You know that feeling when you finally find the pumpkin carving idea that looks exactly right for your front stoop? That perfect blend of spooky, creative, and totally doable. We get it. That’s why we dove deep into this year’s most inspiring designs to find the ones that spark real joy. After filtering through literally hundreds of options, we narrowed it down to 32 incredible ideas that genuinely deliver. Inside, you’ll find everything from classic spooky faces and funny monster designs to elegant artistic patterns and pop-culture tributes. These 2026 designs are all about personal expression, moving beyond the standard triangle-eye jack-o’-lantern to something that tells a story. And stay until the end — we break down the most common mistakes that can ruin these looks. 📌 Save this to Pinterest for later — you’ll want to revisit these ideas.
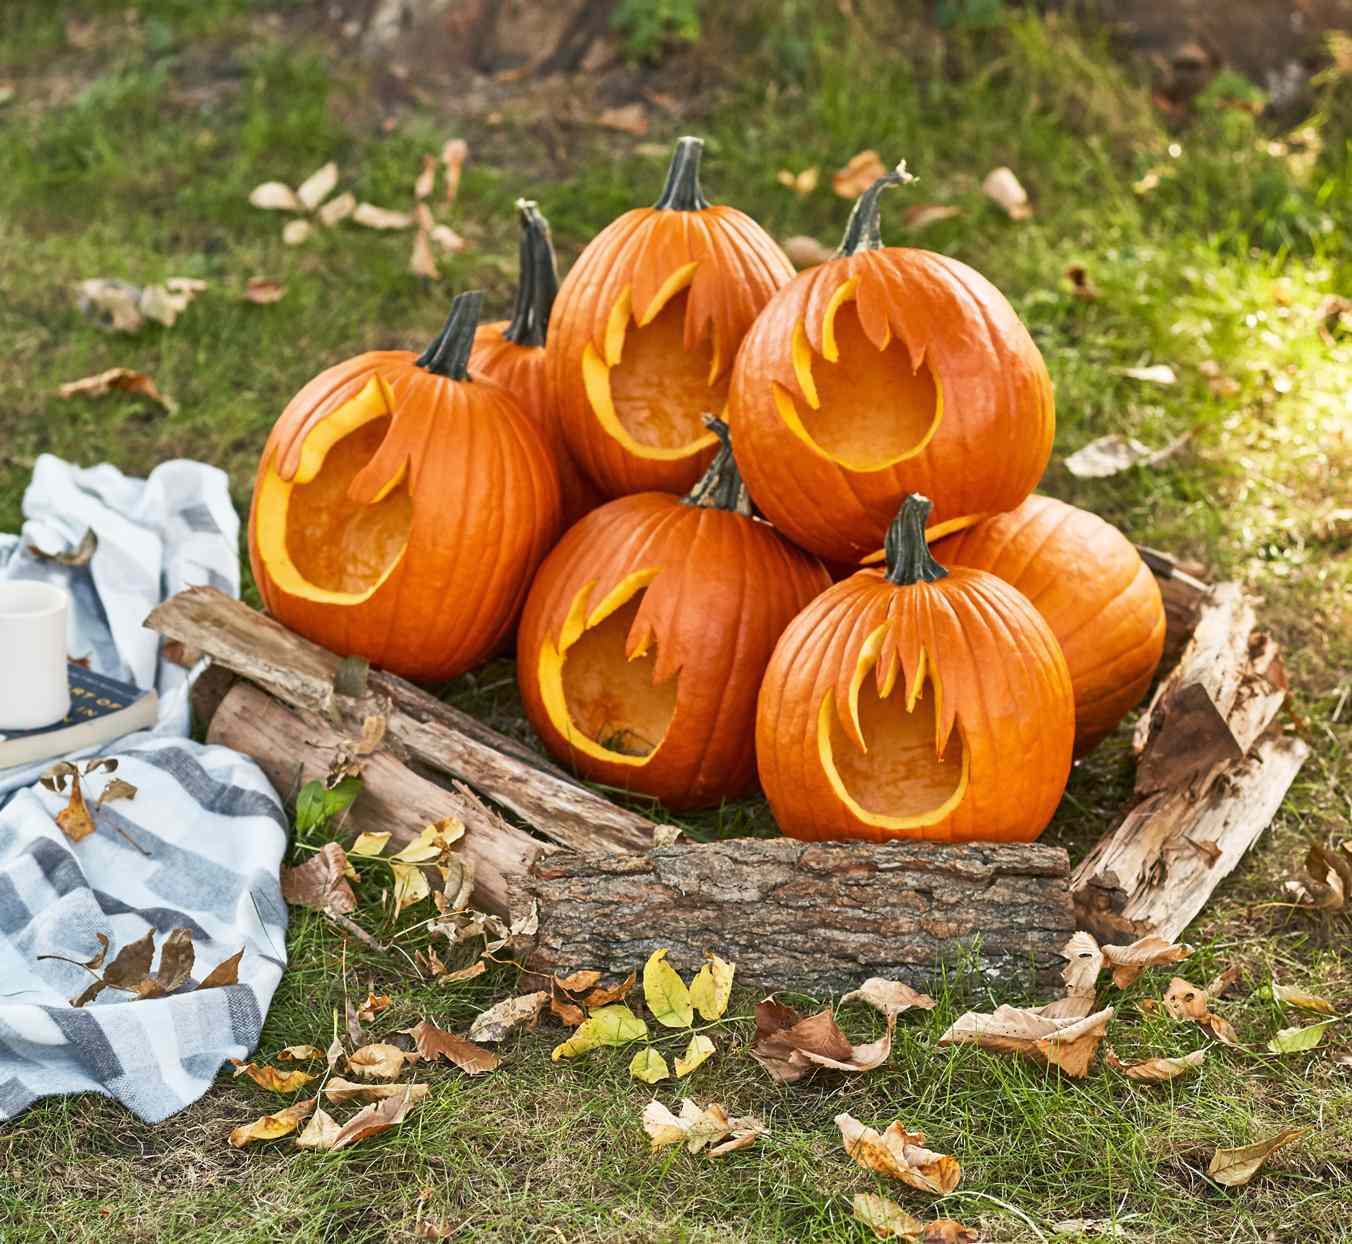
1. Cluster of Flame-Carved Pumpkins on Rustic Logs
There’s a beautiful simplicity to this design that makes it so effective. Instead of a detailed face, the focus is on a single, repeated organic shape. The ‘flame’ or ‘wave’ cutout at the base of each pumpkin is easy to execute but creates a powerful visual rhythm when grouped together. The arrangement on natural wood logs of varying heights adds rustic texture and creates a dynamic, multi-level display, drawing the eye across the entire scene rather than settling on one jack-o’-lantern.
⚠️ Real Talk
This look is all about creating a contained, yet naturalistic, autumn scene. It works by playing with repetition and elevation. The scattered leaves around the base of the logs help to ground the arrangement, making it feel less like a temporary decoration and more like a little piece of an enchanted forest that sprouted right on your lawn. The unified carving style ties the whole display together into one cohesive, artistic statement.
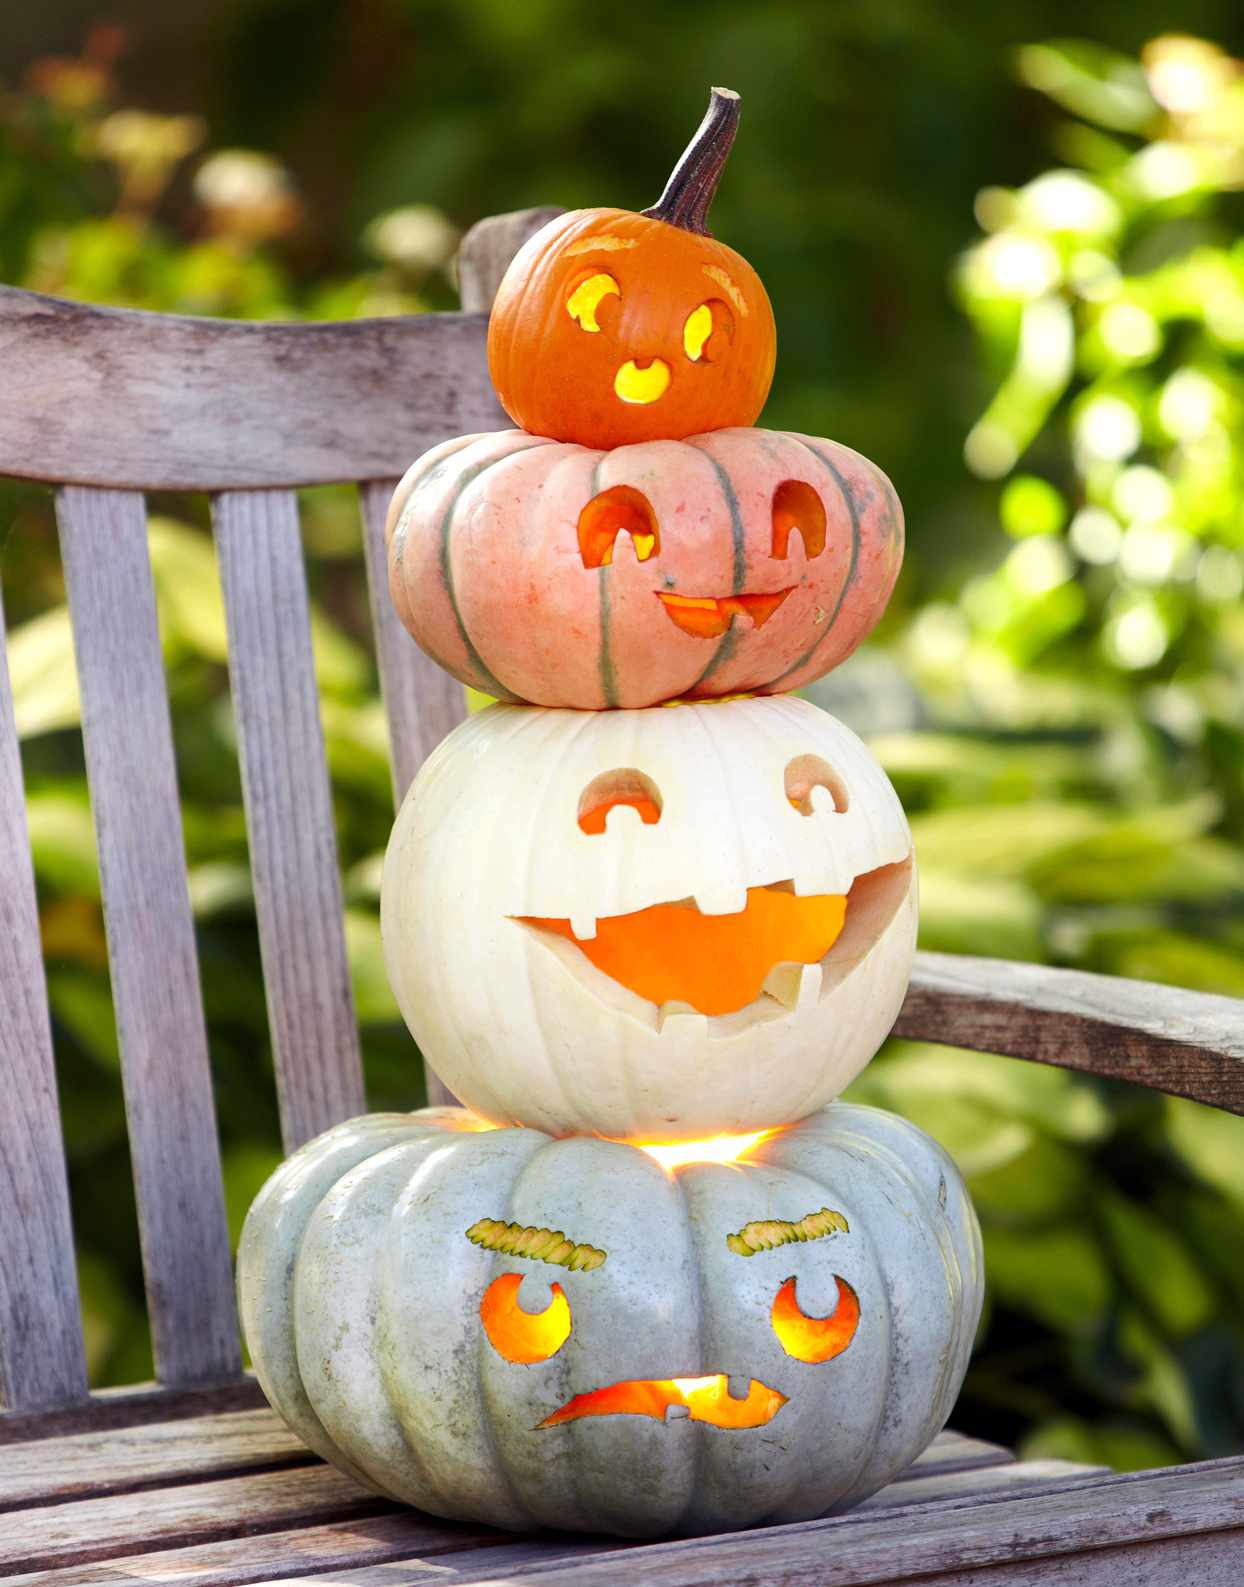
2. Stacked Totem of Four Multicolored, Lit Pumpkins
To create a stable pumpkin stack, think like an engineer. Before carving, choose pumpkins that have relatively flat tops and bottoms. Start by carving a small, circular hole (about 3-4 inches in diameter) in the bottom of each pumpkin except the very base one. Then, on the top of each pumpkin (except the very top one), cut a corresponding ‘plug’ or shallow indentation where the pumpkin above it can nestle securely. This prevents the tower from toppling over from a gust of wind or a gentle bump.
📐 Style Math
This stacked design works best in a space where it can have some vertical presence. Aim for a spot with at least 4 feet of height clearance. It’s perfect for flanking a doorway, accenting the corner of a porch, or sitting next to a bench as shown. Because of its vertical nature, it draws the eye upward, making a small porch or entryway feel a bit grander. This idea is less suitable for a wide, open lawn where its verticality would be lost.
3. Hay Bale Display with Gourds as Monster Features
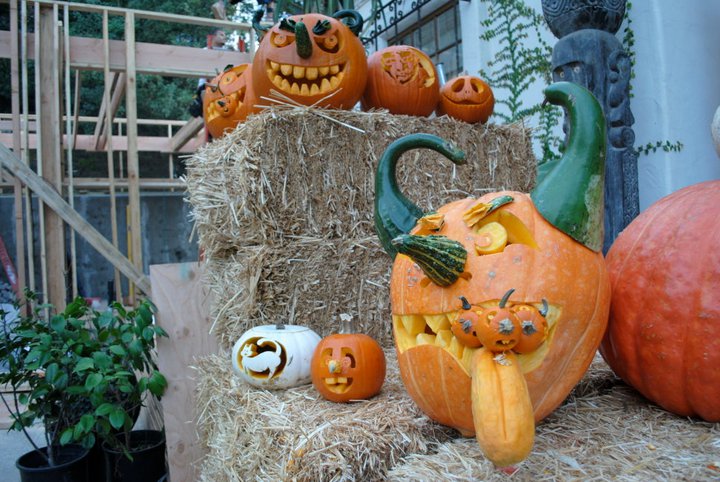
The single element that makes this idea a showstopper is the brilliant use of other gourds to create facial features. It’s not just a carved pumpkin; it’s a mixed-media sculpture. The long, curved gourd used as a tongue on the main pumpkin is a stroke of genius, adding a comical and slightly grotesque dimension that a simple carving could never achieve. Removing this element would leave you with a standard jack-o’-lantern. With it, you have a story and a personality.
💰 Budget Breakdown
You don’t need a farm to get this look. Hay bales can be found at craft stores or garden centers in the fall, often for around $10-$20. Instead of buying dozens of expensive pumpkins, get one or two large ones for the main ‘monsters’ and supplement with cheaper gourds and mini-pumpkins from the grocery store. Check Facebook Marketplace—you can often find people giving away excess gourds from their gardens for free. The key is the creative assembly, not the price of the individual components.
4. Classic ‘BOO’ and Spooky Face on Concrete Steps
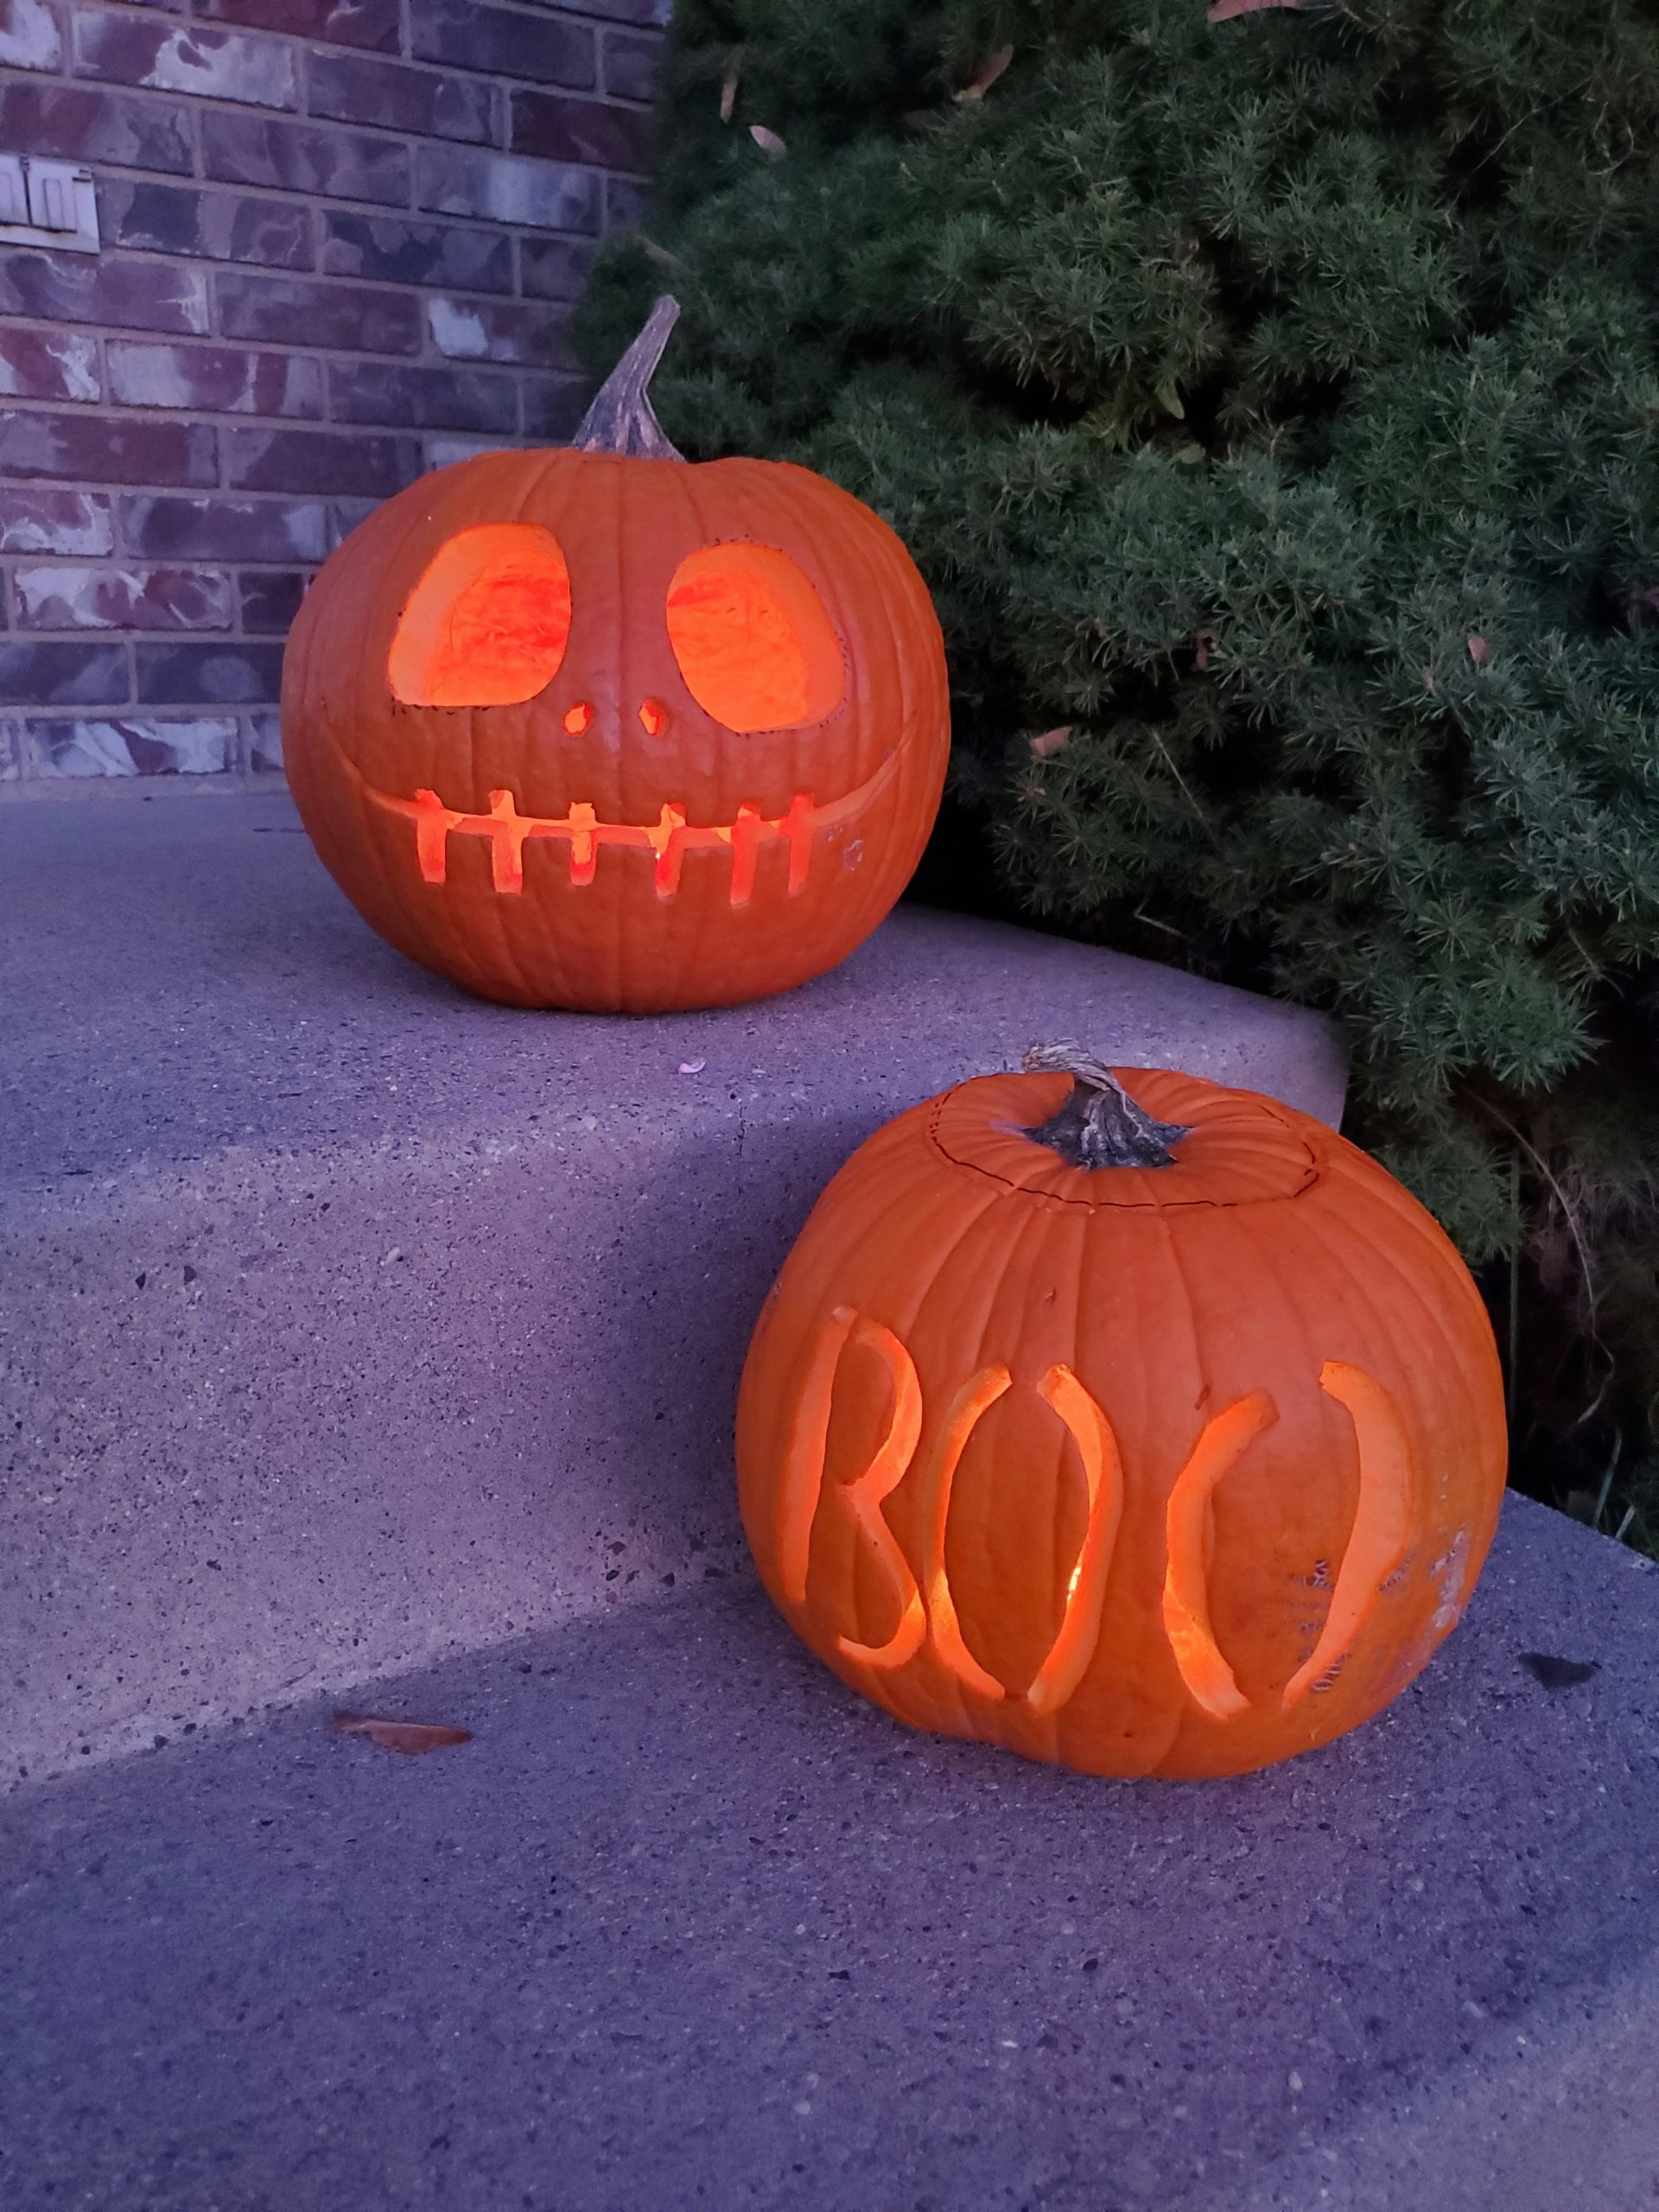
This timeless look follows a simple formula: 50% classic spooky face + 50% typographic carving. This balance ensures the display is both fun and traditionally festive. The ‘BOO’ provides a clear, playful message, while the scary face adds that essential Halloween spirit. You could swap the elements while keeping the ratio: try one pumpkin with a cat face and another with the word ‘EEK!’ or a moon and stars pattern paired with the word ‘SPOOKY.’ The key is the combination of an image and a word.
📏 Scale Guide
Let’s be honest: this works so well because the pumpkins are HUGE and perfectly round. Finding pumpkins of this size and quality can be a challenge and a bit pricey. Also, carving letters, especially on a curved surface, is harder than it looks. You’ll need a good stencil (you can print one online) and a fine-toothed carving tool to get those clean edges. Rushing the ‘BOO’ will result in jagged, hard-to-read letters, which kind of ruins the whole effect.
5. Whimsical Pumpkin Carved into a Cat with Ears and Paws
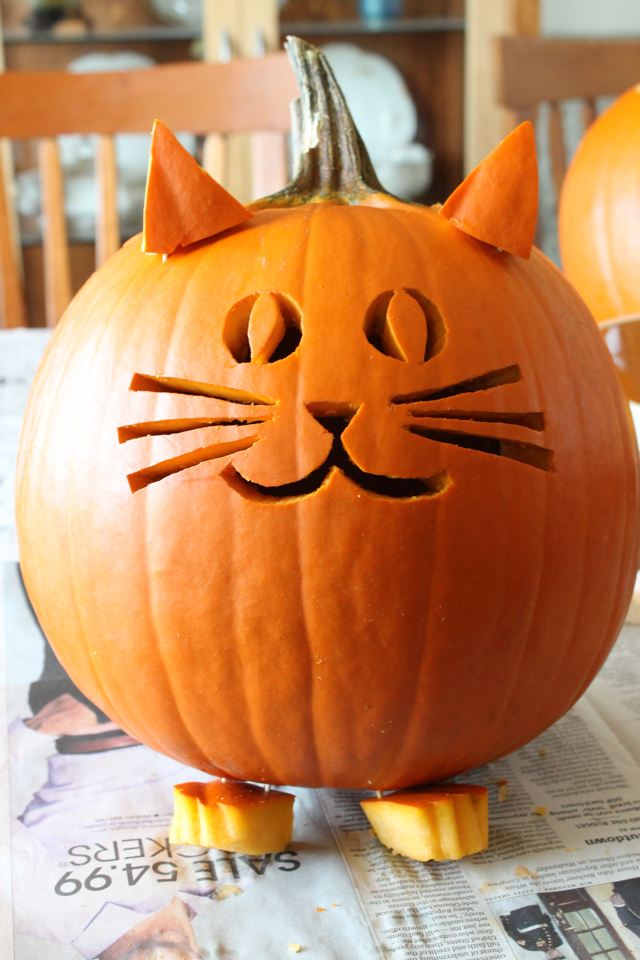
Create this cute cat in about an hour with minimal materials. First, select a round, medium-sized pumpkin. Second, carve a simple, friendly cat face: two ovals for eyes, a small triangle for the nose, and a ‘w’ for the mouth with whisker dots. Third, take the piece you cut out for the lid and carve two 3-inch triangles from it to serve as ears. Fourth, use toothpicks to secure the ears to the top of the pumpkin. Finally, carve four small, bean-shaped ‘paws’ from pumpkin scraps and place them at the base.
✅ Before You Start
This design’s charm comes from its clever use of the entire pumpkin. Instead of discarding the scraps from the lid opening, they are repurposed into the ears and feet, creating a cohesive and resource-savvy little creature. The simplicity of the facial carving—just a few basic shapes—makes it approachable for any skill level, while the three-dimensional ears and paws elevate it from a simple jack-o’-lantern to a delightful sculpture. It’s a perfect example of how thinking beyond a 2D face can bring a pumpkin to life. Compare this to the cat silhouettes in Idea #30 for a different take.
6. Exploring Modern and Geometric Carving Patterns
For a truly modern look, ditch the face idea entirely and focus on geometric patterns. Use a drill with various bit sizes to create intricate dot patterns (think constellations or mandalas). You can also use painter’s tape to mark off sharp, geometric shapes like chevrons, stripes, or triangles. Scrape the skin off within the taped areas instead of carving all the way through. This creates a two-tone effect that looks incredibly chic when lit from within.
🔧 How-To Brief
Modern and minimalist designs look simple, but they are often harder to execute than a classic jack-o’-lantern face. A slightly crooked eye on a monster face looks charmingly spooky; a slightly crooked line in a geometric pattern just looks like a mistake. These designs demand precision. You’ll need a steady hand, the right tools (like a linoleum cutter for scraping or a drill for perfect circles), and a lot of patience. One slip can compromise the entire pattern.
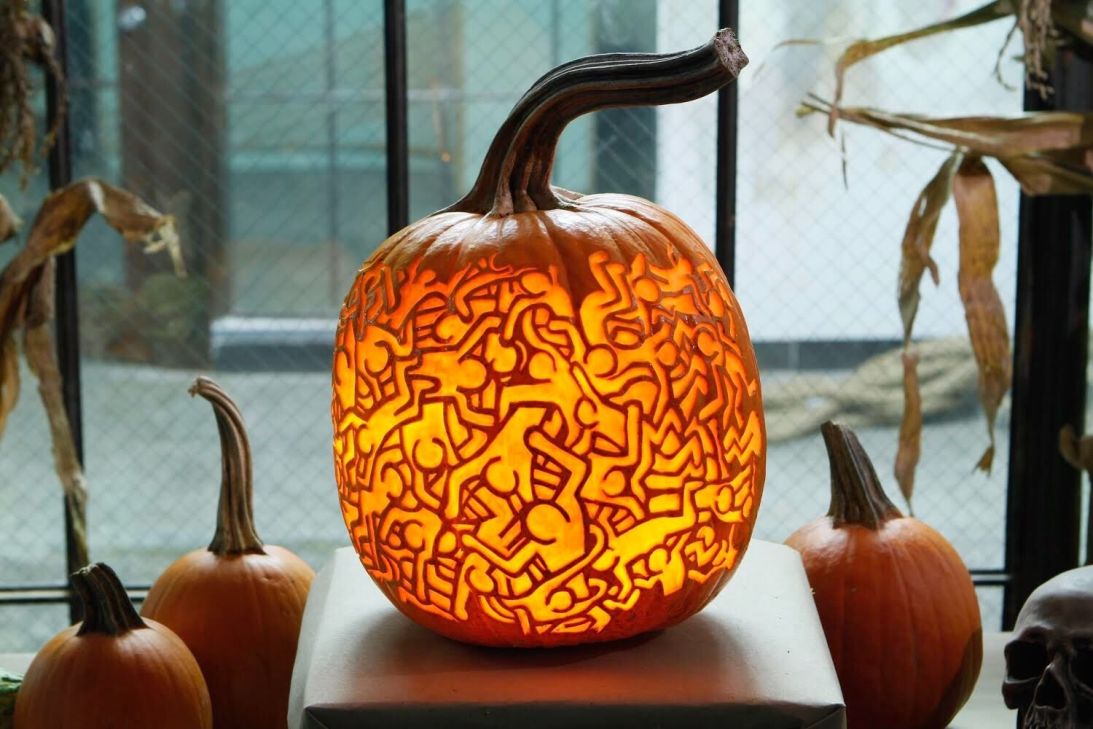
7. Artistic Pumpkin Carved with Keith Haring-Inspired Figures
The absolute soul of this design is the intricate, continuous pattern of carved figures. It transforms the pumpkin from a mere seasonal decoration into a piece of pop art. The dynamic, dancing shapes, clearly inspired by artist Keith Haring, create a sense of energy and movement that is completely unexpected on a pumpkin. This isn’t just a carving; it’s a statement piece that showcases artistic sensibility. Without the specific, recognizable art style, it would just be a pumpkin with random squiggles.
💸 Get This Look For Less
There’s a growing movement to treat pumpkins as a temporary art medium rather than just a holder for a spooky face. This Keith Haring-inspired piece is a perfect example of that 2026 trend. People are looking for ways to inject their own personality and cultural tastes into their holiday decor. Referencing iconic artists, patterns, and even memes in pumpkin carving has become a massive hit on Pinterest and Instagram because it feels personal, clever, and highly creative.
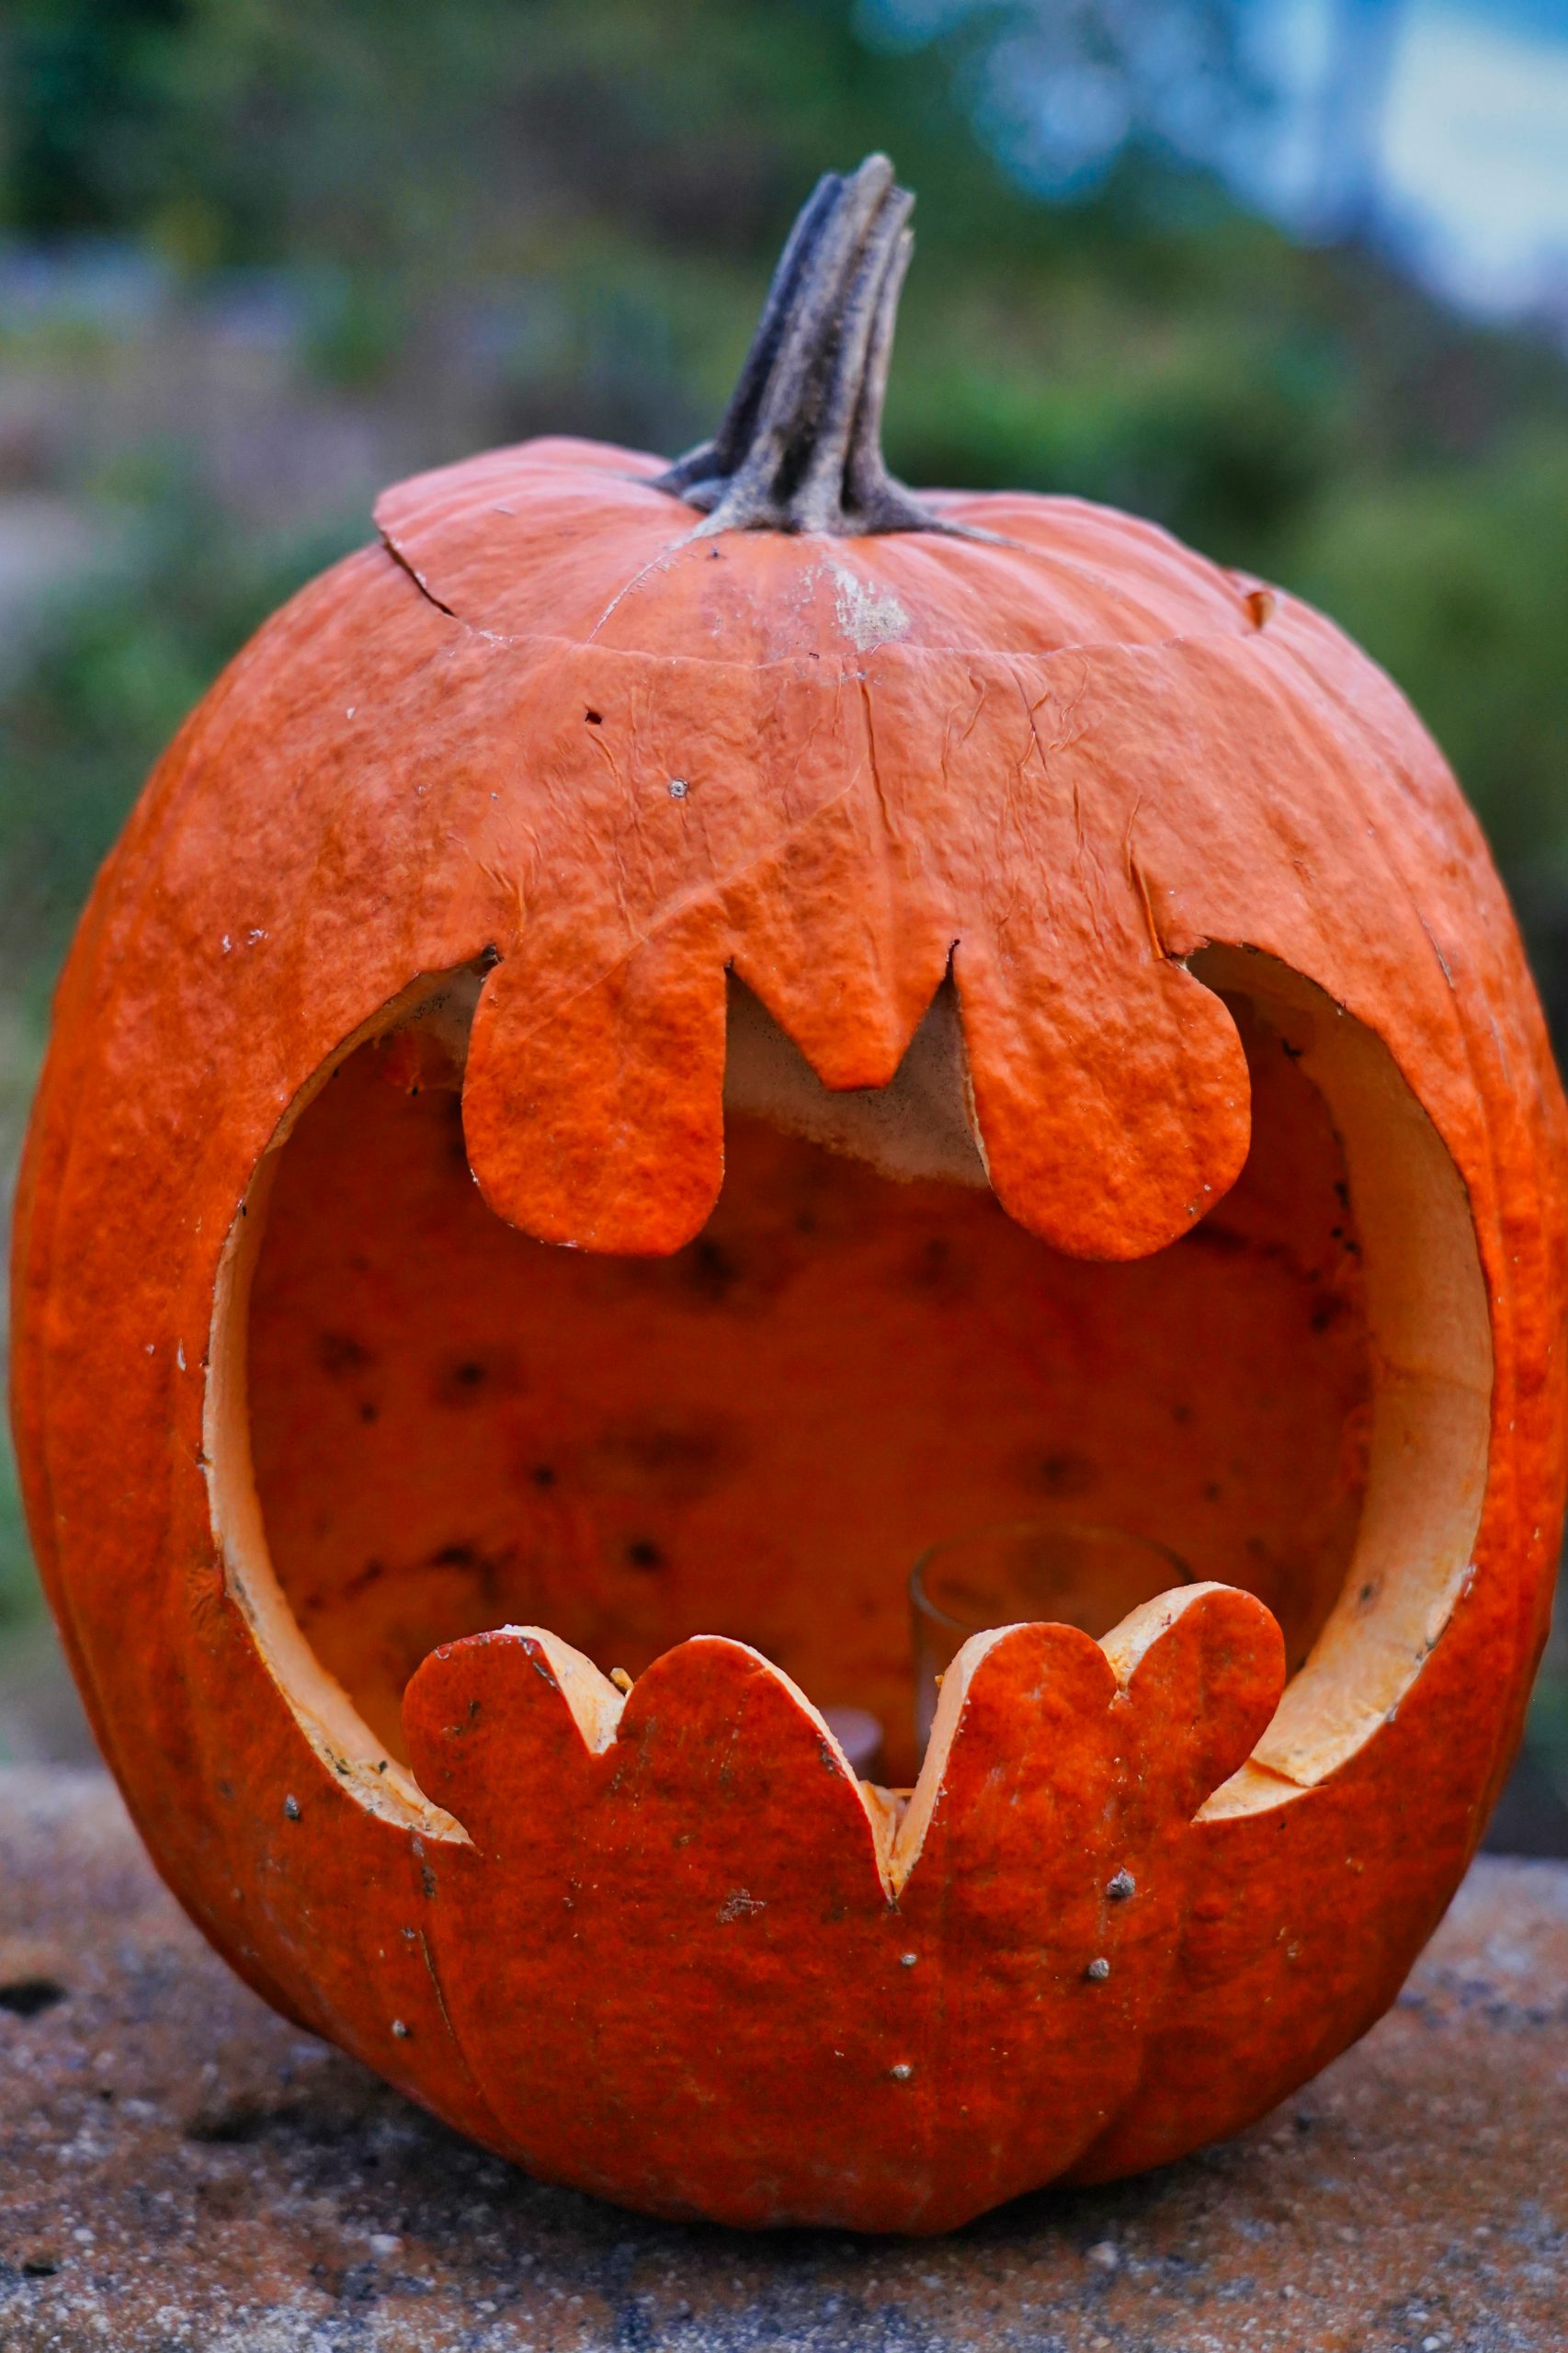
8. Classic Jack-o’-Lantern with a Fanged Mouth and Brow
This design is a masterclass in using negative space to create expression. The large, open mouth cavity is what you notice first, but the ‘fangs’ are actually the uncarved pumpkin flesh left behind. Furthermore, the simple act of carving an overhanging ‘brow’ above the mouth gives the face an incredible amount of personality, suggesting a scowl or a menacing glare. These two simple techniques create a dynamic, expressive face with far more character than simple triangular eyes and a generic smile.
🧹 Maintenance Reality
The beauty of a classic jack-o’-lantern is that it’s the cheapest Halloween decoration you can make. All you need is one pumpkin ($5-$15 at any grocery store or patch) and a basic carving kit (often found for under $5). You don’t need fancy gourds, multiple pumpkins, or special props. The entire project can easily come in under $20. For the lighting, skip the expensive battery-operated lights and use a simple tea light candle (just be mindful of fire safety!).
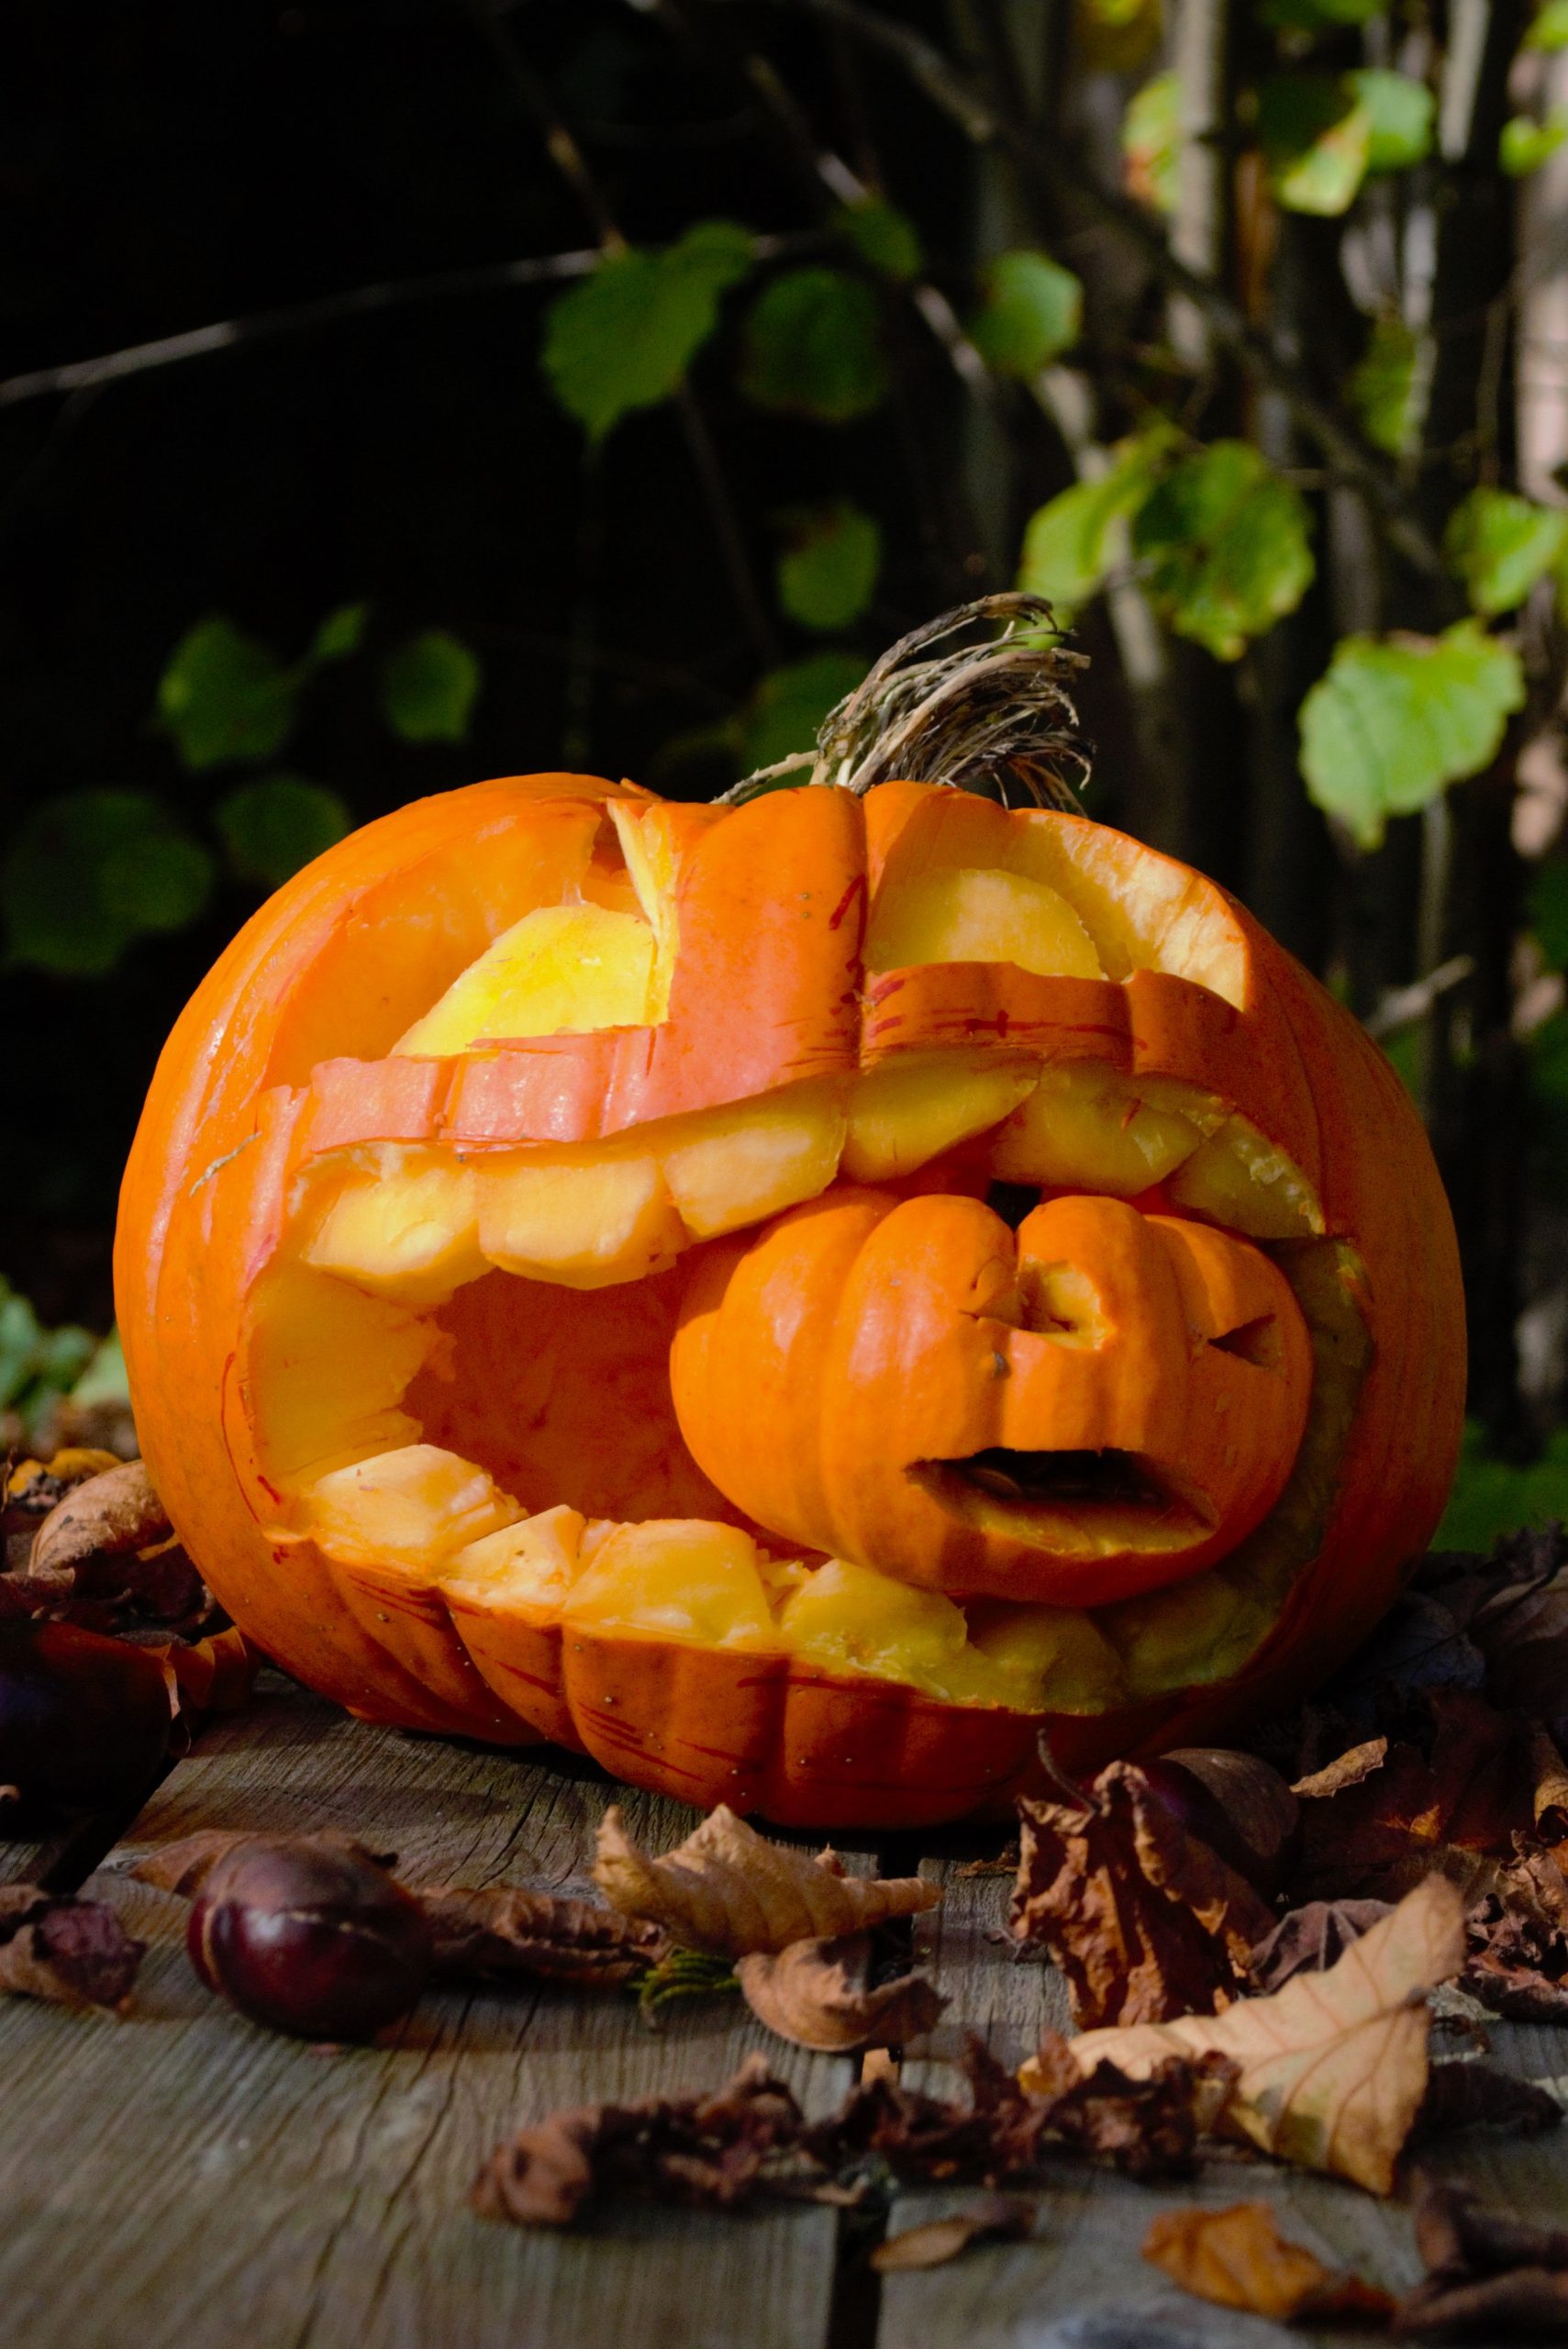
9. Pumpkin Eating a Smaller Pumpkin
This playful ‘cannibal’ pumpkin design relies on a simple visual gag. The formula is: 70% large ‘monster’ pumpkin + 30% smaller ‘victim’ pumpkin. The key is making the larger pumpkin’s mouth wide enough to comfortably fit the smaller one, with a jagged, toothy grin to sell the ‘eating’ effect. The smaller pumpkin can have a simple scared or surprised face to complete the story. The color contrast between a deep orange pumpkin and a lighter yellow one, like in Idea #12, can enhance the effect even more.
🔥 Trending Context
Heads up: getting that smaller pumpkin to sit perfectly inside the larger one’s mouth can be tricky. You’ll likely need to scrape the bottom of the larger pumpkin’s mouth flat to create a stable base. Also, this design can attract more pests, as there are more cut surfaces and pooled moisture. Don’t expect this one to last as long as a standard, single jack-o’-lantern, especially in warmer climates. Plan to display it just a few days before Halloween for maximum freshness.
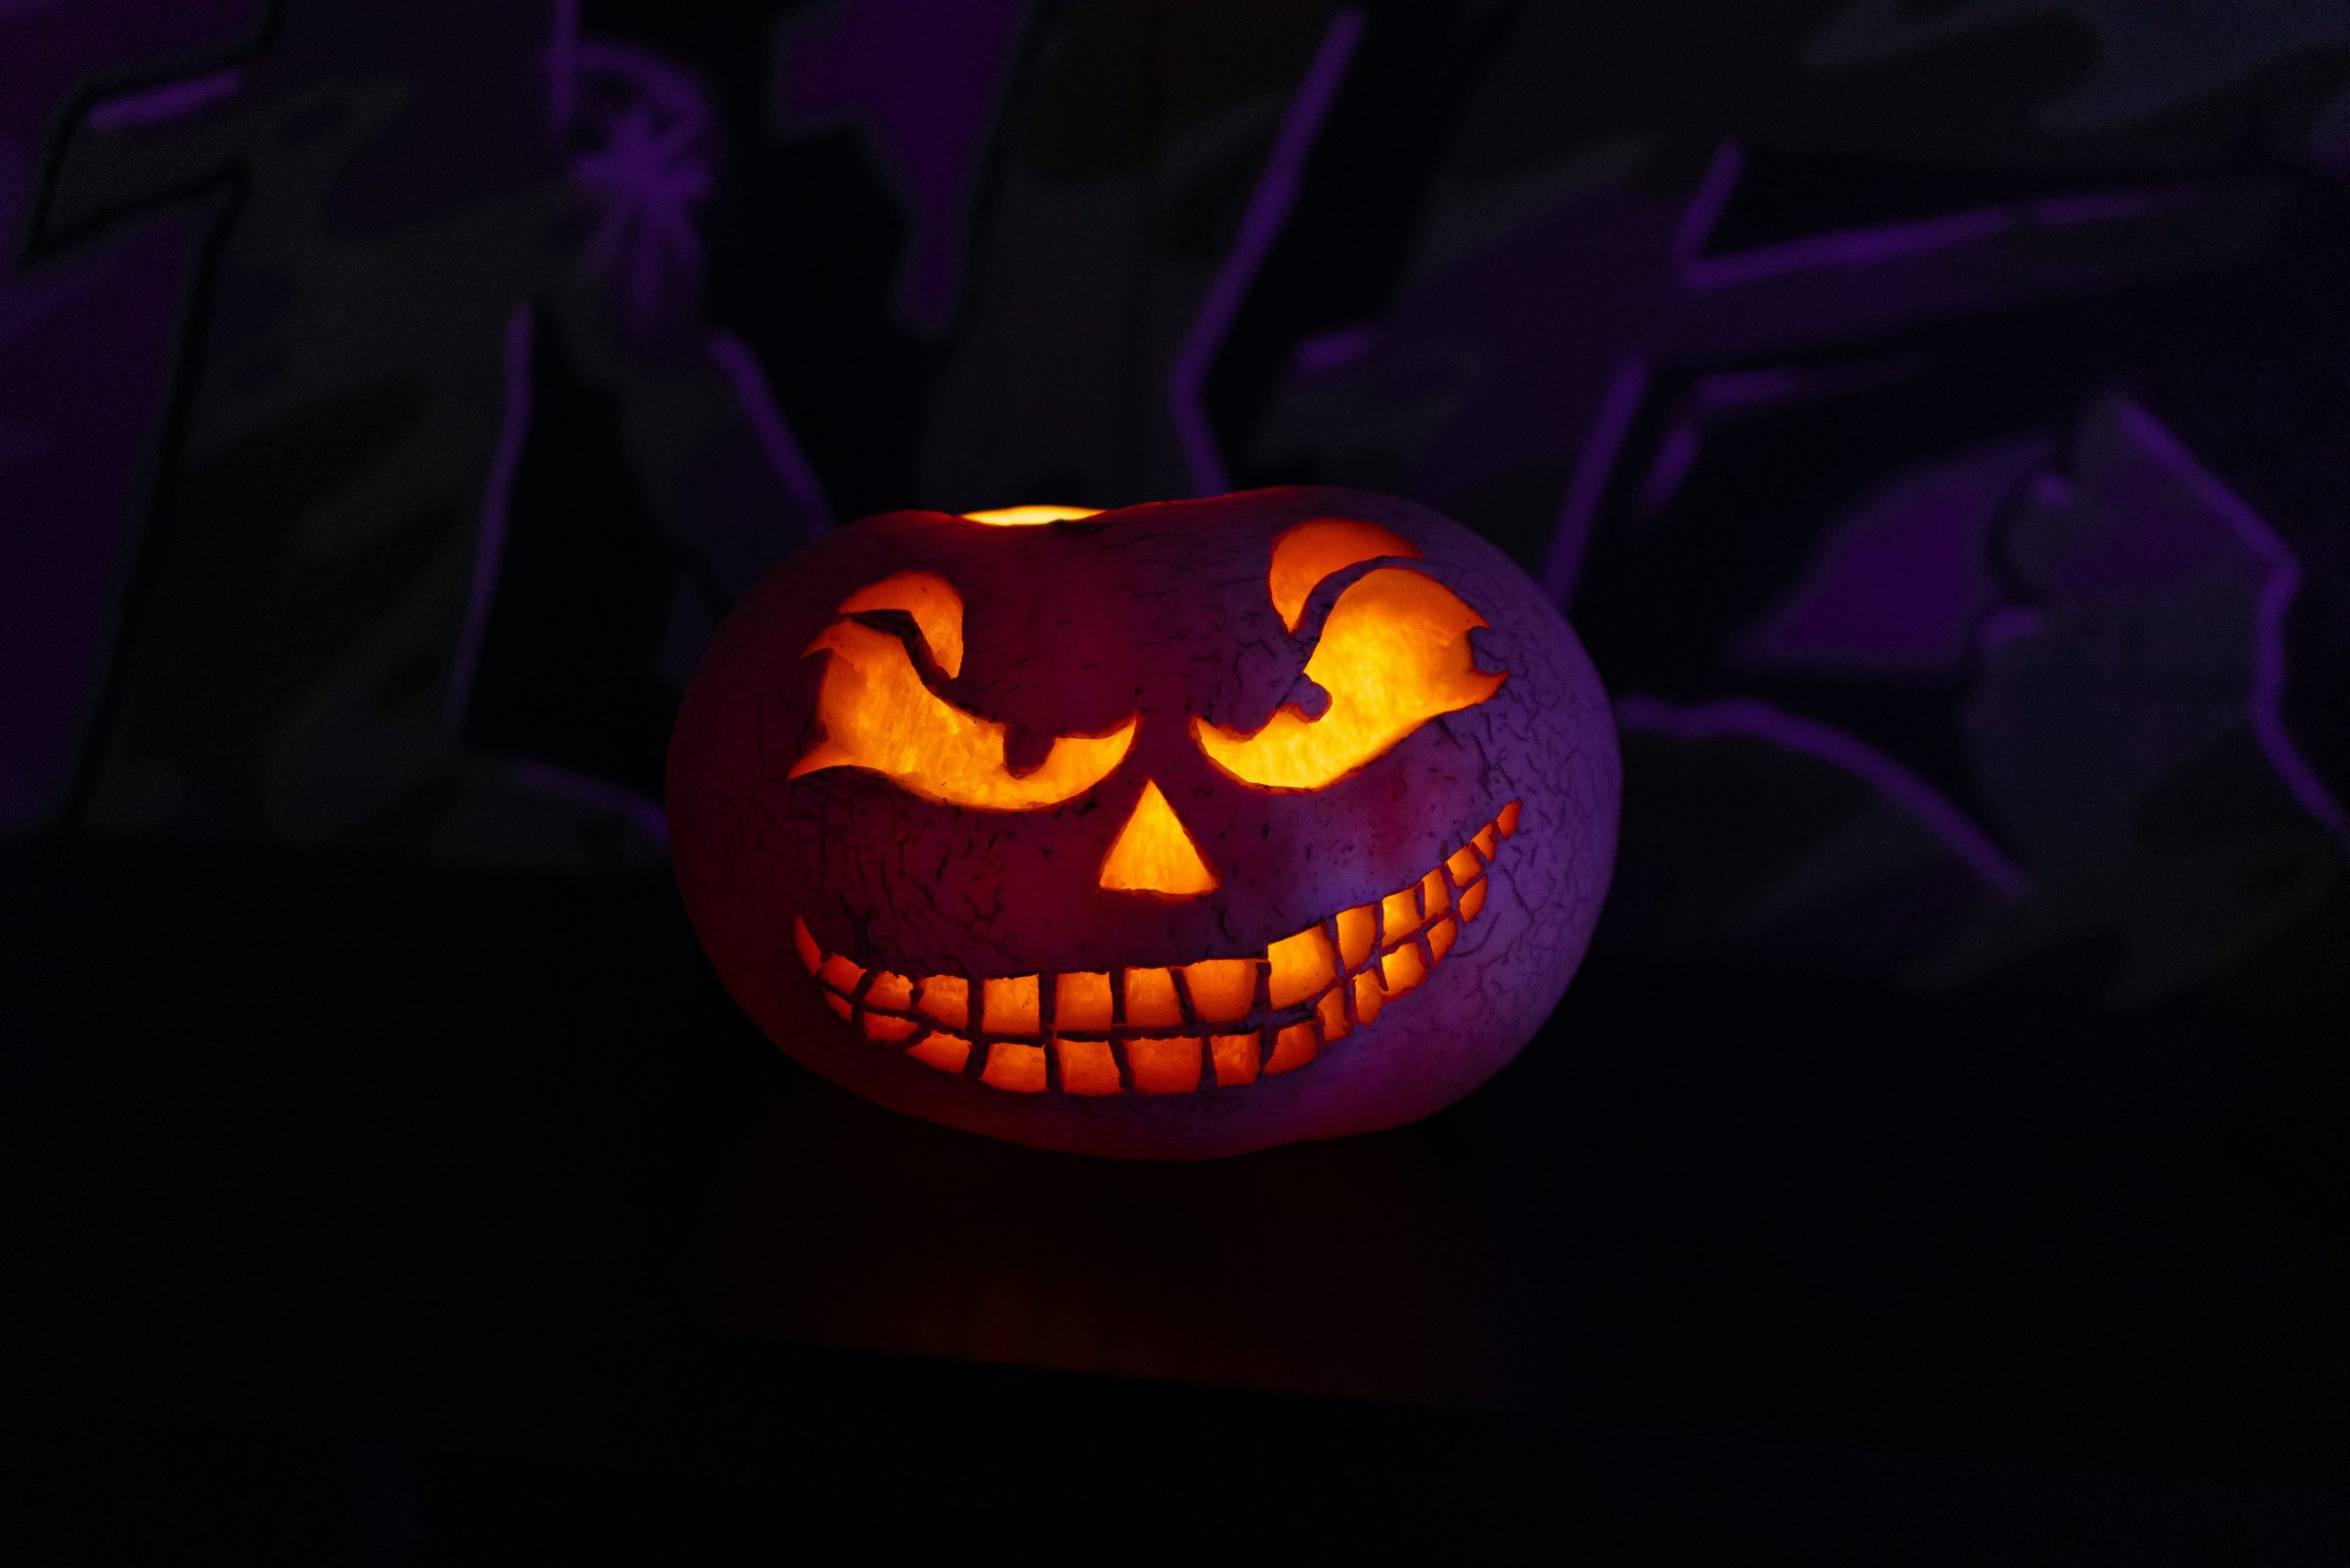
10. Menacing Pumpkin with Jagged Teeth and Purple Backlight
To recreate this eerie, dual-toned glow, use two different light sources. Place a standard warm, yellow-orange LED candle or bulb inside your pumpkin to make the face glow. Then, place a purple or blue floodlight on the ground *behind* the pumpkin, aimed at the wall or backdrop. This creates a dramatic silhouette and a cool-toned ambient light that contrasts beautifully with the warm interior light, making the entire display feel more cinematic and spooky.
💡 Designer Tip
The success of this image hinges on color contrast. The warm, fiery orange light exploding from the pumpkin’s face immediately says ‘Halloween.’ But it’s the cool, mysterious purple light in the background that elevates it. This push-and-pull between warm and cool colors creates visual tension and depth, making the pumpkin pop. The darkness surrounding the setup is also crucial, as it allows the two colors to play off each other without distraction.
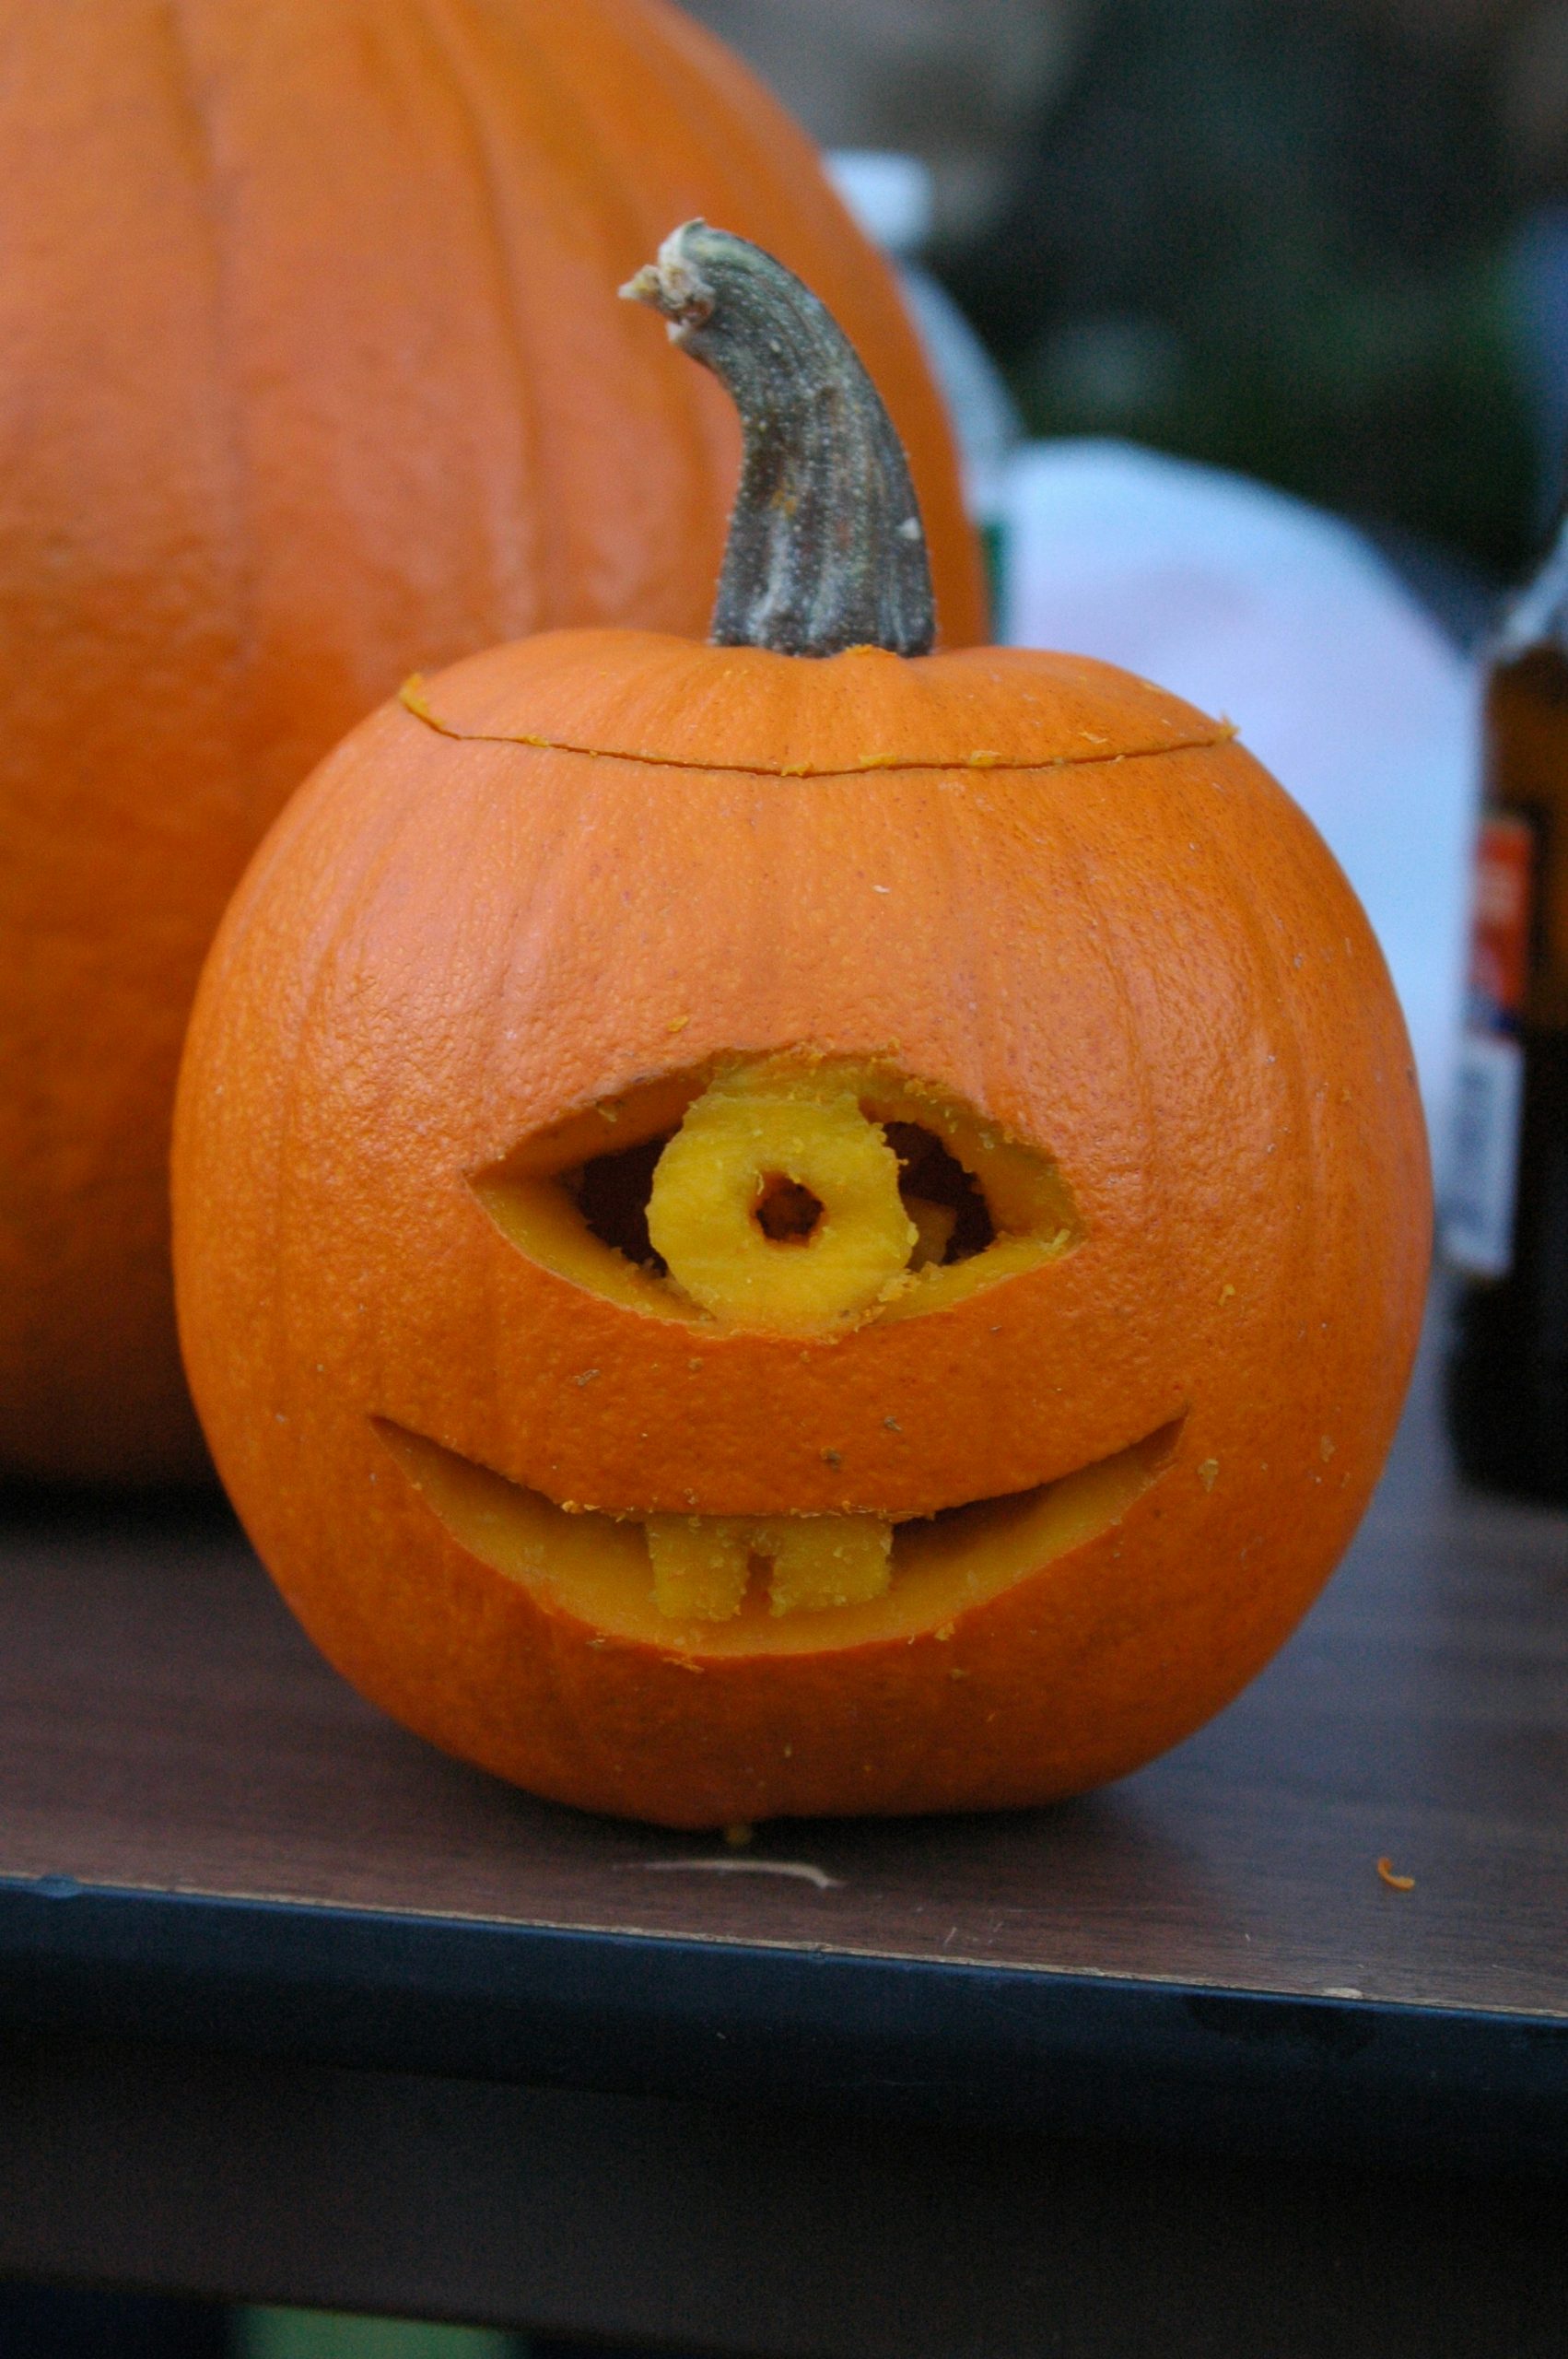
11. Minimalist Cyclops Pumpkin with a Tiny Smile
The single element that defines this pumpkin is its restraint. In a world of complex, over-the-top carvings, this simple cyclops face is refreshingly minimalist. The large, single, expressive eye draws you in, and the tiny, slightly goofy smile with two small teeth provides a surprising amount of character. It proves that you don’t need a dozen jagged cuts to create something memorable. Its power lies in its simplicity and the playful personality it conveys with just a few well-placed carvings.
🎯 What Makes It Work
This is the perfect idea for a small space or as part of a larger collection. Because of its simple design and small stature, it works wonderfully on a bookshelf, an office desk, or an apartment windowsill. It won’t overwhelm a small room. You could group three or four of these little cyclops pumpkins together on a mantelpiece for a big impact. It’s less effective as a standalone piece on a large porch, where its subtle charm might be lost from a distance. Compare its simplicity to the complexity of Idea #7.
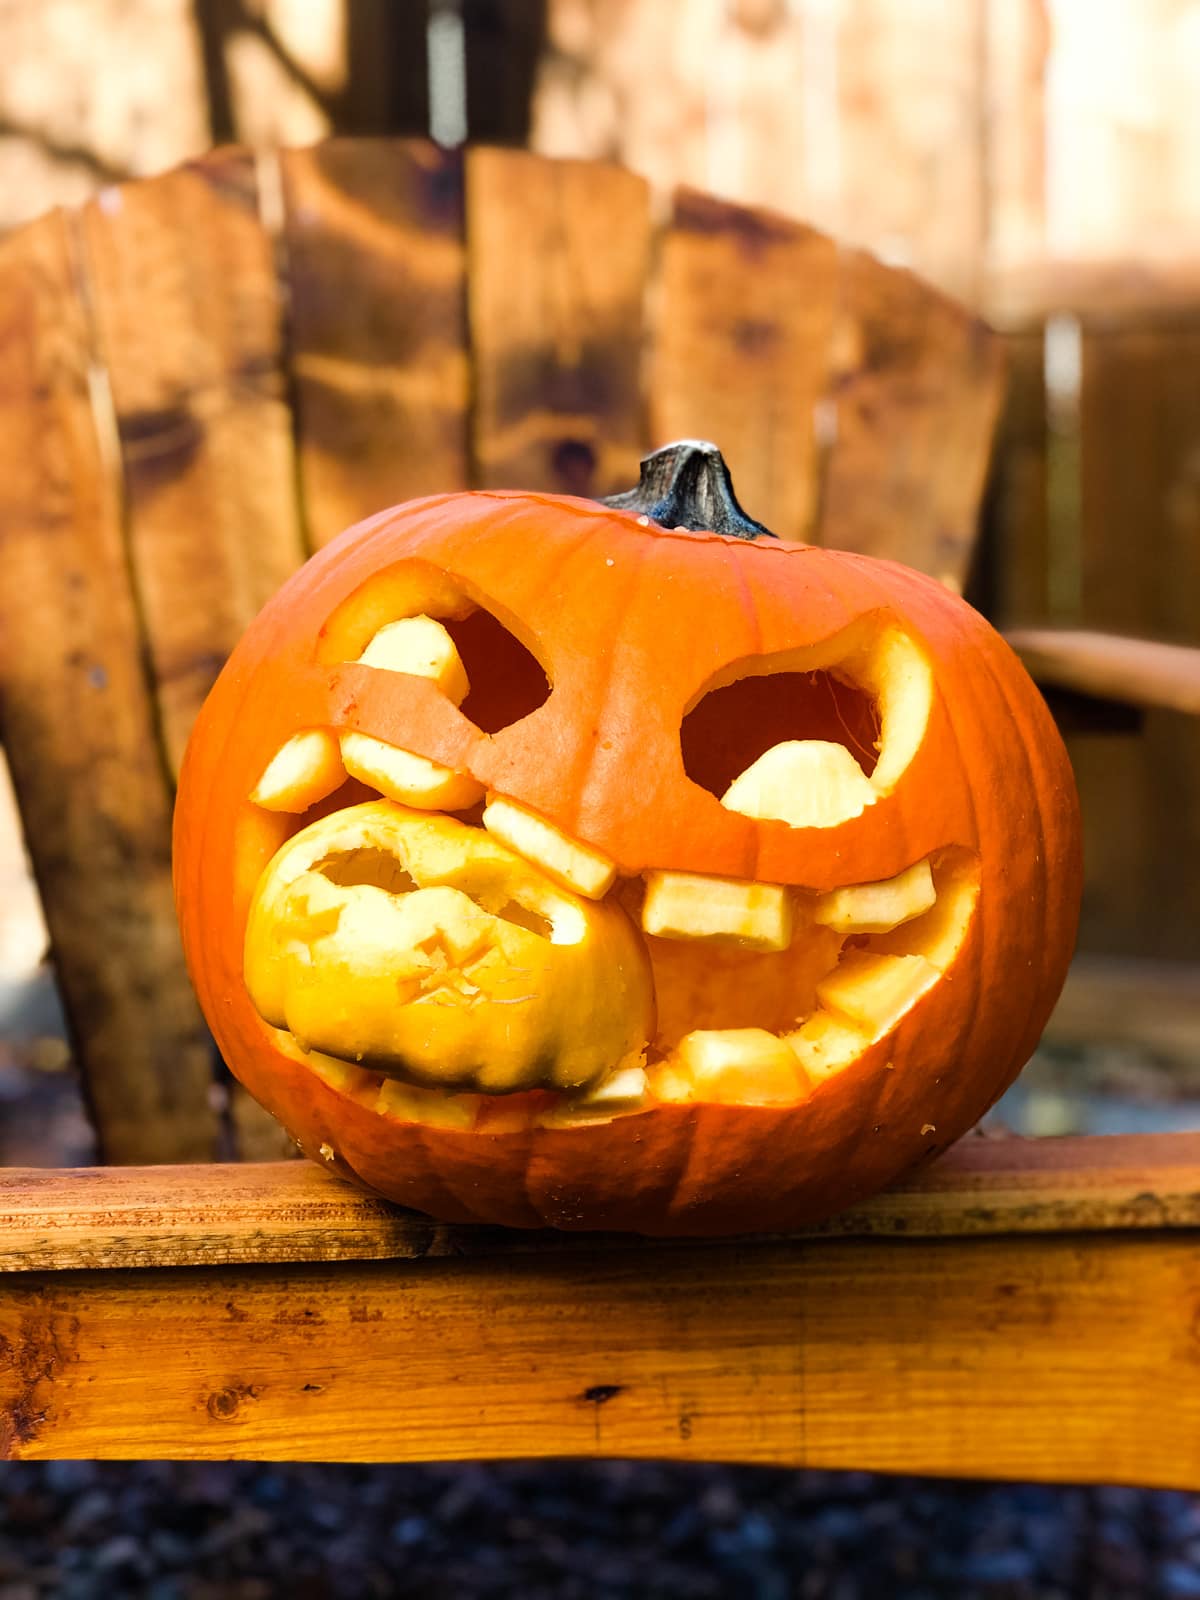
12. Big Orange Pumpkin ‘Eating’ a Smaller Yellow One on a Chair
This is a wonderfully creative and budget-friendly project that packs a lot of personality. The cost is mainly in the pumpkins themselves, with the chair serving as a prop you likely already own.
⭐ The One Thing
- Large Orange Pumpkin: $10 – $20
- Small Yellow Pumpkin or Gourd: $3 – $7
- Lighting (LED candles): $5 – $10
- TOTAL: $18 – $37
Budget alternative: Forage for a rustic branch or log to display the pumpkins on instead of a chair, and simply use one large pumpkin with a funny face, which brings the total cost down to around $15.
This idea, much like Idea #9, works because it tells a mini-story. The visual gag is immediate and funny. The composition is strengthened by the use of contrasting colors—the deep orange of the ‘predator’ versus the pale yellow of the ‘prey’—which clearly distinguishes the two characters. Placing them on a rustic wooden chair elevates the scene, turning it from a simple pumpkin display into a deliberate, staged tableau with a touch of farmhouse charm.
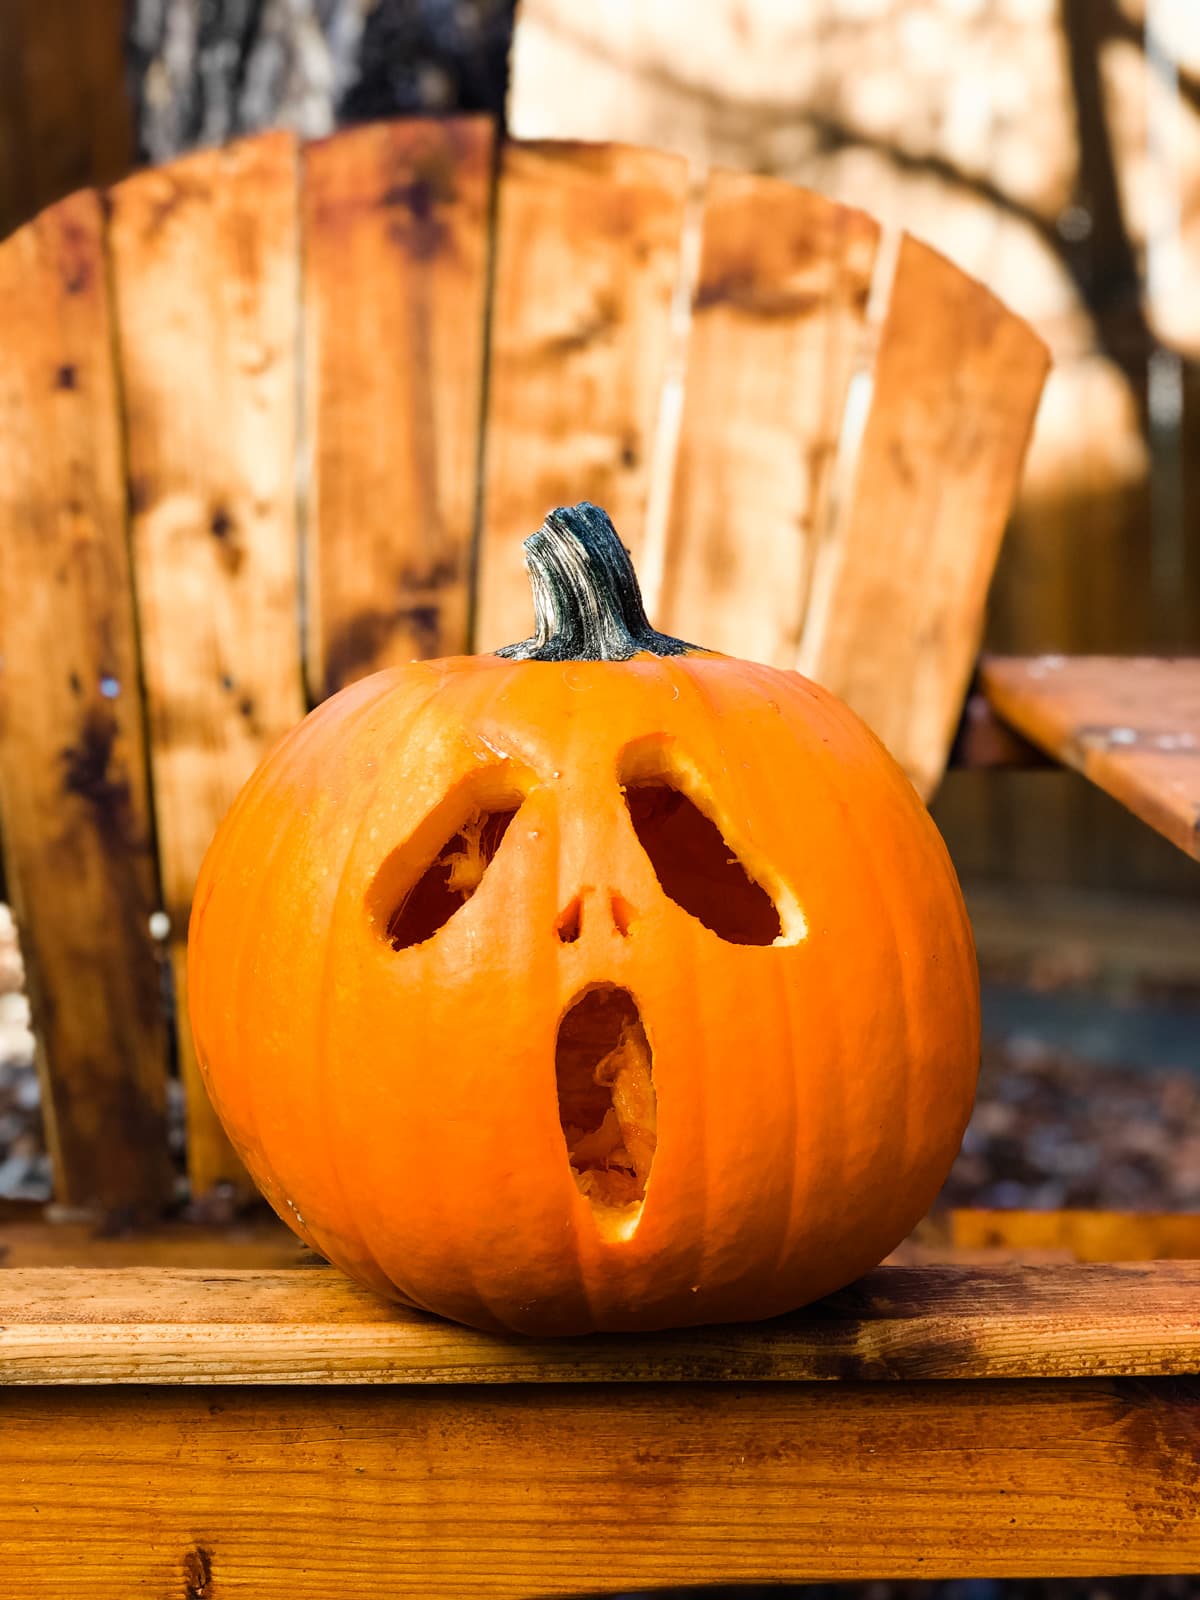
13. Screaming Face Carved Pumpkin on a Slatted Bench
A word of warning if you’re going for this ‘hollowed-out’ look with a wide-open mouth: structural integrity is key. The more pumpkin you carve away, the weaker the walls become. If you make the mouth too wide or the walls too thin, the top of the pumpkin can start to sag after just a day or two, turning your terrified scream into a sad slump. To combat this, choose a pumpkin with thick walls and consider leaving a small, uncarved ‘bridge’ of flesh in the middle of the mouth for support.
⚠️ Real Talk
The success of this carving is all in the mouth. The eyes and nose are standard, but the wide, gaping, slightly asymmetrical mouth is what sells the ‘surprised scream’ expression. It’s the element that gives the pumpkin its emotion. If you were to change the mouth to a smile or a frown, you’d have a completely different character. The visible pulp and strings inside add a messy, visceral quality that enhances the frantic, spooked feeling.
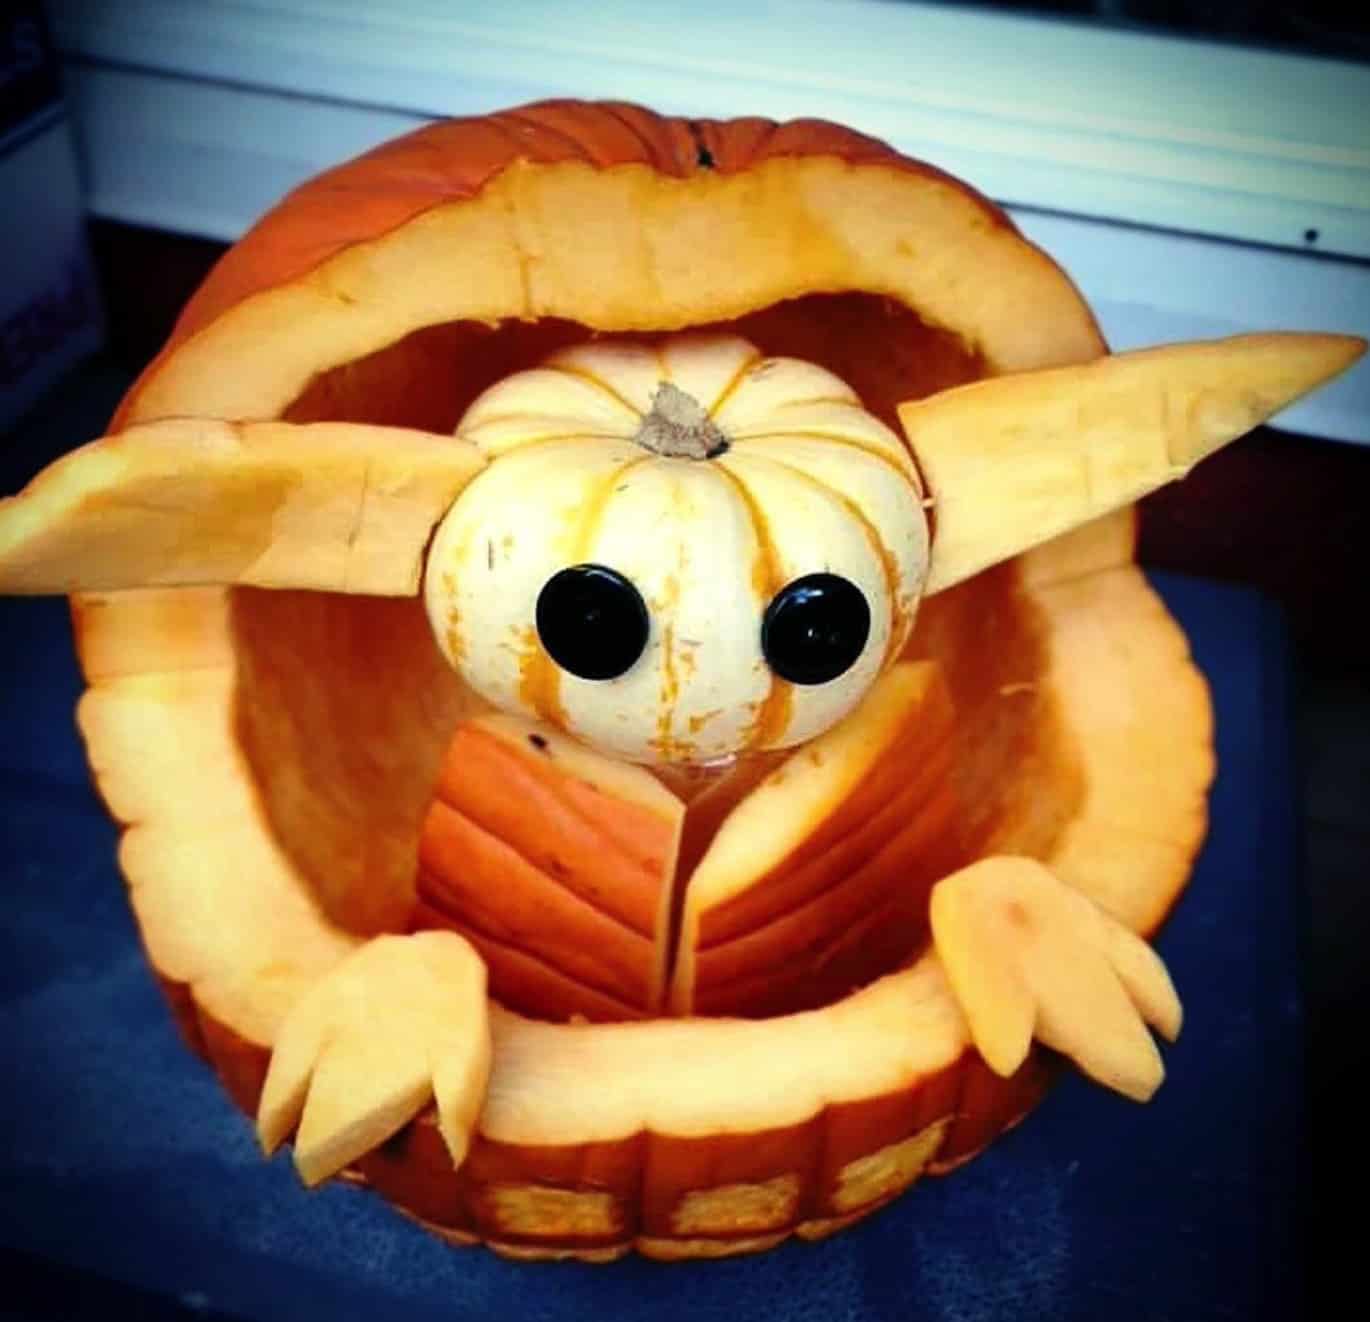
14. Carving a Sci-Fi Character with a Striped Pumpkin Head
When recreating a character, the silhouette is everything. Before you even start carving, study the character’s key features. In this case, it’s the large ears and the distinct shape of the floating cradle. Use a dry-erase marker to sketch your main cuts directly onto the pumpkin. It’s much more forgiving than a permanent marker. For the ‘hands’ and ‘ears’, carve them from a separate, smaller pumpkin or gourd so you can get the shapes just right before attaching them with toothpicks.
📐 Style Math
Recreate this beloved character in under 90 minutes. 1. Hollow out a large orange pumpkin from the top. 2. Carve a wide ‘U’ shape in the front to create the cradle, saving the cutout piece. 3. From the saved piece, carve two long, pointed ears and two small hands. 4. Select a small, oblong striped pumpkin for the head. Use a black permanent marker or paint to create two large, solid eyes. 5. Use sturdy toothpicks or short wooden skewers to attach the ears and hands to the main body. 6. Place the ‘head’ inside the cradle, and you’re done!
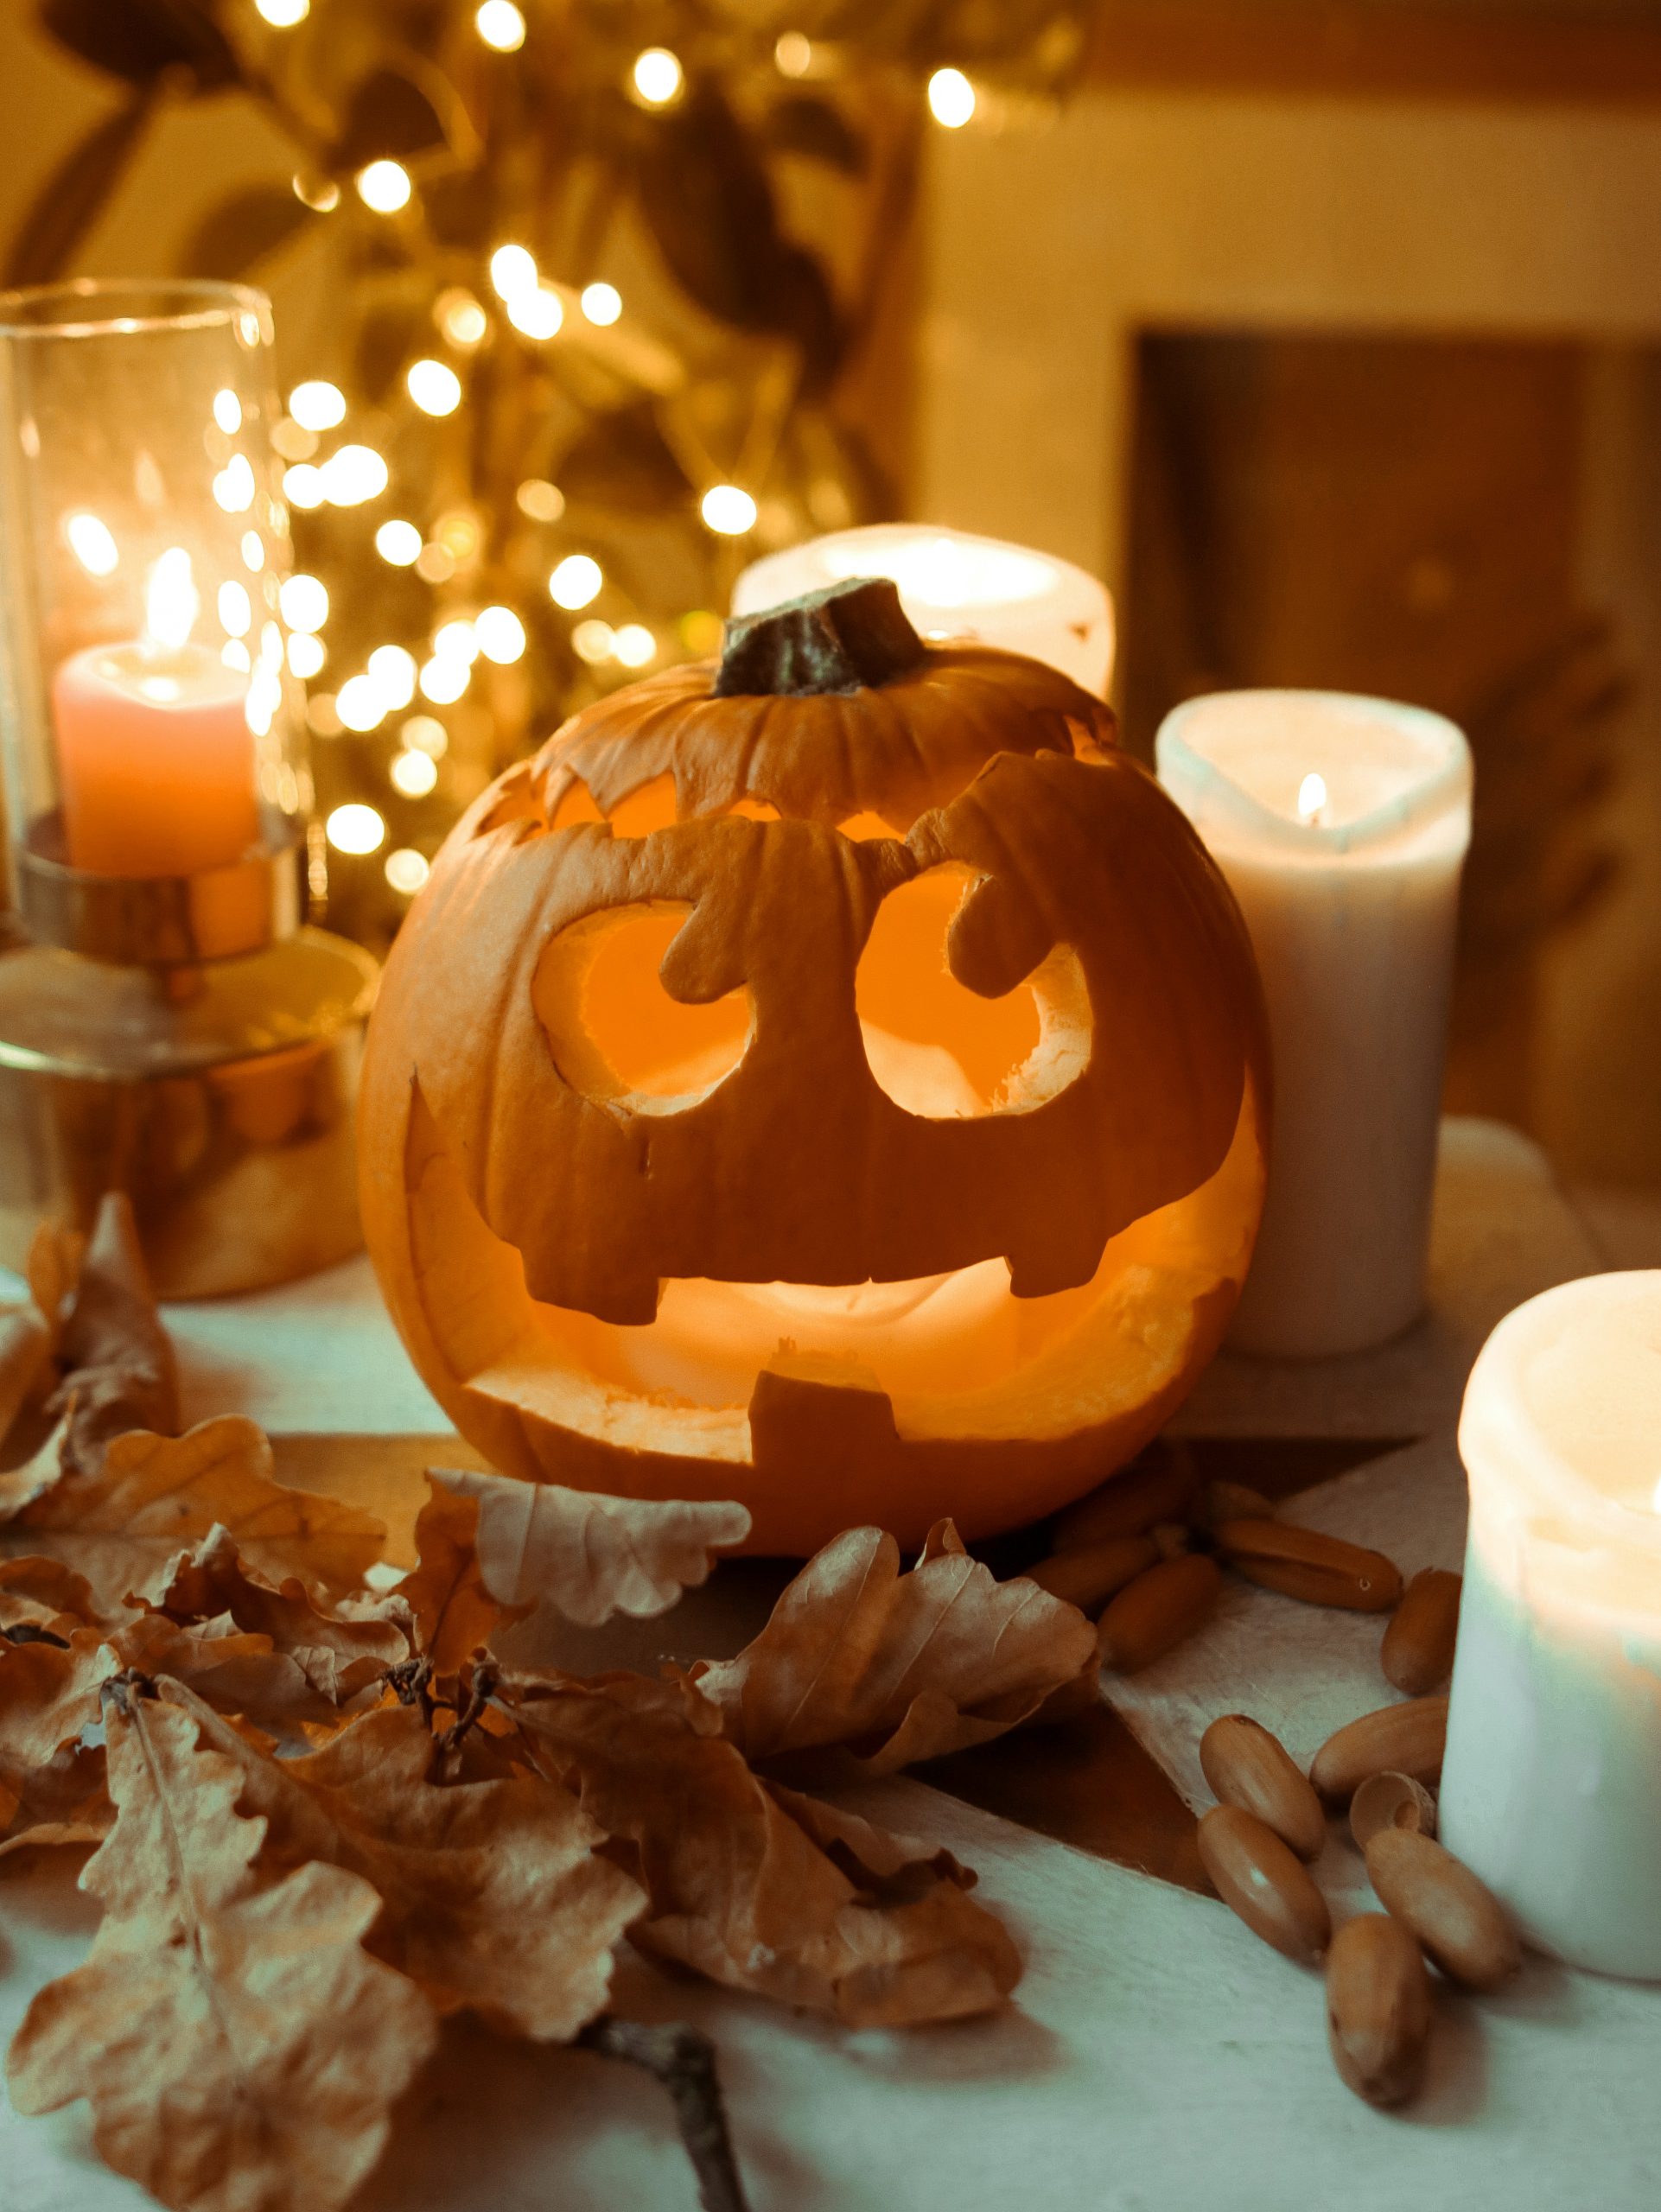
15. Classic Jack-o’-Lantern with Candles and Fairy Lights
The magic here comes from layering different types of light. The formula is approximately: 40% pumpkin glow + 40% candlelight + 20% ambient fairy lights. The main jack-o’-lantern provides the central, character-filled light. The surrounding pillar candles add height and a soft, flickering warmth. Finally, the blurred fairy lights in the background create a dreamy, bokeh effect that fills the entire scene with a festive atmosphere. It’s a symphony of warm light.
💰 Budget Breakdown
While beautiful, this setup requires constant supervision. Using real candles, especially surrounded by dry leaves, is a significant fire hazard. Never leave this display unattended, even for a moment. The candles will also need to be replaced or relit, and wax drippings can be messy. For a lower-maintenance and safer version, use a variety of high-quality, flickering LED candles. You’ll get a very similar warm glow without any of the worry or mess, and you can leave it ‘on’ all evening.
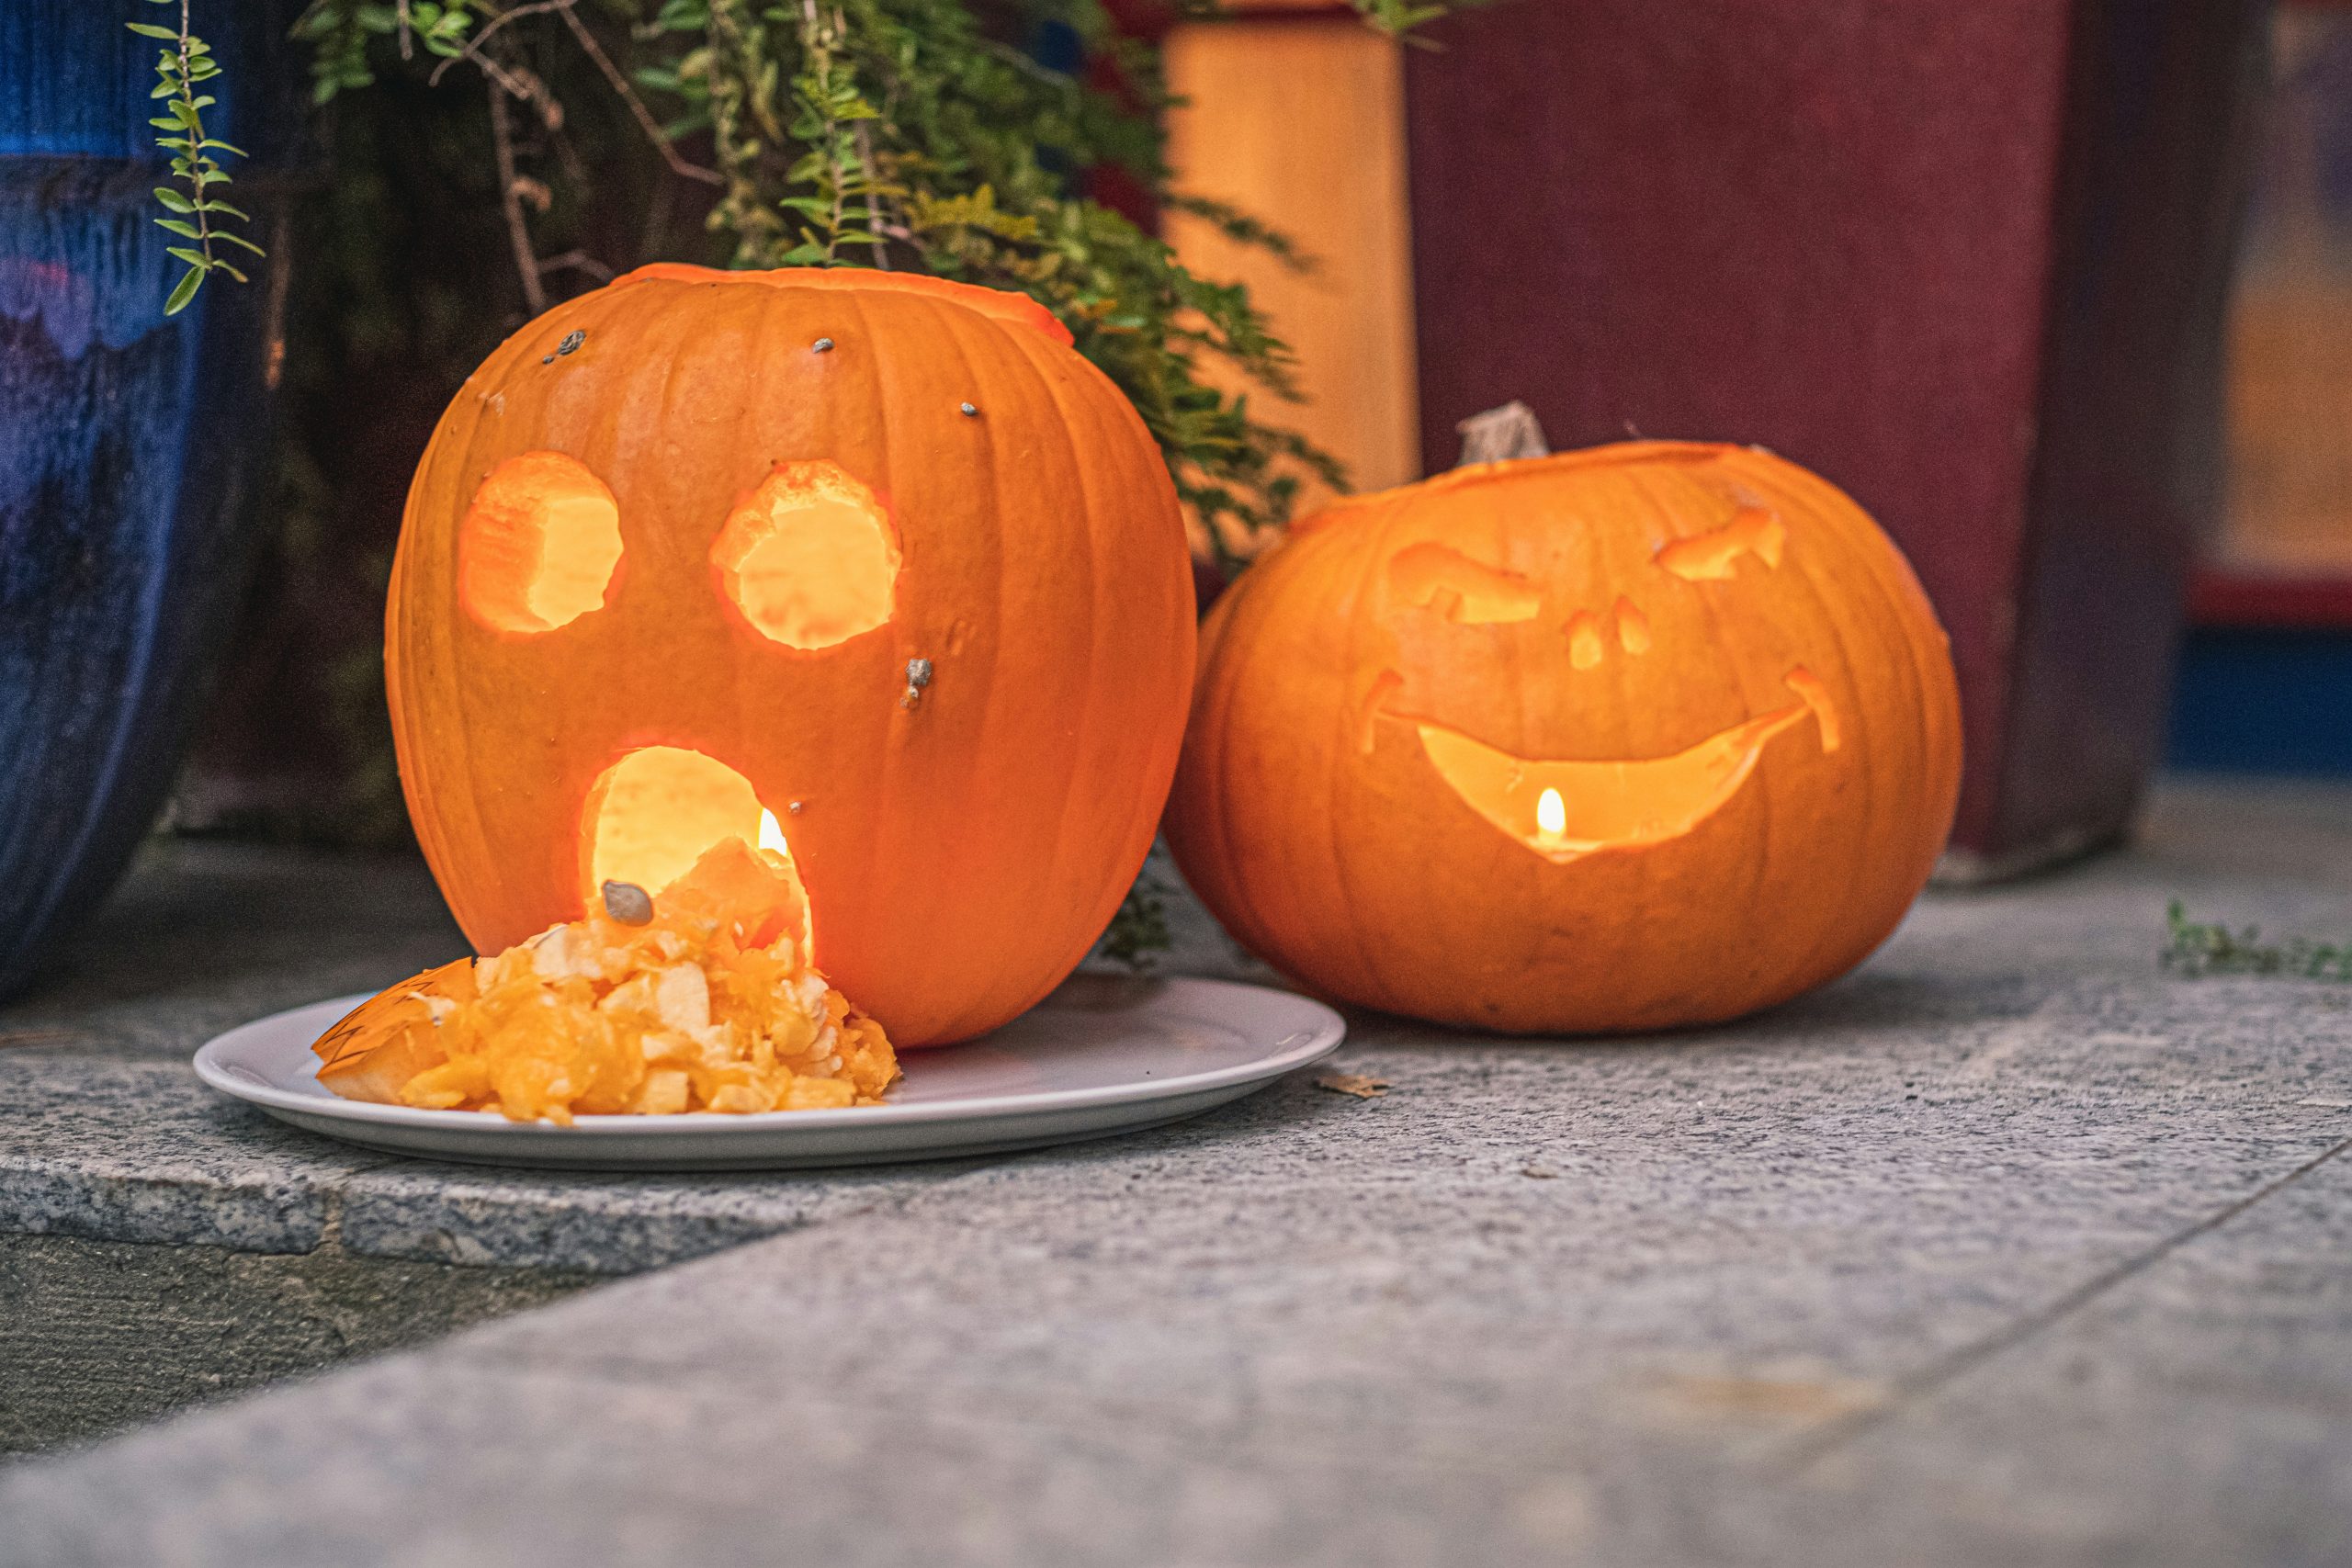
16. Two Glowing Jack-o’-Lanterns, One with Guts on Display
This scene is effective because it shows both the finished product and the process. The beautifully carved smiling pumpkin on the right represents the ideal outcome. The ‘surprised’ one on the left, with its guts and seeds scooped out onto a plate, adds a touch of gruesome, behind-the-scenes reality that is quintessentially Halloween. It tells a story and feels more authentic and less sterile than a row of perfectly clean pumpkins. It’s a bit of spooky meta-commentary.
📏 Scale Guide
Let’s talk about pumpkin guts. They’re slimy, stringy, and get everywhere. While putting them on display adds to the spooky vibe, it’s also an open invitation for fruit flies and other pests, especially indoors. If you’re going for this look, commit to cleaning it up at the end of the night. Also, pumpkin pulp will start to look sad and discolored after just a few hours at room temperature. For a party, scoop them out right before guests arrive to keep it looking ‘fresh’.
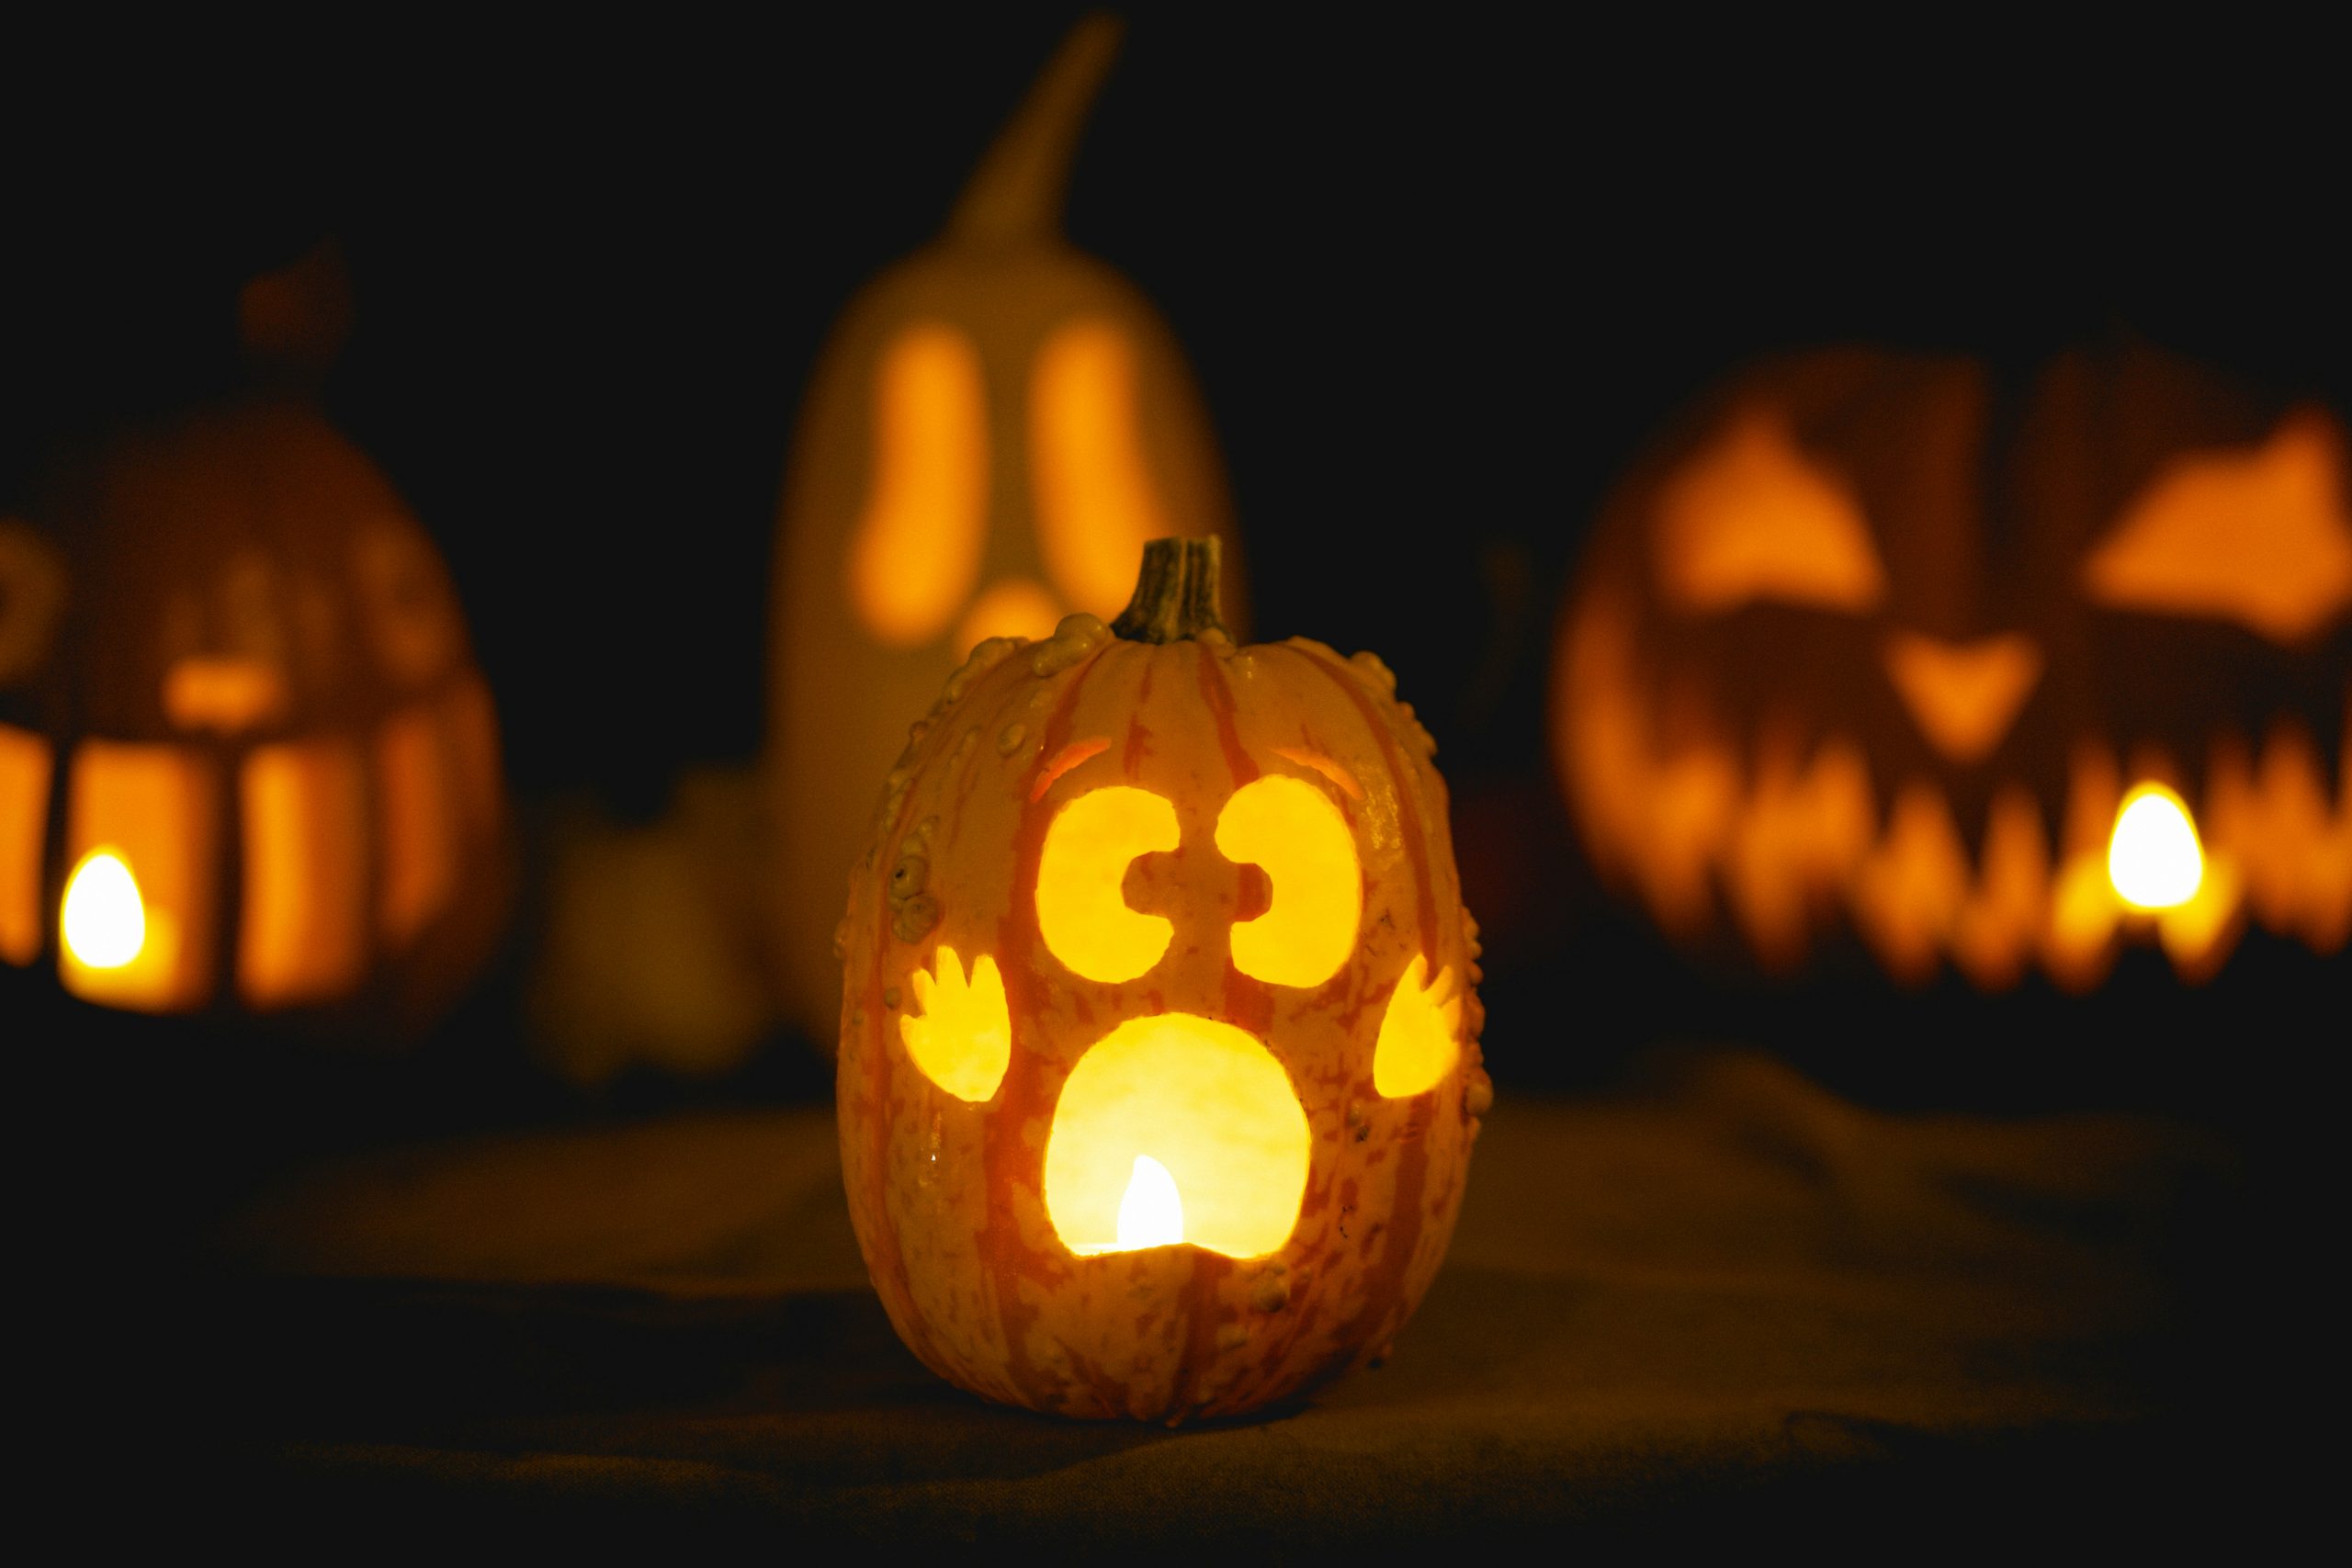
17. Ghost-Faced Pumpkin with Paw Print Details
The small, almost hidden detail that makes this design special is the carved paw prints. The ghost face is classic Halloween, but the addition of the paws tells a story. Is a spooky creature walking across the pumpkin? Is it a tribute to a beloved pet? This simple addition elevates the pumpkin from a generic decoration to a personalized piece. It invites the viewer to look closer and wonder about the meaning, which is the hallmark of a great design.
✅ Before You Start
To get that ghostly, ethereal glow from inside your pumpkin, don’t use a yellow or orange light. Opt for a cool white or even a pale blue LED candle. A warmer light will make your ghost look more like a standard jack-o’-lantern. The cool-toned light reinforces the spooky, spectral theme of the ghost carving and creates a striking contrast against the pumpkin’s orange skin, especially in a dark room. It’s a small change that makes a huge thematic difference.
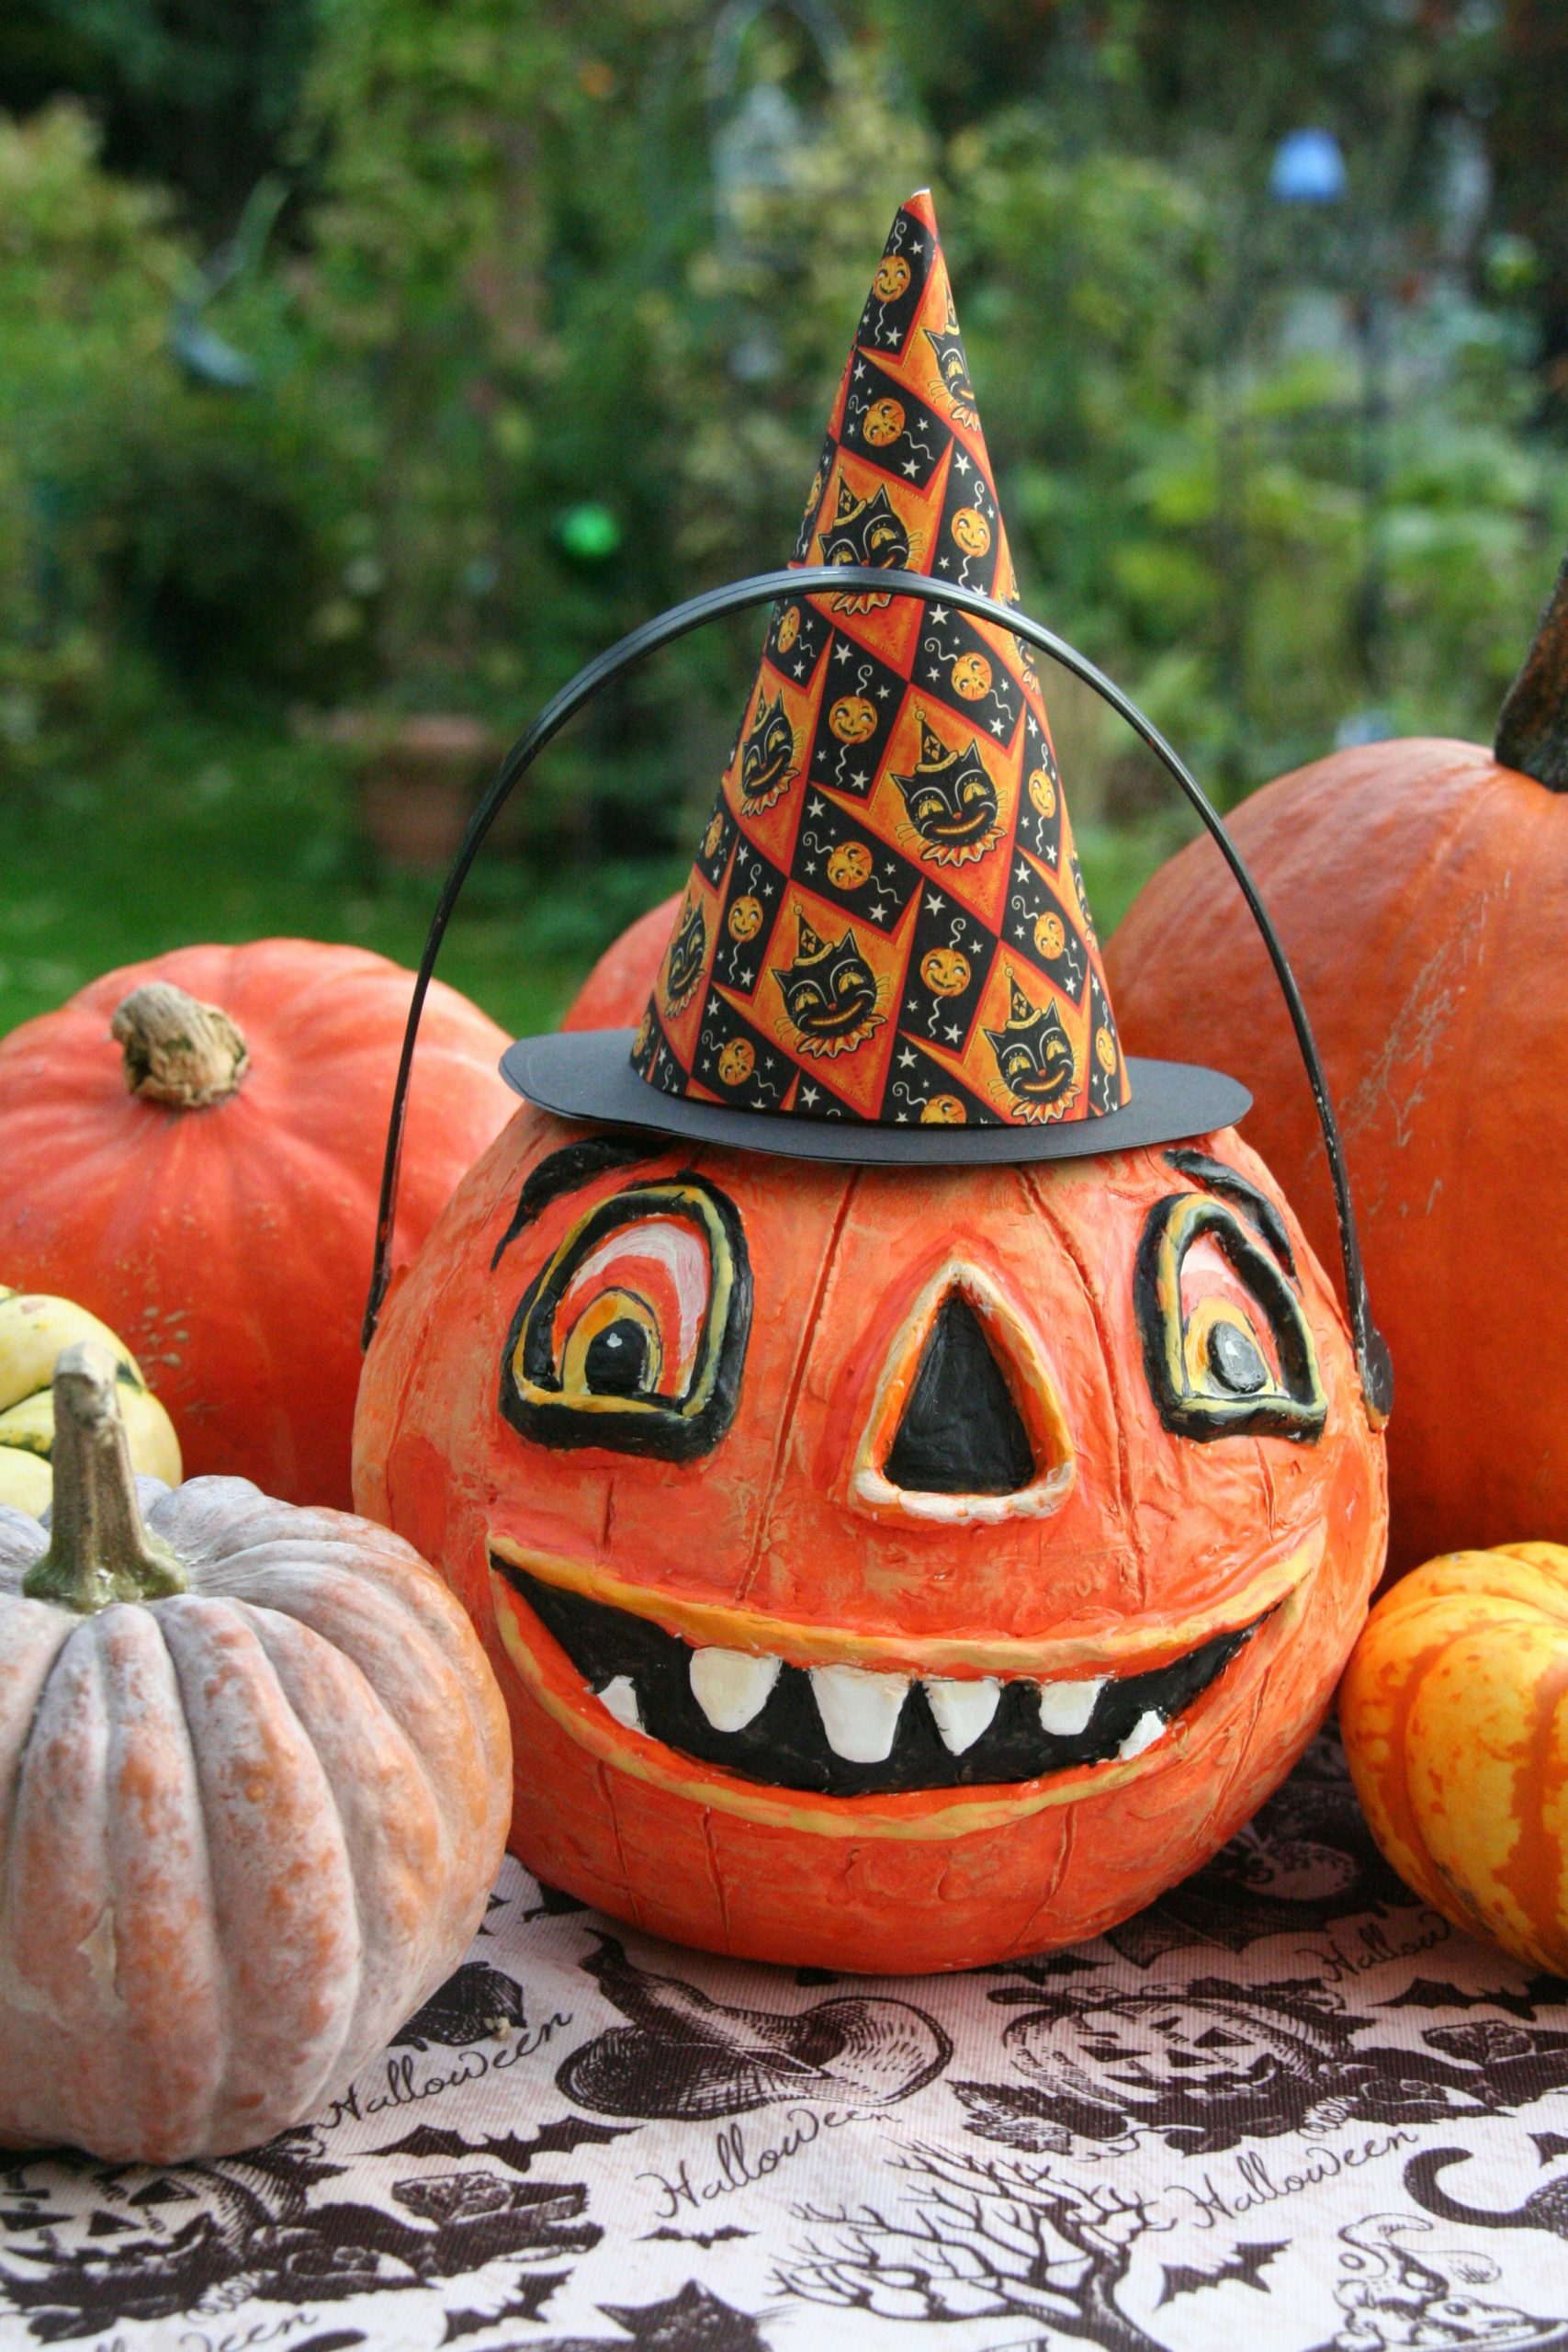
18. Painted Trick-or-Treat Pumpkin with a Witch Hat
This design’s success comes from its fantastic use of mixed materials and exaggerated features. It’s not just a carved or painted pumpkin; it’s an assemblage. The fabric witch hat, the metal handle, and the bold, graphic painting style all work together to create a character with tons of personality. The multi-colored rings around the eyes are particularly effective, giving the face a hypnotic, theatrical quality that paint alone achieves better than carving could.
🔧 How-To Brief
A painted pumpkin won’t last as long as an unpainted one. The paint can trap moisture against the skin, accelerating the rotting process. To maximize its lifespan, make sure the pumpkin is completely clean and dry before you start painting. Use a breathable acrylic craft paint. To prevent rapid decay, this is a ‘make it the day before’ project, not a ‘decorate for the whole month of October’ project. It will look amazing for your party, but don’t be surprised if it starts to soften a few days later.
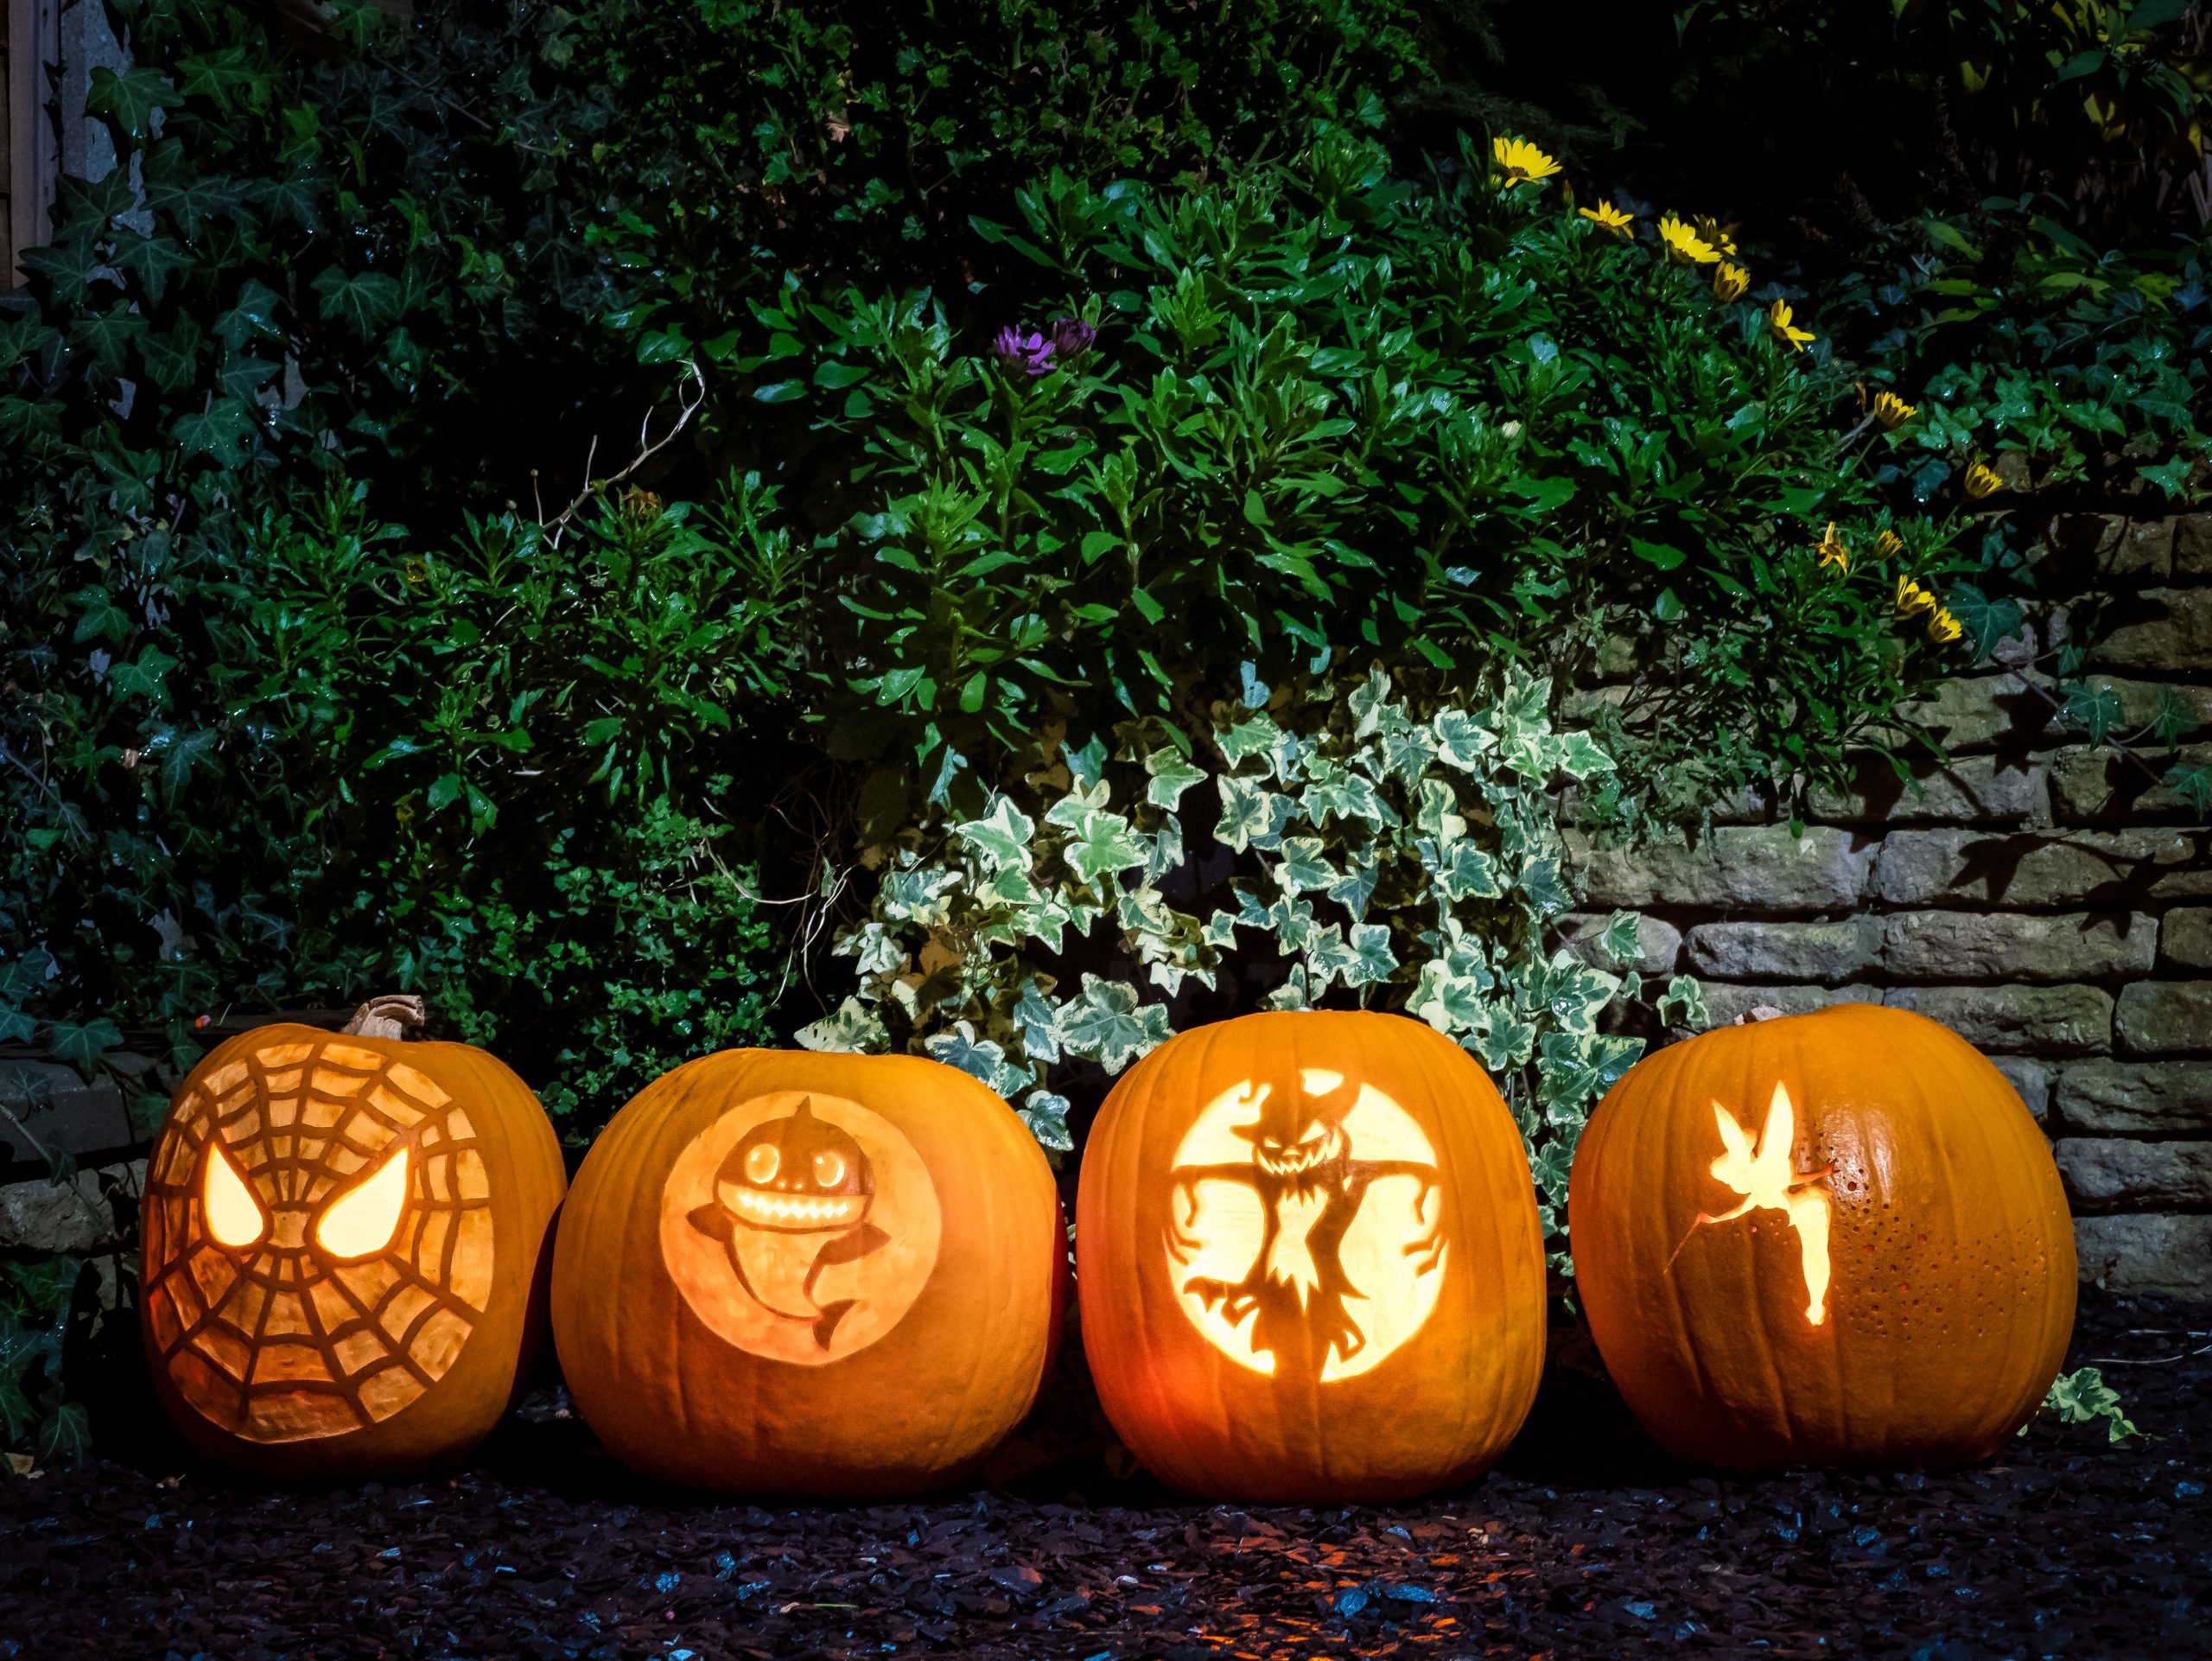
19. Pop Culture Pumpkins: Spider-Man, Baby Shark, and More
Carving pop culture icons is more popular than ever because it’s a way to share what you love. It turns your porch into a reflection of your family’s fandoms, whether that’s superheroes, kids’ songs, or fantasy characters. These designs are conversation starters and are hugely popular on social media, letting you connect with other fans. In 2026, holiday decorating is all about this kind of personalization, moving beyond generic themes to things that are specifically meaningful to you.
💸 Get This Look For Less
Before you dive into a complex character carving, be sure to check these boxes. These designs require more skill than a simple face, so it’s best to be prepared.
- Find a quality stencil: Search online for a pattern specifically designed for pumpkin carving. A regular coloring page won’t work.
- Get the right tools: You’ll need a fine-toothed serrated tool for details and possibly a scraper tool for non-cutout areas.
- Pick the right pumpkin: Look for one with a smooth, even surface and a shape that fits your chosen character.
This prep work is the key to success.
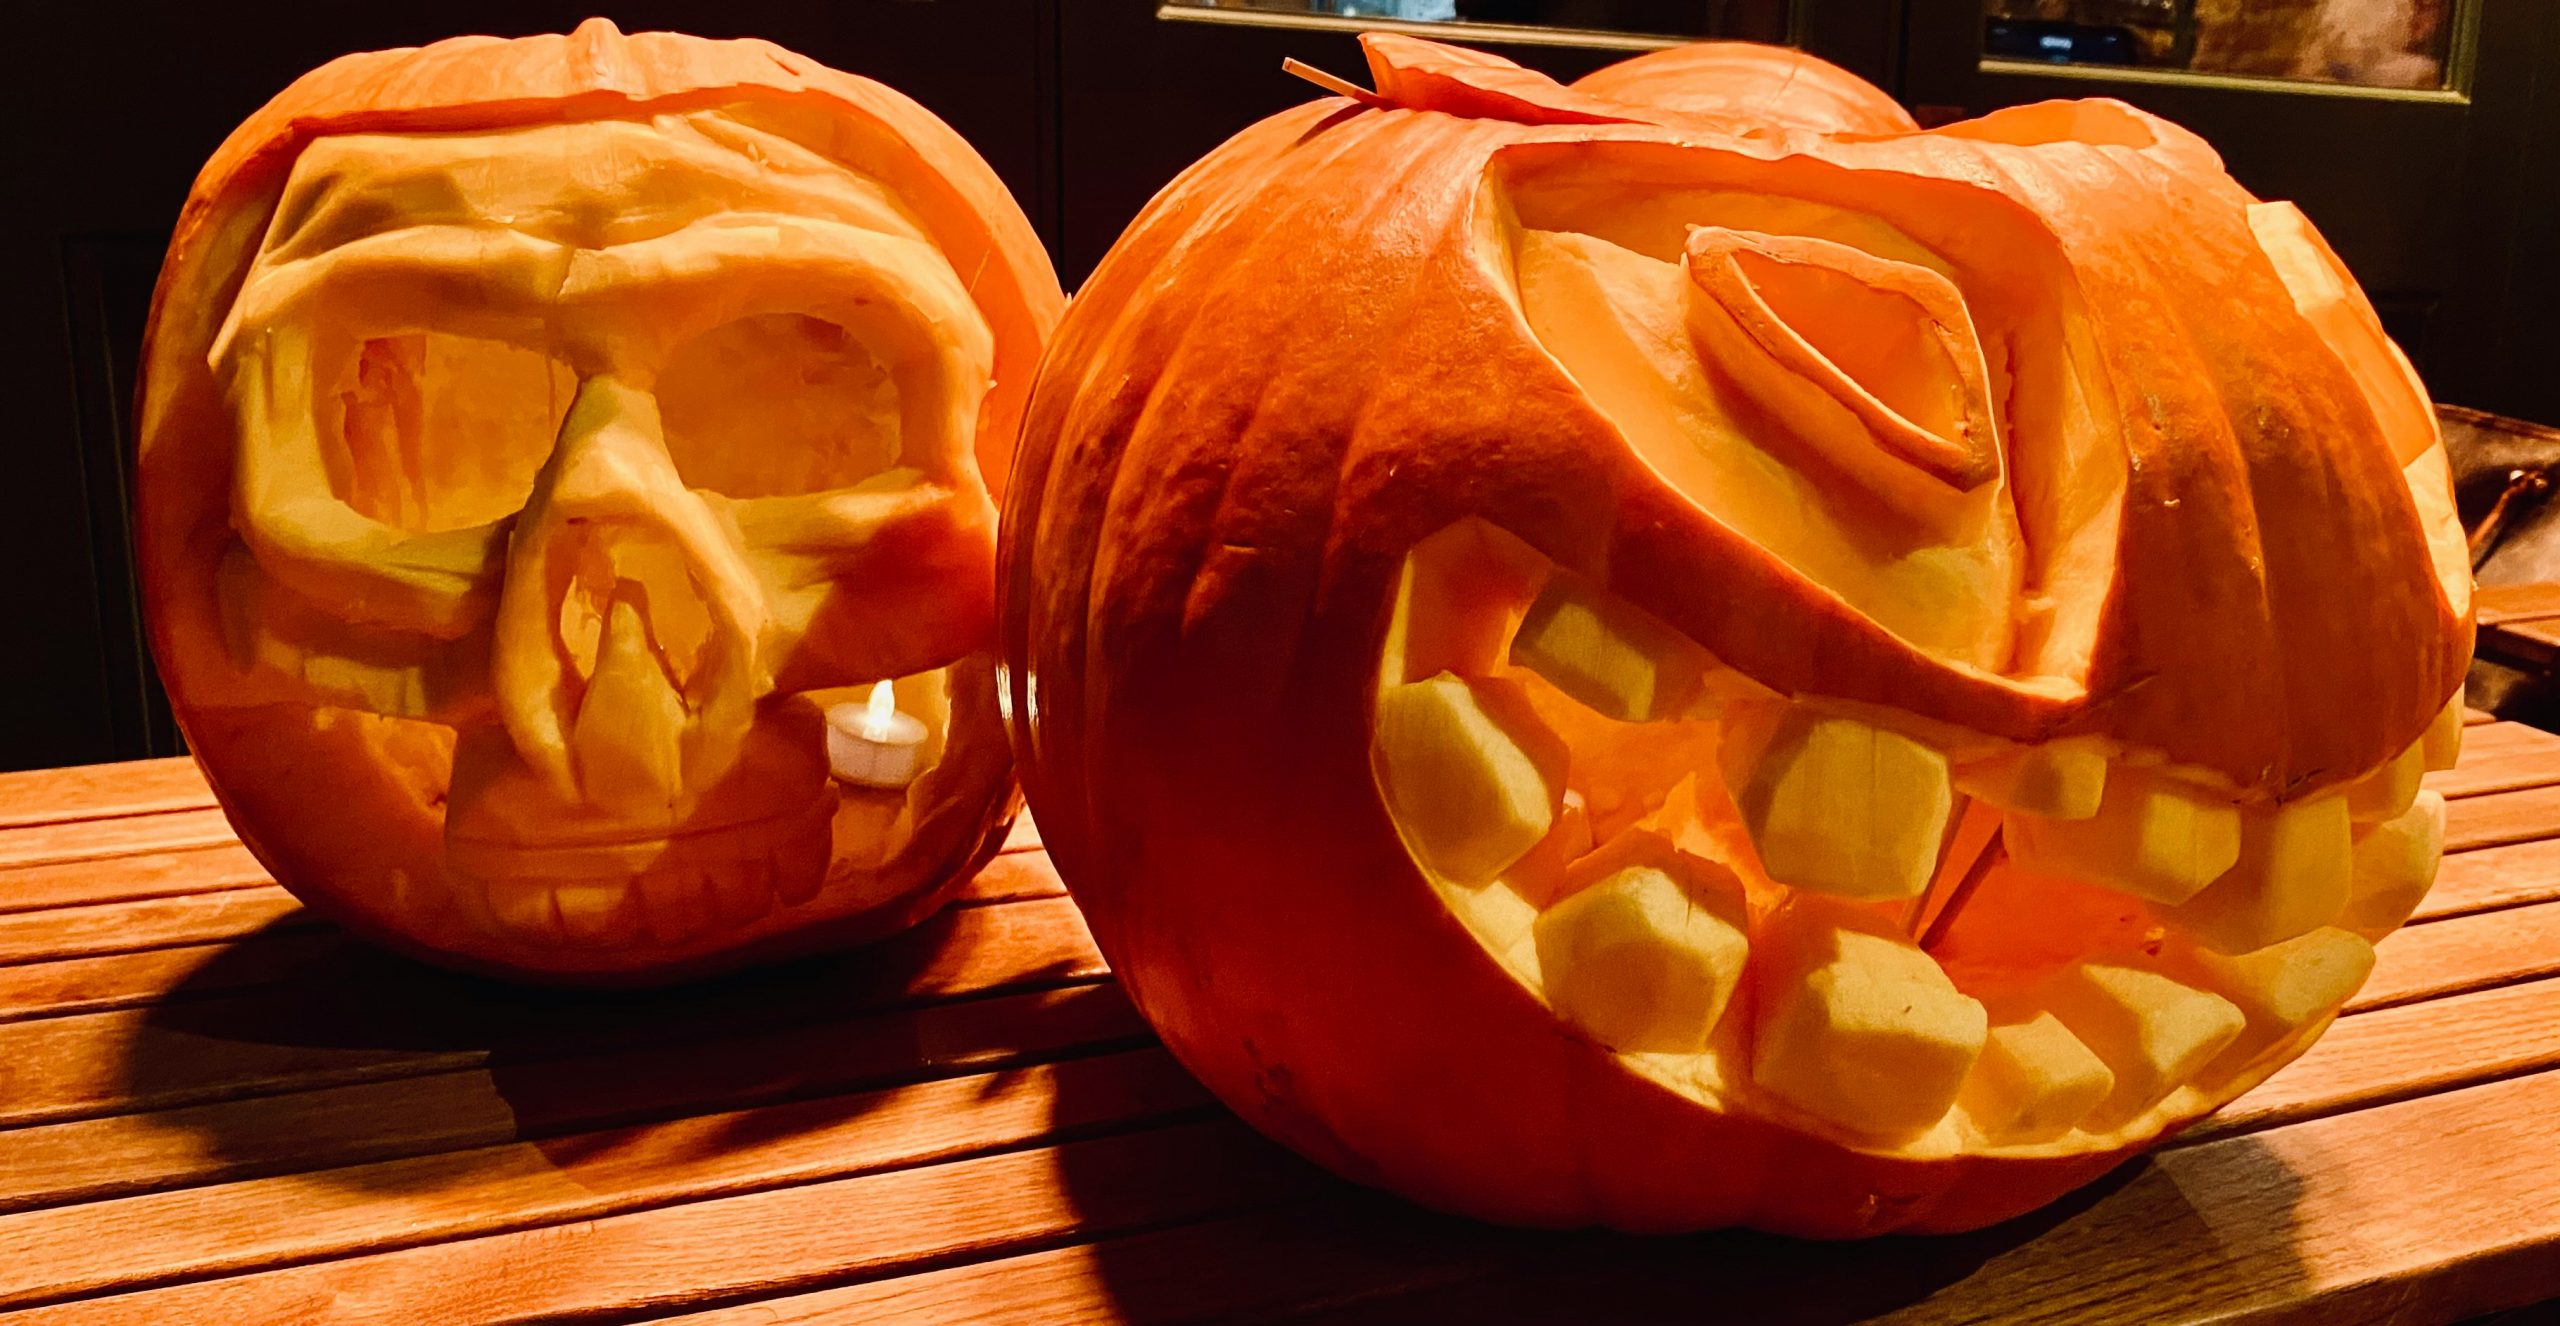
20. A Spooky Duo: Skull Face and a Monster Grin
This pair works so well because of the contrast in their carving styles, which gives them distinct personalities. The skull on the left is more detailed and anatomically inspired, with defined eye sockets, a nasal cavity, and teeth. The monster on the right is pure cartoon fun, with simple crescent eyes and big, blocky teeth. Placing them side-by-side creates a dynamic where one feels more seriously spooky, and the other feels playfully monstrous. It’s a classic comedy duo, but for pumpkins.
🧹 Maintenance Reality
This is a highly scalable idea, perfect for almost any space. If you have a large porch, you can use two oversized pumpkins to create an intimidating display. For a smaller apartment balcony or even an indoor mantelpiece, you can replicate the exact same designs on smaller pumpkins. The designs themselves are what matter, not the size. You could even create a whole family of them in varying sizes, all displayed on a single table or a few steps.
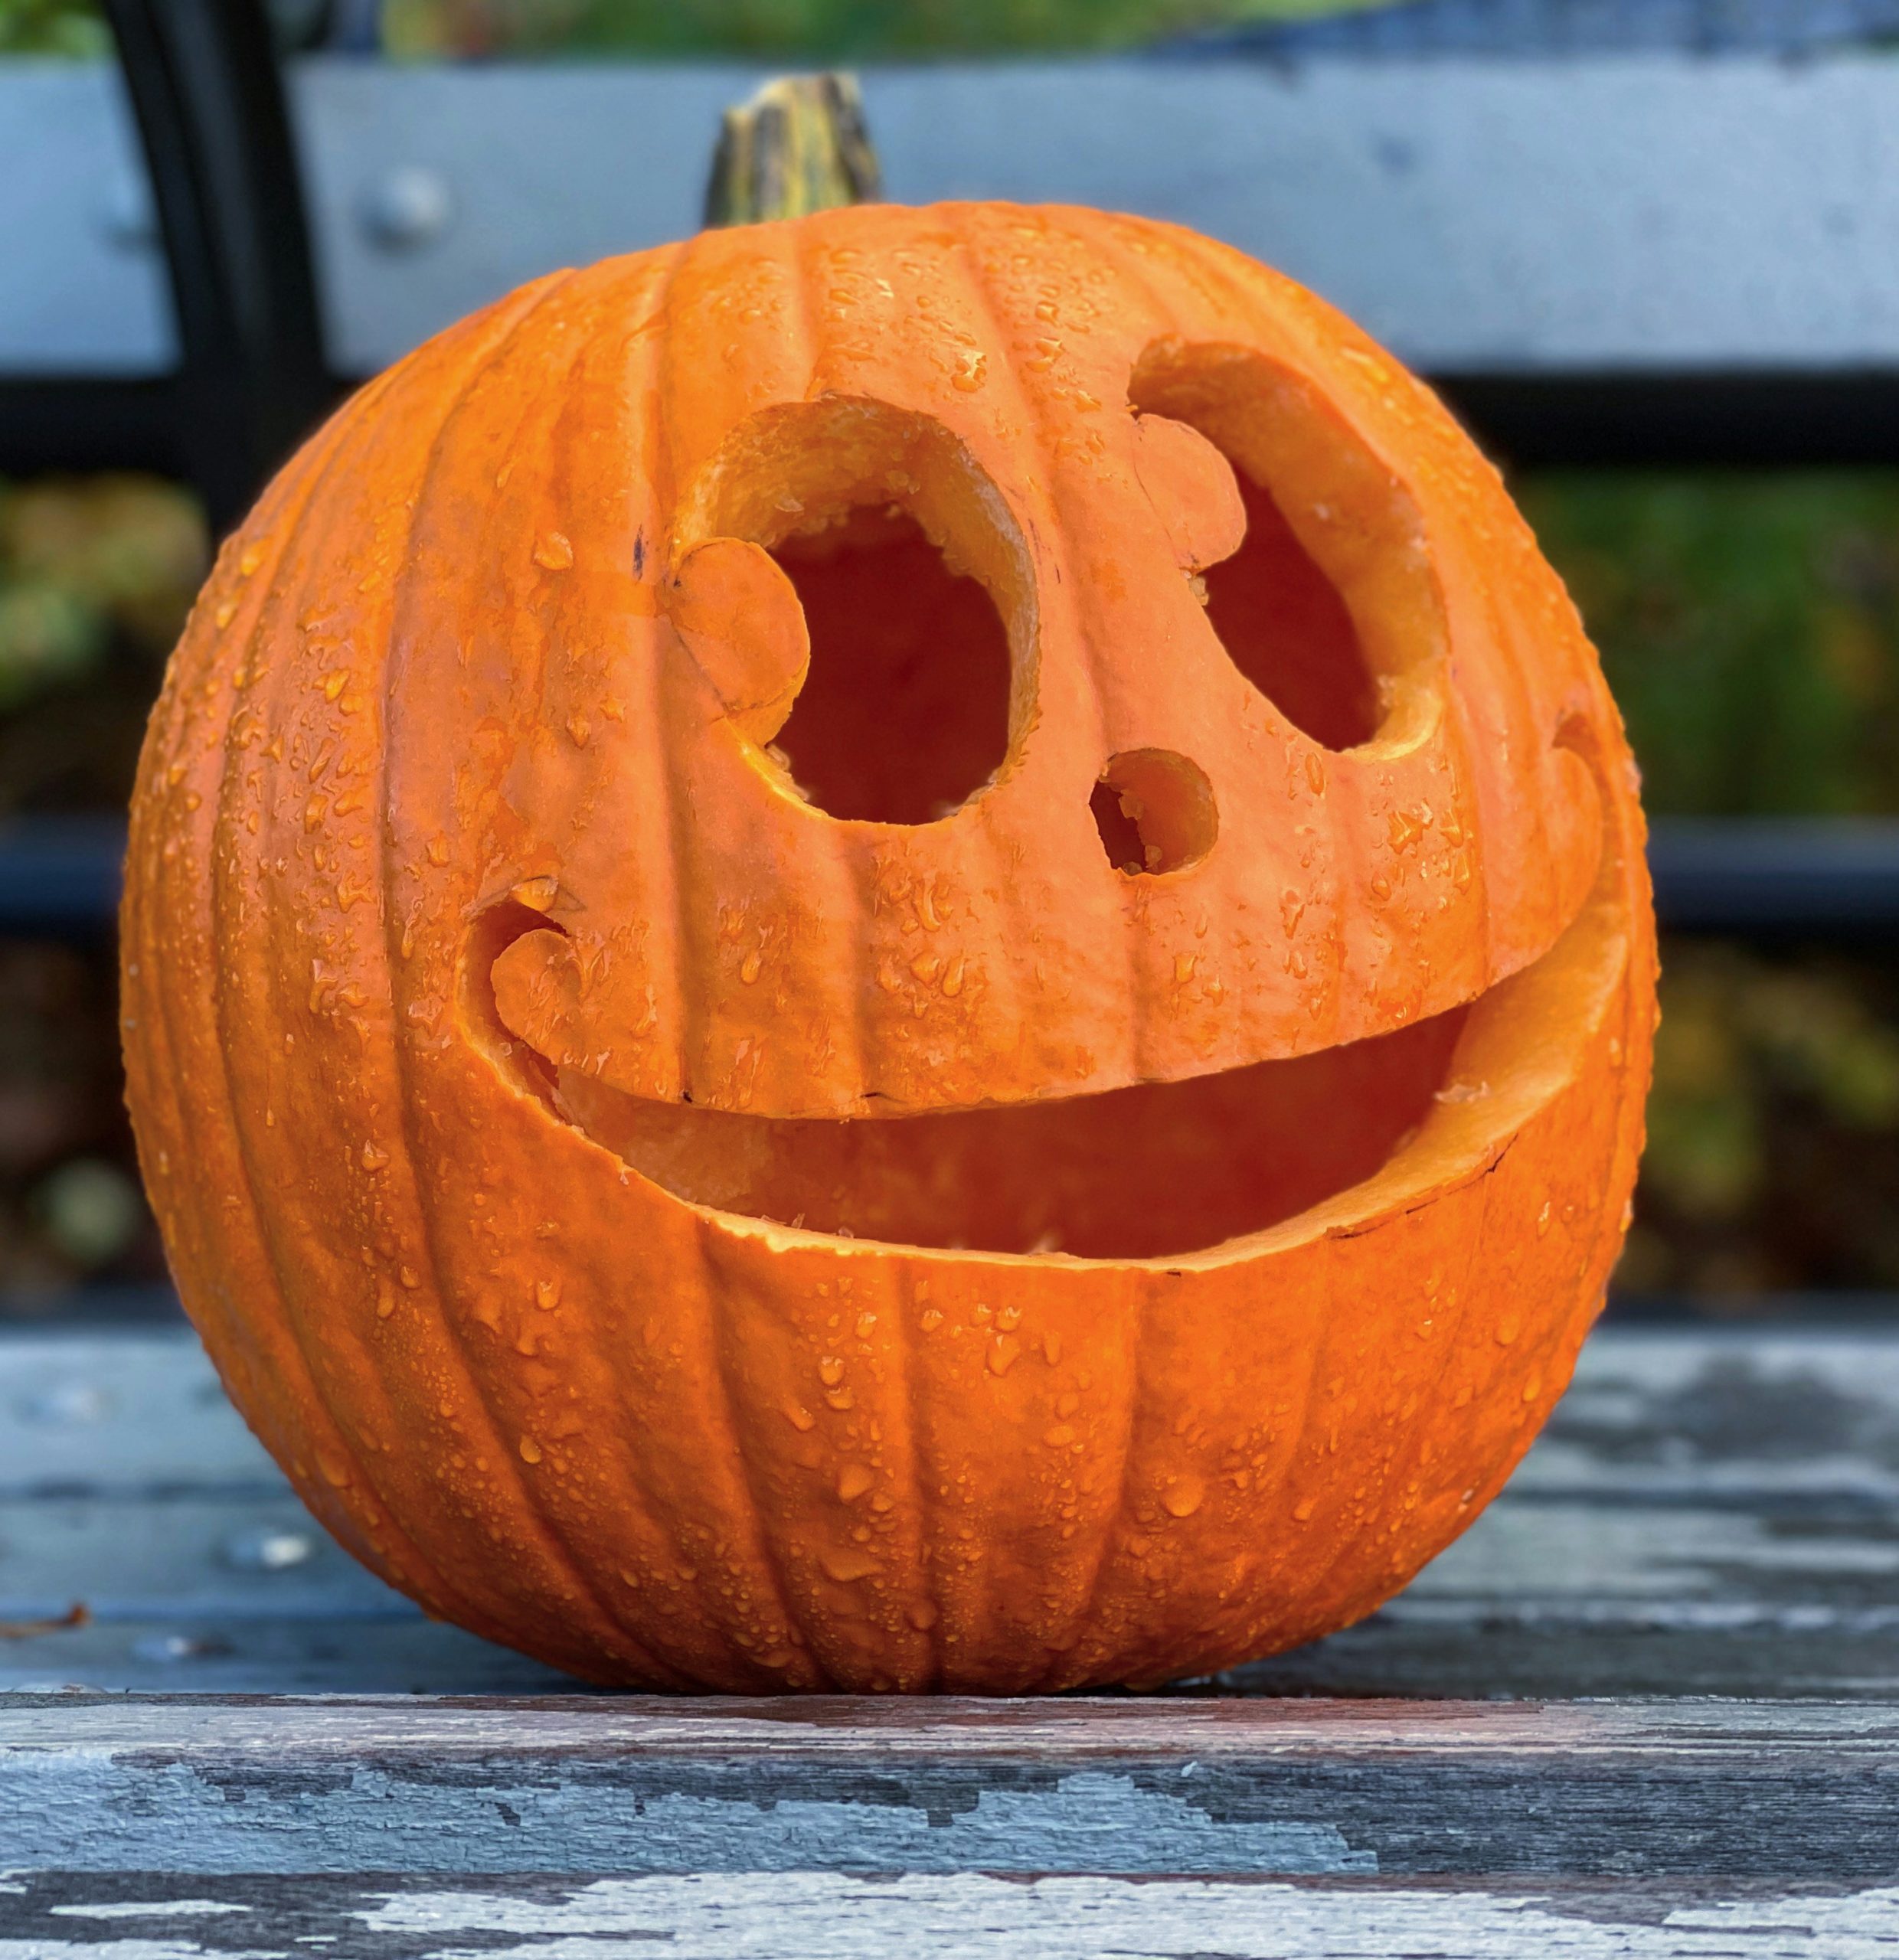
21. Rain-Kissed Happy Pumpkin on a Weathered Blue Bench
The single element that makes this photo so charming and atmospheric is the water droplets. They add a layer of texture and realism to the scene, suggesting a crisp, dewy autumn morning. The beads of water catch the light, making the pumpkin’s vibrant orange skin glisten and feel fresh and alive. Without the rain-kissed texture, it would be a nice photo of a carved pumpkin. With it, it’s a mood and a moment.
🔥 Trending Context
If you’re displaying your pumpkins on a painted or finished wooden surface like a bench or porch, be aware that pumpkins will start to weep and decompose, especially from the base. This can leave a slimy, hard-to-remove stain and potentially damage the paint or wood finish. Always place a small, discreet barrier like a clear plastic plant saucer or a piece of cardboard underneath your pumpkin to protect the surface it’s sitting on.
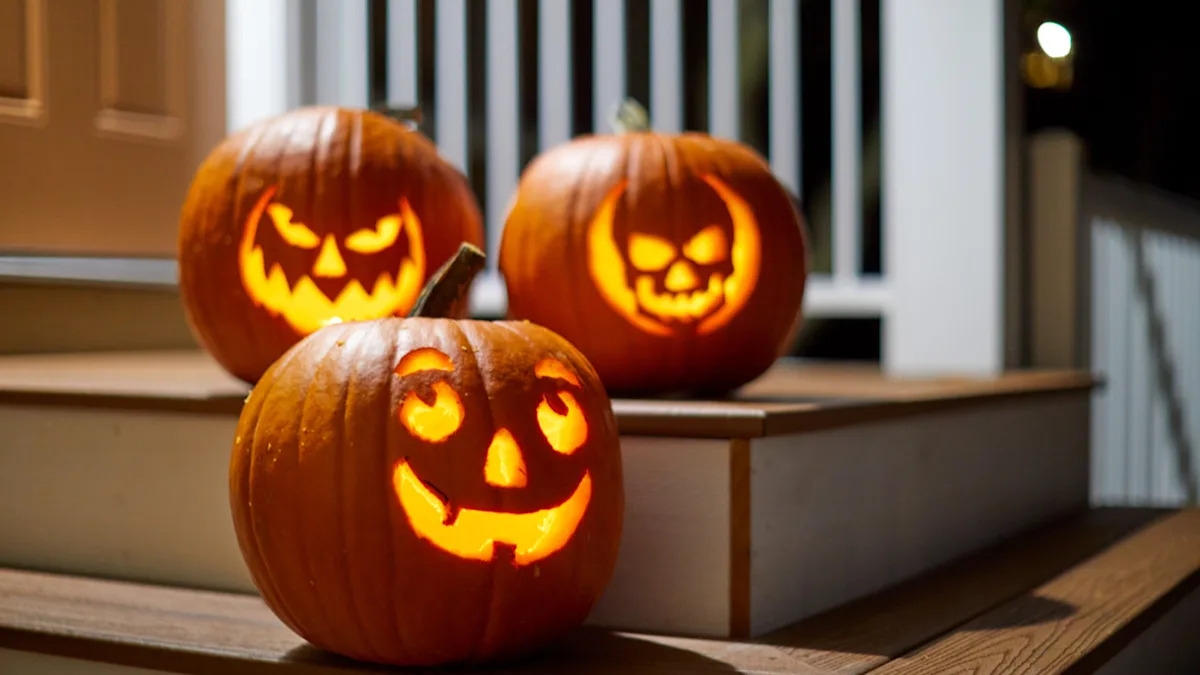
22. Trio of Glowing Jack-o’-Lanterns on a Porch at Night
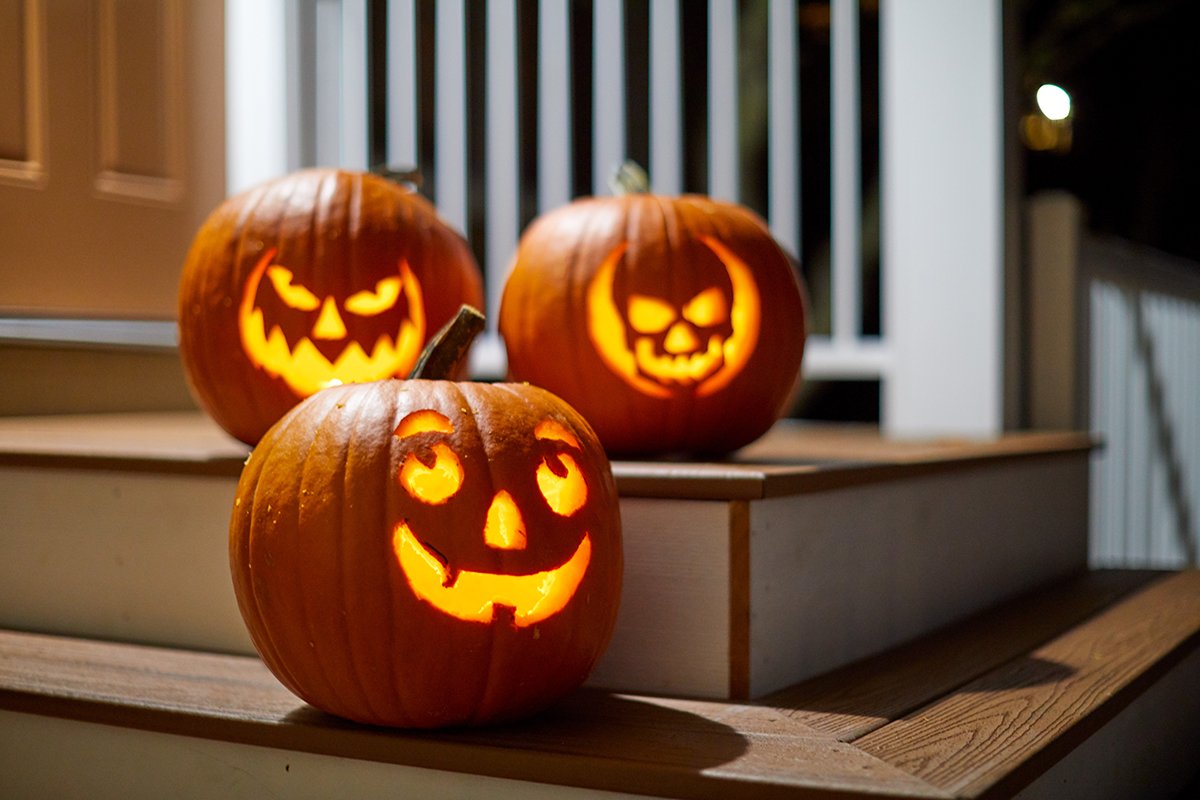
When arranging multiple pumpkins, don’t just line them up. Create a sense of depth and hierarchy by staggering them. Place the largest pumpkin slightly behind the others, and arrange the smaller ones at different positions on the steps. Let their carved faces point in slightly different directions. This makes the display feel more dynamic and natural, as if they are a group of characters interacting with each other, rather than a static, flat lineup. The use of different expressions—happy, scary, skull—further enhances this effect.
💡 Designer Tip
This classic porch display works because of the power of three and the warm, welcoming glow it creates against the darkness. In design, arrangements in odd numbers (especially three) are almost always more visually appealing and dynamic than even-numbered groupings. The warm, yellow-orange light from inside the pumpkins contrasts beautifully with the cool, dark night and the crisp white trim of the porch, creating a scene that is the very definition of festive and autumnal.
23. In-Process Pumpkin Carving with a Serrated Tool
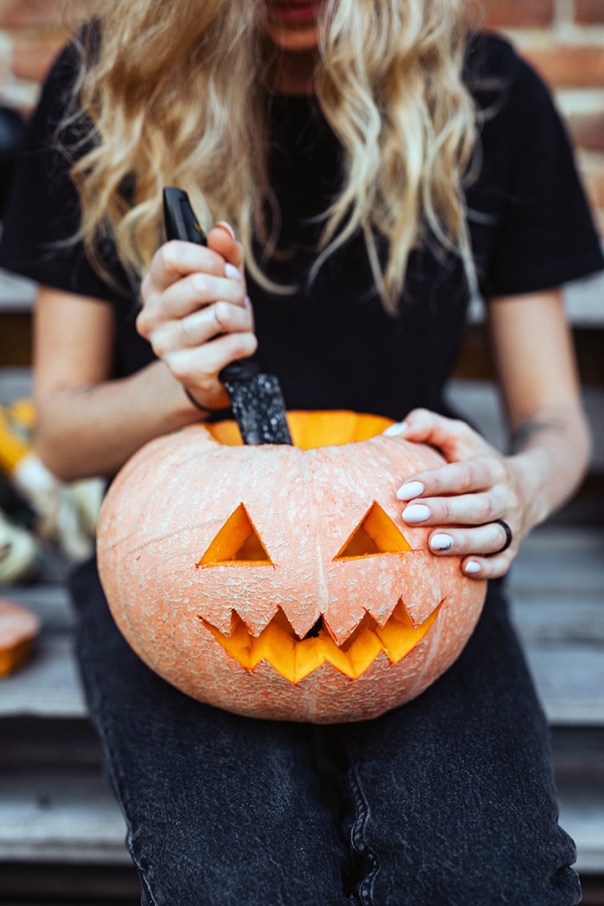
Using the right tools is non-negotiable for a good result. Here’s a quick guide to what you should have. 1. A scoop or large metal spoon for gutting. 2. A large, serrated pumpkin saw for cutting the lid and major sections. 3. A small, fine-toothed saw for detailed work like eyes and teeth. 4. A drill with various bits for perfect circles or decorative holes. A poker tool for transferring stencil patterns. Forget the big kitchen knife; it’s ineffective and dangerous. A cheap $5 kit from any store is safer and works much better.
🎯 What Makes It Work
The most important part of this entire image is the tool. It showcases the *act* of creating, not just the finished product. The small, serrated saw is the hero—it’s the proper tool for the job, allowing for the precise, clean cuts needed for the jagged mouth and triangular eyes. It sends a clear message: achieving this classic look is accessible and manageable when you have the right equipment. This image is less about the pumpkin and more about the empowerment of the carving process itself.
24. Simple and Sweet: A Happy Face on a Ridged Pumpkin
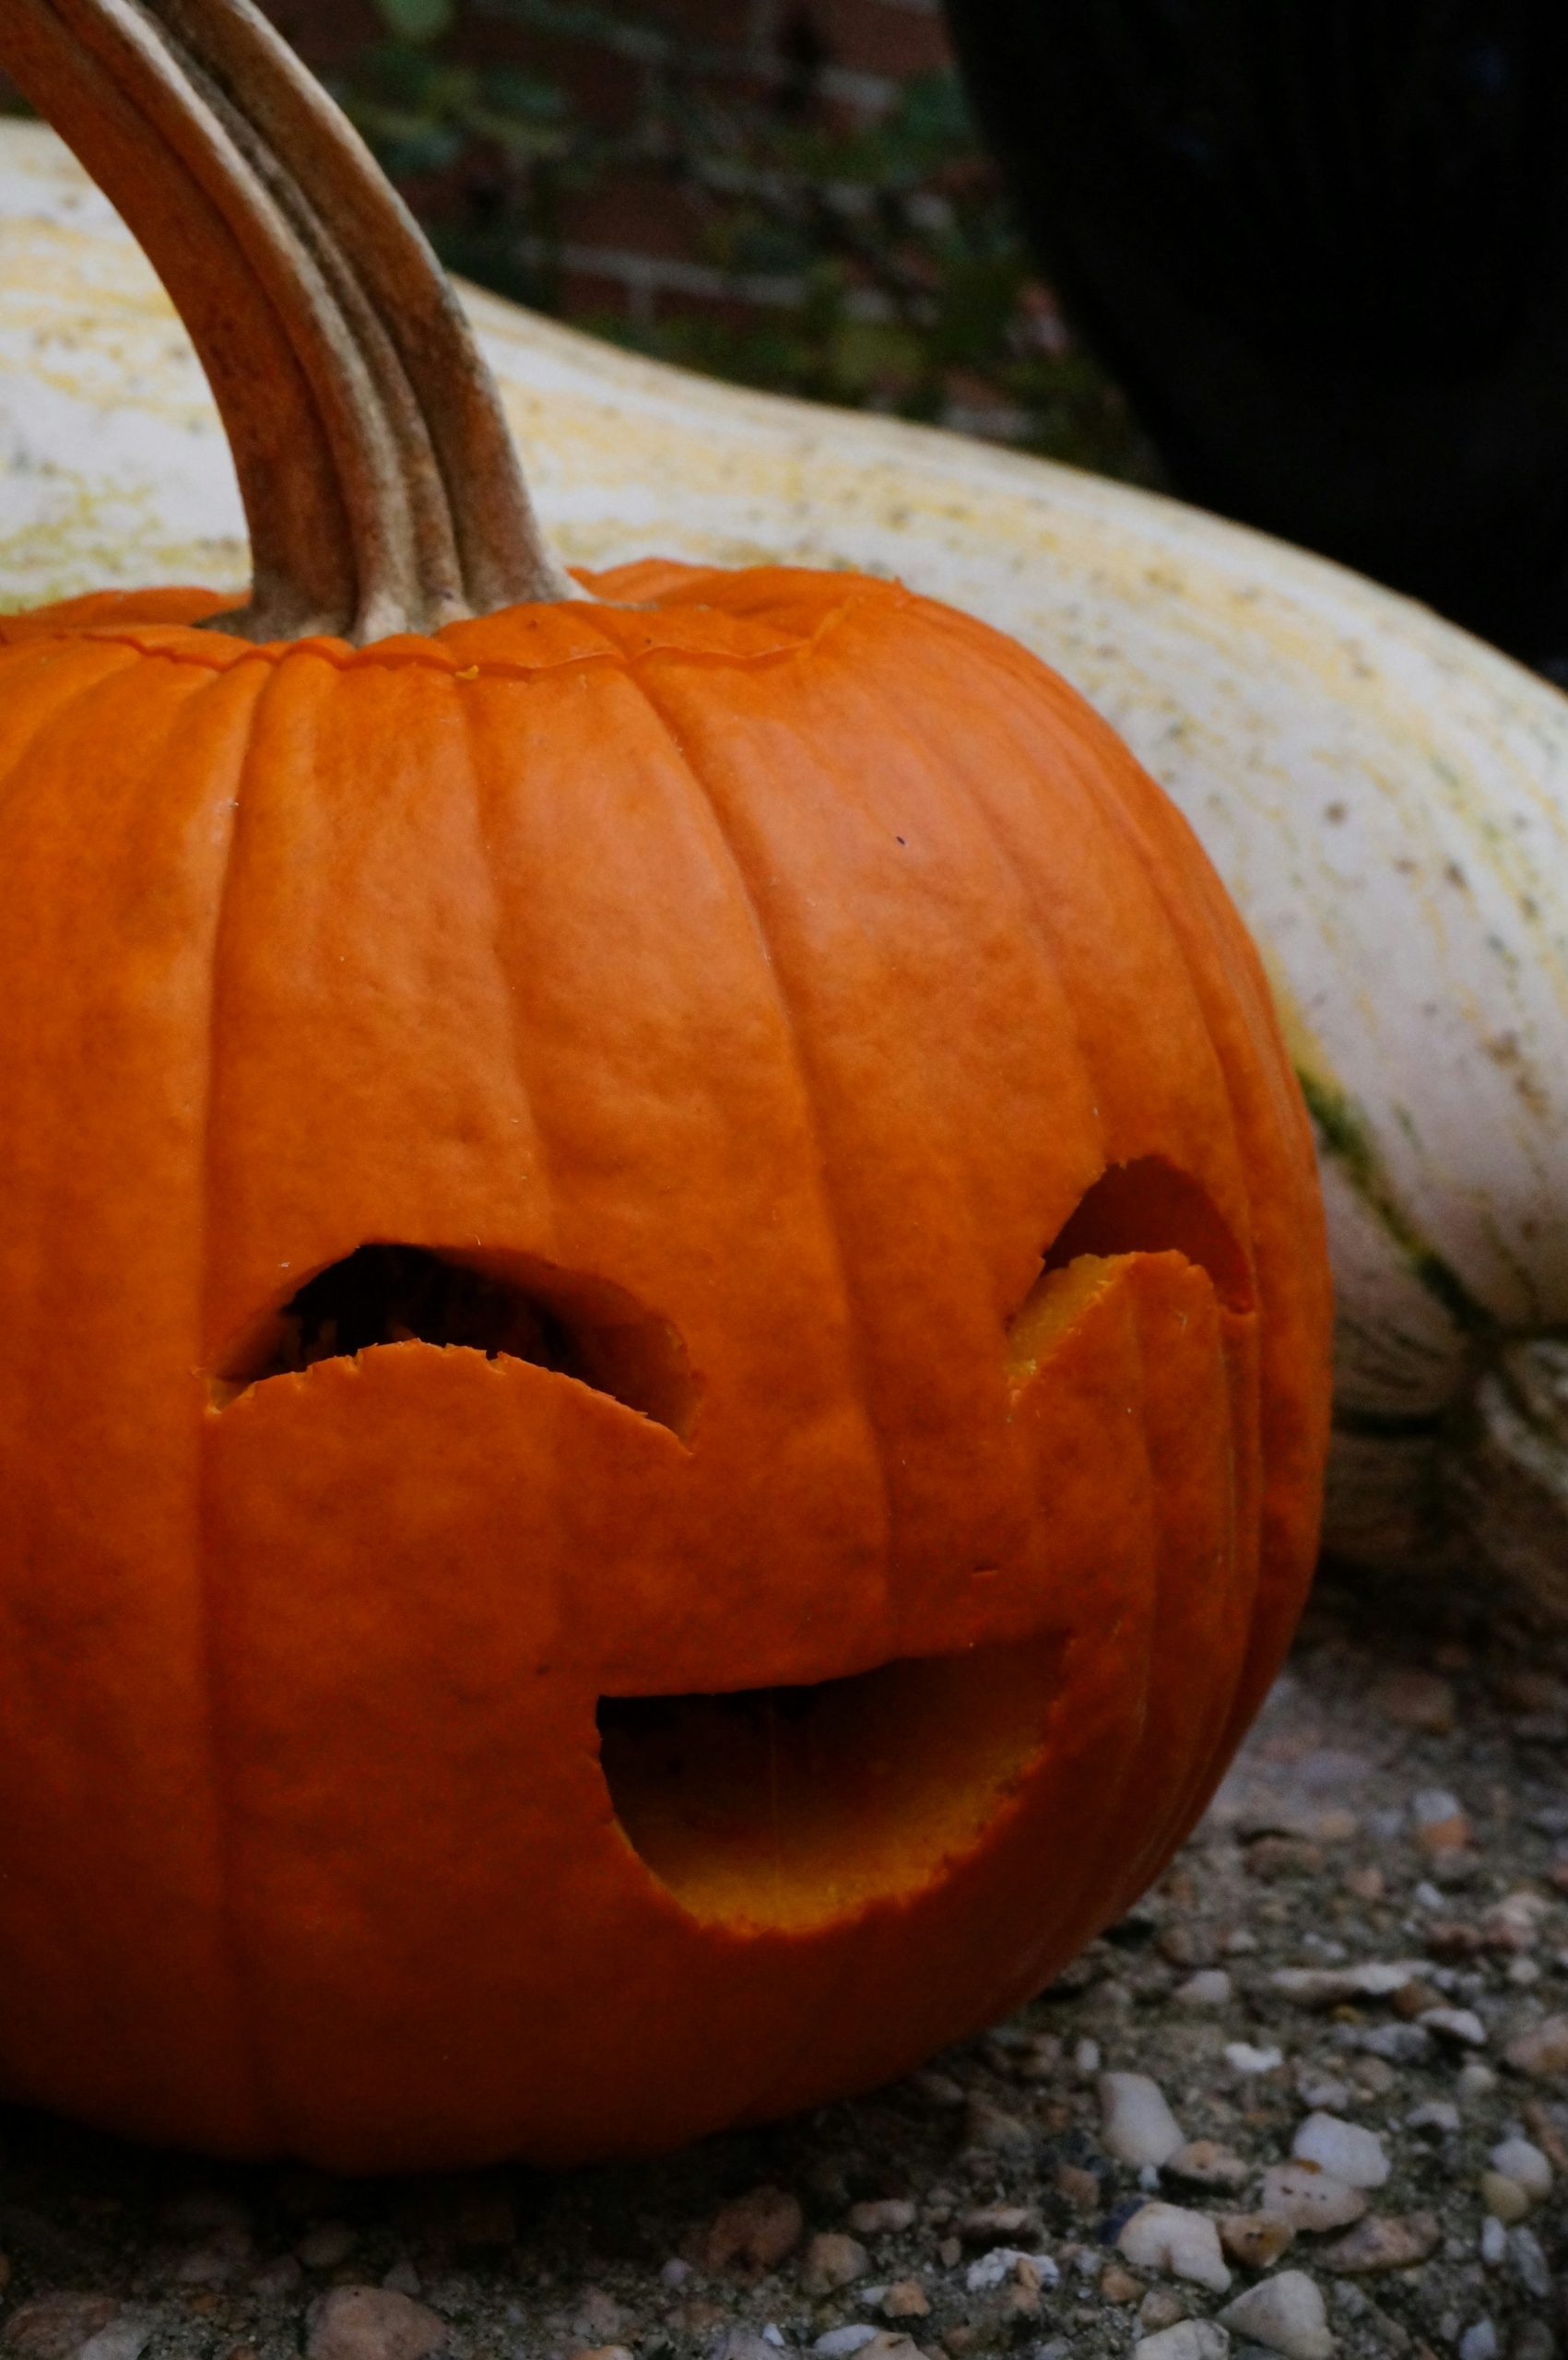
The beauty of this design lies in its utter simplicity. The face is composed of just three cuts—two crescent eyes and one wider crescent mouth. This minimalist approach proves that you don’t need intricate details or spooky fangs to create a charming and effective jack-o’-lantern. The pumpkin’s natural, heavy ridges add texture and character that a more complex carving might have overshadowed. It’s a reminder that sometimes, the most classic and straightforward designs are the most endearing.
⭐ The One Thing
This is the ultimate look for less. You need exactly one pumpkin and a knife. That’s it. No special lighting, no props, no collection of gourds. Find a pumpkin with a nice shape at a local grocery store for $5-$10. If you don’t have a carving kit, a small paring knife from your kitchen can work for this simple design (with adult supervision, of course!). You get 90% of the festive charm of more complex displays for about 10% of the cost and effort. A great choice for a fun activity with kids, similar to the process shown in Idea #29.
25. Easy and Awesome First-Time Carving Designs
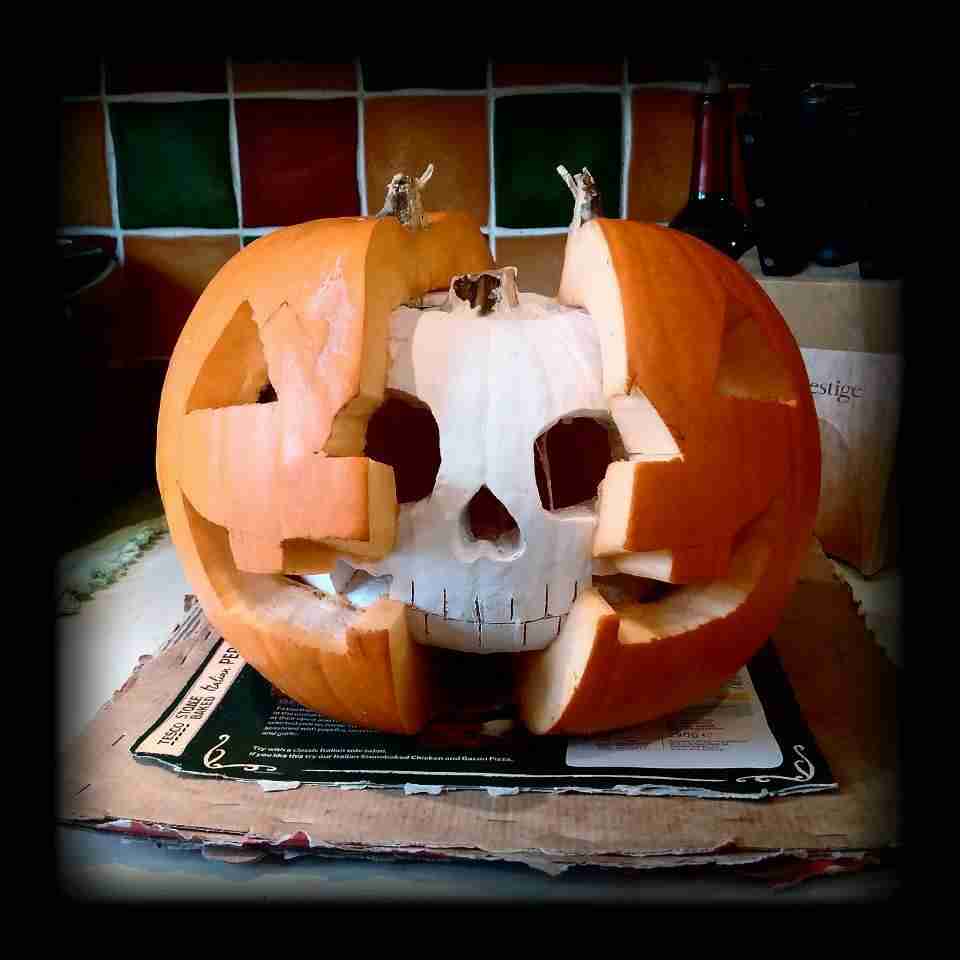
For your first time, think simple shapes and big expressions. Polka dots are a fantastic starting point. Just use a drill with a 1-inch spade bit to make perfect circles all over the pumpkin. It’s fast, easy, and looks incredibly stylish when lit. Another great beginner’s design is a simple ‘surprised’ face: two medium-sized circles for eyes and one large oval for a mouth. The cuts aren’t complicated, and the result is always full of character. Don’t try a complex stencil on your first go.
⚠️ Real Talk
Before you make your first cut, it’s crucial to have a plan. Don’t just start carving randomly. Decide on your design first, even if it’s a simple one.
- Draw your design: Use a dry-erase marker to sketch your face or pattern. It’s easy to wipe off and adjust.
- Choose the best side: Every pumpkin has a ‘face’. Find the smoothest, most appealing side for your carving.
- Cut the lid correctly: Angle your knife at 45 degrees so the lid has a ledge to sit on and won’t fall inside.
26. Funny Pumpkin Faces That Wow the Neighbors
The secret to a ‘funny’ pumpkin is often exaggeration. Think about human expressions and push them to the extreme. A goofy smile should be super wide with one or two blocky teeth. Worried eyebrows should be angled high up on the pumpkin’s ‘forehead.’ A ‘sick’ pumpkin might have a wide-open mouth with pumpkin guts spilling out. The humor doesn’t come from intricate carving, but from creating a relatable, cartoonish expression that’s instantly readable from the street.
📐 Style Math
The formula for a funny face is all about breaking symmetry: 70% classic face structure + 30% quirky, lopsided feature. For example, carve two standard eyes, but make one noticeably larger than the other. Or, give it a wide smile, but have it curve up more on one side. You can also carve a winking eye, or have the tongue (a carved piece of pumpkin flesh) lolling out of one side of the mouth. A perfectly symmetrical face is rarely funny; the humor is in the imperfection.
27. Monster Pumpkin with Gourd Eyes and a Tongue
The use of gourds as 3D facial features is what takes this from a pumpkin to a personality. The two small, bi-colored gourds popping out as eyes give it a zany, cartoonish look that carving alone couldn’t achieve. The long, curved gourd tongue is the punchline, adding a dash of goofy horror. These non-pumpkin elements are the key; without them, it’s just another set of jagged teeth. It’s a brilliant example of thinking outside the pumpkin itself.
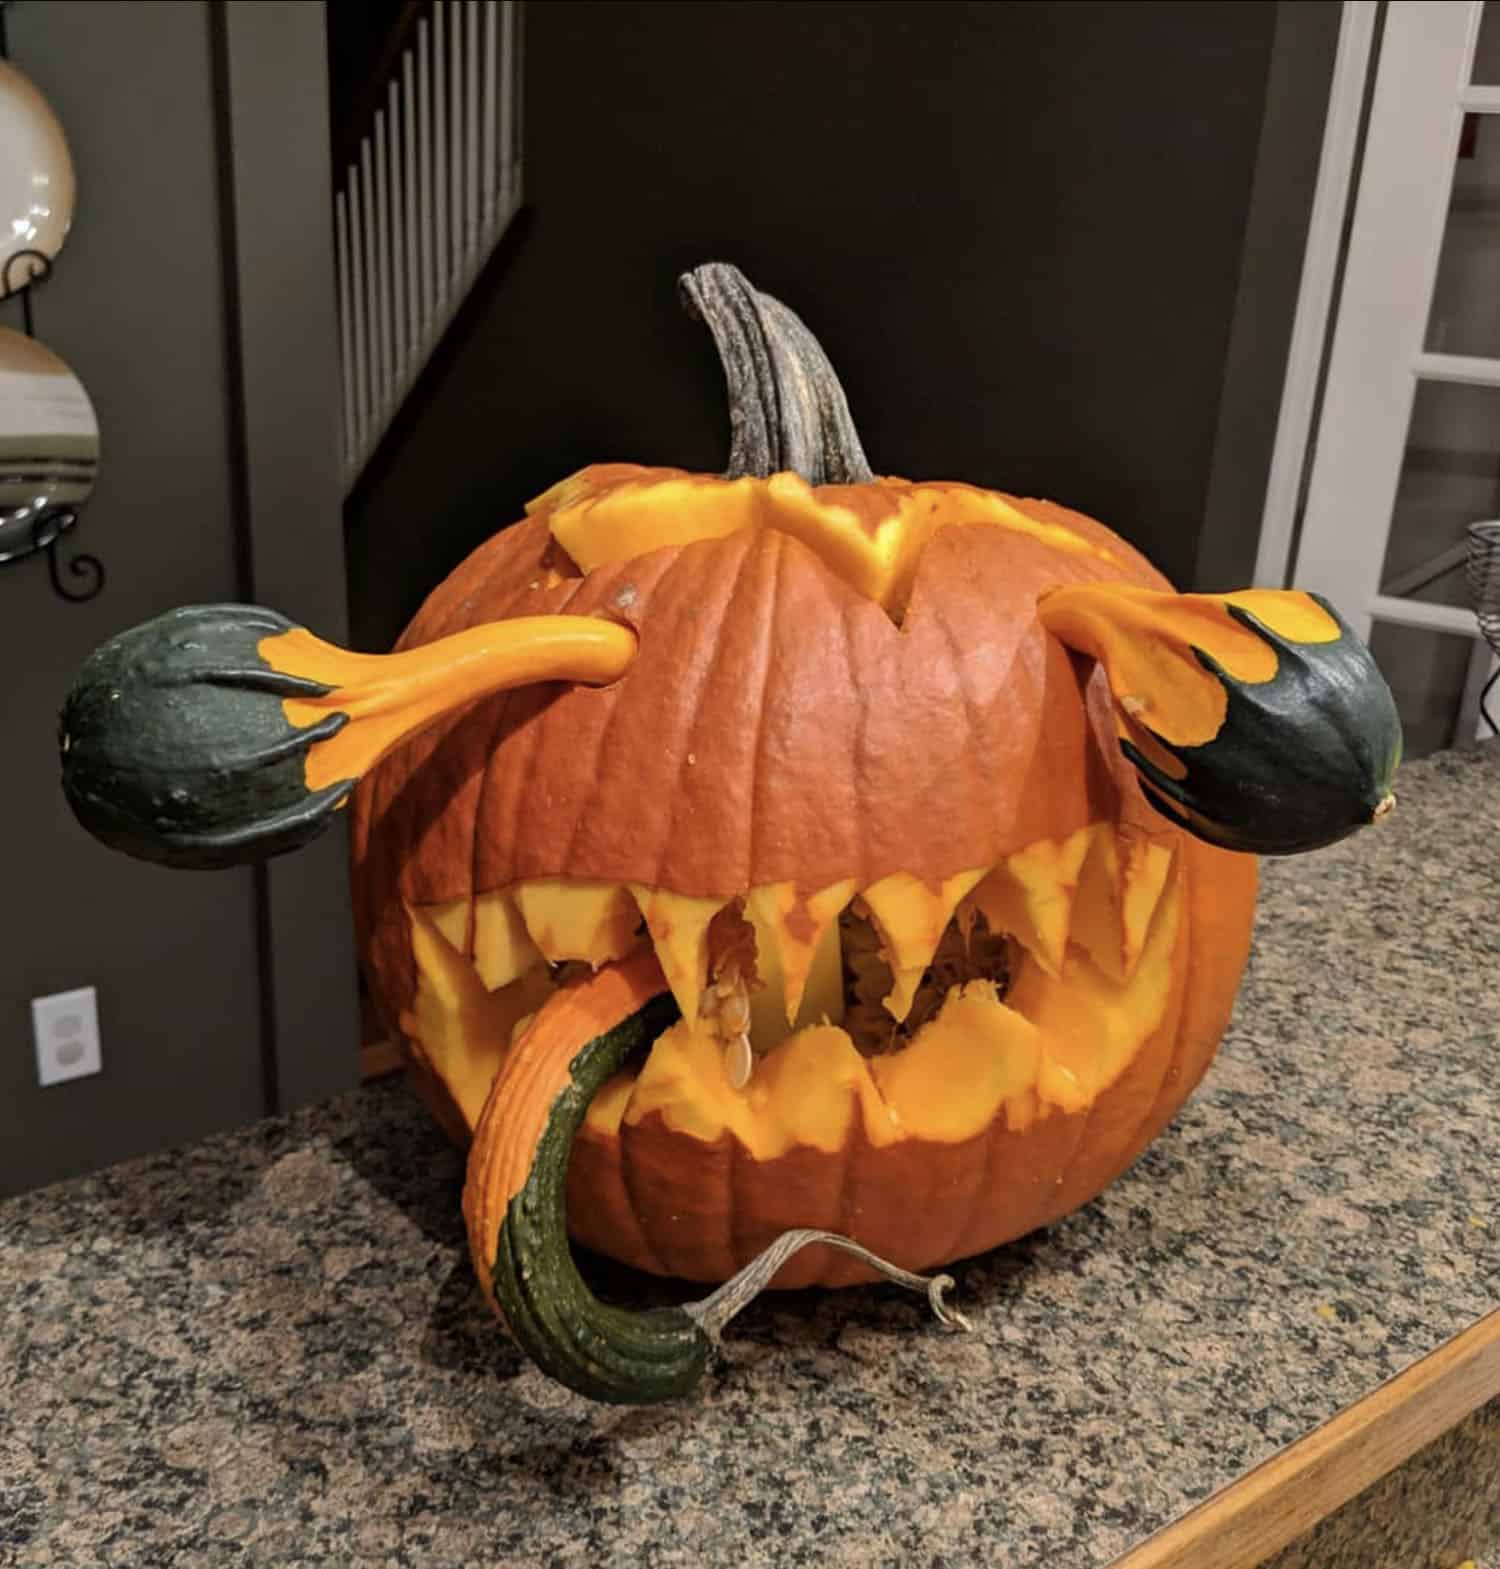
💰 Budget Breakdown
This creative monster is surprisingly affordable to assemble, as the character comes from cheap gourds rather than expensive, giant pumpkins.
- Medium Orange Pumpkin: $8 – $15
- Assorted Small Gourds (for eyes & tongue): $5 – $10 for a bag
- Toothpicks/Skewers (for attaching): $1 – $2
- TOTAL: $14 – $27
Budget alternative: If you have a garden, you might be able to grow your own gourds for pennies. Otherwise, check a farmer’s market late in the day; vendors will often sell remaining ‘ugly’ gourds for a deep discount.
28. Illuminated Skull and Roses Carving
This design is so striking because it combines two contrasting themes: the spookiness of the skull and the beauty of the roses. This ‘spooky-pretty’ juxtaposition is what creates the intrigue. The skull is a classic symbol of Halloween and mortality, while the roses represent romance and life. Placing them together on one pumpkin creates a complex narrative and a Goth-inspired aesthetic that is both eerie and beautiful, appealing to a more sophisticated, artistic sensibility.
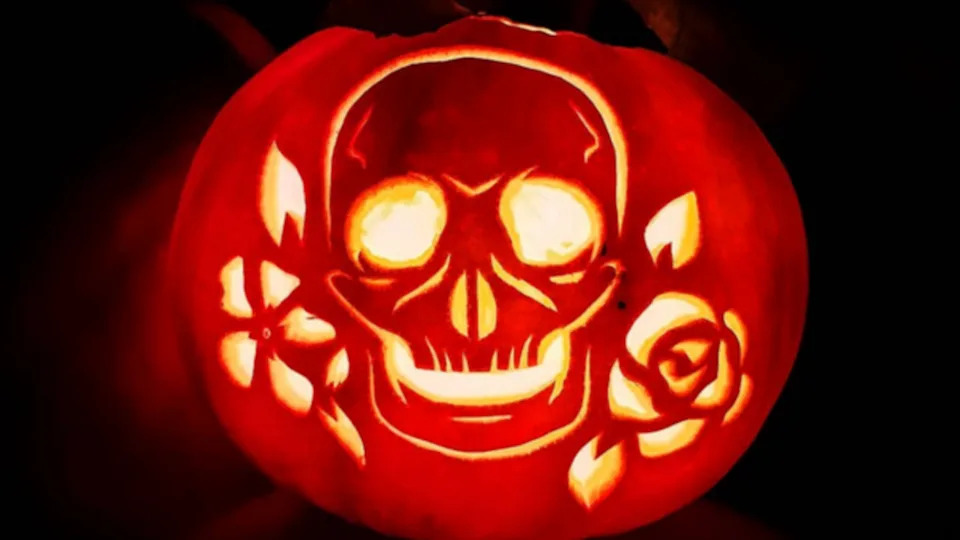
📏 Scale Guide
A design this intricate is a race against time. The more delicate cuts you make, the faster the pumpkin will dehydrate and start to wilt, causing your beautiful design to shrivel and warp. To keep it looking crisp for an extra day or two, rub petroleum jelly (like Vaseline) on all the cut edges after you’re done carving. This helps seal in the moisture. You can also give it a 1-hour ice water bath before putting it on display to rehydrate it.
29. Child Carving a Pre-Drawn Jack-o’-Lantern Face
When carving with kids, the best tip is to do the prep work for them. Cut the top lid off and completely scoop out the insides yourself. This is the messiest and most difficult part. Then, use a bold, black permanent marker to draw a simple, classic face onto the pumpkin. By giving them clear lines to follow with their kid-safe carving tools, you set them up for success. They get the fun and pride of the actual ‘carving’ part, without the frustration.
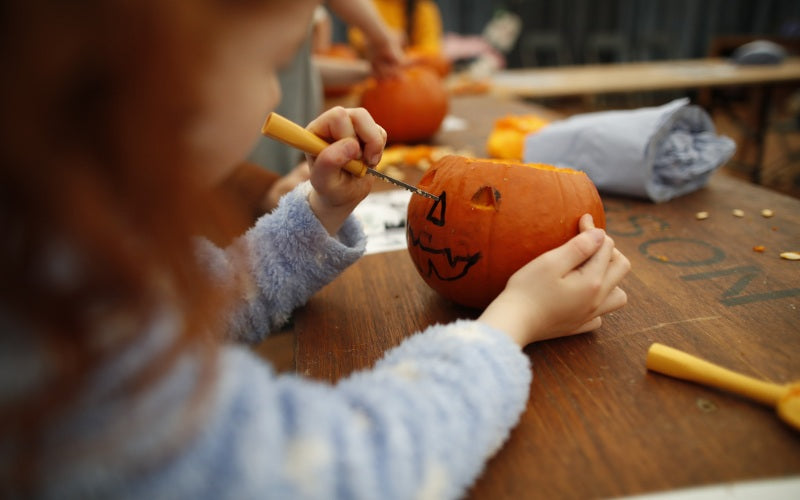
✅ Before You Start
Let’s be real: carving with kids is messy. Very messy. Before you even bring the pumpkin to the table, cover your work surface with newspaper, a cheap plastic tablecloth, or a trash bag. Have a large bowl ready specifically for the ‘guts’ and another for the seeds (if you plan to roast them). And keep a roll of paper towels within arm’s reach. Trying to contain the mess *after* it’s started is a losing battle. A little prep makes the cleanup infinitely easier.
30. Trio of Carved Pumpkins with Autumnal Accents
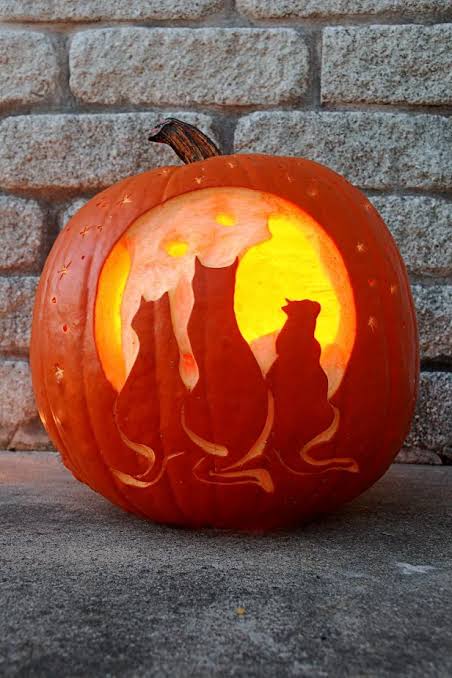
This composition is a perfect autumnal formula: 30% classic grin + 30% silhouette carving + 30% character carving, all tied together with 10% natural elements. This mix keeps the eye moving. You have the traditional jack-o’-lantern, the more graphic and modern silhouette style (cat and bats), and the character-based design. The scattered leaves and gourds act as the ‘glue’, filling in the gaps and unifying the different styles into one cohesive, richly textured scene.
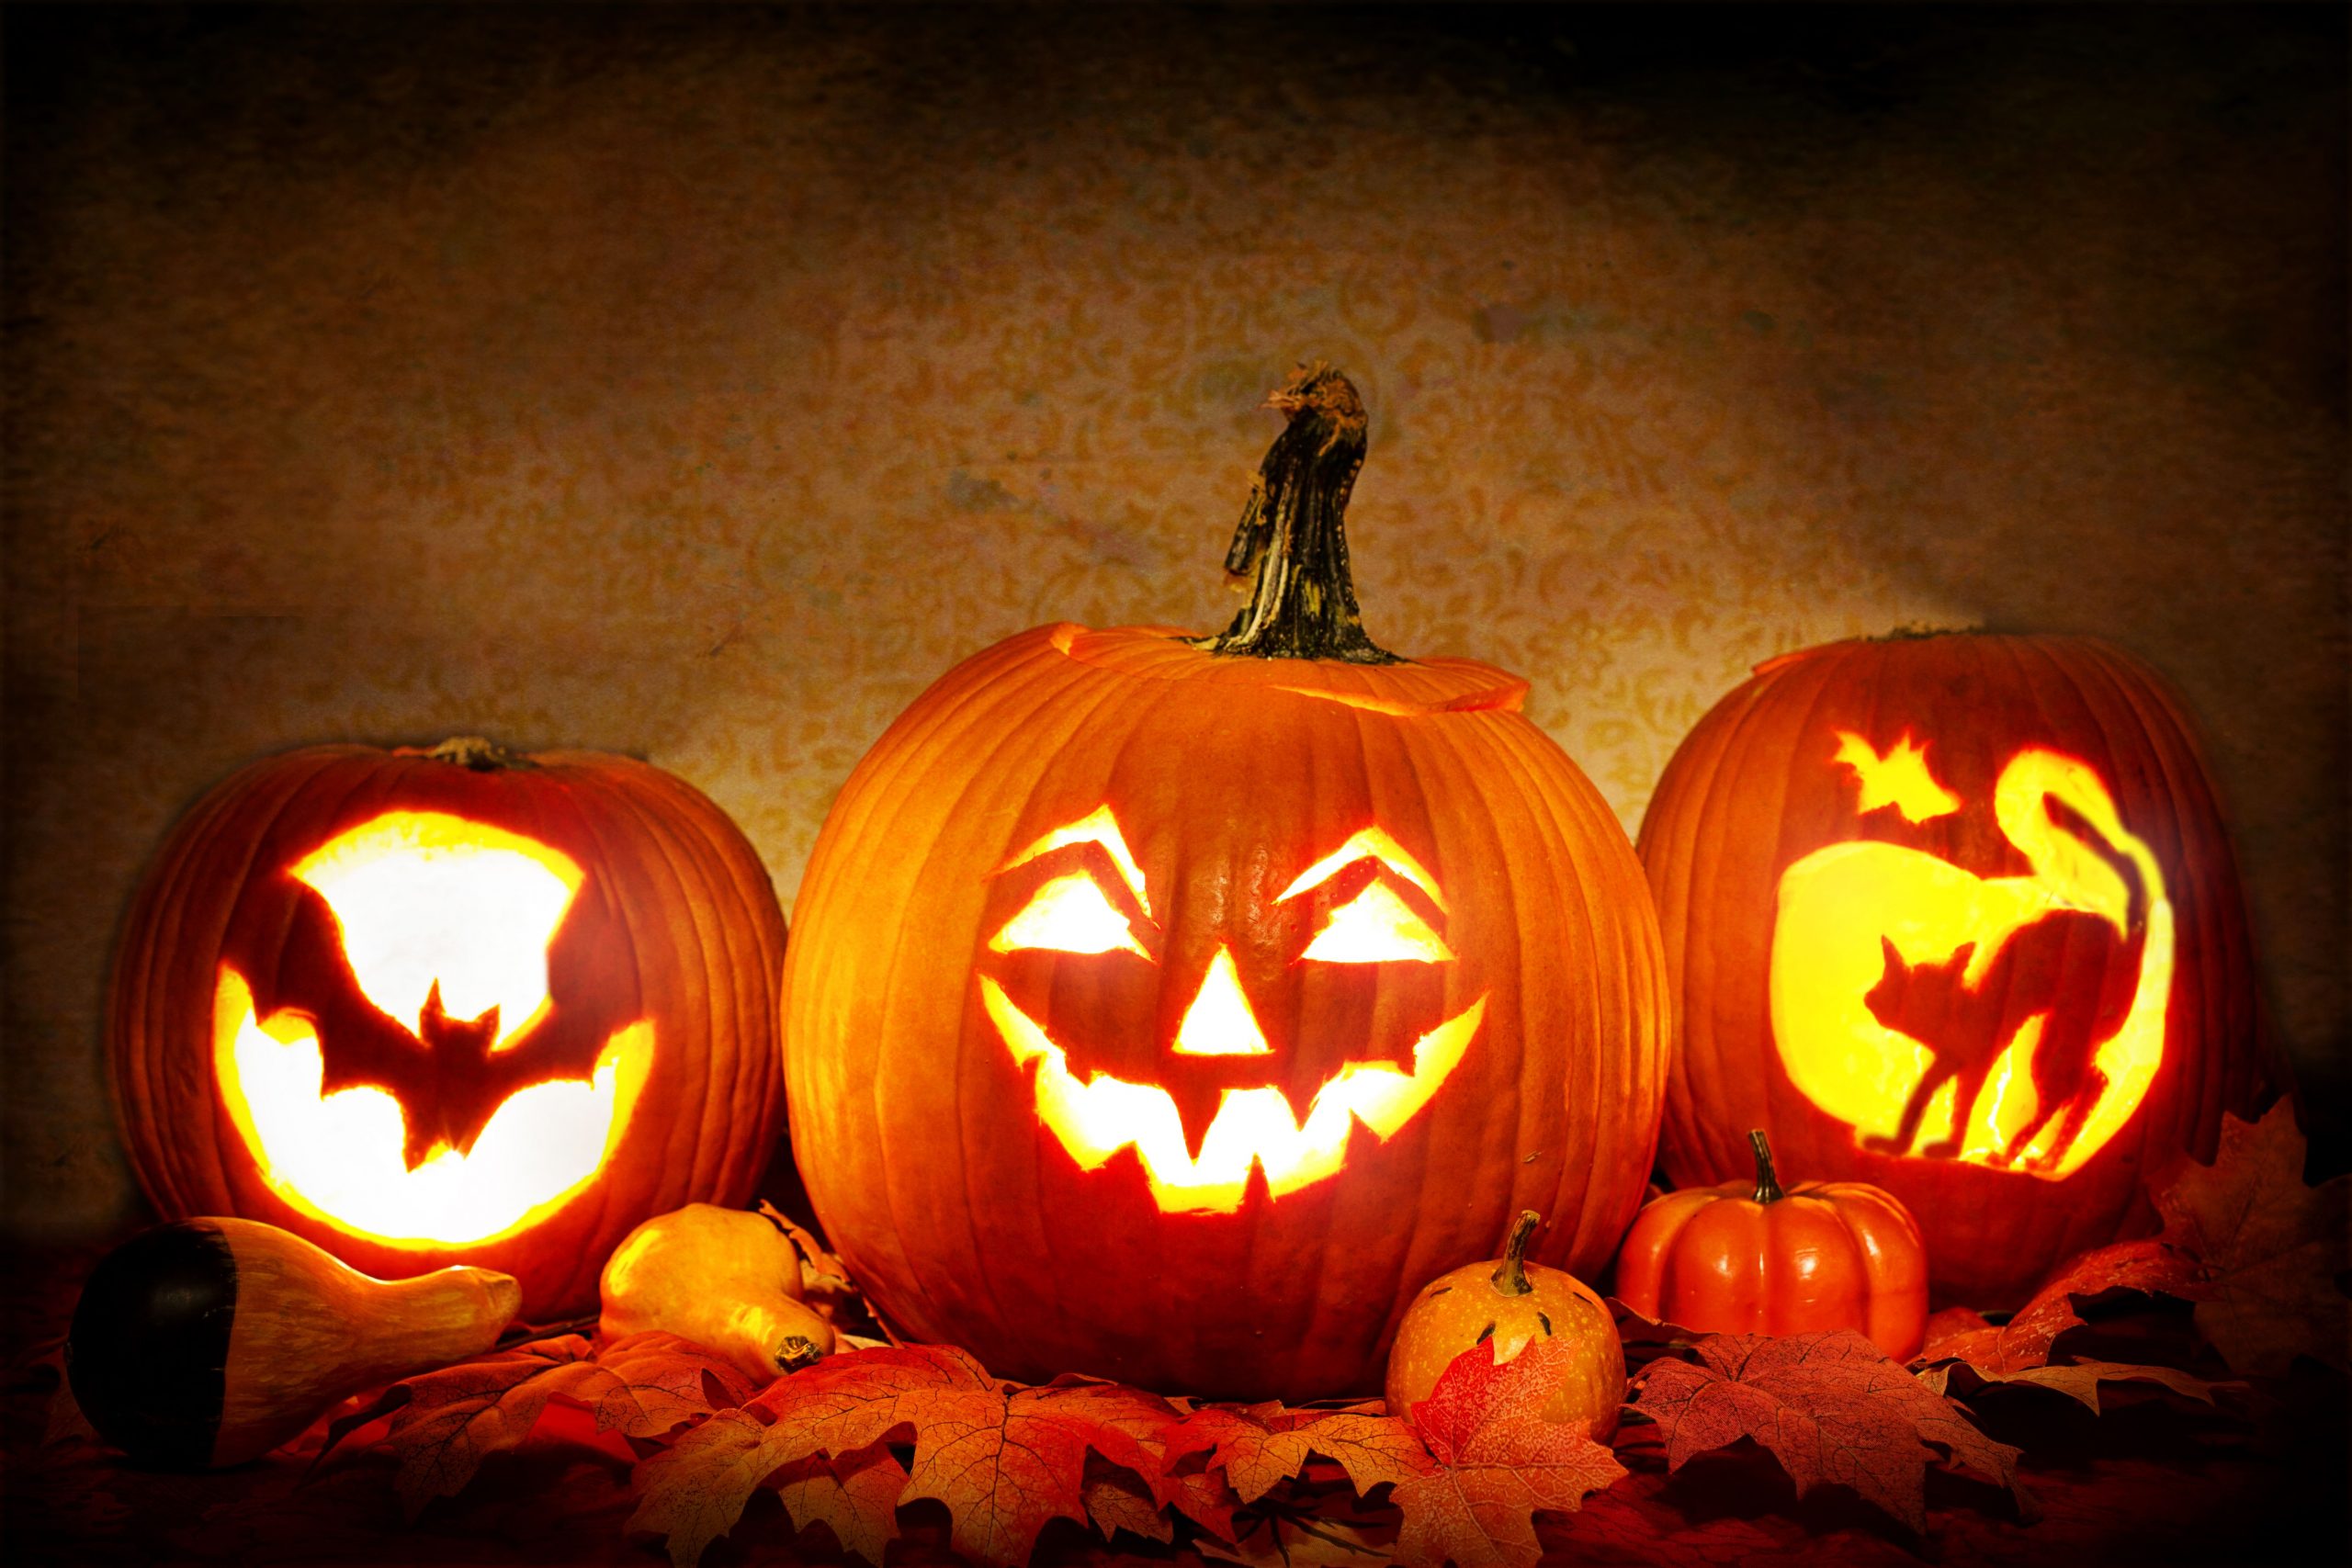
🔧 How-To Brief
This display works by layering multiple carving styles. Instead of three pumpkins with the same simple face, we have a variety of designs: a traditional grin, bat-shaped cutouts, and intricate cat silhouettes. This variety makes the overall arrangement far more interesting and showcases a higher level of creativity. The dim, warm lighting enhances the spooky, festive mood, letting the glowing designs take center stage against the richly textured backdrop. Compare this to the porch display in Idea #22.
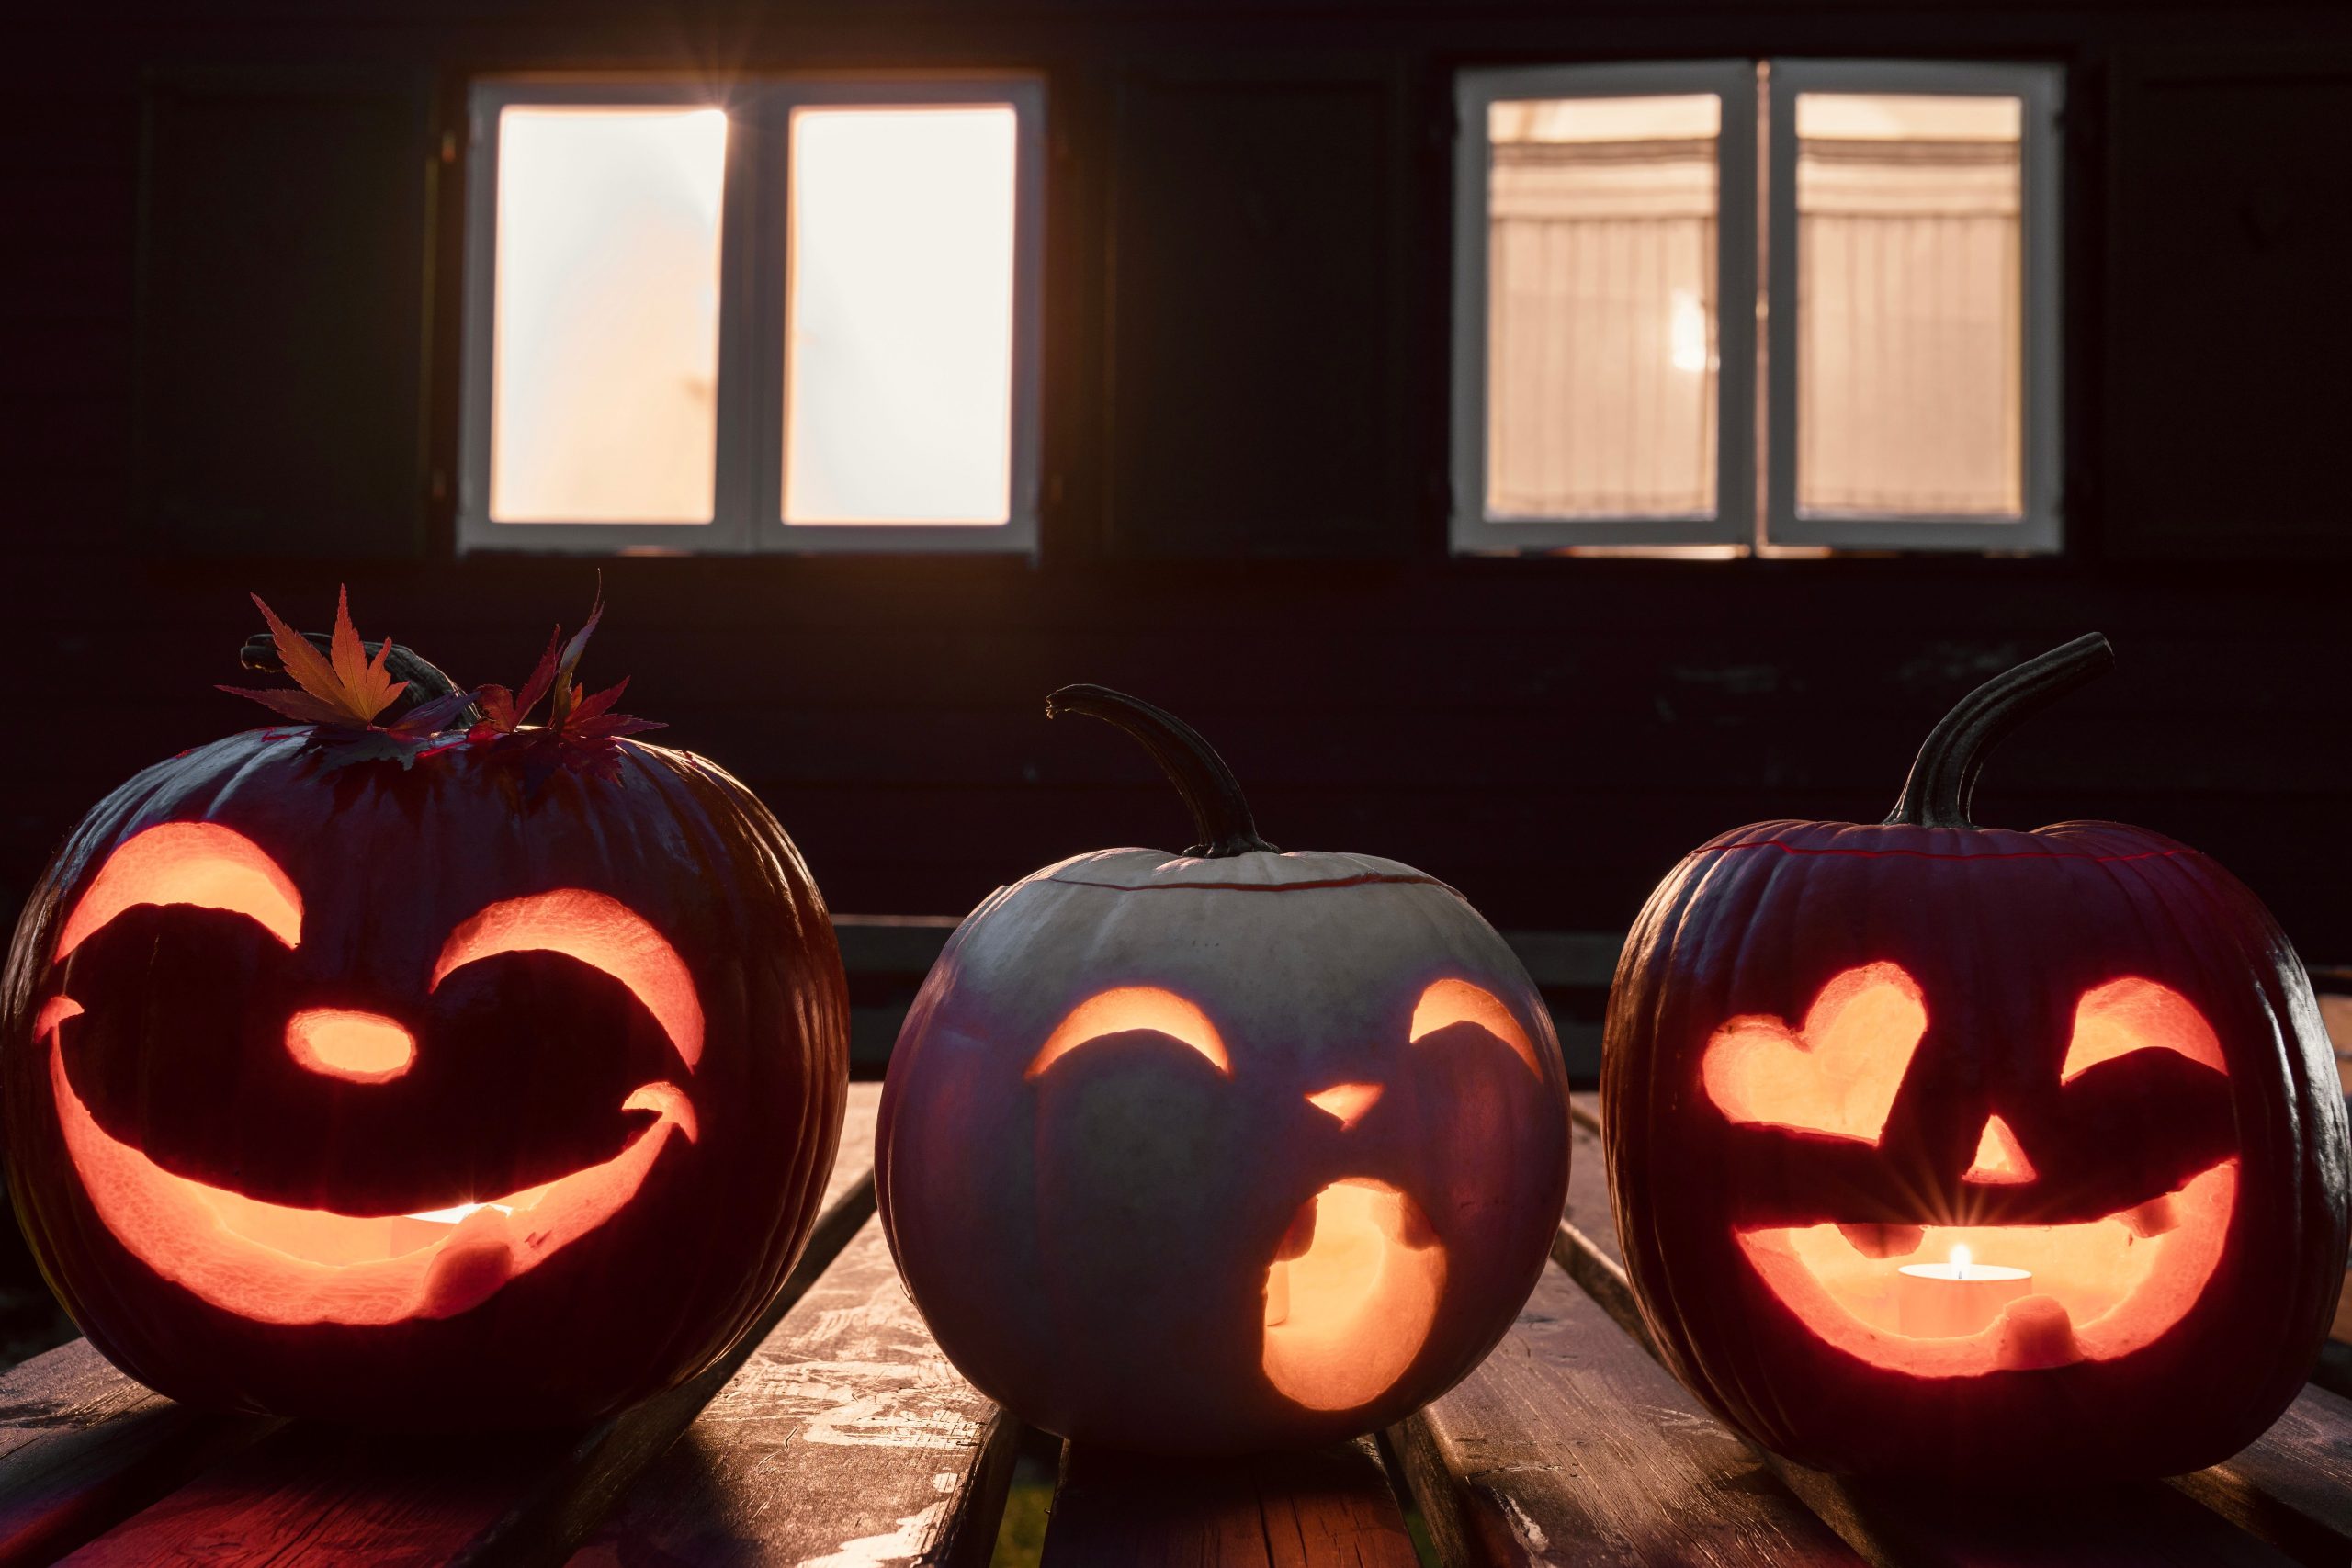
31. Three Expressive Pumpkins Glowing at Night
The single element that makes this idea shine—literally—is the inclusion of a white pumpkin. The contrast is spectacular. The two orange pumpkins provide the classic, expected Halloween glow, but the white pumpkin offers a brighter, more ethereal light. It breaks up the monotony of an all-orange display and adds a modern, almost ghostly touch. The winking heart-eye face on the white pumpkin is the final, charming detail that makes it the undeniable star of the trio.
💸 Get This Look For Less
To make your carved faces really pop at night, the interior color matters. After you’ve scooped out all the seeds and strings, take an extra five minutes to really scrape the inside walls of your pumpkin with a sturdy metal spoon. You want to remove the darker orange flesh and get down to the lighter, almost yellow layer. This lighter interior will reflect the light from your candle or LED much more effectively, resulting in a significantly brighter and more evenly lit jack-o’-lantern.
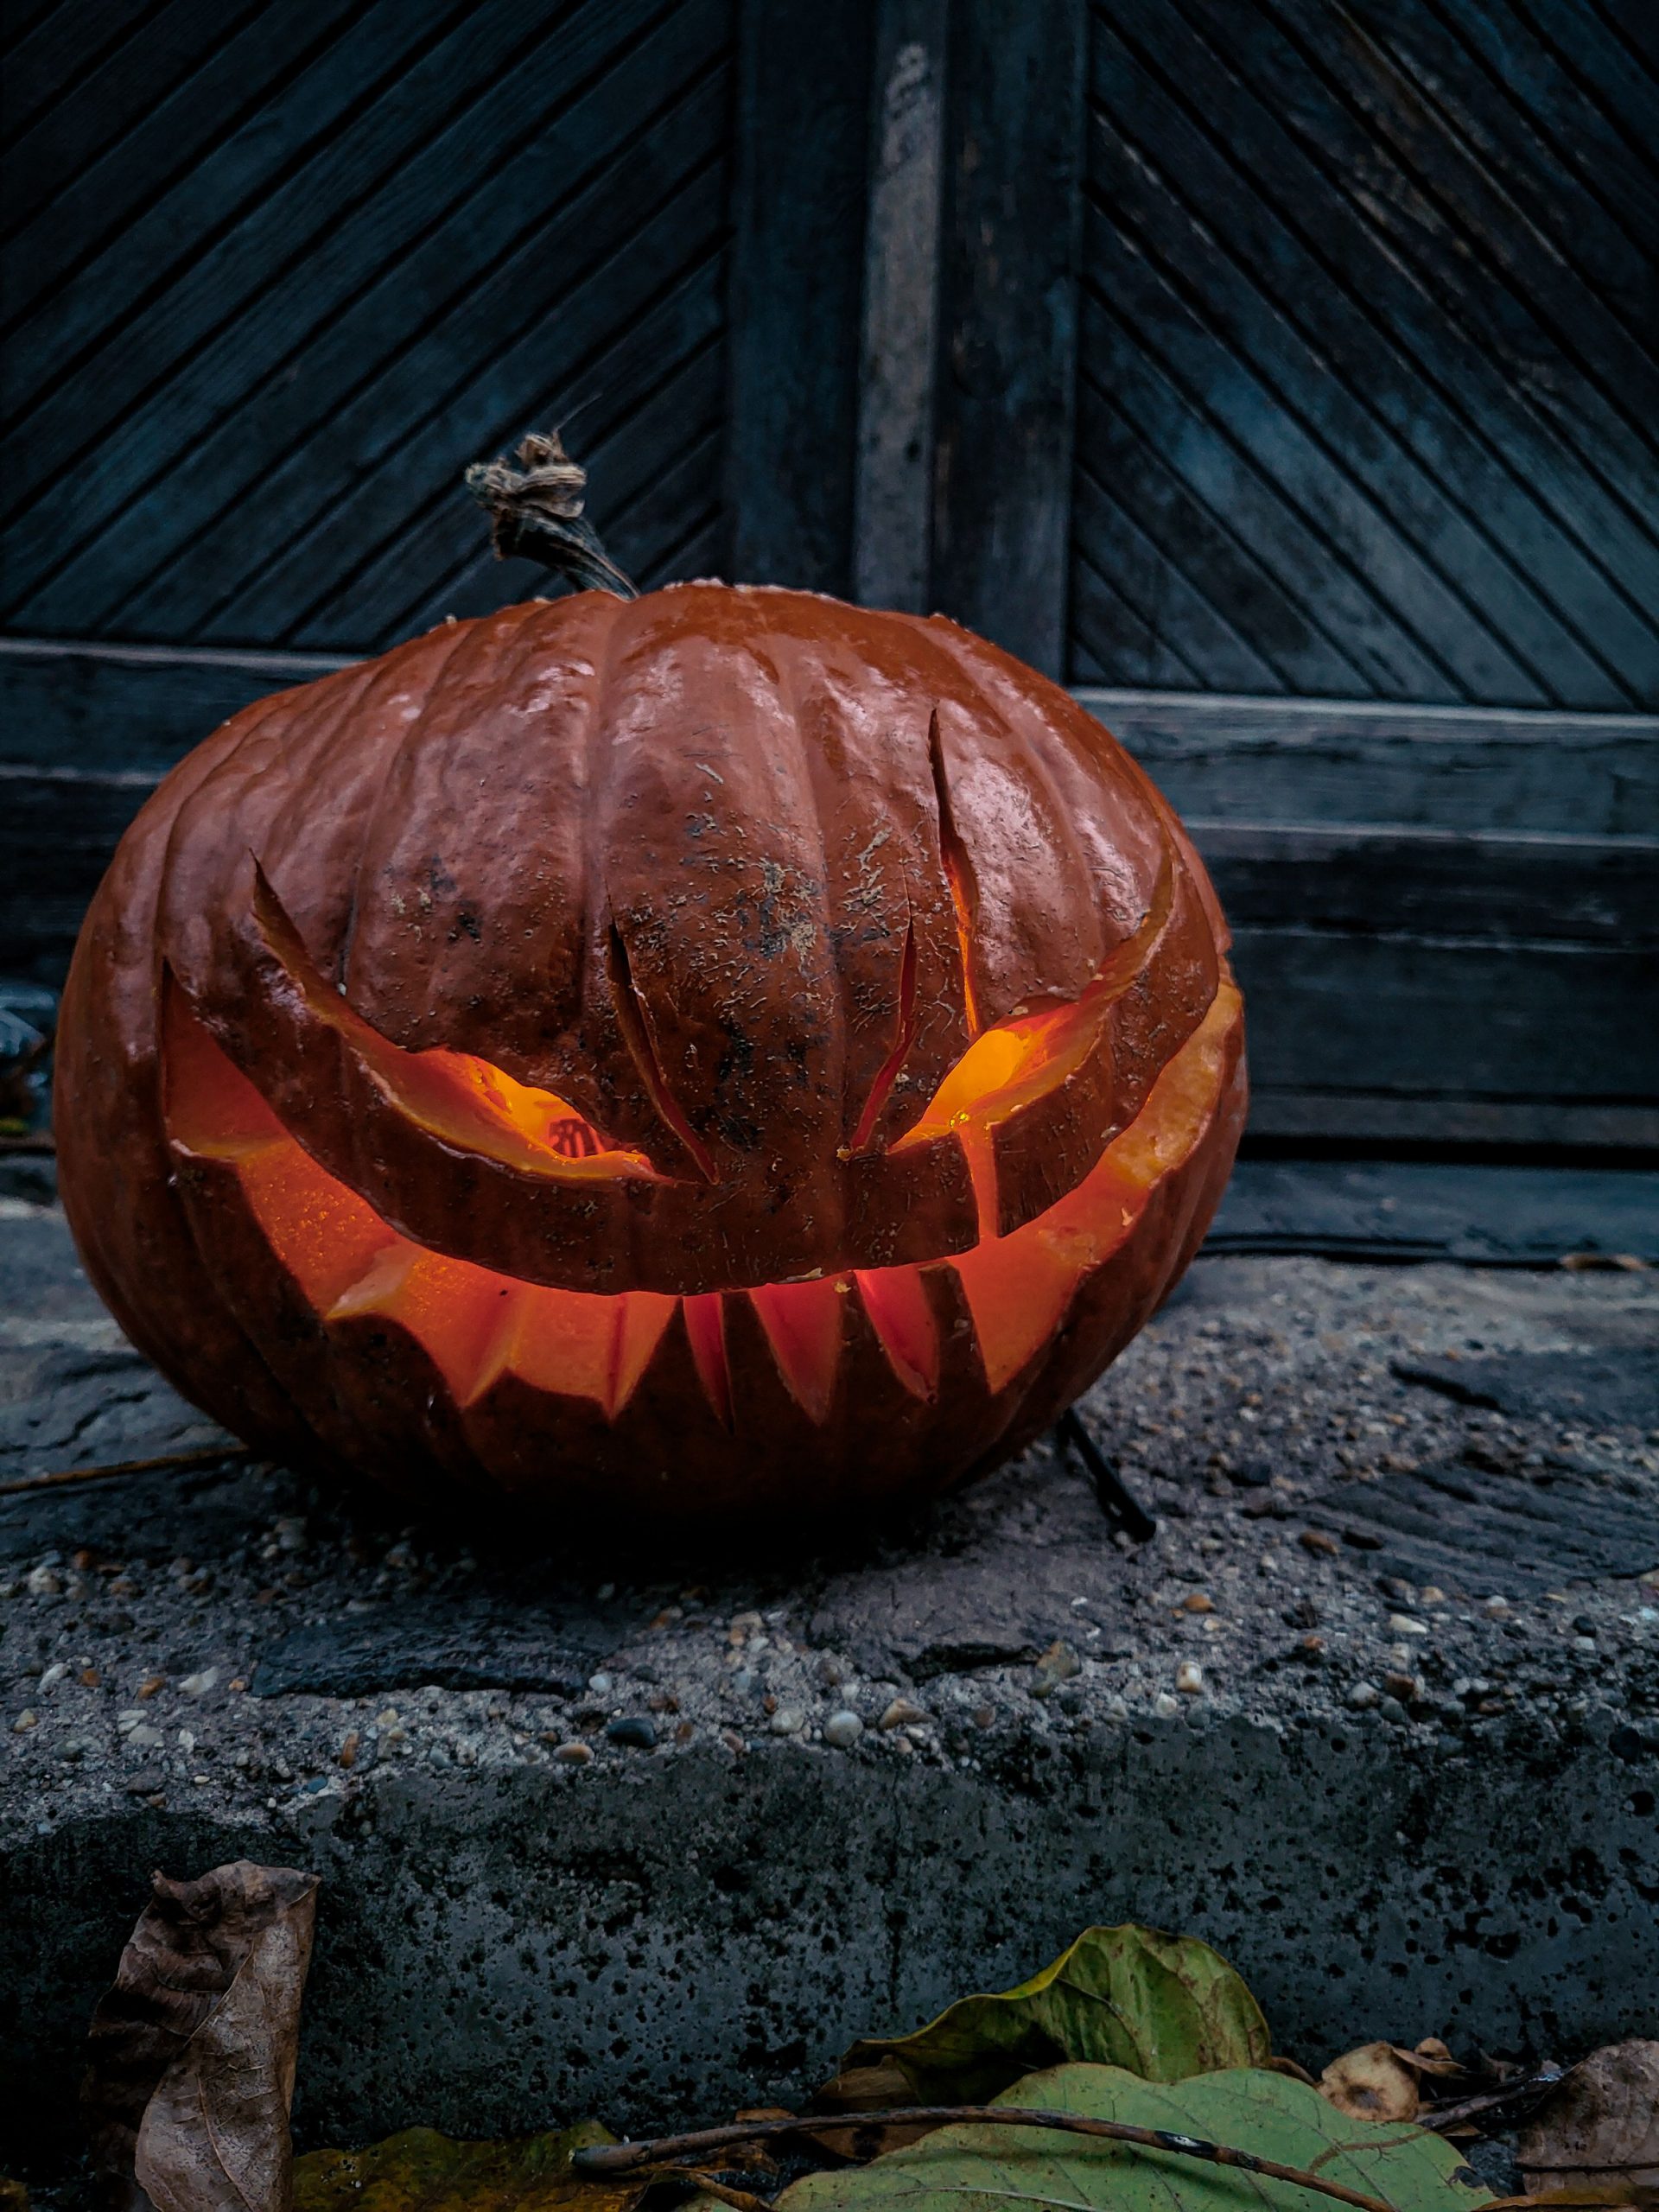
32. Shadowy Jack-o’-Lantern Against a Diagonal Wood Wall
This image is all about mood, and it achieves its eerie vibe through two key elements: shadow and lines. The single light source from within the pumpkin casts dramatic shadows, accentuating the carved features and making them appear more menacing. The strong diagonal lines of the wooden wall in the background create a sense of unease and tension, a classic cinematic technique to make a scene feel slightly ‘off’ and unsettling. The combination is pure, spooky atmosphere.
🧹 Maintenance Reality
This is a perfect small-space solution. Because the design relies on a single pumpkin and a dramatic backdrop, it’s ideal for a tight corner, a narrow entryway, or an apartment balcony. It proves you don’t need a whole squad of pumpkins to make a big impact. A minimum space of about 2×2 feet is all that’s required. The key is having a solid, textured wall behind it to catch the shadows and create that moody, enclosed feeling. It would be less effective in an open area.
Your Perfect Pumpkin Patch Awaits
With 32 distinct ideas in your back pocket, you’re officially ready to tackle this year’s pumpkin project. Whether you’re aiming for a spooky porch, a funny monster, or an artistic statement piece, the perfect design is waiting for you. The only thing left to do is grab a pumpkin and get carving! 🎃
Don’t forget to share your amazing creations on Pinterest when you’re done!