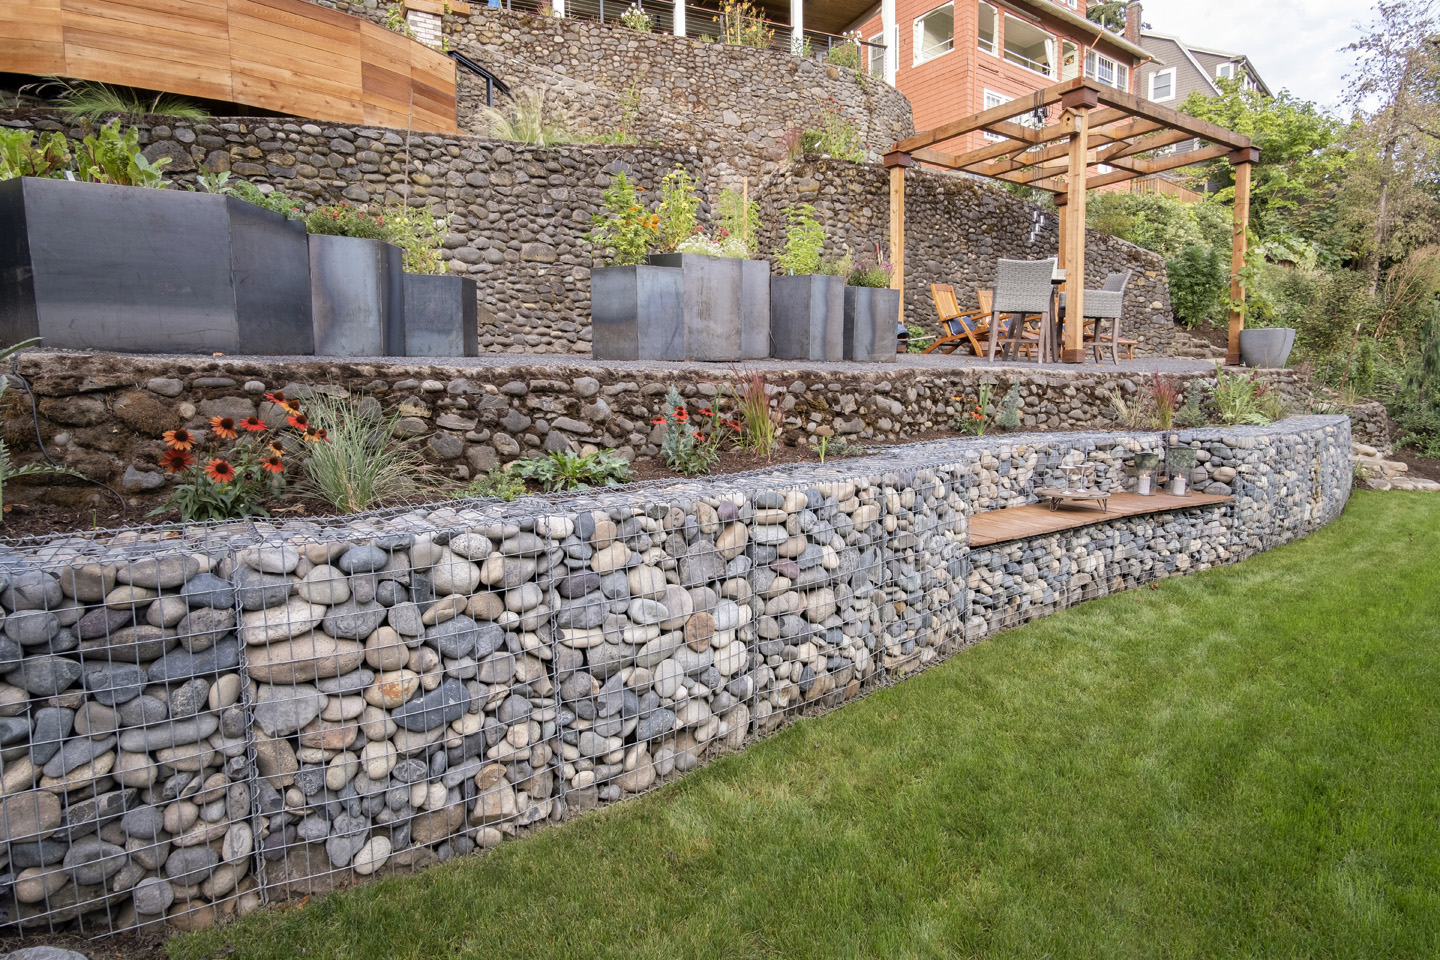
You know that feeling when you finally find the outdoor project that looks exactly right for your space? Gabions—those cool, industrial-yet-natural wire baskets filled with stone—might just be it. They’re popping up all over our Pinterest feeds, and for good reason. After filtering through hundreds of options online and checking out what’s feasible with materials from landscape suppliers and home improvement stores, we narrowed it down to 31 ideas that actually deliver. We’re talking stunning garden walls, creative seating, and even entire outdoor kitchens, covering styles from ultra-modern to cozy and rustic. For 2026, it’s all about finding clever ways to blend structure with nature, and gabions are the perfect tool for the job. And stay until the end — we break down the most common mistakes that can ruin these looks. 📌 Save this to Pinterest for later — you’ll want to revisit these ideas.
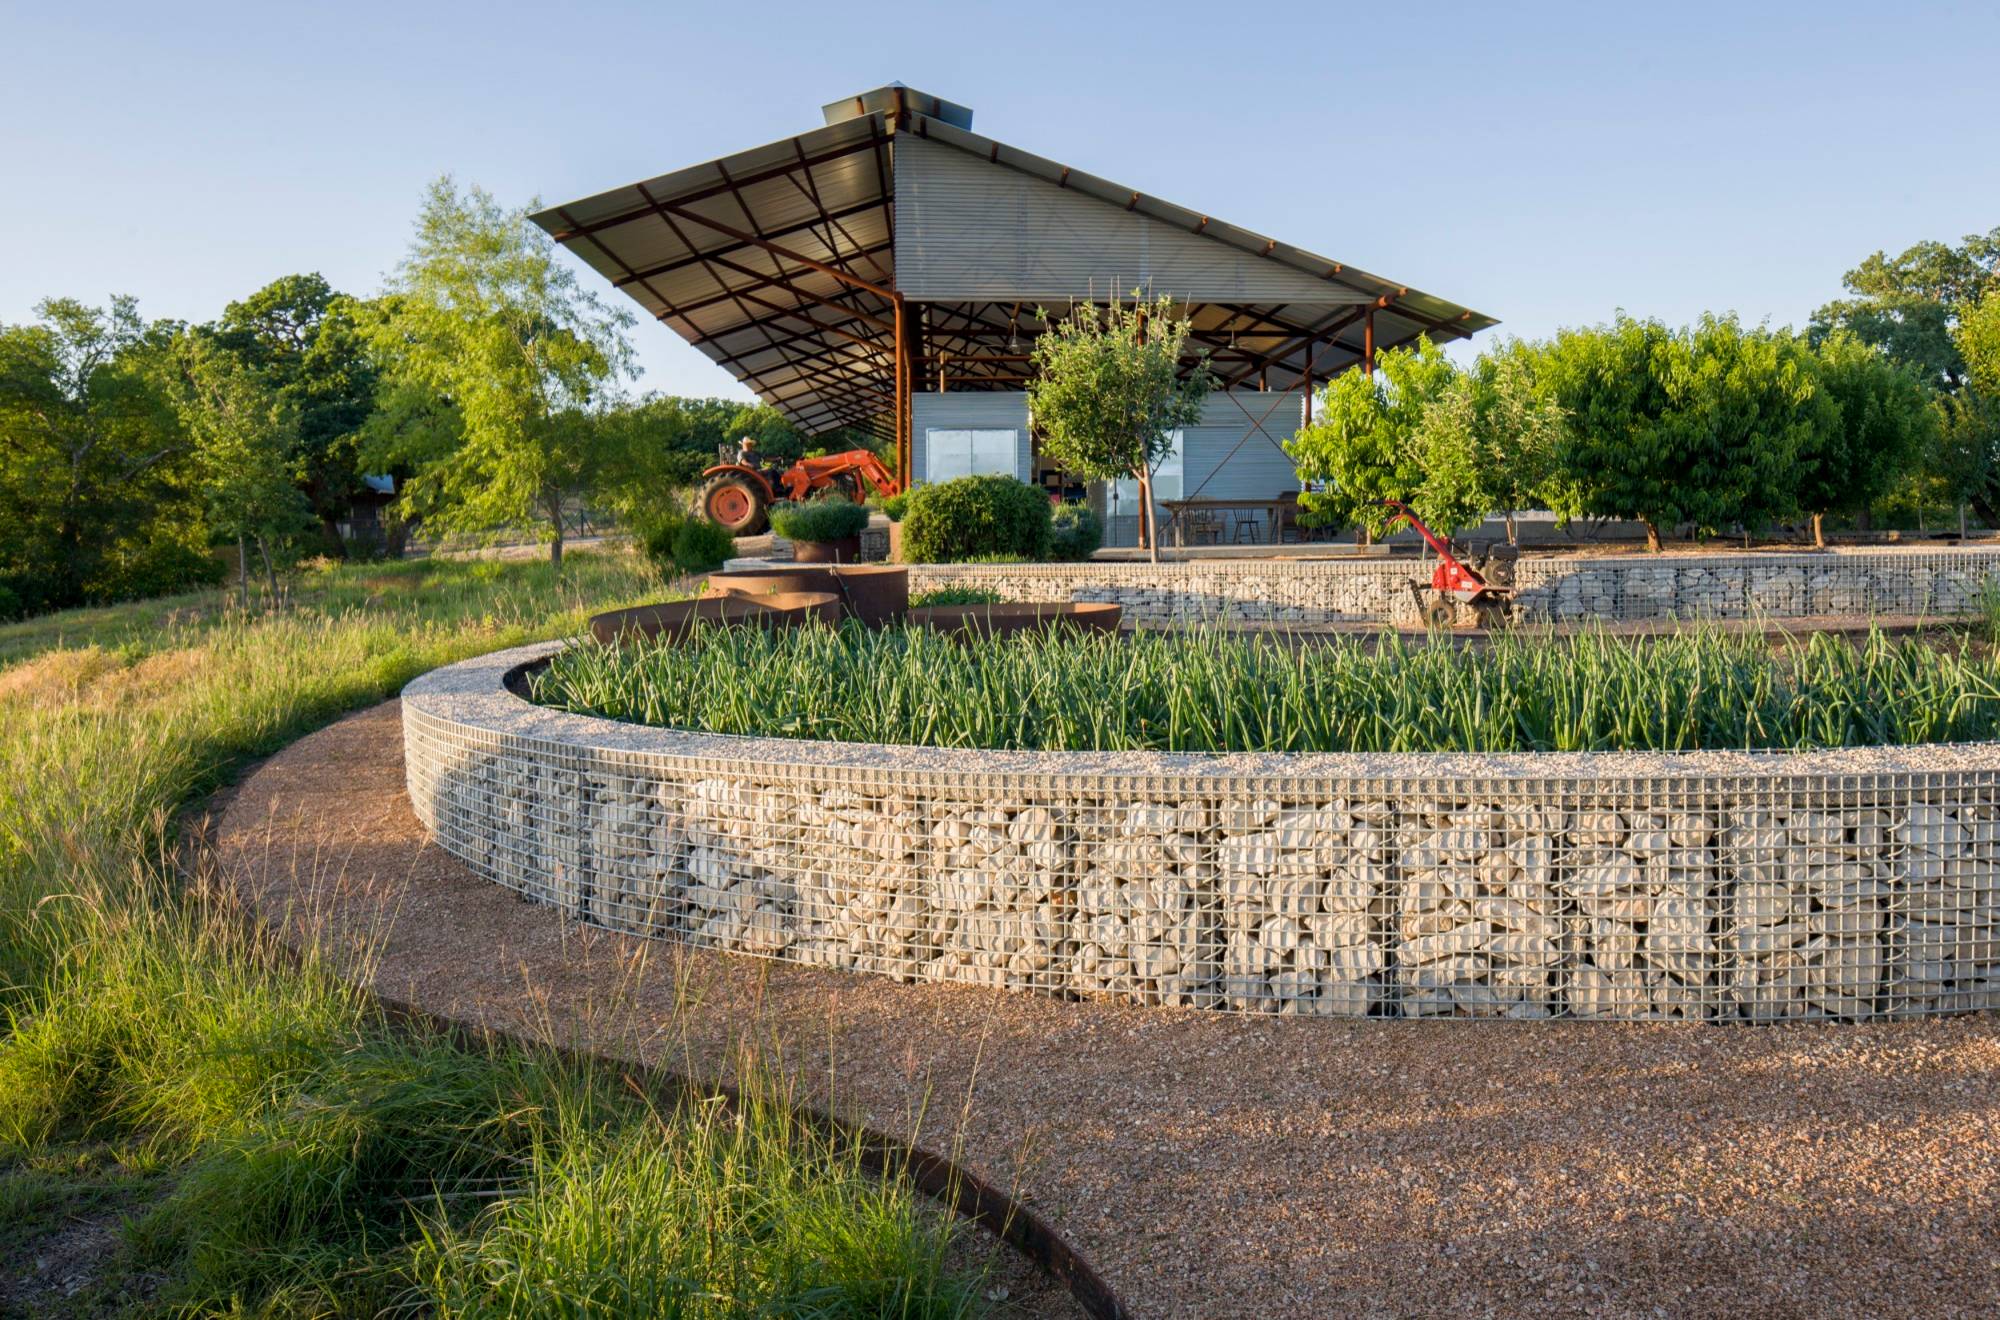
1. Industrial-Style Retaining Walls on a Grand Scale
The magic here is the beautiful tension between the raw, industrial look of the corrugated metal building and the organic, flowing curves of the gabion walls. One is rigid and man-made, the other is structured yet natural. This contrast makes the entire landscape feel intentional and designed, rather than just a pile of rocks. The light-colored stones inside the gabions brighten up the functional design, keeping it from feeling too heavy or imposing next to the wild grasses.
⚠️ Real Talk
This idea is best suited for larger properties with noticeable elevation changes. You’ll need a significant slope to justify the scale of these retaining walls. Think a minimum of 50 feet of wall length and a height of at least 3-4 feet to get this powerful, landscape-defining effect. For smaller, flatter yards, a project of this size could easily overwhelm the space. Consider the more modest approaches in Idea #23 or Idea #5 if you’re working with a standard suburban lot.
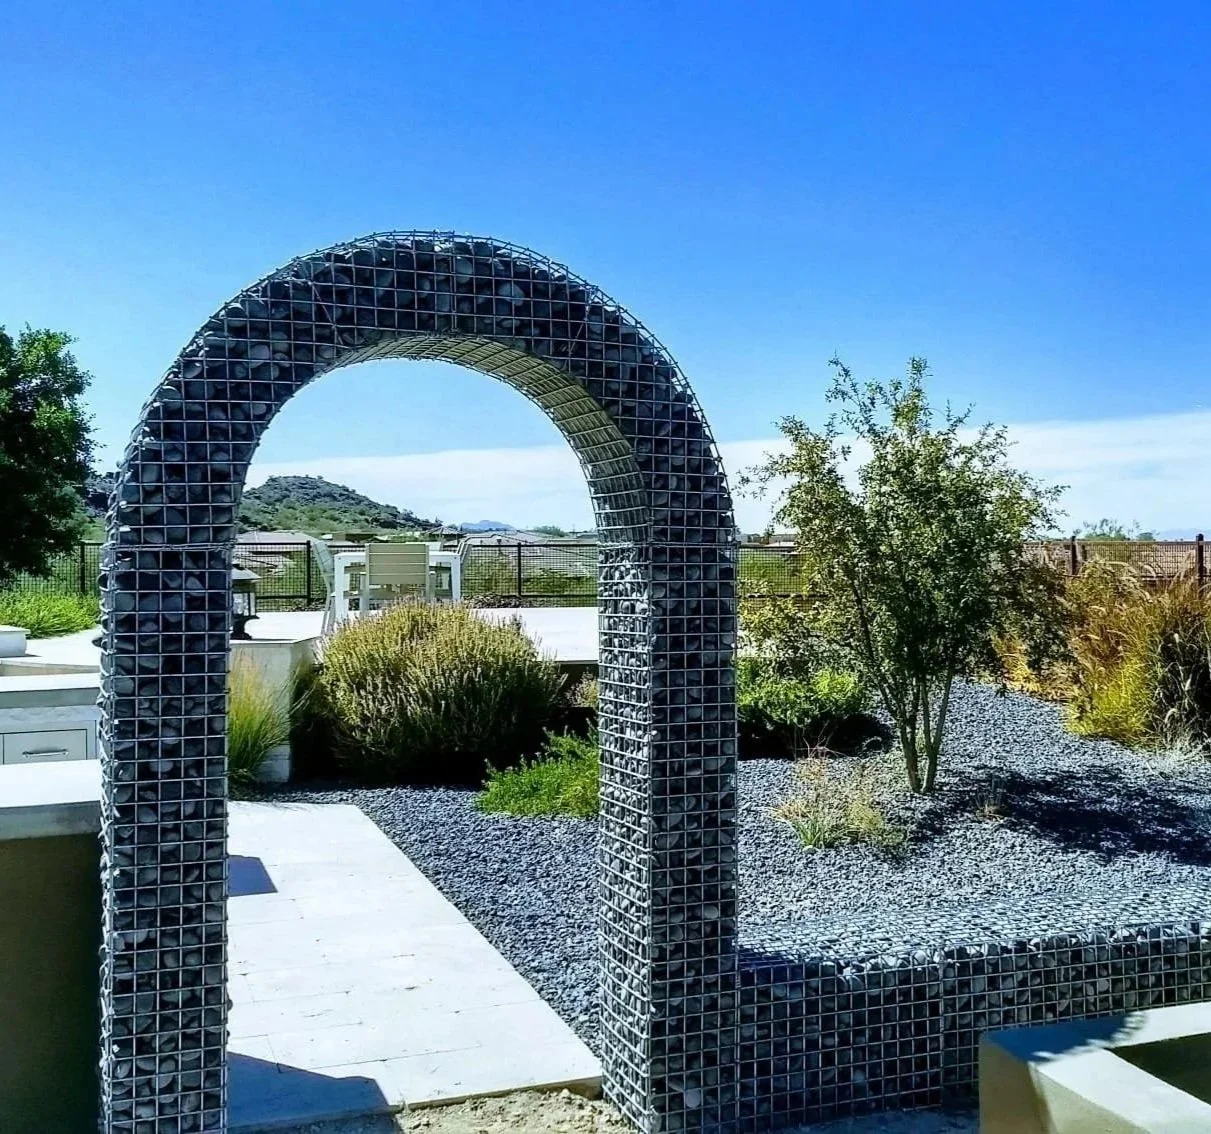
2. A Striking Gabion Archway for a Garden Entrance
that makes this design unforgettable is the arch itself. It transforms a simple garden path into a grand entrance. By taking the gabion concept vertical and shaping it into a classic architectural form, it creates a sense of passage and arrival. Remove the arch, and you just have a path. With it, you have a destination. The dark grey stones create a bold silhouette against the bright sky, making it a powerful focal point in this arid landscape.
✅ Before You Start
When building any vertical gabion structure, especially an arch, the foundation is everything. For an arch of this size (roughly 8-10 feet tall), you need to sink the base baskets at least 18-24 inches below ground level and set them in a concrete footing. This prevents leaning and ensures stability against wind and ground movement. Don’t be tempted to just place them on top of pavers; it’s a recipe for a costly failure down the line.
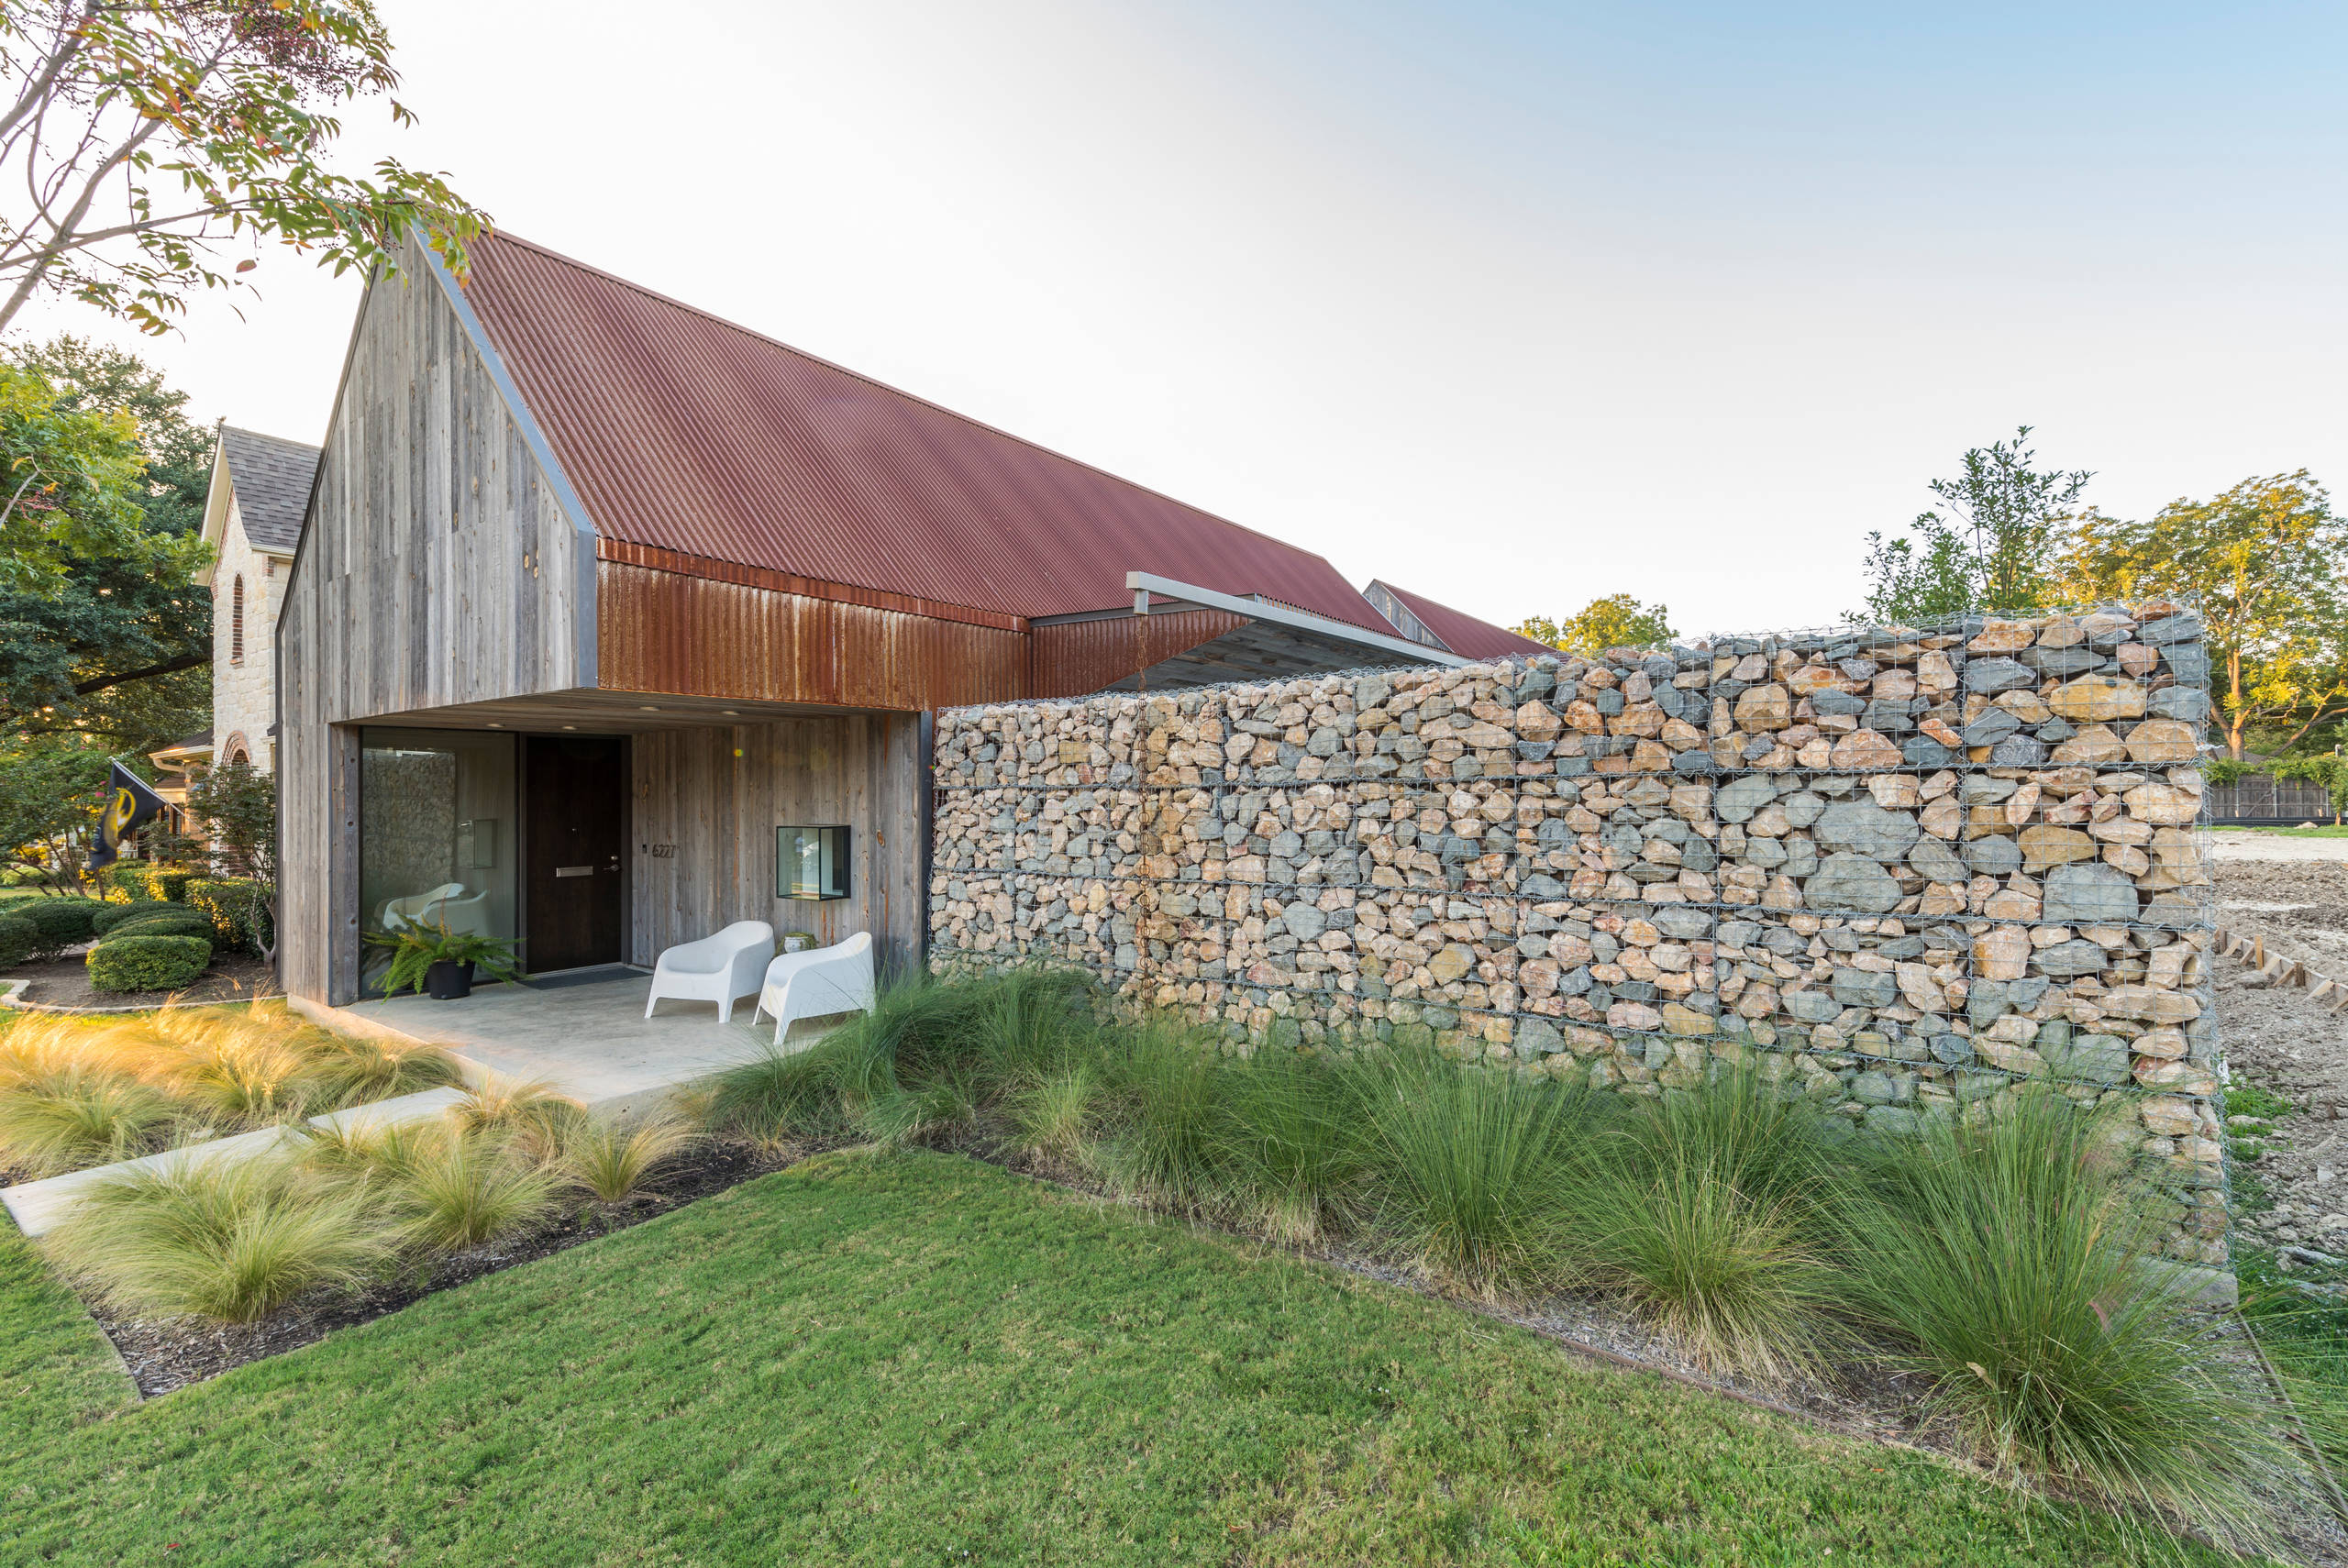
3. Modern Meets Rustic with a Gabion and Weathered Wood Wall
The visual formula here is a perfect blend of textures and eras. Think of it as 50% rustic charm from the weathered wood siding and rusty corrugated metal, 40% modern structure from the clean lines of the gabion wall and concrete patio, and 10% soft nature from the ornamental grasses. You could swap the rusty metal for a dark bronze or black finish to lean more contemporary, or use a darker wood to create a moodier, more dramatic feel while keeping the same balanced equation.
🎯 What Makes It Work
While weathered wood has a beautiful, lived-in look, it’s not zero-maintenance. To keep it from turning a patchy, mildewy grey or splintering, it needs to be sealed every 2-3 years, depending on your climate’s sun and moisture exposure. The rusty corrugated metal is more forgiving, as its patina is the whole point. Be mindful that rust can run and stain the concrete patio below it during heavy rains if not properly sealed or installed with a drip edge.
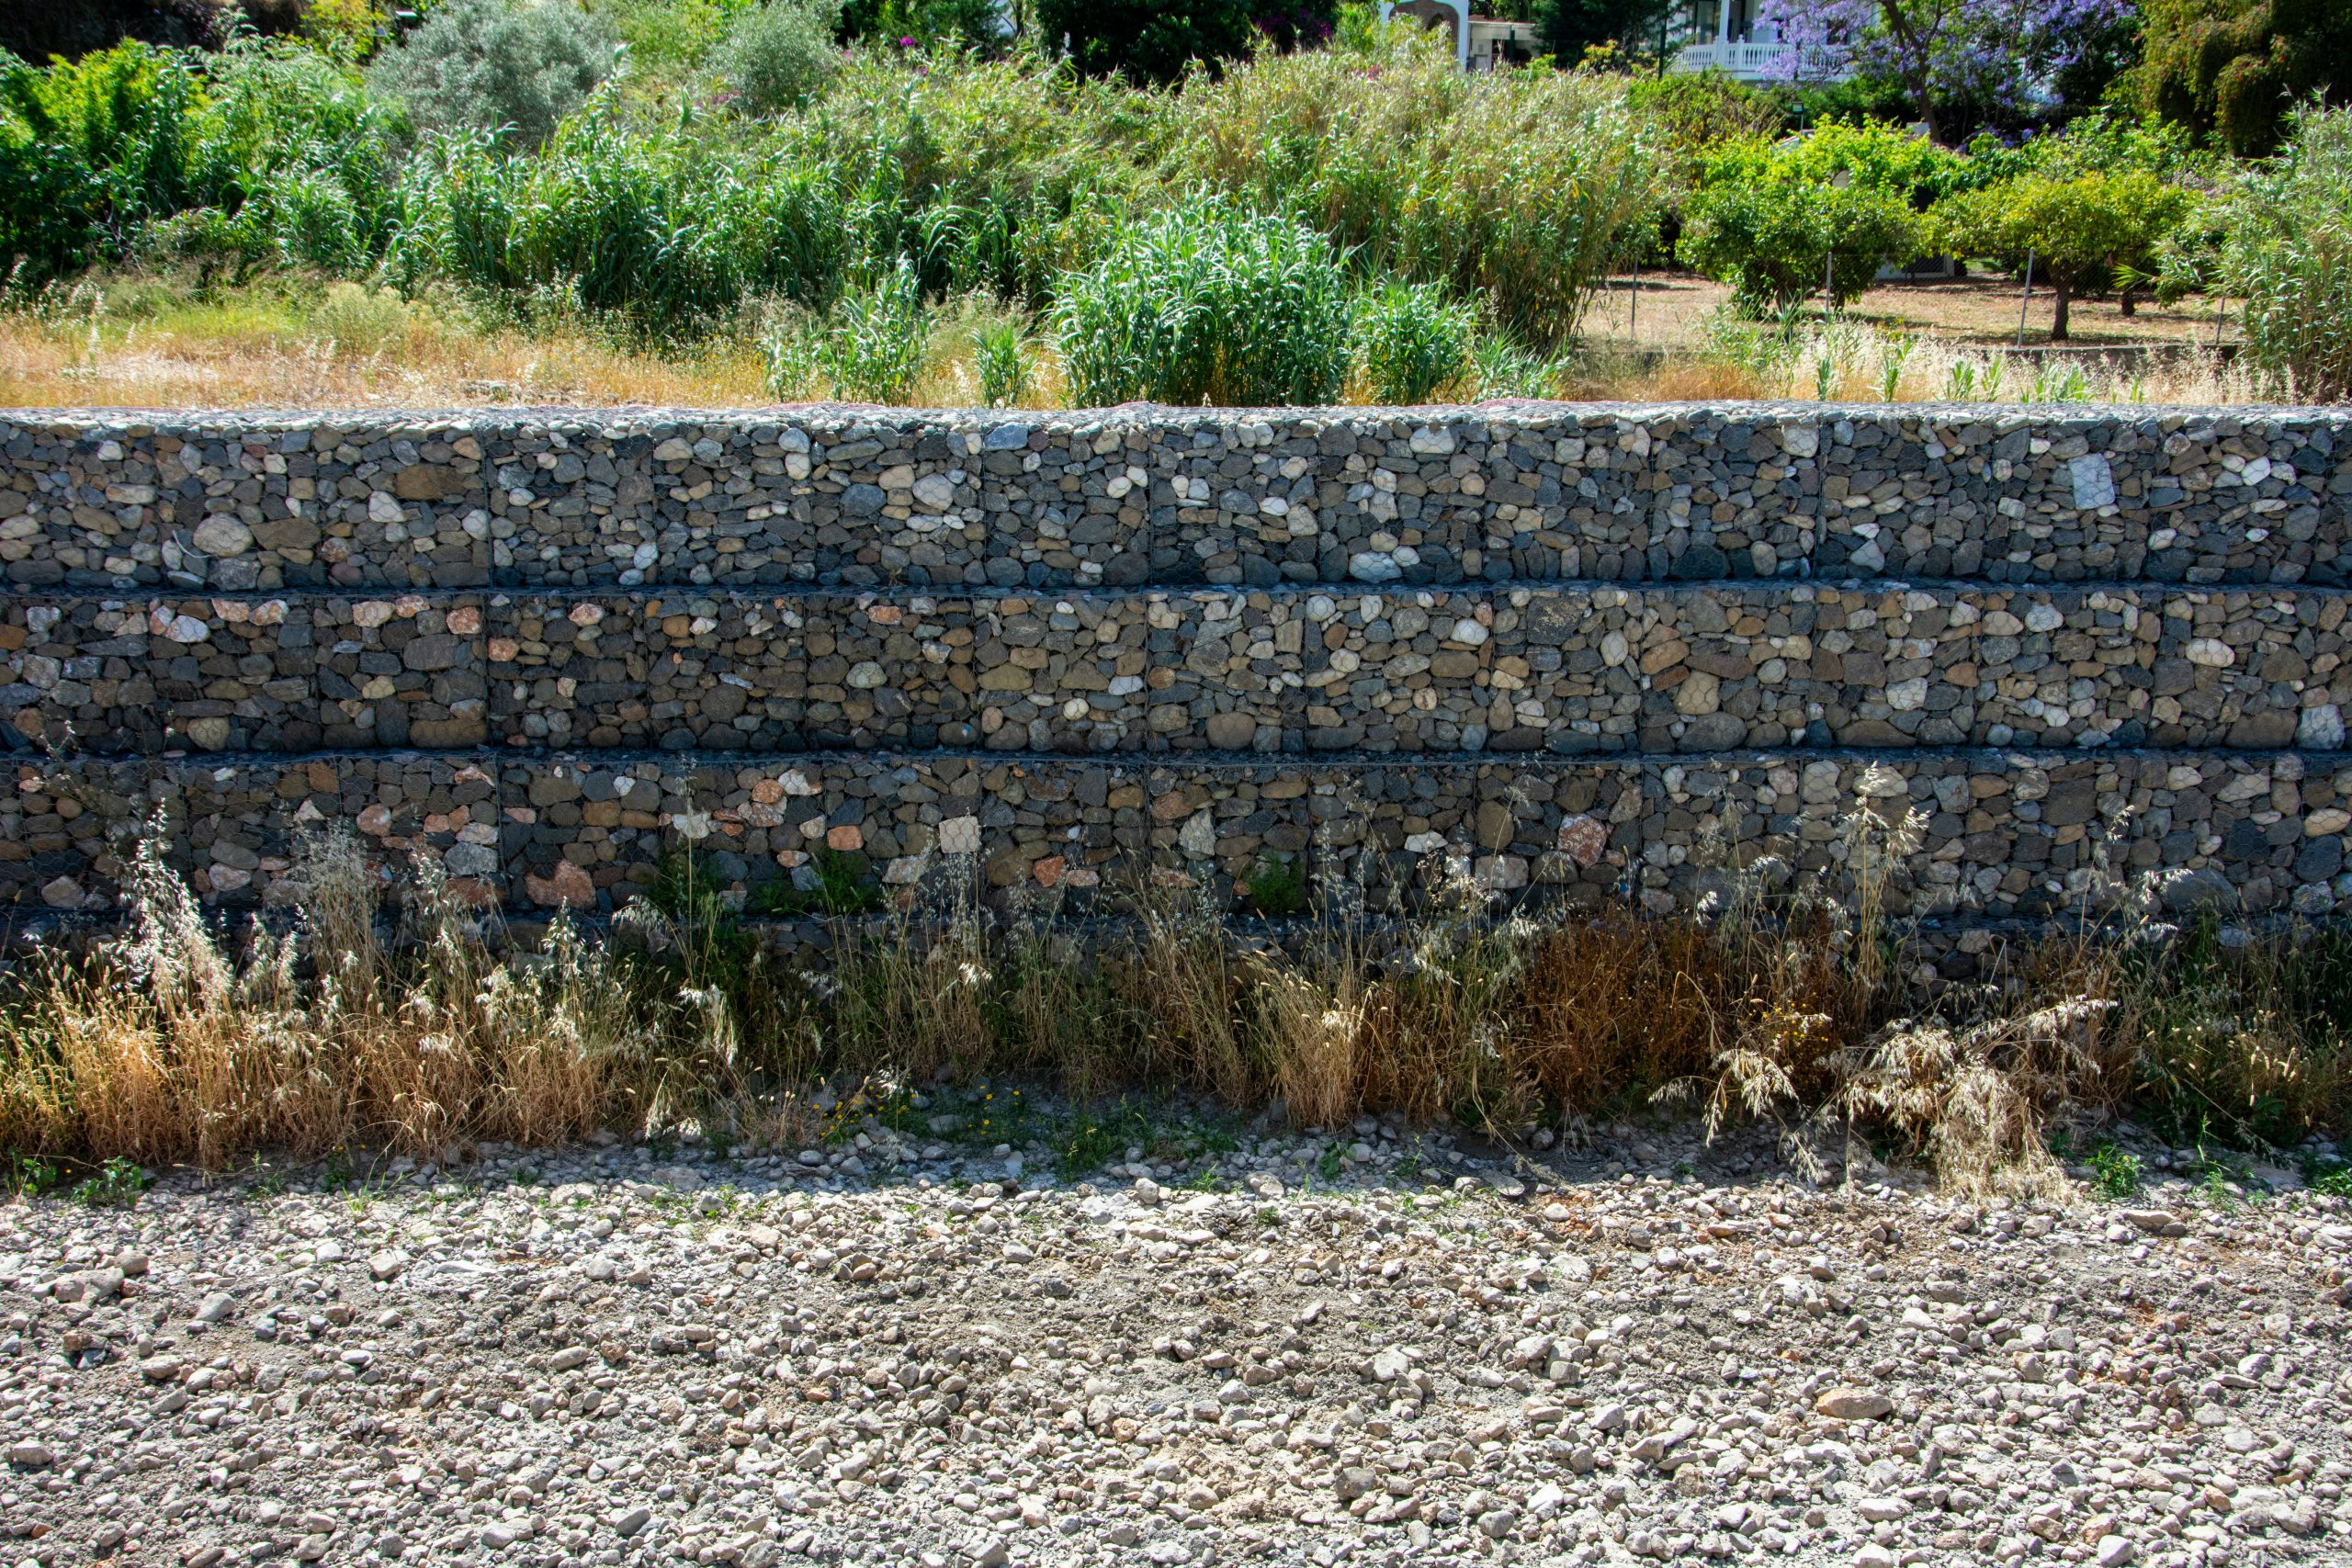
4. A Multi-Tiered Gabion Retaining Wall with Assorted Stones
Building a strong, multi-tiered gabion wall involves more than just stacking baskets. Here is a quick guide for a stable construction:
📏 Scale Guide
- Excavate and Level: Dig a trench at least 6 inches deep and fill with compacted gravel to create a level, stable base.
- First Course: Assemble and place your first layer of gabion baskets, ensuring they are perfectly aligned and level.
- Fill with Stone: Fill the baskets, placing larger, flatter stones against the faces for a neat look and using smaller fill in the center.
- Stagger the Tiers: Set the next course of baskets back from the one below it by at least 6-12 inches. This “step-back” design is critical for stability.
- Connect and Brace: Securely wire each basket to its neighbors, including those below it, to create a monolithic structure.
It’s easy to underestimate the immense pressure that soil and water can exert on a retaining wall, even one that’s only a few feet tall. A wall this big needs proper “deadman” anchors—tie-backs extending from the gabion wall deep into the hillside behind it—to resist the lateral earth pressure. Without this hidden reinforcement, the wall could bulge or even fail over time, especially in areas with freeze-thaw cycles. This isn’t a simple weekend DIY; it’s a serious landscaping project.
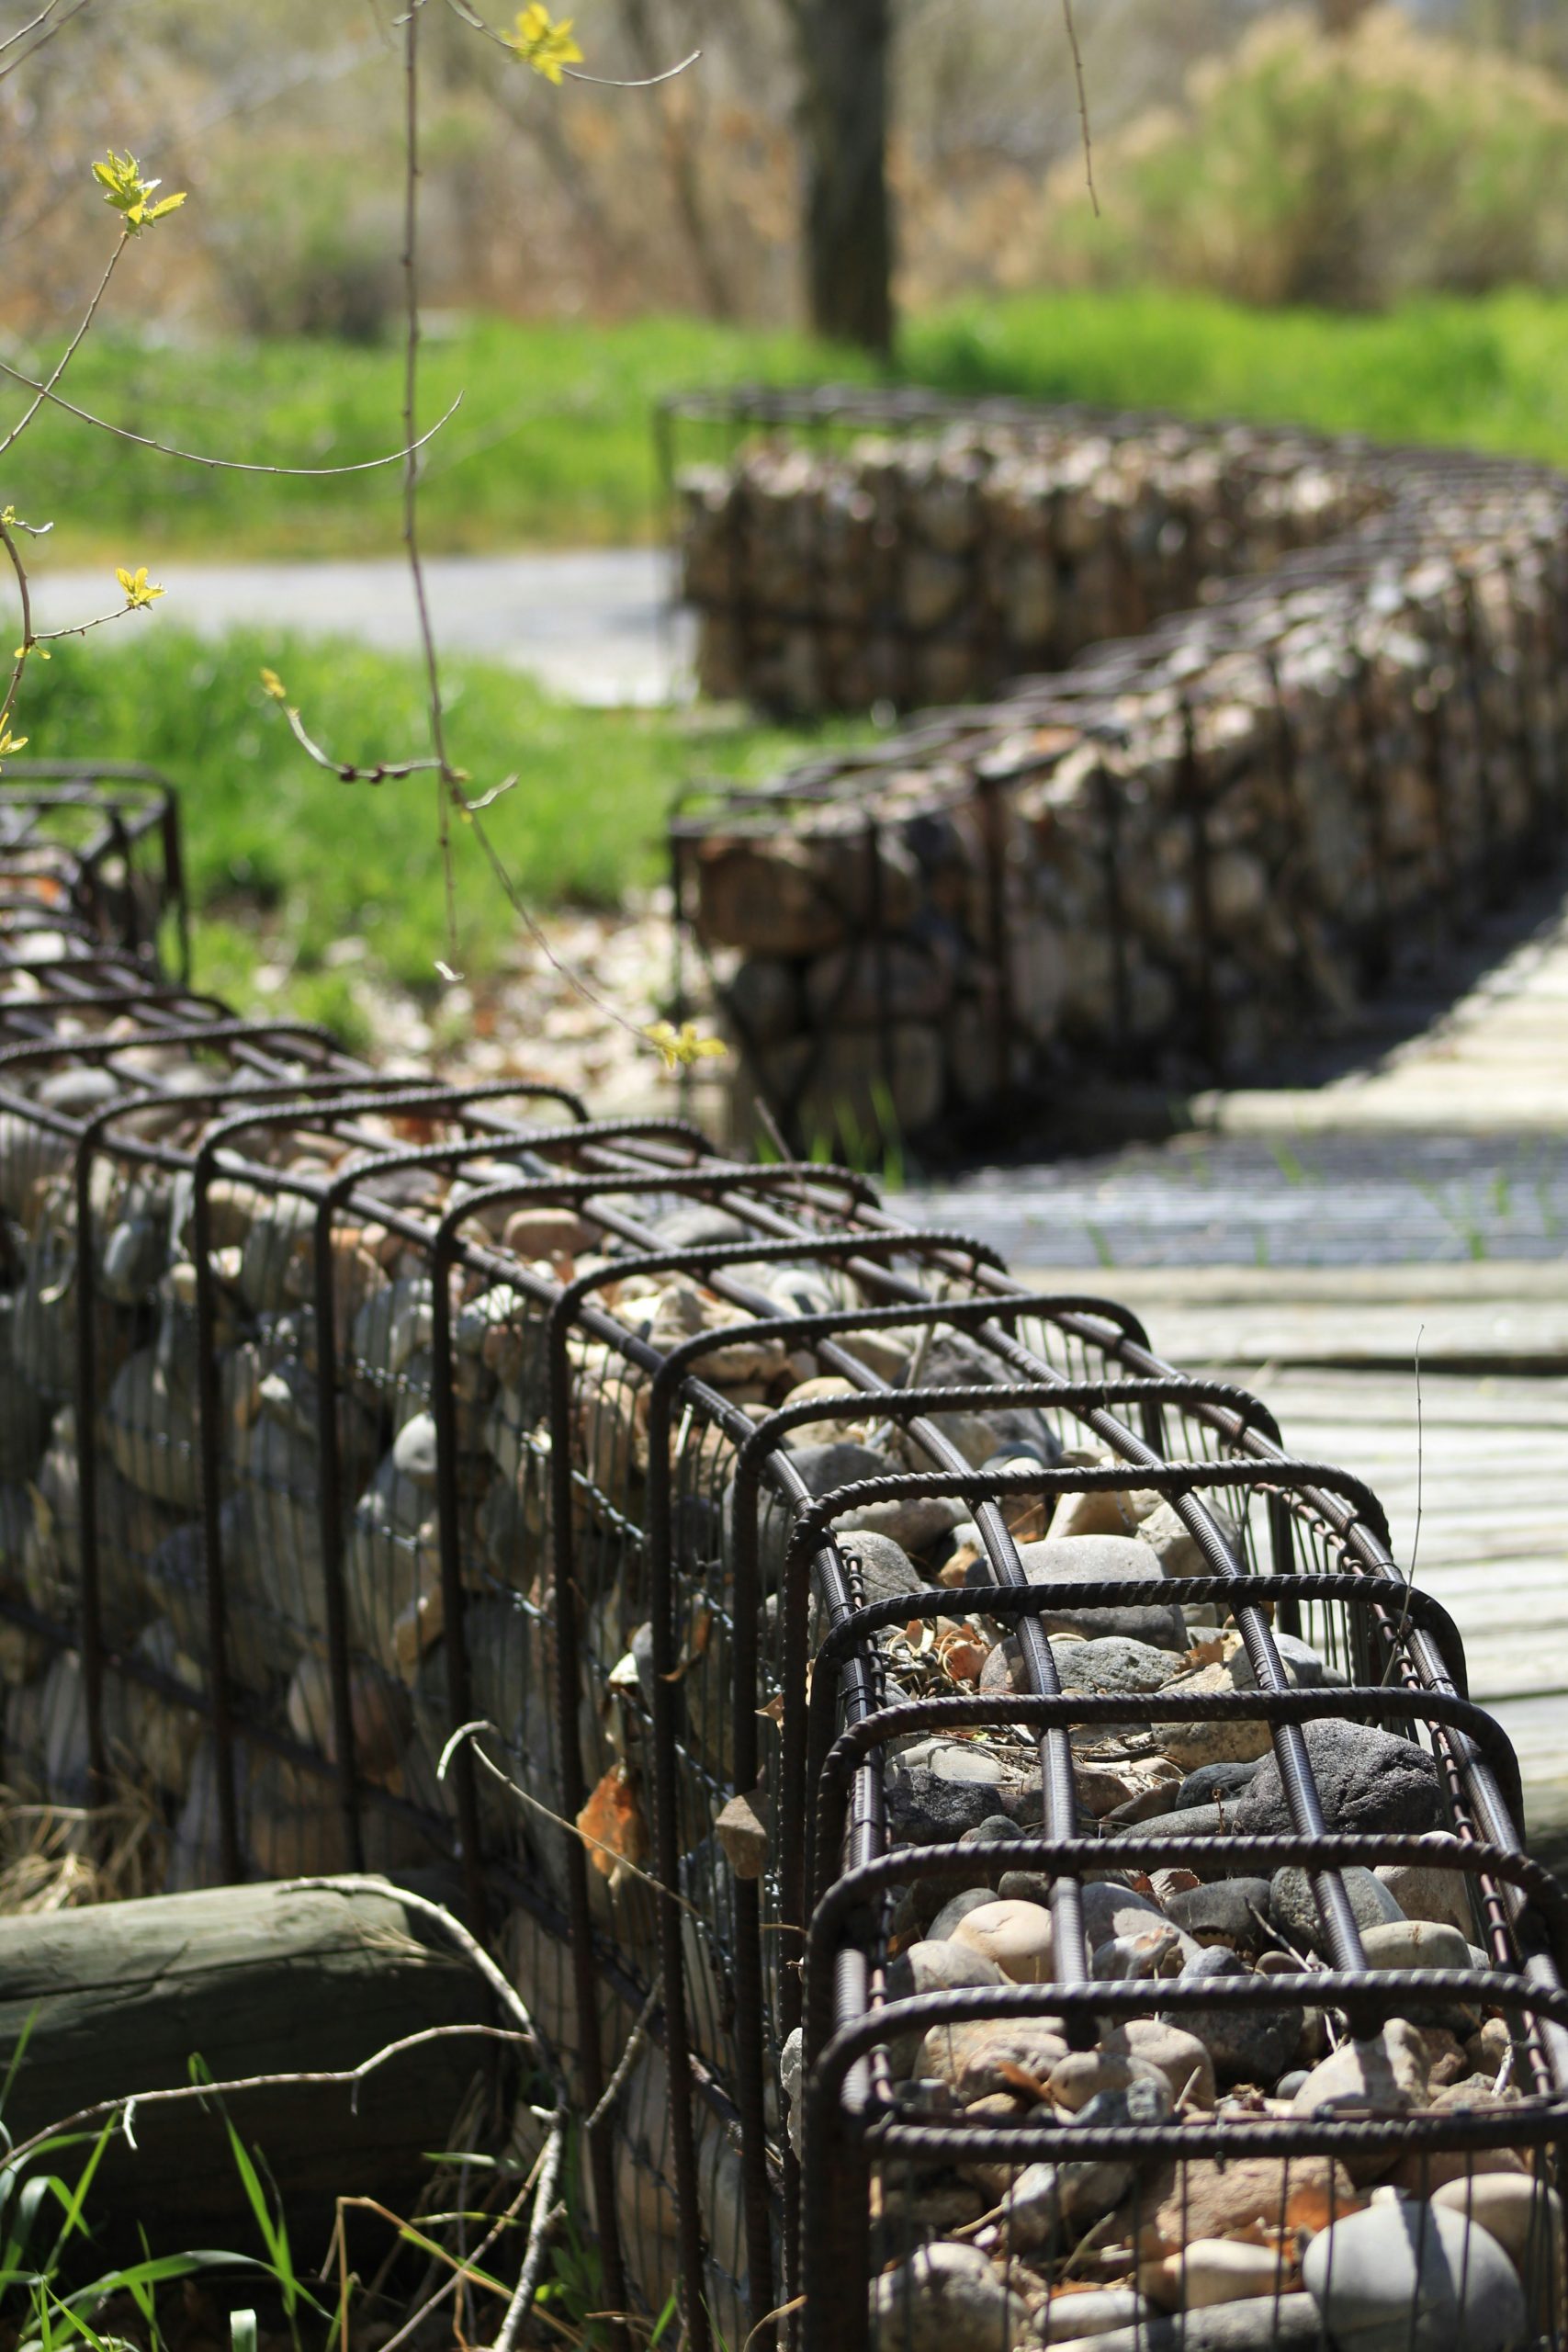
5. Curved Garden Edging with Rustic Rebar Frames
This design works so well because the organic, flowing curves of the gabion edging create a beautiful contrast with the rigid, industrial look of the rebar cage. It feels both natural and man-made at the same time. The dark, rusty texture of the rebar adds a layer of warmth and ruggedness that you wouldn’t get with standard galvanized wire mesh. It helps the structure blend in with the soil and surrounding greenery, making the enclosed river stones the main visual feature.
🔧 How-To Brief
You don’t need to buy expensive pre-fabricated curved gabion baskets to get this look. A trip to the hardware store is all you need. You can create these custom curves yourself using standard construction rebar, which costs about $5-$10 per 10-foot length. You’ll need a torch and some muscle to bend it into shape, or a simple rebar bender tool. Use heavy-duty wire ties to connect the pieces into a cage, and you can create any shape you want for a fraction of the cost. Compare this rustic approach to the clean lines of Idea #29.
6. Designing Your Dream Gabion Outdoor Kitchen
An outdoor kitchen is a fantastic addition, but it requires careful planning before you even think about buying stones. Here’s a checklist to run through first:
🔥 Trending Context
- Check local codes: Are there setback requirements for cooking structures from your property line or main house?
- Map your utilities: Where are your existing water, gas, and electrical lines? Planning your kitchen layout near them will save a fortune in installation costs.
- Plan for drainage: The patio or base for your kitchen must be sloped correctly to prevent water from pooling around your appliances and seating areas.
- Consider the wind: Note the prevailing wind direction in your yard. You don’t want smoke from the grill constantly blowing into your outdoor dining space or back into the house.
Recreating a substantial outdoor kitchen with a gabion base involves several components. Here’s a rough estimate:
- Gabion Baskets & Stone Fill: $800 – $2,000
- Countertop (Concrete, Stone, or Butcher Block): $1,000 – $3,500
- Grill Insert & Side Burner: $700 – $4,000
- Sink, Faucet & Plumbing Hookup: $500 – $1,500
- Backsplash & Lighting: $300 – $1,000
- TOTAL: $3,300 – $12,000
Budget alternative: Build a simpler DIY gabion bar island and use a high-quality standalone grill. Total cost could be 40-60% less.
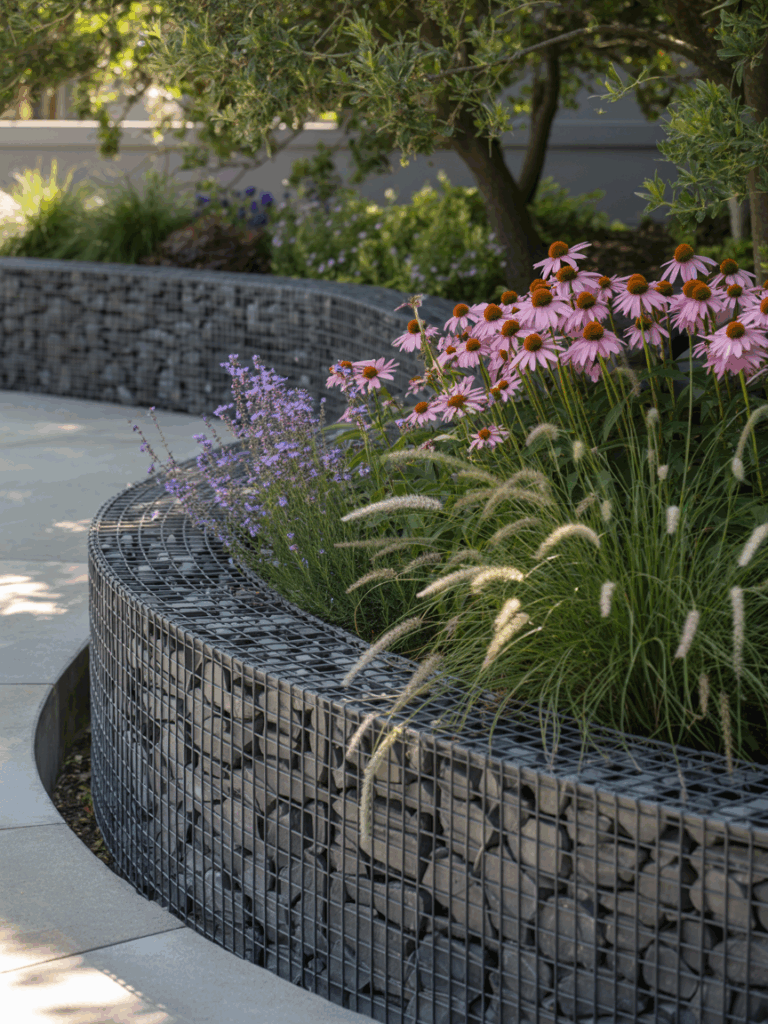
7. A Curved Gabion Planter Wall Bursting with Flowers
The key to a lush gabion planter is choosing plants that can handle the excellent drainage and potential heat retention from the stones. For the top surface, drought-tolerant perennials like these Coneflowers (Echinacea) and Ornamental Grasses are perfect. For planting directly into the sides of the gabion, use sedums and other succulents. Pack the planting pockets with a mix of compost and coir to retain some moisture, and install a drip irrigation line along the top before you plant—it’s nearly impossible to add later.
🧹 Maintenance Reality
This look is a masterclass in color and texture balance. It’s roughly 70% cool, hard texture from the dark gray stones and metal mesh, providing a neutral, structural base. This is then softened by 30% vibrant, soft color from the pink and purple flowers and feathery grass plumes. The gray makes the colors pop, while the flowers keep the stone wall from feeling too stark and industrial. You could easily swap the pinks and purples for sunny yellows and oranges for a completely different but equally balanced mood.
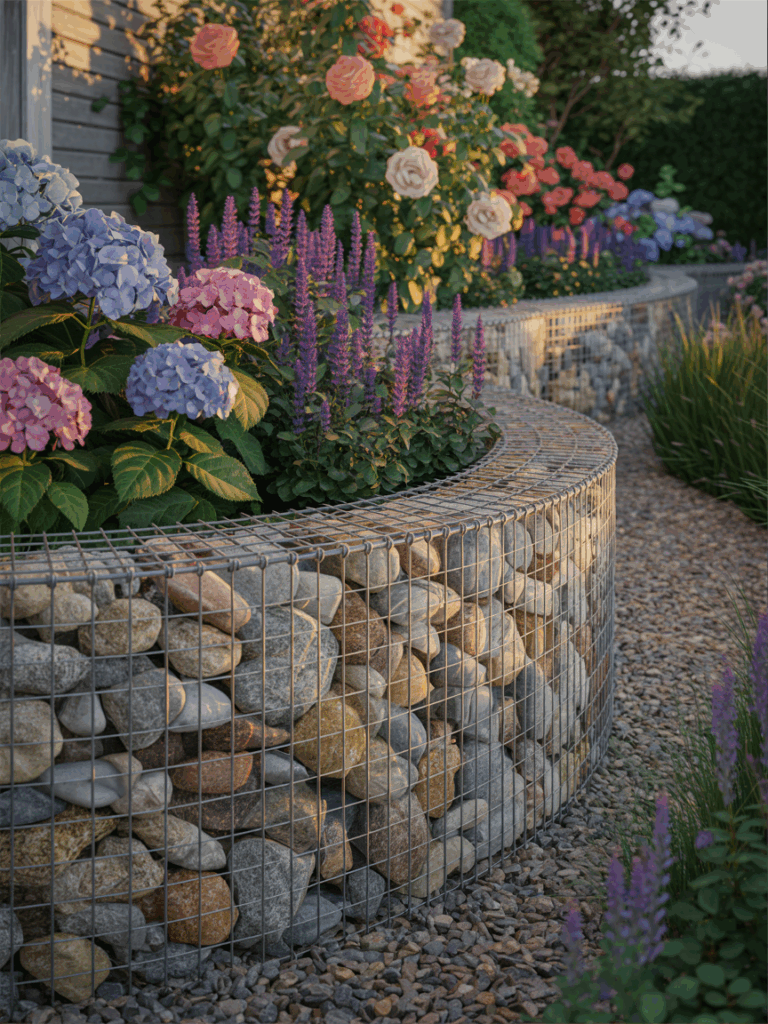
8. Lush Garden Beds with Curving Gabion Walls
While gabion planters offer fantastic drainage, that can be a double-edged sword. The soil inside can dry out much faster than in a traditional garden bed, especially on hot, windy days. You will need to be more vigilant with watering, especially when the plants are first getting established. A hidden soaker hose or drip irrigation system snaked through the beds before planting is a smart move that will save you a lot of time and keep your hydrangeas and roses from wilting sadly.
💸 Get This Look For Less
What truly makes this garden space feel so special and inviting is the sheer abundance and variety of the flowers. It’s not just one type of plant, but a joyful jumble of pink and blue hydrangeas, spiky purple blooms, and roses in multiple colors. This layered, cottage-garden approach to planting inside the rigid, modern structure of the gabions is what creates the magic. It feels lush, romantic, and alive, proving that strong lines and soft planting are a perfect match. A simpler version of this can be seen in Idea #7.
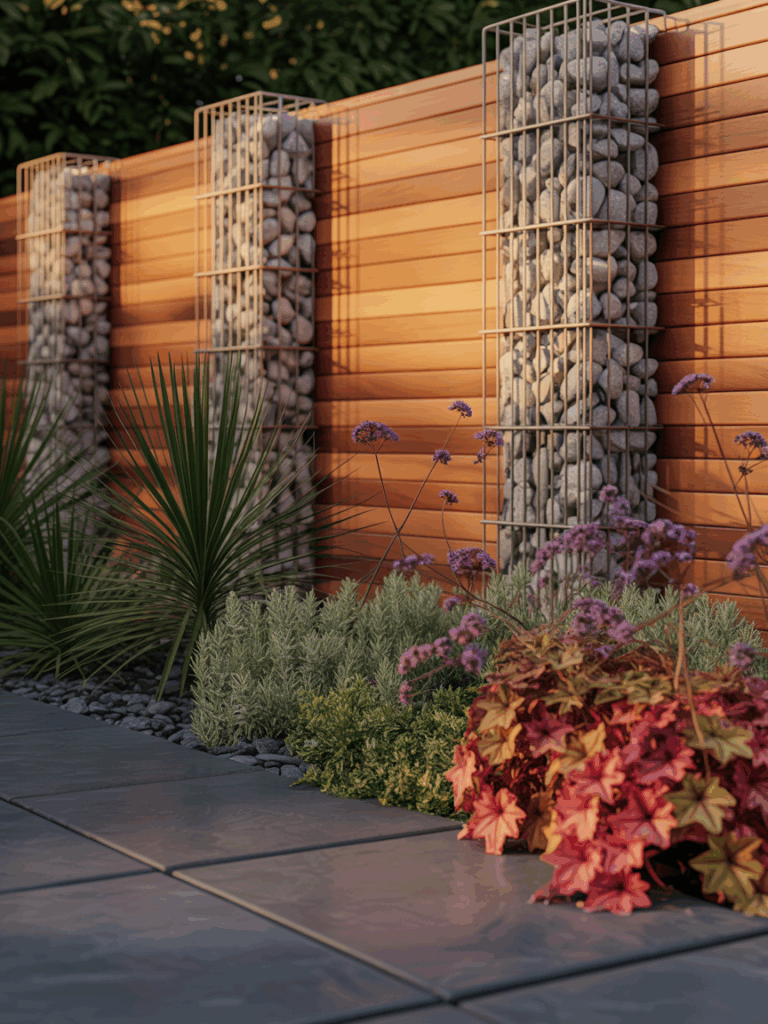
9. Combining Vertical Gabion Pillars and a Slatted Wood Fence
This design is successful because it breaks up the monotony of a long fence line. By alternating materials—the heavy, textured stone of the gabion pillars with the warm, linear lines of the horizontal wood slats—it creates rhythm and visual interest. The pillars act as anchors, giving the lighter wood fence a sense of permanence and strength. The rich plant life, with its varied greens and reddish tones, softens the entire structure and integrates it beautifully into the garden.
💡 Designer Tip
For this pillar-and-panel design to look balanced, spacing is key. The gabion pillars should be no more than 6 to 8 feet apart. Any wider, and the wood sections will look flimsy and unsupported. The pillars themselves should have a footprint of at least 18×18 inches to feel substantial next to the fence panels. This style works well for defining property lines or creating privacy screens for patios in medium to large-sized yards where you have at least 20 feet of length to establish the pattern.
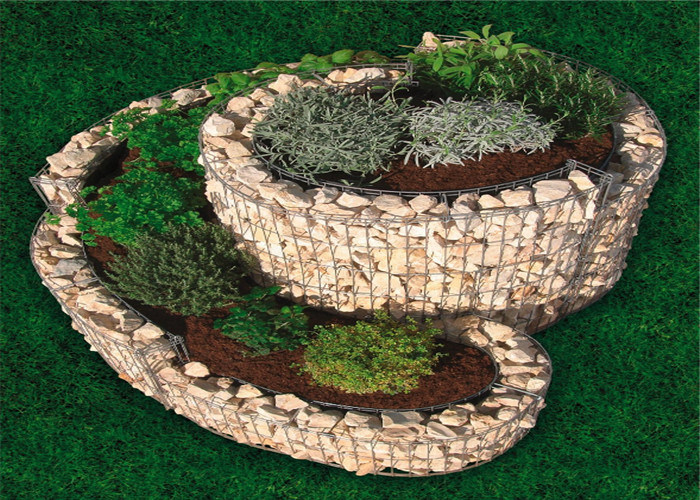
10. A Spiral Gabion for a Tiered Herb Garden
A spiral gabion is a brilliant way to maximize planting space for herbs or strawberries. Here’s how to approach it:
💰 Budget Breakdown
- Lay Out Your Spiral: Use marking paint or a garden hose to outline the spiral shape on the ground. Aim for a diameter of at least 5-6 feet.
- Form the Cage: Use flexible wire mesh panels (like cattle panel fencing) to form the walls of the spiral, securing them with zip ties or hog rings as you go.
- Fill as You Go: Start filling the outer ring of the spiral with your chosen stones. As you build up the height, backfill the inside with soil.
- Work Your Way In: Continue coiling the mesh and filling with stone for the walls and soil for the planting bed, moving towards the center and building up the height.
- Plant It Up: Plant sun-loving herbs at the top/center and those that prefer more moisture at the lower, outer edges.
You can achieve a similar, albeit smaller, tiered garden for much less. Look for pre-made spiral galvanized steel raised garden beds online or at garden centers, which often cost between $80 and $150. While you won’t get the stone texture, you will get the same functional, space-saving spiral shape. For a true budget version, you can create a similar form using reclaimed, broken concrete pieces (urbanite) stacked into a spiral shape, which can often be sourced for free.
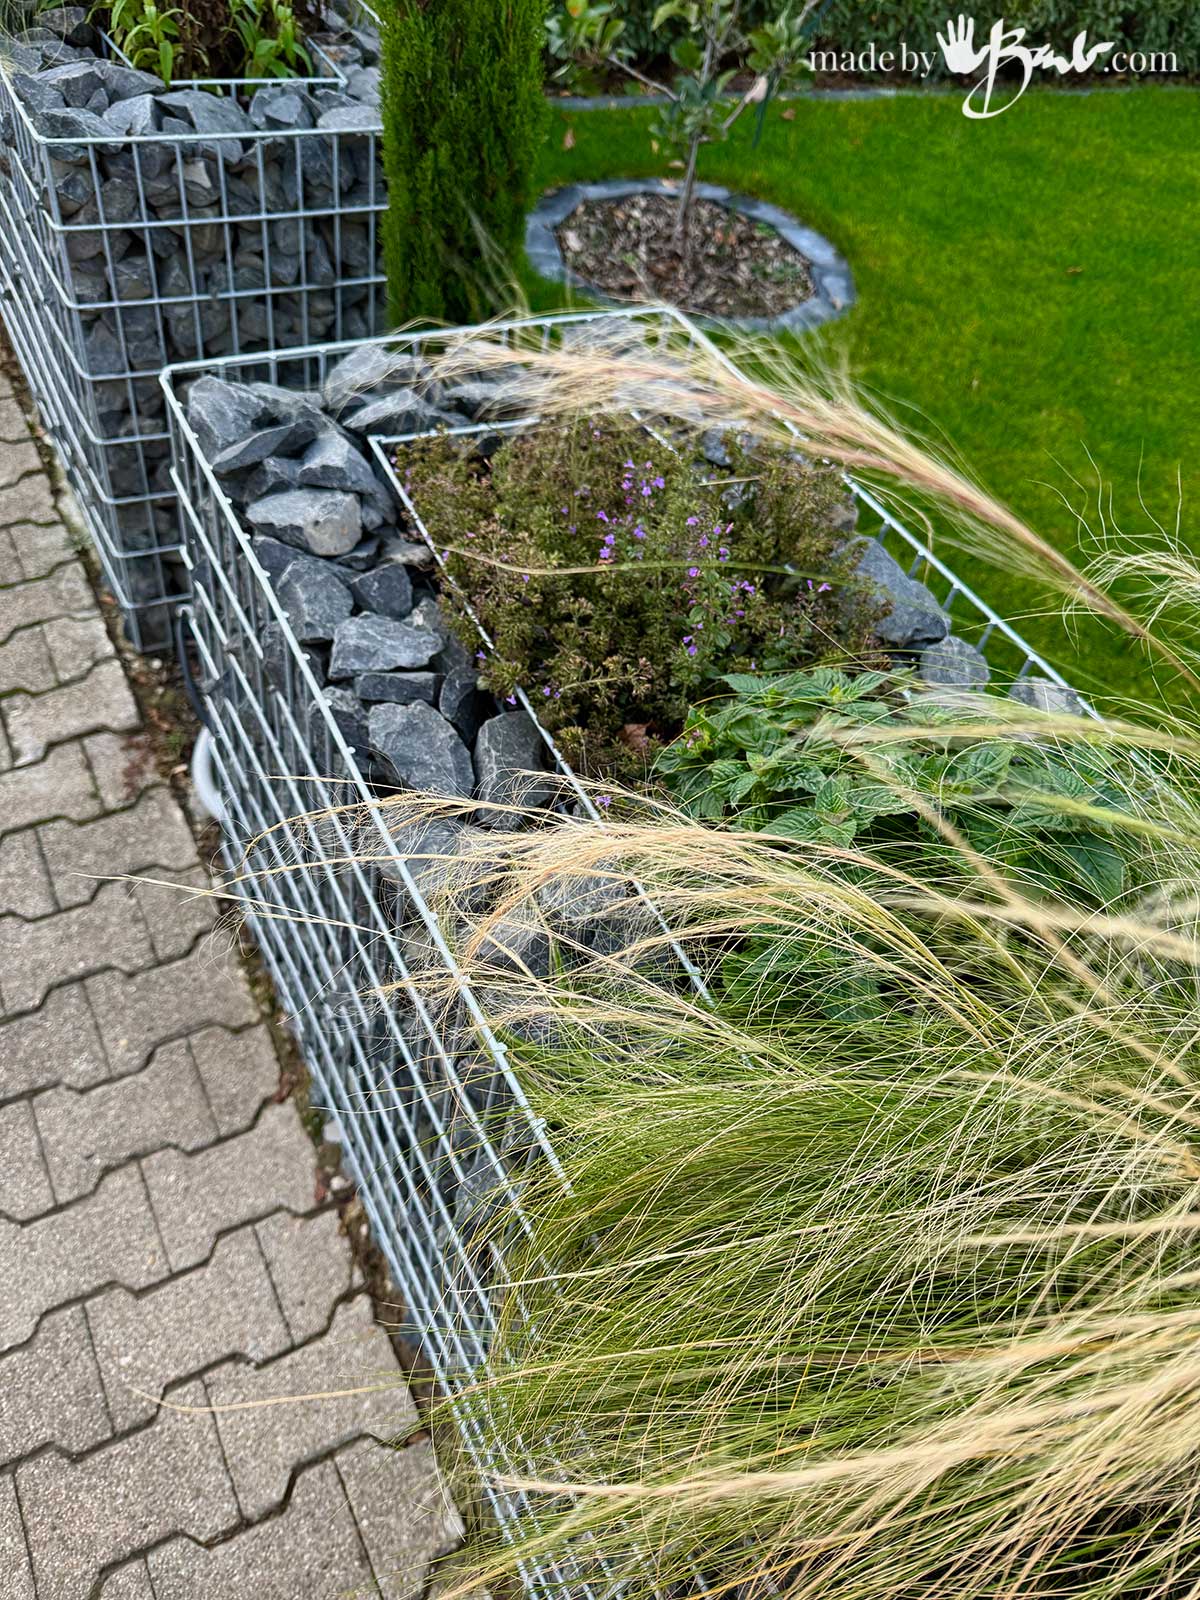
11. Modern Gabion Planter with Ornamental Grasses
This look achieves its modern, clean vibe with a simple formula: 60% structural grid + 40% wild texture. The square wire cages and dark grey crushed stone provide a strong, geometric, and monochromatic base. This rigidity is then broken up and softened by the airy, flowing movement of the tall ornamental grasses and the lush green plants. The contrast is what makes it visually exciting. Change the stone to a warm-toned river rock, and the look becomes more rustic; swap the grasses for structured boxwoods, and it becomes more formal.
⭐ The One Thing
While the dark grey crushed stone offers a sleek, modern look, it can be a magnet for weeds and fallen leaves. To minimize upkeep, ensure you lay down a high-quality, permeable landscape fabric inside the gabion *before* adding the decorative stone on top of your soil. This will suppress most weeds. You will still need to periodically use a leaf blower or shop vac to clear out debris that gets trapped between the stones to keep it looking sharp and clean.
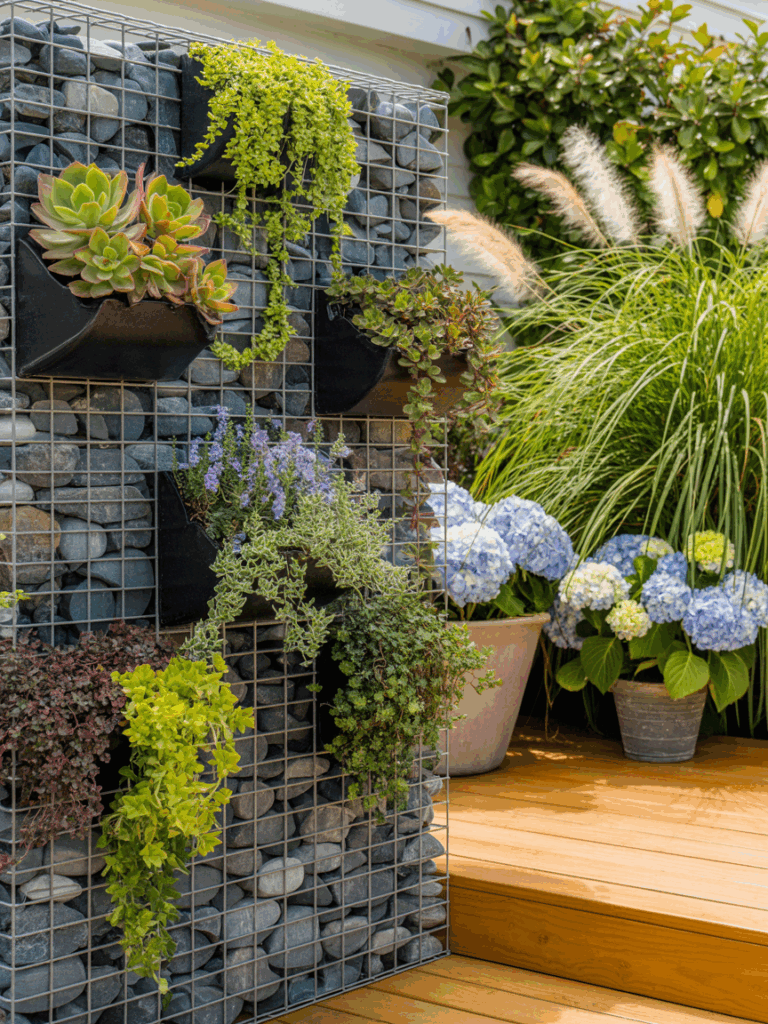
12. A Gabion Wall Transforms into a Vertical Garden
Vertical gardening is more than just a passing trend; it’s a smart response to our shrinking outdoor spaces. For 2026, we’re seeing a move away from simple plastic vertical planters and towards integrated, textural solutions like this. It taps into the biophilic design movement—our innate need to connect with nature—by literally weaving plant life into the fabric of our home’s exterior. This isn’t just a wall with plants on it; it’s a living structure, blurring the line between hardscape and garden, which feels incredibly current.
📐 Style Math
Watering is the biggest challenge for a vertical garden like this. The black fabric pockets can dry out in a heartbeat on a sunny day. The most effective solution is to install a dedicated drip irrigation system. Run a main ½-inch poly tube along the top of the gabion wall, then run ¼-inch emitter lines down to each individual planter pocket. Hook it up to a simple battery-powered timer, and you’ll ensure the plants get consistent moisture without you having to hand-water them twice a day.
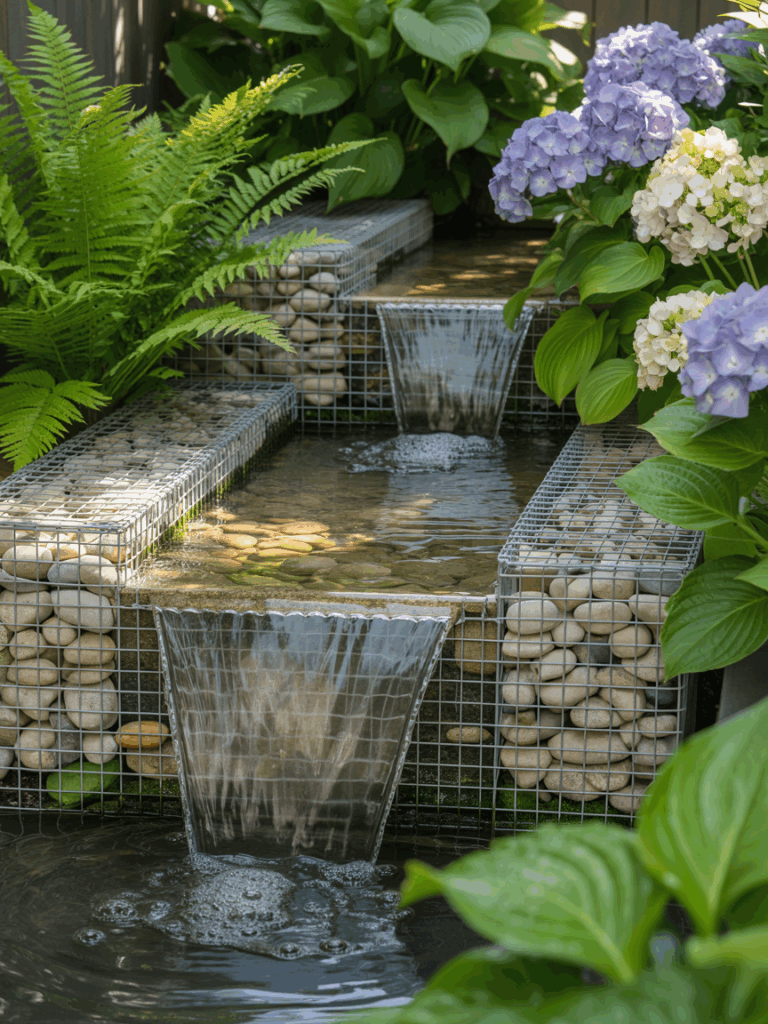
13. A Serene Gabion Water Feature with Tiered Waterfalls
A water feature is a stunning sensory addition to a garden, but it requires consistent upkeep. You’ll need a good quality submersible pump to circulate the water, and its intake will need to be cleaned of leaves and debris every few weeks. To combat algae growth, which is inevitable, you can use a UV clarifier installed in the water line or add beneficial bacteria to the water regularly. In colder climates, you’ll also need to properly winterize the system to prevent pipes and the pump from freezing and cracking.
⚠️ Real Talk
Building a custom multi-level water feature with professional-grade components can be a significant investment. Here are some estimated costs:
- Gabion Baskets (3-4): $400 – $800
- Stone/Pebble Fill: $500 – $1,200
- Pond Liner & Underlayment: $200 – $500
- Submersible Pump & Tubing: $250 – $700
- Professional Installation Labor: $1,000 – $3,000+
- TOTAL: $2,350 – $6,200
Budget alternative: All-in-one waterfall kits are available for $500-$1,500, but they won’t have the same custom, high-end look.
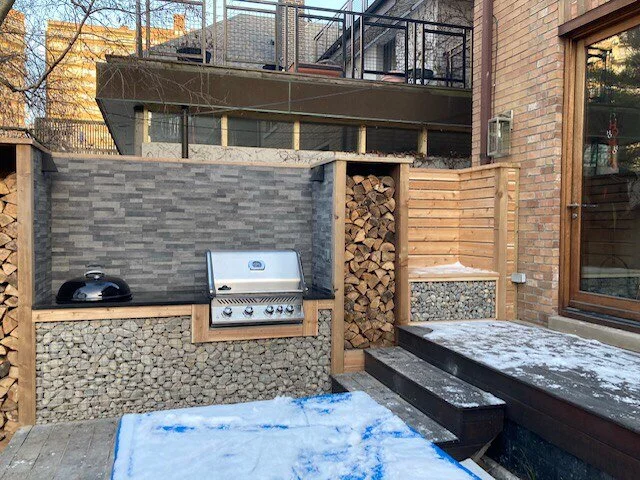
14. Gabion and Wood Outdoor Kitchen with Log Storage
The single most brilliant element in this outdoor kitchen is the integrated log storage. It’s a perfect example of form meeting function. Not only does it provide a dry, convenient place to store firewood for a nearby fire pit or pizza oven, but the texture and color of the stacked wood become a key design element. It adds a touch of rustic warmth that beautifully complements the cool gray stone of the gabions and the sleek black countertop. It feels thoughtful and custom. To compare with another kitchen idea, check out Idea #6.
✅ Before You Start
Before you commit to a built-in outdoor kitchen, think carefully about workflow and utilities. Here’s a quick pre-build checklist:
- Appliance Placement: Will you have enough counter space on either side of the grill for food prep and landing space? A minimum of 18 inches on each side is recommended.
- Utility Runs: Have you gotten quotes for running gas, electrical, and plumbing lines? These can sometimes cost more than the kitchen structure itself.
- Task Lighting: Grilling in the dark is no fun. Plan for integrated under-counter or overhead lighting from the start.
- Material Durability: Are the countertop and appliance materials you’ve chosen rated for outdoor use in your specific climate (e.g., UV resistance, freeze-thaw stable)?
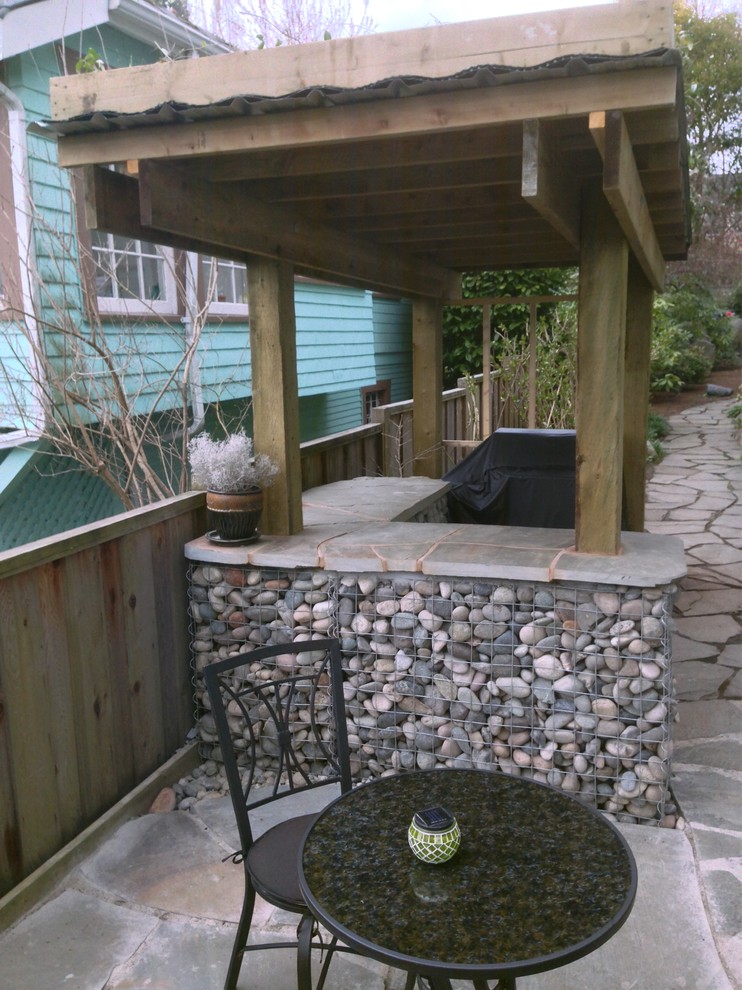
15. A Cozy BBQ Alcove with a Gabion Base and Pergola
To create a safe and functional grilling alcove like this, you need a surprisingly small footprint. A depth of at least 4 feet from the back wall to the front of the counter is essential to accommodate most grills and provide some maneuvering room. The width should be at least 5-6 feet to allow for a small counter prep space next to the grill. Don’t forget vertical clearance: ensure at least 6-7 feet of height under the pergola, especially if it has a solid roof, to allow heat and smoke to dissipate safely.
🎯 What Makes It Work
You can capture the essence of this rustic BBQ spot for a lot less. Instead of a custom-built gabion counter, buy two tall, narrow gabion baskets online for about $100-$150 each. Fill them with locally sourced stone and place a thick, sealed butcher block countertop or a single slab of remnant granite across the top. For the pergola, a simple DIY wood structure using 4×4 posts and 2×6 rafters can be built for a few hundred dollars in materials. Add a standalone grill, and you’ve got a similar vibe for under $1,000.
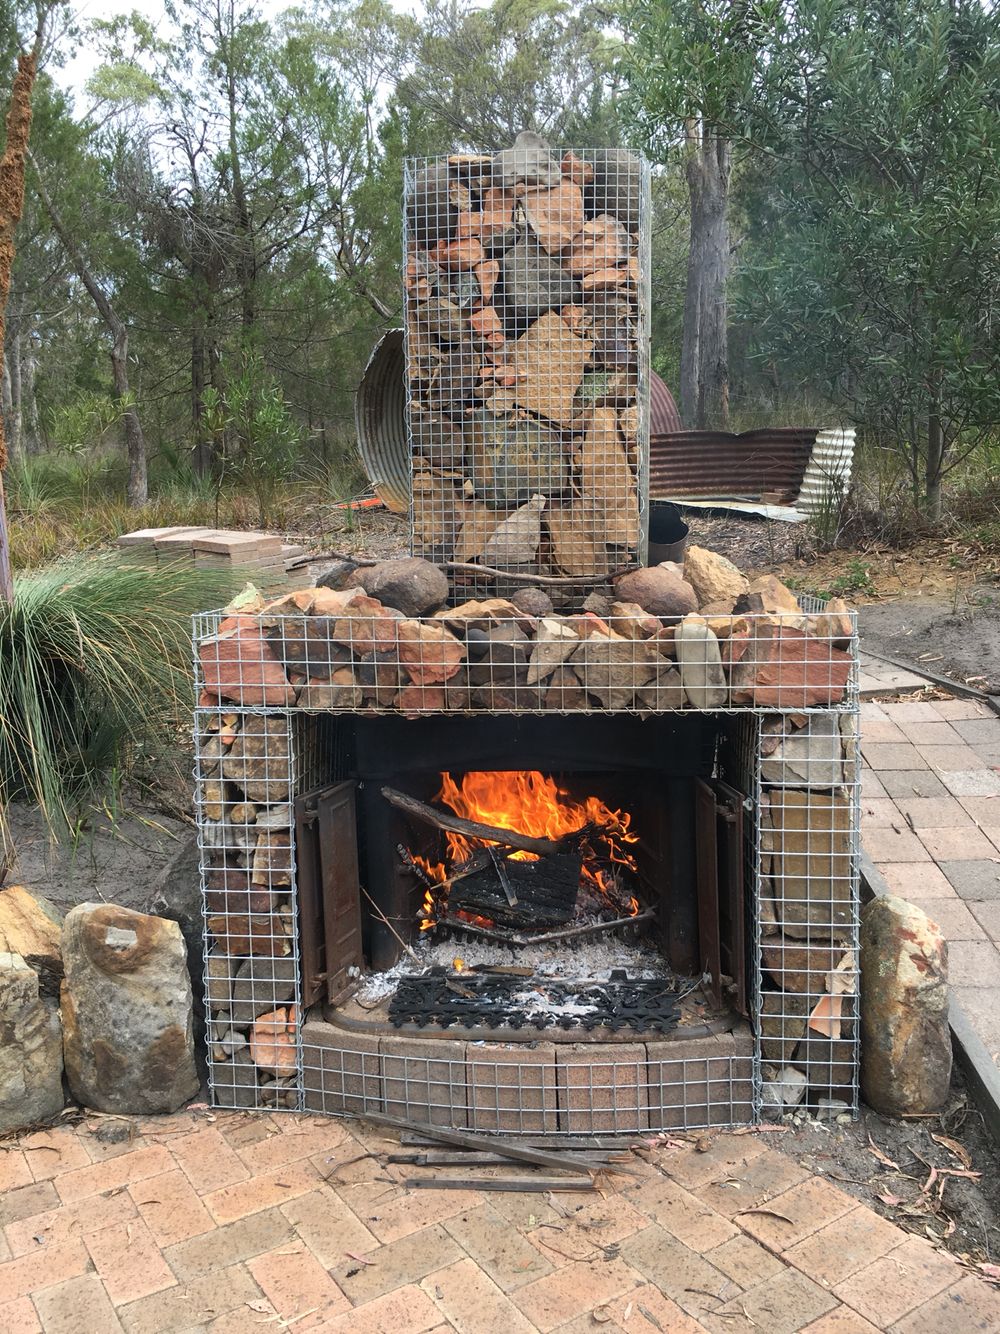
16. Rustic Gabion Fireplace with a Herringbone Brick Patio
The beauty of this fireplace lies in its rich, layered textures. The decision to fill the gabion baskets with a mix of irregular stones *and* broken brick pieces is brilliant. It gives the structure a sense of history and character, as if it were built from salvaged materials over time. This rustic, higgledy-piggledy feel is beautifully grounded by the organized, classic pattern of the herringbone brick pavers below. It’s a masterful mix of chaotic texture and orderly pattern.
📏 Scale Guide
A wood-burning outdoor fireplace is not something to eyeball. You must adhere to strict safety clearances. Generally, a fireplace needs to be at least 10 feet away from your house, property lines, and any combustible structures like a deck or pergola. You also need to check local ordinances, as some areas have restrictions on open-flame features. And don’t forget a spark arrestor cap on the top of the chimney to prevent embers from landing on your roof or a dry lawn.
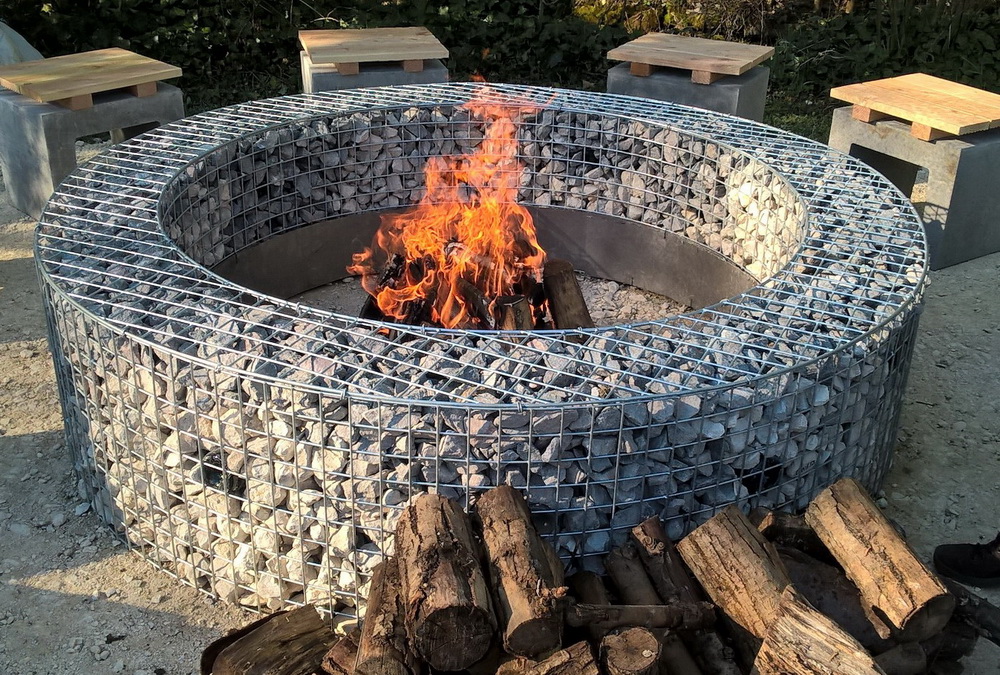
17. Circular Gabion Fire Pit with Concrete and Wood Bench Seating
This minimalist seating is stylish and surprisingly simple to build. Let’s make one bench:
🔧 How-To Brief
- Get the Blocks: You’ll need four standard 8″ x 8″ x 16″ concrete blocks (CMUs). These cost about $2 each at any home improvement store.
- Position Them: Stand two blocks on their ends to create the first leg of the bench. Place the other two about 4-5 feet away for the second leg. Ensure the holes are facing up.
- Cut Your Wood: Get two 2×6 or 2×8 planks of a weather-resistant wood like cedar or redwood. Cut them to your desired length (e.g., 5-6 feet).
- Finish the Wood: Sand the planks smooth and apply several coats of a quality outdoor spar urethane to protect them from sun and rain.
- Assemble: Simply lay the finished wooden planks on top of the concrete block legs. Their weight will hold them in place for casual seating.
For comfortable conversation and to avoid roasting your shins, seating should be positioned a specific distance from the fire pit. A good rule of thumb is to allow a minimum of 36 inches from the outer edge of the fire pit to the front of the bench or chair. This provides enough space for people to walk by safely and keeps you far enough from the intense heat, while still being close enough to enjoy the warmth and ambiance. Anything closer feels cramped and hot; much farther and you lose the cozy effect.
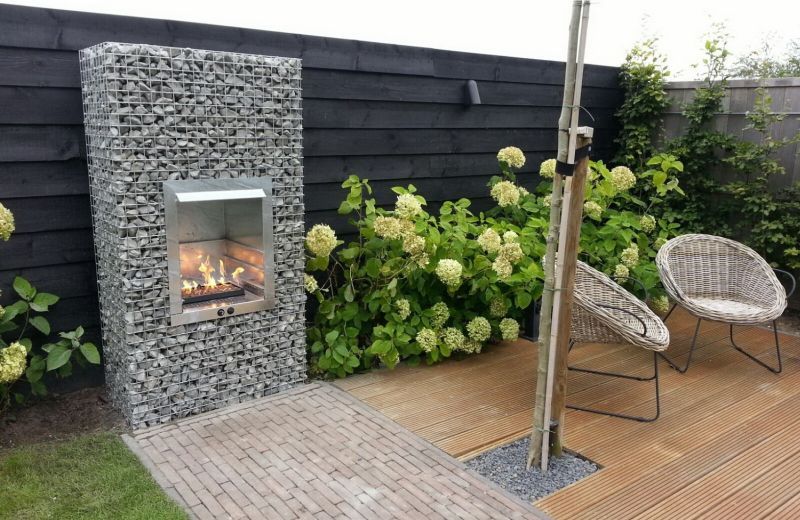
18. Sleek Gabion Fireplace with a Dark Wood Fence and Deck
The sophisticated look here comes from a clever balance of color and temperature. It’s about 50% cool tones from the grey gabion stones and the stainless steel firebox, which gives it a crisp, modern edge. This is warmed up by 50% rich, dark tones from the black-stained wooden fence and the light brown decking. The dark background makes the fireplace stand out as a bright focal point, while the wood keeps the overall scheme from feeling sterile or cold. The vibrant green foliage is the fresh, natural element that ties it all together.
🔥 Trending Context
A stainless steel firebox looks stunning when it’s new, but it requires regular cleaning to stay that way, especially in a wood-burning unit. Soot and creosote will build up and stain the metal. You’ll need to wipe it down frequently with a soft cloth and a specialized stainless steel cleaner. Avoid abrasive pads or harsh chemicals, as they can scratch the finish. Over time, the intense heat will also cause the steel to develop a permanent golden or bluish patina, which is a natural part of its aging process.
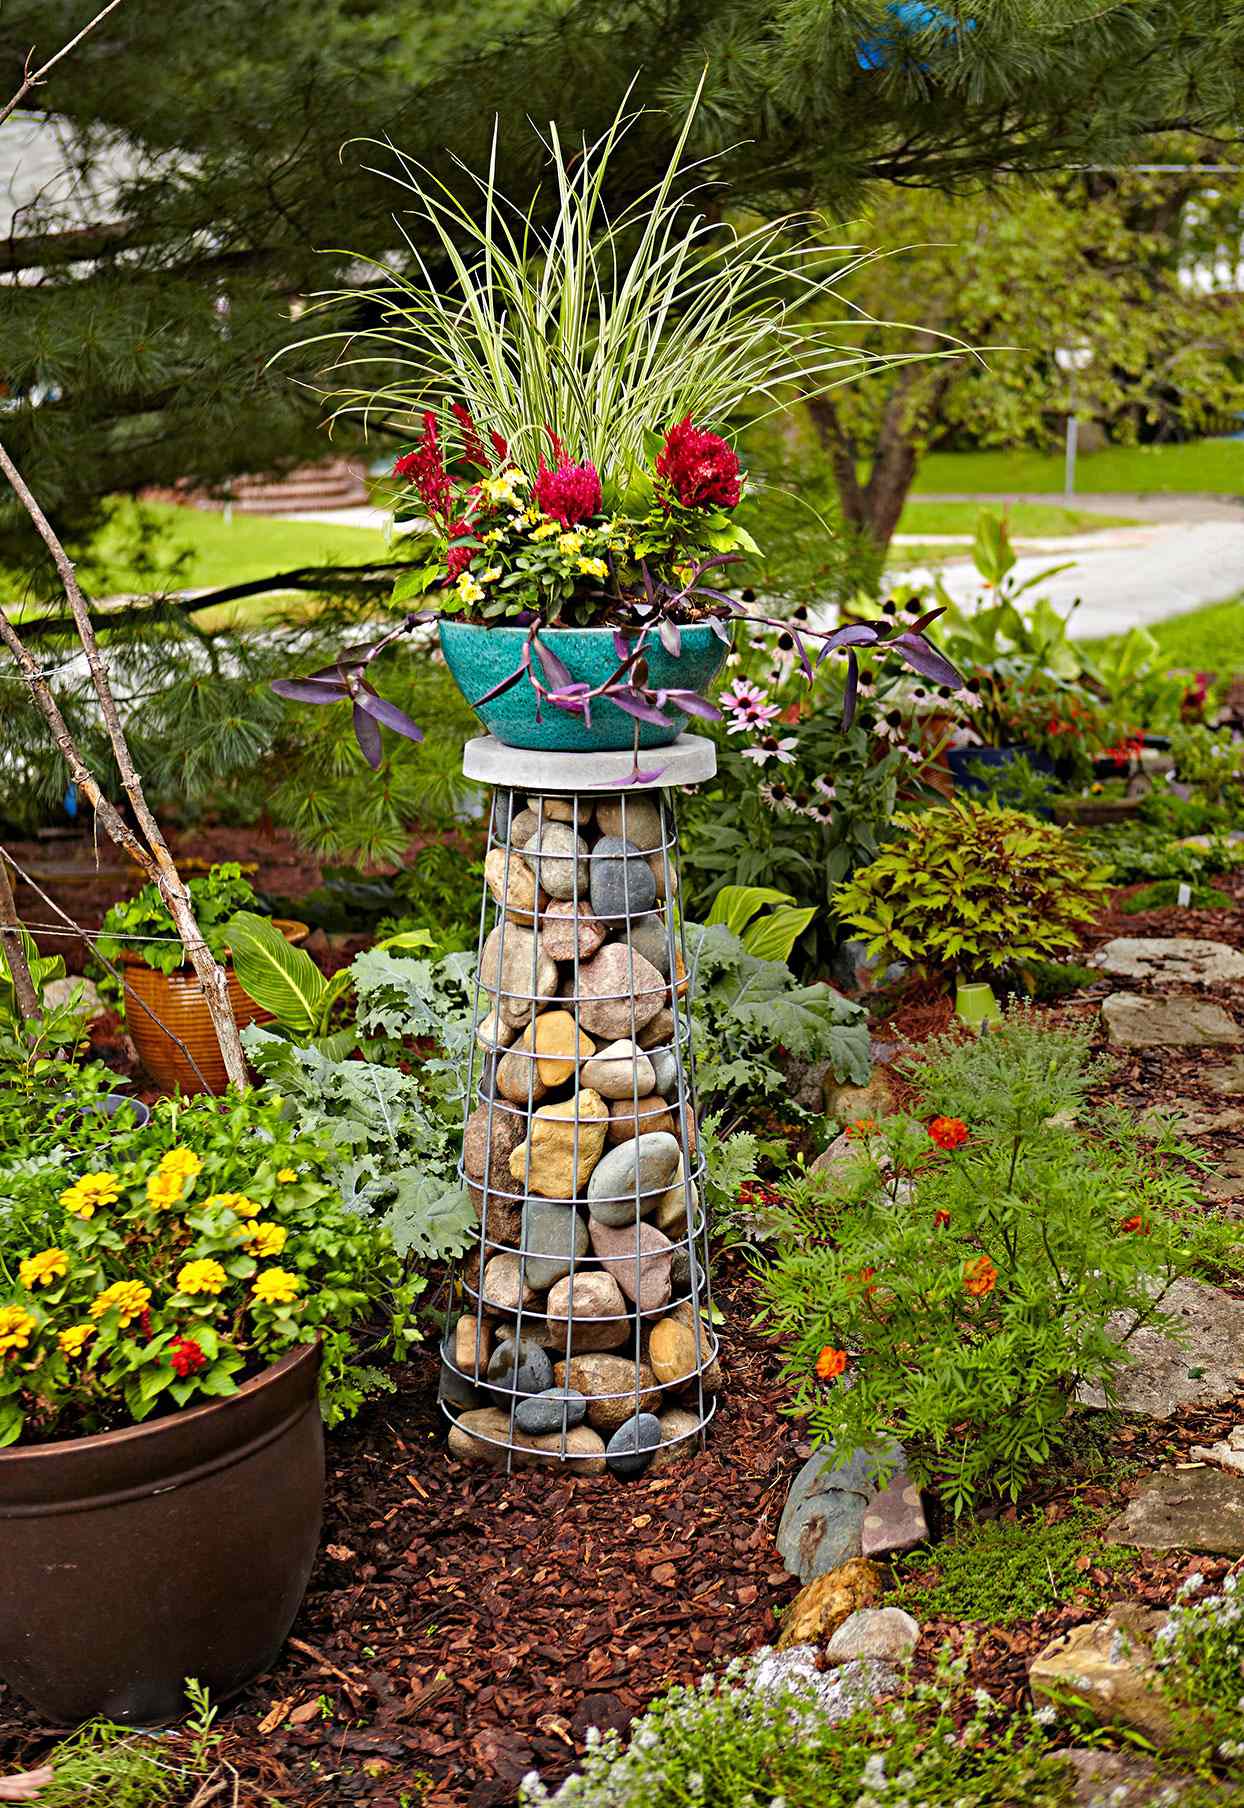
19. A Sculptural Gabion Planter Stand with a Pop of Teal
The single element that elevates this from a simple garden decoration to a true statement piece is the vibrant teal planter bowl. Against the neutral, earthy tones of the river stones, concrete disc, and surrounding mulch, the pop of saturated color is completely unexpected and joyful. It draws your eye immediately and makes the entire composition feel artistic and intentionally styled. Without that splash of bold color, it would be a nice texture study; with it, it’s a work of garden art.
🧹 Maintenance Reality
You can create a striking planter stand with a similar vibe using much more affordable materials. Instead of a custom gabion base, find a large, interesting terracotta chimney flue liner at a landscape supply yard (often under $50). Then, scout thrift stores or Facebook Marketplace for a large, colorful ceramic bowl or pot to place on top. The contrast between the rustic, earthy terracotta and a brightly glazed pot will create the same exciting visual tension for a fraction of the cost.
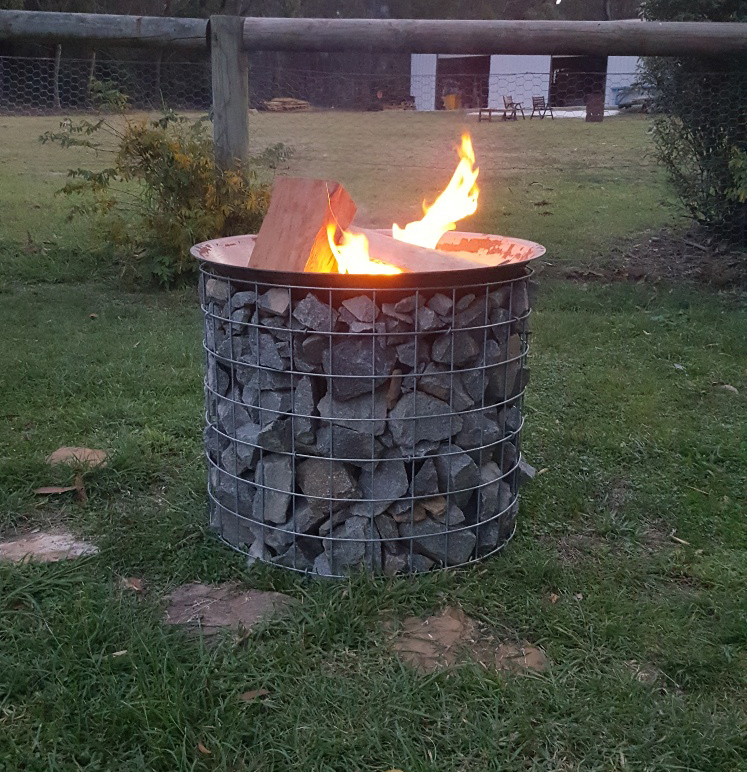
20. Cozy Circular Gabion Fire Pit for a Grassy Lawn
Placing a wood-burning fire pit directly on a lush green lawn is a recipe for a large, circular patch of dead, scorched grass. The intense heat radiating from the bottom of the fire pit will kill the turf underneath. To get this look without ruining your lawn, you must create a protective barrier. The simplest method is to place a layer of flat paver stones or a specialized heat shield mat (designed for placing fire pits on decks) on the grass before you set the gabion fire pit down. It won’t look quite as seamless, but it will save your lawn.
💸 Get This Look For Less
This type of fire pit is perfect for smaller, more intimate outdoor settings. A diameter of 30 to 36 inches is ideal for a small group of 4-6 people to gather around comfortably. It’s large enough to hold a decent-sized fire but small enough that it won’t dominate a compact patio or a small clearing in the yard. This scale is much more approachable for a typical suburban backyard than the massive fire pit shown in Idea #21, which is designed for a much larger, more open landscape.
21. A Modern Circular Fire Pit in a Desert-Inspired Landscape
This design is so powerful because of its elemental purity. You have the raw, crackling energy of fire, contained by the heavy, solid mass of stone, all set within a minimalist bed of fine gravel. It’s a study in texture and form. The sharp, clean lines of the modern architecture in the background are echoed in the crisp circle of the fire pit, creating a sense of cohesion. The warm glow of the fire provides the perfect contrast to the cool, muted tones of the desert palette (greys, greens, and browns).
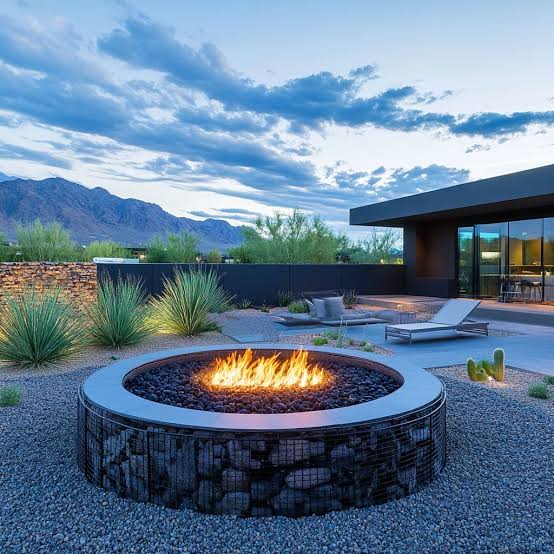
💡 Designer Tip
As we head into 2026, there’s a growing appreciation for “Desert Modern” style, and this fire pit is a perfect example of why. This trend, born from places like Palm Springs and Joshua Tree, prioritizes clean lines, natural materials, and a seamless flow between indoors and out. It’s about creating serene, uncluttered spaces that respect their natural surroundings. This fire pit isn’t just an accessory; it’s an architectural feature that embodies that calm, sophisticated, nature-connected ethos.
22. A Tall Gabion Wall Softened by Climbing Ivy and Blossoms
While lush ivy covering a wall looks romantic, be prepared for a commitment. Aggressive climbing plants like ivy can and will work their way *into* the gabion basket, making them nearly impossible to remove later. Their roots can also displace stones over time. To get this look with more control, choose a less aggressive climber like a clematis or climbing hydrangea and provide a trellis attached to the *front* of the gabion, rather than letting the plant attach to the wall itself. Regular pruning is non-negotiable to keep it from taking over completely.
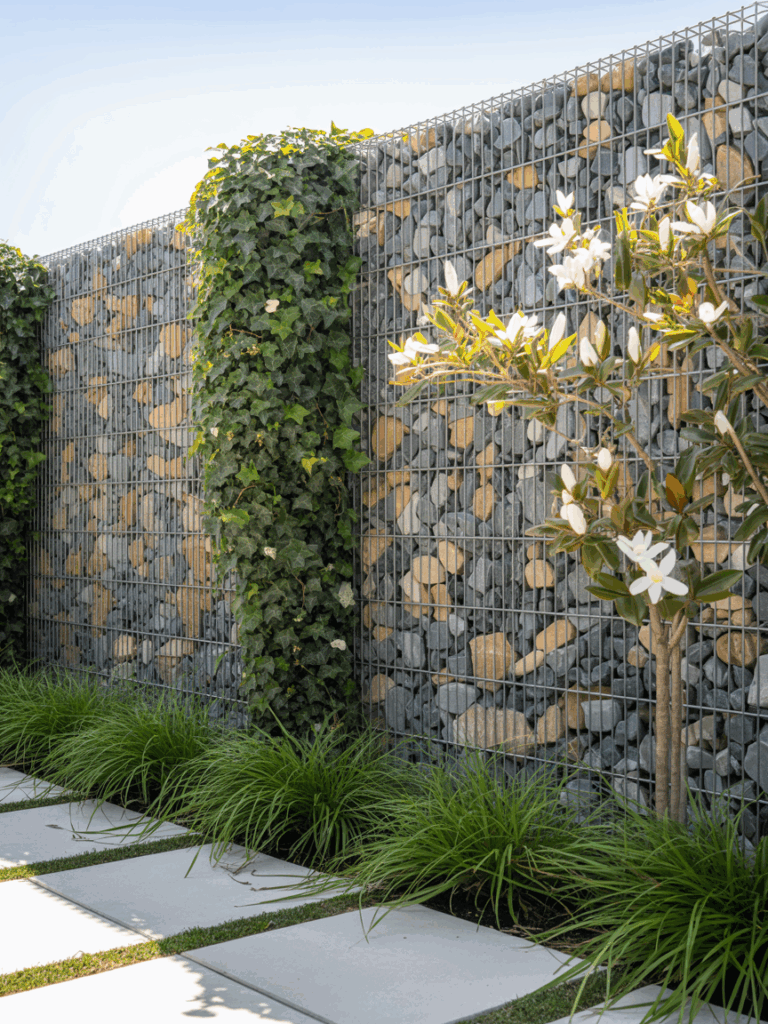
💰 Budget Breakdown
This design works because it perfectly balances hard and soft, living and non-living elements. The rigid, geometric grid of the gabion cage and the cool grey stones provide a strong, static backdrop. This hardness is then beautifully softened and brought to life by the dark green ivy and the delicate white blossoms of the tree. The planting isn’t just at the base; it’s integrated into the wall itself, making the entire structure feel like a dynamic, living part of the garden—not just a barrier.
23. A Simple Gabion Border Defining a Mulched Flower Bed
Installing a low gabion garden border is a perfect weekend project. Here’s a quick guide to do it right:
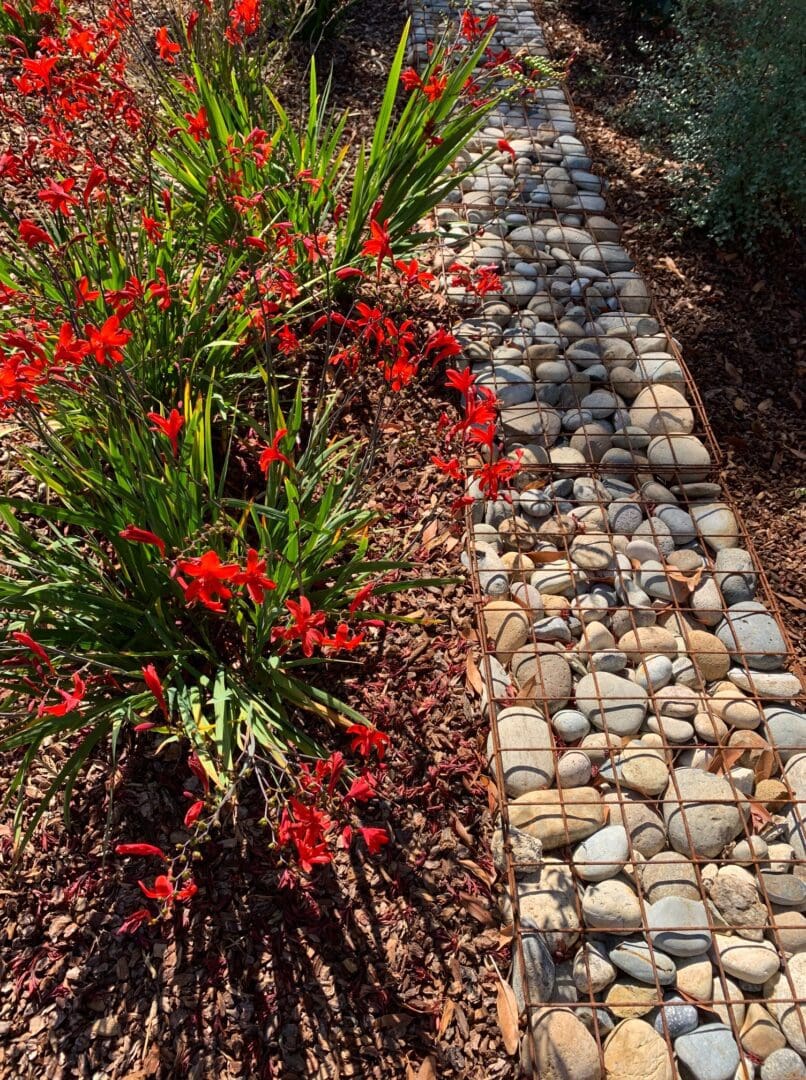
⭐ The One Thing
- Mark Your Line: Use a rope or garden hose to lay out the exact line where you want your border.
- Dig a Shallow Trench: Excavate a trench about 3-4 inches deep and as wide as your gabion basket. This helps seat the basket firmly and prevents it from shifting.
- Add a Gravel Base: Fill the trench with an inch or two of compacted pea gravel to create a level and well-draining foundation.
- Assemble and Place: Assemble your narrow gabion baskets and place them in the trench, wiring them together for a continuous line.
- Fill with Stone: Carefully hand-place your river rocks. For a clean look, put the smoothest, most attractive stones facing out.
When filling a narrow gabion border like this (typically 6 inches or less in width), the size of your stone is critical. You must choose stones that are larger than the openings in the wire mesh—a common mesh size is 3×3 inches, so your stones should be at least 4 inches in diameter. At the same time, the stones can’t be wider than the basket itself. This means you need a very specific size of rock. Always measure your basket’s mesh openings and width before you order your stone fill.
24. Modern Gabion Wall with Integrated Light Panels and Water Feature
The single element that makes this wall a showstopper is the integrated light panels. By breaking up the continuous texture of the stone with vertical columns of soft, diffused light, the design moves from functional to magical. It provides ambient illumination, but more importantly, it turns the wall into a piece of sculpture. The glow from within the wall, reflected in the dark water at its base, creates a serene, high-end resort atmosphere that a simple stone wall could never achieve.
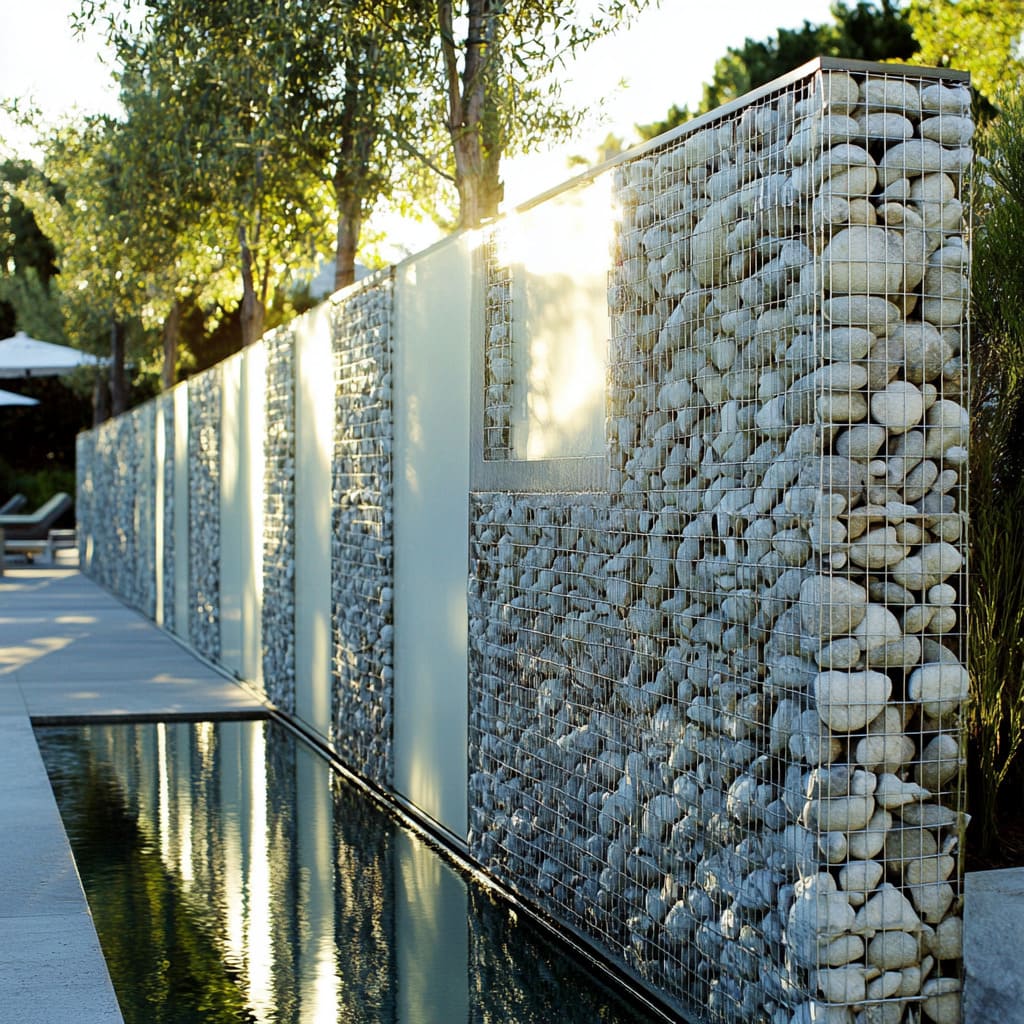
📐 Style Math
Incorporating custom lighting and water features into a gabion wall isn’t for a novice DIYer. This requires routing low-voltage electrical wiring and installing waterproof LED fixtures, all of which must be done to code to be safe. The linear water feature needs a perfectly level concrete foundation and a circulation system to keep the water clear. This is a job for a professional landscape contractor who has experience with gabions, lighting, and water features to ensure it’s built safely and functions correctly.
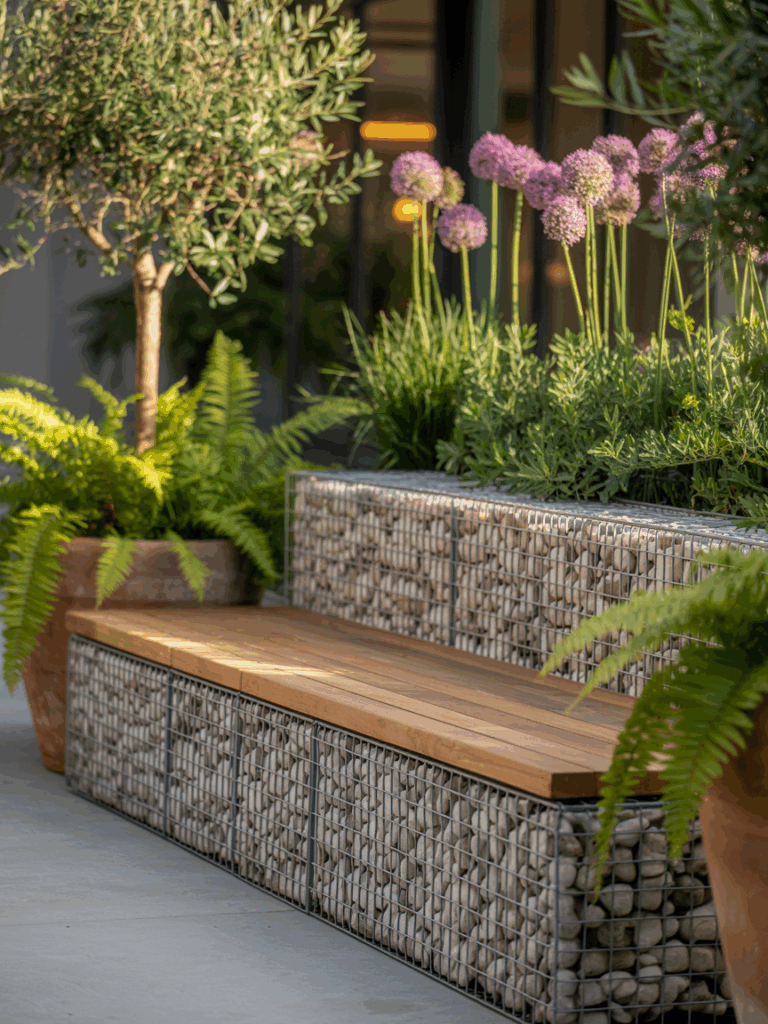
25. A Combined Gabion Planter and Integrated Wood Bench
When integrating a wooden bench into a gabion wall, the choice of wood and its finish is paramount to longevity. You must use a species known for its natural rot and insect resistance, like teak, ipe, or cedar. Even with these durable woods, it’s critical to apply a high-quality penetrating oil or marine varnish that offers UV protection. Reapply the finish every 1-2 years. Also, ensure the wood slats are installed with small gaps (about 1/4 inch) between them to allow for water drainage and air circulation, which prevents moisture from getting trapped.
⚠️ Real Talk
Before you build a bench, think about who will be using it and how. A comfortable and ergonomic design is just as important as the aesthetics. Here’s a quick checklist:
- Seat Height: Is the planned height of 16-18 inches off the ground comfortable for you?
- Seat Depth: Aim for a depth of 18-20 inches to provide proper leg support. A deeper bench, like the one in Idea #31, can feel more like a lounge space.
- Weight Support: Is the internal structure designed to support the weight of several adults? The wooden seat should be supported by a metal frame, not just resting on the stone fill.
- Back Support: If you plan to add a backrest, is it angled slightly (around 5-10 degrees) for comfortable leaning?
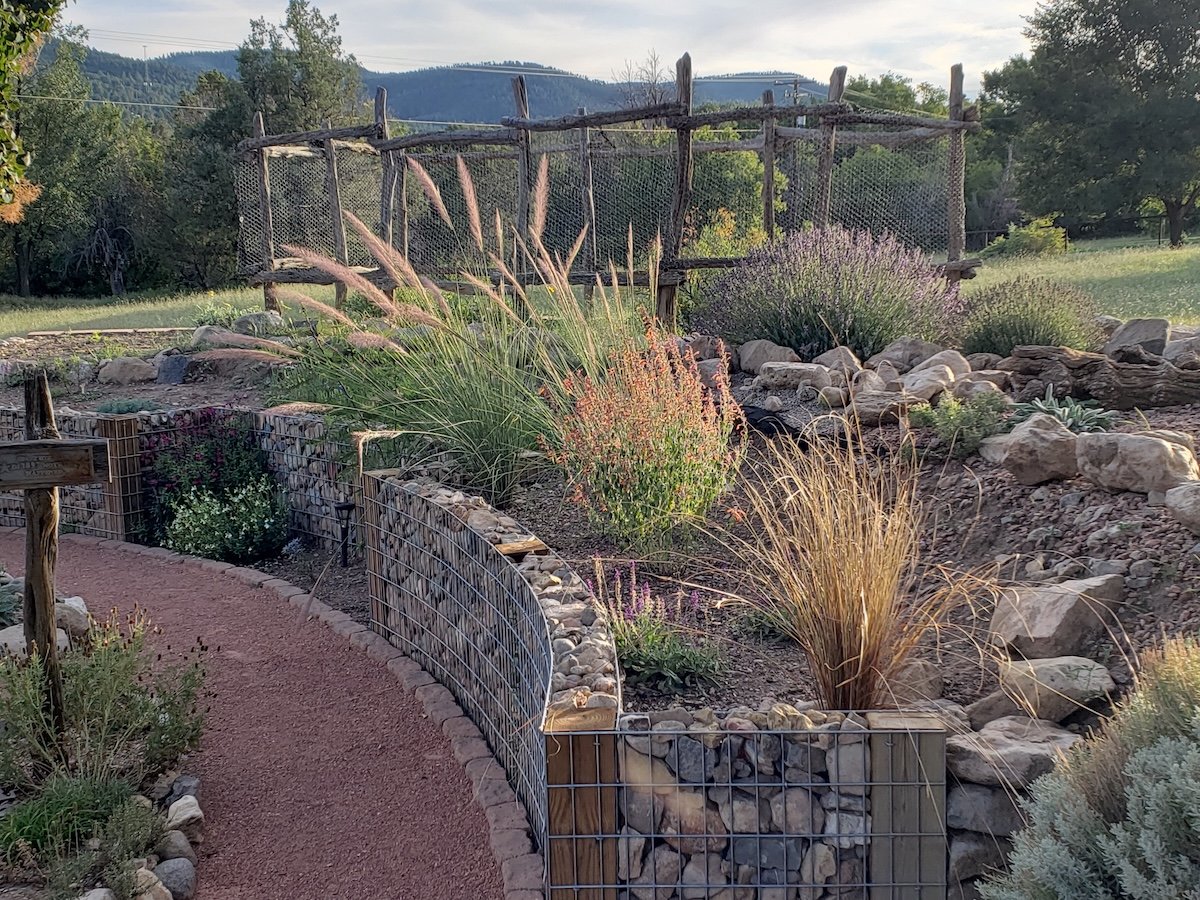
26. Curved Gabion Retaining Walls Along a Red Gravel Path
This landscape feels so natural and serene because of how the curved lines of the gabion walls and the red gravel path guide your eye through the space. Instead of rigid, straight lines, the gentle arcs meander, creating a sense of discovery and encouraging a slower pace. The contrast between the cool gray stone of the walls and the warm, reddish tone of the gravel path adds another layer of visual interest and helps to define the walkway as a distinct element within the lush green garden. It’s a classic landscape design trick executed perfectly.
✅ Before You Start
This layered, curving design is ideal for medium-sized, sloped backyards. You need enough space to allow the curves to feel generous and not cramped, so a yard that is at least 40-50 feet wide is a good starting point. The retaining walls themselves don’t need to be massive; a height of 2-3 feet is often plenty to create usable terraces and manage a gentle slope. This approach is a more organic-feeling alternative to the grander, more industrial retaining walls seen in Idea #1.
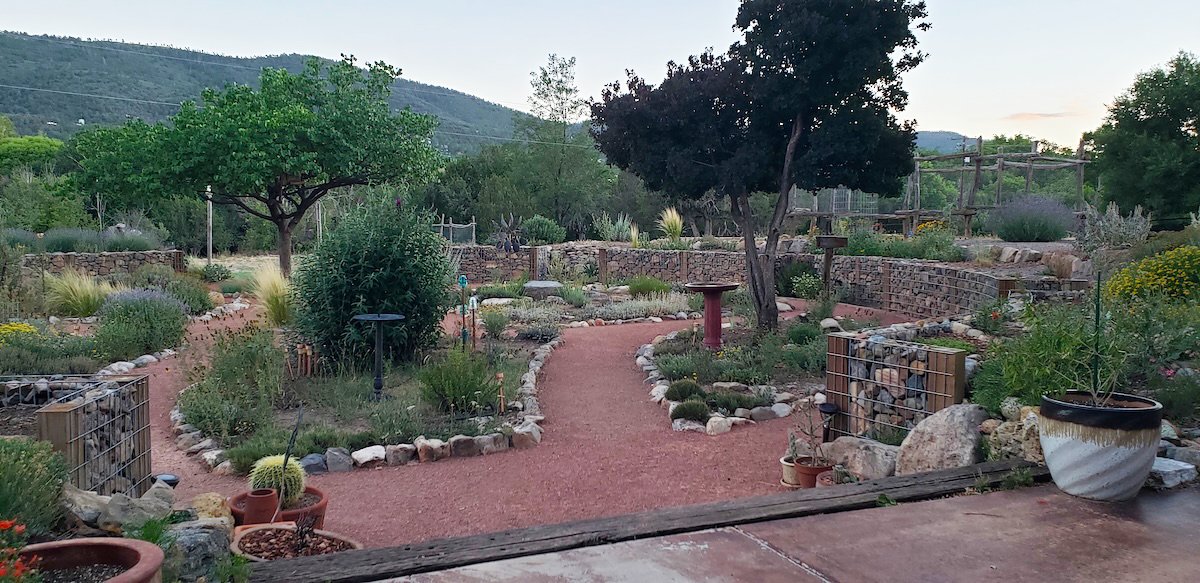
27. A Terraced Garden with Gabion Walls and Crushed Red Rock Paths
Creating an extensive terraced landscape is a major project with a wide cost range, depending heavily on labor. Here’s a possible breakdown:
🎯 What Makes It Work
- Gabion Baskets & Stone Fill (for approx. 100 linear ft.): $3,000 – $7,000
- Red Crushed Rock & Pathway Edging: $800 – $2,000
- Drought-Tolerant Plants & Trees: $1,000 – $4,000
- Labor (Excavation, Installation): $5,000 – $15,000+
- TOTAL: $9,800 – $28,000
Budget alternative: Tackle the project in phases over several years. Build one terrace at a time, starting with the highest or lowest point, to spread the cost and labor out significantly.
Planning is everything for a terraced garden. Here is a mini-guide:
- Measure Your Slope: Use strings and line levels to determine the total vertical drop (‘rise’) and horizontal length (‘run’) of the area.
- Plan Terrace Height & Depth: Divide the total rise by the number of terraces you want. A comfortable wall height is 2-3 feet. Ensure the flat terrace area is deep enough to be useful (at least 4-5 feet).
- Map it Out: Use landscape paint to mark where each wall will go. This helps you visualize flow and pathways.
- Start at the Bottom: Always build the lowest retaining wall first. This provides a stable base to work up from and prevents soil from the upper levels from sliding down onto your work area.
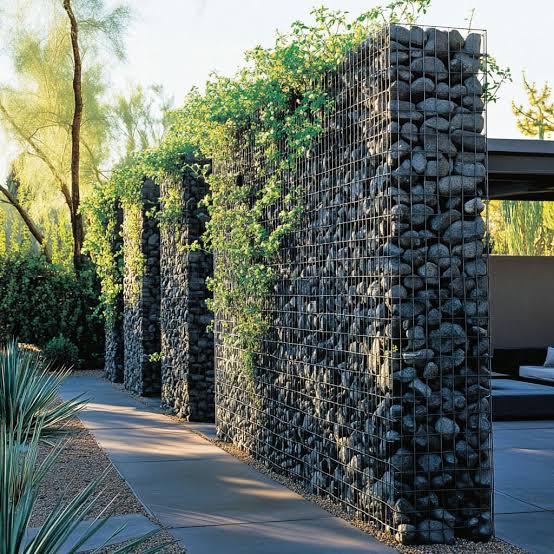
28. A Privacy Screen of Gabion Walls with Cascading Greenery
This serene and private patio space follows a simple but effective design recipe: 70% rigid structure + 30% untamed nature. The repeating gabion walls, with their dark gray rock fill and black metal mesh, create a strong, rhythmic, and modern backdrop. This hardscape is then dramatically softened by the lush, green climbing plants that are allowed to spill over the top and down the sides. It’s the perfect push-and-pull between human-made order and natural chaos, resulting in a balanced, tranquil atmosphere.
📏 Scale Guide
The key to maintaining this lush, spilling-over look is choosing the right plants and giving them the right care. Trailing plants like creeping Jenny or certain types of ivy are great choices. You’ll need to install a simple drip irrigation line along the top of the wall, hidden just behind the top layer of stone, to ensure the plants get enough water. Be prepared to do some seasonal trimming and training to encourage the plants to cascade down the front of the wall and to keep them from getting too overgrown or woody.
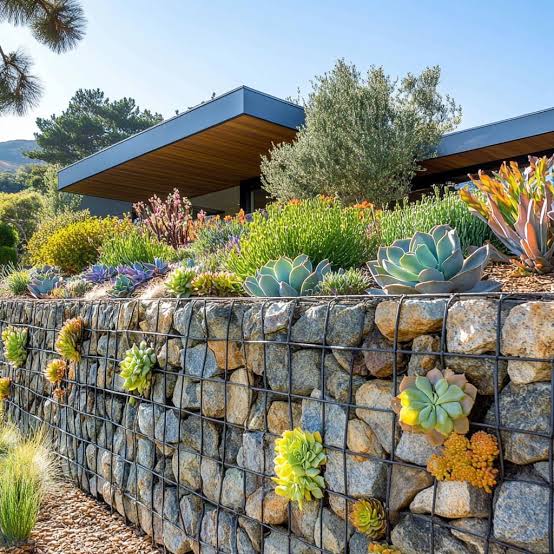
29. A Modern Gabion Retaining Wall with Succulent Pockets
The trick to successfully planting succulents directly into the face of a gabion wall is to create planting pockets as you build it. Don’t try to just stuff plants into the gaps afterward. As you fill the basket with rock, strategically place a few empty 4-inch nursery pots where you want plants. Fill the rest of the gabion with stone around them. Once the wall is full, remove the pots, fill the resulting cavities with a fast-draining cactus/succulent soil mix, and then insert your succulents. This gives their roots a proper home.
🔧 How-To Brief
This design feels so cohesive because the materials echo the surrounding environment. The earthy, muted tones of the gabion stones pick up on the colors of the soil and the distant landscape. The sharp, modern lines of the dark wire mesh and the roof of the house provide a grounding structure, while the varied shapes and vibrant greens of the succulents add a layer of living, sculptural detail. It’s a design that feels completely connected to its modern architectural and natural setting.
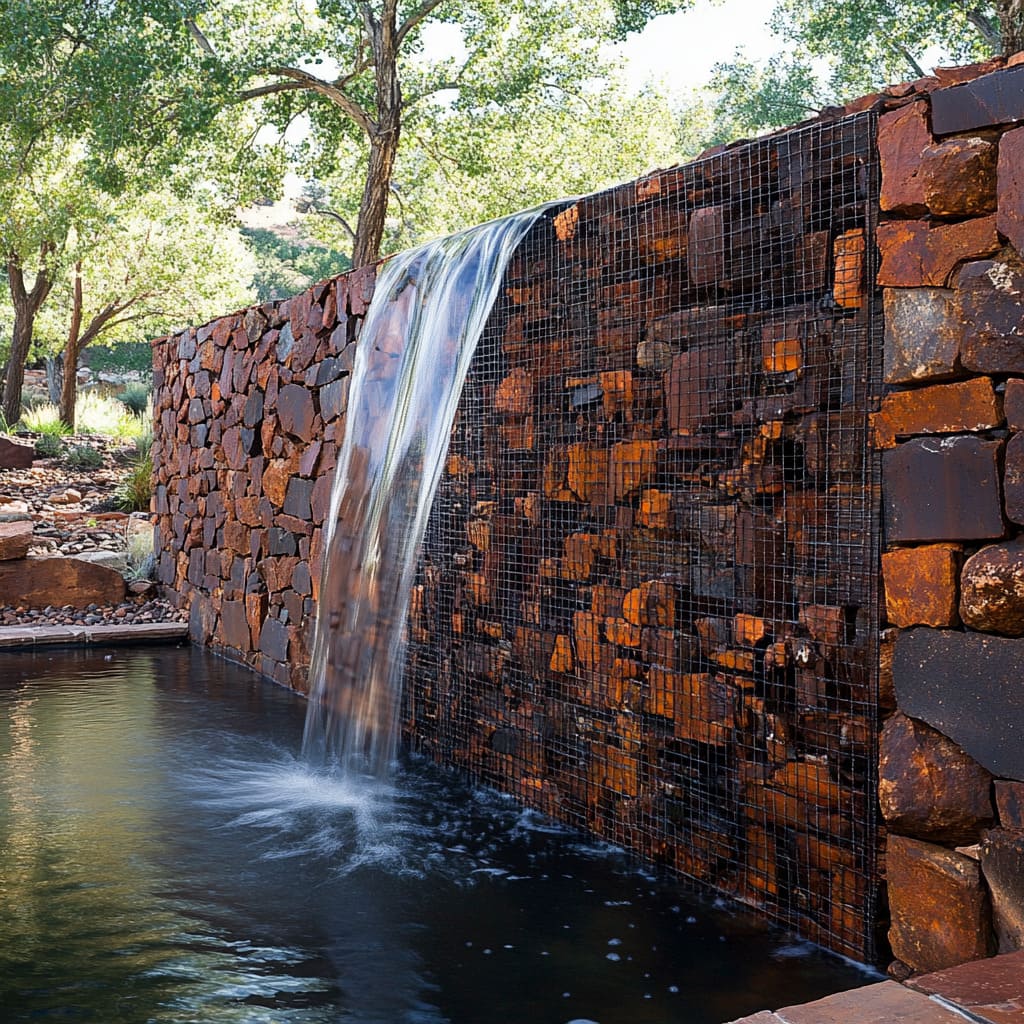
30. A Rustic Gabion Wall with a Cascading Waterfall and Pond
More than the visuals, the one thing that truly defines this feature is the sound. The gentle, cascading sound of water falling over the reddish-brown stones and into the pond transforms the garden into a tranquil oasis. It masks neighborhood noise, creates a relaxing ambiance, and adds a dynamic, sensory element that a static wall could never provide. It’s this auditory experience that makes the space feel like a true escape. For a different take on a water feature, see the more contemporary Idea #13.
🔥 Trending Context
That beautiful dark pond water, while looking naturalistic, can be a sign of tannins from leaves and debris or an algae bloom. A healthy pond requires a balanced ecosystem. This involves a good filtration system (mechanical and biological) to remove debris and process waste, and adequate water circulation to keep it oxygenated. Without proper filtration, a pond can quickly become stagnant and smelly, especially in a sunny location. Be prepared for the regular maintenance that a living water feature demands.
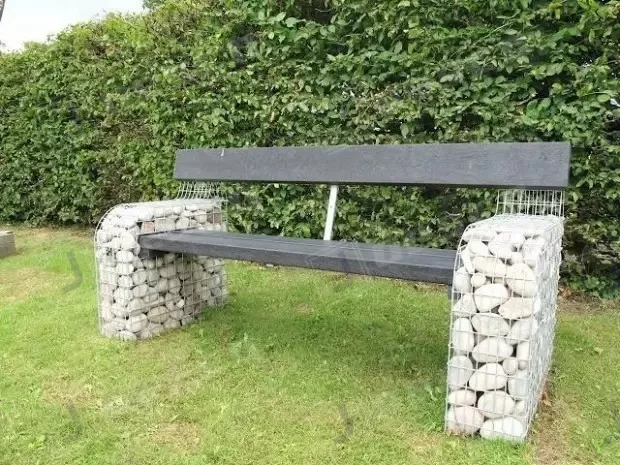
31. A Simple, Modern Bench with Gabion Bases and Dark Wood Slats
High-end modern outdoor furniture can be incredibly expensive. This gabion bench delivers a very similar clean, contemporary look for a fraction of the price of a designer piece. A pair of gabion baskets can be purchased for $100-$200, and local landscape stone to fill them might cost another $100. The wooden slats for the seat and backrest, if you use a common decking material like pressure-treated pine or cedar, could be under $150. With a bit of DIY spirit, you can build this stylish and durable bench for under $500, a huge saving compared to retail benches that can run into the thousands.
🧹 Maintenance Reality
This bench design is so successful because of its honesty and simplicity. There are no hidden tricks or superfluous decorations. It’s made of just three basic materials: stone, wire, and wood. The light, textured stone in the base baskets provides a visual anchor and a natural feel. The dark, smooth wood of the slats offers a warm and comfortable seating surface. The thin, metallic lines of the gabion cages tie it all together with a touch of modern, industrial crispness. It’s a design that is strong, functional, and effortlessly stylish.
Your Outdoor Structure Story Starts Here
From a simple garden edge to a full-blown outdoor kitchen, gabions offer a unique way to add texture, structure, and style to your yard. They prove that practical can be beautiful. Feeling inspired? Pick your favorite idea, start planning, and get ready to build something that lasts. Don’t forget to save your top picks to your “Future Backyard” board on Pinterest!