You know that feeling when you finally find the perfect pin for hiding that ugly AC unit, but you’re not sure how to make it work in your own yard? We’ve all been there, endlessly scrolling for a solution that feels both beautiful and doable. That’s why we did the heavy lifting for you, sorting through hundreds of options to find what’s genuinely good. After filtering through inspiration from top retailers, we narrowed it down to the 27 best ideas that actually deliver. We’re covering everything from sleek modern screens to clever landscape-integrated solutions, ensuring there’s a style for every home. And stay until the end — we break down the most common mistakes that can ruin these looks. 📌 Save this to Pinterest for later — you’ll want to revisit these ideas.
1. Use Slatted Wood Screens for Privacy and Utility Concealment
This solution is so effective because it tackles two problems at once: privacy and concealment. The warm, light wood slats create a visual boundary that feels inviting, not aggressive, turning a purely functional patio space into a cozy outdoor room. The repetition of the slatted design—from the larger privacy wall to the smaller utility box—creates a cohesive, intentional look. It proves that utility solutions don’t have to be an afterthought; they can be a core part of the design language. The string lights and patterned rug soften the clean lines, adding layers of comfort.
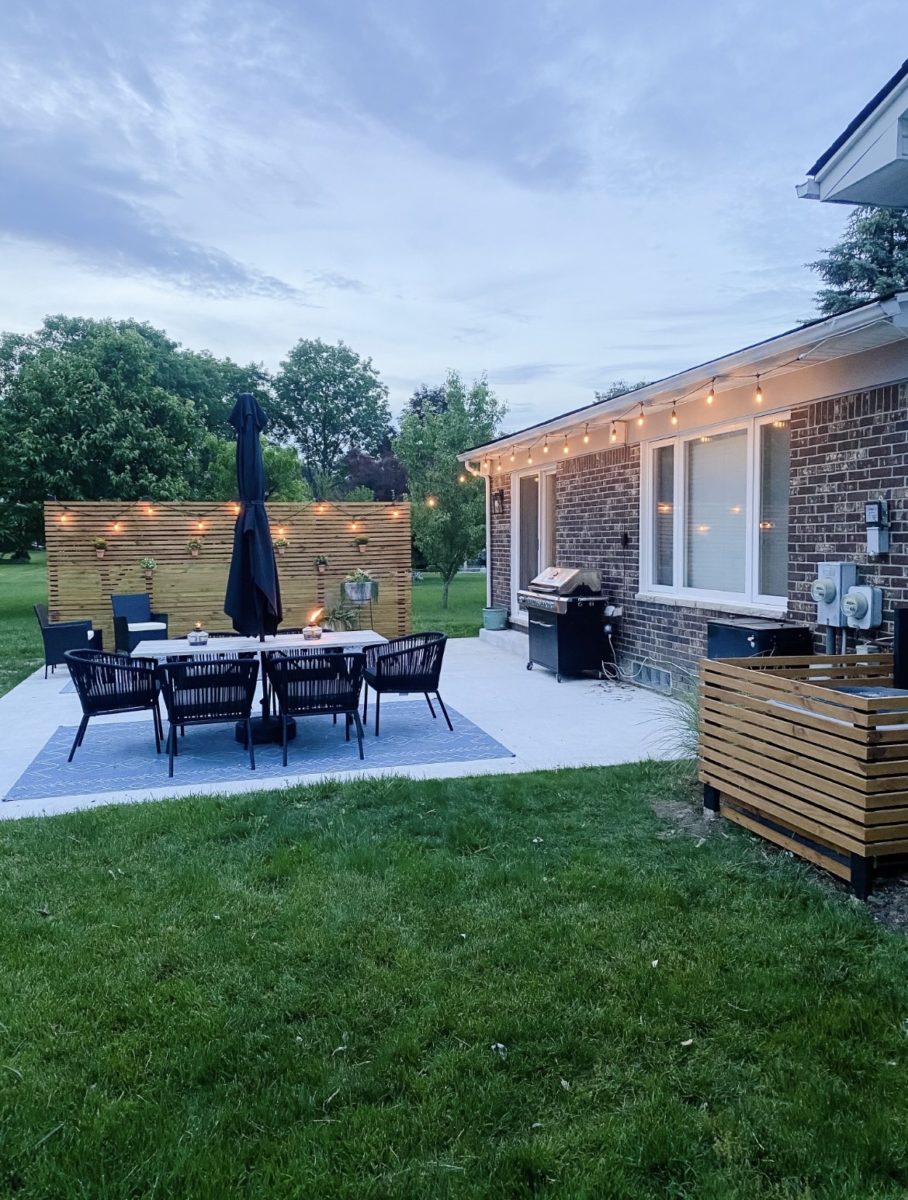
🔧 How-To Brief
This look feels custom, but it’s surprisingly achievable on a sliding scale. Here’s a potential cost breakdown to recreate this specific setup:
- Main Furniture (Table & Chairs): $700 – $2,000
- Lighting (String lights, Umbrella light): $100 – $300
- Textiles (Outdoor Rug): $150 – $400
- Decor (Potted plants): $75 – $200
- Materials (Wood for screens, hardware): $500 – $1,500
- TOTAL: $1,525 – $4,400
Budget alternative: Build the screens with lower-cost lumber and opt for secondhand furniture finds from Facebook Marketplace to bring the total down by 40-50%.
2. Install a Modern Horizontal Slat Fence to Hide Utilities
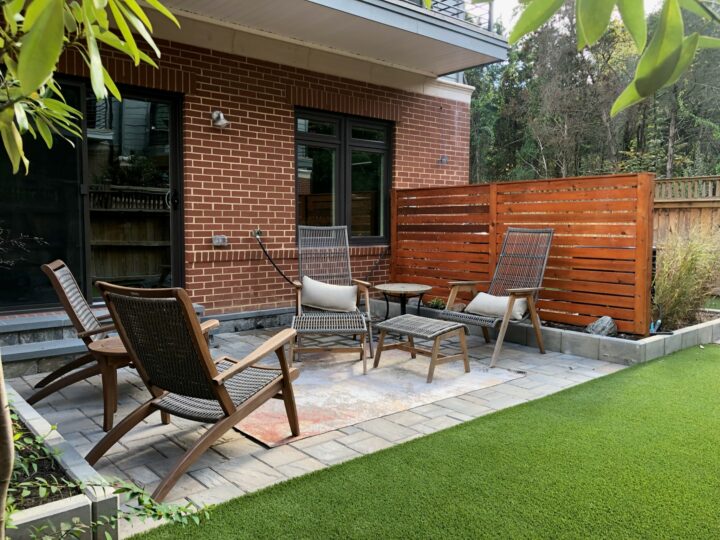
When building a horizontal slat screen, the spacing is everything. For a modern, high-end look that still provides good coverage, aim for a gap that is no more than 50% of the slat’s width. For example, if you’re using 3.5-inch-wide boards (a standard 1×4), your gap should be 1.75 inches or less. This maintains a sense of substance and privacy. Any wider, and the screen starts to look flimsy and fails to properly conceal what’s behind it. Always use weather-treated lumber rated for ground contact for your posts, even if the rest of your wood is a different species.
📏 Scale Guide
The visual success here is a lesson in balanced composition. The formula is approximately 60% dominant natural material (the reddish-brown wood fence), 30% cool, solid base (the light grey pavers), and 10% dark, textural accent (the woven chairs). This simple math creates a look that’s grounded and sophisticated. You could swap the reddish-brown wood for a dark composite material and the woven chairs for black metal ones, and the formula would still hold, delivering a similar modern-yet-natural vibe.
3. Elevate Your Yard with a Well-Chosen Privacy Fence
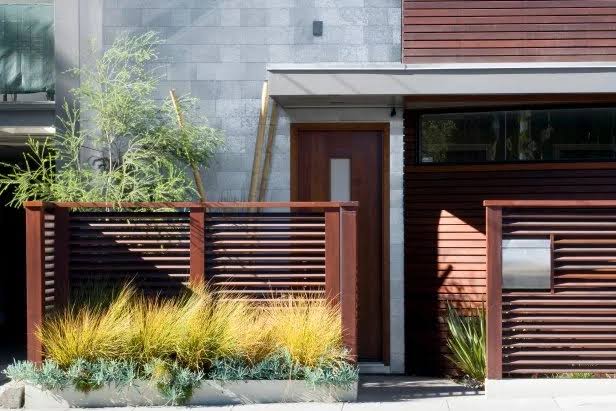
Just putting up any old privacy fence won’t necessarily solve your eyesore problem; a cheap-looking fence can become an eyesore itself. The biggest pitfall is choosing a material or height that clashes with your home’s architecture or your neighborhood’s vibe. A towering, solid-panel vinyl fence might feel like a fortress next to a charming brick cottage. The key is to see the fence as an extension of your home’s design, not just a barrier to hide the ugly stuff. It’s an opportunity to add style, not just subtract a problem.
✅ Before You Start
Before you commit to a full fence project, which is a significant investment, run through this quick checklist to ensure you’re on the right track:
- Have I checked local HOA and city regulations on fence height, material, and placement?
- Does the style of the fence complement the architectural style of my house?
- Have I walked the proposed fence line to check for obstructions like tree roots, buried utility lines, or drainage issues?
- Is the primary goal privacy, security, or aesthetics? This will determine the best height and design.
4. Add a Charming Teal Garden Shed for Storage and Style
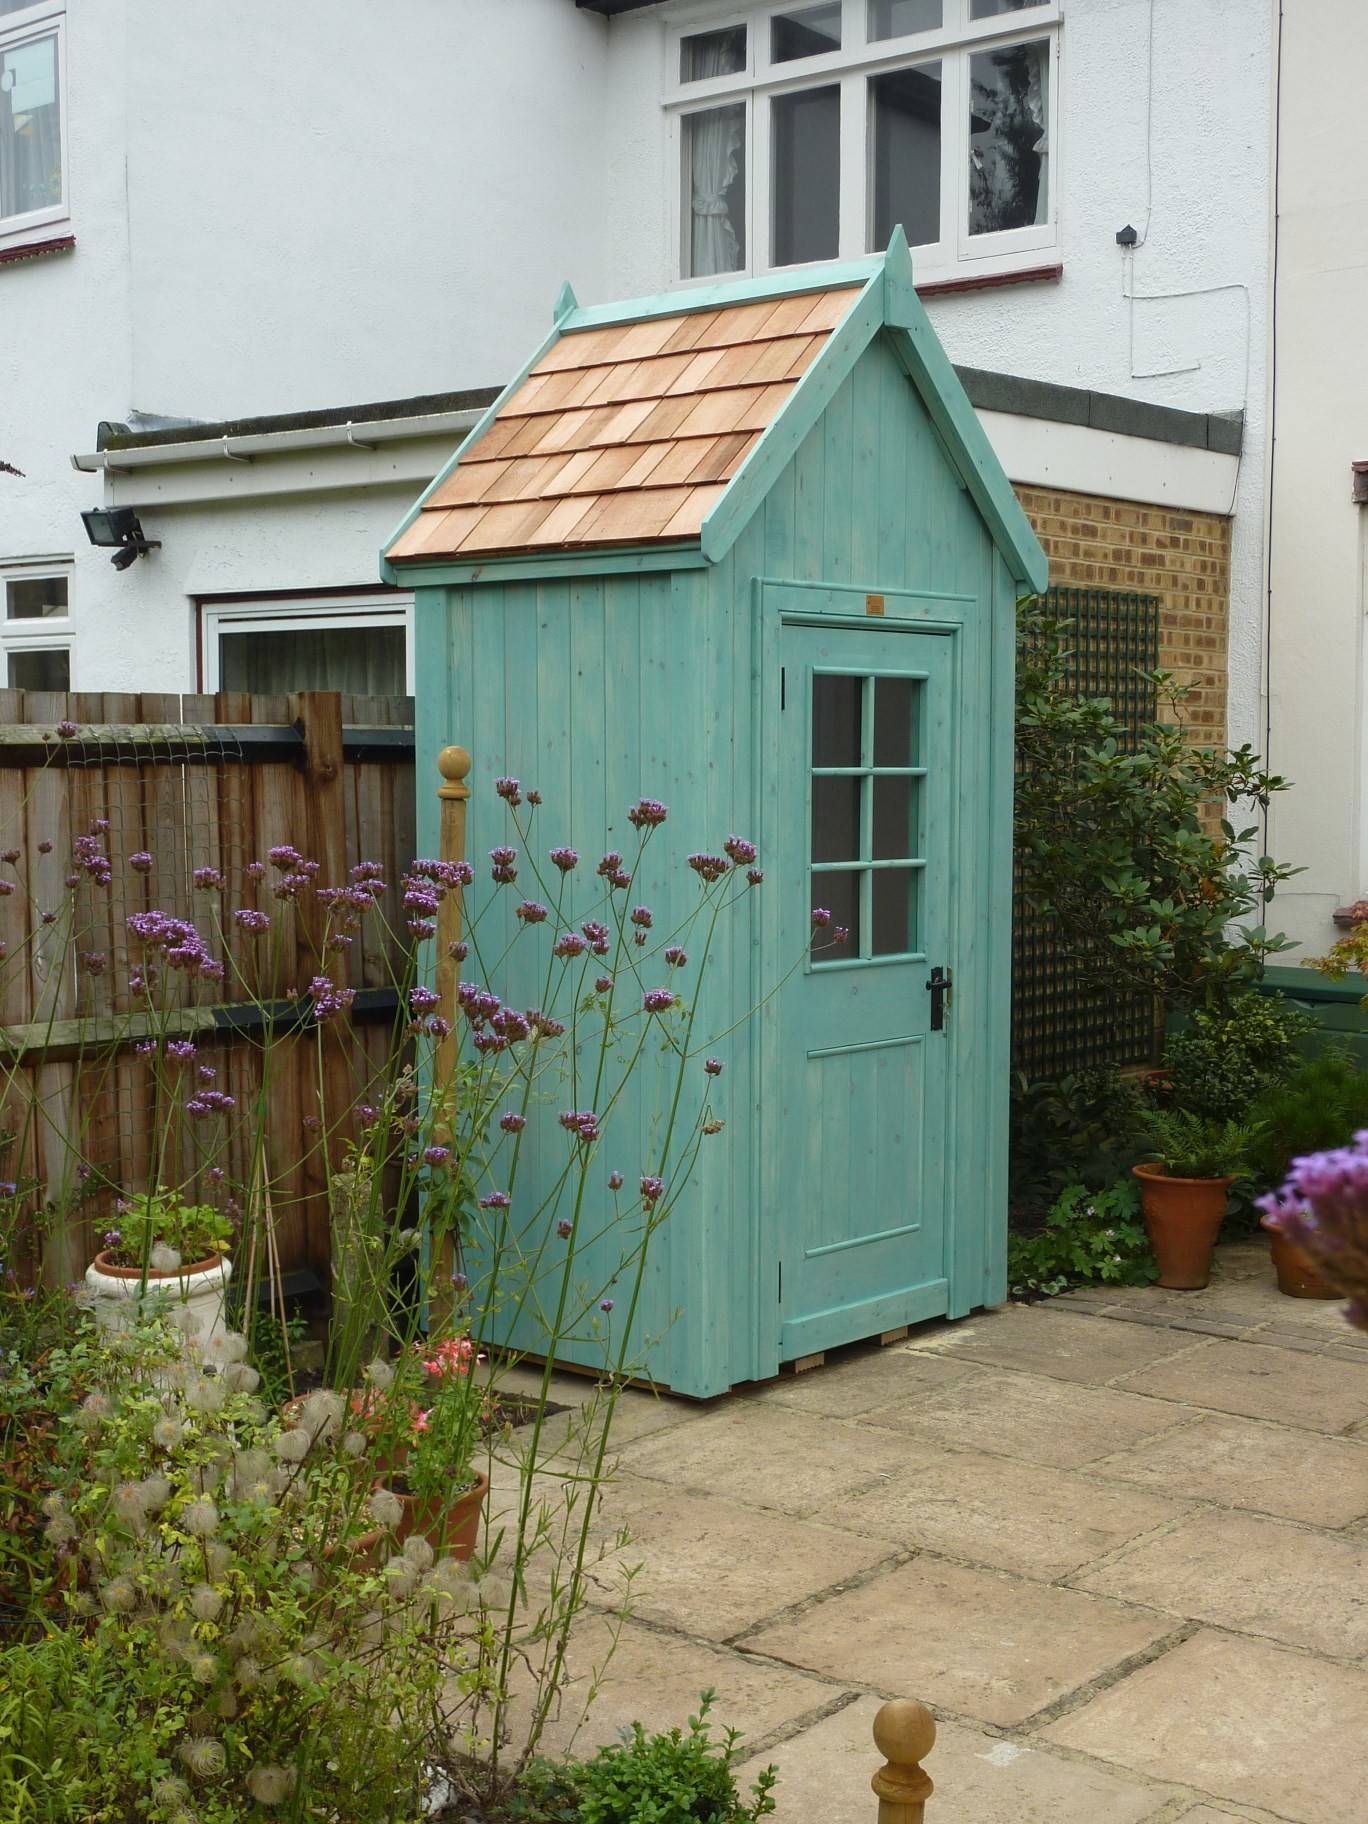
The single element that makes this work is the confident use of color. Without the fresh, light teal paint, this would just be a standard-issue garden shed. But the paint transforms it from a purely utilitarian object into a delightful focal point. It’s a design choice that says, “I’m not hiding my storage; I’m making it beautiful.” The natural wood roof shingles provide the perfect textural and tonal balance, keeping the colorful shed from feeling out of place in a garden setting.
⭐ The One Thing
A painted wooden shed looks incredible, but it’s not a one-and-done project. To keep that teal looking fresh and not faded or peeling, expect to repaint it every 3-5 years, depending on your climate. The natural wood shingle roof is fairly low-maintenance but should be inspected annually for any cracked, loose, or mossy shingles that could lead to leaks. The biggest job will be managing moisture around the base; ensure the paved stones are graded away from the shed to prevent rot along the bottom edges. Annual cleaning with a soft brush and water will keep it looking its best.
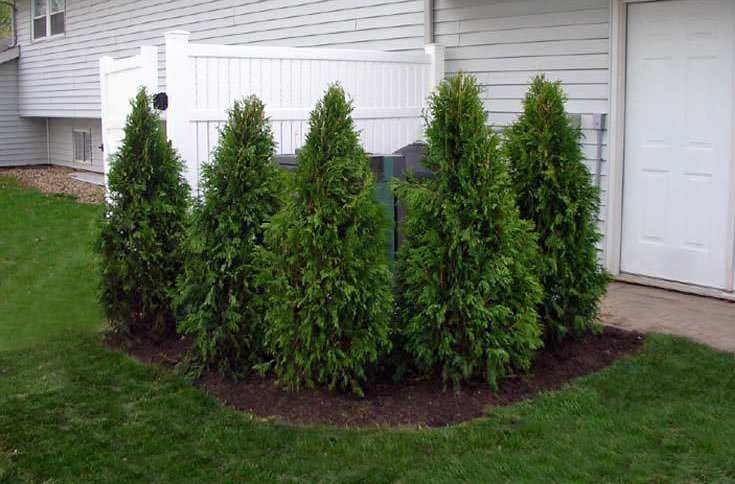
5. Plant a Strategic Evergreen Border to Conceal Utility Boxes
This is a masterclass in using living elements for concealment. The uniform, conical shape of the evergreen shrubs creates a neat, rhythmic pattern that is pleasing to the eye, drawing attention away from the awkwardly shaped utility boxes behind them. Using a single type of plant in a straight line provides a sense of order and intentionality—it reads as a deliberate landscape design feature, not just a random attempt to hide something. The dark mulch further unifies the planting bed and suppresses weeds, making the solution both beautiful and low-maintenance.
🔥 Trending Context
A living fence is one of the most cost-effective screening solutions, especially when compared to hardscaping. You can achieve this tidy look for significantly less than a constructed fence. While mature shrubs can be pricey, you can start with smaller, younger plants to save money.
- 5 small Thuja ‘Emerald Green’ Arborvitae (2-3 ft tall): $150 – $250
- Bags of dark brown mulch: $30 – $50
- Shovel and garden gloves: $40
- Total DIY Cost: $220 – $340
You’ll need patience as they grow to full height, but the long-term payoff is a beautiful, natural screen that adds value to your landscape. This biological approach is a great counterpoint to the constructed screen in Idea #1.
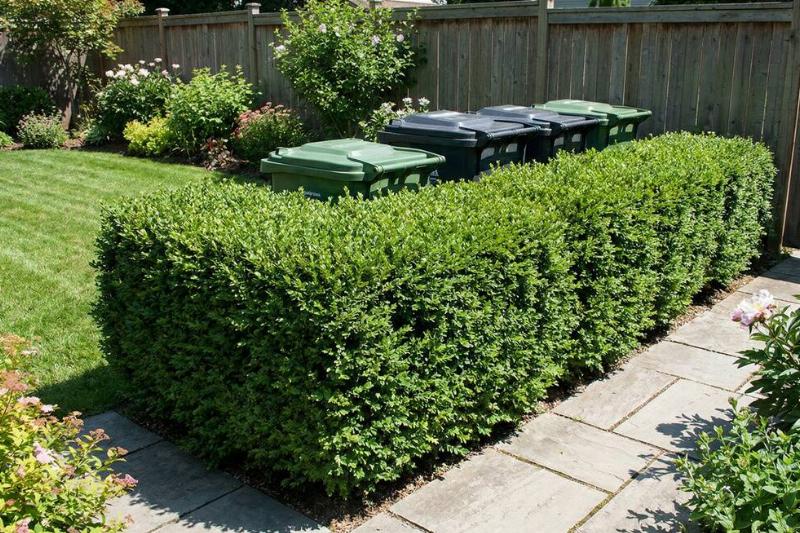
6. Grow a Dense Evergreen Hedge to Hide Refuse Bins
A hedge is a fantastic living screen, but it requires the right amount of space to thrive. For a dense hedge like this to effectively hide trash bins (which are typically 2-3 feet deep), you need a planting bed that is at least 4-5 feet deep. This gives the shrubs enough room to grow to their mature width without being squished against a fence or spilling onto the walkway. The hedge should be at least 15-20 feet long to comfortably conceal two to three standard-sized bins and allow for easy access. Any shorter, and it will look cramped and fail to provide complete coverage.
📐 Style Math
While a lush, green hedge is a beautiful solution, it comes with a reality check: hedges are living things that require ongoing care. They don’t look this neat and dense by accident. Be prepared for at least twice-yearly trimming to maintain the shape and prevent it from getting overgrown and woody. You also need to consider access. Make sure you leave enough space behind the hedge to easily pull the bins in and out on collection day. If the hedge grows too close to the fence or wall, it can become a hassle.
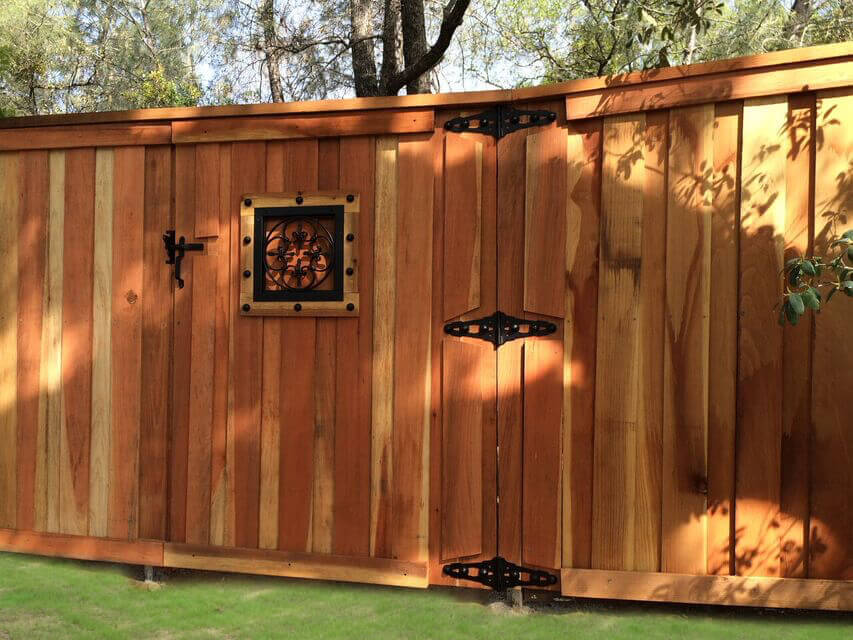
7. Install a Custom Wood Gate with Ornate Metal Accents
The ornate metal grate in the small square window is the detail that elevates this entire project. It transforms a simple wooden gate from a forgettable barrier into a charming, almost storybook entrance. Removing it would leave you with a perfectly fine gate, but you’d lose all the personality and custom feel. It’s a small touch that shows how hardware and decorative elements can be used to inject character into a purely functional build, making the entire fence feel more like a piece of craftsmanship.
⚠️ Real Talk
When you’re building a custom gate or fence, don’t just grab the cheapest hardware off the shelf. Think of hinges, latches, and handles as the jewelry for your project. Spending an extra $50-$100 on high-quality, decorative wrought iron or black powder-coated hardware can make a $500 fence look like a $2,000 custom job. Ensure the scale of the hardware matches the scale of the gate; oversized strap hinges can add rustic charm to a large gate, while a smaller, more intricate latch suits a pedestrian gate like this one.
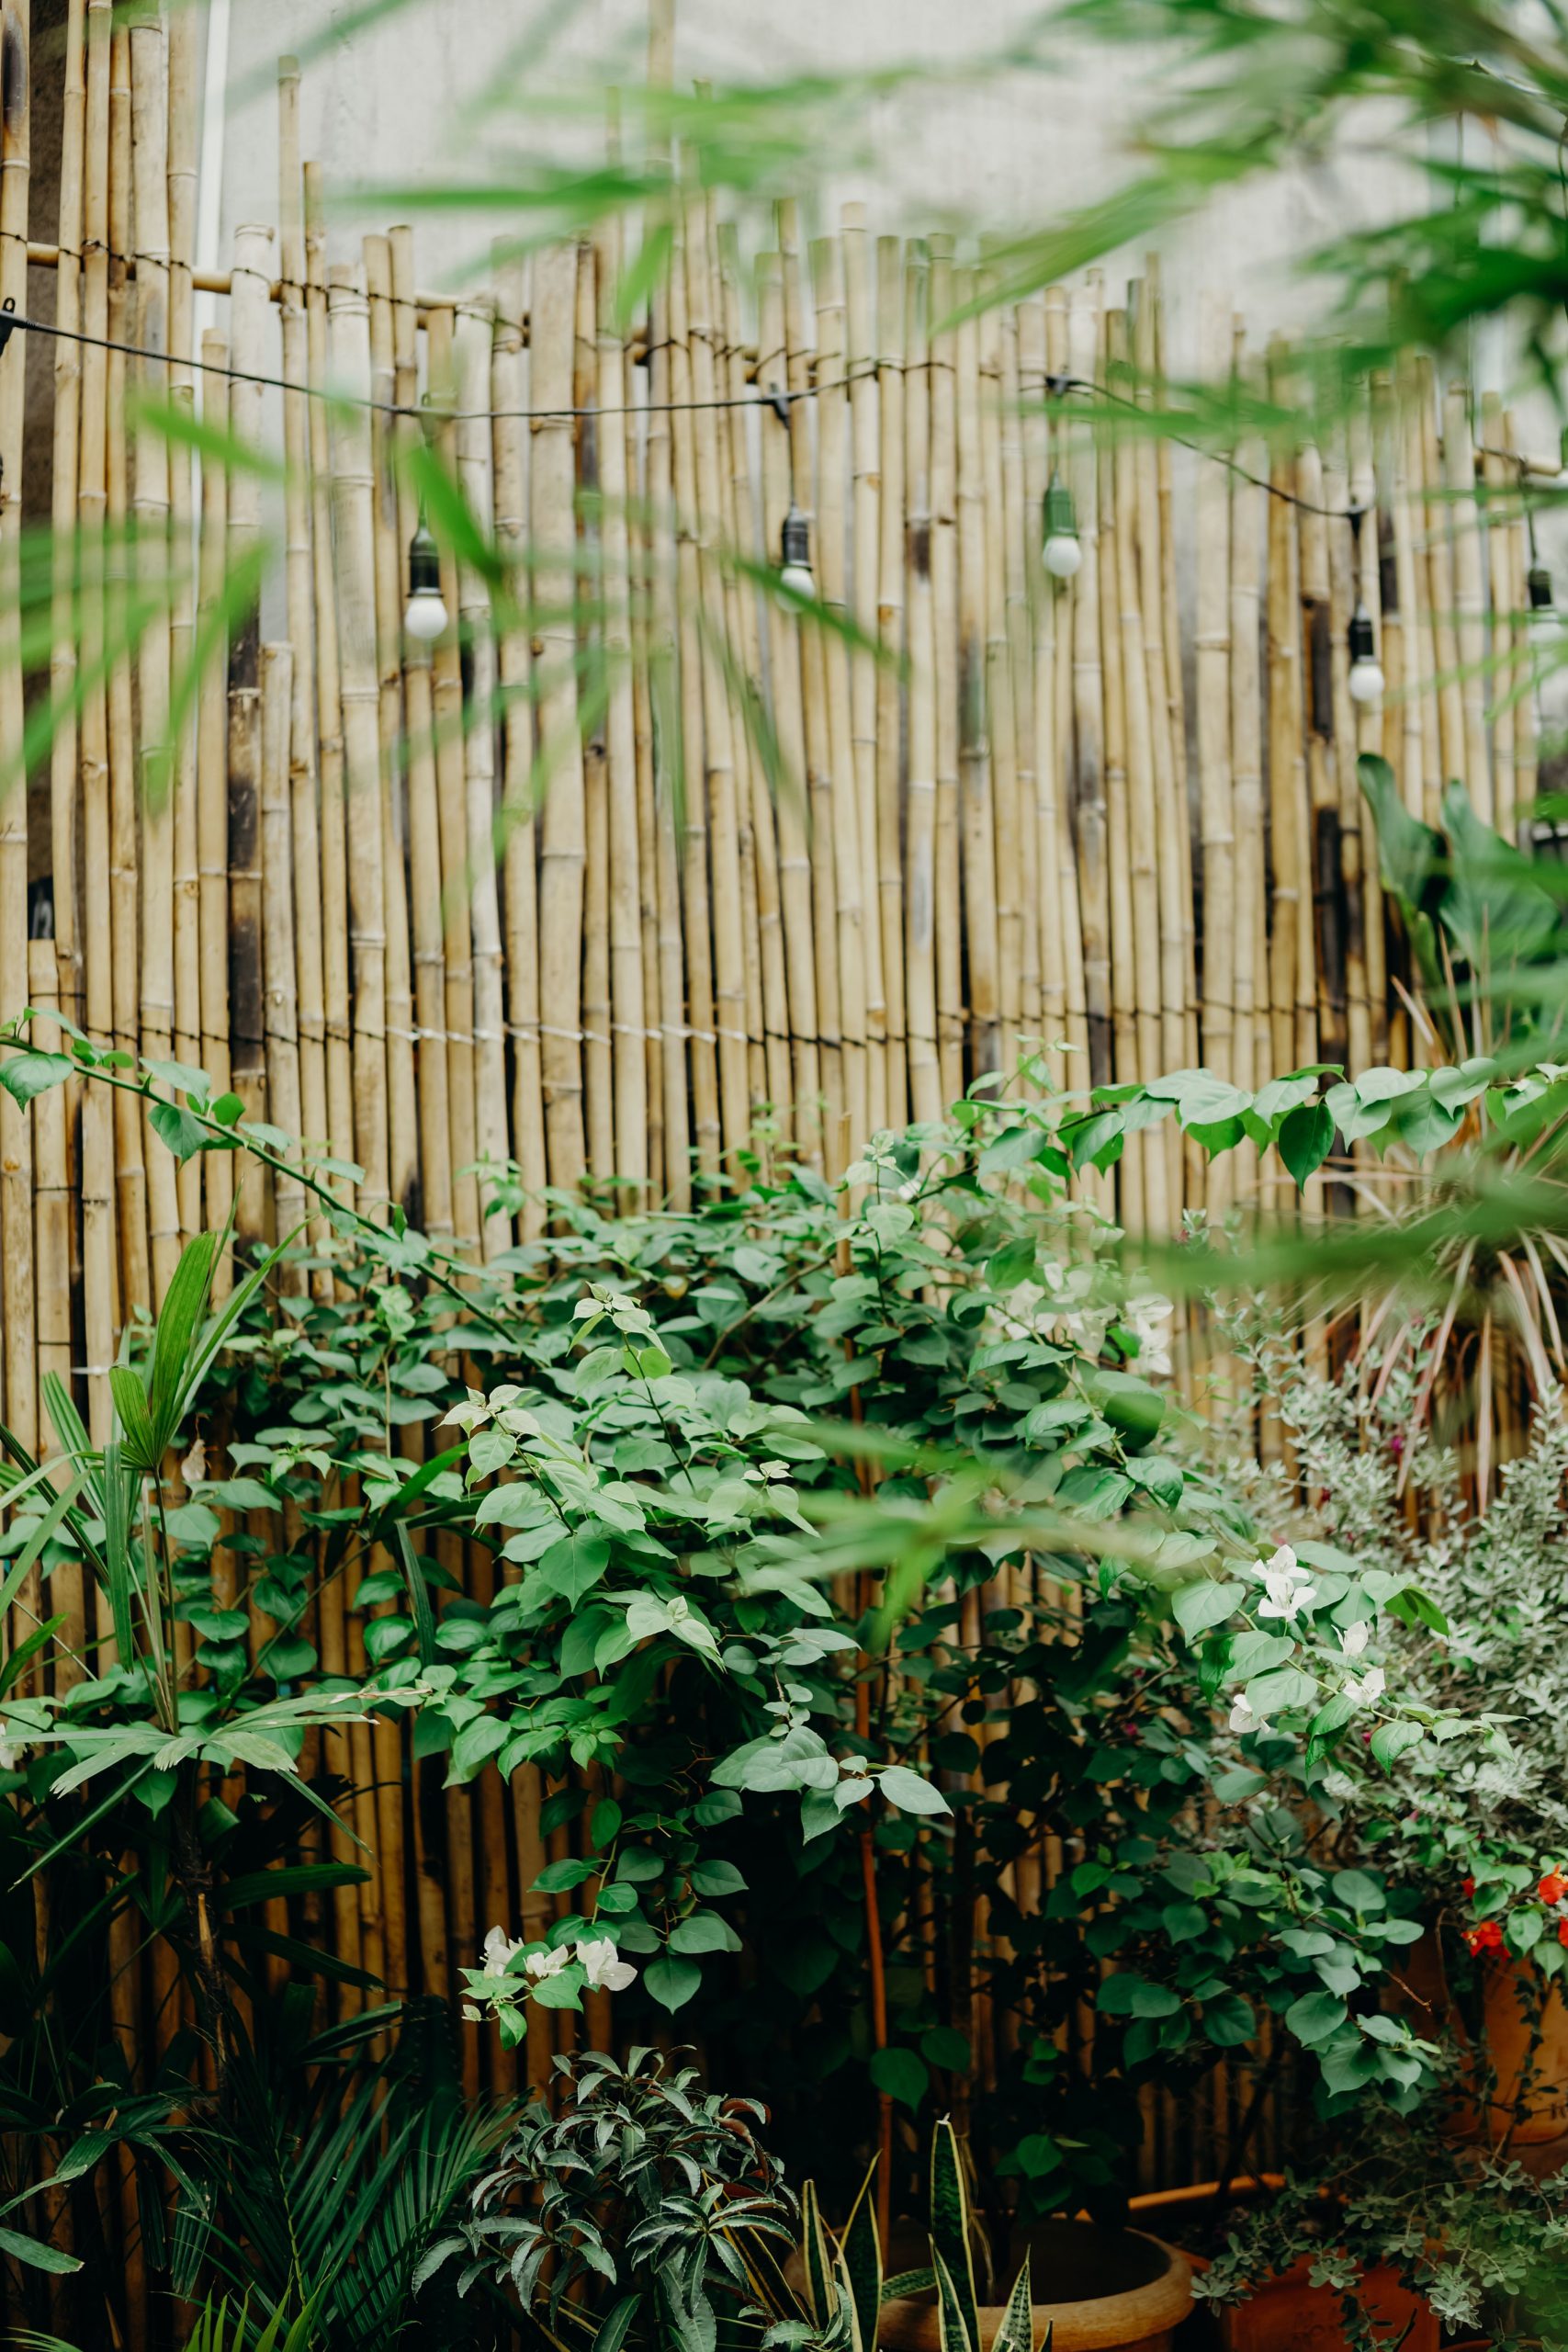
8. Create a Secluded Nook with a Bamboo Screen and String Lights
The magic of this intimate space comes from a simple formula: 50% natural texture + 40% lush greenery + 10% warm ambiance. The bamboo screen provides the dominant textural backdrop, feeling both organic and structured. The dense collection of plants, spilling out of their pots, creates a jungle-like feeling of enclosure and life. Finally, the soft glow from the Edison-style string lights provides that crucial 10% of warmth and intimacy, turning the nook into a perfect evening retreat. By sticking to this ratio, you can create a cozy vibe in almost any corner.
💸 Get This Look For Less
Want to recreate that inviting glow? Hanging string lights securely is key. Here’s a quick guide:
- Time: 30 minutes | Cost: $25 – $75
- Measure Up: Measure the length you need to cover and buy a string of outdoor-rated lights that’s slightly longer.
- Choose Your Hooks: Use screw-in cup hooks or outdoor-rated cable clips. For a bamboo screen like this, you can often just weave the wire through the bamboo stalks.
- Start at the Outlet: Begin securing the lights near your power source, running the cord upwards.
- Create a Drape: Don’t pull the string taut. A gentle, scalloped drape looks much more relaxed and professional. Secure the string with a hook or clip every 2-3 feet.
- Secure the End: Make sure the final bulb is securely fastened. Plug in and enjoy the ambiance!
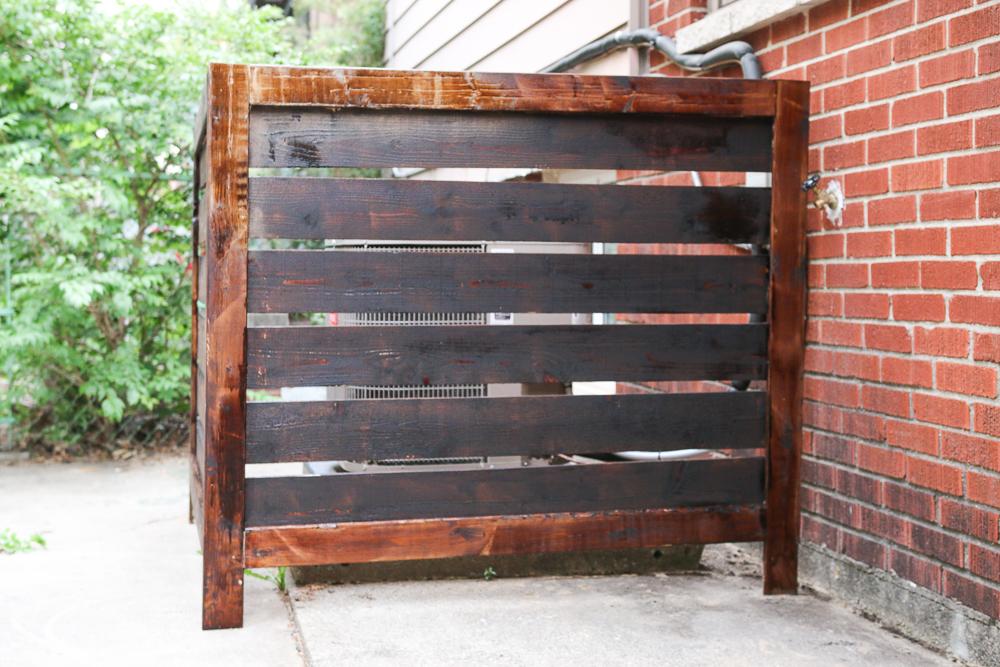
9. Build a Slat-Wood Enclosure for Your Air Conditioner
You don’t need expensive redwood or cedar to get this look. This is a perfect project for affordable, pressure-treated pine boards from a big-box store like Home Depot or Lowe’s. A three-sided enclosure like this can be built for under $150. Use one can of dark brown stain and another of a lighter, medium-brown stain to create the contrasting pattern. The key is to let the boards dry thoroughly after purchase before staining and assembly. With a circular saw, a drill, and a weekend afternoon, you can hide that AC unit for good.
💡 Designer Tip
The staggered, two-tone stain pattern is what makes this simple wooden box so visually interesting. It breaks up the monotony of a plain wood screen and turns it into a deliberate design feature. The horizontal lines of the slats create a sense of width, making the area feel more grounded. By stopping short of the brick wall and leaving a small gap, the design allows the texture of the brick to show through, adding another layer of visual depth. It’s a simple but incredibly smart design choice.
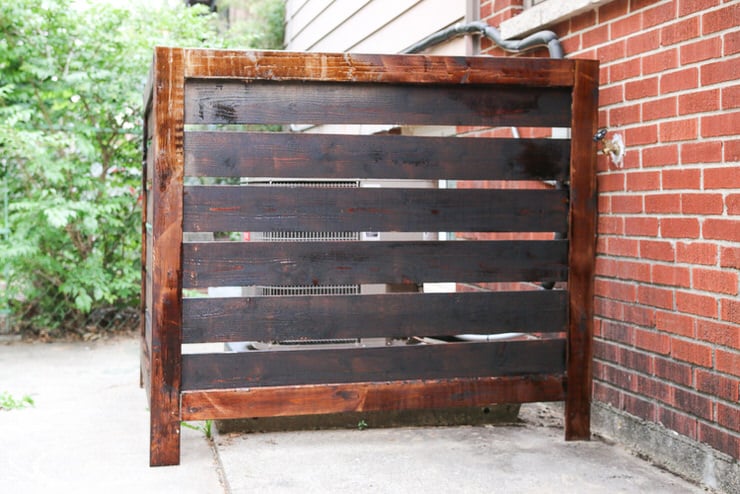
10. Use a Dark-Stained Wood Screen to Conceal an Outdoor Unit
Dark stains look incredibly chic and modern, but they require a bit more upkeep than natural finishes, especially in sunny climates. The dark pigments absorb more UV radiation, which can cause them to fade and break down faster. To keep this screen looking rich and black instead of a chalky gray, plan on cleaning it and applying a fresh coat of sealing stain every 2-3 years. If you live in a very damp area, a dark stain can also show mildew more readily, so an annual wash with a deck cleaner is a good idea. Compare the upkeep to the natural finish in Idea #14.
💰 Budget Breakdown
Before you even buy the lumber for a screen to hide a utility unit, you need to check the manufacturer’s recommendations for clearance. Most AC condensers require at least 24-36 inches of unobstructed space on all sides for proper airflow. Building a screen too close can cause the unit to overheat, work inefficiently, and even fail prematurely. Measure your unit, add the required clearance, and then design your screen to those dimensions. Also, ensure one side is easily removable for service and maintenance access.
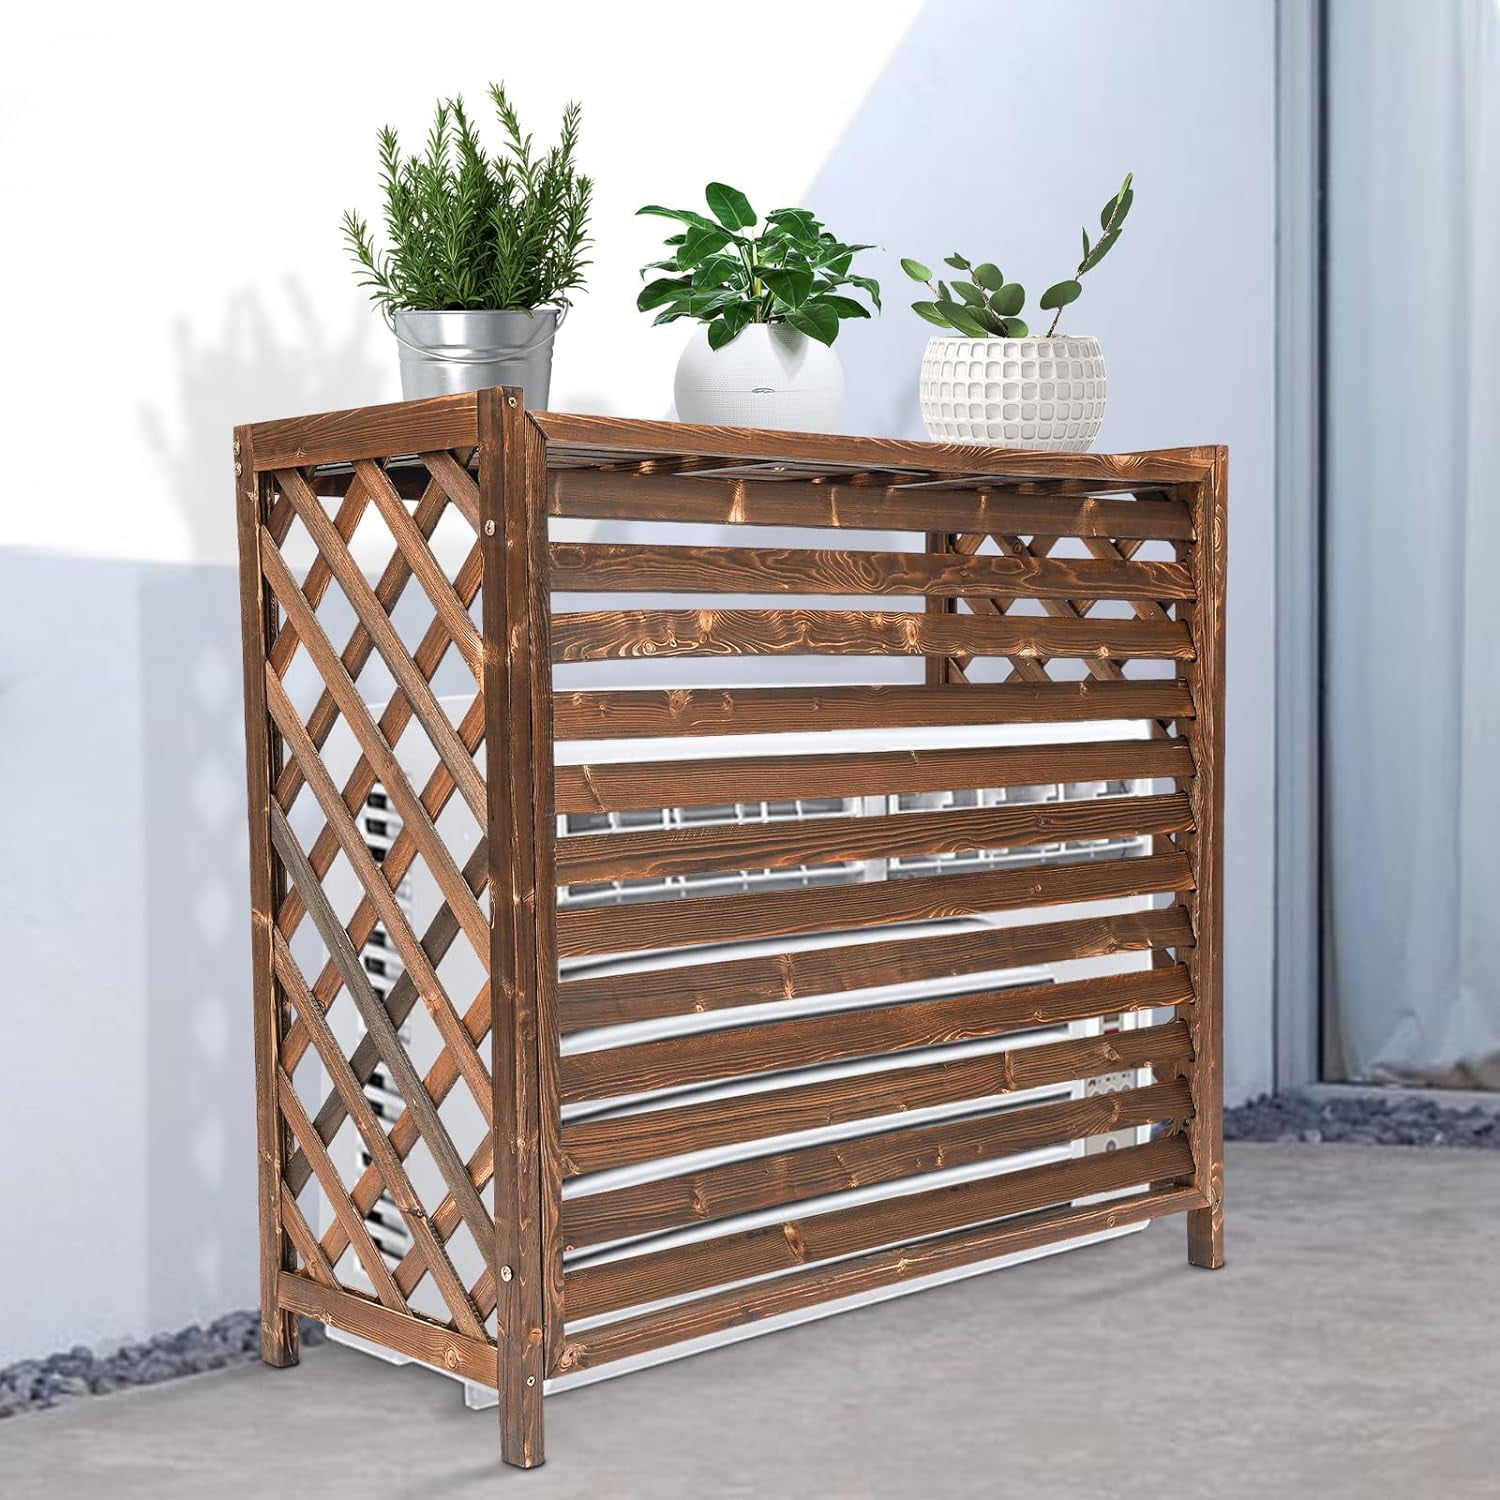
11. Install a Dark Wood Louvered Screen with a Lattice Panel
For AC unit screens, louvered panels are the superior design choice. Unlike solid or tightly gapped slat screens, louvered panels allow for excellent airflow while still providing 100% visual concealment from an angle. This is critical for the health and efficiency of your AC unit. When building or buying a screen, orient the louvers so they slope downwards and away from the unit. This directs noise towards the ground and provides better protection from falling leaves and rain without impeding air circulation.
🎯 What Makes It Work
The combination of two different screen styles—louvered and lattice—is what makes this piece successful. The tightly packed louvers provide the heavy-duty concealment needed for the main unit, while the more open and decorative lattice panel on the side adds a touch of visual lightness. It feels less like a heavy, monolithic box and more like a thoughtful piece of outdoor furniture. The simple addition of the potted plants on top completes the illusion, turning a utility cover into a plant stand.
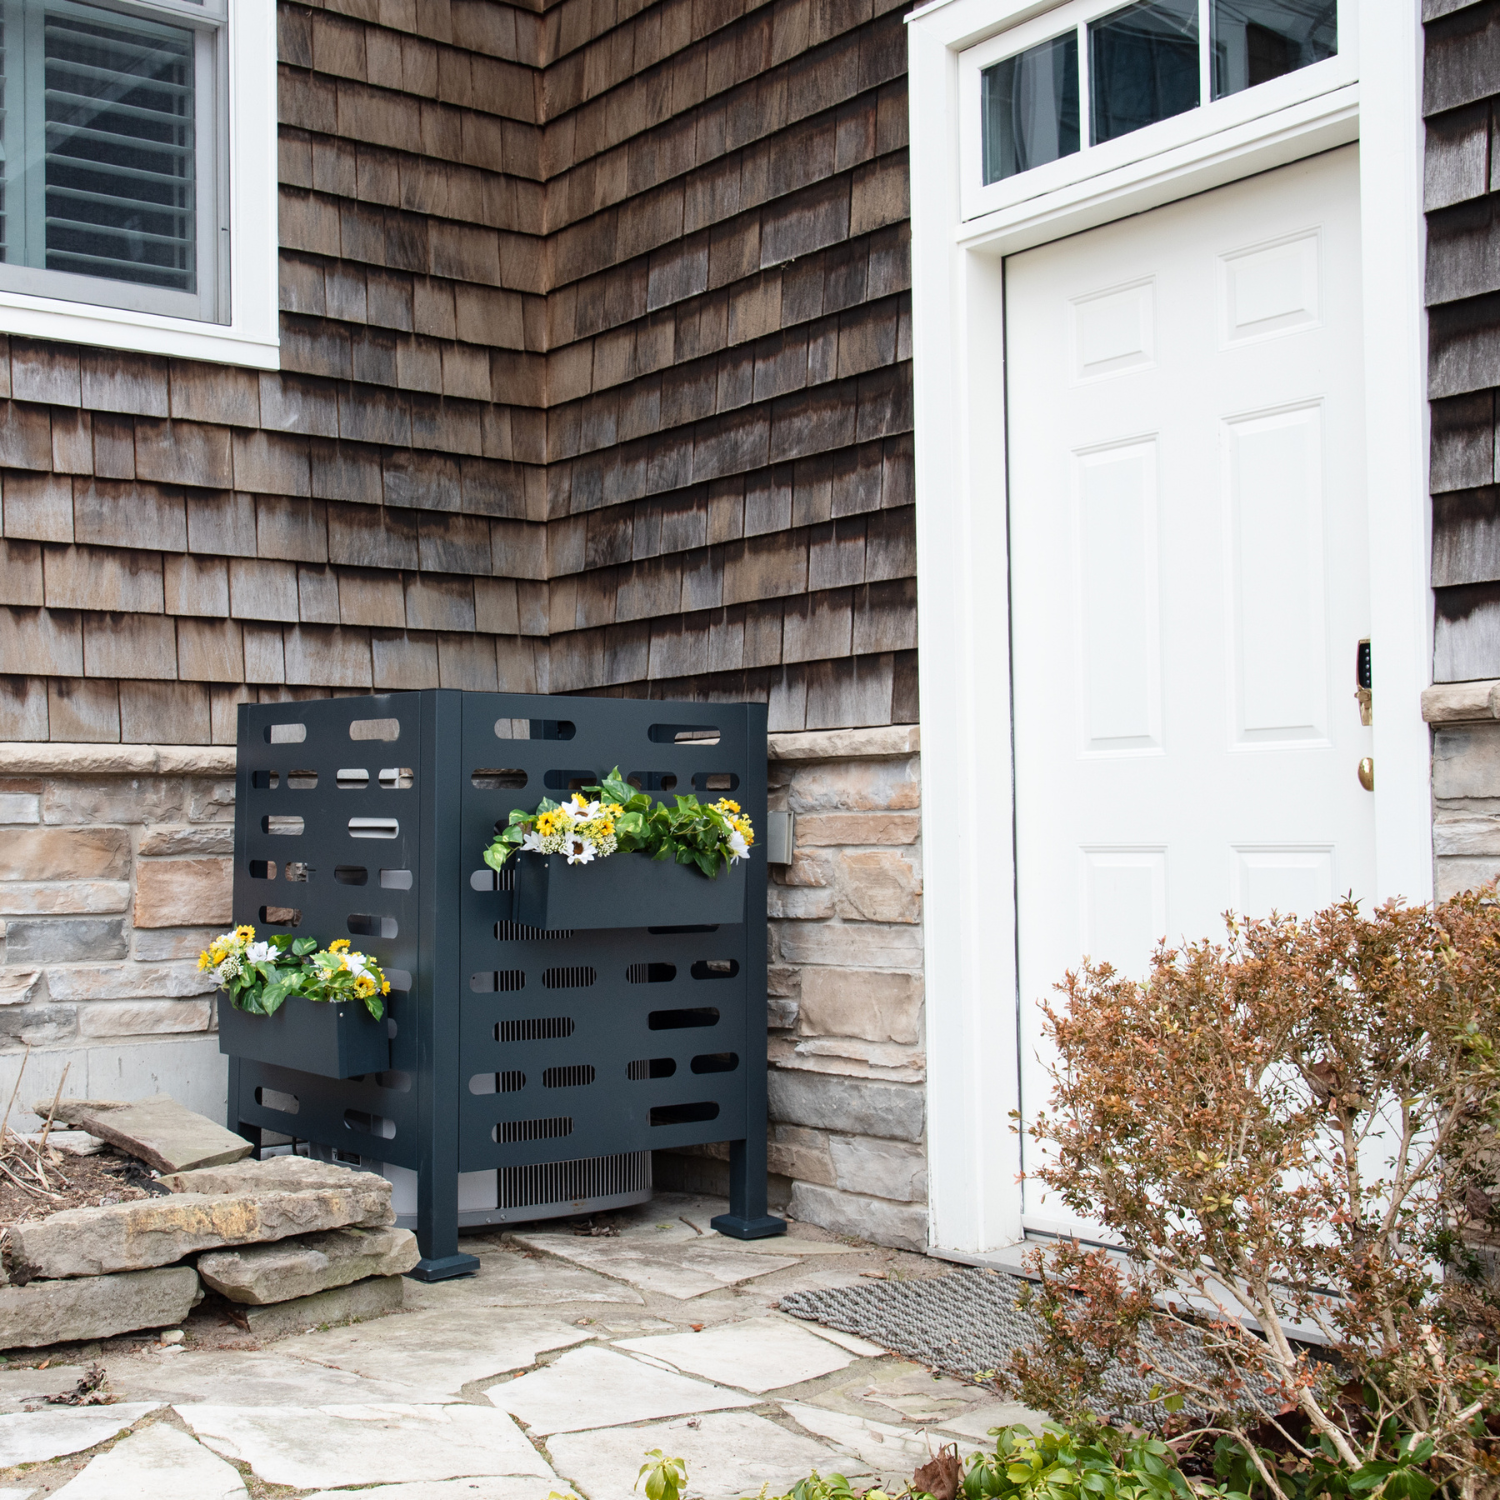
12. Opt for a Dark Gray Perforated Metal Screen with Planters
This style is tapping directly into the growing trend of bringing industrial and commercial-grade materials into residential design. Perforated metal, once reserved for office parks and public spaces, is having a moment in backyards. Homeowners are drawn to its durability, clean lines, and modern aesthetic. The geometric pattern of the perforations feels more contemporary than traditional wood lattice, and the dark gray powder-coated finish is a perfect match for the moody, sophisticated color palettes currently popular in exterior design.
🧹 Maintenance Reality
A high-quality metal screen like this is an investment in durability, but it comes at a higher price point than a DIY wood version. Here’s a rough estimate for a pre-fabricated unit like the one shown:
- Perforated Metal Screen (2-3 panels): $400 – $900
- Integrated Planter Boxes: Often included, but can be $100 – $200 extra
- Artificial Plants & Flowers: $80 – $250 (for good quality ones)
- TOTAL: $480 – $1,350
Budget alternative: You could achieve a similar look by using perforated metal sheets from a hardware store and building a simple wooden frame for them, but the powder-coated finish on a purchased unit offers superior weather resistance.
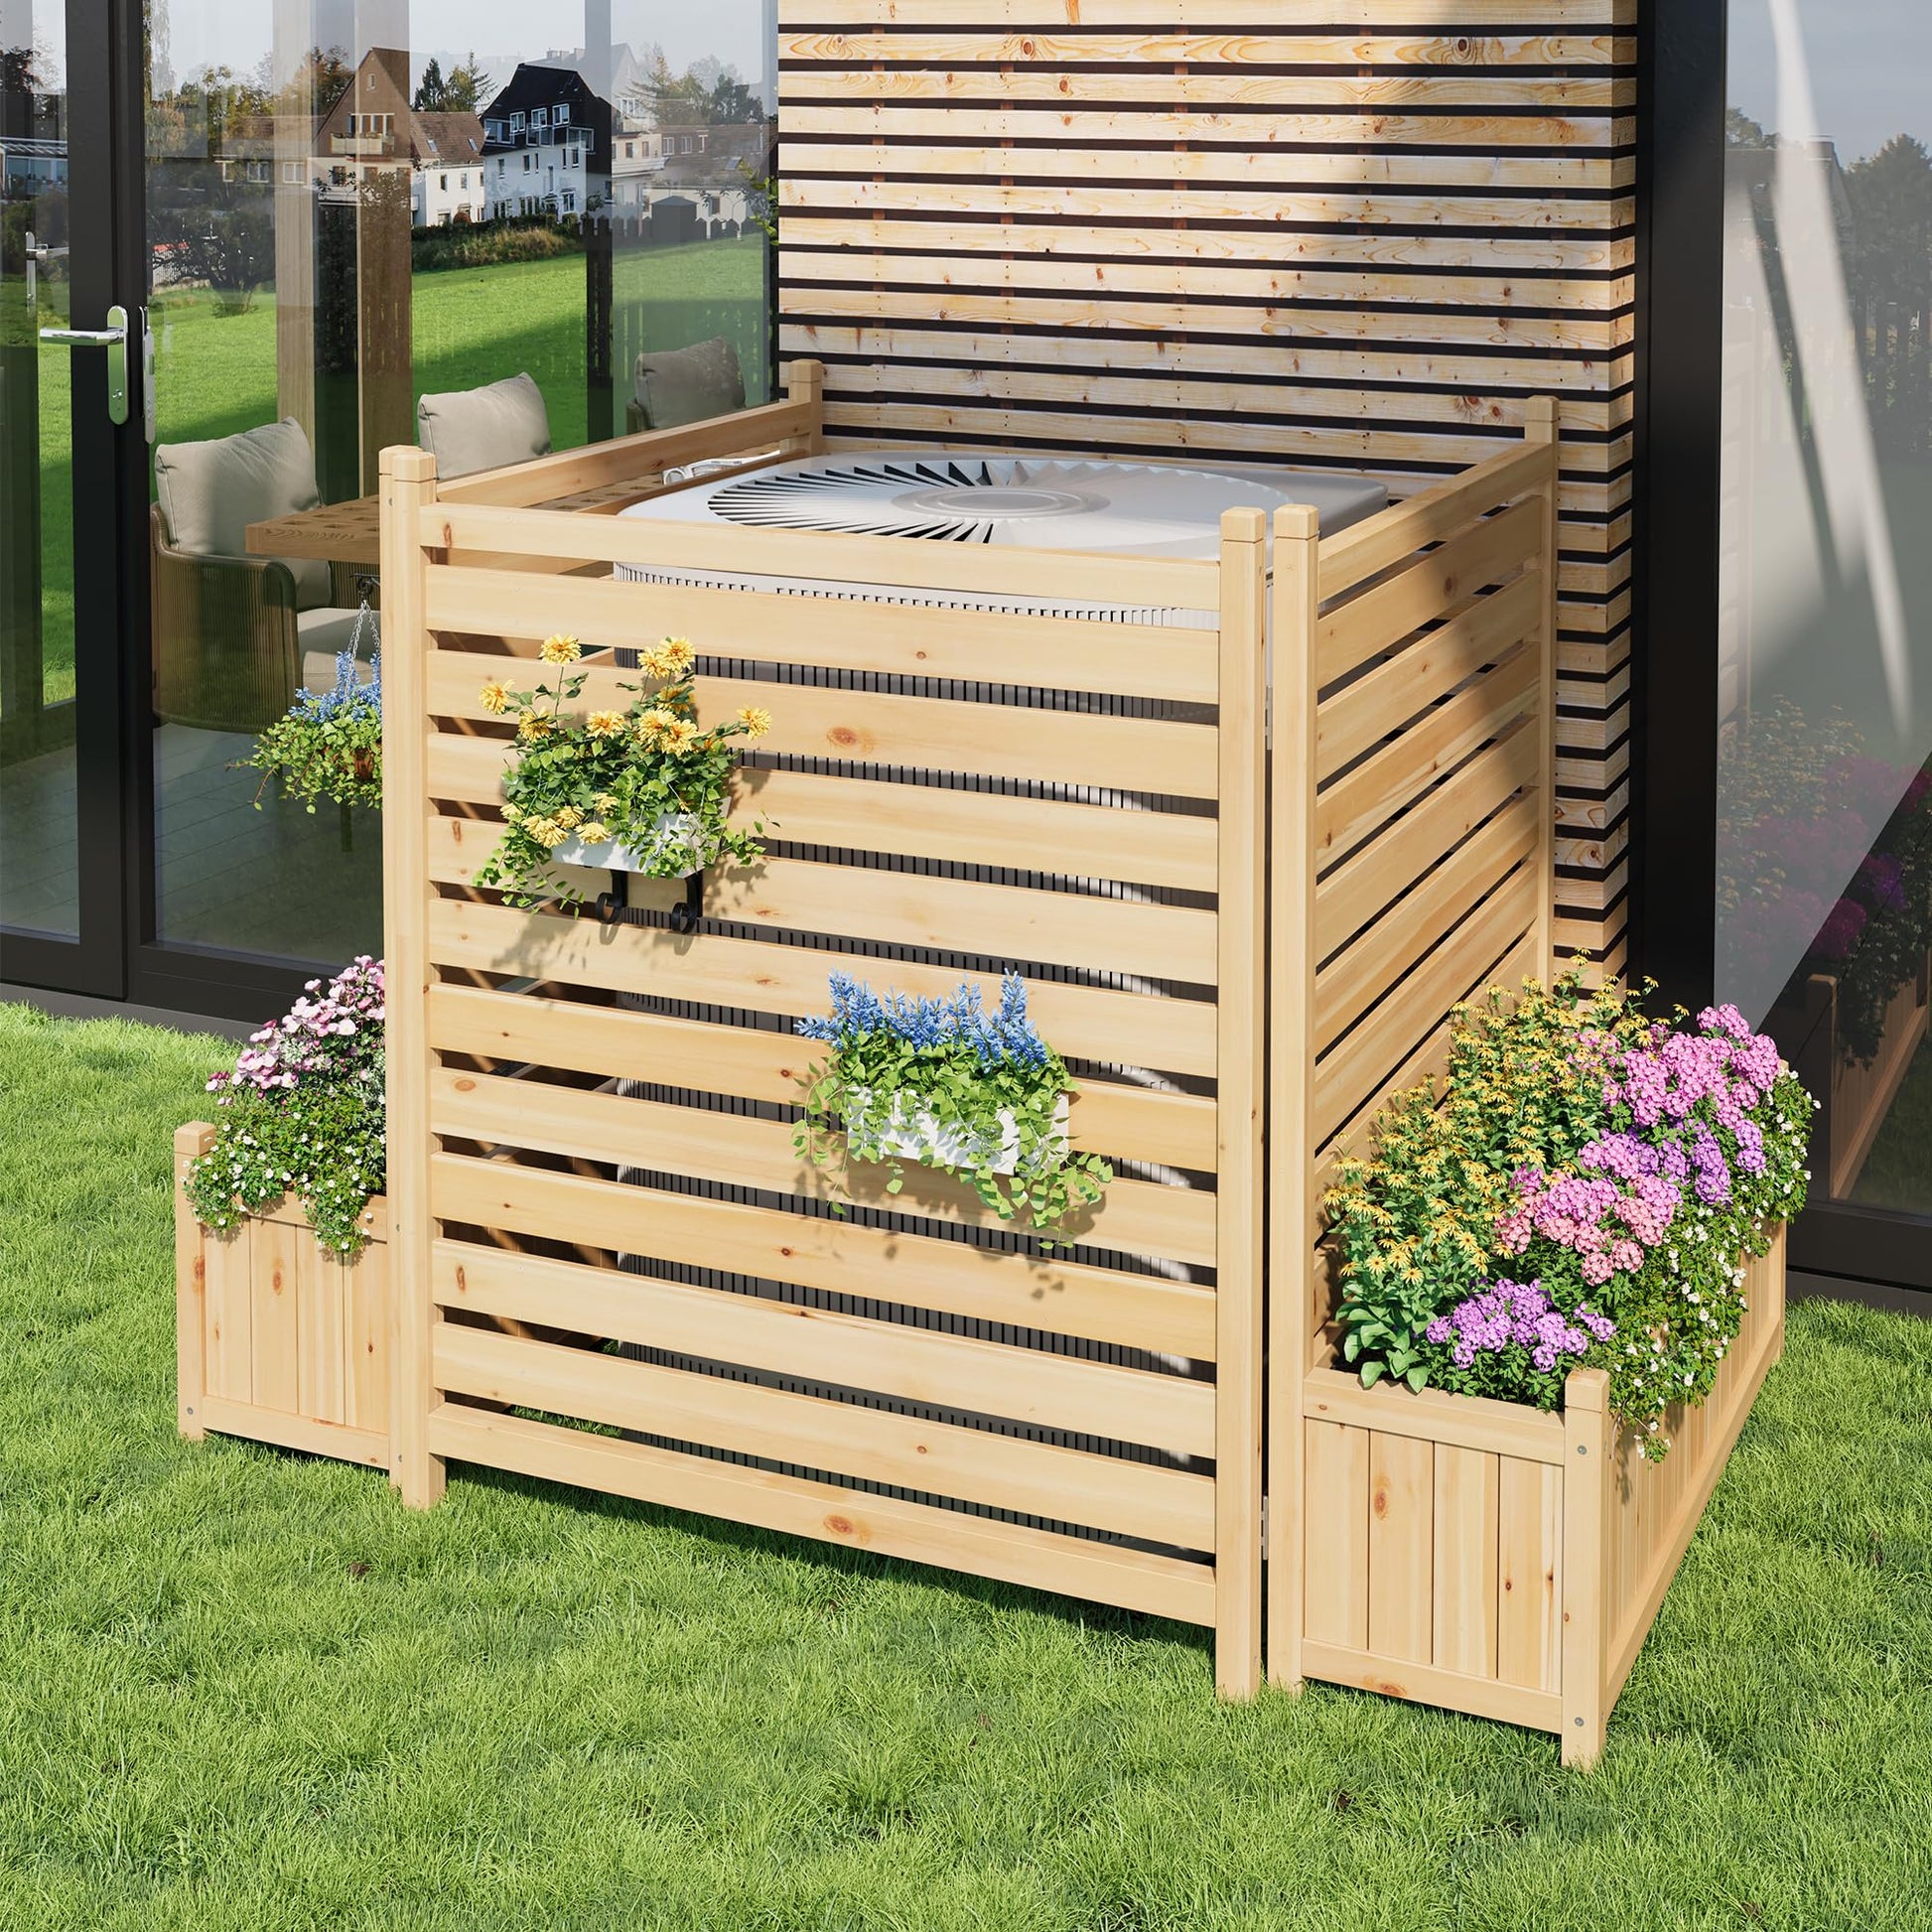
13. Build a Slatted Wood Enclosure with Integrated Planter Boxes
Adding a planter top is a brilliant way to make a utility screen blend in. Here’s a quick guide to building one:
- Time: 2 hours | Cost: $40 – $80 (for the planter portion)
- Build the Box: Construct a simple, bottomless four-sided frame out of cedar or pressure-treated 1×6 boards. Make it the same length and width as the top of your screen.
- Add a Base: Cut a piece of 1/2-inch hardware cloth (metal mesh) and staple it securely to the bottom inside edge of the frame. This will hold the soil in.
- Line It: Line the inside of the frame and the hardware cloth base with landscape fabric. This prevents soil from washing out.
- Attach and Fill: Secure the planter box to the top of your screen with exterior screws. Fill with potting mix and your favorite annuals. Don’t forget to drill a few small drainage holes in the landscape fabric.
🔧 How-To Brief
This design works because it uses the principle of misdirection. The bright colors and soft textures of the flowers and plants in the planter boxes and hanging baskets become the focal point. Your eye is naturally drawn to the life and color on top and on the sides, and you simply don’t notice the functional-but-boring slatted box or the machinery hiding inside it. It’s a classic magic trick: distract with something beautiful to hide something plain.
14. Use a Natural Wood Screen Beside Adirondack Chairs
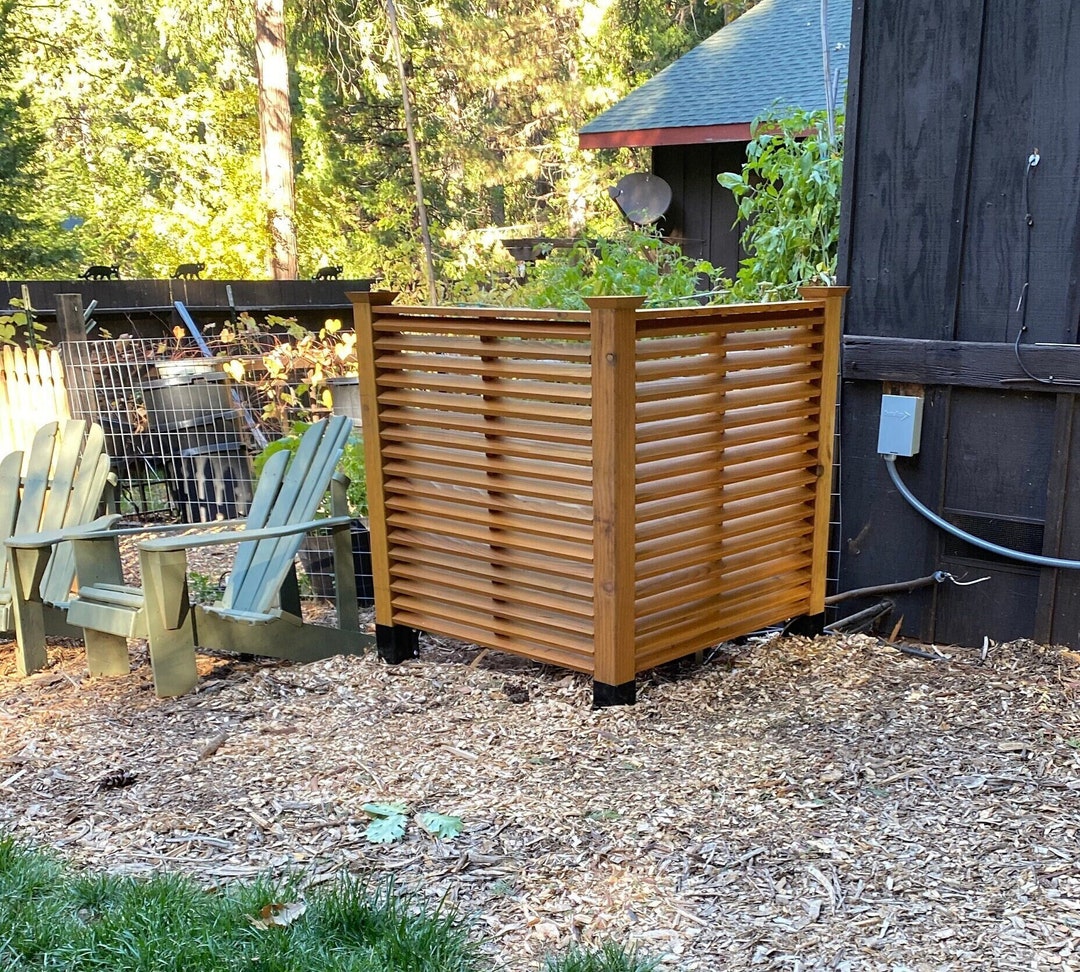
This tranquil scene follows a simple rustic-modern formula: 40% clean lines (the slatted screen, the dark house siding) + 40% natural texture (the wood screen, the wood chip ground cover) + 20% pop of color (the light green Adirondack chairs). The balance between the straight, architectural lines and the organic materials is key. The chairs provide just enough color to liven up the neutral palette without overwhelming the calm, natural atmosphere. It’s a composition that feels both deliberate and effortlessly relaxed.
📏 Scale Guide
This type of simple, three-panel screen is perfect for smaller yards or specific problem spots. A screen of this size—typically around 4 feet high and 6-8 feet wide when unfolded—works best to hide things like a single trash can, a hose reel, or a pool pump. It’s not large enough to conceal a multi-bin recycling station or provide significant privacy for a patio. Its strength is in targeted, localized concealment in a space where a full fence would be overwhelming. Check out Idea #15 for a larger-scale screen solution.
15. Install a Modern Dark Horizontal Slat Screen by the House
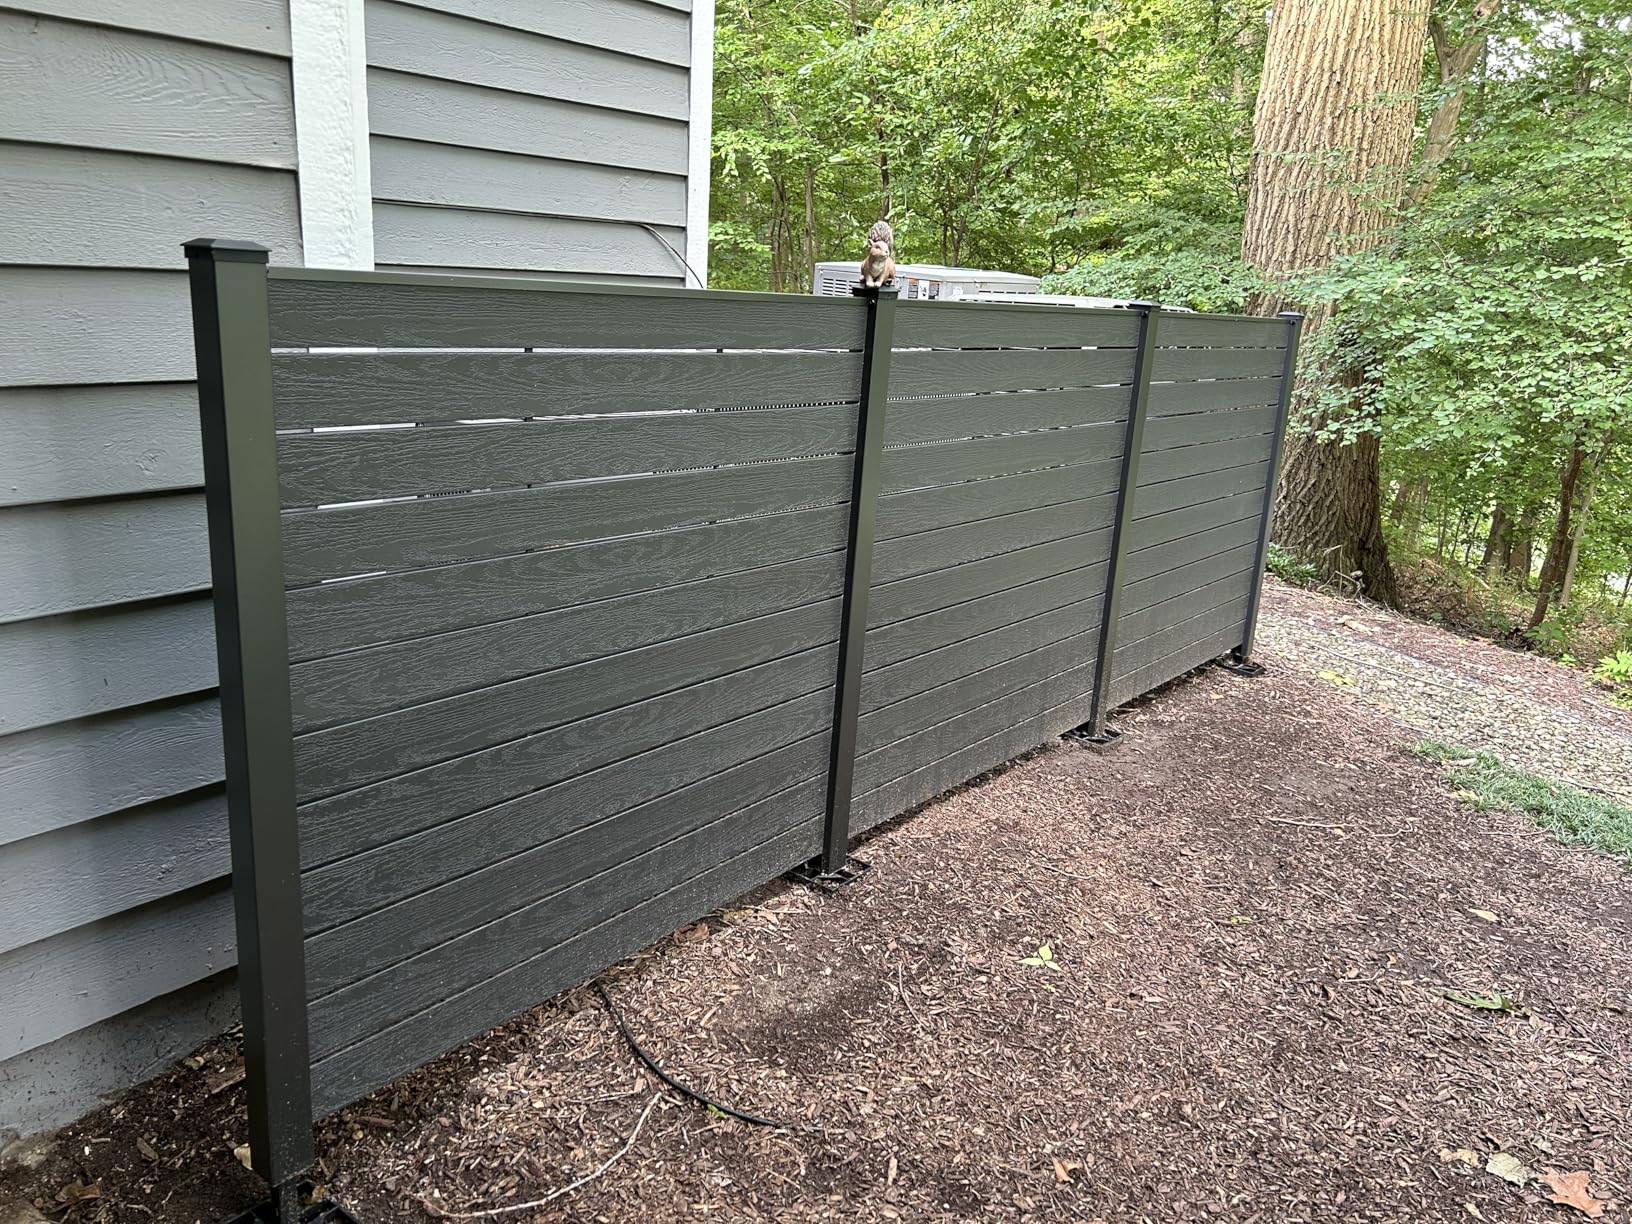
A common mistake with screens like this is installing them directly on the soil or mulch. Over time, this constant contact with ground moisture will cause even treated wood to rot prematurely, starting with the base of the posts. This screen is installed correctly, with the posts either set in concrete footings or attached to metal post spikes driven deep into the ground. This elevates the wood slightly off the mulch, allowing it to dry out and dramatically increasing the lifespan of the entire structure. Don’t let your weekend project rot away in three years!
✅ Before You Start
When installing a screen parallel to your house wall, pay attention to the “line of sight.” Don’t just place it far enough out to cover the utility unit. Stand at the key viewpoints—your kitchen window, your patio door, the path from the driveway—and have someone hold up a board to see exactly where the screen needs to begin and end to completely block the eyesore from those angles. People often make screens too short, only to find they can still see the ugly AC unit from their favorite chair.
16. Build a Privacy Screen with a Glowing, Plant-Filled Top
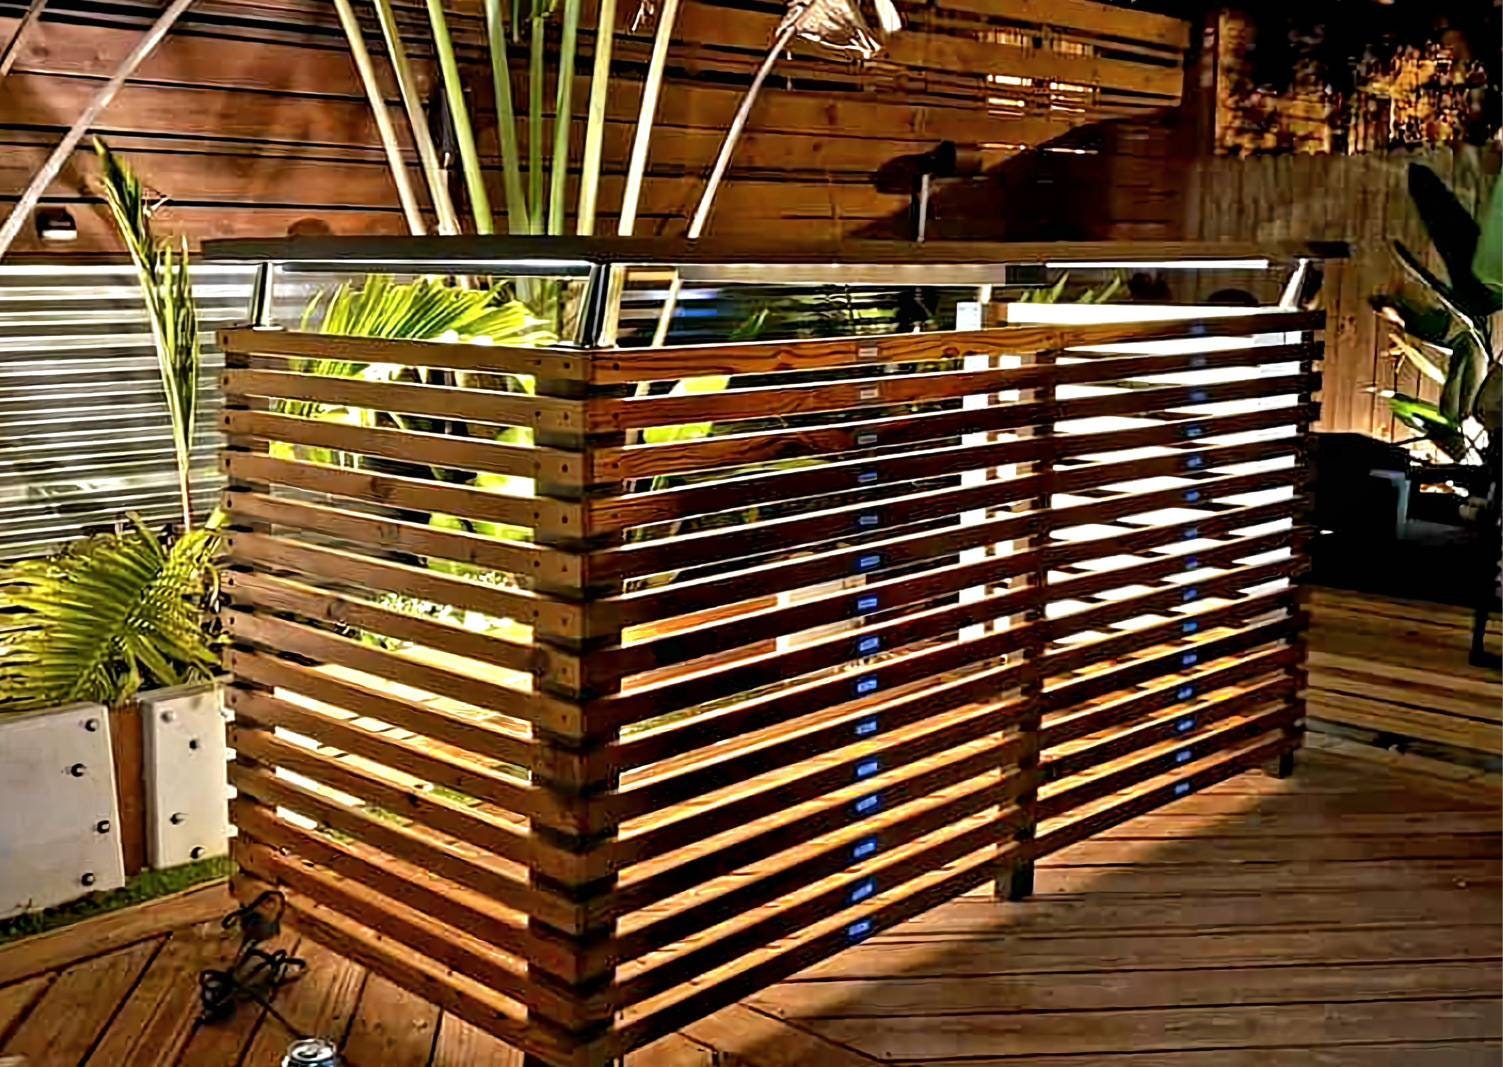
The integrated, illuminated planter is, without a doubt, the star of this show. It’s a truly show-stopping feature that elevates a simple privacy screen into a piece of landscape art. During the day, it’s a sleek, modern planter. At night, it transforms into a dramatic light feature, casting a warm glow over the deck and highlighting the foliage within. This single design choice adds a layer of luxury and custom-built expense that no ordinary fence could ever achieve. The light turns the screen from something that hides a view into a view itself.
⭐ The One Thing
A high-end, custom feature like this involves more than just wood. The cost includes carpentry, electrical work, and specialty materials. This is definitely a splurge item.
- Lumber (Cedar or Ipe for a high-end look): $1,200 – $2,500
- Outdoor-rated LED strip lighting & transformer: $200 – $500
- Tempered glass or acrylic top panel: $150 – $400
- Labor (Carpenter & Electrician): $1,000 – $3,000
- Plants & Soil: $100 – $250
- TOTAL: $2,650 – $6,650
This is a project for a skilled DIYer with electrical experience or, more likely, a professional contractor.
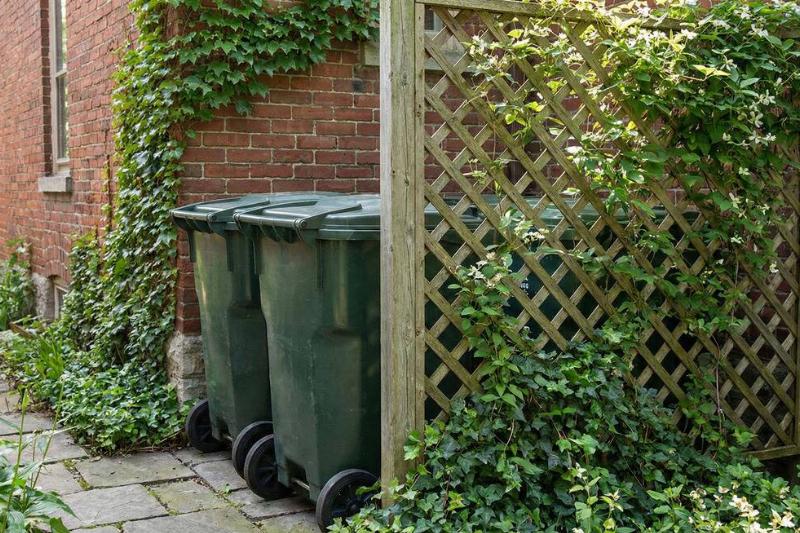
17. Camouflage Bins with a Wooden Lattice and Climbing Vines
This is the ultimate budget-friendly, eco-friendly concealment plan. A simple wooden lattice panel from a home improvement store can cost as little as $30-$50. A fast-growing climbing vine like clematis or a perennial sweet pea can be purchased for $15-$25. With a few screws to attach the lattice to a wall or posts and a little patience, you can create a living screen for under $100. It’s a fantastic way to blend an eyesore into a garden, making it look completely intentional and natural. For a comparison to a ready-made bin store, see Idea #24.
🔥 Trending Context
Training a vine to cover a lattice screen is easier than it looks. It just requires a little guidance to get started.
- Time: 15 minutes to plant, 5 minutes per week for training | Cost: $15 – $50
- Plant it Right: Plant the vine at the base of the lattice, angled slightly toward it.
- Provide Initial Support: As the first new shoots grow, gently weave them through the bottom openings of the lattice. Don’t force them.
- Guide, Don’t Wind: For twinning vines, guide new stems in the direction they naturally want to grow around the lattice. For plants that use tendrils (like sweet peas), they’ll do most of the work themselves once they make contact.
- Tuck and Weave: As the plant grows taller, continue to tuck and weave long stems through the lattice to encourage even coverage.
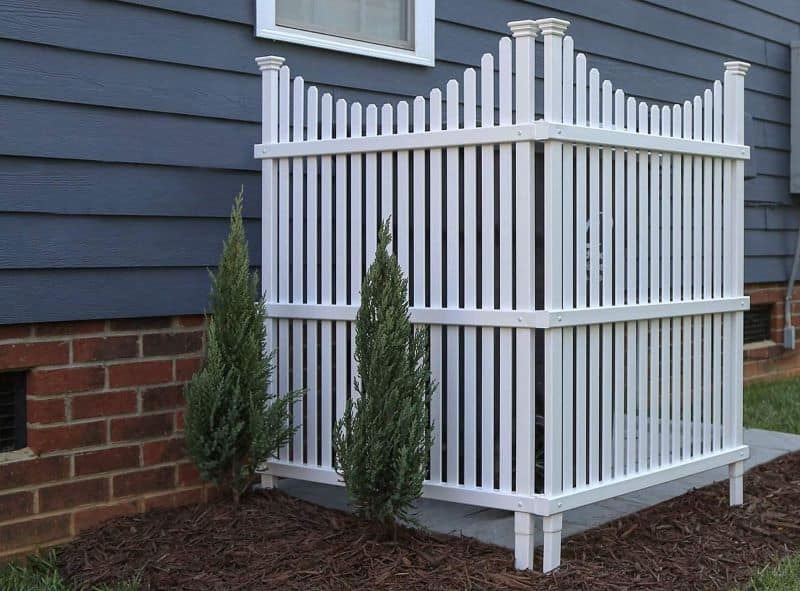
18. Enclose an Outdoor Unit with a Neat White Slat Fence
This solution works because it leans into a classic, traditional aesthetic. The clean white fence, decorative scalloped top, and formal corner posts create a crisp, tidy look that complements the blue siding and brick foundation of the home. It feels like a miniature version of a classic American picket fence. By choosing a style that harmonizes with the house, the enclosure becomes an architectural feature, not just a box. The symmetrical planting of the two slender evergreens reinforces this formal, orderly feel, resulting in a picture-perfect vignette.
📐 Style Math
White vinyl or PVC fencing is famously low-maintenance, but it’s not *no*-maintenance, especially when placed near a house and under trees. Expect to give it a good cleaning once a year to remove mildew, pollen, and dirt that can accumulate, particularly on the north-facing side. A power washer on a low setting or a bucket of soapy water and a soft brush will do the trick. The biggest challenge is preventing stains from grass clippings, so be careful when using a string trimmer around the base of the fence.
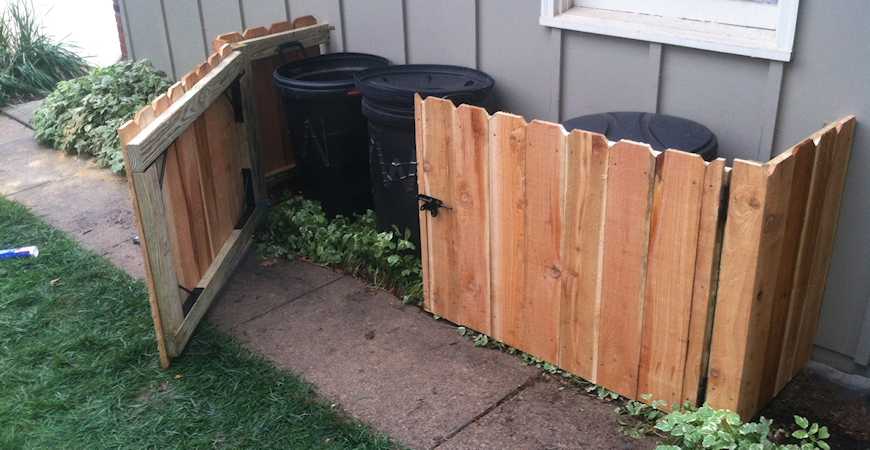
19. Use a Simple Picket Fence to Screen Rain Barrels
This is one of the quickest and easiest screening solutions out there. You can buy pre-assembled picket fence panels from any major hardware store for $40-$60 each. All you need are a couple of panels, a few T-posts to drive into the ground, and some wire or zip ties to attach the panels to the posts. You don’t even need to dig holes or pour concrete. For less than $100 and about an hour of work, you can create a simple, effective screen for your compost bins or rain barrels. For a more permanent and stylish gate, look at Idea #7.
⚠️ Real Talk
A simple screen like this is great for quick concealment, but it’s not a fortress. Because it’s lightweight and not permanently anchored, it won’t stand up to high winds or rough treatment. It’s a visual barrier, not a structural one. This solution is perfect for a sheltered spot next to the house, but it wouldn’t be a great choice for a very windy, exposed corner of your yard. It’s also important to remember that it only provides partial concealment; you can still see the barrels through the pickets.
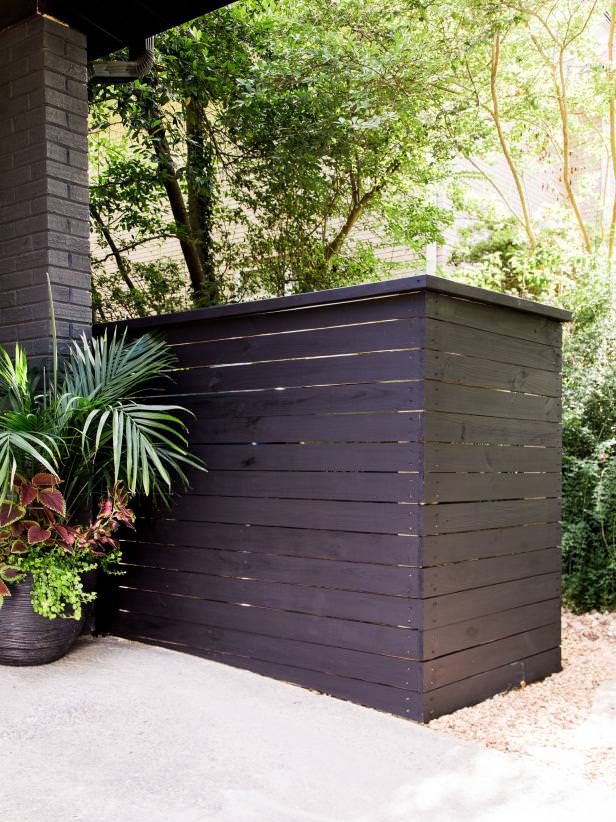
20. Frame a Modern Black Slat Screen with a Brick Pillar
The sophisticated look of this corner is all about balancing hard and soft textures within a tight color palette. The formula is roughly: 50% sleek modern lines (the black slat screen), 30% rugged masonry (the gray brick pillar), and 20% lush, organic texture (the woven planter and foliage). The key is the limited color scheme—black, gray, and green. This allows the different textures to stand out without the scene becoming visually chaotic. The reddish-purple leaves offer just a hint of color to keep it interesting.
💸 Get This Look For Less
To make a black or very dark screen work, you need to surround it with contrasting colors and textures. A black screen against a dark wall can disappear into a gloomy void. Here, the screen is beautifully framed by the light gray concrete, the textured gray brick, and the bright green foliage. These lighter, contrasting elements make the black screen pop and feel intentional. When planning a dark screen, make sure to include lighter-colored pavers, gravel, or plantings around it to create that essential visual contrast.
21. Integrate a White Slat Screen into a Landscape Bed
A screen placed in the middle of a lawn can look abrupt, but placing it within a landscape bed, as shown here, makes it feel purposeful. Before you build, lay out the shape of your new landscape bed with a garden hose. Make sure the curves are gentle and that the bed is wide enough to accommodate the screen and at least 18-24 inches of planting space in front of it. Also, consider access to what’s behind the screen. Does one panel need to be a gate or easily removable? Plan this out before you dig.
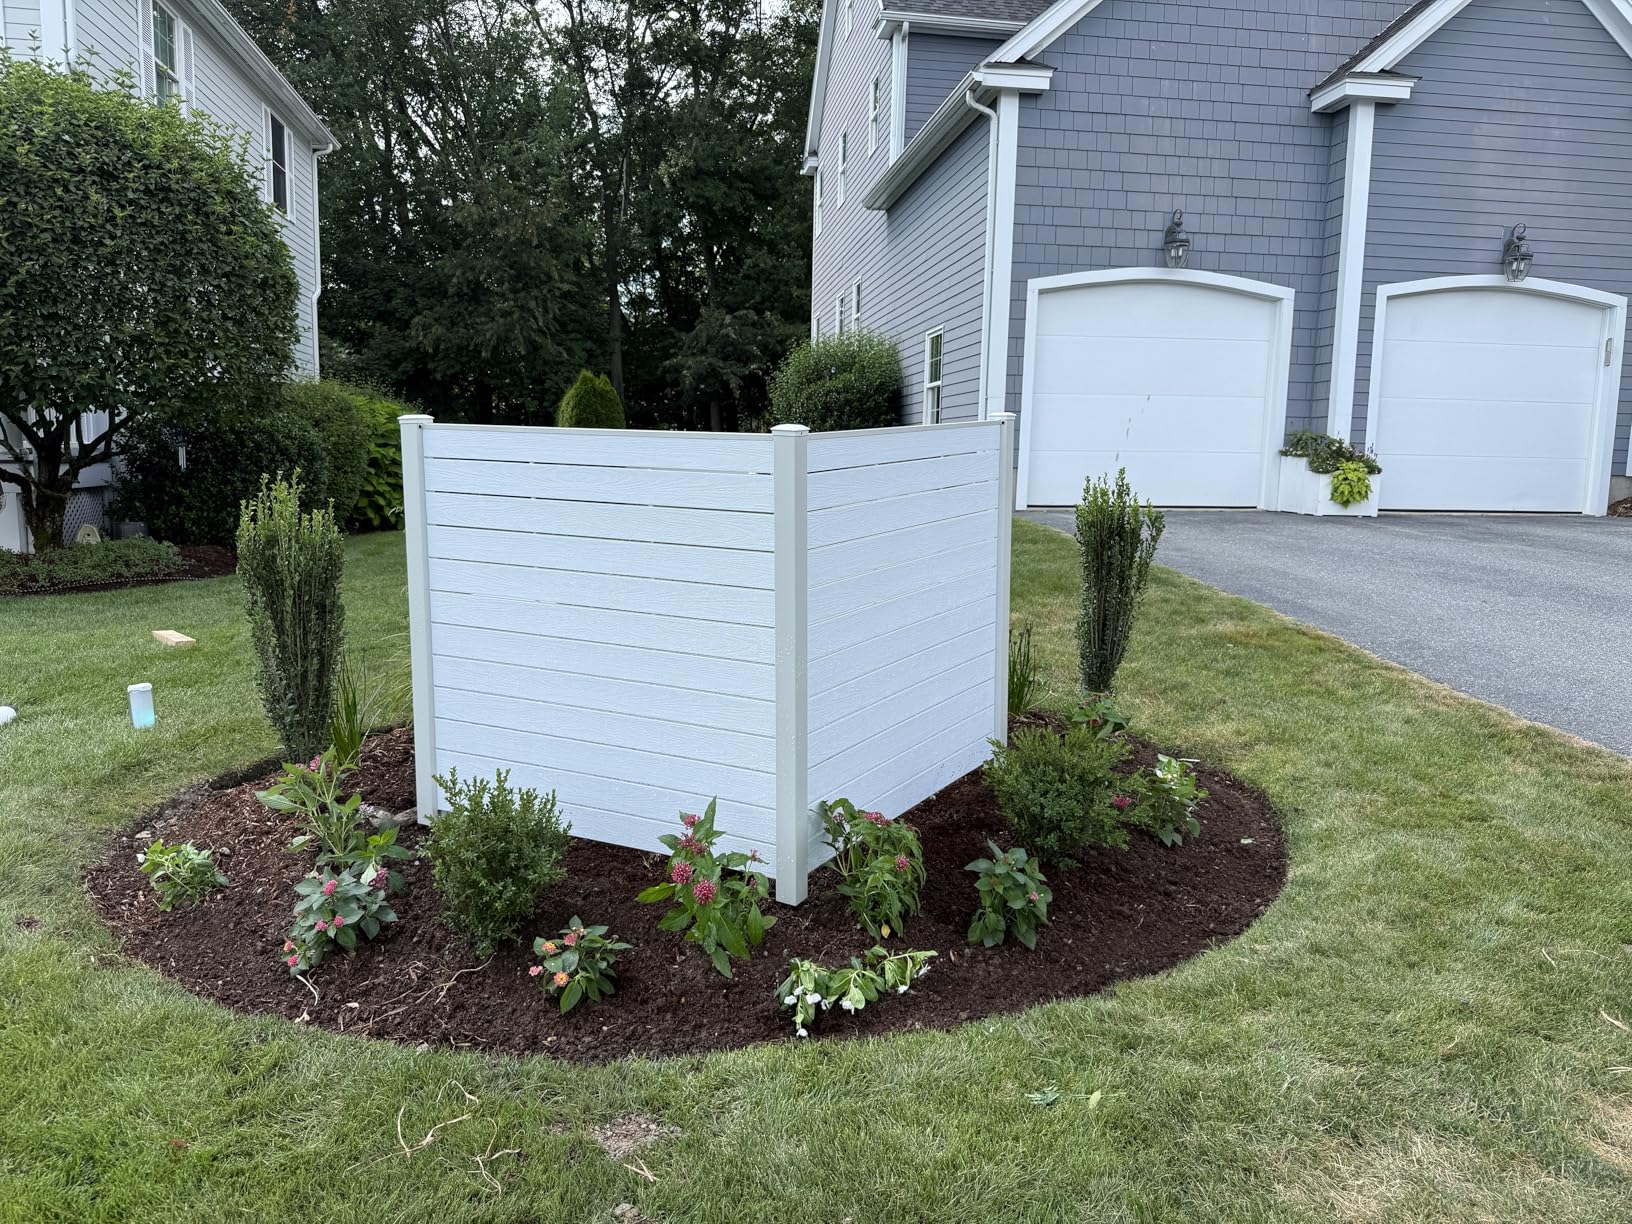
💡 Designer Tip
This setup works so well because the screen is treated as an intentional part of the garden design, not just an object plopped on the lawn. The curving border of the mulch bed gracefully integrates the straight lines of the screen into the organic shape of the yard. The repetition of color—the white screen echoing the white garage doors—ties the entire scene together, making the screen feel like it was part of the home’s original design plan. The plantings at its base soften the edges and anchor it visually to the ground.
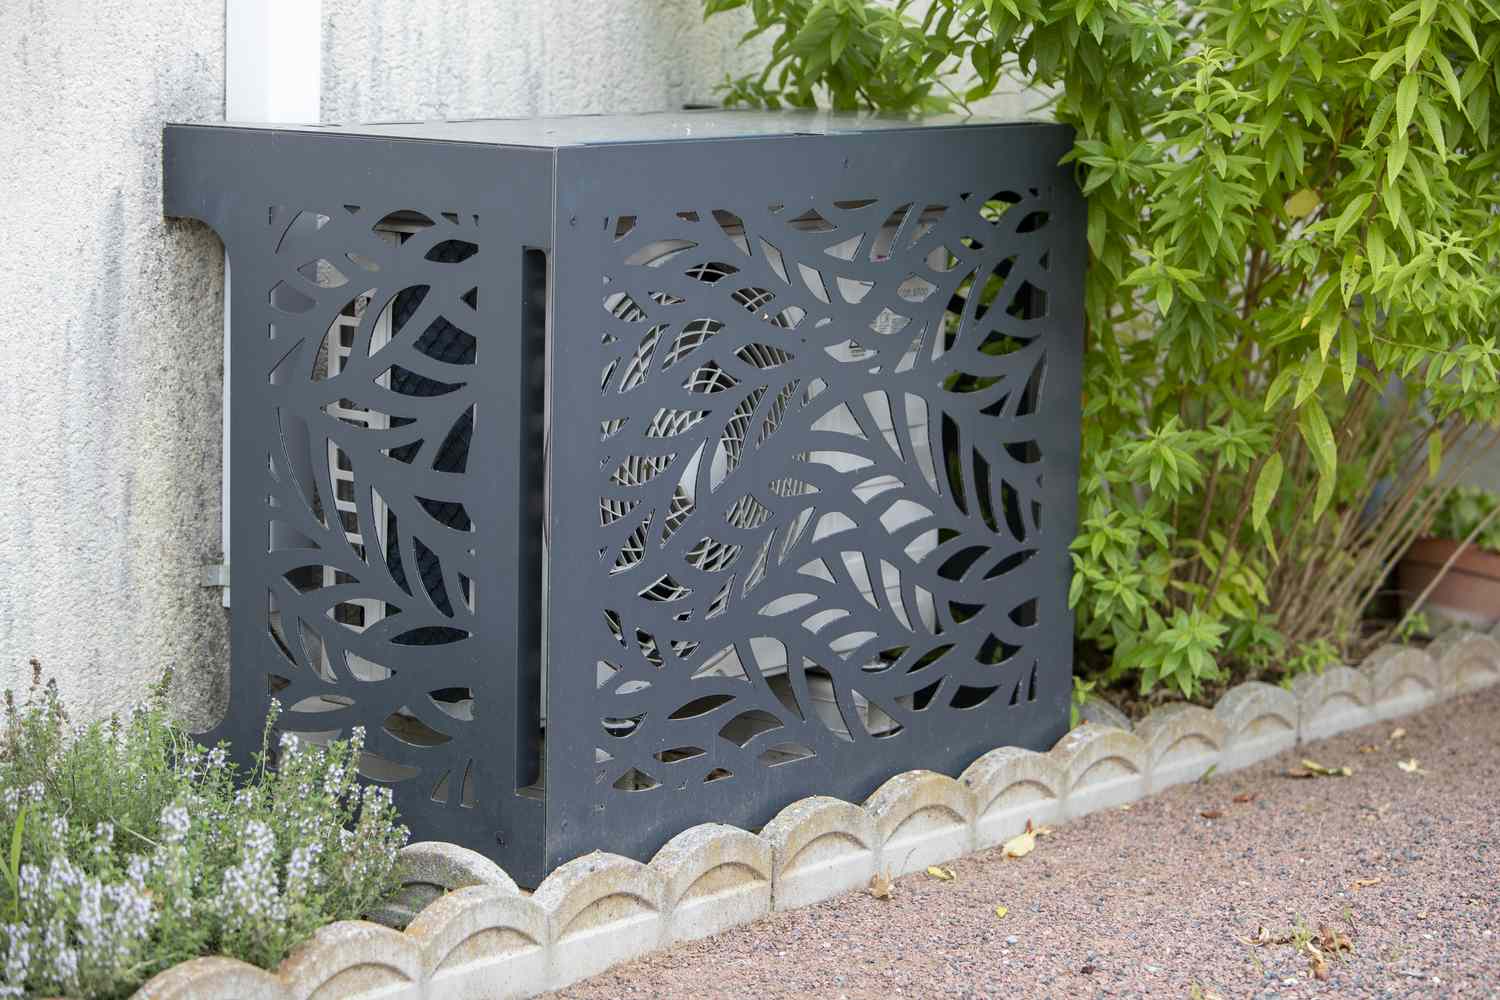
22. Choose a Decorative Metal Cover with Leaf Cutouts
The leaf-shaped cutouts are the single feature that makes this cover special. It’s a purely decorative choice that turns a metal box into a piece of garden art. Without the cutouts, it would be a plain (and likely hotter) metal cover. The botanical pattern allows the cover to blend in with the surrounding foliage, creating a clever camouflage that feels both artistic and functional. It acknowledges the nature around it, making the man-made object feel more at home in the garden setting.
23. Utilize a Modern Outdoor Storage Unit with Mixed Panels
A multi-functional unit like this is ideal for a patio, deck, or narrow side yard where space is at a premium. This unit appears to be about 6-7 feet long and 2-3 feet deep, providing enough space to hide a small AC unit or a couple of slim trash bins while also offering some enclosed storage. It’s a great mid-scale solution. Because it’s a finished piece of furniture, it works best on a hard, level surface like a paved walkway or concrete pad. It would look out of place floating in the middle of a lawn.
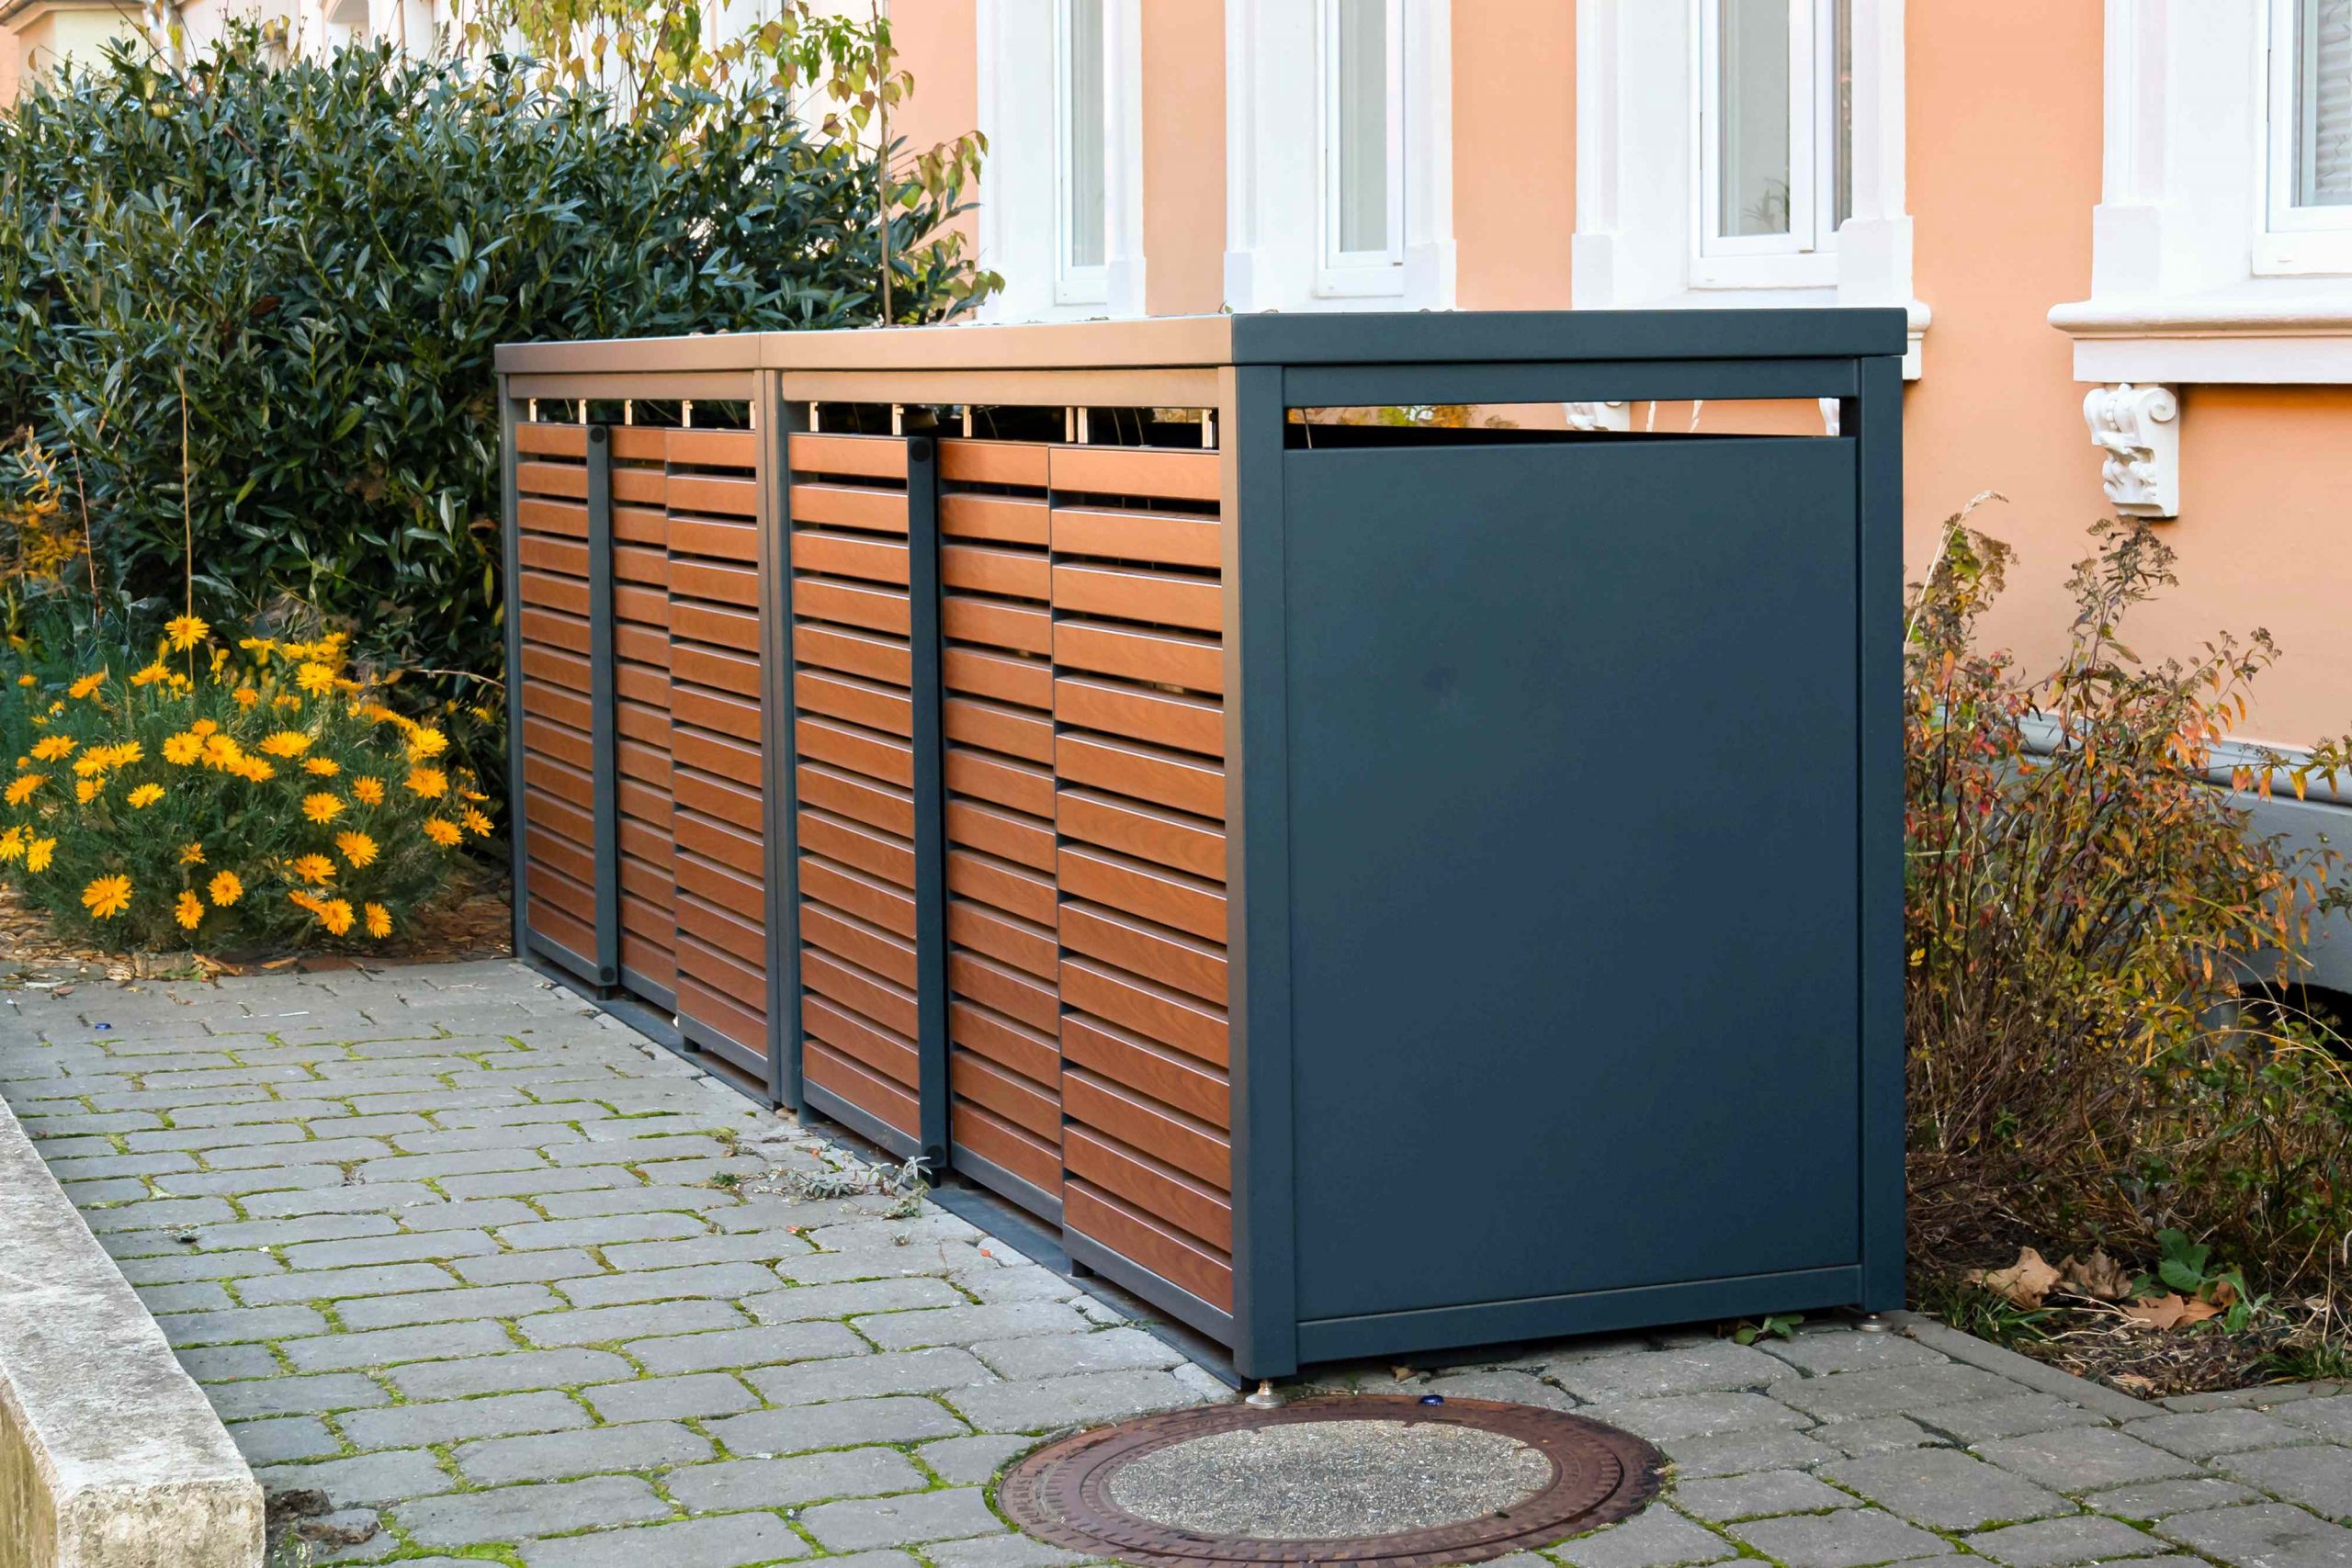
🎯 What Makes It Work
When you have a functional piece of outdoor furniture like this, treat it like an indoor sideboard. The top surface is a prime opportunity for styling. Don’t just leave it bare. Add a collection of potted plants with varying heights, a stylish outdoor lantern, or a decorative tray. This draws the eye, adds personality, and further distracts from the unit’s primary purpose of concealment. Using it as a display surface signals that it’s a deliberate part of the decor, not just a box you’re trying to ignore.
24. Build a Wooden Bin Store with a Planted Green Roof
A living roof is an amazing way to camouflage a bin store. Here’s how to create a simple one:
- Time: 3 hours | Cost: $100 – $200
- Waterproof the Top: The roof of your bin store must be solid. Cover it with a waterproof membrane, like a pond liner, stapling it securely up the sides to create a shallow tray.
- Add Drainage: Lay a drainage mat or a 1-inch layer of gravel. It’s crucial to let excess water escape so you don’t rot the wood or the plant roots.
- Install a Filter Layer: Place a sheet of landscape fabric over the drainage layer to keep soil from clogging it.
- Add Lightweight Soil: Use a lightweight potting mix, ideally one formulated for green roofs or succulents, about 3-4 inches deep.
- Plant It: Choose drought-tolerant, low-growing plants like sedums and succulents. They are hardy and won’t require much maintenance.
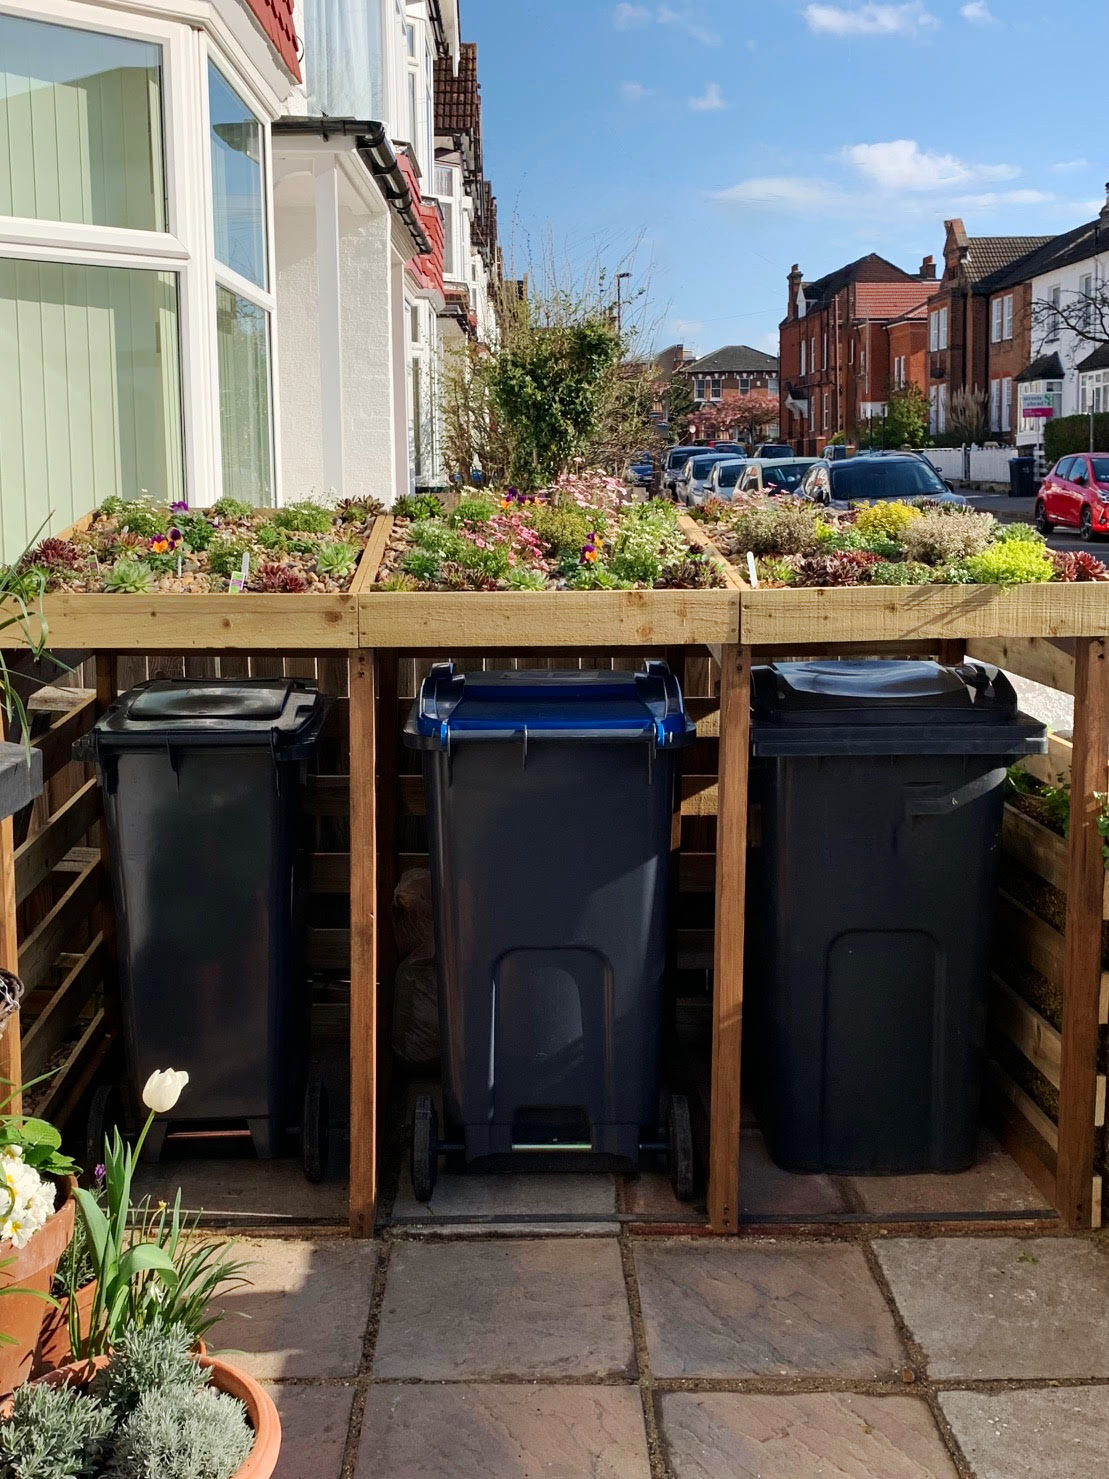
🧹 Maintenance Reality
The green roof is, without question, the hero of this design. It’s a brilliant, unexpected feature that turns a mundane object—a trash bin enclosure—into a vibrant, living garden feature. It takes the idea of blending into the environment to the next level by literally topping the structure with nature. It’s a conversation starter and a joyful detail that completely overshadows the less-than-glamorous function of the box below. It makes you smile, and how often can you say that about your trash cans?
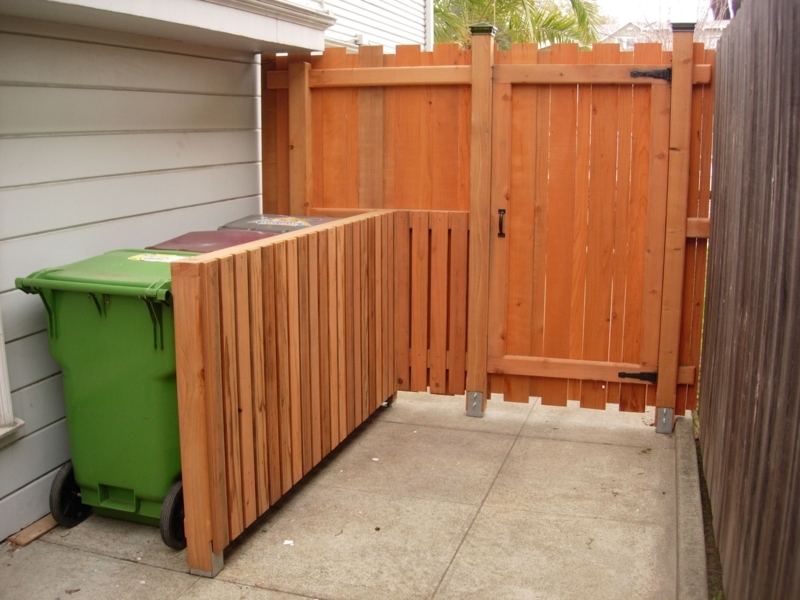
25. Coordinate a Slat Wood Fence and Trash Bin Enclosure
Coordinating your fence and bin enclosure in the same material looks fantastic, but it also means you’re doubling down on maintenance. If you use a natural wood like this gorgeous warm-toned cedar, be prepared to clean and re-seal both the fence and the enclosure every couple of years to maintain the color. If you let it go, it will weather to a silvery gray. While some love the weathered look, it won’t be the same warm, rich color you started with, and the two pieces might weather at different rates depending on their sun exposure.
🔧 How-To Brief
This setup demonstrates the power of creating a unified design language. By using the exact same slatted wood for both the main fence panel and the L-shaped bin enclosure, the two distinct pieces read as a single, cohesive system. It looks custom and high-end. The black gate hardware provides a subtle accent that connects back to the dark handles of the bins, while the light gray house siding and concrete patio create a clean, neutral canvas that makes the warm wood tones pop. Check out the similar materials but different feel of Idea #1.
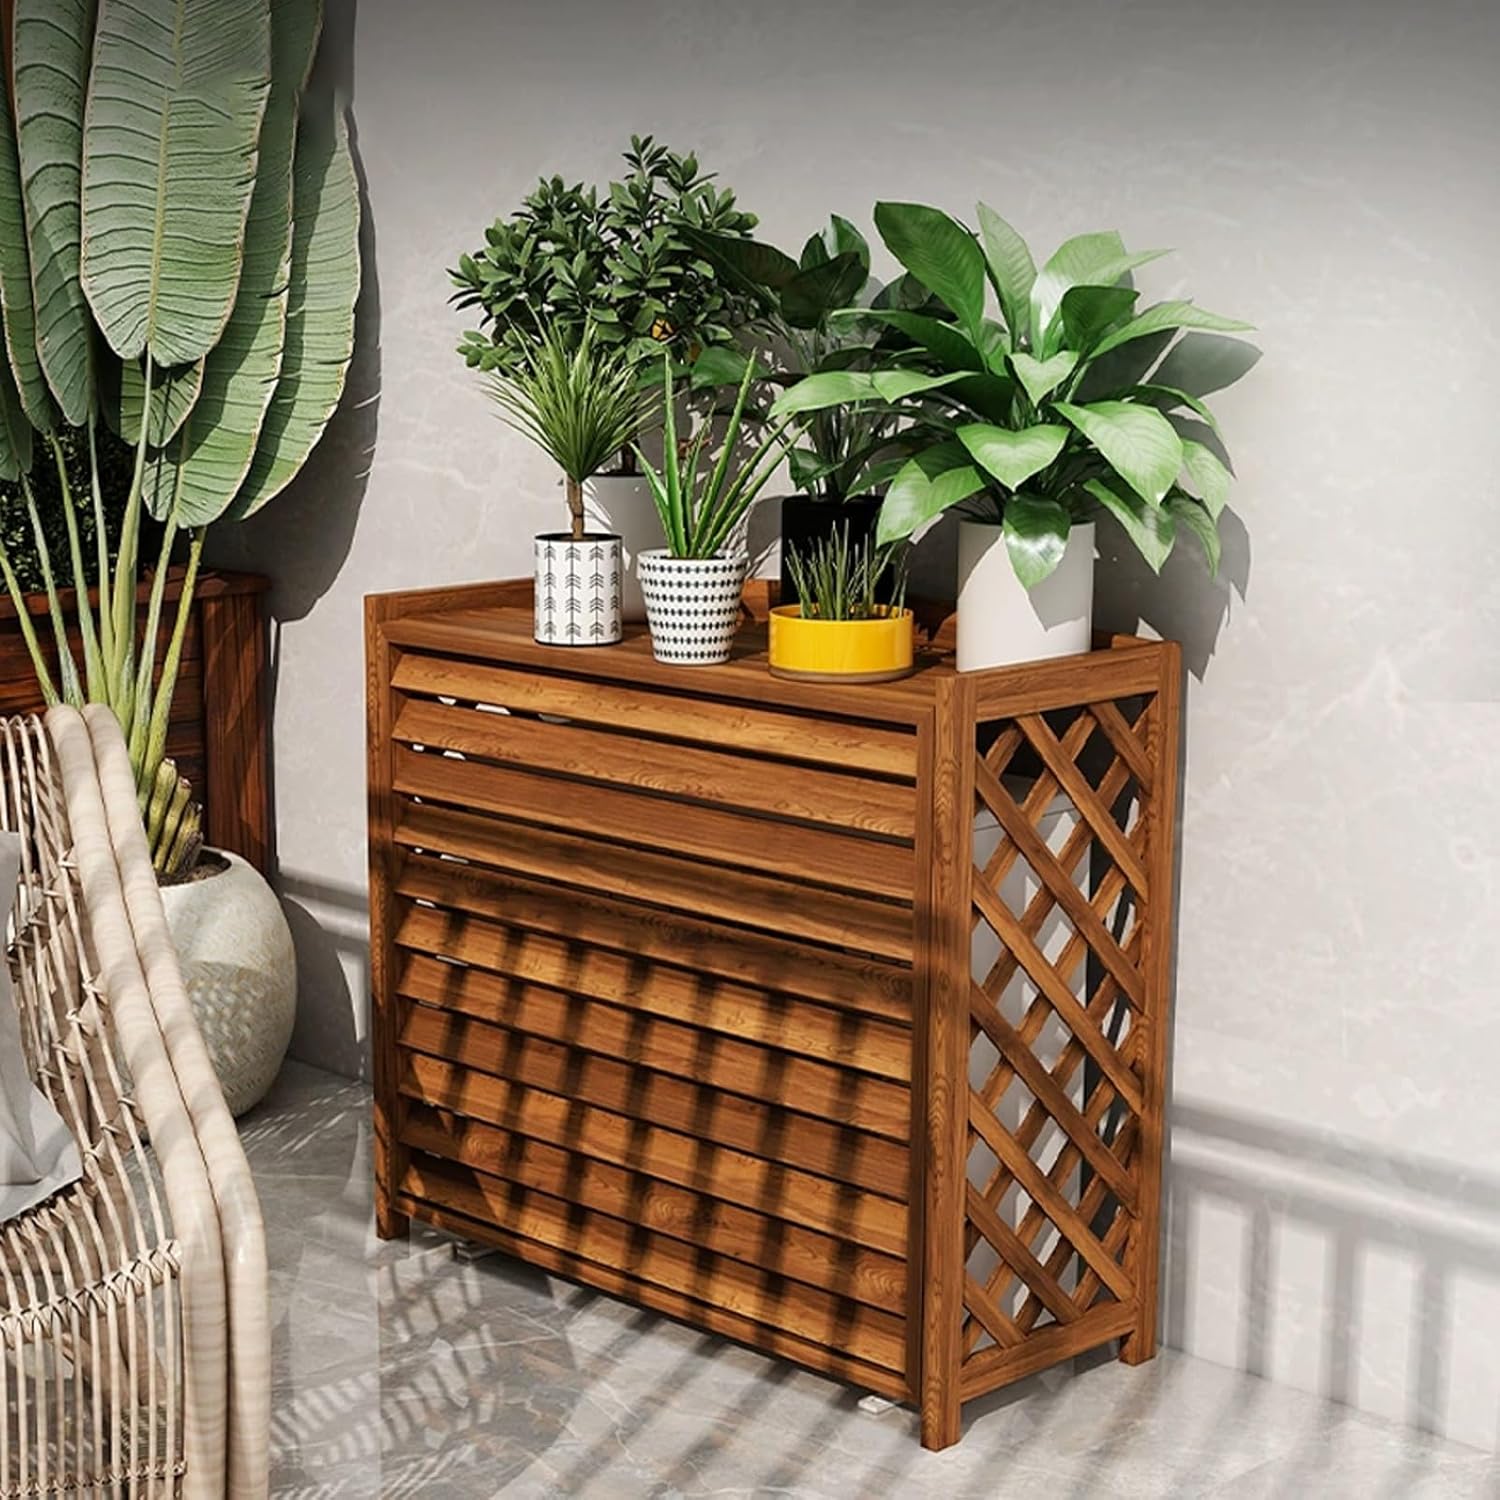
26. Use a Louvered Wood Cabinet for Stylish Patio Storage
This breezy, natural look is all about layering textures within a calm palette. The formula is: 50% warm wood tones (the cabinet), 40% lush greenery (the potted plants), and 10% neutral backdrop (the light grey wall and tiled floor). The success lies in the variety of textures within those categories: the repeating lines of the louvers, the open weave of the lattice, the different leaf shapes, and the smooth ceramic pots. The result is a look that’s rich and interesting without being cluttered or loud. Compare this to the more rustic cabinet in Idea #9.
📏 Scale Guide
A decorative cabinet like this is perfect for a covered patio, a balcony, or a sunroom. Its height (around 3-4 feet) and depth (1.5-2 feet) make it substantial enough to hide pool chemical containers, bags of potting soil, or kids’ toys, but it’s not so large that it would overwhelm a smaller space. Its finished, furniture-like quality means it’s best suited for an area that’s treated as an outdoor living room, rather than out in the open yard. It provides concealment while also serving as a beautiful and functional surface for plants and decor.
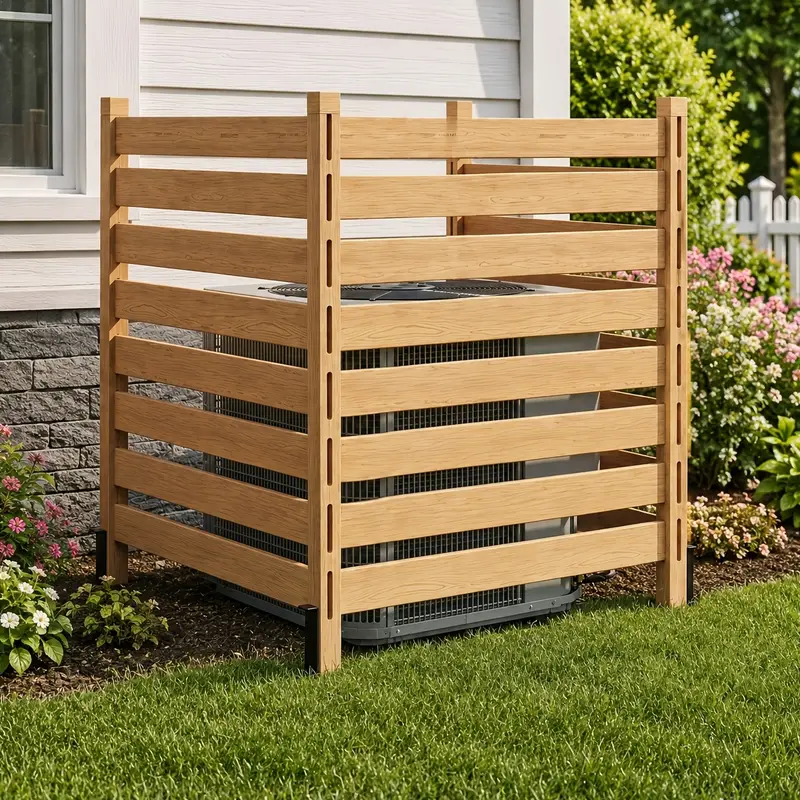
27. Assemble a Slatted Light Wood Screen for an AC Unit
You can get this clean, modern look without a custom build. Many companies now sell modular privacy screen kits online and at big-box stores. These kits typically come with the posts, pre-cut slats, and hardware for around $150 – $400. They are designed for easy DIY assembly with basic tools. While they might not have the same longevity as a screen built from high-end cedar, they offer a massive aesthetic upgrade for a fraction of the cost and effort of a fully custom project. Look for options with aluminum posts for better ground-contact durability.
✅ Before You Start
Before you buy or build a screen for your AC unit, you have to get the measurements right not just for the unit, but for your line of sight. Here’s a quick checklist:
- Unit Clearance: Have you checked the manufacturer’s manual for the minimum required airflow clearance on all sides (usually 2-3 feet)?
- Service Access: Is at least one panel of your screen design easily removable for a technician to access the unit?
- Visual Block: Have you stood at your main viewpoints (patio, kitchen window) to confirm the screen will be tall and wide enough to hide the unit completely?
- Ground Contact: Does your plan ensure the wood an elevated off the grass/soil to prevent rot?
From Eyesore to Outdoor Asset
Hiding the not-so-pretty parts of your yard doesn’t have to be a boring chore. As you’ve seen, it’s a chance to add major style, personality, and function to your outdoor space. Whether your budget is tiny or massive, a thoughtful solution can turn a daily annoyance into a feature you genuinely love looking at.
Feeling inspired? Pick one idea that feels right for you and start planning. Don’t forget to save your favorite looks to your Pinterest boards so you can find them again when you’re ready to get started!