You know that feeling when you finally find the Driveway Lighting Ideas 2026 that looks exactly right for your space? That “aha!” moment is what this guide is all about. After filtering through hundreds of options across IKEA, Target, and Walmart, we narrowed it down to 27 ideas that actually deliver on both style and function. Inside, you’ll find everything from sleek modern solar-powered solutions to grand, traditional up-lighting and rustic post lanterns. In 2026, great curb appeal is all about creating a layered, secure, and welcoming glow from the moment you pull in. And stay until the end — we break down the most common mistakes that can ruin these looks. 📌 Save this to Pinterest for later — you’ll want to revisit these ideas.
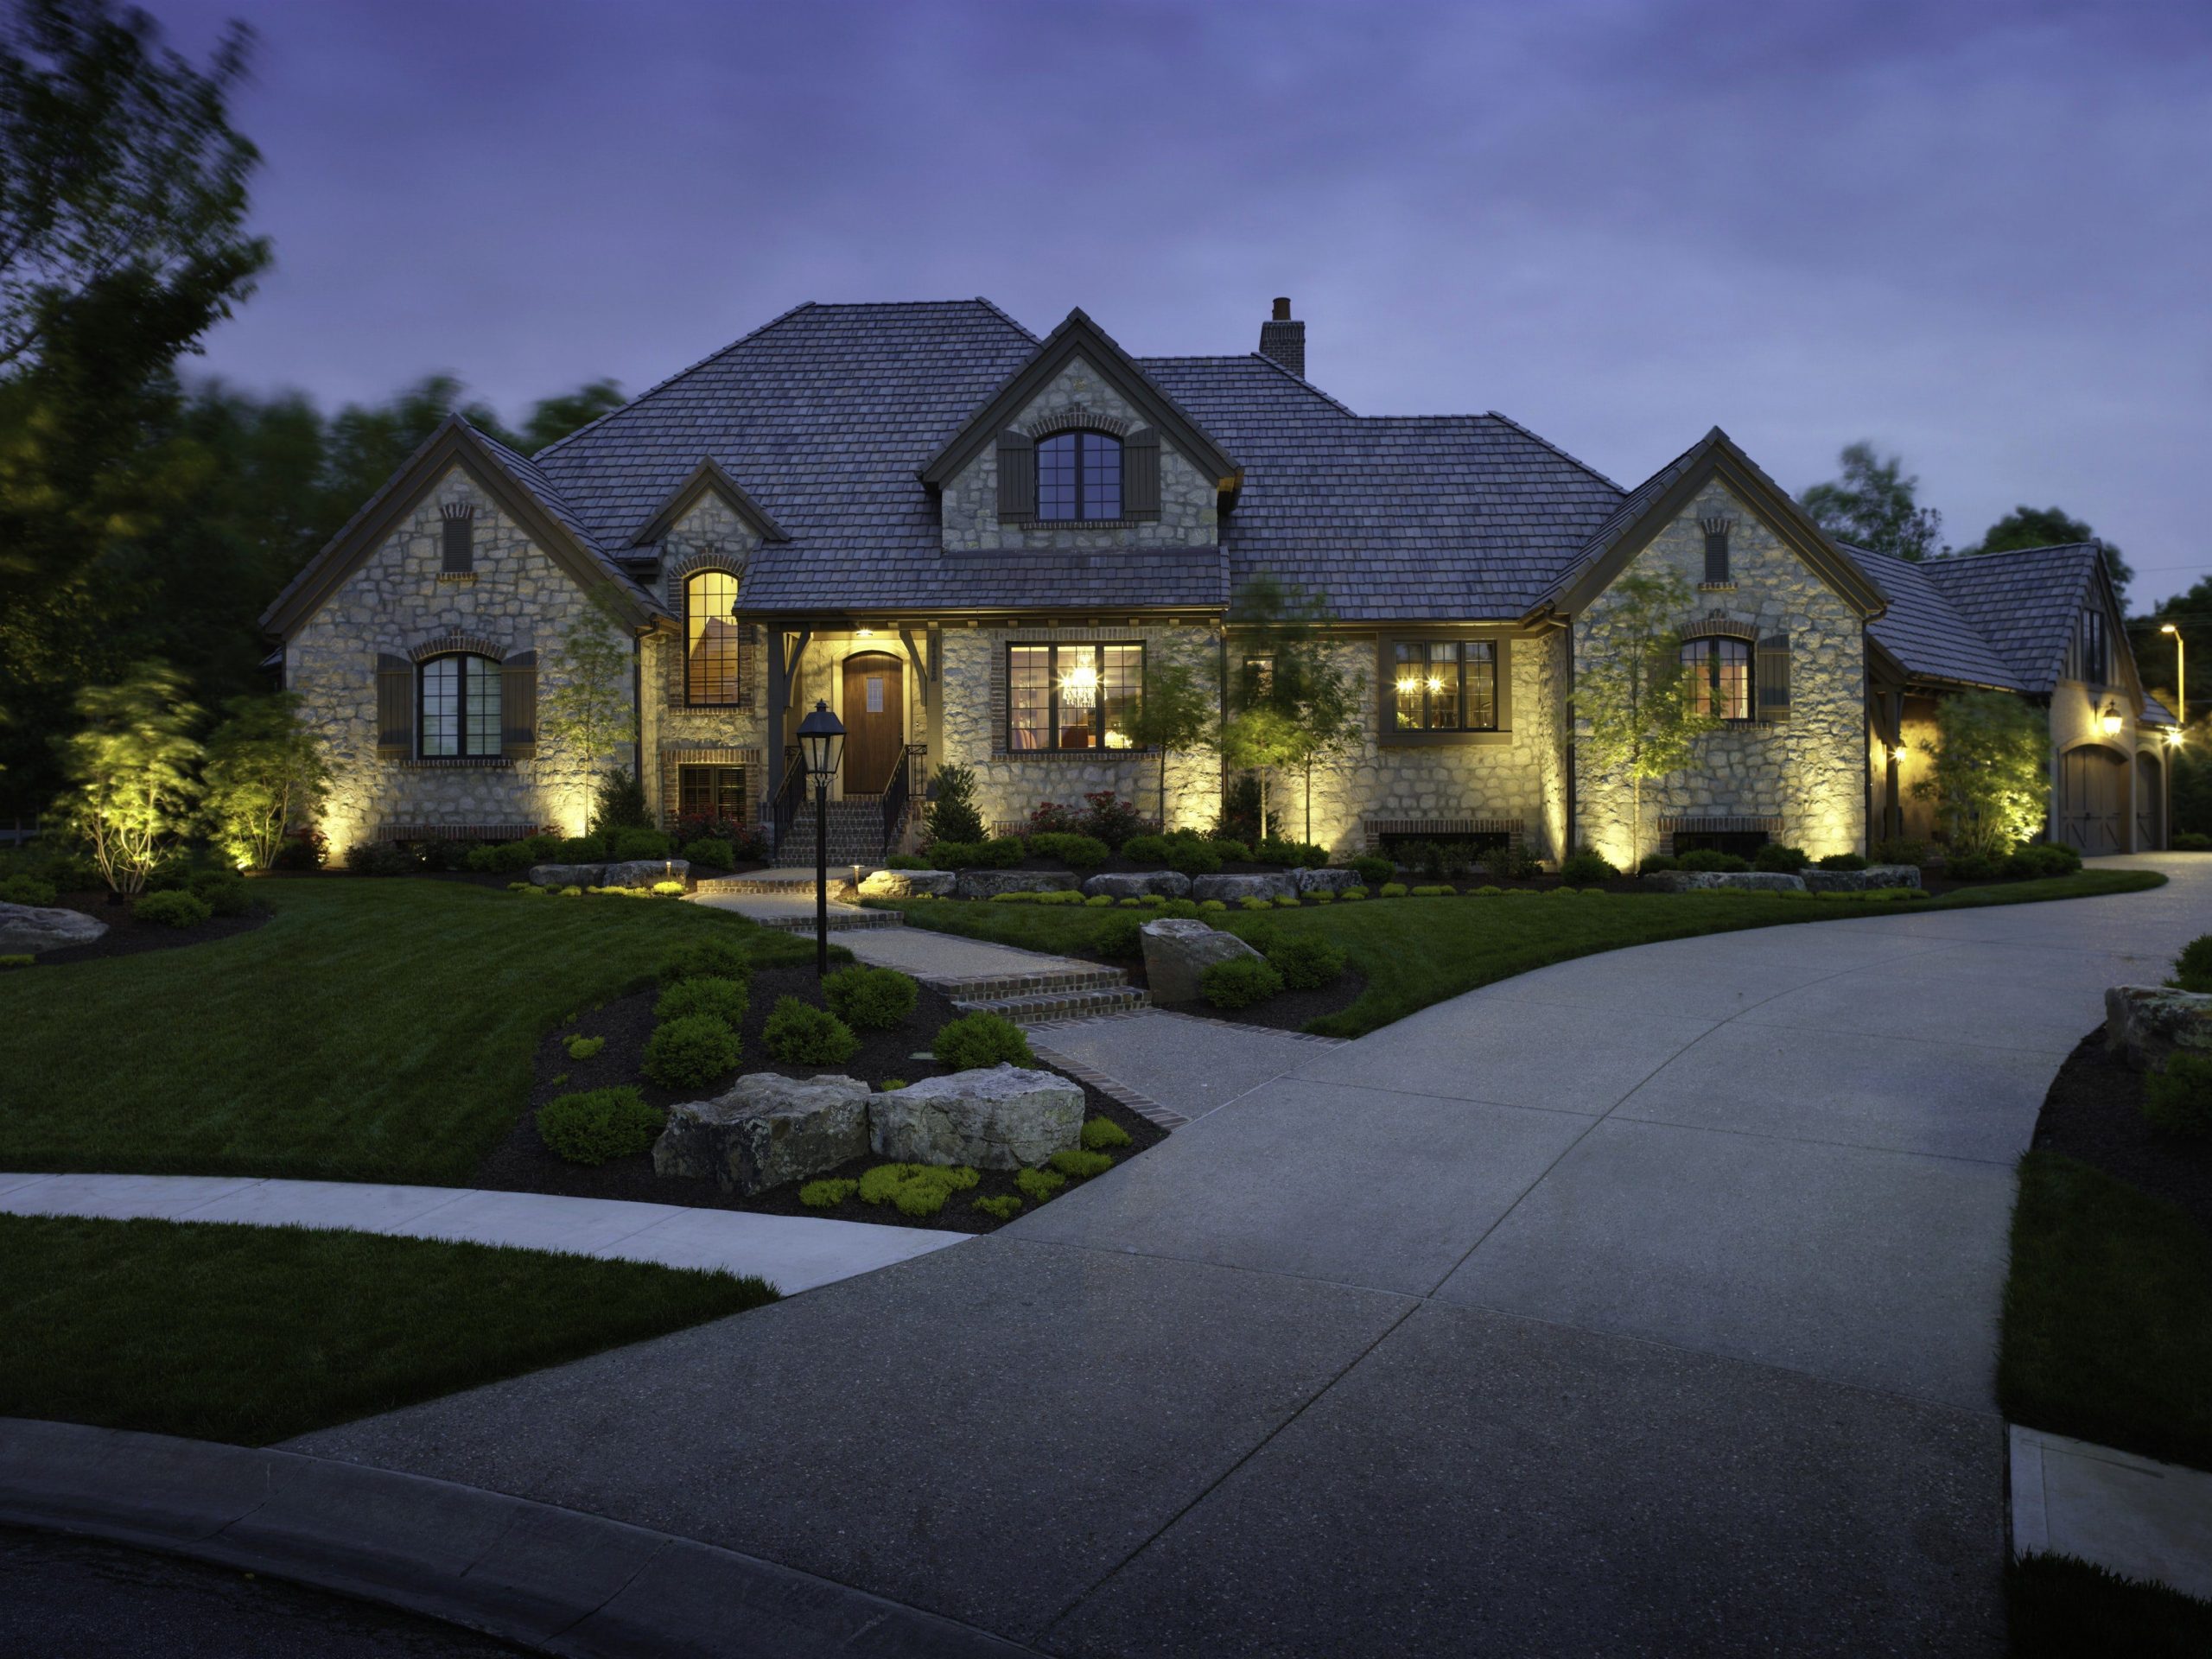
1. Warm Up-Lighting for a Grand Stone Mansion
What makes this lighting scheme so effective is the technique of “grazing.” By placing warm up-lights close to the stone facade, the light catches the texture of every stone, creating dramatic highlights and shadows. This adds immense depth and character that would be lost with flat, overhead lighting. The design also layers different types of light: broad strokes on the house, focused points on landscaping, and a classic lamppost for a human-scale welcome. This layering makes the entire property feel cohesive and thoughtfully designed, not just illuminated.
📐 Style Math
Recreating this grand look involves significant professional installation. Here’s a potential cost-of-entry to achieve a similar layered lighting design for a large home.
- Professional Landscape Lighting Design: $1,000 – $2,500
- Facade & Landscape Up-lights (15-20 fixtures): $3,000 – $6,000
- High-End Traditional Lamppost: $500 – $1,500
- Path Lighting & Wiring Installation: $1,500 – $4,000
- ESTIMATED TOTAL: $6,000 – $14,000
2. Integrated Low-Profile Lighting on a Modern Brick Driveway
For integrated wall lights like these, the magic is in the spacing. A common mistake is placing them too far apart, creating dark, uninviting pools between fixtures. A good rule of thumb is to space low-voltage hardscape lights 8 to 12 feet apart. For a softer, more continuous glow along a driveway or wall, aim for the closer end of that range. Measure your total wall length and divide by 8 to get a starting number of fixtures. This ensures a consistent, overlapping wash of light that’s both beautiful and safe for navigation.
💡 Designer Tip
While stunning, this look is not a simple weekend DIY project. Integrating lights into a brick retaining wall requires planning *before* the wall is built, as wiring needs to be run internally. Retrofitting can be incredibly costly and difficult. Furthermore, any failure in waterproofing during installation can lead to short circuits and frequent maintenance headaches. This is a job for a seasoned professional landscaper or electrician to ensure it’s done safely and built to last against the elements.
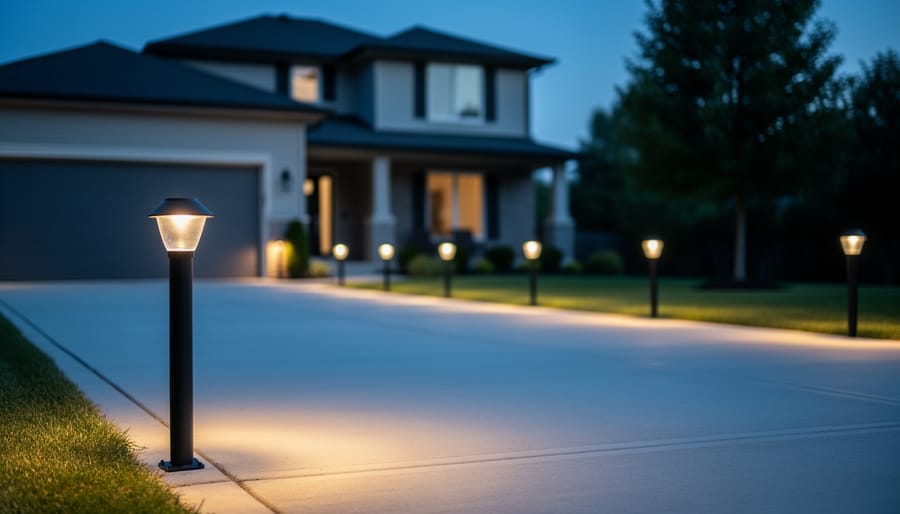
3. Subtle Glow from Bollard Lights Along a Concrete Driveway
Bollard lighting is perfect for long, straight driveways on properties of a quarter-acre or more. The key is scale and spacing. These fixtures are about 24-36 inches tall, making them substantial enough to not get lost in the landscape. For even illumination without creating a “runway” effect, space them approximately 10-15 feet apart. This spacing provides enough light for guidance without being overpowering. This style is less suited for very short or narrow driveways, where they might feel oversized and cluttered. Compare this with the integrated look in Idea #2, which suits tighter spaces.
🔥 Trending Context
You don’t need a custom electrical installation to get this classic look. The market for high-quality solar bollard lights has exploded. A set of 6-8 solar-powered bollards from a big-box store like Home Depot or Lowe’s can be had for $150-$300. They won’t be as bright as their hardwired cousins, but they provide a similar ambient glow and clear demarcation for your driveway edge. The best part? You can install them yourself in an afternoon with zero wiring required.
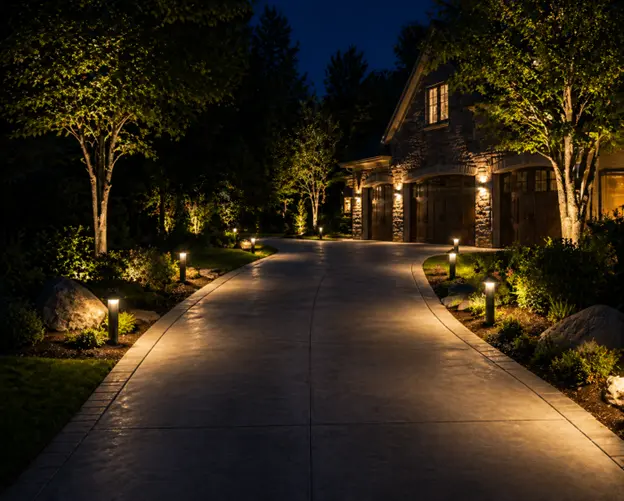
4. Lush Landscape Uplighting on a Winding Driveway
This lighting scheme works because it prioritizes the landscape over the driveway itself. By focusing the light on the beautiful trees and shrubs, the driveway is illuminated indirectly with soft, reflected light. This creates a much more natural, high-end feel than simply lining the pavement with lights. The mix of uplighting on trees and low-level bollards provides depth and variety, guiding the eye through the scene rather than just marking a path. The result is a journey, not just a utility.
📏 Scale Guide
When uplighting trees, placement is everything. Don’t just stick a light at the base and point it straight up. For smaller, wider trees like Japanese maples, use two or three lower-wattage lights from different angles to create a gentle, surrounding glow. For tall, narrow trees like birches, place a single, slightly more powerful, and narrower beam light close to the trunk to emphasize its height and texture. This thoughtful approach is what separates amateur lighting from professional-grade design.
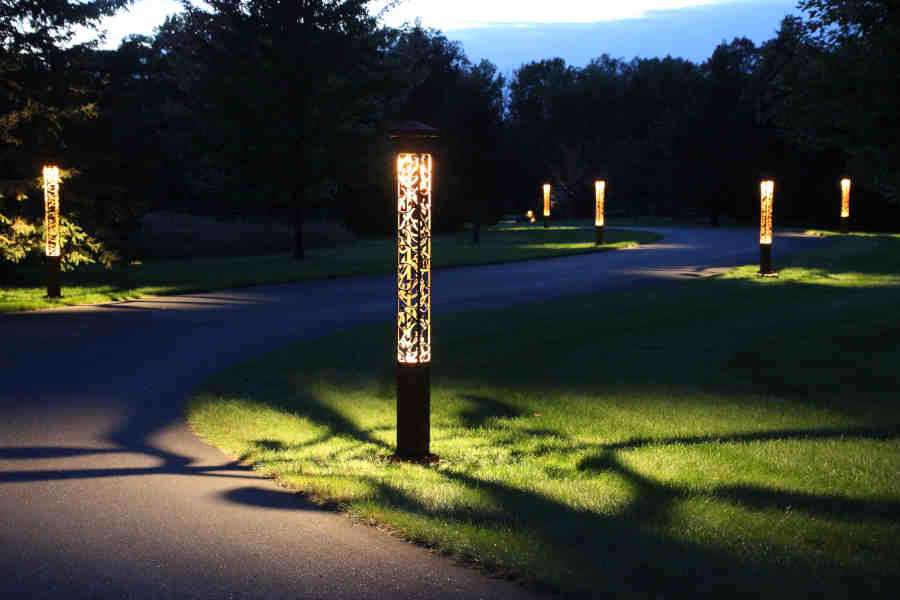
5. Ornate Cutout Bollard Lights for a Decorative Touch
that makes this idea truly special is the decorative pattern play. Without the intricate, laser-cut metal shades, these would just be standard path lights. But with them, the light itself becomes a design element, casting beautiful, complex shadows on the surrounding path and lawn. It transforms the function of illumination into an art form. This single detail elevates the entire experience of the walkway, making it a feature to be admired rather than just a way to get from A to B. It’s a perfect example of how the fixture can be as important as the light it casts. For a simpler take on bollards, see Idea #3.
💸 Get This Look For Less
While undeniably beautiful, these cutout-style lanterns have an honest maintenance demand. The intricate patterns that create those lovely shadows are also perfect traps for spiders, insects, and wind-blown debris like grass clippings and leaves. To keep the light clear and the patterns sharp, expect to clean them out at least two or three times a year. A blast from an air compressor or a good wipe-down with a microfiber cloth is usually all it takes, but it’s a recurring task you’ll need to commit to.
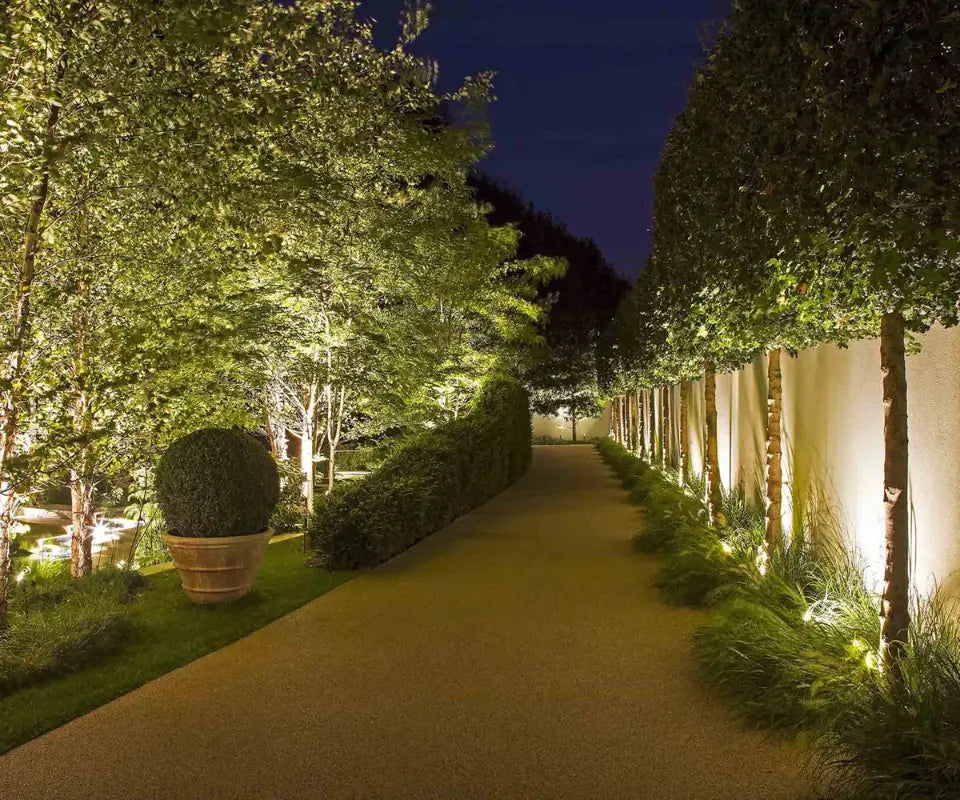
6. Dramatic Garden Path with Up-Lit Trees and Hedges
The visual success here is a carefully balanced formula. Think of it as 60% uplighting + 30% path contouring + 10% shadow play. The majority of the light is dedicated to highlighting the vertical elements—the trees and the large topiary—creating drama and height. A smaller portion defines the path’s edge, using a soft wash on the hedge. The final 10% is the magic: the dramatic shadows cast onto the wall, which add depth and an almost theatrical quality. You could swap the hedge for ornamental grasses and still achieve the same effect by keeping this ratio.
🎯 What Makes It Work
A lighting scheme this dramatic and layered requires a significant number of fixtures. While the effect is stunning, be prepared for the reality of your electricity bill. Using all low-voltage LED fixtures is a must to keep running costs from getting out of hand. Also, consider the light’s impact on your home’s interior. If this path is right outside a bedroom window, the bright uplighting could cause unwanted light spill, disrupting sleep. It’s a great look for a backyard path, but requires careful thought near living spaces.
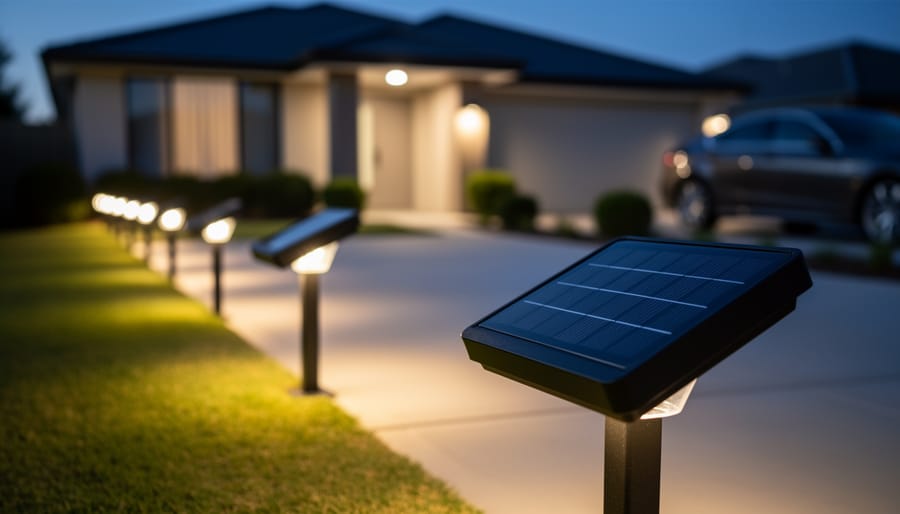
7. Modern Solar Pathway Lights Along a Concrete Driveway
This clean, minimalist look is trending heavily on Pinterest right now, and for good reason. It aligns perfectly with the growing desire for sustainable, easy-to-install home solutions. As solar technology has improved, fixtures have become more powerful and their designs more sophisticated. Homeowners in 2026 are realizing they can achieve a high-end, modern aesthetic without the cost and complexity of hardwiring. These sleek, dark-sky friendly designs provide a gentle, downward glow that feels contemporary and eco-conscious.
💰 Budget Breakdown
This look is inherently budget-friendly. Even the more stylish, architectural solar lights are a fraction of the cost of their hardwired counterparts. You can find four-packs of lights with this exact modern profile at stores like Target or on Amazon for $40-$80. For the cost of a single professionally installed hardwired fixture, you can outfit your entire driveway with these. They offer the perfect blend of modern style and wallet-friendly practicality, making a chic entryway accessible to almost any budget.
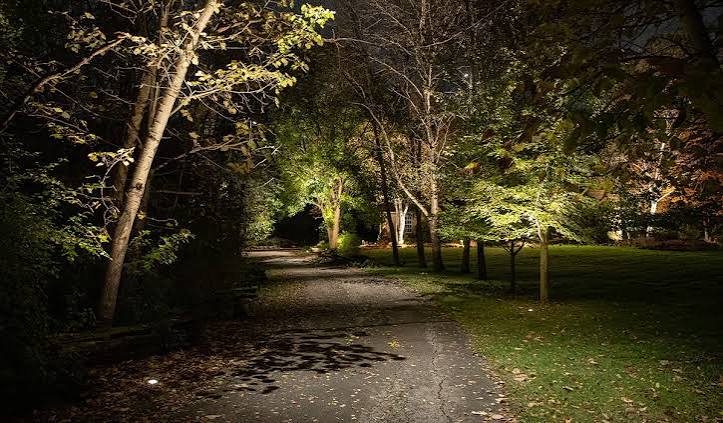
8. Elegant Lighting for a Front Entrance Driveway
The power of this design lies in its subtlety and focus. Instead of flooding the area with light, the fixtures are strategically placed to highlight key features: the texture of the landscaping, the edge of the driveway, and the architectural lines of the house. This creates a soft, ambient glow that feels welcoming and luxurious, not like a stadium. By using multiple small sources of warm light rather than one or two harsh, bright ones, the scene has depth, dimension, and a distinctly upscale, professionally designed character.
🔧 How-To Brief
To create a cohesive front entrance lighting plan, think in zones. Zone 1 is navigation: low-level path lights to guide feet safely. Zone 2 is architectural: uplights or wall sconces to highlight the home’s texture and form. Zone 3 is landscape: accent lights on specimen trees or garden beds to add depth. Ensure all fixtures are the same color temperature (2700K-3000K is best for a warm, inviting feel) so the different zones blend together seamlessly into one beautiful, unified picture.
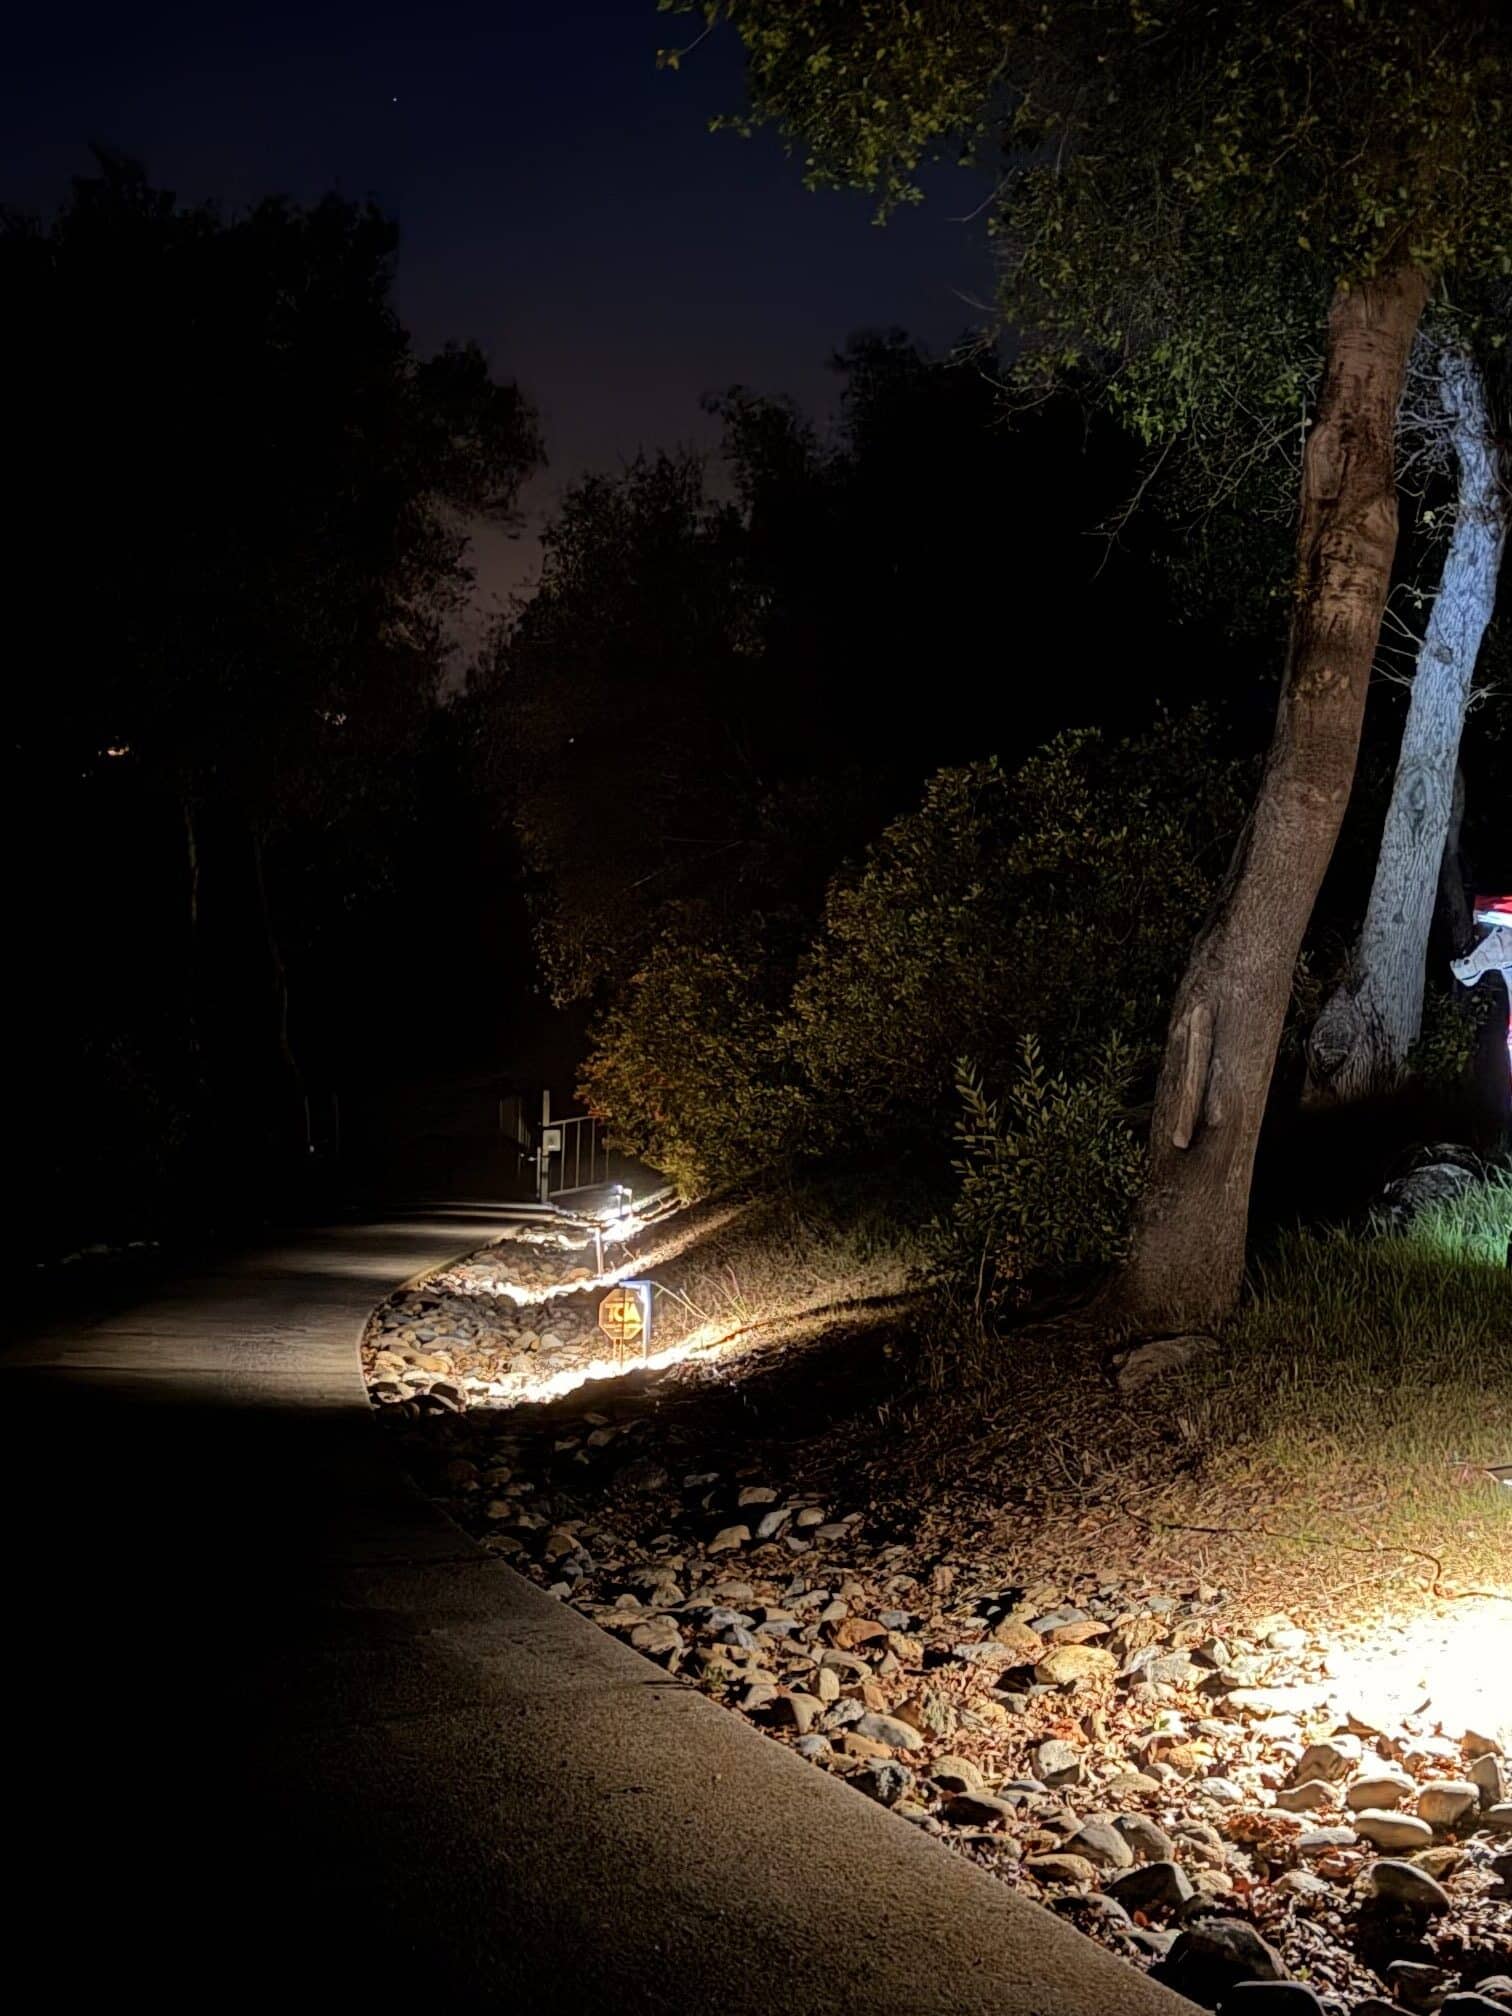
9. Natural Pathway with Warm Uplights and Tree Spotlights
The single element that makes this design work so beautifully is the spotlight on the tree trunk. While the low-level path lights are functional, the tree spotlight is pure atmosphere. It draws the eye upward and into the landscape, celebrating a natural feature and turning it into a living sculpture. Without it, the path would be lit, but the scene would be flat and utilitarian. This one fixture adds a critical layer of vertical interest and depth, transforming the walk into a more immersive, enchanting experience.
⭐ The One Thing
Before you invest in a landscape lighting project like this, run through this quick checklist to ensure you’re prepared for a successful installation.
- Map your power source: Where is your nearest outdoor GFCI outlet? Plan your low-voltage transformer location and how you’ll run or bury the main wire.
- Test with flashlights: Go out at night and use flashlights to simulate light placement. See what angles look best for your trees and path before you commit to fixture locations.
- Check your soil: Are you digging into soft soil, clay, or a rocky base? This will affect how you’ll stake your fixtures and bury your wiring.
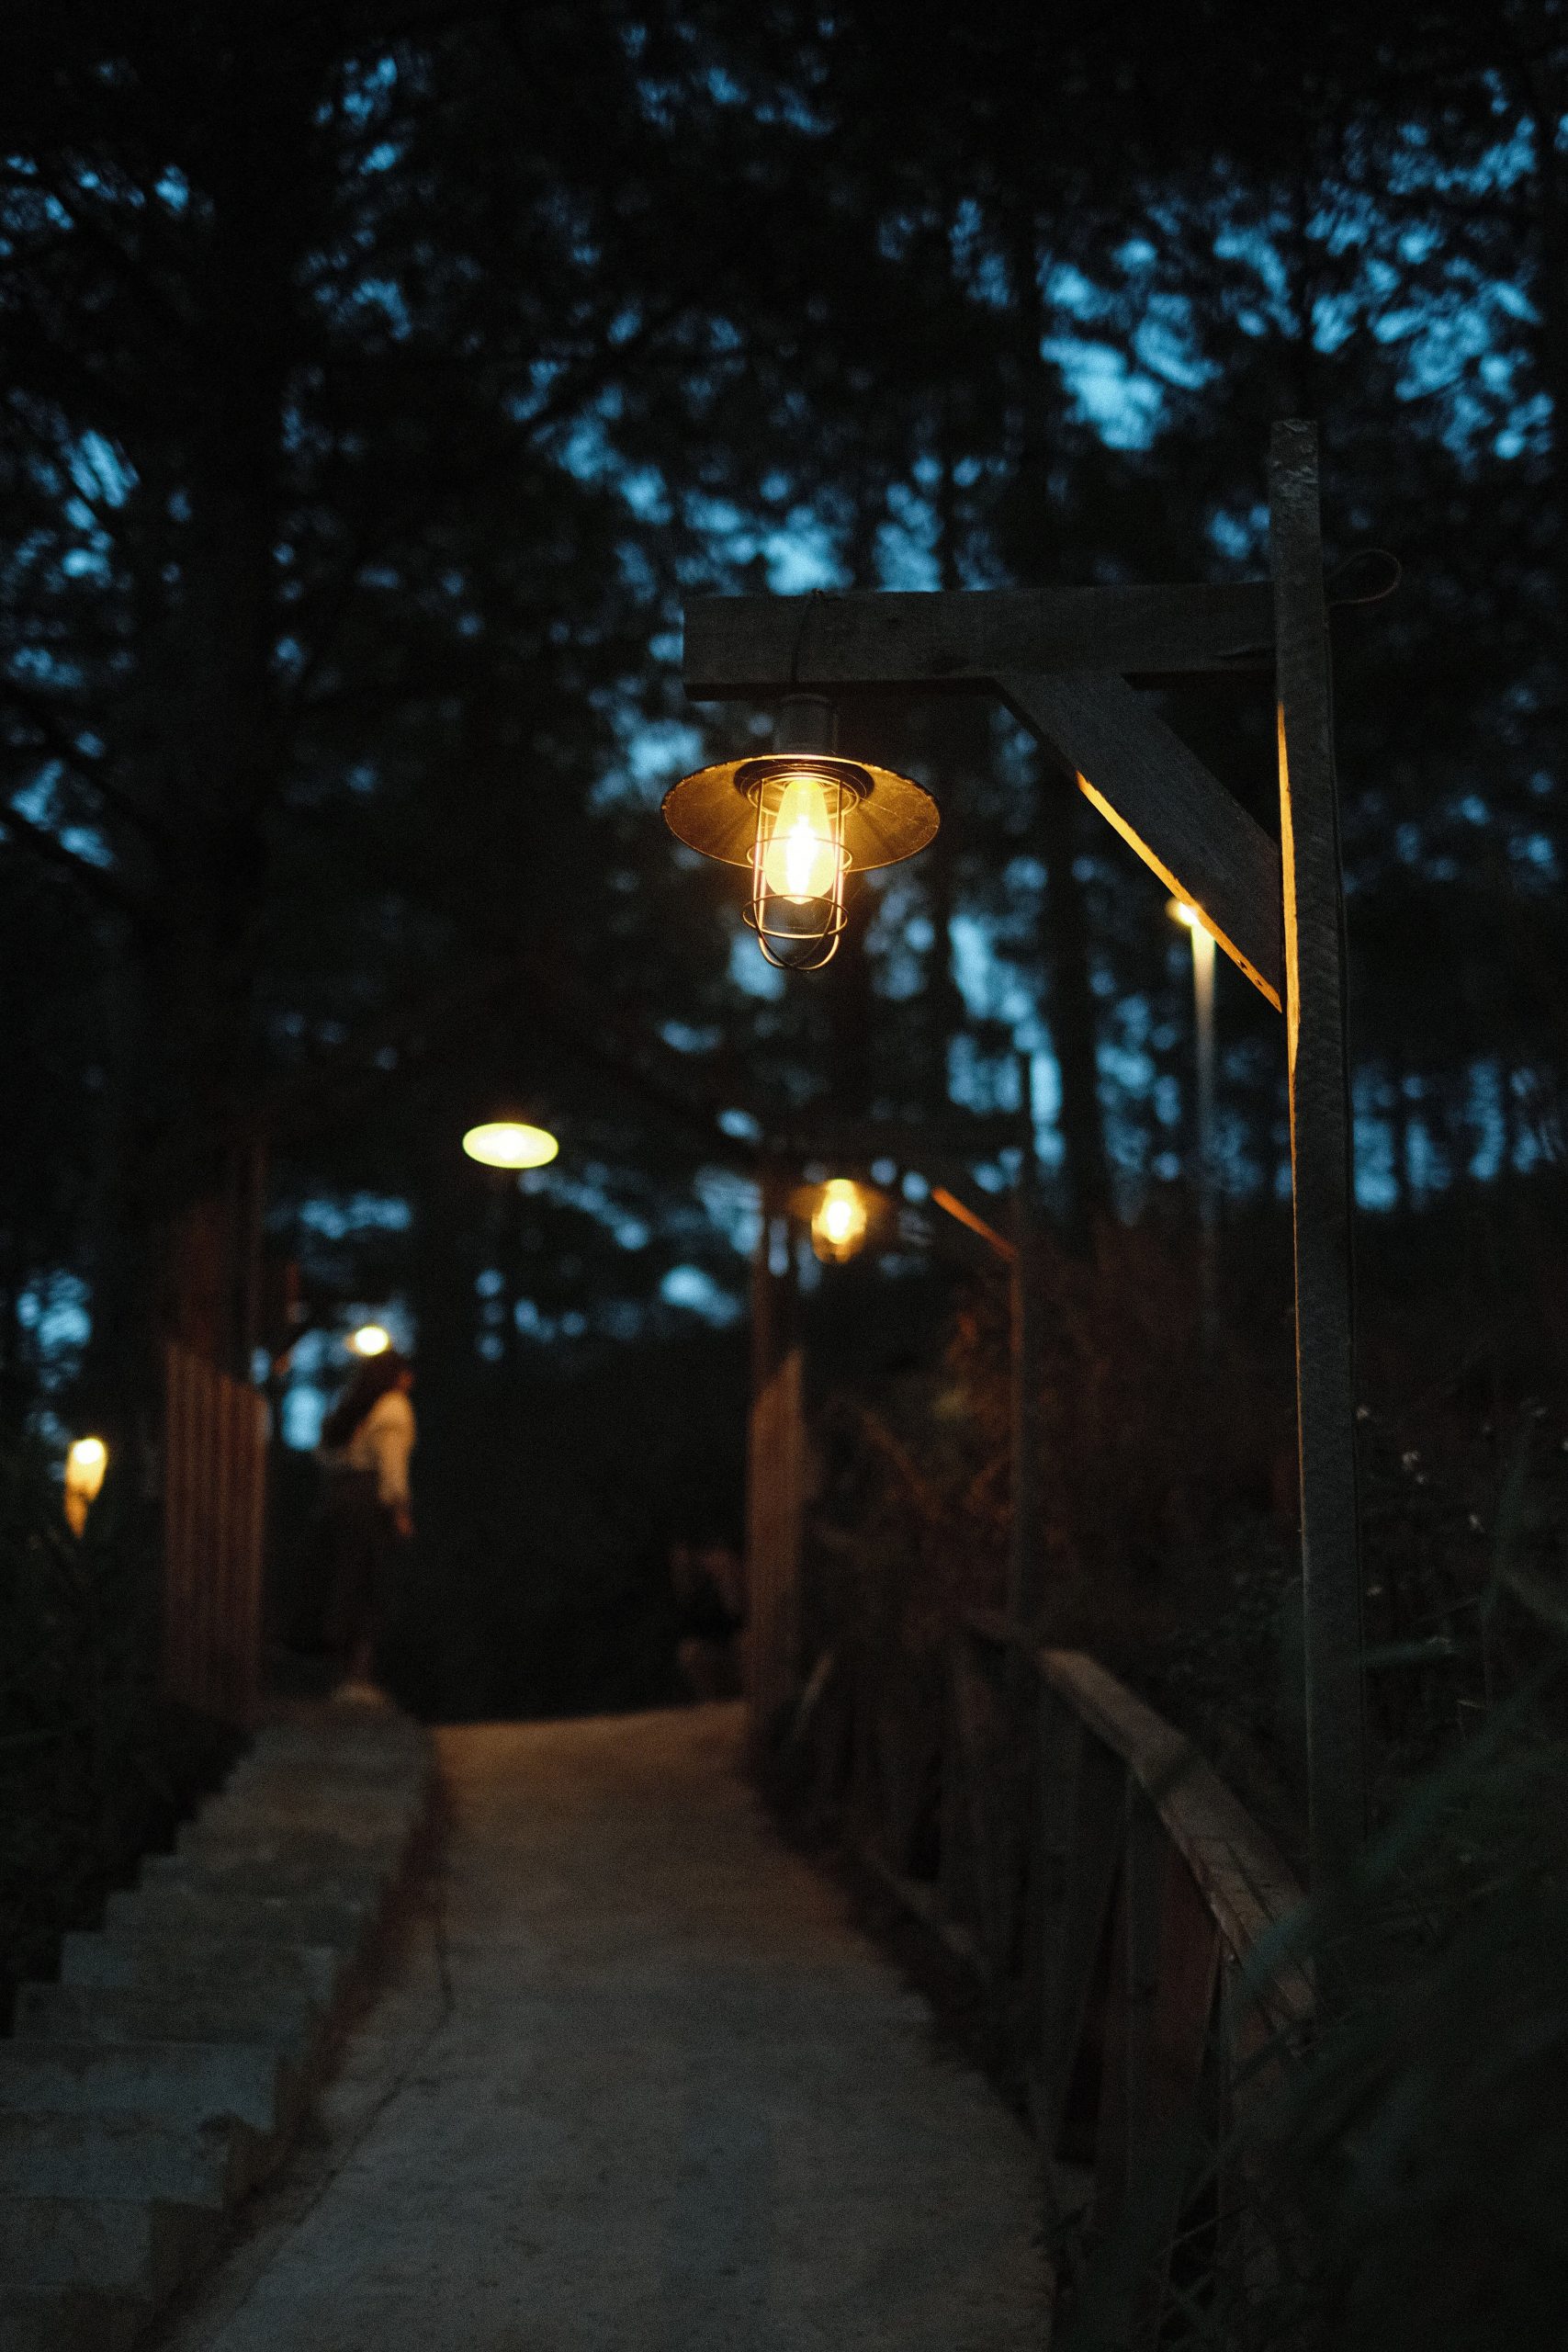
10. Cozy Pathway with Rustic Wooden Post Lanterns
This inviting look is all about a simple, rustic formula: 70% natural materials + 30% warm, low light. The heavy lifting is done by the chunky wooden posts, railing, and the dense, dark foliage, which ground the scene in an organic, cabin-like feel. The lighting itself is secondary and supportive, with just enough warm yellow glow to provide safe passage and a cozy ambiance. If you were to swap the wooden posts for sleek metal ones, the entire ‘cozy’ equation would fall apart, proving how critical the material choice is to the overall vibe.
⚠️ Real Talk
Wooden posts, while beautiful and rustic, are in constant contact with the elements. To keep them from rotting, splitting, or fading, they require more upkeep than their metal or composite counterparts. Plan to clean and re-seal the wood every 2-3 years, depending on your climate’s harshness. Use a high-quality outdoor wood sealant with UV protection. This regular maintenance is key to preserving their structural integrity and natural beauty for the long haul.
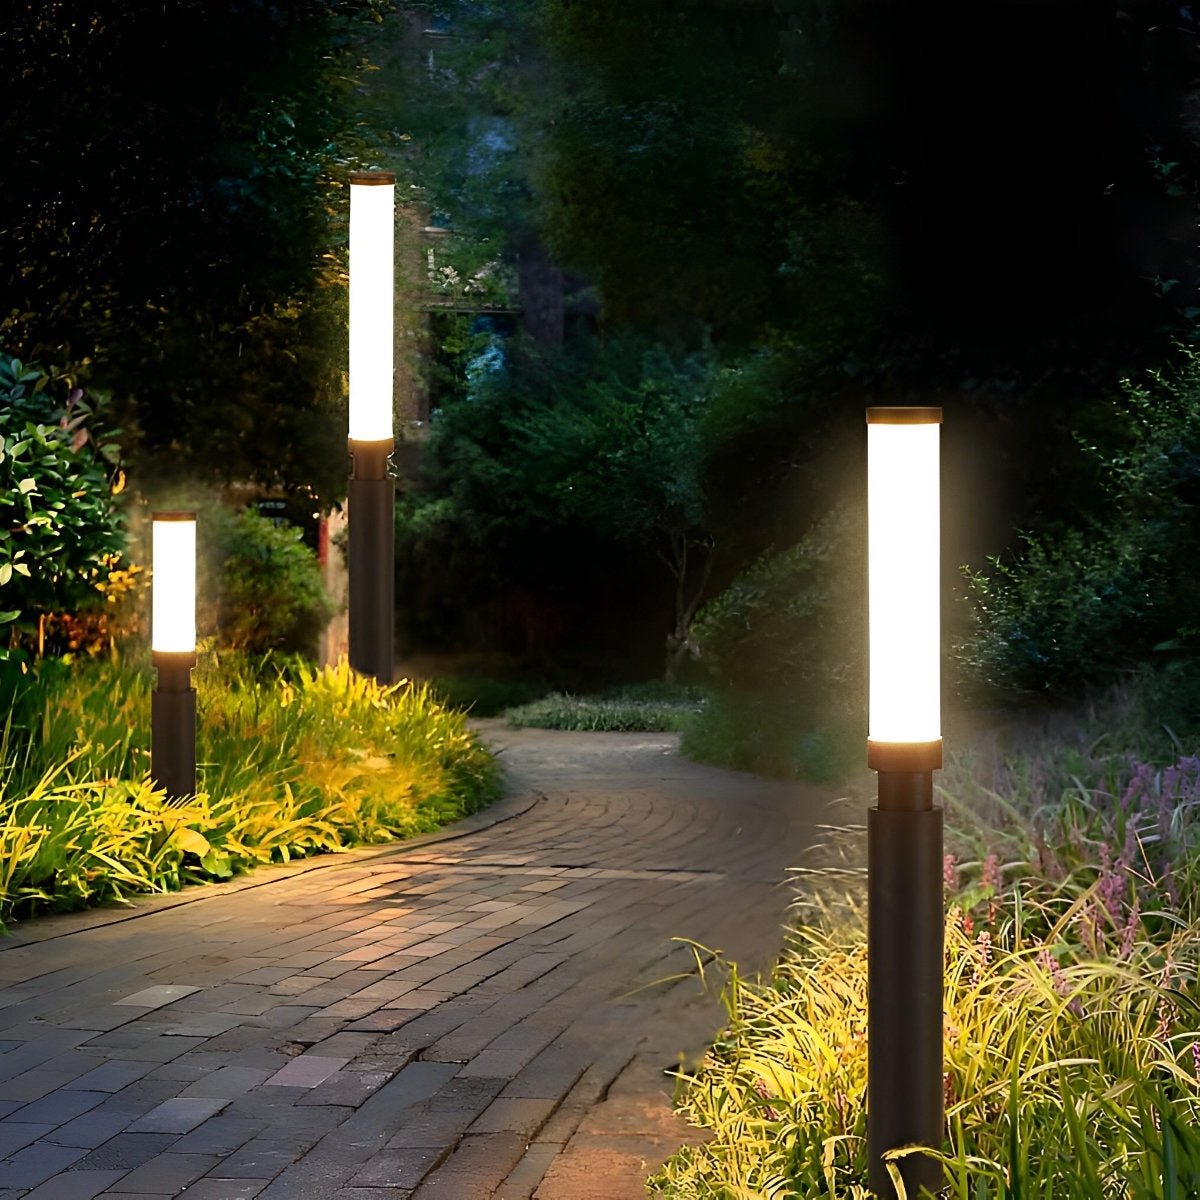
11. Modern Cylindrical Bollards Along a Curved Stone Walkway
A hard truth about tall, modern bollards like these is that they are an investment. High-quality fixtures made from powder-coated aluminum or stainless steel can cost $200-$500 *each*, and that’s before the cost of professional installation and wiring. While they deliver a sharp, architectural look, this isn’t a budget-friendly option. Be wary of cheap knock-offs, as they often use inferior metals that will rust and finishes that will fade or peel within a season or two, completely ruining the intended sleek effect.
🧹 Maintenance Reality
These tall, slim bollards are ideal for defining walkways that cut through open spaces or dense garden beds, as shown here. Their height (typically 30-42 inches) allows them to stand above low-lying foliage that would obscure shorter path lights. They work best when spaced about 8-12 feet apart along a curved path, as the repeated vertical forms help to emphasize the sweep of the walkway. This style is particularly effective for leading to a specific destination, like a front door or a garden seating area.
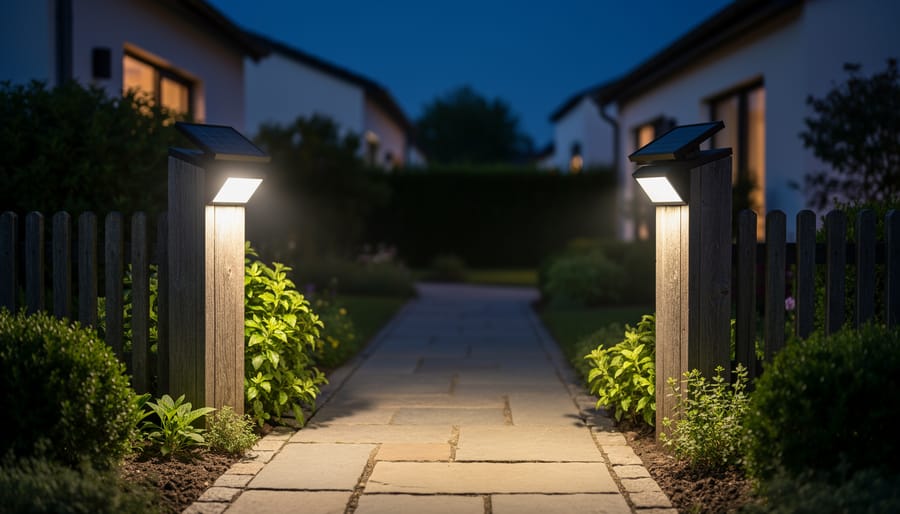
12. Solar-Powered Wooden Bollards Flanking a Stone Path
Creating a simple lighted path edge with solar bollards is an easy weekend project. This mini-guide focuses on setting just two lights for maximum effect.
✅ Before You Start
- Time Estimate: 1 hour. Material Cost: $50 – $150.
- Choose Your Spot: Place the lights where they will receive at least 6-8 hours of direct sunlight. Mark the spots on opposite sides of the path for a gateway effect.
- Assemble the Lights: Unbox and assemble the bollards per the manufacturer’s instructions. Most simply screw or click together.
- Activate and Charge: Turn the power switch on (it’s often under the solar panel cap) and leave the lights in the sun for a full day to charge the battery before installing.
- Install the Stakes: Use a rubber mallet to gently drive the ground stakes into the soil until they are firm and level.
- Mount the Lights: Place the charged bollards onto the installed stakes. Wait for dusk and enjoy your new illuminated pathway!
This charming, eco-friendly look is incredibly accessible. You can find solar-powered bollards with wood or wood-look finishes at many retailers. Check out IKEA’s solar lighting section or look for brands like Hampton Bay at Home Depot. A pair of lights like these often costs between $50 and $100. They provide a soft, ambient light that’s perfect for marking a path edge without the expense or hassle of hiring an electrician. It’s a high-impact, low-cost upgrade for any garden or walkway.
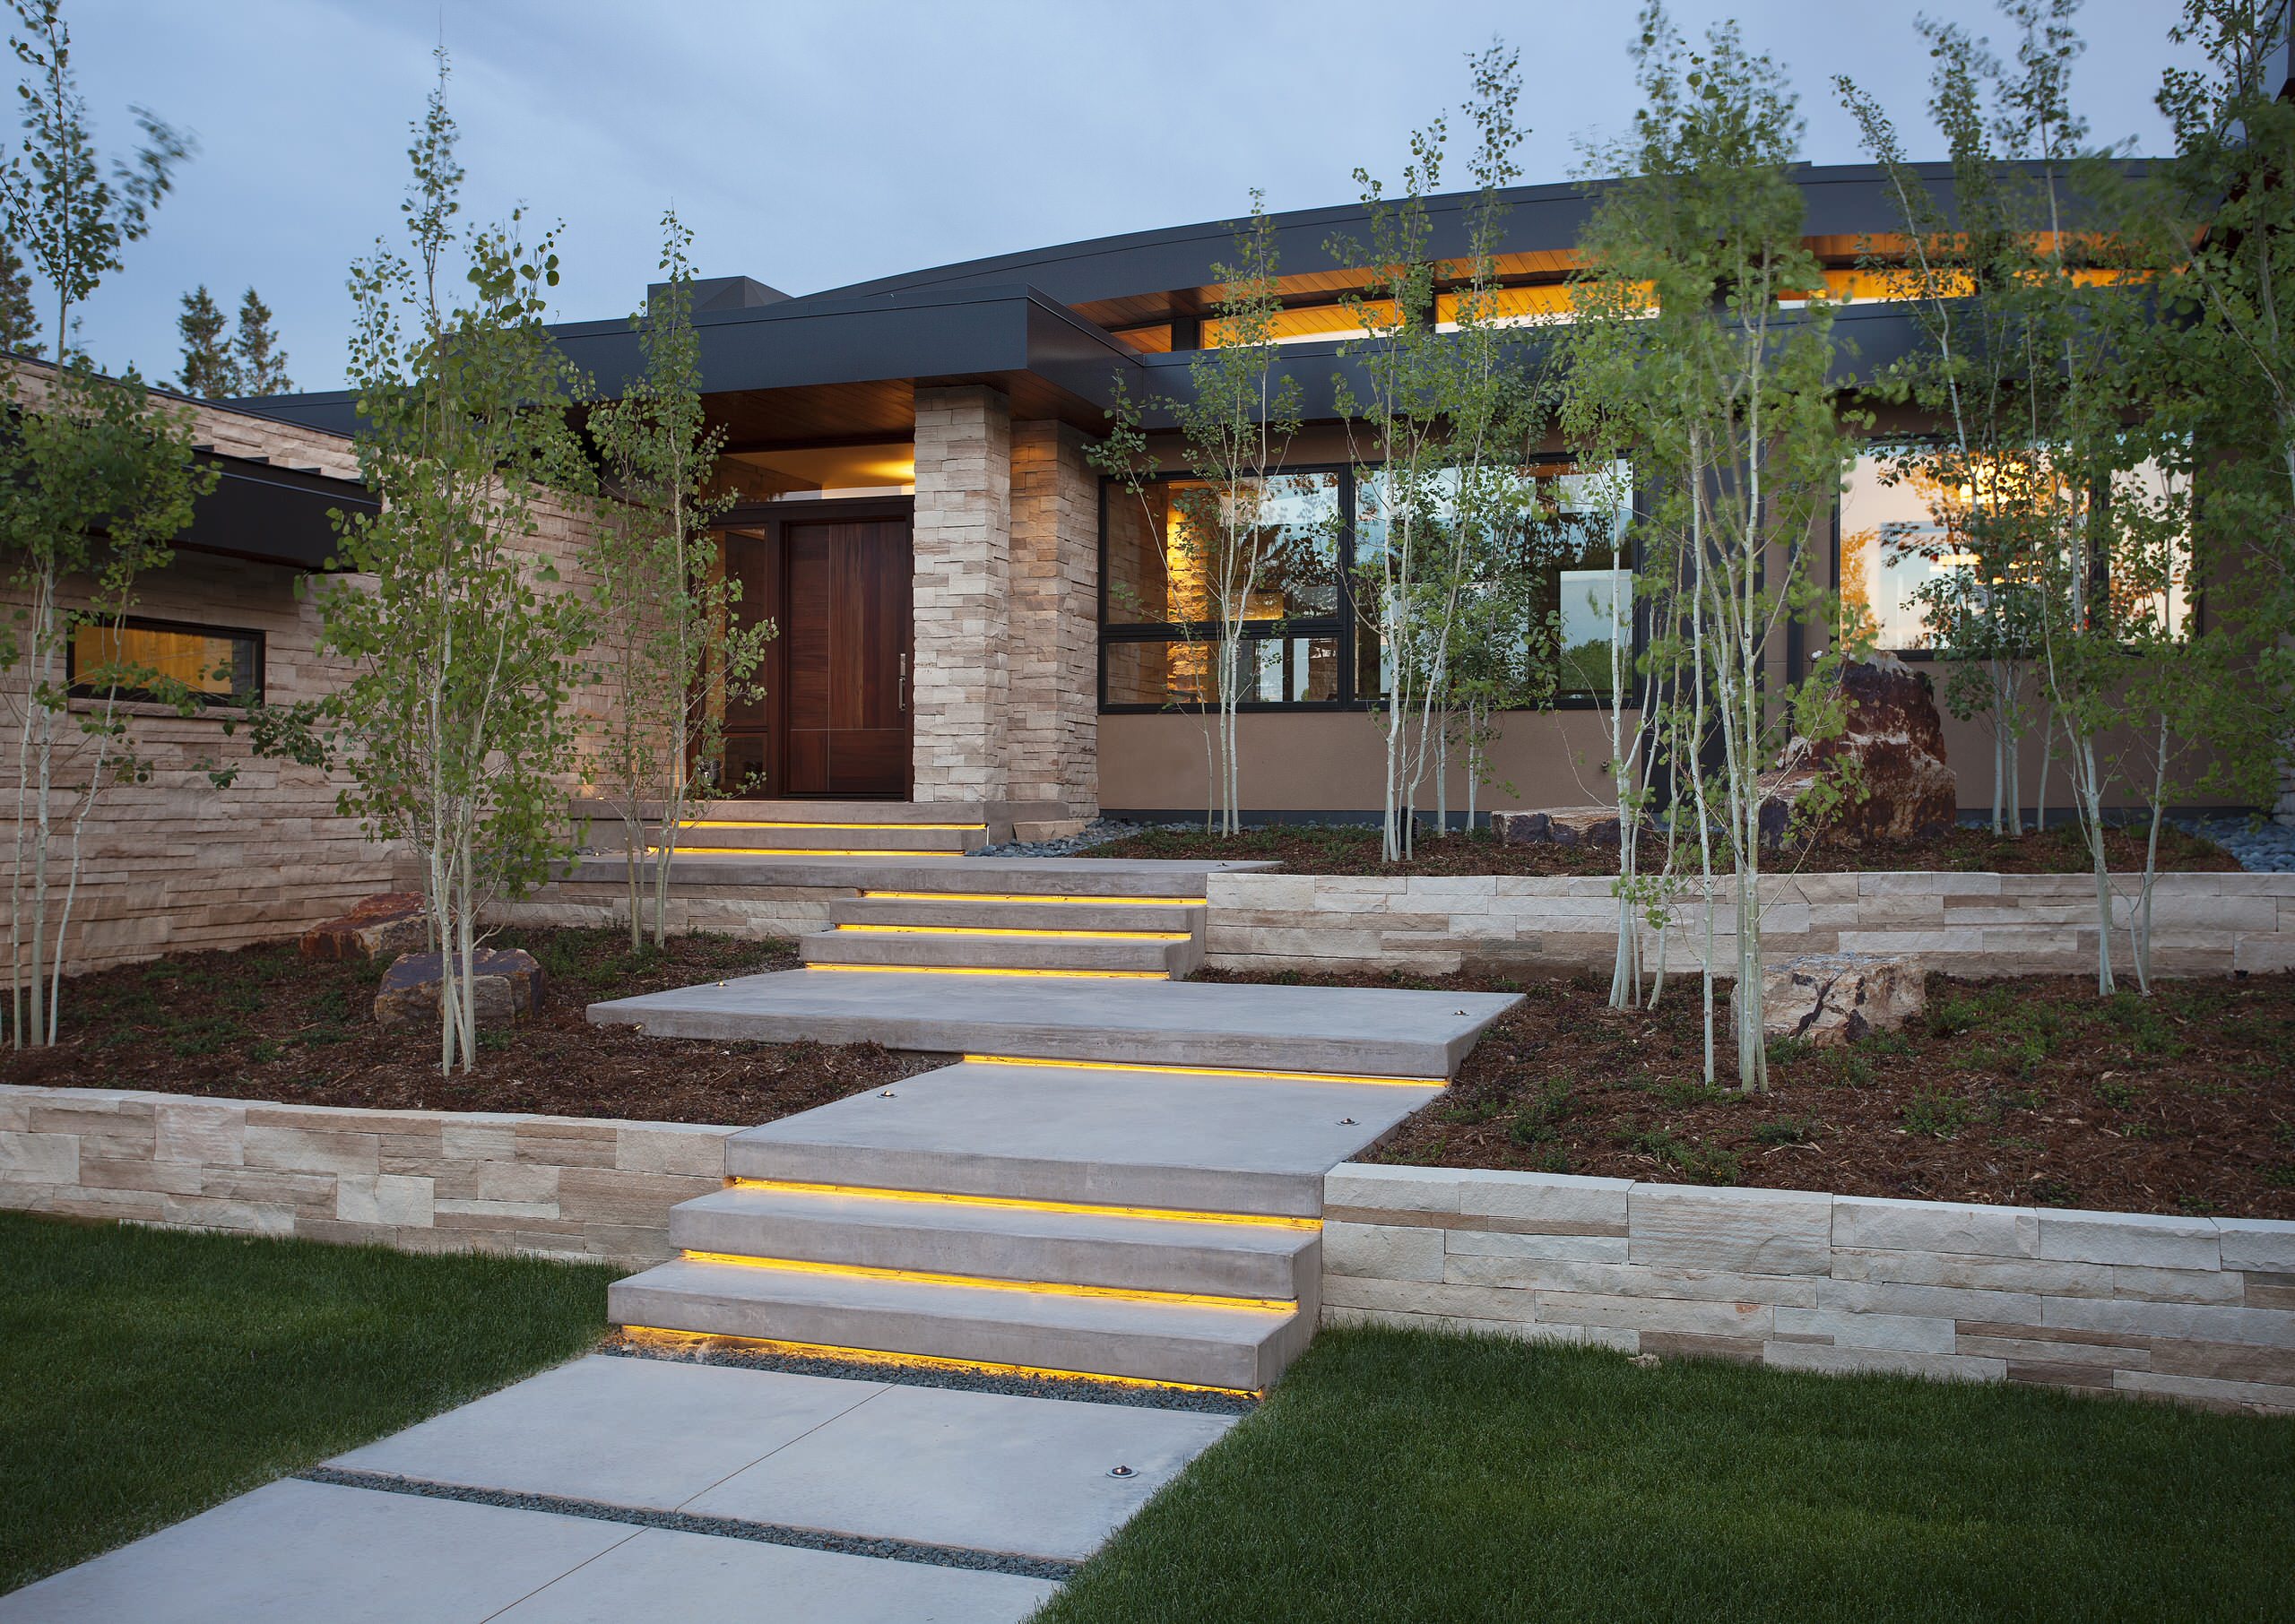
13. Modern Illuminated Steps with Integrated LED Strips
This design is so successful because it integrates lighting directly into the architecture. The light isn’t an afterthought; it’s a fundamental part of the steps’ structure. This creates an incredibly clean, seamless, and high-end look. The warm, horizontal lines of light guide you visually up the stairs while also providing perfect, glare-free illumination on each tread for safety. The contrast between the warm light and the cool, natural materials of the stone and concrete is what gives it that ‘wow’ factor.
📐 Style Math
Thinking about integrating lighting into your steps? Hold on. This isn’t a simple project. Here’s what to confirm before you even start getting quotes:
- Step Construction: Is there a sufficient overhang or ‘lip’ on each stair tread to conceal an LED channel? A minimum of a 3/4-inch overhang is usually needed.
- Wiring Path: How will the low-voltage wiring run from the transformer to the steps and between each step? This needs to be planned, often involving routing through or behind the structure.
- Material Compatibility: Ensure the LED channels and strips you choose are rated for outdoor, in-ground, or concrete-encased installation to prevent moisture damage.
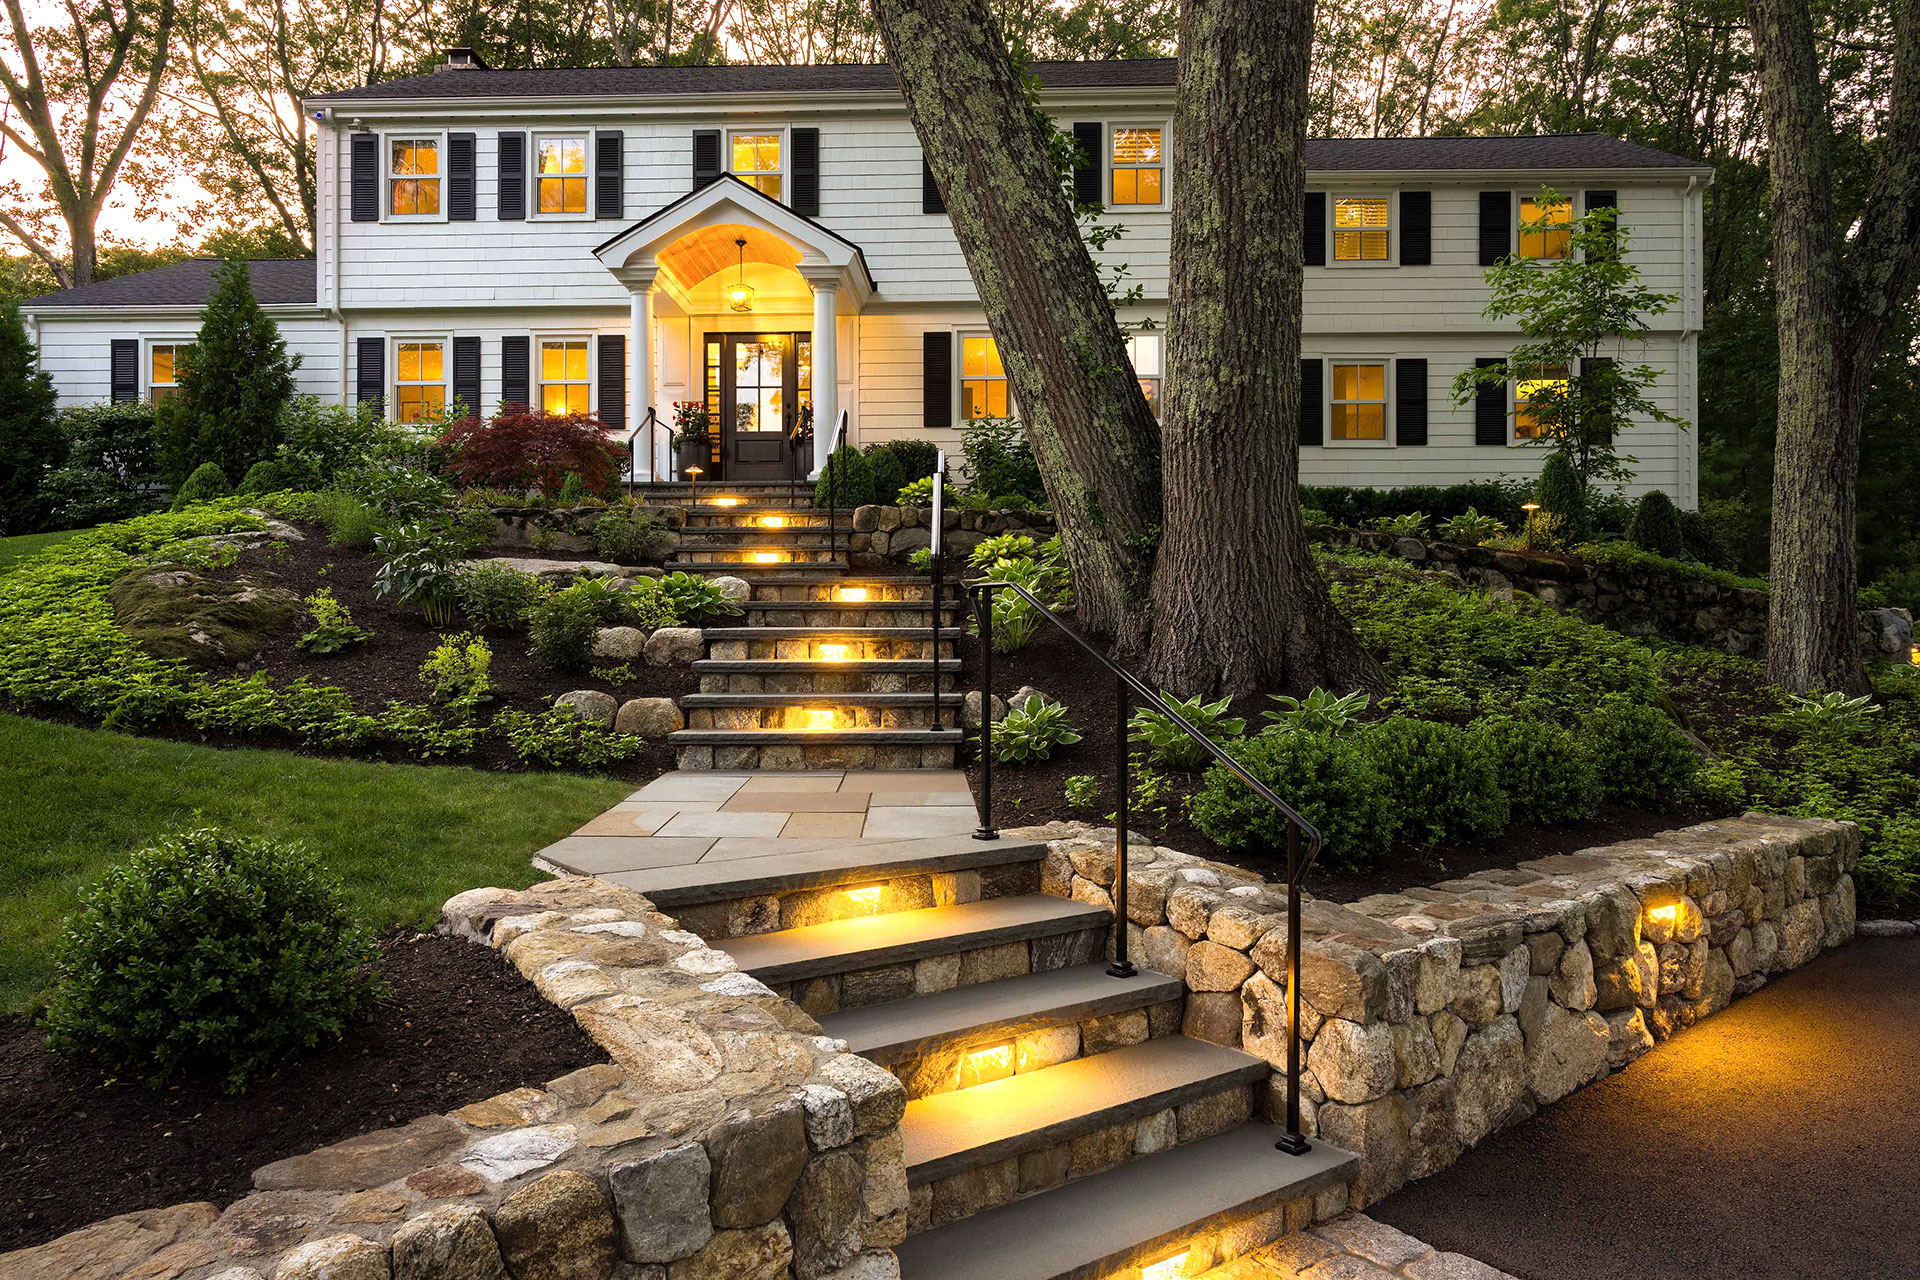
14. Elegant Lighting Embedded in Stone Steps and Retaining Walls
The formula for this timelessly elegant entrance is 50% structural lighting + 30% safety lighting + 20% landscape accenting. Half the impact comes from the lights built into the retaining walls, which highlight the beautiful texture of the rough-hewn stone. The step lights account for the next 30%, providing essential, non-negotiable safety while reinforcing the grandeur of the staircase. The final 20% is the soft spillover that illuminates the lush green landscaping, adding softness and color to the hardscape. The look in Idea #13 is a more modern take on this concept.
💡 Designer Tip
Achieving this level of integrated hardscape lighting is a high-end project that requires masonry and electrical expertise. Here is a sample budget for a similar-_scale_ project.
- Hardscape-rated LED Step Lights (10-15 units): $1,000 – $2,500
- Wall-integrated LED fixtures (8-10 units): $800 – $2,000
- Professional Installation (Masonry & Electrical): $3,000 – $7,000
- Low-Voltage Transformer & Wiring: $500 – $1,200
- ESTIMATED TOTAL: $5,300 – $12,700
Budget alternative: Use solar-powered adhesive light strips under step lips for a similar, though less permanent, effect for about 90% less.
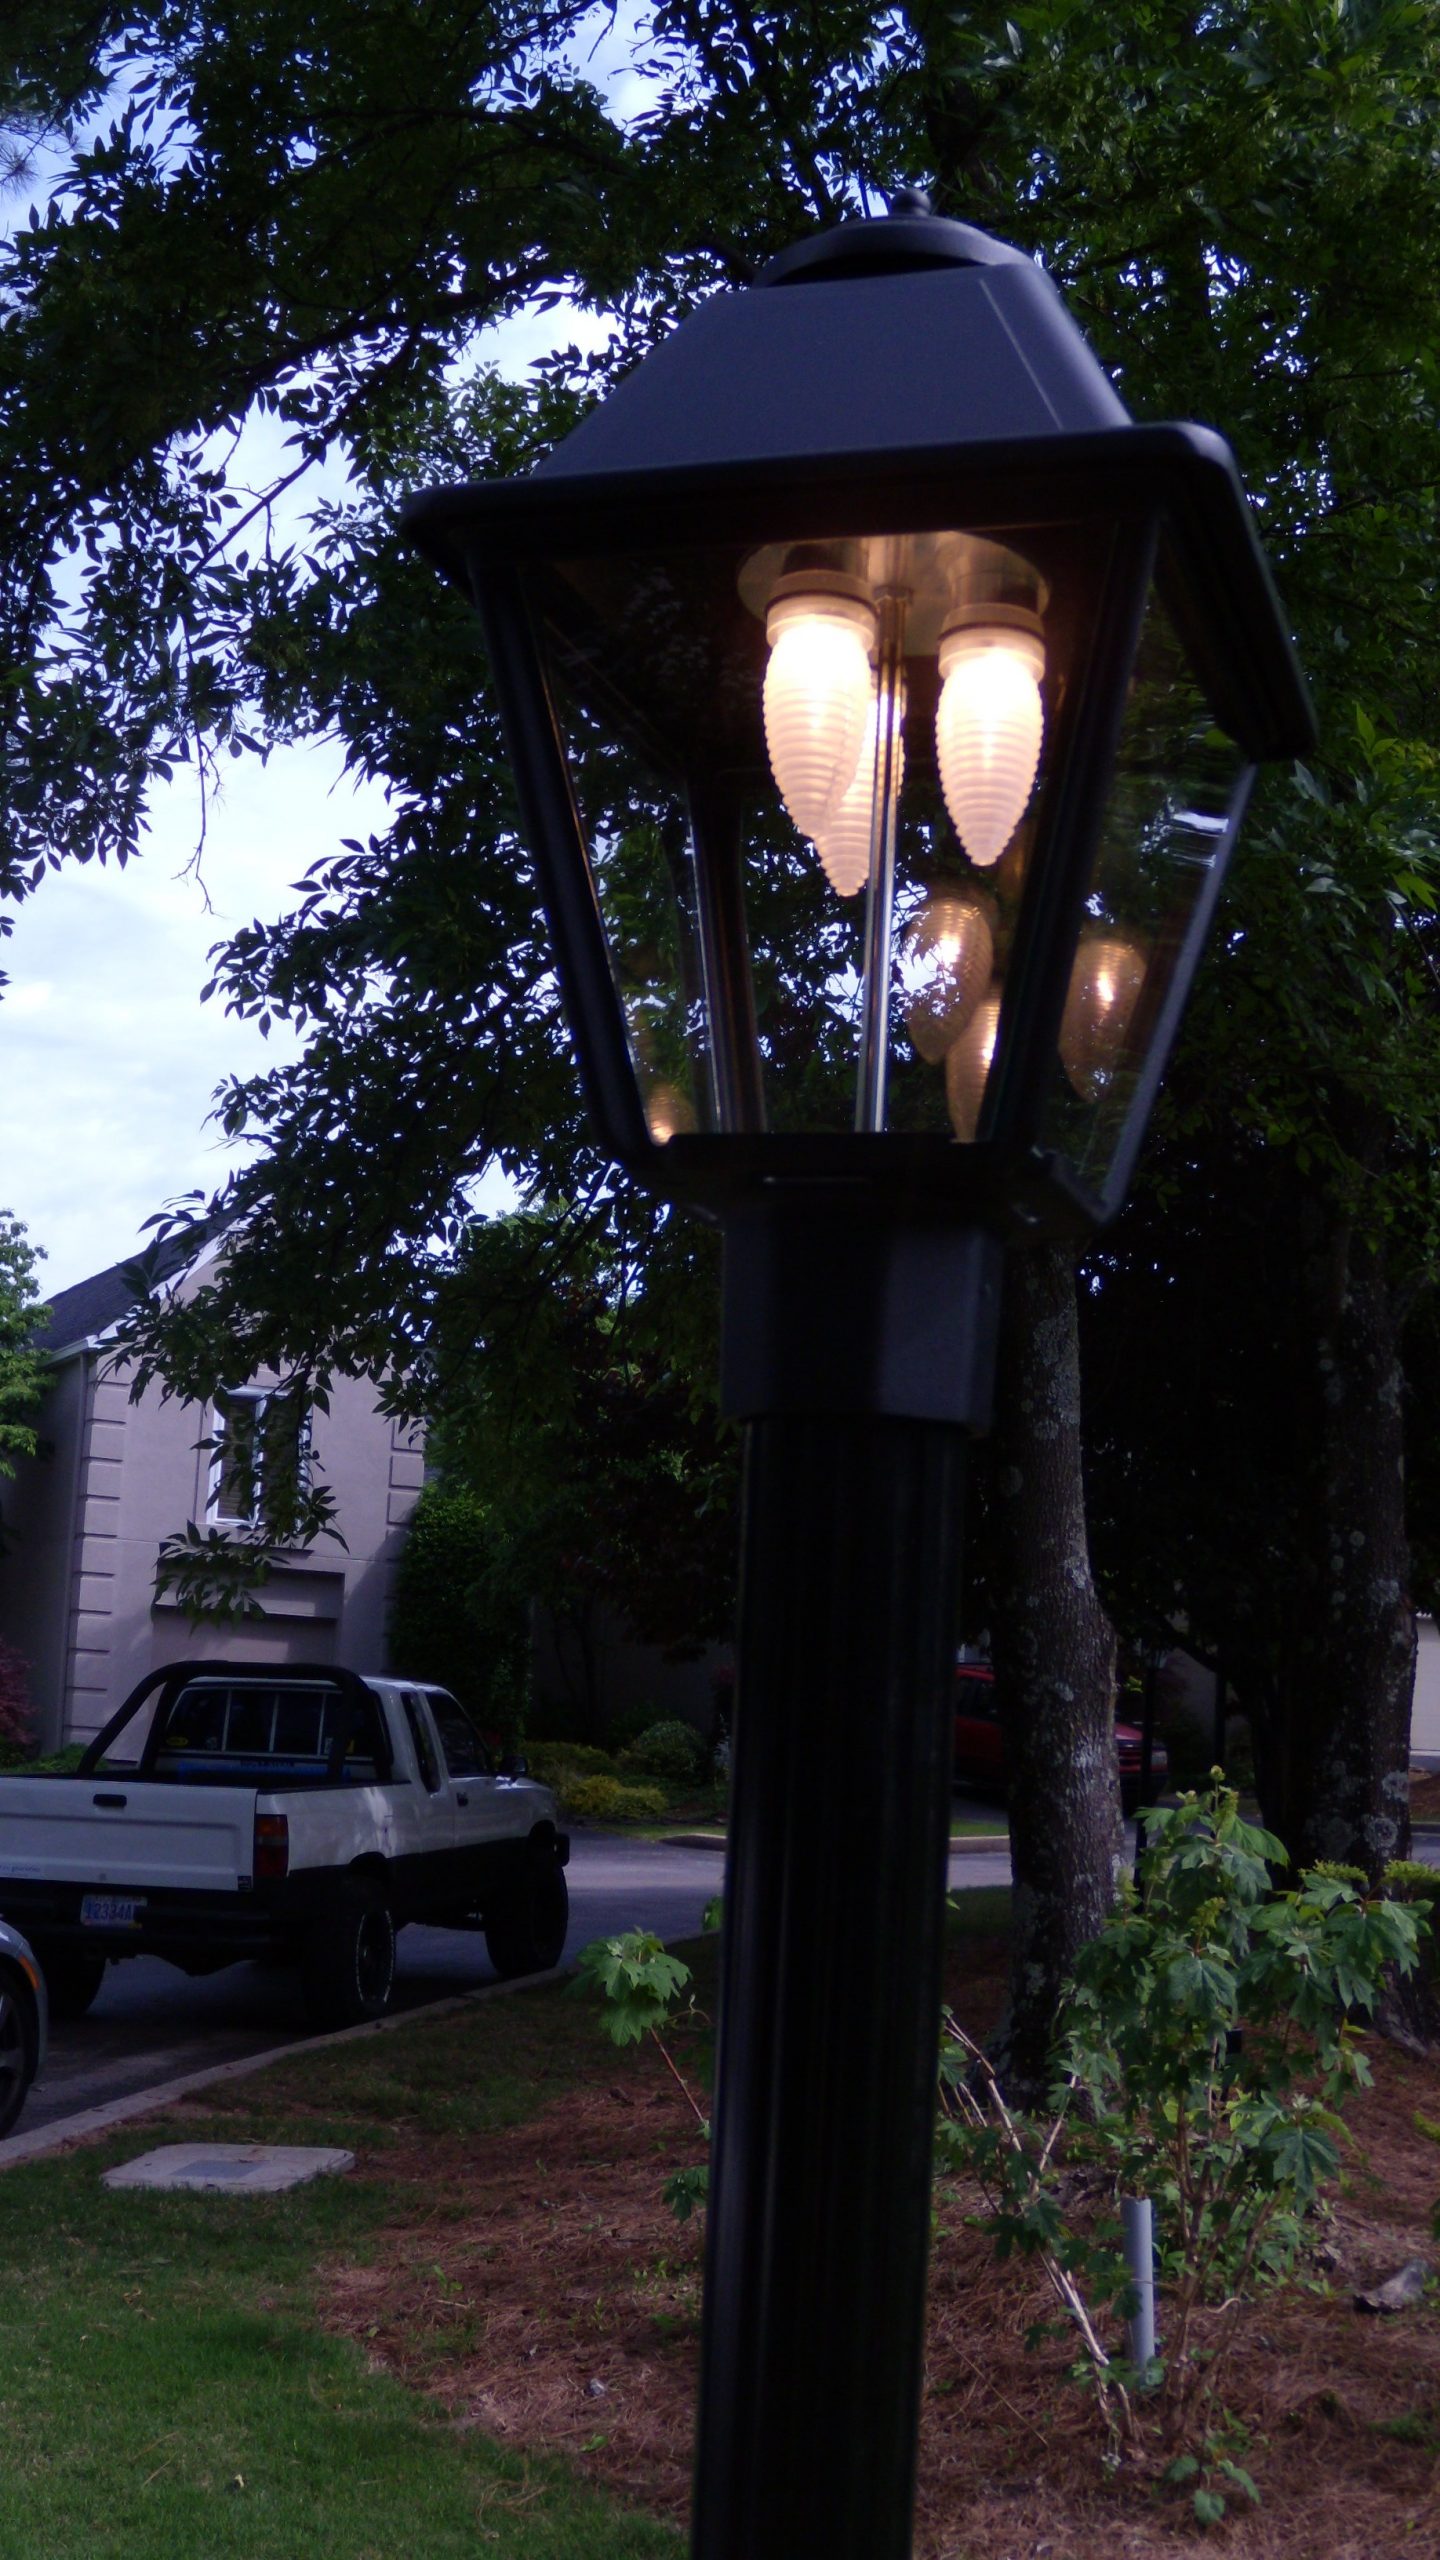
15. Classic Black Post Lantern with Bright Ridged Bulbs
that sets this traditional lantern apart is the choice of bulbs. Instead of standard, smooth candelabra bulbs, these have a distinct ridged, cone shape. It’s a small, subtle detail, but it adds a layer of visual texture and interest that elevates the entire fixture. It shows a level of thoughtfulness beyond simply choosing a lantern style. When the light is on, the ridges in the glass will catch and refract the light in a unique way, proving that even the smallest components contribute to the overall design.
🔥 Trending Context
When choosing a post lantern, pay close attention to the listed wattage and lumens. It’s easy to over-light an area and create a harsh, glaring security-light effect. For a single post lantern meant to illuminate a driveway entrance or a garden corner, look for a fixture that supports bulbs totaling around 800-1200 lumens (the equivalent of a 60-75 watt incandescent bulb). This is enough light to feel safe and welcoming without overpowering the landscape or annoying your neighbors.
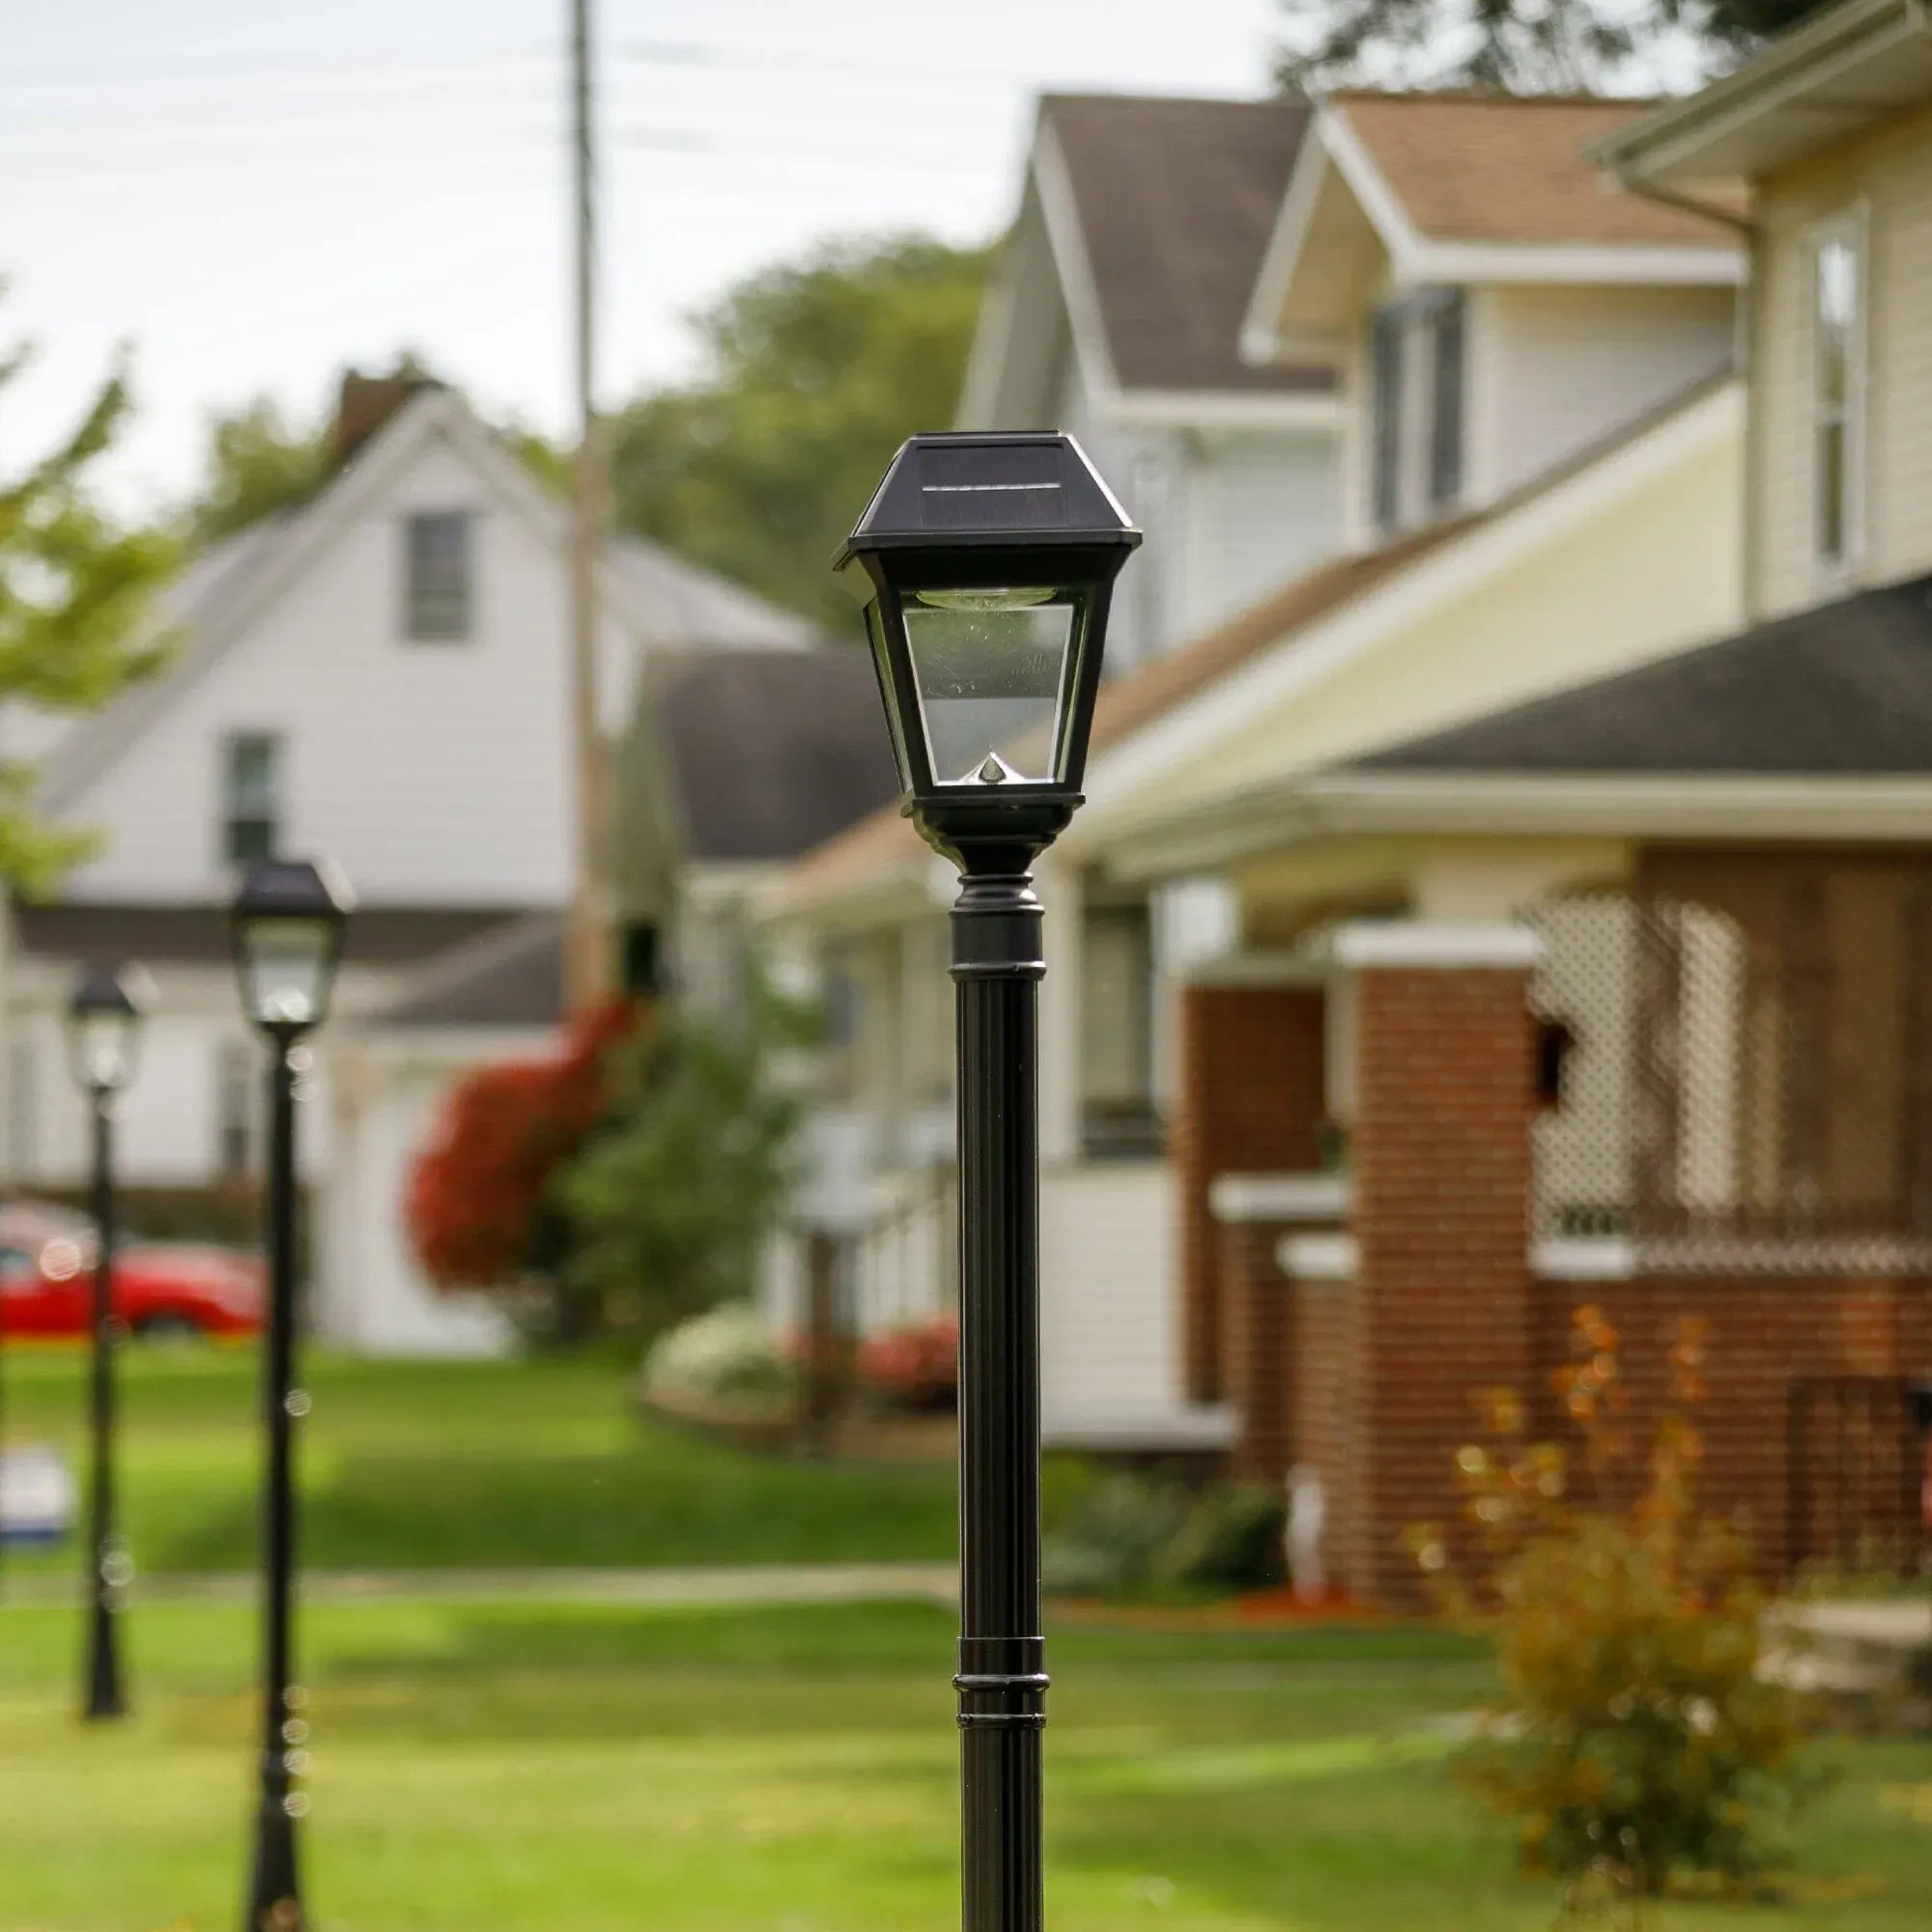
16. Traditional Solar-Powered Lamp Posts Along a Lawn
This look is gaining traction for a very practical reason: it offers a classic, suburban aesthetic without the headache and expense of trenching electrical wires across an established lawn. In 2026, as homeowners are increasingly looking for ways to upgrade their property with minimal disruption, high-performance solar is the answer. These posts combine a timeless, traditional form with modern, set-it-and-forget-it technology, making them a popular choice for new housing developments and existing homes alike.
📏 Scale Guide
Let’s be honest about solar lamp posts. The quality and performance can vary dramatically. Cheaper, all-plastic models from discount stores often have weak batteries, produce a dim, bluish light, and may only last a single season. To get the reliable, warm light shown here, you need to invest in a model with a durable metal frame (like cast aluminum), clear glass (not plastic) panels, and most importantly, a high-capacity battery and a large, efficient solar panel. Expect to spend $150-$300 per post for a quality fixture that will perform well for years.
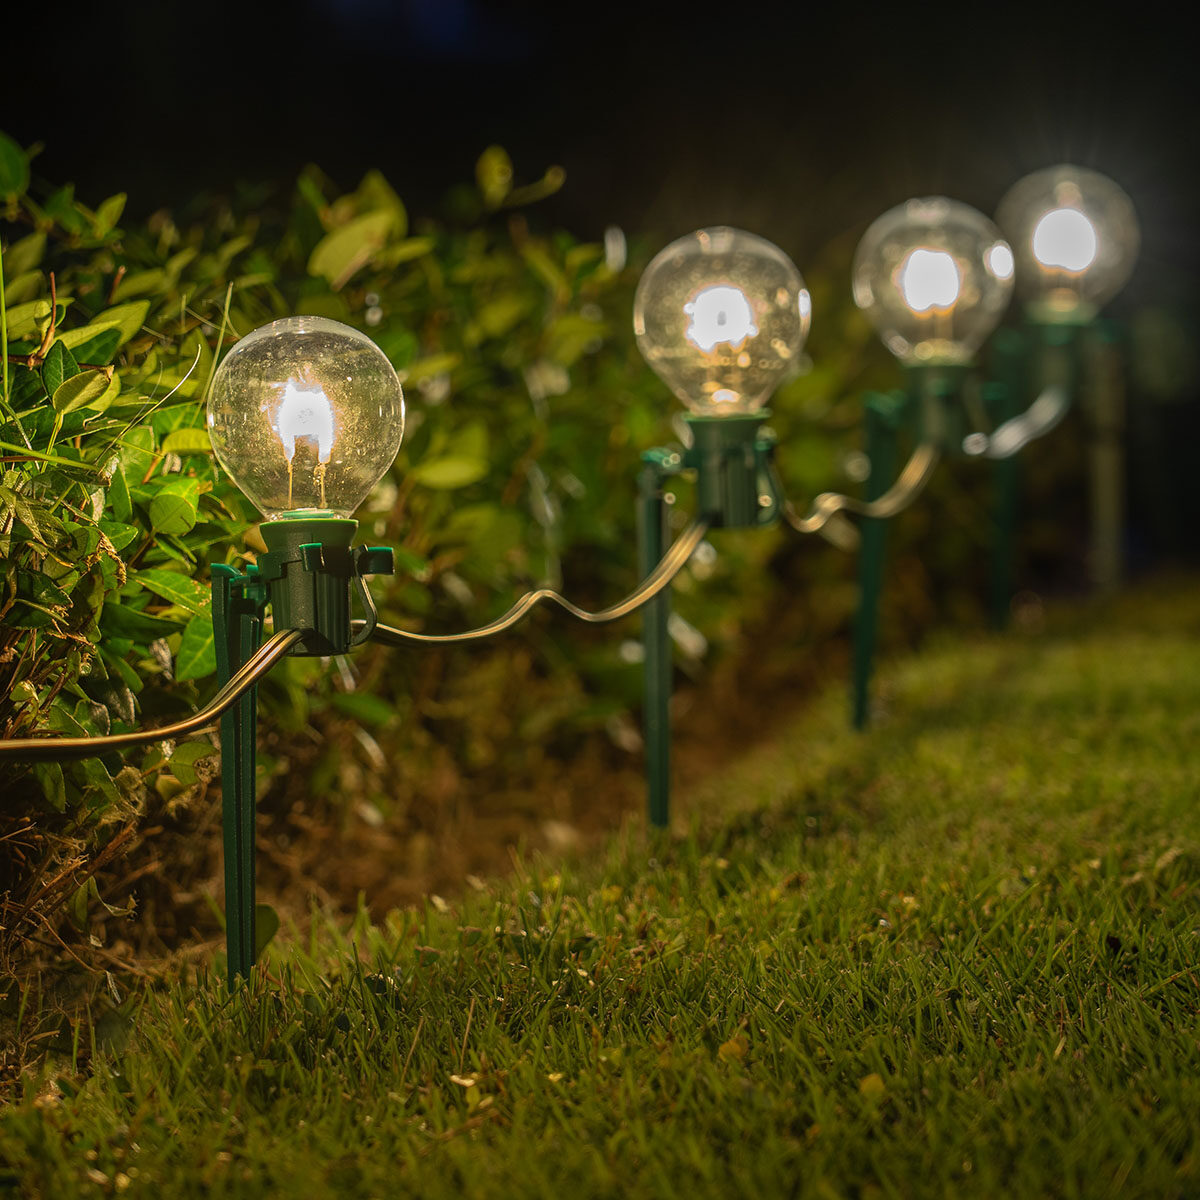
17. Subtle Pathway Definition with Globe String Lights
For an incredibly affordable and charming way to light a path, look no further than staked string lights. This is a brilliant solution often found at places like Walmart or Target, especially in the spring and summer. A 25-foot string of globe lights might cost $20-$30, and a pack of simple stakes is under $15. For less than $50, you can create a gentle, sparkling guide along a garden path or driveway edge. It’s perfect for renters or for adding a temporary festive touch for a party or event.
💸 Get This Look For Less
This idea works so well because of its simplicity and low-level placement. The lights are positioned just above the ground, meaning they illuminate the path for your feet without creating any upward glare. The warm glow of the globe bulbs provides just enough light to see by, creating a feeling of intimacy and magic. It’s not about bright, functional task lighting; it’s about creating a mood and gently suggesting the way forward. The casual, slightly imperfect drape of the string adds to its charm.
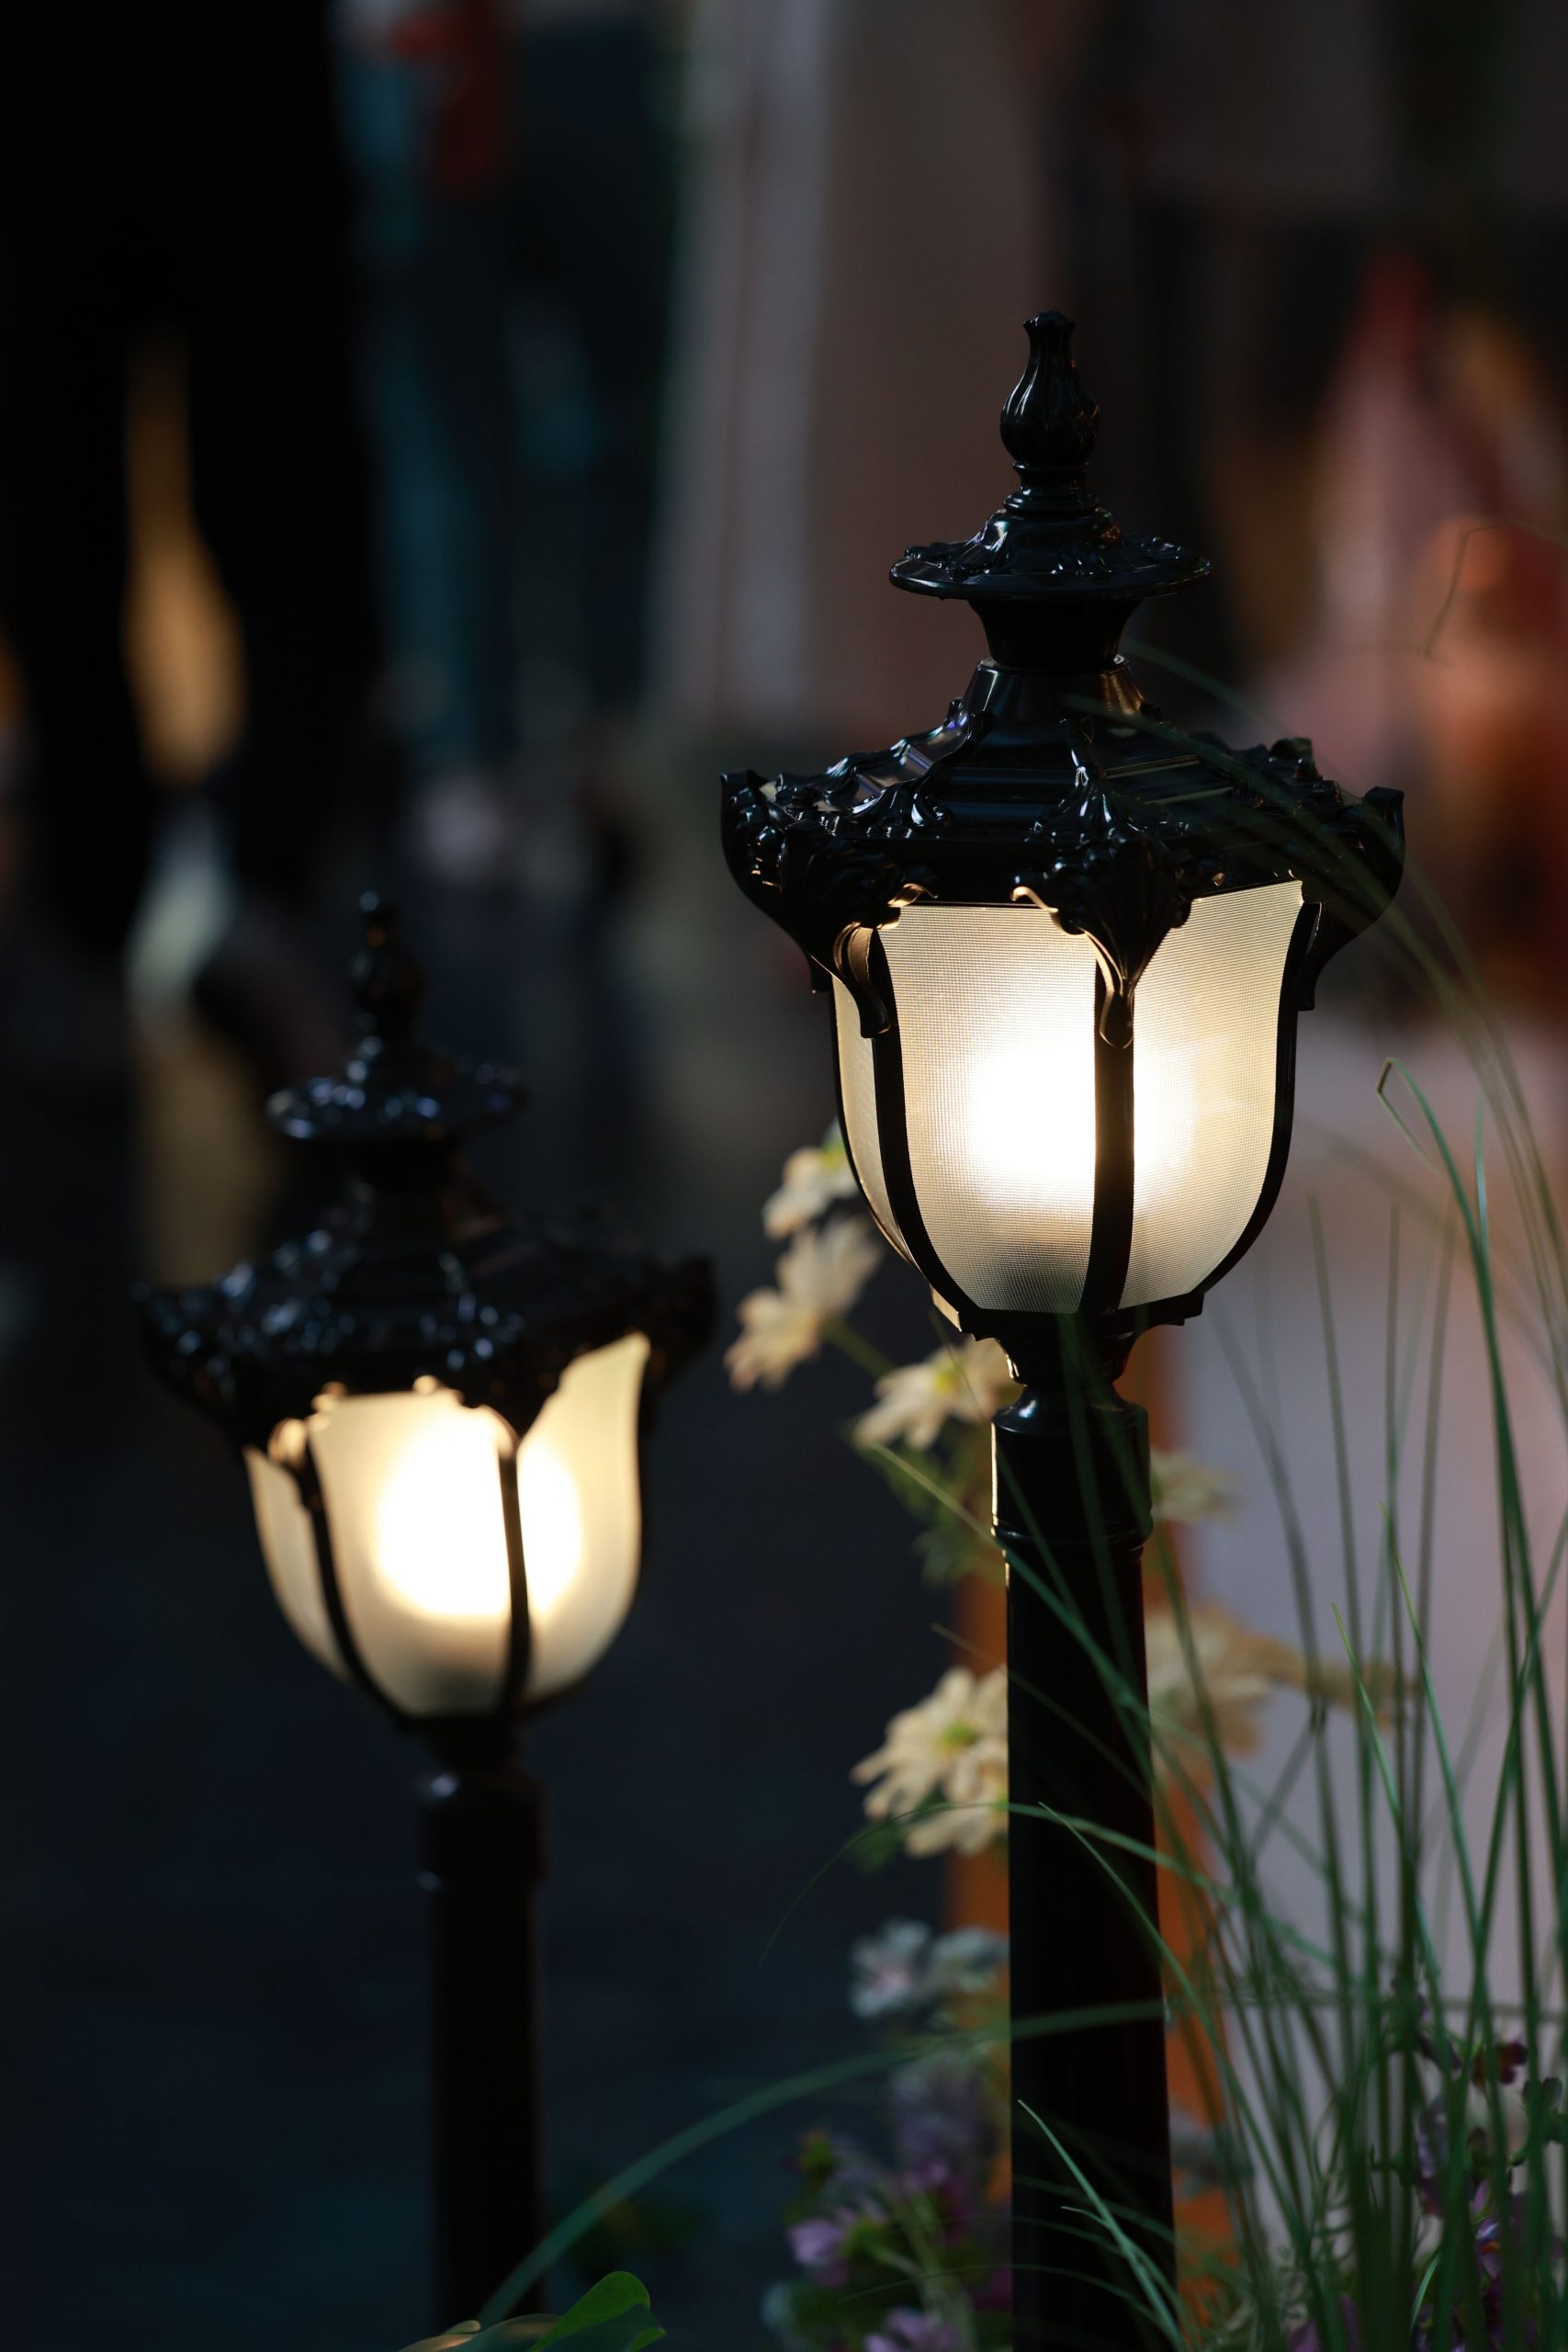
18. Decorative Black Lamp Poles with Warm Internal Glow
The single element that makes these lamps magical is the textured glass. It’s not just clear glass; it has a subtle, pebbled, or water-like quality that diffuses the light beautifully. This diffusion turns the bright point of the bulb into a soft, warm, all-over glow. It obscures the light source, making the lamp itself appear to be the source of illumination. This small detail is what gives the fixtures their soft, inviting, and high-end character, preventing them from feeling like harsh, utilitarian security lights.
🎯 What Makes It Work
These are not small fixtures. At what appears to be 4-5 feet tall, these are substantial accent pieces, best suited for marking a significant entry point, flanking a garden gate, or standing at the corners of a patio or deck. They require a bit of breathing room. Placing them in a very small yard or narrow walkway could feel overwhelming. They are perfect for properties of a half-acre or larger, where their scale can be appreciated and they can serve as dramatic focal points in the landscape design.
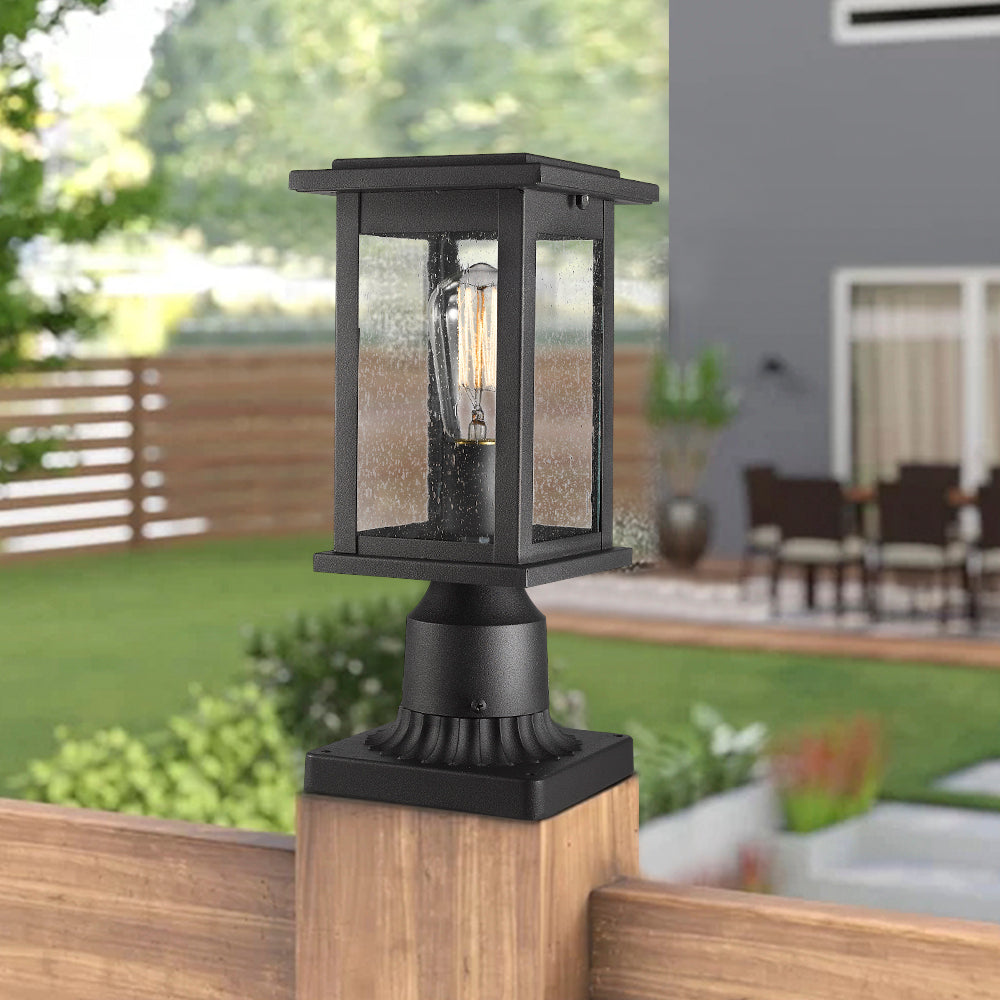
19. Modern Black Outdoor Pillar Lamp with Edison Bulb
When mounting a pillar or post cap light like this, height is critical for both aesthetics and function. The ideal placement is to have the center of the light fixture sit at or just below eye level, which is typically between 60 and 66 inches from the ground or walkway surface. This positioning illuminates the area effectively without shining directly into anyone’s eyes as they approach. It ensures the light is cast downwards and outwards onto the path, where it’s most needed for safe navigation.
💰 Budget Breakdown
The seeded glass and exposed Edison bulb are stylish, but they do come with a little cleaning chore. Seeded glass, with its tiny embedded bubbles, has a slightly textured surface that can trap more dust and pollen than smooth glass. Likewise, the clear glass of the Edison bulb will show every speck of dust. To keep this fixture looking sharp and modern, plan on wiping down both the inside and outside of the glass panels and the bulb itself 2-3 times per year. It’s a small price to pay for the crisp, clean look.
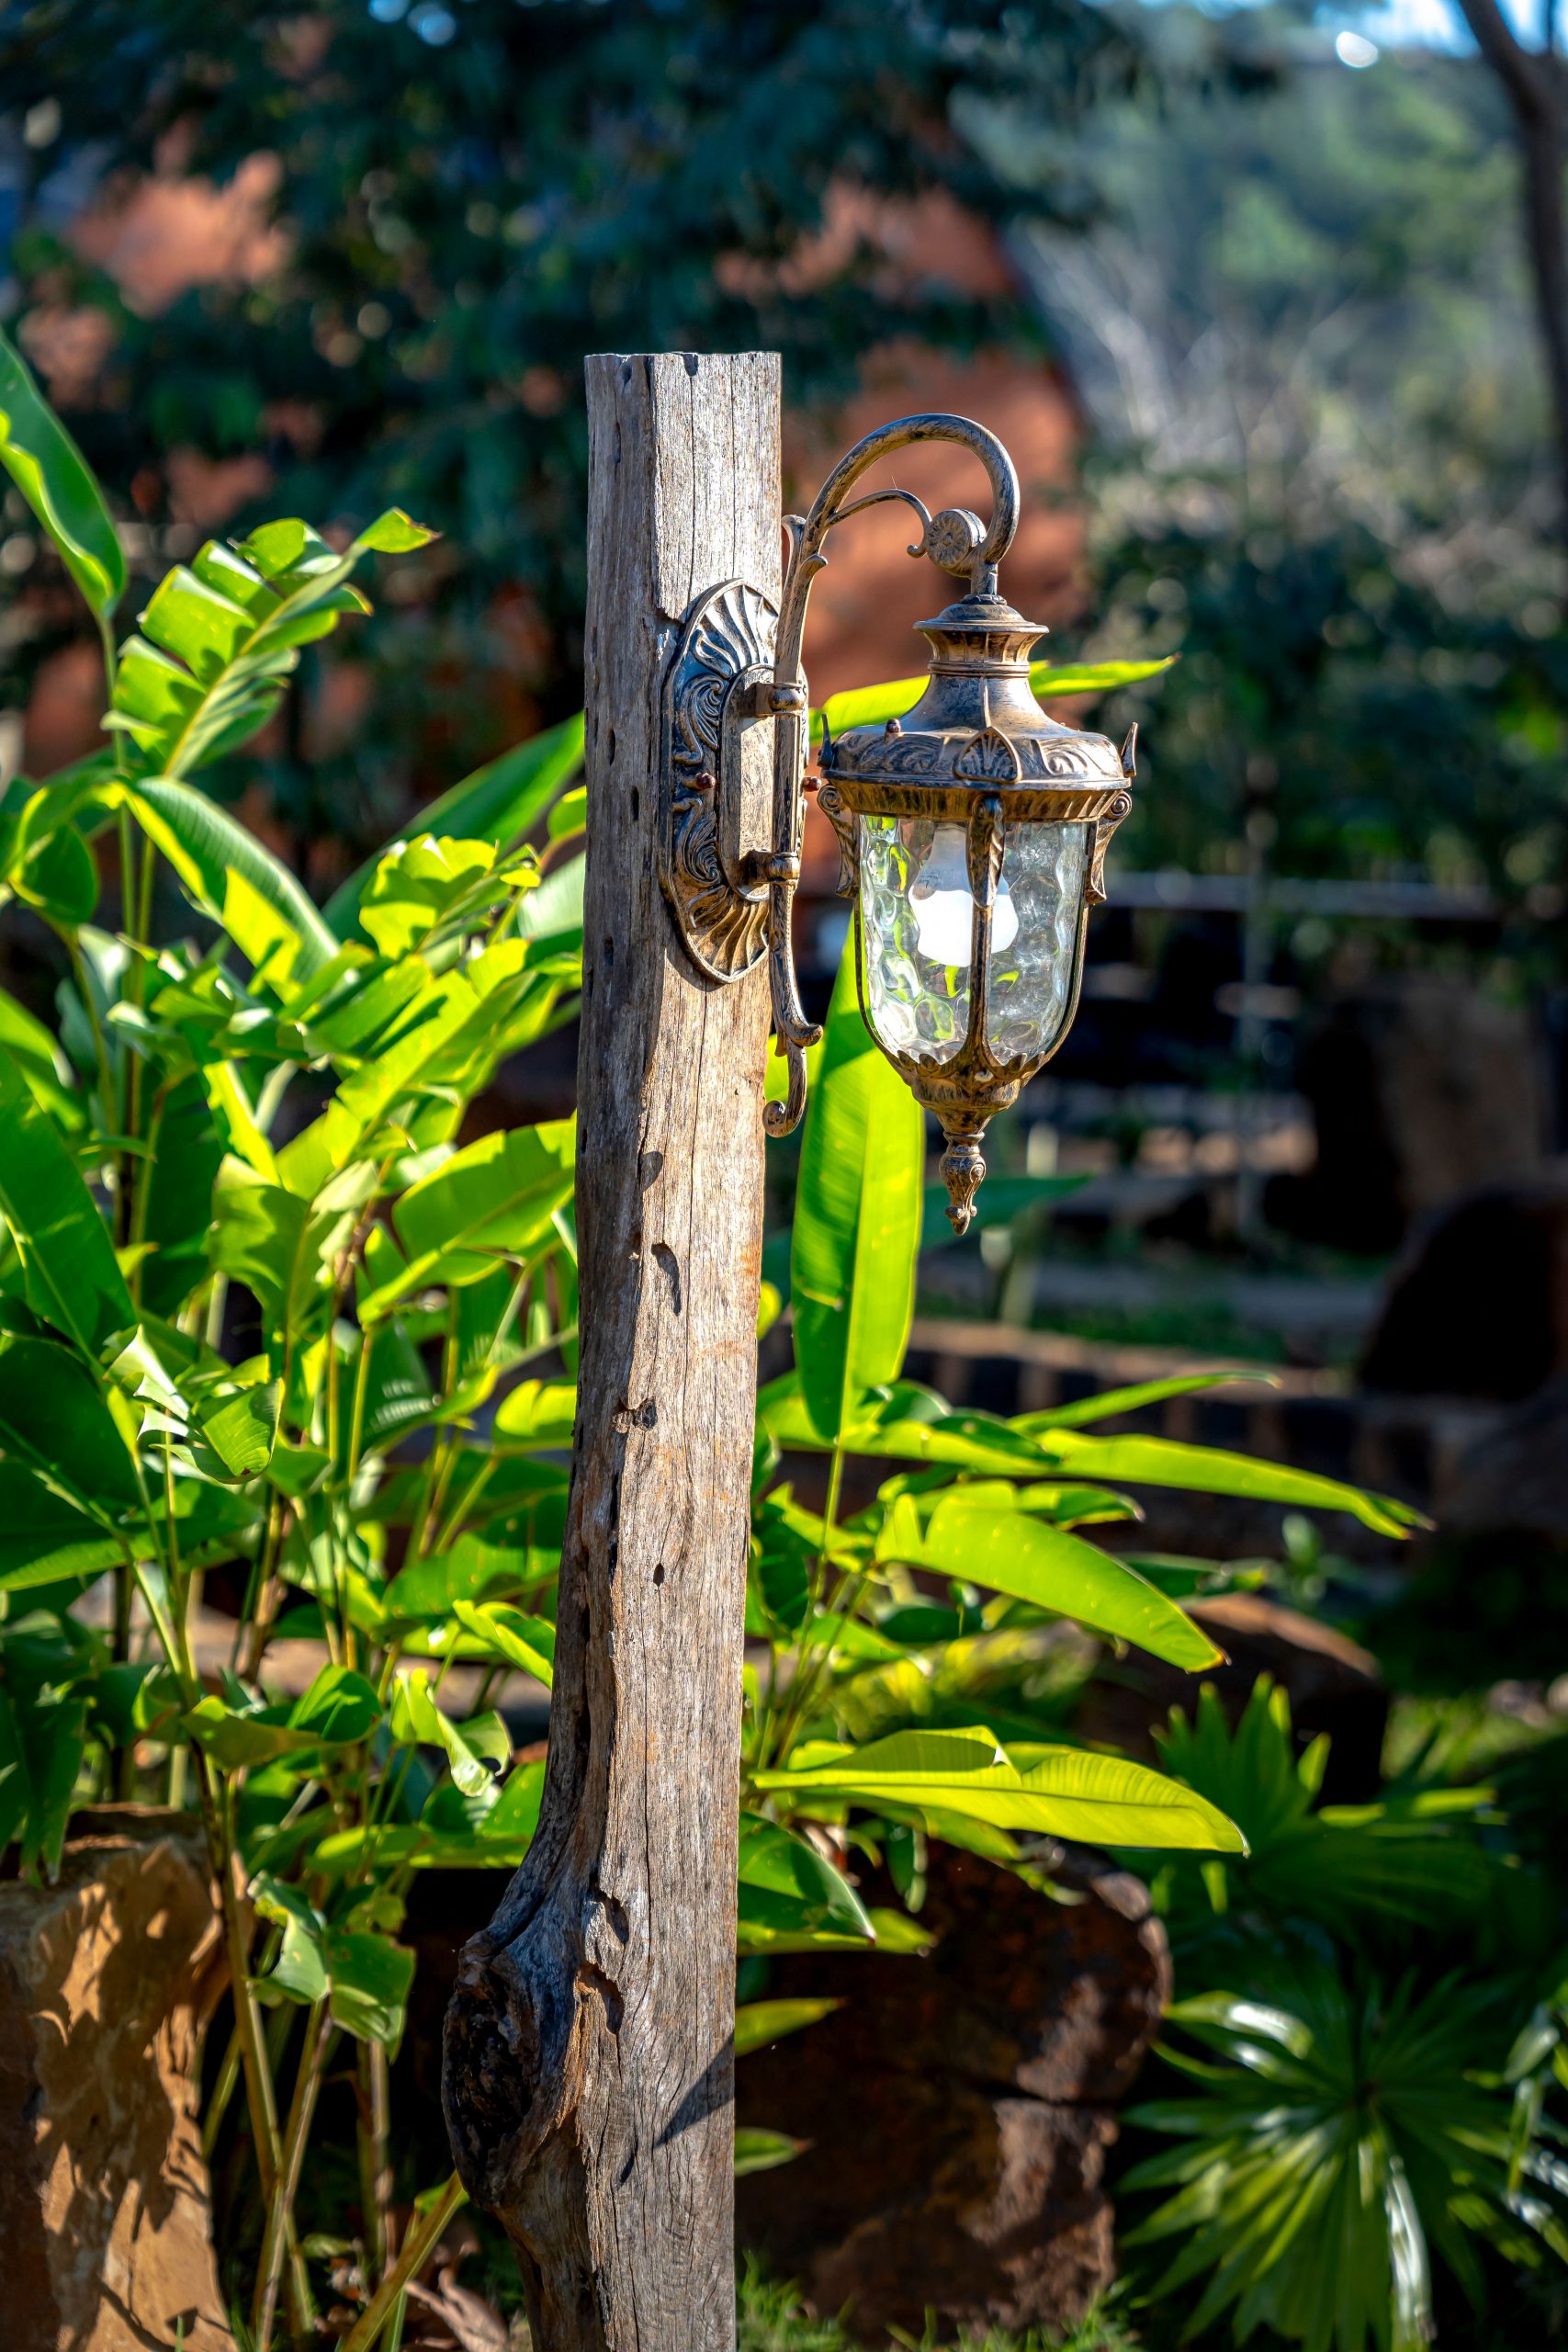
20. Ornate Bronze Wall Lantern on a Rustic Wooden Post
This combination is successful because it masterfully blends rustic and refined elements. The rough-hewn, almost raw texture of the wooden post provides a sturdy, natural base. The ornate, detailed bronze lantern adds a touch of classic elegance and sophistication. The contrast is key: the smooth, dark metal and clear glass of the lantern pop against the lighter, textured wood. It’s a pairing that feels intentional and curated, like a piece of antique jewelry displayed on a piece of reclaimed barn wood.
🔧 How-To Brief
Here’s a dose of reality: you can’t just mount any indoor or outdoor wall lantern onto a wooden post and expect it to work. This fixture is a *wall-mounted* lantern, designed to attach to a flat surface with a junction box behind it. To install this on a standalone post, you have to run electrical wiring up through the center of the post and create a proper, weatherproof mounting surface and junction box for the fixture. It’s a custom job that requires both carpentry and electrical skills to execute safely and correctly.
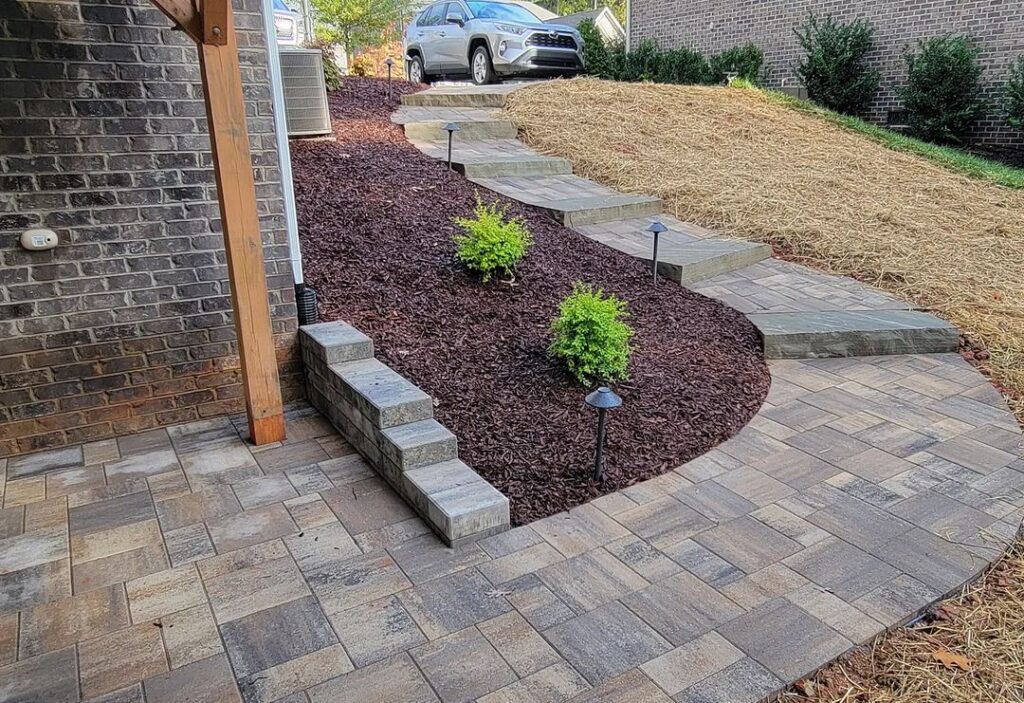
21. Stepped Paver Pathway with Integrated Landscape Lighting
Installing low-voltage path lights in a mulched garden bed is a straightforward DIY project. Here’s a quick guide:
⭐ The One Thing
- Time Estimate: 2-3 hours. Material Cost: $150 – $400 for a kit.
- Lay Out Your Lights: Place the light fixtures along your path to finalize spacing, typically 8-10 feet apart.
- Position the Transformer: Mount the low-voltage transformer on an exterior wall near a GFCI outlet.
- Lay the Cable: Run the low-voltage cable from the transformer along the path, leaving some slack near each light location.
- Connect the Fixtures: At each location, use the simple clip-on connectors to attach the fixture wires to the main cable. This is the easiest part!
- Bury the Wire: Dig a shallow 3-4 inch trench or simply cover the wire with the mulch. Set the timer on your transformer and you’re done!
This type of low-profile path lighting is incredibly versatile and works well in almost any size yard. It’s especially effective for sloped or terraced areas, as it can navigate changes in elevation with ease. The lights themselves are small, so they don’t overwhelm a compact garden, but when used in a series, they can effectively illuminate a very long driveway or path on a larger property. The key is to keep the spacing consistent to create a pleasing rhythm along the entire length of the path.
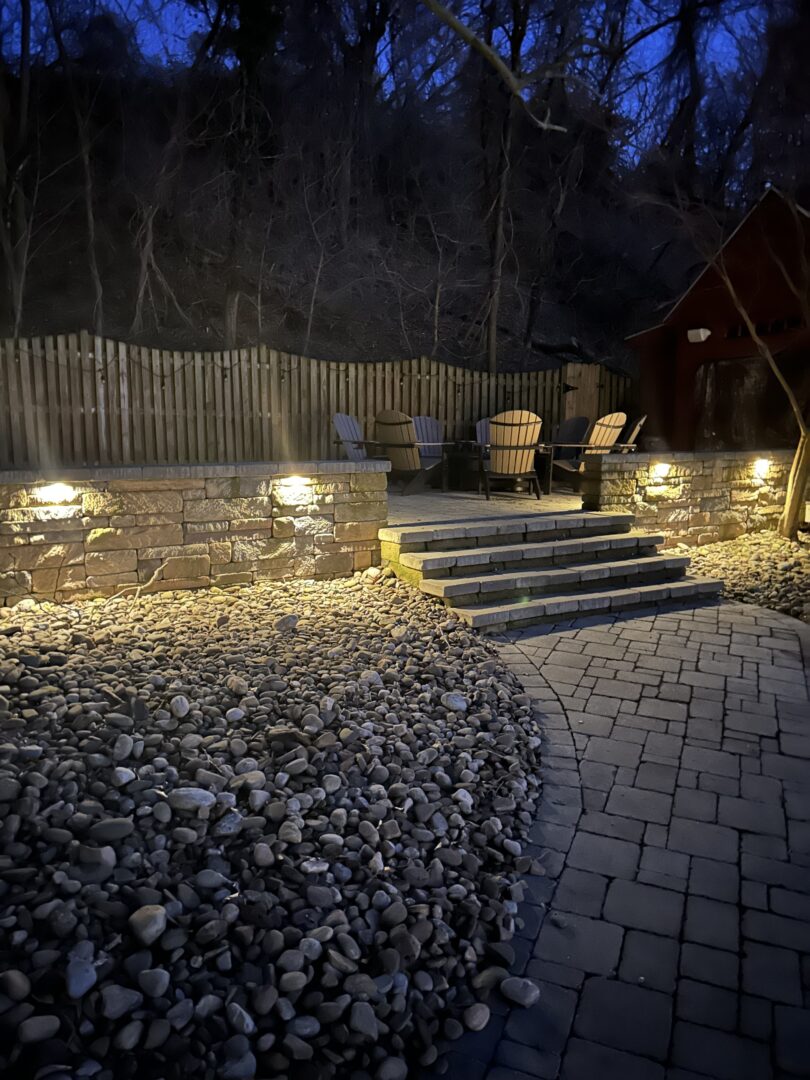
22. Stone Retaining Wall with Integrated Lights and Pebble Groundcover
The single element that makes this design so compelling is the textural contrast. You have the large, rough, stacked forms of the retaining wall, the smooth, dark gray cobblestone pavers, and the small, rounded river pebbles. The integrated lighting serves to highlight these differences at night, catching the rough face of the stone and the varied shapes of the pebbles. Without the rich interplay of these three distinct textures, the lighting would be far less interesting. It proves that what you light is just as important as the light itself.
⚠️ Real Talk
When using a pebble or gravel groundcover, choose dark-colored stones. The dark gray and black pebbles seen here are a brilliant choice because they absorb light rather than reflecting it. This allows the integrated lights to create defined, dramatic pools of illumination without causing excess glare. Lighter-colored gravel, like white marble chips, would reflect too much light, creating a washed-out, glary effect that would detract from the cozy, structured ambiance you want to achieve.
23. Modern House with Illuminated Stone Steps and Garden Spotlights
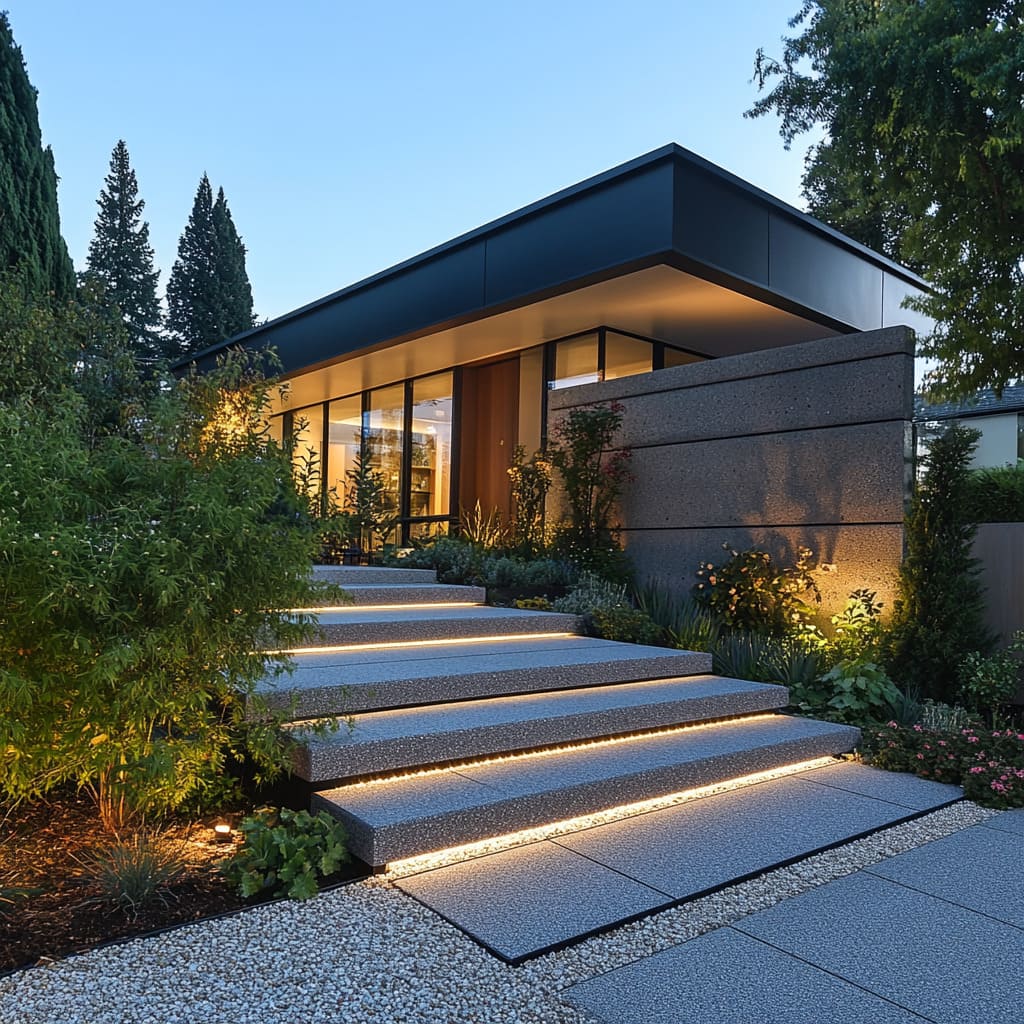
This design masterfully demonstrates the principle of layering light. There are three distinct layers at play: 1) The architectural lighting (the glowing steps) that is part of the structure itself. 2) The landscape lighting (the spotlights on the plants) that adds softness and organic shapes. 3) The interior lighting (visible through the large windows) that creates a sense of life and warmth within. None of these layers competes with the others; they work together to form a complete, cohesive, and incredibly sophisticated nighttime portrait of the home.
🧹 Maintenance Reality
This look is at the forefront of the “biophilic design” trend that continues to dominate architecture and interior design in 2026. The idea is to blur the lines between indoors and outdoors. The large windows, the use of natural materials like stone, and the way the landscape lighting pulls the garden right up to the home’s facade all contribute to this feeling. The lighting on the plants makes them just as much a part of the evening view as the furniture inside, creating a seamless connection to nature.
24. Warm Glow from Recessed Lights in Stone Walls and Steps
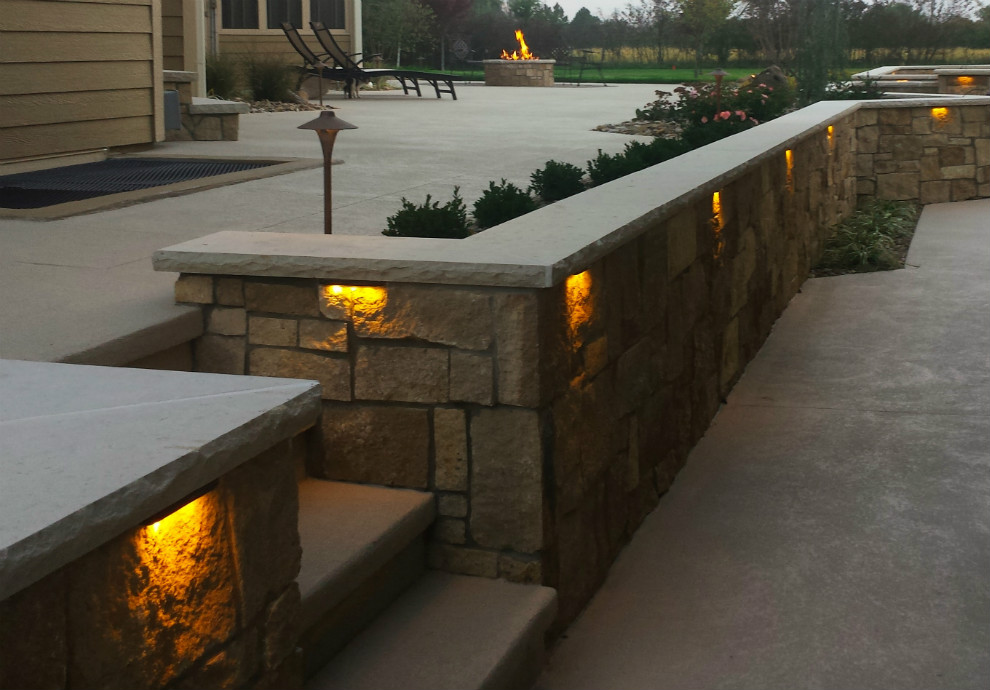
This kind of fully integrated hardscape lighting carries a premium price tag due to the labor involved. It must be planned and installed *as the walls and steps are being built*.
✅ Before You Start
- Low-Voltage Hardscape Step Lights (4-6 units): $300 – $800
- Low-Voltage Recessed Wall Lights (8-10 units): $600 – $1,500
- Bronze Path Light (1 unit): $100 – $300
- Professional Masonry/Electrical Labor: $2,500 – $6,000
- ESTIMATED TOTAL: $3,500 – $8,600
Budget alternative: A similar, though less seamless, glow can be achieved for around $400-$700 using strategically placed solar-powered spotlights aimed at the walls and battery-operated puck lights attached to the step risers.
Let’s have a frank conversation about integrated lighting. When an LED fixture fails—and eventually, they all do—it’s not as simple as changing a lightbulb. Because these lights are mortared directly into the stone, replacement can be a real challenge. It may involve chipping away mortar, carefully extracting the old fixture, and then re-mortaring a new one in place. Choosing high-quality, long-life LED fixtures from reputable brands is absolutely critical to minimize this future maintenance headache. Don’t try to save a few bucks on the fixtures themselves.
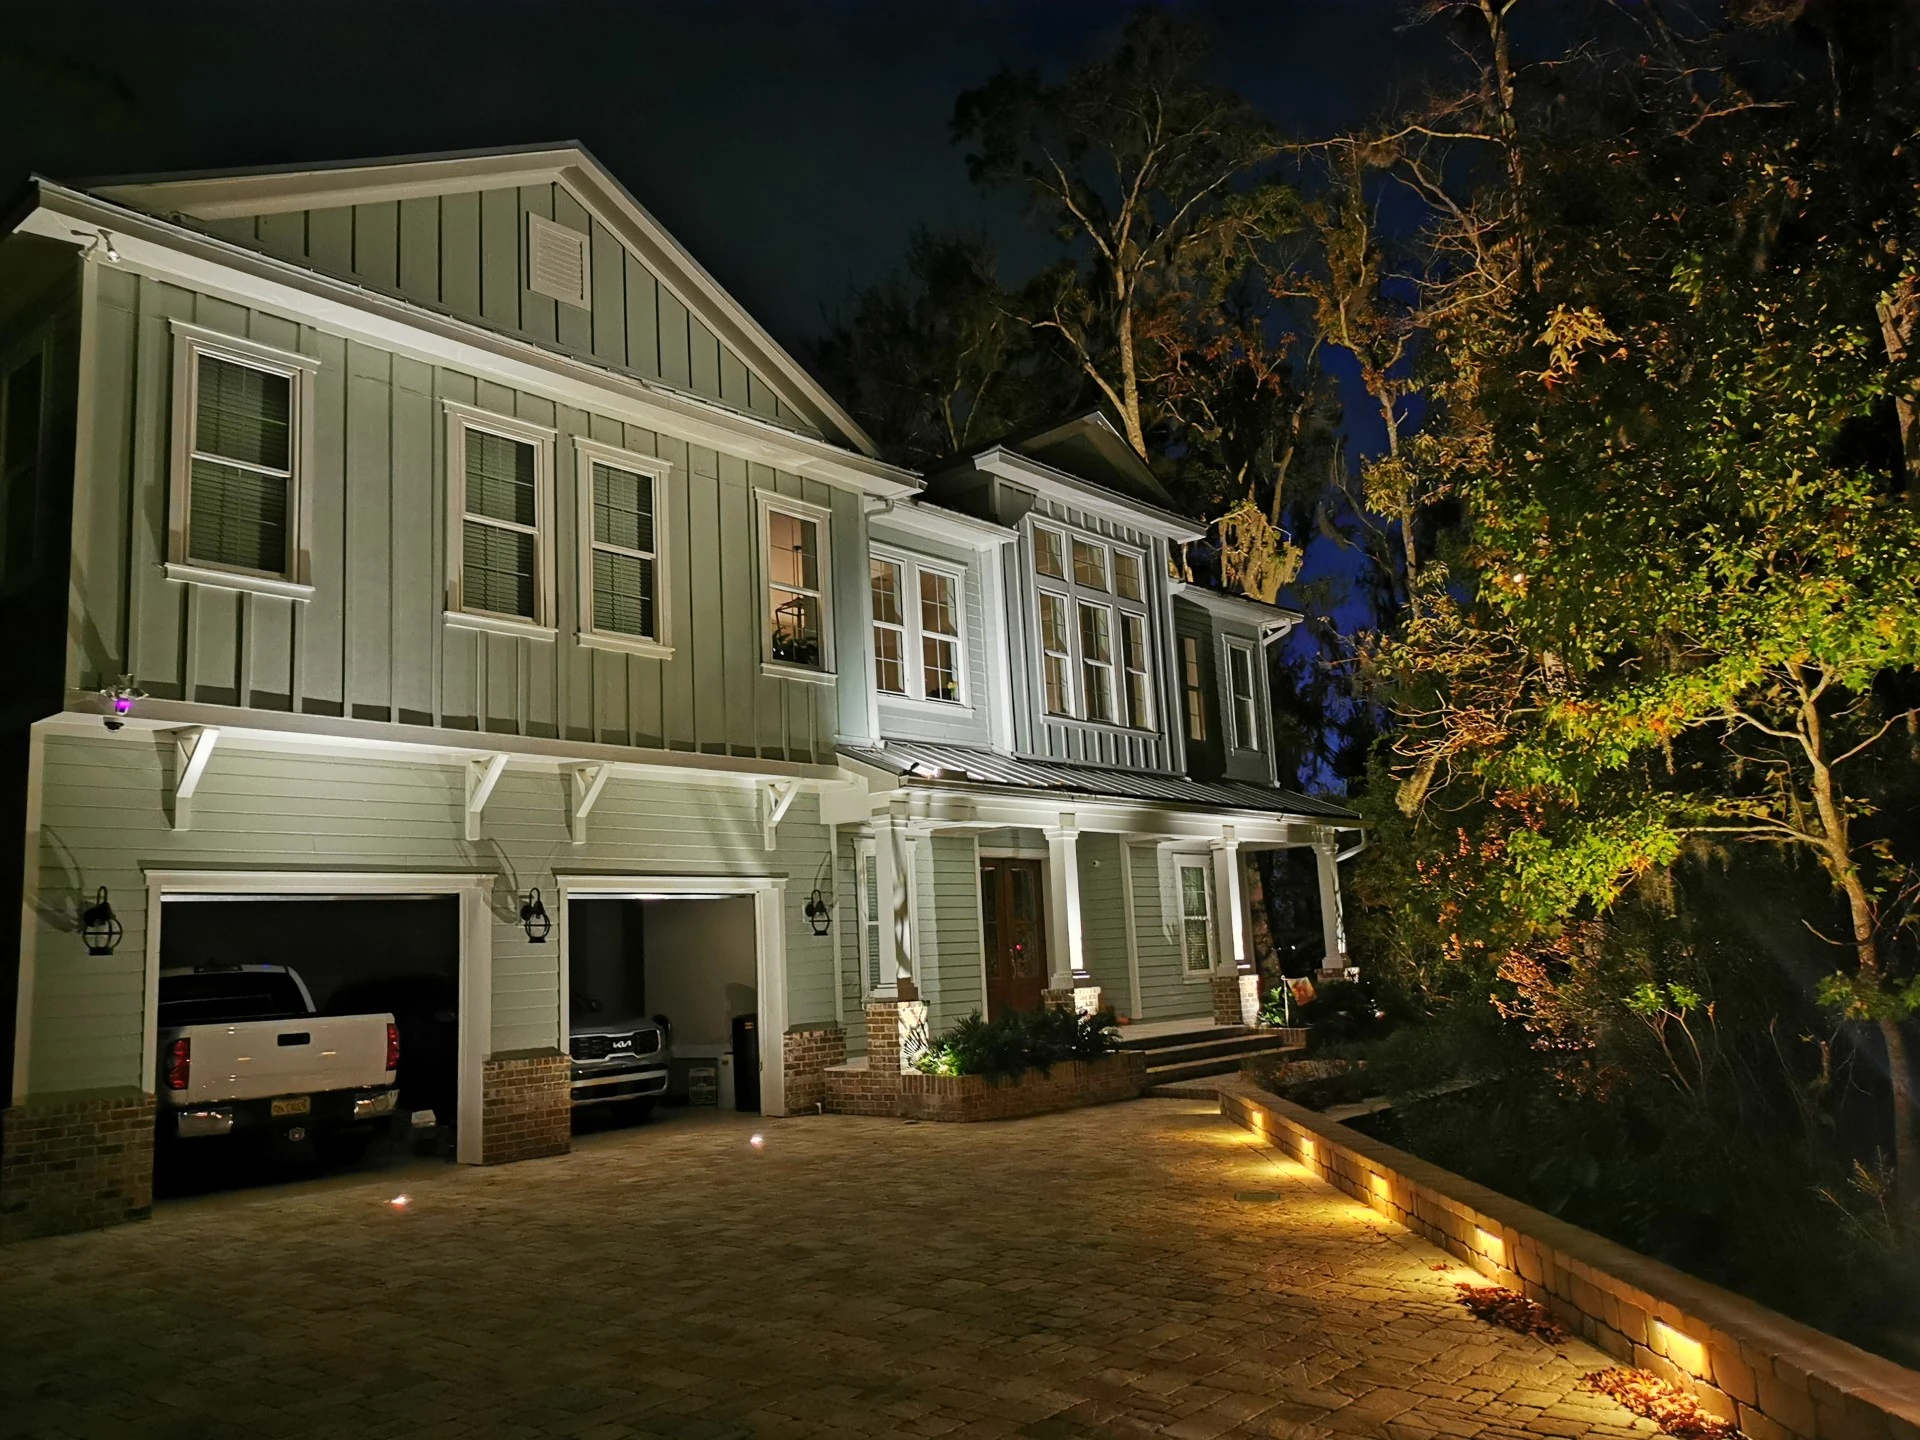
25. Modern Coastal Home with Paver Driveway and Uplighting
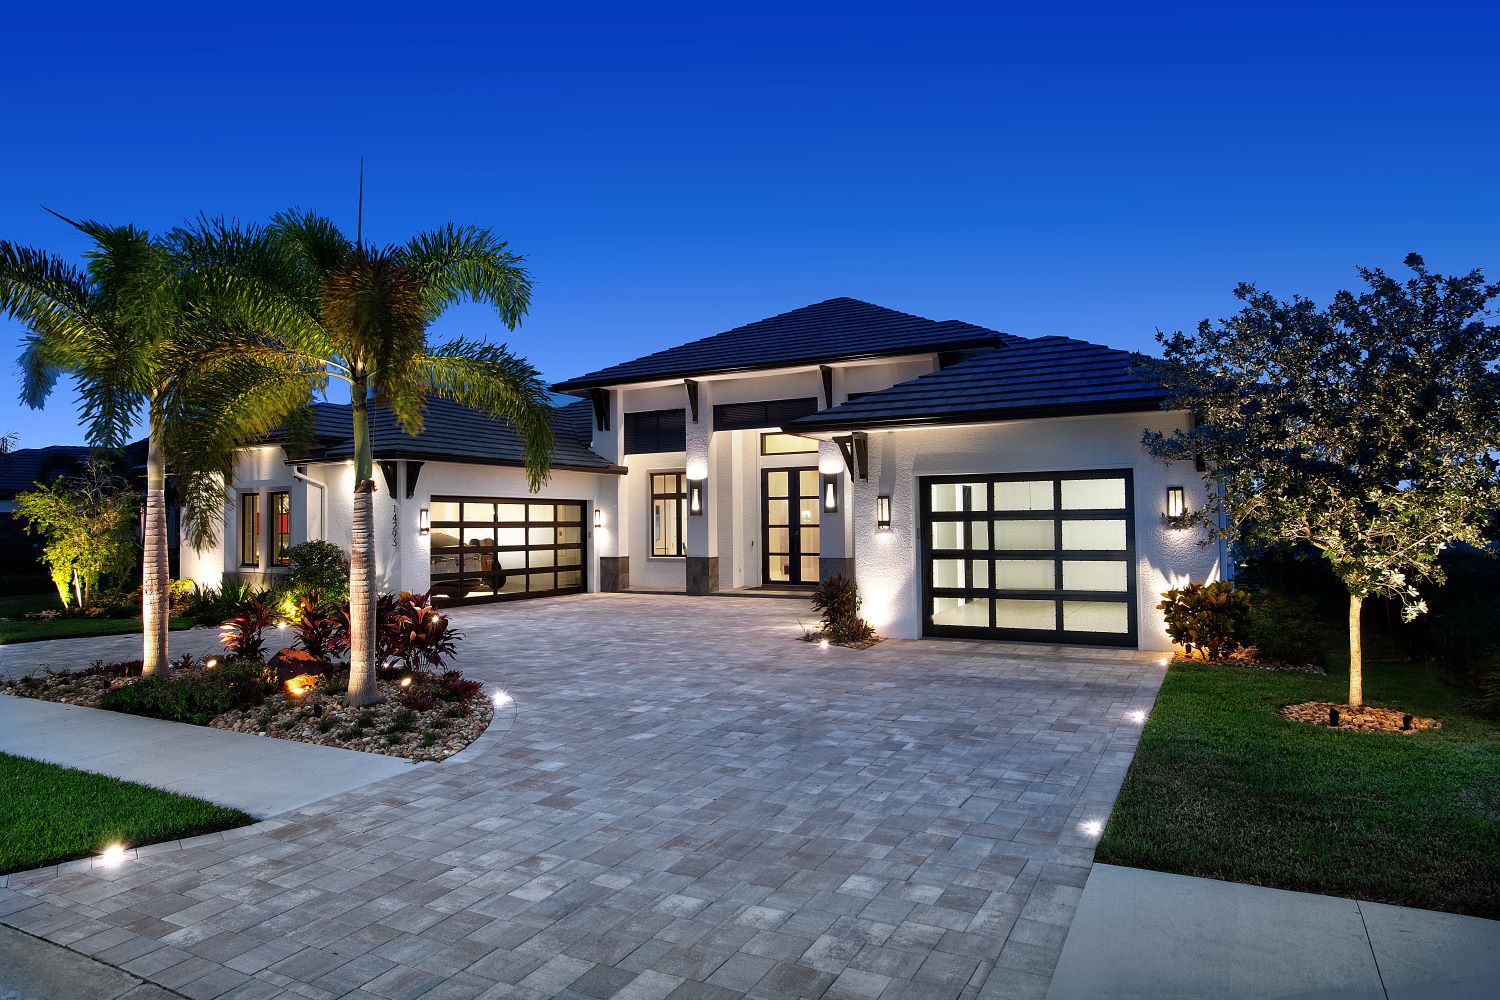
The lighting design here is successful because it creates a beautiful visual hierarchy. The brightest points of light are at the main entry points: the front door and the garage doors, signaling “welcome.” The next layer is the landscape lighting, which uses a softer glow on the palm trees to create shape and silhouette against the dusk sky. The final, most subtle layer is the in-ground paver lights, which provide a practical, low-level guide for movement. This ordering of brightness guides your eye naturally from the street to the front door.
📐 Style Math
If you have glass-paneled garage doors like these, don’t just light the outside. Adding simple, inexpensive shop lights or LED strips to the *inside* of your garage ceiling creates a stunning effect at night. It turns the garage doors into large, glowing lanterns, adding a huge amount of warmth and curb appeal. It signals a lived-in, well-cared-for home and provides a beautiful, diffuse light source that complements your exterior sconces and landscape lighting.
26. Pathway Bollard Lighting Leading to a Pavilion Entrance
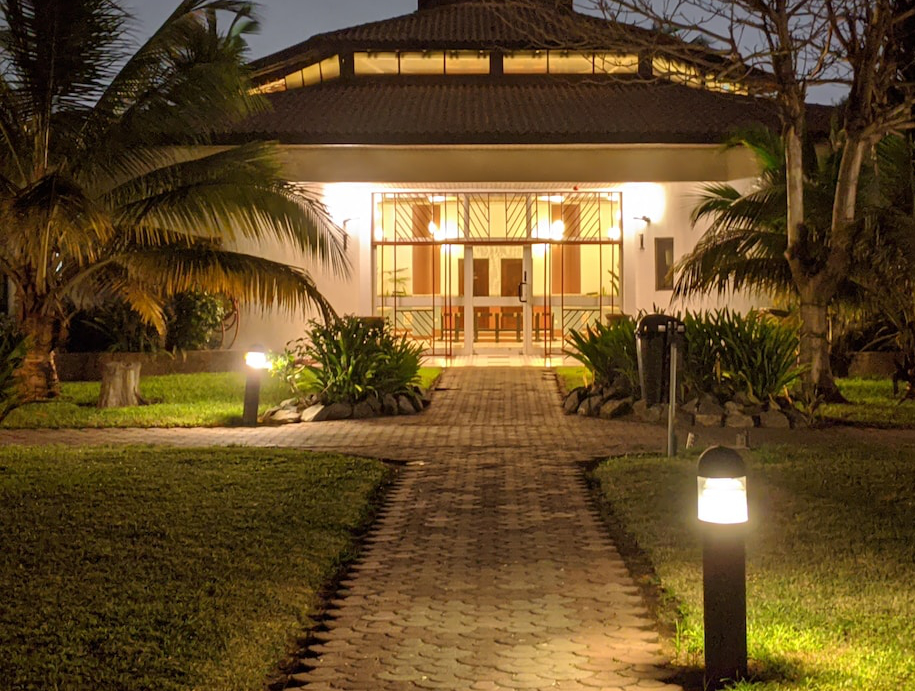
that makes this path feel so special is the intentional S-shape. A straight path with the same lights would feel much more rigid and utilitarian. By curving the pathway, the designer creates a sense of journey and discovery. You can’t see the final destination from the starting point, which builds anticipation. The bollard lights are essential to this effect, as their rhythmic placement emphasizes the elegant curve of the path, turning a simple walk into a deliberate and pleasing experience.
💡 Designer Tip
Short bollards, typically 18 to 24 inches high, are perfect for lighting pathways through manicured lawns or low groundcover, as seen here. They provide enough downward light to illuminate the paver surface without creating distracting glare. Their low profile ensures they define the path’s edge without visually competing with the destination—in this case, the brightly lit pavilion. This style works beautifully in commercial settings or on larger residential properties with distinct outdoor ‘rooms’ or destinations to connect.
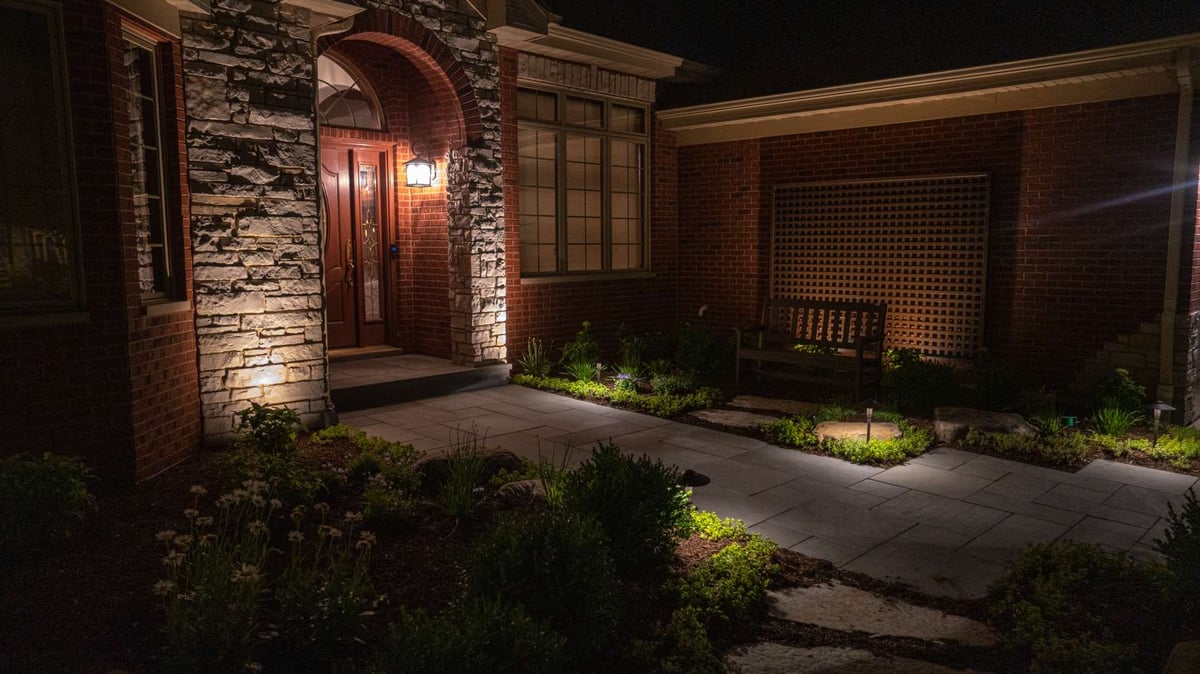
27. Warm Entryway with Brick, Stone, and Multiple Light Sources
This entryway feels so warm and complete because it uses a mix of lighting types, a strategy designers call “layering.” There’s a wall-mounted lantern for general, human-scale light, in-ground uplights to highlight the rich texture of the brick and stone, and likely other lights out of frame illuminating the wider landscape. This combination creates a rich, deep scene with no harsh shadows. The different light sources work together to make the space feel safe, welcoming, and architecturally interesting from every angle.
🔥 Trending Context
You can achieve a similarly layered and warm welcome on a much smaller budget. Start with a single, attractive wall lantern—you can find great options at Home Depot for under $100. Then, instead of installing wired in-ground lights, buy two or three solar-powered spotlights for about $40-$60. Place them in your garden bed or a planter and aim them up at the most interesting parts of your home’s facade, like brickwork or a climbing plant. It creates the same layered effect for a fraction of the cost. Compare with the grander approach in Idea #1.
Let There Be (the Right) Light
Your driveway is the first welcome your home offers, the literal path to your front door. With the right lighting, you can make that welcome warm, stylish, and secure every single night. It’s one of the most impactful upgrades for boosting curb appeal. Now, which idea are you saving to your Pinterest board first?