You know that feeling? You save a pin of a gorgeous, expensive-looking yard, but your own space feels miles away from that dream. Let’s close that gap. The secret is that high-end landscaping isn’t about a huge budget; it’s about smart, intentional design choices. We’ve filtered through hundreds of options to bring you these 27 ideas that prove you can get a luxe look for less. From wild, natural gardens to sleek, modern patios, there is something in here for you. And stay until the end — we break down the most common mistakes that can ruin these looks. 📌 Save this to Pinterest for later — you’ll want to revisit these ideas.
1. Frame a Modern Home with Lush Greenery and Paver Steps
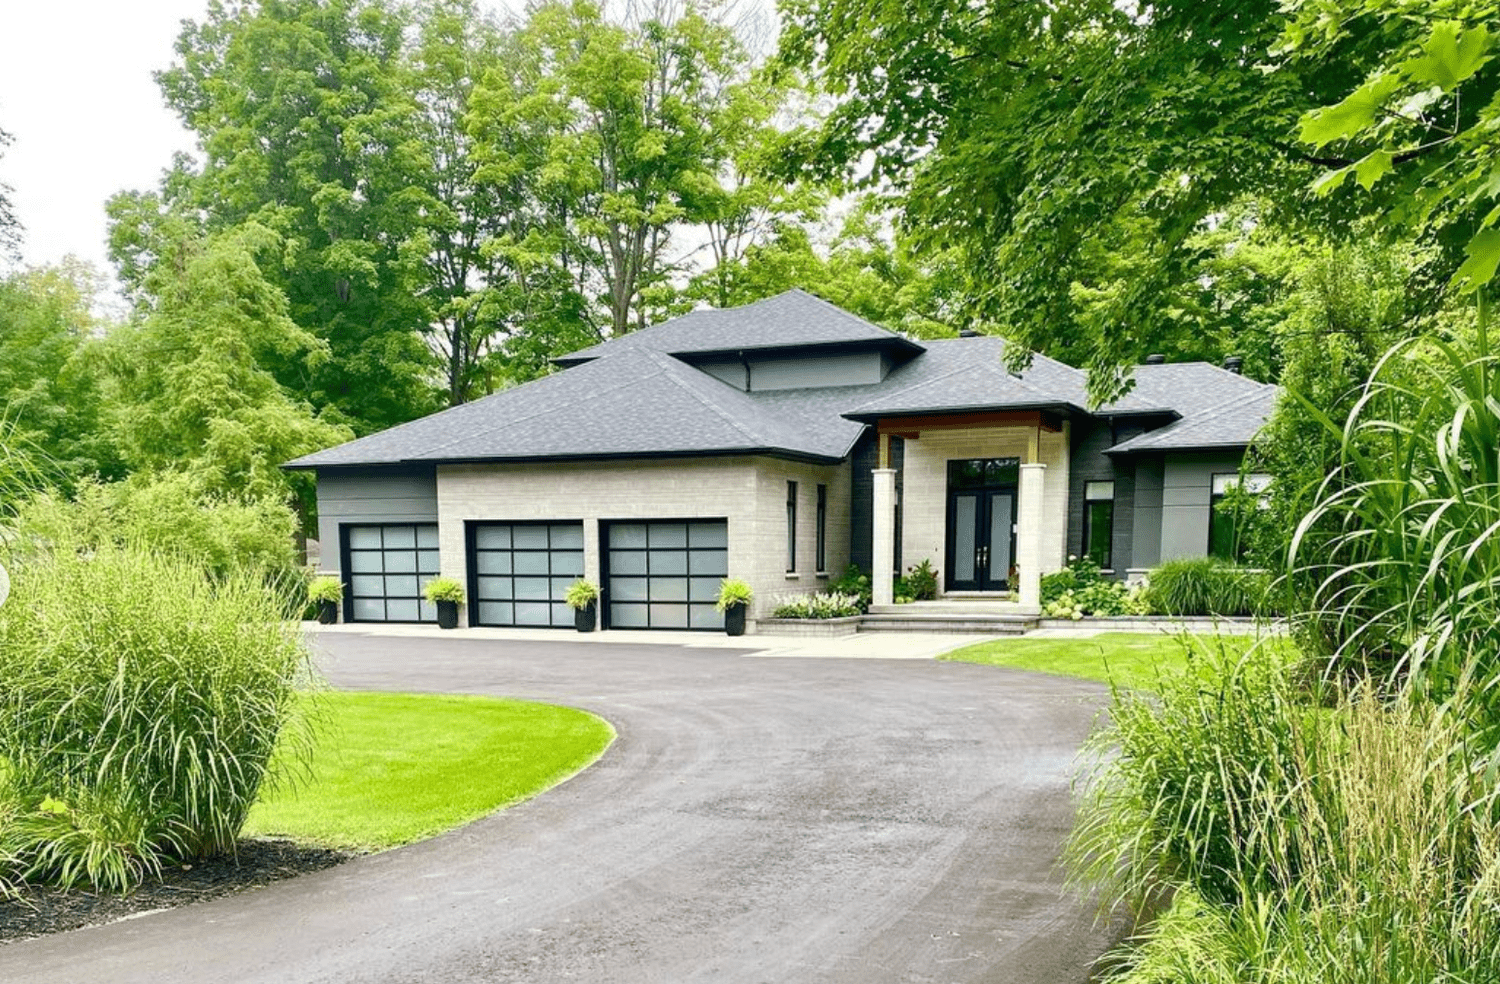
This design succeeds by leaning into contrast. The light-colored brick of the home creates a bright, welcoming canvas, which is then grounded by the dark gray siding, roof, and deep black accents on the garage and front door. This high-contrast palette makes the vibrant green of the manicured lawn and tall grasses pop, feeling extra lush and intentional. The strategic placement of plants also creates ‘rooms’ within the landscape, directing the eye and making the large space feel more organized and intimate.
🔧 How-To Brief
Get this kind of polished structure by thinking in layers. When selecting plants, don’t just consider their final height. Place your tallest, most architectural plants (like the tall grasses here) furthest back or at key anchor points, like the corners of the garage. Then, step down in height with your next layer, and finally, add your lowest ground cover or border plants. A great rule of thumb is to allow for at least 18-24 inches of space between each ‘layer’ to prevent overcrowding and give each plant room to shine.
2. Create a Classic Welcome with a Winding Brick Pathway
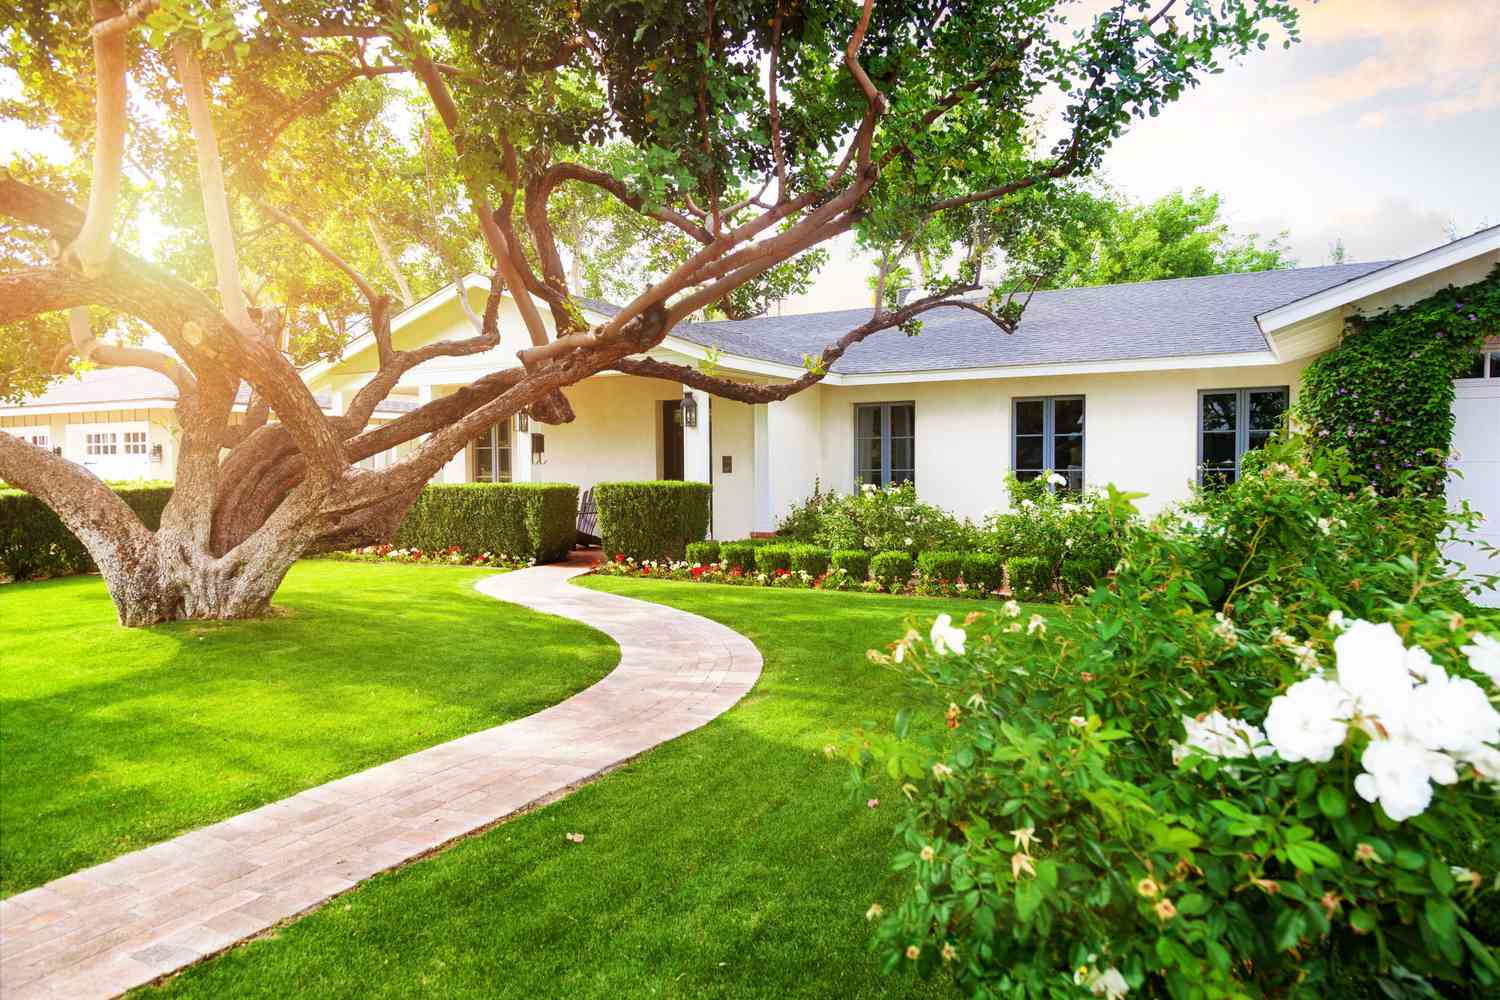
The formula here is all about classic charm and balance. Let’s break it down: 50% lush, uniform green lawn provides a calm, expansive base. 30% structured plantings, like the tightly pruned bushes and flowering shrubs, add texture and seasonal color. 20% hardscape, in the form of the winding pinkish-brown brick path, introduces a natural material that guides the eye and breaks up the sea of green. The success of this look hinges on the gracefully curving path; a straight concrete walkway would feel far more rigid and less inviting.
💡 Designer Tip
A winding brick path is gorgeous, but it’s not a ‘set it and forget it’ feature. To keep it looking sharp, you’ll need to address weeds or moss that grow in the cracks 2-3 times a year. A pressure washer on a low setting can work wonders, or you can use a specialized crack-weeding tool. To prevent bricks from shifting or becoming uneven over time, especially in climates with frost, ensure the path was installed correctly on a compacted base of gravel and sand. Expect to re-sweep new sand into the joints every 2-3 years to keep everything tight.
3. Layer Evergreens and Hedges for a Grand Estate Feel
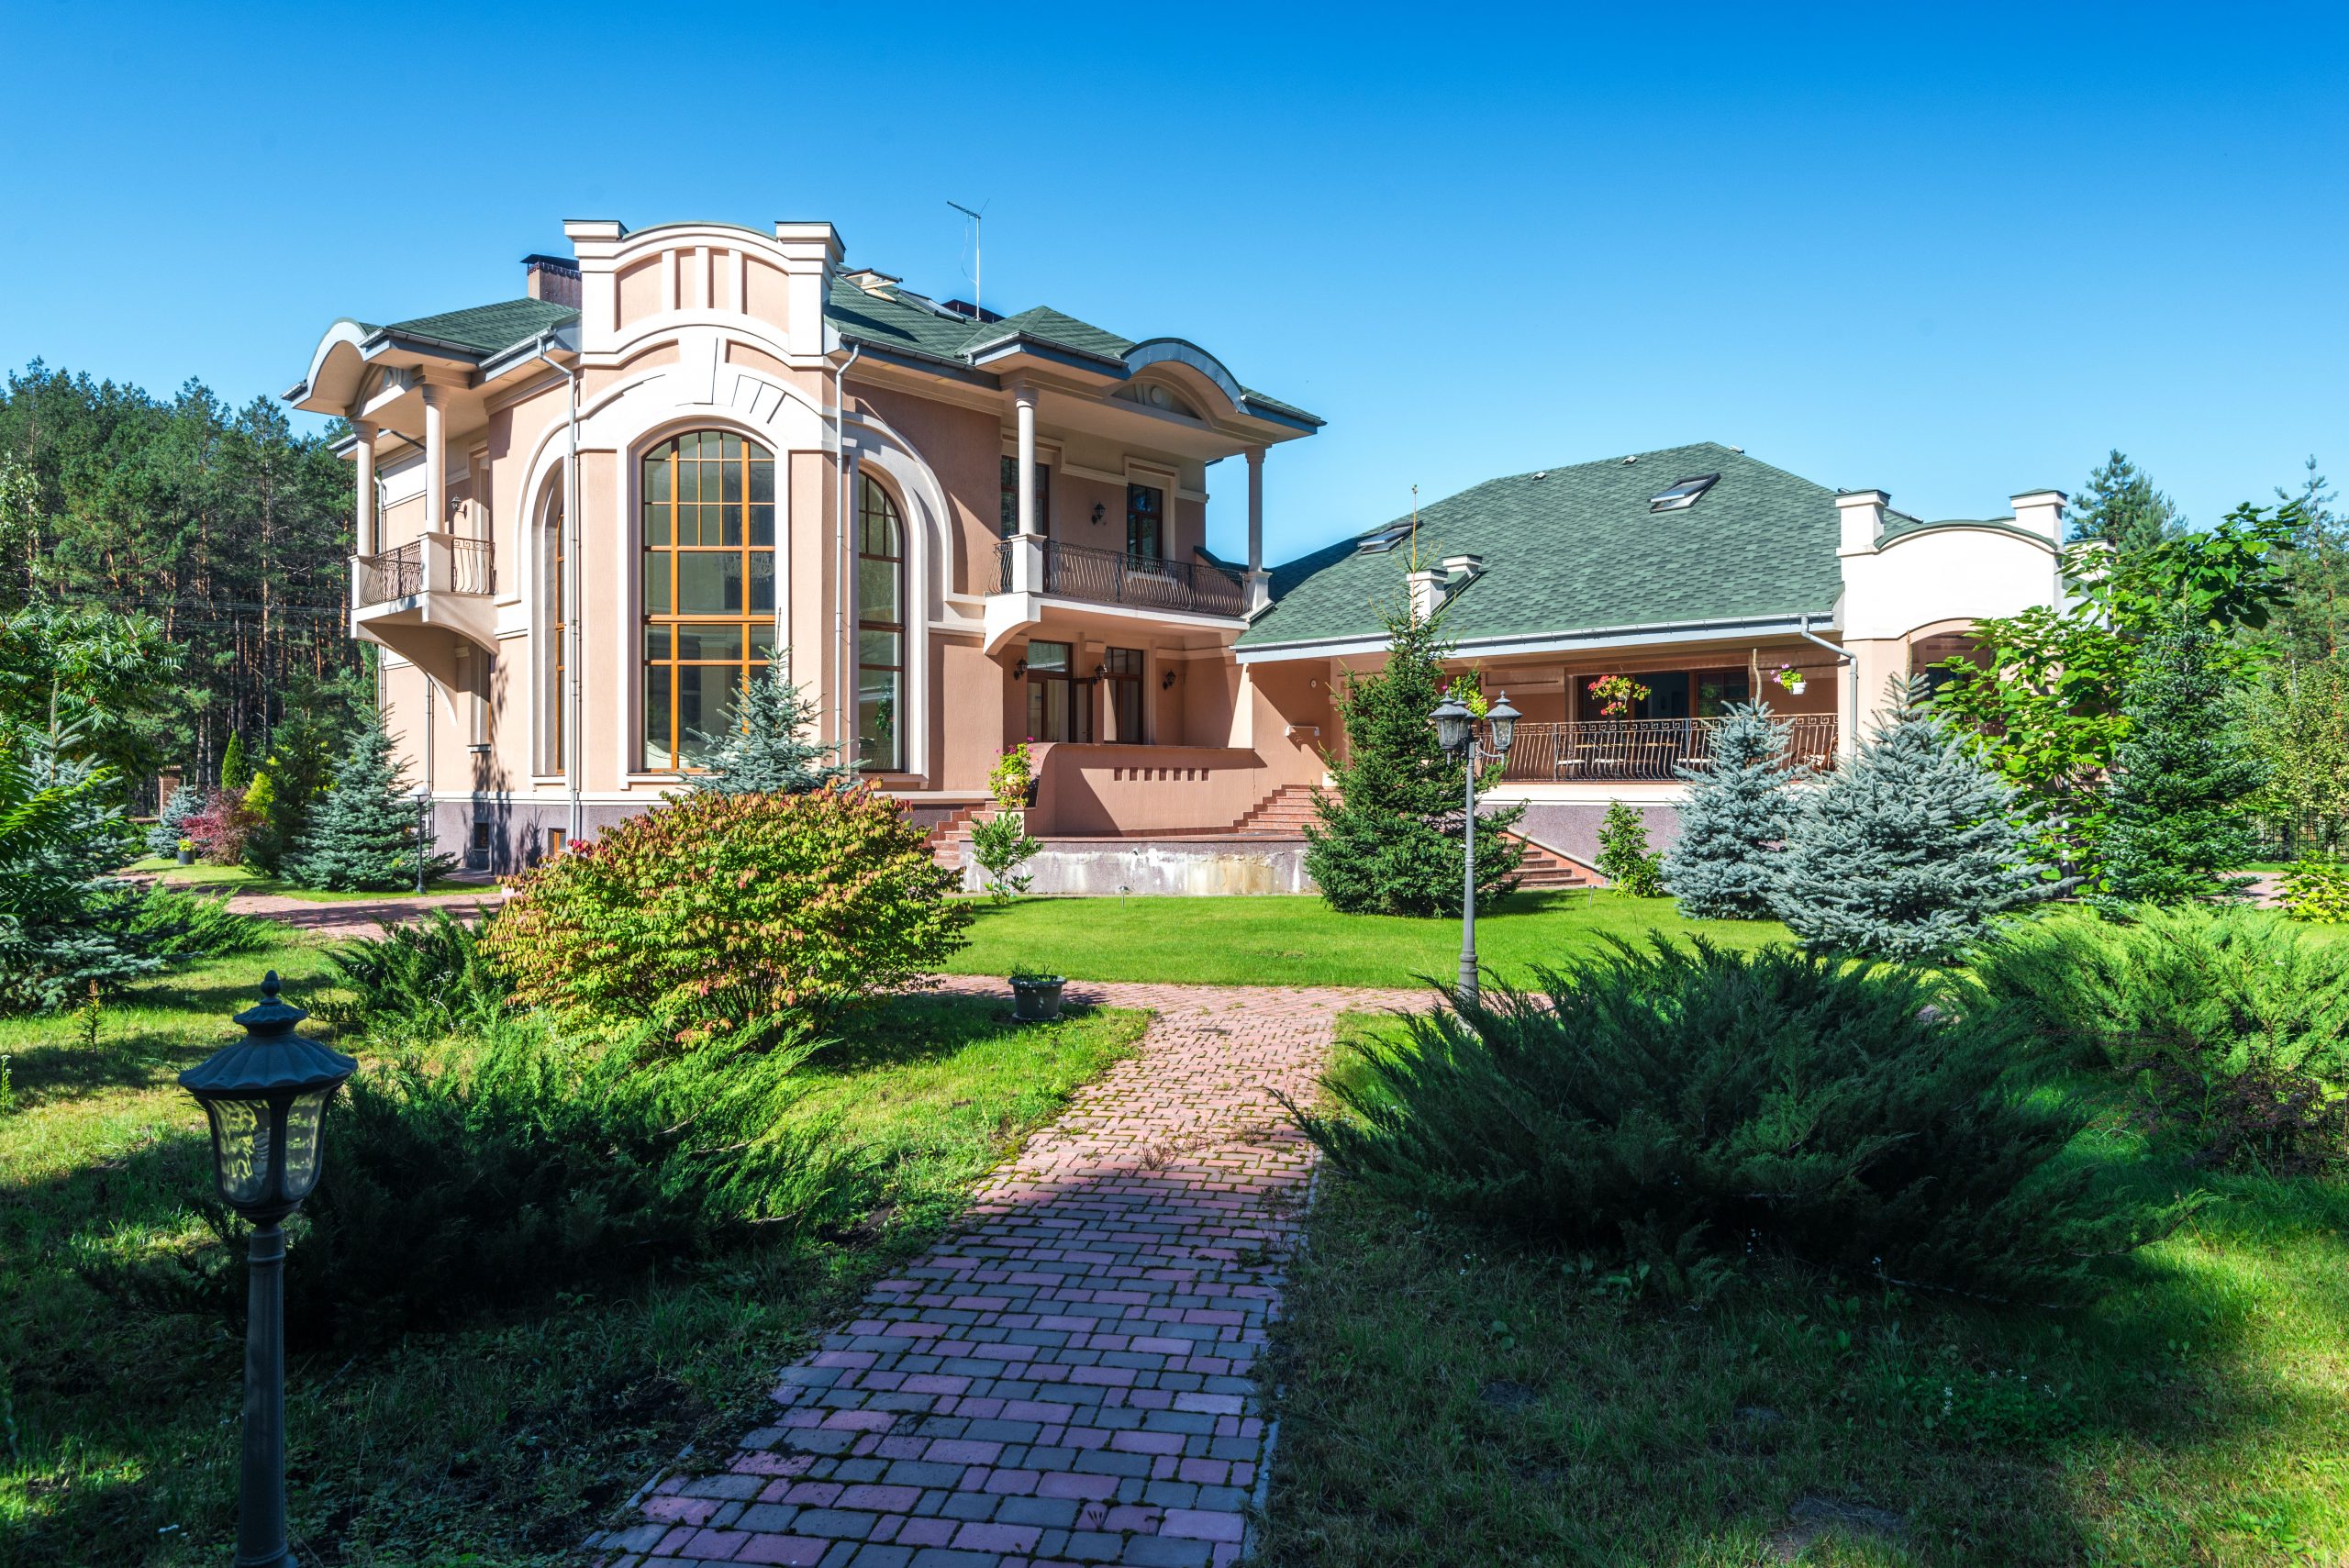
The single element that gives this landscape its grand, established feel is the variety in texture and color within the evergreen family. It would be easy to plant a simple, uniform hedge, but the inclusion of feathery blue spruce trees alongside deep green pine and neatly manicured hedges creates incredible depth and visual interest. The interplay between the silvery-blue needles, the dark green canopy, and the bright green of the lawn is what makes the scene feel so rich and dimensional. Without this botanical diversity, the effect would be much flatter.
✅ Before You Start
This kind of layered, multi-species design works best on properties of at least a quarter-acre. The larger trees, like the background pines and the focal blue spruce, need ample room for their roots and canopy to spread without crowding the house or walkways. For this look, your setback from the house should be a minimum of 20-25 feet for the larger trees. For smaller yards, consider the charming symmetry of Idea #13, which achieves a similar formal feel on a more compact scale.
4. Build a Budget-Friendly Foundation with Simple Plant Groupings
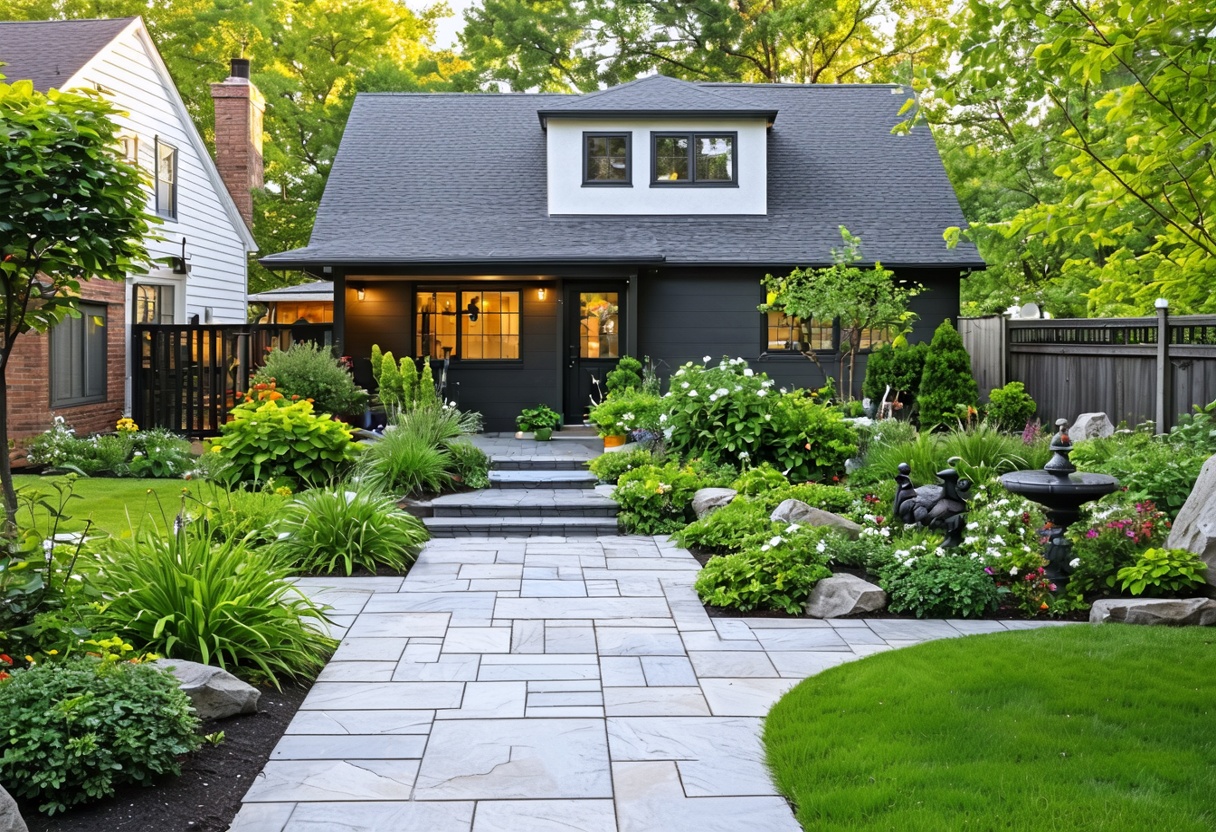
Achieving a professional-looking front yard doesn’t require a five-figure budget. The key is to buy plants in odd-numbered groups (3, 5, or 7) of the same species and repeat those groupings. Head to big-box stores like Lowe’s or Home Depot and look for hardy perennials like hostas, daylilies, and ornamental grasses. For about $150-250, you can buy enough plants to create a substantial, layered garden bed. Use inexpensive bagged mulch (around $3-4 a bag) to fill in the space, which suppresses weeds and makes the area look instantly finished and tidy.
⭐ The One Thing
The biggest mistake homeowners make with budget landscaping is impatience. Small, inexpensive plants will look sparse for the first year or two. You will be tempted to overplant, stuffing every square inch with small perennials. Don’t do it. Read the plant tags and space them according to their mature size, not the size they are in the pot. Use mulch to cover the bare ground for the first couple of seasons. By year three, the plants will fill in beautifully, and you’ll have a lush, full garden that doesn’t look choked or overgrown.
5. Achieve High-Impact Curb Appeal on a Low Budget
Want to create a polished, layered flower bed without hiring a pro? This simple how-to will get you there in a weekend. It’s all about creating a defined edge and using mulch to your advantage.
- Use a flat-edged spade to carve a clean, 4-inch deep trench between your lawn and the garden bed.
- Install simple black plastic edging (about $20 for 20 feet) in the trench, ensuring the top is flush with the soil level.
- Lay down a layer of cardboard over the existing soil/weeds in the bed. This is a free, effective weed barrier.
- Cut holes in the cardboard where you plan to place your new plants and dig your holes.
- Arrange your plants, with taller ones in the back.
- Cover the entire bed, including the cardboard, with 2-3 inches of dark mulch.
This entire process for a small front bed could cost under $100 in materials (plus plants).
📏 Scale Guide
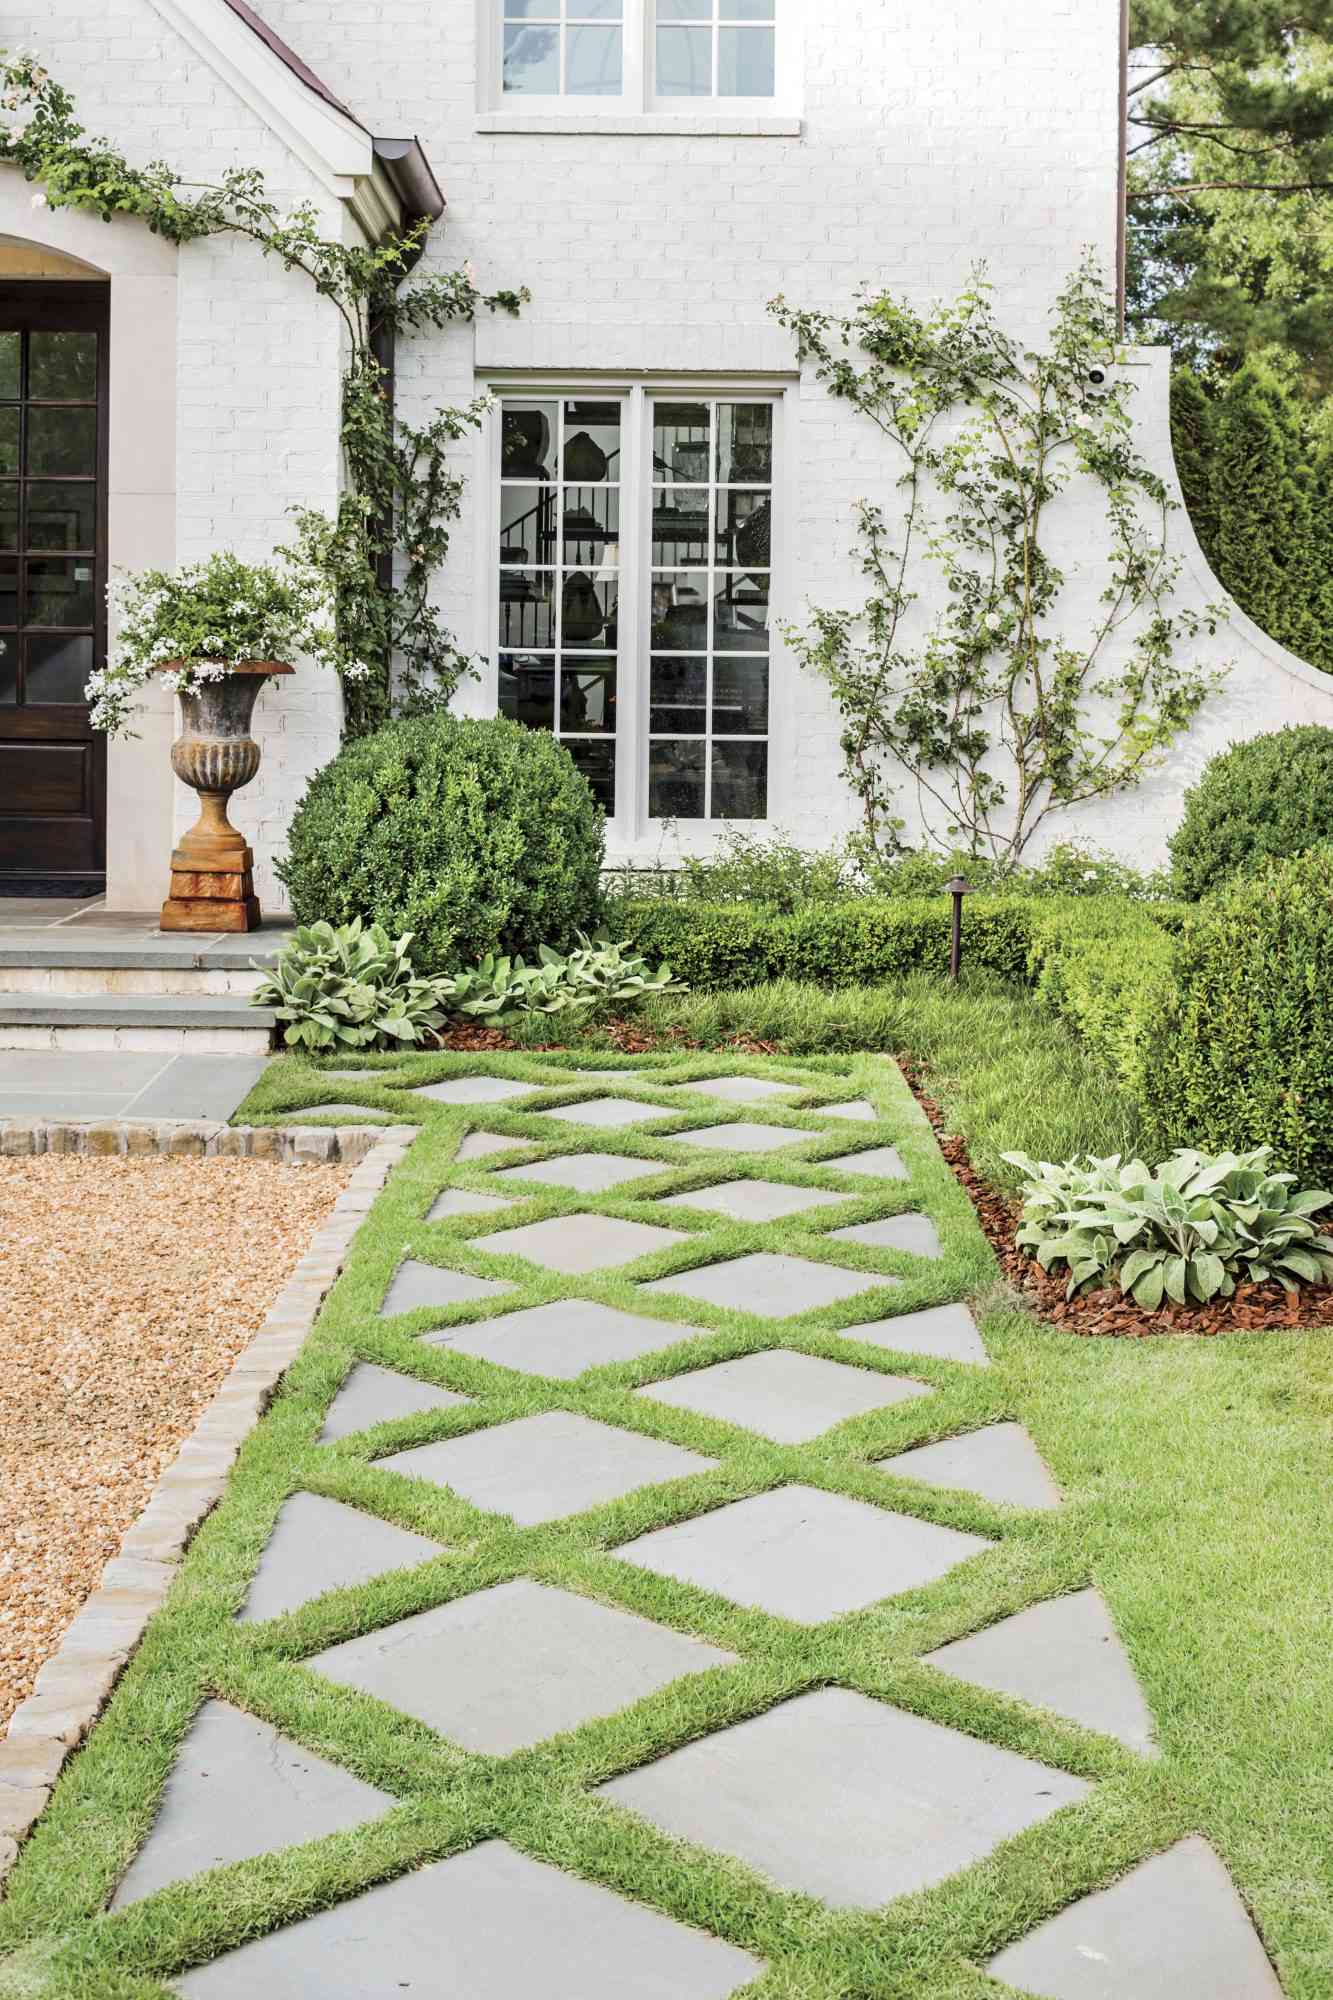
The secret weapon for budget landscaping is mulch. A thick, 3-inch layer of dark-colored mulch instantly makes any garden bed look intentional and well-maintained. It provides a clean, contrasting background that makes your green plants pop, suppresses weeds, and helps retain soil moisture, meaning you have to water less. A bag of mulch is one of the cheapest, highest-impact materials you can buy. For a 100-square-foot bed, you’ll need about 10-12 bags, costing you less than $50 for a total transformation.
6. Design a Smart, Low-Cost Front Yard with Artistic Flair
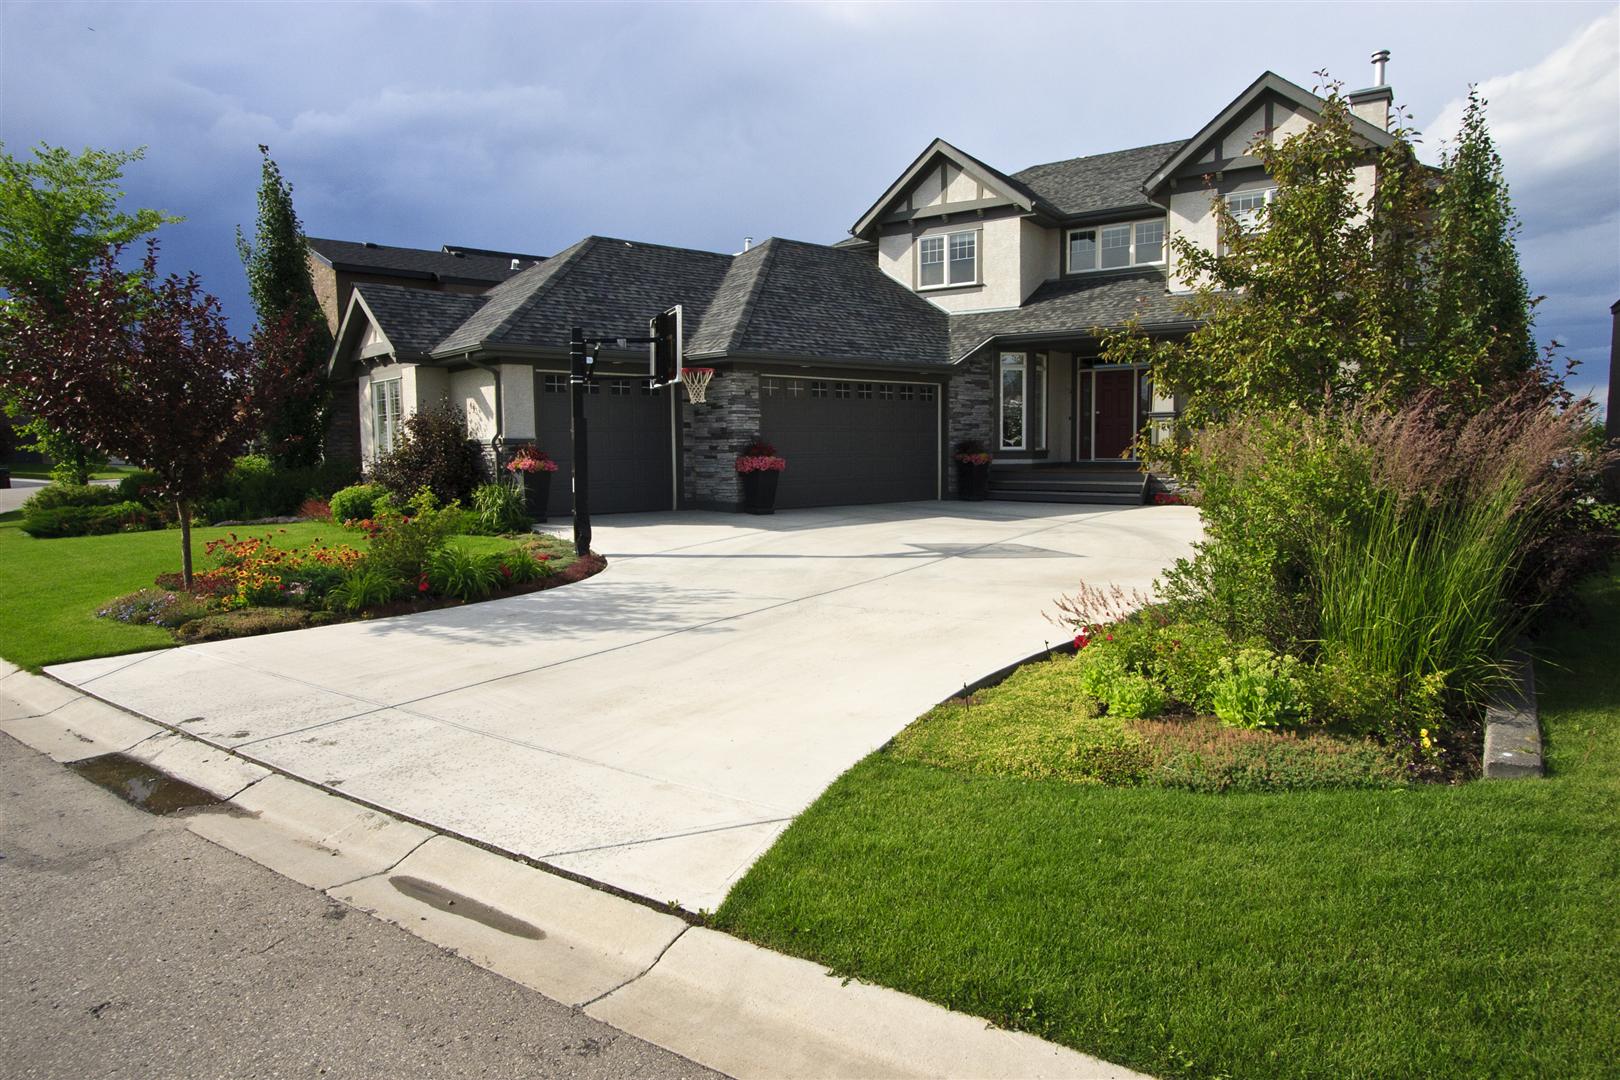
The formula for an artistic, budget-friendly design is about creating rhythm and repetition. It’s about 60% inexpensive ground cover or lawn, 30% repeating structural plants (like boxwoods or grasses), and 10% a single, dramatic focal point. The ‘focal point’ doesn’t have to be expensive; it could be a single Japanese Maple, a unique boulder, or a piece of garden art. By repeating the cheaper structural plants, you create a cohesive look that guides the eye towards the one special element, making the whole design feel more valuable.
🔥 Trending Context
This approach works because it mimics high-end design principles on a shoestring. Professional landscape designers rarely use one of every plant. Instead, they create a strong visual story by repeating a limited palette of plants and materials. By planting a row of identical grasses or a cluster of the same flowering shrub, you create a sense of order and calm. This repetition is easy on the eyes and makes the landscape feel curated and intentional, rather than like a random assortment of plants bought on sale.
7. Use Curving Brick Paths to Define Vibrant Garden Beds
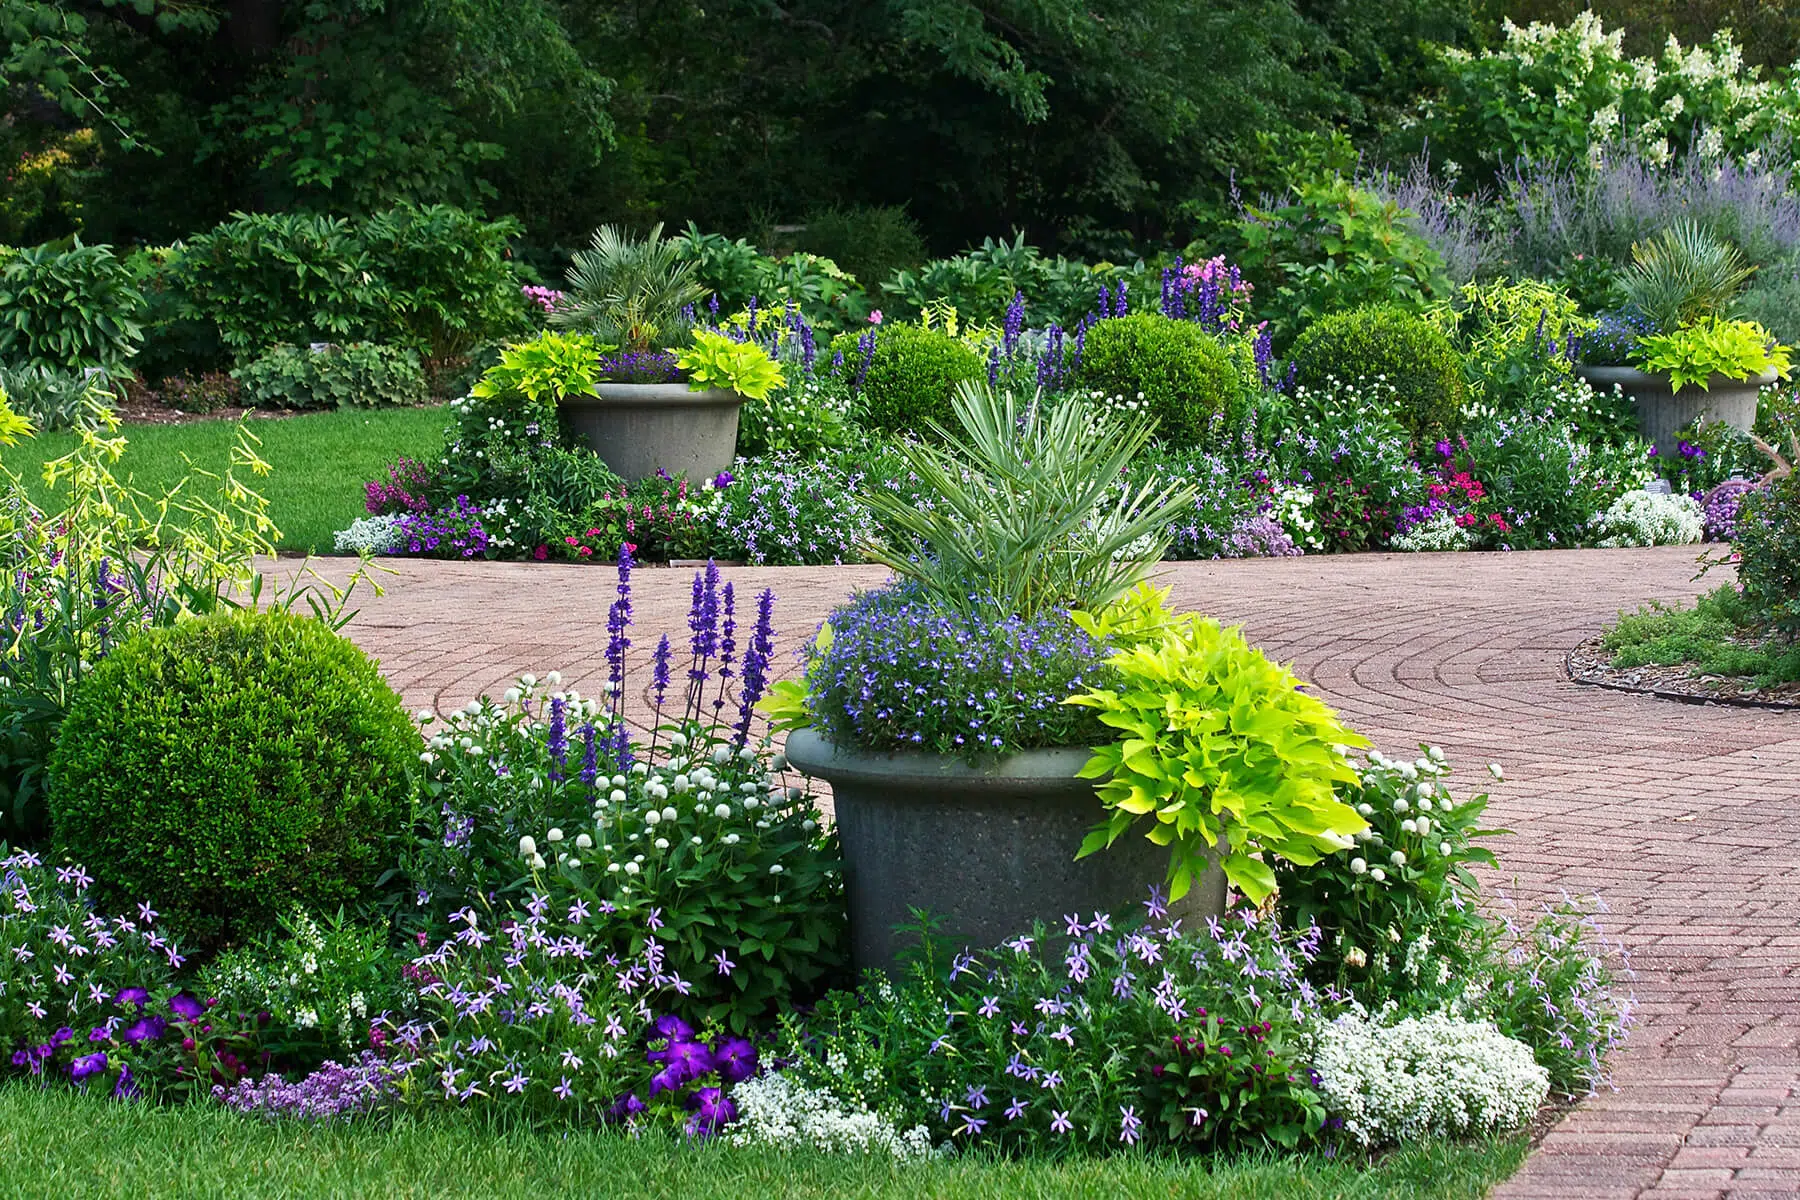
When you have dense, multi-layered plantings, a hardscaped edge is non-negotiable. The key to making it feel luxurious instead of clumsy is the material and shape. Opt for a classic material like brick, and lay it in a graceful, curving line rather than a rigid straight one. The curve invites you to slow down and look at the plants. For a truly high-end touch, install a ‘soldier course’—a border of bricks laid standing on their narrowest side—along the edge of the main path. It creates a crisp, finished line that permanently separates the path from the garden bed.
💰 Budget Breakdown
The bold, oversized grey planters are the game-changer here. Without them, this is still a pretty garden. With them, it’s a *designed* space. They serve several key functions: they introduce a modern, minimalist material (concrete/fiberglass) that contrasts beautifully with the traditional brick and lush plants; they create vertical interest, lifting the eye up from the ground-level beds; and they allow for high-impact, contained plantings, like the vibrant sweet potato vine, that might otherwise take over the whole garden.
8. Embrace Romantic Charm with Climbing Ivy and Manicured Hedges
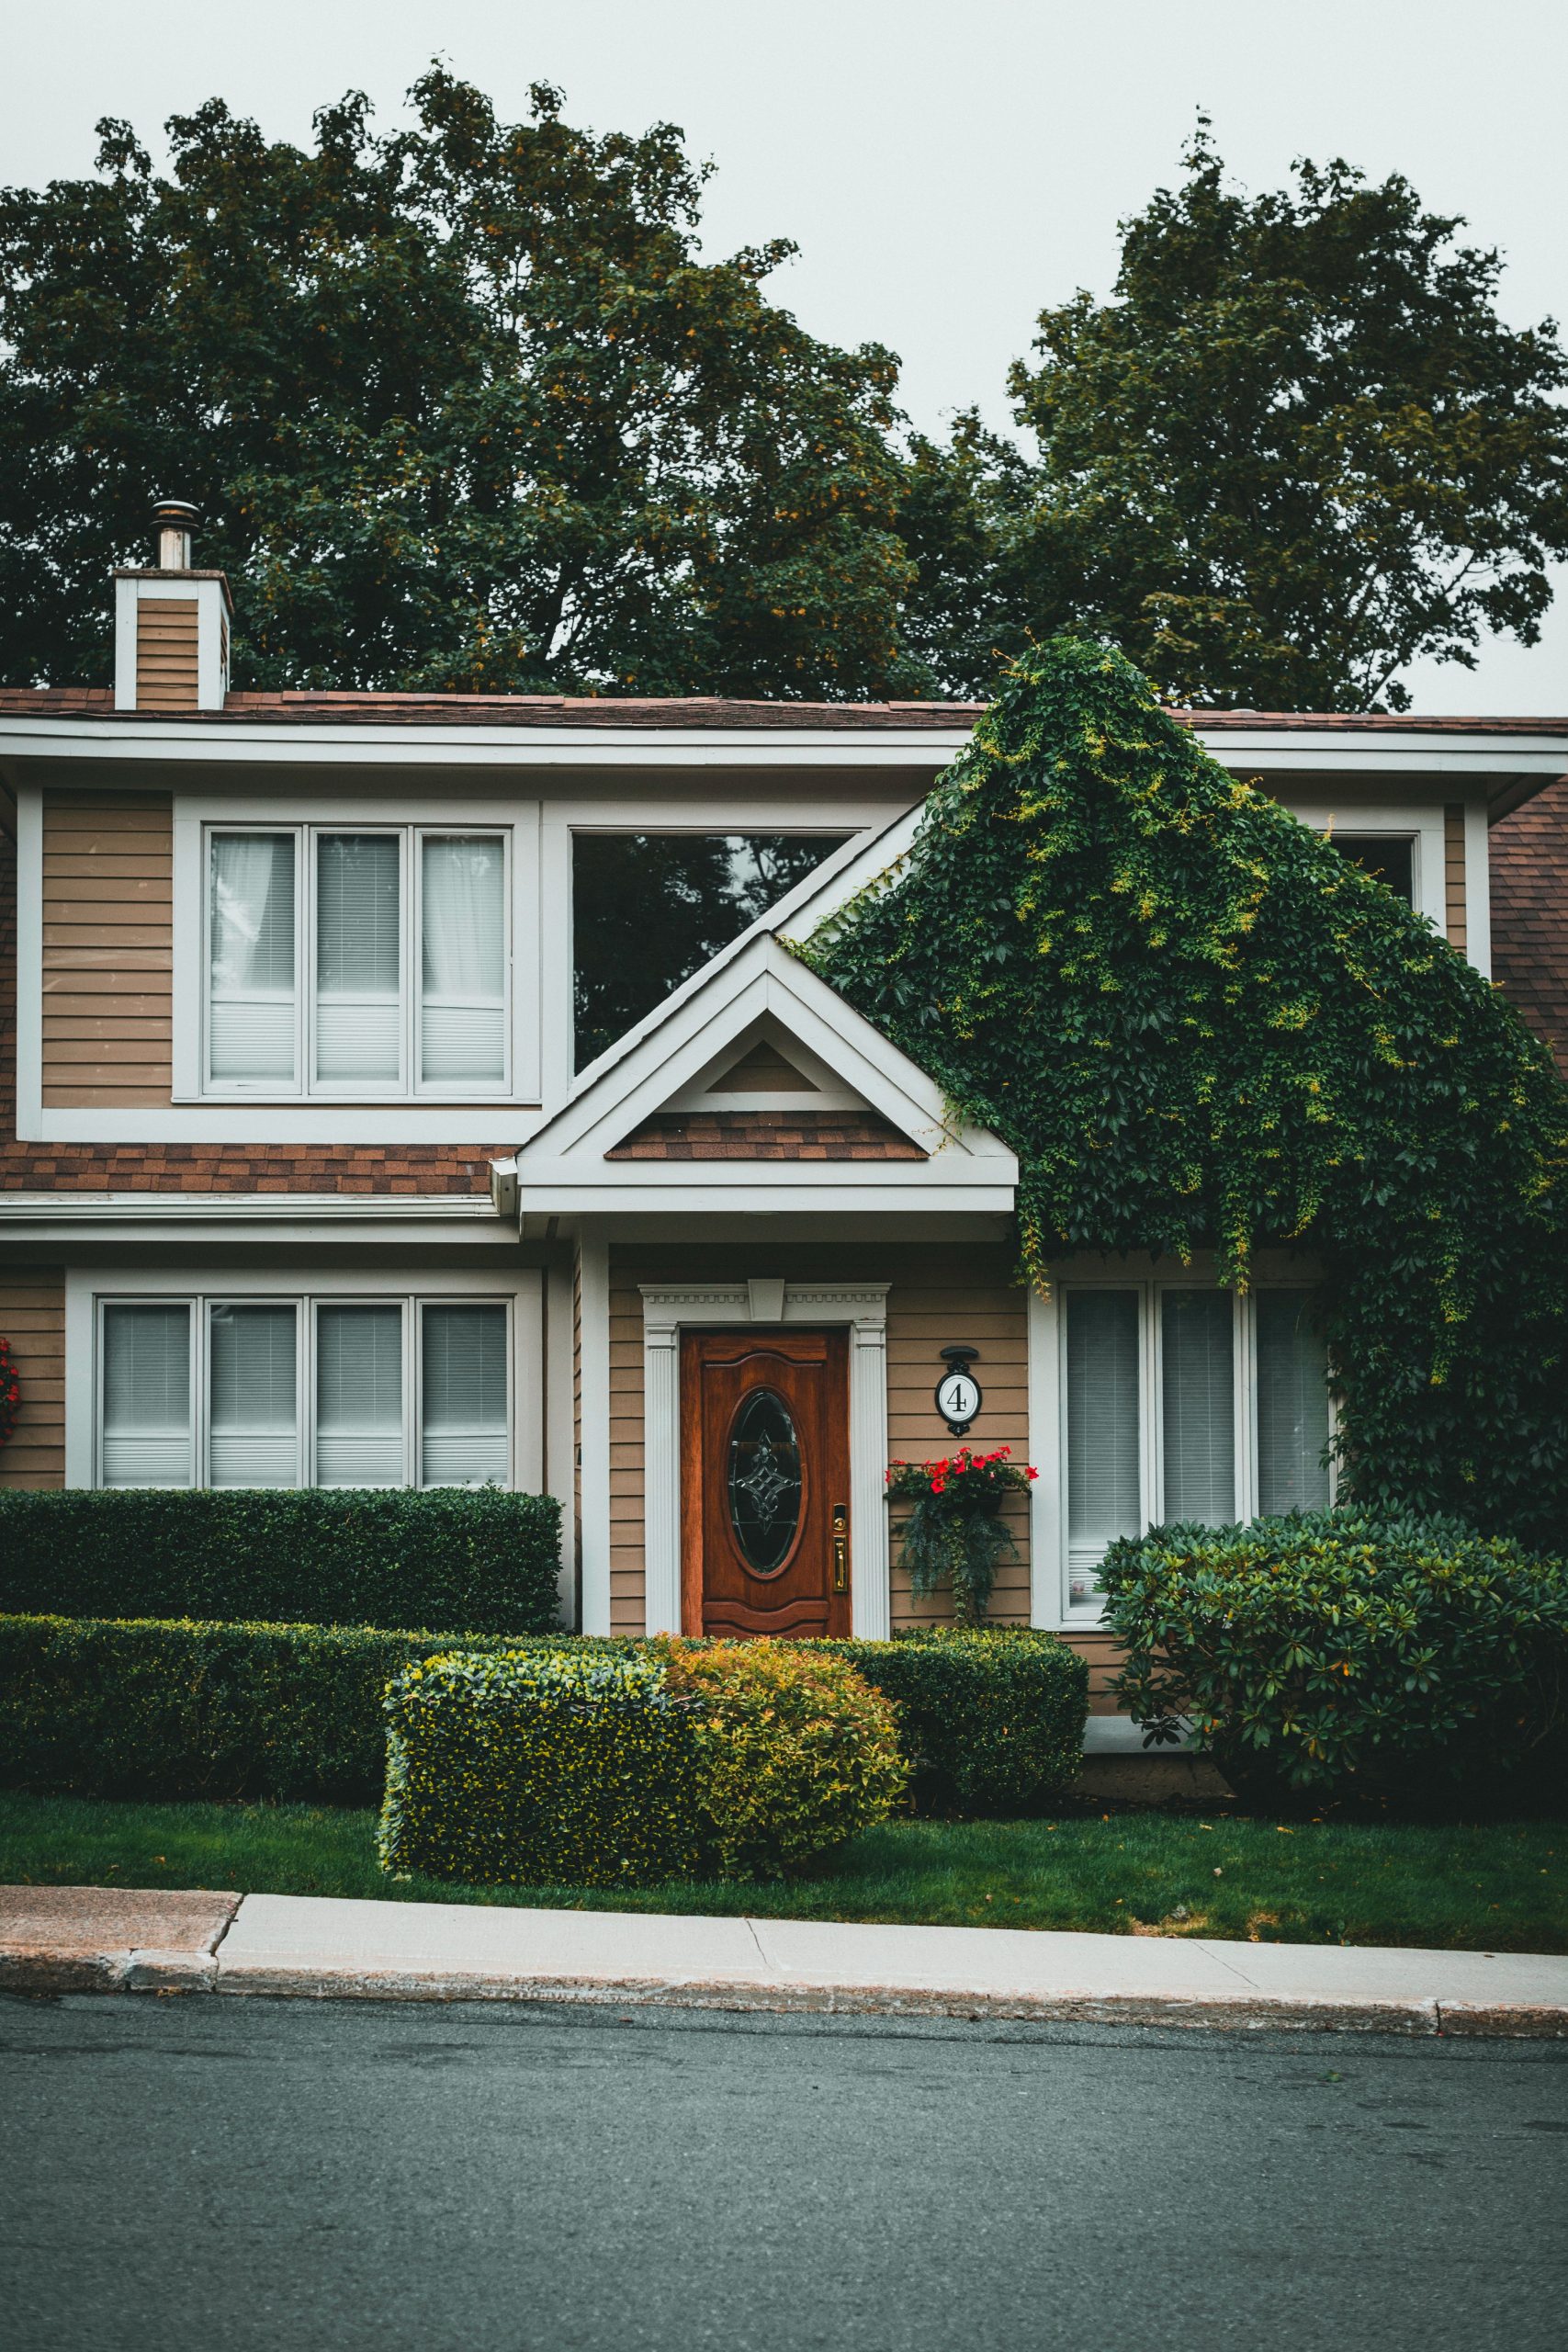
There’s no denying the romance of a vine-covered house, but you need to be very careful about which vines you choose and where you let them grow. Some species, like English Ivy, can be incredibly destructive, working their way into mortar, under siding, and even lifting roof shingles. They can also harbor moisture against the house, leading to rot. If you love this look, opt for a less aggressive, self-clinging vine like Climbing Hydrangea or Boston Ivy, and be prepared to prune it diligently away from windows, gutters, and the roofline at least twice a year.
🎯 What Makes It Work
This look is high-maintenance. Ivy requires aggressive annual trimming to keep it from damaging the house. The manicured hedges will need to be sheared at least two, maybe three, times during the growing season to maintain their sharp, geometric shape. A hanging basket needs daily watering in the summer. If you love the aesthetic but not the workload, get a similar feel with a large, self-contained trellis placed a foot away from the house wall for a climbing plant, and swap the sheared hedges for naturally tidy, mound-shaped shrubs like boxwoods.
9. Anchor a Formal Garden with a Classical Fountain and Pebble Paths
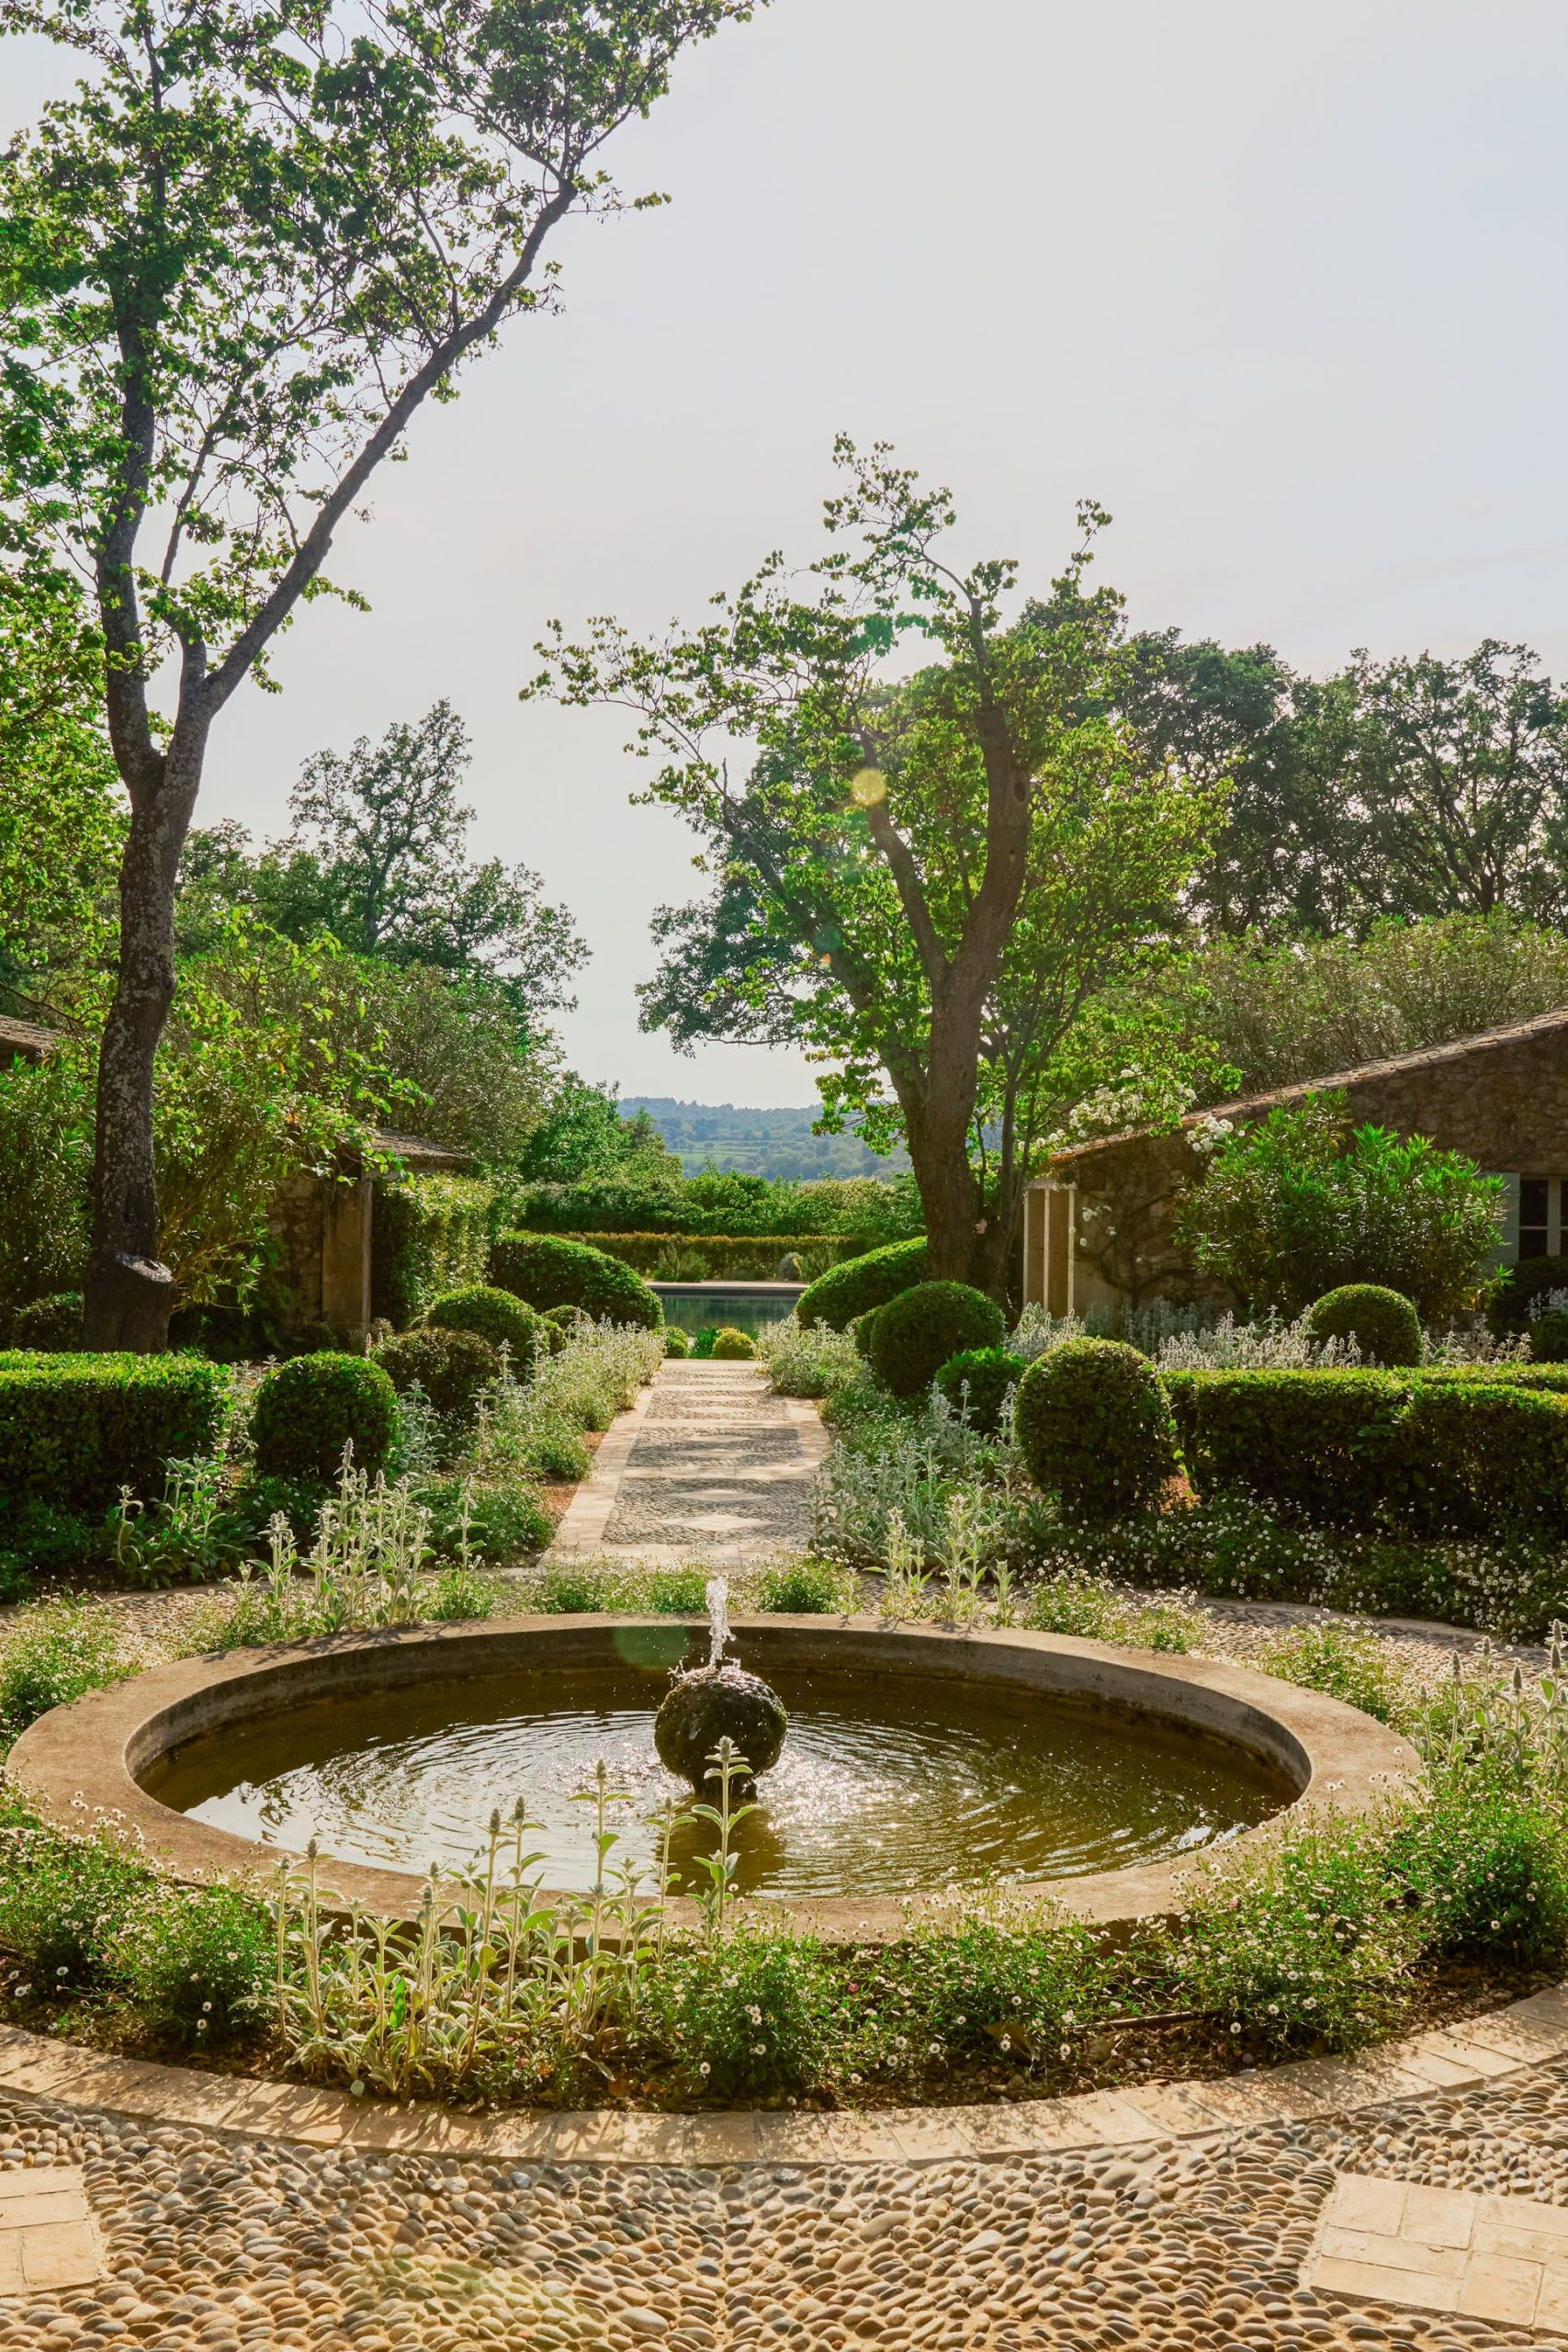
Recreating this formal, classic look requires a focus on hardscaping and structure. The plants are secondary to the ‘bones’ of the garden.
- Focal Point Fountain: $1,500 – $5,000+ for a cast stone fountain, plus installation.
- Pathways: $15 – $30 per square foot for professionally installed pebble or gravel paths.
- Shrubs & Hedges: $500 – $2,000 for mature boxwoods and other hedges to create immediate structure.
- Flowers & Groundcover: $200 – $400 for annuals or perennials.
- Budget Alternative: A small, self-contained fountain from a garden center ($300), pea gravel for paths ($50/ton), and smaller, less mature shrubs ($200) can give a similar vibe for around $1,000-1,500.
- TOTAL (Pro-Grade): $7,000 – $15,000+
🧹 Maintenance Reality
A formal, symmetrical design like this craves space and a clear line of sight. This works best in a dedicated, level area of a backyard that is at least 40×40 feet. The central fountain needs to feel like a true centerpiece, not an obstacle, so you need enough room to walk comfortably around it. The paths should be at least 3-4 feet wide to feel generous. If your space is smaller or sloped, trying to force this level of symmetry can feel cramped and awkward. For a different take on formal structure, see the dramatic courtyard in Idea #11.
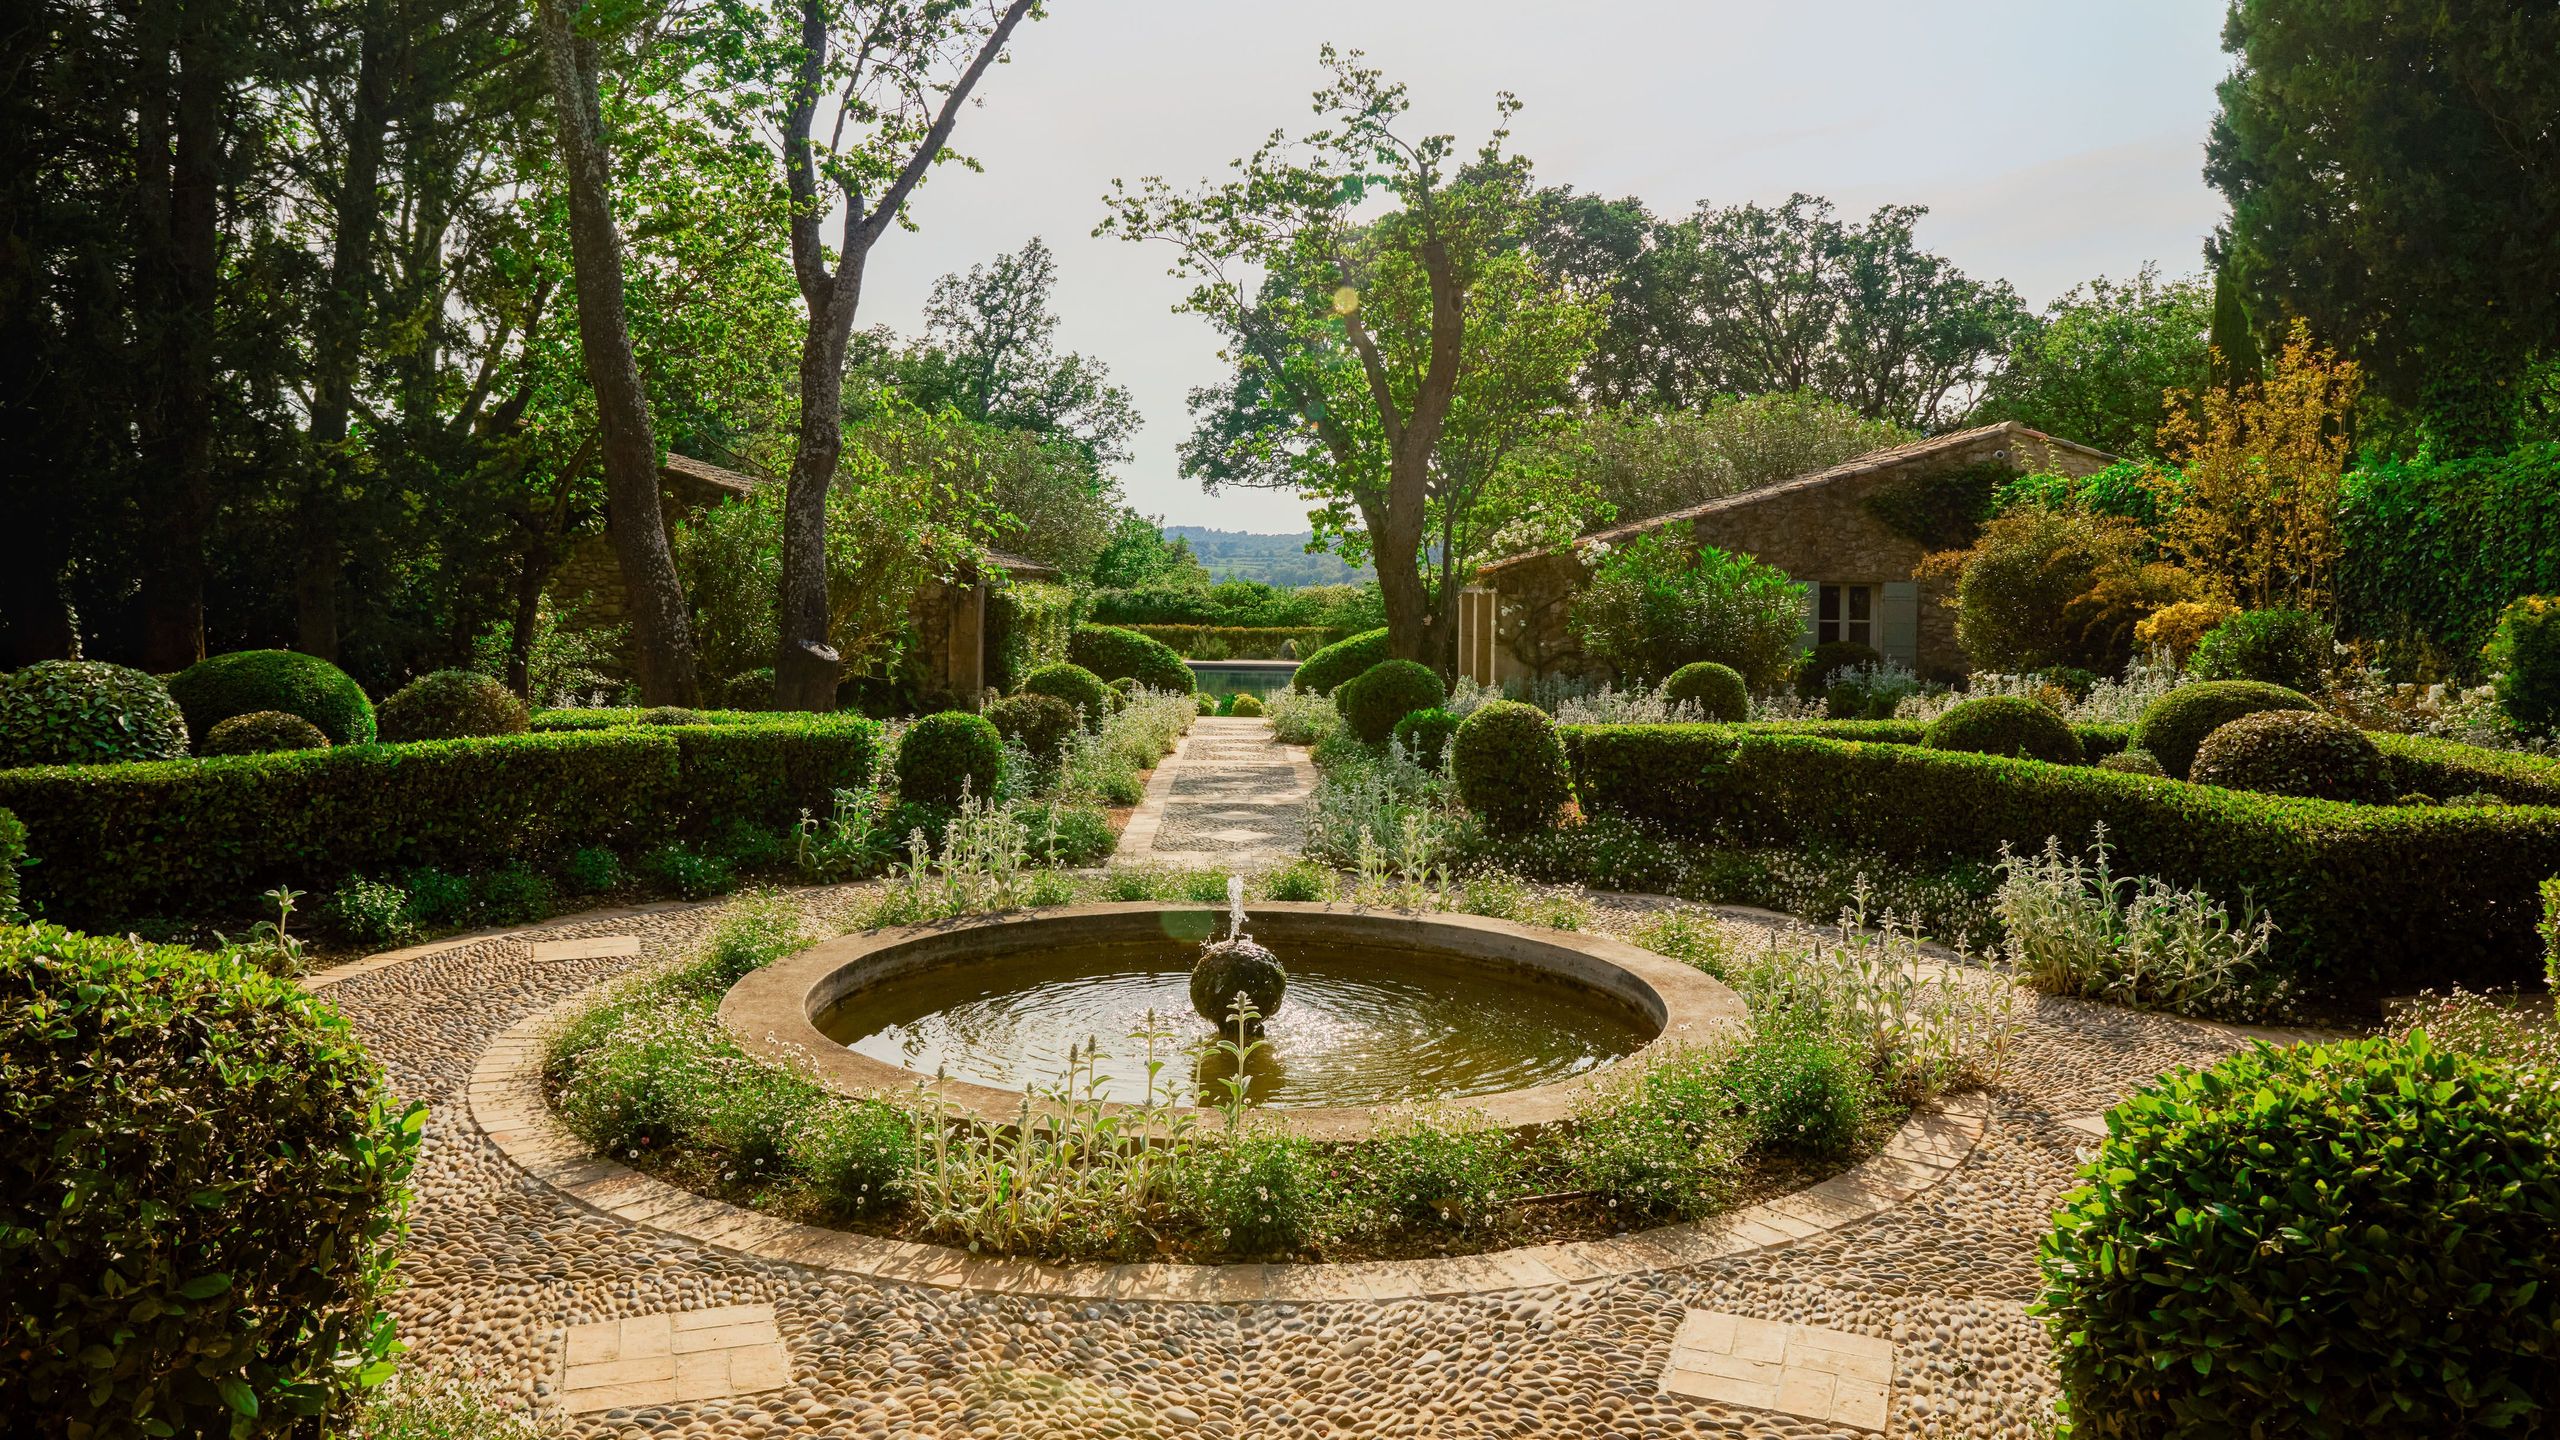
10. Evoke European Elegance with Cobblestone and Topiaries
This landscape feels luxurious because it masterfully combines formal structure with natural, organic shapes. The perfectly spherical topiaries and neatly clipped hedges provide a strong, geometric framework. This ‘order’ is then intentionally softened by the ‘chaos’ of the winding cobblestone paths and the sprawling, flowering ground cover. It’s a classic design principle: the tension between the tamed and the untamed. The rigid shapes of the topiaries make the meandering paths feel more romantic, and vice versa. It’s a multi-sensory experience.
💸 Get This Look For Less
As people continue to seek out timeless, enduring styles, the ‘European Garden’ aesthetic is a perennial favorite on Pinterest. In 2026, this isn’t about recreating a palace garden exactly, but about borrowing the core elements: weathered stone, structured hedges, and a touch of formality. It speaks to a desire for longevity and a connection to history in our designs. This trend has staying power because it’s based on classical principles that have worked for centuries, and it can be scaled down to fit a variety of homes. Compare it to the similar, but more contained, feel of Idea #9.
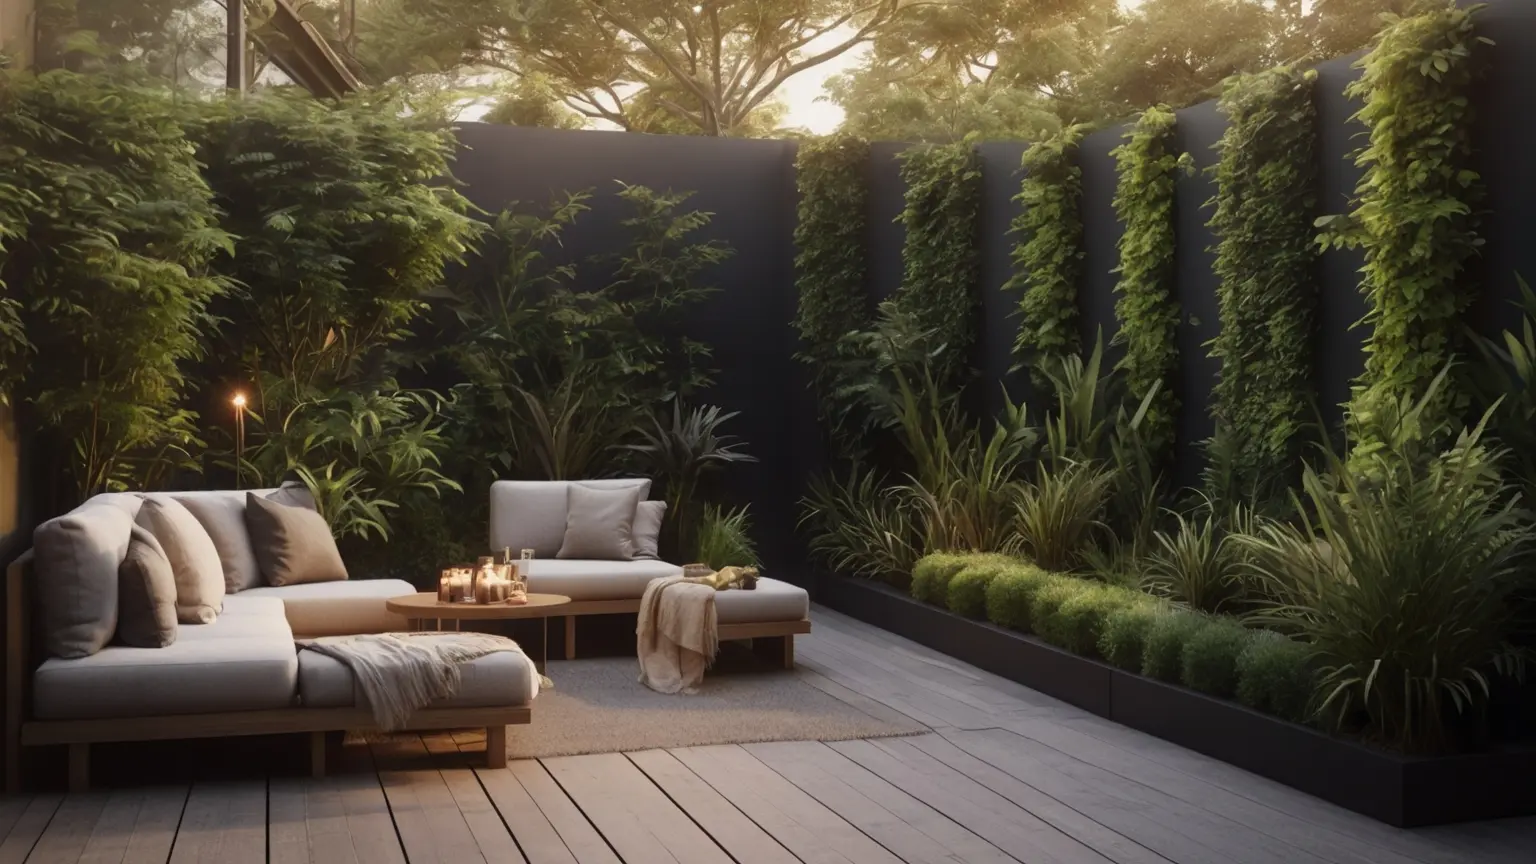
11. Create a Modern Courtyard Oasis with Dark Walls and Lush Greenery
The single most impactful element here is the dark perimeter wall. Painting a fence or courtyard wall a deep charcoal or black is a bold move that pays off handsomely. It instantly makes the space feel more intimate and gallery-like. More importantly, it provides a dramatic, high-contrast backdrop that makes every shade of green from the plants appear more vibrant and electric. A standard wood or white fence would have resulted in a pleasant, but far less memorable, backyard. The darkness is what creates the magic.
📐 Style Math
If you have a small patio or courtyard, go vertical. Use walls to your advantage by installing a simple wire or wood trellis system. This encourages climbing plants to grow up the walls, surrounding the space in greenery without sacrificing precious floor space. For an even easier solution, use tall, narrow planters. A row of three identical tall planters against a wall creates a ‘living screen’ and adds a strong, architectural element that makes a small space feel much more designed and deliberate.
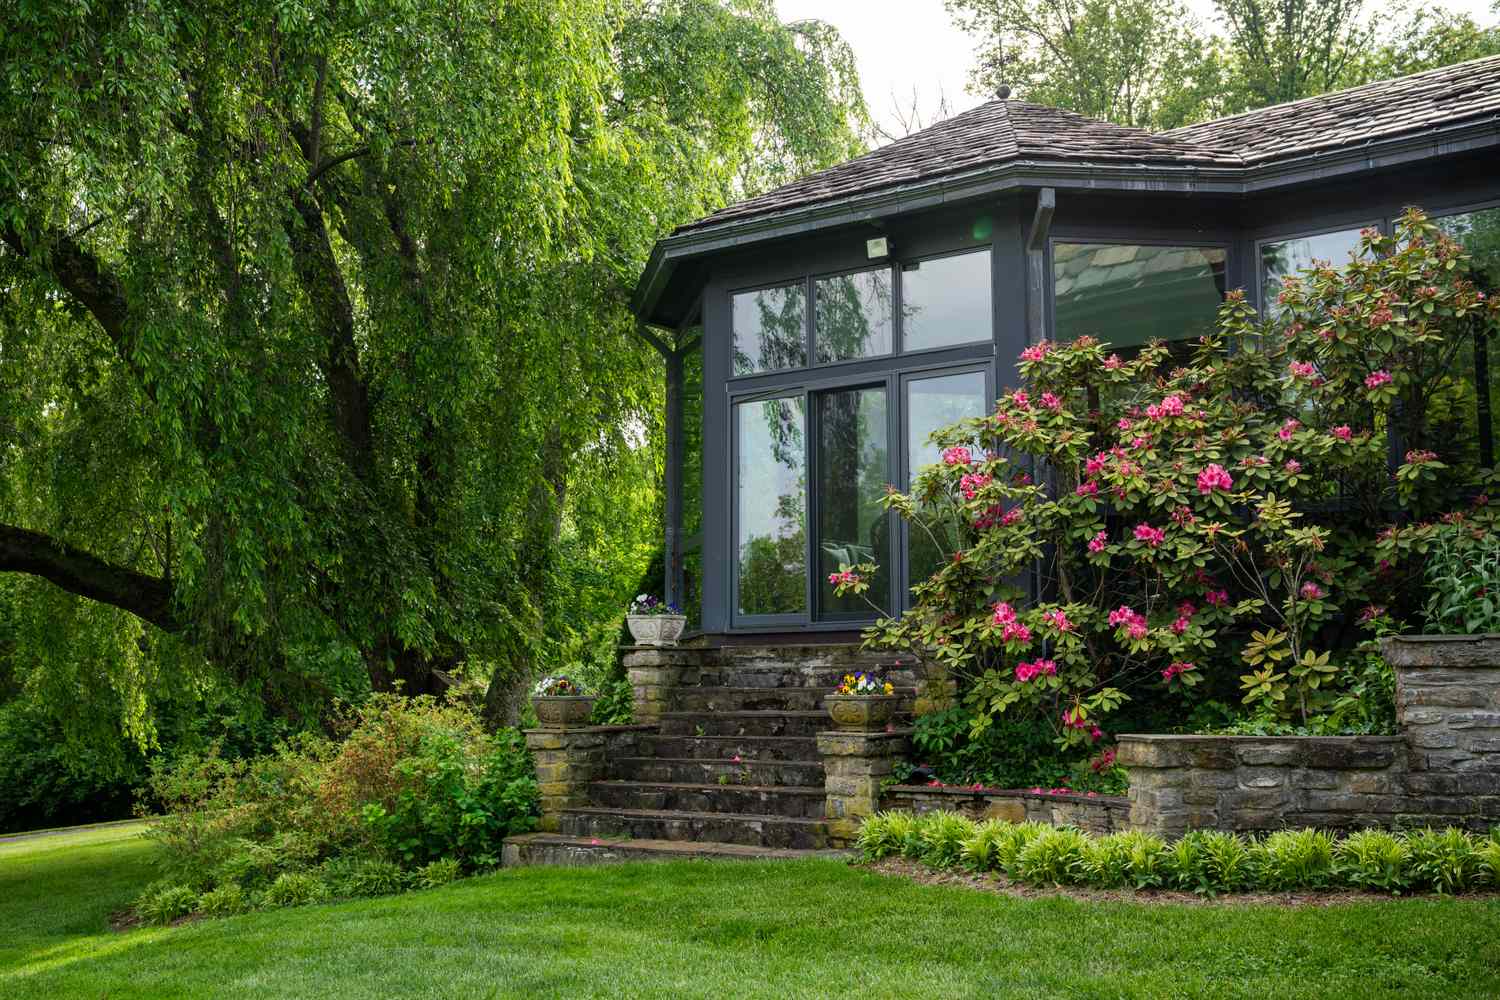
12. Frame Stone Steps with Weeping Willow and Vibrant Rhododendrons
This enchanting look is a study in texture and scale. The formula is: 40% dominant, dramatic foliage (the massive weeping willow), 30% strong architectural elements (the dark-framed sunroom and stone steps), 20% bold, seasonal color (the vibrant pink rhododendrons), and 10% small-scale details (the flowers in the stone planters). The key is the willow tree; its soft, flowing branches create a beautiful contrast against the hard lines of the house and stone, making the entire scene feel like a secret garden.
⚠️ Real Talk
A weeping willow is a stunning tree, but it is not for every yard. They are water-loving and have incredibly aggressive, shallow root systems that will seek out and destroy sewer lines, septic tanks, and foundations. Never plant a weeping willow within 50 feet of your house or any underground utilities. They also grow to be enormous and drop a considerable amount of branches, so they require space and regular cleanup. For a similar weeping effect without the risk, consider a weeping cherry or katsura tree.
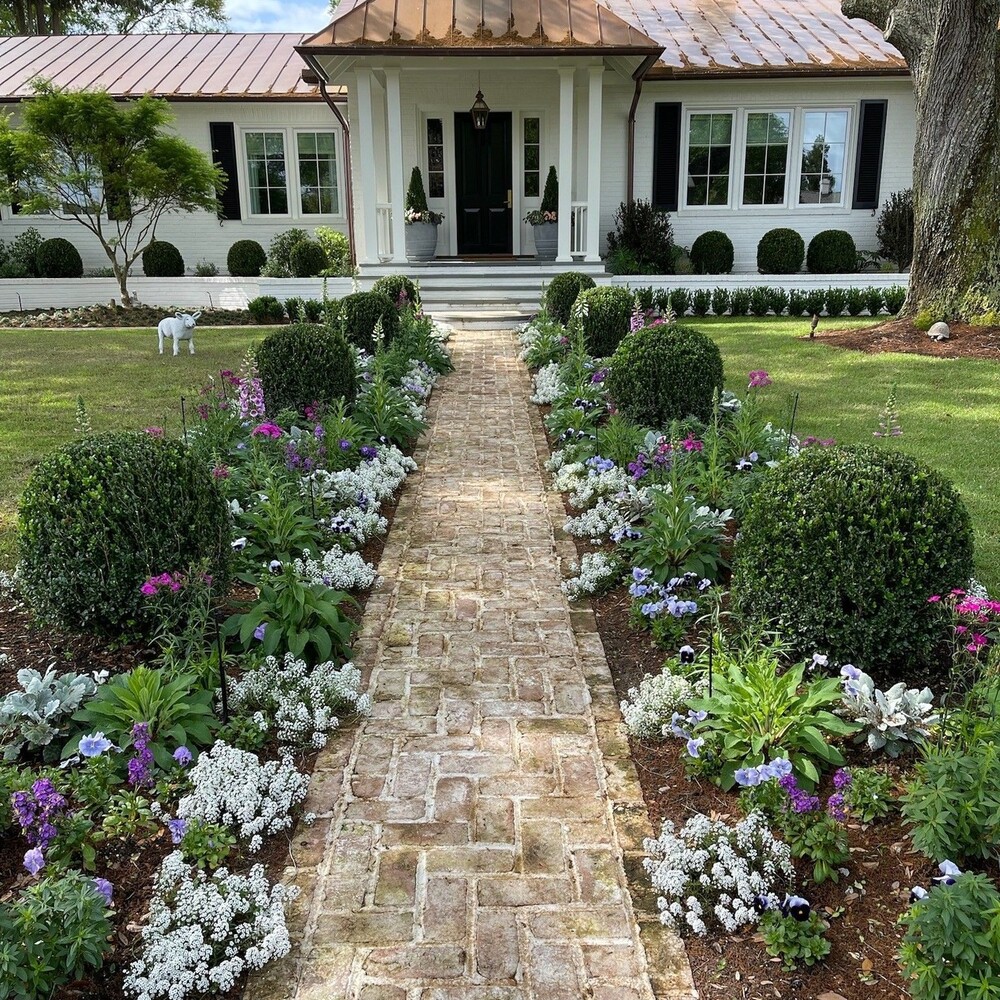
13. Master Symmetry with a Brick Path and Rounded Evergreen Shrubs
This perfectly symmetrical design is ideal for the front approach to a house, particularly one with a central doorway. It creates a powerful sense of order and welcome. The ideal width for the central pathway is 4-5 feet, allowing two people to walk side-by-side. The garden beds on either side should be at least 5-6 feet deep to accommodate the large, rounded shrubs without them overhanging the path or touching the house. This look is fantastic for level, rectangular front yards from small suburban lots to larger properties.
🔧 How-To Brief
Before you commit to a formal, symmetrical design, check these crucial points.
- Measure your centerline: Your front door must be the true center of the design. If your door is off-center, a symmetrical path will look perpetually wrong.
- Confirm sun exposure: Will both sides of the path get equal sunlight? If one side is in deep shade and the other is in full sun, it will be impossible to grow the same plants for a symmetrical look.
- Existing Elements: Are there any mature trees or immovable objects that would interrupt the symmetry? Don’t try to force it.
- Budget for maturity: This look depends on large, well-shaped shrubs. Buying them mature is expensive. Are you willing to wait 5-7 years for smaller ones to fill in?
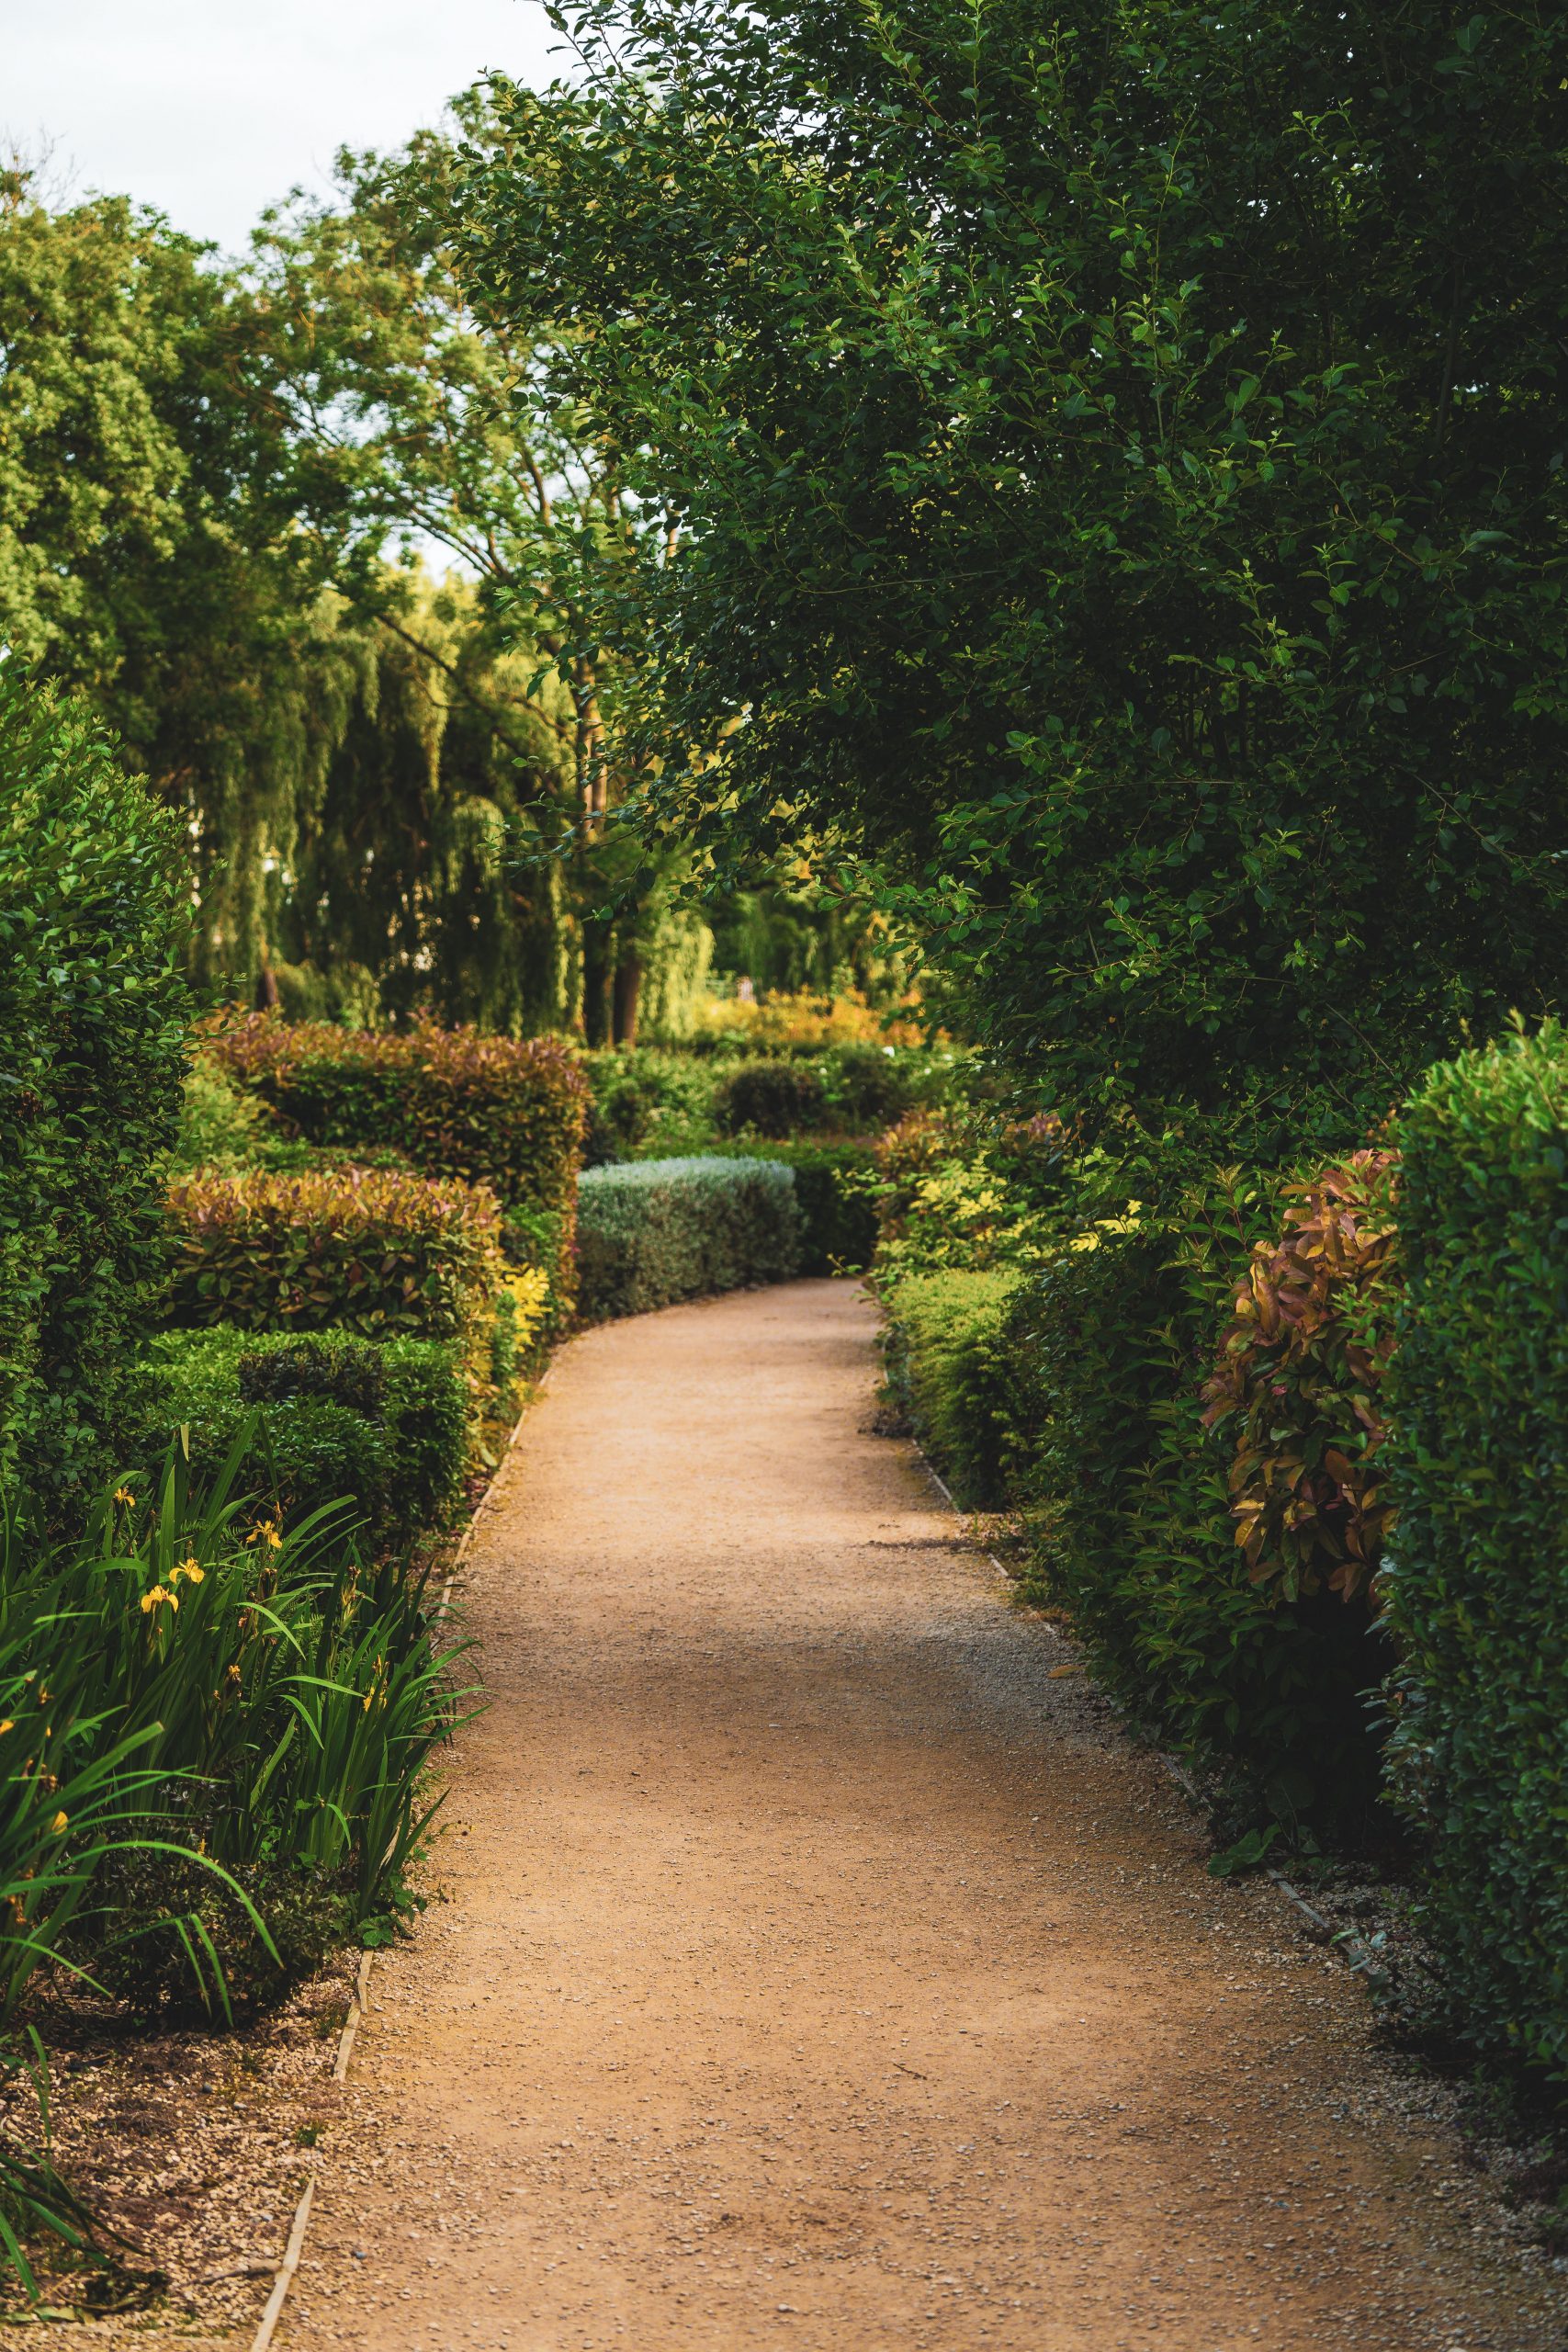
14. Wind a Secluded Gravel Path Through Dense, Layered Hedges
This path feels enchanting because it uses the classic design trick of ‘conceal and reveal.’ The S-curve of the path and the dense, layered plantings on either side mean that you can’t see the destination from the starting point. This creates a sense of mystery and discovery, inviting you to walk along the path to see what’s around the next bend. The narrowness of the path, just wide enough for one person, enhances the feeling of a private, secret garden. The varied foliage, from dark green to reddish-brown, makes the journey more visually interesting.
💡 Designer Tip
A gravel or mulch path is one of the most affordable ways to create a high-end looking walkway. Unlike the mortared brick path in Idea #13, there’s no masonry skill required. You can get the look for a fraction of the cost. Start by marking out your desired path with a garden hose. Dig out about 4 inches of sod and soil. Lay down a permeable landscape fabric to block weeds, and then fill the path with 3-4 inches of inexpensive pea gravel or bark mulch. For a 50-foot path that’s 3 feet wide, the materials would cost around $200-300.
15. Soften a Stepping Stone Path with Abundant Floral Borders
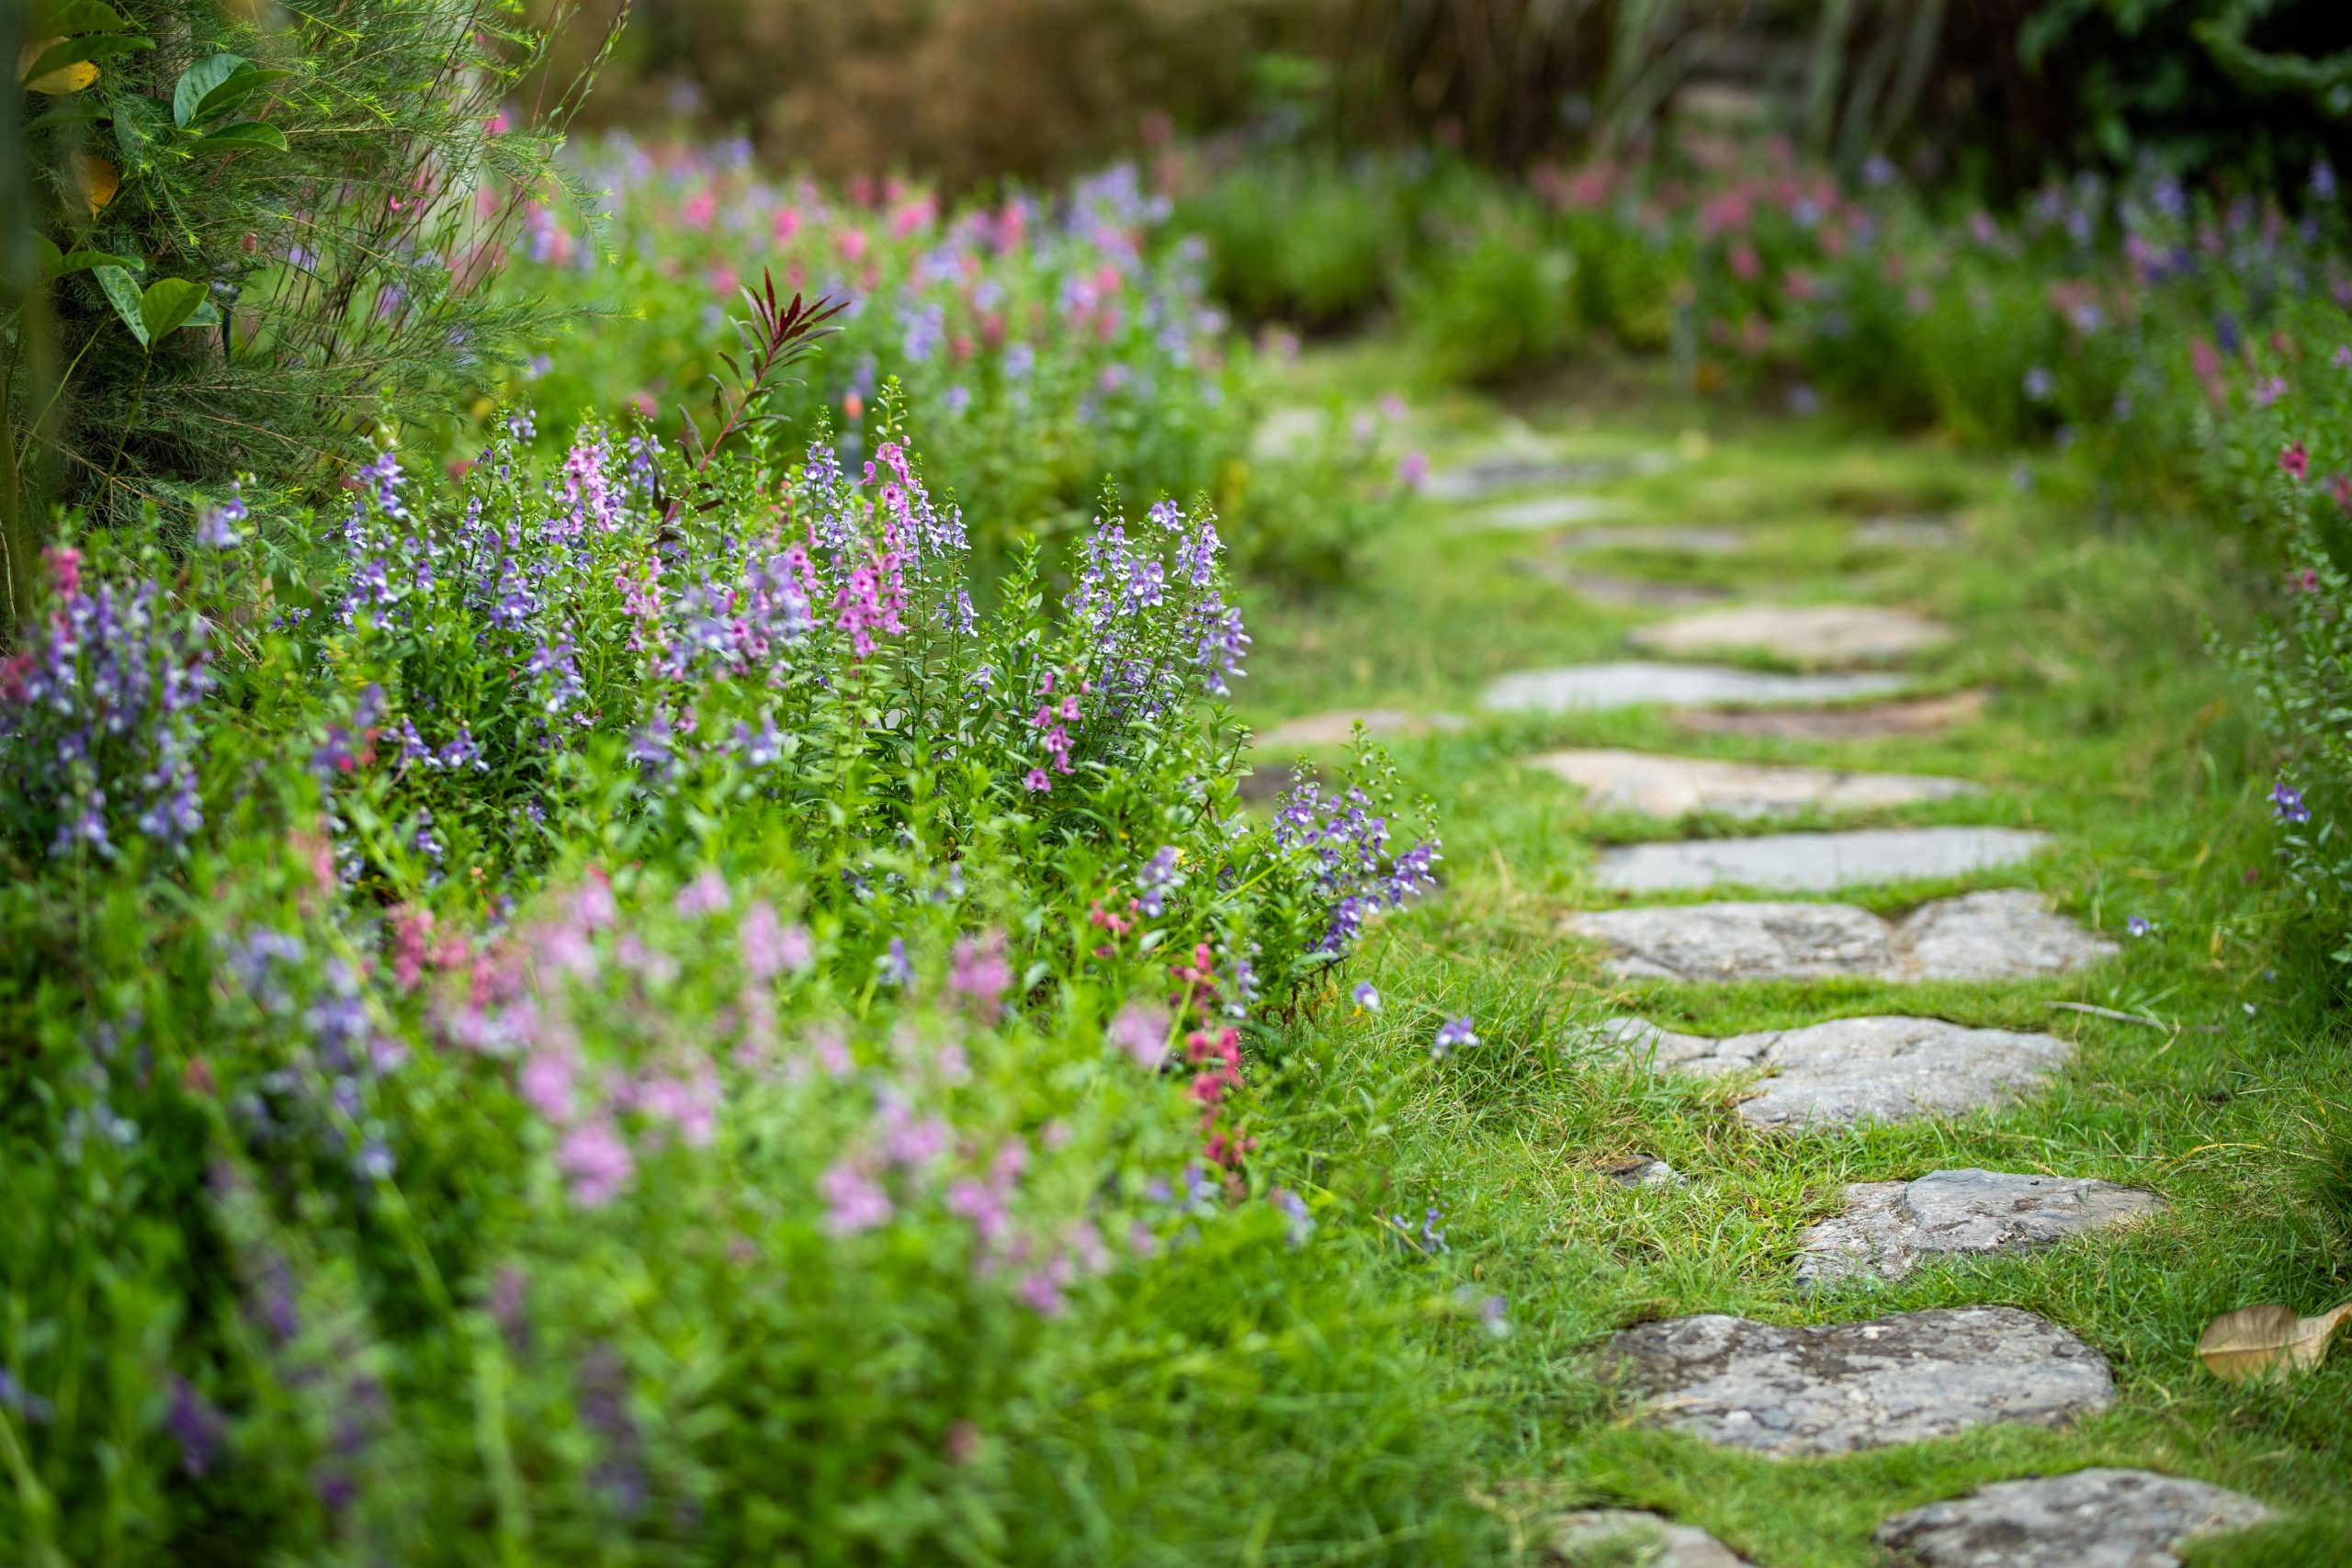
The secret to a natural-looking stepping stone path is to embrace imperfection. Use irregularly shaped flagstones rather than uniform concrete pavers. Most importantly, allow your border plants to spill over the edges of the stones. When low-growing, soft plants like creeping phlox, sweet alyssum, or the purple flowers seen here are allowed to creep into the path, it softens the hard edges of the stone and makes the entire garden feel more lush and integrated. A rigidly maintained border would look sterile and less inviting.
✅ Before You Start
You can install a path like this in an afternoon. Here’s a quick guide:
- Lay the stones out on top of the grass to perfect your spacing and alignment. Aim for a comfortable stride between the center of each stone.
- Use a sharp spade or knife to trace around each stone, cutting through the sod.
- Set the stone aside and remove the circle of sod you just cut. Dig out a little extra soil so the stone will sit flush with or slightly below the lawn level.
- Add a 1-inch layer of sand to the hole to create a stable, level base.
- Place the stone back in the hole and use a rubber mallet to tamp it down firmly.
Adding plants along the border afterward will complete the look.
16. Combine Light Gray Brick and White Siding for a Fresh, Modern Look
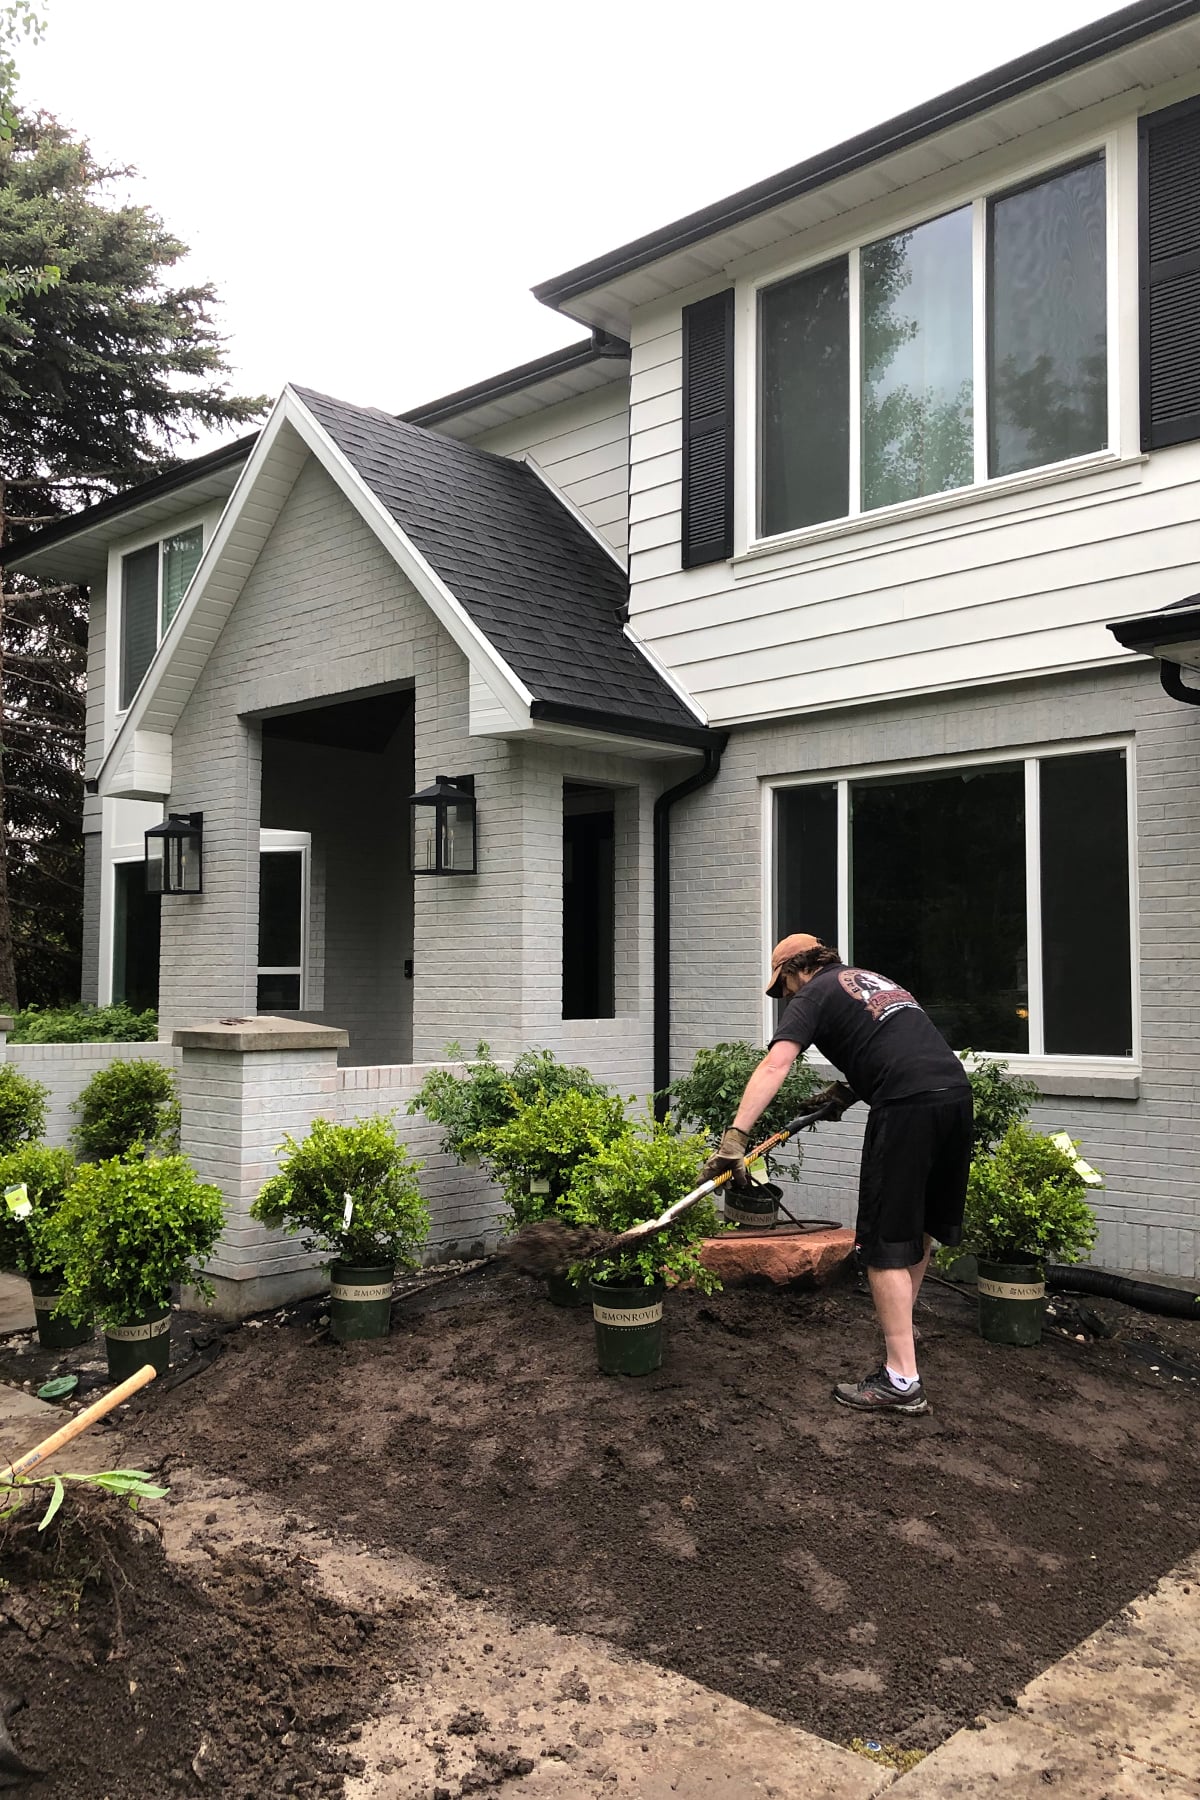
This image showcases a house in a transitional phase, and that’s a good reminder for any landscaping project: it will look worse before it looks better. Preparing a new garden bed properly means digging up old grass, turning over soil, and looking at a patch of dirt for a while. Don’t be discouraged by this messy middle stage. The fresh, dark soil is a sign of progress. The key is having a clear plan for what comes next, like the neatly arrayed potted shrubs waiting to be planted, which ensures the ‘messy’ phase is short-lived.
⭐ The One Thing
The exterior material palette here is a lesson in sophisticated, low-contrast harmony. It’s a 50/50 split between light gray brick on the bottom and crisp white siding on top. This creates a calm, modern canvas. The magic comes from the 10% of sharp, black accents—the shutters and lanterns. This small dose of high contrast is just enough to keep the facade from looking bland, adding a graphic punch that feels deliberate and upscale. The dark green of the chosen shrubs is the final touch, a natural accent that complements the neutral palette perfectly.
17. Define Your Garden with Layers of Bark Mulch, Boulders, and River Rocks
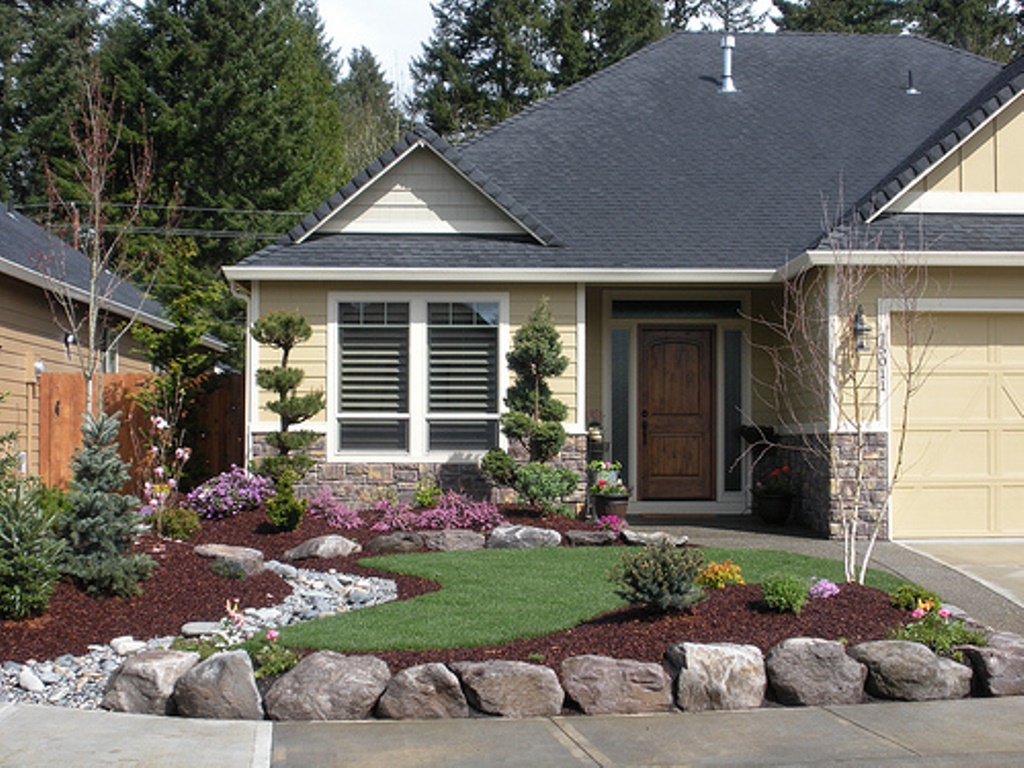
The game-changing element in this landscape design is the use of large boulders as anchors. Without them, this would be a simple mulch bed with some plants. By strategically placing a few large, natural boulders, the design gains instant structure, maturity, and a connection to nature. They act as focal points and break up the monotonous texture of the mulch, creating visual interest and a sense of permanence. Even just one or two well-placed boulders can make a young garden feel more established.
📏 Scale Guide
This design is effective because it masters the principle of texture contrast. You have the fine, dark texture of the reddish-brown bark mulch, the smooth, rounded shapes of the gray river rocks, the rough, craggy surface of the large boulders, and the soft, feathery foliage of the grass and shrubs. Each material’s texture is highlighted by the one next to it. This multi-layered approach makes the landscape visually rich and engaging, preventing it from looking flat or one-dimensional.
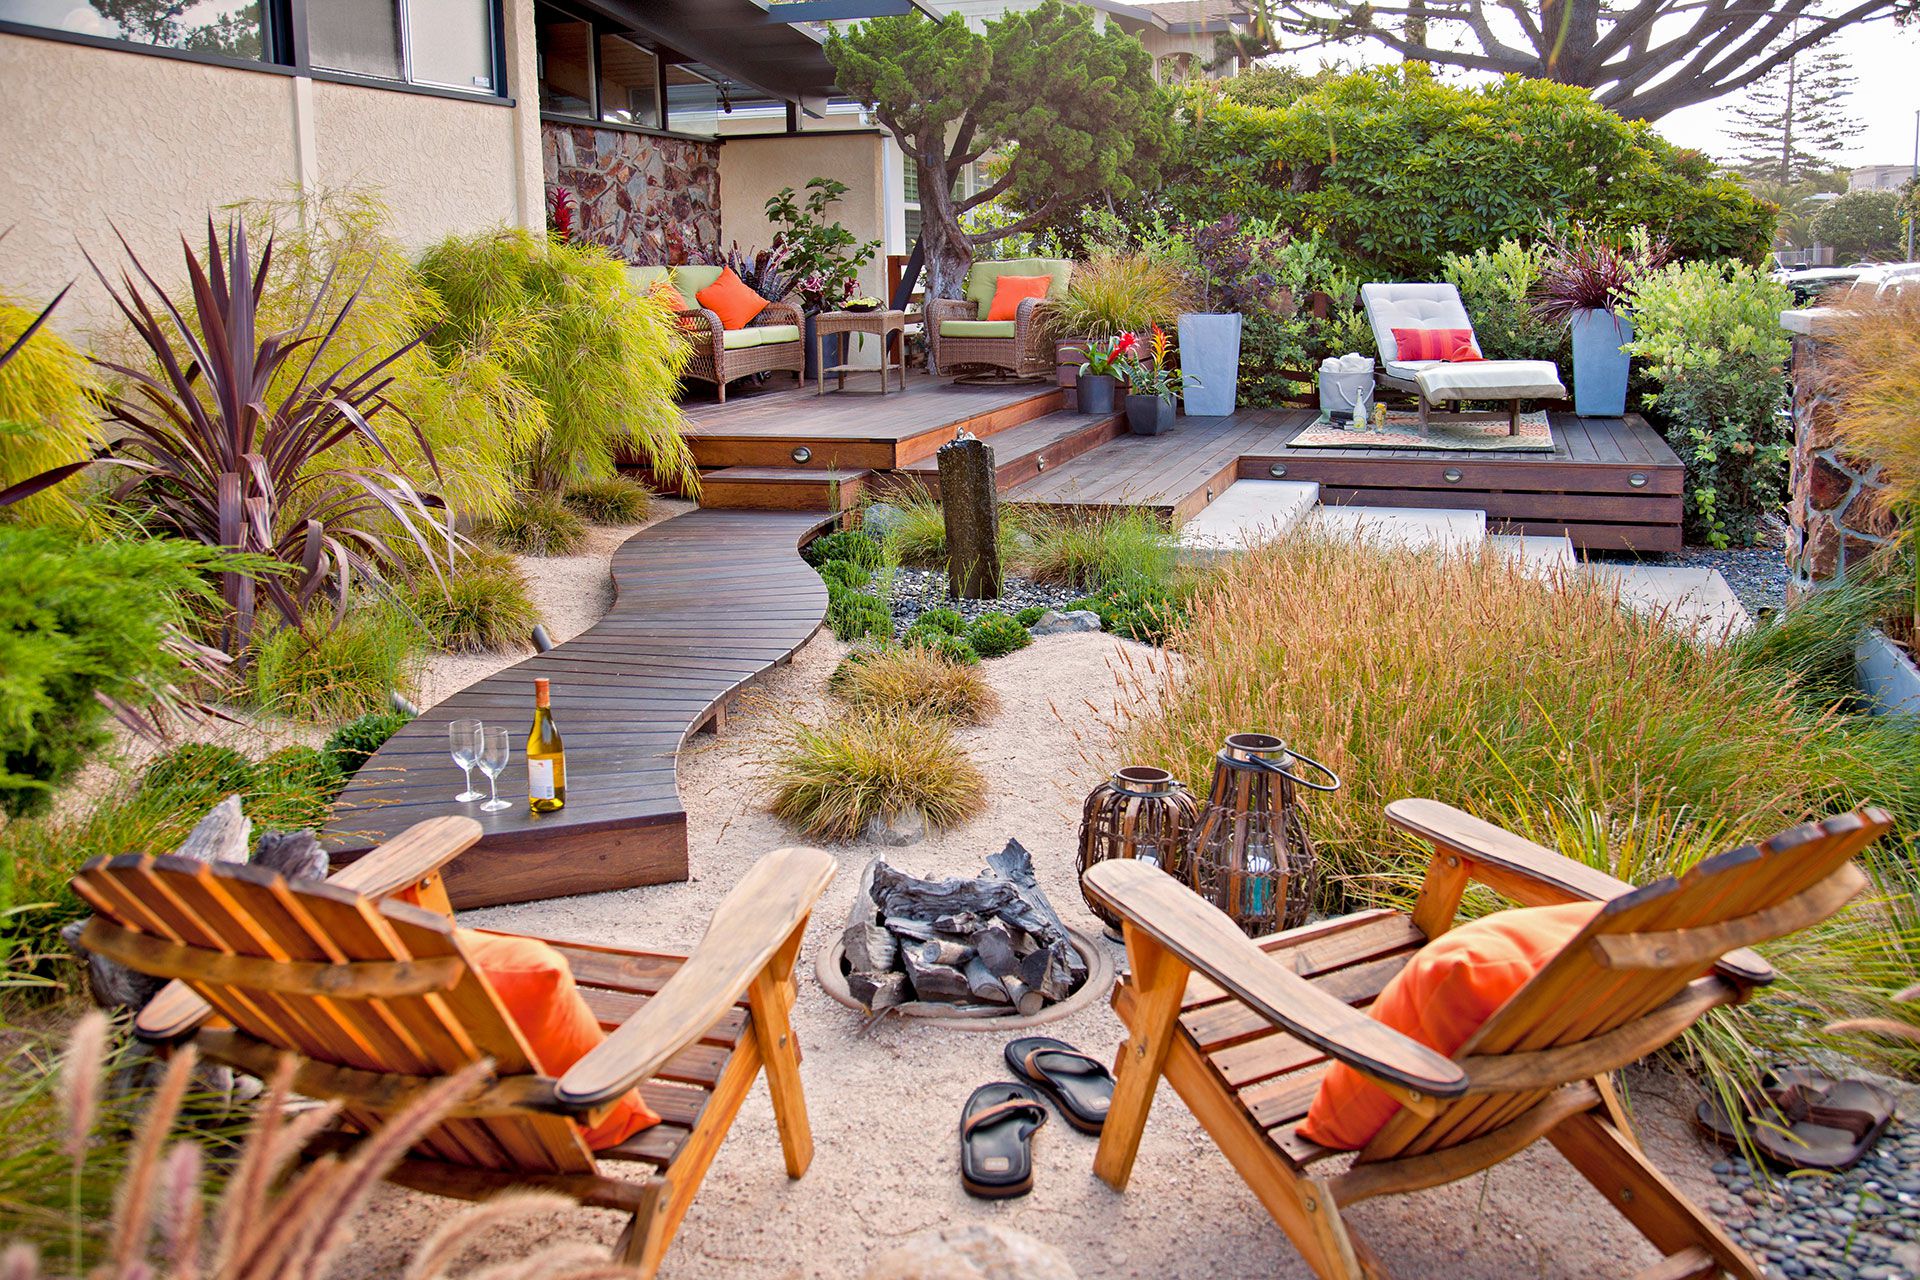
18. Design a Multi-Level Backyard Retreat with Interconnected Decks
Creating a multi-zone deck and landscape like this is a significant investment in outdoor living. Costs can vary dramatically based on materials (pressure-treated wood vs. composite) and labor.
- Multi-Level Decking: $25 – $50 per square foot for wood; $45 – $80+ for composite. A project this size could be 400-600 sq ft.
- Pathways & Sand Area: $5 – $15 per square foot.
- Fire Pit & Seating: $500 – $3,000 for a built-in pit and quality chairs like Adirondacks.
- Plantings: $1,000 – $4,000 for the variety and maturity of grasses and shrubs shown.
- Budget Alternative: Use a single-level deck, pea gravel instead of sand/pathways, a portable fire pit ($150), and smaller plants you grow over time to achieve a similar feel for 60-70% less.
- TOTAL (Pro-Grade): $20,000 – $50,000+
🔥 Trending Context
A multi-level design is the perfect solution for a yard with a gentle slope. Instead of undertaking a massive, expensive regrading project, you can use decks to terrace the space, creating distinct, level ‘rooms’ for lounging, dining, or a fire pit. This project requires a medium to large backyard, at least 50 feet deep, to accommodate the different zones without feeling crowded. The changes in elevation add immense visual interest, but be mindful of local building codes regarding railings and step heights.
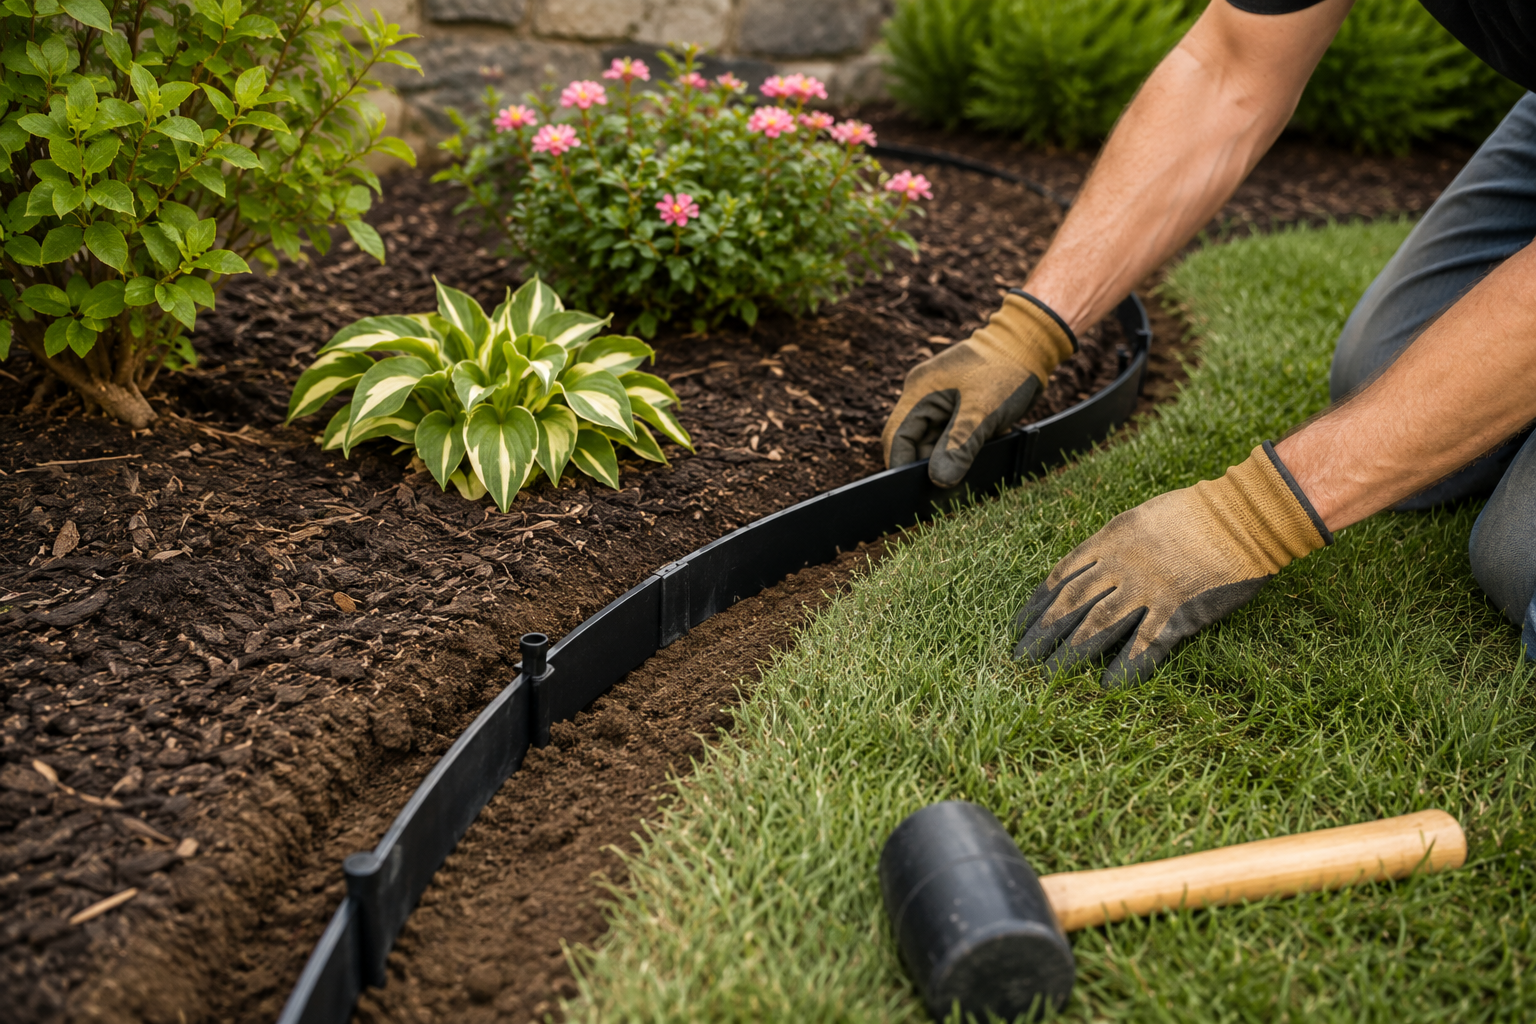
19. Get a Clean Look with Black Plastic Edging and Dark Mulch
Installing black plastic landscape edging is a quick DIY project that creates a crisp, professional-looking line between your lawn and garden beds. Time: 1-2 hours for 50 feet. Cost: $20-40.
- Lay the edging in the sun for an hour to make it more flexible and easier to uncoil.
- Use a flat-edged spade to dig a 4-inch deep trench along the border of your bed.
- Place the edging in the trench. The top beaded edge should sit just above the soil level.
- Backfill the trench on both sides, tamping the soil down firmly to hold the edging upright.
- Use the provided stakes every 4-5 feet to secure the edging, hammering them through the plastic into the ground.
- Finish by adding mulch to the garden bed, covering the base of the edging.
💰 Budget Breakdown
The combination of edging and mulch is a powerhouse for low-maintenance gardening, but it’s not zero maintenance. Mulch, especially wood-based types, decomposes over time. To keep your beds looking fresh and to continue suppressing weeds effectively, you’ll need to top-dress with a fresh 1-inch layer of mulch every spring. The plastic edging can also heave up from the ground during winter freeze-thaw cycles. A quick walk around your yard in the spring with a mallet to tap down any raised sections is all it takes to keep it looking neat.
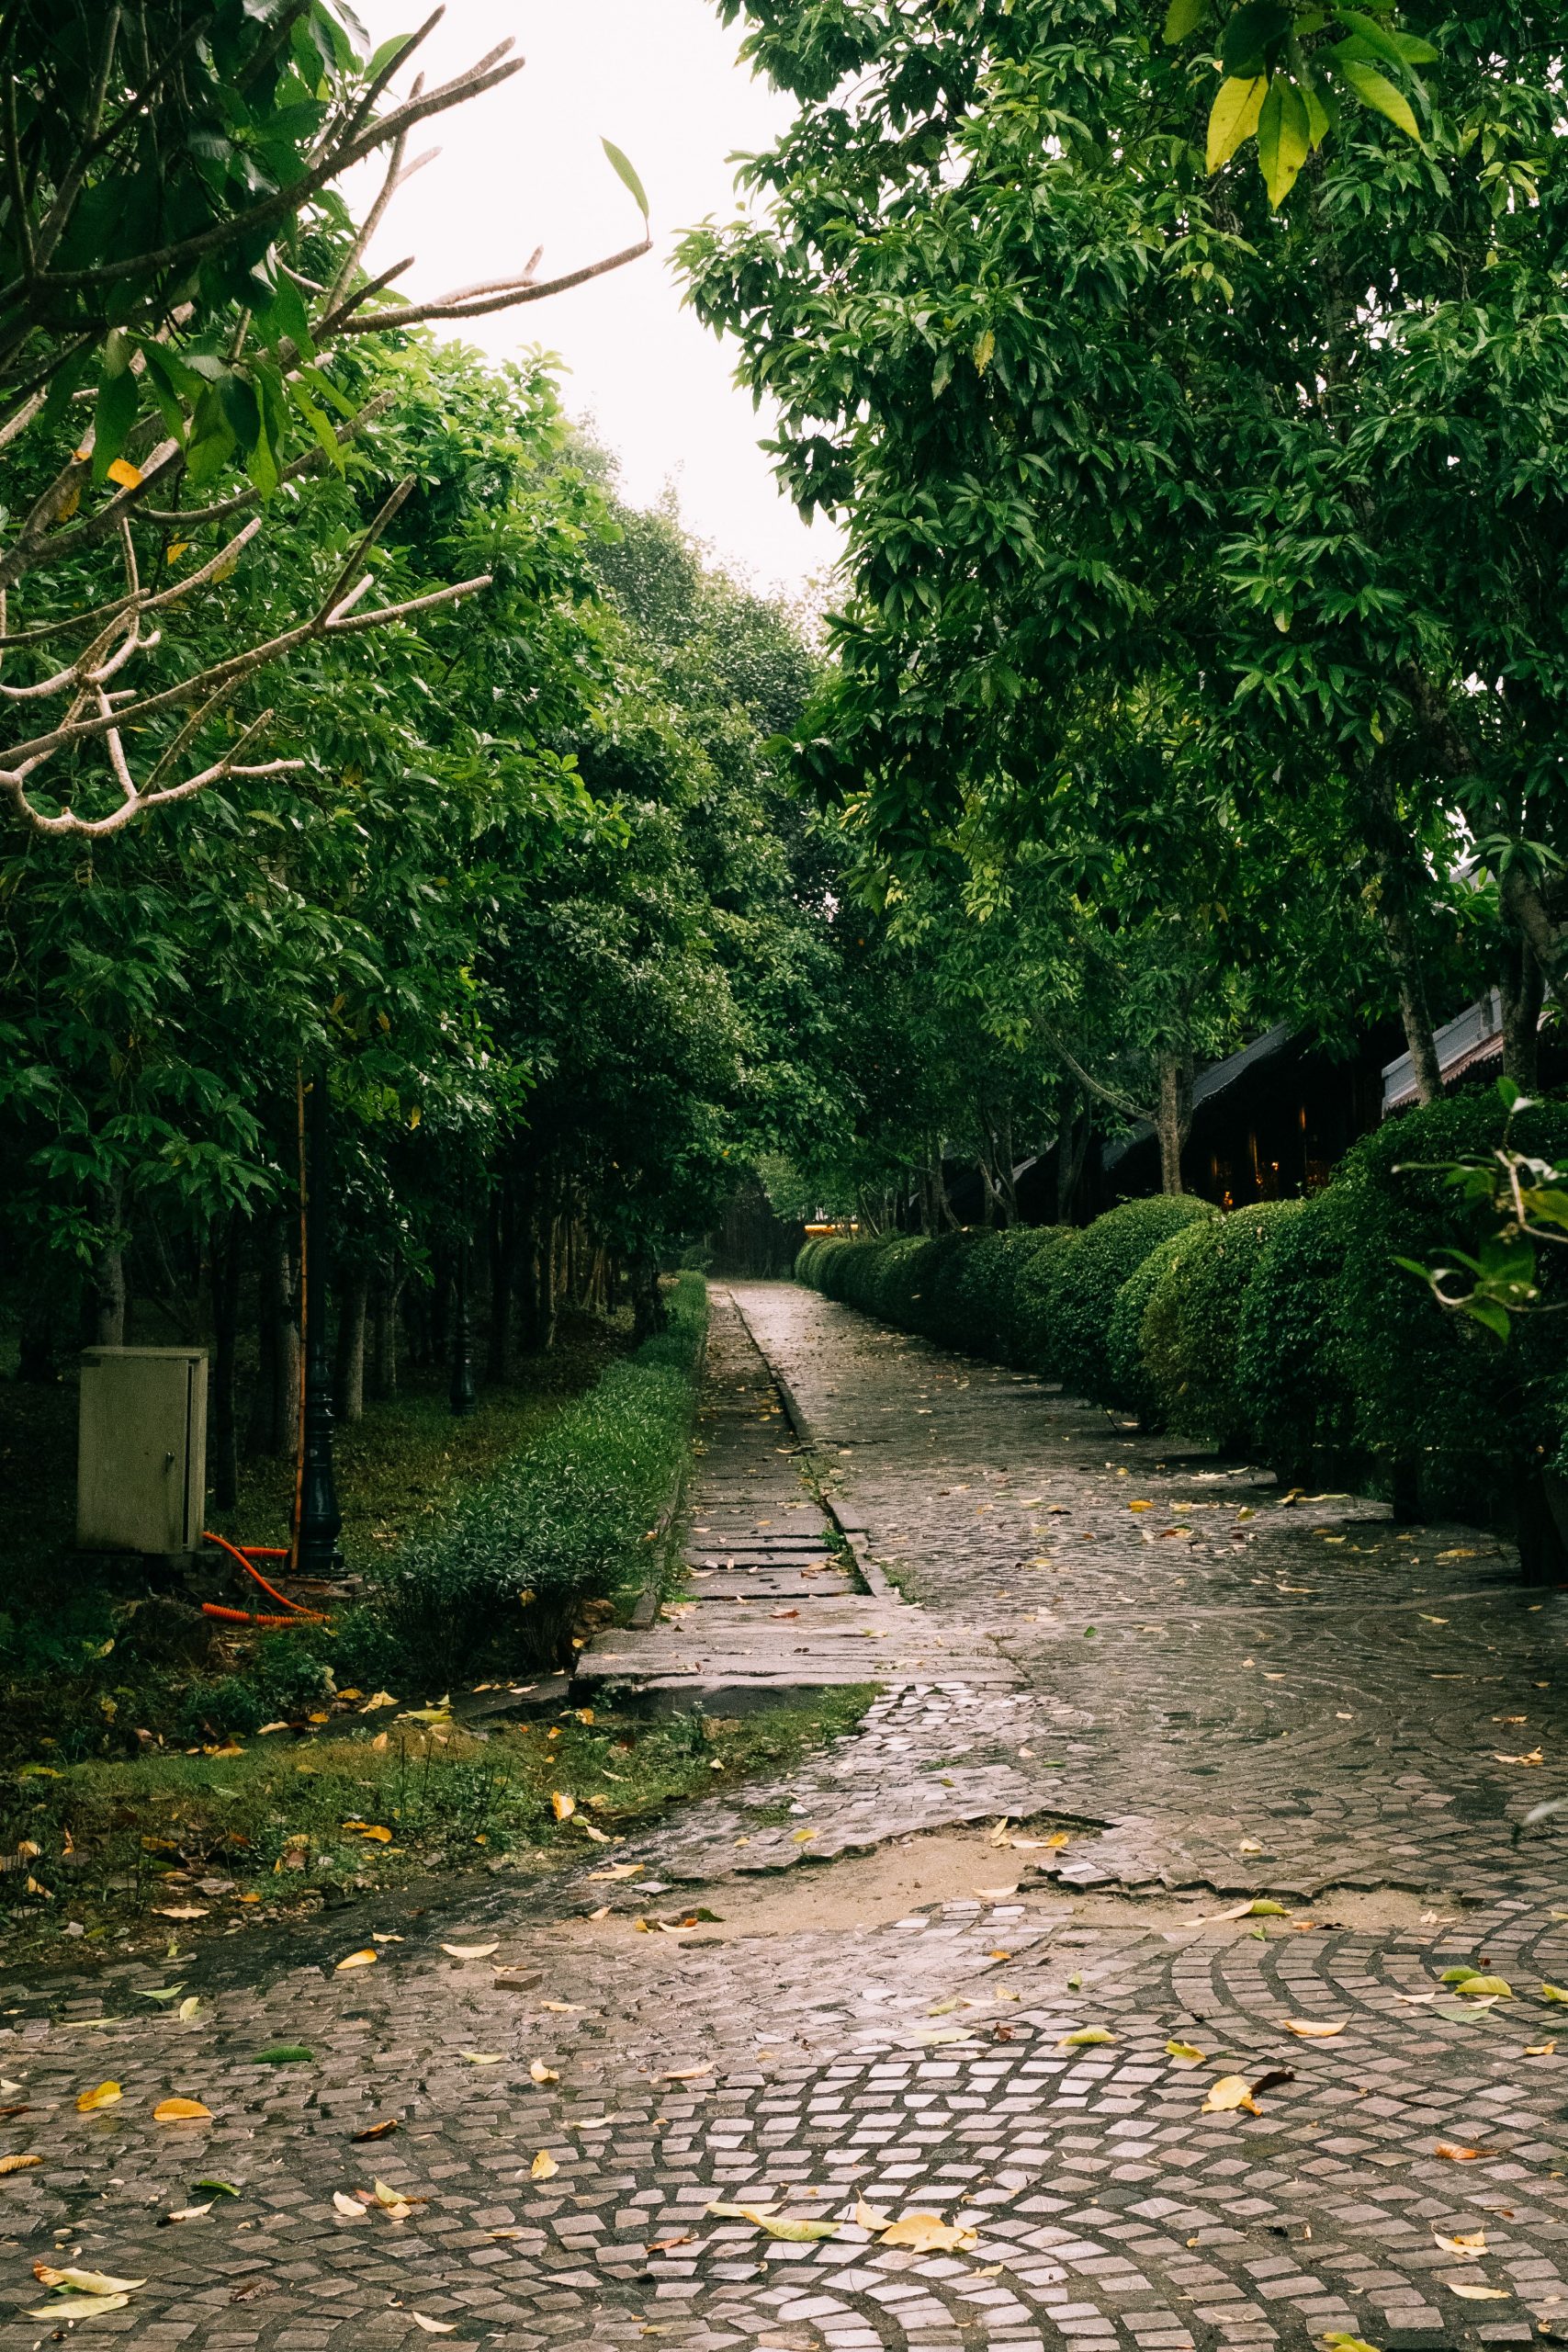
20. Carve a Lush Pathway Through a Tunnel of Green Hedges
This pathway feels so immersive and serene because it creates a sense of enclosure. The tall, dense hedges on either side act as ‘living walls,’ screening out the wider world and focusing your attention on the path ahead. This technique, known as creating a ‘garden room,’ makes the space feel private and magical. The dappled light filtering through the leaves above adds to the tranquil atmosphere. The mix of paving materials—stone and concrete—adds a layer of rustic, found-history character, preventing the long corridor from feeling monotonous.
🎯 What Makes It Work
To get this ‘living tunnel’ effect without waiting 20 years for slow-growing hedges to mature, choose a fast-growing species like Privet or Arborvitae ‘Green Giant’. Plant them closer together than the standard recommendation—about 3-4 feet apart instead of 6-8. This will encourage them to grow up, rather than out, and form a dense, continuous wall more quickly. Be prepared for aggressive pruning. You will need to shear the sides and top at least twice a year to maintain the tunnel shape and prevent it from becoming an overgrown thicket.
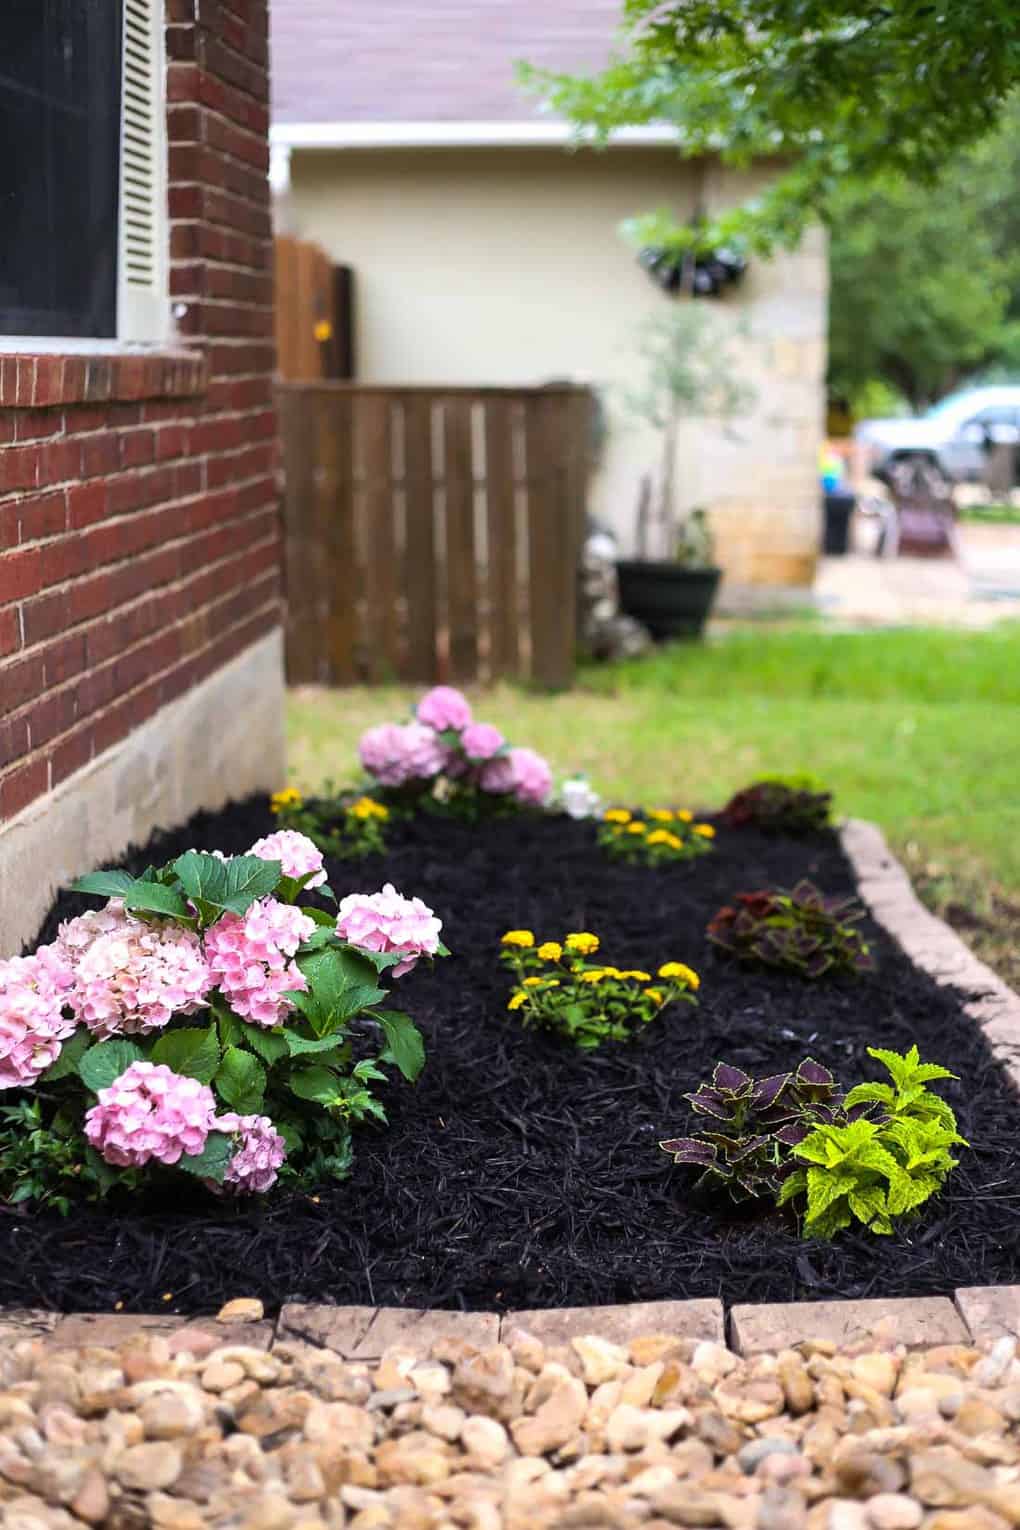
21. Contrast Colorful Flowers with Black Mulch and a Brick Border
This vibrant bed uses a simple but powerful formula: 50% high-contrast mulch, 30% colorful plantings, and 20% hard edging. The black wood chip mulch is the key; it’s a neutral, dark backdrop that makes the pinks of the hydrangeas and the yellows of the groundcover appear more saturated and vivid. The light-colored brick and stone border creates a clean, defined frame around the entire composition, separating the ‘art’ of the flower bed from the rest of the yard. Without the dark mulch, the colors would be far less impactful.
🧹 Maintenance Reality
You can get this look for far less than you think. Black mulch can be found for $3-4 per bag at any home improvement store. For flowers, skip the expensive, instant-gratification hydrangeas at the garden center. Instead, check Facebook Marketplace or local gardening groups in late summer. People often divide their mature hydrangea or hosta plants and give them away for free or cheap. The brick and stone edging can also be sourced from salvage yards or Craigslist for a fraction of the price of new materials. This is an excellent alternative to the more formal edging seen in Idea #19.
22. Craft a Chic Outdoor Lounge with Cinder Blocks and Wood Planks
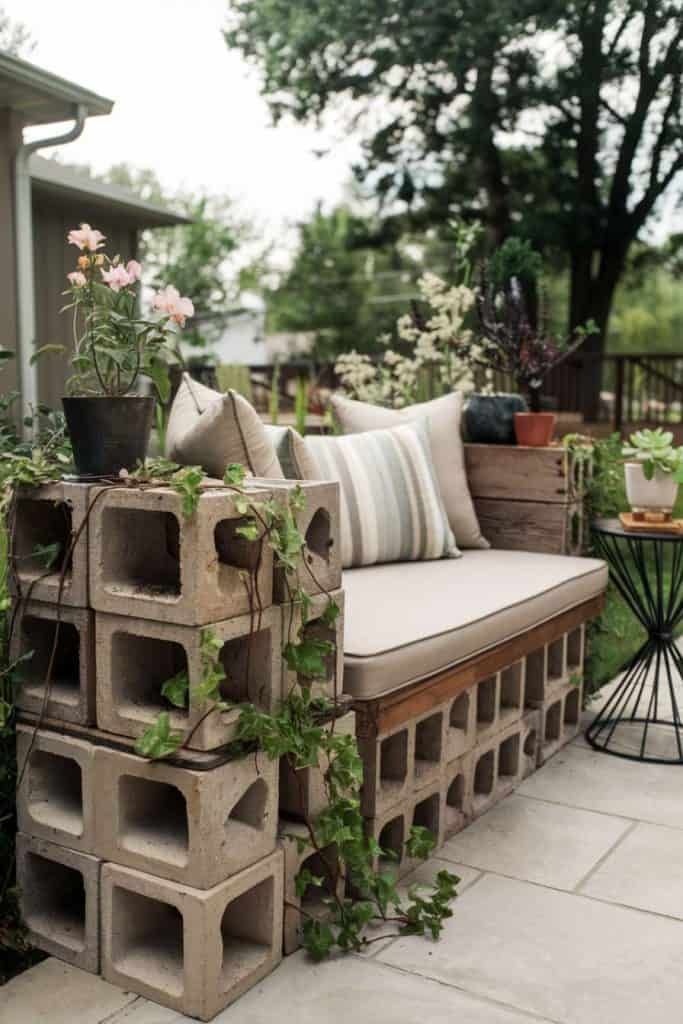
This genius DIY bench is stylish, affordable, and requires no power tools. Time: Under 1 hour. Cost: $80-120.
- You’ll need about 16-20 standard concrete cinder blocks and four 8-foot long 4×4 or 2×6 wooden posts (Douglas fir or pressure-treated).
- Create two pillars for the ends by stacking three cinder blocks on their widest side, turning each one 90 degrees from the one below it. Staggering them provides more stability.
- Slide your four wooden posts through the holes in the top cinder blocks of each pillar. Adjust the spacing to your liking.
- Create a center support pillar with two more cinder blocks to prevent the wood from sagging.
- Add a custom-sized outdoor bench cushion and pillows. You can find these online or at stores like Target or HomeGoods.
💸 Get This Look For Less
that makes this incredibly simple project look stylish instead of sloppy is the styling. Bare cinder blocks and wood can look harsh. The addition of a thick, comfortable beige seat cushion, an assortment of throw pillows with varied textures, and the strategic placement of potted plants completely transforms the raw materials. The climbing vine on the stacked-block side table and the small potted plant on the metal table soften the industrial feel, turning it into a cozy, intentional lounge spot. Without these soft touches, it’s just a pile of building materials.
23. Mix Modern Loungers and Natural Plantings for a Relaxed Vibe
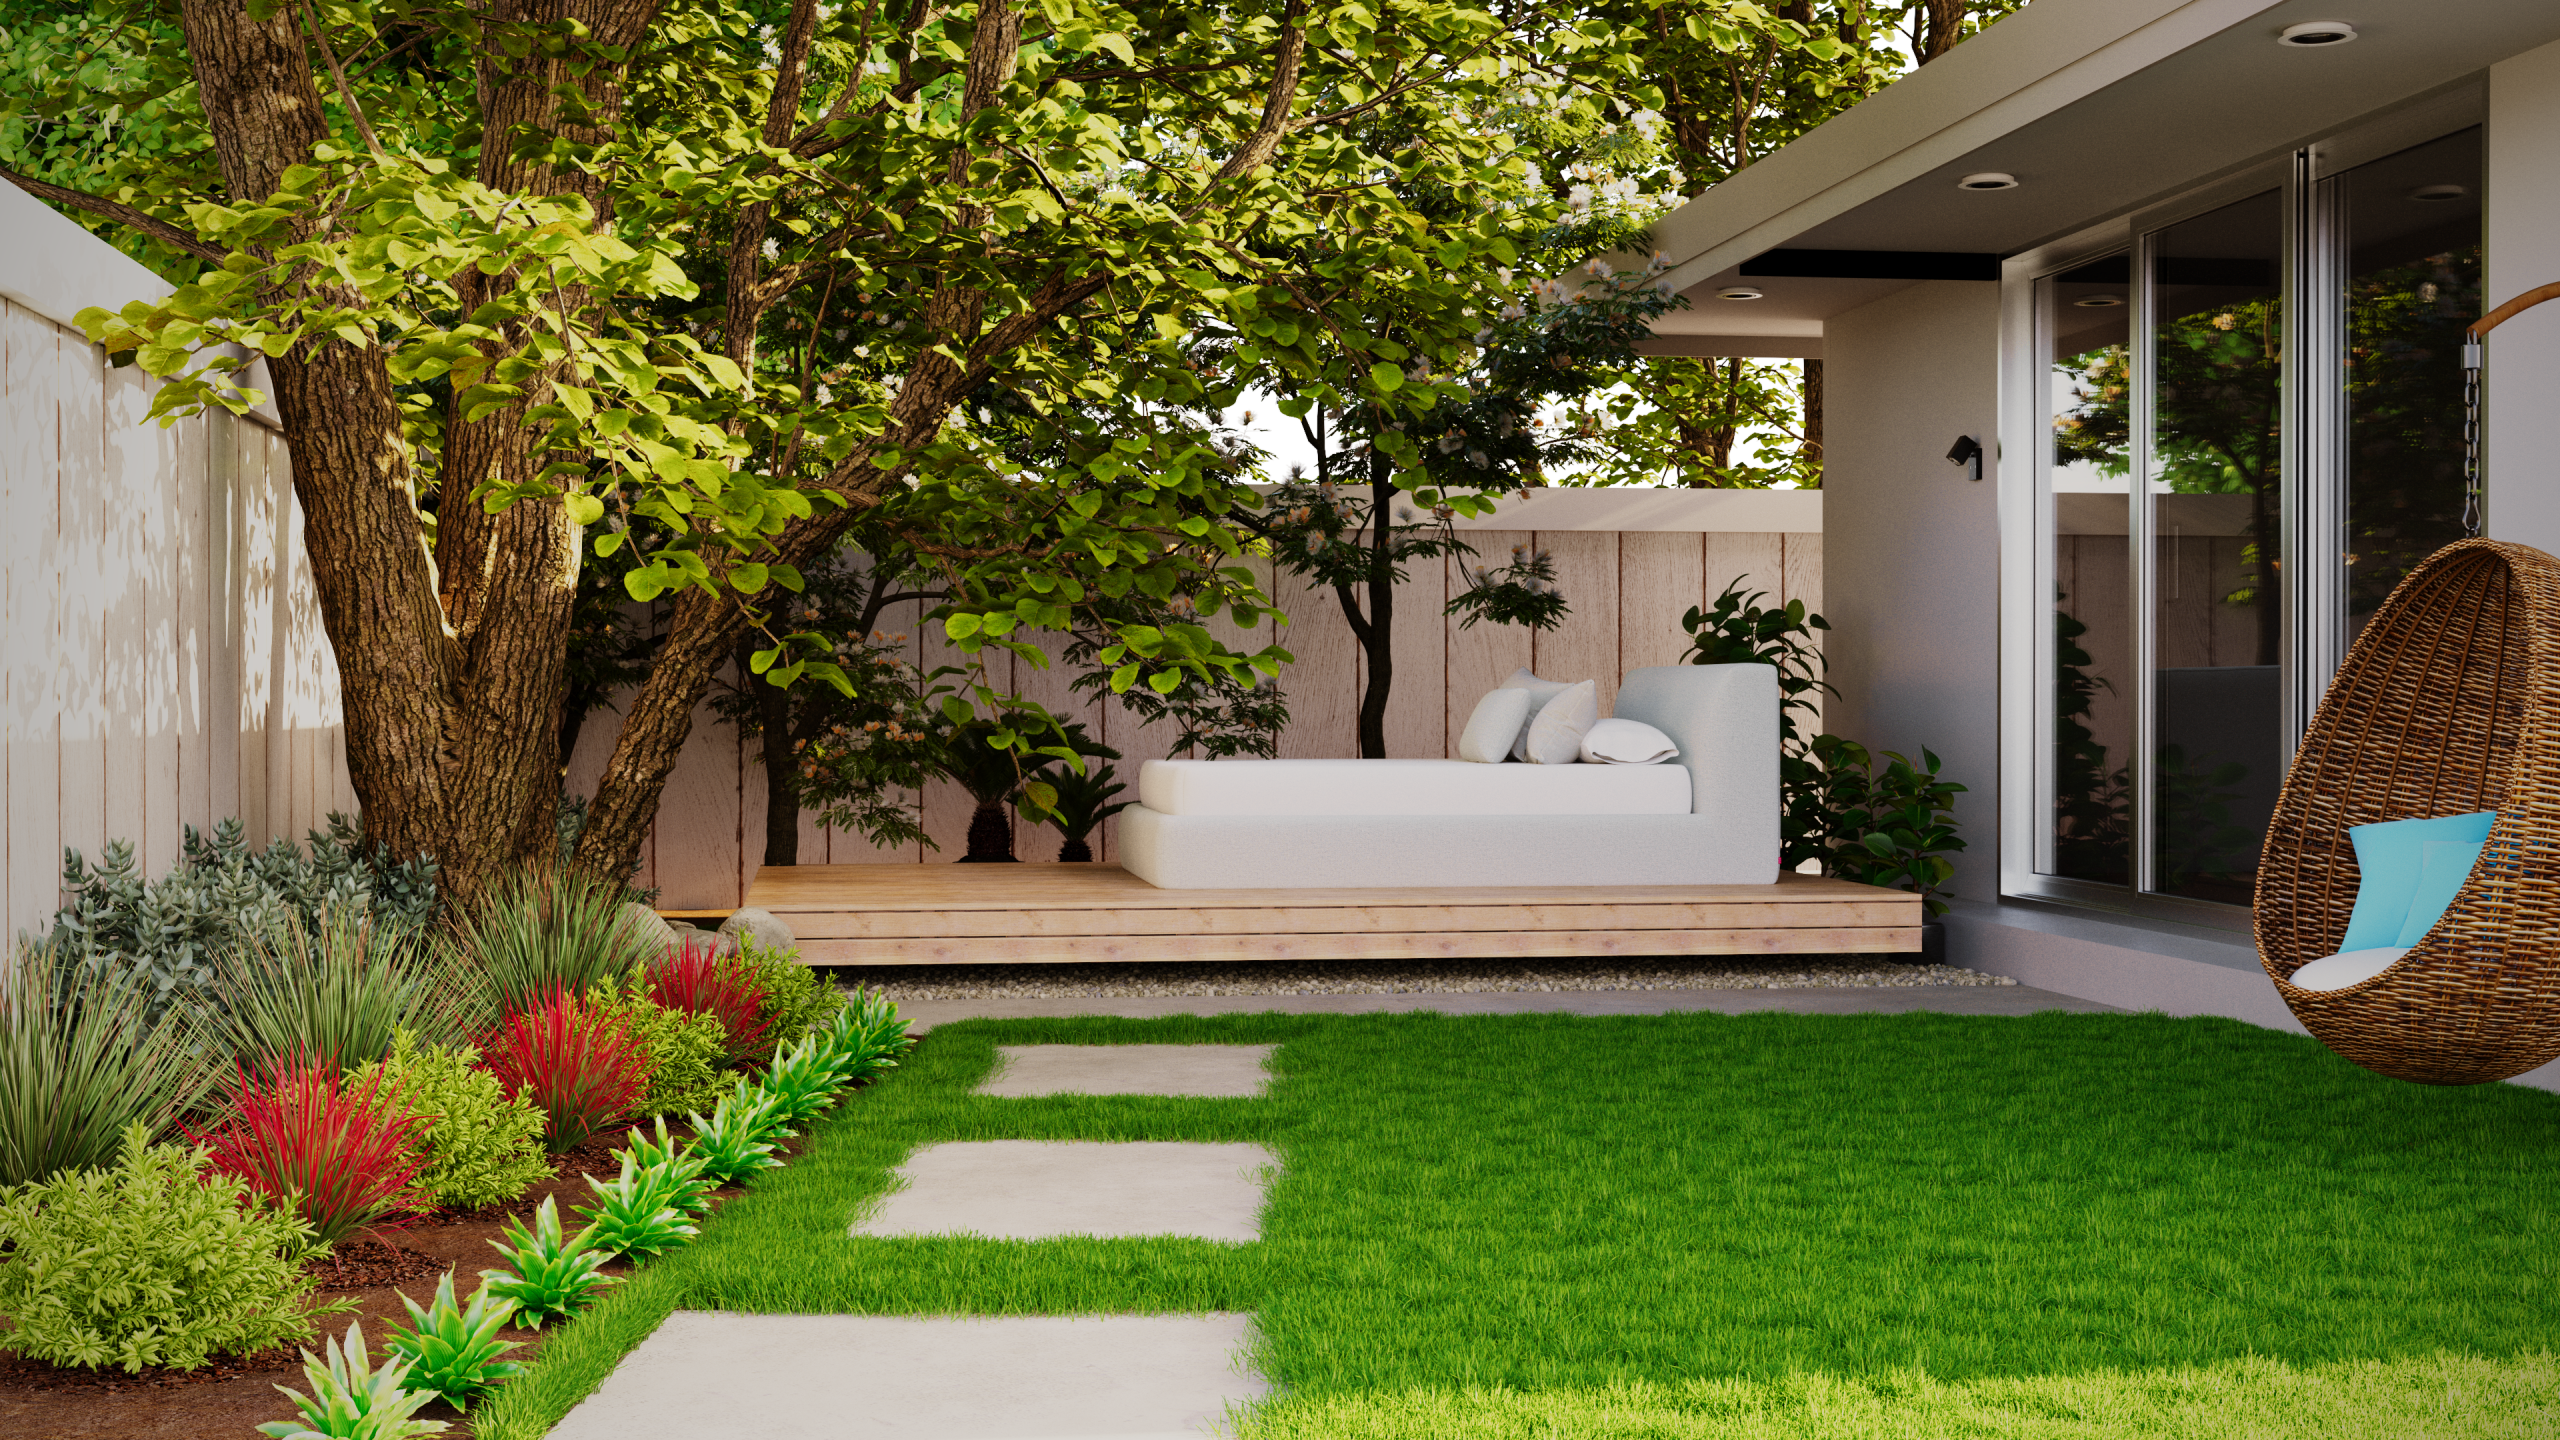
The ‘resort at home’ trend is stronger than ever for 2026, and this space nails it. Homeowners are craving outdoor spaces that feel like a genuine escape. This look taps right into that desire by blending sleek, modern furniture—like the crisp white daybed—with loose, naturalistic plantings. It’s the best of both worlds: the comfort and clean lines of a boutique hotel pool deck, combined with the lush, slightly wild feeling of a private garden. The hanging chair adds another layer of relaxed, bohemian comfort that’s all over Pinterest right now.
📐 Style Math
White outdoor furniture looks stunning—for a while. Be honest with yourself about your tolerance for cleaning. White cushions and frames will show every speck of dirt, pollen, and bird dropping. If you have pets or kids, or live in an area with a lot of dust or trees that drop debris, maintaining this pristine look will be a constant battle. Opt for high-performance outdoor fabrics like Sunbrella, which are stain-resistant and easier to clean. Even so, you’ll need to invest in waterproof covers and be diligent about using them.
24. Use a Curved Hedge to Soften a Stacked Stone Garden Wall
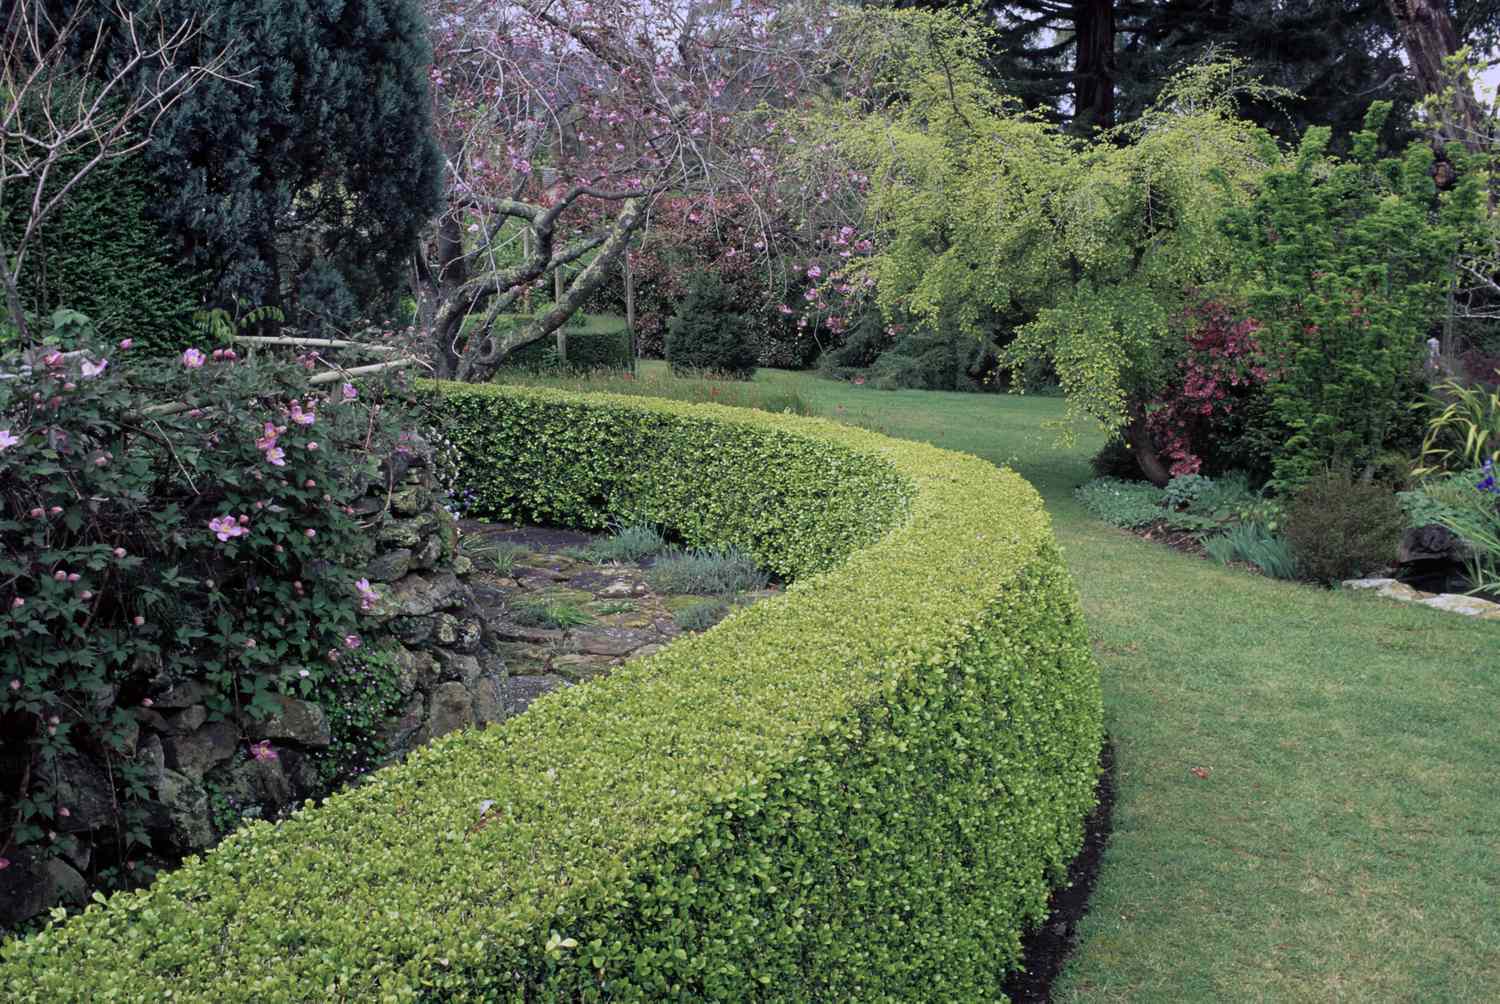
When combining hardscaping (like a stone wall) with softscaping (plants), the magic is in the contrast of forms. A stacked stone wall, especially a low one, has a rustic, somewhat irregular horizontal line. Following that line with an equally low, horizontal planting would be visually boring. By adding a tightly clipped, curved hedge that is taller than the wall, you create a beautiful interplay of shapes. The smooth, solid green curve of the hedge provides a perfect backdrop that highlights the rough texture and color variations of the natural stone in front of it.
⚠️ Real Talk
This combination of a low stone wall and a medium-height hedge is incredibly versatile. It’s substantial enough to define a property line or create a ‘room’ in a large, acre-plus yard, but it can also be scaled down to enclose a cozy patio or garden bed in a standard suburban backyard. For smaller spaces, keep the hedge height to no more than 3-4 feet and the stone wall to 1-2 feet. The key is maintaining the height difference: the hedge should always be noticeably taller than the wall to get this specific layered effect.
25. Create a Striking Desertscape with Succulents and Gravel Paths
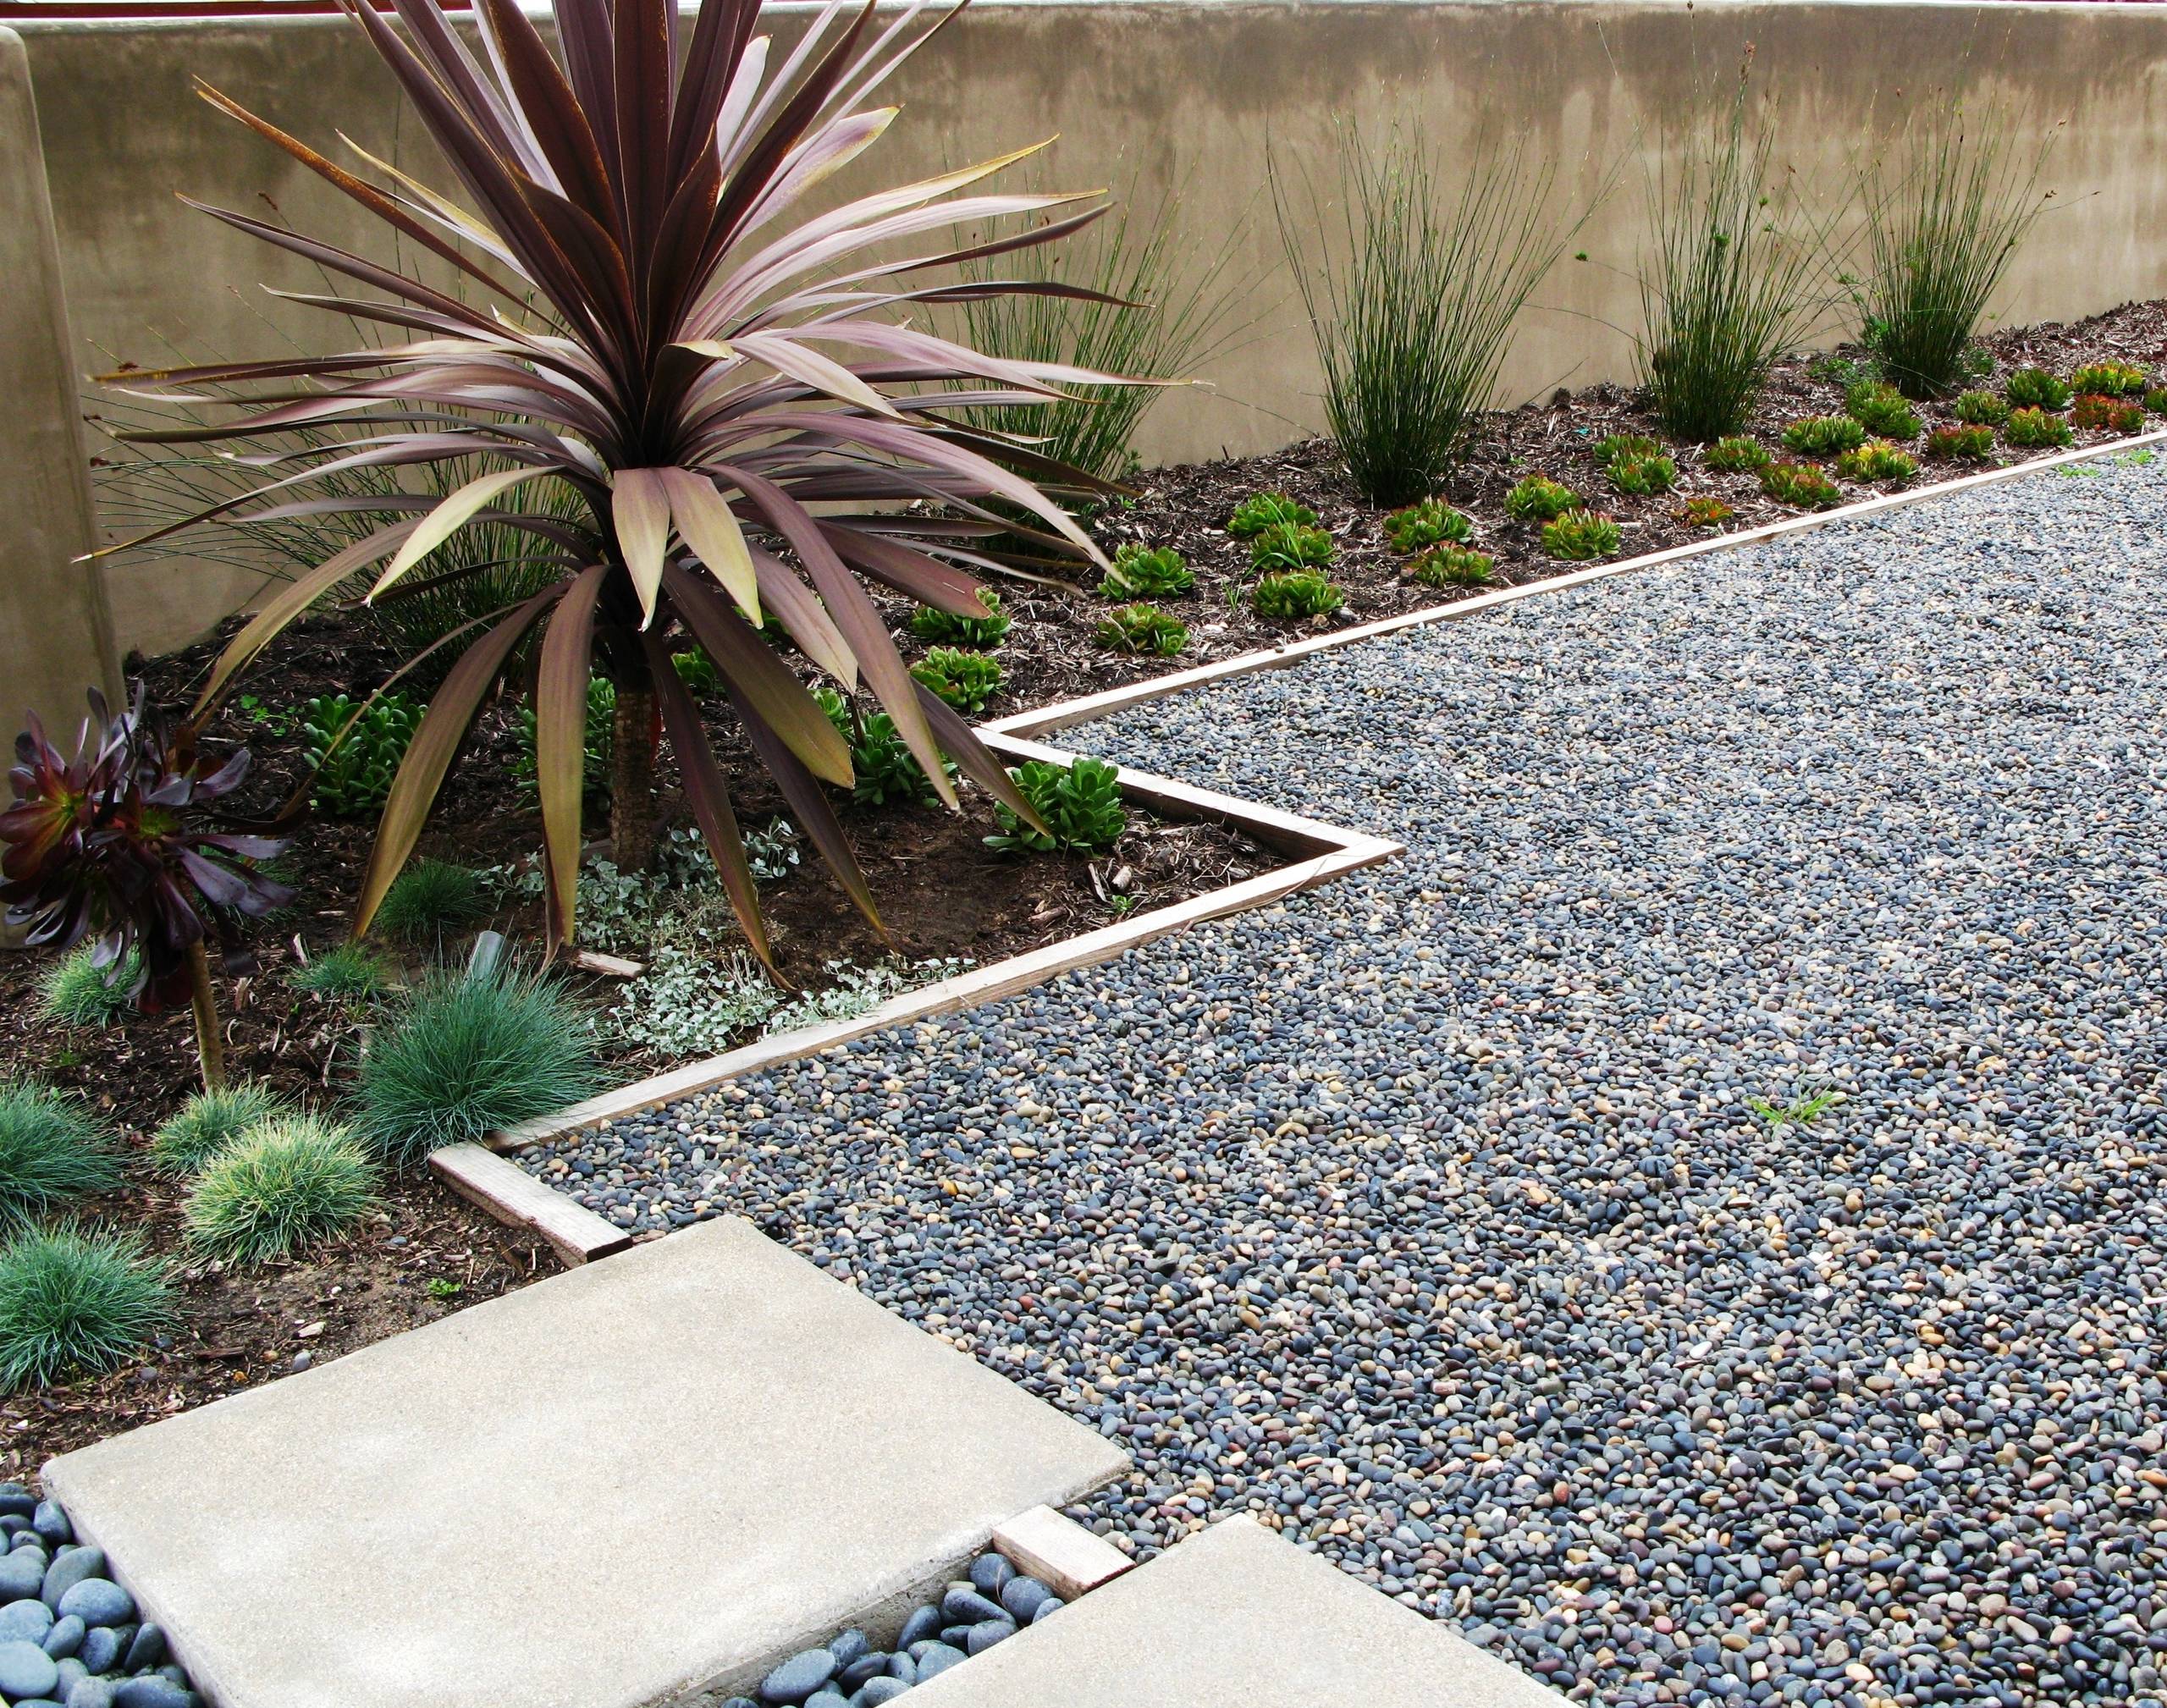
This minimalist design works because it’s a masterclass in using color, form, and texture as the main event, rather than flowers. The bold, sculptural shape and deep red color of the large Cordyline plant create an immediate, dramatic focal point. This is balanced by the finer textures of the slender grasses and the chunky forms of the smaller green succulents. The dark grey gravel acts as a ‘negative space,’ a quiet floor that makes the sculptural plants stand out. The clean lines of the wood and concrete edging provide a crisp, modern frame. Compare this to the lush, floral-heavy path in Idea #15 for a completely different mood.
🔧 How-To Brief
Drought-tolerant landscaping is often marketed as ‘no maintenance,’ but it’s more accurately ‘low maintenance.’ While you won’t be mowing or watering daily, these gardens do require upkeep. Gravel and rock beds are prone to collecting leaves and debris, which will need to be removed with a leaf blower to keep the look clean. Weeds can and will eventually find a way to sprout through the gravel. And even succulents need some water, especially during prolonged heat waves, and may need to be protected from frost in colder climates. Expect to spend an hour or two a month keeping it tidy.
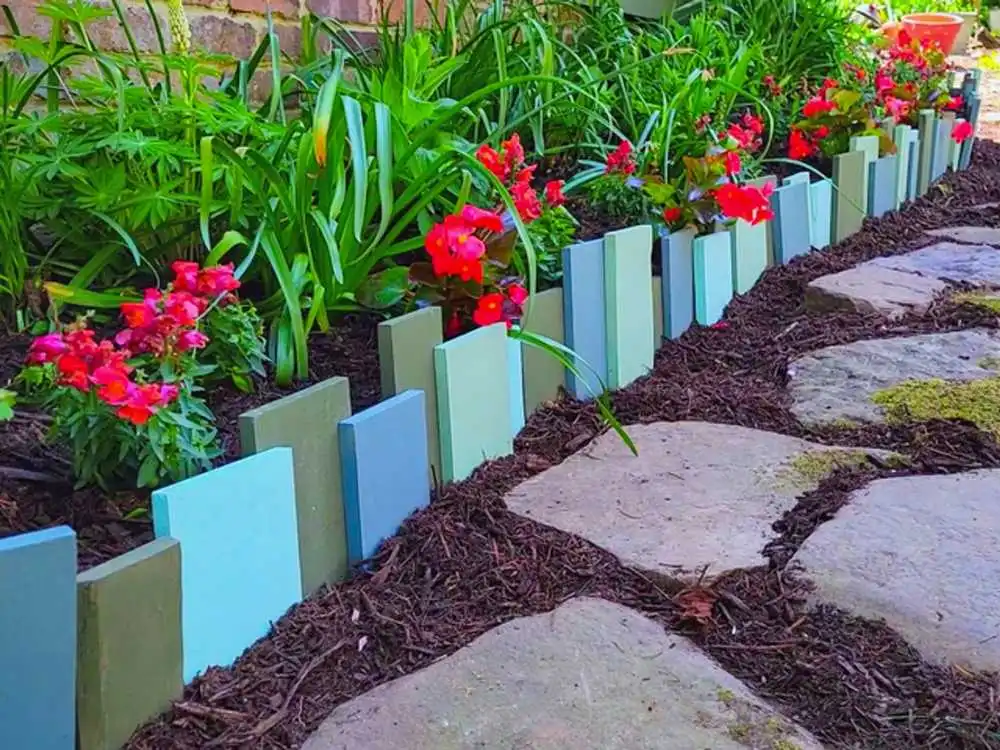
26. Add Whimsy with a Painted Pastel Picket Garden Border
A high-end garden border can be expensive, but this playful, colorful look can be achieved for next to nothing. This is a perfect project for using up leftover sample pots of exterior paint. You can often find mismatched pickets or wood scraps for free on Facebook Marketplace or Craigslist. The key is to embrace the mismatched, bohemian vibe. A uniform, perfect picket fence would look traditional; a randomly colored one looks artistic and intentional. Pair it with an inexpensive mulch and stone path for a completely custom look on a shoestring budget.
💡 Designer Tip
Creating colorful garden pickets is a fun and easy weekend DIY.
- Gather your wood scraps or pickets. They don’t need to match in height or shape.
- Give them a quick sanding to remove any splinters. No need to be perfect.
- Apply one to two coats of exterior-grade paint. Use a mix of 3-4 complementary pastel colors. Don’t forget to paint the stakes that will go into the ground.
- Once dry, you can attach the pickets to a horizontal backer board (like a 1×2) for an easy-to-install panel.
- Alternatively, simply drive each painted picket into the mulched soil of your garden bed, varying the heights and colors for a whimsical, random effect.
This is a fantastic way to add personality and color to your garden for under $30.
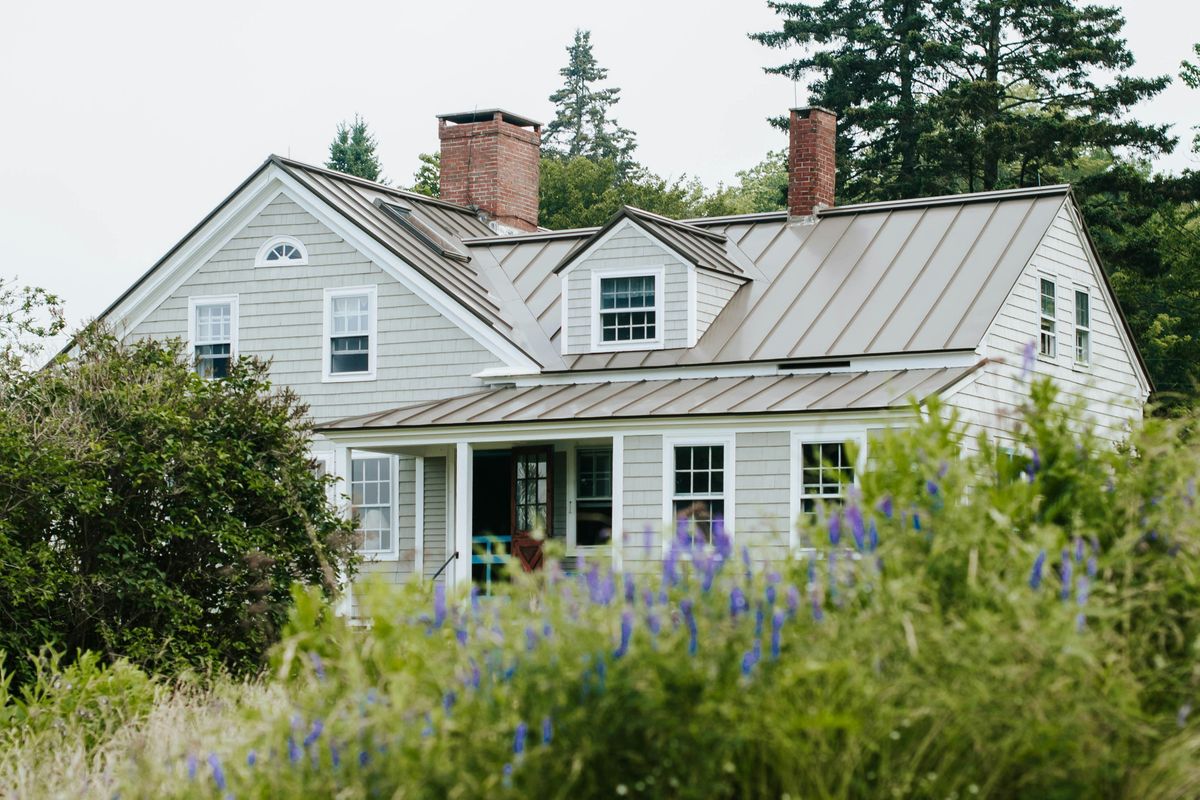
27. Pair a Modern Farmhouse with Wild, Natural-Looking Gardens
The key to this entire look is the tension between the clean, geometric lines of the house and the wild, untamed nature of the foreground garden. The farmhouse itself is very orderly: light grey shingle siding, a simple metal roof, and neatly trimmed white windows. By placing a meadow-like planting of soft, wild green foliage and purple flowers right in front of it, the design feels balanced and alive. A formal, manicured garden here would feel too stiff; the ‘wildness’ is what makes the clean architecture really sing.
✅ Before You Start
This rustic-modern balance follows a clear formula: 70% clean, simple architecture + 30% wild, naturalistic planting. The ‘architecture’ part is the house itself, with its neutral grey, white, and silver palette. The ‘wild’ part comes from using plants that look like they belong in a field—feathery grasses and delicate, airy flowers like the purple blooms seen here. The ratio is key. Too much wildness and it looks messy; not enough and it loses its soulful, organic charm. The brick chimneys add a final touch of warm, rustic texture.
Your Dream Yard Is Just a Weekend Away
Creating a landscape that looks expensive is less about money and more about thoughtful choices. By focusing on clean edges, smart repetition, and high-impact focal points, you can transform your outdoor space. Pick one idea that resonates with you and start small. You’ll be amazed at how a few strategic changes can make a world of difference. Now, get out there and start planning on Pinterest!