You know that feeling when you finally find the garden lighting ideas that look exactly right for your space? It’s a specific kind of magic. We spent serious time browsing Amazon, Home Depot, and Wayfair to bring you only what’s worth your attention this year. After filtering through hundreds of options, we narrowed it down to 31 ideas that actually deliver, covering everything from modern and dramatic statements to soft, natural glows. These aren’t just pretty pictures; they are real, achievable designs trending hard on Pinterest because everyone is finally realizing their backyard is just another room to decorate. Go ahead and save this — you’re going to want to reference it.
📌 Save this to Pinterest for later — you’ll want to revisit these ideas.
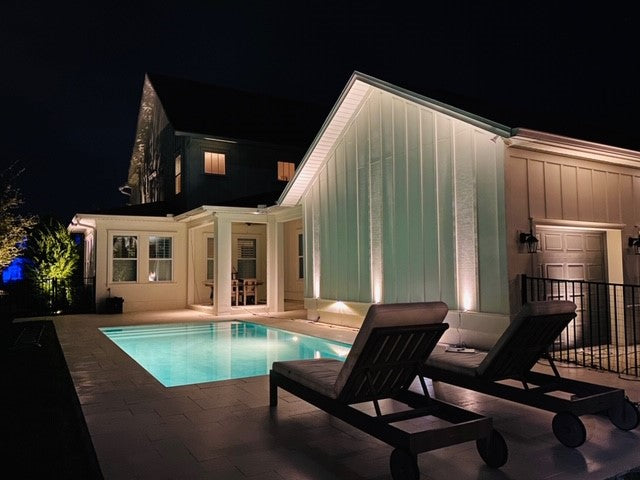
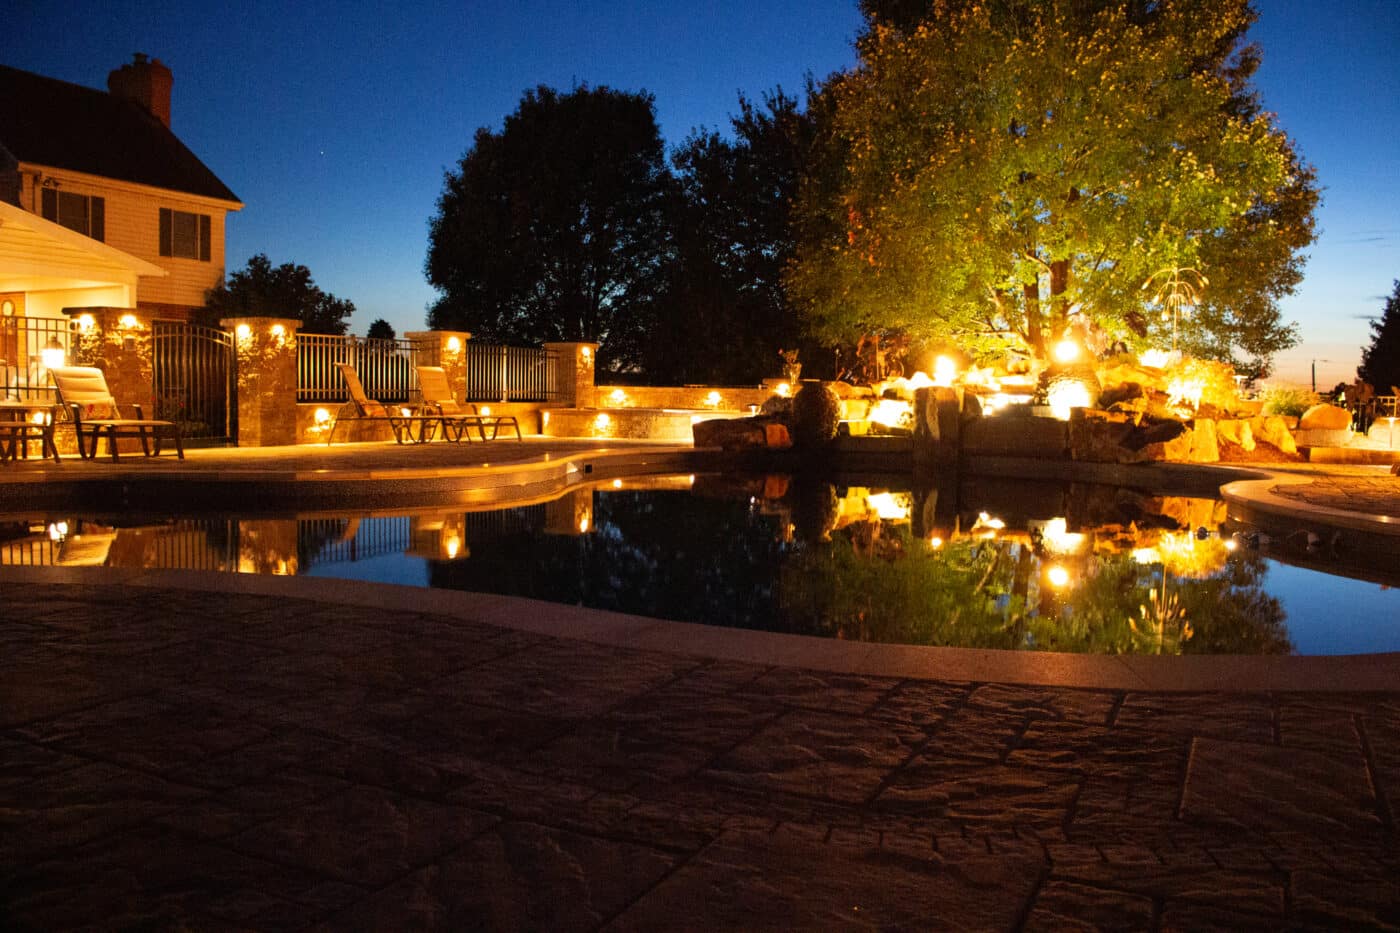
1. Highlight Architecture with Warm Uplights and a Glowing Pool
This setup is so effective because it uses a technique called “layering light.” Instead of one harsh floodlight, it combines multiple sources: architectural uplighting on the textured wall, submerged lighting within the pool, and a specific accent light on the shrub. This creates depth, visual interest, and a cohesive, high-end feel. The warm temperature of the primary lights makes the space feel inviting, while the single pop of cool blue adds an unexpected, modern touch.
💰 Budget Breakdown
When uplighting a textured surface like this white wall, place the fixtures about 12-18 inches away from the base. This creates a dramatic “grazing” effect that catches all the interesting shadows and highlights. If you place them too far away, you’ll just get a flat, washed-out look. Angle the fixture slightly inward to keep the light focused on the wall and prevent spillover that can cause glare for anyone on the patio.
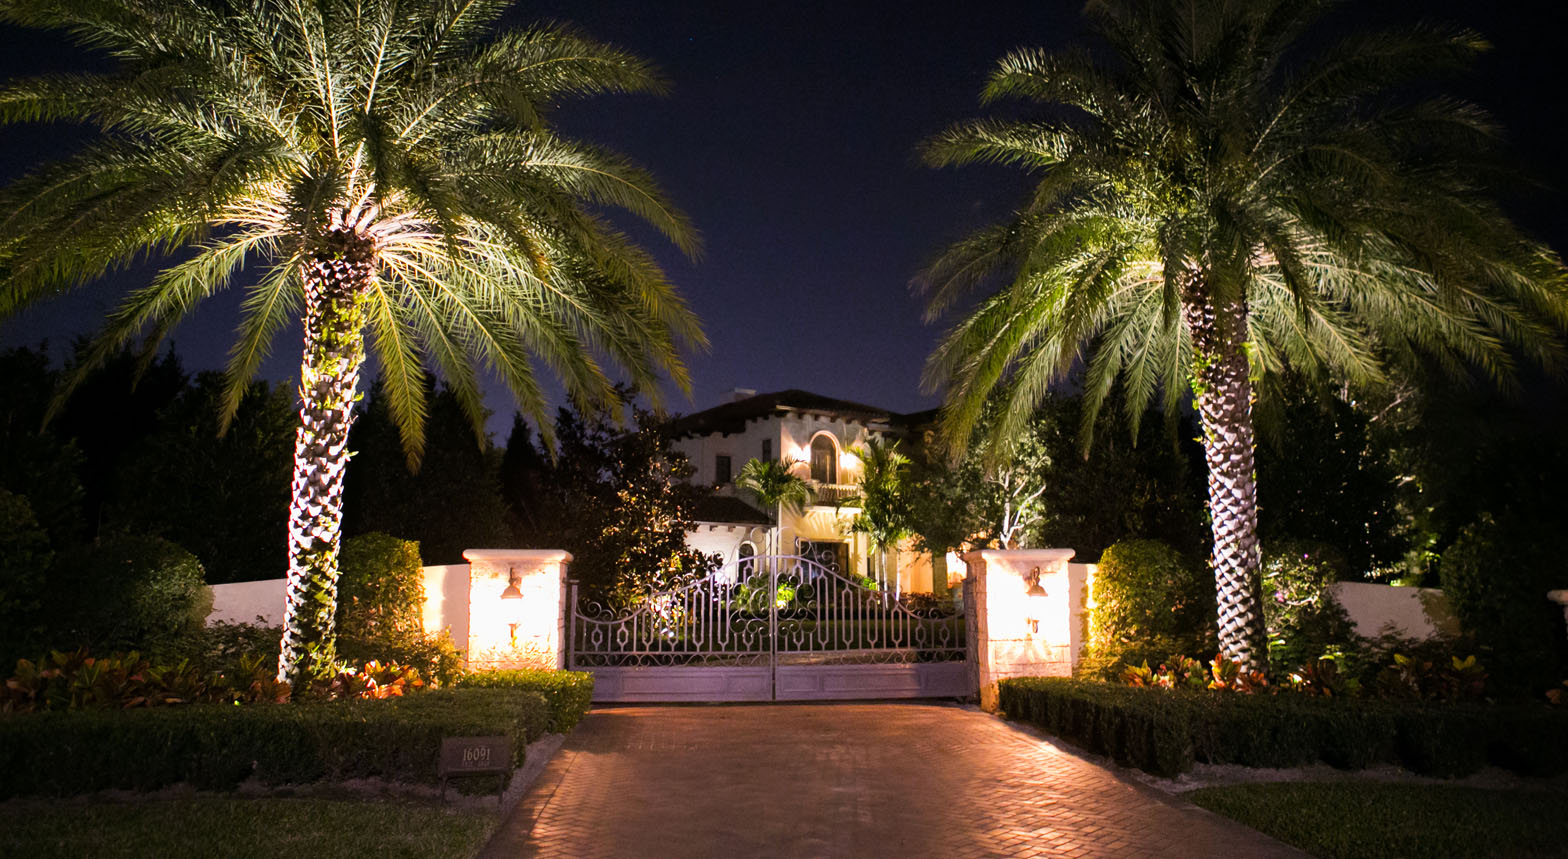
2. Create a Grand Entrance with Illuminated Palm Trees
The single most important element here is the dramatic uplighting on the palm trees. Without it, the entrance would be perfectly fine but forgettable. By using focused spotlights at the base of each trunk, the trees become living sculptures, their height and texture turning into the main architectural feature of the driveway. It’s a power move that signals elegance and draws the eye directly toward the gate, creating a clear and impressive sense of arrival.
🎯 What Makes It Work
This high-impact, symmetrical approach works best for properties with a long driveway or a formal entrance that’s at least 50-75 feet from the main road. The palm trees themselves should be mature, with a trunk height of at least 15 feet to achieve this grand scale. For smaller yards, trying to replicate this can feel overwhelming. Instead, consider the more intimate approach seen in Idea #14, which uses uplighting on smaller plants.
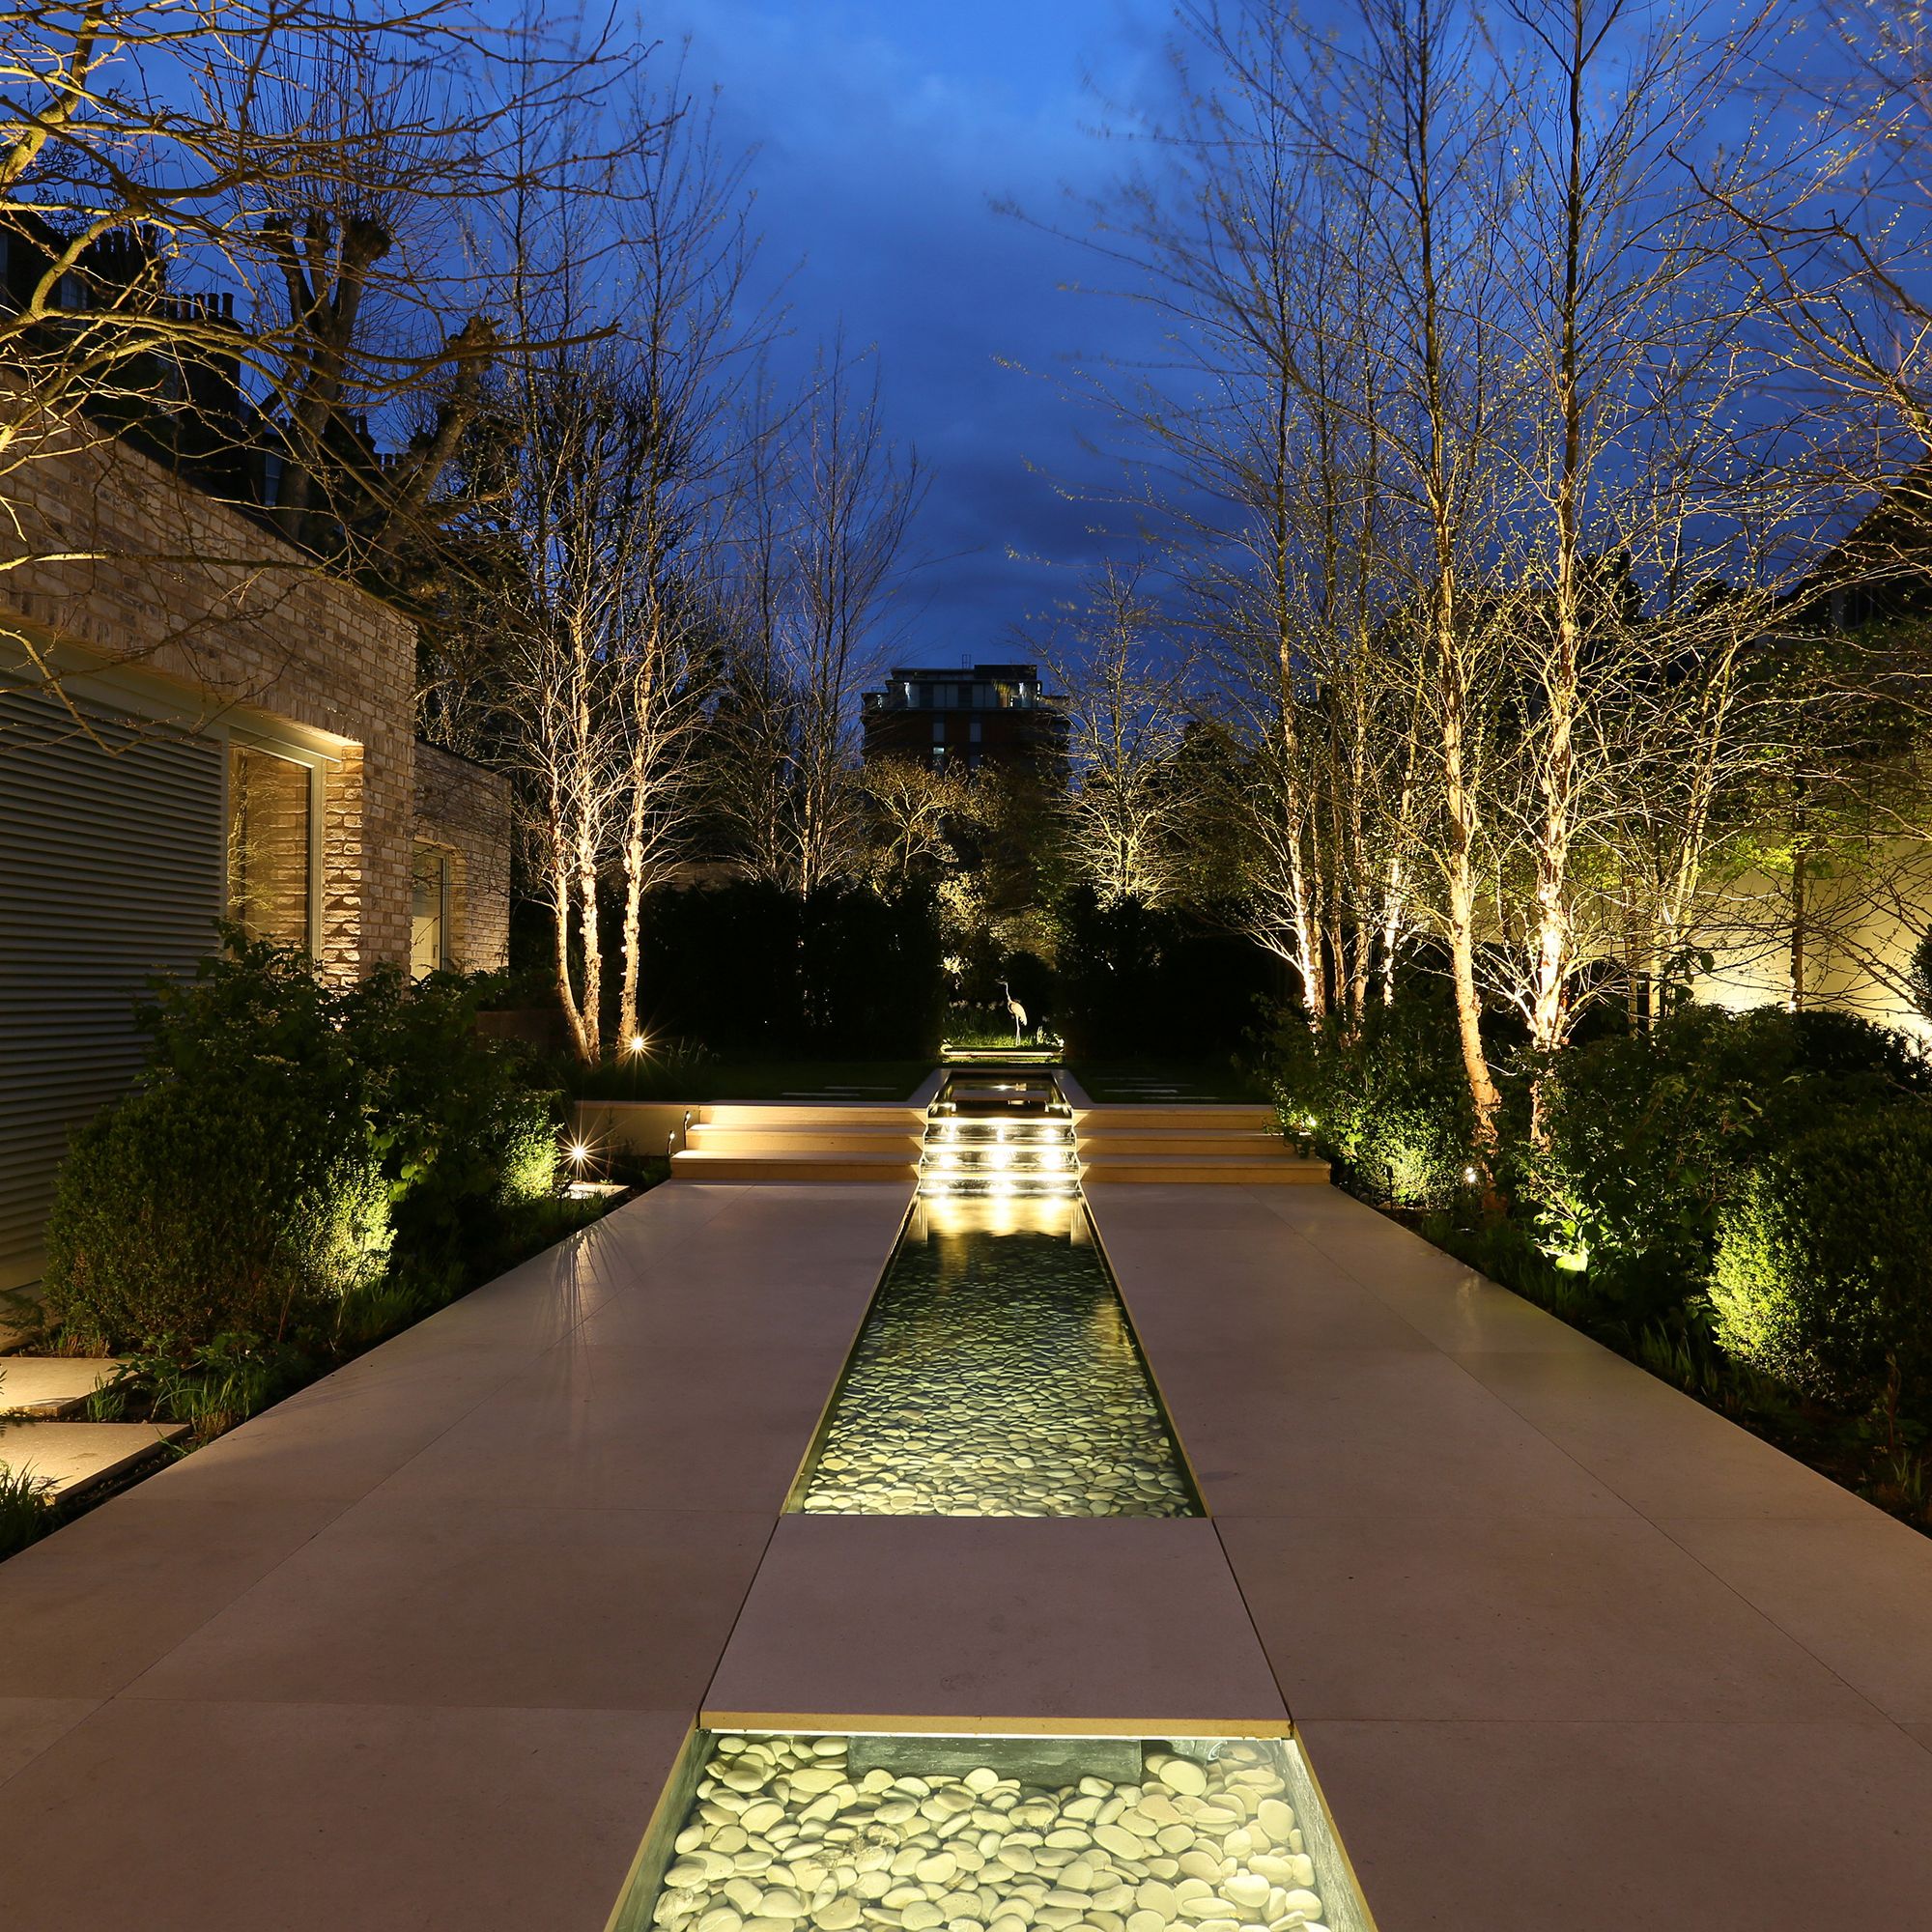
3. Frame a Symmetrical Pathway with a Lit Water Feature
Think of this look as a simple formula: 50% structural lighting + 30% landscape lighting + 20% water feature lighting. The structural lights (on the steps and walls) provide safe navigation and define the architecture. The landscape uplights add softness and highlight nature. The submerged lights in the water feature create a central, captivating focal point. You could swap the materials—like using dark pavers and bamboo instead of brick and trees—and the balanced, serene feeling would remain.
⭐ The One Thing
An in-ground water feature like this is stunning, but it’s a commitment. Be honest with yourself about maintenance. You’ll be regularly checking water levels, cleaning out leaves and debris, and ensuring the submerged pumps and lights are functioning. If you live in an area with freezing winters, you’ll also need a plan for winterization, which can be a complex and time-consuming chore each year.
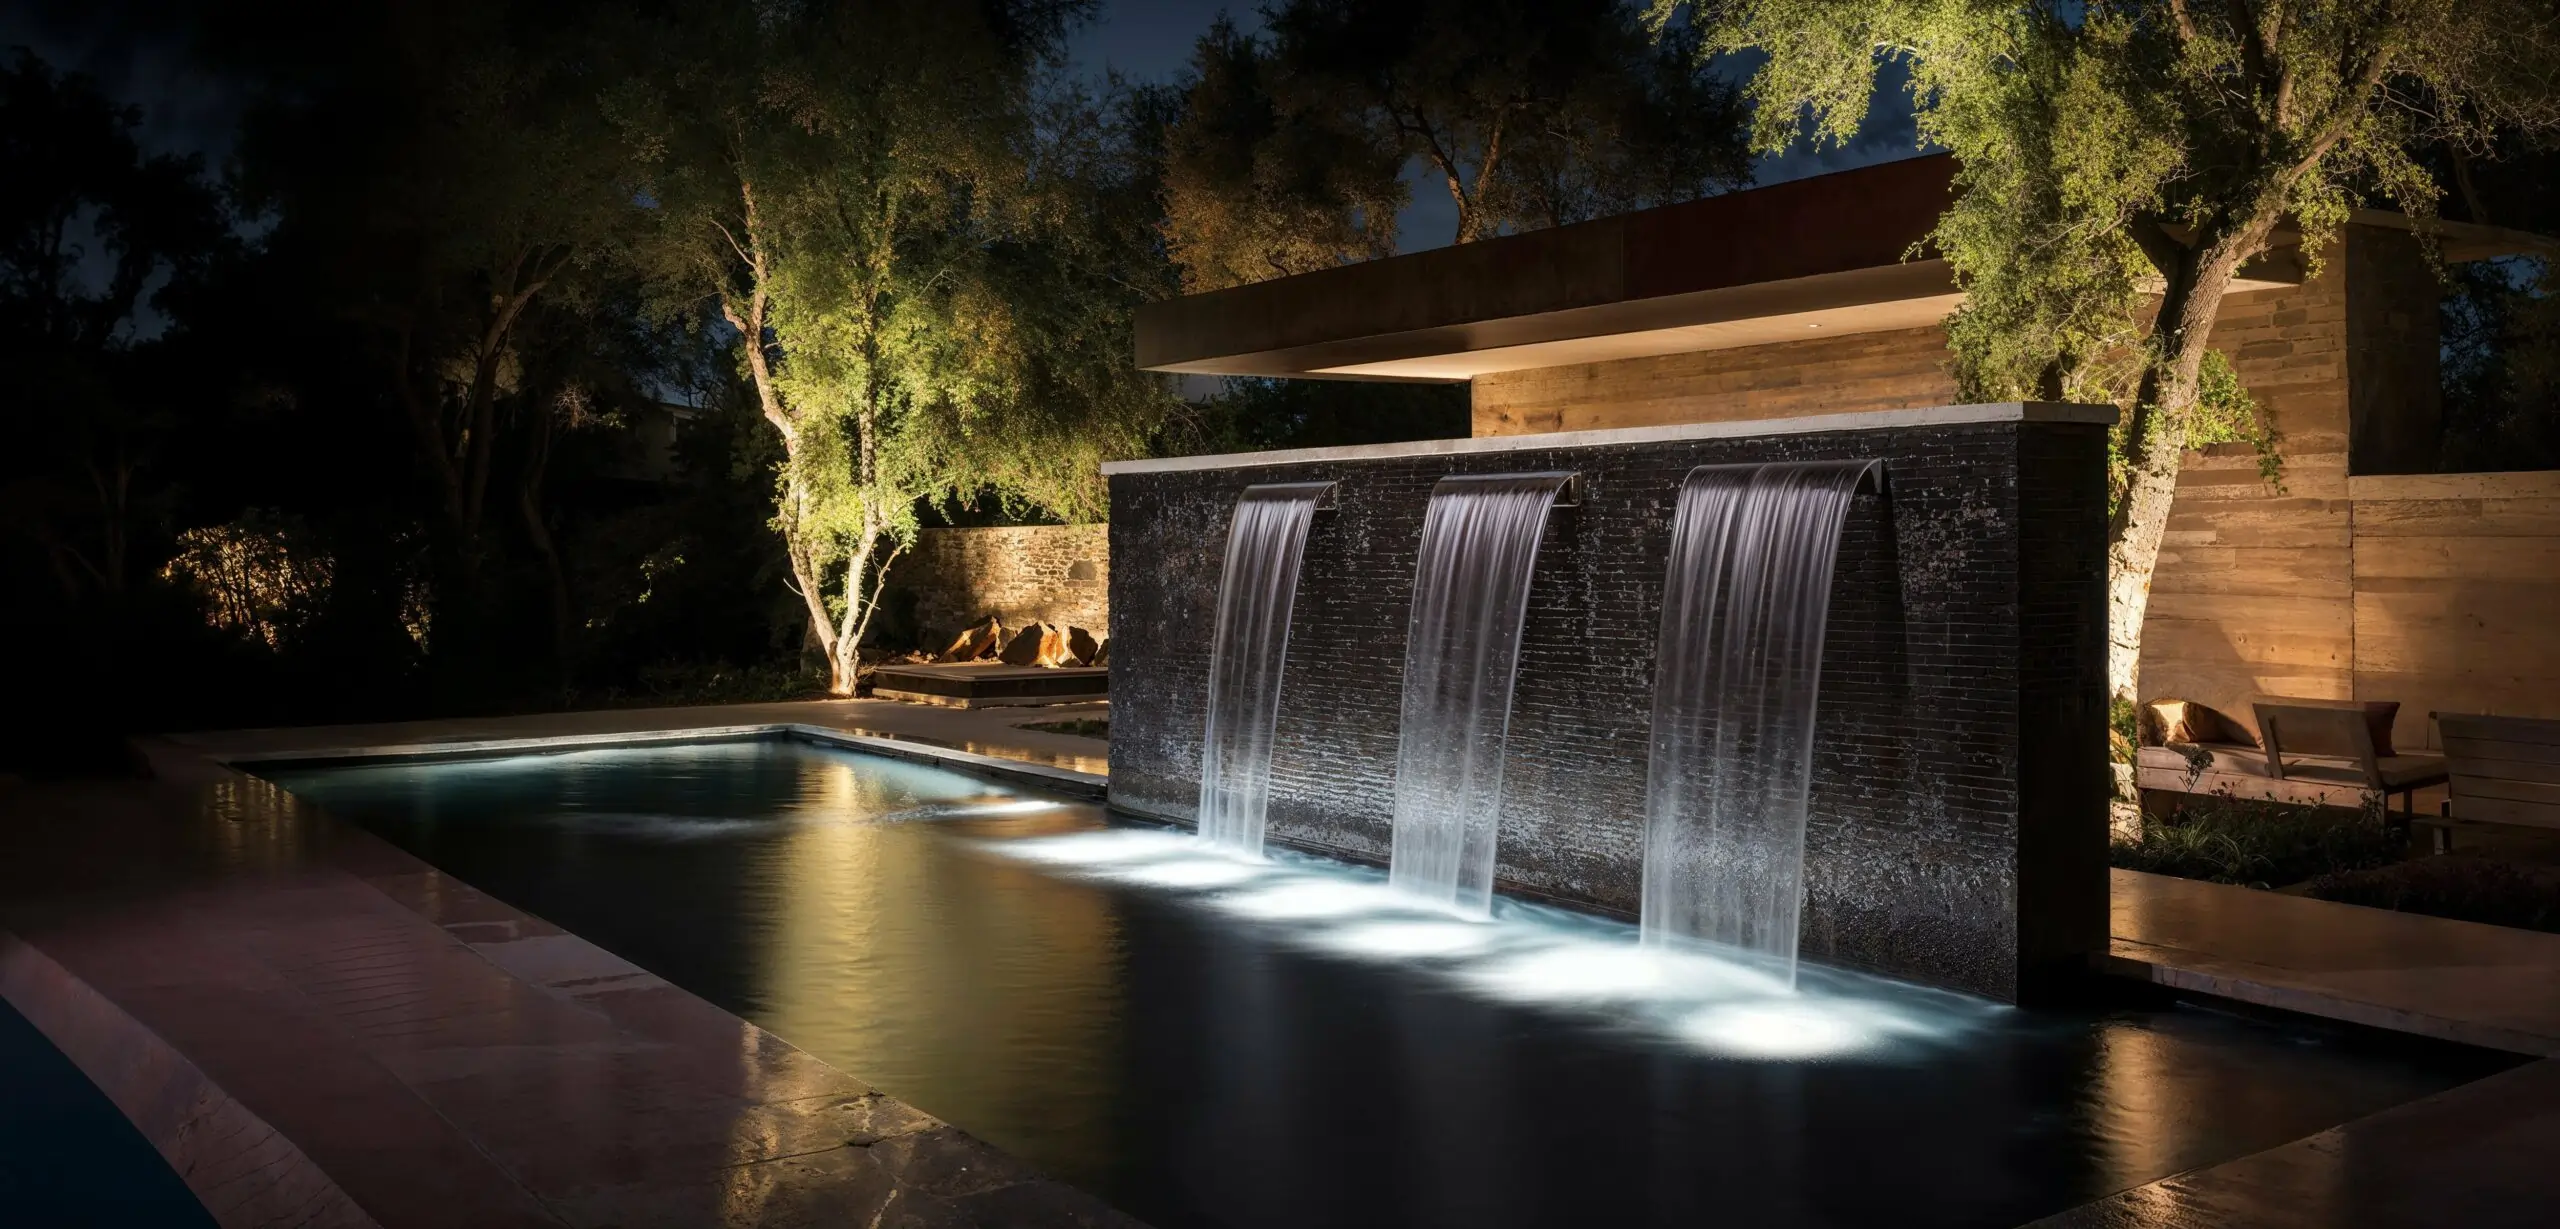
4. Add Drama with an Illuminated Waterfall Wall
The magic here comes from contrast. You have the dark, glassy water of the pool set against the richly textured, dark brick of the waterfall wall. The light-colored coping acts as a visual frame. The key is that the light sources are hidden; the fixtures are placed just under the water’s surface, aimed straight up the wall. This makes the three streams of water themselves appear to be the source of light, creating a dynamic, almost magical effect that is far more sophisticated than simply pointing a spotlight at the wall.
🔥 Trending Context
A feature wall with flowing water is a magnet for mineral deposits (efflorescence) from the water, especially on dark tile. To keep this looking sharp, you’ll need to scrub the tiles periodically with a specialized cleaner. Also, check the area around your lights for algae buildup, which thrives in warm, wet spots. A quick wipe-down every few weeks during peak season will prevent it from becoming a bigger issue.
5. Wash a Textured Wall and Pathway in a Warm Glow
To achieve this seamless wash of light, use linear in-ground fixtures or a series of very wide-angle (120-degree) spotlights placed close together. The goal is to eliminate individual “hot spots” or cones of light. For the pathway, the small embedded fixtures are likely low-voltage LEDs. The trick is to have them cast light *across* the path, not *up*. This highlights the texture of the pavers and illuminates the walking surface without blinding you as you walk.
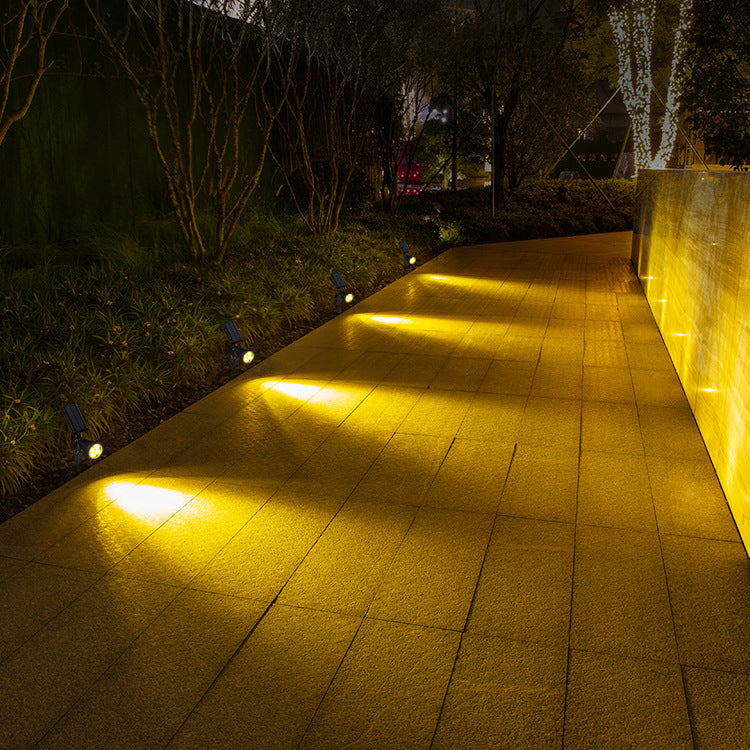
📏 Scale Guide
You don’t need expensive hard-wired fixtures to get this effect. A series of high-quality solar-powered spotlights can work wonders on the wall. Look for models with adjustable heads and a warm-white color temperature (around 2700K). For the pathway, you can find solar-powered puck lights or small stake lights at Target or Walmart for under $50 for a set. The key is to buy more than you think you need and group them tightly for a high-impact look.
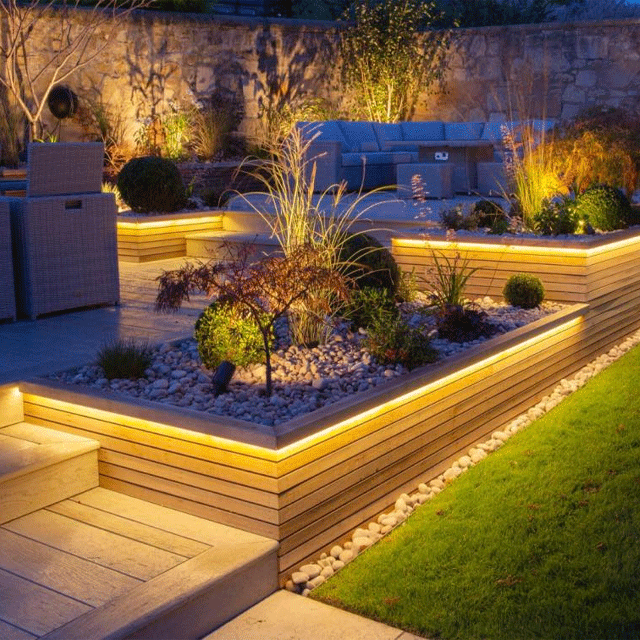
6. Define Garden Beds and Steps with Warm LED Strips
This is a an amazing way to add a high-end, contemporary feel to your deck or patio. It clearly defines elevation changes, which improves safety, while looking incredibly chic. It works by hiding the light source and letting the warm glow reflect off the surfaces below.
🧹 Maintenance Reality
Creating this floating-step effect with LED strips is a great DIY project. Here’s a quick guide:
- Measure and Cut: Measure the length of each step’s underside and cut your outdoor-rated LED strip light to size.
- Install the Channel: Screw or glue an aluminum channel (with a diffuser) to the underside of the step’s overhang. This protects the strip and creates a smooth, even glow.
- Adhere the Strip: Peel the backing off the LED strip and press it firmly into the channel.
- Connect Power: Run the low-voltage wire discreetly along the back or side of the stairs to the power source. Conceal wires for a clean look.
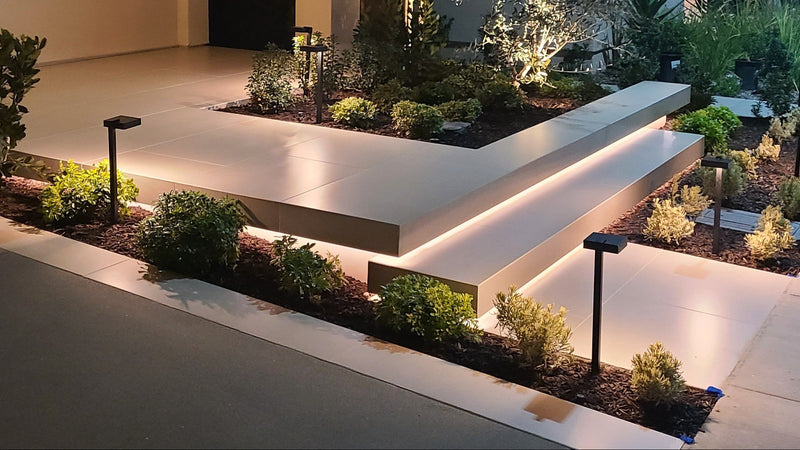
7. Integrate Sleek Strip Lighting into Concrete Steps
The integrated strip lighting is what makes this design feel so custom and architectural. By building the light source directly into the structure of the planters and floating steps, the two elements—concrete form and light—become one. This is a far cry from simply placing a light next to the steps. It’s a deliberate design choice that speaks a language of modern minimalism and intentionality. Without it, these would just be nice concrete planters; with it, they are a landscape sculpture.
📐 Style Math
This look is a direct reflection of the move towards bringing interior design principles into outdoor spaces. For years, outdoor lighting was purely functional. Now, with the rise of durable, weatherproof LED strips and a desire to make patios true extensions of our living rooms, we’re seeing these more detailed, refined applications. It’s less about just seeing in the dark and more about creating a whole mood and highlighting the architectural quality of the landscape itself.
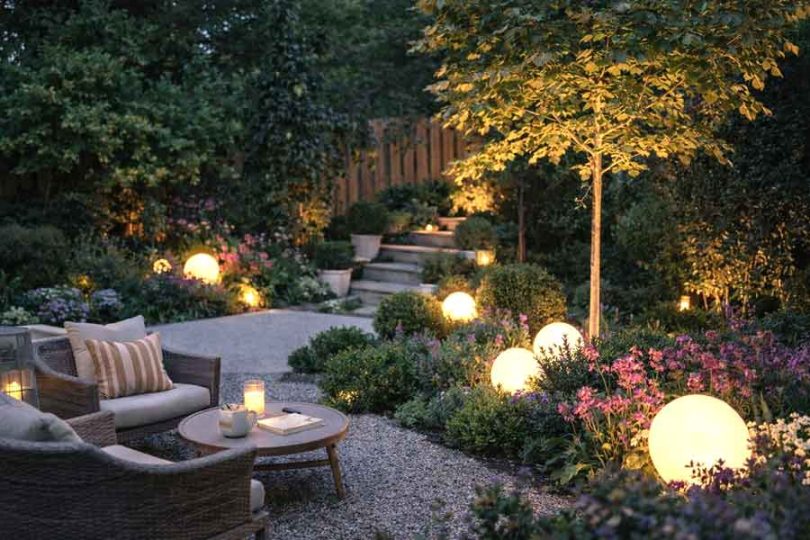
8. Scatter Enchanting Spherical Lights Through a Lush Garden
This idea works so well because of the unexpected nature of the lights. We expect to see lights on a wall or along a path, but placing these glowing orbs directly within the garden beds, nestled among the foliage, creates a sense of magic and discovery. They mimic natural forms, like oversized dew drops or fantastical glowing stones, which makes them integrate beautifully into the organic shapes of the garden. The varied sizes add to this naturalistic, less structured feel, as seen in Idea #21 as well.
✅ Before You Start
You can get this enchanting look for much less. IKEA’s ‘SOLVINDEN’ series often includes solar-powered LED globes in various sizes for around $15-$30 each. Look for them in early spring. You can also find plug-in or solar versions on Amazon. The trick is to cluster them in groups of three or five, using different sizes to create a more dynamic and natural-looking arrangement. A few larger spheres make a bigger impact than a dozen tiny ones.
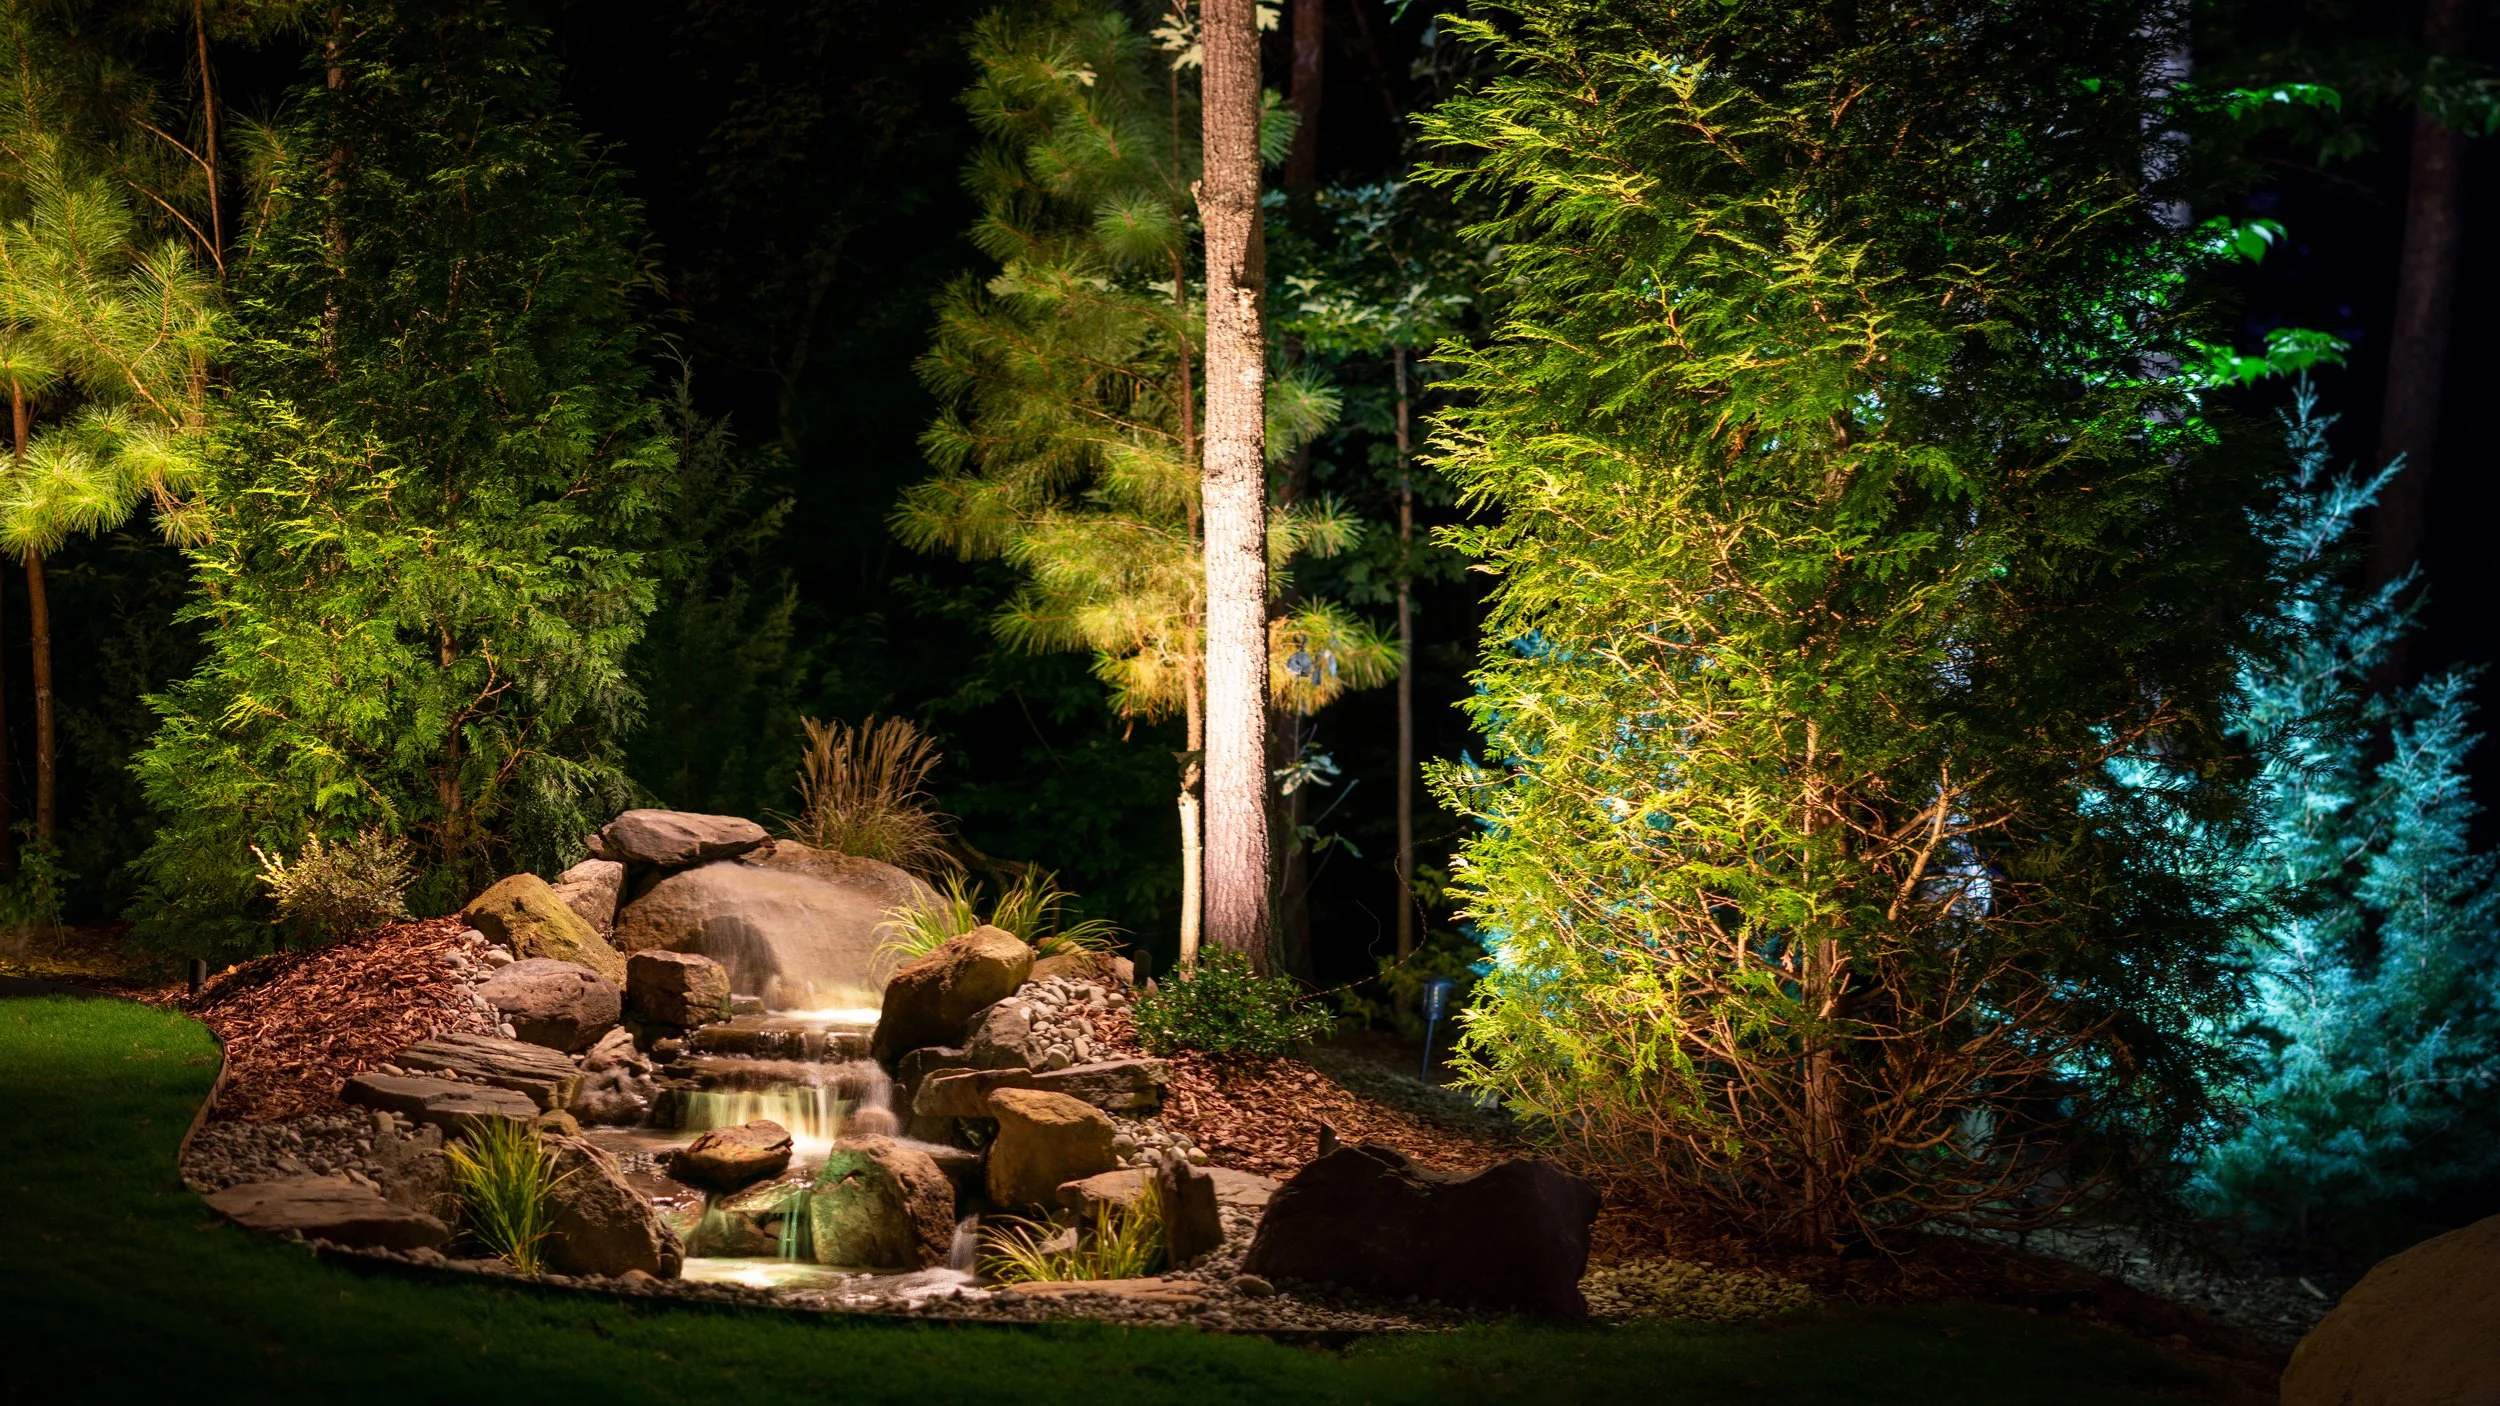
9. Set a Mystical Mood with Colored Pond Lighting
The single element casting a spell over this entire scene is the use of colored light, specifically the deep green and blue tones in the background. While the foreground path light provides functional, warm light, the colored accent lights transform the pond and trees into something otherworldly. This isn’t just about visibility; it’s about painting a picture with light and creating an atmosphere that feels intentionally magical and serene.
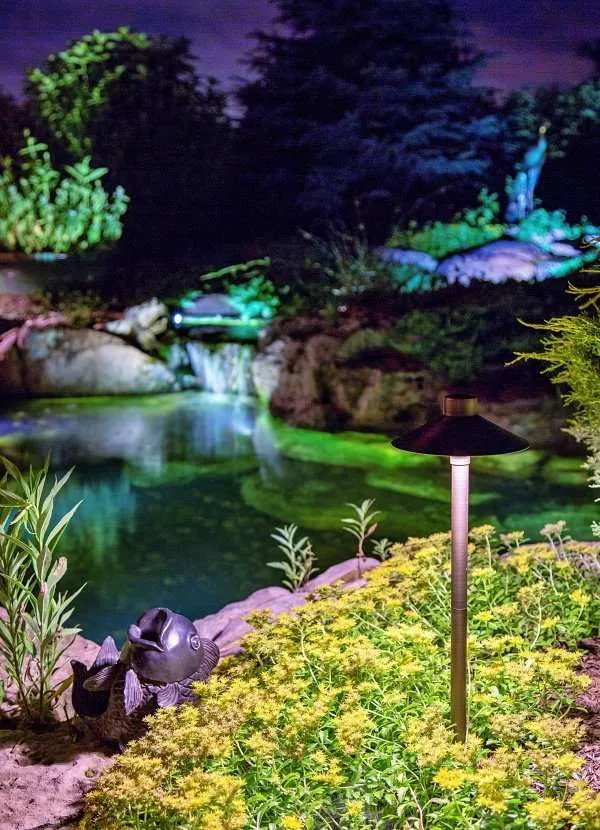
💸 Get This Look For Less
A little colored light goes a very long way. It’s incredibly easy to overdo it and end up with a garden that looks more like a nightclub than a serene escape. Start with just one or two fixtures and a single color. Live with it for a few nights before adding more. Also, be aware of your neighbors. A bright blue light shining into their bedroom window is a quick way to strain a relationship. Keep the lights aimed at your own foliage and features.
10. Choose Discreet Bullet Lights for a Natural Look
The beauty of this lighting is in its subtlety. By choosing fixtures in a dark green that matches the surrounding foliage, the light source itself becomes nearly invisible during the day. At night, the focus is entirely on the illuminated plants, not on the hardware. This approach feels more natural and integrated, as if the light is emanating from the landscape itself, rather than being imposed upon it. The angled top of the bullet lights also helps direct the light while minimizing glare.
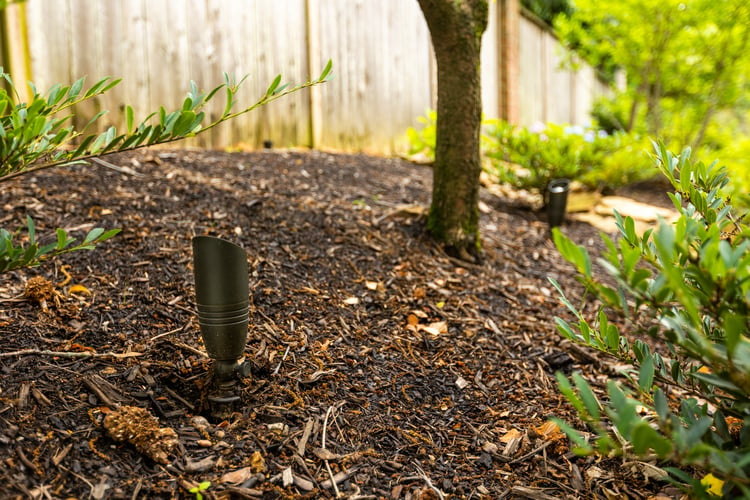
💡 Designer Tip
When placing landscape lights in a mulched bed, don’t just set them on top. Dig a small area out and set the fixture’s stake firmly into the soil underneath. Then, brush the mulch back around the base. This provides much more stability, preventing the light from getting knocked over or shifting position during yard work or heavy rain. It also helps conceal the stake for a cleaner, more professional installation.
11. Use a Single Spike Spotlight to Highlight Plant Texture
The secret here is restraint. Instead of flooding the whole garden with light, this approach uses a single, focused beam to turn one plant into a living sculpture. The warm light rakes across the large leaves, catching the veins and texture in a way that wouldn’t be visible in broad daylight or with a diffuse light source. It’s a confident choice that understands that sometimes, highlighting one beautiful detail is more powerful than trying to show everything at once.
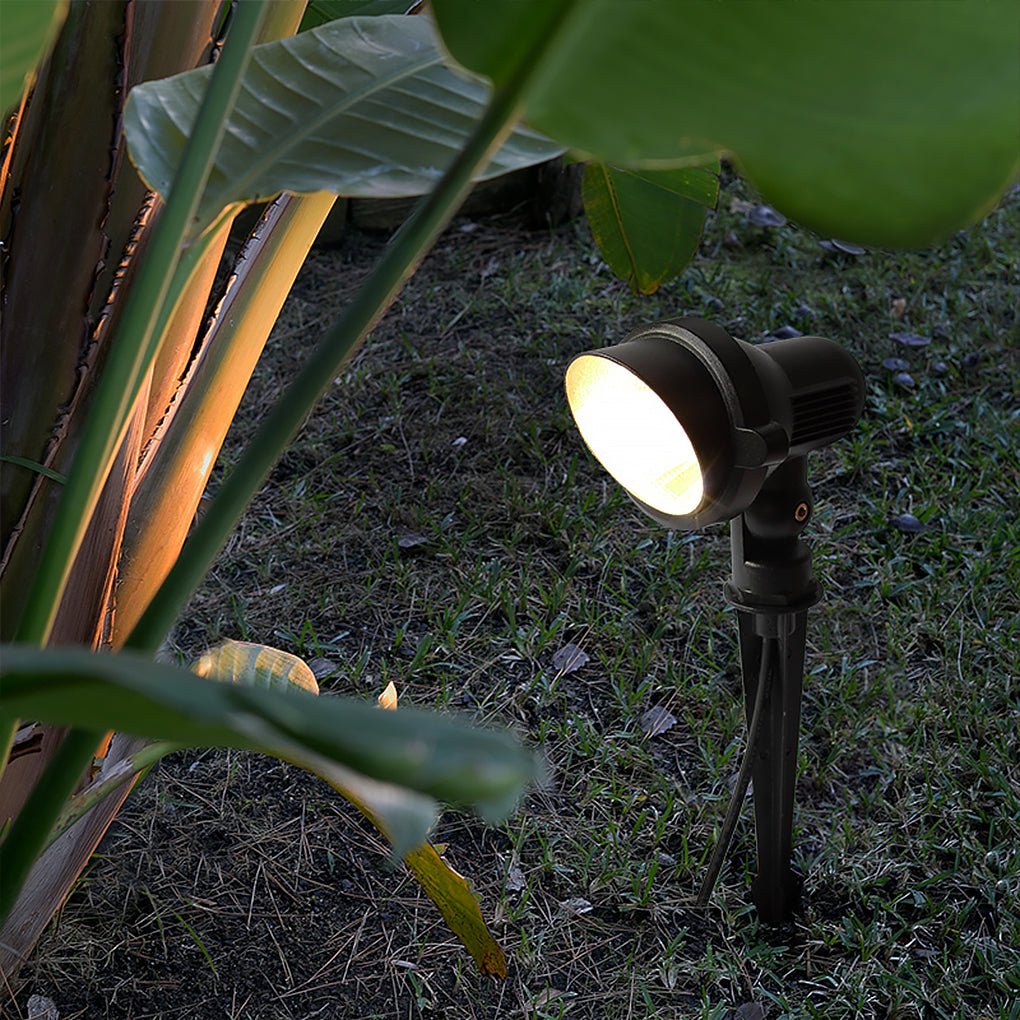
⚠️ Real Talk
Here’s how to perfectly position a spike spotlight to highlight a plant:
- Choose Your Hero: Select one plant with interesting leaf shape, texture, or color. This works great on hostas, ferns, or ornamental grasses.
- Position from the Front: Place the stake light about 1-2 feet in front of the plant.
- Aim Low: Aim the light at the base of the plant, not the top.
- Angle Upwards: Adjust the angle to around 45 degrees. This will cause the light to wash up through the leaves, creating dramatic shadows and highlighting the structure.
- Check from Afar: Walk back to your main viewing point (a patio, a window) and adjust until the effect is just right.
12. Create an Enchanted Grotto with Colored Waterfall Lights
This magical look follows a distinct recipe: 60% white/yellow light + 40% colored accent light. The primary, warm yellow light on the main waterfall provides the functional illumination and a welcoming base. The vibrant magenta accent light is used more sparingly, hitting just a few rocks and plants. This strategic pop of unnatural color is what creates the enchanting, grotto-like atmosphere. Reversing the ratio would likely look garish and overwhelming.
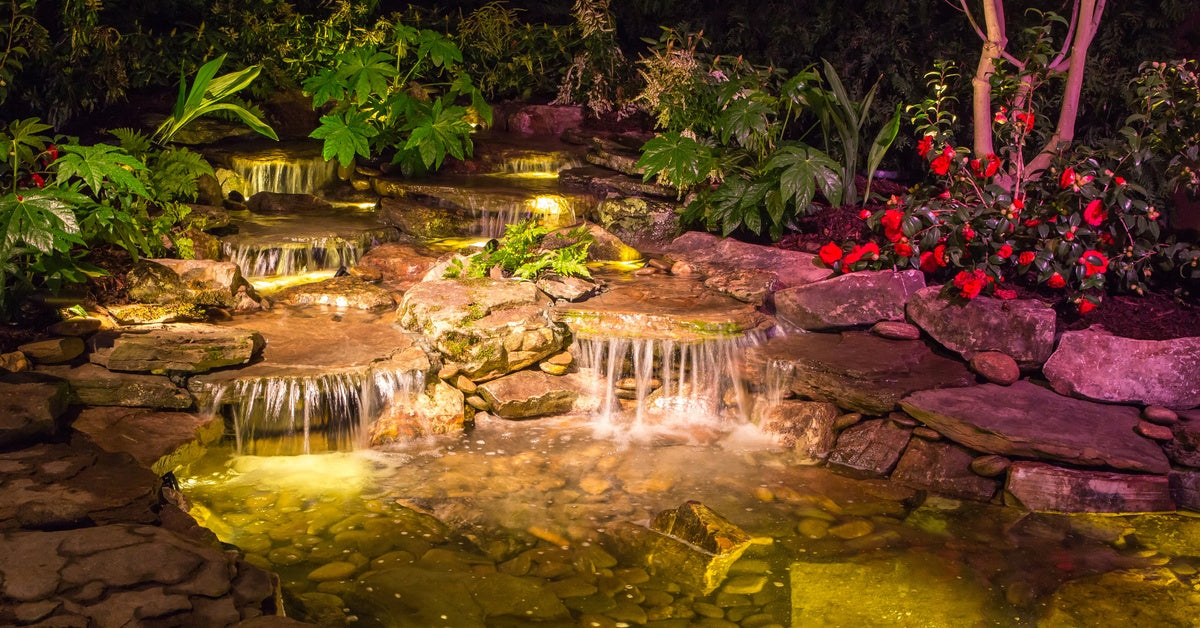
🔧 How-To Brief
Submerged and low-to-the-ground lighting in a water feature requires purpose-built, waterproof fixtures. This is not the place to try and DIY a solution with indoor lights. Using the wrong type of fixture is a serious electrical hazard. Always use UL-rated, low-voltage lighting systems specifically designed for underwater use and have them installed by a qualified electrician if you are not 100% confident in low-voltage wiring.
13. Paint with Light Using Multiple Colors on Trees and Water
This design succeeds by treating the landscape like a blank canvas and using light as paint. Instead of a uniform color, different elements get different treatments: a bright, clear light for the cascading water to emphasize movement and clarity, and a mix of greens and blues for the surrounding trees. This creates distinct zones and layers within the scene, adding depth and a sense of painterly composition that is far more engaging than a single-color scheme.
💰 Budget Breakdown
You can achieve a similar multi-colored effect on a budget using solar-powered spotlights that come with color-changing LEDs. Brands like Hampton Bay or even unbranded options on Amazon offer affordable multi-packs. Instead of a permanent waterfall, a smaller, self-contained fountain (often found for under $100) can provide the water element. A few strategically placed colored lights on the surrounding bushes can replicate this enchanted feeling for a fraction of the cost.
14. Combine Task and Accent Lighting for a Cozy Shed
The key to this cozy, welcoming scene is the combination of two different types of light. There’s the functional ‘task’ light—the wall-mounted fixture above the door that illuminates the entrance for safety and use. Then there’s the ‘accent’ light—the uplights on the trees and hostas that create the mood and drama. One without the other would be incomplete; the task light alone would be boring, and the accent lights alone would be impractical. Together, they create a fully realized, layered design.
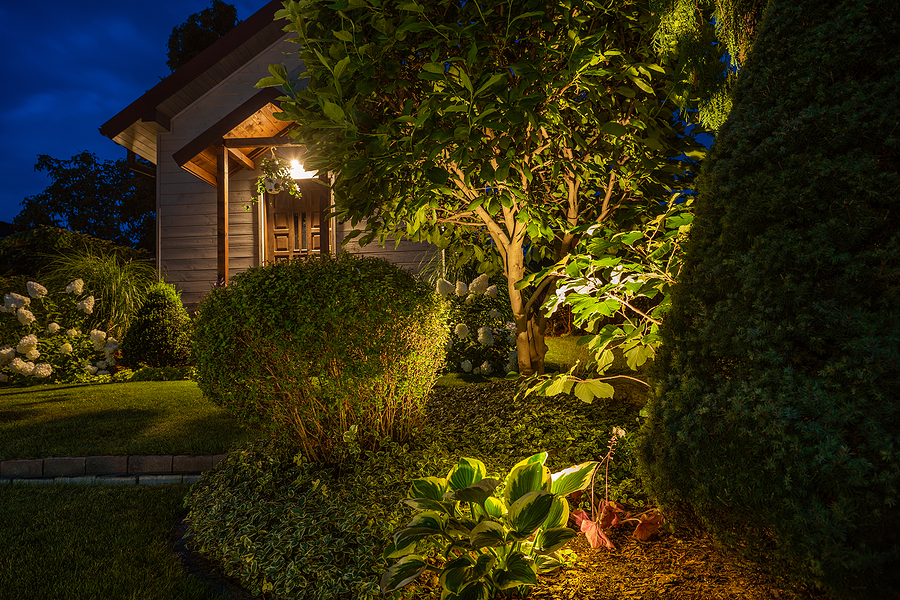
🎯 What Makes It Work
This lighting approach is perfect for smaller structures like sheds, gazebos, or even just a featured corner of your yard. The key is that the structure itself is small enough not to require massive floodlights. It works best when the surrounding plants are within 5-15 feet of the structure, allowing the accent lights to feel connected to the main focal point. For a larger house, you’d need more powerful and more numerous fixtures to achieve a similar balance.
15. Light a Serene Walkway with Lanterns on a Wooden Bridge
This scene feels so serene because of repetition and reflection. The lantern-style lights are all identical and spaced at regular intervals, creating a soothing, predictable rhythm that guides the eye and the feet. This rhythmic quality is then amplified by the reflections in the calm water below, which double the light and create a sense of perfect symmetry between the real and the reflected world. The dark, framing forest background prevents distraction and focuses all attention on the warm, guiding light.
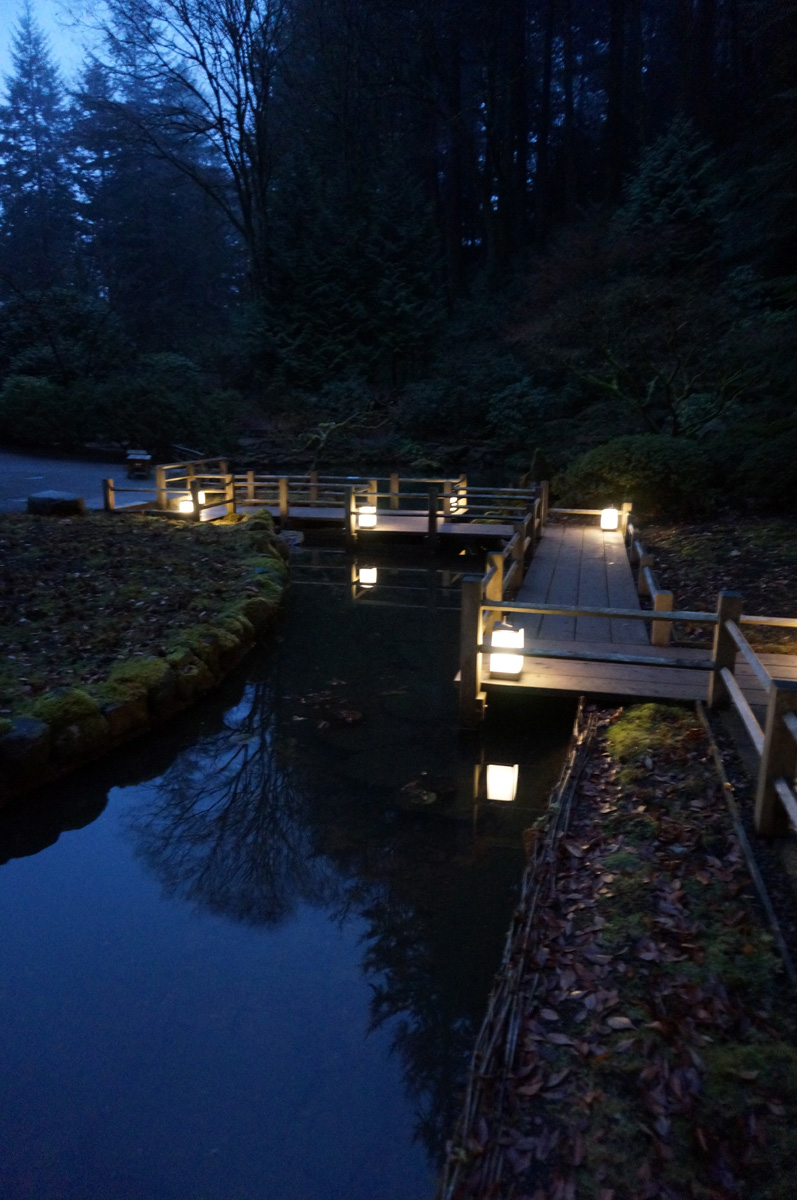
⭐ The One Thing
Wood and water are a beautiful combination, but they require upkeep. The wooden bridge will need to be cleaned and resealed every 2-3 years to protect it from moisture, rot, and UV damage, especially the railings and walking surface. The light fixtures themselves, being so close to the water, may be prone to corrosion or mineral buildup on the lenses, so a quick wipe-down a couple of times a year will keep their glow clear and bright.
16. Use Capped Path Lights for Soft, Downward-Facing Illumination
When selecting path lights, always choose a fixture with a cap or shield that directs the light downwards, like the ones shown here. This is crucial for two reasons. First, it prevents glare. You see the illuminated path, not a blinding bulb. Second, it creates a much more pleasant and subtle effect, casting soft pools of light exactly where you need to see. Unshielded path lights, especially those with clear glass, create light pollution and a less sophisticated look.
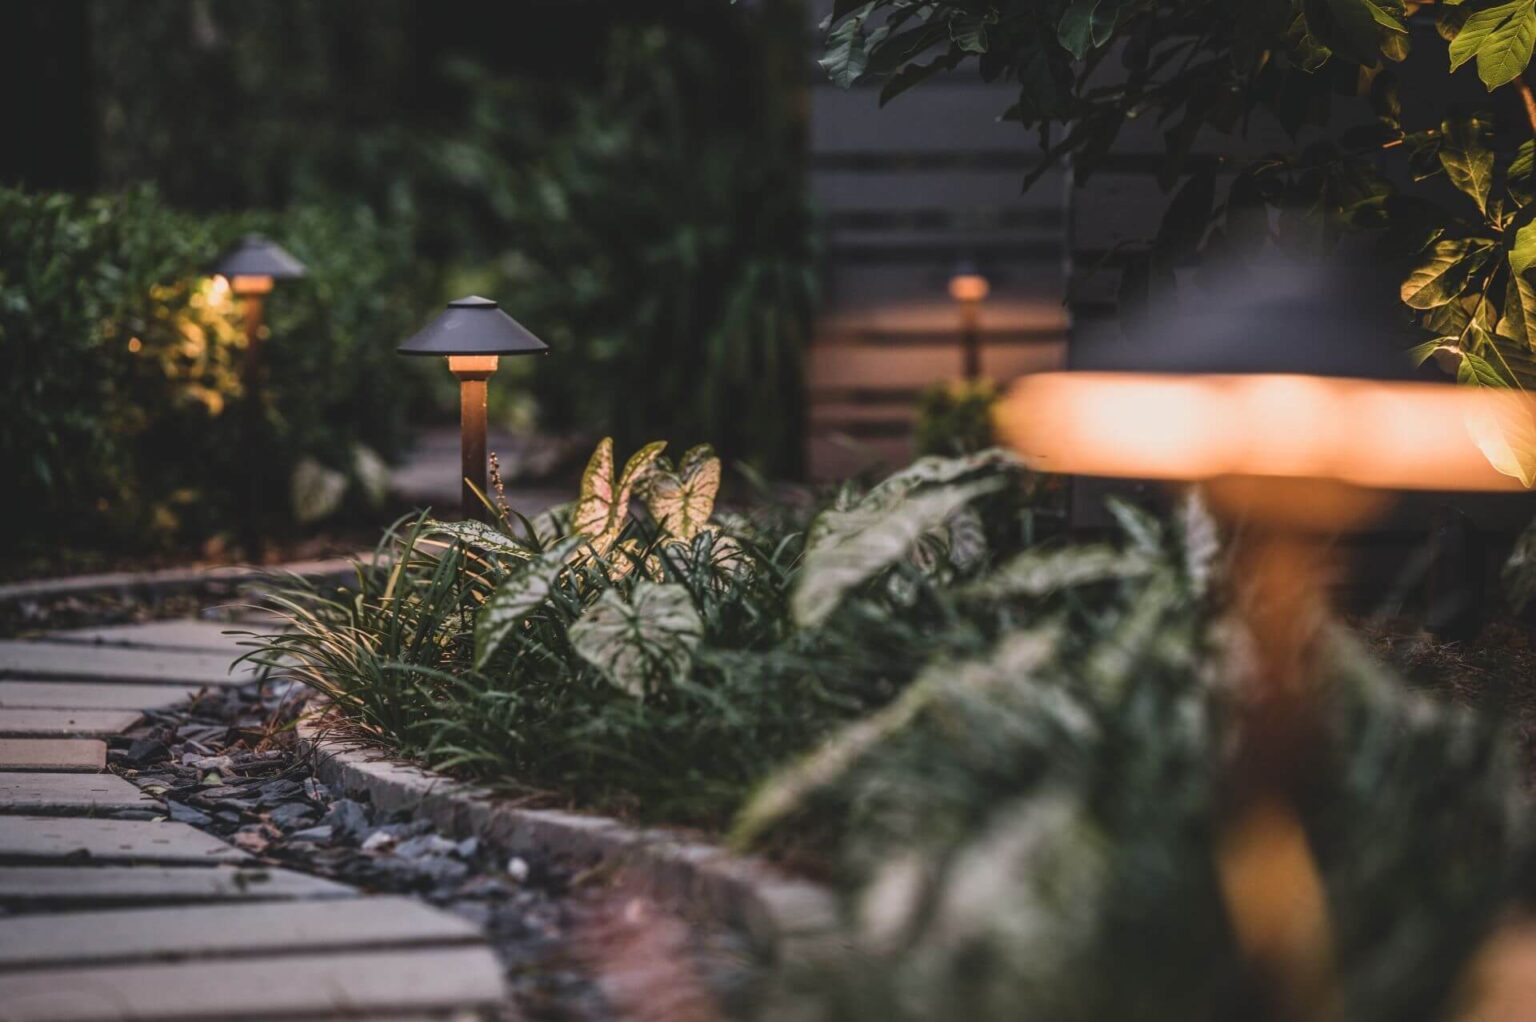
🔥 Trending Context
The defining feature of this look is the softness of the light. The fixtures are intentionally low-impact; their job is not to flood the area with bright, harsh light but to gently highlight the texture of the nearby foliage and provide just enough illumination to suggest the path’s edge. This restraint is what makes the scene feel so natural and inviting, rather than utilitarian or commercial. It’s lighting that whispers instead of shouts.
17. Bring a Pond to Life with Underwater and Pathway Lights
A well-lit pond environment is all about balance: 40% in-water lighting + 40% surrounding landscape lighting + 20% path lighting. The underwater lights are the star, revealing the fish and rocks. The landscape lights provide context, illuminating the trees and waterfall that frame the pond. Finally, the path lights ensure you can safely navigate the space. Leaving out any one of these components would make the scene feel incomplete—either unsafe, lacking drama, or disconnected from the rest of the garden.
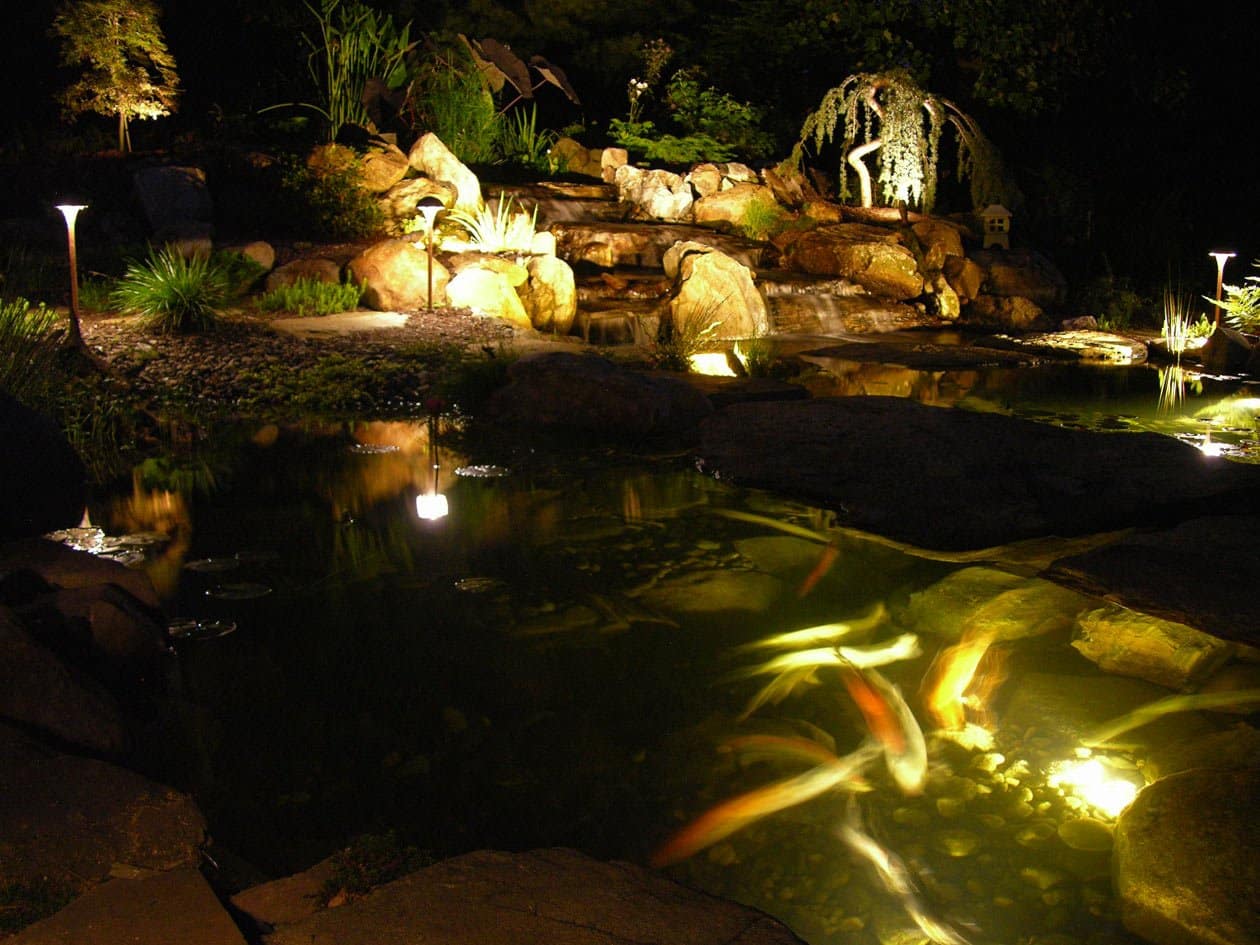
📏 Scale Guide
Lighting a pond can be magical, but it reveals everything—including algae and murky water. If you’re going to invest in underwater lighting, you must also commit to keeping the pond water clear. This means having an adequate filtration system, managing aquatic plants, and potentially using water treatments. A bright light shining into cloudy water is not the enchanting effect you’re hoping for.
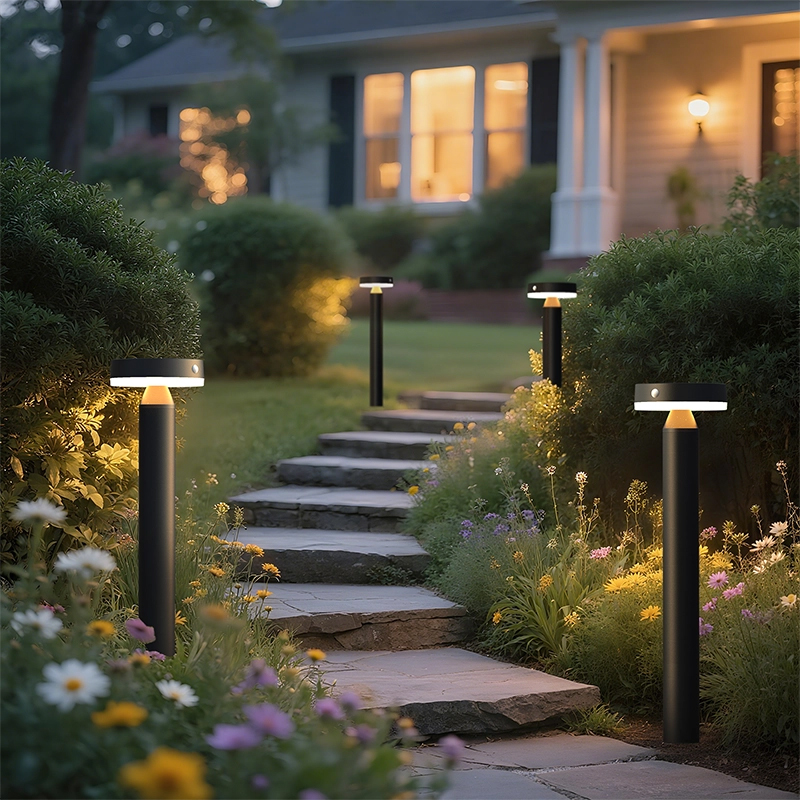
18. Modernize Your Garden with Tall, Rectangular Bollard Lights
This design feels simultaneously modern and lush because of the contrast between the clean, rigid forms of the bollard lights and the soft, organic shapes of the plants. The tall, minimalist black rectangles provide a strong vertical element that acts as a visual anchor in the sprawling garden beds. They impose a sense of order and contemporary design onto the wildness of the foliage, making the entire landscape feel curated and intentional.
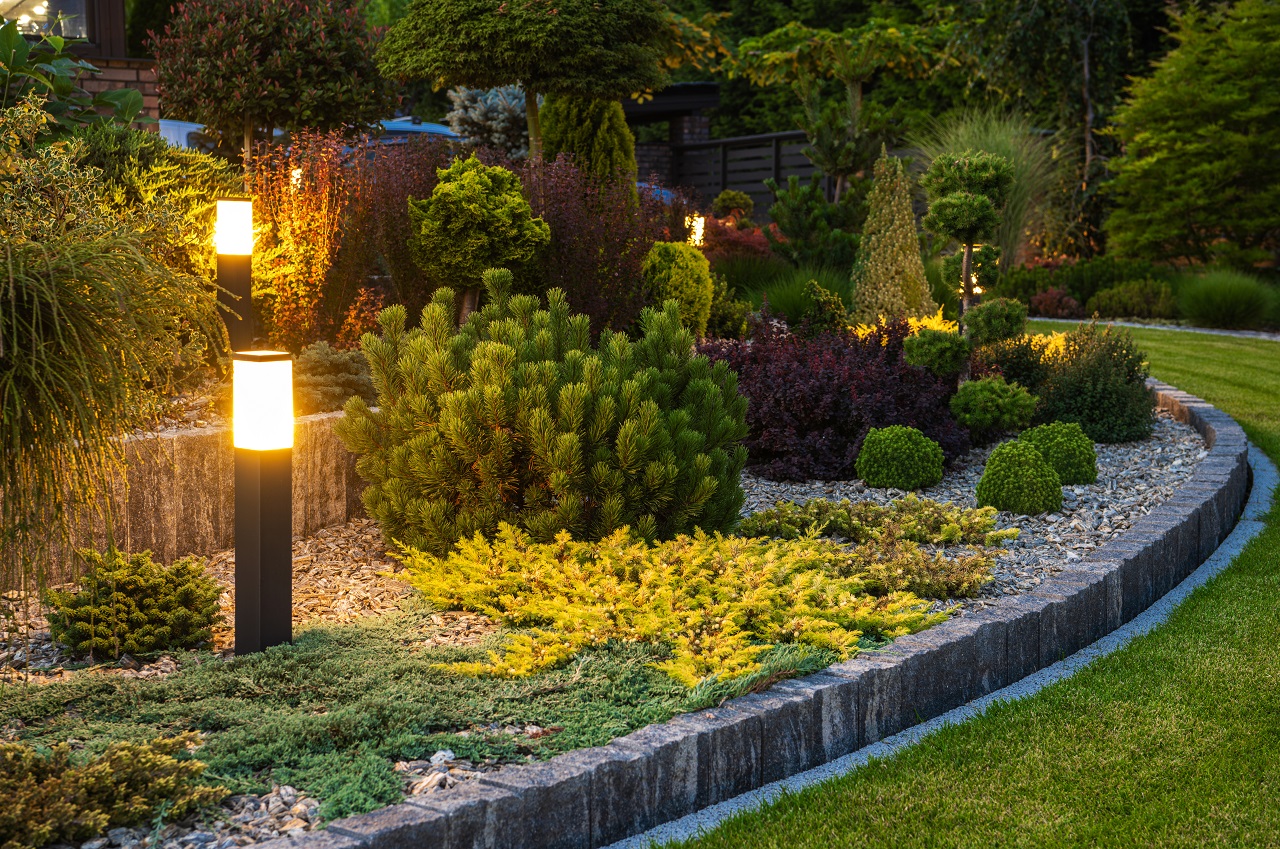
🧹 Maintenance Reality
Bollard lighting is seeing a huge resurgence, especially styles like this that are sculptural in their own right. As homeowners invest more in landscape design, they want lighting fixtures that look good 24/7, not just when they’re switched on. A well-designed bollard acts as a piece of daytime garden art, defining edges and adding structure, which is a departure from older lighting styles that were meant to be hidden.
19. Create a Patio Focal Point with Tree and Fence Lighting
- Main Furniture: Two armchairs and pouf – $500 – $1,200
- Lighting: One uplight and LED strip for fence – $150 – $400
- Planter & Tree: Large planter and small tree – $200 – $500
- Decor/Accessories: Cushions and throw – $100 – $250
- TOTAL: $950 – $2,350
- Budget alternative: Source similar chairs from Facebook Marketplace ($100-300), use a simple solar uplight ($30), and string cafe lights behind the fence instead of a custom install ($50). Total cost: around $400.
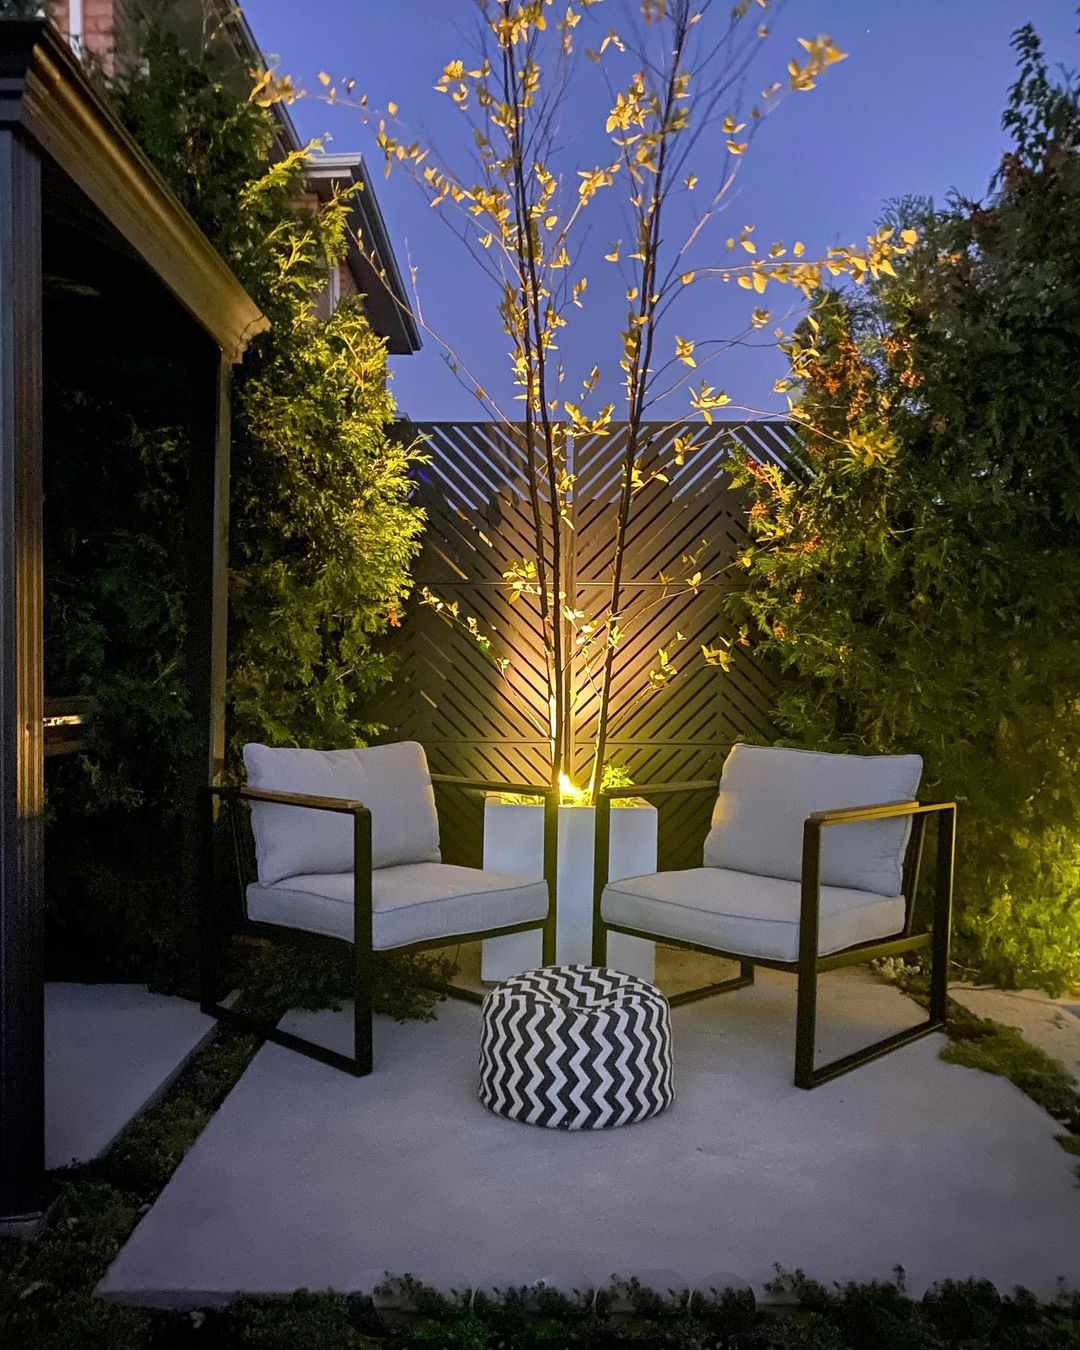
📐 Style Math
The trick to making a small tree look this dramatic is to use a narrow-beam spotlight (15-25 degrees). A wide-beam floodlight would spill light everywhere, washing out the effect. Place the fixture close to the base of the trunk and aim it almost straight up. This creates the striking shadows and highlights that make the branches pop against the night sky, turning a simple plant into a major statement piece.
20. Weave a Canopy of Warmth with String Lights and Lanterns
The star of this cozy scene is unequivocally the large tree. Everything else—the string lights, the hanging lanterns, the fire pit, the chairs—is anchored by its presence. The tree provides the scaffolding for the canopy of light, and its organic form offers a beautiful, natural contrast to the clean lines of the contemporary patio furniture. Removing the tree would collapse the entire concept; it’s the heart of the design that makes this space feel like an outdoor room.
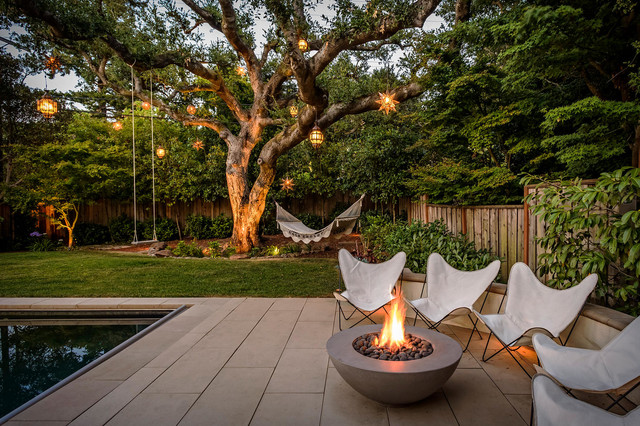
✅ Before You Start
Before you commit to this magical, light-draped look, run through this quick checklist:
- Anchor Points: Do you have at least two, preferably three, solid points to string the lights from? (A tree, a house wall, a sturdy fence post).
- Power Source: Is there a GFCI-protected outdoor outlet within a reasonable distance? Running extension cords across the lawn is a temporary fix, not a safe long-term solution.
- Clearance: Is there enough height to hang the lights so they are well above head-level and not a hazard? Aim for at least 8-10 feet off the ground.
21. Flank a Stone Pathway with Glowing Garden Orbs
This look is so enchanting because it plays with expectations. Path lights are typically small and directional, but these large, glowing spheres are ambient and decorative. They don’t just light the path; they become a major feature of it. Their soft, diffuse glow is less about sharp visibility and more about creating a mystical atmosphere. Placed within the dense foliage, they feel like found objects from a fairytale, a much more imaginative approach than the more structured look of Idea #22.

💸 Get This Look For Less
Large spherical lights like these make a big statement, so they work best in gardens with some breathing room. The pathway should be at least 4-5 feet wide to prevent the orbs from feeling cramped or becoming obstacles. This idea is ideal for a medium to large backyard where the lights can be nestled into substantial garden beds that are at least 3-4 feet deep. In a very narrow side yard, they might overwhelm the space.
22. Guide the Way with Modern ‘Mushroom’ Bollard Lights
For pathway lighting up steps or a slope, spacing is key. Place a light at the bottom, one at the top, and one at every major change in direction or elevation. For a straight run of steps like this, placing a fixture every 3-4 steps on alternating sides prevents a boring ‘runway’ effect. This staggered placement creates a more natural, pleasant journey and provides ample light for safe navigation without being overly bright.
💡 Designer Tip
What truly elevates this design is the choice of fixture. The flat, circular ‘mushroom’ top on these bollards is a deliberate, modern design choice. It not only directs all light downward onto the path where it’s needed (and out of your eyes), but its clean, geometric shape also provides a beautiful contrast to the soft, colorful, and slightly wild flower beds that surround the path. It’s the tension between the curated fixture and the natural planting that makes it interesting.
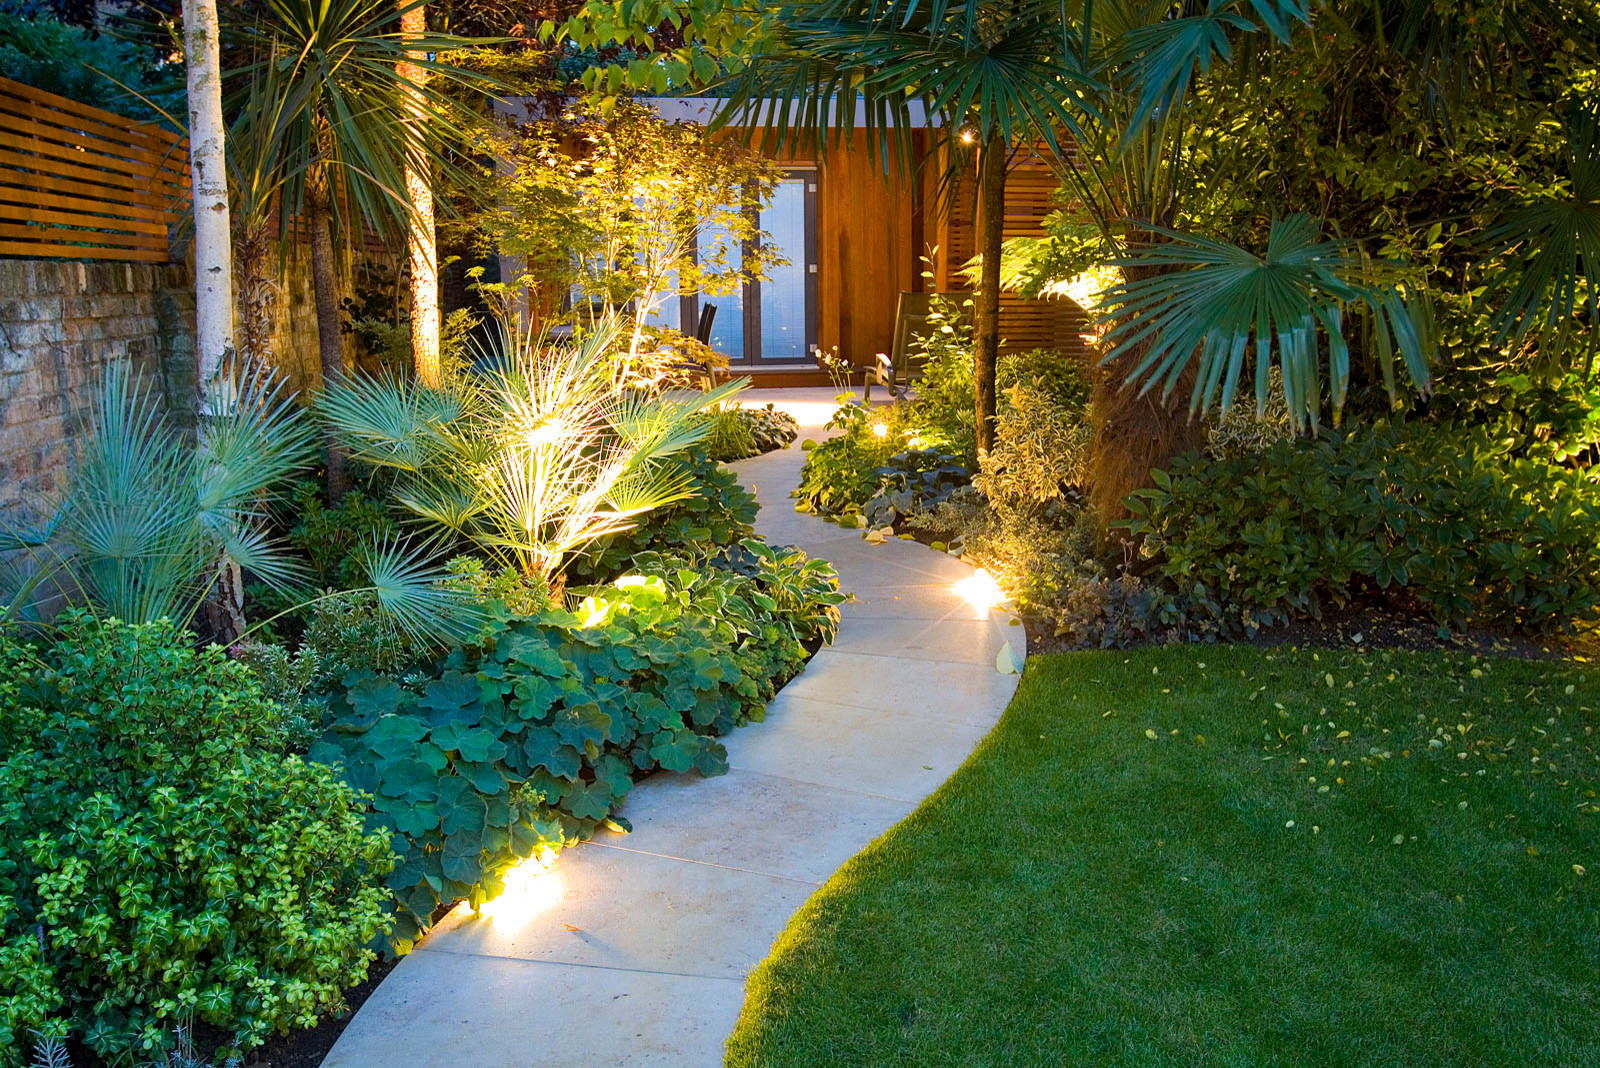
23. Use Small Path Lights to Weave Through Lush Garden Beds
This lighting scheme is successful because it prioritizes mood over mechanics. The lights aren’t placed in a rigid, straight line. Instead, they are tucked in and around the curves of the pathway and nestled deep within the foliage. This creates an inviting sense of discovery, where little pockets of light reveal the color and texture of different plants. The goal isn’t to illuminate the entire path evenly, but to create a gentle, meandering experience that feels integrated with the garden itself.
⚠️ Real Talk
A lush, densely planted garden like this is beautiful, but be prepared for regular upkeep to keep your lighting effective. Plants grow! You’ll need to trim back leaves and stems that grow over your path lights at least once or twice a month during the growing season. If you don’t, your carefully placed lights will be completely swallowed by the foliage, leaving your path dangerously dark and defeating the whole purpose of the installation.
24. Install Minimalist Bollards for a Clean, Manicured Lawn
The single element that defines this look is the clean edge. The lighting works because the garden beds are so sharply and perfectly defined against the manicured lawn. The modern bollard lights are placed right at this border, reinforcing the clean lines and deliberate curves of the landscape design. This precision is what gives the entire yard a high-end, professionally-maintained appearance. Without those crisp edges, the lights would just look randomly placed in a messy yard.
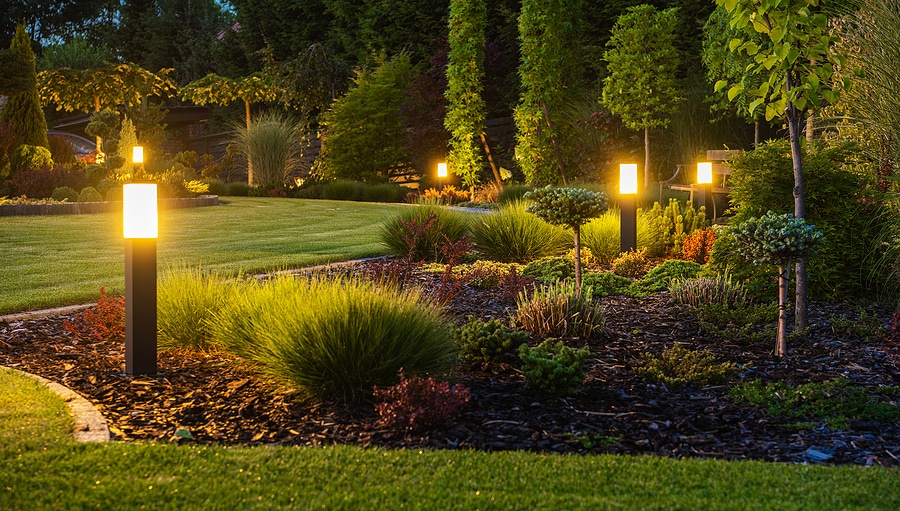
🔧 How-To Brief
Maintaining those perfect, curved garden bed edges is a recurring task. To keep the look this sharp, you’ll need to edge the lawn every few weeks with a string trimmer or a manual edger. Also, the dark wood chip mulch will fade in the sun and decompose over time. Plan on top-dressing it with a fresh layer every 1-2 years to keep that rich, dark color that provides such a great contrast to the green lawn and the warm lights.
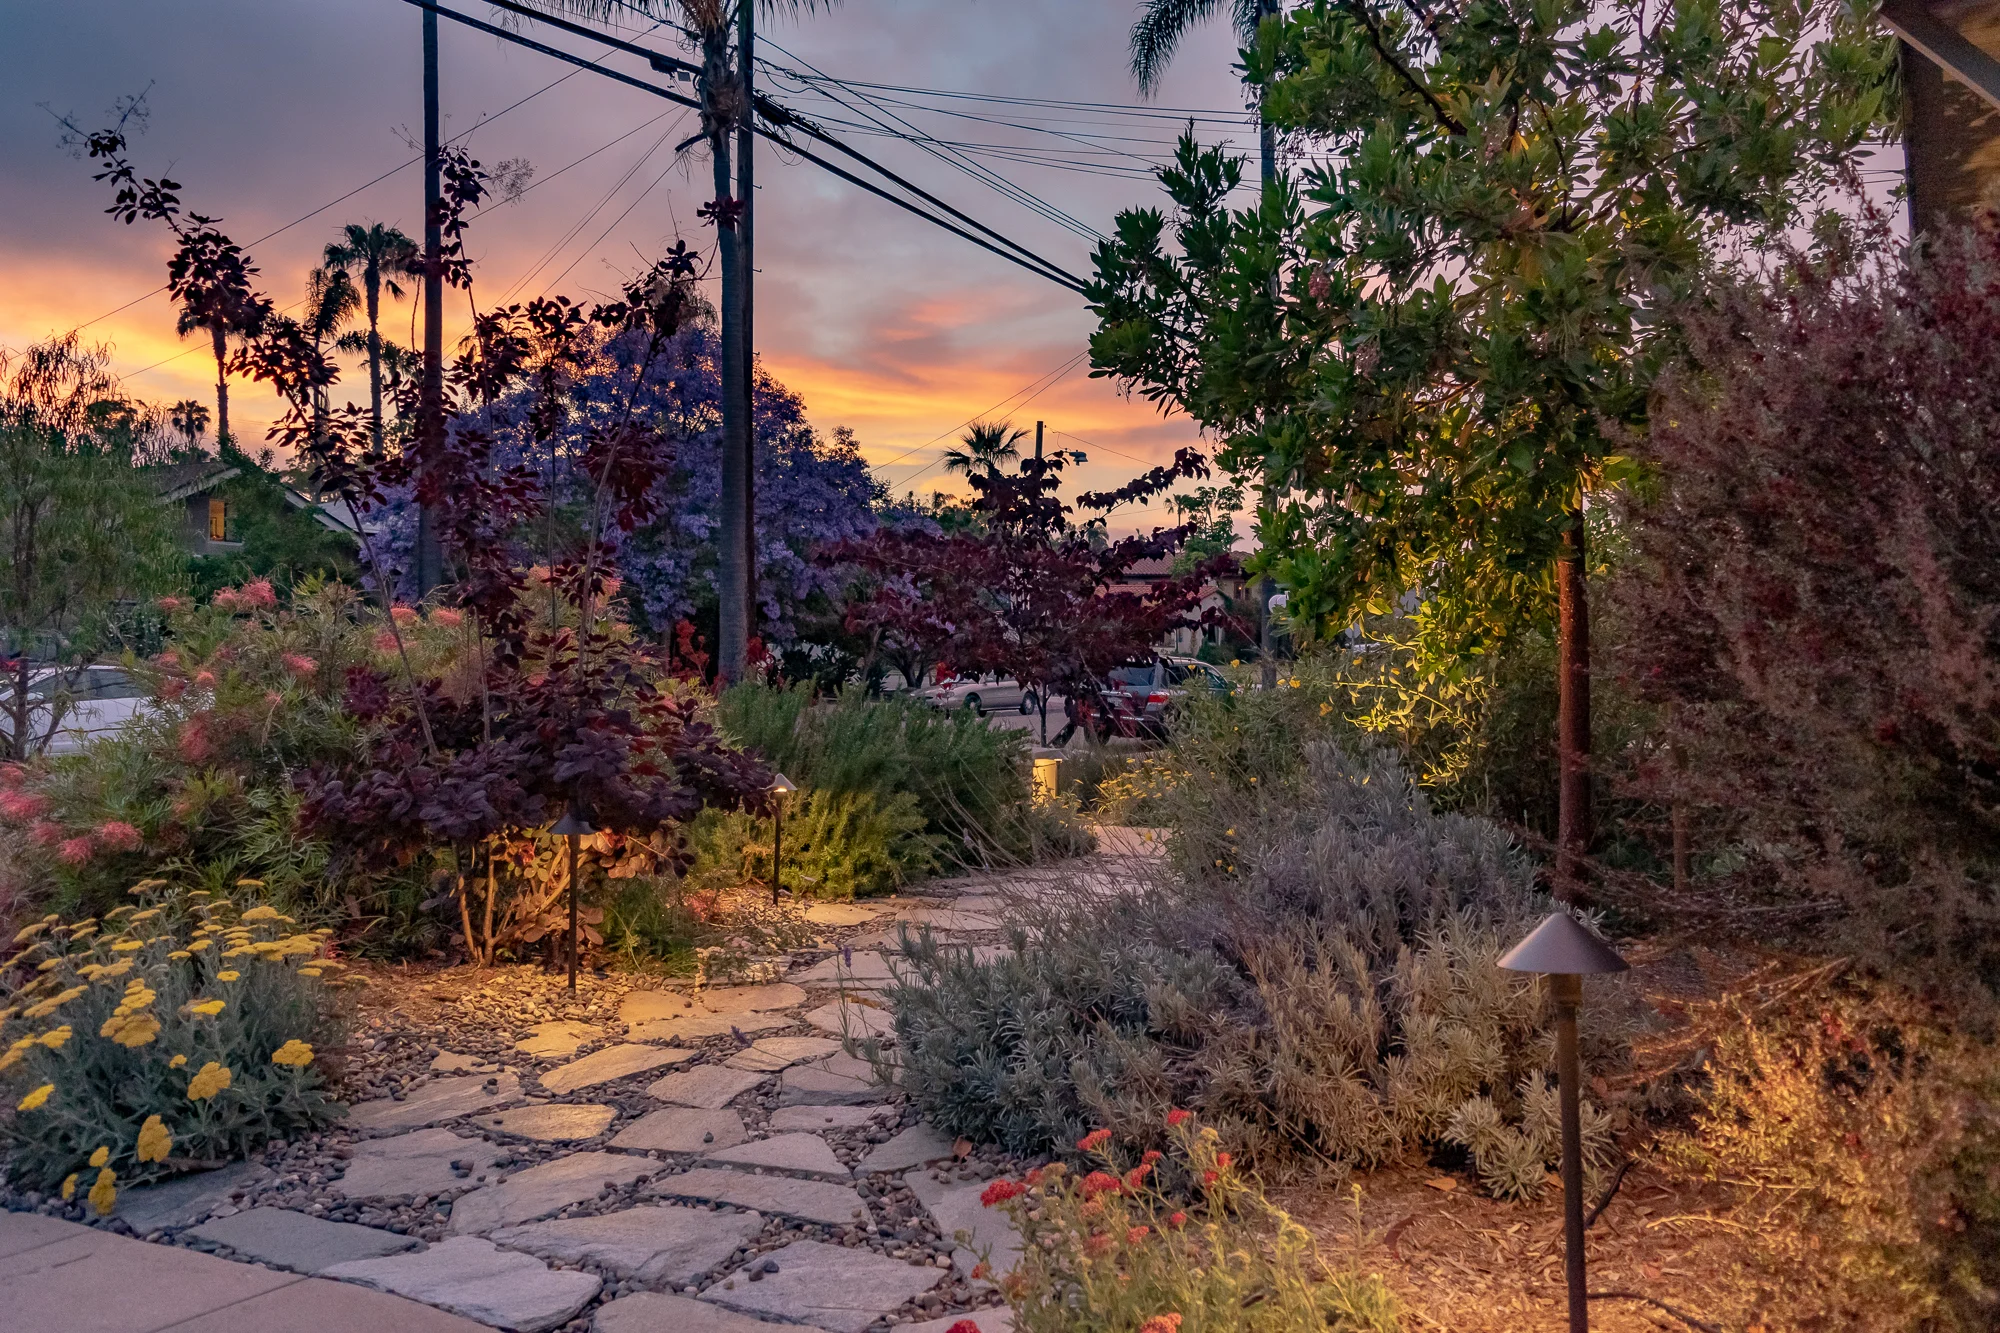
25. Carve a Winding Path with Warm Plant Uplighting
The formula for this enchanting look is simple: 70% accent lighting + 30% path material. The overwhelming majority of the visual impact comes from the warm, golden uplights on the diverse foliage. The path itself, made of simple light-colored stone, acts as a neutral ribbon that ties the illuminated scenes together. The focus is entirely on the dramatic shapes of the palm trees and shrubs against the night sky. You could change the path material to gravel or wood, and the magical effect would persist because the lighting is the star.
💰 Budget Breakdown
When laying out path lighting in a garden, think in terms of ‘scenes,’ not just a line of lights. Instead of evenly spacing them, cluster 2-3 fixtures to dramatically light a beautiful specimen tree, then leave a darker space, then create another ‘scene’ by highlighting a group of interesting shrubs. This creates rhythm and drama, making a walk through the garden feel like a journey through an art gallery, as seen with the varied focal points here.
26. Set a Japanese Garden Mood with a Stone Lantern and Uplights
This incredible scene feels so balanced because it combines traditional and modern lighting techniques. The classic stone lantern (Tōrō) provides a low, warm, and historically authentic focal point in the foreground. This is then supplemented by powerful modern uplights that create the dramatic, saturated color on the red maple and surrounding foliage. The lantern grounds the scene in its Japanese garden style, while the uplighting adds the ‘wow’ factor and depth that makes it feel truly magical and contemporary.
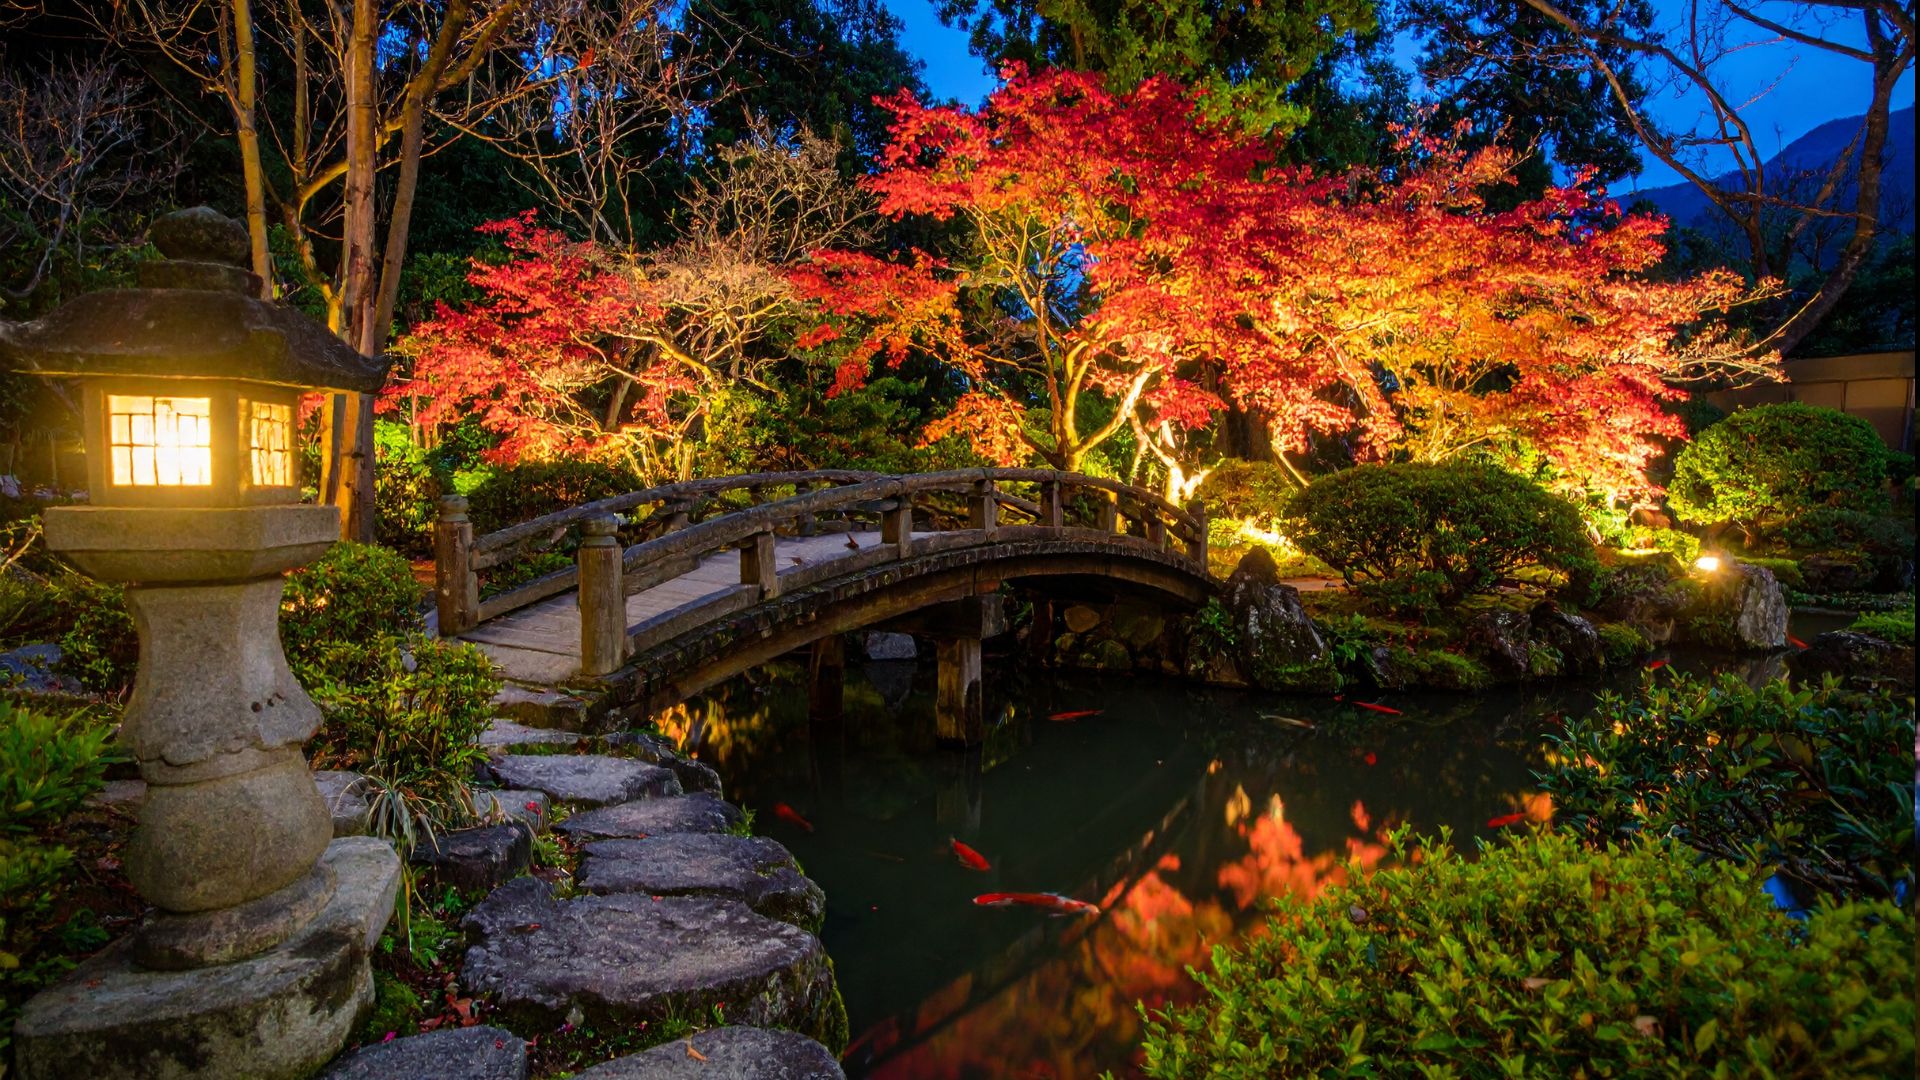
🎯 What Makes It Work
A genuine carved stone lantern and a permanent pond can be a massive investment. To get this vibe for less, search for a cast concrete or resin lantern online or at garden centers (often $100-$300). Place a simple, solar-powered puck light inside it. Instead of a pond, a simple bird bath or even a dark, glossy ceramic bowl filled with water can create beautiful reflections. Use a few solar spotlights with red-filtered lenses to illuminate a Japanese maple or any plant with reddish leaves.
27. Contrast Wood and Stone with Architectural Uplighting
The power of this design lies in its celebration of texture. The lighting’s sole purpose is to rake across the two different wall surfaces—the smooth, linear wooden planks and the rough, irregular stacked stone—to emphasize their inherent material qualities. The warm uplighting on the stone makes every crevice pop, while the light on the wood highlights its clean lines. It’s a minimalist approach that’s all about appreciating the materials in their purest form.
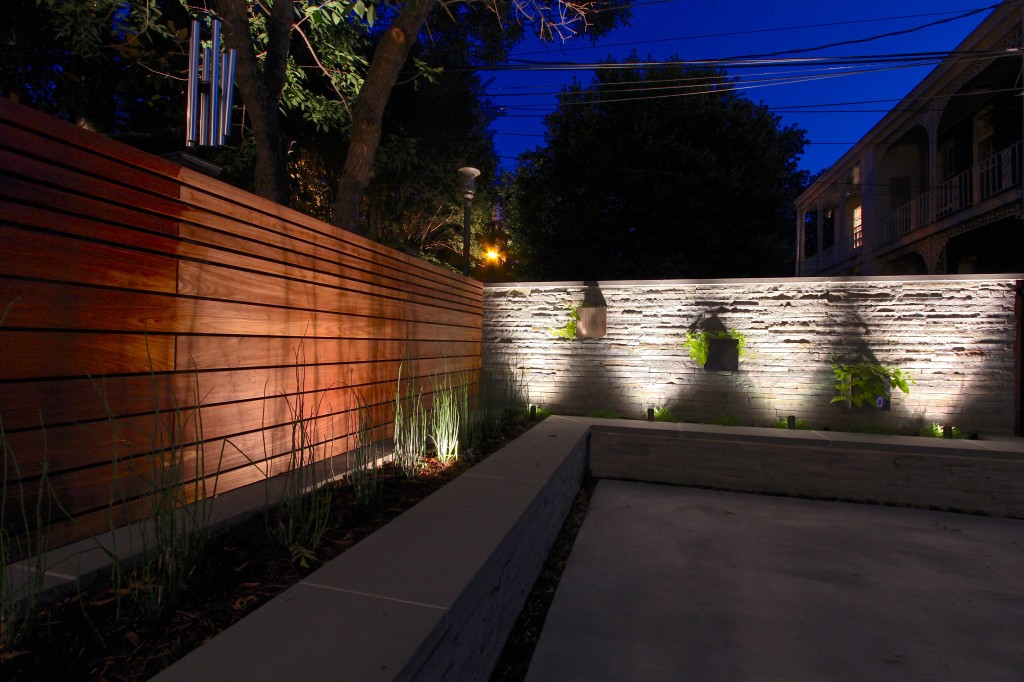
⭐ The One Thing
This technique is perfect for accent walls, retaining walls, or the facade of a modern home. It works best on walls that are between 6 and 15 feet tall. Taller, and you risk the light fading out. Shorter, and the effect can be lost. To properly light a wall like this, you need at least 10-20 feet of length to allow the pattern of light and shadow to develop. It’s a great solution for narrow side yards where you can’t plant but want to create visual interest. Compare this to the taller architecture seen in Idea #1.
28. The Classic Technique for Uplighting Garden Trees
When uplighting a tree, the goal is often to highlight the trunk’s texture and the canopy’s shape. For a medium-sized tree, a common professional technique is to use two or even three separate spotlights. Place one relatively close to the base with a narrow beam to graze up the trunk, emphasizing the bark. Then place a second, wider-beam fixture further back, aimed at the leafy canopy. This combination creates a full, rich look that feels more natural than a single, harsh light source.
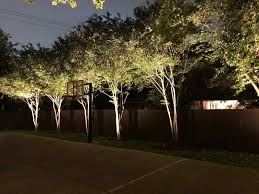
🔥 Trending Context
Be mindful of creating ‘light trespass’—spilling unwanted light onto a neighbor’s property or into the night sky. Always aim your fixtures carefully and consider using glare shields or hoods. What looks like a beautifully lit tree from your patio might be a constant, annoying glare shining into your neighbor’s bedroom window. A little consideration goes a long way in maintaining neighborhood peace.
29. Mix Gravel and Pavers with Dramatic Tree Uplighting
- Paving & Gravel: Stone slab pavers and light grey gravel – $500 – $2,000 (depending on area size)
- Lighting: 4-6 tree uplights – $300 – $800
- Furniture: Wicker chairs & small table – $400 – $1,500
- Plants & Decor: Metal sphere, pedestal, plants – $300 – $700
- TOTAL: $1,500 – $5,000
- Budget alternative: Use fewer, larger concrete pavers from a big box store and fill with pea gravel. Opt for solar uplights and source secondhand patio furniture. Total cost: around $600-$900.
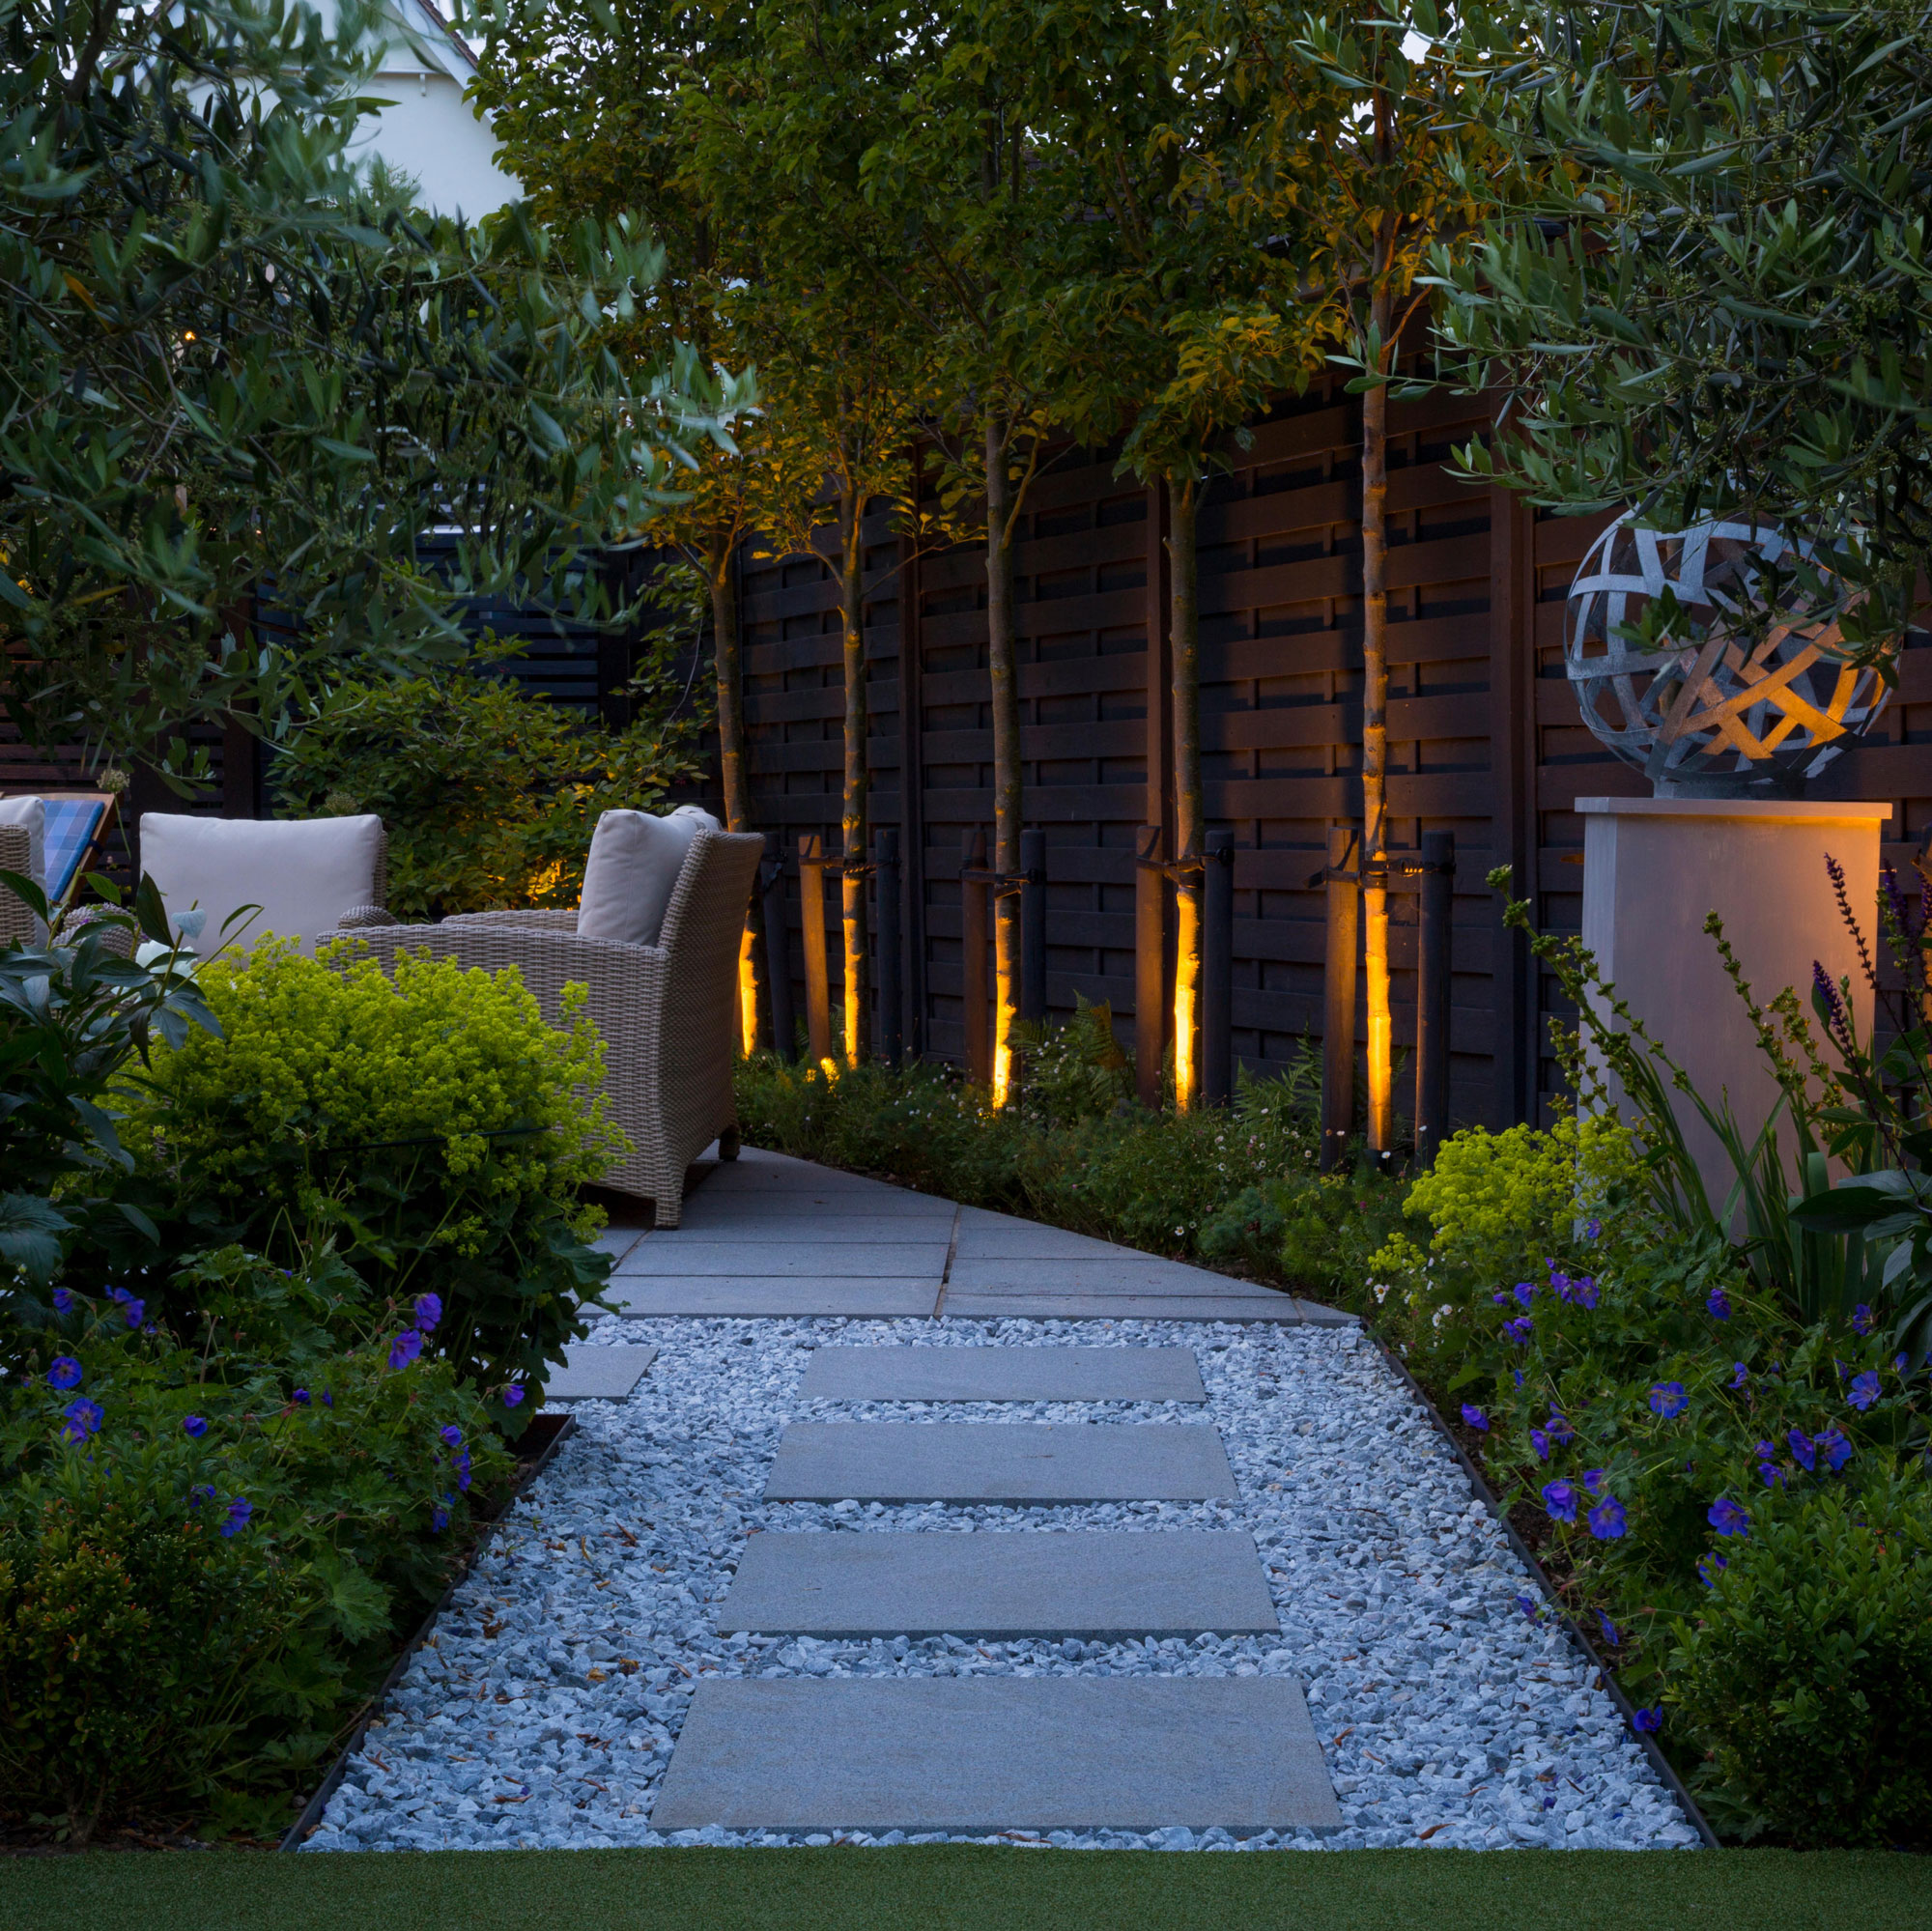
📏 Scale Guide
This design successfully marries the rustic and the refined. The irregular stone pavers and gravel ground cover have a natural, almost rustic feel, while the dramatic uplighting on the trees and the clean lines of the slatted fence are very modern and sophisticated. The sculptural metal sphere on a stark concrete pedestal acts as a perfect bridge between these two styles. It’s this intentional mix of textures and styles that makes the space feel layered and custom-designed.
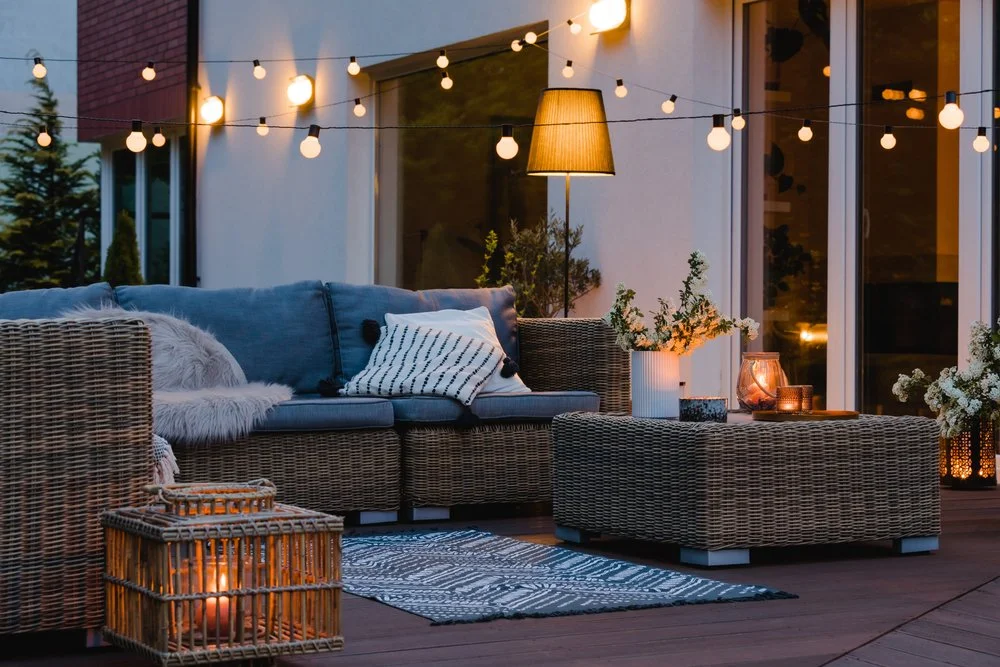
30. Layer Multiple Light Sources for the Coziest Patio
The formula for ultimate coziness is all about variety: 50% ambient overhead light (the string lights) + 30% task/accent light (the floor lamp) + 20% decorative candlelight. The string lights provide the overall warm glow for the whole space. The floor lamp adds a focused pool of light for reading. The candles provide the flickering, intimate glow that makes it feel special. You need all three layers working together to achieve this level of inviting warmth. This is a great example to compare with Idea #20 which uses a similar canopy of light.
🧹 Maintenance Reality
Before you go all-in on a layered lighting plan, check your power situation.
- How many outlets? This setup needs at least two, possibly three, weatherproof outdoor outlets.
- Are they GFCI protected? This is a non-negotiable safety requirement for any outdoor electrical setup to prevent shock.
- Can you hide the cords? A cozy vibe is instantly killed by a tangle of ugly orange extension cords. Plan your furniture layout to hide cords behind sofa legs or under rugs.
31. Illuminate a Multi-Level Patio with Integrated Wall Lights
When integrating lights into a stone retaining wall, choose fixtures with a slight downward angle and a ‘lip’ or ‘eyelid’ shield. This ensures the light shines down onto the patio surface where you need it for safety and ambiance, rather than shining outwards and creating uncomfortable glare for anyone sitting or walking nearby. These shielded fixtures are specifically designed for this purpose and make a huge difference in the final quality of the light.
📐 Style Math
The integration of the lights is the key to this entire design. By building the light sources directly into the stone retaining walls, the functionality (lighting the patio) and the structure (the walls) become one and the same. This makes the entire space feel cohesive, intentional, and high-end. If you simply placed stake lights next to the wall, you would get illumination, but you would completely lose the sophisticated, built-in aesthetic that makes this space so impressive.
Your Garden’s Nighttime Story Awaits
Whew, that was a lot of inspiration! Don’t feel pressured to tackle your entire yard at once. The best approach is to start small. Pick one area—that dark pathway, that beautiful tree, your patio seating area—and make it shine. Good lighting can completely change how you feel about your outdoor space.
Ready to start planning? Save your favorite ideas to your Pinterest board and turn that inspiration into a reality, one light at a time.
Photo credits: Houzz, lumiereus.com, The Spruce, Moments of Ma – WordPress.com, Ideal Home, Clicka Lights, Inaray, Birddog Lighting, BulbSquare · In stock, Americana Outdoor Lighting, Dazuma, Mid South Outdoor Lighting & Audio, Enhanced Outdoor Lighting & Design, Beautiful Blooms Landscaping, Sprinkler Pro, Triangle Gardener Magazine, Gardening Know How, Ciminello’s, Willow Gates Landscaping, Limelight Outdoor Lighting, Miller Outdoors, Outdoor Illumination, Wallis Landscape, Good Earth Water Gardens, Aquascape Construction, Pond Universe, Sunset Magazine, Real Homes, The Gold Hive, Outdoor Lighting / Web