32 Stunning Halloween Door Decorations You Need to Try for the 2026 Season That Will Turn Heads

You know that feeling when you finally find the perfect Halloween door inspiration that looks exactly right for your home? Getting your front porch ready for spooky season should be fun, not a chore. After filtering through hundreds of options across Target, Home Depot, and Etsy, we narrowed it down to the looks that actually deliver. Inside, you’ll find 32 curated front door ideas, from cozy and classic autumnal looks to genuinely spooky and modern glam designs. For 2026, the trend is all about moving past generic kits. Pinterest is flooded with unique, layered front porch stories that feel personal and photogenic, and we’re showing you how to get that look. And stay until the end — we break down the most common mistakes that can ruin these looks. (This post may contain affiliate links, which means we may earn a small commission if you make a purchase.) 📌 Pin this guide for later — your future self will thank you when it’s time to actually do this.
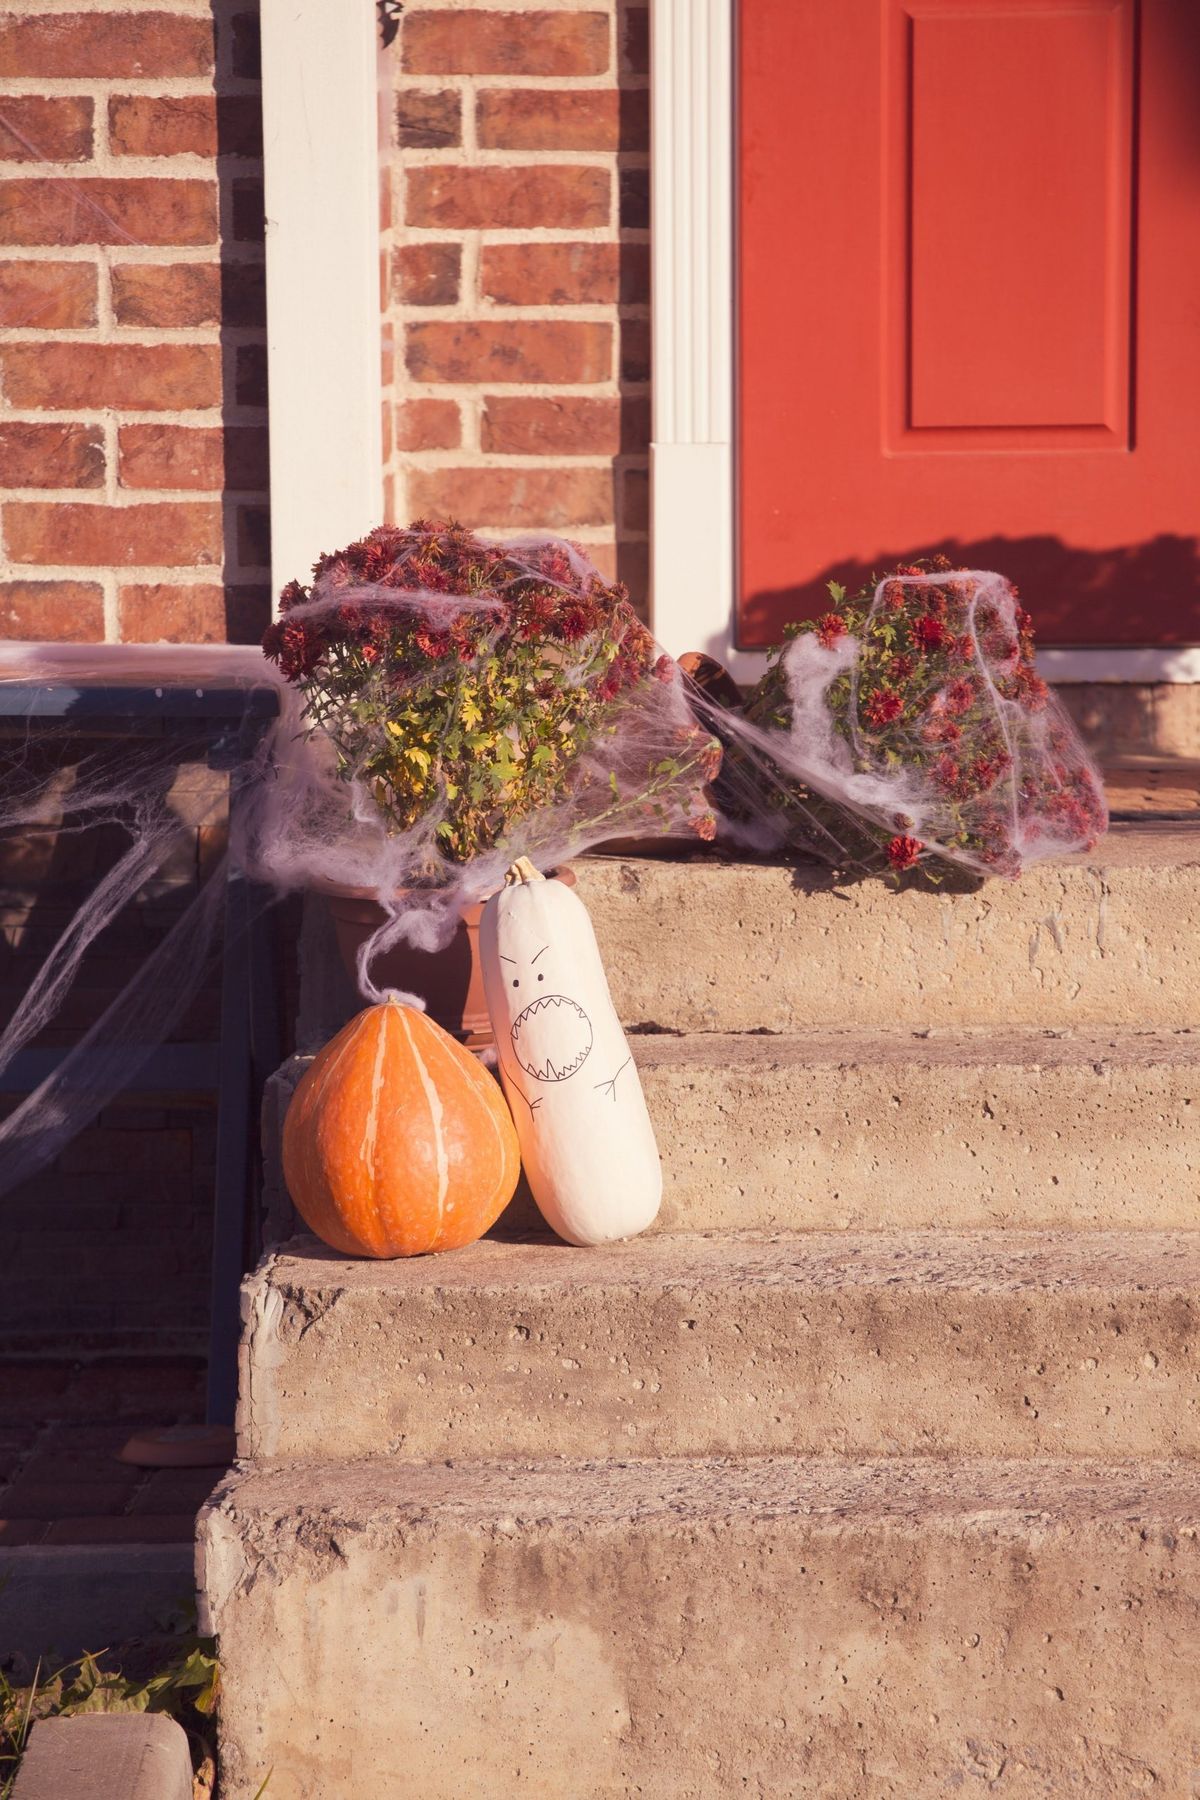
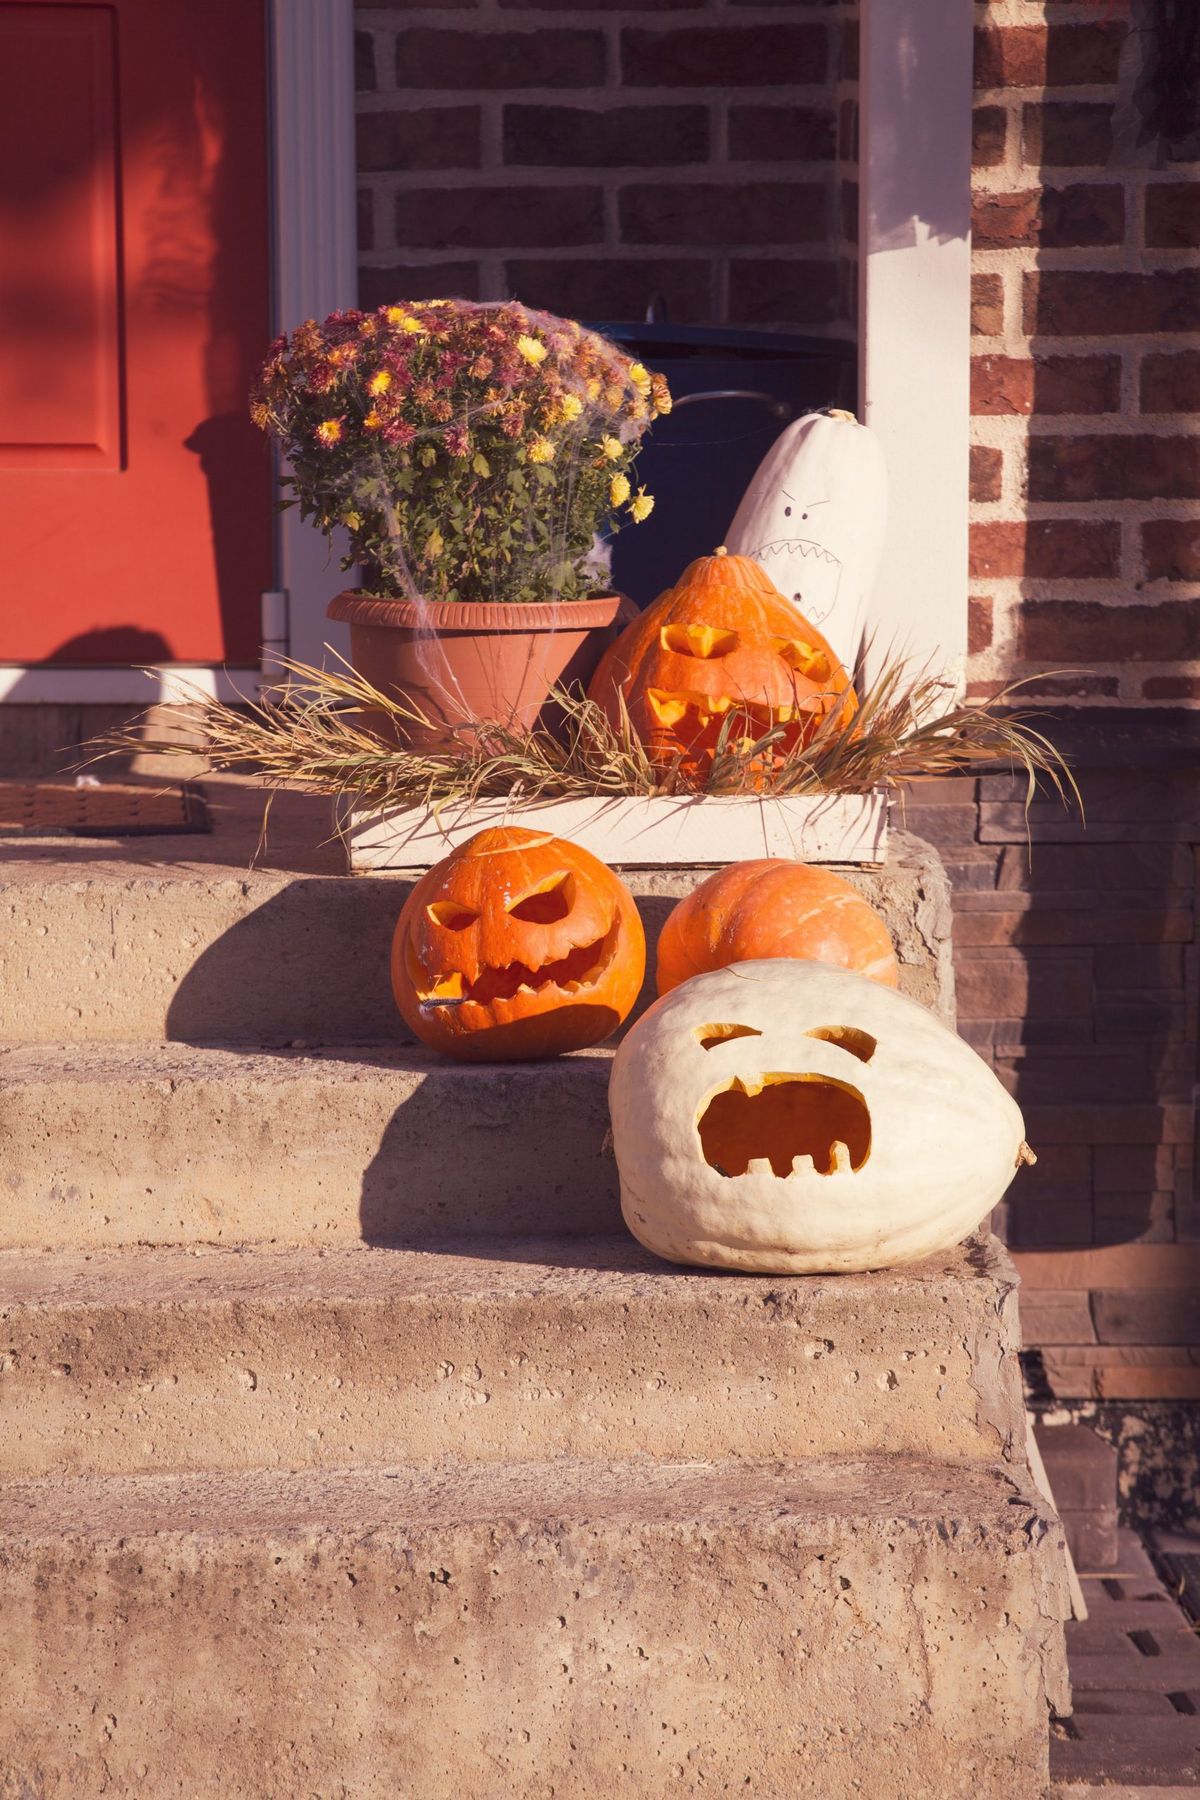
1. Playful Monster Squash on a Spider-Webbed Porch
What Makes It Work: This look succeeds because of its smart use of color and personality. The bright red door creates a vibrant, high-contrast backdrop that makes the seasonal oranges and deep burgundies of the mums pop. The real charm, however, is the hand-drawn angry face on the white squash. It’s a tiny detail that injects a huge dose of playful, homemade character, preventing the decor from feeling like a generic store-bought set. The mix of a traditional round pumpkin with a quirky, decorated gourd adds visual interest and a touch of wit.
🔥 Trending Context
Real Talk: Those expansive, drapey spiderwebs look fantastic for a photo, but they are a magnet for real leaves, actual spiders, and dirt. In a windy or rainy area, they can quickly become a tangled, sad-looking mess. Plan to either replace them weekly or use them in a more sheltered part of your entryway. Also, be mindful that the webbing can be a hazard for local wildlife, particularly birds, so consider using a thicker, more ‘rope-like’ web material that’s less likely to ensnare small animals.
2. A Classic Pumpkin Lineup on Concrete Steps
Designer Tip: When arranging multiple jack-o’-lanterns, create a visual hierarchy. Don’t just line them up. Place the largest or most intricately carved pumpkin at a key focal point—like the top step or center stage. Then, flank it with smaller pumpkins with simpler faces. This creates a ‘hero’ pumpkin that draws the eye, making the whole composition feel more intentional and less like a random pile. For added depth, mix in a few uncarved white or green pumpkins to break up the sea of orange. The contrast in color and texture will make your carved designs stand out even more.
💡 Designer Tip
Get This Look For Less: The cost of buying a dozen perfect pumpkins can add up. Hit up a local farm or farmer’s market towards the end of the day; they often sell bruised or misshapen pumpkins for a fraction of the price (under $5 each). Since you’re carving them anyway, imperfections don’t matter. The potted mums can be swapped for a DIY arrangement of foraged fall branches and leaves, which costs nothing. For a similar feel to the display, check thrift stores for old wooden crates or trays to add height for free or a few dollars. See a similar rustic vibe in Idea #1, but with a more minimalist approach.
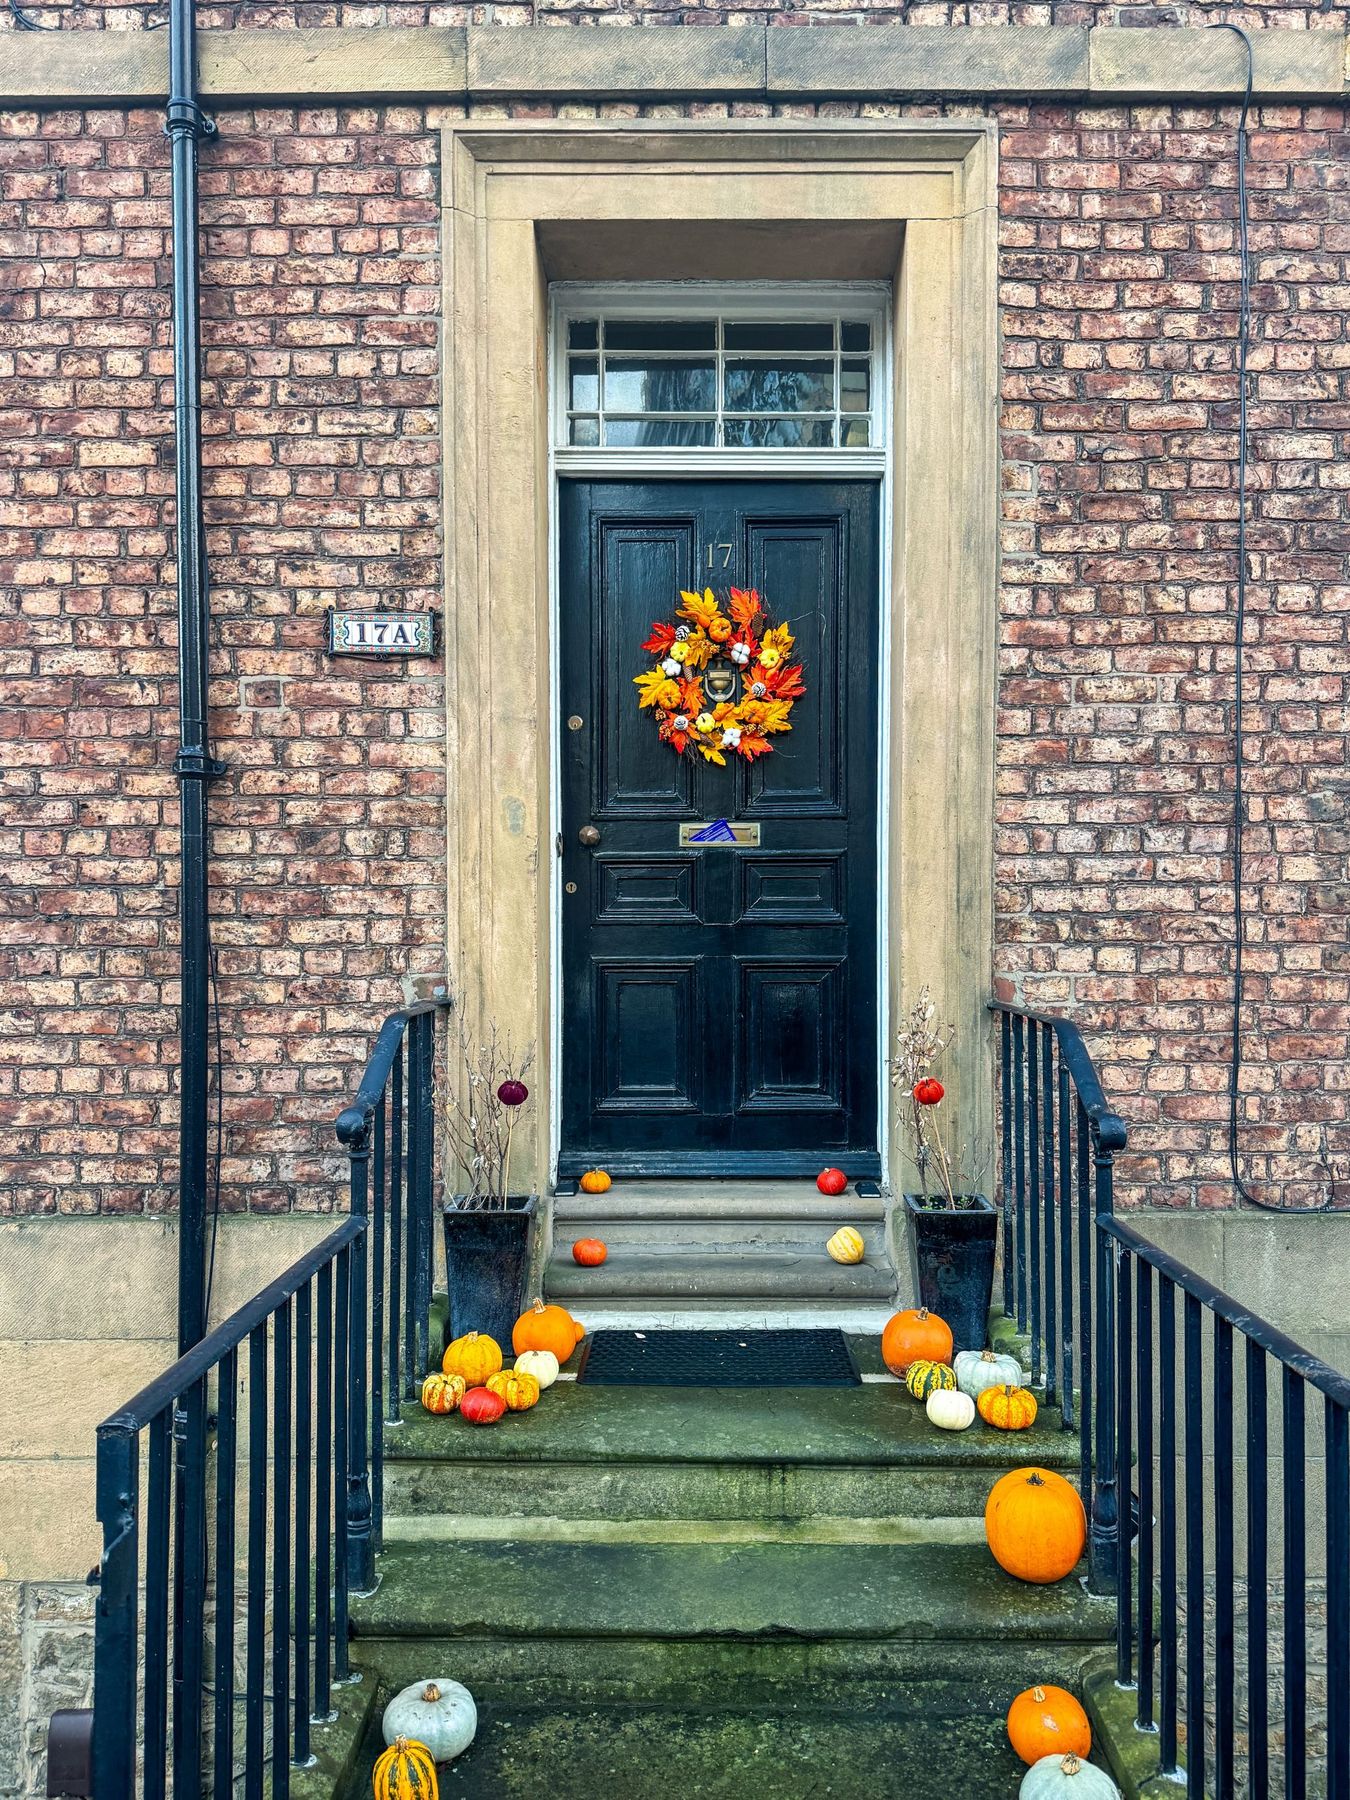
3. Black Paneled Door with an Autumn Leaf Wreath
Style Math: This elegant and traditional look follows a simple formula: 50% classic architecture + 30% natural textures + 20% seasonal color. The black door and brick facade provide a timeless, neutral base. The wreath and dry stalks in the planters bring in natural, rustic textures. Finally, the assorted pumpkins inject that essential pop of autumnal color—burnt orange, muted green, and cream. You could swap the black door for a deep navy or forest green and still maintain the same sophisticated feel, as long as you keep the texture and color ratios balanced.
📐 Style Math
Before You Start Checklist:
- Measure your door. A standard door is 36 inches wide, so your wreath should be between 22-24 inches in diameter to look properly scaled.
- Check your step depth. You need at least 12-15 inches of depth on your steps to arrange pumpkins without creating a tripping hazard.
- Confirm your lighting. This look benefits from soft, ambient light. Do you have overhead sconces, or will you need to add small, battery-powered lanterns?
- Assess your color palette. Make sure the oranges and reds of the decor will complement, not clash with, your home’s exterior paint and trim color.
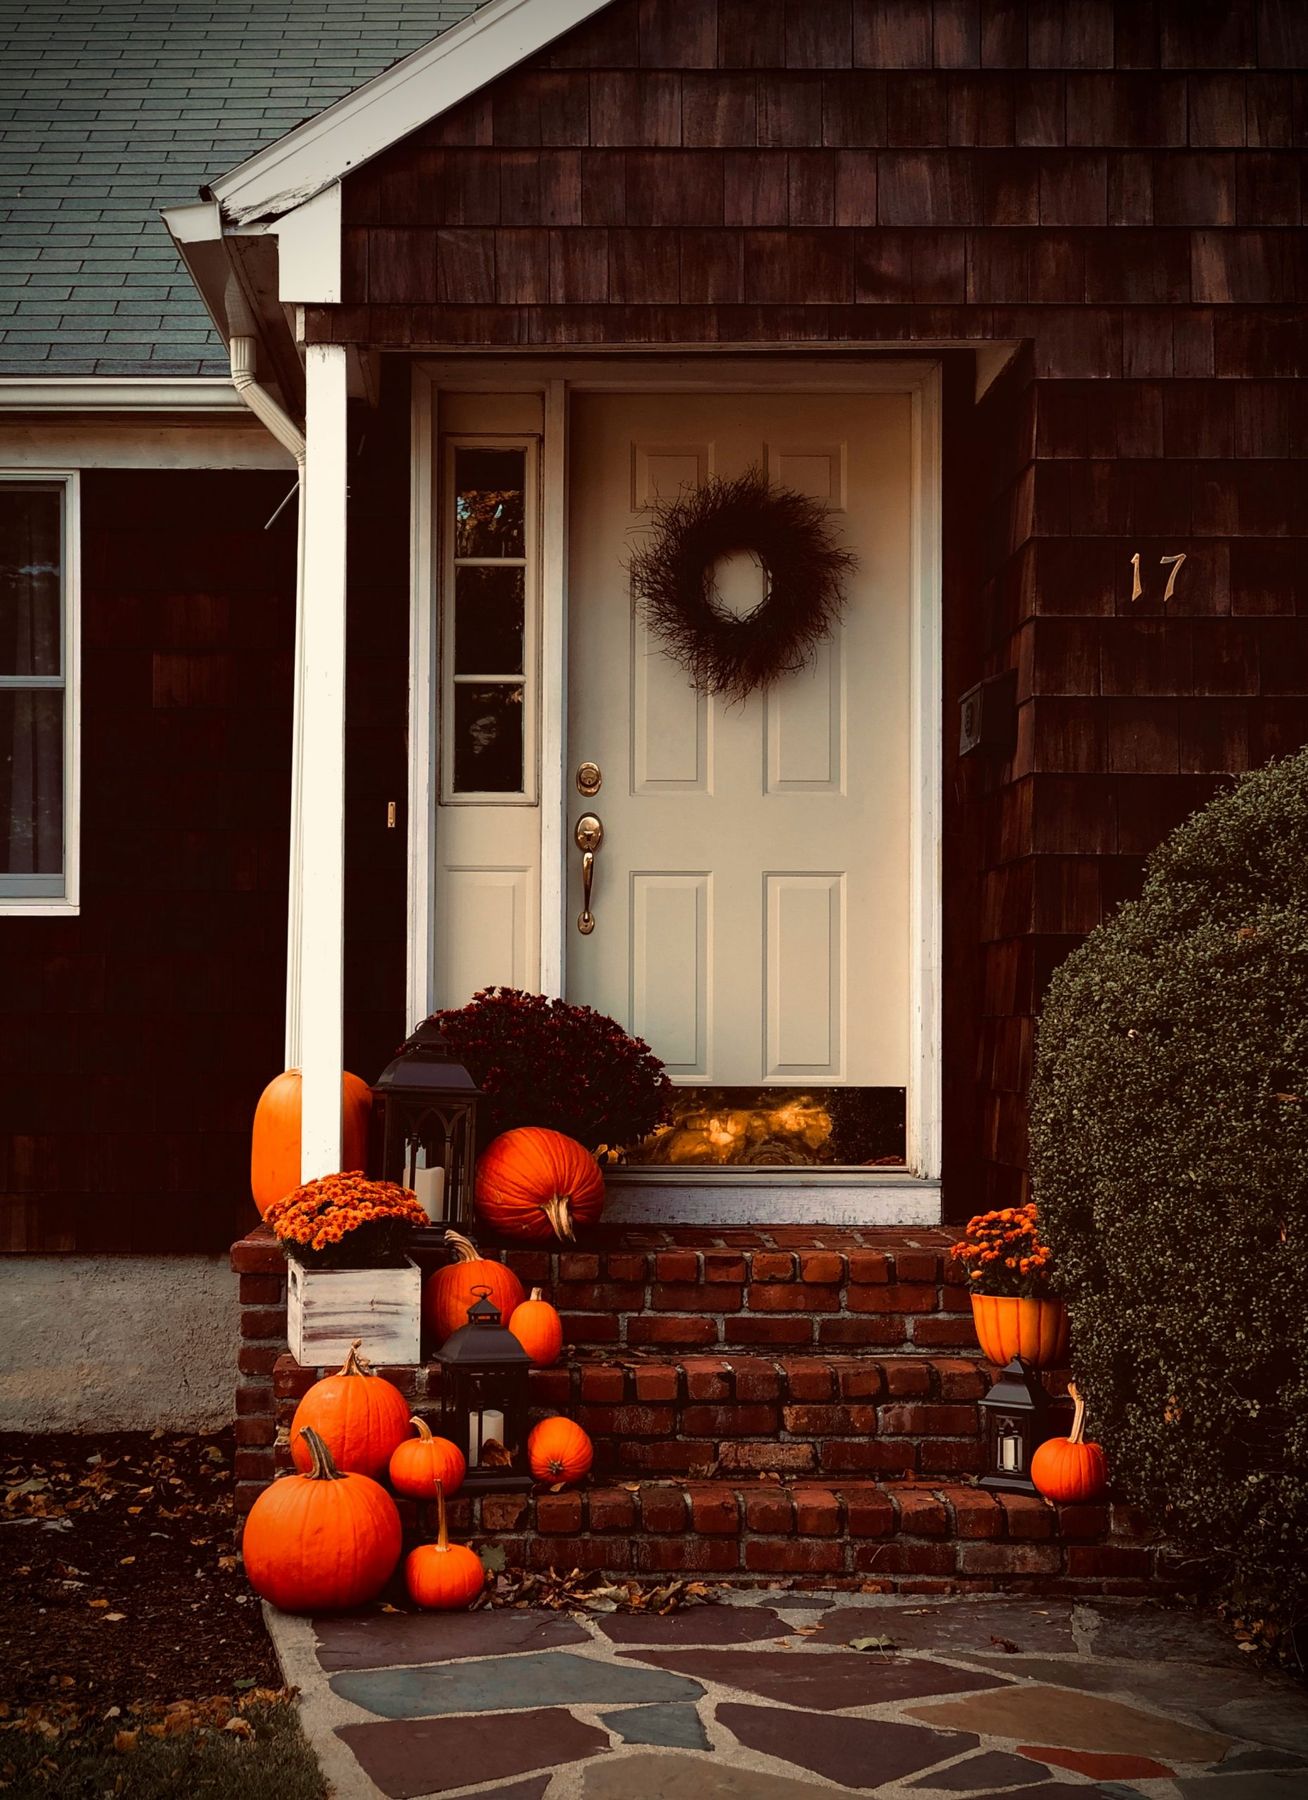
4. Red Brick Steps Layered with Pumpkins and Lanterns
The One Thing: It’s the black metal lanterns. Without them, this is a pretty, but standard, pile of pumpkins. The lanterns introduce a crucial element of structure and sophistication. Their strong, geometric shape contrasts beautifully with the round, organic forms of the pumpkins and mums. They also add height and a touch of classic design that elevates the entire porch from a simple ‘pumpkin patch’ vibe to a curated, welcoming entrance. At night, with flameless candles inside, they would create a gorgeous, warm glow.
🎯 What Makes It Work
Maintenance Reality: Potted mums are notoriously thirsty. In direct sun or a dry climate, you’ll need to water them thoroughly every single day to keep them from wilting and dropping their flowers. Also, real pumpkins, especially when clustered together on warm brick, can begin to rot within a couple of weeks. To prolong their life, give them a quick bleach-and-water bath before setting them out and try to place them on small, unseen risers (like pot feet) to allow for air circulation underneath.
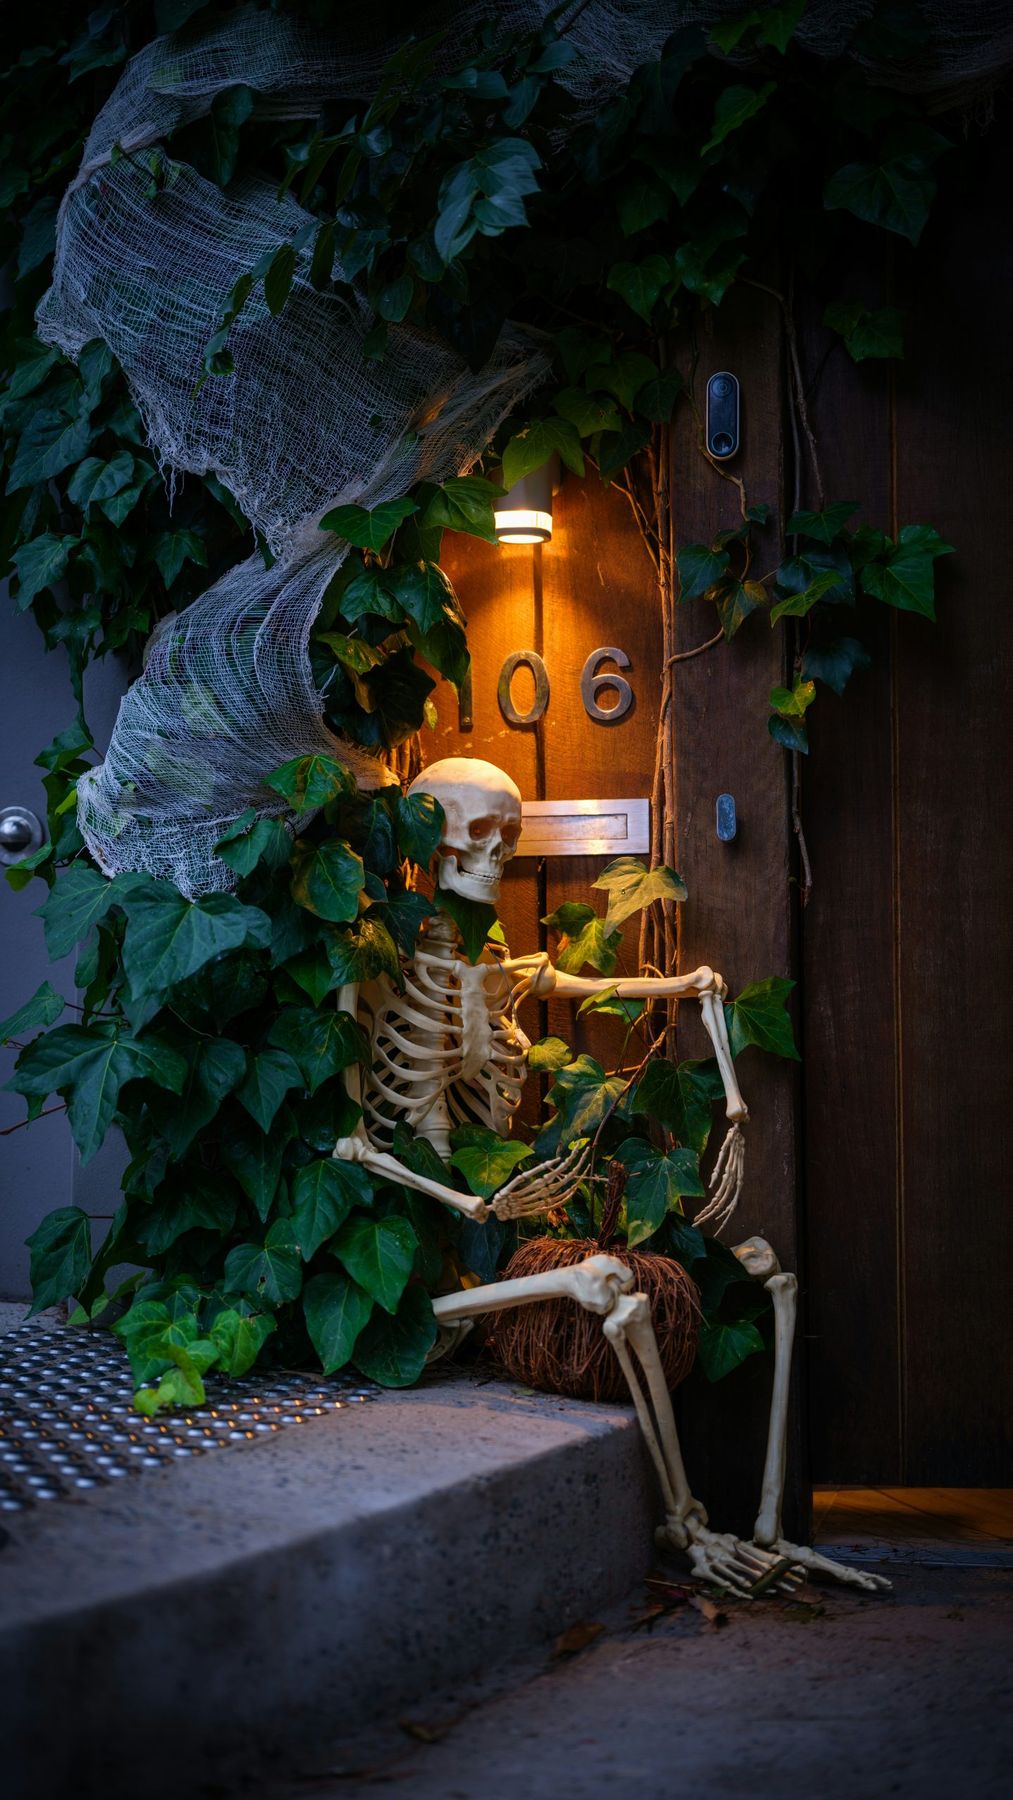
5. An Eerie Skeleton Nestled in Green Ivy
What Makes It Work: This design is a masterclass in using existing features. The moody, spooky vibe doesn’t come from a ton of props, but from the brilliant integration of the skeleton with the overgrown ivy. The natural foliage becomes part of the scene, looking as if it’s slowly reclaiming the skeleton. The single, warm-toned porch light acts like a theatrical spotlight, casting dramatic shadows and highlighting the skeleton’s form against the dark wood door. The draped cheesecloth adds just the right amount of texture to complete the eerie, abandoned look.
💰 Budget Breakdown
Scale Guide: This idea is perfect for a home with a recessed or covered entryway that’s at least 4 feet wide and 4 feet deep. The sense of enclosure is key to creating the moody, contained scene. It needs the ivy (or a similar dense climbing plant) to be effective. For a smaller space, like a narrow apartment doorway, a smaller, child-sized skeleton or even just a skull and hands emerging from a large potted plant can create a similar, scaled-down effect. The key is making the skeleton look integrated, not just placed.
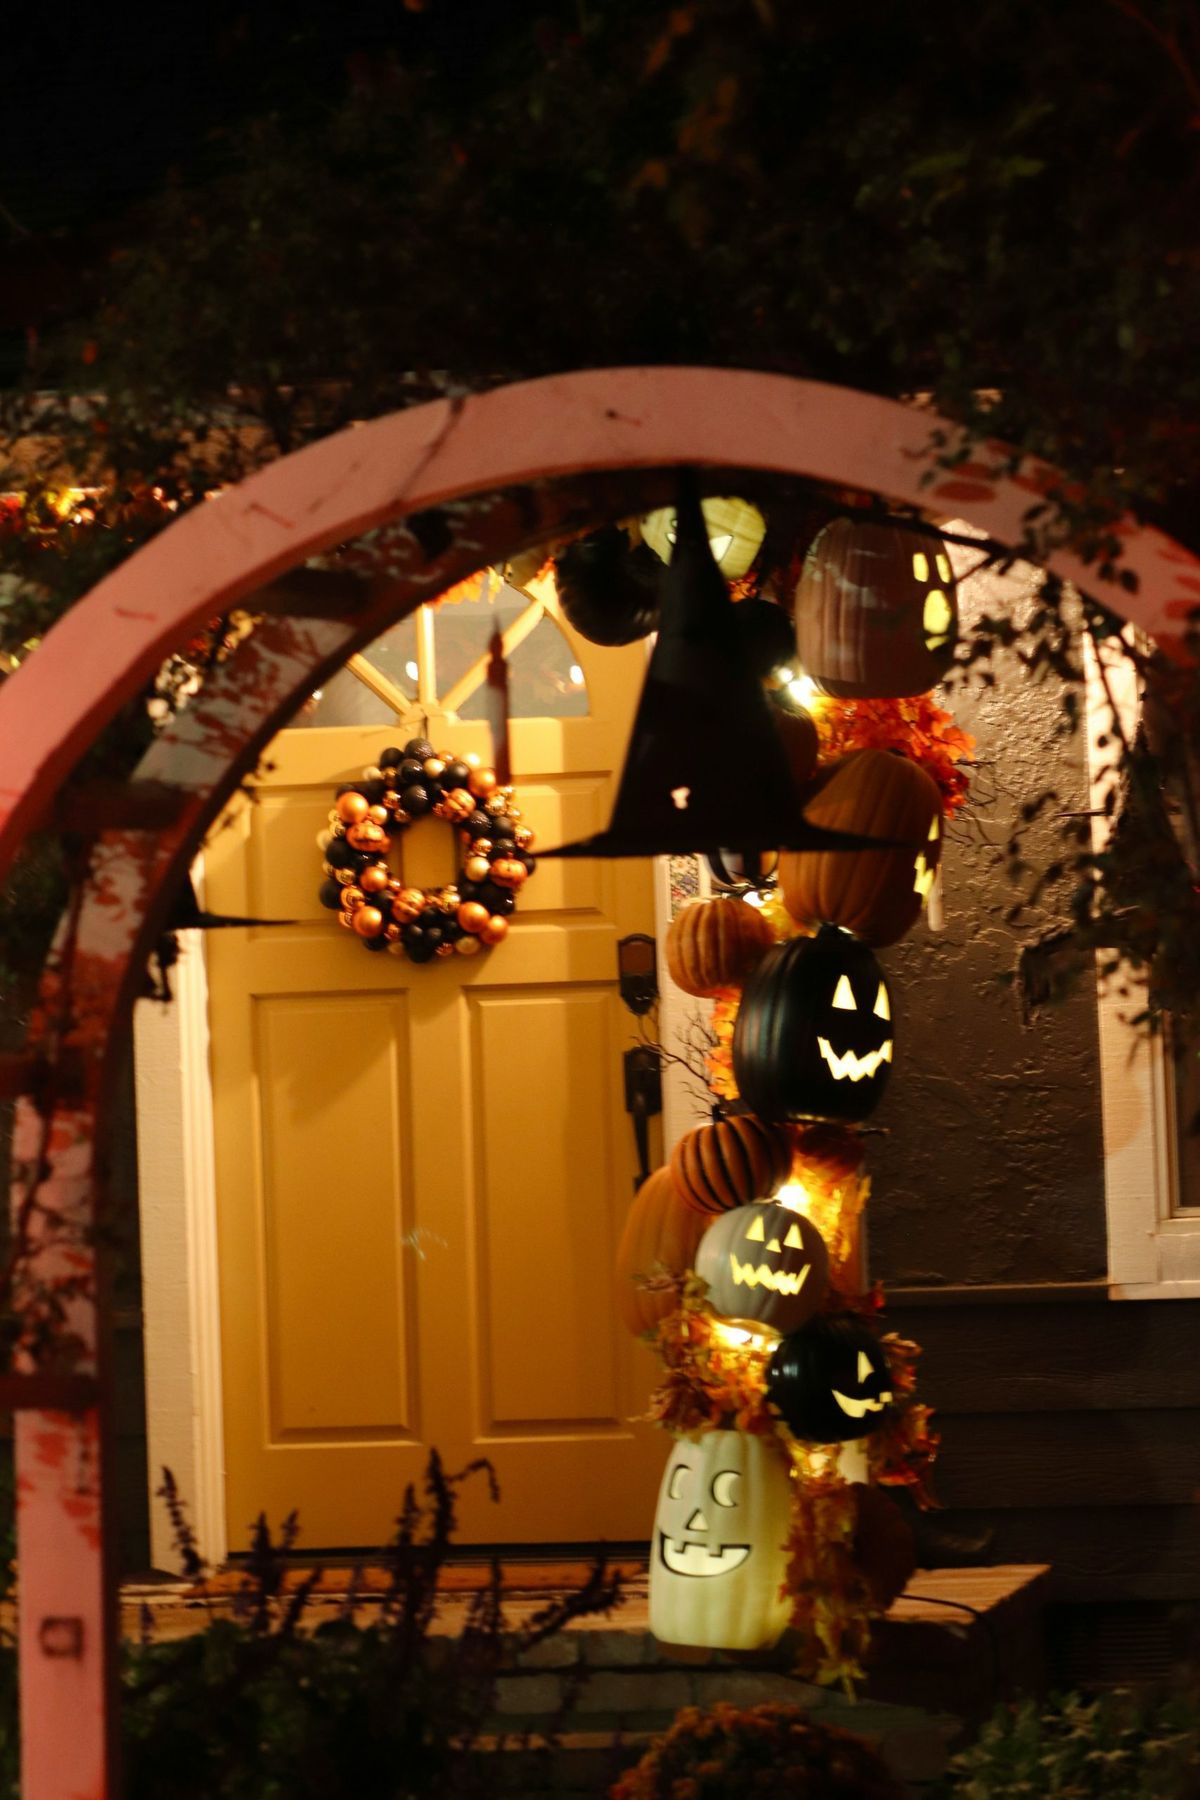
6. A Glowing Jack-O’-Lantern Pillar by a Yellow Door
How-To Brief: Create a DIY illuminated pumpkin pillar. Time: 1 hour. Cost: $40-$80.
- Purchase 3-4 stackable, hollow foam pumpkins from a craft store.
- Using a hot knife or craft blade, carefully cut a 4-inch hole in the bottom of each pumpkin and a corresponding 4-inch hole in the top of all but the highest pumpkin.
- Spray paint them your desired shade of orange; let dry completely.
- Use a permanent marker to draw faces, then carefully carve them out.
- Thread a strand of outdoor-rated LED string lights up through the stacked holes, ensuring a few bulbs are coiled inside each pumpkin.
- Secure the stack with dabs of hot glue between each layer for stability.
✅ Before You Start
Trending Context: This playful, almost cartoonish approach to Halloween is a direct response to the overly serious, minimalist design trends of the past few years. Homeowners are craving joy and nostalgia, and this look delivers. The bright yellow door paired with the glossy black and orange wreath feels confident and fun. This isn’t trying to be subtle or scary; it’s a pure celebration. This trend has staying power because it’s adaptable and focuses on color and light, which are timeless design tools for creating a happy, welcoming atmosphere.
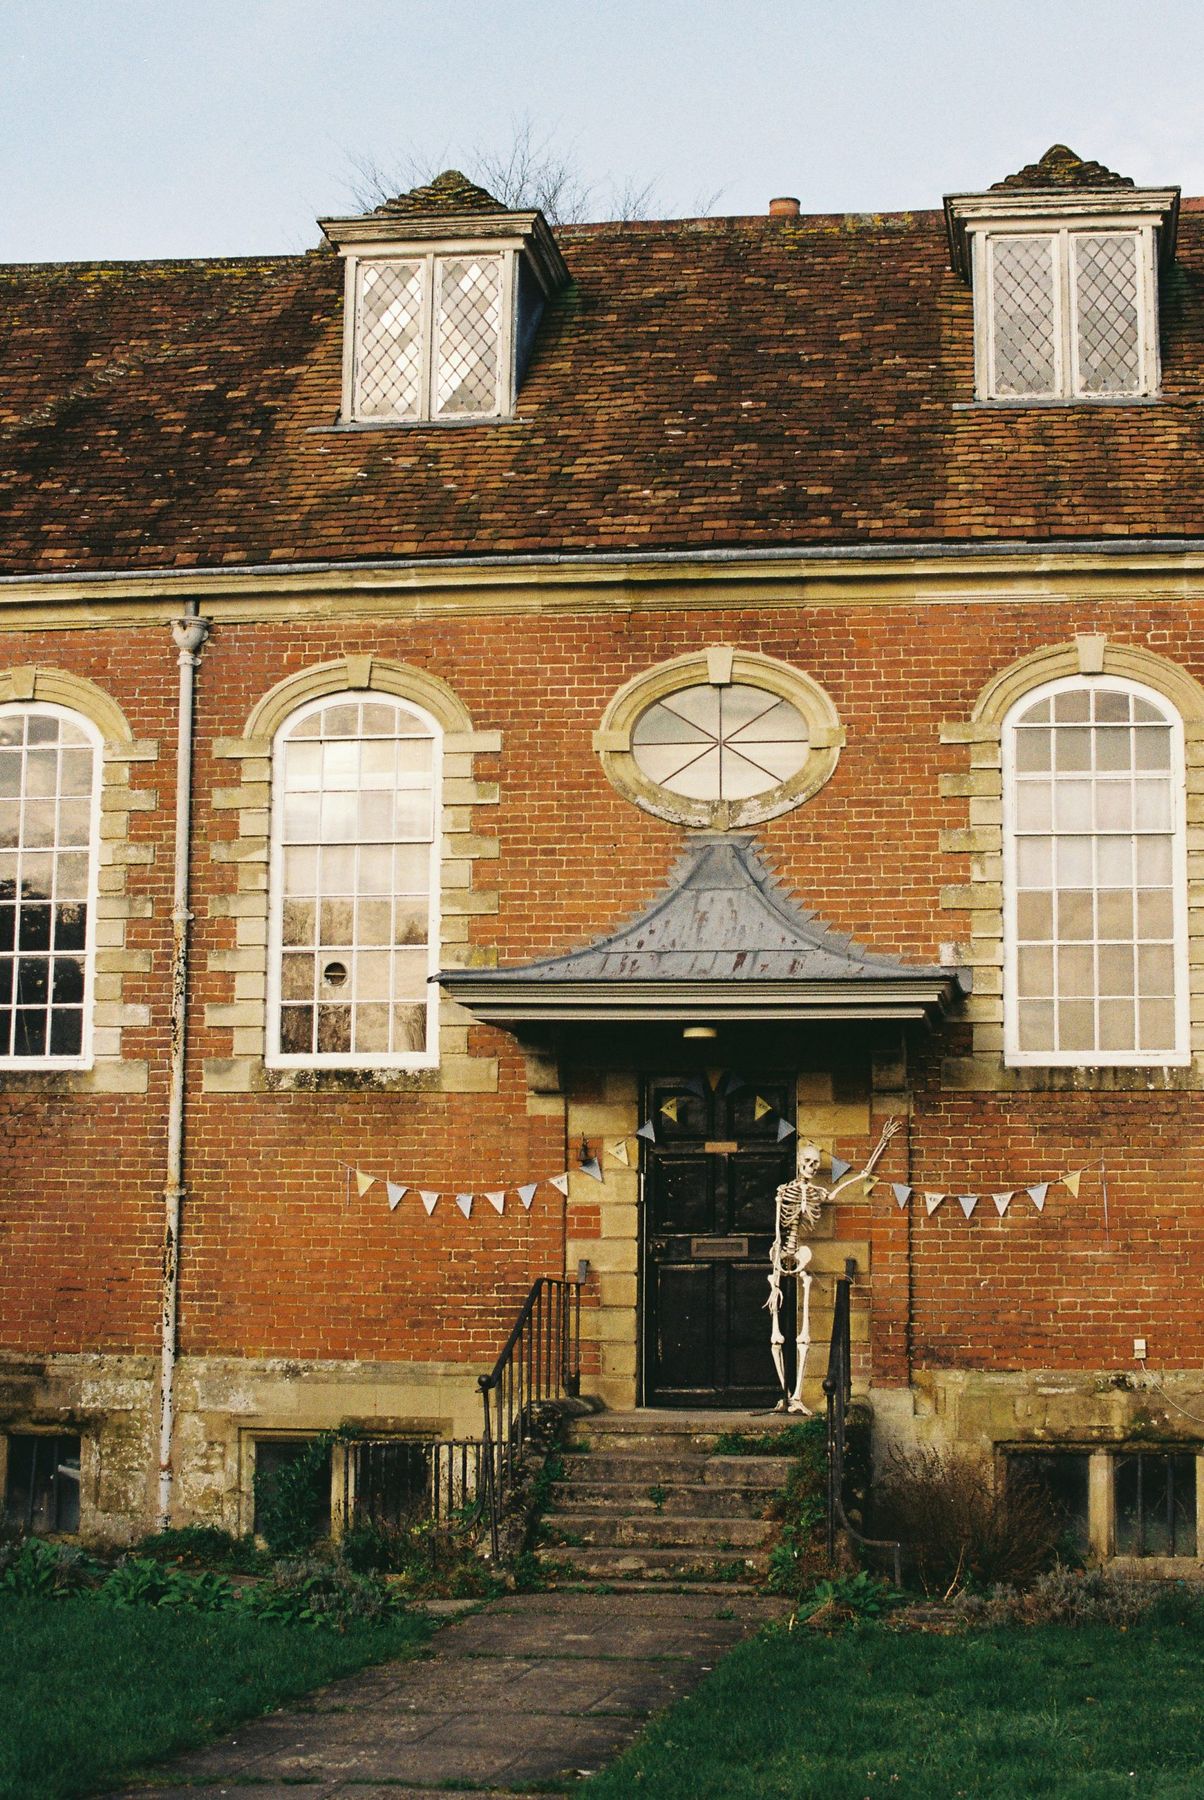
7. Whimsical Waving Skeleton by a Historic Brick Entrance
Designer Tip: When using a life-sized skeleton, give it a ‘story’ through posing. Don’t just stand it up stiffly. Posing it in a human-like, dynamic way—like the friendly wave seen here—instantly adds personality and narrative. Use clear fishing line to secure the waving arm to an anchor point (like a drainpipe or window frame) to hold the pose. You could also have it holding a pumpkin, sitting on the steps reading a book, or appearing to climb a pillar. This small effort transforms it from a simple prop into a character in your seasonal display.
⭐ The One Thing
Real Talk: A life-sized skeleton is surprisingly lightweight and acts like a sail in the wind. A single gust can send it tumbling down the steps, potentially breaking it or damaging other decor. To secure it properly, you’ll need more than just hope. Use heavy-duty zip ties or wire to anchor its spine to a permanent fixture like a railing or porch column. For extra stability, you can also wire its feet to a heavy paver or a sandbag hidden behind a pumpkin.
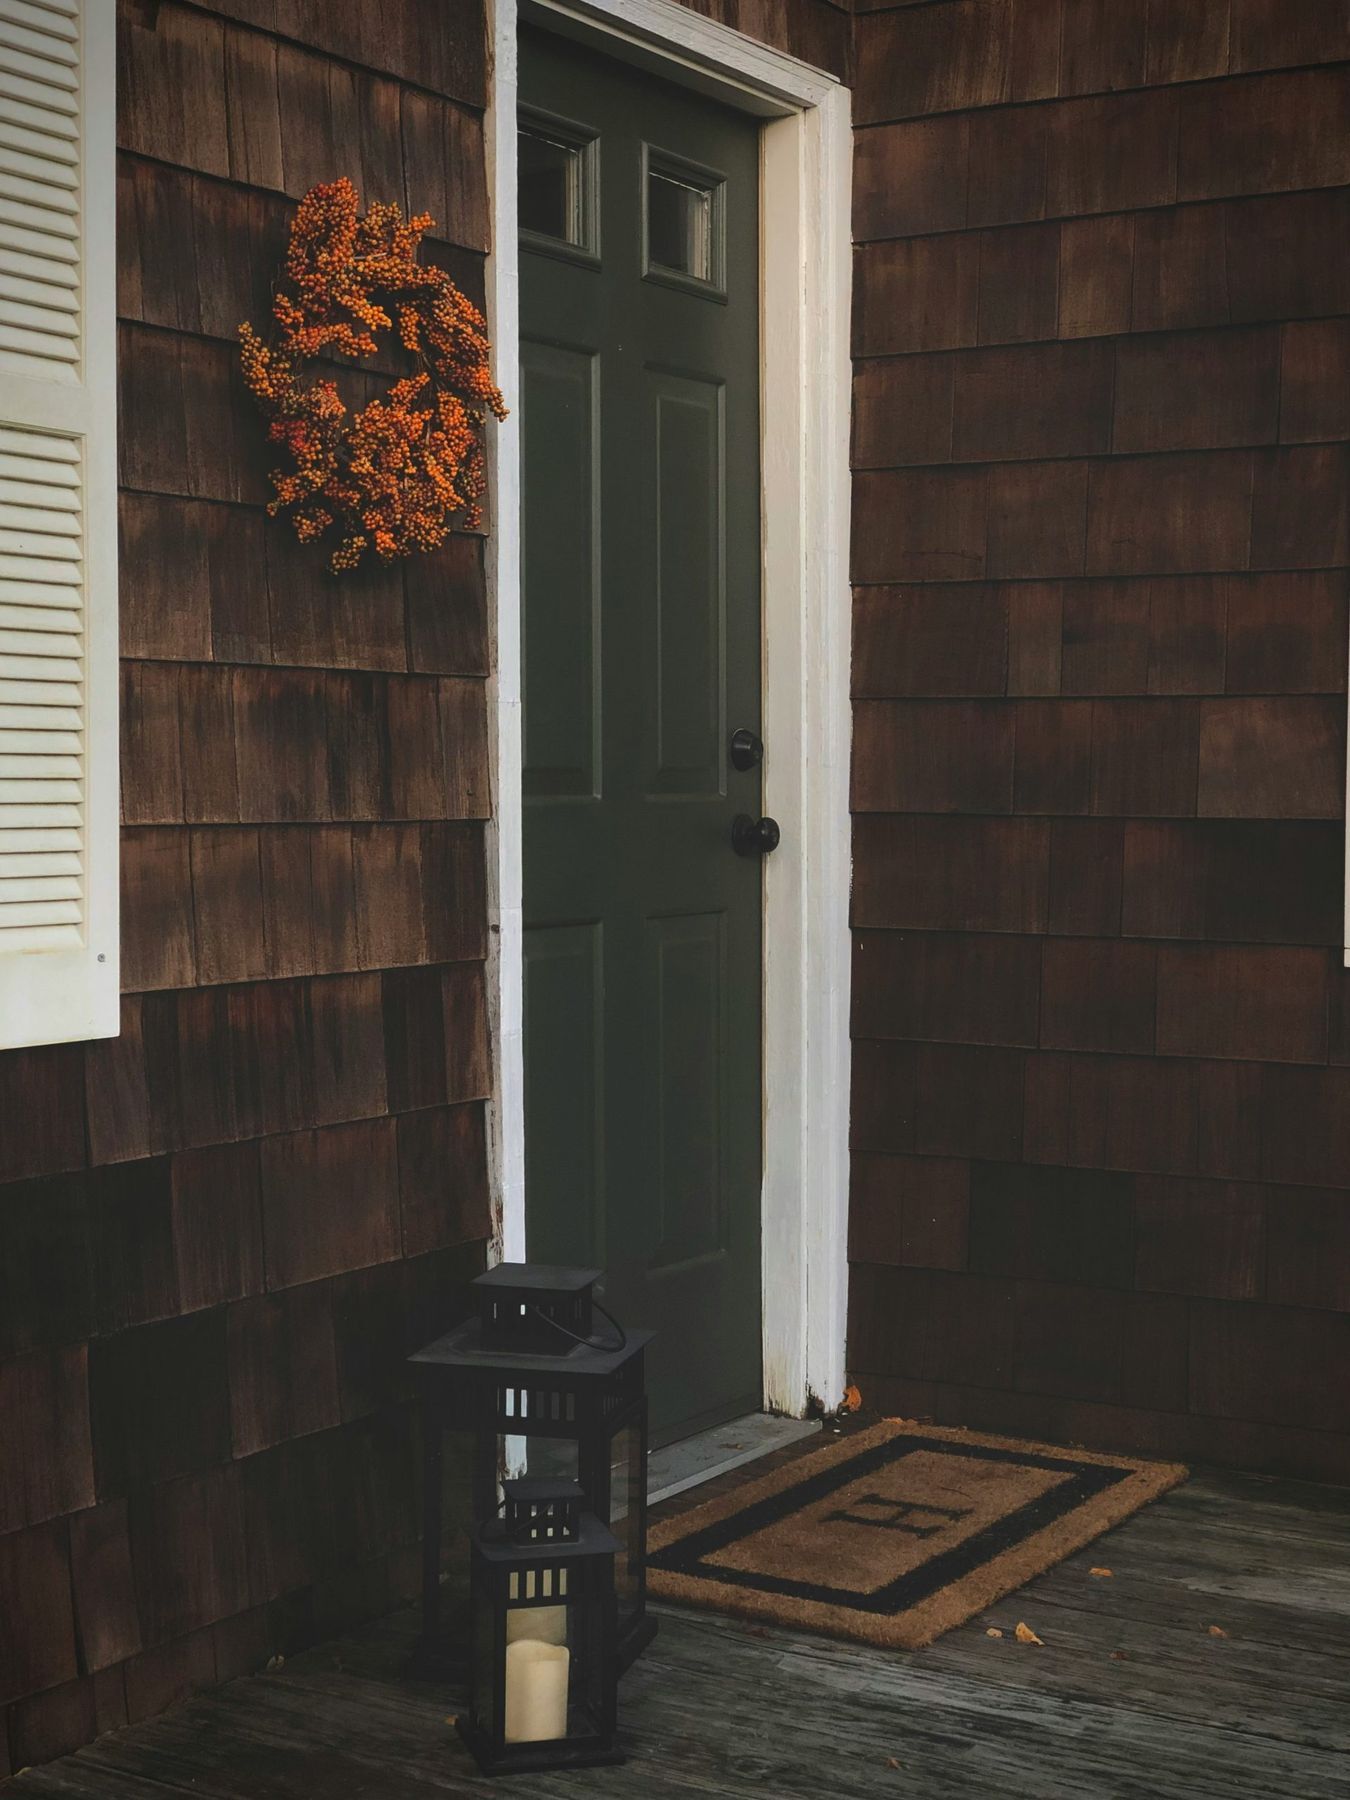
8. Dark Green Door with a Striking Orange Berry Wreath
The One Thing: It’s the color combination. The pairing of a deep, moody forest green door with a fiery, burnt-orange wreath is a perfect example of using complementary colors to create maximum visual impact. The orange and green are opposites on the color wheel, so they intensify each other. This isn’t just a Halloween look; it’s a sophisticated autumn palette that feels warm, rustic, and incredibly chic. Remove the vibrant wreath, and the door is just a dark door. It’s the wreath that brings the entire entrance to life.
🧹 Maintenance Reality
Style Math: The formula here is 70% dark & moody base + 30% high-contrast accent. The dark green door, dark wood shingles, and black lanterns create a cohesive, shadowed foundation. This allows the 30%—the single, powerful pop of orange from the wreath—to feel incredibly vibrant and intentional. You could achieve the same effect by pairing a navy door with a golden yellow wreath or a charcoal gray door with a deep crimson one. The key is the dramatic contrast between the base and the single, bold accent color.
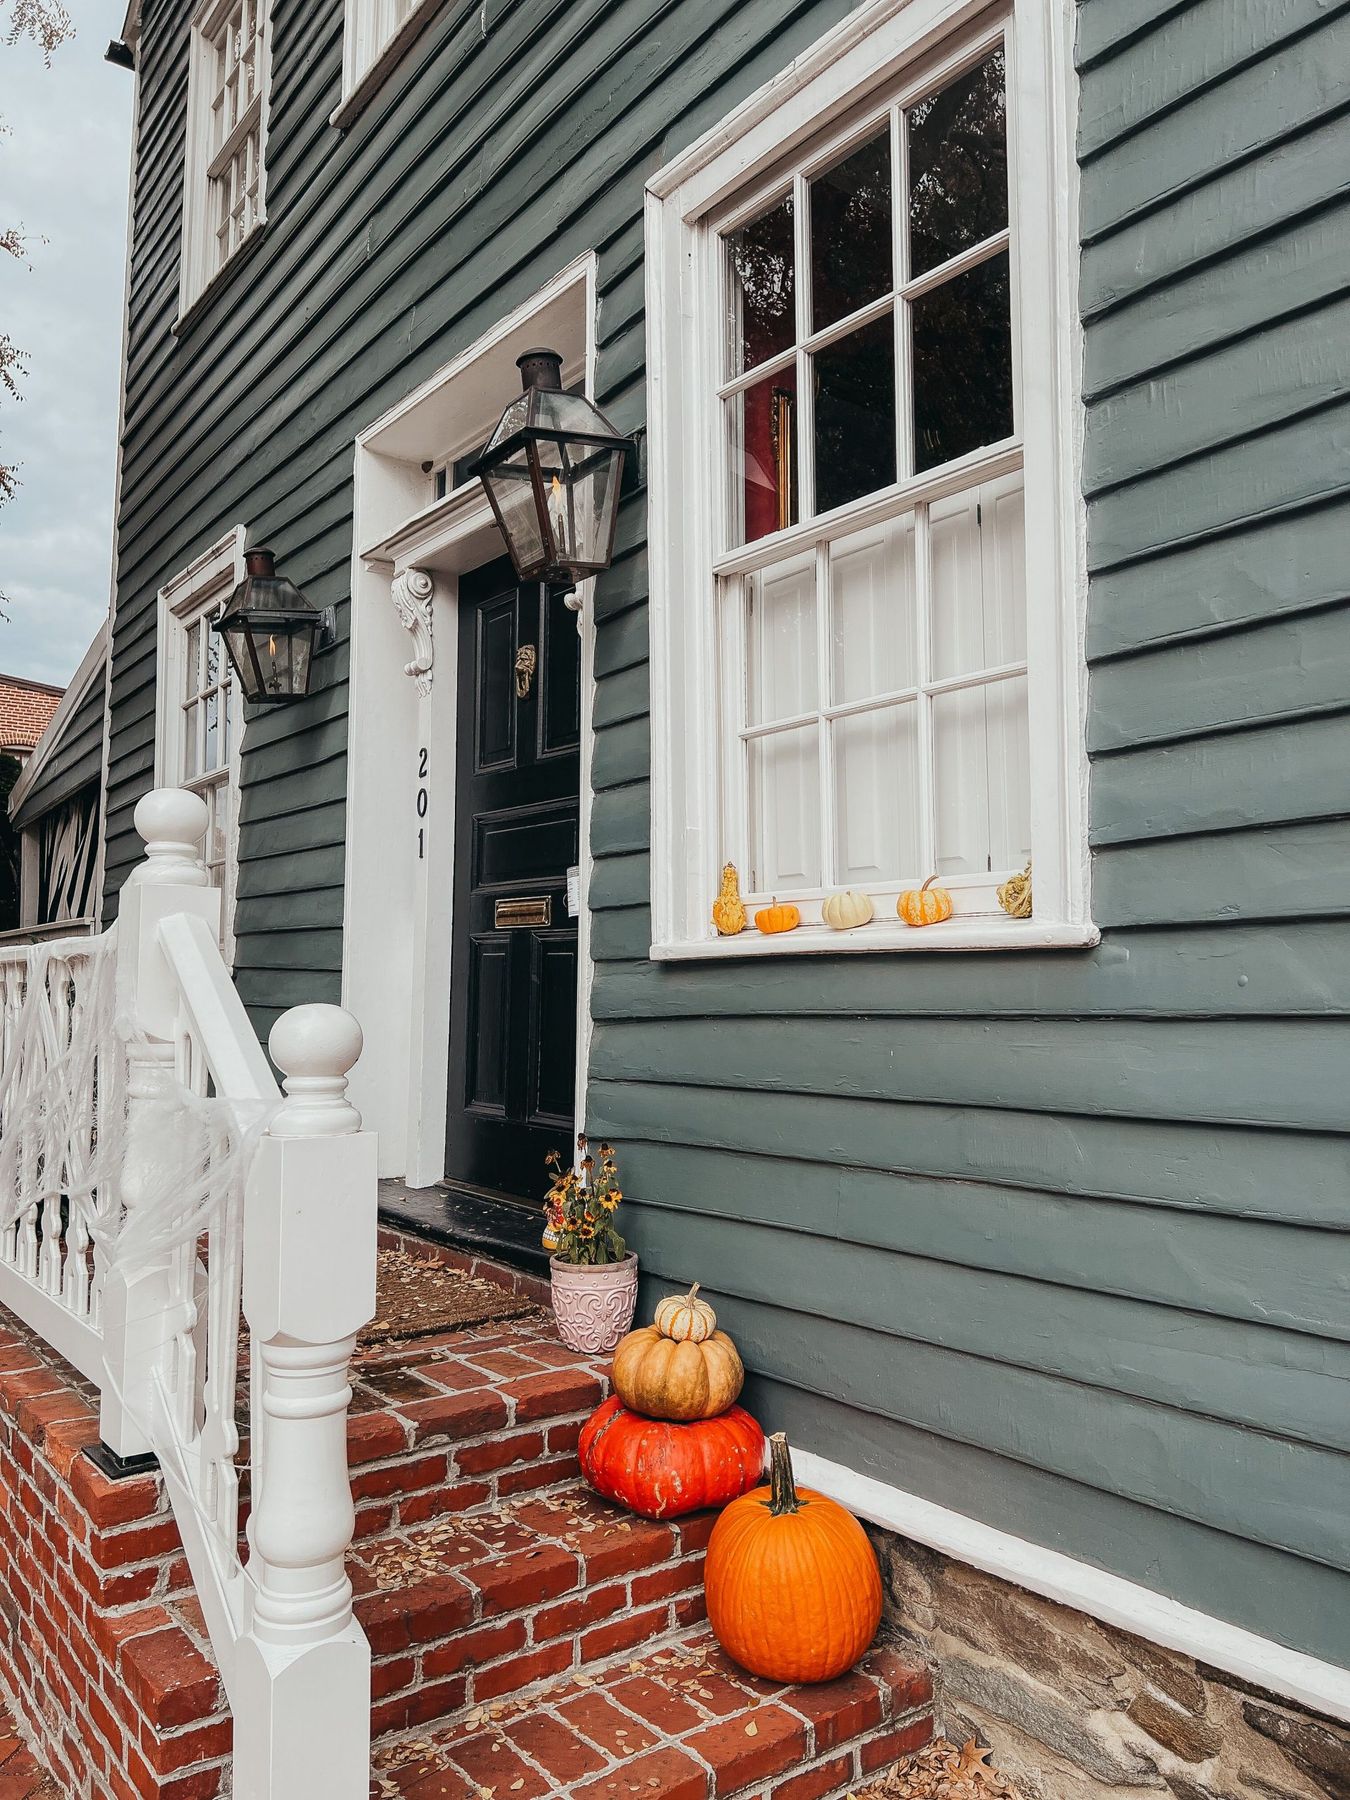
9. Subtle Pumpkin Stacks on a Gray Colonial Porch
What Makes It Work: This design is all about understated, classic charm. Instead of overwhelming the facade, the decor respects the home’s traditional architecture. The restraint is the key. A small, thoughtful stack of pumpkins on the brick steps and a tiny line of gourds on the windowsill are just enough to signal the season without screaming ‘Halloween.’ The muted gray siding and black door create a quiet backdrop, allowing the terracotta brick and orange pumpkins to provide all the necessary warmth. It feels curated and elegant, like a nod to the season rather than a full-blown theme park. Compare this with the bolder choices in Idea #2.
📏 Scale Guide
Get This Look For Less: The ‘less is more’ approach is naturally budget-friendly. You only need a handful of pumpkins and gourds from a grocery store or pumpkin patch, which might cost $20-$30 total. The stacked pumpkin look can be created with three small pumpkins for under $10. The biggest savings comes from skipping a wreath and other large decor items. Focus your small budget on real, natural elements. The spiderweb detail on the railing is made from a few dollars’ worth of stretchy webbing, proving that impactful details don’t need to be expensive.
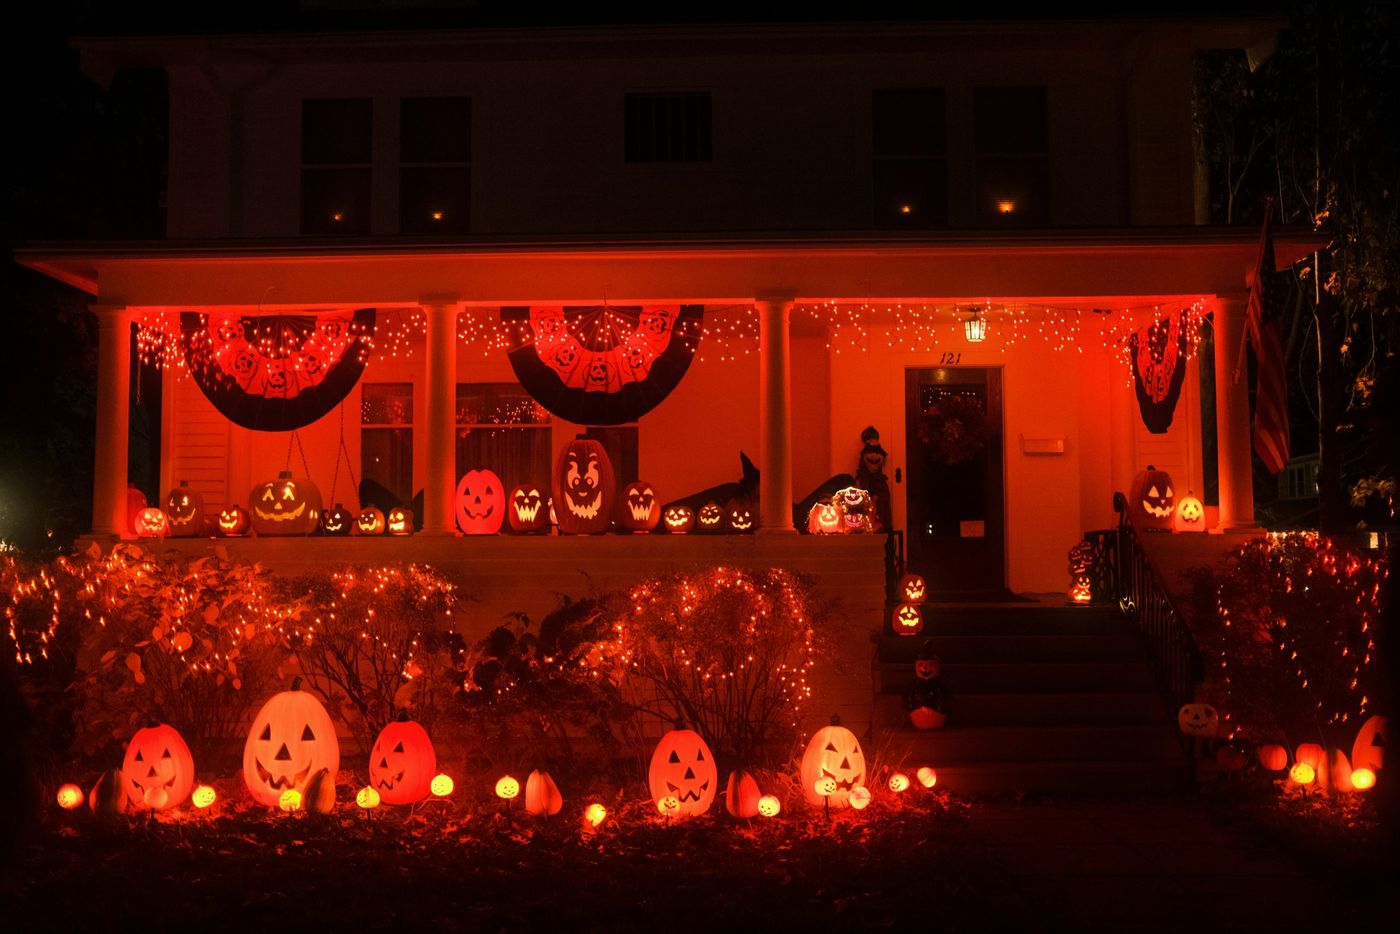
10. A Porch Aglow with Dozens of Jack-o’-Lanterns
Scale Guide: This epic display demands a large, wide porch with multiple levels, ideally at least 15 feet wide with 3-5 steps. The power of this look comes from the sheer volume of pumpkins, and it would look cramped and cluttered on a smaller stoop. You also need accessible outdoor power outlets for the string lights and potentially for some of the jack-o’-lanterns if you opt for electric candles. The buntings require a porch ceiling or overhang to hang from. This is a go-big-or-go-home idea that’s best suited for a classic suburban house with a generous front entrance.
🔧 How-To Brief
Maintenance Reality: Carving this many real pumpkins is a multi-day project, and their lifespan is short. In a warm climate, carved pumpkins can start to mold and collapse in less than a week. The sheer number of them will also attract pests. For a display of this scale, investing in high-quality, carvable foam pumpkins is the only practical long-term solution. They’re a significant upfront cost ($20-$50 each) but can be reused for years, making them more economical over time than replacing dozens of real pumpkins annually.
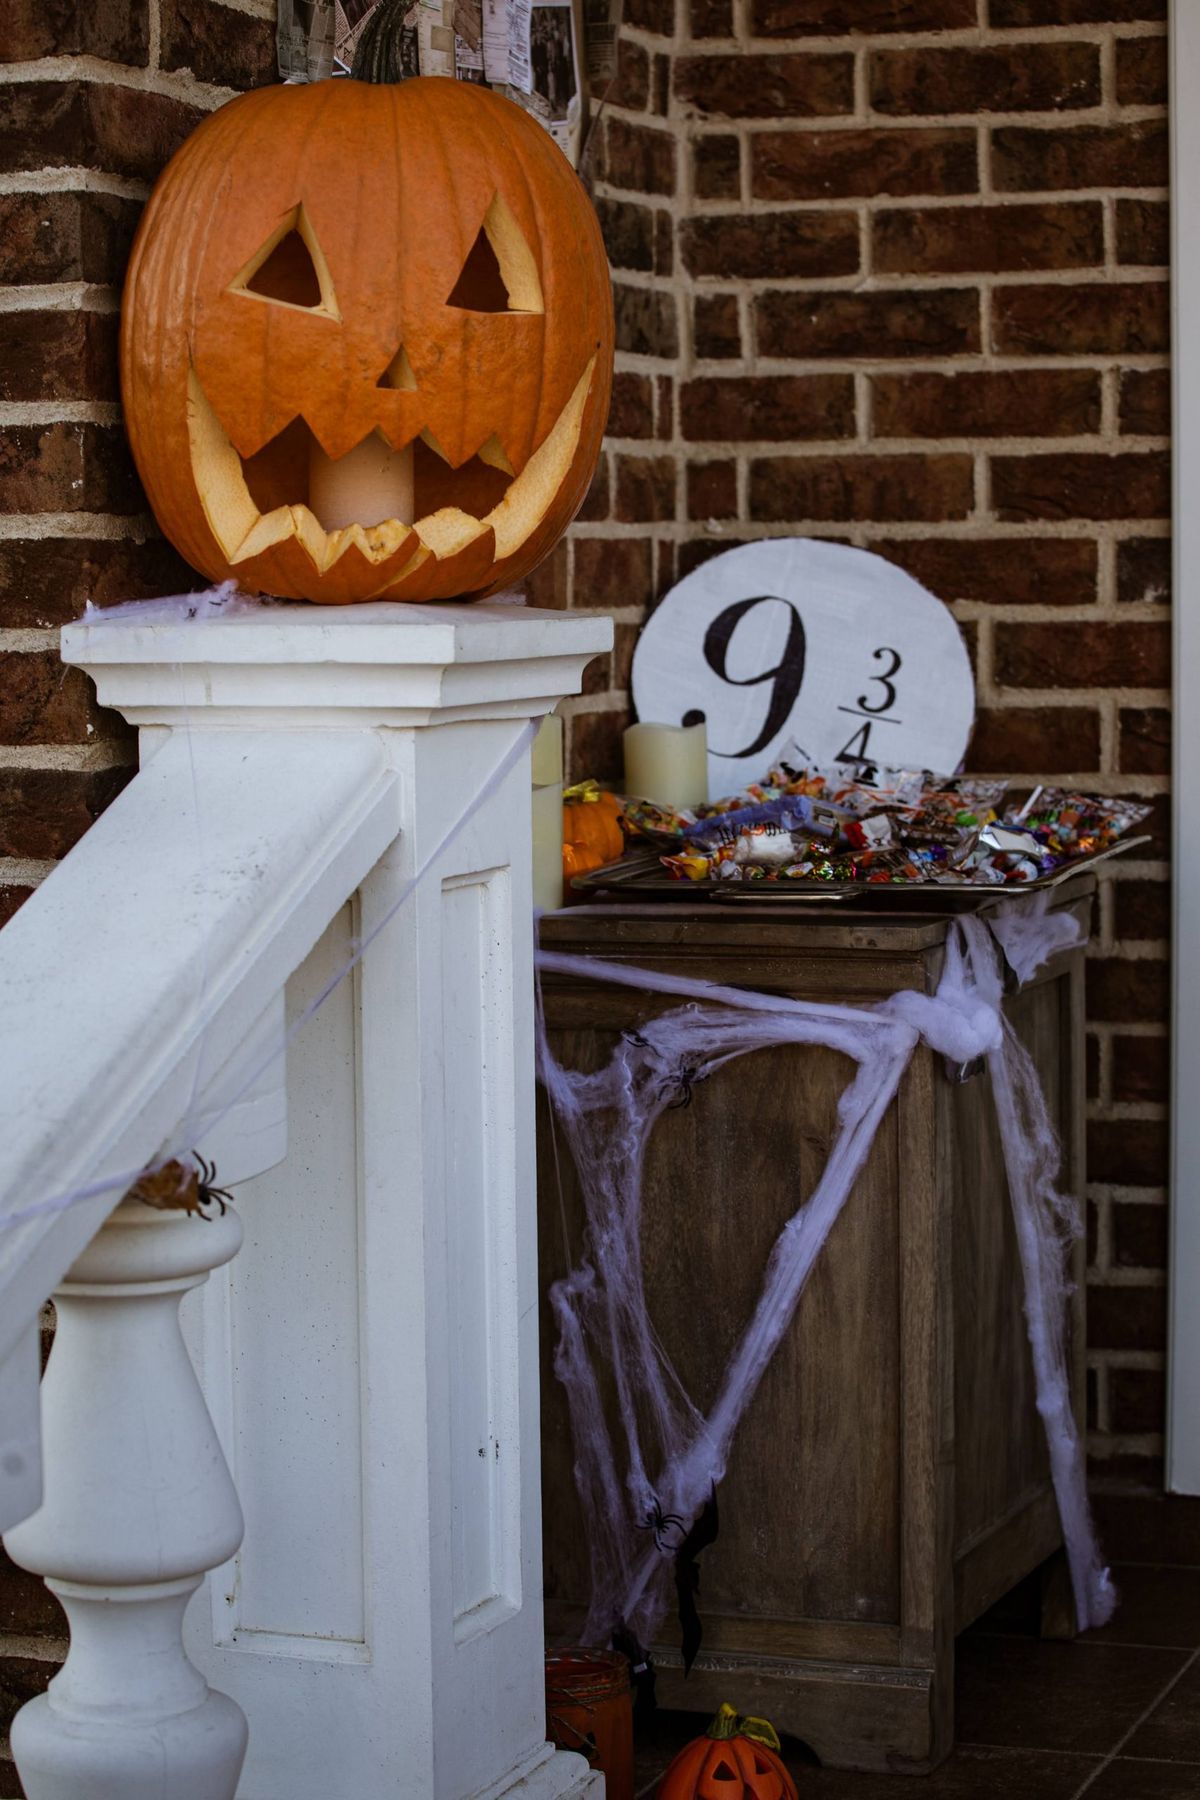
11. A Magical Harry Potter Themed Entryway
Trending Context: Pop culture nostalgia is a huge driver in home decor, especially for holidays. Themes like Harry Potter tap into a shared cultural memory that feels both personal and instantly recognizable to guests. It’s a way to showcase personality beyond just ‘spooky’ or ‘autumnal.’ This trend is about creating an experience and telling a story with your decor. It’s particularly popular with millennials who grew up with the series and are now homeowners looking to create magical traditions for their own families. It has staying power because the source material is timeless.
💸 Get This Look For Less
How-To Brief: Create the Platform 9 3/4 Sign. Time: 30 minutes. Cost: $15.
- Purchase a round wood blank (about 12 inches in diameter) from a craft store.
- Paint the entire surface with 2-3 coats of a deep crimson or burgundy red craft paint. Let it dry fully.
- Print out the ‘9 3/4’ text and the ‘Platform’ banner in a font you like, scaled to fit the wood round.
- Use the pencil transfer method: shade the back of the paper with a pencil, place it on the wood, and trace the letters firmly to transfer the outline.
- Carefully fill in the outlines with gold or beige paint using a fine-tipped brush. Add a black drop-shadow for extra dimension if you’re feeling ambitious.
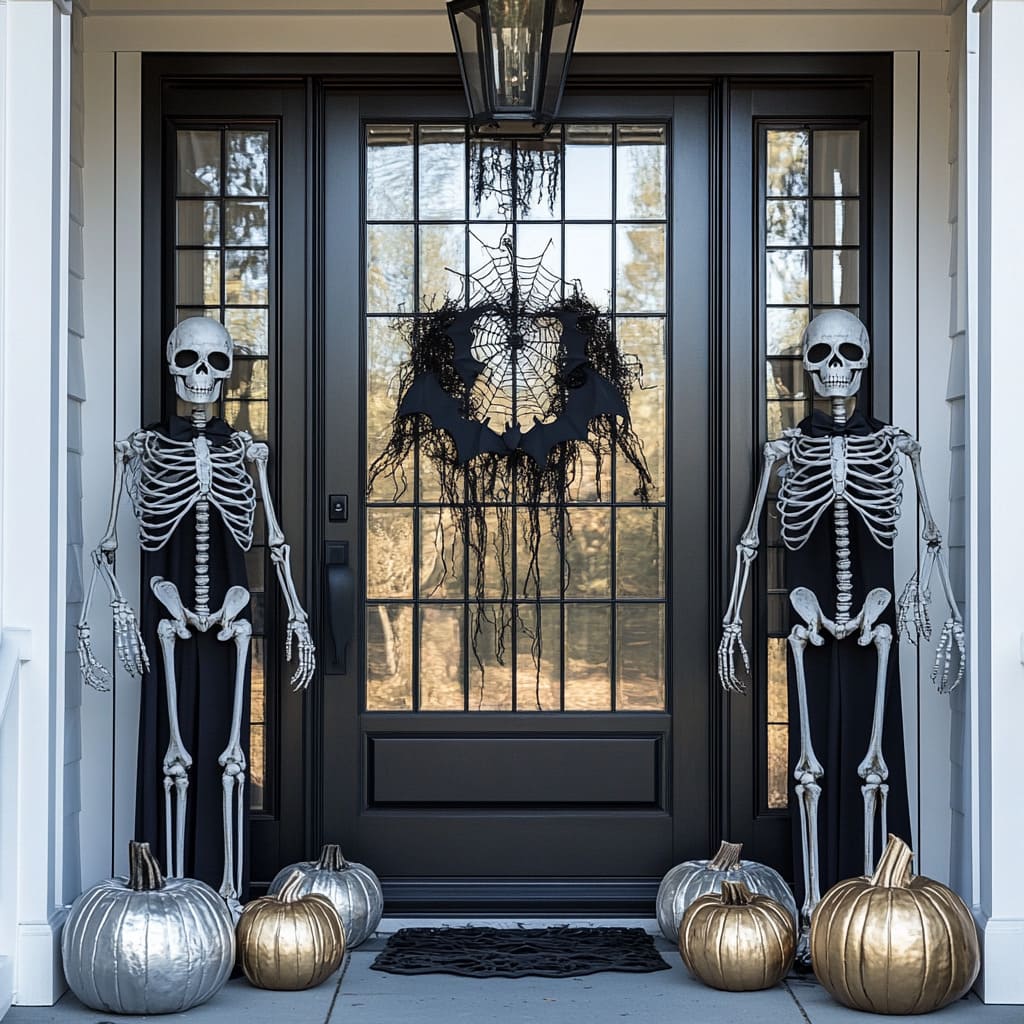
12. Gothic Glam with Twin Skeletons and a Bat Wreath
Budget Breakdown:
- Life-Sized Skeletons (2): $80 – $200
- Bat & Spiderweb Wreath: $30 – $60
- Metallic Pumpkins (4-6): $40 – $75
- Black Capes/Fabric: $15 – $30
- TOTAL: $165 – $365
Budget alternative: Get a similar symmetrical, gothic vibe for 60% less. Use two tall, spindly tree branches spray-painted black instead of skeletons. Craft a simple wreath from black cardstock bats and a wire frame ($10). Spray paint cheap plastic pumpkins from the dollar store with metallic paint instead of buying pre-finished ones.
⚠️ Real Talk
What Makes It Work: This design is successful because of its strict, limited color palette and commitment to symmetry. The look is almost entirely black and white, with the metallic gold and silver pumpkins acting as the only accents. This tight color control makes it feel dramatic and high-end. The perfectly mirrored skeletons create a powerful, imposing frame for the doorway, drawing your eye directly to the intricate bat wreath. It’s a highly intentional and curated look that feels more like a theatrical set than a casual holiday display.
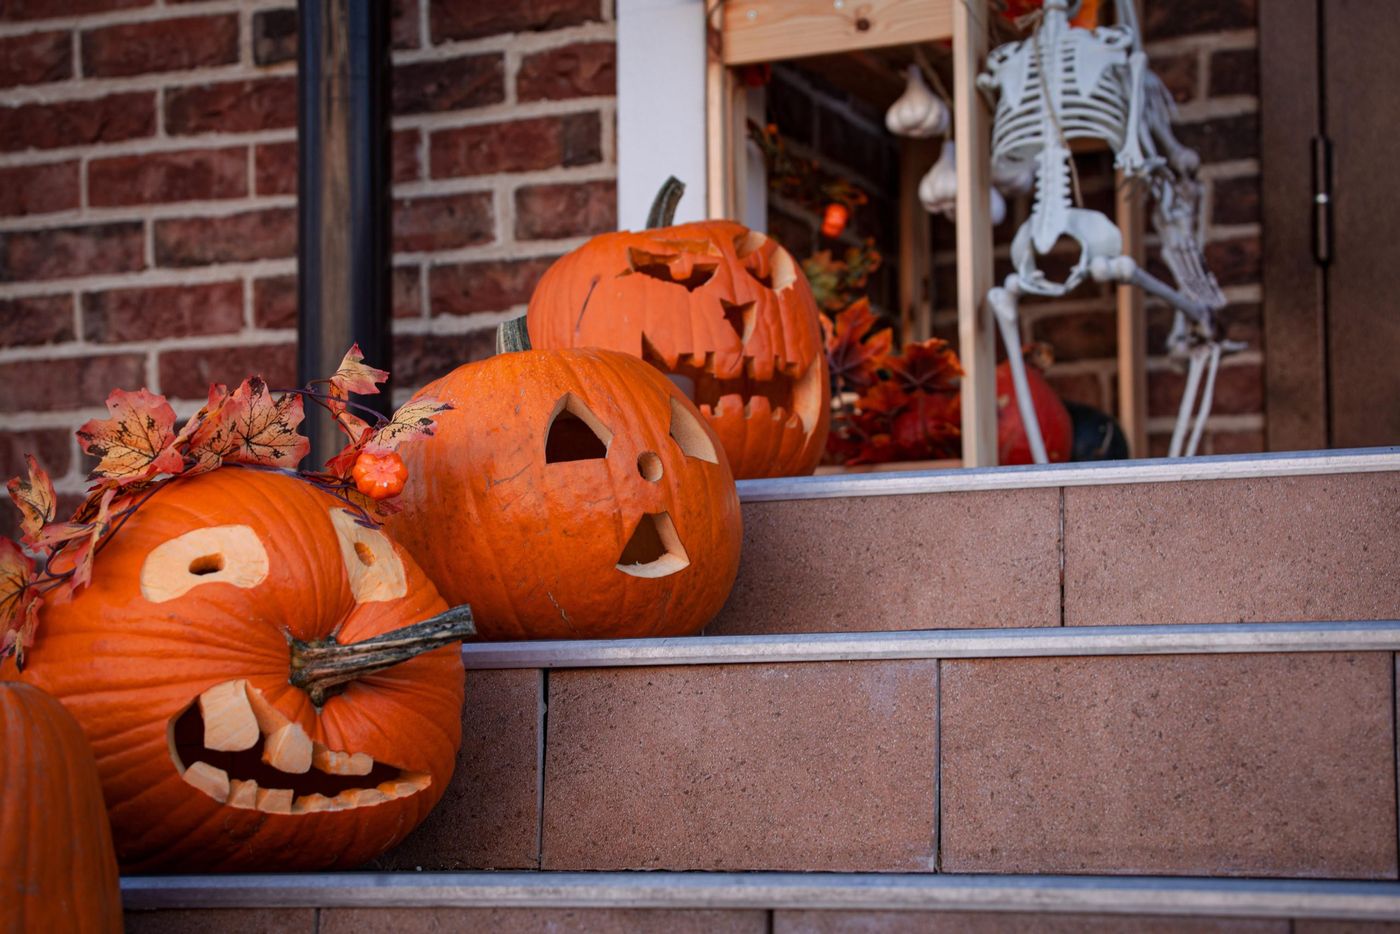
13. A Cheerful Lineup of Carved Pumpkins on Tiled Steps
Designer Tip: Give your pumpkins distinct personalities. Instead of carving the same triangle-eyed smile on every one, try creating a ‘family’ of expressions. Carve one that looks surprised, one that’s grumpy, one that’s laughing, and one with a classic spooky grin. This simple trick adds a layer of storytelling and charm. It encourages guests to look closer at each individual pumpkin. For an easy win, use online pumpkin carving stencils—there are thousands of free patterns for every skill level, from simple faces to complex characters.
🔥 Trending Context
Real Talk: Those beautiful, smooth outdoor tiles can become incredibly slippery when wet, especially with autumn dew or rain. Placing pumpkins directly on them can trap moisture underneath, creating a slick spot and accelerating rot. Be sure to place your pumpkins slightly to the side to maintain a clear, dry path for walking. After Halloween, be prepared to scrub the tile where the pumpkins sat, as they can sometimes leave a faint, slimy ring behind as they decompose.
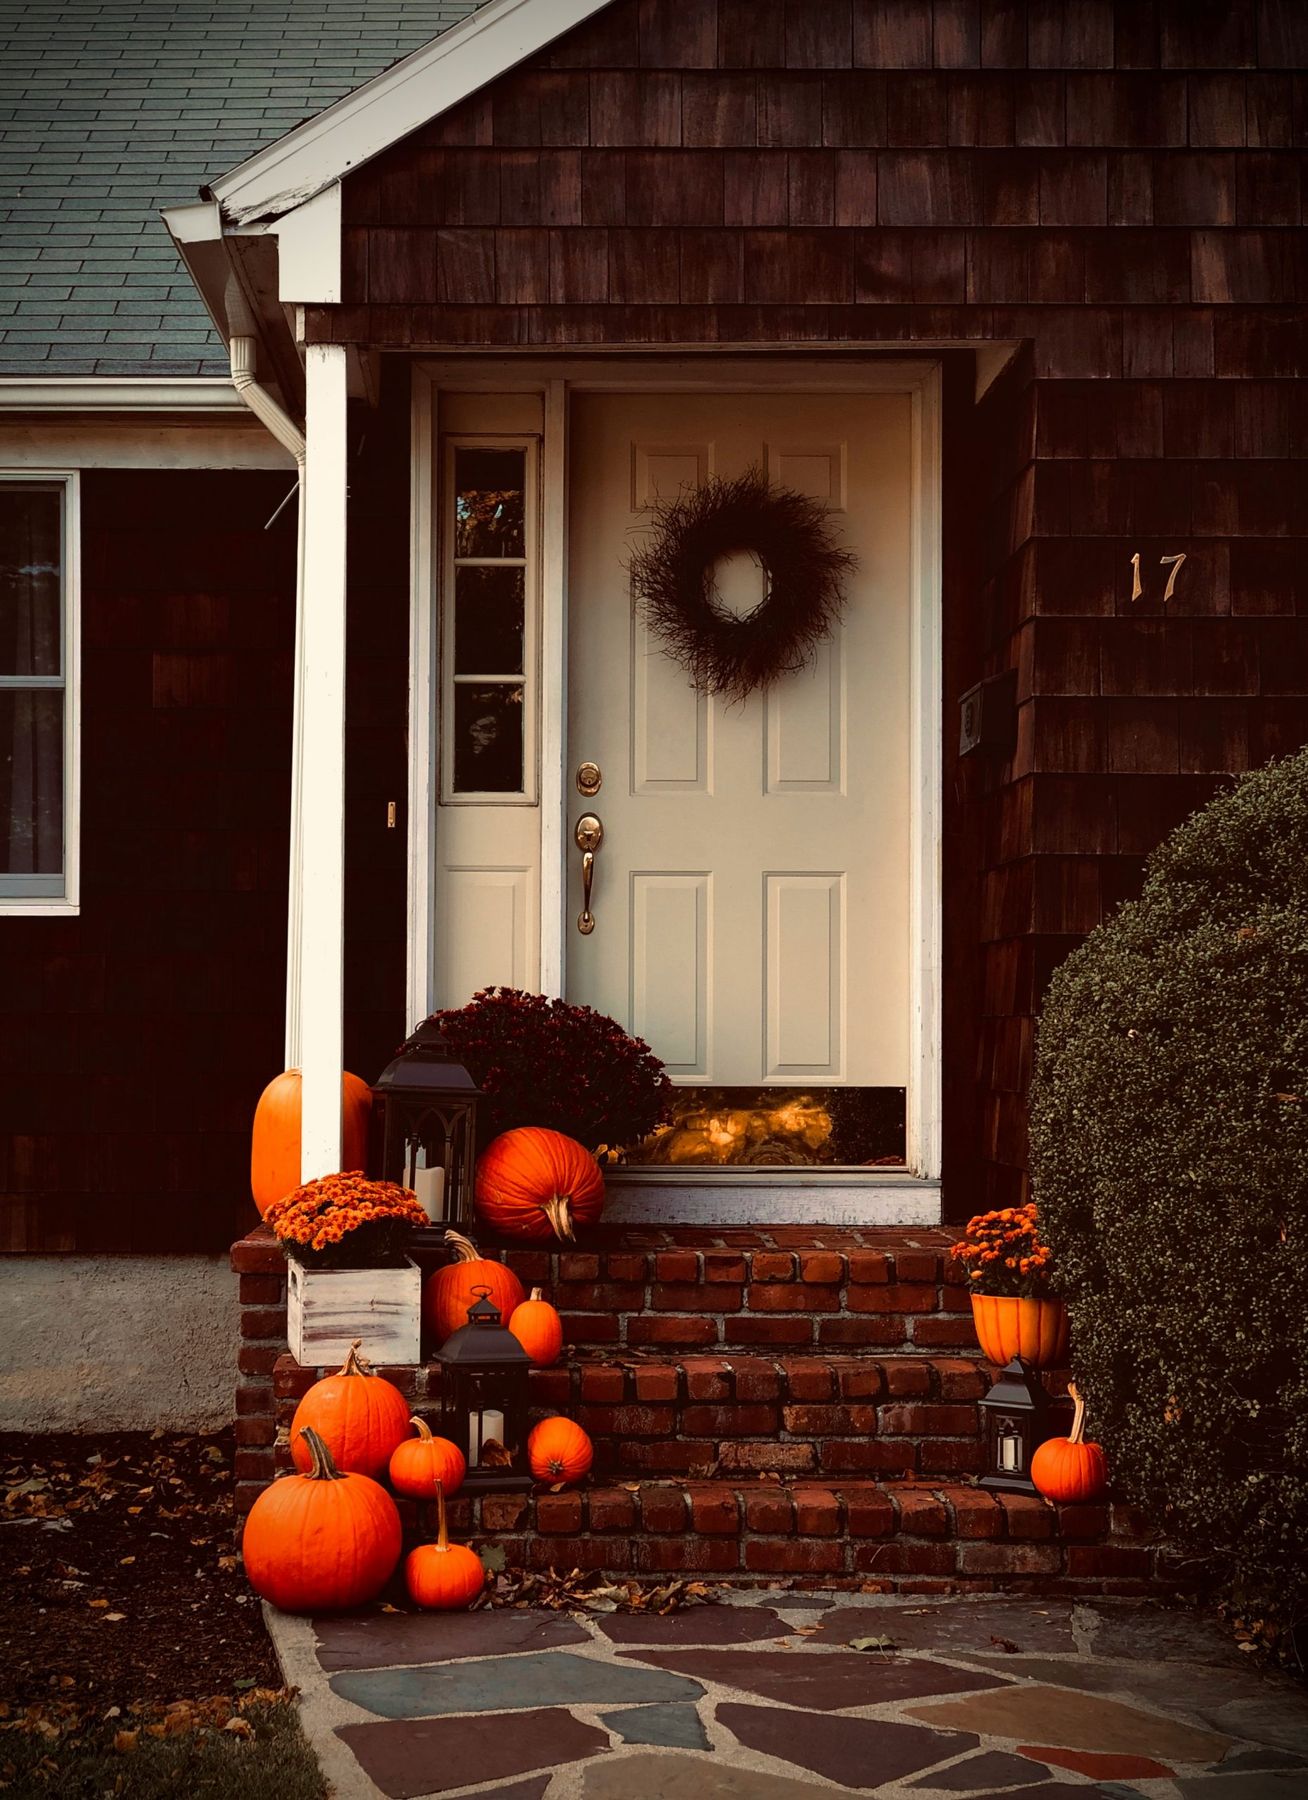
14. A Rustic Twig Wreath on a Simple White Door
The One Thing: The stark simplicity of the twig wreath is what makes this entire porch feel so effortlessly chic. In a sea of orange pumpkins and mums, the wreath provides a necessary ‘quiet’ moment. Its natural, unadorned texture is a rustic counterpoint to the polished white door and dark wood shingles. It doesn’t compete for attention; it complements. It proves that you don’t need a wreath loaded with leaves, bows, and gourds to make a statement. Sometimes, the most humble element is the most sophisticated.
💡 Designer Tip
Get This Look For Less: This look is already quite attainable, but you can bring the cost down even further. Instead of buying 10-15 pumpkins, get 3-5 larger ones for more impact with less cash (around $25). A twig wreath can be a DIY project using foraged branches and floral wire for virtually no cost. For the lanterns, skip the expensive versions from home decor stores and check out IKEA’s ‘BORRBY’ lantern ($12.99) or look for used ones on Facebook Marketplace. You can often find them for under $10 each, though they may need a quick coat of black spray paint.
15. A Spooky Skeleton Scene on a Classic Brick Porch
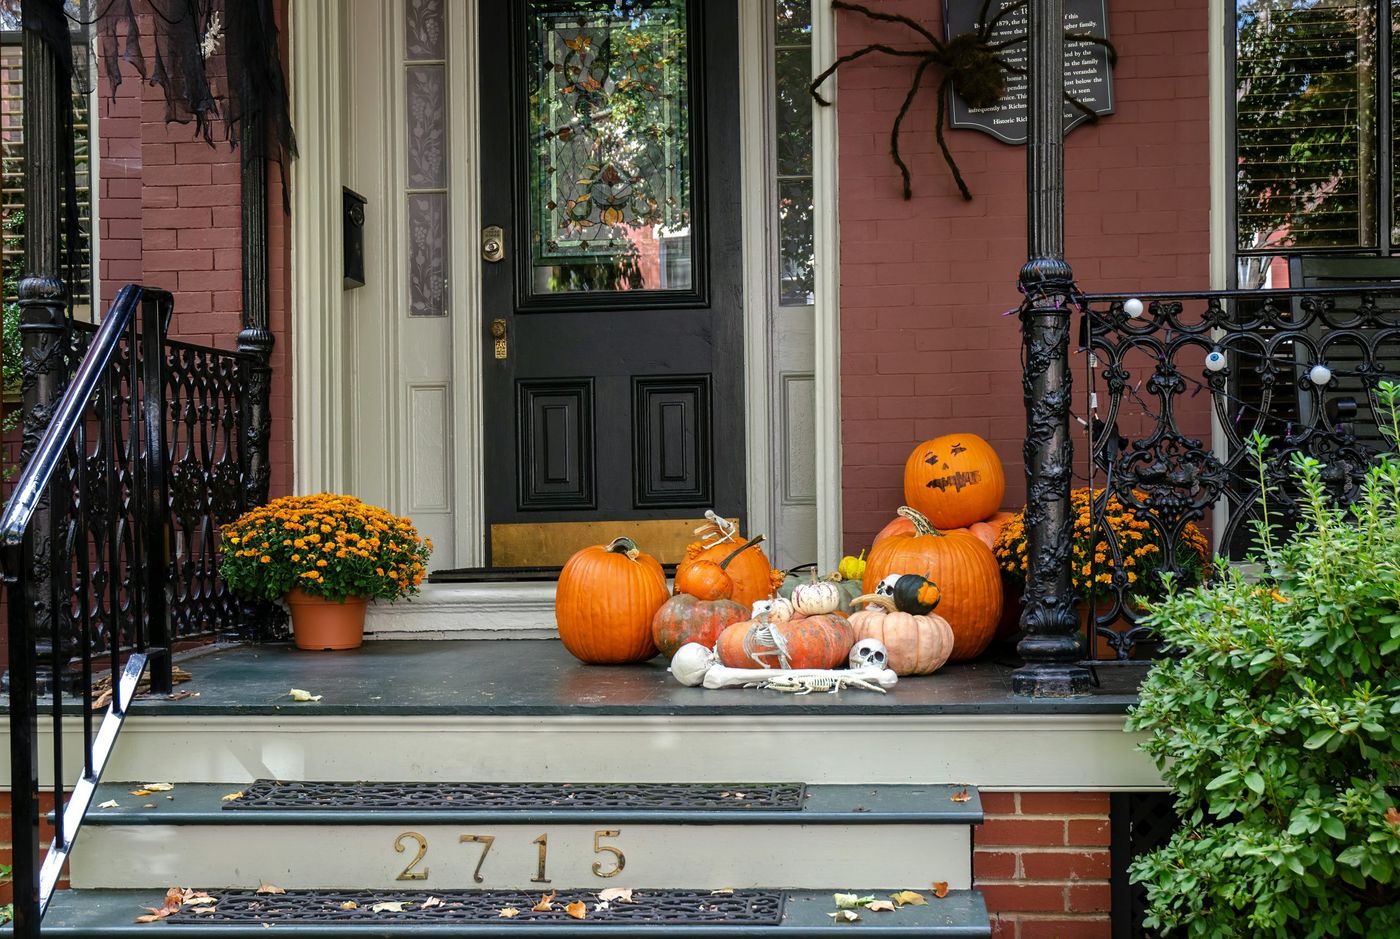
Style Math: This is a great example of the 60/30/10 rule applied to seasonal decor. The ‘60%’ is the home’s existing, dominant feature: the classic red brick. The ‘30%’ is the primary decorating color: the pumpkin orange found in the gourds and mums. The final ‘10%’ is the spooky accent: the bone-white of the skeleton parts and the black of the giant spider and iron railings. This formula ensures the decor feels integrated with the house, not just plopped on top. The orange warms up the brick, and the black and white accents provide a sharp, spooky contrast. For a different take on a similar scene, see Idea #15.
📐 Style Math
Before You Start Checklist:
- Check your surfaces. How will you attach the spider to the brick? Use removable brick clips or strong, outdoor-rated adhesive hooks that won’t damage the mortar.
- Plan your lighting. This display will look best with some dramatic uplighting. Do you have a spot to hide a small, outdoor spotlight to cast shadows?
- Take inventory of your existing planters. Can you just add mums to what you have, or do you need to buy new pots that fit the scale of your porch?
- Consider pet and child safety. Are the small skeleton bones in a place where a toddler or a dog might try to grab them? Make sure small parts are secure or out of reach.
16. A Giant Spider and Skeletons on a Historic Facade
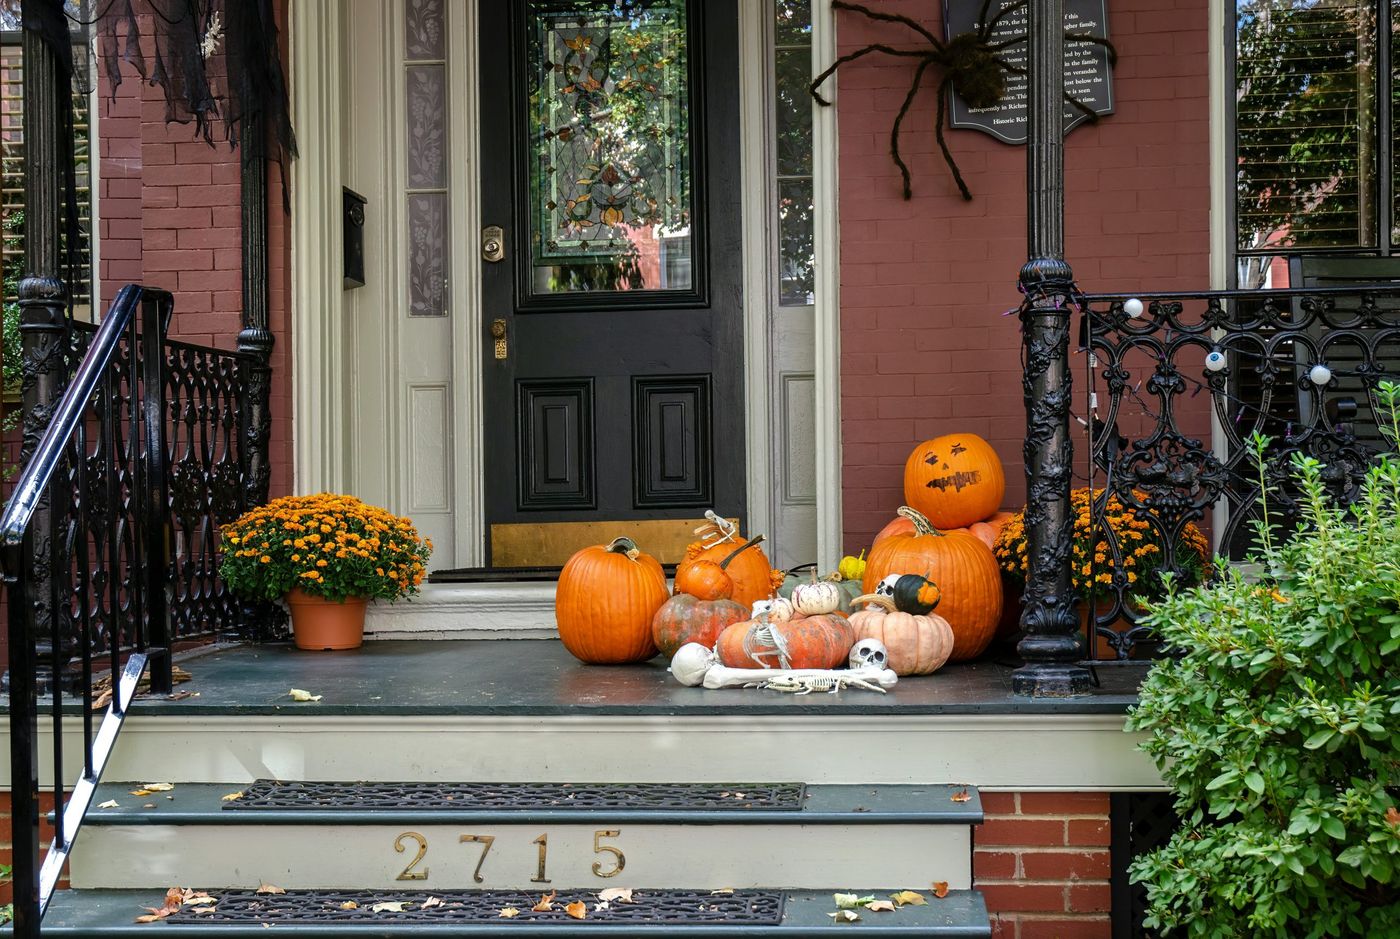
What Makes It Work: The success of this display lies in its playful use of scale. The giant spider is intentionally oversized for the space, creating an immediate sense of comic-book spookiness. In contrast, the tiny plastic skeletons scattered among the pumpkins add a secondary layer of detail that rewards a closer look. This high/low combination of scales makes the whole scene more dynamic and interesting than if everything were the same size. It tells a small story—the giant spider and its tiny victims—which is always more engaging than a simple arrangement of objects.
🎯 What Makes It Work
Designer Tip: When working with a strong architectural element like red brick, don’t fight it—lean into it. The deep brick red is the perfect traditional backdrop for classic Halloween orange. To make the orange pop even more, use a heavy dose of black as a visual anchor. Here, the black door, ornate railings, and the giant black spider all work together to frame the scene and make the pumpkins and chrysanthemums feel more vibrant. The black elements ground the composition and add a touch of gothic seriousness to the otherwise playful decor.
17. A Simple Row of Pumpkins on Distressed White Stairs
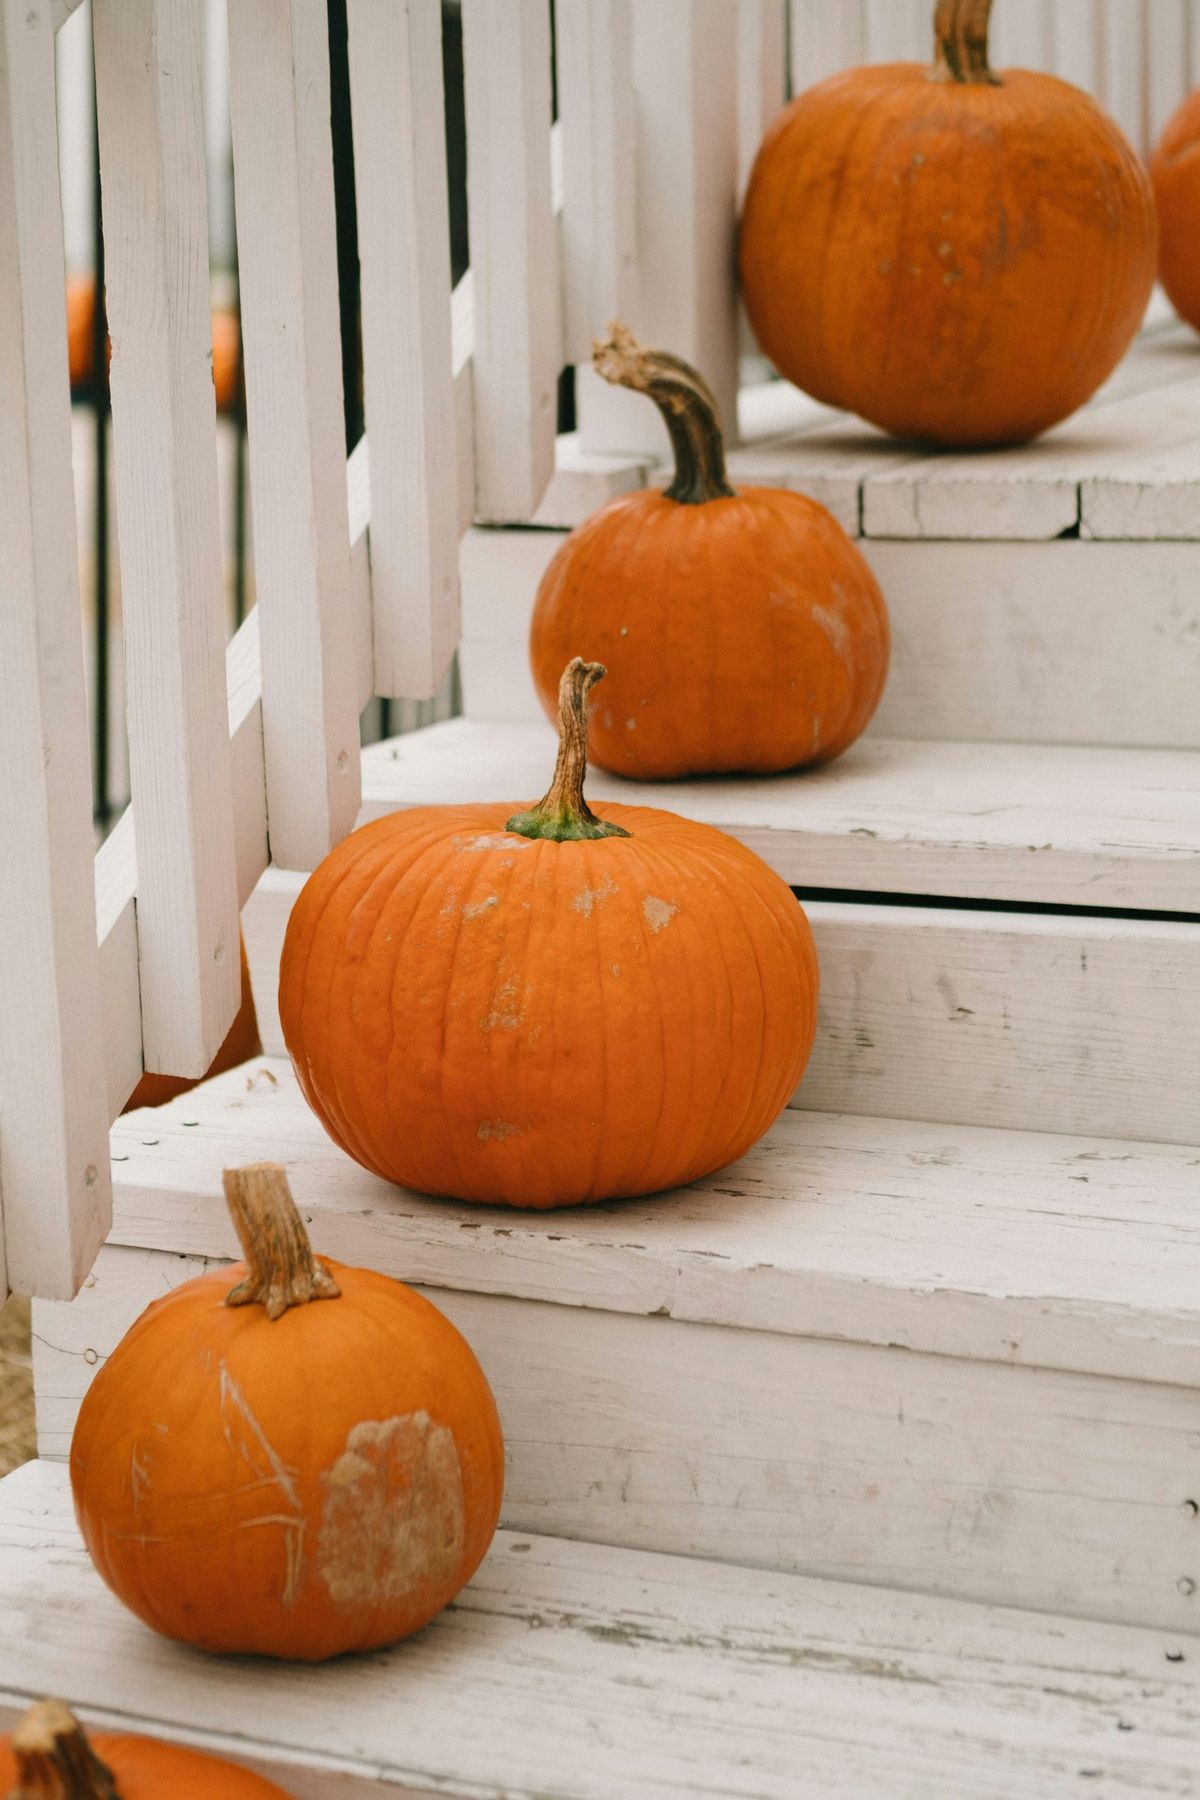
Scale Guide: This minimalist idea is perfect for narrow staircases or smaller entryways where a cluttered display isn’t an option. It works best on a straight run of at least 5-7 steps to get the full effect of the repetition. The key is uniform spacing. If your steps are less than 36 inches wide, use smaller pie pumpkins so they don’t become a tripping hazard. This concept is all about clean lines and simplicity, making it a great choice for spaces that could easily feel overwhelmed. For another minimalist pumpkin idea, check out Idea #29.
💰 Budget Breakdown
The One Thing: Repetition. The power of this design comes from repeating the same simple element—a single orange pumpkin—over and over. This creates a strong visual rhythm that leads the eye up the staircase. There are no other distractions. No gourds, no hay, no skeletons. It’s the disciplined focus on this one single idea that makes it so striking and graphically strong. If you were to add other types of decor, it would dilute the impact and lose its minimalist charm.
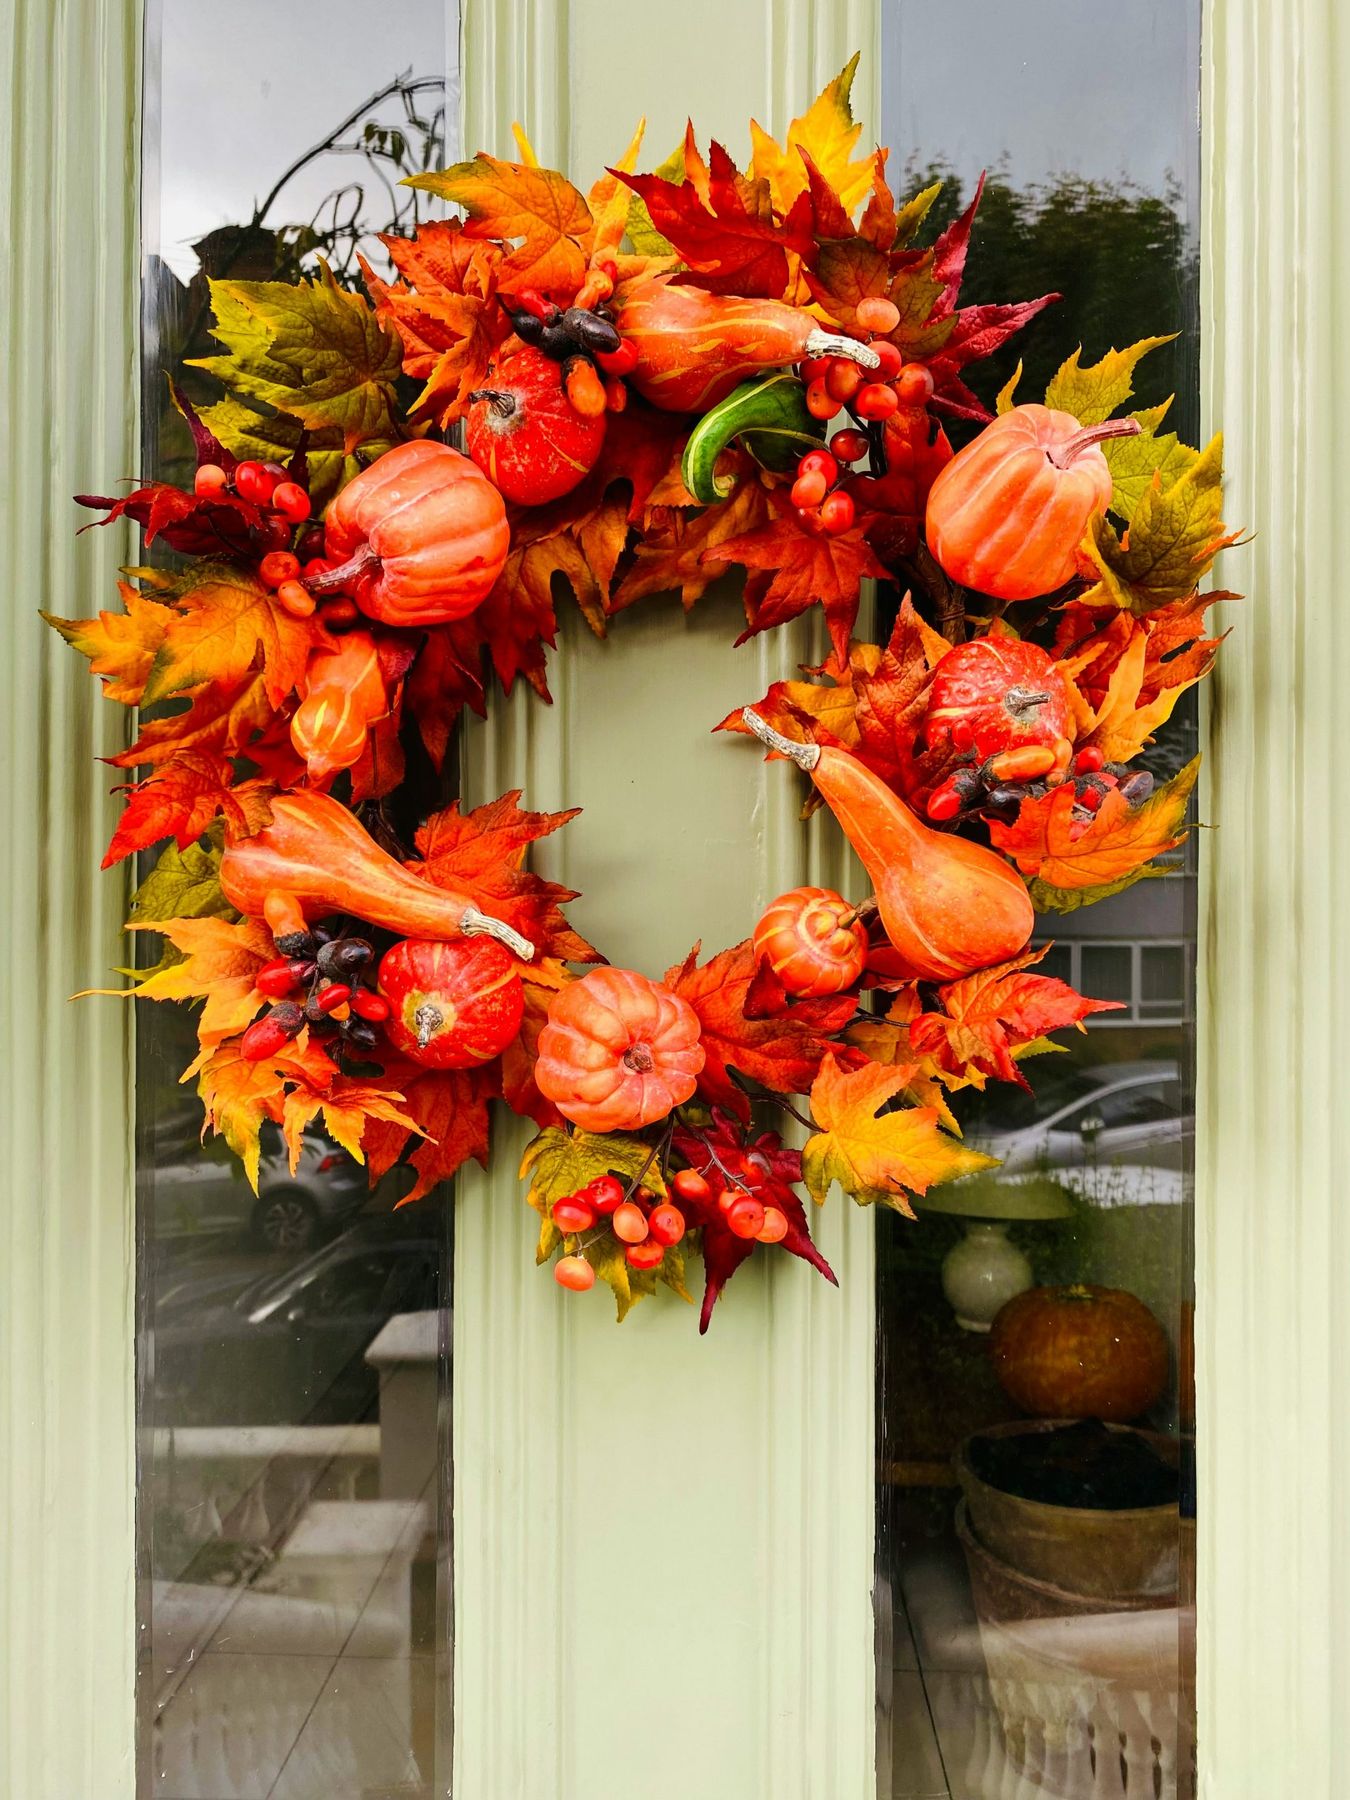
18. A Harvest Wreath on a Light Sage Green Door
Designer Tip: The perfect wreath-to-door ratio is key. For a standard 36-inch wide door with glass panels like this one, aim for a wreath with a diameter between 24 and 28 inches. Anything smaller will look lost, and anything larger will overwhelm the door and obscure the handle. When hanging it, the center of the wreath should be at eye level, which is typically around 60-65 inches from the floor. This ensures it’s the first thing people see and that it feels balanced with the overall door height.
✅ Before You Start
What Makes It Work: It’s all about sophisticated color theory. The soft, muted sage green of the door is a cool, earthy tone. The wreath is filled with warm colors—burnt orange, fiery red, and golden yellow. Placing these warm tones against the cool background makes them appear even more vibrant and rich. It’s a classic designer trick to create energy and contrast. The variety of shapes within the wreath, from the round pumpkins and berries to the elongated gourds, adds texture and a feeling of natural abundance.
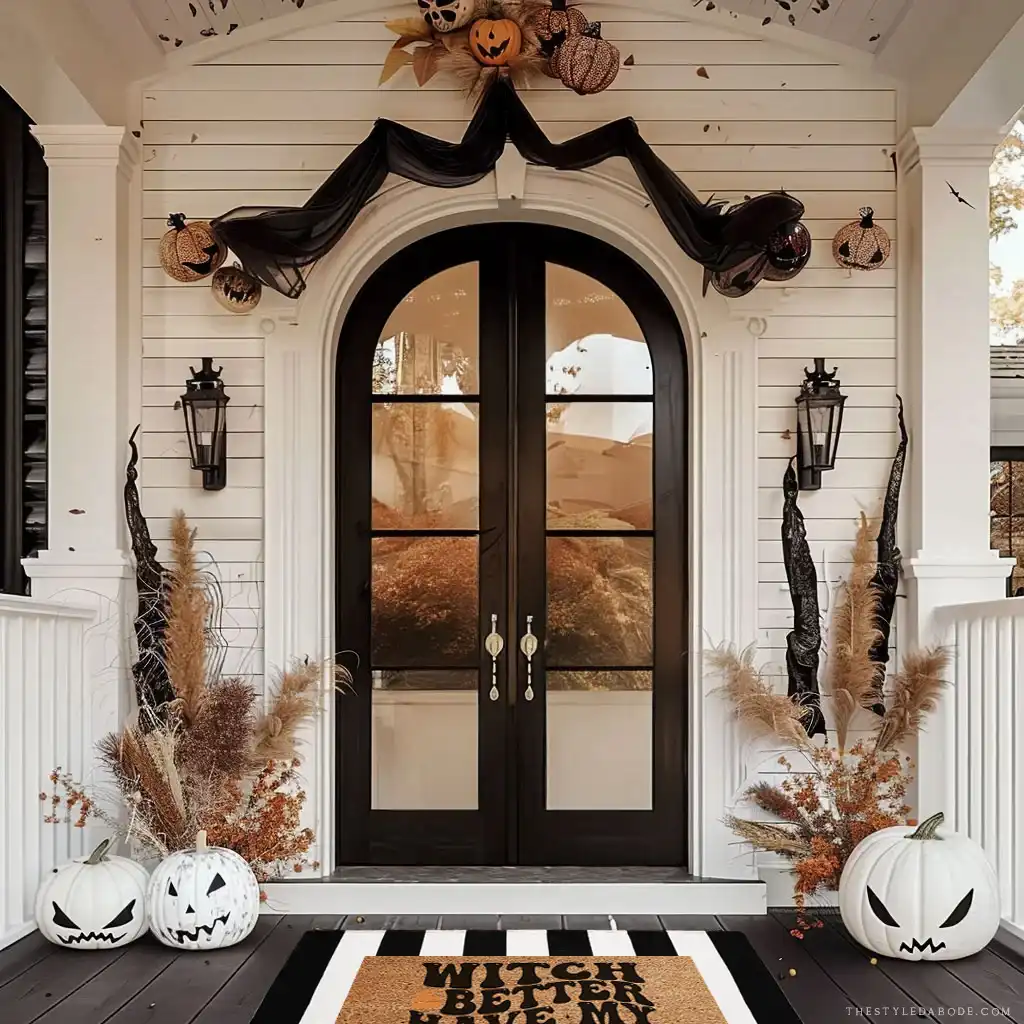
19. Gothic Glam Halloween Decor on an Arched Doorway
Budget Breakdown:
- Sheer Black Fabric (6-8 yards): $20 – $40
- Pampas Grass Stems: $30 – $60
- Assorted Pumpkins (mix of real/faux): $50 – $100
- Layered Doormats: $40 – $75
- Carriage-style Lanterns (2): $100 – $300
- TOTAL: $240 – $575
Budget alternative: Get this chic look for 60% less. Use cheap black tulle from a fabric store. Forage for tall, feathery grasses instead of buying pampas grass. Paint inexpensive craft pumpkins with black, white, and metallic copper paint. For lanterns, use a simple, modern IKEA version and place battery-operated candles inside.
⭐ The One Thing
Trending Context: The ‘Gothic Glam’ or ‘Spooky Chic’ trend is huge on Pinterest and Instagram right now. It moves Halloween decor away from kitschy and childish toward something more sophisticated and adult. By using a restrained palette of black, white, and metallics, and incorporating trendy decor items like pampas grass and layered doormats, it treats Halloween as a genuine design opportunity, not just a novelty holiday. This look has staying power because its core elements—a strong color story and beautiful textures—are principles of good design year-round.
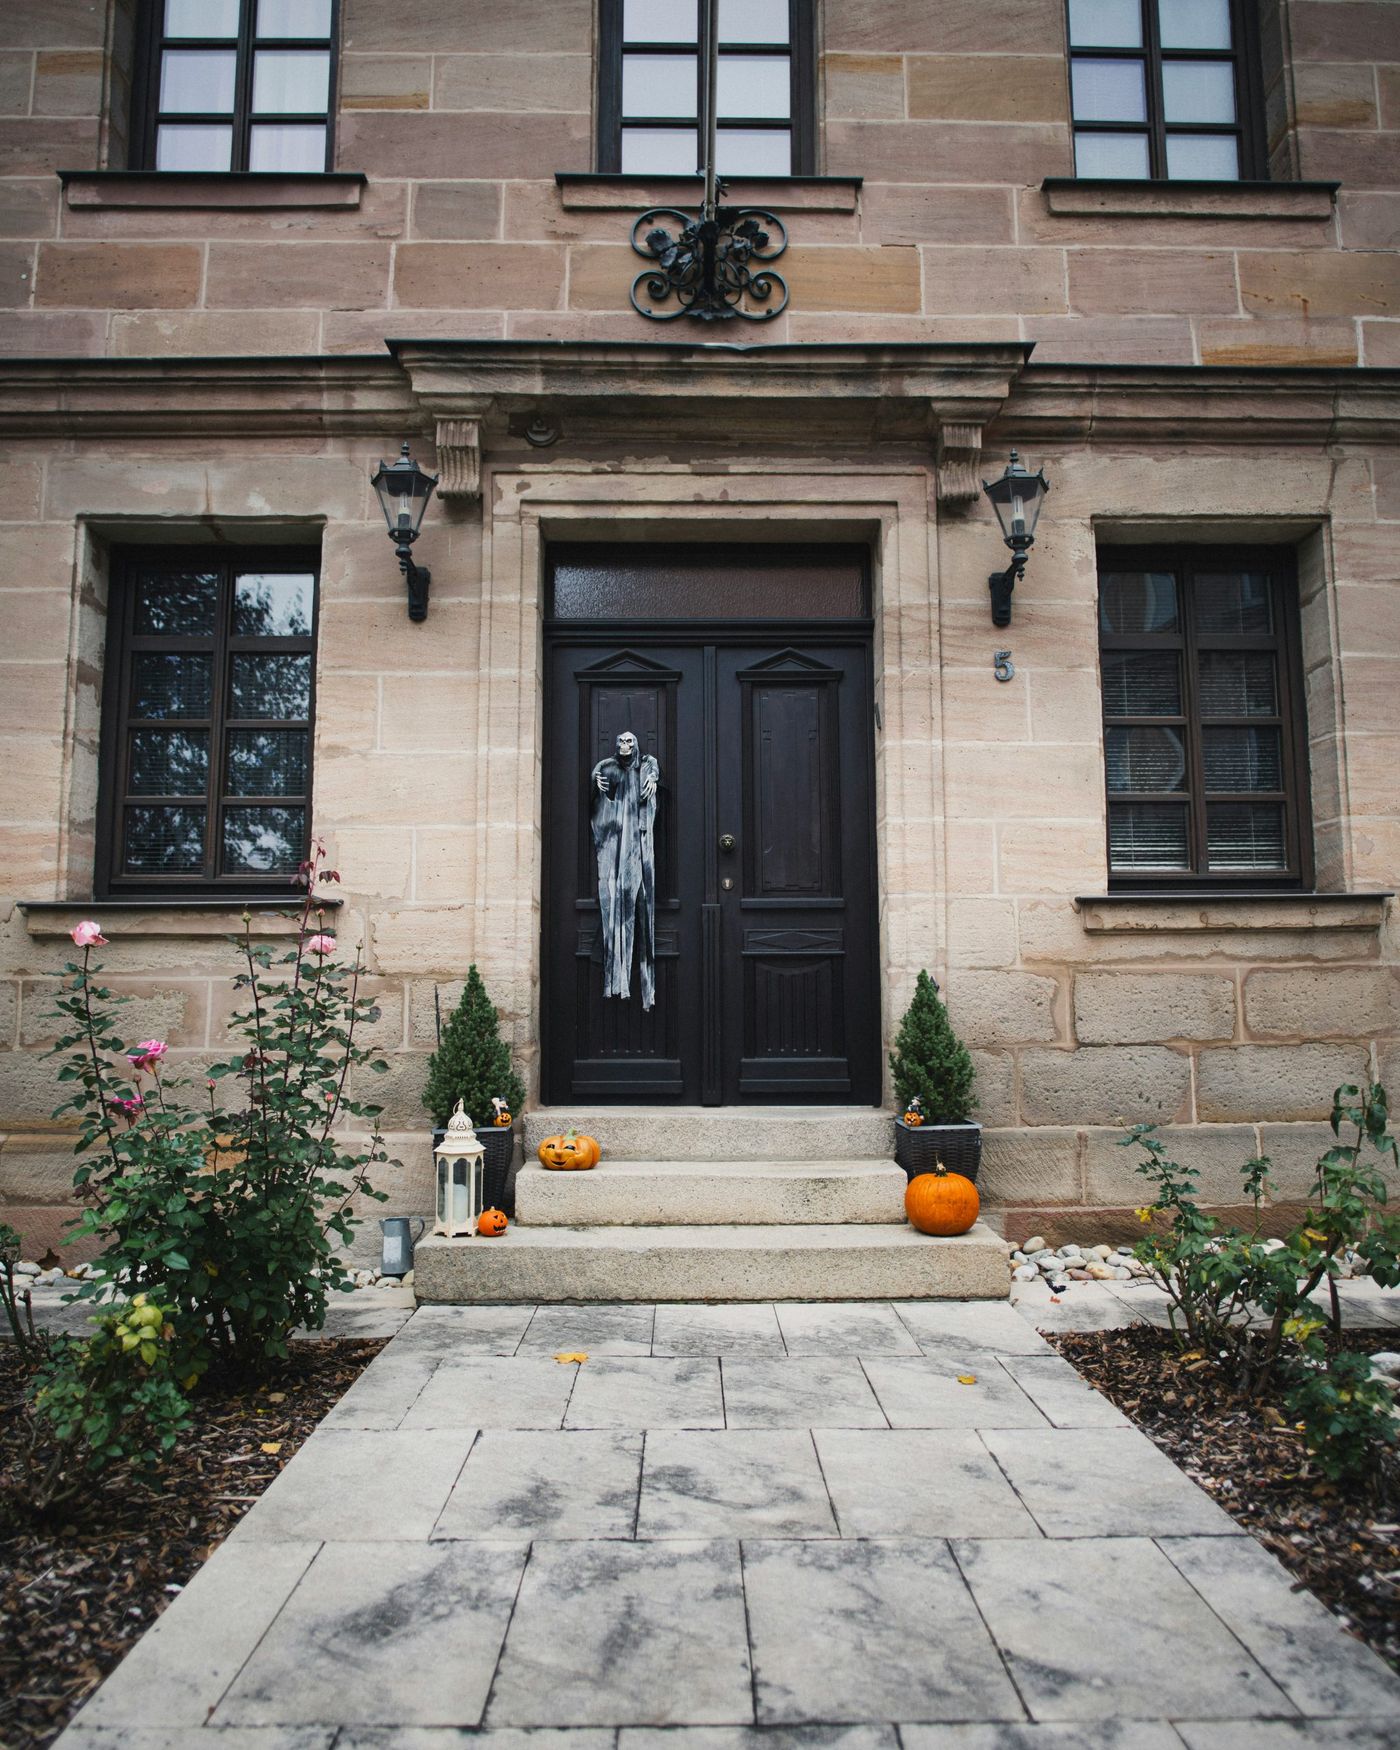
20. Festive and Fun German Halloween Entrance
Designer Tip: When your front entrance has strong architectural details like this recessed alcove, use them to your advantage. Frame the inside of the alcove with decor to create a ‘vignette’ or a contained scene. Here, the decorations are kept within the bounds of the entry, making it feel like a deliberate, curated display. Don’t be afraid to use vertical space; hanging elements from the top of the alcove draws the eye upward and makes the space feel more immersive and special. It turns a simple doorway into a destination.
🧹 Maintenance Reality
Real Talk: While a dense, layered look is fantastic, remember the practical function of your front door. Can you still easily get mail or packages? Is there a clear, safe path for guests to walk without tripping over a pumpkin or getting tangled in a hanging decoration? Before you go all-out, map out the ‘must-be-clear’ zones. It’s no fun having the perfect spooky porch if your pizza delivery person takes a tumble on their way to the door. Functionality should always come first, even during the holidays.
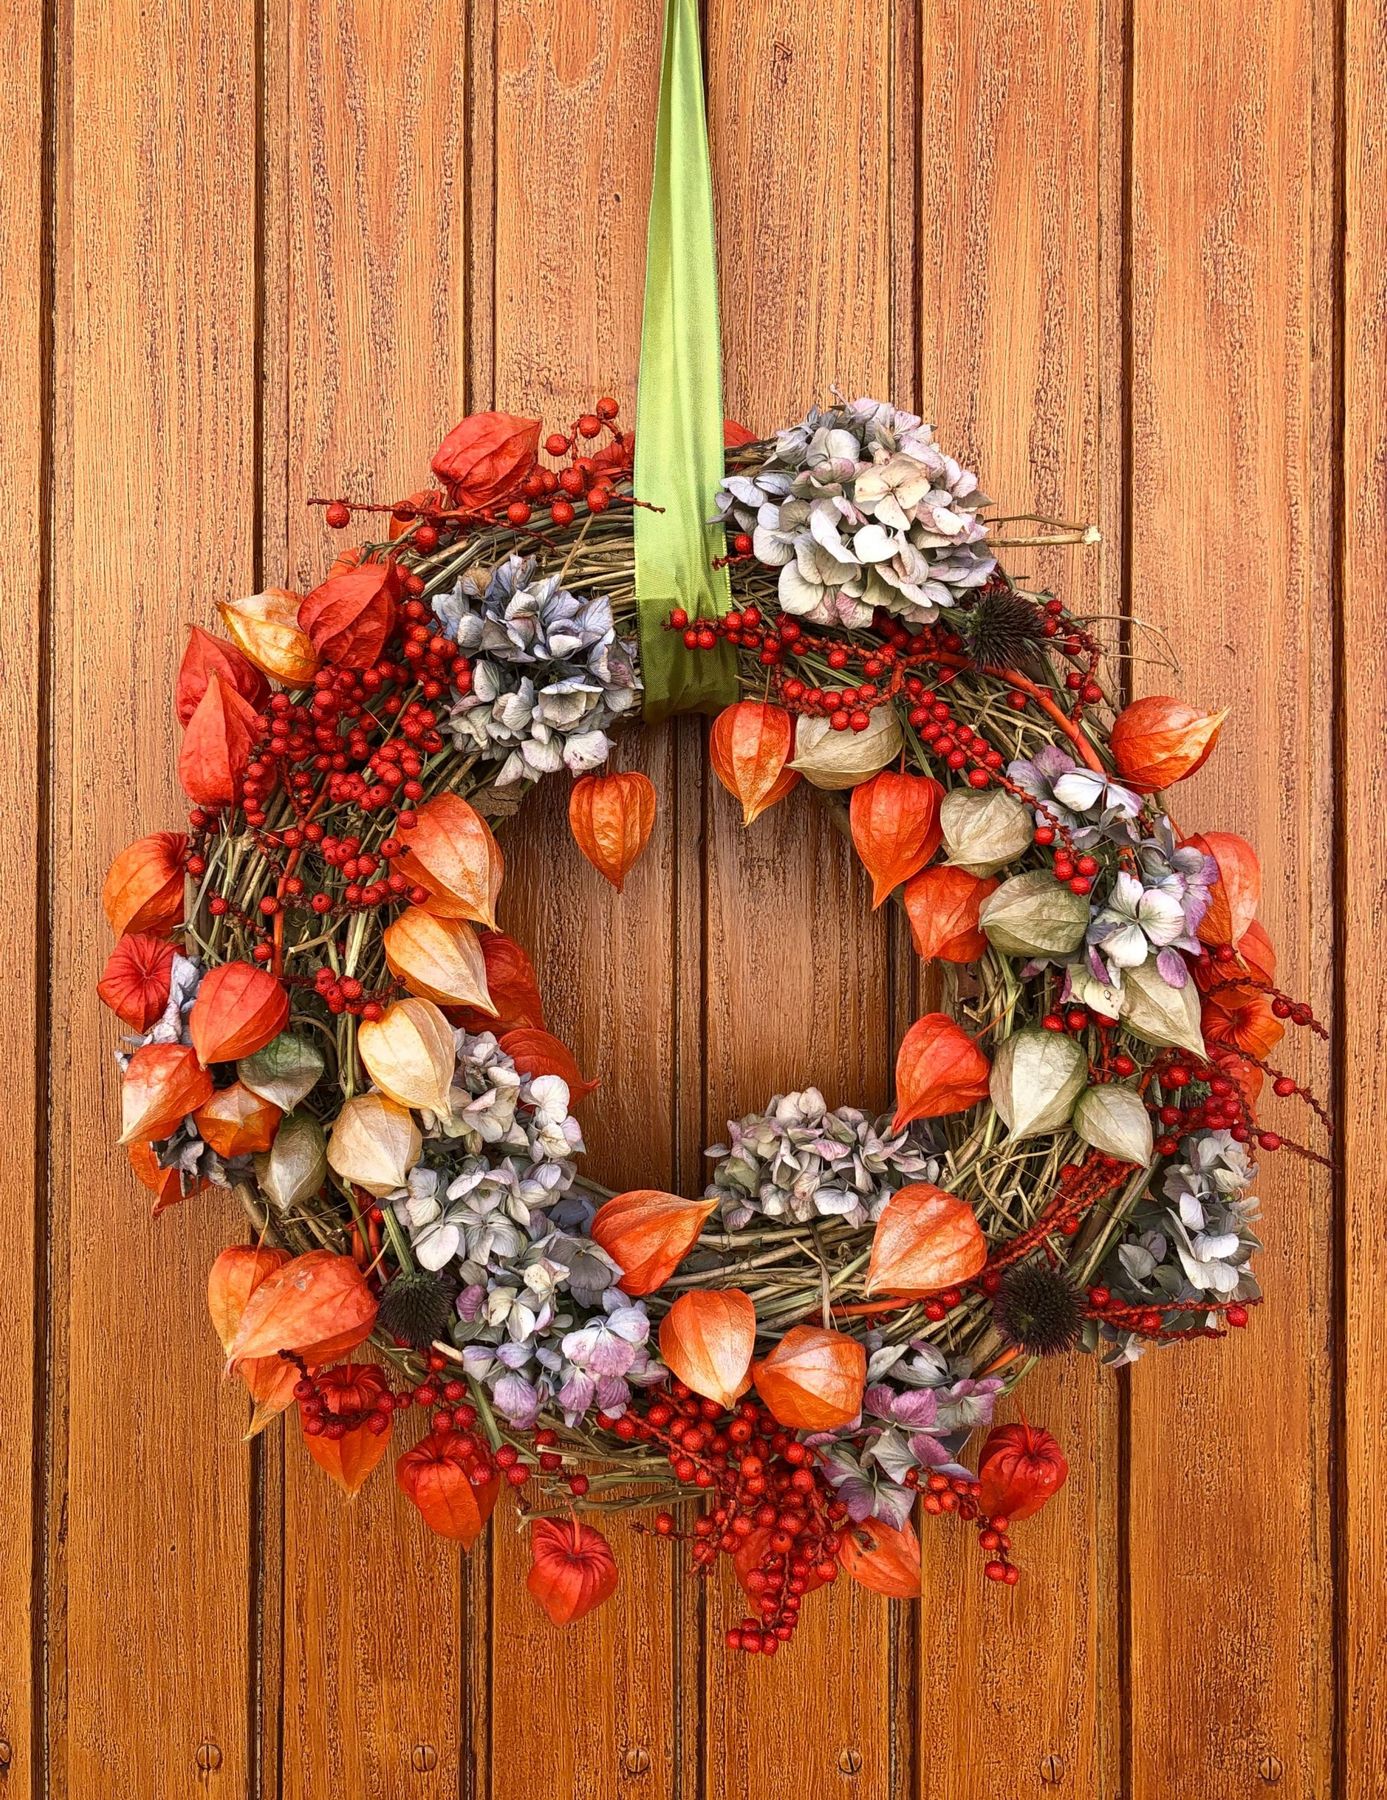
21. A Rustic Wreath with Chinese Lanterns and Hydrangeas
How-To Brief: Make this vibrant, textured wreath. Time: 45 minutes. Cost: $35.
- Start with a basic 18-inch grapevine wreath base. You don’t need a perfect one; rustic is better.
- Buy a bunch of dried Chinese lantern stems and dried hydrangeas. Using a hot glue gun, attach the largest hydrangea heads first to create three anchor points.
- Snip the Chinese lantern husks from their stems and glue them in dense clusters around the hydrangeas, filling in the gaps.
- Add small bunches of faux red berries intermittently for a pop of contrasting color and texture.
- Weave any remaining loose stems or leaves into the grapevine base to add depth.
- Finally, loop a wide, bold ribbon around the top for hanging.
📏 Scale Guide
Maintenance Reality: This wreath is stunning, but it’s delicate. Dried natural elements like Chinese lanterns and hydrangeas are brittle and can be easily crushed or broken. This is not a wreath that can withstand a heavy storm or a door that gets slammed frequently. To protect it, give the entire finished wreath a few light coats of clear matte spray sealant. This will help strengthen the dried elements and give them some resistance to moisture. Store it carefully after the season, wrapped loosely in a box, to prevent it from getting crushed.
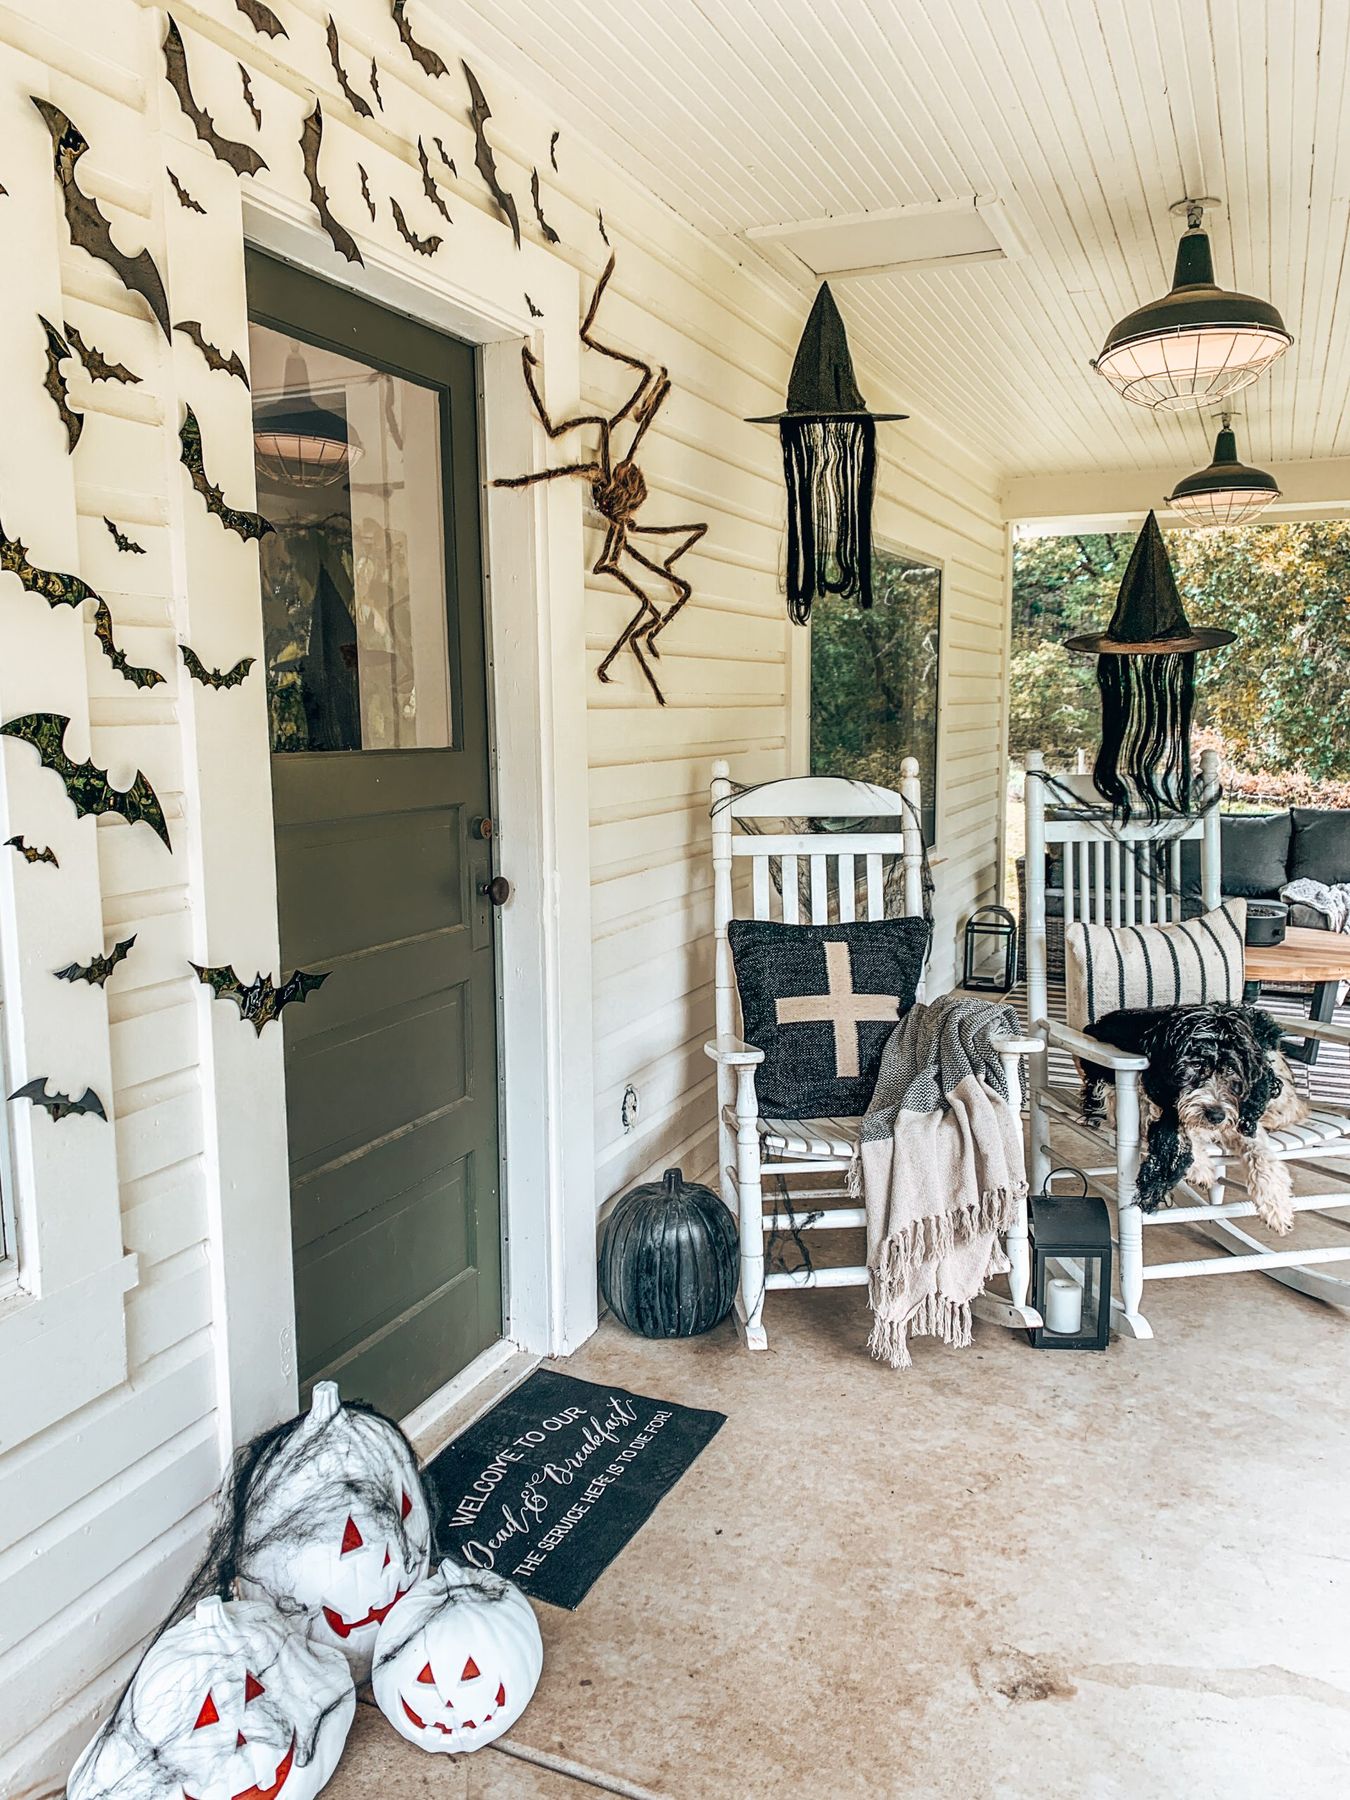
22. A Cozy Farmhouse Porch with Floating Witch Hats
Style Math: This charming look is a perfect blend: 50% cozy farmhouse + 30% whimsical spookiness + 20% graphic punch. The white rocking chairs, olive green door, and wood porch create the comfortable farmhouse base. The floating witch hats and wall bats add the fun, Halloween-specific layer. Finally, the black-and-white pillows and doormat provide a strong graphic element that modernizes the look and ties all the black accents together. It feels balanced because the spooky elements are playful, not scary, which fits the cozy vibe.
🔧 How-To Brief
Get This Look For Less: The floating witch hats are a brilliant, low-cost DIY. All you need are cheap witch hats from the dollar store ($1-2 each), some fishing line, and a few small hooks for the porch ceiling. The paper bats are another classic DIY; just buy a pack of black cardstock for a few dollars and use a template to cut out dozens of them. The white jack-o’-lanterns can be made by painting inexpensive orange foam pumpkins from a craft store. The most expensive items are the chairs, which you may already own or can find on Facebook Marketplace.
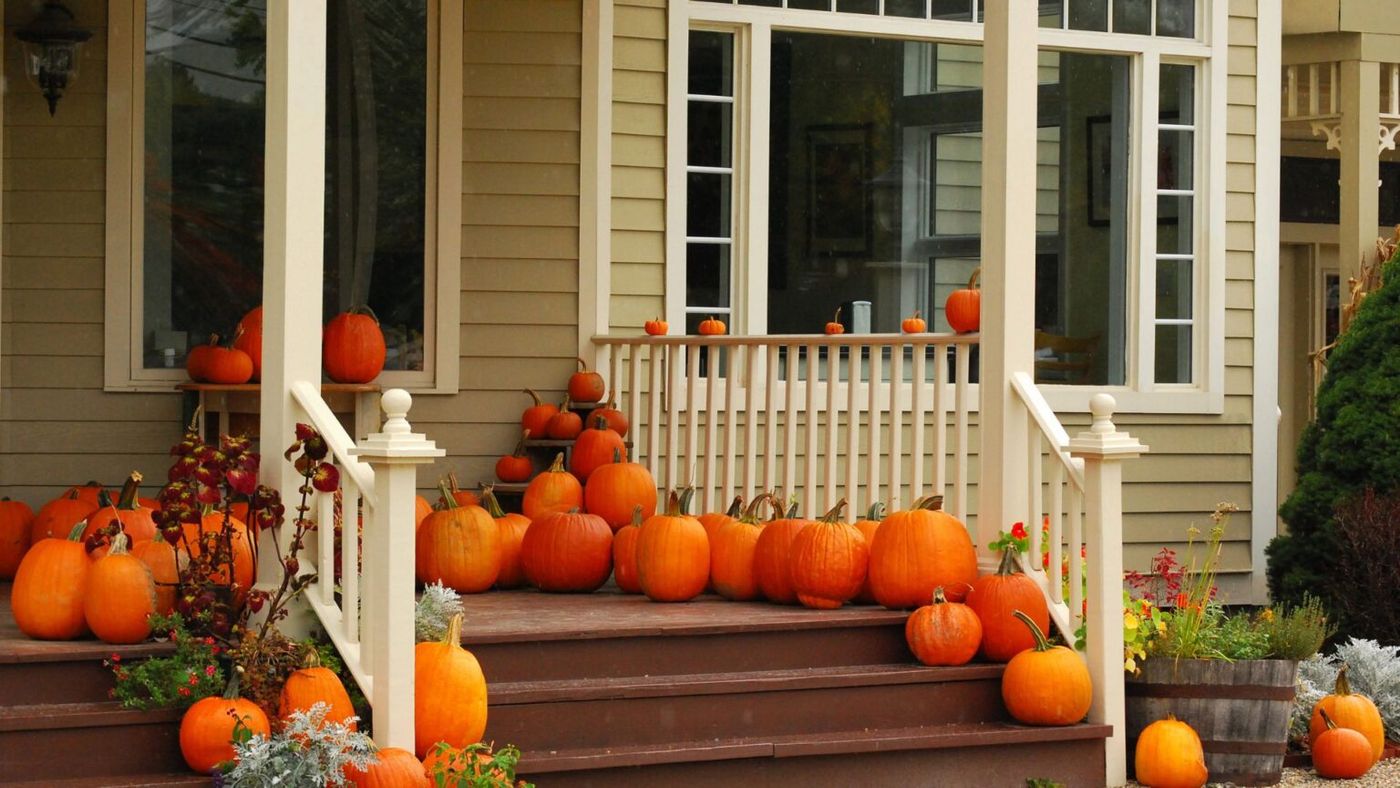
23. An Explosion of Orange Pumpkins on a Wooden Porch
Scale Guide: A look this abundant needs space to breathe. It’s ideal for a wide, multi-level porch, at least 12-15 feet across. The sheer quantity of pumpkins creates a massive visual weight, so it works best against a home with a simple, light-colored facade that won’t compete. A narrow stoop or a home with dark or busy siding would make this much pumpkin-power feel overwhelming and cluttered rather than bountiful and festive. You also need a good ‘holding area’ on the porch floor itself, not just on the steps.
💸 Get This Look For Less
Real Talk: Let’s be honest about the logistics here. This is a LOT of pumpkins. We’re talking 30, 40, maybe even 50 of them. This represents a significant investment of both money (potentially hundreds of dollars) and time. Getting them all home, arranging them, and then disposing of them after the season is a major undertaking. If you love this look, consider building your collection of high-quality faux pumpkins over several years. It’s a bigger upfront cost, but far more manageable in the long run.
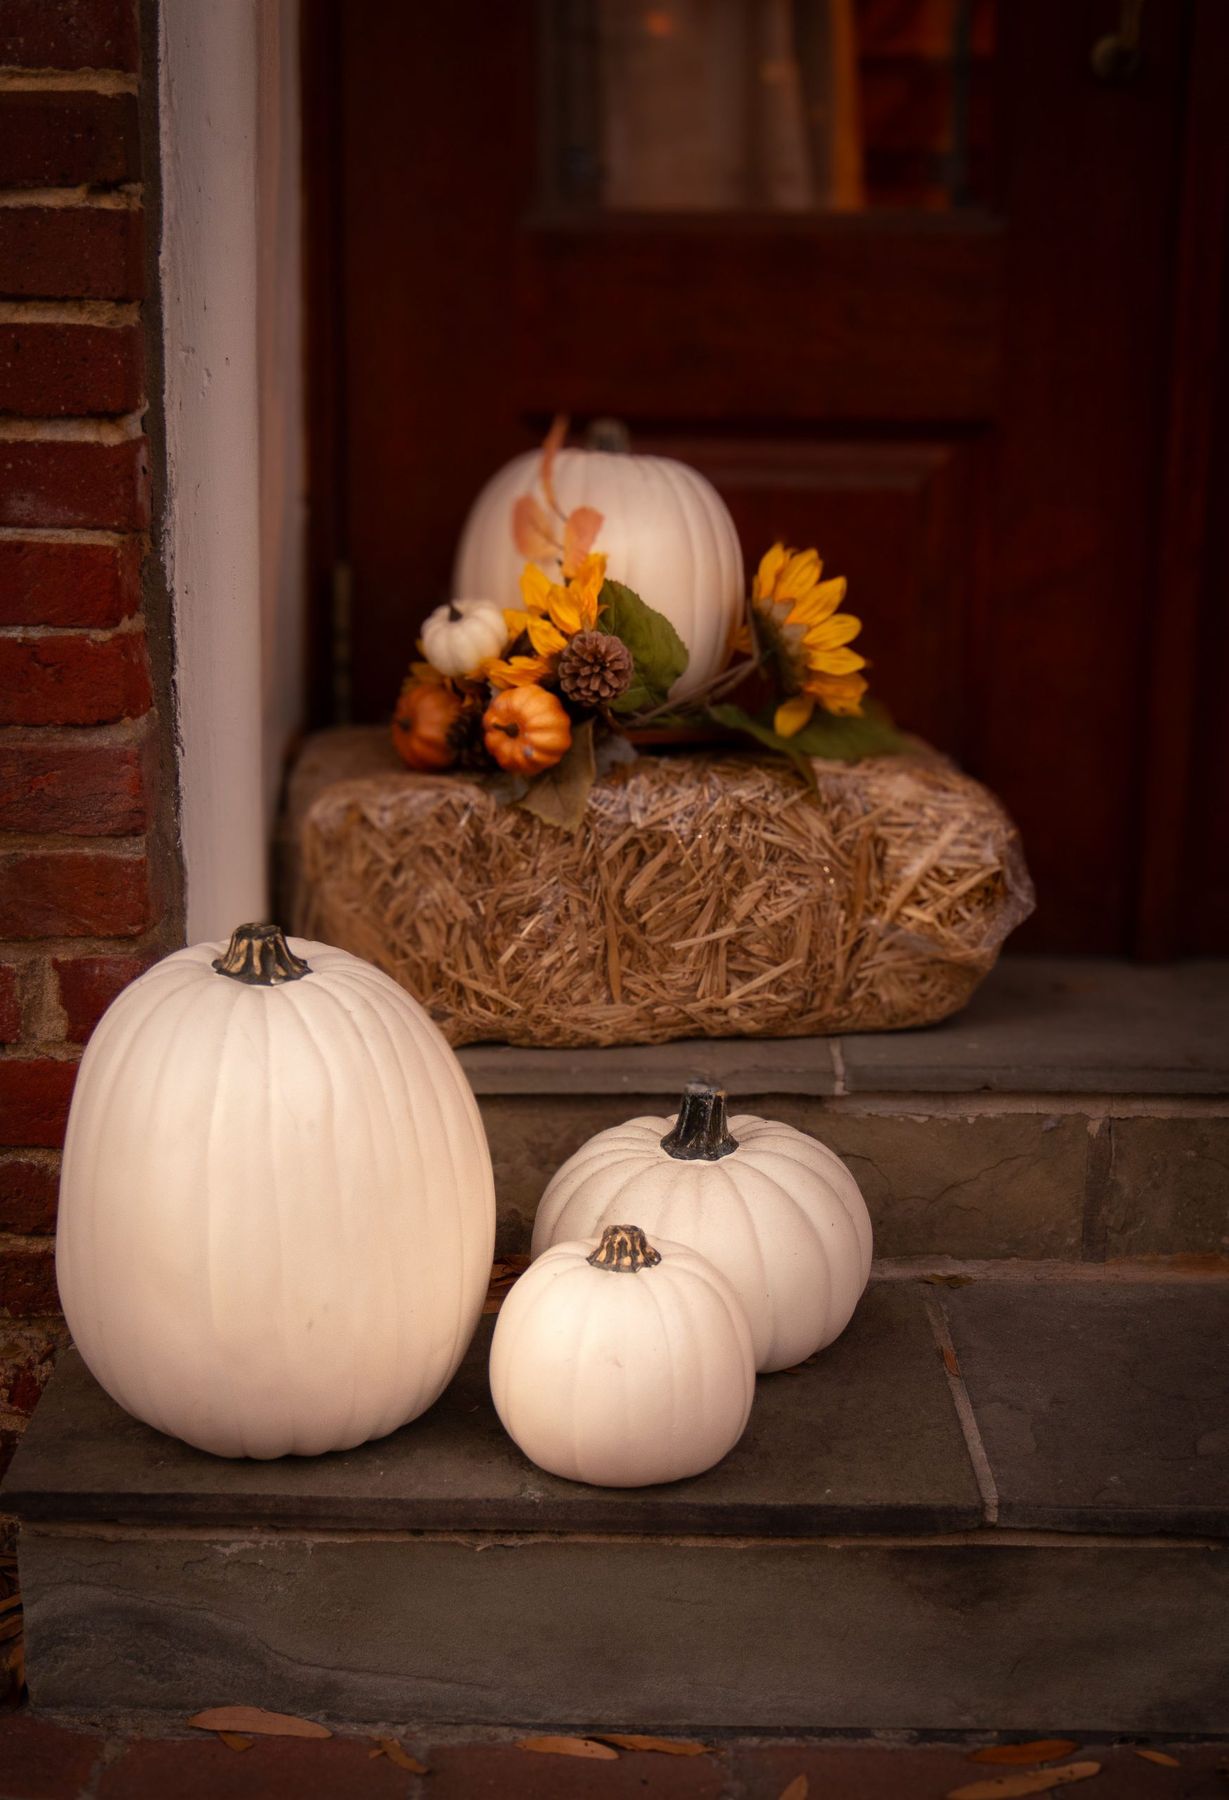
24. A Rustic Porch Display with White Pumpkins and Hay
What Makes It Work: This design is a celebration of texture. You have the smooth, waxy skin of the white pumpkins, the rough, scratchy texture of the hay bale, the hard coolness of the stone steps, the warm grain of the dark wood door, and the weathered surface of the red brick. This rich variety of textures creates a deep sensory experience and makes the simple arrangement feel complex and interesting. The color palette is also very controlled—mostly neutrals with just a pop of orange and yellow—which lets the textures take center stage. For another take on the white pumpkin look, see Idea #17.
⚠️ Real Talk
The One Thing: It’s the hay bale. Take it away, and you just have some pumpkins on the steps. The hay bale is the crucial rustic element that grounds the entire scene. It adds height, a substantial block of texture and color, and provides the perfect ‘stage’ for the smaller decorative items like the sunflowers and pinecones. It’s what transforms the arrangement from a simple collection of items into a cohesive, harvest-themed vignette. It tells a story of farms and fields, which is the heart of autumnal decor.
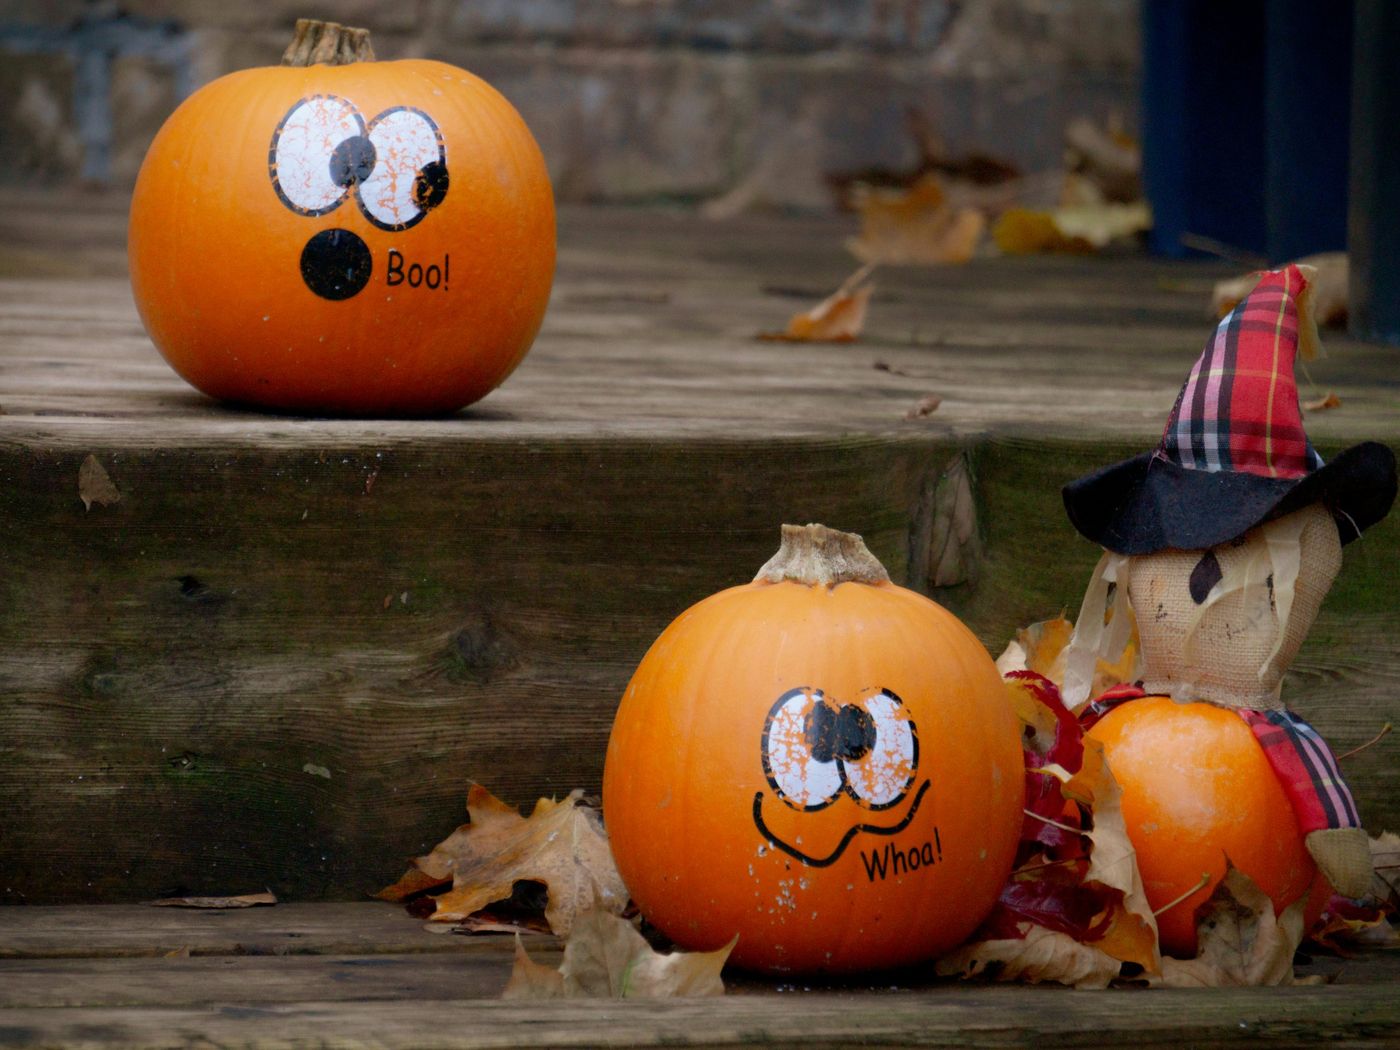
25. Playful Pumpkins with Cartoon Eyes on Wooden Steps
Designer Tip: If you have young children, embrace the ‘not-so-scary’ side of Halloween. Using stickers, paint, or Mr. Potato Head-style pieces to create funny or silly faces on pumpkins is a fantastic, kid-friendly alternative to carving with sharp tools. This approach is all about fun and creativity, not fear. Let your kids pick out the expressions and help place the stickers. It turns porch decorating into a collaborative family activity and ensures your entryway feels welcoming and cheerful to even the smallest trick-or-treaters.
🔥 Trending Context
How-To Brief: The Easiest No-Carve Pumpkin Faces. Time: 10 minutes per pumpkin. Cost: $5-$10.
- Thoroughly wash and dry your pumpkin to ensure a clean surface for adhesion.
- Buy a set of pre-made vinyl pumpkin face stickers online or from a craft store. They come in tons of expressions.
- For a DIY approach, cut out eyes, mouths, and eyebrows from a sheet of black adhesive vinyl or even black electrical tape.
- Let your kids (or your inner child) arrange the features on the pumpkin. The best part is they are repositionable!
- Add text or extra details with a black permanent marker to complete the cartoon look.
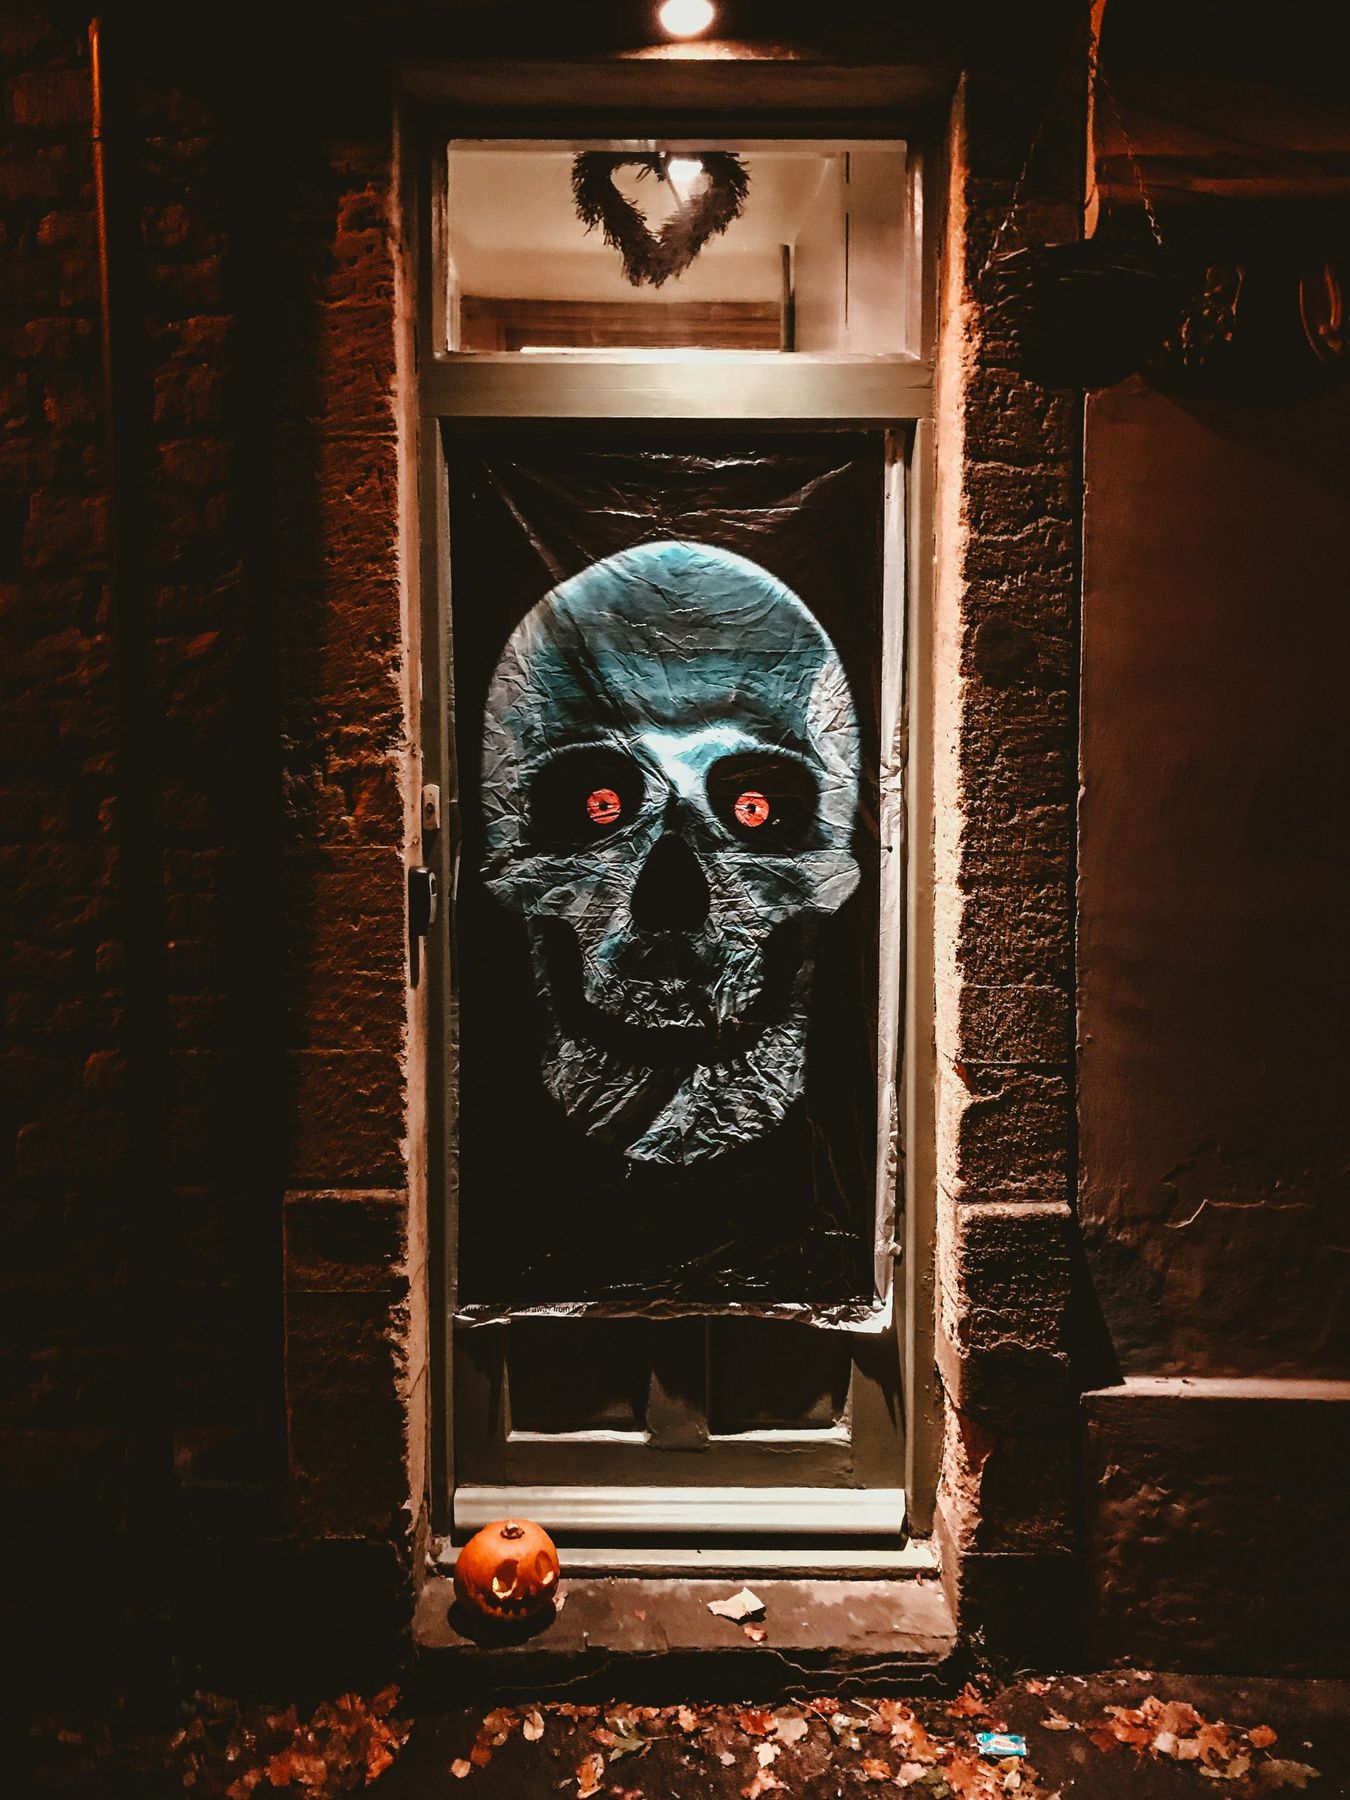
26. An Illuminated Skull Poster with Glowing Red Eyes
Real Talk: While a door poster is a quick, high-impact decoration, be mindful of your door type. These are typically made of thin plastic and are designed to be taped to a glass panel. If you have a solid wood or metal door, it can be tricky to attach without damaging the paint. Also, the ‘crinkled’ look, while adding texture, can read as ‘cheap’ up close in daylight. This decoration is definitely at its most effective at night when the glowing red eyes become the main focus and the material of the poster itself is less visible.
💡 Designer Tip
Get This Look For Less: This is already a very budget-friendly idea, but you can take it a step further. Instead of buying a pre-made poster, you can create a similar effect yourself for under $10. Get a roll of black craft paper and cut it to the size of your door’s glass panel. Then, use white paint or a white paint marker to draw a large, graphic skull. For the glowing eyes, buy a set of small, battery-operated red LED ‘fairy’ lights and tape the battery pack to the inside of the door, with the lights positioned behind the eye sockets.
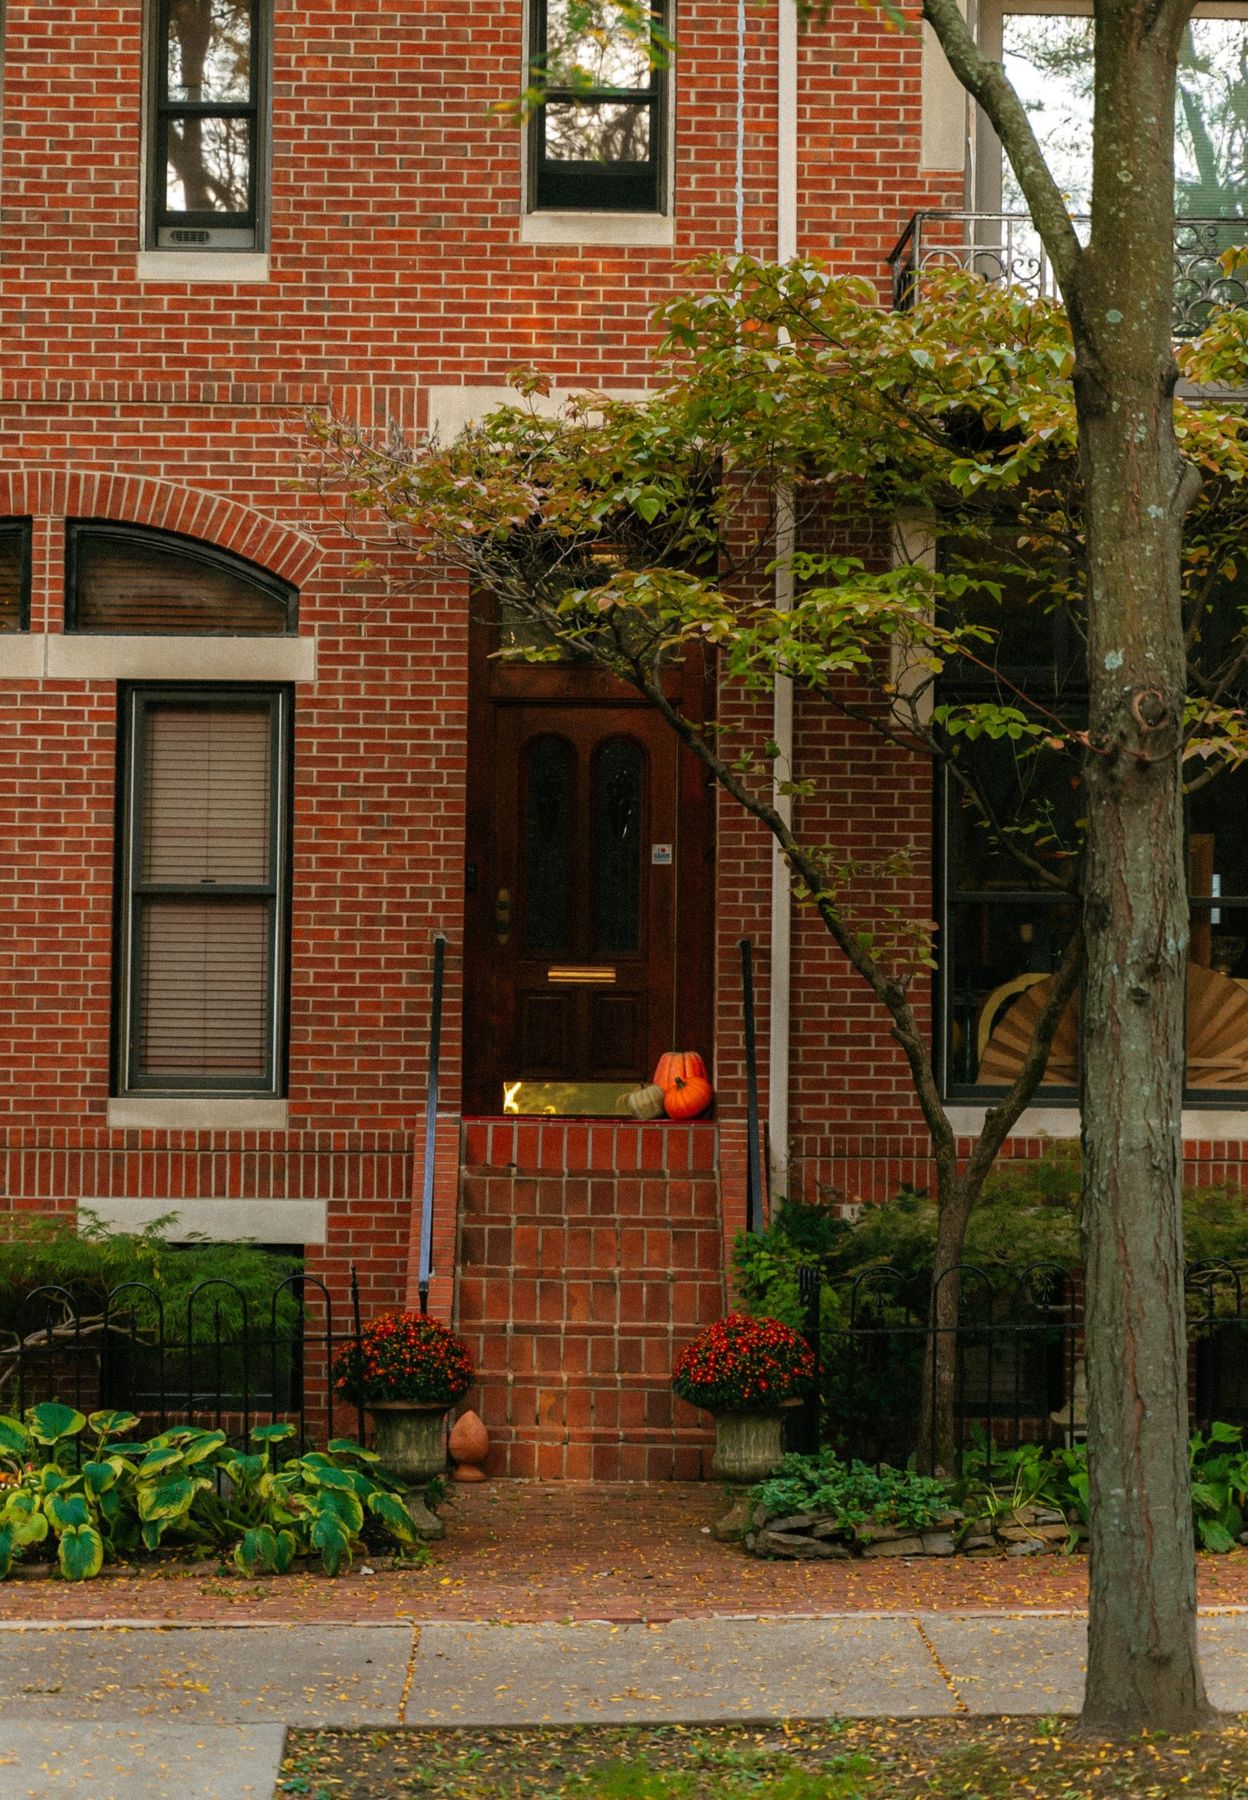
27. Minimalist Pumpkin Accents on a Brick Townhouse Stoop
Style Math: This look is the definition of quiet elegance, following a formula of 90% classic architecture + 10% seasonal accent. The stately brick facade, arched wood door, and wrought iron railings do all the heavy lifting. They provide a beautiful, timeless canvas. The decor is just two small pumpkins and two pots of mums. That’s it. The ‘10%’ is just enough to acknowledge the season without disrupting the inherent beauty of the home. This proves that you don’t need a mountain of decor to be festive; sometimes a whisper is more powerful than a shout.
📐 Style Math
Before You Start Checklist:
- Evaluate your architecture. Does your home have strong, beautiful features like this one? If so, a minimalist approach is a great way to highlight them.
- Check the sun exposure. Mums need at least 6 hours of sun a day. Make sure the spot you plan to put them isn’t in deep shade for most of the day.
- Measure your space. The success of this look is in its perfect, uncluttered scale. Make sure the pumpkins and pots are small enough to sit neatly without blocking the walkway.
- Confirm your commitment. Are you okay with a look that’s subtle and might not scream ‘Halloween’ from the street? This is for personal enjoyment, not for winning a neighborhood contest.
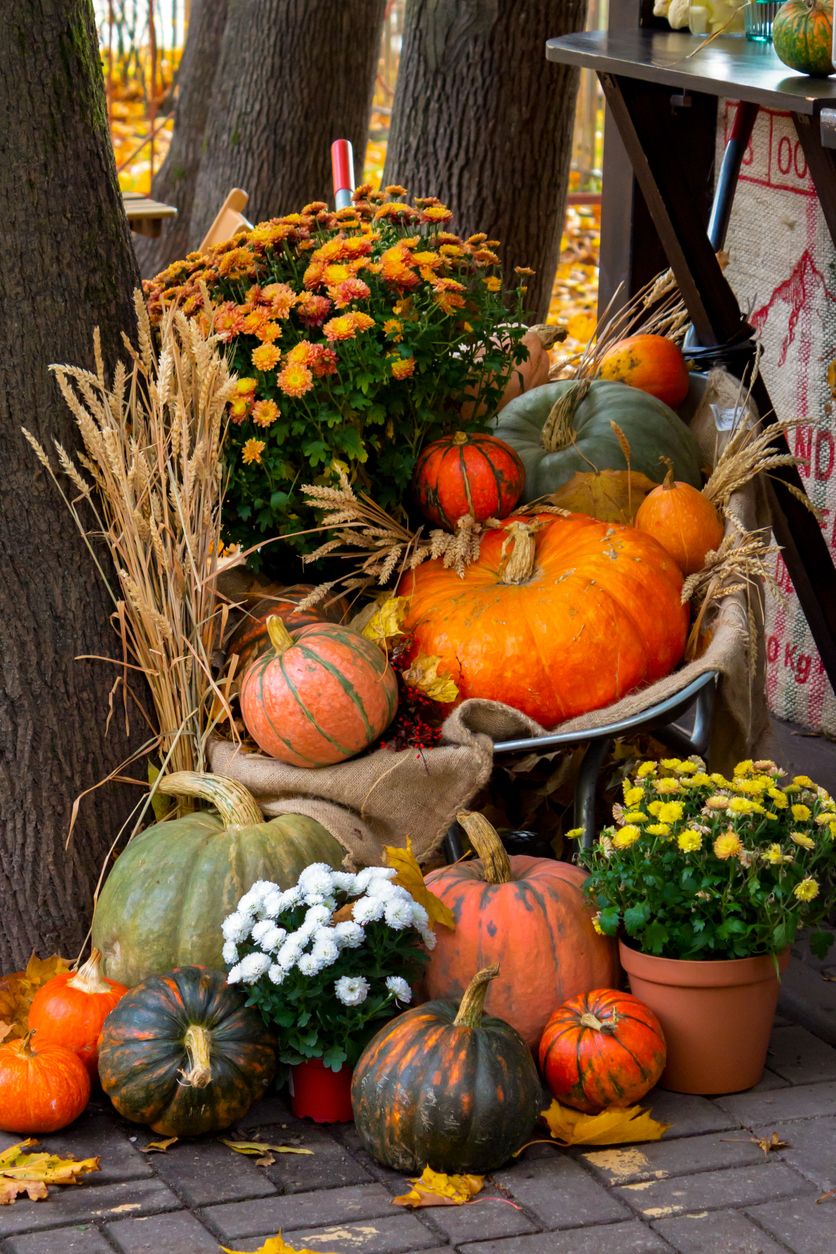
28. A Rustic Harvest Porch with Cornstalks and Gourds
Scale Guide: A full-on harvest display with cornstalks requires a decent amount of vertical and horizontal space. This is best for a porch that is at least 8 feet wide and has columns, posts, or railings to which you can tie the cornstalks. Without anchor points, the stalks will just fall over. The height is also important; you need at least an 8-foot clearance to accommodate standard-sized stalks without them looking cramped. This is a classic look for a farmhouse or a home with a prominent, covered front porch.
🎯 What Makes It Work
The One Thing: It’s the cornstalks. They are the single element that provides the essential verticality and rustic texture that defines a ‘harvest’ look. Without them, it’s just a collection of pumpkins on a porch. The cornstalks frame the doorway, draw the eye upward, and create a cozy, enclosed feeling. They bring the texture and scale of the autumn field right to your front door, which is the entire point of this style. They are the backdrop that makes all the other elements work.
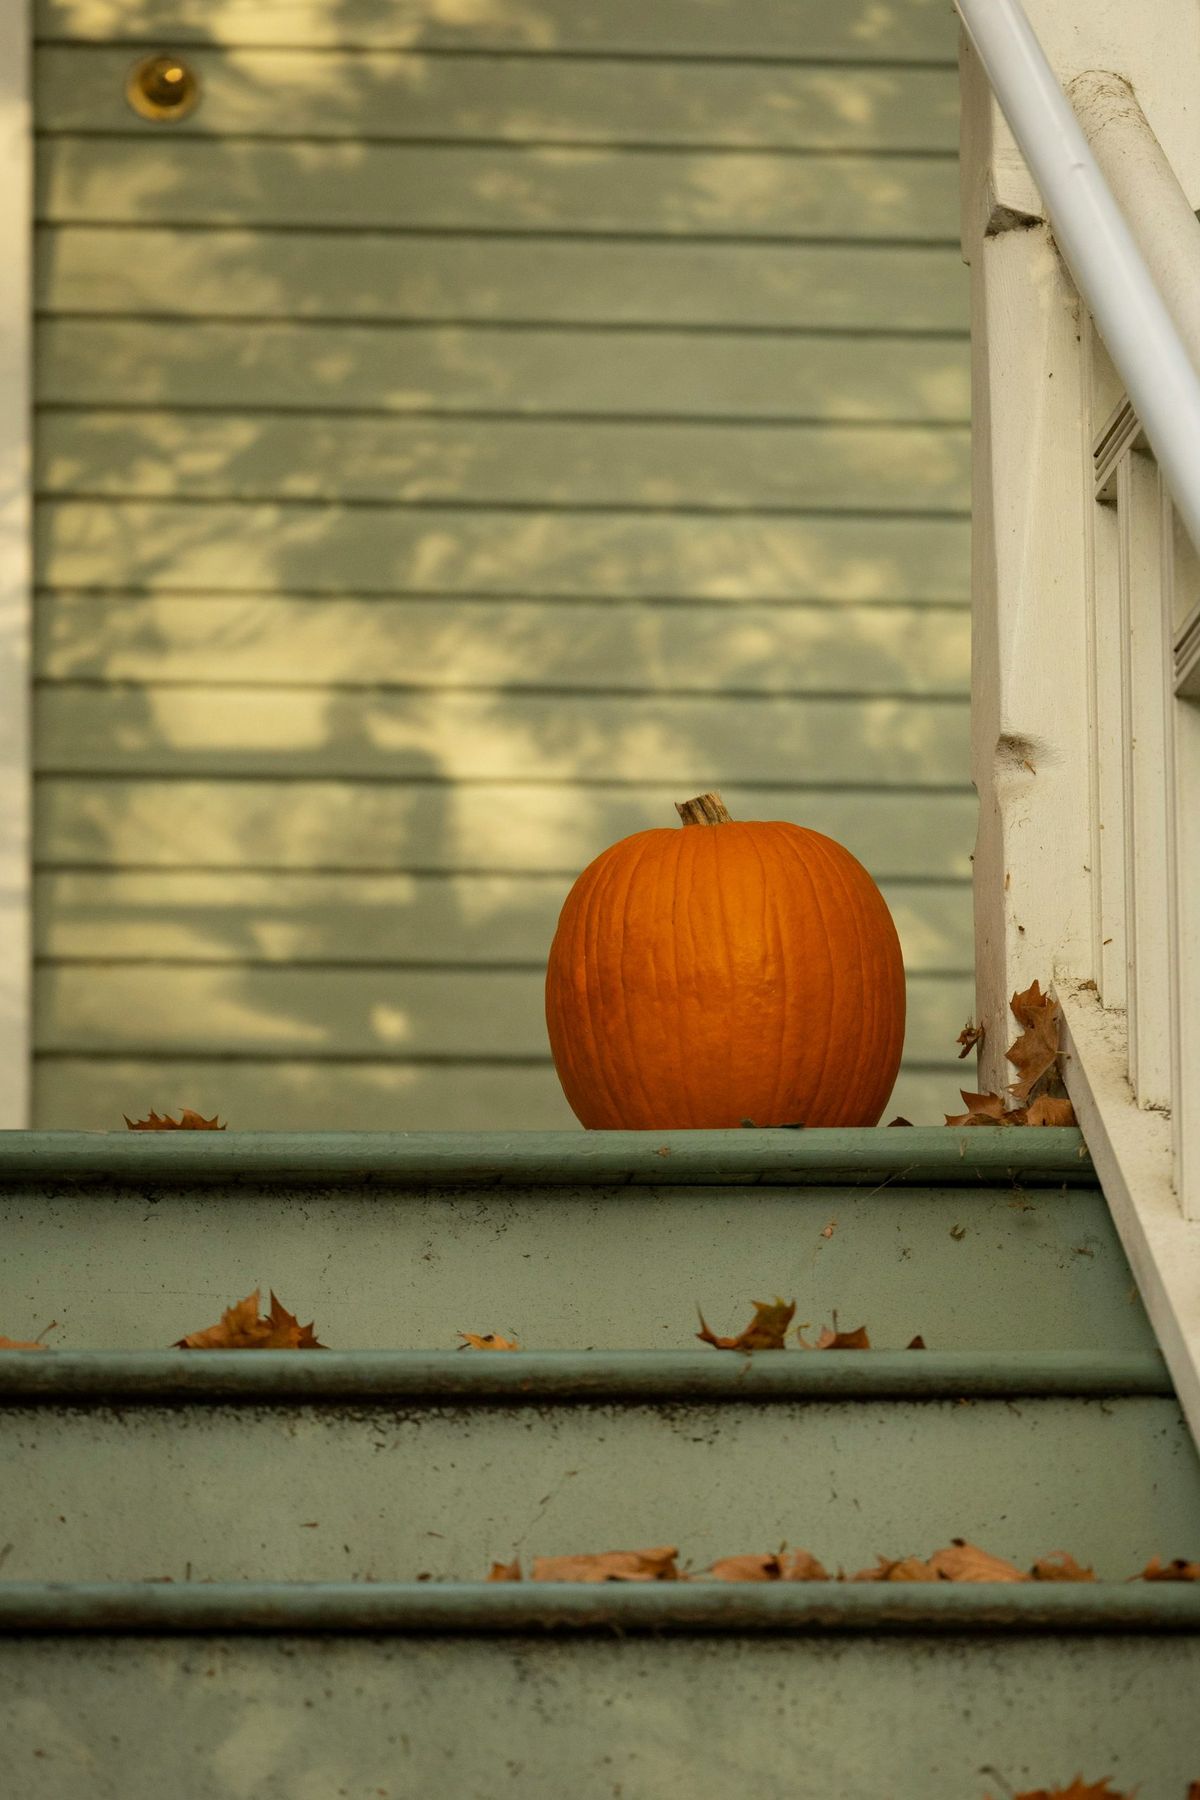
29. A Single, Perfect Pumpkin on Sage Green Steps
What Makes It Work: This is a powerful lesson in the beauty of simplicity. The design works because of extreme restraint. By placing a single, vibrant orange pumpkin against the cool, muted sage green steps, the color contrast is maximized. The pumpkin becomes a piece of sculpture. The scattered leaves add a touch of natural, unstudied messiness that keeps the look from feeling too sterile. It’s confident. It says, ‘I don’t need a dozen pumpkins; this one is enough.’ This is a look that’s all about quiet, contemplative autumn beauty. Compare this to the repetitive minimalism in Idea #17.
💰 Budget Breakdown
Designer Tip: When you’re going minimalist, the quality of your single element is everything. Don’t just grab any pumpkin. Find ‘the one.’ Look for a pumpkin with a beautiful, saturated color, a pleasingly round shape, and a great stem. The stem is the ‘exclamation point’ and adds tons of character. Take the time to turn it around and find its ‘best side’ before placing it. When your entire design rests on one object, that object needs to be as perfect as possible.
30. A Spooky-Meets-Traditional Display on a Brick Porch
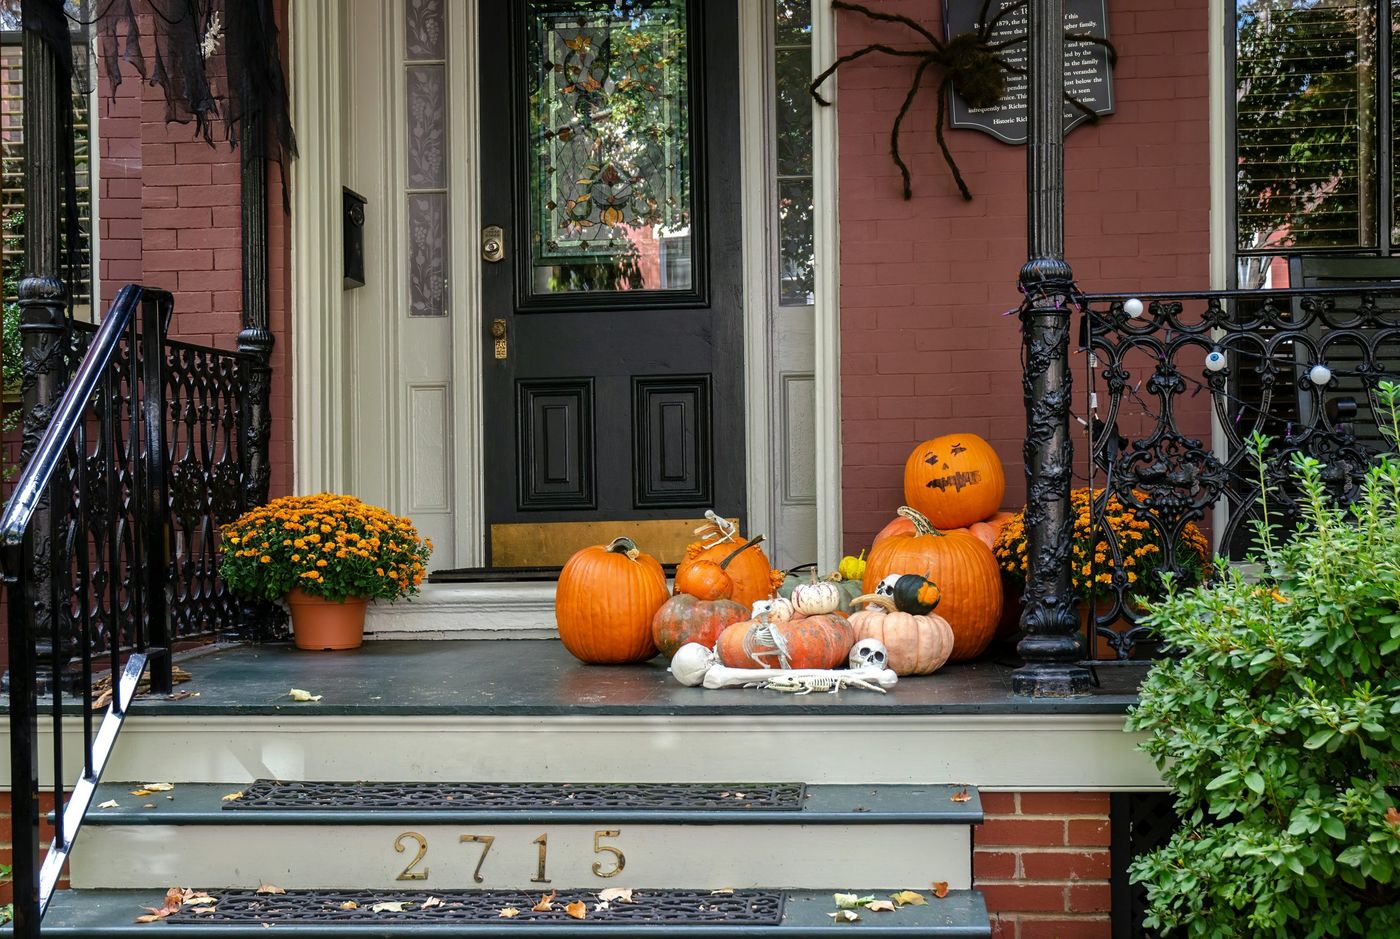
Budget Breakdown:
- Assorted Pumpkins & Gourds (real): $40 – $80
- Potted Chrysanthemums (2 large): $30 – $50
- Large Faux Spider: $15 – $25
- Small Plastic Skeletons (pack of 3-5): $10 – $20
- TOTAL: $95 – $175
Budget alternative: Get this look for 50% less. Grow your own mums from starter plants in the spring. Buy pumpkins from a pick-your-own farm where they are often cheaper per pound. Make the skeletons the star and use fewer pumpkins. You can often find large spider props for under $10 at stores like Walmart closer to Halloween. For another take on a skeleton-centric design, check out the gothic glam of Idea #12.
✅ Before You Start
Real Talk: Mixing real pumpkins and potted plants with props that you want to reuse (like the skeletons and spider) requires some care. Real pumpkins will eventually start to seep and rot, and watering the mums can lead to dirt and moisture getting all over your props. This can stain the plastic skeletons or cause the fuzzy material on the spider to get matted and gross. To prevent this, place the pumpkins on small, hidden plastic risers and remove the props before you water the plants.
31. A Gothic Wooden Door Framed by Crimson Vines
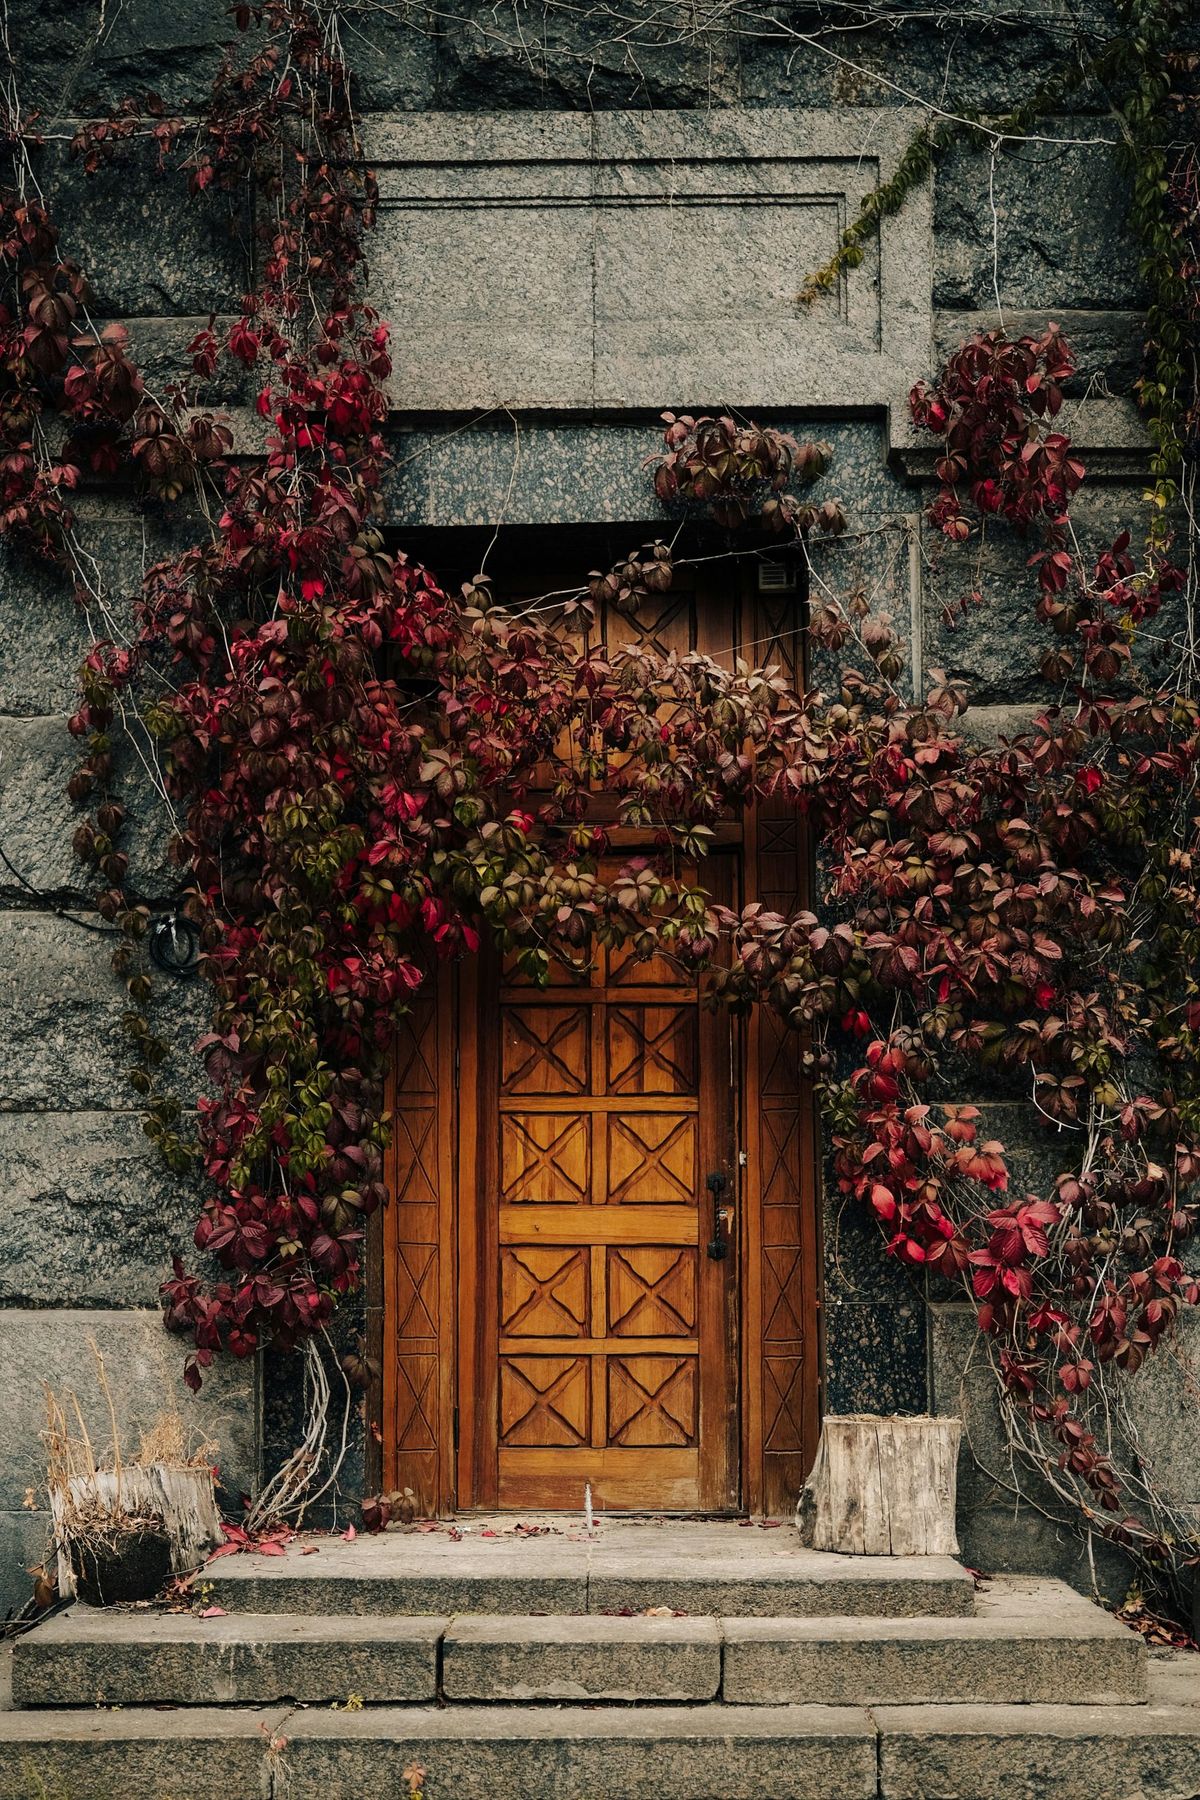
The One Thing: The climbing vines. Absolutely everything else in this scene is secondary. The deep crimson leaves are what create the entire mood—gothic, melancholic, and breathtakingly beautiful. They perfectly frame the heavy wooden door, and their organic, wild nature is a stunning contrast to the solid, man-made stone facade. This isn’t a look you can easily create with props; it’s the result of years of growth. It’s a reminder that sometimes the most powerful decoration is the one that nature provides. If you took the vines away, the magic would be completely gone.
⭐ The One Thing
Maintenance Reality: If these are real vines (like Boston Ivy), they require commitment. They can be invasive, and their tendrils can damage mortar and woodwork over time if not managed. They’ll also need to be pruned annually to keep them from covering windows or becoming too dense. If you want this look without the commitment, high-quality faux autumn garlands are the answer. You’ll need several of them (at least 6-8 strands) to achieve this level of density, and you’ll need to strategically secure them to the stone and door frame with removable hooks or clips.
32. Harvest Wreath with Ribbons on a Textured Glass Door
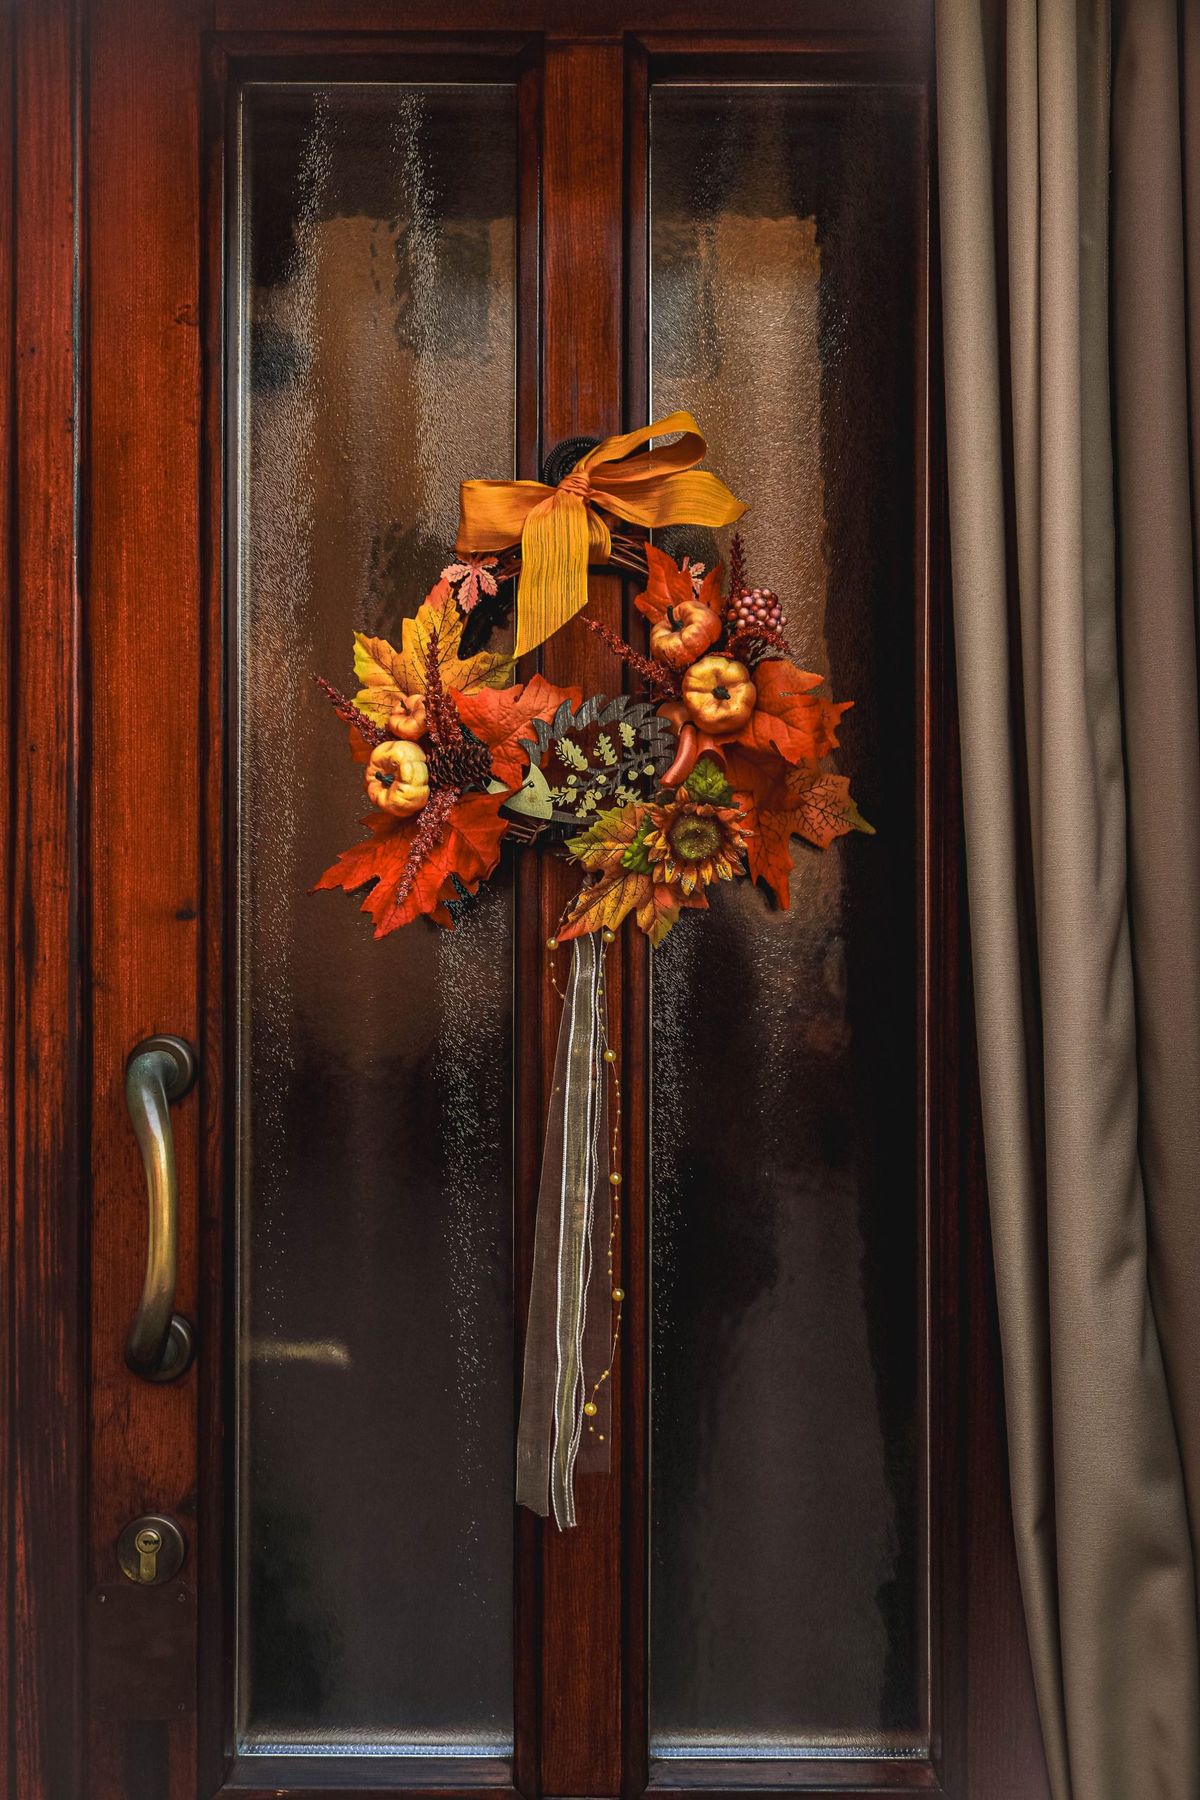
Designer Tip: Hanging a wreath on a glass door panel can be tricky. The best tool for the job is a single or double-sided suction cup hook. Make sure both the glass and the suction cup are perfectly clean before applying for the strongest hold. For a more decorative approach, use a long, beautiful ribbon like the one shown here. Loop the ribbon around the wreath, bring the ends up over the top of the door, and secure them on the inside of the door with a thumbtack or a small, upside-down Command hook. This method avoids adhesives on the glass and adds an extra decorative touch.
🧹 Maintenance Reality
What Makes It Work: This design successfully layers textures. You have the warm, rough texture of the wood door frame, the cool, pebbled texture of the privacy glass, the varied textures of the leaves and pumpkins in the wreath, and the smooth, sheer texture of the ribbons. This layering creates visual depth and interest. The wreath is also perfectly scaled to the narrow vertical glass panel, making it feel like an intentional, integrated part of the door’s design rather than an afterthought that was just stuck on.
Your Spookiest Welcome Awaits
Feeling inspired? We hope so! The best approach is to pick one idea that genuinely excites you and start there. You don’t have to recreate it exactly—use it as a jumping-off point to tell your own seasonal story. Your perfect Halloween porch is just a few pumpkins and a little bit of creativity away.
Don’t forget to save your favorites to your Pinterest board so you can find them again when you’re ready to start decorating!