You know that feeling when you’ve scrolled through a thousand Halloween decor pins and they all start to blur together? It’s a real thing. One minute you’re inspired, the next you’re just overwhelmed by a sea of orange and black. That’s where we come in.
We filtered through hundreds of real homes and designer looks to curate these 30 standout Halloween ideas for 2026. This isn’t about just throwing a plastic skeleton on your lawn. We’re talking about creating specific moods—from cozy rustic and traditionally spooky to playfully modern and even a little gothic. This year is all about layering personal touches over trends, creating a look that feels uniquely yours, not like a page from a party store catalog.
And stay until the end — we break down the most common mistakes that can ruin these looks. 📌 Save this to Pinterest for later — you’ll want to revisit these ideas.
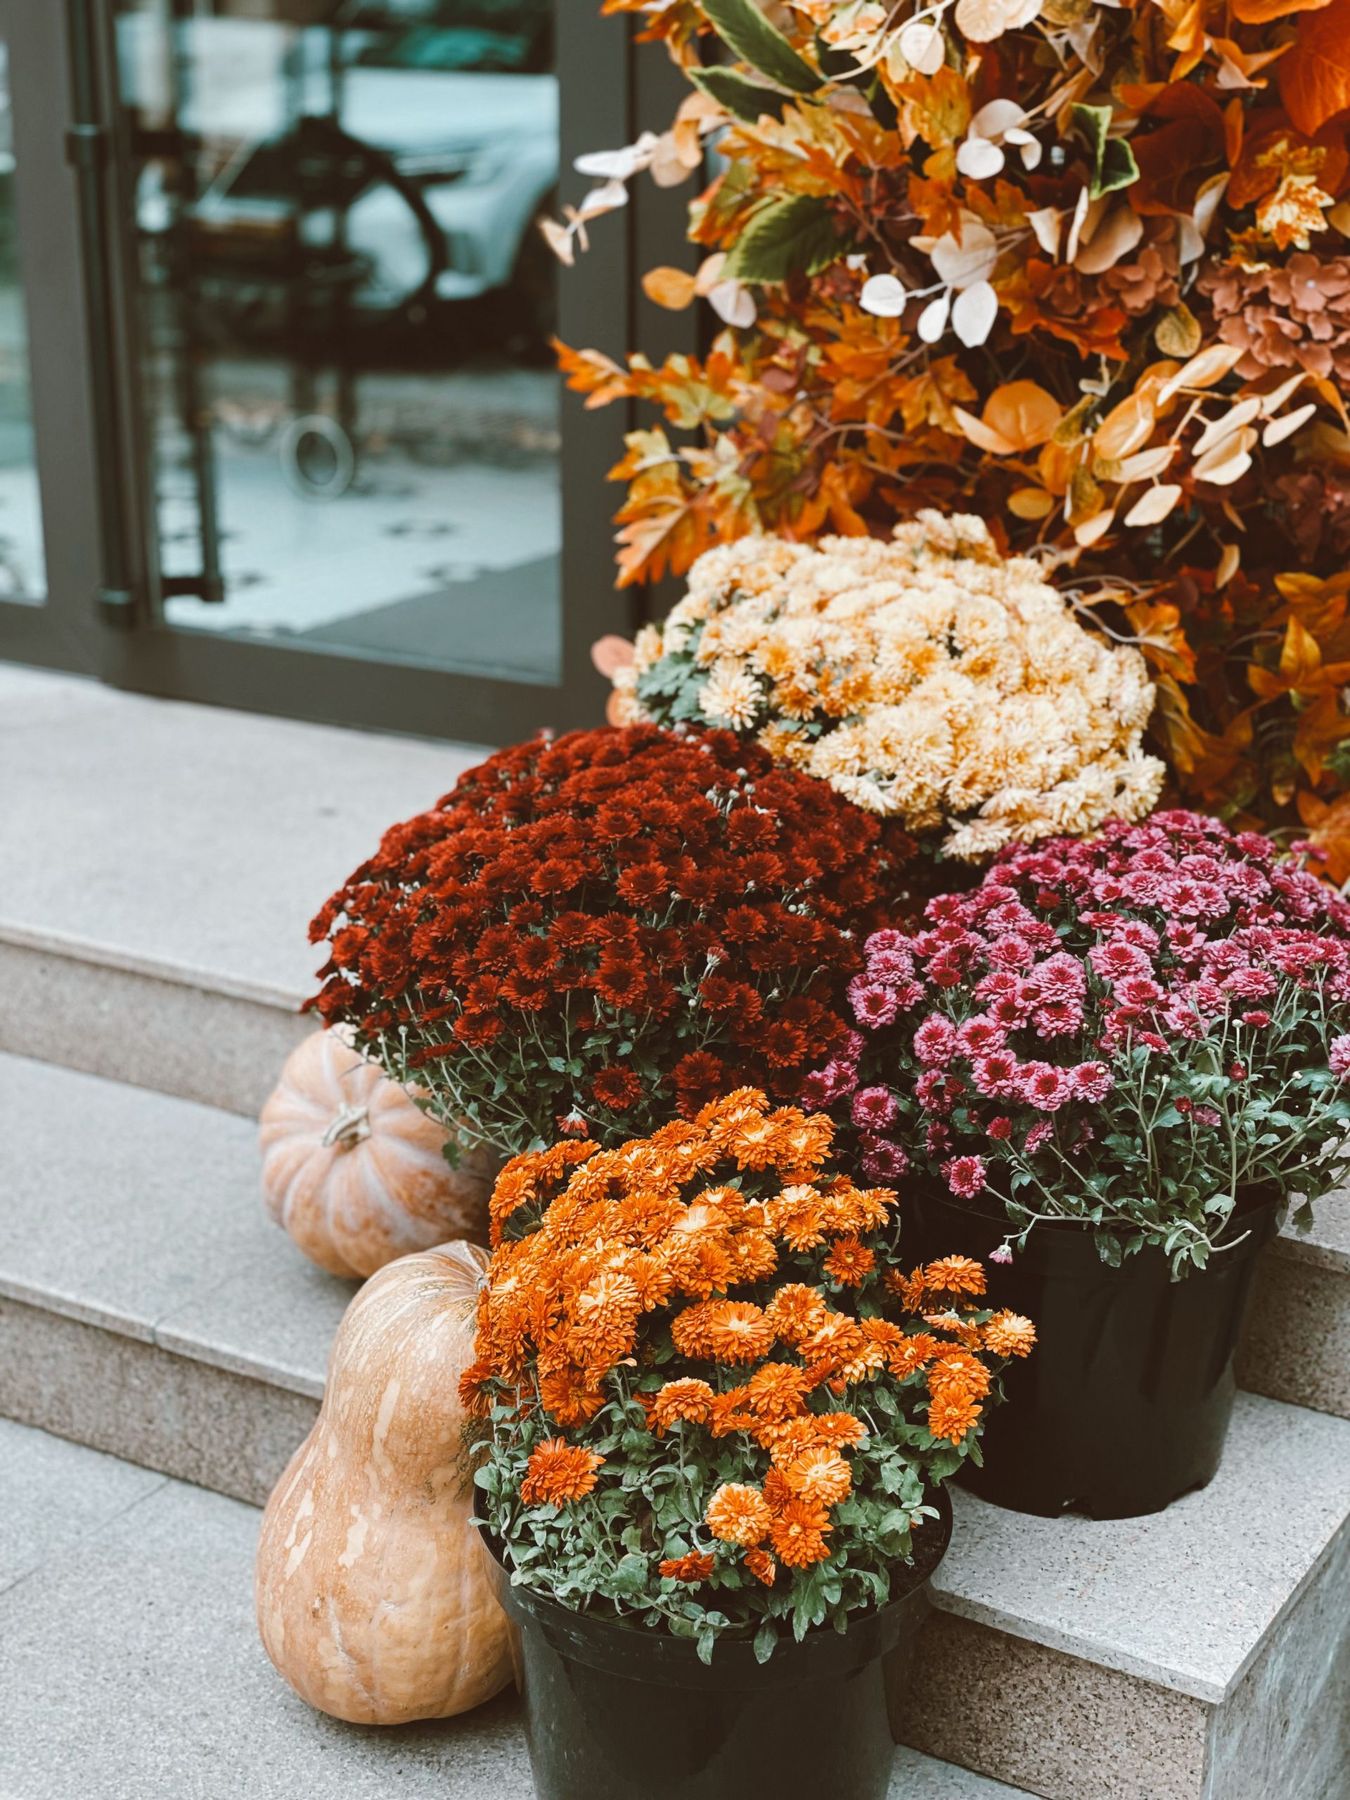
1. Create a Cascade of Fall Mums and Natural Pumpkins
This stunning entry works because of its masterful use of repetition and color theory. The design doesn’t just place one pot of mums; it creates a waterfall of them in harmonious shades of burgundy, orange, and pale yellow. This repetition of a single plant type in varied colors creates a lush, cohesive look. The vertical arrangement of preserved leaves draws the eye upward, making the entrance feel taller and more grand, while the beige heirloom pumpkins offer a soft, neutral counterpoint to the vibrant florals.
💰 Budget Breakdown
When you’re grouping potted plants like this, always follow the ‘Thriller, Filler, Spiller’ rule, even with multiple pots. Your ‘thriller’ is the tallest element (the vertical leaf arrangement). The ‘filler’ is the mass of mums that builds the body of the design. And the ‘spiller’ is the way the pumpkins and lower pots seem to flow down the stone steps. This creates a dynamic, natural composition instead of a static, staged one. For maximum impact, ensure your tallest pot is at least 2/3 the height of your door.
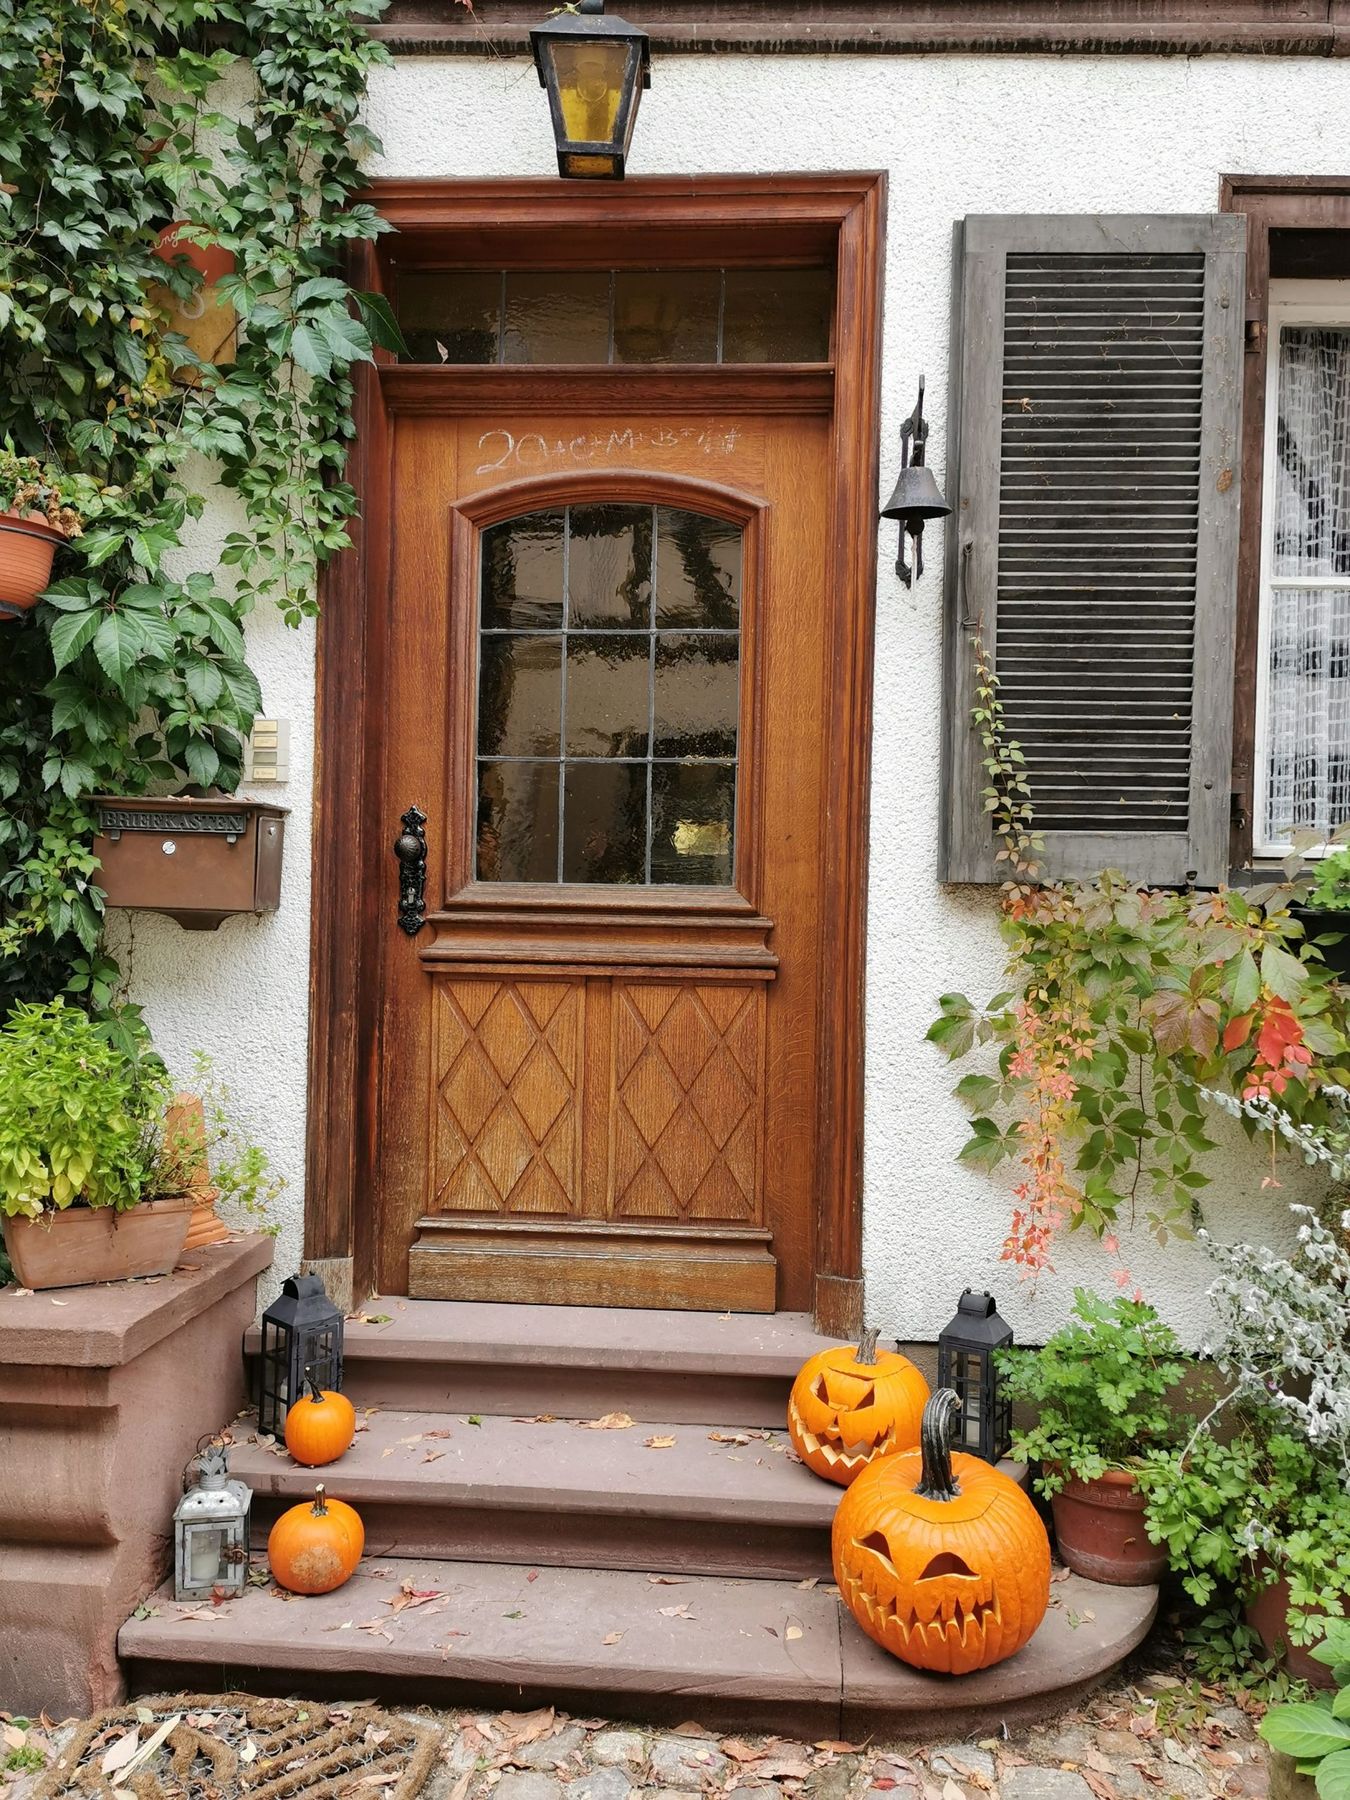
2. A Rustic European Doorway with Hand-Carved Jack-o’-Lanterns
that truly makes this scene magical is the texture. Without the contrast between the weathered oak door, the climbing ivy, the rough stone steps, and the smooth pumpkin skins, this would just be another porch display. The texture tells a story of age and charm. The louvered shutters add deep shadows, the ivy brings organic life, and the vintage-style lanterns introduce a hint of weathered metal. It’s a masterclass in layering materials to create a rich, nostalgic atmosphere that feels like it’s been there for centuries.
⚠️ Real Talk
Let’s have a real chat about fresh pumpkins and ivy. Hand-carved jack-o’-lanterns look amazing, but they start to soften and mold within 5-7 days, especially in warmer or humid climates. To prolong their life, wipe the inside with a bleach solution and coat the cut edges with petroleum jelly. As for that gorgeous climbing ivy on the stucco? It can look romantic, but the plant’s tendrils can damage paint and work their way into mortar over time. Consider using faux ivy or a non-clinging vine in a planter with a trellis for a similar effect without the potential repair bill.
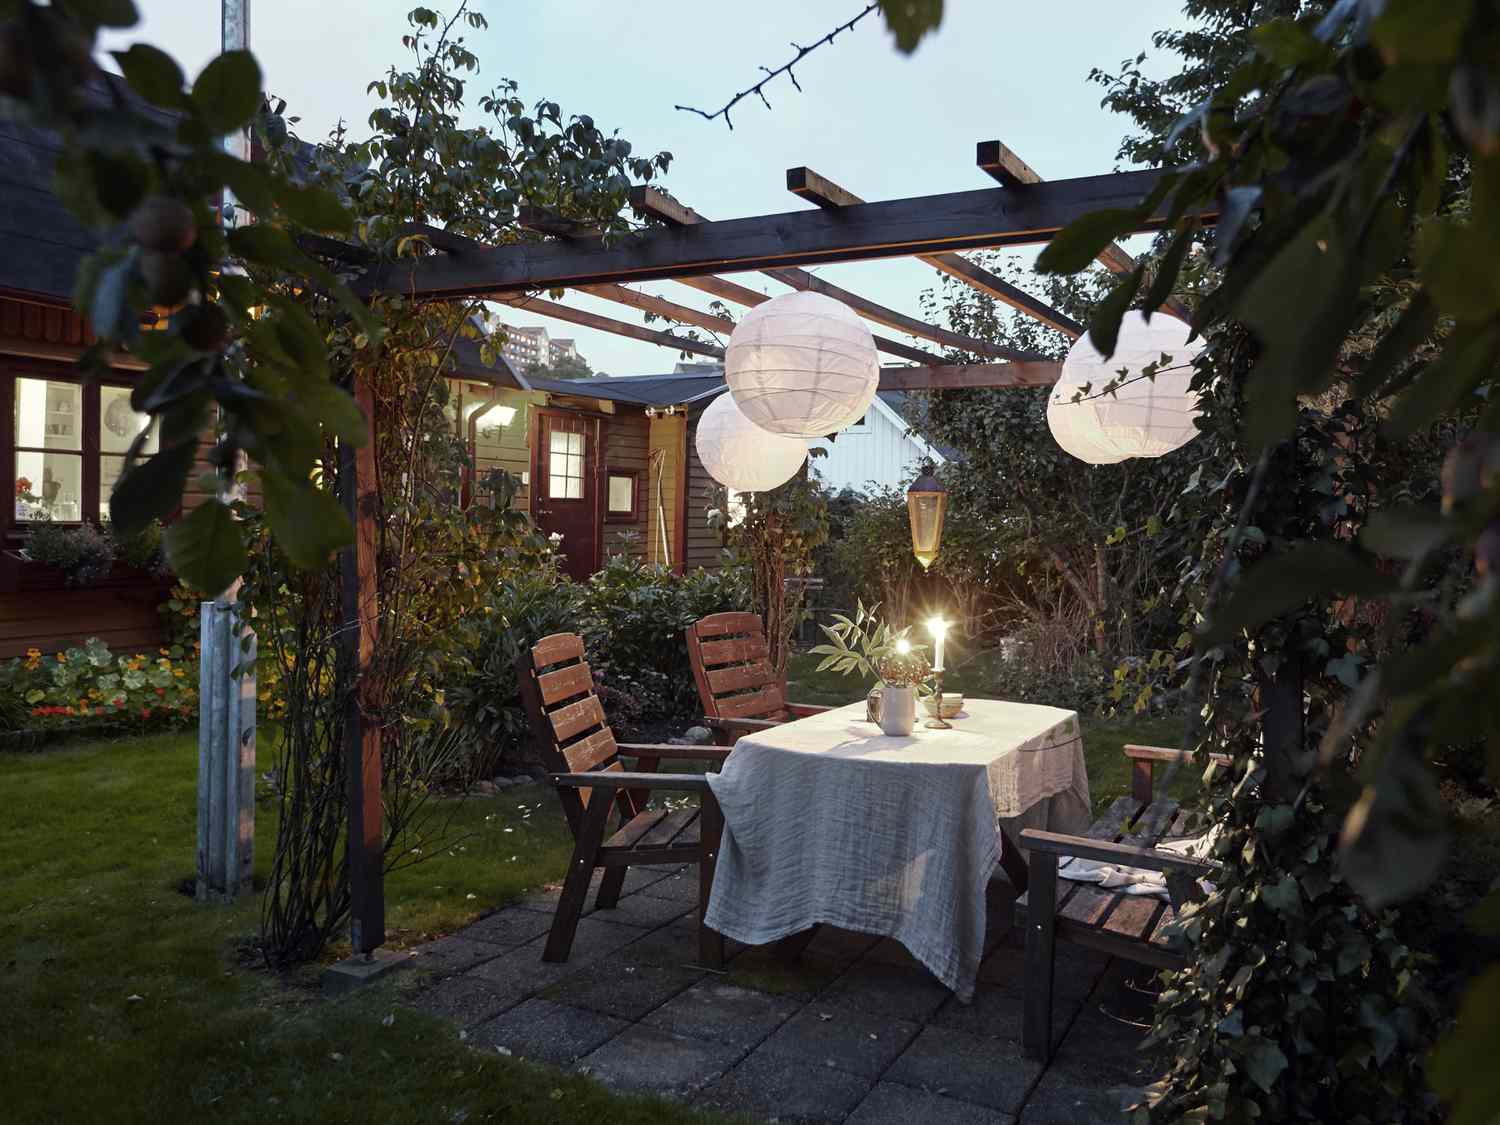
3. Bringing Seasonal Style to Your Campsite or RV
You don’t need a sprawling front porch to get a great seasonal look. For a camper, RV, or small patio, focus on portable and compact decor. Skip the giant pumpkins and grab a bag of mini gourds from the grocery store ($8-$12). Instead of big potted mums, use a few 6-inch pots of marigolds or pansies ($5 each). A simple string of battery-operated orange LED lights ($15 from Target) can be wrapped around an awning or a folding chair. The whole vibe can be had for under $50 by focusing on smaller-scale items that pack a colorful punch.
🔥 Trending Context
Decorating an outdoor space like a campsite comes with its own set of challenges. Most importantly: weather and wildlife. That beautiful display can be ruined by one good rainstorm or a curious raccoon. Use plastic or resin pumpkins instead of real ones if you’re leaving the display unattended. Secure everything with zip ties or weights. Also, be mindful of campground rules; many don’t allow extensive decorations or anything that could be a fire hazard, so battery-powered lights are a must over real candles.
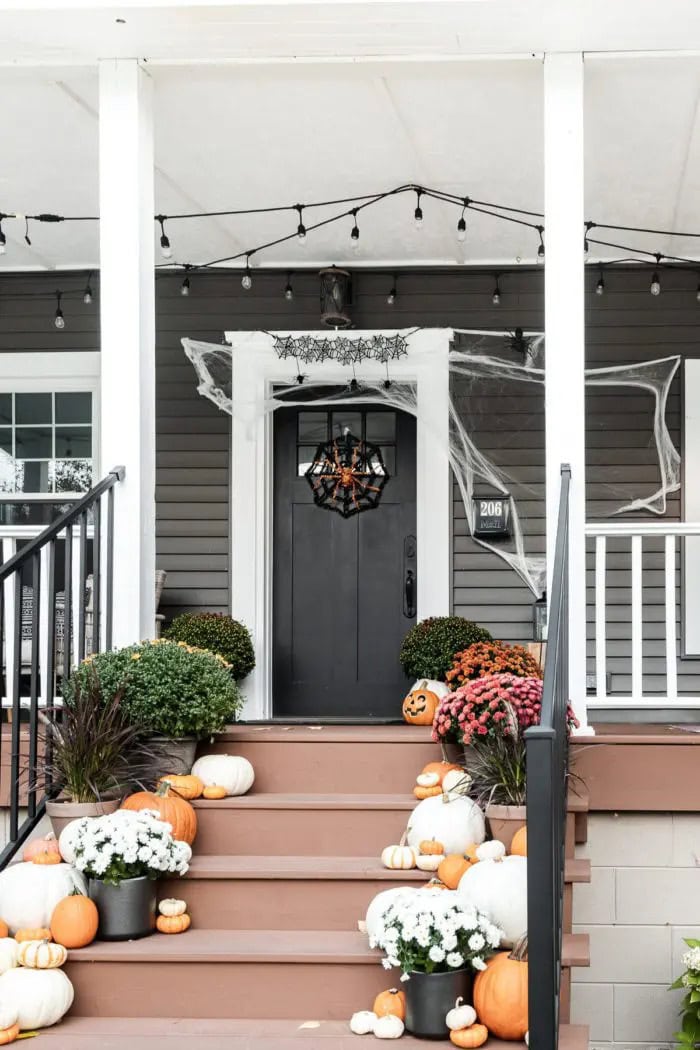
4. Classic Halloween Porch with Layered Pumpkins and Webs
This look follows a simple but effective formula: 60% Classic Harvest + 30% Spooky Accents + 10% Ambient Light. The base is all about fall—potted mums and a mix of orange, white, and green pumpkins. The spooky element comes from a targeted dose of spider webs and a thematic wreath, but it doesn’t overwhelm the welcoming harvest feel. The final 10% is the warm string lighting, which adds a cozy glow and makes the whole scene pop after dark. You could swap the spiders for ghosts or the orange for purple and still have the formula work perfectly.
📏 Scale Guide
Here’s how to get that perfectly spooky, not-tacky, stretched spider web look. Total time: 15 minutes. Cost: $5.
- Start with a small, condensed wad of the webbing material. Don’t try to stretch it out of the bag.
- Find a high anchor point, like a porch light or the corner of the door frame. Hook a small piece of the wad onto it securely.
- Pull the wad slowly and gently away from the anchor point, stretching it as thin as you can. The goal is to create individual, wispy strands, not a thick blanket.
- As you pull, hook other sections onto different points—a railing, a planter, a doorknob—to create a multi-directional web.
- The more you pull and stretch, the better it will look. A little goes a long way!
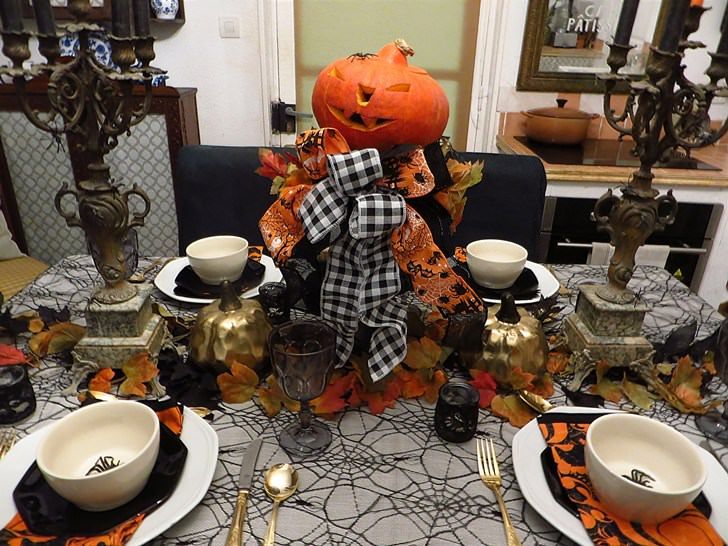
5. A Rustic Harvest Tablescape with Gold and Buffalo-Check Accents
Want to set a table just like this? Here’s a rough idea of the cost for a six-person setting. Note how the impact comes from layering, not one single expensive item.
- Main Centerpiece (Large pumpkin, ribbon): $15 – $30
- Textiles (Spiderweb cloth, 6 sets of napkins): $40 – $75
- Dinnerware (6 spider-motif bowls, basic plates): $50 – $100
- Accessories (Candelabras, gold pumpkins): $60 – $120
- TOTAL: $165 – $325
Budget alternative: Use a black plastic tablecloth from a party store and splatter it with white paint for the web effect. Swap candelabras for a cluster of mismatched glass bottles with orange candles. Total cost could drop to $60-$90.
🔧 How-To Brief
We’re seeing a huge move away from disposable party decor and towards tablescapes that feel more permanent and thoughtful. This look is popular because it perfectly marries ‘spooky’ with ‘sophisticated.’ The buffalo-check ribbon and rustic candelabras tap into the enduring farmhouse trend, making the Halloween elements feel like a seasonal update to an existing style, rather than a childish theme. It’s decor you can live with for the whole month of October, not just for one night.
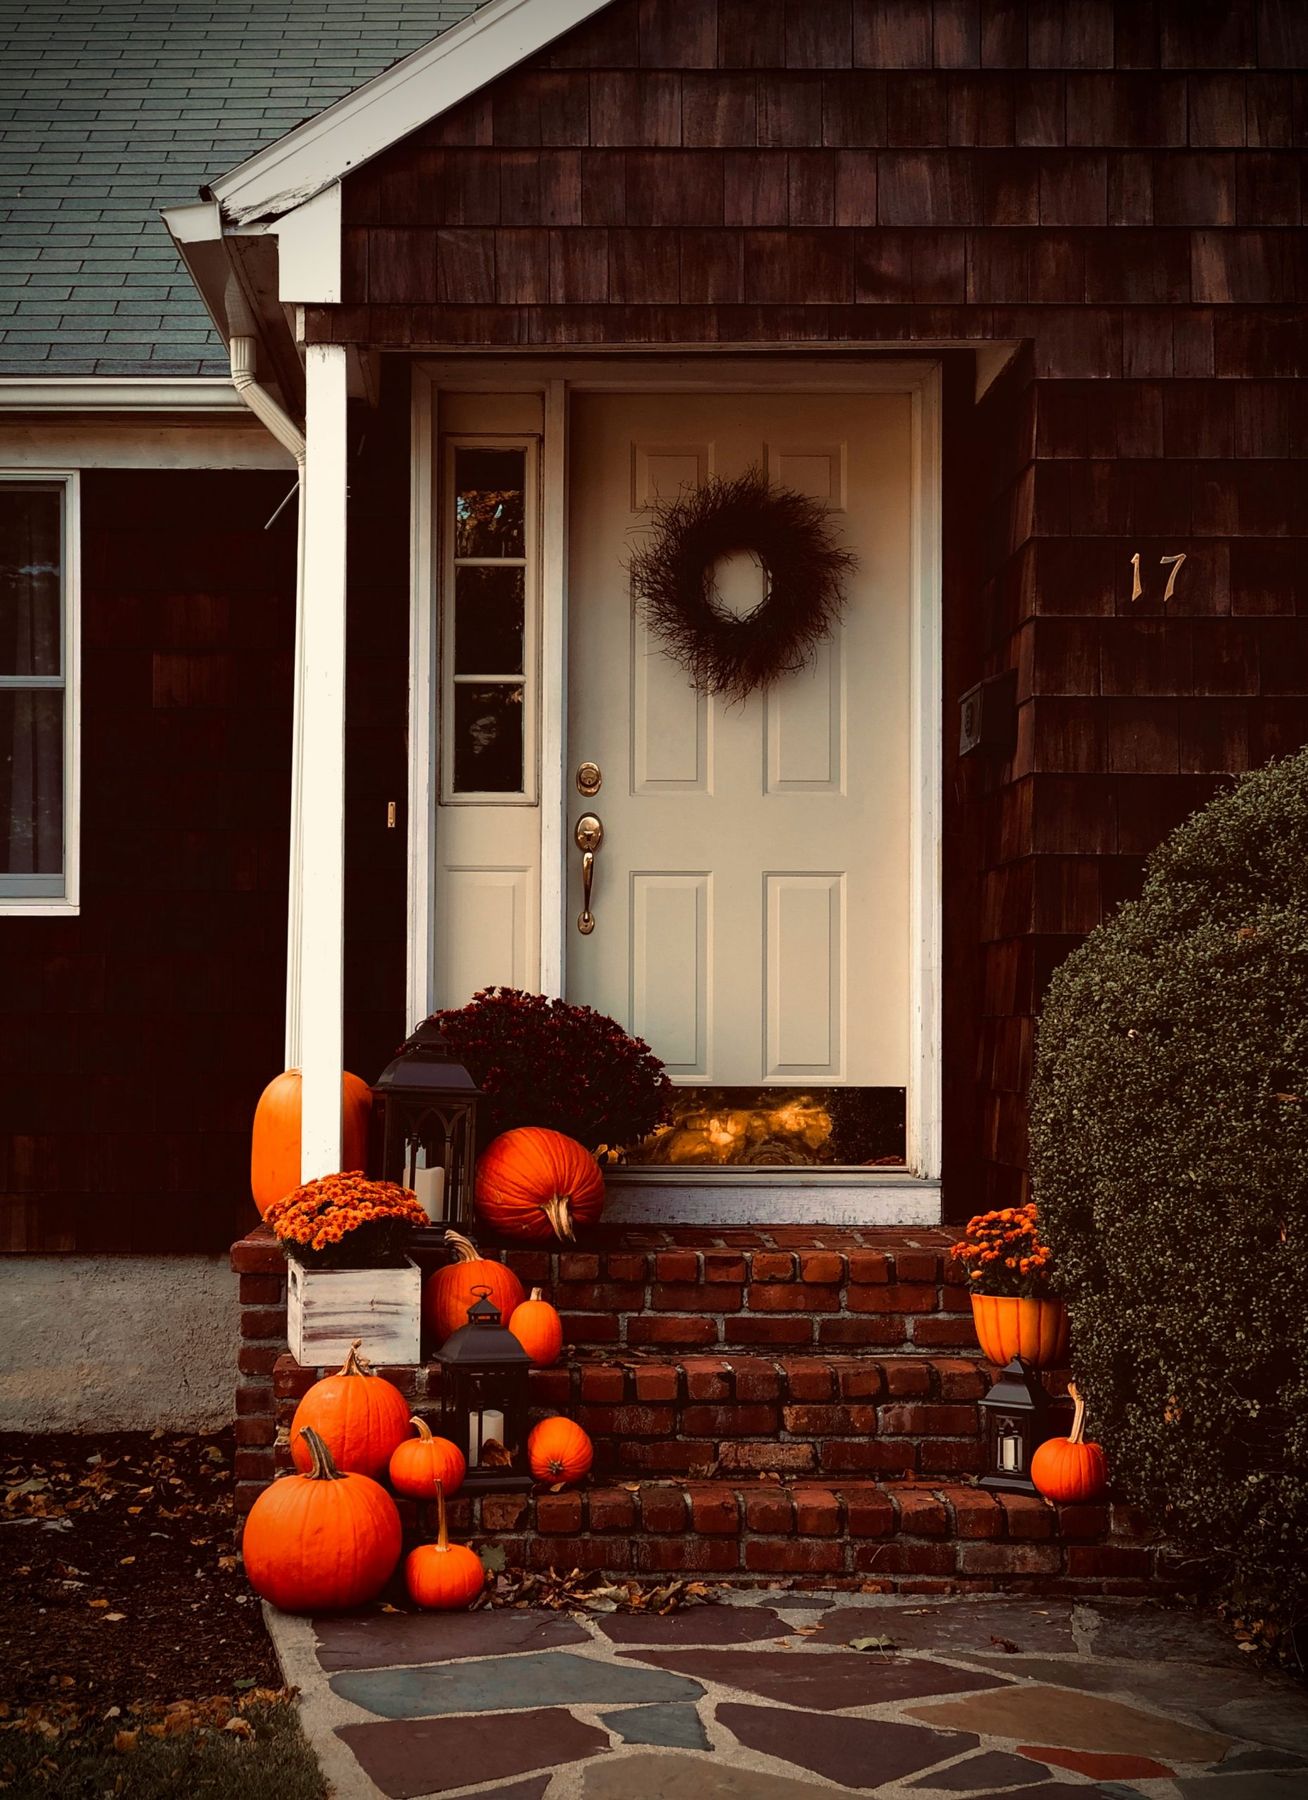
6. A Classic Welcome with Orange Pumpkins on Red Brick Steps
The reason this timeless look is so satisfying is due to the principle of analogous colors. The deep orange of the pumpkins sits right next to the red-orange of the brick on the color wheel. This creates a very low-contrast, harmonious, and pleasing palette that feels warm and unified. The pops of white on the door and trim provide a necessary visual break, preventing the scene from becoming a monotonous wash of warmth. The dark metal lanterns and twig wreath add texture and a touch of rustic definition.
🧹 Maintenance Reality
This ‘more is more’ pumpkin approach works best on wider, deeper staircases—at least 4-5 feet wide. If your steps are too narrow, it will feel cluttered and become a tripping hazard. For a smaller stoop (less than 4 feet wide), adapt this by creating one large cluster on one side of the door instead of lining the steps. This gives you the same lush feeling without blocking the path. Compare this grand approach with the more contained version in Idea #11, which is perfect for smaller spaces.
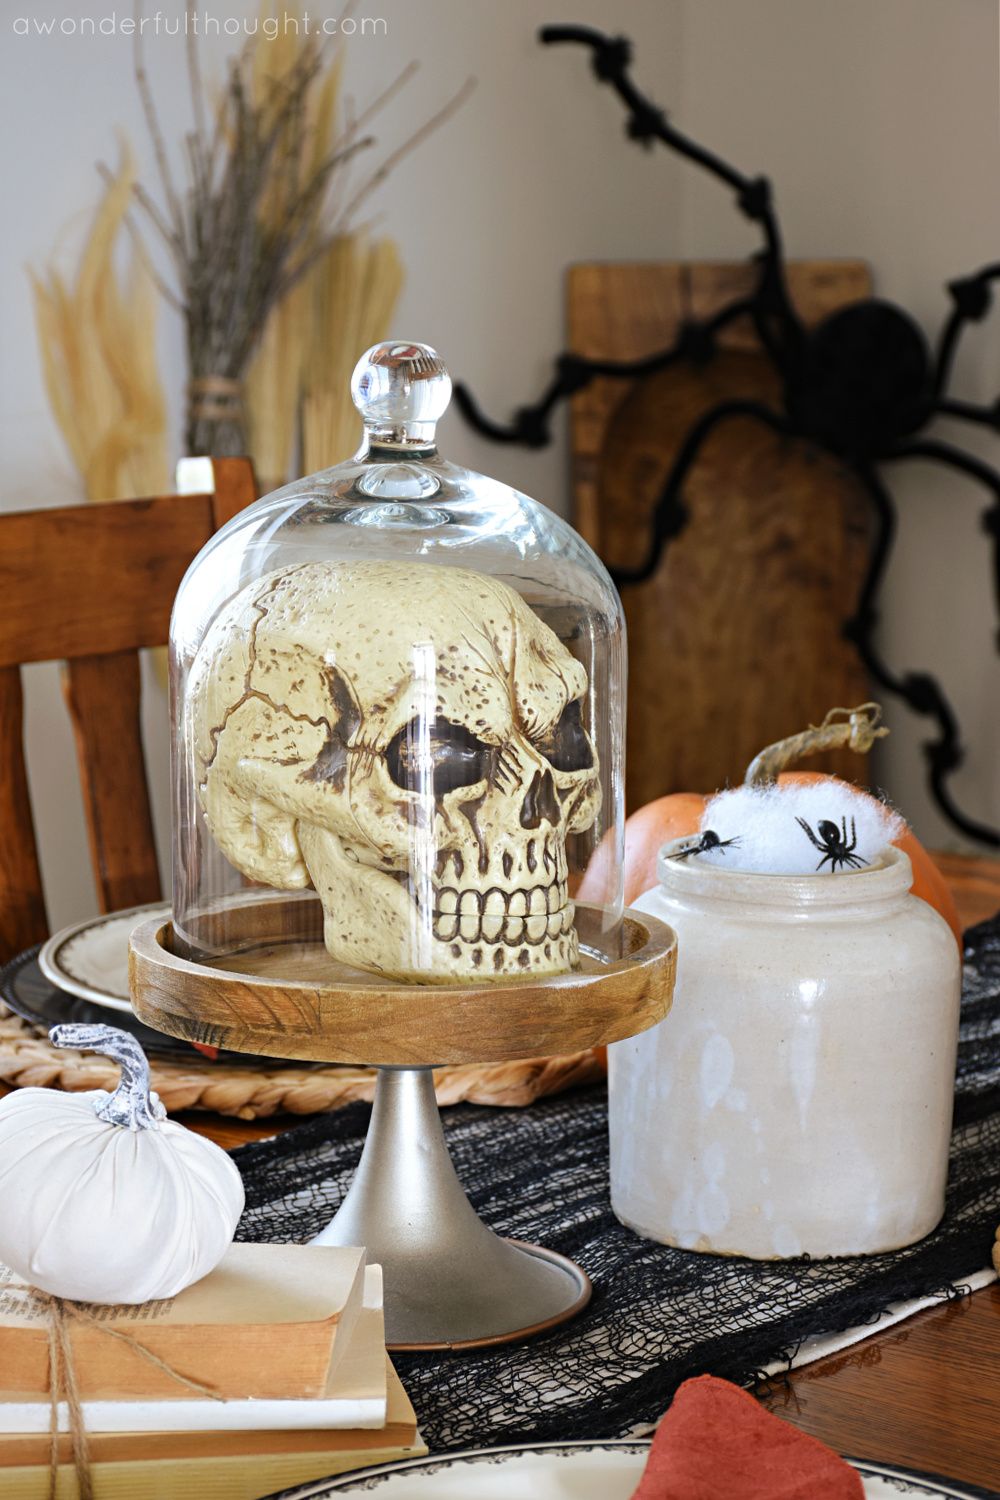
7. Create a Sophisticated Still Life with a Skull and Cloche
The single element elevating this from a pile of Halloween props to a curated design moment is the glass cloche. A cloche, or bell jar, instantly signals that what’s inside is special, like a museum artifact. It contains the eerie quality of the skull, making it feel more like an object of curiosity than a cheap fright. Removing the cloche would leave you with a skull on a table; adding it creates a story and a focal point. It’s the frame that turns the piece into art.
✅ Before You Start
When styling a surface like a console or side table, always think in triangles. Notice the composition here: the top of the cloche is the highest point. The arrangement then slopes down to the white pumpkins on one side and the vintage books on the other, forming a triangular shape. This creates a balanced, professional-looking vignette. Your tallest item should be in the back-center, with medium and small items fanning out and forward to create depth. Never line things up in a straight row.
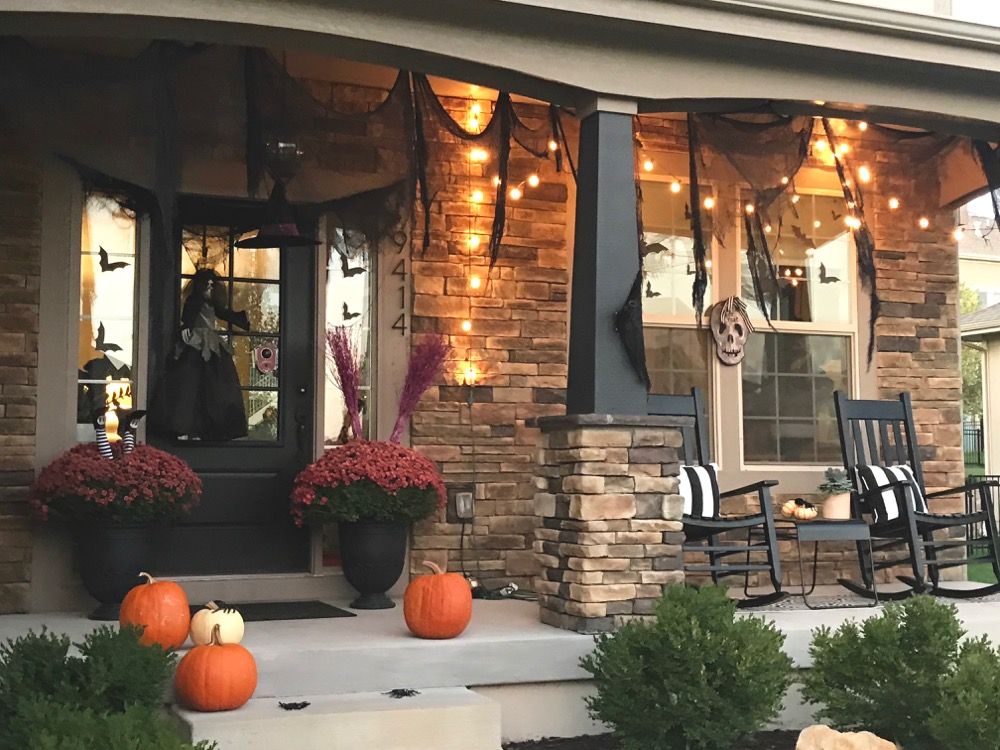
8. A Cozy and Spooky Stone Porch with Draped Fabric and Lights
This inviting scene is a perfect blend of spooky and cozy, and it’s all about balance. The formula is roughly: 50% Classic Halloween + 50% Cozy Comforts. The spooky side is covered by the draped black cheesecloth, paper bats, and pumpkins. But it’s matched equally by the cozy elements: the warm glow of the string lights, the comfortable rocking chairs with their striped cushions, and the lush red mums. Neither side overpowers the other, resulting in a look that’s festive and fun without being genuinely scary.
⭐ The One Thing
Draped fabric and string lights look amazing, but you need to be smart about safety. Use only outdoor-rated string lights and extension cords. When draping fabric like cheesecloth, ensure it’s nowhere near the bulbs, especially if they are older incandescent ones that get hot. LED lights are a much safer choice here. Also, secure that fabric tightly! One windy night can turn your elegant draping into a tangled mess wrapped around your neighbor’s mailbox. Use a staple gun or strong outdoor clips for a secure hold.
9. Layering Autumn Mums in Rustic Woven Baskets
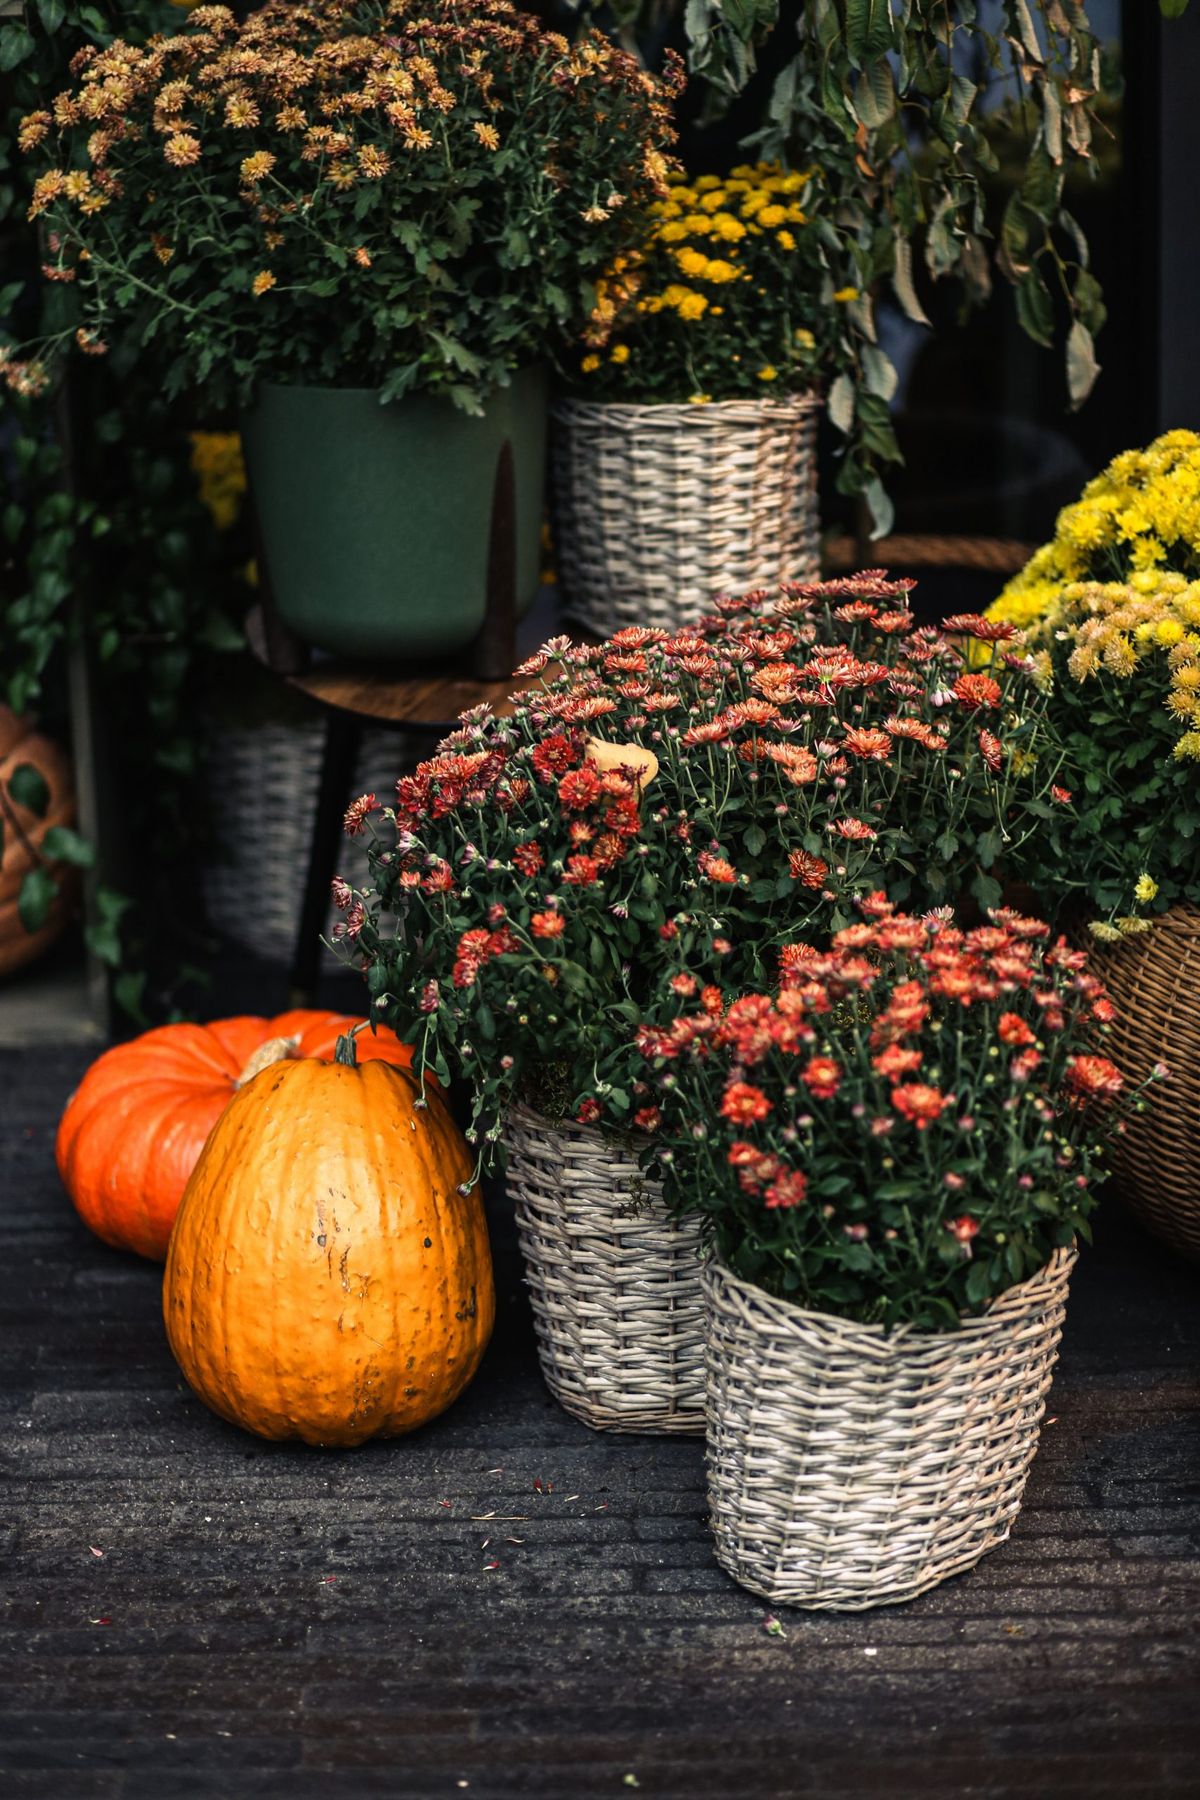
This is the savvy, budget-friendly cousin of the grand display in Idea #1. The secret here is using baskets to add visual weight and texture without buying giant, expensive planters. You can find woven wicker baskets at thrift stores for $3-$5 each. Just drop a standard plastic nursery pot of mums ($10-$15 from a home improvement store) directly inside. It’s a fantastic way to hide ugly plastic pots and get a high-end, rustic look for a fraction of the cost of ceramic or metal planters. The dark wood stool adds height and importance to the arrangement for free.
💸 Get This Look For Less
This arrangement works so well because it layers not just color, but also texture and height. The fine, nubby texture of the chrysanthemum petals contrasts beautifully with the coarse, open weave of the wicker baskets. The smooth skin of the pumpkins provides a third texture. By placing some planters on the ground and one on a stool, the designer has created an effortless-looking tiered effect that guides the eye around the entire composition, making a small collection of items feel much more substantial.
10. A Cozy Farmhouse Mantel with Repurposed Window and Cotton Stems
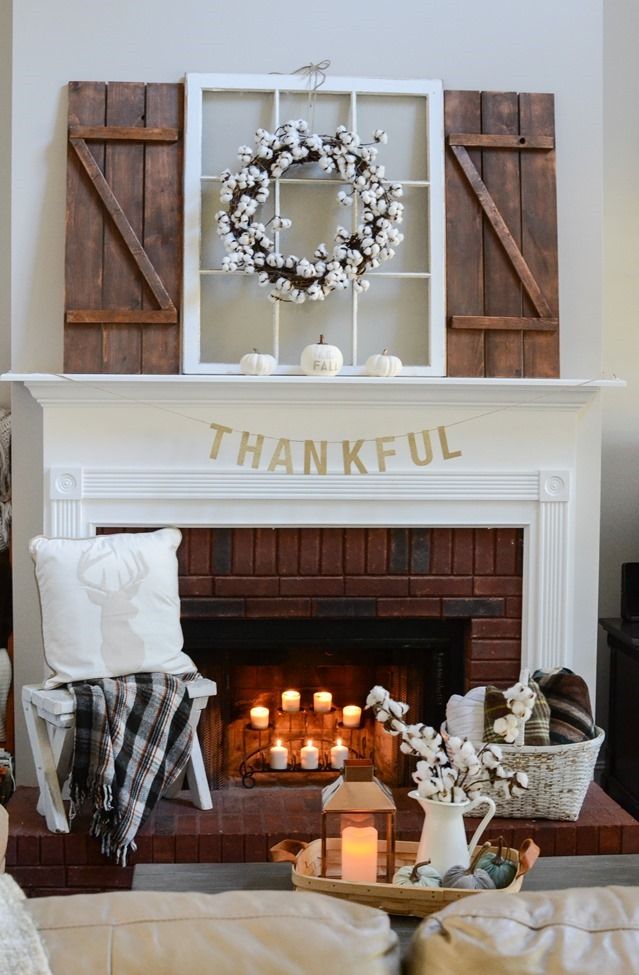
The single object that sets the entire tone for this mantel is the repurposed window frame. Without it, you’d have a nice, but generic, fall display. The window frame adds architectural interest, height, and a strong dose of rustic, farmhouse character. It acts as a perfect backdrop, framing the cotton wreath and anchoring the whole composition. It proves that the most important element isn’t always the most colorful or seasonal one; sometimes it’s the structural piece that everything else builds upon. Compare this farmhouse style to the gothic mantel in Idea #21.
🎯 What Makes It Work
Before you commit to a layered mantel display like this, run through this quick checklist:
- Measure your mantel depth. A mantel less than 7 inches deep will struggle to safely support layered items like window frames and shutters.
- Check for heat. If you use your fireplace, ensure any flammable materials like cotton stems or faux garlands are placed far enough away from the firebox opening to be safe.
- Assess your anchor points. Do you have a way to secure the tall window frame to the wall? A single nail or a bit of museum putty can prevent a costly accident.
- Inventory your neutrals. This look relies on a strong base of white, wood, and neutral tones. Does it work with your existing wall color?
11. A Simple White Pumpkin and Hay Bale Entryway
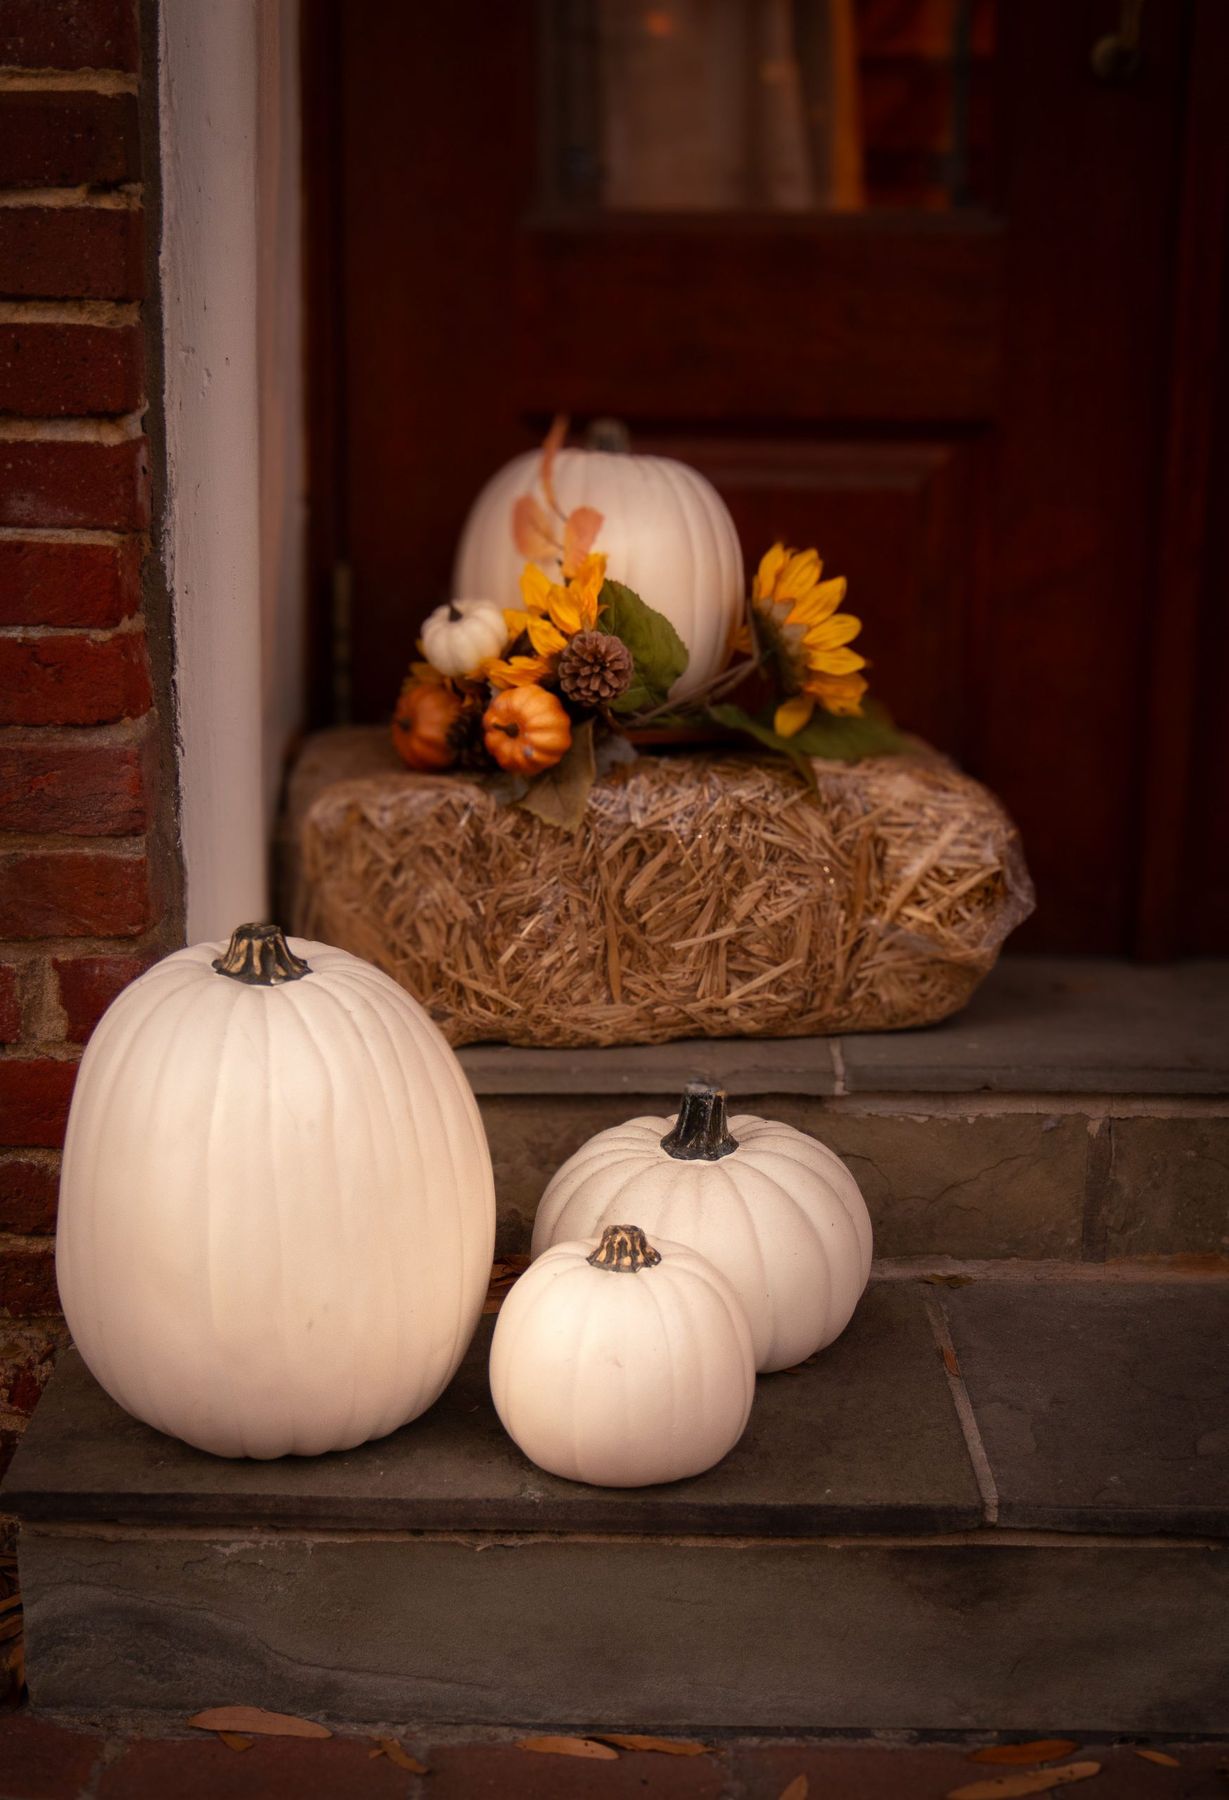
The success of this simple display lies in its sophisticated color restraint and asymmetrical balance. Instead of a riot of orange, the focus on creamy white pumpkins feels fresh and modern. The single pop of sunflower yellow is more impactful because it’s not competing with other bright colors. The arrangement is also beautifully balanced, but not symmetrical. The visual weight of the tall hay bale arrangement on the right is offset by the lower, smaller grouping of pumpkins on the left, creating a natural and pleasing flow for the eye.
📐 Style Math
This design is perfect for small porches, narrow entries, or even the landing of an apartment building staircase where you can’t block the path. The entire footprint is probably no more than 4 square feet. It provides a lot of seasonal impact without requiring a wide, sprawling space like the look in Idea #6. The key is to build vertically with the hay bale to draw the eye up, making the small space feel more intentionally designed and significant.
12. A Playful DIY Ghost Lantern and Jack-o’-Lantern Welcome
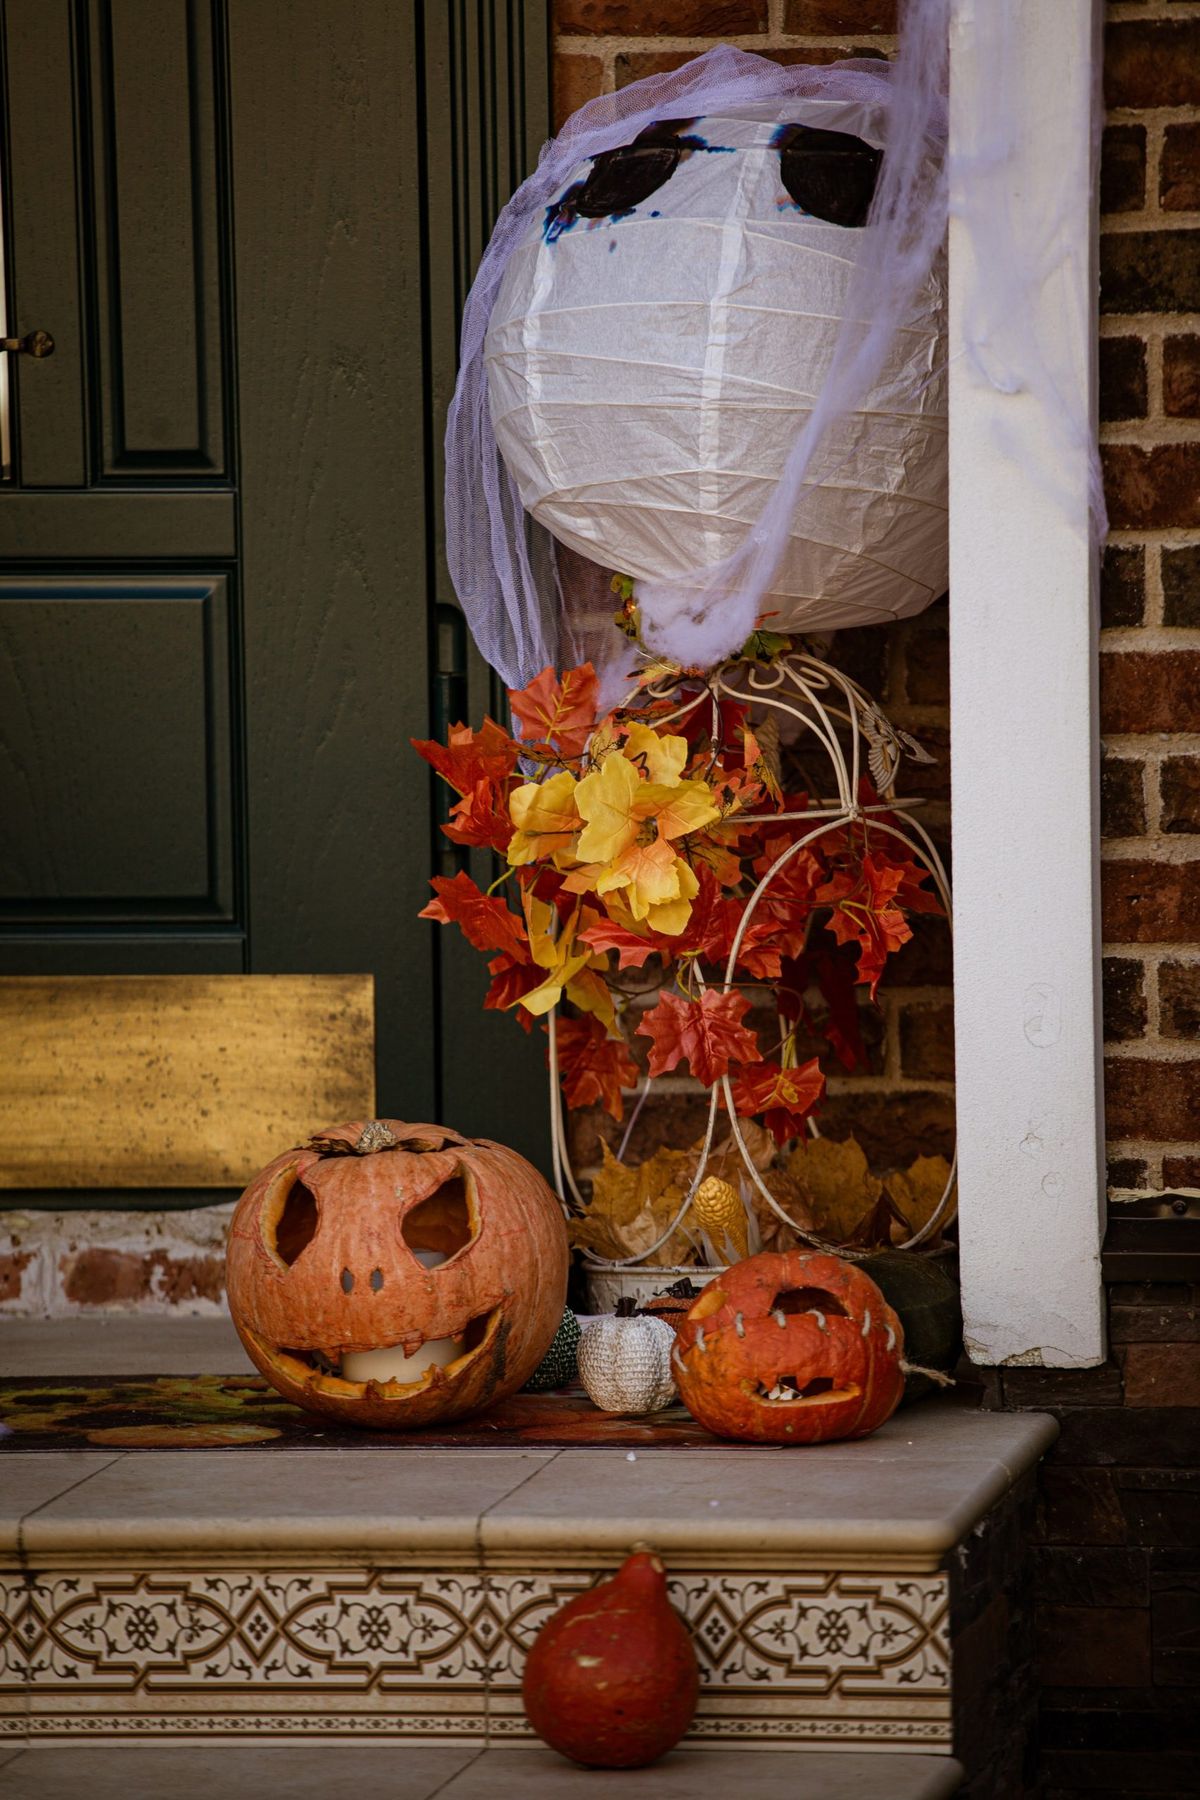
Want to make that charming ghost lantern? It’s easier than you think. Total time: 20 minutes. Cost: $25.
- Take a large white paper lantern (18-24 inches) and assemble it according to the package directions.
- Drape a piece of sheer white fabric or cheesecloth (at least 60×60 inches) over the top of the lantern, letting it hang down unevenly.
- Use a hot glue gun to attach the fabric to the top wire frame of the lantern in a few spots to secure it.
- Cut two large ovals out of black felt and glue them onto the fabric for eyes.
- Place the lantern on a decorative stand or hang it from a porch hook with fishing line. Add a battery-powered puck light inside for a safe glow.
💡 Designer Tip
The core elements of this look are incredibly affordable. You can recreate this entire vibe for under $50. A large paper lantern is about $15 online. Sheer fabric can be found in the remnant bin at a craft store for a few dollars. The decorative wire stand is the most expensive part, but you can get the same effect by placing your ghost on an upside-down tomato cage from a garden center ($8) and filling the base with faux leaves from the dollar store. Carve your own pumpkins, and you have a high-impact entrance for minimal cash.
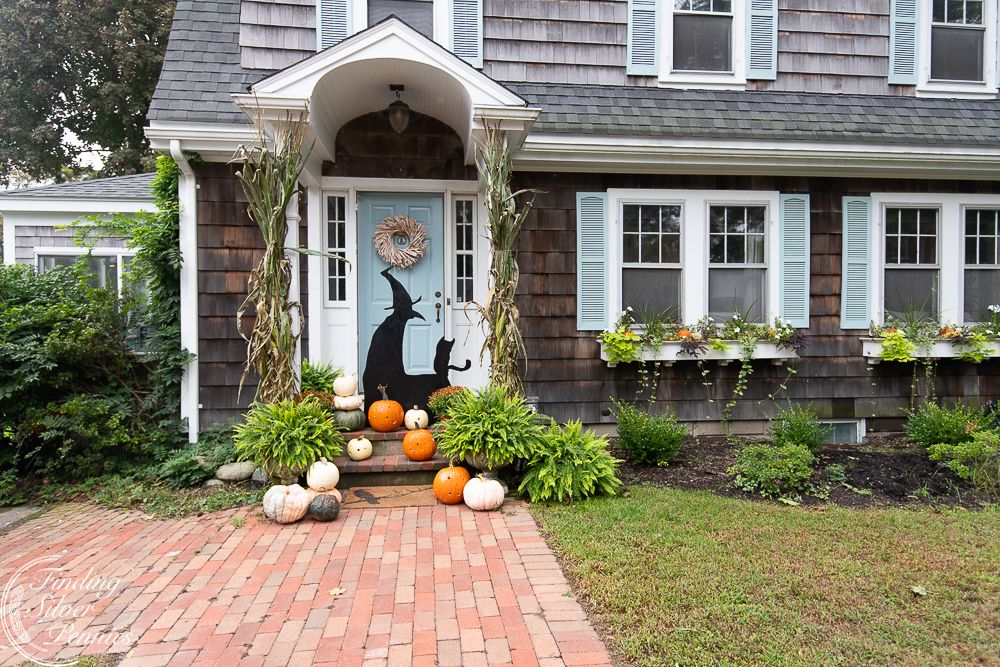
13. A Witch Silhouette on a Light Blue Front Door
The absolute genius of this design is the choice of the light blue front door. A black witch silhouette on a white or dark-colored door would be fine, but against the unexpected, cheerful light blue, it creates a fantastic visual pop. The contrast is surprising and delightful. It balances the spooky, nostalgic silhouette with a modern, fresh color, preventing the look from feeling dated or overly traditional. It’s a single, bold color choice that makes the entire entrance feel custom and designer-led.
💰 Budget Breakdown
When applying large decals to your front door, cleanliness is everything. First, wash the door with a mild soap and water solution, then wipe it down with rubbing alcohol to remove any residue. This ensures maximum adhesion. Use a credit card or a plastic squeegee to smooth the decal from the center outwards as you apply it, which will push out any air bubbles. To remove it after the season, gently warm the vinyl with a hairdryer. This will soften the adhesive and allow you to peel it off without damaging the paint underneath.
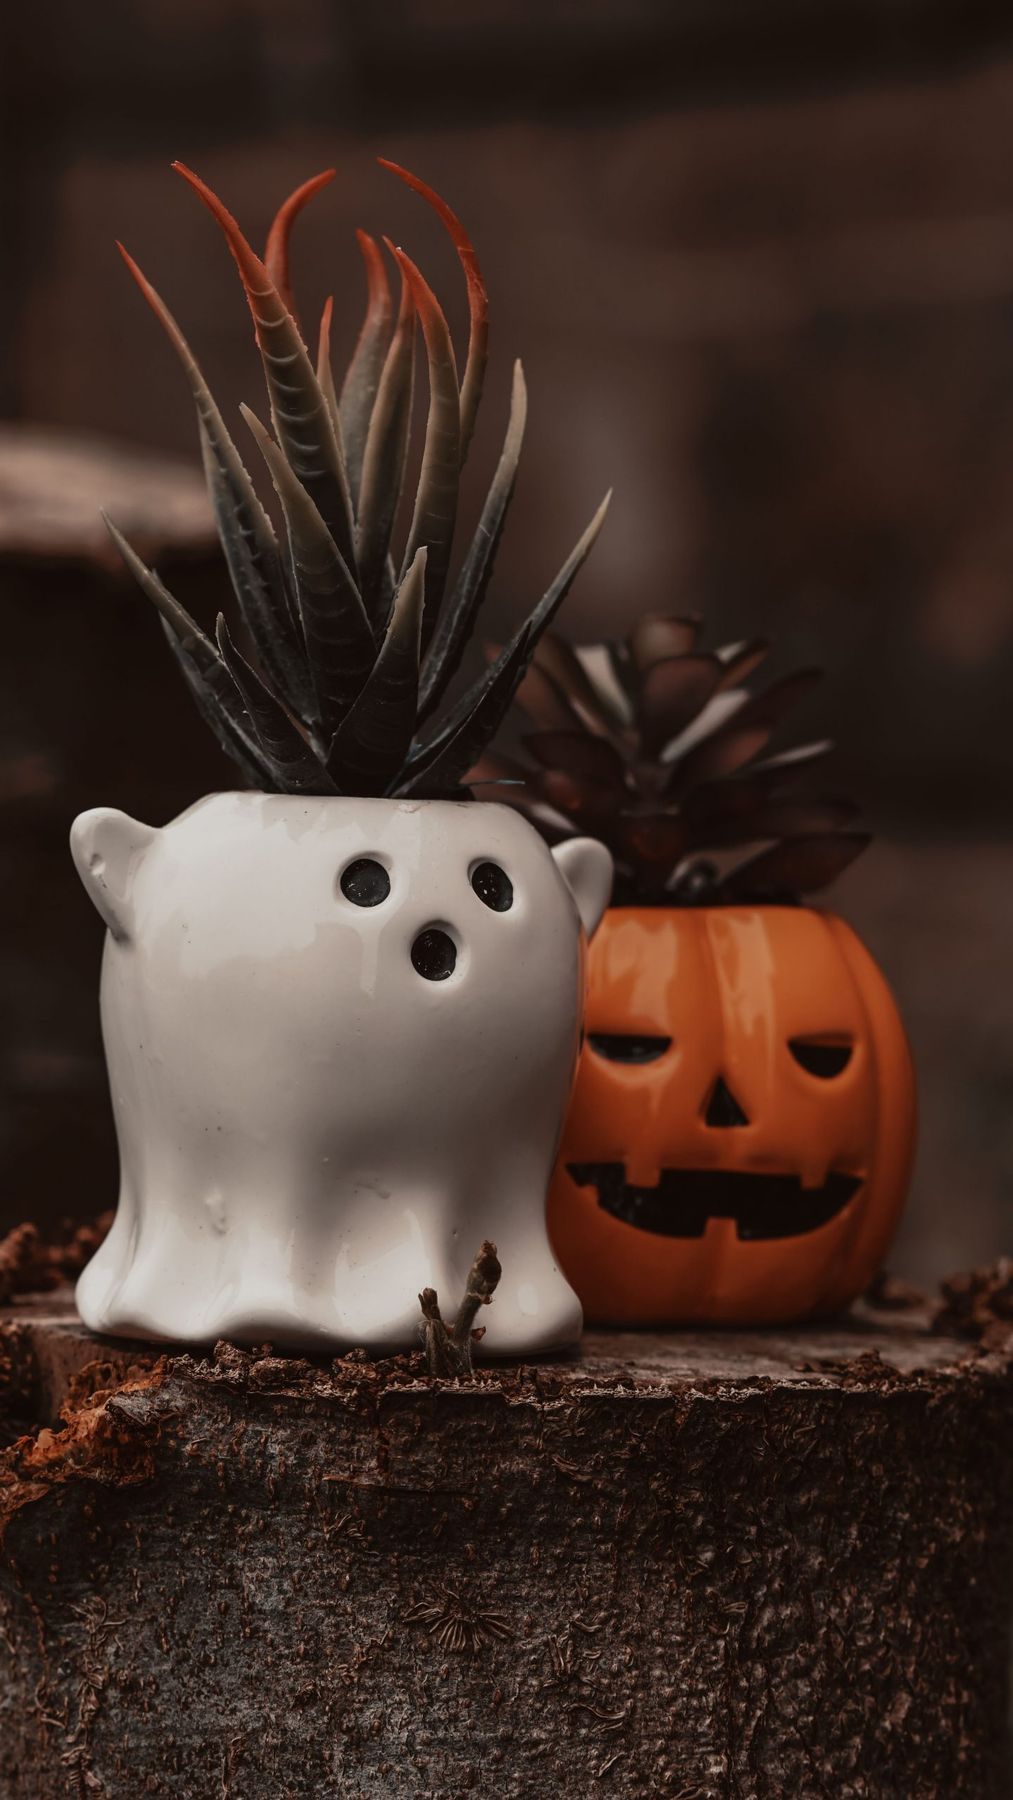
14. Whimsical Succulent Planters Shaped Like a Ghost and Pumpkin
These little planters are tapping into a larger trend we’re seeing everywhere: the ‘houseplant-ification’ of seasonal decor. For years, people have been investing in their houseplant collections, and now they want their seasonal items to follow suit. Instead of a plastic decoration that lives in a box for 11 months, this offers a piece of decor that is alive and part of the home’s ecosystem. It’s a sustainable, less wasteful way to be festive, combining the joy of Halloween with the wellness and nurturing aspects of plant ownership.
⚠️ Real Talk
While succulents are famously low-maintenance, they are not ‘no-maintenance,’ especially in tiny, novelty planters. These cute ceramic shapes rarely have drainage holes, which is the number one killer of succulents. Water will pool at the bottom and cause root rot. To keep them alive, you must water them very sparingly—we’re talking a tablespoon of water every 2-3 weeks. Or, even better, drill a small hole in the bottom of the ceramic pot with a diamond-tipped drill bit before you plant anything.
15. A Moody Close-Up of Ceramic Jack-o’-Lanterns
This vignette works because of its extreme focus and shallow depth of field, which creates a sense of intimacy and mood. By blurring the background, the photographer forces you to focus on the textures in the foreground: the glossy finish of the cream ceramic jack-o’-lantern, the rough texture of the dried raffia, and the weathered surface they sit on. The tight crop and dramatic lighting make simple, nostalgic objects feel important and evocative. It’s a lesson in how presentation can transform the mundane into something magical.

🔥 Trending Context
The visual formula here is about a dominant color and its complement. It’s 70% Warm Neutrals + 30% Accent Color. The warm neutrals are the cream ceramic, the beige raffia, and the dark, weathered surface. This creates a cozy, unified base. The single, powerful accent is the vibrant orange of the second vessel. This pop of color brings the scene to life. You could easily swap the accent—imagine a deep purple or a mossy green—and the composition would still feel balanced because the underlying formula is so strong.
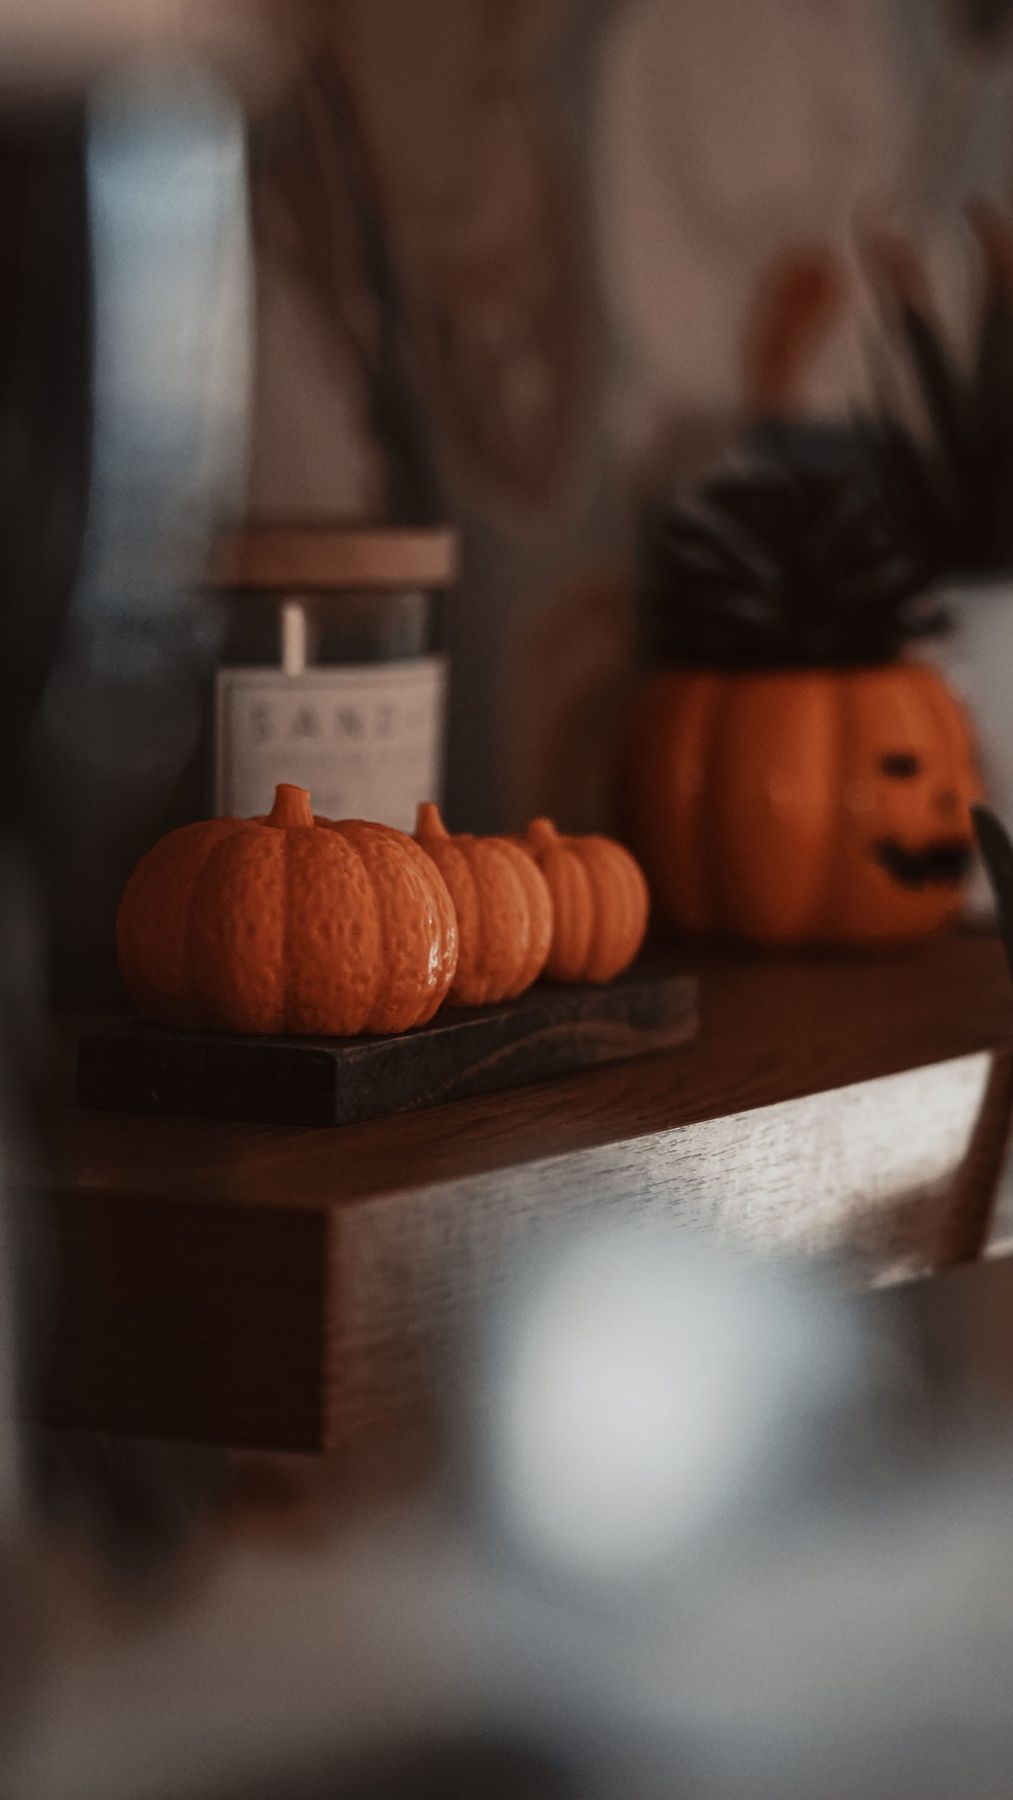
16. A Cozy Shelf with Miniature Pumpkins and a Candle
This look is proof that you don’t need a huge budget or a ton of space to create a cozy fall moment. The key elements are incredibly affordable. Three mini pumpkins can be had for under $5 at any grocery store in October. The dark wooden display block could be a scrap piece of wood from a hardware store, stained with a $5 can of Minwax. The ceramic jack-o’-lantern planter is a common find at stores like HomeGoods or TJ Maxx for $10-$15. It’s an achievable, high-impact look for under $25 that can tuck into any corner of your home.
📏 Scale Guide
A cozy shelf display with candles is lovely, but let’s be honest about the fire risk. Never leave a burning candle unattended, especially when it’s surrounded by natural, dry materials. That glass candle jar is a good start, but it’s still close to the wooden display block and the potentially flammable ceramic planter. For true peace of mind, opt for a high-quality flameless LED candle. The new ones have realistic flickering effects and timers, so you can get all the ambiance with zero of the anxiety. It’s just not worth the risk.
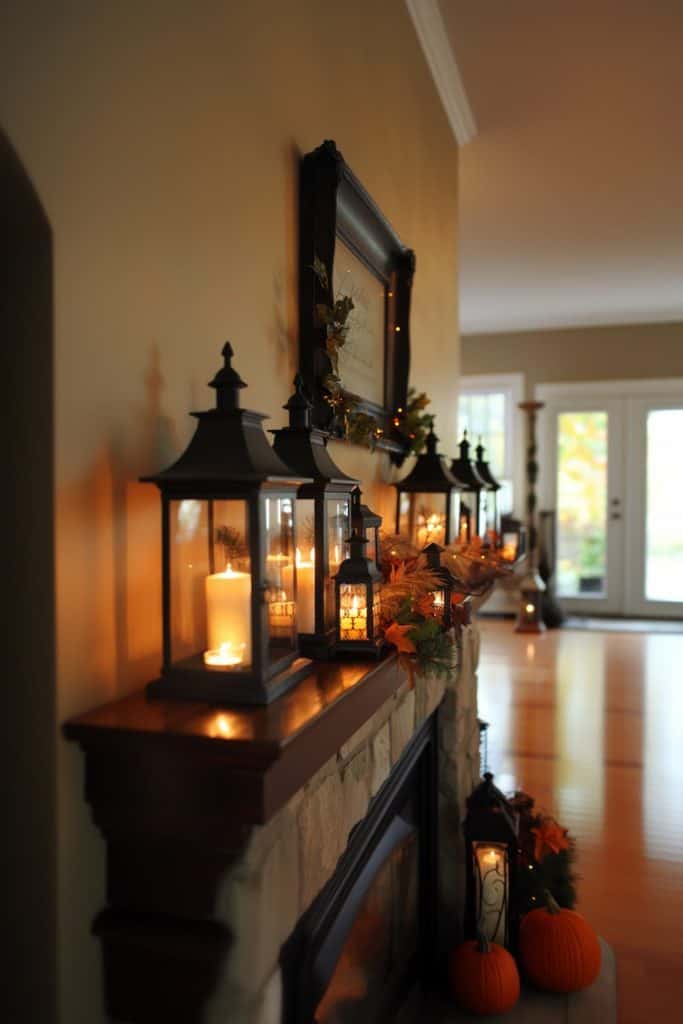
17. Stone Fireplace Mantel with Black Lanterns and Autumn Garland
To get this professional, layered look on a mantel, think in threes. The designer used three black lanterns of the same style but different heights to create visual interest. They also used a trio of textures: the hard, matte black metal; the rough, natural stone of the fireplace; and the soft, organic shapes of the faux foliage. When you’re decorating, grouping items in odd numbers (especially 3s or 5s) and mixing textures are two of the fastest ways to make a space feel intentionally designed rather than just decorated.
🔧 How-To Brief
Dust. The biggest enemy of a beautiful faux foliage display is dust. That lush autumn garland will look drab and dirty after just a few weeks. To maintain it, give it a once-over with the brush attachment of your vacuum every other week. For a deeper clean at the end of the season before you store it, take it outside and use a hairdryer on a cool, low setting to blow the dust off. For the black lanterns, a simple wipe-down with a microfiber cloth will keep them looking sharp. The pumpkins on the hearth will need a wipe too!
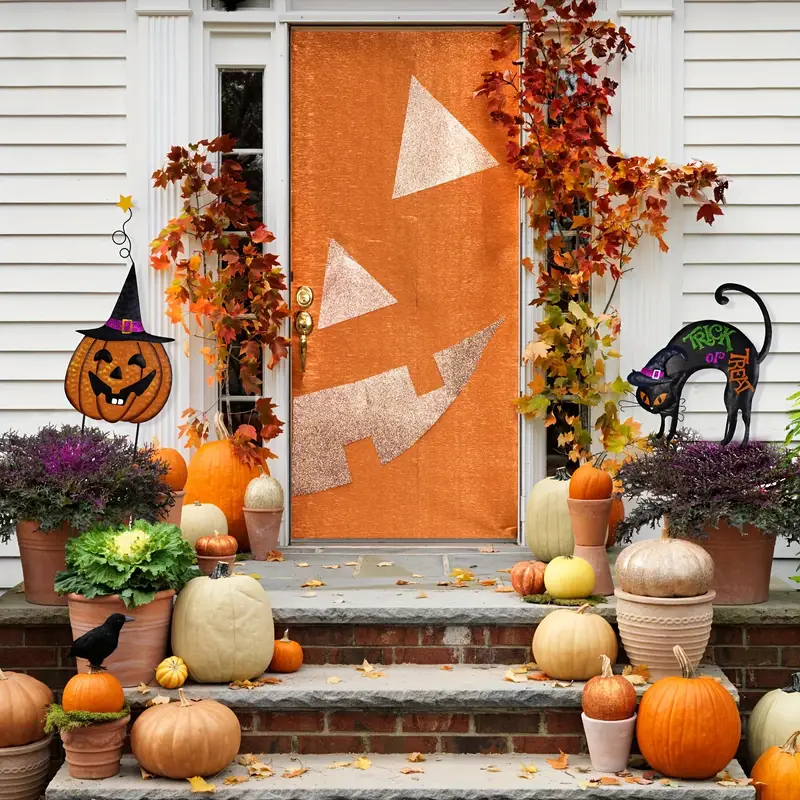
18. A Sparkling Orange Glitter Jack-o’-Lantern Front Door
The single element that makes this entire porch unforgettable is, without a doubt, the orange glitter door wrap. It’s pure, unapologetic joy. You could take away the kale, the metal stakes, even half the pumpkins, and you’d still have an amazing, high-impact entrance. It’s a bold, confident choice that turns a functional object—the front door—into the star of the show. It communicates fun, whimsy, and a true love for the holiday, setting the tone before a guest even steps out of their car.
🧹 Maintenance Reality
Okay, let’s talk about glitter. It’s fun, it’s festive, and it gets… everywhere. A glitter-wrapped door is an amazing statement, but be prepared for the consequences. Every time you open or close the door, a fine dusting of orange sparkle is likely to fall onto your porch. A windy day could create a glitter vortex. It will get tracked into your house. If you are a person who is driven crazy by a little mess, this is not the look for you. If you embrace a bit of festive chaos, go for it! Just have the vacuum ready.
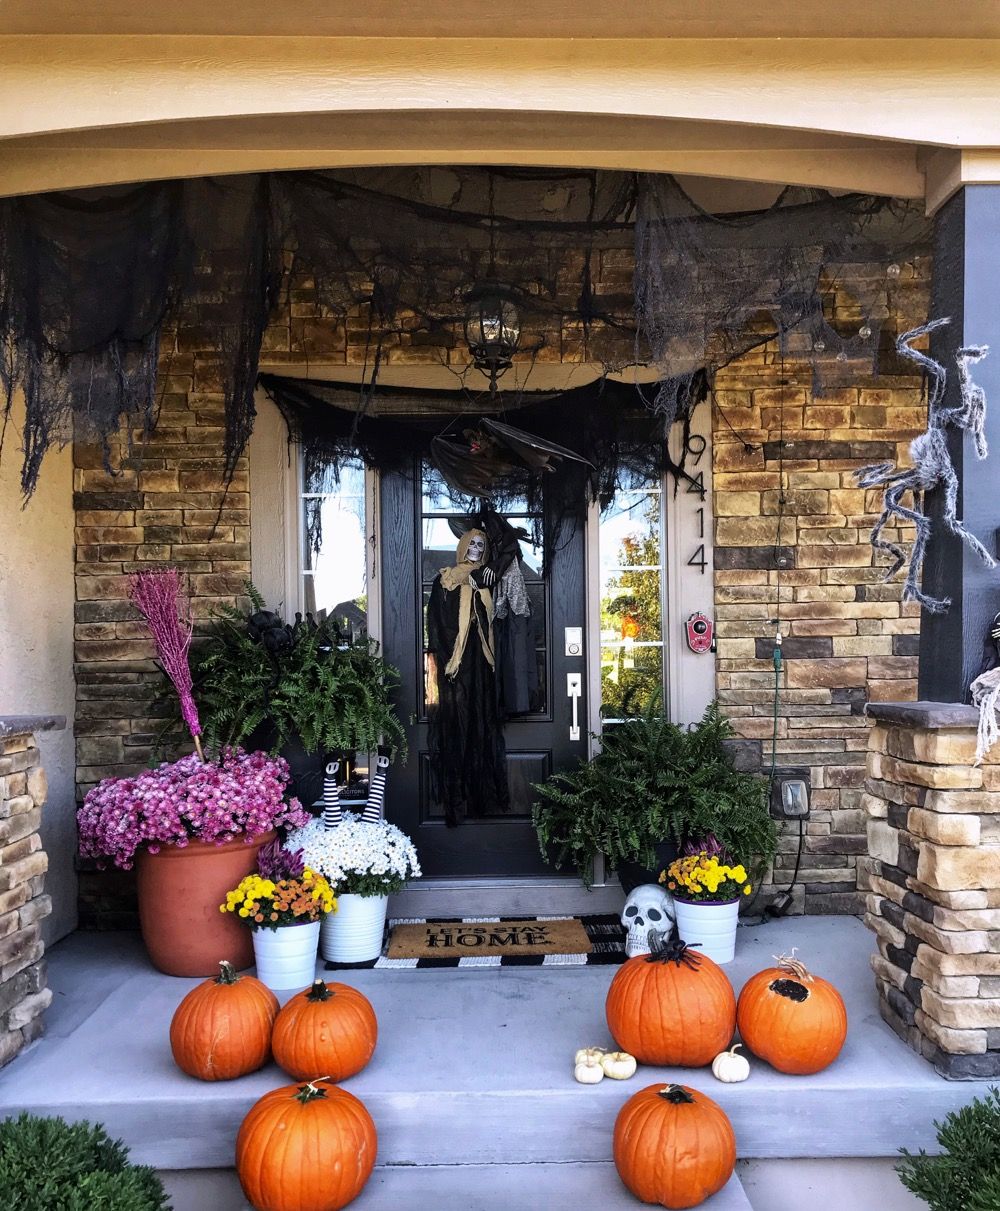
19. A Layered and Spooky Entry with Draped Gauze and a Reaper
This porch feels so immersive and theatrical because of its brilliant use of layering in a small space. The designer has created distinct visual planes: the stacked stone wall in the back, the grim reaper on the door, the striped witch legs in the mid-ground, and the scattered pumpkins in the foreground. And above it all, the draped black gauze creates a ceiling, enclosing the space and making it feel like its own spooky little room. This layering of elements creates depth and makes the small entryway feel much larger and more complex than it really is.
✅ Before You Start
This ‘enclosed’ decorating style is perfect for a covered porch or a recessed entryway that’s at least 4 feet deep. The depth is crucial for the layering effect and for creating that ‘ceiling’ with the draped fabric. If your porch is just a flat slab, this look can be harder to achieve. You’d need to install temporary hooks or an overhead frame to hang the gauze from. For a smaller, shallower porch, focus on a layered ground display and a dramatic door hanging, like in Idea #13.
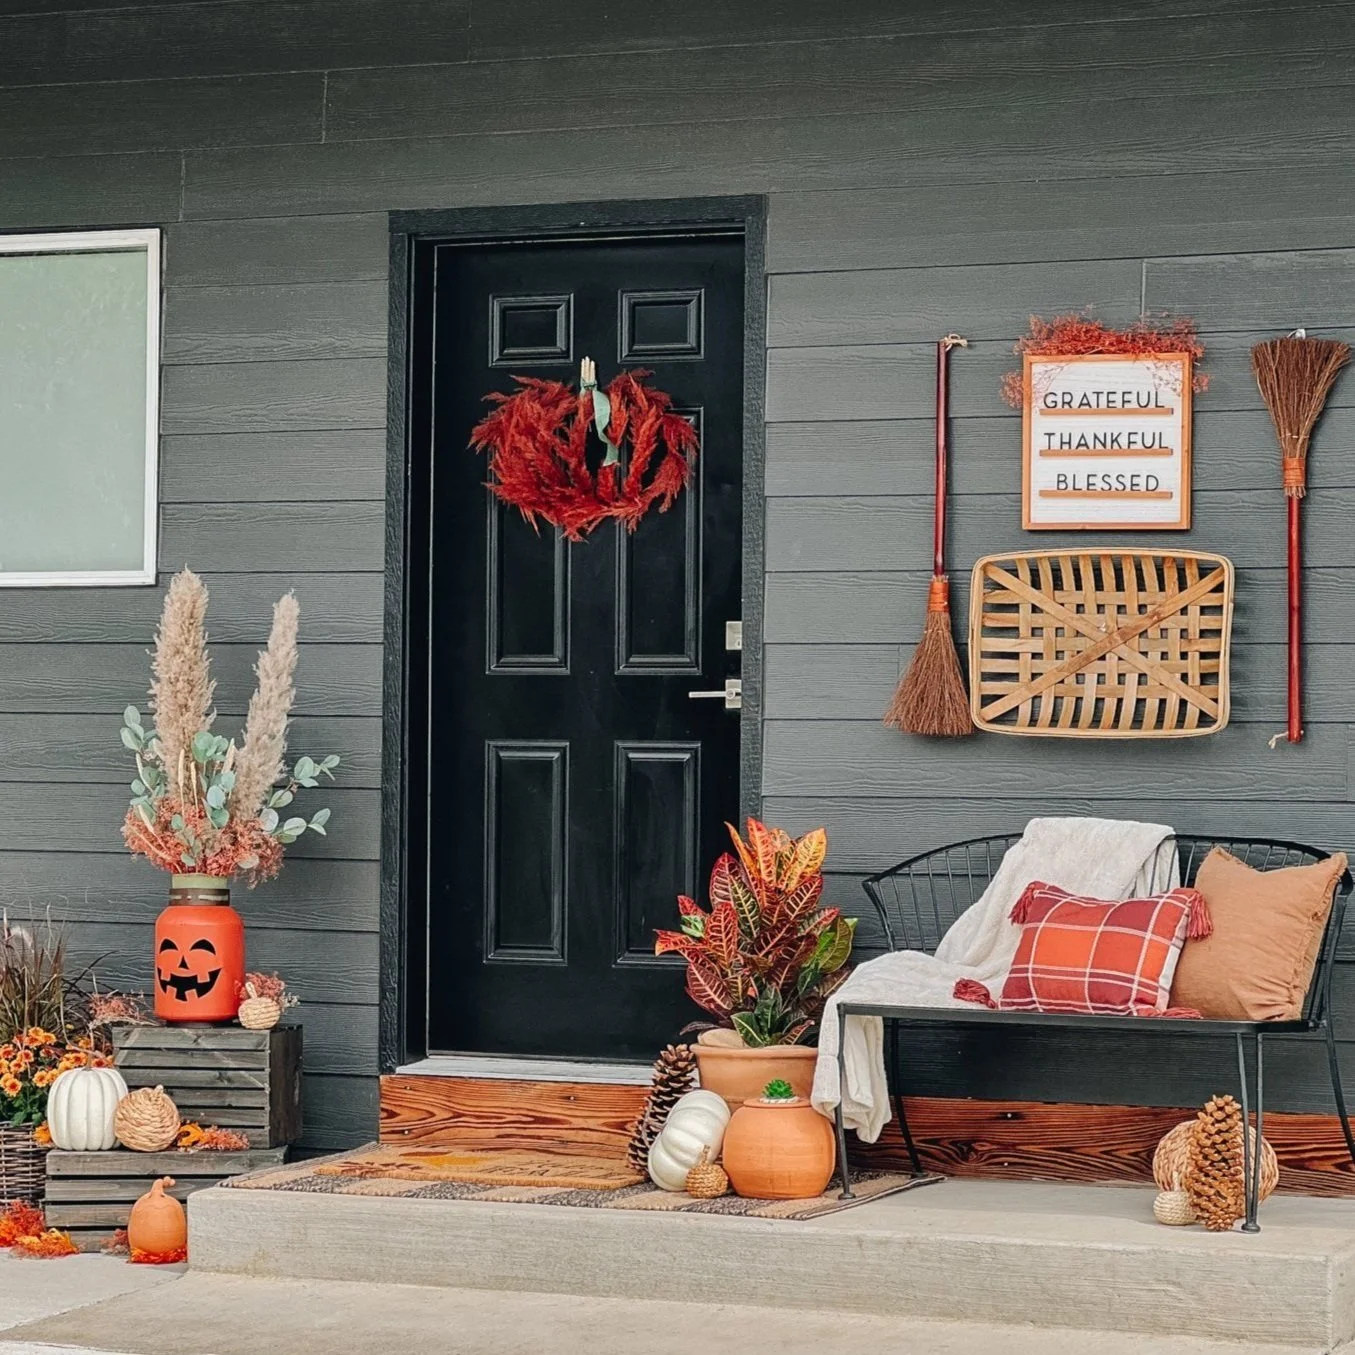
20. Modern Farmhouse Porch with Moody Hues and Rustic Fall Touches
To get this curated, modern farmhouse look, here’s a potential cost breakdown. The investment is in pieces that can be used year-round, with smaller seasonal swaps.
- Main Furniture (Black metal bench): $150 – $400
- Wall Decor (Tobacco basket, brooms): $60 – $120
- Accent Furniture (Stacked wooden crates): $40 – $80
- Textiles & Decor (Plaid pillows, jack-o’-lantern canister, wreath): $75 – $150
- TOTAL: $325 – $750
Budget alternative: Get the same vibe for 60% less. Find a used bench on Facebook Marketplace and spray paint it black. Use apple crates from a craft store. Make your own plaid pillow covers. Total cost could be under $120.
⭐ The One Thing
Want this look for way less? You got it. Start on Facebook Marketplace or at a garage sale to find a bench; even a wooden one can be painted matte black ($10 for a can of spray paint). Instead of pricey tobacco baskets, hang a trio of straw placemats from IKEA or Target ($15 for three). For the stacked crates, ask your local grocery store for old wooden produce crates—they often give them away for free. A simple red berry wreath from Walmart ($20) and a single, real jack-o’-lantern will finish the look. The total could easily be under $75 for the whole scene.
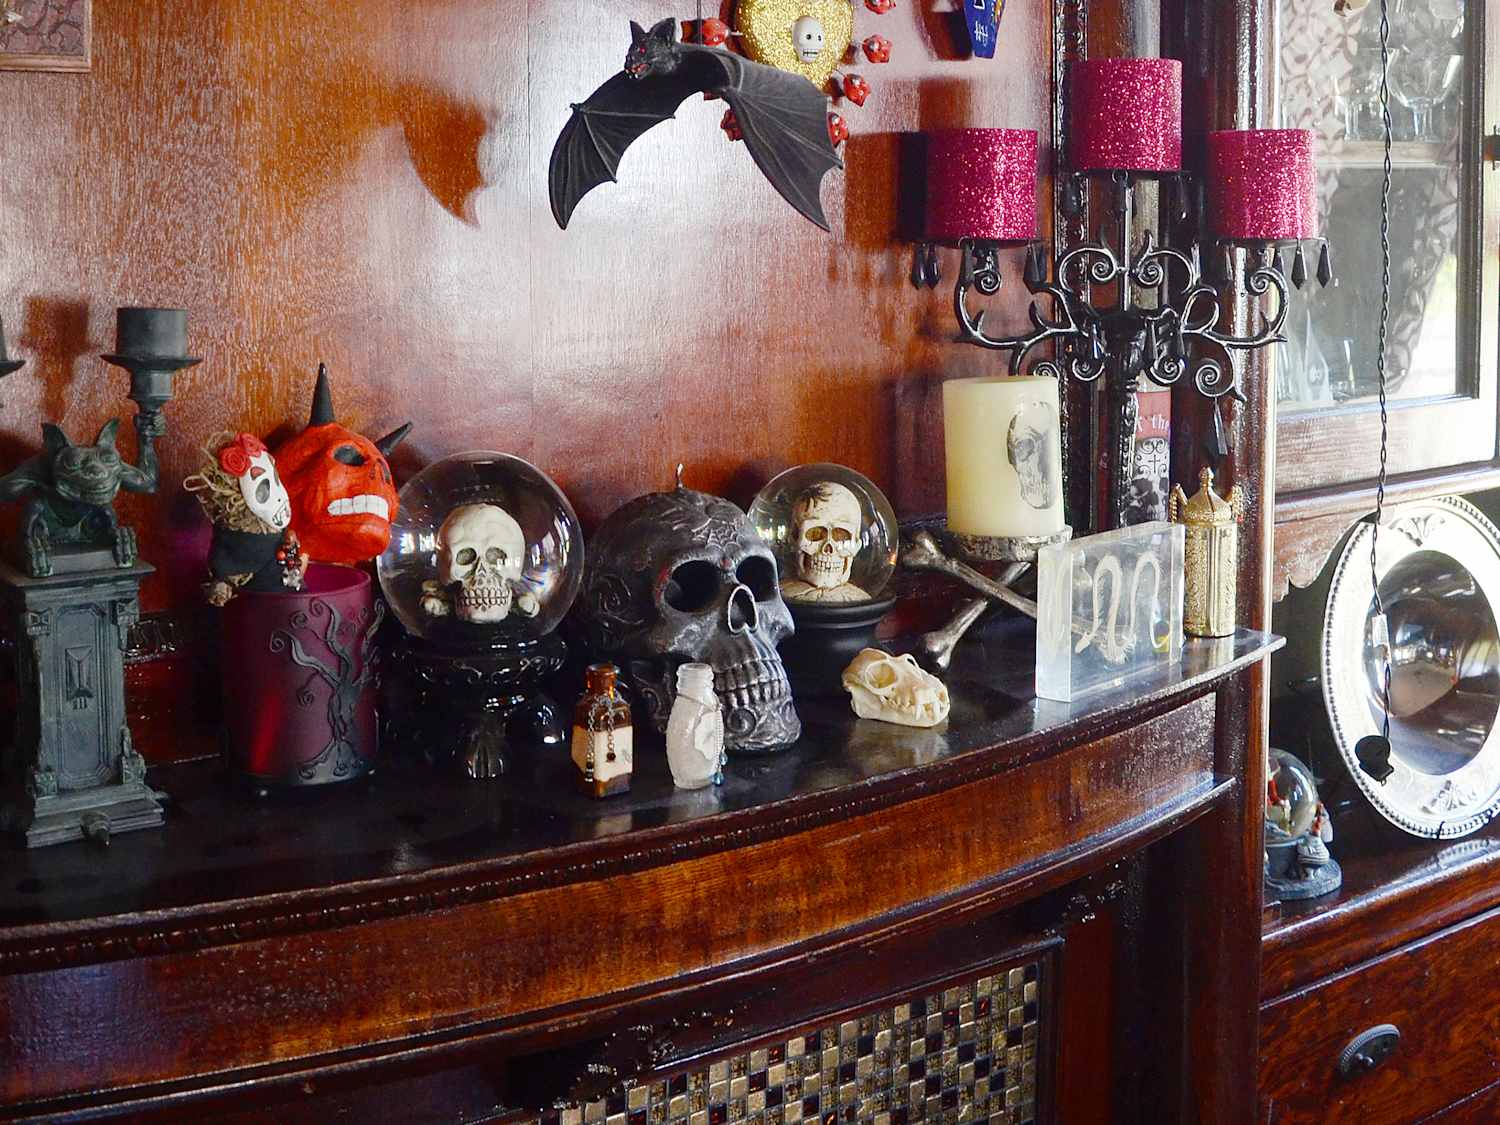
21. A Dramatic Gothic Mantel with Skulls and a Black Candelabra
The single element that injects life and a dose of high-fashion drama into this otherwise macabre scene is the pop of shimmering fuchsia. In a sea of dark wood, black bats, and bone-white skulls, the glittery fuchsia candle shades on the candelabra are a shocking, brilliant surprise. It’s a touch of punk-rock glamour that cuts through the gothic seriousness, making the whole display feel more eclectic, personal, and modern. Without that flash of vibrant color, the mantel would risk feeling like a one-note Halloween store display.
💸 Get This Look For Less
This look is a beautiful exercise in controlled chaos, following a formula of 80% Moody Monochrome + 20% Unexpected Glam. The vast majority of the display is built from a tight palette of dark wood, black, and white/cream. This creates a strong, cohesive, and gothic foundation. The magic comes from the final 20%, which is all about surprising texture and color: the sparkle of the fuchsia shades, the glint of the glass skull orbs, the hint of red in the apothecary bottles. It’s the perfect recipe for a look that is both spooky and chic.
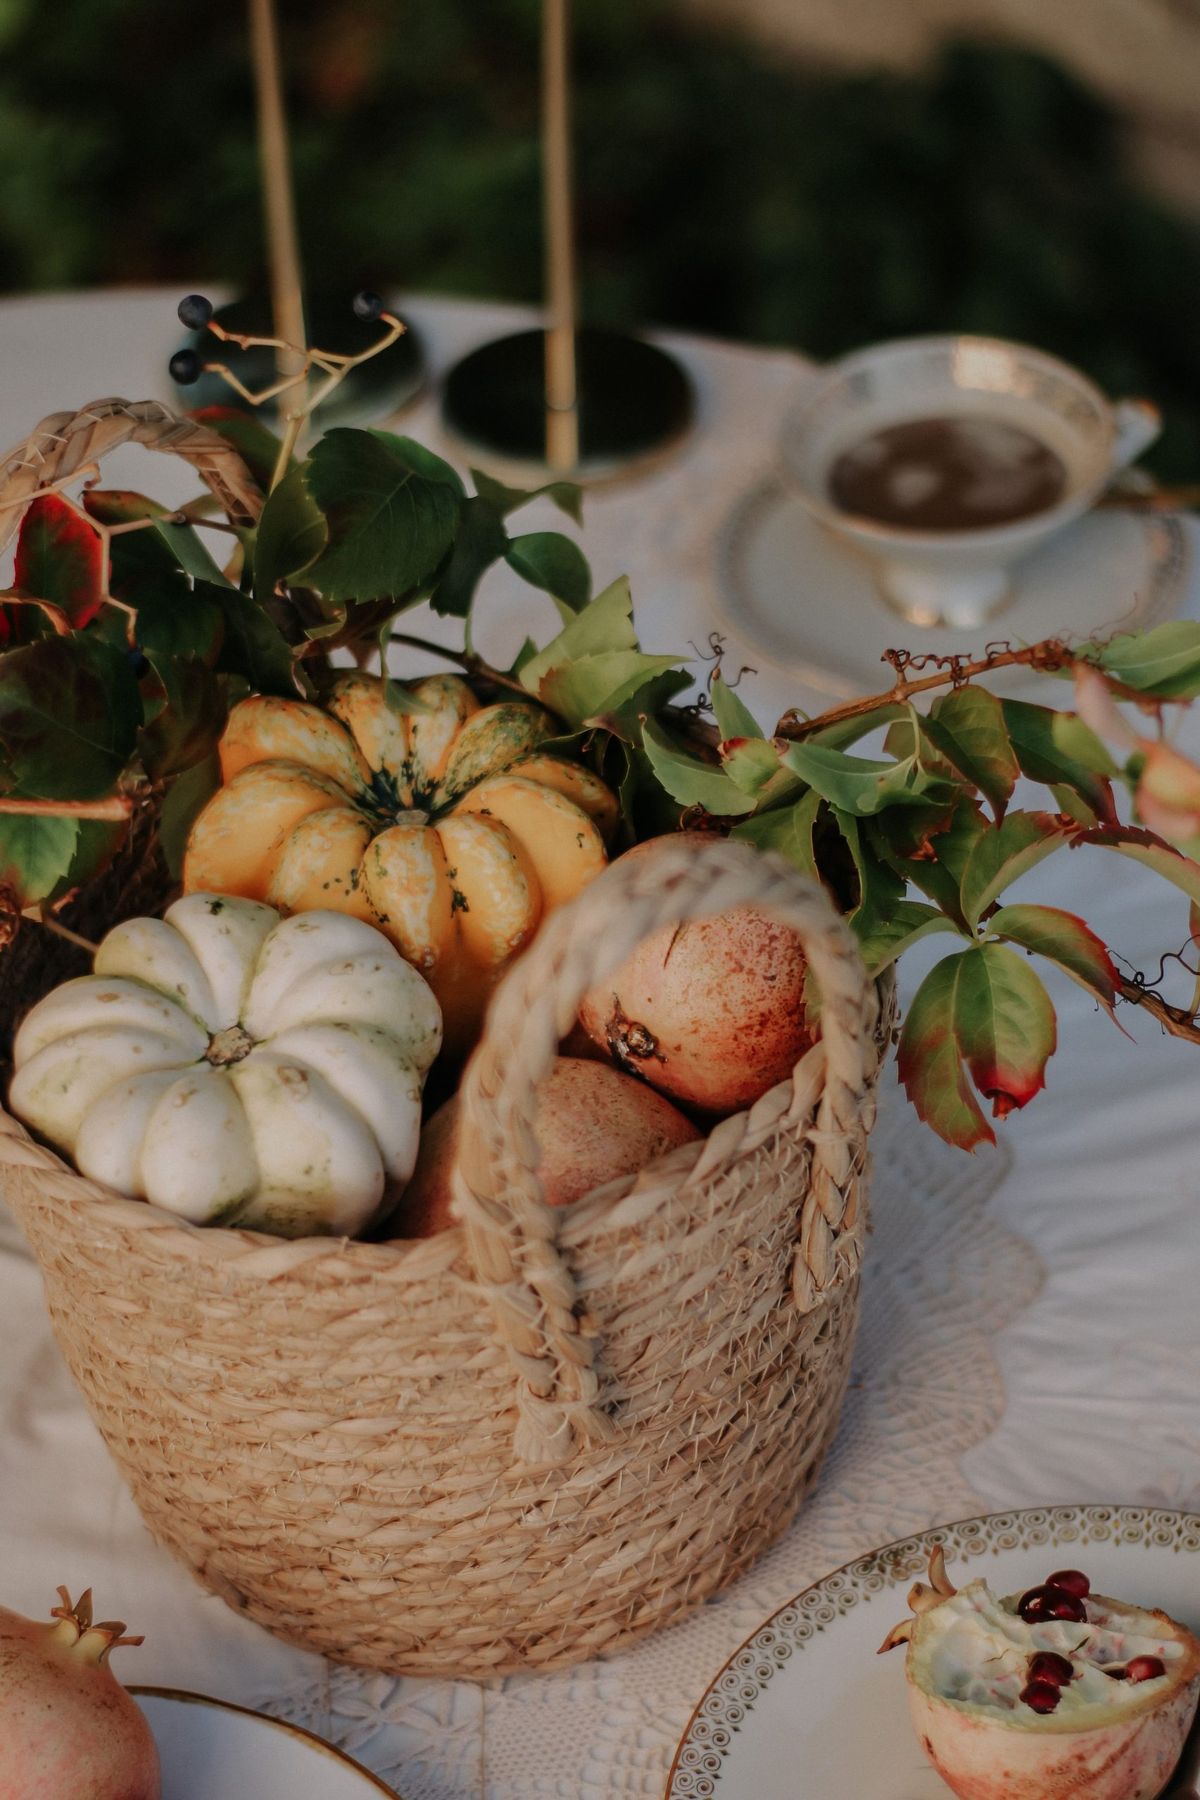
22. A Rustic Woven Basket Centerpiece with Pomegranates and Pumpkins
This centerpiece feels so effortlessly chic because it combines harvest elements that share a rich, jewel-toned palette. The deep, glossy red of the pomegranates and the burnt orange of the pumpkins are a sophisticated, non-traditional take on fall colors. The addition of fresh vine greenery adds a vital touch of life and breaks up the warm tones. Placing it all in a natural, textural woven basket on a delicate lace tablecloth creates a beautiful tension between rustic and refined. This is a much more organic approach than the more structured table in Idea #5.
🎯 What Makes It Work
For a centerpiece that truly feels alive and dynamic, always include one element that ‘spills’ out of the main vessel. See how the vine clippings are artfully trailing out of the basket and onto the table? This small detail breaks the rigid container of the basket, making the whole arrangement feel more natural and integrated with its surroundings. It connects the centerpiece to the table itself. Whether it’s a bit of greenery, a string of beads, or a piece of ribbon, that one little ‘spill’ makes all the difference.
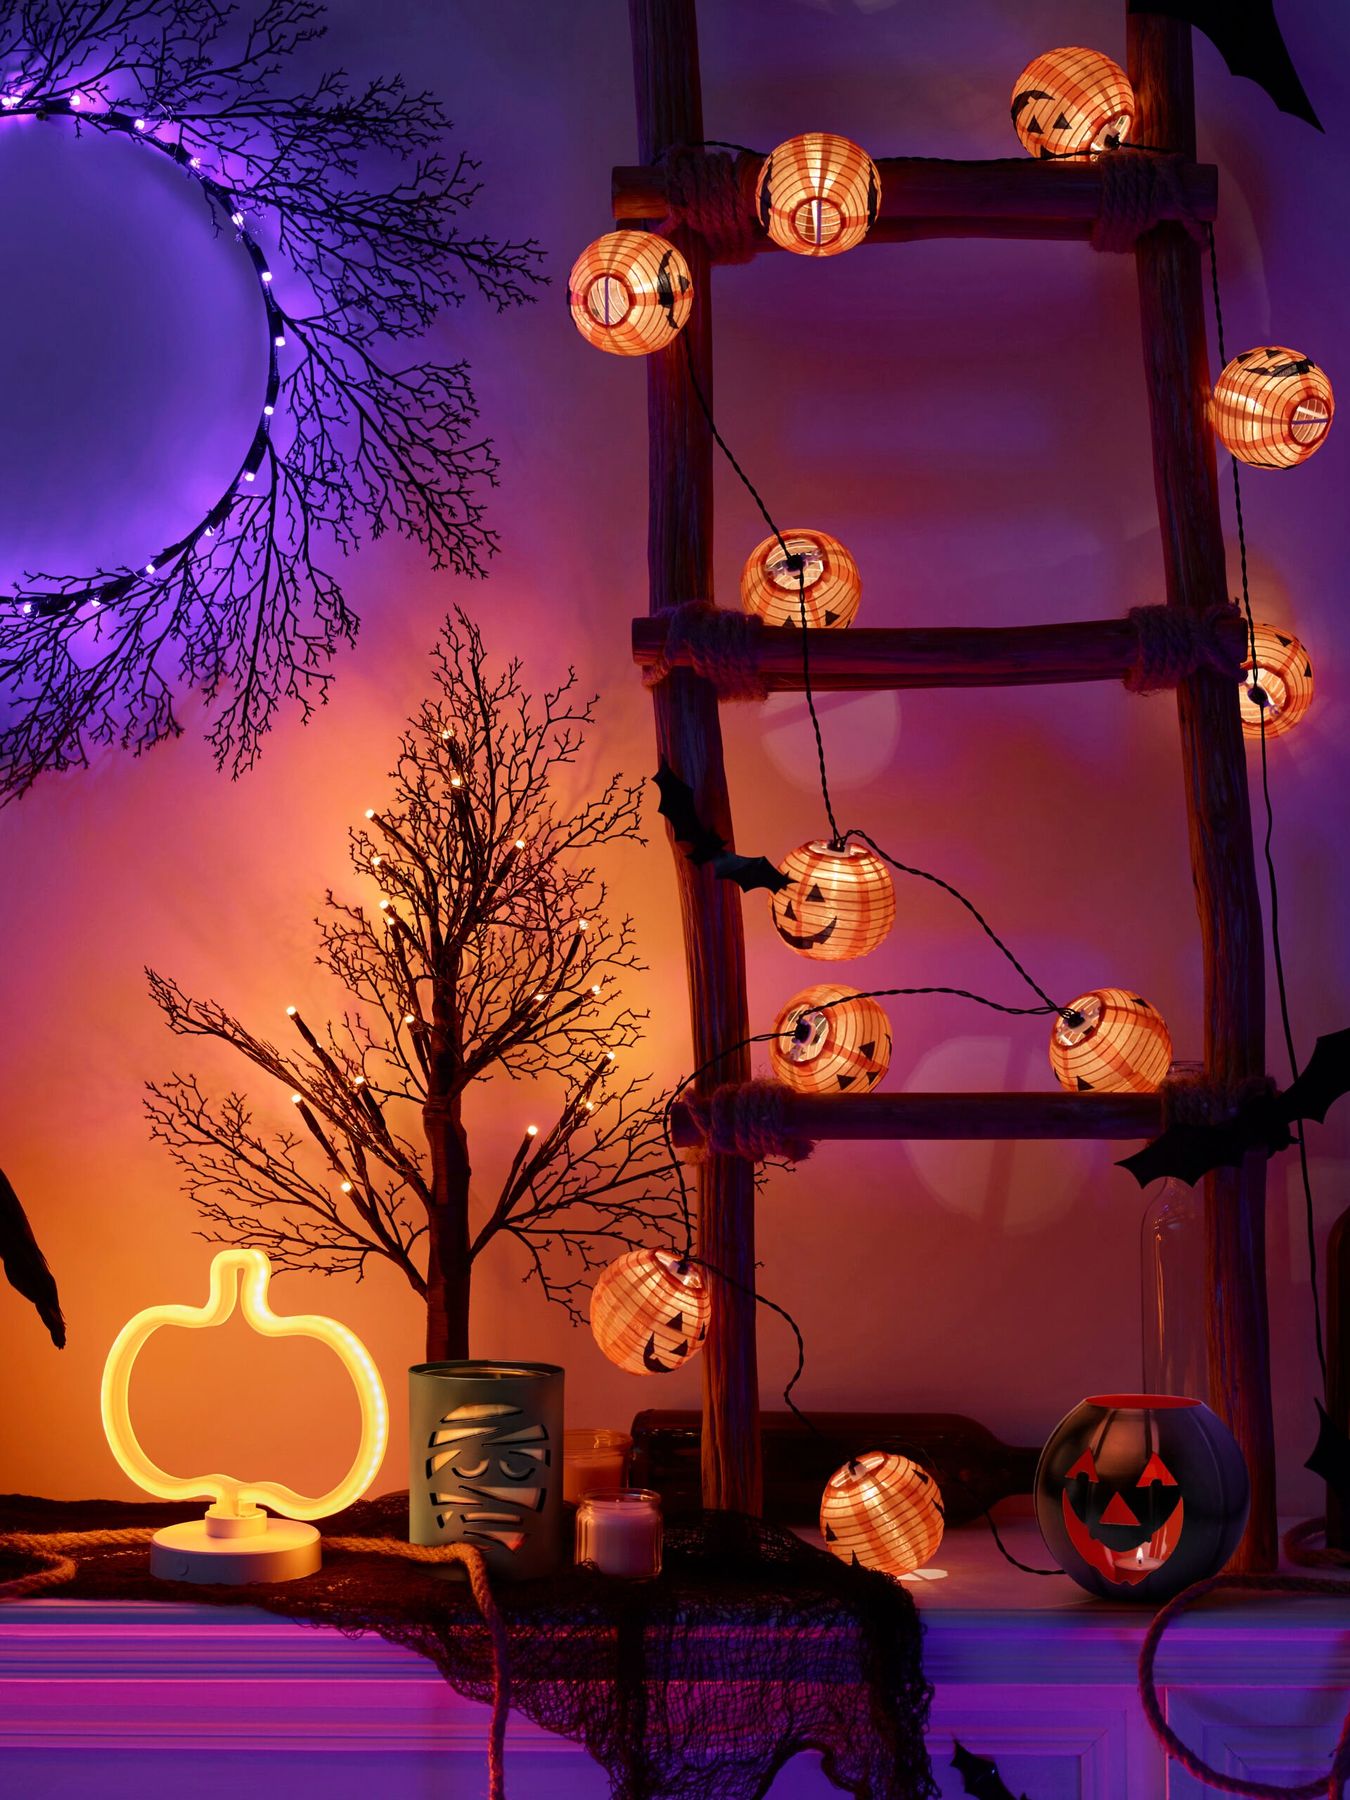
23. A Spooky-Chic Corner with a Ladder and Neon Lighting
Neon is having a major moment in home decor, and this look shows how to perfectly integrate it into a seasonal display. For a generation raised on screen culture, the vibrant, electric glow of neon and LED lights feels both nostalgic and modern. It’s a departure from the traditional candle-lit spookiness, offering a more playful, graphic, and pop-art inspired take on Halloween. The mix with rustic elements like the wooden ladder and distressed cheesecloth keeps it from feeling like a rave, grounding the futuristic glow with earthy textures.
📐 Style Math
Create that distressed, aged cheesecloth effect in 3 easy steps. Time: 30 minutes (plus drying). Cost: $8.
- Brew a very strong pot of black tea or coffee in a large bucket or your kitchen sink.
- Submerge a package of white cheesecloth in the dark liquid. Let it soak for at least 20-30 minutes, agitating it occasionally. The longer it soaks, the darker the stain.
- Carefully wring out the cheesecloth (wear gloves!). Don’t rinse it. Let it air dry completely. The uneven drying will create a mottled, aged patina. For extra spookiness, you can rip and pull at the fibers once dry.
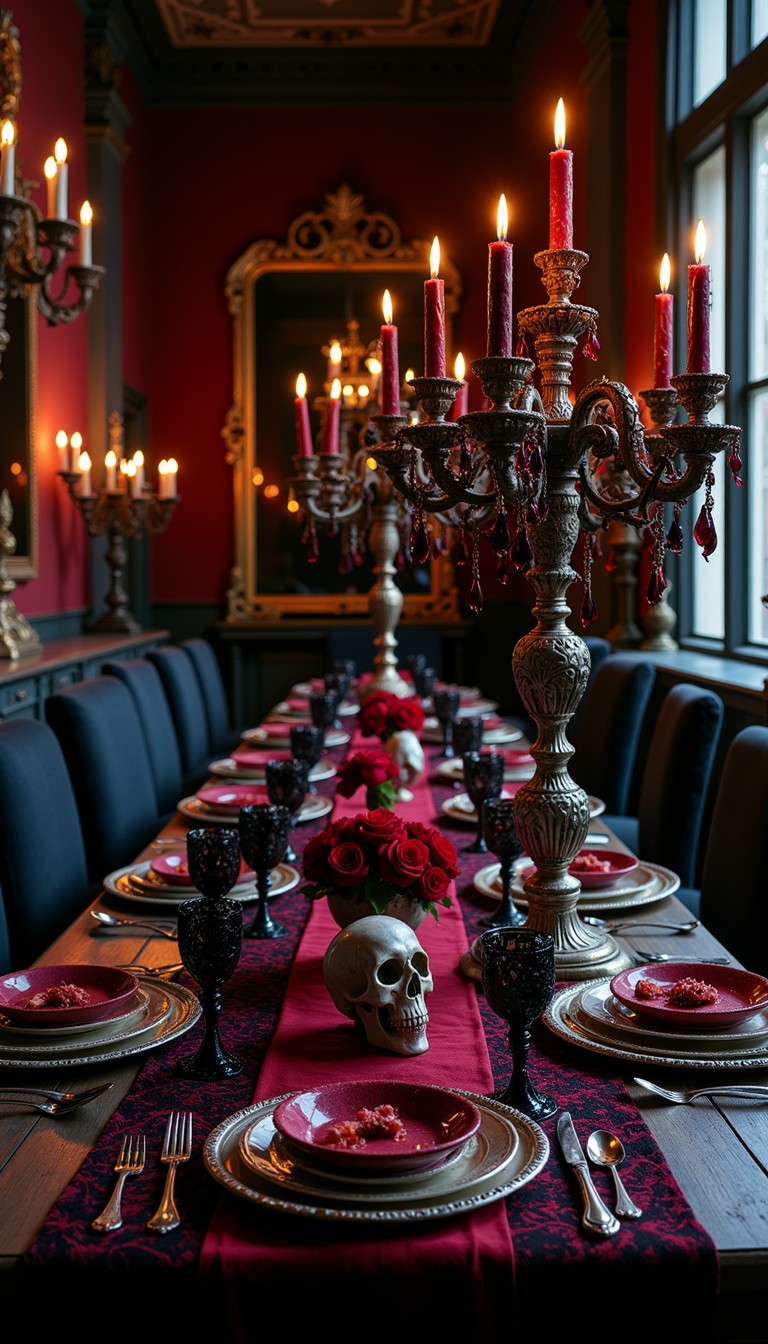
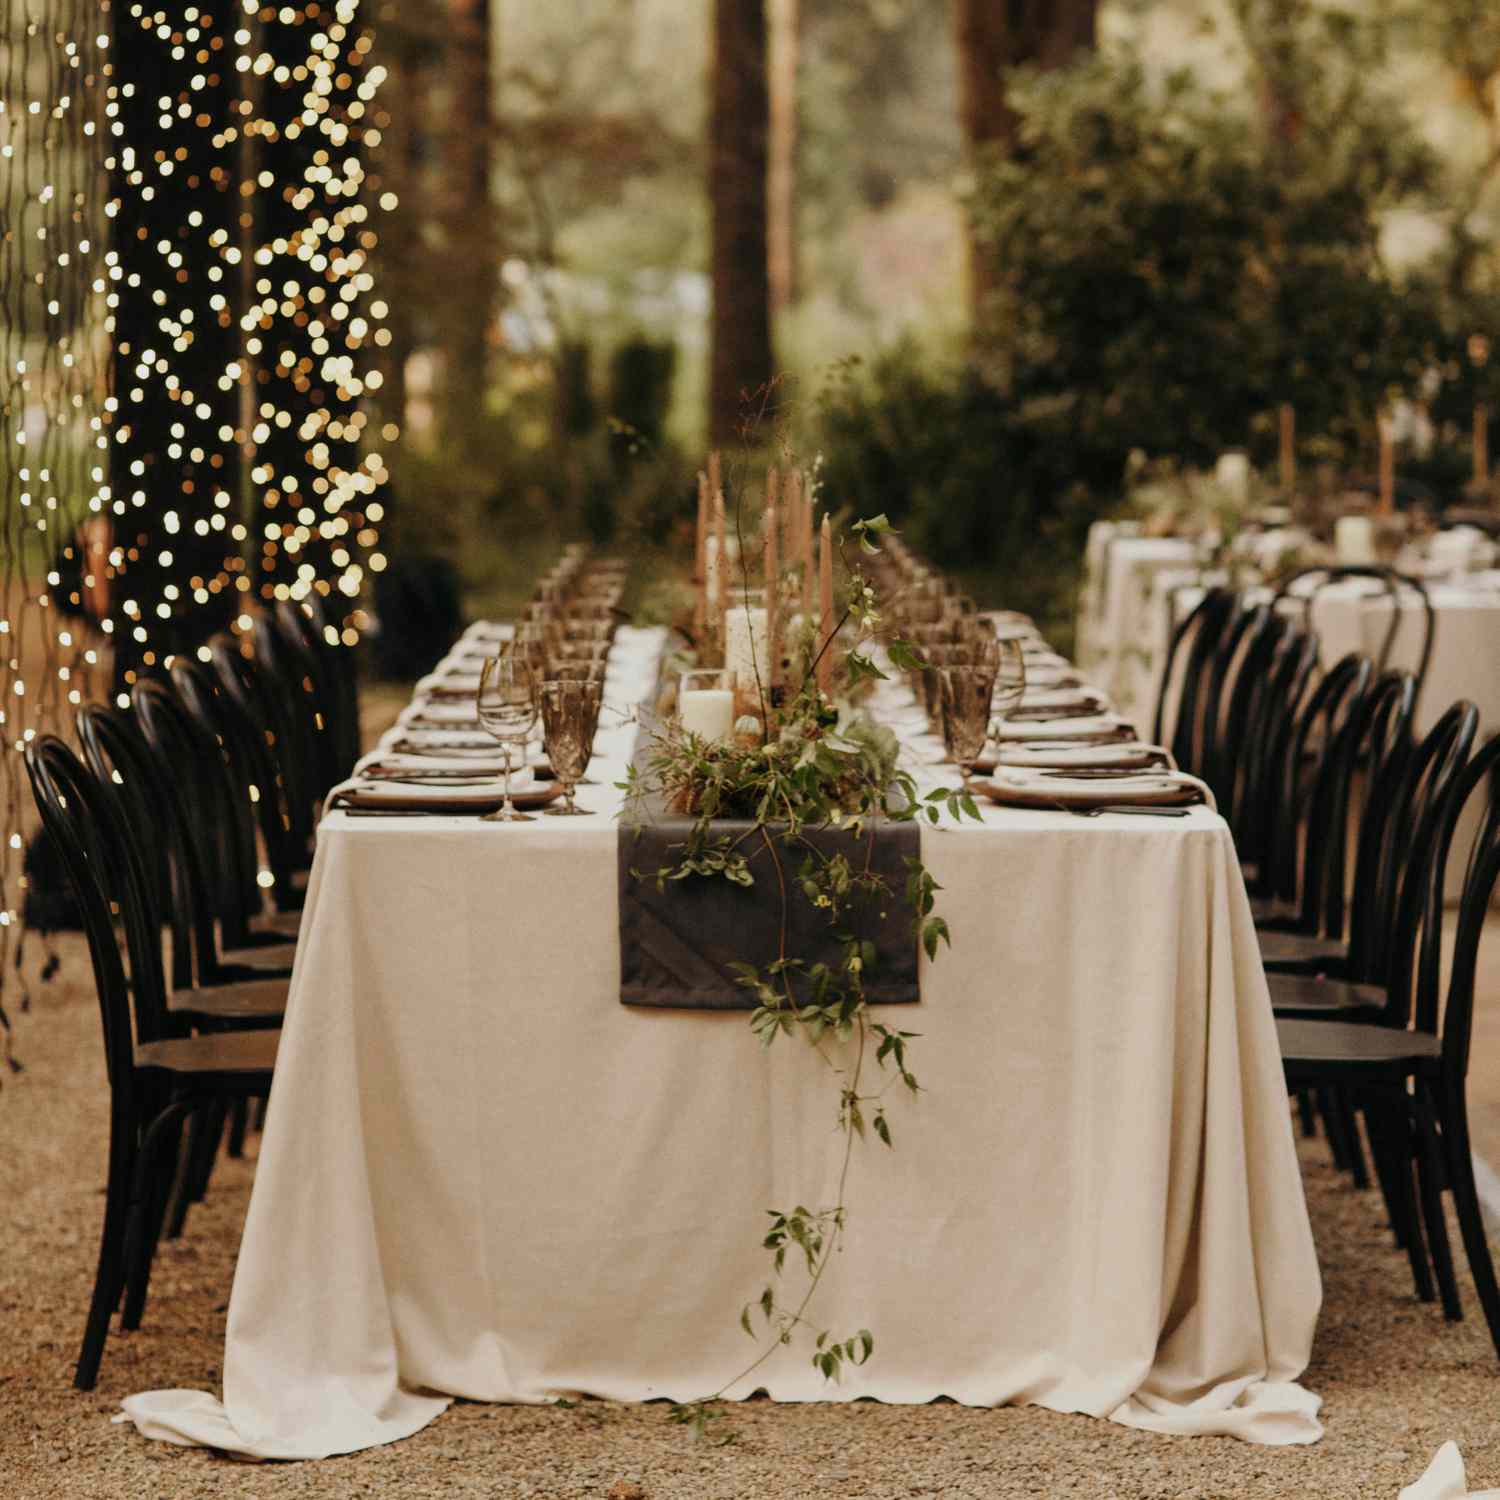
24. An Elegant Gothic Tablescape with Pink and Black
Achieving a high-end gothic look doesn’t require a royal budget. A can of matte black spray paint is your best friend. Find old, ornate brass candlesticks at a thrift store ($5-$10 for a pair) and spray them black. The same goes for a fake floral arrangement. Buy an inexpensive, fluffy pink bouquet from a craft store and give it light, misty coats of black spray paint to ‘age’ it and give it a creepy, dried-out look. A roll of black cheesecloth ($8) is all you need for a runner. It’s all about transforming cheap items into moody masterpieces.
💡 Designer Tip
A kitchen or dining table piled high with spooky decor, dark fabrics, and tall candelabras looks incredible for a photoshoot or a dinner party. But for everyday life? It can be a nightmare. Dark fabrics show every crumb and speck of dust. Tall centerpieces block conversation and need to be moved for every meal. And if you have pets or kids, that elegant candelabra is a major hazard. Consider this a ‘special occasion’ look, or scale it down to a smaller, contained vignette on a buffet or side table for a more practical approach.
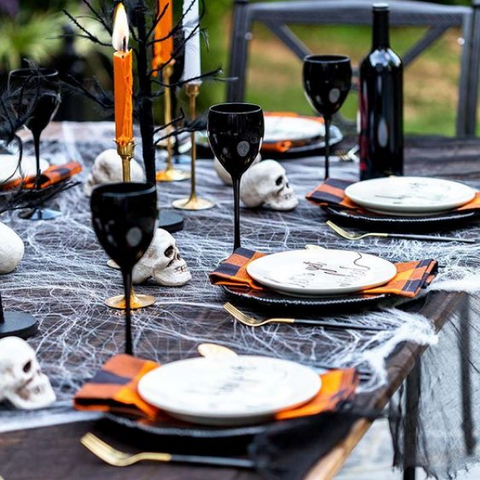
25. A Moody Gothic Table Setting with Skulls and Cobwebs
This tablescape is successful because it commits to a tight, dramatic color story and then adds layers of texture. The palette is almost exclusively black, white/cream, and orange, with a metallic accent. This discipline prevents the spooky theme from becoming chaotic. The texture is where it gets interesting: the gauzy spider web runner, the smooth ceramic plates, the rough plaid napkins, the glossy wine glasses, and the matte finish of the skulls all combine to create a rich tactile experience, even before you touch anything. The look is a great contrast to the more rustic table in Idea #22.
💰 Budget Breakdown
Before you commit to hosting a dinner party with this dramatic tablescape, run through this quick checklist:
- Do you have enough contrast? If your dining table is very dark, the black elements may disappear. You might need the orange napkins and brass candle holders to provide definition.
- Is your lighting adjustable? This look thrives in low, moody light. Bright overhead lighting will kill the vibe instantly. Make sure you can dim the lights and rely on candles (safely!).
- Are your guests clumsy? Those black wine glasses are dramatic, but they make it impossible to see how much red wine is left in the glass. Spills are more likely!
26. An Illuminated Scarecrow and Ghost Display on the Lawn
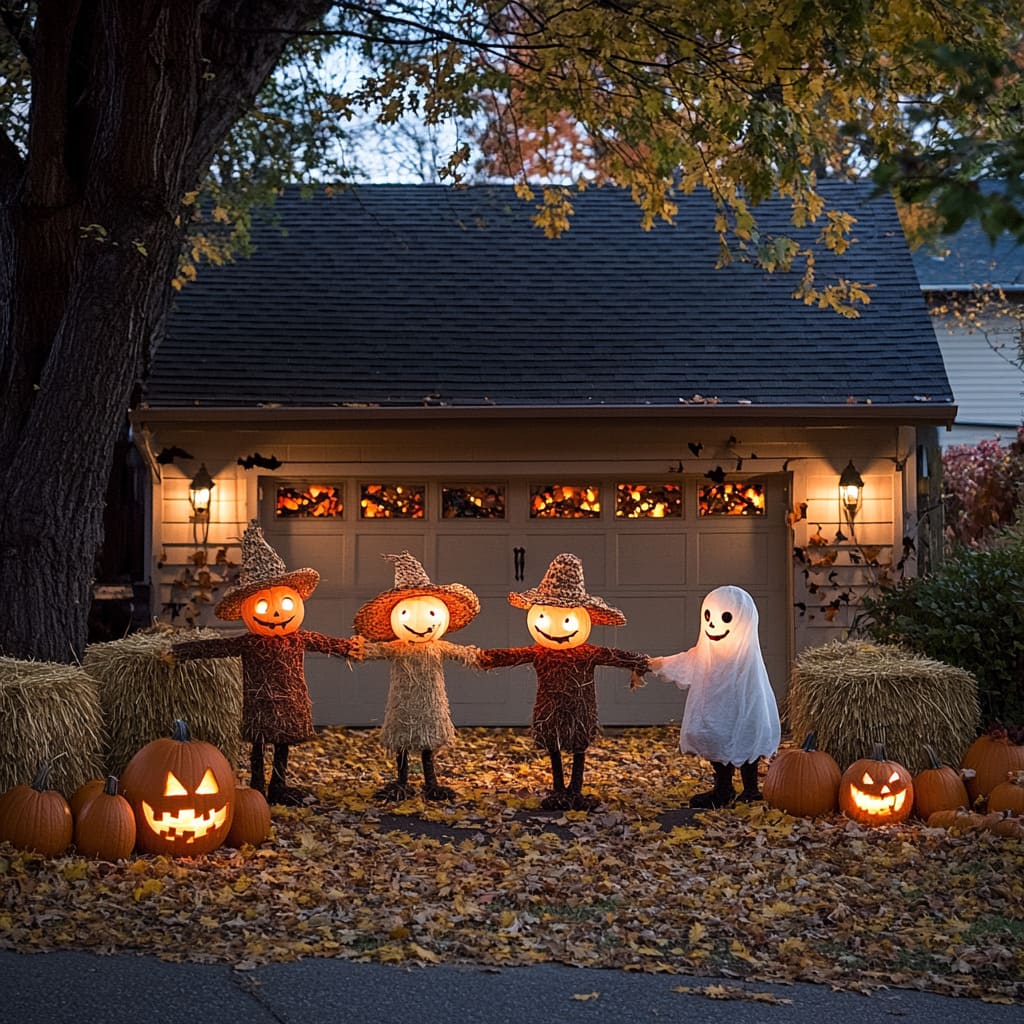
The key to making a group of figures like this look intentional and not like a random collection of yard sale finds is the simple act of having them hold hands. This small gesture links them together into a single, cohesive unit. It creates a story and a sense of connection. The second trick is symmetry. By placing the ghost in the center and flanking it with scarecrows, the arrangement feels balanced and deliberately designed. This formal structure makes the playful subject matter even more charming.
⚠️ Real Talk
Let’s build one of those glowing pumpkin-head scarecrows. Time: 1 hour. Cost: $40.
- Create a ‘T’ shape frame from 2×2 lumber or sturdy branches. The vertical piece should be about 5 feet tall, and the cross-piece for the arms about 3 feet wide. Secure with screws.
- Stake the frame firmly into the ground.
- Drape an old flannel shirt over the arms and button it up. Stuff the shirt loosely with plastic bags or straw to give it some body.
- For the head, use a plastic, carvable pumpkin (a ‘funkin’). Cut a hole in the bottom big enough to fit over the top of your wooden stake.
- Place a battery-powered puck light or string lights inside the pumpkin head before placing it on the frame.
- Add straw hands and a hat to finish the look.
27. A Cozy Nook with a Wingback Chair and Cloche-Covered Skulls
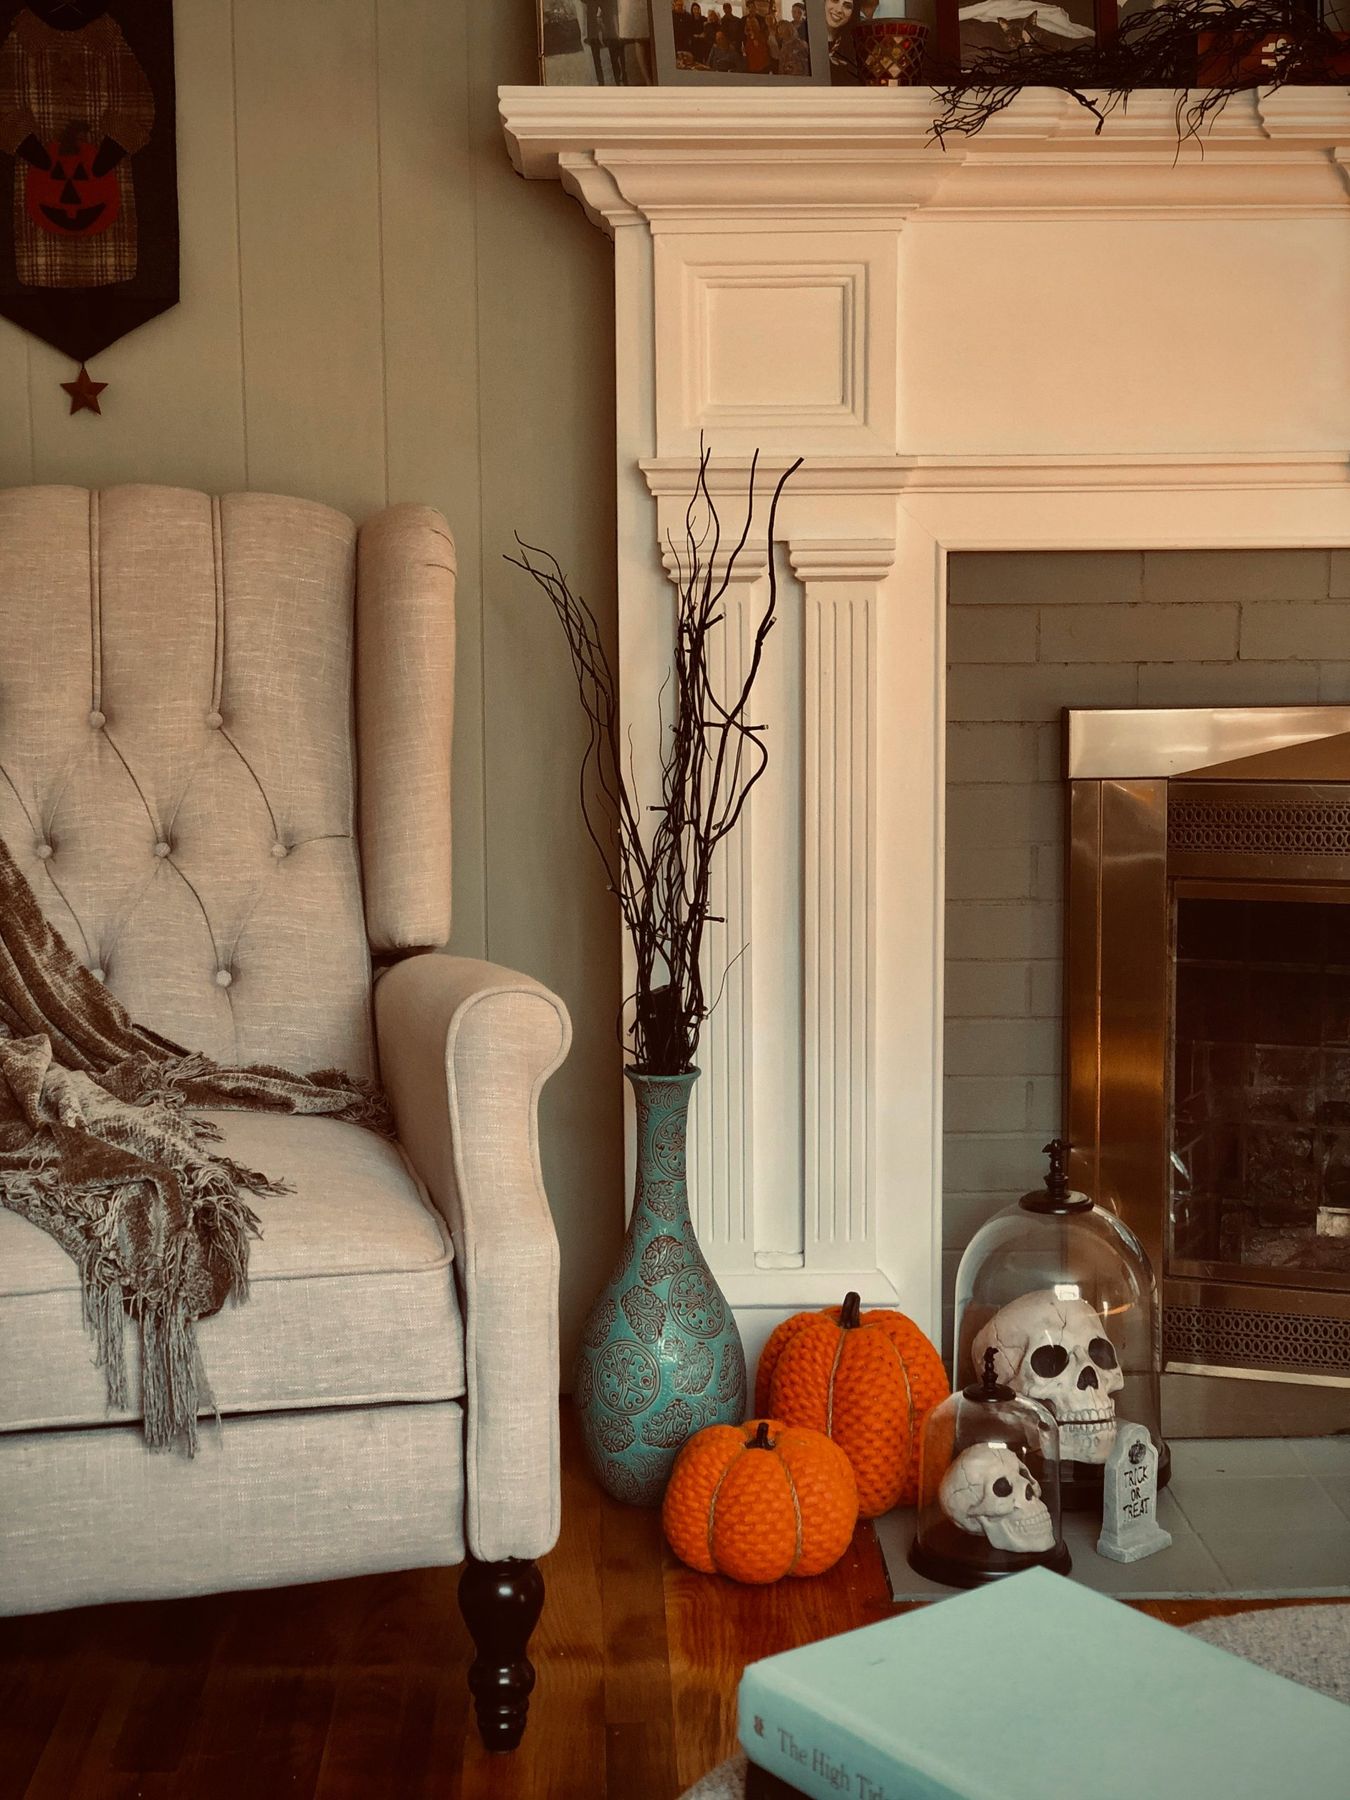
This comfortable corner perfectly demonstrates the ‘Spooky Season’ formula: 80% Cozy Year-Round Decor + 20% Seasonal Accents. The foundation of the look is the timeless tufted wingback chair, the classic white mantel, and the neutral gray brick. These are beautiful on their own, any day of the year. The Halloween magic comes from swapping in just a few key items: the cloche-covered skulls, the knitted pumpkins, and the bare branches. This approach makes decorating feel easy and integrated, rather than like you have to reinvent your whole house for one month.
🔥 Trending Context
That beautiful beige tufted wingback chair looks so inviting, doesn’t it? It’s also a magnet for dust, pet hair, and spills. If you have kids or a furry friend, a light-colored, high-texture piece of furniture like this requires regular maintenance. Weekly vacuuming with an upholstery attachment is a must. Keep a good upholstery cleaner on hand for spot treatments. If you love the look but not the upkeep, consider a similar chair in a performance velvet or a patterned fabric, which will be much more forgiving of daily life. Or, you know, just don’t let anyone actually sit in it.
28. A Charming Display of Rustic Scarecrow and Gnome Figurines
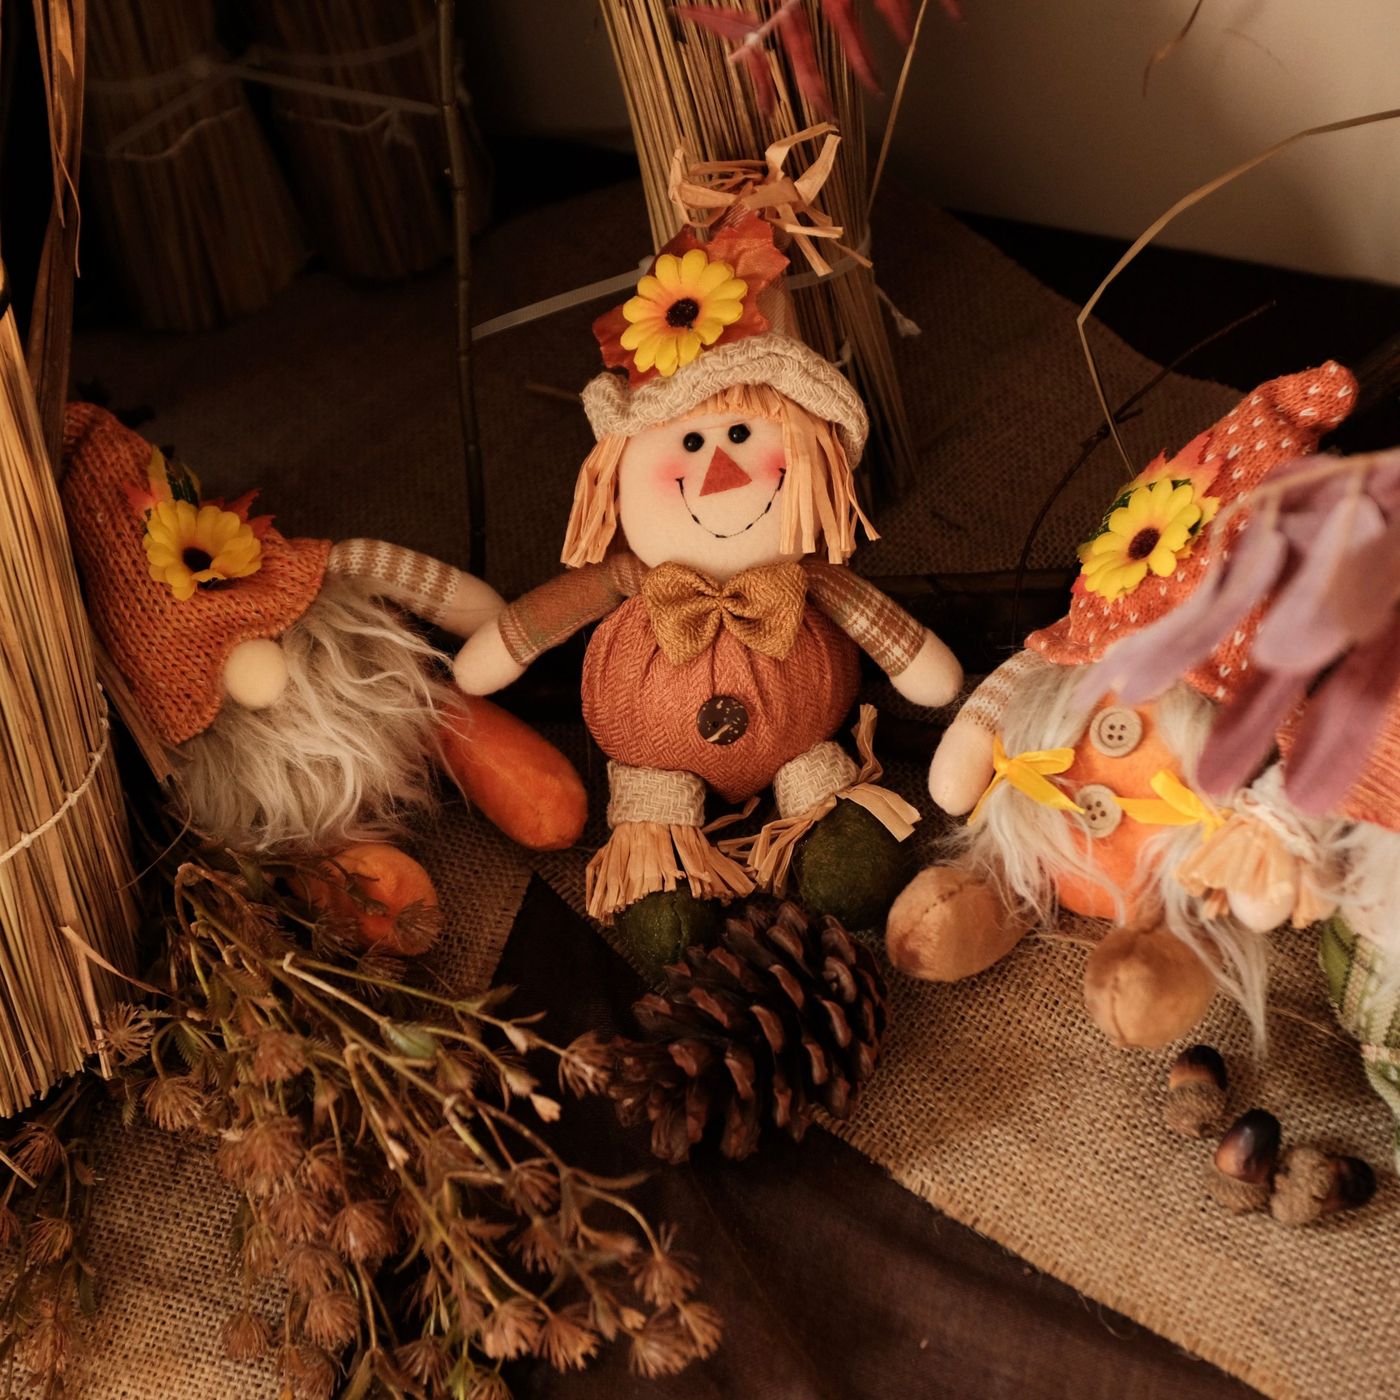
Putting together a tabletop display like this is a low-cost, high-impact project. It’s all about assembling affordable craft store finds.
- Main Figurines (2 gnomes, 1 scarecrow): $25 – $50
- Textiles (Burlap runner or placemat): $5 – $10
- Natural Elements (Dried wheat, pinecones, acorns): $10 – $20 (or free if you forage!)
- Accent Florals (Faux sunflowers): $5 – $15
- TOTAL: $45 – $95
Budget alternative: Make your own gnome figurines using socks, rice for filling, and faux fur for beards—you can find countless tutorials online. The total cost could easily be under $20.
📏 Scale Guide
This little grouping is so delightful because it’s a masterclass in texture. Every single item contributes a different tactile quality. You have the fuzzy beards of the gnomes, the stitched fabric of the scarecrow, the coarse weave of the burlap, the papery feel of the wheat sheaves, the hard, woody texture of the pinecones and acorns. This textural richness is what makes the simple arrangement feel so cozy, inviting, and interesting to look at. It engages the senses beyond just the visual.
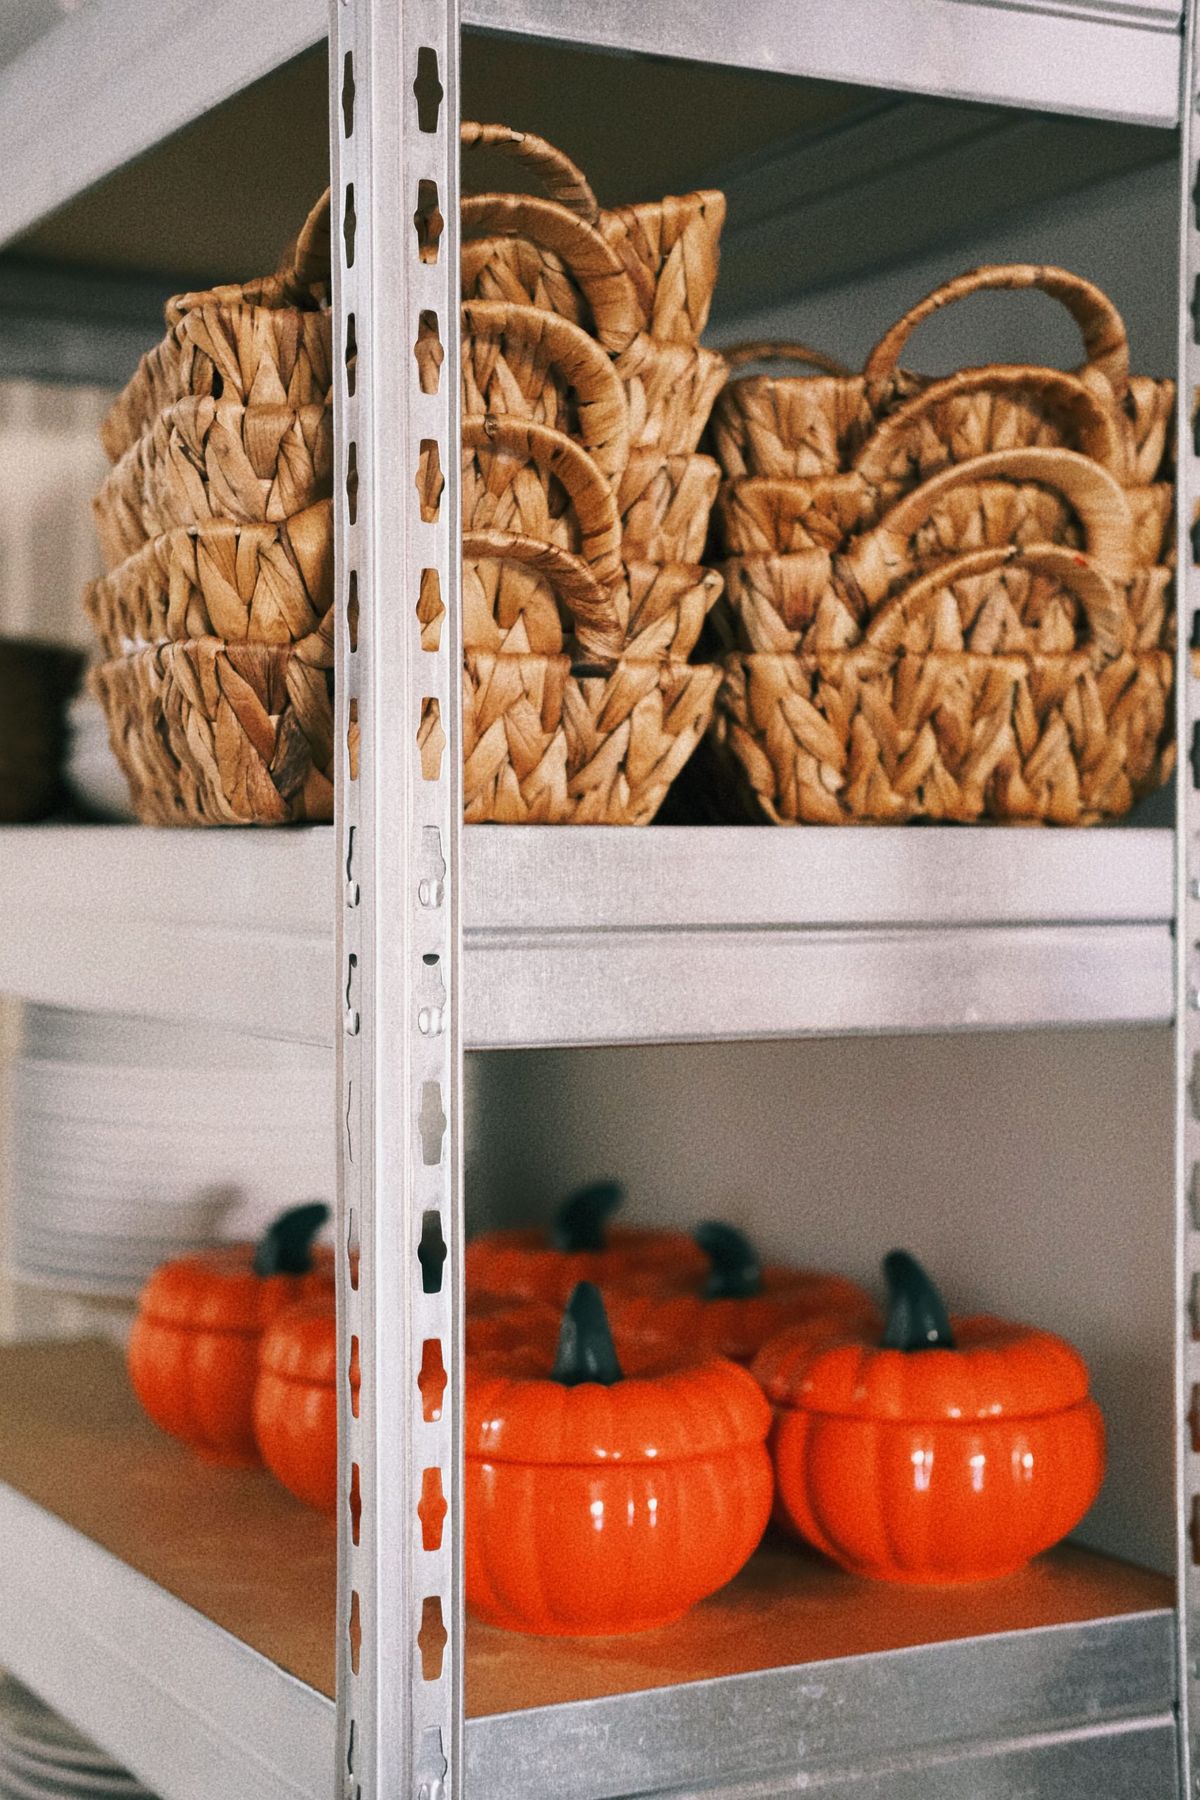
29. Organized Industrial Shelving with Baskets and Pumpkin Dishes
that makes this work so well is the discipline of repetition. The designer didn’t just put one wicker basket or one ceramic pumpkin dish on the shelf. They committed. The entire top shelf is filled with neatly stacked baskets, creating a block of texture and neutral color. The entire bottom shelf is a riot of glossy orange from the repeating pumpkin shapes. This massing of identical or similar items is what turns clutter into a collection and gives the industrial shelving a strong, graphic, and organized look.
🔧 How-To Brief
Let’s be real about open shelving, especially in or near a kitchen: it’s a magnet for dust and grease. Those beautiful woven wicker baskets will need to be taken down and vacuumed with a brush attachment at least once a season. The glossy orange pumpkin dishes will show every single fingerprint and speck of dust. To keep them looking shiny and new, they’ll need frequent wiping with a microfiber cloth. It’s a great look, but it’s not ‘set it and forget it.’ If you hate dusting, this might not be the storage solution for you.
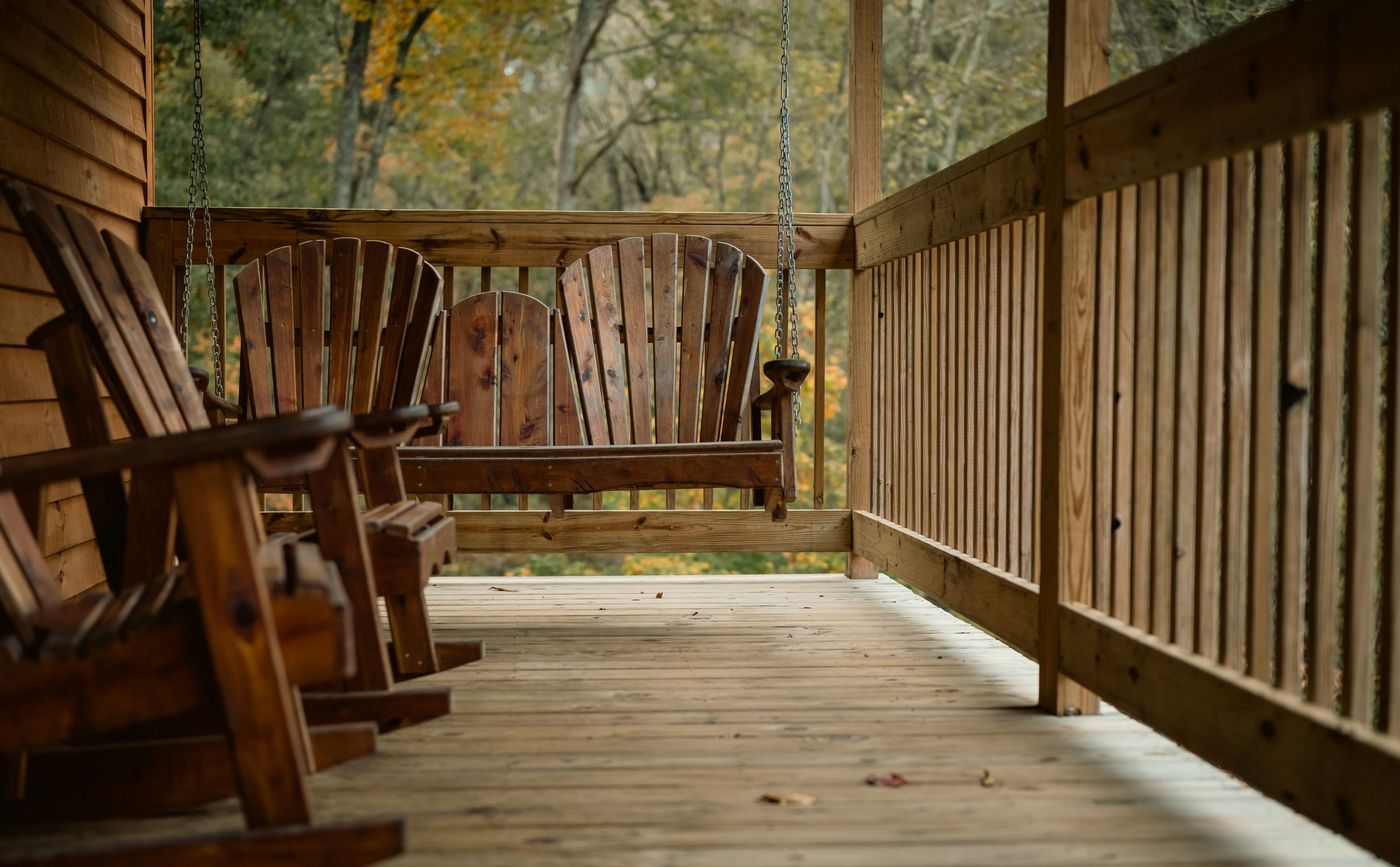
30. A Rustic Wood Porch with Adirondack Rockers and a Swing
This kind of expansive, multi-zone seating arrangement requires a generously sized porch. To comfortably fit two Adirondack rockers and a porch swing, you’ll need a porch that is at least 10 feet deep and 20 feet long. This allows for proper clearance for the swing (at least 3 feet in front and back) and ample walkway space so people aren’t tripping over the chairs. For a smaller porch, choose one or the other: a swing OR a pair of chairs, but not both. Don’t try to cram too much furniture into a space; it will feel cluttered, not cozy.
🧹 Maintenance Reality
In a world of fast furniture and disposable decor, there’s a growing movement towards ‘quiet luxury’ and enduring, natural materials. This porch is the antithesis of a quick Halloween theme. It’s about investing in quality, timeless pieces—the solid wood chairs, the well-built swing—that create a feeling of peace and permanence. The ‘seasonal’ aspect comes not from props, but from the experience of sitting on the porch and watching the autumn leaves fall. It’s a trend about embracing simplicity and the beauty of the natural world itself, which feels very right for 2026.
Now, Go Make Some Magic (and a Little Mayhem)
Remember, the best Halloween decor tells a little story about you. Whether you go for full-on gothic drama or just a few cozy pumpkins, the goal is to create a space that feels festive and fun. Don’t be afraid to mix and match these ideas to create your own unique look.
Find an idea you love? Pin it! Your future self will thank you when you’re ready to start decorating.