Outdoor holiday lighting is having a real moment on Pinterest right now — and 2026’s version is less about wattage and more about composition. We spent serious time browsing Home Depot, Target, Amazon, and Lowe’s to bring you only what’s worth your attention, narrowing hundreds of displays down to 29 that actually deliver, from an $18 starter spool to a $1,200 full-frontage install. Inside you’ll find warm-white classic estates, multicolor maximalist yards, wrapped-tree elegance, and modern rooflines that stay minimal on purpose — with budget and luxury versions compared side by side. It matters more than usual this year: searches for layered and full-coverage lighting are climbing, because LED prices dropped and people figured out that a designed display photographs far better than a bright one. And stay until the end — we break down the most common mistakes that can ruin these looks. 📌 Save this to Pinterest for later — you’ll want to revisit these ideas.
1. A Snowy Lawn of Glowing Figures and One Green Tree
Picture the scene: a snow-covered lawn holding a snowman family, a pair of candy canes, and a tall nutcracker standing at attention. What keeps it from reading like a yard sale of props is the bare tree on the left, wrapped trunk to twig in green lights and throwing a green glow onto the snow beneath it. That tree is the spine of the whole display — one vertical, high-density element that makes every figure around it look placed on purpose. Remove it and you have a collection of objects. Keep it and you have a scene.
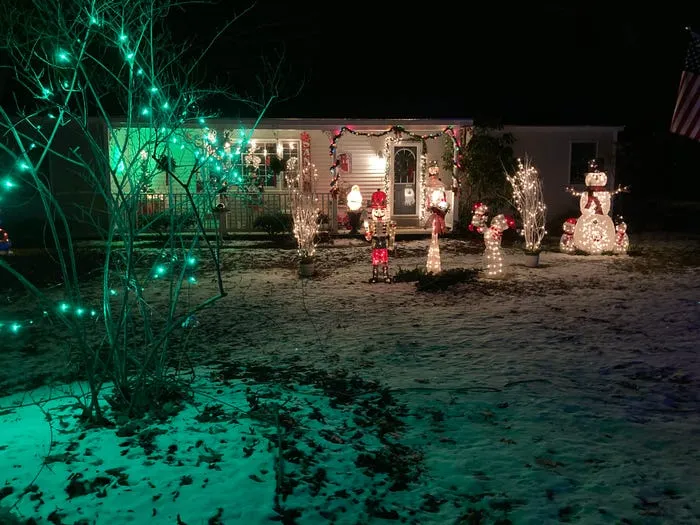
Hard figures like a nutcracker and candy canes are heavier than they look, and they will tip in wet snow or a gust off the corner of the house. Drive stakes through the base into the lawn, then weight the feet with sandbags you can hide under the snow. Run every cord so it exits the figure above the snow line, and channel the rest of the run to the outlet instead of letting it sit in meltwater. Everything on the yard circuit belongs on a GFCI outlet or a smart plug with built-in ground-fault protection.
2. Warm White Everywhere, Even Outlining the Driveway
Roughly 70 percent of this display is one color temperature — warm white — laid down as continuous line along the roofline, the wrapped evergreens, and the curving cobblestone driveway. About 20 percent goes to the evergreens themselves, which repeat that same warm white in a denser, softer texture. The last 10 percent is the illuminated gift boxes on the lawn, the only place the eye finds a shape instead of a line. Trade warm white for soft gold and the formula holds. Trade the evergreens for bare, densely wrapped trees and you land on Idea #15.
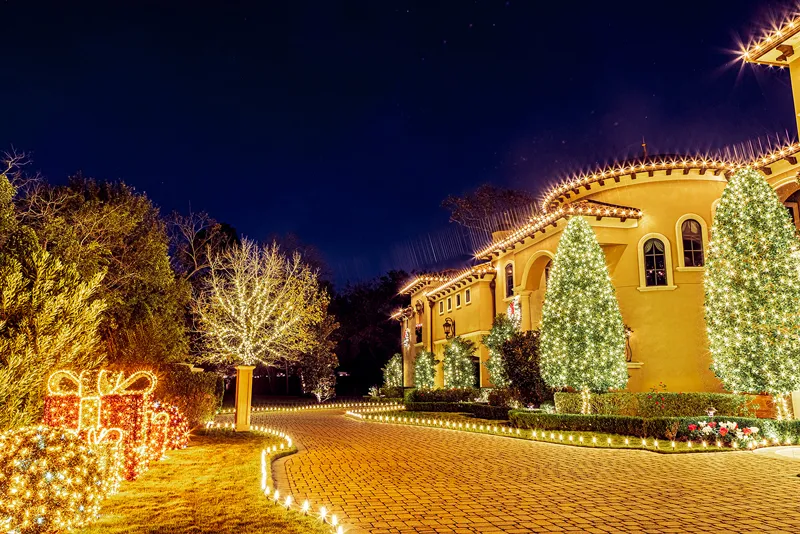
Single-color-temperature displays have quietly taken over holiday boards, and there’s a practical reason beyond looks: a monochrome warm-white scheme photographs beautifully on a phone at night, where mixed color temperatures turn muddy and blown out. Warm white LEDs rated around 2700K also read expensive in a way multicolor simply doesn’t. It’s the rare trend with staying power, because it isn’t really a trend — it’s the same idea luxury hotels have used for decades.
3. Santa, a Reindeer, and Garland Tied With Red Bows
Space your figures at least six feet apart and stagger their depth — one at four feet from the walk, the next at nine, the next at fourteen. A single row of props sitting on the same line flattens into one bright blur from the street, no matter how nice each piece is. Depth is what turns a lit yard into a lit scene, and it costs nothing but a walk out to the curb to check.
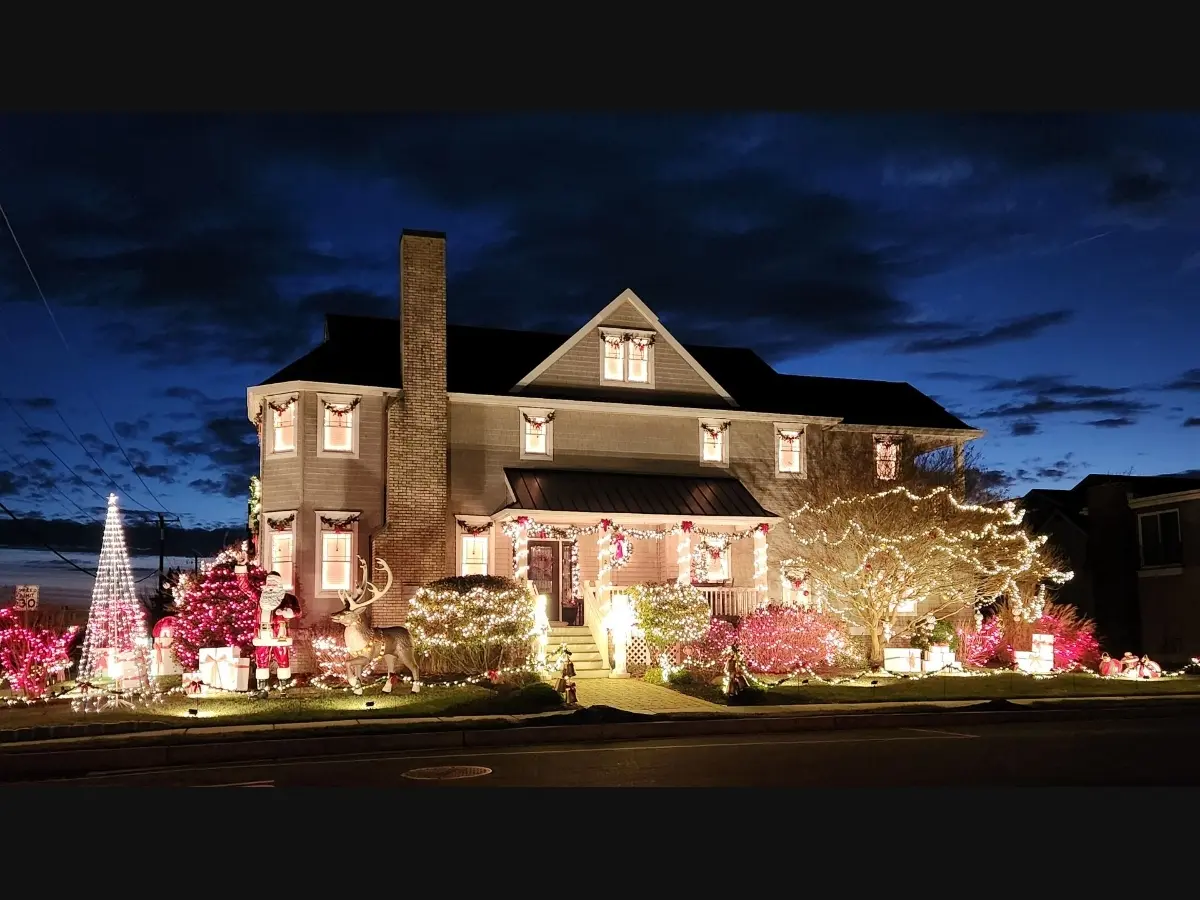
- Illuminated Santa and reindeer figures: $90–$350
- Warm white string lights for roofline and porch (about 300 ft): $60–$180
- Garland, red bows, and wreaths: $70–$260
- Gift box props and red accent spotlights: $50–$160
- Stakes, clips, timers, and 12-gauge extension cords: $45–$120
- Total: roughly $315–$1,070
Budget alternative: skip the pre-lit Santa and put a wireframe reindeer plus two red spotlights aimed at the porch columns instead — about $140 all in. From the street, the difference is smaller than you’d expect.
4. Multicolor Maximalism Finished With an Inflatable Archway
The density is the whole trick. Multicolored bulbs blanket the facade — roofline, windows, porch — while the lawn gets a completely different treatment: white lights raked into wavy patterns across the grass. That contrast between chaotic color and calm white line keeps the display from turning into visual noise. Repeating the waves at a consistent interval is what makes them read as intentional rather than leftover.
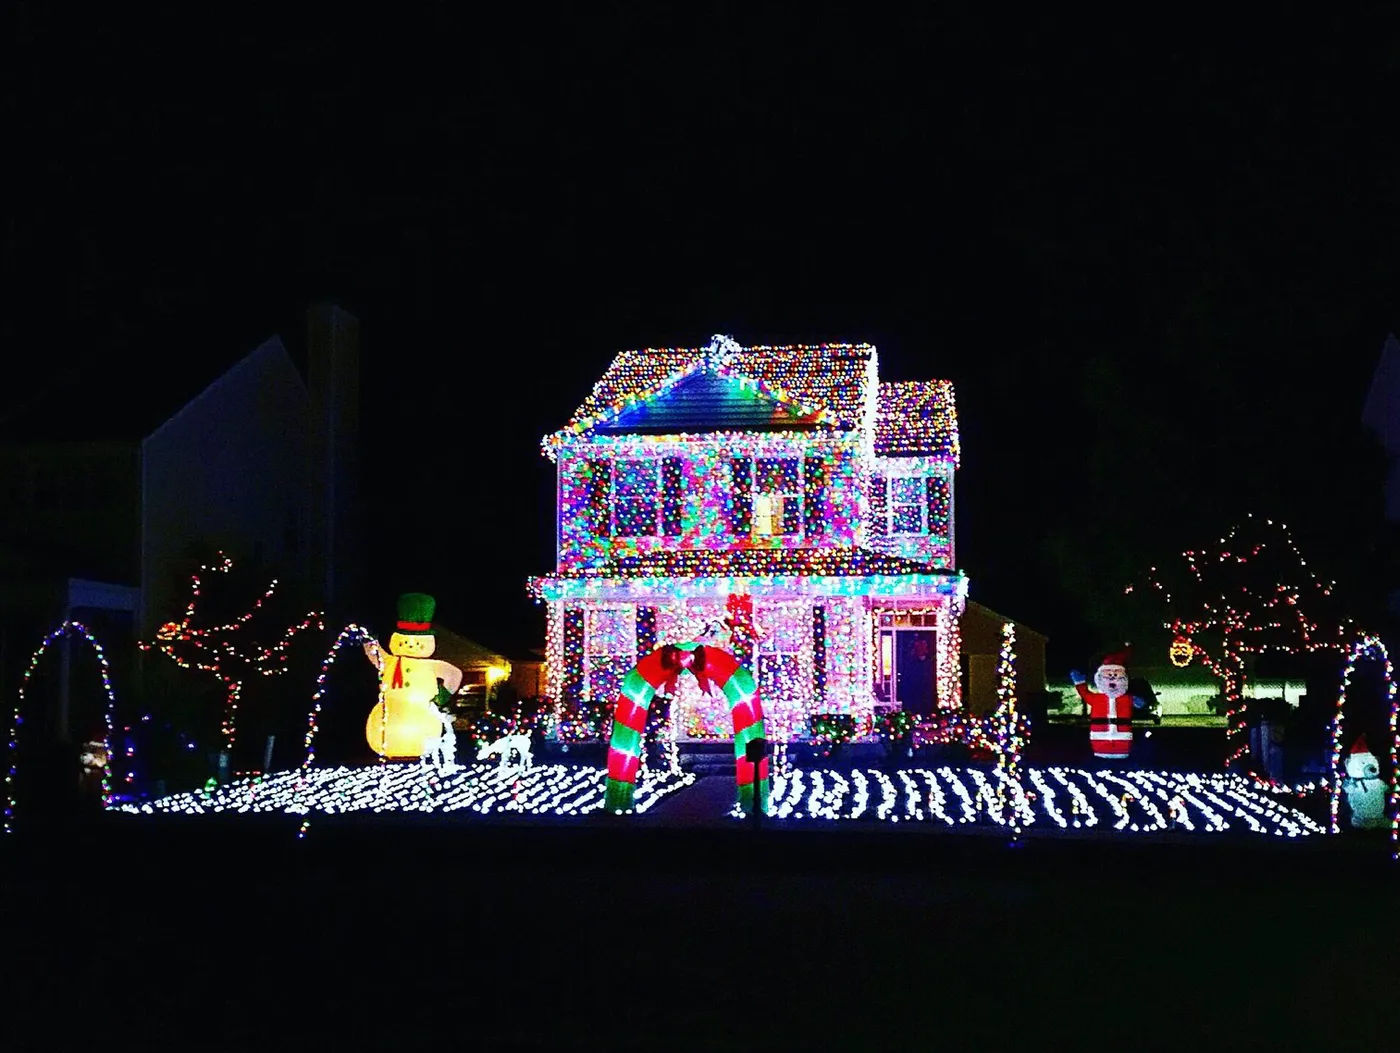
Inflatables are the highest-maintenance thing in any holiday yard. The blower motors wear out in two or three seasons, wet vinyl mildews if it’s stored damp, and the nylon fades from UV after a couple of Decembers. Budget for replacing one or two figures a year, dry everything fully before storage, and store flat in a bin rather than folded tight against itself. If you want the same silhouette with less upkeep, a wireframe figure strung with LEDs lasts about a decade.
5. Icicle Lights, Lit Snowflakes, and a Santa on the Chimney
Hanging icicle lights evenly is more math than muscle.
- Measure the eave run and buy lights in two-foot increments of drop length so the tips align.
- Install plastic eave clips every 12 to 16 inches — nails split fascia, clips don’t.
- Start at one end and unspool as you go instead of dragging the whole strand behind you.
- Loop the last foot back onto itself rather than cutting, so you can reuse them next year.
- Plug into a timer set for 5 p.m. to 11 p.m. and leave it alone.
Plan about 90 minutes per 40 feet, and around $40–$70 in clips and cords.
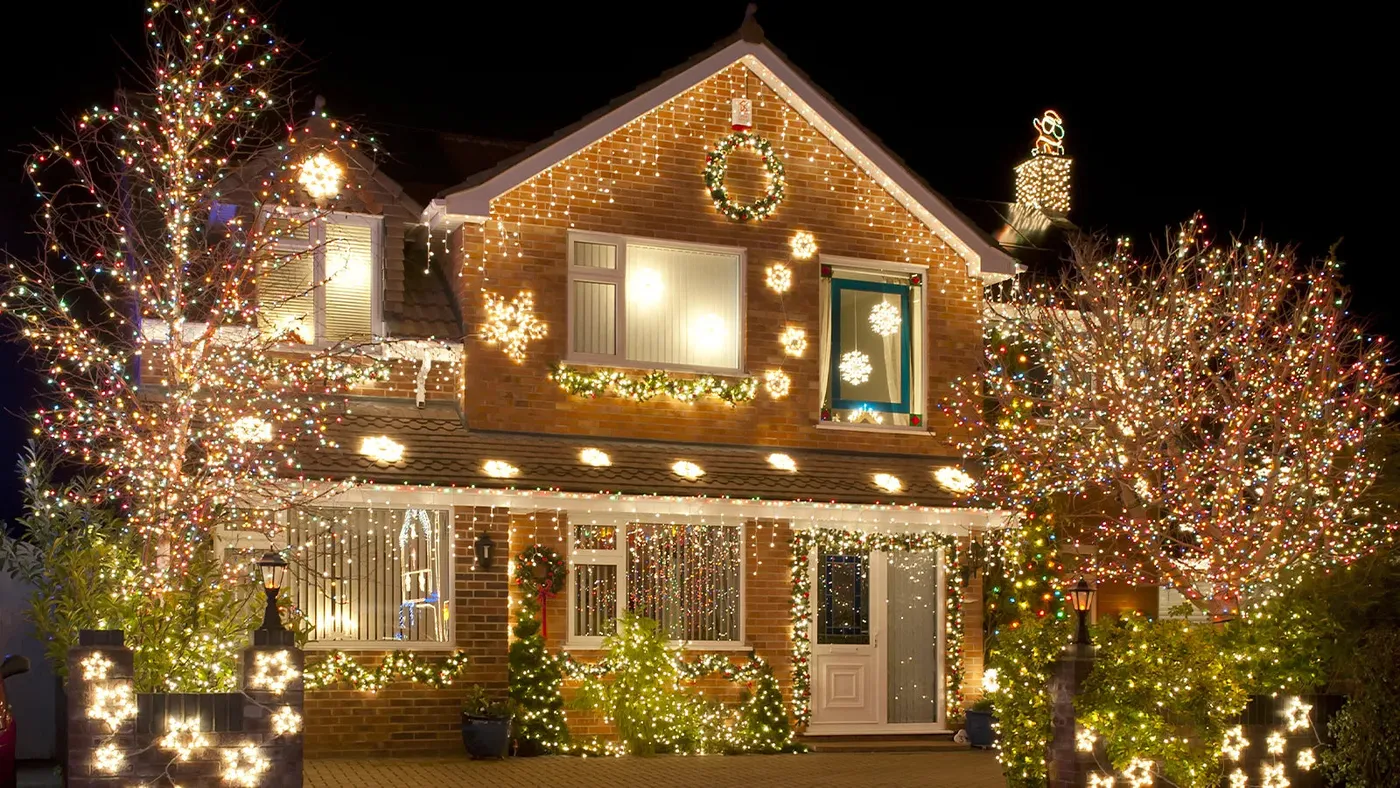
A lit Santa on the chimney looks charming from the sidewalk and is genuinely the most dangerous install in this whole article. Never lean a ladder against a chimney — you need roof access or a chimney mount kit, and honestly, you need a pro. If you’re not comfortable walking the roof, put the Santa on the porch instead. Nobody has ever once noticed.
6. Purple Ground Lights and a Light-Up Train in the Yard
This yard is doing a lot, and it only works because there’s room for it — think 90 feet of frontage or more, plus a setback deep enough to keep figures out of the driveway. On a 40-to-50-foot lot, cut the figure count in half and let the house carry the display. If your frontage is closer to 30 feet, the tighter approach in Idea #16 will look far better than a compressed version of this one.
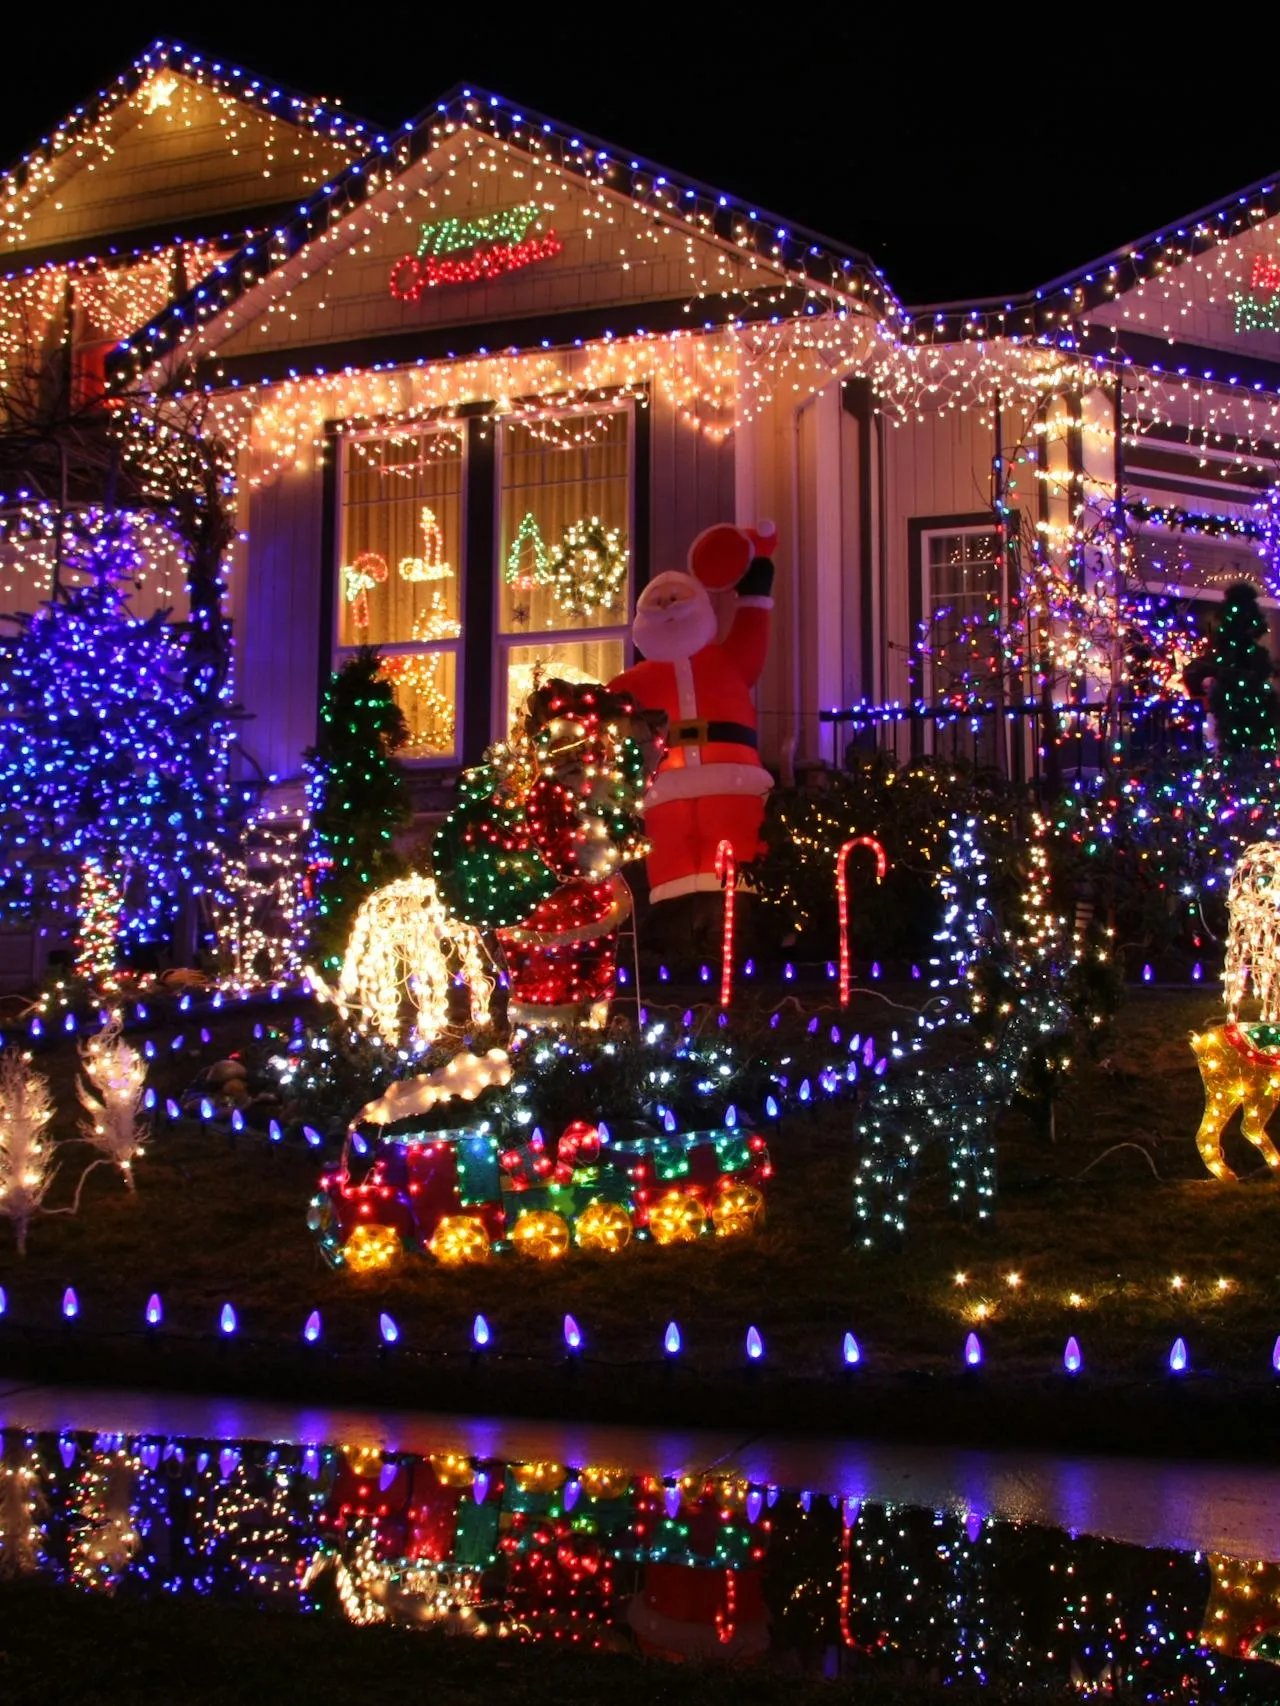
The purple ground lights outlining the property are what hold this together. Everything above them is chaotic — inflatables, trains, reindeer — but that single continuous purple line around the perimeter frames it all like a mat around a photo. It’s also the cheapest part of the whole install, and the part people forget to buy.
7. A Grand Estate Held Together by Outlined Rooflines
About 80 percent of this estate is warm white outline — roofline, gables, window frames, all one continuous 2700K line. Fifteen percent is the large lit wreaths, hung on upper-story windows where the outline alone would go slack. The final 5 percent is the wrapped evergreens in the foreground. Swap the wreaths for lit window candles and the proportions still work; drop the outline to anything but one continuous run and the house starts looking pieced together.
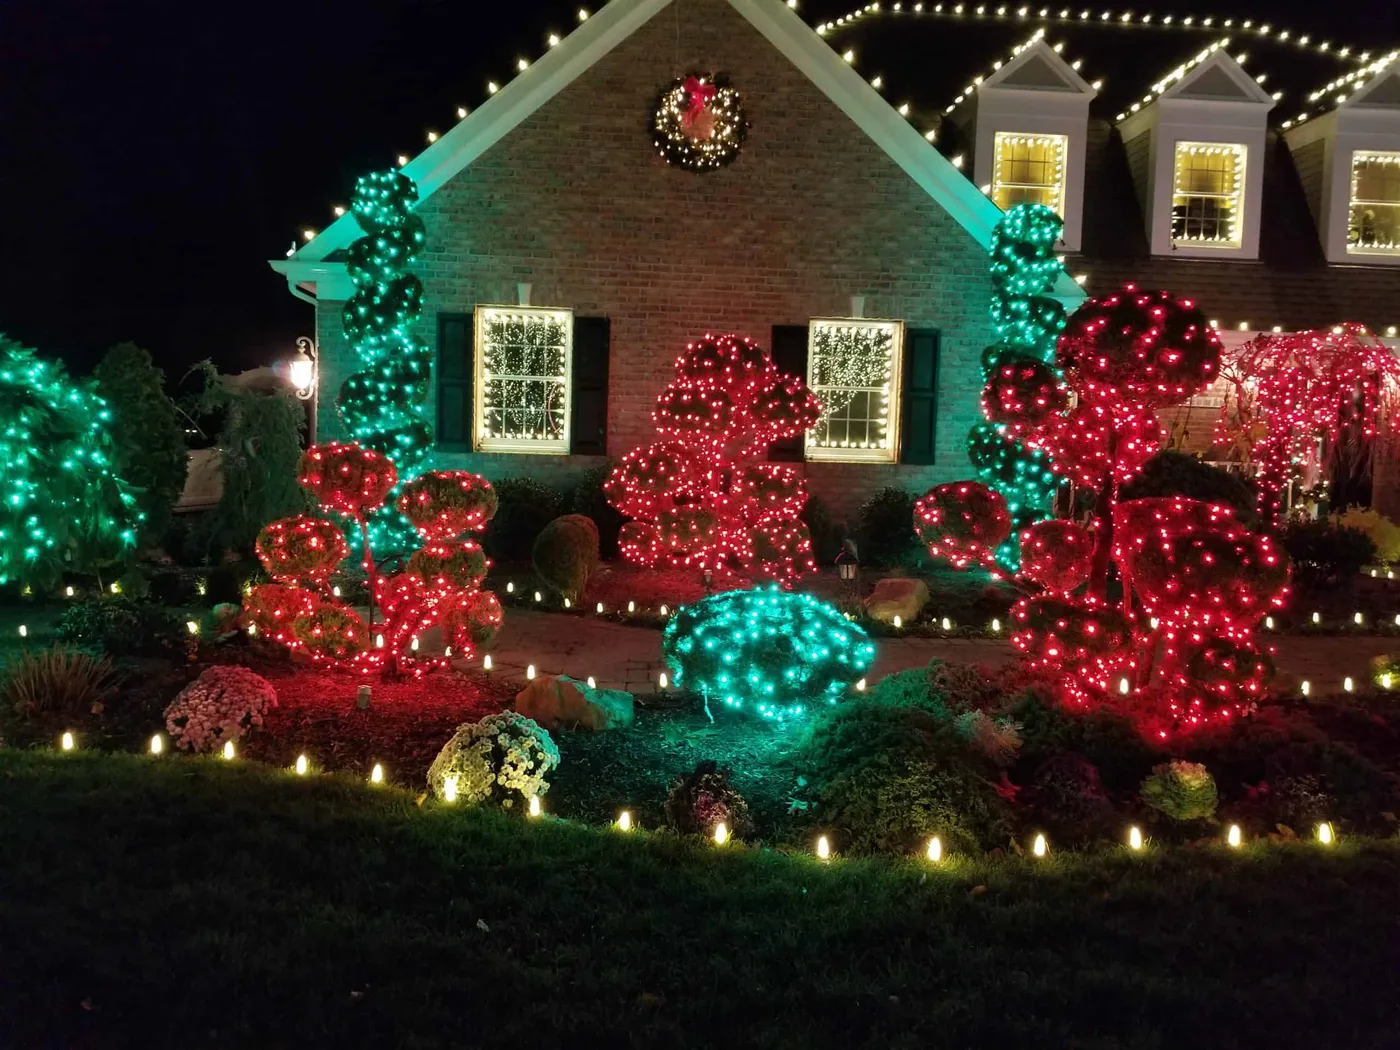
Clip spacing is the difference between professional and someone did this on a Saturday. Go every 12 to 16 inches, no exceptions, and measure the run with a piece of string first so you buy the right length. A three-inch gap at the corner of a gable is the first thing guests spot from the street.
Renting a ladder and giving up one Saturday gets you the first story for the price of lights alone. Warm white LED spools run $12–$20 per 100 feet at Walmart and Home Depot, and that’s honestly the same product a $4,000 installer puts up. What you’re buying from a pro is the second story and the insurance. Do the ground floor yourself, hire out the gables — that’s a real $600–$900 middle path.
8. Festive Roofline Glow That Reads From Half a Block Away
Exterior lighting has moved from does the house have lights to does the house have a scheme, and 2026 shopping reflects it — people are buying lengths, color temperatures, and clip counts instead of grab bags. Dimmable warm white LEDs and $25 smart plugs made it possible to run a big display without a scary electric bill. The next shift is already visible: displays that turn on in phases, so the outline comes up at dusk and the figures join an hour later.
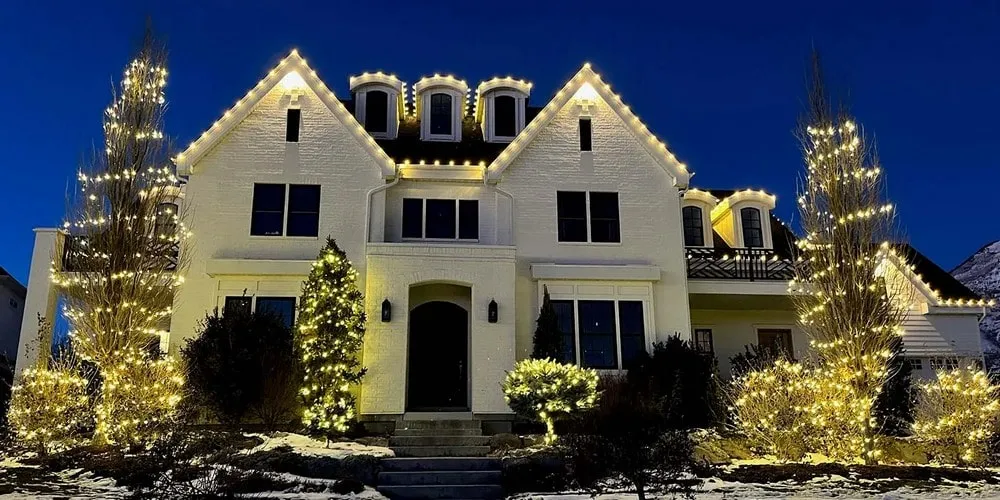
Brightness in layers reads as depth. A dim glow on the far side of the house, a mid-level wash across the porch, and a crisp bright line at the roofline give the eye three distances to travel. Flat, all-at-one-brightness lighting from a single string is what makes amateur displays look amateur — not the color, not the count.
9. A Light Yellow Facade Outlined in Warm White
Size your wreaths to the window, not the wall. The rule that works: a wreath should be about one-third to one-half the width of the window it hangs on, mounted in the top third of the glass. Anything smaller disappears at night; anything larger blocks the light coming from inside — and that interior glow is half the effect. Match the bow color to something already on the facade, not to the season.
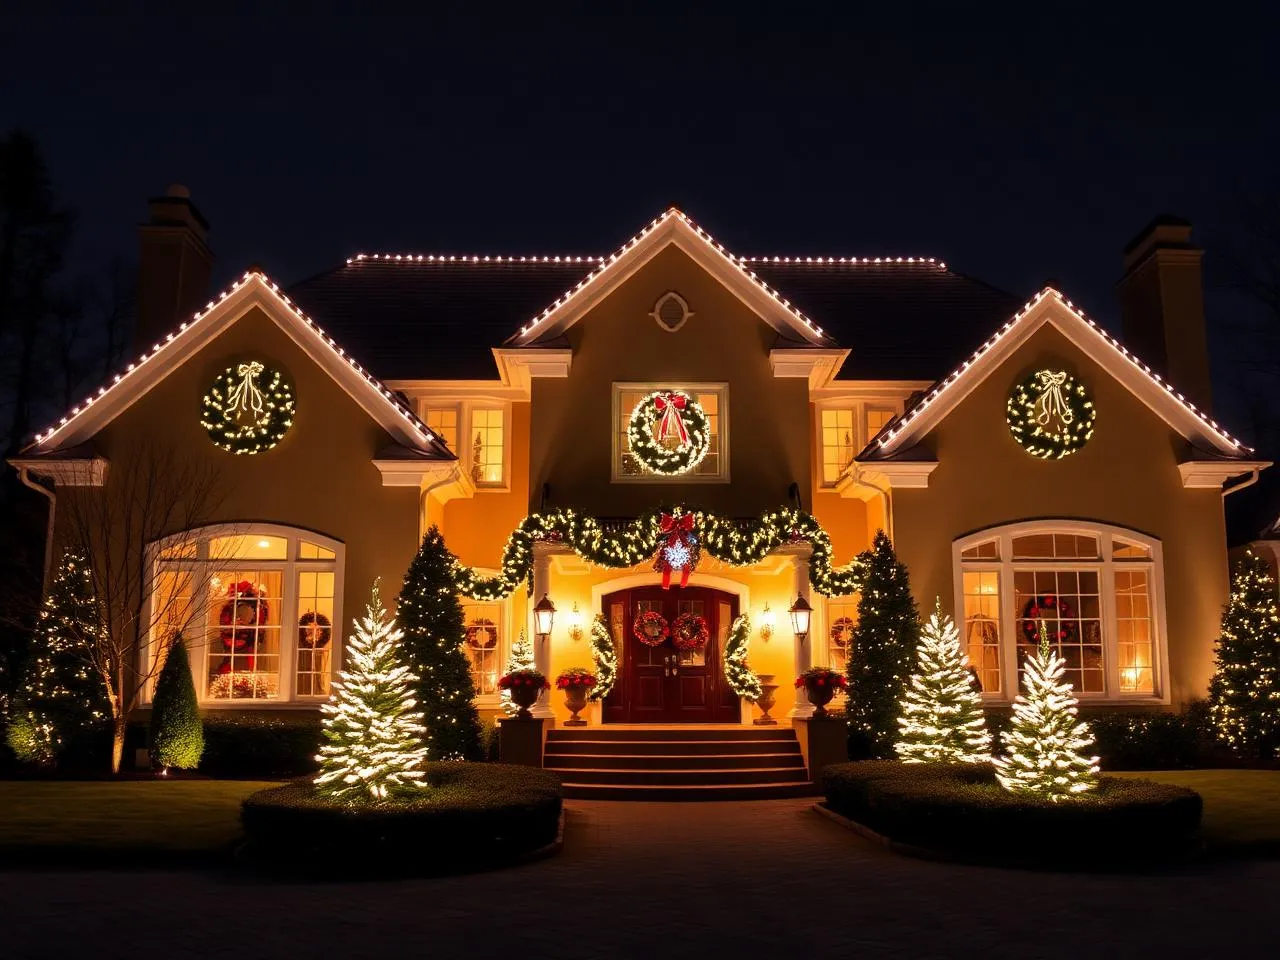
Dressing an entry in garland with red bows:
- Measure the door surround and add 20 percent for the swags.
- Anchor the first end with a clear cup hook or a zip tie on the trim, never a nail into the door frame.
- Swag in even arcs — three across a double door, two on a single.
- Wire the bows on after hanging so they sit level instead of wherever the garland sagged.
- Weave a warm white strand through the underside, not across the front.
Budget two hours and $70–$180.
10. The Classic Display, Edited Down to What Matters
A classic outdoor display lives or dies on one repeated motif. Pick a single shape — a snowflake, a star, a candy cane — and use it at three different scales: a big one on the gable, medium ones on the porch, small ones in the beds. That repetition is what makes a display look composed instead of assembled. Variety in motif is what makes a yard look like a storage unit exploded.
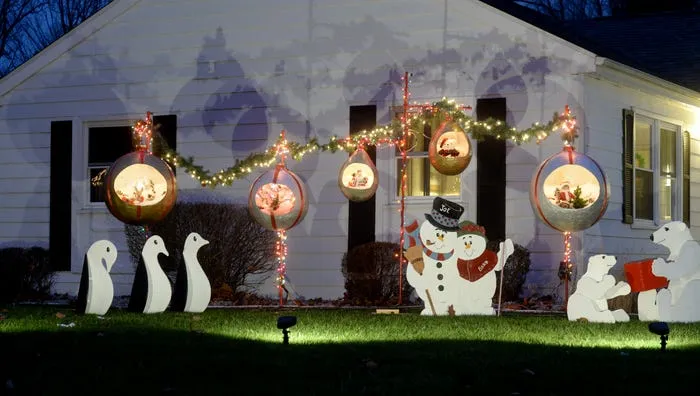
A display like this wants 50 feet of frontage minimum so the motif can appear three times without crowding. Eave height matters more than square footage here — single-story homes under 10 feet are the easiest and safest to light, which is why so many great displays are ranch houses. Two-story homes need an extension ladder or a pole kit; see Idea #20 for the cleanest way to handle tall, flat walls.
11. Icicle Lights, Porch Garland, and a Lit Path to the Door
Pathway stakes are the cheapest upgrade in outdoor lighting and the one most people skip. Basic plastic stakes with a warm white bulb run $3–$6 each at Walmart; solar versions are $8–$12 and skip the cord entirely. Line both sides of the walk at four-foot intervals and the whole entrance reads intentional. Six stakes, roughly $40, and it changes how the house looks from the street more than another $200 of roofline lights would.
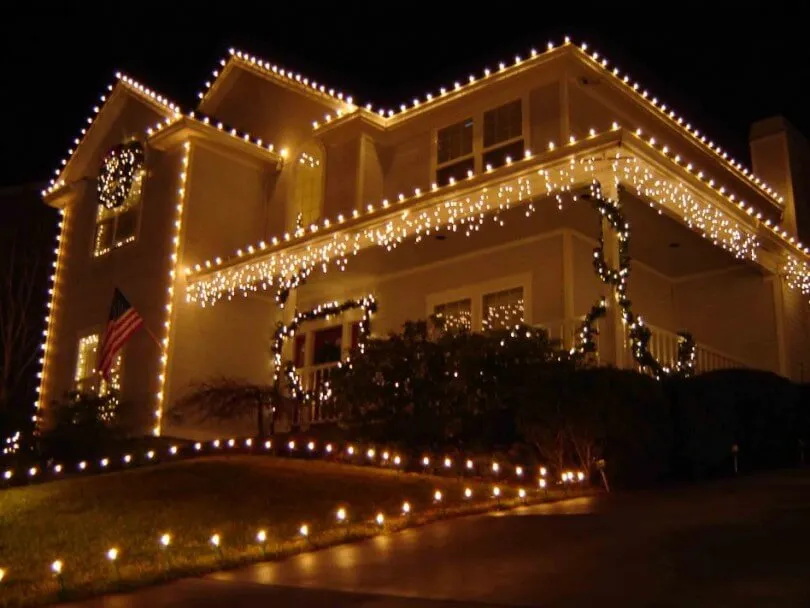
Porch clutter is the real risk here. Icicle lights on the eaves, garland on the columns, a lit wreath on the door, pathway stakes on both sides, and a flag — that’s a lot of small elements competing in a small space. Give the path lights their own timer that comes on an hour later than everything else. Staggered, it looks designed. All at once, it looks like a switch got flipped.
12. An Urban Facade of Floral Motifs and Draped Trees
Half of this urban facade is draped fairy lights on street trees, delivering a soft, continuous wash of warm white. About 30 percent is the oversized white floral outline motifs on the building itself — a completely different texture, hard-edged and graphic. The remaining 20 percent is accent color: green on the upper levels, blue on the dome. Change the accent hue and the whole thing shifts mood; keep the 50/30/20 split and it always resolves.
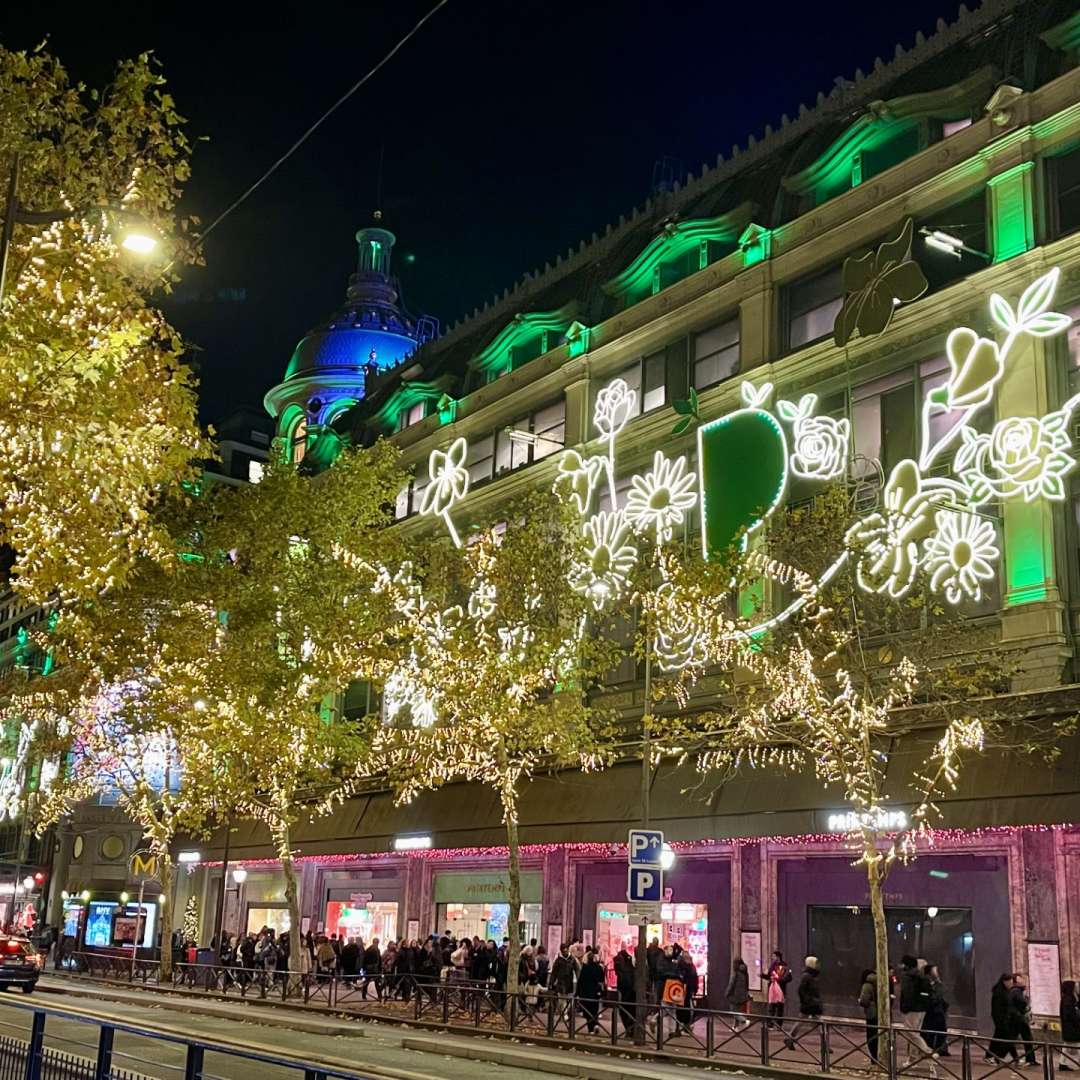
Repetition at architectural scale creates a rhythm you feel rather than notice. The floral motifs repeat at even intervals across the facade, and the street trees repeat again below them. Vertical light above, organic light below, one accent color carrying across both — that’s a composition, not just decoration.
Wrapping a living tree is fine if you do it loosely. Tight spirals that press into the bark can girdle a young trunk and trap moisture under the wire. Wrap in open, angled loops and take everything down by mid-January — most municipalities leave tree lights up through the first week of the month and then start reminding property owners. Removal on a mature tree takes about two hours.
13. The Kind of Display Neighbors Drive Over to See
You don’t need a five-figure budget to become the house people slow down for. Two hundred warm white LED bulbs from Walmart, one decent timer, and four clip-on floodlights aimed at the facade will do it for under $250. Neighborhood displays get compared at 20 mph, and detail you’d fuss over up close vanishes at that speed — what registers is coverage and consistency, not bulb count.
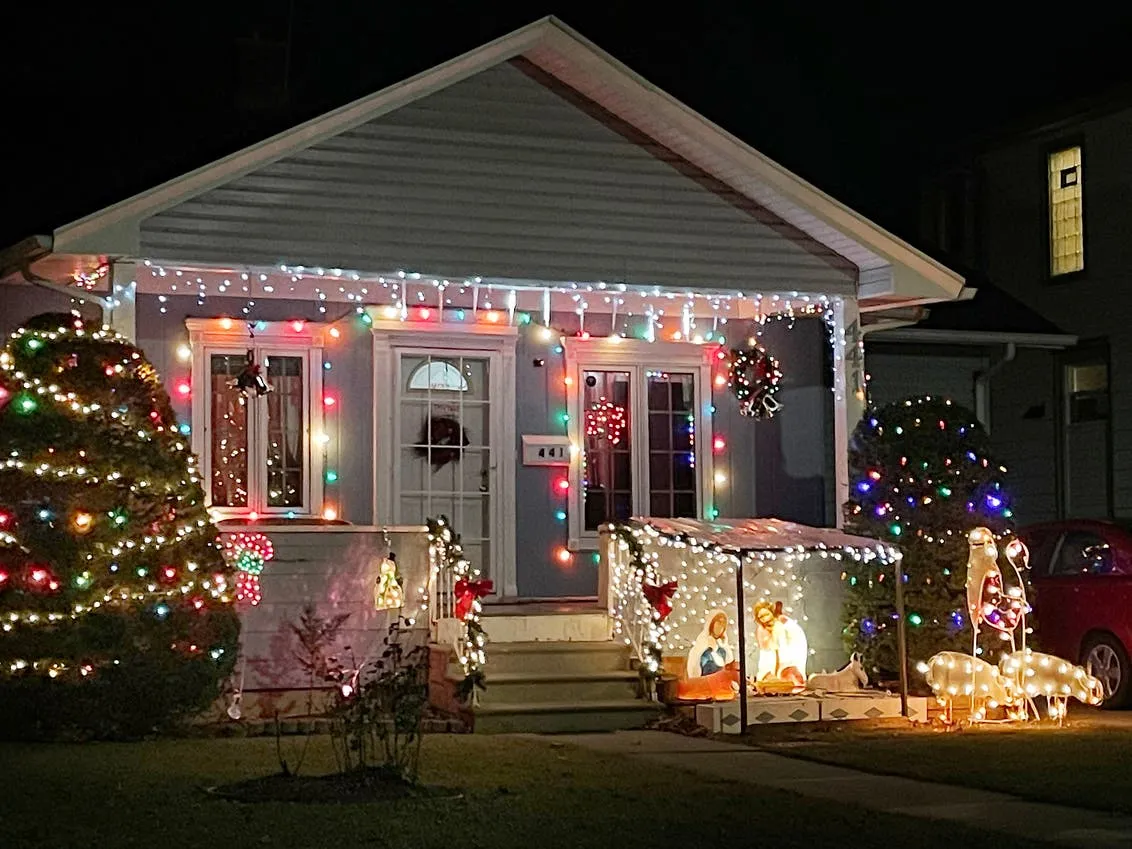
Neighborhood light maps, drive-by routes, and best-streets roundups have turned holiday lighting into a local spectator sport, and that’s changed what people build. Displays are increasingly designed to be seen from a car: bigger shapes, fewer fine details, colors that hold up from 40 feet away. The upside is generosity. The downside is a whole lot of extension cords.
14. Drive-By Lighting, Built for the View From the Curb
- Measure your frontage and eave height, then add 20 percent to every light length you calculate.
- Add up the amps — 100 warm white LED bulbs draw roughly 0.5 amps, and a 15-amp circuit maxes out near 1,800 watts.
- Decide on one color temperature before you buy anything. Half warm white and half cool white is the most common regret in this whole hobby.
- Check HOA rules and local ordinances on display dates and hours.
- Buy one plastic storage bin now and label it. Next November you’ll thank yourself.
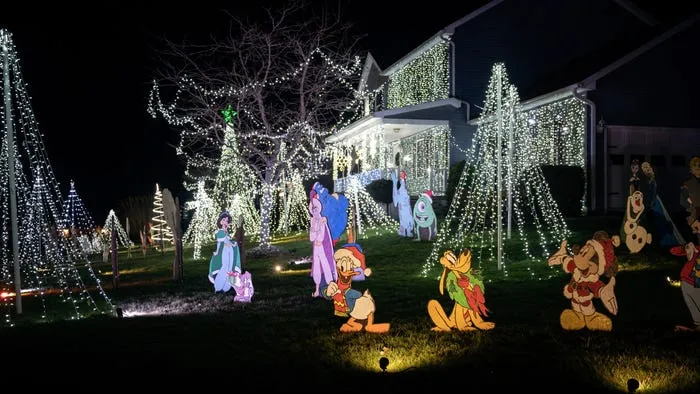
The thing that makes a drive-by display work is a single bright focal point you can clock from 100 yards — one big wreath, one lit tree, one star. Everything else in the yard is supporting cast. Build that one element first, then decide how much gets added around it.
15. Trunks and Branches Wearing Nothing But White Lights
Wrapping a bare deciduous tree takes patience more than skill.
- Start at the trunk about 18 inches off the ground and anchor the first wrap with a zip tie.
- Work upward in six-inch spirals, keeping tension even so nothing sags after the first rain.
- Where the trunk splits, follow one branch at a time to its outer third — never past the thinnest twigs.
- Run an extension cord up the back of the trunk and secure it every three feet.
- Test the whole tree once before you climb down.
Expect three to four hours per large tree and $60–$150 in lights.
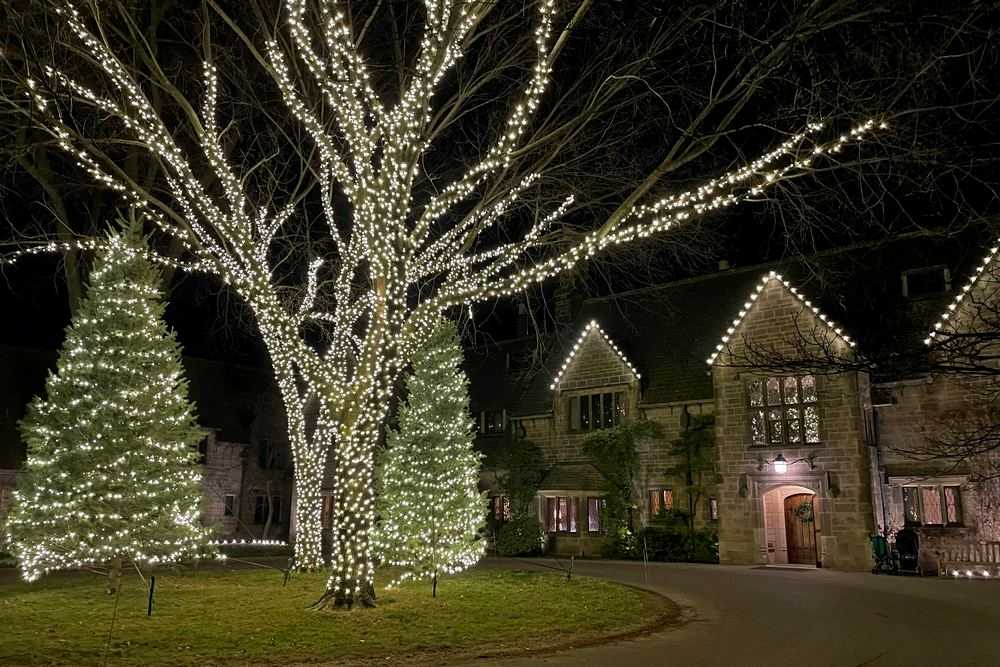
Lights left on a living tree past February can damage bark and interfere with spring budding; leaving them up year-round is how you get a tree that dies on one side. Remove them by March. And if a branch is thinner than your pinky, stop — the wire alone is heavy enough to snap it in ice.
This approach suits large lots with mature trees — think 15,000 square feet and up, with trees 25 feet or taller. It also suits a compact lot with exactly one beautiful tree, which is the budget version of the same idea. If your frontage is under 40 feet, wrap one tree and outline the gable only. That’s a complete composition.
16. One Glowing Star Against a Completely Dark Yard
The single star is the bargain hero of outdoor lighting. Retail versions run $25–$60, and you can hang one with two hooks and a zip tie in fifteen minutes. The dark yard is free — and it’s the part people get wrong by adding more. If your yard is already crowded, take something down before you hang the star. Subtraction costs $0 and looks like a designer was involved.
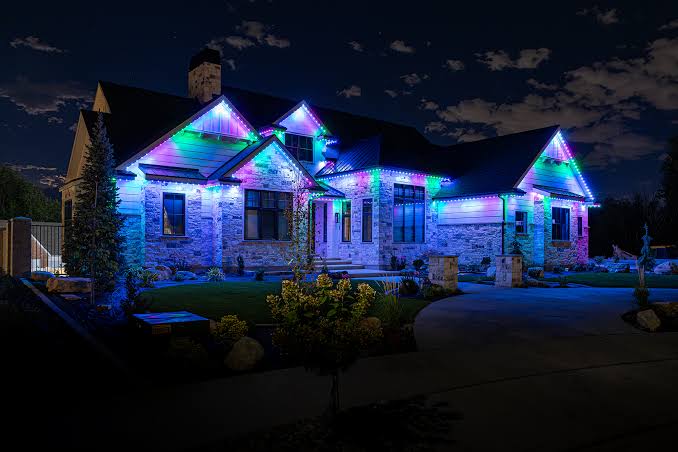
This is a 90/10 formula: nine parts darkness to one part light. The roofline and windows get a single continuous warm white outline, and the star carries the upper wall alone. That’s it. If you want to add a second element, remove something else first — the scheme falls apart the moment a third competing focal point shows up.
17. Hanging Light Orbs and a Red-and-White Walkway
Hanging light orbs look best at head height and above — about eight to nine feet to the bottom of the sphere. Space them 30 to 36 inches apart, use monofilament rather than wire so they appear to float, and screw a one-inch cup hook into a branch or beam rather than tying around anything living. Uneven spacing is instantly visible; nobody notices a slightly dull bulb.
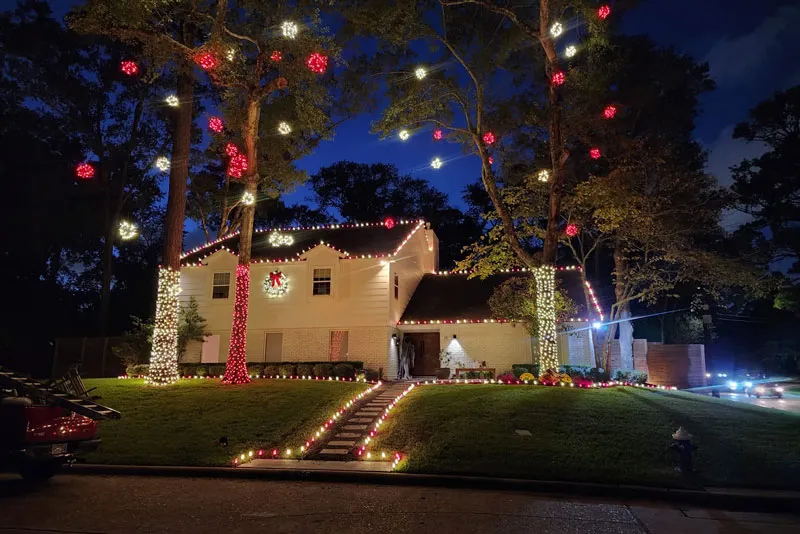
Hanging light spheres and oversized ornaments suspended from trees have moved from wedding venues into front yards, and it’s the fastest-growing exterior detail in holiday decorating. They photograph better than anything flat because the light wraps in every direction, which is exactly what social feeds reward. Expect to see them sold pre-lit in more colors every year.
18. Three Trees, One Roofline, and a Rainbow of Bulbs
The three front-yard trees are the anchor here, not the house. They repeat the same treatment at the same interval across the lawn, so your eye moves left to right in a steady rhythm — and the roofline above echoes that rhythm with a straight multicolor line. Take the trees away and you have a decorated house. With them, you have a composition that fills the whole lot.
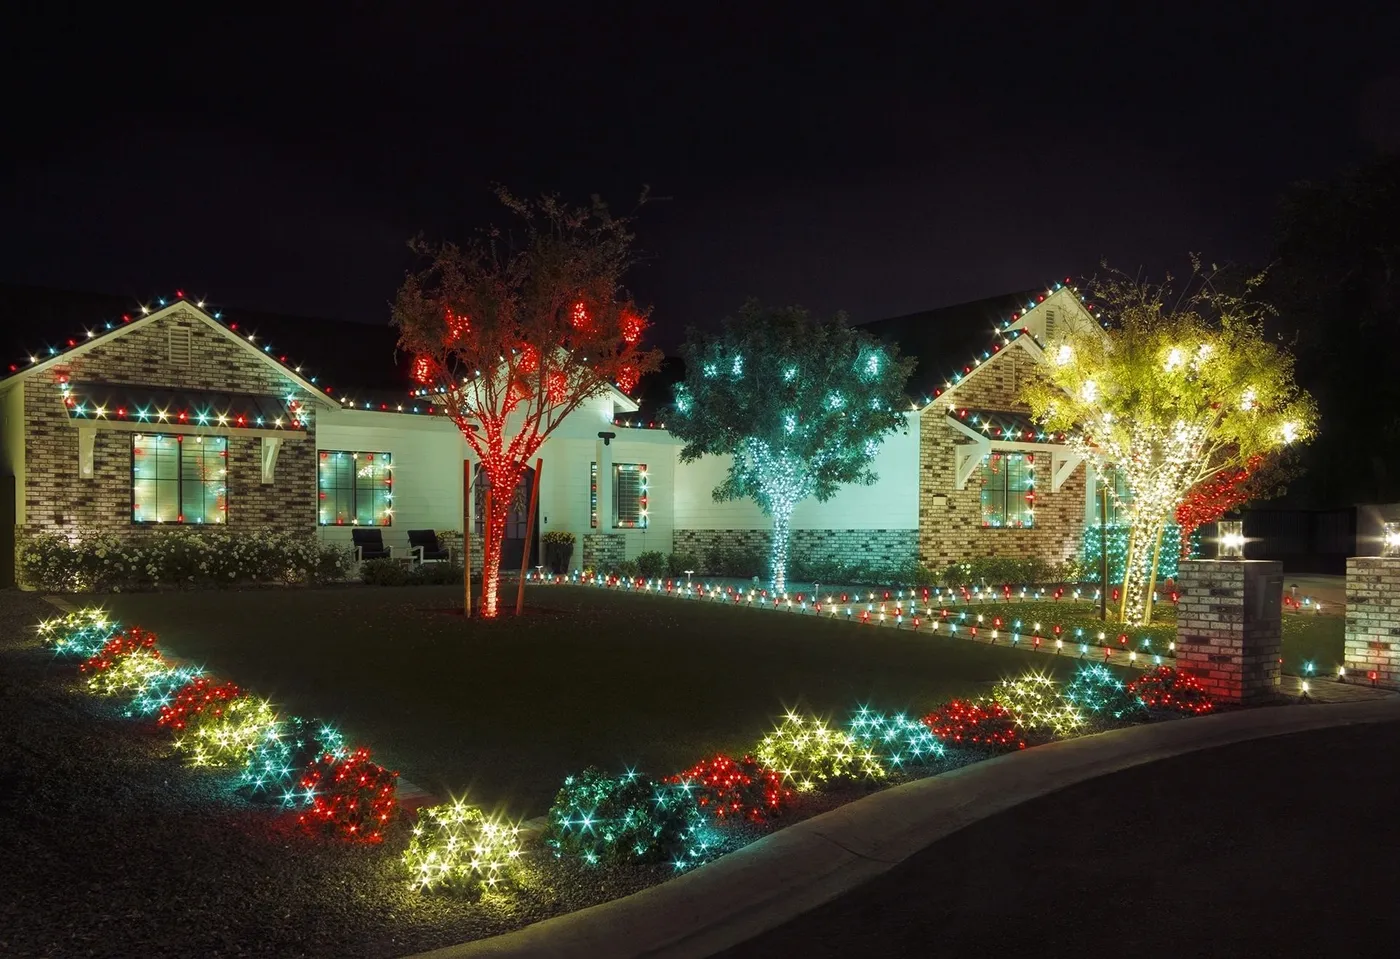
Odd numbers look composed; even numbers look arranged. Three trees, one roofline, and lines of light along the garden beds all use repetition to build pattern, while multicolor bulbs against brick give warmth-on-warm contrast. That’s why this reads cheerfully vintage rather than chaotic — the structure underneath is orderly, even though the color isn’t.
19. Stone Facade, Warm White Outlines, and Flattering Uplights
Uplights on a stone facade need to sit 18 to 24 inches from the wall and aim at roughly two-thirds of the wall’s height, not straight up at the eave. Space fixtures four to six feet apart, and keep them all at 2700K — cool white on warm stone looks like a parking lot. Burying the cable is worth the extra afternoon; visible cords along a stone wall undo the whole effect.
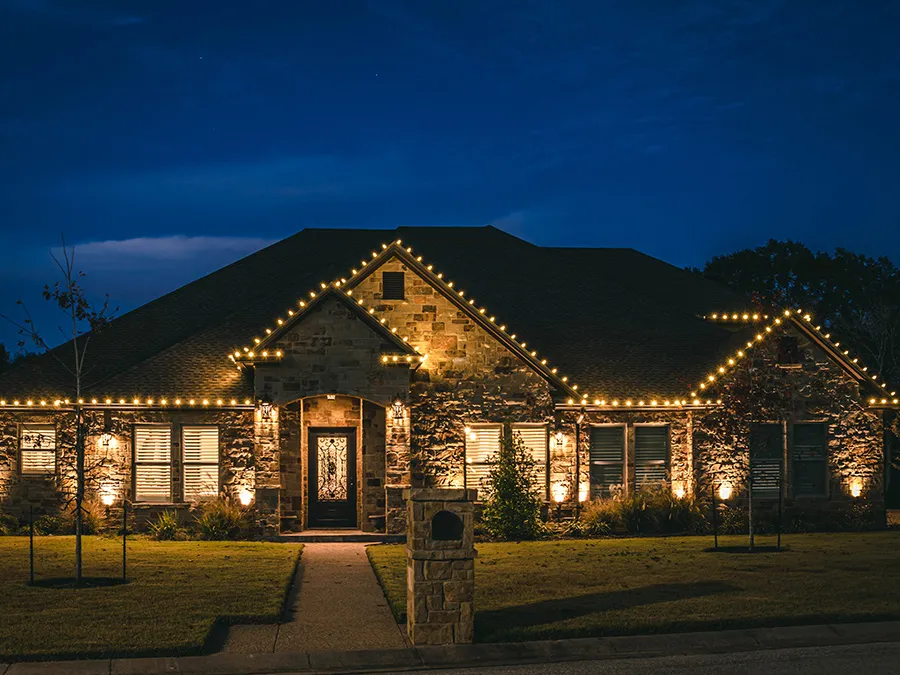
Solar uplights run $8–$15 each and install with no wiring at all, which makes them the easiest way to test whether you even like the look before committing. They’ll dim by 10 p.m. in deep winter, so for a display running until midnight, spend $12–$20 per fixture on plug-in LED spots instead. Four of them aimed at the stone will transform it for under $80.
20. A Modern Flat Roofline That Needs Exactly One Line
A perfectly straight line on a flat roofline takes one extra step most people skip.
- Measure the run and buy half-inch aluminum channel or PVC conduit cut to length.
- Secure the channel to the fascia with flat clips every three feet.
- Press the string light into the channel so every bulb points the same direction.
- Cap both ends and seal with a small bead of silicone.
- Plug into the soffit outlet, not a cord dangling down the wall.
Roughly two hours and $60 in materials for a 40-foot run.
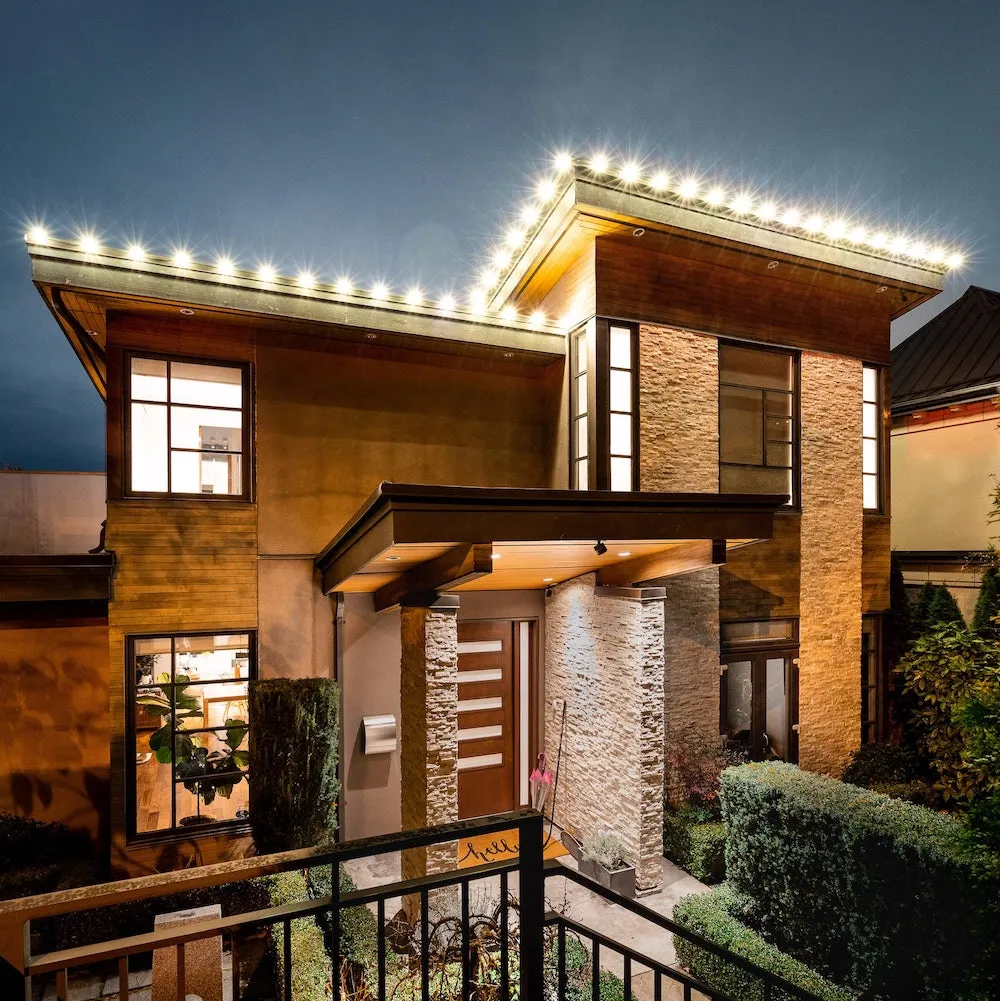
Flat-roof modern homes between 1,800 and 3,000 square feet are the sweet spot for this — clean horizontal edges, no gables, and usually a soffit outlet already in place. Hedges should stay below the roofline so the light line reads uninterrupted. If your home has gables, skip this and go with the outline approach in Idea #7.
Modern architecture is unforgiving about cords. A single visible wire running from the roofline down the stone cladding will undo the entire design, and there’s no way to hide it after the fact. Plan the power run first, before you buy a single light, or this display ends up looking worse than no display at all.
21. Layered Light: Base, Mid, and Accent in One Display
- Base layer — continuous warm white outline for roofline and windows (about 250 ft): $50–$140
- Mid layer — wreaths, garland, lit window candles: $80–$300
- Accent layer — two or three spotlights and one hero figure: $40–$250
- Clips, timers, 12-gauge cords, and one smart plug: $55–$130
- Total: roughly $225–$820
Budget alternative: skip the hero figure, keep the outline and the wreaths, and point two $15 floodlights at the facade. About $180, and it still layers just as convincingly.
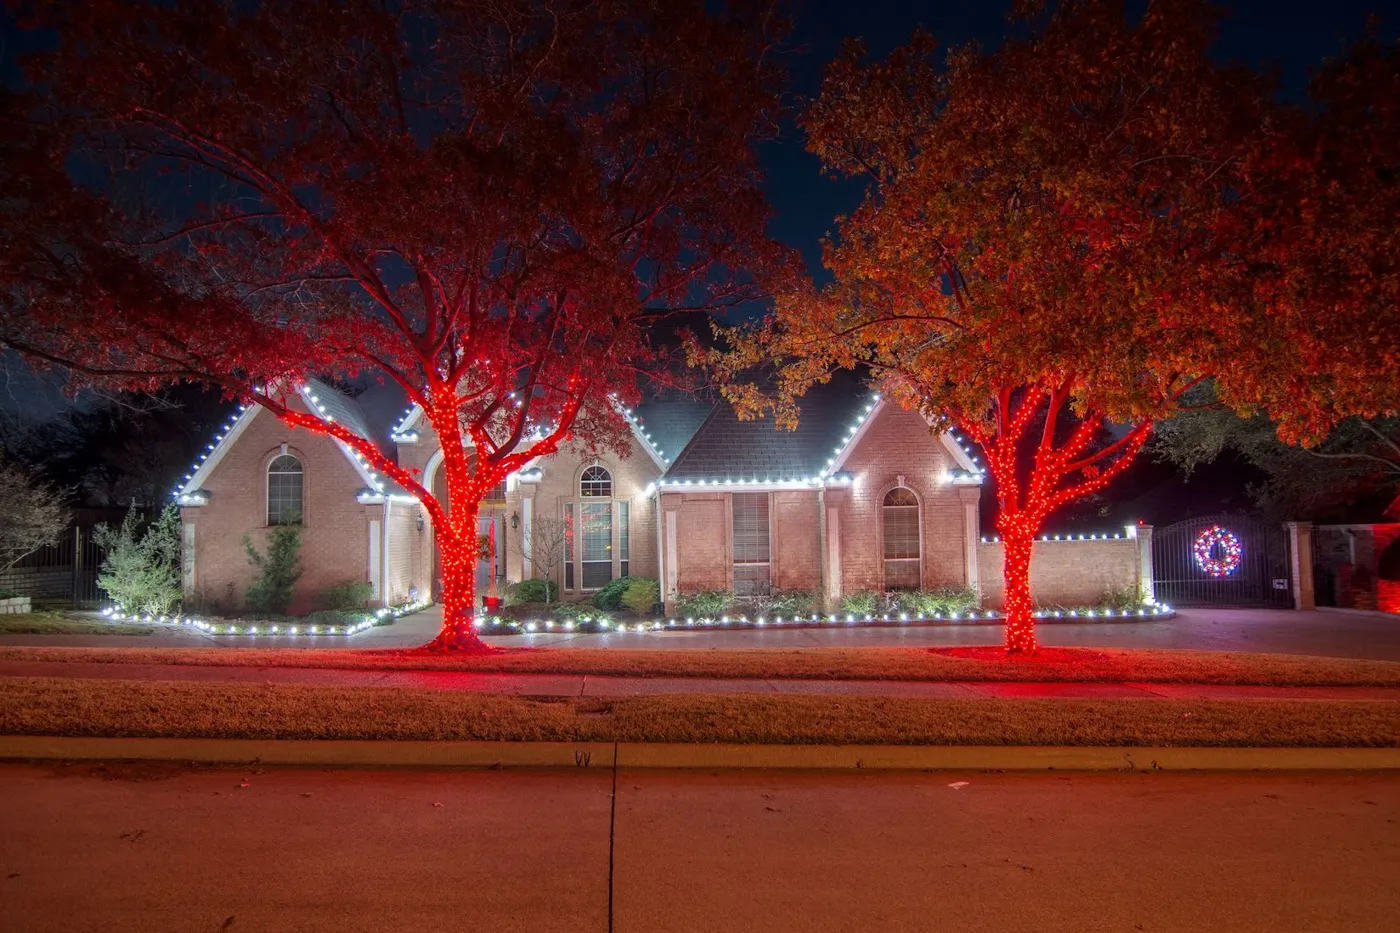
The base layer is non-negotiable and everything else is optional. If you only do one thing, make it the continuous warm white outline — roofline first, then window frames. It’s what makes the house look intentional from the street, and it costs the least per foot of anything in the display. Build it first. Then decide how much you have left for personality.
22. What a Professional Holiday Lighting Install Actually Costs
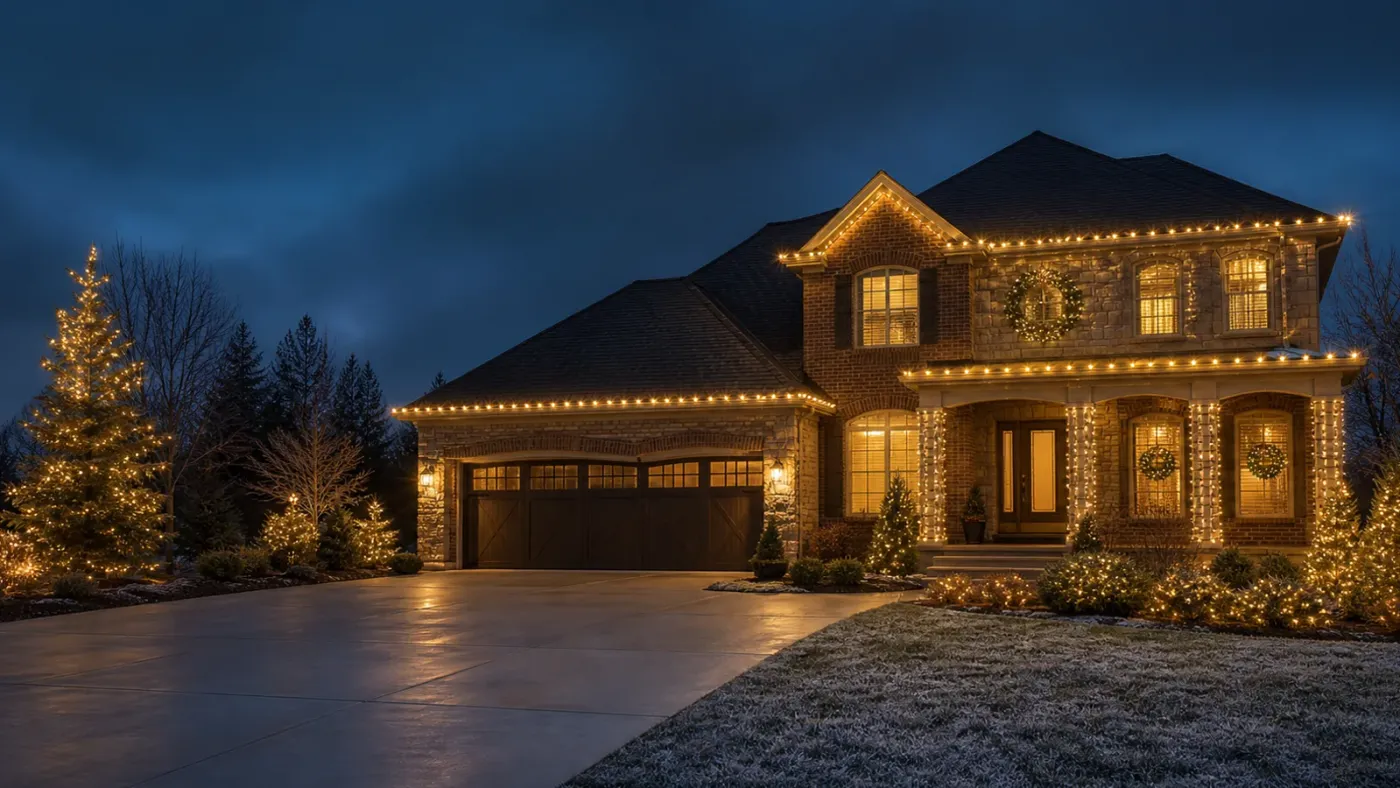
A crew that quotes $1,200 for a two-story house isn’t overcharging; commercial-grade spools, insurance, and a lift rental are baked into that number. What genuinely goes wrong is the cheap version — a guy with a ladder, retail strings rated for 90 days, and no coverage if he puts a foot through your gutter. Ask for a certificate of insurance before anyone climbs, and get in line by October, because good installers book out by early November.
Vetting an installer takes about twenty minutes.
- Ask for the insurance certificate and verify the policy is current.
- Request a written scope listing light type, color temperature, and total linear feet.
- Confirm who owns the lights and what happens when a strand fails in January.
- Get the takedown date in writing — removal is half the value.
- Ask which outlets they plan to use and how many amps they assume.
Most reputable companies include a mid-season service call.
23. Snow, Black Urns, and Topiaries Lit in Warm White
Snow does half the work here: call it 60 percent white and 25 percent dark — the black shutters, the charcoal door, and those two black urns flanking the entrance. The last 15 percent is warm white light and a single hit of red on the wreath and the topiary accents. Swap the dark elements for anything lighter and the whole thing goes soft. Swap the red for gold and it turns elegant instead of classic.
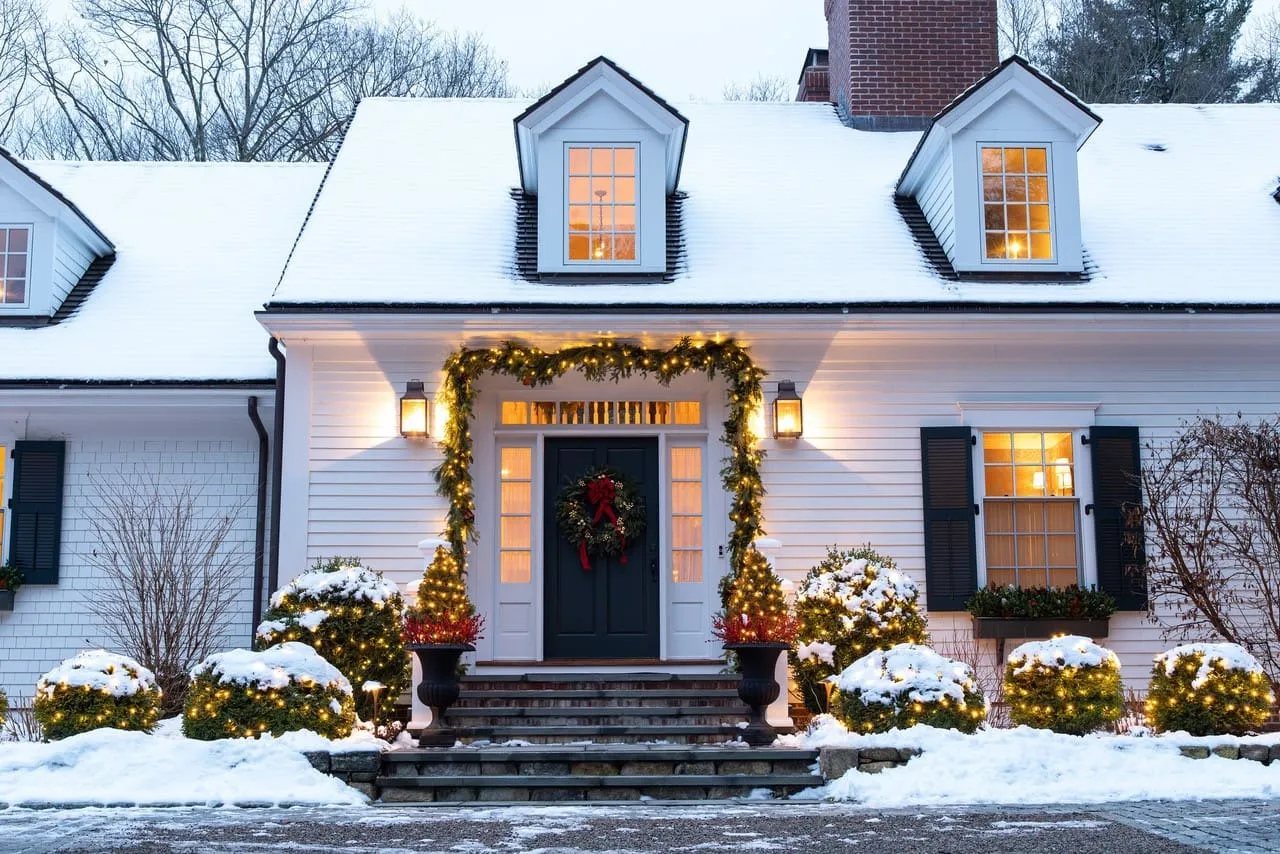
It’s the contrast that carries it. Black urns and a dark door frame against fresh snow give the eye hard edges to rest on, and the warm white glow reads as heat in a scene that’s otherwise all cold tones. That temperature contrast — literal warm light on a cool white scene — is exactly why this looks cozy instead of clinical.
24. Wrapped Trees Dressed With Red and Green Ornaments
Those oversized ornaments hanging in the trees are the easiest thing to fake. Big-box stores discount jumbo shatterproof spheres to $1.50–$3 each the week after Christmas, and a can of red or green spray paint turns dollar-store ornaments into a matched set for about $12 total. Ten ornaments per tree, roughly $40, and the wrapped tree goes from pretty to memorable.
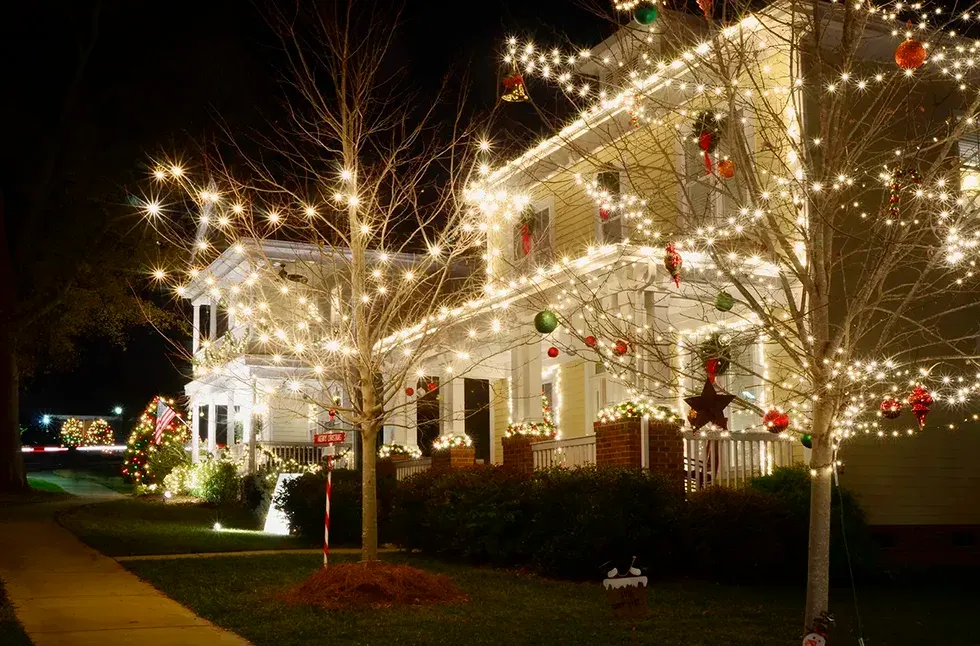
Hang your largest ornaments in the lower third of the tree and work smaller as you go up — the same trick a Christmas tree stylist uses indoors, and it works outside because you’re almost always viewing from below. Space them 18 to 24 inches apart, loop monofilament through the cap, and tie to the wrapped branch rather than the light strand itself.
Wind is what kills outdoor ornaments. Anything glass will chip against a branch within a season, so stick with plastic or shatterproof finishes. Bells and metal stars also rust in wet winters; a quick coat of clear spray enamel in November buys you three or four more years. And plan to lose a few every season to the neighbor’s dog.
25. Blue and Red, With Snoopy Guarding the Front Steps
Building a two-color scheme that doesn’t look accidental:
- Choose which color goes on architecture — that’s the blue on roofline, windows, porch, steps, and railing.
- Reserve the second color for landscaping only: red on every bush and bed line.
- Never mix the two on the same surface.
- Keep all figures on warm white so they read separately from the color plan.
- Put everything on one timer so it snaps on together.
Two 300-foot spools and an afternoon gets you there.
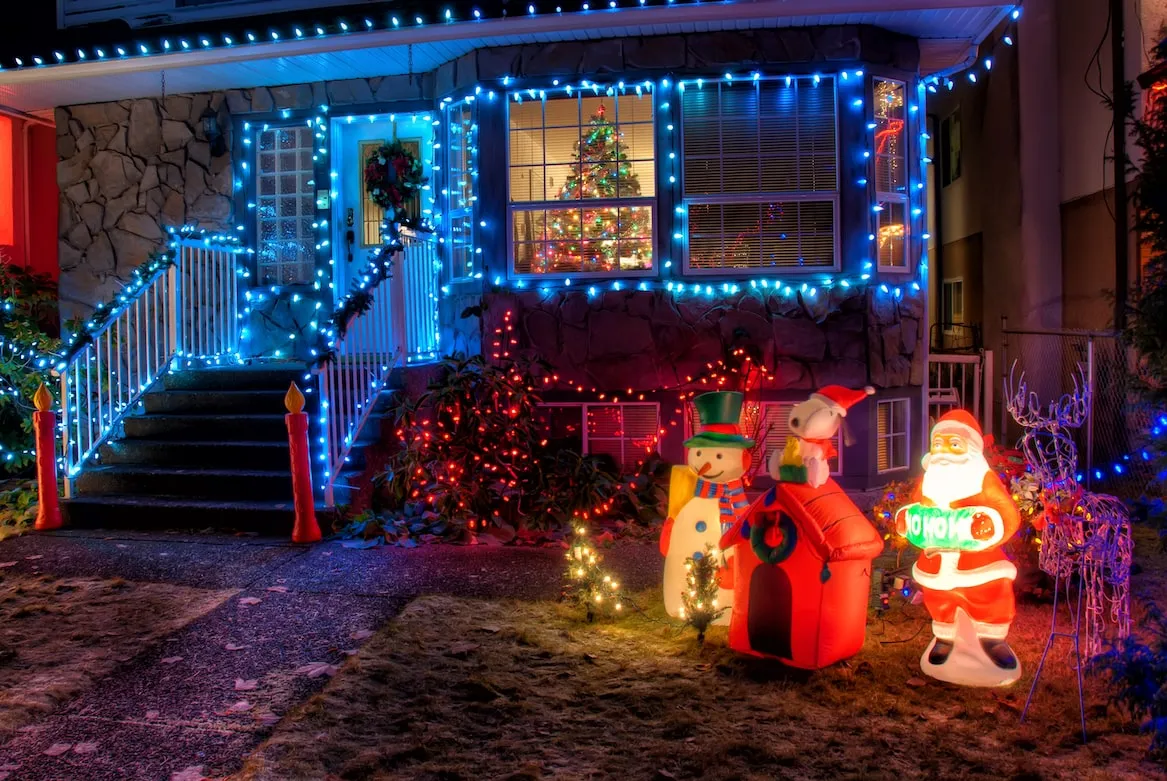
The best detail here isn’t in the yard at all — it’s the lit Christmas tree visible through the front window. That warm glow behind the glass is what makes the house feel inhabited rather than merely decorated. Leave one interior tree or lamp on a timer that runs an hour later than the outdoor display, and the whole facade gains a heartbeat.
26. Every Bush Lit: Warm White at Full Coverage
Full coverage is the phrase showing up in holiday searches this year — the all-in approach where rooflines, windows, hedges, and foundation plantings all get lights. Net lights made it feasible; a four-by-six-foot net covers a shrub in under two minutes. The look reads as generous rather than designed, which is exactly why it keeps outperforming minimalist schemes on curb appeal.
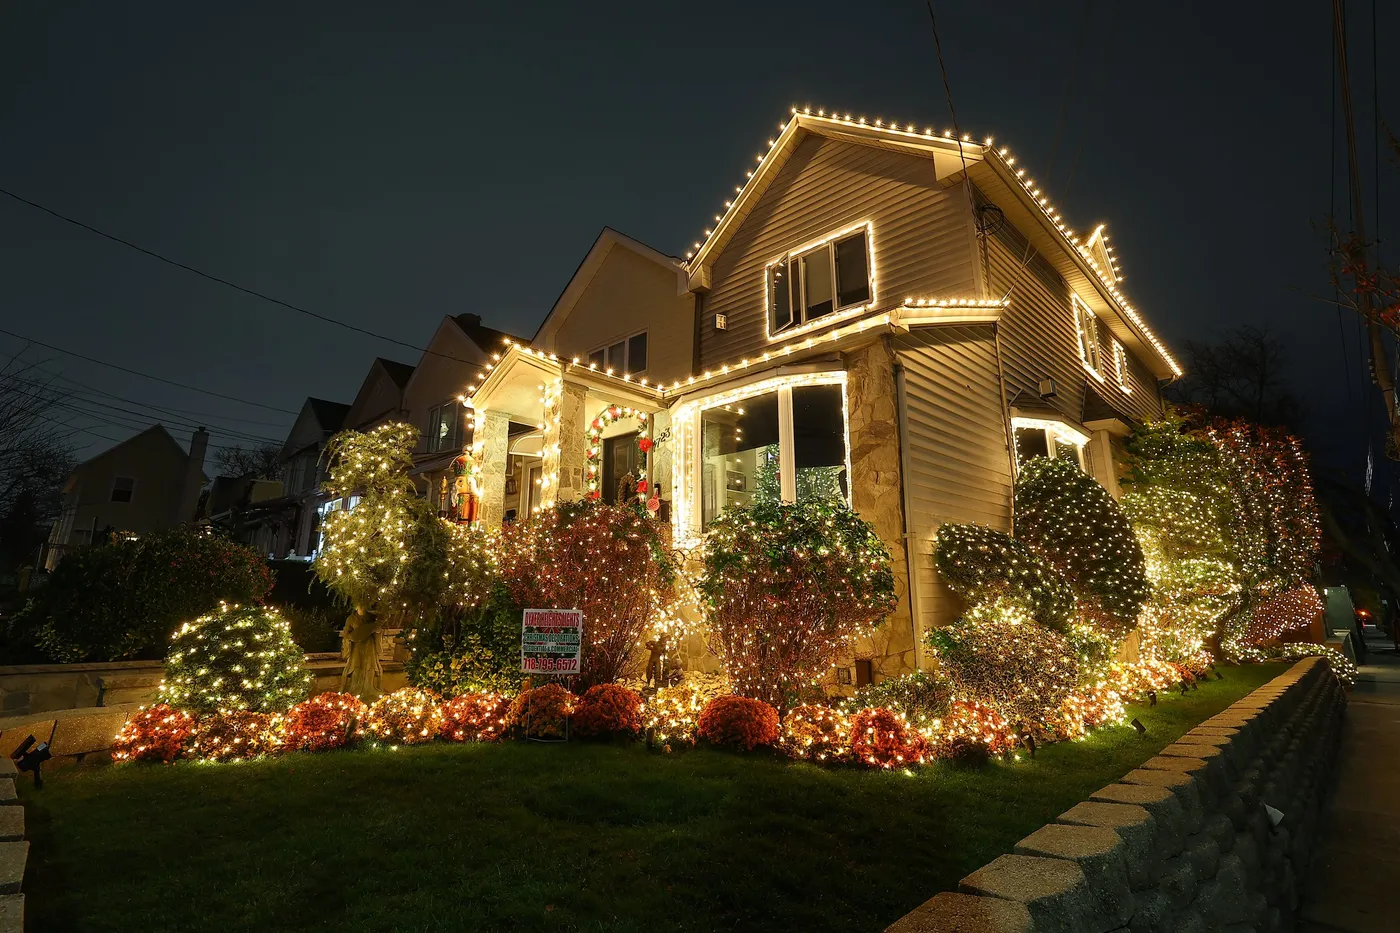
Count your bushes before you buy. A four-by-six net covers one medium shrub; large foundation plantings need two, overlapped slightly so no bare patch shows. For a typical 50-foot frontage with eight to ten shrubs, plan on 10 to 14 nets, roughly $90–$160. Smaller lots under 35 feet can light the three bushes nearest the entry and stop there.
Net lights are wonderful until they’re in a bag. Buy one net per bin compartment, or wrap each net around a piece of cardboard before it goes in the box — untangling ten nets in November is a two-hour job you will not enjoy. And never drape nets onto wet foliage you’re about to prune. Cut first, then light.
27. A Tudor in Two Languages: Multicolor Roof, Warm White Yard
When you’re running two color schemes, make the switch happen at one clean architectural line — here, the eaves. Multicolor bulbs above, warm white everything below, and nothing mixing across that boundary. The eye accepts two palettes if there’s a rule; it rejects two palettes if they’re sprinkled together. Pick your dividing line before you hang anything.
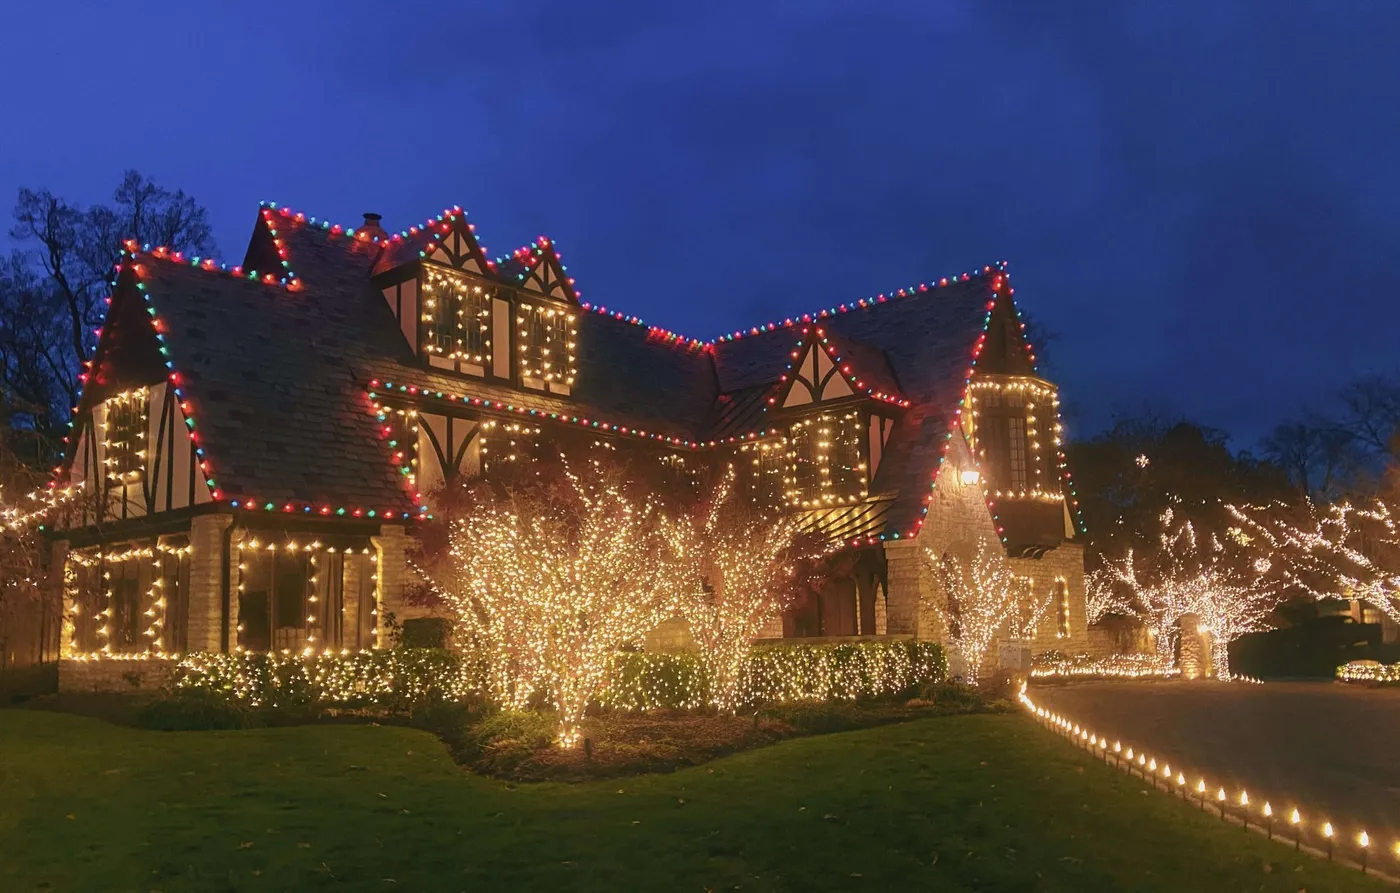
It’s roughly 60 percent warm white (windows, bushes, trees, path) to 40 percent multicolor (roofline and trim), and the Tudor’s stone and timber detailing does the separating for you. Want it more restrained? Drop the roofline to warm white and you have the grand-estate look in Idea #7. Want it louder? Flip the ratio and let color take the whole yard, like Idea #4.
Two schemes usually fight. Here they don’t, because they’re separated by a horizontal line and by height — your eye registers the roof as one object and the yard as another. It’s the same principle behind an accent wall: one plane gets the bold treatment and everything else stays quiet.
28. A Row of Conifers, Each Wearing a Different Solid Color
Color-blocking a row of trees looks like an expensive custom install and costs almost nothing extra. Solid-color strings run the same $10–$14 per 100 feet as multicolor, so the only real variable is how many trees you light. Three trees in red, green, and blue read as deliberate from the road; if you have twelve, great, but three well-placed ones do 80 percent of the work.
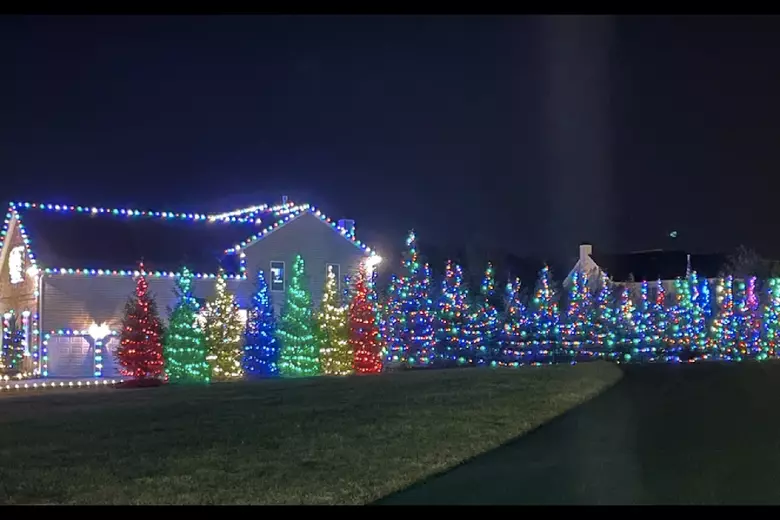
Conifers grow, and a tight wrap on a young spruce becomes a problem in three years — the wire can bite into expanding bark and inner branches die back from lack of light. Wrap conifers in loose, diagonal loops that leave gaps rather than a solid spiral, and take everything off by March. Most conifer light strands survive about four seasons outdoors before sections start dropping out.
29. White Trees Above, a Multicolor Carpet Below
The split is the idea: tall trees and the building above in pure white, the low ground cover in loud multicolor. That vertical division keeps the color from becoming overwhelming — it’s confined to a band at ankle height, where it reads as a glowing carpet instead of a mess. Remove the white canopy above and the color below just looks like clutter.
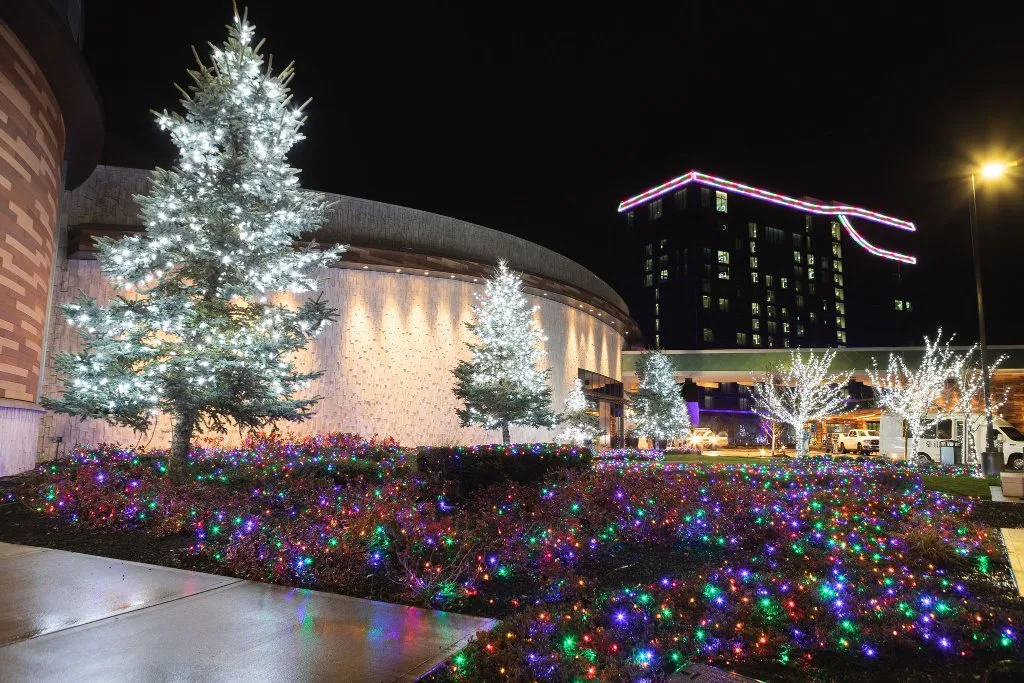
String lights laid through low ground cover are the ones that fail first. Snowmelt, mulch moisture, and foot traffic in the beds shorten their life to two or three seasons, and the wire gets chewed by whatever lives in the bushes. Keep ground lights on a separate circuit from your roofline so one failure doesn’t kill the whole display, and pull them the moment the beds thaw.
Plug In, Then Step Back to the Curb
Start with one element — the outline, the tree, the star — get it right, then stand at the curb before you add the next layer. Most displays that disappoint aren’t under-lit; they’re over-decorated without a plan, which is exactly what the mistakes up above are about. 📌 Pin this guide now — next November, standing in the cold with a box of tangled lights, you’ll be very glad it’s saved.
