You know that feeling when you finally find the stepping stone walkway that looks exactly right for your space? That “aha!” moment is what this guide is all about. After filtering through hundreds of options from local stone yards to big-box retailers, we’ve narrowed it down to the 27 most inspiring ideas that actually deliver. We’ve curated a collection that covers everything from modern, geometric layouts to winding, rustic cottage paths. For 2026, it’s all about “soft landscaping” – integrating hardscape materials like stone seamlessly with natural elements like grass and lush plantings for a more organic feel. And stay until the end — we break down the most common mistakes that can ruin these looks. 📌 Save this to Pinterest for later — you’ll want to revisit these ideas.
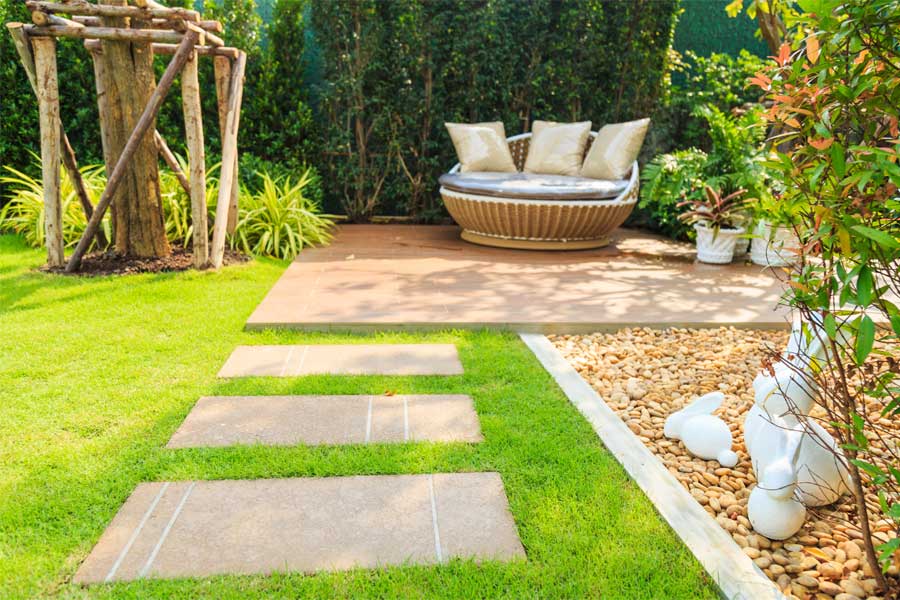
1. Create a Destination with a Grass-Inlaid Path to a Patio Nook
What makes this design so effective is its sense of purpose. The path isn’t just a way to cross the lawn; it’s an invitation that leads your eye directly to the cozy woven daybed, creating a clear destination. This transforms a simple patch of grass into a multi-zone outdoor living area. The juxtaposition of clean, rectangular stones against the soft, living grass provides a satisfying visual contrast—structured yet natural. The surrounding bed of river stones adds a third texture, proving that thoughtful layering is key even in simple designs.
🔧 How-To Brief
Recreating this serene corner involves a few key expenses. The final cost depends heavily on the quality of the seating and the square footage of the path and patio.
- Main Furniture (Woven Daybed): $700 – $2,500
- Stepping Stones (per sq. ft.): $8 – $20
- Patio Pavers (per sq. ft.): $10 – $25
- River Stone Ground Cover (per bag): $25 – $50
- Decor & Plants: $100 – $400
- TOTAL ESTIMATE: $1,500 – $4,500
- Budget alternative: Find a used daybed on Facebook Marketplace and use pre-cast concrete pavers instead of premium stone to bring the total cost down to the $600 – $1,200 range.
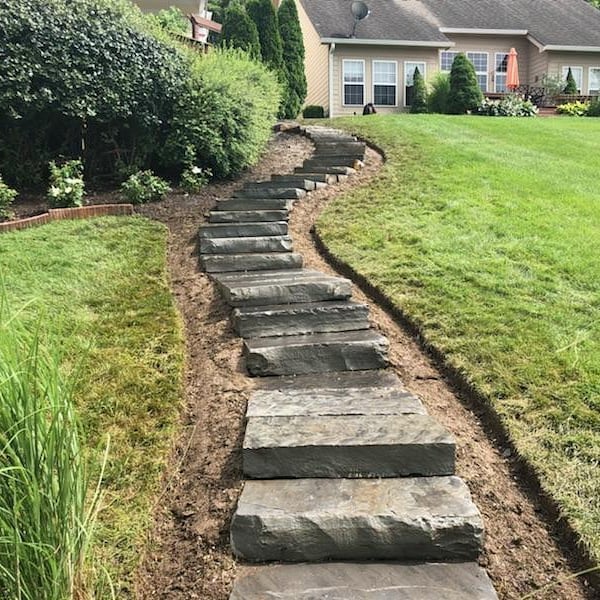
2. Embrace the Gradient with Sweeping Stone Slab Steps on a Slope
When building steps into a hill, the single most important factor is a comfortable “rise and run.” For a gentle, meandering feel like this, aim for a low rise of no more than 6 inches per step. Critically, make the run—the depth of each stone slab—a generous 18 to 24 inches. This encourages a leisurely strolling pace rather than a steep, awkward climb. The extra depth gives you a secure, full-footed landing spot on each step, making the journey up the slope feel effortless and integrated with the landscape.
⚠️ Real Talk
Let’s have some real talk. While this organic, “found-in-nature” look is stunning, it comes with maintenance challenges. The exposed soil and grass growing right up to the stone edges will require consistent weeding to prevent it from looking overgrown and messy. In wet or icy conditions, these un-grouted, irregular stones can become slippery and shift over time. This is a path that prioritizes a natural aesthetic over perfect, low-maintenance stability, making it better suited for sure-footed wanderers.
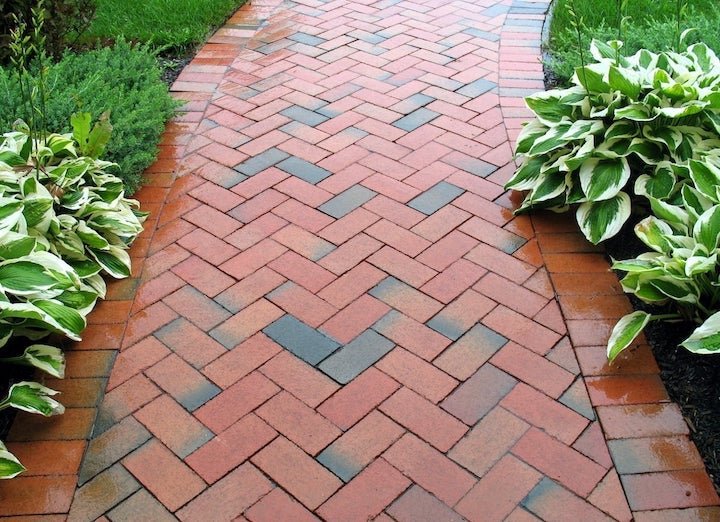
3. Add Classic Charm with a Red Brick Herringbone Walkway
The secret to a crisp herringbone pattern is a perfectly stable edge. Installing the linear brick border first provides the frame to keep your pattern tight. Here’s a quick guide:
📐 Style Math
- Excavate the Edges: Dig a narrow trench along your path’s border, about 6 inches deep and the width of a single brick.
- Add a Base: Fill the trench with 2-3 inches of compacted paver base or gravel for drainage and stability.
- Set the Bricks: Place your edging bricks tightly end-to-end in the trench, using a rubber mallet to tap them level.
- Backfill and Secure: Fill in the soil or gravel around the outside of the edging bricks to lock them firmly in place before you start laying the herringbone pattern inside.
This timeless look relies on a balanced visual recipe. Think of it as 60% warm, textured hardscape (the red and gray herringbone brick) + 30% lush, structured greenery (the vibrant hostas) + 10% crisp definition (the single-file brick edging). You can easily adapt this formula. For a more modern feel, swap the red brick for a cool-toned bluestone, but be sure to keep the lush plantings to prevent the design from feeling too cold or sterile.
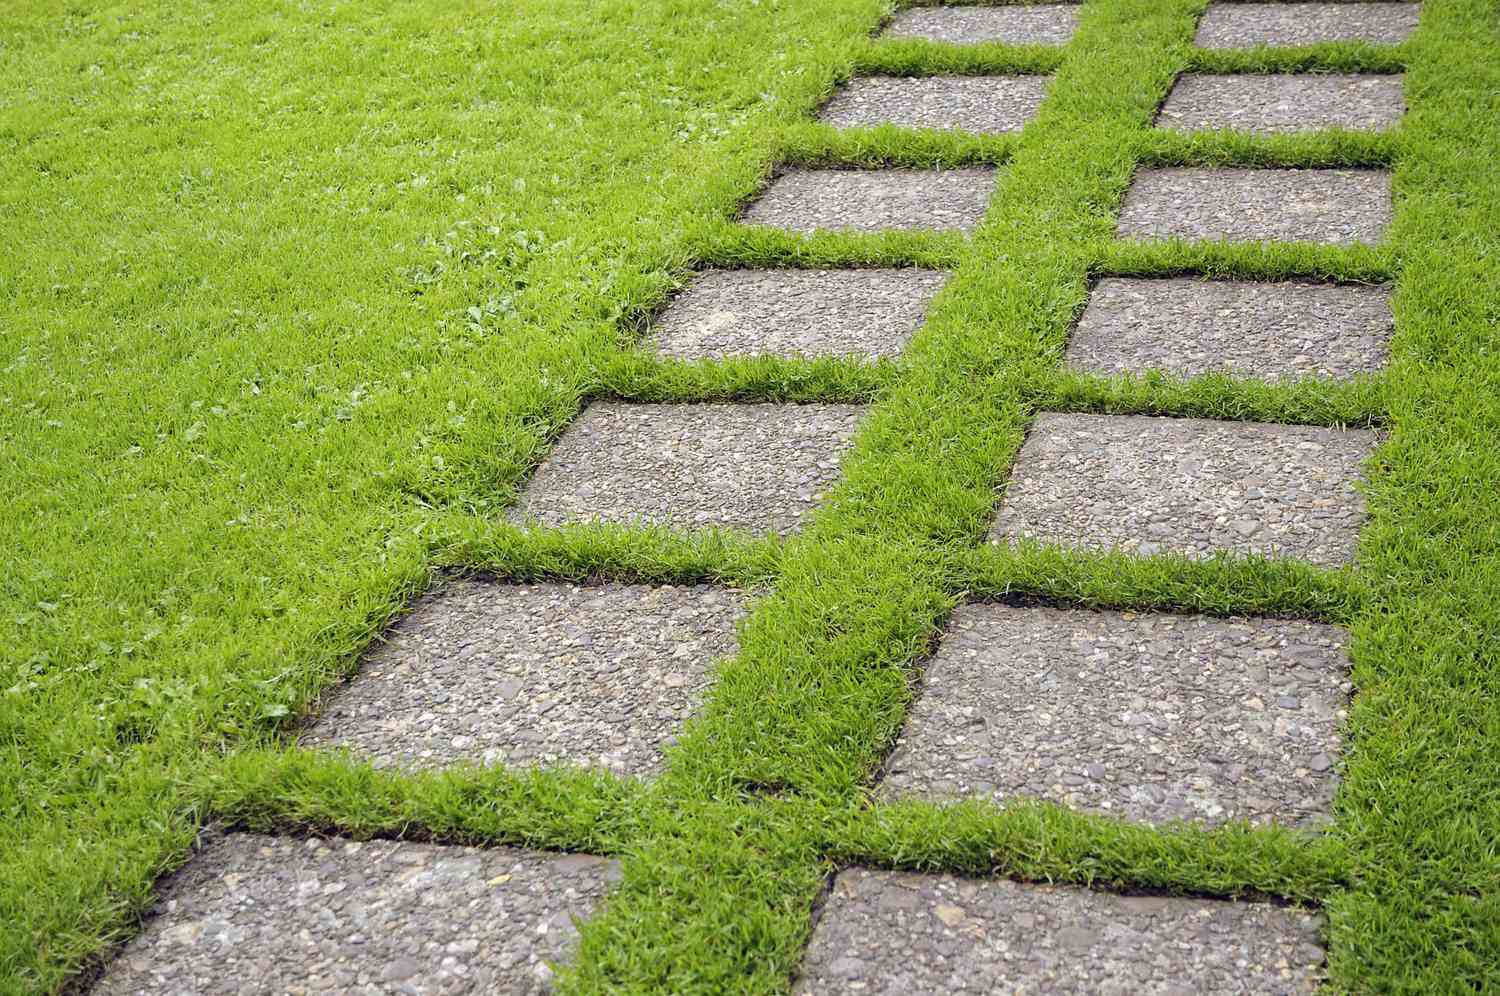
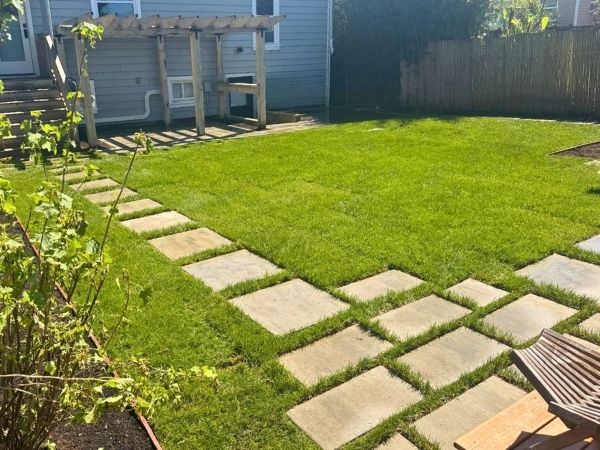
4. Integrate Nature with a Square Paver and Grass Grid Walkway
that makes this design work so beautifully is the grass. Without it, you’d just have a standard paver patio. By allowing vibrant green grass to grow in the gaps, the hardscape becomes fully integrated with the lawn. It breaks up the monotony of a solid surface, creating a dynamic pattern that feels both structured and organic. The grass doesn’t just fill space; it’s an active design element that softens the entire look and connects the path to the surrounding landscape. Compare this to the gravel-filled path in Idea #9 to see the difference.
⭐ The One Thing
While this “checkerboard” style is visually stunning, the reality of upkeep is worth considering. The primary challenge is mowing. You won’t be able to use a standard lawnmower over the stones without risking damage to your blades (and the stones). This means you’ll be spending time with a string trimmer or manual clippers to keep the grass in those gaps looking neat. You’ll also need to be diligent about weeding to ensure only grass, not unwanted intruders, grows between your perfectly placed pavers.
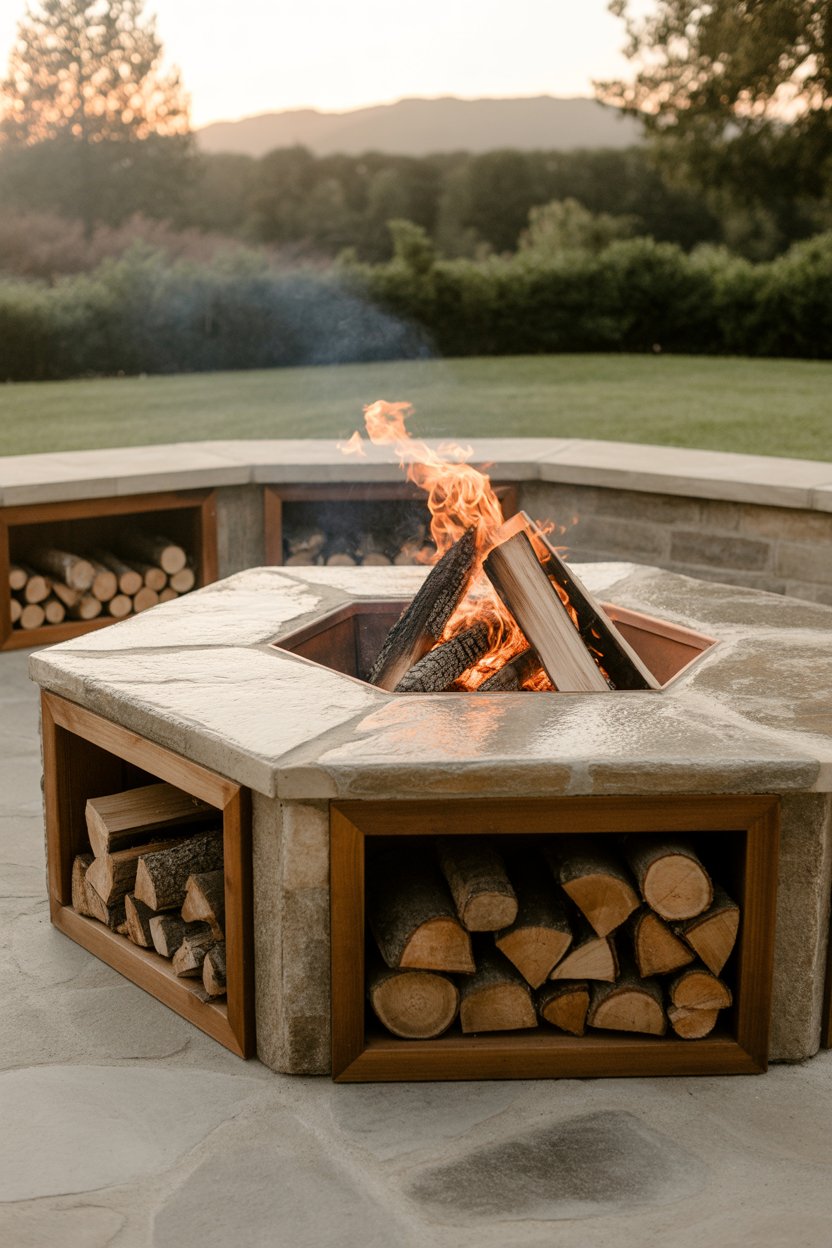
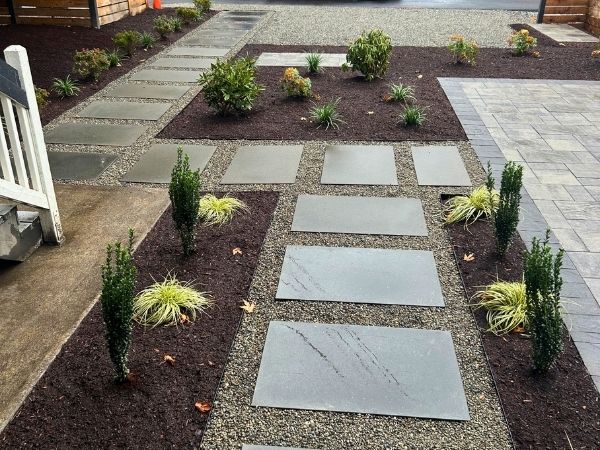
5. Lead the Way to a Cozy Modern Fire Pit Lounge
This design is all about creating a journey with a compelling destination. The simple, light-colored stepping stones act as a clear visual cue, pulling you through the landscape. The use of dark mulch provides strong contrast, making the grey stones pop and guiding the eye effortlessly towards the circular patio. The repetition of black—in the chairs and the fire pit—creates a cohesive and sophisticated focal point, while the surrounding ornamental grasses soften the modern lines and tie the entire seating area into the natural environment.
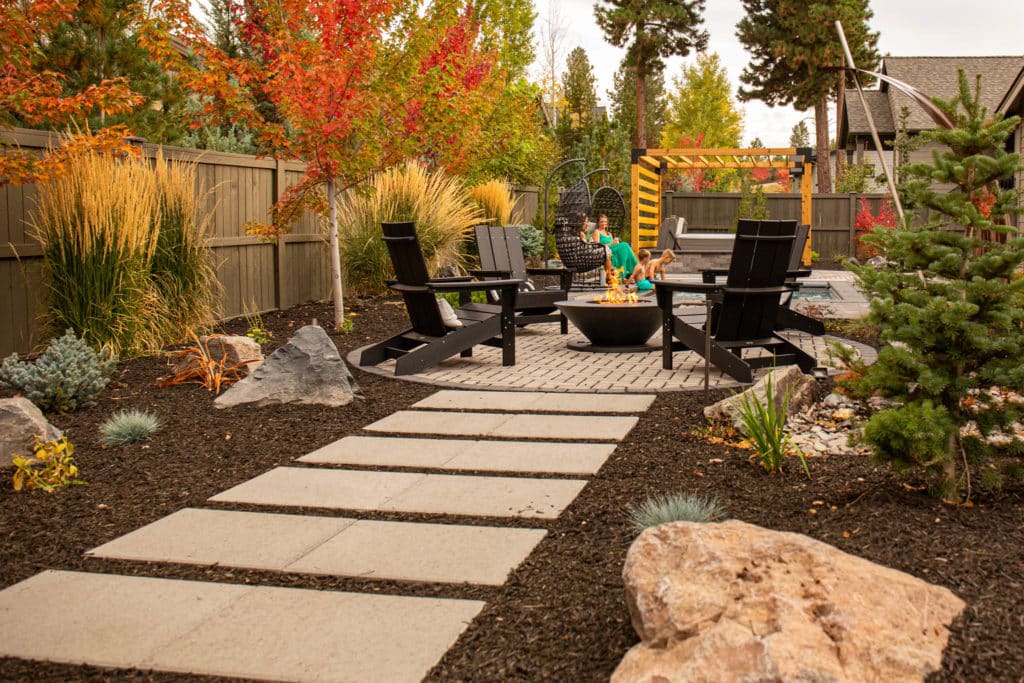
🔥 Trending Context
An arrangement like this is perfect for a medium to large backyard, ideally with at least 25-30 feet of length to allow the path to feel like a proper walkway. The circular fire pit area itself will require a diameter of at least 10-12 feet to comfortably accommodate chairs with enough space to walk around. For smaller spaces, consider the more compact walkway and seating idea shown in Idea #23, which clusters the elements more tightly.
6. Define Your Space with a Symmetrical Stepping Stone Grid
For a clean, grid-style layout, precision is everything. Don’t just eyeball the spacing. Use a tape measure and marking flags to map out your grid before you dig a single hole. For a comfortable walking path, the center-to-center distance between stones should be around 24 inches. For a patio area, you can reduce this to 18 inches. The key is absolute consistency. Use a level on every single stone, both side-to-side and front-to-back, to ensure a perfectly flat, trip-free surface that looks professionally installed.
🎯 What Makes It Work
This look is gaining so much traction on Pinterest because it perfectly captures the “structured nature” trend. Homeowners in 2026 are moving away from vast, featureless lawns and towards creating defined “outdoor rooms.” This design uses pavers and grass to delineate a pathway and a separate patio zone without building a single wall. It offers the openness of a lawn with the intentionality of a designed space, which feels both modern and highly functional for how people want to live outdoors now.
7. Carve a Gentle Curve Through a Lush, Green Lawn
The single element that defines this path is the gentle, sweeping curve. If these same stones were laid in a straight line, the entire feeling would change from a whimsical wander to a direct march. The curve slows you down, encourages you to look around at the surrounding landscape, and adds a sense of mystery about what’s around the bend. It’s a classic landscape design technique used to make a space feel more natural, more spacious, and infinitely more interesting. This is a much softer approach than the angular path in Idea #8.
💡 Designer Tip
A beautifully simple path like this looks effortless, but be prepared for the reality of lawn care. Mowing around irregular, curved stepping stones is significantly more tedious than mowing an open lawn. You’ll need to carefully navigate your mower around each stone, and then follow up with a string trimmer to get the edges just right. If the stones are set even slightly too high, you risk nicking your mower blades. If they are too low, they can quickly become overgrown and disappear into the lawn.
8. Craft a Modern Rhythm with Concrete Slabs and Grass Joints
The success of this walkway lies in its rhythm and repetition. The consistent size of the concrete slabs and the uniform width of the grass strips between them create a predictable, calming pattern. This isn’t a random assortment of stones; it’s a deliberate, geometric composition. The slight curve prevents the design from feeling too rigid, while the contrast between the smooth, light grey concrete and the dark green, textured grass provides a clean, modern aesthetic that is both orderly and alive.
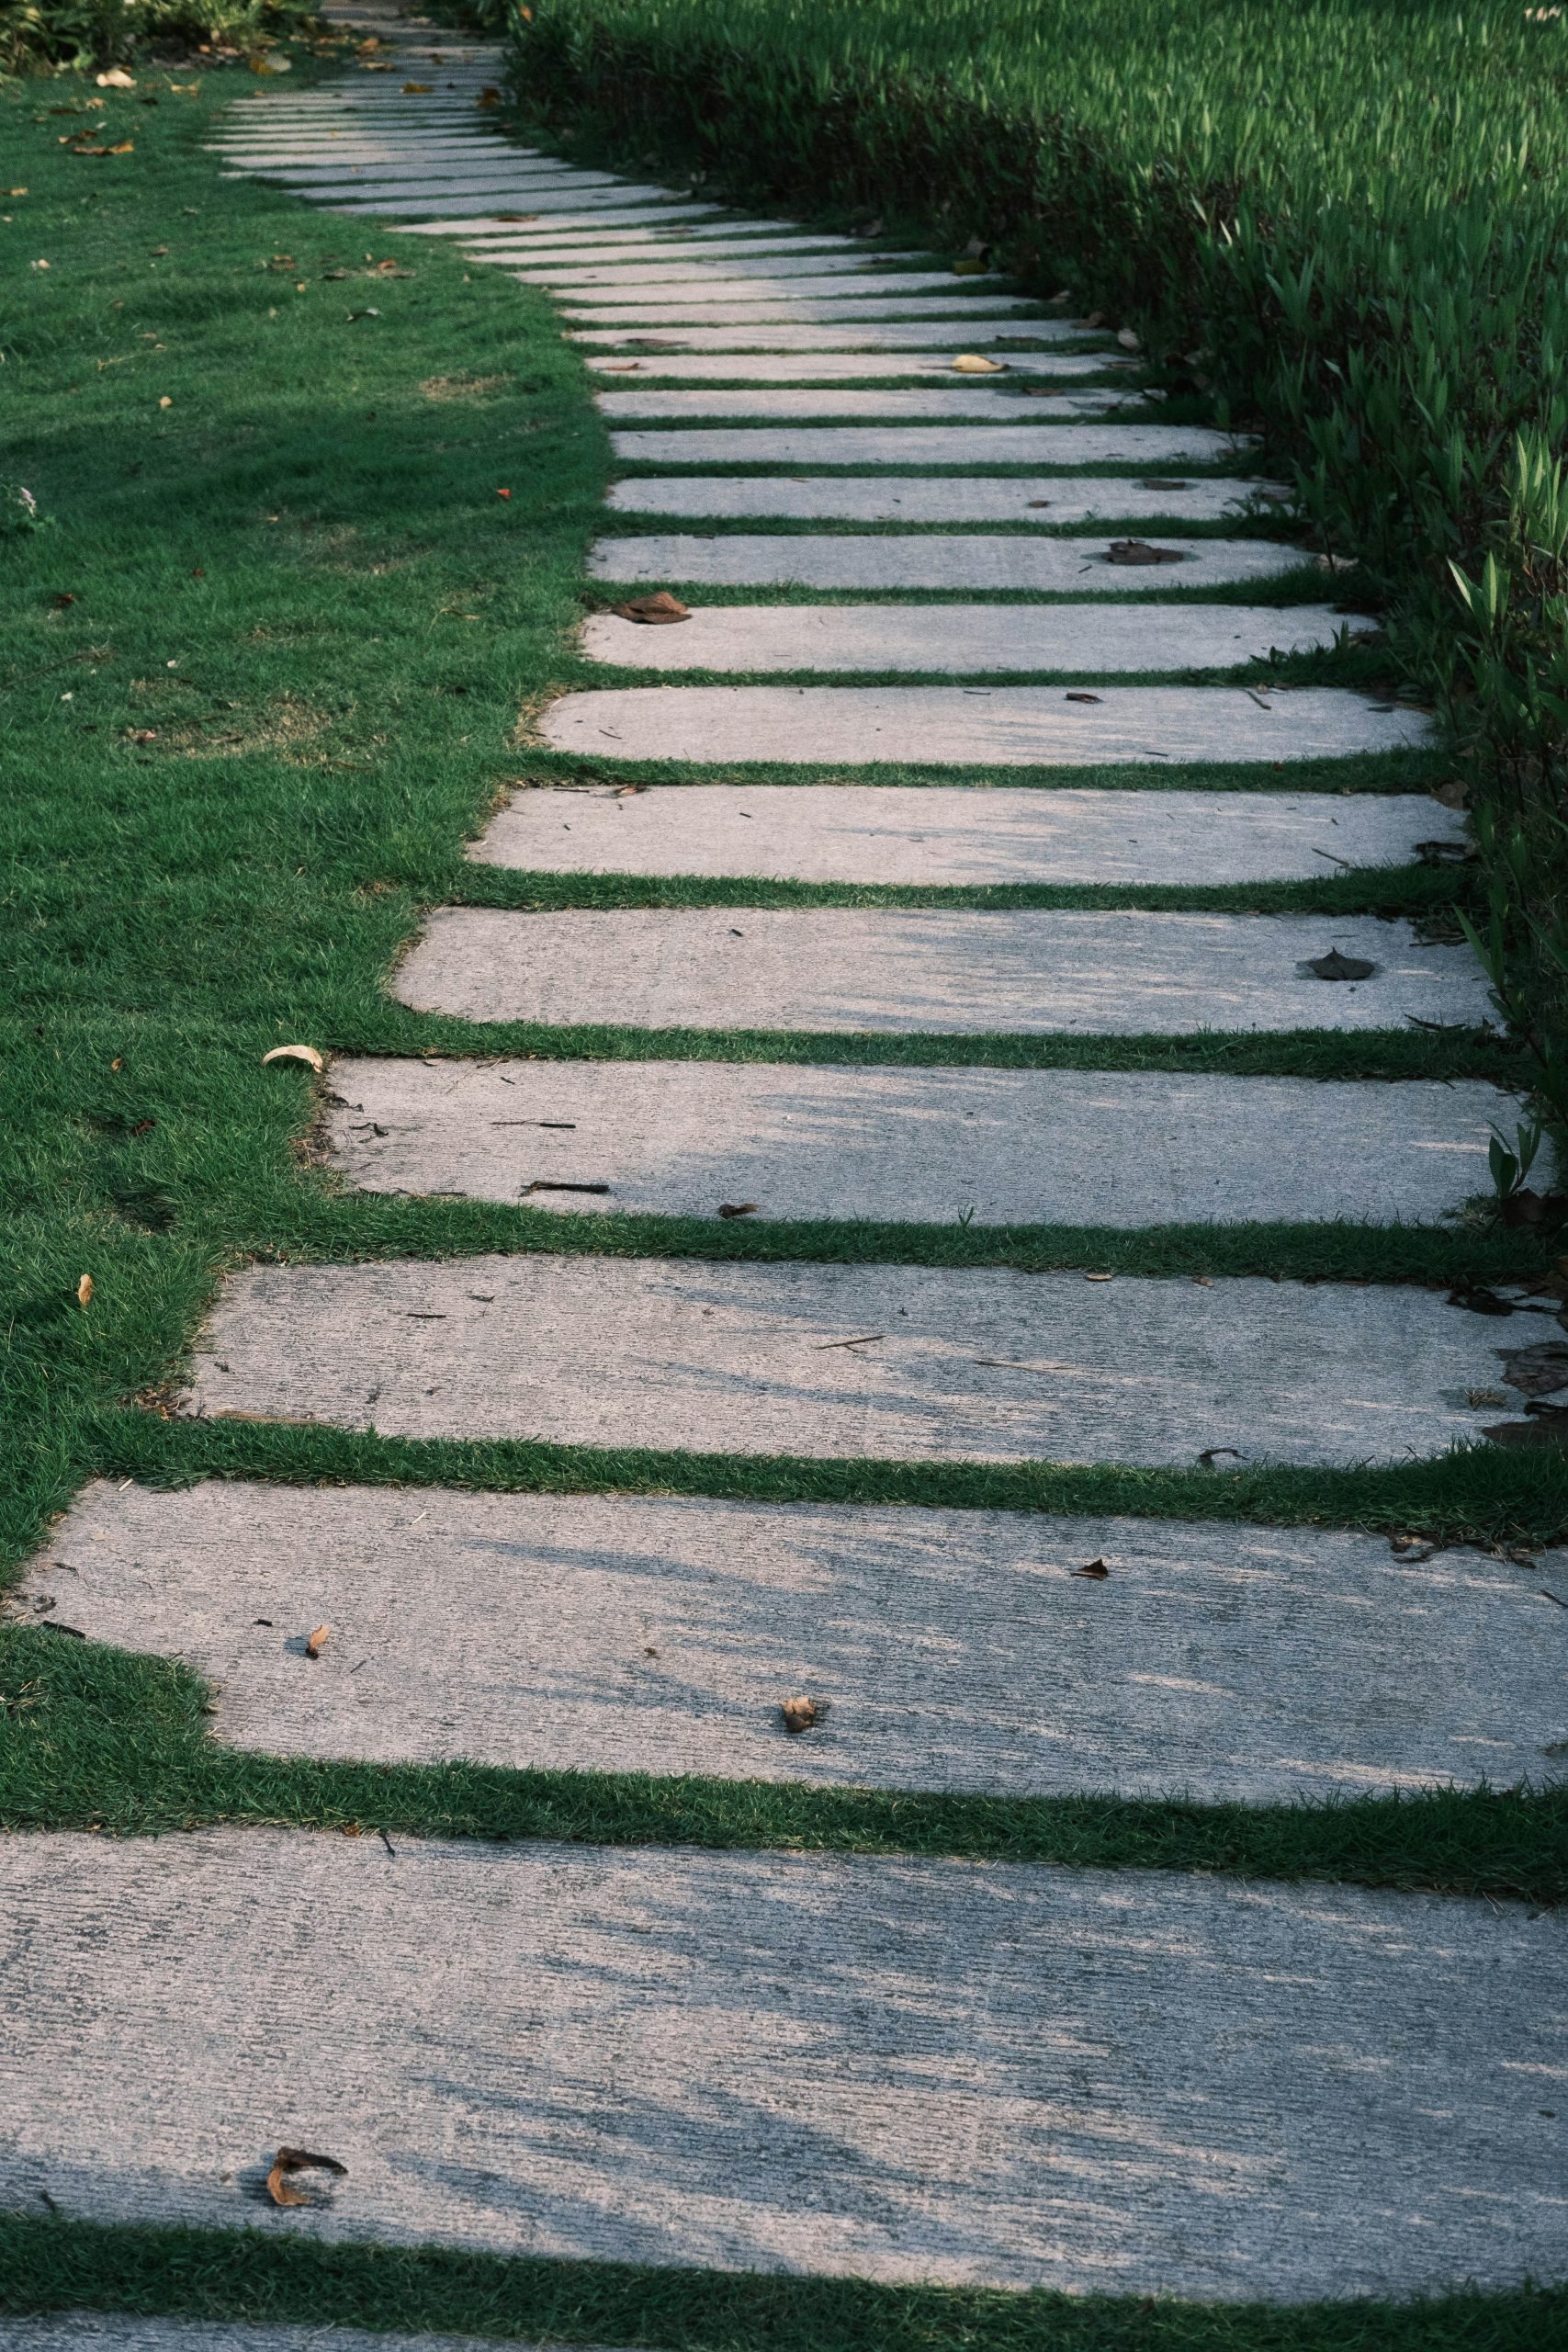
✅ Before You Start
This style is incredibly versatile but works best in spaces where you want to create a sense of length and gentle movement. It’s ideal for side yards or for connecting two distinct areas of a backyard, requiring a path width of at least 3 to 4 feet to feel substantial. The consistent, repeating pattern is great for leading the eye, making a small or narrow space feel more considered and longer than it actually is. However, in a very wide, open lawn, it might feel too narrow; a broader, more scattered pattern like in Idea #3 might be more appropriate there.
9. Layer Textures with a Modern Grey Stone and Gravel Path
This contemporary look is all about a sophisticated textural formula: 40% large, smooth stepping stones (the walkway) + 40% fine, crunchy texture (the gravel fill) + 20% soft, organic shapes (the plantings). The key is the contrast between these layers. The smooth stones provide a stable walking surface, the gravel provides visual and auditory interest, and the plants soften the hard edges. You could swap the grey gravel for black pebbles for a more dramatic look, or use a lighter stone to brighten up a shady area, all while keeping the same successful ratio.
🧹 Maintenance Reality
A gravel and stone path is a fantastic low-water, modern option, but it’s not zero-maintenance. Over time, leaves and debris will collect in the gravel, requiring you to rake or use a leaf blower (on a low setting!) to keep it clean. Weeds can and will eventually sprout through the gravel, so an initial layer of high-quality landscape fabric underneath is non-negotiable. Be prepared to refresh or top up the gravel every few years as it settles and gets kicked out of place.
10. Achieve an Organic Feel with Irregular Stones and Dark Pebbles
You can get this lush, natural look for a fraction of the cost of professionally installed flagstone. Instead of sourcing expensive, pre-cut stone, look for “flagstone remnants” or “broken flagstone” at local landscape suppliers—they often sell them at a steep discount. For the filler, swap the pricey, polished pebbles for basic pea gravel from big-box stores like Home Depot or Lowe’s, which costs around $5 a bag. A weekend of DIY labor laying the stone and spreading the gravel can save you thousands compared to hiring a contractor.
💸 Get This Look For Less
This design works because it masterfully mimics a path found in nature. The stepping stones are completely irregular in shape and placement, suggesting they were simply placed where a foot would naturally fall. The dark grey pebbles act as a unifying groundcover, providing a consistent color and texture that makes the lighter, varied stones stand out. The final touch is the overflowing greenery; by allowing the plants to creep over the edges of the path, the line between hardscape and garden is beautifully blurred.
11. Weave a Tapestry of Color with a Mixed-Planting Stone Path
When designing a path with dense, varied plantings like this, think in triangles. Instead of planting one of each plant, group 3, 5, or 7 of the same variety together in a loose triangular shape. Here, you can see this with the clumps of yellow flowers and the narrow-leafed grasses. This technique, called “drifting,” creates waves of color and texture that feel natural and intentional, rather than a polka-dot jumble of individual specimens. It guides the eye through the garden more effectively.
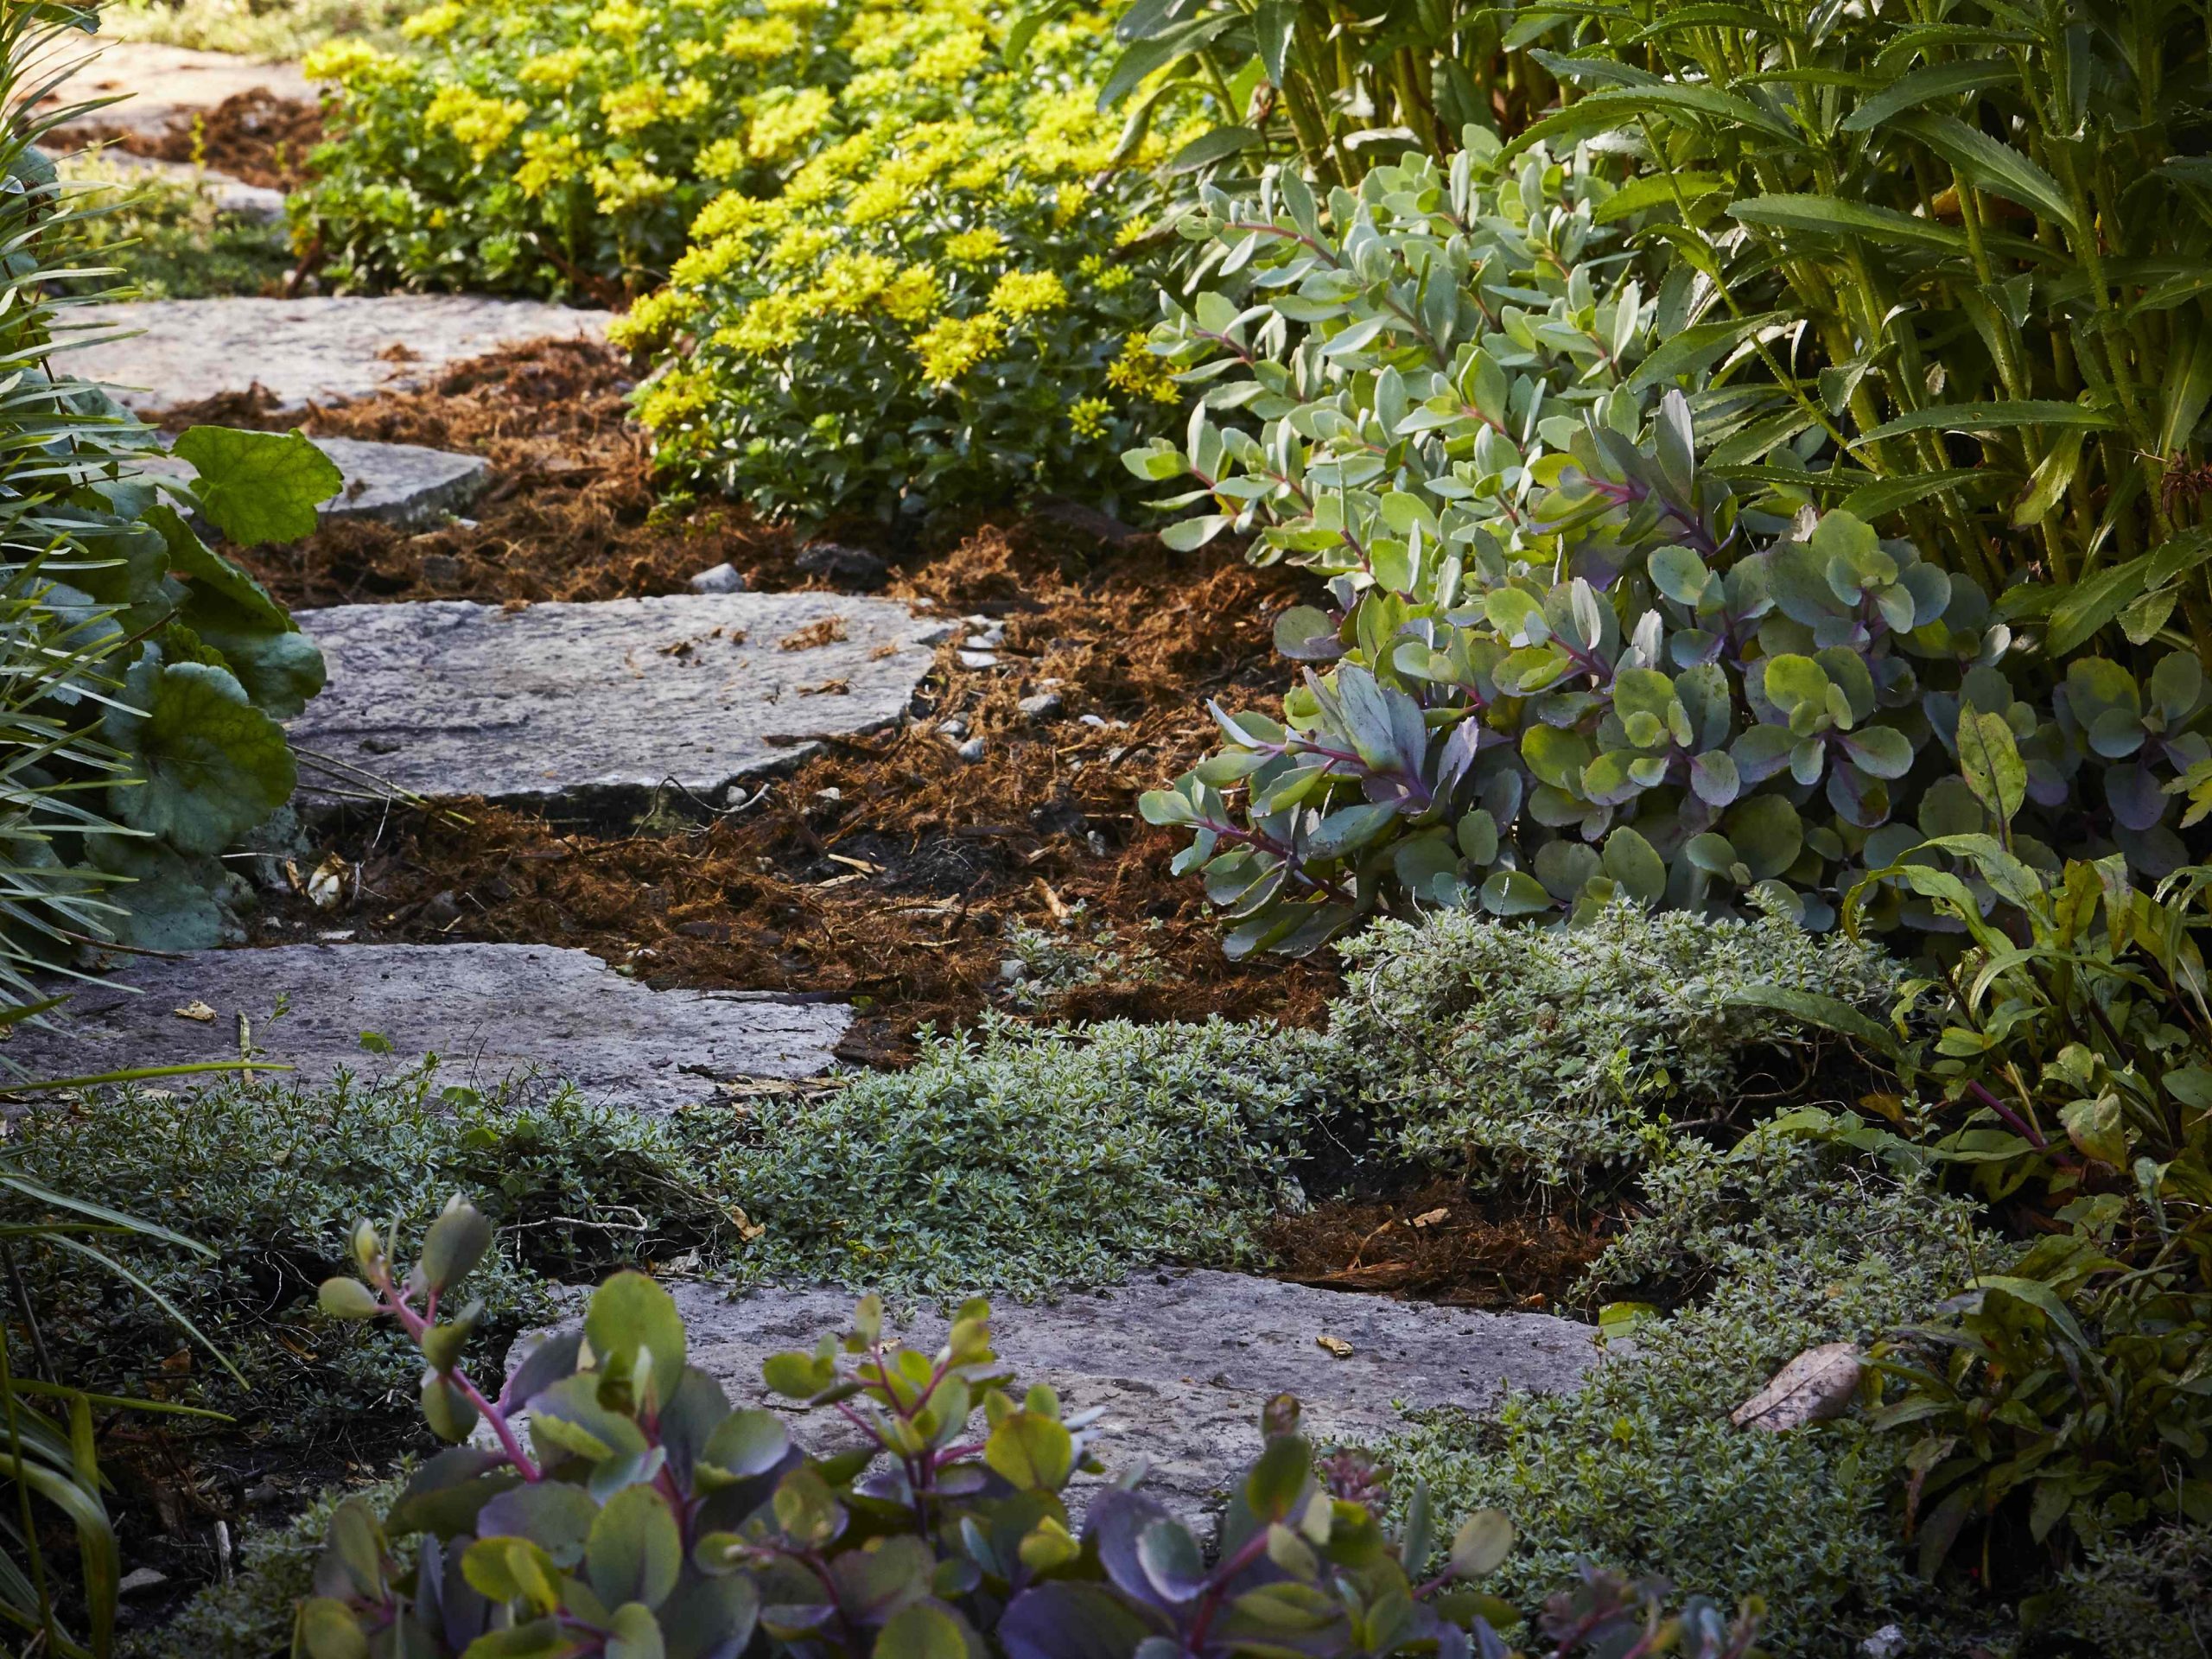
📏 Scale Guide
that makes this walkway so enchanting is the bold use of color from the foliage itself. While flowers are fleeting, the bright yellow of the groundcover and the deep purple tones in the stems of the other plants provide year-round interest. This isn’t just a path surrounded by green; it’s a path woven directly into a tapestry of contrasting plant colors. Without the vibrant yellow and subtle purple, the design would be pleasant, but it would lose its magical, painterly quality.
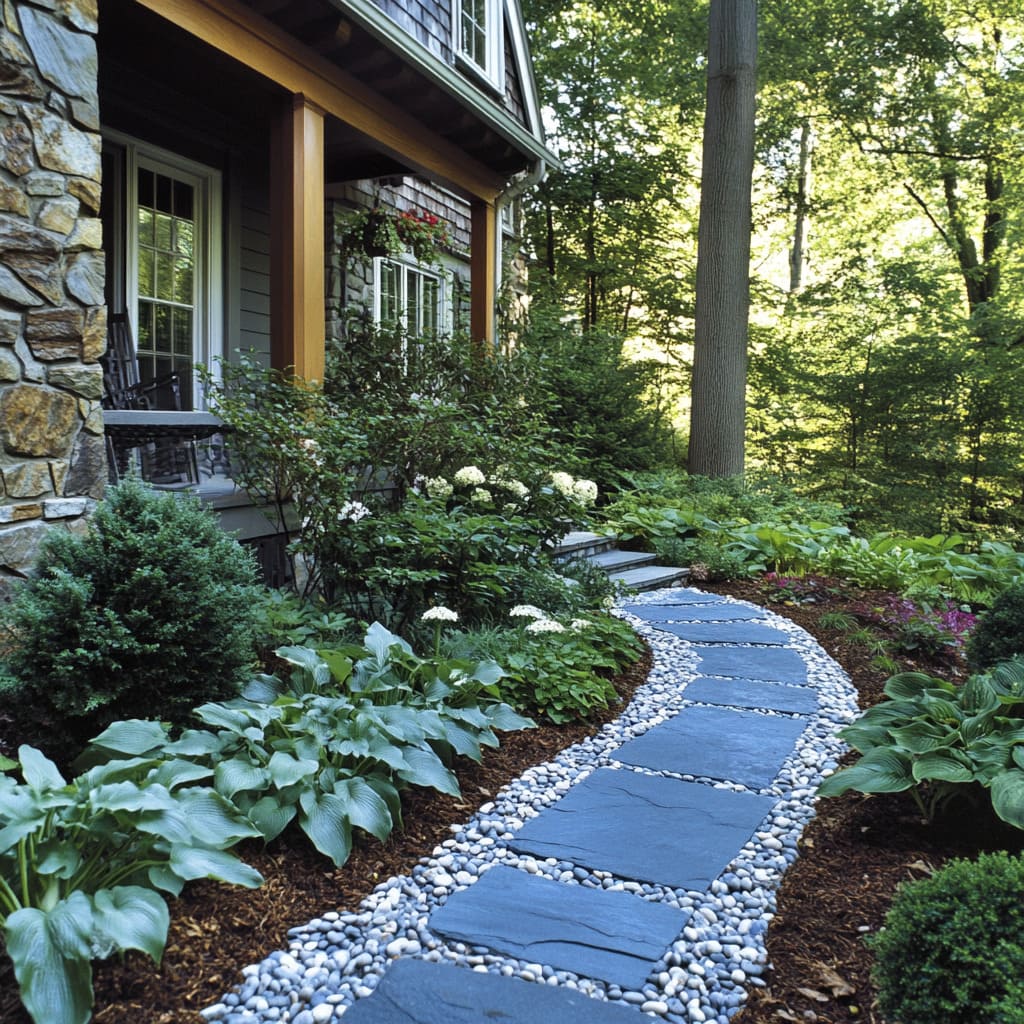
12. Create a Tropical Vibe with Dark Stones and Polished Pebbles
This lush, dense look is perfect for narrow side yards or smaller garden spaces where you want to create a big impact. The verticality of the large-leafed plants draws the eye upward, making the space feel taller. A path width of 3 to 4 feet is ideal. Anything wider, and you risk losing the immersive, jungle-like feel. This design proves you don’t need a huge backyard to create a dramatic and transportive garden experience. It’s about density and layering, not square footage.
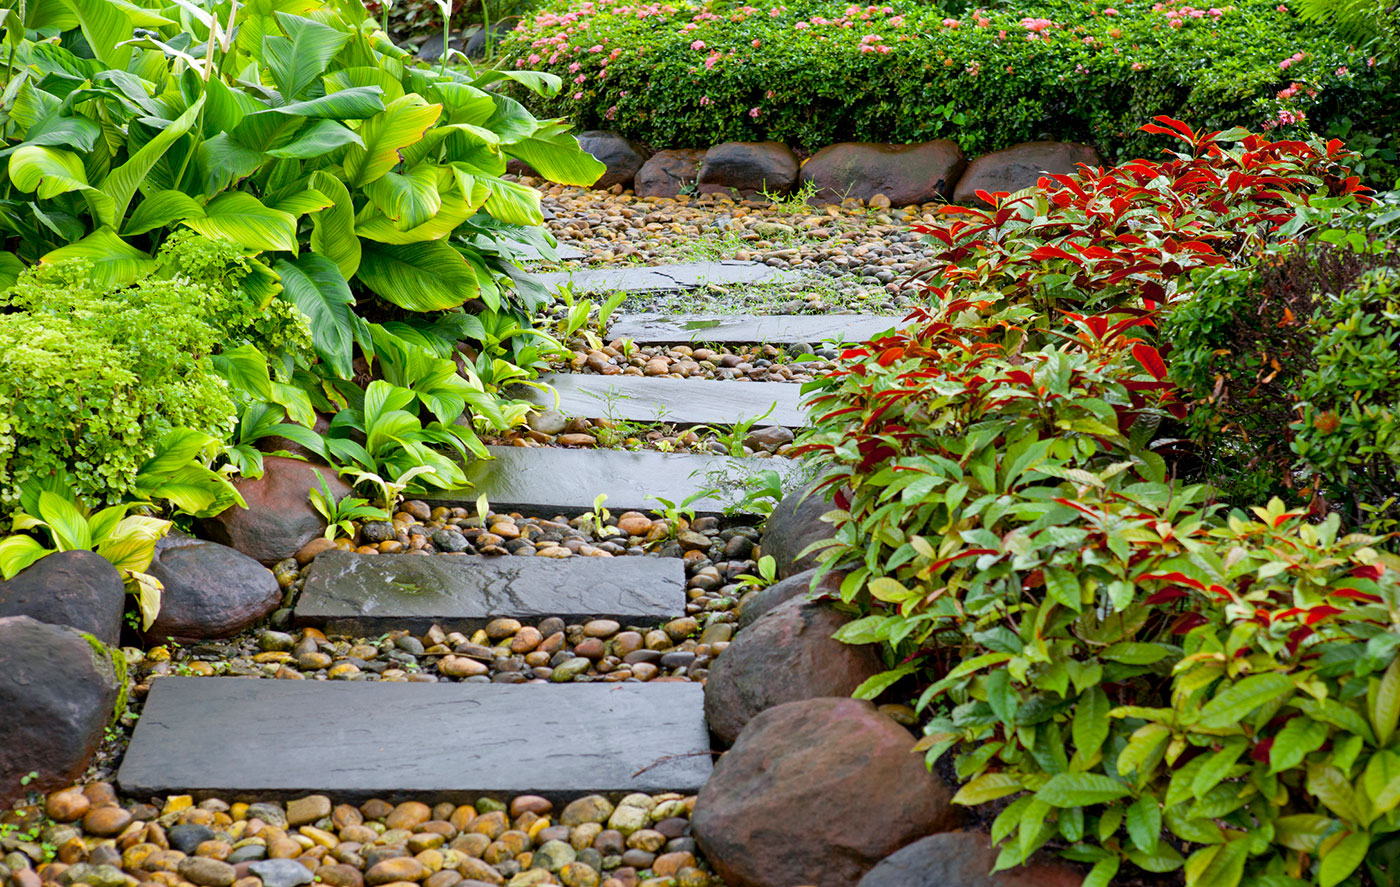
💰 Budget Breakdown
This pathway feels so luxurious because of the high-contrast textures. The smooth, dark grey rectangular stepping stones provide a sleek, modern base. The polished river pebbles add a glossy, varied texture that reflects light and mimics a streambed. Finally, the oversized, dramatic foliage of the surrounding plants introduces a wild, organic element. This combination of sleek, glossy, and lush textures is what elevates the design from a simple garden path to a rich, sensory experience.
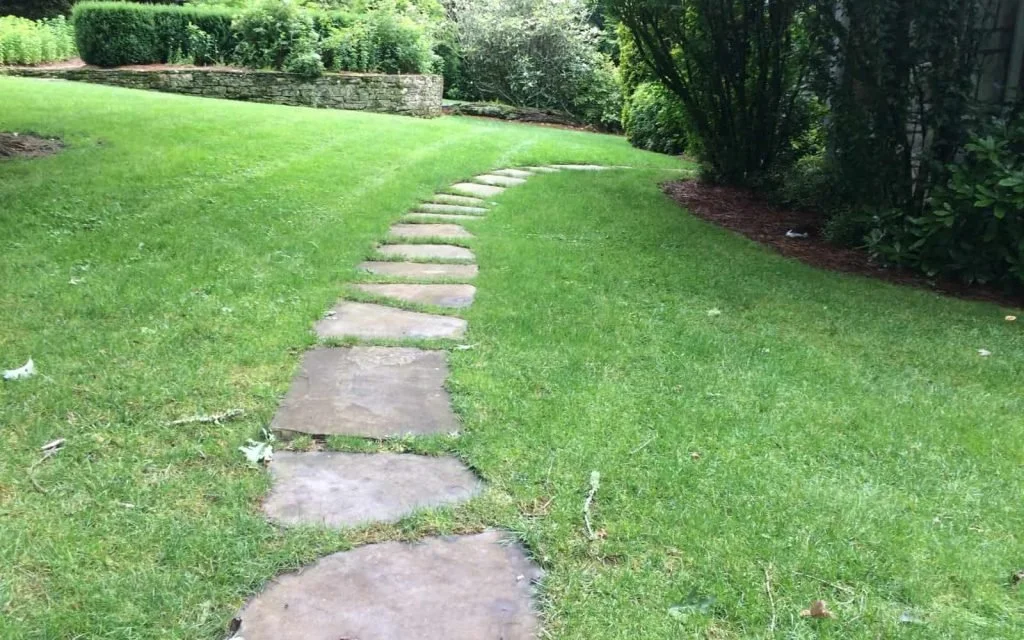
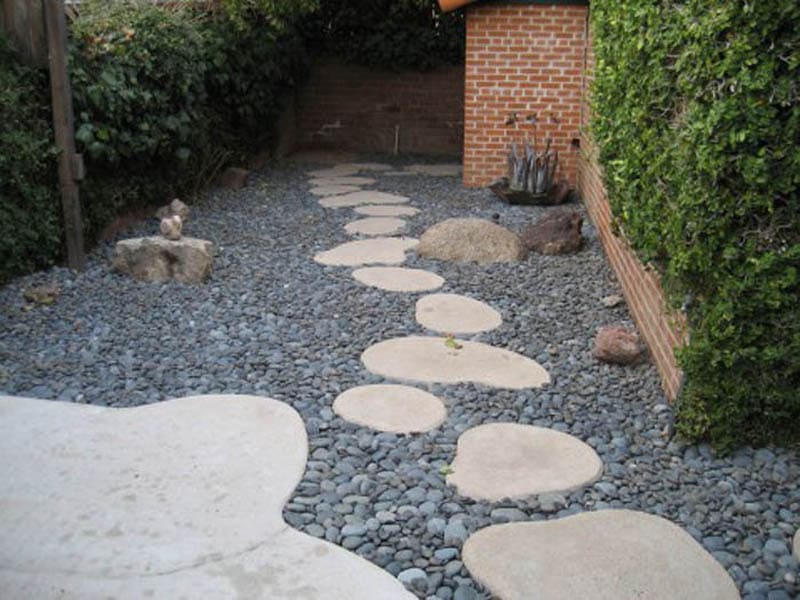
13. A Simple Stone Path for a Classic Garden
Image quality for this idea is lower, so let’s focus on the general concept it represents: a basic garden stepping stone path. A path like this can be a double-edged sword. If the stones are too small or spaced too far apart, it can look amateurish and be awkward to walk on. If not set properly into the ground with a stable base, they become tripping hazards that shift over time. A simple path requires just as much thoughtful installation as a complex one to look good and function safely for years.
🔧 How-To Brief
A classic stepping stone path is one of the most budget-friendly walkway projects you can tackle. You can buy 12-inch or 16-inch square concrete pavers from any big-box hardware store for just a few dollars each. Instead of digging out the entire path, simply outline the paver on the grass with a shovel, remove the sod just deep enough for the paver and an inch of sand, level it, and drop it in. For a 20-foot path, you could easily complete the project for under $100 in materials.
14. Craft a Rustic Ascent on a Mulched Hillside
When using irregular natural stone for steps on a slope, the key to a professional look is to “nestle” them into the hill, not just place them on top. Excavate enough mulch and soil so that at least one-third of the stone is buried within the hillside. This gives the impression that the stones are an outcropping of the hill itself, rather than something foreign placed on top. It also provides much greater stability, ensuring your steps won’t shift and wobble after a heavy rain or with repeated use.
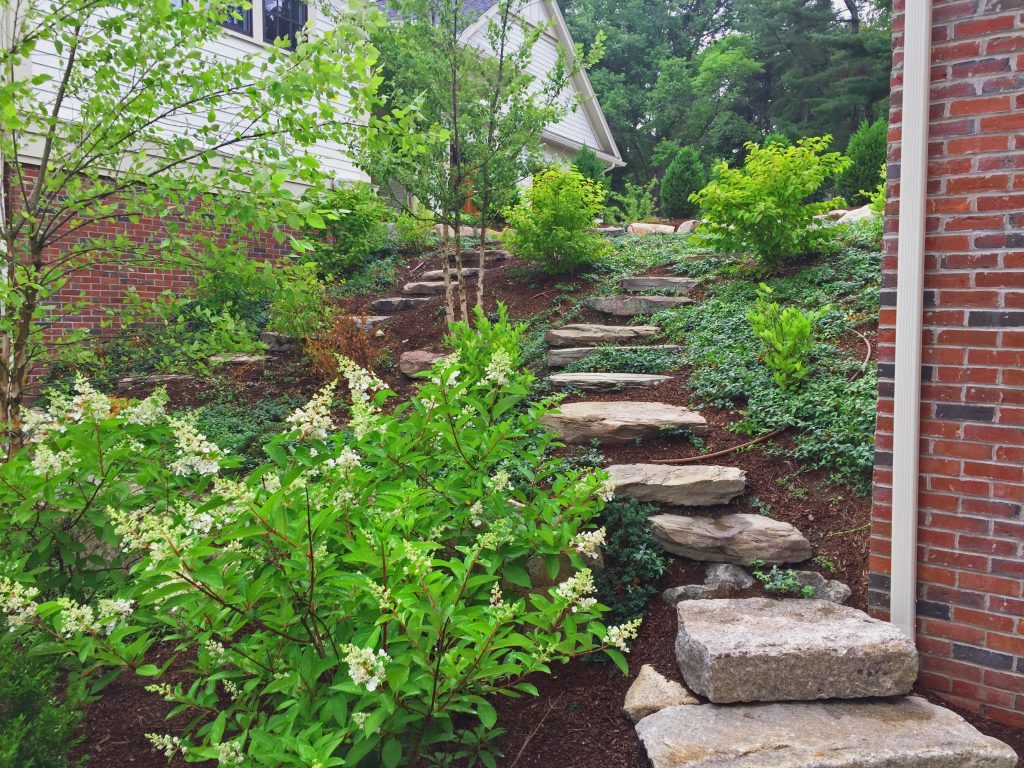
⚠️ Real Talk
A mulched path is a beautiful, natural, and cost-effective choice, but be prepared for a consistent upkeep regimen. Mulch is a lightweight material that gets displaced by foot traffic, wind, and water. You will need to rake it back into place periodically. More importantly, mulch decomposes over time. Expect to top-dress the entire path and surrounding beds with a fresh layer of mulch every 1-2 years to maintain its rich color and depth. This is an ongoing material cost to factor into your decision.
15. A Welcoming Flagstone Path to a Colorful Front Door
The single element that brings this entire scene to life is the light green front door. It serves as a cheerful, welcoming focal point at the end of the walkway. Without that specific pop of color, the house would be a pleasant but unremarkable combination of white siding and grey stone. The door provides a destination, a purpose for the path, and a hint of the personality inside. It’s a masterclass in how a small, strategic dose of color can have an outsized impact on curb appeal.
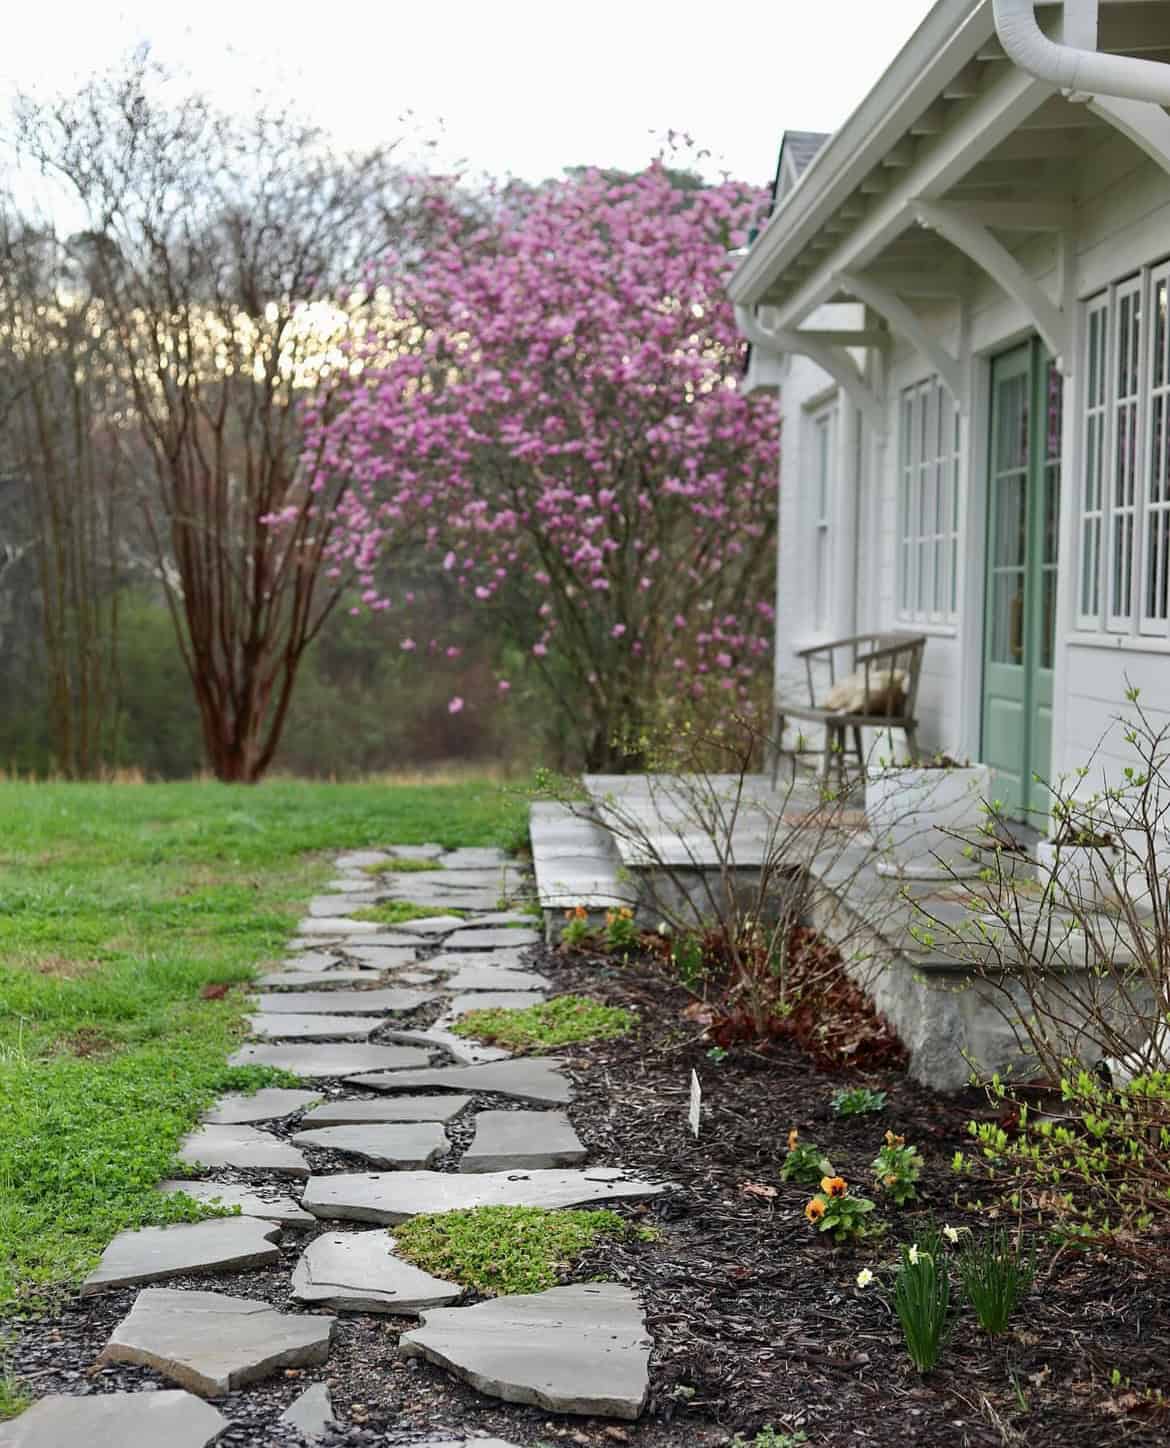
📐 Style Math
This design feels so natural and established due to its effective use of asymmetry and organic shapes. The flagstone path is composed of irregular stones, creating a rustic, unforced line. The garden bed on the left curves gently, softening the corner of the house. Even the vibrant pink flowering tree in the background is off-center, balancing the composition. This avoidance of rigid, straight lines makes the entire landscape feel as if it grew into place over time. Compare its rustic charm to the formal symmetry of Idea #5.
16. Define a Curved Paver Walkway with a Brick Border
A crisp border is what elevates a paver path from simple to sophisticated. For a curved walkway like this one, flexible plastic paver edging is your best friend. Here’s a quick how-to for that professional edge:
⭐ The One Thing
- Lay the Pavers First: Install your main field of pavers, cutting them to shape along your desired curve.
- Excavate a Small Trench: Dig down a few inches right along the outside edge of your laid pavers.
- Install the Edging: Press the flexible plastic edging firmly against the pavers in the trench.
- Spike it Down: Hammer landscape spikes through the designated holes in the edging every 12-18 inches to secure it to the ground.
- Backfill: Cover the installed edging with soil and sod or mulch to hide it completely, leaving only a perfect, stable line.
The cost of a professionally installed paver walkway can vary widely based on materials and labor. Here’s a general estimate for a similar look:
- Paver Stones (per sq. ft.): $6 – $15
- Edging Bricks (per linear ft.): $2 – $5
- Base Material (Gravel/Sand): $100 – $300
- Professional Labor (per sq. ft.): $15 – $30
- Plants & Landscaping: $200 – $800
- TOTAL ESTIMATE (100 sq. ft. path): $2,400 – $5,600
- Budget alternative: Using cast concrete pavers instead of natural stone and tackling the installation as a DIY project can reduce the cost to the $800 – $1,500 range.
17. Alternate Pavers and Pebbles for a Textured, Curvy Path
To create this striped effect, the installation order is crucial. First, lay out and fully set your main rectangular pavers, leaving a consistent gap of 6-8 inches between them. Use a temporary wood spacer to ensure uniformity as you go. Once the main pavers are set and stable on their base, you can then come back and fill the gaps. Use durable landscape edging along the sides of the path, and then pour in the pebbles, spreading them carefully to create a level surface with the pavers.
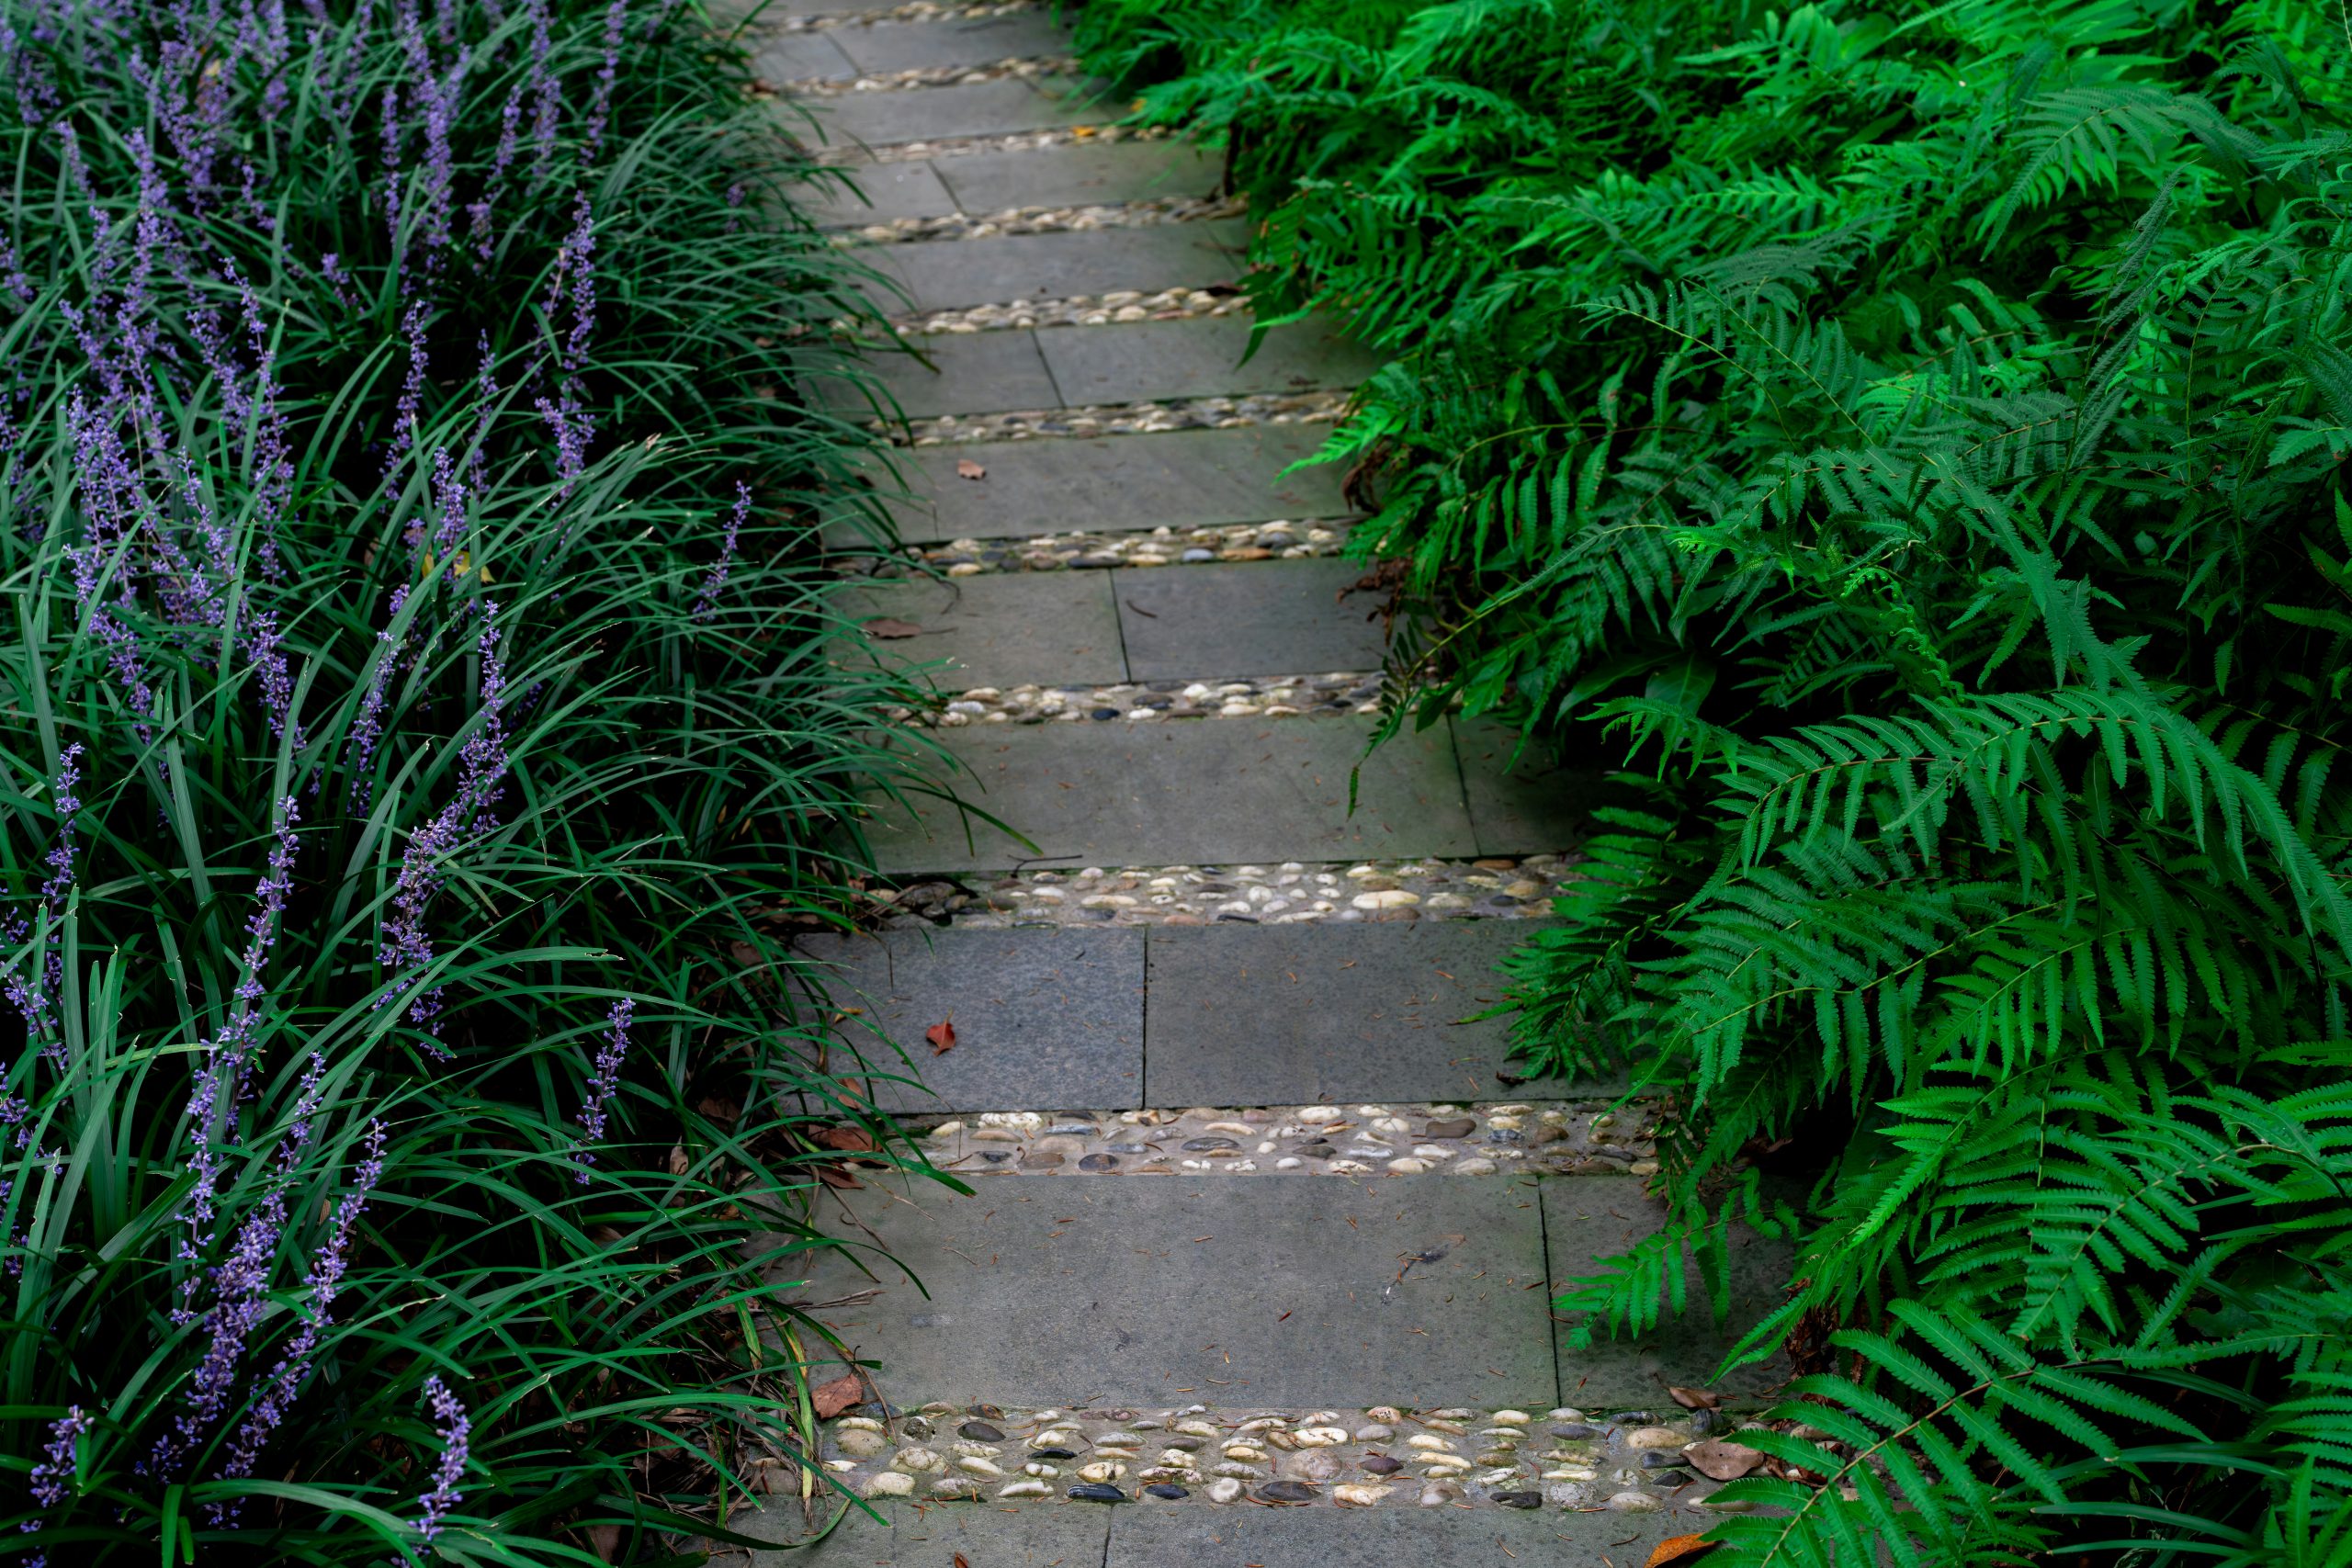
🔥 Trending Context
This path design works so well because it creates a strong visual rhythm through alternation. It’s a simple pattern—paver, pebbles, paver, pebbles—that is immensely satisfying to the eye. The contrast isn’t just in color (dark gray vs. beige) but also in texture and scale (large and smooth vs. small and bumpy). The surrounding lushness of the ferns and lilies provides a soft, organic counterpoint to the path’s clean, geometric stripes, creating a perfect balance between man-made structure and natural beauty.
18. Nestle Natural Stone Pavers in a Bed of Lush Groundcover
While setting stones in groundcover creates a beautiful, seamless look, choosing the right plant is critical. A delicate, slow-growing groundcover can be easily trampled and killed. You need a tough, resilient, walkable variety like creeping thyme, dwarf mondo grass, or Irish moss that can handle foot traffic. Be prepared for an establishment period of at least one full growing season before the path can be used regularly. It’s a patient gardener’s pathway, not an instant solution.

🎯 What Makes It Work
that makes this path feel so vibrant and alive is the sheer variety and density of the surrounding plantings. It’s not just a path bordered by a few plants; it’s a path that seems to have been carved directly through a thriving, colorful jungle. The hot pink and spiky white flowers, combined with deep green and even reddish-purple foliage, create a rich tapestry. Without this bold, multi-hued botanical abundance, the simple stone path would lose all its drama and context.
19. A Serpentine Stone Path into a Secluded Garden Nook
This moody, atmospheric look is a careful balance of elements: 50% cool, hard surfaces (the gray stepping stones), 40% lush, deep green foliage, and 10% curated technology (the subtle path lighting). The key to its mysterious vibe is the embrace of shadow. The overgrown bushes are allowed to create dark, intriguing spaces. The single light source doesn’t illuminate everything; it just provides enough light to safely navigate, enhancing the sense of enclosure and privacy. To make it feel less mysterious, you would increase the lighting and trim back the foliage.
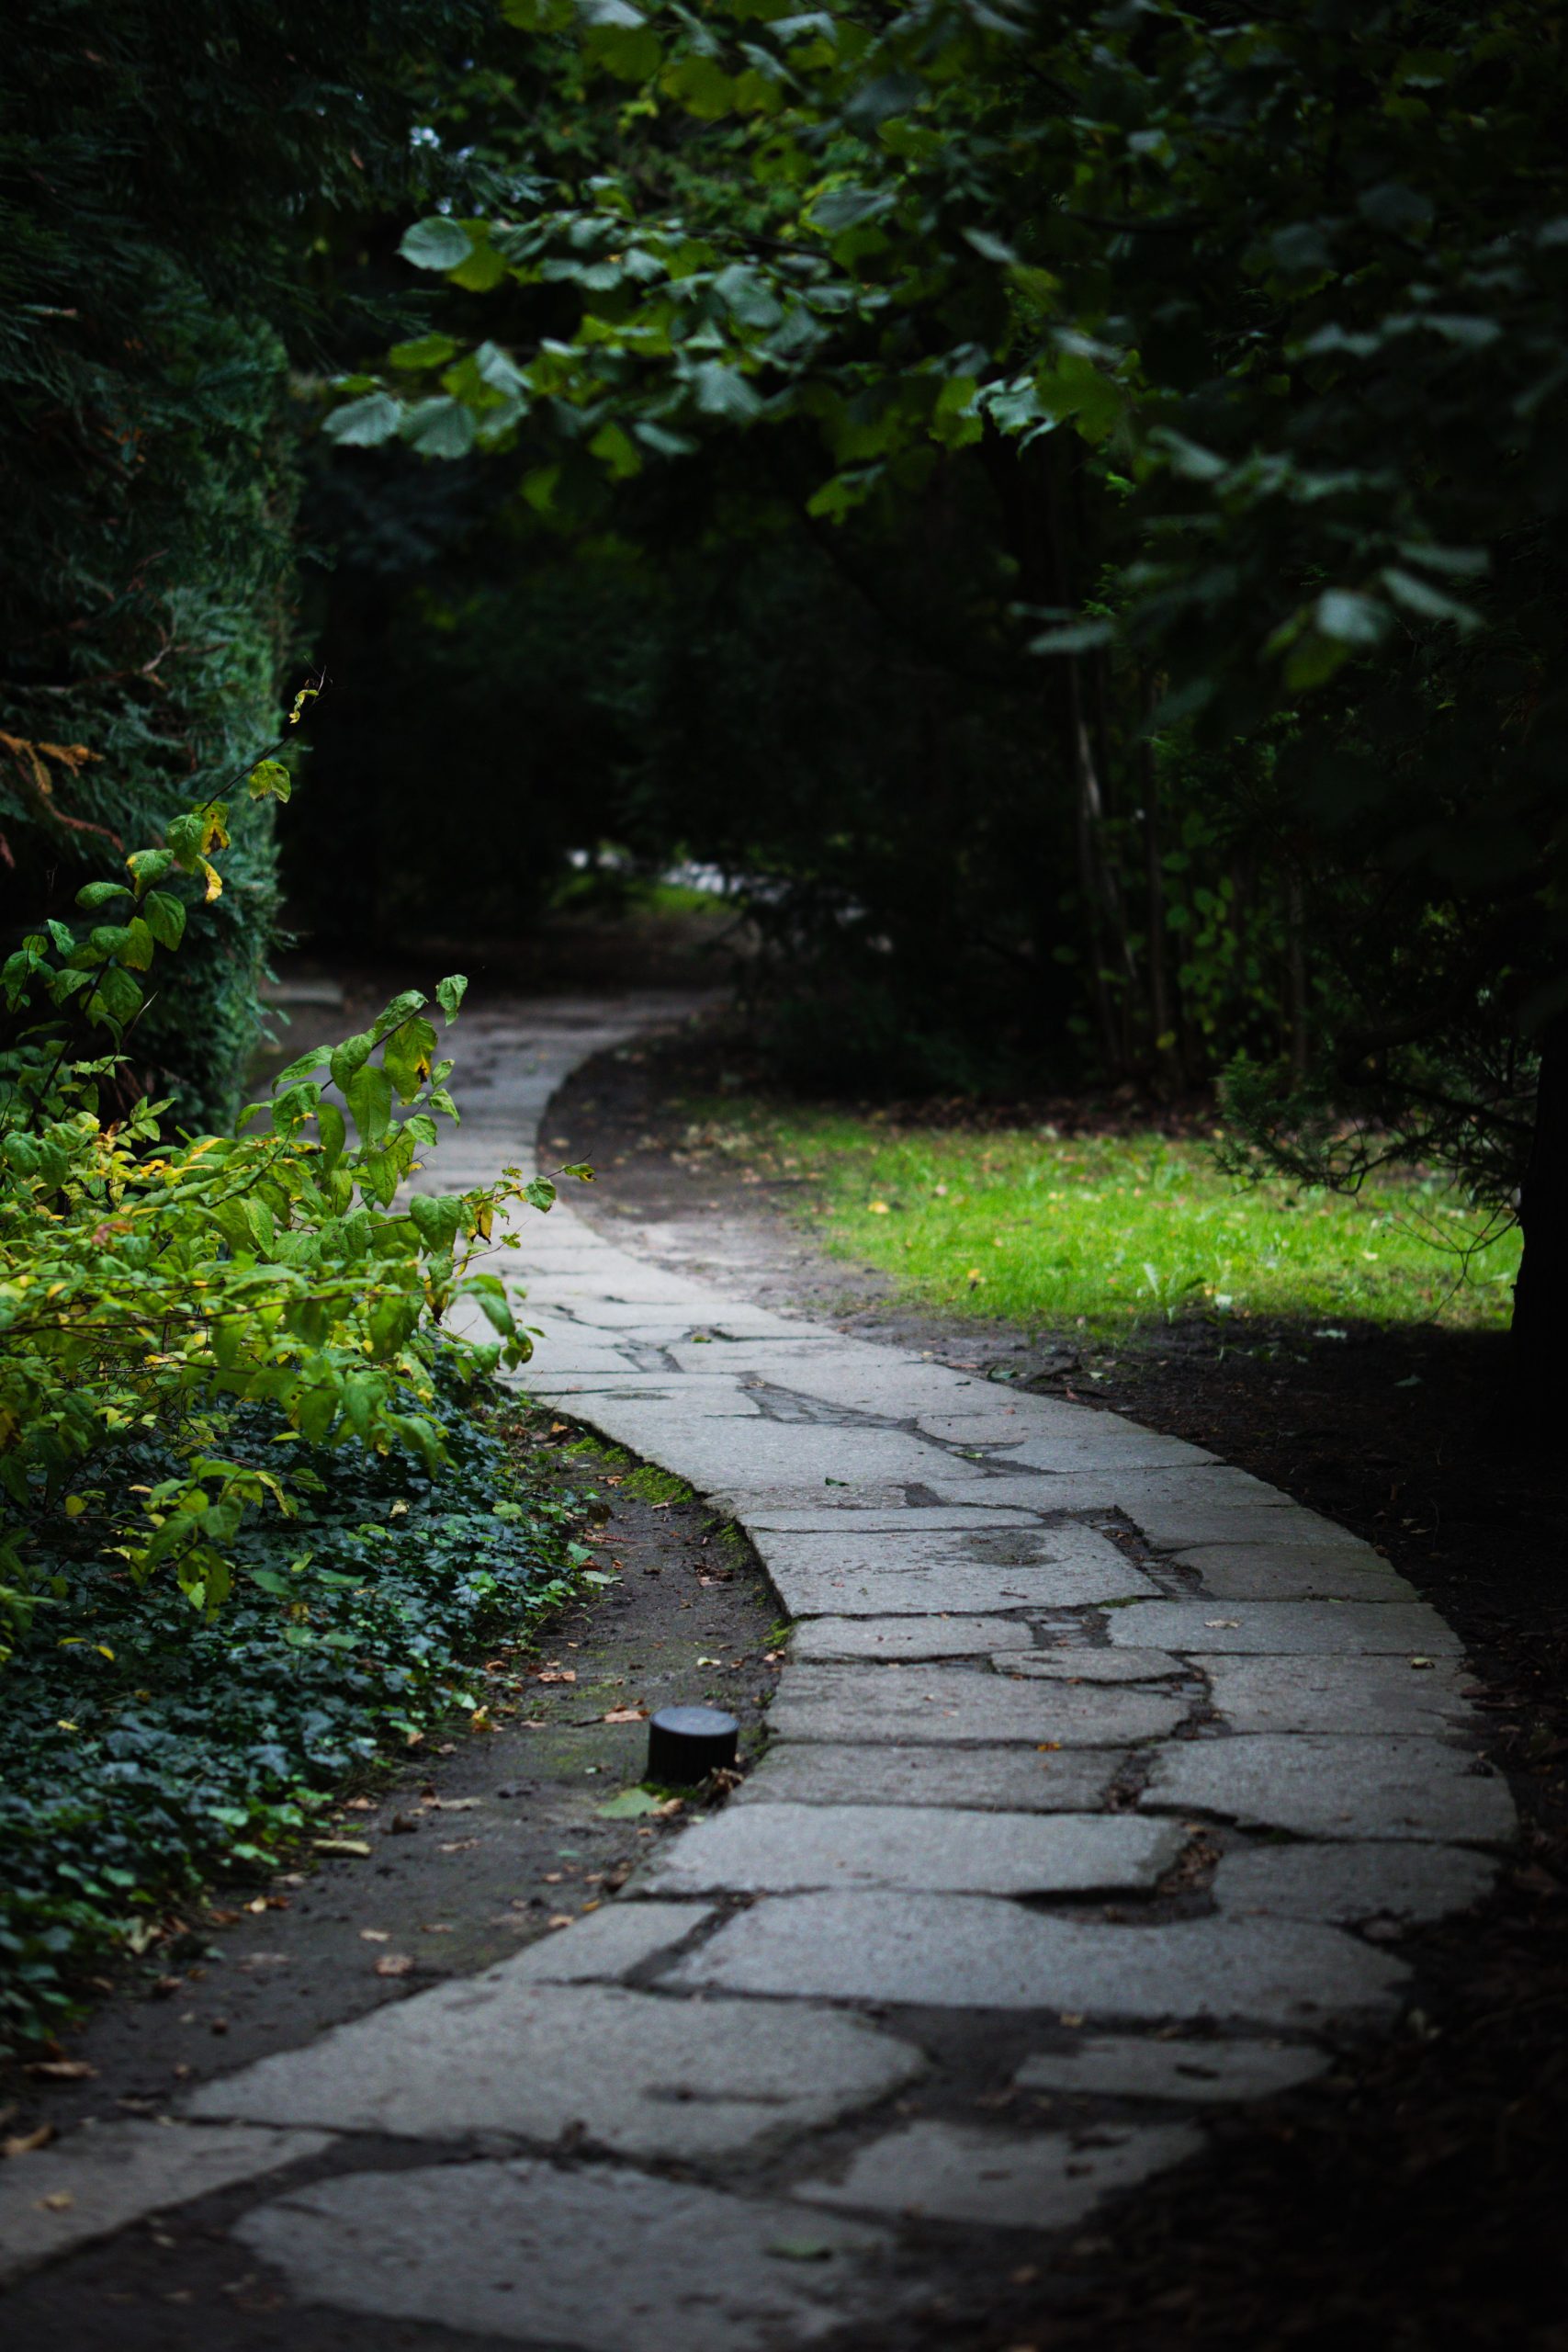
💡 Designer Tip
Before committing to this secluded, organic style, run through this quick checklist:
- Sunlight Check: Does this area get enough sun to support the lush greenery you want, or will you need to choose shade-loving plants like ivy and ferns?
- Footing Test: Are the stones you’ve chosen flat and wide enough to provide stable footing, even when damp or in low light?
- Lighting Plan: Have you planned for low-voltage lighting? Trenching for wires is much easier before you lay the stones and plant everything.
- Water Drainage: Does the area drain well, or will your path turn into a stream during heavy rain?
20. A Practical Path of Stepping Stones, Gravel, and Brick
This walkway is a masterclass in using affordable, common materials in a thoughtful way. It works because it defines different zones through texture and color. The smooth gray pavers create a clear, comfortable walking surface. The light-colored gravel acts as a durable, low-maintenance filler that provides a pleasant crunch underfoot. Finally, the red brick edging creates a crisp, colorful border that separates the path from the adjacent river rock bed. It’s a highly functional design where each material has a specific job to do.
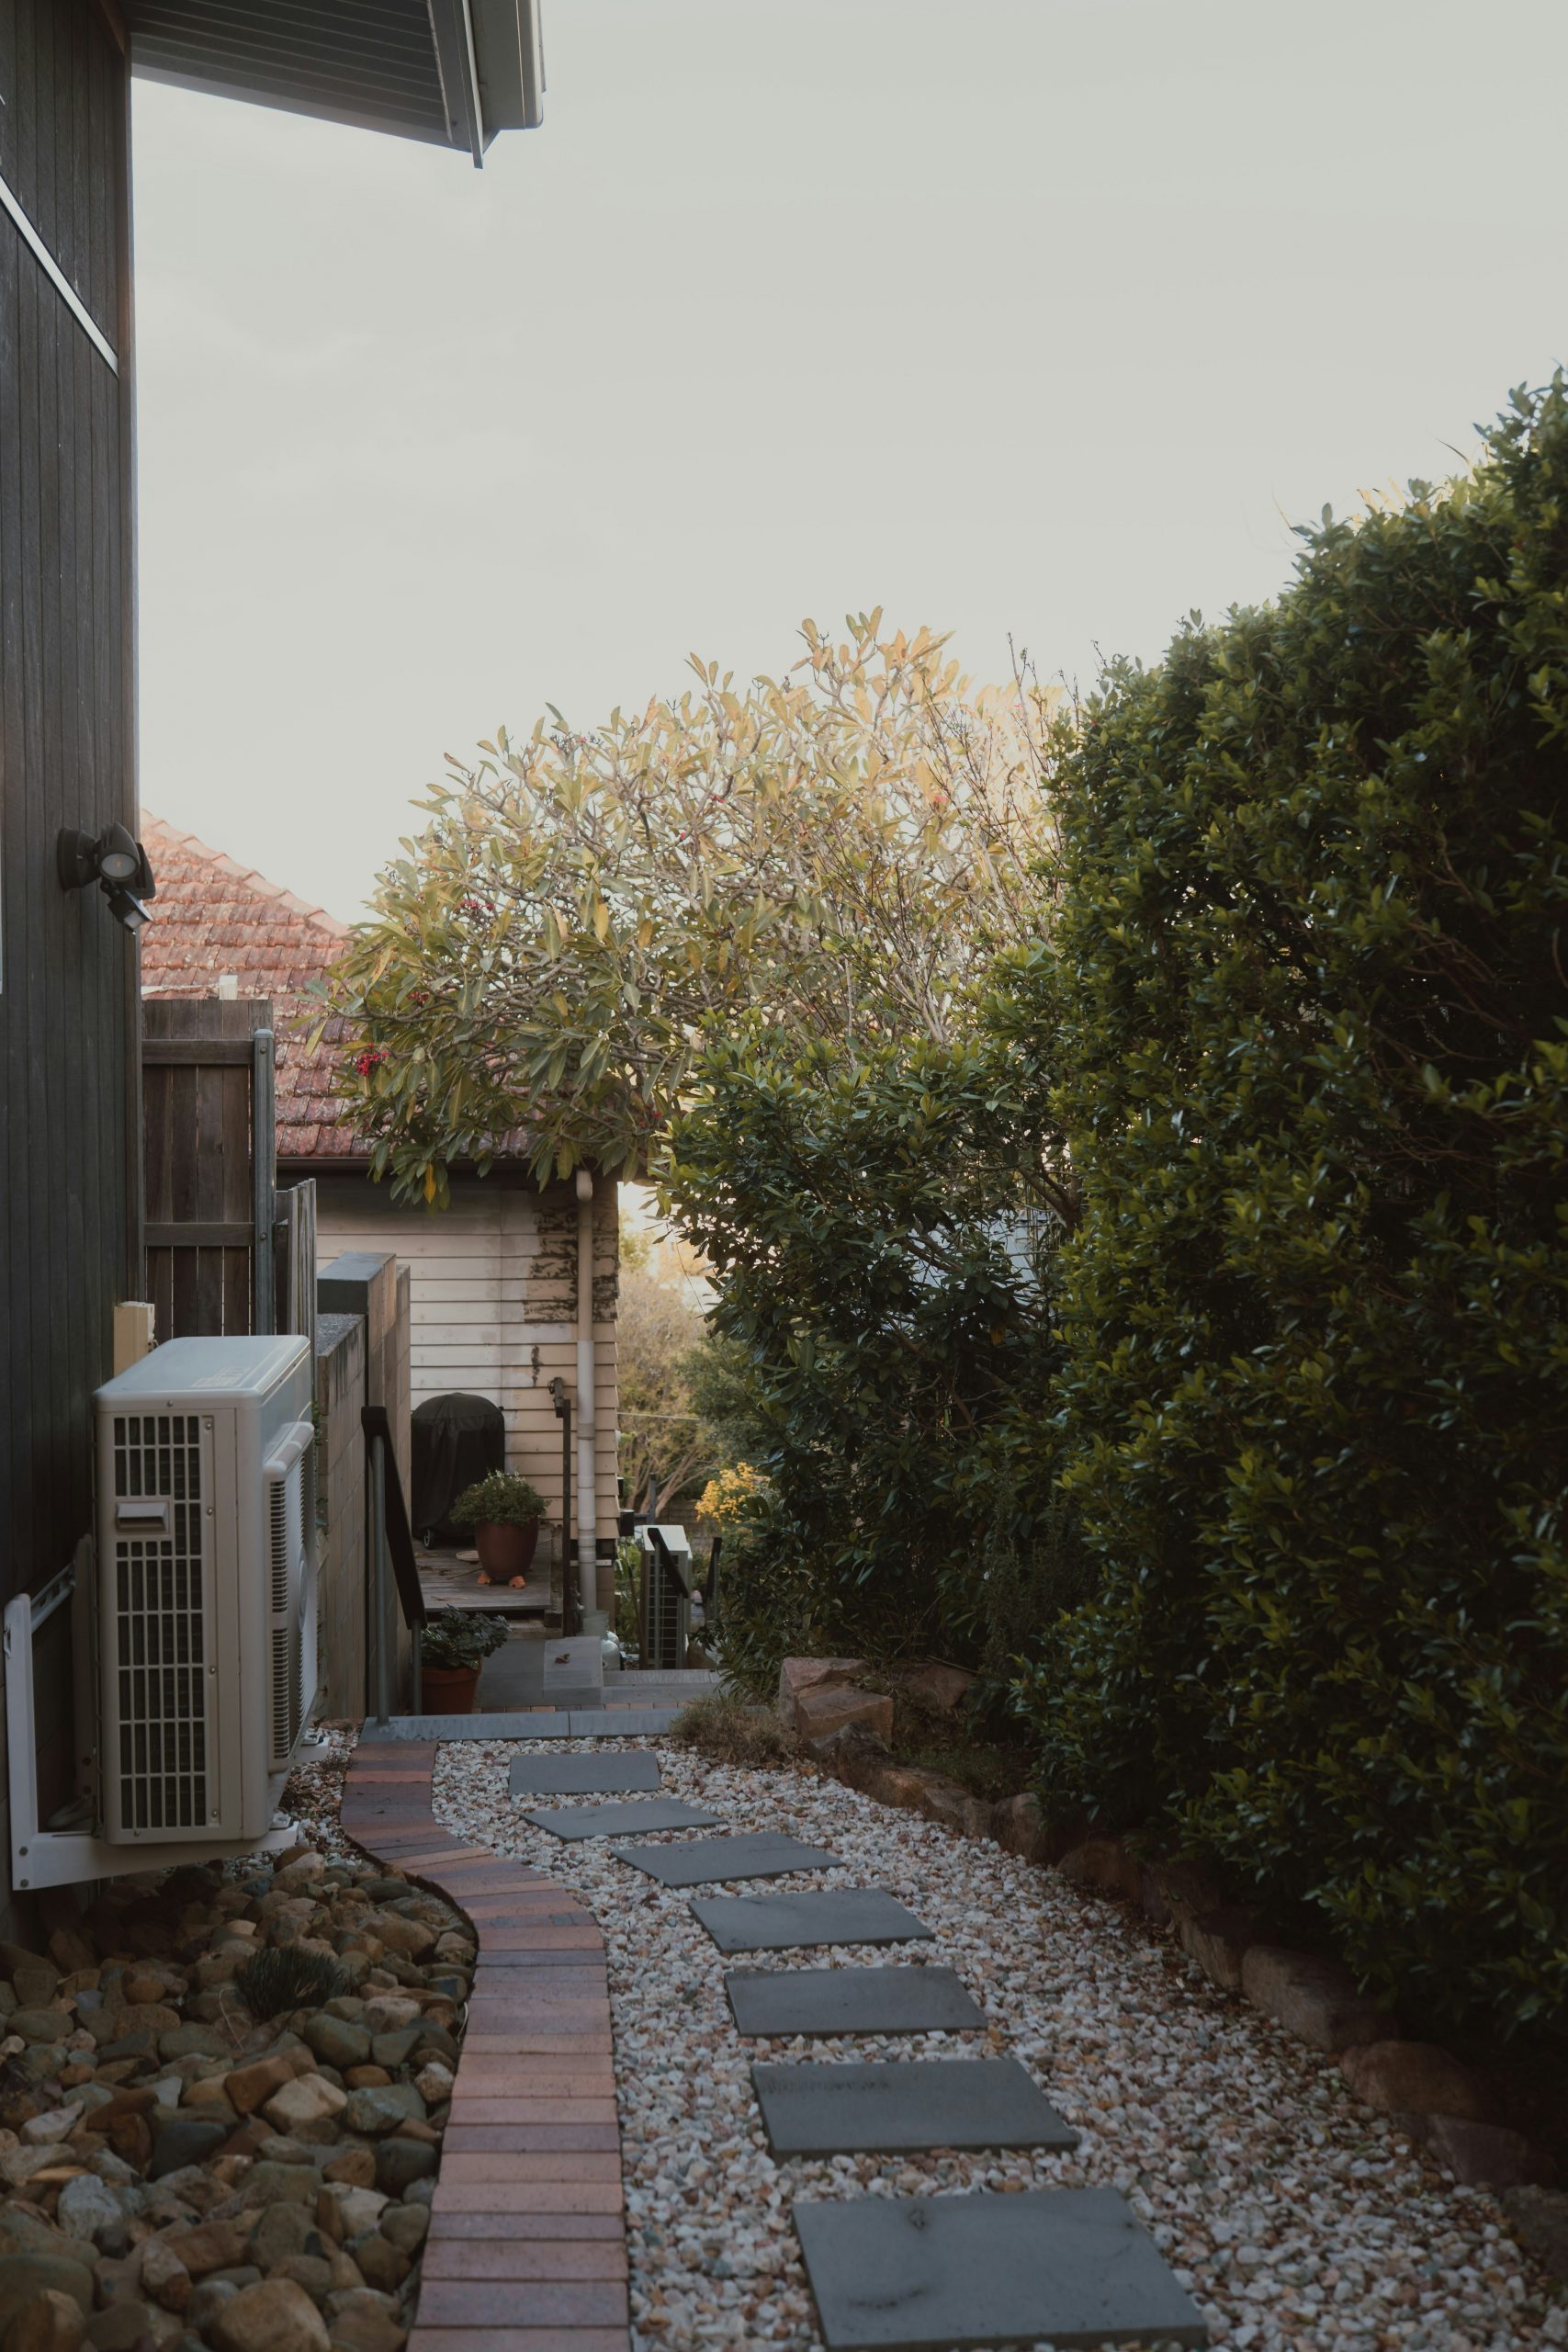
✅ Before You Start
This is a look you can absolutely achieve on a tight budget. All the core components—concrete pavers, basic pea gravel, and standard bricks—are available at very low prices from any home improvement store. Look for pavers in the $3-$5 range, gravel for around $5 a bag, and reclaimed bricks for pennies on the dollar from a local salvage yard or Facebook Marketplace. The key is in the careful installation and crisp lines, not in expensive materials. This look feels much more high-end than its material cost.
21. Walk a Magical Path Through a Green Archway Tunnel
that gives this walkway its fairy-tale quality is repetition. A single archway would be a nice feature, but repeating it over and over again transforms a simple path into an immersive, tunnel-like experience. This repetition creates a powerful sense of rhythm and perspective, drawing your eye down the long path and creating a feeling of journey and destination. It’s a commitment to a single idea that pays off with incredible dramatic impact. This is a much grander statement than the single arbor in Idea #23.
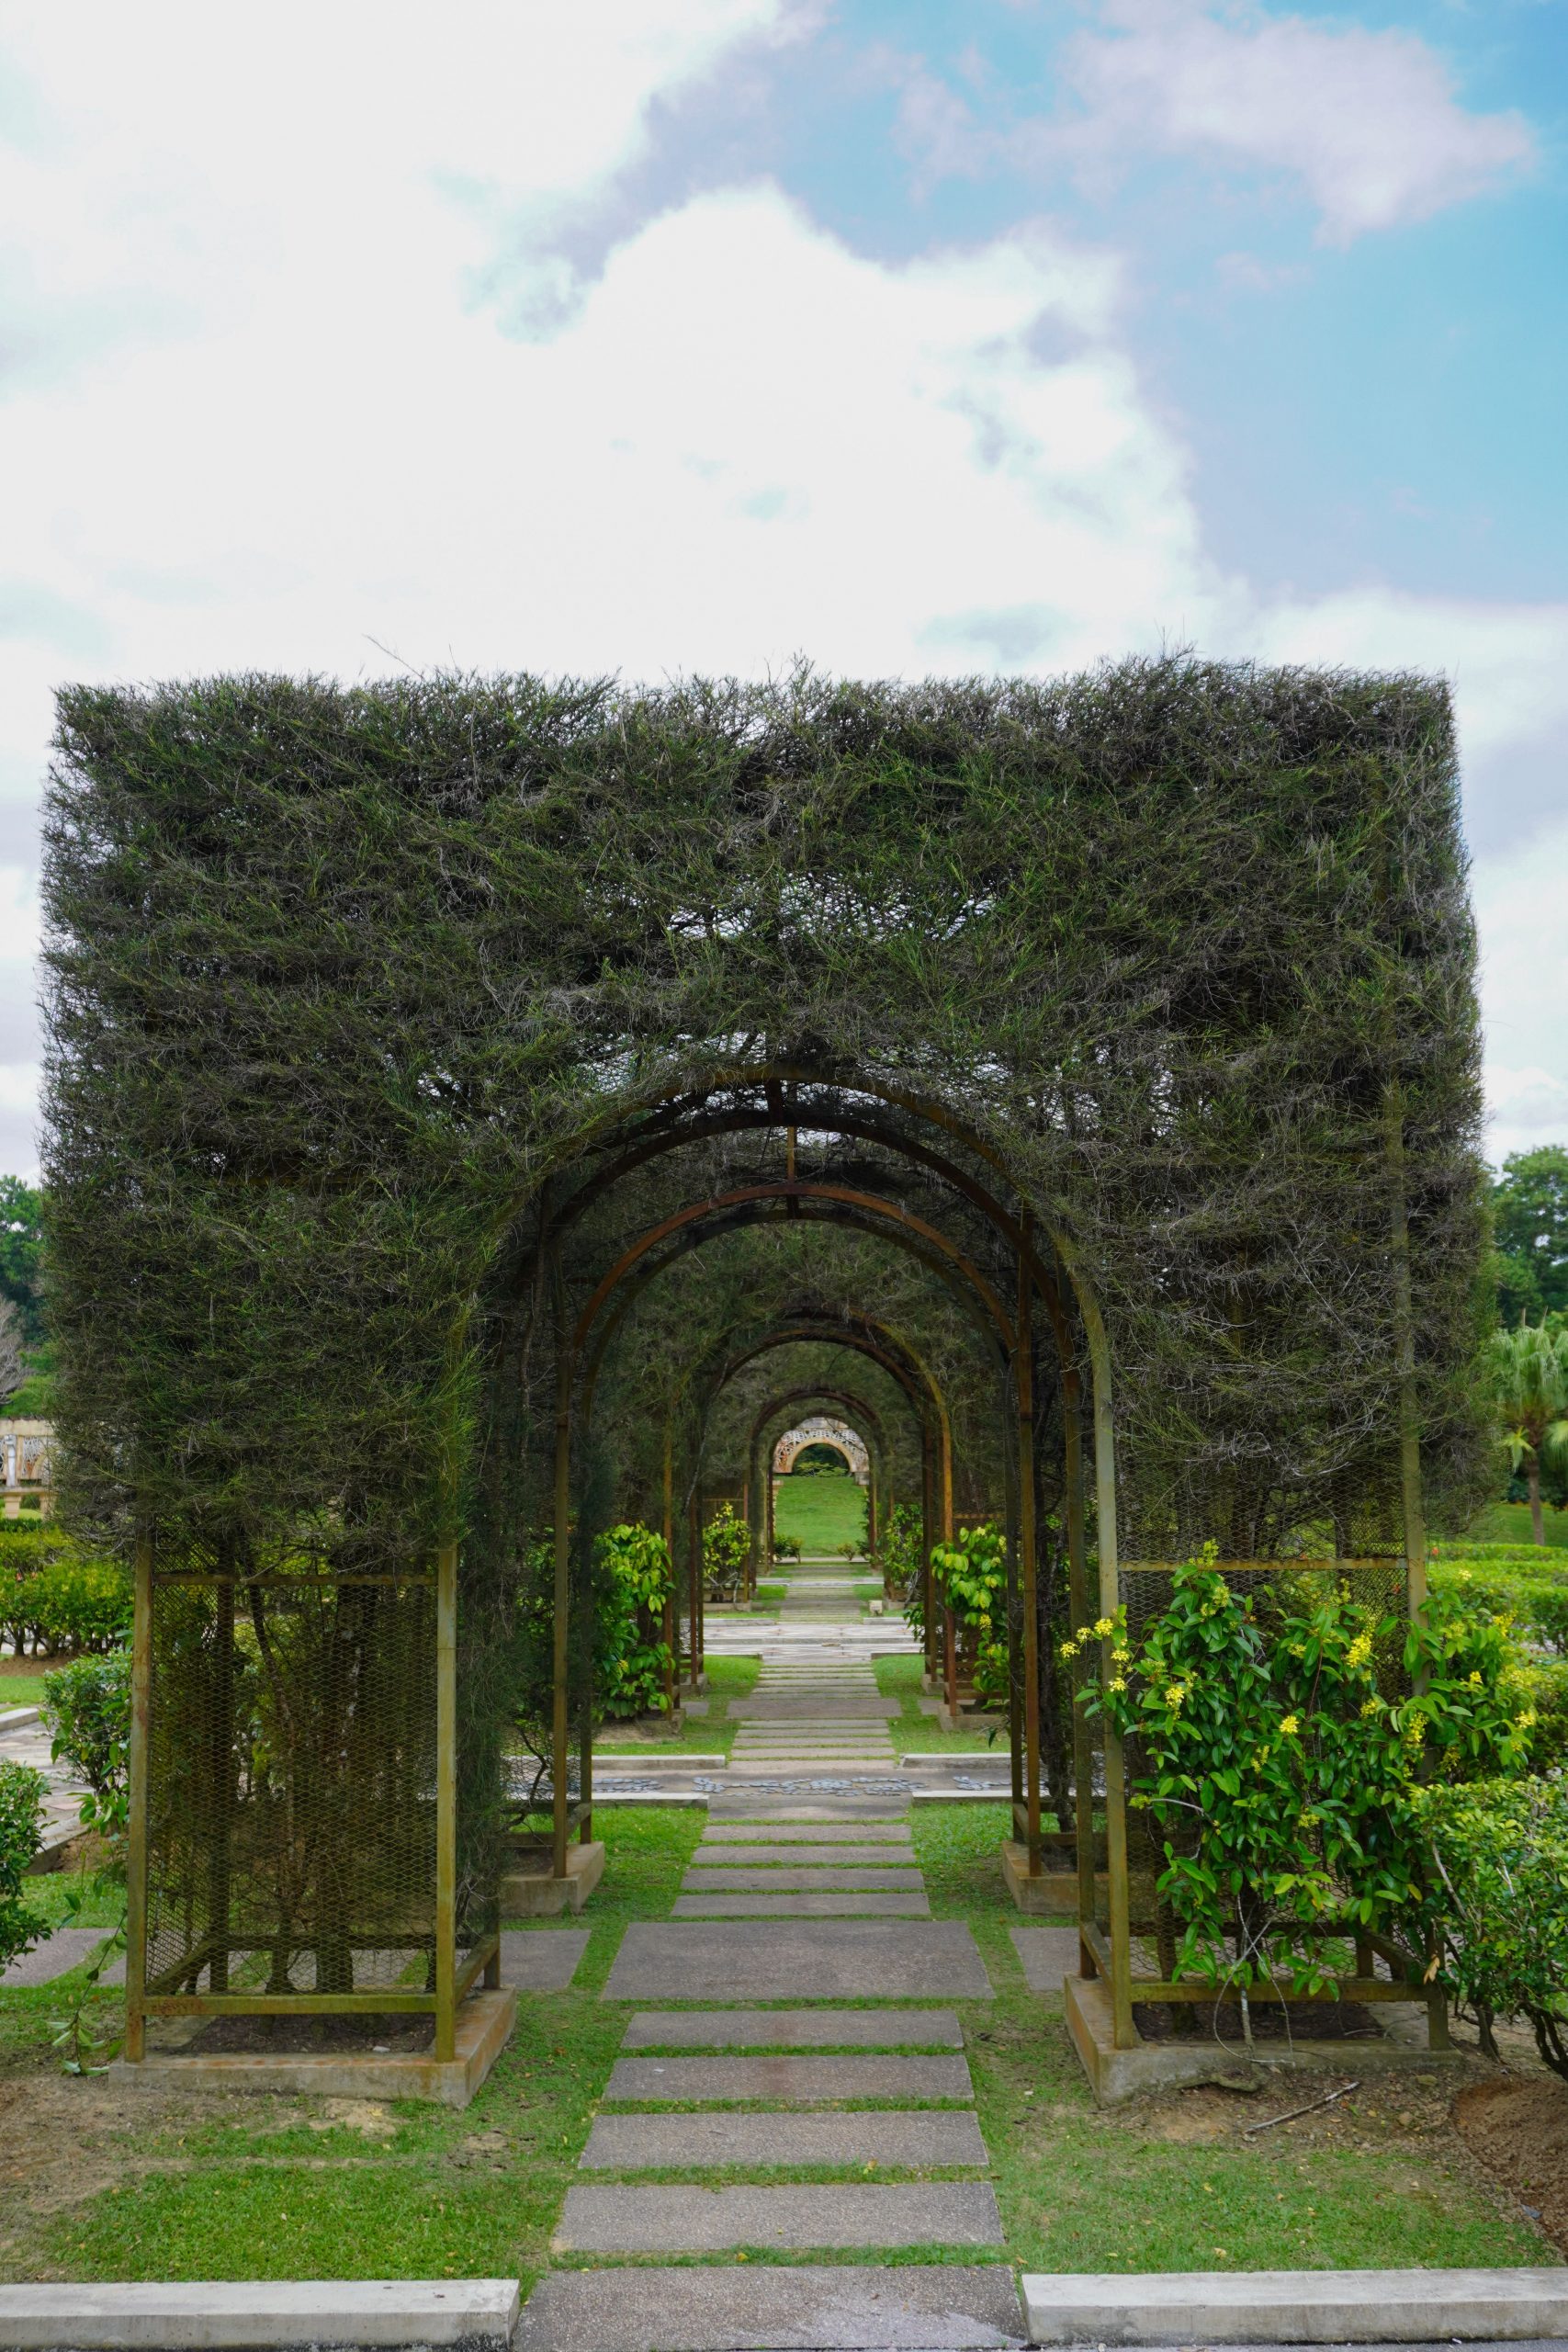
🧹 Maintenance Reality
A design feature this dramatic requires significant space to be effective. For the tunnel effect to work, you need a straight run of at least 30-40 feet, which allows for a minimum of 4-5 arches spaced 8-10 feet apart. The path width should be generous, at least 4-5 feet, to prevent the tunnel from feeling cramped. This is a statement piece for a large, formal garden or a long backyard where you want to create a stunning focal point and a sense of formal progression.
22. A Rustic Stone Walkway Bordered by Light River Rocks
When combining stepping stones and a river rock filler, the secret to a clean look is to set the main stones first, on a solid base of compacted gravel and sand, so they are perfectly stable. Then, lay down high-quality landscape fabric around them, cutting it to fit snugly. Finally, pour the river rocks over the fabric. This ensures your expensive, decorative river rocks don’t slowly sink into the soil and disappear over time, and it drastically reduces the amount of weeding you’ll have to do.
💸 Get This Look For Less
A path filled with small river rocks looks fantastic, but get ready for the leaf blower to become your favorite tool. Debris, leaves, and dirt inevitably get trapped between the rocks. A regular pass with a leaf blower on a medium setting is the most effective way to keep it looking clean and prevent organic matter from building up and turning into soil for weeds. You may also find yourself occasionally hand-picking weeds or using a targeted weed killer for stubborn intruders that find a way through.
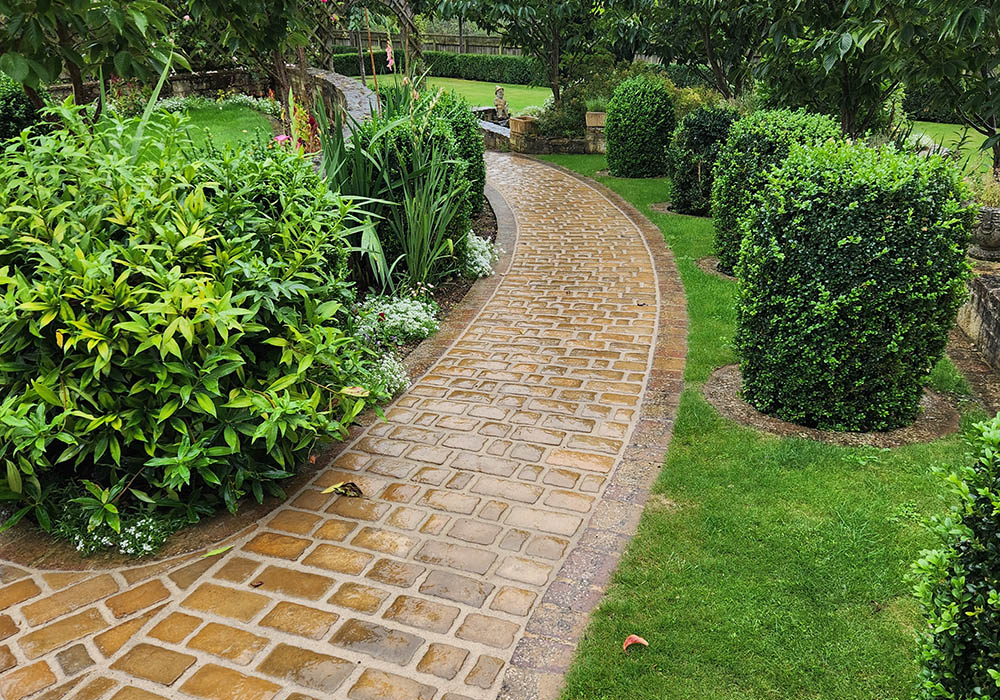
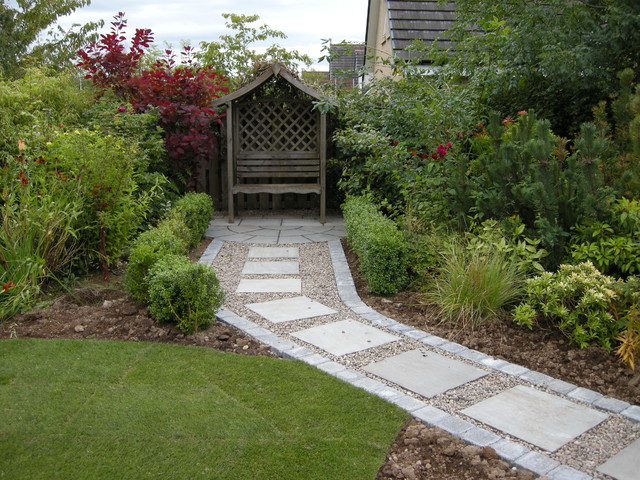
23. A Formal Garden Path Leading to a Wooden Arbour Bench
This design feels so peaceful and complete because it combines a clear path with a distinct destination. The walkway, with its neat gravel and paver border, creates a sense of order and formality. This path leads you to a focal point—the arbour bench on its own circular patio—which acts as a visual reward. It’s not just a place to sit; it’s a sheltered, defined space that invites you to pause. The lush plantings flanking the path and surrounding the bench soften the structure and make the entire composition feel integrated and serene.
📏 Scale Guide
An arbour and path combination is a significant garden feature. Before you start, be sure to:
- Confirm the Footprint: Measure out the full space for the path and the circular patio. Will it overwhelm your garden or fit in comfortably? Remember to account for chair leg room and access around the bench.
- Check Local Codes: Some areas have regulations about structures like arbours, especially regarding height and placement near property lines. A quick check can save you a big headache.
- Consider the Sun: Will the arbour be in a sunny spot needing shade, or a shady spot where you want to maximize light? This will influence whether you grow dense vines over it.
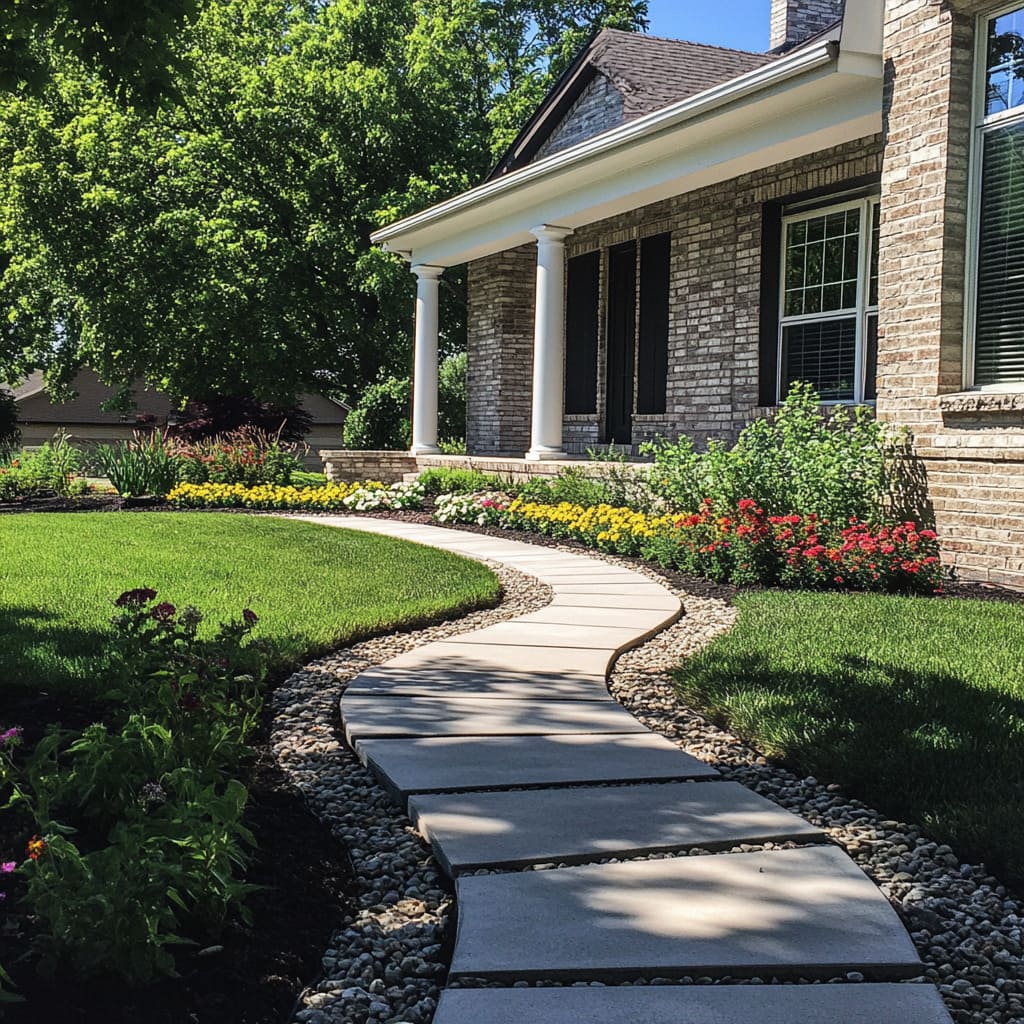
24. A Cheerful Curved Walkway with Pebble Infill and Flowers
This bright, happy walkway follows a simple but effective formula: 40% clean, man-made lines (the concrete pavers) + 30% soft, natural textures (the green grass and white pebbles) + 30% vibrant, joyful color (the red and yellow flowers). The pebbles are key; they act as a bright, clean border that makes both the grey concrete and the green grass look more defined and intense. To change the mood, you could swap the colorful flowers for all-white blooms for a more serene, formal look.
💰 Budget Breakdown
A path with pebble infill is gorgeous, but let’s be honest about the pebbles. They will get kicked around. Foot traffic, kids, pets, and even heavy rain can displace them onto the grass and the concrete pavers. You’ll be sweeping them back into place more often than you think. Also, if you use a light color like white, be aware that it will show dirt and algae over time, especially in shady or damp areas, requiring a good cleaning each season to stay bright.
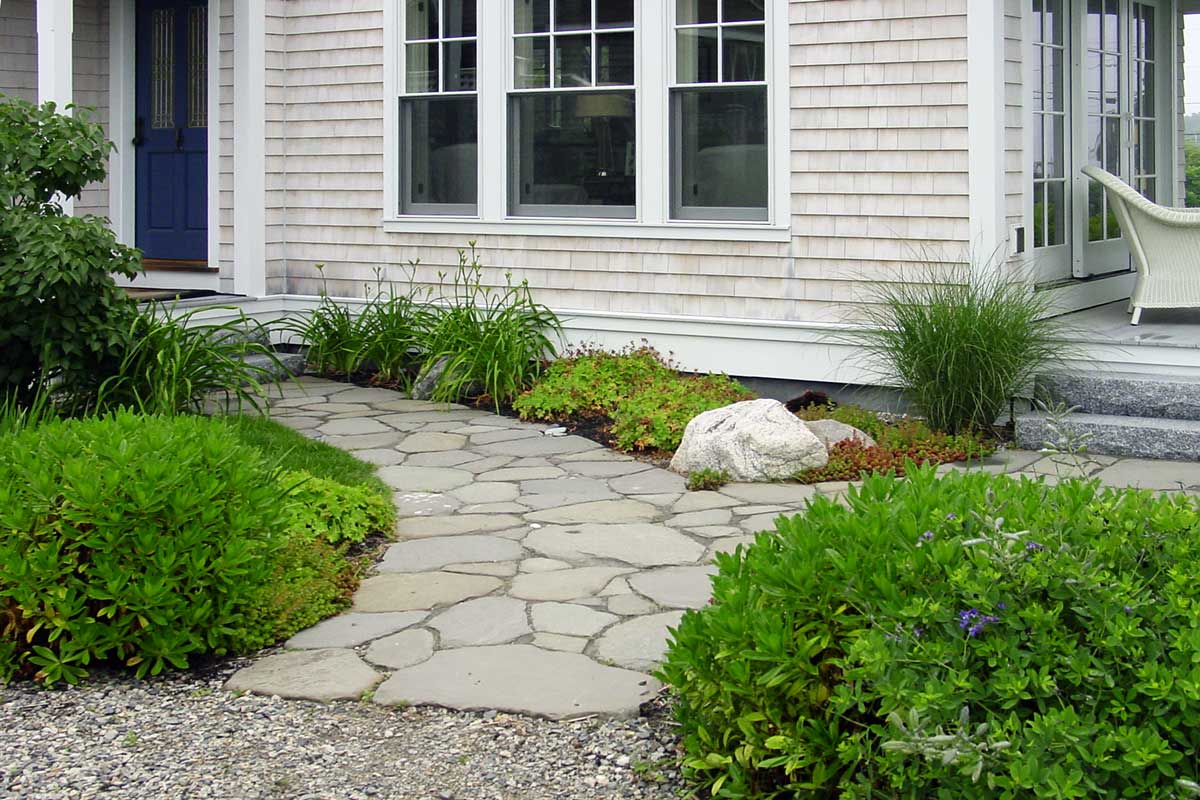
25. An Organic Flagstone Path Along a Charming Shingled House
When laying an irregular flagstone path like this one, the art is in the spacing. Avoid leaving uniform gaps between the stones. Instead, create a “puzzle” by fitting them together with varied spacing, from tight joints to wider gaps of 2-3 inches. This mimics how stone might naturally settle over time and enhances the organic, rustic feel. Lay out all your stones on the lawn first and spend time arranging them like a puzzle before you ever start digging for the final placement.
🔧 How-To Brief
that gives this walkway its charming, established feel is the variety of the path’s border. On one side, you have the straight, architectural line of the house’s foundation. On the other, you have the soft, curving, and completely natural line of the garden bed. This contrast between the built environment and the organic landscape is what creates the visual interest. It makes the path feel like the perfect transition between the home and the garden, rather than just a feature of one or the other.
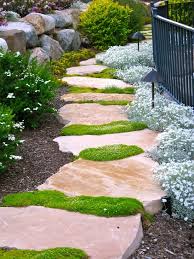
26. A Serene Mossy Path in a Traditional Japanese Garden
This path achieves its profound sense of tranquility through its embrace of imperfection and nature. The stepping stones are irregular in size, shape, and placement, forcing a mindful, deliberate pace. The vibrant green moss is not treated as a weed but as a treasured groundcover that softens every edge. The restraint in the plant palette—mostly greens with just a hint of reddish-orange—creates a calm, uncluttered scene. The entire design prioritizes natural textures and a feeling of age and permanence over pristine, sharp lines.
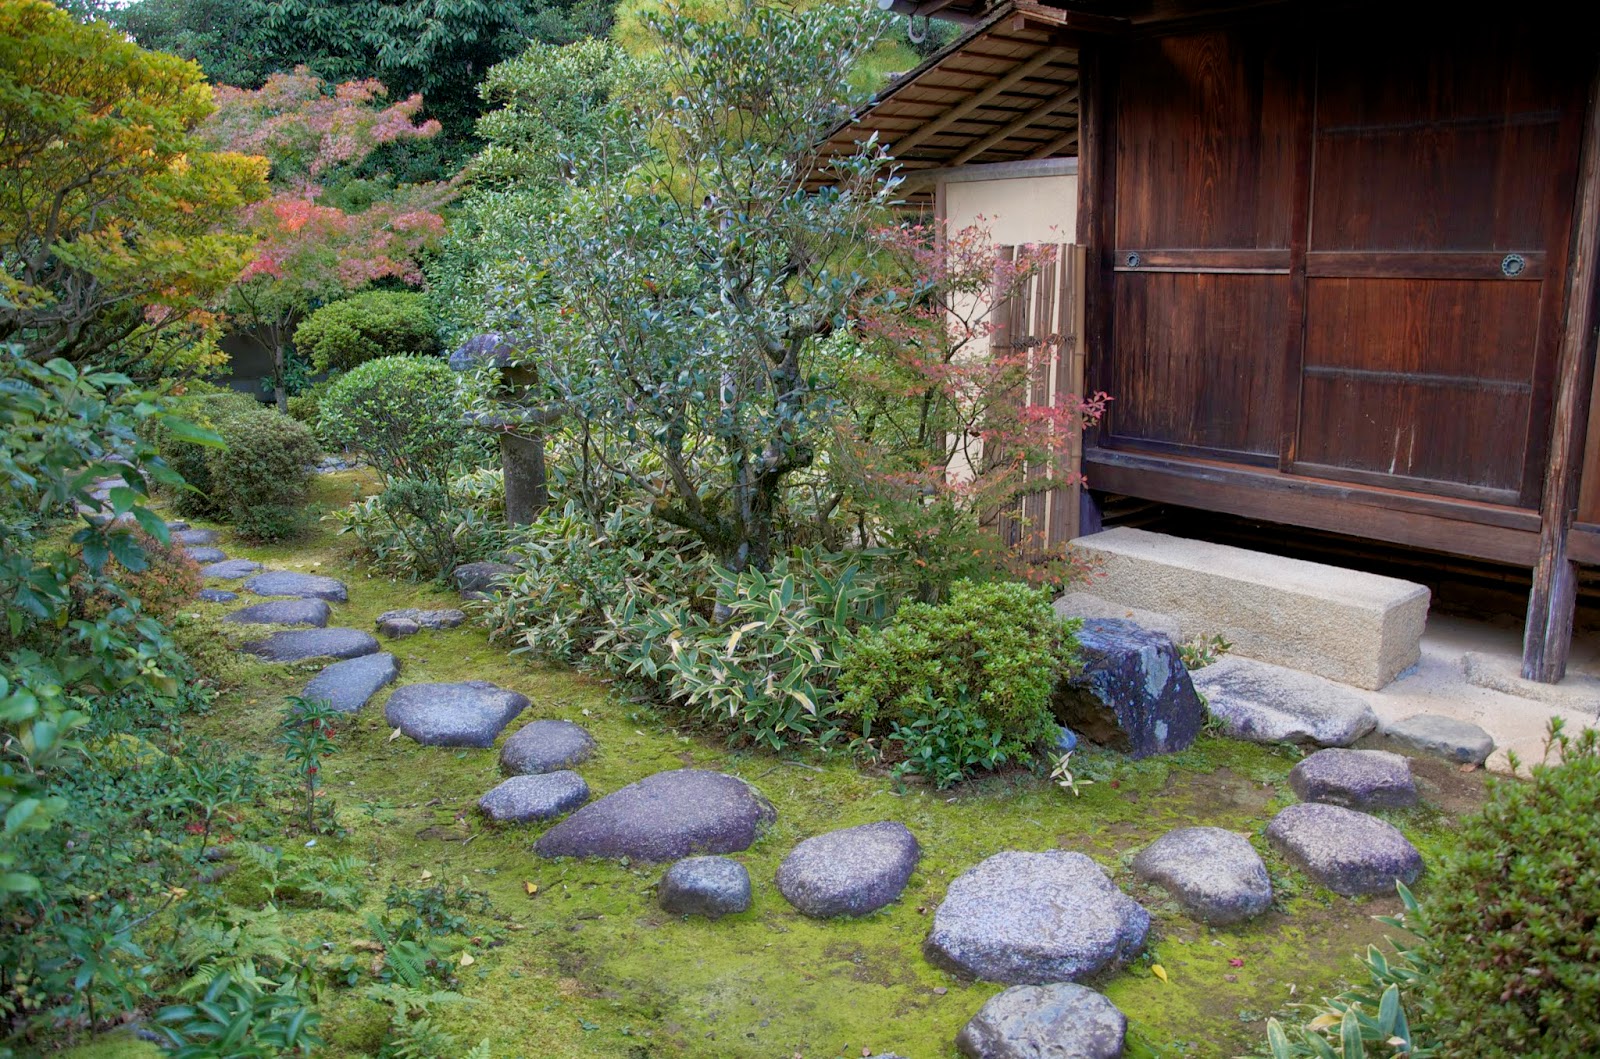
⚠️ Real Talk
A moss path is the definition of a passion project, not a low-maintenance feature. Moss requires very specific conditions to thrive: consistent moisture, shade from harsh afternoon sun, and acidic soil. It does not tolerate heavy foot traffic. Keeping it pristine involves regular misting in dry weather, diligent removal of fallen leaves that can smother it, and pulling out any invasive grasses or weeds by hand. This is a walkway for contemplation, not for a major thoroughfare.
27. A Modernist Walkway Flanked by Reflective Water Features
This minimalist design is a striking exercise in material contrast. The formula is simple: 30% rough, organic texture (the irregular grey stepping stones) + 30% fine, dark texture (the gravel base) + 40% sleek, reflective surface (the dark water). The magic is in how these elements play off each other. The rough stone feels earthy, the gravel provides a neutral background, and the water adds a layer of depth, movement, and light. The silvery metallic grates add a final, industrial-chic touch.
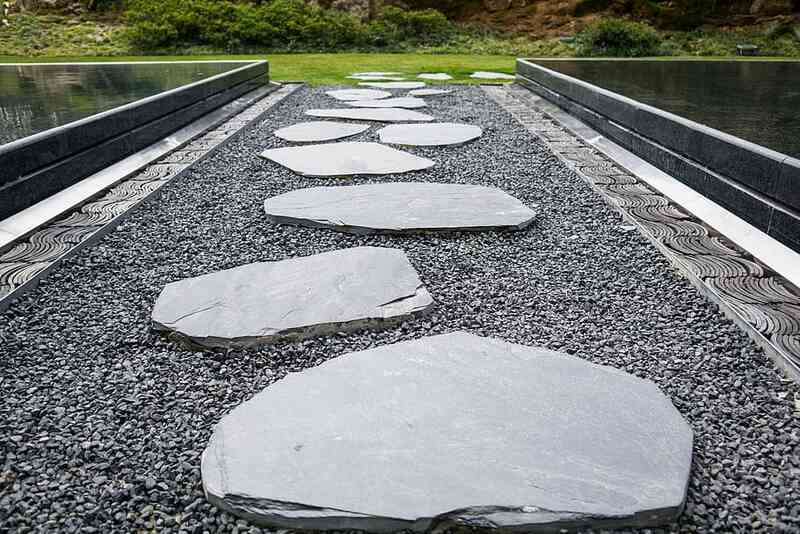
📐 Style Math
This type of architectural walkway reflects a major trend in landscape design for 2026: the integration of multi-sensory elements. It’s not just about what you see; it’s about what you hear and feel. The sound of your feet on the gravel, the cool air rising from the water, the flash of reflected sky—it’s a fully immersive experience. As homeowners seek to create outdoor spaces that are true escapes, designs that engage more than just the eyes are becoming increasingly sought-after.
Your Perfect Path Starts Here
A great walkway does more than get you from point A to point B; it tells a story and sets the tone for your entire outdoor space. We hope these 27 ideas have sparked some serious inspiration for your own garden path. Now get out there and start planning your project!
Don’t forget to save your favorite ideas to Pinterest for when you’re ready to break ground!