You know that feeling when you finally find the Driveway Paving Ideas that looks exactly right for your space? It’s the finishing touch that pulls your whole exterior look together. After filtering through hundreds of options across specialty suppliers and home improvement stores, we narrowed it down to 30 ideas that actually deliver. We’re serving up inspiration for every style, from timeless interlocking pavers and rustic natural gravel to sleek modern concrete. The big trend for 2026 is all about creating a seamless, thoughtful transition from the street to your front door, making the journey as beautiful as the destination. And stay until the end — we break down the most common mistakes that can ruin these looks. 📌 Save this to Pinterest for later — you’ll want to revisit these ideas.
1. Embrace the Curve with an S-Shaped Paver Driveway
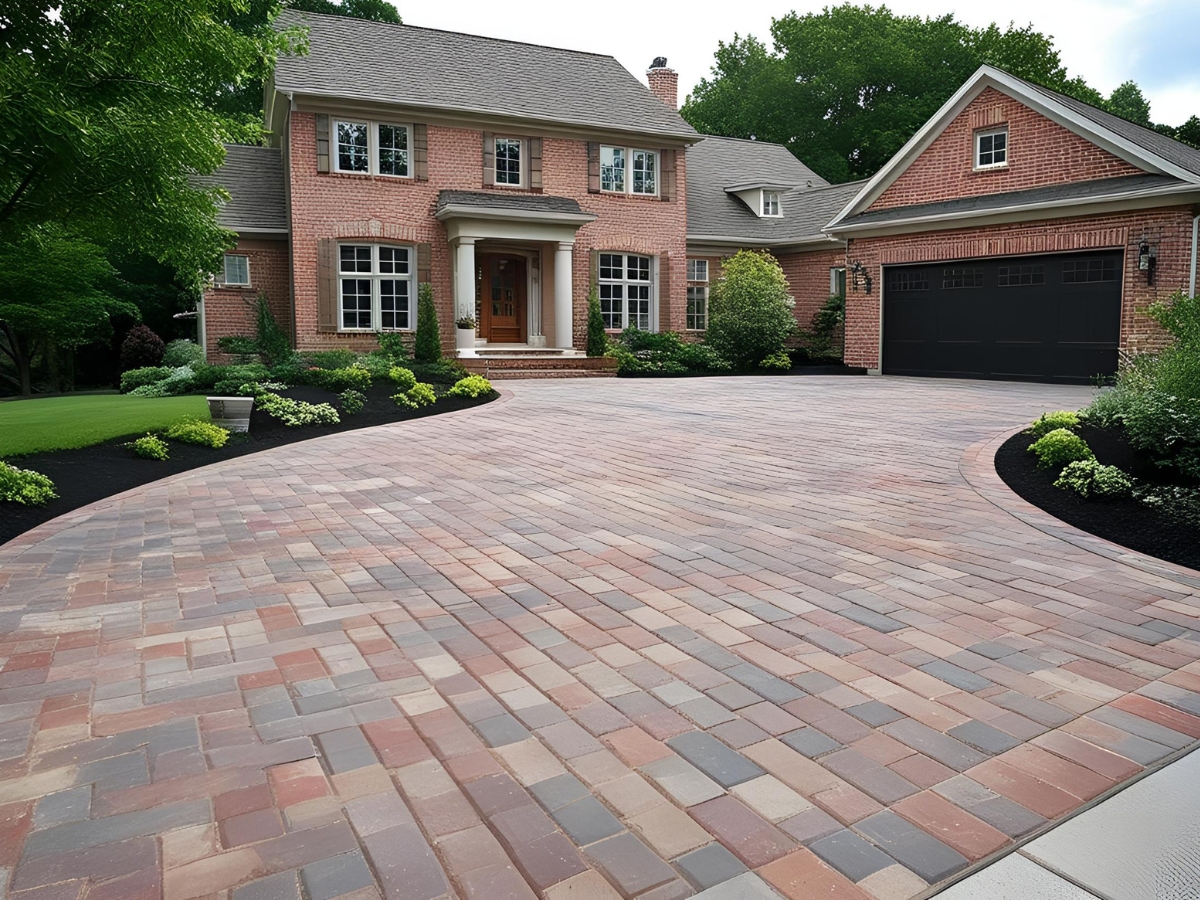
There’s a reason this classic look never goes out of style. The gentle S-curve does more than just guide cars; it creates a sense of journey and discovery, making the arrival feel more like an event. The combination of multi-colored pavers adds visual depth and texture, preventing the large surface area from feeling monotonous. By framing the driveway with dark mulch and lush green shrubs, the hardscape feels intentionally integrated into the landscape rather than just sitting on top of it. The perpendicular paver border is a small detail that makes a huge impact, cleanly defining the edge and adding a professional, custom finish.
💸 Get This Look For Less
While pavers are incredibly durable, the sand-filled joints are their one persistent vulnerability. You’ll need to re-sand the joints every 2-3 years to prevent weed growth and keep the pavers from shifting. A pressure washer can be too harsh and wash out the joint sand, so a stiff-bristled broom and a good quality polymeric sand are your best friends. Be mindful that the varied colors, while great for hiding stains, can sometimes fade unevenly depending on sun exposure. Sealing the pavers every 3-5 years can help maintain their color and protect against oil spills and other stains.
2. A Classic Herringbone Brick Path with a Polished Border
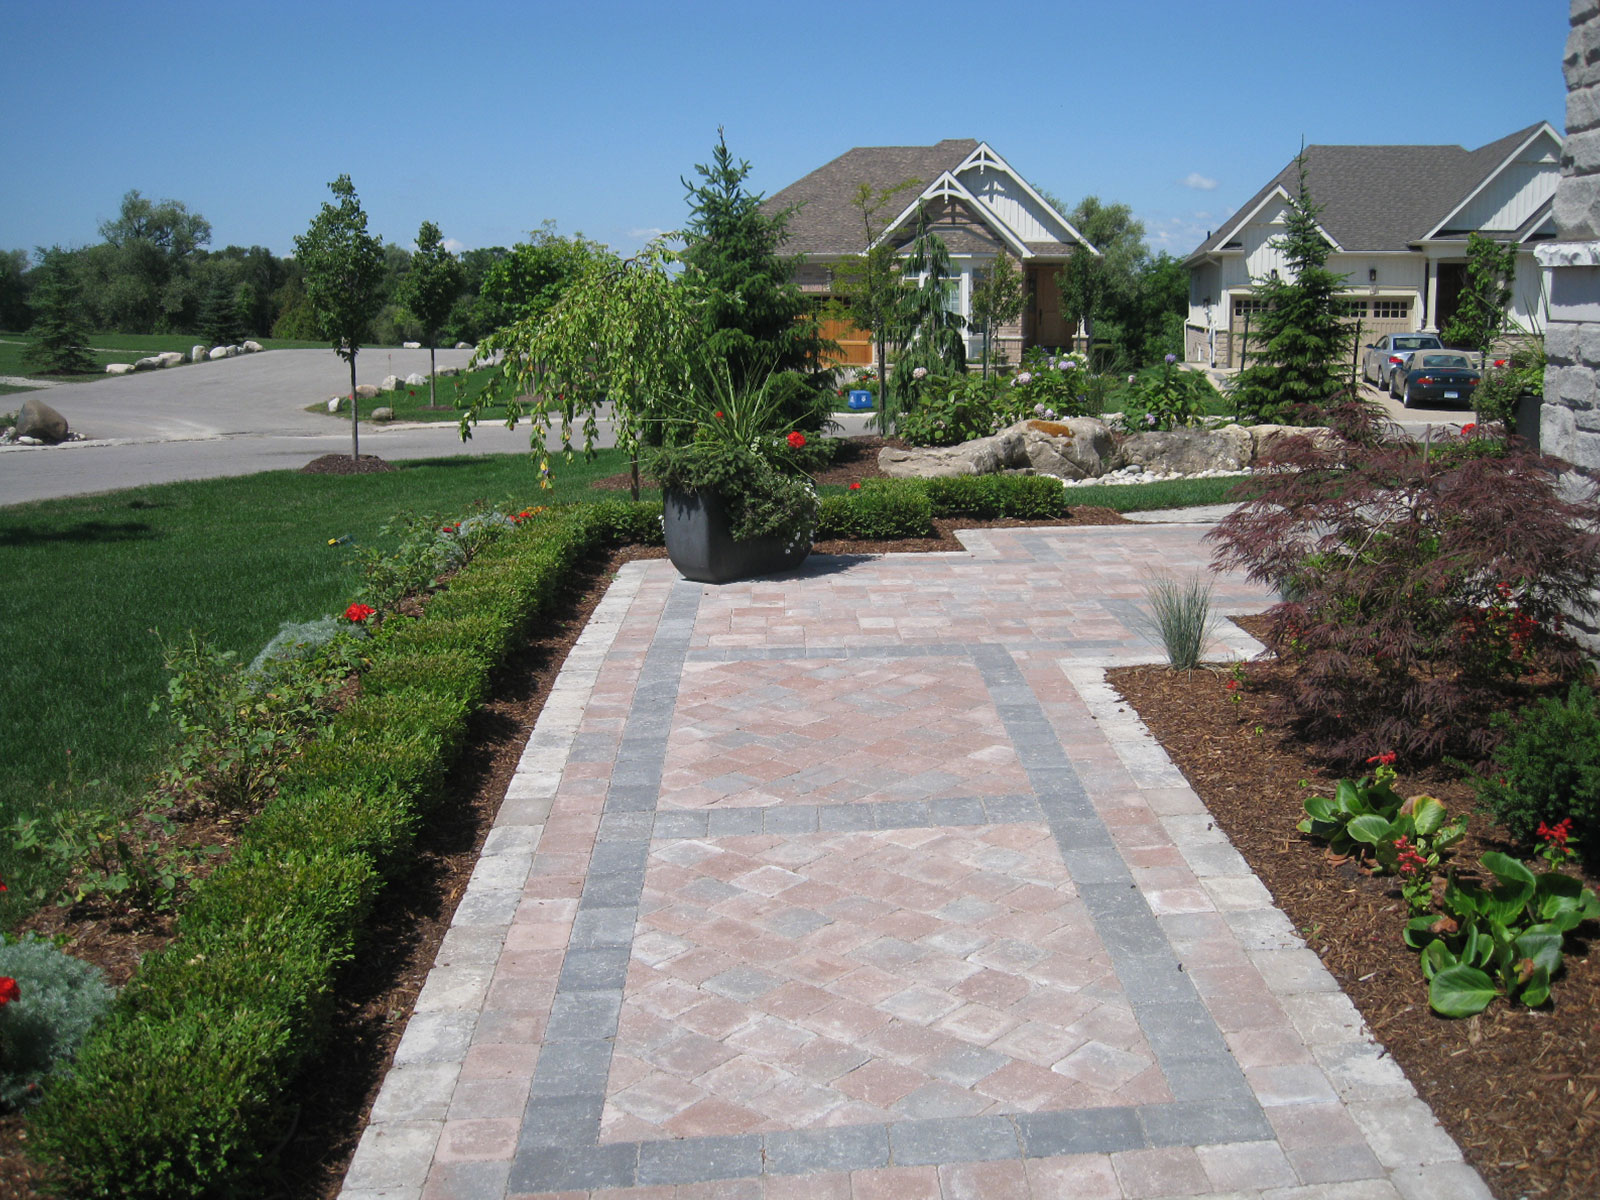
To keep a herringbone pattern looking crisp and prevent visual chaos, the border is non-negotiable. For a path that is 4 feet wide, use a border paver that is at least 4-6 inches wide. This creates a strong visual frame. Also, ensure the sub-base is compacted to at least 95% of its potential density and is a minimum of 6 inches deep for pedestrian paths. This prevents the individual pavers from shifting and creating an uneven surface, which is a common failure point for this intricate pattern. A little extra work on the foundation pays off for decades.
🔥 Trending Context
The success of this look lies in a balanced visual recipe. Think of it as 70% primary color field, 20% border, and 10% landscape integration. The main pathway is composed of pavers in the red/tan family, creating a warm and unified field. The darker gray paver border makes up about 20% of the hardscape’s visual weight, providing sharp contrast and definition. The final 10% comes from the lush green lawn and mulched beds that press right up against the edges, softening the geometry and tying it all together. You could swap the red brick for bluestone and the gray border for a lighter limestone, and the formula would still work perfectly.
3. Soften the Edges with a Curving Pebbled Concrete Driveway
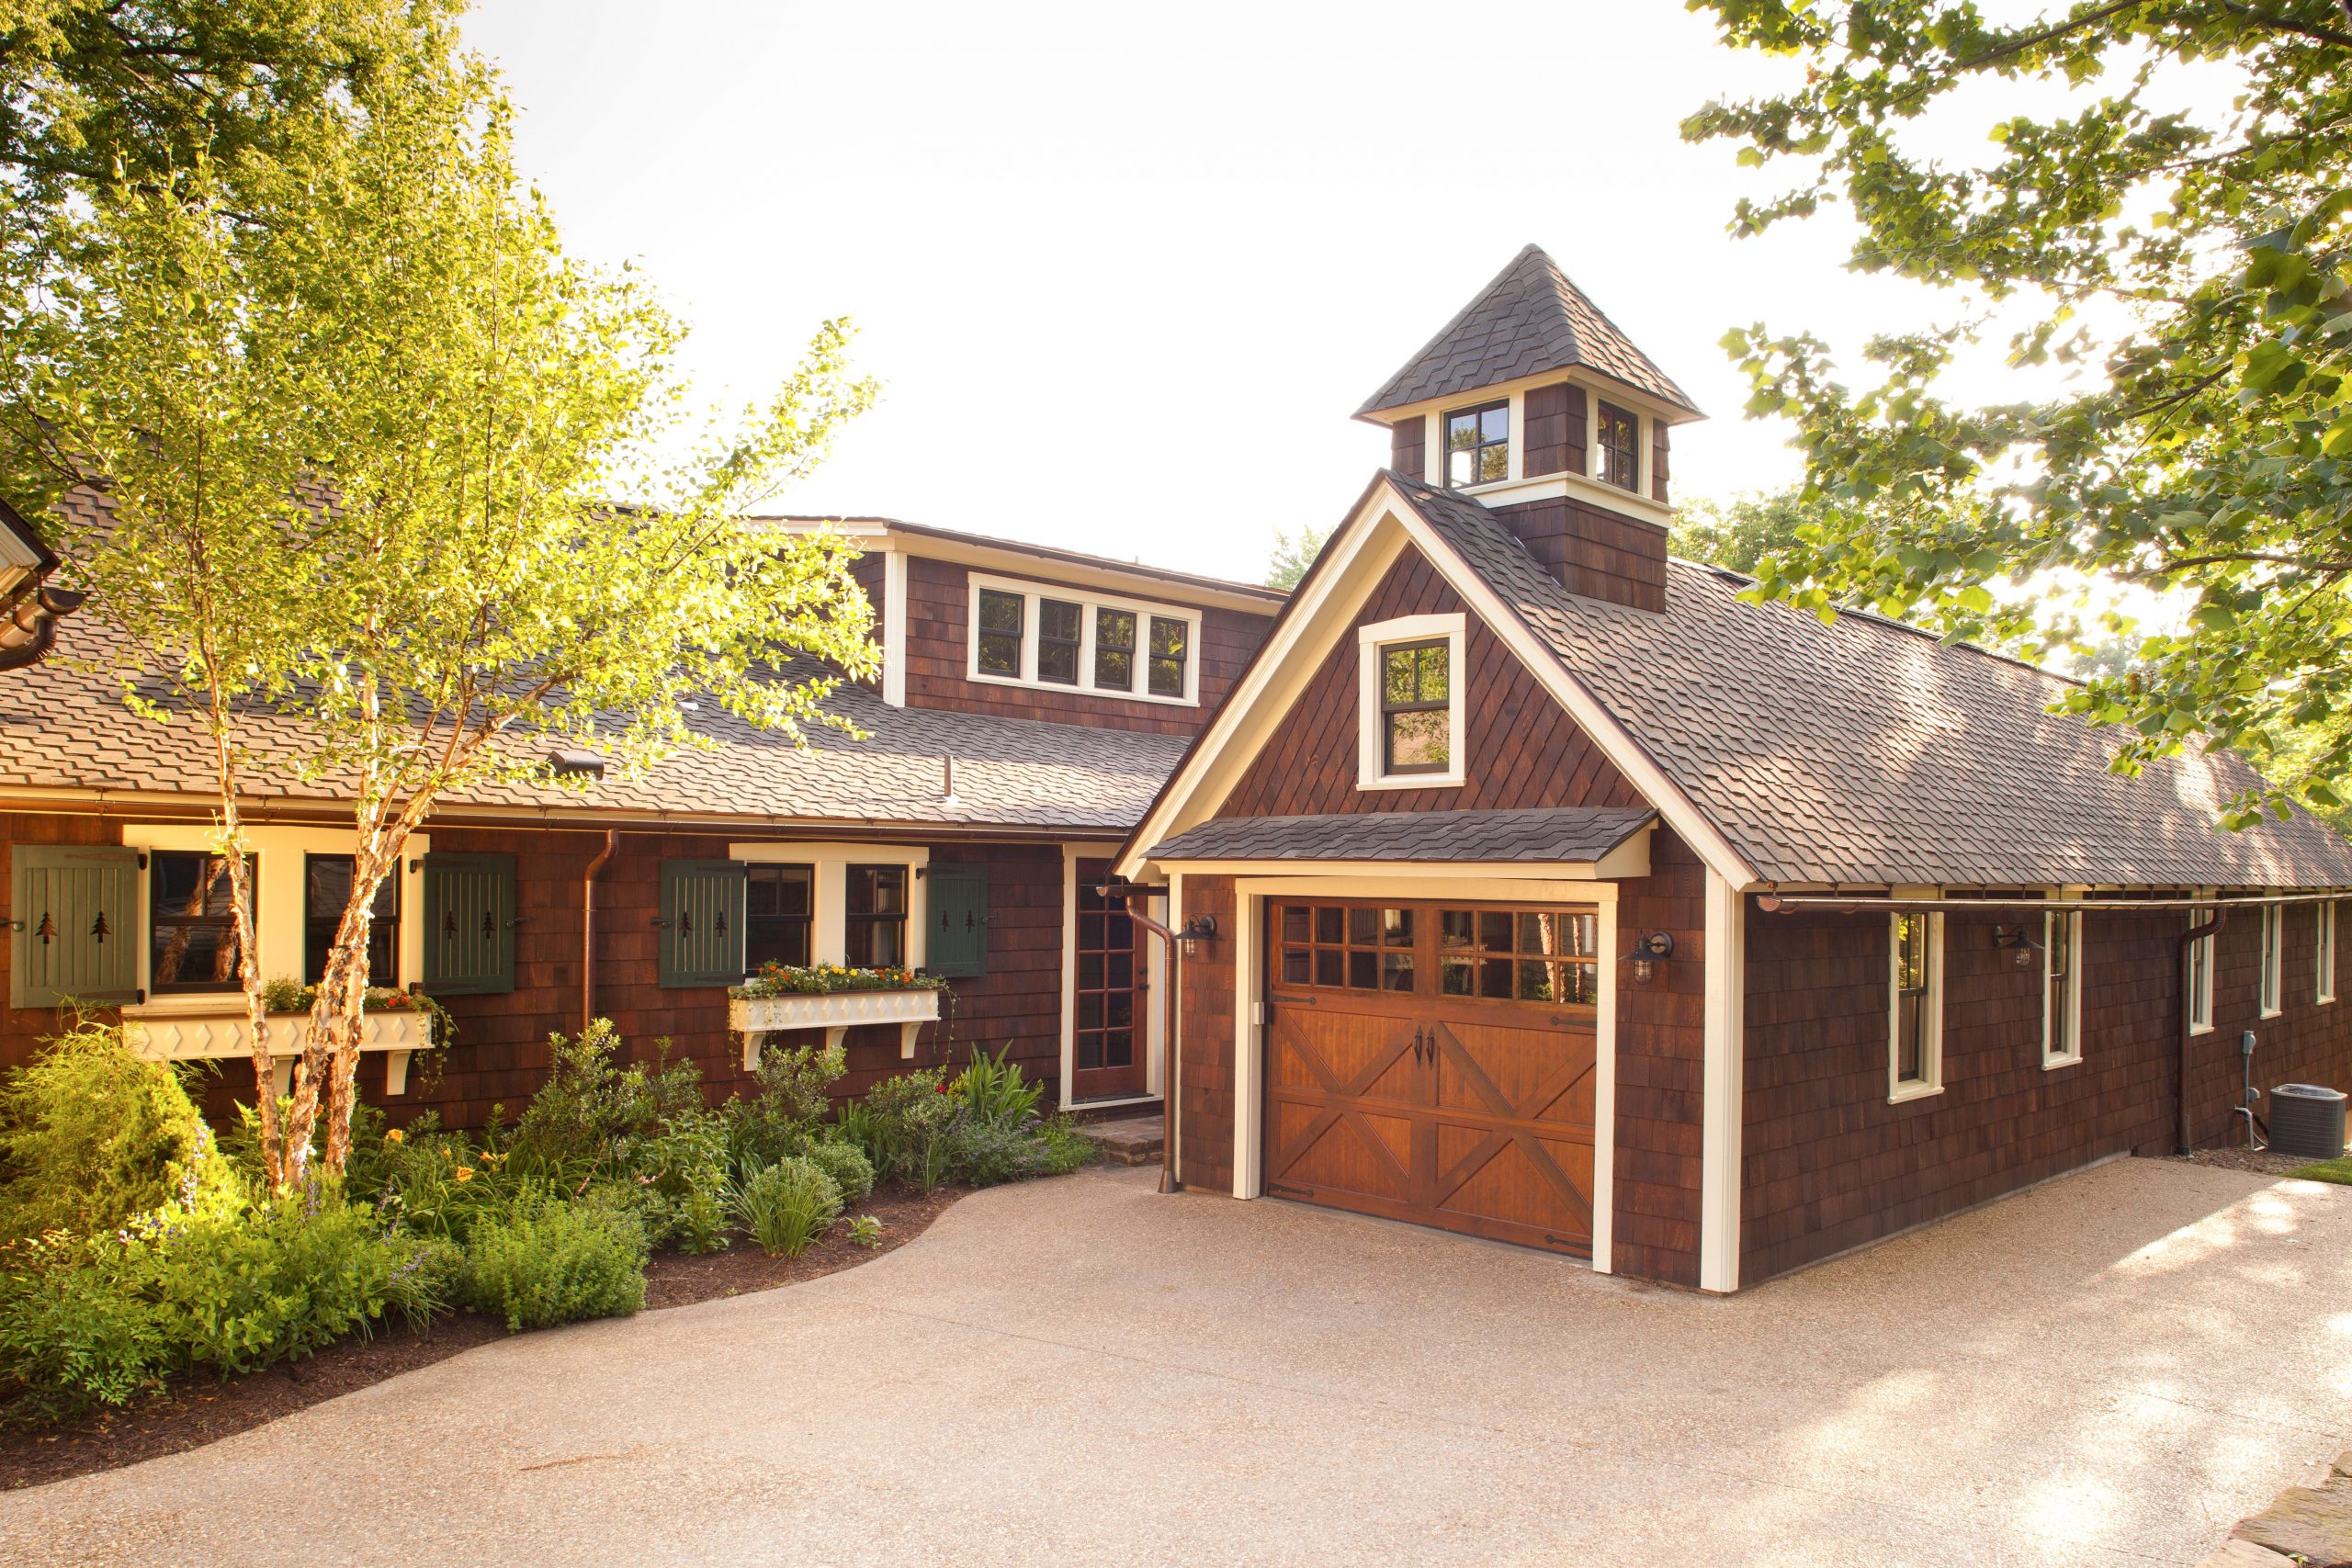
The grace of this design comes entirely from its curves. Without those soft, sweeping edges, this would just be a standard concrete driveway. The curve transforms the driveway from a purely functional element into a key landscape feature. It forces a slower, more deliberate approach to the house, creating a sense of reveal and enhancing the home’s welcoming, rustic charm. The pebbled texture complements this organic shape, giving it a natural, almost river-washed appearance that feels much softer than a stark, brushed concrete finish. This is a perfect example of how form can elevate function.
🎯 What Makes It Work
You can get a very similar organic vibe for a fraction of the cost with a high-quality gravel or tar-and-chip driveway. Instead of poured concrete, lay down a solid base of crushed rock, and then top it with a few inches of decorative pea gravel ($50-$70 per ton). Use a heavy-duty landscape edging from a store like Lowe’s or Home Depot (around $2 per foot) to define those same beautiful curves seen here. The total cost for a 50-foot driveway could be as low as $1,000 – $1,500, compared to the $8,000+ for professionally installed pebbled concrete. For a more stable gravel surface, look into permeable plastic grid systems. If you’re looking for a similar but more uniform aesthetic, check out the simple concrete slab in Idea #11.
4. Frame a Simple Asphalt Drive with Lush, Colorful Plantings
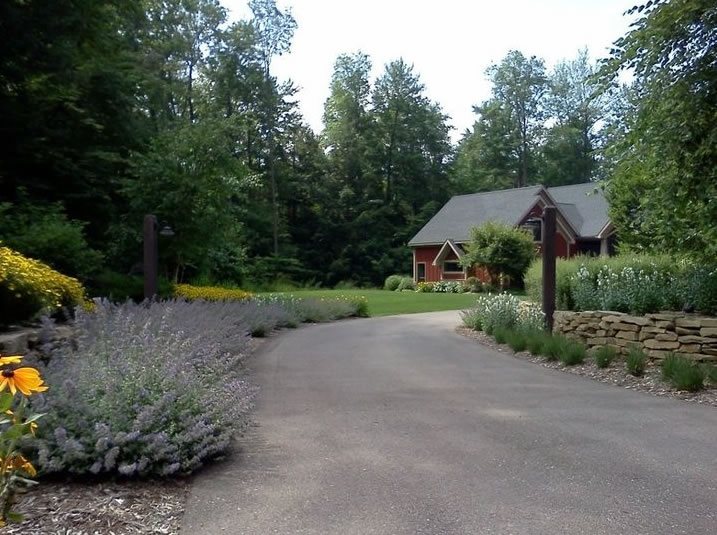
This approach is perfect for driveways of any length, but it’s especially effective on those longer than 75 feet where a full paver installation would be prohibitively expensive. The key is to have at least 3-4 feet of plantable space on either side of the asphalt. This allows for layered plantings—like the low lavender and taller shrubs seen here—which create depth. For a smaller driveway under 50 feet, a single, consistent row of flowering shrubs on one side is enough to make a statement without overwhelming the space. The visual impact comes from the contrast between the dark, simple asphalt and the vibrant, organic border.
📏 Scale Guide
While asphalt is a cost-effective and durable choice, it’s not without its issues, especially in climates with extreme temperatures. It can get extremely hot in the summer, potentially softening and becoming susceptible to damage from sharp objects or heavy, stationary vehicles. In very cold climates, it can become brittle and is prone to cracking. Regular sealing every 3-5 years is crucial to protect the surface, prevent cracks, and maintain that rich, dark color. Without sealing, it will fade to a dull gray and deteriorate much more quickly.
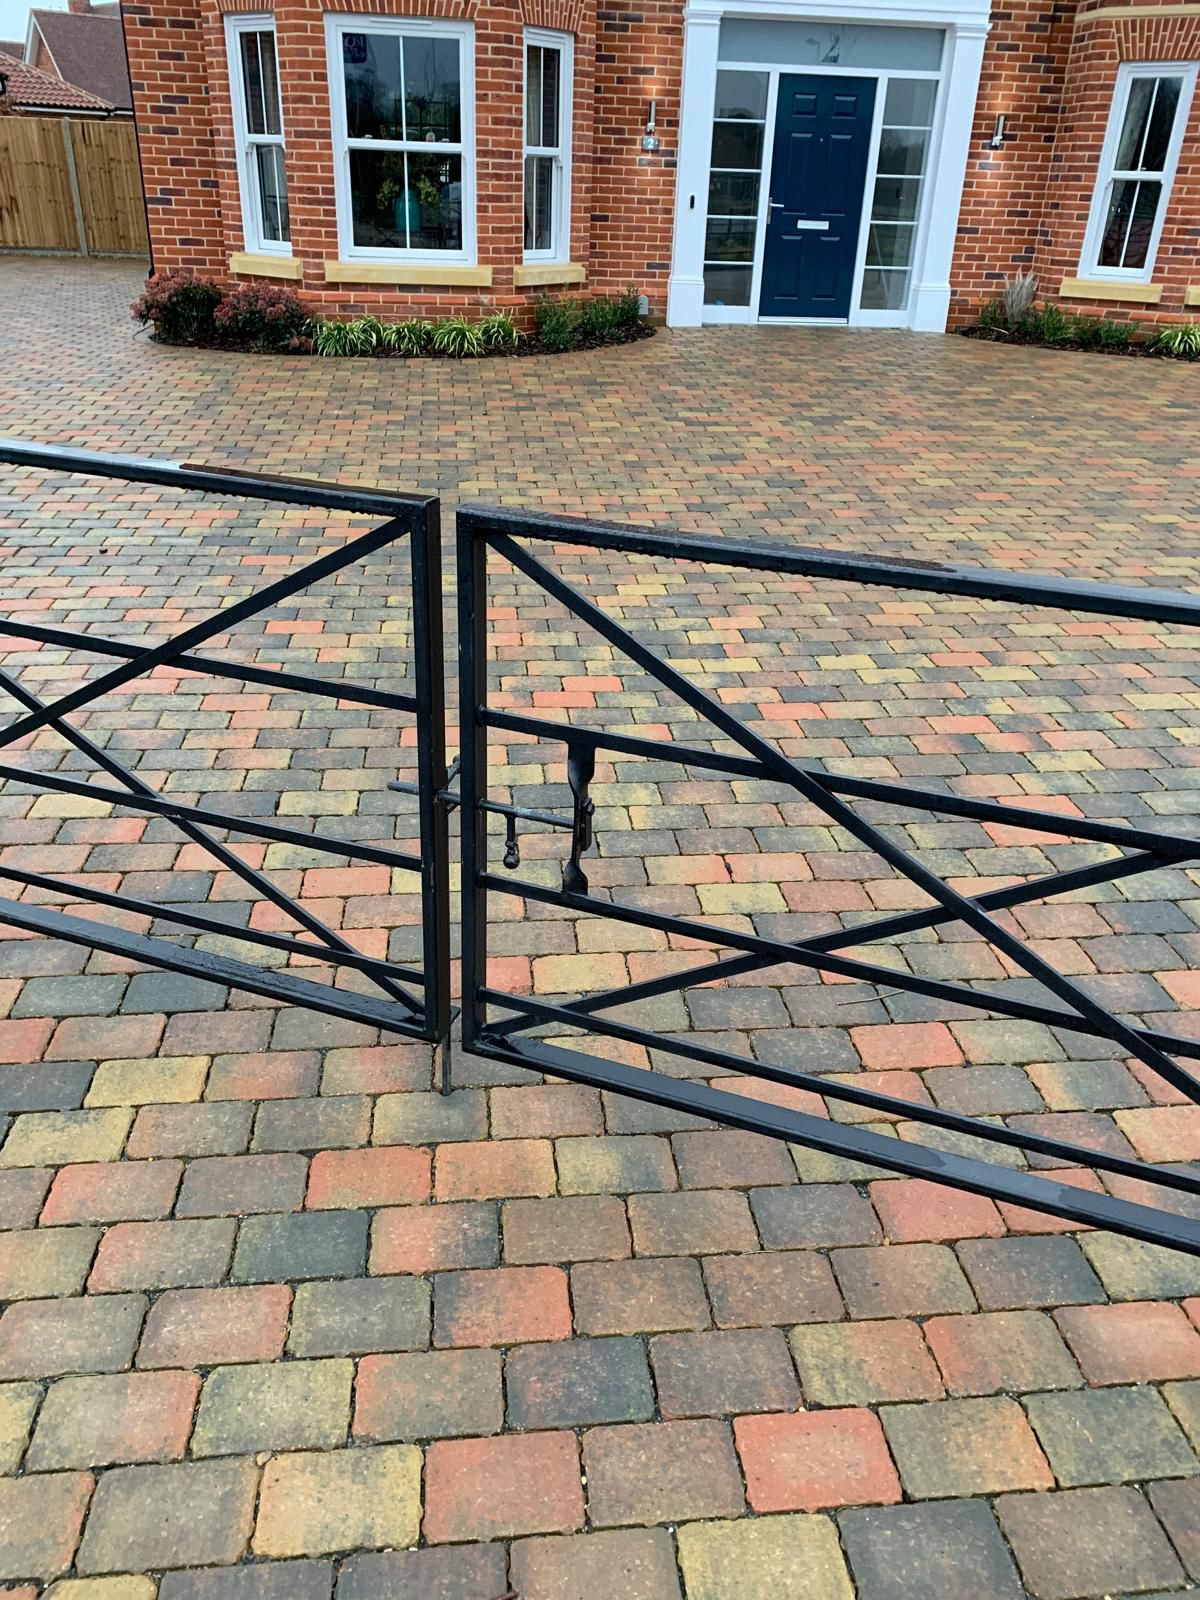
5. Create a Grand Entrance with a Metal Gate and Multicolored Brick
To recreate this traditional and secure entrance, you’ll need to invest in both quality paving and a sturdy gate system. The charm of the varied brick colors is that it’s forgiving and classic, pairing well with almost any home exterior. The gate adds a significant cost but also a major security and design upgrade.
🧹 Maintenance Reality
- Paving Materials (interlocking brick pavers): $4,000 – $7,500
- Professional Installation/Labor: $5,000 – $9,000
- Metal Gate (Custom or Semi-Custom): $3,500 – $8,000
- Gate Automation & Installation: $2,000 – $5,000
- TOTAL: $14,500 – $29,500
- Budget Alternative: Use stamped concrete to mimic the multicolor brick pattern and opt for a high-quality, non-automated manual gate. This could bring the total cost down to the $7,000 – $12,000 range.
Before you commit to a gate and paver combination, double-check these critical points. A little planning upfront saves major headaches later.
- Check local building codes and homeowner’s association rules regarding driveway gates, including setback from the road and maximum height.
- Measure the driveway width at the gate location precisely. Account for the gate posts and the swing or slide path of the gate itself.
- Verify your material choices against your home’s exterior. Bring paver samples home to see them in different light next to your brick, siding, and trim.
- Get at least three quotes for both the paving and the gate installation. Costs can vary wildly between contractors.
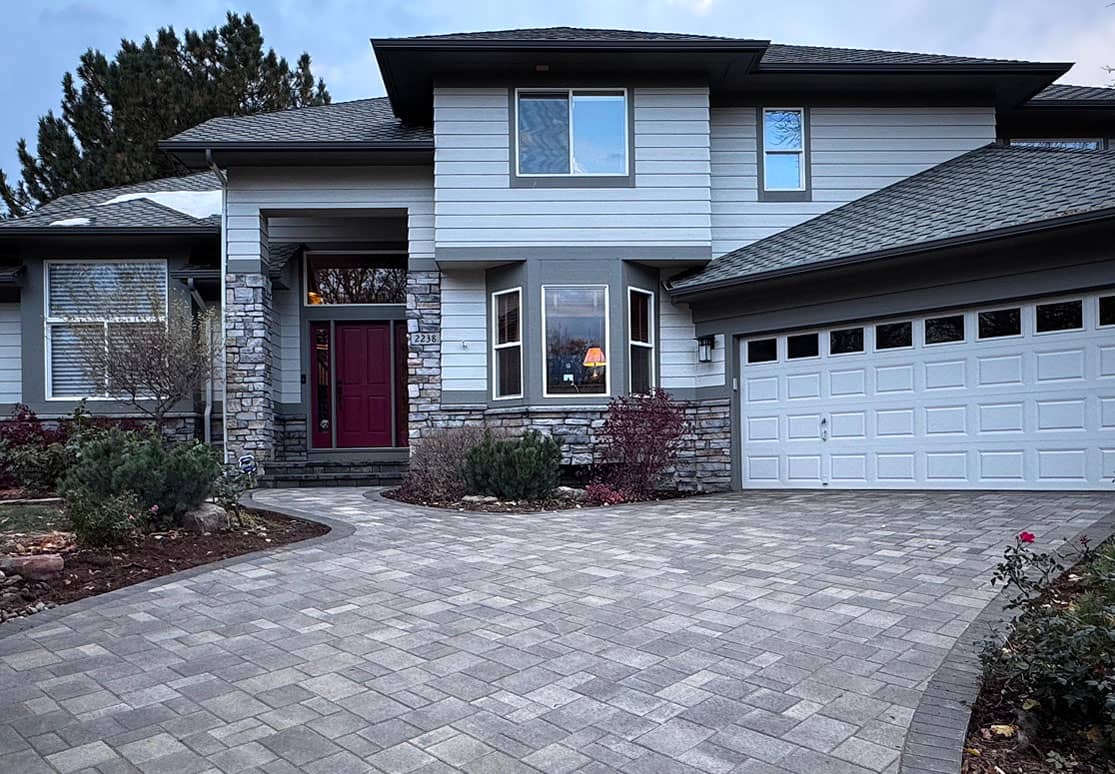
6. A Cohesive Look with Interlocking Gray Pavers and Matching Trim
This design is a masterclass in creating a cohesive, unified exterior. The magic is in the repetition of color. The light gray of the pavers is echoed in the home’s siding, while the dark gray paver border perfectly matches the roof, trim, and stone accents. This limited, intentional palette makes the entire property feel custom-designed and thoughtfully planned. The use of rectangular pavers in a simple running bond pattern adds texture without competing with the other materials like the horizontal siding and varied stone cladding. Tying the pathway pavers into the main driveway reinforces this unified feel. Compare this to the similar palette in Idea #23 to see how landscaping changes the mood.
⭐ The One Thing
When creating a monochrome gray palette like this, the key to avoiding a flat, boring look is to vary the textures and shades. Don’t try to match everything perfectly. Notice how the pavers are a medium gray, the siding a very light gray, and the trim a dark charcoal. It’s a family of grays, not twins. For maximum curb appeal, ensure your darkest gray is used on at least two different elements (here, the border and the trim) to create a sense of rhythm and intentionality. The stone cladding then works to tie all these shades together.
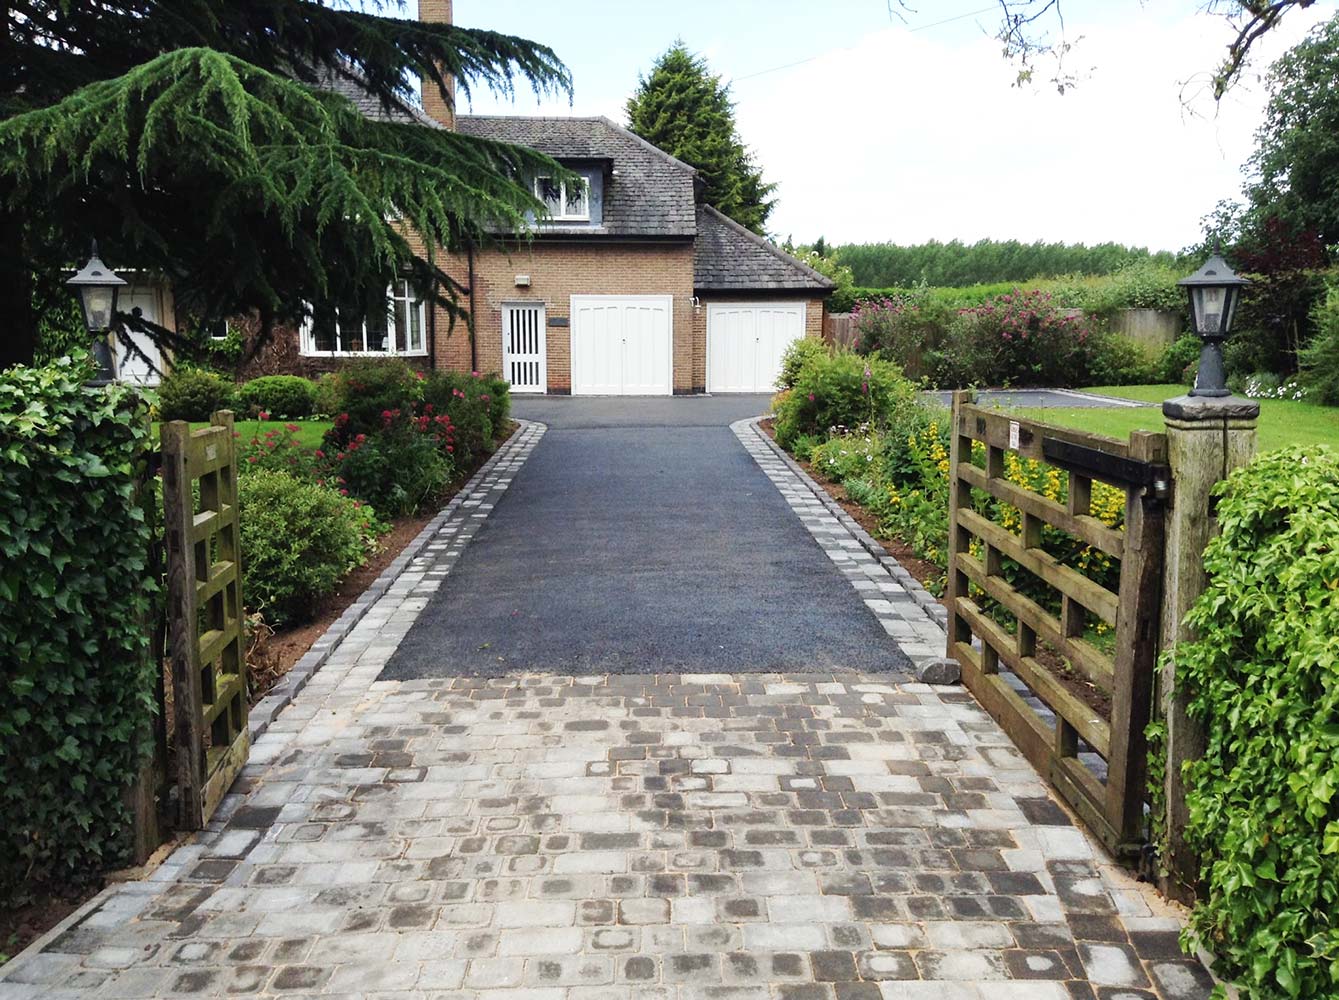
7. Combine Tarmac and Cobblestone for a Traditional Look
The beauty of this design lies in its elegant ratio of materials. It’s roughly 80% practical tarmac, 15% decorative paver edging, and 5% statement entrance. The dark tarmac provides a durable, cost-effective surface for the main length of the driveway. The light grey cobblestone edging elevates the entire look, defining the space and preventing the tarmac from feeling unfinished. Finally, dedicating a full paver section at the entrance creates a sense of arrival and adds a touch of luxury right where it counts the most. This strategic mix gives you a high-end feel without the expense of a full paver driveway. This is a great upgrade from a simple asphalt look like in Idea #4.
💡 Designer Tip
The single element holding this entire design together is the light grey cobblestone paver edging. Without it, you’d have a disconnected tarmac driveway and a random patch of pavers at the end. The cobblestone border is the visual thread that ties the functional tarmac to the decorative entrance pad. It defines the curves, provides a crisp edge against the lawn, and introduces the material and color that will be celebrated at the entrance. It’s the design equivalent of a good transition sentence—it makes everything that follows make sense.
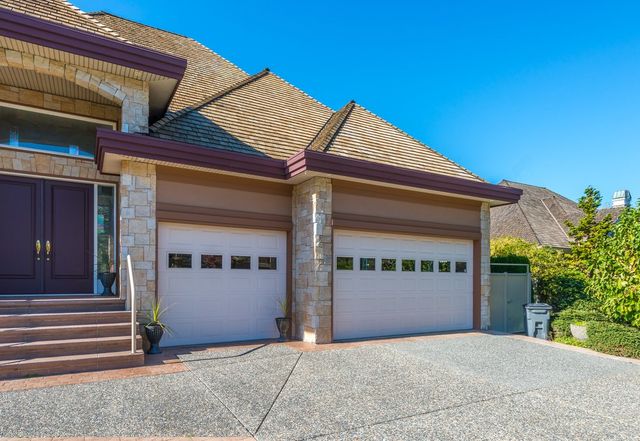
8. Modernize with an Exposed Aggregate and a Bold Colored Border
Exposed aggregate is fantastic for hiding dirt and small stains, but its textured surface can be tricky to keep pristine. Over time, the tiny crevices can trap dirt and even encourage moss or algae growth, especially in shaded, damp areas. A pressure washer is your best tool here, but use a fan-tip nozzle and keep it moving to avoid dislodging the small stones. It’s also critical to have it sealed properly upon installation and resealed every 2-4 years. The sealer not only protects it from stains but also enhances the color of the stones and gives it that desirable ‘wet’ look.
🔧 How-To Brief
This style is gaining traction in new suburban developments because it offers a custom look without the high cost of full pavers. The colored concrete border is the key trend here. For years, driveway design was monolithic. Now, homeowners on Pinterest and Instagram are looking for ways to add personality and curb appeal, and a contrasting border is a relatively inexpensive way to do it. The reddish-brown terra cotta color seen here is a nod to popular Southwestern and Mediterranean styles, warming up what could otherwise be a sterile gray-and-beige facade.
9. Define Zones with Contrasting Red and Grey Pavers
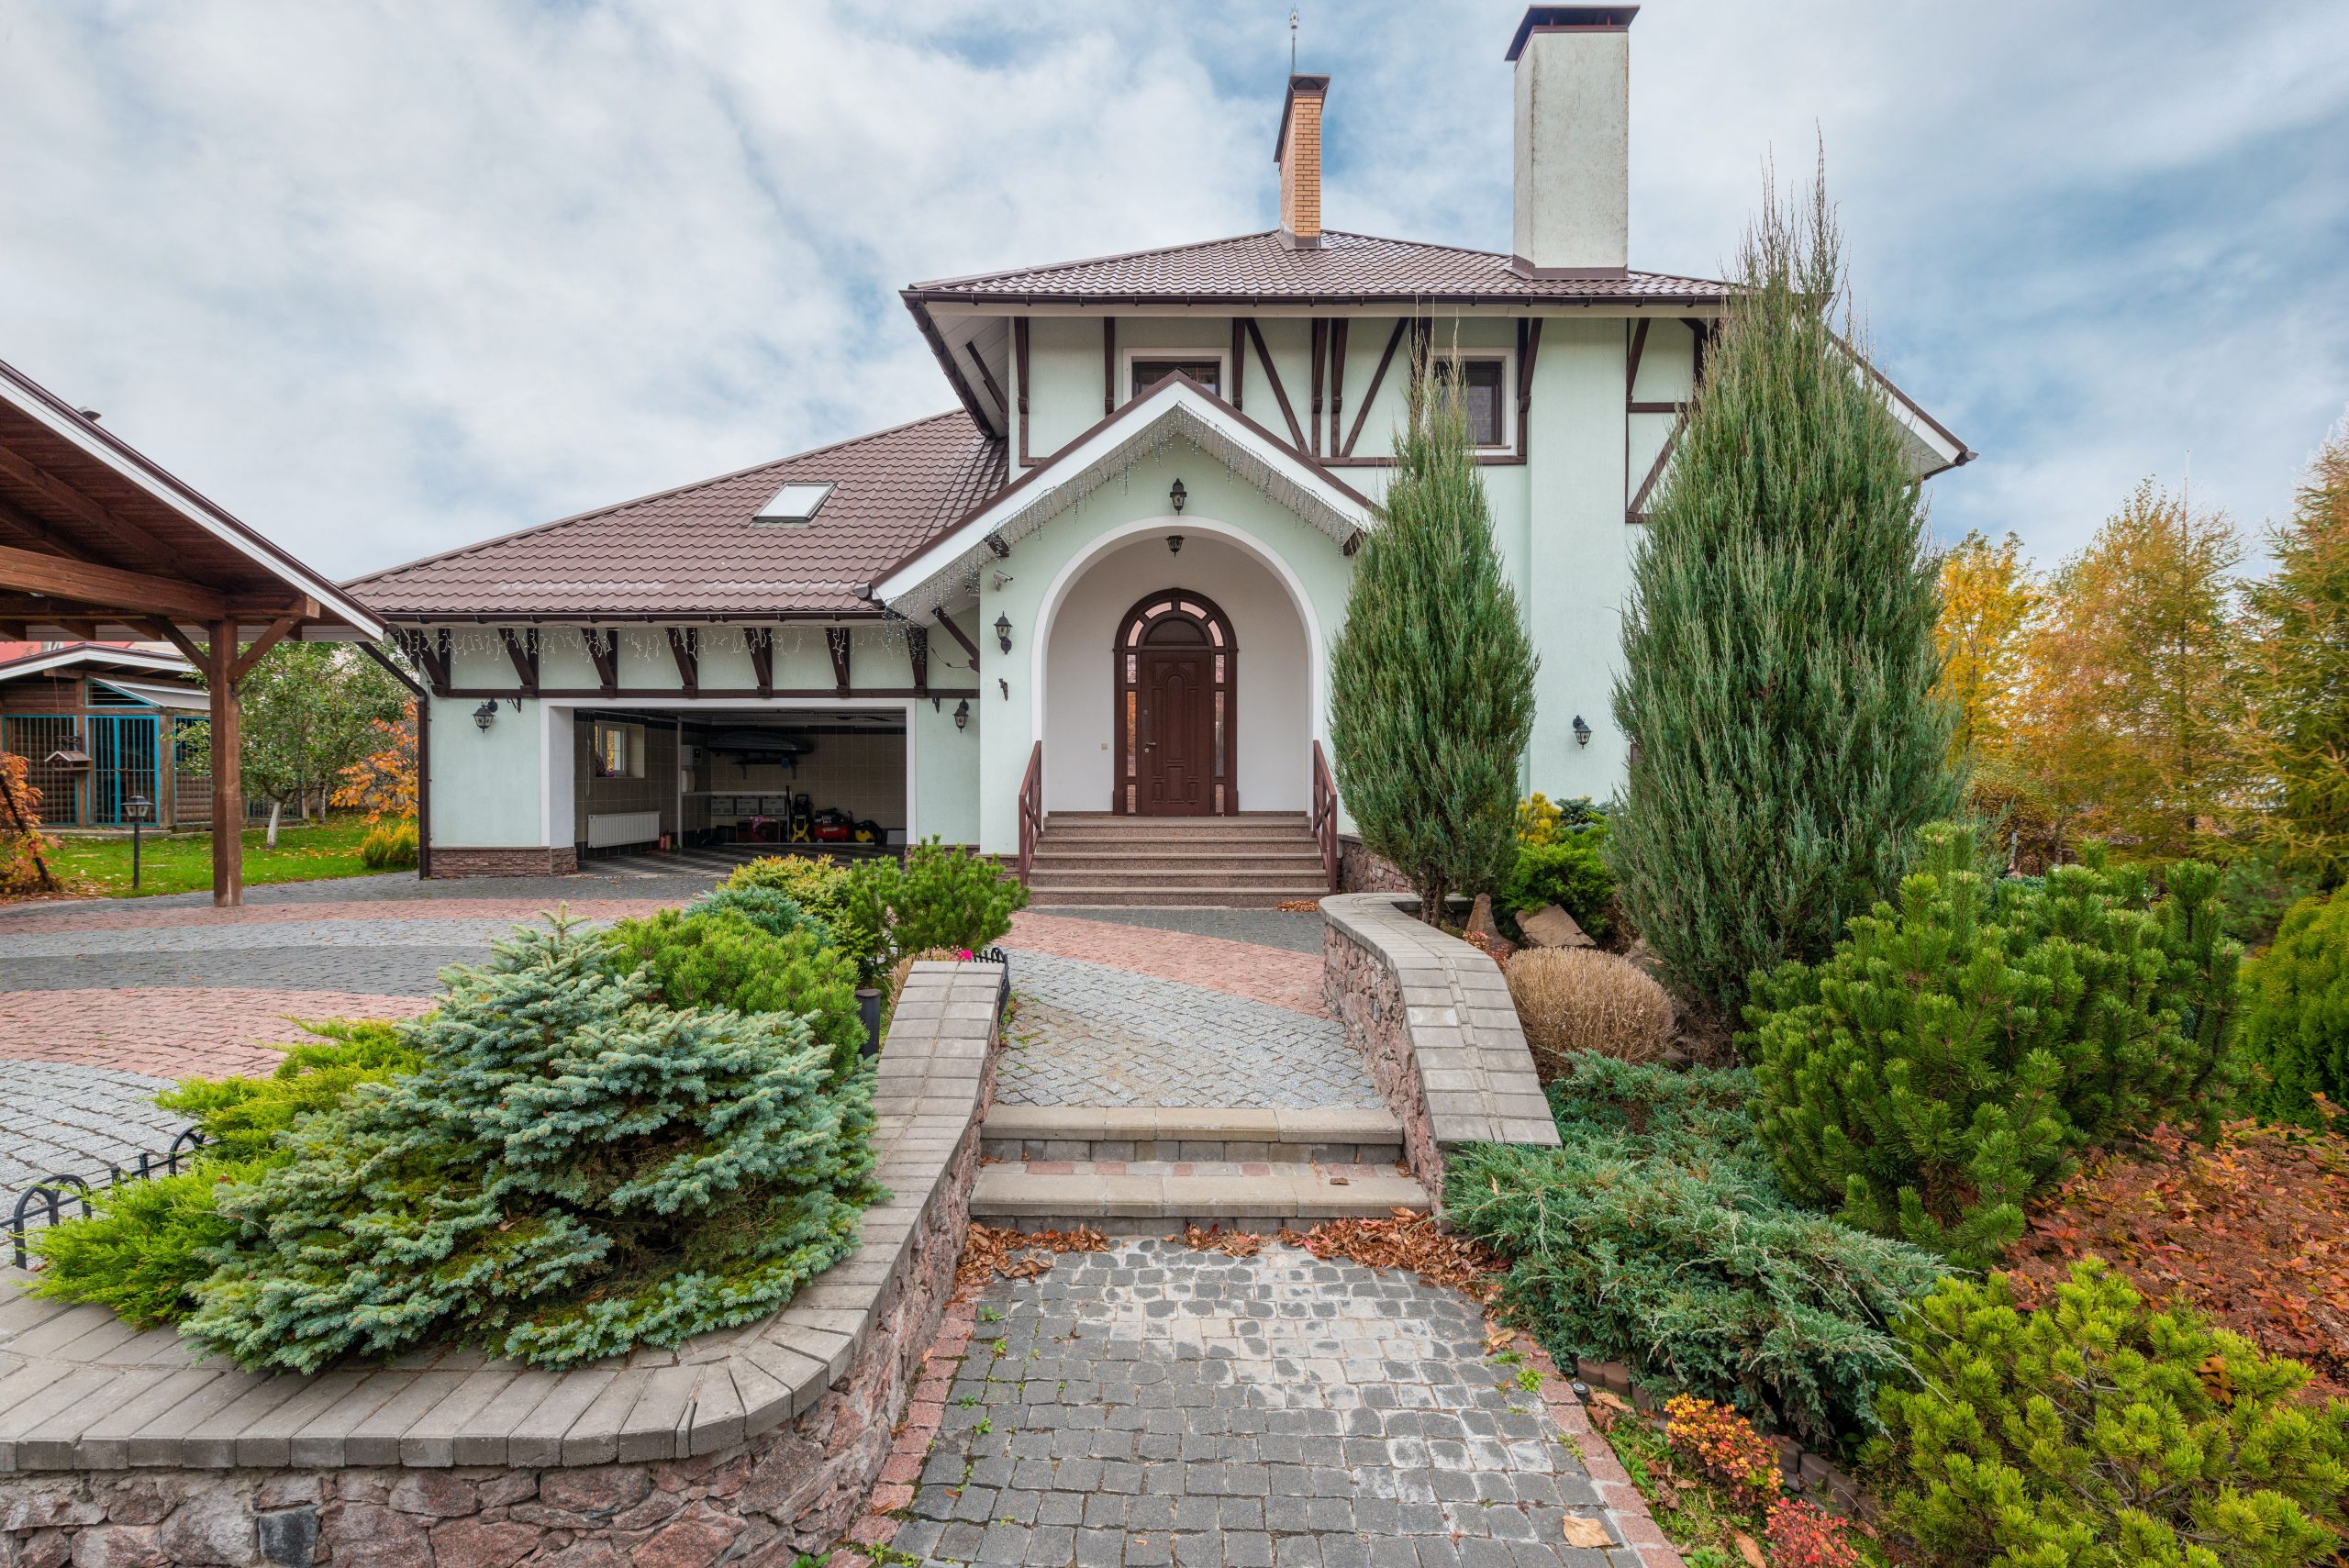
This two-tone paver strategy works best on larger properties where you need to define different functional zones, like a main parking area versus a pedestrian walkway. For this to be effective, you need a driveway area of at least 800 square feet. Anything smaller and the contrasting colors can make the space feel busy and cramped. The key is to use one color (here, red) for the primary vehicle area and the other (grey) for secondary paths or landings. This creates an intuitive visual hierarchy that guides visitors and organizes the space without physical barriers.
💰 Budget Breakdown
Be honest with yourself about your climate. Multicolored paver installations look fantastic, but they can be a nightmare in areas with heavy snowfall and aggressive plowing. A snowplow blade can easily catch the edge of a paver, causing it to lift or crack. While interlocking designs are robust, repeated impacts can cause shifting over time. If you’re in a heavy snow region, consider a heated driveway system (a significant upfront cost) or be prepared for seasonal maintenance and potential paver replacement. Also, the lush evergreen landscaping seen here requires consistent upkeep to prevent it from encroaching on the paved surfaces.
10. A Utilitarian Concrete Driveway for a Classic Brick Home
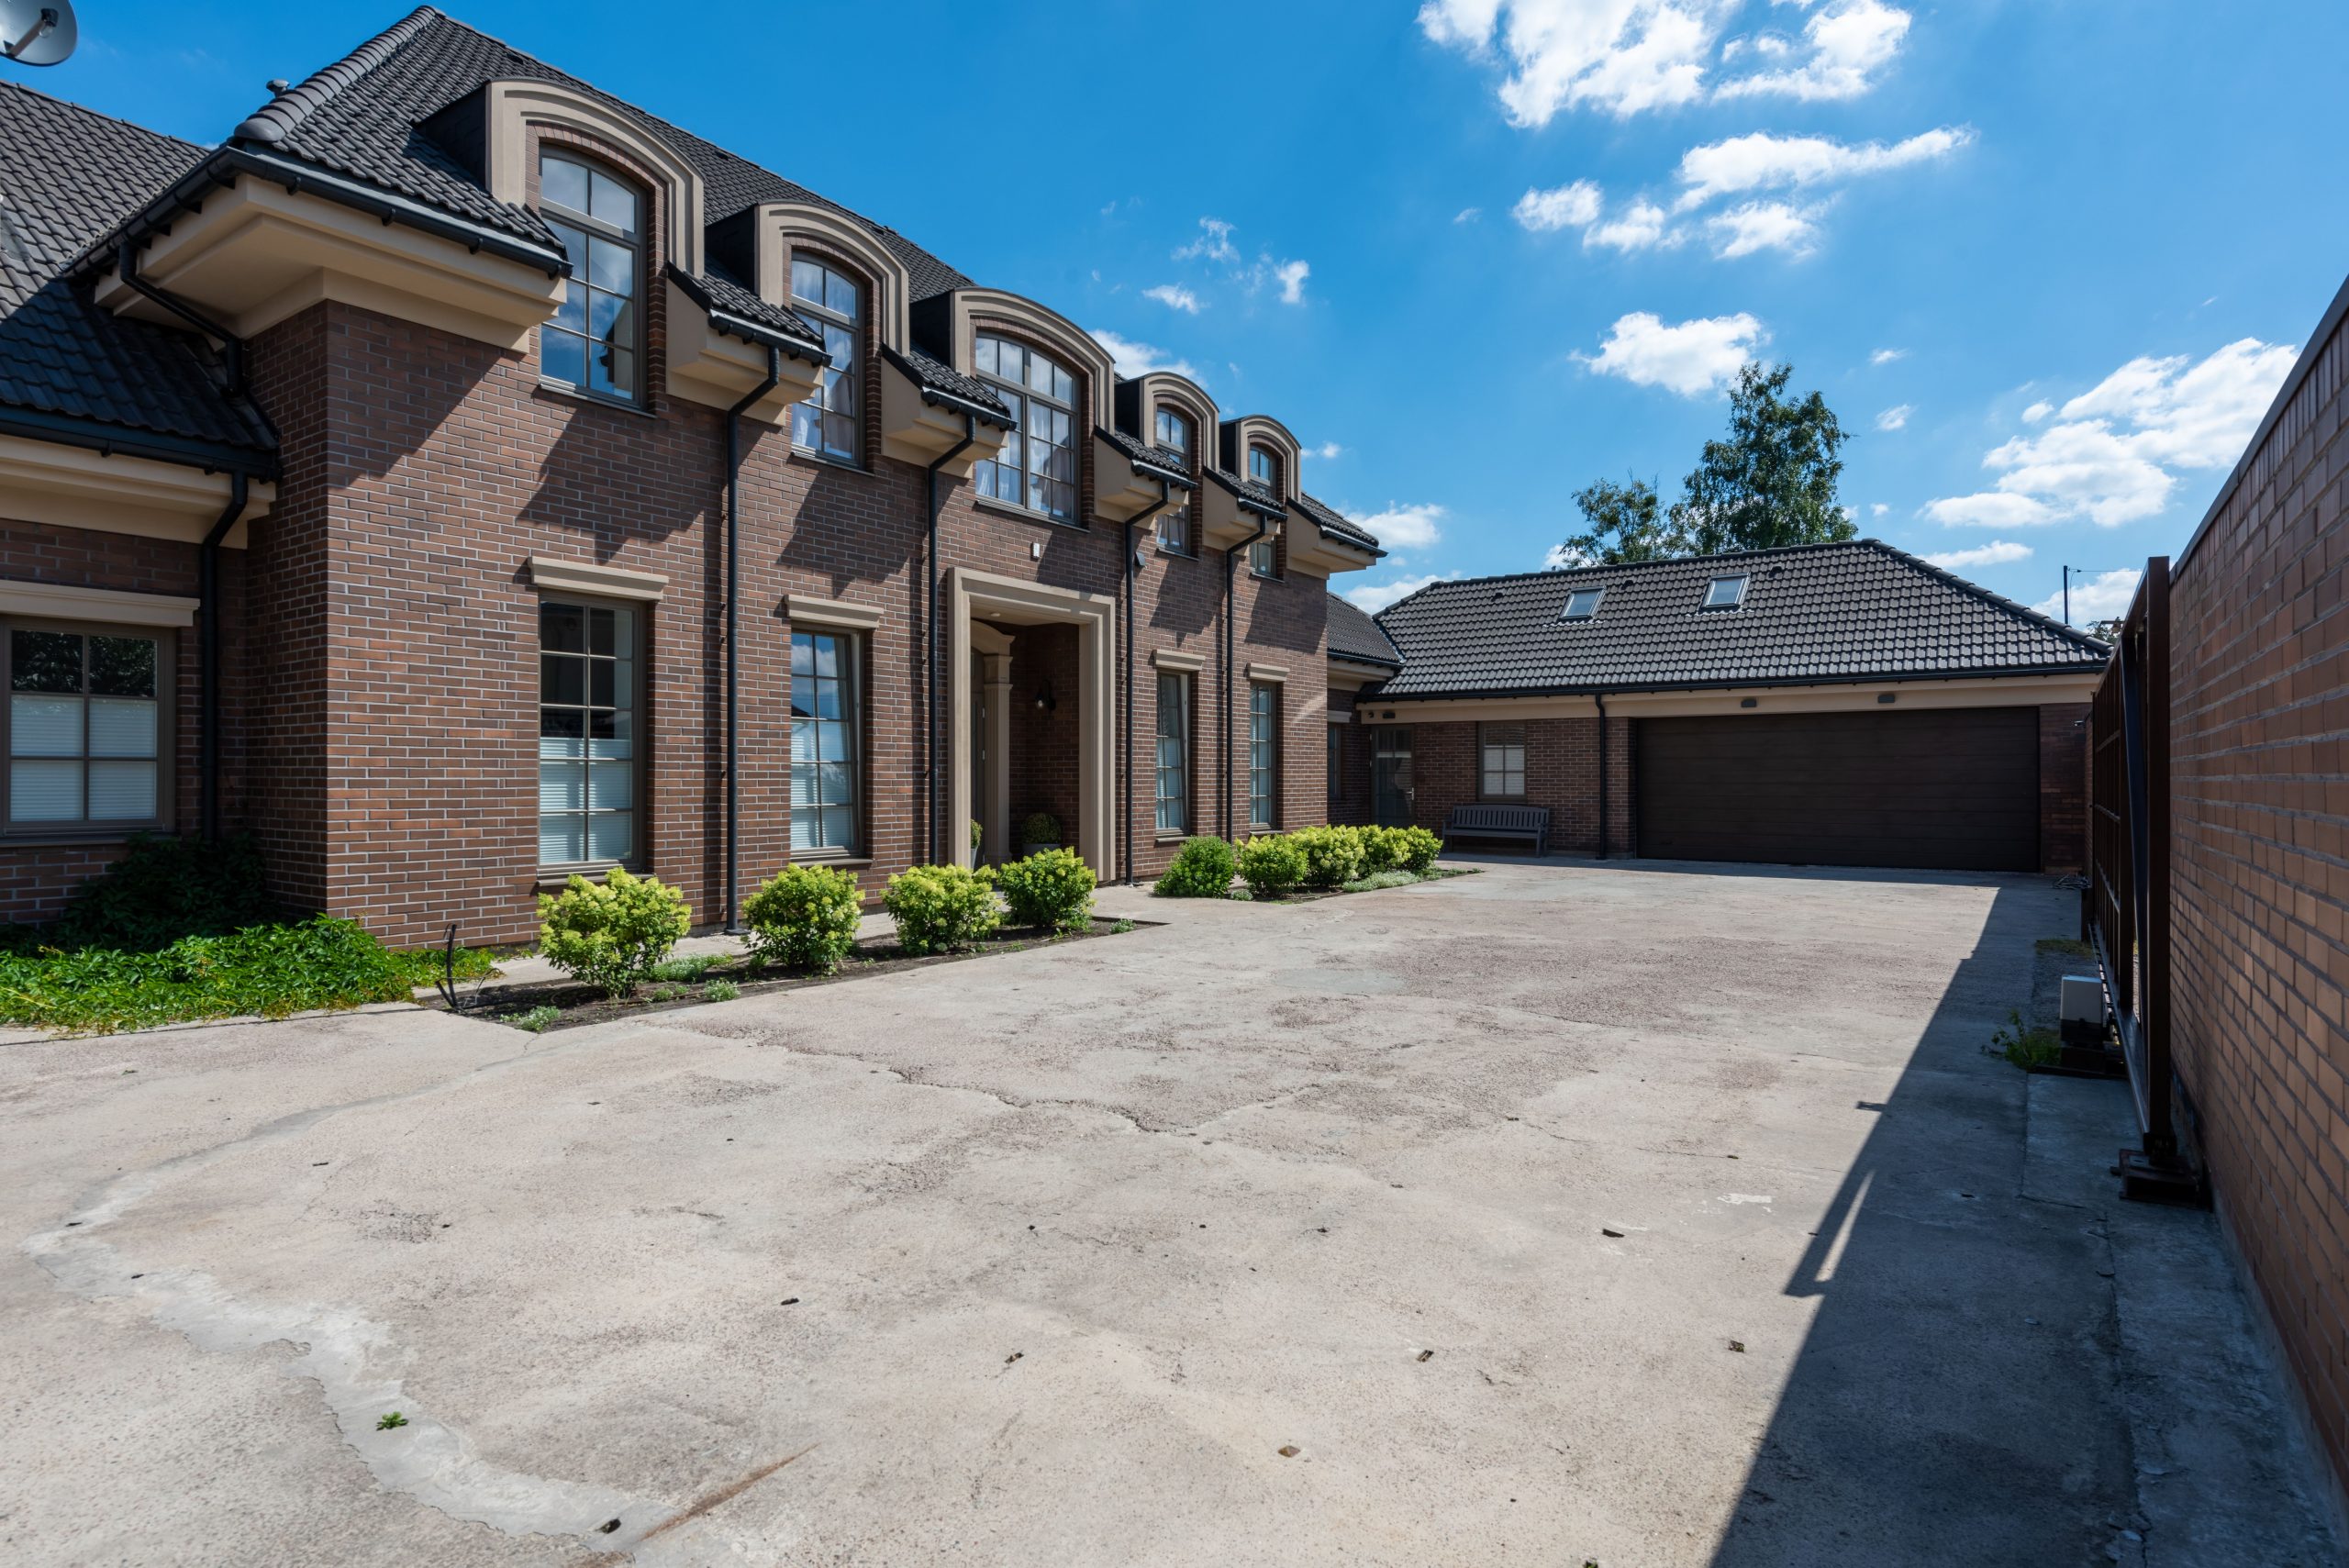
This is the workhorse of driveways: a simple, poured concrete slab. While it may not have the decorative flair of pavers, it’s a fantastic budget-friendly choice, often costing 40-60% less than an interlocking paver system. For a standard two-car driveway, you could be looking at $3,500-$6,000 for concrete, whereas basic pavers might start at $7,000 and go up quickly. To elevate this look slightly without breaking the bank, consider adding a simple brick border using bricks that match your house. This small detail can tie the driveway to the home and make it feel much more intentional for a minimal additional cost.
⚠️ Real Talk
This combination works because of its straightforward, honest contrast in materials. The formidable, traditional red brick of the house provides all the texture and color the scene needs. The simple, light gray concrete driveway doesn’t try to compete. It acts as a neutral, functional ground plane that allows the architecture of the house to be the star. The visible cracks and utilitarian nature of the concrete lend an air of authenticity and established presence, suggesting that this home is lived-in and robust. It’s a purely functional choice that, in its simplicity, becomes a style statement of its own.
11. The Simple and Clean Look of a Concrete Slab Driveway
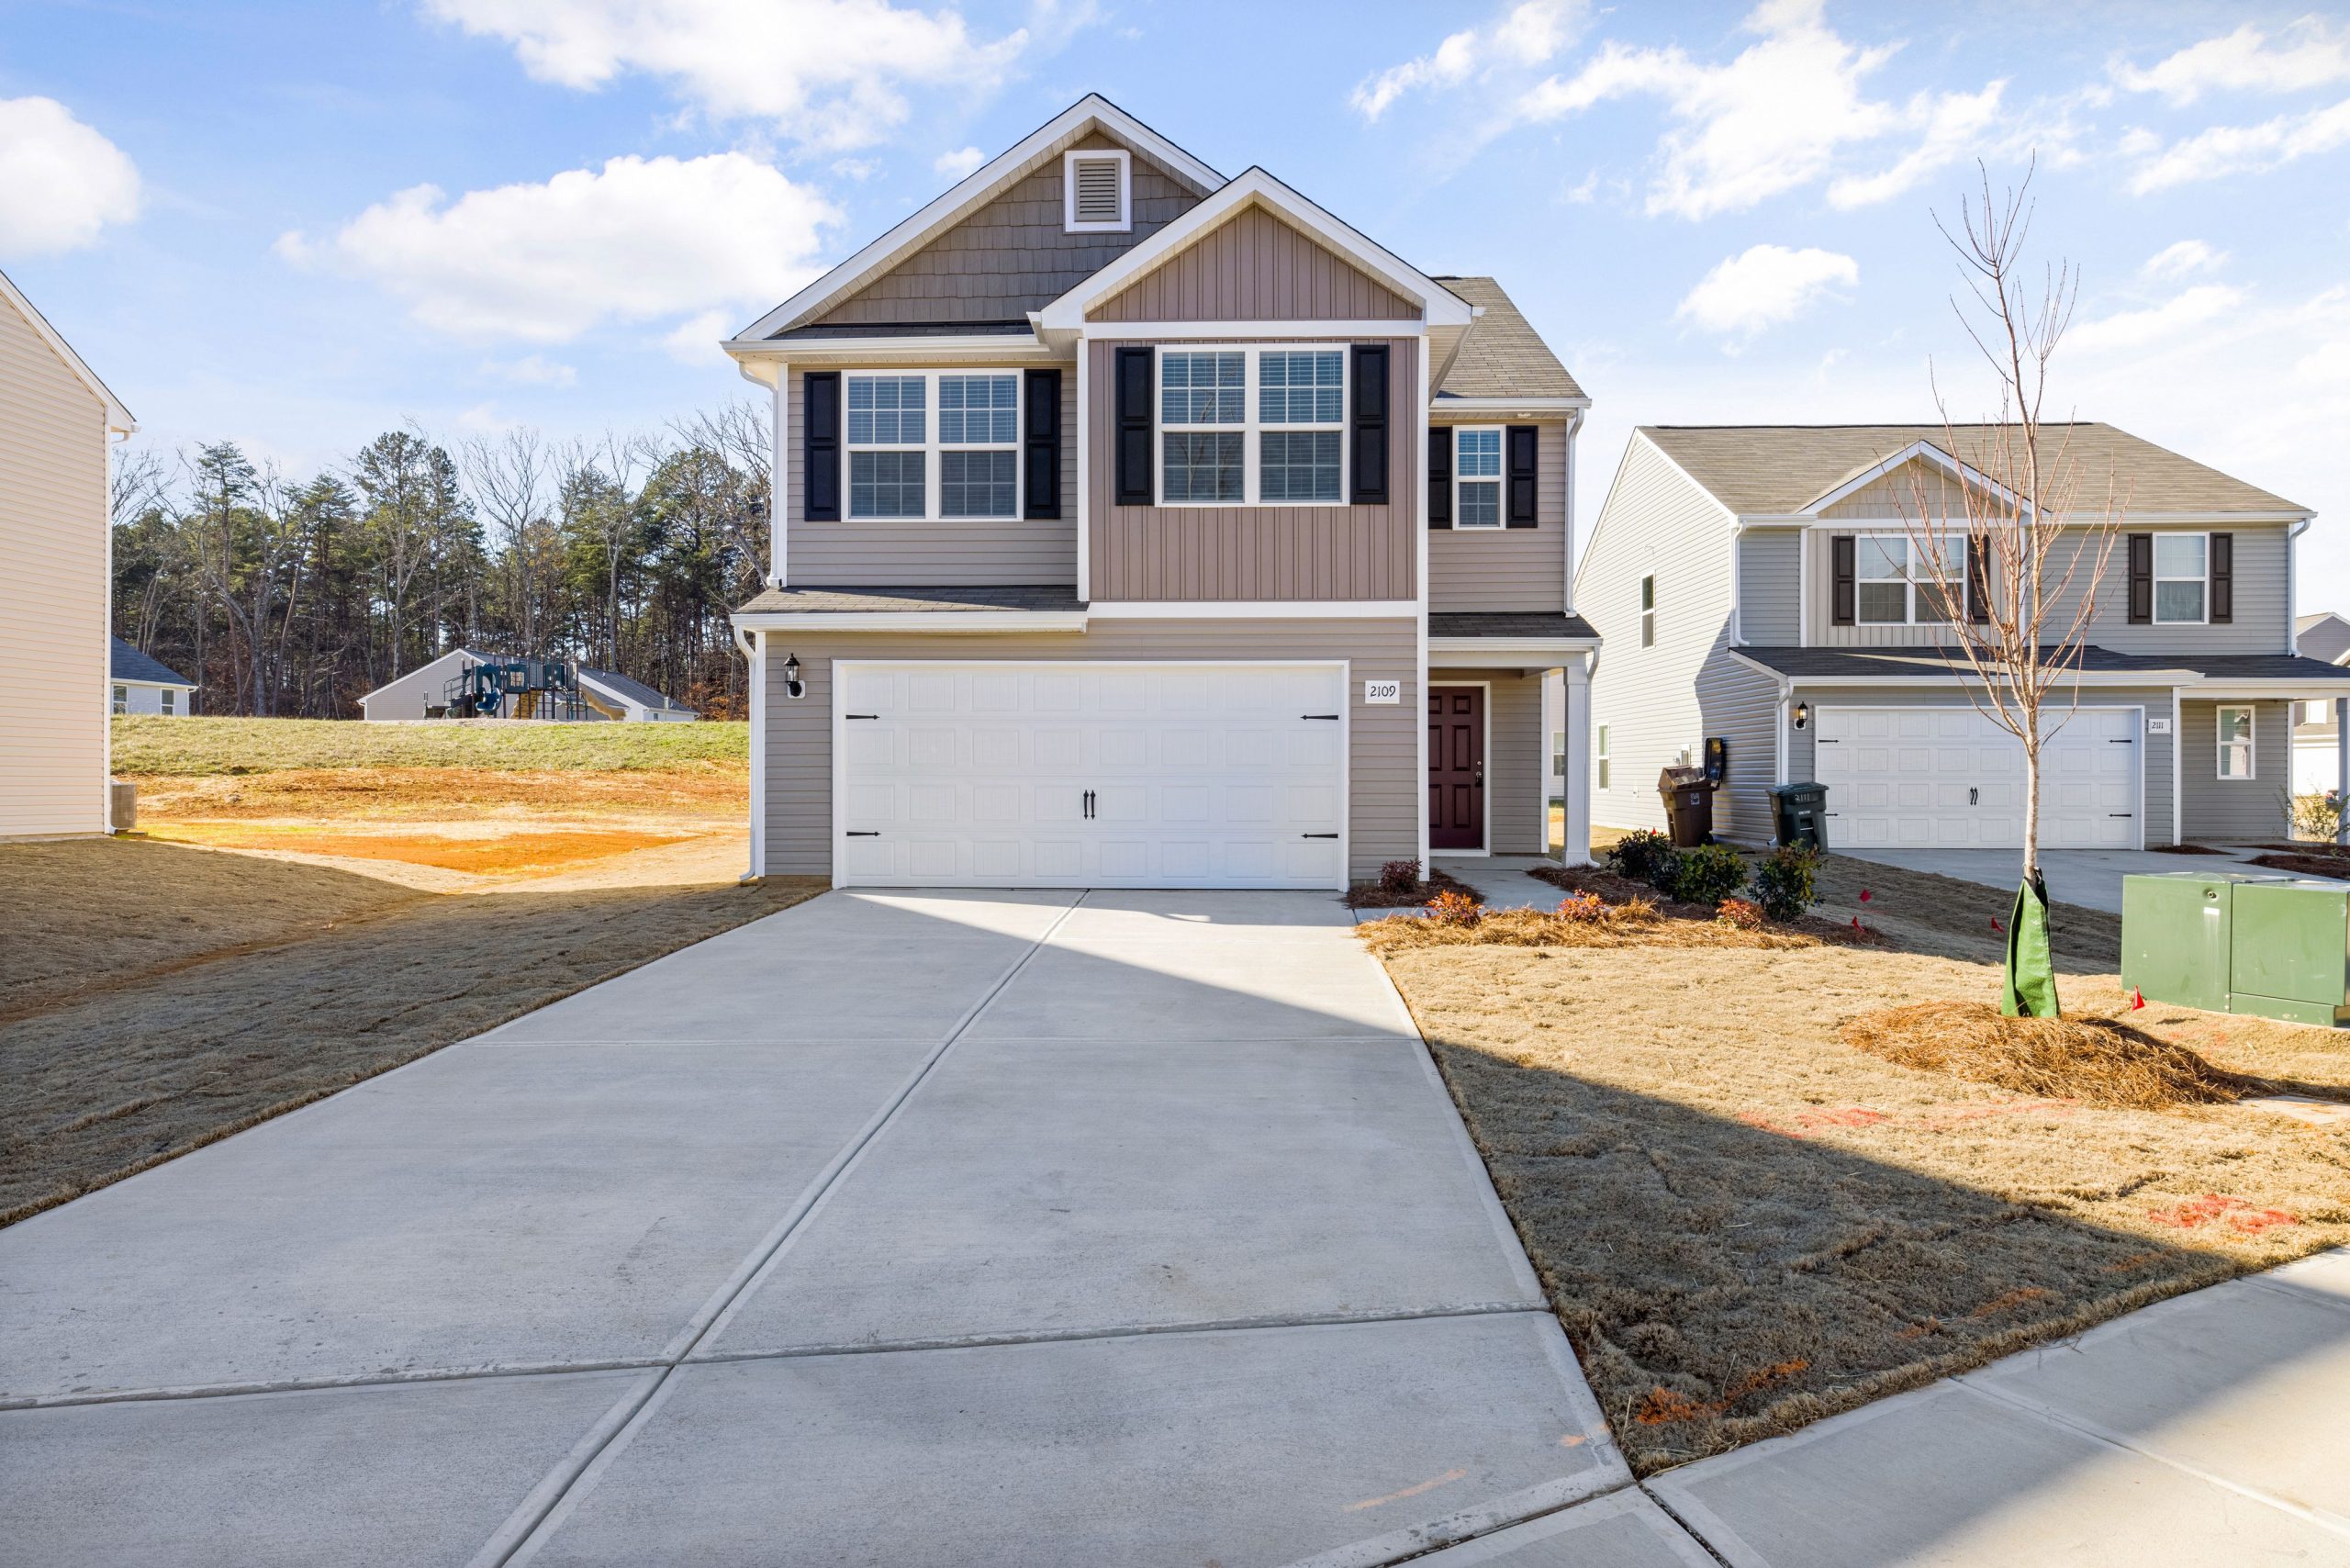
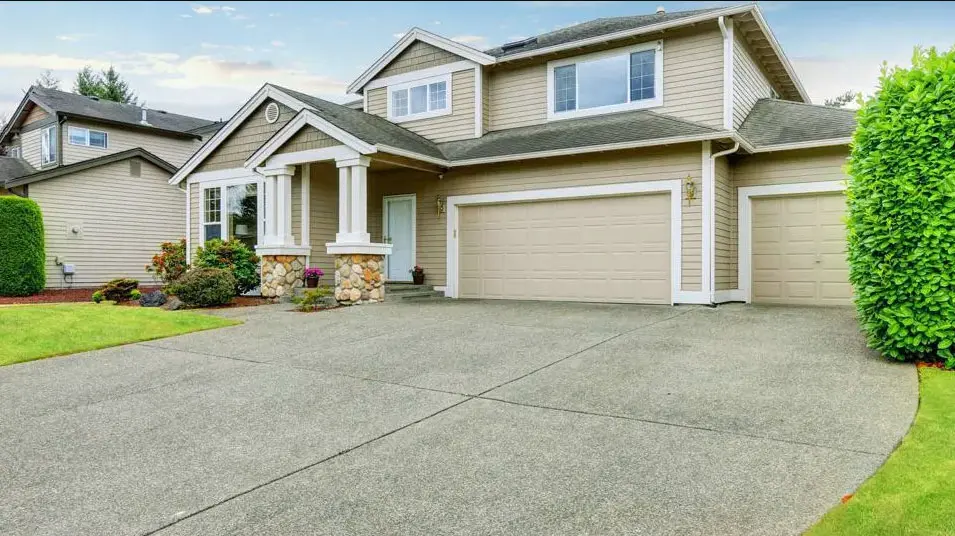
This is the baseline for many new construction homes, and it comes with a reality check: a pristine white garage door next to a light grey concrete slab will show every single tire mark, oil drip, and speck of dirt. If you love a spotless look, be prepared for frequent cleaning. More importantly, those expansion joints are not just for decoration. They are crucial for preventing the slab from cracking under temperature changes. However, they are also perfect little channels for weeds to grow. You will need to regularly apply weed killer or manually remove growth to keep it looking clean.
📐 Style Math
Want to improve the look of a basic concrete slab? Staining is a great DIY-friendly project. Here’s a quick guide:
- Prep is everything (1-2 hours): Thoroughly clean the concrete with a pressure washer and a concrete degreaser. It must be completely clean, dry, and free of any old sealers.
- Choose your stain (Cost: $50-$150): Select a water-based concrete stain for easier application and cleanup. Buy a small sample to test in an inconspicuous area first.
- Application (2-3 hours): Use a pump sprayer for even coverage, working in small, manageable sections. Have a partner follow with a roller to avoid puddles.
- Add a second coat (optional): For a deeper color, apply a second coat after the first is dry to the touch (usually 2-4 hours).
- Seal it (1 hour + cure time): After the stain has cured for at least 24 hours, apply a clear concrete sealer with a roller to protect the color and finish. Let it cure completely before driving on it.
12. Add Old-World Charm with Irregularly Shaped Natural Stone Pavers
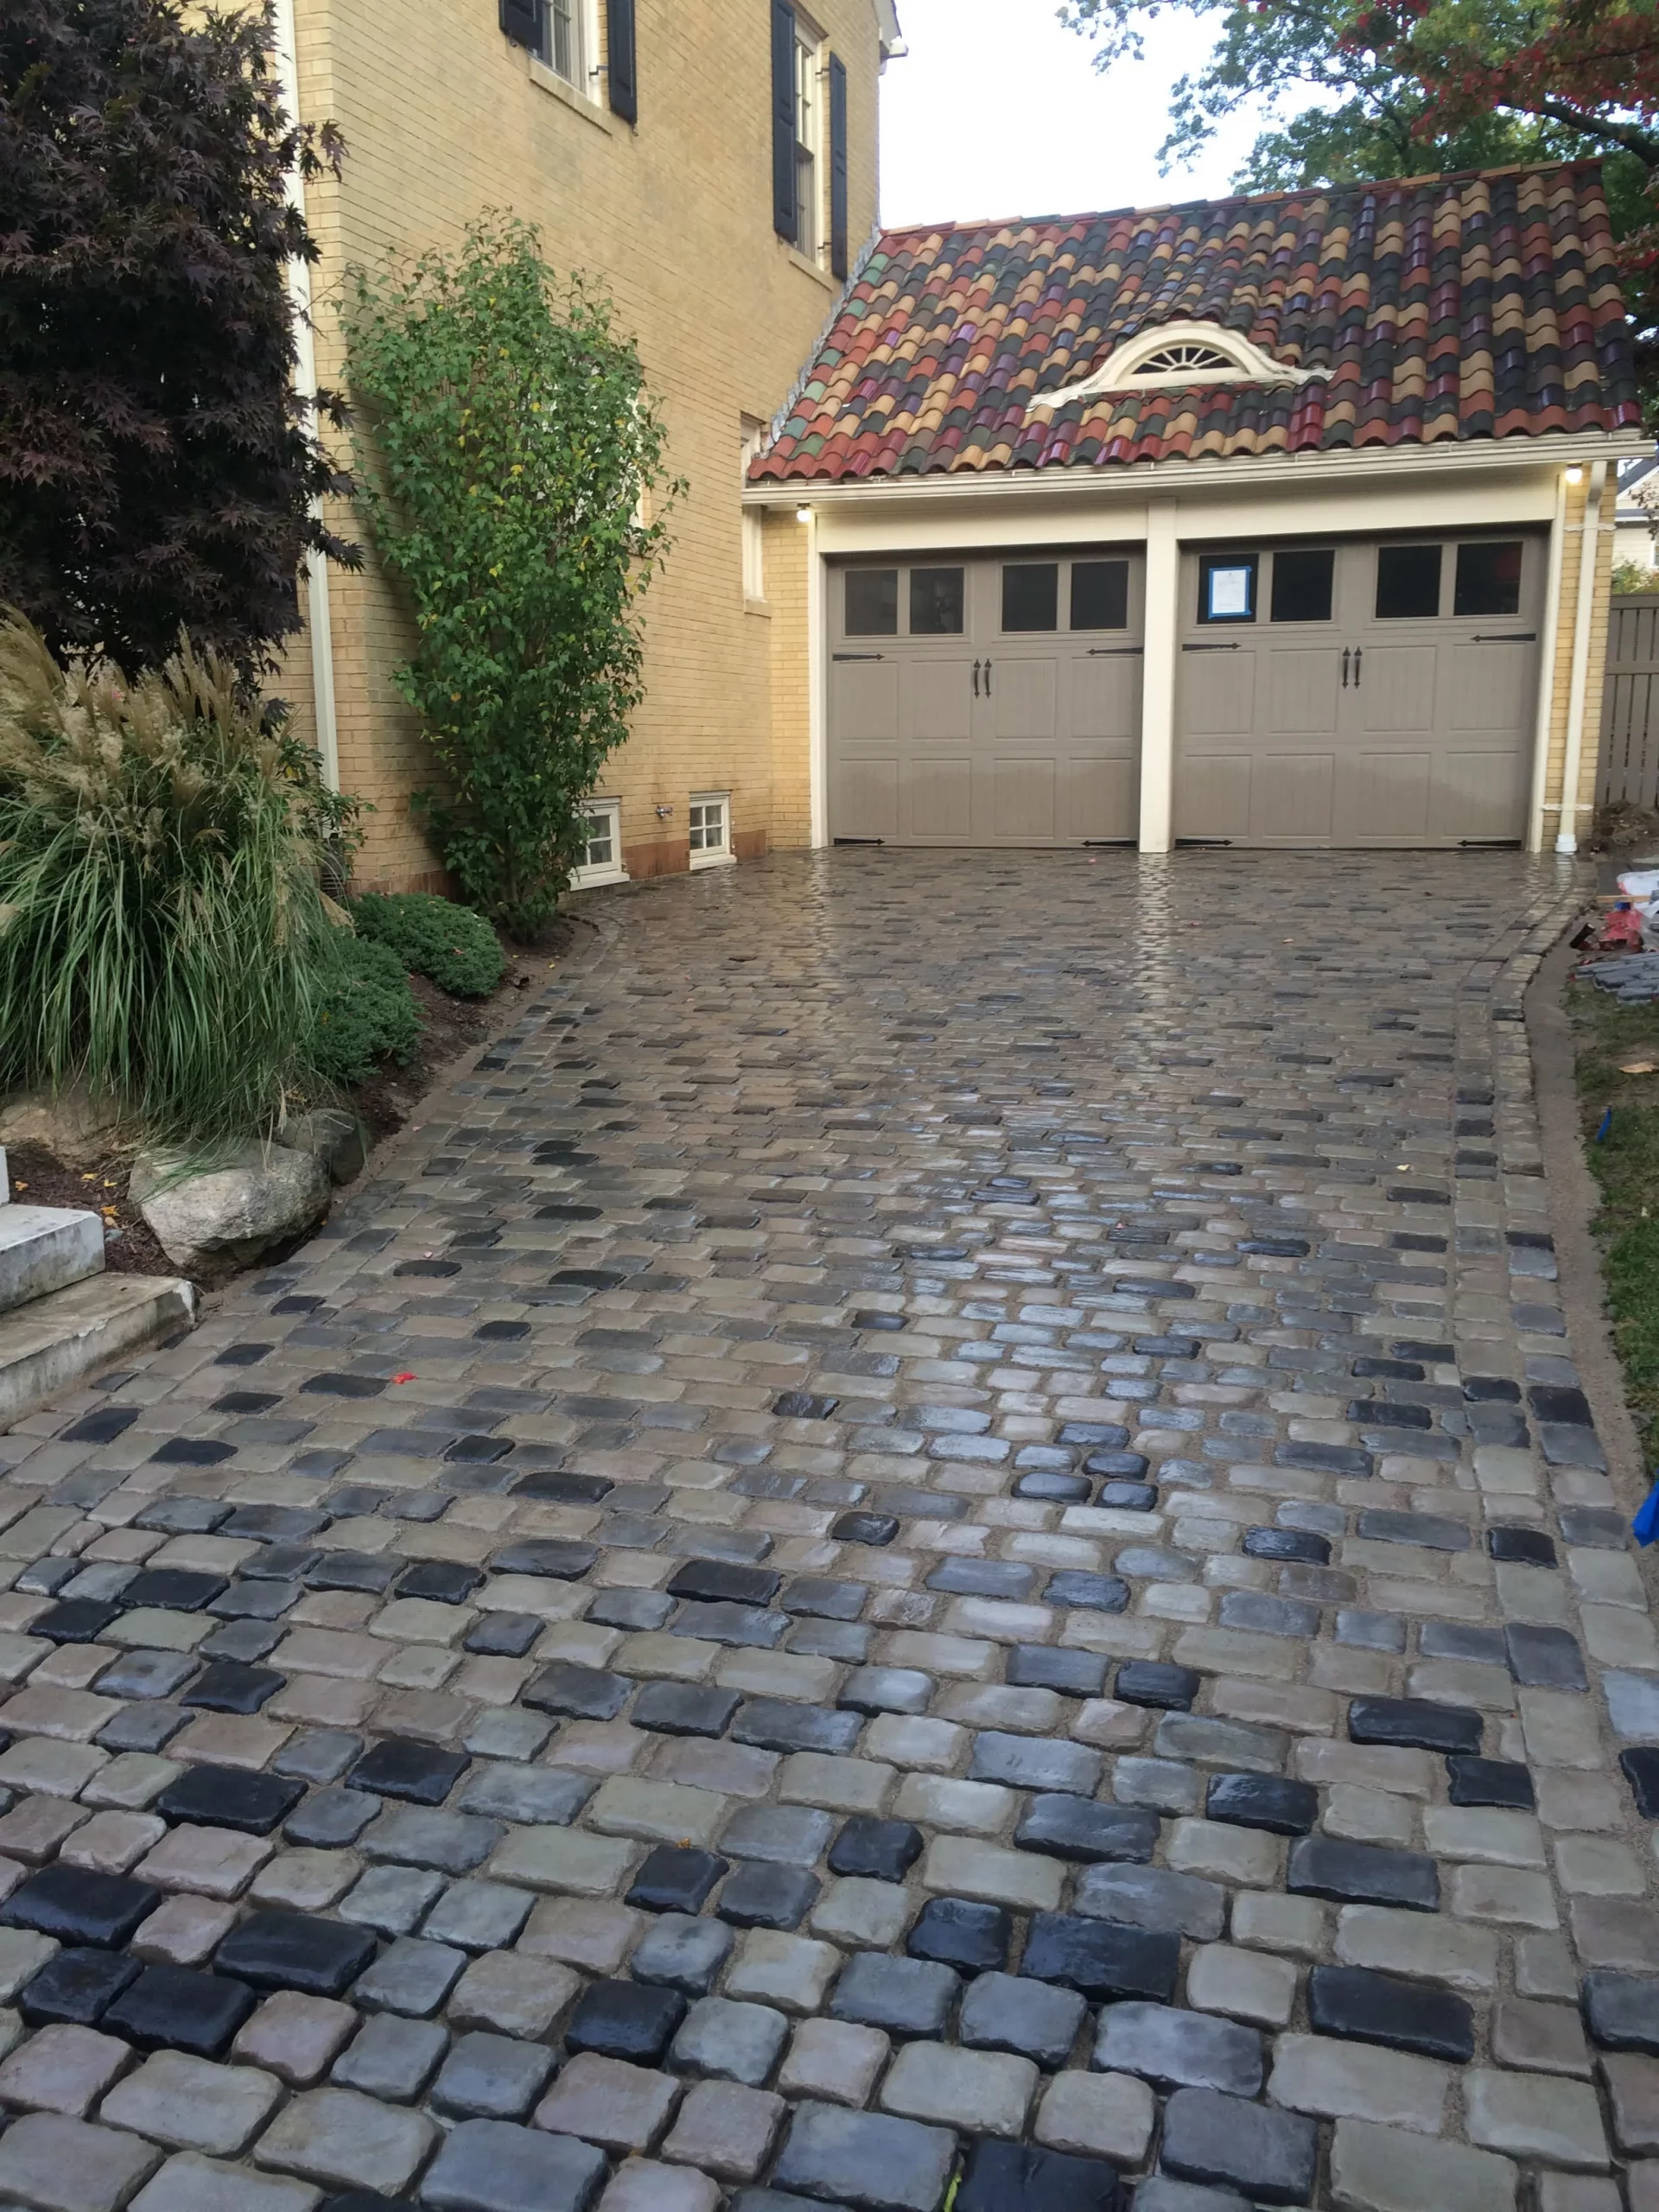
When working with irregular or ‘crazy’ paving, the key to a professional look is the joint size. Don’t let your contractor rush this part. Aim for a consistent joint width of about 3/4 inch to 1 inch between all the stones. If the gaps are too wide, the driveway will look patchy and the focus will be on the grout, not the stone. If they are too tight or inconsistent, the pattern loses its rustic charm and just looks messy. Using a high-quality polymeric sand in a color that complements the stone (like a tan or gray) will lock everything in place and prevent weeds.
✅ Before You Start
This driveway’s visual success comes from a formula of controlled chaos. It’s about 90% mixed neutral pavers and 10% bold architectural context. The pavers themselves are a near-equal mix of three distinct tones: a light grey, a dark grey/black, and a warm beige. This variation is key to creating a natural, stone-field look. The final 10% of the effect comes from the strong colors of the house itself—the vibrant yellow brick and the bold, multi-colored terracotta roof—which provide a warm, saturated backdrop that makes the neutral pavers feel grounded and intentional.
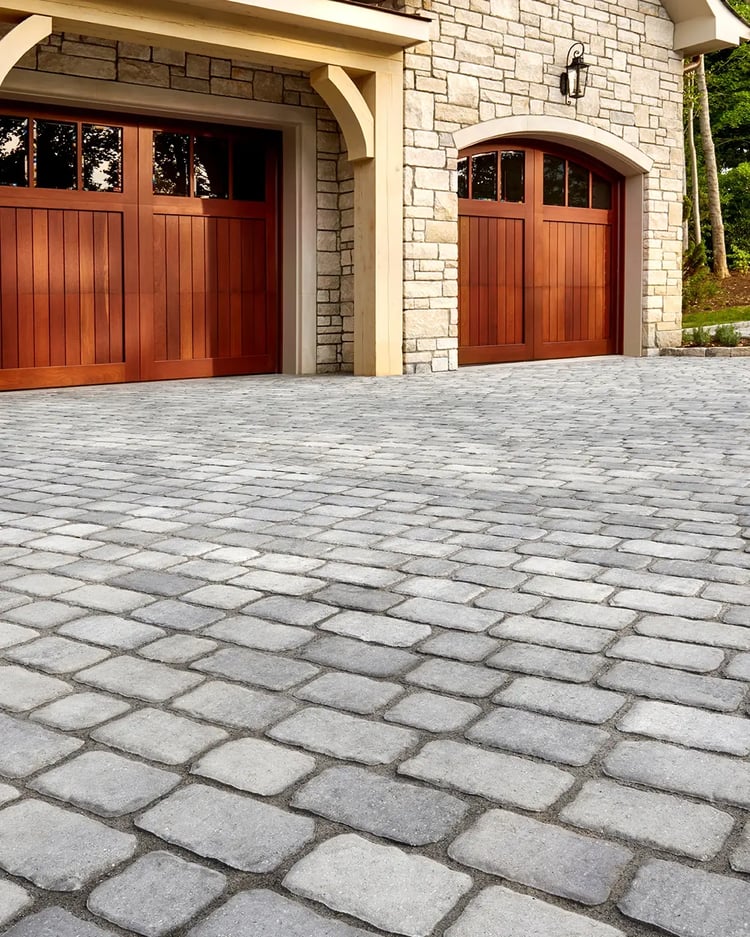
13. Achieve a Sturdy, Classic Look with Tumbled Stone Pavers
The combination of tumbled stone and natural wood creates a timeless, high-end look. Tumbled pavers are pricier than standard concrete pavers due to the extra manufacturing step that gives them their soft, weathered edges. The wood garage doors are also a significant investment but are key to the design.
💸 Get This Look For Less
- Paving Materials (Tumbled Stone Pavers): $6,000 – $11,000
- Professional Installation/Labor: $6,000 – $10,000
- Custom Wood Garage Doors (x2): $8,000 – $15,000
- Exterior Lighting and Details: $500 – $1,500
- TOTAL: $20,500 – $37,500
- Budget Alternative: Use standard (non-tumbled) concrete pavers in a similar grey color. Opt for steel garage doors with a high-quality wood-look finish, which can save you 50-70% compared to real wood. This could bring the total down to the $11,000 – $18,000 range. For a lower-cost alternative, consider gravel like in Idea #30.
The single element that elevates this entire design is the rich, warm tone of the wooden garage doors. They provide a necessary and beautiful contrast to the cool gray stone of the pavers and the building’s facade. Without the wood, the exterior would be a sea of muted, monochromatic stone. The doors act as the heart of the design, injecting warmth, organic texture, and a sense of classic craftsmanship that a painted or metal door simply could not replicate. They are the focal point that makes everything else around them look more luxurious.
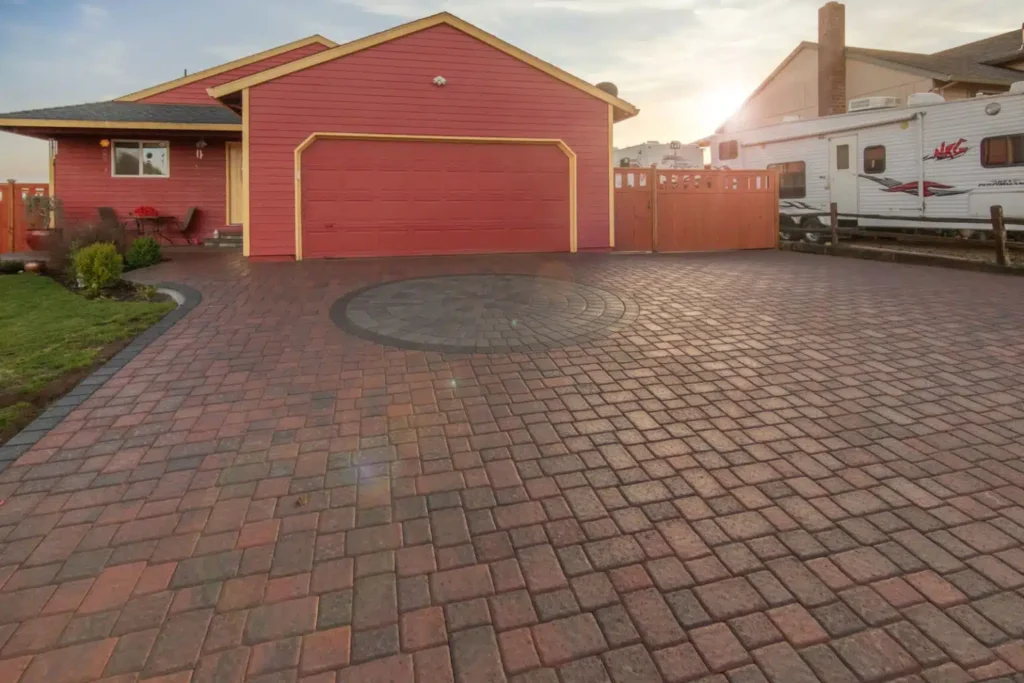
14. Integrate a Bold Circular Medallion into a Brick-Pattern Driveway
The success of adding a decorative element like a circle kit hinges on contrast and placement. By using darker, smaller pavers for the circular medallion, it stands out distinctly from the larger, warmer-toned pavers of the main field. The dark gray border around the main driveway reinforces this contrast and makes the whole design feel cohesive. The placement is also key; locating the medallion centered on the garage creates a formal, organized feel and turns a purely functional space—the area for turning into the garage—into an intentional design feature. For a similar concept with a different shape, see Idea #15.
🔥 Trending Context
Installing a pre-packaged paver circle kit is a manageable project for a seasoned DIYer. Here’s how to approach it:
- Lay the Main Field First (Time: 1-2 days): Install your main driveway pavers, leaving a rough, squared-out opening larger than your circle kit’s diameter.
- Mark Your Center (15 mins): Find the exact center point for your circle and drive a stake into the base material.
- Draw Your Circle (Cost: $5 for string): Tie a string to the stake and, using the radius specified in the kit’s instructions, use marking paint to draw a perfect circle on your pavers.
- Make the Cut (1-2 hours): Using a diamond-blade masonry saw (rentable for ~$80/day), carefully cut the main field pavers along the painted circle line. Remove the offcuts from inside the circle.
- Install the Kit (2-3 hours): Following the manufacturer’s pattern, lay the pieces of the circle kit.
- Fill and Compact: Add edge restraints, sweep polymeric sand into all the joints, and compact everything to lock it in place.
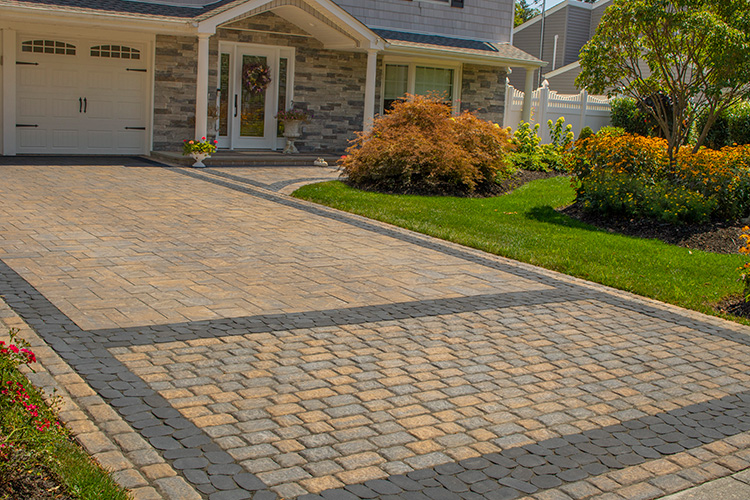
15. Define Your Space with a Contrasting Paver Border and Inlay
When you’re using a decorative inlay, the rule of ‘less is more’ applies. The rectangular inlay here works because it’s a simple shape that mirrors the architecture of the house and the garage doors. Don’t get tempted by overly ornate patterns unless you have a very large, grand driveway. For most homes, a simple geometric shape like a rectangle or a diamond, placed strategically, is far more effective. Ensure the color of the inlay and border pavers matches another element of your home’s exterior, like the roof or trim, to create a cohesive look—here, the dark grey pavers echo a dark roof or trim color.
🎯 What Makes It Work
This design is highly scalable. The concept of a border and a simple inlay works beautifully on a wide range of driveway sizes. For a small two-car driveway (around 400-600 sq ft), a simple border and a single rectangular inlay centered on the garage doors is perfect. For a larger, more expansive driveway (1000+ sq ft), you could place two inlays—one in front of each garage bay—to create a more formal, symmetrical look. The key is to maintain the proportions; the border should be consistently 6-12 inches wide, and the inlay should feel substantial but not so large that it overwhelms the main paver field.
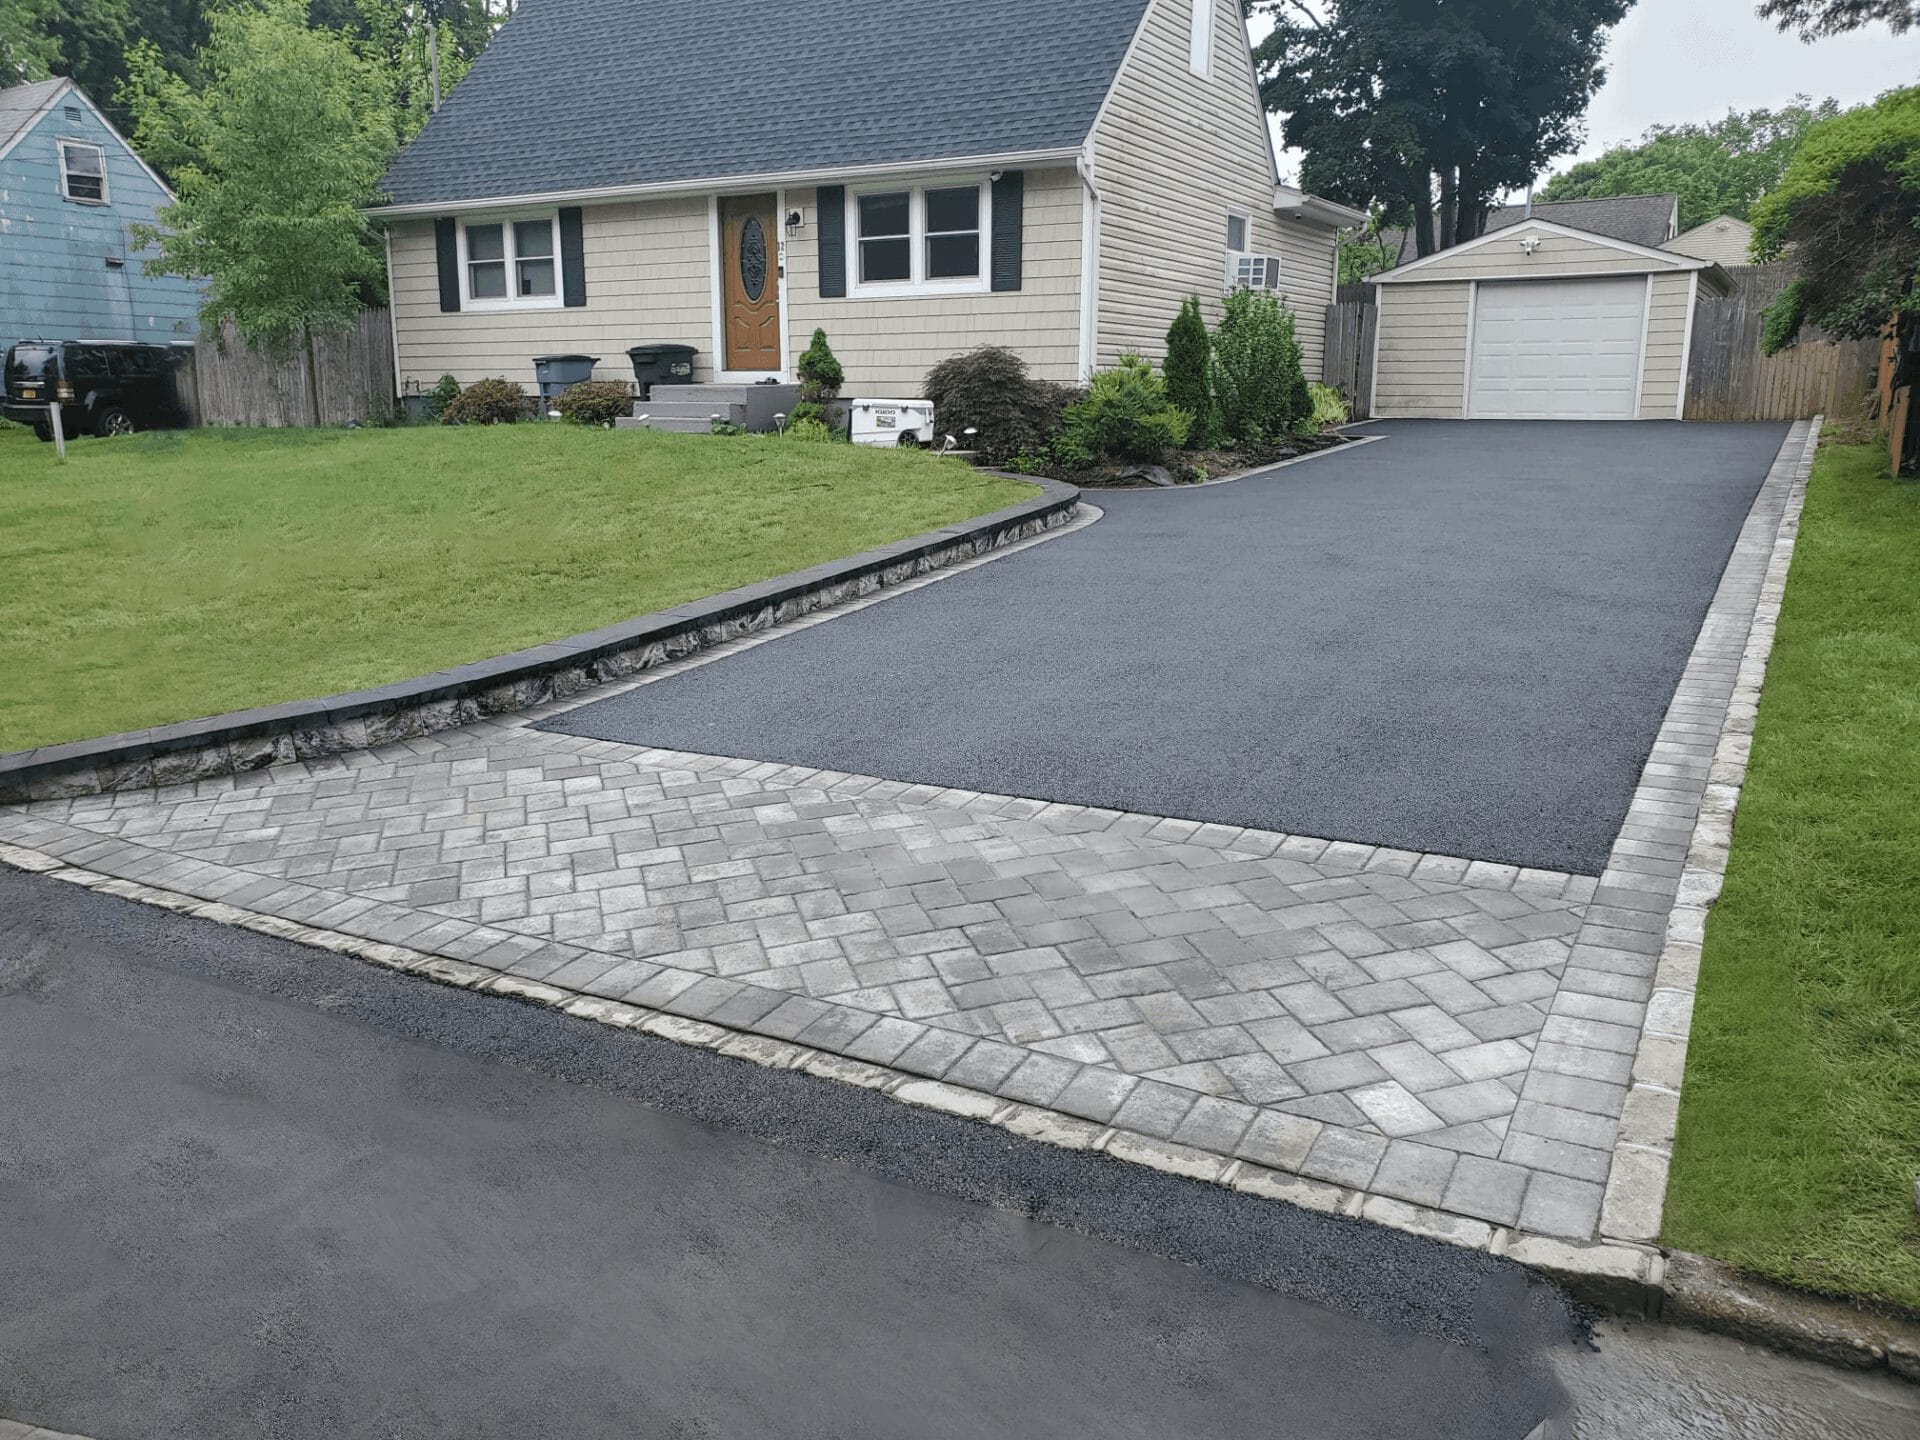
16. A Crisp Look with an Asphalt Driveway and a Paver Apron
This design perfectly balances budget and aesthetics. The formula is simple: 85% cost-effective asphalt + 15% high-impact paver accents. The bulk of the driveway uses black asphalt, which is durable and relatively inexpensive to install. The visual upgrade comes from the ‘apron’—the entrance section at the street—and the continuous border, both done in contrasting light grey pavers. This puts the expensive material where it has the most visual impact, giving the entire driveway a custom, finished look for a fraction of the cost of a full paver installation. The herringbone pattern at the entrance adds an extra touch of class.
📏 Scale Guide
This hybrid approach requires mindful maintenance. The main weak point is the seam between the asphalt and the paver border. Over time, temperature changes and settling can cause a small gap to form or the asphalt to crack along this line. It’s important to keep this seam sealed to prevent water from penetrating and causing damage, especially freeze-thaw cycles in colder climates. The pavers themselves are low-maintenance, but you’ll need to seal the asphalt every 3-5 years to maintain its dark black color and protect it from a premature ‘graying out’ which would reduce the beautiful contrast that makes this look work.
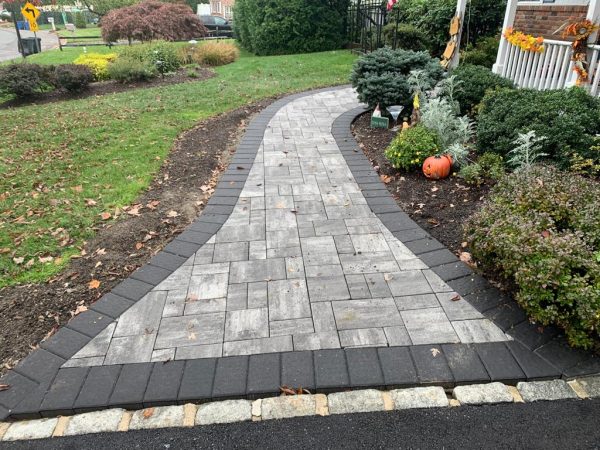
17. Create a Graceful Entrance with a Curved Paver Walkway
The single most important element here is the generous, sweeping curve of the walkway. A straight path from the driveway to the door would be shorter, but it would be purely functional and lack any sense of grace. The curve slows down the journey, creating a more welcoming and intentional transition from the public space of the driveway to the private space of the home. It allows for deeper, more interesting garden beds along its edges. The dark charcoal border serves to accentuate this beautiful curve, making it the undeniable hero of the design.
🧹 Maintenance Reality
You don’t need expensive pavers to create a beautiful, curving walkway. You can achieve a very similar and charming effect for much less. Dig out your desired curved path, lay down landscape fabric, and fill it with 3-4 inches of attractive gravel or wood chips (around $60 per cubic yard). Use a simple and flexible plastic or metal landscape edging from Target or Amazon (about $2-$4 per linear foot) to hold the curve and keep the material contained. Add a few solar-powered path lights, and you have a stylish, functional walkway for a weekend of work and a few hundred dollars.
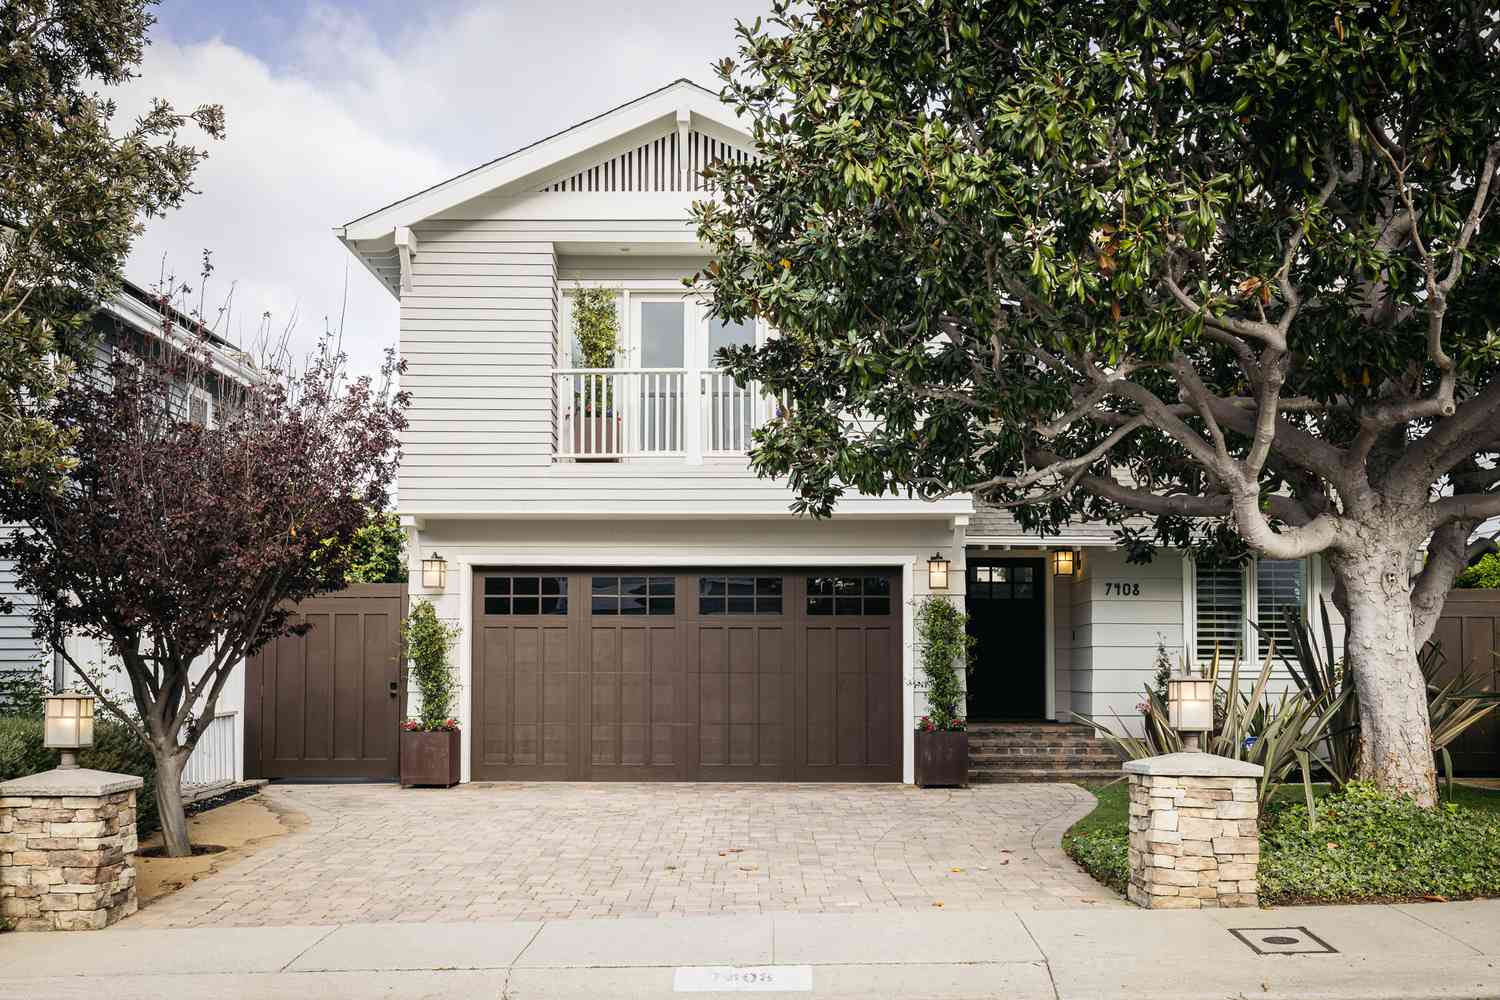
18. Frame Your Driveway Entrance with Lit Stone Pillars
Entrance pillars make a grand statement, but they need space to look right. This idea is best suited for properties with a driveway entrance that is at least 14 feet wide, allowing for a comfortable 12-foot opening for vehicles while accommodating two substantial pillars. The pillars themselves should be proportional to the house. For a single-story home, a height of 4-5 feet is appropriate. For a larger, two-story home like the one shown, pillars that are 6-7 feet tall feel balanced. Anything smaller would look comically undersized. Make sure you have at least 3-4 feet of clear space on either side of the driveway for the pillar footprint and surrounding landscaping.
⭐ The One Thing
A project involving masonry and electrical wiring requires careful planning. Don’t skip these crucial first steps:
- Call 811 (Call Before You Dig): Before any excavation for the pillar footings or electrical conduit, you must have underground utility lines marked. It’s a free service and it’s the law.
- Consult an Electrician: Running power to gate pillars for lights requires trenching and weatherproof wiring that meets local codes. This is not a casual DIY task. Get a professional opinion and a quote.
- Check Local Setbacks: Your city or county will have rules about how close any structure, including pillars, can be to the public road or property line. Verify these regulations before you pour any concrete.
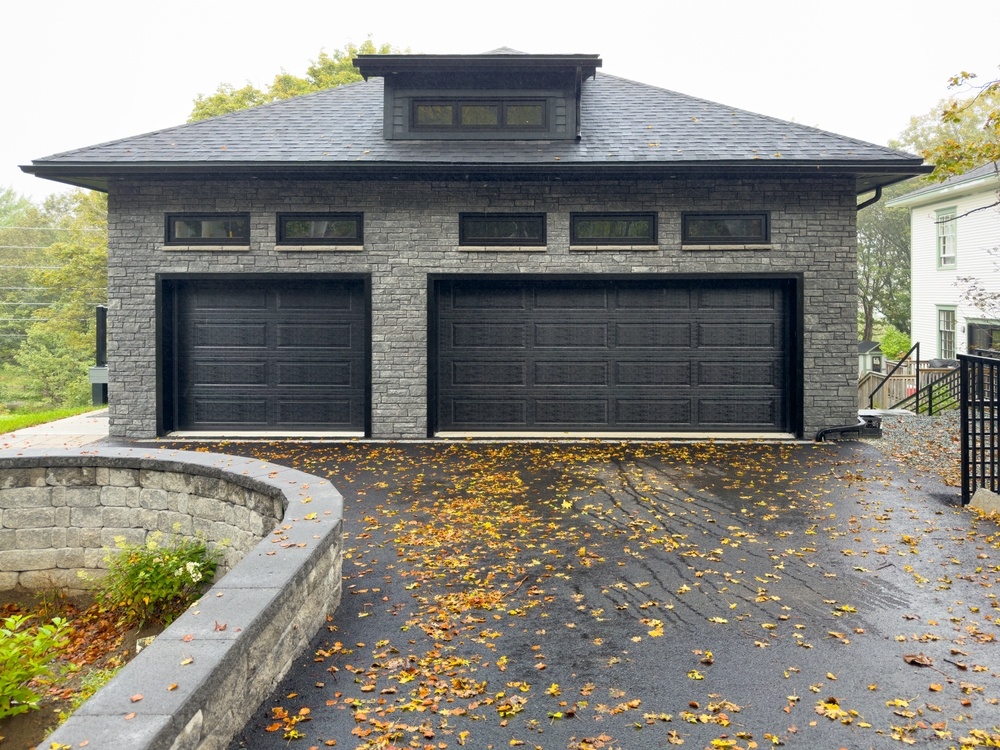
19. Statement Gates as a Key Design Feature
We’re seeing a huge trend towards making the driveway gate more than just a security feature; it’s becoming a central piece of architectural jewelry for the home. Driven by a desire for both privacy and curb appeal, homeowners are moving away from purely functional gates and investing in custom or semi-custom designs that reflect the style of the house. The use of mixed materials, like wood and metal, and strong geometric patterns, as hinted at in inspiration photos, is particularly popular right now. It’s about creating a ‘first impression’ that feels both secure and incredibly stylish.
💡 Designer Tip
A beautiful gate is one thing, but a functional one is another. The biggest mistake people make is underestimating the cost and complexity of automation. A high-quality gate opener system, professionally installed, can easily cost as much as the gate itself ($2,000 – $5,000+). You need to consider how it will be powered (is there a nearby source?), what kind of safety features you need (like photo-eye sensors for kids and pets), and what type of access control you want (keypad, remote, intercom). A heavy, solid gate also requires a more powerful—and more expensive—motor to operate reliably, especially in areas with wind or snow.
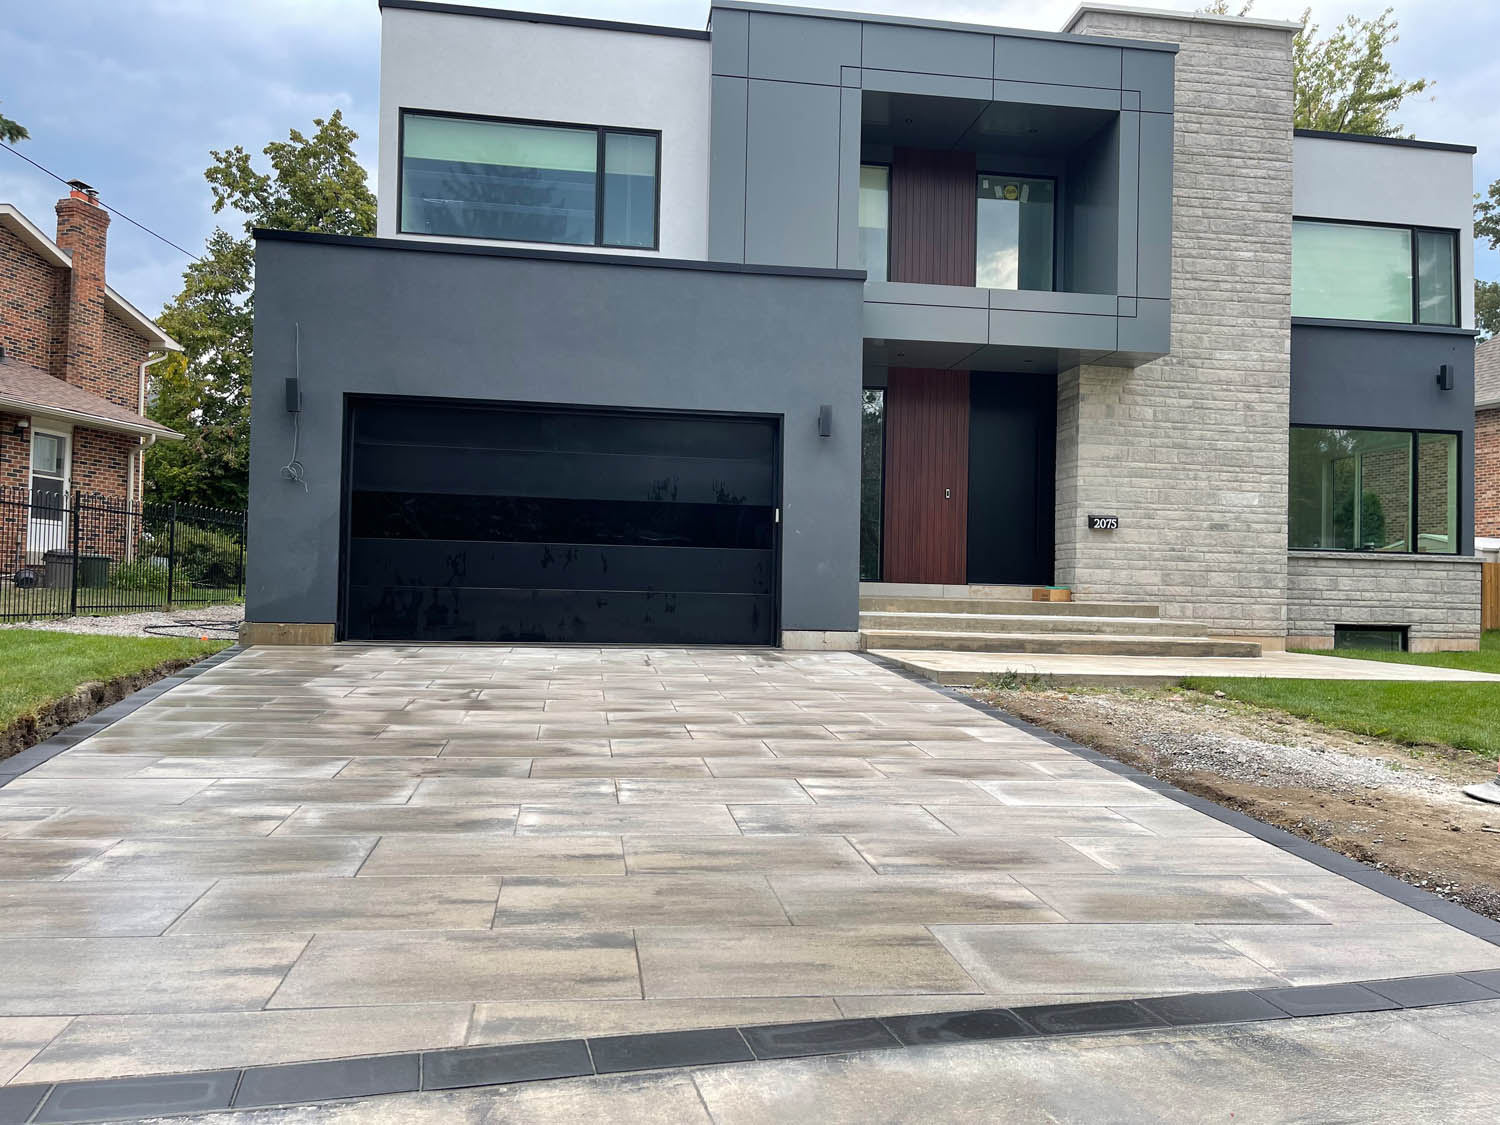
20. A Modern Mix: Light Grey and Black Pavers
This is modern exterior design boiled down to its essence: clean lines, a limited color palette, and a focus on texture. The combination of light grey and dark charcoal/black works so well because it creates a crisp, graphic contrast that feels intentional and sophisticated. The irregular rectangular shapes of the pavers add a layer of subtle texture that prevents the surface from feeling flat, while the continuous dark border acts like a frame on a painting, containing the composition and giving it a sharp, defined edge. It’s a look that complements the blocky, geometric forms of modern architecture perfectly.
🔧 How-To Brief
When going for a modern two-tone look like this, don’t mix patterns. If your main field is a random rectangular layout, your border should be a simple, single-row ‘soldier’ course (pavers laid side-by-side). If your main field is a herringbone, use a soldier course border. Mixing a running bond pattern with a herringbone border, for example, creates visual noise and undermines the clean, minimalist aesthetic you’re trying to achieve. The goal is contrast in color, not complexity in pattern. Keep it simple and let the colors do the talking.
21. Elegant Curves with Dark Aggregate and a Light Paver Border
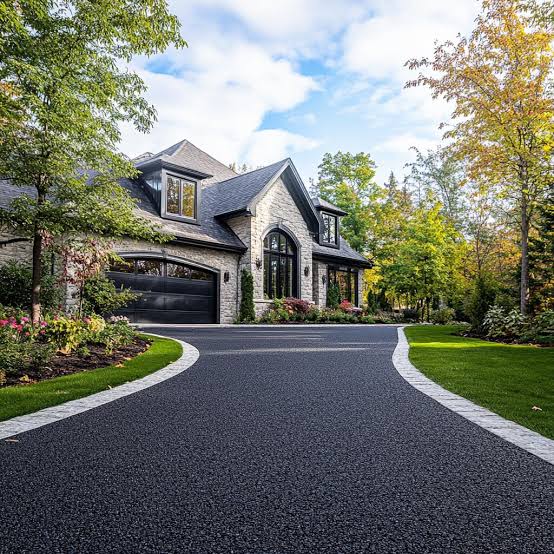
The visual formula here is all about contrast and proportion. Think of it as 95% dark field and 5% light edge. The vast expanse of dark aggregate creates a dramatic, uniform surface that reads as a single, bold shape. This allows the graceful curves of the driveway to be the primary design element. The very thin, light-colored paver border makes up a tiny fraction of the surface area but does all the heavy lifting. It acts as a crisp, bright line that defines the edge of the dark field, making the curves pop and creating a clean separation from the vibrant green lawn. Without this sharp contrast, the edge would be lost.
💰 Budget Breakdown
It’s the contrast. The entire success of this sophisticated look hinges on the stark difference between the dark driveway surface and the light paver edging. If you used a medium-gray border, it would get lost. If you edged it with dark pavers, the beautiful curve would be invisible from a distance. The light border acts like a piece of chalk, drawing a clean, elegant line through the landscape. It highlights the shape of the driveway, making it a feature in its own right, rather than just a path to the garage. This single detail elevates the entire design from basic to breathtaking.
22. The Ultimate Luxury: A Long, Stately Driveway
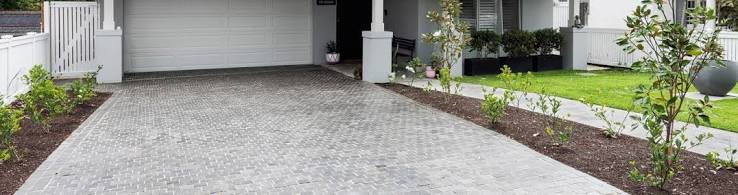
A truly long and luxurious driveway, the kind that meanders through a property, is a feature in and of itself. This concept doesn’t even begin to work unless your driveway is at least 150-200 feet long. The goal is to create a sense of procession and reveal. For maximum impact, the driveway should have at least one or two gentle curves, and it needs to be framed by mature landscaping—whether it’s a formal allée of trees or more naturalistic plantings. The width is also key; it should be at least 12 feet wide to feel generous and accommodate larger vehicles without feeling cramped.
⚠️ Real Talk
Creating a half-mile long, tree-lined, heated paver driveway entrance is the absolute pinnacle of luxury and convenience, with a price tag to match. This is a true estate-level feature.
- Paving Materials (High-end stone or porcelain pavers): $150,000 – $300,000
- Excavation & Base Prep (for a long drive): $50,000 – $100,000
- Professional Installation Labor: $100,000 – $200,000
- Heated Driveway System (Hydronic or Electric): $75,000 – $150,000
- Mature Tree Planting & Landscaping: $40,000 – $80,000
- TOTAL: $415,000 – $830,000
- Budget Alternative: There is no true budget alternative for this scale. A more modest approach would be a long gravel drive with younger trees, which could be installed for $20,000 – $50,000.
23. A Classic Suburban Look with Gray Pavers and a Dark Border
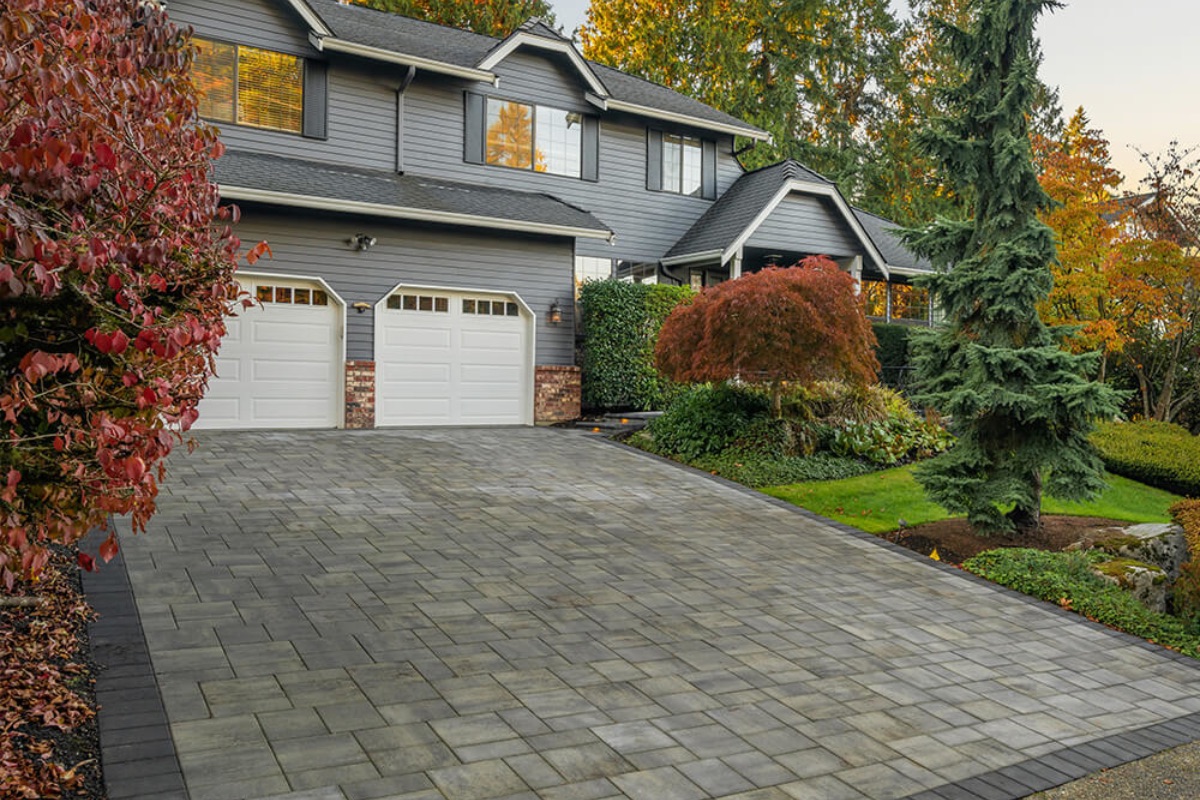
For a wooded or heavily treed lot like this, a paver driveway is a fantastic choice, but it comes with specific maintenance tasks. Leaf tannins are your number one enemy. When wet leaves sit on light-colored pavers, they can leach tannins and leave stubborn brown stains. You’ll need to be diligent with a leaf blower, especially in the fall. The joints between pavers are also prime real estate for seeds and saplings from surrounding trees. Expect to do a thorough weeding and re-sanding of the joints every couple of years to keep it looking sharp and prevent damage from roots. This is a bit different from the needs of the similar driveway in the more open setting of Idea #6.
📐 Style Math
Let’s be honest: the two-tone paver look has been a suburban staple for a couple of decades for a reason—it’s a safe bet. It looks clean, structured, and adds more value than plain asphalt or concrete. However, it can sometimes feel a bit… predictable. If you’re using this classic combo, the landscaping is what will set your driveway apart from your neighbors’. Investing in more interesting, layered plantings with a variety of textures and seasonal colors (like the mix of green foliage and red-orange leaves seen here) is what will make your classic driveway feel custom and special, not generic.
24. Grand Scale: A Curving Asphalt Drive with Stone Curbing
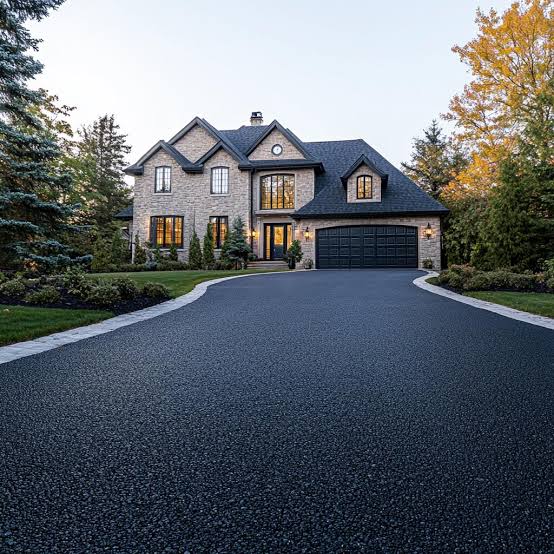
This design is all about scale and transition. The long, dark, curving ribbon of the asphalt driveway creates a powerful sense of arrival, leading the eye through the landscape toward the house. The use of asphalt is a smart choice for such a large area, keeping costs manageable. The magic happens at the edge. The light-colored stone curbing acts as a formal, architectural border that elevates the simple asphalt, transitioning it from a mere road to a stately drive. This hard edge provides a clean, manicured line against the soft, green lawn, making both elements look more intentional and well-kept.
✅ Before You Start
If you’re investing in a long, curving driveway, don’t skimp on the lighting. For a grand, traditional look like this, you need to think in layers. Use subtle, low-level path lights along the curve of the drive itself, spaced about 20-25 feet apart, to guide the way safely without creating a ‘runway’ effect. Then, use uplighting on key landscape features—a few mature trees or a beautiful stone wall—to create depth and drama. The goal is to create soft pools of light rather than flooding the area. This creates a sophisticated, resort-like feel as you approach the house.
25. The Clean Lines of a Speckled Concrete Driveway
While professionally poured concrete is the standard, you can get a similar clean, functional look on a tighter budget with large format concrete pavers. Stores like Home Depot and Lowe’s sell 24×24 inch concrete pavers for about $15-$25 each. For a standard 18×20 foot driveway (360 sq ft), you would need around 90 pavers, putting your material cost in the $1,350 – $2,250 range, plus base material. With some serious sweat equity for digging out and laying a proper gravel base, you can get a high-end look for a fraction of the cost of poured concrete, which would typically run $3,000 – $5,000+ for the same area.
💸 Get This Look For Less
that makes this driveway feel so clean and satisfying is the grid created by the expansion joints. They break up what would otherwise be a vast, boring expanse of grey. The lines impose order and a sense of neat, geometric precision. This grid visually echoes the lines of the home’s siding, the panes in the garage doors, and the edges of the lawn, creating a subtle but powerful sense of rhythm and cohesion. Without these joints, the driveway would feel like an afterthought; with them, it feels like an integral part of the architectural design.
26. A Modern Grid of Concrete Slabs and White River Rocks
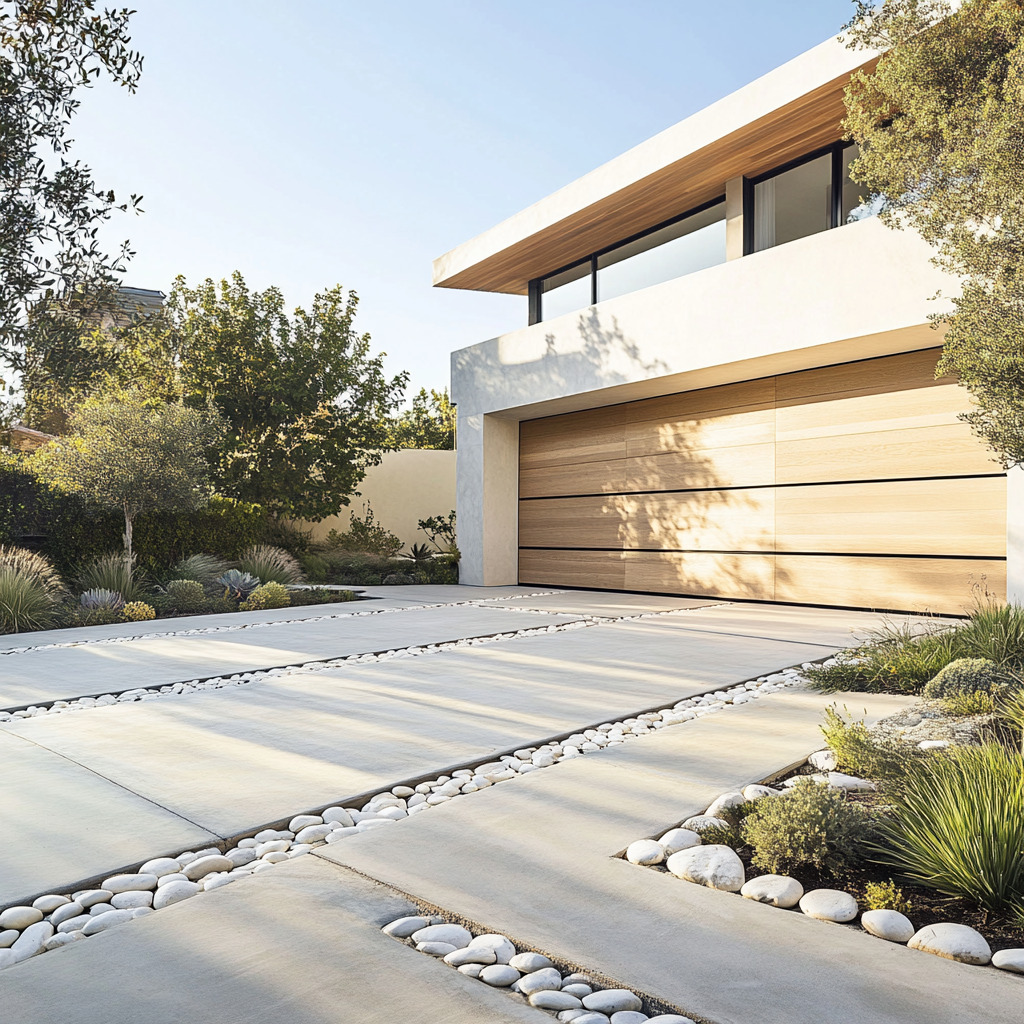
Creating this high-end look is about precision. It’s a great project for a detail-oriented DIYer.
🔥 Trending Context
- Plan Your Grid (Time: 2 hours): Measure your space and plan the layout using graph paper. Standard large-format slabs are often 24×24 inches. Plan for a consistent 4-6 inch gap between them for the river rocks.
- Excavate and Level (1-2 days): Dig out the entire driveway area to a depth of 6-8 inches. Ensure the base is compacted and perfectly level. This is the most crucial step.
- Add Base Material (4-6 hours): Fill the area with 4-6 inches of paver base (crushed gravel), wetting and tamping it down until it’s solid.
- Lay the Slabs (Cost: $15-$30 per slab): Carefully place your concrete slabs according to your grid, using a level to ensure each one is perfect.
- Add Edging and Rocks (3-4 hours): Install a sturdy, hidden landscape edge. Then, fill the gaps with at least 3 inches of your chosen river rocks. One ton of rock will cover about 70 sq ft at this depth.
This style is soaring on Pinterest right now, especially for modern and minimalist homes. It’s a direct reflection of the broader ‘biophilic design’ trend, which seeks to blend indoor and outdoor spaces and integrate natural elements into our built environments. The combination of smooth concrete, organic rock texture, and lush greenery is the perfect expression of this idea. It feels more like a landscaped garden path than a utilitarian driveway, which is exactly the point. It’s also a permeable solution (if done right), which is a growing priority for eco-conscious homeowners. For another take on using natural aggregate, see Idea #3.
27. A Curved Exposed Aggregate Driveway with a Dark Border
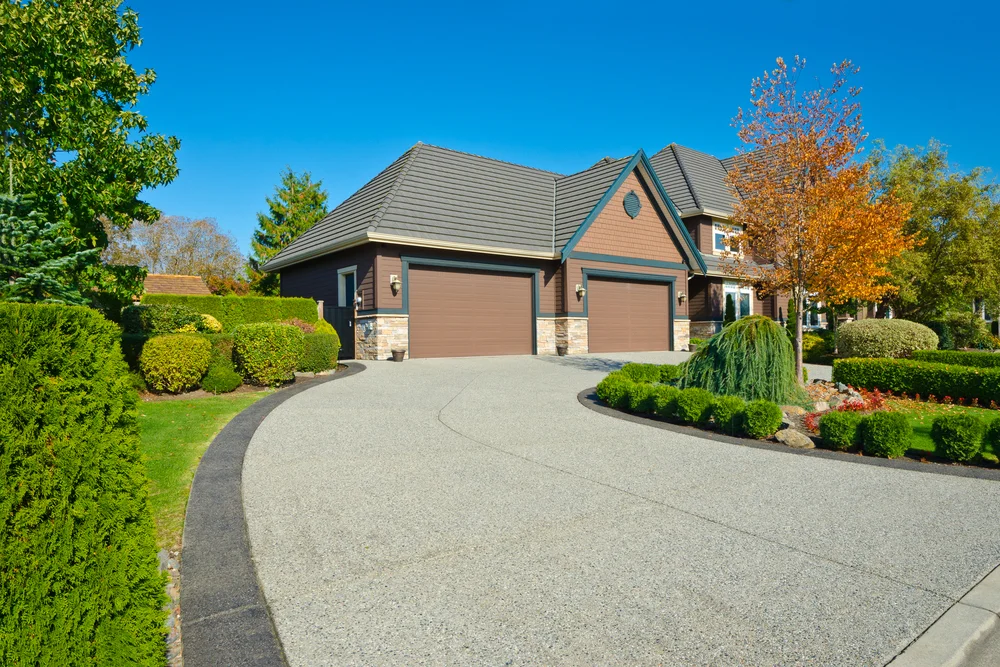
The elegance of this driveway comes from a simple formula: 70% landscape, 30% hardscape. The driveway itself doesn’t dominate the view; it weaves through it. The paving is about 90% light aggregate field and 10% dark border. This high-contrast border is what makes the gentle curves legible and intentional. You can swap the materials and maintain the formula: a tar-and-chip driveway with a brick border, or a gravel driveway with a steel edge, could follow the same 90/10 visual ratio to achieve a similar, though less formal, effect. The key is the strong visual contrast at the edge.
🎯 What Makes It Work
A curving driveway requires a bit more width in the turns to be comfortable, especially for larger vehicles. While a straight driveway can be as narrow as 10 feet, a curved one should be at least 12 feet wide. On the turns, you’ll want to flare out to 14 or even 16 feet to prevent cars from driving onto your pristine lawn. This design is ideal for a lot that is at least 75 feet wide, which gives enough room for the curve to feel graceful rather than forced. On a narrower lot, a straight driveway with beautiful border plantings, like Idea #4, would be a better choice.
28. Add a Polished Touch with Asphalt and Gray Paver Edging
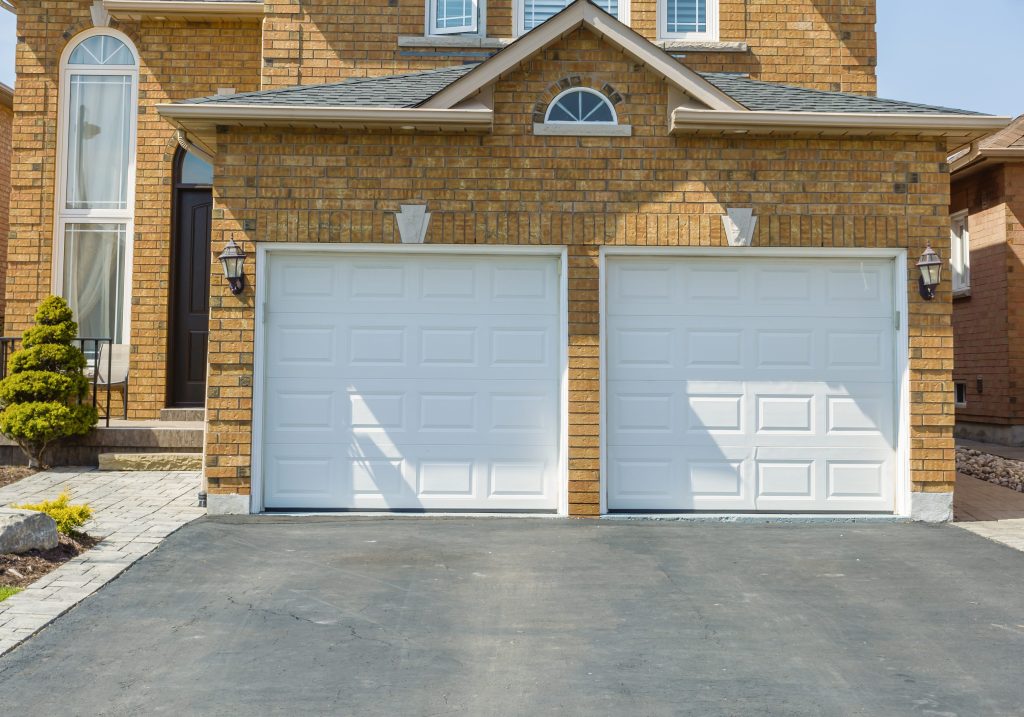
This is a classic ‘high-low’ design strategy. The asphalt is the ‘low’—a cost-effective, durable, and unassuming material that provides a dark, neutral canvas. The gray interlocking paver border is the ‘high’—a relatively small addition that adds significant polish and perceived value. It works because the pavers create a crisp, clean edge that frames the asphalt, making it look more finished and intentional. This border visually connects the driveway to the stone walkway and the home’s brick facade, integrating all the elements into a single, cohesive design.
📏 Scale Guide
The ultimate budget version of this is a ‘seal and edge’ project you can do yourself. If you already have an asphalt driveway that’s looking a bit tired, you can bring it back to life for a few hundred dollars. First, edge the driveway with a flat-blade spade to create a clean line. Then, patch any cracks with asphalt patch from a hardware store. Finally, apply two coats of a high-quality asphalt sealer (about $40 per 5-gallon bucket). This will restore the rich, black color. For the border, you can install a simple soldier course of basic gray pavers from Home Depot for about $1 each, giving you that crisp edge for a minimal investment.
29. The Sleek Appeal of Modern Luxury Paving
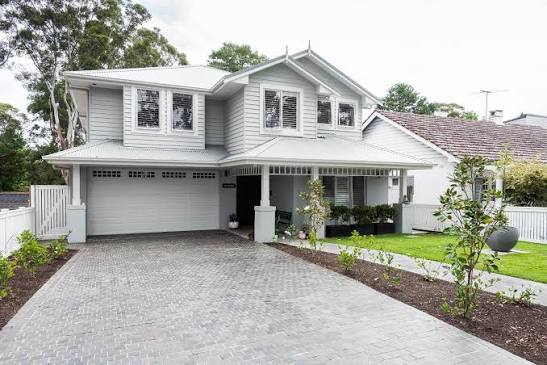
For a truly luxurious and modern look, think big. Use the largest format pavers or tiles you can find, such as 24×24 inch or even 24×48 inch porcelain pavers. Large formats minimize grout lines and create a sleek, uninterrupted surface that feels expansive and high-end. Another key is integrating lighting directly into the paving. In-ground, drive-over-rated LED lights can be used to uplight architectural features, trace the driveway edge, or create a stunning visual effect at night. The luxury is in the seamless integration of materials and technology.
🧹 Maintenance Reality
Before committing to a high-end modern driveway, make sure you’ve covered all your bases. This isn’t a style you can easily change later.
- Confirm material suitability: Are those beautiful, large-format porcelain pavers rated for vehicle traffic and your climate’s freeze-thaw cycles? Verify the technical specs with the manufacturer.
- Plan for utilities: Do you want integrated lighting, a heated system, or power for a gate or charging station? Plan the conduit and wiring layout *before* any paving is installed.
- Vet your installer: Modern, large-format pavers require a higher level of skill to install correctly than traditional 4×8 pavers. Ask to see a portfolio of their modern-style work.
30. A Bright Gravel Driveway with Dark Cobblestone Edging
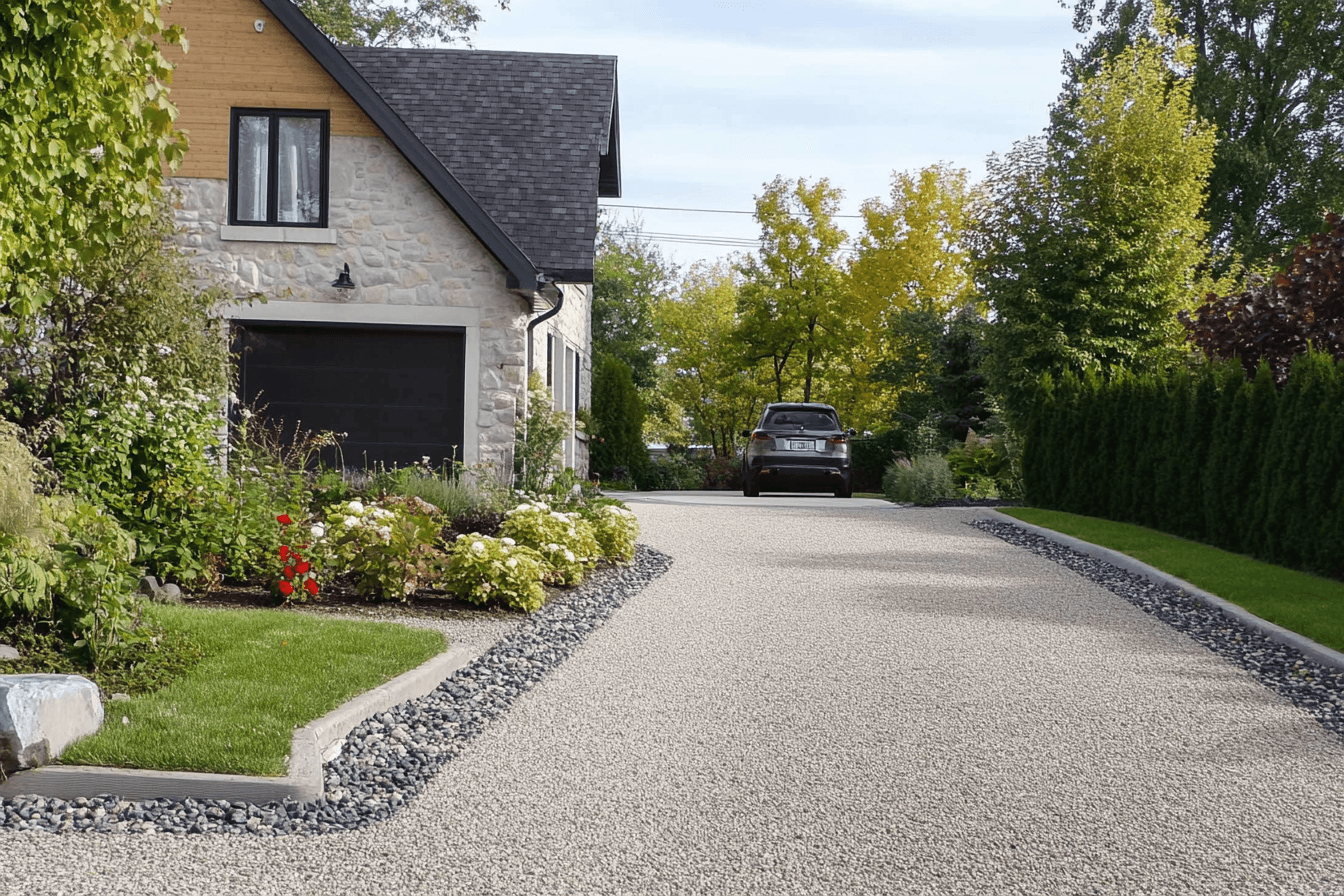
Gravel is beautiful and budget-friendly, but it’s not a ‘set it and forget it’ surface. You will need to rake it periodically to smooth out ruts and low spots caused by tires. The gravel will also get kicked into your lawn, and lawn clippings will get into your gravel, so mowing requires care. The biggest task is refreshing the top layer. Every 2-4 years, you will likely need to add a fresh layer of gravel (a ‘top-dressing’) to keep it looking full and clean, which can cost a few hundred dollars depending on the size of your drive. Using a good quality landscape fabric underneath is absolutely essential to prevent weeds.
⭐ The One Thing
This is arguably one of the most cost-effective and charming driveway options available, perfect for a cottage, farmhouse, or traditional-style home. A ton of basic 3/4″ crushed stone or pea gravel costs between $50 and $80 and covers roughly 100 square feet at a 2-inch depth. The cobblestone edging is what sells the look, but you can get that same dark border for less by using concrete curb blocks (around $2 each) or even a simple black metal landscape edge. For a 500 square foot driveway, you could achieve this entire look for well under $1,000 in materials if you’re willing to do the labor.
Your Grand Entrance Awaits
Your driveway is the first handshake your home gives to the world, so make it a good one. Whether you’re drawn to the timeless appeal of pavers or the modern simplicity of concrete, the right choice can dramatically elevate your home’s curb appeal. Don’t be afraid to mix materials for a custom look, and always prioritize a solid foundation.
Feeling inspired? Save your favorite looks to your Pinterest boards and start dreaming up the perfect approach to your own front door. That perfect first impression is closer than you think.