29 Jaw-Droppingly Cheap and Easy DIY Projects That You Absolutely Need to Try to Vastly Improve Your Home Right Now

Still scrolling through “Cheap And Easy Diy Projects That Will Vastly Improve Your Home” photos on Pinterest without knowing where to actually start? You know that feeling when you finally find an idea that looks exactly right for your space, but the instructions feel a million miles away. We’ve been there. After filtering through hundreds of options across IKEA, Target, and Facebook Marketplace, we narrowed it down to the best-of-the-best for 2026. Inside, you’ll find 29 curated ideas covering Modern, Rustic Farmhouse, and cozy Eclectic styles, all designed to be achievable on a real-world budget. What makes this year different is the huge shift towards “character-building” — adding personal, handmade touches that tell your story. And stay until the end — we break down the most common mistakes that can ruin these looks. Pin this guide for later — your future self will thank you when it’s time to actually do this.
1. Build a Modern Horizontal Slat Fence for Privacy and Style
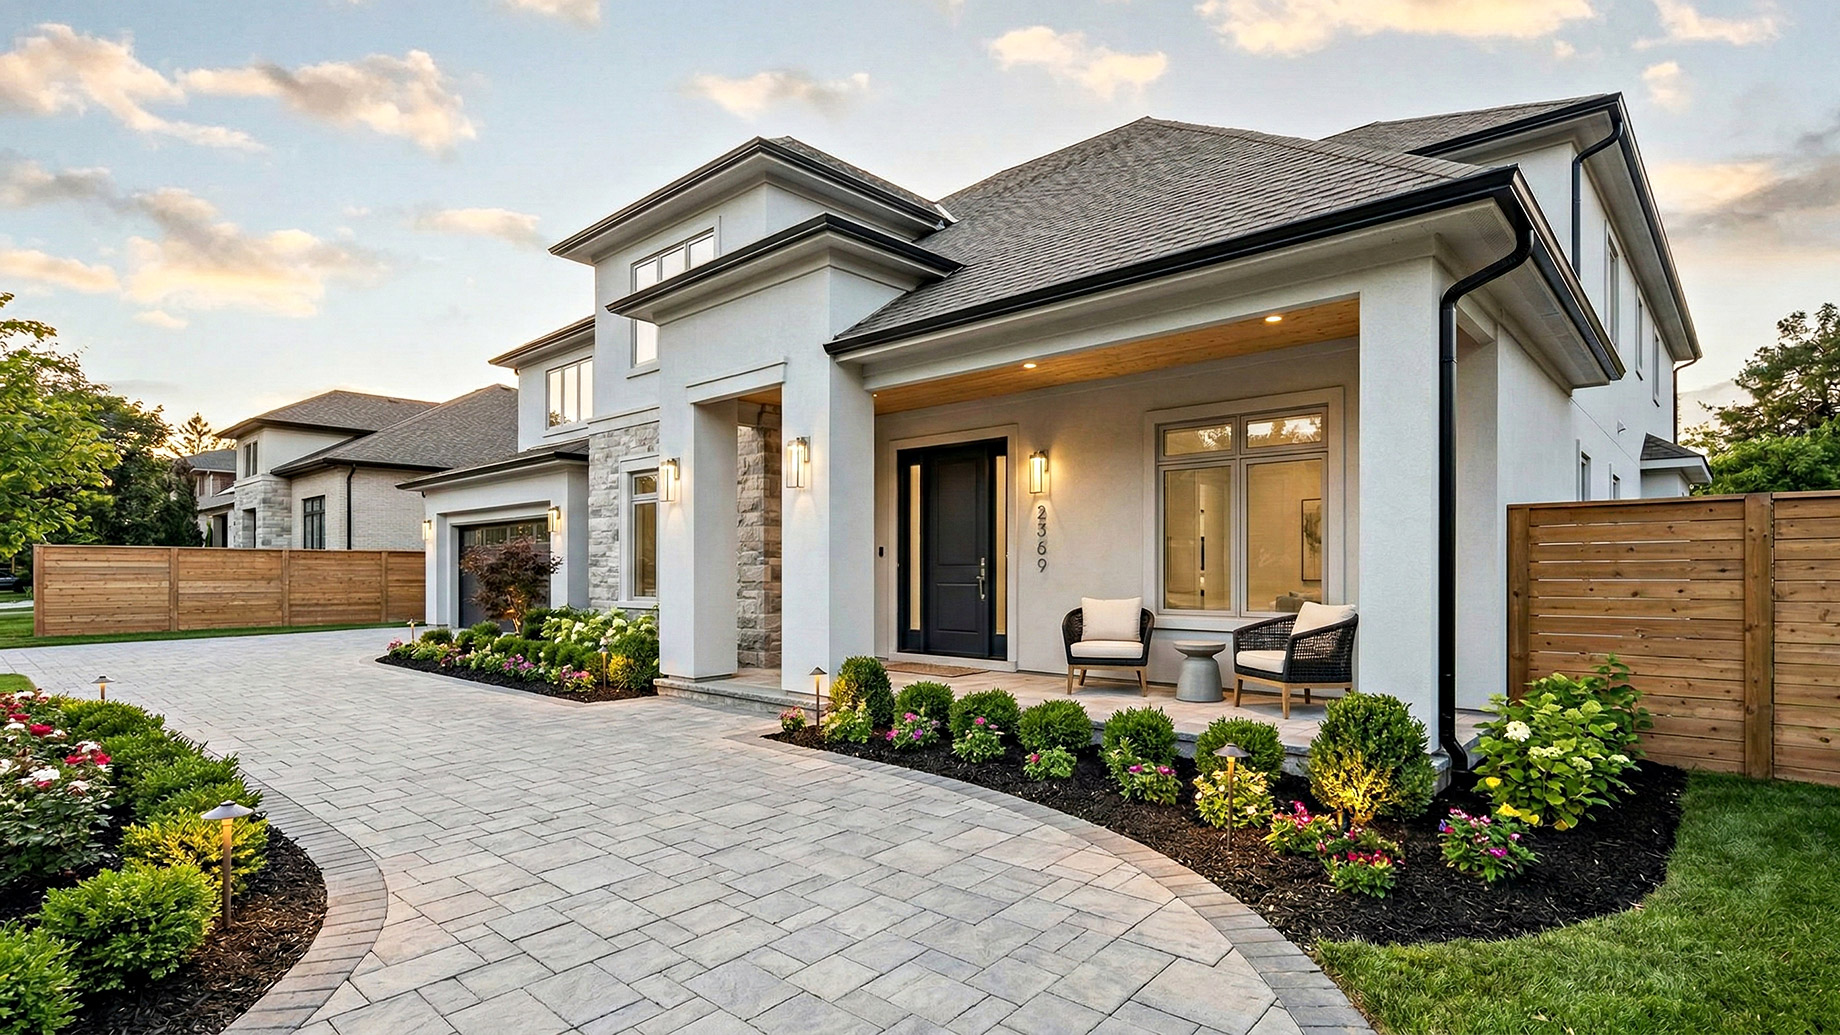
A sleek wooden slat fence, like the one accenting this modern home, is a stunning DIY project that adds major curb appeal. It looks expensive, but it’s surprisingly straightforward. This mini-guide focuses on creating a 6×6 foot panel.
⭐ The One Thing
- Time Estimate: 4-6 hours per panel. Material Cost: $150-$250 per panel.
- Set Your Posts: Dig holes and set two 4×4 pressure-treated posts 6 feet apart, ensuring they are plumb and set securely in concrete.
- Choose Your Slats: Cedar or redwood are naturally rot-resistant and beautiful. For a budget option, use pressure-treated pine and stain it. You’ll want 1×4 or 1×6 boards.
- Install Slats: Starting from the bottom, attach your horizontal slats to the posts using exterior-grade screws. Use a spacer block (a small piece of wood cut to your desired gap, typically 1/2″ to 1″) to ensure even spacing all the way up.
- Finish Strong: Once all slats are in place, apply a quality outdoor stain or sealer to protect the wood from the elements and bring out its natural color.
Wood fencing requires regular upkeep to stay looking sharp. To prevent graying and rot, plan to re-stain or reseal your fence every 2-3 years, especially in climates with harsh sun or heavy rain. Annual cleaning with a pressure washer on a low setting can remove built-up dirt and mildew. While cedar and redwood have a higher upfront cost, they contain natural oils that resist decay, potentially saving you maintenance headaches compared to cheaper pine. The biggest enemy is moisture, so ensure the bottom slat is a few inches off the ground.
2. DIY Large-Scale Abstract Art for a Scandinavian Vibe
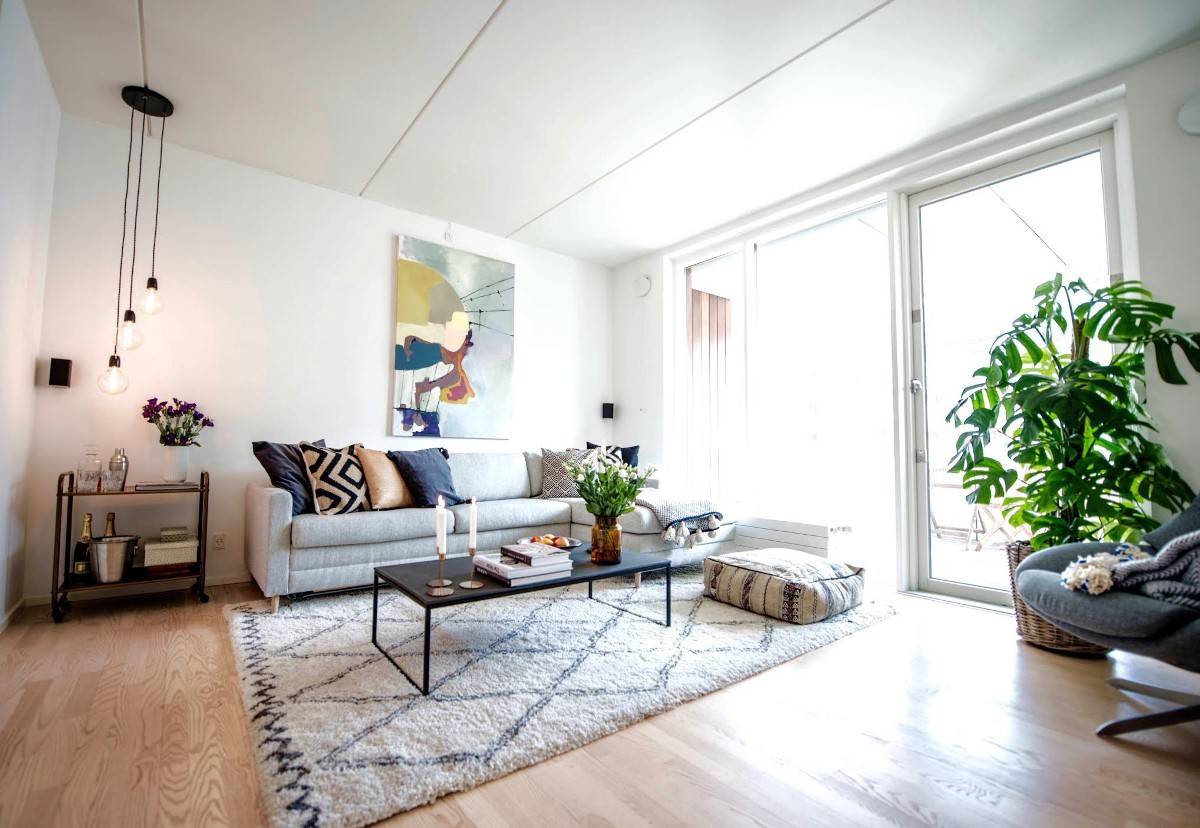
The key to making your DIY art look like a professional piece, like the one in this airy living room, is to a create a cohesive color story. Don’t just pick random colors you like. Instead, pull 3-4 shades directly from your existing room decor. Use your sofa as the base color, grab an accent color from a throw pillow, and a third from your rug or a piece of decor. Buy small sample pots of house paint in these shades, plus a white or cream for blending. This ensures your final artwork will naturally belong in the space rather than clashing with it.
💸 Get This Look For Less
You absolutely don’t need to spend hundreds on art supplies to get this look. A gallery-wrapped canvas from a craft store can be pricey in large sizes. Instead, buy a cheap, ugly framed piece of art from a thrift store for under $15. Paint over the existing image with a coat of primer (like Kiln 2), and you have a perfectly good surface ready for your abstract creation. For the art itself, use affordable acrylic craft paints or even leftover latex wall paint samples. The frame is often the most expensive part, so repurposing an old one is the ultimate budget hack.
3. Instantly Upgrade a Sofa with a Nailhead Trim DIY
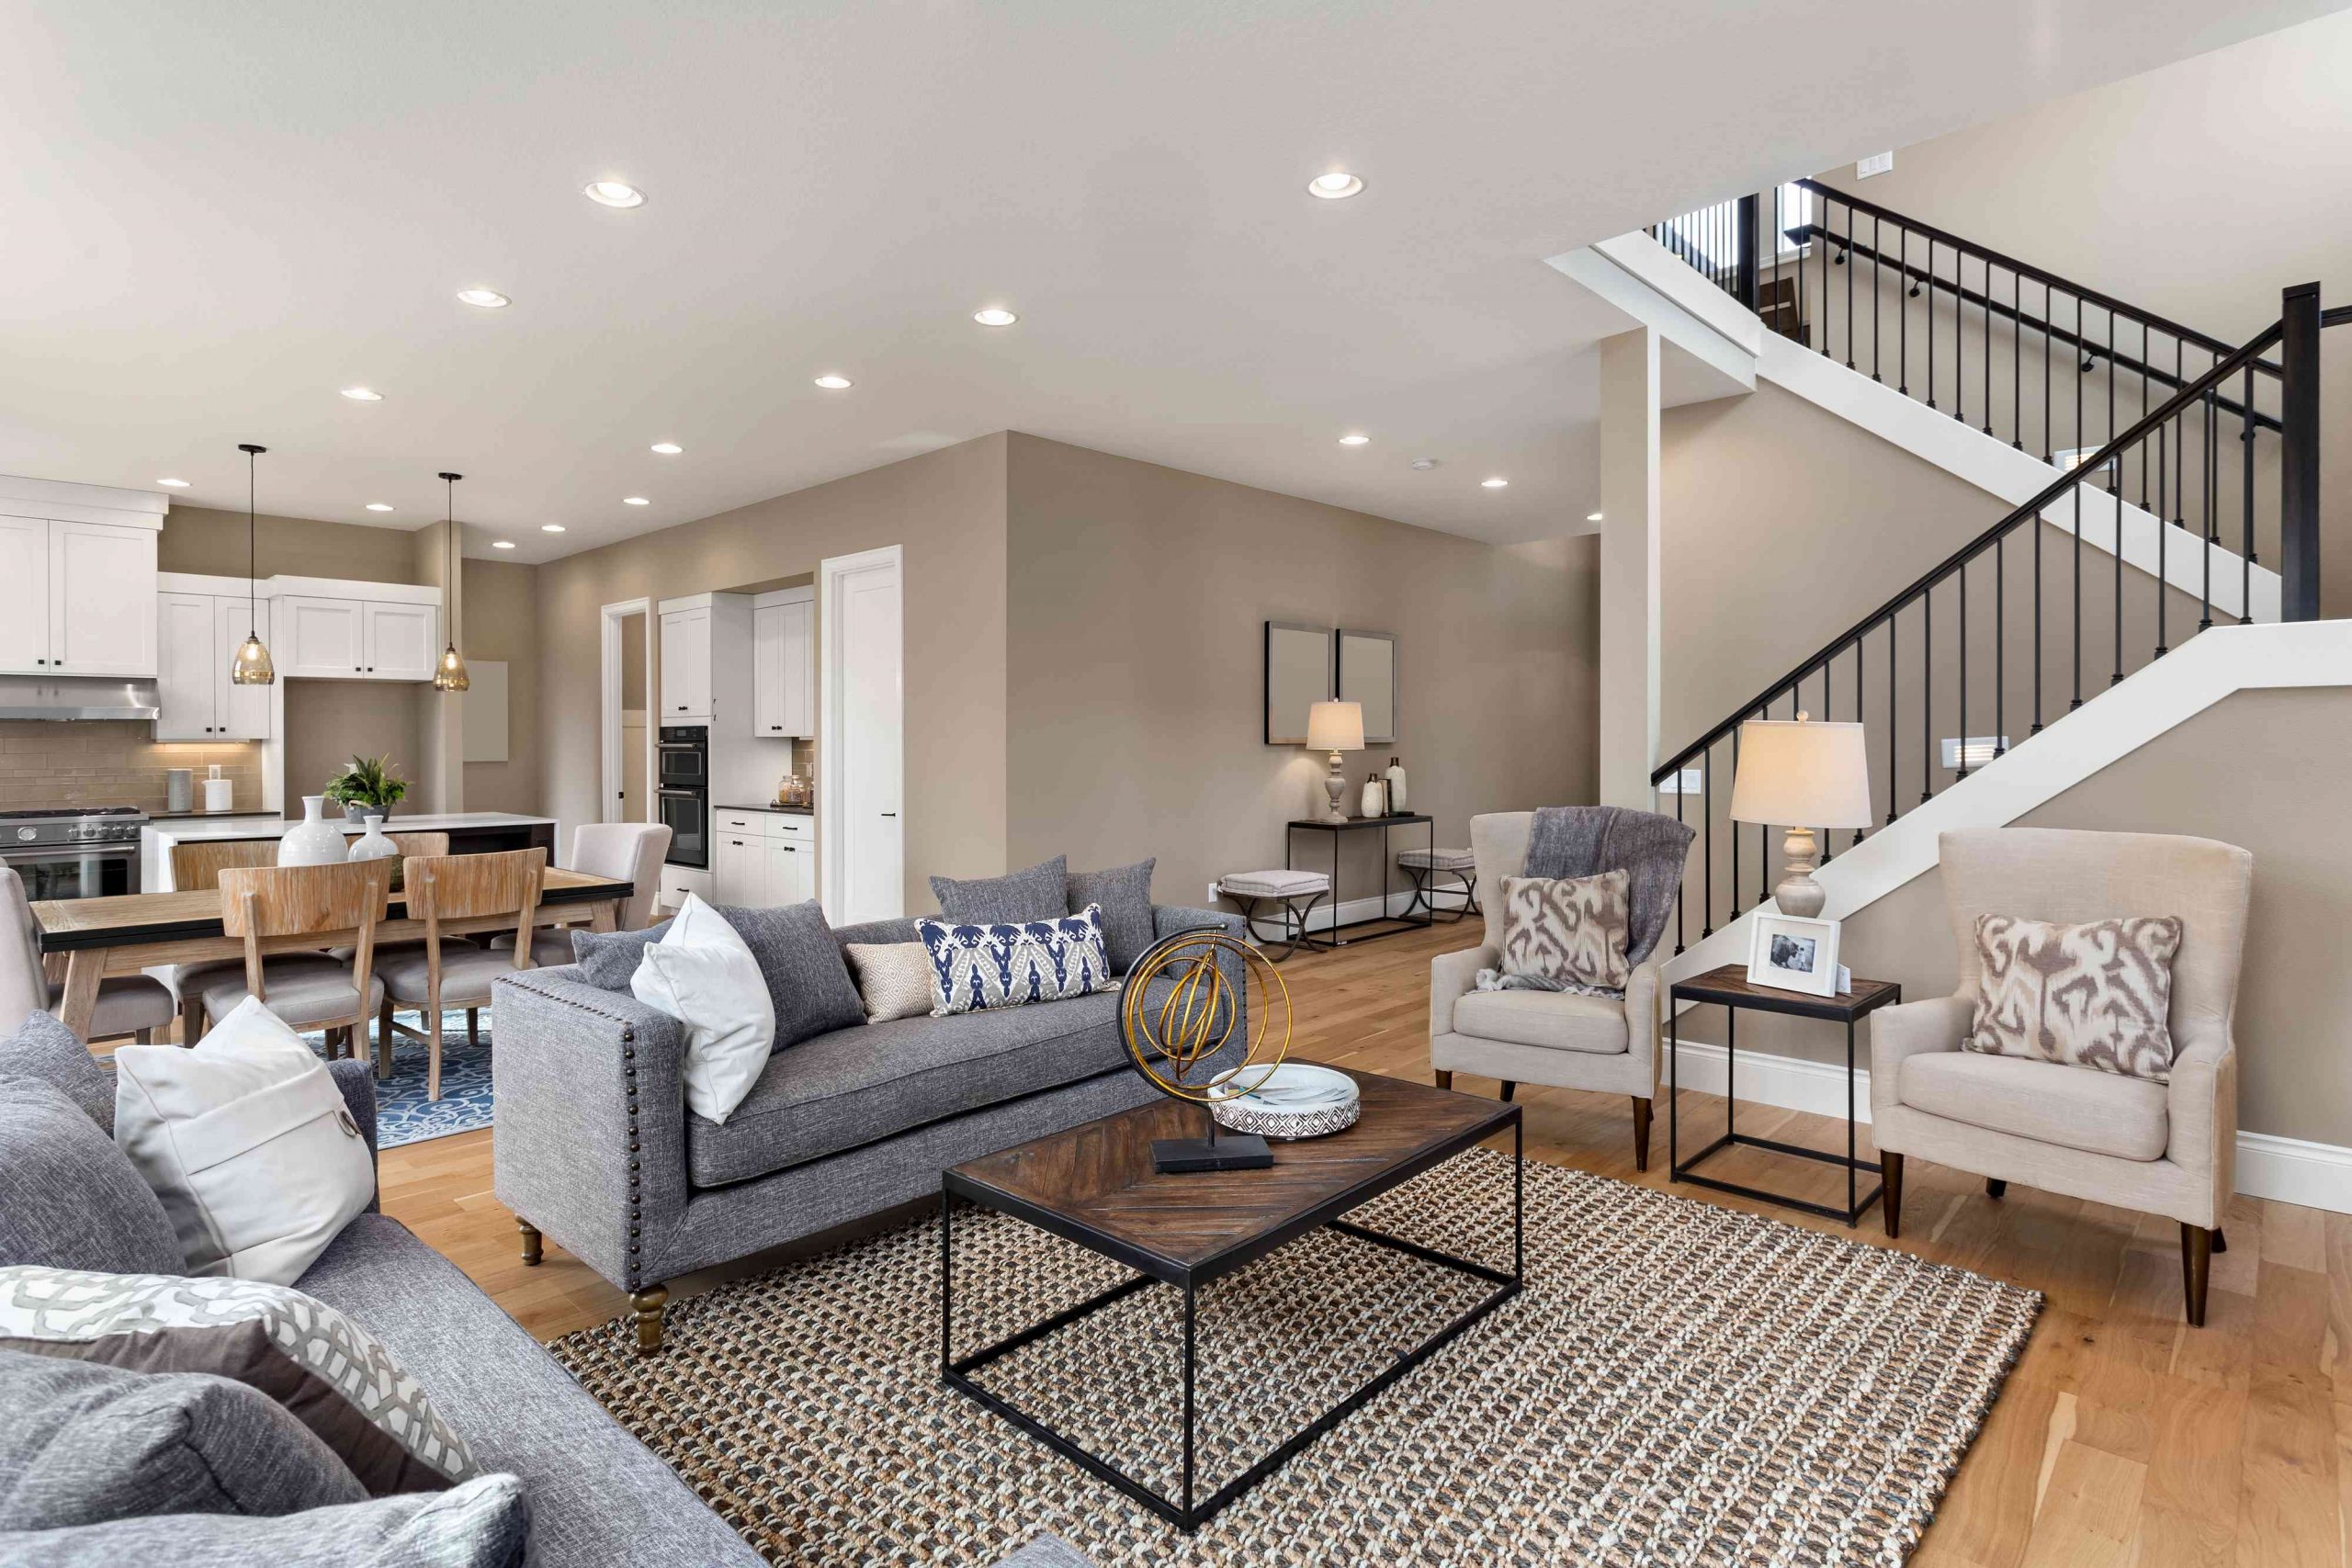
The nailhead trim on the gray sofa here is a perfect example of a small detail with huge impact. It works because it adds a layer of tailored sophistication and definition to an otherwise simple piece of furniture. The metallic finish catches the light, creating a subtle highlight that outlines the sofa’s shape, making it feel more structured and custom. It’s a classic detail that bridges the gap between modern and traditional styles, adding a touch of glamour without being over-the-top. This technique is especially effective on neutral-colored upholstery, where it provides a much-needed touch of contrast and visual interest.
💡 Designer Tip
Adding nailhead trim to your own armchair or sofa is a high-impact, low-cost weekend project.
- Time estimate: 2-3 hours. Material Cost: $20-$40.
- Get the Right Supplies: You can buy individual nailheads, but for a much easier and straighter application, purchase nailhead trim strips. You’ll also need a rubber mallet.
- Plan Your Path: Decide where the trim will go. Common placements are along the arms, across the base, or around the back. Use a measuring tape to ensure your lines will be straight.
- Start Tacking: Gently tap in the first nail of the strip to secure it. Pull the strip taut and align it with your intended path. The strips have holes every few inches for a real nail; you’ll tack one of these in to secure each section of the strip.
- Check Your Work: Step back frequently to make sure your line is straight. It’s easy to go astray, but also easy to gently pull out a nail and readjust.
4. Paint Your Kitchen Cabinets a Calming Sage Green
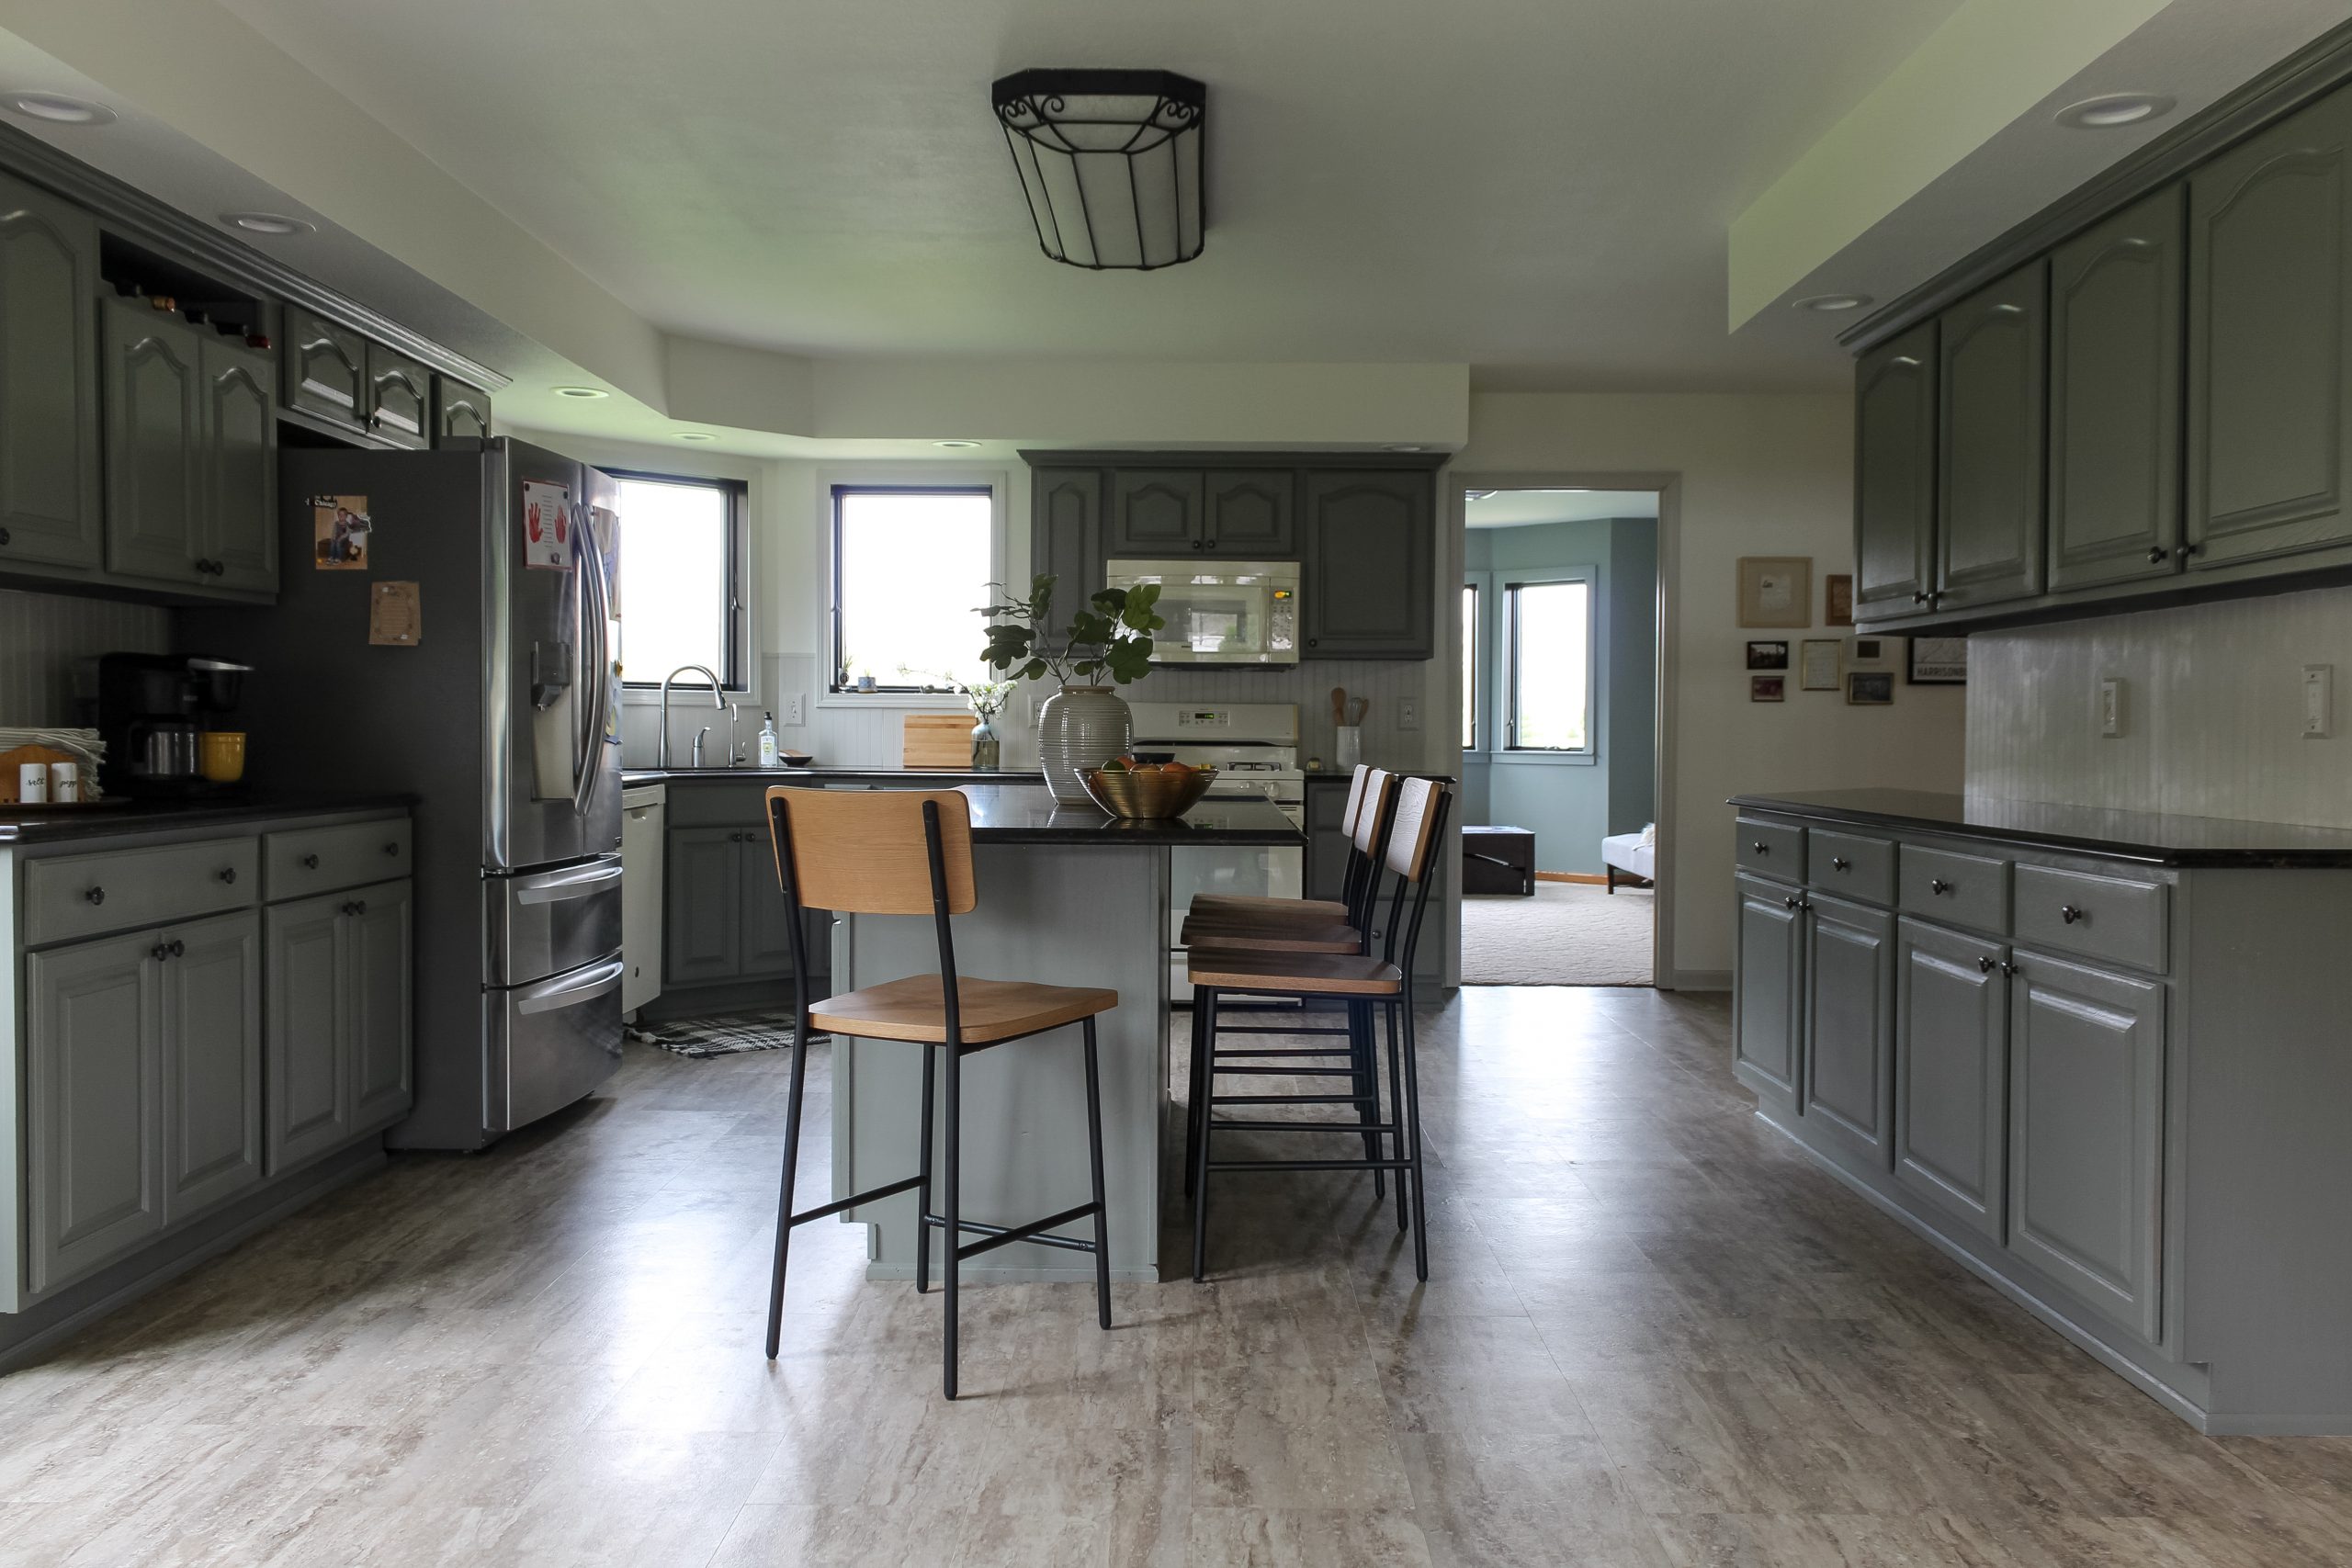
Painting your kitchen cabinets is the number one DIY for transforming a kitchen on a budget, and this serene sage green is a fantastic choice. But before you even pick up a brush, run through this checklist to avoid disaster. A successful paint job is 90% prep work.
🔧 How-To Brief
- Confirm Your Cabinet Material: Are they wood, laminate, or thermofoil? Wood is the easiest to paint. Laminate requires a special bonding primer. Painting thermofoil is generally not recommended as it’s prone to peeling.
- Count Your Doors and Drawers: This seems obvious, but do a full count to accurately estimate how much paint and primer you need. Nothing is worse than running out mid-project.
- Commit to the Prep: Do you have a weekend to devote to cleaning, sanding, and priming? If you try to rush this, the paint will fail. Be honest about the time commitment. This is not a one-day project.
- Test Your Color: Paint a large sample board and move it around the kitchen throughout the day. Sage green can look vastly different in the morning light versus under artificial light at night.
What makes this sage green kitchen work so well is a balanced design formula. It’s not just about the cabinet color; it’s about how it combines with the other elements. Think of it as Style Math: 60% Sage Green + 20% Light Wood/Flooring + 10% White/Cream + 10% Black Accents. The sage green is your dominant base, creating a calm and welcoming feel. The light wood flooring prevents the green from feeling too cold. The white backsplash and trim add crispness and light, while the black countertops and hardware provide essential grounding and contrast. You could swap the black for brass to warm it up, but the core percentages should remain to keep the look balanced.
5. Achieve a Serene, Neutral Living Space on a Budget
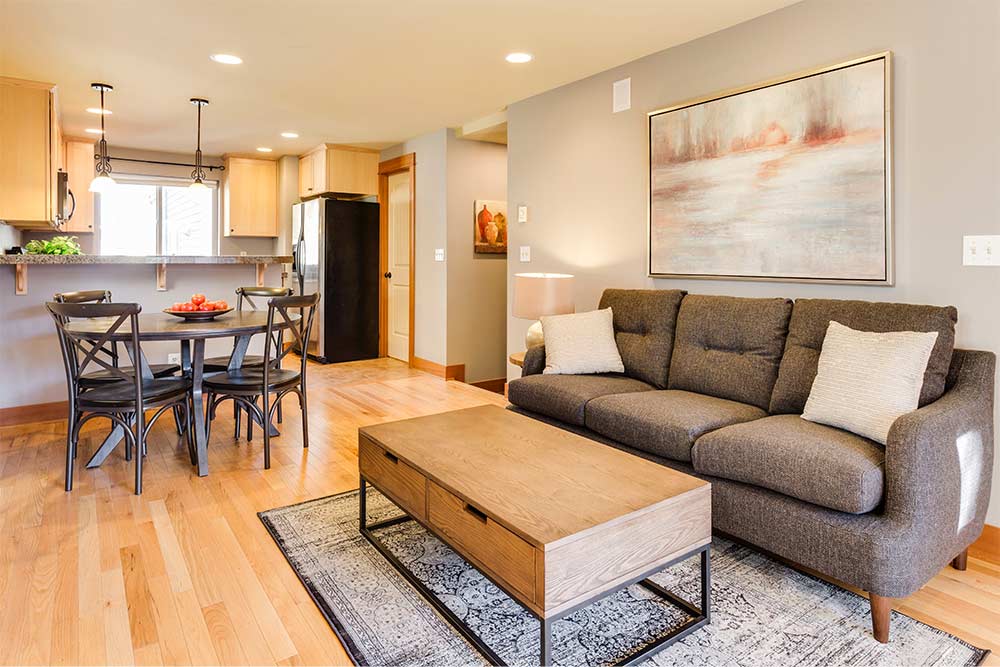
In this beautifully serene, open-plan space, the one thing holding the entire design together is the consistent use of black metal accents. Take a moment and mentally remove them: the coffee table base, the dining set, the refrigerator, the frame on the art. Without them, the soft grays, creams, and light woods would blur together into a pleasant but forgettable scene. The black is the punctuation. It adds just enough graphic punch and industrial edge to keep the neutral palette from feeling washed out. It’s the visual anchor that makes everything else feel more intentional and crisp. This is a great lesson in how even a small dose of a strong contrasting element can elevate an entire room.
⚠️ Real Talk
A neutral, open-plan space like this is a dream, but it comes with a challenge: sound. Hard surfaces like wood floors and large windows are notorious for bouncing sound around, which can make a room feel echoey and loud. While the rug helps, if you have kids, love to entertain, or are sensitive to noise, you’ll need more soft surfaces than you think. Consider adding heavy curtains (not just sheers), more upholstered furniture (like an ottoman instead of a wood table), and even large-scale fabric art to help absorb sound and make the space feel cozier and more intimate. Compare this to the cozier setup in Idea #2, which uses a large, shaggy rug for better sound absorption.
6. Create a Welcoming Porch with Potted Plants and a Wicker Chair
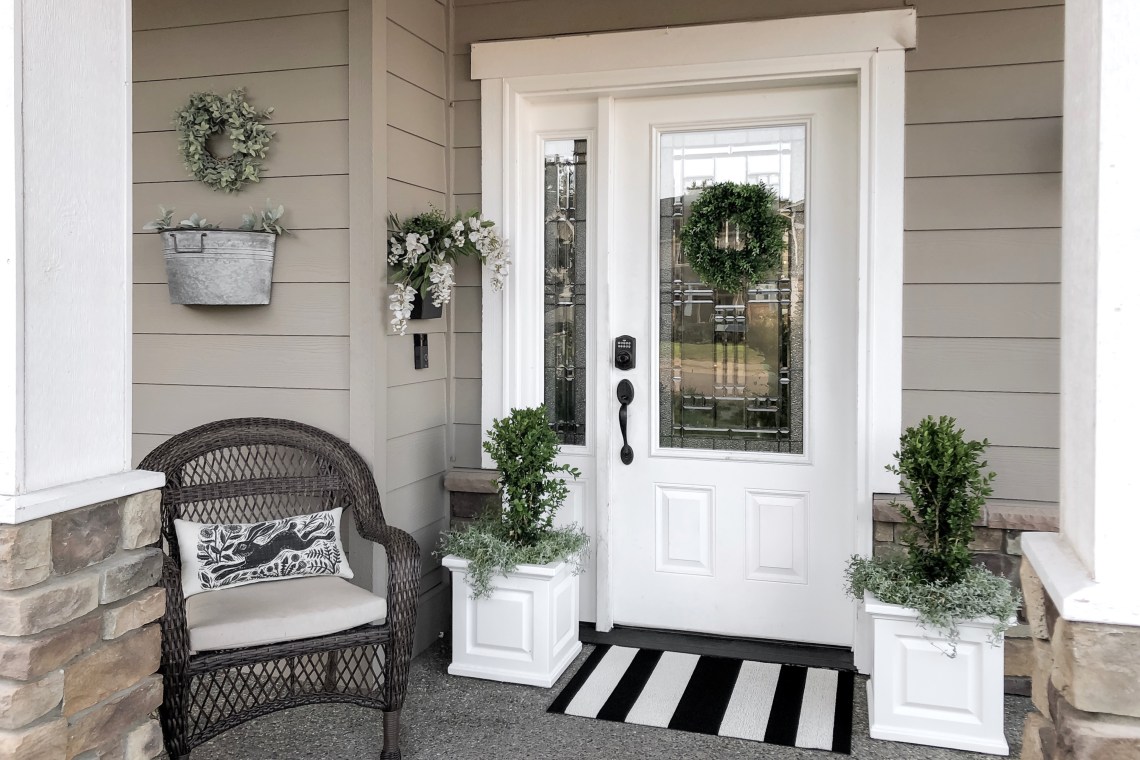
To get this lush, layered look on a porch or patio, use the “Thriller, Filler, Spiller” method for your planters. This is a classic container design rule that guarantees beautiful results every time. For your “Thriller,” choose one tall, dramatic plant that sits in the center (like the boxwood here). For your “Filler,” add medium-height, mounding plants around the thriller to make the pot look full (like flowers or lush foliage). Finally, add your “Spiller”—a trailing plant that hangs over the edge of the pot, like the ivy shown. This simple formula creates arrangements with height, fullness, and dimension.
🎯 What Makes It Work
This cozy porch vignette is perfect for smaller, more compact entryways. You don’t need a massive wraparound porch to make this work. A space as small as 5 feet by 5 feet can comfortably accommodate this arrangement. The key is using vertical space. The wall-mounted bucket planter draws the eye upward, making the area feel larger. An armchair with a slim profile, like this wicker one, works much better than a bulky bench in a tight spot. Ensure you have at least a 36-inch clear path to the door so the area feels welcoming, not cluttered. For a similar effect on a slightly larger porch, check out the bench setup in Idea #6.
7. Style a Classic Front Entry with a Black Door and Topiaries
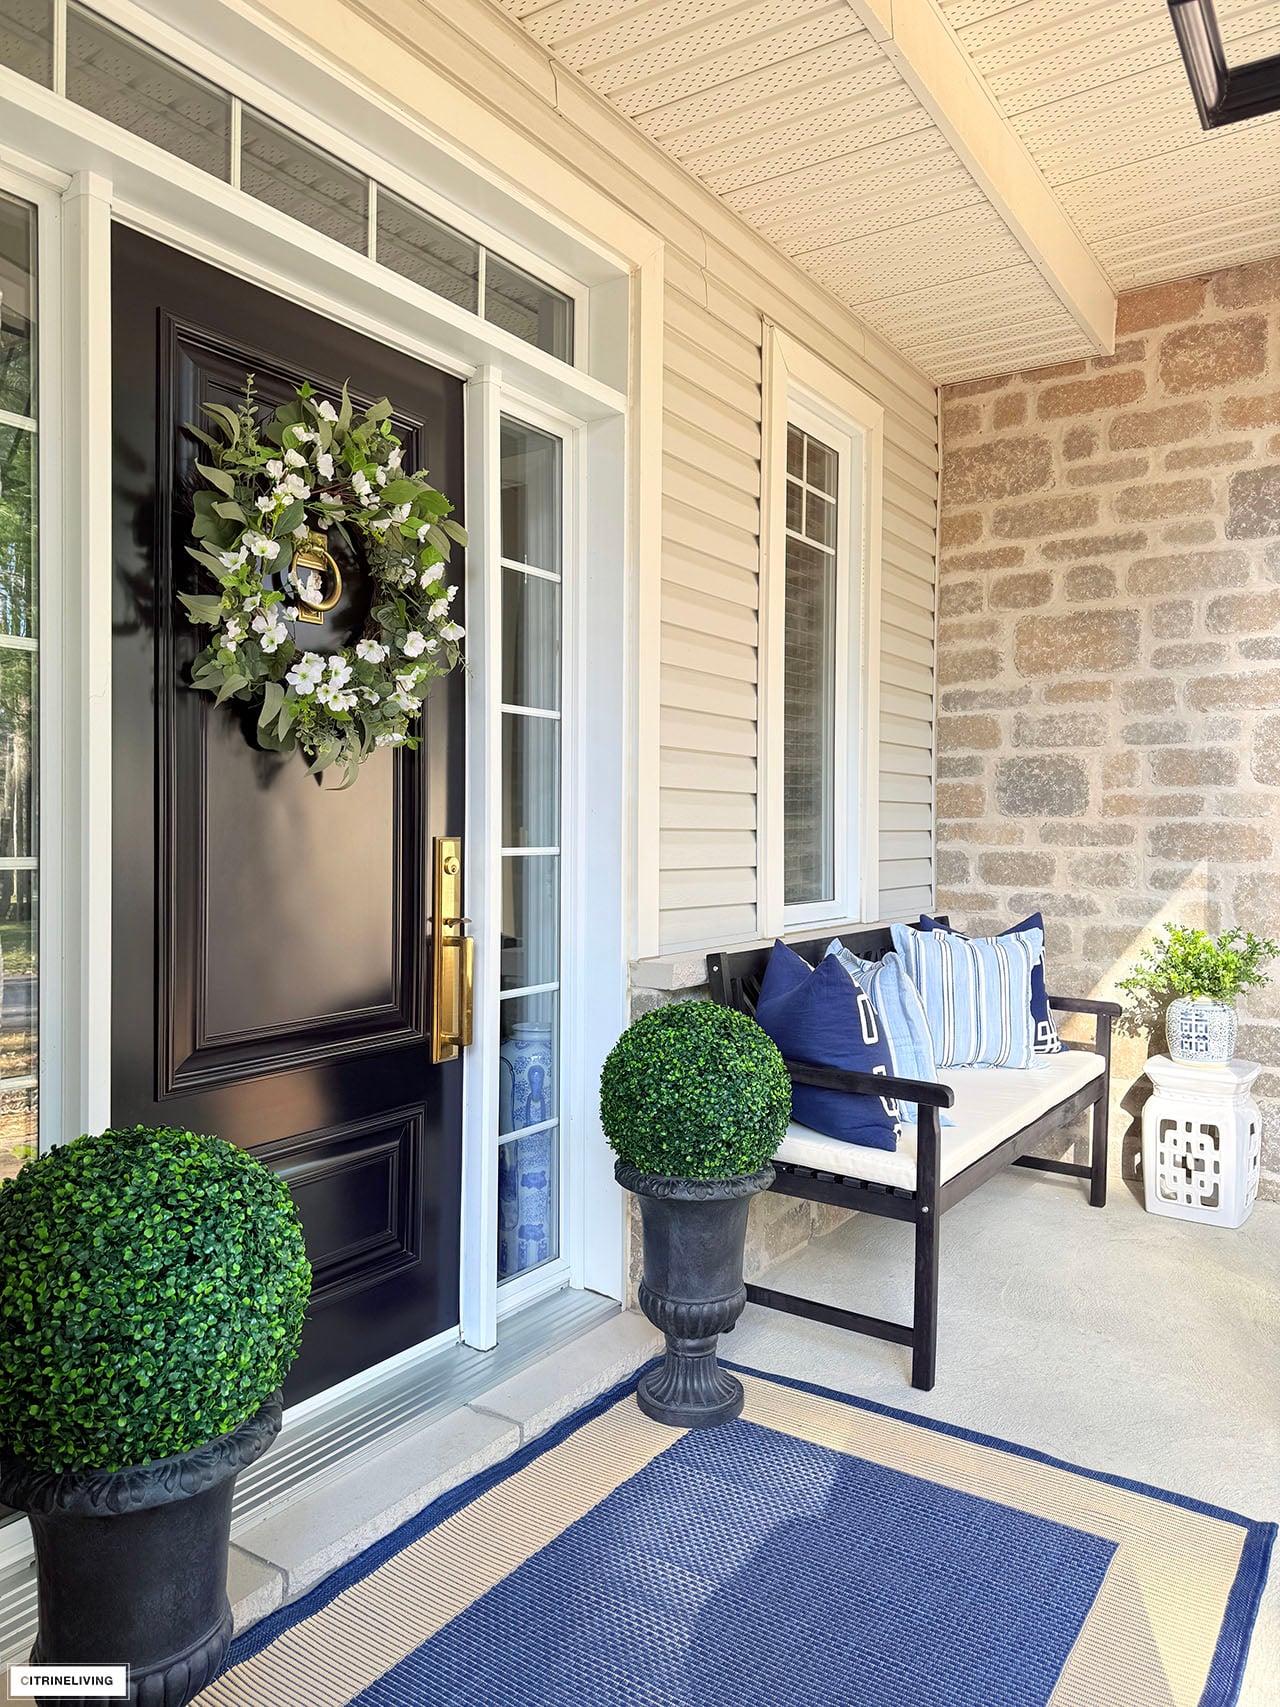
This entry feels so classic and stately due to the power of symmetry and repetition. The identical topiary balls in matching black urns flanking the door create a perfect sense of balance and formality. This symmetry draws your eye directly to the focal point: the black front door. The color palette is also a key factor. The repetition of black in the door, urns, and bench creates a cohesive visual thread. The crisp white of the wreath and pillows pops against the dark background, while the blue provides a cheerful, patriotic accent. It’s a timeless formula that signals order and care.
💰 Budget Breakdown
A top-of-the-line wooden bench and high-end faux topiaries can cost a pretty penny. You can get this exact same vibe for a fraction of the cost. Check Facebook Marketplace or a thrift store for a simple wooden bench; a can of black spray paint for outdoor use ($8) can transform any dated find. For the topiaries, look for affordable options at craft stores like Michael’s or At Home, especially during seasonal sales. Instead of expensive urns, you can get two basic planters from Target or Walmart and spray paint them black for a cohesive look. The entire setup can be recreated for under $100 with a bit of savvy shopping.
8. Install Integrated LED Cove Lighting for a Modern Glow
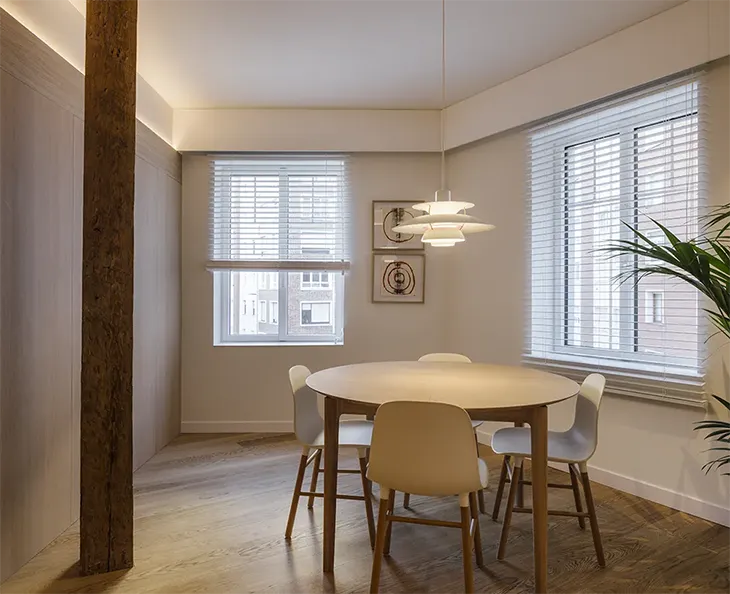
The magic of this minimalist dining room comes down to a lighting formula that feels incredibly high-end but is a surprisingly accessible DIY. The formula is: 50% Ambient Light (Cove Lighting) + 30% Task Light (Pendant) + 20% Natural Light (Windows). The LED strip hidden in the ceiling cove provides the soft, diffuse ambient glow that makes the whole room feel bright and airy, eliminating shadows in the corners. The pendant provides focused task lighting on the table itself. The windows, with their adjustable blinds, control the natural light. This layered approach is what gives the room its professional, polished feel.
📏 Scale Guide
Integrated LED strip lighting is a fantastic way to add a luxe feel, but be prepared for some upkeep. The biggest issue isn’t the LEDs themselves—they last for years—but the dust. The coves or channels where the lights are installed are major dust collectors. You’ll need to wipe them down every month or two with a microfiber duster or a vacuum attachment to keep the light quality pure and prevent a dingy look. If a section of the LED strip fails, it can be tricky to replace just that segment, sometimes requiring you to replace the entire strip for a perfect color match, as LED color temperature can vary slightly between batches.
9. DIY Repurposed Window Frame Wall Decor
This charming farmhouse look, especially the repurposed window frame wall decor, is achievable for much less than you’d think. It’s about finding character-filled pieces and styling them with seasonal touches.
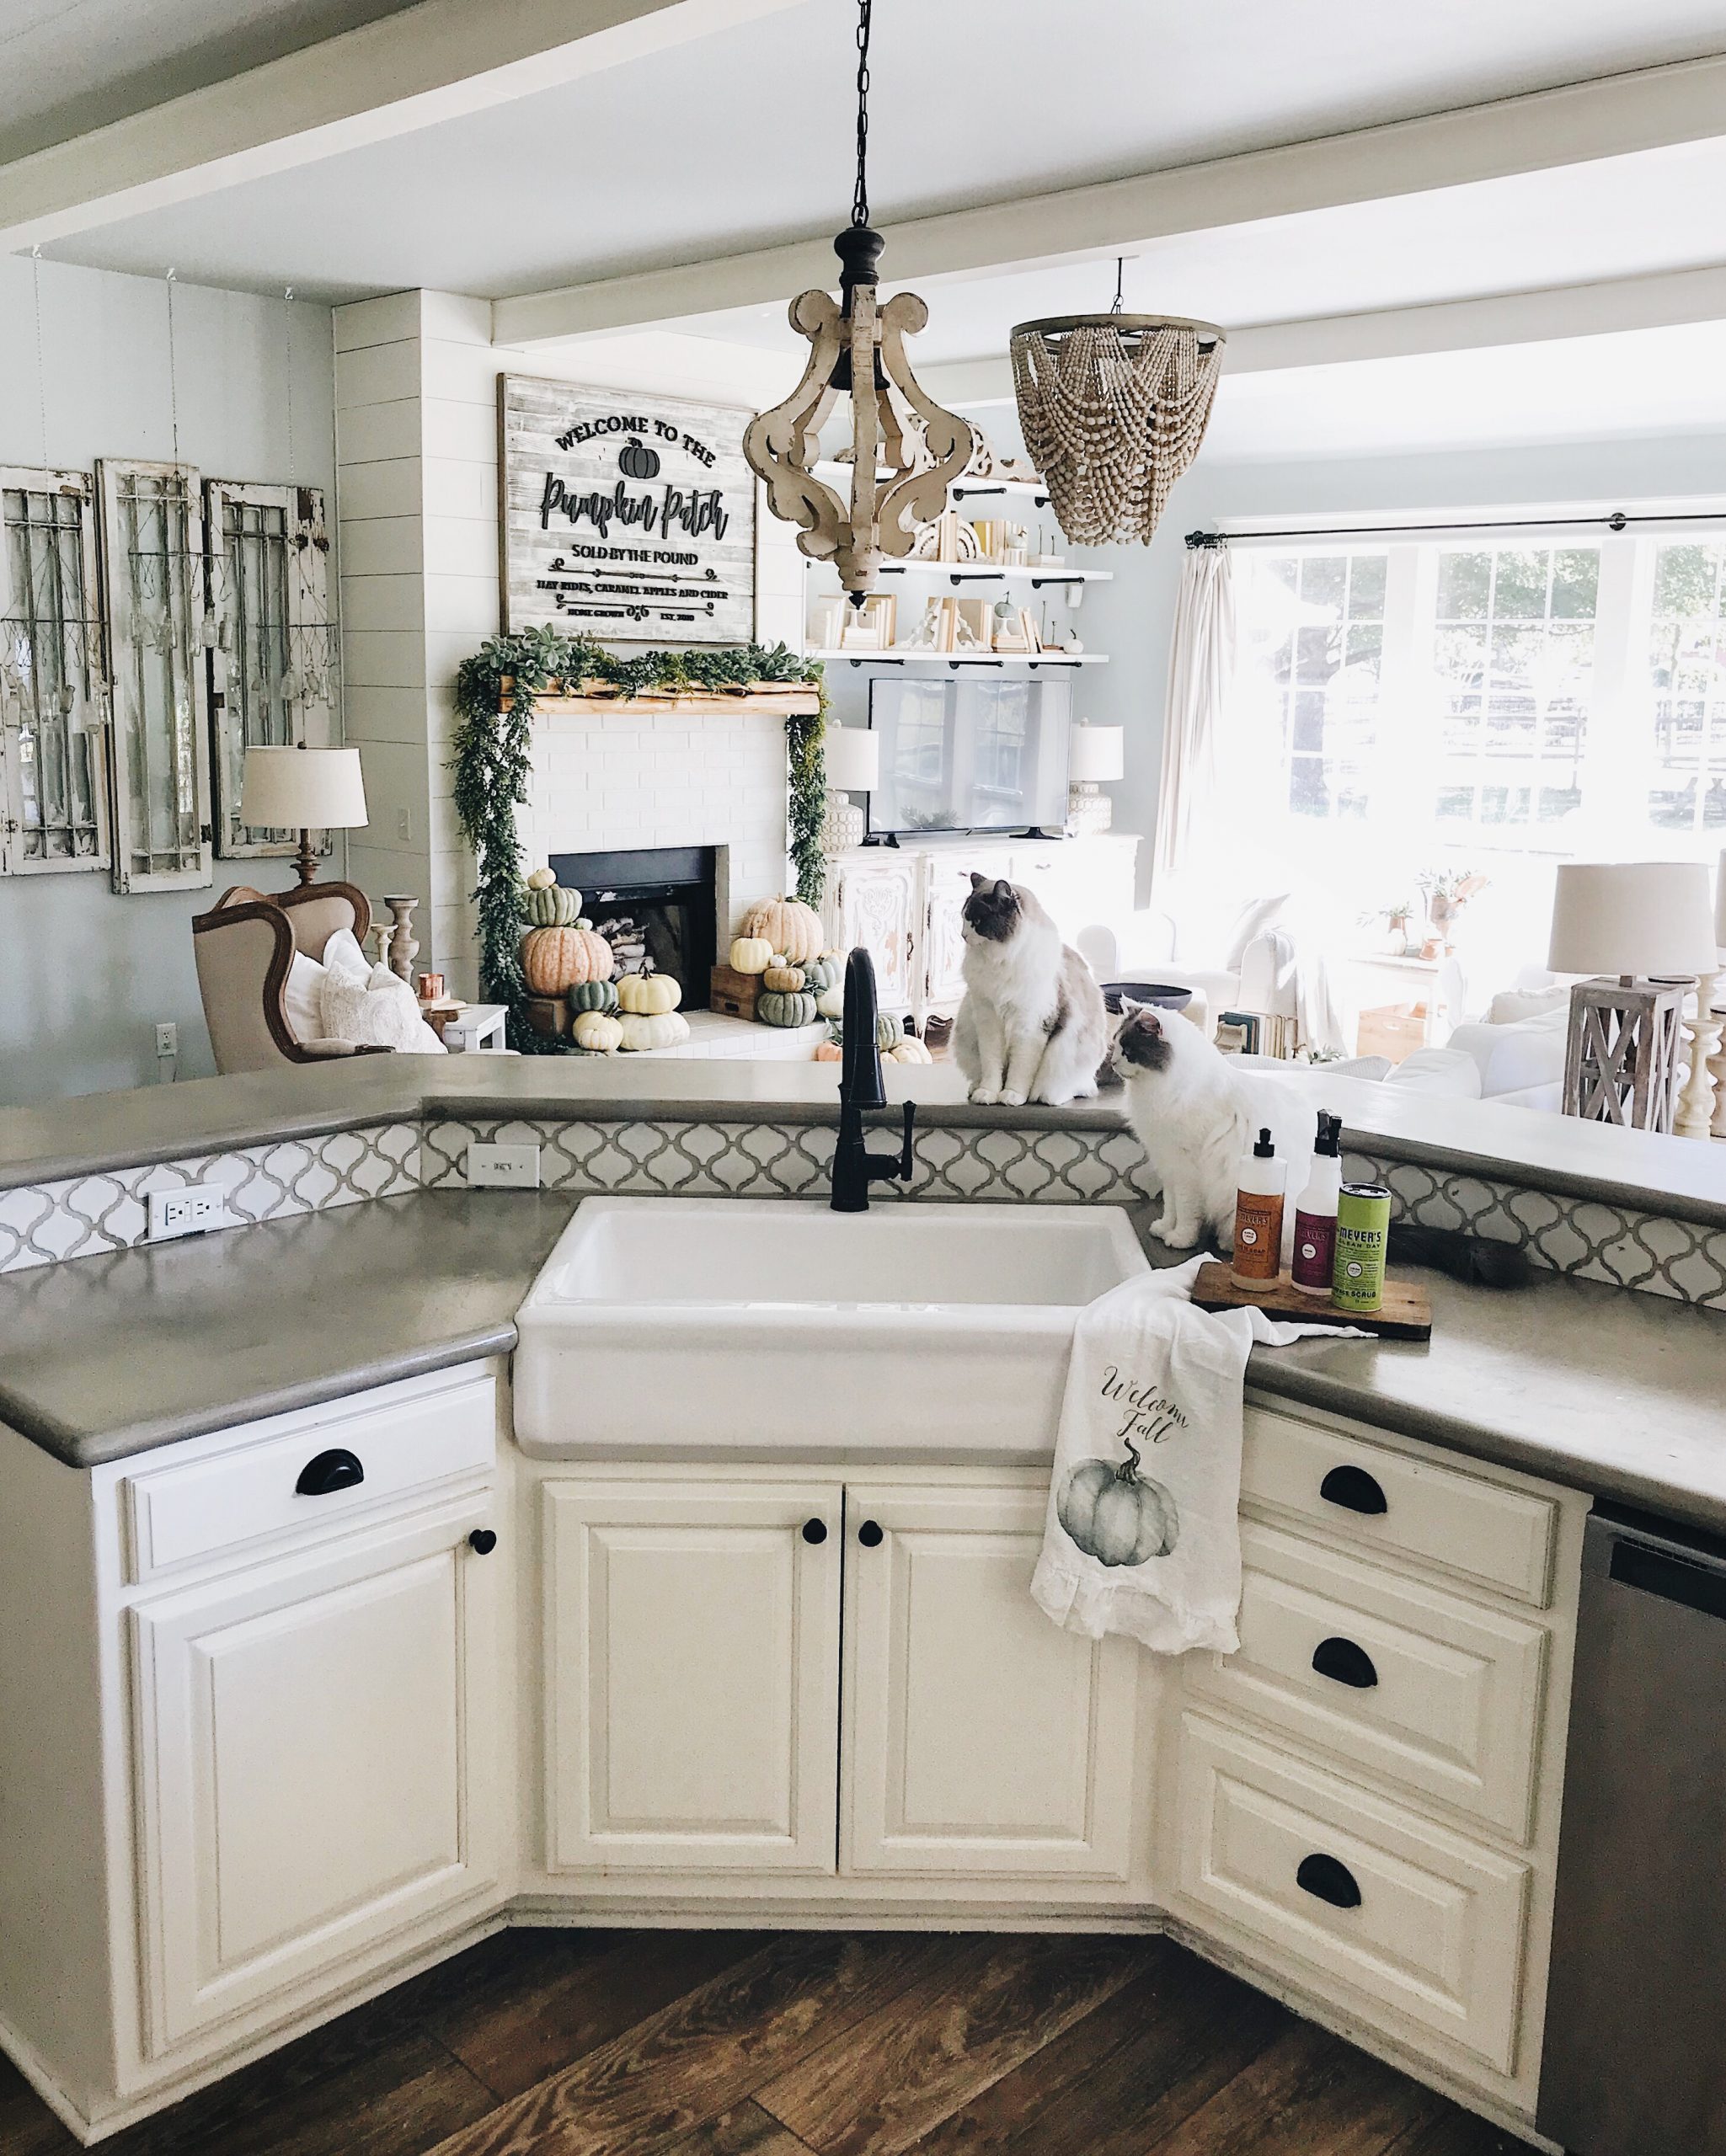
📐 Style Math
- Repurposed Window Frames: $20 – $80 (Flea market or architectural salvage yard)
- Distressed Paint & Supplies: $30 – $50 (Chalk paint and sandpaper)
- Fall Decor (Pumpkins, foliage, sign): $40 – $100 (Craft store or home goods store)
- Kitchen Backsplash (Tile for a small area): $150 – $400
- TOTAL: $240 – $630
- Budget Alternative: Skip the tile and focus on the decor. Find free fallen branches for a natural touch and DIY a ‘Pumpkin Patch’ sign with a simple wood board and craft paint, bringing the total well under $150.
The modern farmhouse aesthetic has been popular for years, but what keeps it fresh for 2026 is this move toward authentic, found objects. People are tired of mass-produced decor that everyone else has. A distressed, chippy window frame from a salvage yard tells a story. It has history and character that you can’t buy at a big-box store. This trend is all about celebrating imperfection and sustainability—giving old items a new life as art. It’s a direct response to the overly polished, cookie-cutter designs of the past, making homes feel more personal and lived-in.
10. Craft a Live-Edge Wood Slab Coffee Table
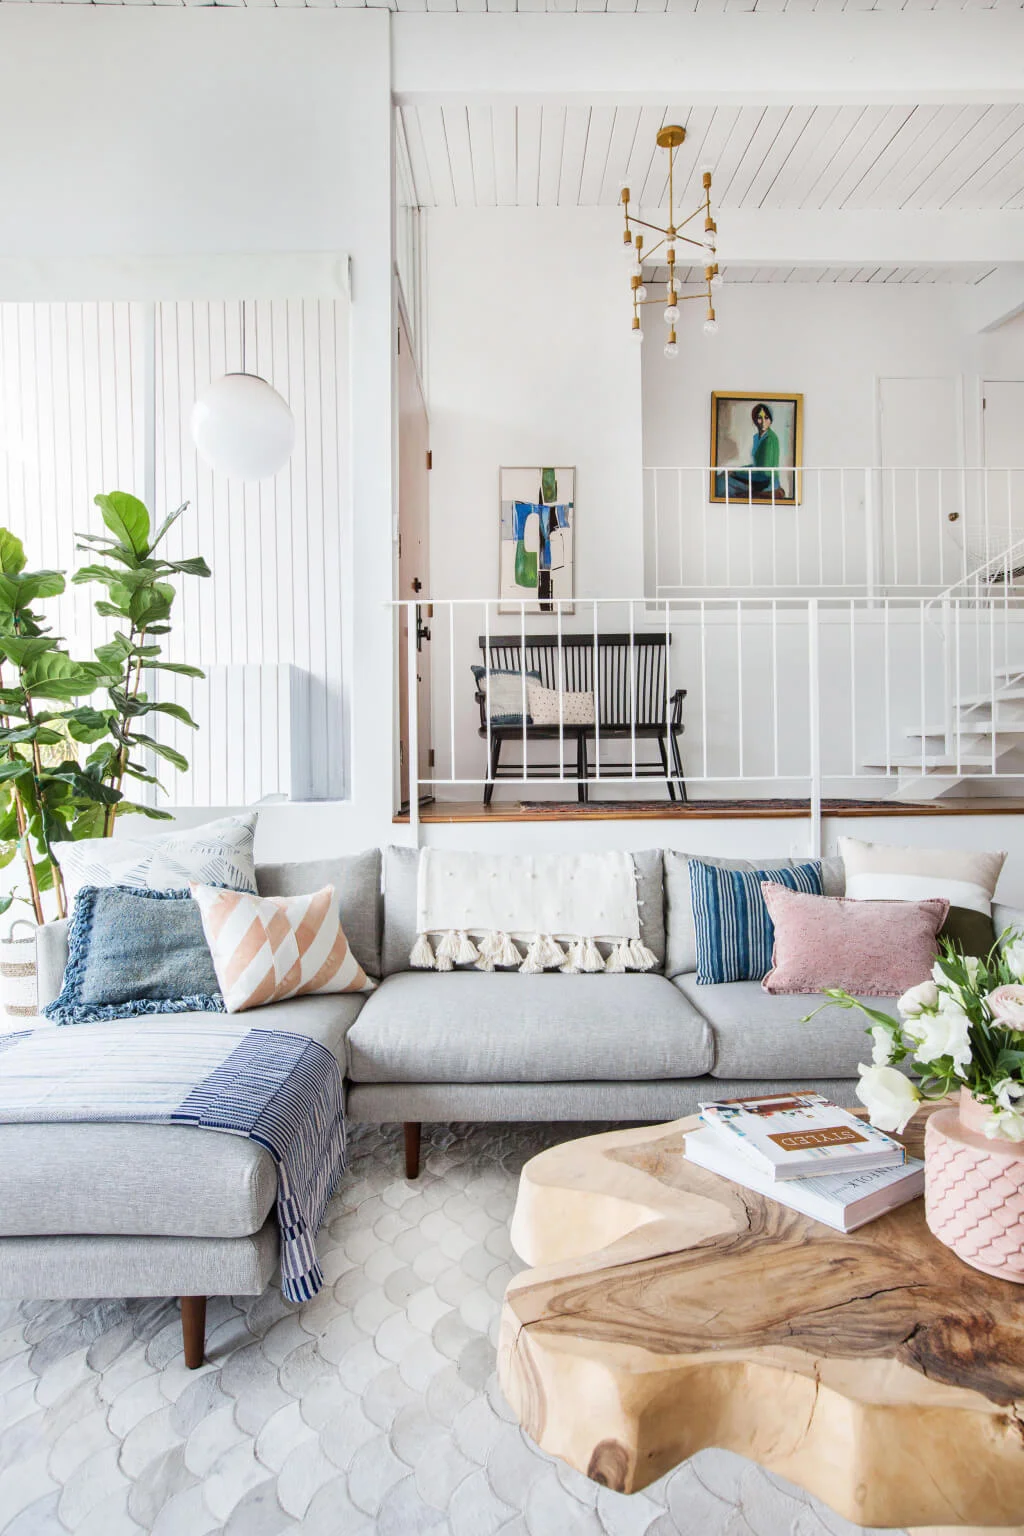
In this bright, modern coastal living room, the one thing that truly makes the space special is the organic, wood slab coffee table. Without it, the room would still be lovely, with its light gray sofa and sputnik chandelier, but it would lack a soulful focal point. The table’s raw, irregular shape and natural grain provide a necessary dose of warmth and texture that counterbalances the clean lines and white walls. It’s the element that keeps the room from feeling too sterile or generic, grounding the entire seating area with a piece of nature. It proves that even in a modern space, an organic element is essential for creating an inviting atmosphere.
✅ Before You Start
When you’re making your own live-edge table, the finish is everything. To get that silky-smooth, durable surface that shows off the grain, you need to sand properly and use the right topcoat. Start with a lower grit sandpaper (like 120) and work your way up to a fine grit (220 or higher). Don’t skip grits! For the finish, avoid thick, glossy polyurethanes that can look like plastic. Instead, opt for a hardwax oil finish like Rubio Monocoat or Osmo Polyx-Oil. They are more expensive but are incredibly user-friendly, enhance the natural feel of the wood, and are very easy to spot-repair if the table gets a scratch later on.
11. Sew Simple White Slipcovers for a Total Sofa Makeover
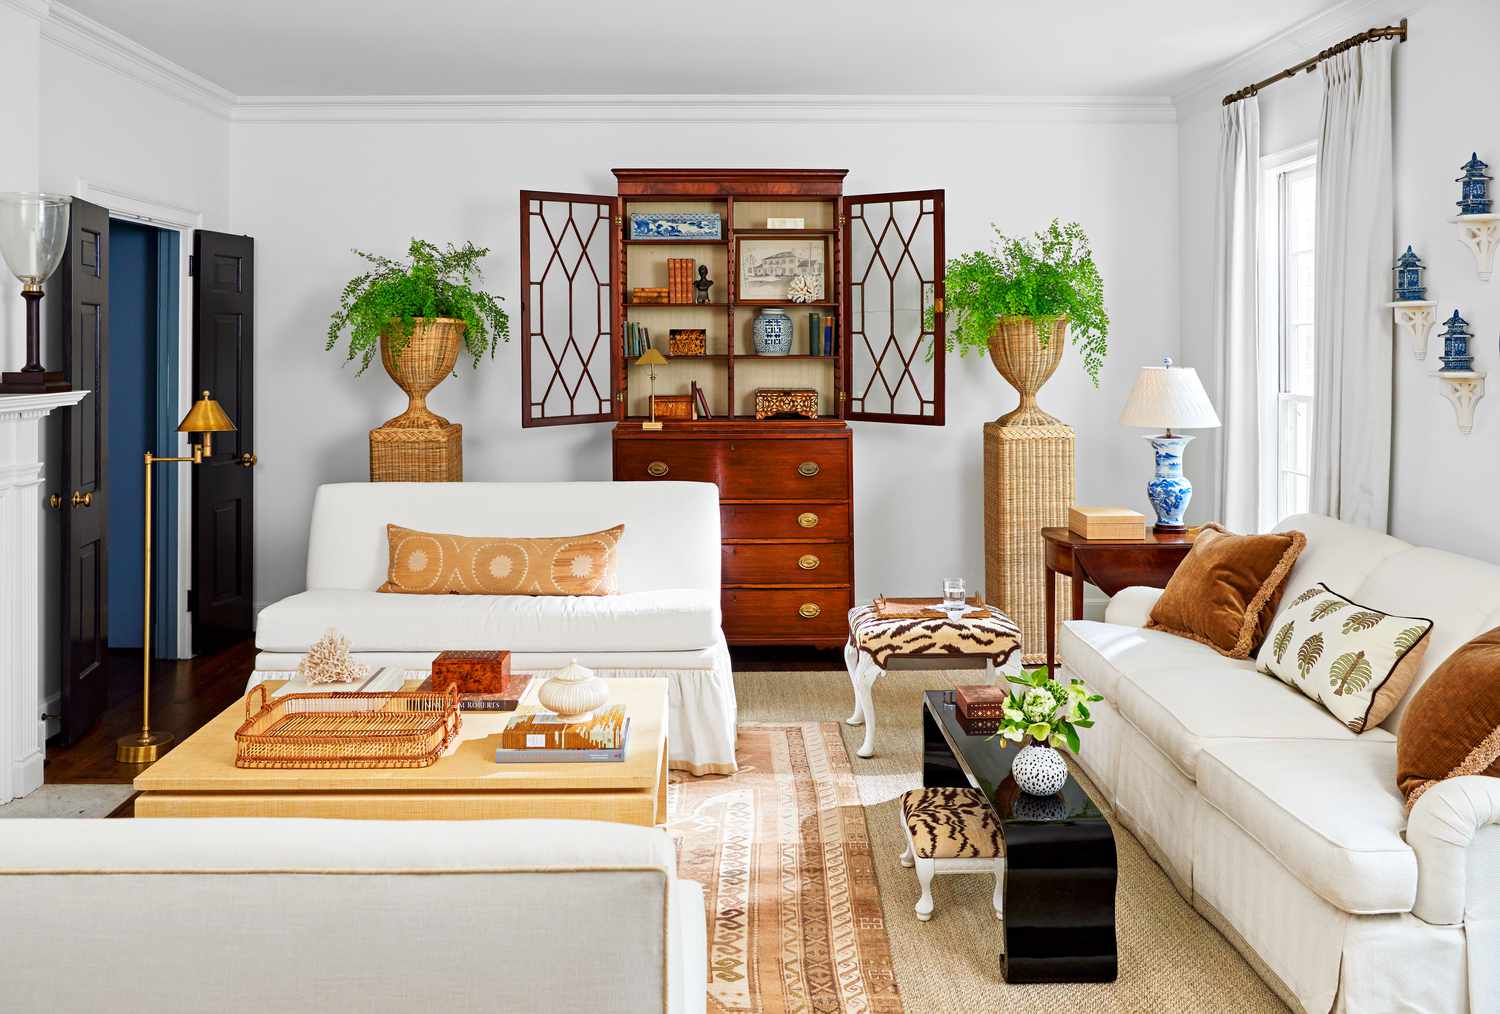
White slipcovered sofas offer a timeless, elegant look, but let’s have some real talk about keeping them clean. If you have kids, pets, or enjoy red wine, you need a strategy. Not all white fabrics are created equal. Opt for a durable, machine-washable fabric like a heavy cotton canvas or a performance blend with polyester. For stains, have a dedicated spot cleaner on hand (Folex is a designer favorite). The biggest secret? Own two sets of slipcovers. It’s an upfront investment, but it means you can have one on the sofa while the other is in the wash, eliminating the stress of a naked, unsightly couch. Also, remember that direct sunlight will yellow white fabric over time.
🔥 Trending Context
This look, with two full-sized sofas facing each other, requires a generously sized living room. To pull this off without the space feeling cramped, you need a room that is at least 15 feet wide. This allows for the depth of both sofas (around 3 feet each) plus a minimum of 3 feet of walkway space behind one of them and a comfortable 3-4 foot gap between them for the coffee table and legroom. A ceiling height of 9 feet or more also helps the room feel balanced and not overwhelmed by the large furniture pieces. If your room is narrower, consider a single sofa and two armchairs instead to achieve a similar conversational layout without overcrowding the space.
12. Embrace Earthy Tones with Terracotta and Plant Styling
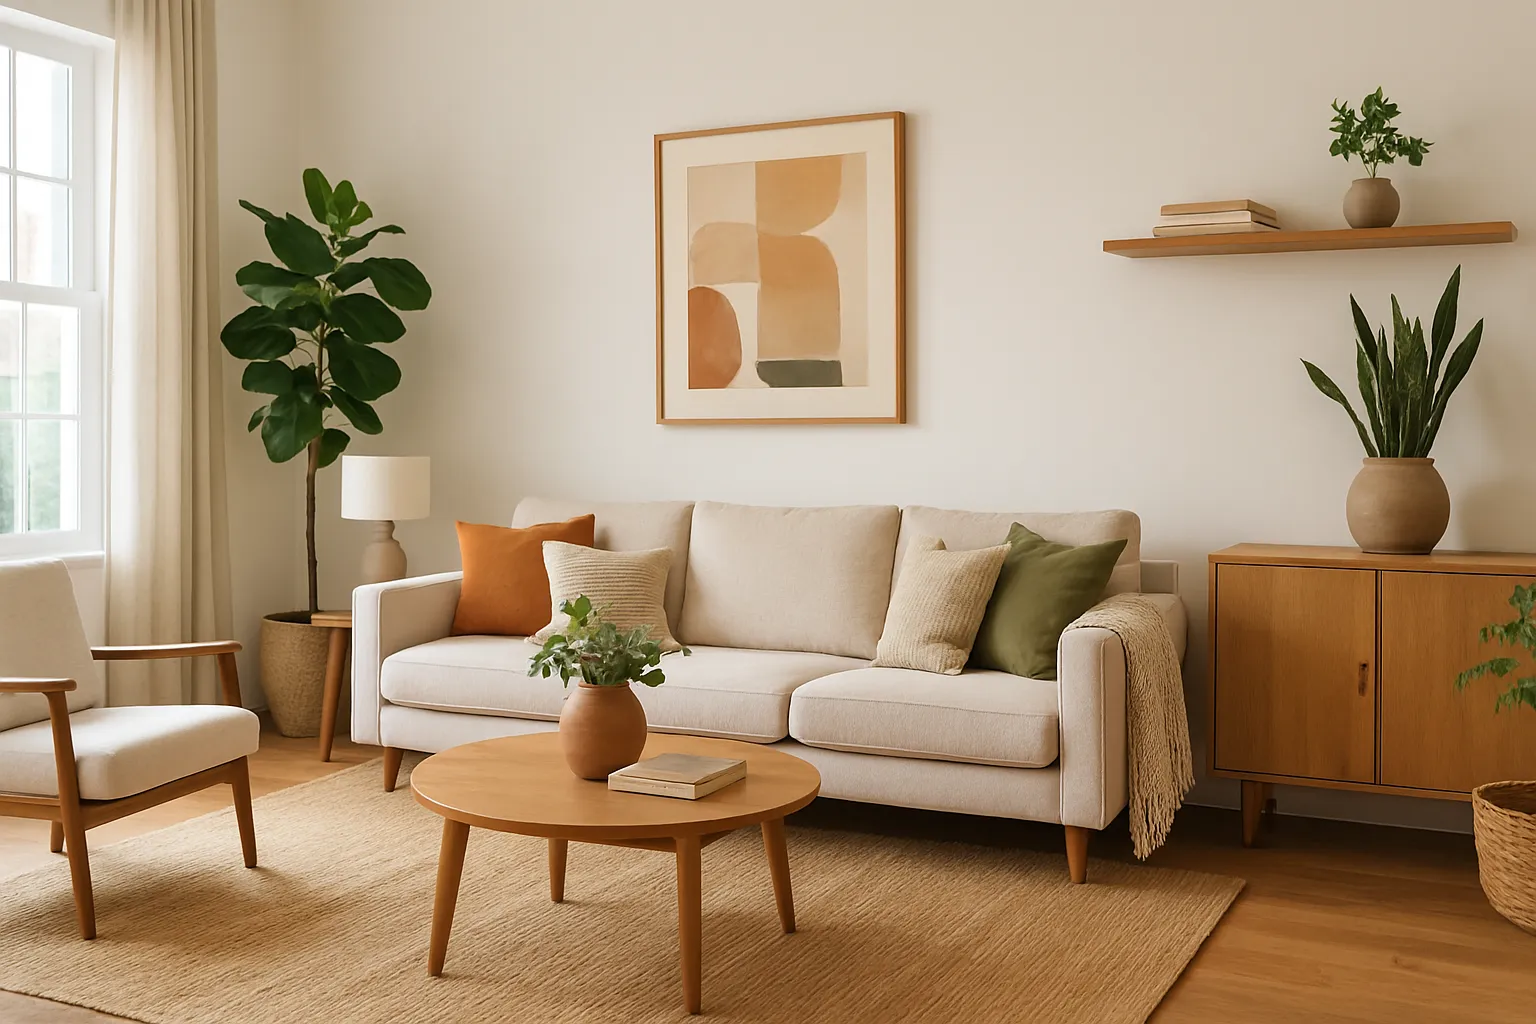
Ready to bring this warm, natural vibe into your home? This look is all about layering earthy materials. Before you start buying plants and pots, it’s smart to do a quick assessment of your space to ensure your new green friends will thrive.
🧹 Maintenance Reality
- Assess Your Light: Where do you plan to put the plants? Track the sunlight in that spot for a full day. Is it bright, indirect light (ideal for most houseplants) or hot, direct sun? This will determine which plants you can buy.
- Check Your Palette: This style works best with a neutral base. The terracotta and green pop beautifully against the beige sofa and light walls. If your room is already full of bold color, this earthy palette might get lost.
- Measure for a Statement Plant: See that gorgeous large plant in the corner? That’s what makes the look. Measure the floor space and height you have available for a larger focal point plant like a Fiddle Leaf Fig or Bird of Paradise.
This room feels so calming and cohesive because it expertly mixes warm and cool tones. The light beige walls and sofa have cool undertones, which are beautifully balanced by the warmth of the terracotta pots and medium-toned wood furniture. This temperature contrast is key; it creates a subtle visual tension that is much more interesting than a room that is all warm or all cool. Furthermore, the design uses repetition of natural textures—the weave of the plant basket, the grain of the wood, the texture of the pottery—to create a rich, layered feel that is both sophisticated and incredibly inviting.
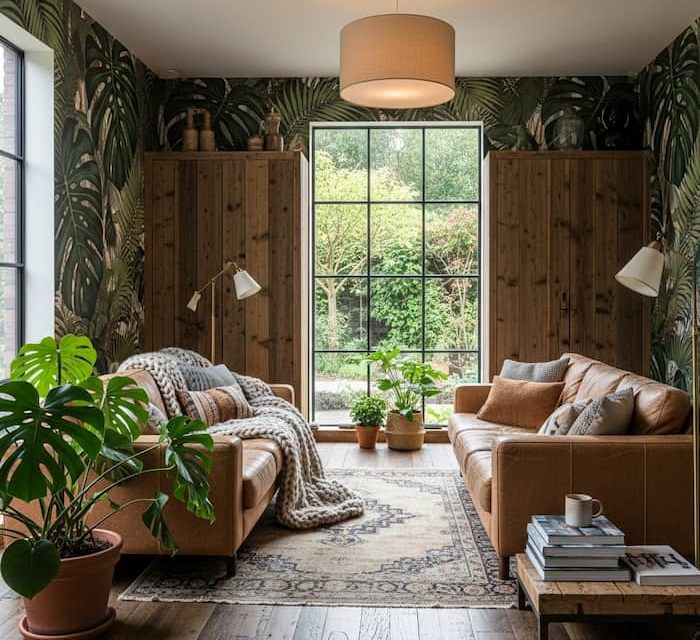
13. Apply a Bold, Botanical Peel-and-Stick Wallpaper
Dark, moody, botanical prints like this one are a major trend, and for good reason. They’re part of a larger movement called
14. Paint a Bright, Geometric Mural as a Feature Wall
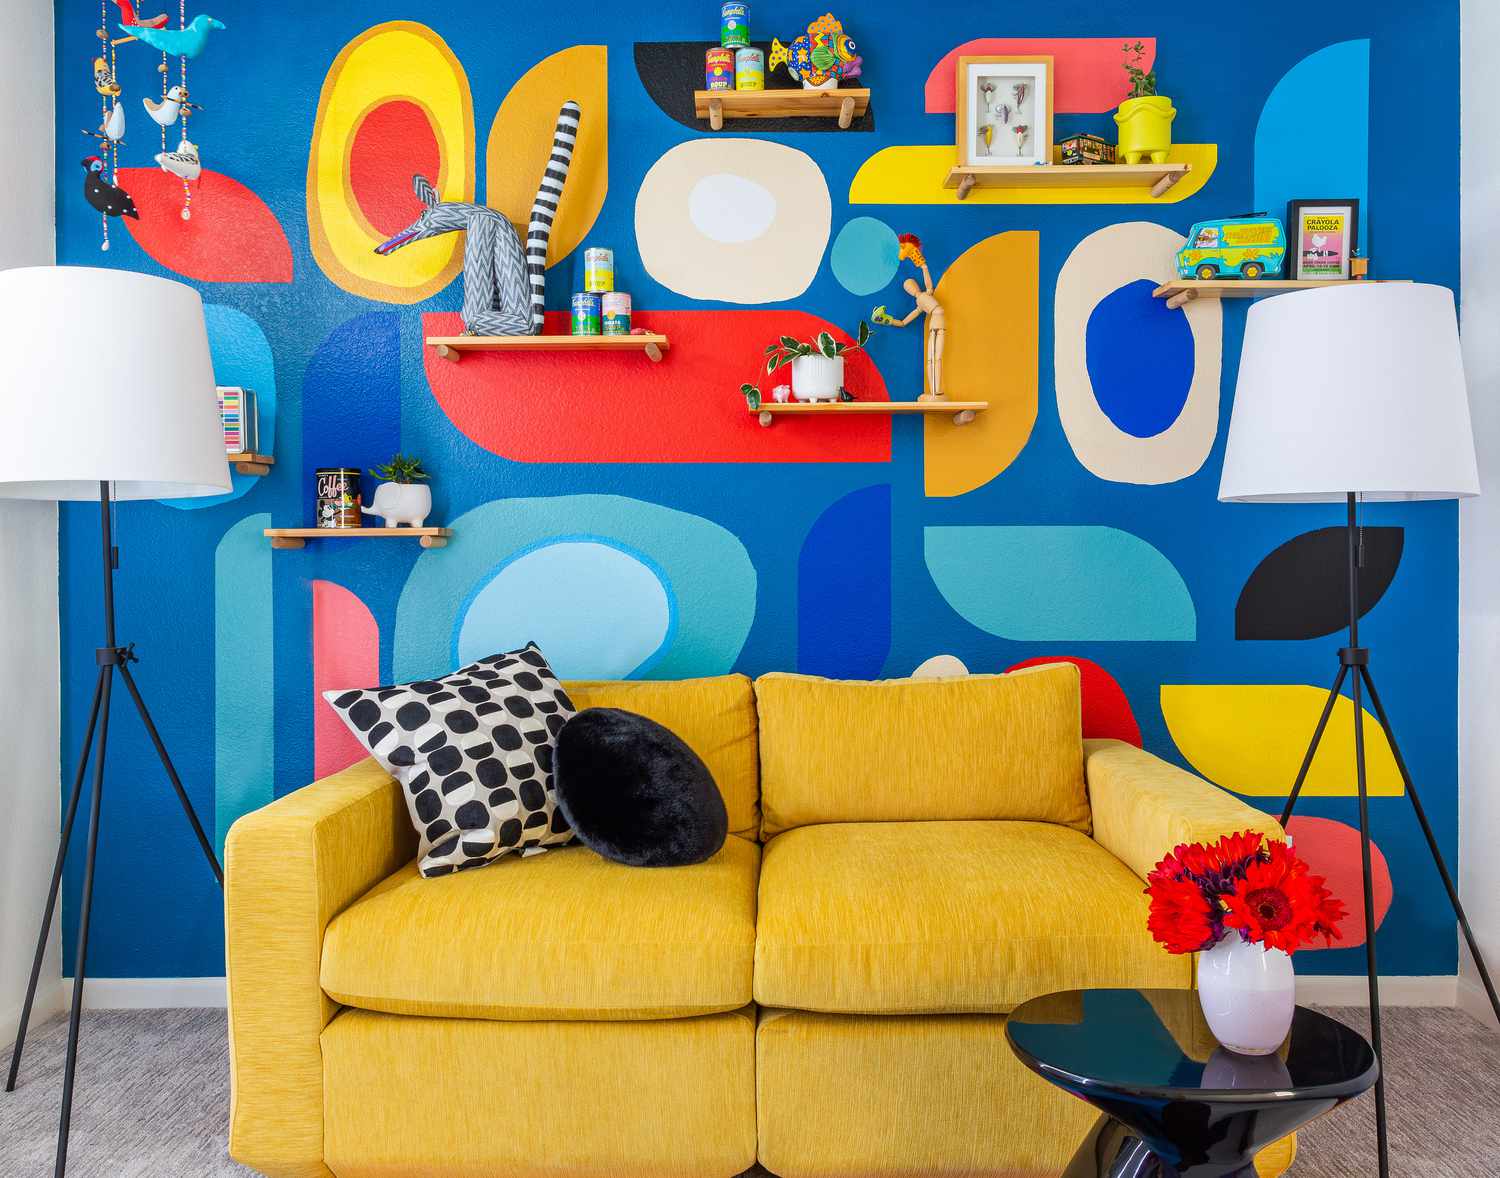
A hand-painted mural is the ultimate DIY for adding personality to a room. This playful, geometric style is easier than it looks and makes a massive impact. It turns a plain wall into a work of art.
💸 Get This Look For Less
- Time Estimate: 6-8 hours. Material Cost: $50-$100.
- Design First: Sketch your design on paper or an iPad first. Keep the shapes simple and overlapping.
- Base Coat: Paint the entire wall your main background color (like the bold blue here) and let it dry completely.
- Tape Your Shapes: Use high-quality painter’s tape (like FrogTape) to tape off your first, largest shapes. Press the edges down firmly to prevent bleeding.
- Paint and Peel: Fill in your taped-off shapes with your chosen colors. Here’s the key: peel the tape off *while the paint is still wet* for the cleanest lines. Pull it away from the painted area at a 45-degree angle.
- Layer Up: Let the first shapes dry, then tape and paint your next set of overlapping shapes. Repeat until your mural is complete!
The success of such a vibrant mural lies in a controlled color palette, even when it feels wild. Let’s break down the style math: 50% Dominant Cool Color (the blue wall) + 30% Dominant Warm Color (the yellow sofa) + 20% Smaller Accent Colors (red, orange, pink). The design pits a primary cool color against a primary warm color for maximum energy and contrast. Then, smaller amounts of related warm tones are used in the mural to tie back to the sofa. This prevents the look from becoming pure chaos. You could easily swap the blue and yellow for other complementary colors, like a deep green wall with a pink sofa, and the formula would still work perfectly.
15. Build a Floating Bookcase Around a Fireplace
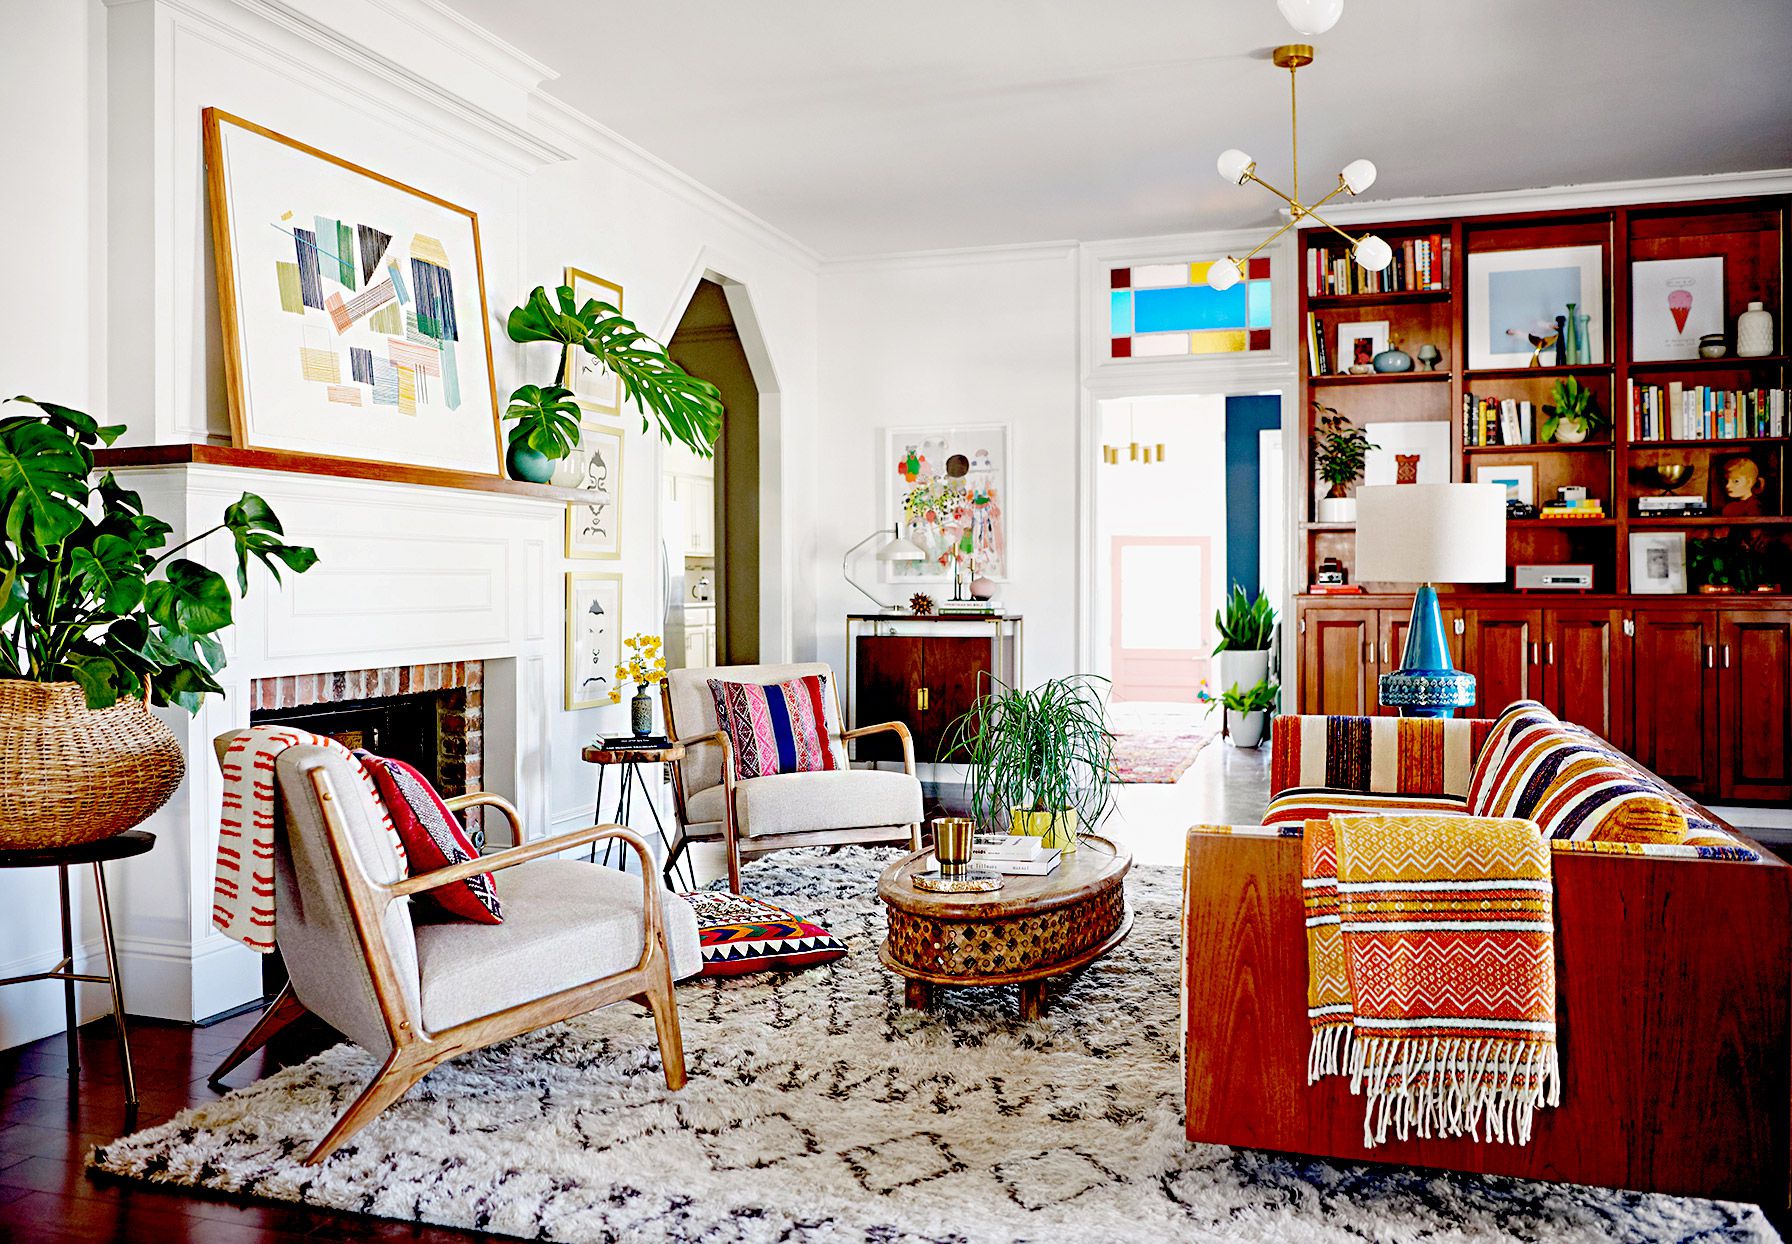
Custom built-ins like these gorgeous wooden bookcases can cost thousands of dollars. To get a similar look for less, use a series of sturdy floating shelves from IKEA, like the LACK or BERGSHULT models. Plan your layout to create the illusion of a single unit. You can either stain unfinished wood shelves to match your flooring, as seen here, or paint them the same color as the wall for a more seamless, integrated look. For the base, a simple wooden bench or a low TV console can anchor the shelving and provide a ‘built-in’ appearance without the custom price tag. The key is precise measurement and using high-quality wall anchors.
💡 Designer Tip
Take away the shaggy geometric rug, and this room loses its soul. It’s the single element that ties everything together. The off-white base color of the rug connects with the fireplace and walls, while the dark gray geometric pattern echoes the dark wood of the floors and bookcase. More importantly, its plush, shaggy texture provides a crucial dose of coziness and softness, balancing the hard surfaces of the brick, wood, and walls. It’s the anchor that defines the seating area and makes this eclectic collection of furniture, plants, and books feel like a unified, inviting home.
16. Create a Cozy Reading Nook with a Patterned Accent Wall
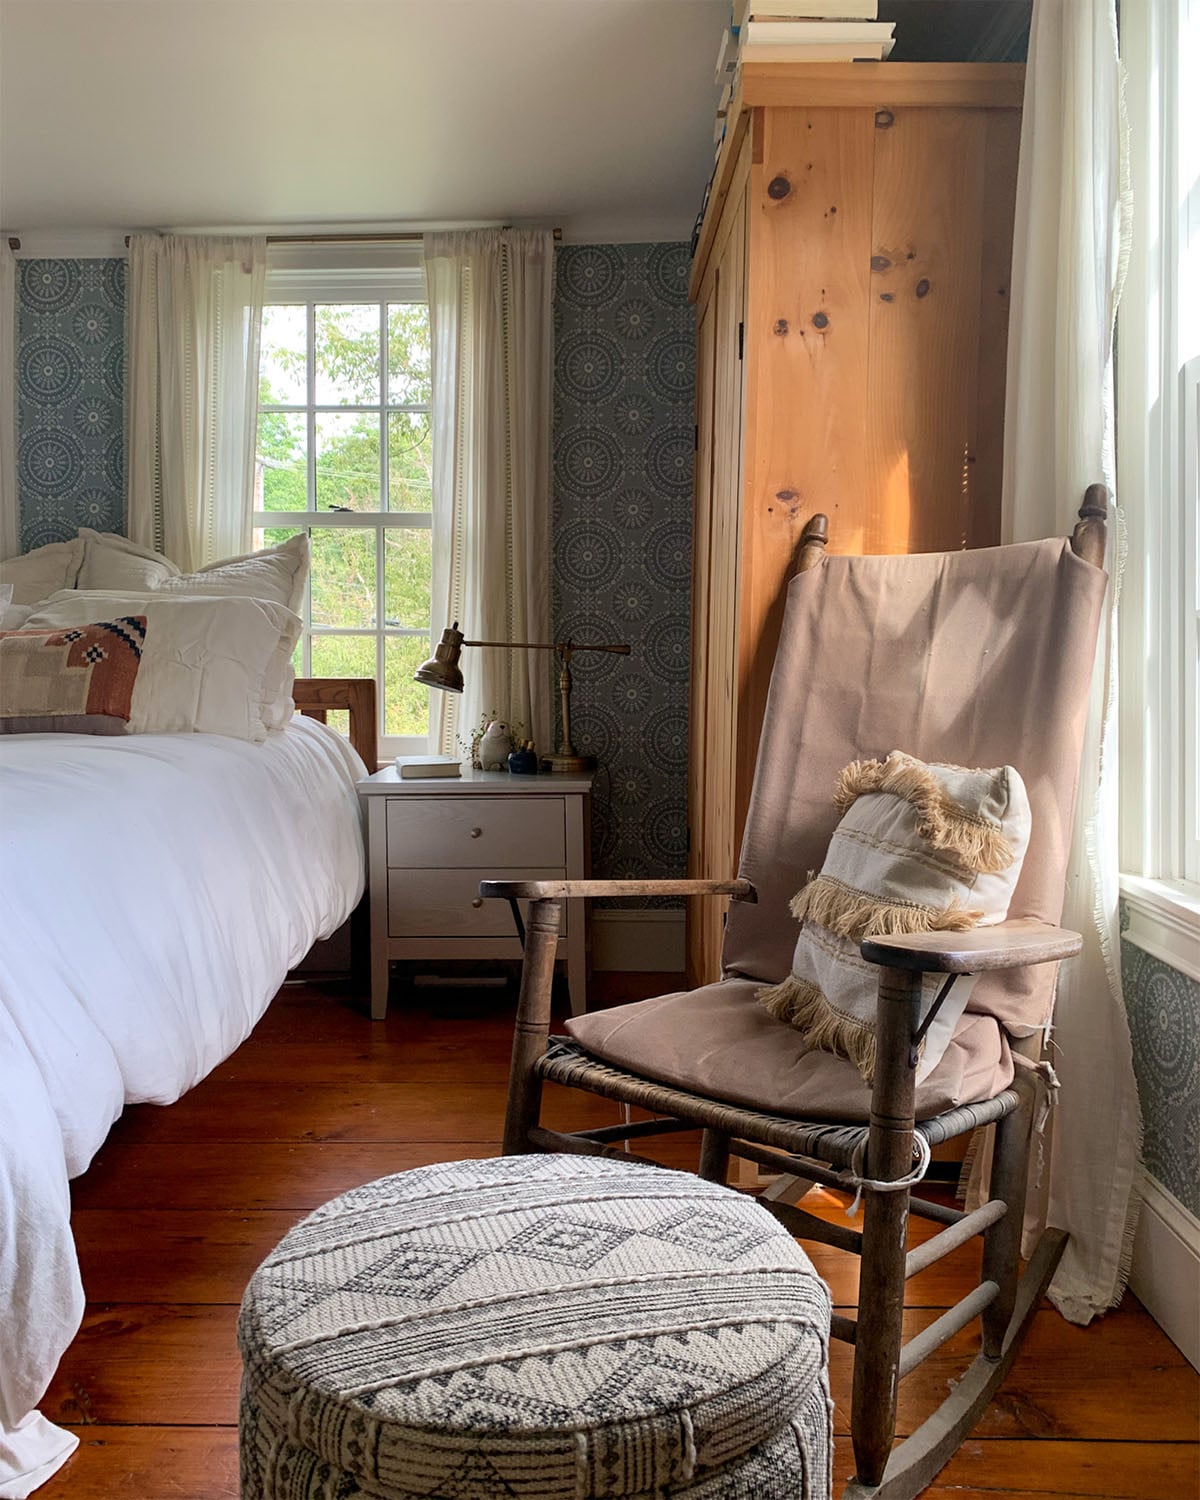
An accent wall using patterned wallpaper is a fantastic way to add character, as seen in this cozy bedroom. However, be realistic about pattern matching. The first time you do it, it can be frustrating. Patterns have a ‘repeat’, meaning the design aligns at specific intervals down the roll. You will waste some wallpaper cutting it to make sure the pattern lines up seamlessly from one strip to the next. Factor this in when you buy your rolls—always order at least 15% more than your measurements suggest. If you skip the pattern matching, the final result will look jarring and amateur, undermining the cozy effect you’re going for. Start on a simple, flat wall with no windows for your first project.
🔧 How-To Brief
This idea works brilliantly in bedrooms of a modest size, typically from 120 to 200 square feet. The key is to place the accent wall behind the bed, which visually anchors the room and creates a focal point without overwhelming the space. In a smaller room, a busy pattern on all four walls can feel claustrophobic. By containing it to one wall, you get all the personality without the visual clutter. The use of a rocking chair instead of a bulky armchair provides functional seating without taking up a large footprint, making it ideal for a corner nook in a medium-sized bedroom.
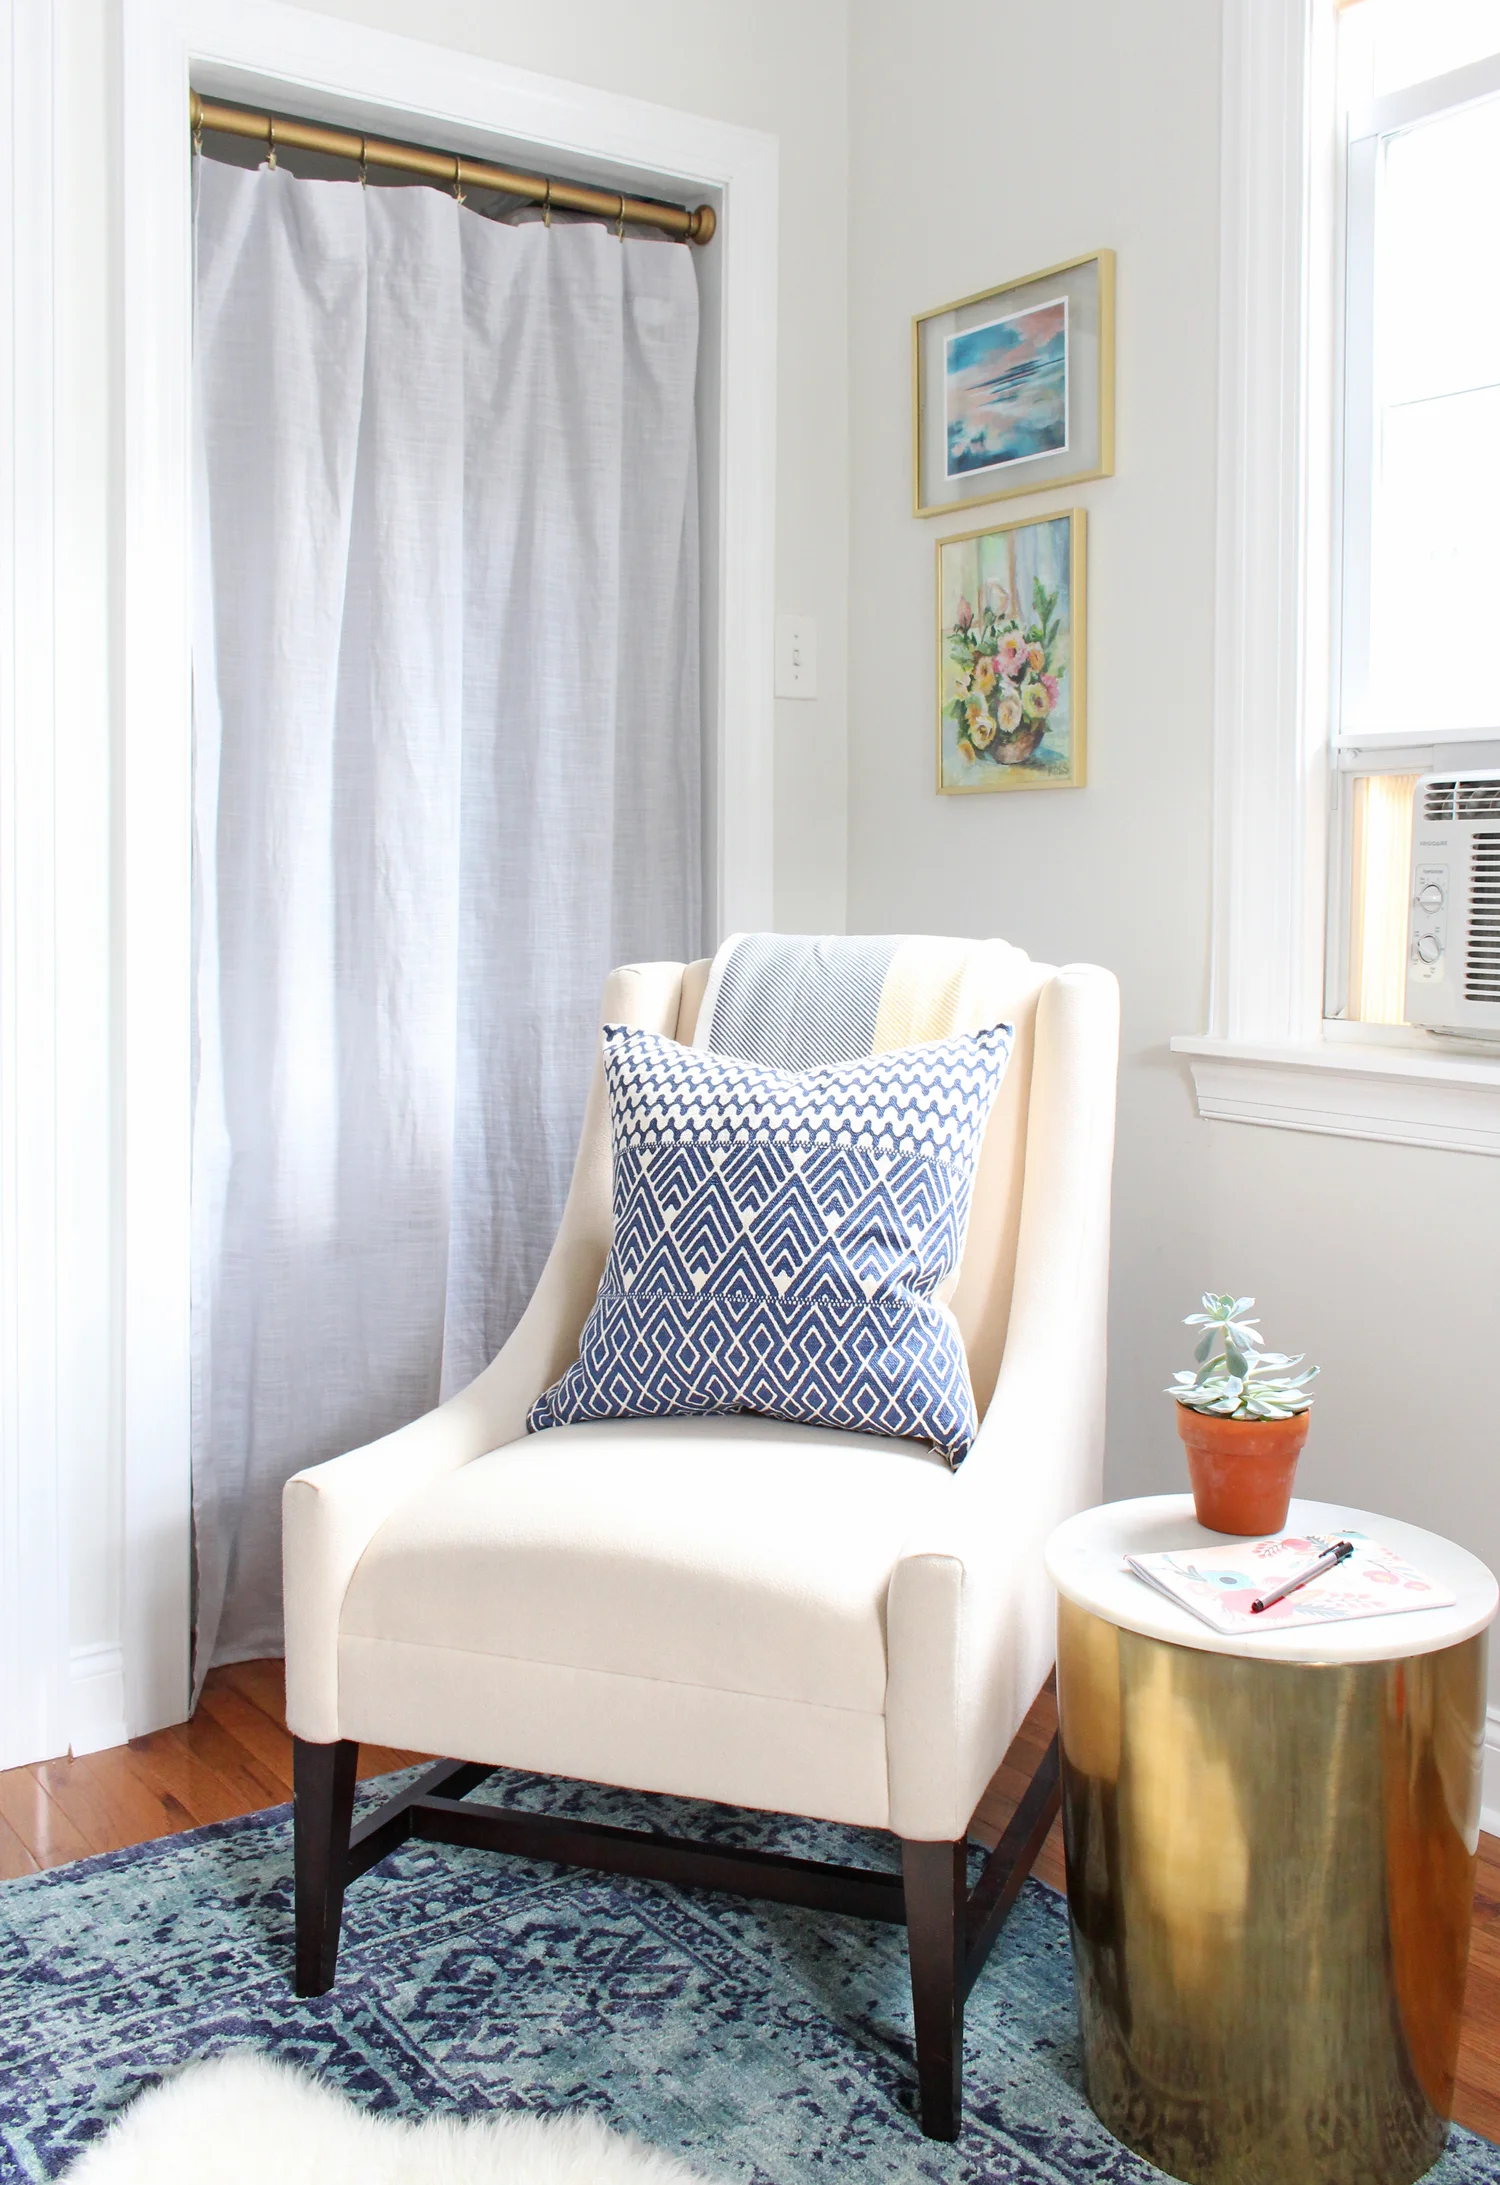
17. DIY a No-Sew Closet Curtain with a Brass Rod
Hanging a curtain instead of a door is a great way to soften a space and handle an awkward doorway. To get that chic, designer look without sewing, buy a curtain panel that is at least 2 inches longer than you need. Once you have it hanging on the rod, use iron-on hem tape (you can get it at any fabric or craft store for about $5) to create a perfect ‘kiss’ with the floor. Don’t hem it too short! The fabric should just skim the surface of the floor. This makes the curtain look custom and intentional, not like a cheap, temporary fix. Use a level when installing your rod; it’s a small step that makes a world of difference.
⚠️ Real Talk
Creating this calm, chic corner is a very affordable project that delivers a big style upgrade. It’s all about a few carefully chosen pieces.
- Linen-look Curtain Panel: $30 – $60 (Target or IKEA)
- Adjustable Brass Curtain Rod: $25 – $50
- Small Accent Chair: $50 – $150 (Look on Facebook Marketplace or Wayfair)
- Gold Side Table: $40 – $90
- Small Patterned Rug: $30 – $70
- TOTAL: $175 – $420
- Budget Alternative: For a similar but much more luxe version of this palette, check out the marble and gold details in Idea #17.
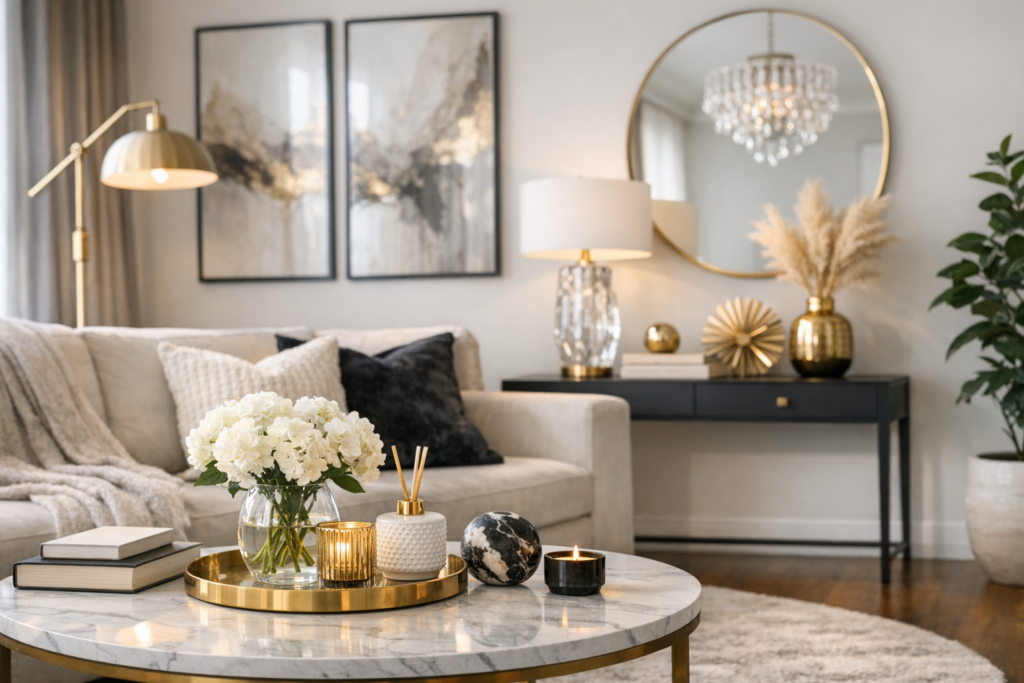
18. Get a Luxe Look with a Marble & Gold Coffee Table
This living room feels so luxurious and pulled-together because of its masterful use of material repetition and shape. Notice how the gold of the coffee table base is repeated in the frame of the mirror and the decorative accents on the console table. This creates a cohesive, rhythmic flow that guides the eye through the space. The circular shape of the coffee table is also echoed in the large round mirror, softening the clean, straight lines of the sofa and console. This harmony of materials (gold) and shapes (circles) on a calm, neutral backdrop (beige and white) is what creates that effortlessly elegant and intentional designer look.
🎯 What Makes It Work
A real marble and metal coffee table can easily run you $800 or more. To get this high-end look on a DIY budget, hunt for a cheap, round coffee table at a thrift store or on Craigslist—the base material doesn’t matter. Next, purchase a roll of high-quality, realistic marble-effect contact paper for around $20. Carefully apply the contact paper to the tabletop, using a squeegee to smooth out any air bubbles. For the base, a can of metallic gold spray paint ($10) will work wonders. The result is a surprisingly convincing dupe for under $50 that gives you the same glamorous feel.
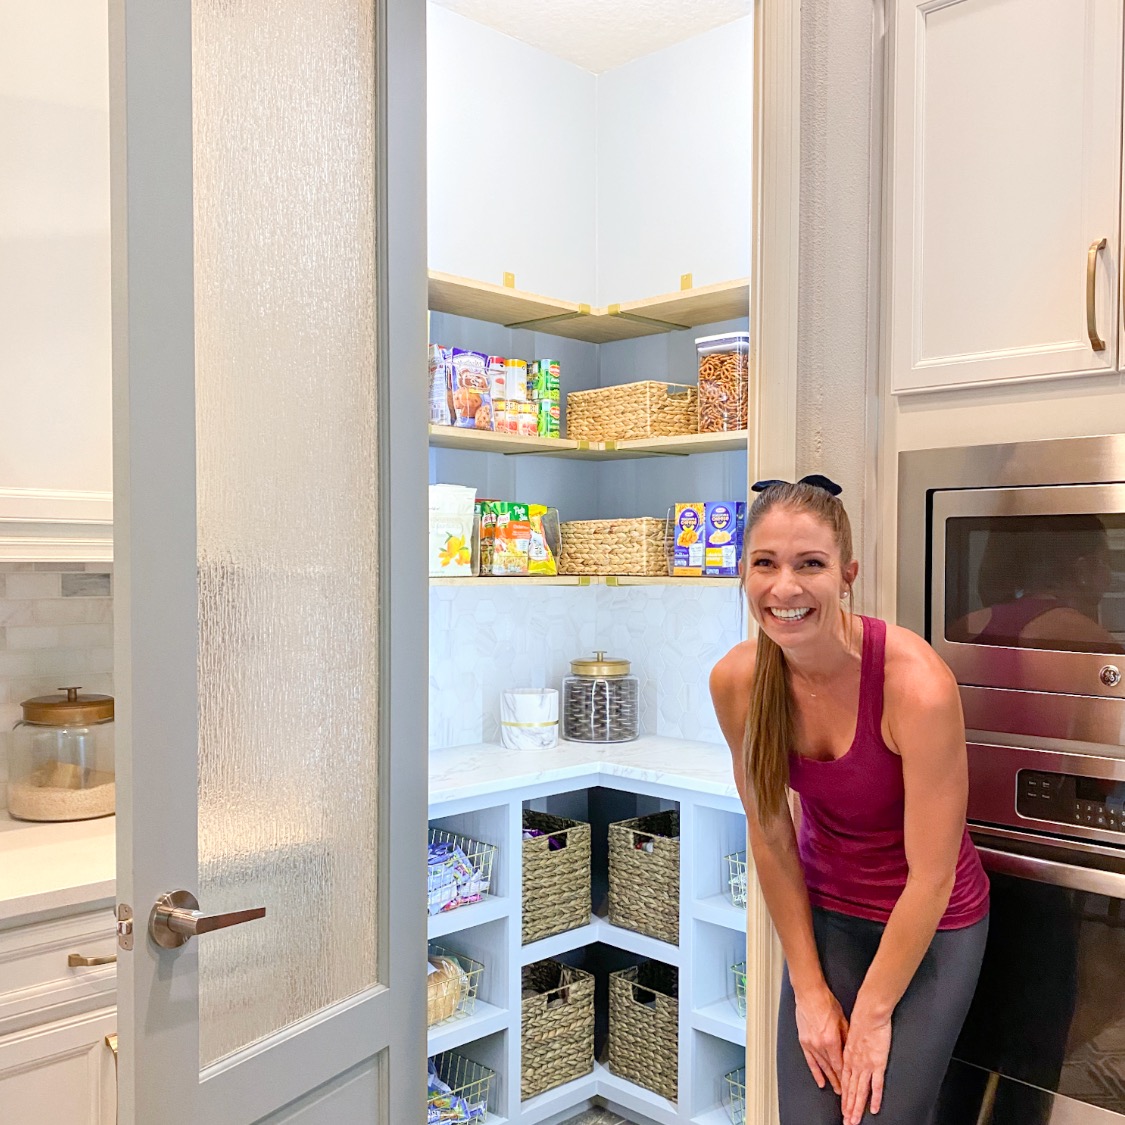
19. Install Open Shelving in a Pantry with Gold Brackets
Open shelving in a pantry is a fantastic DIY that makes everything visible and easy to grab. The combination of natural wood shelves and stylish gold brackets, as seen here, turns a purely functional space into a design feature.
💰 Budget Breakdown
- Time Estimate: 3-4 hours. Material Cost: $100-$300.
- Measure and Plan: Measure your wall and decide on shelf height and spacing. A typical spacing is 12-16 inches between shelves. Use painter’s tape to mark the wall to visualize the layout.
- Choose Wood and Brackets: Get 1×10 or 1×12 pine or poplar boards from a hardware store. Select your metal brackets; they add a lot of style.
- Cut and Finish Shelves: Have the hardware store cut the boards to length for you. At home, sand them smooth and apply a food-safe stain or sealer.
- Install Brackets: Use a stud finder to locate the wall studs. This is CRITICAL. Drywall anchors will not hold the weight of pantry items. Screw the brackets securely into the studs using a level.
- Place Shelves: Rest your finished shelves on the brackets and secure them.
Open pantry shelving is beautiful, but it demands that you stay organized. Unlike a closed-door pantry where you can hide a bit of chaos, everything here is on display. Be prepared to decant items like flour, sugar, and pasta into clear, uniform containers to maintain the clean, curated look. Woven baskets are your best friend for hiding less attractive bags and boxes. You will also need to dust the shelves and containers regularly, as they are exposed to airborne dust and cooking grease, especially if the pantry is near the kitchen. It’s a trade-off: improved visibility and style for a higher standard of daily tidiness.
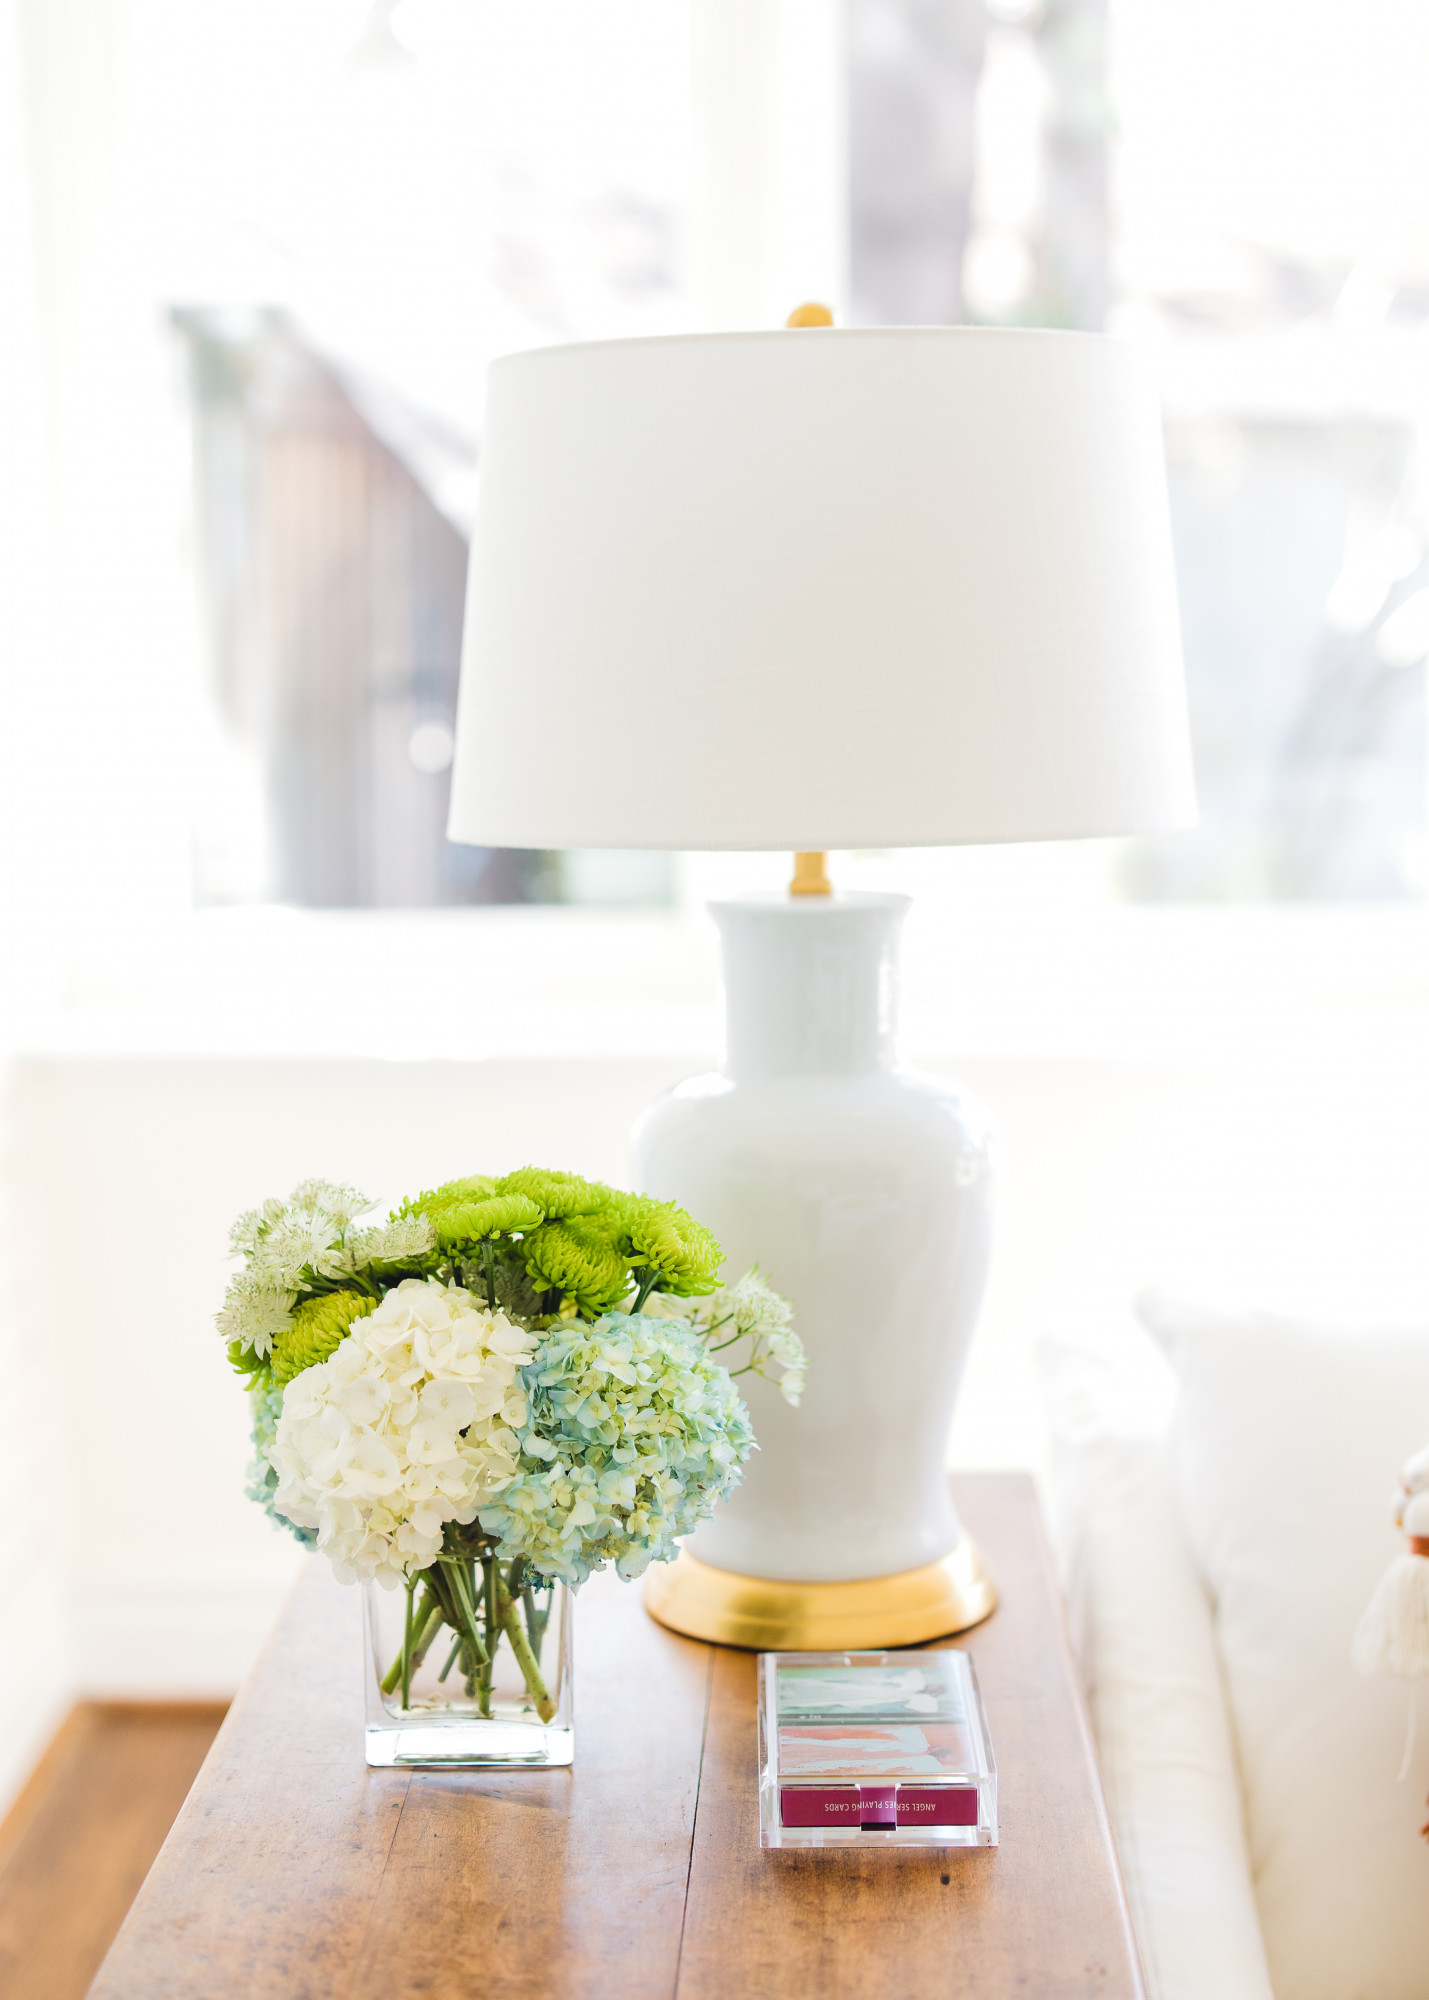
20. Refresh a Table Lamp with a Coat of Spray Paint
In this beautifully simple and fresh vignette, the one thing that makes it feel styled and intentional is the metallic gold lamp base. Without that little touch of warmth and shine, it would just be a white lamp on a wood table—nice, but plain. The gold accent elevates the entire composition, connecting with the warm tones in the wood and providing a touch of glamour. It’s a perfect illustration of how a small metallic detail can add a layer of sophistication and keep a minimalist setup from feeling boring. This is an incredibly easy detail to replicate on any thrifted lamp.
📏 Scale Guide
This fresh, serene look follows a simple and repeatable formula that you can apply to any surface in your home: 60% Neutral Base (the white lamp and shade) + 30% Natural Element (the wood table and fresh flowers) + 10% Metallic Accent (the gold lamp base). The neutral base provides a clean, bright canvas. The natural elements add life, texture, and organic softness. And the small pop of metallic provides the crucial finishing touch of polish and sophistication. You could change the formula—a black lamp, a dark wood table, and silver accents—and it would still feel just as balanced, though with a moodier vibe.
21. Create a Cozy Reading Corner with Leather and Raw Wood
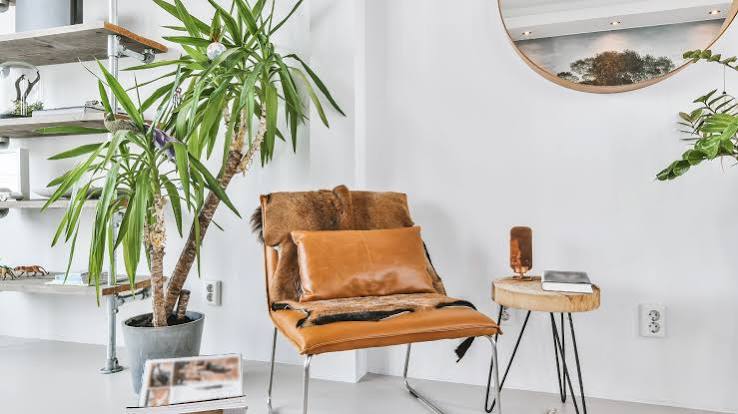
The secret to making a curated corner like this feel authentic and not like a store display is to mix your materials with confidence. The designer here masterfully combined sleek leather, a rustic raw wood slice, a fuzzy animal hide, smooth metal hairpin legs, and the organic leaves of the yucca plant. The rule of thumb is to include at least three different textures. For your own corner, if you have a leather chair, add a knit throw and a metal table. If you have a fabric chair, add a wooden table and a ceramic planter. This textural variety is what creates depth and visual interest.
📐 Style Math
Assembling a stylish corner nook doesn’t have to break the bank. This look is all about finding a few key pieces with strong character.
- Faux Leather Accent Chair: $200 – $400 (Wayfair, Overstock)
- DIY Raw Wood Slice Table (slice + hairpin legs): $80 – $150
- Large Yucca Plant & Pot: $70 – $120
- Faux Animal Hide Throw: $30 – $60 (IKEA, Amazon)
- Large Round Mirror: $60 – $100 (Target, HomeGoods)
- TOTAL: $440 – $830
- Budget Alternative: Find a used leather chair on Facebook Marketplace for under $100, use a plant you already own, and thrift a mirror and spray paint the frame. This can bring the total cost down to around $150.
22. Curate and Hang a Neutral Toned Gallery Wall
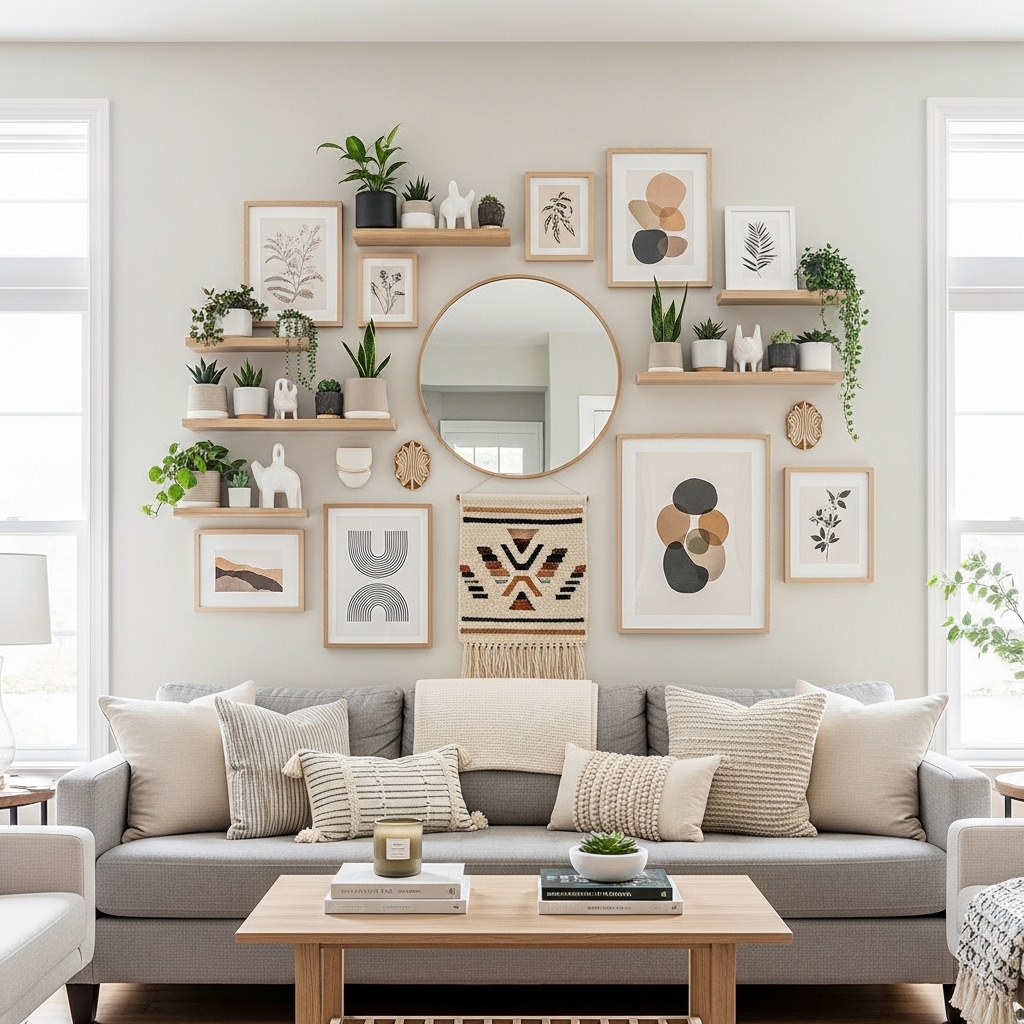
This gallery wall is so successful because it follows a few key design principles. First, it uses a consistent color palette of neutrals—beige, cream, terracotta, and light wood tones—which unifies the disparate collection of art, shelves, and mirror. Second, it balances elements of different scales and shapes: the large round mirror acts as an anchor, while the smaller rectangular frames and organic plant shapes create variety. Finally, the arrangement is asymmetrical but balanced. The visual weight of the large mirror on the right is offset by the cluster of shelves and frames on the left, creating a dynamic yet harmonious composition.
✅ Before You Start
Let’s be honest: achieving a gallery wall that looks this effortlessly chic is harder than it looks. The biggest pitfall is a cluttered, chaotic result. To avoid this, you MUST plan your layout on the floor first. Arrange all your frames, shelves, and objects on the ground in front of the wall. Live with it for a day. Move things around until the spacing and balance feel right. Aim for a consistent 2-3 inches between each piece. And remember to edit! Just because you own it doesn’t mean it has to go on the wall. A few well-chosen pieces will always look better than a jumble of everything. Be sure to avoid the common mistake we outline in The Haphazard Gallery Wall.
23. Install a Dramatic Floral Mural Accent Wall
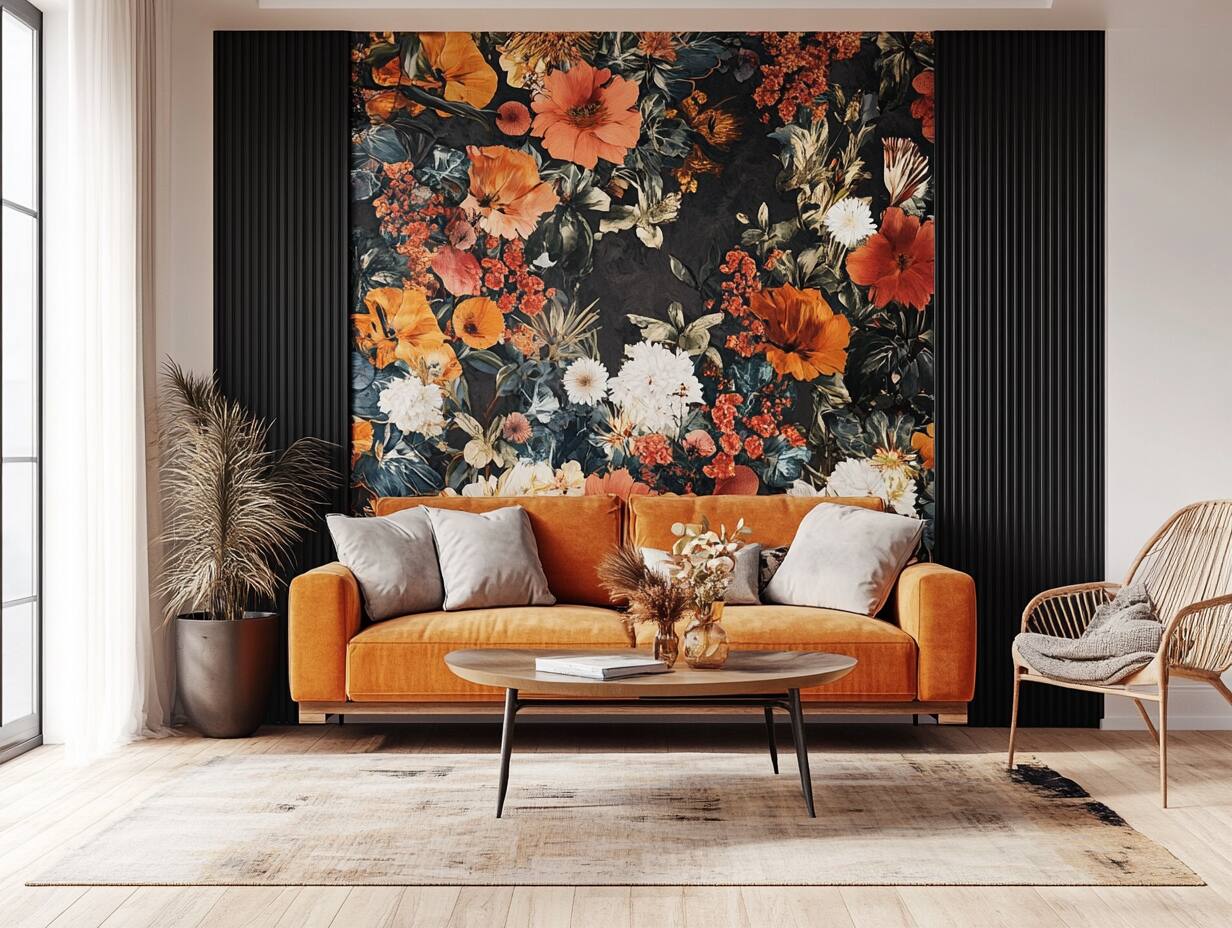
The rise of ‘Dark Academia’ and ‘Cottagecore’ aesthetics on Pinterest and TikTok has paved the way for dramatic, moody florals like this to have a major moment. People are craving spaces that feel cozy, layered, and full of personality, moving away from the minimalist white-and-gray everything of the last decade. A large-scale floral mural is a bold statement that instantly adds a sense of history, romance, and drama to a room. It functions as both a wall covering and a massive piece of art, making it a powerful tool for transformation. This trend has staying power because it’s about creating an immersive, atmospheric environment, not just decorating a room.
🔥 Trending Context
A bold, dark mural like this works best in a medium to large room, typically 150 square feet or more, where it can be a focal point without overwhelming the space. It’s ideal for a living room wall behind a sofa or a bedroom wall behind a headboard. Crucially, the wall you choose should be a simple, solid rectangle. A wall broken up by lots of windows or doors will chop up the mural and ruin the grand, immersive effect. This idea requires a significant ‘canvas’ to truly shine. For smaller rooms, consider a similar but less overwhelming pattern, like the one in Idea #15.
24. DIY a Woven Trunk Coffee Table for Hidden Storage
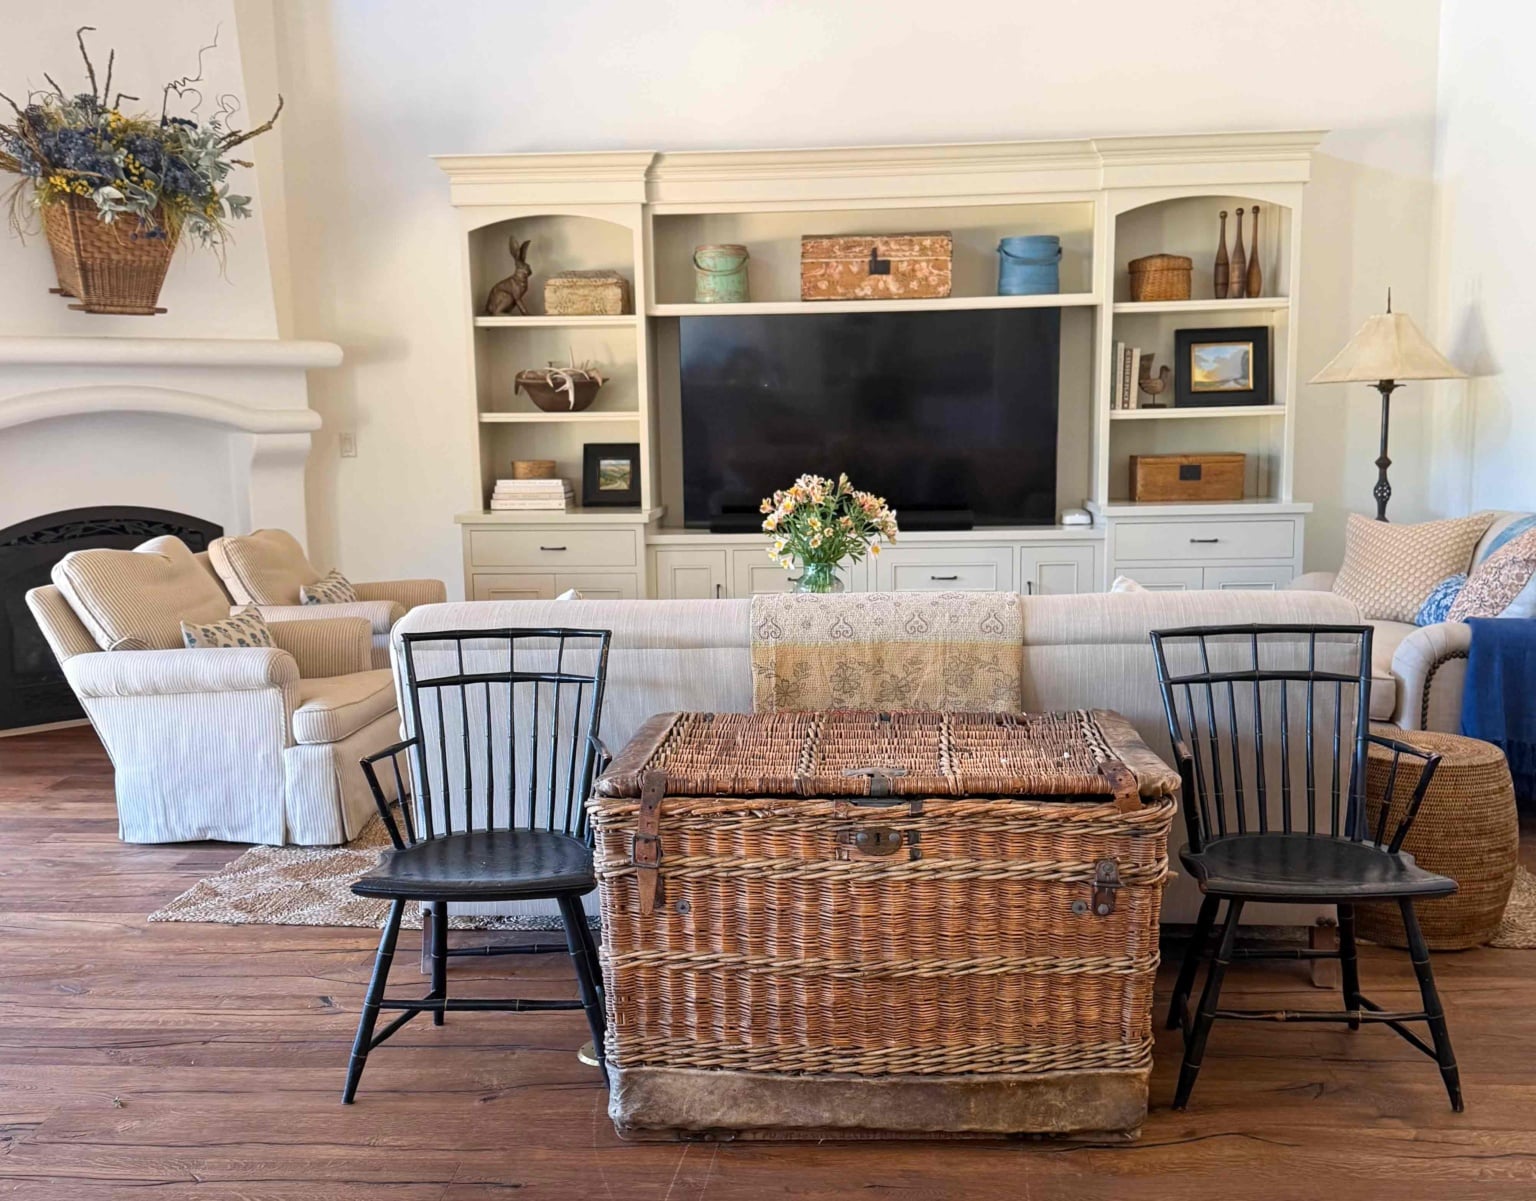
The single element that gives this cozy, traditional living room its character is the large woven trunk used as a coffee table. It’s the heart of the room. It provides a massive dose of natural texture that contrasts beautifully with the smooth, dark wood floors and the soft upholstery of the sofa. More than just a table, it hints at travel and history, adding a layer of storytelling to the space. And, of course, it’s a powerhouse of hidden storage for blankets, board games, or kids’ toys. Replace it with a standard wood or metal coffee table, and the room would instantly lose its rustic, inviting charm.
🧹 Maintenance Reality
Large woven trunks can be surprisingly expensive when purchased new from retailers like Pottery Barn or Crate & Barrel. The secret to getting this look for less is to go vintage. Scour thrift stores, flea markets, and especially Facebook Marketplace. People are often getting rid of old, sturdy wicker or rattan trunks for $25-$75. They might be a dated color or a bit worn, but that adds to the charm! A good cleaning is often all they need. This approach not only saves you hundreds of dollars but also gets you a unique piece with more authentic character than a brand new one.
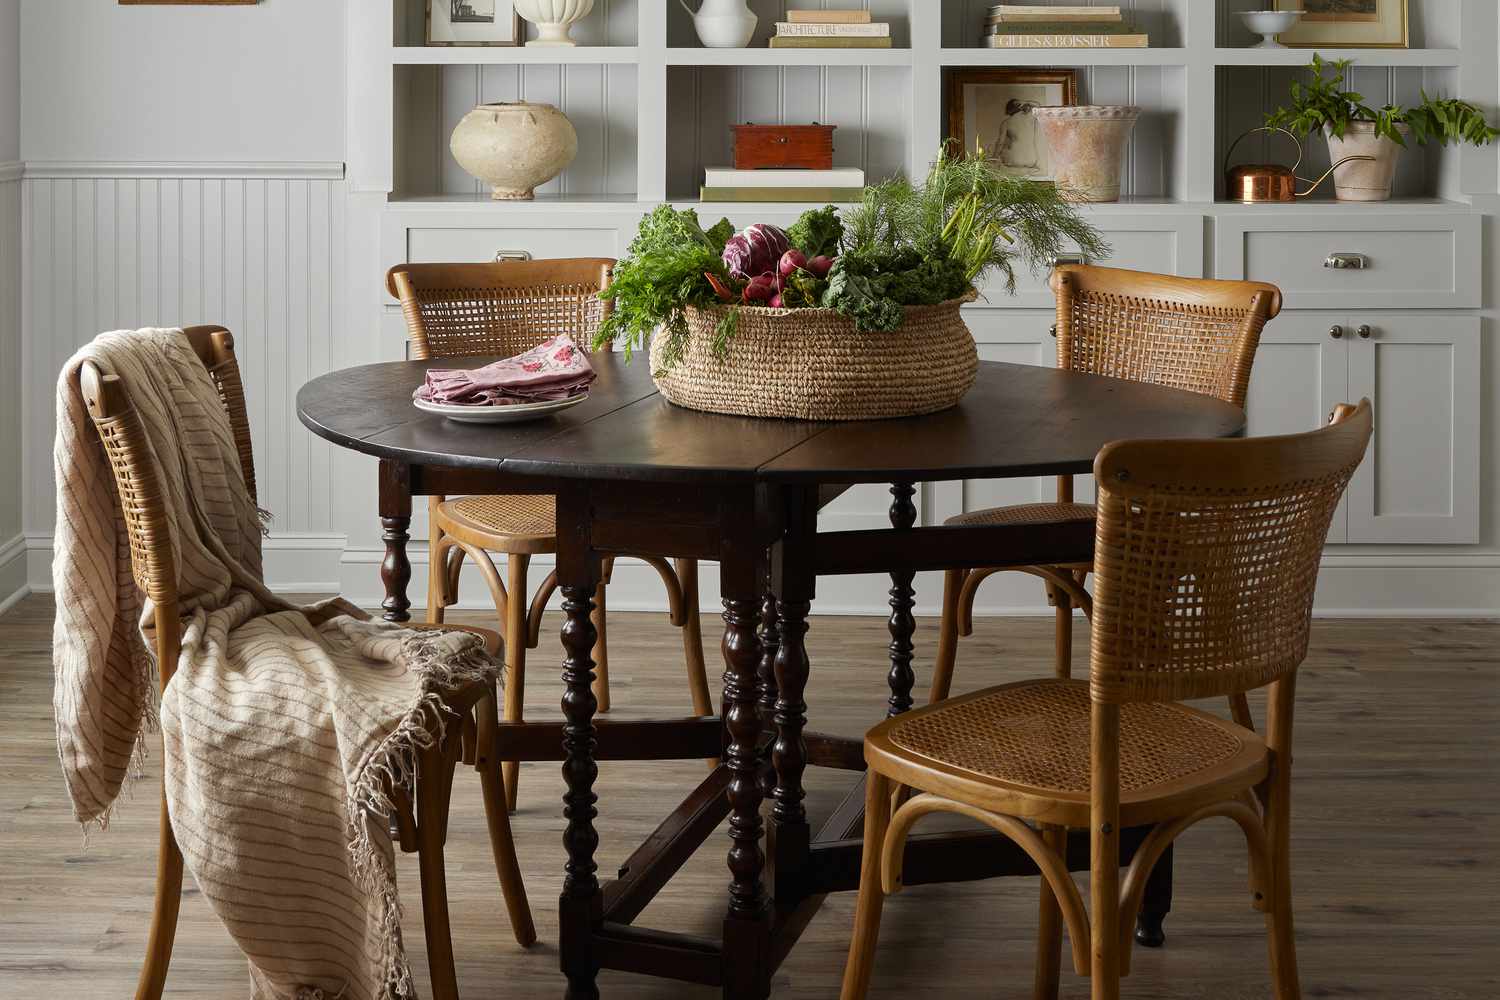
25. Build a Farmhouse Dining Shelving Unit
This light gray built-in shelving adds incredible charm and storage. You can create a similar custom look using stock cabinetry and lumber for a high-impact DIY project.
⭐ The One Thing
- Time Estimate: 2-3 days. Material cost: $400 – $800.
- Install Base Cabinets: Start with unfinished stock kitchen base cabinets from a home improvement store. Secure them to the wall studs.
- Build the Top: Construct a simple countertop from sanded plywood or edge-glued pine boards to sit on top of the base cabinets.
- Add Vertical Supports: Build the open shelving ‘towers’ on either side using 1×12 boards, screwing them into the countertop and the wall studs.
- Add Shelves & Backing: Cut your shelves from 1×12 boards and install them using shelf pins or fixed supports. For the paneled look, add beadboard paneling to the back wall before installing the shelves.
- Prime and Paint: Caulk all the seams, then prime and paint everything in one uniform color to create that seamless, built-in look. For a similar rustic vibe, compare with the trunk coffee table in Idea #23.
The reason this dining nook feels so inviting and thoughtfully designed is the principle of ‘contrast in proximity.’ The dark, traditional drop-leaf table is placed directly against the light, airy, and more modern form of the gray built-in unit. This contrast makes both elements stand out more. The dark table feels richer and more historic next to the pale gray, while the built-in feels cleaner and brighter next to the dark wood. The cane-back chairs act as a perfect bridge, combining light wood tones and a texture that complements both the rustic table and the clean lines of the shelving.
26. Add a Woven Pendant Light for Instant Warmth
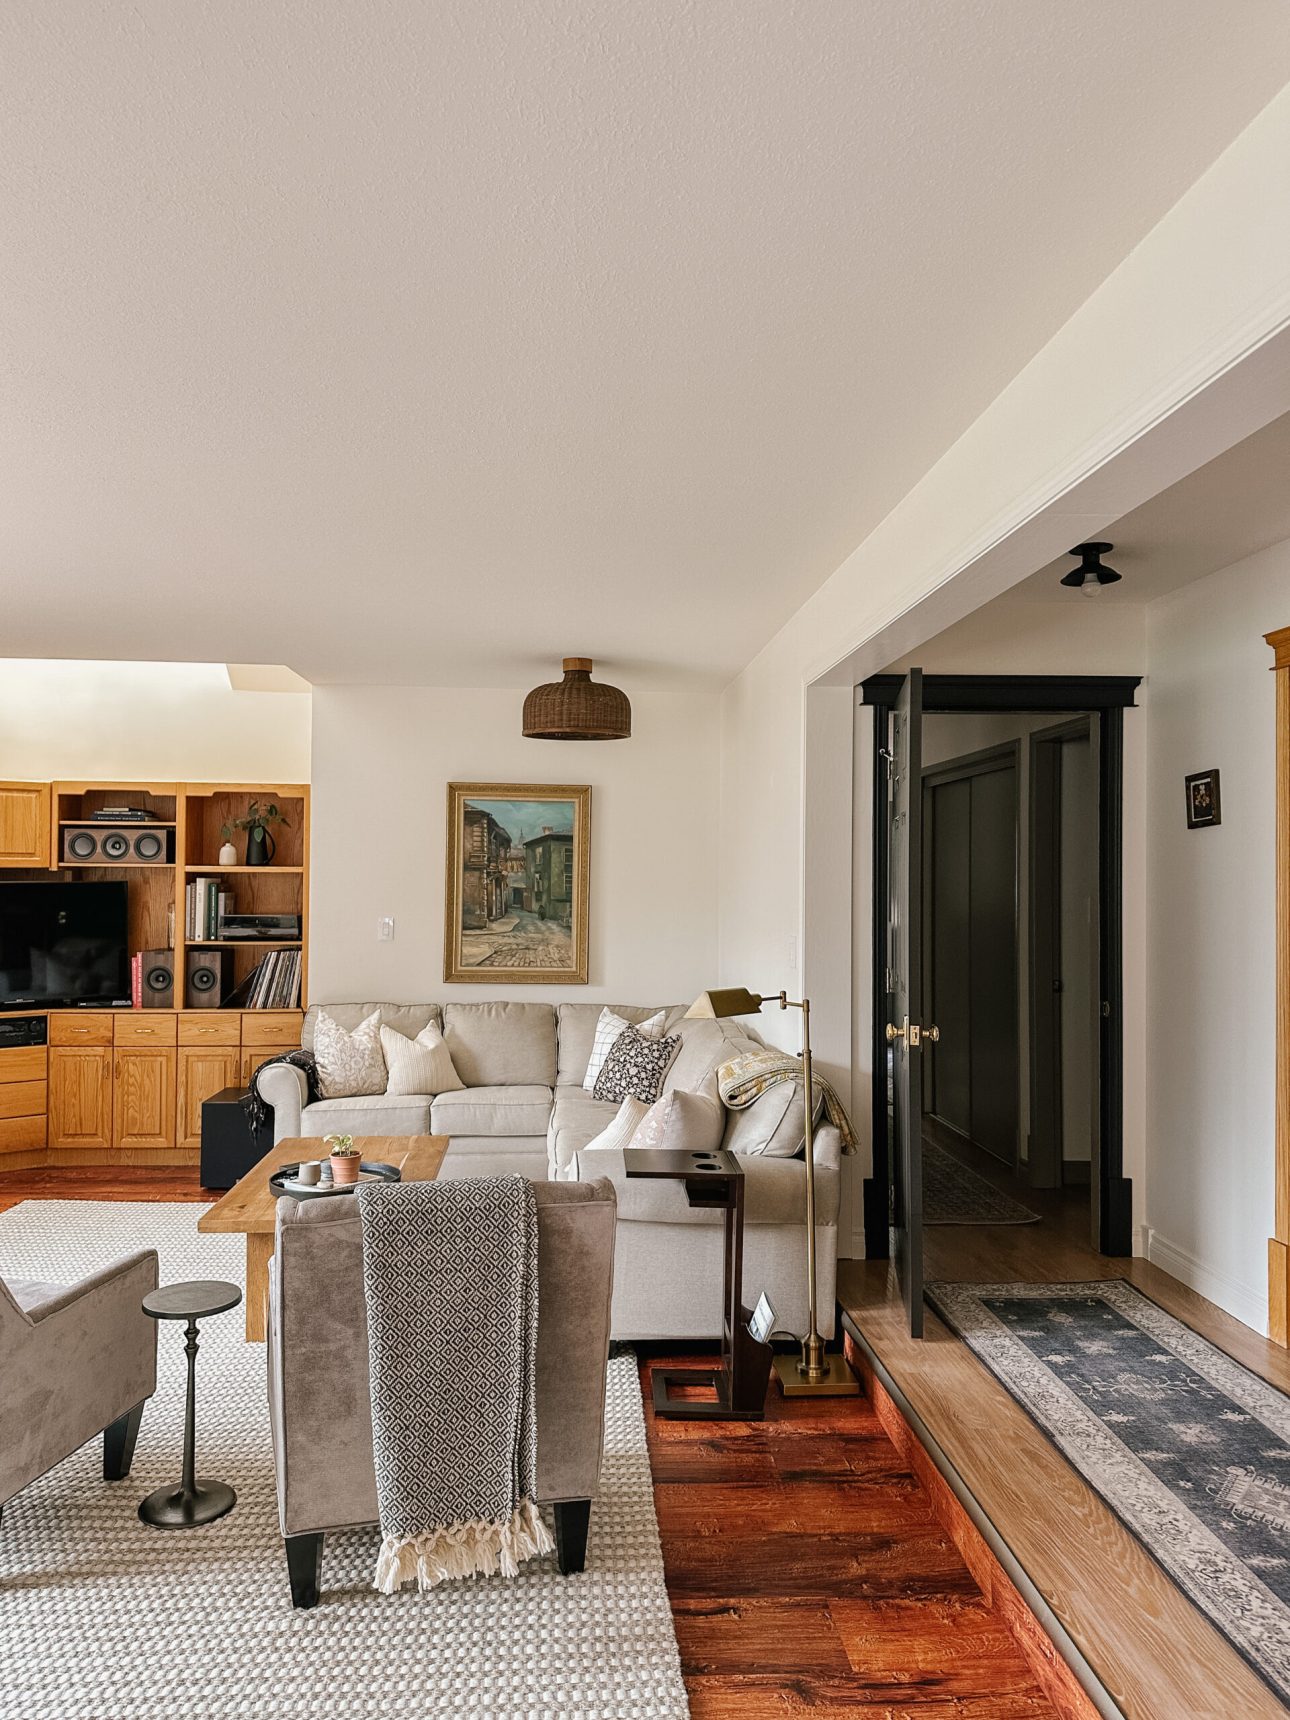
This cozy living room perfectly demonstrates a formula for creating a warm, traditional, and inviting space. The math is simple: 50% Neutral Upholstery (the large beige sectional) + 40% Rich Wood Tones (the floor and media cabinet) + 10% Natural Texture (the woven pendant light and rug). The large, light-colored sofa prevents the rich wood tones from making the room feel too dark or heavy. The wood provides the essential warmth and traditional feel. But it’s the 10% of intense natural texture from the woven light fixture that acts as the ‘special ingredient,’ adding a touch of rustic, handcrafted charm that makes the entire room feel complete.
💸 Get This Look For Less
When hanging a statement pendant light like this woven one over a general seating area (not over a table), the height is crucial. A common mistake is to hang it too high, causing it to get lost near the ceiling. A good rule of thumb is to ensure the bottom of the pendant is at least 7 feet (84 inches) from the floor. This allows for comfortable clearance for even tall guests to walk underneath without feeling like they need to duck. If your ceiling is lower than 8 feet, a pendant light might not be the best choice; consider a flush-mount fixture with similar texture instead.
27. Upcycle a Rustic Coffee Table with a Distressed Finish
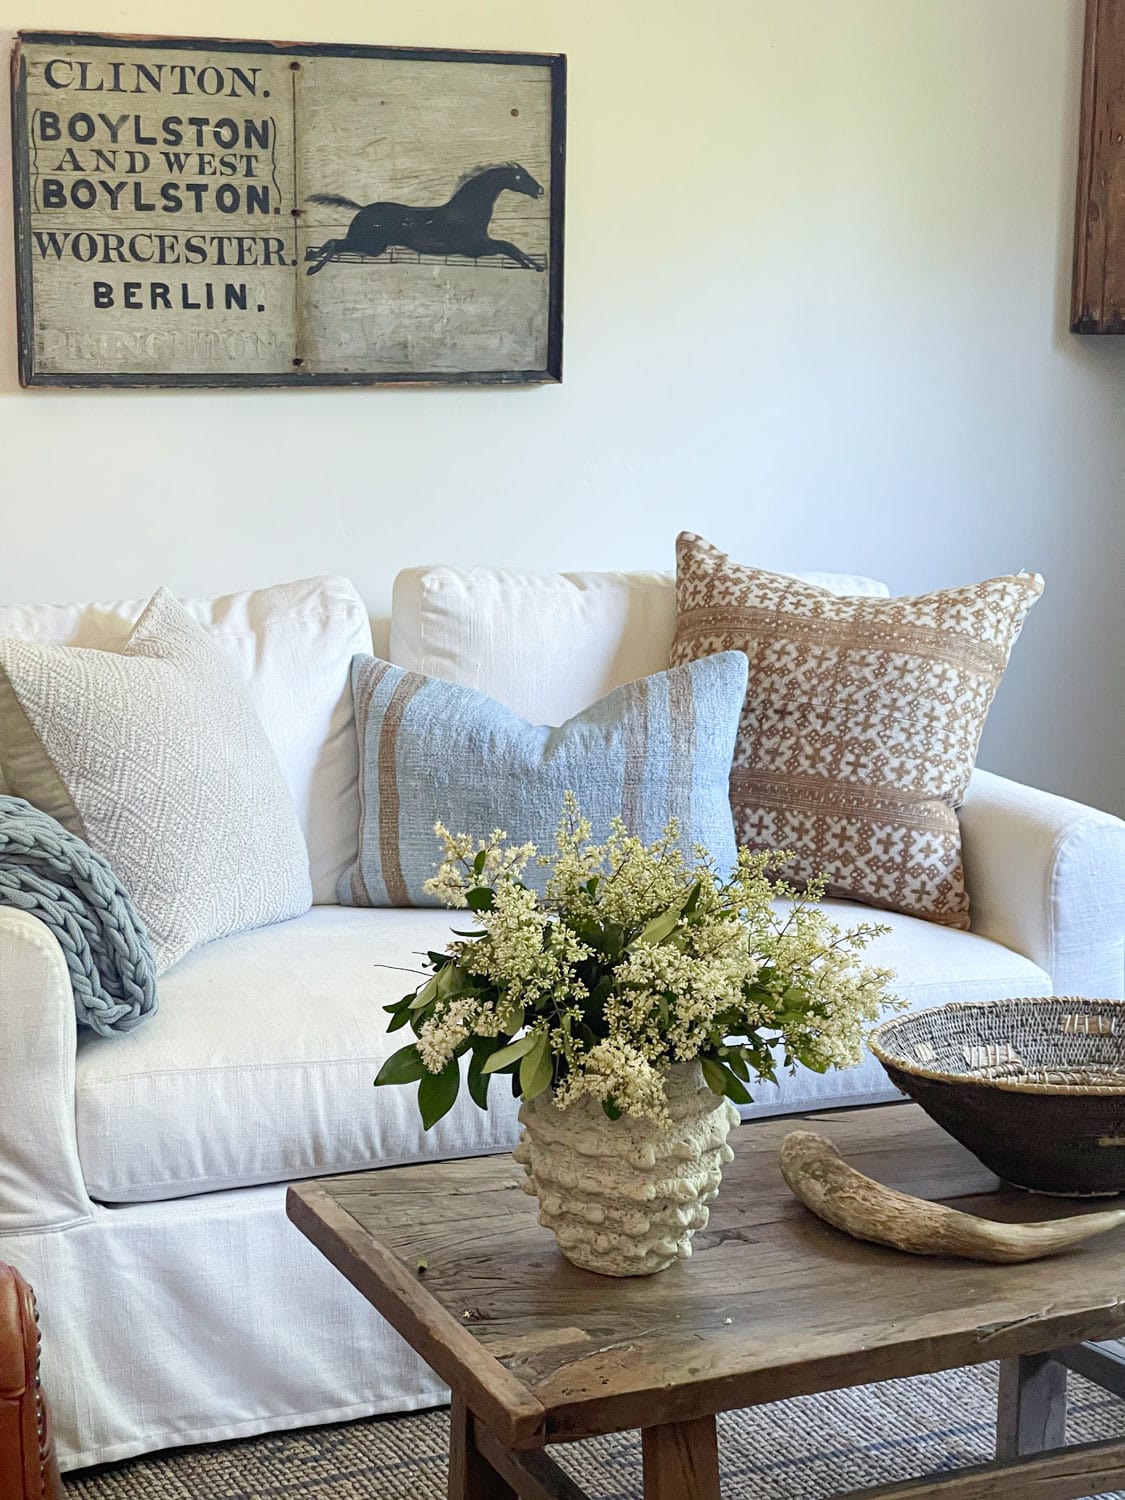
That perfectly rustic, ‘found-in-a-barn’ coffee table look is gorgeous, but a real antique can be wobbly, uneven, and impractical for everyday life. Drinks can spill easily on a rough surface, and splinters can be a real issue for little hands. If you’re DIY-ing this look on a new piece of wood, be aware that the distressing process (using chains, hammers, etc.) can be unpredictable. It’s easy to overdo it and go from ‘charming rustic’ to ‘badly damaged.’ Practice on a scrap piece of wood first to get a feel for the techniques before you apply them to your main project.
💡 Designer Tip
Instead of trying to find or build a solid wood rustic table, you can achieve a very similar aesthetic for far less money and effort. Find a basic, sturdy coffee table with clean lines from a thrift store or IKEA for under $30. Then, head to a home improvement store and buy a few lengths of inexpensive, rough-sawn cedar or pine fence pickets. Cut these pickets to size and clad the top and sides of the cheap table, affixing them with wood glue and small brad nails. You get the authentic rustic texture and appearance of the raw wood, but with the stable, functional structure of the underlying table. Now compare this rustic look to the more modern sofa in Idea #9.
28. DIY a Colorful Tribal Rug with Tassels
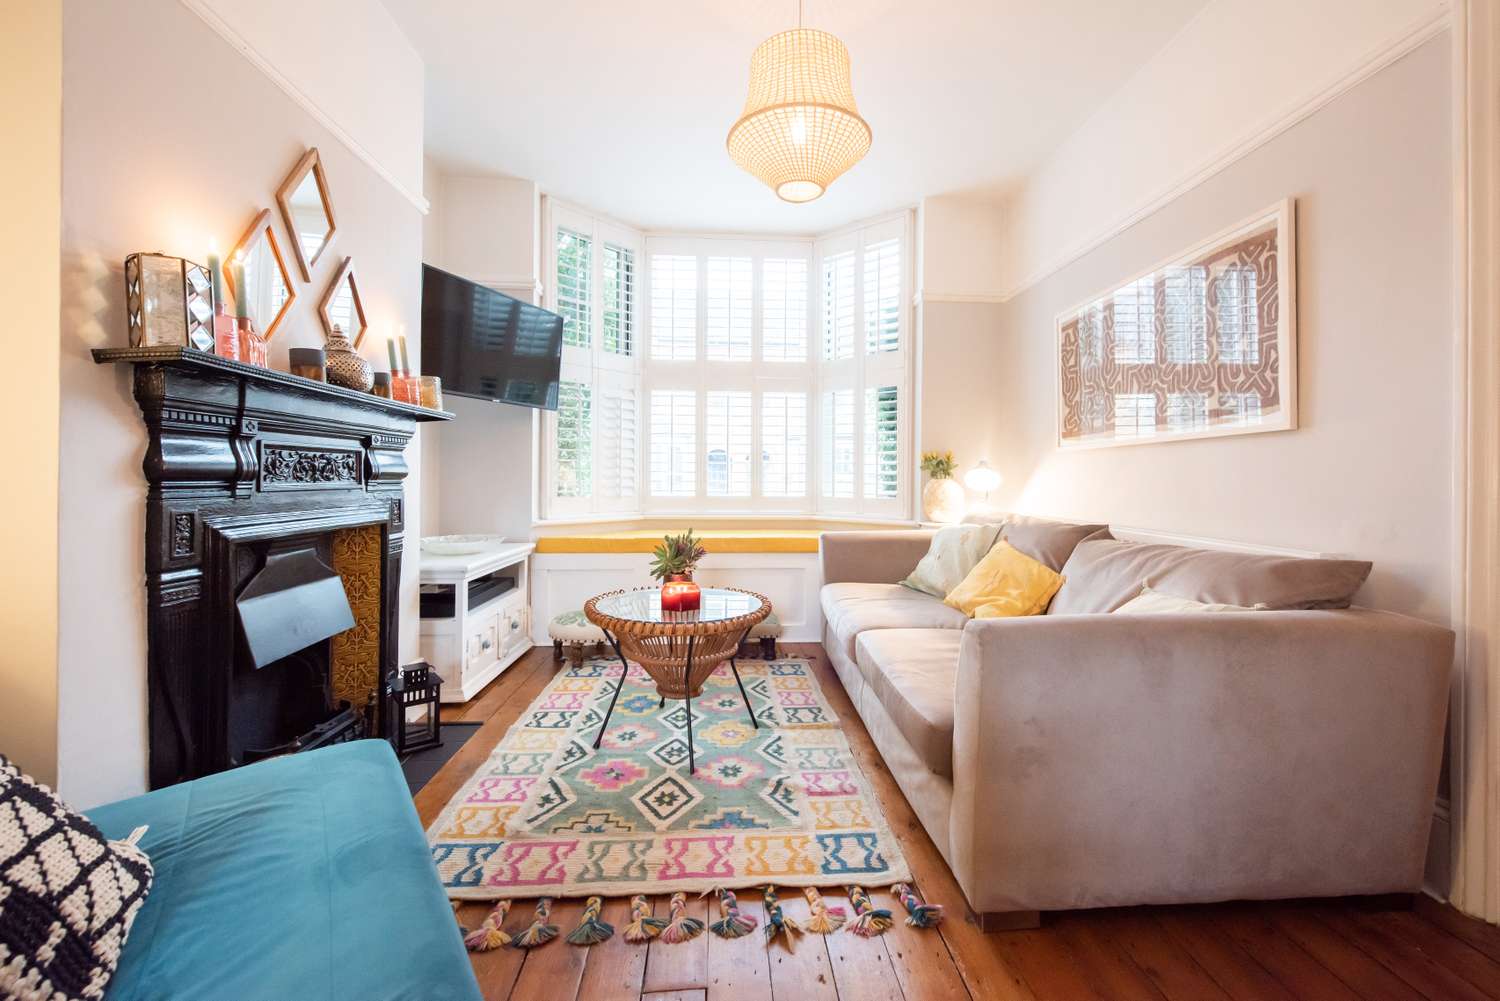
A large, colorful rug like this one is perfect for defining a seating area in an open-concept living space or a large room (200 sq. feet or more). For the rug to properly anchor the furniture, as it does here, it needs to be large enough for at least the front legs of the sofa and any accent chairs to rest comfortably on it. A common size for this arrangement is an 8×10 or 9×12 foot rug. In this room, the bay window provides extra square footage, making the large rug feel perfectly proportioned. In a smaller room, a rug this bold and large could easily overwhelm the space and make it feel cluttered.
🔧 How-To Brief
While the bay window is lovely and the black fireplace adds drama, the one thing that truly gives this living room its unique personality is the colorful, tribal-patterned rug. It is the undeniable heart of the space. It injects energy, pattern, and a vibrant color palette into an otherwise neutral room. The hints of yellow in the rug are cleverly picked up by the cushion in the bay window, creating a smart, cohesive design moment. If you were to replace it with a plain jute or beige rug, the room would still be nice, but its eclectic, joyful, and inviting spirit would be completely gone.
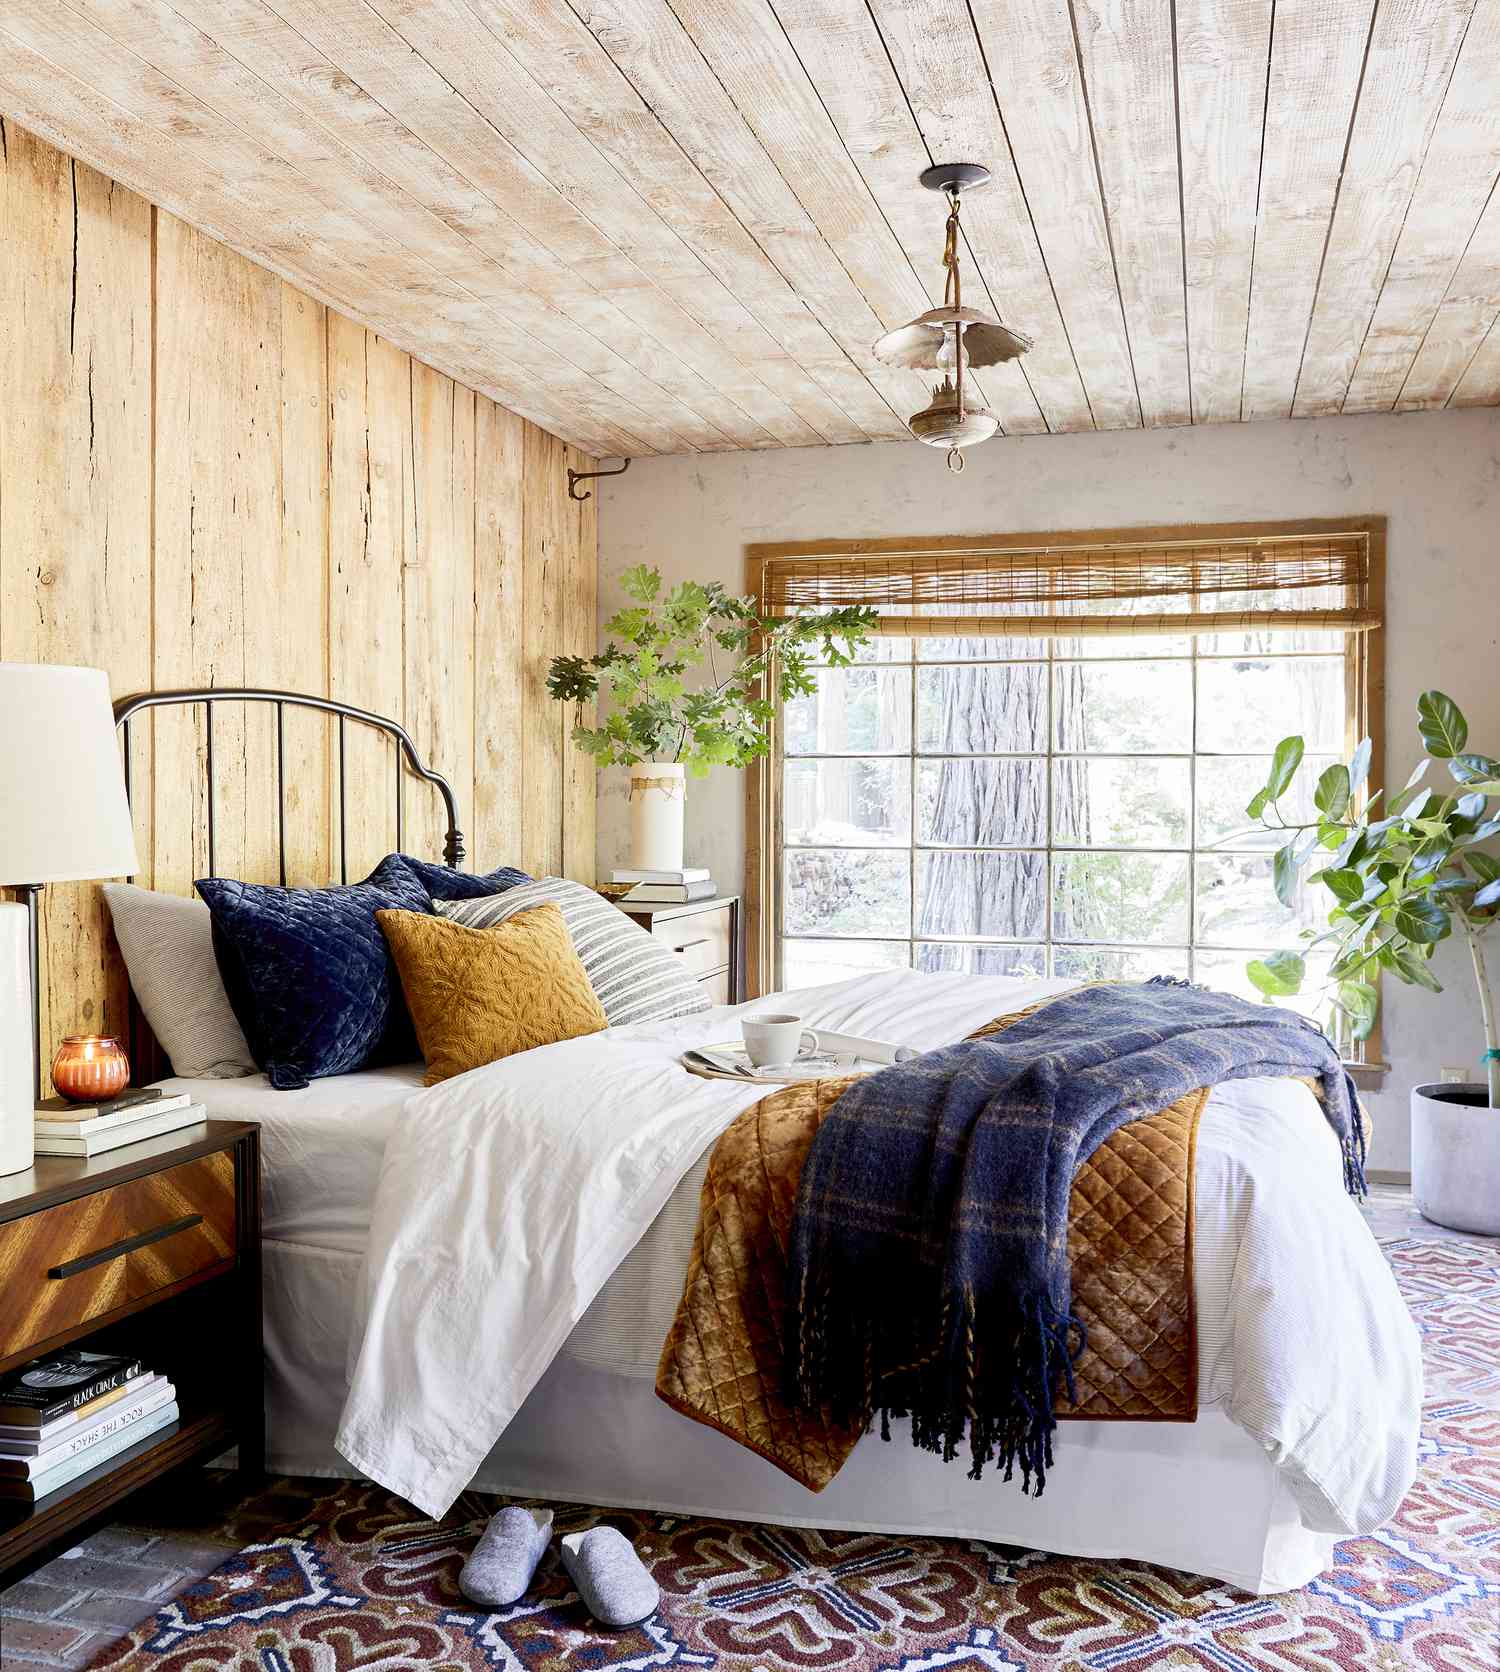
29. Install a Raw Wood Plank Accent Wall
An accent wall made from raw, unfinished wood planks, like the one in this cozy bedroom, is a stunning textural feature. However, ‘raw’ wood is a magnet for dust and cobwebs. The rough surfaces and crevices are much harder to clean than a smooth, painted wall. You’ll need to vacuum the wall with a brush attachment every few weeks to keep it from looking dusty and dull. Also, be aware that unfinished light-colored wood like pine will naturally yellow or ‘amber’ over time as it’s exposed to light. While some people like this aged patina, it’s something to be prepared for. Applying a matte, non-yellowing polyurethane sealer can help protect it, but will slightly alter the raw look.
⚠️ Real Talk
For a DIY wood plank wall, the secret to a high-end look is to vary the plank widths and stagger the seams randomly. Don’t use boards that are all the same width, and don’t let the vertical seams line up, creating a repetitive ‘H’ pattern. For example, use a mix of 1×4, 1×6, and 1×8 boards. When you’re installing them, make sure the end of a board on one row is nowhere near the end of a board in the rows directly above or below it. This randomness is what makes the final wall look like an authentic, custom-built feature rather than a uniform, manufactured panel.
Your Home’s Next Chapter is Handmade
The most beautiful, memorable homes are the ones that tell a story about the people who live there. These projects are your chance to write your own chapter, one brush stroke or perfectly placed shelf at a time. The best part isn’t just the finished product, but the pride that comes from saying, “I made that.” Pick one idea that speaks to you and begin. Don’t forget to save your favorite ideas and share your own DIY masterpiece on Pinterest!