You know that feeling? You’ve scrolled through a hundred Halloween party photos, but nothing feels quite right—it’s either too cheesy, too complicated, or just… not you. We get it. That’s why we’ve done the work, filtering through hundreds of real homes to find what actually works in 2026. This isn’t about generic ideas; it’s a curated gallery of 29 specific, achievable looks for every style, from playfully spooky to dramatically gothic.
We’ve broken down how to get these exact vibes, whether you’re working with a shoestring budget or ready to go all out. And stay until the end—we’ll show you the three most common decorating mistakes that can subtly ruin your party’s atmosphere. 📌 Pin this guide for later; your future self will thank you when it’s time to decorate.
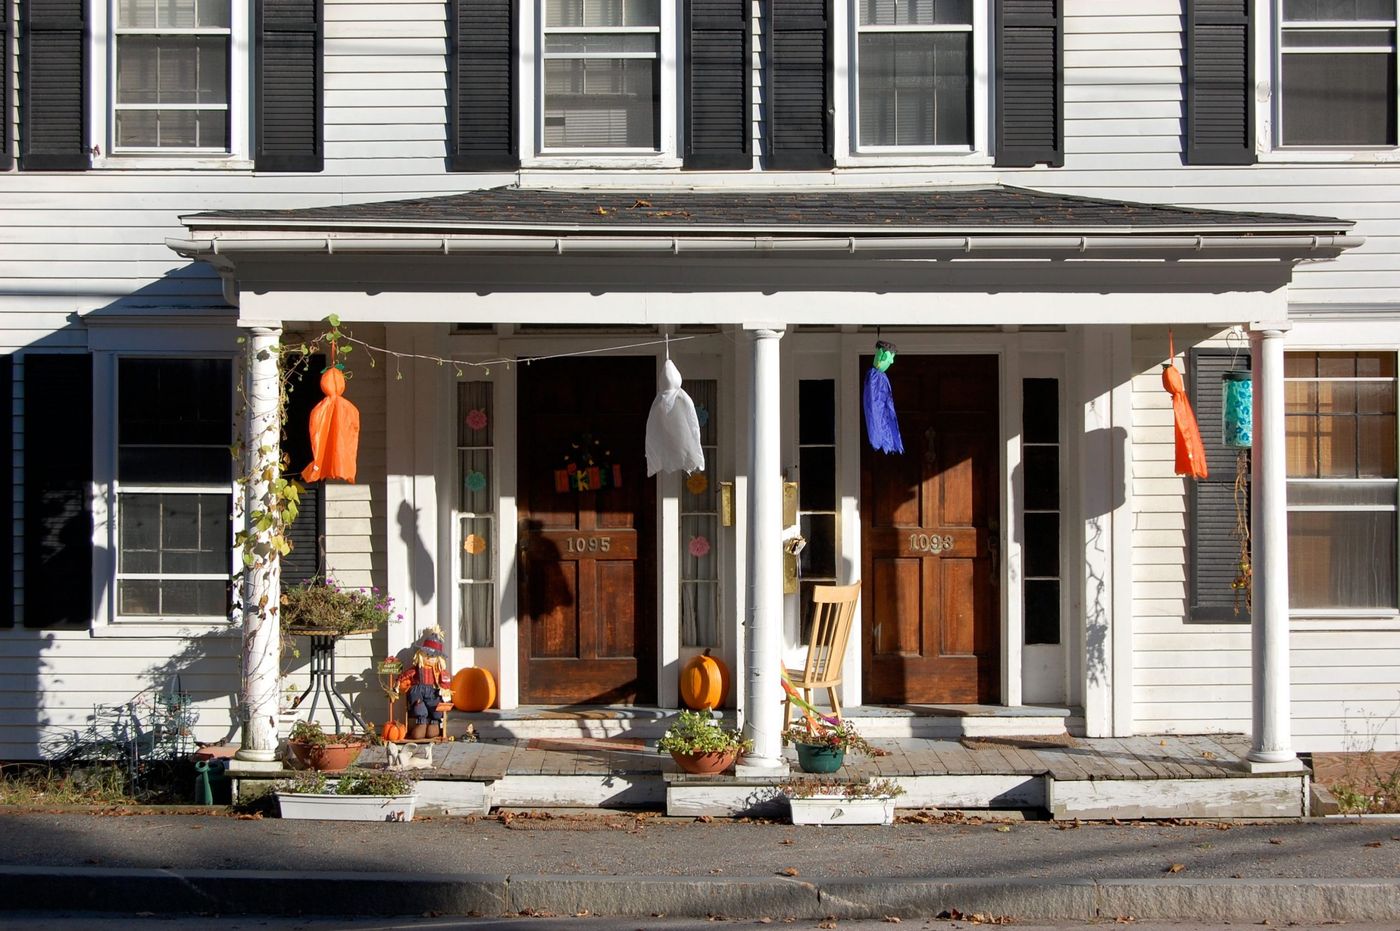
1. A Classic Colonial Porch with Hanging Ghosts and Pumpkins
This traditional setup wins because of its perfect symmetry. The twin wooden doors create a powerful focal point, and the decorations mirror each other on both sides, which is incredibly pleasing to the eye. The white colonial architecture provides a clean, bright canvas that makes the orange pumpkins and hanging ghosts pop without feeling overwhelming. It’s a lesson in restraint: the charm comes from balancing just a few classic elements—pumpkins, ghosts, and greenery—rather than piling on every decoration imaginable.
✅ Before You Start
When hanging lightweight decor like these fabric ghosts, the secret is varying the heights. Don’t hang them all in a straight, boring line. Use clear fishing line and attach them to your porch ceiling or light fixtures at slightly different lengths—some at 12 inches down, others at 18 or 24 inches. This creates a more dynamic, ‘floating’ effect that looks effortless and magical, especially when a little breeze brings them to life. Aim for an odd number of ghosts for a more natural-looking cluster.
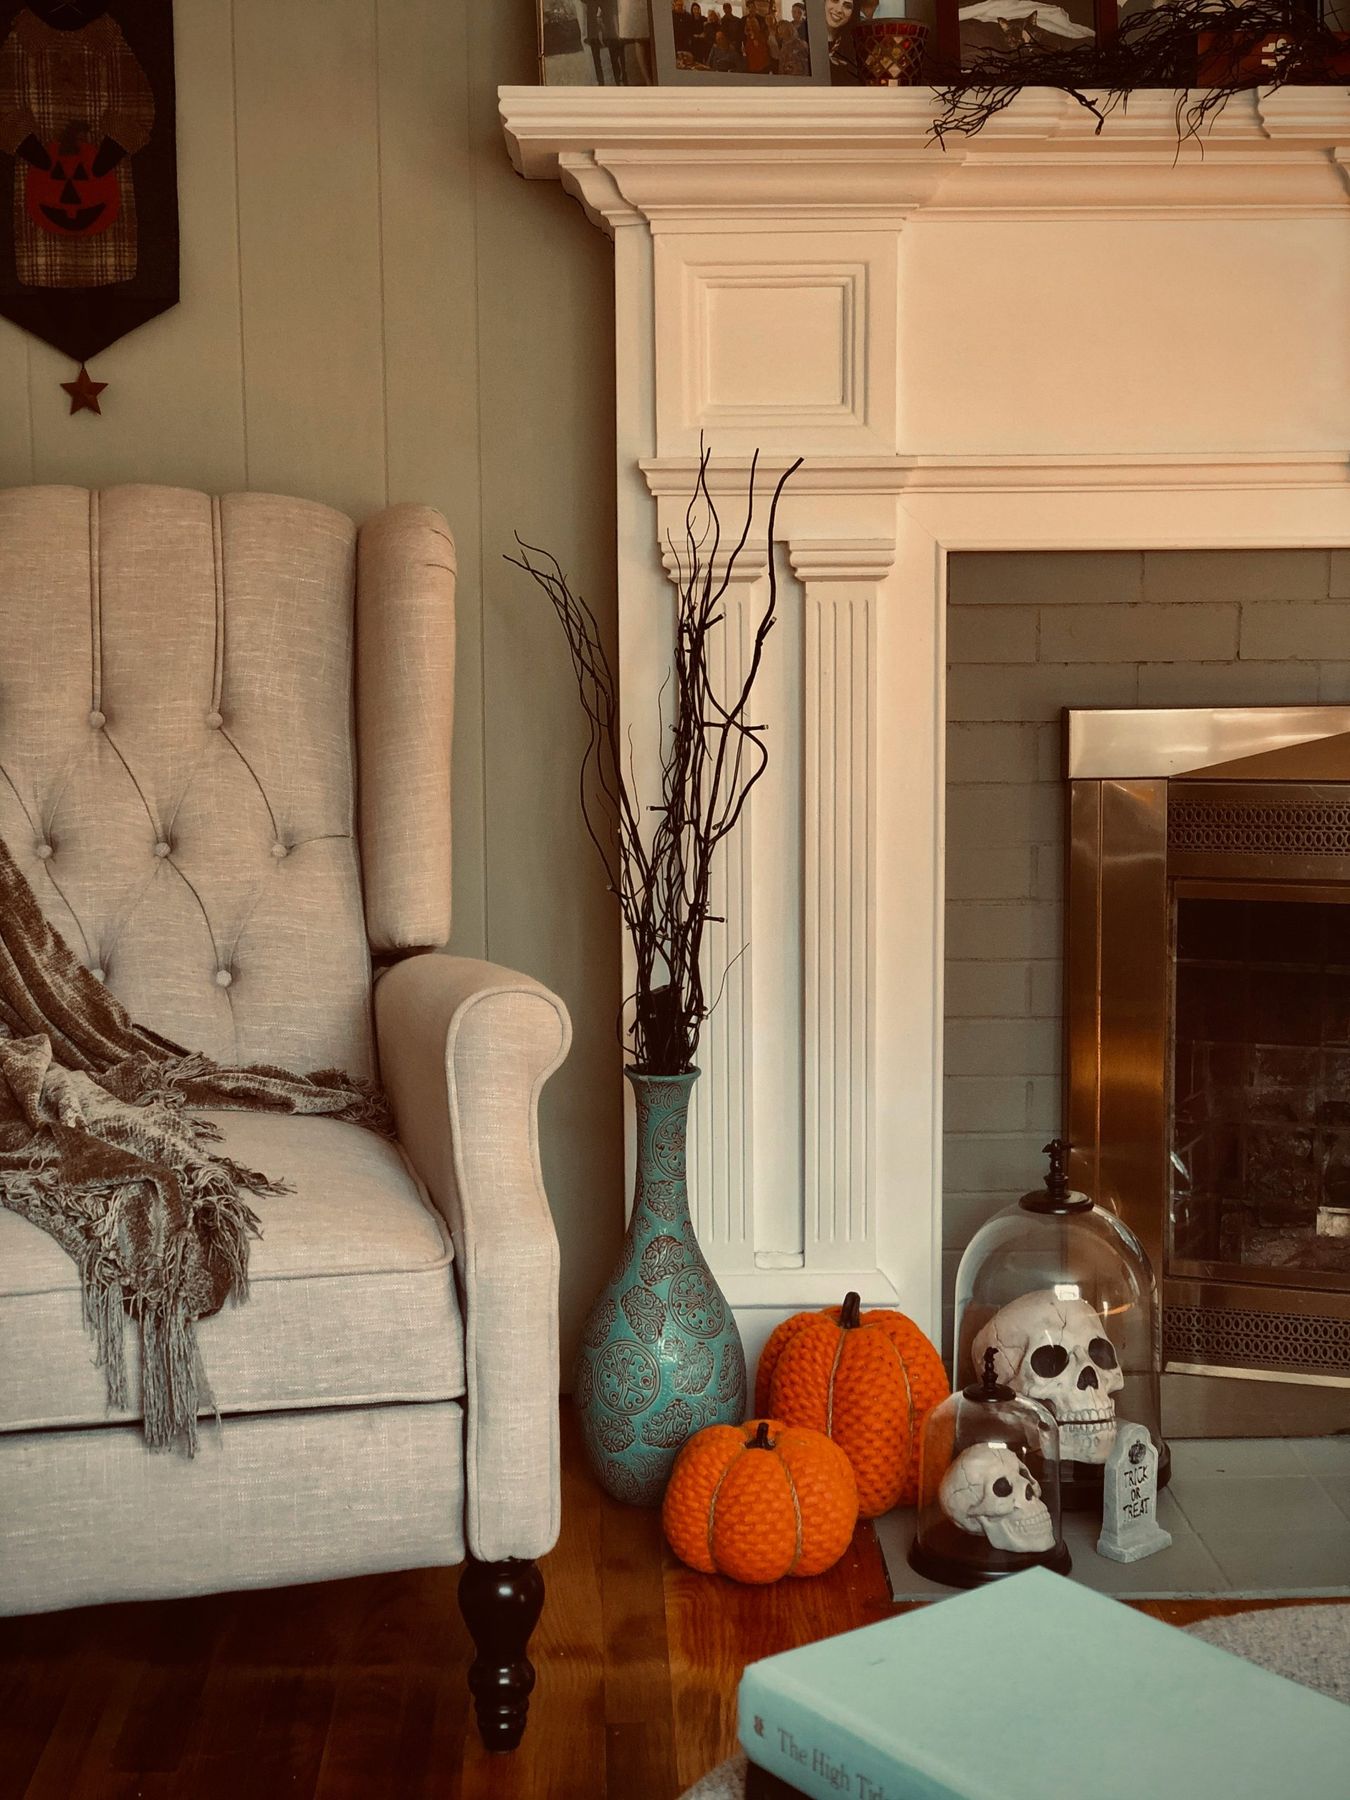
2. A Cozy Living Room with Subtle, Textural Halloween Decor
This look is all about a sophisticated formula: 70% existing cozy decor + 20% textural Halloween elements + 10% macabre accents. The base is the warm, neutral room with its tufted wingback chair and creamy whites. The Halloween layer comes from touchable pieces like the crochet pumpkins. Finally, the skulls under glass cloches add a tiny, controlled dose of ‘spooky’ that feels more like a curiosity cabinet than a haunted house. You could swap the olive and cream for gray and navy and still get the same refined effect.
💰 Budget Breakdown
It’s the crochet-texture pumpkins. Seriously. If you took them away and just had the skulls and branches, the look would be cold and a little severe. These soft, handmade-feeling objects bring an essential layer of warmth and coziness. They bridge the gap between everyday decor and seasonal fun, making the entire fireplace arrangement feel intentional and inviting, not just like you dropped a bunch of Halloween props on the mantel. It’s texture that makes the spookiness feel right at home.
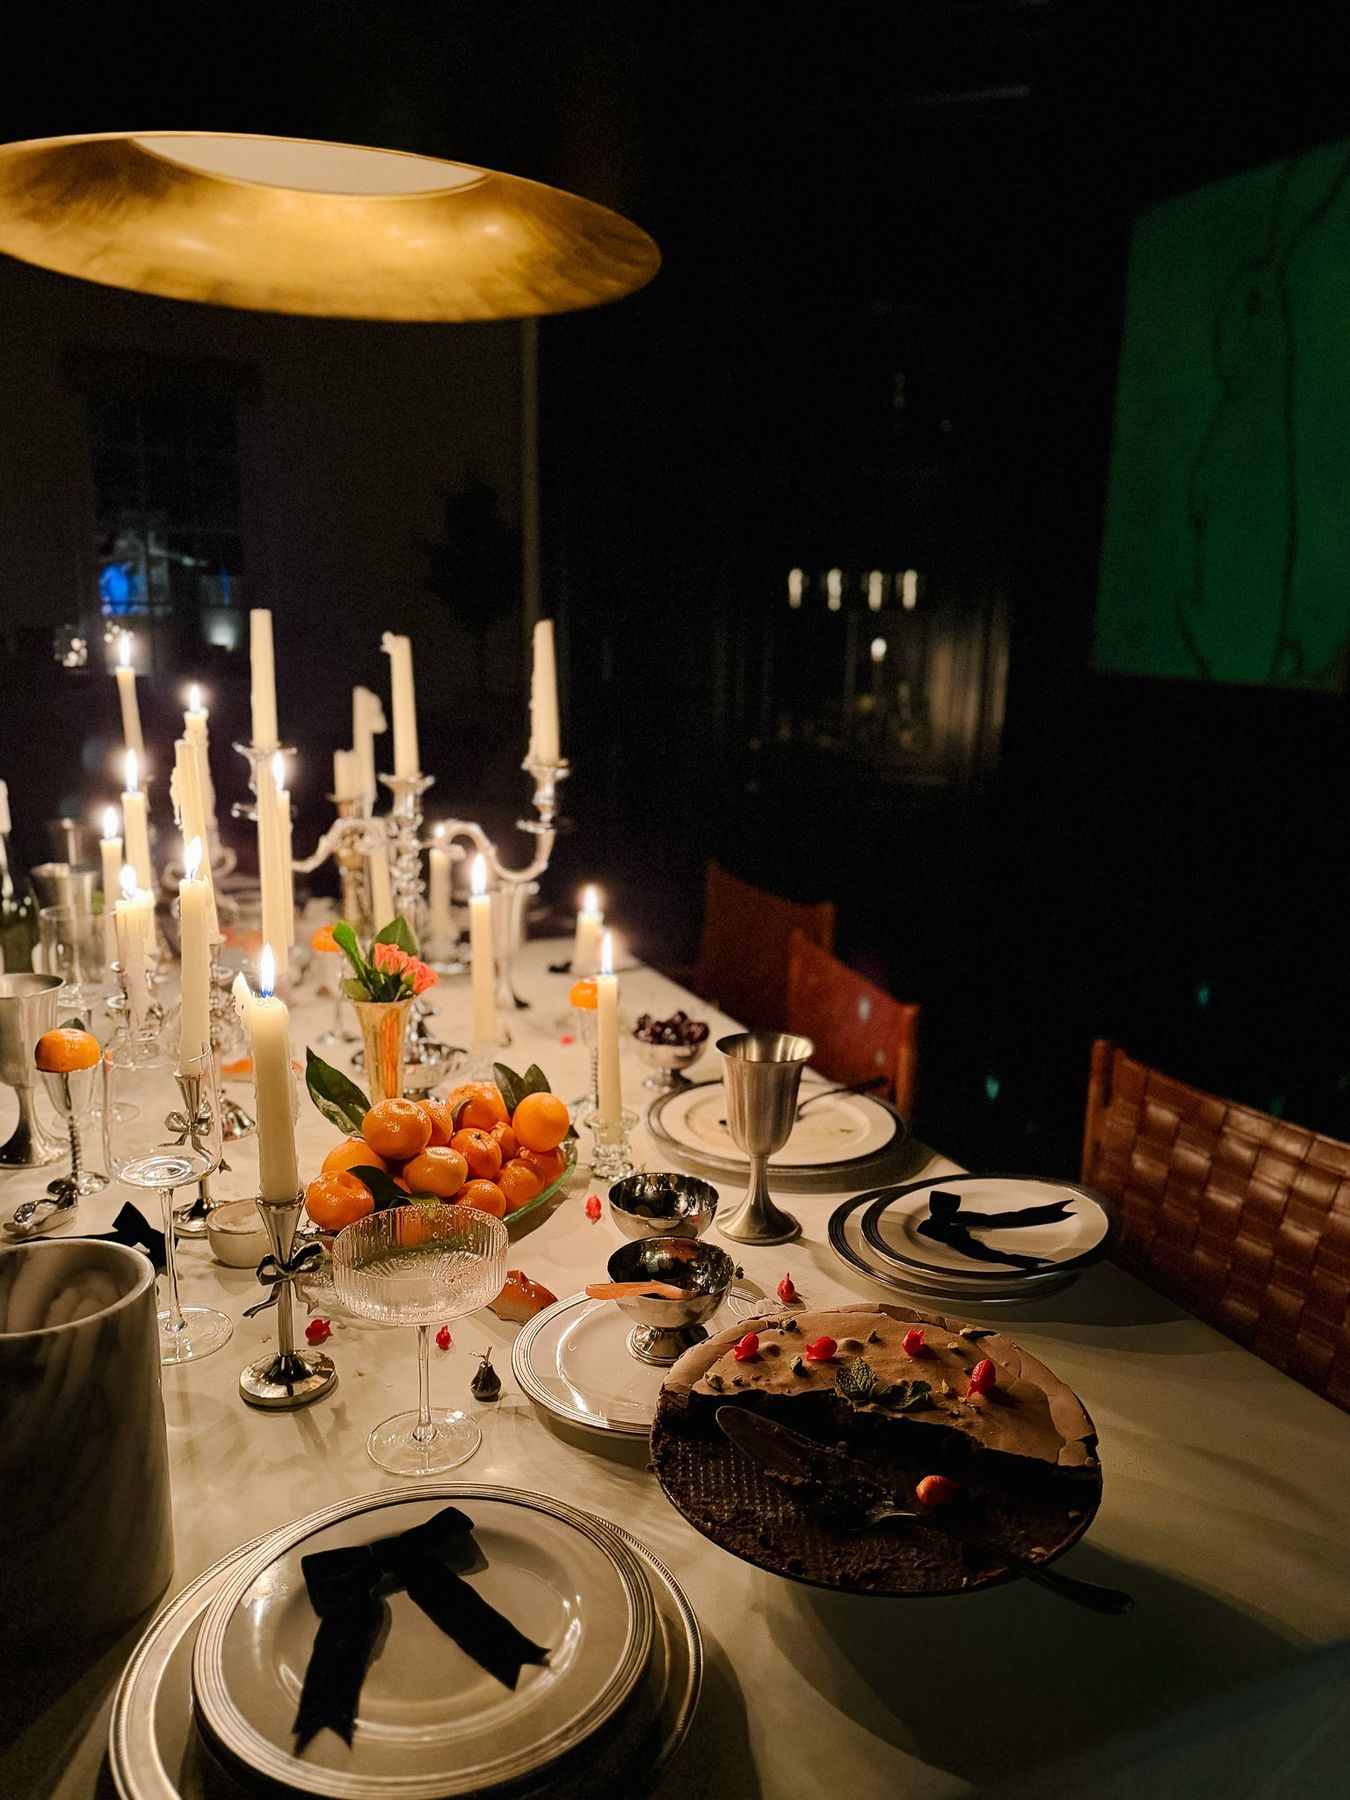
3. A Moody, Candlelit Table with Silver and Citrus
- Silver Candelabras (2): $150 – $400
- White Taper Candles (1 dozen): $20 – $40
- Dinnerware & Goblets: $300 – $800
- Black Velvet Ribbon & Oranges: $30 – $50
- Pendant Light Fixture: $400 – $1,200
- TOTAL: $900 – $2,490
🎯 What Makes It Work
Budget alternative: Source mismatched silver-plate candelabras and goblets from thrift stores or Facebook Marketplace. Use high-quality dripless candles from a restaurant supply store. The total look can be achieved for around $250 – $400, especially if you use your existing dinnerware.
Let’s be honest: a scene this gorgeous with this many open flames is a beautiful fire hazard. Taper candles can drip wax onto your table, linens, and even your food. More importantly, if you have flowing sleeves, animated guests who talk with their hands, or any paper decorations nearby, the risk is real. Never leave a candlelit table unattended, even for a moment. For a lower-stress version, invest in high-quality, warm-toned flickering LED taper candles. You get all the ambiance with zero of the anxiety.
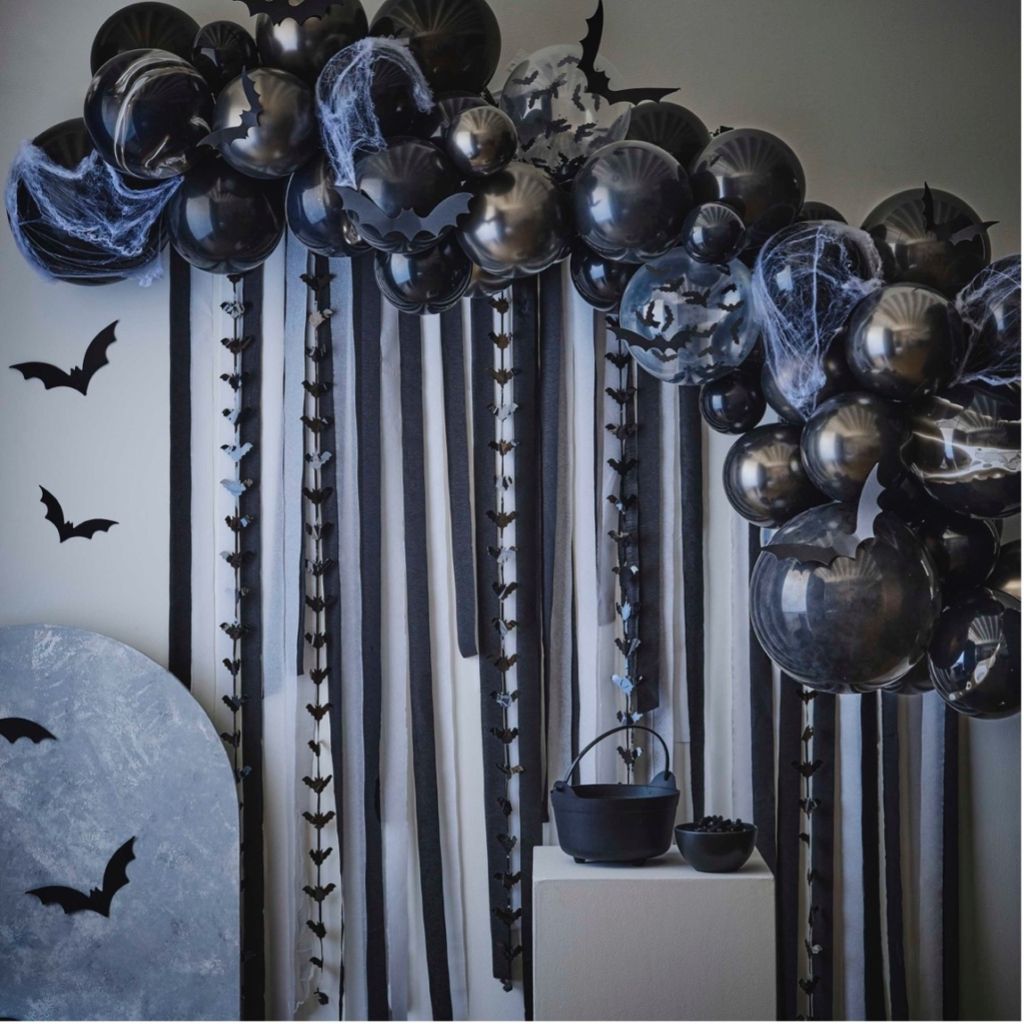
4. A Graphic Black-and-White Bat-Themed Backdrop
You can create that high-impact streamer wall in under an hour for less than $20. Here’s how:
📐 Style Math
- Purchase rolls of party streamers in black and white. You’ll need about 2-3 rolls of each color for a 6-foot-wide section.
- Measure the height of your wall and cut the streamers about 6 inches longer.
- Starting from one side, attach the end of a streamer to the wall near the ceiling with painter’s tape (it won’t damage your paint). Let it hang straight down.
- Attach the next streamer of the alternating color right beside it, with no gap.
- Continue this pattern across the wall until your backdrop is the desired width.
- Once all streamers are up, use scissors to trim the bottoms in a clean, straight line just above the floor.
That balloon arch is a showstopper, but it can get pricey if you hire a professional. You can get 90% of this vibe for about $50. Buy a balloon arch kit from Amazon or a party store in black and silver. The key is to under-inflate some balloons and over-inflate others to get that varied, organic look. Skip the minimalist plinth and use a simple black-painted stool or small table you already own. A can of spray paint and a cheap plastic cauldron from Target will complete the look for pennies.
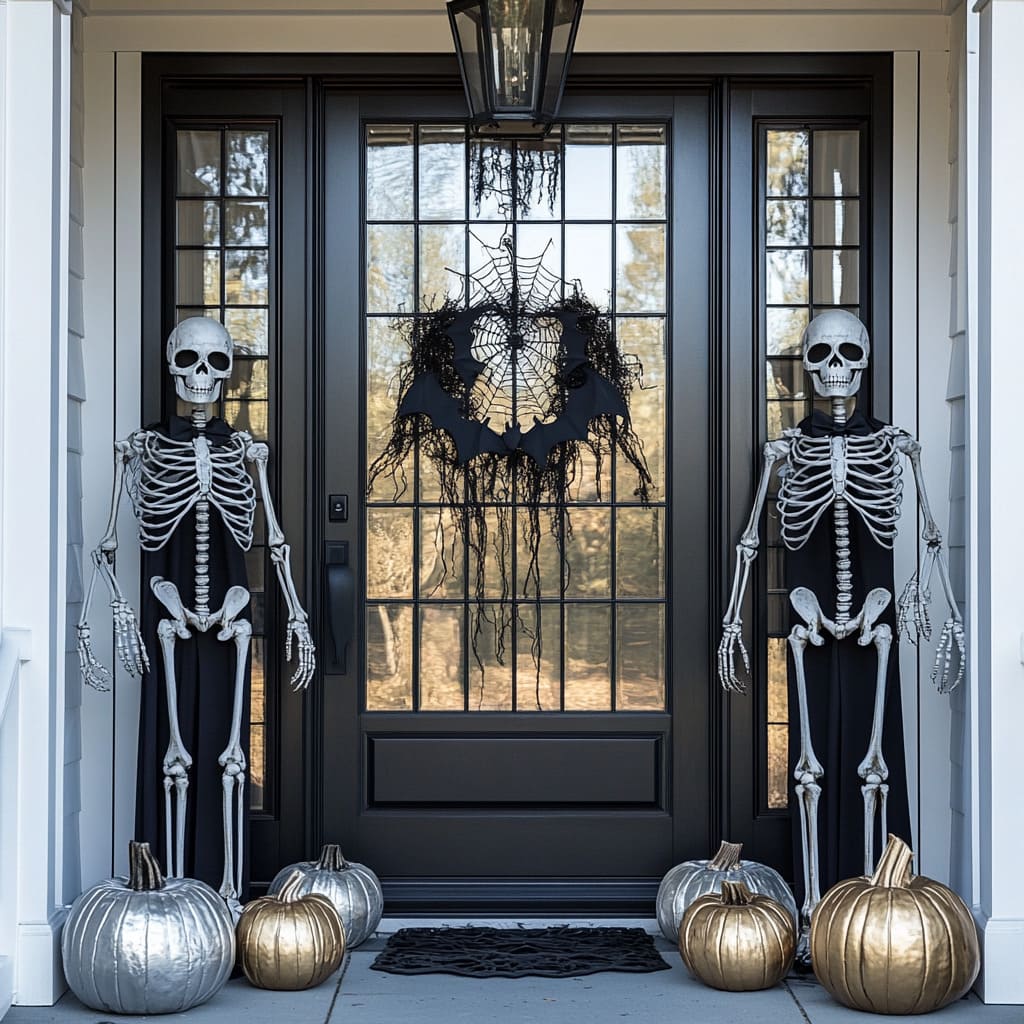
5. A Symmetrical Skeleton Entryway with Metallic Pumpkins
This idea is perfect for a home with a symmetrical entryway and a covered porch that’s at least 8 feet wide and 5 feet deep. You need enough space for the two full-sized skeletons to stand without blocking the walkway, plus room for the pumpkins at their feet. A standard 36-inch front door works perfectly as the centerpiece. This look would feel cramped and awkward on a smaller porch or with an off-center door. For a tighter space, consider the more classic approach of Idea #0, which uses smaller decorative elements.
💡 Designer Tip
This design is pure drama, and it works because of two classic principles: symmetry and repetition. Flanking the door with two identical skeletons creates an immediate sense of formality and grandeur, like royal guards. This symmetry makes the whole scene feel intentional and designed, not just decorated. The repetition of the metallic finish on both the gold and silver pumpkins ties the different elements together, creating a cohesive and polished palette against the matte black door. It’s a powerful, confident statement.
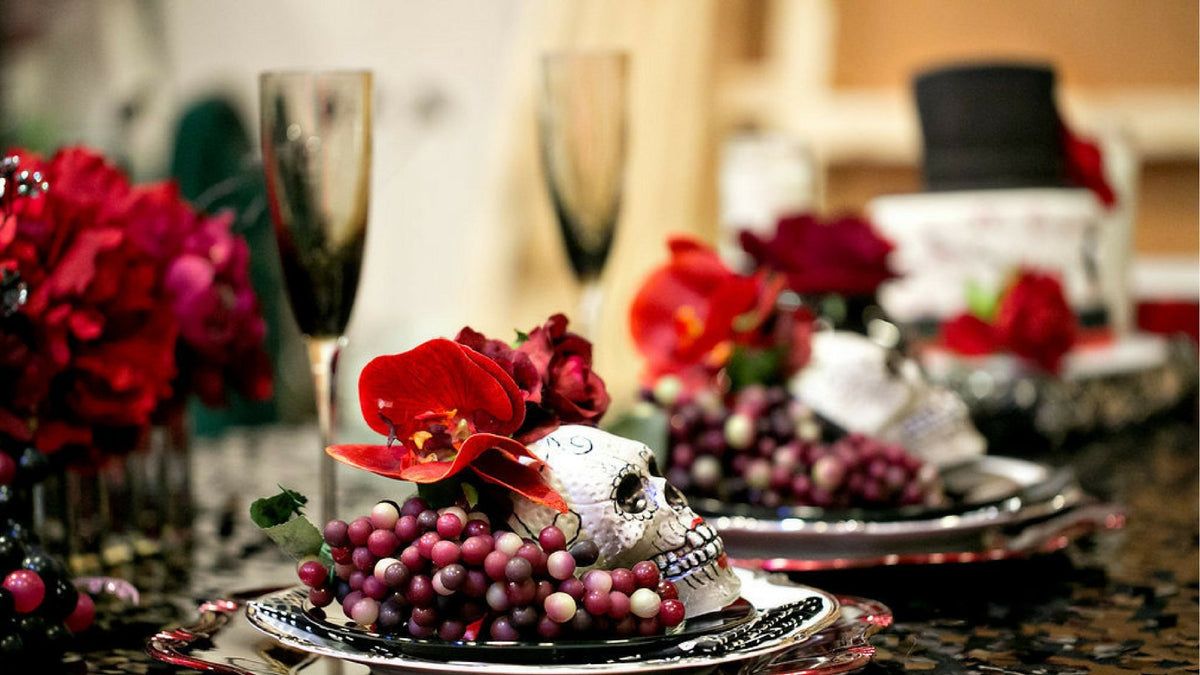
6. A Gothic Floral Table with Sugar Skulls and Grapes
To get this opulent gothic look, focus on flowers with deep, saturated colors and interesting textures. Ask your florist for ‘black baccara’ roses, deep crimson dahlias, or dark purple calla lilies. The key is to avoid anything too bright or cheerful. Mix in dark foliage like eucalyptus or plumosa fern for texture. For the ultimate dramatic touch, let clusters of dark purple grapes spill out of the arrangements and onto the table. It adds a sense of decadent, painterly abundance that feels straight out of a Caravaggio painting.
🔧 How-To Brief
The visual recipe here is a masterclass in balance. It’s 40% deep, dramatic color (the crimson orchids and purple grapes), 30% stark black (the reflective table surface, plates), 20% crisp white (the sugar skulls), and 10% metallic shine (the silver plate rims). This formula ensures the look is rich and moody without becoming a muddy mess. The white skulls act as a crucial highlight, preventing the deep colors from blending into one dark blob, while the silver adds a necessary touch of light-catching elegance.
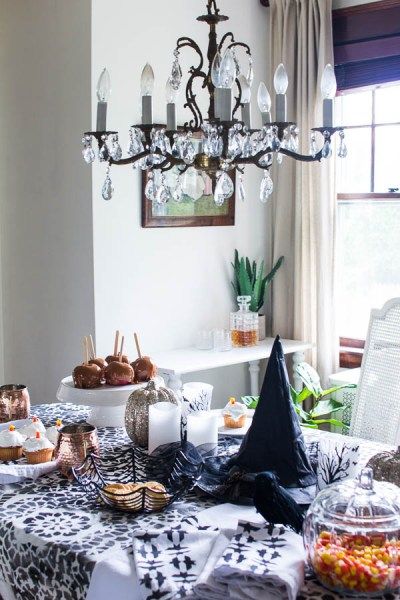
7. An Elegant Witch-Themed Table with Monochrome Patterns
This isn’t your childhood green-faced witch. This is a direct reflection of the ‘witchcore’ or ‘whimsigoth’ aesthetic that has been bubbling up on TikTok and Pinterest for the past few years. It’s less about jump scares and more about celebrating a mystical, sophisticated, and slightly dark femininity. The look favors curated objects, rich textures, and a playful nod to the occult. The crystal chandelier and copper mugs elevate it from a simple party theme to a full-blown aesthetic statement that feels very current for 2026.
🧹 Maintenance Reality
It’s the bold, graphic black-and-white tablecloth. Without it, you’d just have a collection of cute Halloween items on a table. The tablecloth is the foundation that makes everything else work. It establishes the entire color palette and provides a busy, energetic pattern that can handle strong decorative elements like a witch hat centerpiece and shiny copper mugs. It’s the confident, slightly chaotic base that says, ‘This is a party, and we’re here to have fun.’ Everything else is just an accessory to its graphic punch.
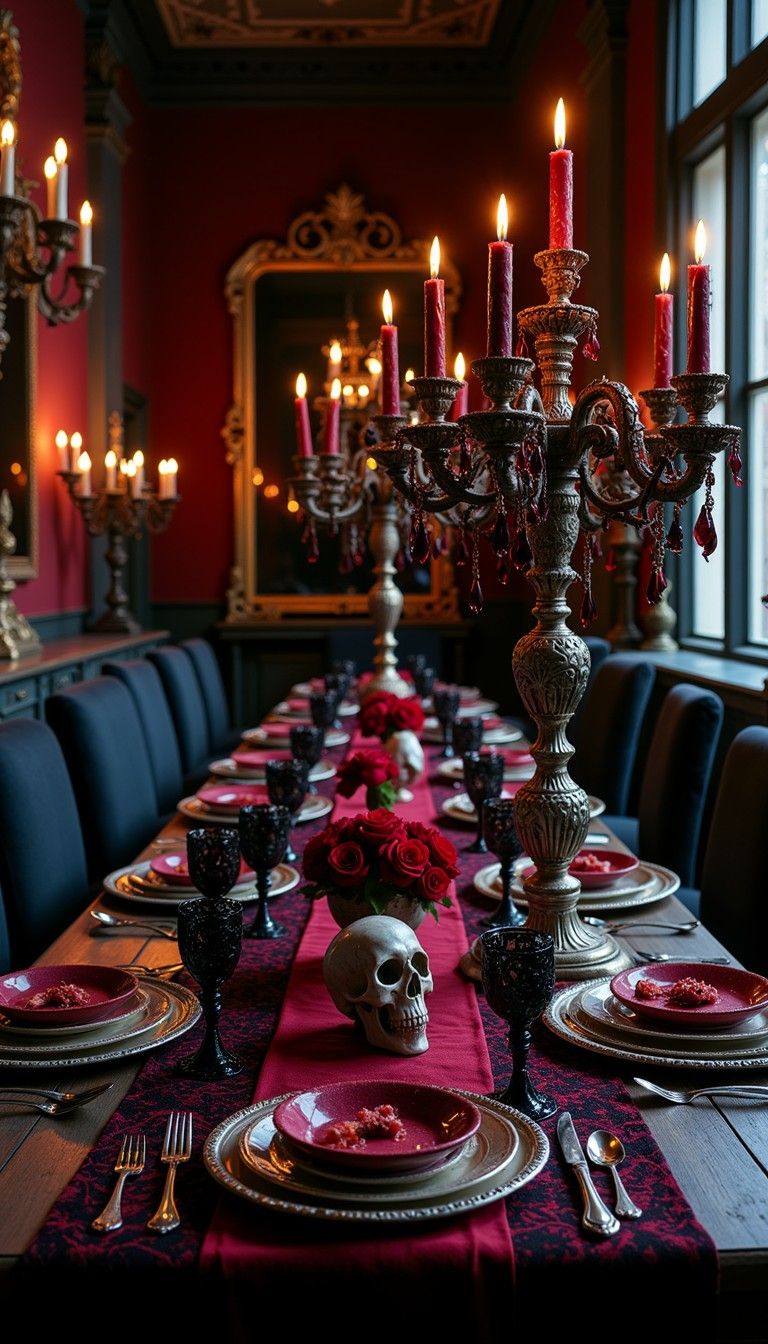
8. A Macabre Dining Room with Skull and Red Rose Centerpieces
A centerpiece this lush with real red roses requires some planning. You’ll want to buy the roses no more than a day before your party and keep them in a cool place. Just before guests arrive, trim the stems at an angle under running water and arrange them with the skulls. During the party, the flowers will likely be fine for a few hours without a direct water source. After the party, you can expect them to last maybe one more day. For a longer-lasting version, invest in high-quality silk red roses; you can reuse them year after year.
🔥 Trending Context
A quick reality check: while this look is undeniably stunning and dramatic, it might not be for every crowd. The hyper-realistic skulls and deep, blood-red color scheme create a genuinely macabre atmosphere. This is perfect for a murder mystery dinner or a serious gothic-themed party, but it could be a bit intense or even off-putting for a family-friendly gathering or a party with more sensitive guests. Know your audience. A similar vibe with less intensity can be seen in Idea #6, which uses sugar skulls for a more festive feel.
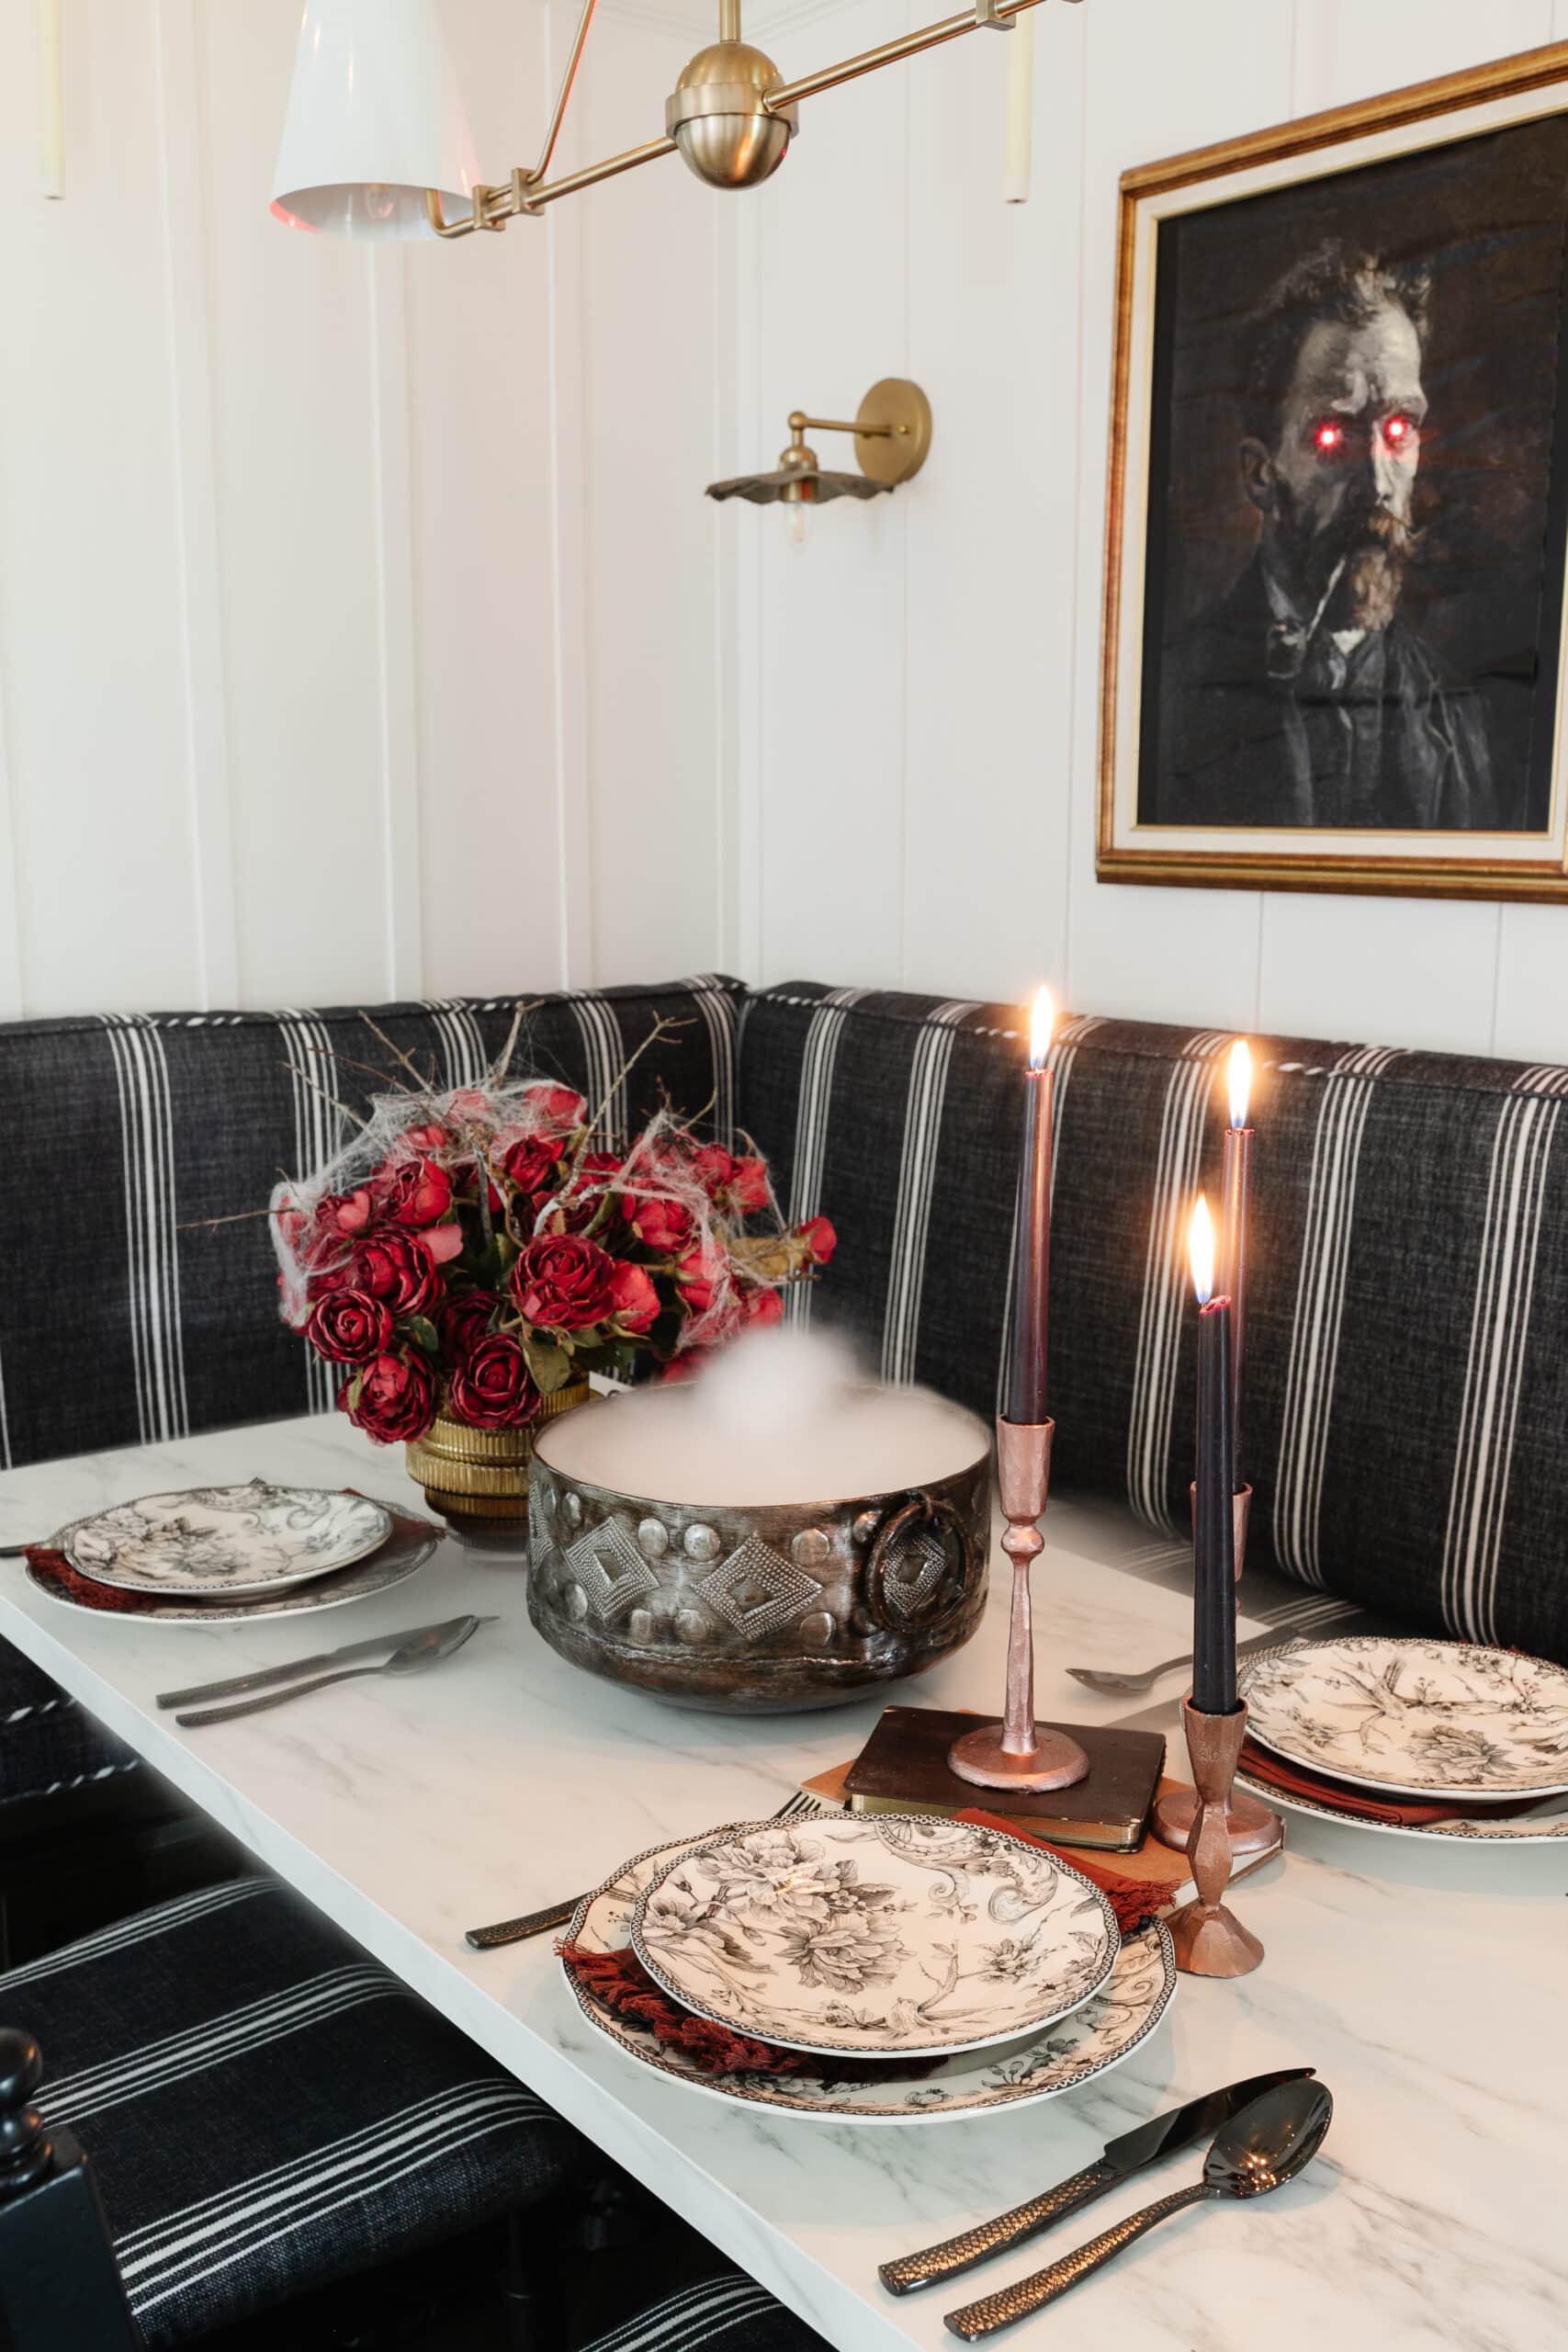
9. A Gothic Dining Nook Featuring a Smoking Centerpiece
This corner is so effective because it engages multiple senses. The visual is strong with the high-contrast black and white stripes and the glowing red eyes in the portrait. But the masterstroke is the smoking bowl. It adds an element of mystery and movement, and potentially even scent, that static decorations can’t achieve. This multi-sensory experience makes the scene feel immersive and alive. It’s not just something to look at; it’s an atmosphere you can feel, making the corner a memorable moment for any guest.
⚠️ Real Talk
You don’t need a special effects budget to create a smoking centerpiece. The secret is dry ice, which you can often buy at larger grocery stores or ice supply companies (call ahead!). Just place a few small chunks of dry ice into a metal or ceramic bowl and pour a small amount of hot water over them to create the thick, rolling fog. It’s a high-impact, low-cost trick that delivers all the moody drama of the original. Just remember to handle dry ice with gloves—it’s extremely cold!
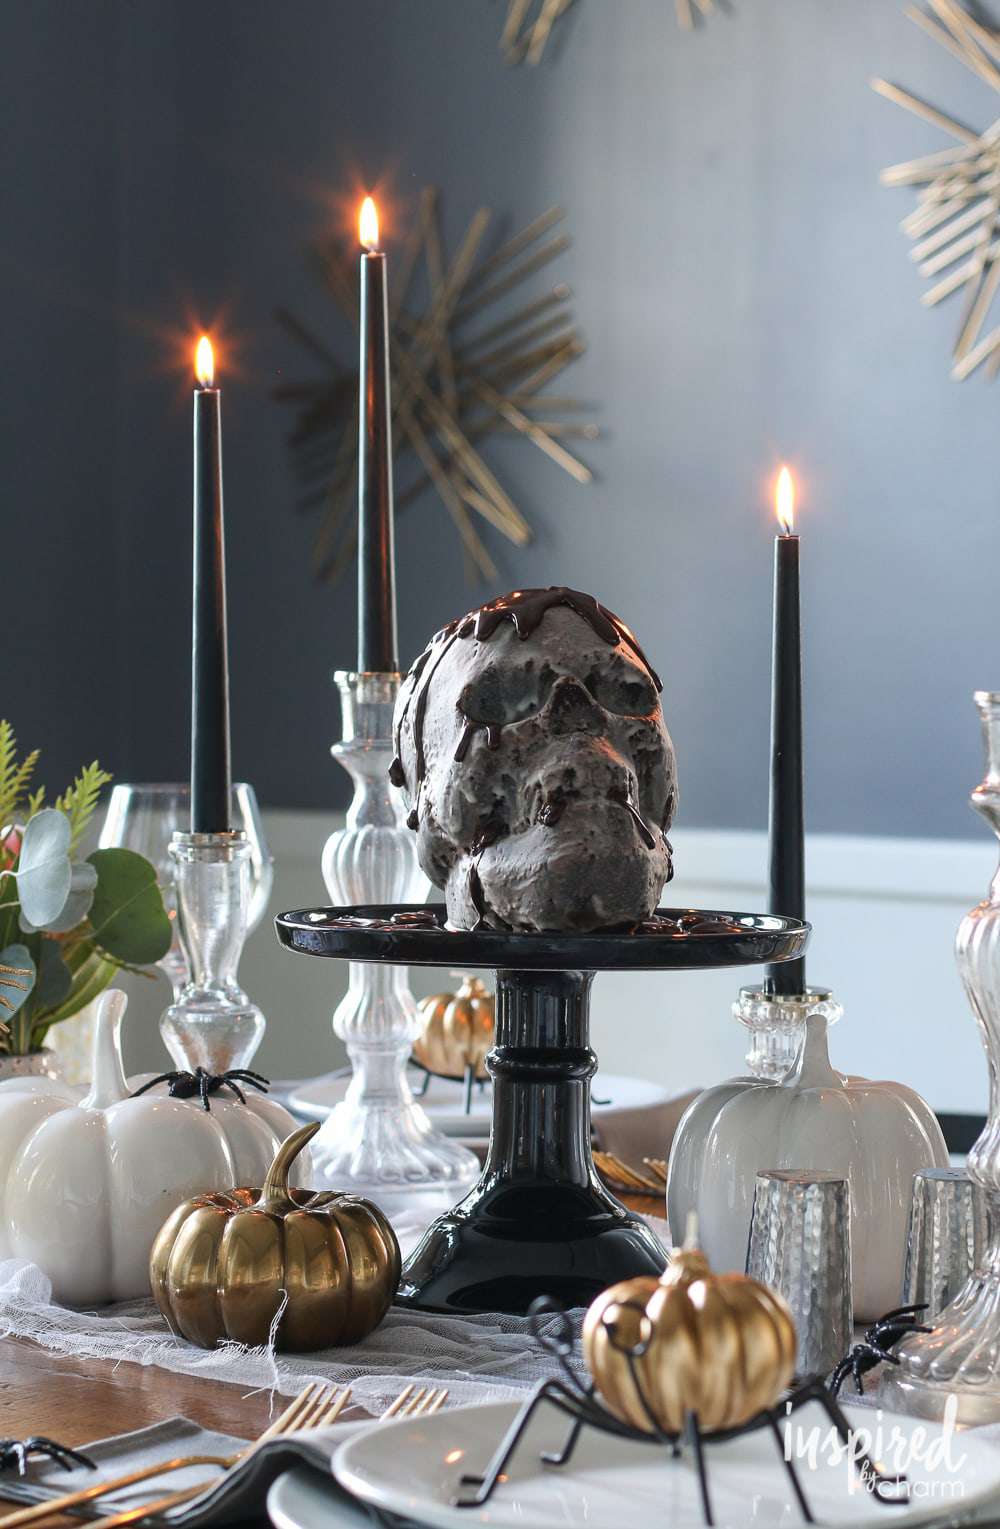
10. Craft an Elegant Halloween Tablescape with Sophisticated Layers
The secret to an ‘elegant’ Halloween tablescape is choosing a tight, disciplined color palette—three colors, maximum. Think black, white, and a single metallic like gold or silver. Instead of scattering many small decorations, focus on creating height and drama in the center of the table. Use tall, slender candelabras or a large floral arrangement in a statement vase. From there, layer down with high-quality linens, charger plates, and cloth napkins. Elegance comes from quality materials and intentional composition, not quantity.
📏 Scale Guide
Before you commit to a full-blown elegant tablescape, run through this quick checklist:
- Do you have a clear ‘hero’ centerpiece? If not, find one first.
- Have you chosen a strict color palette of 2-3 colors?
- Will your guests have enough elbow room with the decor you’ve planned?
- Do you have access to layered lighting (candles, lamps) beyond just overhead lights?
- Is your budget focused on a few high-quality items rather than many cheap ones?
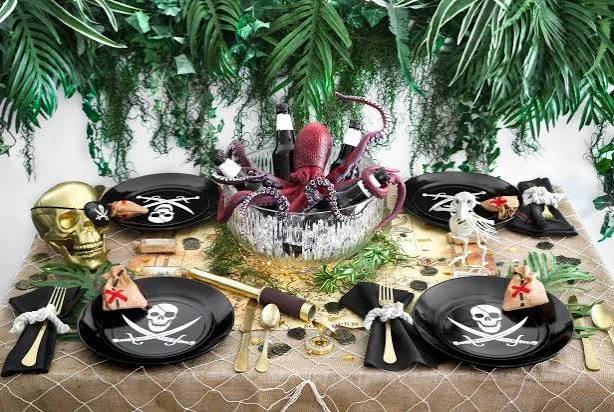
11. Design a Gothic Forest Dinner Party Setting
To capture that ‘Gothic Forest’ feeling, stick to this formula: 50% dark, natural elements + 30% moody lighting + 20% refined details. The ‘dark natural’ part comes from things like bare branches, dark moss, black-painted pumpkins, and maybe some deep-colored florals. The ‘moody lighting’ is crucial—rely almost exclusively on candlelight. Finally, ‘refined details’ like black linen napkins, elegant silverware, and perhaps some subtle metallic accents keep it from feeling like a messy forest floor. It’s about bringing the dark woods indoors, but making it chic.
⭐ The One Thing
This theme works best on a long, rectangular dining table that’s at least 6 feet long, allowing you to create a dense, runner-style centerpiece of ‘forest’ elements down the middle. For a smaller round or square table, this can feel overwhelming. If you have a table smaller than 60 inches, adapt this by creating a single, dramatic centerpiece in the middle rather than a sprawling runner. You need a room with dimmable lighting, as harsh overhead lights will completely kill the moody, candlelit forest vibe.
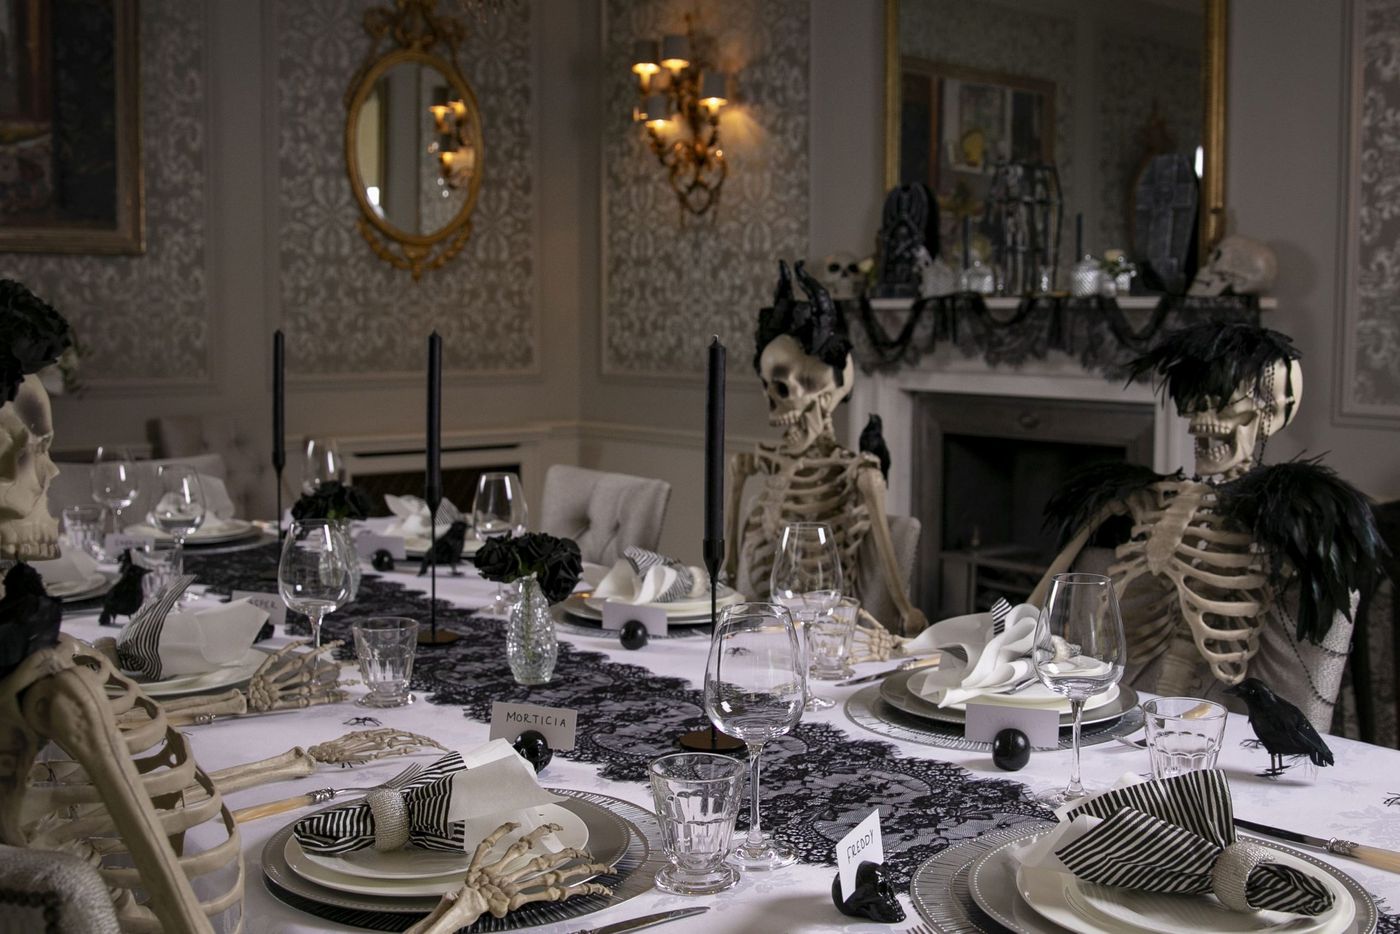
12. A Theatrical Dinner Party with Seated Skeletons
The life-sized skeletons seated at the table are, without a doubt, the single element that makes this idea extraordinary. Take them away, and you have a perfectly nice gothic dinner table. But with them, you have performance art. They transform the scene from mere decoration into a narrative. Who were they? What is this ghostly dinner party? It sparks the imagination, creates an unforgettable photo opportunity, and sets a tone of macabre, theatrical fun that no amount of candles or crows could achieve on their own. For a different take on skeleton decor, compare this with the entryway in Idea #5.
💸 Get This Look For Less
Dressing a posable skeleton to look this chic takes a few key steps. Time: 20 minutes per skeleton. Cost: $15-30.
- Start with a 5-foot posable skeleton, ensuring the joints can be tightened to hold a pose.
- Don’t just sit it in the chair; interact it with the table. Have one hand resting on the table or holding a wine glass.
- Drape it with a simple piece of black fabric or a cheap cloak. Use safety pins to secure it around the shoulders.
- The headpiece is key. Use a black feather boa from a craft store and wrap it around the skull, securing with pins or hot glue. Add a sparkly brooch for a touch of glamour.
- Finally, pose the head at a slight angle to give it personality.
13. A Casual, Cluttered Halloween Party in Full Swing
This photo perfectly captures the happy chaos of a real party. The key is to accept that a functional party space can’t look like a pristine magazine spread. People need places to put their drinks! Instead of trying to keep everything perfect, lean into it. Use themed (but disposable or sturdy) glassware and have plenty of napkins. Consolidate your decor onto a sideboard or mantel and leave the main dining table relatively clear for food and drinks. The best decor is a room full of people having fun, not a perfectly styled but unusable space.

✅ Before You Start
Look closely at the costumes: a bedsheet ghost, a pirate, a doctor with horns. This is a powerful reminder that you don’t need to spend hundreds on costumes. The fun of Halloween is creativity, not commerce. Challenge your guests to a DIY costume contest with a silly prize. A trip to a thrift store with $20 and a lot of imagination can yield a far more interesting and memorable costume than a pre-packaged one from a big-box store. The focus should be on participation and fun, not a high budget.
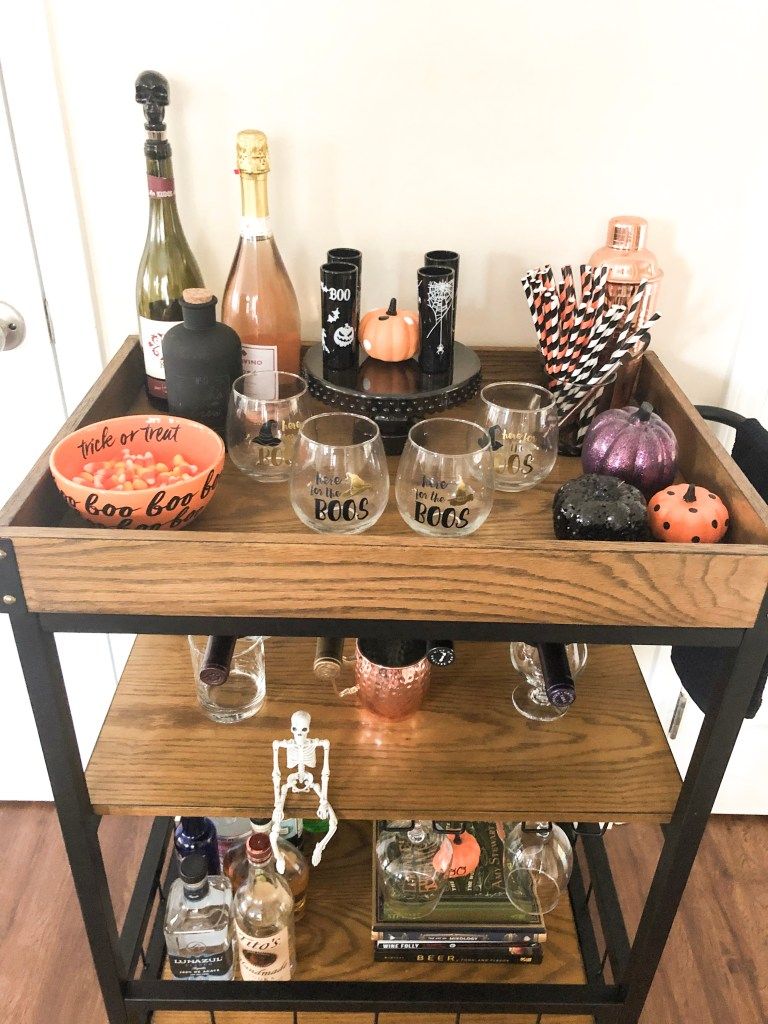
14. A Festive Wood and Metal Halloween Bar Cart
- Wood & Metal Bar Cart: $150 – $400
- Themed Glassware & Mugs: $40 – $100
- Decorative Pumpkins & Skeleton: $20 – $50
- Striped Paper Straws & Candy: $15 – $25
- Assorted Alcohol & Mixers: $75 – $200
- TOTAL: $300 – $775
💰 Budget Breakdown
Budget alternative: You don’t need a dedicated bar cart! Use a bookshelf, a side table, or even a cleared-off kitchen counter. Find fun glassware at thrift stores. The mini pumpkins and skeleton can be found at any dollar store. Focus the budget on a few key beverage ingredients and let the DIY spirit shine through.
When styling a bar cart, think in triangles and vary your heights. Place your tallest item (like a bottle of whiskey or a vase with branches) in the back. Then place a medium-height item (like a shaker or a shorter bottle) to one side, and a low item (like your bowl of candy corn or the mini skeleton) to the other, forming a visual triangle. This creates a balanced, professionally styled look instead of a lineup of random objects. Repeat this on each tier of the cart for a cohesive display.
15. A Gothic Damask Table with Witch and Spider Motifs
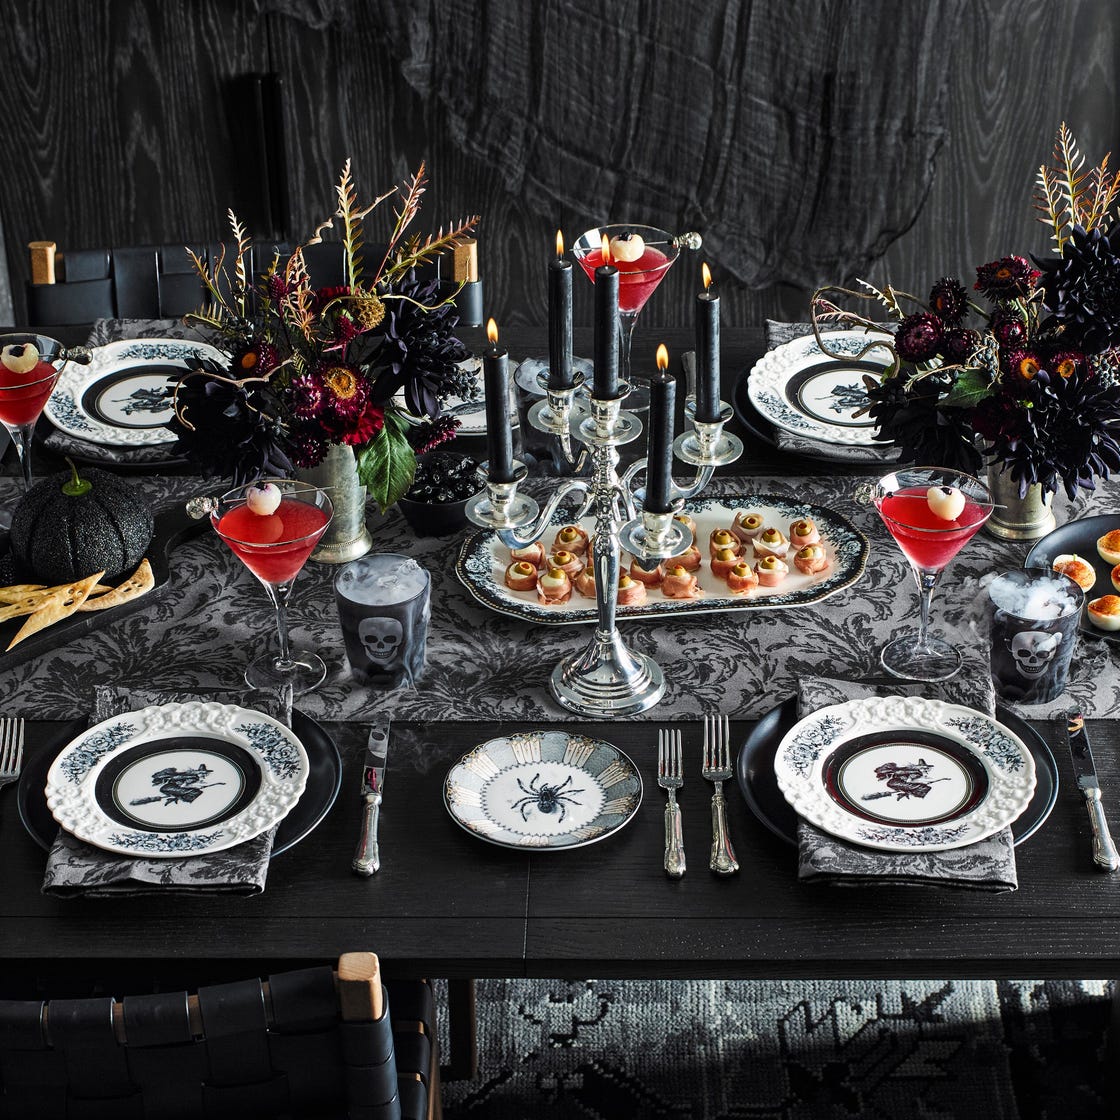
This tablescape is a masterclass in layering patterns and textures. The foundation is the subtle, tone-on-tone grey damask runner. It adds a touch of classic elegance without being loud. On top of that, the crisp, graphic illustrations on the plates (witches, spiders) provide a sharp, modern contrast. Finally, the texture of the vapor from the dry ice and the smoothness of the glassware add another layer. This combination of classic pattern, graphic illustration, and textural elements is what makes the whole scene feel so rich and deeply considered.
🎯 What Makes It Work
Using dry ice in drinks or decor is an amazing effect, but it requires careful handling. You must use food-grade dry ice and never, ever touch it with your bare hands—it can cause severe frostbite. Use tongs to handle it. When adding it to a punch bowl or a glass, use a very small piece (about 1-inch cube). Crucially, you must wait until the dry ice has completely sublimated (stopped smoking) before drinking the beverage. Ingesting a piece of dry ice is extremely dangerous. Be safe!
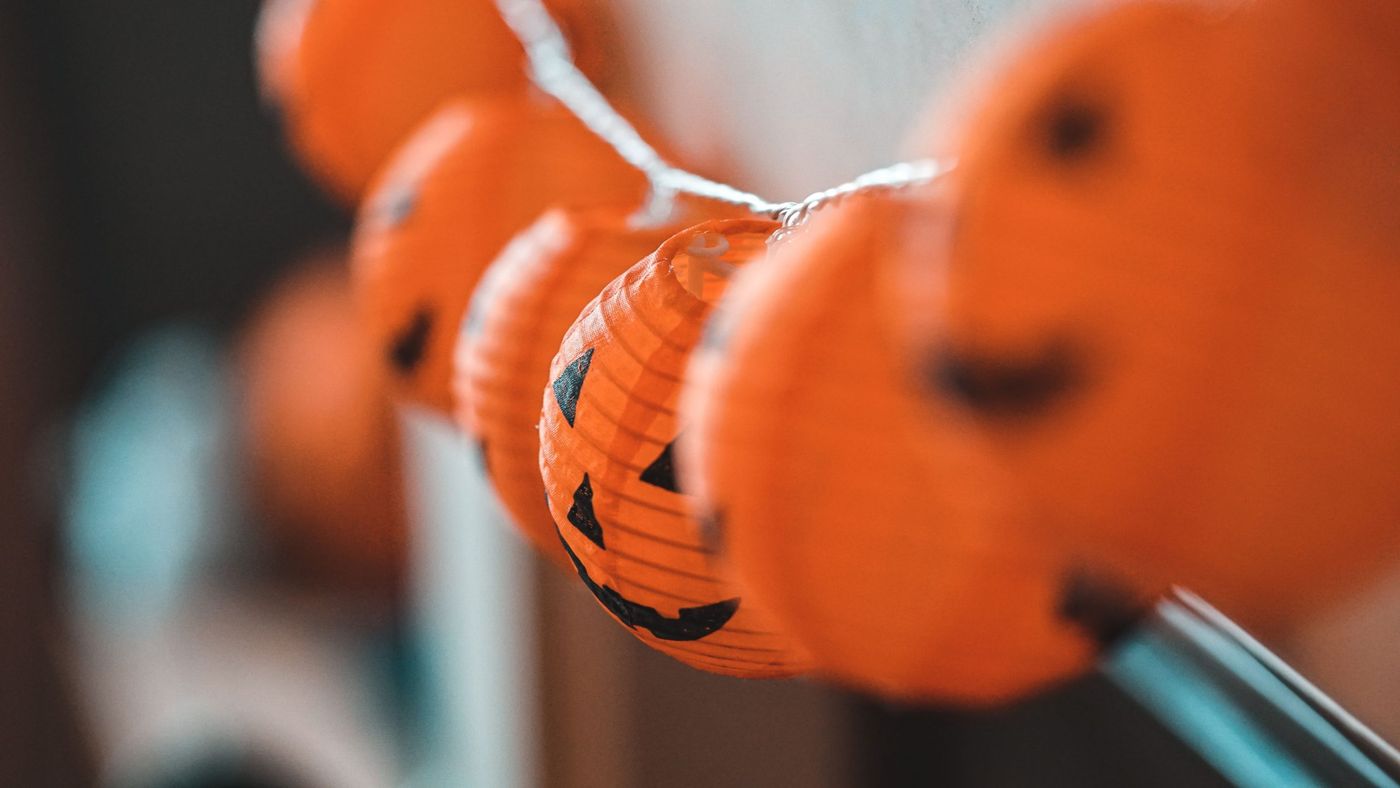
16. Playful Miniature Jack-o’-Lantern String Lights
You can give generic pumpkin string lights this charming, hand-drawn look yourself. It takes about 15 minutes and costs almost nothing.
- Start with a string of simple, orange paper lantern lights.
- Grab a black permanent marker with a medium-fine tip.
- Instead of drawing perfect, symmetrical triangle eyes, make them slightly different shapes and sizes.
- For the mouths, try a simple crooked line, a small ‘o’, or a jagged grin. Don’t overthink it!
- Vary the expressions on each lantern. The slight imperfections are what will make them look unique and full of personality.
It’s a small detail that elevates a mass-produced item into something special.
📐 Style Math
that makes these lights so charming is the hand-drawn quality of the faces. In a world of perfectly manufactured decorations, the slightly uneven lines and varied expressions give these lanterns a sense of personality and playfulness. They don’t look like they came from a big factory; they look like someone put care and a little bit of whimsy into them. It’s a small touch that makes a huge difference, creating a feeling of nostalgic, crafty fun rather than sterile commercialism.
17. A Velvet Pumpkin Centerpiece on a Dark Wood Surface
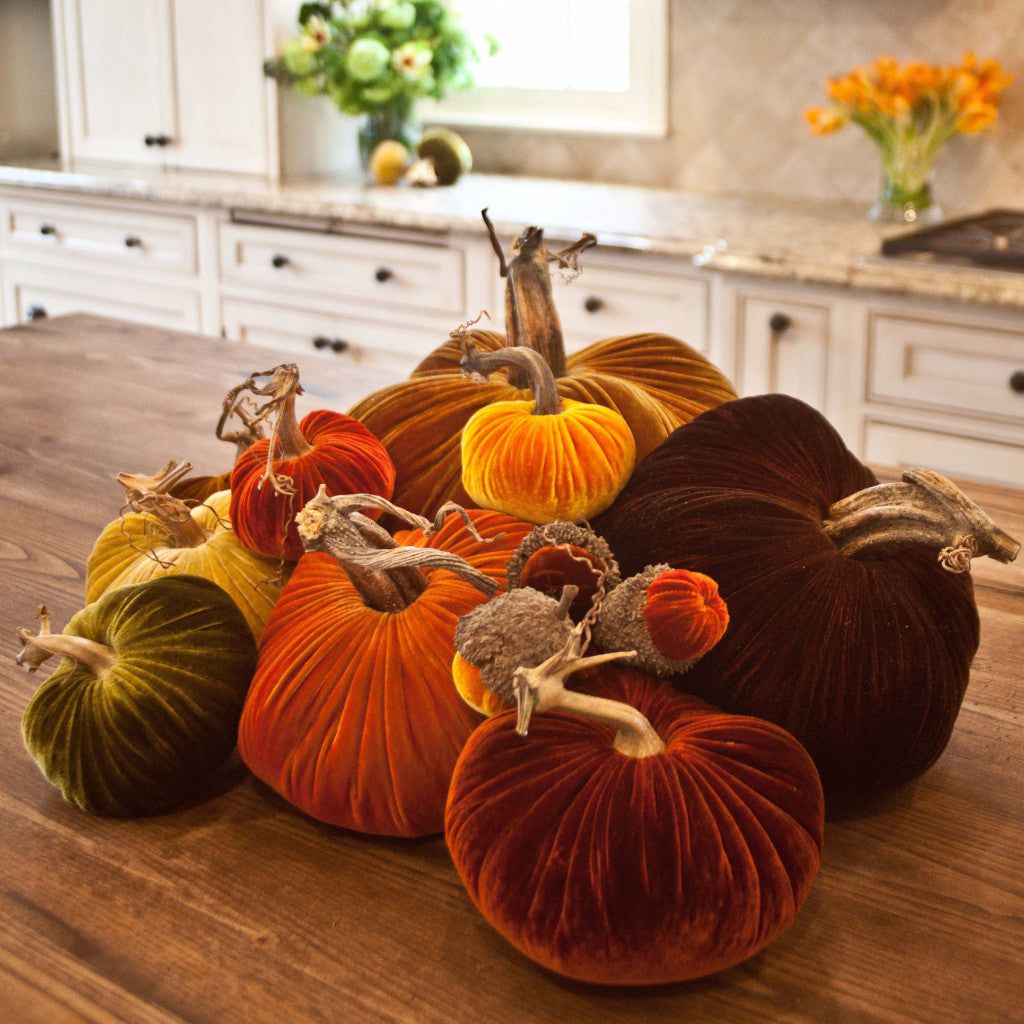
This stunningly simple centerpiece works because of its textural math: 60% plush velvet + 30% rustic, organic stems + 10% smooth, dark wood. The luxurious, light-absorbing velvet of the pumpkins in burnt orange, olive, and mustard provides the main story. The gnarled, realistic stems add a crucial dose of nature and keep the look from feeling too fussy. Finally, the dark, rich wood of the island acts as the perfect moody backdrop, allowing the warm, autumnal colors and textures of the pumpkins to truly shine. It’s all about the interplay of soft, rough, and smooth.
💡 Designer Tip
Those gorgeous velvet pumpkins can cost $20-$50 apiece at boutique stores. You can make your own for about $5 each. Buy cheap foam pumpkins from a craft store after Halloween when they’re on clearance. Purchase scraps of stretch velvet fabric in autumnal colors from a fabric store. Simply stretch the fabric tightly around the foam pumpkin, gathering it at the top and bottom, and secure with a hot glue gun. Snap a real stem off a gourd or find a small, interesting stick from your yard to glue on top. Done.
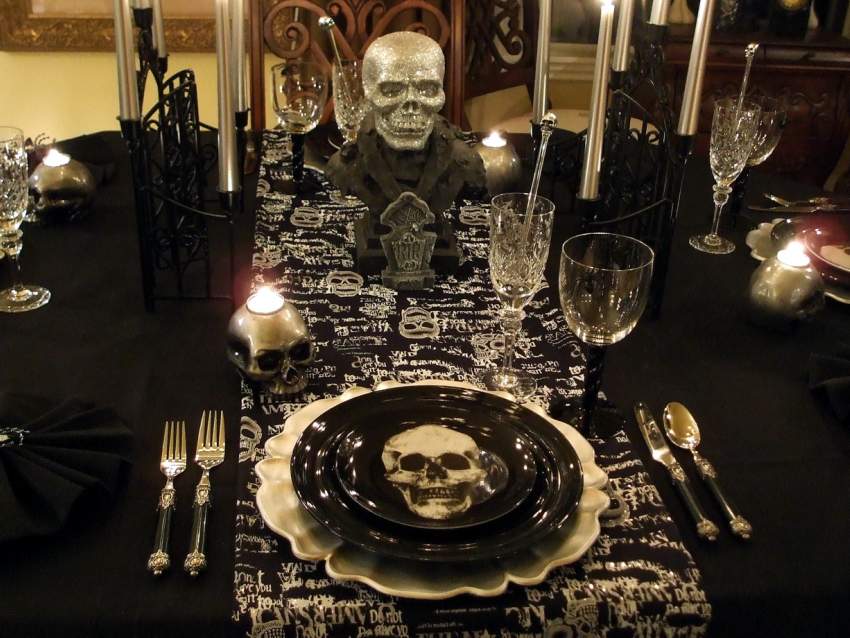
18. A Formal Gothic Dining Table with Glittered Skull Decor
A dramatic, centerpiece-heavy look like this demands a substantial table. This works best on a wide dining table (at least 42 inches across) to prevent it from feeling cluttered. The tall candelabras and large skull bust need breathing room. If your table is narrower, you’ll feel like you’re dining in a canyon of decor. For smaller tables, scale down the concept: use a single, smaller skull and a pair of shorter candlesticks. The goal is to create drama, not an obstacle course for passing the salt.
🔧 How-To Brief
The secret to a high-end looking place setting is layering. Don’t just put a plate on the table. Start with a placemat or a charger (a larger decorative plate that sits underneath). Then layer your dinner plate, and finally, a smaller salad plate or a bowl on top. Here, the skull-themed dinner plates are the star, but they look much more important because they’re part of a deliberate stack. You can even place a folded cloth napkin or a small decorative object on the very top layer to complete the look.
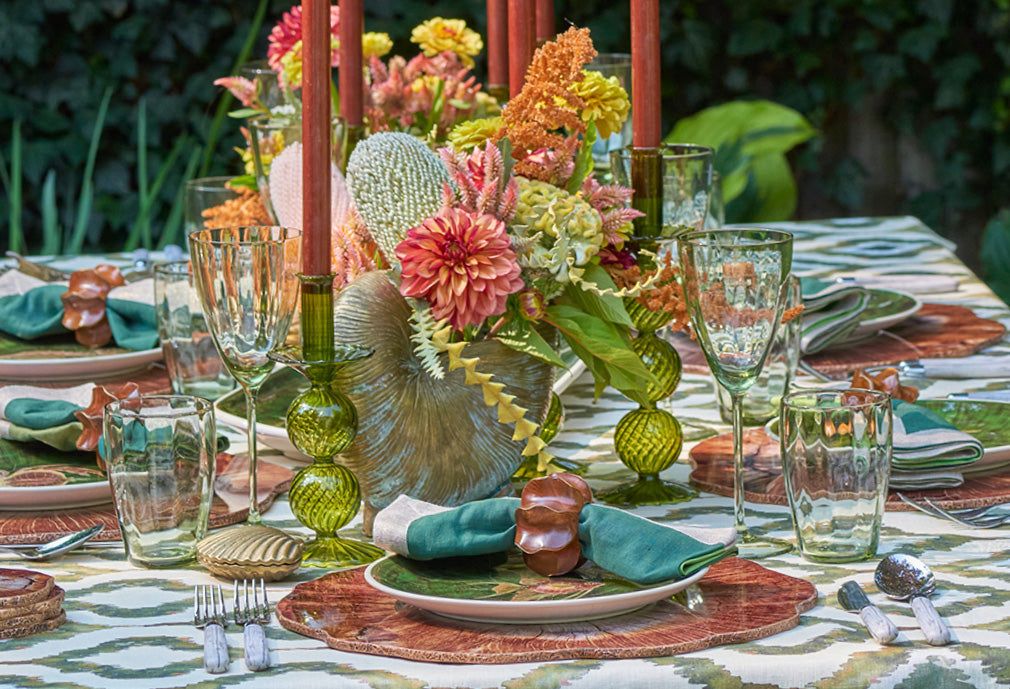
19. A Vibrant Autumnal Table with Green and Orange Accents
This tablescape is a lesson in color theory. The deep forest green and the bright, burnt orange are complementary colors (opposites on the color wheel), which means they create a vibrant, high-energy contrast when placed next to each other. The white and wood tones in the tablecloth and charger plates act as a neutral buffer, giving the eye a place to rest and preventing the bold colors from becoming overwhelming. The result is a look that feels festive and full of life, but also balanced and sophisticated.
🧹 Maintenance Reality
We’re seeing a huge trend of people moving away from classic ‘spooky’ Halloween decor and leaning into a more general, sophisticated ‘autumnal’ or ‘harvest’ theme. This table is a perfect example. It feels special and festive for an October gathering, but it doesn’t scream ‘Halloween.’ This approach has more longevity—you can set a table like this in September and leave it up through Thanksgiving. It’s less about a single holiday and more about celebrating the entire season in a beautiful, elevated way.
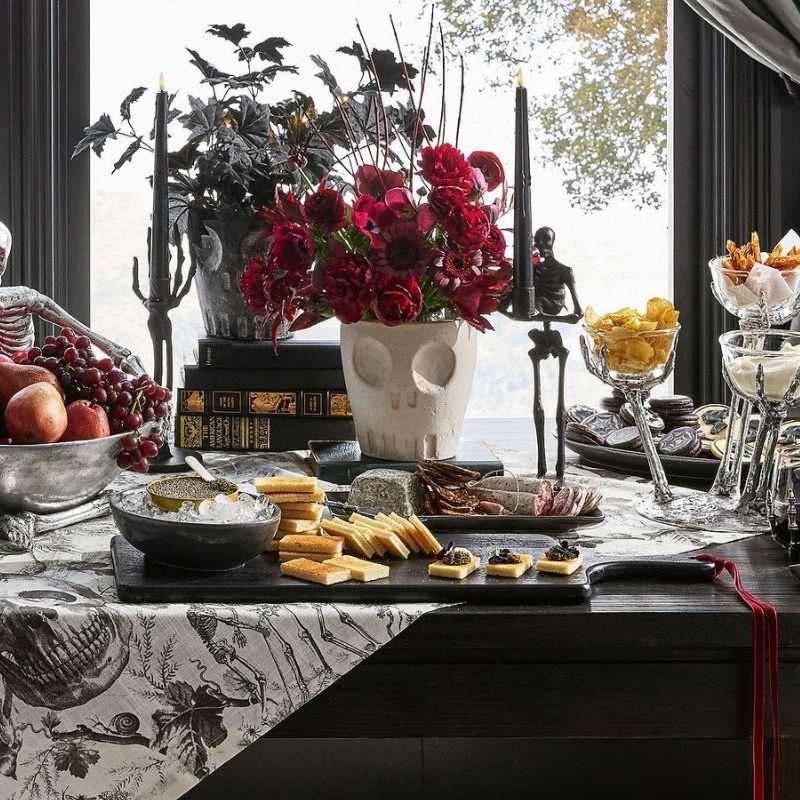
20. A Moody Charcuterie Spread with Skeleton Serveware
Creating a lush charcuterie board is more about assembly than cooking. Here’s a potential cost breakdown for a generous spread for 8-10 people.
- Cheeses (3-4 varieties): $30 – $60
- Cured Meats (2-3 varieties): $25 – $50
- Crackers, Bread, Breadsticks: $15 – $25
- Fruits, Nuts, Olives, Jam: $20 – $40
- Decorative Serveware (skulls, etc.): $40 – $100
- TOTAL: $130 – $275
Budget alternative: Focus on one great cheese, one meat, and fill the rest of the board with affordable seasonal fruits like grapes and apple slices, plus plenty of bread.
🔥 Trending Context
When you’re mixing decorative items (like these cool skeleton pedestals) with food, you have to think about food safety. Make sure any decorative items that will directly touch food are made from a food-safe material like ceramic or sealed metal. Avoid placing food directly on painted surfaces or unsealed plastics that aren’t meant for consumption. A great workaround is to place a small piece of parchment paper or a lettuce leaf as a barrier between the decor and the food. Better safe than sorry—a mistake here could land you in our common mistakes section!
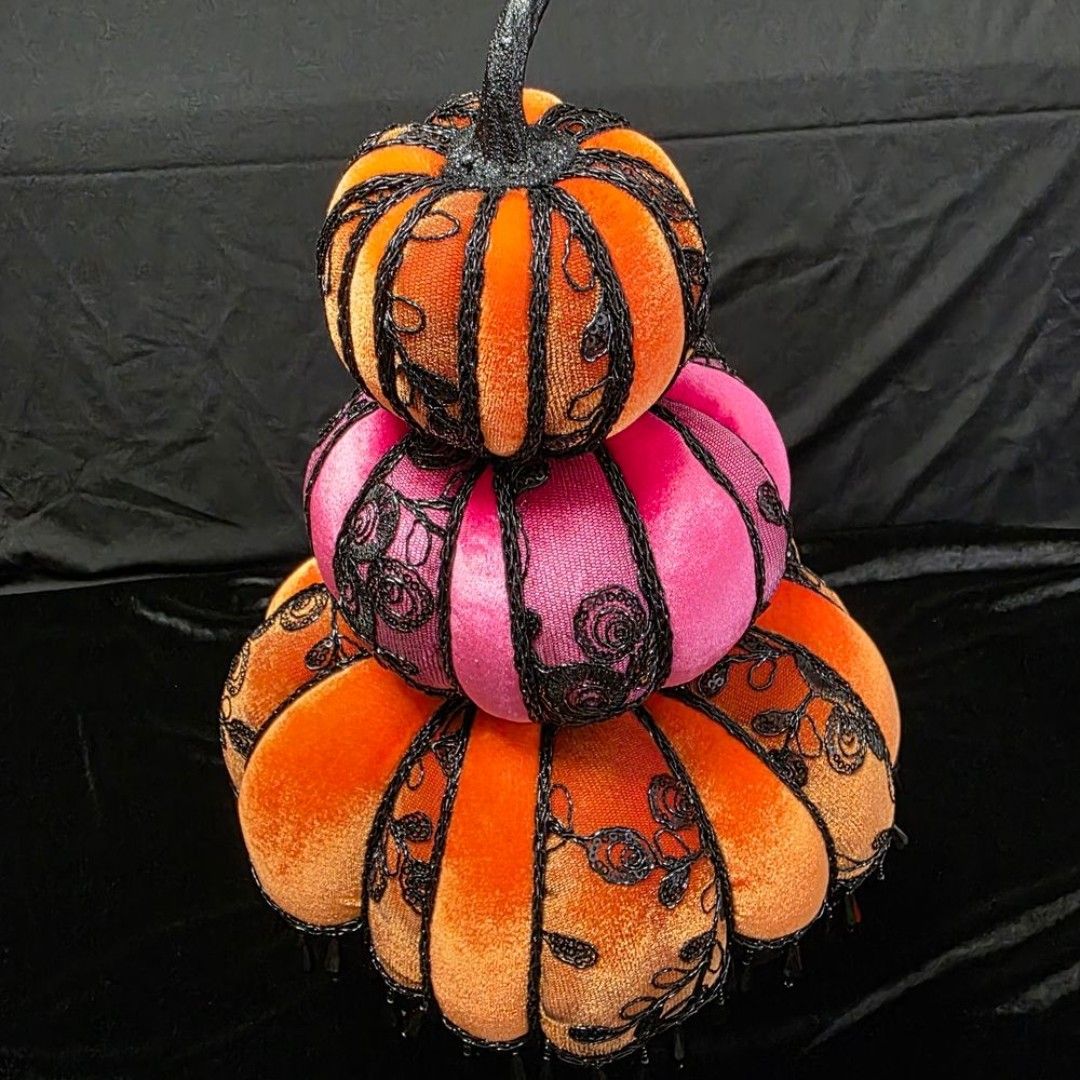
21. Stacked Velvet Pumpkins with Black Sequin Lace
Creating a tall, stacked centerpiece like this adds instant drama to a buffet table or entryway. The trick to a stable stack is to use a hidden dowel. Get a simple wooden dowel from a craft store and sharpen one end. Core the foam pumpkins, then drive the dowel through the center of the bottom pumpkin and up through the stack, leaving a few inches sticking out the top to secure the final pumpkin. This ensures your tower won’t topple over if someone bumps the table. For a finishing touch, glue the glittery stem on top to hide the dowel.
⚠️ Real Talk
The black sequined floral lace is the absolute game-changer here. Without it, you’d have a cute, colorful stack of velvet pumpkins. But the lace adds a layer of unexpected gothic glamour. It’s the contrast between the soft, plush velvet and the sparkly, slightly edgy lace that makes this piece so unique and memorable. It transforms a simple autumnal craft into a statement piece with a distinct ‘whimsigoth’ personality—both whimsical and dark at the same time.
22. A Formal Candlelit Table with Black Velvet Bows
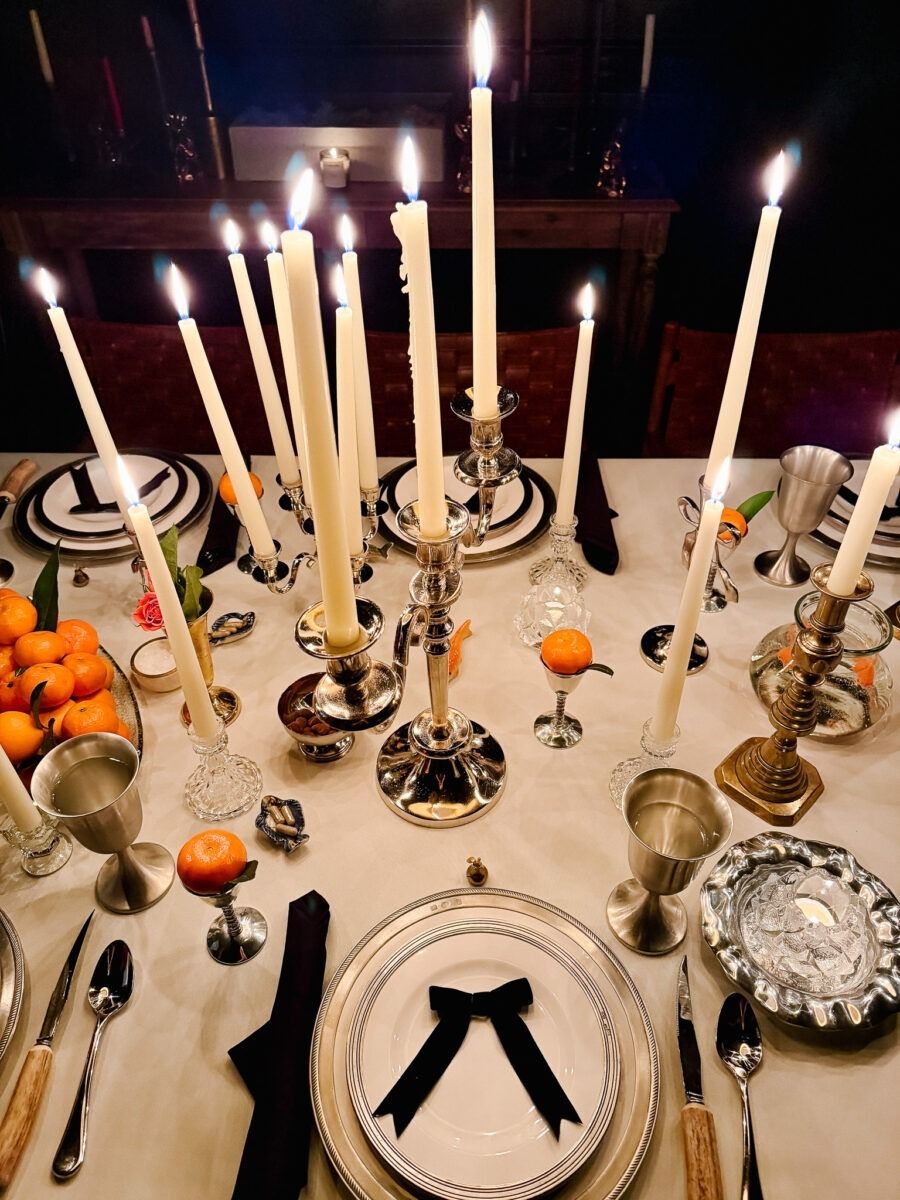
The magic of this scene, much like the similar setup in Idea #3, comes from the sheer repetition of light sources. It’s not one or two candelabras, but many, creating a sea of warm, flickering light. This abundance of candles creates an incredibly intimate and luxurious atmosphere that a single overhead light could never replicate. The metallic silver of the candelabras and goblets multiplies the effect, reflecting the candlelight around the room and making the entire space glow. It’s proof that sometimes, more really is more.
📏 Scale Guide
You don’t need sterling silver to get this look. Scour thrift stores and flea markets for mismatched silver-plated candelabras, goblets, and trays. The slight tarnish and variation in styles will add to the vintage, atmospheric charm. A few dollars’ worth of wide black velvet ribbon from a fabric store can be used to tie simple, elegant bows for each place setting. This whole look is about atmosphere, not pedigree, and you can create that moody, candlelit magic for a fraction of the cost of new items.
23. A Dark and Eerie Tablescape with Skulls and Apothecary Jars
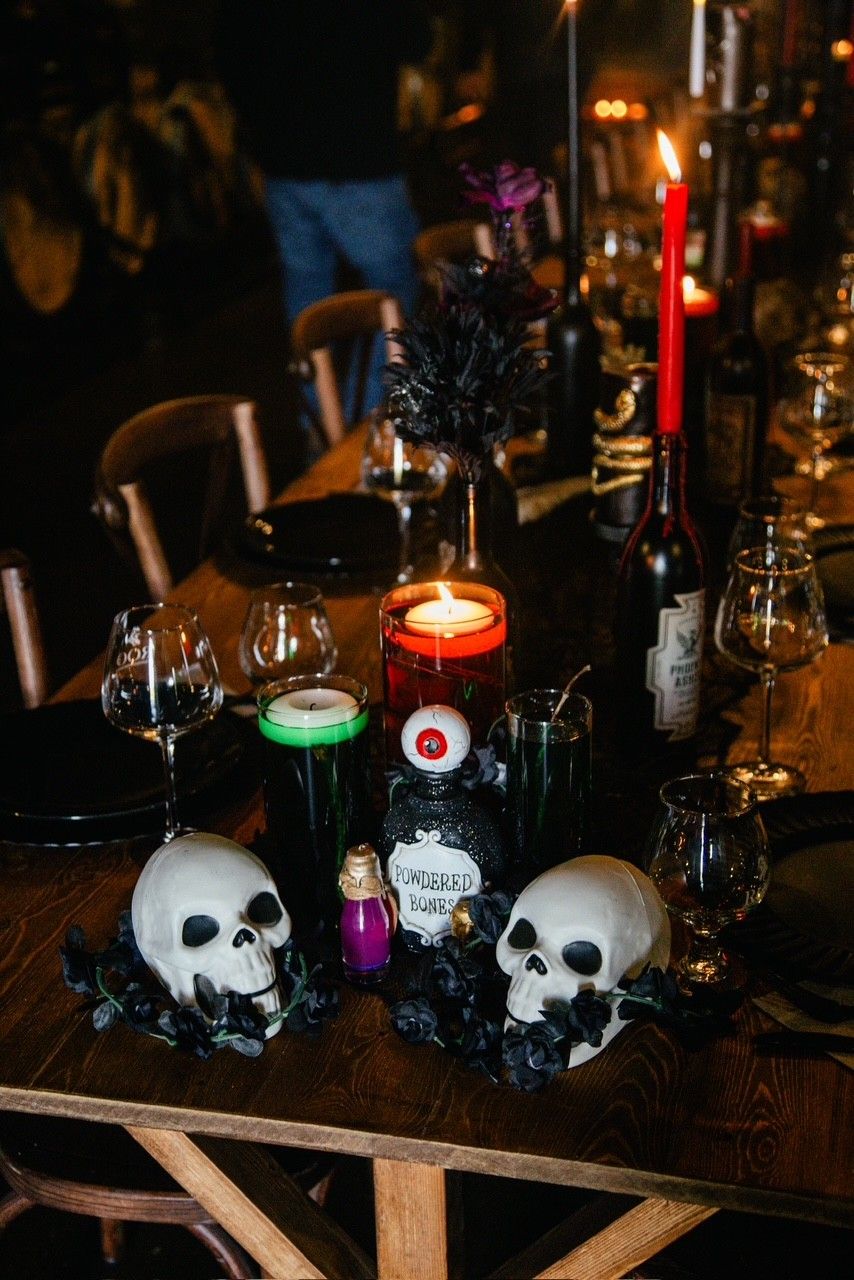
Give your apothecary jars an authentic, aged look with this simple DIY. Time: 30 minutes. Cost: under $5.
- Find and print some vintage-style spooky labels online (search for ‘printable apothecary labels’).
- Brew a very strong cup of black tea or coffee and let it cool.
- Submerge your printed labels in the tea for 5-10 minutes until they are stained a light brown.
- Carefully remove them and let them dry completely on a paper towel. The edges may crinkle slightly, which adds to the effect.
- Use a glue stick to attach the aged labels to various glass jars and bottles you’ve collected.
⭐ The One Thing
The formula for this perfectly eerie vibe is 40% macabre objects + 40% dark, moody colors + 20% warm, contrasting light. The macabre comes from the literal skulls and the ‘Powdered Bones’ jar. The moody color palette is all about the matte black roses and the dark wood table. But it’s the 20% of warm light from the red taper candles that makes it all work. That pop of red and the soft glow provide just enough contrast to keep the scene from being a single, flat, dark mass. It highlights the shapes and creates the spooky shadows.
24. A Minimalist Autumn Table with a Fresh Flower Bouquet
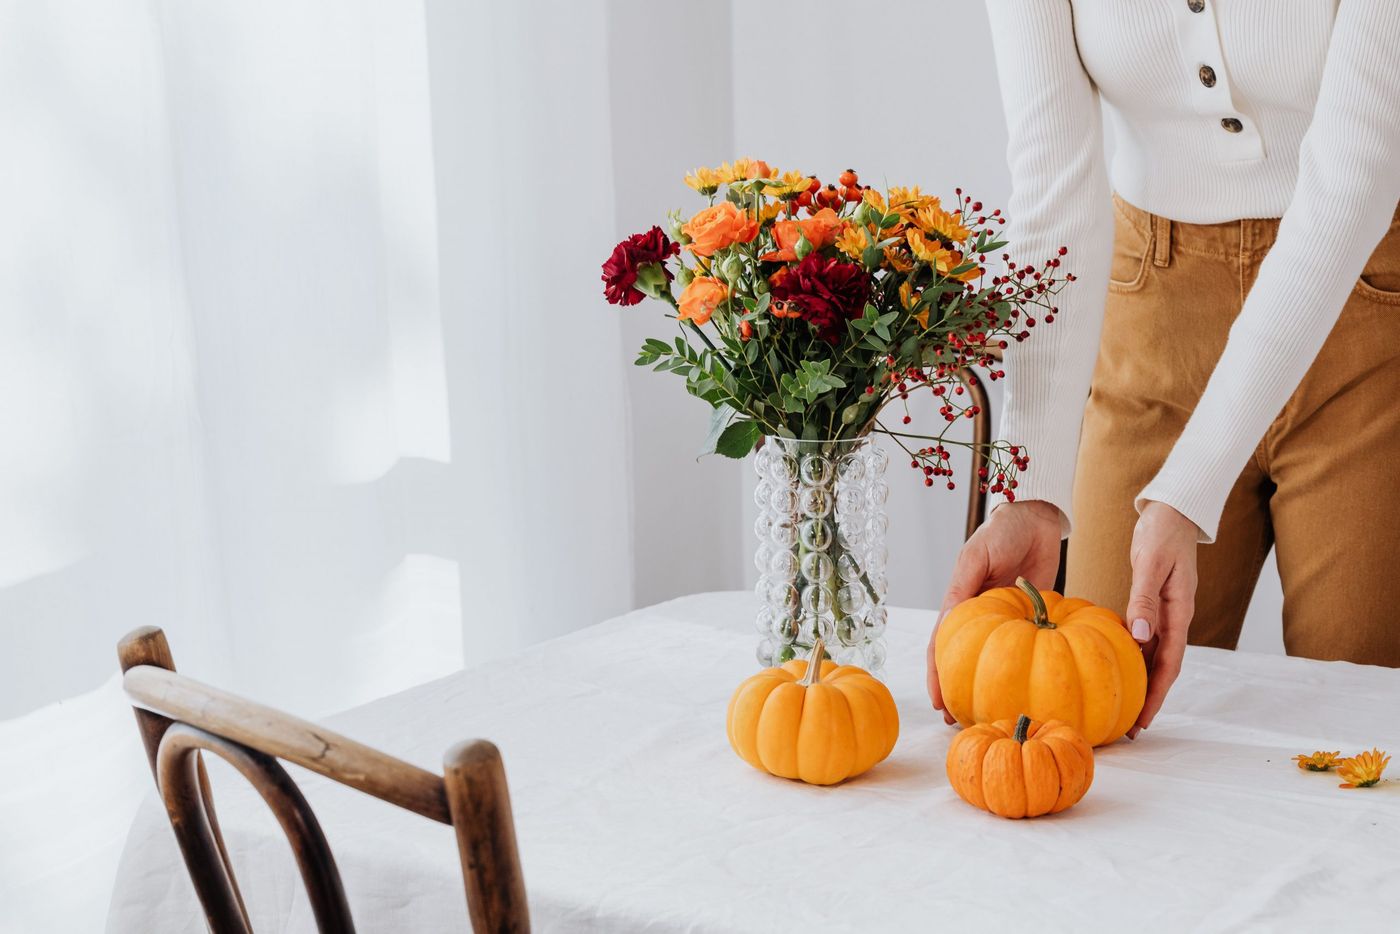
This bright and airy look is perfect for smaller spaces like an apartment dining nook or a small kitchen table. Because the decor is minimal and centered, it doesn’t overwhelm the space. A large, dark, and sprawling centerpiece would make a small room feel cramped. This approach, with its simple linen, clear glass vase, and just a few small pumpkins, celebrates the season without visually shrinking your room. It proves you don’t need a huge dining hall to create a beautiful, festive setting.
💸 Get This Look For Less
When arranging flowers in a clear glass vase, the stems are part of the display. Before you begin, strip all the leaves from the bottom two-thirds of each stem. This not only looks cleaner and more professional inside the vase, but it also helps the flowers last longer by preventing bacteria from growing in the water. Then, cut the stems at varying lengths to create a more natural, cascading shape for your bouquet rather than a tight, uniform dome. The clear vase invites you to appreciate the entire flower, stem and all.
25. A Cozy Centerpiece with Textured Fabric Pumpkins
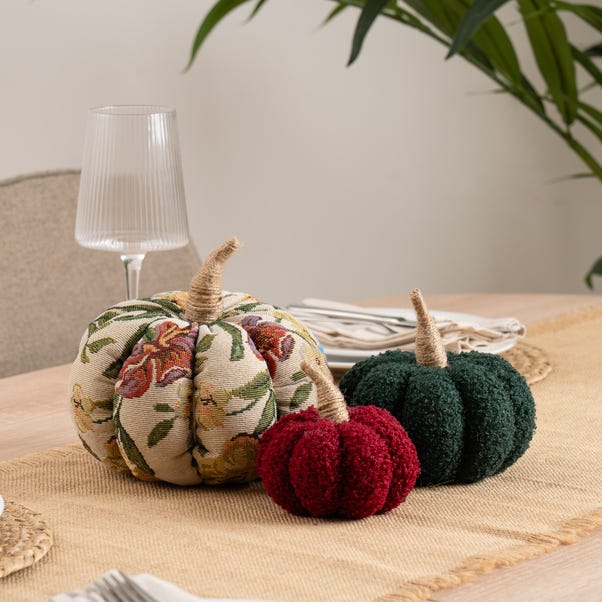
Before you invest in beautiful fabric pumpkins, do a quick check to make sure they’ll fit your style long-term.
- Do the colors (deep green, burgundy, cream) complement your existing home decor for the entire fall season, not just Halloween?
- Do you have a safe, dry place to store them after the season? (Unlike plastic, fabric can be prone to mildew if stored in a damp basement).
- Is the style versatile? The boucle and tapestry here feel autumnal, not just spooky, giving them a longer display life from September through November.
✅ Before You Start
Fabric decor like these boucle and tapestry pumpkins is beautiful, but it requires a bit more care than plastic or ceramic. Their textured surfaces can be dust magnets. Plan to give them a gentle once-over with a lint roller or the brush attachment of your vacuum every couple of weeks. If they get a small spot or stain, try to spot-clean with a damp cloth and a tiny bit of gentle soap. Do not throw them in the washing machine. When storing them, place them in a breathable cotton bag or a loose plastic bin to protect them from dust and moisture.
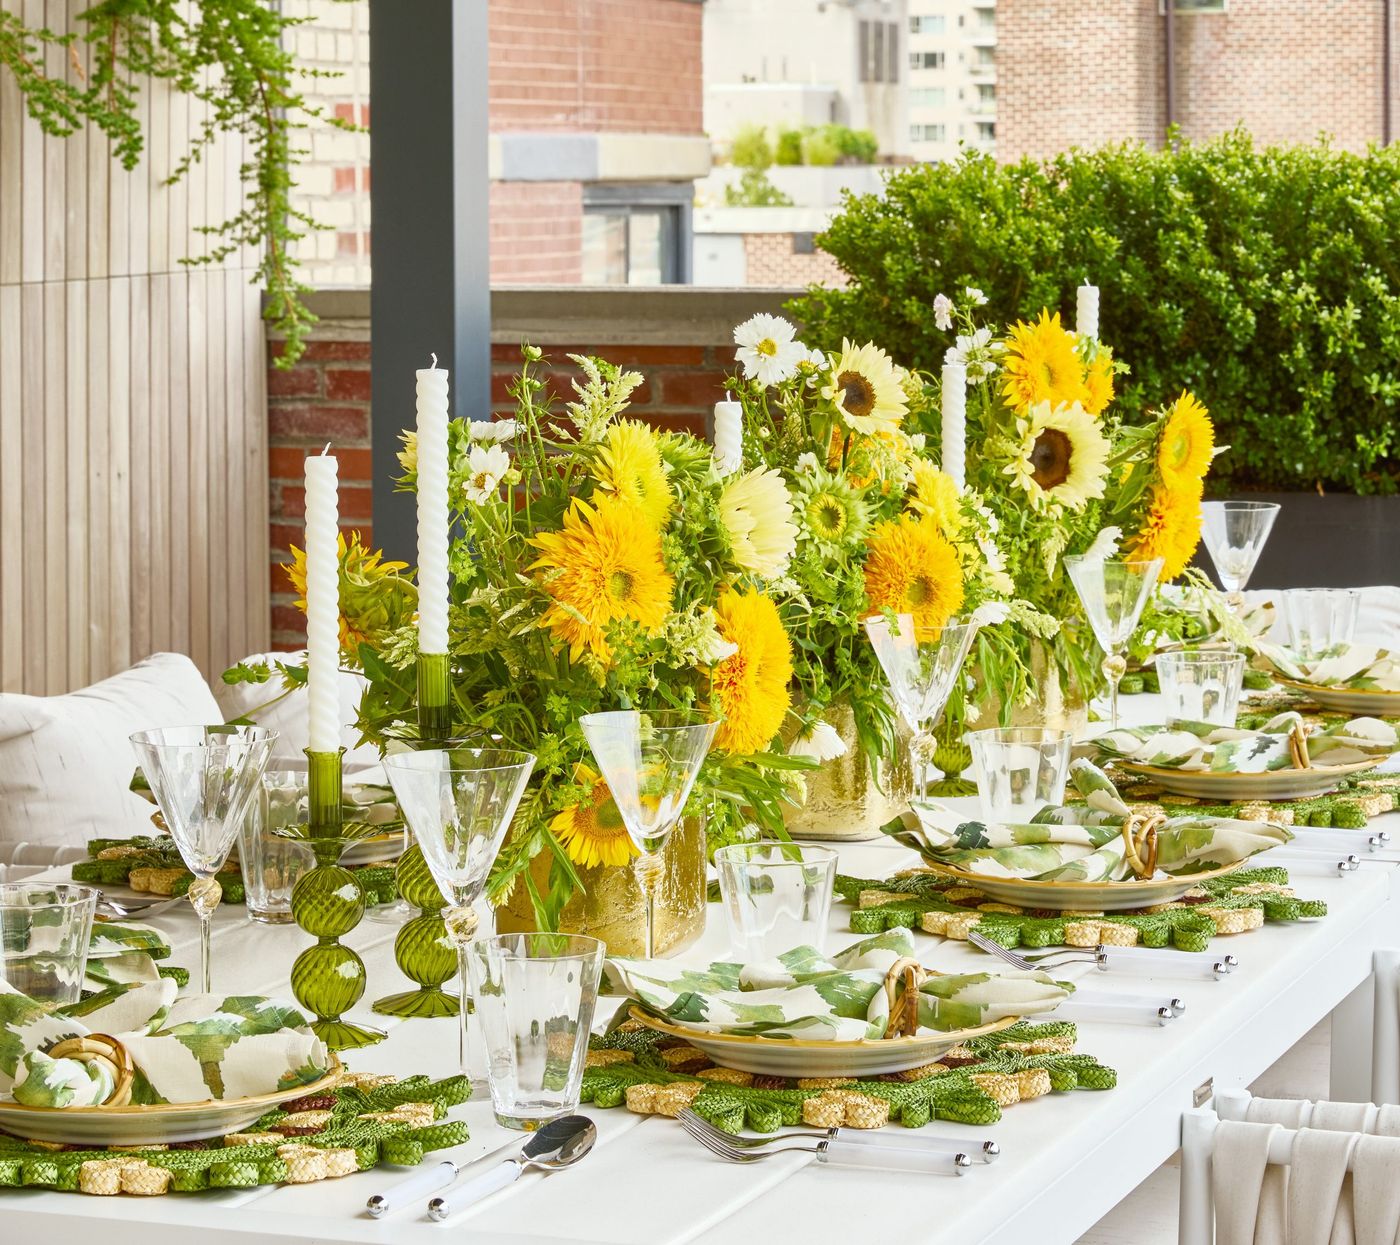
26. A Fresh Al Fresco Table with Sunflowers and Green Glass
This setting feels so fresh and alive because it uses a bold analogous color scheme—colors that are next to each other on the color wheel. The sunflower yellow and leaf green are neighbors, creating a harmonious and naturally pleasing combination. The brain reads this pairing as organic and intentional. The crisp white of the cutlery and the gold vessels act as bright, clean accents that stop the greens and yellows from feeling muddy. It’s a simple, can’t-miss color combination for a vibrant garden party vibe.
💰 Budget Breakdown
An outdoor dinner party looks idyllic, but you have to plan for nature. First, wind is your enemy. Those beautiful taper candles will either blow out instantly or drip wax everywhere. Use hurricane lanterns or opt for high-quality LED candles instead. Second, bugs love a party too. Consider placing a few subtle citronella candles just outside the main dining area. Finally, have a backup plan. If the weather turns, be ready to move the key elements (like those gorgeous sunflower centerpieces) to your indoor dining table in a flash.
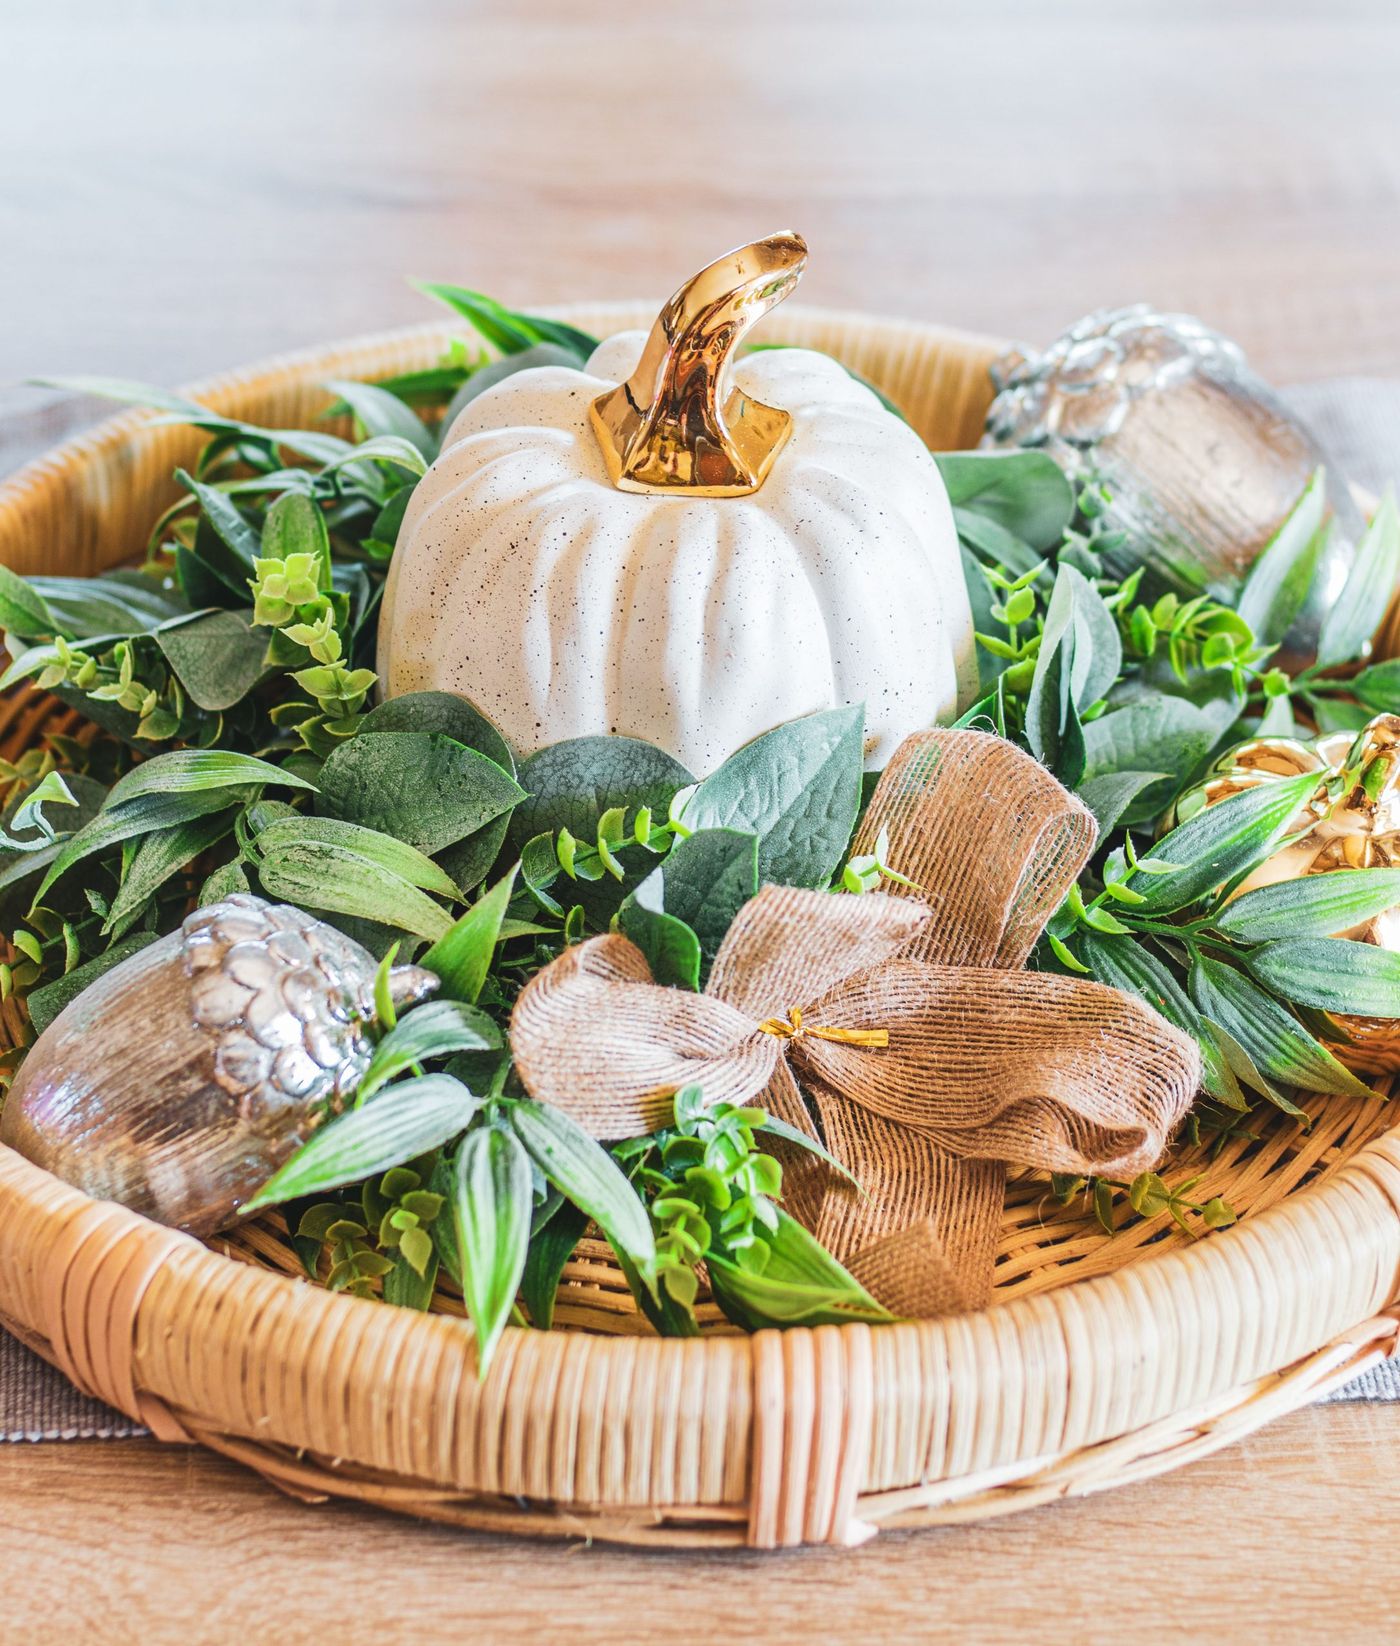
27. A Neutral Fall Centerpiece in a Round Woven Tray
This elegant, neutral centerpiece is a simple and affordable DIY project. It’s perfect for a coffee table or small dining table.
- Round Woven Tray: $20 – $45
- Faux Greenery (Boxwood/Eucalyptus): $15 – $30
- Ceramic Pumpkin: $15 – $25
- Decorative Acorns/Ribbon: $10 – $20
- TOTAL: $60 – $120
Budget alternative: Find a woven tray at a thrift store (or use a large, shallow basket you already own). Forage for real acorns and a small branch for the pumpkin stem. A simple white-painted gourd from the grocery store can stand in for the ceramic version, bringing the total cost down to around $30.
🎯 What Makes It Work
The woven wicker tray is the unsung hero of this entire arrangement. It acts as a visual container, gathering all the separate elements—the pumpkin, the greenery, the acorns—and turning them into a single, cohesive centerpiece. Without it, you would just have a few decorative items sitting on a table. The tray provides a rustic, textural base that grounds the entire look and makes it feel intentional and complete. It’s the simple frame that makes the art look so good.
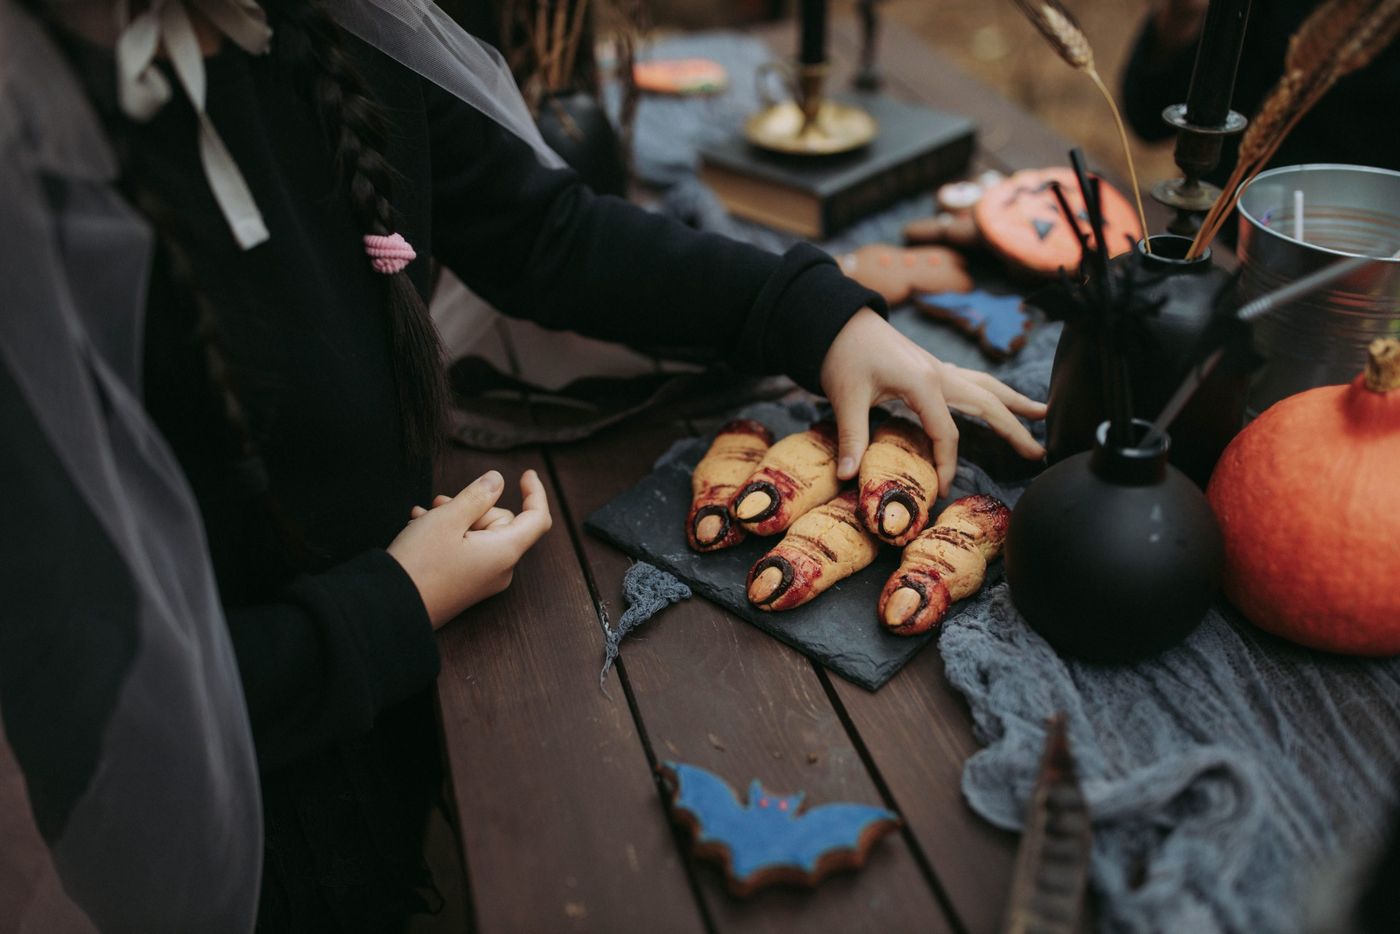
28. A Rustic Halloween Table with Spooky Finger Cookies
This look achieves its spooky-rustic charm with a clear formula: 50% dark, natural textures + 30% quirky, playful elements + 20% warm accents. The dark wood table and slate platter provide the moody, natural base. The finger-shaped cookies are the undeniable quirky star of the show. And the burnt orange of the pumpkin and the warm brass of the candlestick provide just enough color and warmth to keep the scene from feeling too cold or severe. It’s the perfect balance of creepy, crafty, and cozy.
📐 Style Math
For a party, you have to decide where to spend your time and money. A good rule of thumb is to DIY the things that make a big visual impact for low effort, and buy the things that are fussy or require special skills. In this case, definitely make the finger cookies! They are simple sugar cookies and the fun is in their creepy, imperfect shape. Spend your money on a few nice cheeses or a bottle of wine, and save your energy by using simple, store-bought decor like the matte black vases and gauze runner.
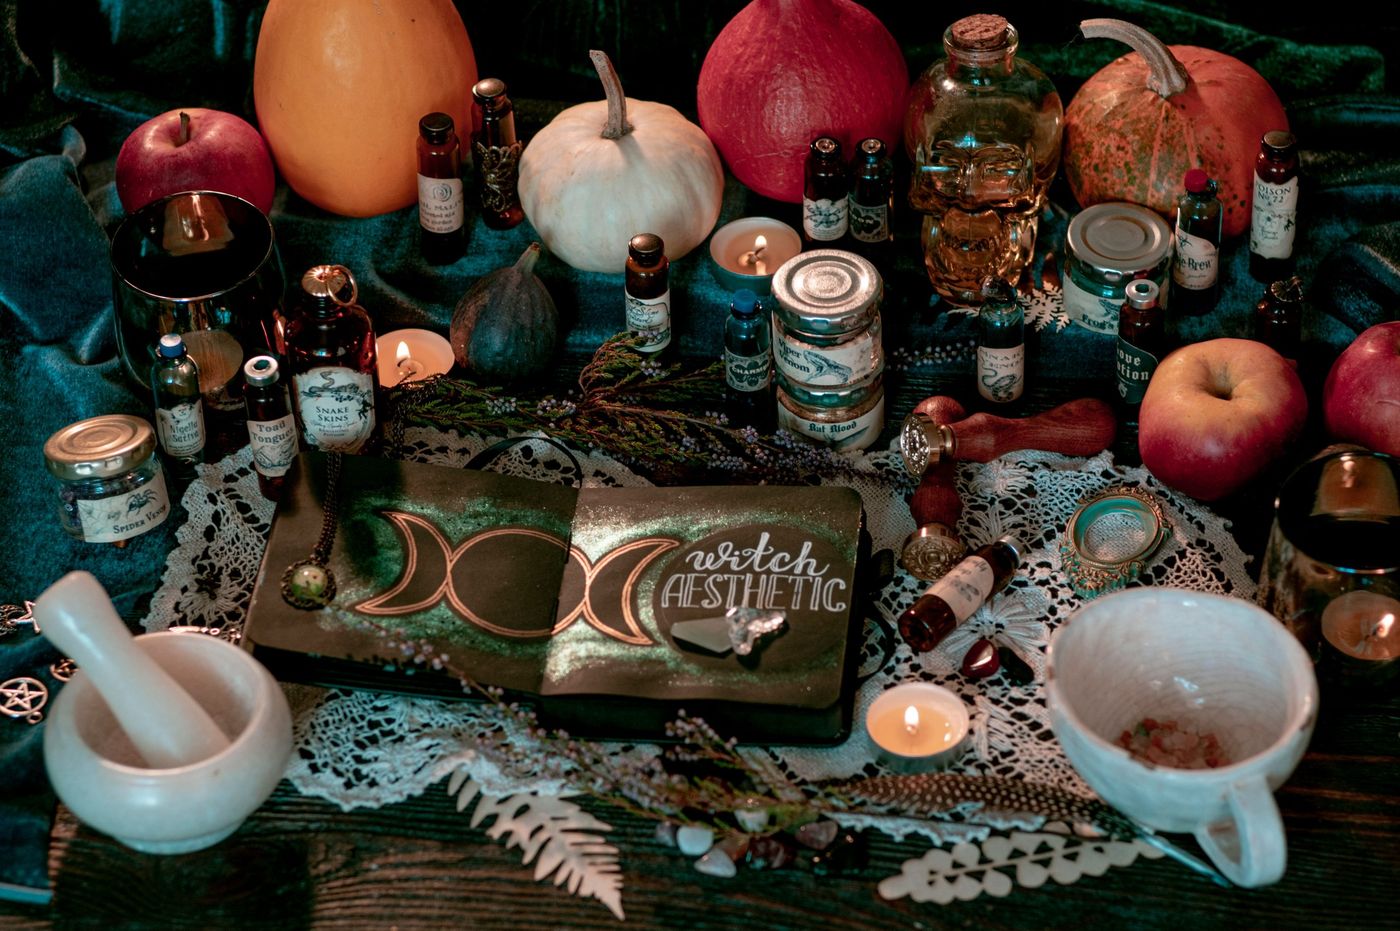
29. A Moody Witchcraft Altar with Apothecary Vials
To create a tabletop display that feels like a real witch’s altar, the key is layering and collecting over time. Don’t just buy a ‘witch kit’. Start with a beautiful piece of fabric for the base, like this deep teal velvet. Then, add items with personal meaning or interesting textures: a vintage book, a ceramic mortar and pestle from a kitchen store, interesting rocks or crystals, dried herbs from your garden. The most authentic-looking displays feel curated and personal, not purchased all at once. Mix in the spooky elements like pumpkins last.
💡 Designer Tip
A prop ‘grimoire’ or spellbook adds an amazing narrative touch. Here’s a quick way to make one.
- Find an old, unloved hardcover book from a thrift store.
- Mix brown acrylic paint with a little water to create a thin wash. Brush this over the cover to make it look like old leather.
- While it’s still slightly damp, press on it with a crumpled paper towel to add texture.
- Use a gold or silver paint pen to draw some mystical symbols on the cover—moons, stars, or invented sigils.
- Open it to the middle and use a glue stick to paste in some interesting pages you printed, like these moon phases.
Your Spookiest, Most Stylish Party Awaits
Now that you’re armed with all this inspiration, the only hard part is choosing which story you want to tell. Remember, the best Halloween decor isn’t about spending a fortune; it’s about creating an atmosphere that makes your guests feel like they’ve stepped into another world. So go on, create a little magic this year. You’ve totally got this.