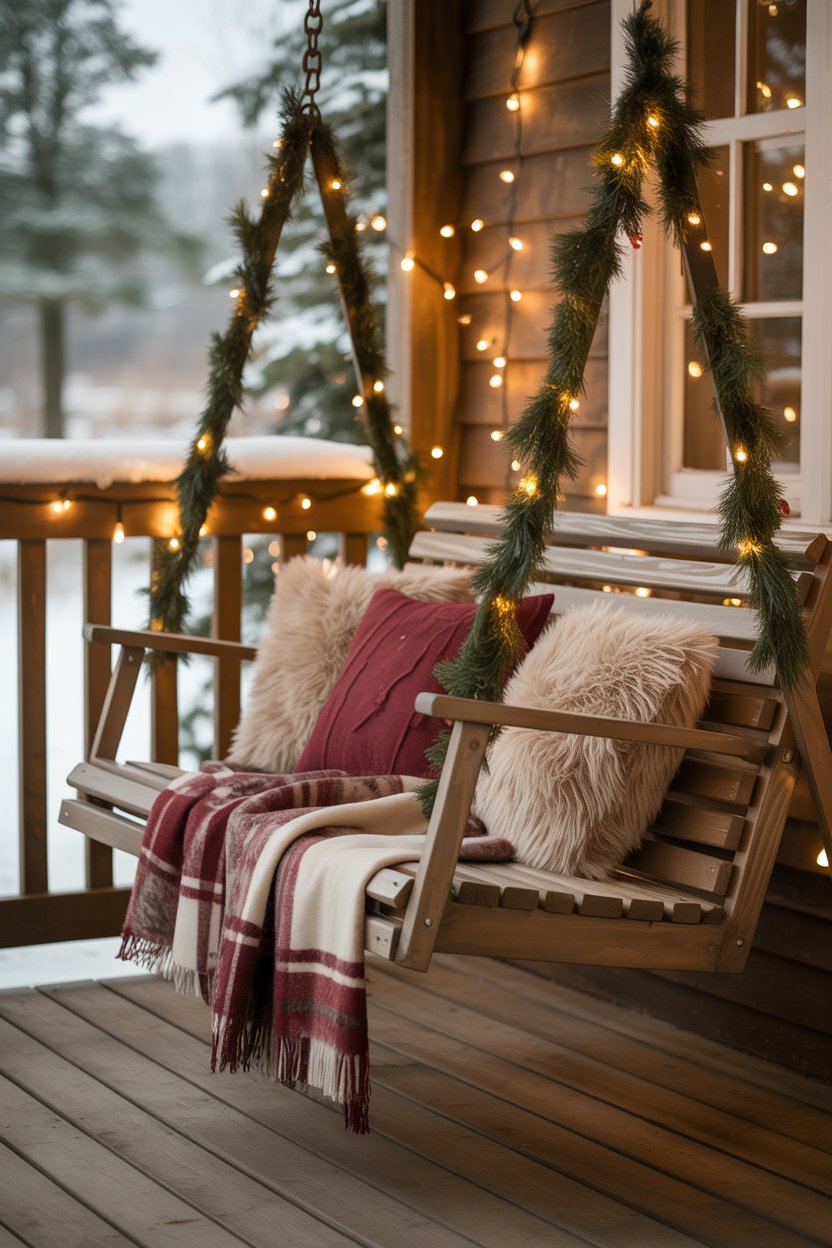
You know that feeling when you’re three hours into Pinterest, thumbnails blurring together, and you still haven’t found the tree that actually fits your living room? That’s exactly why this guide exists.
We spent serious time browsing Etsy, Facebook Marketplace, Lowe’s, Home Depot, and IKEA to bring you only what’s worth building this year — across price points from about $40 in scrap materials up to $600 for a finished statement piece. After filtering through hundreds of options, we narrowed it down to 25 ideas that actually deliver, from rustic pallet slat trees and distressed green plank sculptures to spiral wood-slat designs and minimalist tea-light displays. Budget and luxury versions are compared side by side throughout. And stay until the end — we break down the most common mistakes that can ruin these looks.
Pallet trees are having a real moment in 2026 because people want decor they can build, weather, and keep — not another box that goes back to the garage in January.
📌 Save this to Pinterest for later — you’ll want to revisit these ideas. (A few links in this post may earn us a small commission; it never changes what we recommend.)
1. Wavy Carved Wood Tree on a Textured Beige Wall
A carved tree silhouette reads as negative space first and Christmas second — that’s what keeps it from feeling like a craft project. The textured beige wall does the heavy lifting: warm wood against a chalky, matte backdrop gives the carving depth without a single competing pattern. Then the styling breaks the outline on purpose. Dried eucalyptus and pinecone bundles hang past the tree’s edges, gold ornaments catch the string lights, and a braided natural fiber rug ties the corner into the same earthy family.
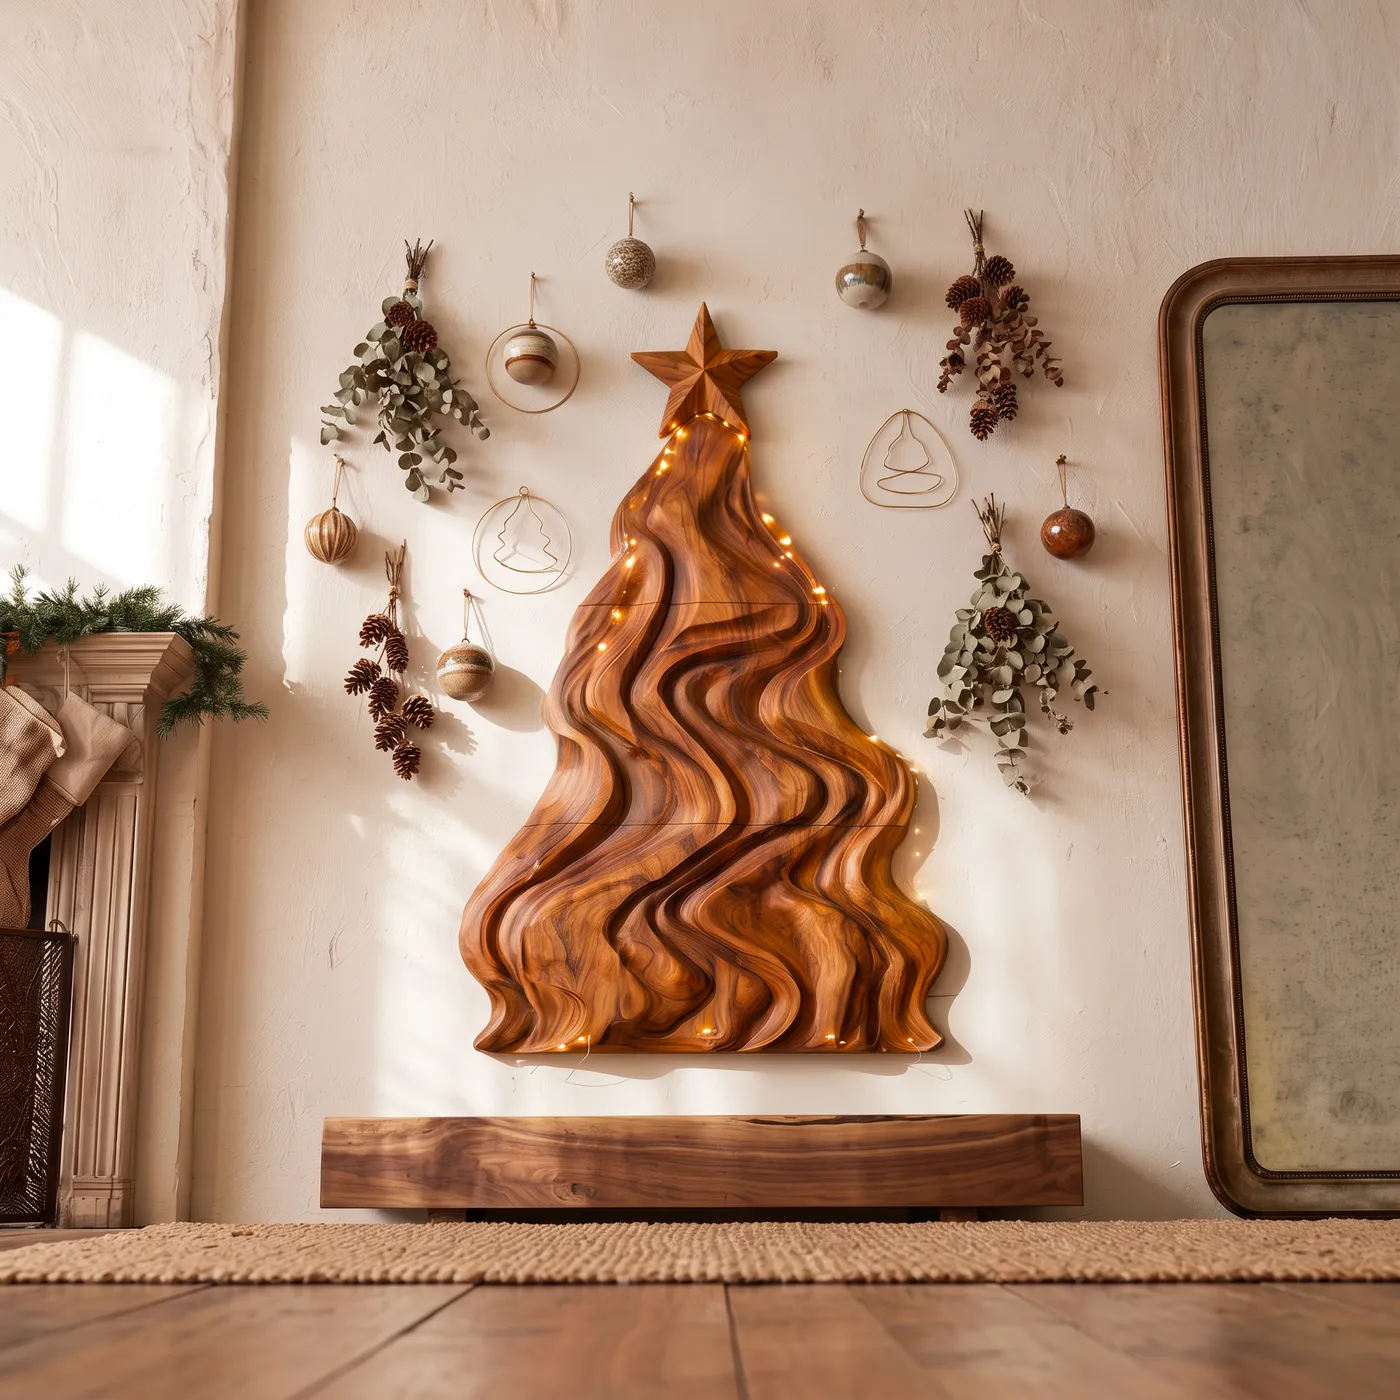
Hang your focal pieces 60 to 66 inches off the floor — that’s average eye level, and it’s where the wooden star should land, not up near the ceiling. For a wall-mounted carving, anchor into studs or use 50-pound toggle bolts, because a four-foot wood tree plus lights and greenery gets heavy fast. Keep the string lights at 2700K. Cool white will make the beige wall look grey and the wood look orange.
2. Chevron Reclaimed Plank Tree Against a Blue Floral Wall
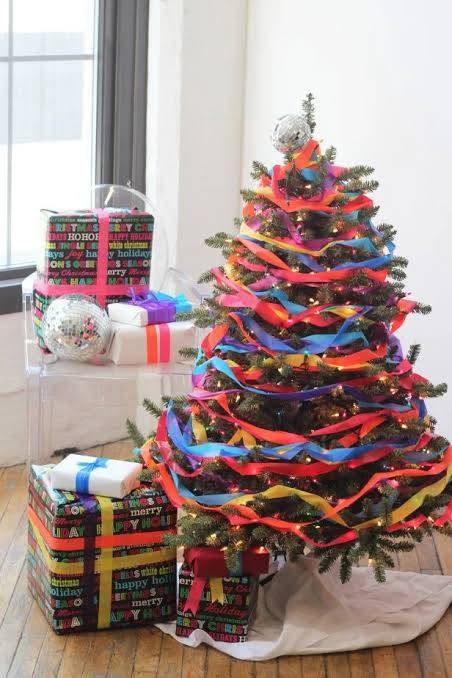
Here’s the formula: 55% weathered wood, 25% pale blue, 15% red, 5% glitter. The chevron pattern supplies the structure, the blue-and-white wall supplies the calm, and the red ribbon is the only true accent — which is why it reads festive instead of chaotic. Swap the blue wall for sage green and the red for copper and the exact same chevron build turns autumn-warm instead of frosty. Change one variable, not all three at once.
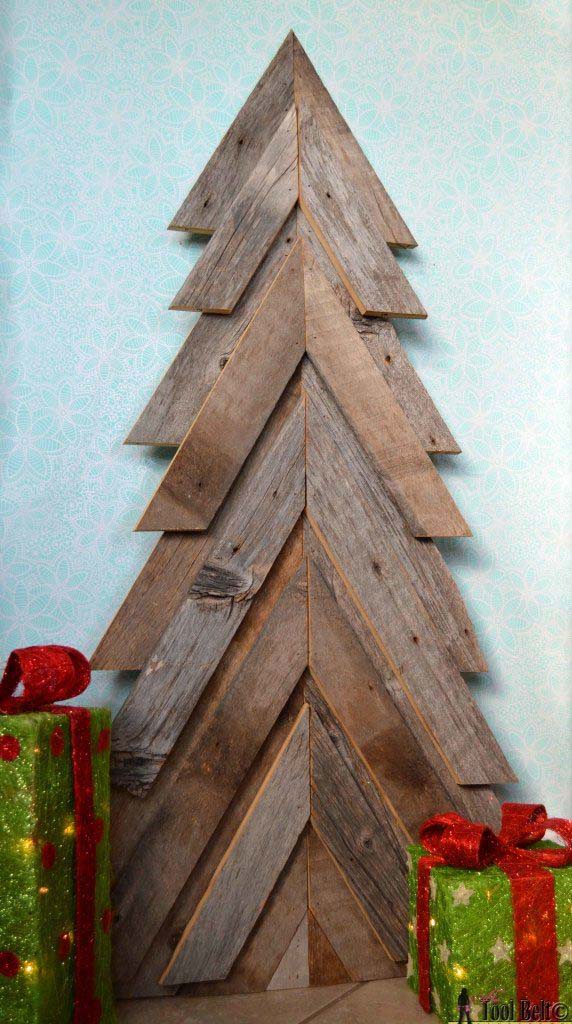
- Reclaimed or fence planks, 10-14 boards: $0-$60 from Marketplace or a salvage yard
- Miter saw or circular saw: $0 if borrowed, $35-$120 if you buy
- Screws, sandpaper, matte sealer: $18-$30
- Green glitter gift boxes, 6-8: $14-$40
- Ribbon, 2 spools: $8-$18
- Total: roughly $40 to $270, depending on your tool situation.
Budget alternative: skip the power tools entirely and ask a local lumber yard to cut your planks to length for a $10-$20 fee. That single move can cut the project nearly in half.
3. Ornament-Shaped Wall Hanging with Corrugated Metal Trim
The corrugated metal strips are the whole reason this piece doesn’t look like a school project. Two bands of ridged metal — one across the top, one across the bottom — frame the vertical planks and give the eye a hard industrial edge to bounce off. Take them away and you’ve got a plain wooden disc with decorations glued on. Keep them and it reads like something salvaged off an old barn door, which is exactly the mood you’re after.
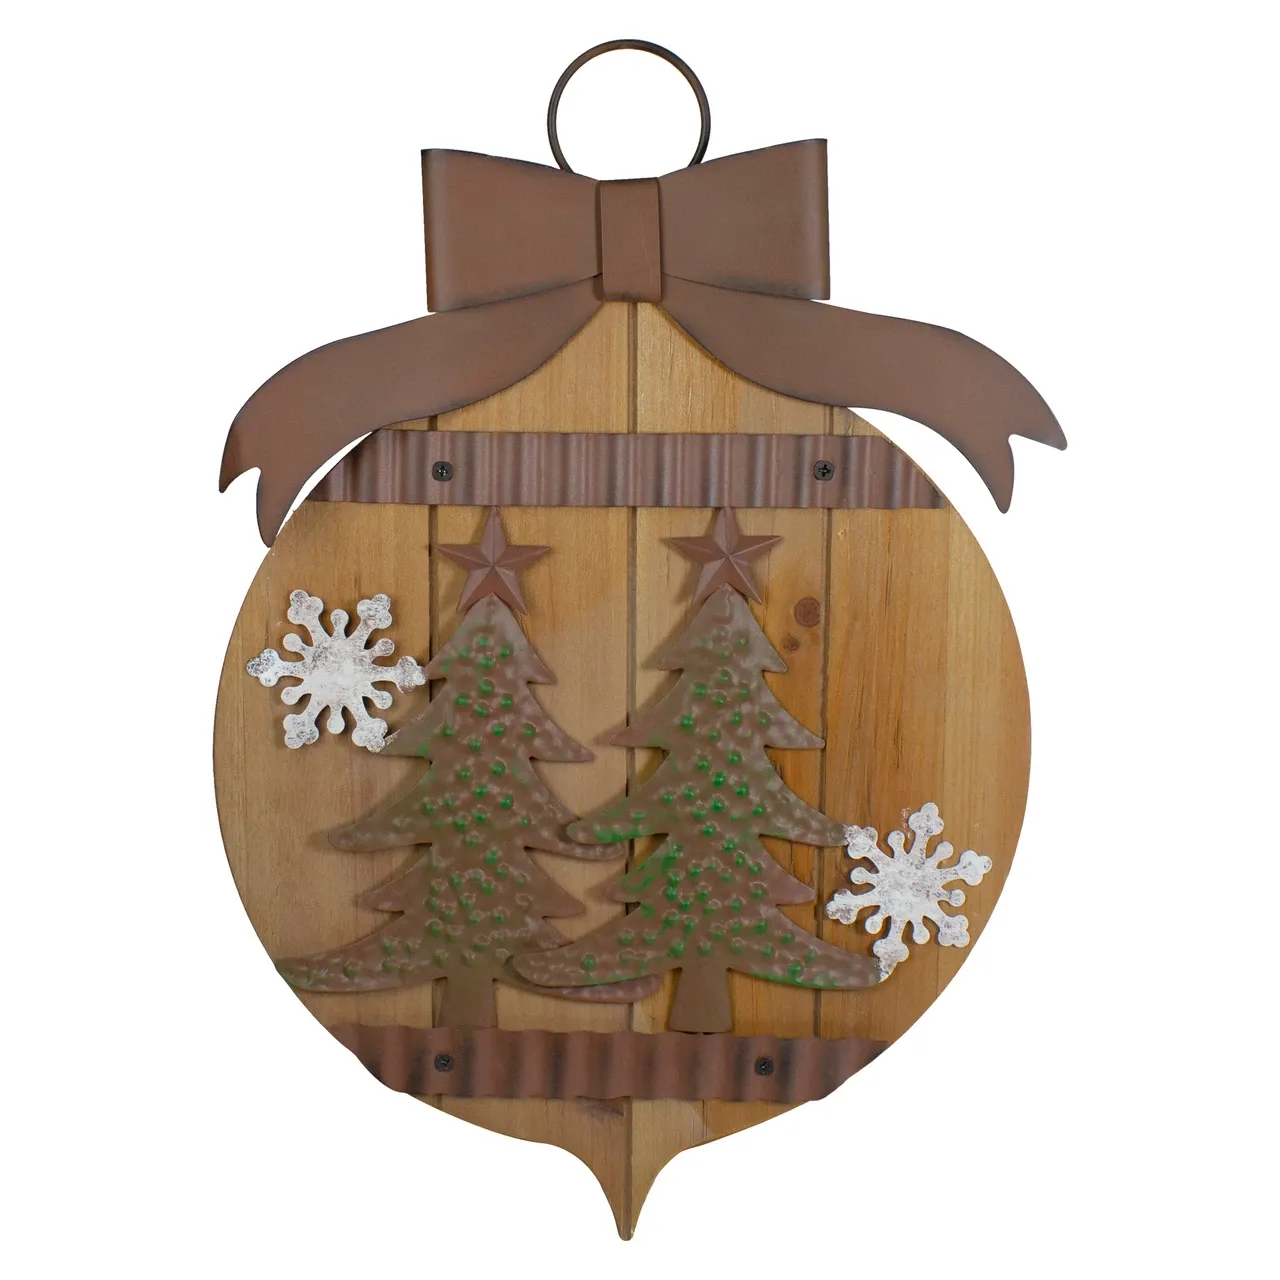
- Cut seven to nine planks to equal length and dry-fit them into an ornament shape.
- Glue and screw a plywood backer behind them so the planks stay aligned.
- Jigsaw the outer curve through planks and backer together — cutting them as one unit keeps the edges flush.
- Tack corrugated metal flashing strips across the top and bottom with a staple gun.
- Attach the bow, then the snowflakes and tree cutouts, with construction adhesive.
About two hours of work and $25-$45 in materials if you’re working from scrap wood and a roll of metal flashing.
4. Horizontal Pallet Slat Tree with Candy Canes and Red Baubles
All you actually need is one pallet — the free kind behind a hardware store. Pry the slats off with a crowbar and hammer, cut five or six lengths that step down toward the top, then screw them to a vertical spine. Add six dollars of warm string lights from Walmart, a three-dollar pack of plastic candy canes, and a bow from last year’s wrapping stash. Total: under $25. IKEA string lights and Target’s dollar-spot ornaments finish it off, and nobody will know the difference.
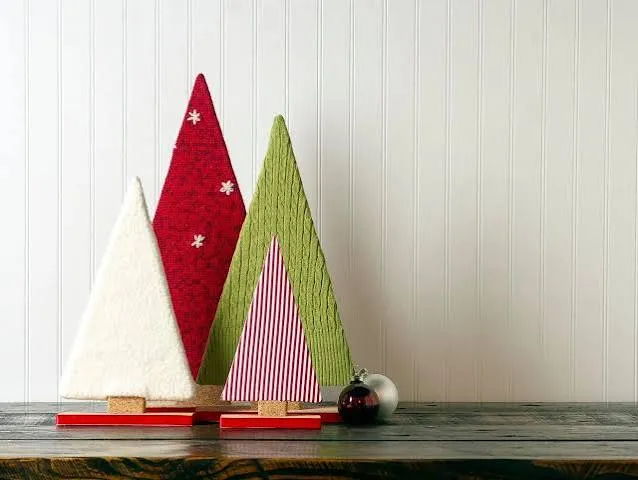
Pallet wood is rough, splintery, and sometimes chemically treated. Pallets stamped HT were heat-treated and are fine indoors; those stamped MB were fumigated with methyl bromide and have no business in your living room. Untreated pallet wood also sheds fine dust for the first week, so a coat of matte polyurethane on day one saves you a season of vacuuming. Keep the finished tree under five feet unless you’re bolting it to the wall — these tip over.
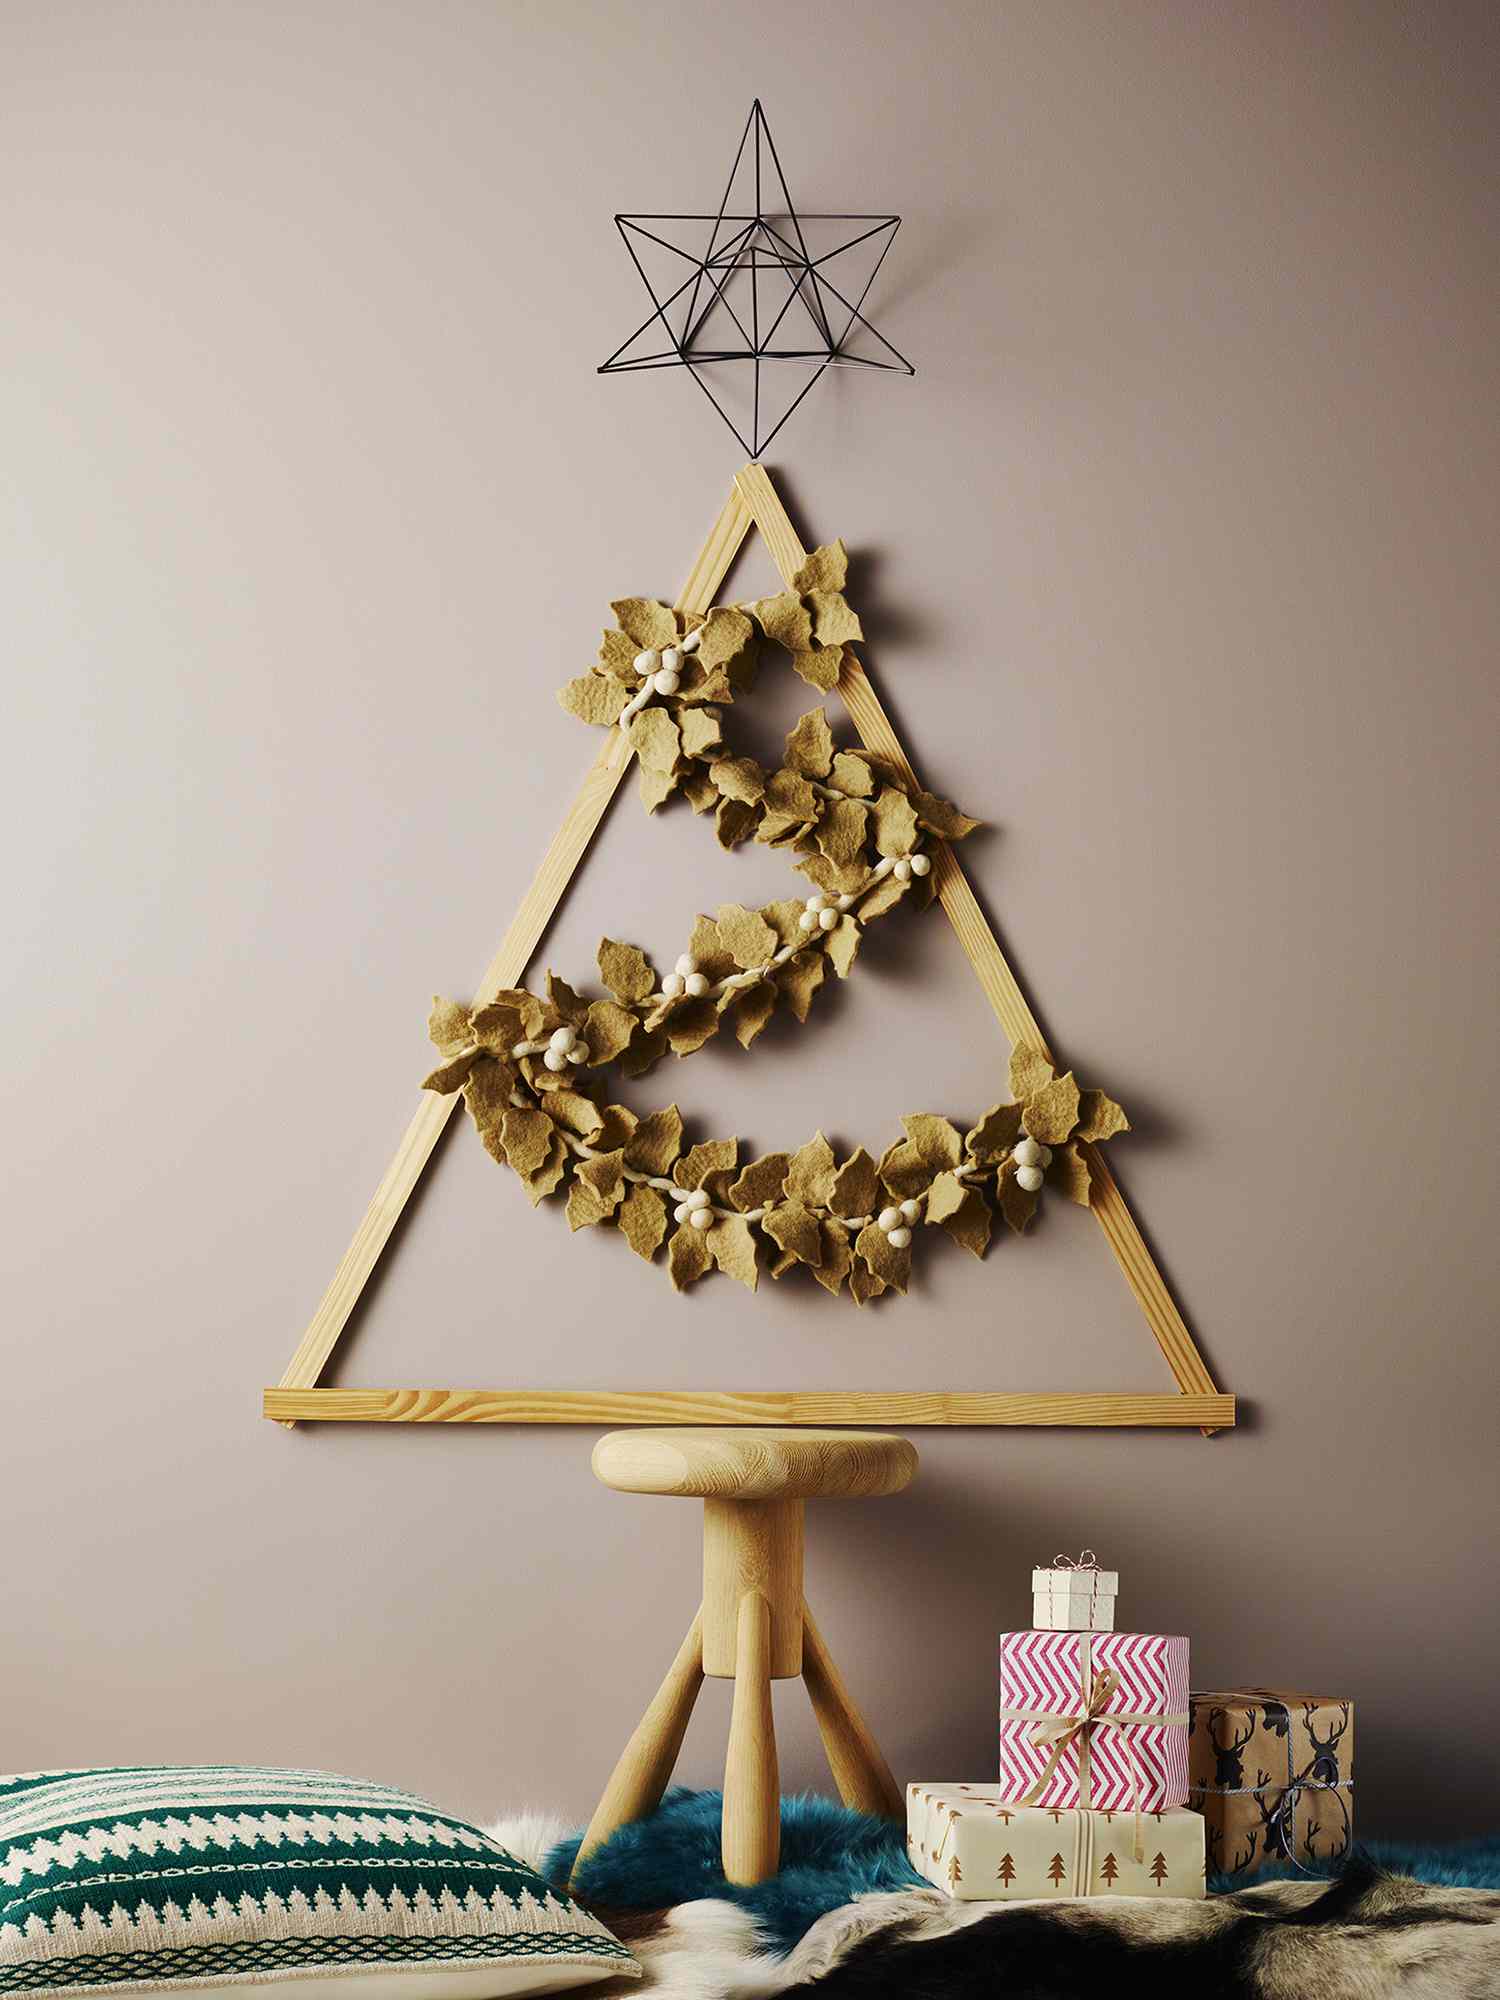
5. Triangle Frame Shelf Tree for Displaying Tiny Figurines
Shelf spacing is everything here. Leave 9 to 11 inches between shelves so a six- to eight-inch figurine has headroom without floating in a void. Stagger the figurines by height — tallest in back, shortest in front — the way a photographer arranges a group shot. And run the garland up the frame in one continuous spiral rather than wrapping each side separately, or you’ll get an awkward double-cross at the apex that no amount of lights will disguise.
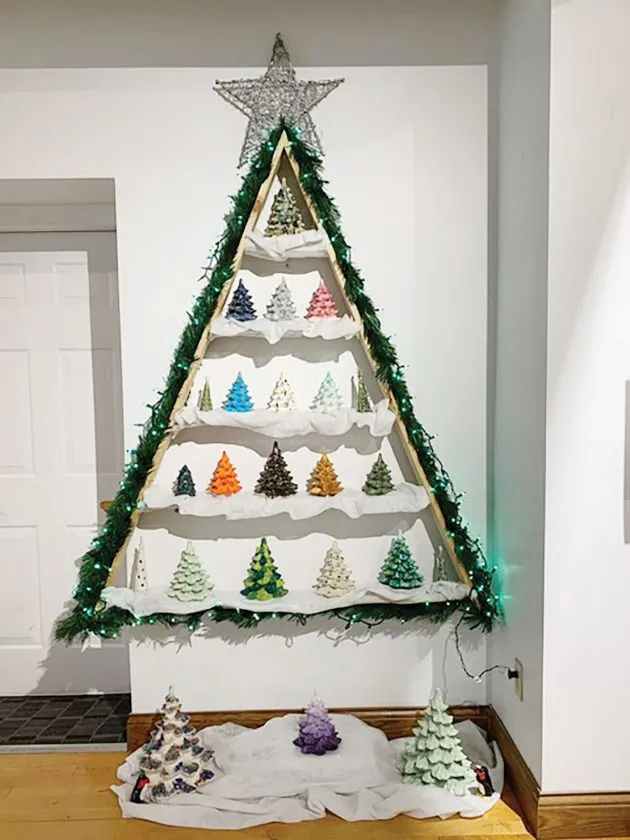
This one wants a wall with at least six feet of uninterrupted width, and it works best between 30 and 44 inches off the floor so the bottom shelf sits in the sightline of anyone seated nearby. It’s a brilliant narrow-room solution: the frame projects only five or six inches, so a hallway, a stair landing, or the sliver of wall beside a kitchen pass-through all work. If you’re short on wall space, compare with Idea #10, where three freestanding wooden trees do the same job on the floor.
6. Live-Edge Mantel with Wooden Trees and a Lit Deer Head
Mantel-scaping has quietly replaced the floor tree in a lot of homes, and 2026 is the year the mix got looser. Instead of one matched set, you’re seeing salvaged wood, painted grey, and bare natural branches all in the same lineup — plus a lighting element that isn’t a tree at all. The white deer head strung with fairy lights is the tell: it’s decor that reads holiday from October through February, so nothing has to come down in a hurry.
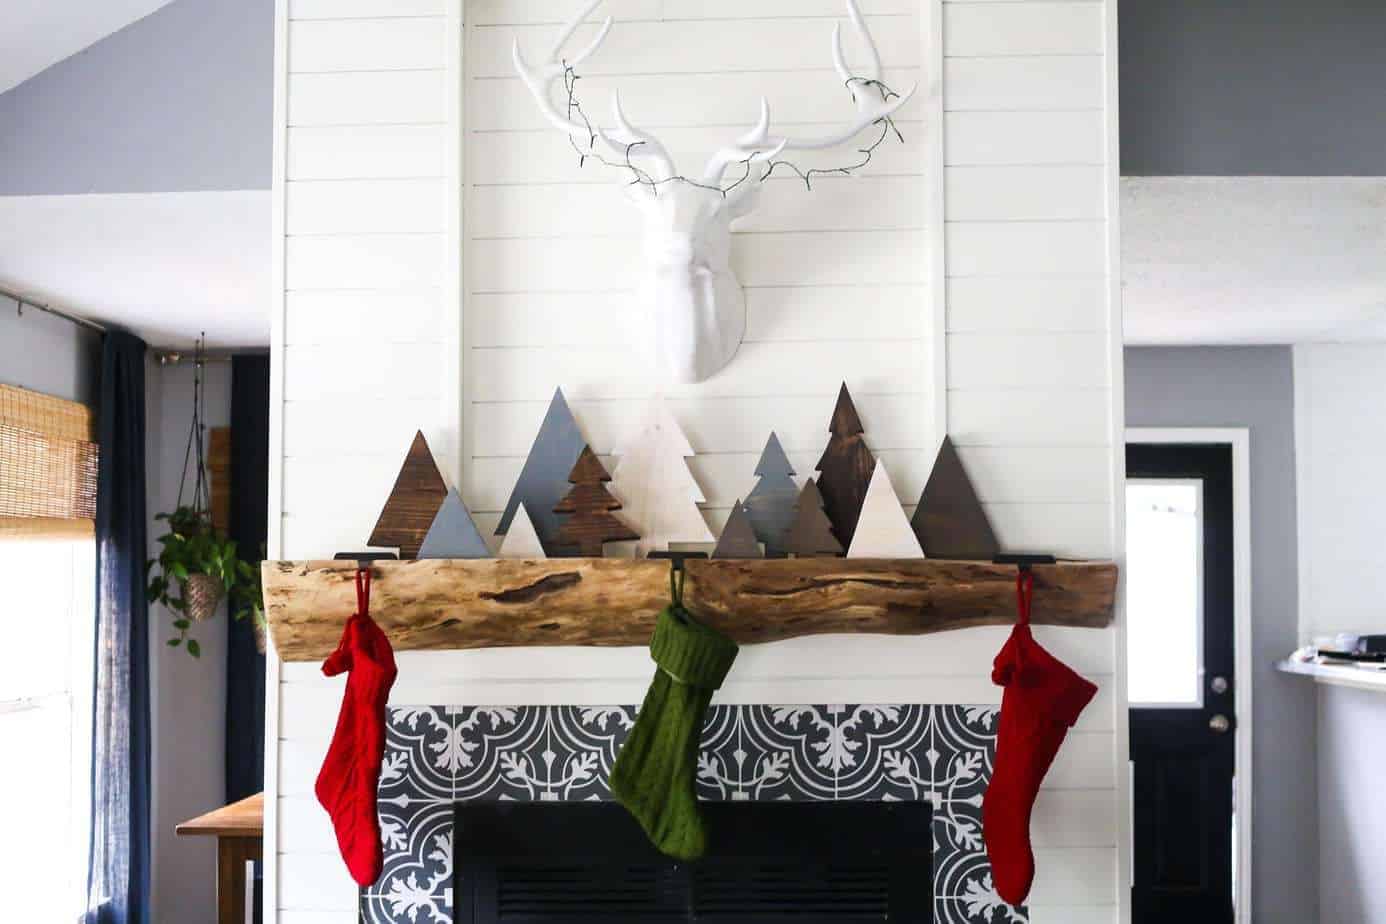
It’s the tile surround that holds this together. Black and white patterned tile under a live-edge log mantel does something no amount of greenery can — it gives soft, organic wood a hard graphic anchor. Strip the tile back to plain drywall and the mantel suddenly looks unfinished, like a branch someone leaned against the wall. It’s also the cheapest part to fake, since peel-and-stick tile gets most of the way there for under $50.
7. Distressed Green Plank Panel with a Layered White Tree Cutout
- Cut 8-10 narrow planks to the same height and dry-fit them edge to edge.
- Paint each plank a different green — use one anchor green and shift the tint board by board instead of buying three cans of the same color.
- Sand the edges and a few random patches while the paint is still slightly soft to get that chipped, weathered look.
- Cut your white tree silhouette in two sizes and layer the smaller over the larger with a spacer behind it for shadow.
- Attach everything to a backer board and hang.
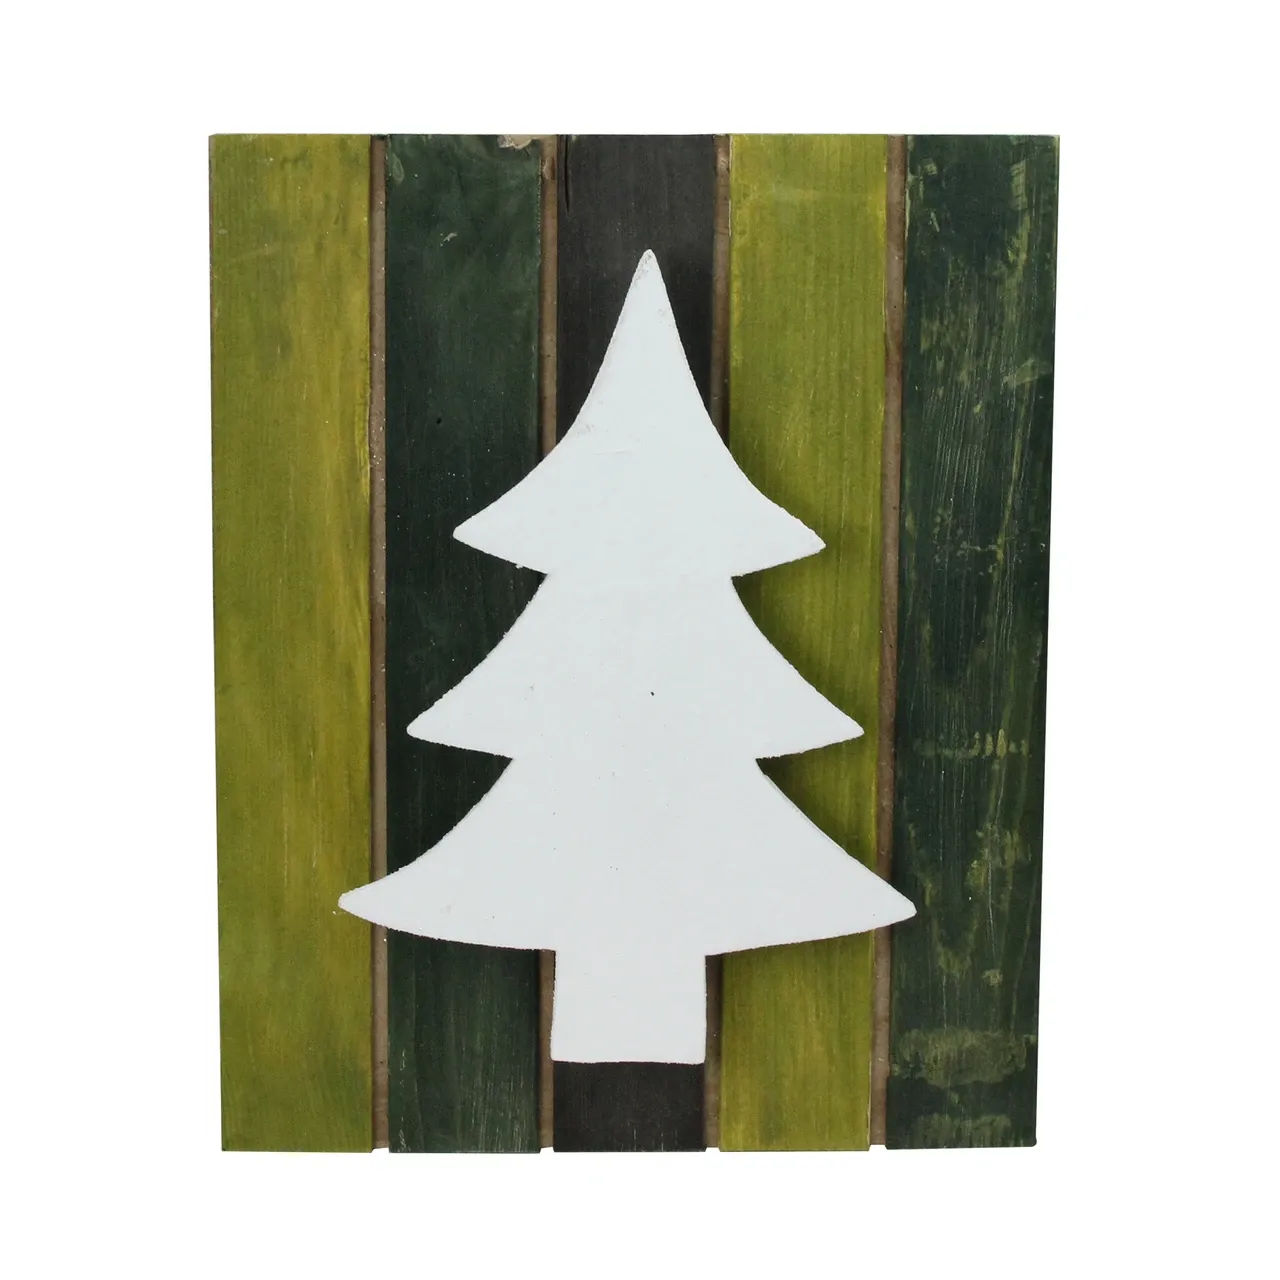
Around two and a half hours and $20-$35 in materials, most of which you may already have in the garage.
Three greens, one white. That’s the whole recipe: roughly 40% mid-green, 35% dark green, 20% pale green, and 5% white for the silhouette. Because every board is a slightly different value, the eye reads texture rather than color, which is why this works on a plain wall with almost no other decor around it. Swap the greens for warm greys and the white tree for pale cream and the same build goes full modern-farmhouse.
8. Layered Branch Tree Wrapped in Warm Fairy Lights
Every branch here is a different length, and the twine holding them is visible — that’s the point. Deliberate imperfection reads as handmade; perfect symmetry reads as manufactured. The warm fairy lights run along the horizontal lines instead of being wrapped chaotically, so they reinforce the stack rather than hiding it. And the base sitting on grass with a few fallen leaves around it keeps the whole thing feeling like it grew there rather than got assembled in a garage.
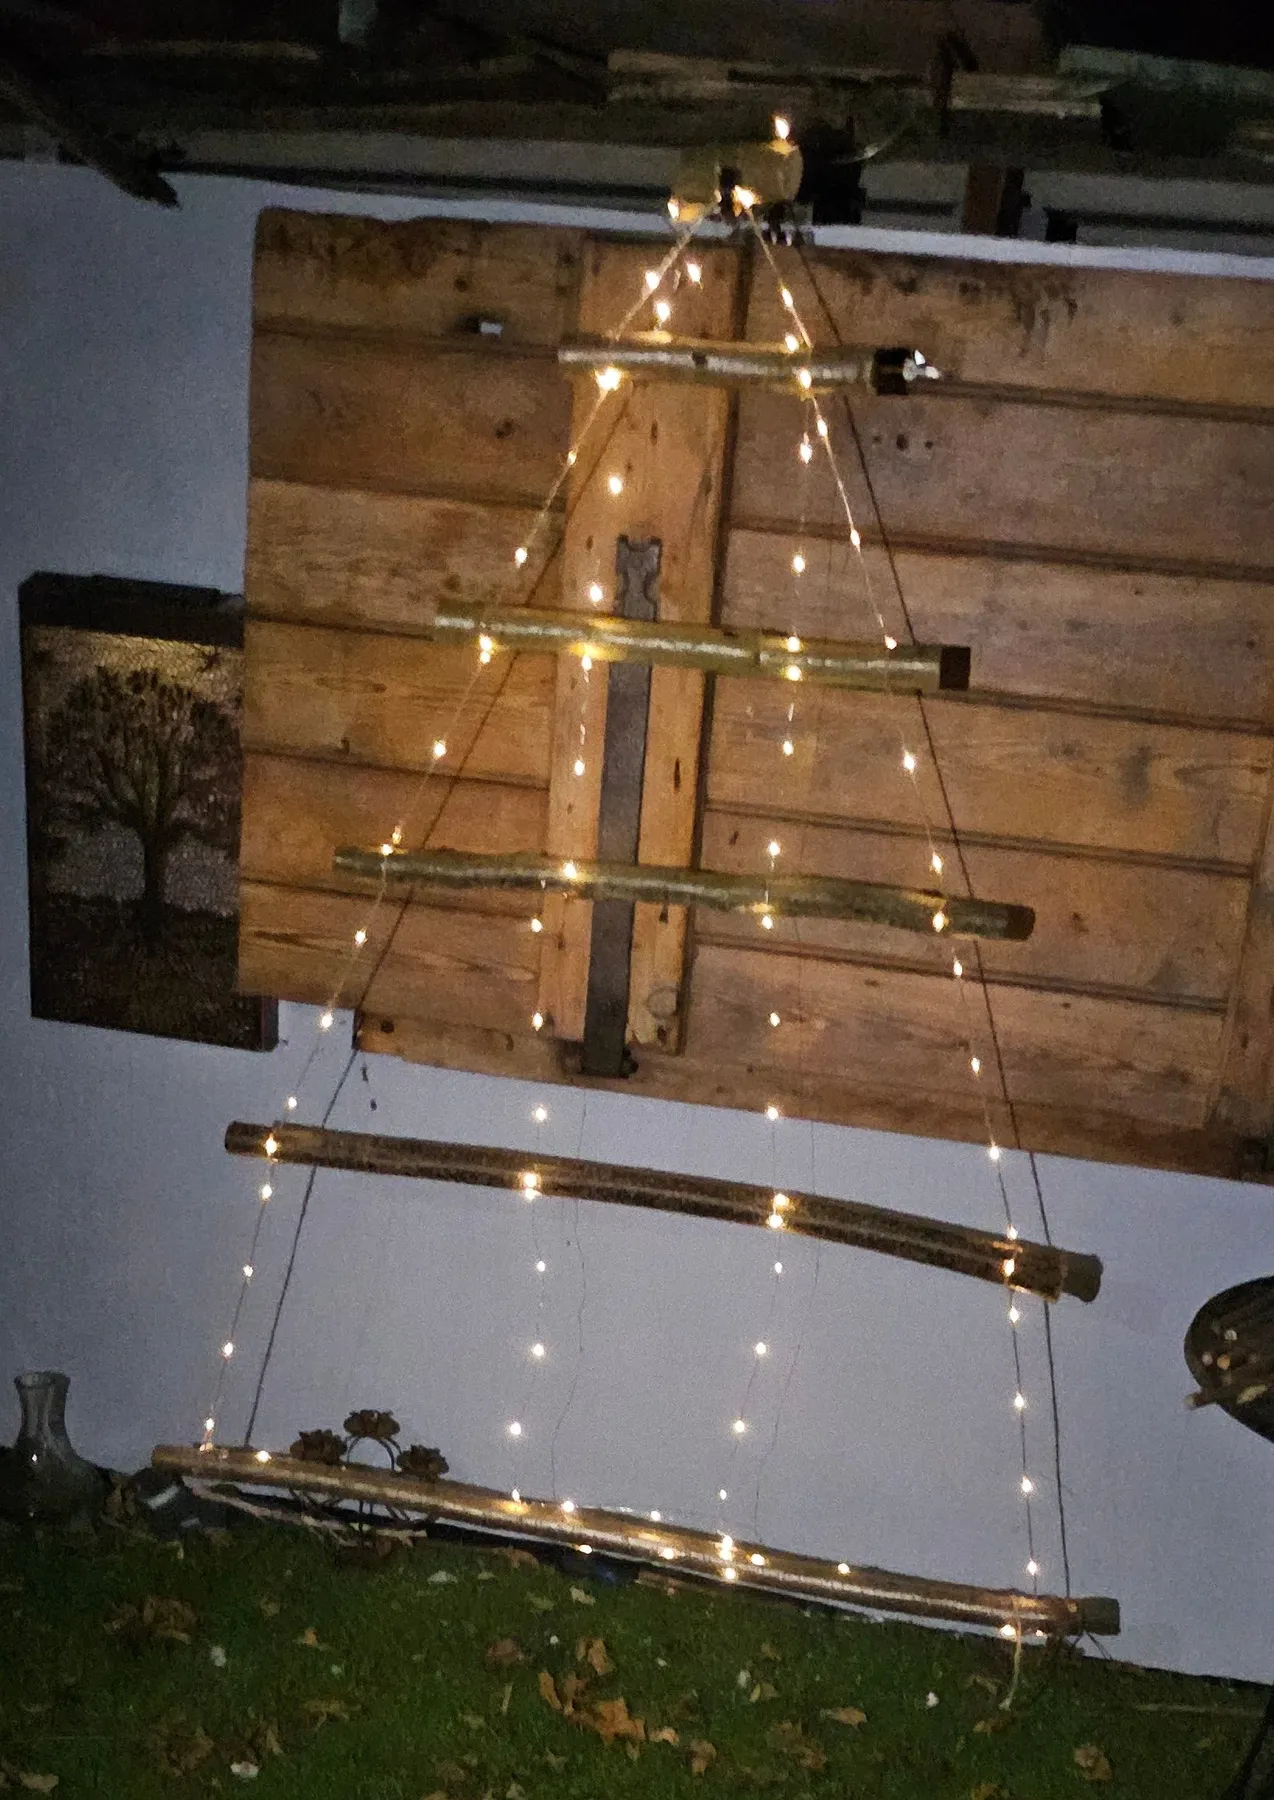
Real branches dry out and shrink, and your twine knots will loosen by mid-December. Pre-drill and use a small screw at each joint, or plan to re-tighten after two weeks. Natural wood with bark also means bugs, sap, and dust — bake thin branches at 200°F for an hour to drive out anything living before they come indoors. If you want the look without the maintenance, painted dowels or narrow cedar boards give you the same horizontal rhythm.
9. Intricately Crafted Wooden Tree with a Star Topper
- Measure the wall and confirm three feet of clearance on both sides — a detailed wood tree needs breathing room or it reads as a wall panel.
- Check outlet placement. Anything lit needs power within six feet unless you’re running battery strands.
- Confirm your lumber is dry. Green or damp wood will crack and twist as it dries indoors.
- Decide on the finish before you cut. Matte oil, wax, or nothing at all each changes the final color.
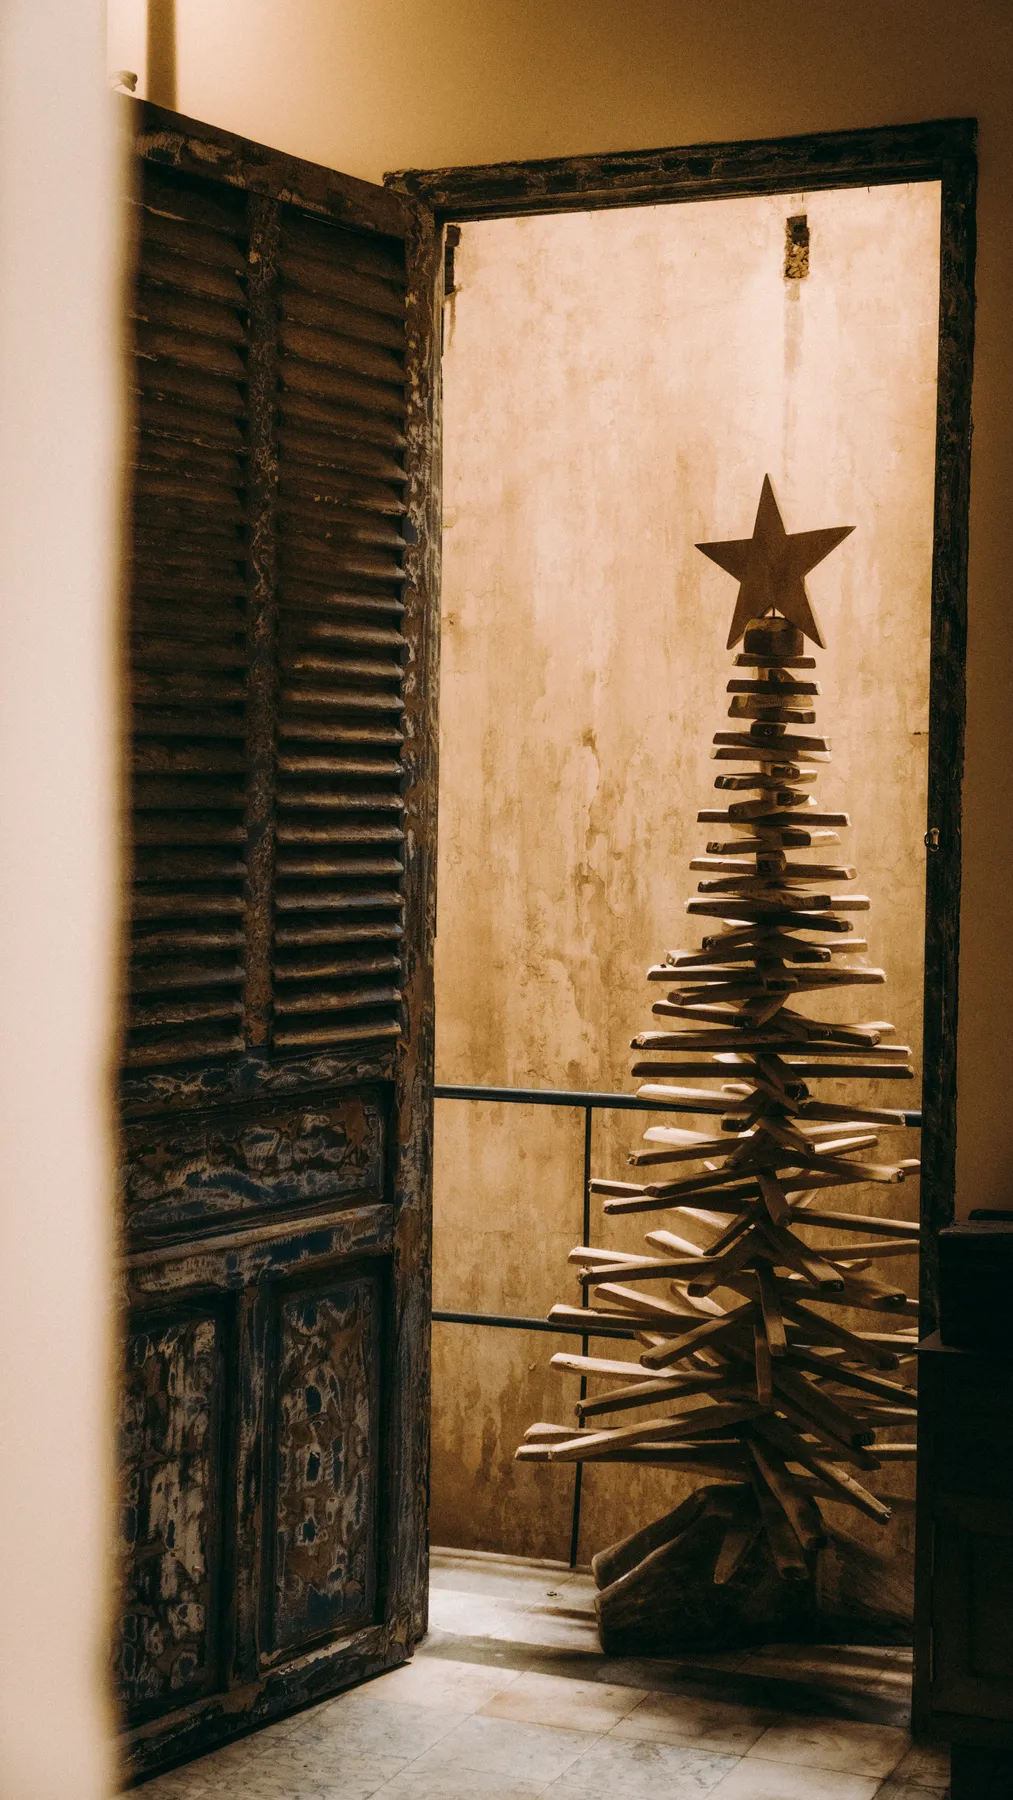
If you’d rather keep it wall-mounted and tool-free, look back at Idea #1 for the lighter carved approach.
- 1×4 or 1×6 pine boards, 8-10: $24-$45 at Lowe’s
- Wood glue, brad nails, clamps: $15-$25
- Wooden star topper: $6-$22 (Etsy has the nicest ones)
- Danish oil or matte wax: $12-$20
- Saw and jigsaw, if you don’t own them: $0-$110
- Total: about $57 to $222, tools included.
Budget alternative: Facebook Marketplace is full of free dressers and shelving units that break down into usable boards. Sand them and your material cost drops to nearly nothing.
10. Three Wooden Tree Sculptures in Plank, Pyramid and Spiral
Rule of three with a twist: make each tree a different height and a different wood tone, but keep the star toppers identical. Repeating one element is what turns three unrelated objects into a set. Space them 6 to 10 inches apart, put the tallest in the middle if you can, and offset the base line slightly so they aren’t all sitting on the same invisible shelf. The white paneled wall behind them does the rest — it’s a free gallery backdrop.

Three freestanding trees need roughly five feet of width and 30 to 40 inches of height clearance, which makes this the most forgiving arrangement in the whole lineup for small rooms. Pull them apart across a console, a hearth, or two separate corners and they still read as a family. Ceiling height is a non-issue since nothing goes above three feet. Just keep the floor tone light — a dark floor swallows pale wood.
11. Rough-Sawn Pallet Tree with a Sheepskin Throw Beneath
Rough-sawn pallet wood is the cheapest interesting material on earth. Scour Marketplace for free pallets, or check behind appliance stores — they stack them by the dumpster. Add eight dollars of warm string lights and a five-dollar pack of red ball ornaments and you’re done for under $30. The sheepskin throw is the one thing worth spending on, and even then, IKEA’s $30 faux version reads just as plush as a $200 real one and goes straight into the wash.
Rough-sawn wood sheds. Expect a fine dust film on the floor for the first two weeks and a light vacuum every few days. One coat of matte water-based polyurethane — about $15 — locks the fibers down and makes the whole tree wipeable. String lights are the other recurring cost: budget bulbs burn out at roughly 8-12% per season, so buy one spare strand now rather than hunting for a match next December.
12. Decorated Pallet Tree Built to Welcome Neighbours
A pallet tree that sits in a public entryway or a church hall has different demands than one in your living room. People brush past it. Kids touch it. So skip loose ornaments, secure every decoration with a zip tie rather than a hook, and widen the base — a 30-inch footprint is the bare minimum before a lightweight wood tree starts wobbling when someone leans on it. Put the lights on a timer too, because nobody wants to remember to switch them on.
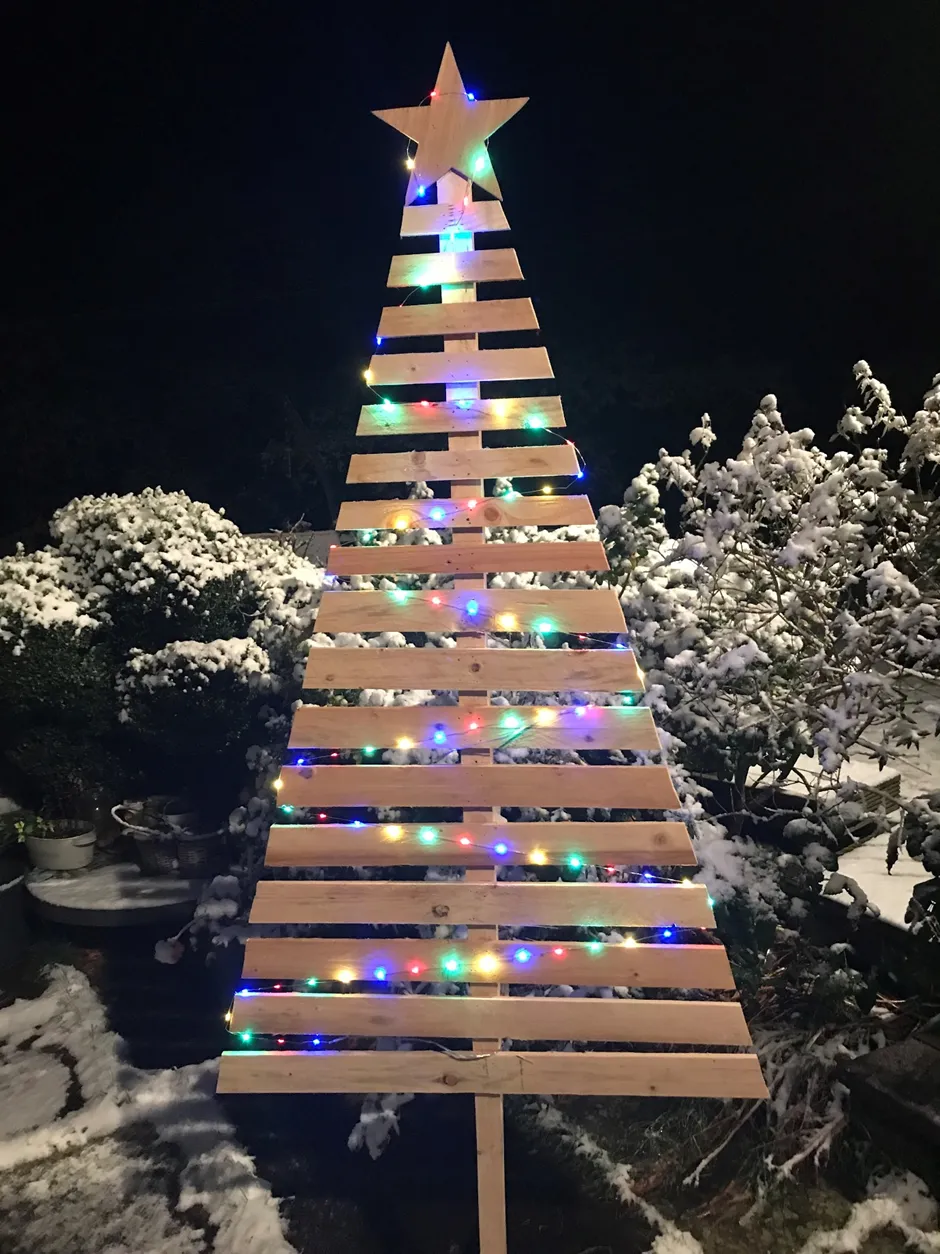
Built for volume: six to eight feet tall, three to four feet wide at the base, in a space with at least nine-foot ceilings and four feet of walking clearance on each side. Entry halls, community rooms, and wide stair landings are its natural homes. In a standard 10×12 living room it will completely dominate — that’s a feature if you want one statement piece, and a problem if you also need the floor.
13. Tall Abstract Tree from Staggered Light Wood Planks
The density is doing all the work. Because the planks are staggered rather than lined up in clean rows, the silhouette stays ragged and organic — it reads as a tree even though not one piece is actually tree-shaped. All that pale wood against a white paneled wall keeps the contrast low, so texture is what your eye notices first. A green garland on the mantel introduces exactly one color, which is honestly all this composition can absorb.

Stagger every plank by one to two inches and vary the overhang so no two edges line up vertically. That randomness is what separates a designed piece from a stack of lumber. For a tree this dense, use 1×3 or 1×4 stock rather than 2x material: thinner boards let you fit 20 to 24 courses into six feet, and more courses means more visual rhythm. Finish with hardwax oil, not polyurethane — it keeps the wood pale instead of ambering.
14. Spiral Wood Slat Tree on a Cross-Shaped Base
60% light natural wood, 25% white, 10% forest green, 5% red. The spiral supplies the movement, the white mantel and wall supply the quiet, and the garland’s red berries are the only saturated note in the frame. Swap the light wood for walnut and rebalance the recipe — drop the green to 5% and let the dark wood carry the drama. The spiral geometry works in any palette; it’s the material contrast you have to manage.
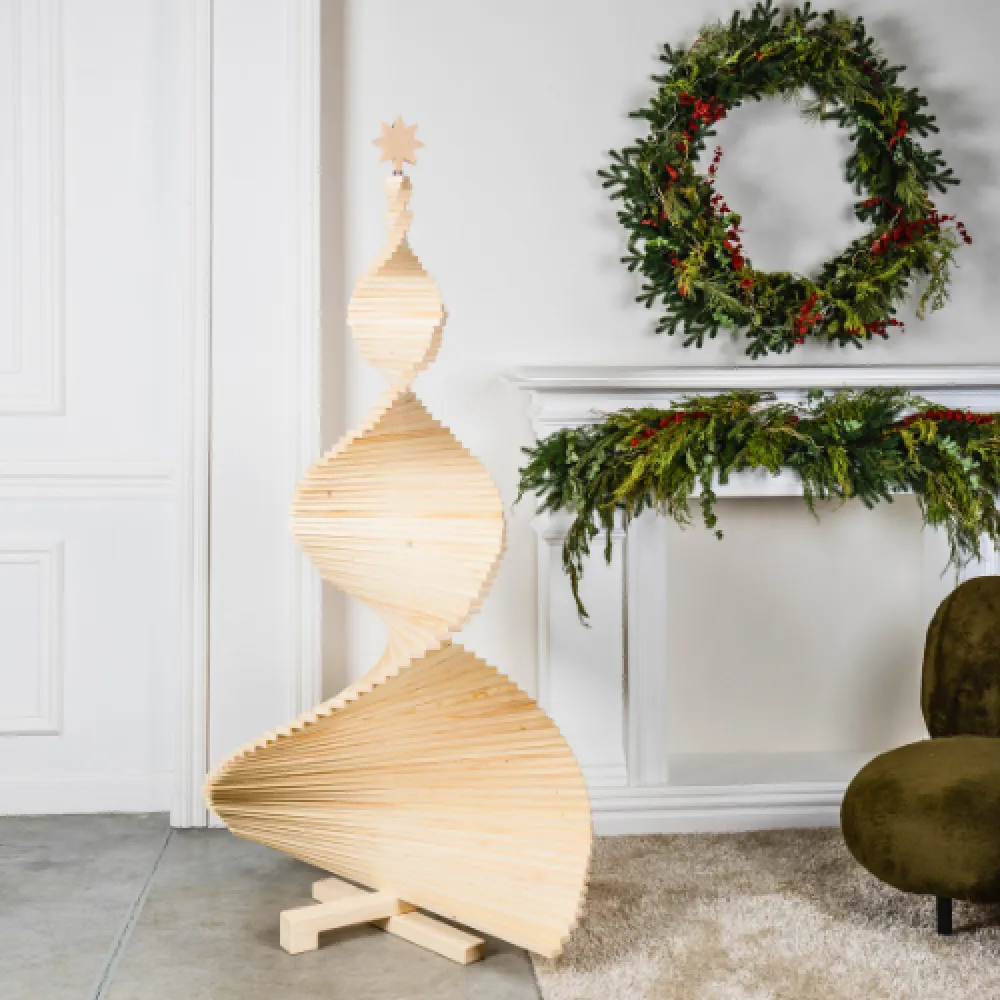
Spiral slat trees live between four and seven feet tall and need a cross base of at least 20 inches to stay upright on a shag or high-pile rug, since those rugs compress unevenly and a narrow base will start to list. It’s happiest under eight-foot ceilings or higher, because the spiral only reads when you can see the full curve. Two of these flanking a fireplace is a stronger composition than one, and cheaper than you’d guess. Compare with Idea #10 — same palette, freestanding, completely different energy.
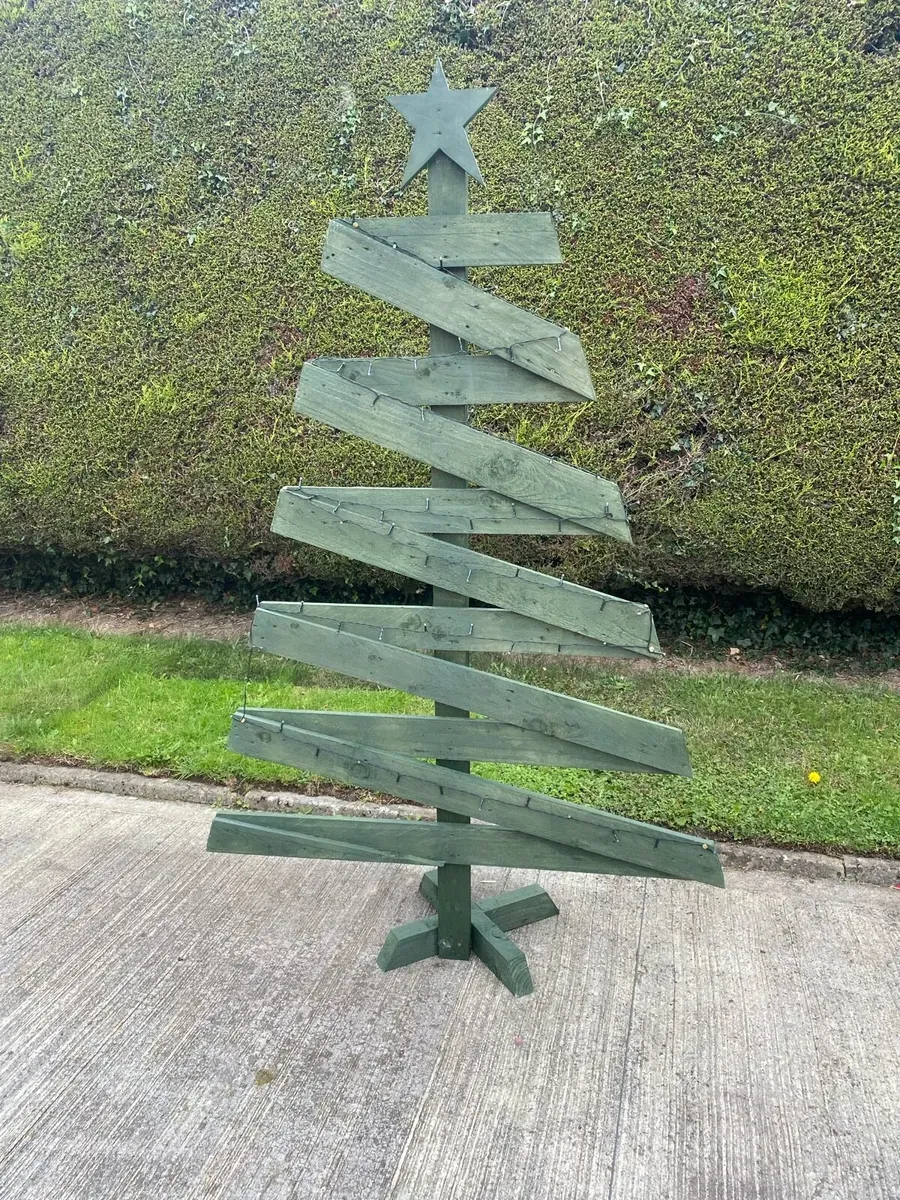
15. Freestanding Distressed Green Plank Tree on an X-Base
The paint is the whole trick. Half the planks are distressed green and half are bare weathered wood, and that mix keeps this from looking like a painted novelty. If all the planks were green you’d have a Christmas decoration; if none were, you’d have a pile of firewood on a stand. The in-between — green bleeding into white under a visible grain — is what makes it look like it came out of a barn and got a second life.
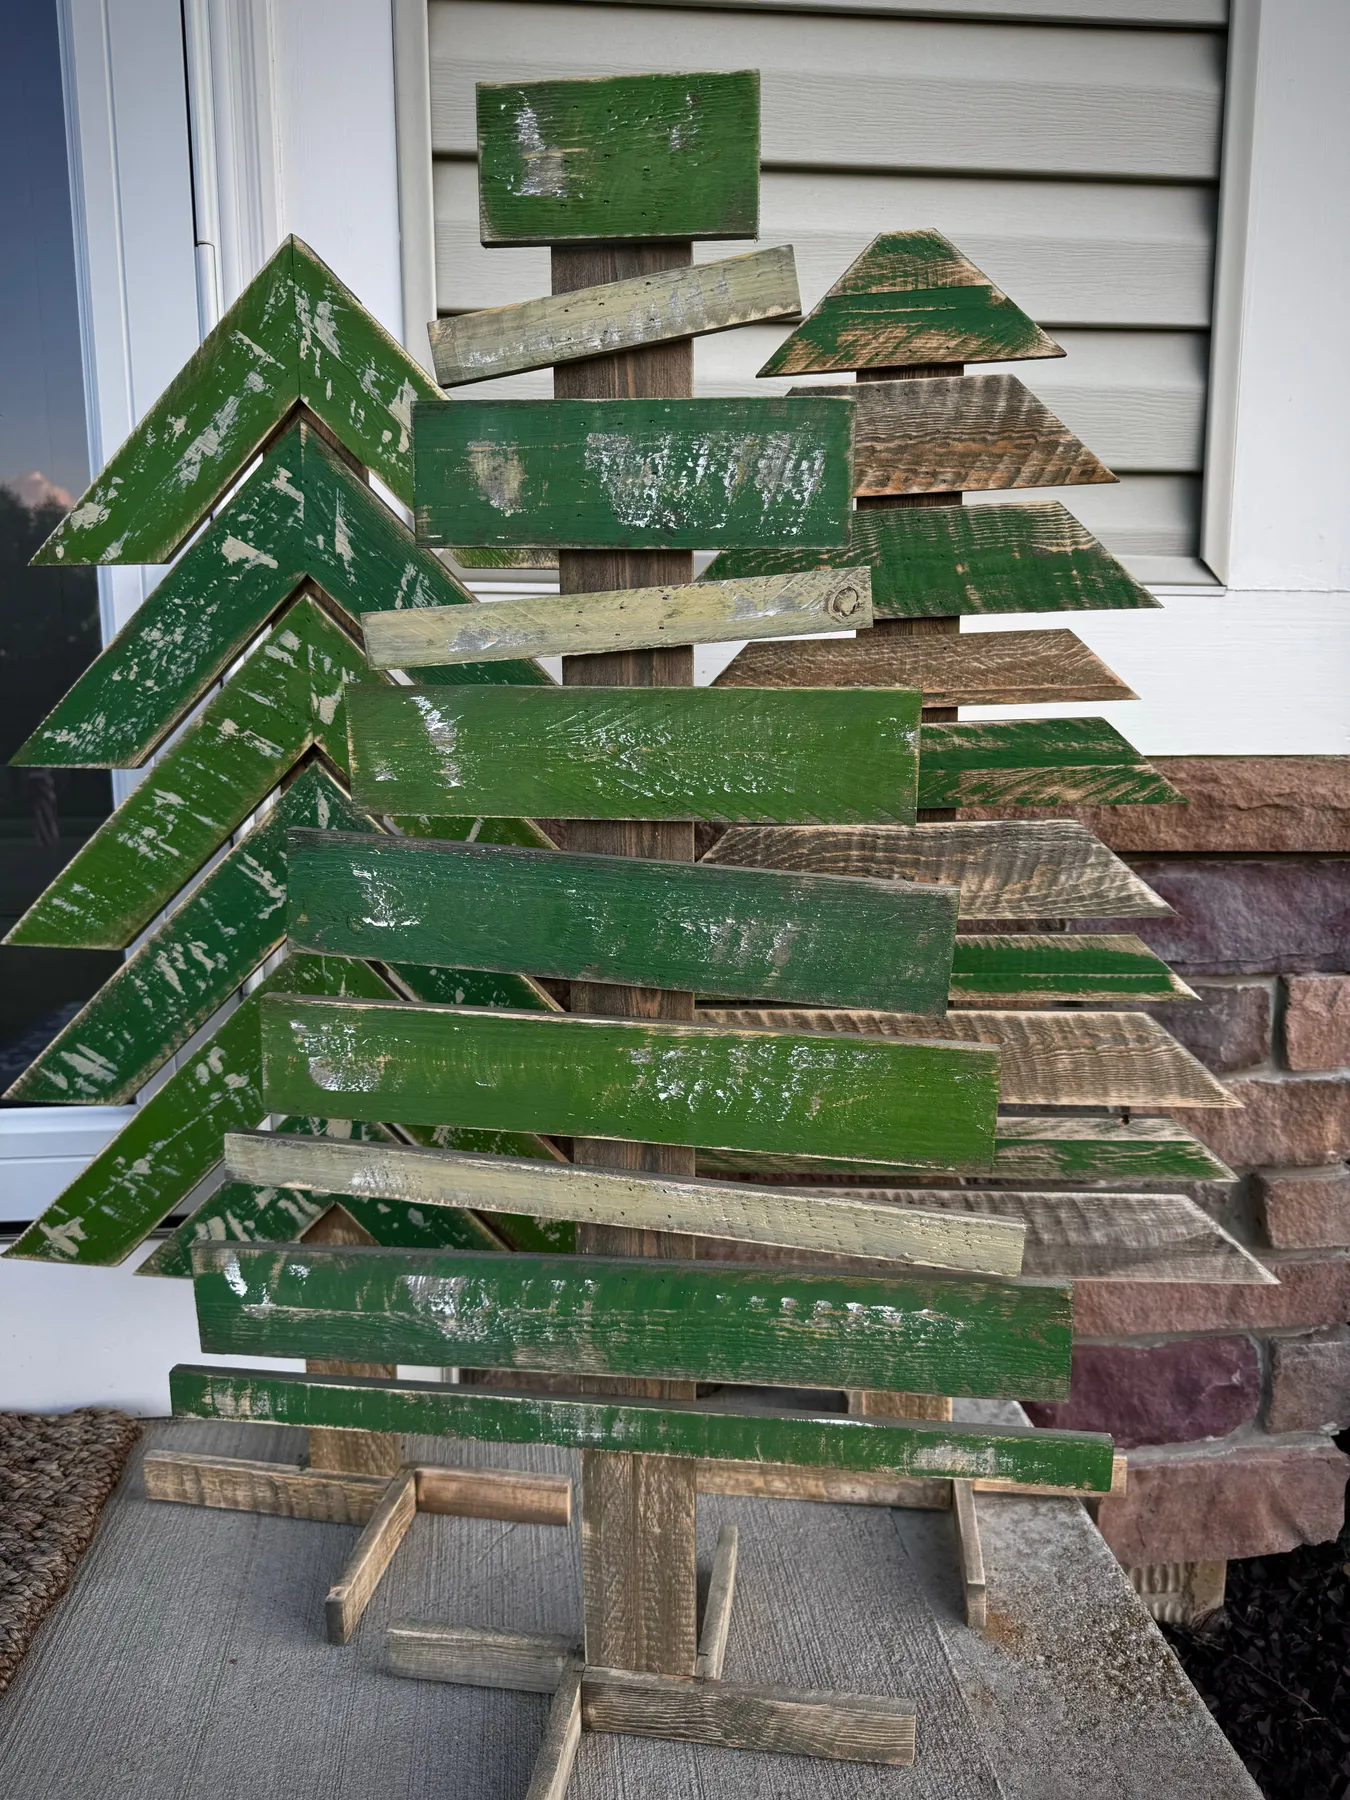
- Build the X-base and central post first; everything hangs off that spine.
- Cut 12-16 planks to progressively shorter lengths, keeping the bottom three within two inches of each other so the shape stays wide.
- Paint half the planks green, let them tack up for 20 minutes, then sand hard along the edges and the grain.
- Dry-fit everything, mark your screw holes, then attach from the back of the post so no hardware shows.
- Finish the whole thing with a clear matte sealer.
Budget two afternoons and $35-$60, assuming you already own a drill and a sander.
16. Three Plank Trees on a Red Sled with Ribbon Rosettes
- Three plank trees, built or bought: $30-$90
- Wooden sled base (thrift store or Marketplace): $15-$45
- Faux snow, 2 bags: $8-$16
- Rosette ribbon, 6-9 yards in mixed colors: $12-$25
- Warm white string lights, 2 strands: $10-$24
- Total: roughly $75 to $200 for the whole vignette.
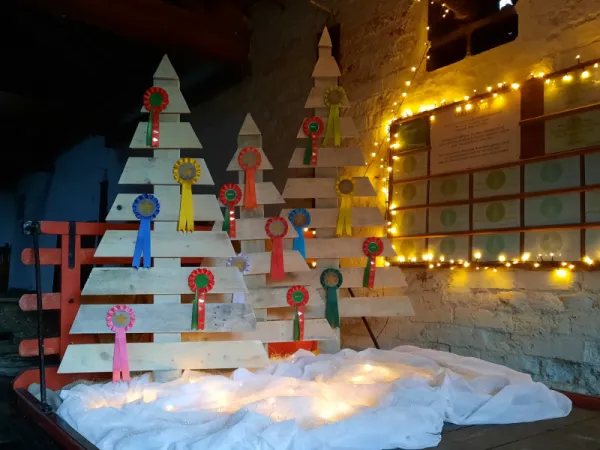
Budget alternative: skip the sled and use a red-painted pallet base you already have — same silhouette, less money. Dollar Tree rosettes run four for a dollar and look identical from three feet away.
Faux snow is the enemy of hardwood floors. Those iridescent flakes are static-charged and will migrate across the room for months. Line the tray or sled with a fabric liner first, and shake it out outside, not over the rug. And if toddlers are in the house, keep the rosettes above the three-foot mark — ribbon loops come off in a fist and go straight to the mouth.
17. Weather-Ready Pallet Tree for an Outdoor Christmas Display
Outdoor pallet trees don’t need to be weather-sealed masterpieces — they need to survive one or two seasons. Build with free pallets, attach lights with exterior zip ties rather than staples that rust, and skip expensive ornaments in favor of shatterproof balls from Walmart at about six dollars a pack. Total outlay lands around $30-$50. For the base, a couple of cheap pavers wedged against the frame will hold it through wind with no hardware at all.

Untreated pallet wood outdoors greys in about six months and starts to check and split by year two. One coat of exterior deck stain every spring buys you two more seasons. Cheap light strands won’t survive freezing and thawing — replace them annually and budget $20-$30 for it. Bring the whole structure into a garage or shed for summer, too; pallets left in full sun all year rot first at the ground contact points.
18. Green Tree Cutout with a Metal Deer on a Weathered Deck
Sculptural metal is the quiet 2026 story in holiday decor. Reindeer silhouettes have moved off the front lawn and onto the porch, and they pair beautifully with the flat painted wood cutouts everybody’s building right now. The shift is toward decorating with shapes rather than glitter — less sparkle, more matte black and flat green. It photographs well, it survives weather, and it doesn’t scream at your neighbors.
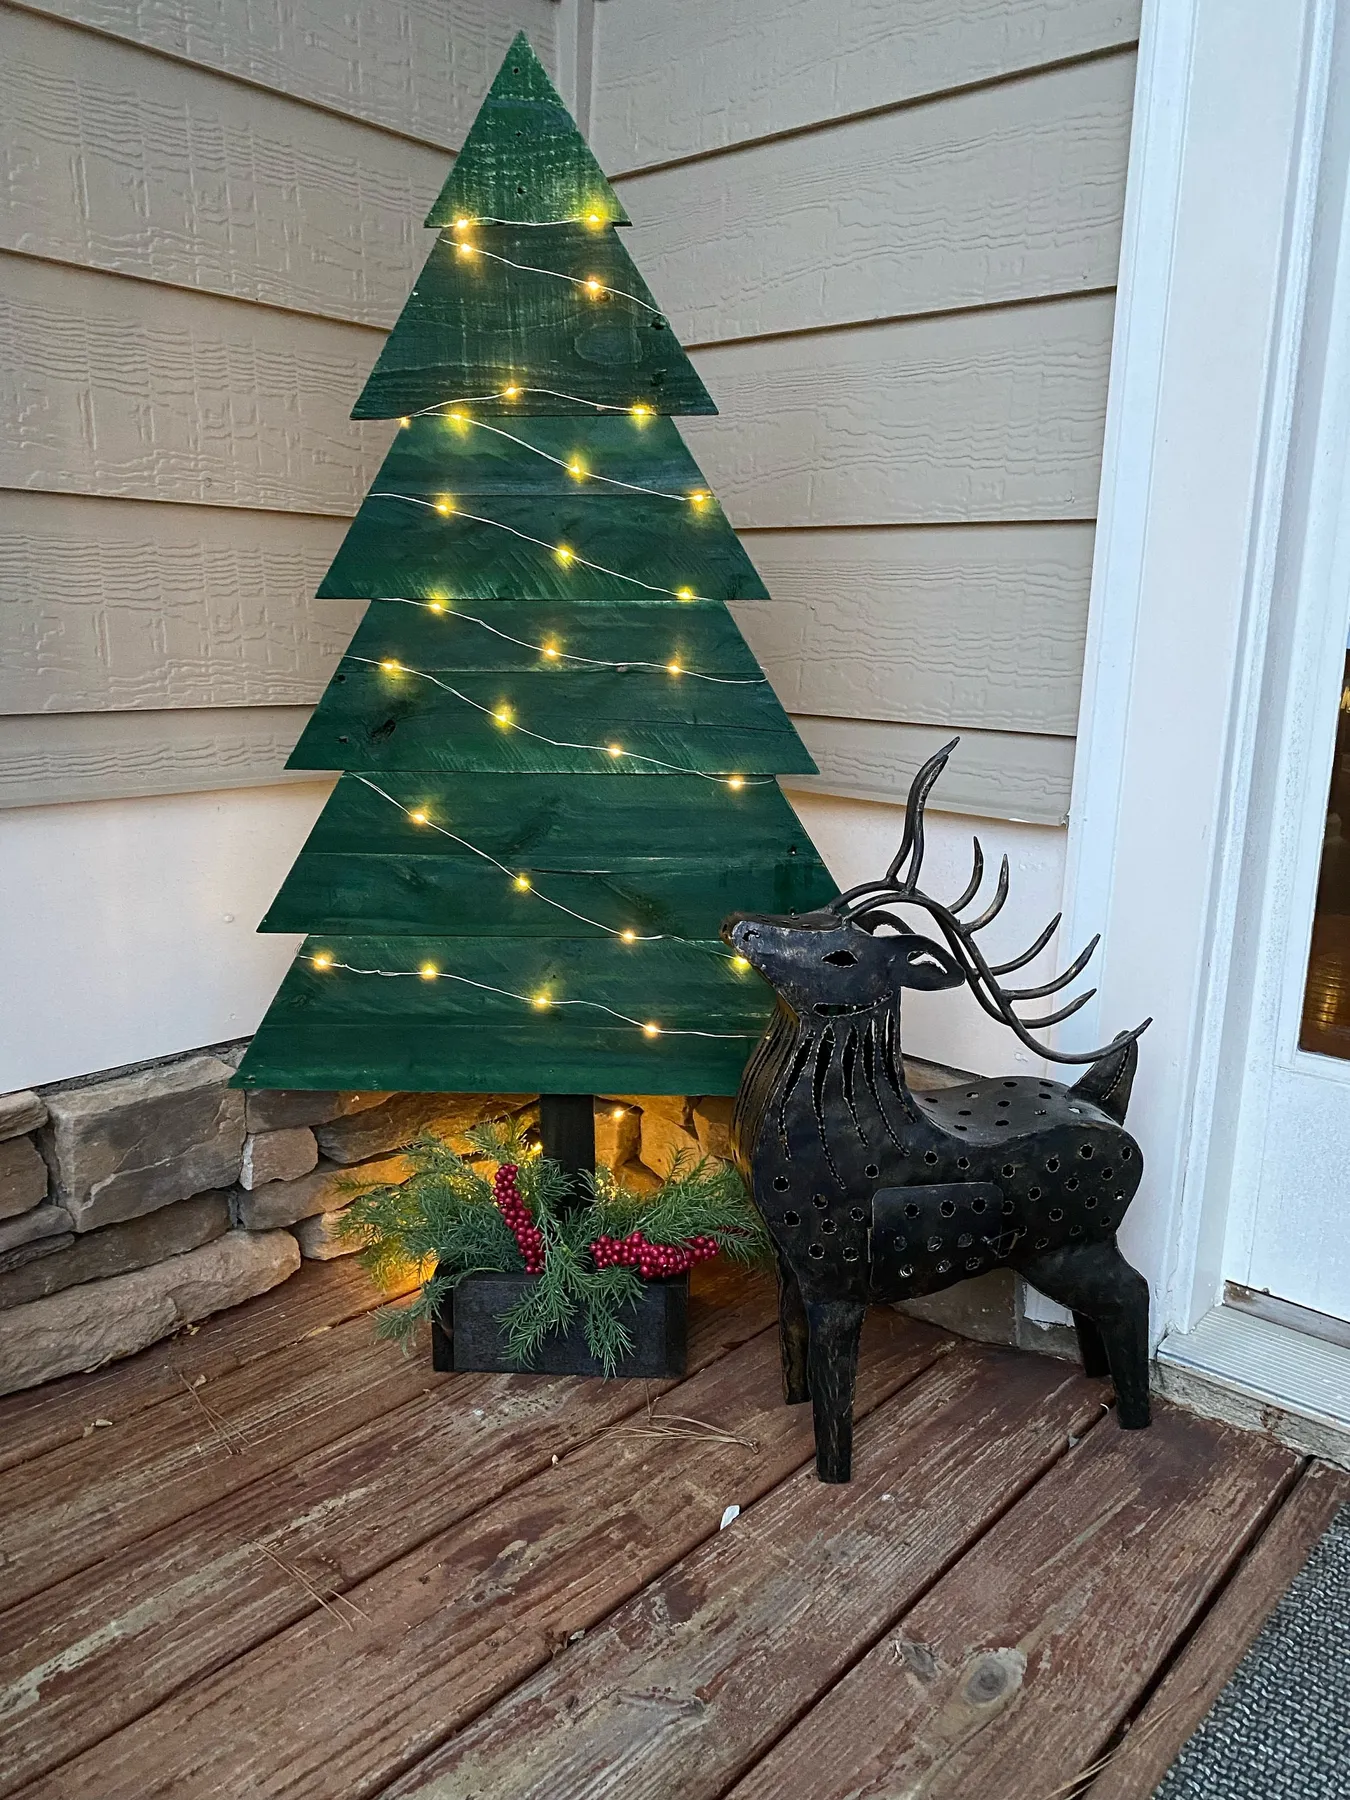
Everything here is flat. The wood tree is two-dimensional, the deer is cut metal, and the siding behind them is a stack of horizontal lines. That consistency is what makes the group feel intentional instead of assembled. The red berries in the base box give you exactly one warm note against all that green and matte black, and they sit low, so your eye travels up the tree instead of down to the ground. For a bigger, more architectural take on the same flat-plane idea, see Idea #24.
19. Elevated Pallet Platform with Stacked Wood Structures
- Level the ground first — a pallet platform on uneven gravel will rock, and that’s a real fall risk.
- Lay a base course of pallets flat and side by side, then screw them together along the stringers.
- Add a second layer only where you need height, not across the entire footprint.
- Sand or cover every exposed top surface; pallet tops splinter badly underfoot.
- Anchor stacked structures to each other with L brackets before you decorate anything.
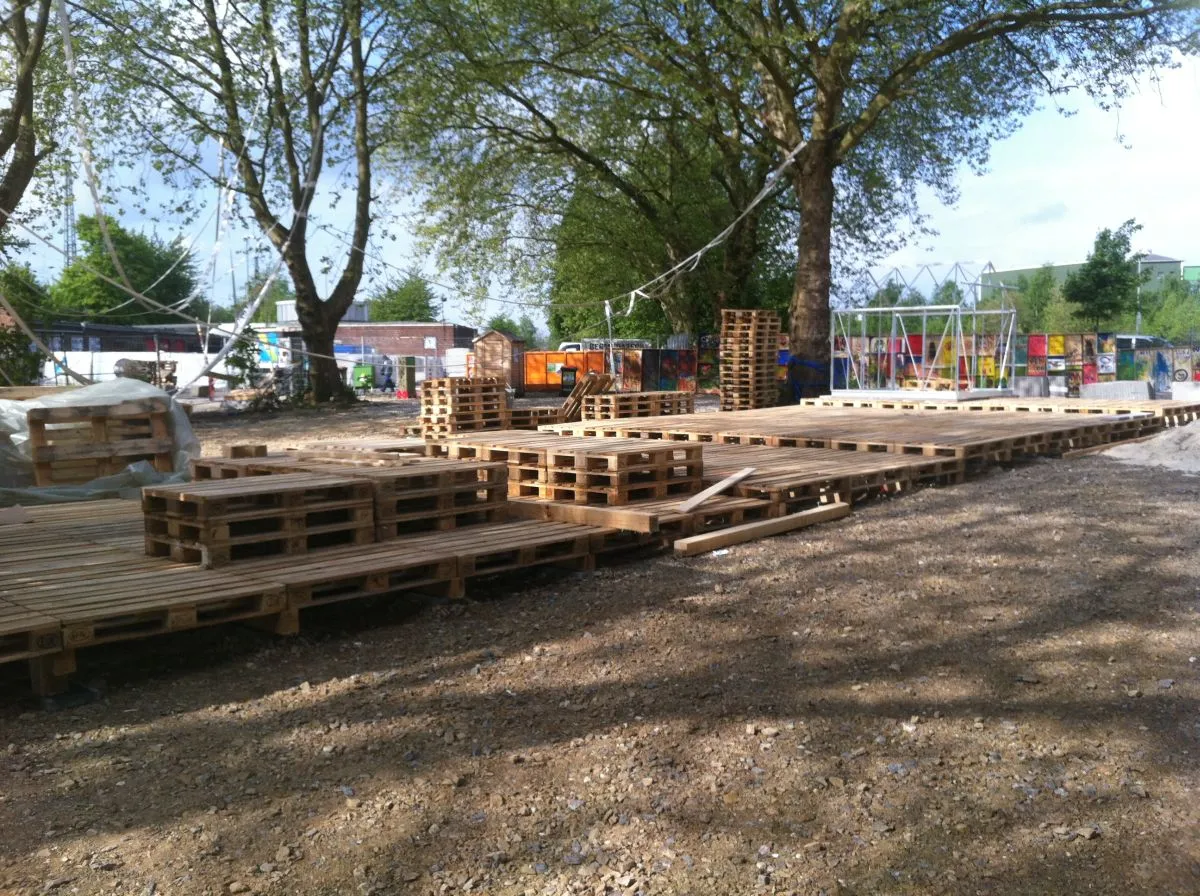
Half a day of work and $0-$40 if the pallets are free. Buy the brackets — don’t skip them.
The beauty of this system is that it’s free if you’re patient. Pallets accumulate behind garden centers, appliance stores, and warehouses all year, and Marketplace listings show up weekly at zero dollars. Screws and brackets run $20-$30. Those white fabric strips draped between branches are just ripped bedsheets or cheap muslin at about three dollars a yard — raid the old curtain bin before you buy anything new.
20. Minimalist Plank Tree Lit with Tea Light Candles
Never put an open flame directly on bare wood, and never near anything that can shift. Use enclosed glass votives or flicker battery tea lights — the good versions are convincing at three feet and cost about a dollar each. If you’re building candle ledges, make each one at least five inches deep and add a one-inch lip at the front, so a bumped table can’t send a candle off the plank.

The clear glass is what makes it. Against pale wood and white walls, clear textured ornaments nearly disappear — and that’s the point. They refract the candle glow without adding a single new color, which is how this tree holds dozens of decorations and still reads minimal. Swap them for colored baubles and the whole composition collapses into noise. Buy the glass at thrift stores for pennies and let the light do the decorating.
21. Light Wood Stick Tree with a Red Star Tree Skirt
40% pale wood, 30% white, 20% assorted bright ornament color, 10% red. The red skirt and the framed arrow above it are the two repeating notes tying this corner together, and they’re the reason the ornaments can run wild in every other hue. Want a calmer tree? Cut the ornament palette to three colors plus metallics and leave the red statement pieces exactly where they are.
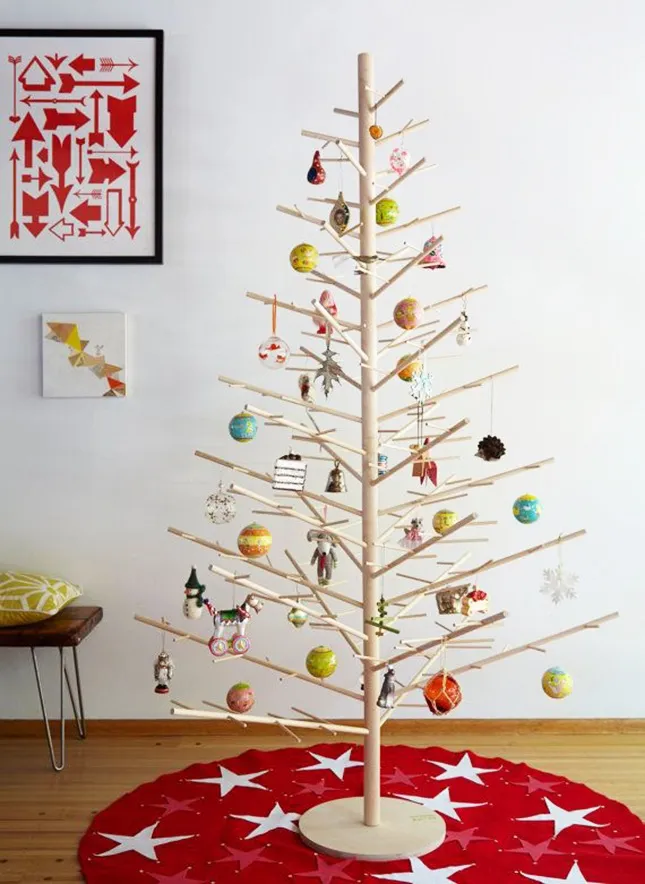
Stick trees run five to seven feet tall with a branch span of 24 to 36 inches, so leave about three feet of clearance on each side to walk past without ducking. They’re ideal under sloped ceilings and in apartments because there’s no bulk at the base — the skirt footprint is only 20 inches across. In a room under 120 square feet, this usually beats a full-width pallet tree.
22. Natural Pallet Tree with Red Berry Ornaments and a Silver Star
- Free pallet, disassembled: $0
- Screws, sandpaper, matte sealer: $15-$28
- White string lights, 2 strands: $10-$22
- Red berry picks, 12-18: $8-$20
- Silver star topper: $5-$18
- Wrapping paper and ribbon: $6-$14
- Total: about $44 to $102 for the full setup.
Budget alternative: thrift stores sell berry picks by the bundle for a dollar or two, and Dollar Tree’s silver star is indistinguishable from the $18 one once it’s up on the tree. This is the pared-back cousin of Idea #11 — same wood, half the ornament count.
- Measure floor to ceiling, then subtract 12 inches — that’s your maximum tree height.
- Photograph your wall in daylight to confirm the wood tone will actually contrast. Pale wood on a pale wall disappears.
- Count your outlets and decide whether you need battery lights.
- Set a hard materials budget before you start cutting. Scrap wood projects balloon quietly.
23. Stacked Pallet Tree Against a Dark Grey Wall
Stacked pallet wood is heavy — a five-foot version weighs 60 to 90 pounds — so it lives where you put it. Plan accordingly: felt pads under every contact point, and don’t count on moving it monthly. Dust settles into every gap between the slats, and a vacuum brush attachment is the only thing that pulls it out. Do one full clean mid-season, and expect to re-tighten screws after the first year as the wood dries and shrinks.
A dark grey wall behind natural wood sounds dramatic, and it is — but it also eats reflected light. If that corner has no lamp nearby, your string lights will be the only illumination and the wood will read muddy brown instead of warm honey. Test it with a single strand before you commit. A warm 2700K floor lamp behind the tree fixes it, and it’s an easy fix as long as you plan for it now rather than in December.
24. Angled Reclaimed Plank Tree with Visible Metal Hinges
- Lay the largest plank flat as your base and mark its center for the post.
- Attach hinged pairs of planks to a central vertical post so each arm can fold or angle independently — that’s what makes the silhouette look scattered instead of symmetrical.
- Alternate finishes: one natural, one distressed white, one pale green, then repeat.
- Cut each plank three to six inches shorter than the one below it, and vary the angle by 5-15 degrees.
- Seal the whole thing with an exterior matte finish, including the cut ends.
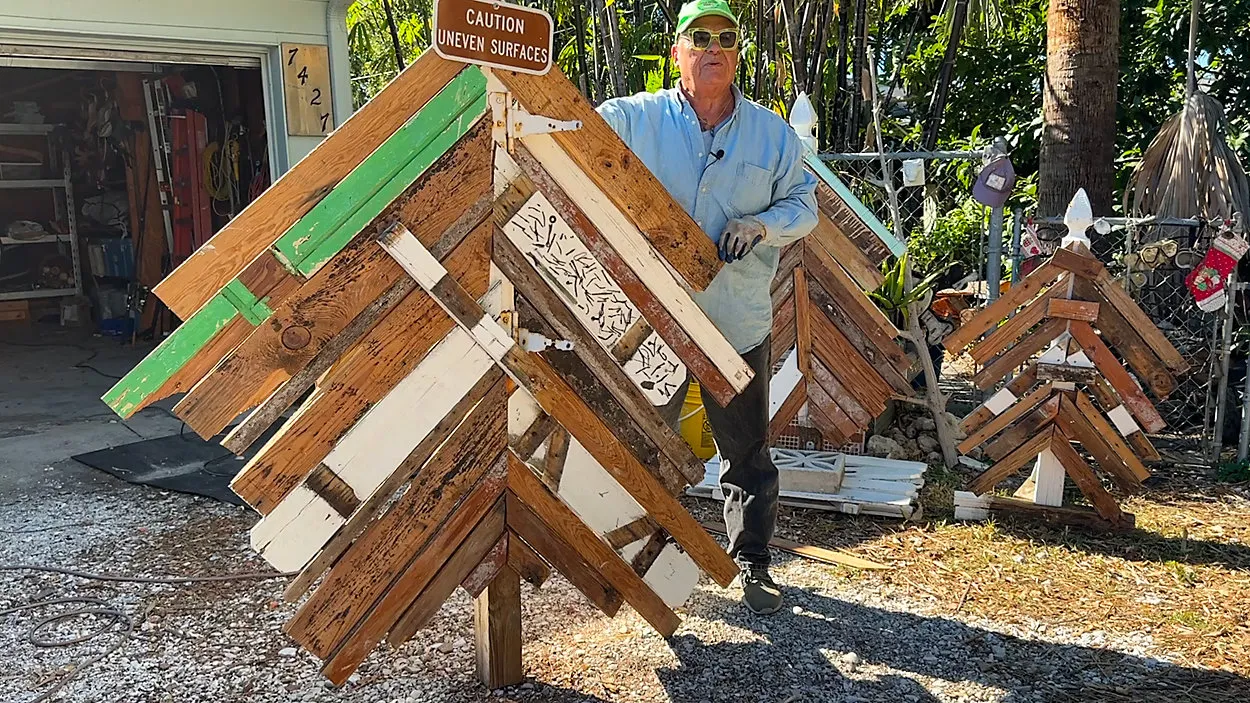
An afternoon of work and $0-$60 if you’re building from a reclaimed wood pile.
Deliberately rough reclaimed wood is the anti-glitter movement in holiday decor, and it’s been building for three years. What changed in 2026 is scale — people are going bigger and putting these outside as yard statements rather than keeping them indoors. Visible hardware is now part of the aesthetic instead of something to hide. Expect this one to age well; rustic wood decor has never really gone out of style, unlike a lot of what we hung up in 2015.
25. Wooden Tree Cutout Revealing a Deer and Pine Forest Scene
The cutout is everything. Remove the circular window and this is a pleasant wooden tree shape with nothing to look at. The hole creates a tiny diorama — a deer standing among pines — and that’s what makes people pick it up and hold it. The pale recessed background is doing quiet work too: it bounces light back toward the viewer and keeps the miniature scene readable from across a room, even at four inches wide.
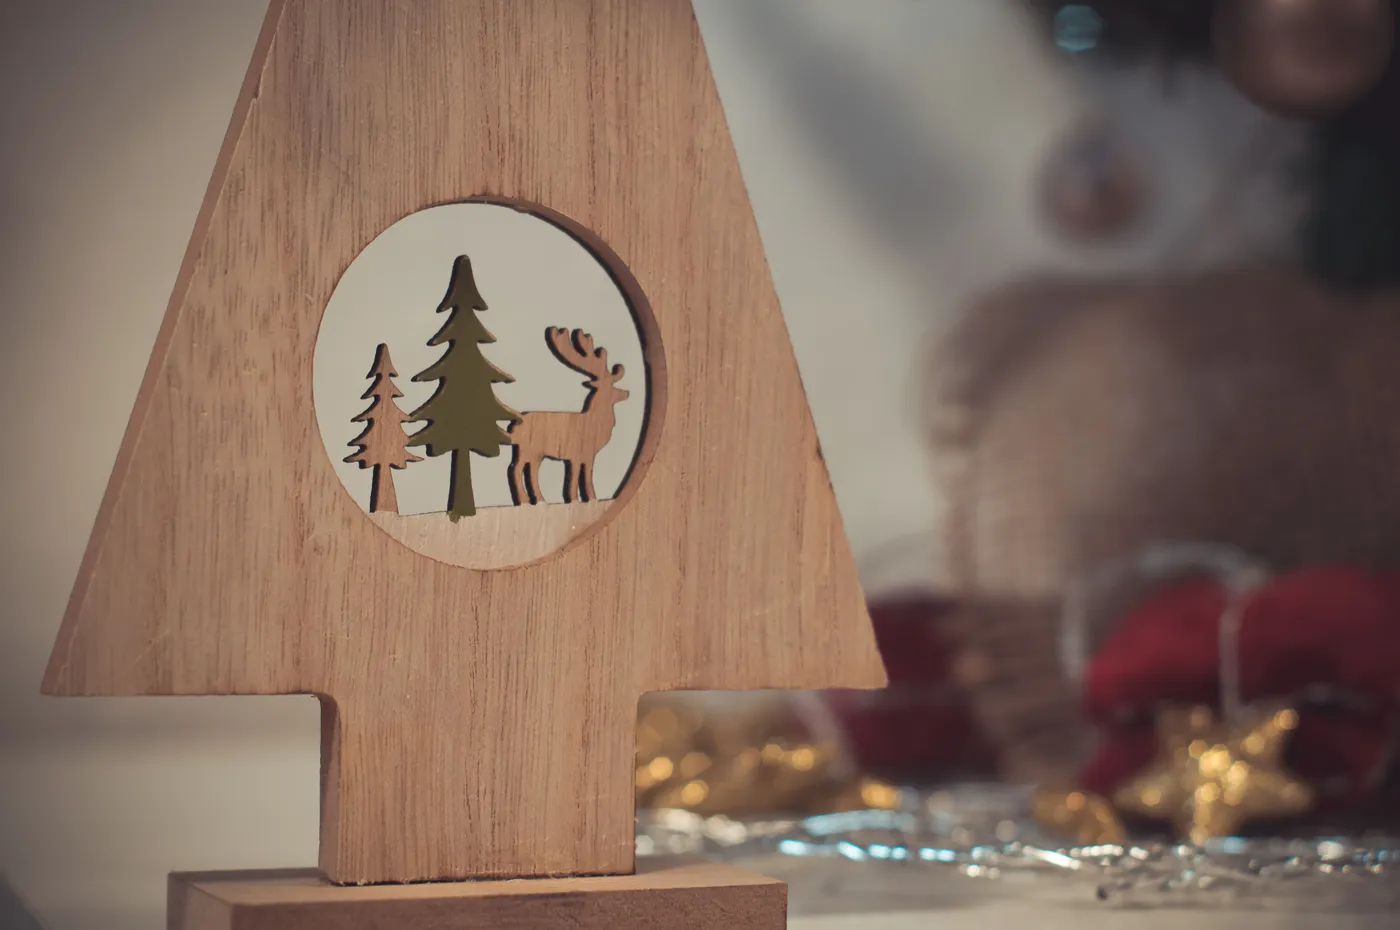
For layered cutout pieces, aim for ¾ to 1¼ inches of depth between the front frame and the back panel. Anything shallower and you lose the shadow that makes the scene read as three-dimensional; anything deeper and the inner figures disappear into darkness. Backlight matters more than front light here — park it near a lamp or a strand of warm lights so the gold tones in the wood glow. It pairs beautifully with Idea #20, which works the same trick with candlelight.
One Pile of Pallets, Twenty-Five Ways to Use It
Pick the version that fits your actual room — not just the one with the prettiest photo — and build it once, properly, with a sealer and a solid base. A well-made pallet tree outlasts three store-bought ones and looks better every December you pull it out. 📌 Pin your favorite to your holiday board so you can find it again the second the sales start.