30 Stunning DIY Christmas Ornaments for 2026 You Absolutely Need to Try This Holiday Season

DIY Christmas ornaments 2026 is having a major moment on Pinterest right now — and it’s the rare holiday trend that leaves your wallet better off. We spent serious time digging through Michaels, Etsy, Amazon, Target, and a few very good thrift-store hauls to pull together 30 handmade ornaments worth your glue-gun burns, from $3 paper accordion fruit to an $85 mantel garland stacked with vintage Santa faces. Inside you’ll find felt and wool, hand-painted ceramic, beaded, embroidered, salt dough, sea glass, and vintage-inspired styles, with budget swaps and honest notes on what actually survives past December 26. And stay until the end — we break down the most common mistakes that can ruin these looks. 📌 Save this to Pinterest for later — you’ll want to revisit these ideas.
A few links in this guide are affiliate links, which means we may earn a small commission if you buy through them — at no extra cost to you.
1. Amber and Crystal Beaded Snowflake Ornament
Beaded snowflakes live or die by symmetry. Cut six identical lengths of 26-gauge silver wire — 6 inches each for a finished ornament around 5 inches across — and string them in mirrored order: one amber round, three clear ovals, one amber round, a single teardrop, then the big faceted crystal at the center. Count beads out loud as you go. The eye catches a one-bead difference from across the room, and fishing beads off crimped wire is nobody’s holiday tradition.
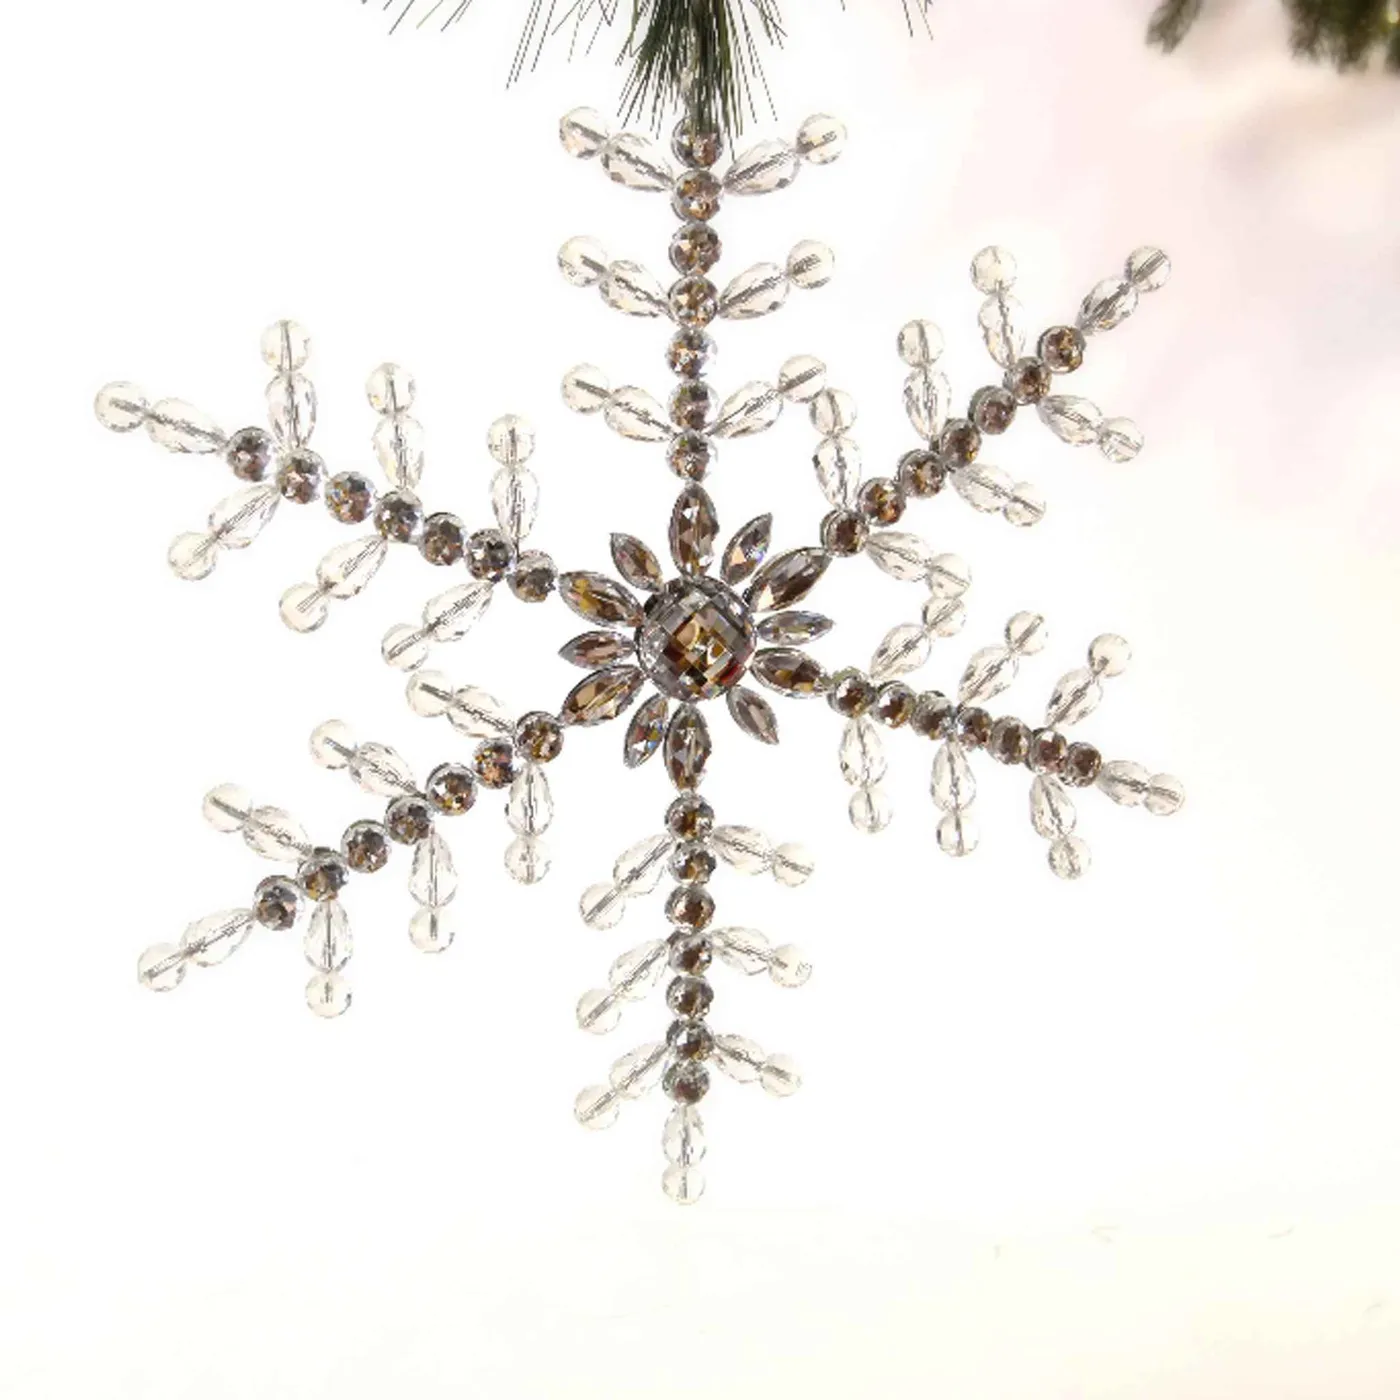
The amber is the whole ornament. Pull those warm beads out and you’re left with a perfectly pretty clear crystal snowflake that vanishes against a lit green tree — pretty, and completely forgettable. The amber is what makes the clear facets read as ice instead of glass, and it’s why this design holds up under warm bulbs rather than cool white LEDs. If you only buy one bead color this year, buy the amber.
2. Embroidered Star and Heart Ornaments in Metallic Thread
Making six of these at home costs less than one boutique ornament set:
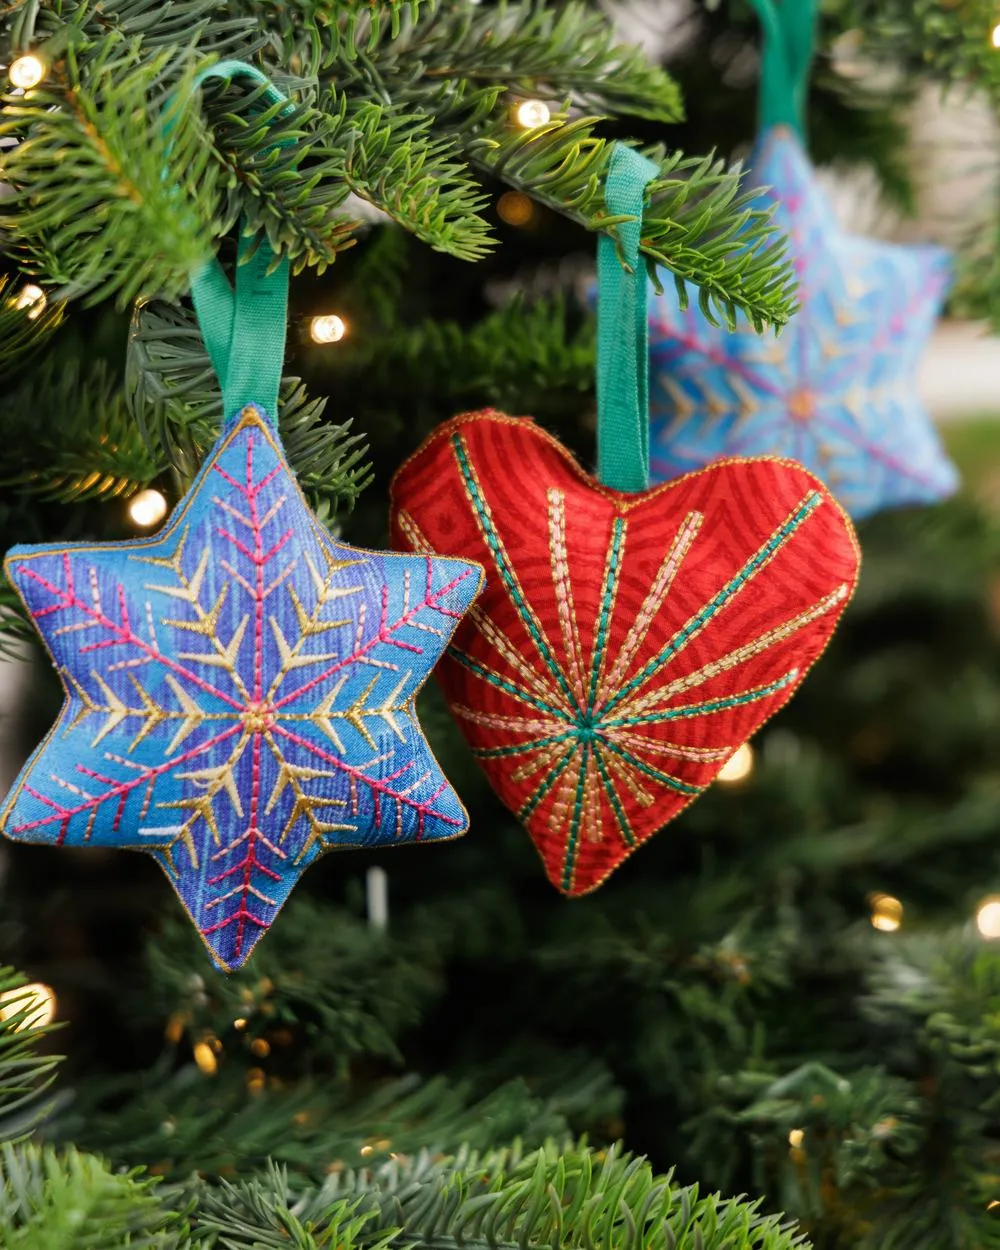
- Wool felt or quilt cotton scraps: $8–$20
- Metallic embroidery floss in gold, blue, and red: $6–$14
- Fiberfill plus narrow green ribbon: $5–$10
- Embroidery hoop, needles, transfer pen: $10–$18
Total: $29–$62 for a set of six. Budget alternative: cut the shapes from a $4 thrifted wool sweater and use dollar-store floss — roughly $15 all in.
Two things do the heavy lifting here. First, metallic thread against matte wool — shine always needs a dull partner or it just reads as plastic. Second, the star-and-heart pairing gives you one sharp geometric silhouette and one soft organic one, hung at slightly different heights. That small asymmetry is what keeps a handmade set from looking like a kit.
3. Hand-Painted Ceramic Berry and Snowflake Discs
Ceramic blanks take paint far better after a swipe of rubbing alcohol — the oils on your hands are why the first coat beads up and looks patchy. Use a liner brush for the fine gold vine and a round brush for the red berries, and keep your snowflakes to three sizes maximum, not five. Leave the top third of each disc undecorated. That breathing room is what makes the gold-painted cap look intentional instead of crowded.
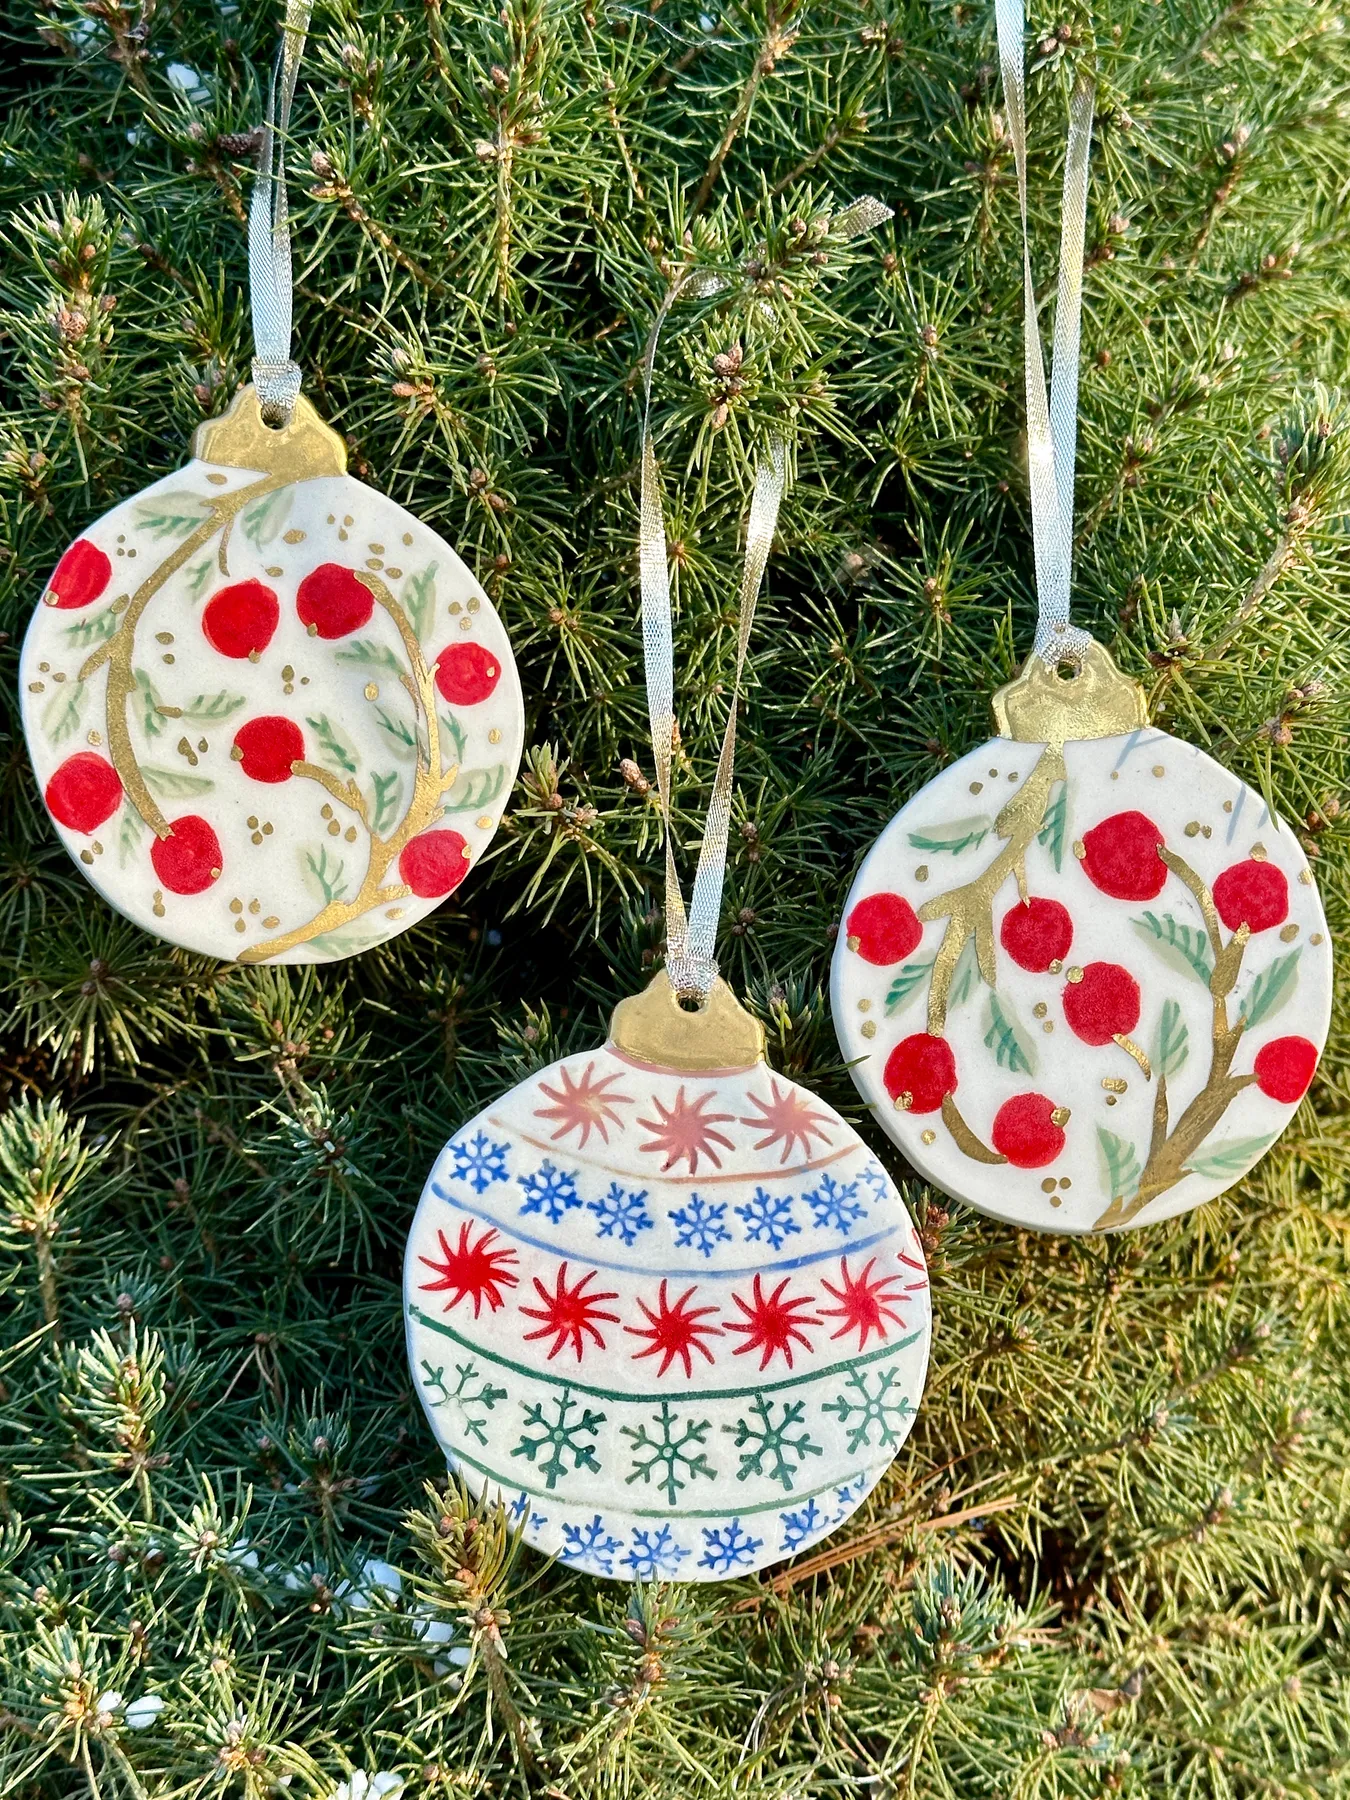
Acrylic paint on a glossy blank will chip, usually right where the ribbon rubs. Seal it with two thin coats of matte polycrylic rather than spray varnish — spray goes on thick and blurs those crisp little snowflakes. Hang these away from a wood stove or a south-facing window, or expect the reds to soften over a season. Compare with Idea #8 — same lighthearted handmade energy, and it’ll tell you whether your tree wants delicate or playful.
4. A Single Red Accordion Ornament on a Frosted Branch
The formula is roughly 70% quiet, 25% red, 5% sparkle. Dark evergreen and snow-dusted branches carry the quiet, one saturated red honeycomb ornament supplies the punch, and the blurred warm bokeh behind it handles the sparkle. Swap the red for deep plum and you get a moodier tree. Swap the green base for flocked white and that same red reads candy-cane sweet instead of woodland.
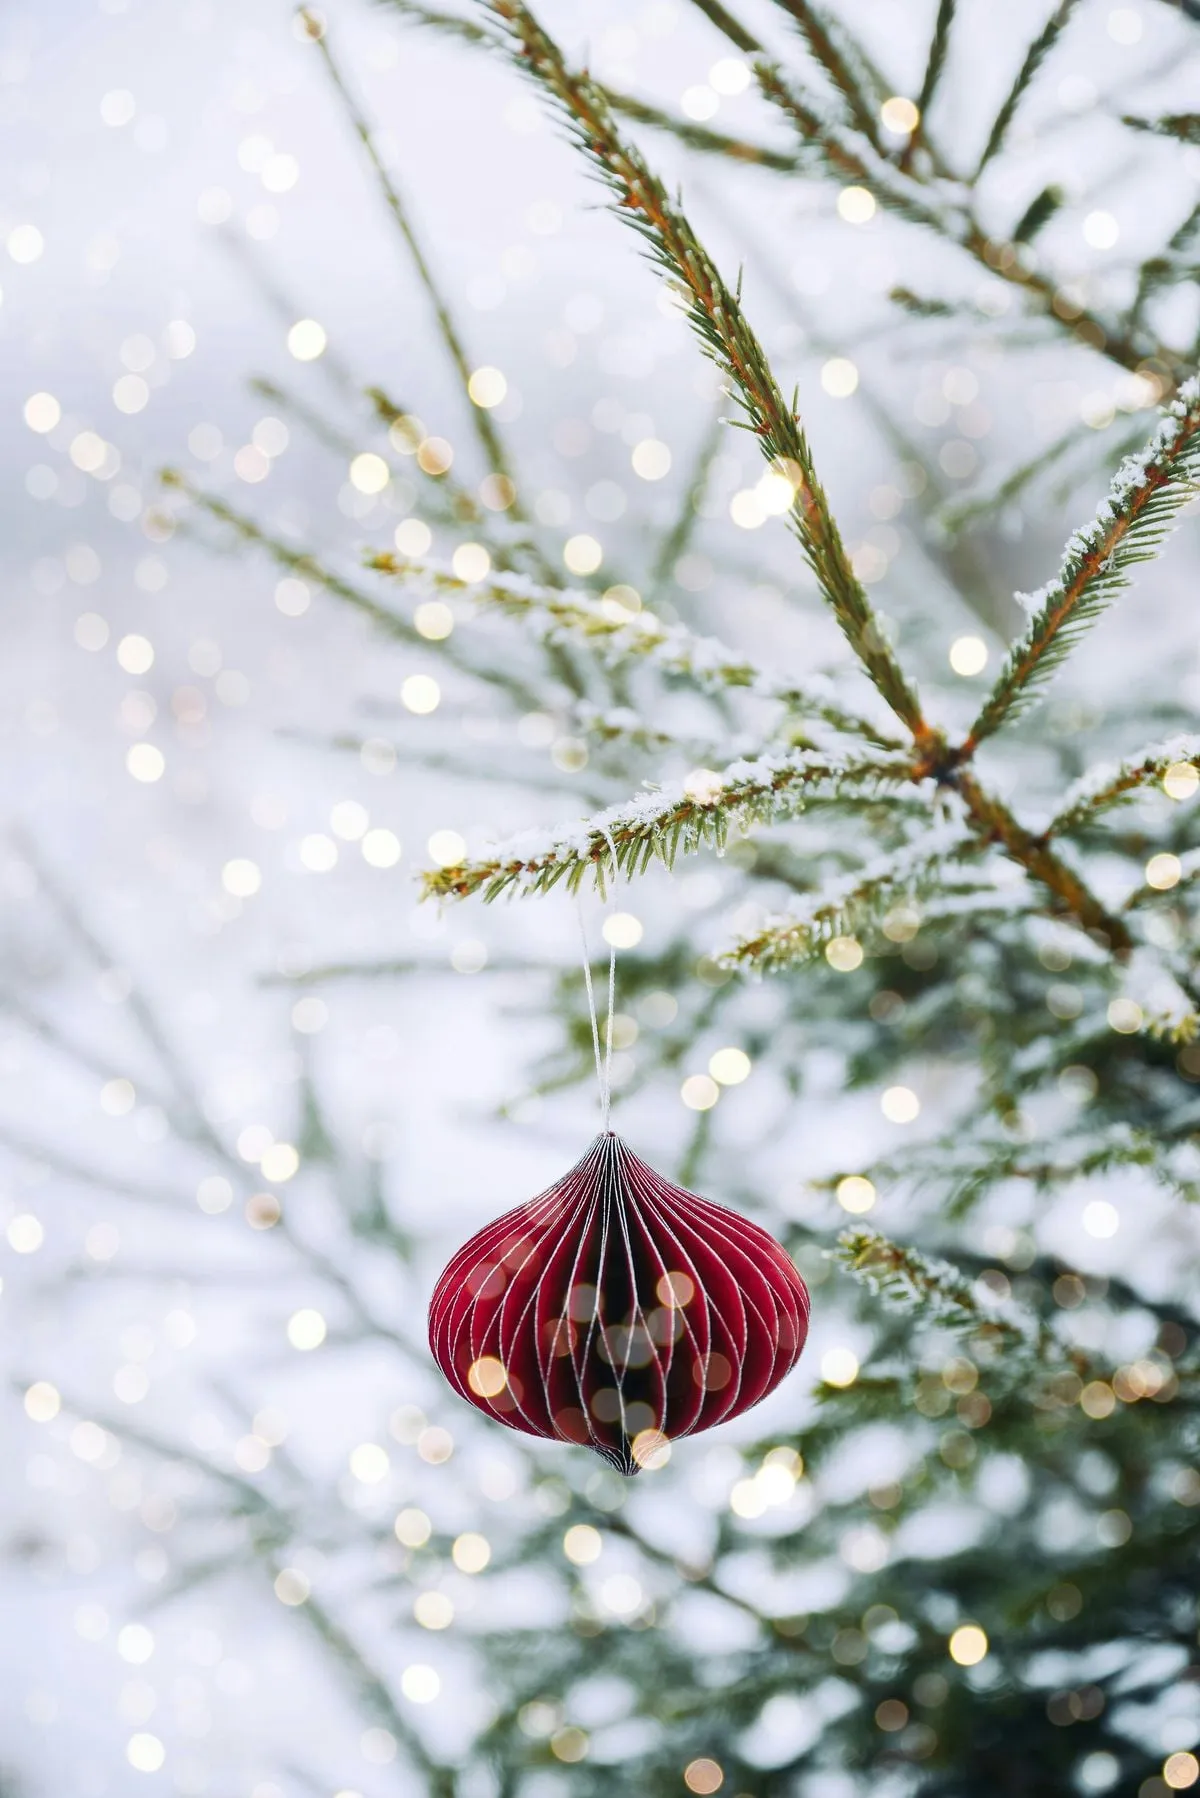
Solitude is the design element. Cluster five accordion ornaments together and you’ve got a craft project; hang one alone against snow-dusted needles and soft lights and you’ve got a photograph. This styling works best in the gaps of a sparse tree, or on a single clipped branch in a tall vase on a console table, where the one red shape has nothing to compete with.
5. Honeycomb Paper Fruit Ornaments in Cupped Hands
Good news: honeycomb paper is one of the cheapest materials in the whole craft aisle. Packs of pre-scored honeycomb shapes run about $6–$12 at Michaels or on Amazon, and a spool of red, orange, and yellow twine costs another $4. Add green paper leaves cut from cardstock you already own and you’ve got a dozen fruit ornaments for under $20 — versus roughly $8 to $14 per ornament from a small-batch seller on Etsy.
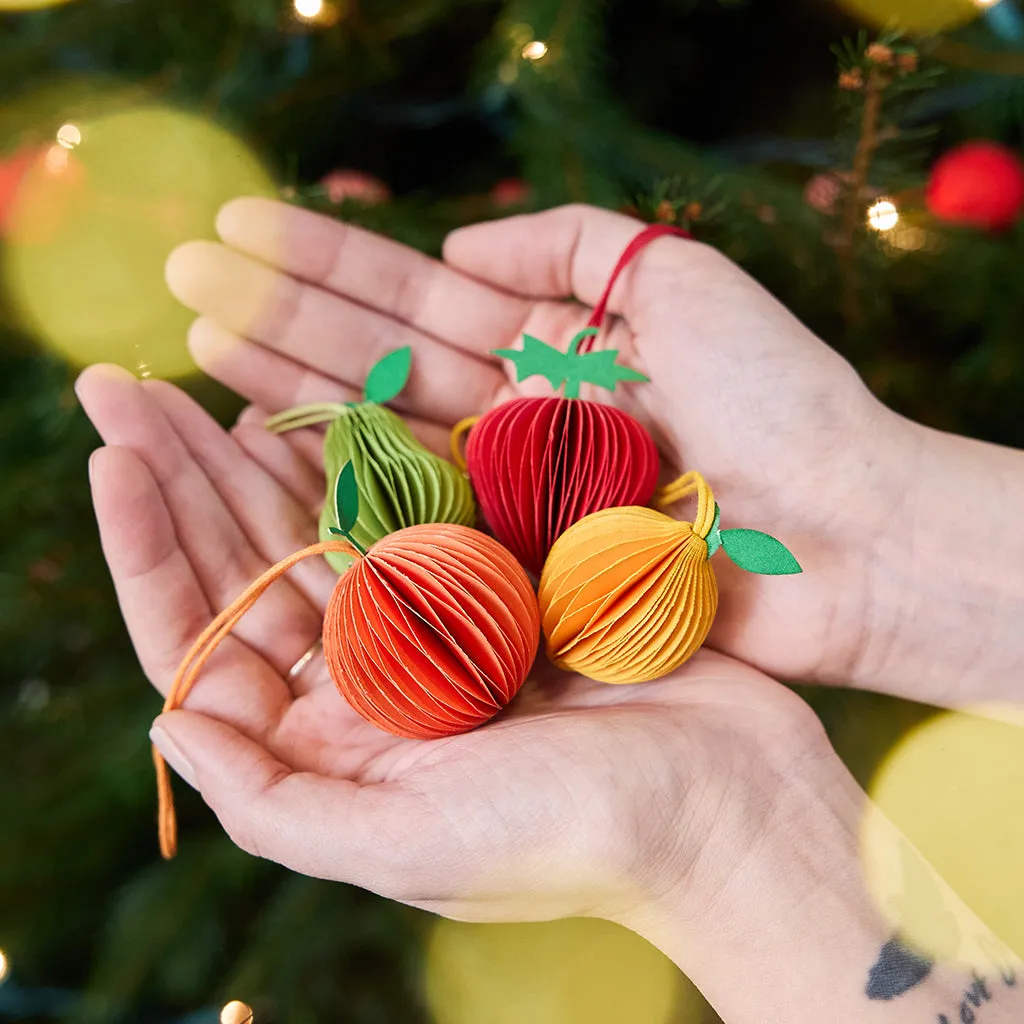
Paper ornaments are the drama queens of the decoration bin. They crush if you stack them, they fade in direct sun, and a humid bathroom or kitchen will slowly soften the fold until the fruit sags. Store them in a rigid box with tissue between the layers, keep them off south-facing windowsills, and give each one a light squeeze back into shape before it goes on the tree. They’ll last for years — just not in a garbage bag in the attic.
6. Craft Stick Sleds with Jingle Bells and Frosted Sprigs
Time: about 45 minutes for four sleds. Materials: roughly $10.
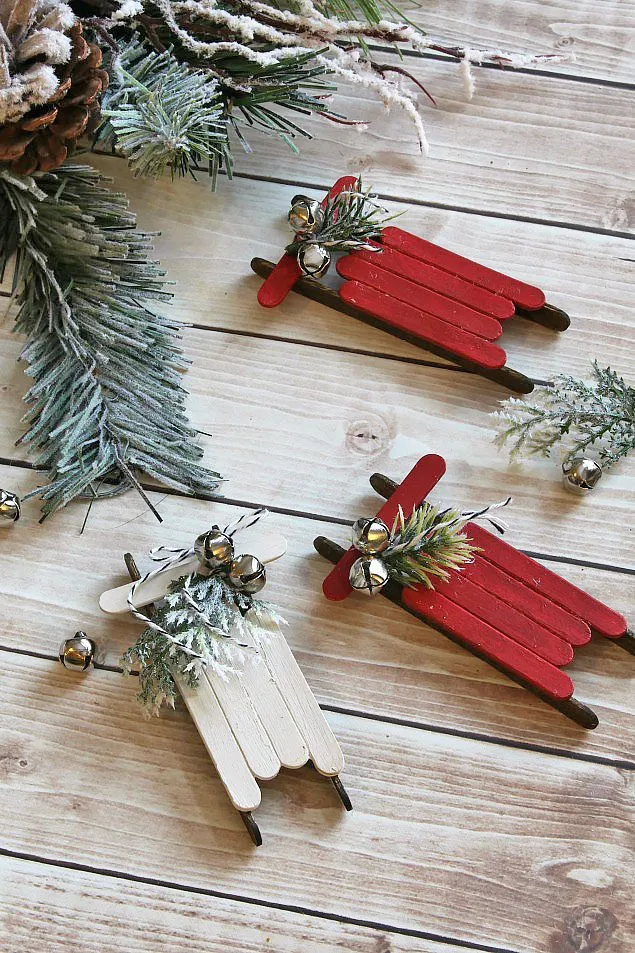
- Paint five mini craft sticks per sled in red, white, or natural, and dry them fully on wax paper.
- Glue four sticks side by side for the deck, then snap two more in half and glue them underneath as runners.
- Add a second runner layer in dark brown so the sled reads as wood instead of popsicle.
- Glue one small silver jingle bell and a frosted evergreen sprig to the top rail.
- Thread baker’s twine through a gap and knot it into a 2-inch loop.
Cost breakdown for the whole batch:
- Mini craft sticks, 500-pack: $5–$8
- Acrylic craft paint in red, white, dark brown: $6–$10
- Silver jingle bells, 24-pack: $4–$7
- Faux frosted evergreen sprigs: $5–$9
- Baker’s twine: $3–$5
Total: $23–$39 for about 20 sleds, or roughly $2 apiece. Buy the sticks and bells at Dollar Tree and you’re near $12.
7. Needlepoint Reindeer with Jingle Bell Antlers
Needlepoint reindeer read best at 3 to 4 inches tall. Bigger and the thin antlers pucker; smaller and the little gold bells swallow the entire face. Work on 14-count plastic canvas rather than fabric — it holds its shape without a hoop, cuts cleanly around the antlers with sharp scissors, and won’t fray when a toddler yanks it off the tree. Use two strands of floss, not three, or the face goes lumpy and the red nose loses its point.
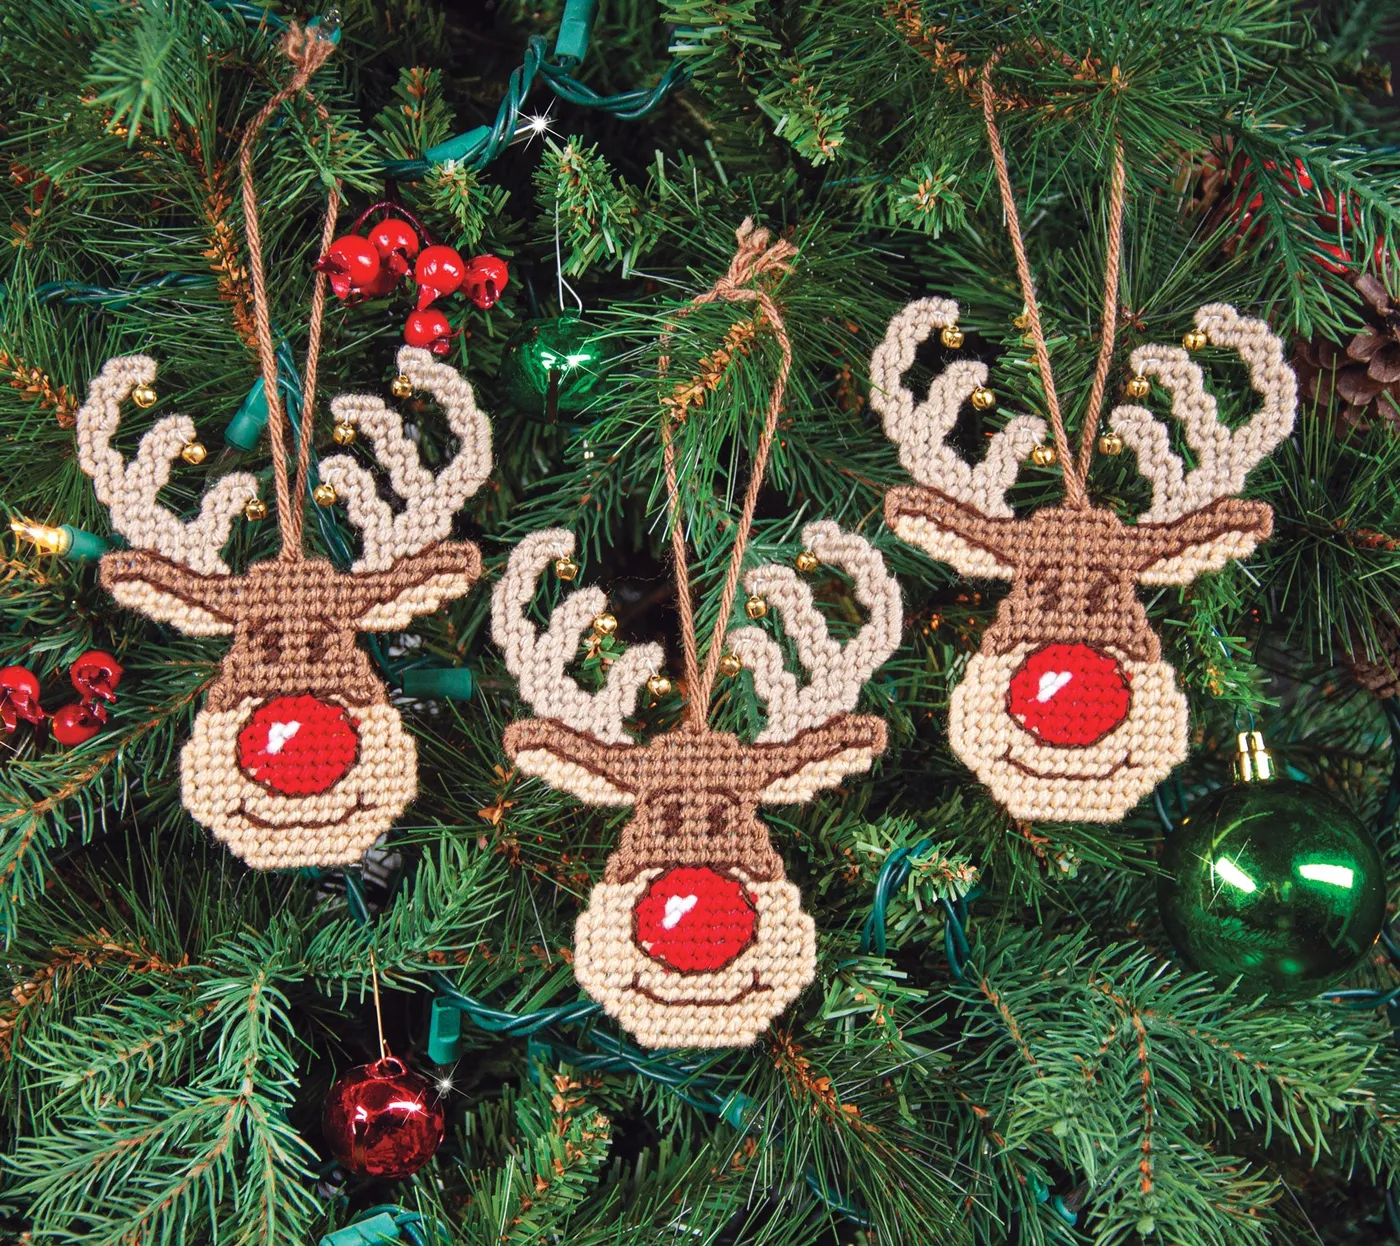
Needlepoint ornaments have been quietly climbing on Pinterest since the big grandmillennial wave, and 2026 is the year they went mainstream — kits are showing up at Joann, Michaels, and dozens of small Etsy shops. The appeal is timing: the stitching is slow, it happens in front of the TV in November, and it gives your hands something to do that isn’t scrolling. Not a flash trend either. Needlepoint reindeer were hanging on grandmothers’ trees in 1978.
8. Pastel Polka-Dot Cups Topped with Pom-Poms
Let’s talk about the cups. Inverted paper cups with glittery white dots and soft pom-pom tops look adorable in a close-up and a little wobbly on an actual branch — the paper is light, so a ceiling fan or a determined cat will send them swinging into each other. Glue the pom-pom on with hot glue, not craft glue, and add two small dots of glue inside the cup rim before pressing it over the branch. Expect to replace two or three after the season.
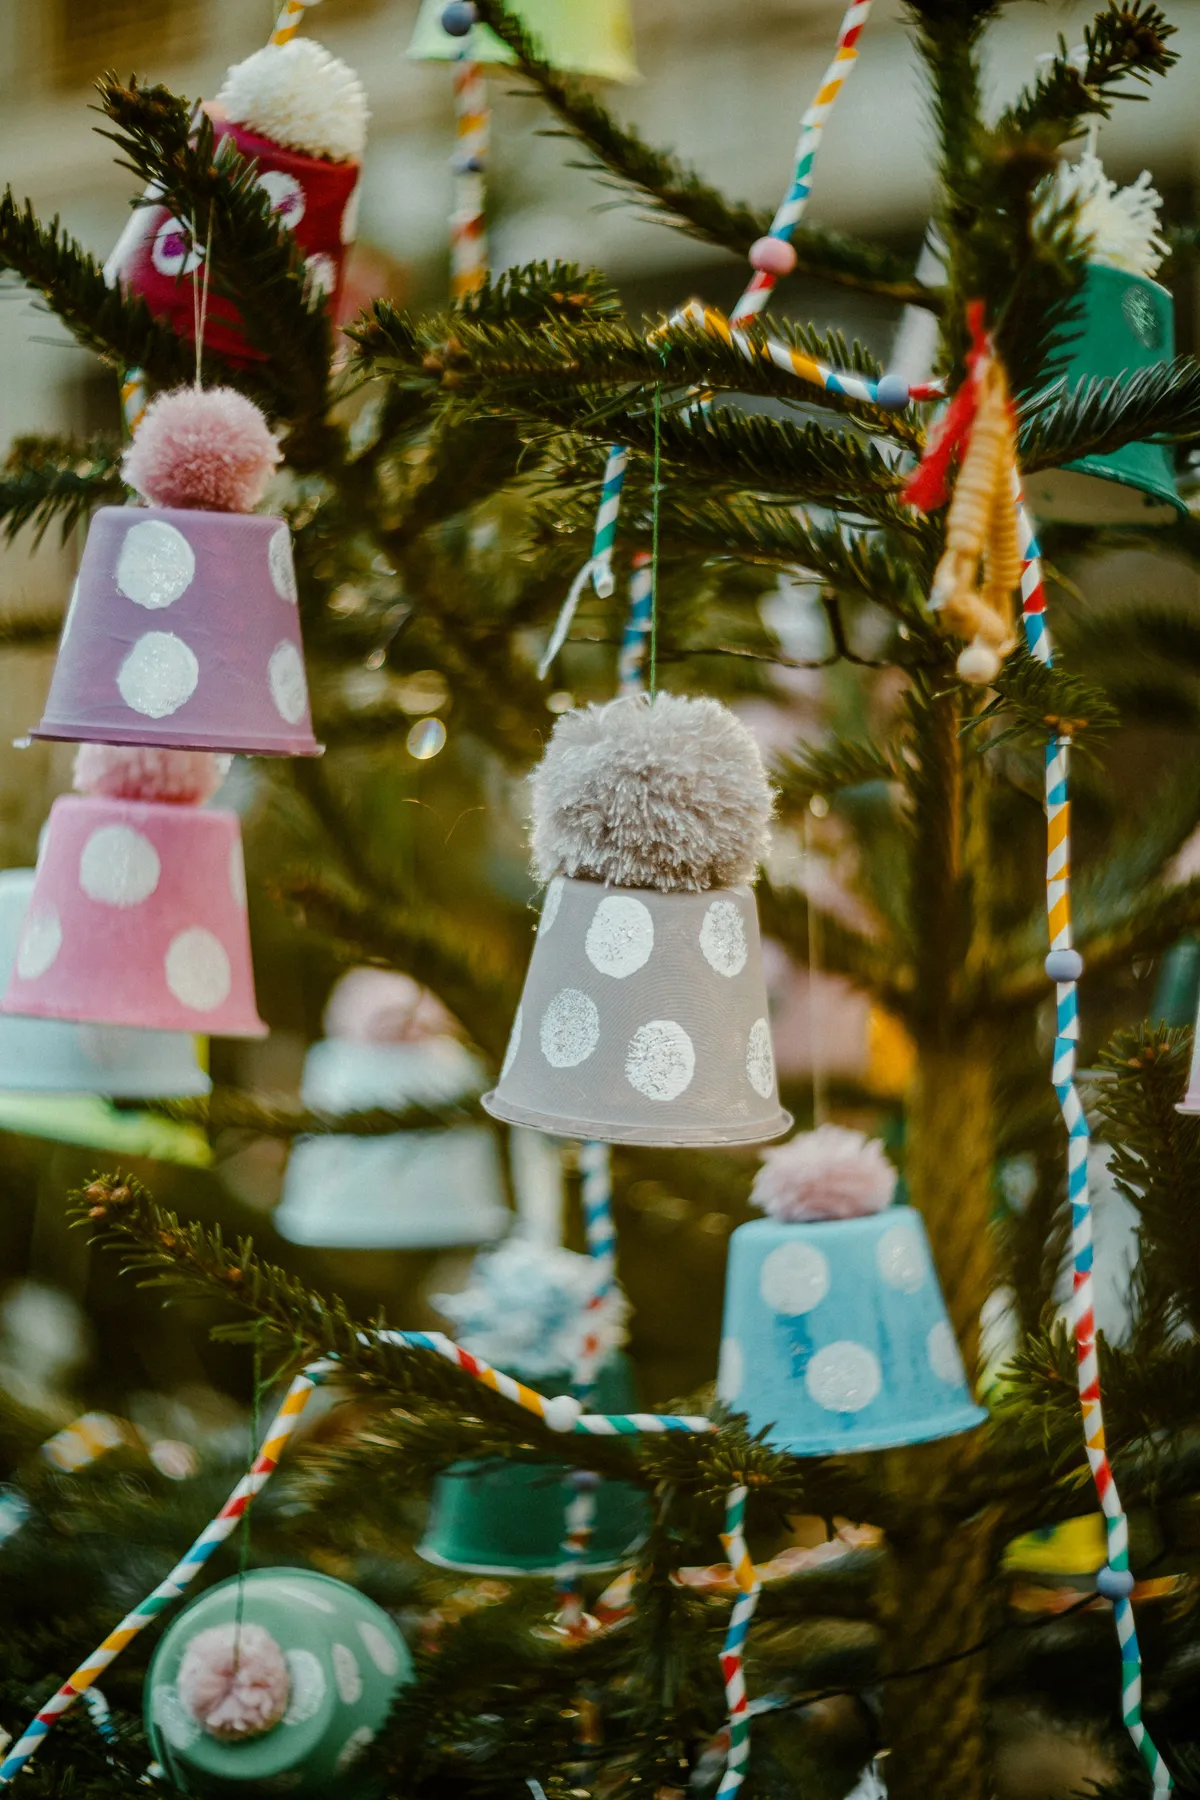
This is a 60/30/10 palette: roughly 60% deep green branches and neutral background, 30% pastels in pink, lavender, and pale blue, 10% white glitter. The pastels only work because the tree behind them is dark. Move these onto a flocked white tree and everything goes mushy — you’d need to drop the pale blue and add one saturated accent to rebuild the hierarchy. Compare with Idea #5 — same paper-craft energy, much softer palette.
9. A Felt Cake Slice with a Stitched Smile
Time: about an hour per slice. Cost: roughly $3.
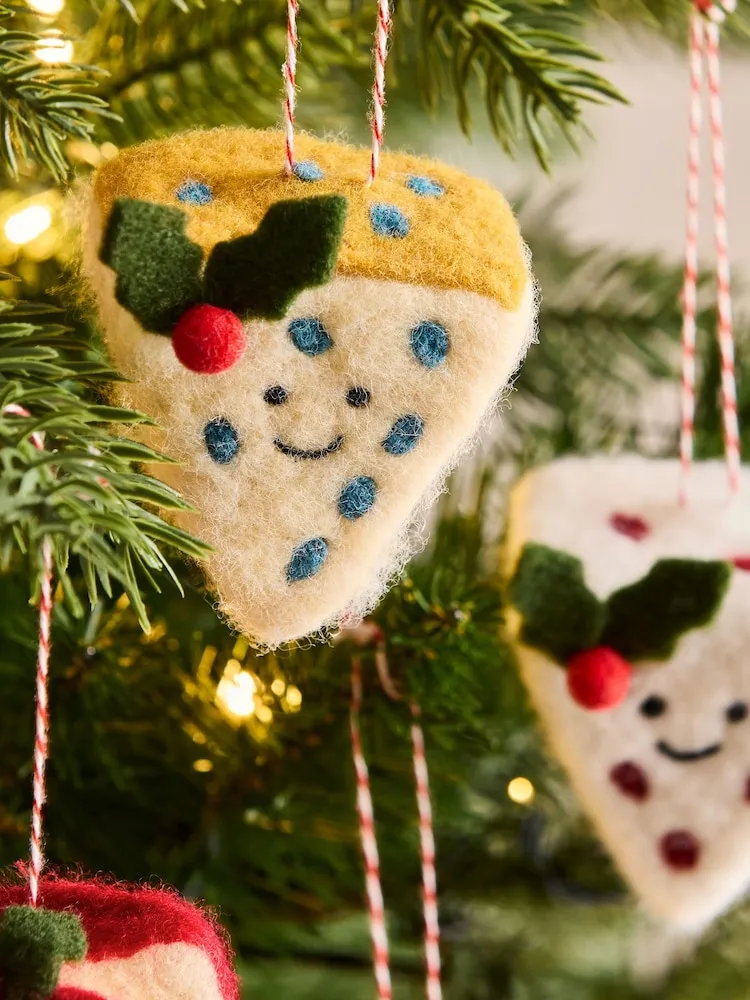
- Cut two matching cake-slice shapes from cream felt, plus one smaller golden-yellow layer for the frosting.
- Backstitch a simple smile and two dots in dark thread on the front piece — do this before assembly.
- Whipstitch front and back together around the edges, leaving the top open.
- Stuff lightly with fiberfill; overstuffing turns a slice into a pillow.
- Blanket-stitch the yellow layer over the top, then tack on two green felt leaves and a red berry.
- Thread a red-and-white striped string through the top and knot it.
The smile is the whole thing. A cake slice is a cake slice; a cake slice that grins at you from the tree is a personality. That single line of dark backstitching turns this from a felt-food exercise into the ornament guests pick up and turn over in their hands. Skip the holly if you must — do not skip the face.
10. Felt Animals in Red Knit Hats and Scarves
Three principles are stacked here. Contrast: soft matte felt against tight knit ribbing, so the red hat reads as a separate object even in low light. Scale: the animals stay small while the hats and scarves are proportionally oversized, which is exactly what makes them feel like characters instead of blobs. And repetition with variation — two animals, same construction, one white and one charcoal — gives you a pair that doesn’t look mass-produced.
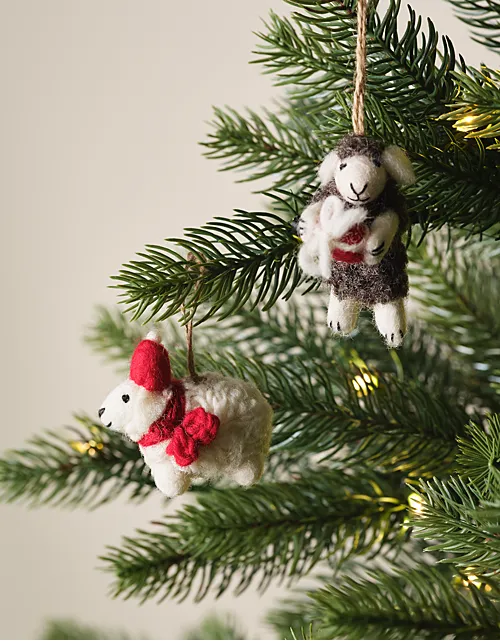
These want a tree at least 6 feet tall with loosely spaced branches. On a 4-foot tabletop tree they’ll dominate every branch within two feet and the whole thing starts to look like a toy store shelf. Working small? Hang one animal near the top where the branches are tightest, keep the rest of the upper third quiet, and let it be the focal point. Ceiling height doesn’t matter here — branch spacing does.
11. Wedgwood Blue Porcelain Tree Ornament
Vintage Wedgwood ornaments routinely sell for $40–$90 apiece on eBay and Etsy, which is a lot for something that spends eleven months in a box. If you love the look, here’s the workaround:
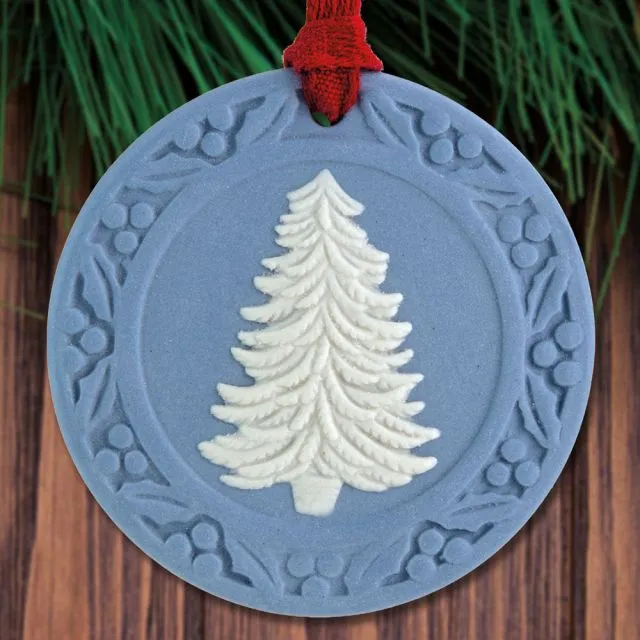
- Hunt estate sales and church bazaars for single blue-and-white porcelain ornaments, usually $3–$8
- Watch for Delft-style or blue transferware miniatures at thrift stores — same visual effect, a tenth of the price
- Fill gaps with plain cobalt glass baubles, about $6 for a set of four at Target
- Use white ribbon instead of gold to keep the palette cool
The blue is what you’re buying. Nobody reads the backstamp from the sofa.
Blue-and-white porcelain also wants white light. Hang it where it can be seen against a window, a white wall, or a flocked branch — under warm yellow bulbs the glaze goes grey and the whole collection looks dusty. And group them: three or more blue-and-white pieces on the same tree read as a deliberate collection, while one lonely piece just looks like you ran out of ornaments.
12. Jasperware Holly Ornament Against Frosted Branches
- Vintage Jasperware-style holly ornament, single: $35–$90
- Or a modern blue-and-white porcelain lookalike: $8–$22
- White satin ribbon, 10 yards: $5–$9
- Small plate stand for off-season display: $6–$14
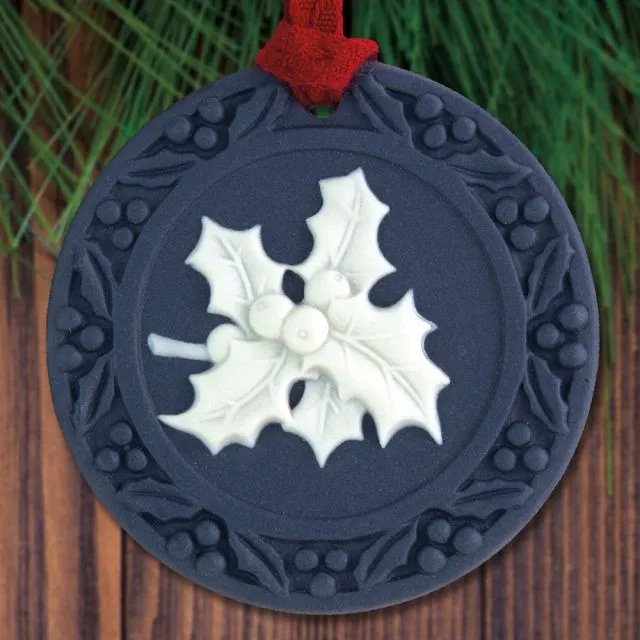
Total: $19–$135 depending on whether you go vintage or new. Budget alternative: skip the ornament entirely and set blue-and-white china cabinet pieces out as a January display — free, and arguably prettier than anything you’d buy.
Run these checks before committing to a blue-and-white collection:
- Does your tree read cool or warm? Cobalt needs neutral or cool light to stay crisp.
- How many blue ornaments do you already own? Under four and they look accidental.
- Is the tree flocked, green, or white? Blue on white disappears; blue on green sings.
- Do you have a storage box with dividers? Porcelain chips in a jumbled bin.
- Kids or pets in the house? Keep porcelain above the 4-foot line.
13. Crushed Amber Glass Ornament with Green Felt Leaves
Time: 20 minutes per ornament. Materials: about $6.
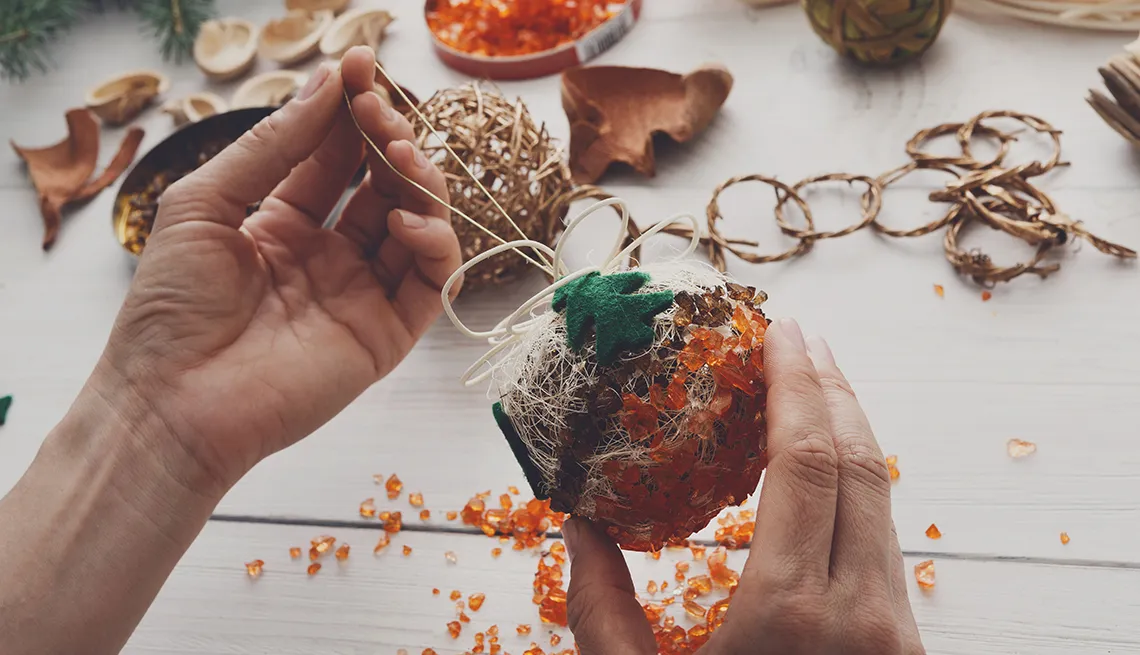
- Coat the bottom third of a clear glass or plastic ball with clear-drying craft glue, working in small sections.
- Press crushed amber and brown glass or resin pieces into the glue with tweezers.
- Add wisps of white cotton or wool roving for a snow-drift effect.
- Glue two small green felt leaves and a thin gold loop near the cap.
- Let it cure upright for 24 hours — gravity slides anything still wet.
These land best at 3 to 4 inches across on a tree 6 feet or taller. The crushed amber reads as texture from about four feet away, which is exactly how far you’ll be standing when you look at the tree, so don’t fuss over perfection up close. On a small tabletop tree, stick to two or three and hang them in the lower half where light travels through the translucency.
14. A Felt Fisherman Doll Holding a Tiny Lobster
Whimsical character ornaments — fisherman, baker, skier, lobster-hauler — are having a real moment in 2026 as coastal and grandpacore decorating cross over on Pinterest. The shift is away from matching sets and toward narrative: a tree that tells a story about a house near the water. It’s a slower trend than a color of the year, and it usually sticks, because the ornaments are personal. It’s a lot harder to toss a fisherman than a silver bauble.
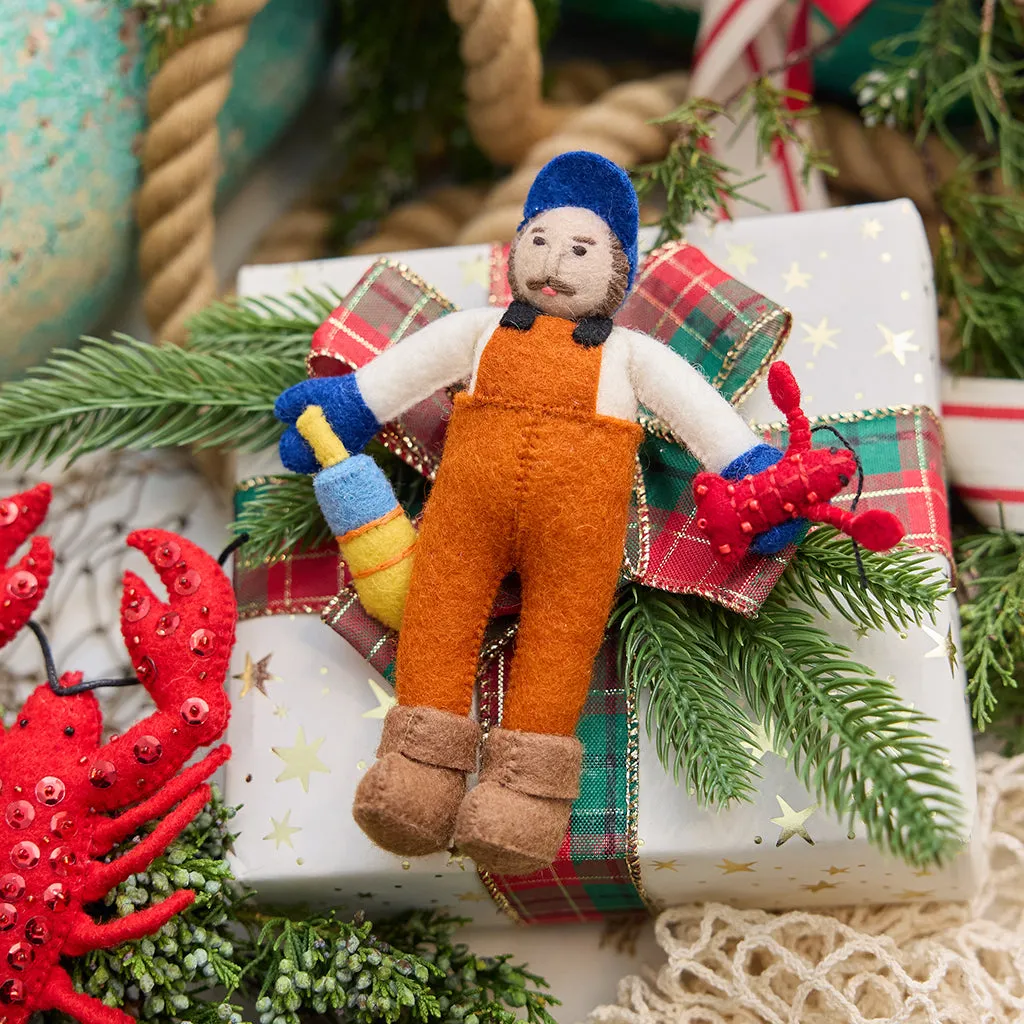
Hand-stitched dolls with wire armatures inside are heavier than they look, and a felt lobster the size of your thumbnail is a choking hazard for toddlers and a chew toy for dogs. Hang the fisherman in the upper third, wire the hanging loop rather than gluing it, and skip the tiny lobster entirely if you have kids under three or a cat with ambition. Store it flat in a lidded box, not a shared ornament bin.
15. Glitter Alarm Clock and Stocking Ornaments
Red and silver at a strict 80/20 split, with white as the ground. The glossy red body does the heavy lifting, silver glitter supplies the accent, and the tiny black hands are a 2% detail that makes the shape read instantly as a clock. Want a different mood? Swap silver for aged gold and you get vintage instead of retro-cute. Swap the red for mint, keep the silver, and the whole thing goes mid-century sweet.
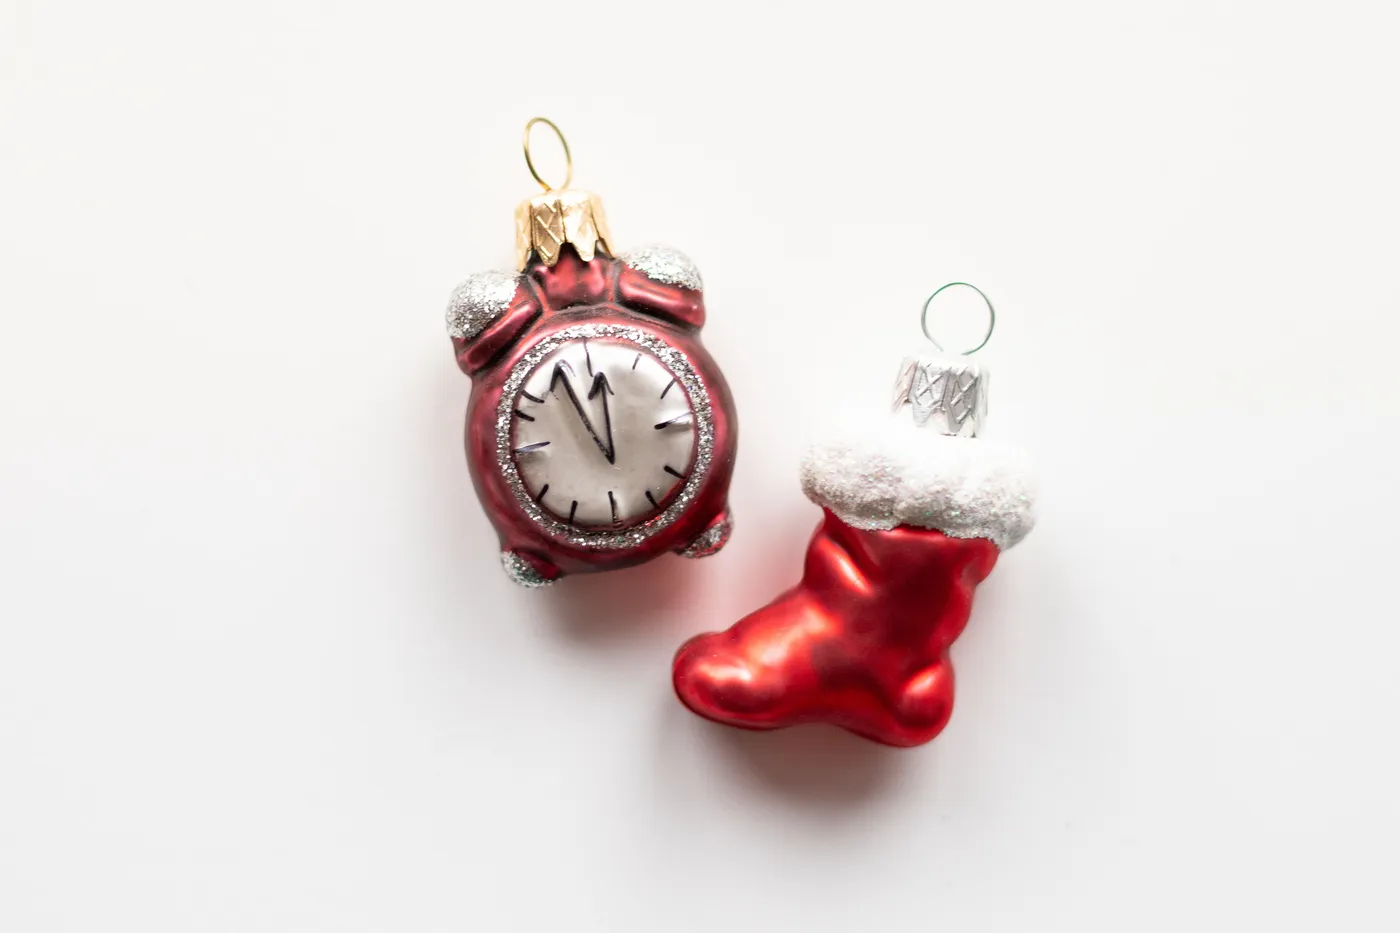
Boutique shops sell glitter novelty shapes for $12–$18 each, which gets expensive fast when you want a whole tree. Better: buy plain paper-mâché or wood blanks at Michaels for $1.50–$3, coat with Mod Podge, and dunk in fine glitter. A $9 jar handles a dozen ornaments. That’s the same red-and-gold glitter logic behind Idea #16, where plain bells do the work of an entire themed set.
16. Accordion Fruit Ornaments with Gold Bells and Ribbon
Accordion ornaments spin unless they have weight at the bottom. Tuck a single small bead or a split-shot fishing weight into the lowest fold before you close the paper — the difference in how they hang is genuinely dramatic. Keep your folds at 1/4 inch, too: wider looks clumsy at ornament scale, and narrower than that and the honeycomb won’t hold its shape past one season.
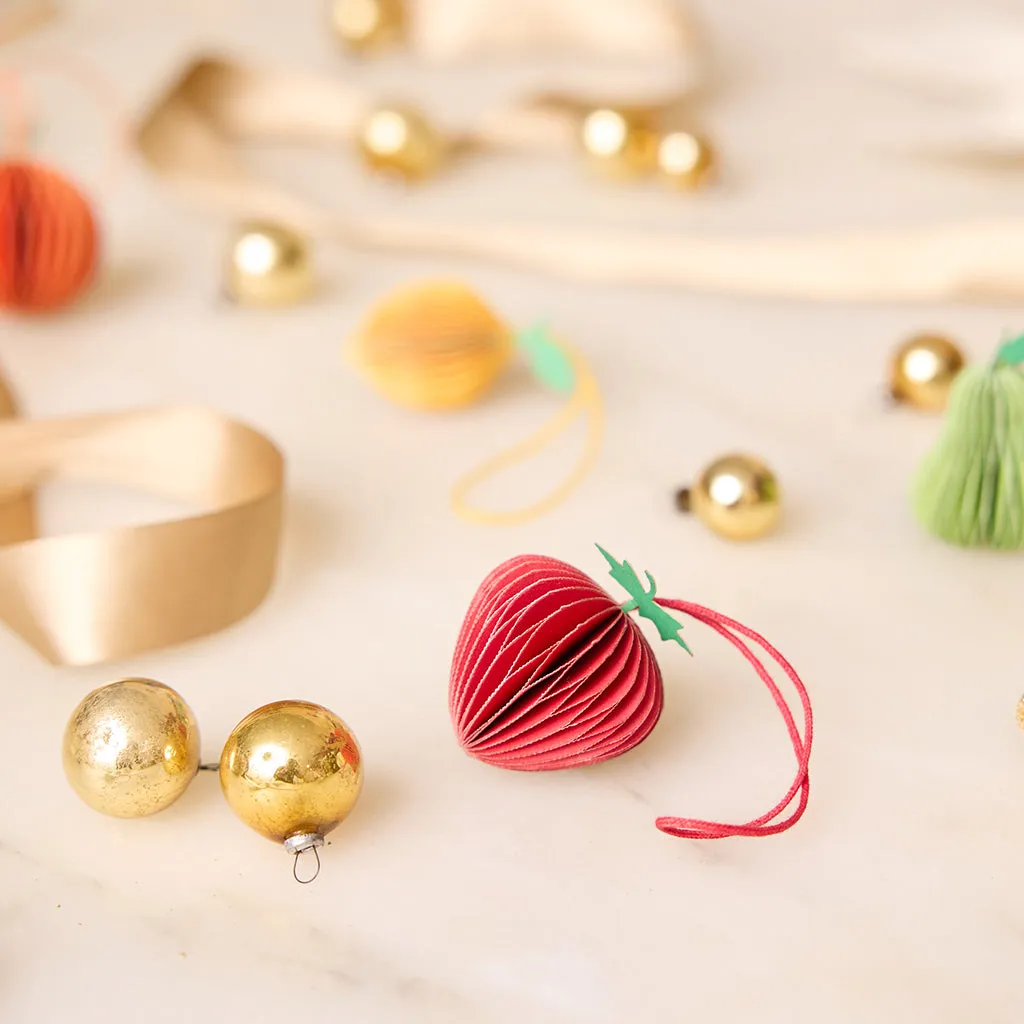
Two moves make this palette work. First, the color story: red, orange, and green fruit against shiny gold spheres and gold ribbon is a warm, fully saturated scheme with zero cool tones, which is why it reads like a market stall instead of a craft bin. Second, the shape contrast — soft scalloped paper next to hard, perfectly round metal. Each element would be flatter without the other.
17. Nativity Ornament on a Frosted Blue-Green Tree
This scheme needs room. Deep blue, patterned green, frosted white, and warm golden light together are dense, so it wants a tree 7 feet or taller and a corner with at least 3 feet of clearance on the visible sides. In a smaller room, borrow the palette but drop one layer — keep the blue and the frosted white, skip the patterned green — and the same mood still works on a 6-footer.
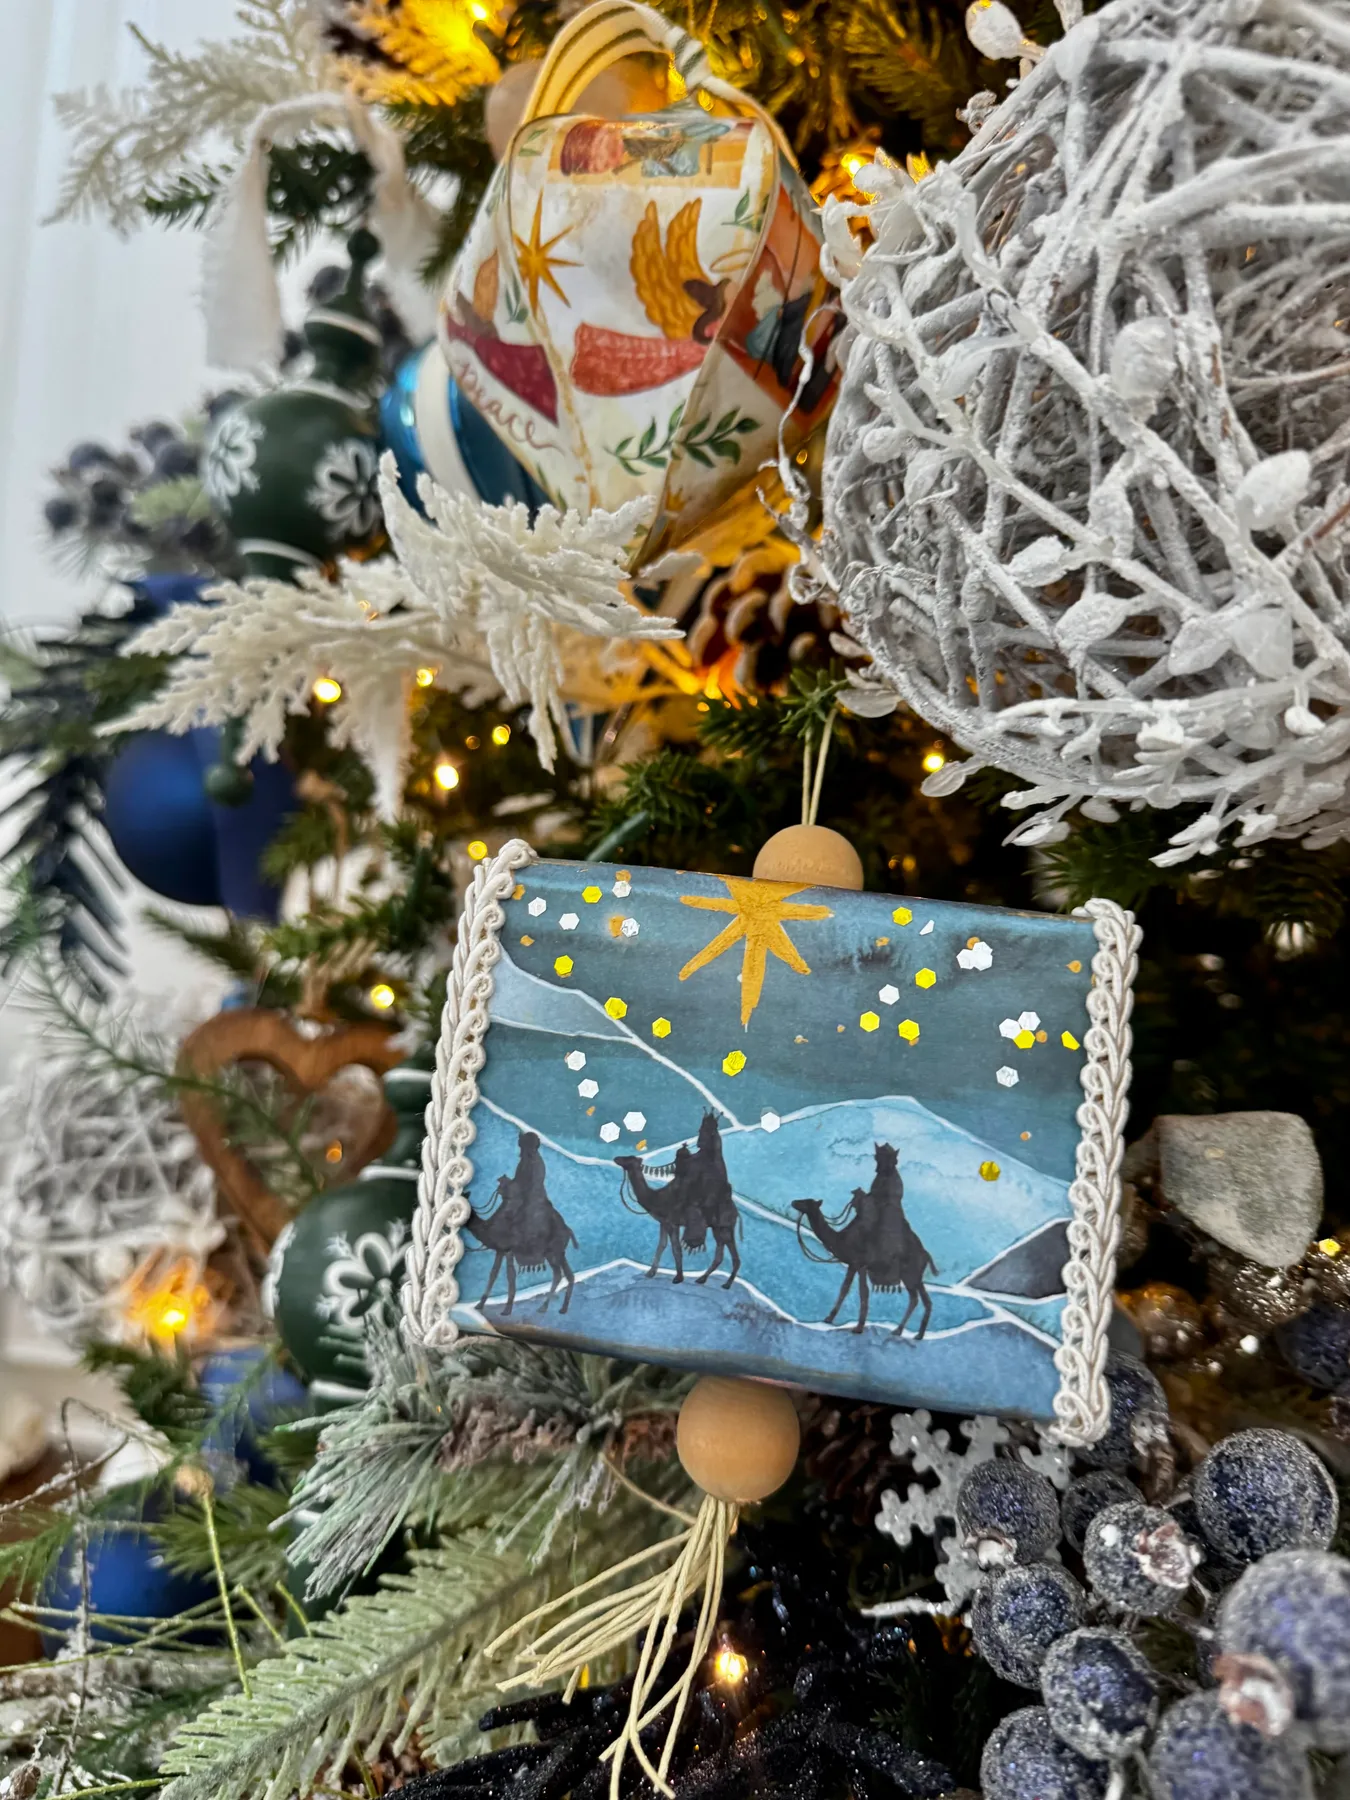
Flocked branches and frosted berries shed. Expect a fine white dust on the floor for the first week, and don’t run a robot vacuum under the tree unless you enjoy cleaning filters. Fabric ornaments with braided trim should be spot-cleaned only — a wet cloth bleeds dye into cream trim fast. Store frosted pieces in individual tissue sleeves so the flock doesn’t rub off onto whatever hangs beside them.
18. Beaded Ornaments in Geometric African Patterns
Time: 2–3 hours per ornament. Cost: about $5.
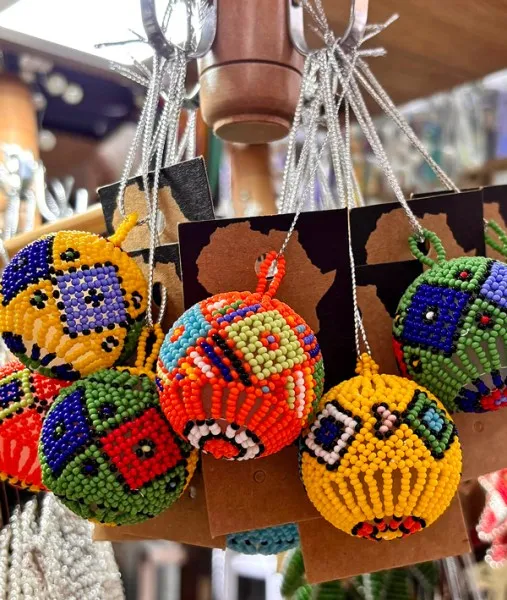
- Start with a 2.5-inch foam or papier-mâché ball and mark your pattern with a white pencil.
- Work one color band at a time, gluing size 8 or 11 seed beads in tight rows from the bottom up.
- Rotate the ball a quarter turn with each new band so the pattern stays straight.
- Fill gaps with smaller seed beads rather than forcing a big bead to fit.
- Seal with a thin coat of matte Mod Podge, then attach a silver thread loop and a brown paper tag.
Think in threes: three to four colors per ball, one dominant, one secondary, one accent. Yellow at 50%, orange at 30%, blue or green at 20% photographs best. The little paper tag does real work here — it adds a neutral brown that lets the saturated beads breathe, and it makes a set of these look curated rather than chaotic.
19. Cartoon Santa Face Baubles on a Lit Tree
Novelty faces are charming in photos and slightly unsettling in person if you hang too many at once. Twelve grinning Santas on one tree and you’ve built an audience. Cap it at five or six, spread them out, and make sure a few hang below eye level where kids can actually find them. Also: painted faces chip. If you’re painting your own on plain white baubles, use enamel paint pens, not acrylics.
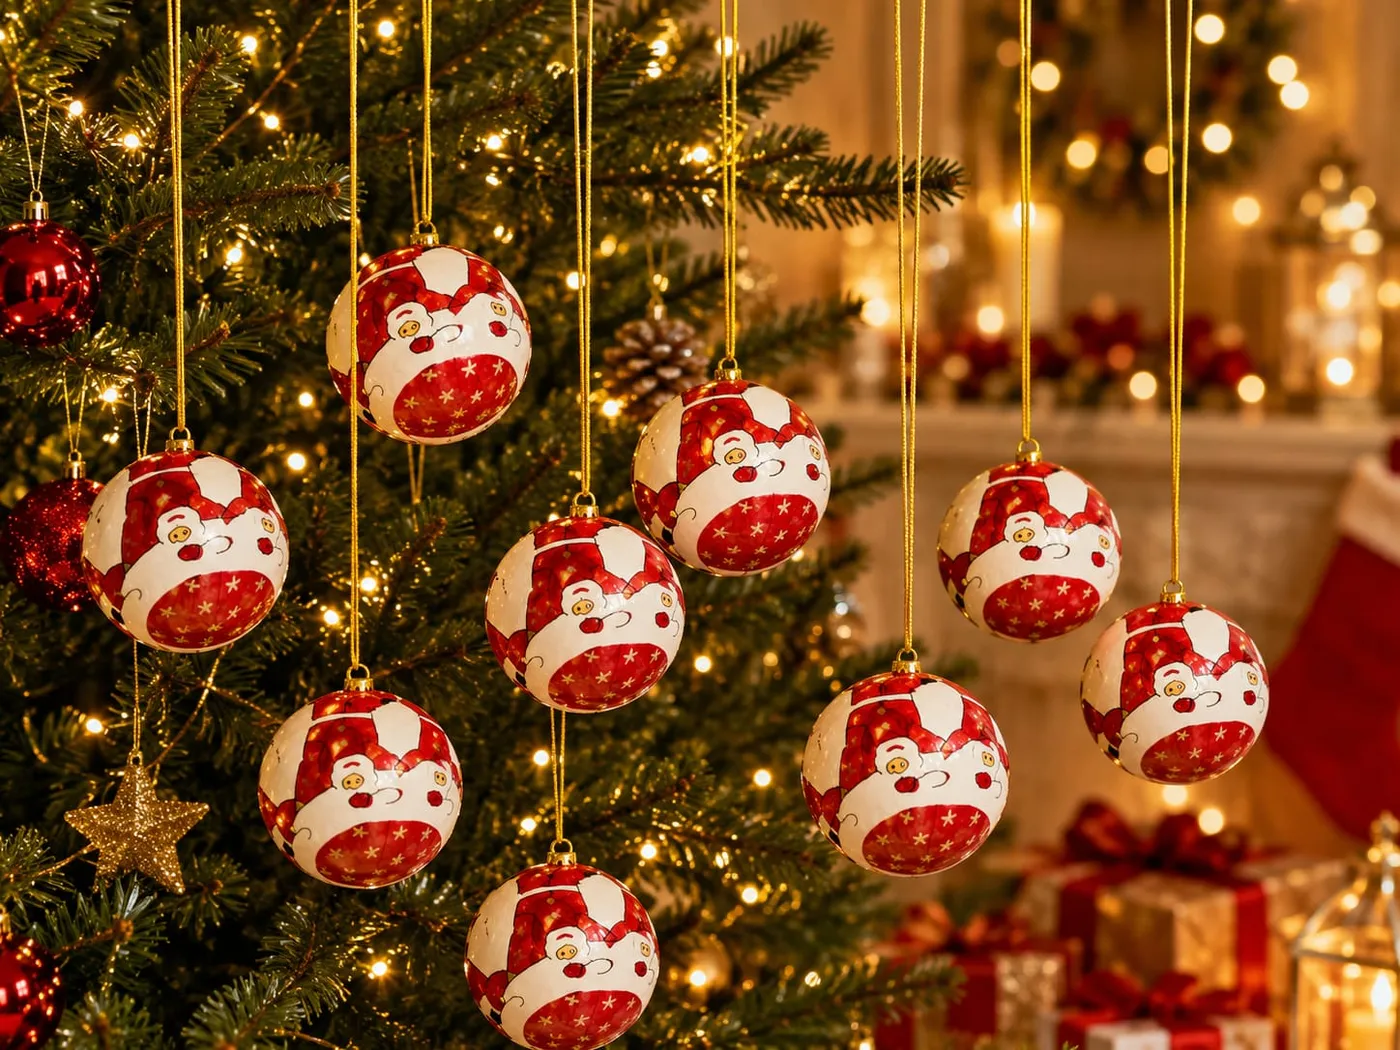
- Plain white and red shatterproof baubles, 24-pack: $14–$24
- Enamel paint pens in red, white, black: $12–$20
- Gold glitter star tree topper: $8–$15
- Gold hanging strings, 100-pack: $5–$9
- Warm white string lights, 200 count: $16–$30
Total: $55–$98 for a full themed tree. Buy the baubles in January at 70% off and the whole thing drops under $35.
20. Golden Bell Pair with Red Berry Accents
Metal ornaments need something matte next to them or they turn into one shiny blur. Pair each gold bell with a dark green branch and one small red berry pick tucked just behind it — the berry gives the eye a landing point. Brass and gold also hold fingerprints, so handle them with a soft cloth when you hang them, and never polish with anything abrasive. You’ll scrub the antiquing right off.
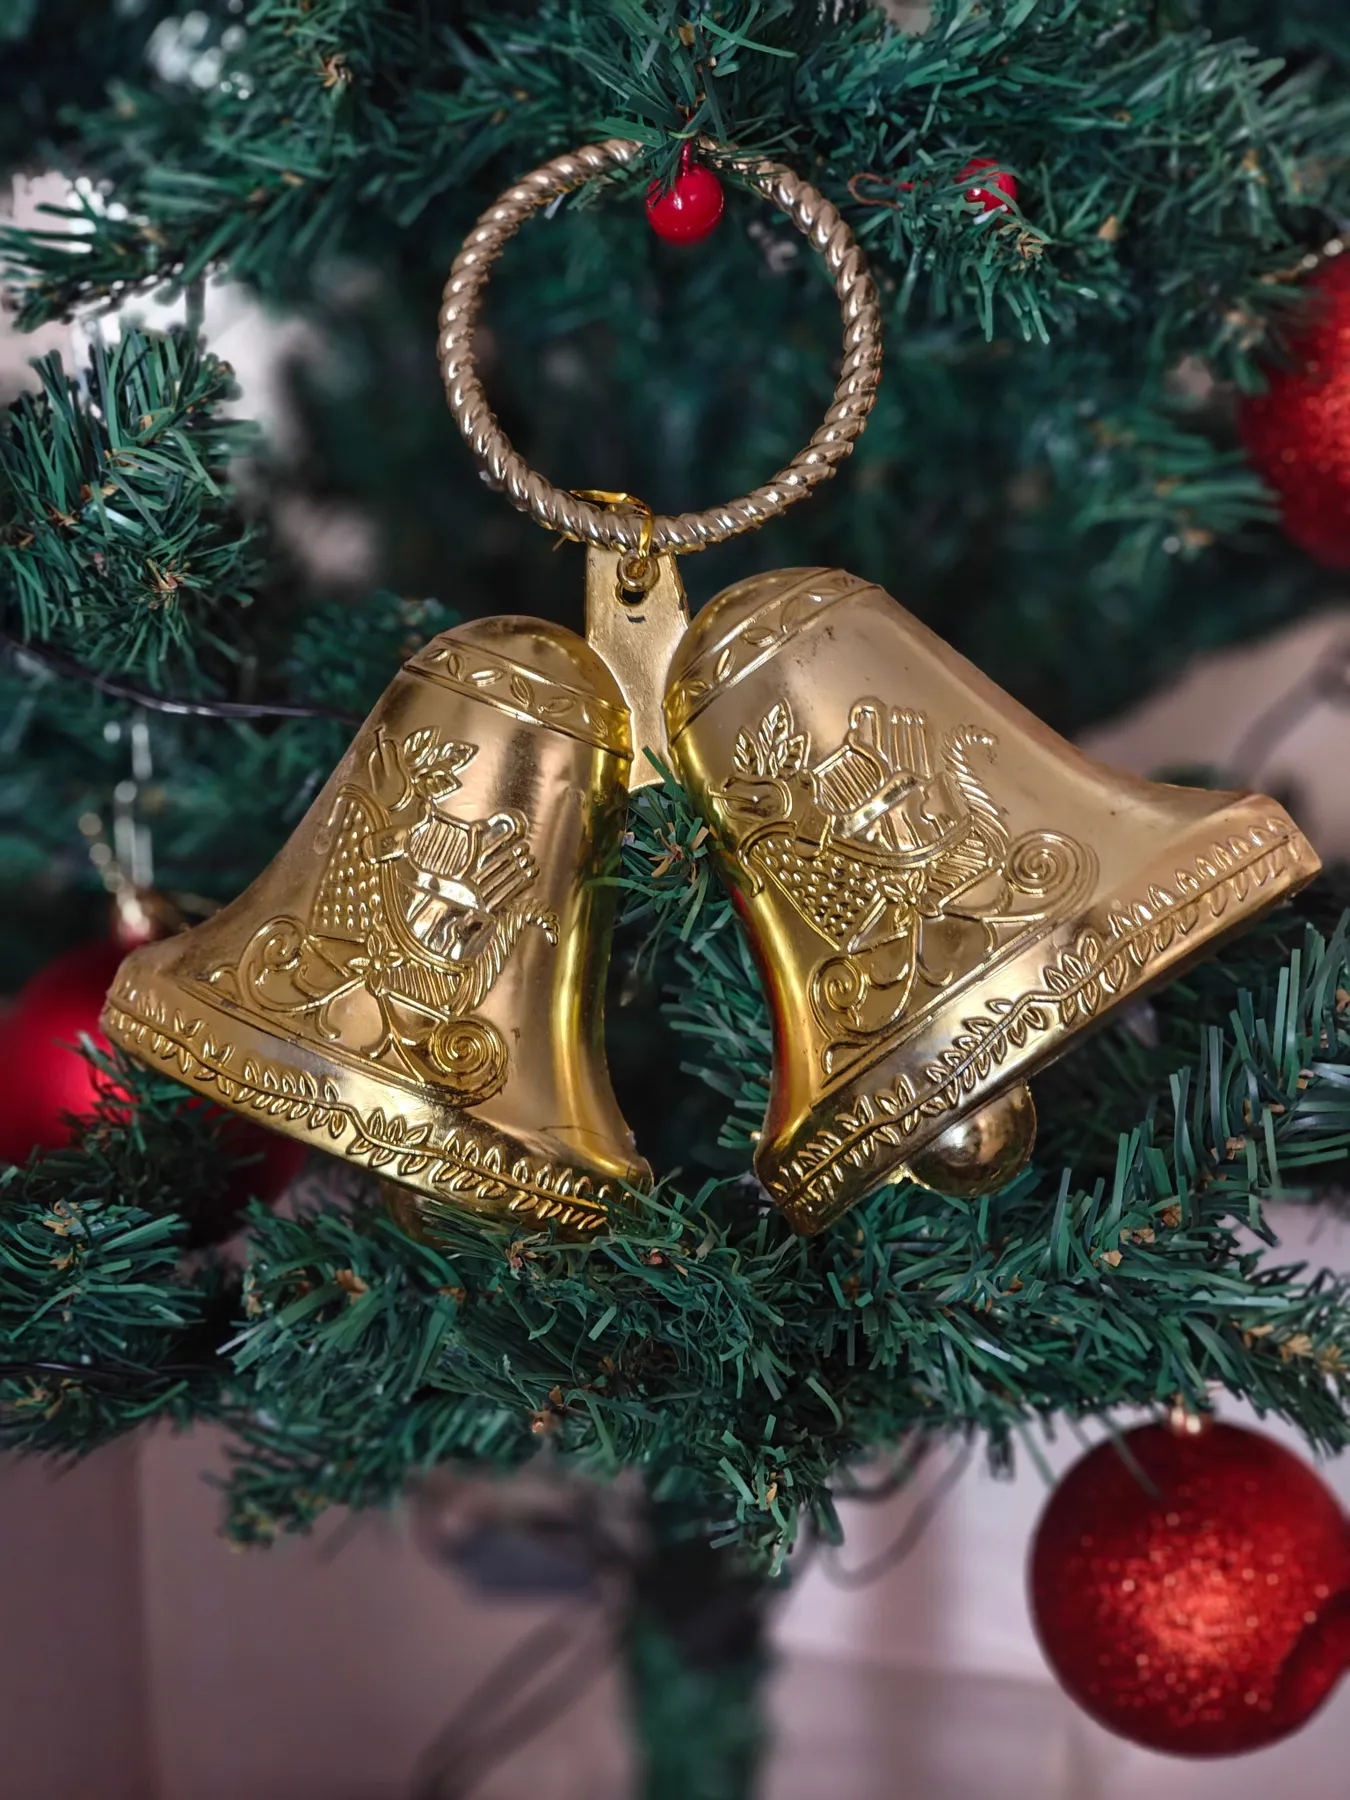
The pair, not the single bell. Two bells on one twisted ring, hung slightly off-center, read as one substantial ornament. Split them and you have two average ones. If you’re building this yourself:
- Hang the lower bell about 1.5 inches below the upper one
- Use a twisted gold ring, not a plain wire loop
- Keep the berry pick narrower than the bell’s width
- Hang at eye level — never tucked into the back of the tree
21. Book Page and Gold Glitter Glass Ornament
A single glass ornament filled with torn book pages costs about $2 to make: a clear craft ball from Michaels ($1.50–$3), a paperback from a library sale ($1), and a spoonful of fine gold glitter you probably already own. Compare that with the boutique versions selling for $14–$22 apiece. A sheer beige ribbon bow and a silver textured cap finish it. It’s the same cost math as Idea #28 — thrifted material, boutique look.
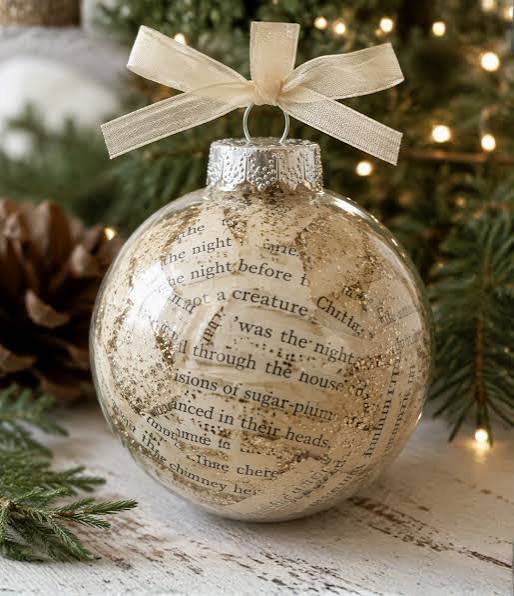
Four quick checks before you start filling glass:
- Real glass or shatterproof plastic? Real glass and tile floors don’t mix.
- Do you have a funnel or a rolled paper cone? Book strips jam without one.
- Is your glitter fine or chunky? Fine only — chunky sinks and looks like debris.
- Have you sealed the pages? Unsealed paper yellows unevenly in sunlight.
22. Gingham Flower Ornament with Rustic Bells
Pattern mixing is the whole trick. The petals layer red-and-off-white gingham under a darker plaid, and both prints are small-scale — two busy patterns at large scale would fight each other, while small-scale reads as texture from across the room. The light brown center disc and the tiny dark bells add a third material, which is what stops a fabric ornament from looking like a scrunchie with a ribbon on it.
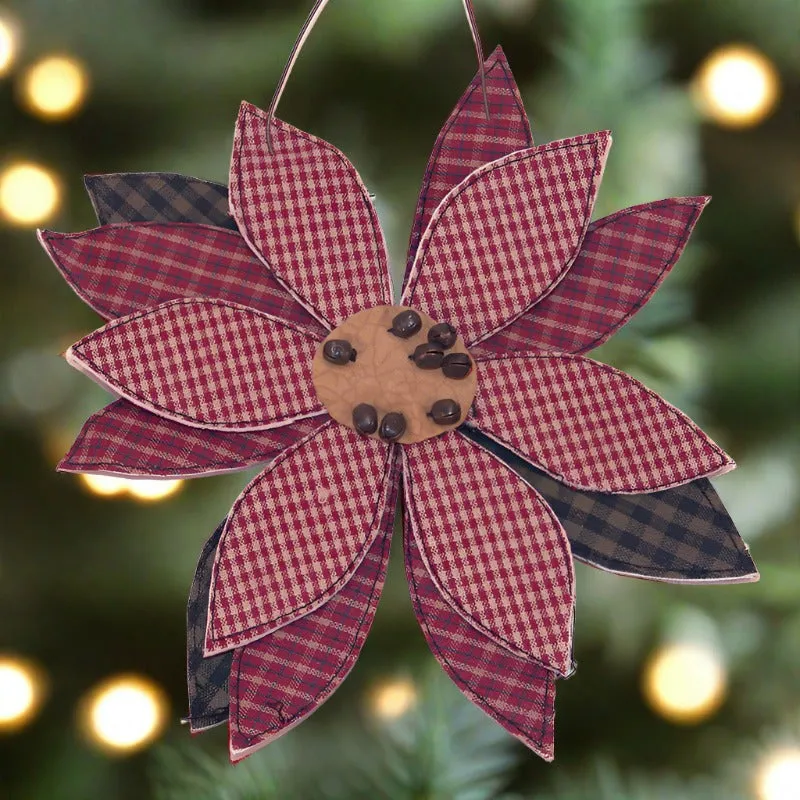
Time: 30 minutes. Cost: about $4.
- Cut six 3-inch circles of gingham and three of a darker plaid.
- Fold each circle in half twice and press on low with an iron.
- Layer the folded petals into a fan and hot-glue them at the point.
- Glue a 1.5-inch light brown felt disc over the center.
- Stitch or glue three small dark bells onto the disc.
- Attach a metallic wire loop at the back and fluff the petals open.
23. Wood Plaque Snowman That Says ‘Let It Snow’
A wood plaque this size — roughly 4 inches tall — is built for a tree 6 feet or taller, or for a rustic wall tree on a 9-foot wall. It’s flat, so it sits close to the branch and doesn’t crowd the silhouette, which means you can hang more of them than you could round baubles. In a small apartment, this is the ornament type to buy: they store flat in a shoe box and nothing breaks.
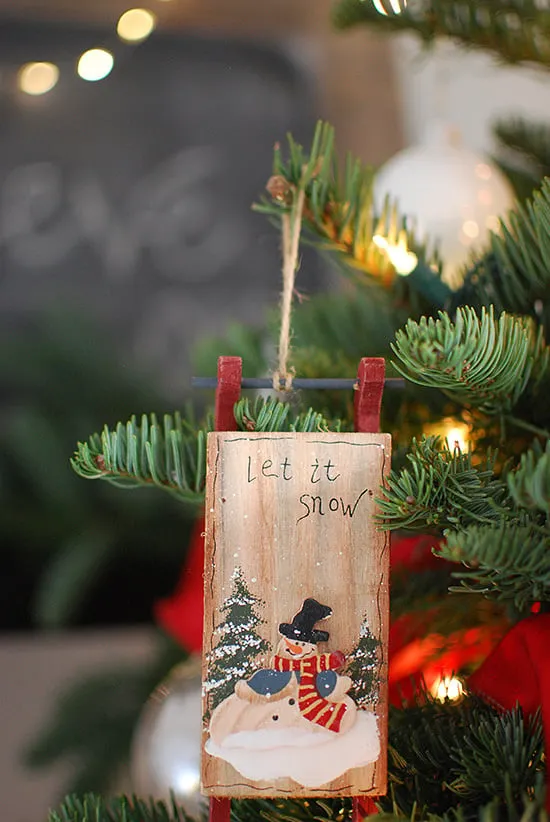
Two things to know. First, painted wood grain drinks paint — seal the blank with a thin coat of matte varnish first, or your snowman’s white scarf soaks into the grain and greys out. Second, twine hangers fray and stretch, so knot them tight and add a single dot of glue at the knot. Check the wood for bark still attached; it flakes onto light floors for the first month.
24. Swirled Clay and Salt Dough Ornaments
The palette is 50% forest green and cream, 30% muted red, 20% light blue and natural wood — a folk-art mix that stays calm because every color is slightly desaturated. Want it brighter? Raise the red to 30% and cut the blue entirely. Want it moodier? Swap the light blue for deep teal and drop the red to 15%. The swirled marbling is what keeps all those colors from looking like a preschool project.
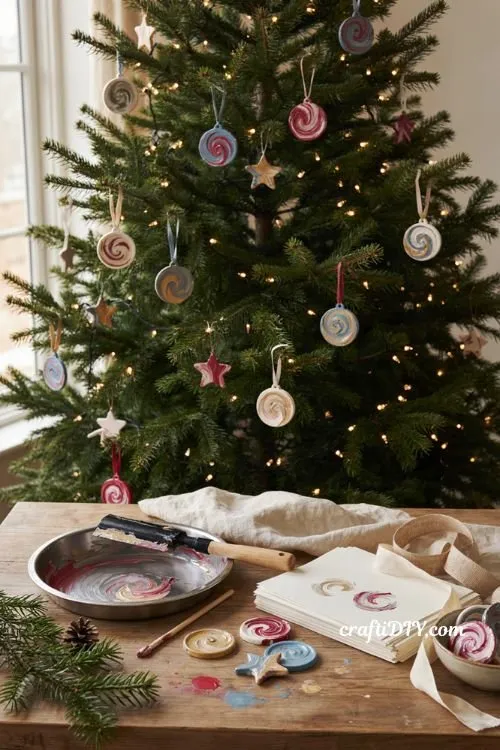
For crisp swirls, roll two clay colors into separate 1/2-inch ropes, twist them together like a candy cane, fold, twist again, then roll flat. One fold-twist pass looks muddy; three passes give you a fine marbled line. Poke the hanging hole before baking, not after — a 1/4-inch skewer at top center, about 1/2 inch from the edge, or the disk will crack when you thread it.
25. Crystal Baubles on a Sparse Second Tree
The negative space is the design. Cut crystal works when there’s a lot of empty tree around it — that’s what lets the light bounce and the facets read as cut rather than cloudy. Fill the branches and the whole effect collapses into a shiny green mass. It’s why crystal sets usually live on a smaller, sparser second tree, or on a bare branch arrangement in a tall vase.
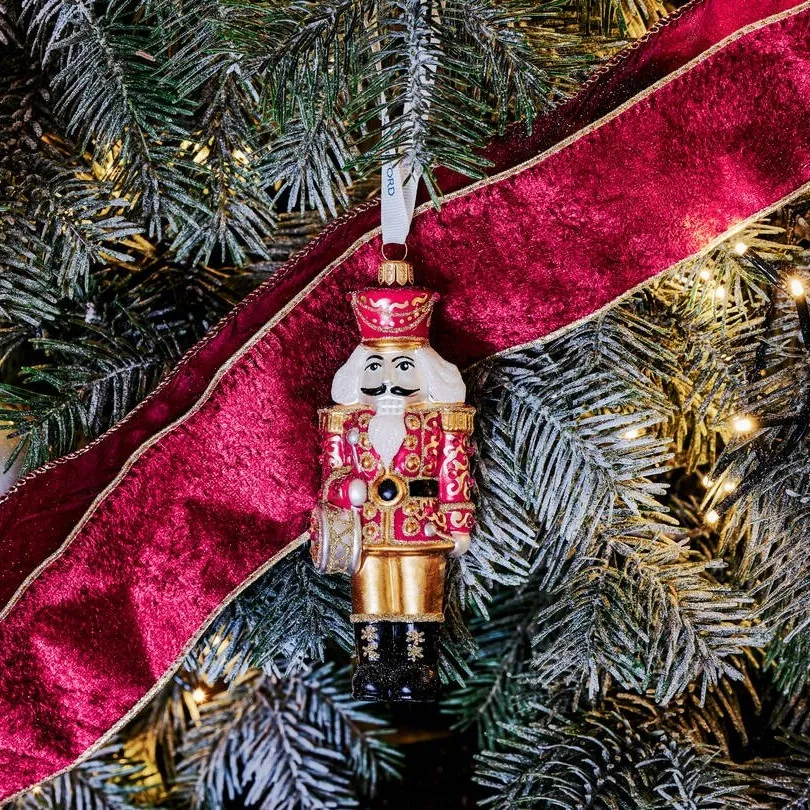
Setting aside a whole second tree for crystal can run $200 and up. Two cheaper routes: hit estate sales and thrift stores for single cut-glass ornaments, usually $2–$6 apiece, and build a set over a couple of years. Or skip the tree entirely — buy plain clear glass balls (about $10 for six at Target) and hang them on bare branches in a vase. Same play of light, nothing extra to store.
26. Vintage Ornament Wreath with Silver Tinsel
Ornament wreaths are back because thrift-store ornament bins finally got cheap again, and because maximalism stopped being a dirty word. Searches for vintage ornament wreaths climb every November — it’s a five-hour craft that looks like you inherited it. This one has real staying power, since the materials are literally old. It self-recycles, which is more than most holiday decor can say.
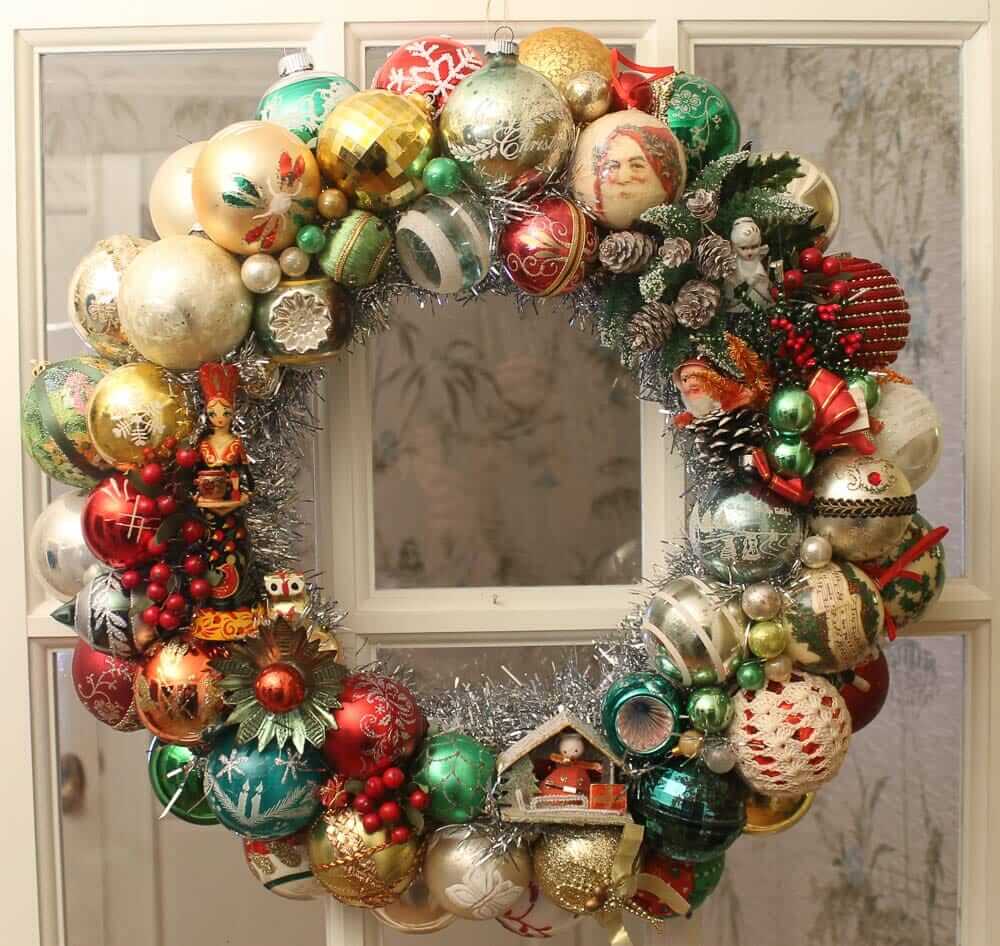
Density and hierarchy are doing the work. There’s no visible base — the wire form is almost fully covered — so it reads as a solid object rather than a decorated ring. But it isn’t random: the largest ornaments anchor the bottom-left, mid-size ones fill the ring, and small tinsel and berries bridge the gaps. For a single-ornament version of the same density trick, see Idea #30.
27. Miniature Wooden House with Lit Windows
Time: 1–2 hours. Cost: about $8.
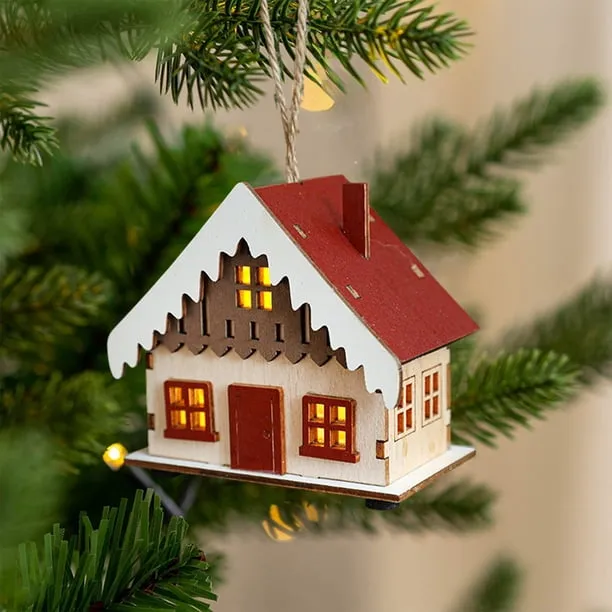
- Cut a simple house silhouette from 1/4-inch basswood — one rectangle plus a triangle roof, glued and clamped.
- Drill or punch window and door openings just smaller than your light source.
- Paint the roof dark red and add white scalloped trim along the eaves.
- Tape a small warm LED behind the front wall, then glue the back panel on.
- Thread braided twine through a top hole and knot it. LED only — never a bulb that gets hot.
Glowing windows read from about 5 feet away, so these want a tree 6 feet or taller with the house hung between 4 and 6 feet off the floor — the sweet spot for both glow and detail. Below that, guests walk past them; above, the light gets lost. Before you commit:
- Tree height of 6 feet or more
- Hanging height between 4 and 6 feet
- At least 2 inches of clear branch below the house
- LED light only, never incandescent
28. Sea Glass Ornament in a Light Wood Frame
Sea glass is tough, but the frosted panel isn’t. Frosted acrylic scratches with a dry cloth, and standard glass cleaner will cloud it further — dust with a soft brush only, and never soak it. Real sea glass is also heavier than craft glass, so choose a wood frame with a glued-in panel rather than a snug fit. Expect to re-glue one or two panels every few seasons, especially if you hang them near a doorway where they swing.
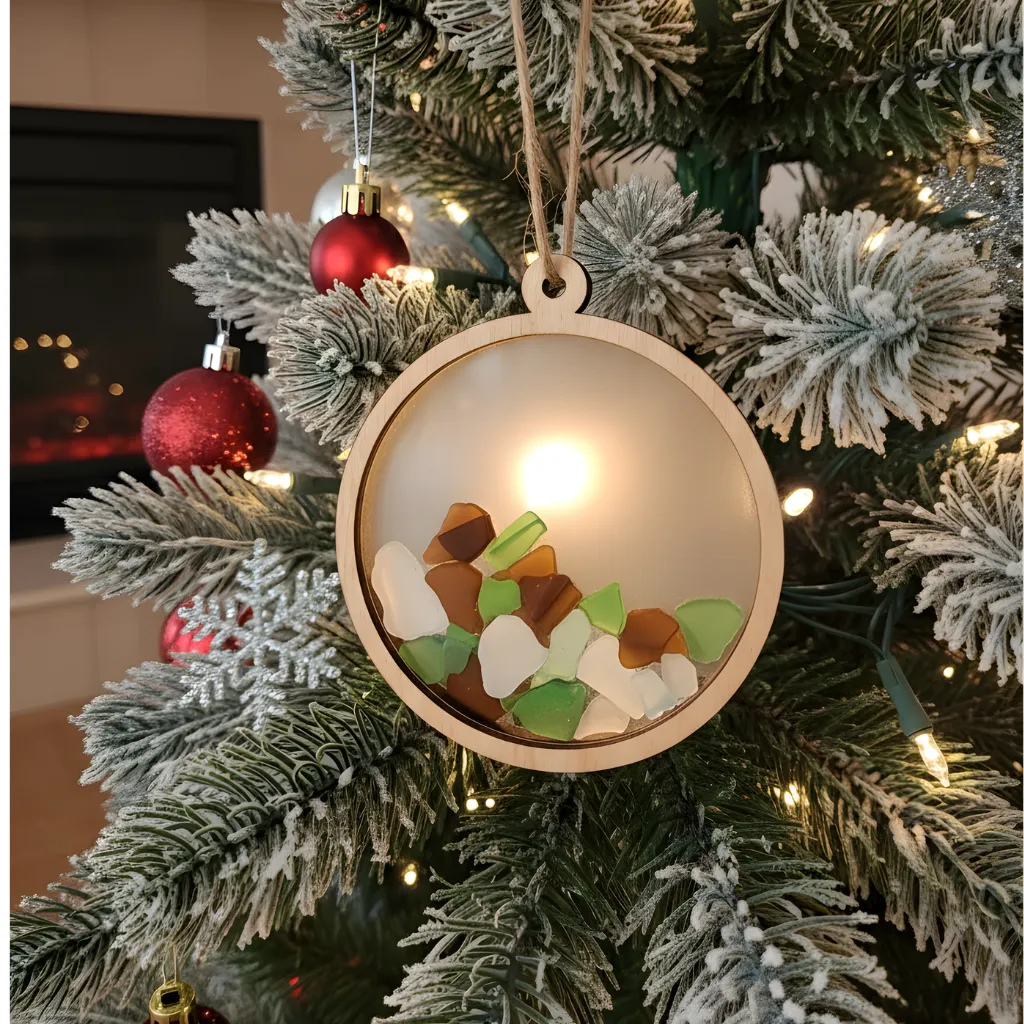
Palette math: 55% driftwood and frosted white, 25% seafoam green, 15% amber brown, 5% twine. It’s a beach palette, and the trick is that nothing in it is bright — every color is softened, which is why it works on a flocked white tree in December without looking summery. Swap the amber for charcoal and the same formula goes fully Nordic.
29. Vintage Ornaments on a Lighted Mantel Garland
- Pre-lit green garland, 9 feet: $30–$60
- Vintage-style Santa and deer ornaments, 6-pack: $18–$36
- Frosted holly picks and red berries: $10–$18
- Rustic white metal bells: $12–$24
- White pillar candles, set of three: $15–$30
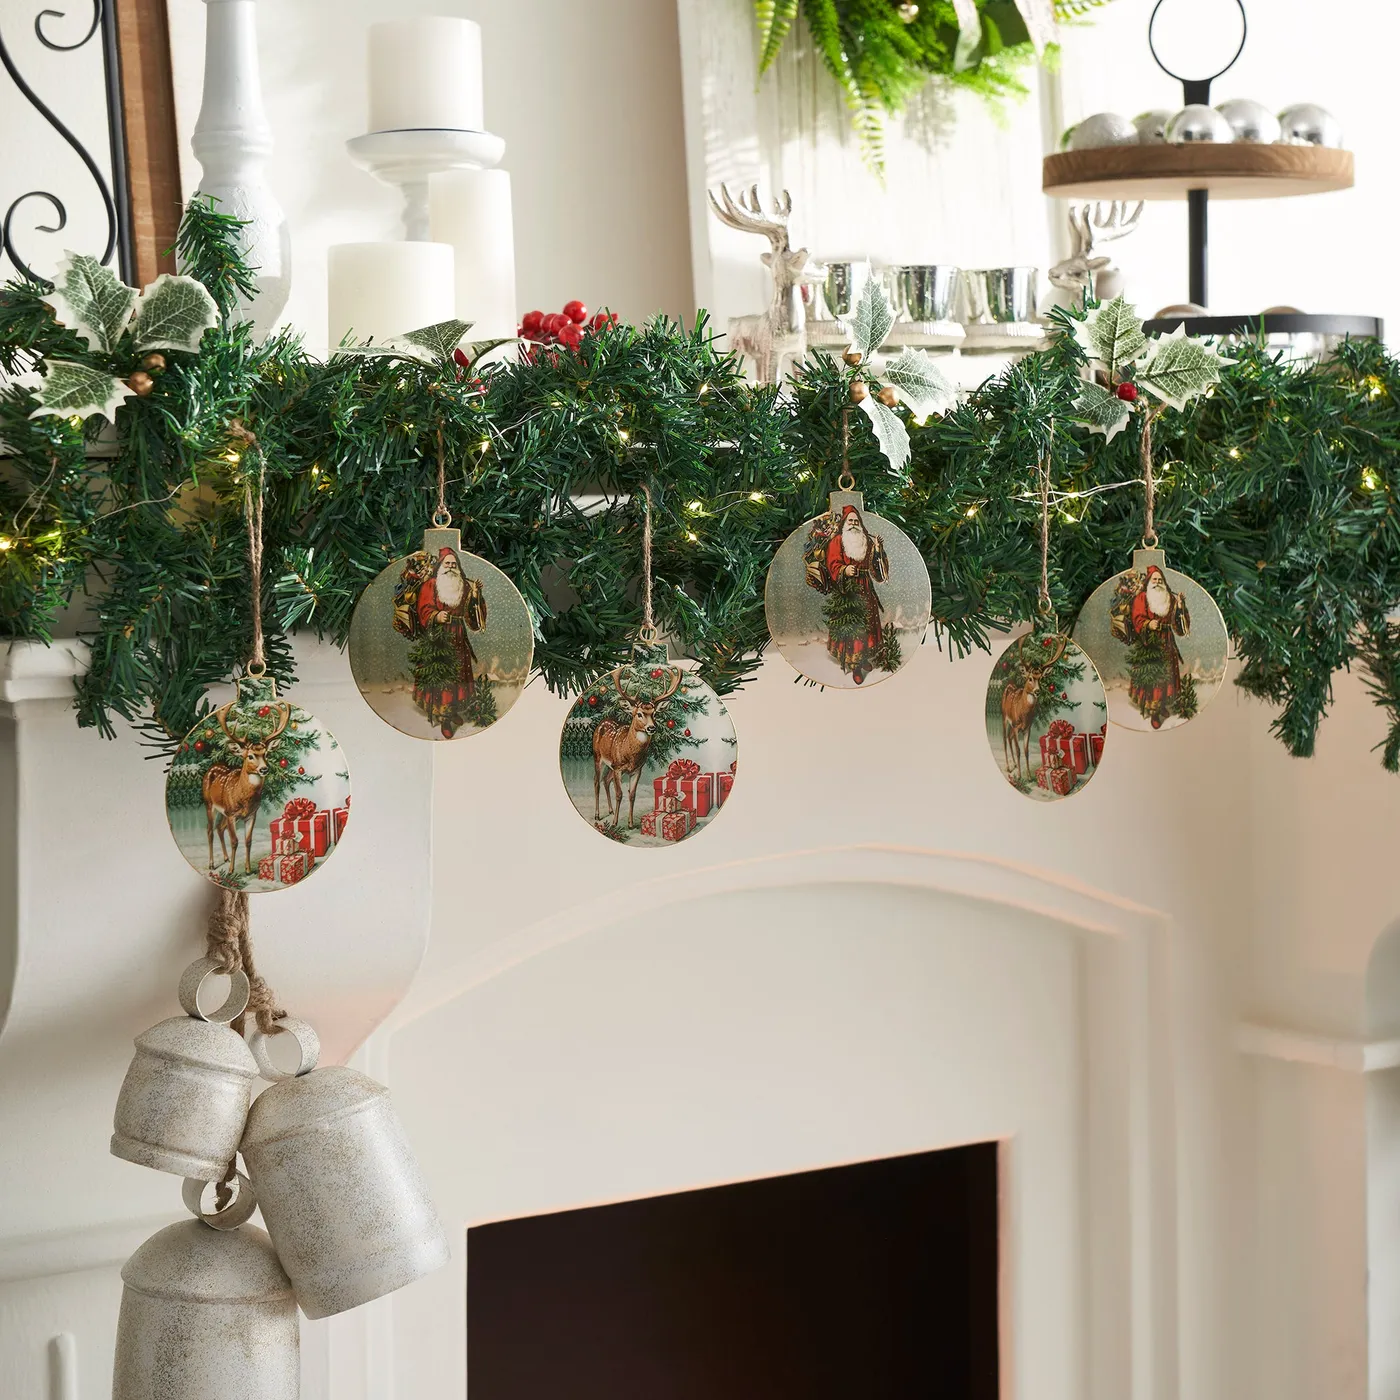
Total: $85–$168 for the full mantel. Budget alternative: thrift the ornaments individually at $1–$3 each and use a plain unlit garland with a $12 string of warm LEDs woven through — closer to $45.
Light the garland from inside, not on top. Weave the string through the back half of the greenery so the bulbs glow through the branches instead of sitting on them like beads. Wire your heaviest ornaments on with floral wire rather than ribbon loops — glass Santas on a two-inch ribbon swing and knock against the mantel every time someone walks by. That’s the mistake hiding in our mistakes section, and it breaks the most ornaments every December.
30. Red Glitter Monogram Letter with a Gnome
The letter shape itself is the point. Strip the Santa hat, the holly, the candy canes, and the little gnome, and you still have an ornament that belongs to one specific household. That’s why monograms outsell every novelty shape at craft fairs — nobody else’s tree can wear it. The glitter outline matters too: it catches tree lights and gives a flat wooden letter an edge, literally and otherwise.

A custom monogram ornament from a small shop runs $18–$30, and in December you’re often waiting three weeks for it. A blank wooden letter at Michaels costs $2–$4, a tube of red glitter glue another $4, and the gnome and holly pick come out of a $6 sticker-and-embellishment pack. Under $12, done in an evening, hanging by the weekend.
One Glue Gun, Thirty Little Heirlooms
Start with one. Pick the ornament that made you stop scrolling — the beaded snowflake, the grinning cake slice, the tiny fisherman — and make just that one this weekend. By next December you’ll have a branch full of things nobody else owns and a box of ornaments with actual stories inside it. Snap a photo once it’s hanging, and pin it so you remember what worked.
📌 Save this to Pinterest for later — next year’s ornament night starts here.