21 Stunning Christmas Mailbox Ideas You Absolutely Need to Try This Holiday Season

Christmas mailbox ideas 2026 is having a major moment on Pinterest right now, and one look at the pins explains why — the mailbox is the one spot on your property where holiday decorating is allowed to be genuinely funny. We spent serious time browsing Etsy, Target, Walmart and Amazon to bring you only what’s actually worth your attention this year, across every price point from $9 to $189.
Inside you’ll find 21 curated ideas spanning rustic evergreen tradition, gingerbread storybook whimsy, bold pink-and-leopard maximalism, and handmade crochet toppers — with budget and luxury versions compared side by side. The 2026 shift is toward personality over polish: crocheted post box covers and candy-cane stripes are outpinning plain boxwood wreaths by a mile, and distressed metal is quietly replacing glossy new.
Some links here are affiliate links — if you buy through them, we may earn a small commission at no extra cost to you.
Pin this guide for later — your future self will thank you when it’s time to actually do this.
1. The Gingerbread House Mailbox That Tells a Story
Scale is the line between charming and cartoonish. Keep the arched window roughly one-third the width of the mailbox face, and give the cookie-shingle roof a 2 to 3 inch overhang so snow doesn’t dam up against the frame. For the icing outlines, skip craft paint and pipe exterior-grade silicone caulk through a star tip instead — it cures flexible, shrugs off frost, and stays bright white through a wet January.
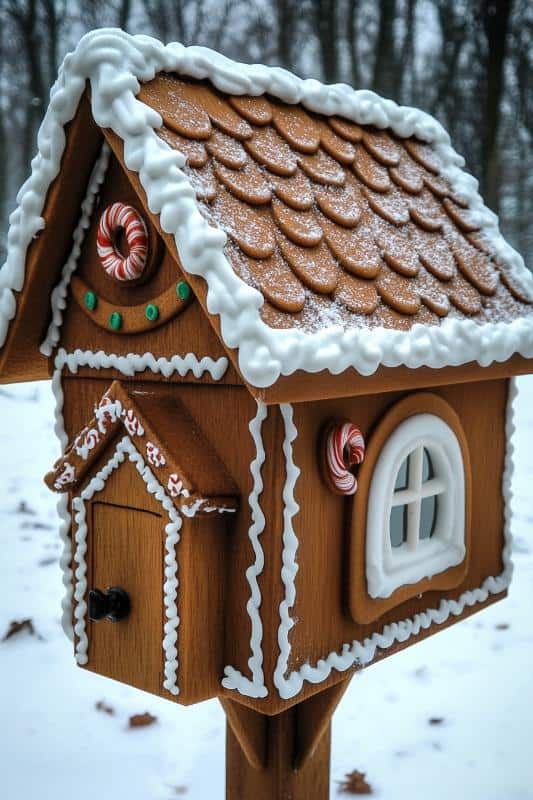
Three moves carry the gingerbread illusion: a tight palette of brown, icing white, candy red and one hit of emerald; a genuinely rough shingle roof playing against smooth painted walls; and that tiny black doorknob. The knob is the scale cue — it’s what tells your brain you’re looking at a building instead of a decorated box. Pair it with something slightly unhinged, like the antlers in Idea #3.
2. A Graphic Red Mailbox Against Black Window Frames
Read this one as a formula: roughly 70% quiet base — cream siding, black window frames, black post — 20% graphic red on the box itself, and 10% green borrowed from the trees behind it. Swap the red for deep teal or forest green and the math still holds. If your house is dark, flip the ratio instead and let a pale box sit on a dark post.
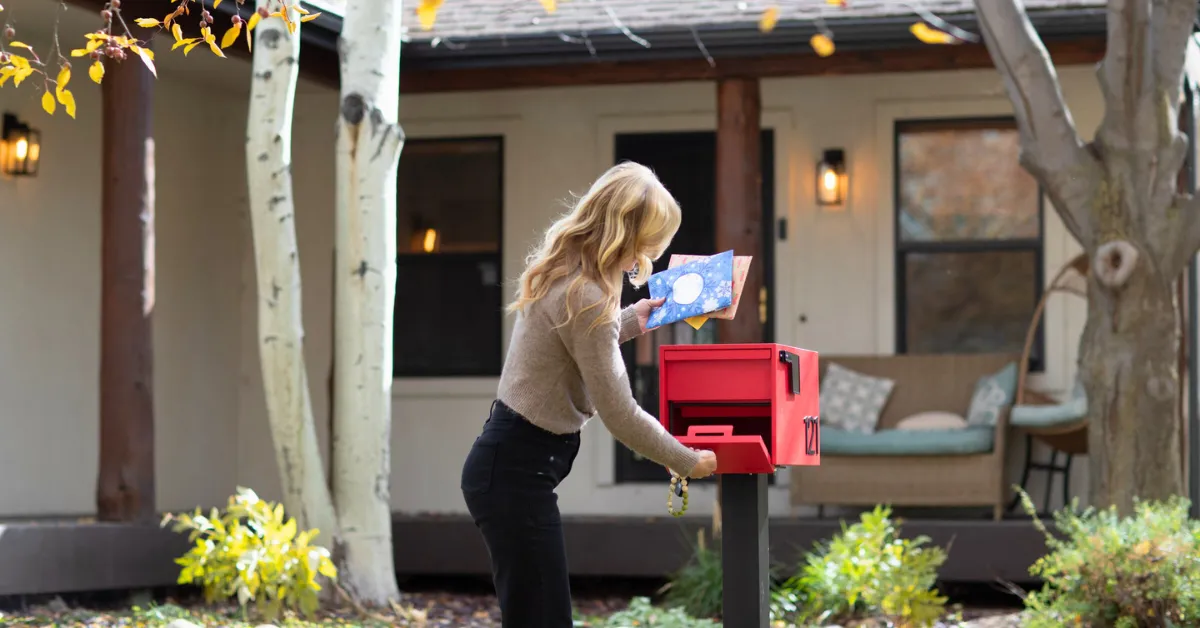
before you buy: a glossy red mailbox shows every fingerprint and every winter road-splash, so pick satin or matte. Mount the box 41 to 45 inches off the ground so it meets the letter carrier at hip height, and check whether your HOA has an opinion before you spray anything. Those black wall sconces are doing more for the composition than you’d think — don’t bury them in garland.
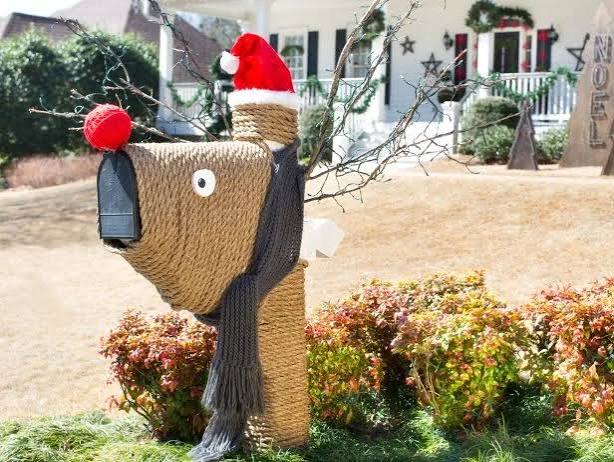
3. Reindeer Antlers, String Lights, and One Big Red Ornament
The single element that makes this one land is the oversized shiny red ornament — everything else is supporting cast. The antlers announce the theme, the warm white lights add glow, the painted snowflakes soften it, but that one fat bauble gives the composition a focal point at exactly the right height. Take it away and you have generic holiday trim; leave it in and the mailbox becomes a character.
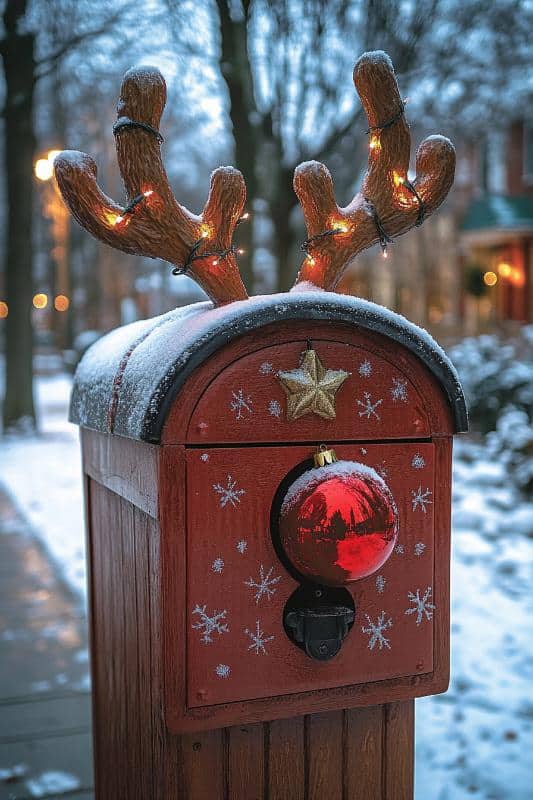
Whimsical outdoor decor keeps outpinning pared-back wreaths heading into 2026, and the reason is simple: a mailbox is one of the few spots where “silly” is allowed to win. It’s weatherproof theater — visible for six weeks, packed away in a box by January. The trend has staying power because it costs almost nothing and photographs beautifully in snow.
4. A Knitted-Scarf Snowman Perched on a Distressed White Box
- Thrift a knit scarf and a child’s black beanie — about $4, and knit hides the armature.
- Carve a 5-inch sphere from floral foam, then coat it with air-dry clay thinned to a frosting consistency.
- Set the black bead eyes and smile while the clay is damp so they sink in and stay put.
- Shape a carrot nose from orange polymer clay, bake it, and pin it in with a bamboo skewer.
- Wire the head to the mailbox lid with two zip ties hidden under the hat brim.
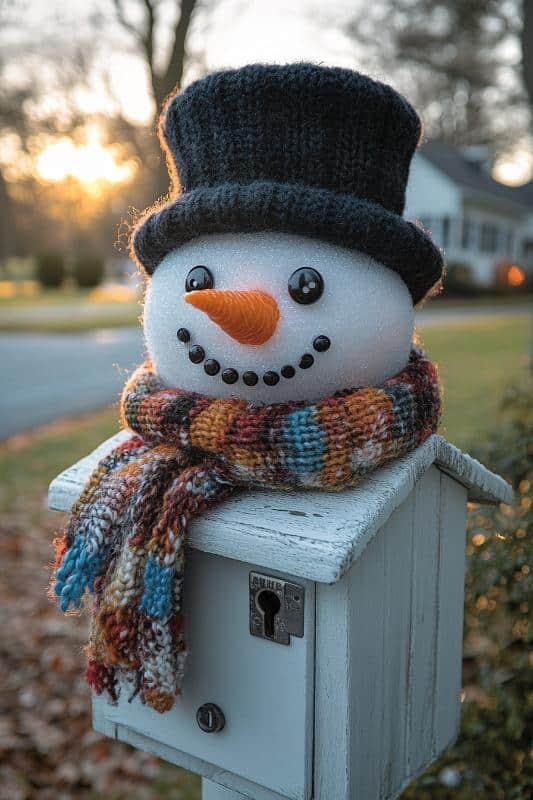
Time: about 2 hours plus overnight drying. Materials: $12 to $18.
You genuinely don’t need to make anything, though. Dollar Tree stocks knit beanies and scarves from October, and a pre-made snowman head runs $6 to $12 at Walmart or a thrift store. No distressed white mailbox? Facebook Marketplace has them for $15 to $40, or chalk-finish paint any box and sand the edges. Under $30 total — the budget cousin of Idea #1‘s frosting treatment.
5. Hot Pink Ornaments and a Leopard-Print Bow on Black
Garland length is where looks like this fail. Measure your post’s height, then buy 1.5 times that in garland so you get a proper swooping drape instead of a stretched-out vine. Attach with green zip ties — they vanish against the needles — rather than wire, which rusts and streaks a black post. Cluster in odd numbers: five fuchsia ornaments, three berry sprigs, one bow. Odd groupings read as styled; even ones read as symmetrical.

This is a statement look and it needs mass to hold it: a substantial post, ideally 4×4 cedar or a masonry column at least 10 inches wide, with the box mounted 48 to 60 inches up so the garland has somewhere to fall. On a slim aluminum post the same garland looks like a costume, so halve the length and lose the pinecones. Older homes with wide-set brick pillars handle the full version beautifully.
6. A Crocheted Royal Guard Takes Over a Red Post Box
- Yarn, worsted acrylic, 8 to 10 skeins in red, white, blue and teal: $40–$70
- Hooks, stuffing and floral-wire armature: $15–$25
- Base cover panel plus elastic to anchor it: $8–$15
- Small embellishments — crown, planes, clouds: $5–$20
- Pre-made figures, if you don’t crochet: $25–$45
- Total: $68–$130
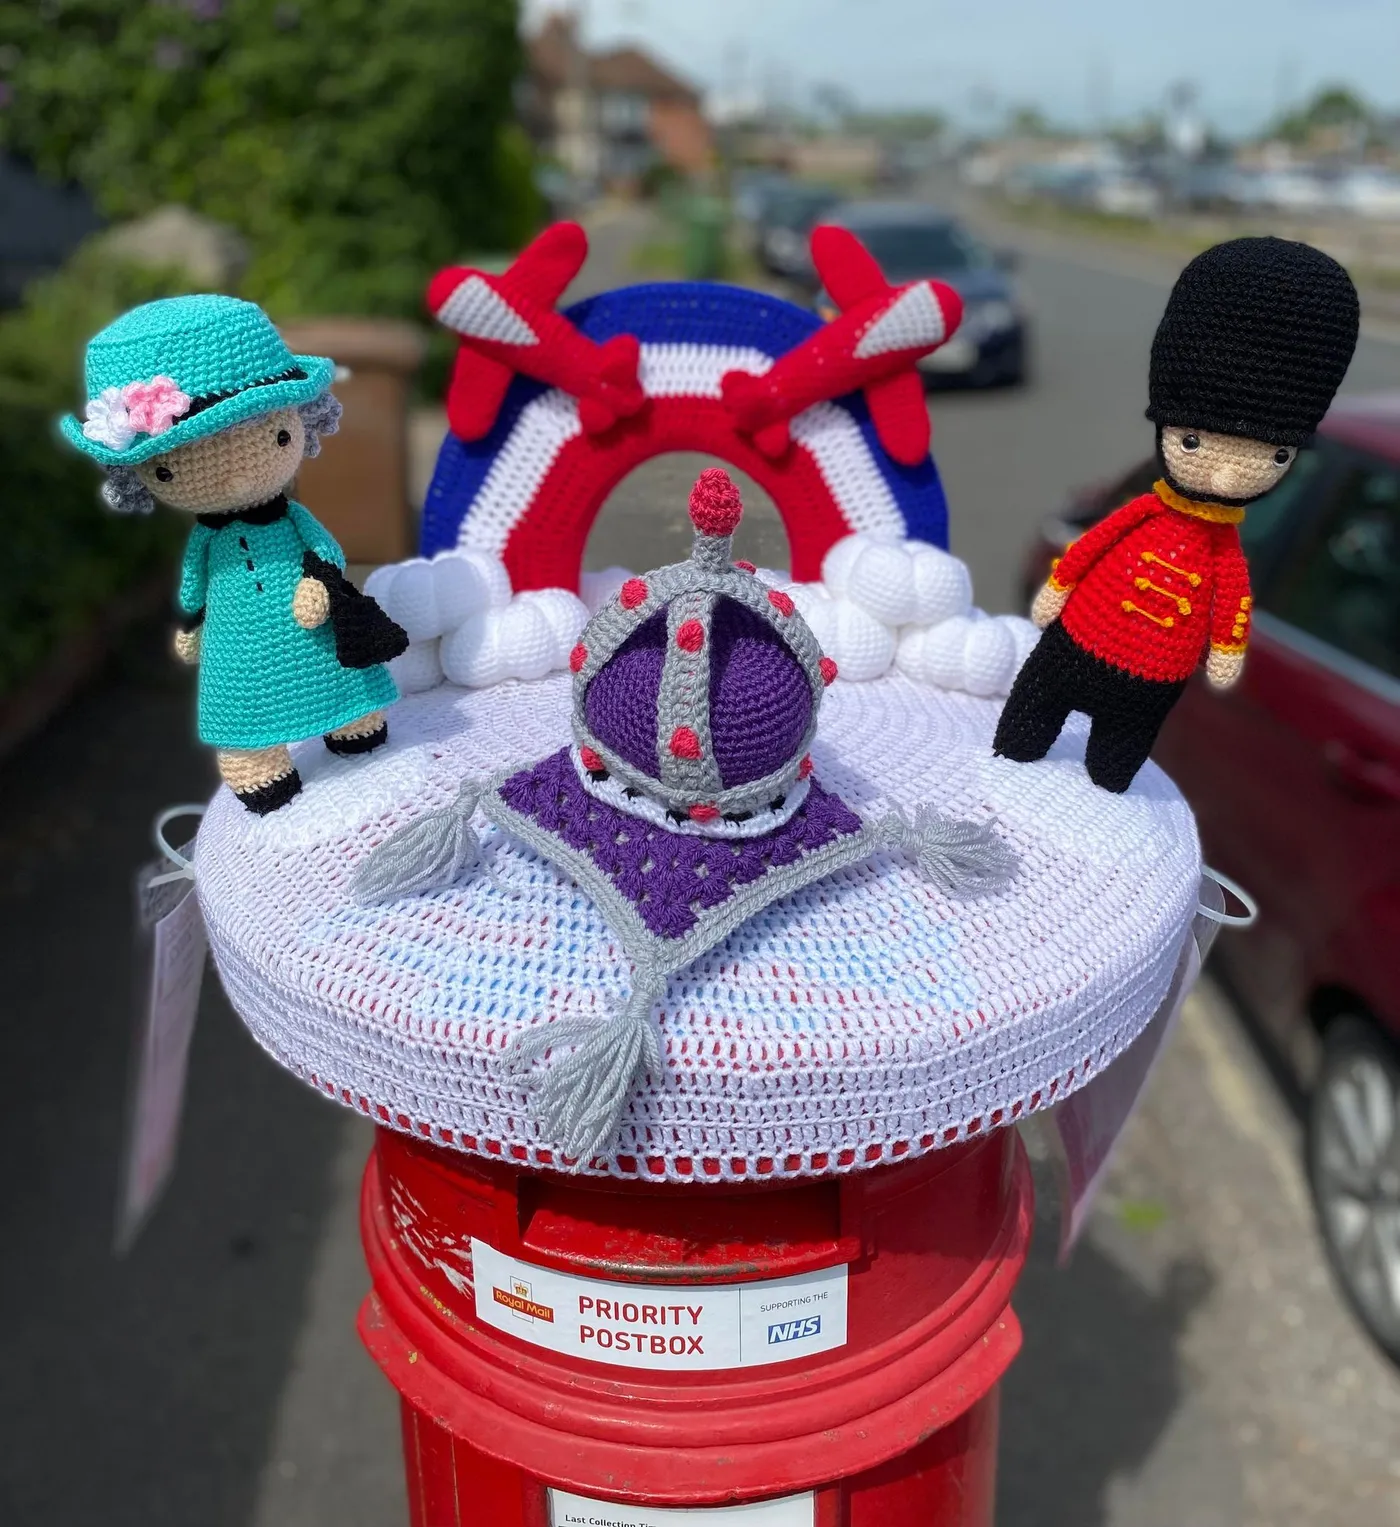
Budget alternative: buy one crocheted figure and set it on a plain red box — that’s the 50% version, and honestly it reads just as clearly from the sidewalk.
Wool plus a wet December equals a soggy, heavy, mildew-prone display, so use acrylic or cotton yarn and bring the piece inside during storms. Crocheted covers also fade in direct sun; expect pink by February. And if you’re decorating a working USPS box, keep every stitch clear of the door and the collection slot — mail carriers are not amused by obstructions.
7. An Illuminated Snowman Holding a ‘To Santa’ Letter
The yellow “To Santa” letter is the whole story. Without it you have a lit snowman next to a lit post box — pleasant, forgettable. With it you have a character mid-action, and your brain fills in the rest: he’s on his way, he’s late, he’s about to drop it in. That little envelope of warm yellow is the only element carrying a narrative, and narrative is what makes people stop scrolling.
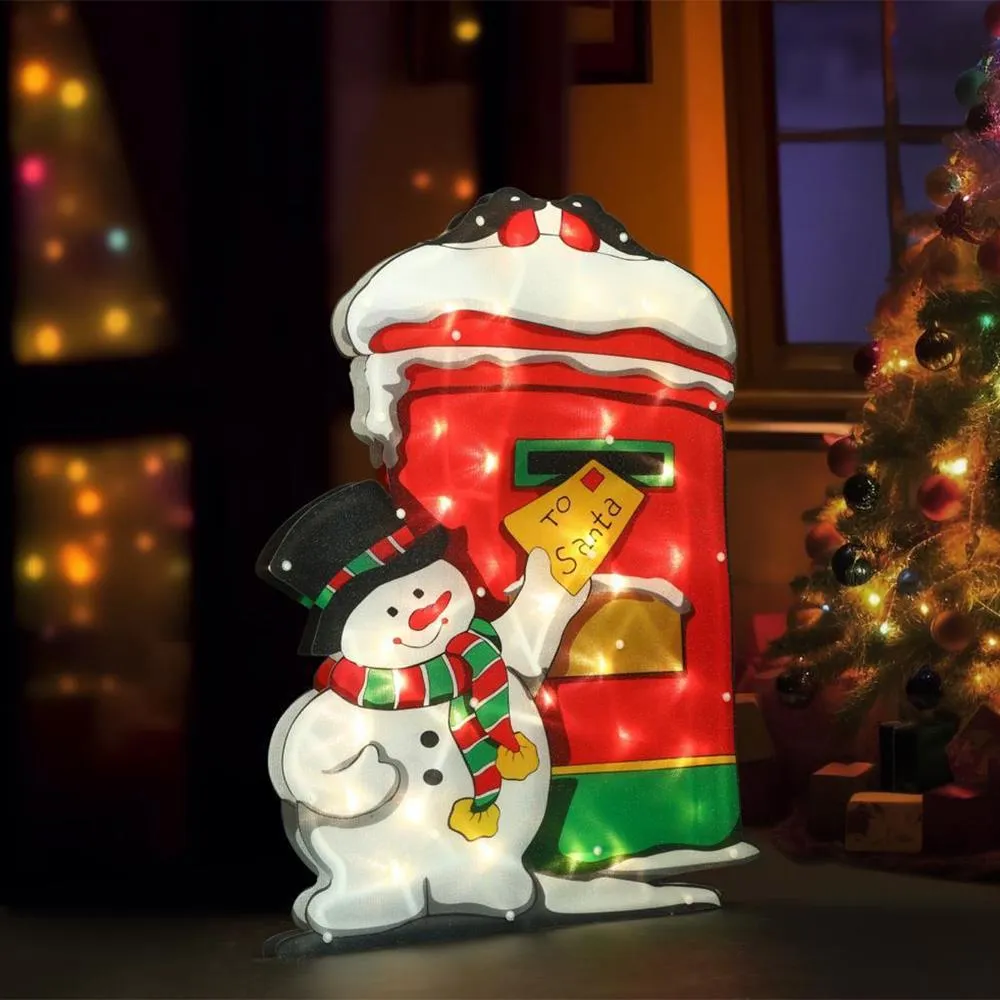
Illuminated figures live hard lives. Look for an IP44 rating or better for anything outdoors, expect 8,000 to 15,000 hours from the LEDs (three to five seasons), and assume one section dies before the rest. Wrap every plug connection in a weatherproof cord cover, run everything to one switched outlet so you’re not crawling under shrubs nightly, and store the pieces in their original box with cords loosely coiled — tight coiling is what kills wiring.
8. A Wooden Post Wrapped Tight in Warm String Lights
Warm white LED string lights are the best-value item in all of holiday decorating: $8 to $14 for a 33-foot strand at Walmart or Target, and the wrapped-post technique looks identical to a designer install costing twenty times more. Hold the box to the light before buying — cheap “warm white” bulbs often run green. For the dark green box itself, check Facebook Marketplace first; people sell them constantly when they move, usually for under $20.
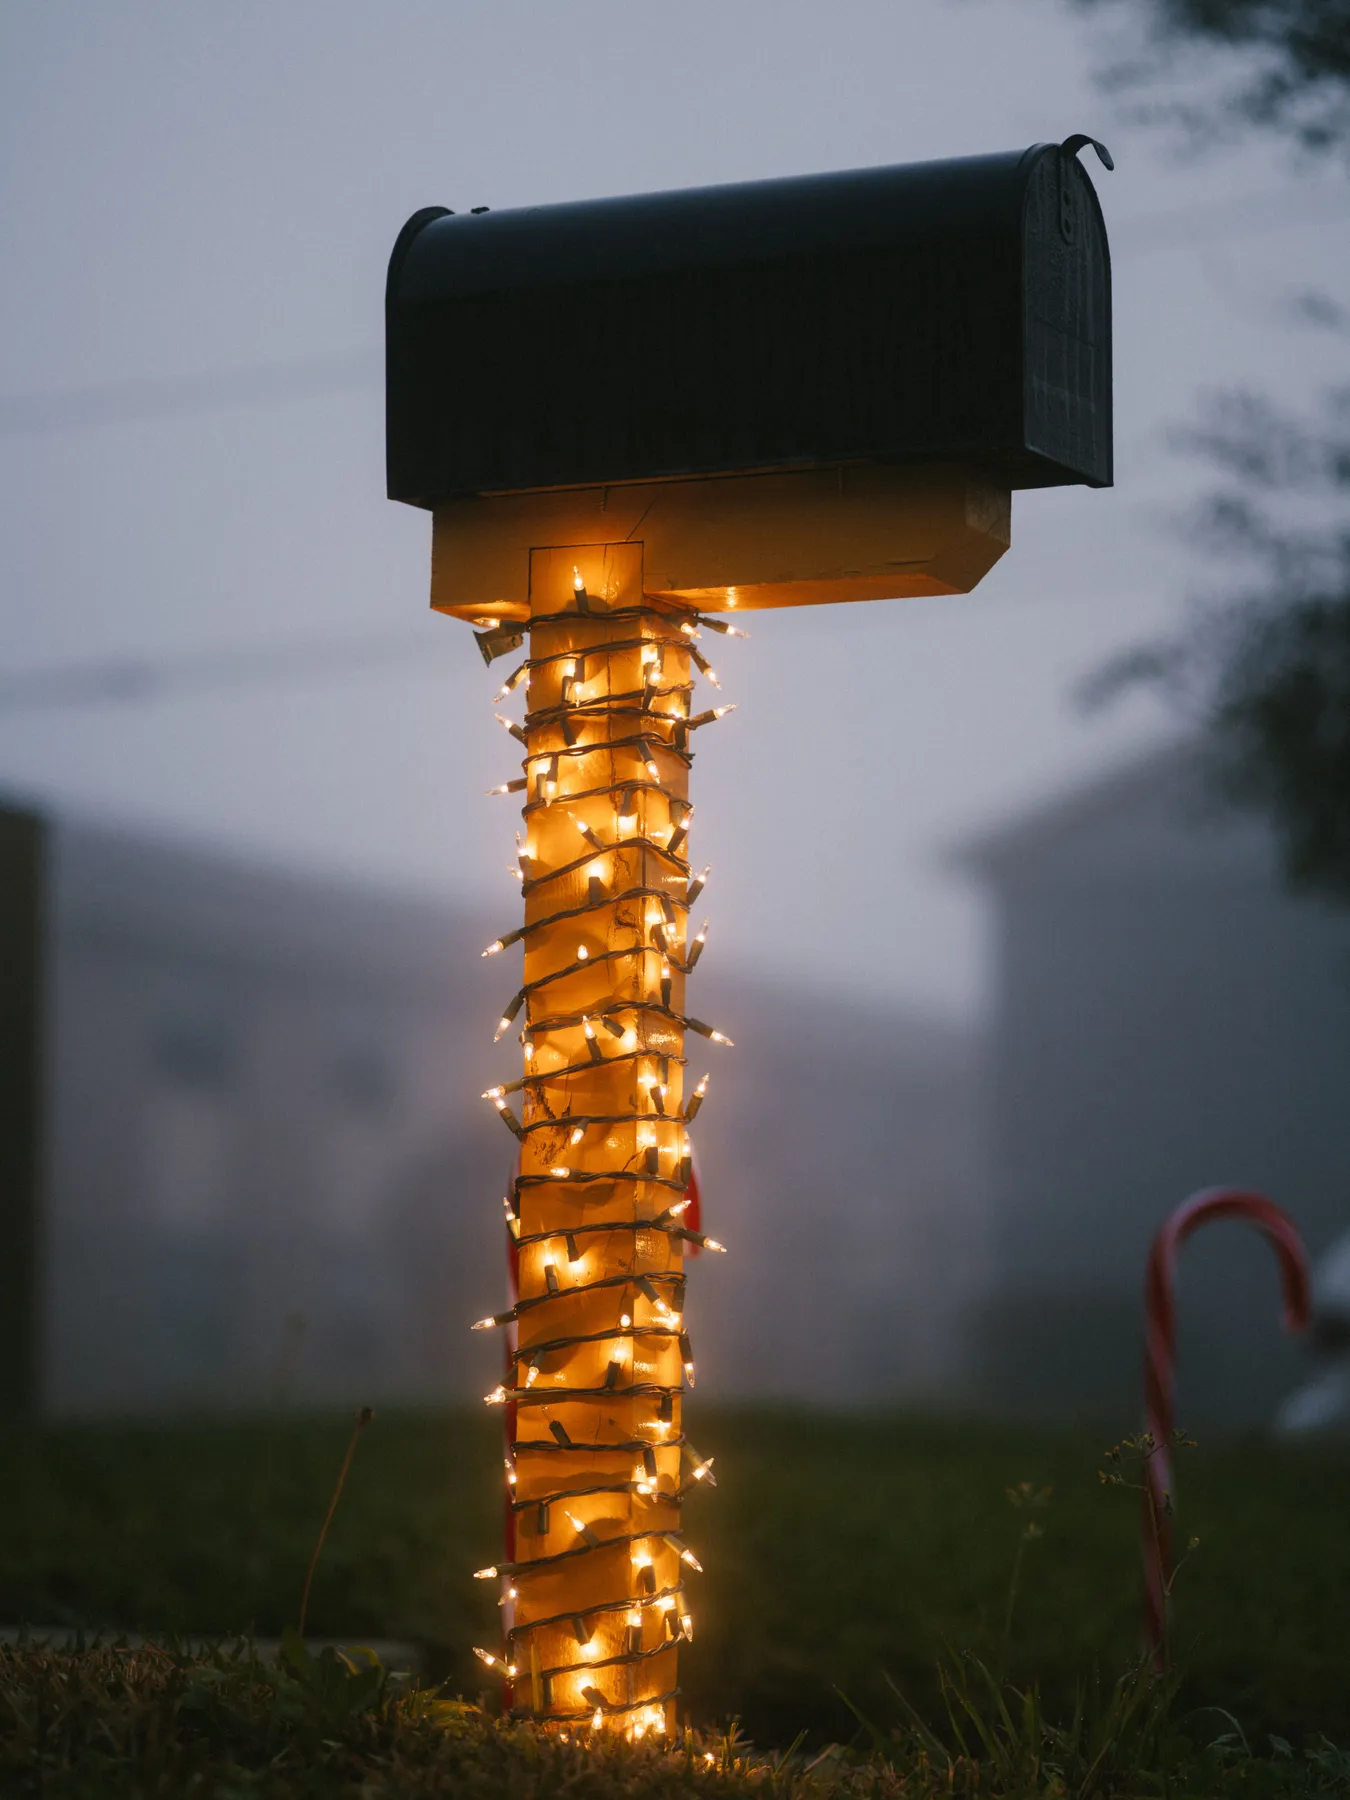
The formula here is mostly restraint: 80% dark green box and post base, 15% warm white glow, 5% red-and-white candy cane as the surprise. It feels calm rather than busy because only two of those three are ever in focus at once. Swap the candy cane for a pair of red boots or a small lantern and the math holds — just don’t add a fourth color.
9. Brick Column, Thick Evergreen Garland, and Big Red Bows
Three principles do the heavy lifting. First, proportion: the garland is thick enough to register against the mass of the brick, so it looks built-in rather than laid on. Second, repetition with variation — one large bow at the apex, smaller bows down the sides, berries and pinecones breaking up the green. Third, texture contrast: matte evergreen against glossy brick and satin ribbon, which is why the red reads as expensive.
This approach needs a chunky column — 12 to 14 inch masonry or a wide brick post — because a 9-foot garland on anything slimmer swallows the mailbox entirely. Working with a standard 4×4 cedar post instead? Scale the garland to 6 feet and skip the side drapes. See Idea #21 for the slim-post version that costs about a third as much.
10. The Frosted Pine Swag That Buckles Onto Any Mailbox
The 3:2:1 rule keeps a swag from turning into a hedge: three pine sprigs, two berry clusters, one bow, then repeat around the curve. Wire everything onto a single 12-gauge base loop first and hang the finished piece — building it in place on the box is how you end up with a lopsided blob. That black strap and buckle is the detail that makes the whole thing removable in seconds.
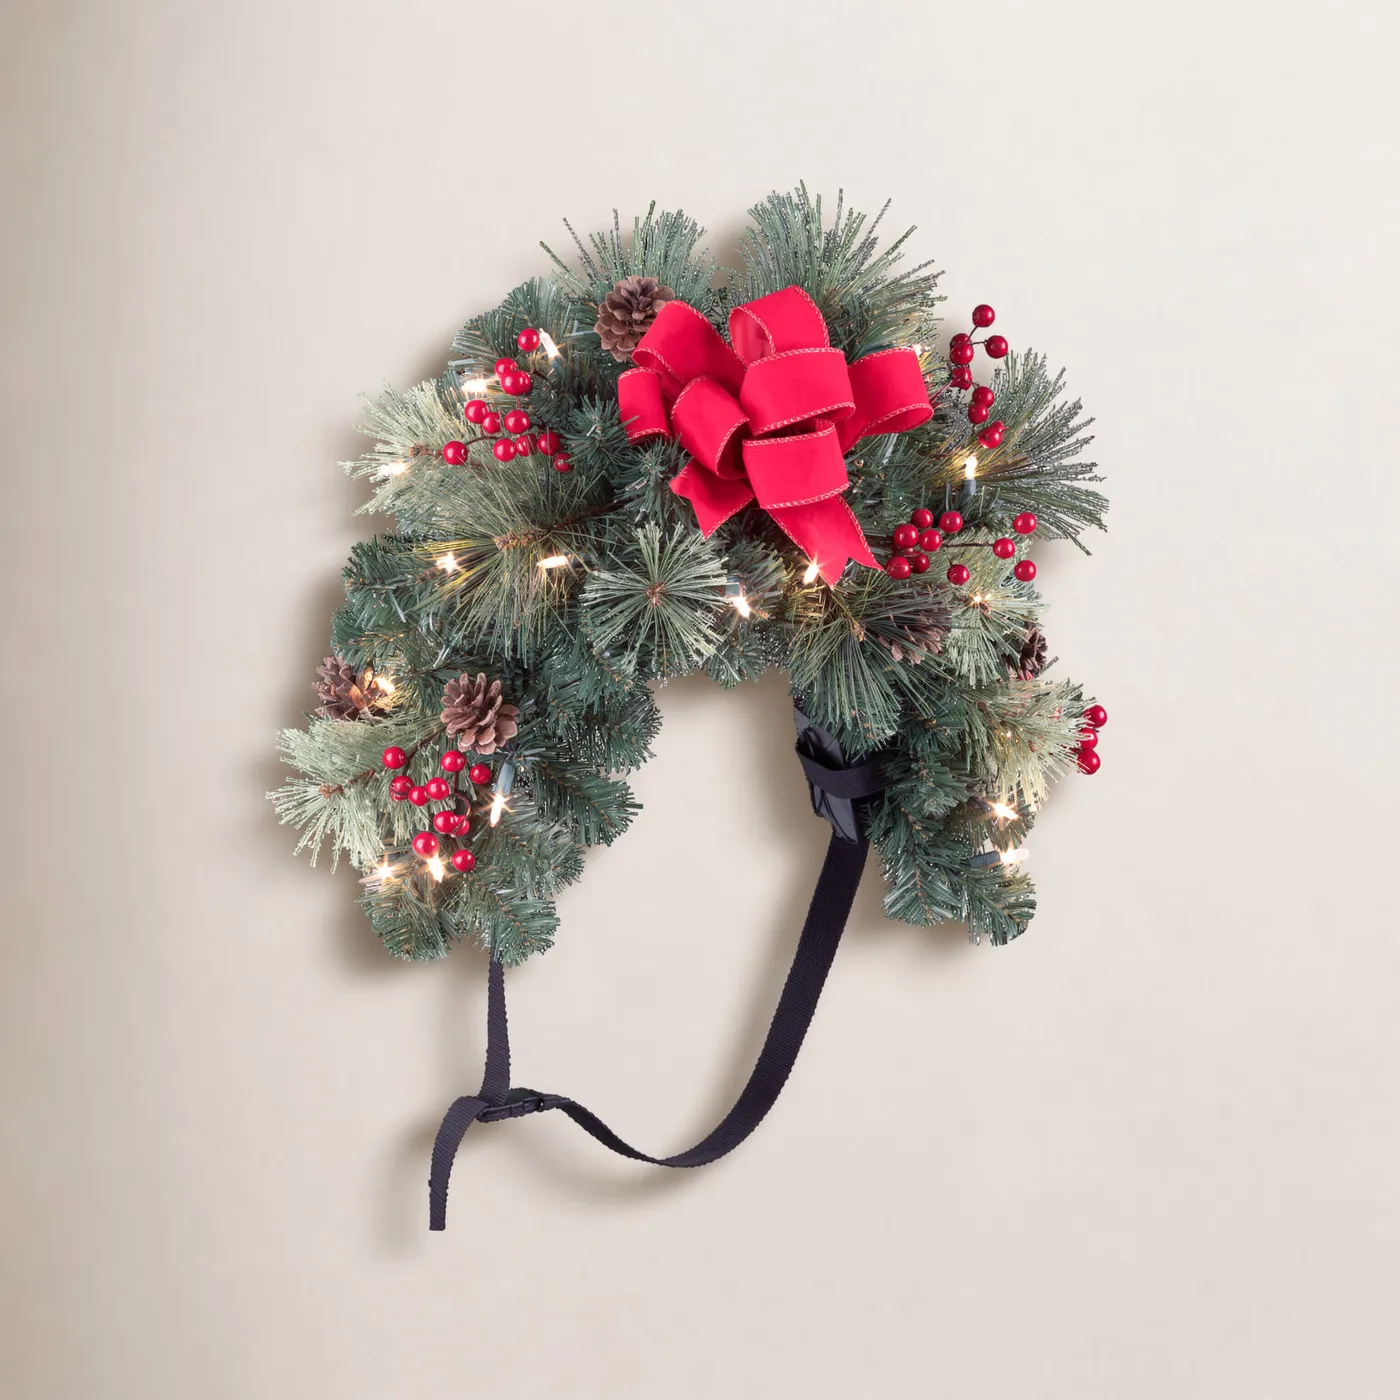
- Bend a 36-inch piece of heavy floral wire into a shallow U.
- Wire frosted pine sprigs on in overlapping layers, tips pointing outward.
- Add berry clusters and pinecones, tucking stems so no wire shows.
- Weave a warm white light strand through, starting at the bottom left.
- Fasten a wide red bow at the top center with a twist tie.
- Thread the strap around the box and buckle it snug.
About 45 minutes and $32 in materials, less if you reuse a bow from last year.
11. Cardinals and Blossoms Wrapped Across a Black Box
A full vinyl wrap printed at a local sign shop runs $60 to $120, which is silly for something that lives outside in the weather. Removable adhesive decals from Etsy start around $12, and a set of bird-and-flower stickers plus two coats of clear outdoor sealer gets you there for under $20. Search “mailbox decals” on Facebook Marketplace too — people sell half-used sets constantly.
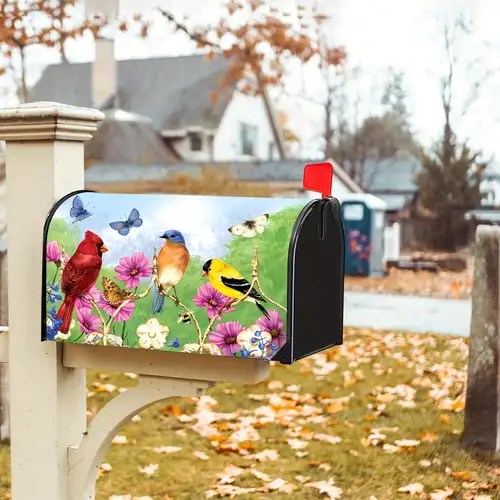
The red cardinal is the anchor. Spread bluebirds and finches evenly and it reads like a bird-watching poster, but the cardinal — bright, singular, perched on the largest blossom cluster — gives the composition a center of gravity. Everything else is background music. If you buy only one decal, buy that one and place it slightly off-center at eye level.
12. A Gnome, a Gift Sack, and a Tiny Crocheted Car
- Measure the circumference and height of your post — crochet has almost no stretch.
- Confirm the box is decorative, not a working USPS box you’d obstruct.
- Check that whatever attaches the topper survives freezing and thawing.
- Budget $40 to $70 in yarn if you’re making it, plus 6 to 10 hours.

Handmade covers are beautiful and completely indifferent to weather. Rain adds weight, sun bleaches red to pink by February, and wet wool left on a metal box can rust the box underneath. Use acrylic yarn, pull the cover before a storm, and dry it flat rather than hanging it, which stretches the stitches. Store rolled, never folded — creases set permanently in crochet. Compare with Idea #17 — same handmade energy, completely different palette.
13. Distressed Red Metal, Gold Lettering, and Two Small Bells
- Distressed metal Santa mailbox, Etsy or a thrift flip: $25–$45
- Gold paint pen or rub-on lettering: $8–$14
- Green holly leaves and a red bow: $6–$12
- Two small gold bells: $4–$9
- Rustic wood riser or crate to display it on: $10–$25
- Total: $53–$105
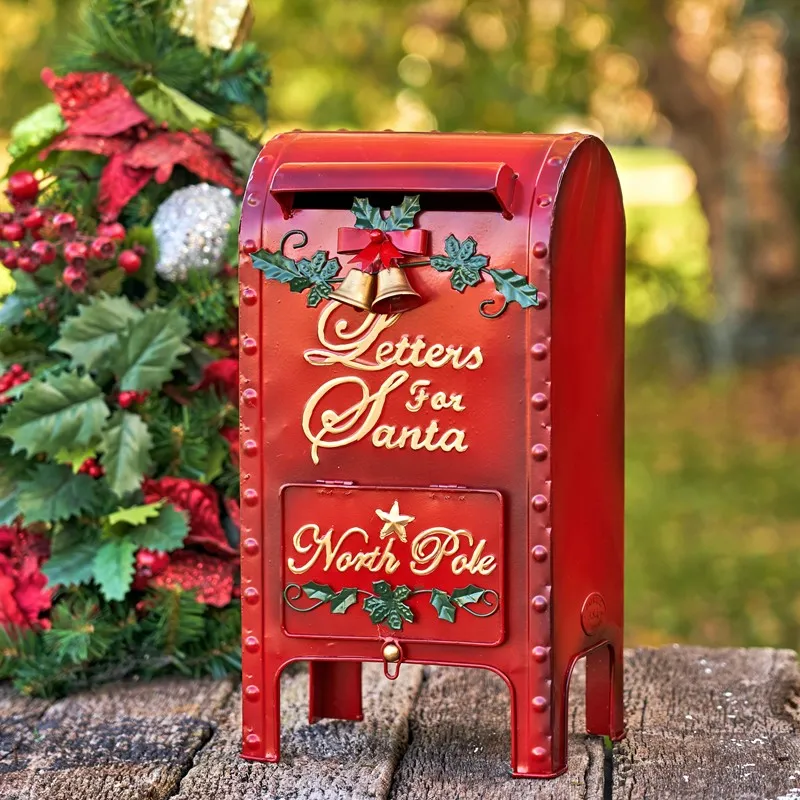
Budget alternative: grab a plain red mailbox at a thrift store for $5, sand the edges to fake the distressing, and hand-paint the lettering. Under $25, and nobody can tell.
Aged finishes are the story of 2026 holiday decor — the “found in grandma’s attic” look that thrift flippers turned into an entire economy. It sticks because it doesn’t demand perfection: a chipped edge or wobbling letter reads as authentic rather than sloppy. Expect this to outlast the glossy maximalist wave, since it plays nicely with almost any furniture you already own.
14. White Vinyl Lettering on an Arched Red Box
Typography sells this one. “Letters to Santa” leads the front, “North Pole Mail” takes the side, so the piece rewards you from two angles, and the arched top gives white vinyl something to curve against. The holly sprig tied on with twine instead of glued is the detail that keeps it feeling handmade — a single honest knot does more for charm than a perfectly uniform bow ever will.
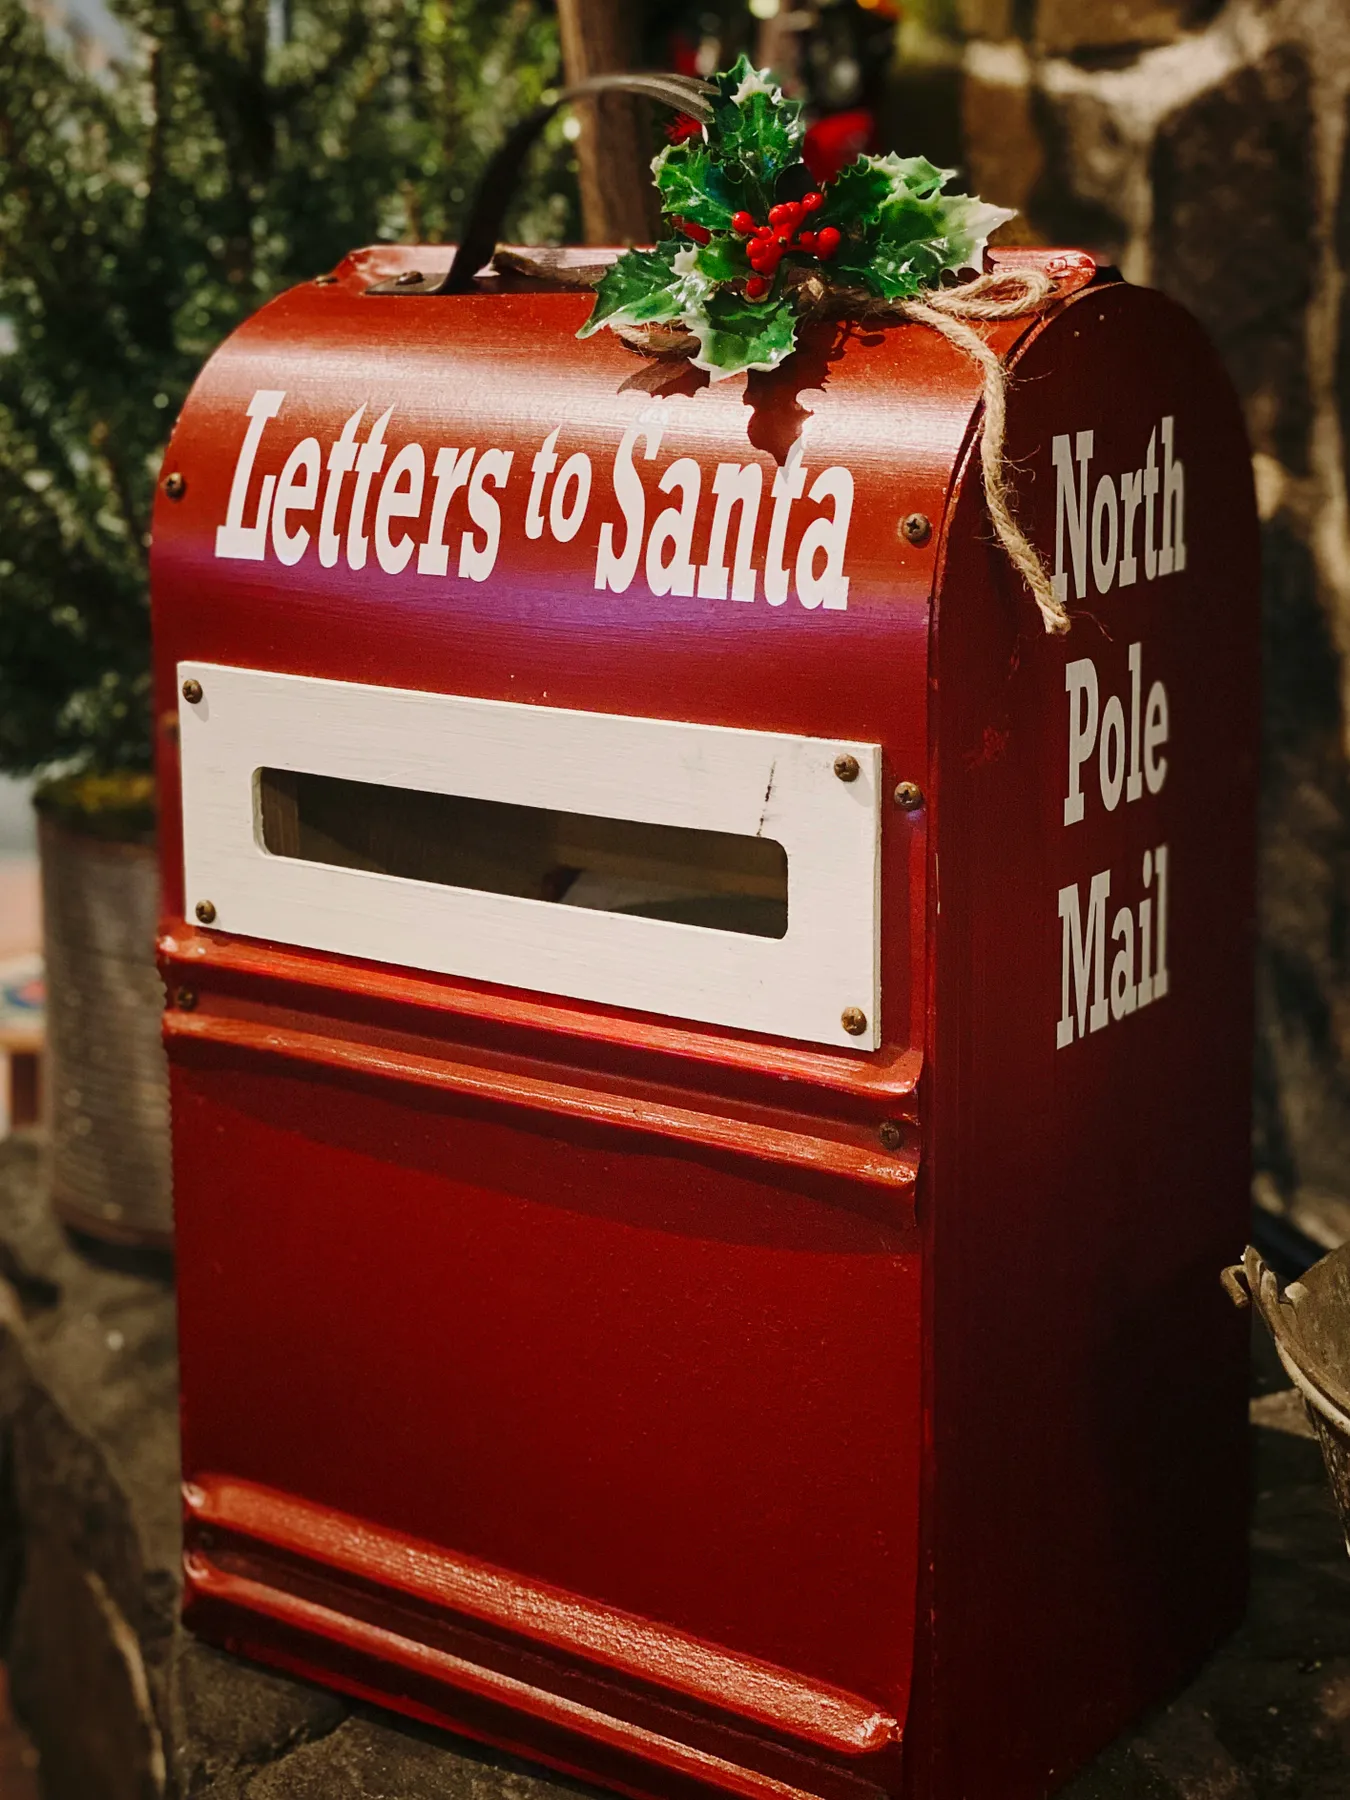
Vinyl lettering on outdoor metal lasts one to three seasons before edges lift, and freeze-thaw cycles speed that up. Wipe the surface with rubbing alcohol before applying anything and press out air bubbles with a credit card. If letters start peeling, a hair dryer on low re-activates the adhesive for a quick re-set. Plan on replacing the lettering every other year, or brush on enamel paint for a permanent version.
15. Pine, Berries, and Battery Lights Crown ‘Santa MAIL’
Battery packs are the giveaway. Tuck yours inside the mailbox with the lid just slightly ajar, or use a magnetic holder mounted under the roof overhang, and choose a strand with a built-in six-hour timer so you aren’t reaching behind the box every night. Attach greenery with rare-earth magnets wrapped in floral tape — they grip steel boxes fine and leave zero holes to rust.
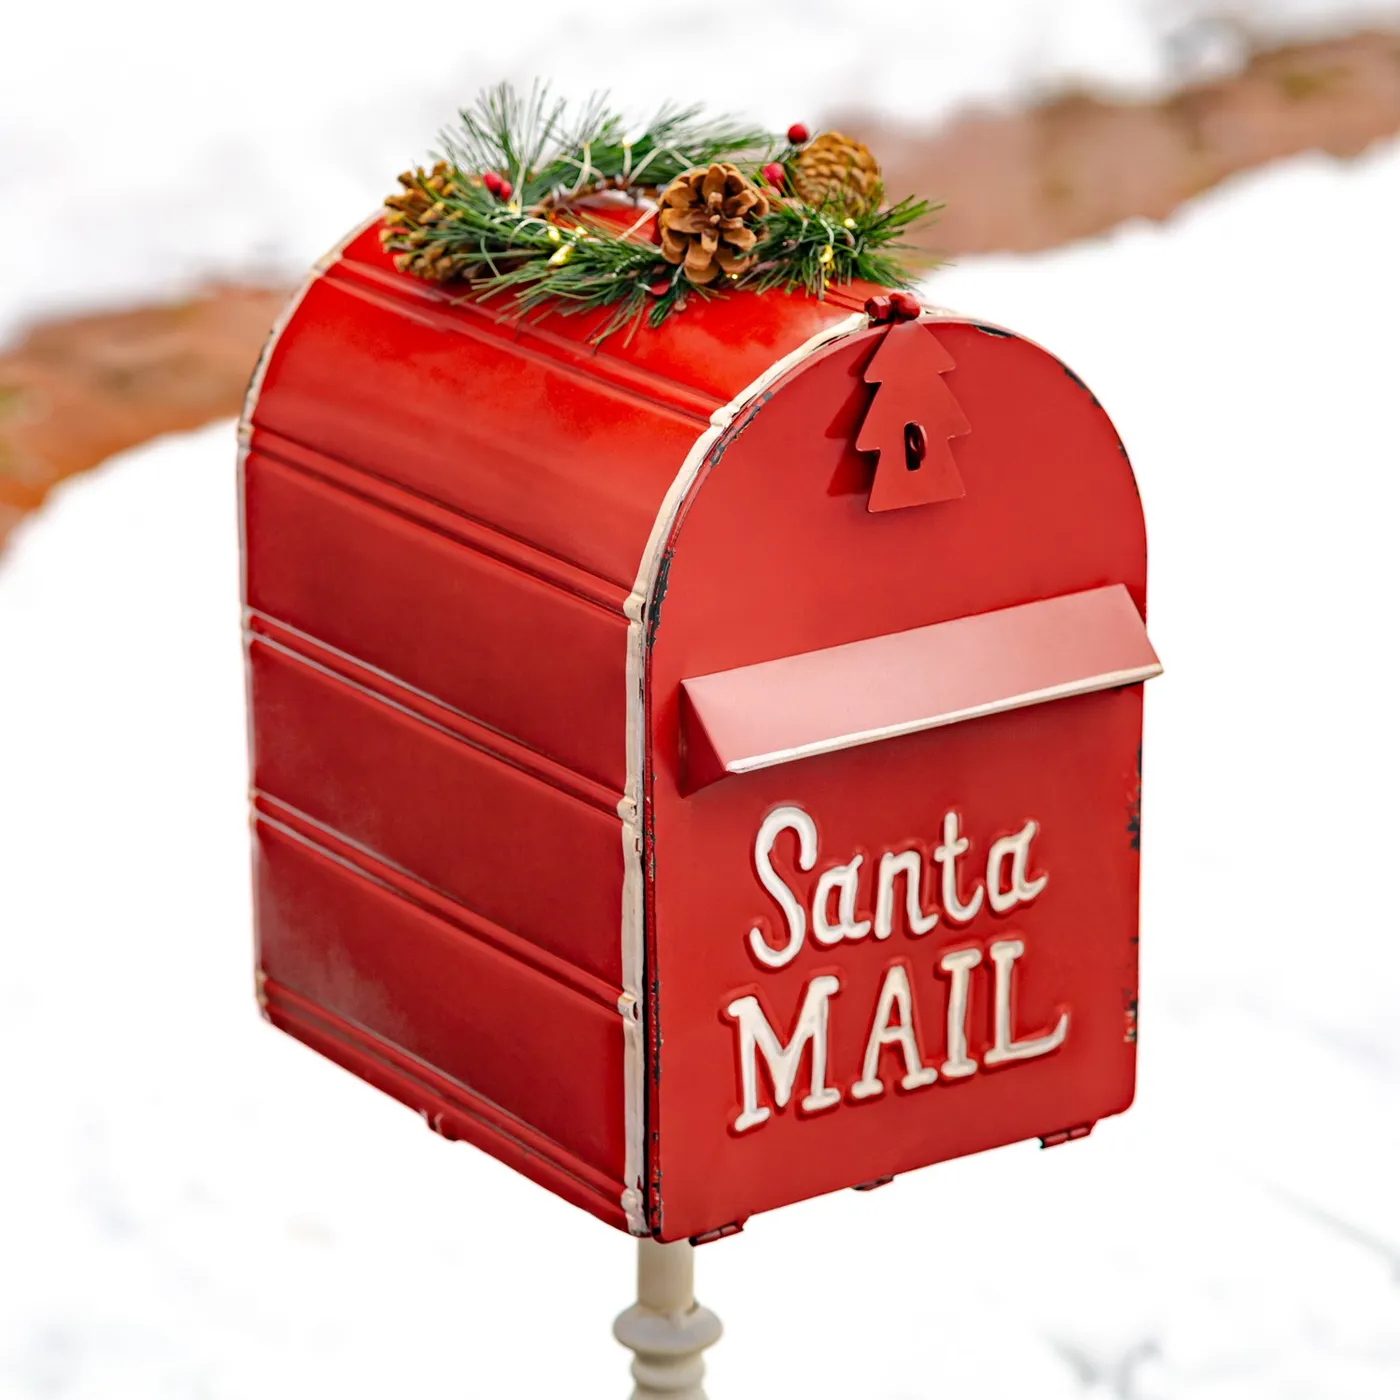
- Test the box with a fridge magnet if you plan to use magnet mounts.
- Check the topper’s width against the box — a 2 to 3 inch overhang, no more.
- Decide where the battery pack lives before you zip-tie anything down.
- Set a total budget; this look lands around $35 to $60.
16. Elf Village Signage and Faux Snow on a Pillar Box
The signs take about 30 minutes and cost under $20:
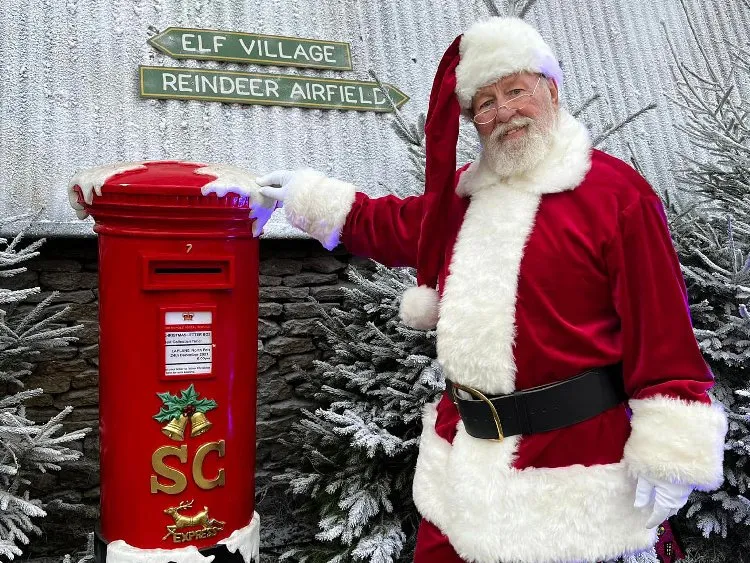
- Cut arrow shapes from 1/4-inch plywood or heavy cardboard.
- Sand the edges, then brush on two coats of dark green craft paint.
- Paint or vinyl-letter “ELF VILLAGE” and “REINDEER AIRFIELD.”
- Sand lightly over the lettering to age it.
- Stake each sign into the display at a slight upward angle.
For the faux snow, spray the pillar’s top and base — never the front panel, where it reads as damage.
This is a full-corner installation and needs a floor or porch area at least 4 feet wide and 3 feet deep, with a wall behind it for the signs to read against. Ceiling height barely matters since it’s a floor-level vignette, but the pillar box should be 30 inches tall or more or the signs will tower over it. Short on room? Idea #14 tells the same North Pole story in about two square feet.
17. A Crocheted ‘MERRY XMAS’ Banner Topped With a Snowman
It’s the white crocheted letters spelling MERRY XMAS. A snowman on a mailbox is charming but common; a topper with actual words turns the thing into a sign, and signs get read. The green letters against white also give the piece a second color story beyond red and white, which is exactly what keeps it from feeling like a novelty item you’d regret by December 28.
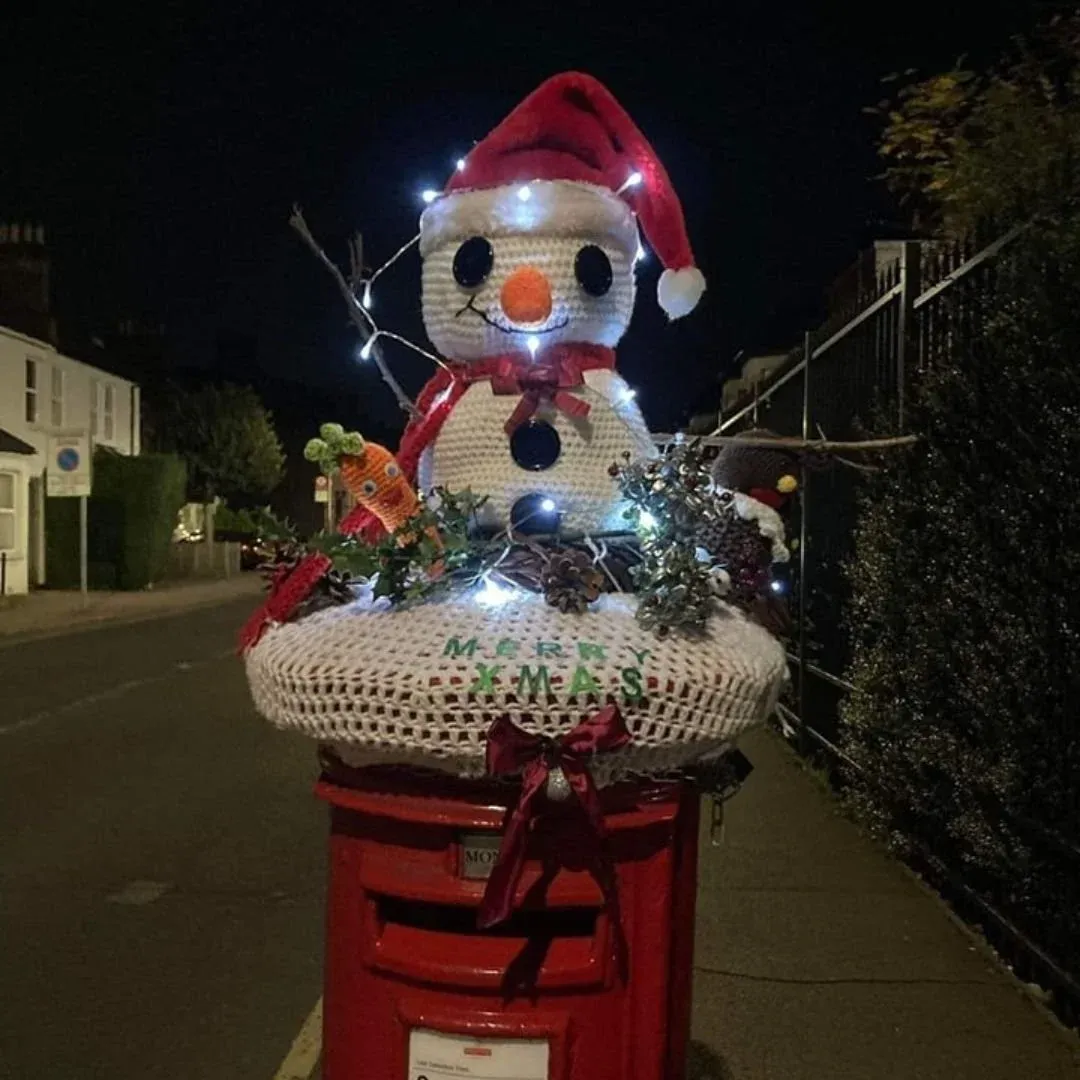
Be careful where this one goes. If you’re decorating a functioning public mailbox, nothing — not a single stitch — can block the door, the slot, or a carrier’s hand path, and plenty of municipalities will pull decor that does. Best on a decorative box or porch pillar, or brought inside as an interior display after the holiday. Also: string lights on a wet metal box need a GFCI outlet, full stop.
18. The Santa Belt Mailbox in a Living Room Corner
- Red metal Santa mailbox with belt detail: $22–$45
- Pre-lit 6-foot Christmas tree: $60–$150
- Red and white ornaments, 40-piece set: $18–$30
- Tree skirt or woven basket base: $12–$25
- Extension cord and plug timer: $8–$15
- Total: $120–$265
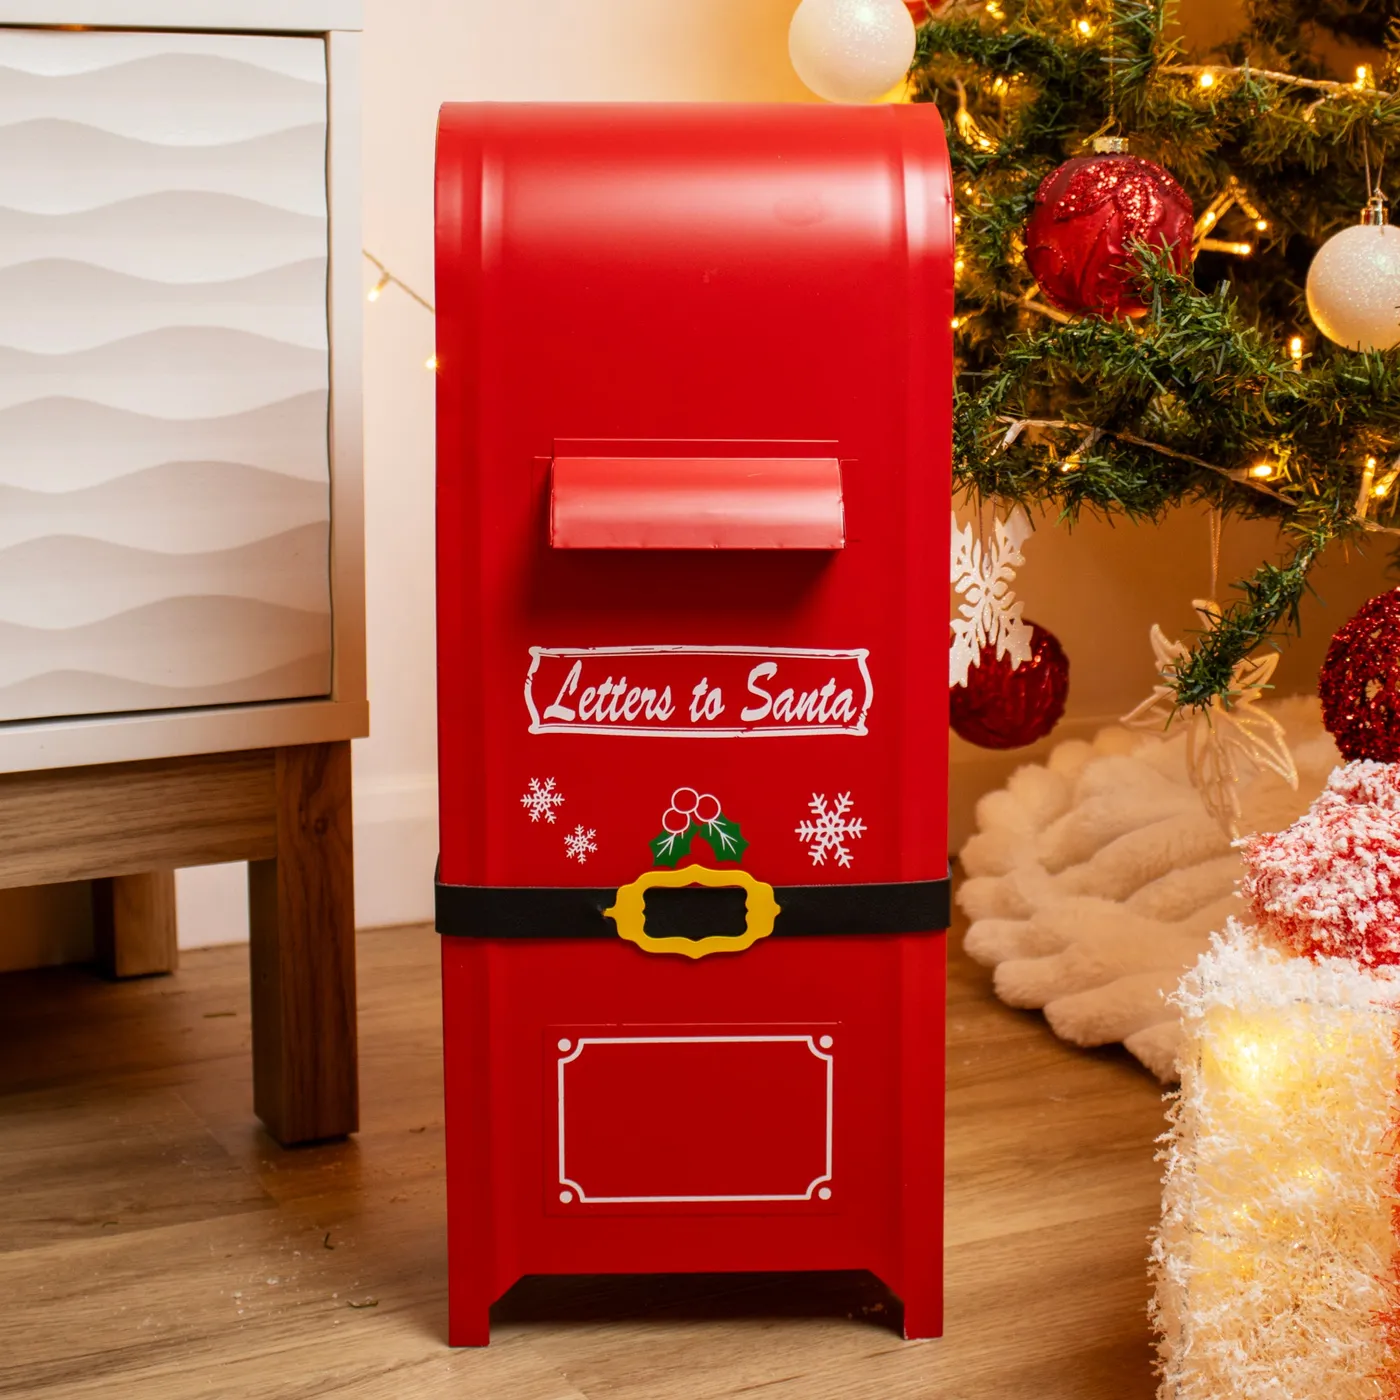
Budget alternative: Facebook Marketplace trees go for $20 to $50 in early December, and Walmart ornament sets run about $10. You can land this corner for under $70 if you shop the first week of the month.
If the full price tag stinks, remember this whole vignette is a two-item story: a red box on the floor and a lit tree behind it. IKEA’s artificial trees start around $30, Target’s glass ornaments go on sale the second week of December, and thrift stores are lousy with red baubles in November. It’s the arrangement people notice, not the price tag.
19. A Miniature Snow Scene Behind a Mailbox Window
Break it down as 60% flocked green from the tree branches, 25% red across the two boxes and the velvet ribbon, 10% gold glitter on the poinsettias, 5% burlap mesh for texture. Swap the gold for silver and the burlap for cream linen and you get a frostier, cooler version using the exact same proportions — same composition, entirely different mood.
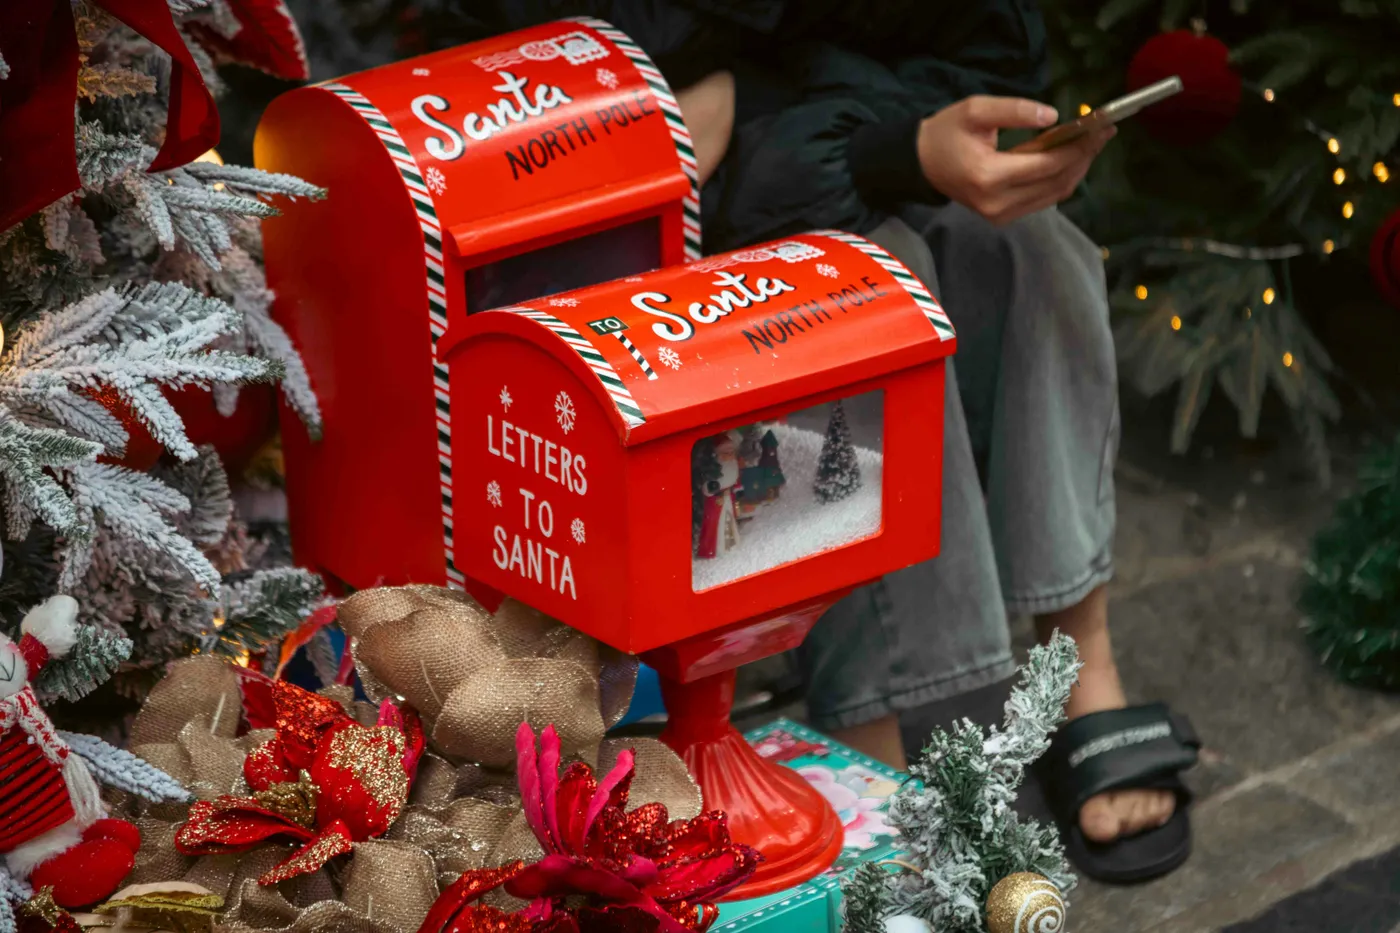
Two red boxes instead of one is the whole trick. Repetition reads as intentional, and the eye enjoys the slight difference in size and detail. Then there’s the texture ladder stacked in one small area: soft flocked needles, glossy metal, matte velvet ribbon, rough burlap. The miniature snow scene behind the window is the payoff for leaning in, which is exactly what good styling does.
20. Cartoon Santa, a Snowman, and a Very Blue Door
If your front door is doing this much talking, the mailbox needs to whisper. A character-decal box plus a full garland plus a wreath plus string lights is five voices competing, and from the street it reads as clutter rather than cheer. Pick two heroes. And check that blue door against the red box — primary blue and primary red fight unless white and green sit between them somewhere.
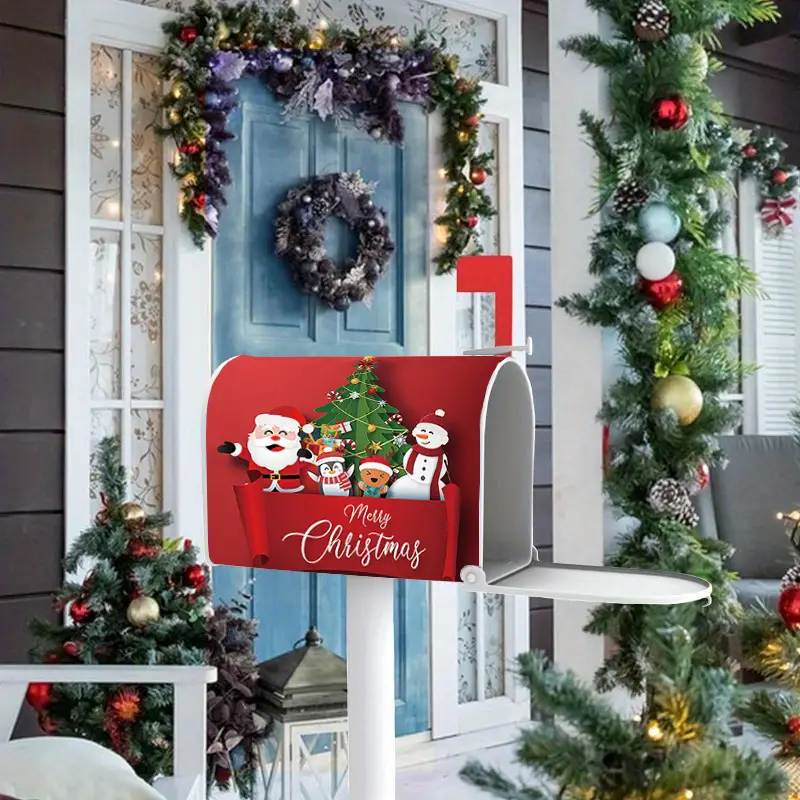
Limit yourself to three ornament colors across the whole entry. Here it’s red, gold and white, with blue coming only from the door itself. Carry one motif — a round shape, or the red-and-white candy stripe — from the door wreath to the mailbox so the two ends of the composition rhyme. Keep the mailbox lighter than the door: roughly 60% of the volume on the door, 40% on the post.
21. The Five-Minute Red Bow and Evergreen Classic
- Wide red velvet or satin ribbon, 3 yards: $6–$14
- Realistic evergreen garland, 6 feet: $12–$28
- Red berry clusters, 2 stems: $4–$8
- Floral wire and green zip ties: $3–$6
- Total: $25–$56
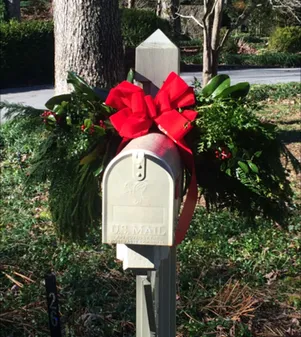
Budget alternative: Dollar Tree carries evergreen garland for $1.25 a strand in November. Two strands plus ribbon salvaged from a thrifted gift box gets the whole look for under $10.
- Loop the garland over the box and let both ends hang evenly.
- Twist the ends together underneath the box to lock the drape.
- Wire the berry stems in at the two shoulder points.
- Tie the bow with wired ribbon so it holds shape in wind.
- Attach the bow at the center top, slightly forward of the garland.
- Trim wiry ends, then fluff the branches by hand.
Twenty minutes, start to finish — the small-scale version of Idea #9.
Your Mailbox Greets December Before You Do
Twenty-one ideas, one small box, and roughly six weeks of December to enjoy it. Start with the version that matches your post, your climate and your tolerance for glitter — then layer from there. The best ones here cost less than a takeout dinner and make the walk to the curb feel like a small event.
📌 Save this to Pinterest and pin your favorite so you can find it again next November, when the garland bins come back out.