32 Jaw-Dropping Steep Sloped Driveway Ideas and Landscaping Solutions You Need to See for 2026

You know that feeling when you finally find the steep sloped driveway idea that looks *exactly* right for your space? That little thrill of “That one! That’s the one!” after hours of scrolling? That’s what this guide is all about. We’ve filtered through hundreds of options from landscape supply yards, paver manufacturers like Belgard, and home improvement stores to bring you only what’s worth your attention this year. We’re covering everything from natural gravel looks to modern pavers and classic brick, with project costs ranging from a practical $5,000 to a more luxurious $75,000.
This isn’t just another gallery of pretty but impractical pictures. We’re exploring 32 distinct, real-world solutions that tackle the challenges of a sloped entrance with style and function. You’ll see budget-friendly approaches and high-end installations side-by-side, so you can find a look that fits your home and your wallet. The “modern natural” vibe is trending hard on Pinterest for 2026, and you’ll see how it plays out in many of these designs—mixing clean lines with organic materials. And stay until the end—we break down the most common mistakes that can ruin these looks.
📌 Save this to Pinterest for later—you’ll want to revisit these ideas.
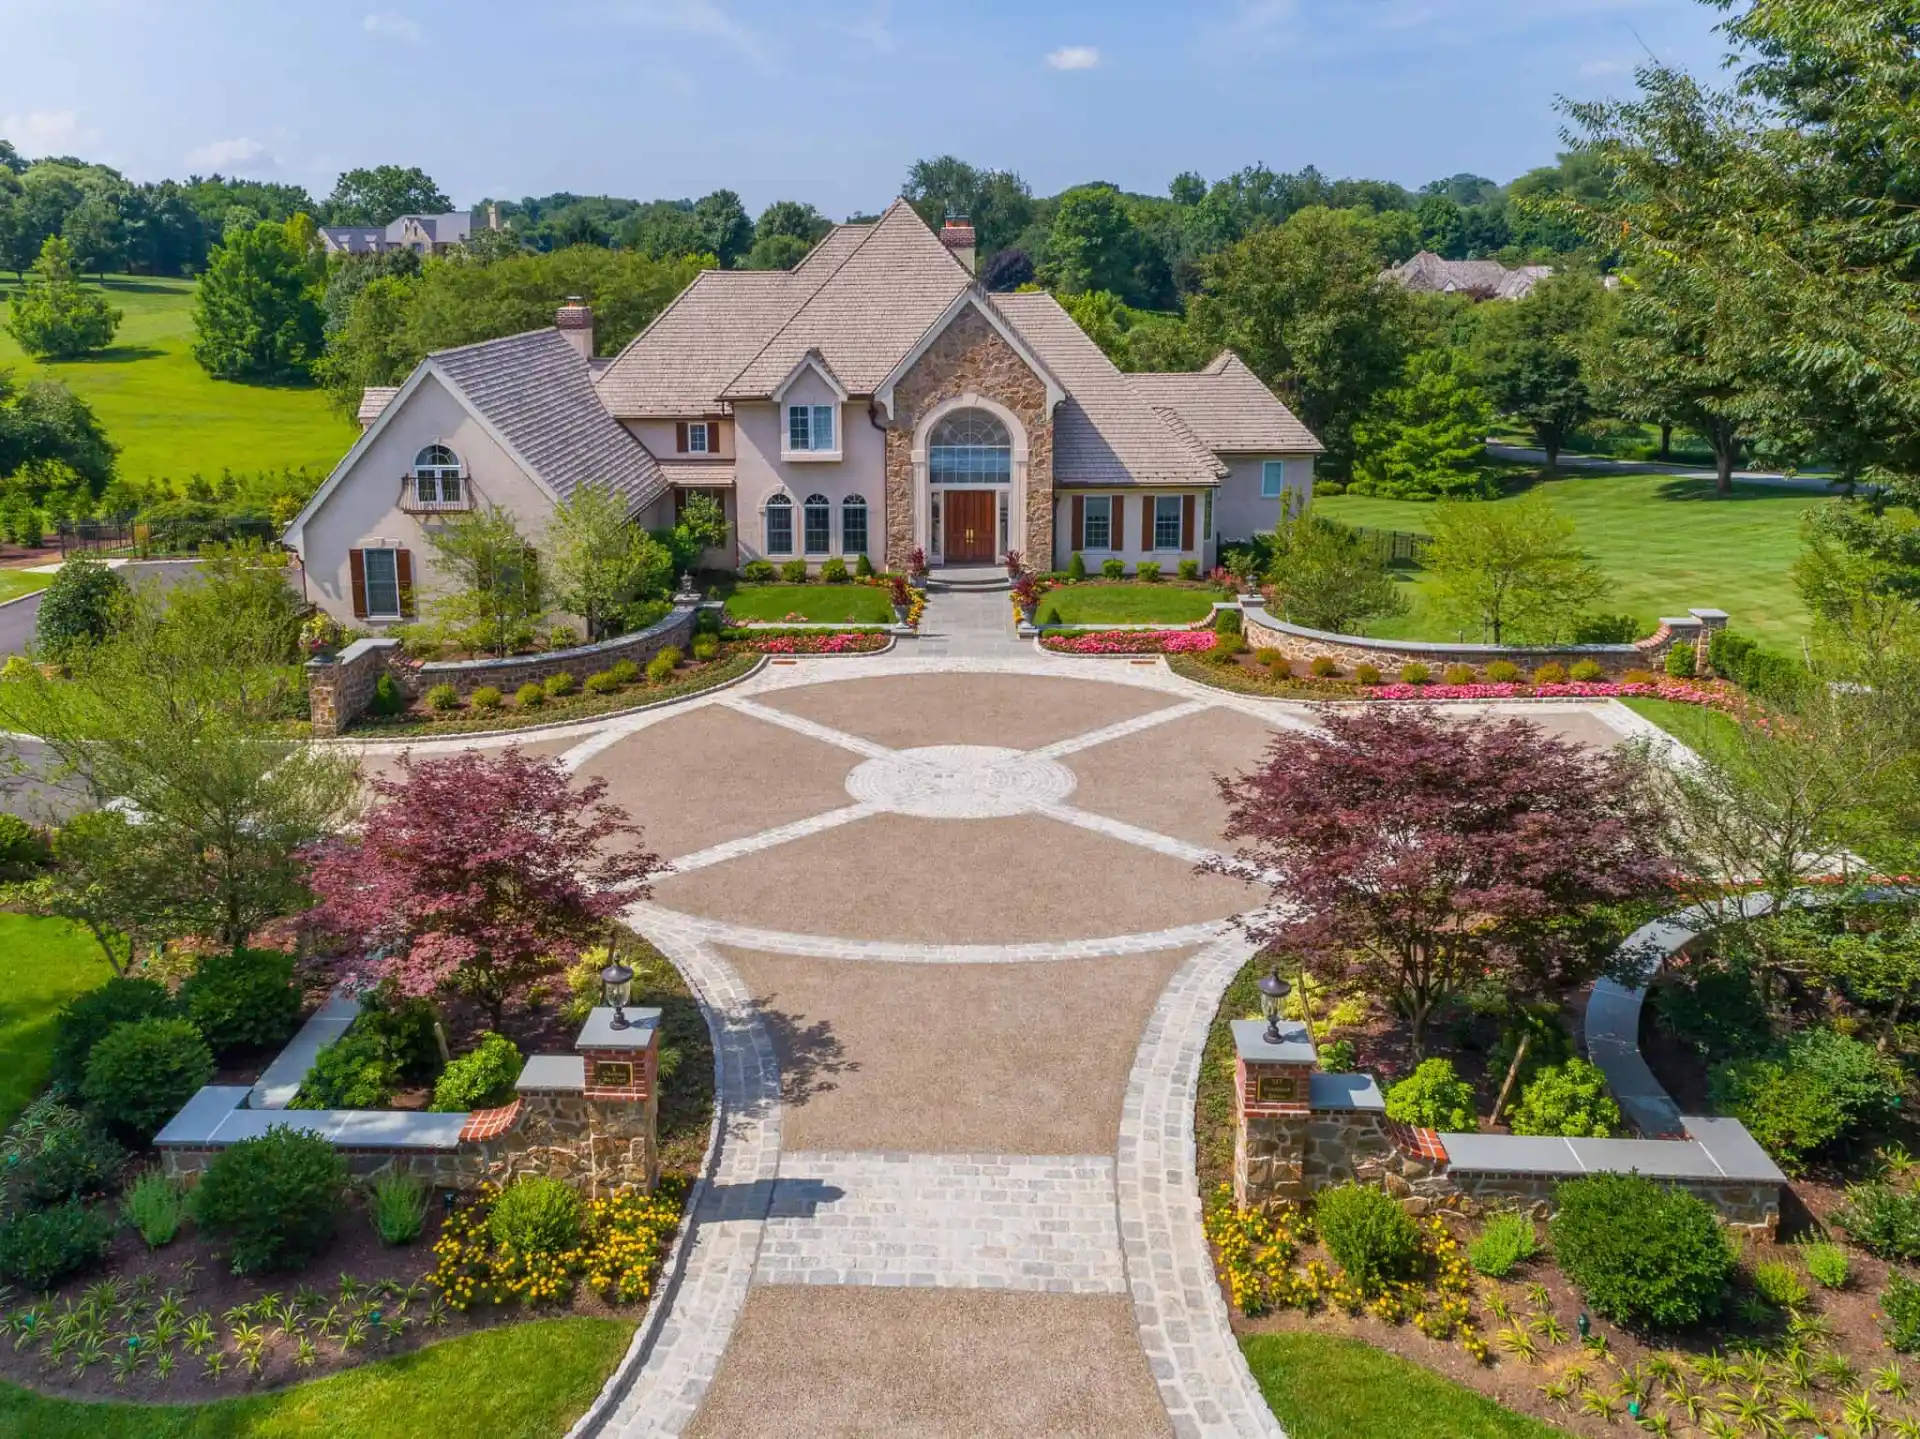
1. A Grand Arrival with a Circular Gravel Driveway
There are a few key design principles that make this entrance so successful. First, the use of concentric circles—the central paver medallion and the sweeping curve of the driveway itself—creates a powerful sense of arrival and order. It turns a simple path into a formal courtyard. Second is the clever mix of textures. The crunchy, light beige gravel contrasts beautifully with the smooth, cool grey of the paving stone borders and the organic forms of the manicured shrubs. This textural play adds depth and interest, preventing the large space from feeling flat or monotonous.
⭐ The One Thing
Recreating a grand entrance like this involves several key investments. The final cost can vary widely based on your location and the specific materials chosen, but here’s a general estimate. For a high-end execution, you are looking at a significant project, but the curb appeal payoff is undeniable.
- Paver Stones (borders & central medallion): $4,000 – $9,000
- Gravel (1.5-inch depth): $3,000 – $6,000
- Professional Landscaping (shrubs, plants, installation): $5,000 – $12,000
- Lighting (lanterns & installation): $2,000 – $5,000
- TOTAL: $14,000 – $32,000
Budget alternative: Use stamped concrete for the borders and a less expensive pea gravel. This could lower the total cost by 30-40%.
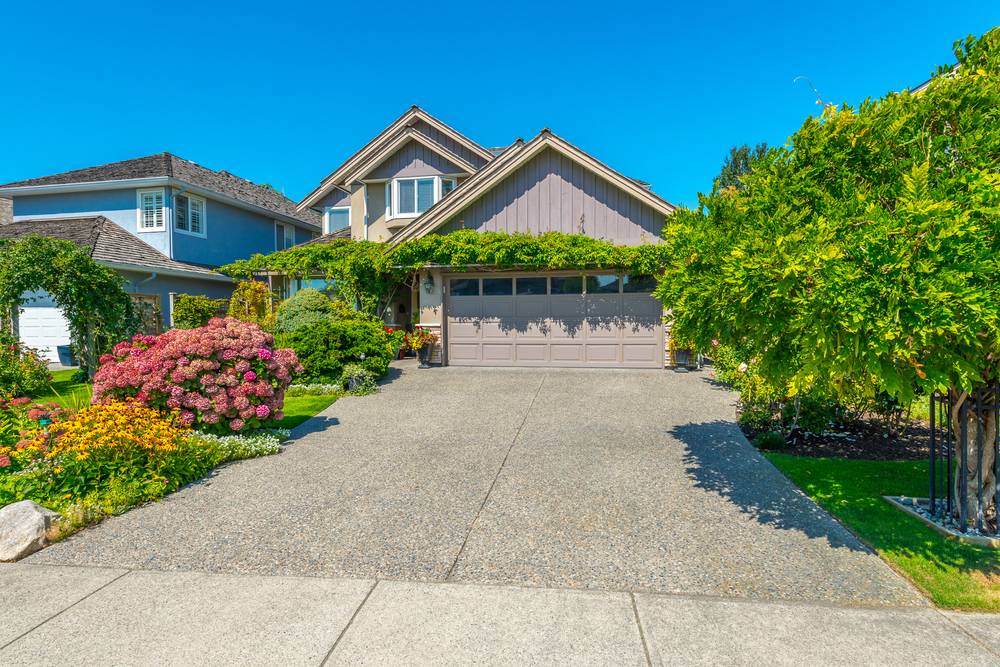
2. Lush Vines and Aggregate Concrete for a Vibrant Facade
While the abundant green vines covering the garage and house look stunning, they require consistent upkeep. Depending on the species, vines can grow aggressively, potentially damaging mortar, siding, and gutters if not pruned regularly—at least twice a year. You’ll need to monitor for pests that can hide in the dense foliage and ensure the plants aren’t retaining excess moisture against the house, which can lead to mold or rot. The aggregate concrete driveway is durable, but its textured surface can be tougher to keep clean than smooth concrete and may require resealing every 3-5 years to maintain its appearance and prevent spalling.
⚠️ Real Talk
that truly elevates this design is the extensive vertical greenery. Without the vines climbing the walls, this would be a pleasant but standard suburban home. The climbing plants are the magic ingredient; they soften the architecture, integrate the house into the landscape, and create a lush, almost magical storybook quality. They transform the garage from a purely functional element into an integrated part of a vibrant, living garden tableau, proving that landscaping doesn’t have to stop at the ground.
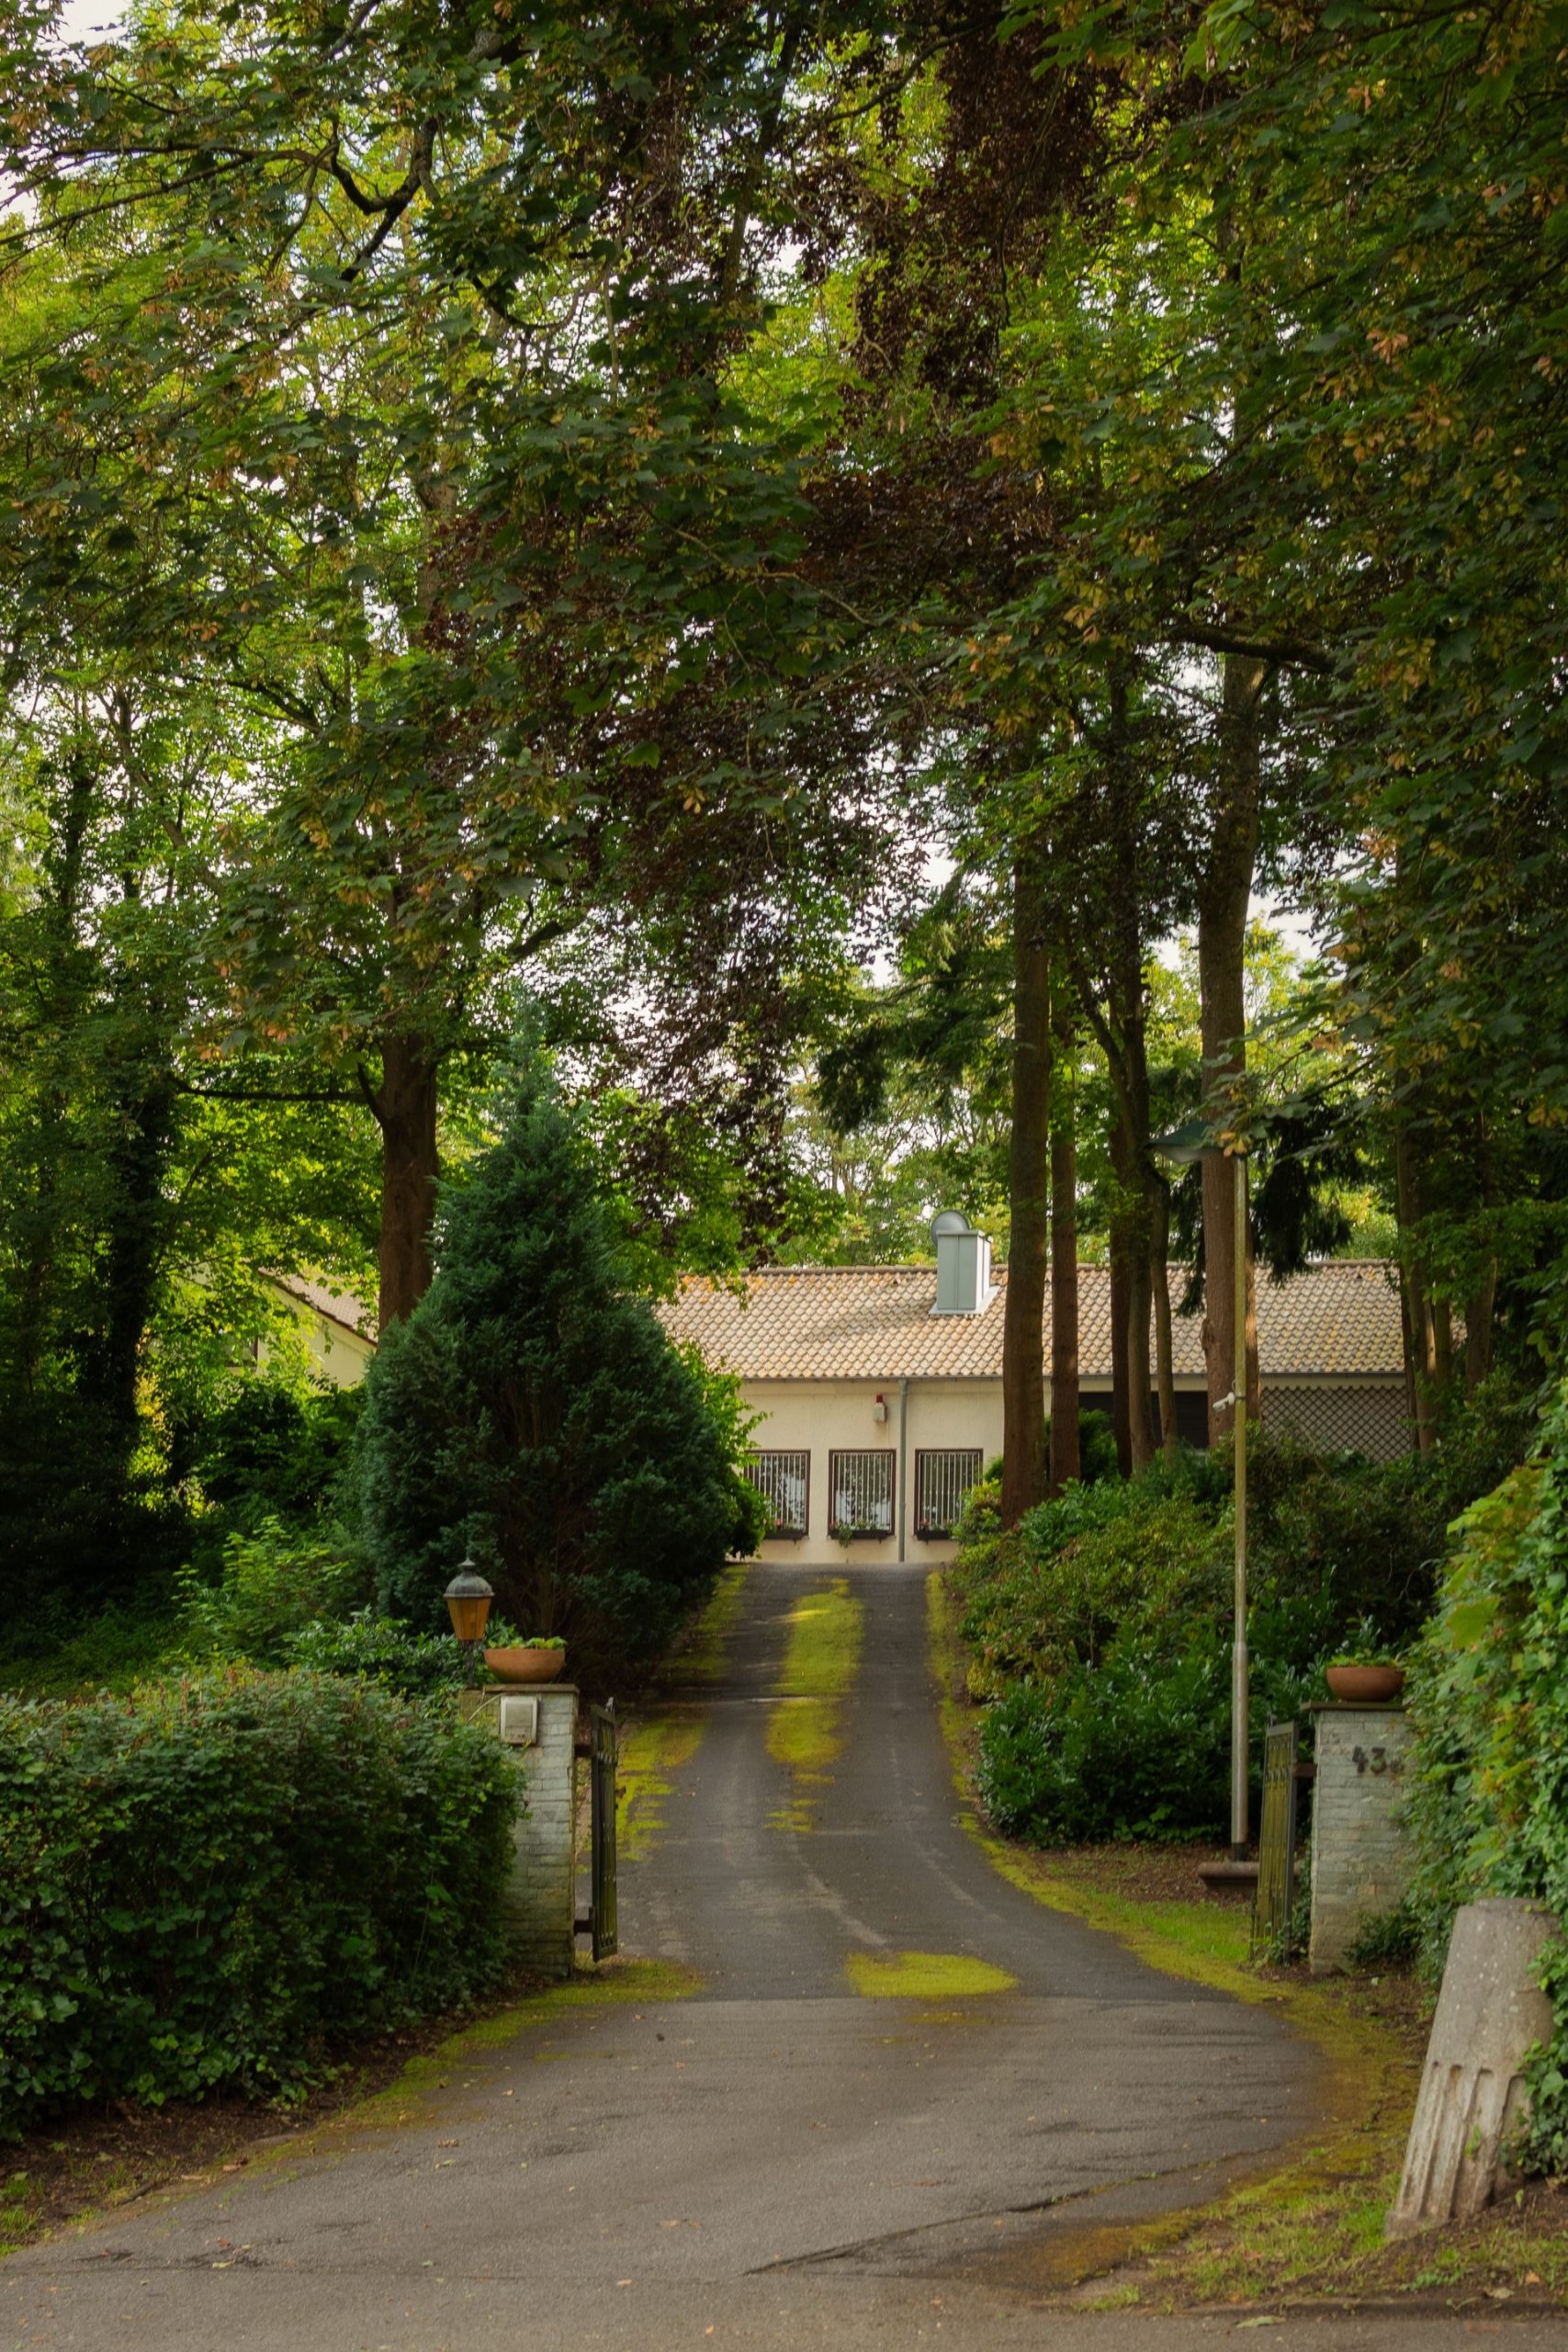
3. A Secluded Driveway with Natural Moss on Asphalt
To recreate this established, serene look, lean into imperfection. The green moss growing on the asphalt isn’t a flaw; it’s a feature. You can encourage this by ensuring the edges of your driveway have adequate shade and moisture. When installing the entrance pillars, choose a brick that has natural color variations rather than a uniform flat color. For the lanterns, opt for real copper or brass; they will develop a beautiful natural patina over time that a painted finish can’t replicate. The key is to select materials that age gracefully and blend with the natural surroundings.
🎯 What Makes It Work
An asphalt driveway like this, especially on a slope and in a shady, damp area, requires some specific considerations. The very moss that gives it character can become extremely slippery when wet, posing a potential hazard for both walking and driving. The overhanging trees, while beautiful, will drop leaves and debris that can stain the asphalt and clog any drainage you have. You’ll be doing a lot of sweeping or blowing to keep it clear, and may need to pressure wash it annually to control the moss if it becomes too thick or hazardous.
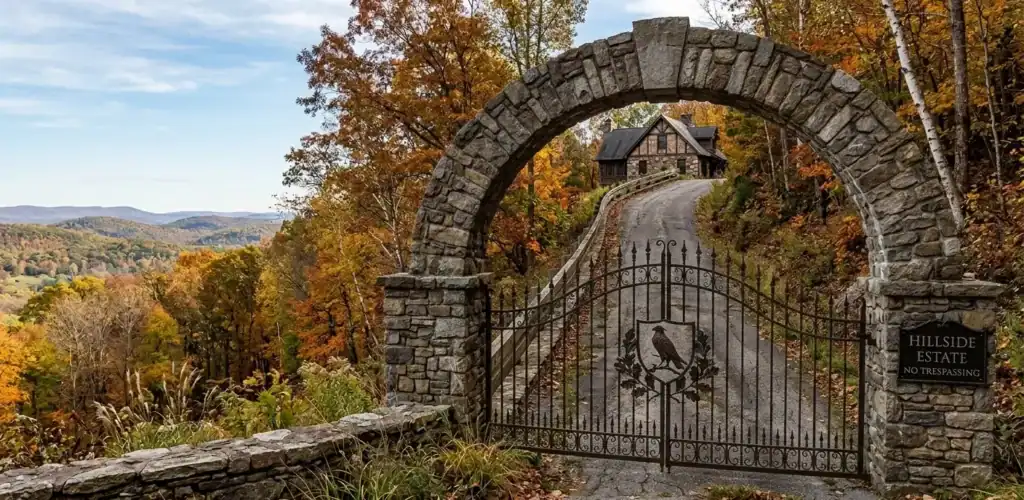
4. Grand Stone Archway Framing a Winding Hillside Drive
A dramatic entrance feature like this stone archway requires significant space to feel appropriate, not imposing. This idea is best suited for properties of at least one acre, where the driveway is long—at least 150 feet—allowing the arch to act as a proper prelude to the home. The arch itself should be scaled to the drive; a minimum width of 12-14 feet is necessary for comfortable vehicle passage. The height needs to accommodate not just cars but also any potential delivery or service trucks, so aim for a clearance of at least 14 feet at its apex.
📏 Scale Guide
This design works because it masterfully builds anticipation. The stone archway and wrought iron gate act as a formal threshold, separating the public world from the private sanctuary of the home. The driveway doesn’t just go straight up; it winds. This forces a slower pace and gradually reveals the house and the stunning autumn foliage, creating a cinematic experience. The consistent use of natural materials—stone in the arch, retaining walls, and house facade—creates a powerful sense of harmony between the built environment and the wooded landscape.
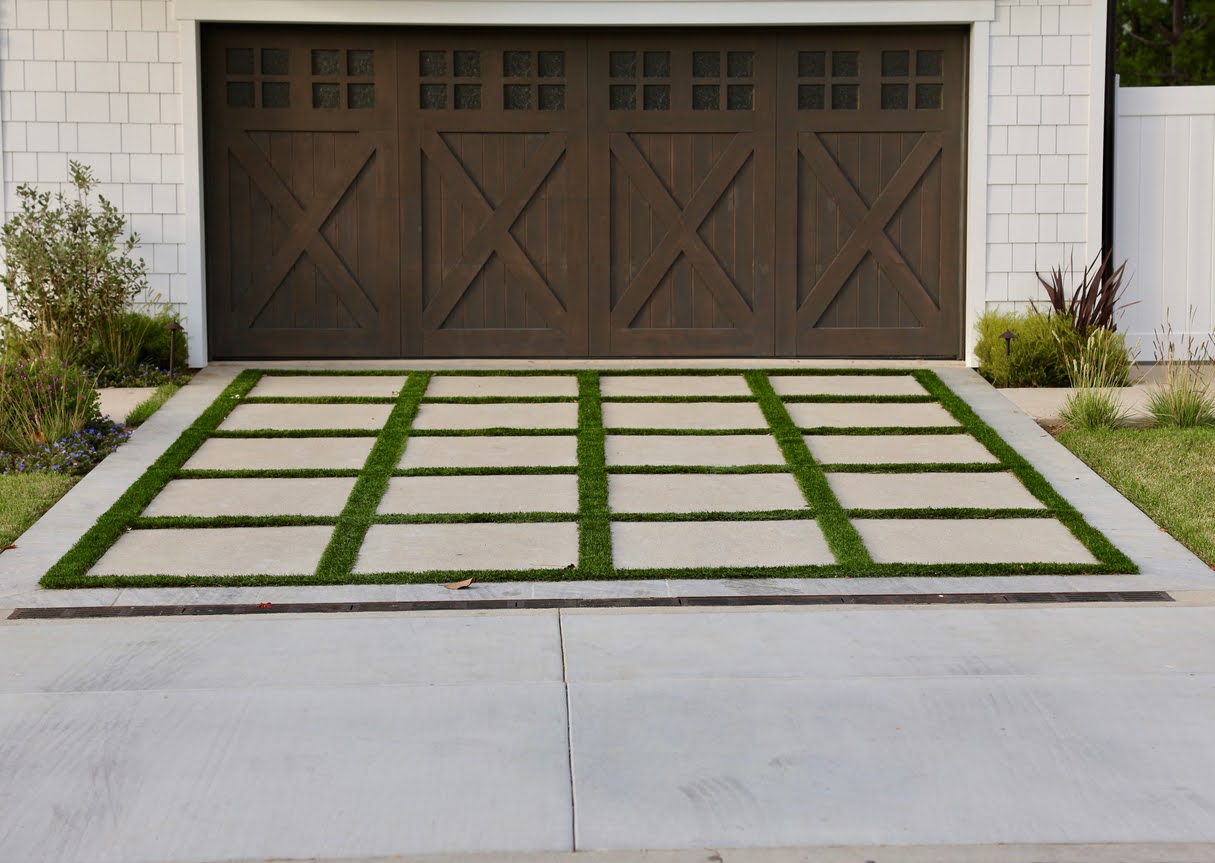
5. Modern Driveway with Concrete Pavers and Grass Strips
This look, often called a
6. Interlocking Pavers Meet a Natural Stone Retaining Wall
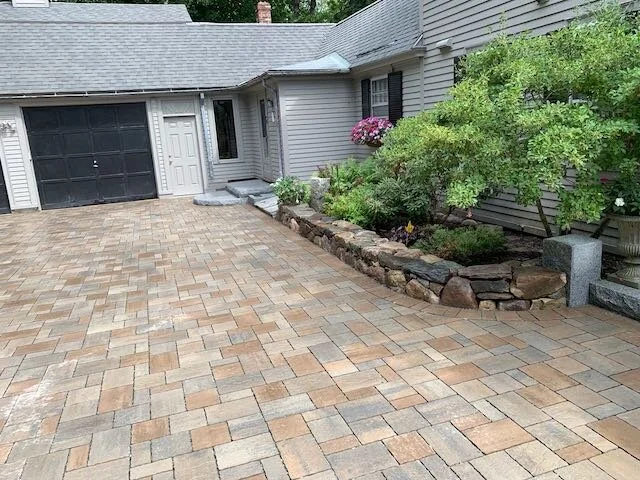
When combining manufactured pavers with natural stone, the key is to find a color echo between them. Notice how the grays in the stacked stone retaining wall are picked up by the cooler-toned gray pavers in the driveway mix. This creates a subtle but crucial visual link. To ensure the wall feels anchored, bury the first course of stones at least 4-6 inches below the driveway level. For a driveway with this much pattern, keep the surrounding elements (garage door, house siding) in solid, neutral colors to avoid visual chaos.
🔥 Trending Context
You can capture this balanced look by thinking in percentages. The formula here is roughly: 60% multi-toned pavers (the main surface) + 30% natural texture (the stone retaining wall) + 10% solid color accents (the dark gray garage door and light gray siding). You could swap the materials while keeping the ratio. For example, trade the pavers for stamped concrete (60%), the stacked stone for a board-formed concrete wall (30%), and use a striking black and white paint scheme for the house accents (10%) to achieve a more modern but equally balanced result.
7. Functional Grey Pavers with a Low Brick Retaining Wall
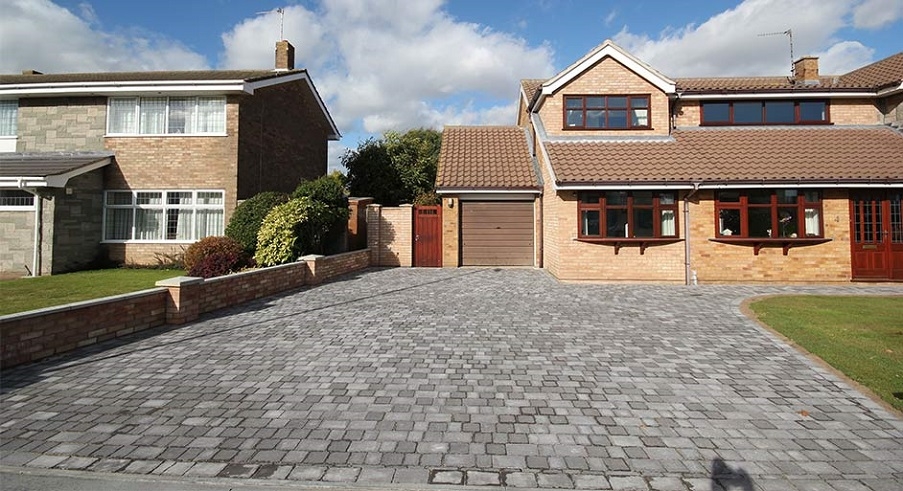
While this is a very practical and neat solution, be aware that a paver driveway of this size is a significant investment in both base preparation and labor. The ground must be excavated, graded with a precise slope for drainage, and filled with several inches of compacted aggregate base. If this isn’t done correctly, the pavers will shift and sink, creating an uneven and hazardous surface within a few years. Also, the joints between pavers will need to be re-sanded every 2-3 years with polymeric sand to prevent weeds and ant hills from taking over.
📐 Style Math
Installing a low retaining wall like this is a manageable DIY project. Here’s a quick guide to building the brick wall:
- Excavate a Trench: Dig a trench about 12 inches wide and 8 inches deep along your planned wall line.
- Add a Gravel Base: Fill the trench with 4 inches of crushed gravel and compact it thoroughly with a hand tamper until it’s level.
- Lay the First Course: Place the first layer of bricks on the gravel base, making sure they are perfectly level and aligned. This is the most critical step.
- Stack and Stagger: Stack subsequent courses, staggering the joints like a classic brick pattern for strength. Apply landscape block adhesive between each layer.
- Add the Capstones: Once you reach the desired height, secure the lighter-colored coping stones on top with adhesive for a finished look.
Time estimate: 1-2 weekends. Material cost: $20-$40 per linear foot.
8. Simple Concrete Driveway with Reddish-Brown Mulch
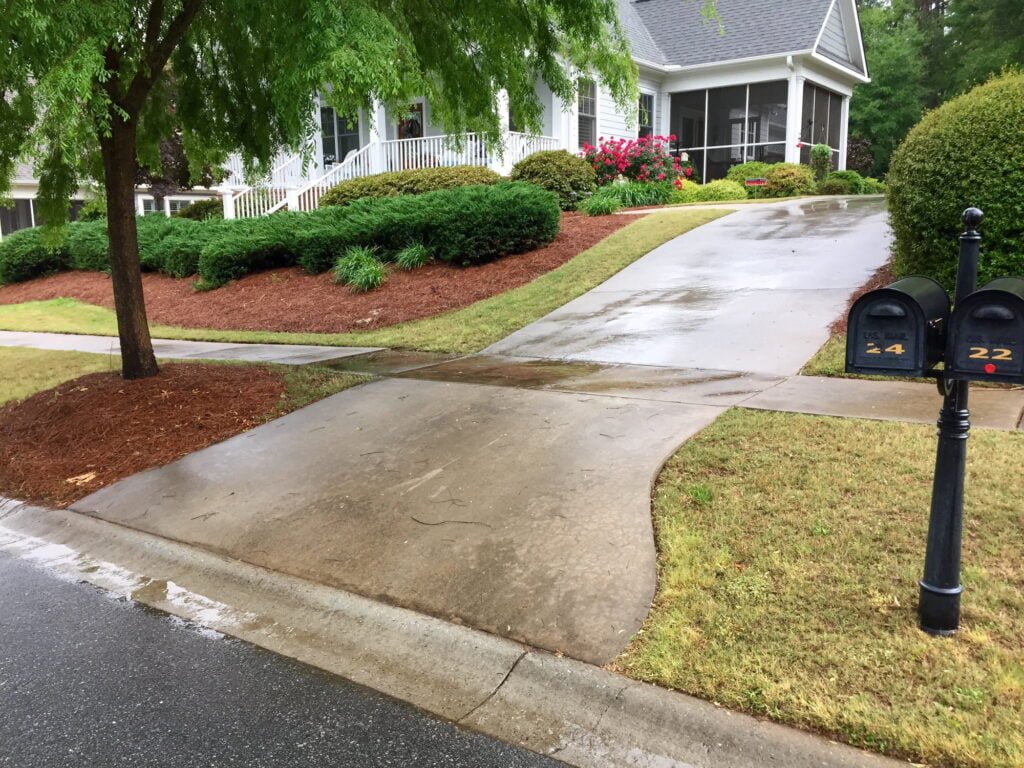
The single element that makes this common suburban look feel cohesive is the consistent use of reddish-brown mulch. It’s a simple detail, but it’s doing a lot of work. It creates a clean, intentional border for the concrete driveway, suppresses weeds, and adds a warm pop of color that contrasts nicely with the green bushes and the cool gray concrete. If you were to replace it with patchy grass or bare dirt, the whole scene would look instantly messier and less cared-for. The mulch is the unifying thread.
💸 Get This Look For Less
A poured concrete driveway is already one of the more budget-friendly options, but you can get this look for even less. Instead of having a professional landscape company deliver and spread premium cedar or cypress mulch (which can cost $50-$70 per cubic yard), check local municipal services. Many cities offer free mulch to residents from recycled yard waste. While the color might be less uniform, the price is unbeatable. For plantings, opt for smaller, younger shrubs from a big-box store like Lowe’s or Home Depot; they may take an extra year to fill in, but will cost 50-70% less than mature plants from a nursery.
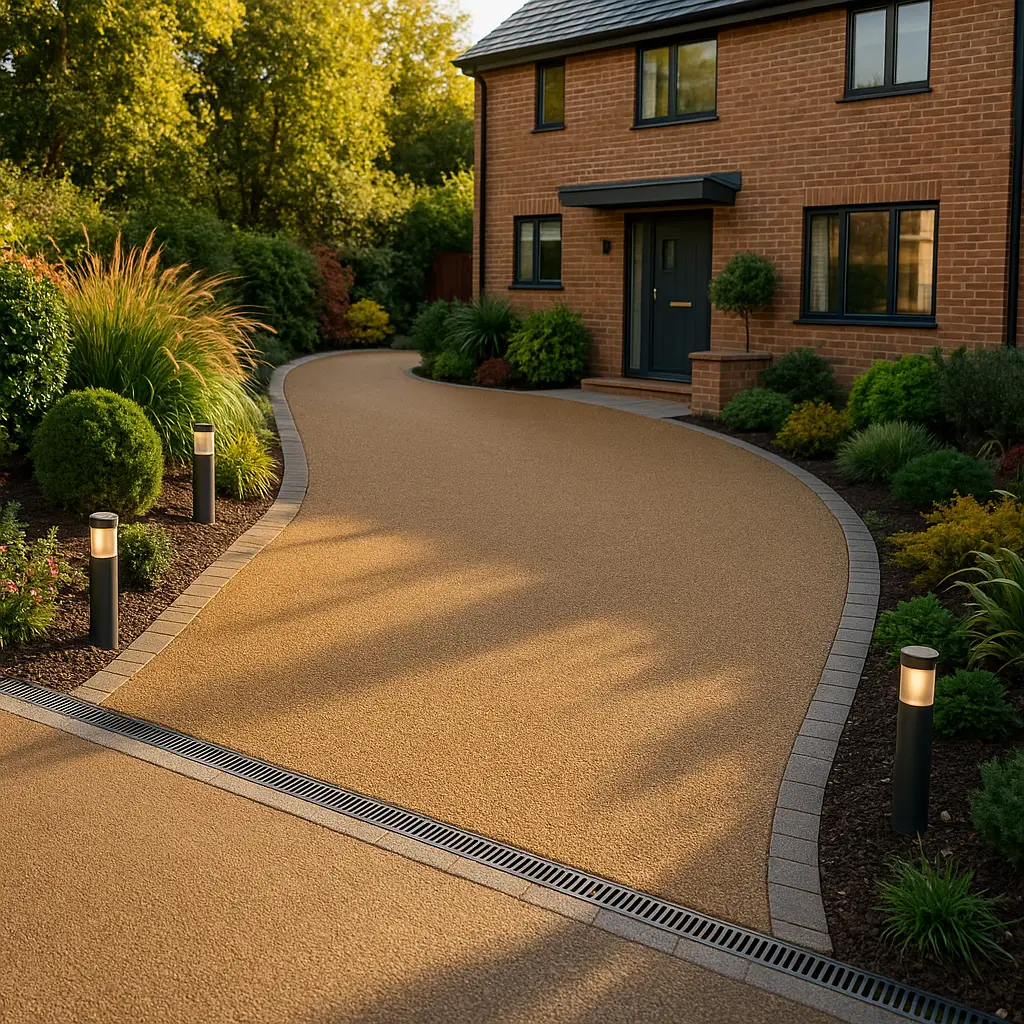
9. Curved Amber Resin Driveway with Linear Drainage
This driveway design feels so clean and modern because of its seamlessness. The amber resin-bound surface has no joints or grout lines, creating a uniform, monolithic appearance that is very calming to the eye. The success is also in the details: the dark grey block paving acts as a crisp, defining border, much like a frame on a painting. The matching dark grey of the linear drain and the pillar lights is a brilliant touch of coordination, showing that every functional element was considered as part of the overall aesthetic, not as an afterthought.
✅ Before You Start
Resin-bound surfaces are incredibly low-maintenance, which is a huge part of their appeal. The permeable surface allows water to drain right through, preventing puddles and ice slicks. However, its longevity depends on a professionally installed sub-base. It can be susceptible to damage from sharp objects or heavy, dragging loads. While you can simply sweep or hose it down, stubborn stains or algae growth might require a specialist cleaning solution. The biggest reality check is the cost—it’s a premium product with a price tag to match, often costing more per square foot than high-end pavers.
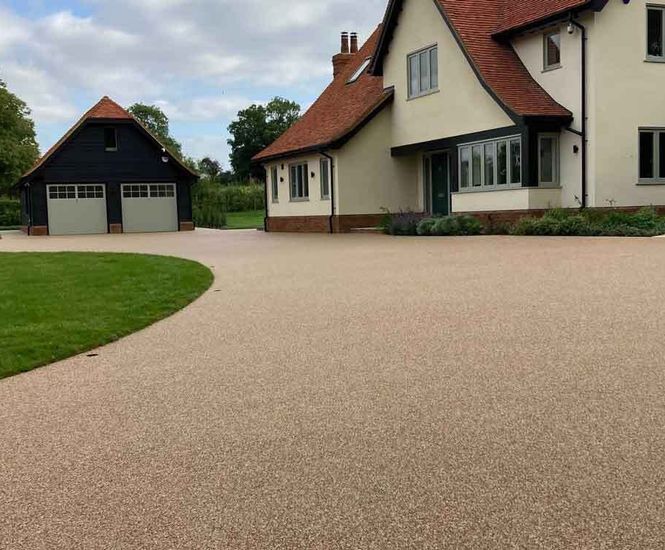
10. Beige Gravel Driveway for a Traditional House and Garage
A broad gravel expanse like this works best on larger properties where you have ample room for vehicle turnaround. The minimum width for a comfortable two-way drive is around 16-20 feet. For the parking and turnaround area in front of the detached garage, you’ll want a space at least 40×40 feet to allow cars to enter, reverse, and exit without complex maneuvers. This style is less suited for narrow suburban lots where the gravel would be constantly spilling onto neighbors’ properties or public sidewalks. It’s ideal for lots half an acre or larger.
🔧 How-To Brief
To keep a large gravel area looking neat and not like a messy construction site, the secret is containment and depth. Use a rigid edging—like the subtle lawn boundary seen here, or a metal or paver border—to keep the stones from migrating. More importantly, install a gravel grid stabilization system underneath. These plastic honeycomb-like grids hold the gravel in place, preventing ruts from forming where you drive and making it much more comfortable to walk on. Aim for a gravel depth of at least 2-3 inches for good coverage.
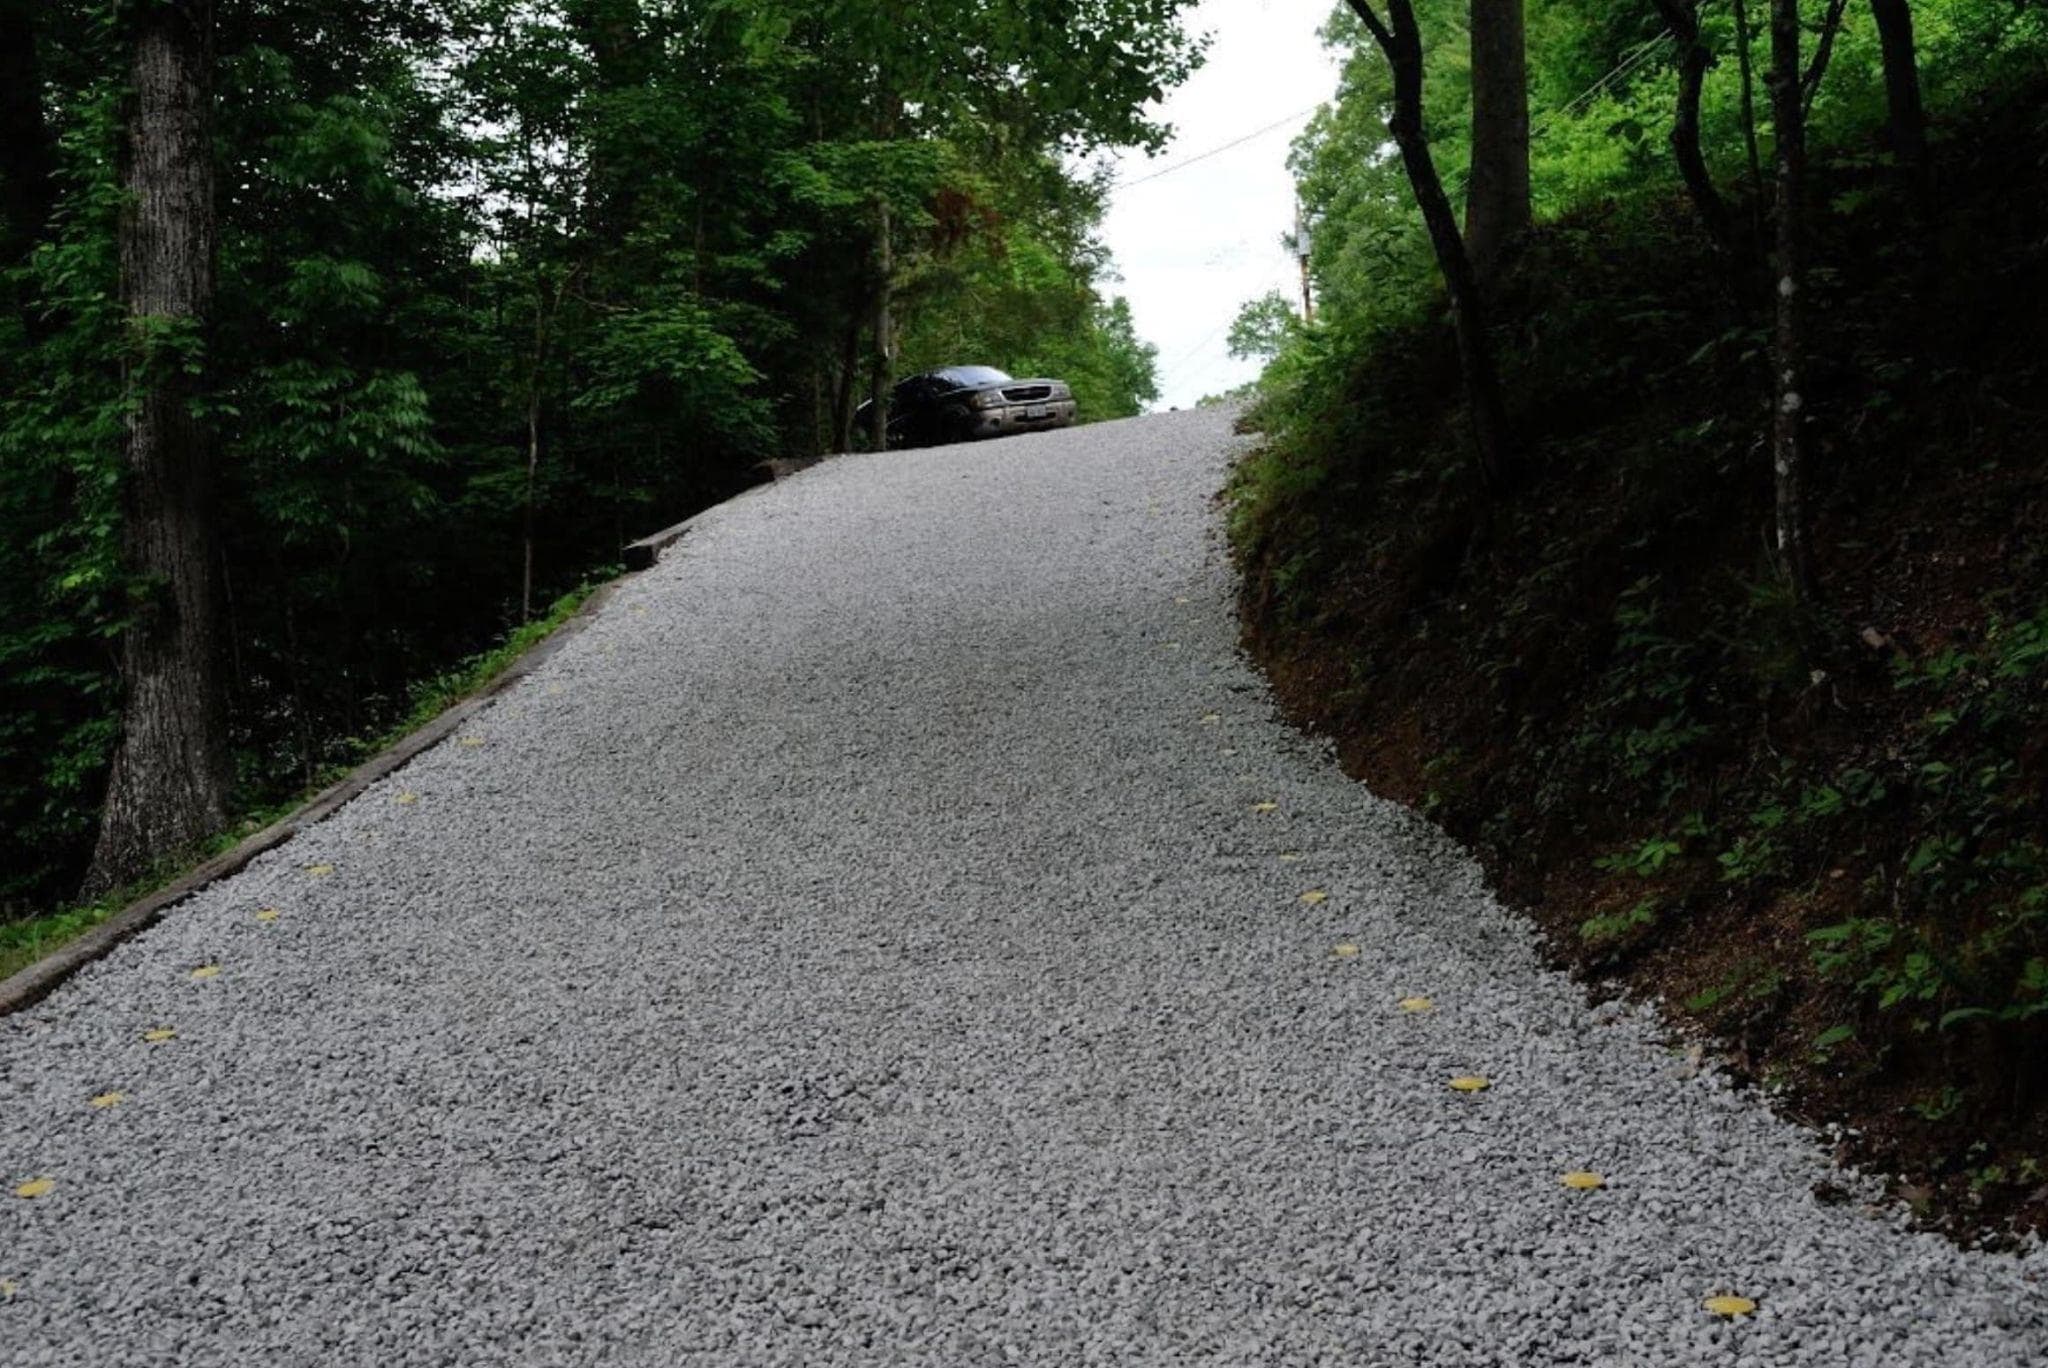
11. Steep Gravel Driveway with Safety Reflectors
Let’s be honest: a steep gravel driveway is a high-maintenance relationship. Heavy rain is your enemy, as it will wash the gravel down the slope, creating ruts and bare spots. You will need to regrade and add new gravel every 2-4 years, and potentially after any major storm. In snowy climates, plowing is tricky; it’s almost impossible to remove snow without also scraping away a significant amount of your gravel. This is a functional, rustic solution, but it is not a
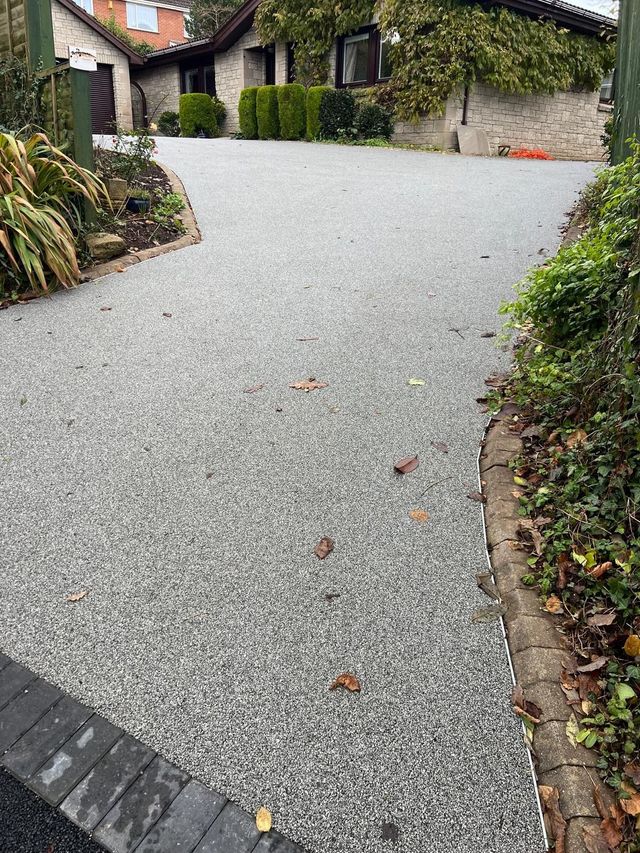
12. Sleek Resin Bound Driveway with Natural Edging
The visual harmony here comes from a simple formula: 80% smooth, uniform surface + 15% clean, man-made edge + 5% wild, natural edge. The vast majority of the visual weight is the light grey resin driveway, which provides a clean canvas. This is contrasted by the crisp, dark paver border on one side and the slightly chaotic, overgrown stone and ivy border on the other. This tension between the tidy and the untamed is what makes it interesting. You could change the driveway to dark asphalt (80%), use a crisp white concrete curb (15%), and let a bed of ornamental grasses grow wild (5%) for a similar effect.
13. Steep Cobblestone Paver Driveway with Timber Retaining Wall
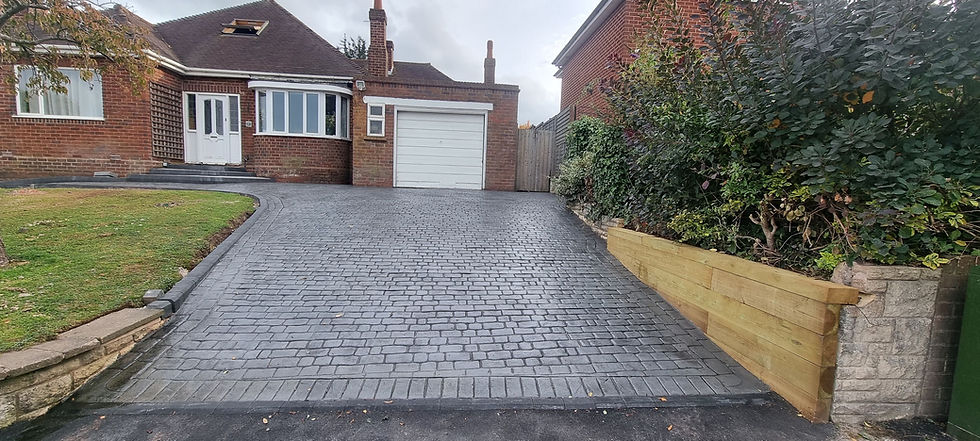
A timber retaining wall, while offering a warm and natural look, requires more maintenance than a stone or concrete block alternative. The wood, especially in contact with soil and moisture, will eventually be susceptible to rot, insect damage, and weathering. To maximize its lifespan, it’s crucial that the timber used is pressure-treated for ground contact. You’ll likely need to re-stain or seal it every 3-5 years to protect it from the elements. Expect a lifespan of 15-20 years before major repairs or a full replacement might be necessary, unlike a stone wall which can last indefinitely. Compare this with the durability seen in Idea #19.
⭐ The One Thing
When installing pavers on a steep slope like this, traction is a primary concern. Opt for cobblestone or pavers with a textured, non-slip surface. The choice of a dark gray color is also smart from a practical standpoint; it’s more effective at melting snow and ice when the sun does hit it compared to lighter-colored pavers. During installation, ensure the pavers are laid in an interlocking pattern (like a herringbone or a running bond) to prevent them from creeping downhill over time under the force of gravity and vehicle traffic.
14. Interlocking Brick and Asphalt with a Grated Drain
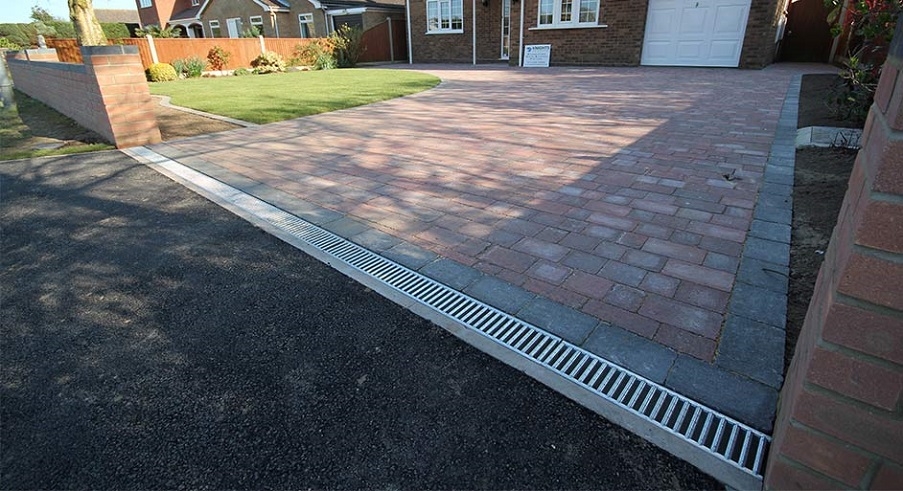
that makes this entire design functional is the grated metal drainage channel. Without it, this would be a disaster. On a sloped site, the upper brick paver area would shed massive amounts of rainwater directly onto the lower asphalt section, causing erosion, water pooling, and potential damage to the asphalt over time. This drain acts as a critical interception point, catching all that runoff and safely directing it away. It’s a purely functional element that’s absolutely non-negotiable for the success and longevity of the two-tier design.
⚠️ Real Talk
Installing a channel drain is the key to managing water on a sloped, paved surface. Here’s a simplified how-to:
- Dig the Trench: Excavate a trench where you want the drain, making it slightly wider than the drain channel and deep enough for the channel plus about 2 inches of concrete bedding.
- Create the Slope: Ensure the bottom of the trench has a slight slope (about 1/8 inch per foot) towards your designated drainage outlet (like a storm drain or a pop-up emitter).
- Pour the Concrete Base: Mix and pour a 2-inch layer of concrete in the trench to create a stable, solid base.
- Set the Channel: Place the drain channel into the wet concrete, ensuring the top of the grate will be about 1/8 inch below the final paver/asphalt surface.
- Connect and Finish: Connect the drain sections and the outlet pipe. Fill in the sides with concrete and then lay your pavers or asphalt right up to the edge of the channel.
Time estimate: 1 day. Material cost: $30-$60 per linear foot.
15. Dark Herringbone Pavers with a Bright Yellow Accent
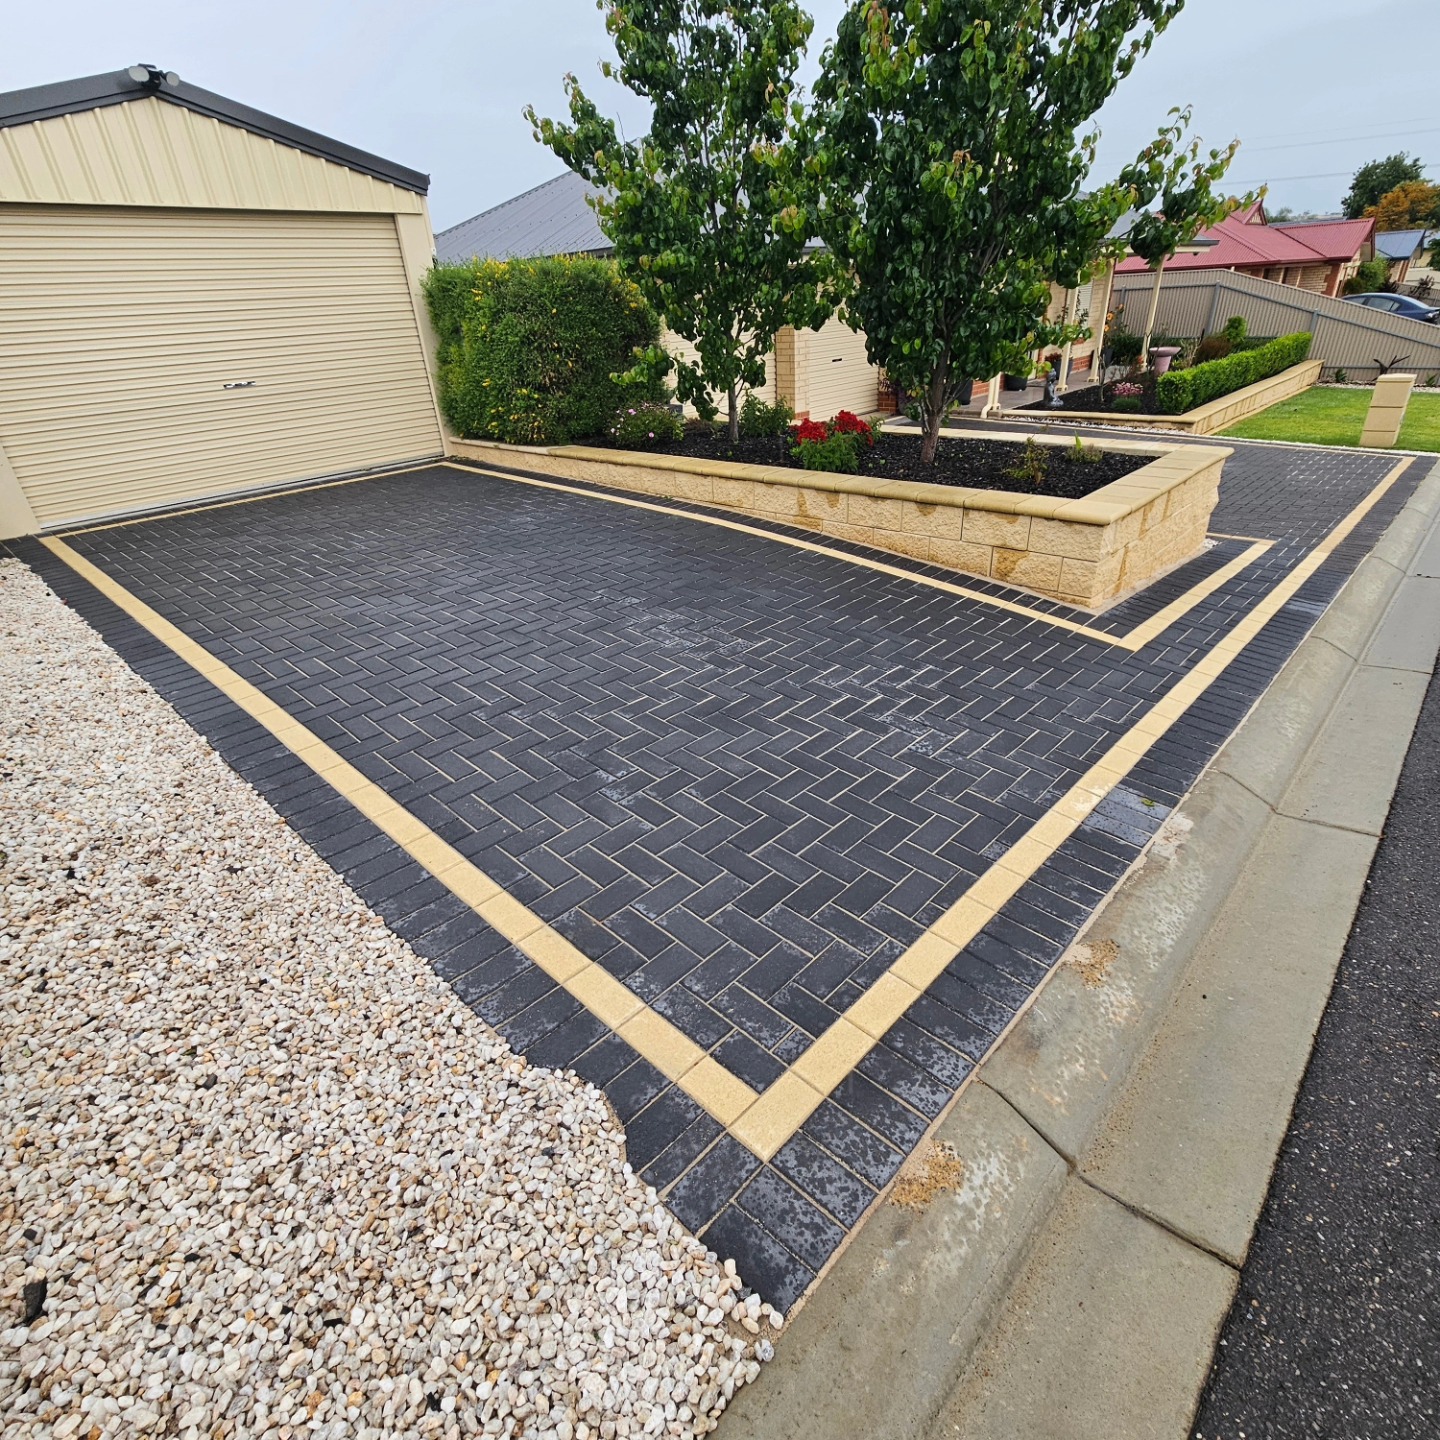
This design is effective because of its high-contrast, graphic quality. The deep charcoal of the herringbone pavers creates a rich, textured field, while the single line of yellow bricks acts as a striking visual accent. It’s a small detail that has a huge impact, guiding the eye and adding a dose of unexpected personality. The choice of a herringbone pattern is also smart; its interlocking V-shape is not only classic but also provides structural strength, resisting the creep and movement that can happen on a sloped surface. You can see a similar herringbone pattern in Idea #28, but with a different overall feel.
16. Steep Asphalt Driveway Flanked by Stone Walls
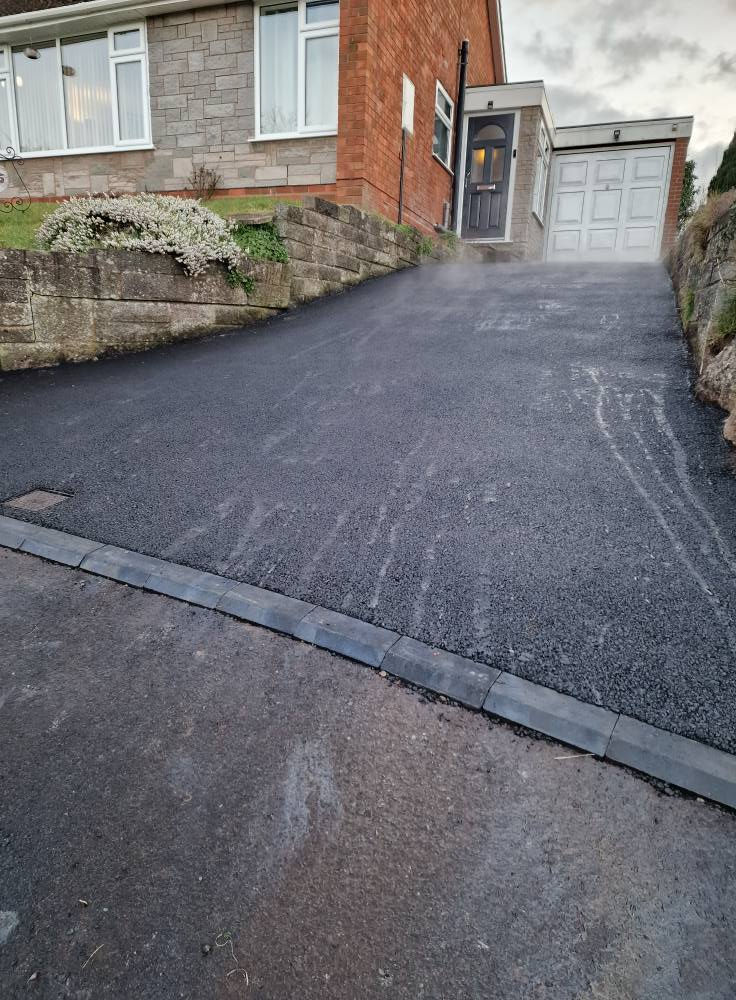
Living with a driveway this steep comes with daily challenges. In winter, this incline will be treacherous with even a small amount of snow or ice, making it inaccessible without a 4-wheel drive vehicle and potentially some sand or salt. Heavy rain can also rush down the asphalt with force, requiring a robust drainage system at the bottom to prevent flooding in the garage. Even simple tasks like carrying groceries from the car to the house become a workout. This is a solution born of necessity, and it prioritizes access over comfort.
📏 Scale Guide
This design is specifically for lots with a significant elevation change between the street and the house—we’re talking a 10- to 20-foot rise or more. The use of tall, robust retaining walls is not just aesthetic; it’s a structural necessity to hold back the earth on either side. The driveway itself occupies a relatively narrow corridor, likely 10-12 feet wide, as widening it would require more extensive and expensive excavation and retaining wall construction. This is a compact, vertical solution for a challenging, sloped building site.
17. Suburban Homes with Tiered Landscaping on Slopes
This approach is becoming the standard for new suburban developments on hilly terrain. As flat, easy-to-build land becomes scarcer, developers are getting smarter about building on slopes. The tiered retaining wall system allows them to create a stable, level pad for the house itself while managing the grade change in a structured, orderly way. It’s a pragmatic and scalable solution that maximizes land use and provides a tidy, if somewhat uniform, aesthetic that appeals to a broad market of homebuyers who want a new-build home in a good school district, regardless of the topography.

💰 Budget Breakdown
that makes this entire suburban landscape work is the tiered retaining walls. Without them, you’d have impossibly steep, unusable grassy hillsides that would be difficult to mow and prone to erosion. The walls are the skeleton of the landscape; they create level, plantable terraces that break up the slope into manageable sections. This not only solves the engineering problem but also creates visual interest and organized planting opportunities. The entire curb appeal of these homes rests on the structure provided by those block walls. Compare this to the single, taller wall in Idea #19.
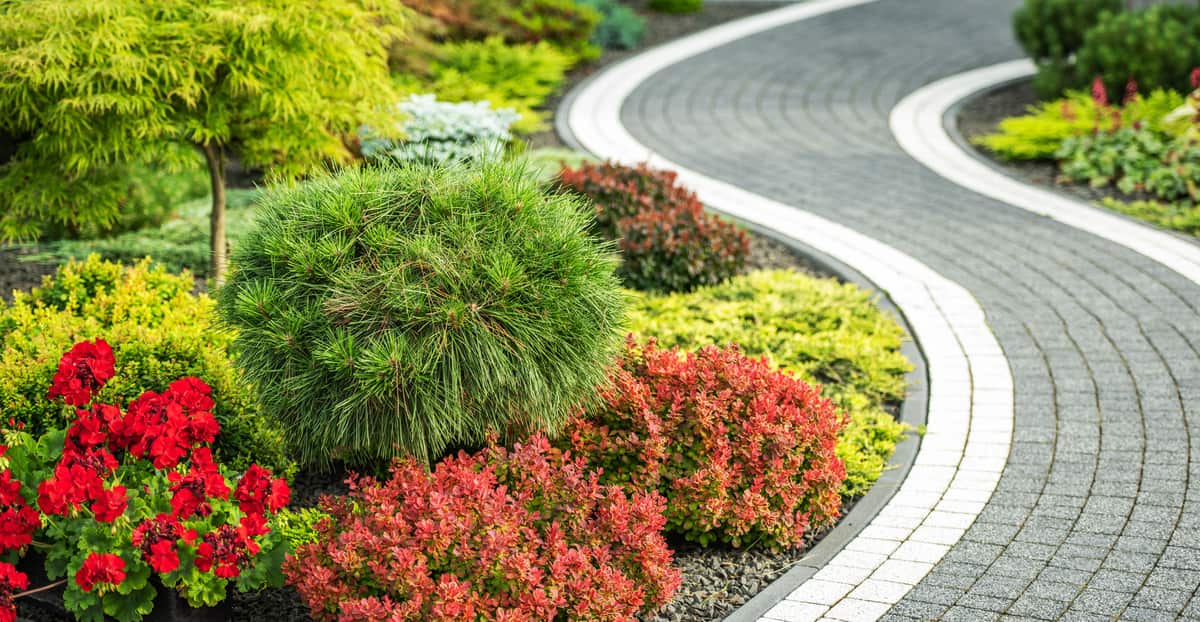
18. Curved Gray Paver Path with a Crisp White Border
The visual recipe here is all about vibrant contrast. Think of it as: 50% lush, multi-tonal foliage + 30% neutral gray pathway + 20% high-contrast border. The pathway itself is a calm, neutral gray, which acts as a perfect backdrop. The real energy comes from the surrounding plants—the deep greens, bright yellow-greens, and pops of red. The masterstroke is the crisp white paver border. It acts like a bright white mat on a photograph, separating the
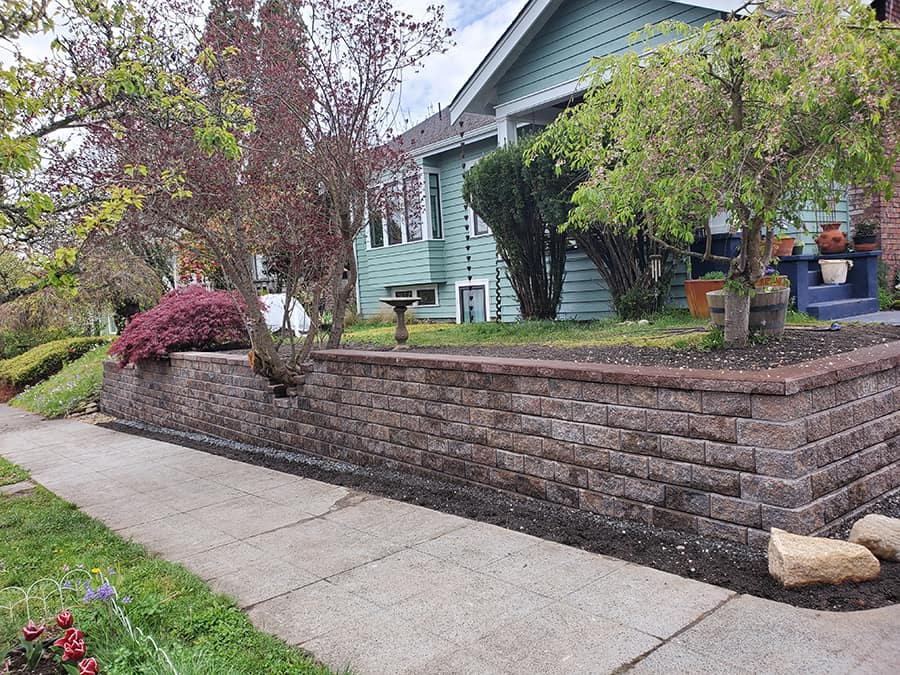
19. Interlocking Block Retaining Wall Supporting a Garden
Before you commit to a segmental retaining wall like this, there are a few crucial checks to make. A wall this tall is doing serious work, so planning is everything.
- Check Local Codes: Many municipalities require a building permit and an engineer’s sign-off for any retaining wall over 4 feet tall. Don’t skip this step.
- Identify Utilities: Before you dig, call 811 to have all underground utility lines (gas, water, electric) marked. Hitting one is a costly and dangerous mistake.
- Assess Your Soil: The type of soil you have (clay, sand, loam) will affect the drainage requirements and the amount of backfill needed. A simple soil test can save you headaches later.
- Plan for Drainage: A wall holding back this much earth needs a bulletproof drainage plan, including a perforated pipe at the base and gravel backfill, to relieve hydrostatic pressure.
📐 Style Math
Building a retaining wall with interlocking blocks is a popular solution for sloped yards. The cost is generally more manageable than poured concrete or natural stone. Price depends heavily on the height of the wall and the specific block style you choose.
- Interlocking Concrete Blocks: $15 – $30 per square face foot
- Capstones: $5 – $10 per linear foot
- Gravel backfill & Drainage Pipe: $3 – $5 per square face foot
- Labor/Installation: $25 – $50 per square face foot
- TOTAL: $48 – $95 per square face foot of wall
Budget alternative: For lower slopes (under 3 feet), a treated timber wall can be a more affordable DIY option, as seen in Idea #13, but it comes with a shorter lifespan.
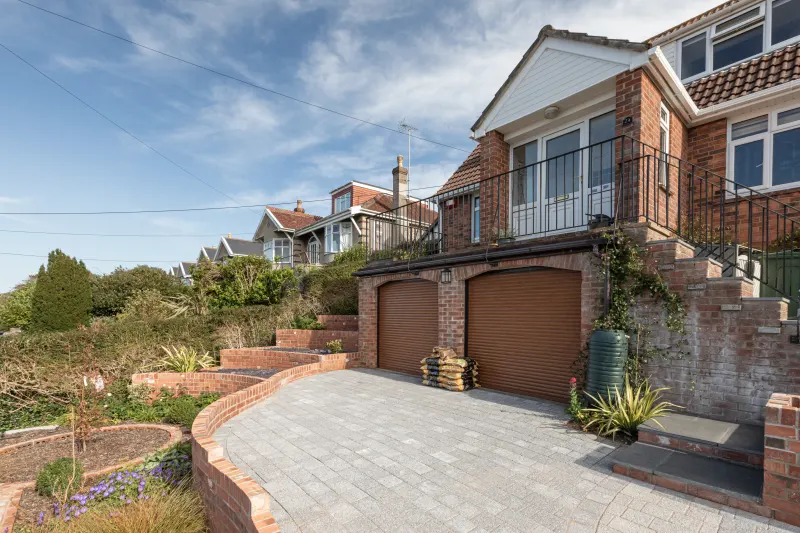
20. Terraced Driveway with Integrated Garage on a Brick Home
This
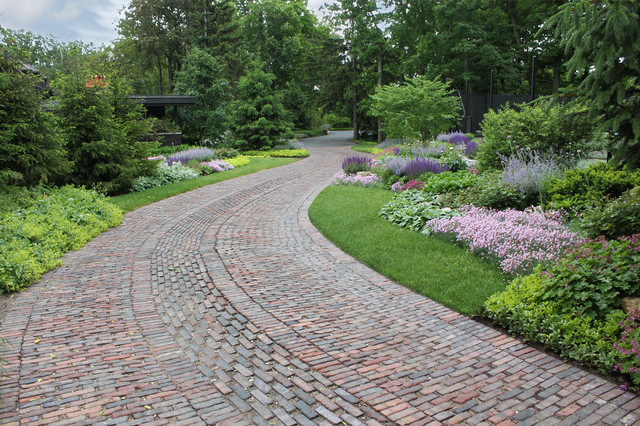
21. Winding Brick Paver Driveway Through Lush Gardens
A brick paver driveway requires more maintenance than solid concrete or asphalt, but less than gravel. The main task is managing the joints between the bricks. Weeds will inevitably try to grow in them, requiring periodic removal or treatment with a weed killer. To minimize this, the joints should be filled with polymeric sand, which hardens and helps block weed growth, but this may need to be touched up or redone every 3-5 years. In shady, damp areas, moss and algae can grow on the brick surface, making it slippery and requiring a pressure wash with a specialized cleaner to remove.
✅ Before You Start
This driveway feels so serene and inviting because it doesn’t fight the landscape; it meanders through it. The winding path creates a sense of journey and discovery, slowing down the approach to the house. The use of brick, a classic and warm material, instantly gives the property an established, timeless feel. Critically, the driveway is bordered by strips of lush lawn and overflowing garden beds. This soft, green edge is crucial—it prevents the large paved area from feeling like a sterile parking lot and instead makes it feel like a charming garden path.
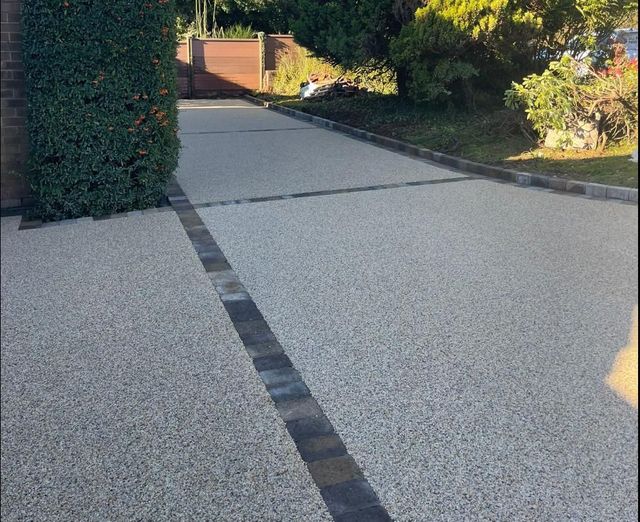
22. Modern Resin Driveway with Dark Brick Accent Strips
To make accent strips like this look intentional and high-end, precision is key. Use a full-sized brick paver for the strips, not a thin veneer. The bricks should be set flush with the final height of the resin surface, which requires careful planning of the sub-base height in those areas. The visual trick here is that the brick strips aren’t random; they are placed to create logical zones, almost like area rugs, defining the main path from potential parking spots. For maximum impact, choose a brick color that has a strong contrast with your chosen resin aggregate.
🔧 How-To Brief
Resin-bound driveways continue to trend upwards in 2026 for several key reasons. Homeowners are increasingly seeking materials that are both aesthetically clean and environmentally friendly. The smooth, seamless look fits perfectly with modern architecture, as shown here. Furthermore, its permeability is a huge selling point in areas with stormwater management regulations, as it helps reduce runoff. This combination of sleek, contemporary style, low maintenance, and eco-conscious functionality is exactly what today’s design-savvy and practical homeowner is looking for. Compare this to the more traditional paver look in Idea #5.
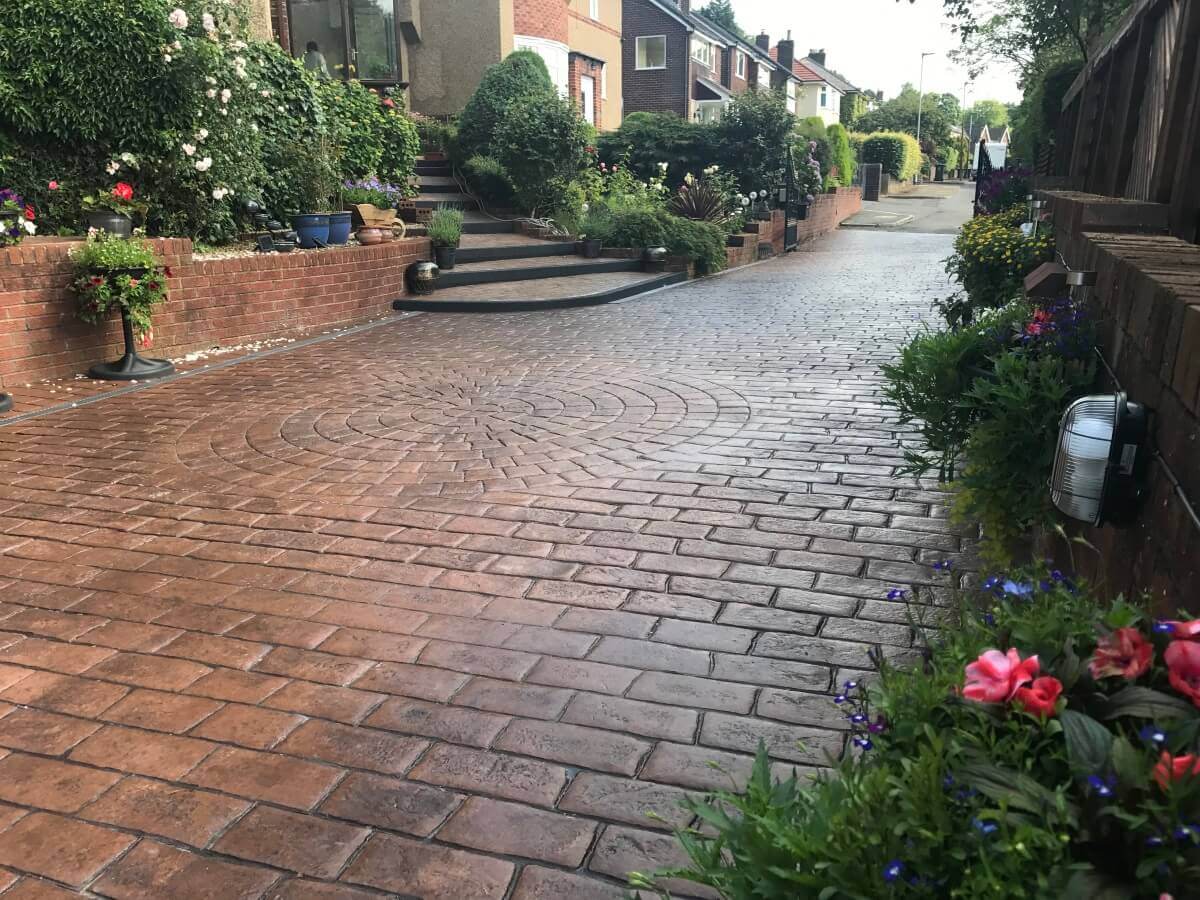
23. Reddish-Brown Stamped Concrete with Circular Inlay
True brick or paver driveways are beautiful but labor-intensive and costly. Stamped concrete is the champion of budget alternatives, delivering a similar look for significantly less. This driveway perfectly imitates a brick-and-cobblestone pattern at what was likely 30-50% off the price of the real thing. The process involves pouring a standard concrete slab, applying a color hardener, and then pressing large, flexible stamps into the wet concrete to create the pattern and texture. The circular medallion shows just how versatile stamping can be, allowing for custom designs that would be prohibitively expensive in real masonry.
🧹 Maintenance Reality
Stamped concrete looks fantastic when new, but it’s not without its issues. The biggest one is cracking. ALL concrete eventually cracks, and on a stamped pattern, a crack can be much more visually jarring than on a simple broom-finish surface. While control joints help guide the cracks, they don’t always work perfectly. Also, the sealer that gives it the glossy, rich color needs to be reapplied every 2-3 years. If you don’t, the color can fade from UV exposure, and the surface can become more susceptible to staining and freeze-thaw damage.
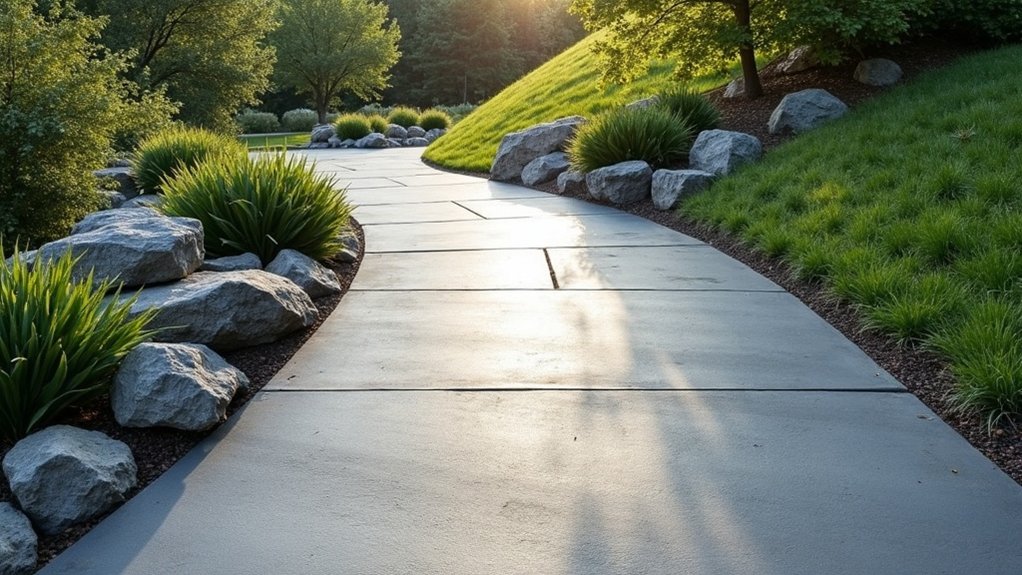
24. Curved Concrete Driveway with Natural Boulder Edging
This design is a masterclass in blending the modern with the natural. The driveway itself, with its clean lines and large, smooth concrete slabs, is distinctly contemporary. The gentle curve prevents it from feeling harsh or sterile. The magic happens at the edges. By using irregular, natural boulders and spiky, architectural plants instead of a tidy concrete curb or manicured hedge, the design creates a soft, organic transition between the man-made path and the natural slope of the landscape. It feels both controlled and wild at the same time.
💡 Designer Tip
The single element holding this entire aesthetic together is the use of natural boulders as an edge. Remove them, and you have a simple concrete path next to a planting bed—nothing special. The boulders are the crucial bridge between the straight lines of the concrete and the soft slope of the grassy hill. They provide texture, natural color variation, and a sense of permanence and weight that anchors the entire scene. They make the landscaping feel like an authentic piece of the environment rather than something simply placed on top of it.
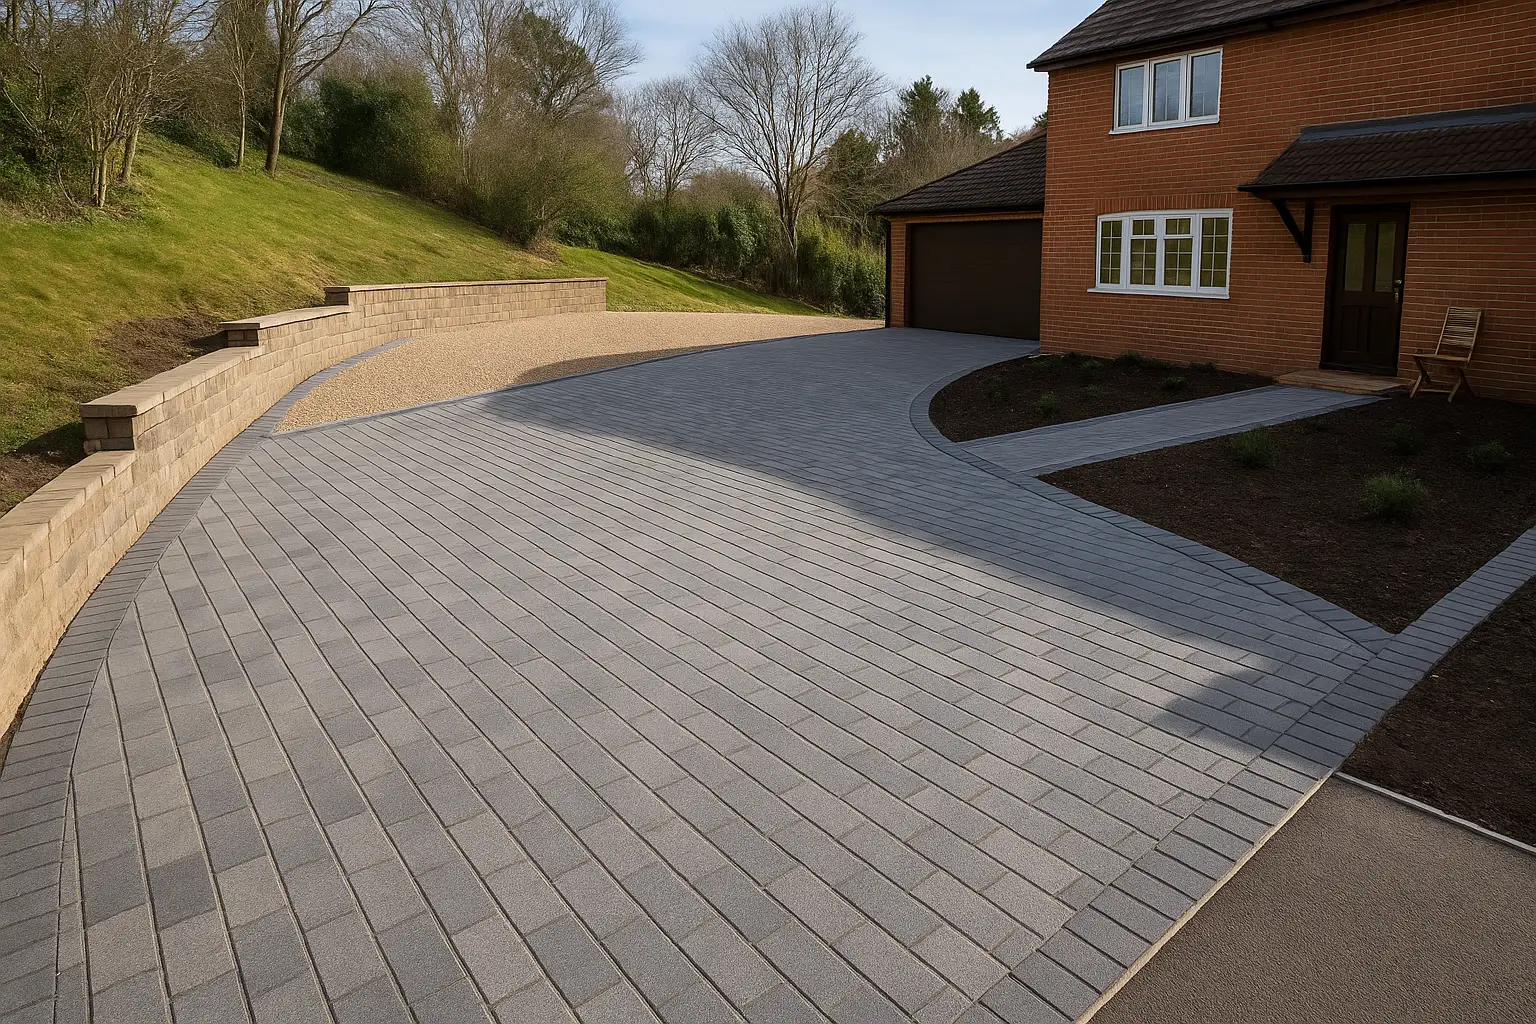
25. Grey Block Pavers and Gravel Path on a Sloped Lot
When you have a tricky slope, using different materials can help define different zones and functions. Here, the smooth pavers clearly mark the primary driveway leading to the garage. The gravel path, which is cheaper and conforms more easily to a steep grade, serves as a secondary path or overflow parking. Here are a few tips for making this combo work:
- Choose a unifying color: Notice how the light brown gravel picks up on some of the warmer tones in the grey paver mix. This color harmony is key.
- Create a clear border: A stacked stone wall, as seen here, or a metal edge is essential to keep the gravel from migrating onto the pavers.
- Consider texture: The combination of smooth pavers and crunchy gravel adds tactile interest, but make sure the gravel is a comfortable size to walk on if it’s also a pedestrian path.
⭐ The One Thing
Before you commit to a multi-material driveway, it’s wise to do a quick assessment. This approach solves problems, but it has to be the right solution for your specific needs.
- Map Your Traffic Flow: Where do cars *actually* need to go? Use pavers for the high-traffic routes to the garage and front door. Use gravel for less-frequented areas like guest parking or access to a side yard.
- Check Your Slope Grade: Gravel can wash out on very steep slopes (greater than 15-20%). Reserve it for more gently sloped or level areas, and use the more stable pavers for the steepest sections.
- Evaluate Your Maintenance Tolerance: The gravel area will require occasional raking and top-ups. The paver joints will need re-sanding. Be honest about how much upkeep you’re willing to do.
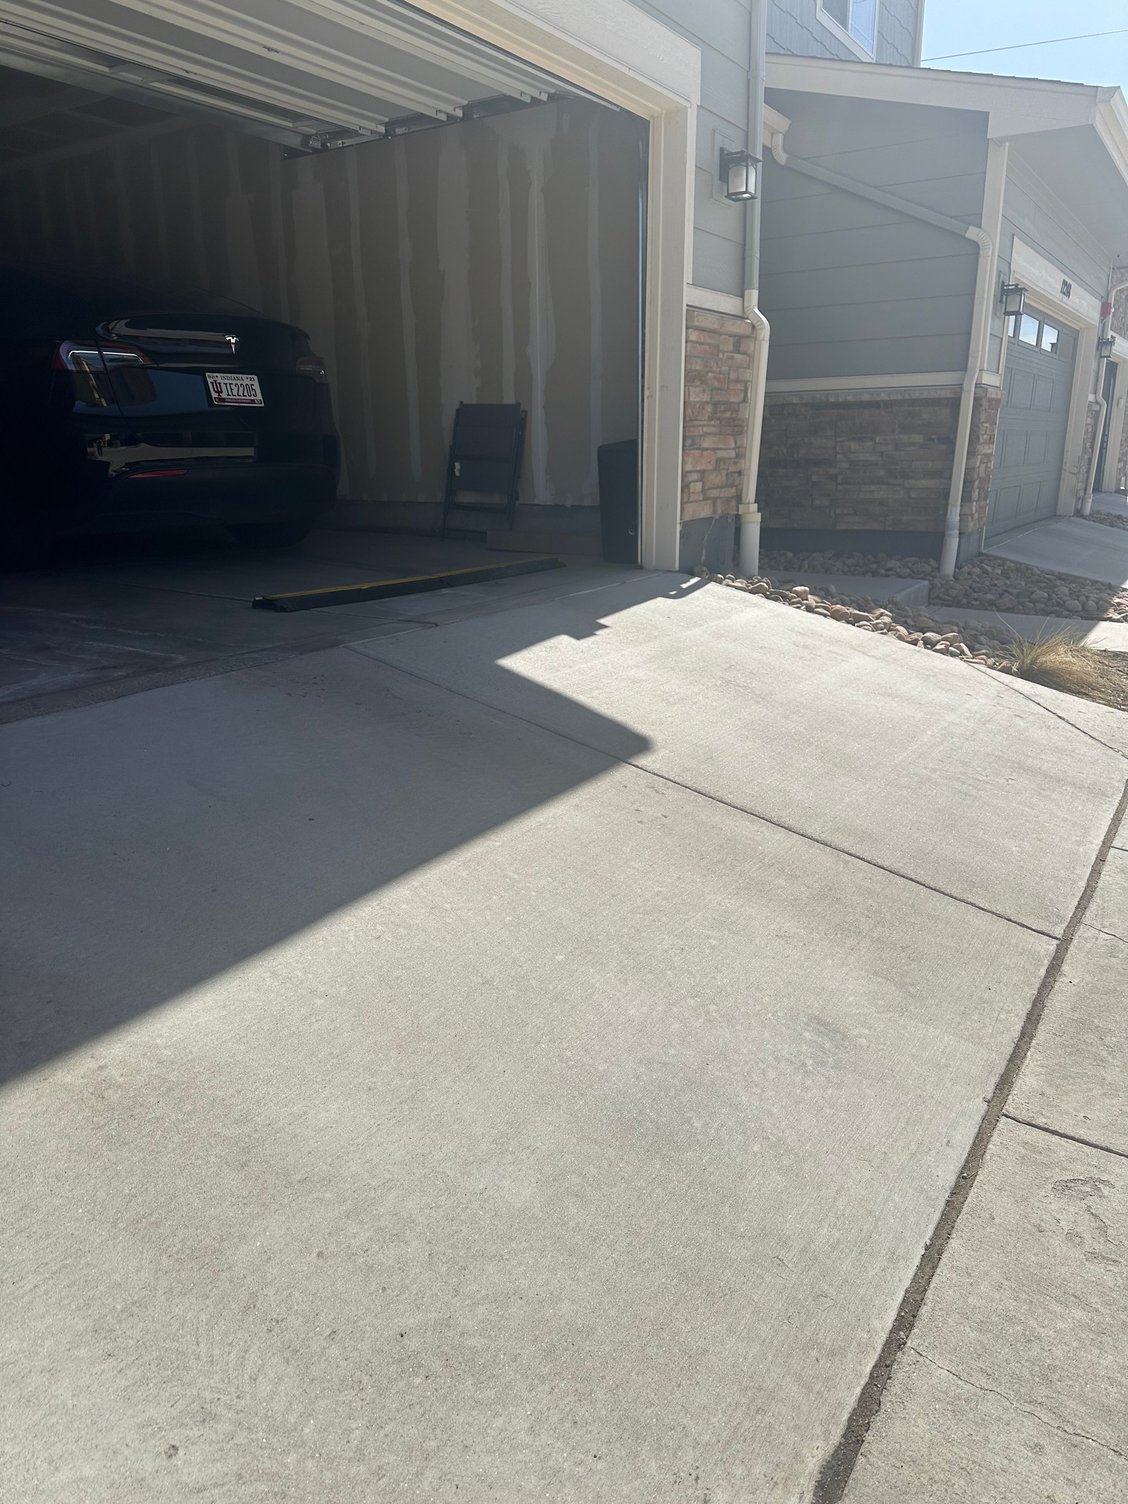
26. A Functional Concrete Driveway with a Slight Incline
This image is a great reality check. Sometimes, a driveway is just a driveway. There’s no fancy pattern, no expensive materials, no elaborate landscaping. It’s a simple, functional slab of concrete that gets you from the street to the garage. And that’s perfectly okay. Not every home improvement project needs to be a Pinterest-worthy spectacle. For many homeowners, durability, cost-effectiveness, and low maintenance are the most important factors. This driveway, with its gentle slope and standard broom finish, checks all those boxes. It does its job without fuss.
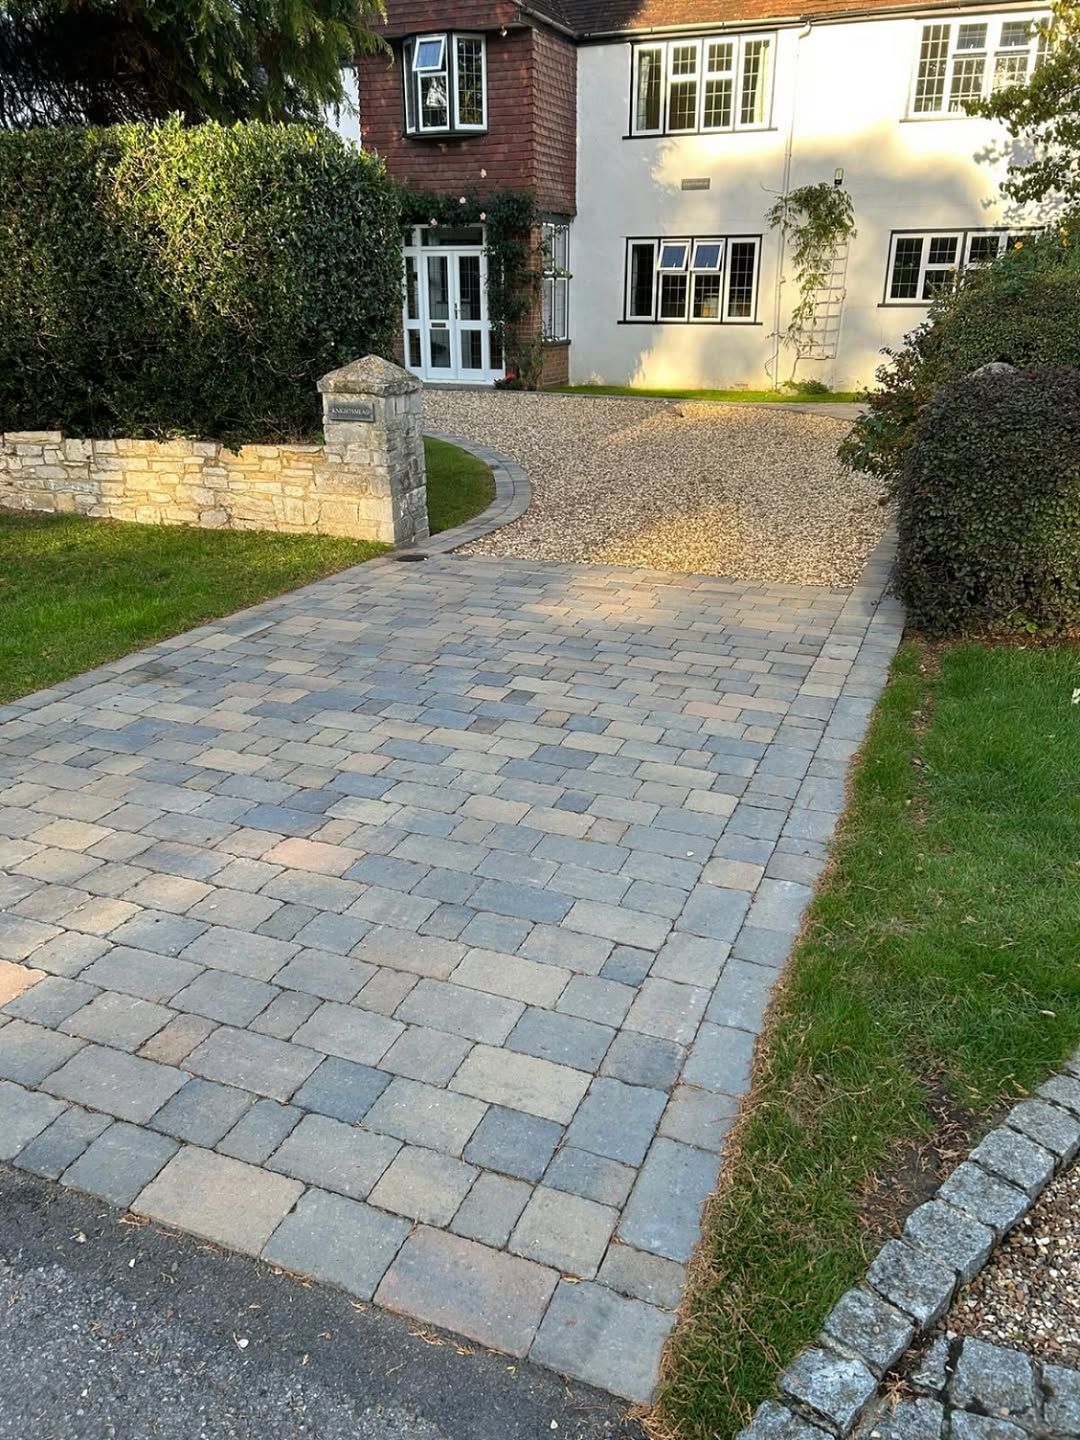
27. Mixed Material Driveway with Pavers and Crushed Stone
This design cleverly uses different materials to signal a transition, both visually and functionally. The interlocking pavers at the entrance create a more formal, finished
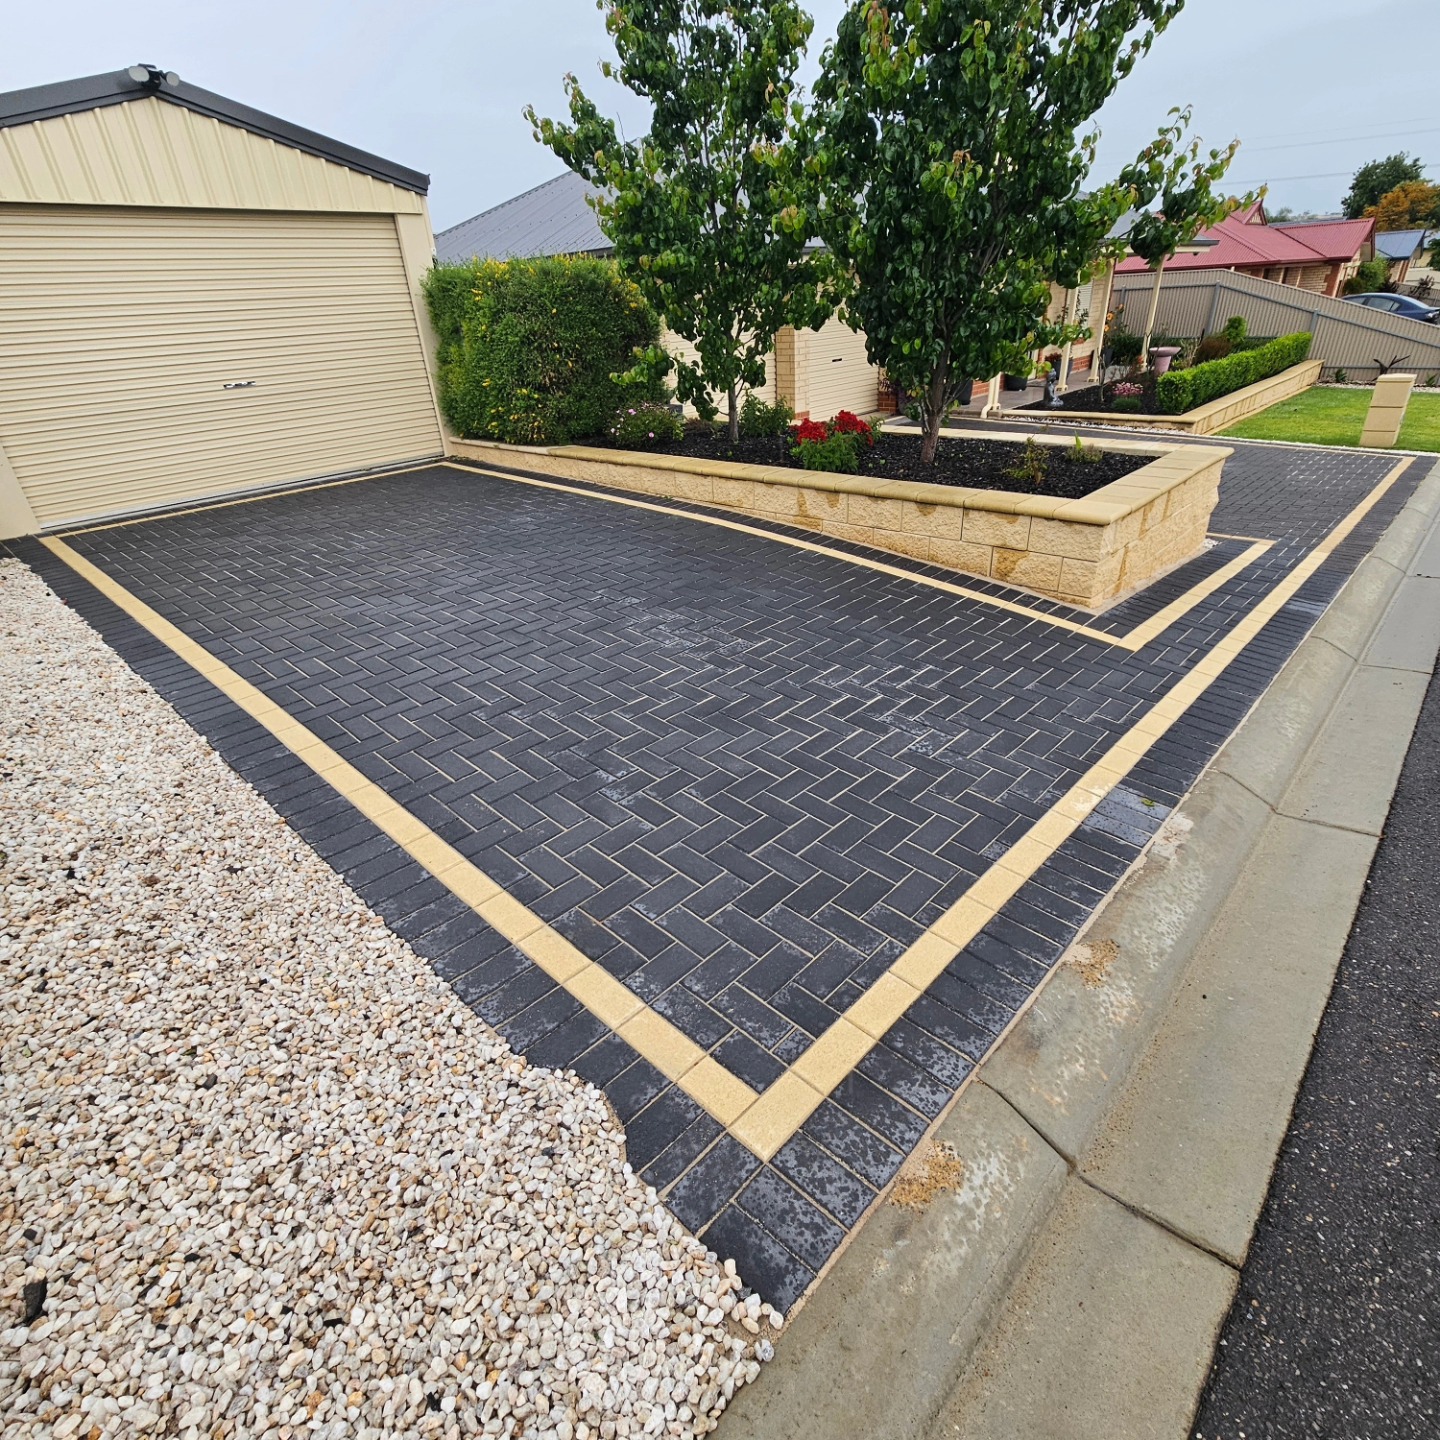
28. Dark Herringbone Pavers with a Bright Yellow Border
The single most impactful element here is the slim, light-yellow brick border. It’s a tiny fraction of the total surface area, but it does all the work of elevating the design from generic to custom. Without that bright, contrasting line, you’d just have a dark, functional driveway. With it, you have a statement. It proves that you don’t need a huge budget or a complex design to create a high-impact look. A single, thoughtful detail can be more powerful than a dozen complicated ones. It’s a lesson in the power of the accent. You see a similar concept in Idea #15, but this one feels more modern.
📏 Scale Guide
Adding a contrasting soldier course (a border of bricks laid side-by-side) is a great way to define your paver project. It’s a fairly simple step that adds a professional touch.
- Excavate the Border Trench: After your main paver area is excavated, dig a slightly deeper and wider trench for your border course.
- Set String Lines: Run tight mason’s lines to mark the exact height and alignment of your border. This is your guide to a perfectly straight edge.
- Lay the Border Pavers: Place your border bricks into the trench on a bed of sand, tapping them into place with a rubber mallet until they match your string line.
- Install Paver Edging: Secure plastic paver edging against the outside of the border bricks, spiking it into the base every 12 inches. This locks the border in place.
- Lay the Field Pavers: Now, lay the main herringbone pattern, cutting the edge pieces to fit snugly against your newly installed border.
Time estimate: Adds 3-5 hours to a standard paver project. Material cost: $4-$8 per linear foot.
29. Winding Paver Driveway with Lush, Multi-Color Landscaping
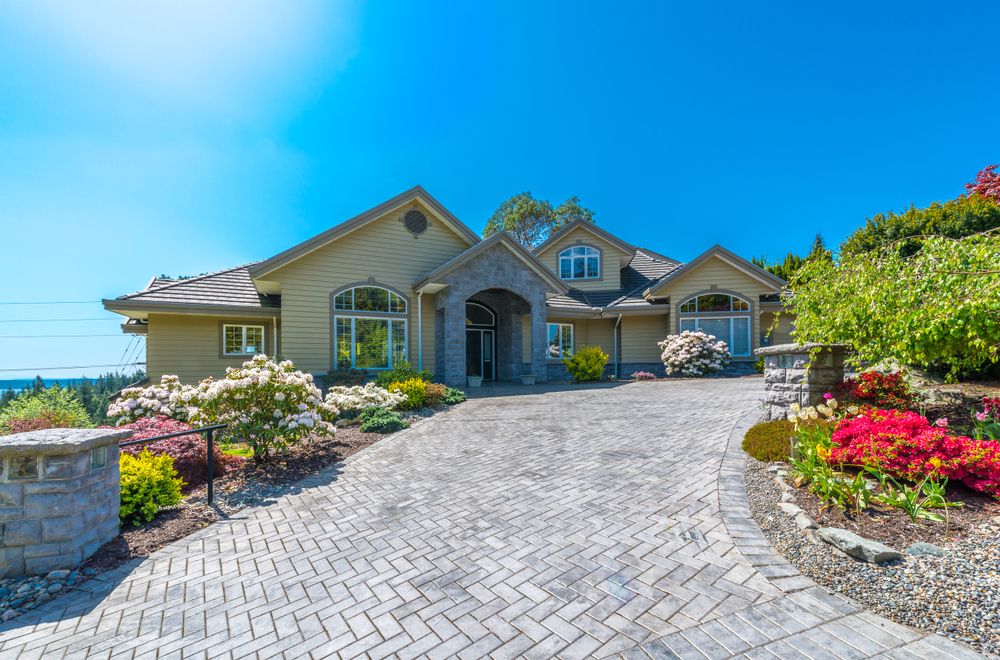
This grand approach works by balancing three key elements: the solid, man-made structure of the driveway; the soft, organic forms of the landscaping; and the impressive scale of the house. The winding herringbone pavers create a sense of formal elegance and movement. This is beautifully softened by the overflowing garden beds, where the pink and white flowers and varied green shrubs prevent the large home and wide driveway from feeling too imposing. The stone pillars act as a perfect transition point, echoing the stone facade of the house and anchoring the entrance to the landscape.
💰 Budget Breakdown
A design of this scale is best suited for a larger property, typically an acre or more, where the house is set back significantly from the road. The driveway’s width—likely 12-14 feet—and its sweeping curves require ample space to feel graceful rather than cramped. The landscaping beds themselves need to be deep, at least 8-10 feet, to accommodate the layered planting of shrubs and perennials that give it this lush, full look. This is not an idea for a narrow lot; it’s a statement piece that relies on having plenty of room to breathe.
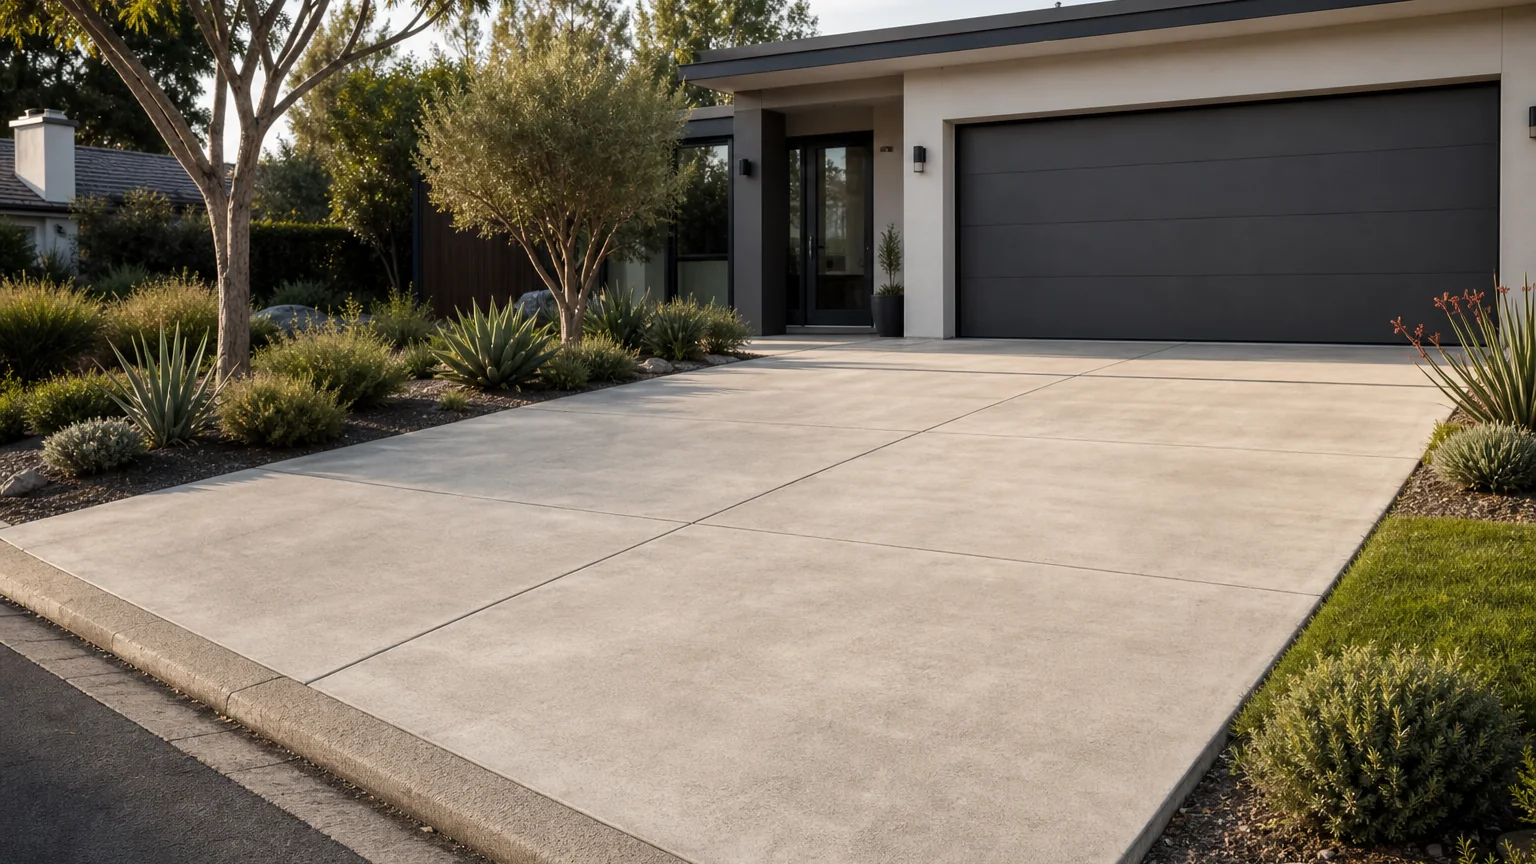
30. Modern Concrete Driveway with Xeriscaping
Xeriscaping—landscaping that requires little or no irrigation—is more than just a trend for 2026; it’s becoming a necessity in many parts of the country. As water conservation becomes more critical, homeowners are ditching thirsty lawns for smart, drought-tolerant plantings like the succulents and ornamental grasses seen here. This modern, clean look pairs perfectly with contemporary architecture. It’s a direct response to a cultural shift towards more sustainable and lower-maintenance living, proving that you can have beautiful curb appeal without a massive water bill.
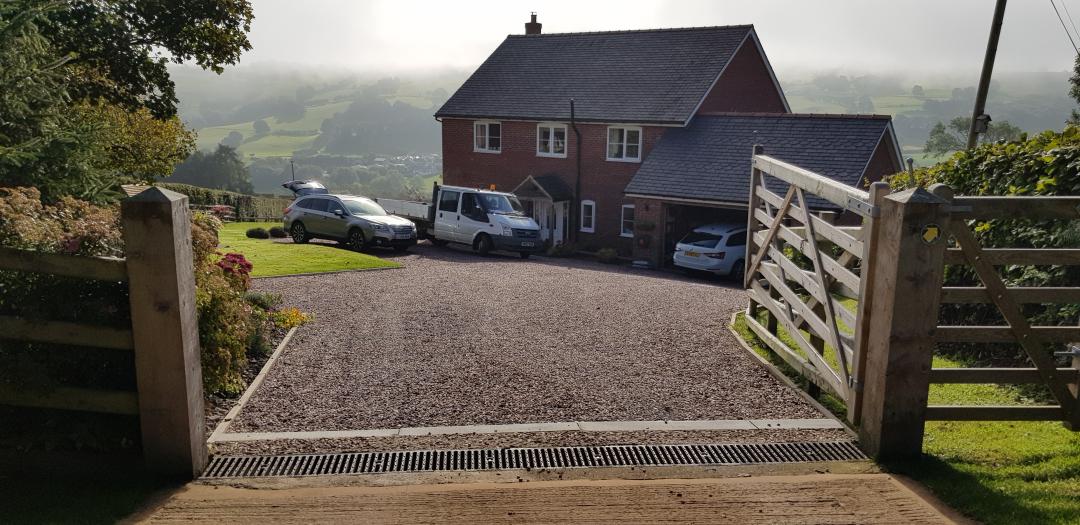
31. Rustic Gravel Driveway Leading to a Countryside Brick House
For a rural gravel driveway, proper drainage is more important than aesthetics. Notice the metal grate set into the gravel. That’s a channel drain intercepting water running down the slope. For a long driveway like this, you should also grade it with a slight
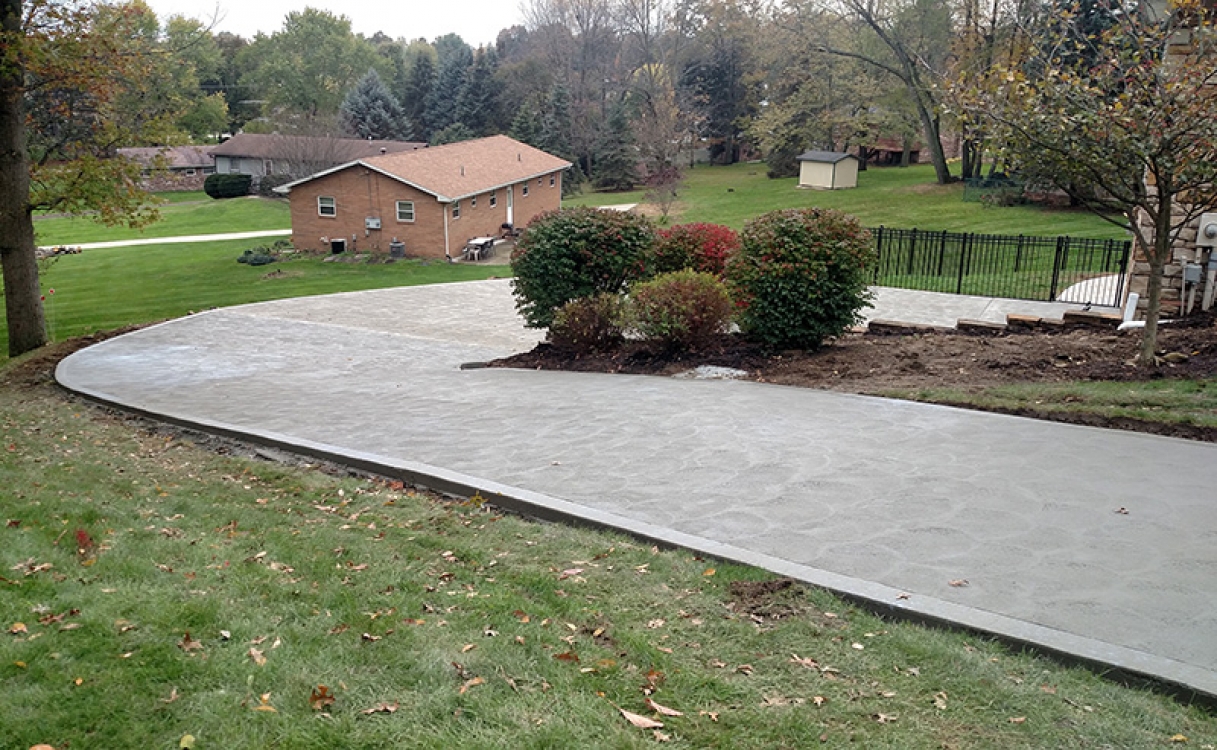
32. Modern Concrete Driveway with Textured Circular Patterns
That textured circular pattern isn’t a stamp; it’s created with a specialized finishing technique right after the concrete is poured. Here’s a simplified overview of how it’s done by professionals:
- Pour and Level: The concrete is poured and screeded level as usual.
- Wait for the Right Moment: The finisher waits until the bleed water has evaporated and the concrete can support the weight of a person on kneeboards.
- Use a Magnesium Float: The entire surface is first smoothed with a magnesium float to open up the pores of the concrete.
- Apply the Swirl Finish: Using a steel trowel or a specialized
Your Driveway’s Next Chapter
You’ve seen the possibilities, from simple gravel paths to elaborate paver masterpieces. The right driveway does more than just get you to the garage—it sets the entire tone for your home. It’s the first impression and the final welcome home, so making it both beautiful and functional is a true game-changer. Now it’s time to take that spark of inspiration and plan your own grand entrance.
Ready to start planning? Pin your favorite ideas from this article to your dream home board on Pinterest and let the transformation begin!