You know that feeling when you finally find the cheap DIY bathroom idea that looks exactly right for your space, only to realize you have no idea how to actually pull it off? We’ve all been there, endlessly scrolling Pinterest for inspiration. That’s why we did the hard work for you. After filtering through hundreds of options from affordable go-to’s like IKEA and Target to secondhand gems on Facebook Marketplace, we narrowed it down to the looks that truly deliver on style without destroying your wallet.
Inside, you’ll find 32 curated ideas covering our favorite styles: Modern Farmhouse, Rustic, sleek Minimalism, and timeless Classic looks. We break down what makes each one work and how you can recreate it in your own home. And stay until the end — we break down the most common mistakes that can ruin these looks. Pin this guide for later — your future self will thank you when it’s time to actually get started.
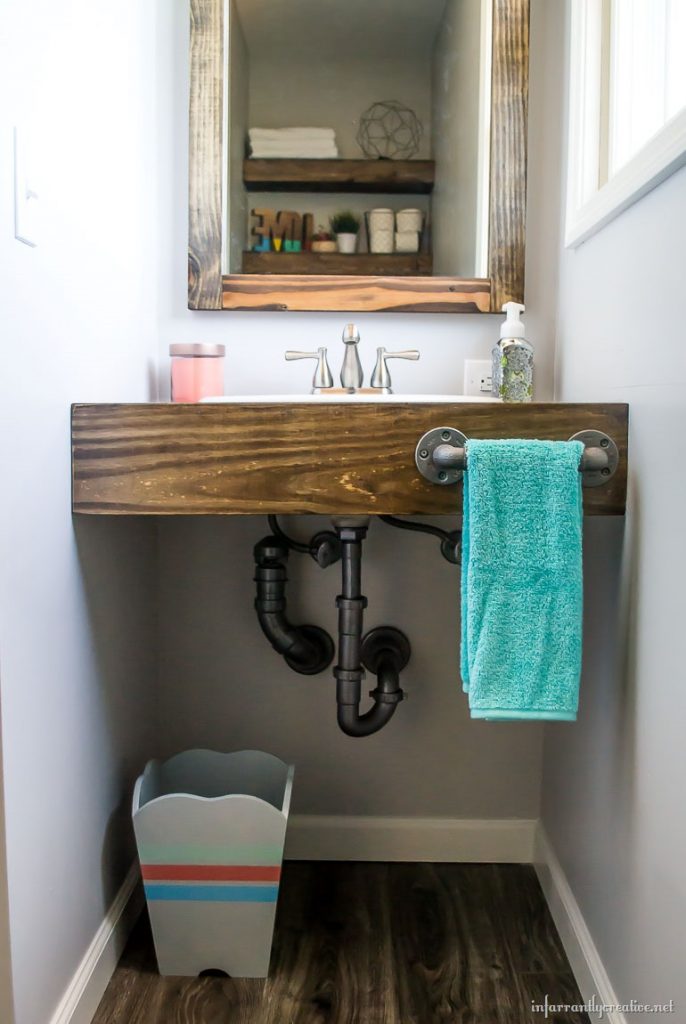
1. Build Your Own DIY Floating Wood Vanity
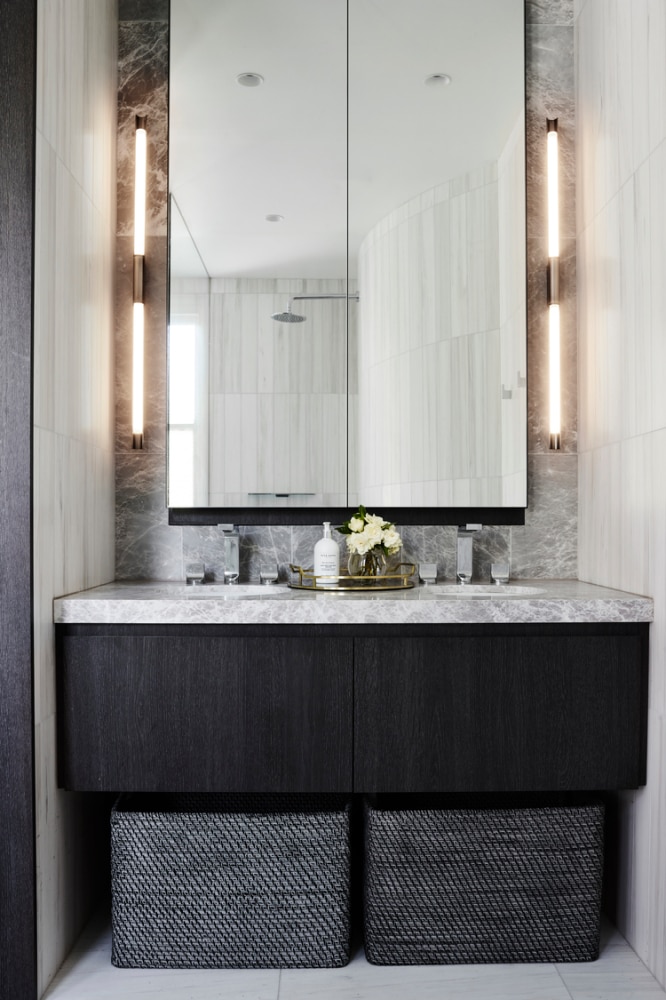
A floating wood vanity instantly makes a small bathroom feel larger by freeing up floor space. This project is surprisingly straightforward and gives you a fully custom look for a fraction of the cost of a store-bought piece. The warm wood tone brings a natural, organic element that can soften a room full of hard tile and porcelain surfaces, making it feel more spa-like and inviting.
⚠️ Real Talk
Creating a floating vanity is an intermediate-level DIY project that delivers major design impact. The key is ensuring it is securely anchored to your wall studs to support the weight of the counter, sink, and daily use. Choose a wood like oak or walnut and seal it properly with a marine-grade varnish to protect it from moisture and splashes. The result is a high-end, custom piece that looks anything but cheap.
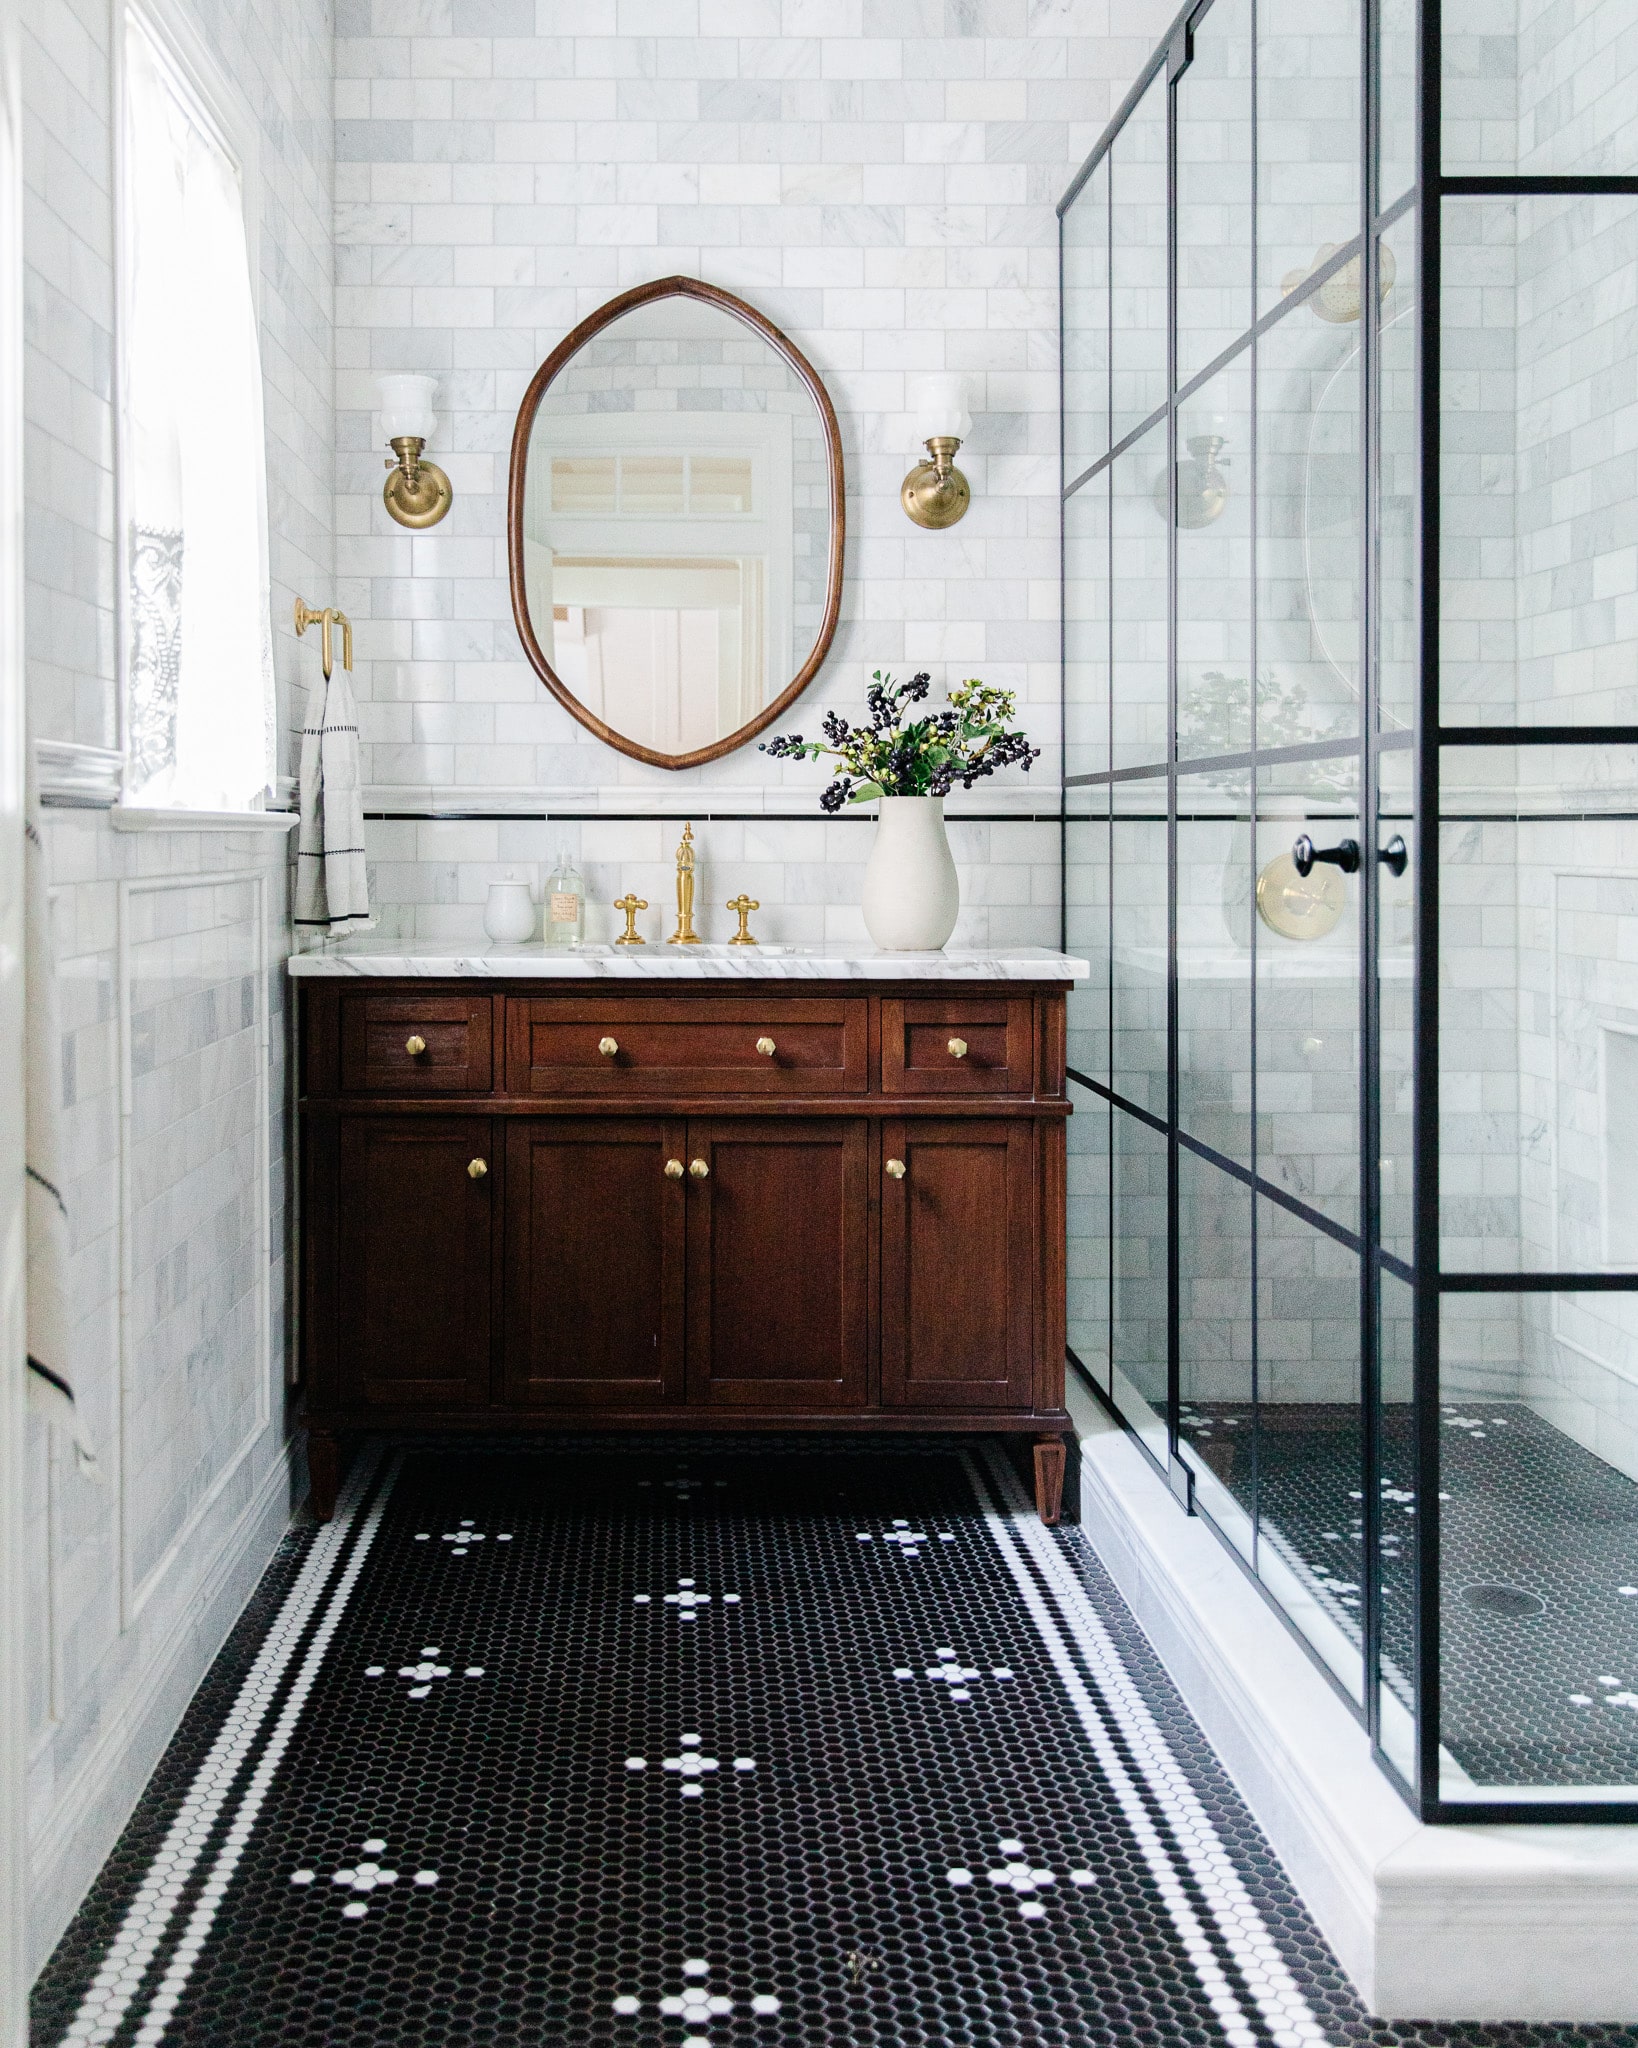
2. Create a Timeless Look with Marble, Wood, and Hexagon Tile
This bathroom nails the high-contrast classic look by balancing three key elements. The dark wood vanity provides a warm, grounding anchor in the room, keeping the white marble from feeling too cold or stark. The black and white hexagon floor tiles add a dose of graphic pattern and historic charm, while the gold fixtures tie everything together with a touch of warmth and luxury. It’s a study in texture and timeless materials.
🧹 Maintenance Reality
Marble is beautiful, but it requires some commitment. It’s a porous natural stone, meaning it can stain or etch if acidic products like certain cleaners or even citrus-based soaps are left on the surface. To keep it looking its best, seal the marble countertop and wall tiles annually and always wipe up spills immediately. For the floor, dark grout is your friend—it’s much more forgiving of dirt and grime than white grout would be.
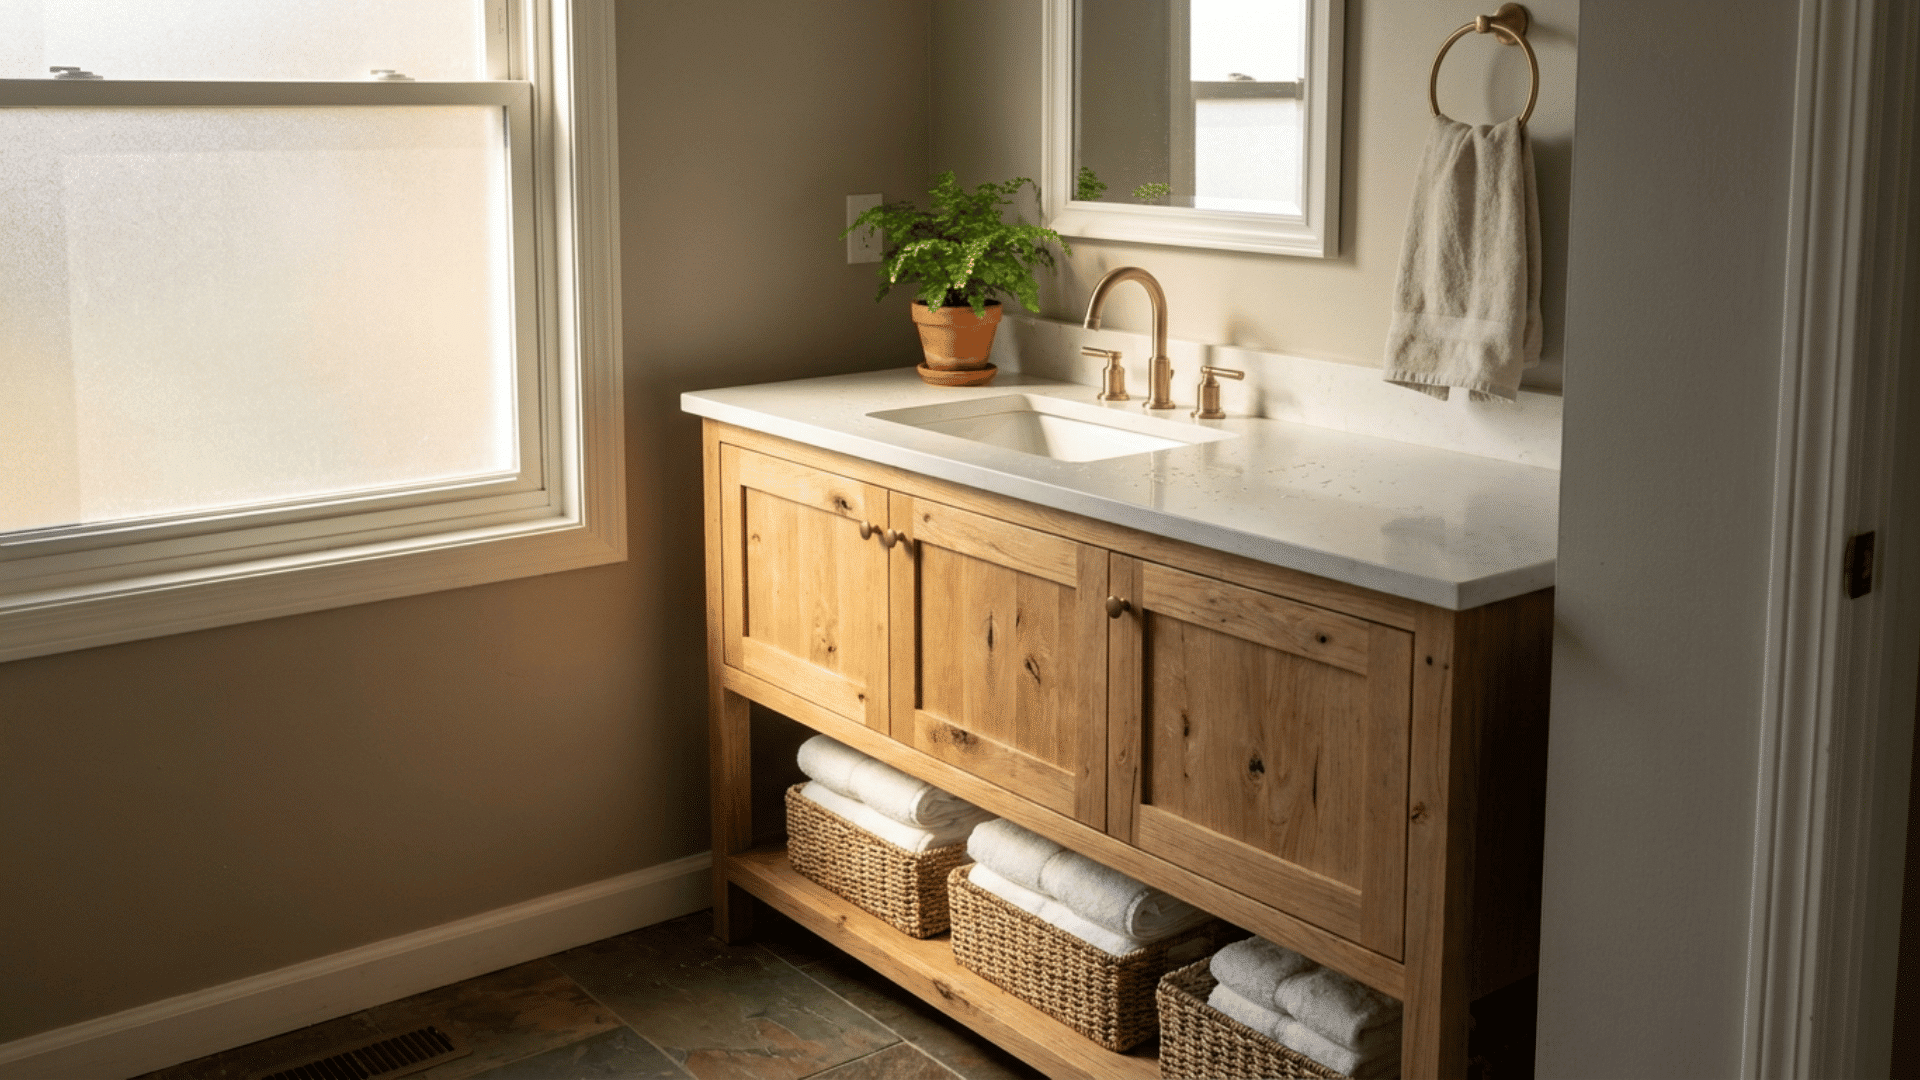
3. Warm Up a Neutral Bathroom with a Natural Wood Vanity
The single element that makes this bathroom sing is the natural wood vanity. Take it away, and you have a standard, neutral space. But with the vanity’s warm tones and visible grain, the room feels instantly more inviting, personal, and connected to nature. It proves that you don’t need a lot of color to create a lot of warmth. The choice to pair it with simple brass fixtures and woven baskets doubles down on that organic, tactile feeling.
✅ Before You Start
When using a wood vanity, the finish is everything. Don’t just use any polyurethane. For a bathroom environment, you need a marine-grade or spar urethane finish, which contains UV inhibitors and is formulated to resist moisture. Apply at least three coats, sanding lightly with 220-grit sandpaper between each coat (after it’s fully cured) for the smoothest, most durable, and water-resistant surface.
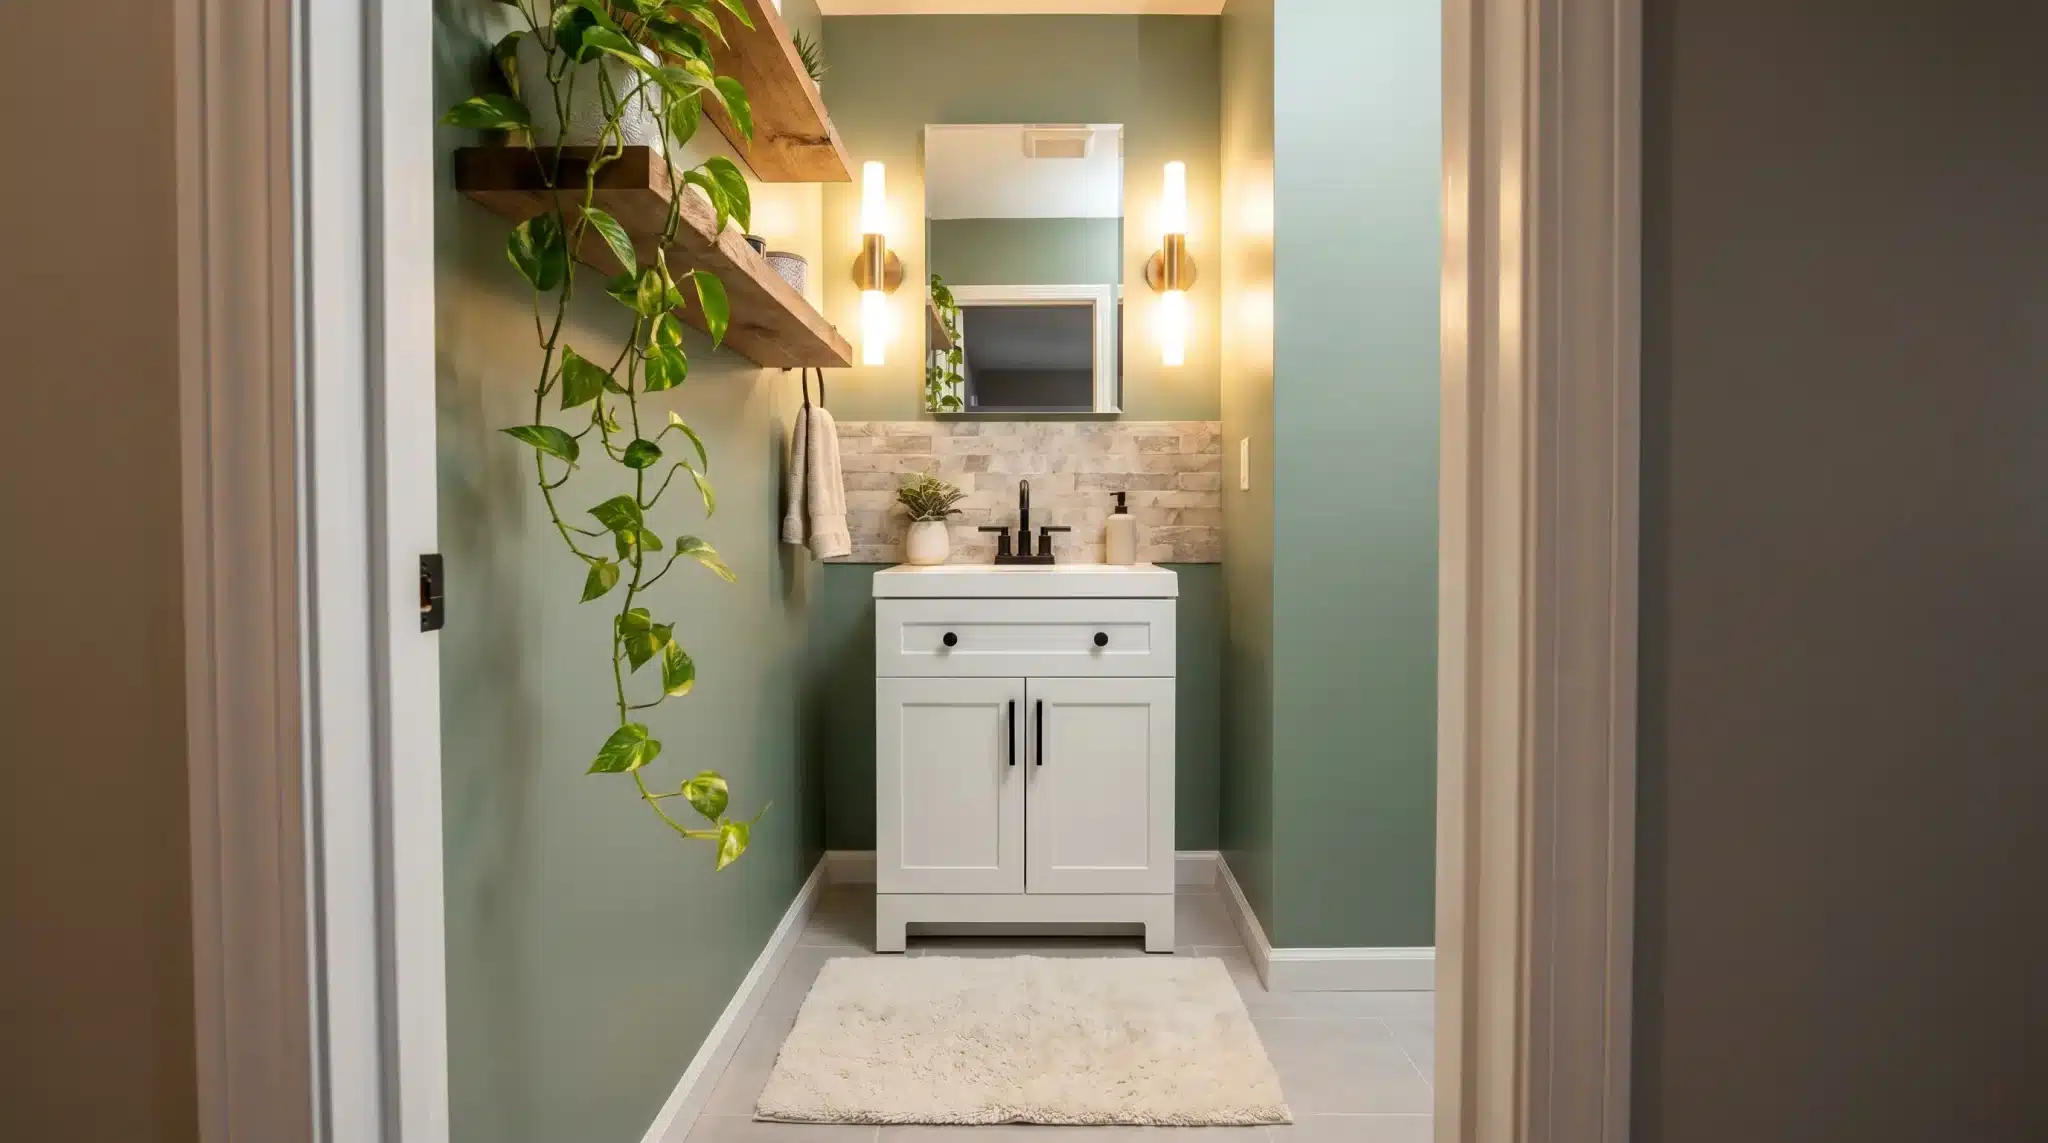
4. Layer Textures with Sage Green Walls and a Stacked Stone Accent
This look is a perfect equation for a nature-inspired bathroom: 60% soothing color (the sage green walls), 30% organic texture (the stacked stone and wood shelves), and 10% metallic warmth (the brass sconces). This formula feels balanced and calming. You could easily swap the sage green for a moody navy or a warm terracotta and the entire vibe would shift, but the underlying textural concept would still work beautifully.
🎯 What Makes It Work
A stacked stone accent wall behind a vanity looks incredible, but be honest with yourself about cleaning. All those little ledges and crevices are magnets for dust, hairspray residue, and makeup powder. It’s not a simple wipe-clean surface. You’ll need to commit to regular dusting with a soft brush attachment on your vacuum. It’s a fantastic look, but it’s not the lowest-maintenance option out there. A similar look with less upkeep would be a textured porcelain tile.
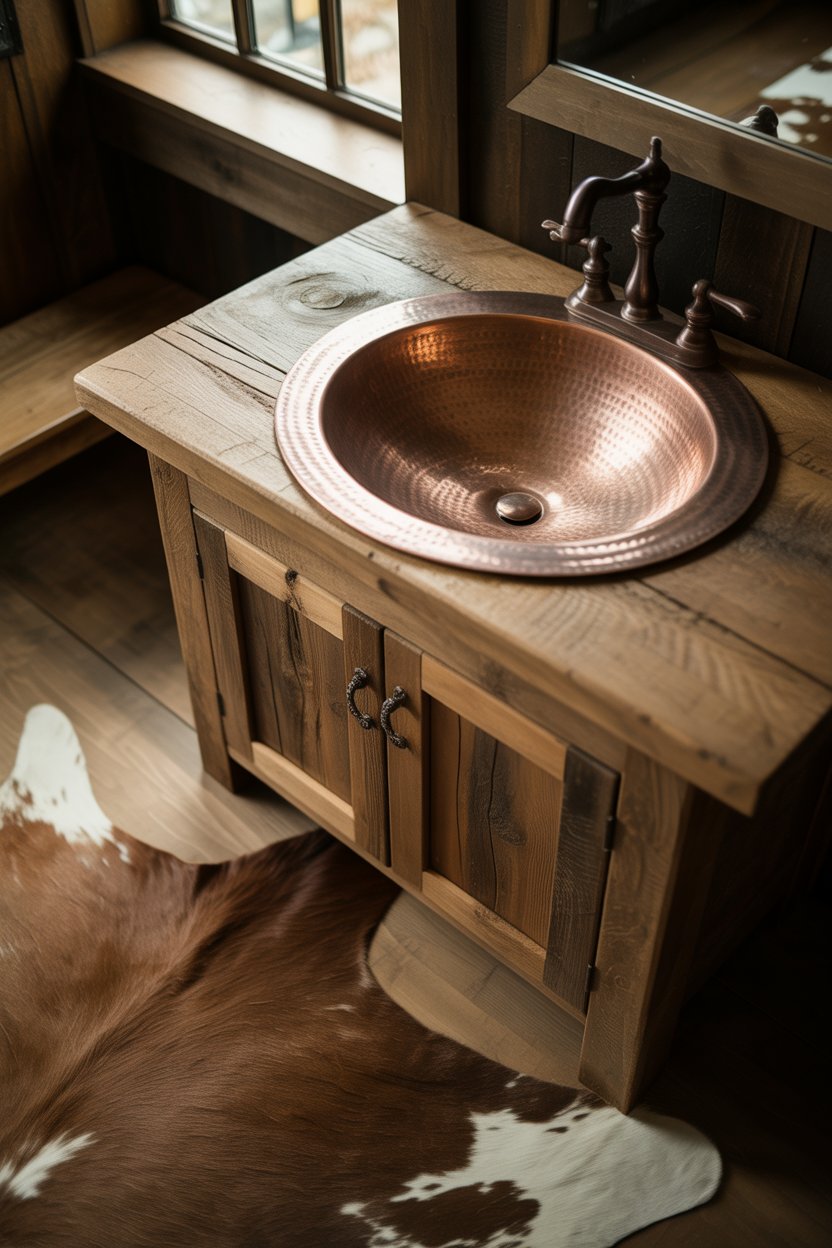
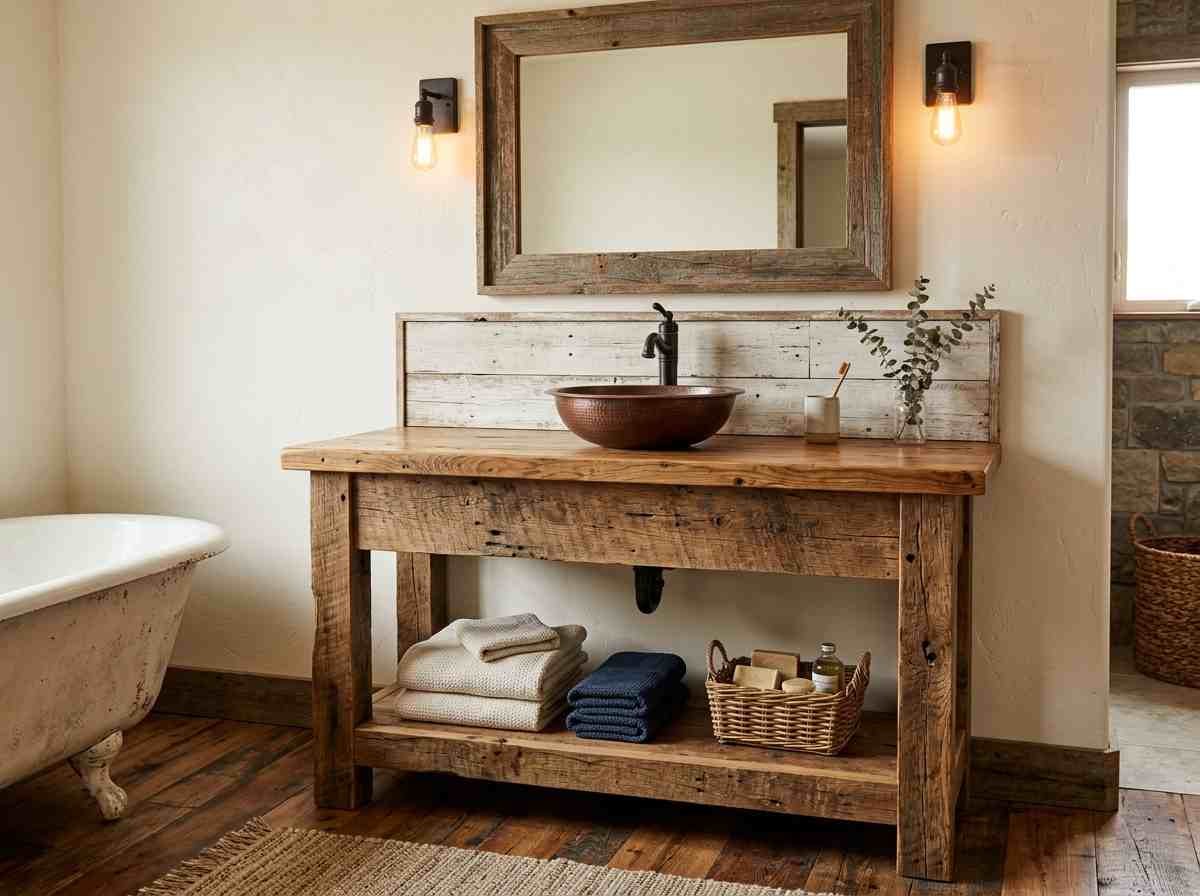
5. Combine a Rustic Wood Vanity and a Hammered Copper Sink
This look leans heavily into rustic, tactile materials that feel gathered over time. The combination of the weathered wood vanity, the hammered copper bowl sink, and the distressed wood paneling on the wall creates a layered, cozy atmosphere. The dark bronze of the faucet and the warm glow from the Edison bulb sconces reinforce the room’s industrial-meets-farmhouse charm. It’s a perfect example of how mixing materials adds depth and character.
💰 Budget Breakdown
Here’s a rough idea of what it costs to get this rustic look:
- Main Furniture: Rustic wood vanity ($400 – $900)
- Sink & Faucet: Copper vessel sink and bronze faucet ($300 – $600)
- Lighting: Wall sconces ($150 – $350 for two)
- Decor/Accessories: Wood-framed mirror ($100 – $250)
- Wall Treatment: Distressed wood panels ($5 – $15 per sq. ft.)
- TOTAL: $1,200 – $2,650
- Budget alternative: Find a used dresser on Facebook Marketplace ($50), use a wood distressing kit ($30), and find a budget-friendly sink/faucet combo online ($150). Total cost: around $500.
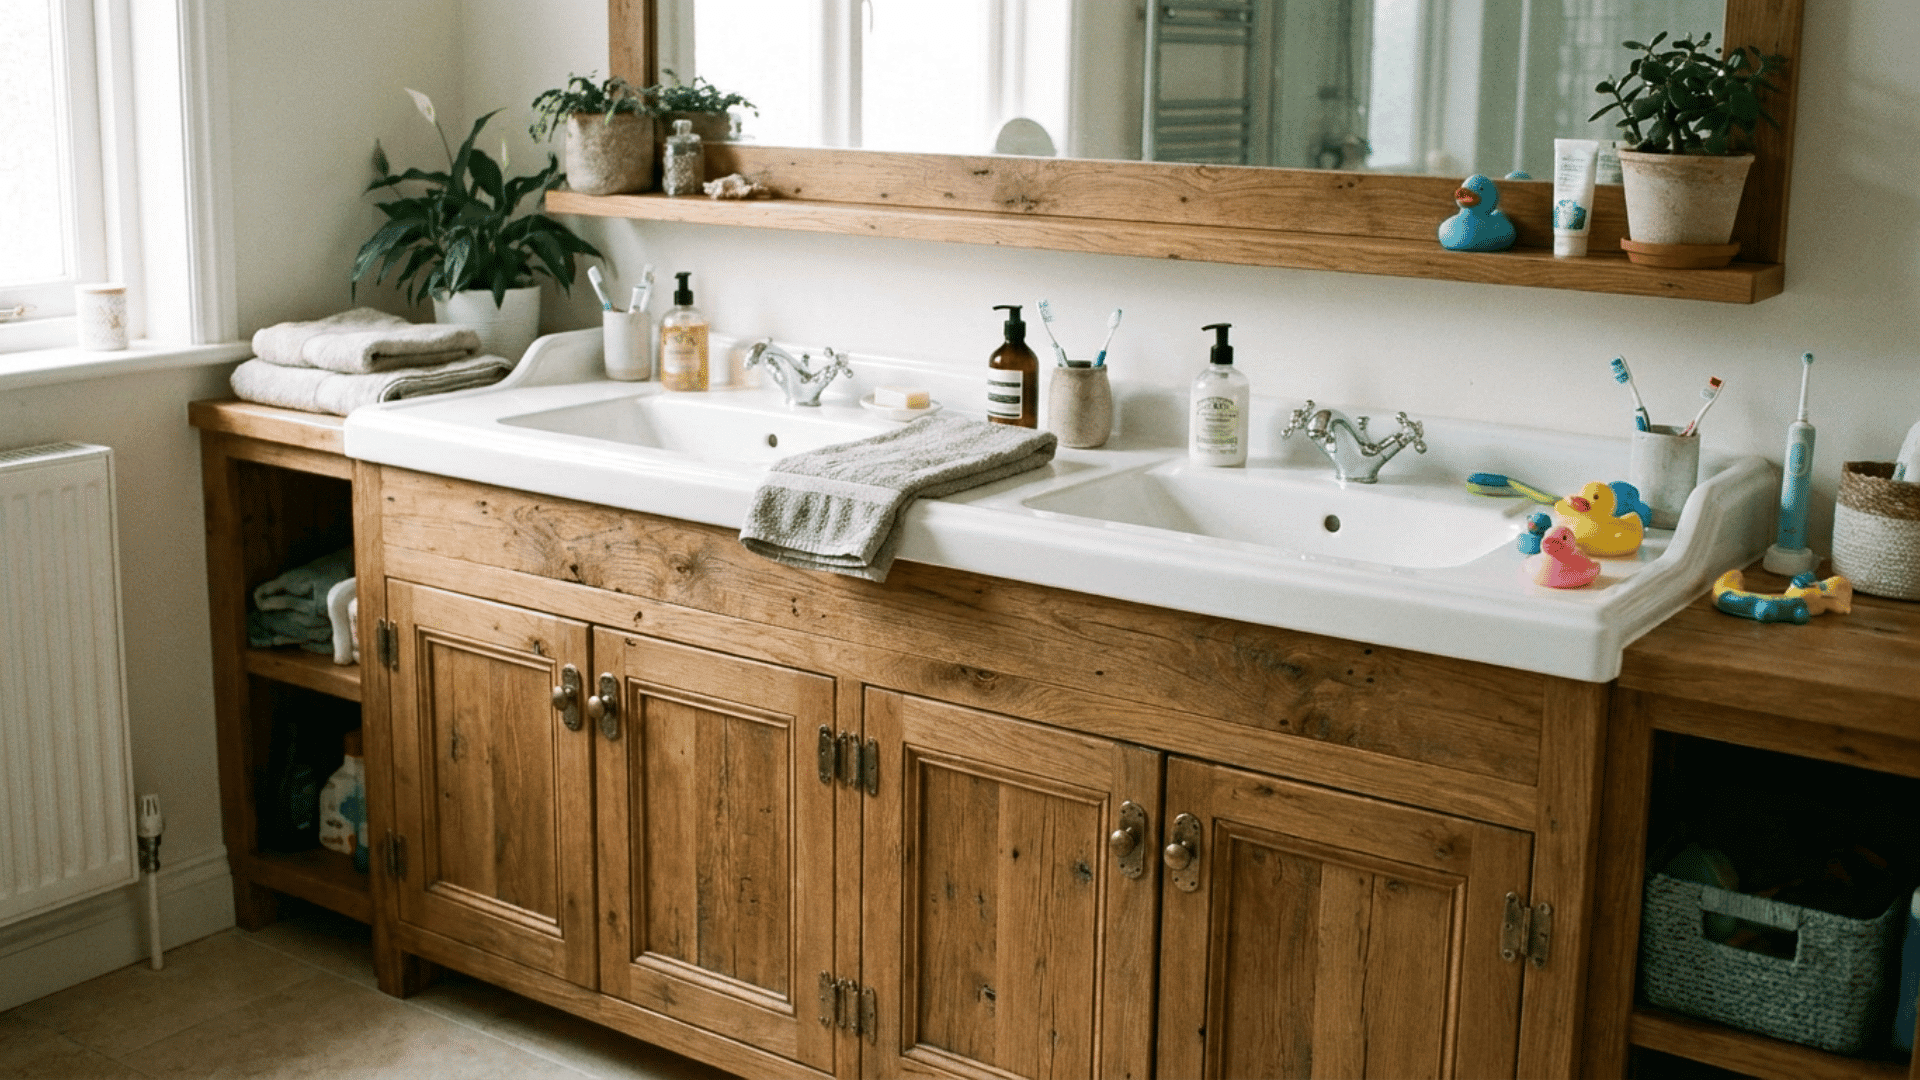
6. Design a Family-Friendly Space with a Rustic Double Vanity
The star of this bathroom is undeniably the large, rustic wooden double vanity. It’s not just a piece of furniture; it’s the heart of the room, providing ample space for a busy family and infusing the entire bathroom with a warm, lived-in character. The sheer scale of it, combined with the matching wood-framed mirror, makes a powerful statement. The little rubber ducks are a charming reminder that this beautiful space is also built for real life.
💸 Get This Look For Less
A large double vanity like this one needs adequate space to breathe. This idea works best in bathrooms that are at least 10 feet wide to allow for comfortable clearance around the vanity and for two people to use it at once. A minimum of 6-7 feet of uninterrupted wall space is necessary to house the vanity itself. For smaller bathrooms, consider the single vanity version seen in Idea #2 to get a similar feel without overwhelming the room.
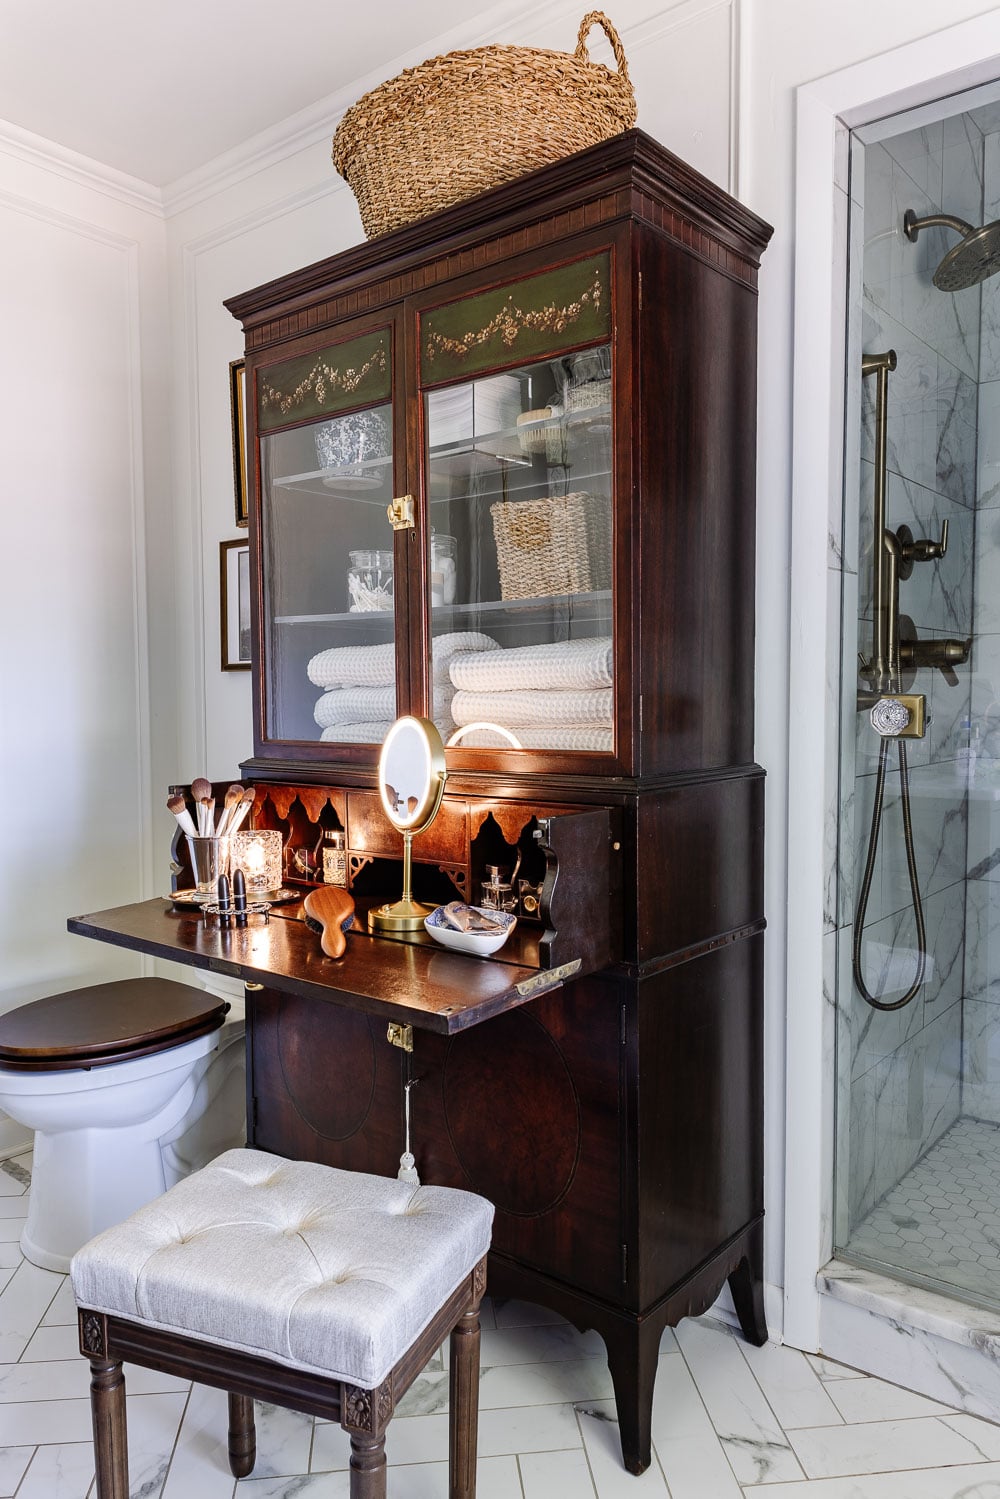
7. Repurpose an Antique Secretary Desk as a Bathroom Vanity
There’s a huge trend on Pinterest and TikTok right now around ‘unfitted’ kitchens and bathrooms—moving away from built-in cabinetry towards freestanding furniture. This antique secretary desk-turned-vanity is a perfect example. It brings a sense of history, character, and uniqueness that you just can’t get from an off-the-shelf cabinet. People are craving homes that feel collected and personal, and repurposing furniture is the ultimate way to achieve that.
📐 Style Math
While a repurposed desk offers tons of charm, it also presents plumbing challenges. Standard vanities are designed with open space for pipes. A desk will require careful cutouts in the back, and possibly reinforcement of the top surface to support a sink. You might also lose a drawer or two to make room for the P-trap. You absolutely must seal the wood top with a marine-grade varnish, or water damage is practically guaranteed. This is a higher-effort DIY, but the payoff is huge.
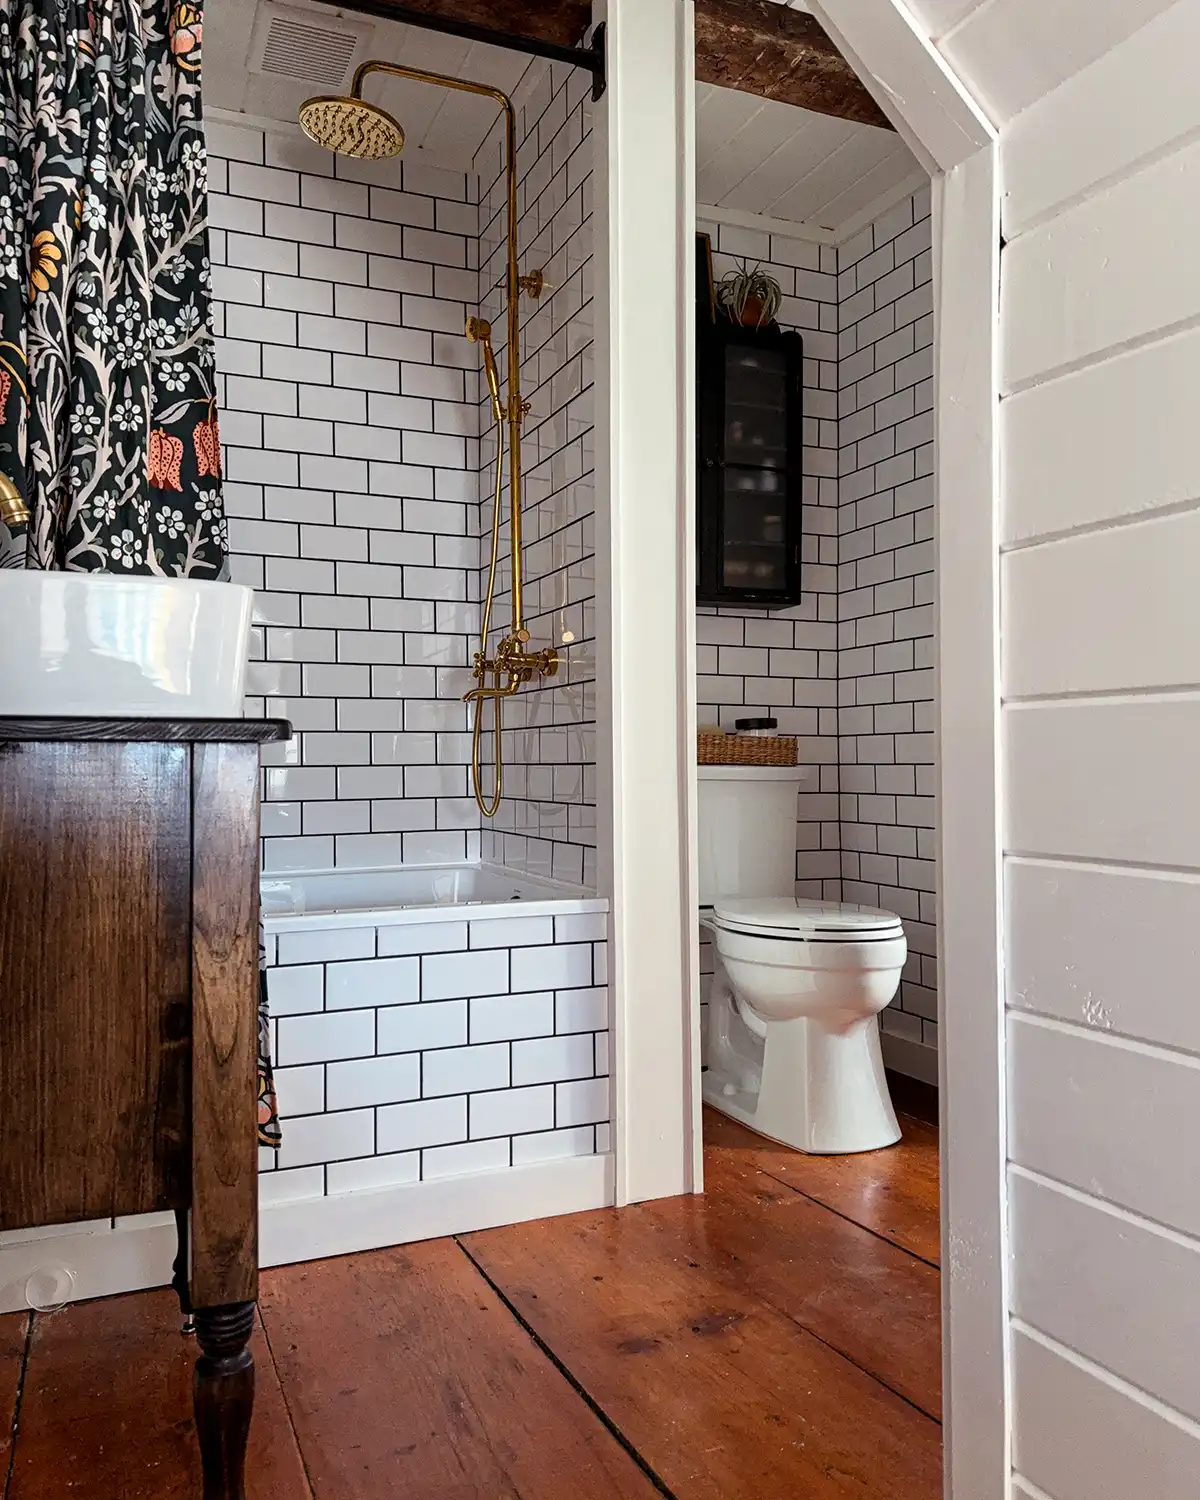
8. Embrace Contrast in a Compact Space with Subway Tile and Dark Grout
This small bathroom feels stylish and intentional because of the smart use of contrast. The dark grout makes the classic white subway tile pop, turning a simple material into a graphic statement. The warm, reddish-brown wood floor prevents the black and white from feeling cold, and the pop of gold from the shower fixture adds a necessary touch of elegance and warmth. It’s a masterclass in making budget-friendly materials look high-end. For a different take on a small bathroom, compare this to the setup in Idea #27.
💡 Designer Tip
You don’t need a huge budget to get this classic look. White subway tile is one of the most affordable tiles on the market (often under $3/sq. ft.). Pair it with a dark gray or black grout for that high-contrast punch. Find a shower curtain with a bold pattern from Target or IKEA for around $25. For the flooring, luxury vinyl plank (LVP) in a warm wood tone gives you the look and durability for a fraction of the cost of real hardwood.
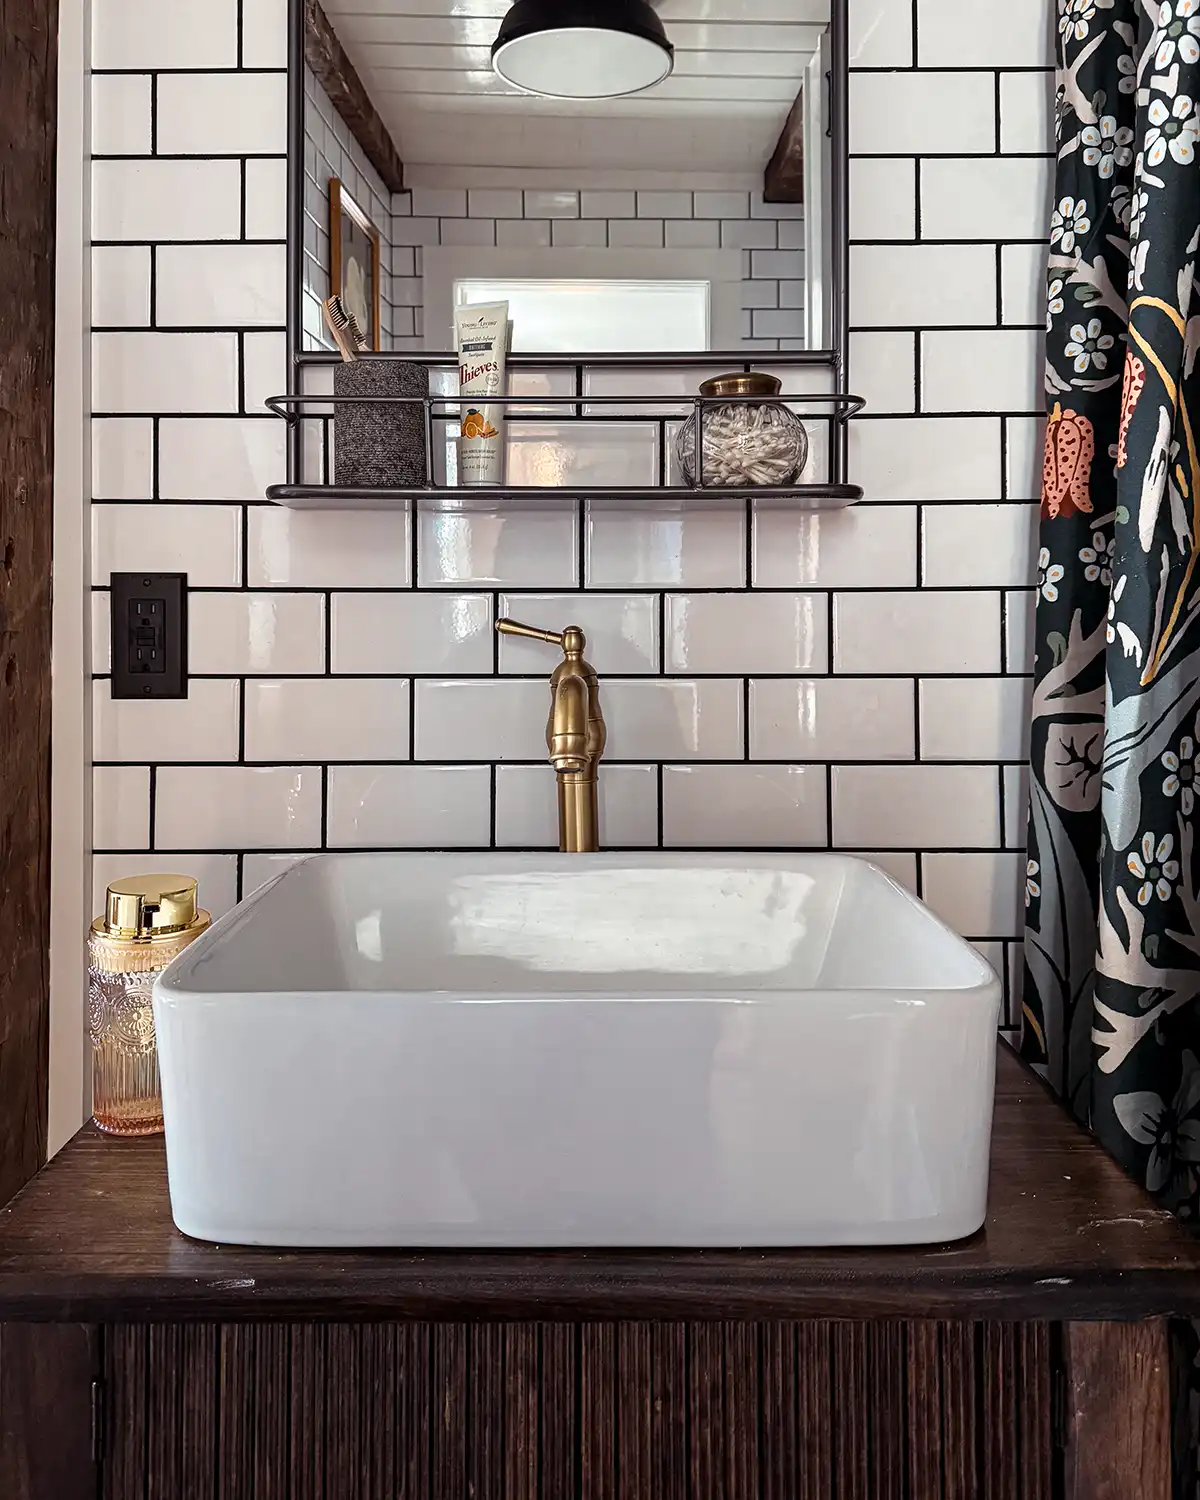
9. Pair Subway Tile with a Vessel Sink and Brass Faucet
When using a vessel sink, the faucet height is critical. For a comfortable hand-washing experience, the end of the faucet spout should be positioned at least 5-6 inches above the sink rim. This prevents water from splashing everywhere and gives you enough room to get your hands underneath. Always check the specs of both your sink and your faucet before your plumber drills any holes in your countertop. A wall-mounted faucet, like the one here, is a great option for a clean, custom look.
🔥 Trending Context
The single thing that elevates this entire design is the brass faucet. The subway tile, dark grout, and wood countertop are all fantastic rustic elements, but they are fairly common. The gleaming, warm brass of the faucet acts as a piece of jewelry for the room. It catches the light and provides a focal point of warmth and sophistication, perfectly contrasting with the more industrial and rustic textures surrounding it. It just goes to show how much impact well-chosen fixtures can have. Compare this to the similar material palette but different vibe in Idea #10.
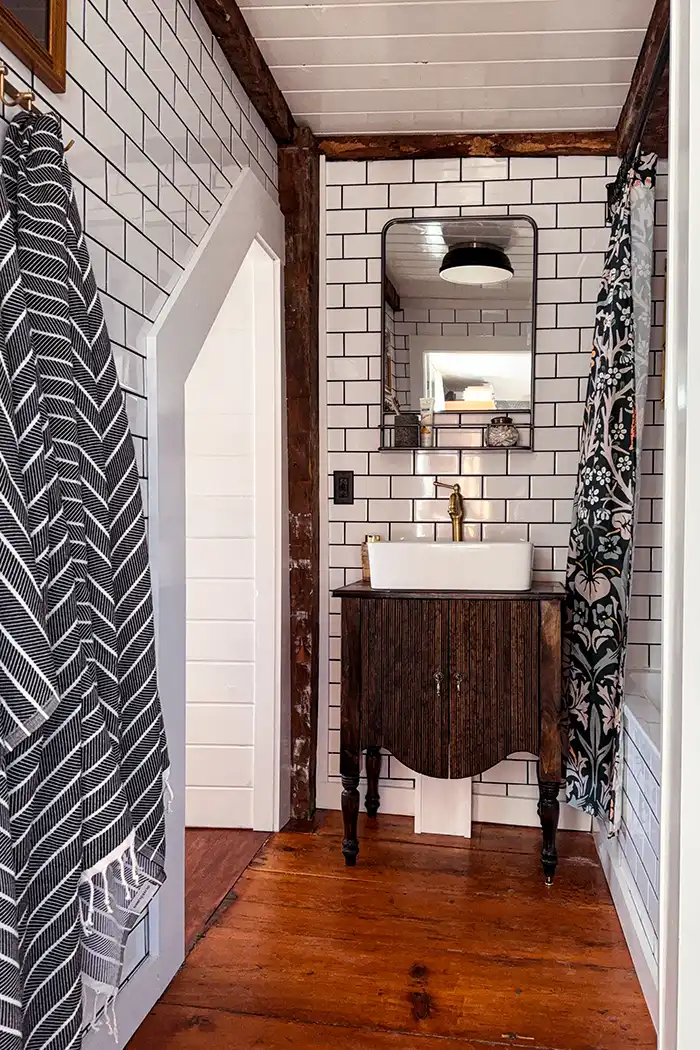
10. Achieve Rustic Charm with Subway Tile and Exposed Wood Beams
What makes this bathroom so cozy is the masterful blending of textures. The smooth, glossy white subway tiles provide a clean, practical backdrop that reflects light. This is contrasted beautifully by the rough, dark-hewn texture of the exposed wooden beams and the repurposed vanity. The warm wood tones of the floorboards tie it all together, creating a space that feels both rustic and clean, historic and modern. The gold faucet and black mirror act as perfect accent pieces in this rich textural tapestry.
🔧 How-To Brief
Exposed wood beams add incredible character, but they can be dust collectors, especially in a bathroom where moisture can make dust stick. Plan to dust them once a month with a long-handled duster or a vacuum extension. Also, ensure the wood is properly sealed, especially in a damp environment, to prevent it from absorbing moisture, which could lead to mold or warping over time. If your bathroom doesn’t have good ventilation, this might not be the best feature for you.
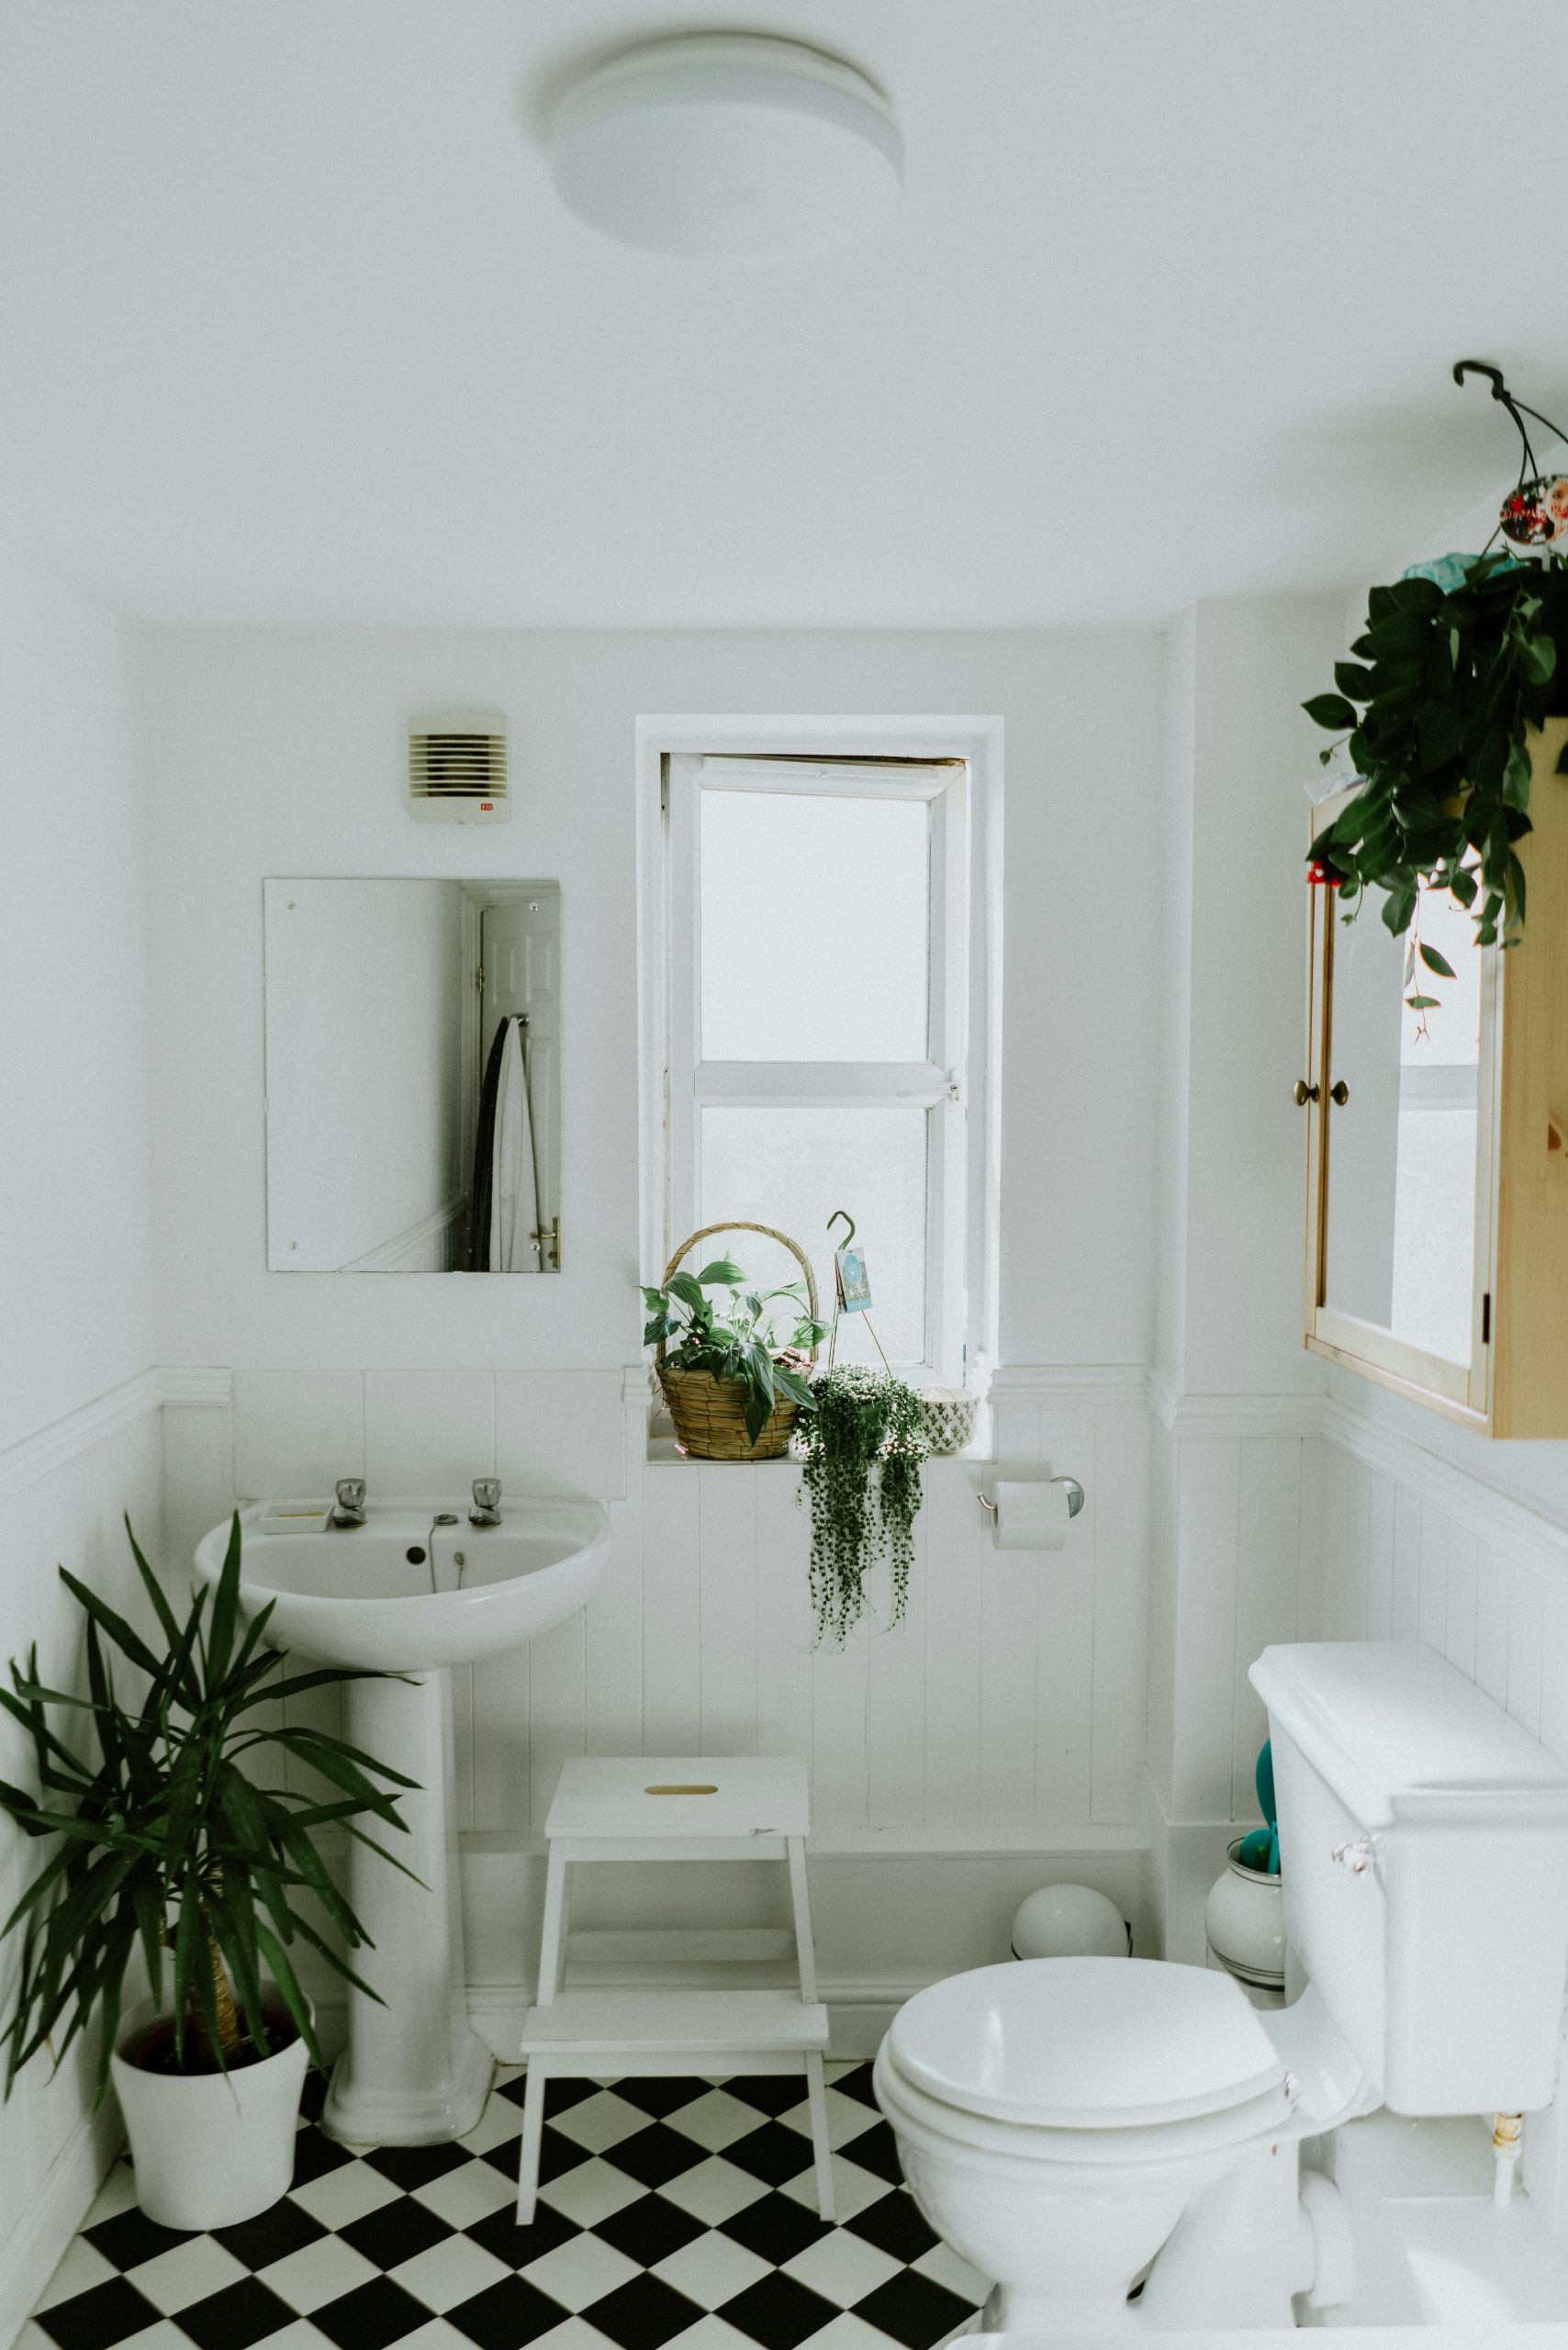
11. Go Classic with a Chessboard Floor and Pedestal Sink
This is a look you can achieve on a shoestring budget. Black and white peel-and-stick vinyl tiles are incredibly affordable (often under $1.50 per square foot) and can be laid right over many existing floors in a single afternoon. A classic pedestal sink creates a sense of space in a small bathroom and can often be found for under $150. Add some thrifted pots and inexpensive plants from a hardware store, and you have a completely transformed bathroom for less than $300.
📏 Scale Guide
A black and white checkerboard floor is timeless and beautiful, but it is brutally honest. Every single dark hair, piece of lint, or speck of dust will show up on the white tiles, and every light-colored crumb or bit of fuzz will stand out on the black tiles. This floor will look amazing for about 10 minutes after you clean it. If you’re a person who needs a perpetually spotless-looking floor with minimal effort, this might not be the pattern for you. See how it’s styled differently in Idea #28.
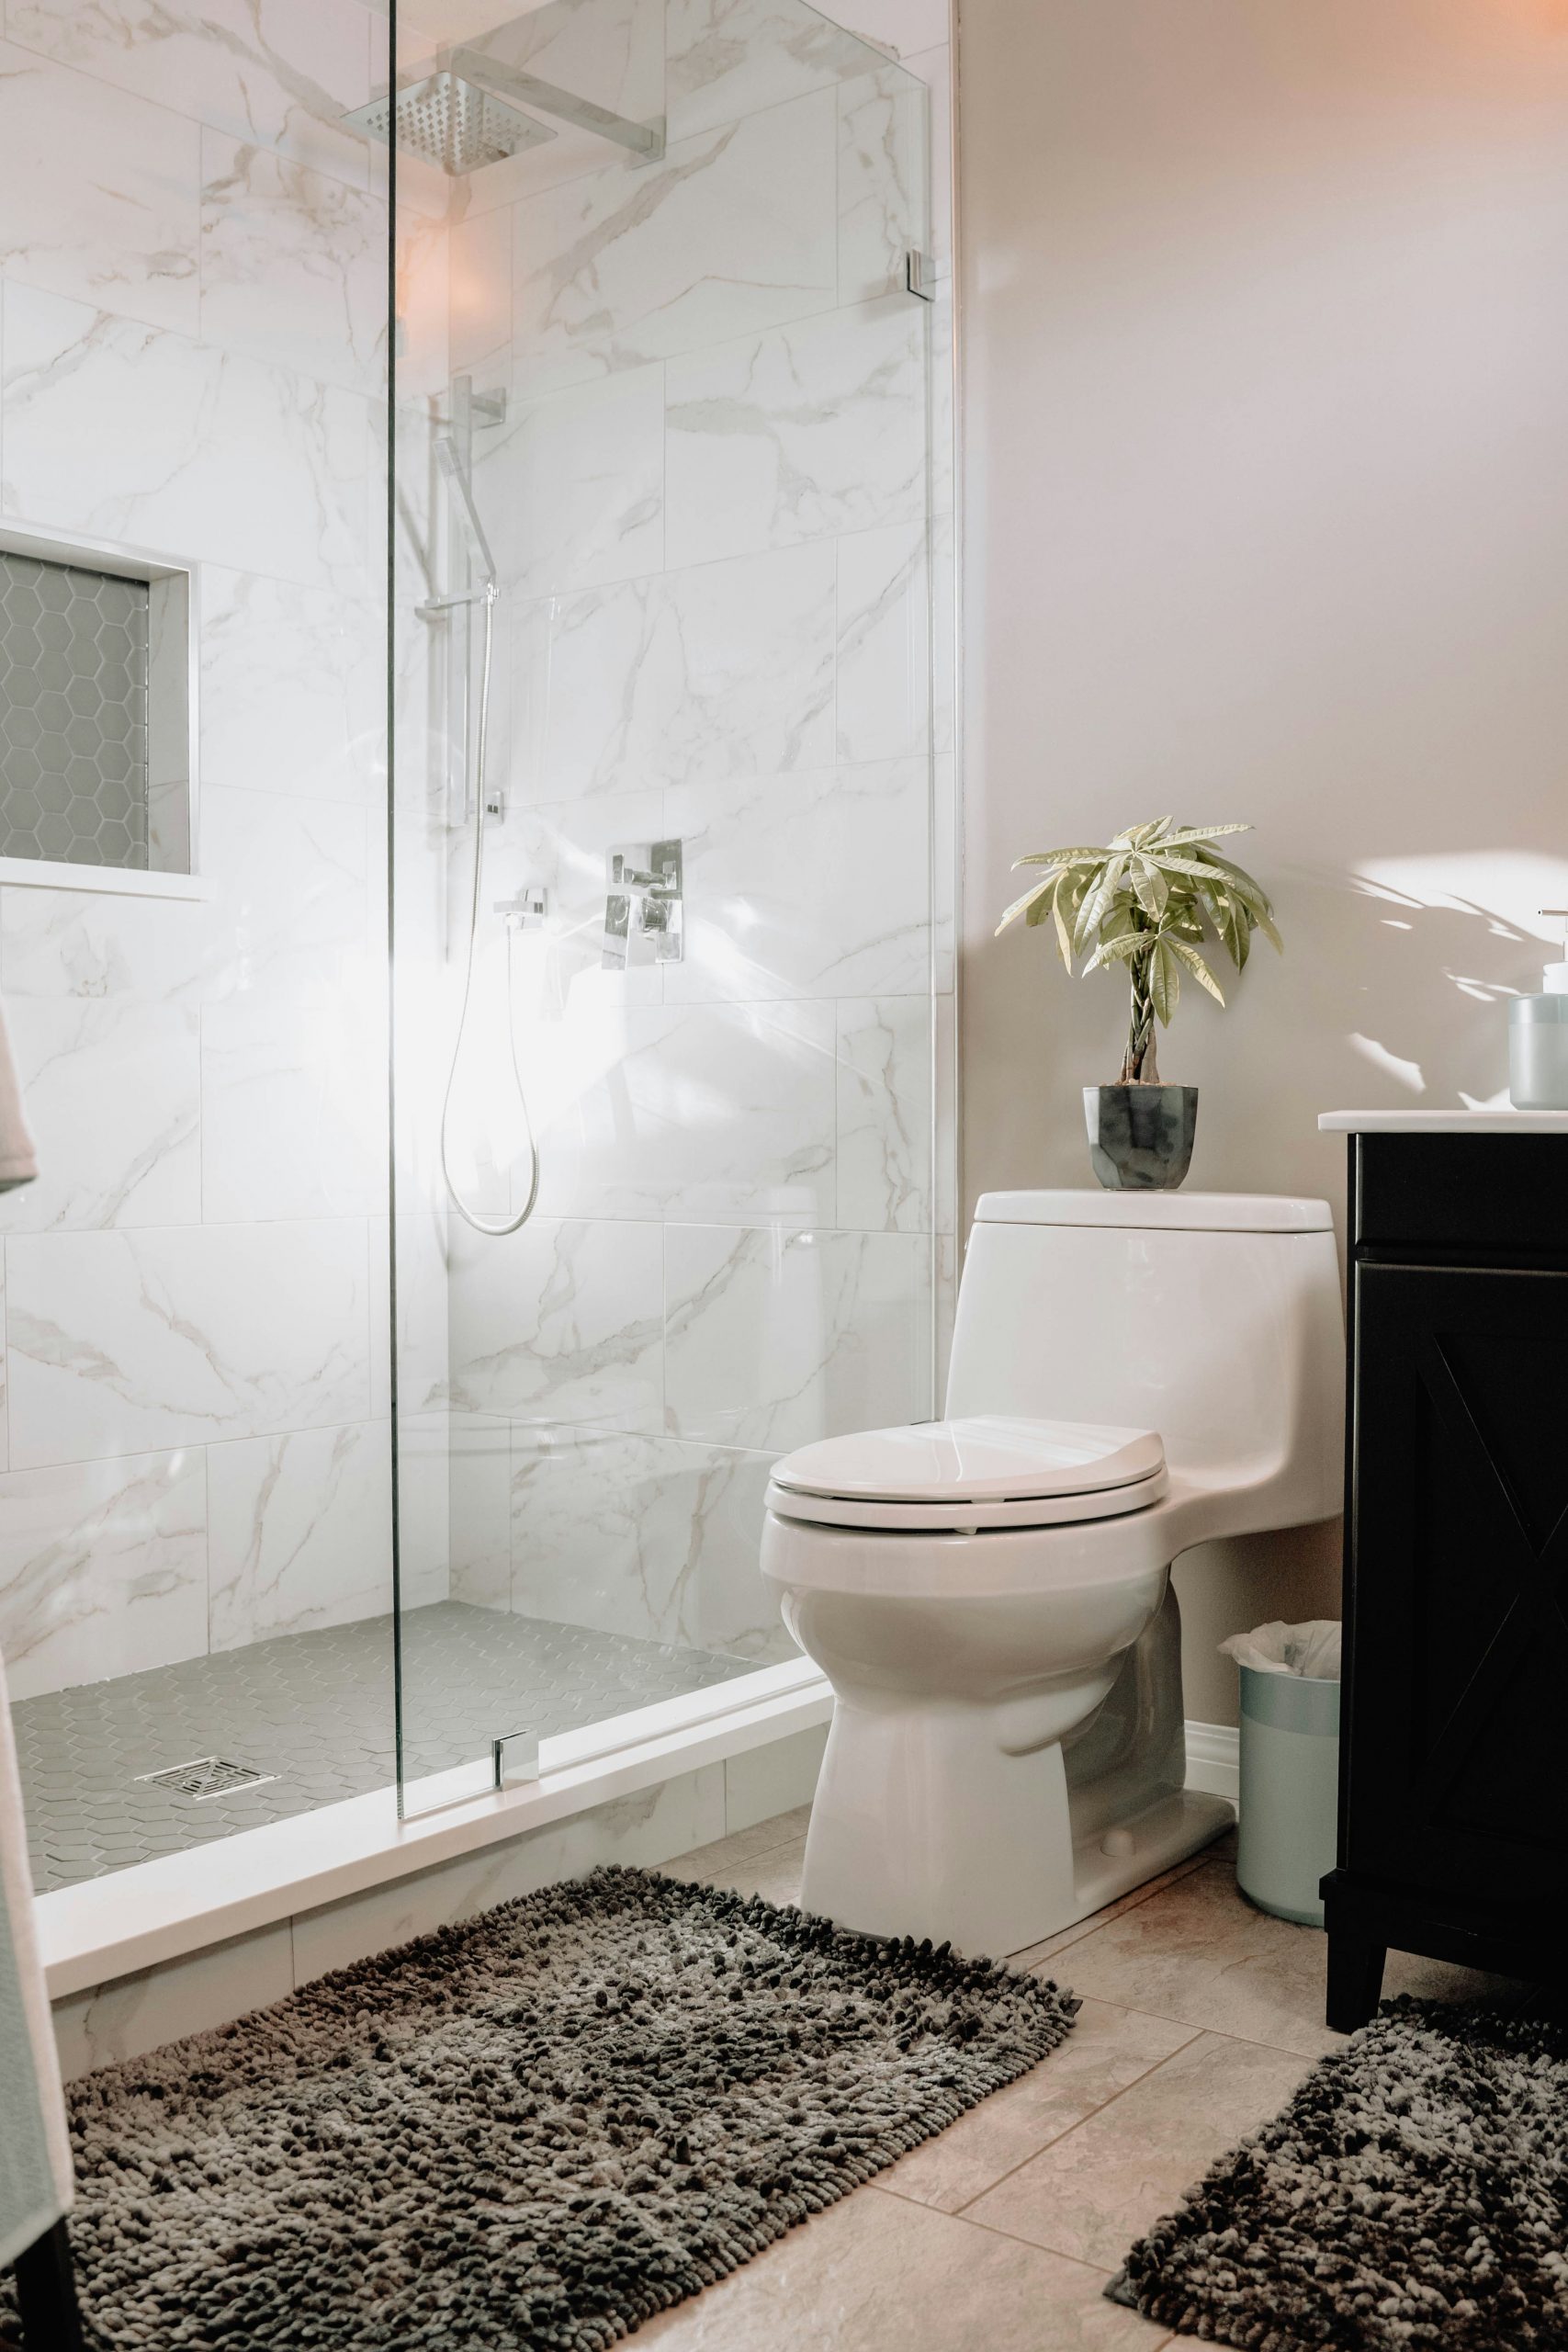
12. Keep it Modern with a Grey and White Tiled Shower
This design is perfect for a standard 5′ x 8′ bathroom layout. The glass shower enclosure prevents the room from feeling cut in half, allowing light to travel through the space and making it feel larger. Using large-format marble-look tiles on the shower walls also helps expand the space visually, as there are fewer grout lines to distract the eye. The combination of different tile shapes—subway, hexagon, and large square—adds interest without introducing overwhelming color.
⭐ The One Thing
When you have a glass shower door, the tile inside becomes a major design feature of the entire bathroom. Don’t let it be an afterthought. This is a great place to invest a little more of your budget. Here, the grey hexagon mosaic on the shower floor adds a subtle pattern and connects to the grey bath mat and vanity, making the whole design feel cohesive. Always choose a shower floor tile with a high slip-resistance rating (look for a DCOF rating of 0.42 or higher).
13. Go Glam with a Green Vanity and Arched Gold Mirrors
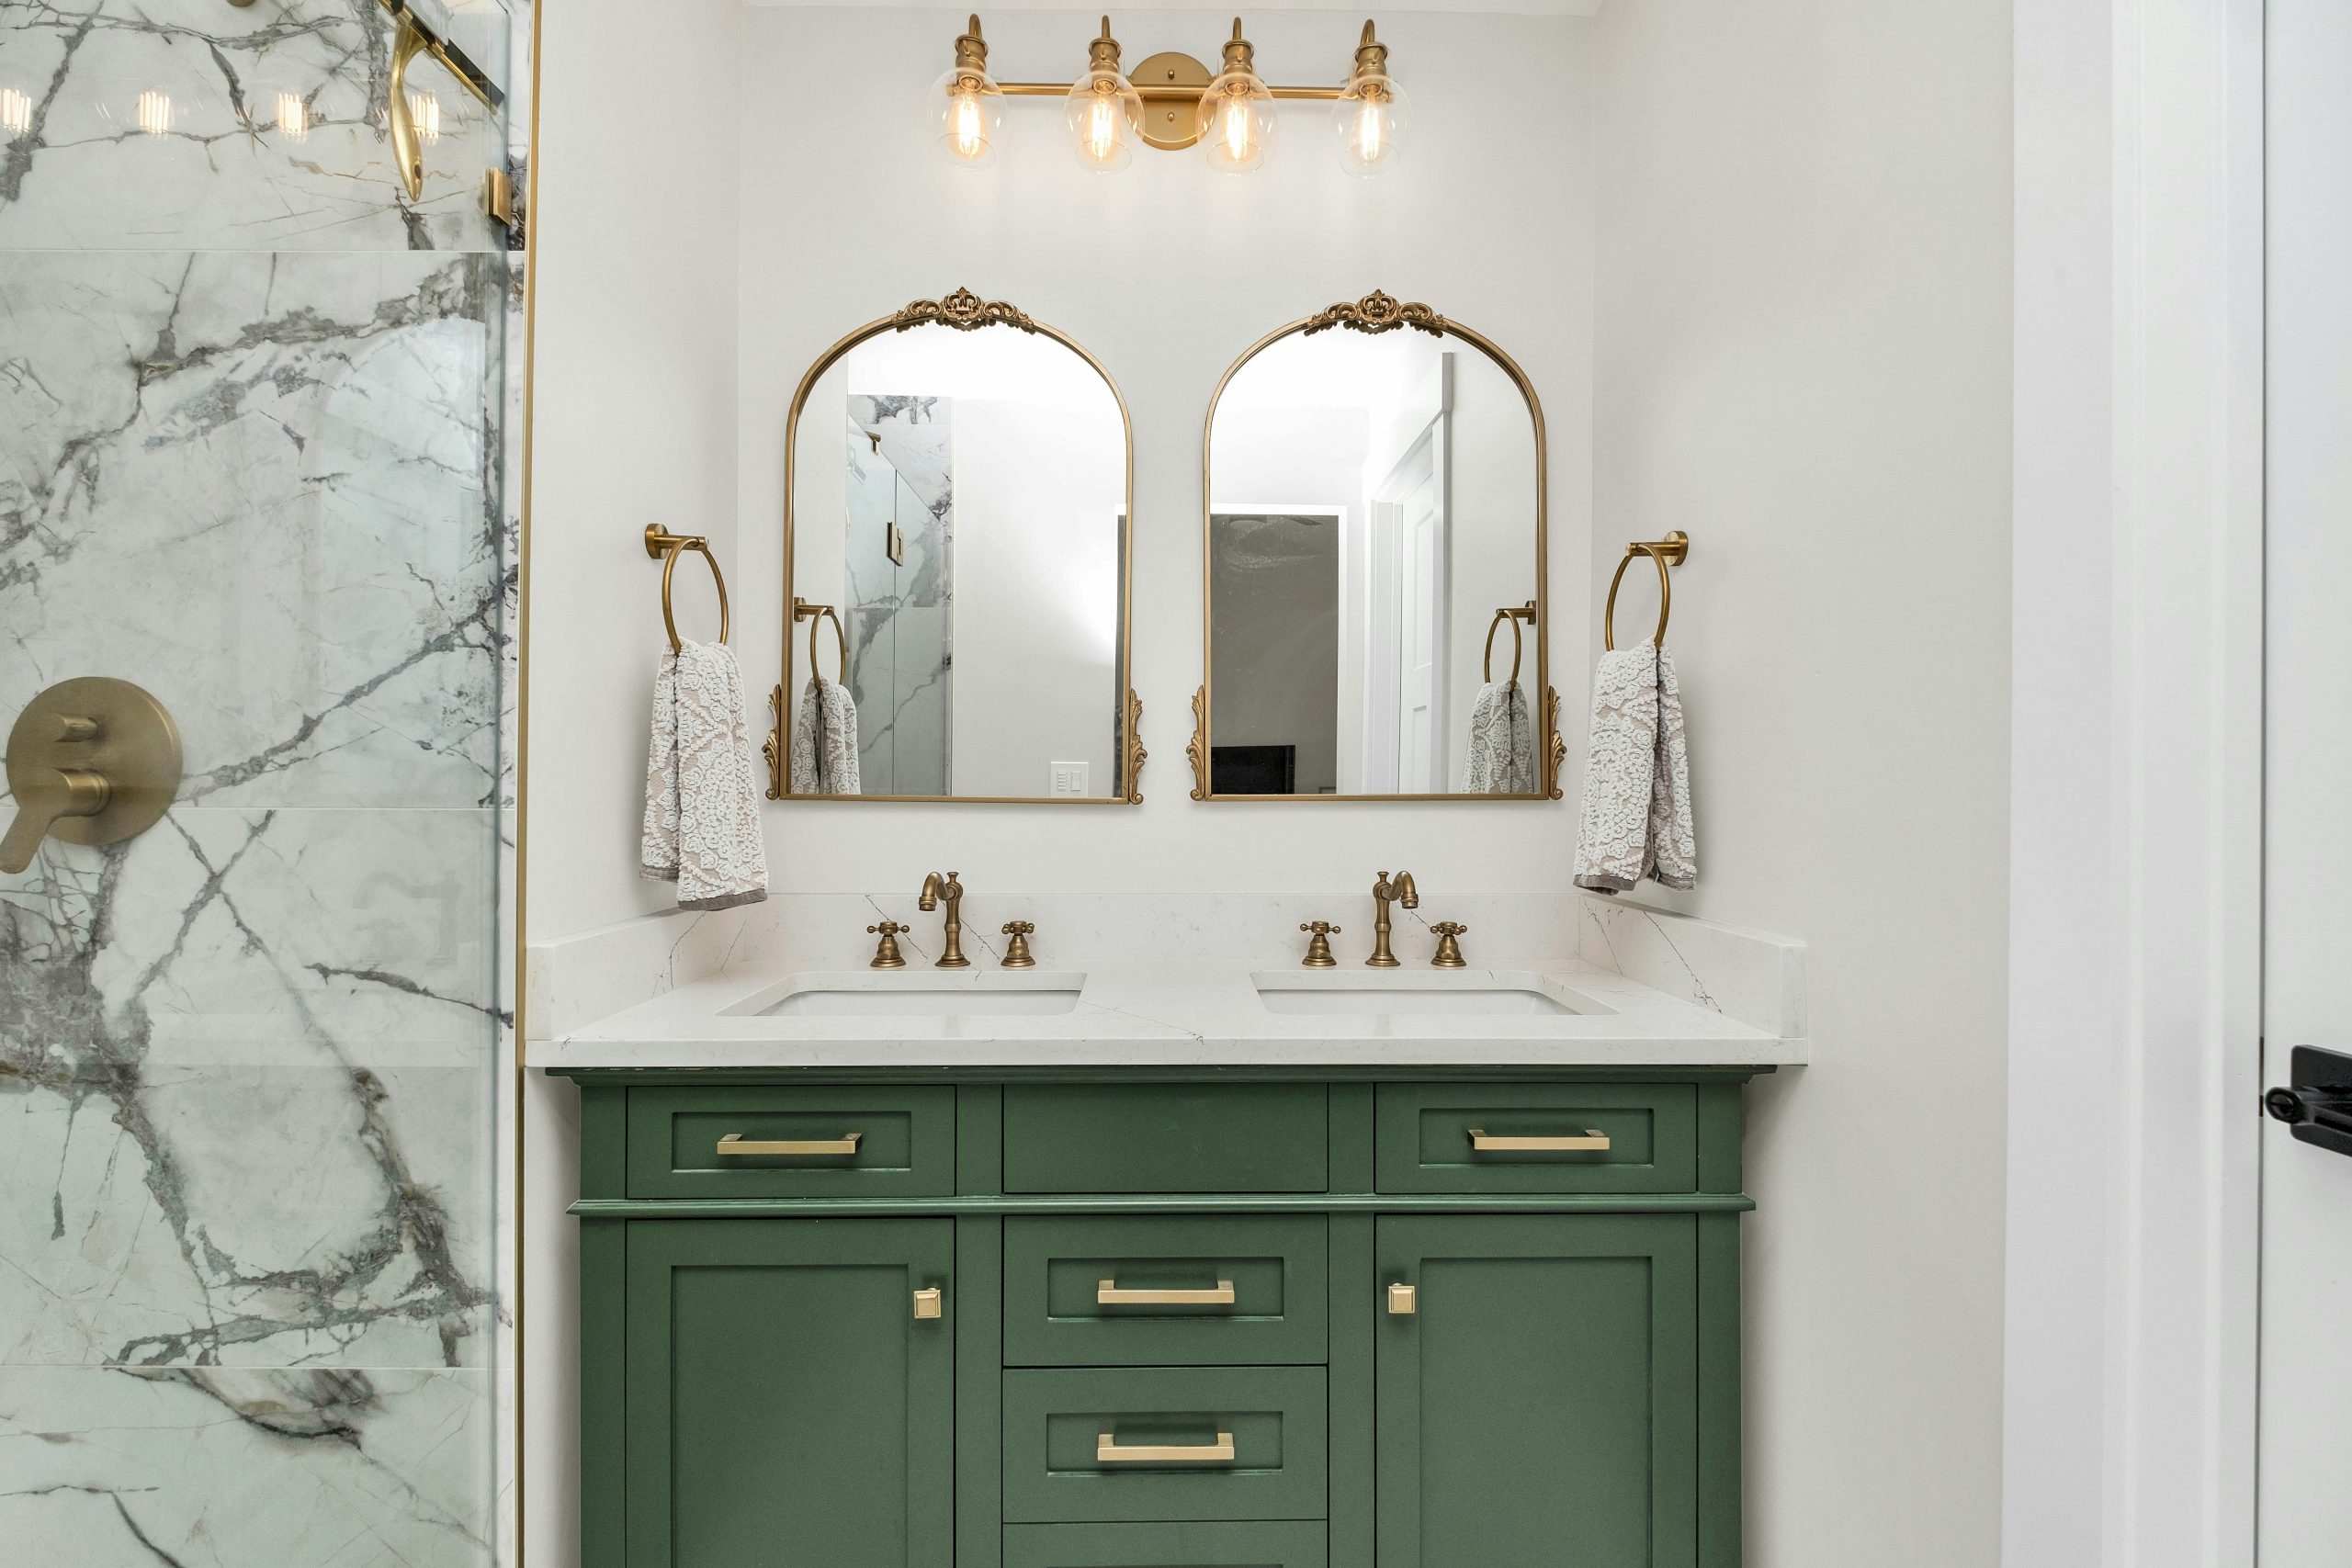
The element that takes this bathroom from simply ‘nice’ to ‘wow’ is the pair of ornate, arched gold mirrors. The deep green vanity and gold hardware are a beautiful combination on their own, but the mirrors add a level of glamour and architectural interest that elevates the entire design. Their curved shape softens the rectangular lines of the vanity and shower, while their height draws the eye upward, making the ceiling feel taller.
⚠️ Real Talk
This design works because of repetition with variation. The gold color is repeated in the mirrors, the light fixture, the faucets, and the cabinet hardware, creating a cohesive and intentional look. The arch shape of the mirrors is a unique element that provides a strong focal point. The deep green of the vanity grounds the space and provides a rich, colorful contrast to the bright white marble, keeping it from feeling too sterile.
14. Create Modern Luxury with Marble Walls and Hexagonal Floor Tiles
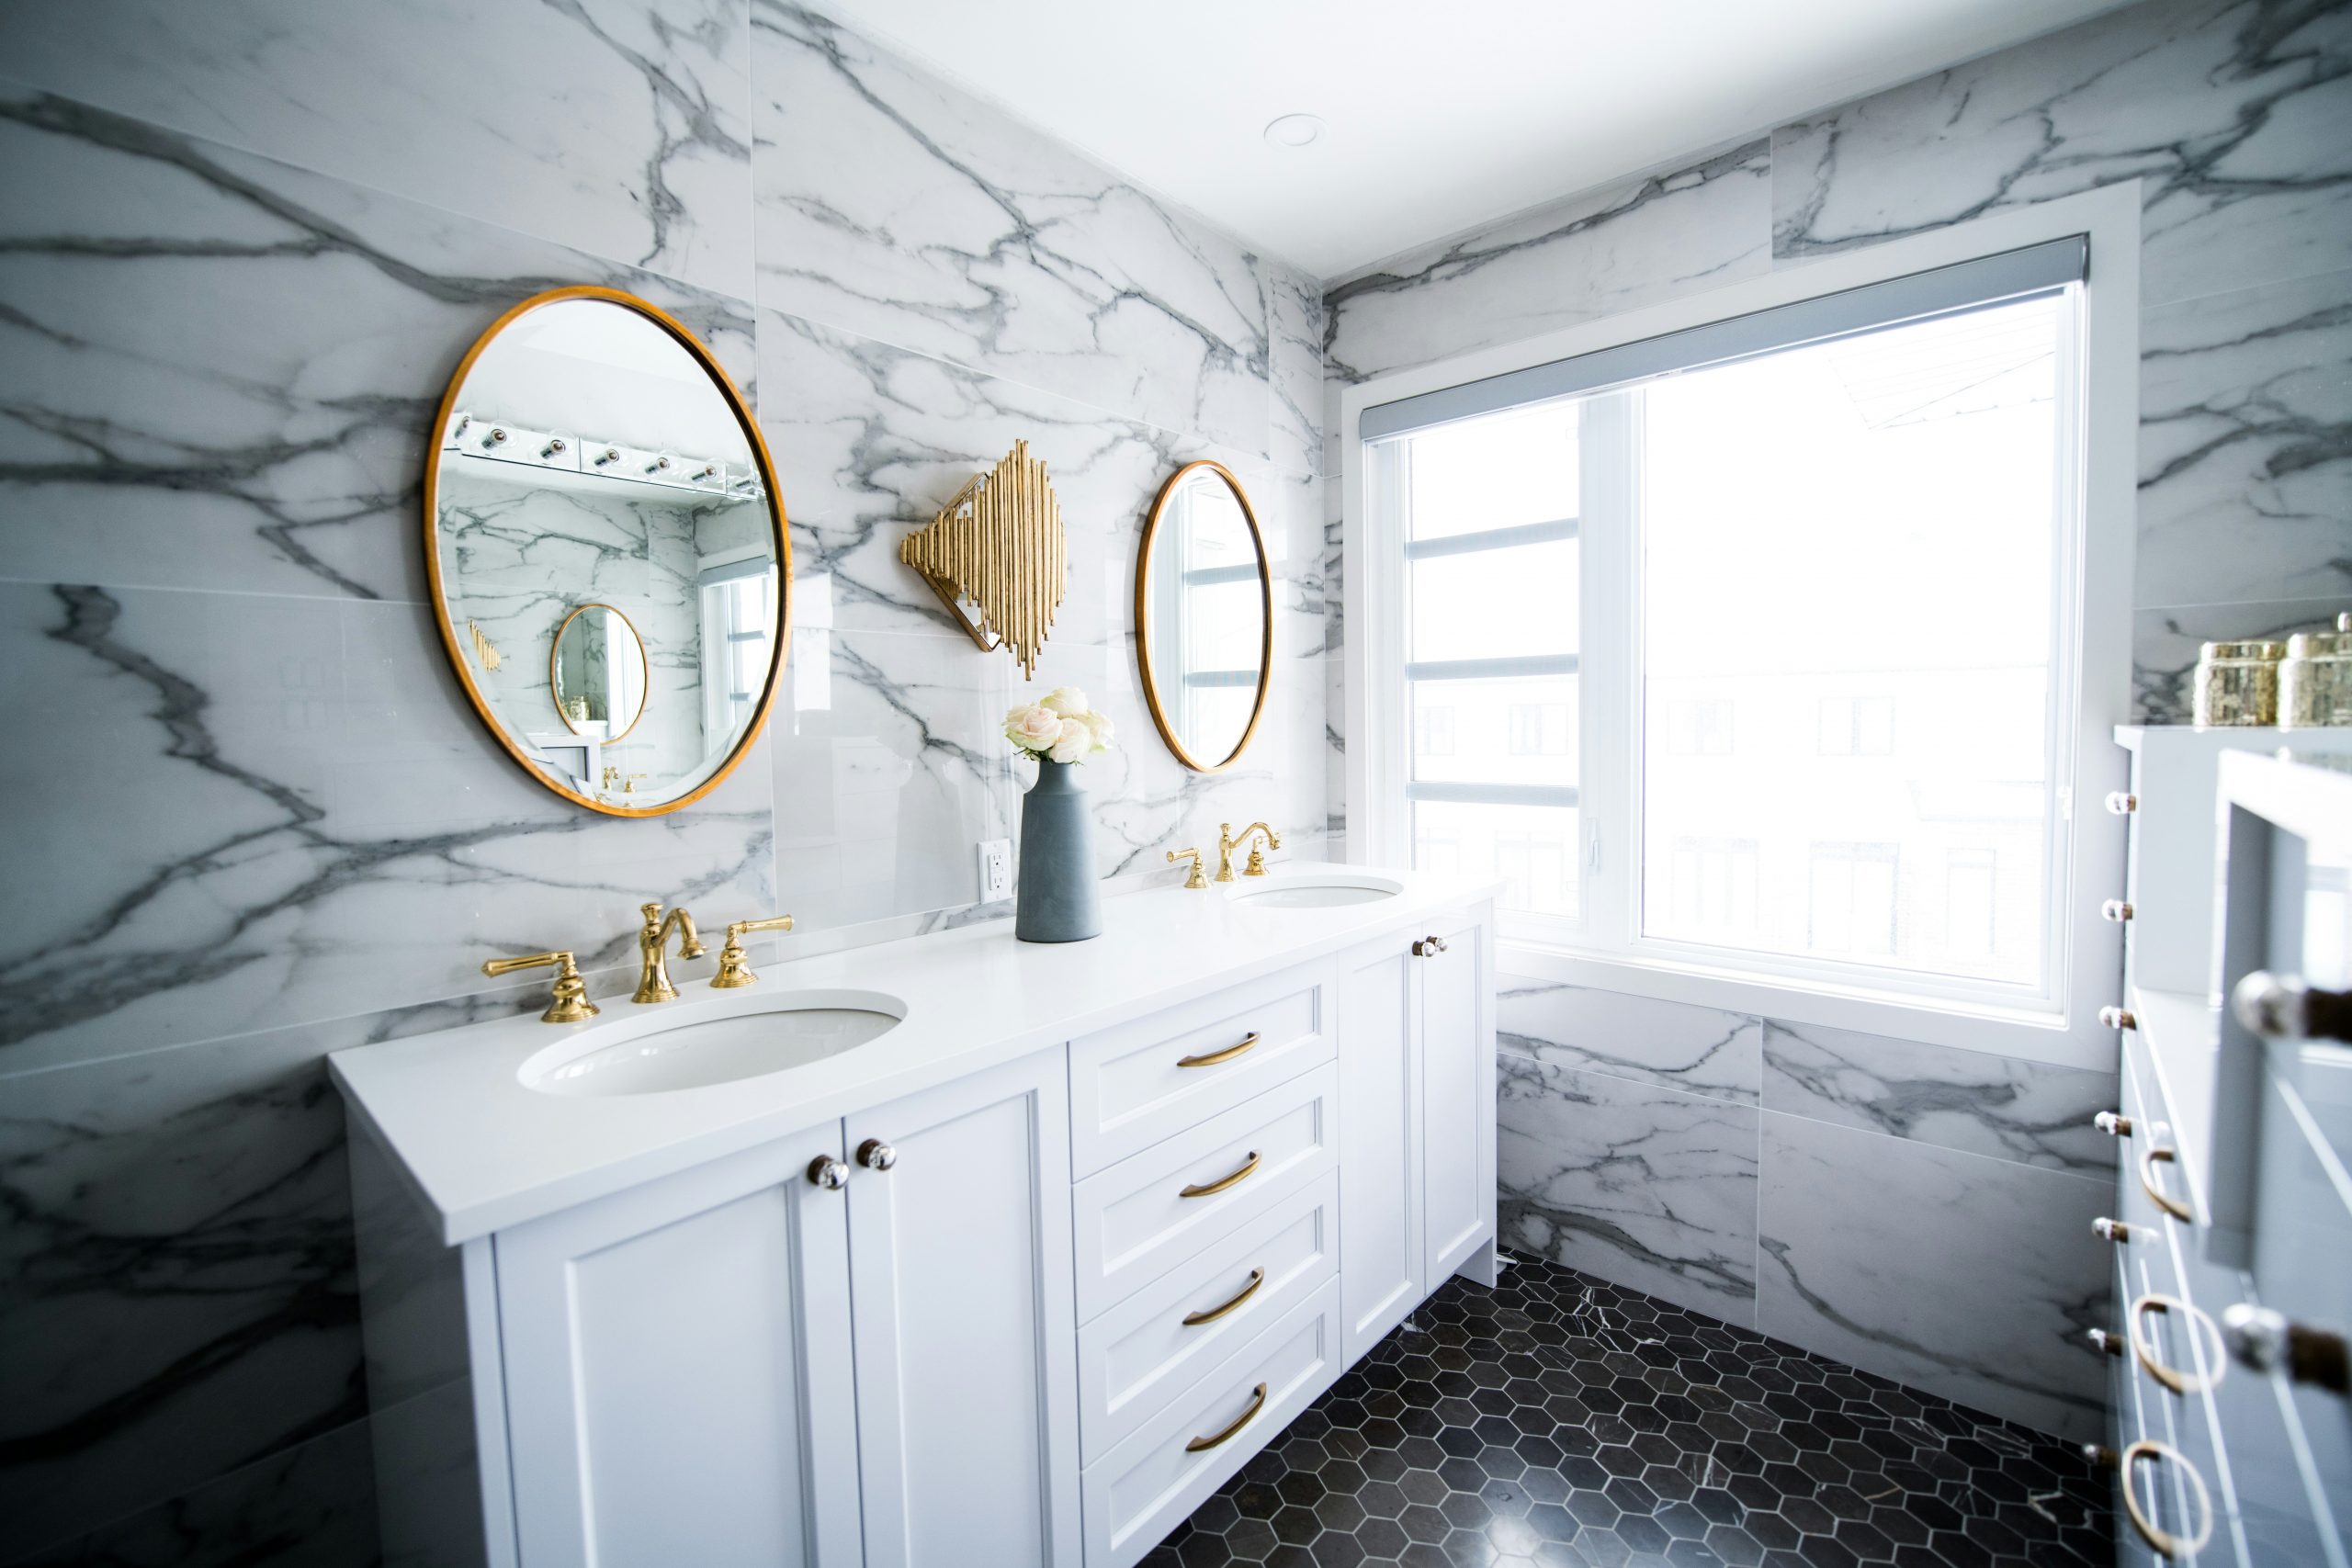
The formula for this luxurious look is simple: 70% dramatic pattern (the large-scale marble-look wall tiles), 20% geometric base (the dark hexagonal floor tiles), and 10% warm metallic (the gold oval mirrors and fixtures). The key is the scale. The wall tiles are large, which makes the space feel grand and minimizes busy grout lines. The dark floor provides a strong foundation and makes the white vanity and walls pop.
🧹 Maintenance Reality
A wall of large-format tile looks incredible, but it’s not a beginner-friendly DIY project. These tiles are heavy, expensive, and unforgiving of walls that aren’t perfectly flat. Tiling from floor to ceiling is also labor-intensive and requires precise cuts around windows and fixtures. Unless you have significant tiling experience, this is one of those jobs where hiring a professional is almost always worth the money to protect your investment and ensure a flawless finish.
15. Balance Light Wood and Patterned Tile for a Warm Modern Bathroom
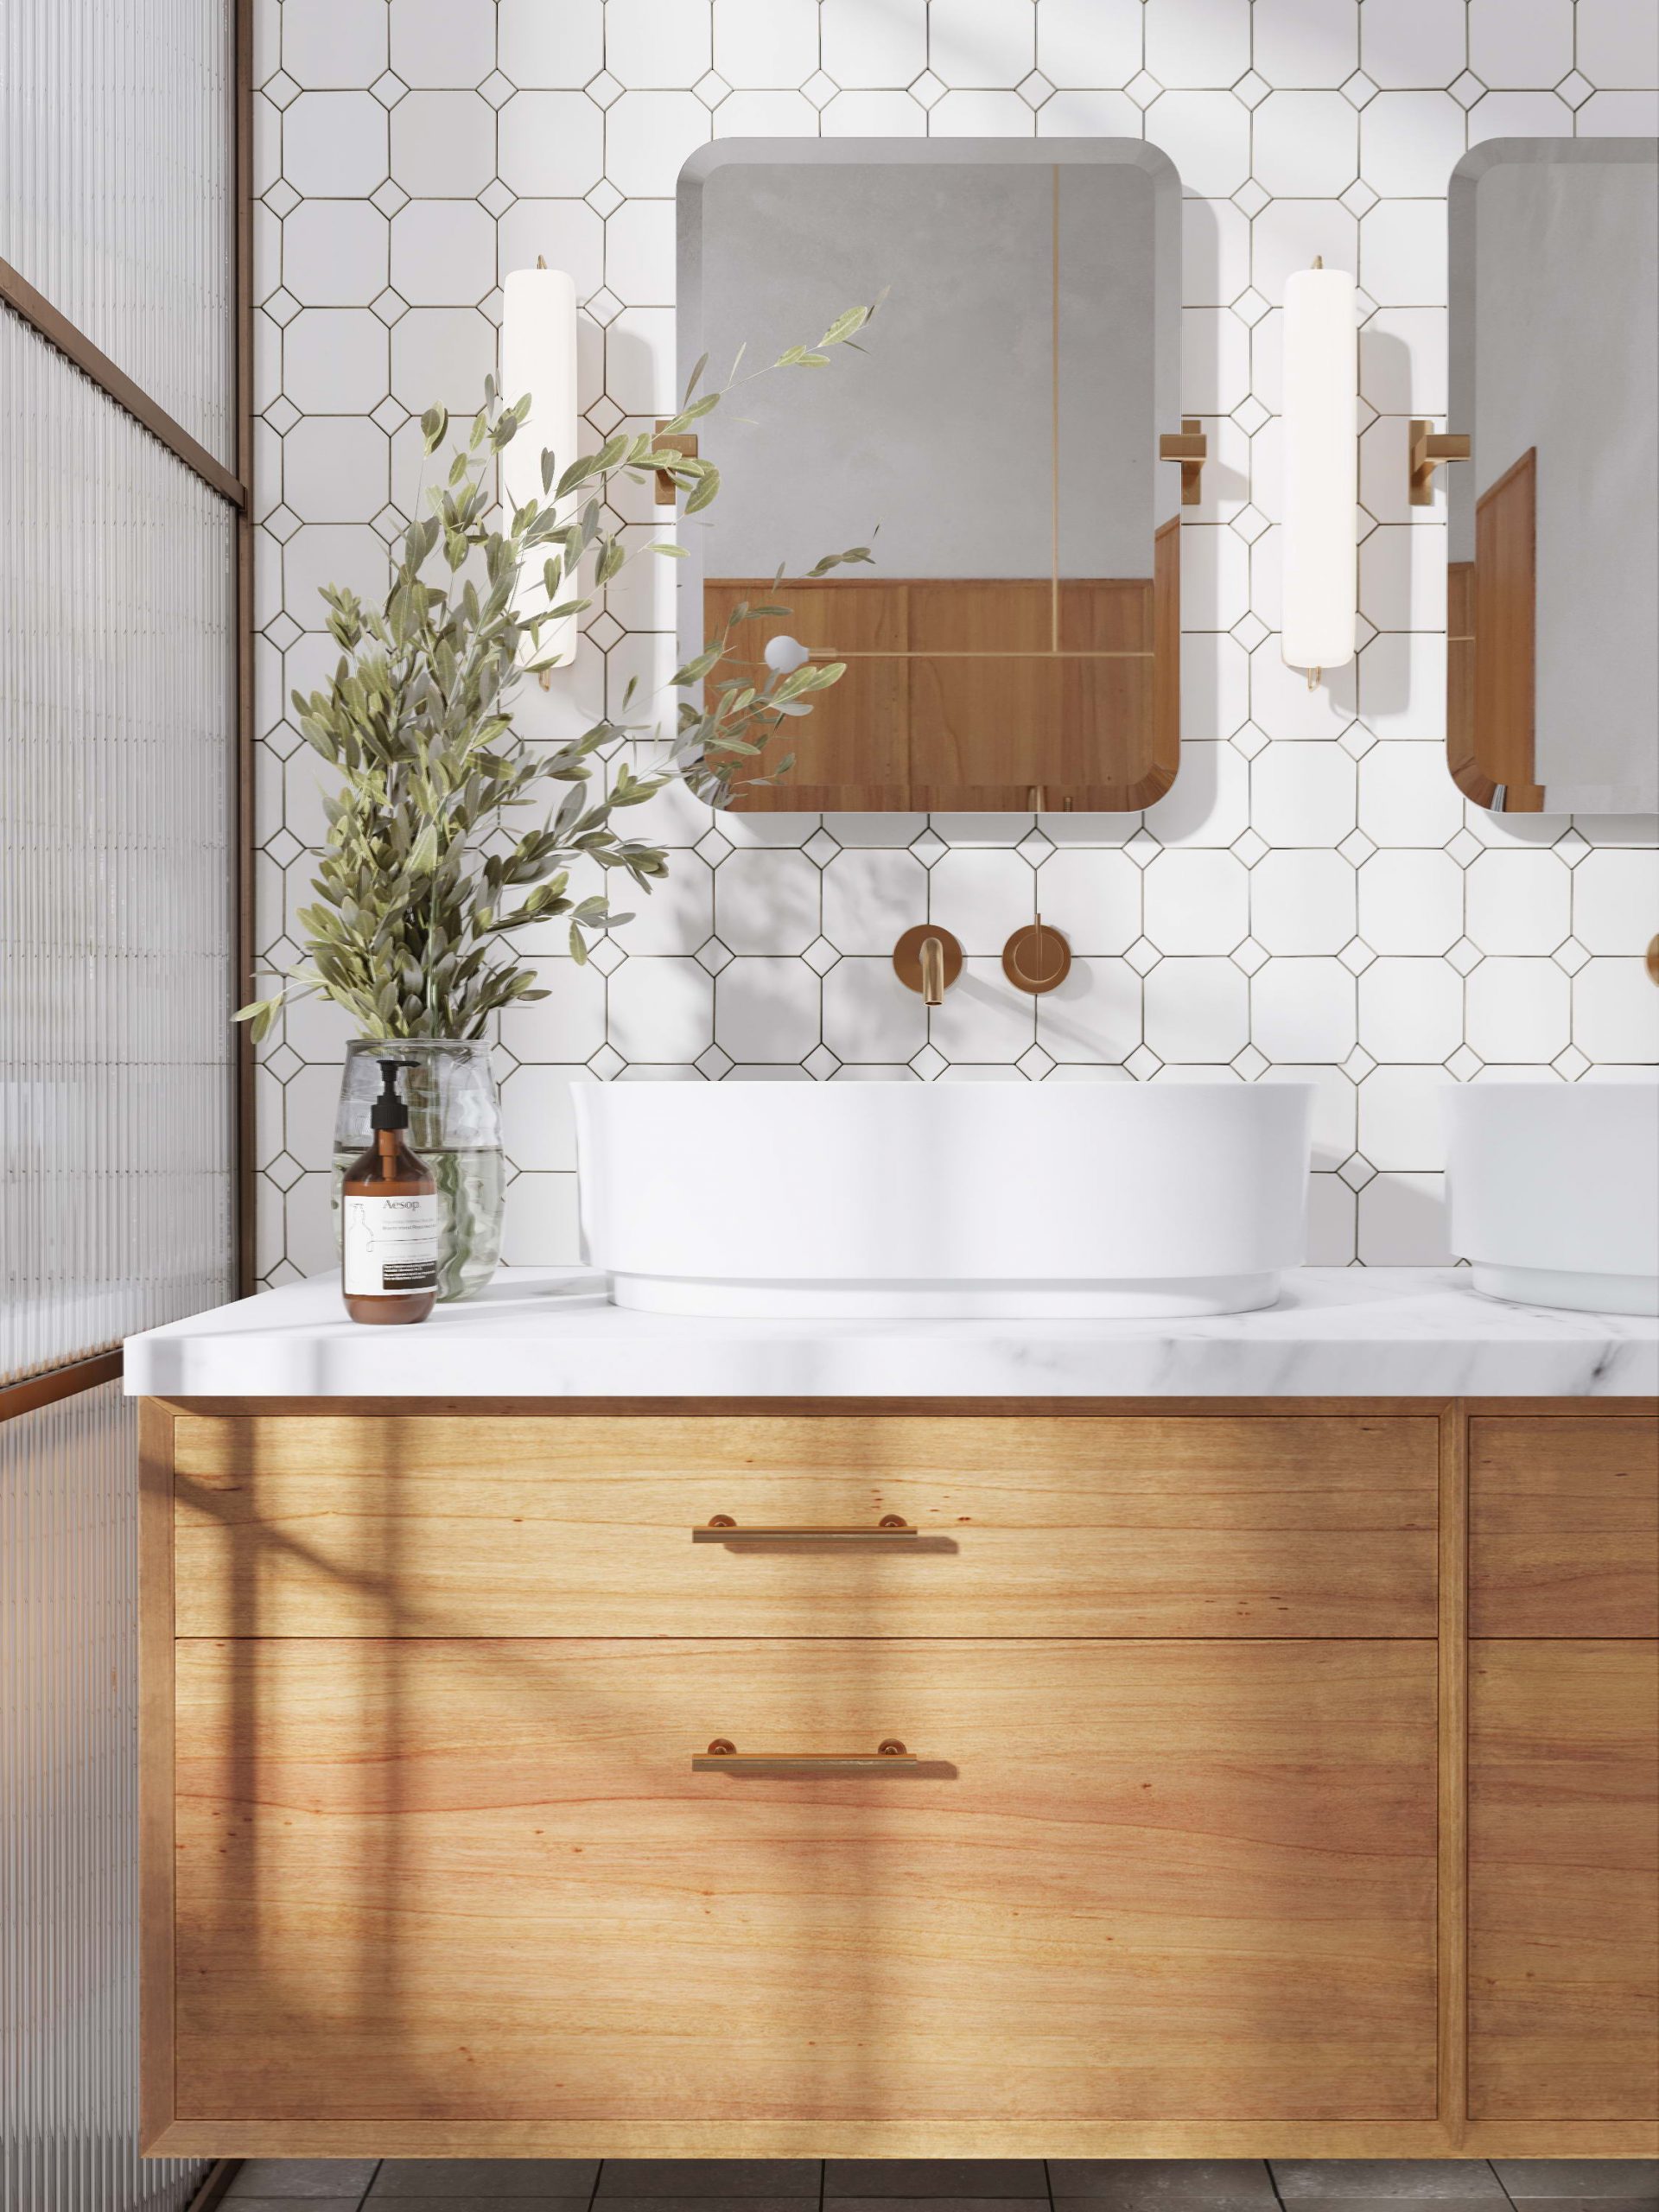
Before you commit to wall-mounted faucets, make sure you know what’s behind your wall. This is not a simple swap for a traditional deck-mounted faucet.
✅ Before You Start
- Confirm you have at least 4-6 inches of depth in the wall cavity to house the faucet valves. This doesn’t work on exterior concrete block walls.
- Plan your mirror and lighting placement simultaneously. The plumbing, electrical for the sconces, and mirror mounting points all have to be perfectly mapped out before any tile goes up.
- Check the spout reach. Ensure the faucet spout will extend far enough to be centered over the sink drain to avoid splashing.
Installing a lantern tile backsplash is a great way to add pattern and character. Here’s a quick guide:
- Time: 6-8 hours (for a typical vanity wall)
- Cost: $15 – $30 per sq. ft. for tile
- Step 1: Prepare your wall. It must be clean, dry, and perfectly flat.
- Step 2: Find the center of your wall and draw a level plumb line to start your first column of tile, ensuring a balanced layout.
- Step 3: Apply a thin-set mortar with a notched trowel and press the tile sheets firmly into place. Use tile spacers for consistency.
- Step 4: Let the mortar cure for 24 hours, then apply grout, pushing it into the joints with a grout float. Clean off the excess with a damp sponge.
- Step 5: After another 24-48 hours, wipe away the grout haze and apply a grout sealer to protect against moisture and stains.
16. Make a Statement with a Chevron Floor and Dark Gray Vanity
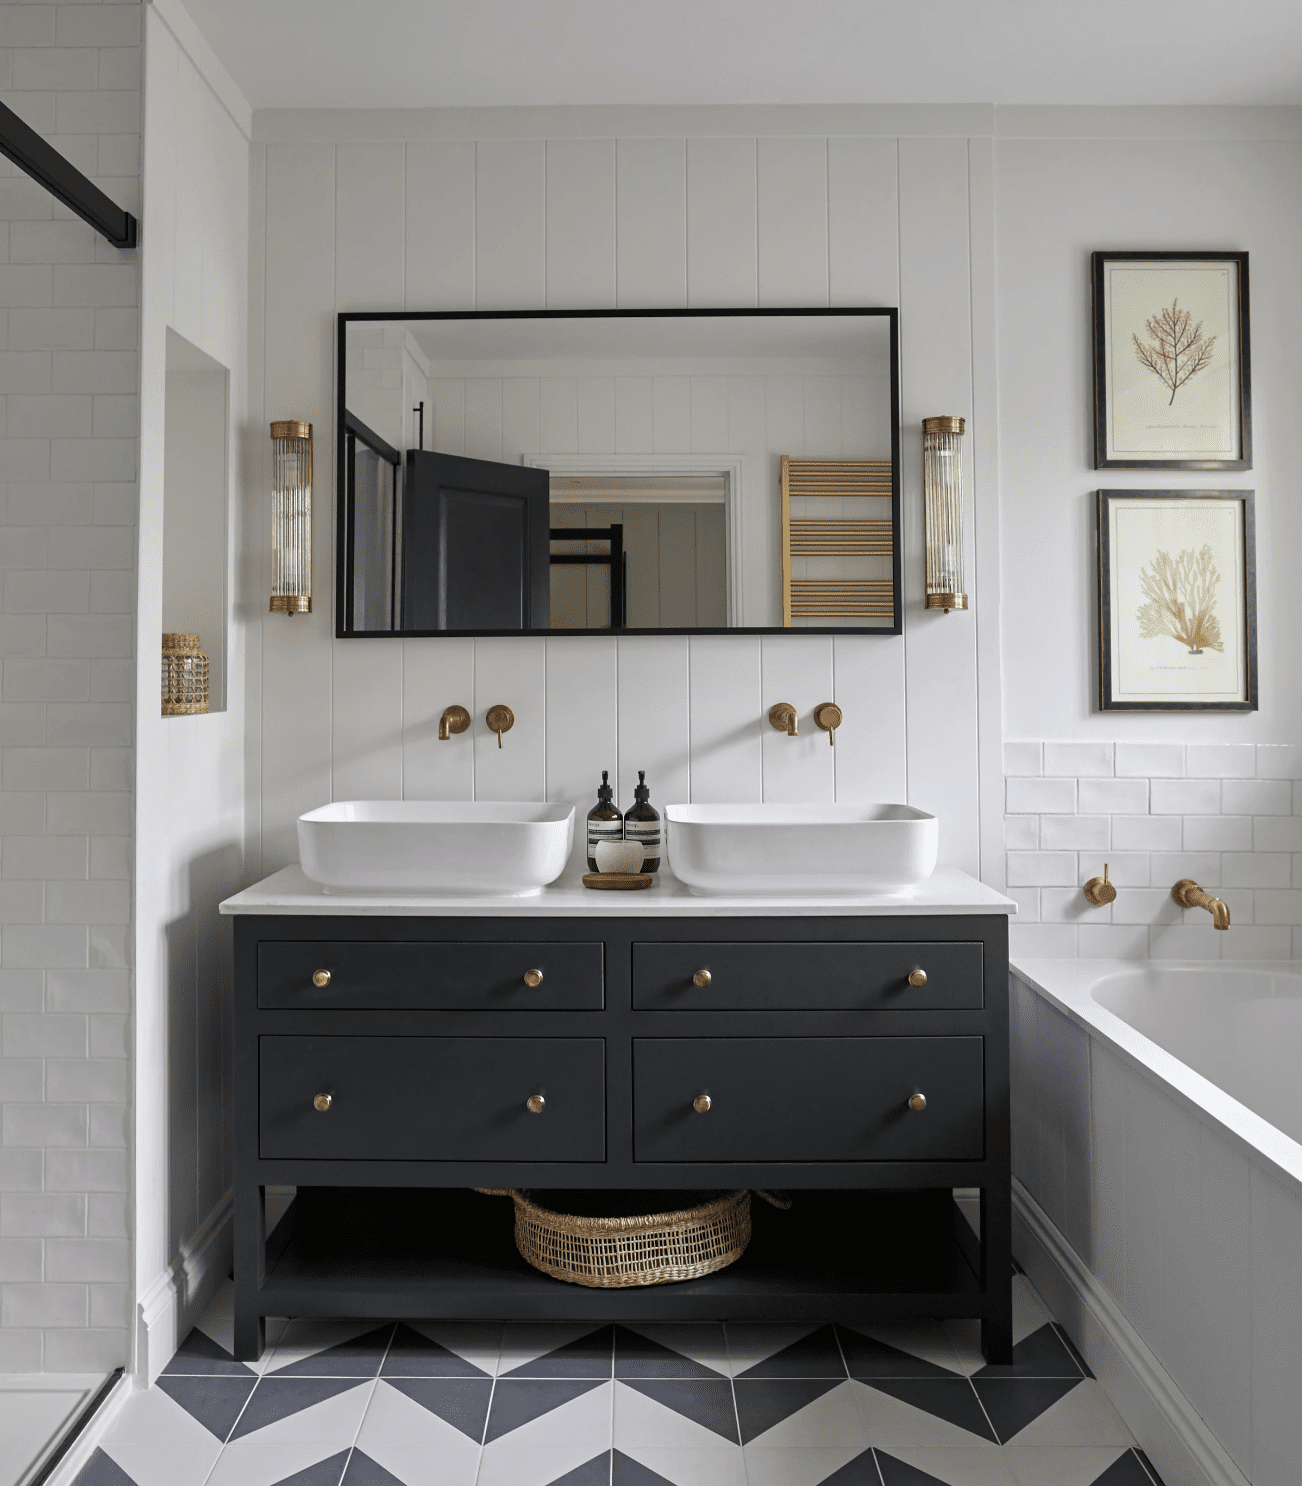
The showstopper here is, without a doubt, the black and white chevron floor. It’s bold, graphic, and injects a huge amount of energy and personality into the room. It proves that the floor doesn’t have to be a boring afterthought; it can be the main event. By keeping the walls white and the vanity a solid, dark gray, the design allows the floor to take center stage without competition. If you want a different take on a high-impact floor, look at Idea #30.
🎯 What Makes It Work
When you have a bold, large-scale pattern on the floor, you need to balance it with calmer elements elsewhere. Notice how this design uses very simple white vertical paneling and subway tile on the walls. The vanity is a solid color with clean lines. The faucets and light fixtures, while a warm gold, are minimalist in their design. If you try to pair a busy floor with a busy wallpaper or intricate cabinetry, the room will feel chaotic and overwhelming.
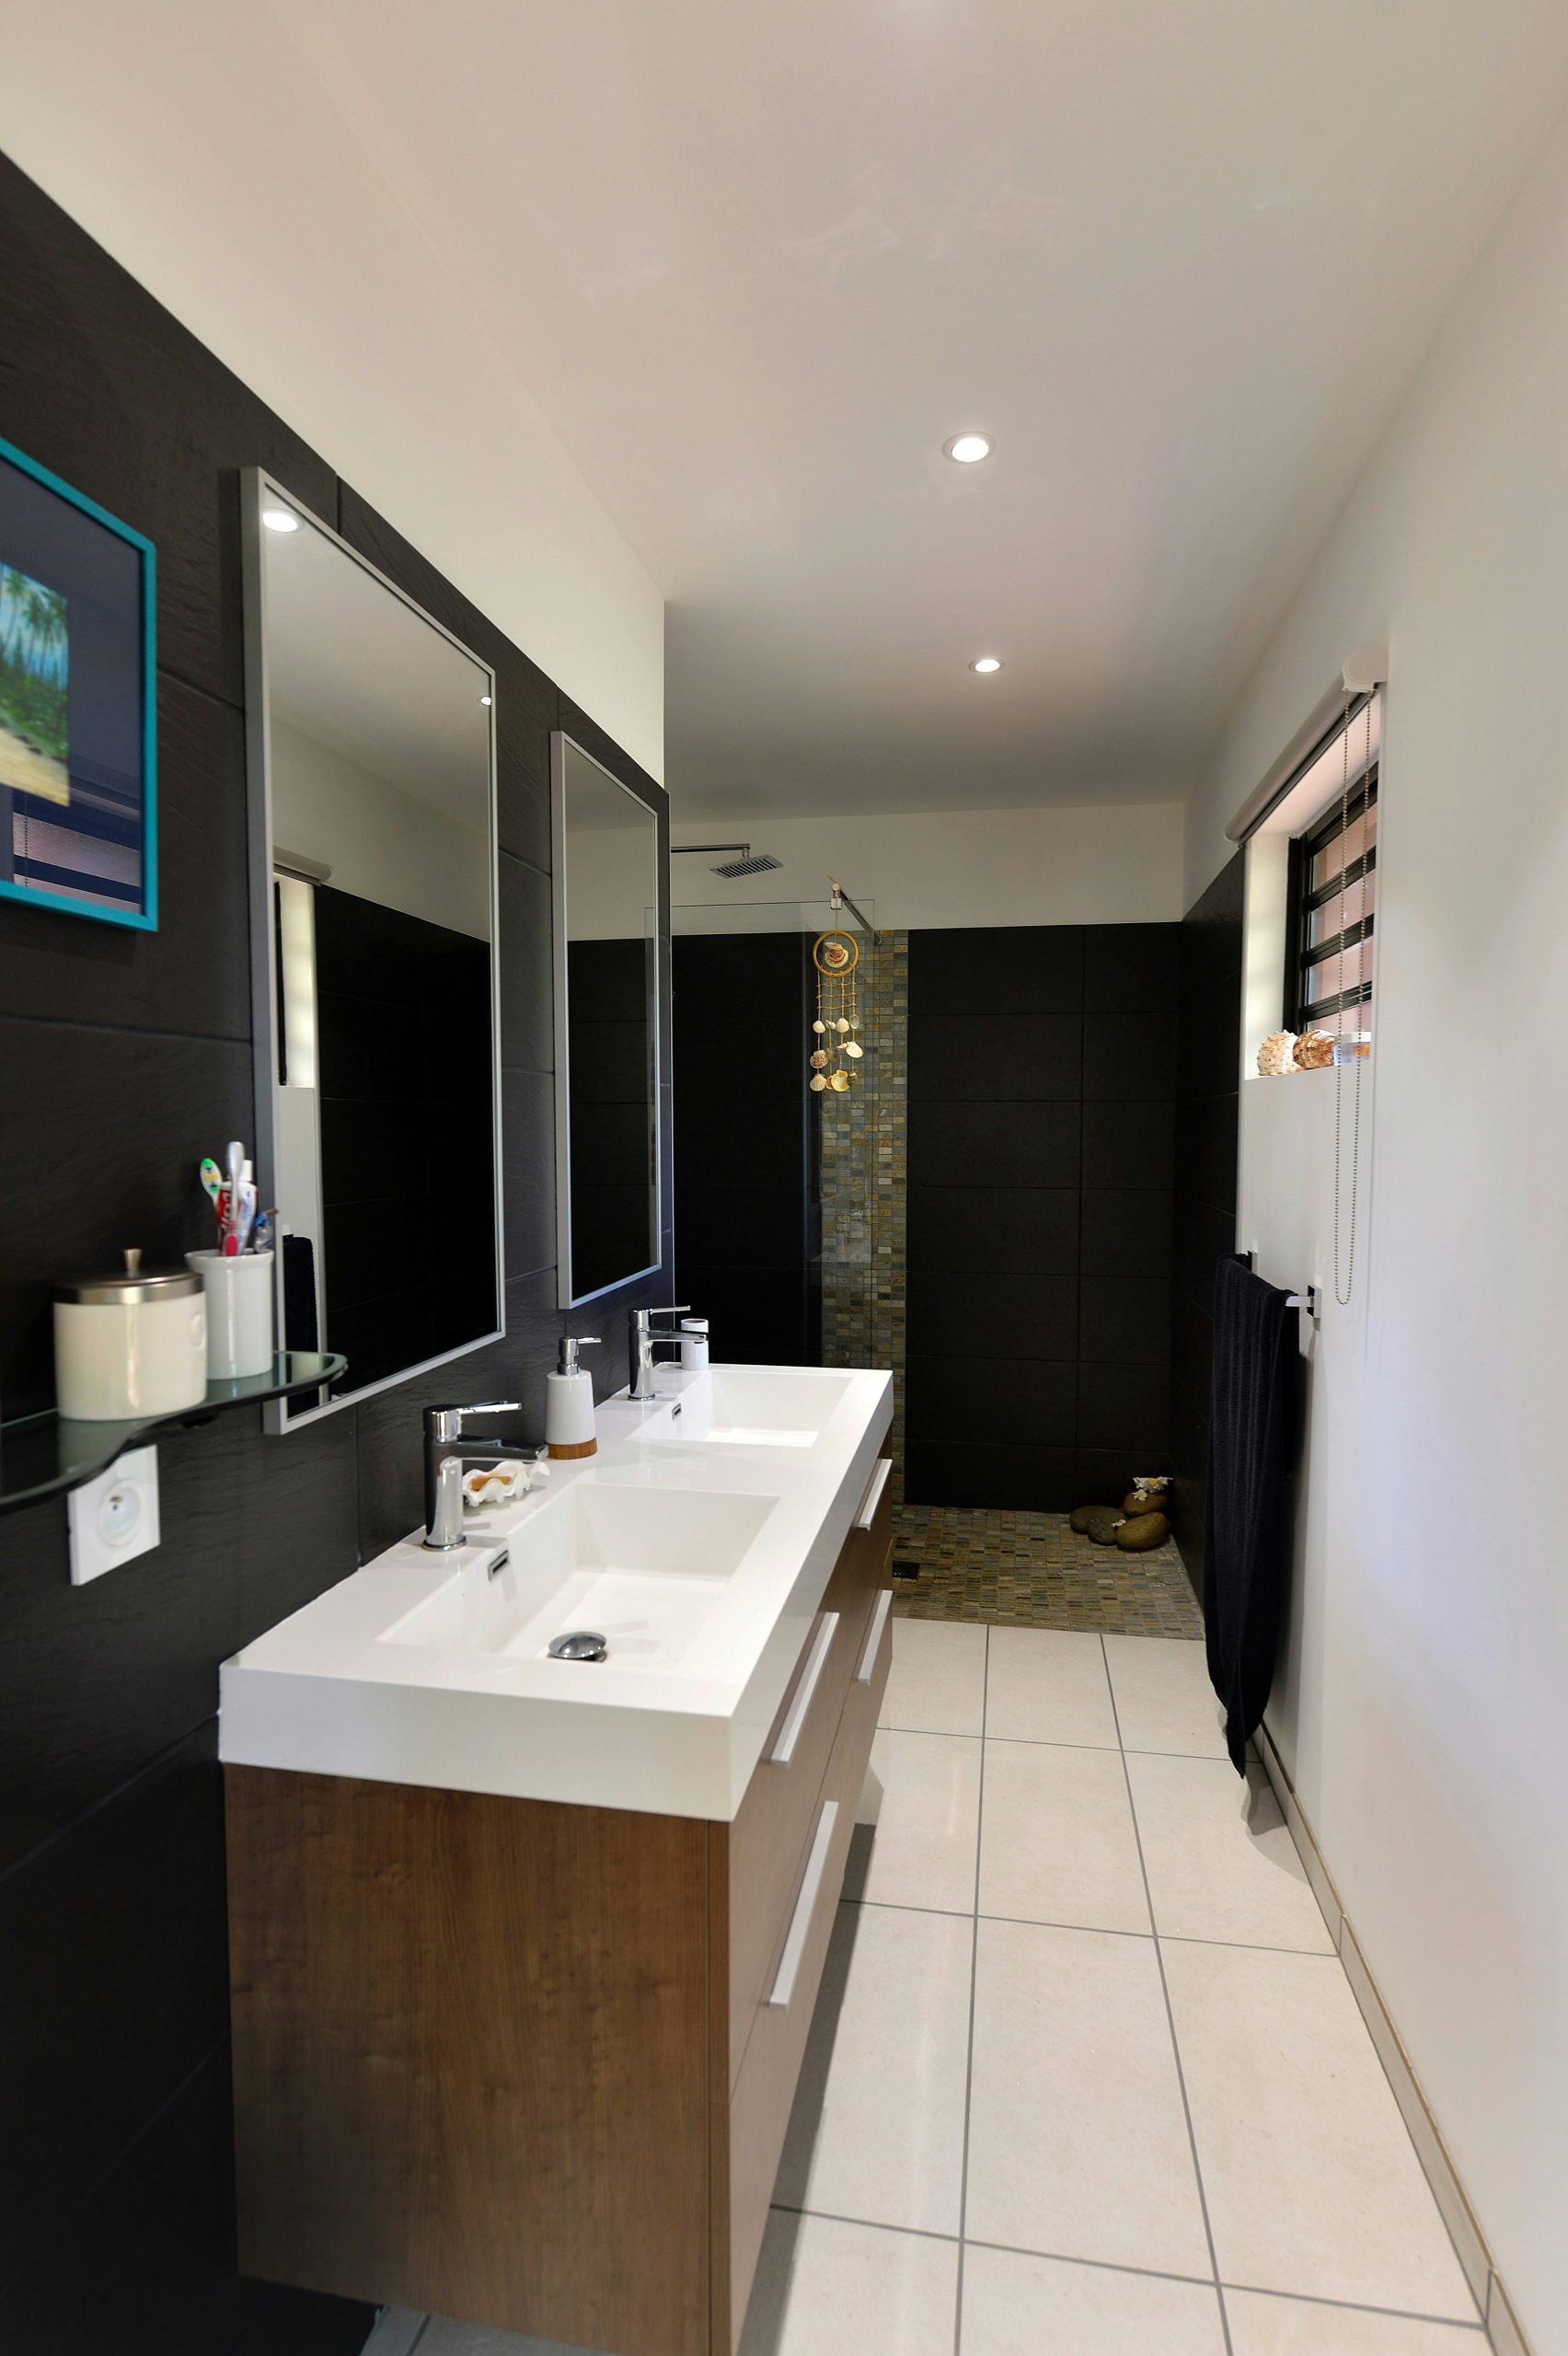
17. Create a Sleek Look with a Floating Vanity and Mosaic Accent Wall
This bathroom design feels so clean and streamlined because of the strong horizontal lines. The long, white floating vanity, the large rectangular mirrors, and even the grain of the dark paneled wall all emphasize the width of the room, making it feel more spacious. The contrast between the dark wall behind the vanity and the white walls elsewhere creates zones and adds visual depth. The mosaic tile in the shower is a perfect accent, adding texture without disrupting the sleek, modern feel.
💰 Budget Breakdown
A long floating double vanity is a fantastic choice for a primary bathroom, but it requires a generous amount of space. This look is ideal for rooms that are at least 12 feet long to accommodate a 6- to 7-foot vanity and still leave ample room for a shower and toilet area. The floating design helps to make a large piece of furniture feel lighter, but it still needs the physical square footage to not feel crammed in.
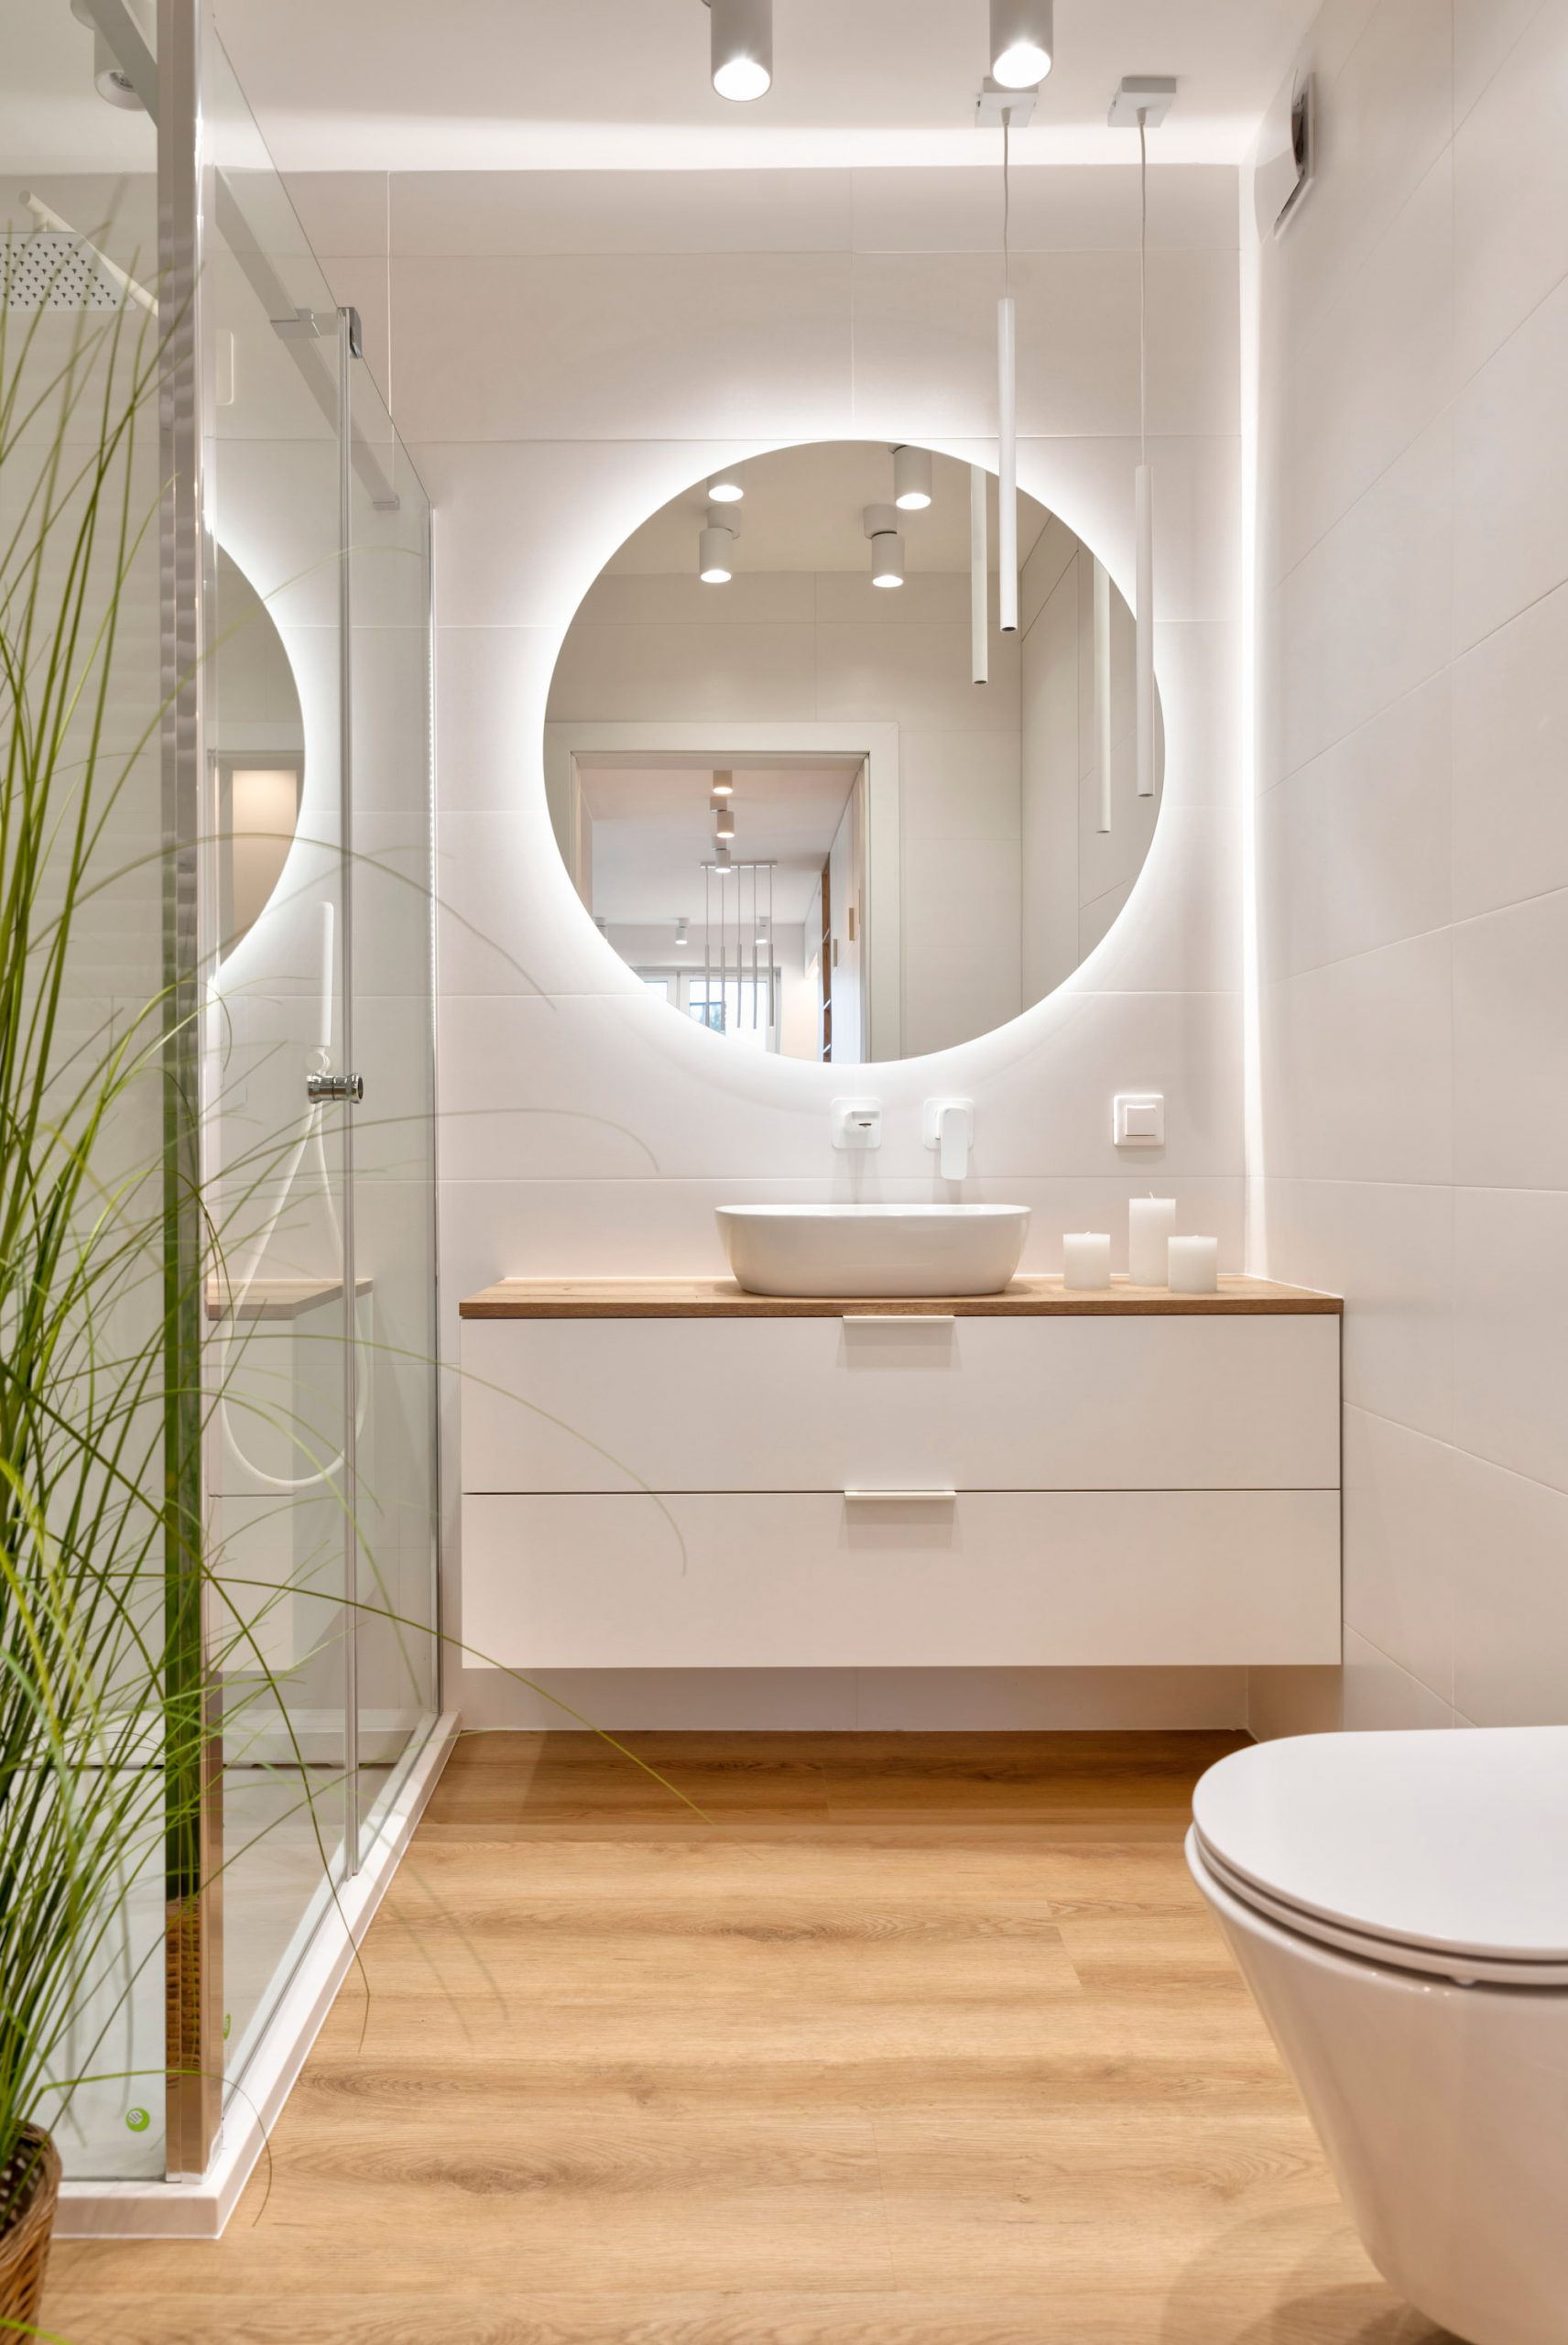
18. Achieve a Minimalist Vibe with an LED-Backlit Mirror
LED-backlit mirrors are a huge trend in bathroom design right now, and for good reason. They provide perfectly even, shadow-free lighting for tasks like makeup application and shaving, which is something traditional overhead vanity lights struggle with. They also bring a clean, minimalist, almost futuristic vibe to the space. This simple addition makes a bathroom feel instantly more modern and high-tech, which is a big part of the 2026 aesthetic.
💸 Get This Look For Less
that defines this bathroom’s modern, clean aesthetic is the LED-backlit circular mirror. It’s both a light source and a design element. The soft glow it casts on the wall creates a beautiful halo effect, turning a functional object into a piece of art. It eliminates the need for bulky sconces, which helps to maintain the room’s minimalist and uncluttered feel. Remove it, and the room loses its focal point and its defining modern feature.
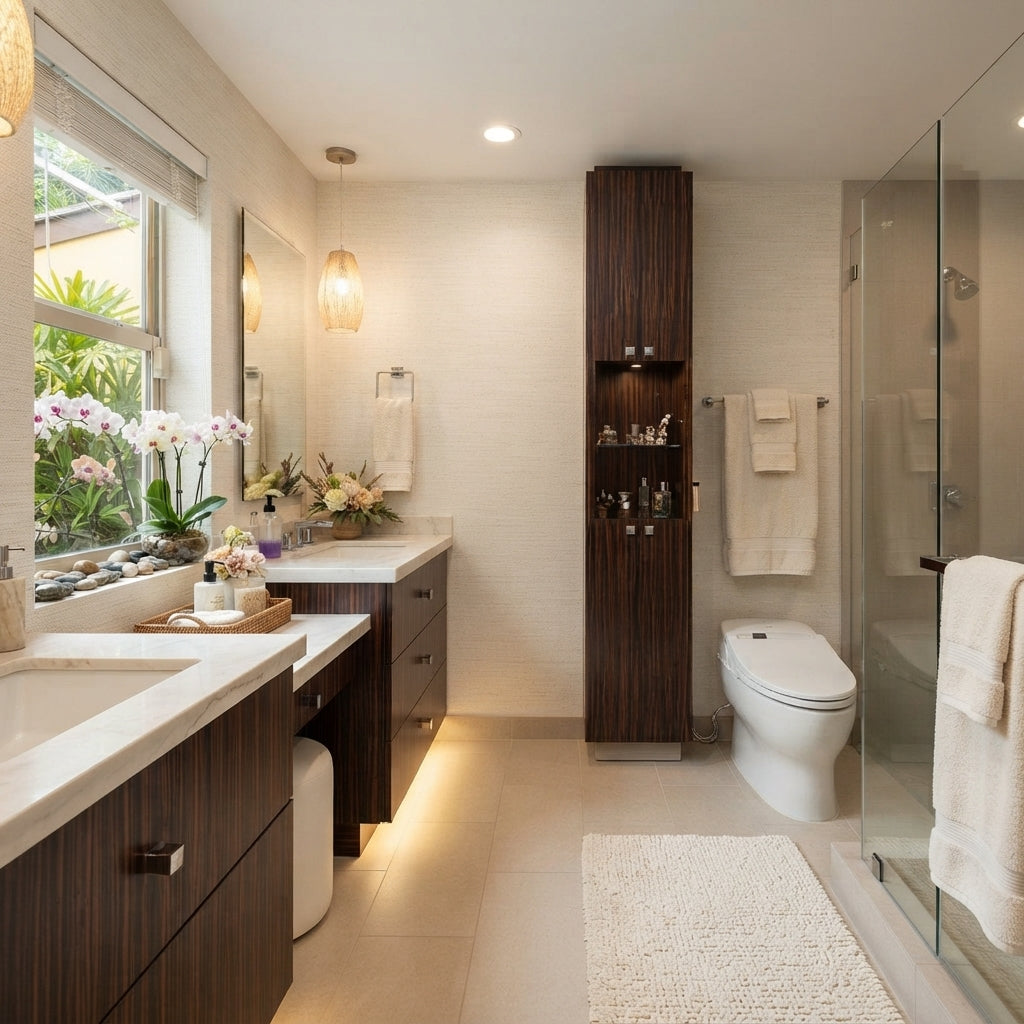
19. Go for Elegance with a Dark Wood Vanity and Marble Countertops
To get this serene, high-end look, pay attention to the details. Instead of a standard tile or painted wall, this bathroom uses a light-colored, textured wallpaper. This adds a layer of softness and sophistication that you can’t get with a flat surface. When pairing it with a bold wood grain vanity, choose a wallpaper with a subtle, small-scale pattern or texture so they don’t visually compete with each other. It elevates the room from ‘nice’ to ‘designer’.
📐 Style Math
That beautiful dark, striped wood is likely a veneer, which requires some care. While durable, veneers can be susceptible to water damage along the edges if not perfectly sealed. Always wipe up any drips or standing water promptly. Avoid harsh, abrasive cleaners which can scratch or dull the finish. A simple damp cloth followed by a dry one is usually all you need. For the marble countertop, remember to use a pH-neutral cleaner and seal it once a year to prevent staining and etching.
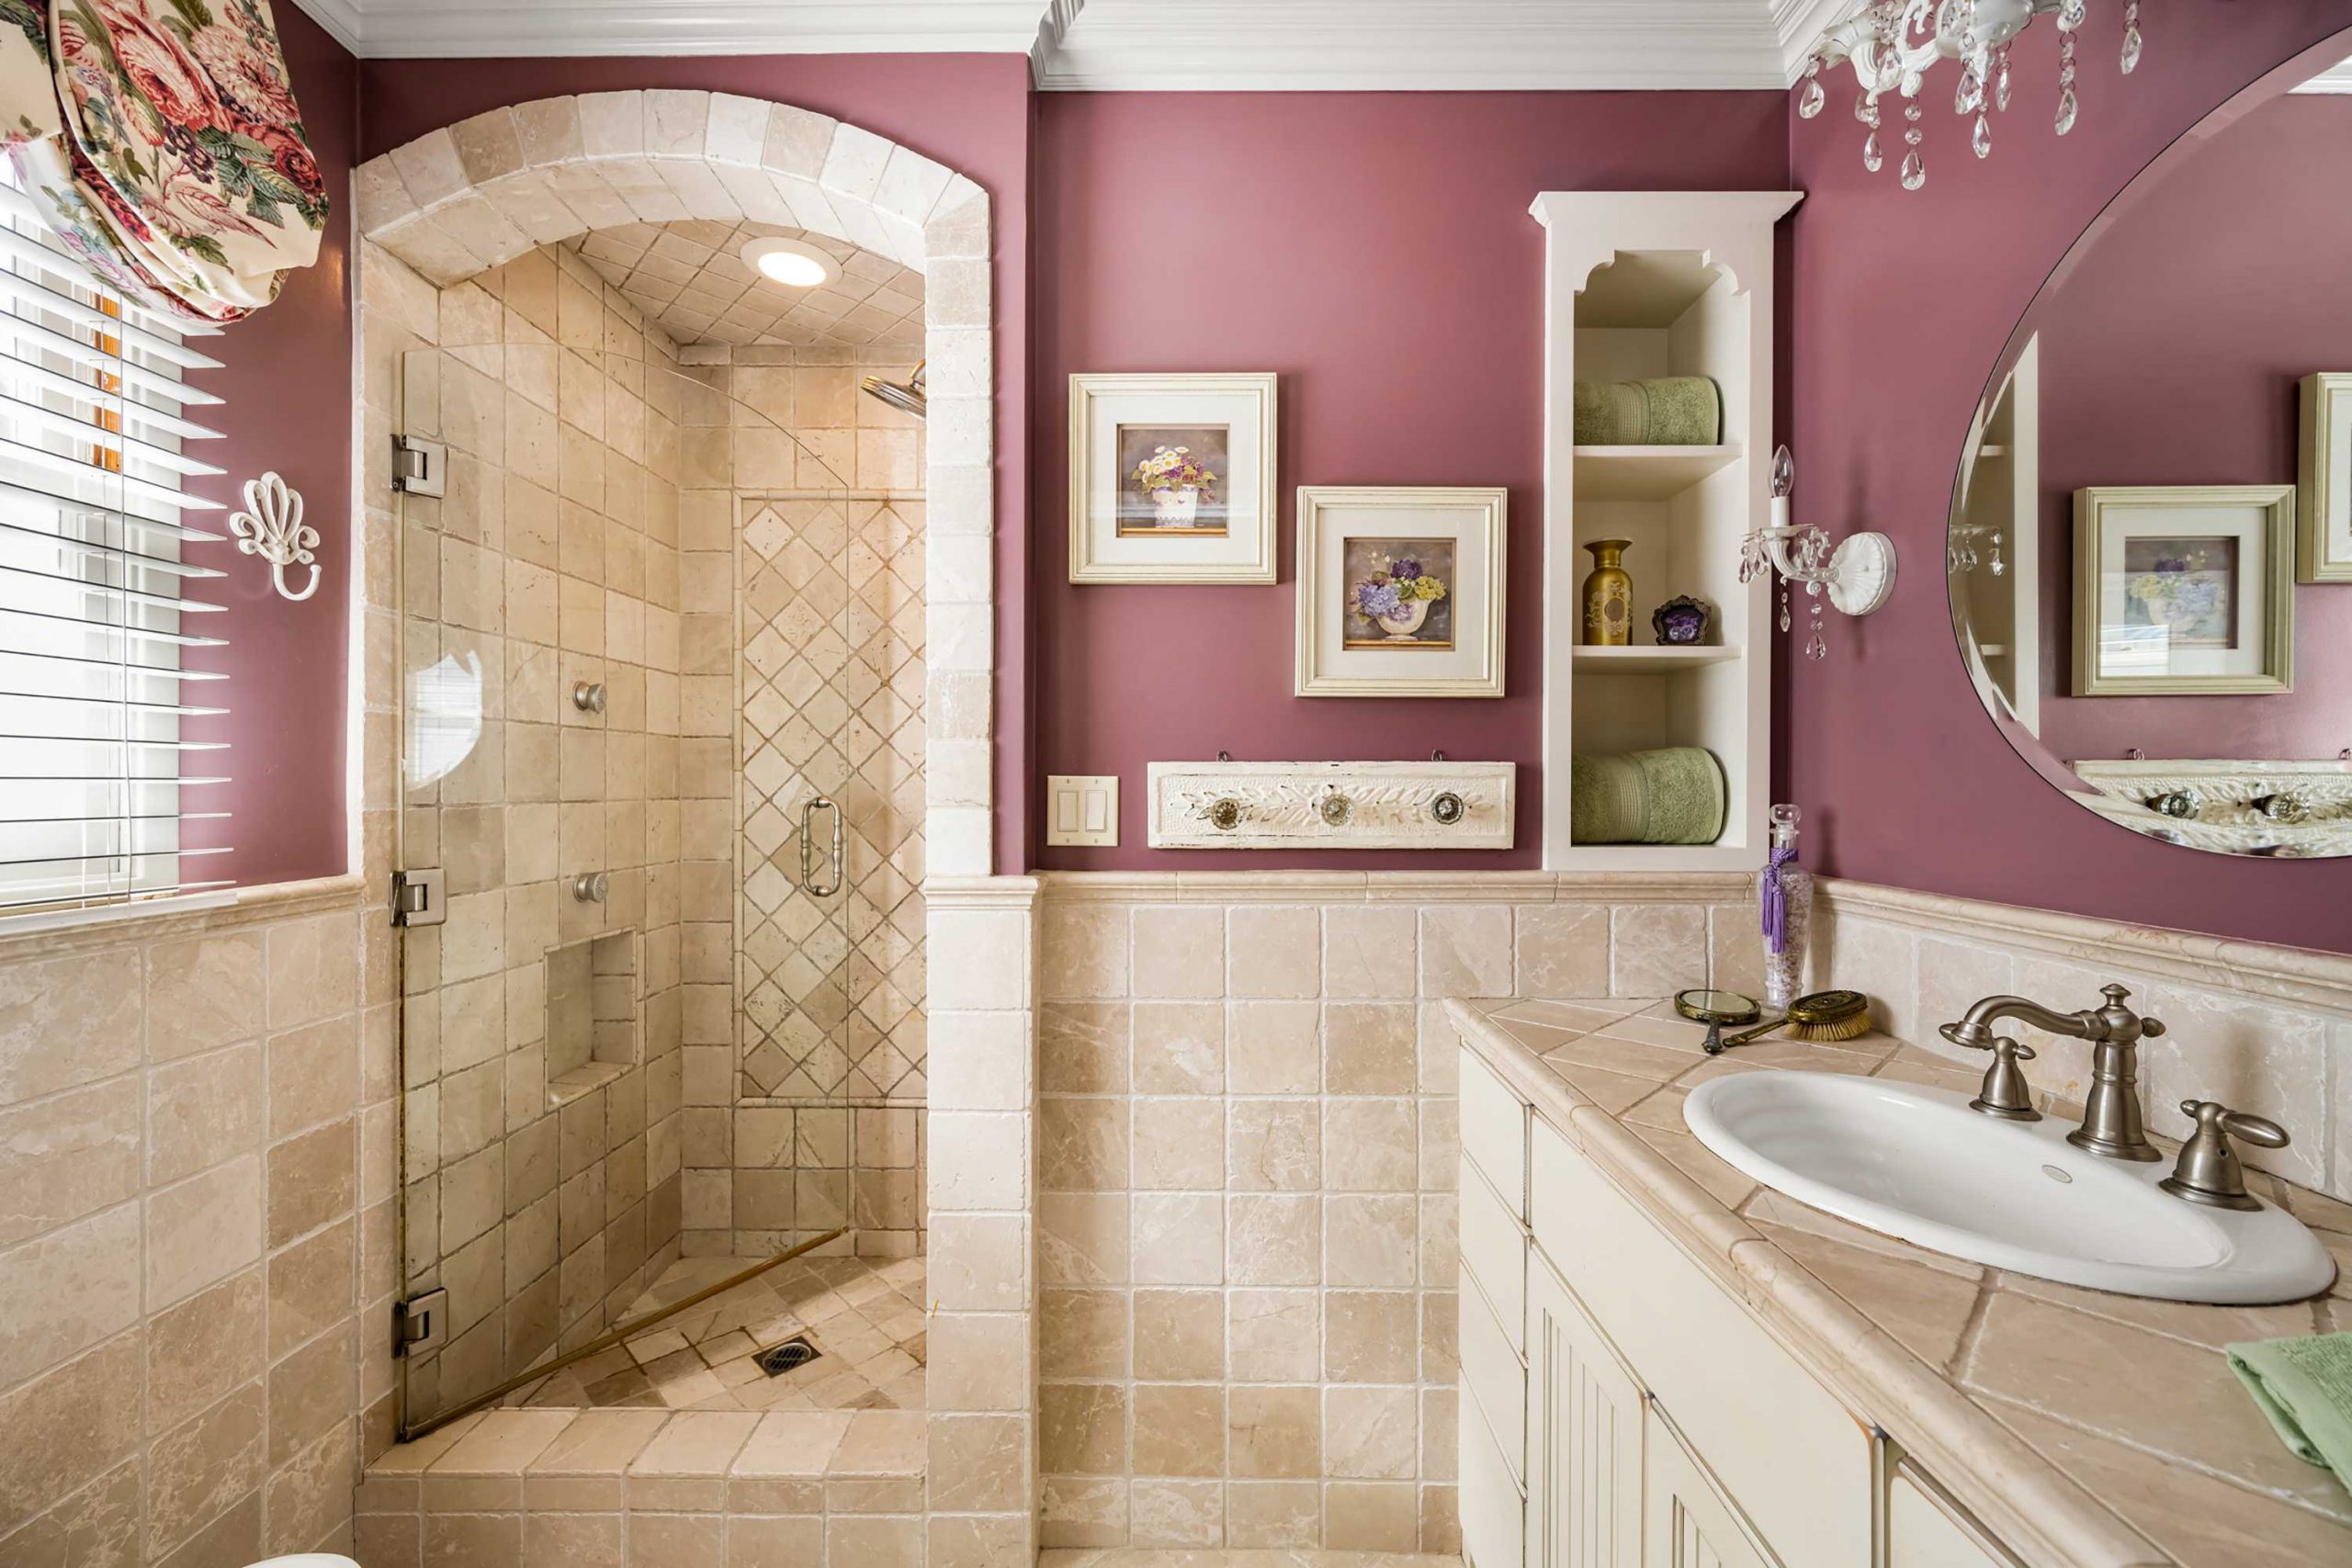
20. Create a Warm, Traditional Space with Burgundy and Beige Tile
This bathroom feels so warm and cohesive because it commits fully to its color palette. The deep burgundy on the upper walls is a bold, enveloping choice, beautifully complemented by the warm beige of the tile. Using the same square tile on the floor, as a wainscot, and throughout the arched shower creates a seamless, unified look that feels incredibly custom and intentional. The white vanity and floral blind provide just enough brightness to keep the rich colors from feeling heavy.
💡 Designer Tip
You can get this rich, traditional look for less. Instead of tiling the walls, create a similar effect with paint and molding. Paint the bottom third of the wall a warm beige and the top two-thirds a deep burgundy, then install a simple chair rail molding where the colors meet. Look for a vinyl floor cloth or patterned linoleum with a tile design to save big on flooring costs. A floral shower curtain can stand in for the pricier Roman blind to give you that same pop of pattern.
21. Add a Pop of Color with a Bright Blue Open-Shelf Vanity
The undeniable hero of this bathroom is the bright blue vanity. In a room that is otherwise mostly white and grey, the vanity provides a powerful and playful punch of color that defines the entire space. The open-shelf design keeps it from feeling like a heavy block of color, allowing the blue and white patterned bins to add another layer of visual interest. It just goes to show that you don’t have to be afraid of bold color in a small space.
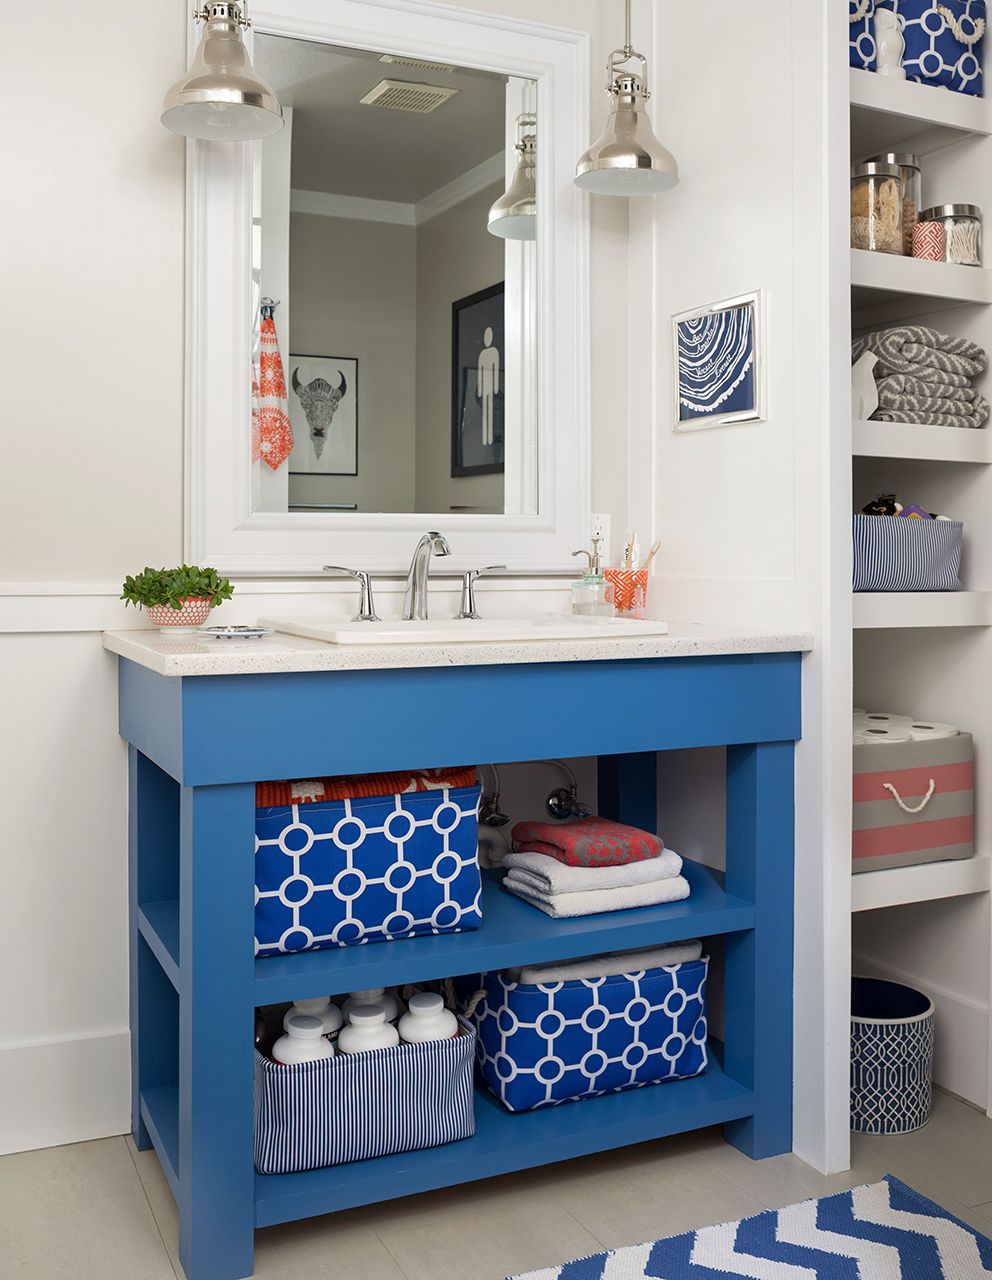
🔥 Trending Context
Open-shelf vanities look fantastic on Pinterest, but they require a commitment to tidiness. There are no doors to hide clutter. If you’re not the type of person who will neatly fold towels or use curated storage bins, this style might drive you crazy. Be brutally honest with yourself: can you maintain this level of organization day-to-day? If not, a vanity with closed doors might be a better choice for your sanity, and you can still paint it a fun, bold color.
22. Go Moody and Modern with a Herringbone Accent Wall
This design is a masterclass in creating drama and mood. The dark charcoal walls absorb light, creating a cozy, intimate feeling, while the light-colored herringbone tile wall does the opposite, reflecting light and acting as a bright, textured focal point. The hidden LED strip lighting that grazes up the herringbone wall is a brilliant touch, highlighting the pattern and creating a stunning architectural effect. The sleek, freestanding tub and minimalist pendant lights complete the sophisticated, modern look.
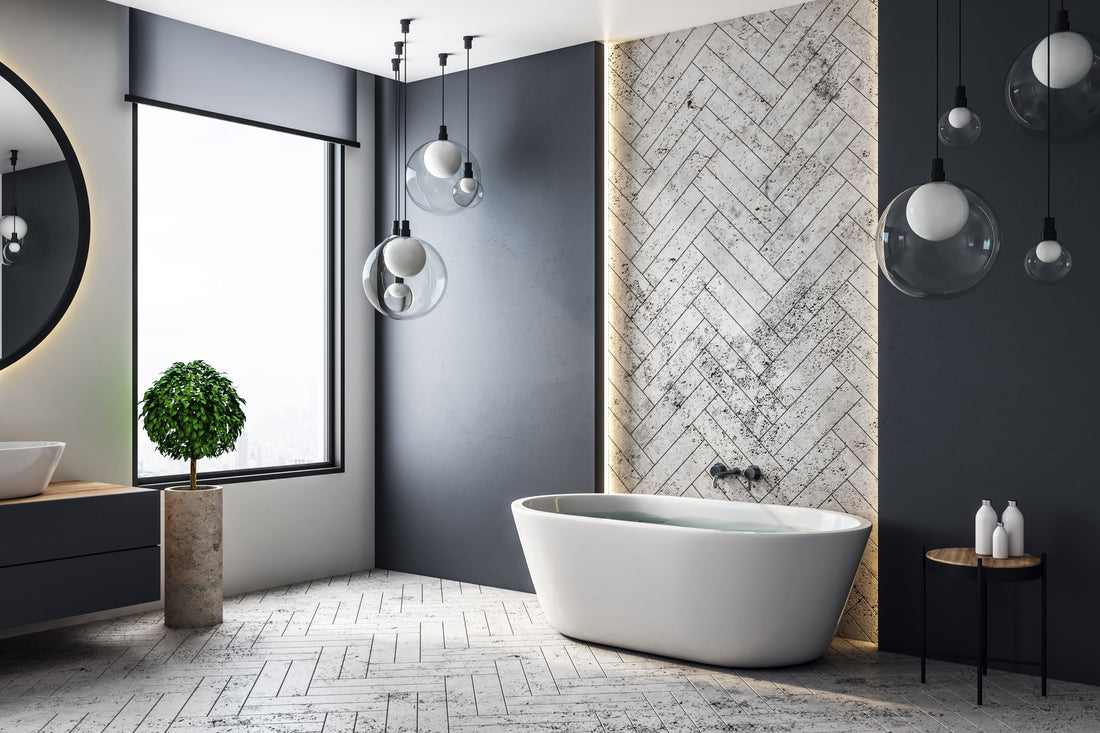
🔧 How-To Brief
When creating a tile accent wall like this, the grout color is just as important as the tile itself. Here, a matching light grey or white grout is used to let the herringbone *pattern* be the star, rather than the individual tiles. If you were to use a dark, contrasting grout, you would get a much busier, more graphic look. For a subtle, textural effect, always aim to match the grout to the tile as closely as possible.
23. Layer Rich Red Wainscoting with Tree-Patterned Wallpaper
The formula for this elegant, classic look is all about balance: 40% bold color (the deep red wainscoting), 40% delicate pattern (the tree wallpaper), and 20% refined materials (the marble top, brass fixtures, and ornate mirror). The wainscoting grounds the space with rich color, while the wallpaper adds a layer of sophisticated, nature-inspired detail. Neither element overpowers the other; they work in perfect harmony to create a layered, timeless feel.
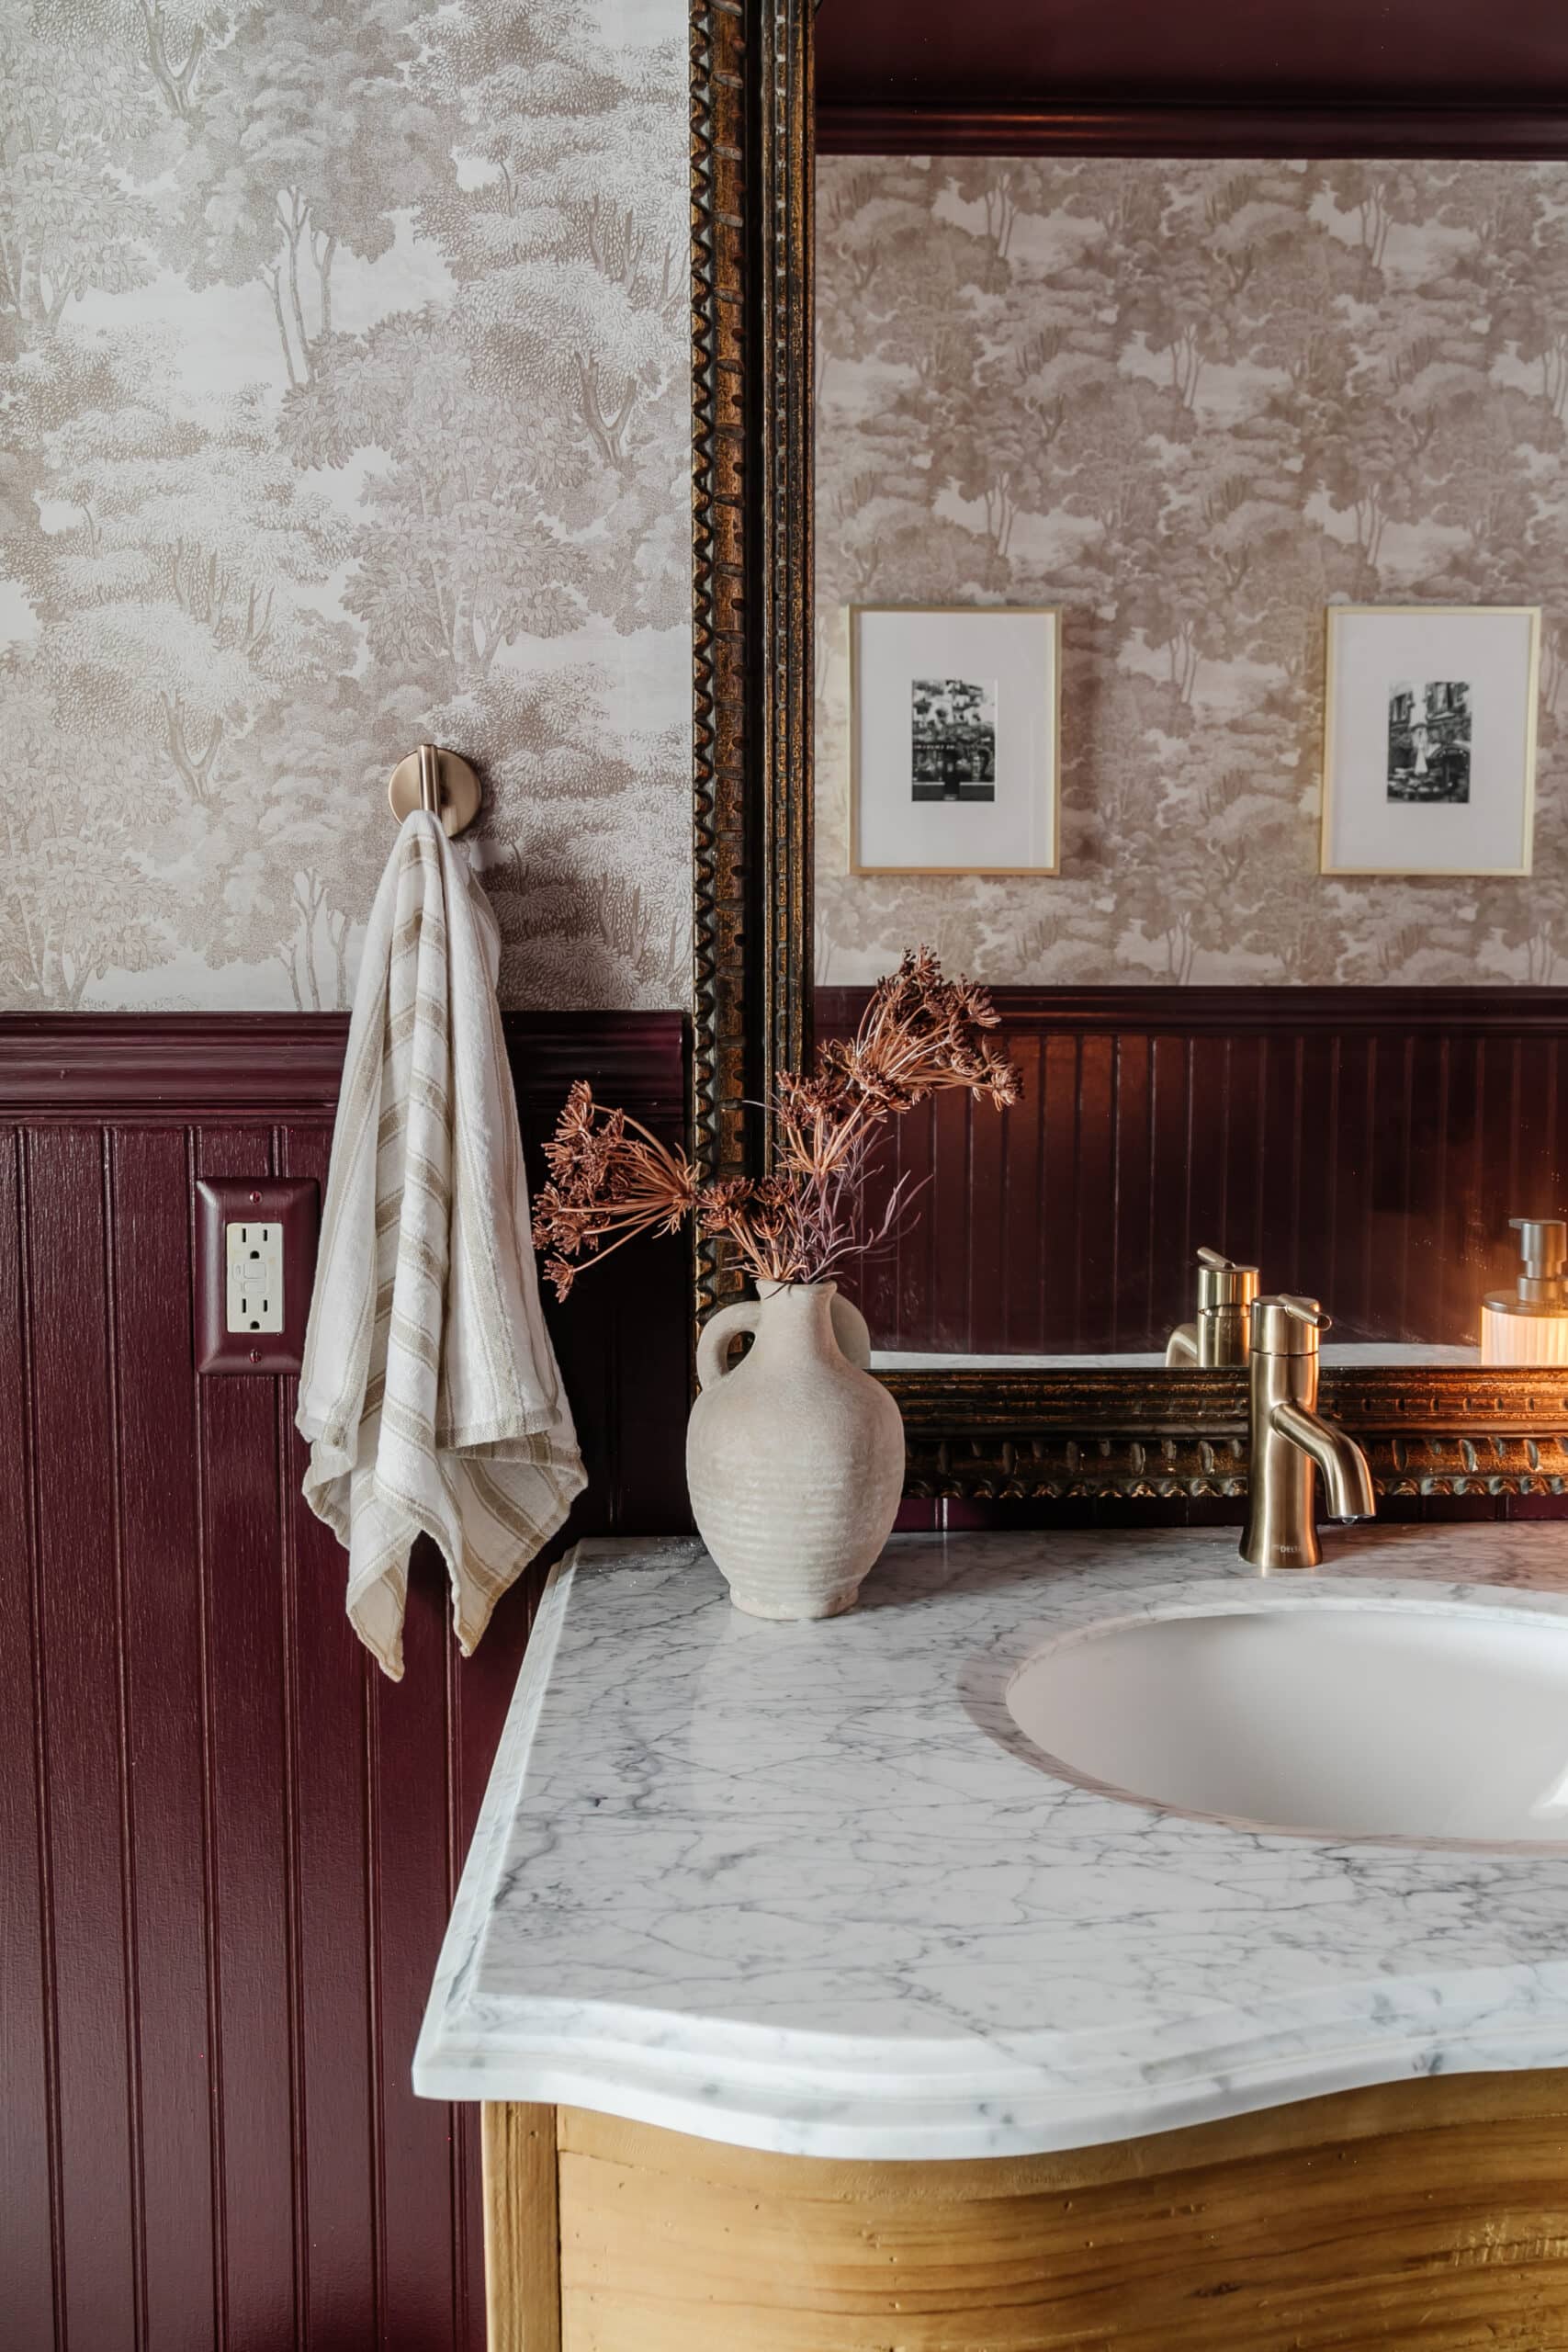
📏 Scale Guide
that truly makes this design feel special and collected is the ornate, oversized mirror. Its dark wood and gold frame perfectly echoes the other finishes in the room—the red of the walls, the brass of the faucet, and the wood of the vanity. It acts as a bridge, tying all the different elements together. Its scale is dramatic and confident, turning the vanity wall into a stunning focal point. Without it, the wall would feel much less impactful.
24. Design a Minimalist Sanctuary with a Freestanding Tub
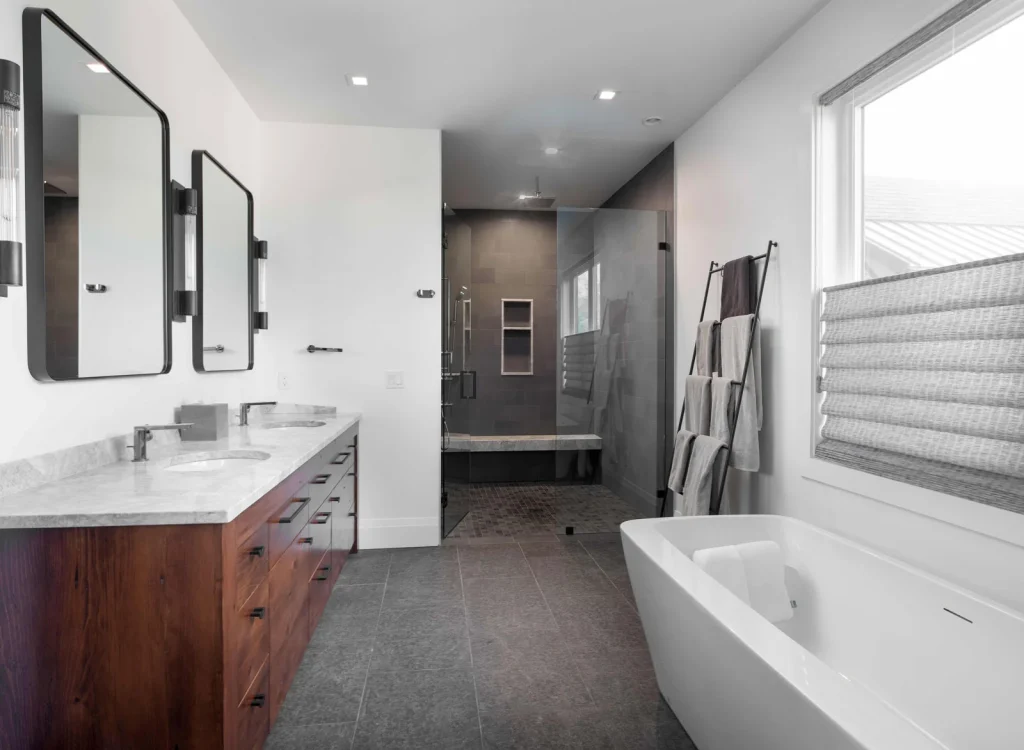
This look is ideal for a larger primary bathroom, typically 100 square feet or more. A freestanding tub needs space to make a statement—a minimum of 12 inches of clearance on all sides is ideal, but more is better. You also need enough length for a separate glass-enclosed shower and a double vanity. Trying to squeeze this layout into a smaller space will feel cramped and lose the airy, minimalist effect. This is a great inspiration piece, but maybe less practical than the compact layout of Idea #8.
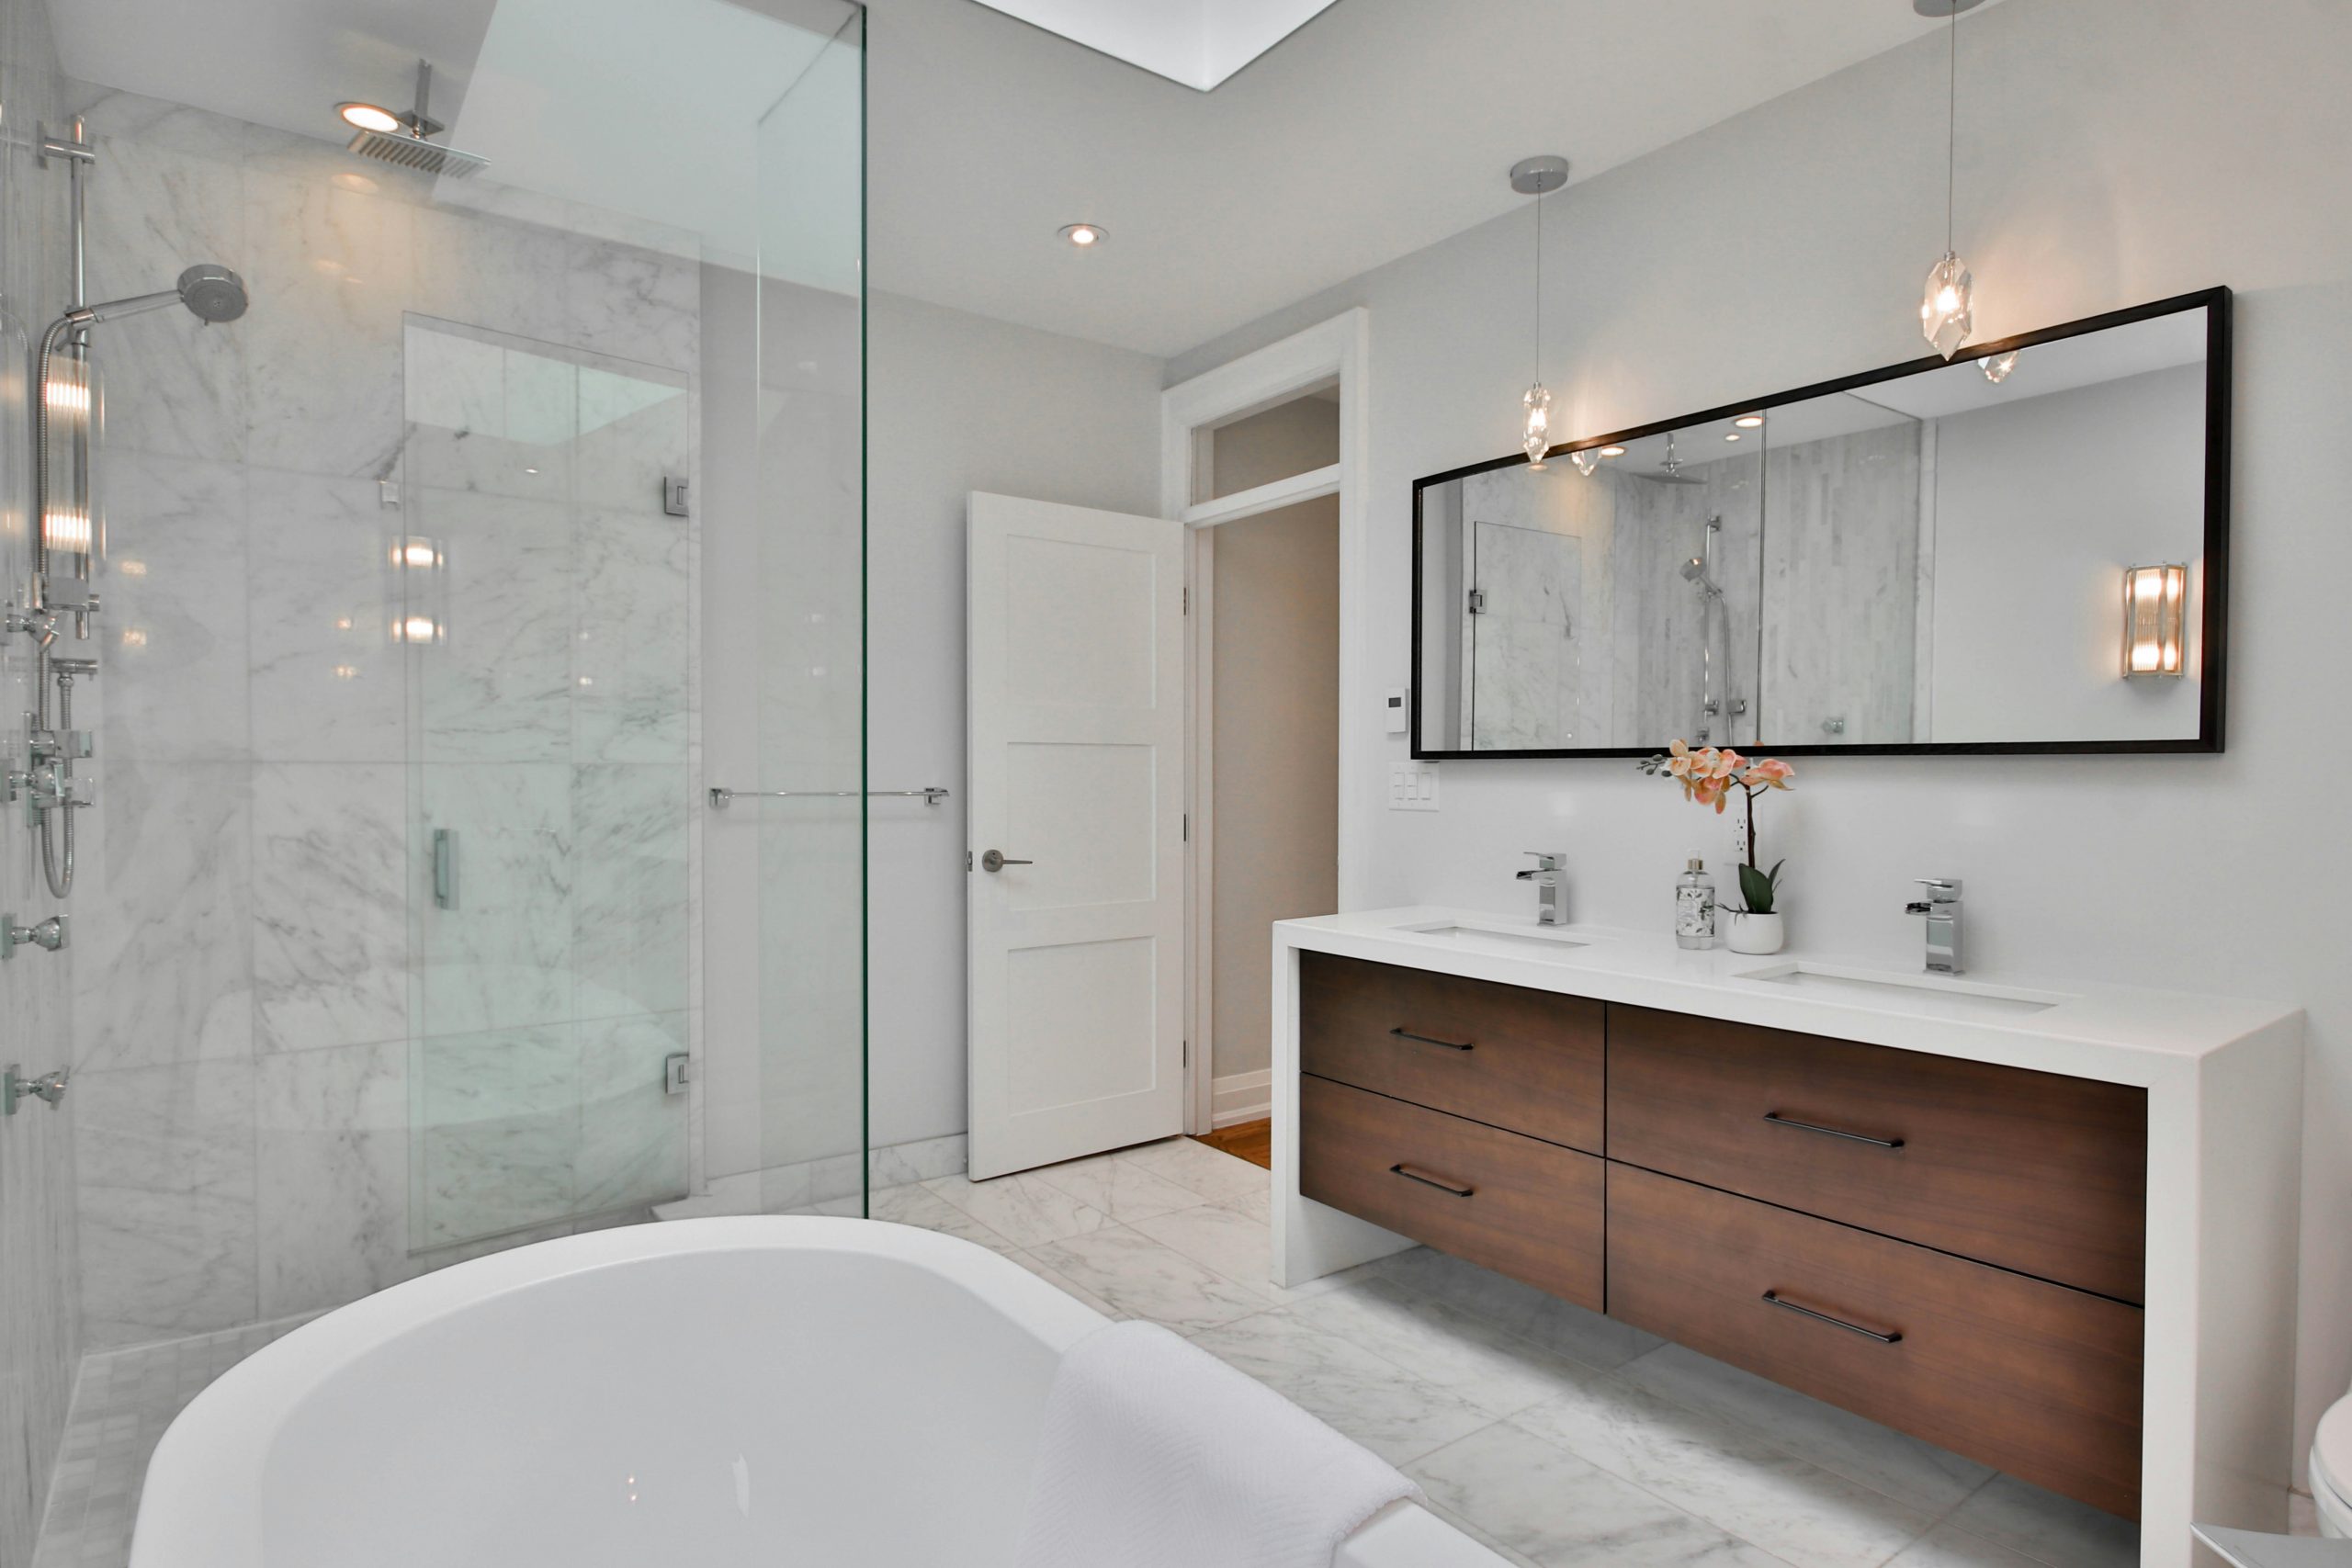
⭐ The One Thing
What makes this minimalist design feel warm and not sterile is the careful use of natural textures. The dark wood drawers of the floating vanity bring an element of organic warmth that contrasts beautifully with the cool, smooth surfaces of the white tub, countertop, and marble tile. The large, black-framed mirror adds a strong graphic element, while the chrome fixtures provide a sleek, polished finish. It’s a perfectly balanced mix of modern and natural.
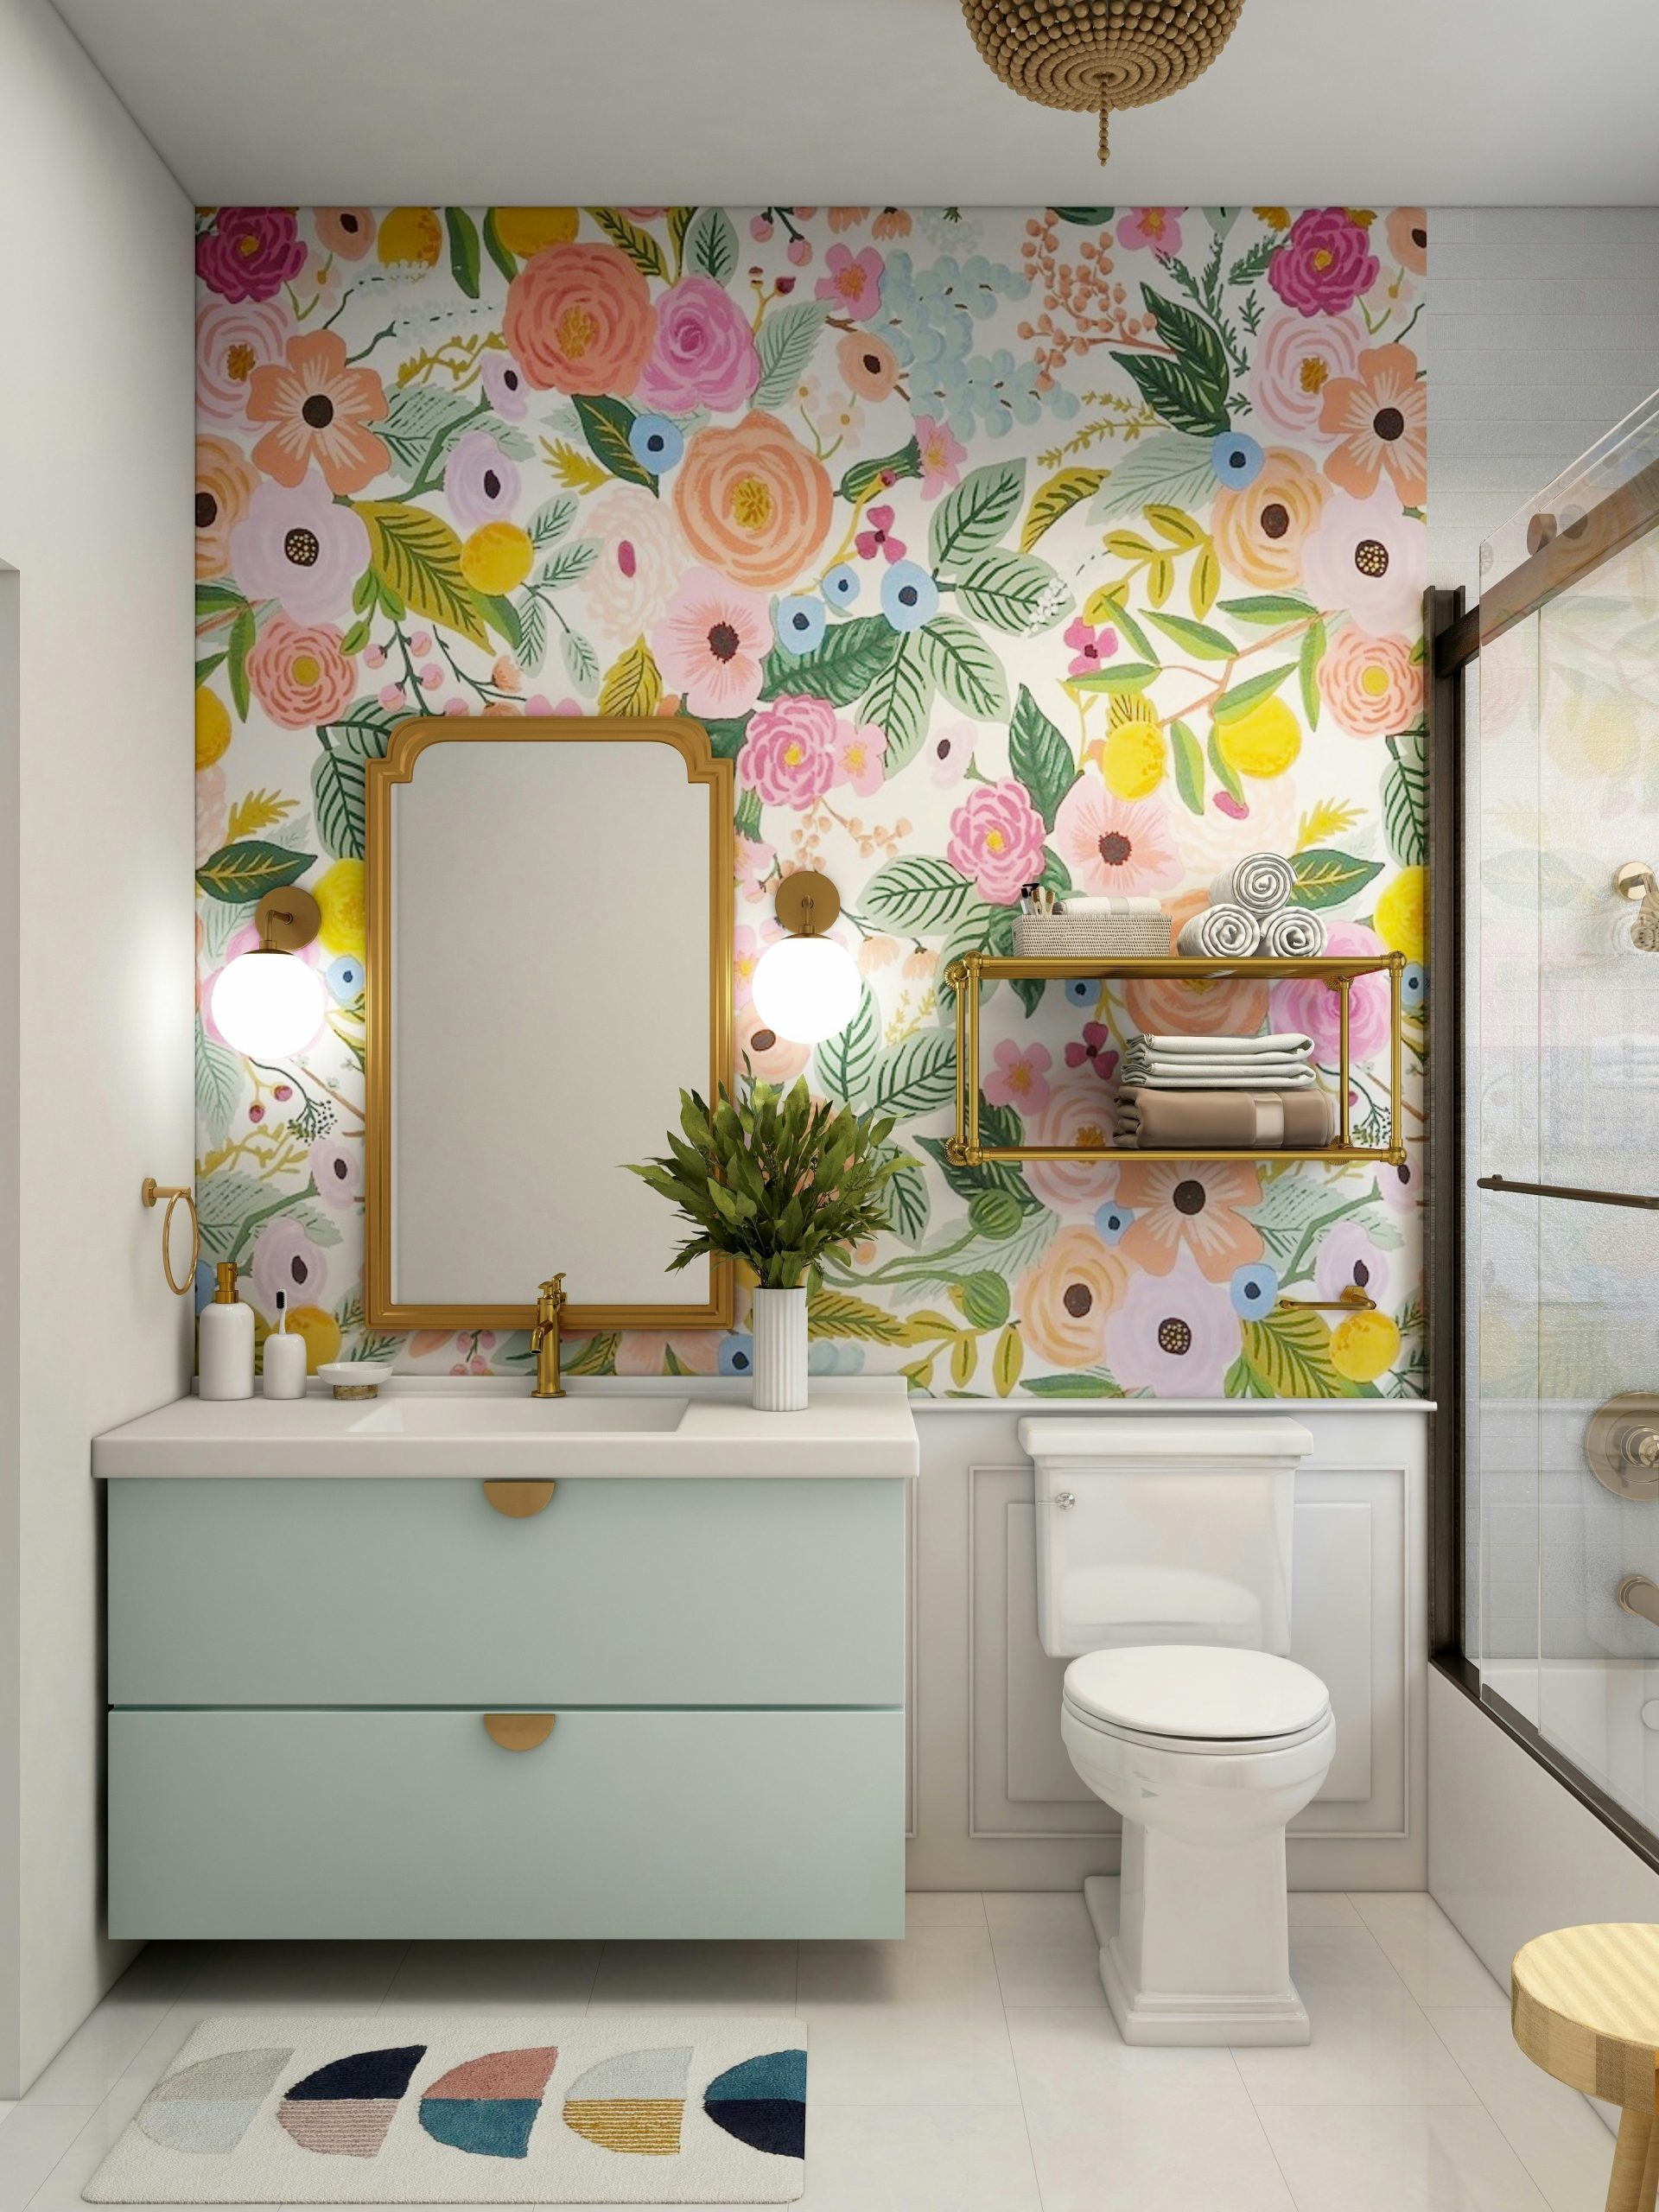
25. Embrace Cheerful Color with Floral Wallpaper and a Mint Green Vanity
The single element that gives this bathroom its infectious personality is the large-scale floral wallpaper. It’s unapologetically cheerful, colorful, and bold. It sets the entire tone for the room, acting as a piece of art that covers the walls. The decision to pair it with a mint green vanity and gold fixtures is brilliant, as it pulls colors from the wallpaper pattern to create a look that feels eclectic yet perfectly coordinated.
⚠️ Real Talk
When using a bold, multi-colored wallpaper, pull your paint colors directly from the pattern for a cohesive look. Use a color-matching app or simply take a photo of the wallpaper to your local paint store. They can scan the photo and create a perfect match to one of the colors in the pattern. Choosing the mint green for the vanity directly from the wallpaper’s leaves is what makes this combination look so intentional and designer-approved.
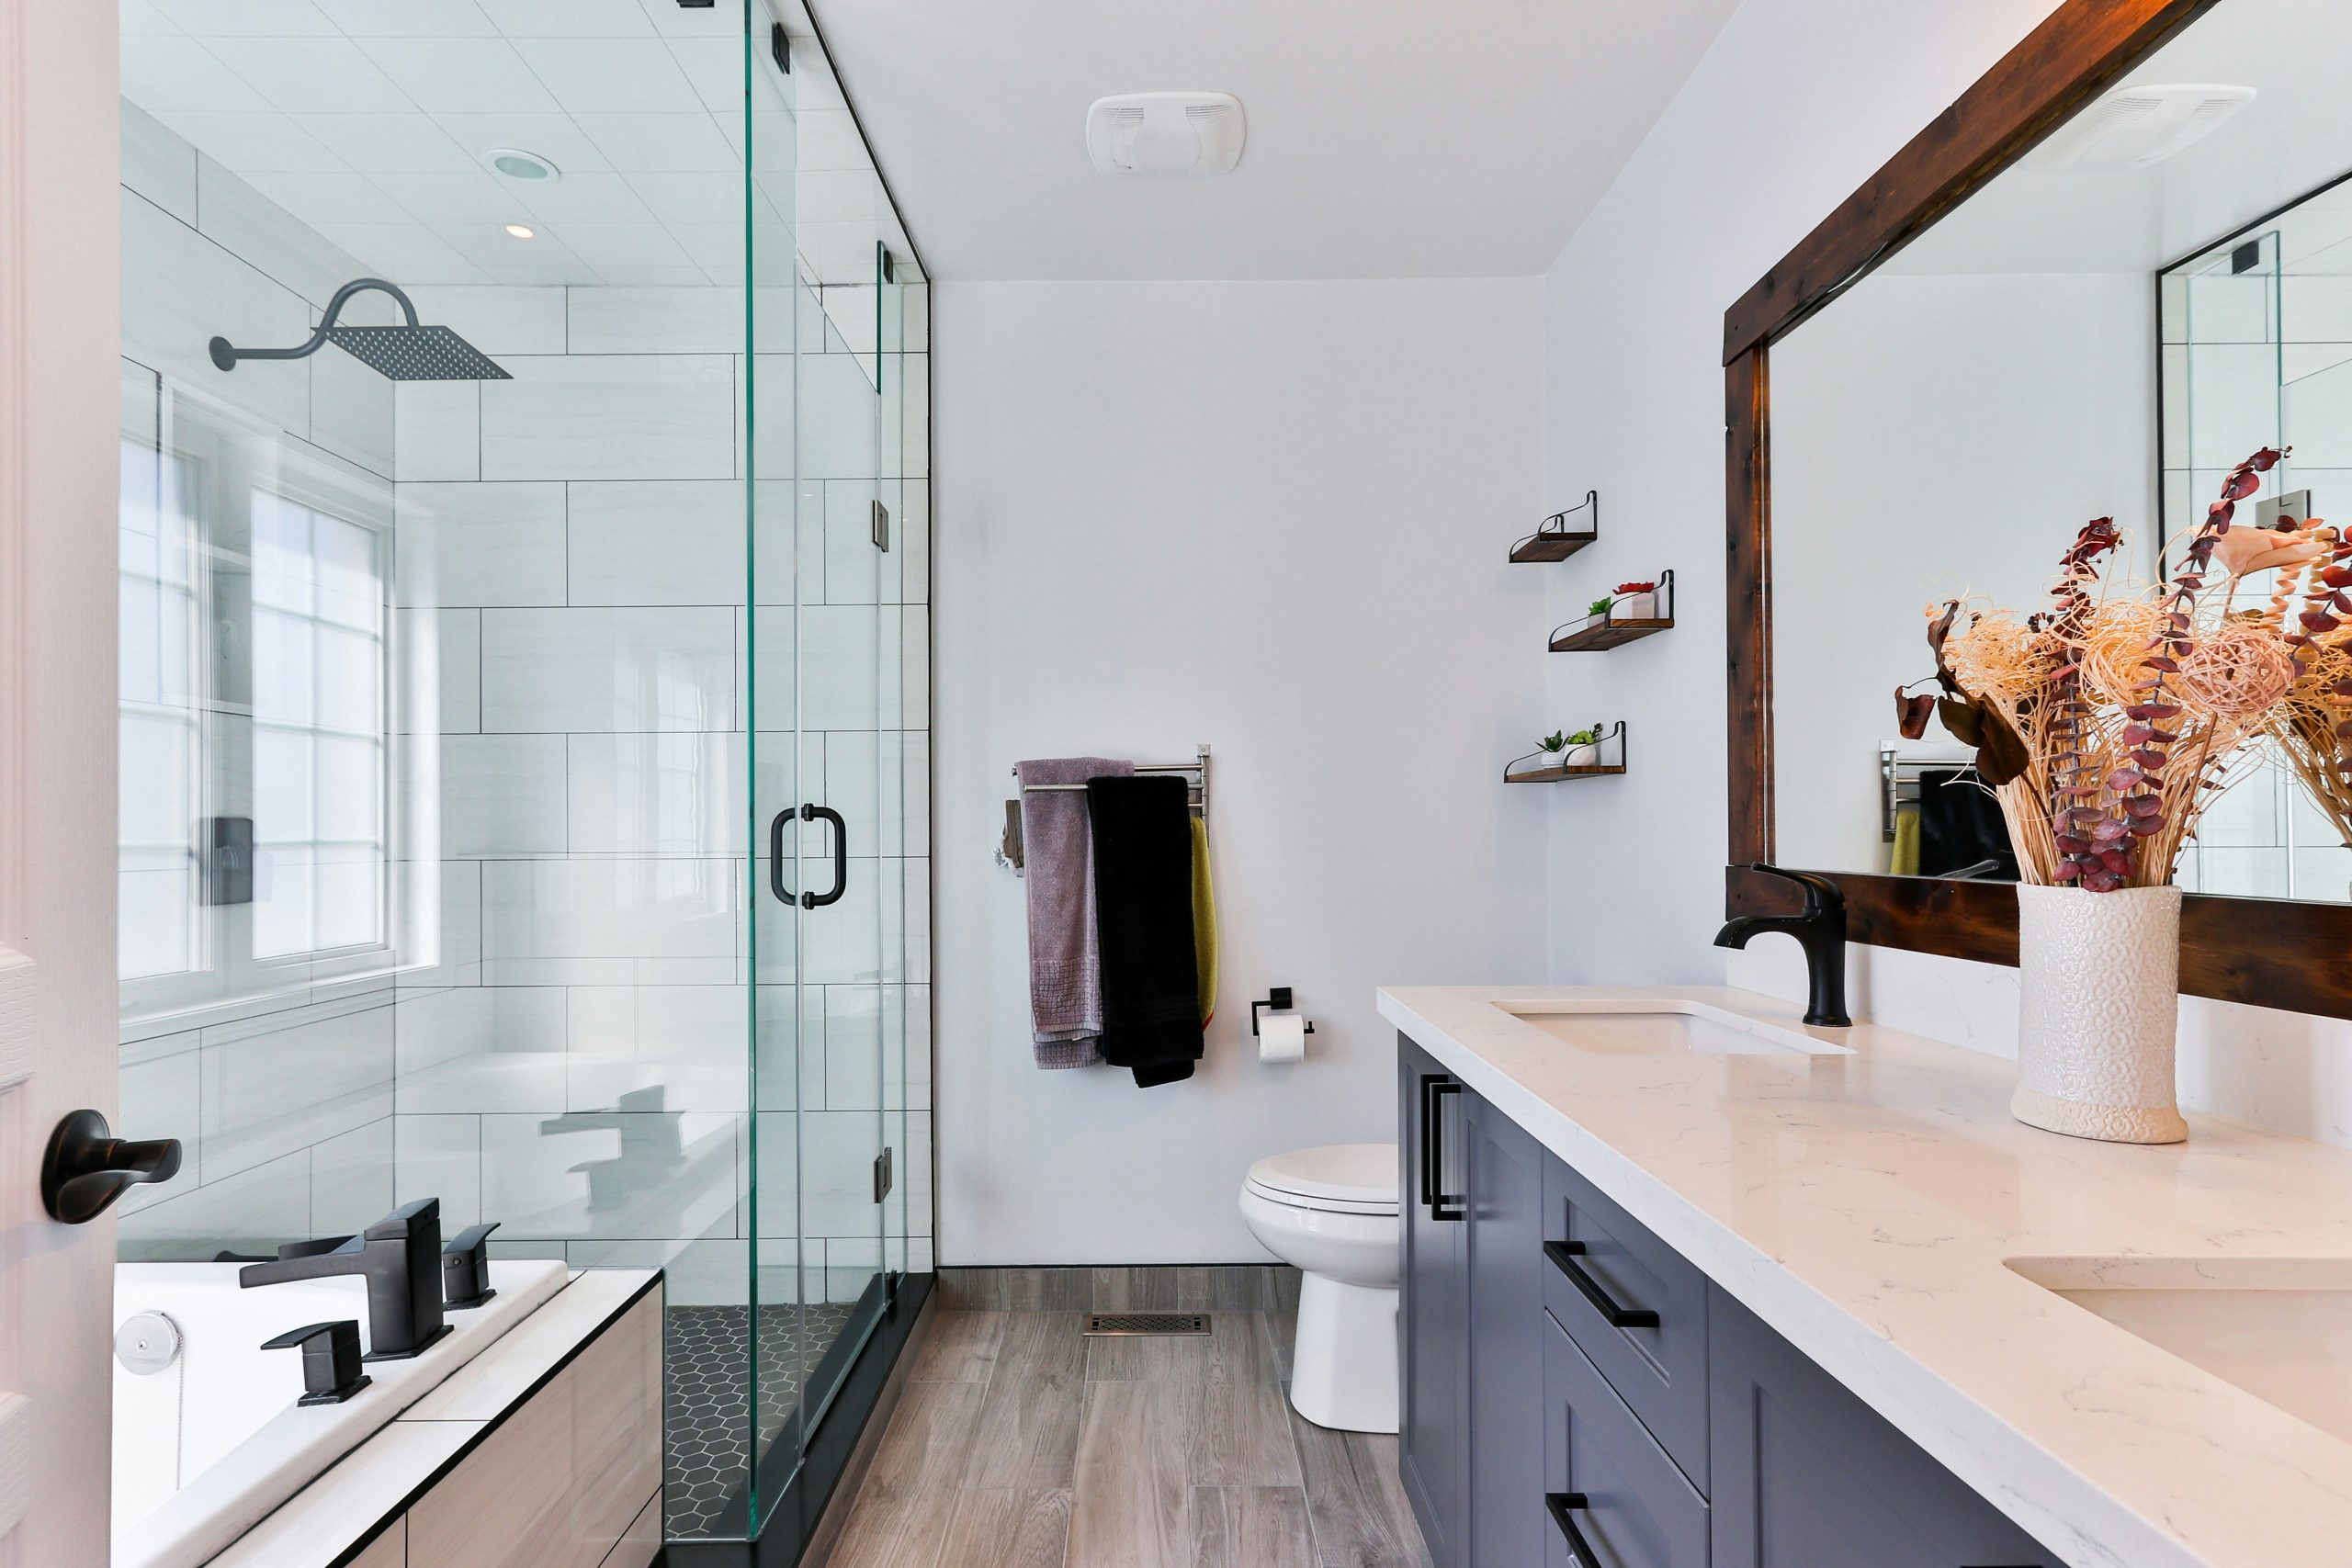
26. Mix Grey, White, and Wood with Modern Black Hardware
This chic, modern look is very achievable on a budget. Look for a stock grey vanity from a big box store like Home Depot or Lowe’s. You can easily swap out the default hardware for matte black pulls (often less than $5 each) for an instant custom look. White subway tile is famously affordable, and wood-look luxury vinyl plank (LVP) flooring gives you this exact appearance for a fraction of the cost and maintenance of real wood. A simple dark wood framed mirror from Target or Wayfair completes the design.
🧹 Maintenance Reality
This bathroom works so well because it sticks to a tight, neutral color story and uses black as a graphic accent. The grey vanity, white tile, and light wood-look floor create a calm and serene base. Then, matte black is used consistently—on the faucets, the cabinet pulls, and the shower frame—to create a series of sharp, modern punctuation marks that tie the whole space together. The dark wood mirror frame adds a touch of warmth and connects to the flooring. For a similar vanity in a different context, see Idea #29.
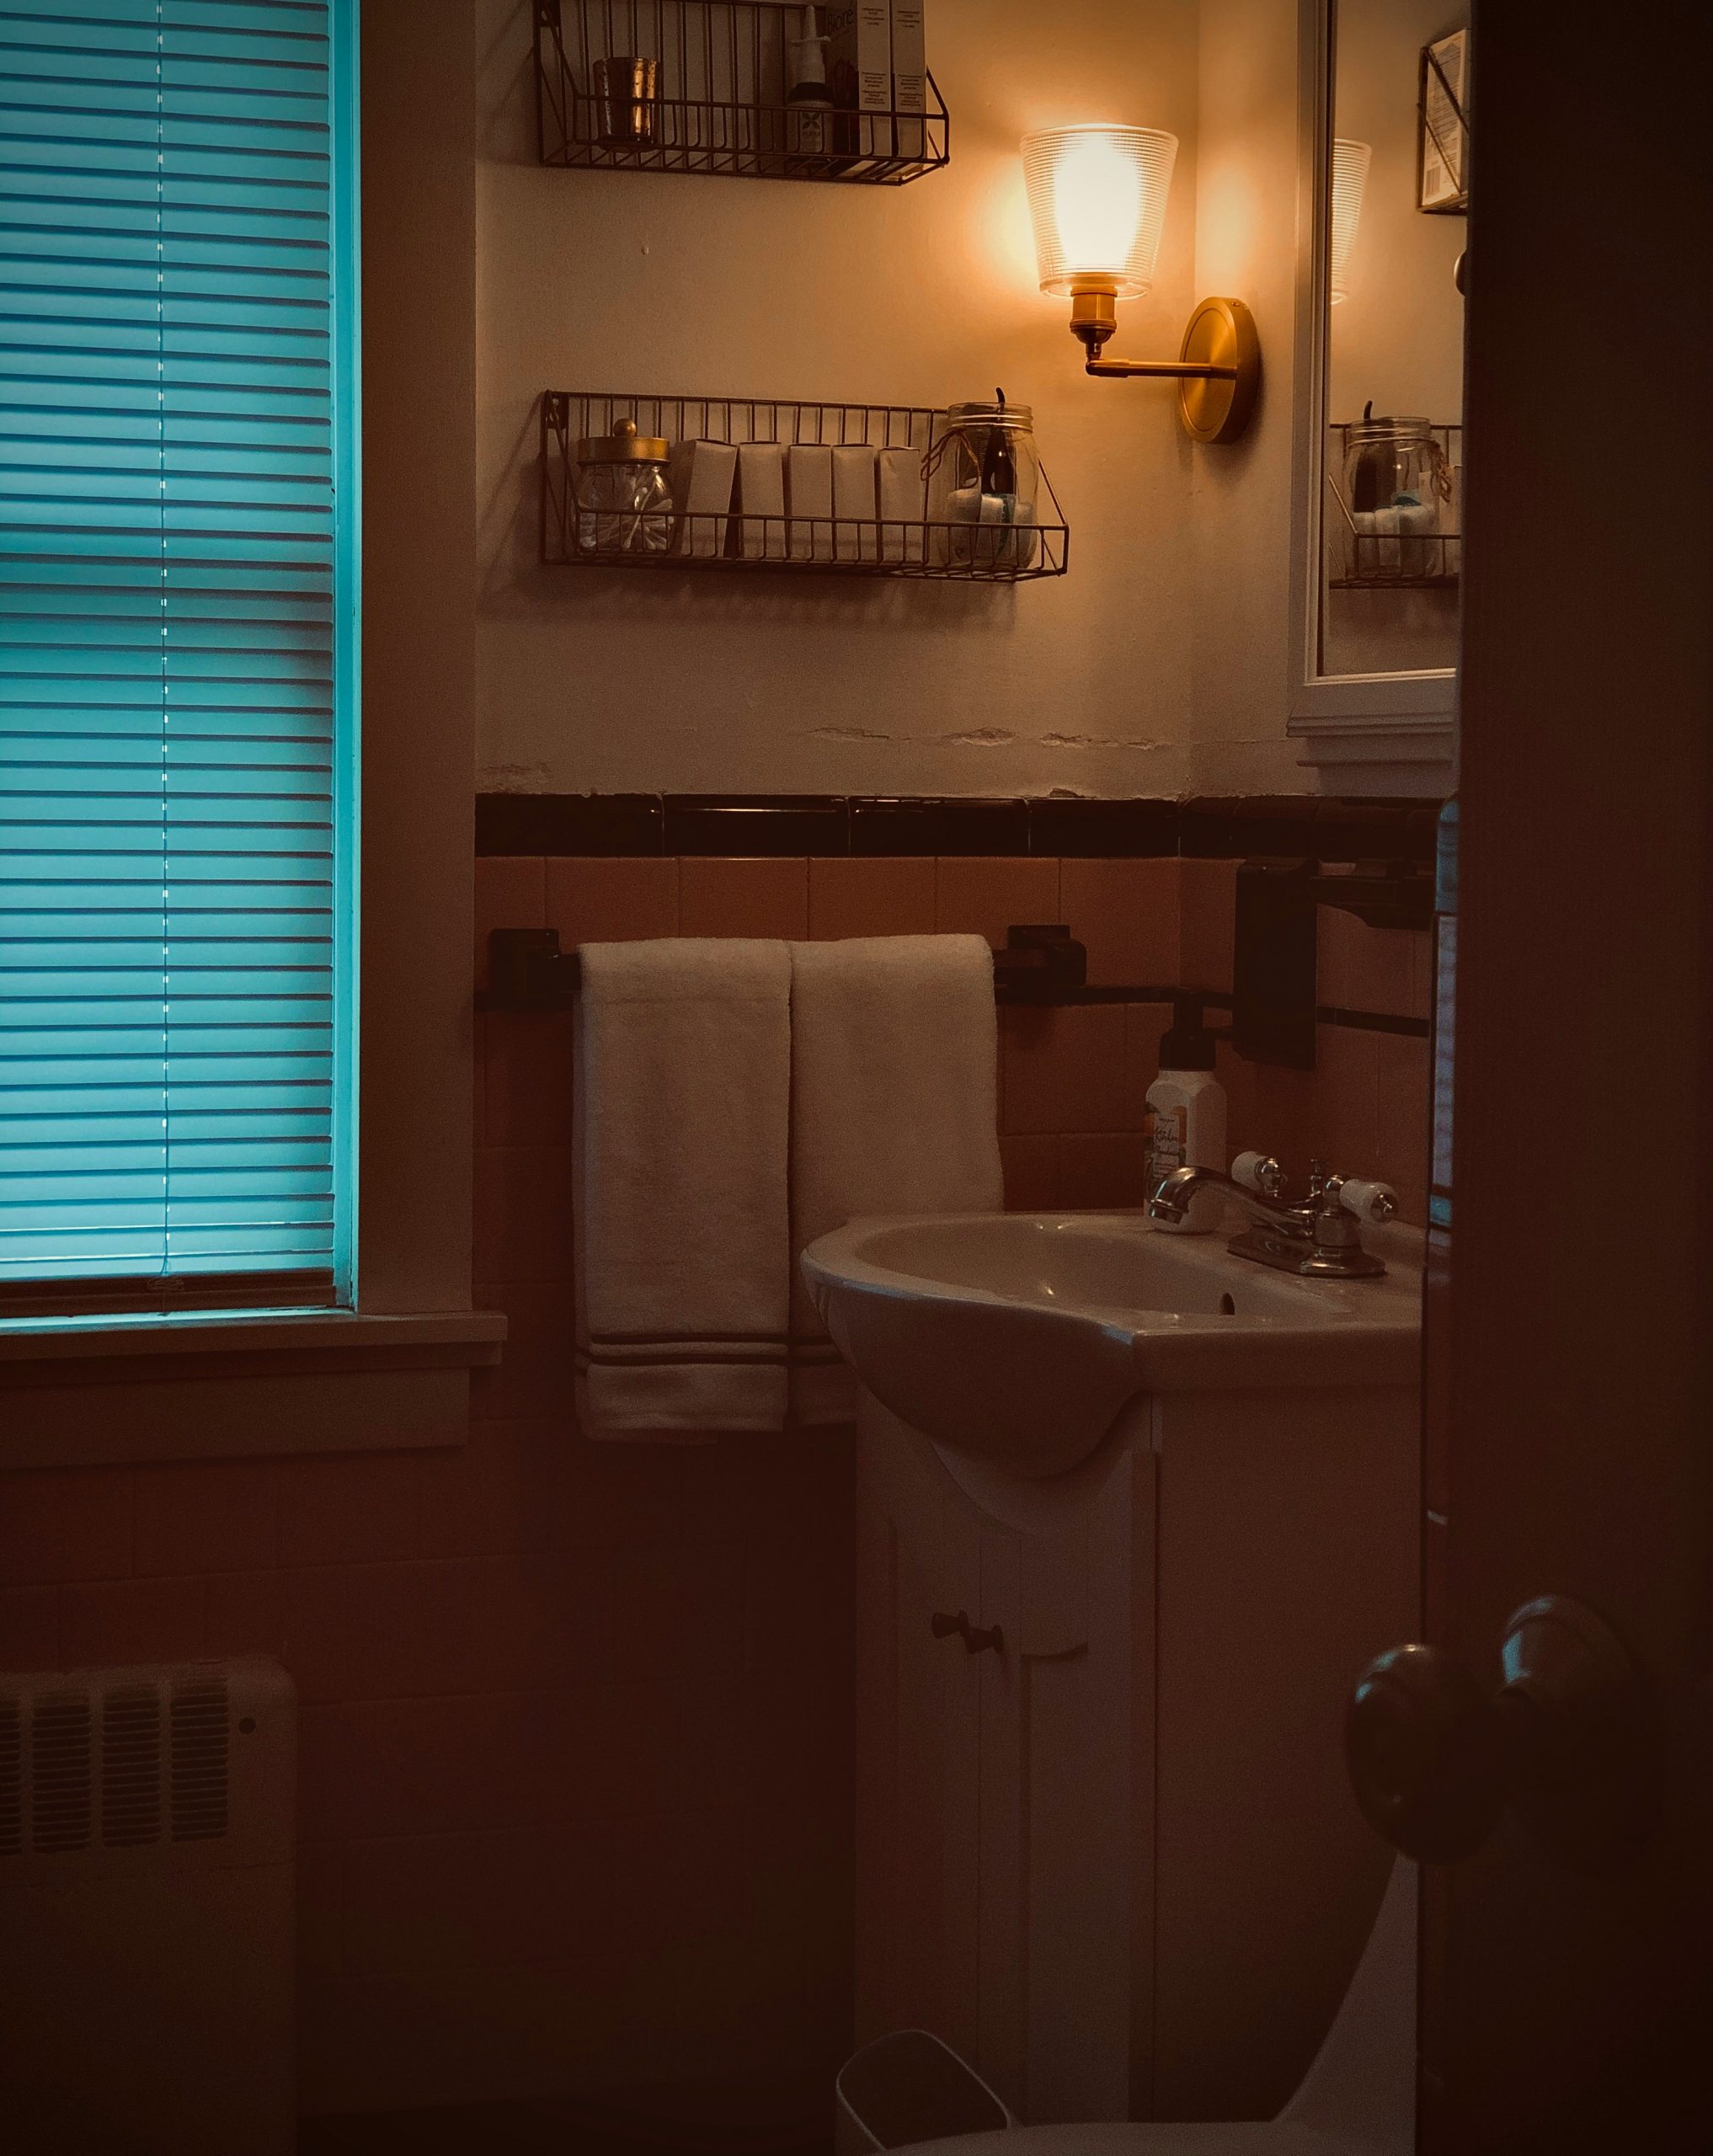
27. Create a Cozy Glow with Warm Lighting and Smart Storage
The key to the cozy atmosphere in this bathroom is the lighting. The gold sconce with its ribbed glass shade casts a warm, soft glow that makes the small space feel incredibly inviting and intimate. It highlights the textures of the towels and baskets, turning a simple storage area into a charming vignette. It proves that you should never underestimate the power of a well-chosen light fixture to completely change the mood of a room. Without that warm light, this would be just another bathroom corner.
✅ Before You Start
Open wire baskets look great and make it easy to see what you have, but they aren’t the best for storing small items that can fall through the gaps. They’re perfect for neatly rolled or folded towels, toilet paper rolls, or larger bottles. For smaller items like makeup, cotton swabs, or travel-sized toiletries, consider using small fabric or canvas bins within the wire baskets to keep things contained and organized.
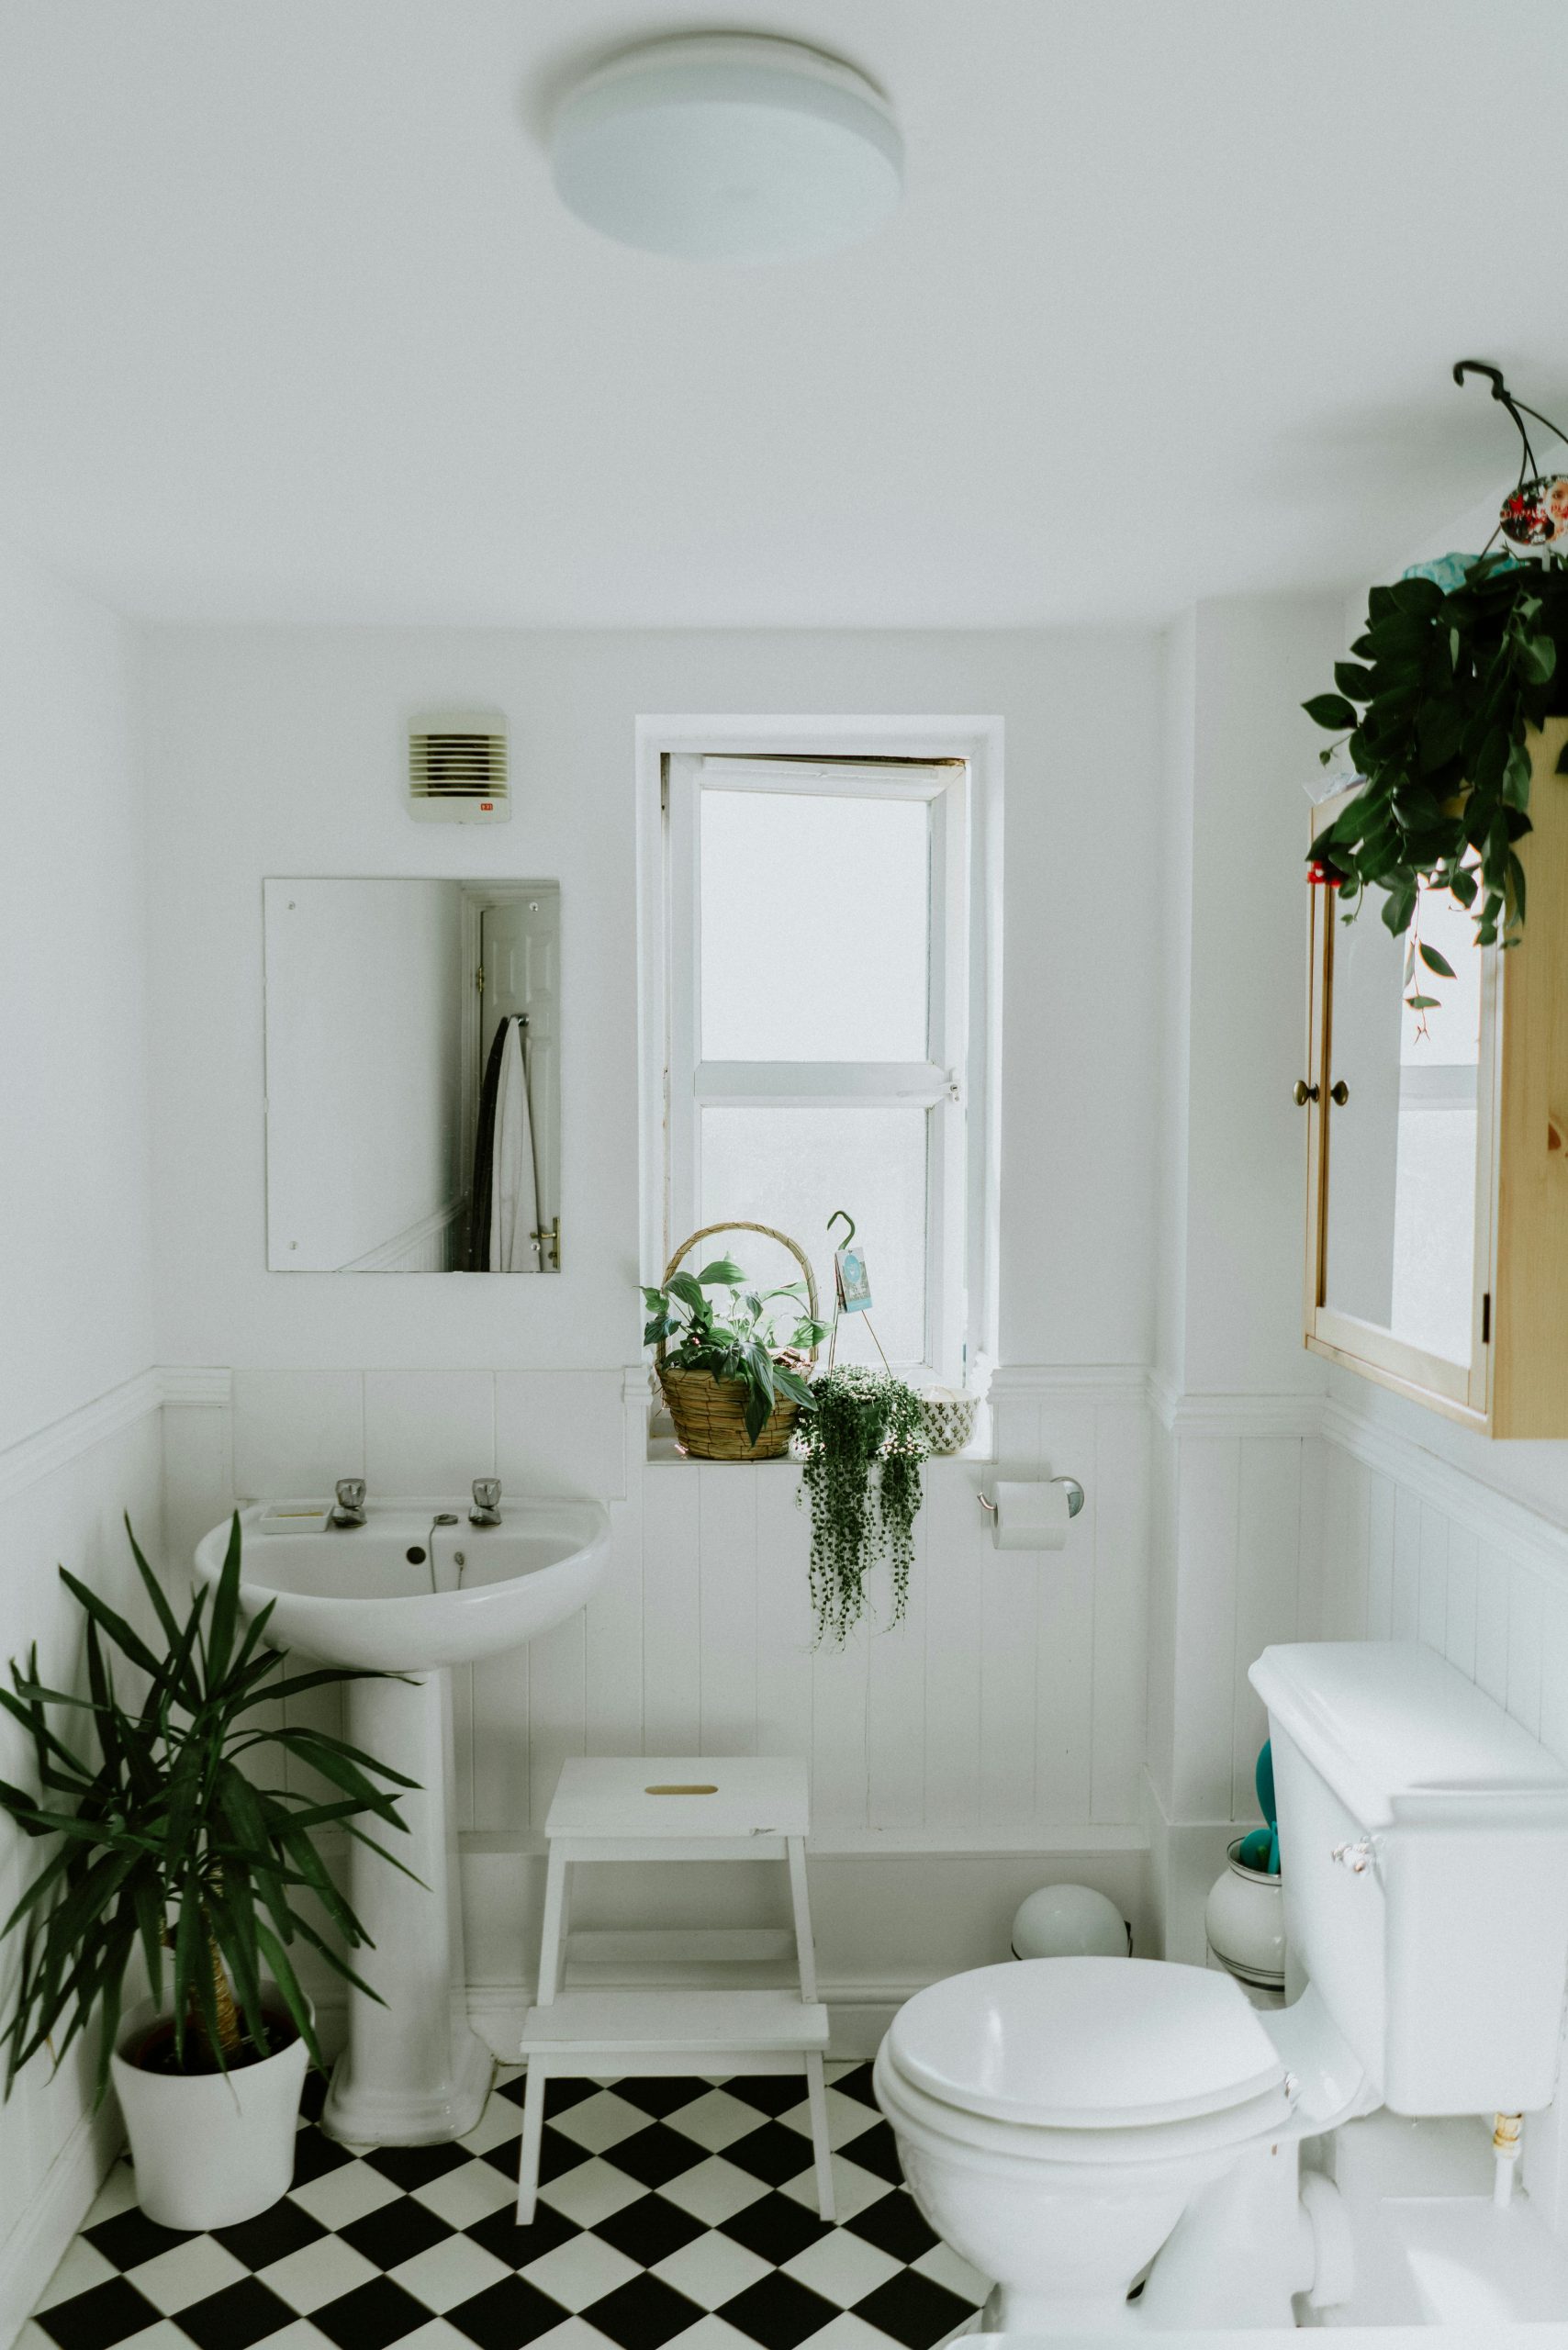
28. Fill a Checkerboard Floor Bathroom with Lush Greenery
This is a perfect example of the ’80/20′ design rule. The room is 80% simple, classic, and neutral: white walls, white plumbing fixtures, and a timeless black and white floor. This provides a clean, versatile canvas. The other 20% is where the personality comes in: lush, vibrant green plants. The greenery adds life, color, and an organic element that keeps the graphic black and white from feeling too stark or sterile. Compare this to the more minimalist take on the same floor in Idea #11.
🎯 What Makes It Work
This look is incredibly budget-friendly. The most expensive part might be the checkerboard floor, but even that can be done cheaply with peel-and-stick vinyl tiles. White paint is affordable, and classic pedestal sinks are widely available. The real style comes from the plants, which can be sourced inexpensively from local nurseries, hardware stores, or even propagated from cuttings from friends. The wooden medicine cabinet could easily be a thrift store find, refinished to add warmth.
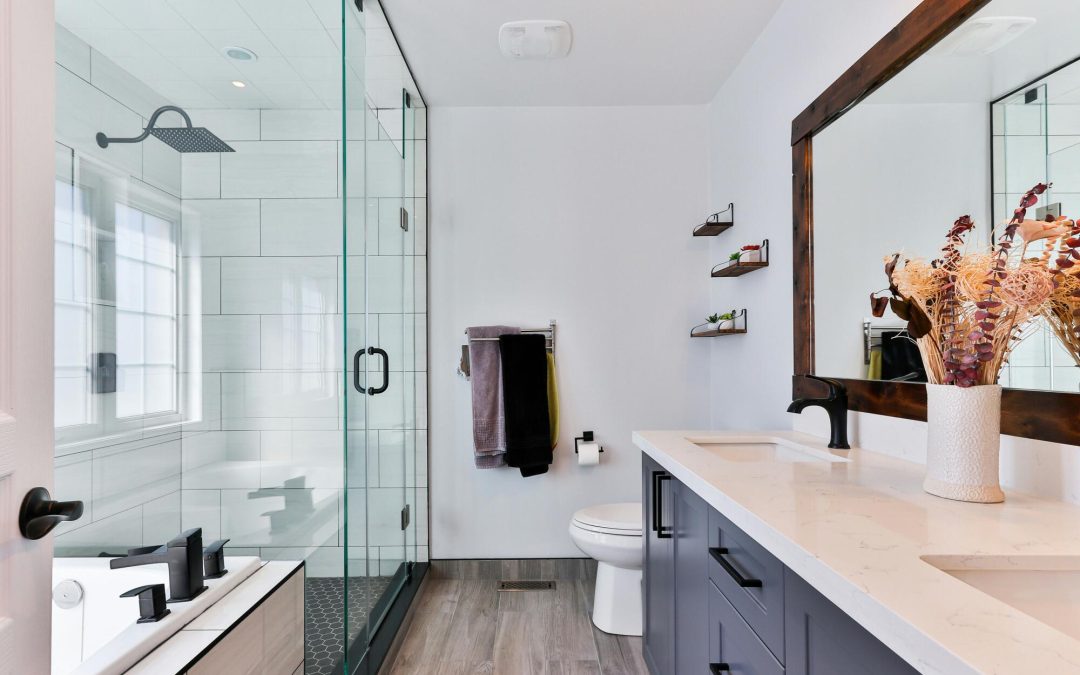
29. Create Separation with a Glass Shower and Grey Double Vanity
This layout is a fantastic solution for a long, rectangular bathroom, common in many new homes and condos. Placing the shower and tub at one end and the double vanity along the long wall makes excellent use of the space. A glass shower enclosure is key here; a shower curtain would visually chop the room in half and make it feel much smaller. The design feels spacious and functional, with clear zones for washing and getting ready.
💰 Budget Breakdown
When you have a double vanity, a single large mirror can be a great way to make the room feel bigger and brighter than two smaller, separate mirrors. It creates one large, uninterrupted reflective surface that bounces light around the room. To keep it from looking boring, choose a mirror with a substantial, textured frame, like the dark wood one here. It adds warmth and character and serves to ground the large mirror, turning it into a deliberate design feature. This is a very similar vanity to Idea #26, but the single mirror gives it a different feel.
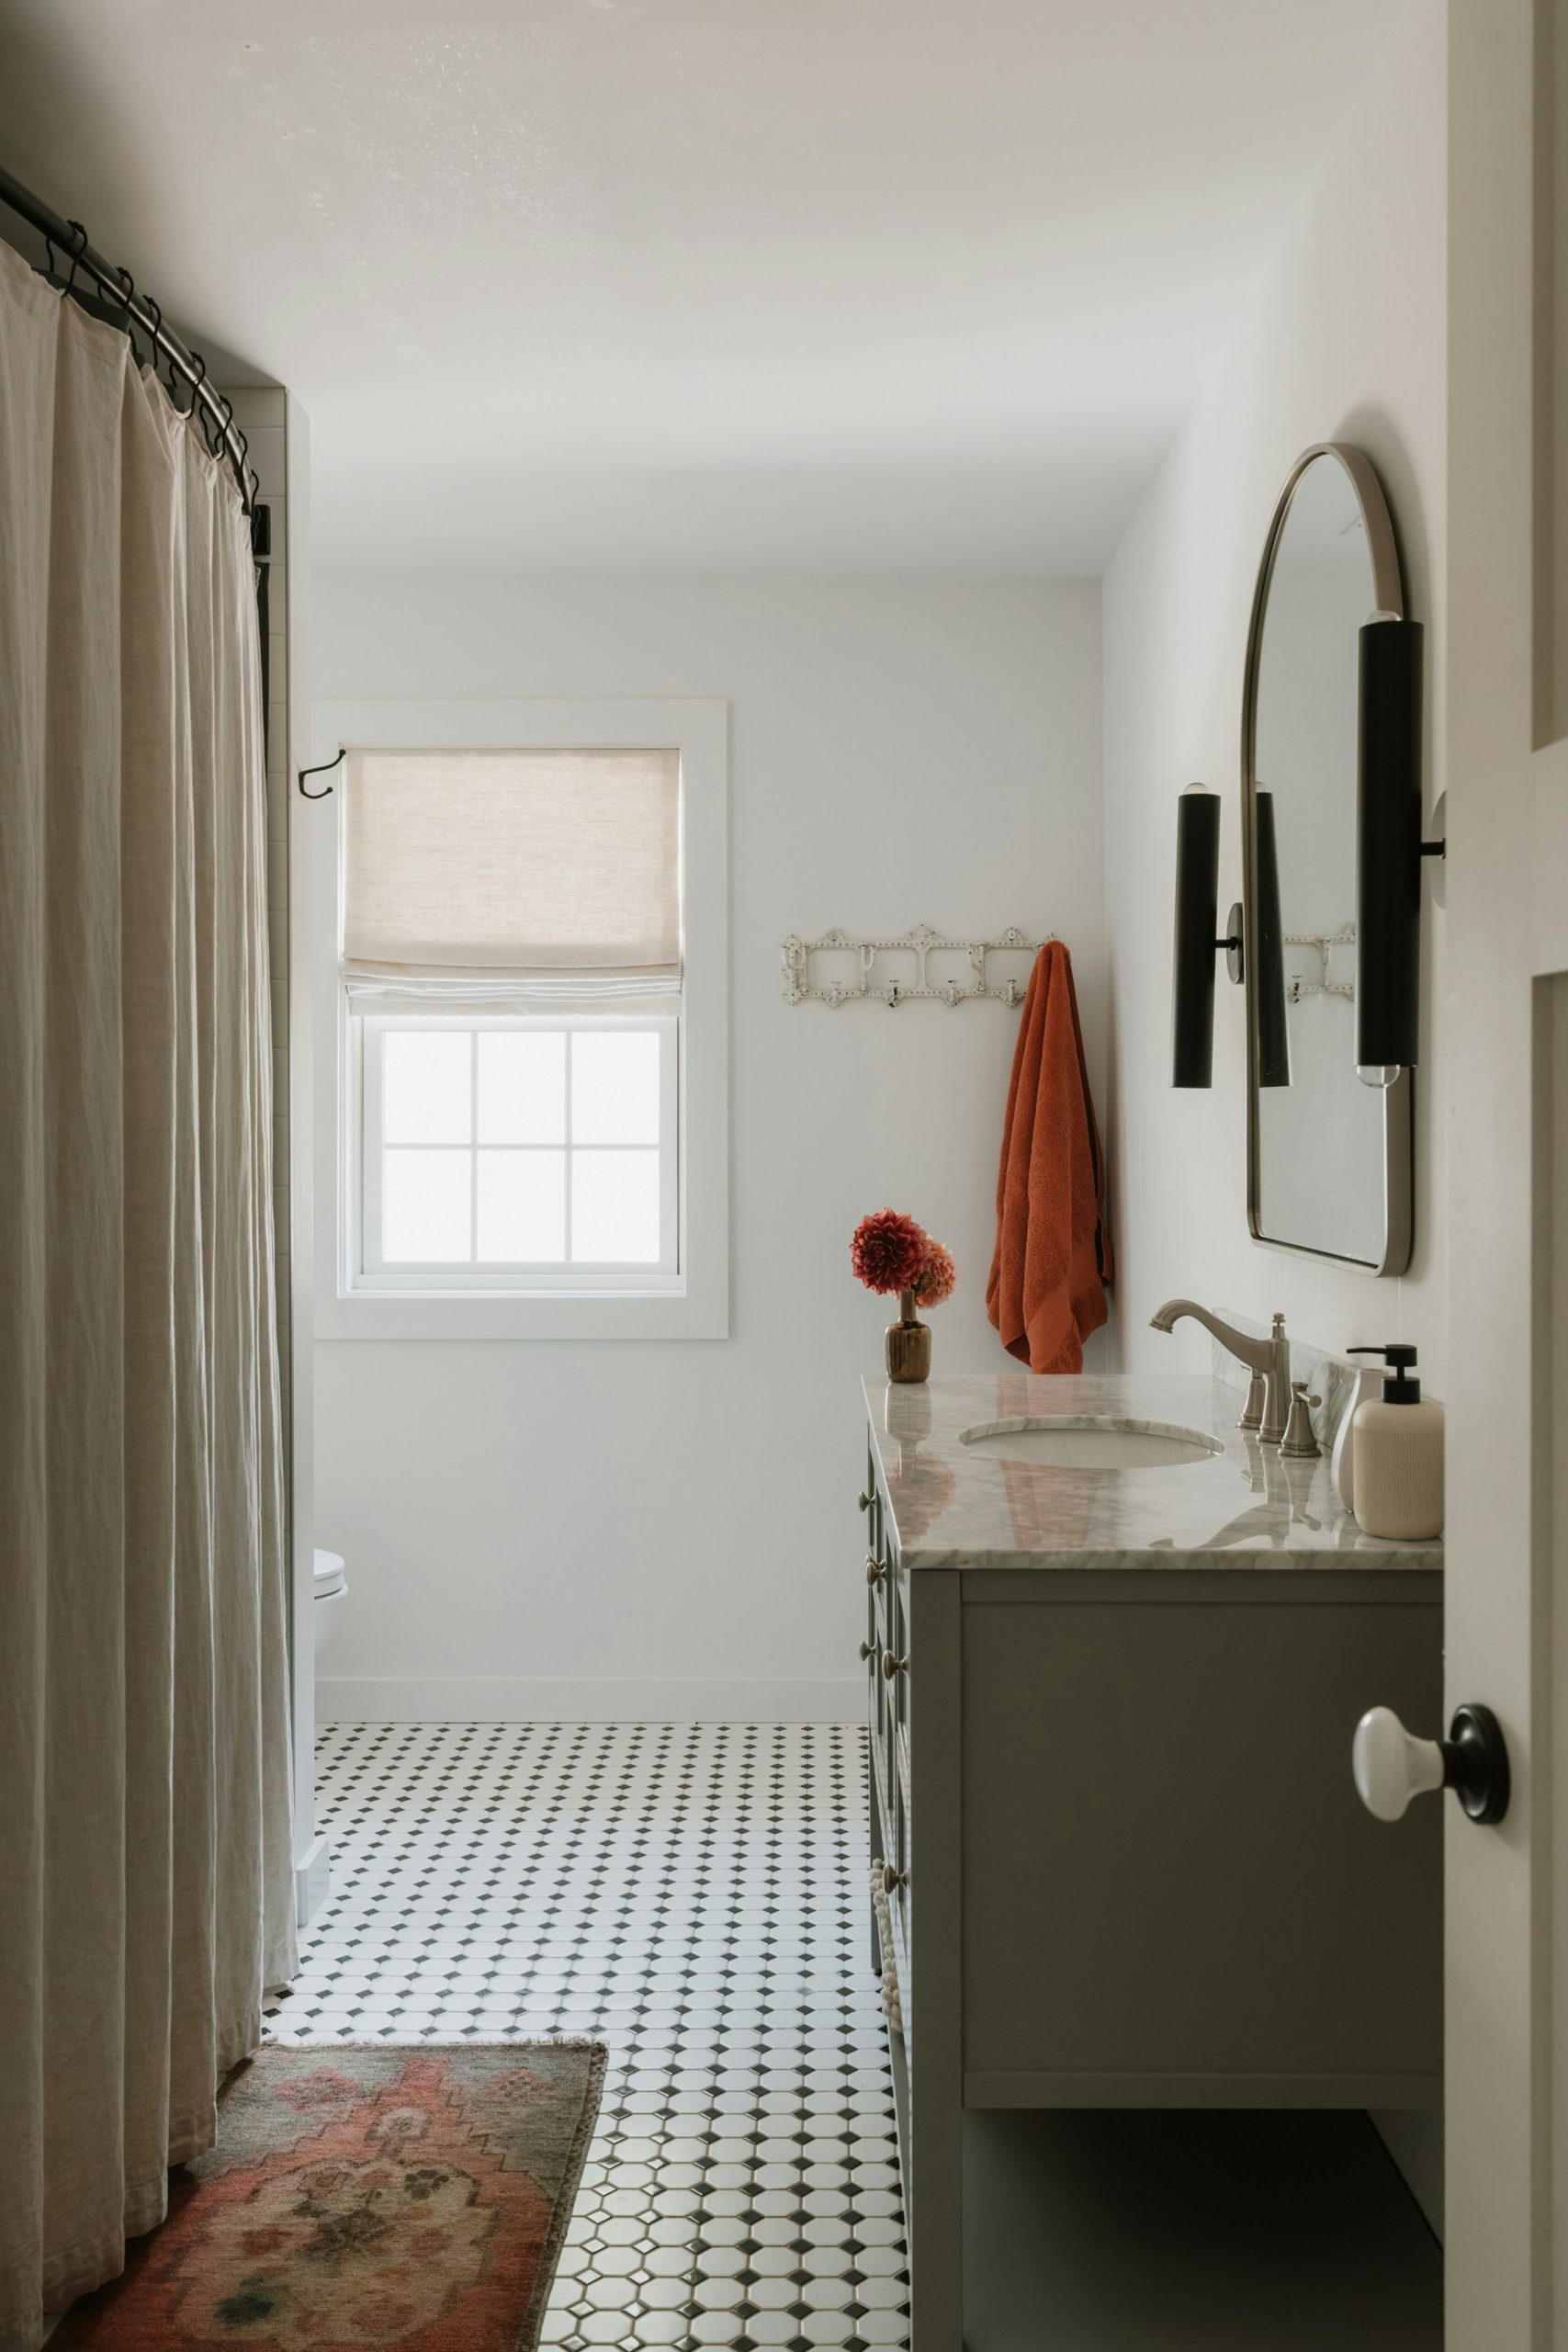
30. Design a Modern Farmhouse Look with Patterned Tile and a Sage Green Vanity
Here’s what it might cost to bring this fresh modern farmhouse look to life:
💸 Get This Look For Less
- Main Furniture: Sage green vanity with marble top ($700 – $1,800)
- Flooring: Patterned cement or porcelain tile ($8 – $20 per sq. ft.)
- Lighting: Black sconces ($150 – $400 for a pair)
- Decor/Accessories: Arched mirror ($150 – $350)
- Textiles: Linen shower curtain and Roman shade ($150 – $300)
- TOTAL: $1,600 – $3,800+ (depending on bathroom size)
- Budget alternative: Paint your existing vanity sage green ($50), use a peel-and-stick floor tile with a similar pattern ($2/sq. ft.), and find a simple arched mirror from a store like Target ($80).
This bathroom design is successful because it perfectly balances pattern, color, and texture. The bold black and white patterned floor provides a strong graphic base. The soft, sage green of the vanity introduces a calming color that’s very on-trend for the modern farmhouse style. The oatmeal-colored linen shower curtain and natural wood tones in the accessories add a layer of soft, organic texture that keeps the space from feeling too graphic or cold. It’s a thoughtful mix that feels fresh and inviting.
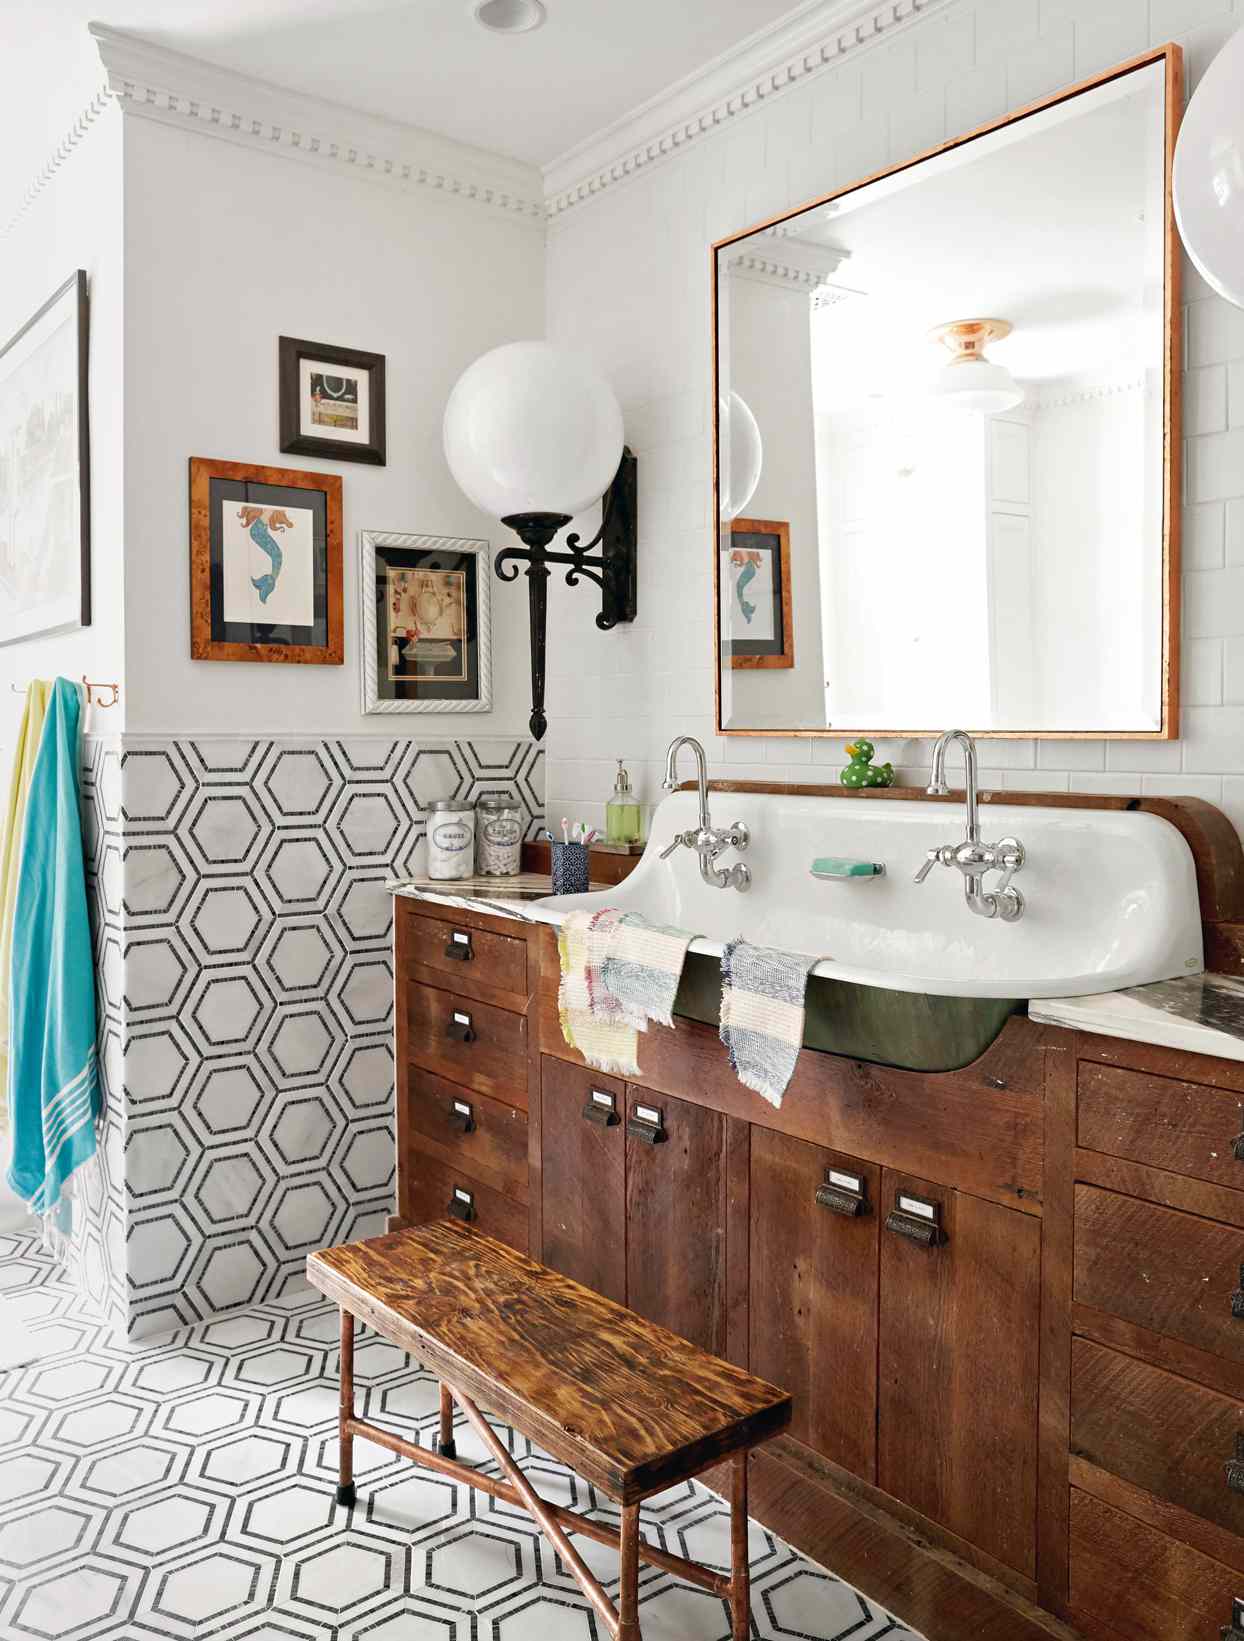
31. Mix Hexagon Tile with a Salvaged Wood Vanity
The core of this bathroom’s eclectic farmhouse charm is the salvaged wood vanity. It’s not a perfect, factory-finished piece; it has history, texture, and a story. The dark wood, with its imperfections, contrasts beautifully with the clean, graphic lines of the white hexagon and subway tiles. The metal bin pulls add a touch of industrial style, reinforcing the found-object, repurposed feel. This single piece keeps the brand-new tile from feeling sterile and gives the room its soul.
📐 Style Math
Mixing metals can be incredibly stylish, but it can also go wrong. This room makes it work by giving each metal a clear role. Chrome is used for the functional plumbing fixtures (the faucets), which makes sense as it’s a classic, durable choice. Copper is used for the decorative frame of the mirror, where it can be a warm, beautiful accent. Black is used for the outlines of the tile. The key is to not mix and match willy-nilly. Don’t use a chrome faucet, a brass soap dispenser, and a black towel bar all right next to each other.
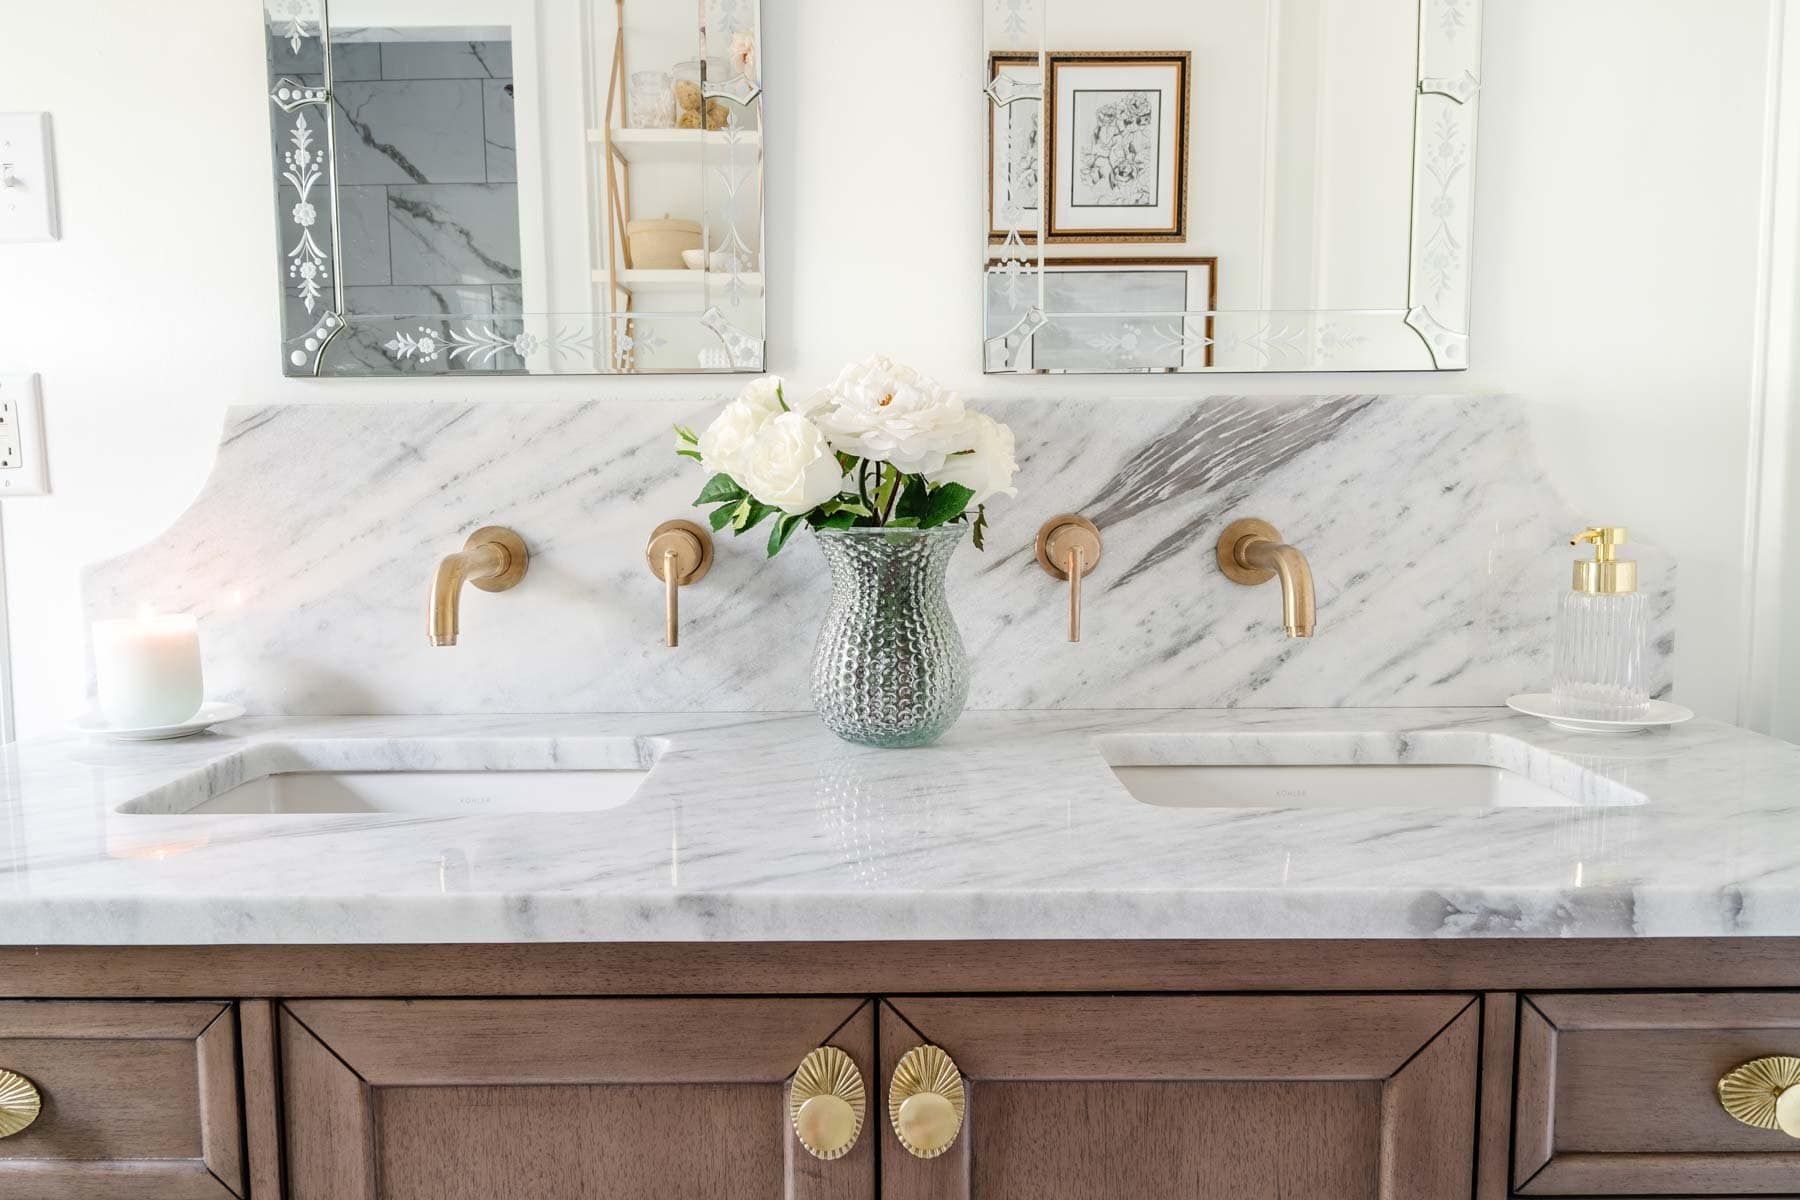
32. Add Polish with a Marble Vanity Top and Venetian Mirrors
For a truly high-end, custom look, upgrade from a standard 4-inch backsplash to a full-height marble slab that extends from the countertop to the mirrors or ceiling. Notice how the backsplash here has a gracefully curved top edge—it’s a small detail that speaks to quality craftsmanship. Also, wall-mounted faucets, while more complex to install, free up counter space and contribute to a more seamless, elegant, and easy-to-clean surface.
💡 Designer Tip
This bathroom feels so sophisticated because it combines classic forms with luxurious materials. The cabinetry has traditional recessed panel doors, but the real stars are the surfaces. The white marble with its soft grey veining provides a timeless and elegant canvas. The warm brass of the faucets and hardware acts as jewelry, while the intricately etched Venetian-style mirrors add a layer of historic glamour and artistry. It’s a design that relies on the inherent beauty of its materials.
Your New Bathroom Awaits
That was a lot of inspiration, but now you’re armed with the ideas and the know-how to tackle that bathroom project you’ve been dreaming of. Whether you’re building a new vanity from scratch or just swapping out a faucet, these budget-friendly updates can make a huge impact. Now go turn that Pinterest board into a reality!