32+ Jaw-Dropping Whimsical Evergreen Landscaping Ideas for 2026 That Will Enchant Your Garden

You know that feeling when you finally find the whimsical evergreen landscaping idea that looks exactly right, but you have no clue how to make it happen? We’ve all been there, endlessly saving pins that feel more like fantasy than reality. That’s why we created this guide. After filtering through hundreds of options from high-end nurseries to accessible spots like The Home Depot and Lowe’s, we narrowed it down to the 32 ideas that actually deliver that magical, year-round charm. This isn’t just a gallery; we’re breaking down everything from naturalized woodland paths to formal topiary gardens, with ideas spanning from a simple $50 plant swap to a $5000+ full-scale installation. The trend for 2026 is all about personal, story-driven gardens that feel alive in every season, moving beyond generic green rectangles. 📌 And stay until the end — we break down the most common mistakes that can ruin these looks. Save this to Pinterest for later — you’ll want to revisit these ideas.
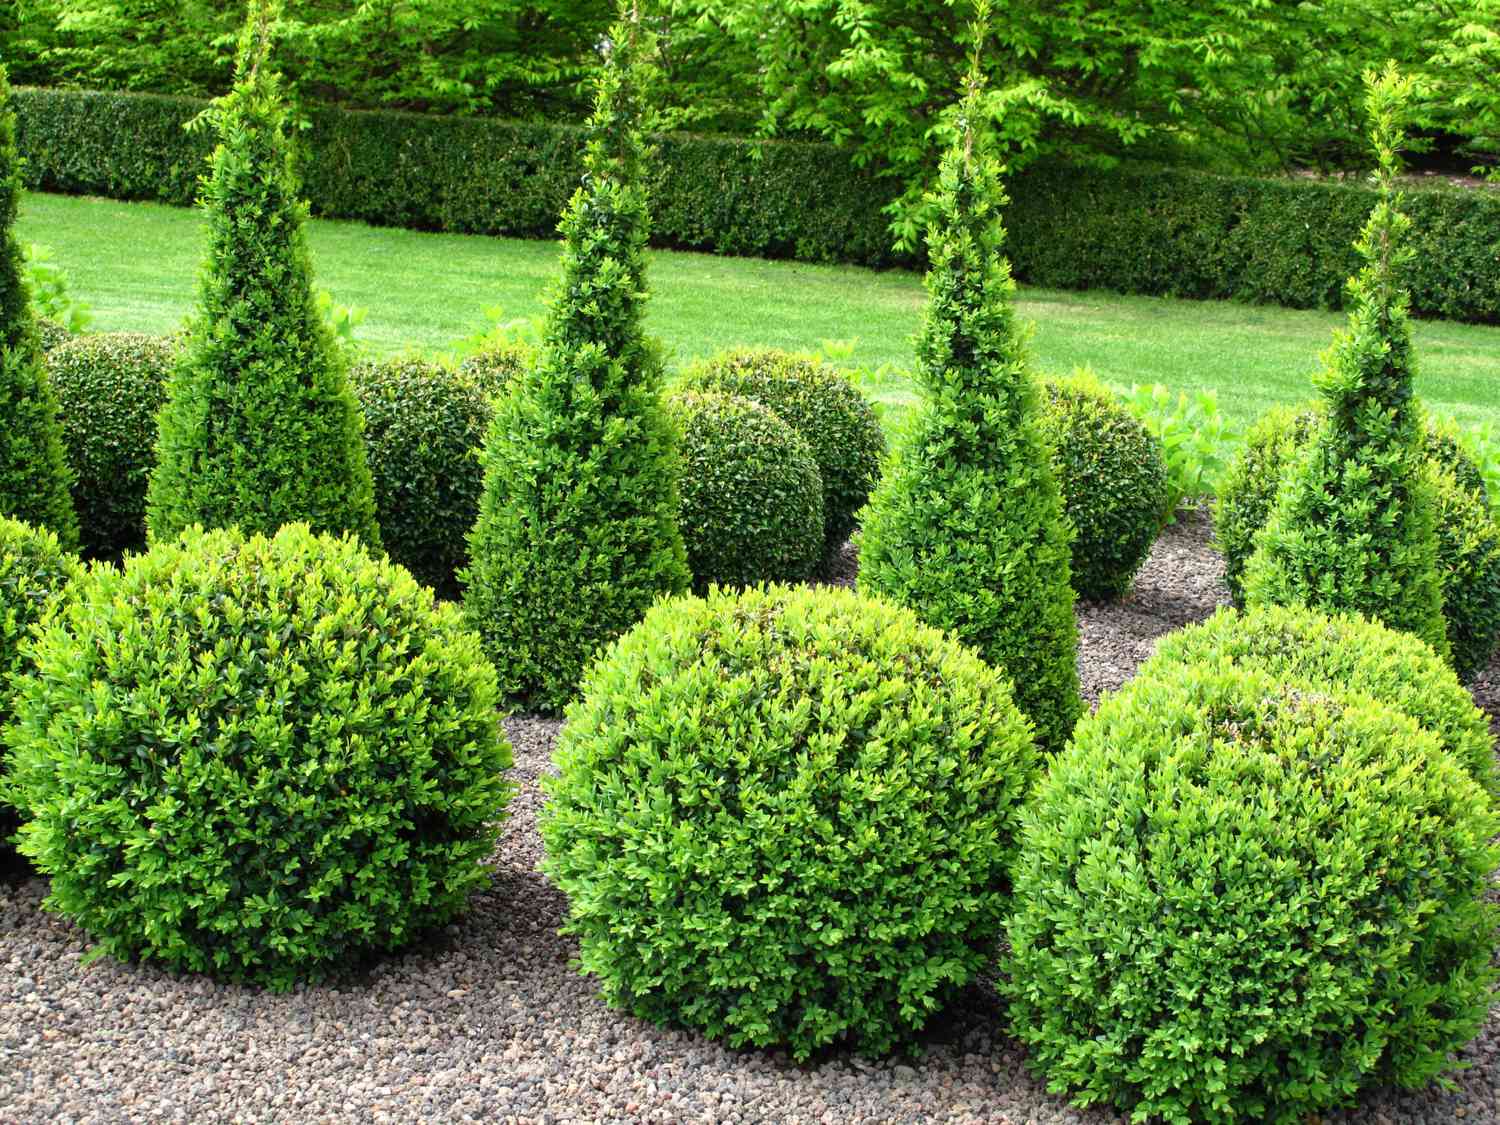
1. Create a Formal Layout with Conical and Spherical Boxwoods
The structured elegance of this garden comes from a principle called “repetition with variation.” The repeated conical and spherical shapes create a calming rhythm, but their different sizes and heights prevent monotony. The gravel ground cover acts as a neutral, textured canvas that makes the bright green of the boxwoods pop. This contrast in form (sculpted plants vs. organic gravel) and color (vibrant green vs. muted grey-brown) is what gives the design its sophisticated yet natural feel.
⭐ The One Thing
Keeping these topiaries looking sharp is a commitment. You’ll need to shear them twice a year, once in late spring after the first growth spurt and again in late summer, to maintain their shape. Using manual hedge shears will give you a cleaner cut than electric trimmers, which can sometimes brown the edges of the leaves. The gravel bed will also need annual weeding and a top-up every 2-3 years as stones get displaced or sink into the soil. Expect about 4-6 hours of maintenance per year for a space this size.
2. Weave a Variegated Shrub Through a Metal Railing
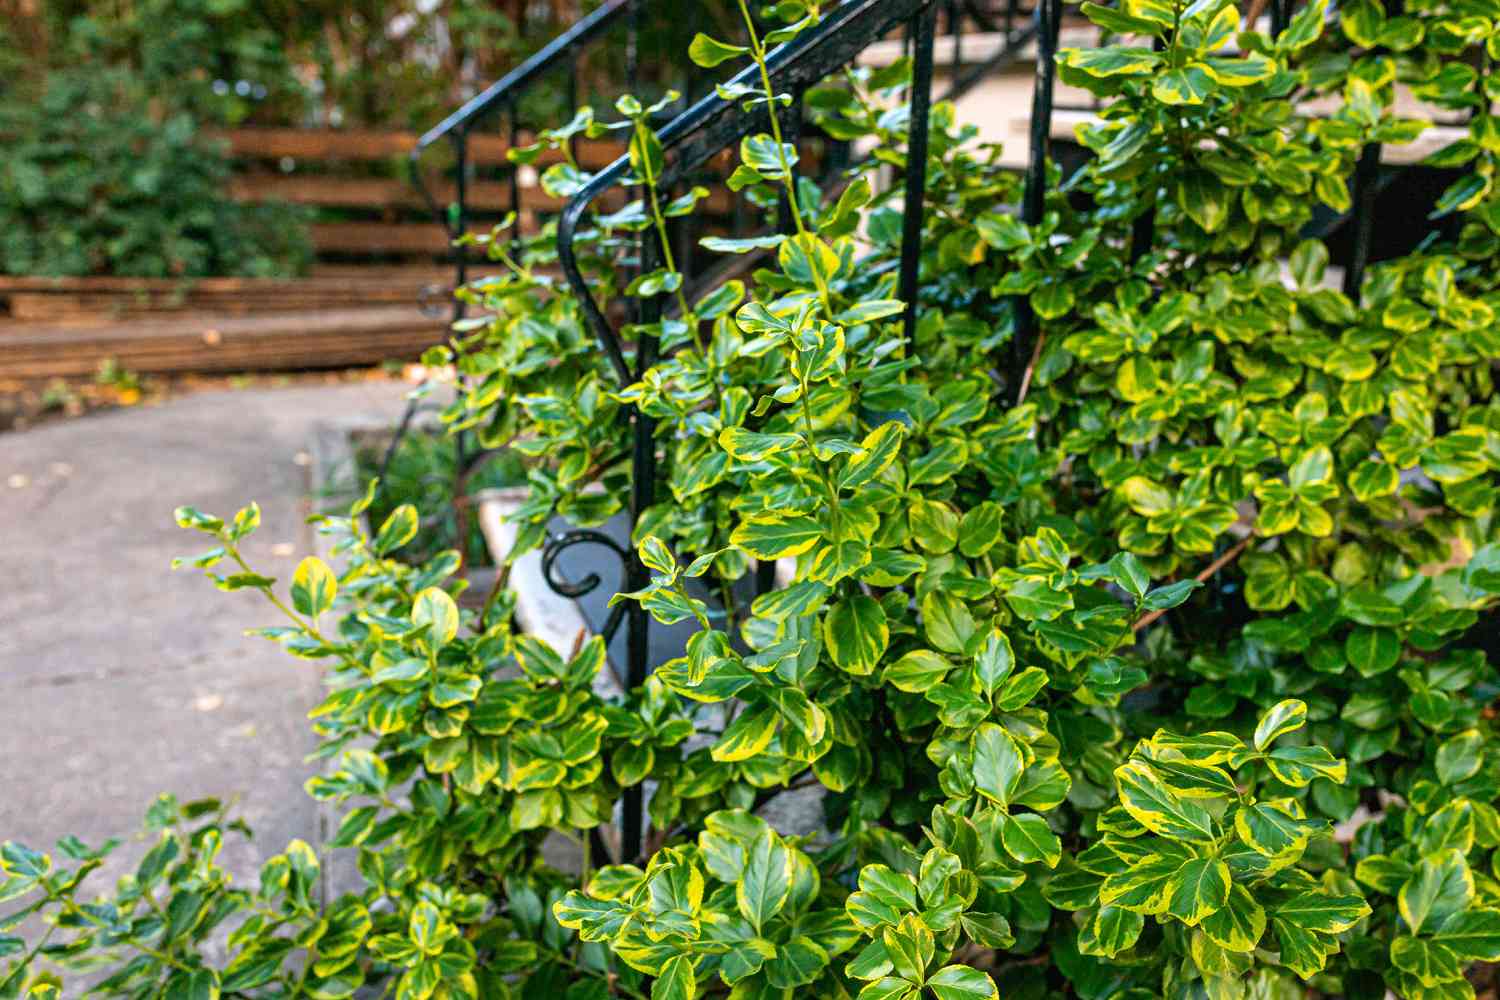
The single element that makes this work is the act of letting the plant interact with the architecture. Without the railing, it’s just a pretty shrub. By allowing the variegated foliage to grow *through* the black metal scrollwork, the design merges the organic with the man-made. This creates a story and a sense of permanence, as if the garden is reclaiming the space. It’s a dynamic detail that transforms a simple staircase into a living feature of the landscape.
✅ Before You Start
To encourage a plant to grow through a railing without causing damage, choose a species with flexible stems, like a climbing Euonymus fortunei. As it grows, gently guide the new shoots through the gaps. Don’t force them. For the first two years, you may need to loosely tie a few key stems to the railing with soft plant ties to establish the direction. Once the main vines are woven through, the rest of the plant will naturally follow their lead. Prune any stray branches that head away from the railing once a year.
3. Use a Japanese Maple as a Focal Point by a Natural Pond
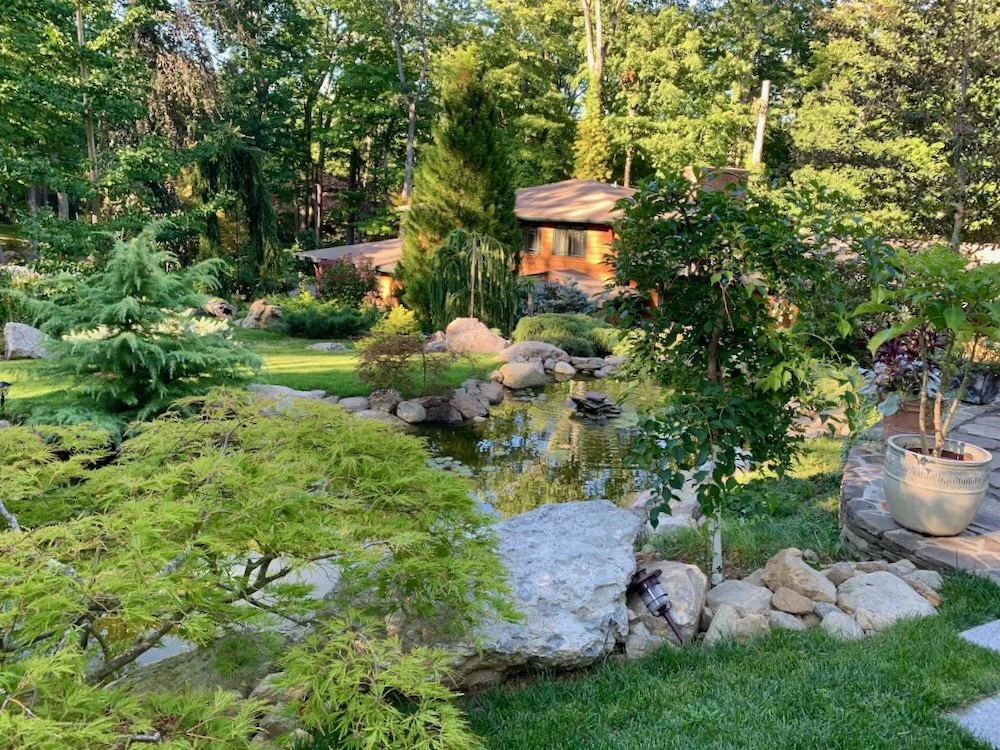
This lush, natural pond design works best in a medium to large yard, requiring at least 400 square feet to avoid feeling cramped. The key is creating depth, so you need enough space for the pond itself (minimum 8-10 ft diameter), the surrounding rock border, and layered background plantings. The cabin in the distance shows how effective this look is when you have a long sightline. For smaller spaces, consider the more contained approach in Idea #23, which uses a rock feature as a mini-pond.
🎯 What Makes It Work
This look follows a simple formula: 40% evergreen structure, 30% feature elements, and 30% wild texture. The evergreens provide the year-round backdrop. The feature elements are the pond, the large rocks, and that stunning light-green Japanese maple, which grabs all the attention. The final 30% is the mix of grasses, smaller shrubs, and groundcover that fills in the gaps and makes it feel untamed and natural. You could swap the maple for a weeping cherry or the pond for a dry creek bed and the math would still work.
4. Pair a Dwarf Evergreen with a Colorful Spring Bulb Bed
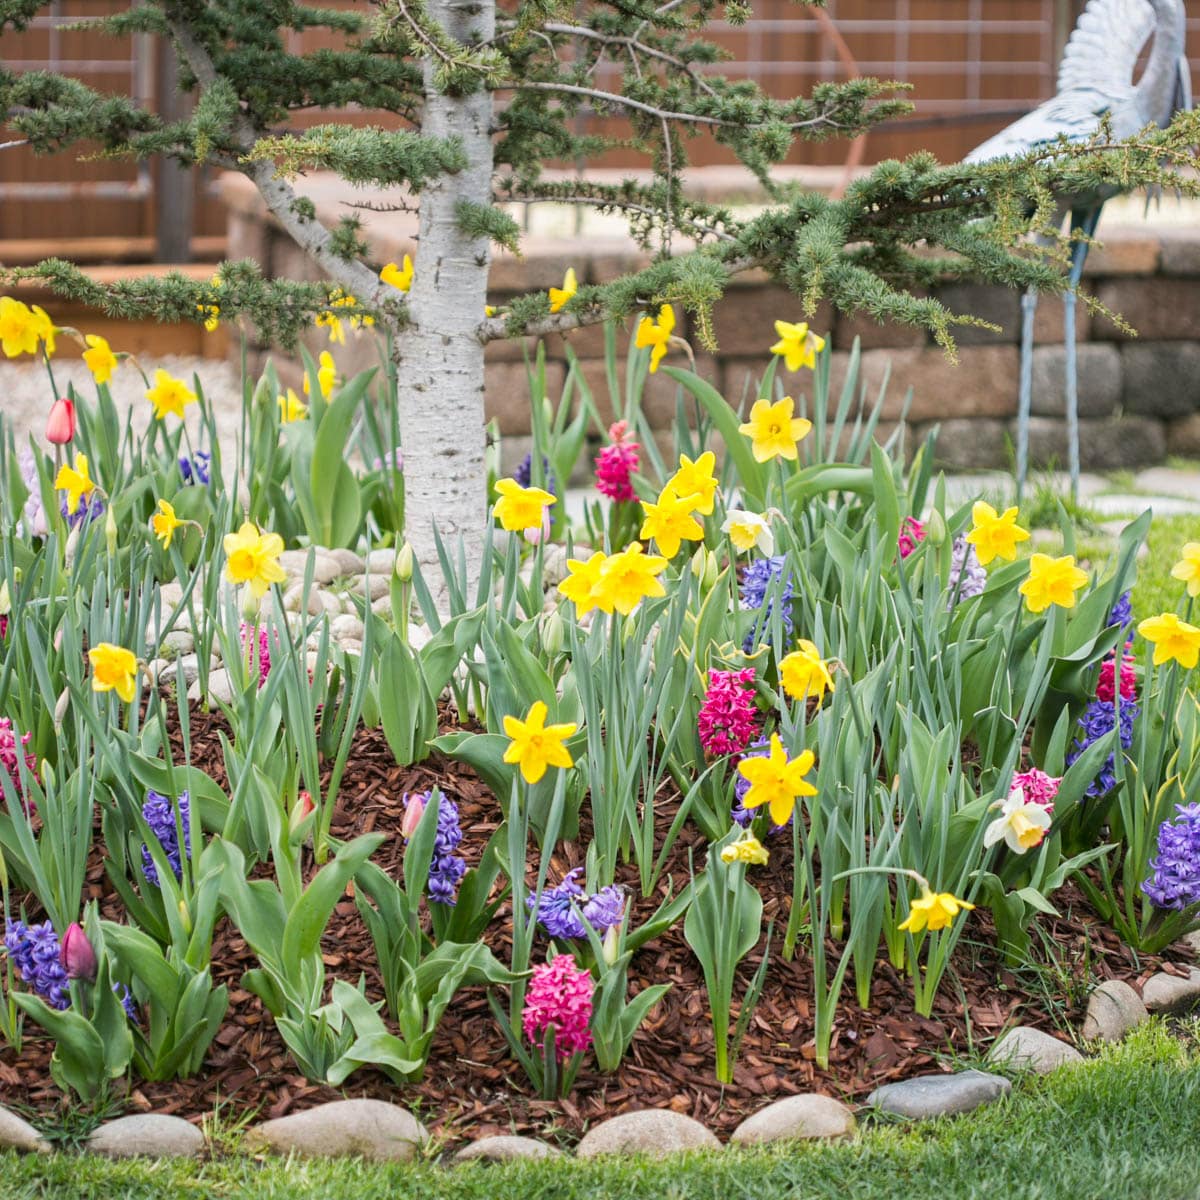
You can get this cheerful, multi-season look for under $150. A small dwarf evergreen, like a Mugo Pine or Bird’s Nest Spruce, will run you $40-$60 at a local garden center. A bag of mixed bulbs (daffodils, hyacinths, tulips) is about $20-$30 for 50 bulbs. Use rocks from your own yard or find them on Facebook Marketplace for free to create the border. Three bags of wood chip mulch will cost around $15. It’s a high-impact, low-cost way to get four seasons of interest in a small footprint.
📐 Style Math
Here’s how to create a layered bulb flower bed for continuous spring blooms. Total time: 2 hours. Cost: $30-$50.
- In the fall, clear your chosen spot and lay down a 2-inch layer of compost.
- Plant your largest, latest-blooming bulbs first, like tulips, about 6-8 inches deep.
- Add a thin layer of soil, then plant your mid-season bulbs, like daffodils, about 4-6 inches deep, staggering them between the tulips.
- Add another thin layer of soil and plant your smallest, earliest-blooming bulbs, like hyacinths or crocuses, about 3-4 inches deep.
- Cover everything with soil, water well, and add a 2-3 inch layer of mulch.
5. Design a Formal Evergreen Allée with a Central Water Rill
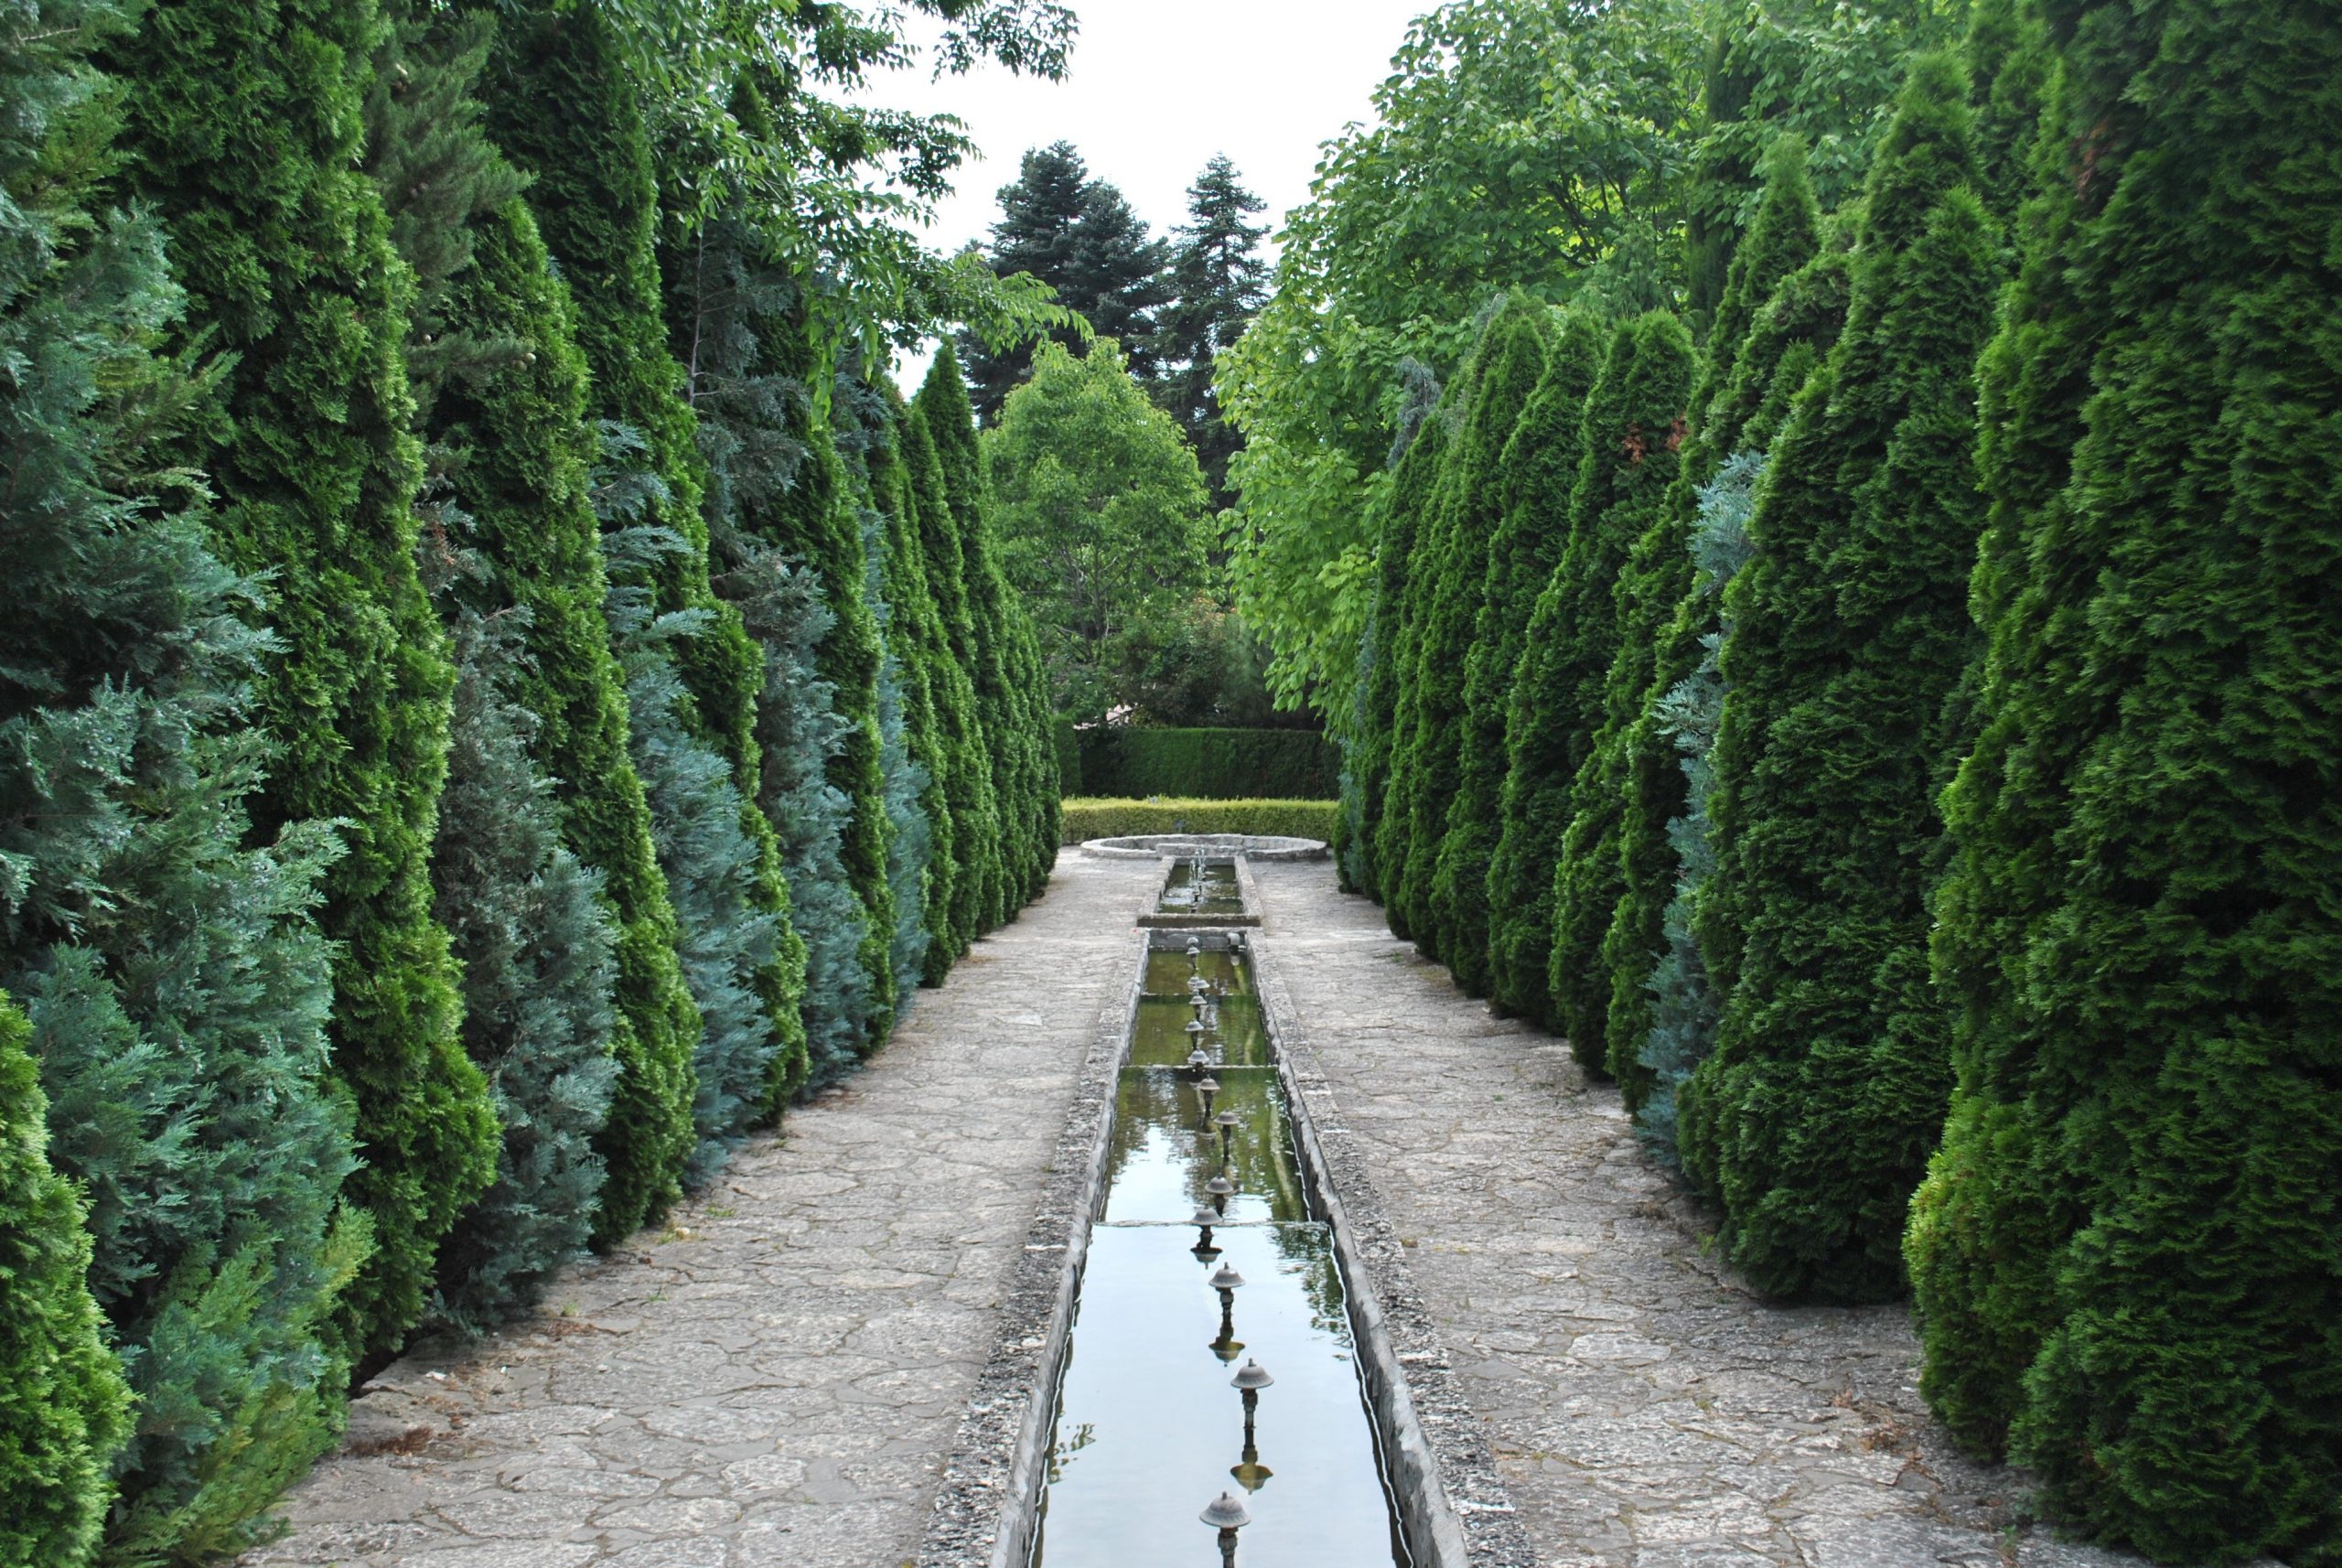
This is a high-drama, high-maintenance look. The symmetry is everything, which means if one tree gets a disease or dies, the entire effect is compromised and replacing it with a mature tree is incredibly expensive. The narrow water feature, or rill, needs constant cleaning to prevent algae buildup and clogged spouts. This is not a beginner-friendly or budget-friendly design. It requires a significant upfront investment in mature trees and professional installation of the water feature and pavers, plus ongoing skilled maintenance.
💡 Designer Tip
Formal, grand garden statements like this are gaining traction as a counterpoint to the wild, naturalistic planting trend. After years of cottage gardens and meadows, designers are reintroducing a sense of order and classical structure. This look speaks to a desire for permanence and timelessness. It’s a flex—a way to show that you appreciate precision and history in garden design. It has staying power precisely because it’s a classic, but it’s being updated for 2026 with more sustainable water systems and hardier plant varieties.
6. Combine Blooming Roses and Boxwood Topiaries Along a Gravel Path
What makes this enchanting garden work so well is the blend of formal structure and informal romance. The neatly clipped boxwood topiaries provide a strong, green framework that persists year-round. Against this formal backdrop, the soft, sprawling forms of the flowering roses feel even more lush and wild. The simple gravel path and white arched trellis add to the classic, storybook feel without competing for attention. It’s a classic pairing for a reason—the two elements bring out the best in each other.
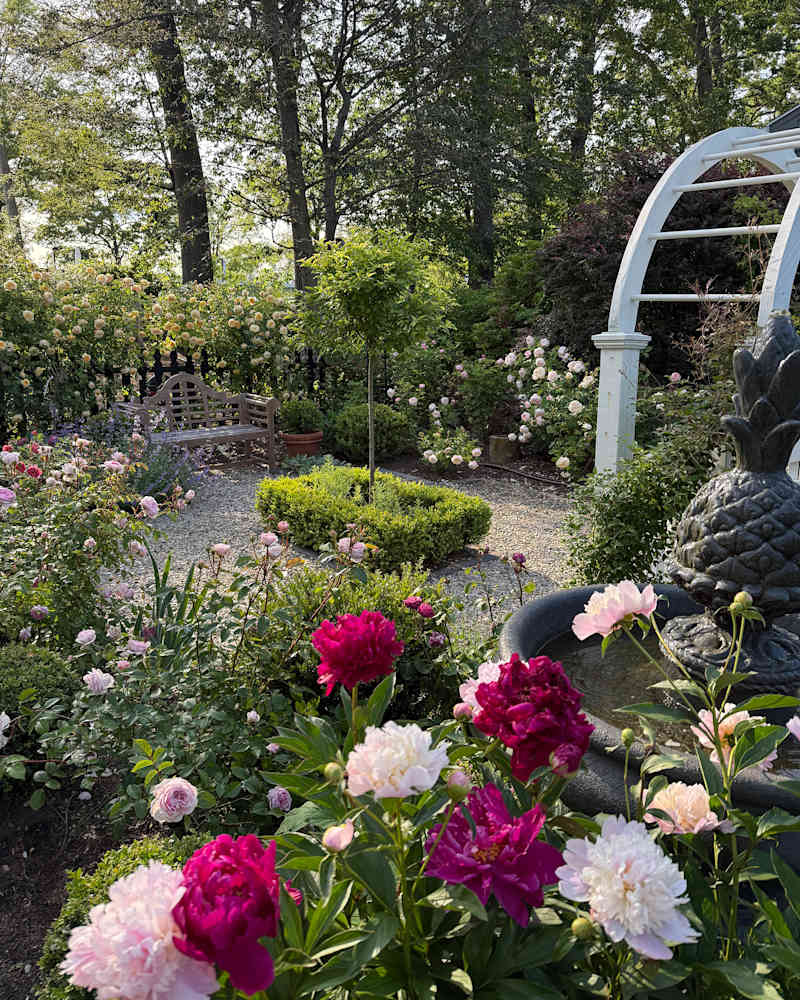
🔧 How-To Brief
Here’s a cost estimate for a 15-foot section of a similar garden path:
- Main Plants: Shrub roses (3) and Boxwoods (5) – $300 – $600
- Architectural Elements: White arched trellis and a small fountain – $500 – $1500
- Path & Edging: Gravel, steel edging, and weed barrier – $200 – $400
- Decor & Seating: Wooden garden bench – $250 – $700
- TOTAL: $1,250 – $3,200
- Budget alternative: Use climbing roses on a simple DIY trellis and find a used bench on Facebook Marketplace. Cost: $450 – $900.
7. Layer a Stone Wall and Wood Fence for a Tiered Garden
When creating a tiered garden on a slope, always place your tallest, most structural plants at the top. Here, the wooden fence provides a solid line, and the evergreens planted in front of it create a dense, private backdrop. Lighter, more colorful, and delicate plants like these purple and orange flowers should be planted in the lower tiers, closer to the viewer. This arrangement feels natural because it mimics how landscapes organize themselves, with taller forests giving way to smaller meadow plants.
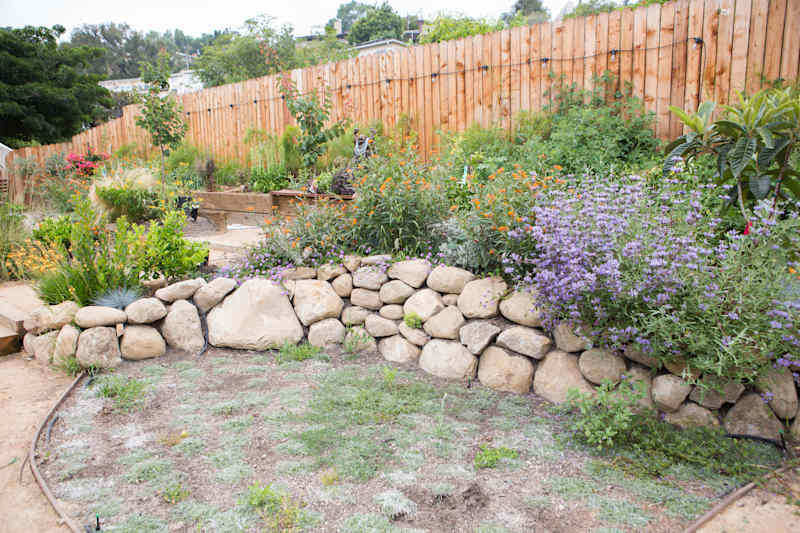
🧹 Maintenance Reality
The visual recipe here is about balancing texture and height. It’s roughly 50% hardscape + 50% softscape. The hardscape is divided between the lower stone wall (heavy, rustic texture) and the upper wood fence (sleek, linear texture). The softscape is a mix of 70% green foliage for fullness and 30% colorful blooms (the purple and orange flowers) for seasonal interest. This formula ensures the garden has strong bones but still feels vibrant and alive.
8. Design a Whimsical Conifer Garden with Varying Forms
The key to a successful conifer garden is embracing diverse forms. It’s not about planting a row of identical trees. The magic comes from mixing weeping, conical, spherical, and sprawling shapes. This variety creates a dynamic, whimsical landscape that has texture and interest even without a single flower. It’s the interplay of different silhouettes against each other that makes the garden feel enchanted and intentional, rather than just a collection of evergreens.
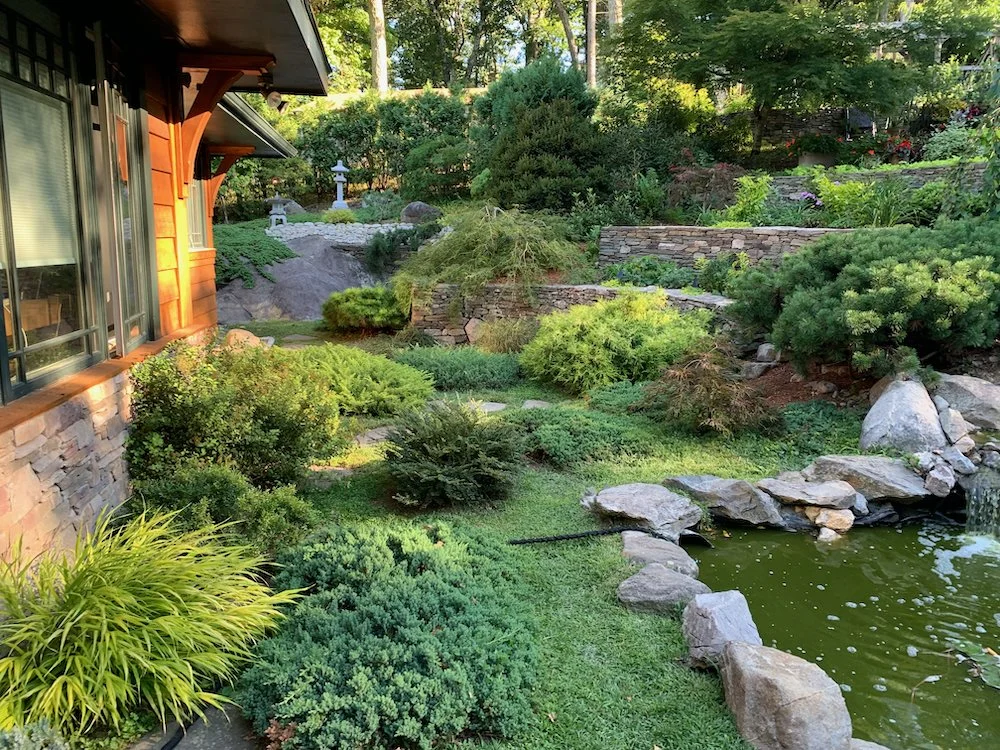
🔥 Trending Context
A word of caution: conifer collecting is addictive! It’s easy to fall in love with a dozen different dwarf varieties at the nursery, but you must plan for their mature sizes. That tiny blue spruce might look perfect today, but in 10 years it could be a 15-foot giant that completely overwhelms your design and casts your entire garden in shadow. Always read the plant tag and design for the 10-year size, not the 1-gallon pot size.
9. Anchor a Naturalized Slope with a Carved Wooden Bench
This lush landscape feels so serene because it perfectly balances wildness with a single point of human comfort. The naturalized plantings, with their weeping evergreens and sprawling groundcover, are intentionally untamed. The dry-stacked stone wall adds to this rustic feel. Placing the intricately carved wooden bench right at the edge of this wildness provides a clear invitation to stop and enjoy it. It’s a resting point that makes the entire scene accessible and welcoming, not just something to look at from a distance.
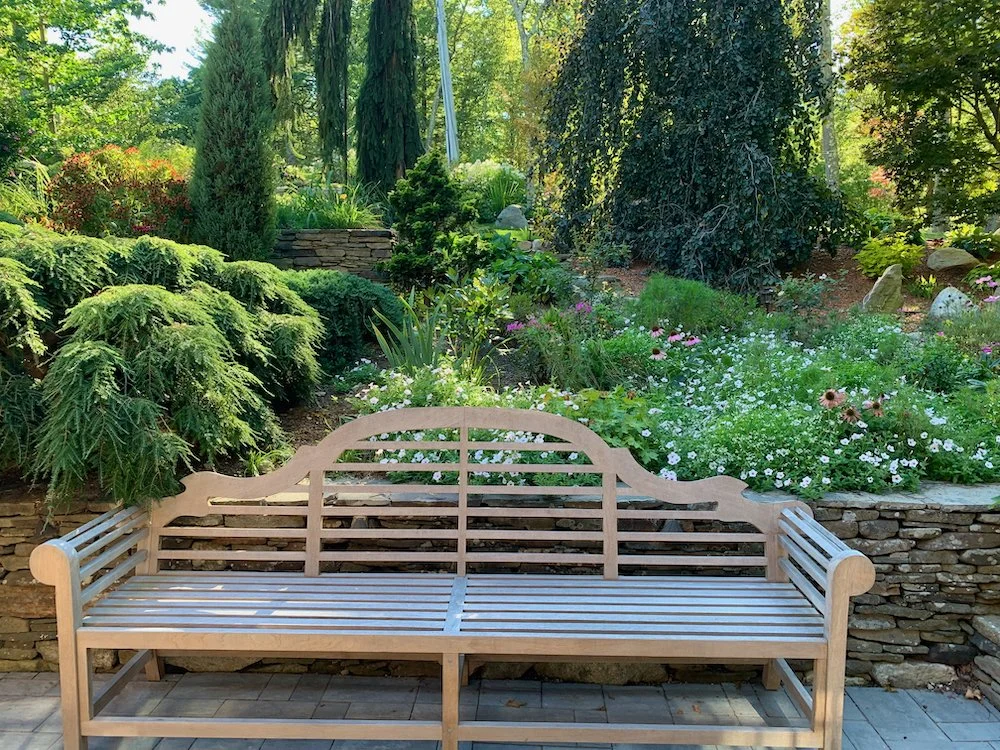
⚠️ Real Talk
A sloped, naturalized design like this is incredibly versatile. It can work in a small backyard with a slight grade (minimum 150 sq ft) or across a large, hilly property. The key is the scale of the plants. For a smaller space, use dwarf weeping evergreens and low-growing groundcover. For a larger area, you can incorporate taller trees and more expansive shrubs. The bench and stone wall are scalable elements that will anchor the design regardless of the total square footage.
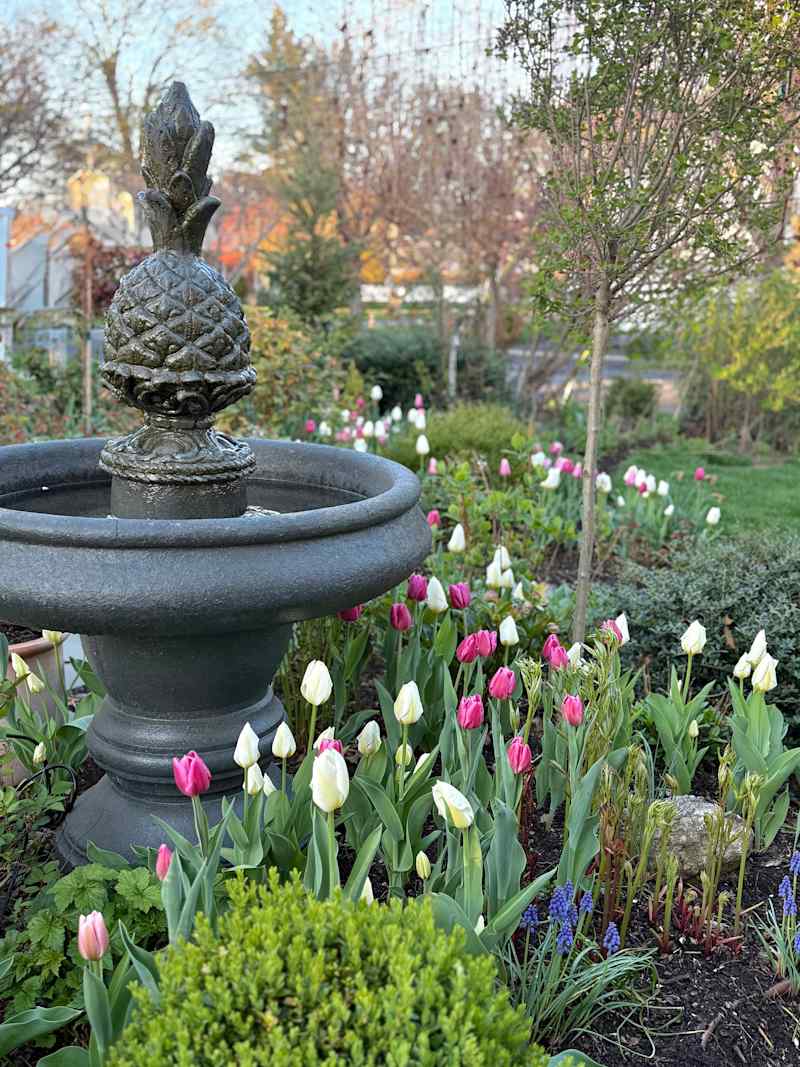
10. Establish a Whimsical Border with Mixed Evergreen Textures
To make a garden border feel truly whimsical, you need to layer textures and colors. Don’t just plant a straight line. Combine fine-needled pines with broadleaf evergreens, and mix deep greens with chartreuse and blue-hued varieties. Place a few taller, sculptural plants as exclamation points, then fill in with lower, mounding forms. The goal is to create an unpredictable, magical edge where you can’t quite see where one plant ends and another begins.
📏 Scale Guide
You don’t need a huge budget to create a magical border. Start with a few interesting evergreen shrubs from a big-box store like Lowe’s for your ‘bones’ ($100-$150). Then, fill in the gaps with inexpensive, fast-spreading perennial groundcovers like creeping thyme or sedum ($50). Search for free rocks on Craigslist or local marketplaces to add texture and definition. The whimsical feeling comes from the composition, not the price tag of the individual plants.
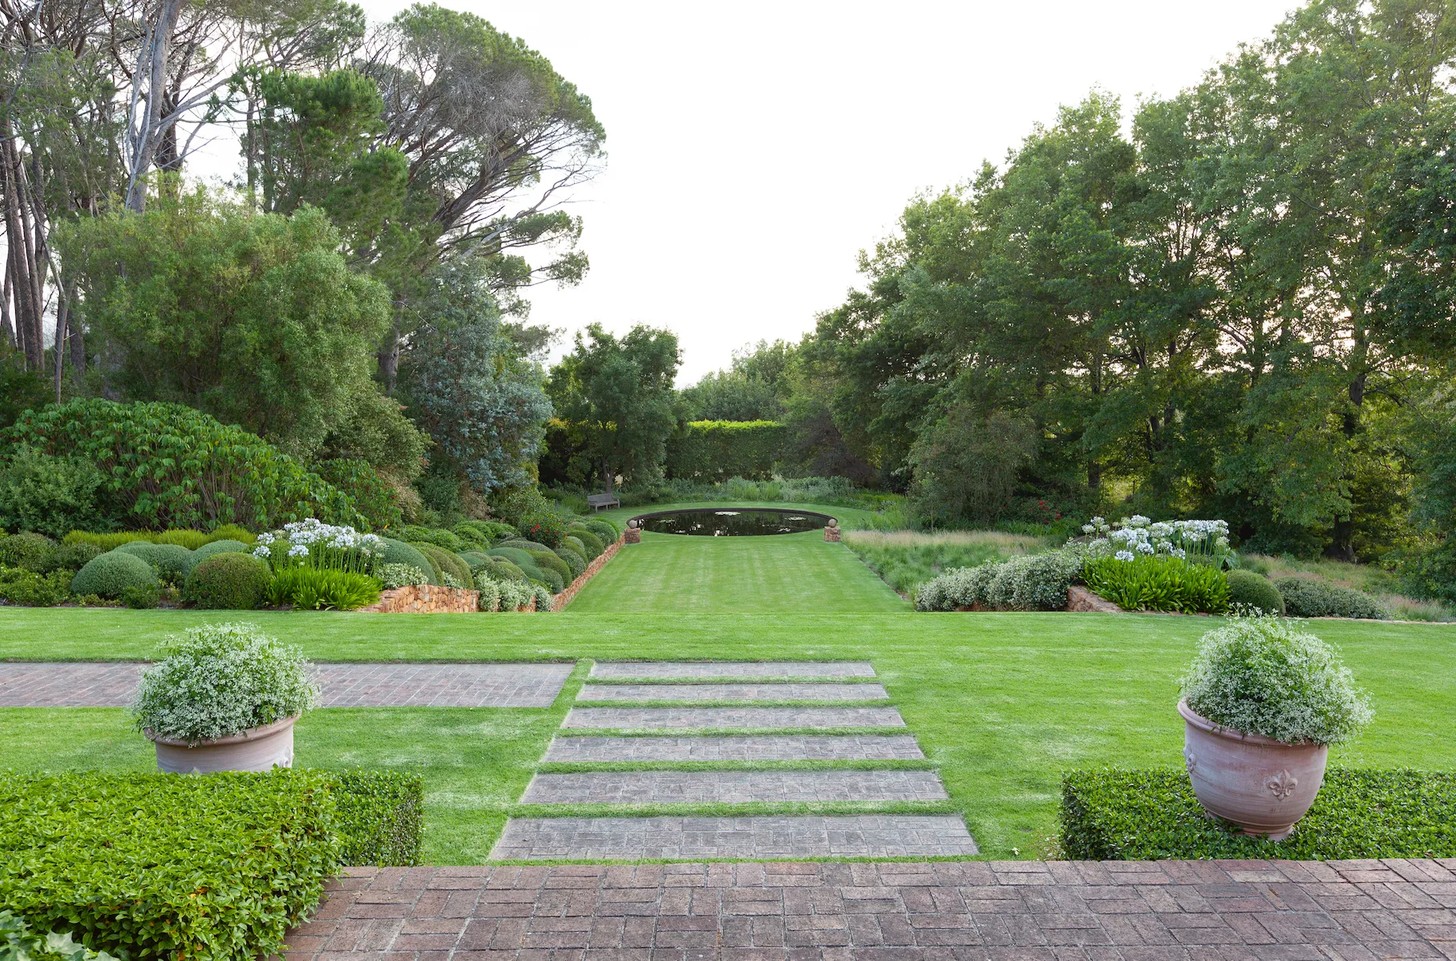
11. Cultivate an Otherworldly Feel with Unique Evergreen Choices
Achieving a whimsical, almost fantasy-like garden design is all about breaking the rules of traditional landscaping. Think 70% unusual textures + 30% unexpected colors. Instead of standard boxwoods, look for contorted pines, weeping larches, or fuzzy mosses. Pair them with pops of color from foliage, not just flowers—think blue fescue grass, burgundy heuchera, or golden Japanese forest grass. The goal is to create a scene that feels like it could be from a storybook.
💰 Budget Breakdown
This move towards highly individual, almost eccentric gardens is a direct reaction to years of cookie-cutter suburban landscapes. Homeowners in 2026 are looking for ways to express their personality outdoors, creating spaces that feel uniquely their own. This trend, heavily fueled by hyper-creative Pinterest boards, celebrates the weird and wonderful plants that you won’t find in every yard on the block. It has staying power because it’s rooted in personal expression, not just aesthetics.
12. Add a Playful Touch with a Garden Gnome
Believe it or not, the single thing that defines this garden’s whimsical character is the gnome. Without it, you have a lovely, well-maintained collection of green plants against a white fence—pretty, but standard. The gnome introduces a sense of humor and narrative. It instantly signals that this garden doesn’t take itself too seriously and invites the viewer to look closer for other playful details. It’s the punctuation mark that gives the entire space its playful personality.

💸 Get This Look For Less
A little whimsy goes a long way. One or two unexpected decorative elements, like a gnome or a small statue, can be charming. But it’s a very slippery slope. Too many, and your garden can quickly veer from whimsical to cluttered and kitschy. The key is to exercise restraint. Let one quirky piece be the star of its own little area, rather than populating every corner with a different fantastical creature. This allows the joke to land without overwhelming the natural beauty of the plants.
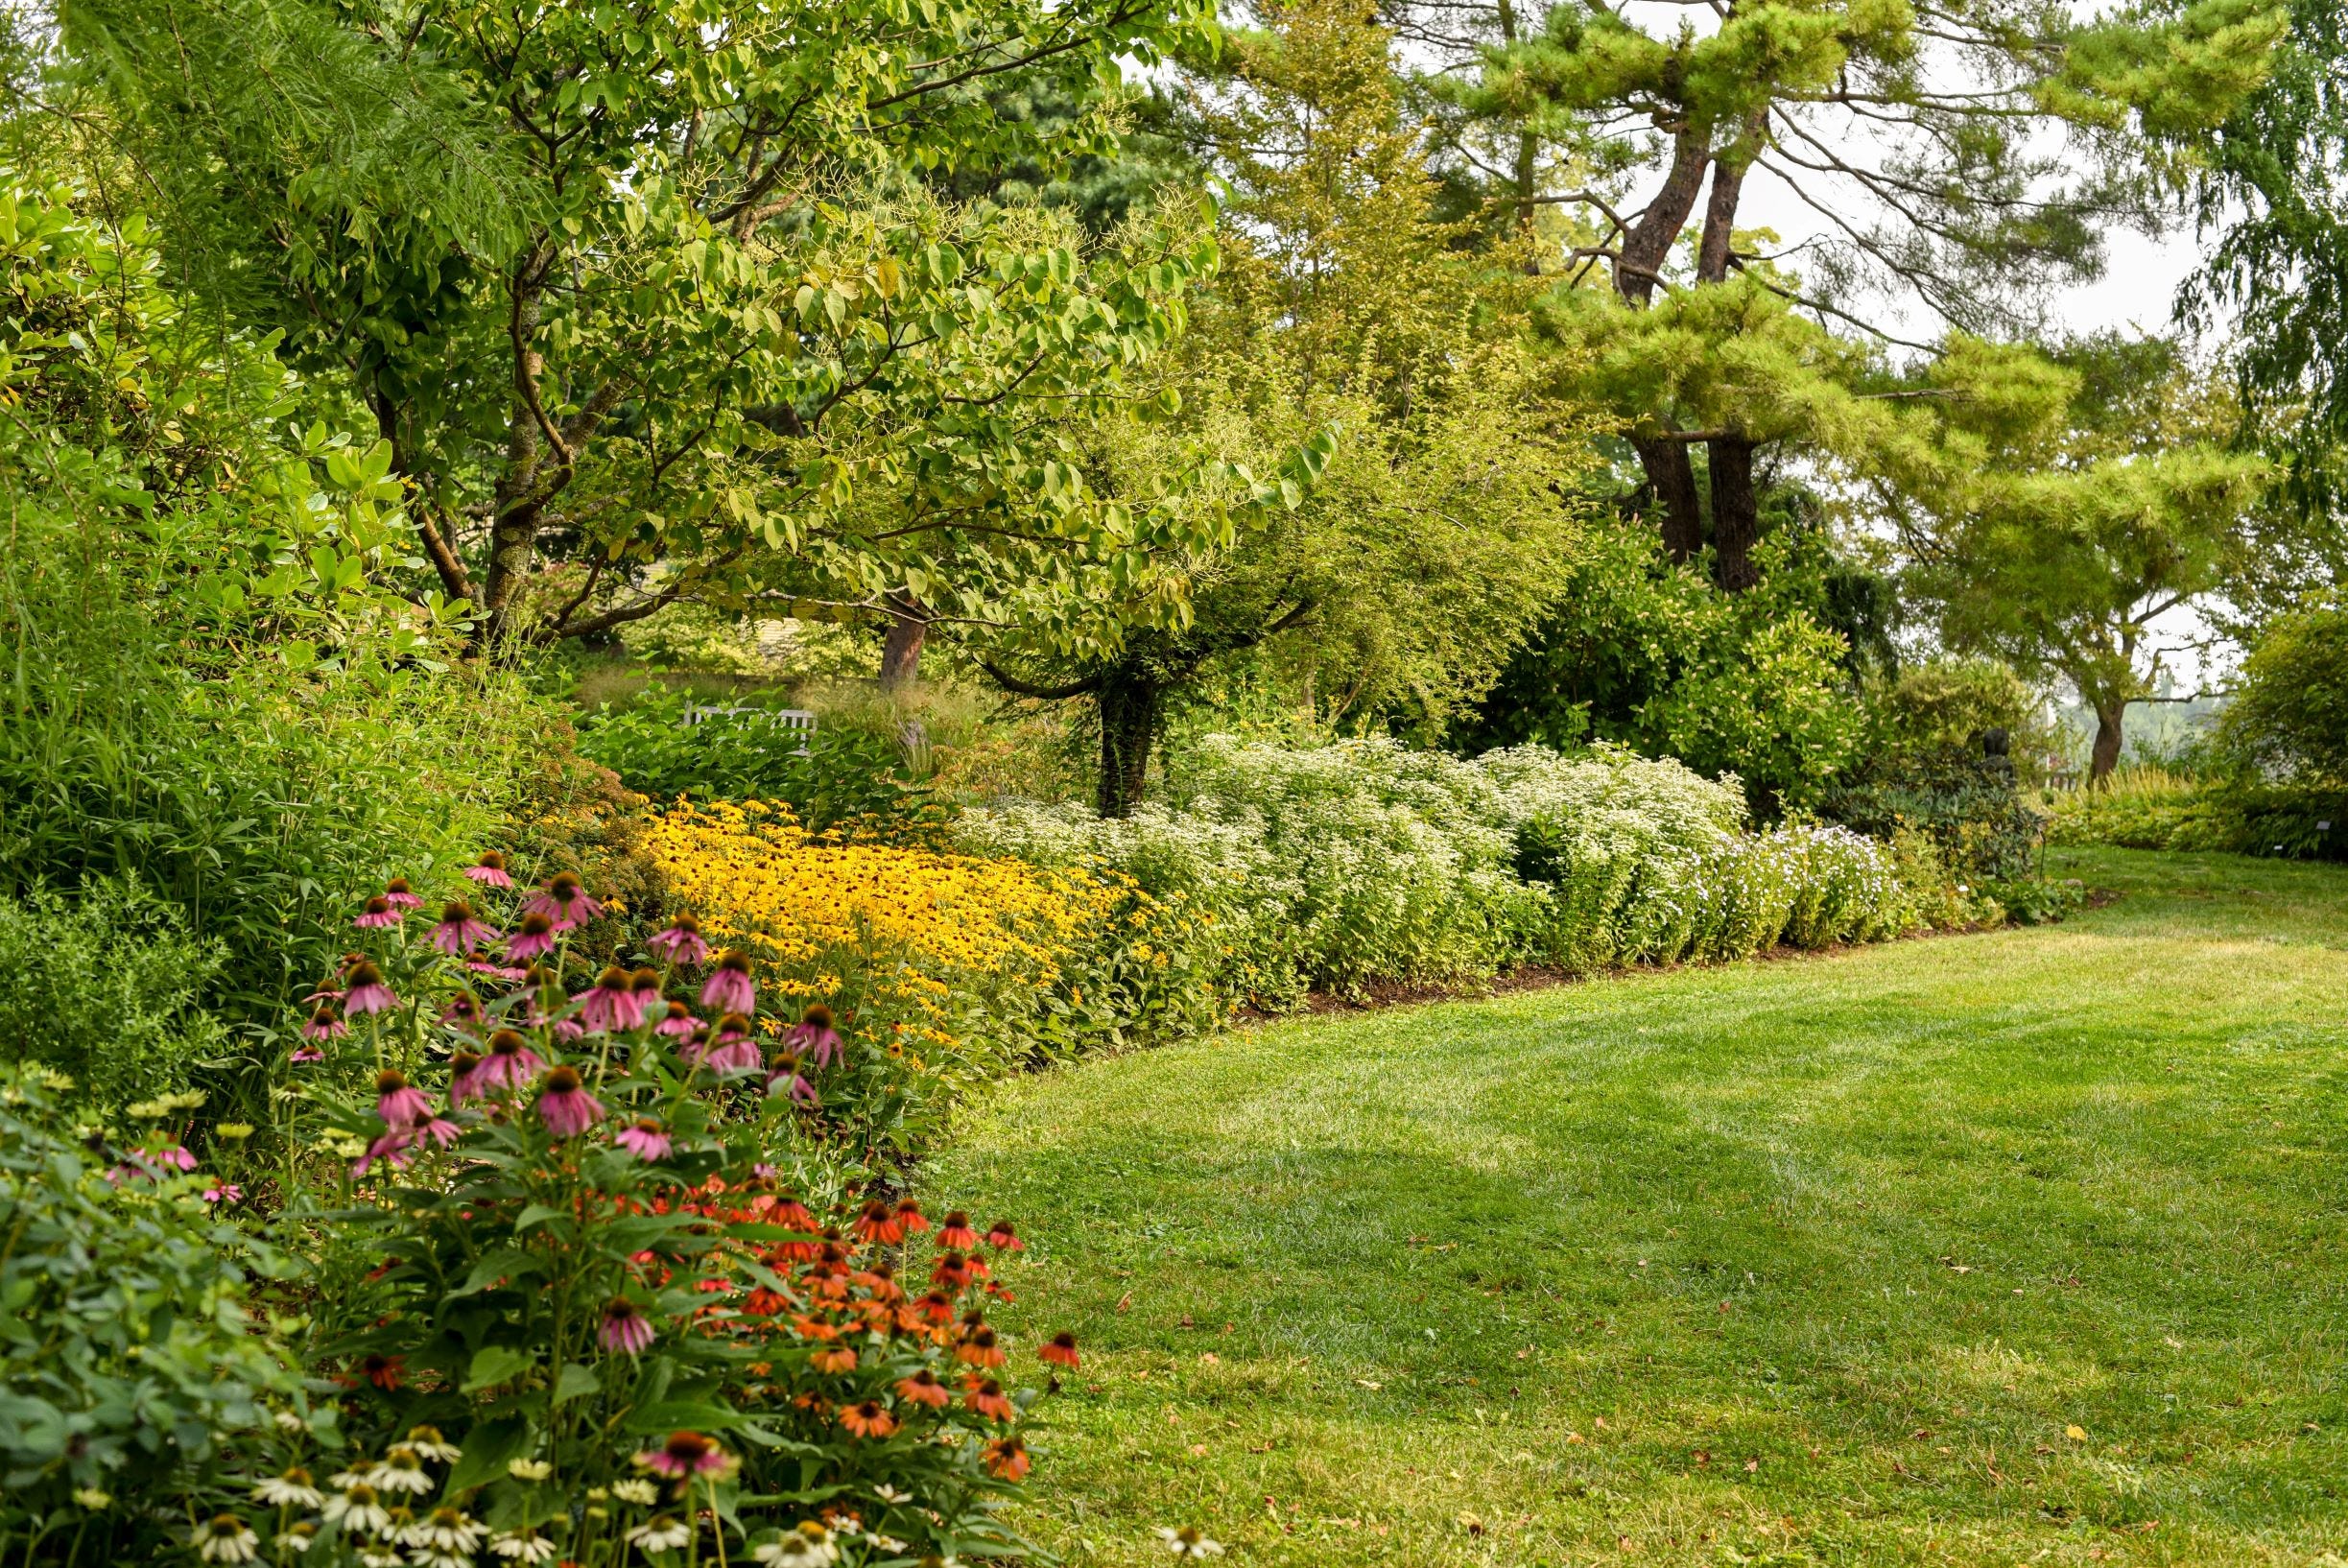
13. Create a Vibrant Border with Mass Plantings of Yellow Flowers
This garden border is so effective because it uses the power of mass planting. Instead of dotting one or two yellow flowers here and there, a large, dense drift of them creates a river of color. This confident, singular statement has much more impact than a mix of twenty different plants. The eye is drawn to the bold swath of yellow, which contrasts beautifully against the deep greens of the surrounding evergreen shrubs and the manicured lawn in the foreground. It’s a lesson in ‘less is more’.
⭐ The One Thing
When planting in masses, always use odd numbers for a more natural look—groups of 3, 5, 7, and so on. But for a large-scale drift like this, think in terms of dozens. To get this effect, you’d want at least 25-30 of the same plant. Arrange them in a loose, cloud-like shape rather than a rigid block or a straight line. This will make the planting feel like it grew there naturally over time, even though it was a deliberate design choice.
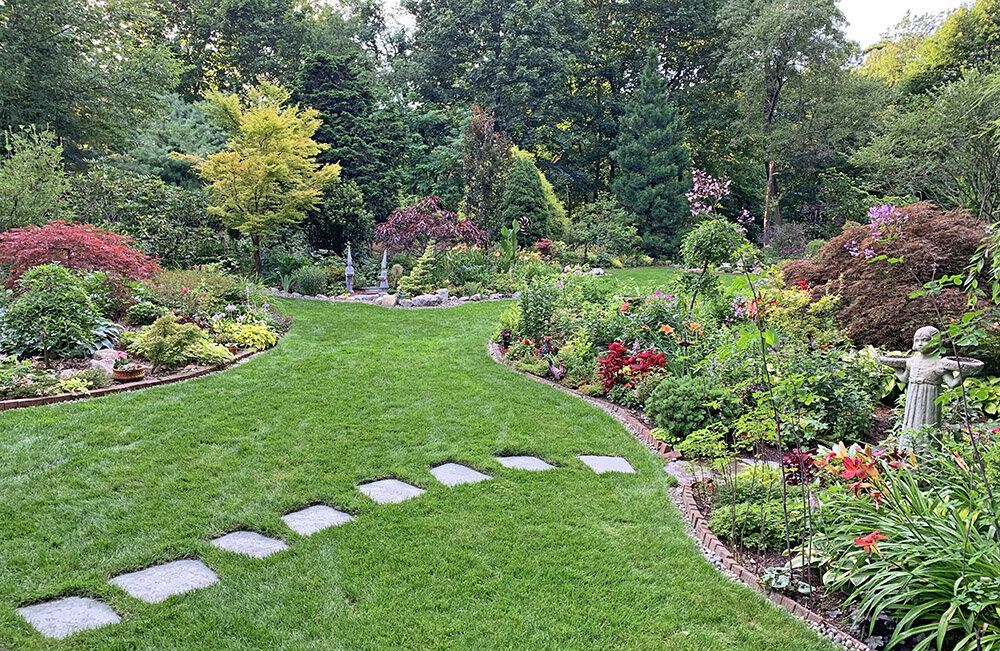
14. Incorporate Statuary into Winding Garden Beds
The statues are the element that elevates this garden from merely beautiful to truly personal and curated. Without them, it would be a lush but anonymous collection of plants. By placing unexpected art pieces among the foliage, the owner is telling a story and creating points of discovery. They act as focal points that guide your eye through the landscape and reward you for looking closely. This is a space designed for strolling and contemplation, not just viewing from a distance.
✅ Before You Start
Before you invest in heavy garden statuary, check these items off your list:
- Foundation: Do you have a firm, level spot for it to sit? A heavy statue can sink or topple on soft soil. Plan to install a simple concrete paver or stone slab as a base.
- Scale: Is the statue the right size for its surroundings? A tiny statue will get lost in a massive bed, while a huge one will overwhelm a small space.
- Sightlines: From where will you view the statue most often? Check the sightlines from your windows, patio, and along your garden paths to ensure you place it for maximum impact.
15. Tell a Story with a Girl Statue in a Lush, Leafy Nook
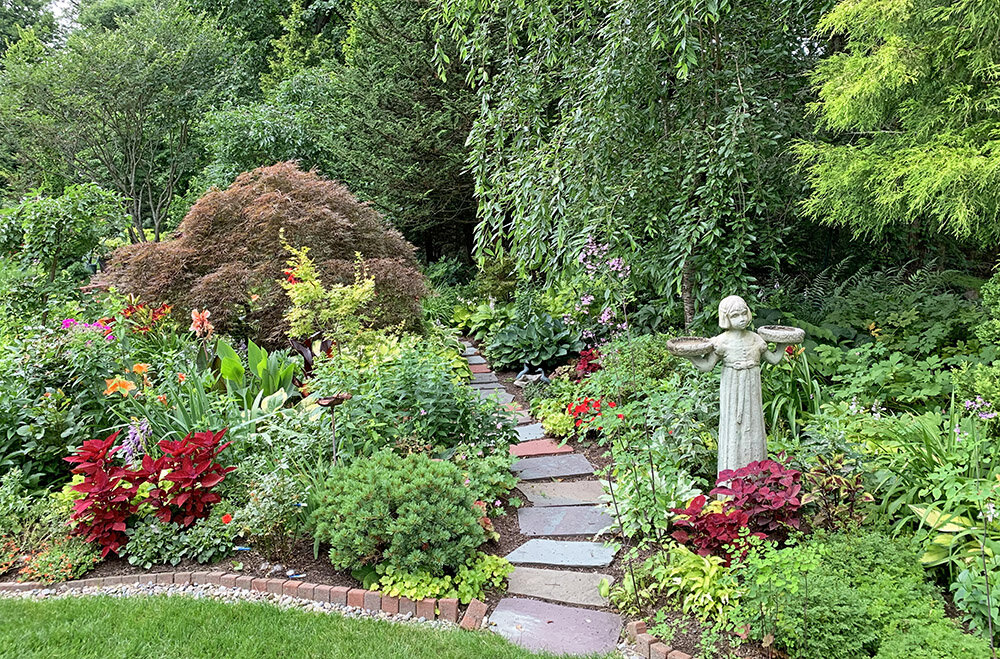
This scene is captivating because it creates a moment of narrative. The stone girl statue isn’t just plonked in a garden bed; she’s nestled within a leafy alcove, creating a sense of intimacy and discovery. The winding path leads you to her. The mix of textures, from the fine, willow-like branches to the bold, burgundy leaves, forms a rich tapestry that makes her feel like a character in a secret garden. The success of this idea is less about the specific plants and more about the thoughtful placement of a focal point. Compare this with the more open placement in Idea #13.
🎯 What Makes It Work
A garden this lush requires diligent upkeep to prevent it from looking overgrown. The stepping stone path will need to be cleared of encroaching plants and fallen leaves weekly during the growing season. The burgundy-leafed shrubs will likely need annual pruning to maintain their shape and prevent them from swallowing the statue and path. Be prepared for regular weeding, as the rich soil and dense planting that make this look so good are also perfect conditions for unwanted guests.
16. Line a Stone Pathway with Sculptural Topiary Trees
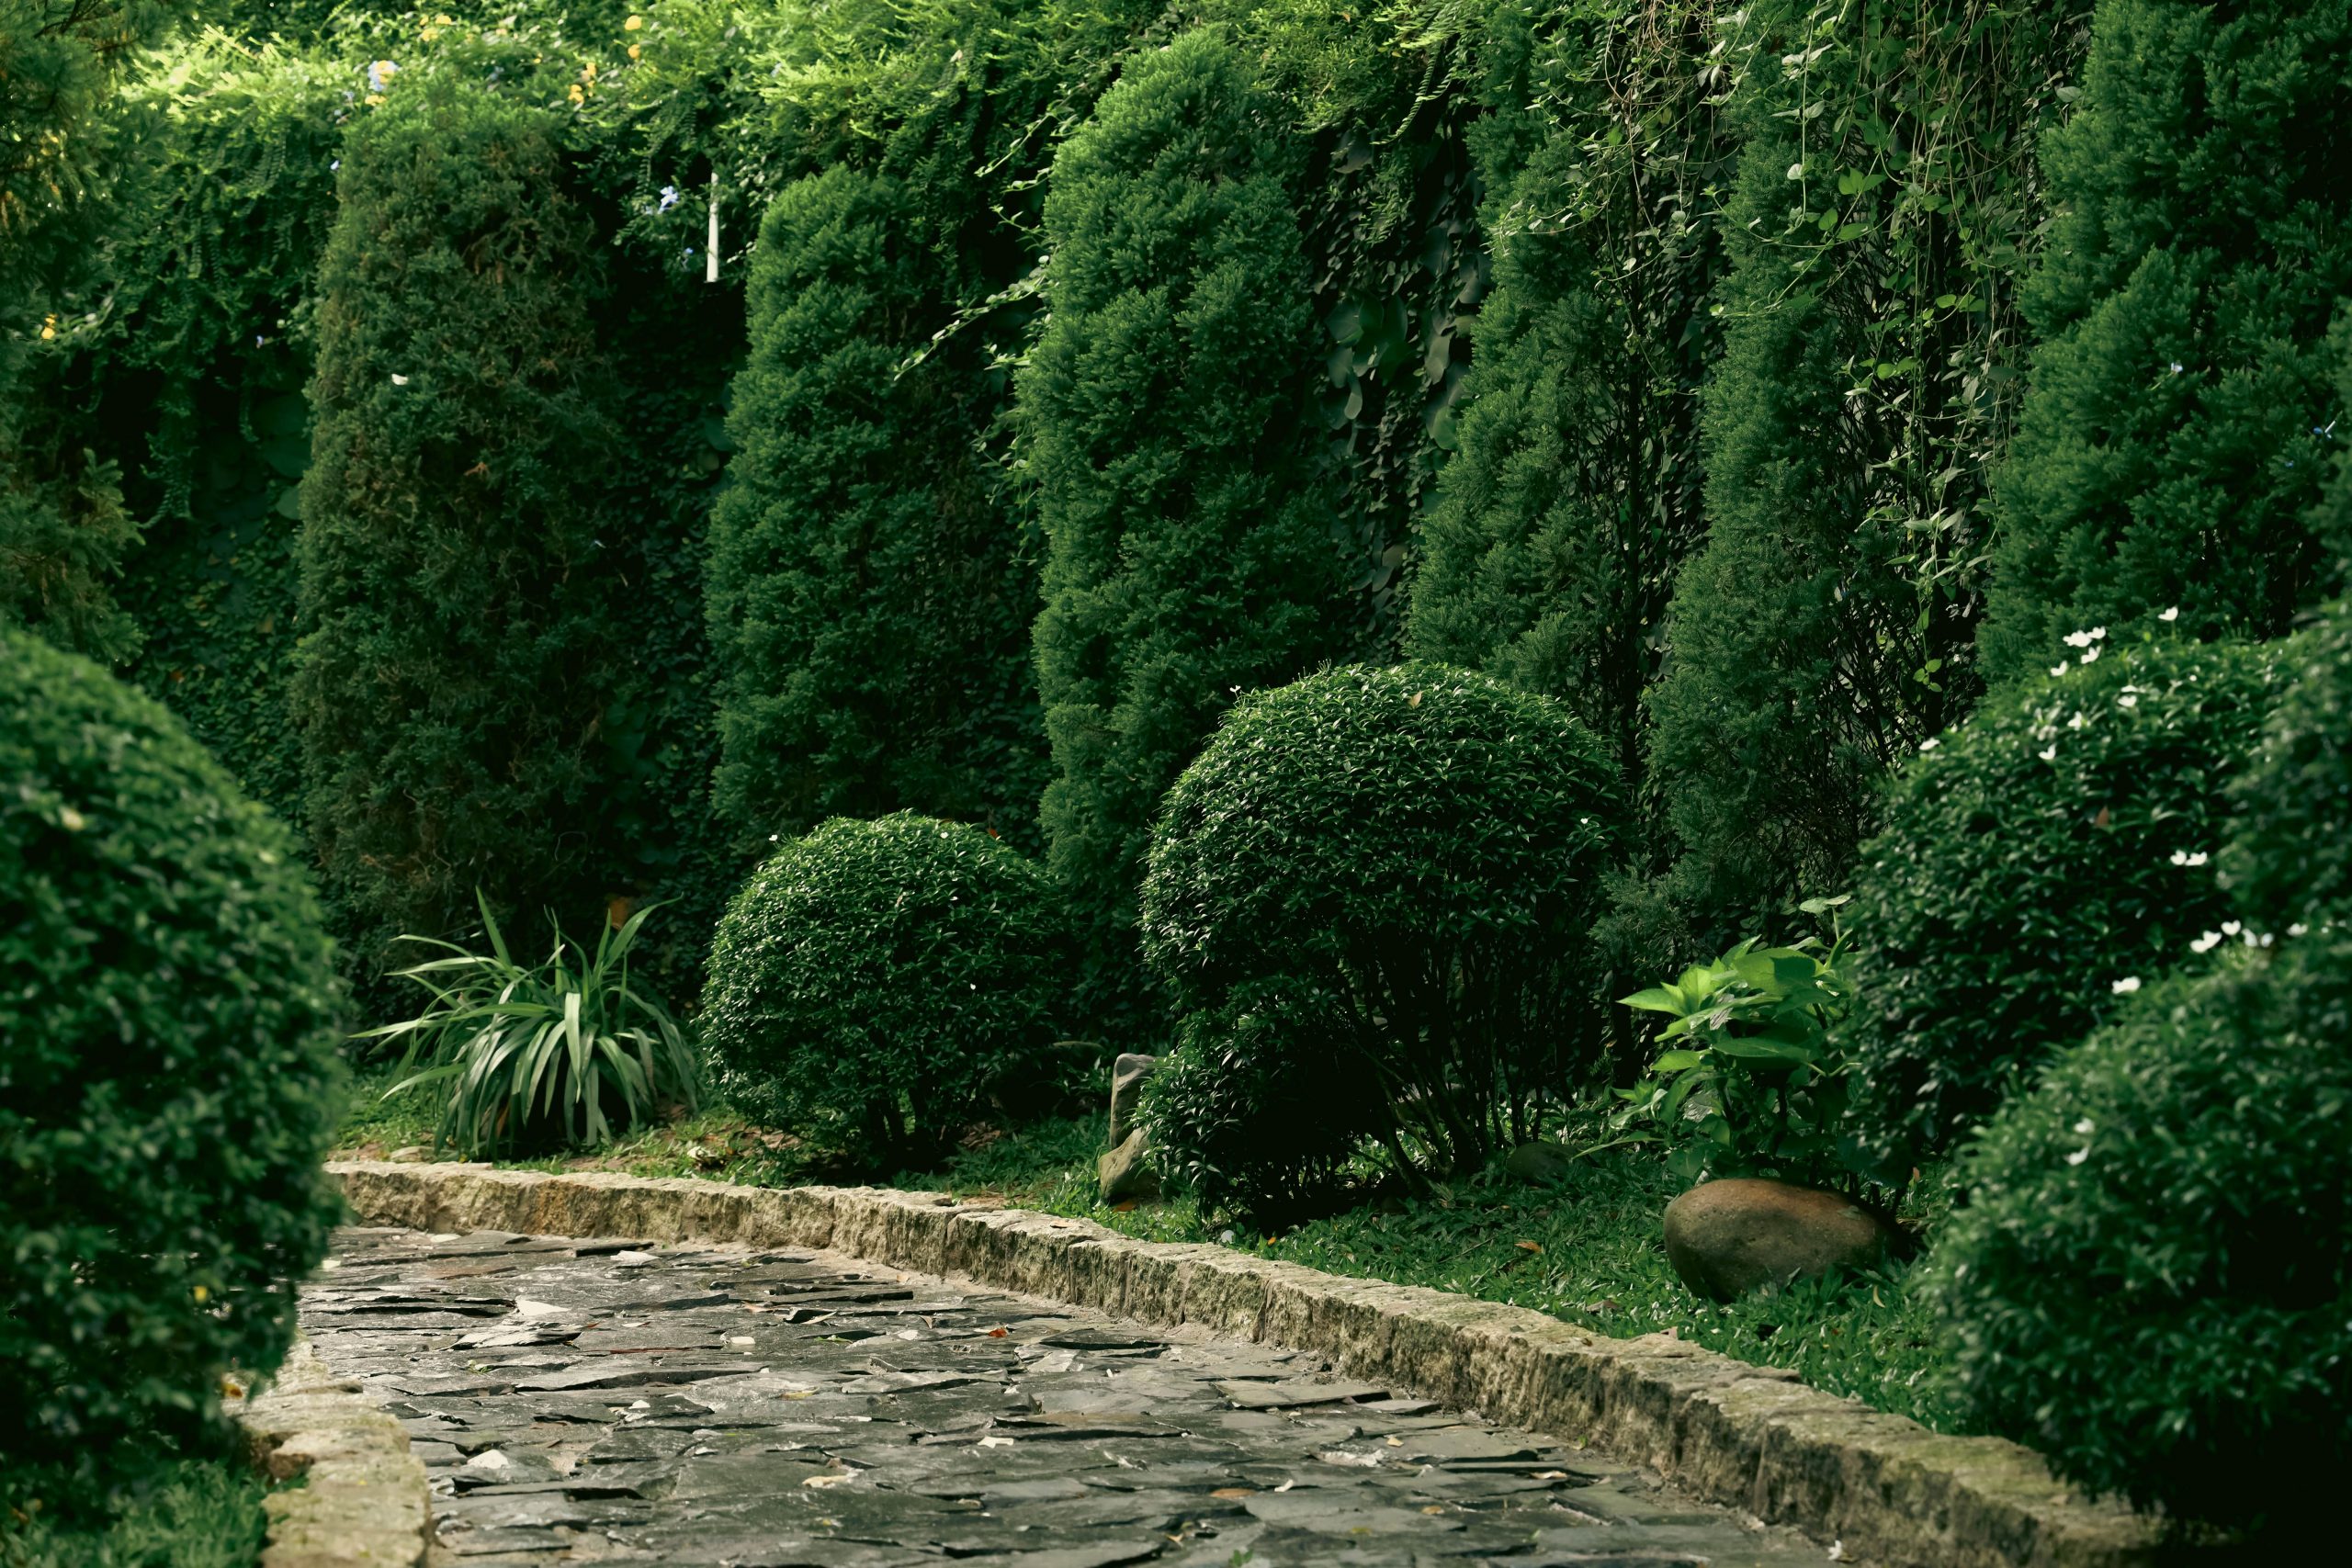
The serene and formal feeling of this garden is achieved with a simple formula: 80% disciplined green structure + 20% natural texture. The overwhelming majority of the visual space is dedicated to the repeated form of the topiary trees and the clean line of the stone path. This creates a powerful sense of order. The remaining 20% is the ‘imperfect’ texture of the stone and the soft, less-defined background greenery, which keeps the scene from feeling sterile.
📐 Style Math
A formal, symmetrical design like this requires a decent amount of space to feel grand rather than cramped. This pathway is likely at least 4-5 feet wide, and the topiaries are planted with enough room to mature without touching—plan for at least 5-6 feet between the center of each tree. The overall length of the path needs to be substantial enough to establish a rhythm, so this look is best for a yard with at least a 30-foot straightaway to dedicate to the feature.
17. Create a Cozy Patio Nook with Layered Greenery
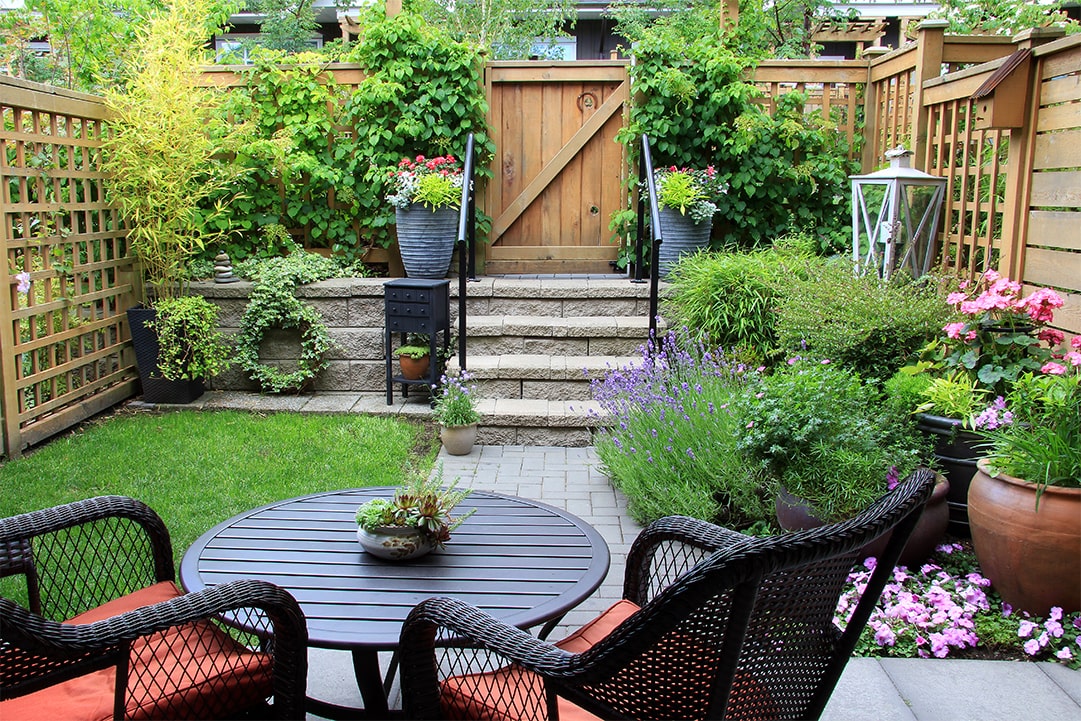
Creating a cozy, enclosed feel like this requires a careful balance. Too many plants, and the patio can feel dark and damp, becoming a haven for mosquitoes. The key is strategic layering. The stone retaining wall and steps create different levels for planting, allowing sunlight to reach the lower plants. Using a mix of plant heights, from low groundcovers to taller shrubs, ensures air can still circulate. If your space doesn’t get at least 4-6 hours of direct sun, a design this dense may struggle with mildew and leggy plants.
💡 Designer Tip
Get this lush, private patio vibe on a budget. Instead of a stone retaining wall, use stacked landscape timbers ($100-$200). For seating, look for used metal bistro sets on Facebook Marketplace ($50-$75) and add new cushions ($40). Use fast-growing, inexpensive perennials and evergreen shrubs from a big box store to create the layered effect. A few bags of mulch will complete the look. You can achieve a similar sense of cozy enclosure for under $400.
18. Use a Bright Blue Gate as a Focal Point in a Sculpted Garden
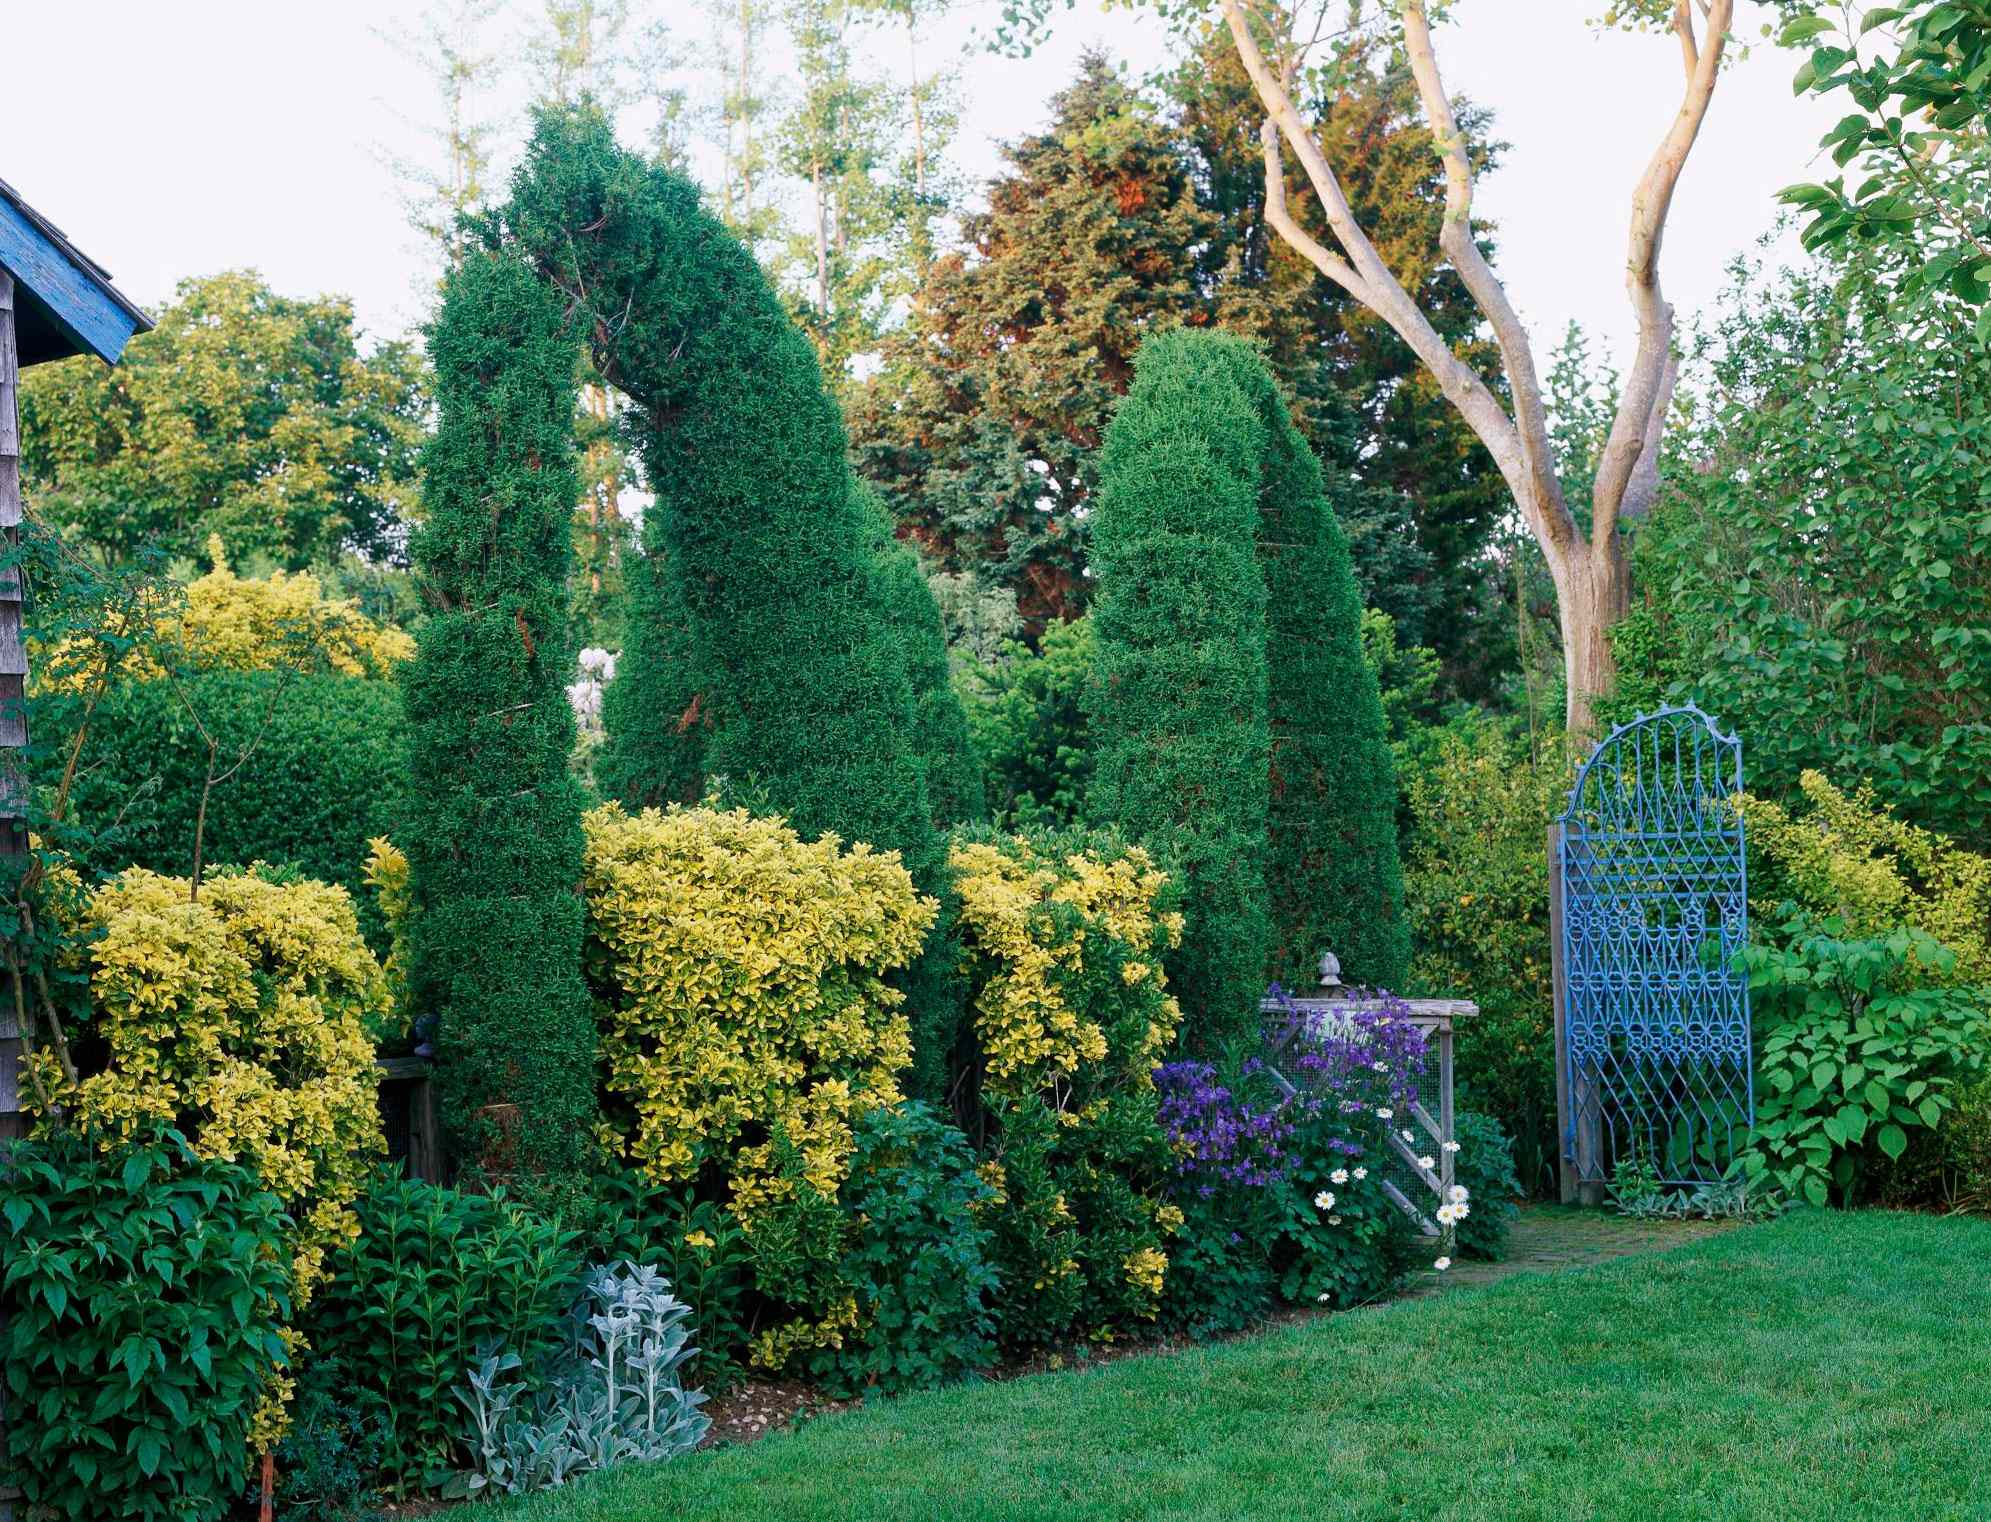
The ornate blue gate is undeniably the star of this show. In a landscape dominated by meticulously sculpted greens and yellows, the gate provides a jolt of unexpected, vibrant color. It serves as a whimsical entry point, promising that the garden beyond is just as interesting. Remove the gate, and you have a technically proficient but somewhat predictable garden. The gate adds personality, a touch of daring, and acts as the perfect focal point to anchor the entire design. It’s what makes the garden memorable.
🔧 How-To Brief
Want to give a metal gate a bold, lasting color? Here’s how. Time: 4-5 hours. Cost: $60.
- Remove the gate from its hinges and lay it on a drop cloth.
- Use a wire brush to remove any loose rust or flaking paint. Wipe it down with mineral spirits to clean it.
- Apply one even coat of a metal primer, like a zinc-chromate primer, designed to inhibit rust. Let it dry completely.
- Apply your first coat of high-gloss, exterior-grade metal paint in your chosen color. Use long, even strokes. Let it dry for at least 24 hours.
- Lightly sand any drips, wipe clean, and apply a second coat for a super durable, vibrant finish.
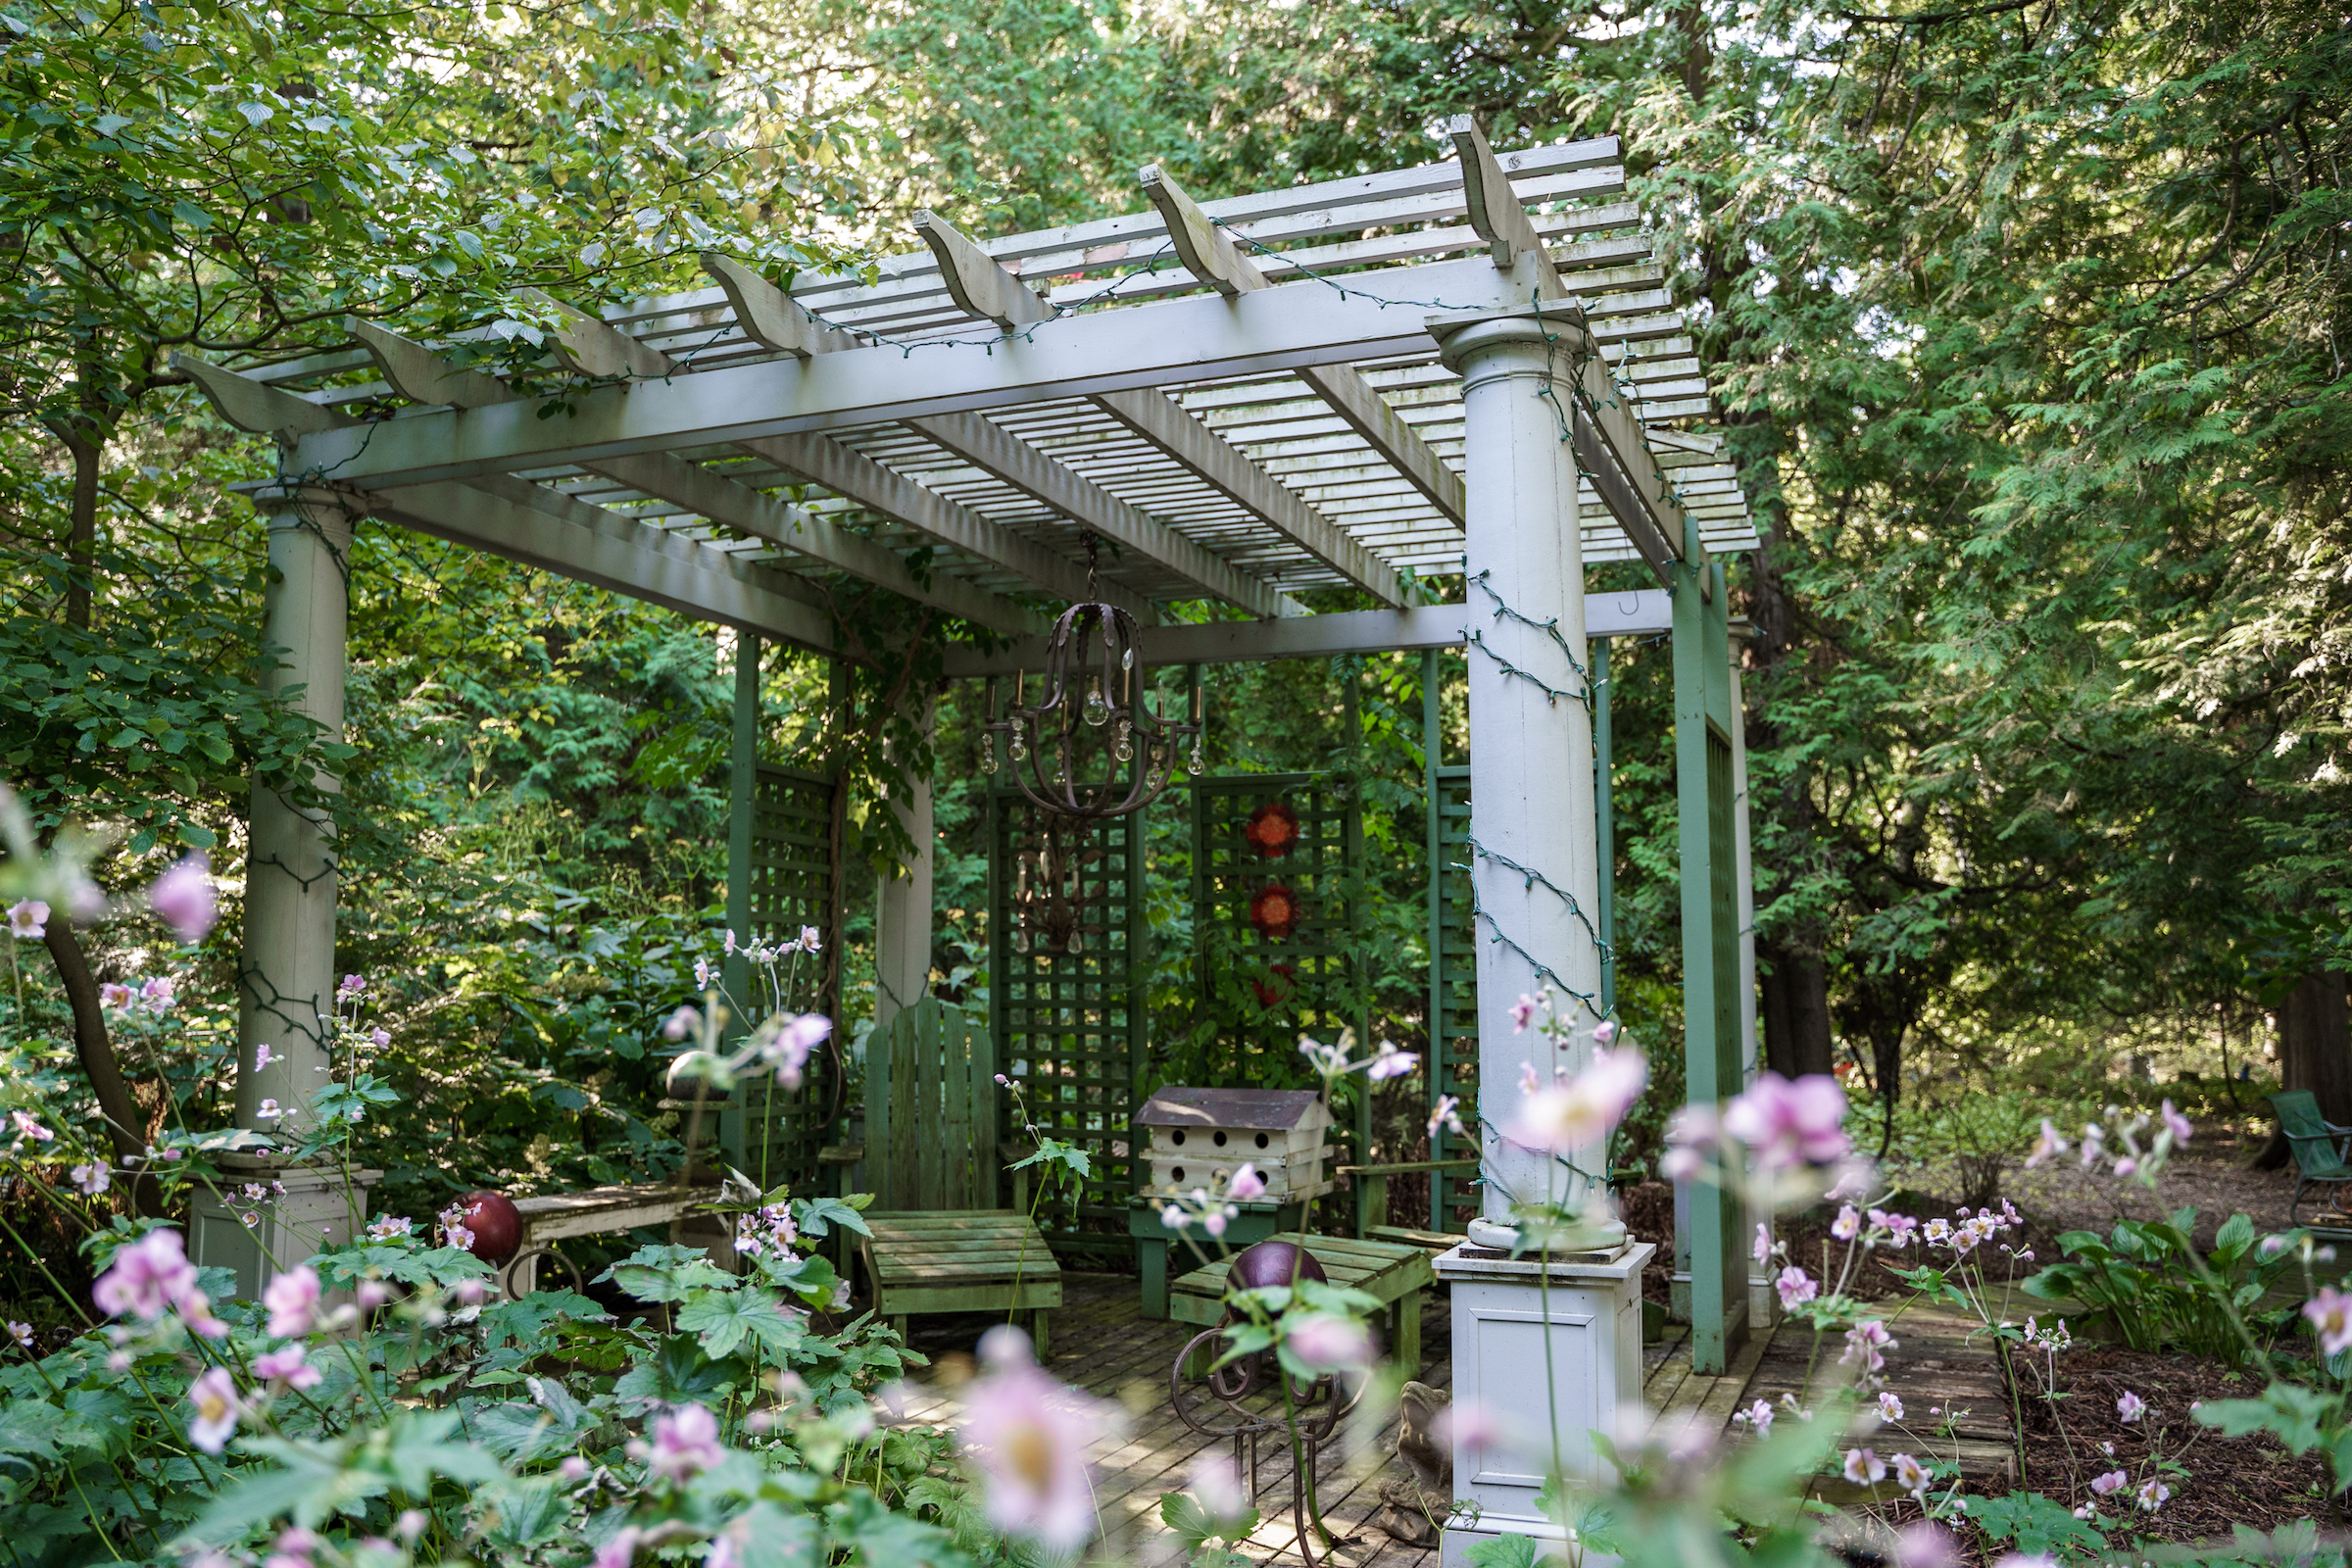
19. Drape a Weathered Pergola with Fairy Lights for an Enchanted Look
This storybook scene works because it masterfully layers elements of age, light, and nature. The weathered green furniture and light-colored wooden pergola look like they’ve been there for decades, giving the space a sense of history. The string fairy lights and the hanging chandelier introduce a magical, ethereal quality, especially at dusk. Finally, the abundant, slightly untamed greenery envelops the space, making it feel like a secret, hidden room within the garden. It is a perfect blend of rustic charm and magical ambiance.
🧹 Maintenance Reality
To create a similar magical pergola nook, here’s a potential budget:
- Structure: Simple wooden pergola kit – $700 – $2,000
- Lighting: Outdoor-rated string lights and a solar chandelier – $100 – $300
- Seating: Weathered-finish metal or wood garden bench/chairs – $300 – $800
- Decor: Birdhouse, planters, and other accessories – $75 – $200
- TOTAL: $1,175 – $3,300
- Budget alternative: Build a simpler archway from wood, use solar-powered fairy lights, and find vintage garden furniture at a flea market. Total Cost: $350 – $700.
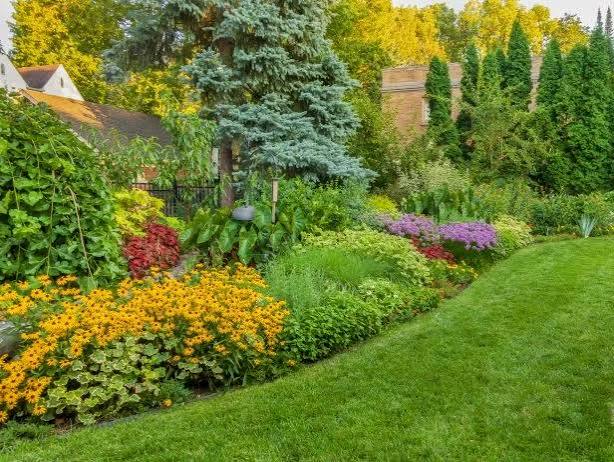
20. Cultivate a Whimsical Vibe with Dramatic and Contrasting Evergreens
For a truly dramatic and whimsical evergreen garden, focus on creating high-contrast pairings. Don’t just mix colors; mix forms and habits. Plant a tall, weeping evergreen next to a low, sprawling juniper. Pair a fuzzy, moss-like shrub with a spiky, architectural yucca. The more tension and contrast you can create between adjacent plants, the more dynamic and visually interesting your garden will be. Think of it as creating conversations between the plants.
🔥 Trending Context
This high-drama approach can be adapted to almost any scale, but it thrives with a bit of room. In a large yard (500+ sq ft), you can use full-size weeping pines and tall cedars to create a truly immersive, forest-like experience. In a smaller front yard (under 200 sq ft), replicate the look with dwarf and miniature varieties. Look for weeping dwarf Norway spruce, ‘Golden Mop’ cypress, and other small-scale conifers that provide the same textural and formal contrast without overwhelming the space.
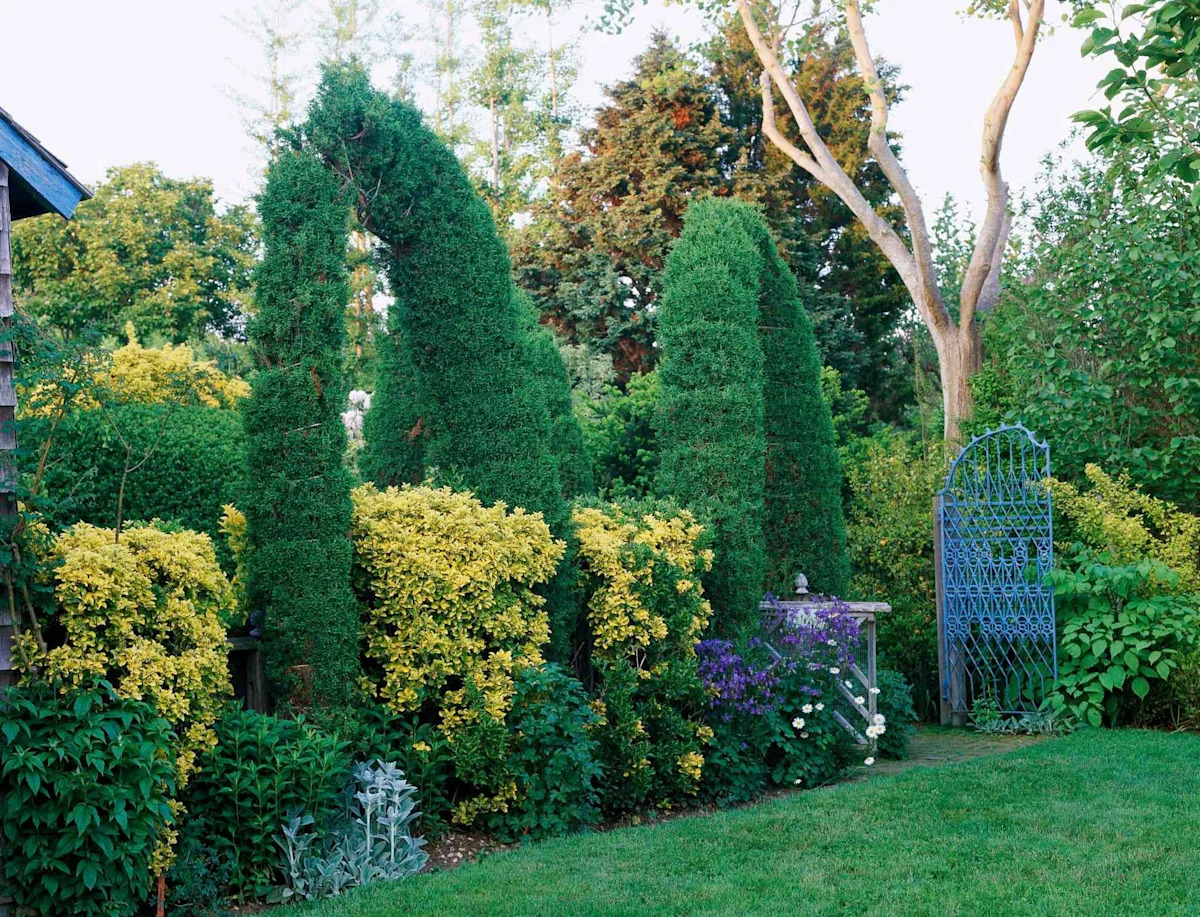
21. Create a Living Archway with a Curved Evergreen Topiary
The single most breathtaking element here is the curved evergreen topiary forming a living arch. It’s a masterful display of patience and horticultural skill that transforms the garden from a collection of plants into a work of art. This is not something you can buy off the shelf; it is grown and trained over years. It creates a sense of wonder and passage, inviting you to step through into another world. Its organic, sweeping form is a stunning contrast to the formal conical shapes nearby.
⚠️ Real Talk
Training a topiary arch like this is a decade-plus project, not a weekend DIY. It requires a young, flexible tree (like a yew or arborvitae), a strong metal form to guide the growth, and years of patient, precise pruning. If you’re not an experienced topiarist, attempting this could easily result in a misshapen or dead tree. A more realistic alternative is to create an arch with a fast-growing vine on a metal arbor, which can give you a similar effect in just 2-3 seasons.
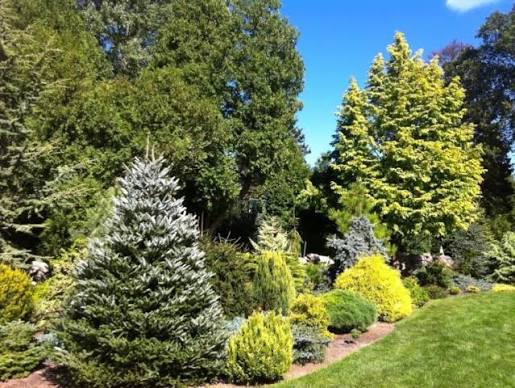
22. Follow Basic Design Principles for a Cohesive Conifer Garden
Even a whimsical garden benefits from basic design principles. This look likely succeeds by using repetition, contrast, and a clear focal point. Repetition might come from using several plants of the same color (e.g., three different blue-hued conifers). Contrast is achieved by mixing plant shapes—tall and skinny next to short and fat. A focal point could be a single plant with a dramatic weeping form or a unique color that draws the eye. These principles provide an underlying structure that keeps ‘whimsical’ from becoming ‘chaotic’.
📏 Scale Guide
buying a cartful of cool-looking conifers, make a checklist:
- Sunlight Map: Chart how many hours of sun different parts of your garden get. A plant that needs full sun will not be happy in a shady corner, no matter how good it looks there.
- Soil Test: Do you have acidic or alkaline soil? Is it sandy or heavy clay? Most conifers prefer slightly acidic, well-drained soil. Knowing your starting point is crucial.
- Mature Size Research: Write down the 10-year height and spread of every plant you consider. Draw a rough map to scale to ensure they won’t be on top of each other in the future.
23. Layer Multiple Evergreen Colors, Shapes, and Textures
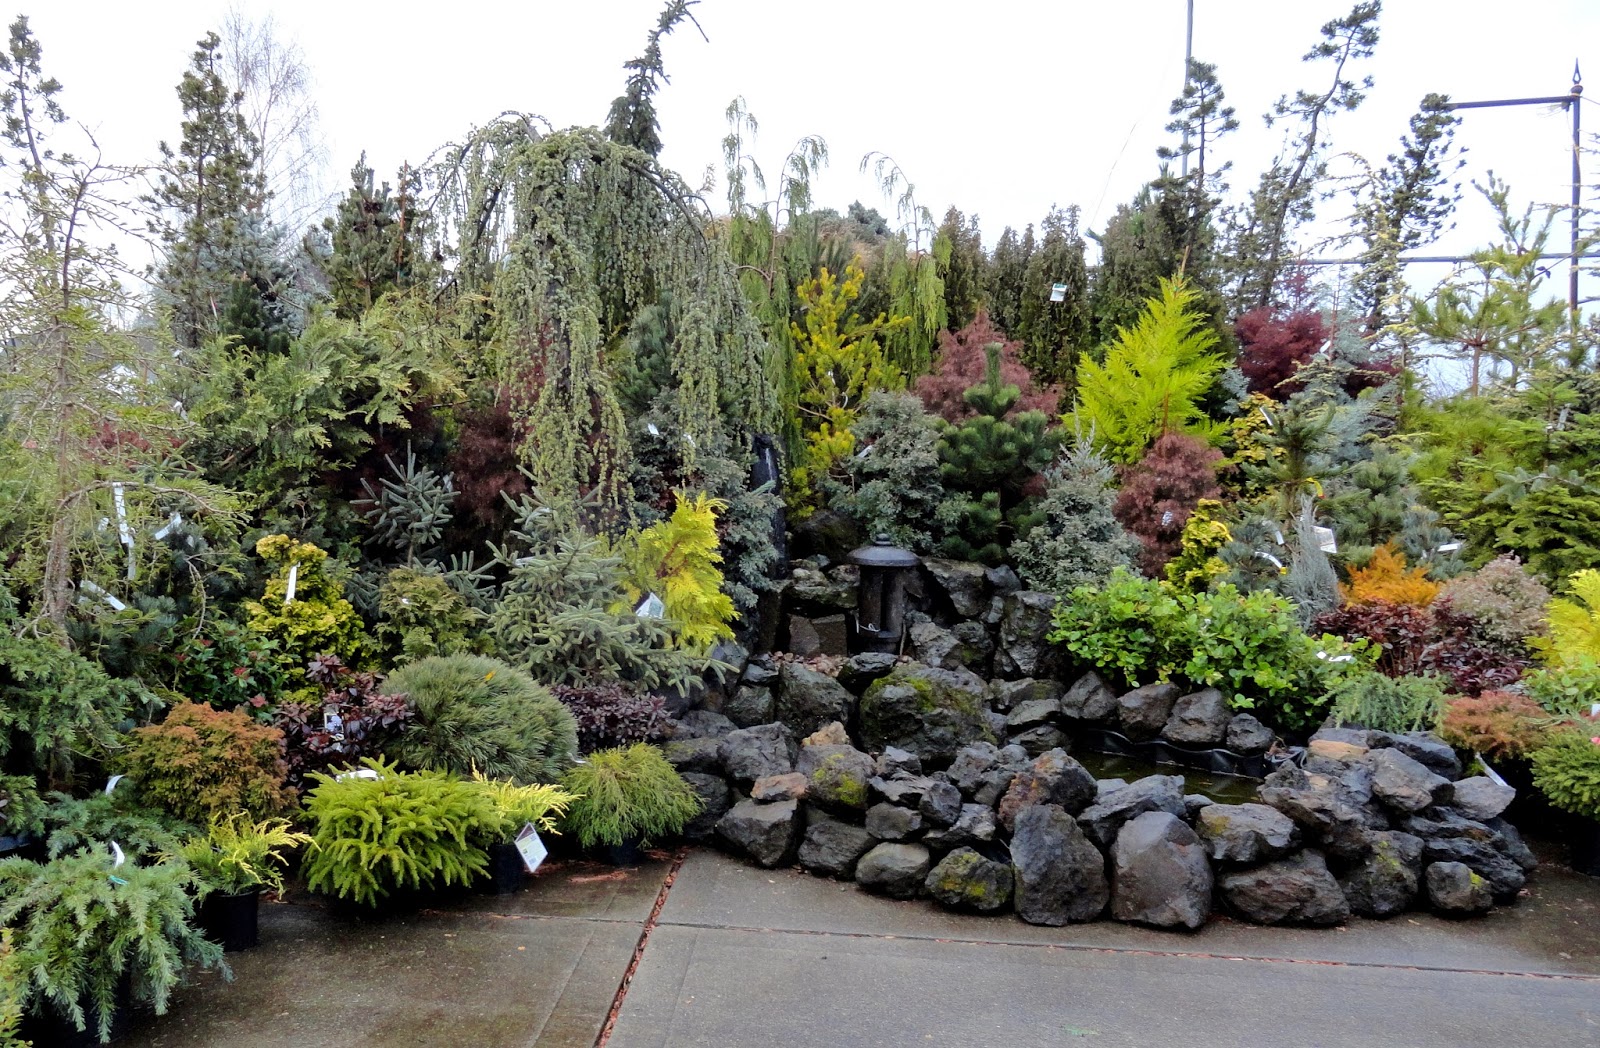
A lush, multi-dimensional look like this comes from a formula of layered diversity. Think: 40% base green, 30% color variation, 20% textural difference, and 10% hardscape. The ‘base green’ is your standard, dark green foliage that provides a backdrop. The ‘color variation’ comes from chartreuse, blue-green, and reddish-brown foliage. ‘Textural difference’ is the contrast between fine needles, broad leaves, and scaly textures. The ‘hardscape’ is the rock water feature, which anchors the whole composition.
💰 Budget Breakdown
When creating a dense planting, organize your plants by light and water needs first, and aesthetics second. It’s tempting to place a plant where it looks best, but if that beautiful, sun-loving Blue Spruce is tucked behind a tall pine that casts afternoon shade, it will fail. Grouping plants with similar cultural requirements (a ‘dry sun’ section, a ‘damp shade’ section, etc.) will make your garden far more successful and easier to care for in the long run.
24. Define a Seating Area with a Circular Paver Patio
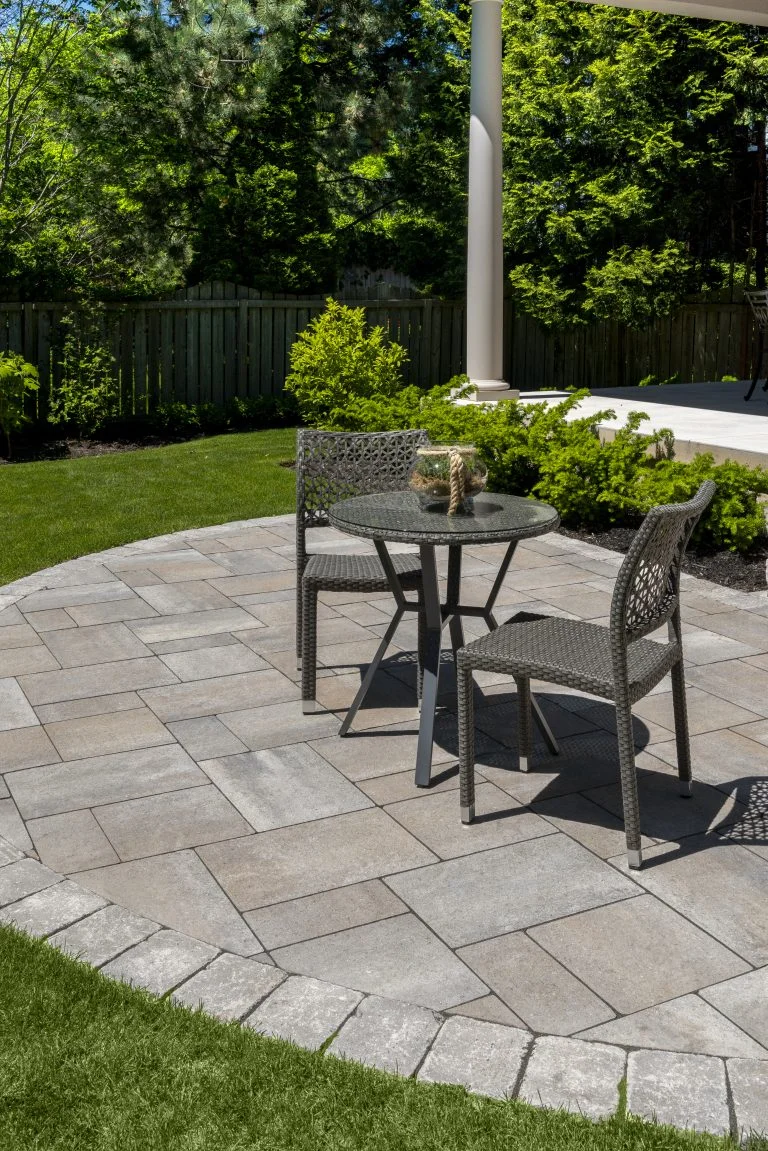
The success of this patio design lies in its clear, geometric definition. The circular shape creates a distinct ‘room’ within the larger garden, a designated space for relaxation. The lighter-toned stone edge acts like a picture frame, cleanly separating the patio from the lawn and drawing the eye inward. This strong geometry provides a pleasing contrast to the soft, organic shapes of the surrounding grass and shrubs. It feels intentional and calm. A similar version of this can be seen in Idea #16 which has a different vibe.
💸 Get This Look For Less
Paver patios are relatively low-maintenance, but not zero-maintenance. Weeds will inevitably try to grow in the cracks between the pavers. You’ll need to treat these 2-3 times a year with a garden-safe herbicide or by hand-weeding. Depending on your climate, you may also need to pressure wash the pavers every few years to remove mildew or dirt buildup. If you live in an area with freeze-thaw cycles, check for and level any heaved pavers each spring.
25. Create an Enchanted Path with a White Picket Archway
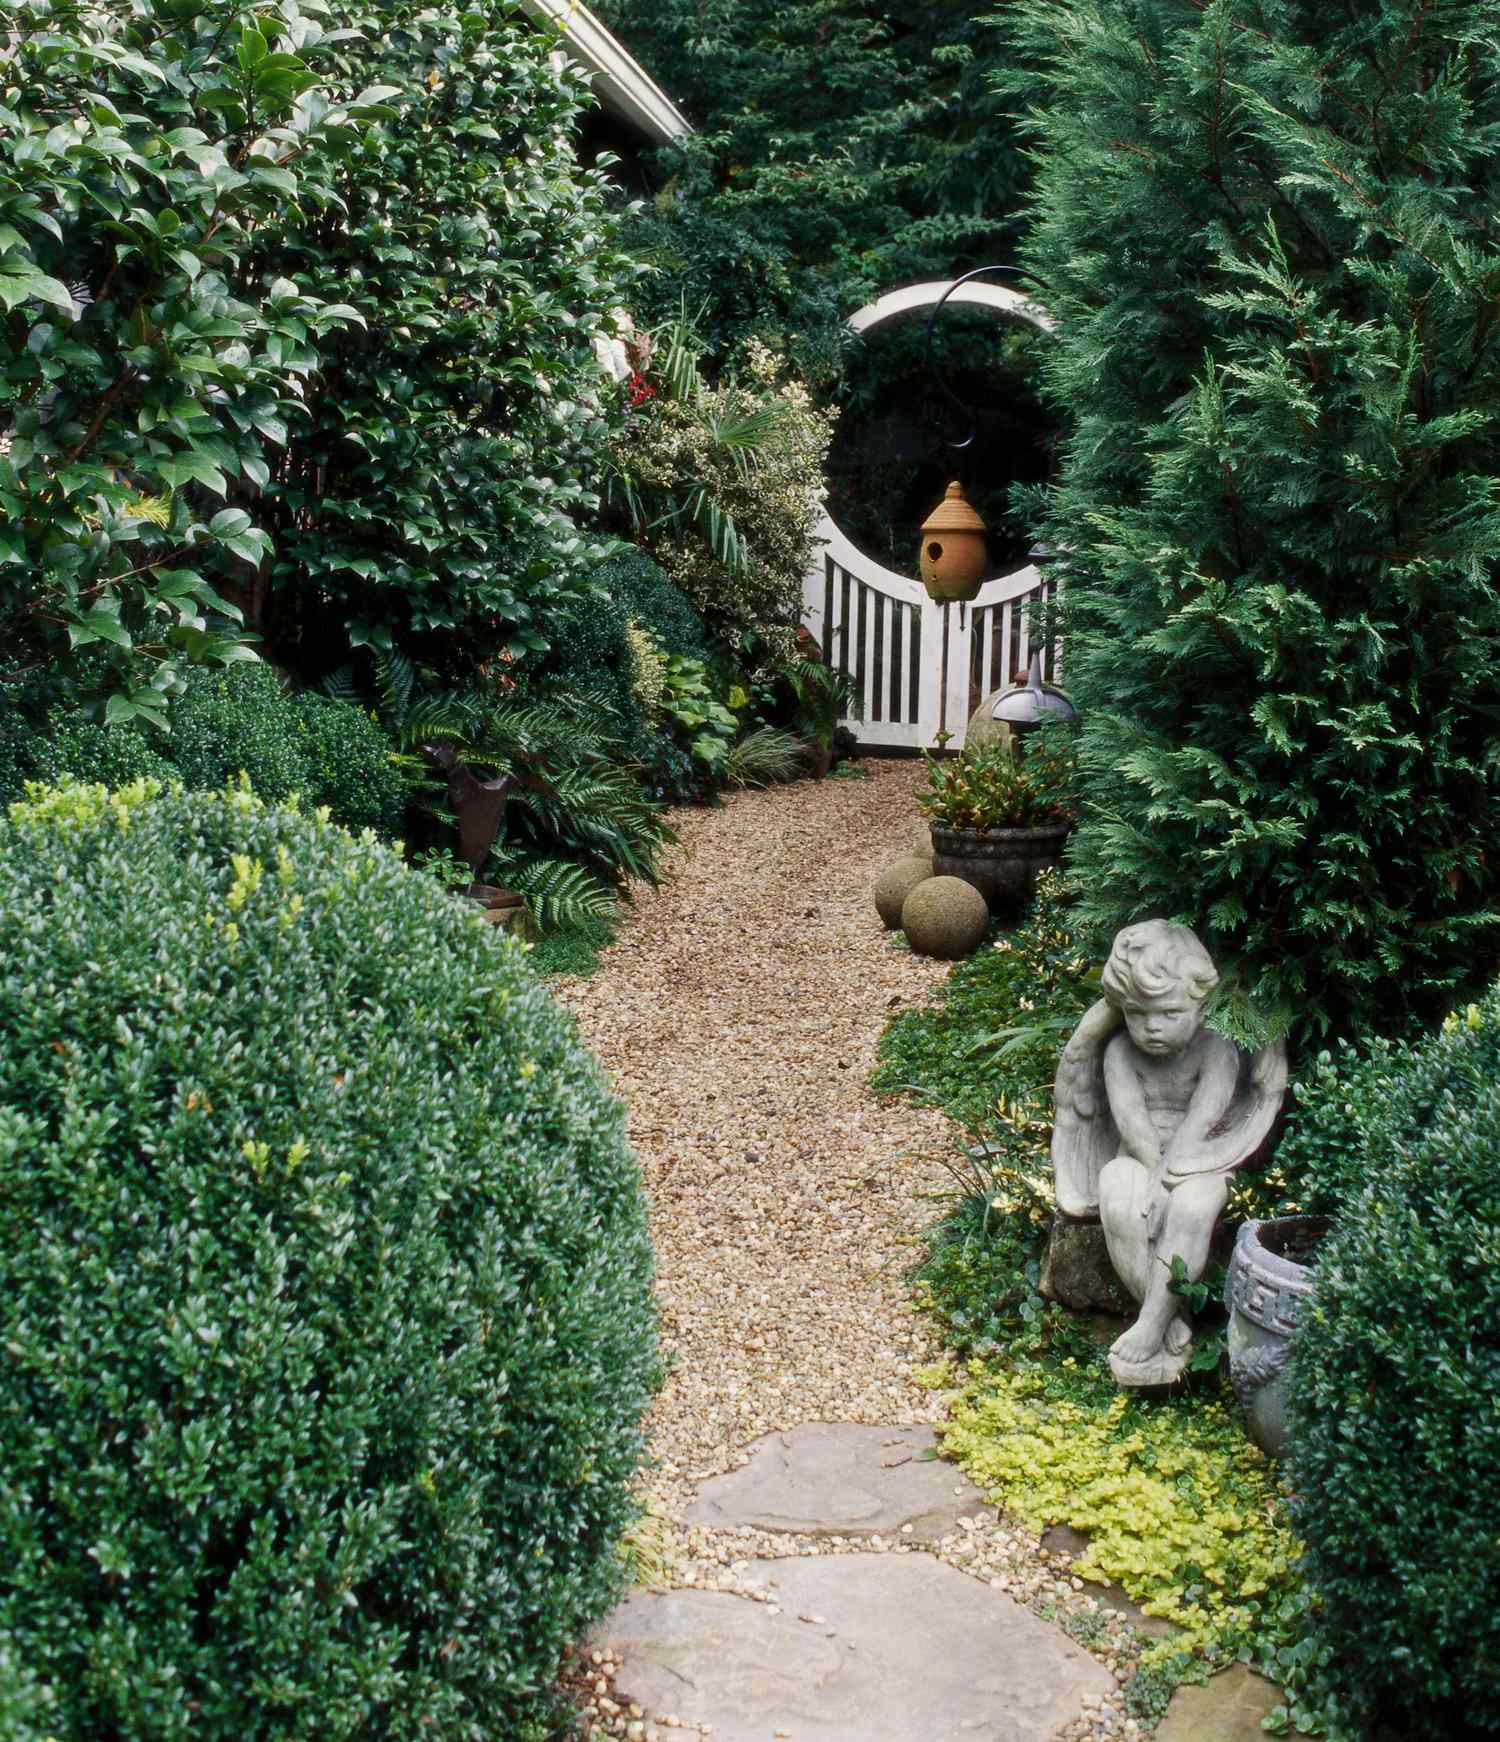
The white picket archway is the single element that transforms this from a simple garden path into an enchanting journey. It acts as a portal, creating a powerful sense of entrance and mystery. It suggests a transition from one space to another, even if it’s just a few feet. The arch, combined with the small hanging birdhouse, adds a layer of story and charm that the plants and stones alone, while beautiful, could not achieve. It’s what gives the garden its soul.
⭐ The One Thing
You can get this enchanted garden feeling for less. While a high-end wooden arch can be pricey, you can find simple metal or vinyl arches at home improvement stores for $100-$200. Pair it with inexpensive groundcover and a few bags of pea gravel for the path ($50). For decor, find a cherub statue at a thrift store or flea market ($20) and a simple terracotta birdhouse from any garden center ($15). The magical feeling comes from the composition, not the cost.
26. Connect a Flagstone Path to Brick Edging for Material Contrast
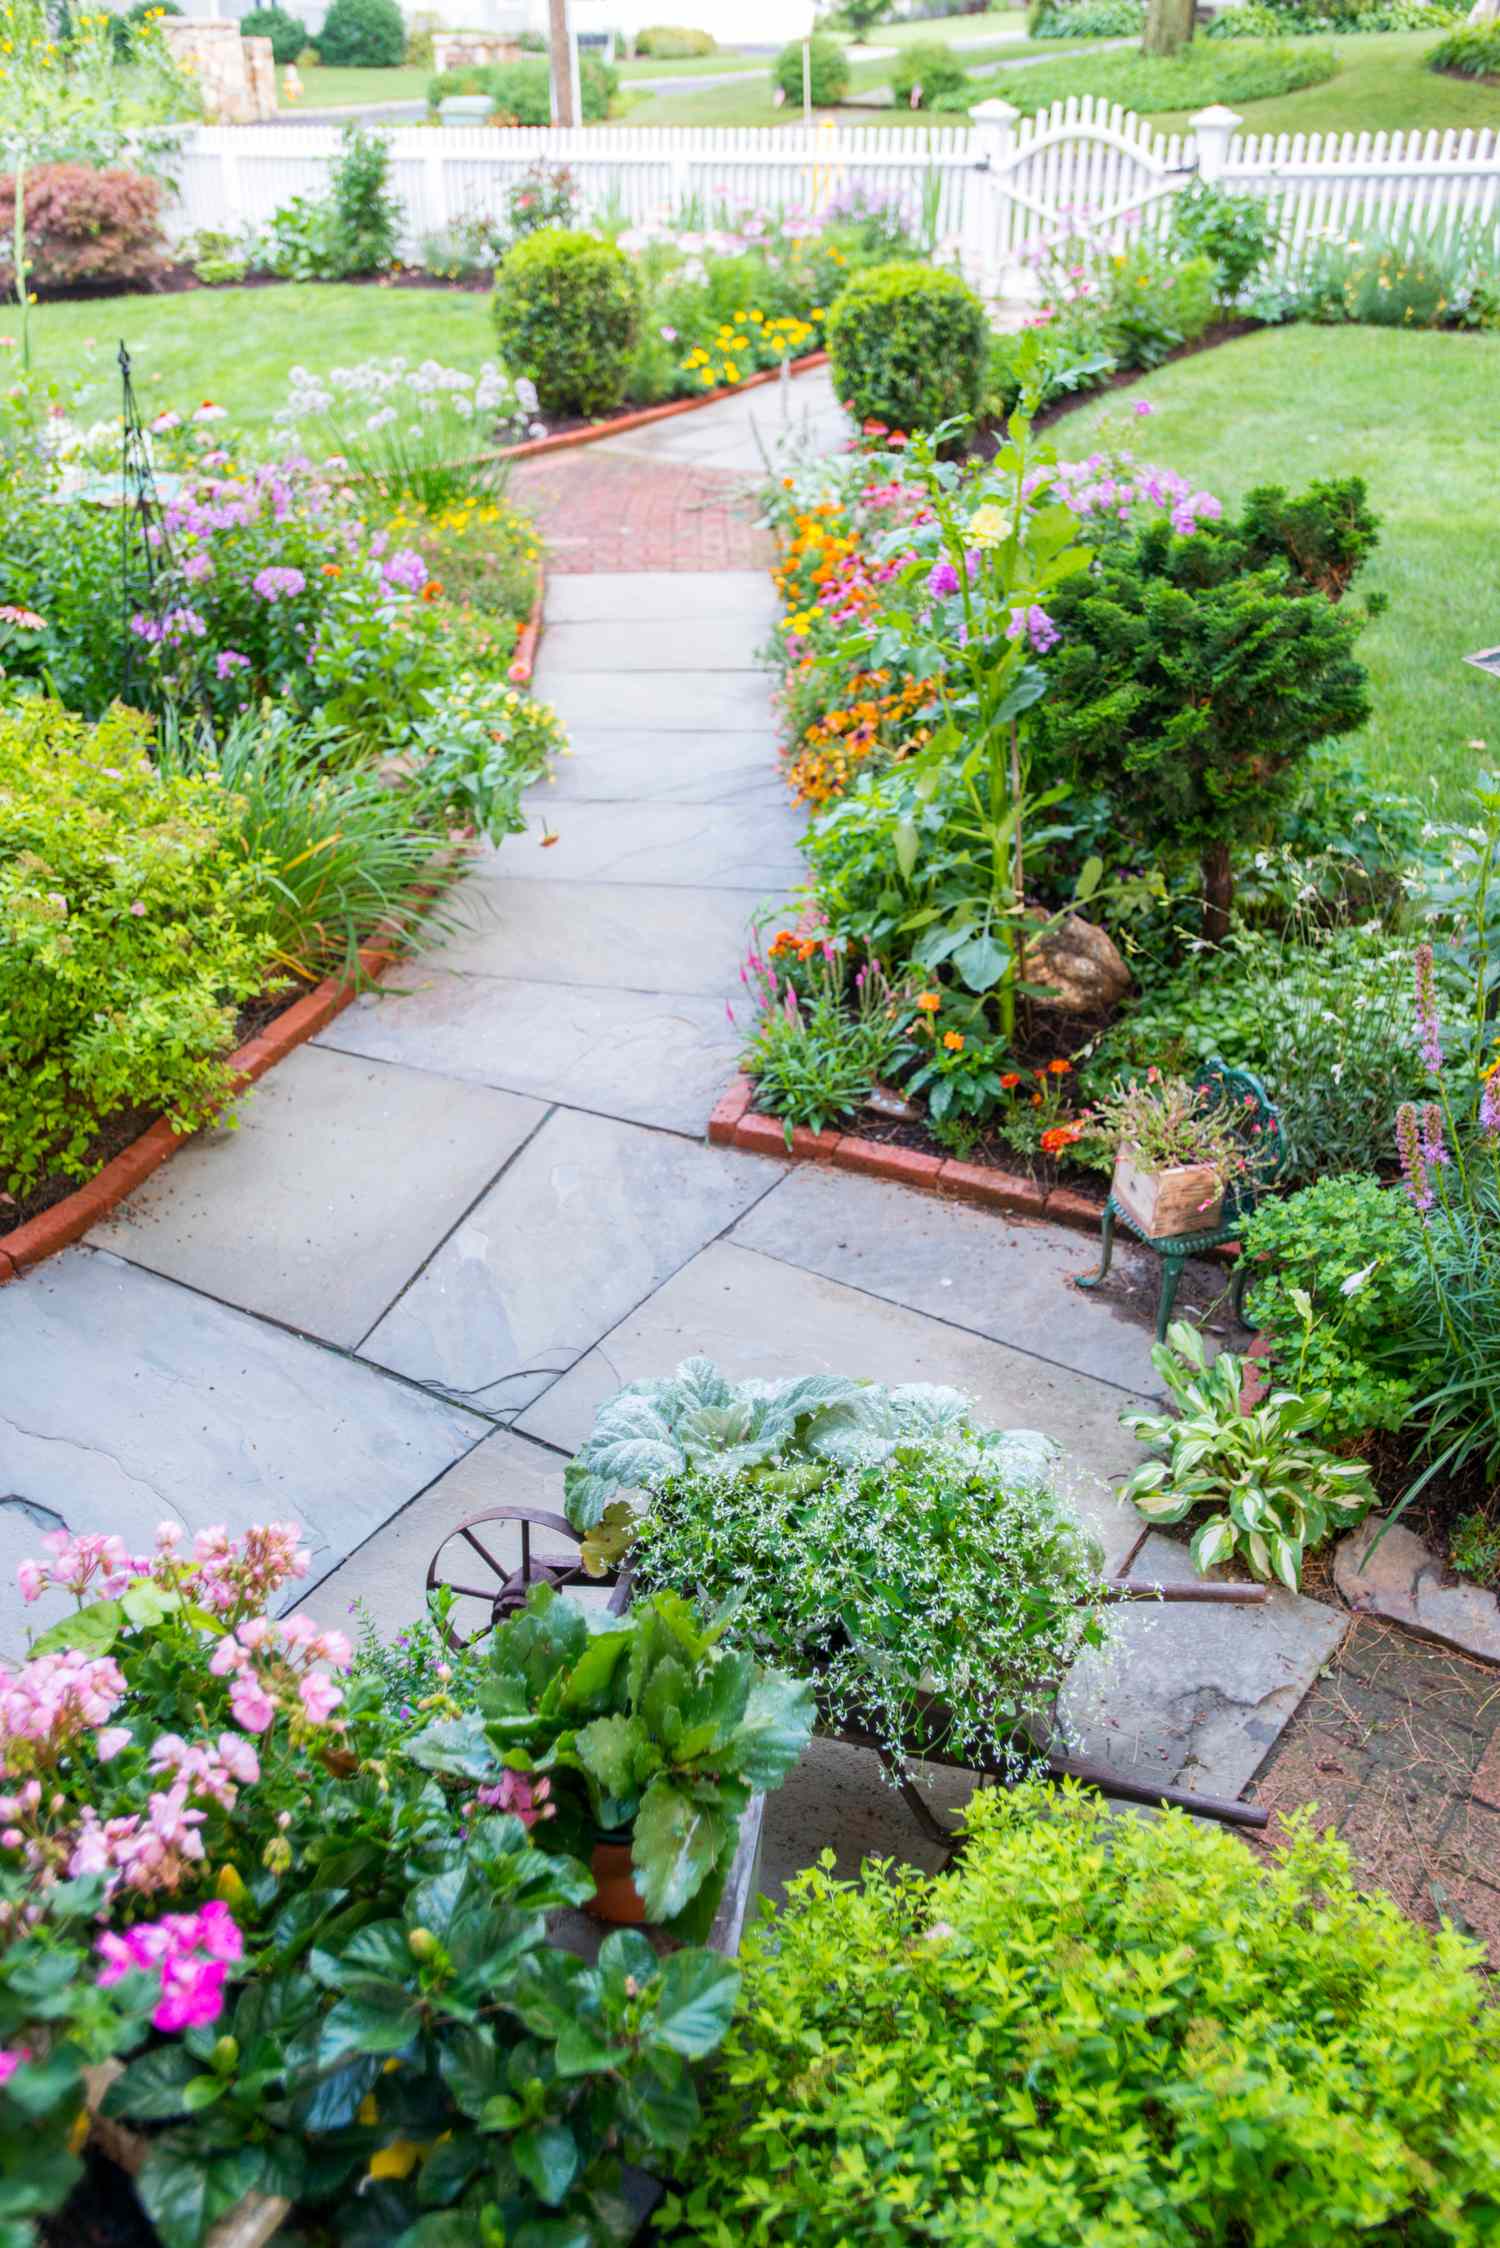
This path design is visually interesting because it successfully mixes materials. The irregular, light grey flagstones have a rustic, natural feel, while the straight, formal line of the red brick edging adds structure and a contrasting color. The transition between the two materials prevents the path from feeling monotonous. This interplay between formal (brick) and informal (flagstone), and between warm (red) and cool (grey) tones, makes the landscape more dynamic and sophisticated.
✅ Before You Start
A narrow, winding path like this is perfect for smaller, intimate garden spaces where a wide, straight walkway would feel too dominant. This path is likely no more than 2-3 feet wide, encouraging single-file strolling and a slower pace. It’s an ideal choice for side yards, connecting a patio to a back gate, or for weaving through dense flower beds. For a much grander, more formal path, see the design in Idea #4.
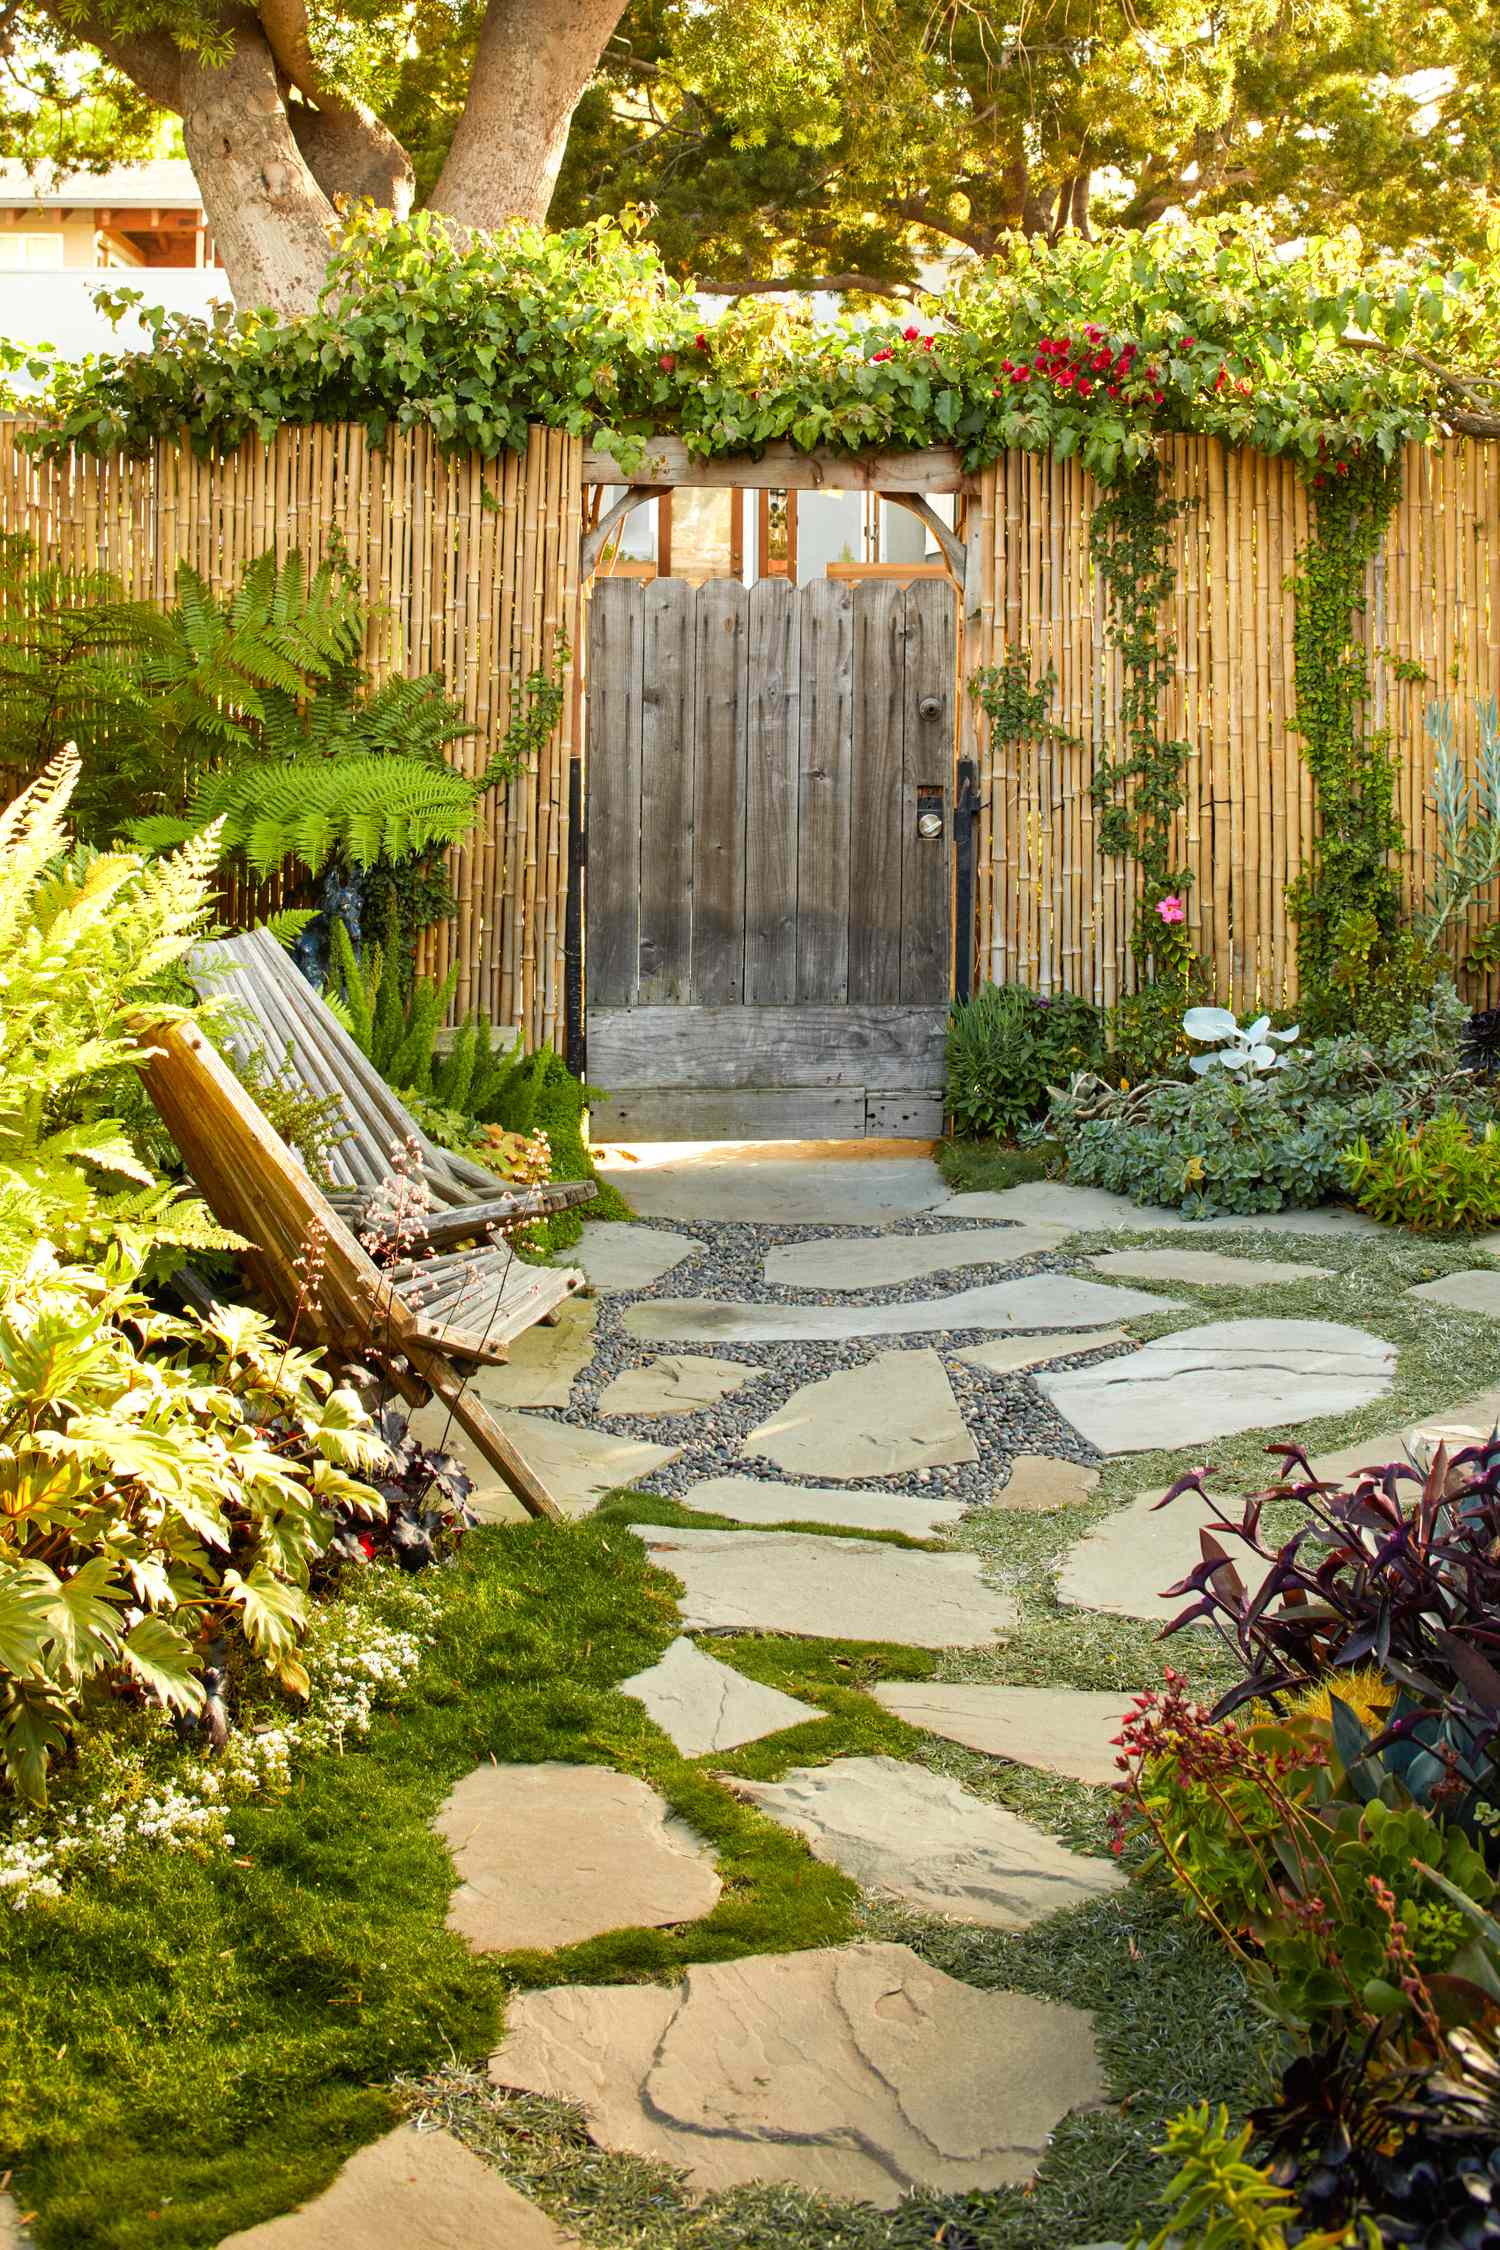
27. Combine Flagstone, River Pebbles, and a Bamboo Fence for a Rustic Look
This tranquil garden path gets its formula right: 60% lush green foliage + 30% natural hardscape + 10% rustic structure. The majority of the space is dedicated to a dense, multi-textured mix of ferns and other plants. The hardscape combines large tan flagstones for walking and dark river pebbles for texture. The final 10% is the tall bamboo fence and weathered wooden gate, which provides privacy and a strong, rustic architectural element that pulls the whole look together.
🎯 What Makes It Work
The use of bamboo as a fencing material is a major trend for 2026, driven by a desire for sustainable, natural materials that also provide an instant sense of privacy and tranquility. It provides a warmer, more organic feel than a traditional wooden or vinyl fence and ties in perfectly with the rise of Zen and Japandi-inspired garden design. It’s a choice that feels both modern and timeless, offering a calm, natural backdrop for lush plantings.
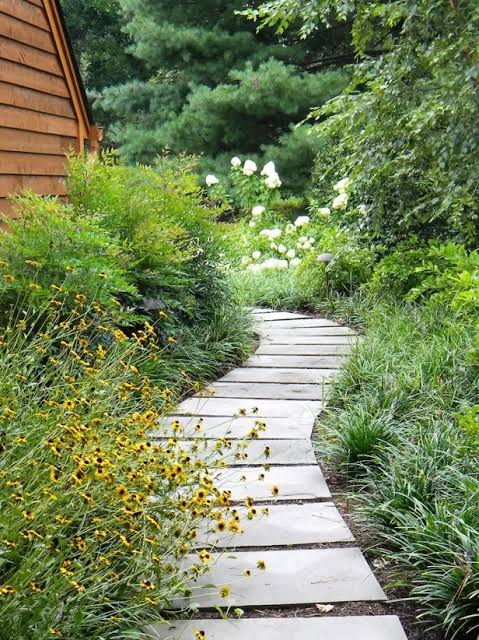
28. Weave a Whimsical Path Through an Evergreen Maze
Be honest with yourself about maintenance. A path that winds tightly between evergreen shrubs will require constant pruning to keep it passable. Those charming, overhanging branches can quickly become a nuisance, snagging your clothes or blocking the walkway entirely after a growth spurt or heavy rain. This look is magical, but it’s not a ‘plant it and forget it’ situation. Plan on trimming the edges of the path at least 3-4 times during the growing season.
📐 Style Math
that makes this path truly whimsical is its sense of discovery. Because the path curves and is densely lined with plants, you can’t see the destination from the starting point. This creates a feeling of mystery and encourages you to follow it to see what’s around the next bend. A straight path is efficient; a winding path is an experience. It’s the journey, not just the arrival, that gives this design its charm.
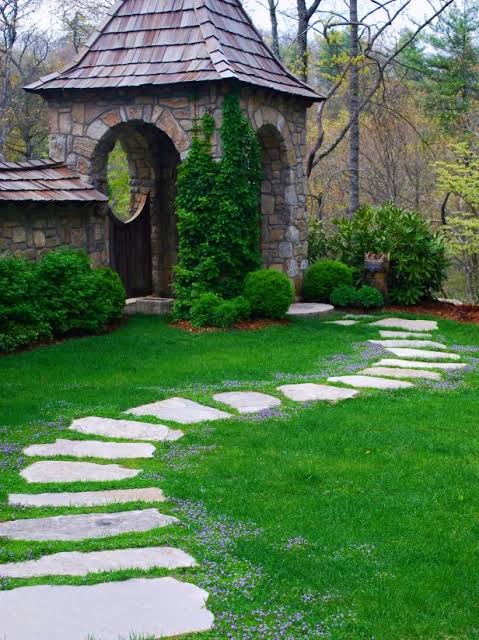
29. Design a Winding Path for a Sense of Journey
A winding path is inherently more engaging than a straight one because it forces you to slow down and it creates a sense of unfolding mystery. By obscuring the final destination, the twists and turns build anticipation. Psychologically, it makes the garden feel larger and more adventurous. The key is to make the curves feel intentional, guiding the visitor past a feature plant, a statue, or towards a specific view. This is a powerful tool for making any garden feel more dynamic.
💡 Designer Tip
When laying out a curved path, use a garden hose or a long rope to experiment with different lines before you start digging. It’s a simple trick, but it allows you to see the flow and adjust the radius of the curves in real time. Live with it for a day or two, walking the ‘path’ at different times. This helps you ensure the curves are gentle and natural to walk, not awkward and sharp. It’s much easier to move a hose than it is to move a ton of flagstone.
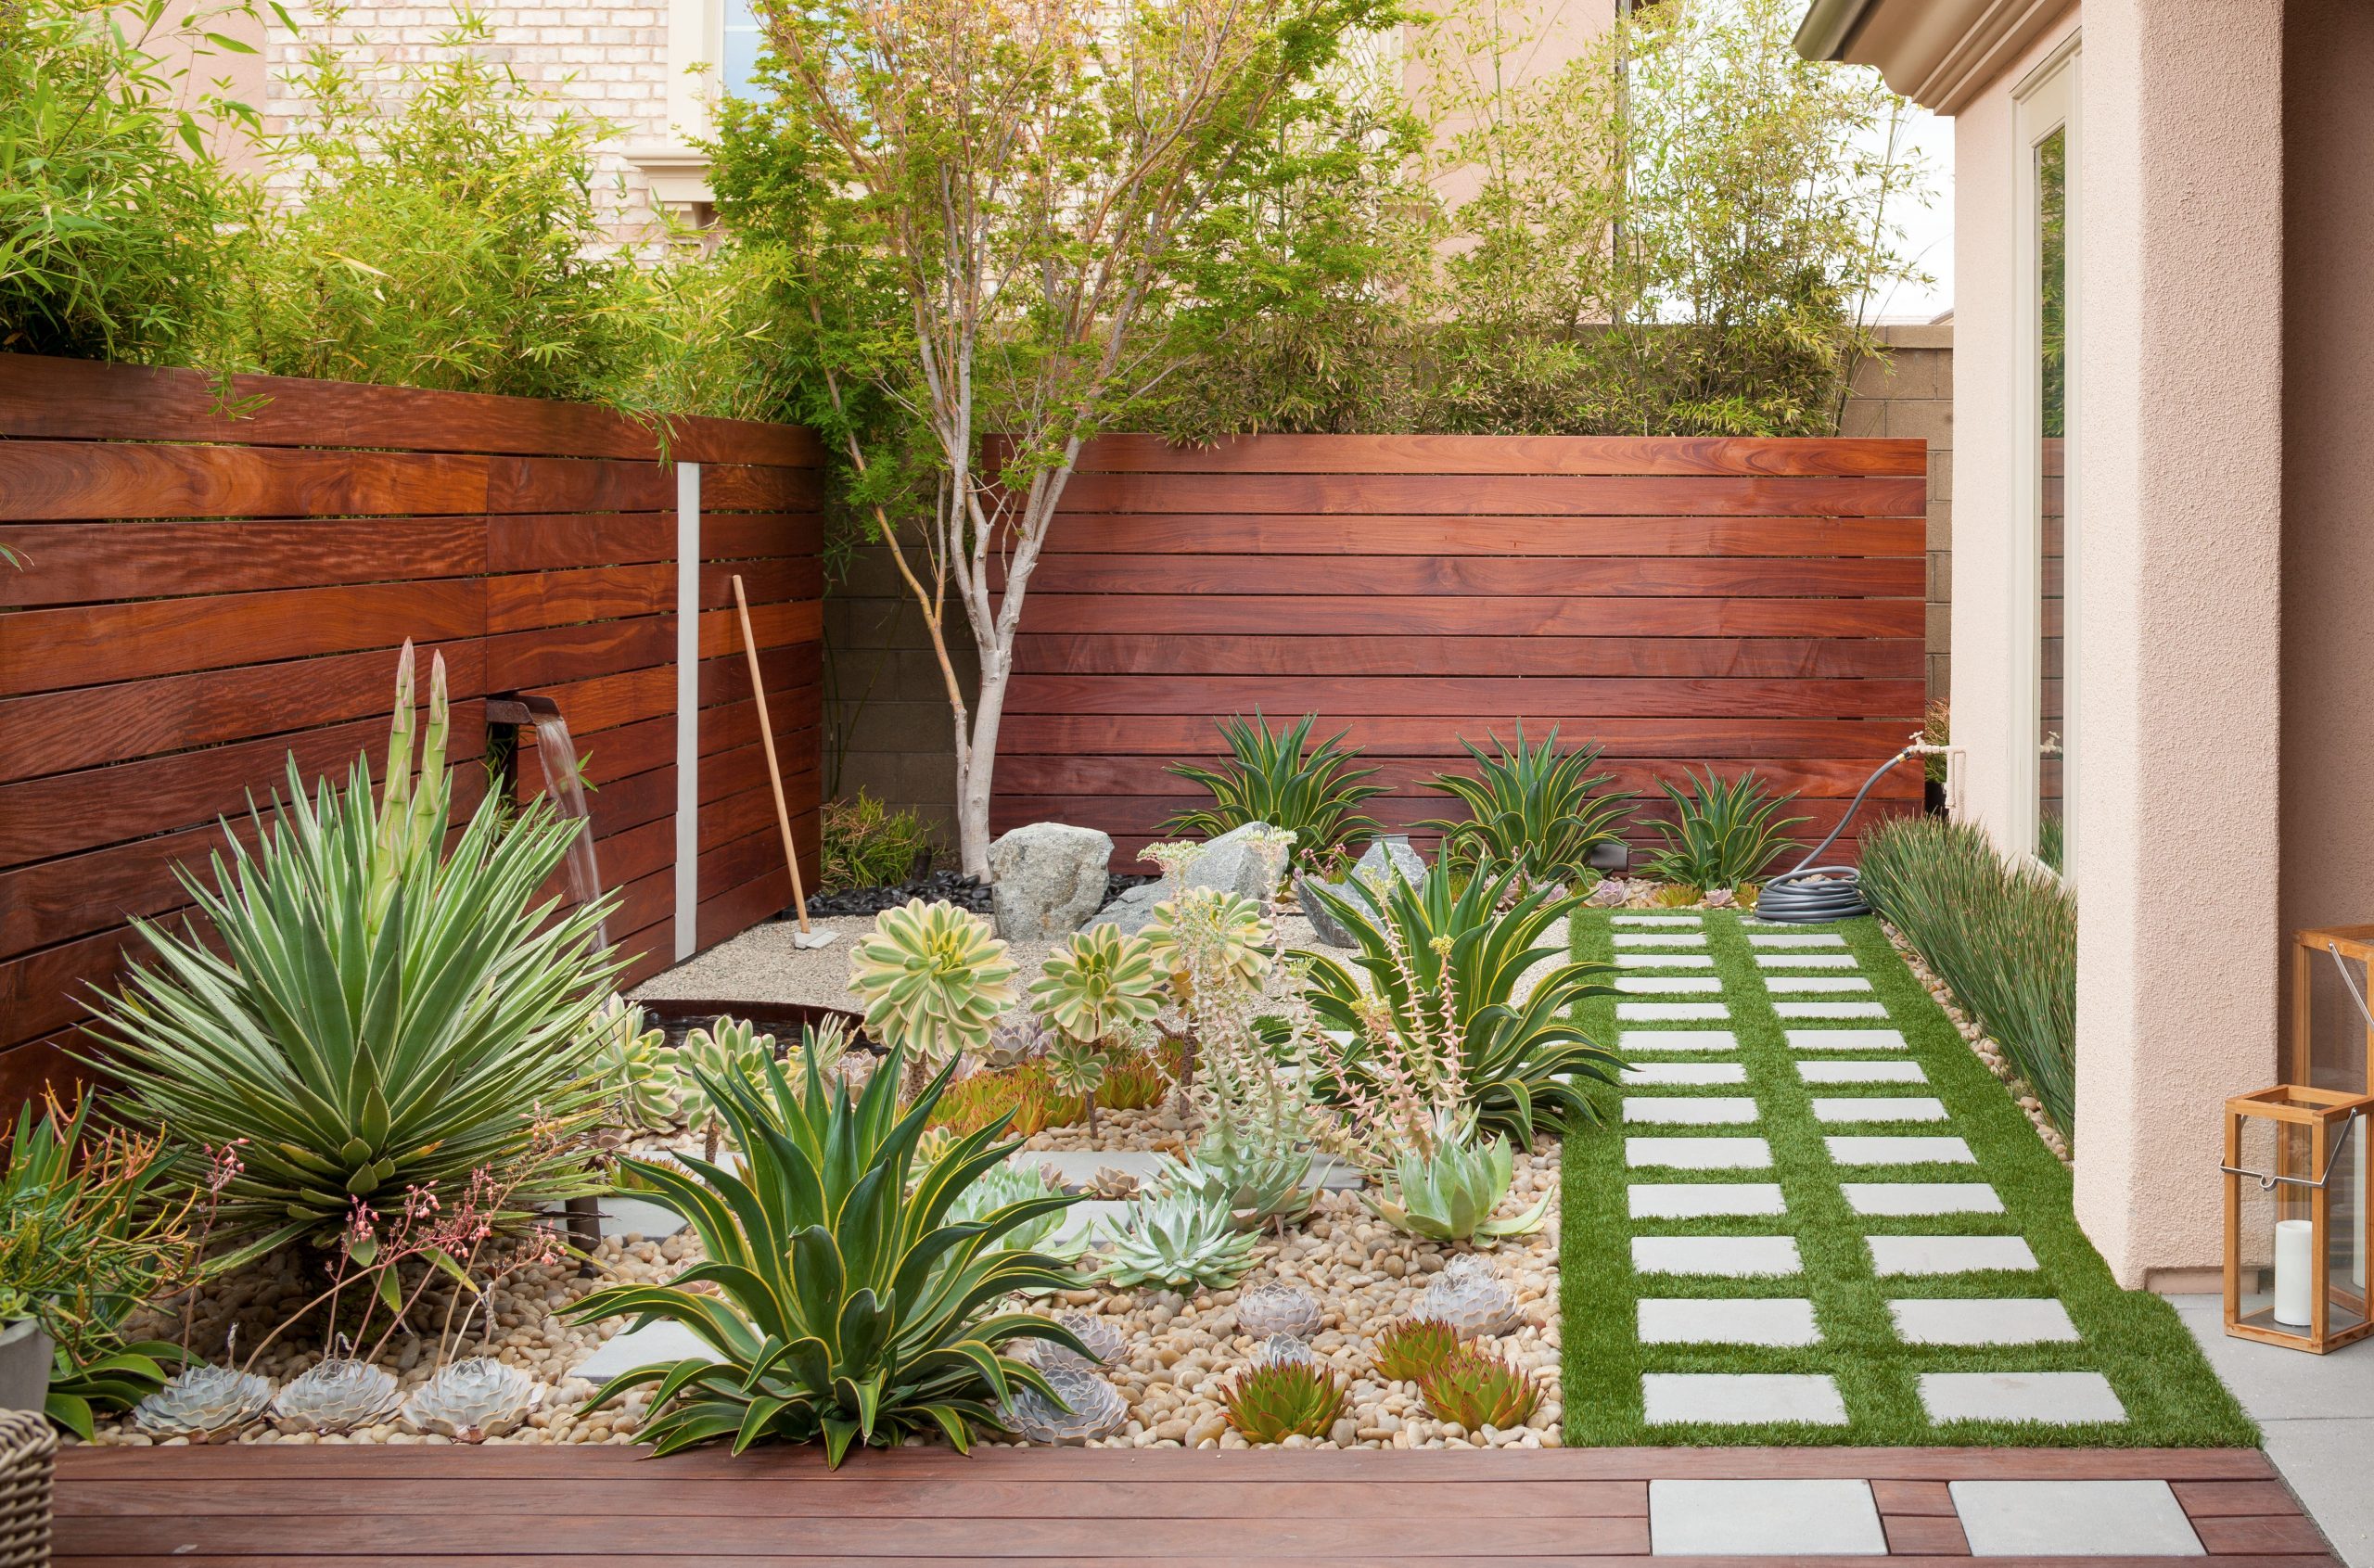
30. Pair a Warm Wood Fence with Modern Desert Plantings
This striking look is a study in material harmony. The formula is approximately 50% warm wood + 30% cool-toned hardscape + 20% sculptural plants. The horizontal slatted fence and dark deck provide a warm, organic backdrop. This is balanced by the cool grey of the pavers and stones. The final 20% is the collection of green and blue-green succulents and agaves, which act as living sculptures. The tension between the warm wood and the cool stone is what makes the design feel so modern and balanced.
🔧 How-To Brief
While desert landscaping is famously low-water, it’s not no-maintenance. The horizontal fence will need to be cleaned and re-stained every 2-3 years to protect it from the elements and maintain its rich color. The artificial turf will need to be occasionally brushed to keep the blades upright and cleared of leaves and debris. The succulents themselves are easy, but the surrounding river rocks can be a magnet for weeds, so occasional spot-treating or hand-weeding will be necessary.
31. Incorporate Modern Sculpture Among Layered Evergreens
The polished silver sculpture is the undeniable centerpiece that elevates this garden into a contemporary art gallery. It’s a bold, confident statement. The reflective surface of the sphere contrasts dramatically with the matte textures of the surrounding evergreen foliage, from the tall columnar trees to the clipped boxwoods. It catches the light and mirrors the garden, creating a dynamic focal point that changes with the weather and the time of day. Without it, this would be a beautiful but traditional garden; with it, it’s a conversation starter.
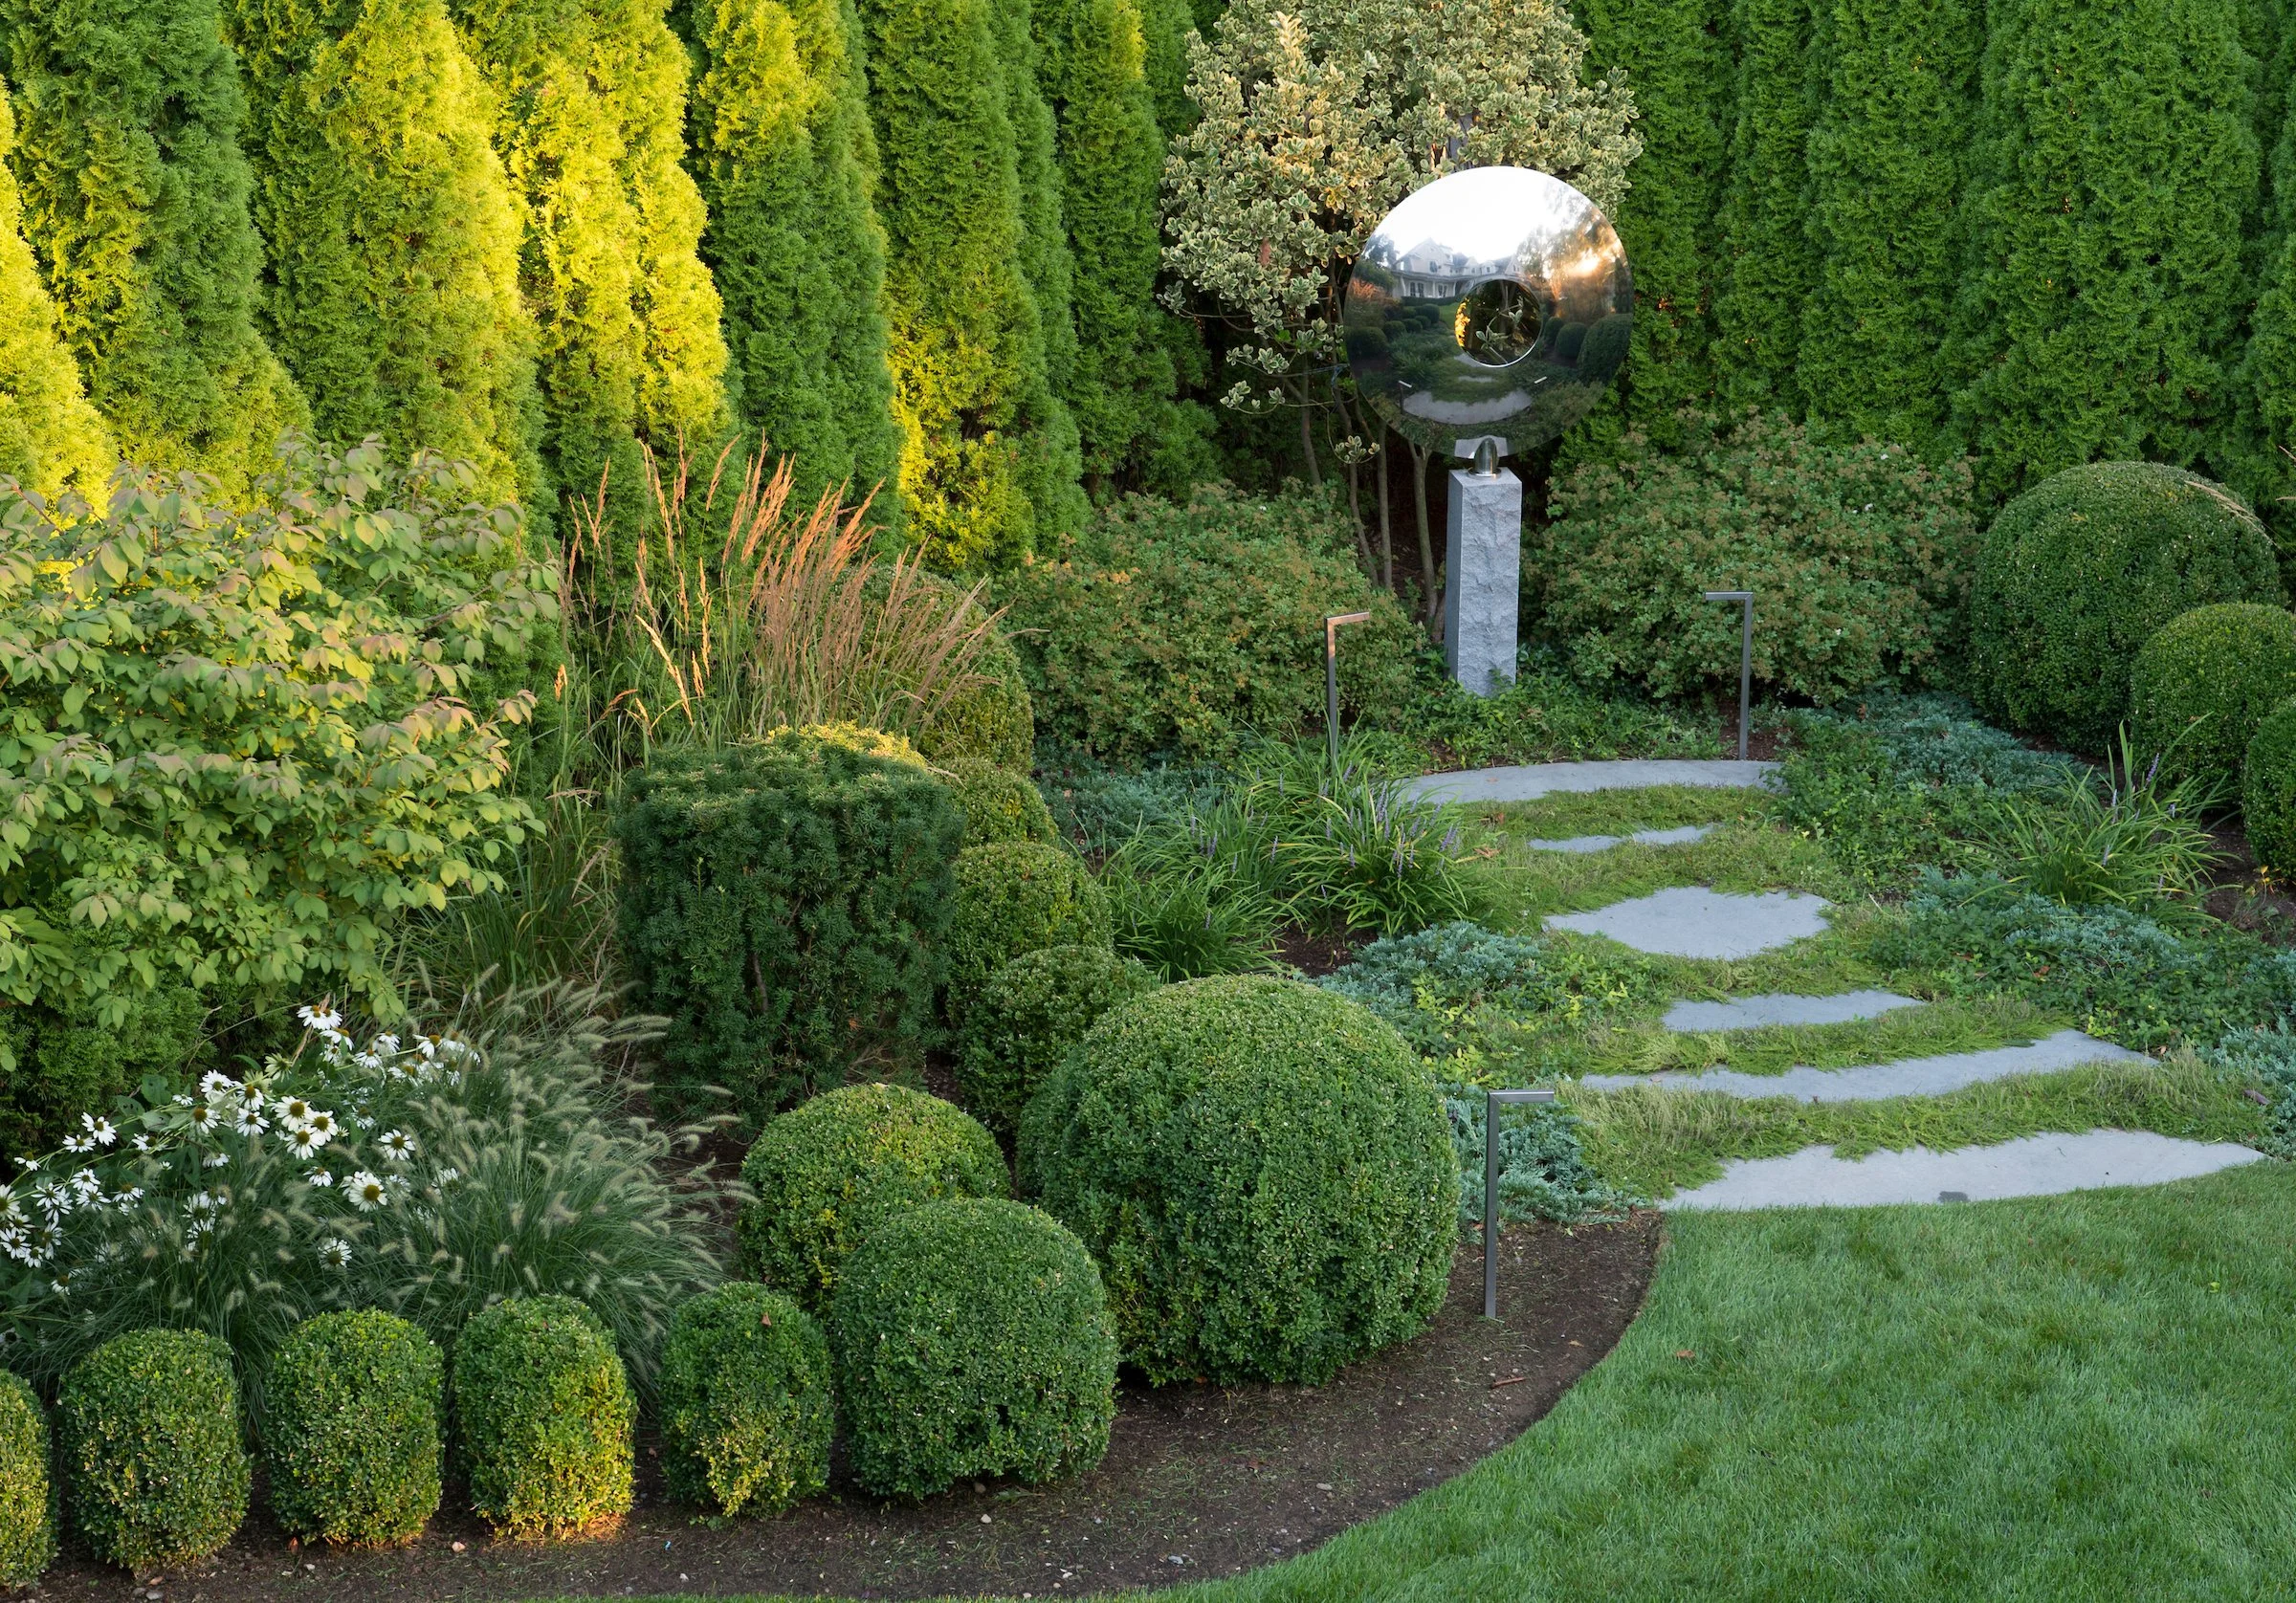
🧹 Maintenance Reality
Installing a sculpture on a pedestal requires a solid foundation. Time: 3-4 hours. Cost: $50.
- Choose your location and mark the pedestal’s footprint. Dig a hole about 12 inches deep and 6 inches wider than the pedestal base.
- Fill the bottom 6 inches of the hole with compacted gravel for drainage.
- Mix a bag of concrete according to the package directions. Pour the concrete into the hole until it’s level with the ground.
- Smooth the top surface with a trowel and use a level to ensure it’s perfectly flat.
- Let the concrete cure for at least 48-72 hours before placing the heavy pedestal and sculpture on top.
32. Soften a Broad Bluestone Path with Lush, Colorful Borders
This landscape design works because it softens a large, functional hardscape element—the bluestone path—with abundant, informal plantings. The broad, curved path provides a strong, elegant line, but it’s the deep, multilayered garden beds that make it feel inviting. The mix of evergreen structures with the seasonal color of reddish-brown foliage and small flowers prevents the scene from feeling static. It’s the classic combination of ‘bones’ (the path) and ‘beauty’ (the plantings) that makes a garden successful.
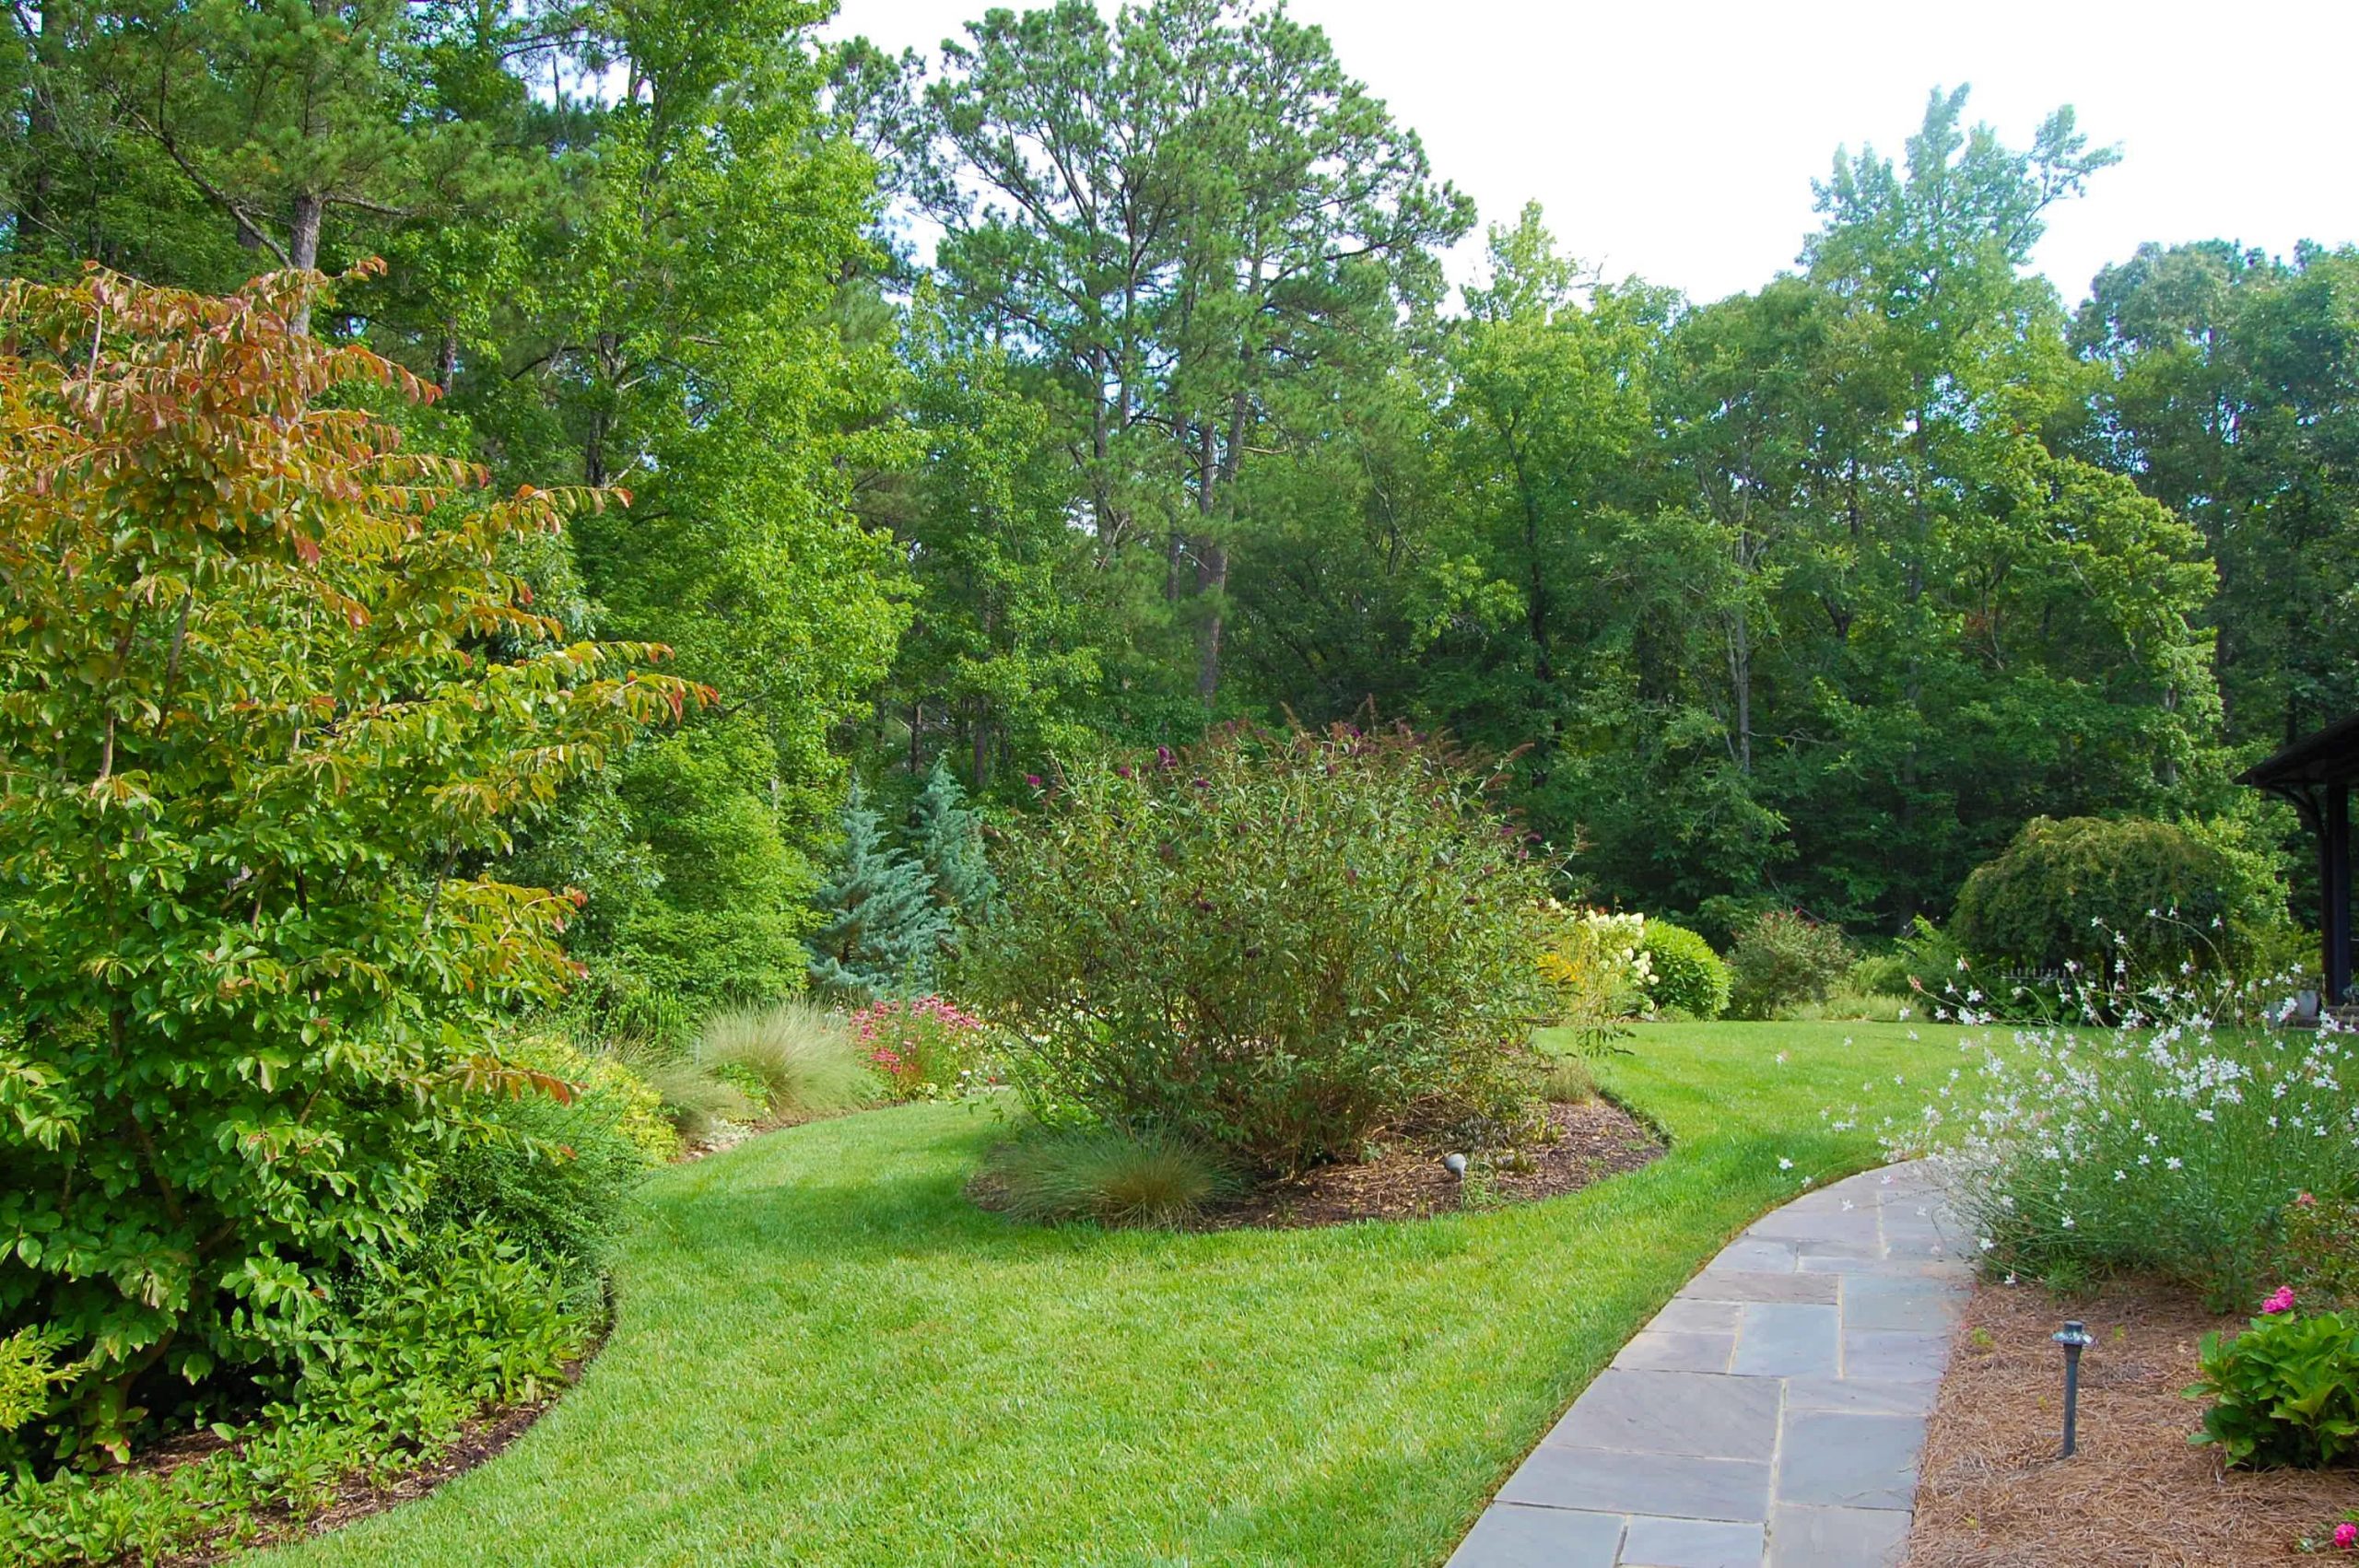
🔥 Trending Context
Let’s estimate the cost for a 50-foot section of this look:
- Hardscape: 4-foot wide bluestone pathway, professionally installed – $4,000 – $8,000
- Plants: Mix of mature evergreen shrubs, deciduous trees, and perennial flowers – $1,500 – $3,500
- Lawn & Mulch: Sod for lawn area and bark mulch for beds – $500 – $1,200
- Labor: For planting and bed preparation – $1,000 – $2,500
- TOTAL: $7,000 – $15,200
- Budget alternative: Use concrete pavers instead of bluestone and start with smaller, younger plants that will fill in over time. Cost: $2,500 – $5,000.
Your Whimsical Garden Story Starts Here
That’s a lot of inspiration, but don’t feel overwhelmed! The best gardens are built one idea at a time, evolving over seasons and years. A whimsical evergreen landscape is all about expressing your personality and creating a space that feels magical to you, 365 days a year. Start with one corner, one path, or one perfect plant, and let your story grow from there.
Feeling inspired? Pin your favorite ideas to your boards so you can find them again when you’re ready to start digging!