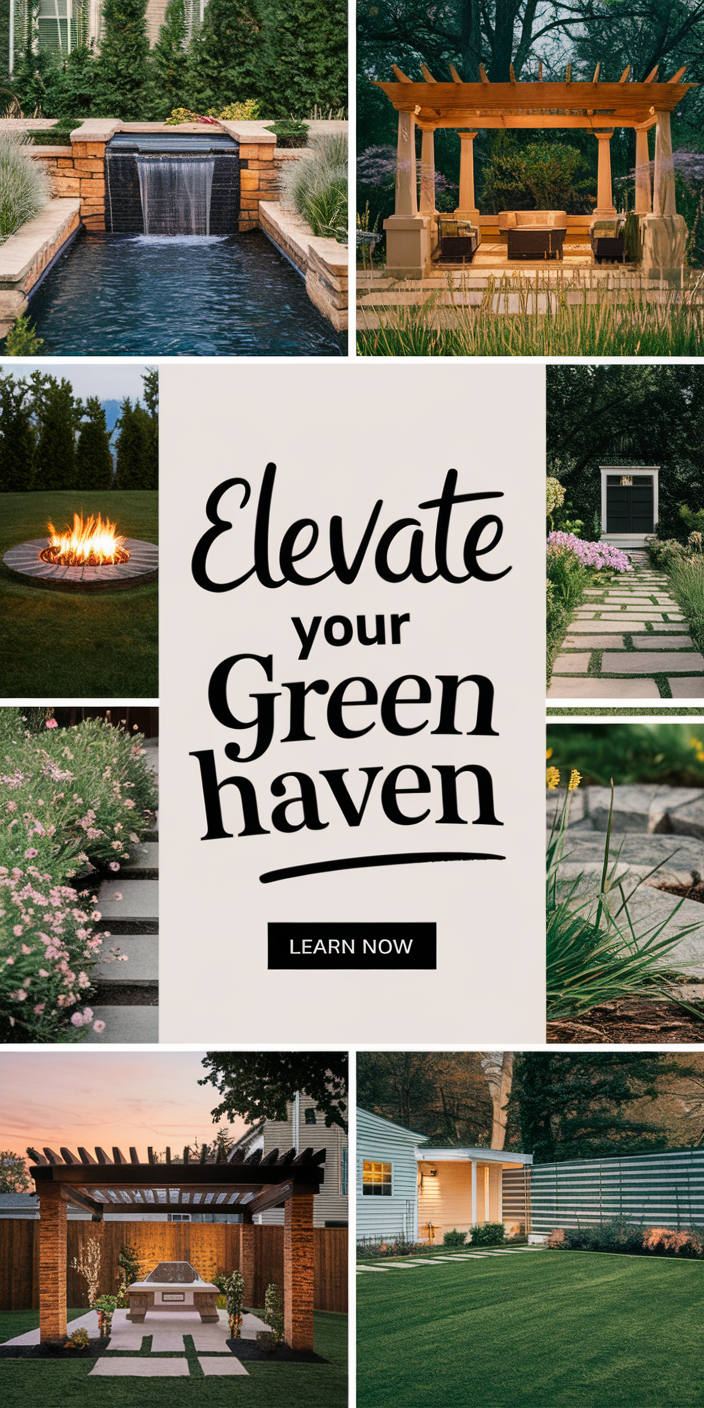
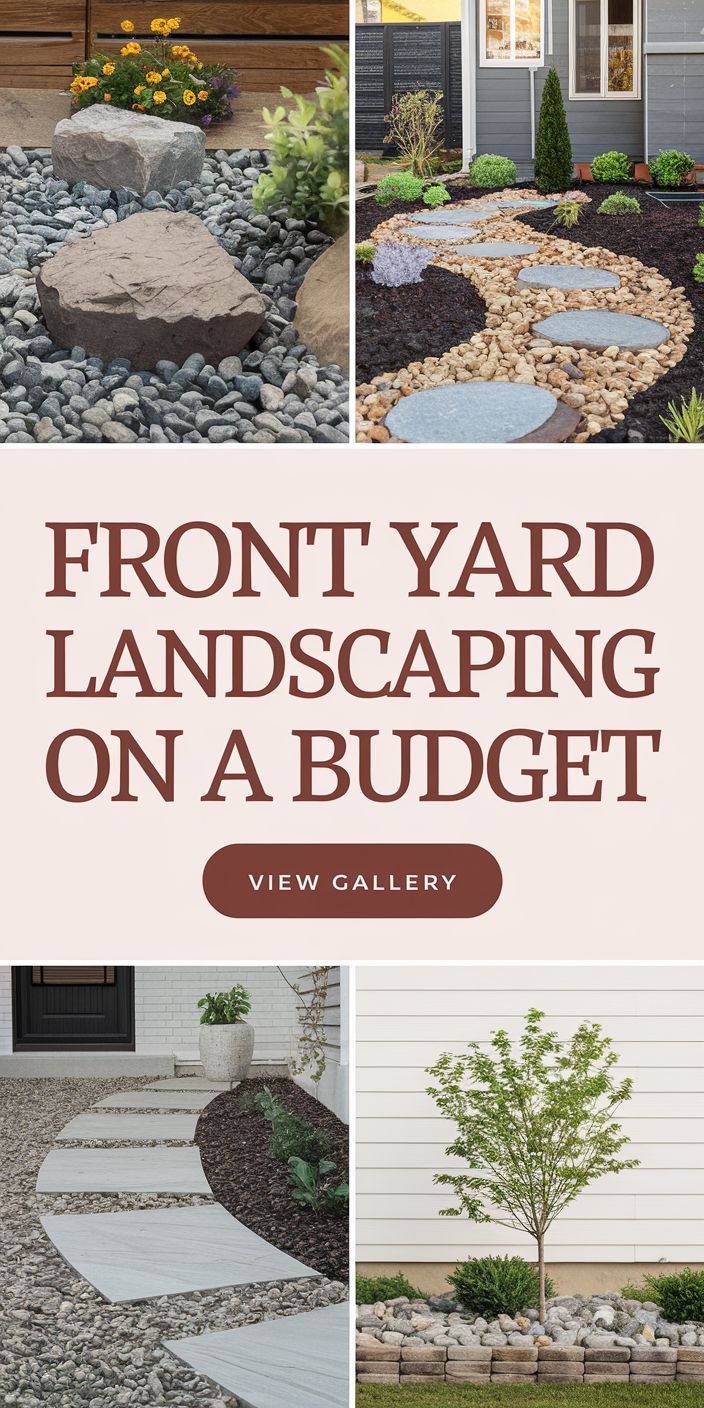
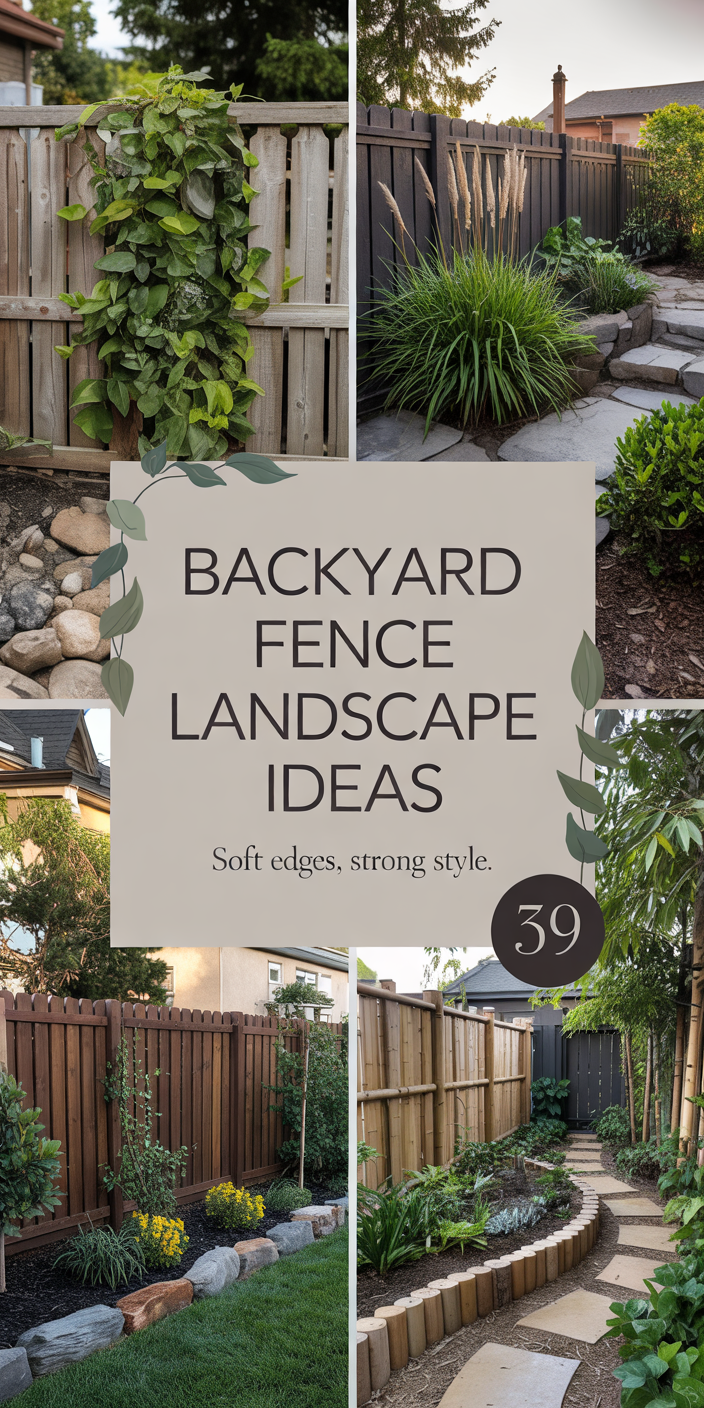
You know that feeling when you finally find the brick edging idea that looks *exactly* right for your garden? That perfect “aha!” moment is what this guide is all about. We’ve filtered through hundreds of options to bring you 27 distinct and genuinely stylish brick edging ideas that deliver on both form and function. This isn’t just a gallery of pretty pictures; we’re breaking down everything from rustic, reclaimed brick paths to crisp, modern paver borders. And stay until the end — we break down the most common mistakes that can ruin these looks. 📌 Save this to Pinterest for later — you’ll want to revisit these ideas.
1. Exploring Classic Brick Edging Design Patterns
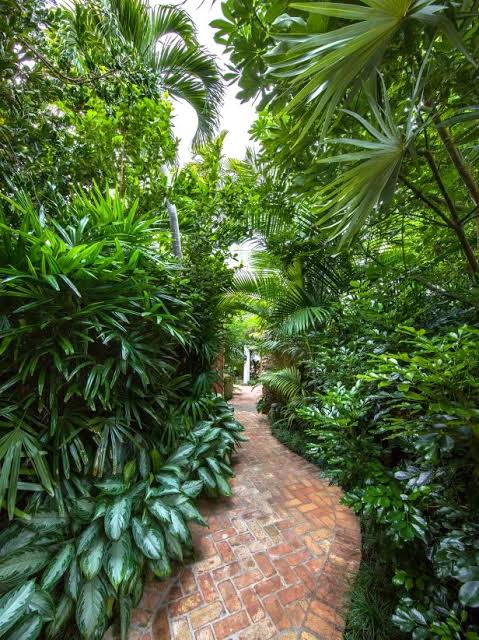
Even without a specific project in mind, understanding the fundamental brick patterns is key. The most common you’ll see are the “soldier course,” where bricks stand upright, and the “stretcher” or “running bond,” where they are laid flat end-to-end. The soldier course provides a taller, more defined barrier, excellent for keeping mulch in place. The running bond offers a lower, more subtle profile that’s perfect for separating a lawn from a pathway without creating a tripping hazard. Each pattern speaks a different design language.
⭐ The One Thing
When choosing a pattern, think about function first, then aesthetics. For a path you’ll be mowing next to, a flat running bond (laid flush with the ground) is your best friend—you can run the mower wheel right over it. For a raised garden bed that needs to contain soil and mulch, a soldier course or even a double-stacked pattern provides the necessary height. Don’t be afraid to mix patterns, for instance using a flat top on a raised brick planter for a finished look and a place to sit.
2. Define a Lush Garden with a Curved Vertical Brick Border
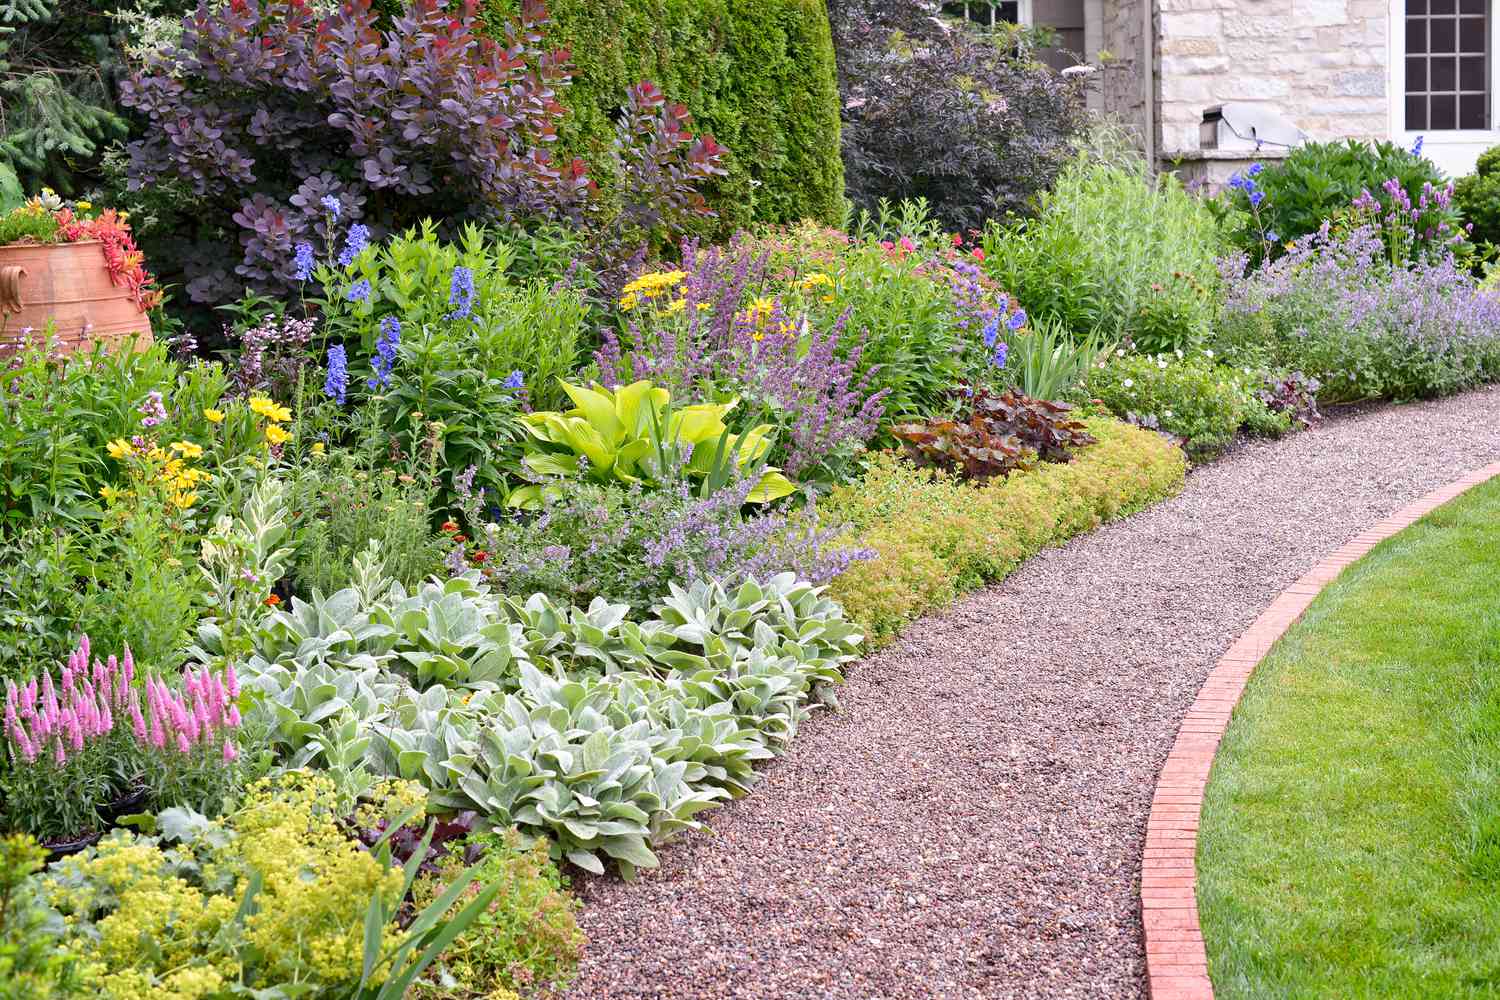
The single most impactful choice here is laying the red bricks vertically. This ‘soldier course’ style creates a crisp, saw-toothed line that feels much more intentional and decorative than a simple flat border. It elevates the entire look from a simple garden edge to a deliberate design feature. Removing this element would make the transition between the gravel path and the lush garden feel far less special and a bit blurry. The vertical orientation adds a subtle height that neatly contains the fine gravel and provides a clean backdrop for the vibrant flowers.
🎯 What Makes It Work
The visual harmony of this scene can be broken down into a simple formula: 40% lush, multi-textured greenery + 30% dark, fine gravel pathway + 20% vibrant, mixed-color flowers + 10% red brick edging. The key is that the edging is a small but powerful accent, not the main event. You could swap the red brick for a dark grey paver and the gravel for light river stones, and the formula would still work because the proportions remain balanced. The greenery is the star, and the path and edging are the supporting cast.
3. Achieve a Formal Look with a Single Rustic Brick Edge
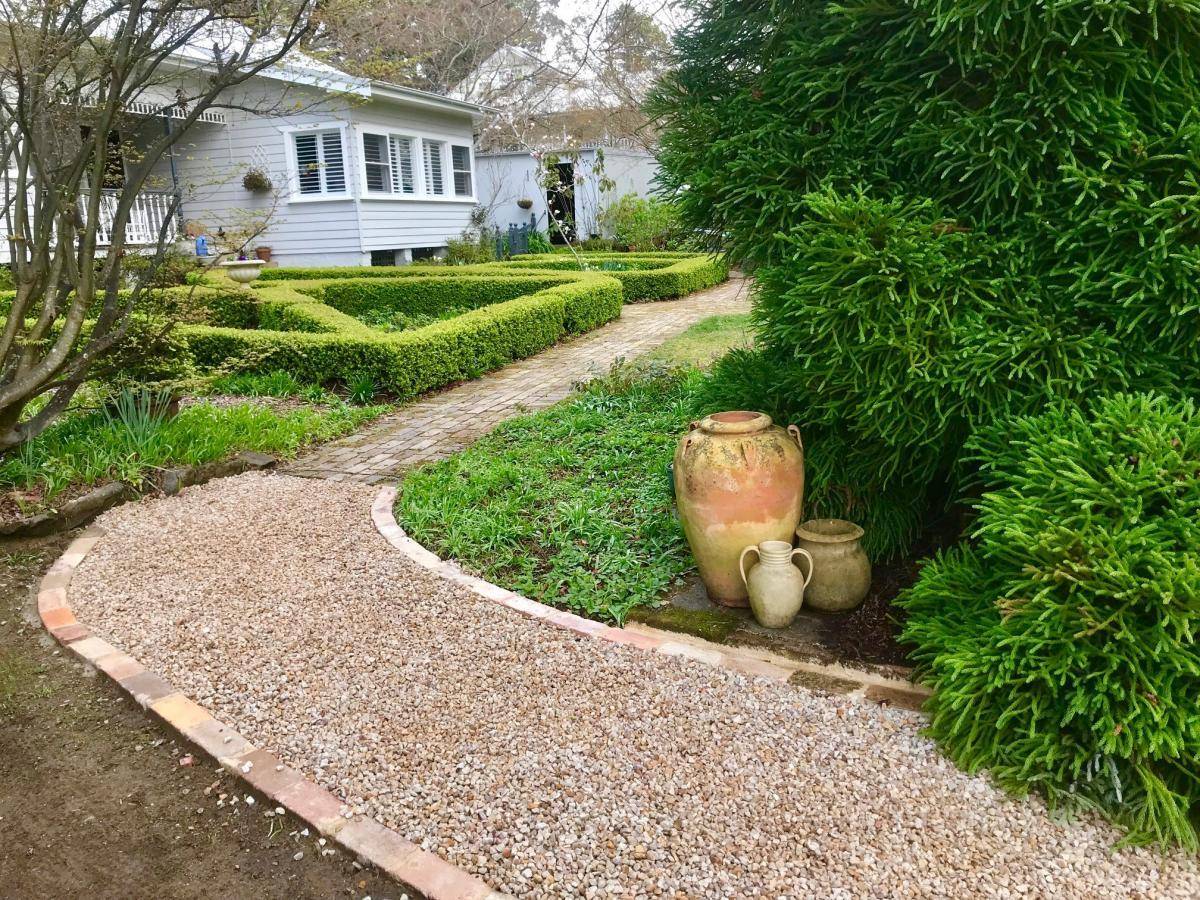
What makes this design so effective is the beautiful tension between formal structure and rustic materials. The neatly trimmed geometric hedges scream formality and control, but the path itself is made of simple gravel and edged with a single row of weathered, unpretentious bricks. This contrast is what gives the garden its charm and keeps it from feeling stuffy. The warm, earthy red of the brick also provides a necessary visual break between the cool tones of the gravel path and the vibrant green of the hedges, making each element pop.
📏 Scale Guide
You can absolutely get this sophisticated look on a shoestring budget. Instead of expensive, uniform bricks, seek out reclaimed bricks from Facebook Marketplace or a local salvage yard—the more weathered and imperfect, the better for this style. For the path, skip the pricy landscape gravel and opt for basic pea gravel, which is significantly cheaper per bag. The real investment here is the time spent trimming the hedges, not the materials themselves. This design proves that elegance is more about thoughtful composition than high-end finishes. Compare this simple style with the more complex build of Idea #25.
4. Layered Retaining Blocks for a Curved Garden Bed
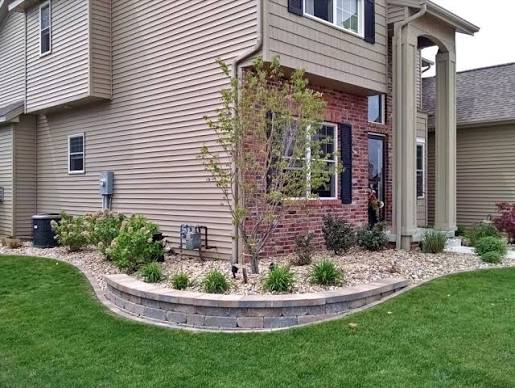
This idea is ideal for suburban lots of a typical size, around a quarter-acre, where you want to add some dimension without building massive retaining walls. The gentle curve and modest height (looks to be about 8-12 inches) work perfectly along the front of a house or to define a bed in an open lawn. It requires a decent setback from the sidewalk or property line to look right—at least 10-15 feet. For smaller, more compact spaces, consider the single-brick border shown in Idea #3 to avoid overwhelming the yard.
🔥 Trending Context
Let’s be honest: getting a smooth, perfect curve with chunky, straight-edged retaining wall blocks can be tricky. While these blocks are designed to create curves, you can end up with awkward gaps or a slightly jagged appearance if you don’t plan your radius carefully. The key is to lay out your full curve with a garden hose first. Then, do a dry run, placing the blocks without adhesive or backfill. This allows you to adjust the spacing and ensure each block sits snugly against the next before you commit to the final installation.
5. Layered Greenery Framed by a Brick Path and Edging
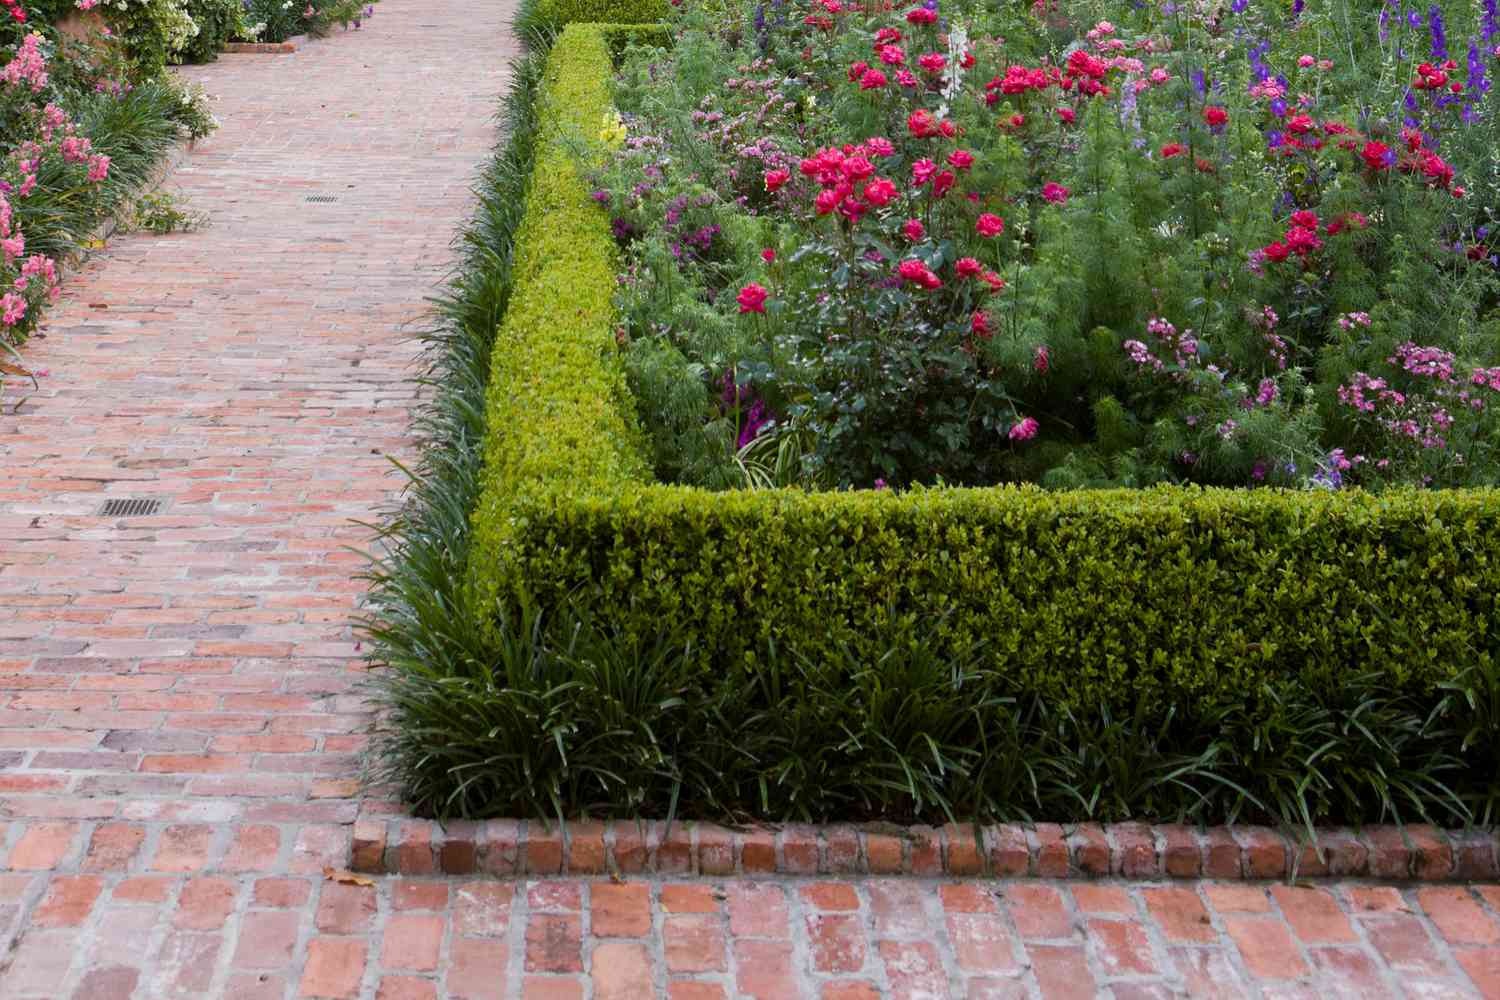
A look this manicured requires consistent upkeep. The low, trimmed hedge will need shearing at least 2-3 times during the growing season to maintain its shape. Weeds are also experts at finding their way into the crevices of brick paths; expect to spend an hour every few weeks on your hands and knees pulling them or use a specialized brick-safe weed killer. The payoff is a classic, serene garden, but it’s not a ‘set it and forget it’ design. If low maintenance is your priority, look at the simpler edging in Idea #9.
🧹 Maintenance Reality
To keep a brick path like this looking its best, the secret is in the foundation. Don’t just lay bricks on dirt. Excavate about 4-6 inches, add a 2-3 inch layer of paver base (crushed stone), tamp it down firmly, and then add a 1-inch layer of paver sand. This stable base prevents the bricks from shifting and sinking over time, which is what leads to an uneven surface and wide, weed-filled gaps. It’s the unglamorous work that makes the glamorous result possible.
6. A Clean & Modern Edge with Light Grey Paver Blocks
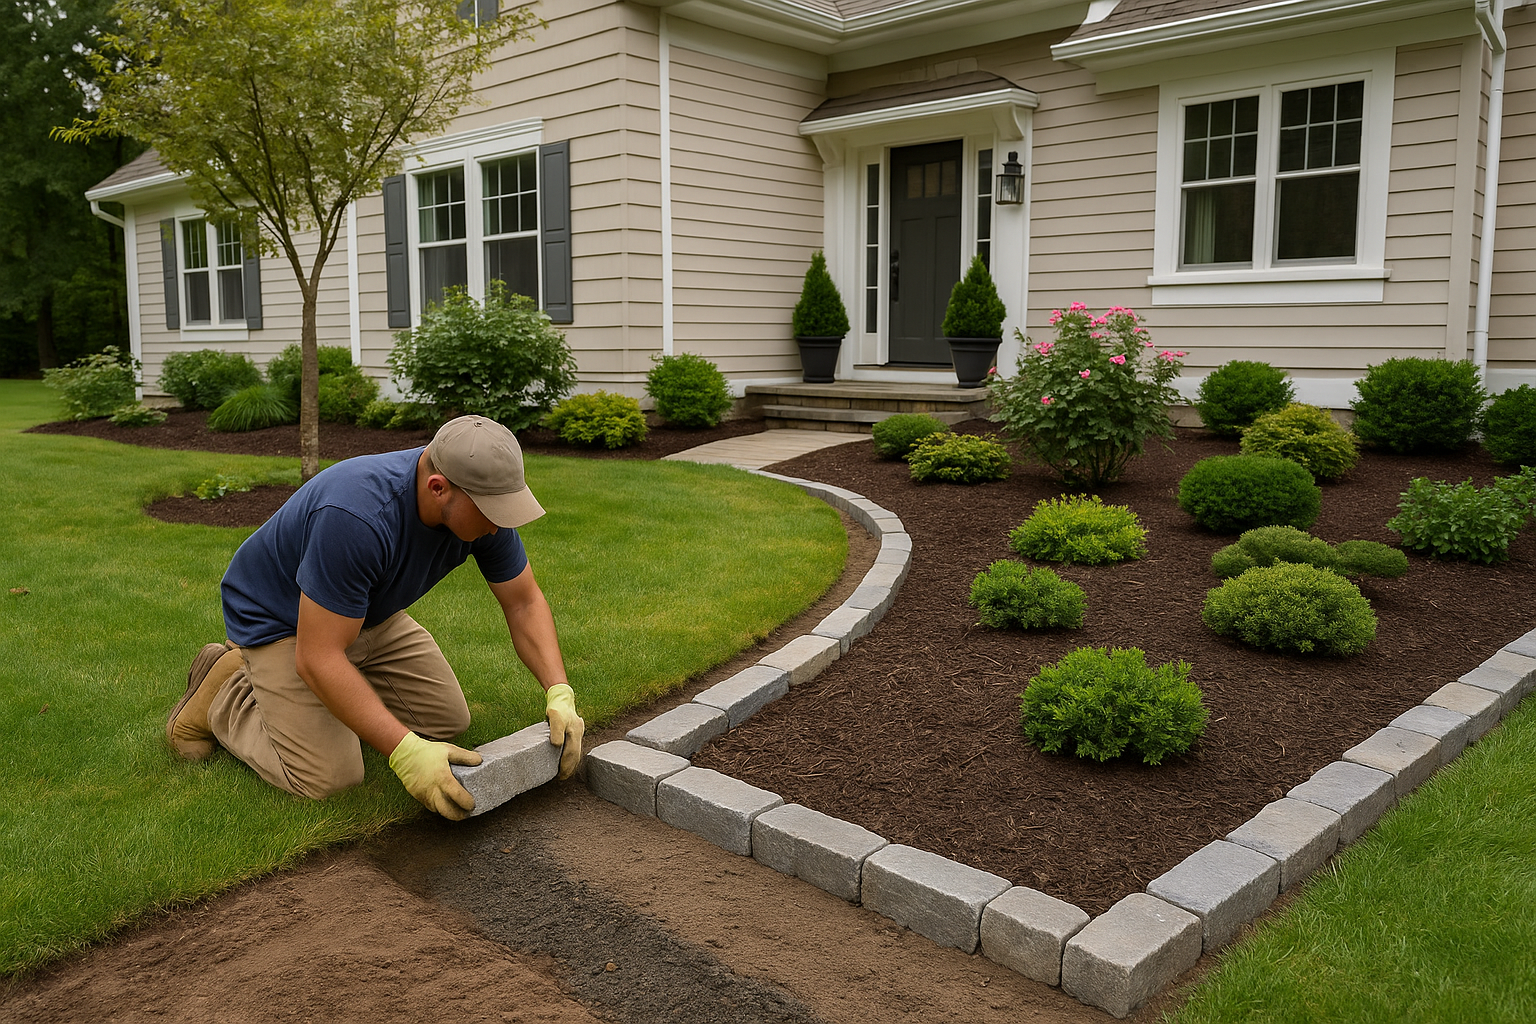
You can create this professional-looking edge in a weekend. Here’s a quick guide:
- Outline & Dig: Lay a garden hose to define your curve, then use a spade to cut a 4-inch deep trench along that line, about 6 inches wide.
- Add a Base: Pour 2 inches of paver base (crushed gravel) into the trench and tamp it down firmly until it’s level.
- Set the Blocks: Place your paver blocks one by one on the base, tapping them with a rubber mallet to settle them. Use a level across several blocks as you go.
- Backfill: Once the blocks are set, fill in the trench on both sides with soil and mulch, packing it firmly against the blocks to hold them in place.
This project should take about 4-6 hours for a 50-foot edge, with a material cost of around $150-$250.
💡 Designer Tip
Here’s a dose of reality: those perfectly uniform, light grey pavers will show every speck of dirt, grass stain from the mower, and bit of spilled mulch. They look incredibly crisp and clean when first installed, but they require regular rinsing to stay that way. Also, light-colored concrete can be prone to developing a chalky white efflorescence (a salt deposit) over the first year. It’s usually harmless and can be cleaned off, but it’s something to be prepared for when choosing a lighter color.
7. A Winding Brick Path with Simple Concrete Edging
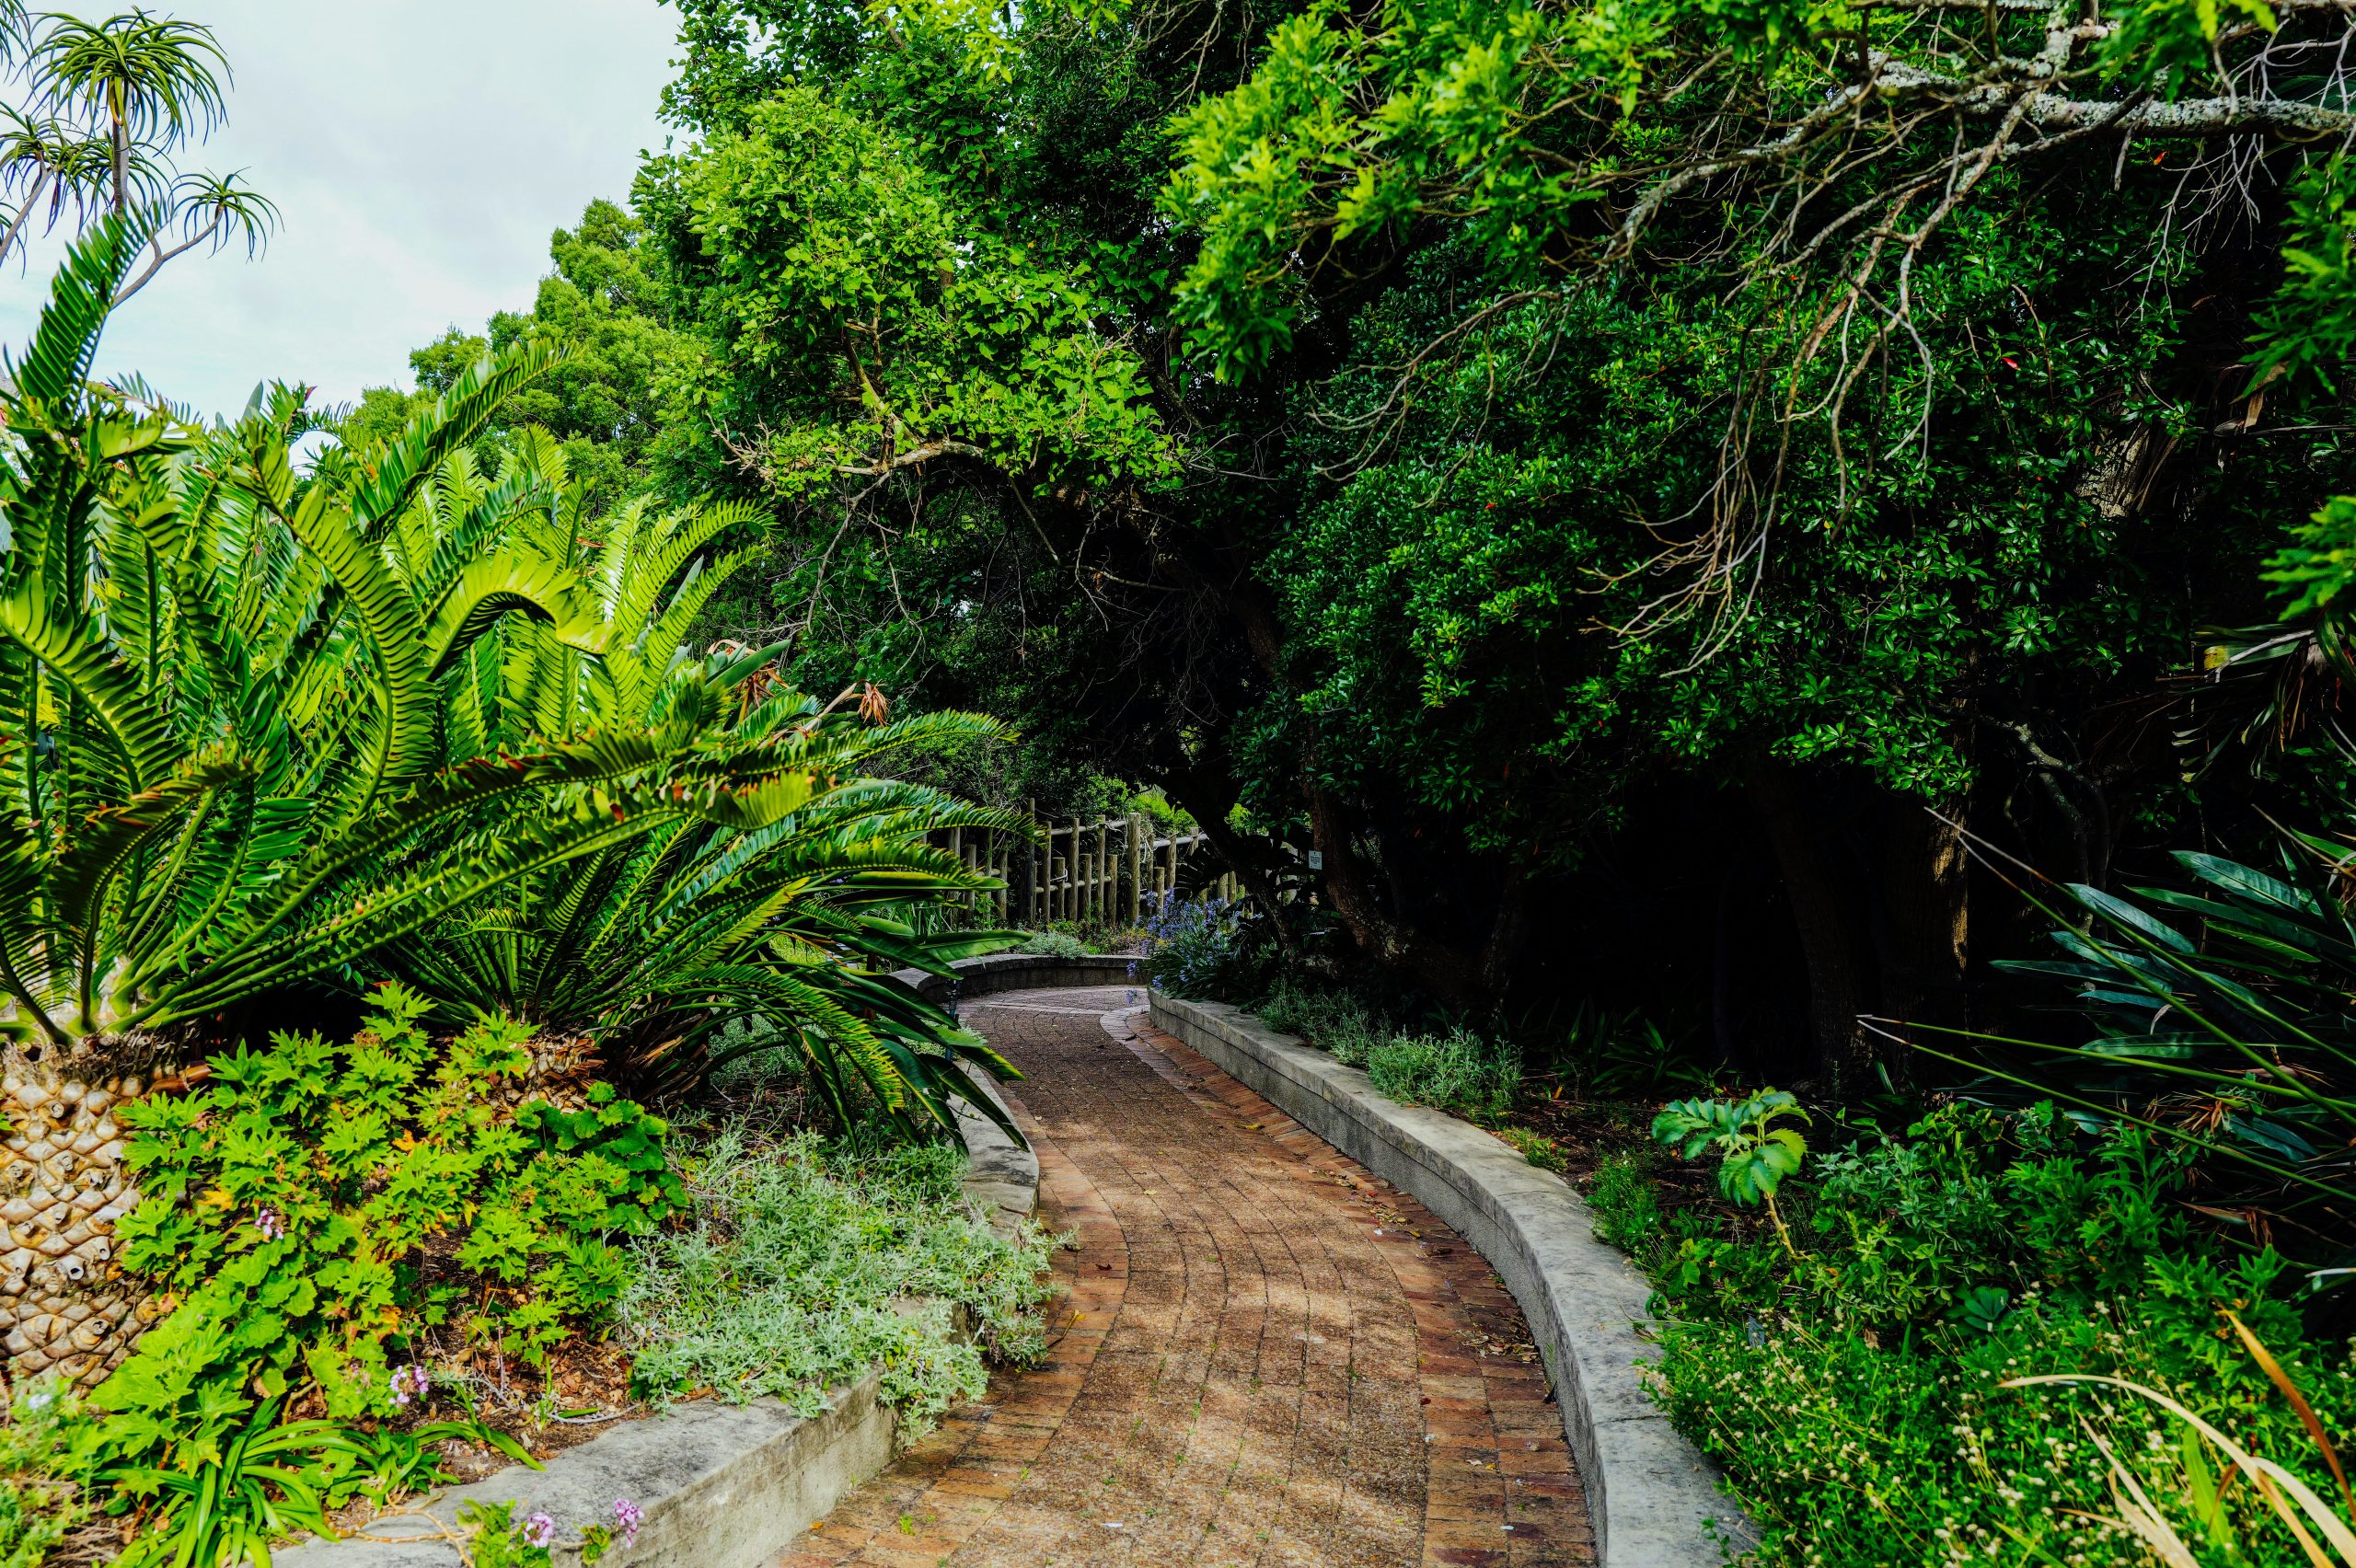
The success of this design lies in its texture and color contrast. The small, warm-toned red bricks of the path have a busy, intricate texture. The simple, grey concrete edging acts as a quiet, neutral frame that contains the visual energy of the bricks. Without that smooth, monolithic border, the edge of the brick path would bleed into the chaotic (in a good way) texture of the lush foliage, and the whole scene would feel less defined. The concrete gives the eye a place to rest and makes the brickwork pop.
💰 Budget Breakdown
This style, with its narrow, winding path, is a fantastic solution for long, skinny side yards or deep garden spaces where you want to create a sense of journey and discovery. The ideal width for a path like this is about 30-36 inches—wide enough for one person to walk comfortably, but narrow enough to feel enveloped by the surrounding plants. It’s not suited for a main front walkway where two people might walk side-by-side, but it’s perfect for creating a private, secluded stroll through a backyard garden.
8. Build Character with a Flemish Bond Brick Planter
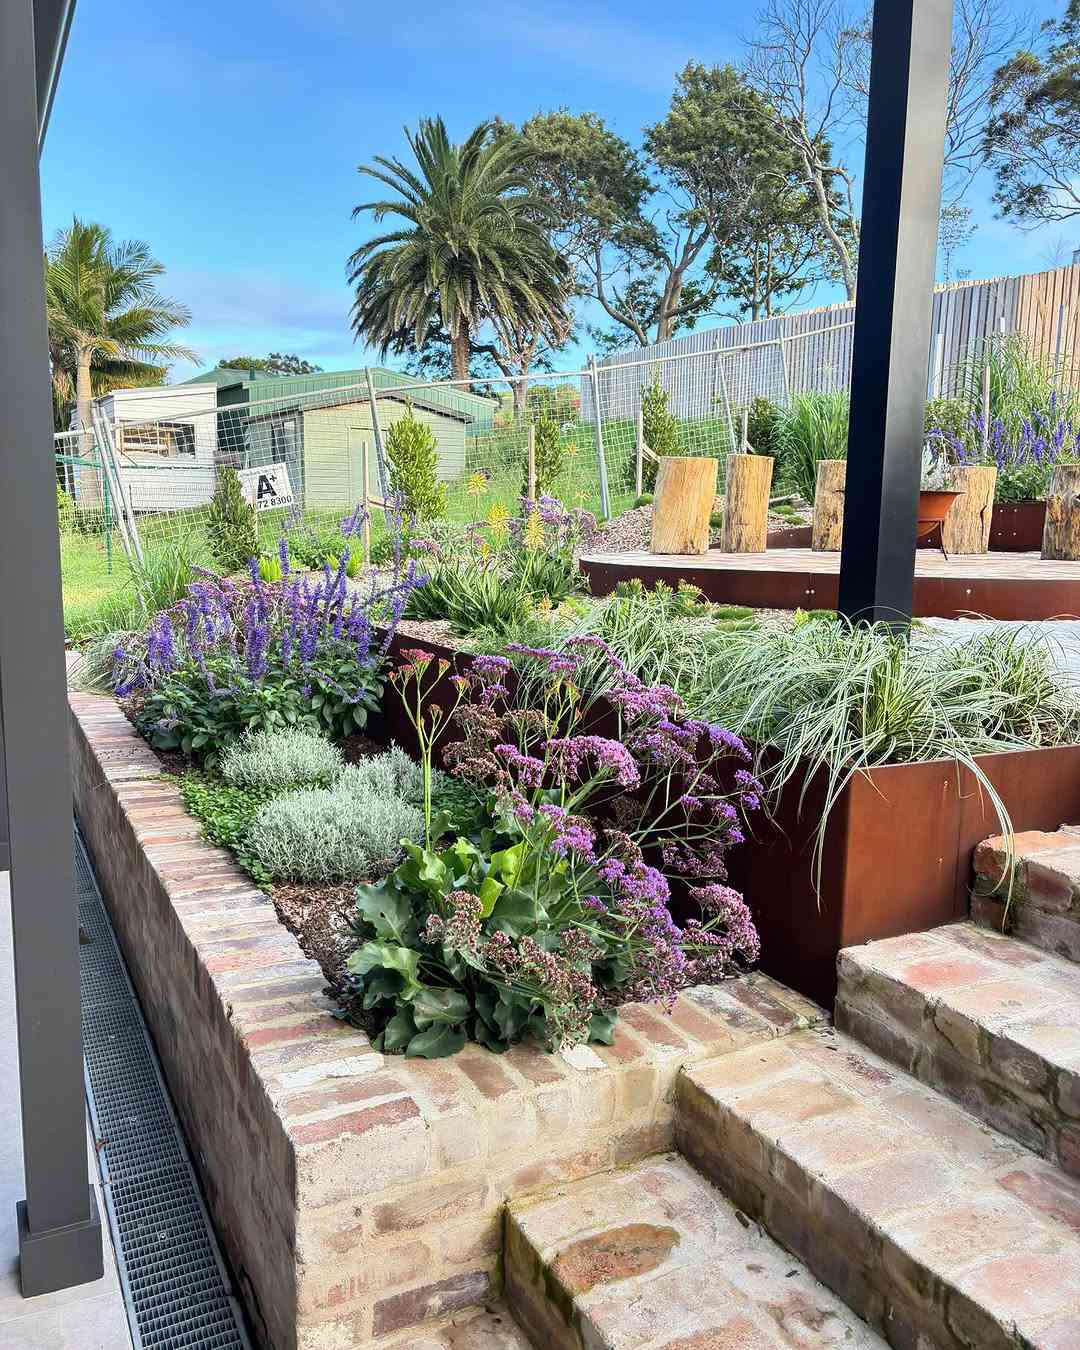
The specific brick pattern—the Flemish bond—is what gives this entire structure its soul. This classic pattern, which alternates the short end (header) and long end (stretcher) of the bricks, creates a beautiful, quilt-like texture that feels both rustic and incredibly sophisticated. Using a standard running bond would have resulted in a much flatter, more utilitarian look. The Flemish bond adds a layer of historical character and craftsmanship that makes the planter and steps feel like they’ve been there for generations, even if they were built last year.
⚠️ Real Talk
We’re seeing a huge move away from disposable, flat-pack outdoor furniture and toward investing in permanent, structural elements in the garden. People want their outdoor spaces to feel as solid and thoughtfully designed as their interiors. Building permanent features like this brick planter and integrated steps is a direct response to that trend. It’s part of a larger movement towards creating ‘garden rooms’ with real substance and longevity, rather than just decorating a patio. This has staying power because it’s about craft, not just consumption.
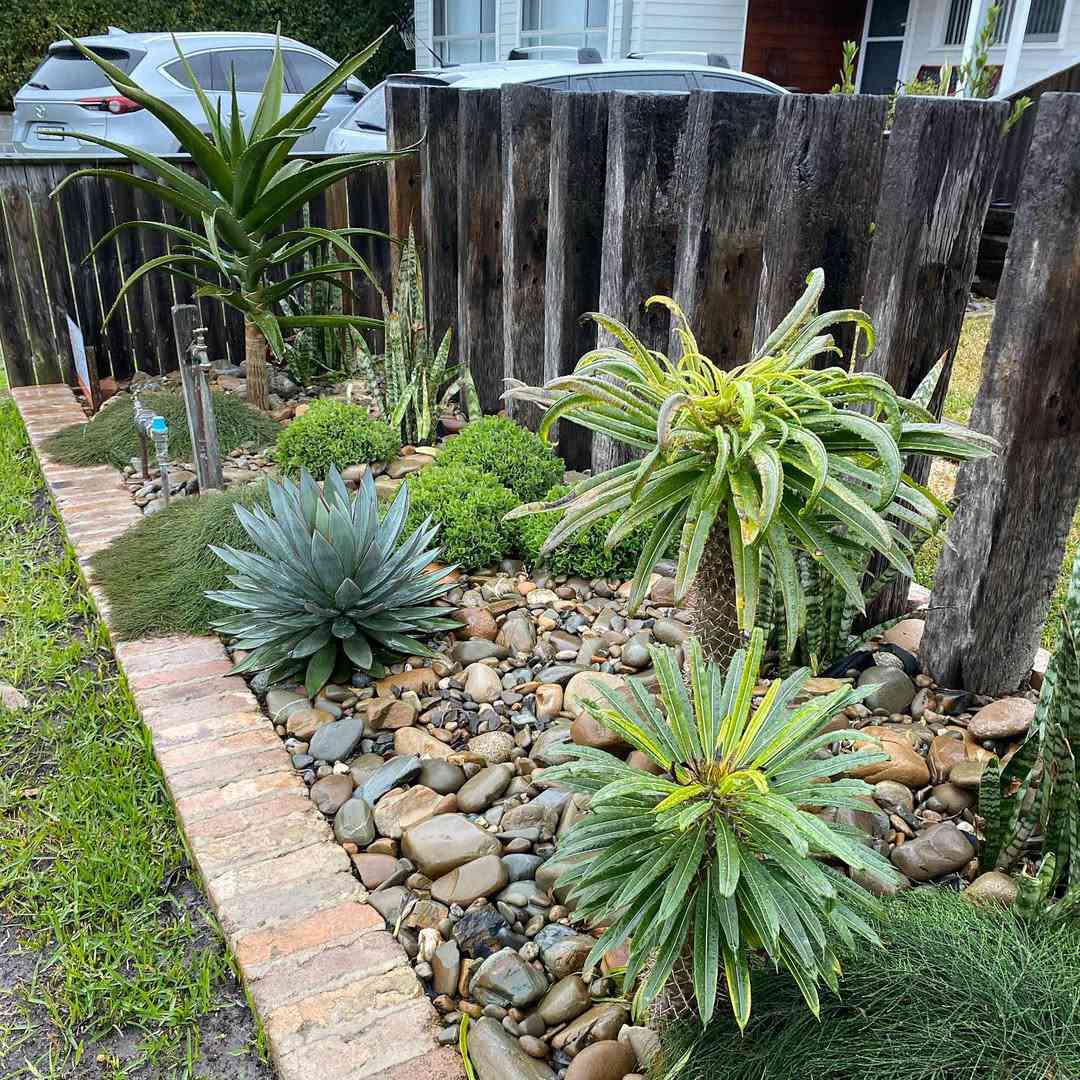
9. A Rustic Border of Weathered Brick and River Rocks
This rustic, natural look is all about a balanced mix of textures. Think of it as a recipe: 50% smooth, varied river rocks as the ‘sauce’ that fills the space, 30% sculptural succulents and shrubs providing height and form, 10% weathered wood from the fence for a rustic backdrop, and 10% simple brick edging as the neat frame that holds it all together. You could swap the succulents for ornamental grasses or the river rocks for dark lava rocks, and the formula would hold, maintaining that effortlessly balanced, nature-inspired vibe.
📐 Style Math
While a rock and succulent garden is wonderfully low-water, it’s not zero-maintenance. Wind will inevitably blow leaves and debris into the bed, and they can be a pain to rake or blow out without displacing all the rocks. A few times a year, you’ll need to do a frustrating but necessary ‘tidying’ session by hand or with a leaf blower on its lowest setting. Also, weeds can and will find a way to sprout between the rocks, so occasional weeding is still on the chore list. It’s less work than a flower bed, but it’s not none.
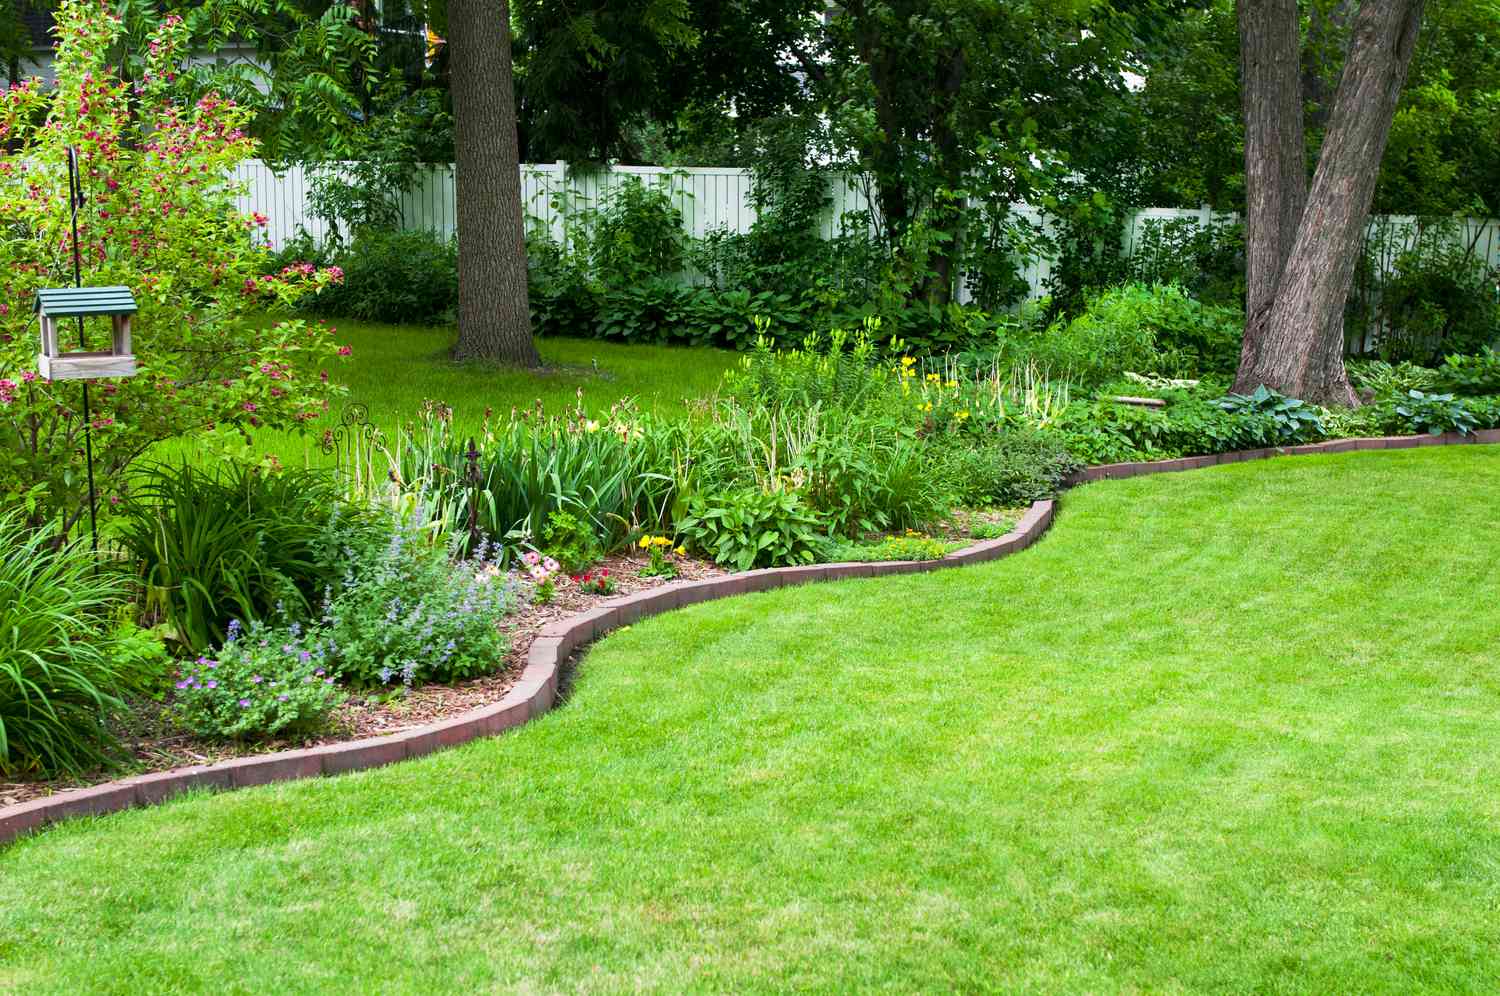
10. Define a Sweeping Lawn with a Curved Brick Border
The power of this design is in its graceful, sweeping curve. A straight-edged border would have felt rigid and would have visually cut the backyard in half. The long, sinuous curve, on the other hand, makes the lawn feel larger and more organic. It draws the eye along the line, creating a sense of flow and movement. The low profile of the reddish-brown bricks laid on their sides provides a clear definition between lawn and garden bed without creating a harsh vertical barrier, keeping the overall feeling soft and serene.
💸 Get This Look For Less
When laying out a grand curve like this, never just eyeball it. The best tool for the job is a long, flexible garden hose. Lay it on the ground and play with the shape until you have a curve that feels natural and looks great from all key viewpoints (like the back door or patio). Once you’re happy with the shape, you can mark the line with spray paint or flour before you start digging the trench for your bricks. This simple step is the difference between a wobbly, awkward curve and a smooth, professional-looking one.
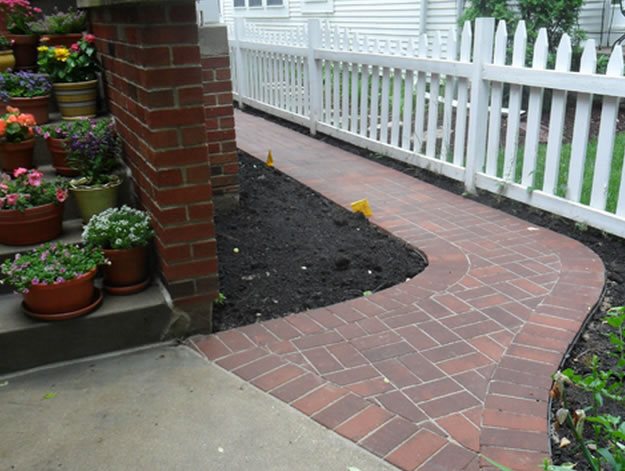
11. A Classic Look with a Soldier Course Brick Path
The ‘soldier course’ edging is the detail that elevates this path. By turning the bricks to stand vertically along the border, it creates a tidy, slightly raised frame that makes the entire pathway feel more finished and deliberate. If the edging bricks were laid flat like the rest of the path, the design would lose its crisp outline and look far more ordinary. This simple change in orientation adds a subtle touch of craftsmanship and structure, neatly containing the main brick pattern and separating it from the dark garden soil.
✅ Before You Start
A pathway of this width, which appears to be about 4-5 feet wide, is perfectly scaled for a primary entrance walk leading to a front door or a main path connecting a patio to a key garden feature. The combination of the path, sizable garden bed, and white picket fence works best on a property with some breathing room—a typical suburban front or side yard is ideal. For a very narrow space, this setup might feel a bit crowded; a simpler path like Idea #5 would be a better choice.
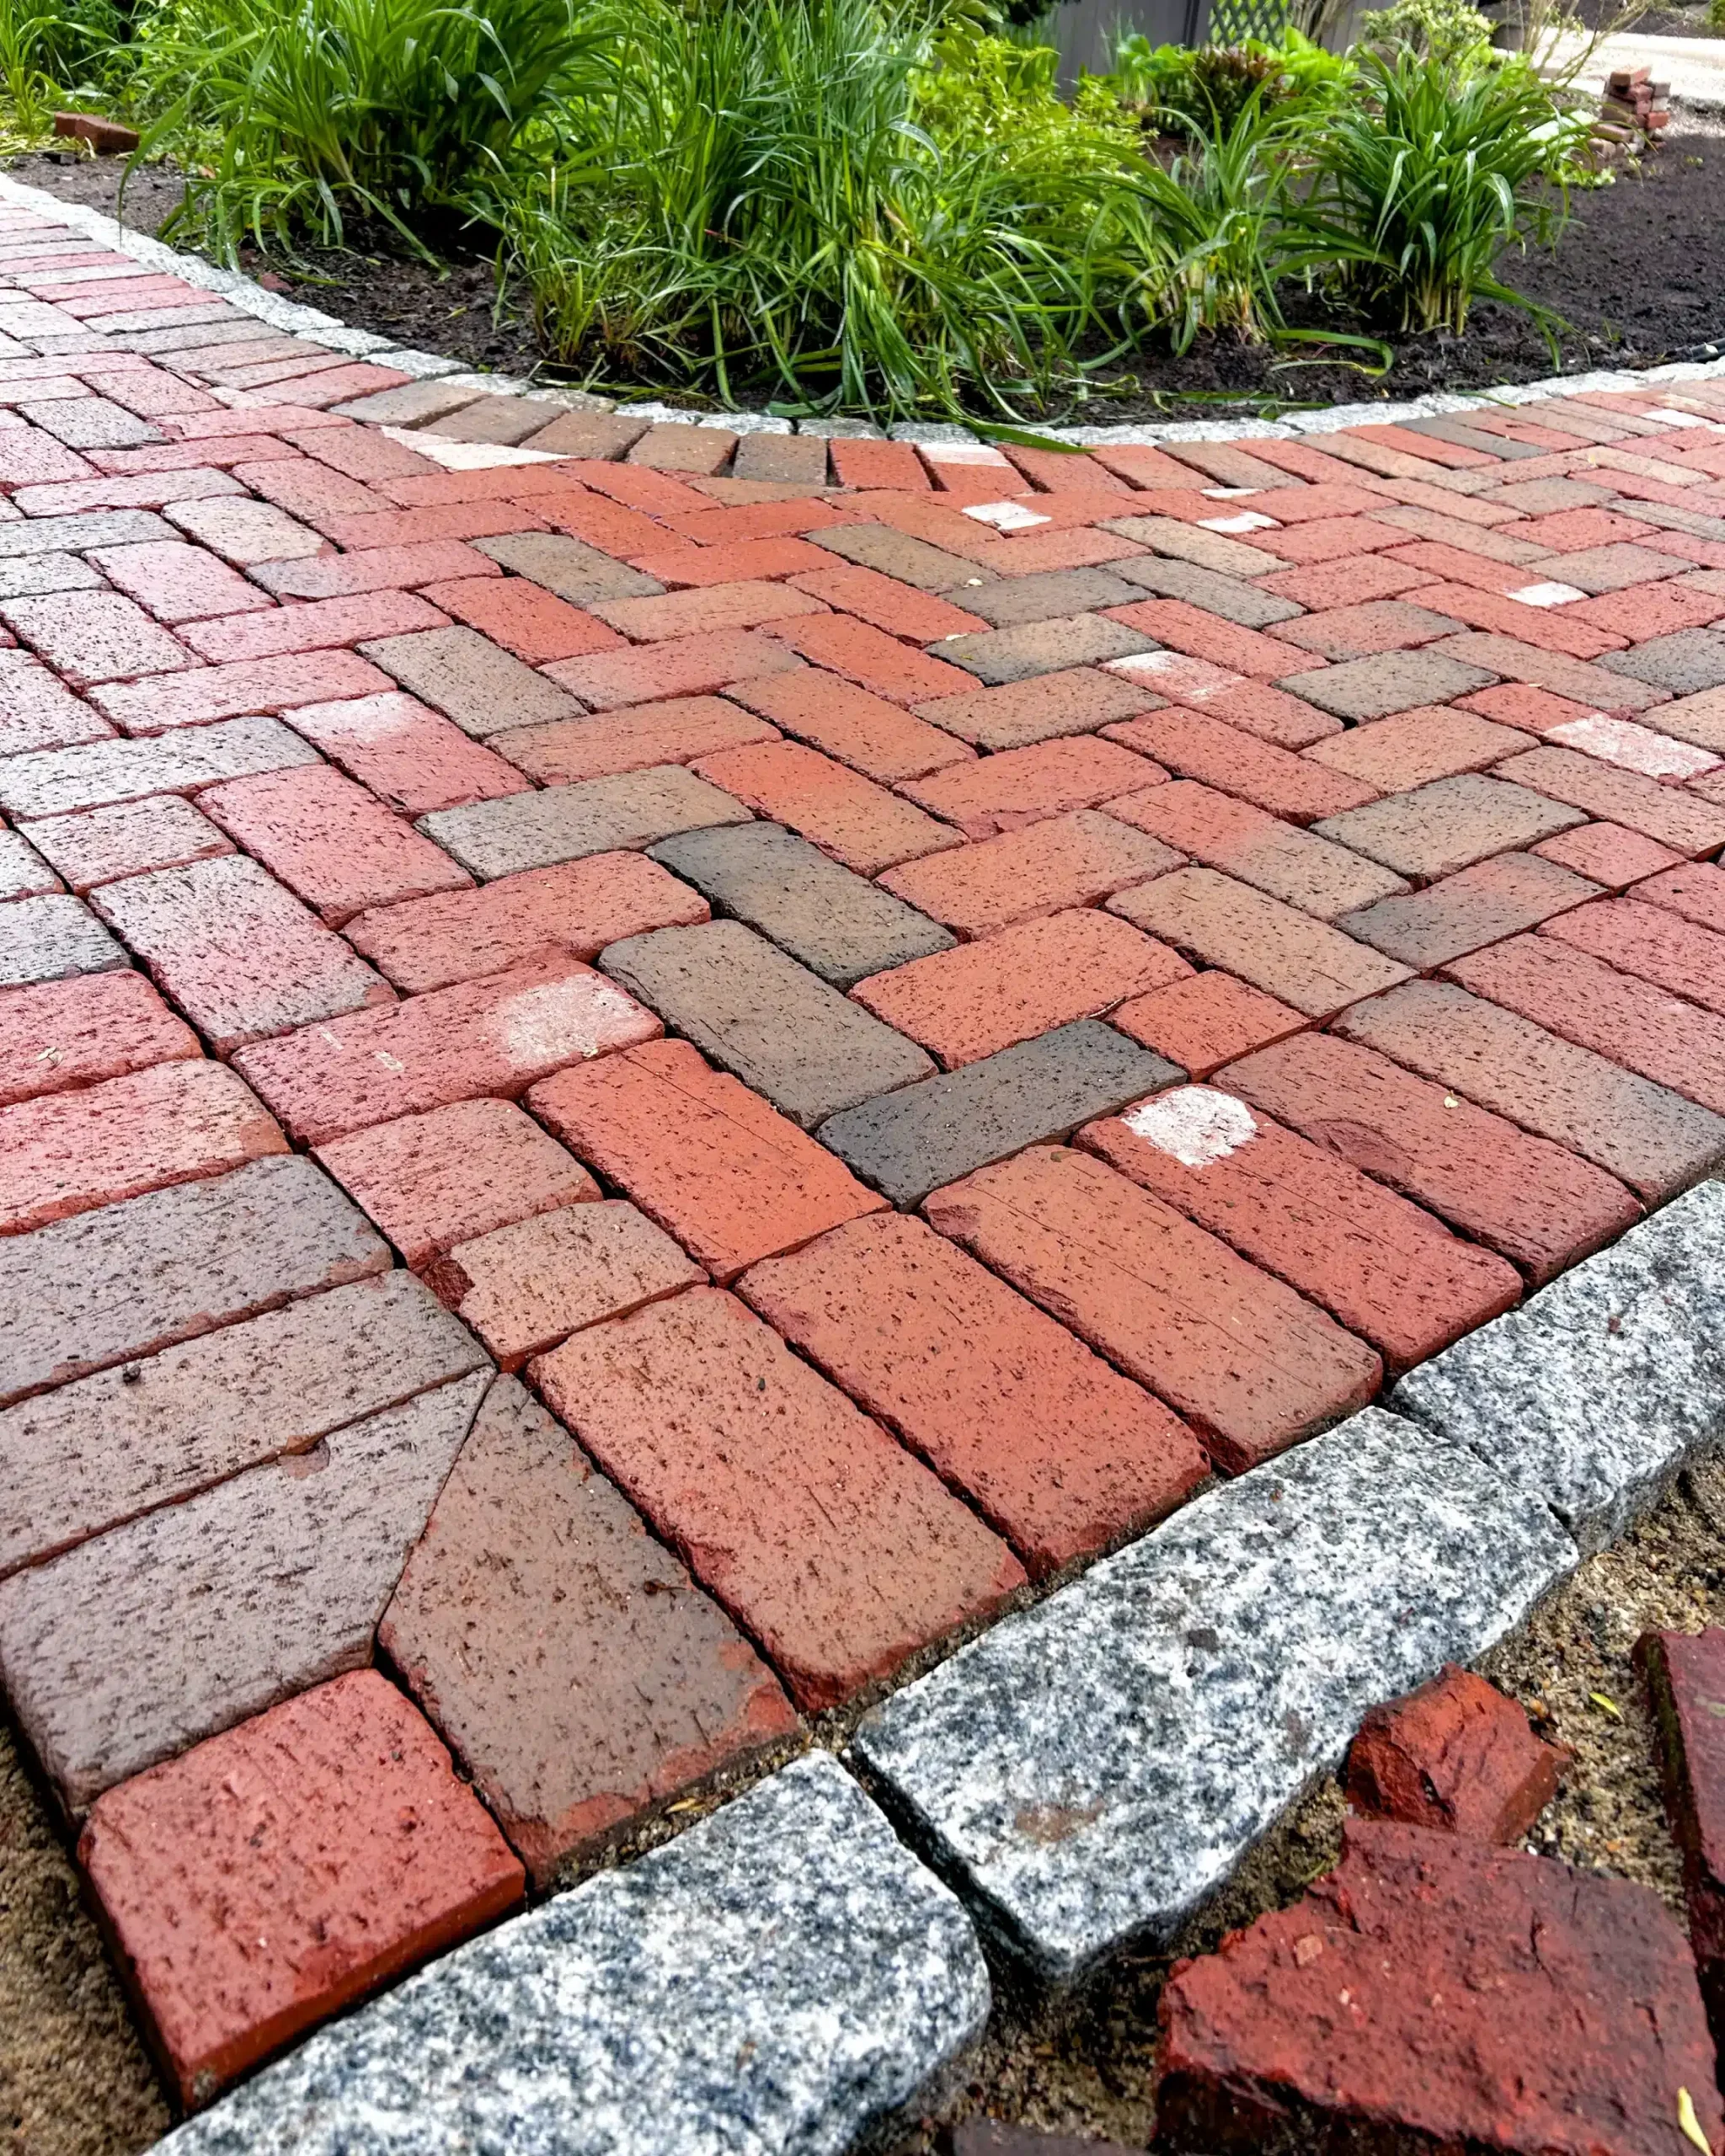
12. Weave Elegance with a Herringbone Path and Granite Edge
This is a premium look, and the budget reflects the materials and labor-intensive pattern. The granite edging is a significant cost, and herringbone brickwork takes much longer to lay than a simple running bond.
- Main Furniture (n/a): $0
- Pavers & Edging: $1,800 – $3,500 (for a 50-foot path)
- Labor for Installation: $2,500 – $5,000
- Plants & Soil: $400 – $800
- TOTAL: $4,700 – $9,300
Budget alternative: Recreate this look for 40-60% less by using a concrete paver that mimics granite for the edging and choosing a simpler brick pattern. The herringbone pattern itself is a major cost driver.
🔧 How-To Brief
This design is all about sophisticated contrast. The rich, warm tones of the terracotta and dark brown bricks in their dynamic herringbone pattern create a lot of visual energy. The cool, light grey granite border acts as a strong, calming frame. It contains the ‘movement’ of the herringbone and provides a crisp, clean line that defines the pathway’s edge. This combination of warm/cool colors and busy/simple textures is what gives the design its timeless, high-end feel. It feels both rustic and refined at the same time.
13. A Curved Paver Path with Rough Stone Edging
While the rustic, chunky stone edging is beautiful, be aware that this is a serious tripping hazard in the making. The irregular heights and rough-hewn shapes of the stone blocks create an uneven surface right where you might step off the path. This is not an ideal choice for a high-traffic area, a home with young children, or for anyone with mobility concerns. To make this safer, the stones should be set much lower and more uniformly, or a different, flatter edging material should be chosen.
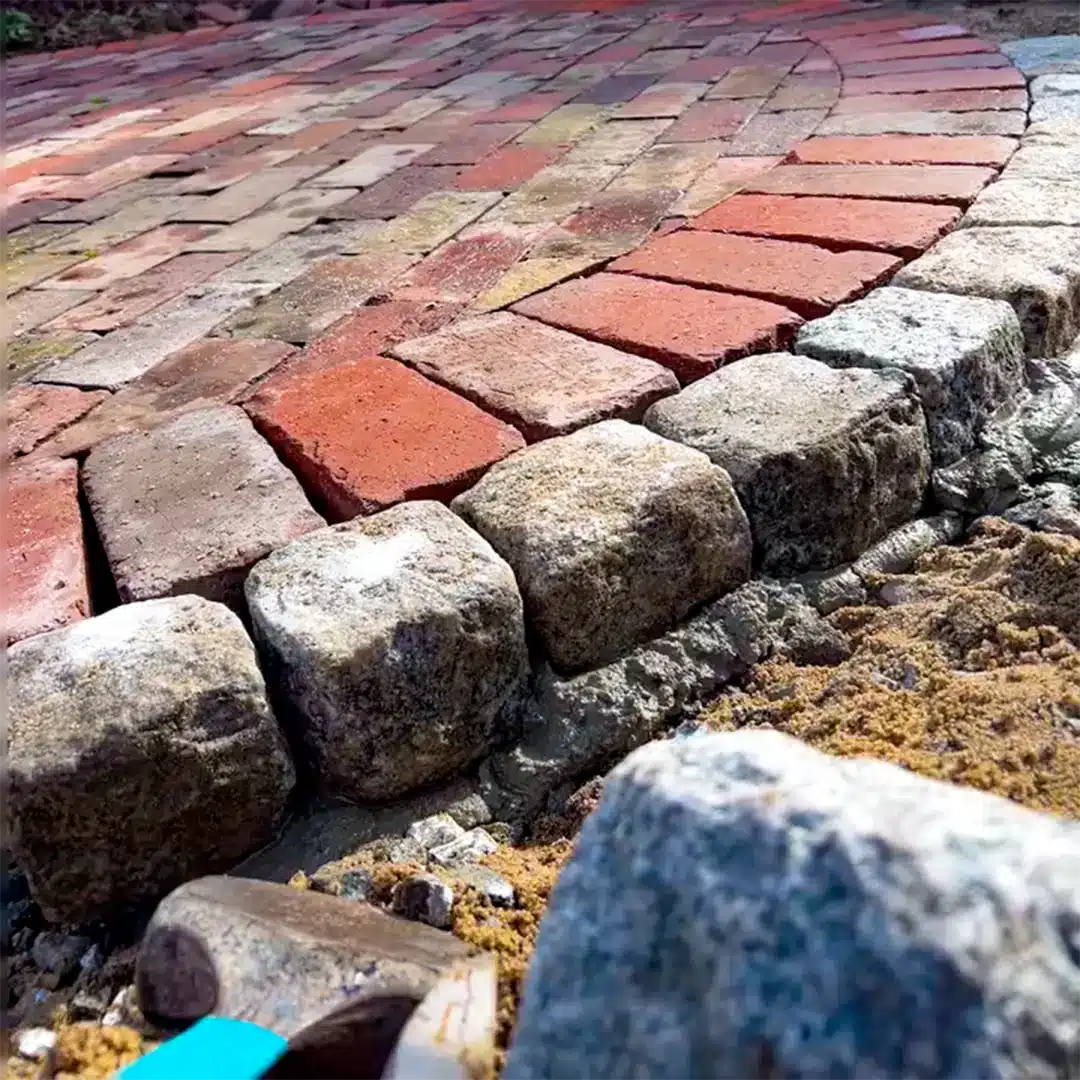
⭐ The One Thing
The single element that defines this look is the rough, irregular stone block edging. It’s a bold choice that moves away from tidy, uniform bricks and pavers. This edging gives the entire project a rugged, almost medieval quality. It suggests permanence and a connection to the natural landscape. If you were to replace it with standard brick pavers, the path would instantly feel more conventional and suburban. The raw, chunky stone is what gives the design its unique, earthy personality.
14. Frame a Colorful Garden with a Simple Paver Curve
You don’t need a huge budget to get this lush, inviting look. The grey-brown brick pavers used here are a standard, affordable option at any big-box home improvement store, often costing just $1-$2 per piece. The real star is the dense, overflowing planting. You can achieve this by purchasing smaller, less mature perennials and packing them in tightly. They’ll fill out within a season or two. Focus your budget on good soil and compost—that’s what will make the plants thrive and give you this million-dollar look for a few hundred bucks.
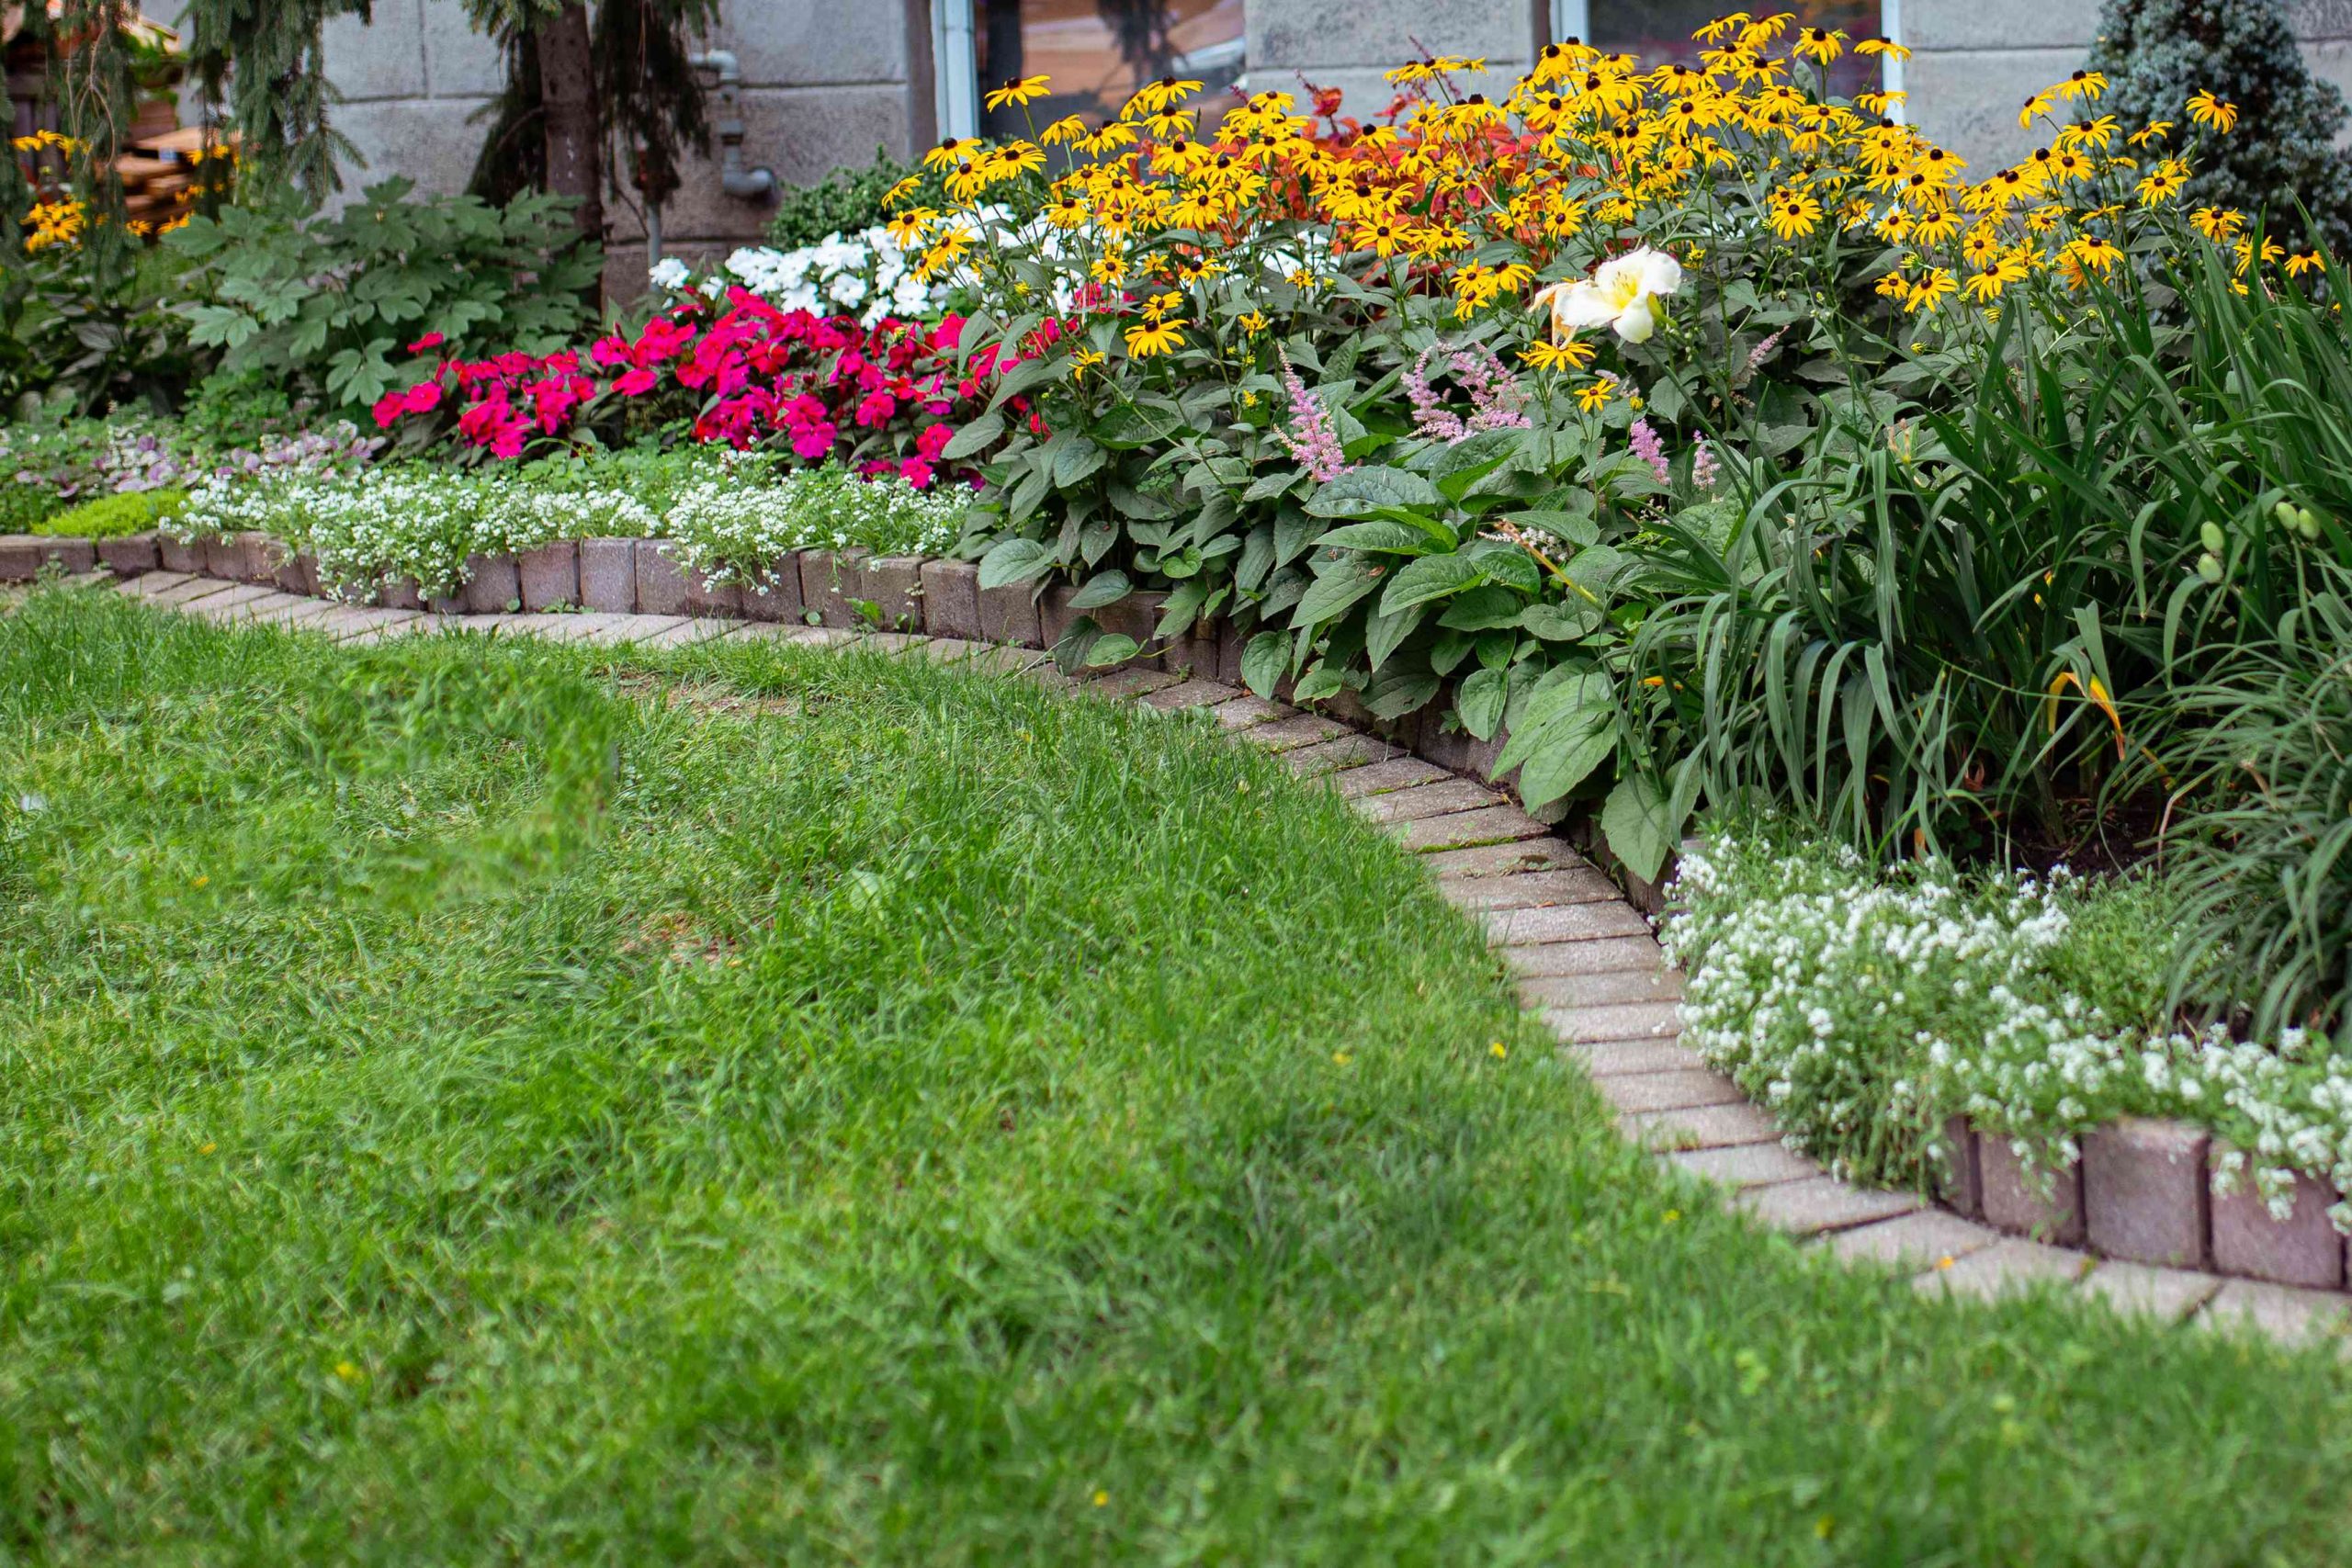
🎯 What Makes It Work
The secret to making a simple paver edge look dynamic is creating a multi-layered, ‘spillover’ effect with your plants. Don’t just plant polite little clumps behind the edging. Choose a few low-growing, creeping plants—like creeping thyme, sedum, or sweet alyssum—and plant them right at the front. Encourage them to grow over and soften the hard edge of the bricks. This trick makes the garden bed look fuller and more established, and it beautifully integrates the edging with the rest of the landscape.
15. Add a Whimsical Touch with Scalloped Concrete Edging
Scalloped concrete edging can be a bit of a design lightning rod—some people love its nostalgic, cottagey charm, while others find it dated. If you decide to go for it, commit to the aesthetic. This style does not play well with modern or minimalist homes. It’s best suited for traditional cottages, ranch houses, or any home where you’re leaning into a deliberately quaint, ‘grandma’s garden’ vibe. If your house has sleek lines and modern windows, this type of edging will likely feel out of place.
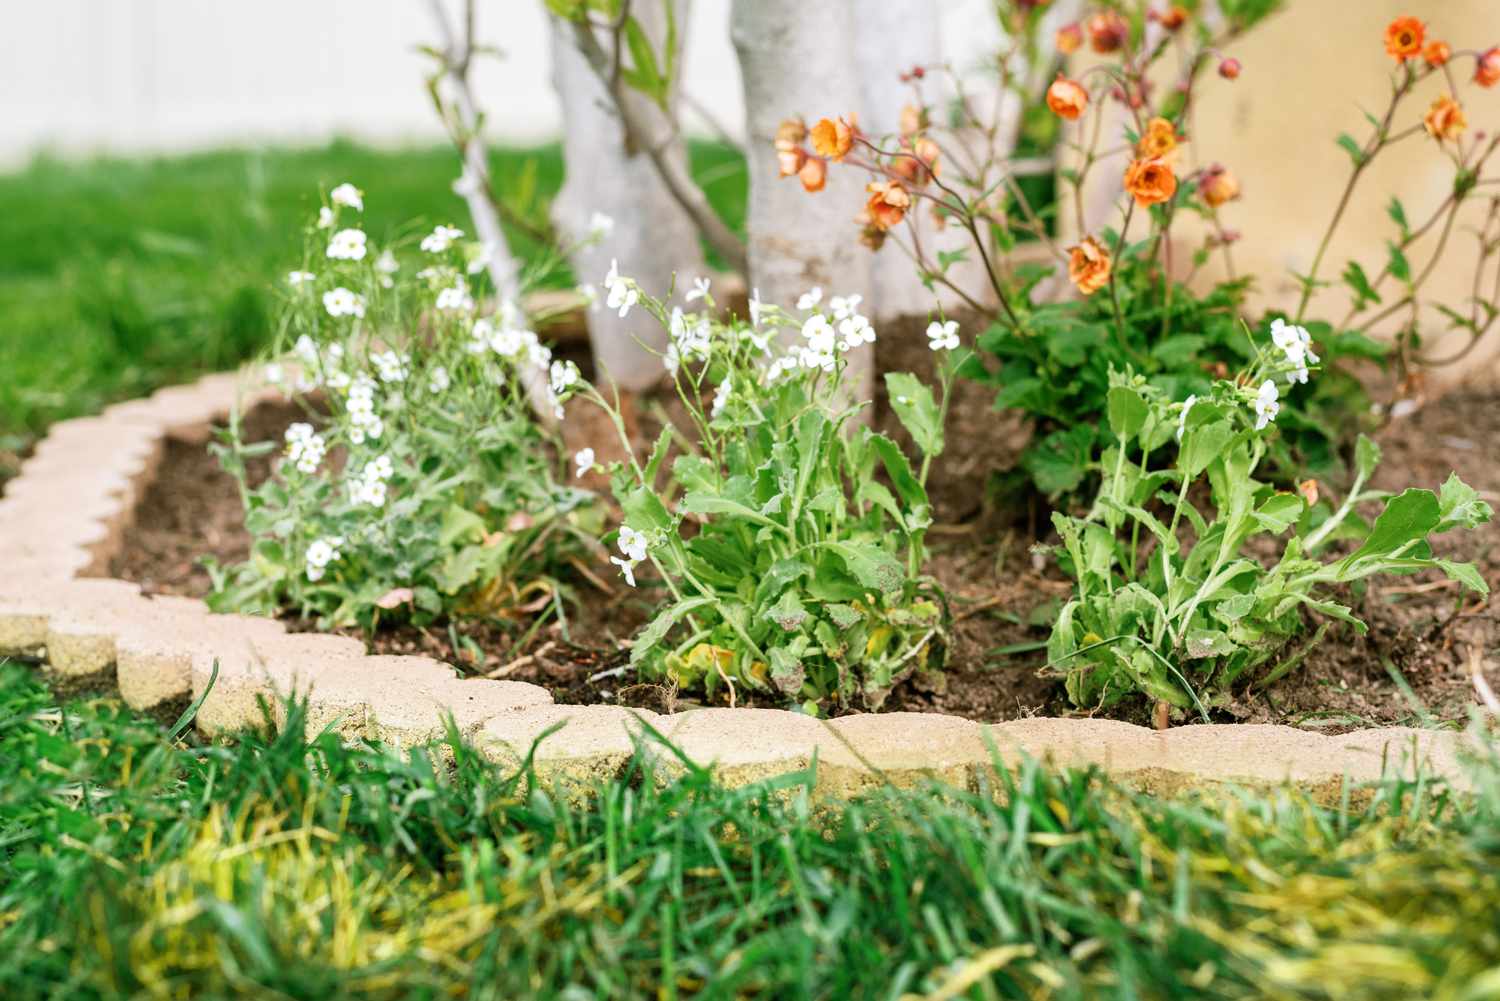
📏 Scale Guide
This works because it’s unapologetically sweet and simple. The gentle, repeating curves of the scalloped edge create a soft, playful rhythm that harmonizes with the delicate flowers in the garden bed. It doesn’t try to be slick or modern. The tan color is a warm neutral that blends well with the dark soil and green grass. In this context, with the simple plantings and tree-lined backdrop, the scalloped edge feels appropriate and charming. It’s a design that knows exactly what it is: a simple, cheerful border.
16. Create a Polished Look with Interlocking Brick Edging
The use of two rows of interlocking bricks is the key to this design’s neat and substantial appearance. A single row could look a bit flimsy, but doubling up gives the border a pleasing visual weight and height. It creates a strong, clean line that clearly separates the lawn from the mulched bed, and the second layer helps to effectively hold back the bark chips. This small detail—simply adding a second course—makes the entire installation look more professional and permanent.
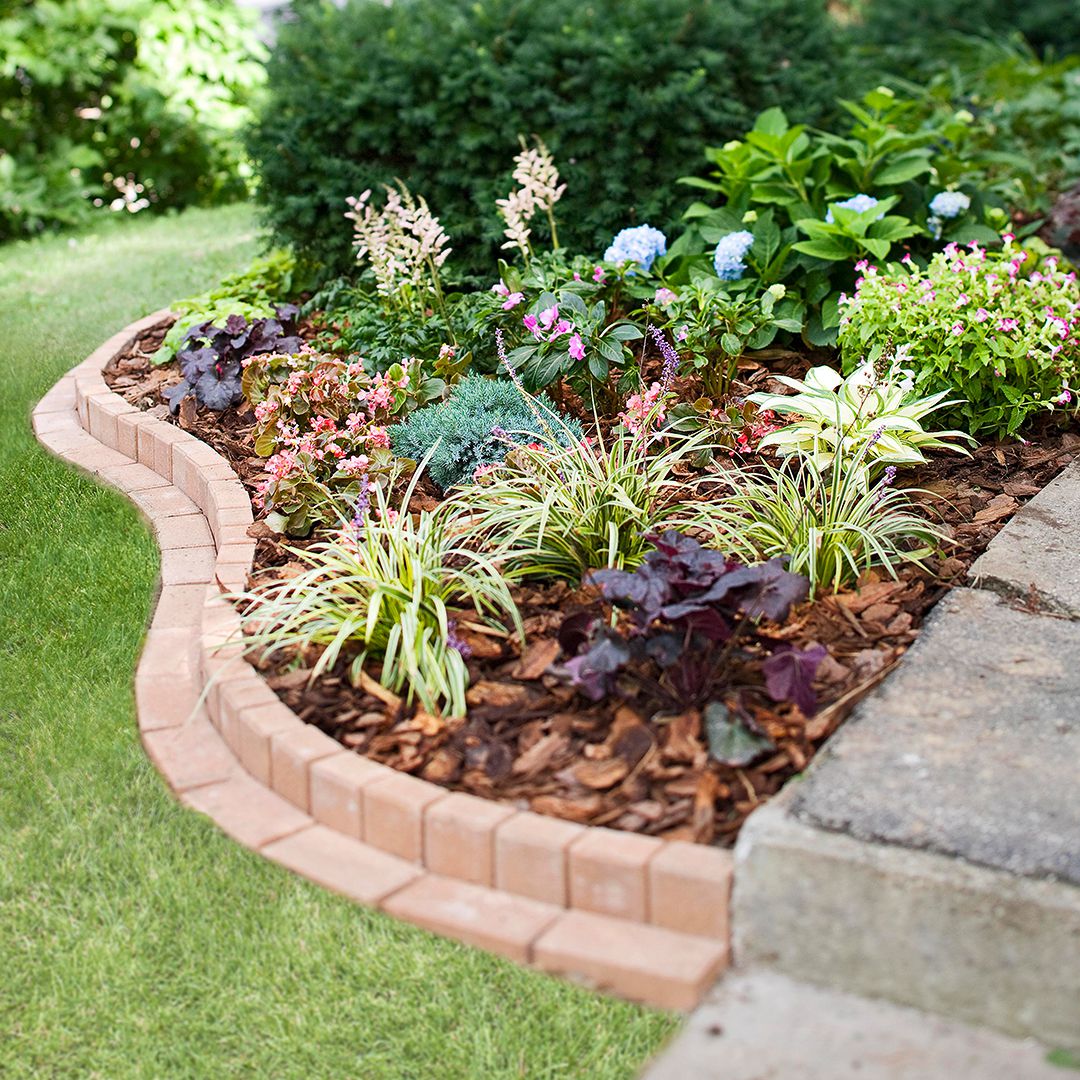
🔥 Trending Context
Achieving this clean, two-tiered look is straightforward with interlocking pavers. Here’s the process:
- Dig Your Trench: Create a trench about 6 inches deep and wide enough for two rows of bricks.
- Lay the Base Course: Add 2-3 inches of paver base, tamp it down, and lay your first row of bricks, making sure they are level.
- Apply Adhesive: Run a bead of landscape block adhesive along the top of the first course of bricks.
- Set the Top Course: Place the second row of bricks on top, staggering the joints like a classic brick wall for strength and visual appeal.
- Backfill: Fill the trench on both sides with soil or mulch to secure the edging.
This process ensures a strong, stable border that will last for years.
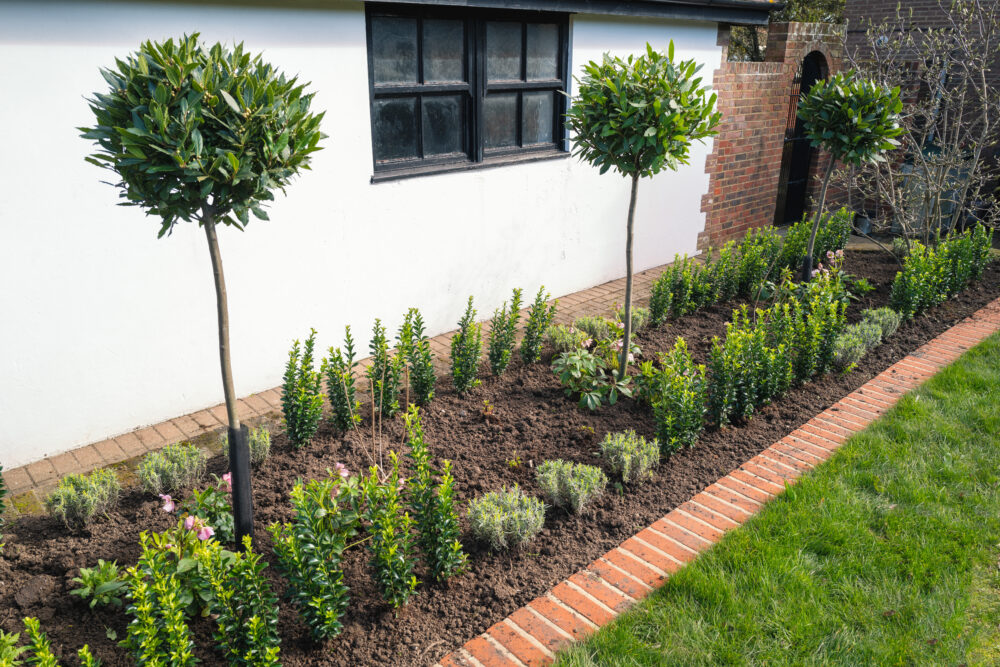
17. A Simple Staggered Brick Edge for a Foundation Bed
This is a classic, no-fail formula for foundation planting. The composition is roughly: 60% neutral backdrop (the white wall), 20% lush green lawn, 15% green shrubs and plants of varying heights, and just 5% red-orange brick edging. The brick here is a small but vital accent. It provides a warm, earthy line that prevents the green lawn and the green plants from blurring together. It’s the punctuation mark that makes the whole sentence read clearly. You can see a similar principle in Idea #2, where the brick frames the garden.
🧹 Maintenance Reality
This is one of the most budget-friendly edging options possible, and it’s a perfect DIY project. You’re using standard, inexpensive house bricks laid in the simplest possible pattern. You can often find these bricks for free or very cheap on community marketplaces from people who have leftovers from other projects. The only other costs are your time and maybe a bag or two of sand to create a level base in your trench. This is proof that a clean, effective garden border doesn’t need to be expensive or complicated.
18. Create a Simple, Tidy Tree Ring with Rough-Hewn Stone
Before you build a ring like this, make sure you’ve covered these bases. A little planning prevents a lot of future headaches.
- Check the Tree’s Mature Size: Is this a small ornamental tree or a future giant oak? The ring should extend to the tree’s eventual ‘drip line’ (the edge of its canopy) to avoid root conflicts. For a new tree, plan for a 4-6 foot diameter ring at minimum.
- Mind Your Mower: Can your lawnmower easily navigate around the finished ring? Lay out the circle with a hose and do a ‘test mow’ to ensure you won’t be creating a trimming nightmare for yourself.
- Plan for Water: The stone border can prevent rainwater from easily reaching the tree’s roots. Ensure the mulch is several inches below the top of the stone to create a basin that can catch water.
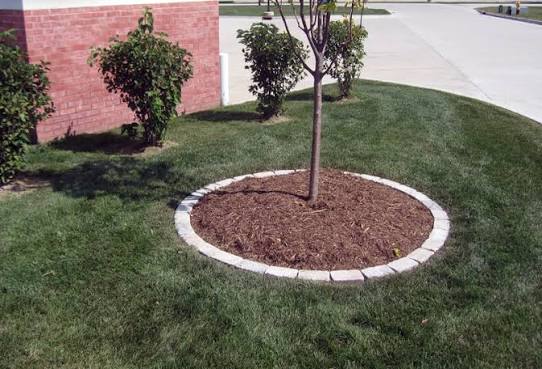
💡 Designer Tip
that makes this work so well is the crisp separation it creates. It cleanly divides the ‘wild’ space of the lawn from the ‘cultivated’ space of the tree bed. This strong circular border instantly imposes a sense of order and intention on the landscape. It turns a simple tree in the middle of a lawn into a deliberate feature. The mulch inside the ring also helps the tree by reducing root competition from the grass and retaining soil moisture. It’s a simple change that has a huge visual and horticultural impact.
19. Play with Curves and Straight Lines Using Red Brick Pavers
This design succeeds by confidently mixing geometric forms. The pathway itself is made of hexagonal pavers, a less common and more intricate shape. But the real genius is in the edging, which shifts between long, graceful curves and sharp, straight sections. This juxtaposition creates visual interest and helps the path navigate the landscape in a dynamic way. It feels less like a pre-planned route and more like a wall that grew organically to accommodate the slopes and greenery. The varying height of the brick wall adds to this organic, sculptural quality.
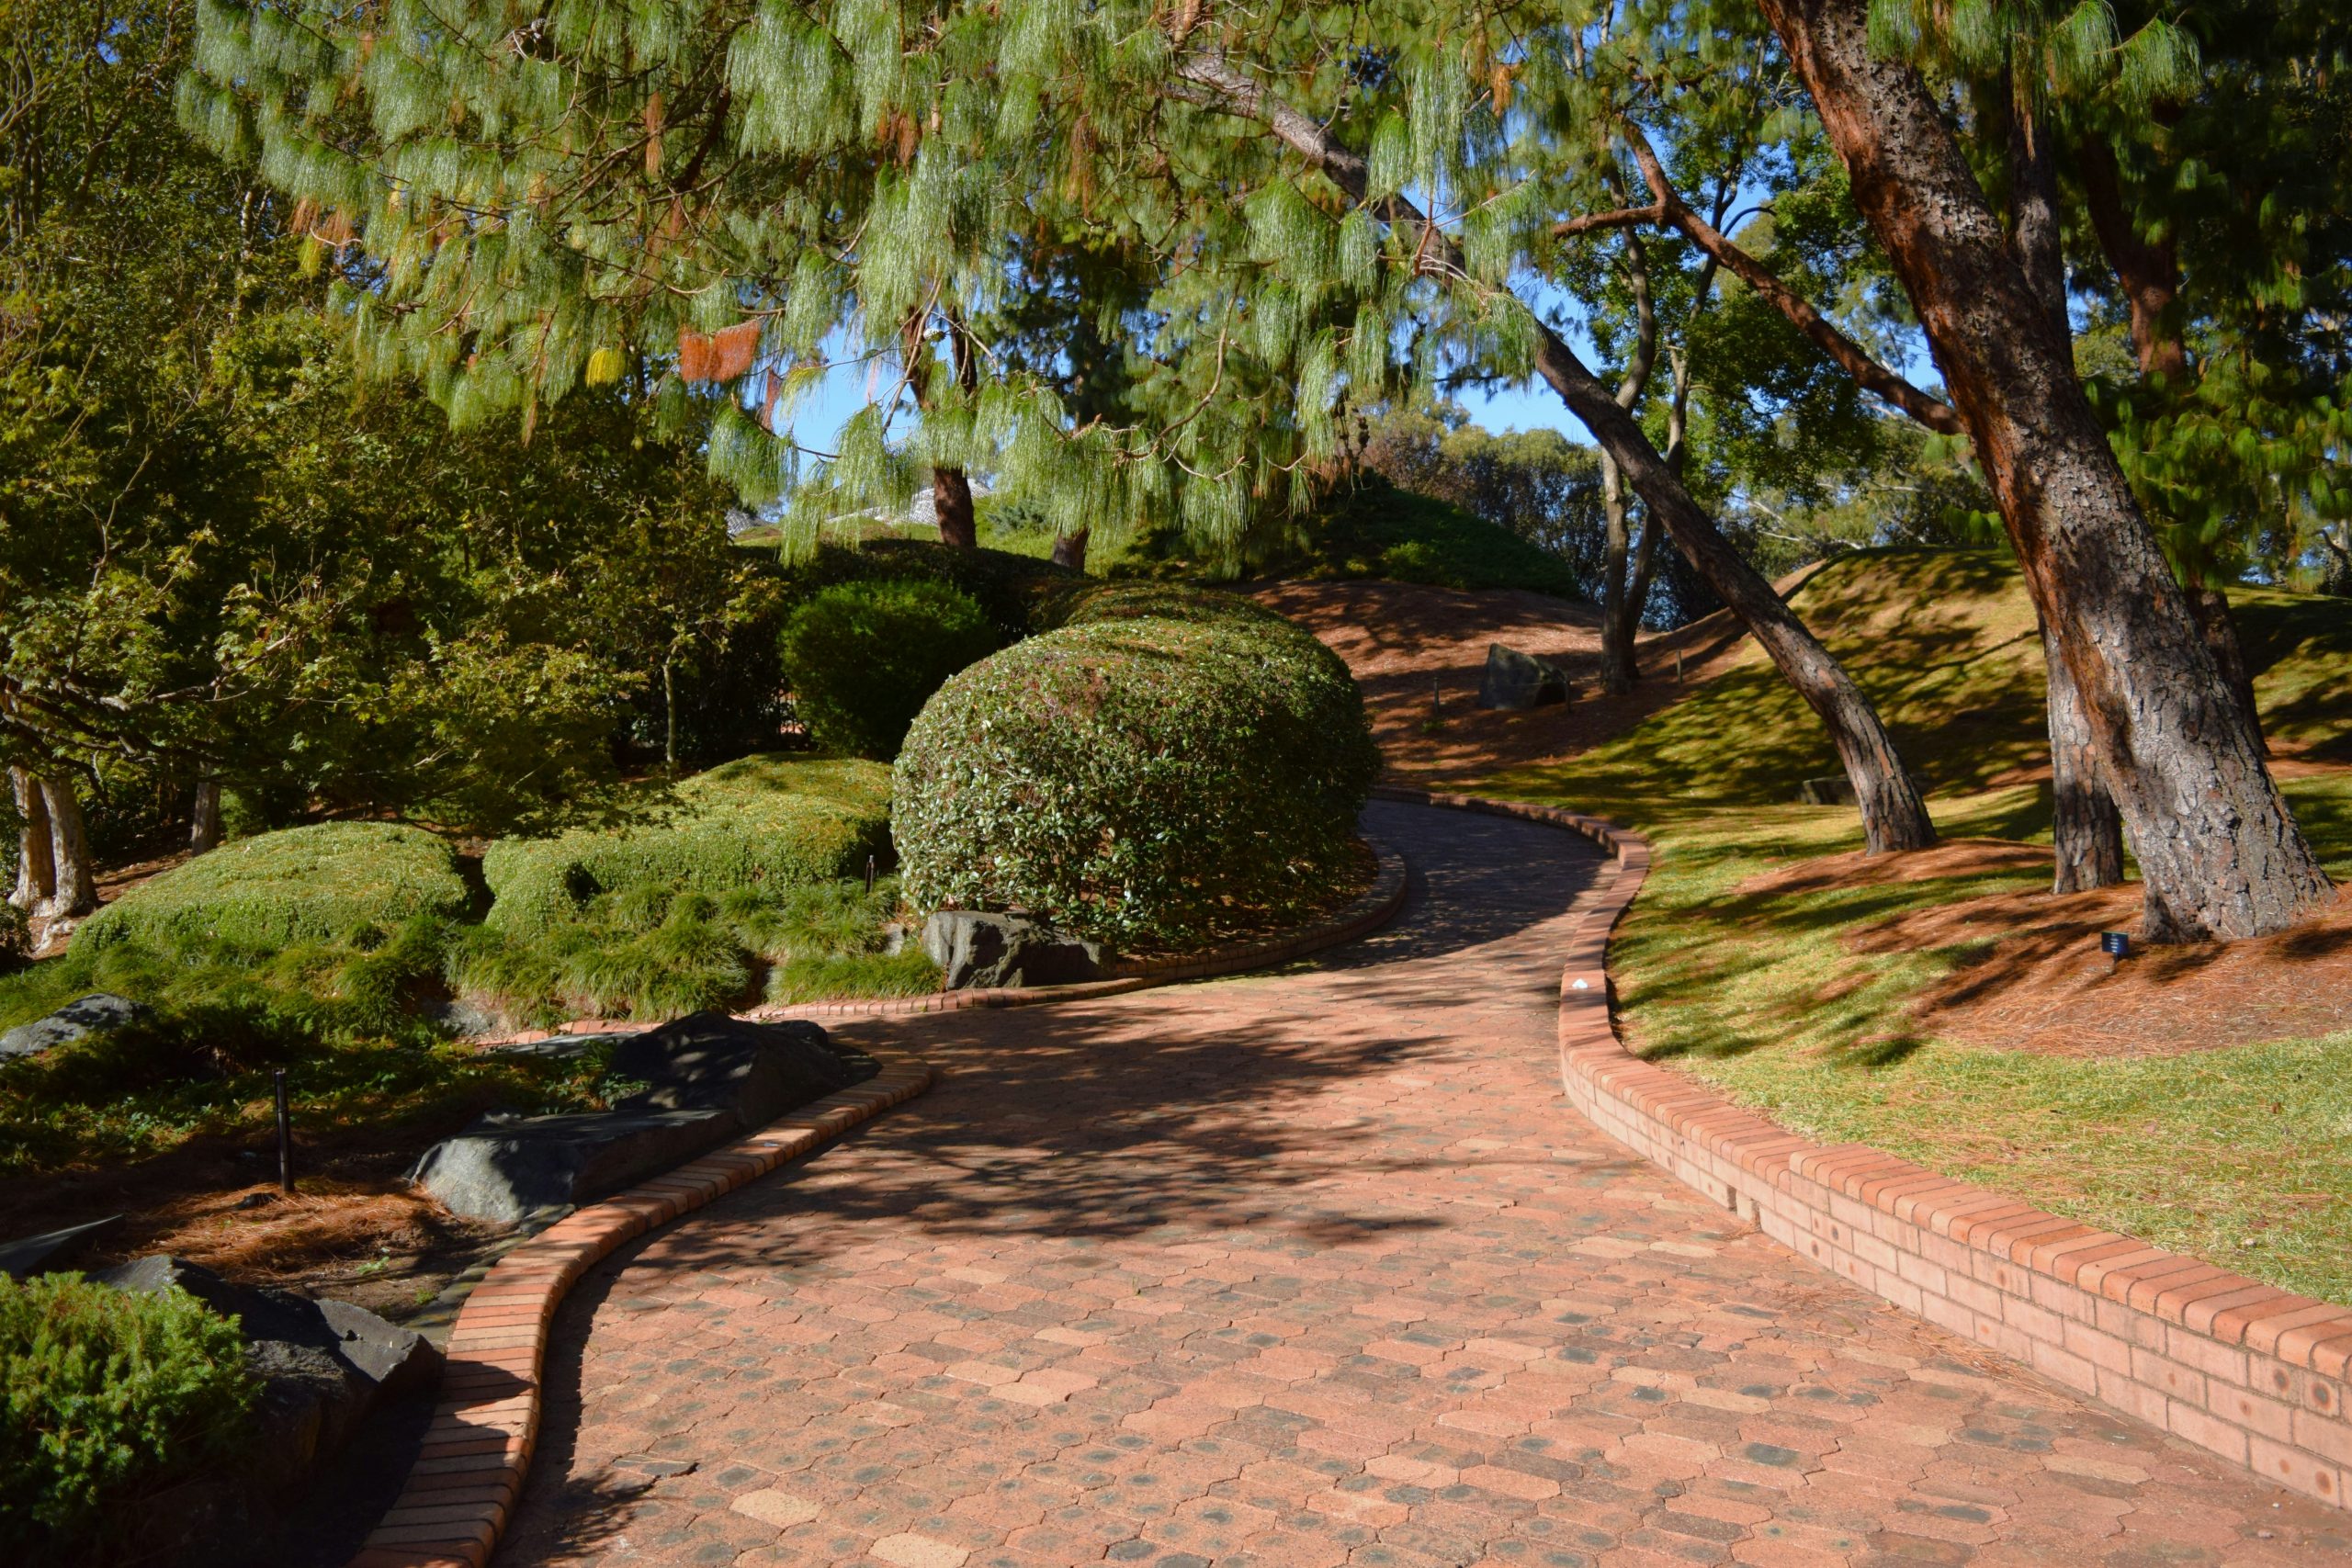
💰 Budget Breakdown
A design with this much going on—a winding path, varied edging, and sloped terrain—needs space to breathe. This is best suited for a larger, more sprawling property like a public park, a large estate, or a backyard that’s at least half an acre. In a small, flat suburban yard, the combination of curves, straight lines, and varied heights could feel chaotic and oversized. The beauty of this design is in its grand, meandering scale.
20. Anchor an Outdoor Kitchen with a Herringbone Paver Inlay
Here, the design formula is about creating a focal point. Let’s call it: 70% neutral grey paver field + 20% striking herringbone accent + 10% functional stainless steel elements. The vast majority of the patio is a simple, functional surface. The herringbone section acts like a beautiful, durable area rug, visually anchoring the cooking zone. This uses the same pattern as Idea #12, but as a bold accent rather than a full path. The red-brown color also adds warmth and balances the cool grey and silver tones.
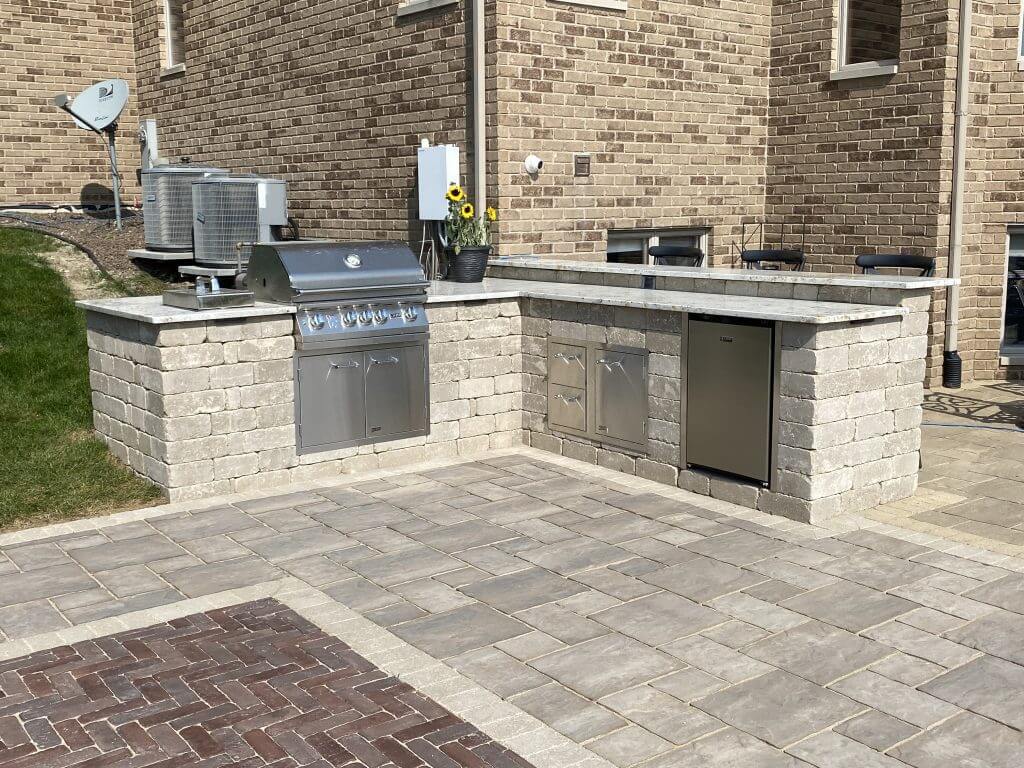
⚠️ Real Talk
While that herringbone inlay looks fantastic, it’s a prime spot for collecting grease splatters from the grill and crumbs from the prep area. The texture of the pavers and the many grout lines can make it more difficult to clean than a smooth concrete slab or larger format tile. Be prepared to give this section regular attention with a good degreasing cleaner and a stiff brush if you want to keep it looking as crisp as the day it was installed. Also, ensure the pavers used are rated for this kind of use and properly sealed.
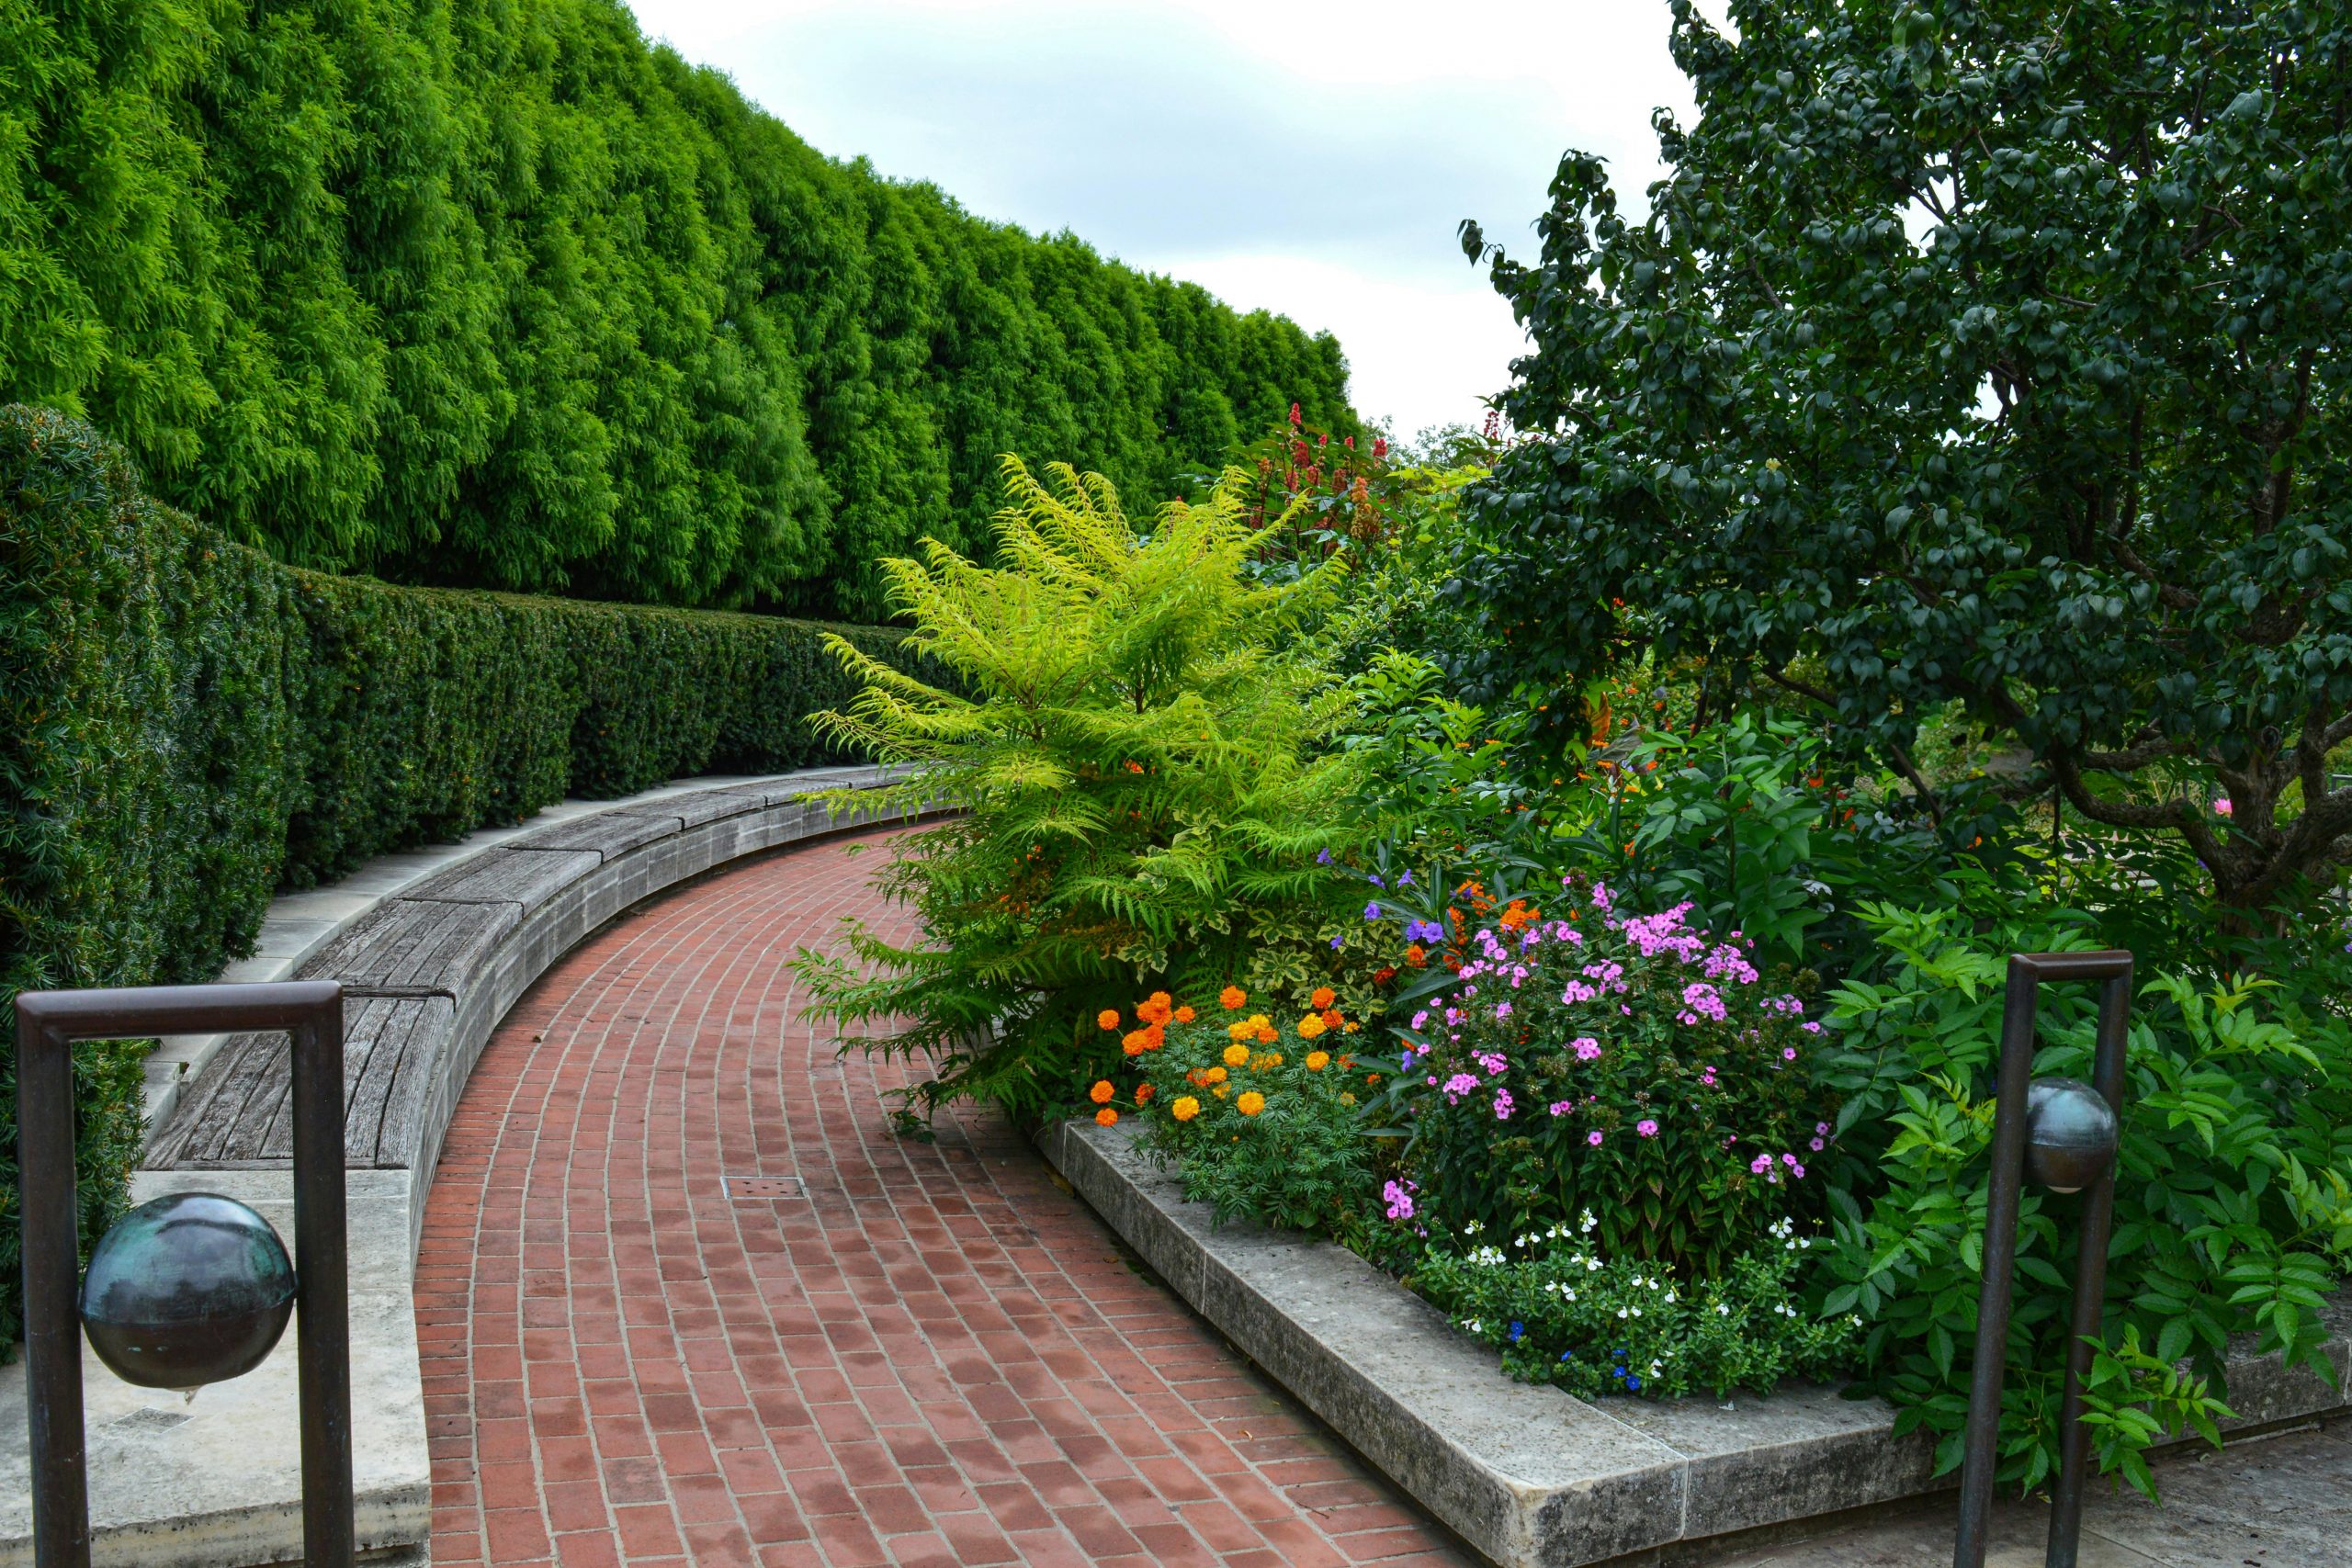
21. A Curved Brick Path with an Integrated Bench and Planter
The integrated, curved wooden bench is the heart of this design. Without it, you’d have a pleasant but fairly standard garden path. The bench transforms the path from a simple walkway into a destination. It follows the curve of the concrete planter curb, making it feel like an organic part of the landscape architecture. It invites you to stop, sit, and actually experience the garden rather than just pass through it. This element adds a crucial human, functional touch to the entire scene.
📐 Style Math
This design is a masterclass in layering materials and sightlines. The lowest level is the warm, textured red brick. Above that rises the cool, smooth grey concrete curb. Then you have the weathered brown wood of the bench, followed by the riot of colorful flowers and green shrubs in the planter. Finally, the tall green hedge creates a solid backdrop that makes everything in front of it pop. Each layer has a distinct color and texture, creating a rich, complex, and deeply satisfying visual experience.
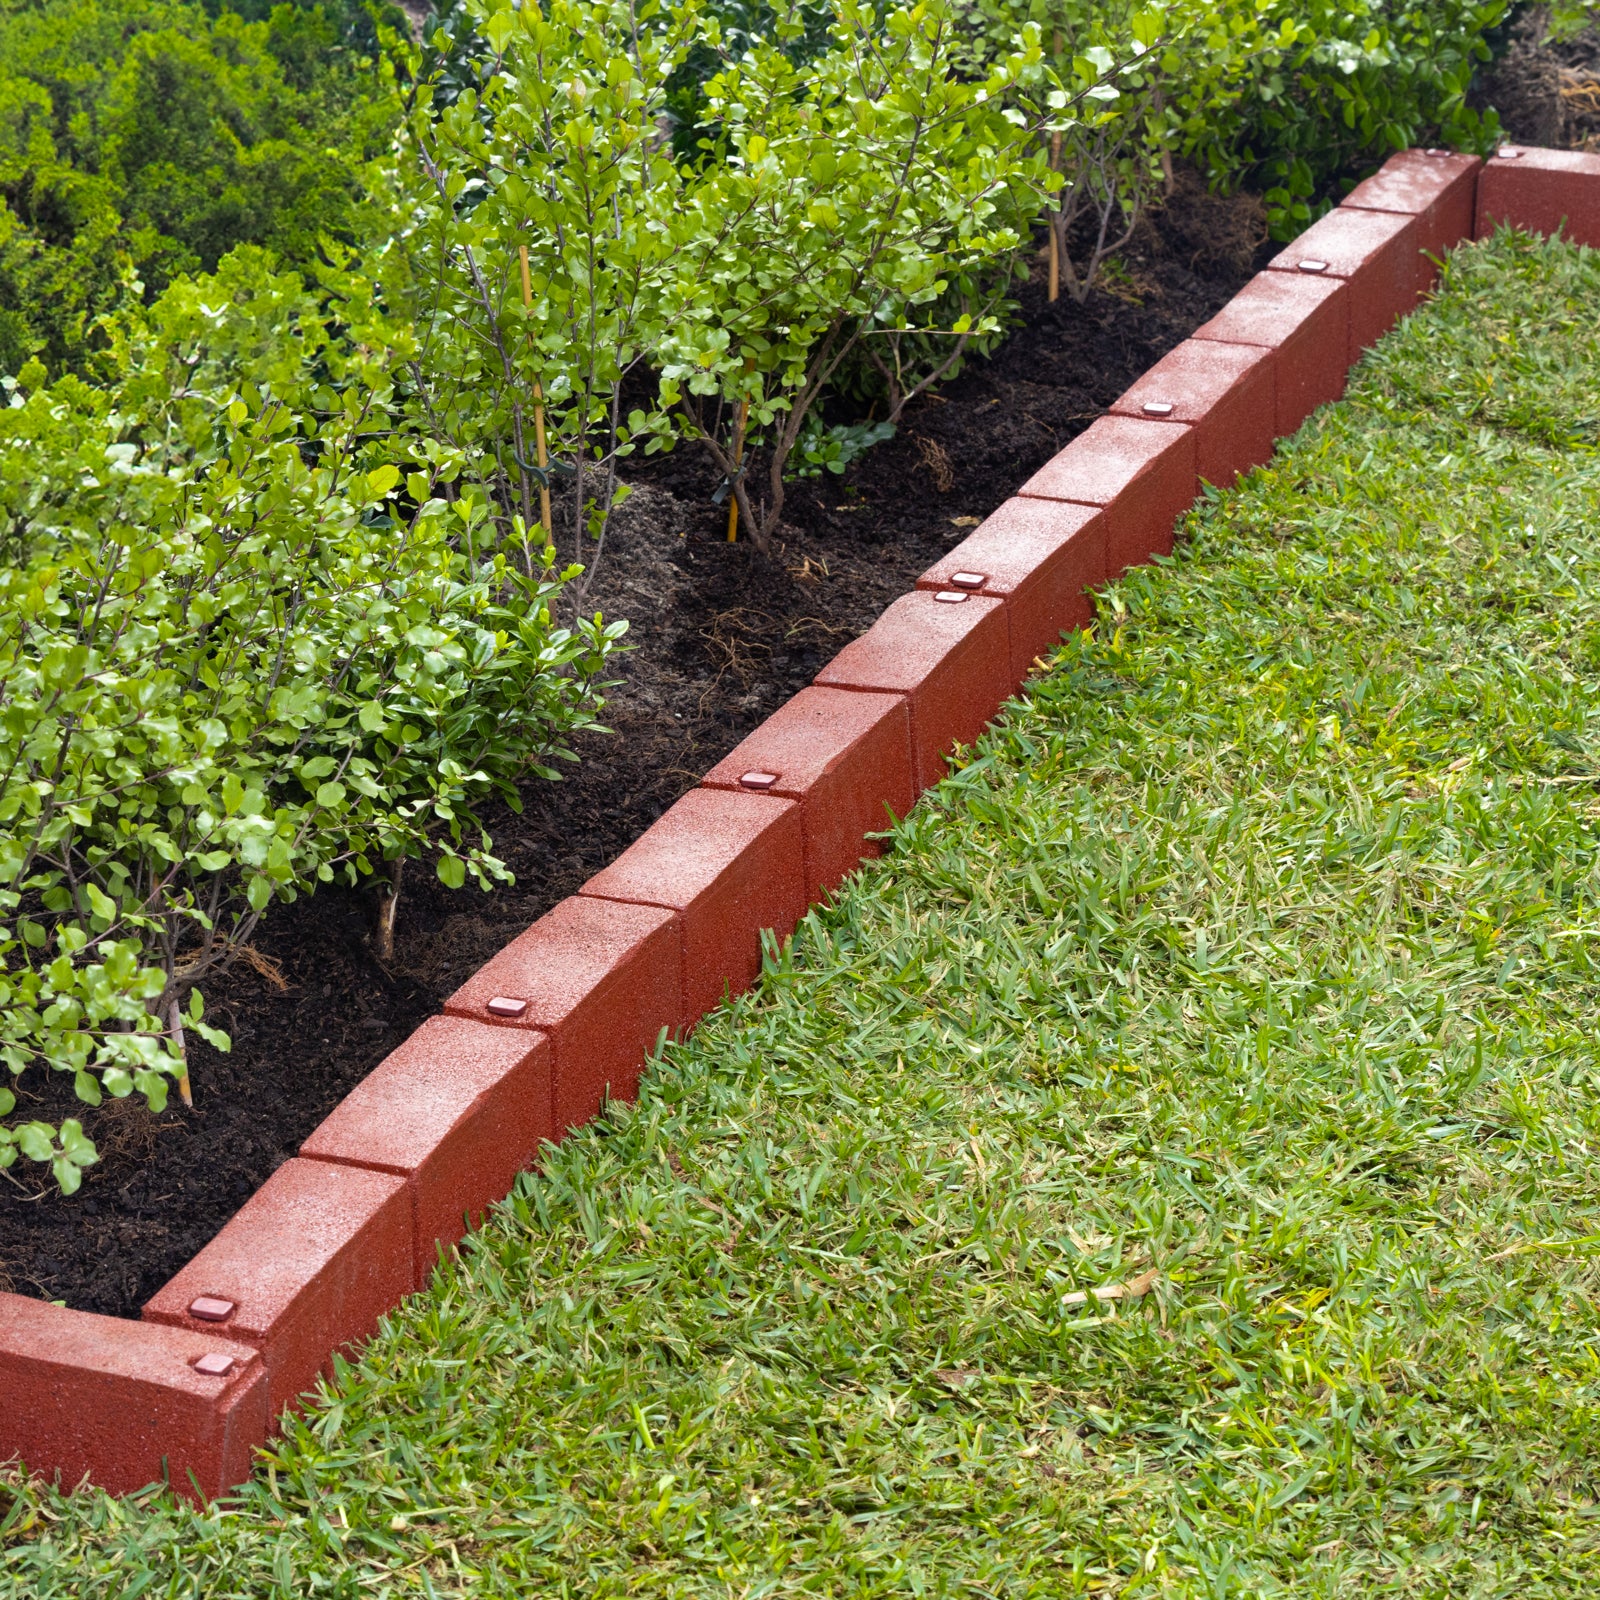
22. Decorative Paver Edging with Circular Inserts
If you’re using a decorative paver with a repeating pattern like this, less is more. The small, light-colored circular inserts are a unique detail. The key is to let them be the ‘jewelry’ of the design and keep everything else simple. The straight, clean line of the edging, the uniform green grass, and the simple green shrubs are the perfect backdrop. Avoid pairing a decorative edging paver with a busy, patterned walkway or multi-colored plantings, as this can quickly lead to a chaotic, visually cluttered look.
💸 Get This Look For Less
A word of caution about pavers with built-in decorative elements: those little inserts can sometimes be the weak point. Depending on how they are manufactured, they may be a different material that can pop out over time with freeze-thaw cycles or if knocked by a mower. Before committing to a style like this, ask your supplier about the construction. Are the inserts fully integrated into the paver, or are they separate pieces glued in? This will tell you a lot about their long-term durability.
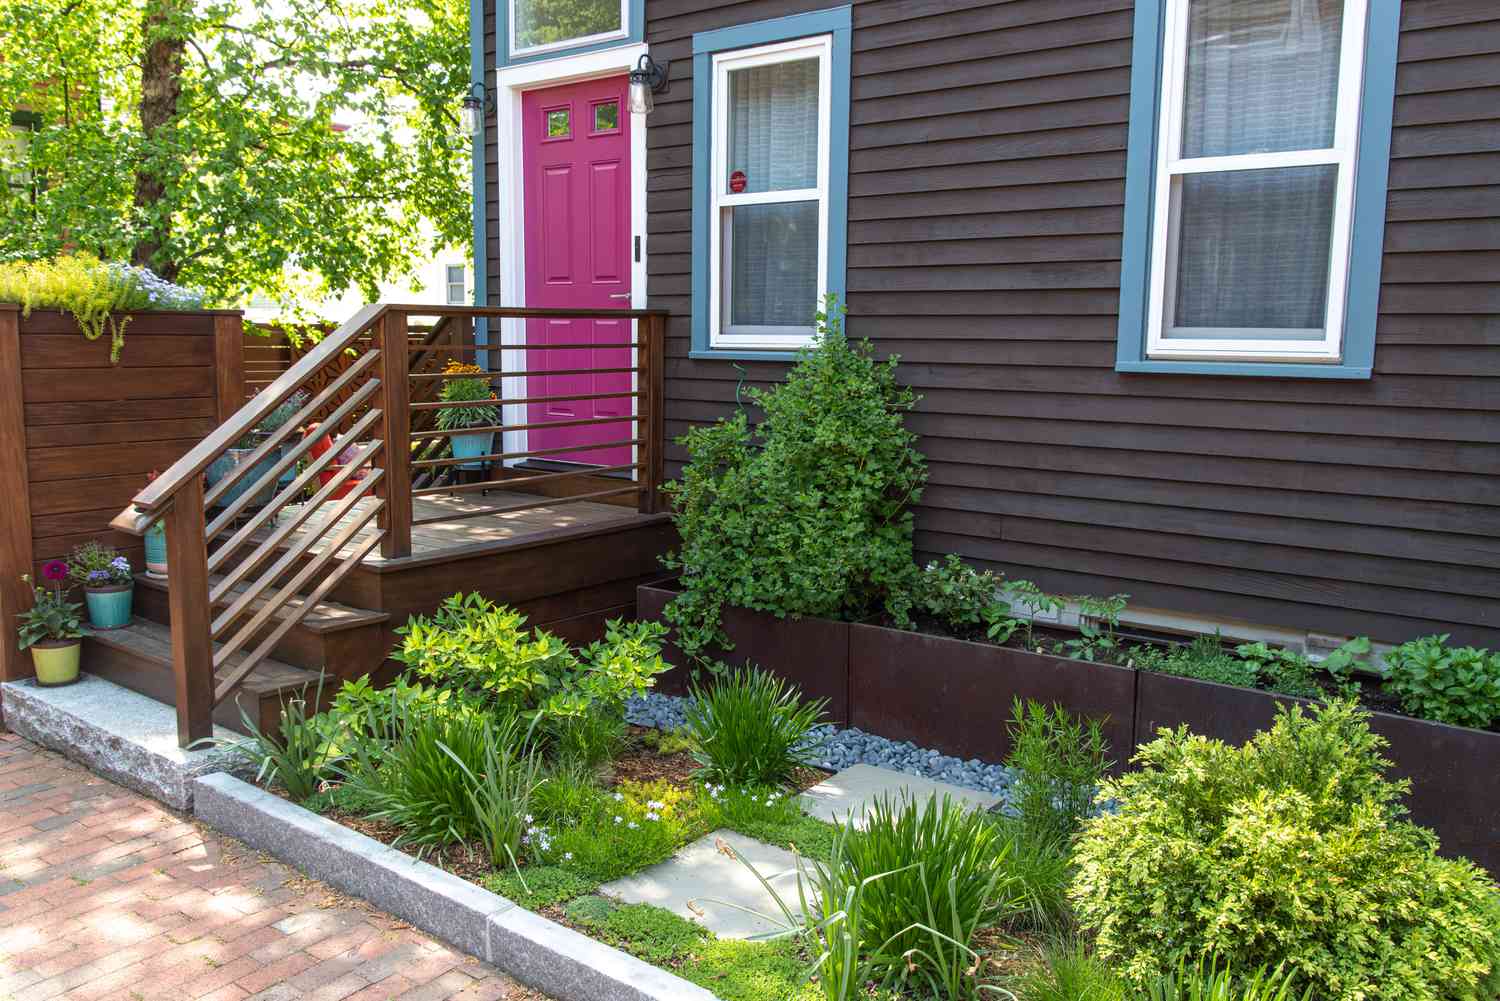
23. A Crisp Granite Border for a Modern, Multi-Material Garden
The genius here is the single, long piece of light grey granite. In a garden bursting with texture—the dark wood siding, the brick path, the rusted metal planter, the varied foliage—the granite block provides a moment of pure, clean simplicity. It acts as a visual palate cleanser. Its smooth surface and cool grey color create a sharp, modern line that separates the chaos of the garden bed from the pattern of the brick path, allowing both to be appreciated more fully. It’s a powerful statement of minimalist restraint in a maximalist setting.
✅ Before You Start
This look is very now. We’re seeing a lot of designers and homeowners on Pinterest embracing what’s being called ‘structured wildness.’ It’s the idea of having lush, slightly untamed planting that is contained within a very rigid, modern architectural frame. The granite border is the perfect example of this. It imposes a clean, human-made order on the natural, organic forms of the plants. It’s a trend with staying power because it offers the best of both worlds: the beauty of a wild garden without the messiness of it taking over your whole yard.
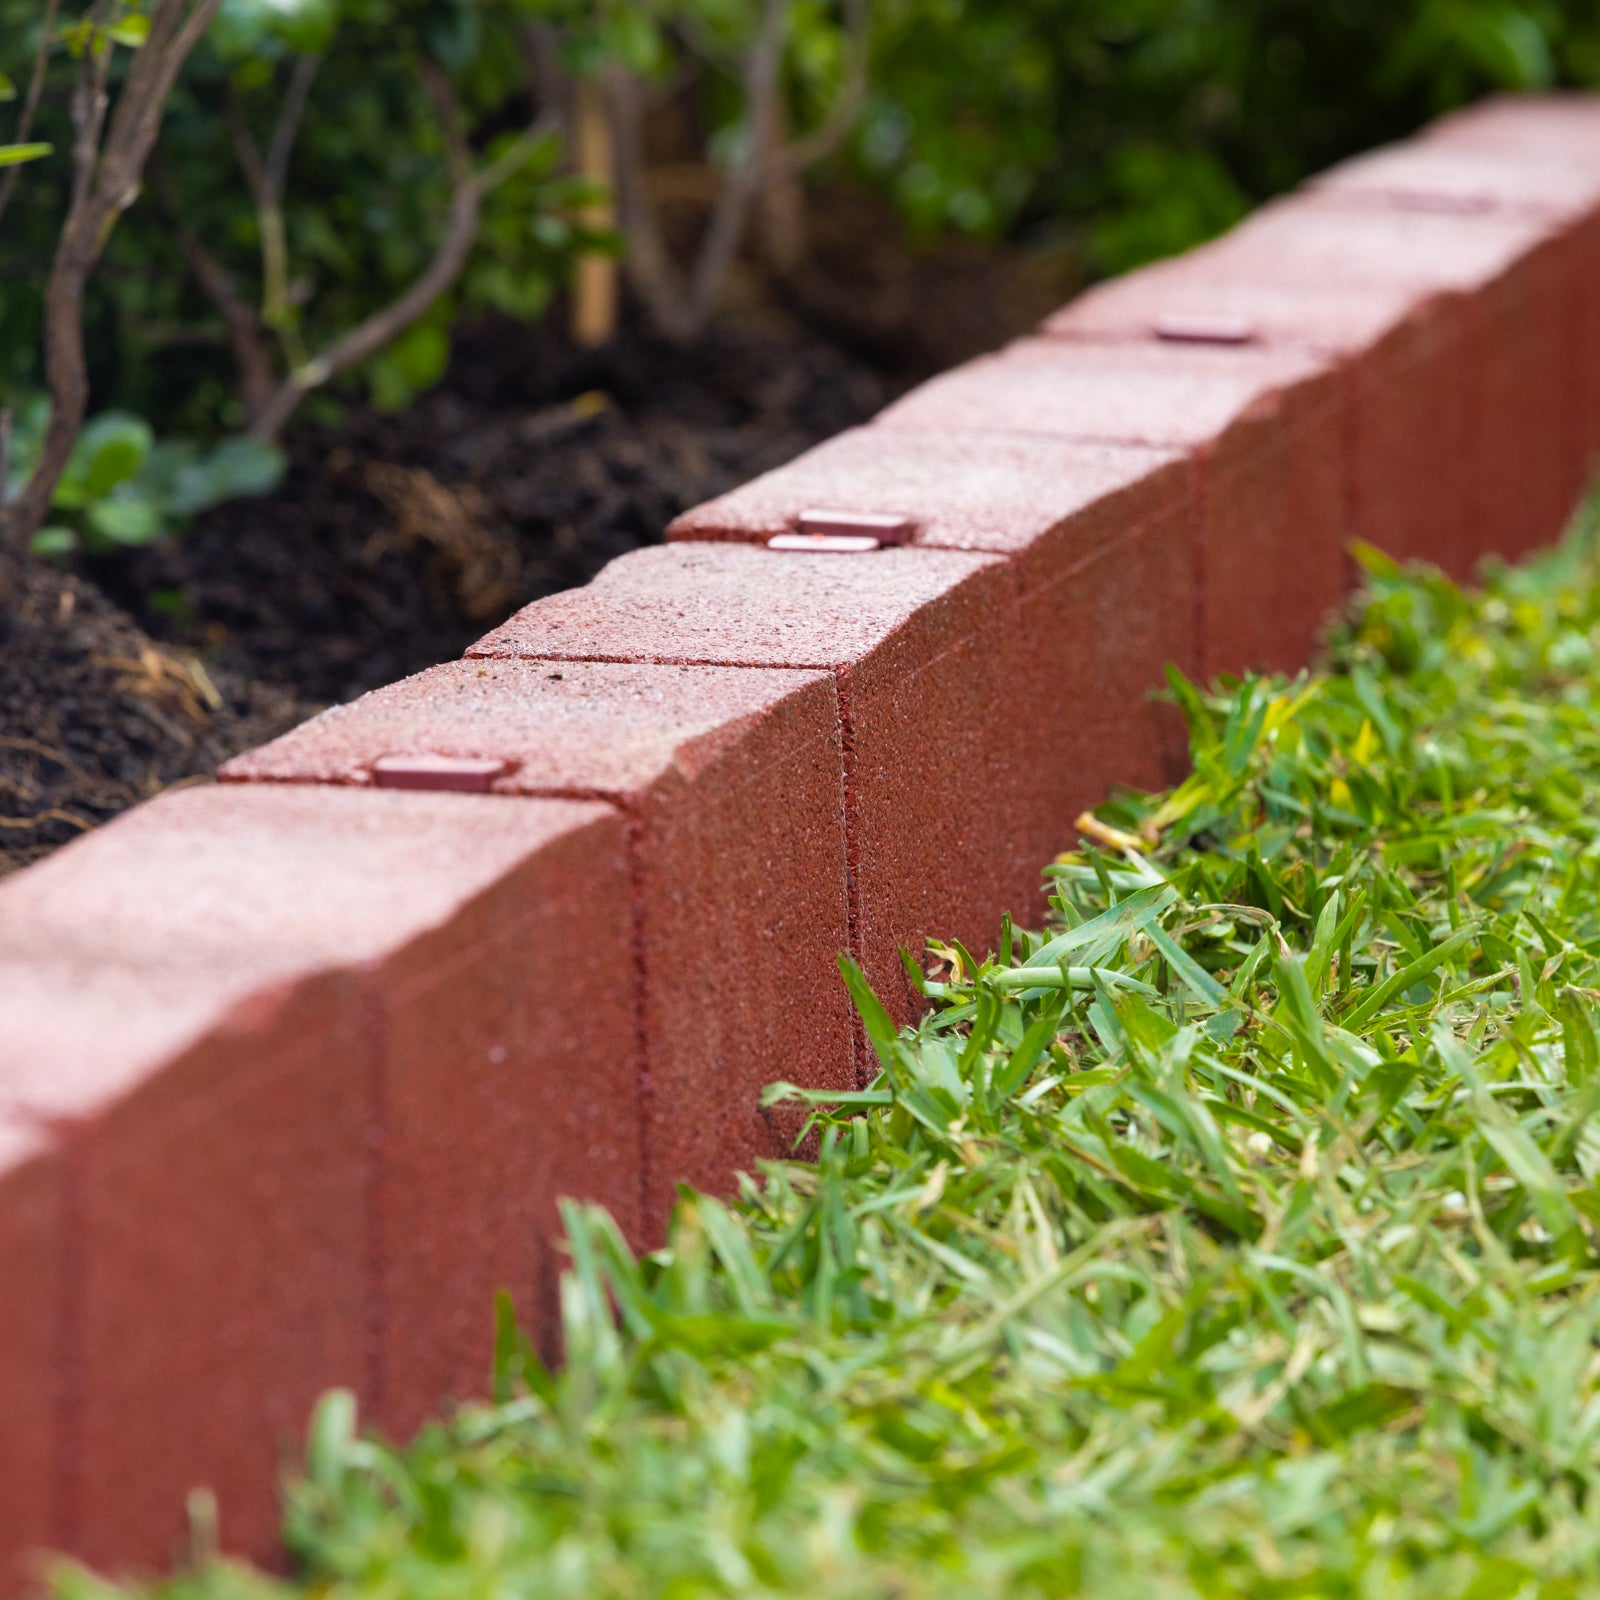
24. Textured Brick Edging with Interlocking Tabs
The most unique feature here are the small, visible interlocking tabs. While many edging systems are designed to hide how they connect, this one makes it a part of the aesthetic. It gives the border an honest, functional, and slightly industrial look. The tabs create a subtle, repeating rhythm and draw attention to the segmented nature of the border. This choice moves the edging from a simple brick line to a ‘system’ that feels sturdy, practical, and thoughtfully engineered.
🔧 How-To Brief
This type of interlocking plastic or composite brick is a fantastic budget-friendly alternative to traditional masonry. A box of these, covering about 20-30 feet, can often be purchased for under $50 at a big-box store. Because they are lightweight and often just require being hammered into the ground with a mallet, there are no labor costs. You get the look of a brick border, with added durability and a simple installation process, for a fraction of the cost and effort of laying real bricks in a trench.
25. Create a Raised Garden Bed with Layered Brick Edging
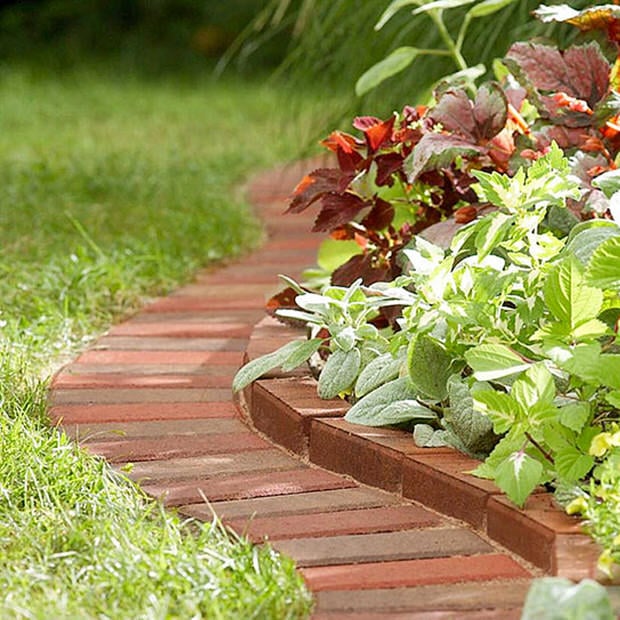
This multi-tiered design follows a simple but effective ratio: 50% lush, overflowing plants, 30% vertically stacked brick for the raised edge, and 20% flat-laid brick for the pathway. The key is that the functional elements—the path and wall—provide a strong, structural base that allows the plants to be the star. You could change the plants to all green hostas or all pink flowers, and the underlying structure would still make the design work. The brick acts as the perfect, warm-toned frame for whatever you choose to plant.
⭐ The One Thing
Building this two-tiered edge is a great weekend project. It looks complex but is quite manageable.
- Define the Path: Lay out the inner curve of your path. Excavate about 4 inches deep for the path area.
- Create the Base: Add a 2-inch layer of paver base and a 1-inch layer of sand to the entire excavated area (path and wall).
- Lay the Path: Lay the bricks flat for your pathway section.
- Build the Wall: Behind the path, stack your bricks vertically for the first course of the raised bed. For the second course, apply landscape adhesive and stack the next layer, staggering the joints for strength.
- Backfill and Plant: Fill the raised bed with garden soil and add your plants. Fill any gaps around the path with soil or more sand.
26. A Textured Block Edge for a Checkerboard Paver Path
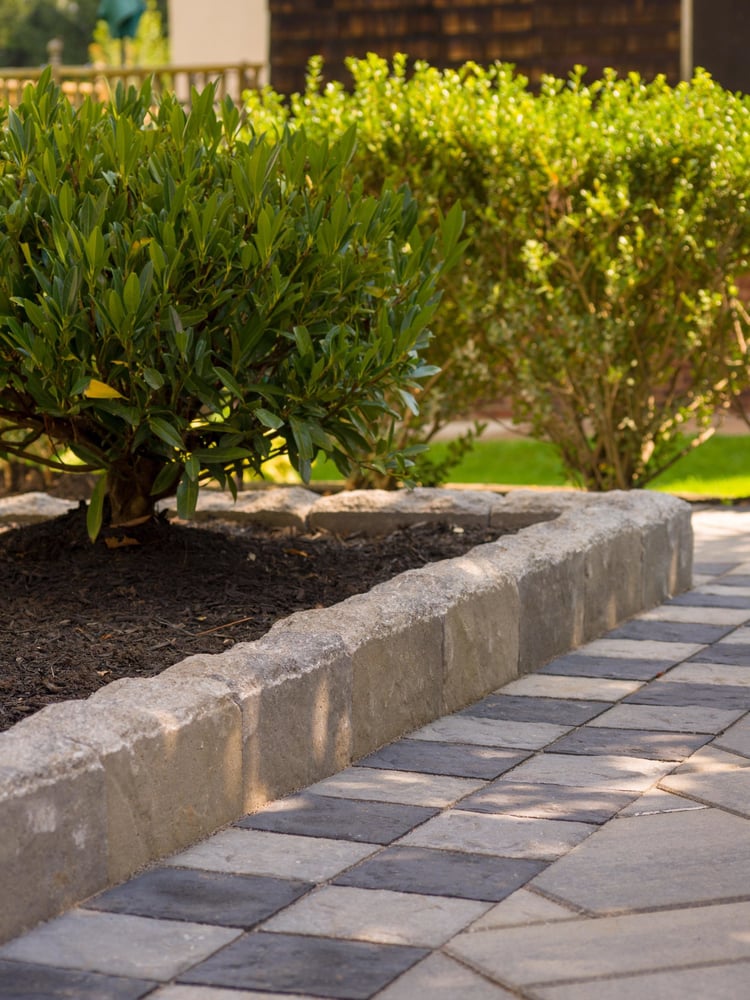
This design is a smart play on geometric patterns and textures. The checkerboard path is very rigid, graphic, and smooth. The garden edging, made of rough-textured concrete blocks, provides a pleasing contrast. It’s also geometric, but its coarse texture prevents the whole scene from feeling too sterile or perfect. The rough edging softens the look and ties it to the natural textures of the soil and plants in the garden bed. It’s the bridge between the hardscape and the softscape.
🎯 What Makes It Work
When you have a strong, busy pattern like this checkerboard, it’s crucial to have a solid, unifying border. If the edging were made of different colored or shaped stones, the entire design would become a chaotic mess. The use of a single-color, single-texture light grey block for the entire garden edge provides a consistent frame. It contains the energy of the checkerboard and gives the eye a calm place to land, making the overall design feel intentional and cohesive rather than random.
27. Modern Raised Beds with Gravel and a Concrete Path
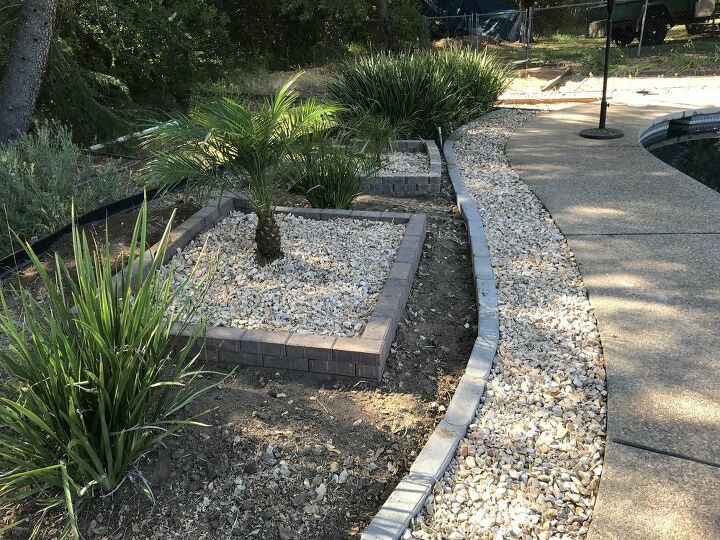
Here’s a formula for a clean, modern, low-water landscape: 40% light-colored gravel, 30% smooth concrete surfaces (path and pool deck), 20% dark, structural elements (the brick planters), and 10% sculptural, green foliage. This ratio creates a bright, airy feel that’s grounded by the dark planters. Notice how the plants are used sparingly, like living sculptures. This isn’t about lush abundance; it’s about a few carefully chosen specimens in a clean, architectural setting. This is a very different vibe from the lushness of Idea #21.
📏 Scale Guide
Gravel is a fantastic, modern-looking mulch, but it’s a magnet for leaves, twigs, and dust. Unlike bark mulch, which hides debris, light-colored gravel shows everything. To keep this area looking pristine, you’ll need to regularly use a leaf blower (on a low setting to avoid sending gravel everywhere). You might also need to rinse the gravel with a hose once or twice a year to wash away accumulated dust and keep it looking bright. It’s a trade-off: you get a sleek, modern look, but it requires a different kind of cleaning than a traditional garden bed.
Your Perfect Path Awaits
Hopefully, these 27 ideas have sparked some genuine inspiration for your own yard. Remember that the best edging is one that not only looks beautiful but also solves a problem—whether it’s keeping mulch in place, defining a walkway, or just making mowing easier. The perfect solution is a blend of your home’s style and your own practical needs.
Ready to start planning? Head over to Pinterest and create a board for your favorite looks from this article!