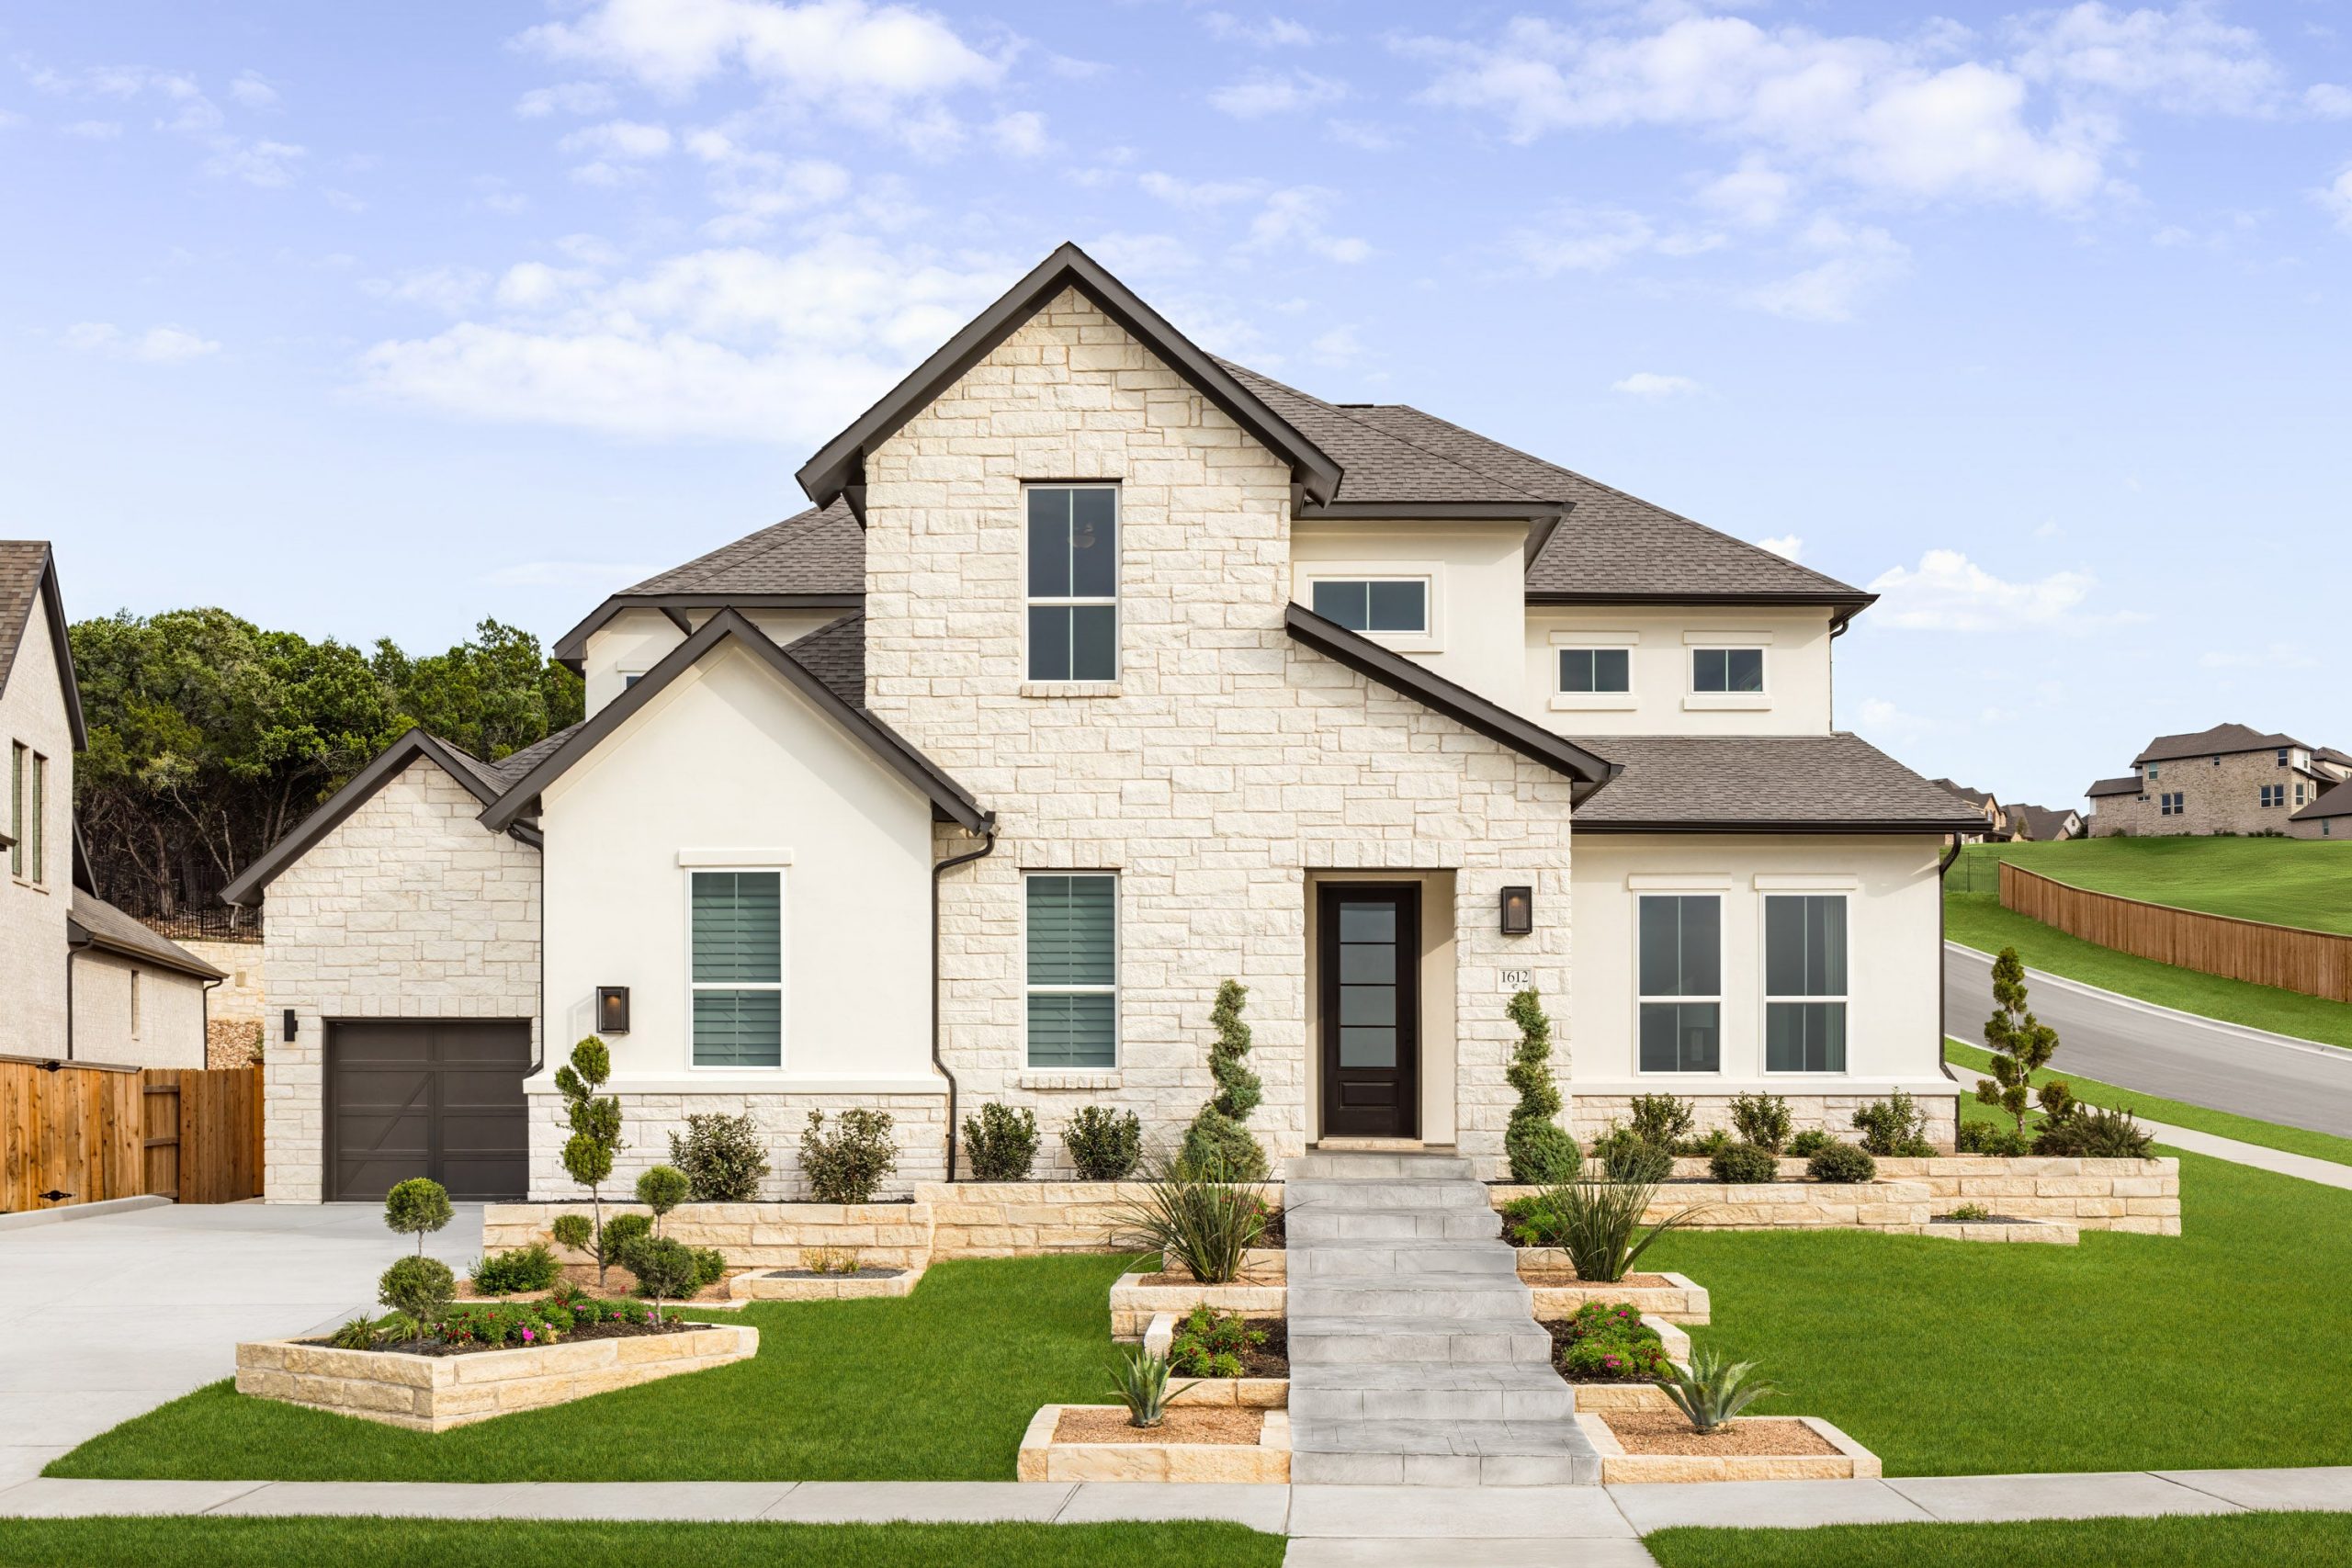
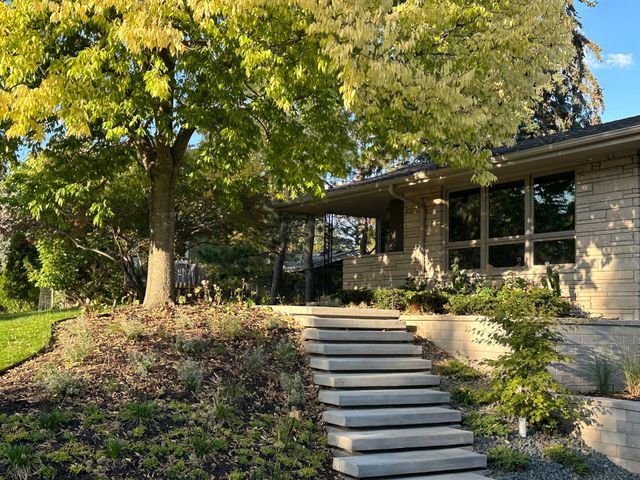
You know that feeling when you finally find the retaining wall idea that looks exactly right for your yard? That “aha!” moment when the jumble of slopes, landscape needs, and Pinterest boards finally clicks into a clear vision. It’s a good feeling, and it’s exactly what we’ve bottled up in this guide. After filtering through hundreds of designs from high-end landscape architects and DIY backyards, we narrowed it down to the 30 ideas that deliver on style, function, and staying power. Inside, you’ll find inspiration for every situation, from grand, terraced masterpieces of natural stone to clever, modern timber solutions and integrated stair designs that turn a problem slope into a main feature. For 2026, the biggest trend is “structured naturalism”—the art of blending strong, clean lines with soft, wild plantings. It’s about making your landscape feel both intentionally designed and effortlessly organic. And stay until the end — we break down the most common mistakes that can ruin these looks.
📌 Save this to Pinterest for later — you’ll want to revisit these ideas.
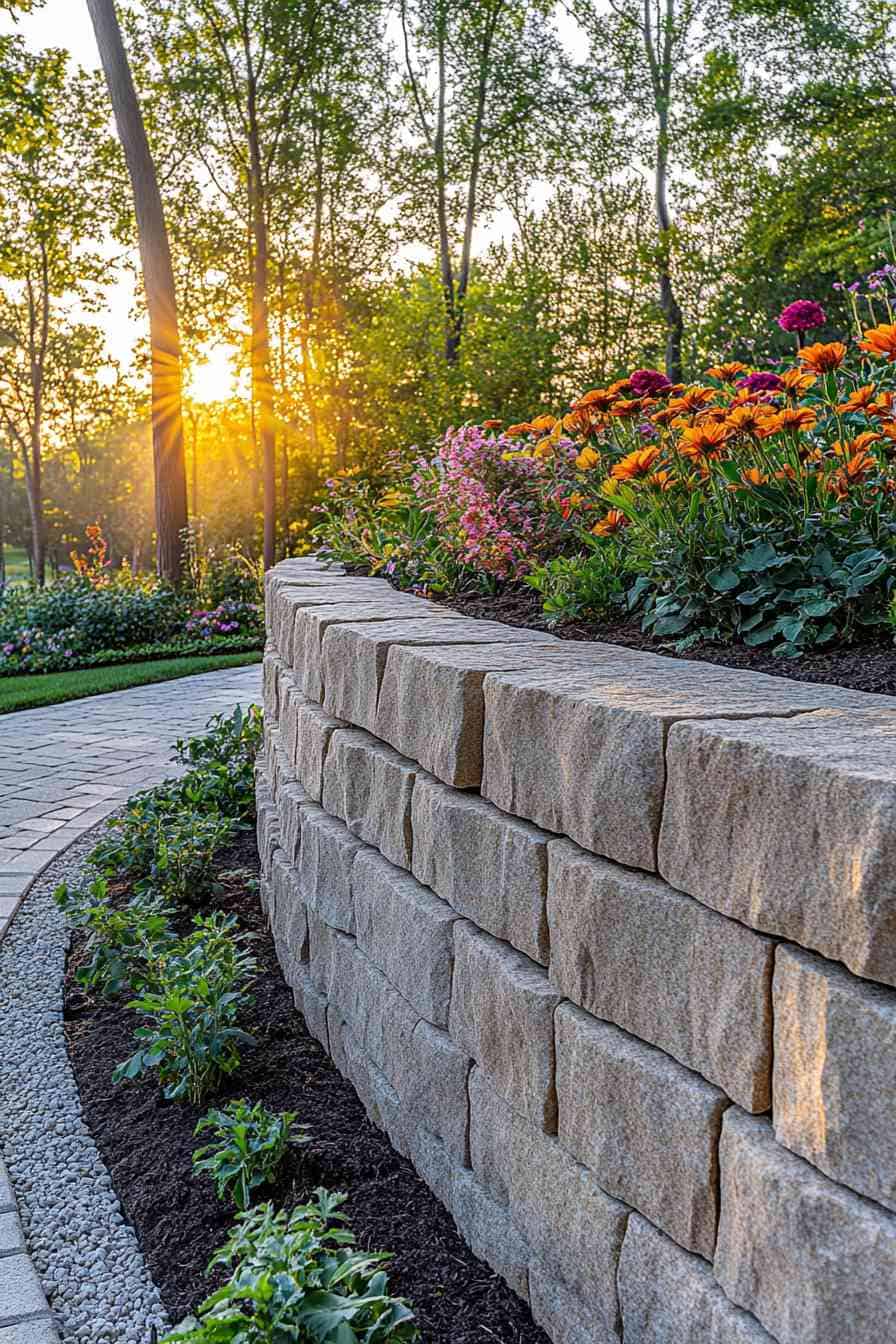
1. Embrace Curves with a Stone Block Wall and Vibrant Flowers
There’s a beautiful harmony in the way the cool, rigid texture of the light grey stone plays against the soft, explosive color of the flowers. The gentle curve of the wall is the key; a straight wall here would feel too harsh and formal. Instead, the arc leads your eye along the pathway and makes the garden bed feel like a generous, welcoming embrace. This design understands that the best retaining walls don’t just hold back dirt—they collaborate with the plants to create a single, cohesive picture of texture and color.
💡 Designer Tip
You can get this high-end look for much less with a bit of savvy shopping. Instead of custom-hewn stone, look for curved concrete edger blocks from Home Depot or Lowe’s, which are designed to create these exact shapes for a fraction of the cost (around $2-$4 per block). For the vibrant color, skip the expensive mature nursery plants. Buy packets of annual flower seeds like zinnias and cosmos for a few dollars. With a season of sun and water, you’ll get this abundant, colorful look for about 60% less than buying full-grown perennials.
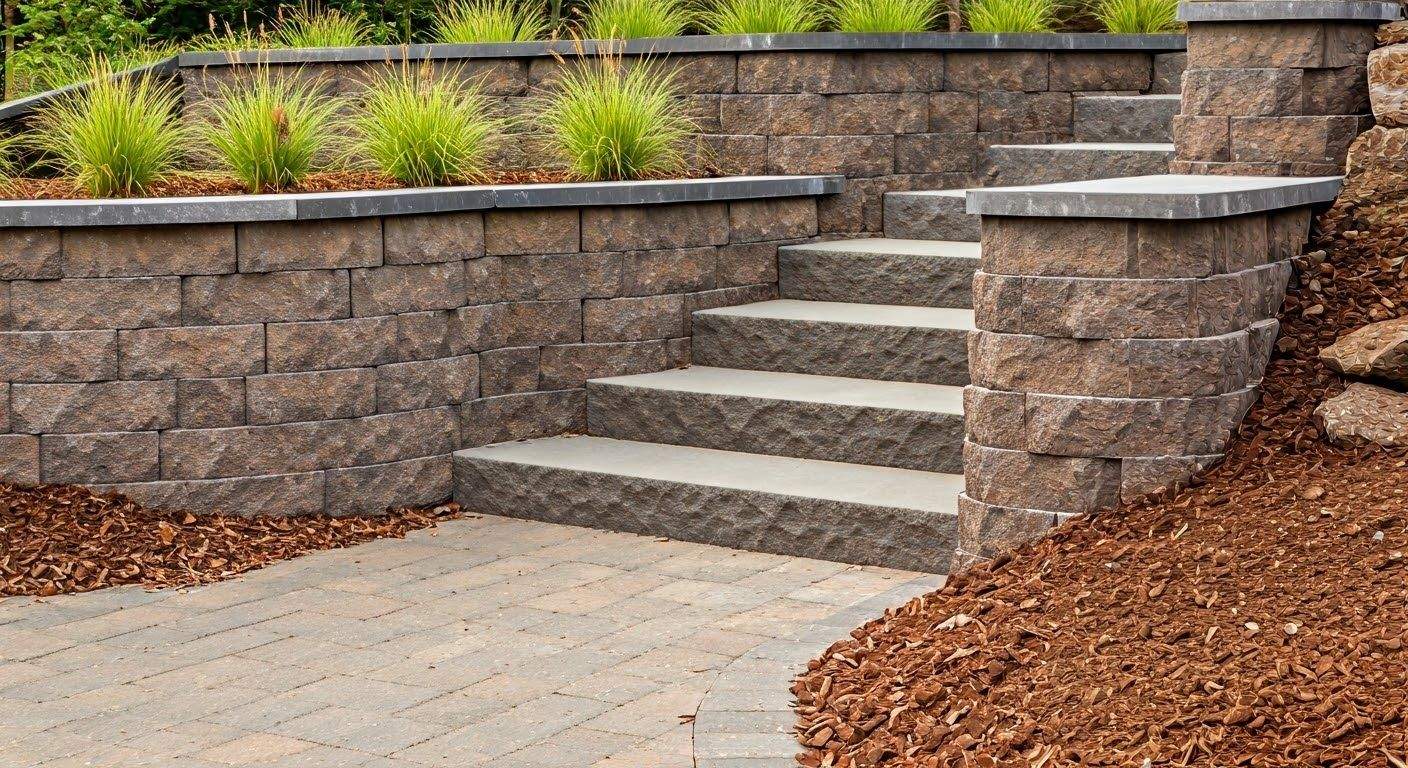
2. Create a Grand Tiered Entrance with Integrated Steps
When integrating steps into a retaining wall, aim for a comfortable and safe climb. The golden rule for outdoor steps is to have a lower riser and a deeper tread than you would indoors. A 6-inch riser combined with a 14- to 16-inch tread creates a gentle, leisurely ascent. This encourages you to slow down and enjoy the journey through the landscape. Also, ensure the capstones on the wall tiers slightly overhang the block below by about an inch to create a clean shadow line and help with water runoff.
🔧 How-To Brief
This multi-tiered approach works best on moderately steep slopes where you need to transition an elevation change of at least 5 to 10 feet. For the design to feel spacious and not cramped, you’ll want a backyard with at least 20 feet of depth to accommodate the different levels and plantings. If your slope is gentler or your yard is smaller, a single, taller wall like the one in Idea #10 might be a more space-efficient solution, while still allowing for a beautiful planted edge.
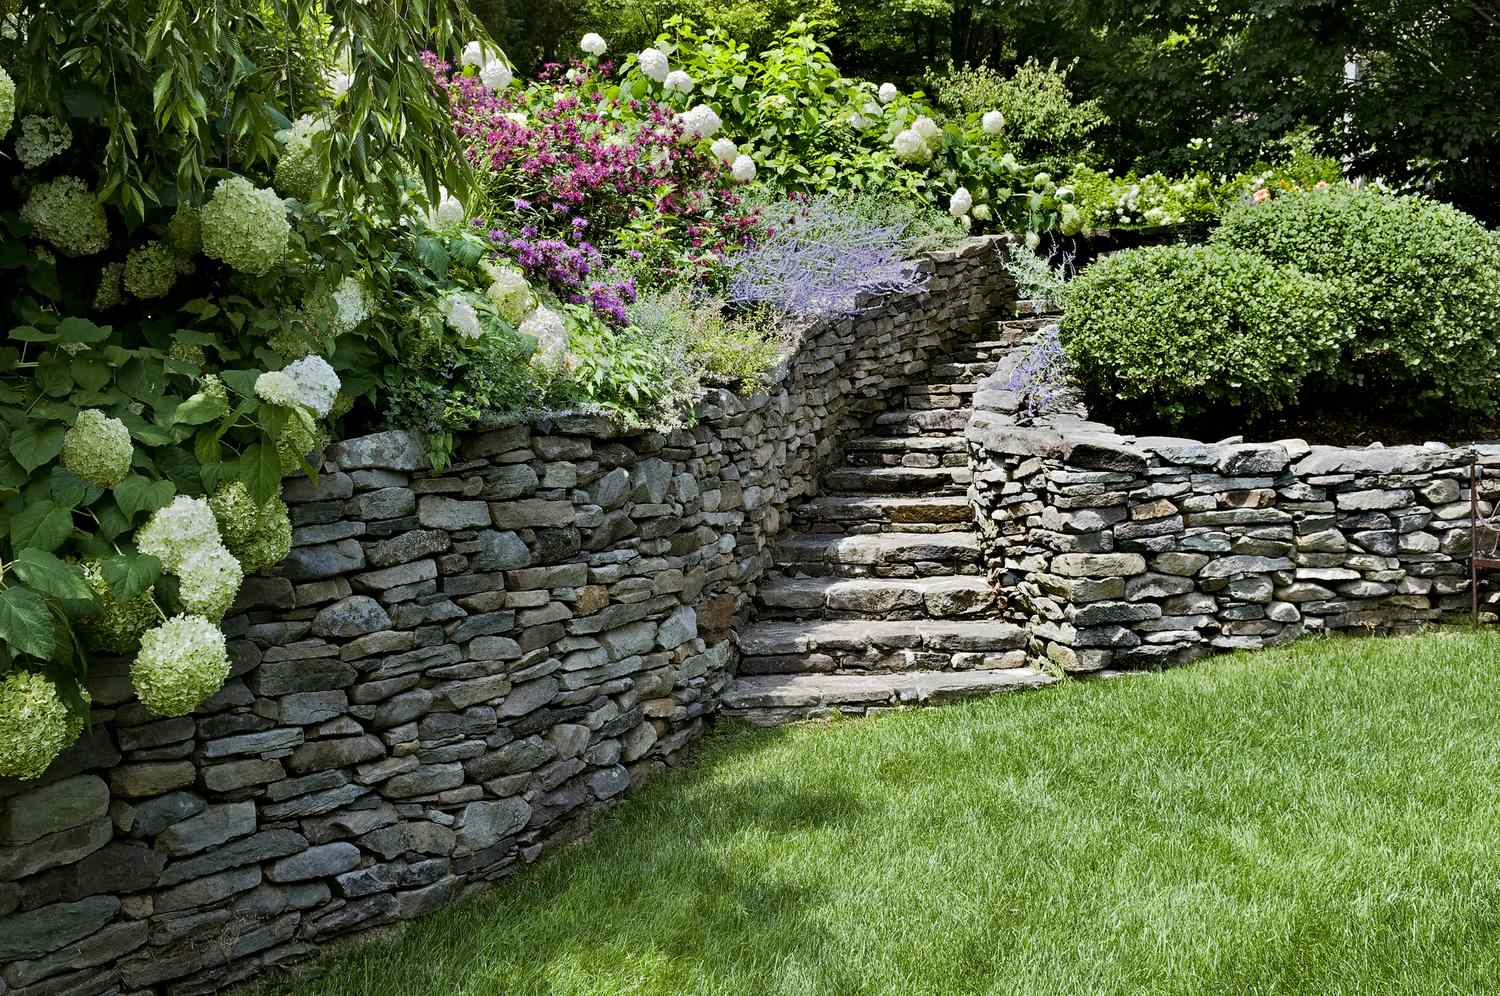
3. Weave a Natural Stone Staircase Through Lush, Terraced Gardens
The single element that makes this design magical is the meandering stone staircase. Without it, the tiered walls would just be functional ledges, beautiful but separate. The steps physically and visually connect the different levels, transforming the slope from a barrier into an explorable journey. It’s an invitation to move through the garden, discovering the different plantings like the bright white hydrangeas and purple shrubs up close. This is what turns a simple retaining wall system into true landscape architecture.
⚠️ Real Talk
A natural stone wall like this is stunningly organic, but its upkeep is different from a block wall. You’ll need to spend a few hours each spring and fall weeding the crevices between the stones where soil and seeds can accumulate. Moss growth is common, which can add to the charm but may need to be managed if it makes steps slippery. After heavy freeze-thaw cycles, walk the wall and inspect for any stones that may have shifted or settled, and budget for minor professional adjustments every 5-7 years to keep it structurally sound.
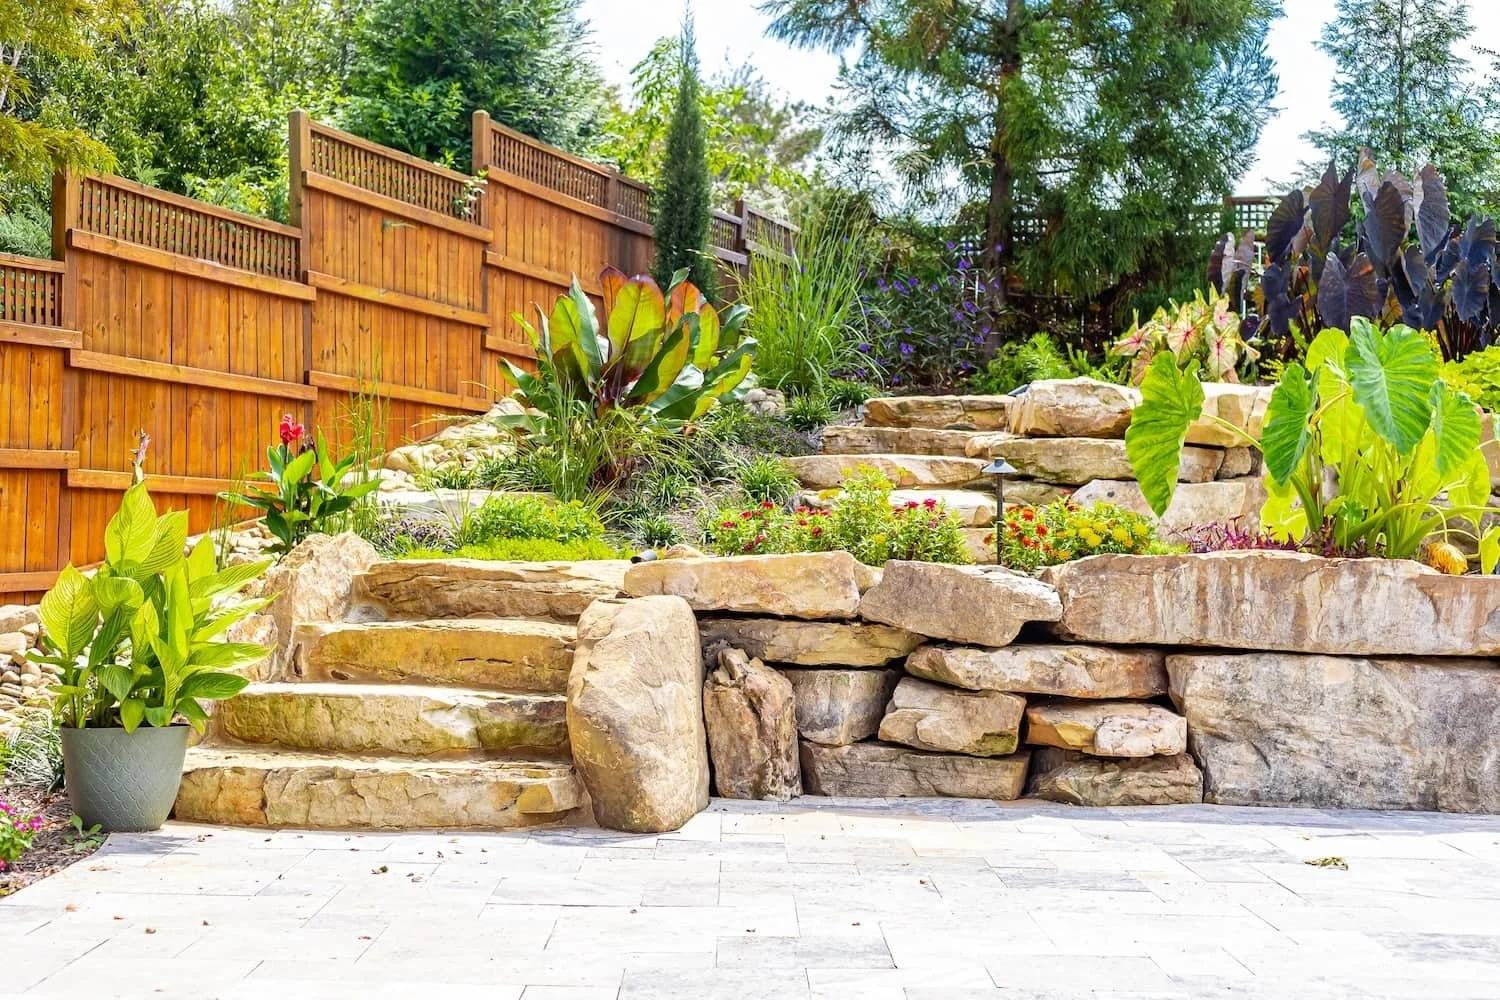
4. Create a Lush Oasis with Tiered Natural Stone and Integrated Steps
What makes this design so successful is the masterful use of repetition and variation. The stacked natural stone is repeated on each tier, creating a strong sense of unity throughout the entire hillside. However, the size and shape of the stones vary, which keeps the look organic and avoids monotony. The way the integrated steps follow the same material palette makes them feel like they were carved right out of the hill. This blend of consistency and natural imperfection is what gives the space its serene, established feel, as if it has been there for decades.
🔥 Trending Context
While a heavily planted, multi-tiered wall is a dream for garden lovers, be honest about the maintenance commitment. Watering a slope can be tricky; the top tiers will dry out faster than the bottom. Consider installing a drip irrigation system with separate zones for each level to ensure even moisture. Also, think about access. Hauling bags of mulch and soil up those beautiful stone steps is a serious workout. This isn’t a low-maintenance setup, so be sure you enjoy the process of gardening itself.
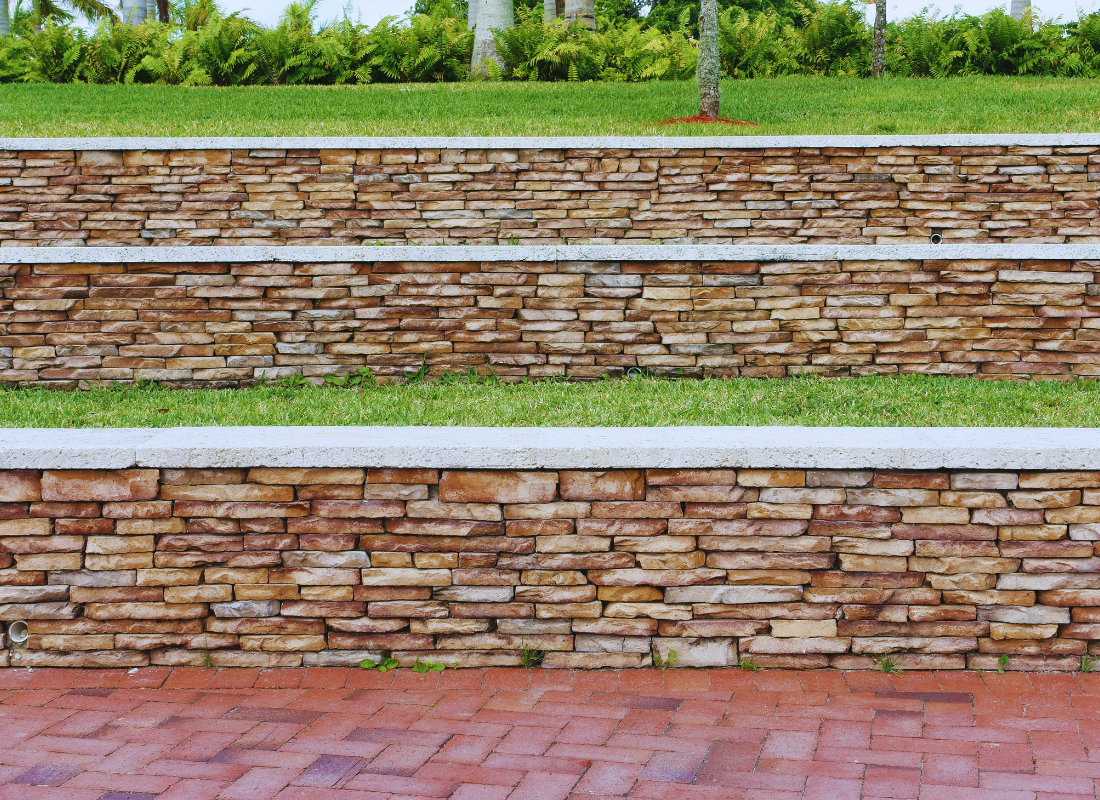
5. Achieve Clean Lines with Stacked Stone and Smooth Concrete Caps
This polished look follows a simple but effective formula: 60% rustic stone texture + 30% sleek modern lines + 10% manicured green. The earthy, irregular shapes of the stacked stone provide a natural, rugged base, while the smooth, light gray concrete caps add a sharp, contemporary edge that defines each tier. The perfectly green grass acts as a calming negative space. You can swap the elements while keeping the ratio. For a warmer look, try red brick walls (60%) with dark slate caps (30%) and a bed of low-maintenance groundcover (10%).
⭐ The One Thing
Before you commit to a multi-tiered wall, there are a few non-negotiables to check off your list. This is one of the three mandatory lists in this article. Get these sorted out first to save yourself a world of headaches later.
- Check Local Codes: Many municipalities have height restrictions for retaining walls (often 4 feet) before an engineer and permits are required. Verify the rules for your area.
- Soil Drainage Test: Dig a 1-foot-deep hole, fill it with water, and see how long it takes to drain. Slow drainage means you’ll need to invest more in a robust French drain system behind the wall.
- Accurate Slope Measurement: You need the total vertical rise and horizontal run of your slope to accurately calculate the amount of stone, capstones, and gravel you’ll need.
6. Integrate Bold Plantings with a Tiered Block Wall System
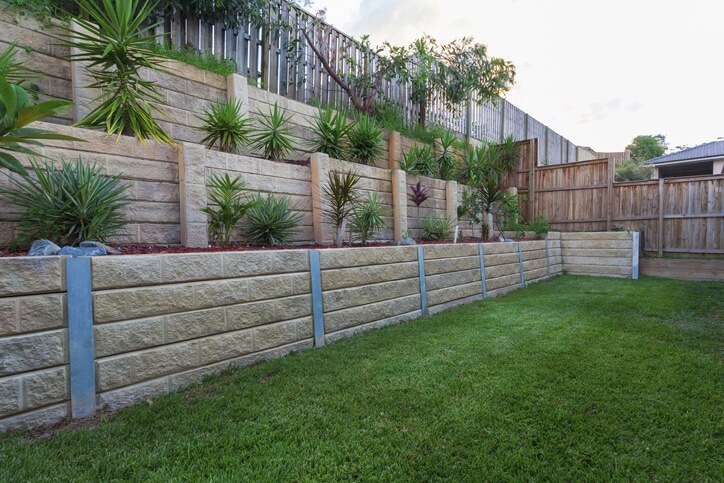
When working with manufactured block systems, the key to a high-end look is breaking up the uniformity. Here, the designer specified planting beds that are deep enough to accommodate substantial plants with interesting shapes, like those spiky succulents. For a 3-foot high wall section, ensure your integrated planter bed is at least 24 inches from front to back. This gives the plant roots enough room to establish without pushing against the wall structure, and the scale of the plants will balance the visual weight of the blocks.
📏 Scale Guide
The success of this design hinges on a powerful play of contrasts. The clean, horizontal lines of the light beige blocks create a very structured and predictable pattern. This structure is then intentionally disrupted by the chaotic, spiky forms of the green plants. The vibrant red mulch further accentuates this contrast, making the green foliage pop. The vertical steel beams, while functional, add another layer of industrial-chic geometry against the softer elements. This is how you make concrete blocks feel like a deliberate design choice, not just a necessity.
7. Layer Grey Concrete Blocks for a Structured, Modern Garden
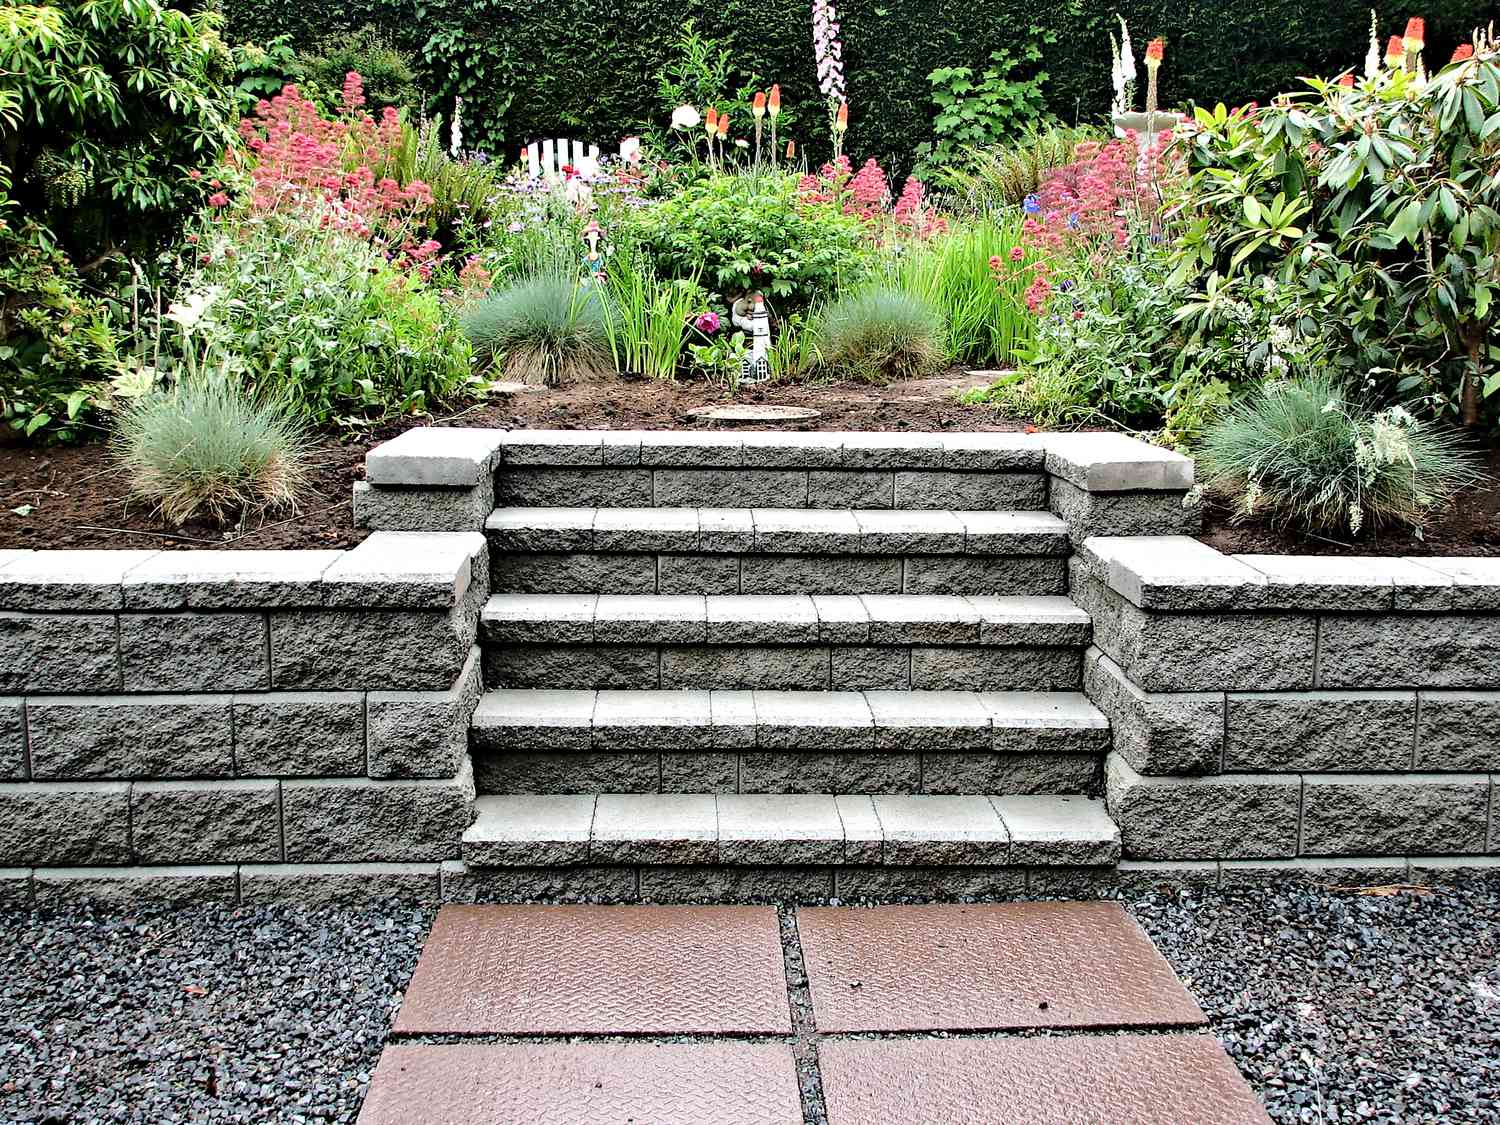
Recreating this clean, modern look is more accessible than you might think. The cost is primarily in the block and labor. Here’s a rough breakdown for a 50-foot long, two-tiered wall system (approx. 4 ft total height).
- Segmental Concrete Blocks: $1,200 – $2,500
- Gravel & Drainage: $400 – $700
- Pavers & Gravel Ground Cover: $500 – $1,000
- Plants & Soil: $300 – $600
- Labor (if not DIY): $3,000 – $6,000
- TOTAL: $5,400 – $10,800
Budget alternative: Use basic grey concrete blocks from a big box store and choose smaller, younger plants that will fill in over time. This can bring the total cost down to the $3,000 – $5,000 range, especially if you do the installation yourself.
💰 Budget Breakdown
A wall made of concrete blocks is incredibly durable, but the aesthetic isn’t for everyone long-term. The grey color can feel a bit monotonous or industrial over time, especially in the winter when the plants die back. Before you build, consider its appearance in all four seasons. Will you still love it? Also, the dark gravel ground cover looks fantastic but can be a pain to keep free of leaves and debris. A leaf blower is your best friend with this kind of ground cover.
8. Fill a Hillside with Tiers of Light Tan Stacked Stone
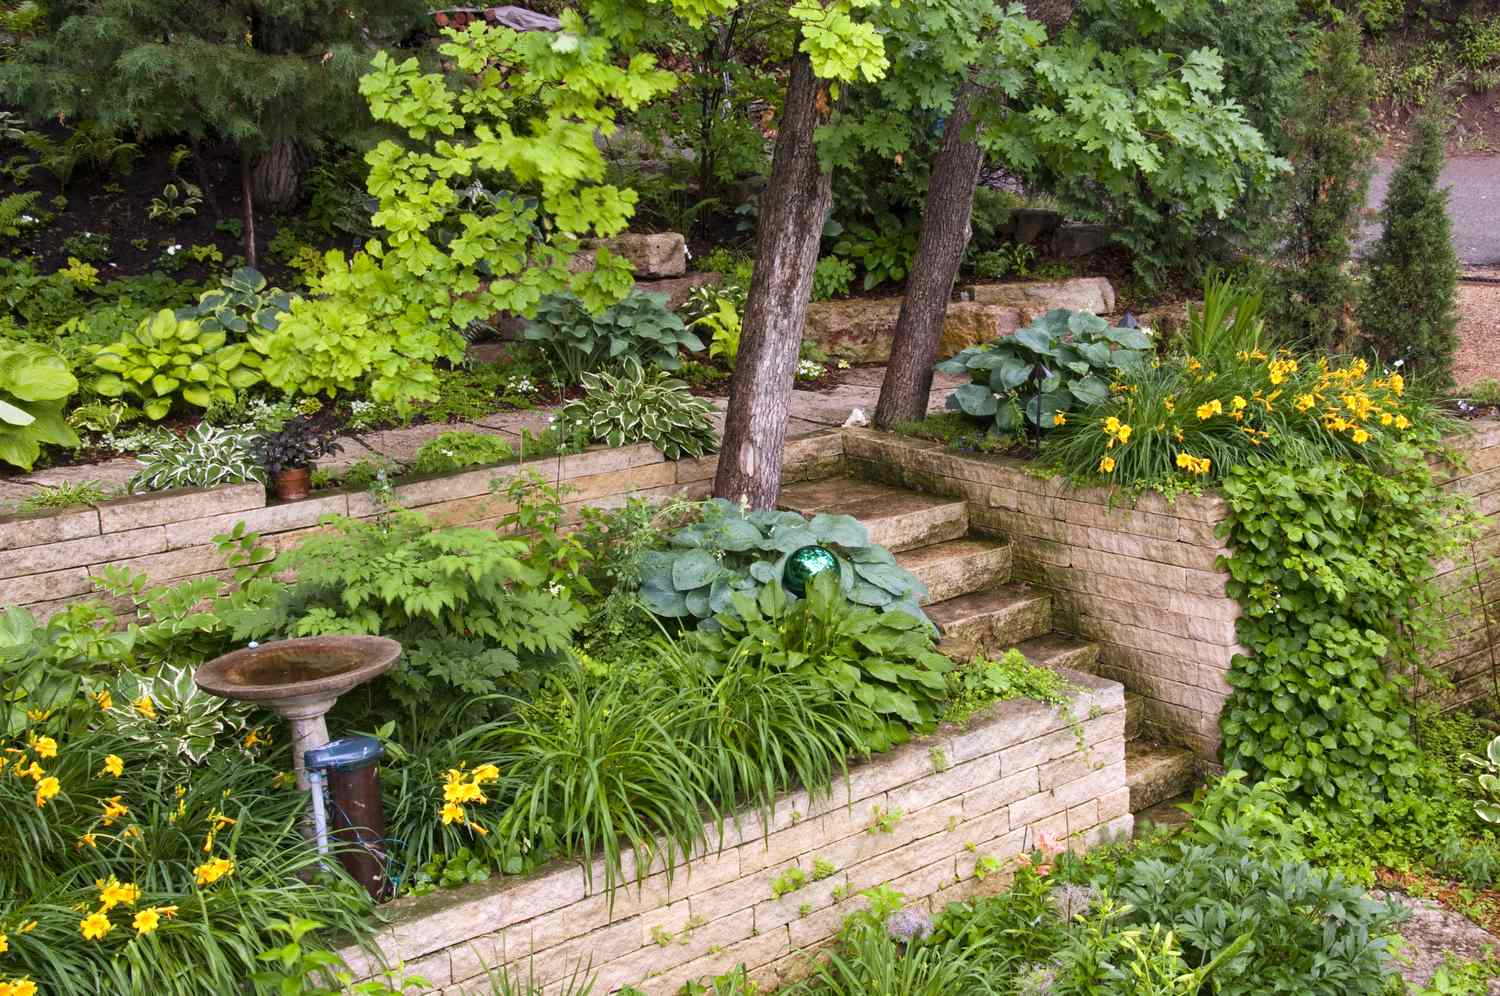
The single most important element here is the consistent use of the light tan stone throughout the entire project. It’s on the walls, it forms the staircase, and it’s even echoed in the warmer tones of the mulch. This unwavering commitment to a single stone color is what makes the extensive terracing feel cohesive and intentional rather than busy and chaotic. It unifies the landscape and lets the vibrant green foliage and yellow flowers become the stars of the show. If you were to introduce another stone color, you would immediately lose this serene, uniform effect.
📐 Style Math
This grand, sweeping terraced style is perfect for a large, sunny hillside with a significant slope (at least a 15-20 degree grade). To get this lush, overflowing look, you need enough depth on each tier to support mature plantings—aim for a minimum of 3-4 feet of planting bed depth. For a smaller or more shaded yard, this much stone might feel overwhelming. Compare this with the more modern, mixed-materials approach in Idea #15, which could be a better fit for a compact space.
9. Define a Lawn with a Dark Timber Tiered Garden Bed
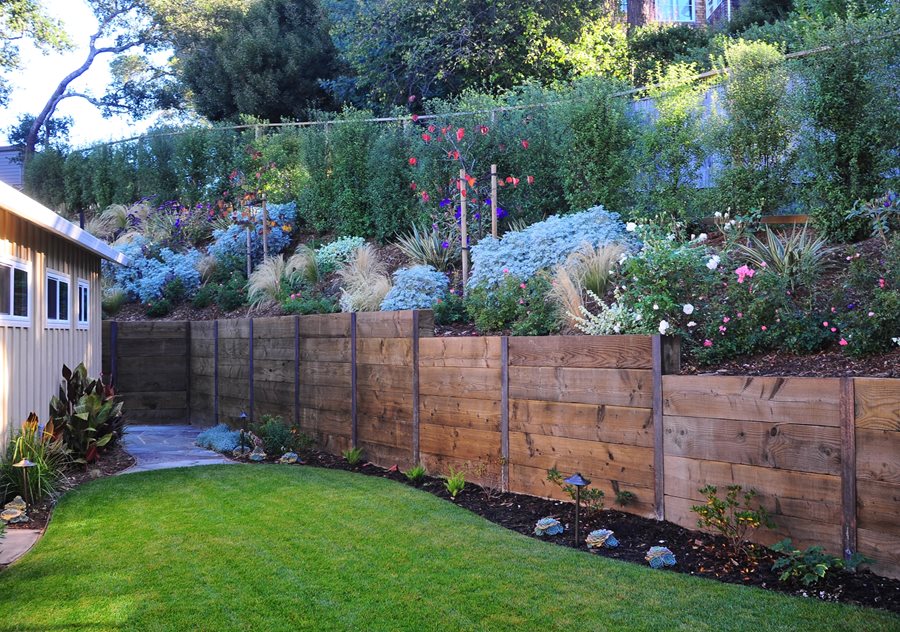
A dark-stained timber wall offers a rich, organic look, but wood requires more upkeep than stone or concrete. To keep this looking sharp, you’ll need to re-stain or re-seal the wood every 2-3 years, especially the top surfaces that get the most sun and rain. Use high-quality exterior wood sealant with UV protection. Also, be vigilant about moisture. Ensure there is a waterproof membrane and proper gravel backfill between the soil and the wood to prevent rot, which is the number one enemy of timber retaining walls.
🎯 What Makes It Work
Installing the low-voltage outdoor lighting seen here is a manageable DIY project that adds major impact. Here’s a quick guide to placing those uplights:
- Time Estimate: 2-3 hours
- Material Cost: $150 – $400 for a kit
- Step 1: Purchase a low-voltage landscape lighting kit, which includes a transformer, cable, and several light fixtures.
- Step 2: Place the transformer near an outdoor GFCI outlet.
- Step 3: Lay out the cable along the base of your retaining wall.
- Step 4: Position your light fixtures, aiming them at the most interesting plants or wall textures. Place them about 1-2 feet away from the feature you want to highlight.
- Step 5: Attach the fixtures to the main cable using the tool-free connectors included in the kit.
- Step 6: Plug in the transformer and set the timer.
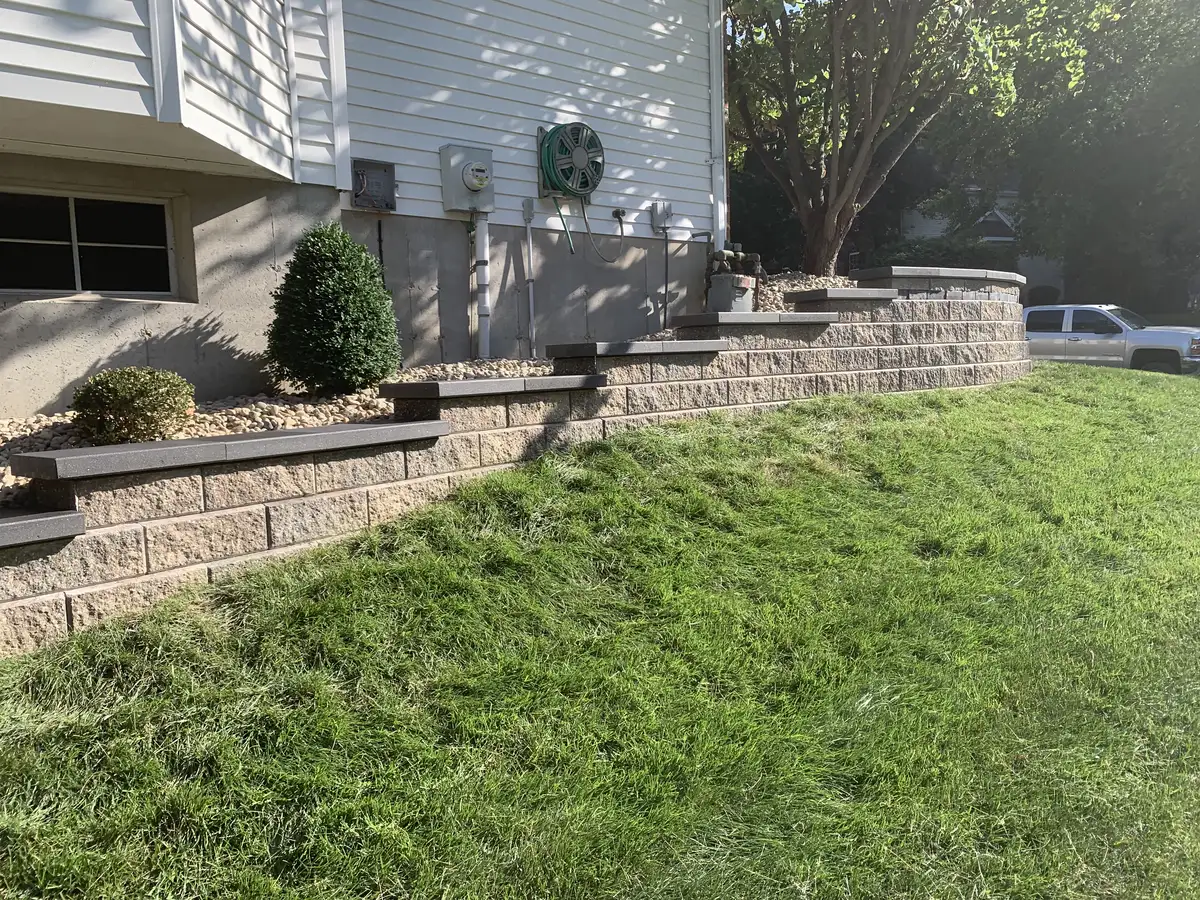
10. Cap a Sloped Lawn with a Stepped Stone Block Wall
This design is a masterclass in creating a “finished” look. The key is the transition from wall to lawn. Instead of the wall simply ending, it steps down gradually, following the natural contour of the land. This makes the wall feel integrated with the property, not like a harsh barrier that was just dropped in. The dark gray capstones are also crucial; they provide a clean, horizontal line that visually ties all the stepped sections together, creating a sense of order and polish that elevates the entire look from functional to truly designed.
🧹 Maintenance Reality
The capstone is the crowning jewel of a block wall, and its installation determines the final quality. Apply two thick beads of high-strength concrete adhesive to the top of your wall blocks. When you place the capstone, ensure it has a consistent overhang of 1 to 1.5 inches on the front. This detail casts a crisp shadow line, making the wall look more substantial and professional. Don’t just lay them on top; they need to be securely bonded to prevent shifting and to create a solid, unified finish.
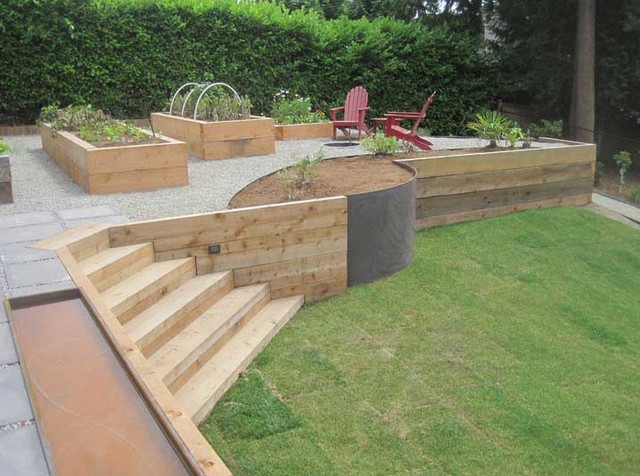
11. Build a Functional Backyard Retreat with Substantial Timber Walls
The cost of a timber retaining wall project can vary widely based on the height and type of wood. For a medium-sized project like this one, featuring multiple tiers, stairs, and a gravel patio area, here’s an estimated breakdown:
- Pressure-Treated Lumber (4×6 or 6×6): $3,000 – $6,000
- Gravel for Patio & Drainage: $800 – $1,500
- Raised Bed Materials & Soil: $500 – $1,000
- Hardware (Rebar, Spikes, Tie-backs): $400 – $800
- Labor (if not DIY): $5,000 – $10,000
- TOTAL: $9,700 – $19,300
Budget alternative: Using smaller dimension lumber (like 4x4s) and sourcing free gravel or mulch from local municipal resources can cut material costs by 30-40%.
✅ Before You Start
Building with large timbers looks satisfyingly straightforward, like a giant LEGO project. However, the reality is that these beams are incredibly heavy. A single 8-foot 6×6 pressure-treated post can weigh over 60 pounds. This is not a solo project. You will need at least one strong helper for the lifting and placement. Also, achieving perfectly level and plumb walls and stairs requires precision and patience. A small error in the base course will be magnified by the time you get to the top. Measure three times, cut once!
12. Master the Classic Timber Wall for a Rustic Look
For any timber wall over 3 feet high, you need to anchor it into the hillside behind it using “deadman” anchors, or tie-backs. This prevents the wall from bowing or collapsing under pressure. It sounds intimidating, but it’s a straightforward process.
- Time Estimate: 30 min per anchor
- Material Cost: $20 per anchor
- Step 1: For every 8 feet of wall length, excavate a trench perpendicular to the wall, extending 4-6 feet back into the slope.
- Step 2: Attach a 3-4 foot long piece of timber (the “deadman”) to your main wall using a long timber screw or another tie-back timber, creating a “T” shape.
- Step 3: Place the deadman in the trench, ensuring it’s level.
- Step 4: Drive several pieces of rebar through the deadman and deep into the undisturbed soil to secure it.
- Step 5: Backfill the trench with compacted gravel and soil.
💸 Get This Look For Less
Wood is a beautiful, natural material, but it is susceptible to the elements. The number one killer of a timber retaining wall is rot from constant contact with moist soil. It is absolutely critical to install a protective barrier. Staple a thick, waterproof membrane (like a heavy-duty pond liner or specialized foundation waterproofing) to the entire backside of the wall before you backfill with gravel and soil. This simple step can be the difference between a wall that lasts 5 years and one that lasts 20 years.
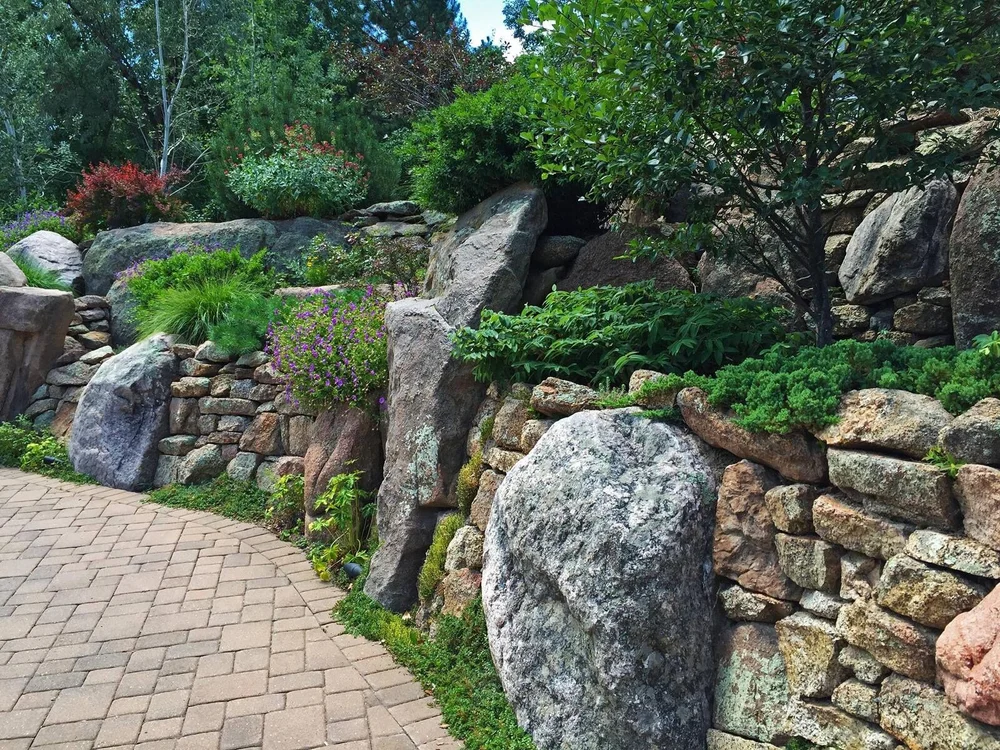
13. Integrate Giant Boulders for an Organic, Naturalistic Wall
The game-changer in this design is the use of massive, irregular boulders integrated directly into the stacked stone wall. While the smaller stones provide the primary structure, the boulders are the soul of the project. They break up the pattern and create a powerful sense of permanence and connection to nature. It makes the wall look less like a human construction and more like a natural rock outcropping that was simply enhanced with smaller stones and beautiful plantings. This is what gives the landscape its raw, organic power.
💡 Designer Tip
We’re seeing a big shift away from perfectly uniform, manufactured looks and towards designs that embrace natural imperfection. This trend, often called “wildscaping” or “naturalistic design,” is all about creating landscapes that feel less sterile and more alive. Using large, locally sourced boulders is a cornerstone of this movement. Homeowners on Pinterest are increasingly searching for ways to make their yards feel like a slice of a nearby forest or mountain, and a boulder-integrated wall is a perfect way to achieve that authentic, timeless aesthetic.
14. Mix Pavers and Wood for a Warm, Modern Multi-Level Patio
This design achieves its inviting feel by balancing cool and warm materials. The formula is roughly: 50% cool-toned hardscapes (the grey paver patio and varied-color retaining wall blocks) + 40% warm wood tones (the stairs and railings) + 10% soft greenery. This mix is crucial. All stone and pavers would feel cold and commercial, while all wood would lack structure. The interplay between the different materials creates a dynamic and comfortable space that feels both modern and welcoming. The red flowers are a small but mighty accent that punches up the warmth.
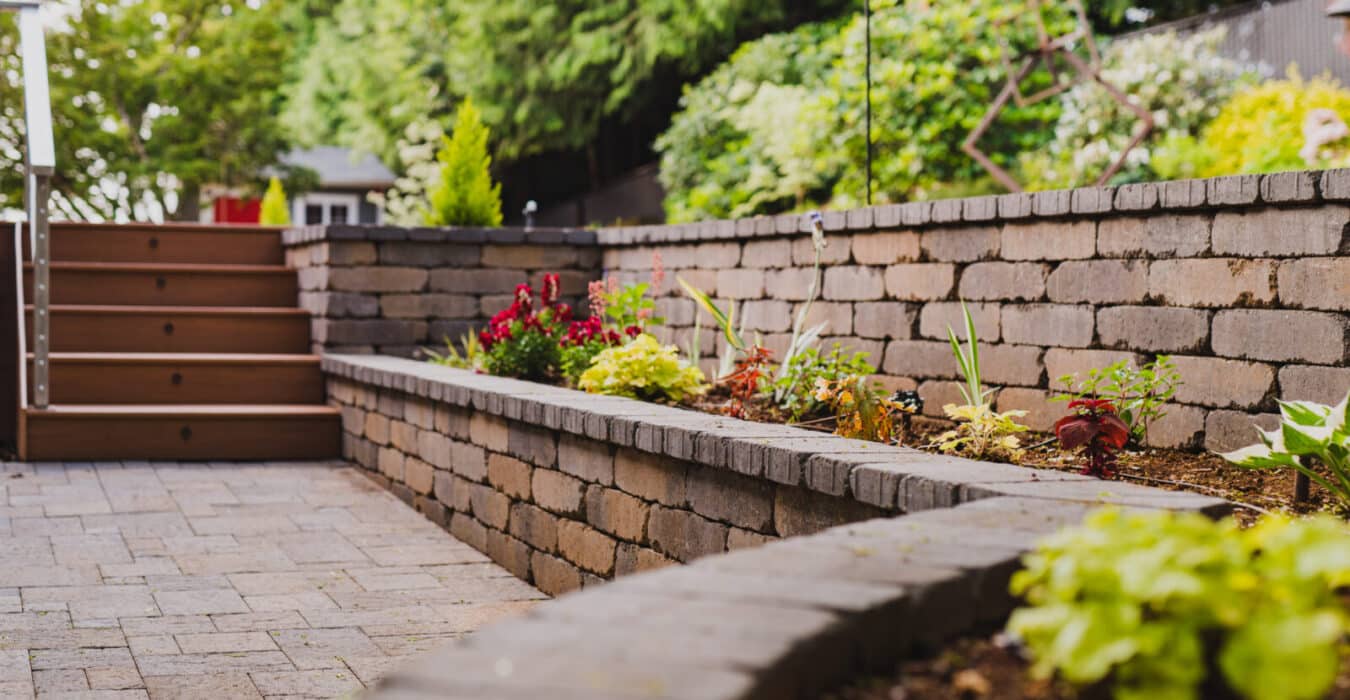
🔧 How-To Brief
When you have stairs in a garden, lighting is both a safety and an aesthetic feature. The subtle glow from stair riser lights, like the ones embedded in the wooden steps here, is far more effective and sophisticated than a single, harsh floodlight. For a professional look, install the wiring before you attach the stair treads. Use LED fixtures, as they consume very little energy and have a lifespan of tens of thousands of hours, meaning you won’t have to worry about replacing bulbs in a hard-to-access spot.
15. Combine Dark Wood, Grey Stone, and Cable Railing for a Sleek Finish
This look feels so luxurious and custom because of its sophisticated layering of textures and light. The smooth, dark-stained horizontal wood planks provide a sleek, linear element. This is contrasted by the rougher, more varied texture of the stacked grey stone. The thin, almost invisible lines of the cable railing add a third, industrial texture without obstructing the view. Finally, the carefully placed uplighting washes over these textures, highlighting the wood grain and stone facets, and turning the entire structure into a dramatic feature after dark.
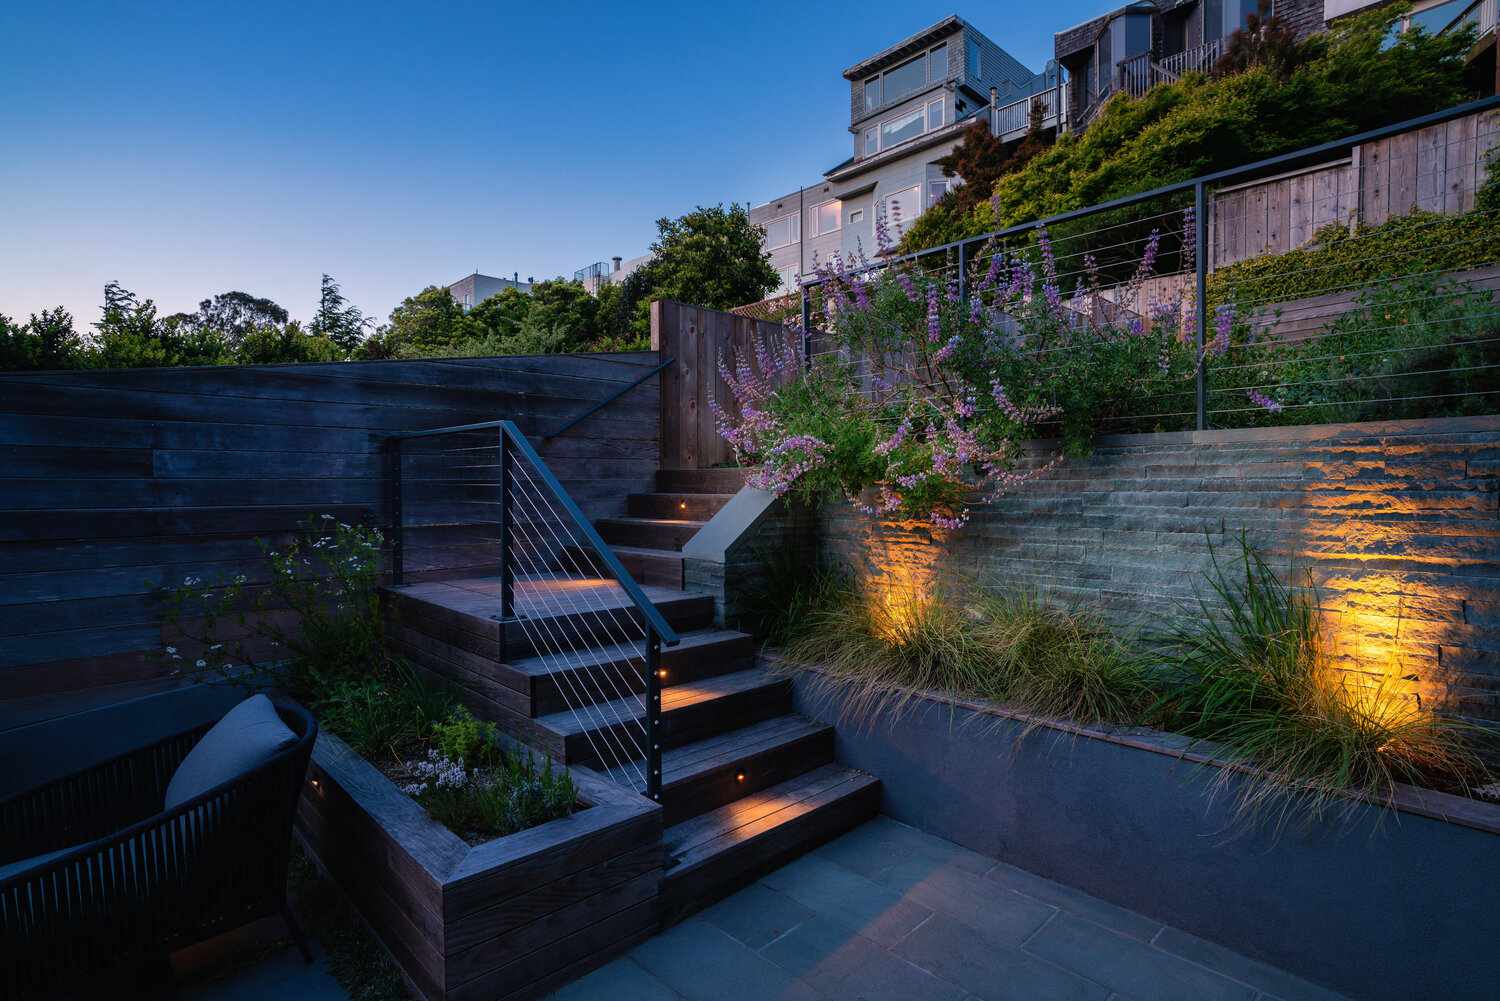
⚠️ Real Talk
A high-end system with stone, dark-stained wood, and cable railings can be pricey. To get this look for less, focus on the key elements: dark horizontal lines and mixed materials. Use pressure-treated pine for the walls and stain it a dark charcoal or espresso color yourself. Instead of stacked stone, use more affordable dark grey interlocking concrete blocks for the second tier. For the railing, swap the expensive cable system for a simple black metal railing from a big-box store. You’ll capture the modern, layered vibe for about half the cost.
16. Carve a Rugged Staircase with Natural Boulders and Stone Steps
The power of this landscape lies in its complete embrace of irregularity. The “wall” is formed by a jumble of massive natural boulders, and the steps are thick, uneven slabs of stone. There are no perfect right angles or smooth surfaces. This raw, unrefined quality is the one thing that gives the design its rugged, powerful character. If you were to replace these with uniform blocks and perfectly poured concrete steps, you would completely lose the feeling of a path carved by nature over time. The imperfection *is* the design.
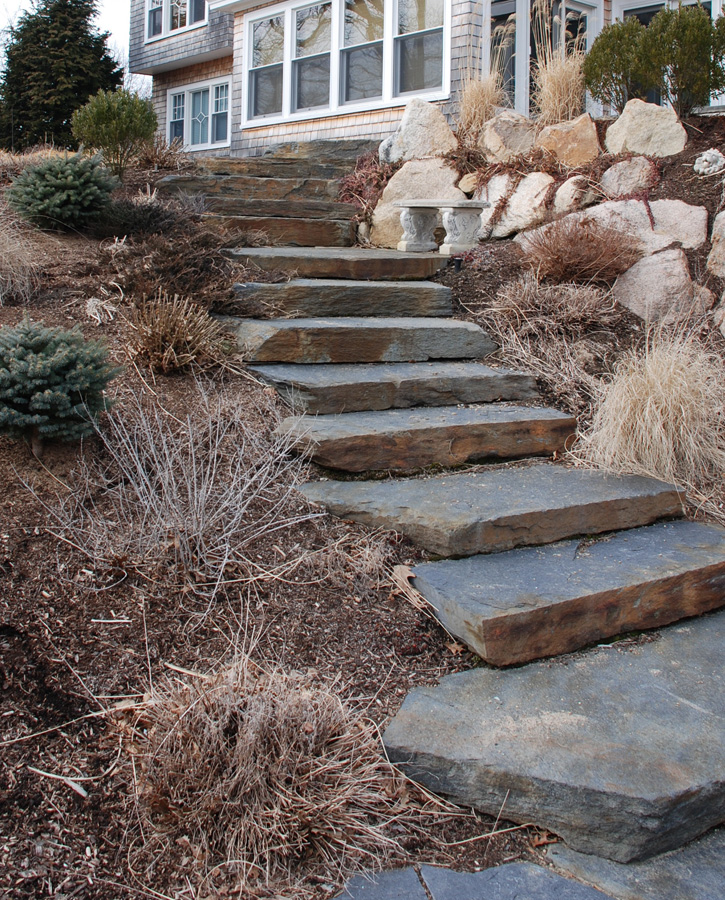
🔥 Trending Context
This is a stunningly natural look, but it’s not the most practical for every situation. Those irregular stone steps can be tricky to navigate, especially for kids, the elderly, or anyone with mobility issues. In wet or icy conditions, the uneven surfaces can become quite slippery. This type of staircase is best suited for a secondary path or a garden you access less frequently, rather than the primary entrance to your home. Prioritize safety, and consider a more uniform step design if this will be a high-traffic route. Compare with the clearer steps in Idea #29.
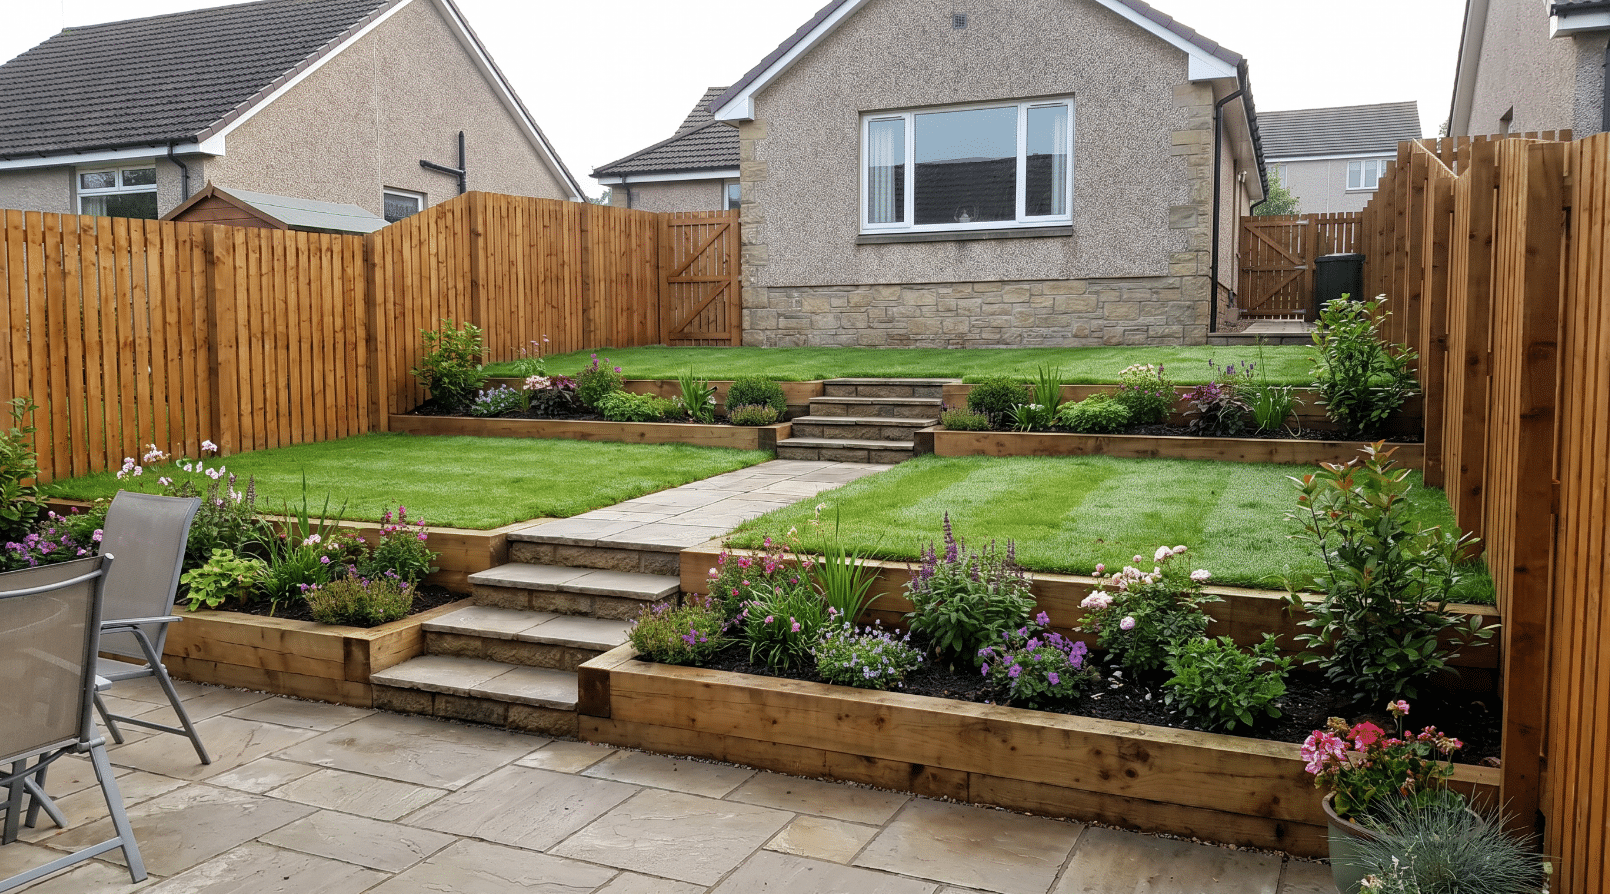
17. Frame a Garden with Classic Tiered Timber Walls and a Gravel Path
Tiered timber walls are one of the most versatile retaining wall solutions, and this design is a perfect example of a medium-scale application. It works wonders for slopes with a 3 to 8-foot elevation change. The key to making it look right is the proportions of the timbers. For walls of this height (each tier being 2-3 feet), using substantial 6×6 inch timbers provides the necessary visual weight. Using thinner 4x4s would look flimsy and underscaled. This approach is ideal for defining garden beds or transitioning from a patio to an upper lawn in a suburban backyard.
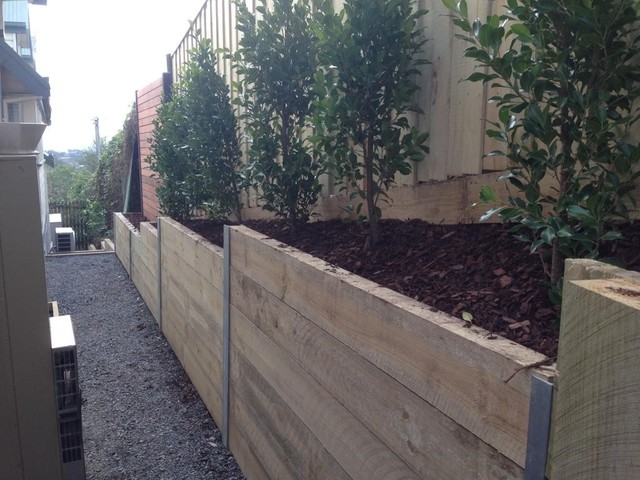
⭐ The One Thing
This is a classic, achievable DIY look. To bring the cost down, look for pressure-treated landscape timbers, which are more affordable than cedar or redwood. For the path, pea gravel is one of the most inexpensive ground covers you can buy. A ton of pea gravel (which covers about 100 sq ft at a 2-inch depth) can often be found for under $100 from local landscape suppliers. Combine that with some elbow grease for the digging and stacking, and you have a handsome, functional retaining wall system without breaking the bank. It’s a significant step up from the basic design in Idea #12.
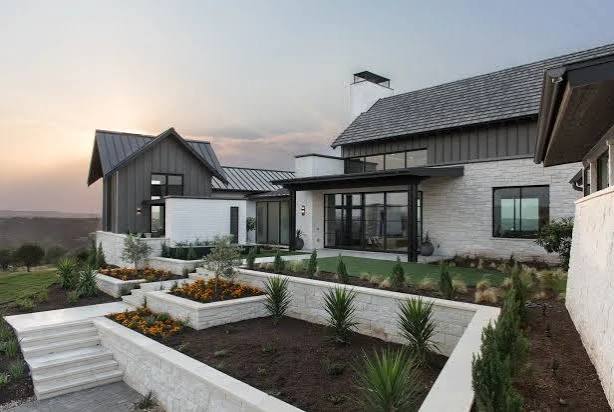
18. Tame a Steep Backyard Slope with Multiple Tiers
When faced with a steep slope, breaking it into several smaller, manageable tiers is almost always better than building one massive wall. This approach has multiple benefits. Structurally, shorter walls are under less pressure and are easier and cheaper to build. Aesthetically, it creates usable flat spaces for planting, seating, or even small patches of lawn. It turns a single, unusable hill into a multi-level garden, adding immense visual interest and functionality to the yard. You’re not just holding back dirt; you’re creating a series of outdoor “rooms.”
📏 Scale Guide
Terracing a steep slope is a fantastic solution, but it’s a major undertaking. This is not a weekend project. It involves excavating and moving tons of soil. You need a clear plan for where all that excavated dirt will go. Will you use it to backfill the walls, or do you need to have it hauled away? Also, every tier needs its own drainage system connected to the one below it to properly manage water flow down the entire hill. Underestimating the earthworks and drainage is the fastest way to turn a dream project into a muddy nightmare.
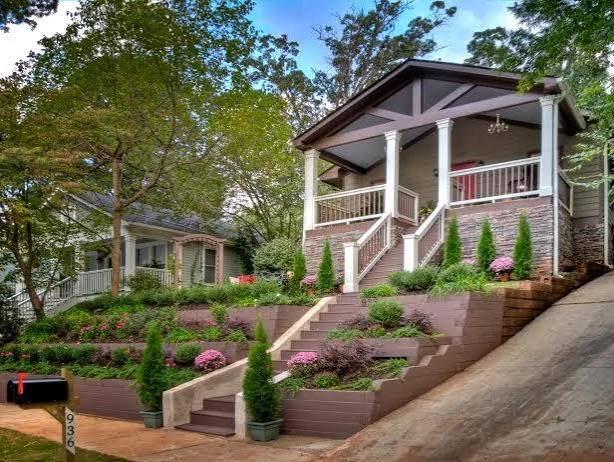
19. Transform a Hillside with Sweeping Terraced Plantings
When creating wide, sweeping terraces on a hillside, think like a painter and use broad strokes of color and texture. Instead of dotting one of this and one of that, plant in large drifts or masses. For example, plant a dozen identical ornamental grasses together, then a large patch of 15-20 flowering perennials of the same variety. This technique creates a much stronger visual impact when viewed from a distance (like from the house or patio). It gives the hillside a cohesive, intentional design rather than a spotty, cluttered look.
💰 Budget Breakdown
The idea of a “food forest” or an edible landscape is gaining huge traction on Pinterest, and terraced hillsides are the perfect canvas for it. Homeowners are increasingly looking for ways to make their yards more productive and sustainable. A terraced slope provides a series of ideal planting beds with great drainage. You could dedicate one tier to herbs, another to strawberries, and another to dwarf fruit trees. It’s a beautiful and practical trend that turns a purely aesthetic feature into a source of fresh food.
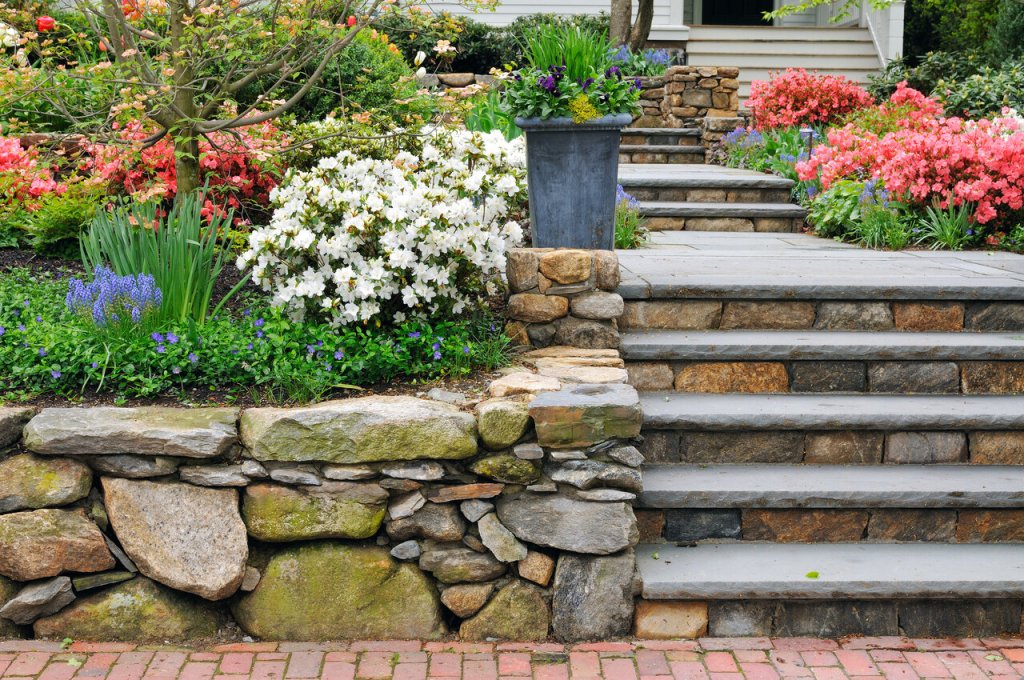
20. Achieve an Old-World Look with a Mossy Natural Stone Wall
The single element that gives this garden its enchanting, aged character is the moss and natural patina on the large retaining wall stones. This isn’t a clean, new wall; it feels like it has been part of the landscape for a century. The green hues of the moss visually connect the hardscape of the wall to the lush plantings it supports, blurring the line between them. It’s a testament to the beauty of letting nature take its course and embracing a weathered, imperfect aesthetic over a sterile, brand-new one.
📐 Style Math
Want that aged, mossy look without waiting a decade? You can encourage moss to grow on a new stone wall with this simple trick. This is a fun weekend project that adds instant character.
- Time Estimate: 1 hour
- Material Cost: $10
- Step 1: In a blender, combine a handful of moss (gathered from another part of your yard), 1 cup of buttermilk or plain yogurt, and 1 cup of water.
- Step 2: Blend until you have a smooth, paint-like consistency.
- Step 3: “Paint” the mixture onto your stone wall with a paintbrush, focusing on shaded, porous areas where moss would naturally grow.
- Step 4: Mist the area with water every few days for a month to keep it moist and encourage growth.
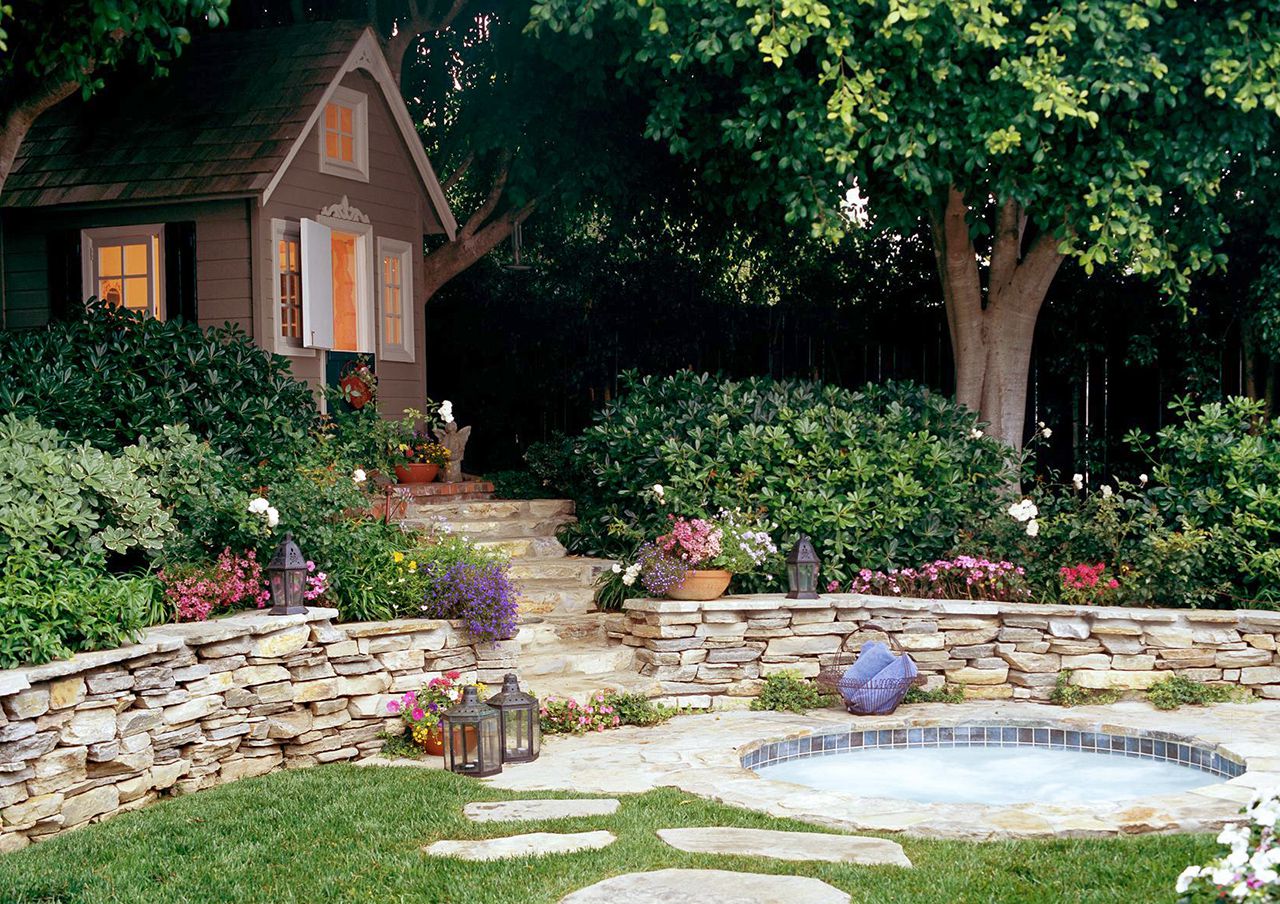
21. Build a Family Paradise with a Stone Wall, Spa, and Playhouse
This magical backyard proves that retaining walls can be the foundation for so much more than just planting beds. The design formula here is: 40% functional hardscape (the natural stone walls and patio) + 30% play and relaxation (the spa and playhouse) + 30% lush, natural greenery. It’s a perfectly balanced recipe for a family-friendly space. The stone walls are the workhorse, creating the necessary flat areas, but the spa and playhouse are the elements that give the yard its purpose and personality.
🎯 What Makes It Work
Integrating a spa into your retaining wall design is a fantastic idea, but you need to plan for access and safety from the very beginning. Remember that spas require regular maintenance, so you’ll need a clear, accessible path to the equipment panel. Don’t wall it in completely! Also, local regulations for pool and spa safety, such as fence height and self-latching gates, still apply, even if the spa is raised or set into a patio. Consult your local building department before you start construction to ensure your design is compliant.
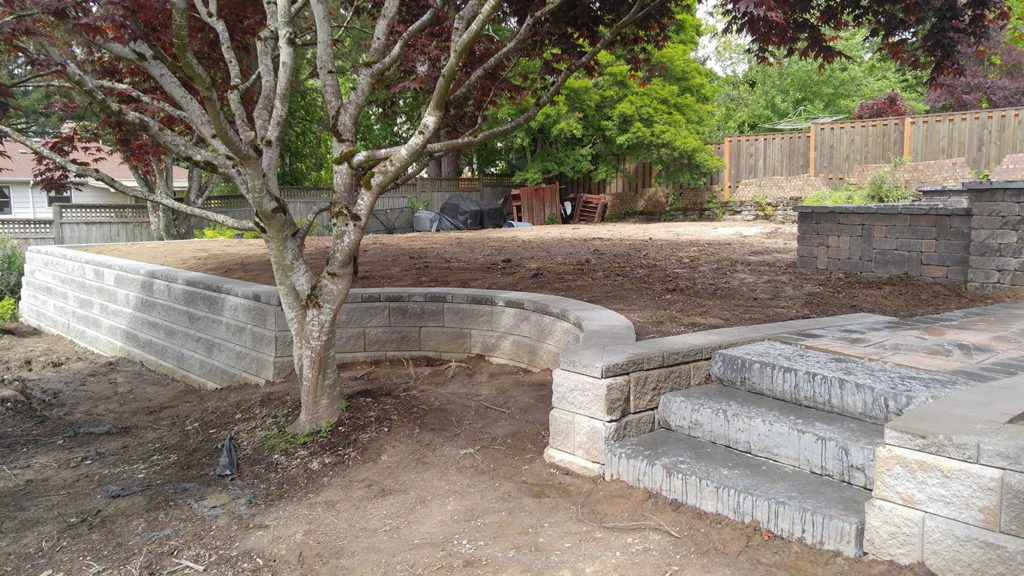
22. Contrast Manufactured Blocks with Rugged, Natural Stone Steps
This design is so visually interesting because it intentionally pairs two completely different materials. The segmental concrete blocks of the retaining walls are uniform, predictable, and man-made. In stark contrast, the rough-hewn natural stone steps are irregular, unique, and feel like they were pulled directly from the earth. This juxtaposition is powerful. The uniform walls highlight the ruggedness of the steps, and the natural steps keep the block walls from feeling too sterile or industrial. It’s a brilliant way to get the affordability and ease of block with the high-end look of natural stone.
🧹 Maintenance Reality
Before mixing materials like this, create a mood board. This is a non-negotiable step to ensure the final look is cohesive, not chaotic. Here’s your checklist:
- Get Physical Samples: Order a sample of the exact concrete block and, if possible, get a stone similar to the ones you’ll use for the steps. Don’t rely on website photos.
- Check Undertones: Place the samples together in the natural light of your backyard. Does the grey of the block have a blue undertone while the stone has a brown one? Clashing undertones can make the pairing feel “off.”
- Consider a Bridge Material: Notice the dark mulch used here? It acts as a neutral “bridge” that helps the two different types of stone relate to each other. Plan your third material wisely.
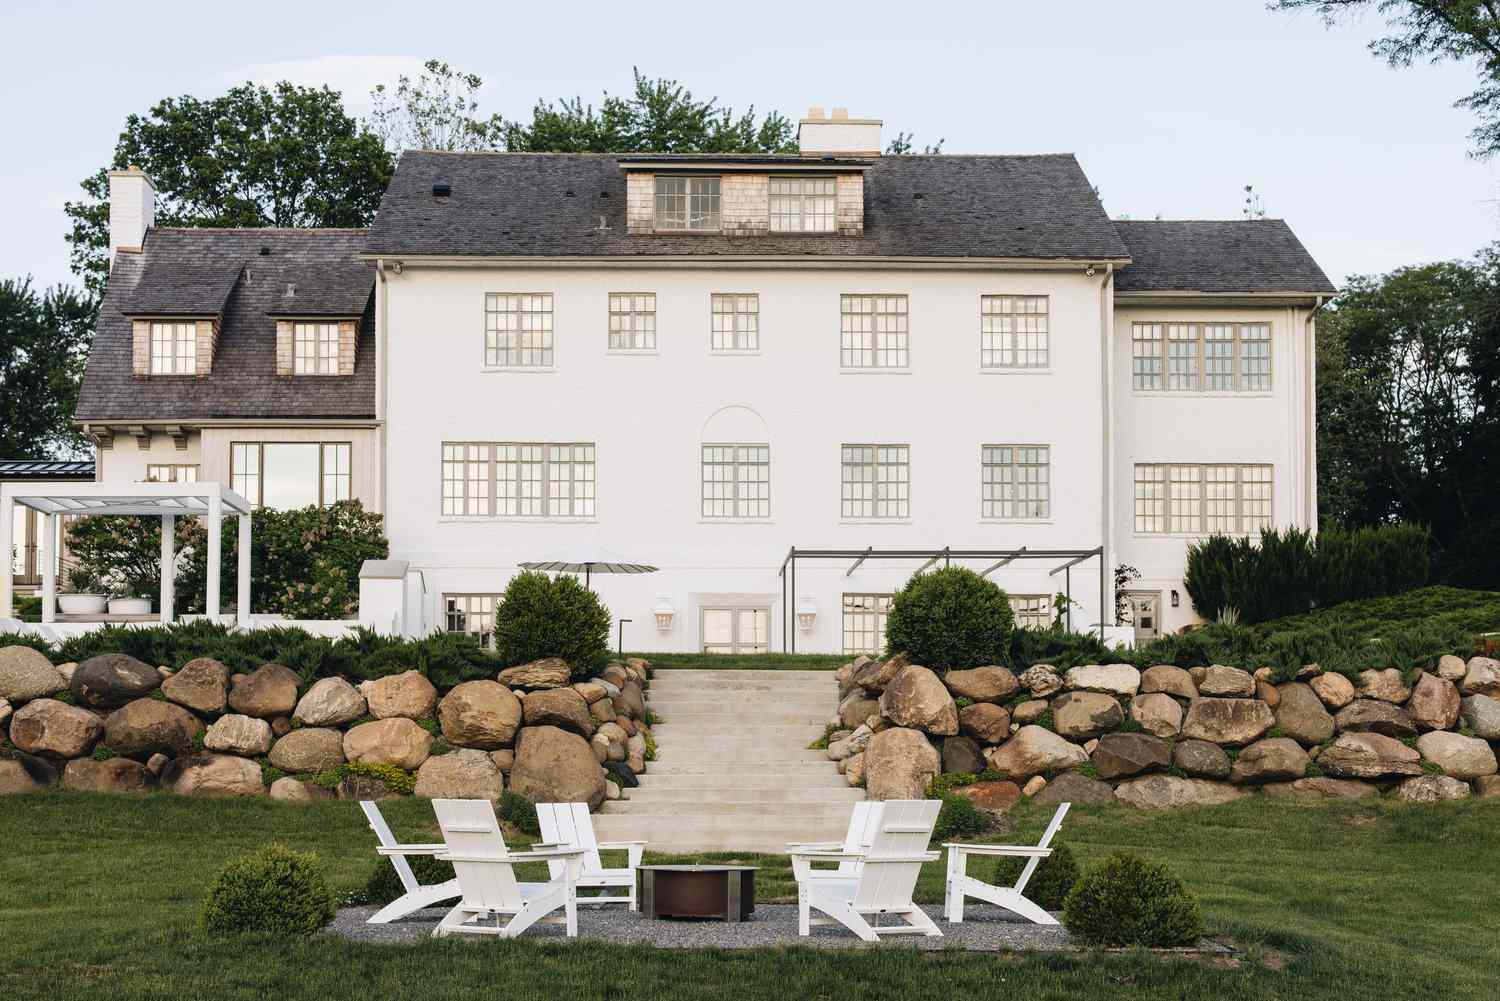
23. Create a Lakeside Vibe with a Natural Boulder Wall and Adirondack Chairs
There’s a growing desire for homes that feel like a retreat, a permanent vacation spot. This design nails that “lakeside resort” feeling, which is trending heavily on Pinterest and home design blogs. The use of large, weathered boulders for the retaining wall feels natural and relaxed, not formal or fussy. Pairing this with classic white Adirondack chairs on a simple gravel patch is the key. It suggests leisurely afternoons and evenings by a fire pit, even if the “lake” is just a well-manicured lawn. It’s about evoking a feeling of escape.
✅ Before You Start
that makes this entire scene work is the sheer scale of the boulders. These aren’t small, stackable rocks; they are massive, heavy elements that anchor the entire landscape. Their size gives the wall a sense of gravity and permanence, making it feel like a natural feature of the property. Using smaller stones would have resulted in a much busier, less impactful look. If you want this serene, expansive feel, you have to be willing to go big with your primary material. For a different approach to scale, see the refined look in Idea #15.
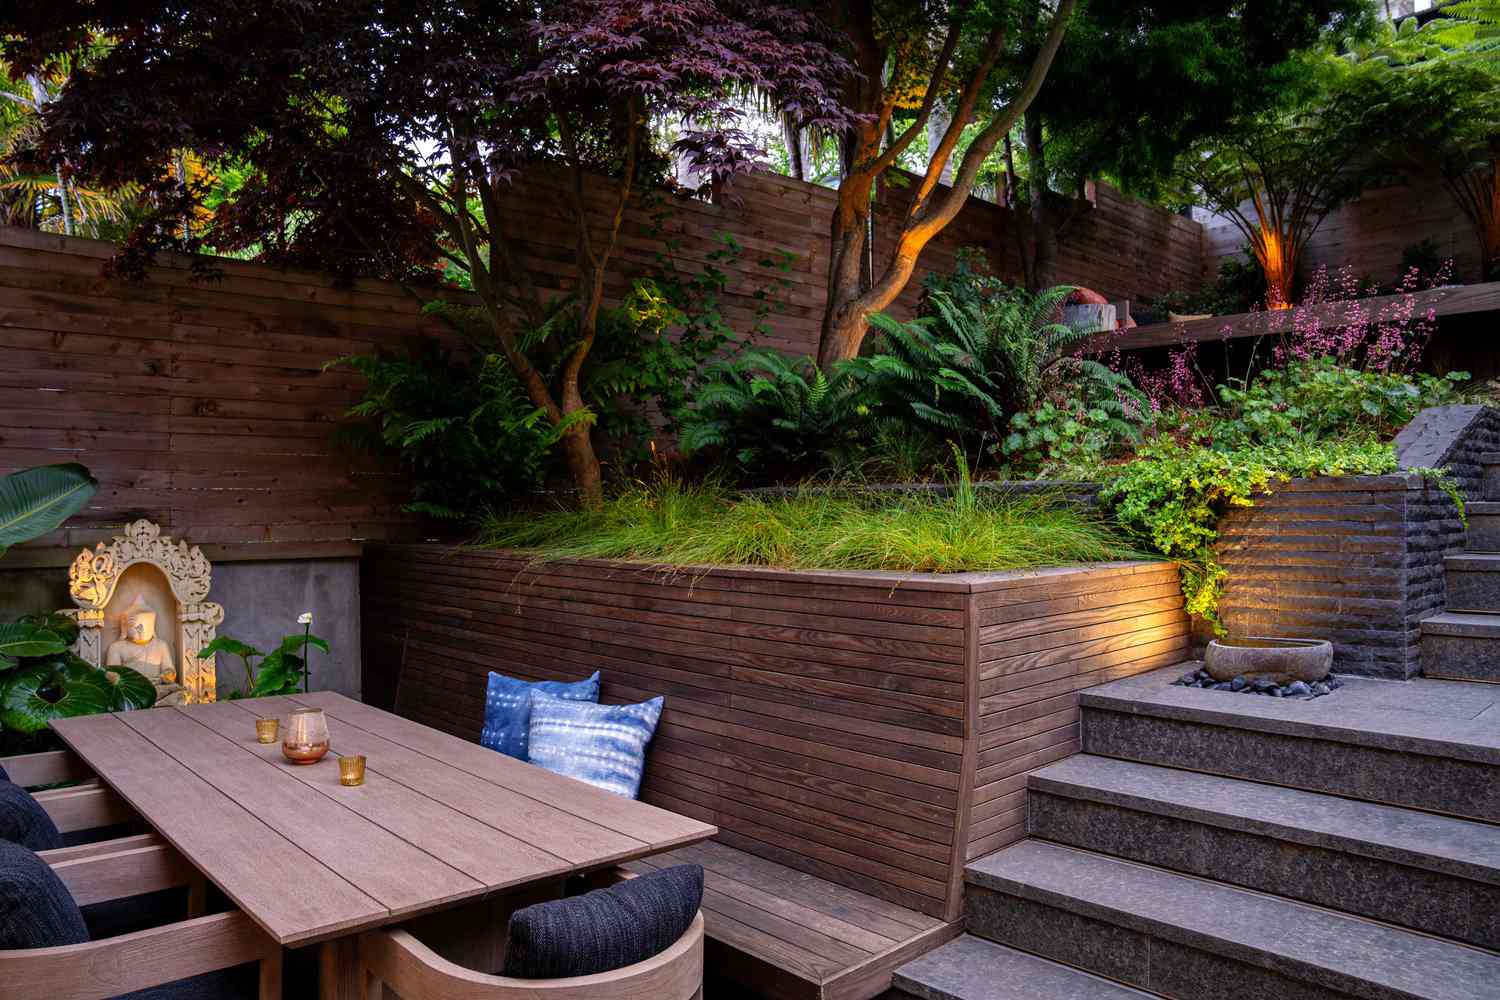
24. Layer a Lush Garden with Dark Wood and Stone Accents
This tranquil garden gets its zen-like quality from a carefully balanced material palette. The formula is: 60% lush, varied greenery + 30% dark, grounding hardscapes + 10% warm, ambient light. The dark wood and stone act as a “shadow” base, making the different shades of green foliage appear even more vibrant and alive. The subtle uplighting is the final touch, adding a soft, warm glow that turns the space into an intimate retreat after sunset. It’s a sophisticated blend that prioritizes mood and texture over bright, loud colors.
💸 Get This Look For Less
A design rich with dark-stained wood and lush plantings is beautiful, but it comes with specific maintenance tasks. The dark stain will fade over time with sun exposure, so plan on a re-staining project every 2-3 years to keep it looking rich and dark. The lush foliage will require regular pruning to maintain its shape and prevent it from overwhelming the sleek lines of the hardscaping. Also, the upward-facing lights will need to be cleaned periodically and adjusted as the plants grow to ensure they are always highlighting the best features.
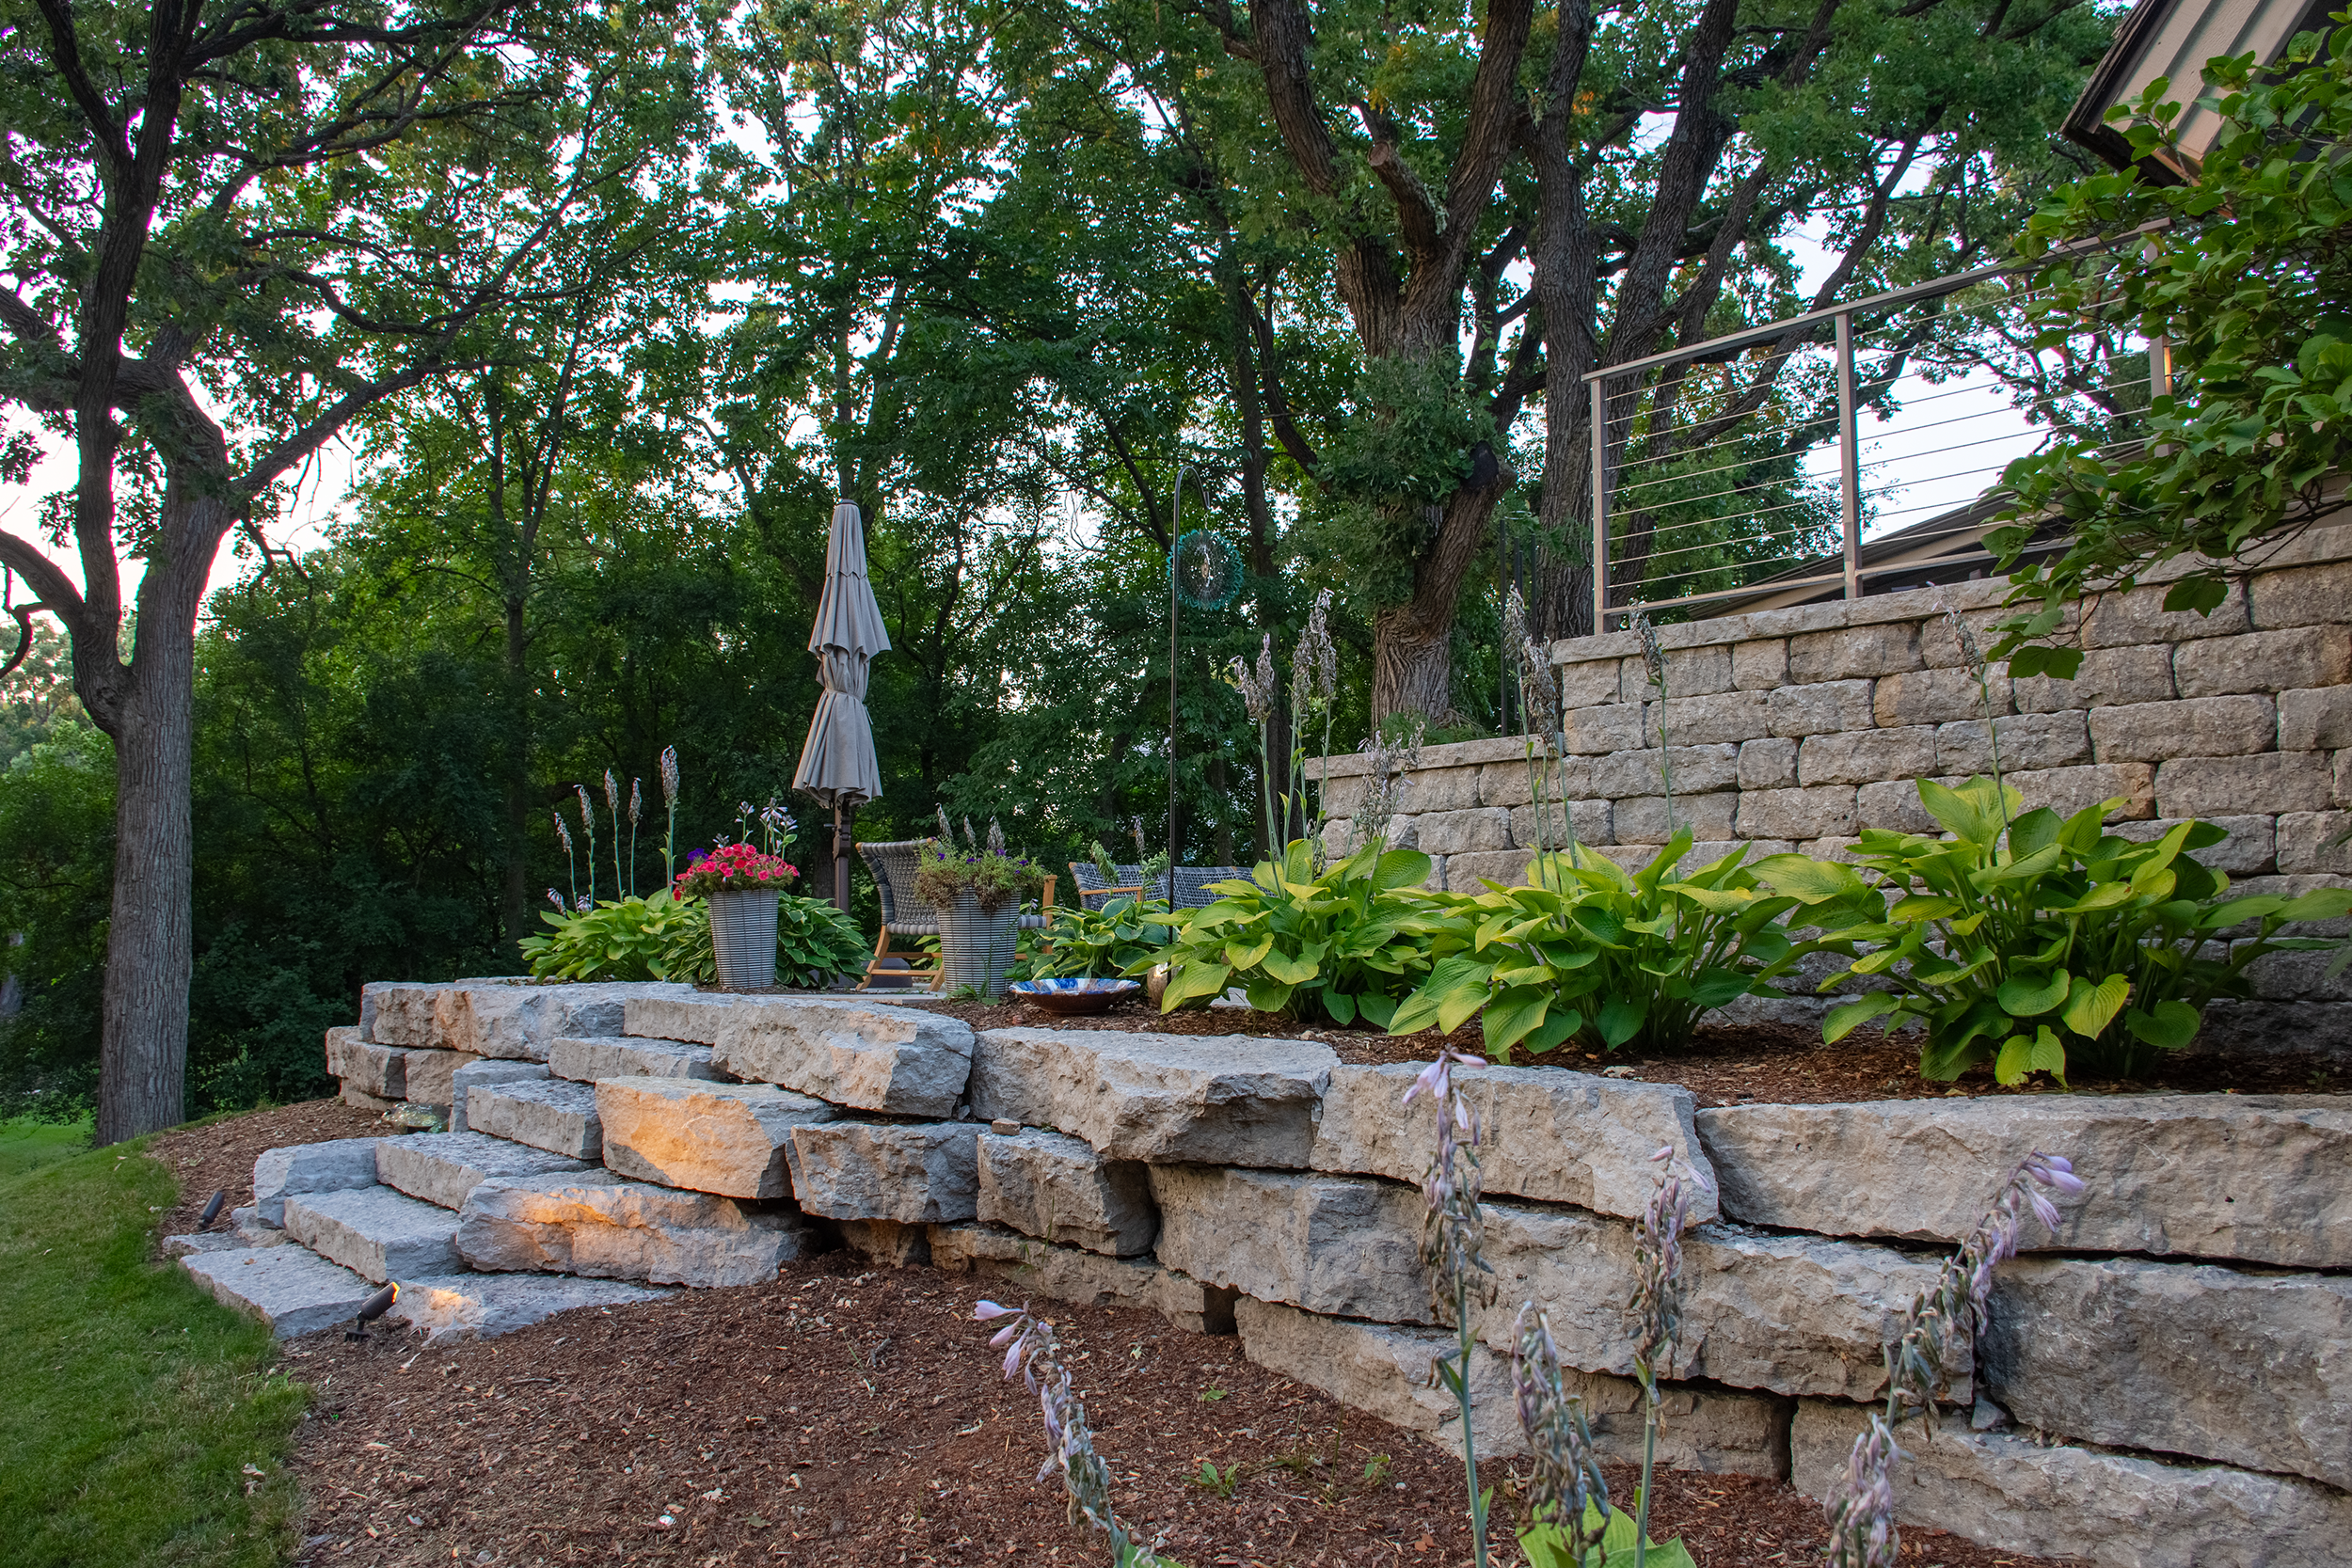
25. Mix a Natural Stone Base with a Sleek Modern Block Wall
This design brilliantly solves the problem of a two-tiered wall on a budget. The lower wall, which is more visible from the lawn, uses large, irregular natural stones. This provides a high-impact, organic look at ground level. The upper wall, which is partially obscured by the first wall and the plantings, uses more affordable and uniform stacked grey blocks. This creates a visually interesting texture break and saves money, as the more expensive, decorative stone is only used where it will be most appreciated. It’s a classic “party in the front, business in the back” design strategy.
💡 Designer Tip
When you have a tiered wall near a patio or seating area, a railing isn’t just for safety; it’s a major design element. Notice how the sleek, minimal cable railing here almost disappears, preserving the view of the trees beyond. If you want to maintain an open, airy feel, a cable rail is the perfect choice. For a more traditional or defined look, a classic wood or powder-coated aluminum railing would work better. The choice of railing has a huge impact on the final mood of the space.
26. Give Your Slope a Modern Edge with a Retaining Wall
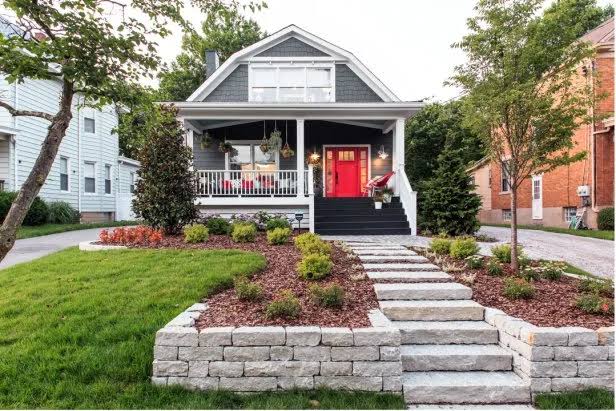
A single, well-placed retaining wall is often the perfect solution for a small to medium-sized backyard with a gentle slope. This approach works best when you need to create one specific, functional flat area—like a small patio or a level lawn for kids to play—without the expense and complexity of a full terracing project. For slopes with an elevation change of 2 to 4 feet, a single wall is usually the most efficient and cost-effective choice. It provides a clean, modern edge and instantly makes the yard feel more usable and organized.
🔧 How-To Brief
While a professionally installed wall by a company like HGTV fave Yardscapes Northwest can be a significant investment, you can achieve a similar modern aesthetic on a tighter budget. Interlocking concrete blocks from stores like Lowe’s or Home Depot are designed for DIY installation and come in a variety of modern colors and textures. A 3-foot high, 40-foot long wall might cost $1,500-$2,500 in materials. Pair it with a simple gravel patio instead of pavers to save even more, and you can get this clean, functional look for under $3,000.
27. Add Character with a Rustic, Weathered Stone Wall and Flower Bed
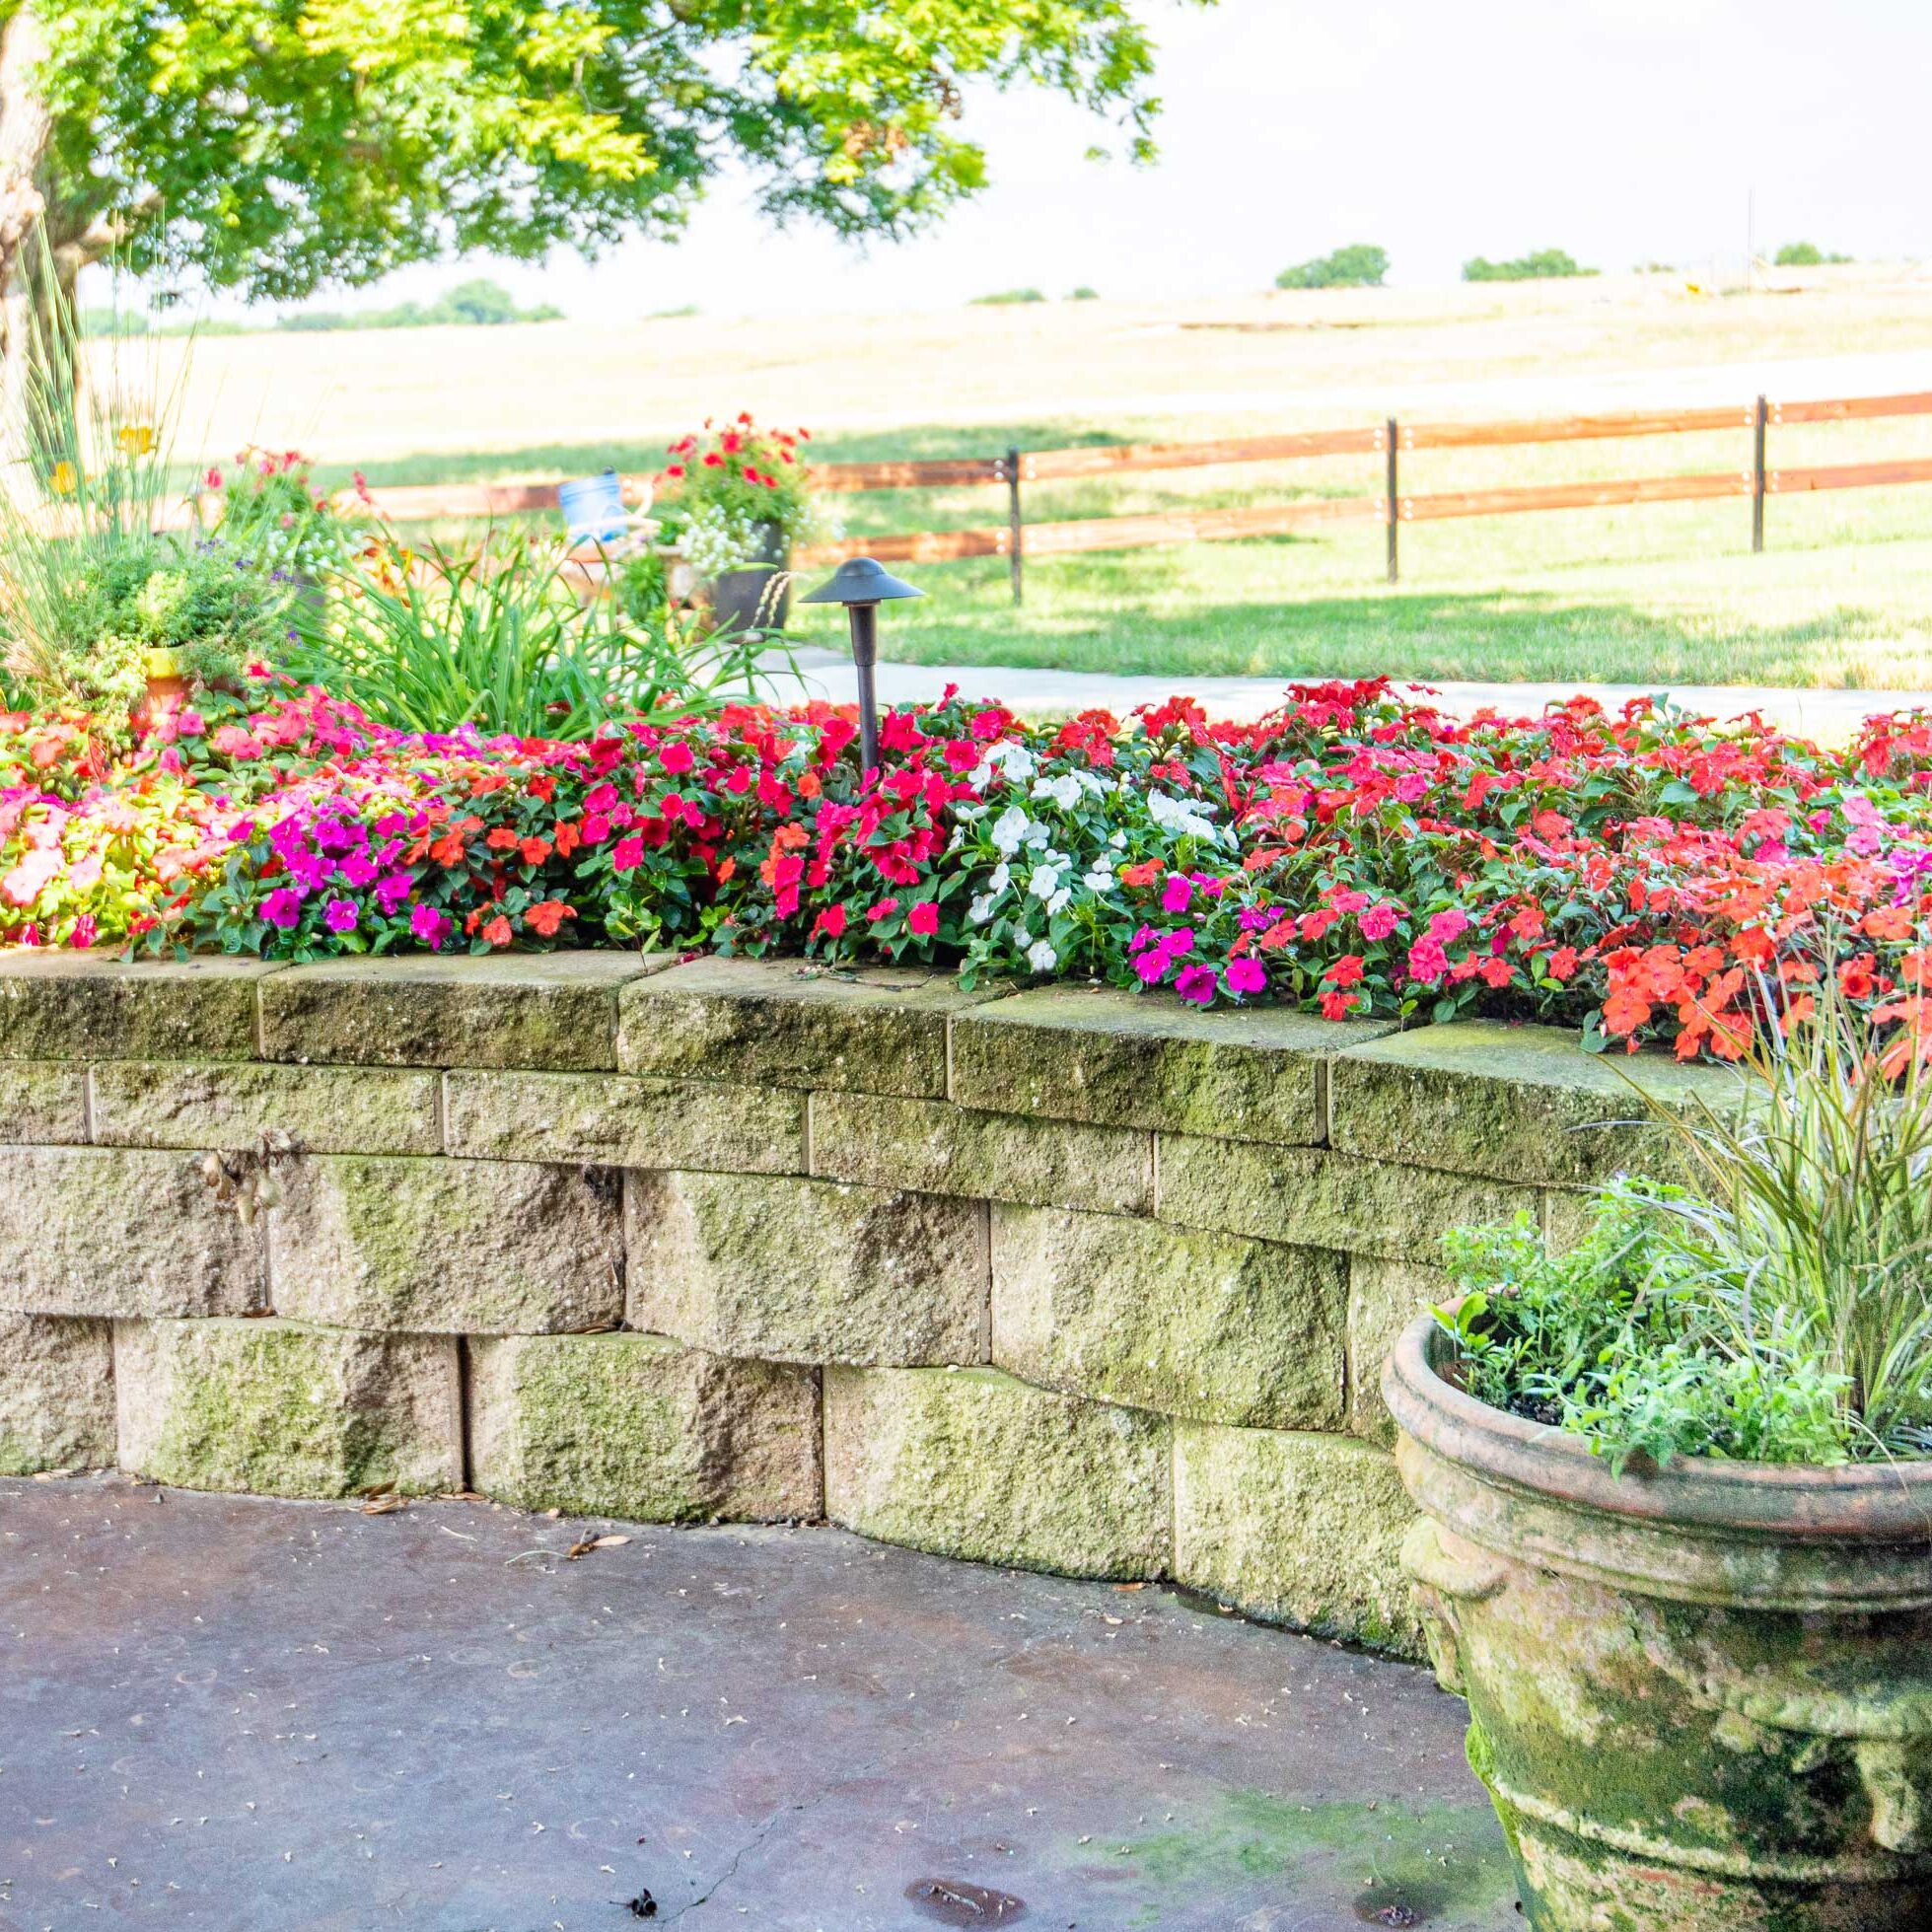
The charm of this design comes from its celebration of age and weathering. The rough-hewn stone blocks aren’t perfectly clean; they have visible algae and moss growth, which gives them a rich, natural patina. This texture is beautifully complemented by the large, mossy terracotta pot in the foreground. The entire scene feels lived-in and established, as if it’s been part of a well-loved garden for years. It’s a powerful reminder that sometimes, a little imperfection is more beautiful than pristine perfection.
⚠️ Real Talk
The single element that makes this idea pop is the explosion of colorful impatiens. The retaining wall is a beautiful, rustic backdrop, but the flowers are the star of the show. Their vibrant reds, pinks, and oranges create a stunning contrast against the cool grey and green tones of the weathered stone. If you were to plant simple green bushes here instead, the entire look would become muted and far less joyful. The flowers provide the energy and focal point that bring the whole vignette to life.
28. Integrate a Modern House into a Hillside with Dark Panels and Natural Rock
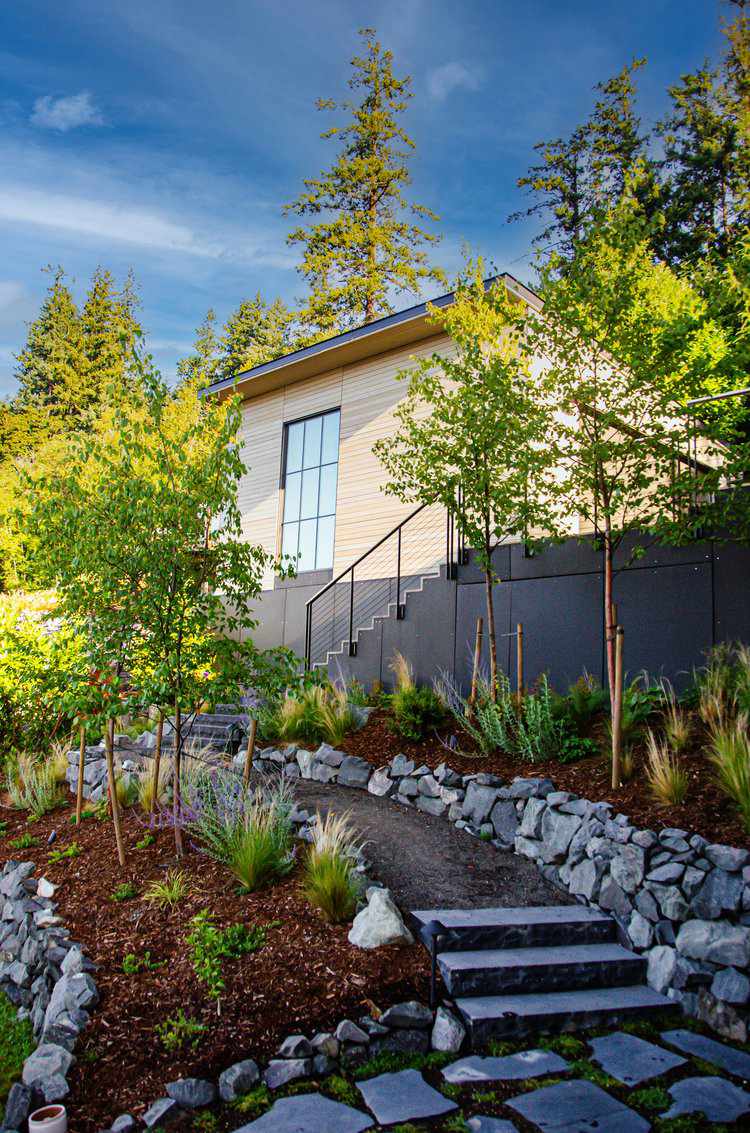
This striking modern landscape uses a formula of dramatic contrast: 40% sleek, dark manufactured panels + 50% raw, piled natural rock + 10% warm wood siding. The smooth, dark grey retaining wall and stairs create a sharp, architectural frame that makes the organic shapes of the piled rock terraces feel even more wild and natural. The light wood siding of the house adds a touch of warmth and prevents the grey and black tones from feeling too cold. This high-contrast mix of sleek, raw, and warm is the essence of modern natural design.
🔥 Trending Context
This is a complex, high-end look that requires professional execution. Piled rock walls, also known as dry-stack stone, look deceptively simple, but creating a stable, attractive wall requires skill and experience in fitting the stones together like a puzzle. The junction between the modern panel wall and the natural hillside is also a critical waterproofing and structural detail. This is not a DIY project. Be prepared to hire a landscape architect and a skilled contractor to achieve this level of finish. It’s a significant investment to get it right.
29. Create Order with Tiered Concrete Block Walls and a Central Staircase
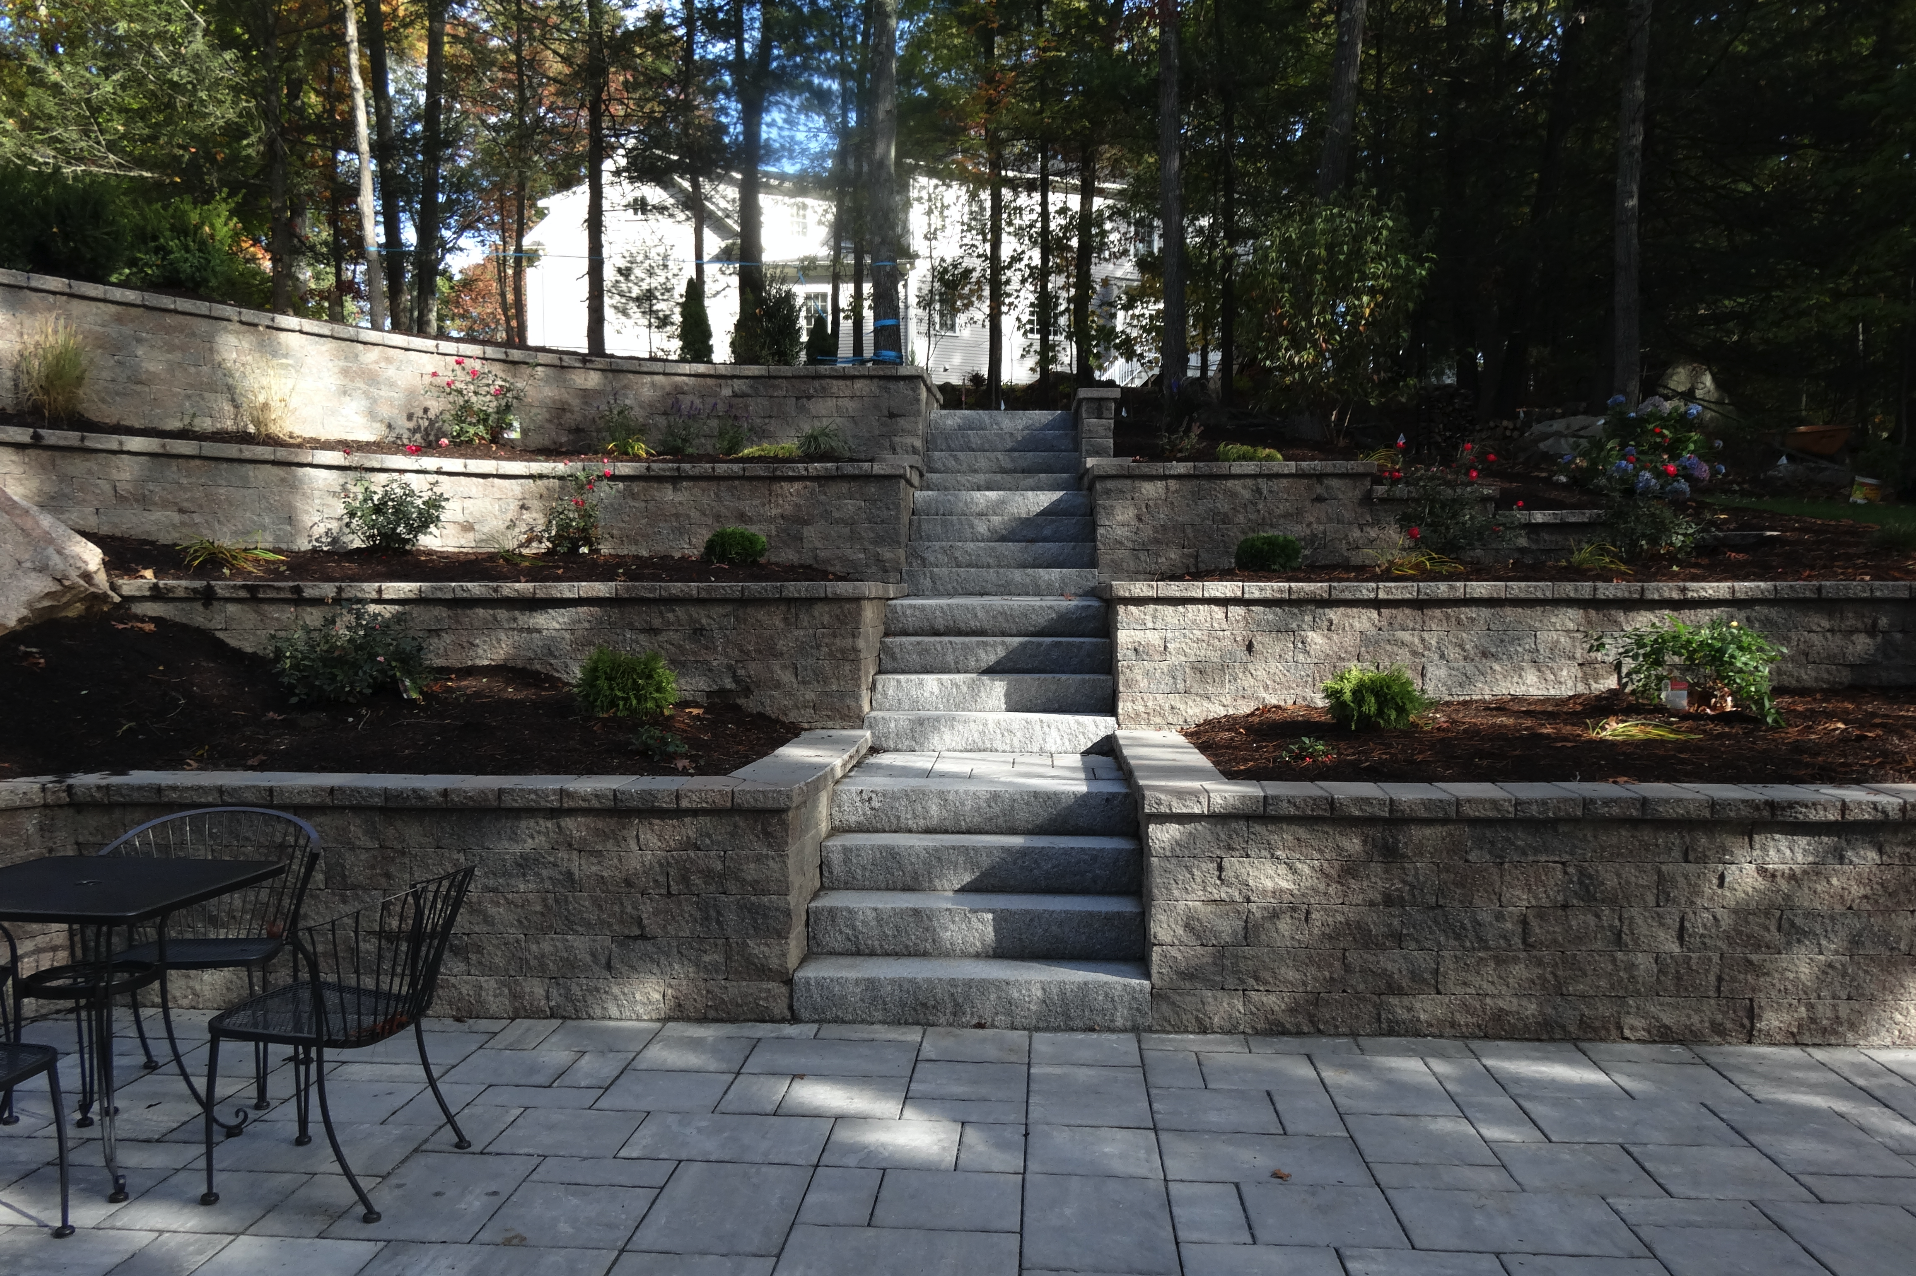
This is one of the most practical and budget-friendly ways to terrace a sloped yard. The use of standard concrete blocks and pre-cast paver steps makes it a very accessible project. Here’s a sample budget for a setup of this scale.
- Concrete Retaining Wall Blocks: $2,000 – $3,500
- Stone Paver Steps: $800 – $1,500
- Paver Patio & Base Materials: $1,500 – $2,500
- Mulch, Soil & Plants: $500 – $1,000
- Labor (if not DIY): $6,000 – $11,000
- TOTAL: $10,800 – $19,500
Budget alternative: Building the stairs from the same concrete blocks as the walls, instead of separate stone pavers, can save you $500-$1,000+ in material costs. The look is more uniform but just as functional. Compare it to Idea #7 which does just that.
⭐ The One Thing
The power of this design lies in its clear and simple geometry. Everything is based on strong, horizontal lines—the tiers of the walls, the steps, the patio—which creates a powerful sense of order and control over the landscape. The central staircase acts as a strong axis, dividing the space symmetrically and leading the eye directly up the hill. This unwavering commitment to structure is what makes the design feel so clean, organized, and effective at transforming a chaotic slope into a functional and visually pleasing space.
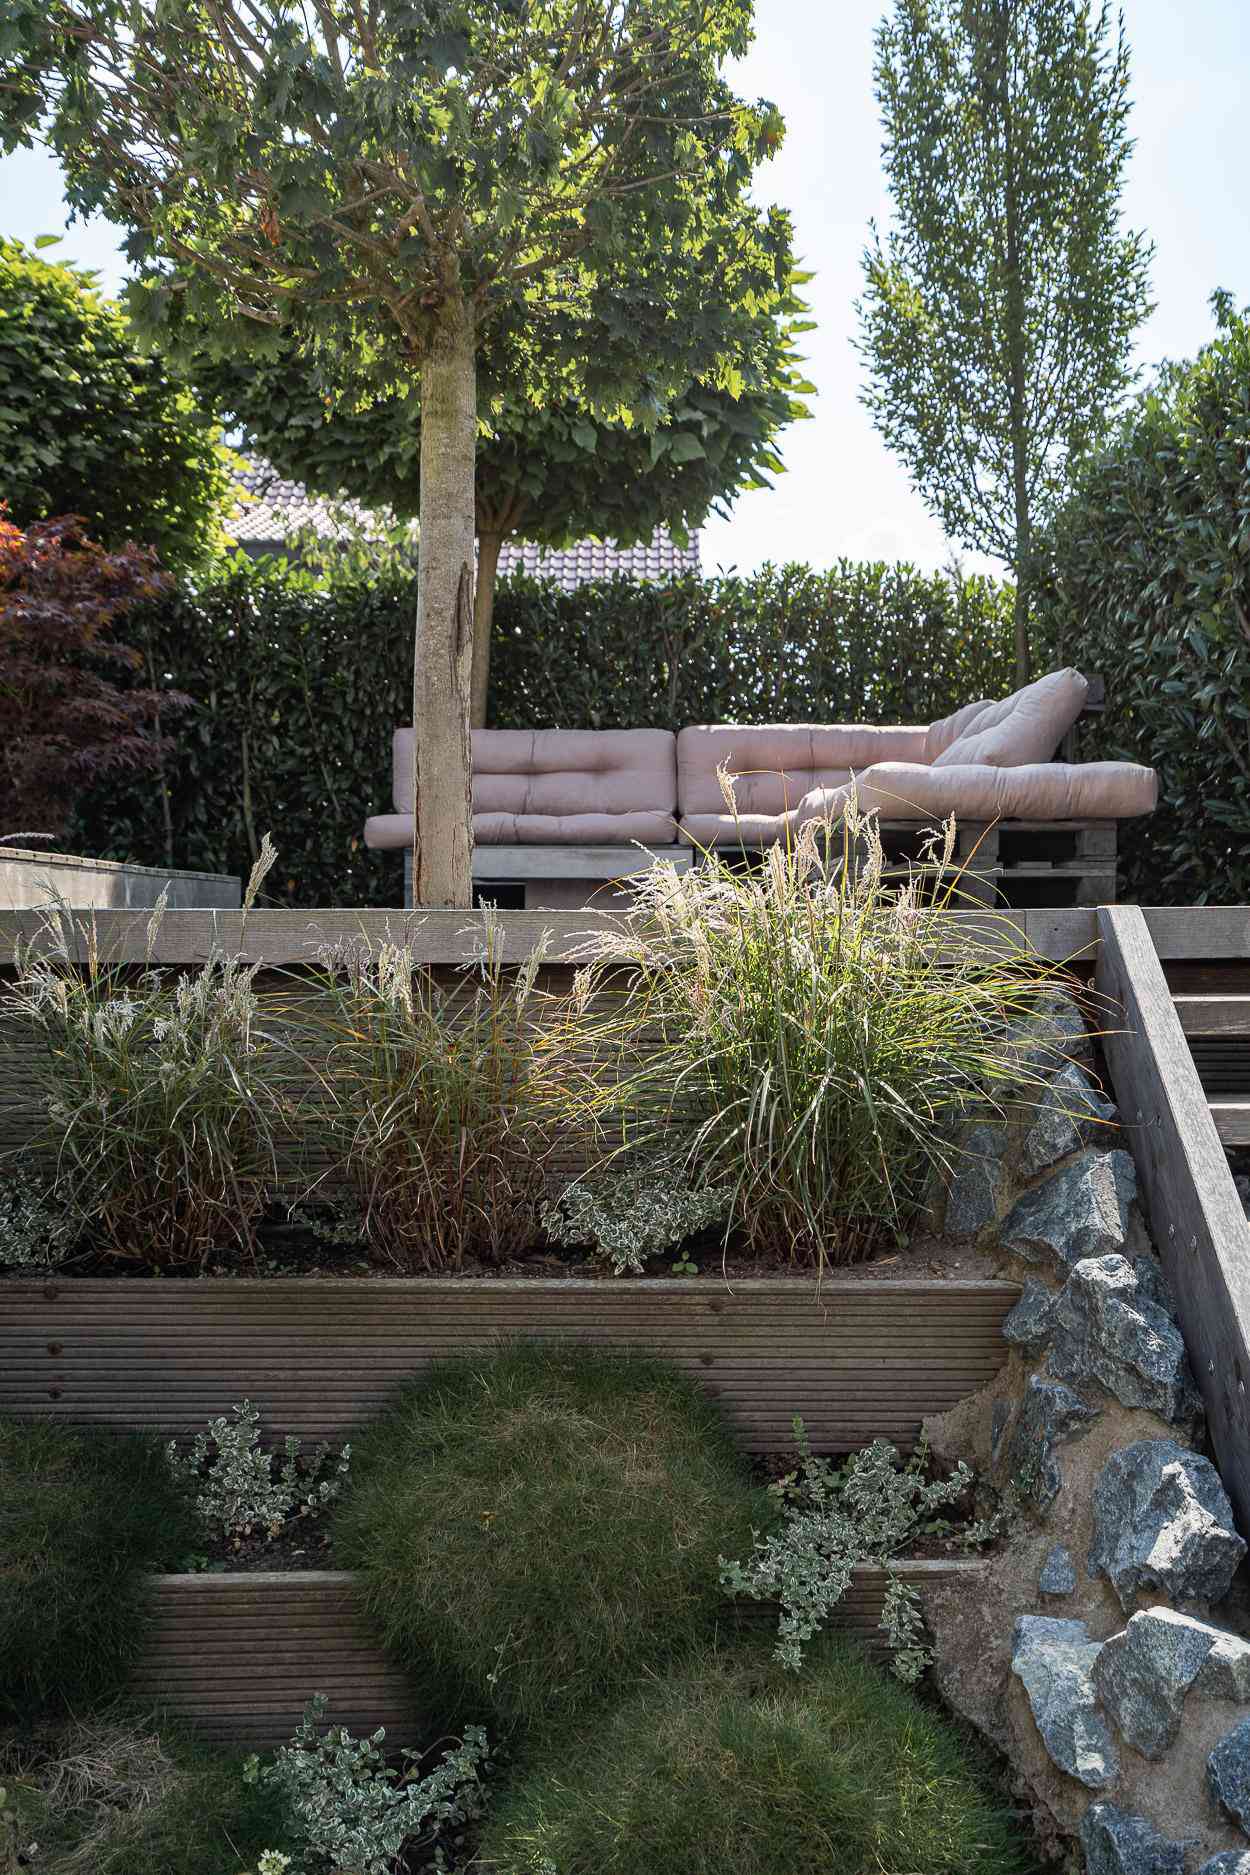
30. Layer a Garden with Horizontal Composite Planks and Integrated Stairs
Composite decking material, used here for the retaining walls, is a fantastic low-maintenance choice. Unlike wood, it won’t rot, warp, or require regular sealing or staining. A simple cleaning with a pressure washer or a deck brush and soapy water once a year is all it needs to look its best. However, be aware that darker composite colors can get quite hot in direct sun, which can affect the plants in the beds directly behind the wall. Lighter colors will stay cooler. Also, while the material itself is durable, the internal framing must still be properly constructed from pressure-treated lumber.
📏 Scale Guide
When you have low, layered retaining walls, think about planting in a way that creates textural contrast. Notice the combination here: the tall, vertical blades of the ornamental grasses contrast beautifully with the low, mounding forms of the green and variegated shrubs. This variety of shapes is what makes the plantings interesting. A good rule of thumb is to use a “thriller, filler, spiller” approach: a tall, dramatic plant (the grass), a mounding plant to fill the space (the shrubs), and you could even add a trailing plant to spill over the edge.
Your Backyard’s Next Chapter Begins
Tackling a slope can feel daunting, but the right retaining wall doesn’t just hold back earth—it unlocks new possibilities for your entire yard. Whether you’re creating new garden space, a terraced patio for entertaining, or simply a more polished landscape, the perfect design is waiting in these ideas. Start gathering your favorite looks and get ready to transform your outdoor space.
Don’t forget to save this guide to your Pinterest boards to come back to when you’re ready to start your project!