32 Jaw-Dropping DIY Old Book Craft Ideas You Absolutely Need to Try for a Unique Home Makeover

You know that feeling when you save a dozen DIY book craft pins, but get overwhelmed trying to actually start one? It’s easy to love the look, but harder to find a project that feels both beautiful and doable. After sifting through hundreds of projects, we narrowed it down to these 32 standout ideas. We kept in mind the supplies you can realistically find at places like Michaels, Hobby Lobby, and Amazon, with projects costing less than $5 and more ambitious designs that might top out around $150.
Inside, you’ll find everything from whimsical centerpieces to rustic wreaths and clever home decor, covering styles from romantic and literary to cozy and autumnal. In 2026, it’s all about sustainable, personalized decor. Repurposing old books isn’t just a craft; it’s a way to add a layer of personal history to your home that you just can’t buy. And stay until the end — we break down the most common mistakes that can ruin these looks. 📌 Save this to Pinterest for later — you’ll want to revisit these ideas.
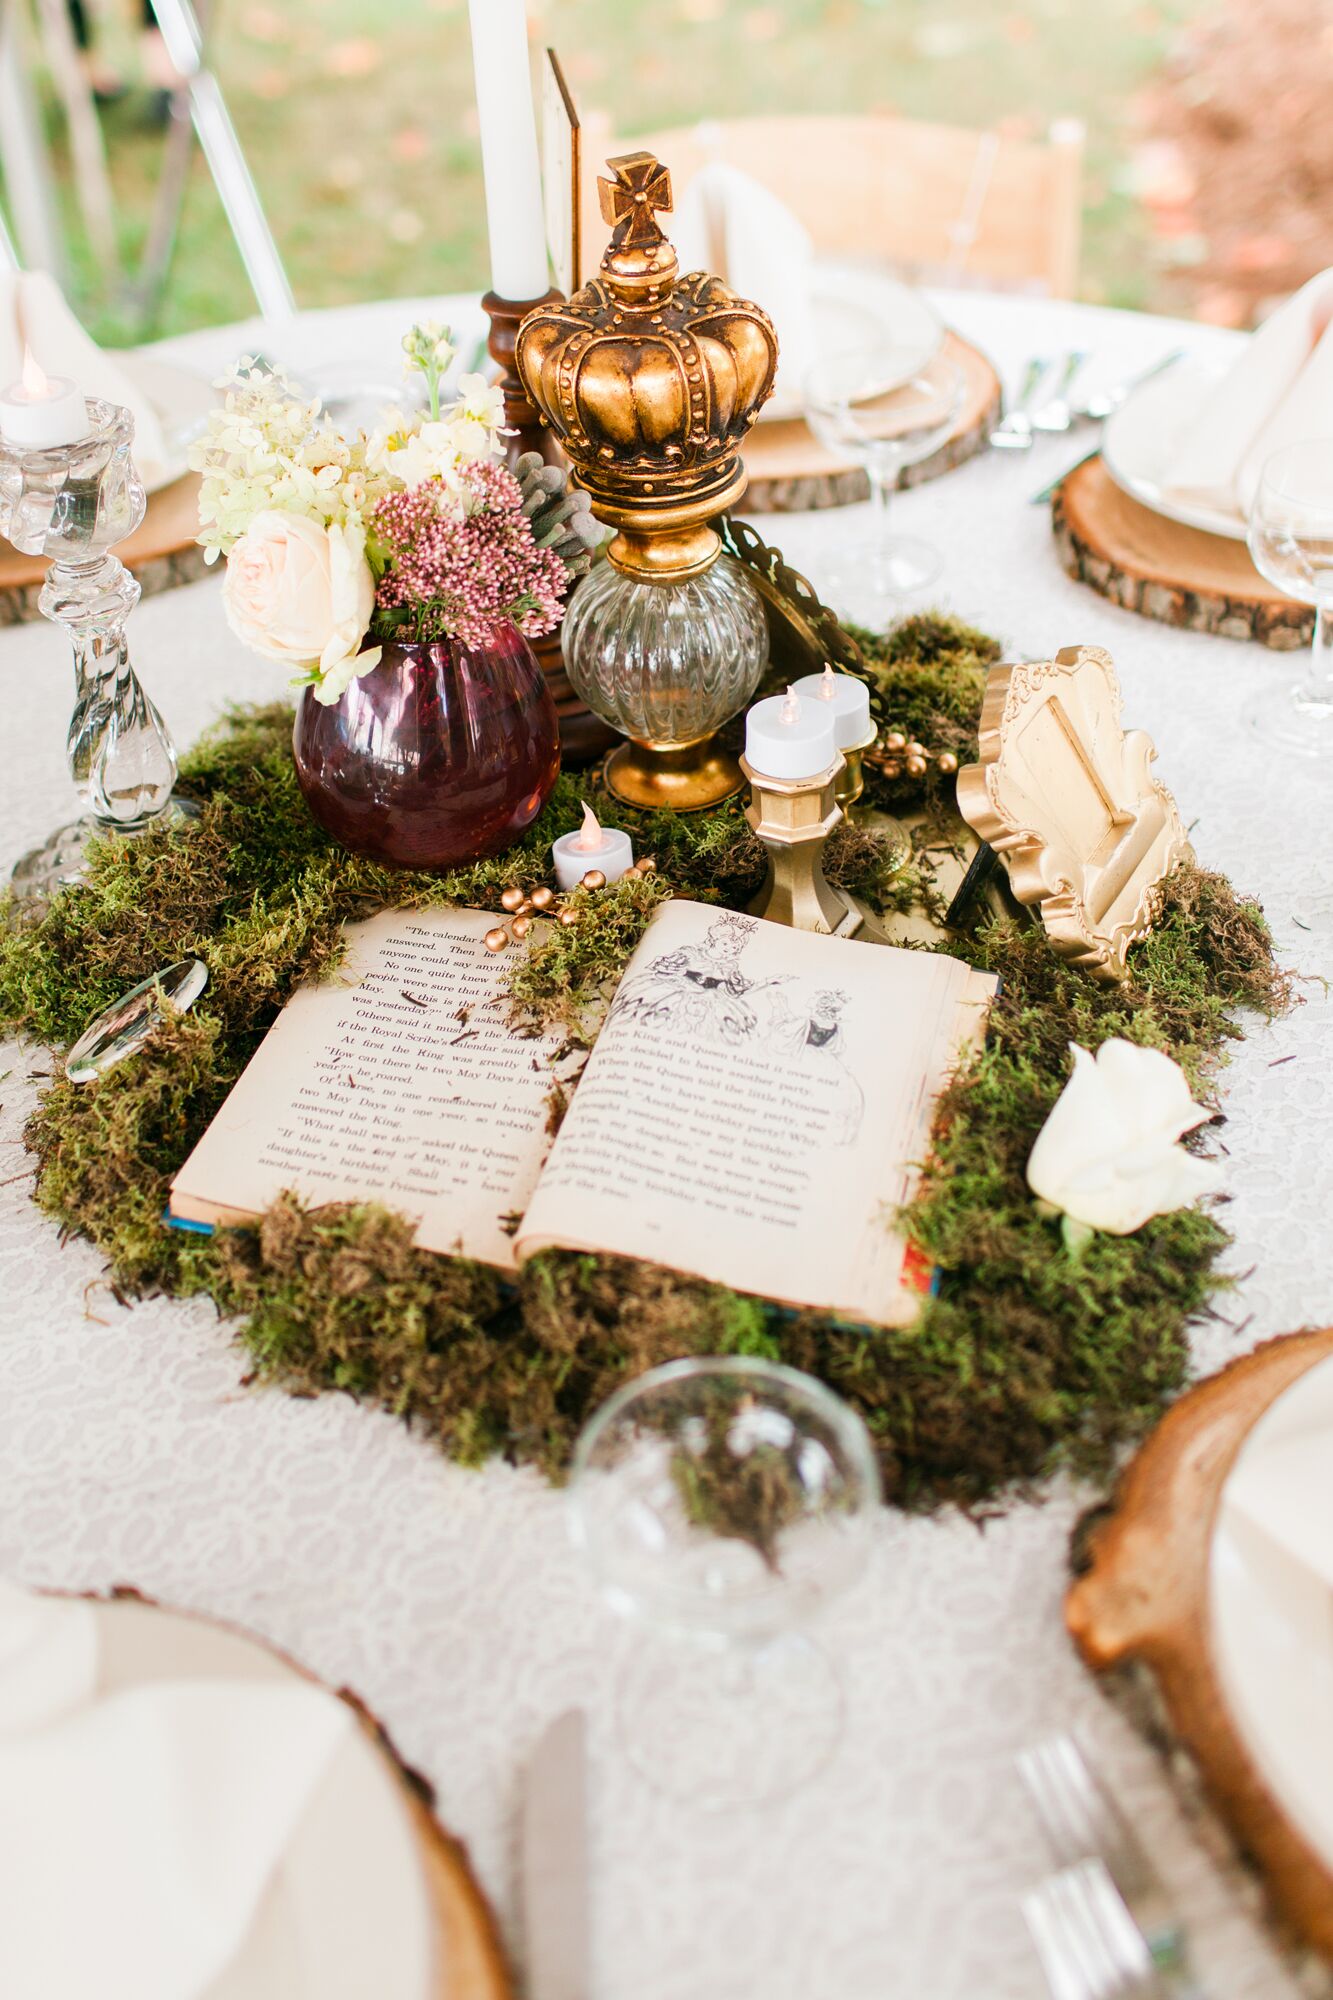
1. Craft an Enchanted Fairy Tale Centerpiece with Moss and Lace
This idea works so well because it creates a tiny, self-contained world. It’s not just a craft; it’s a miniature scene from a story. The magic is in the mix of textures: the crisp, aged paper of the book, the soft, organic green moss, the delicate pattern of the lace tablecloth, and the hard, metallic shine of the gold crown. This textural contrast makes the entire arrangement feel rich and visually interesting. It invites you to lean in and look closer, turning a simple table decoration into a conversation starter.
✅ Before You Start
Here’s a realistic look at what it might cost to get this enchanting vibe. Remember, thrifting is your best friend here!
- Old Illustrated Hardcover Book: $3 – $10 (Thrift Store)
- Craft Moss: $5 – $12 (Craft Store)
- Small Decorative Items (Crown, small vase): $10 – $20
- Tealight Candles (LED recommended): $5 – $8
- Lace Tablecloth or Remnant: $8 – $15
- TOTAL: $31 – $65
- Budget Alternative: Use a book you already own, forage for moss (and dry it properly!), and use a teacup for flowers to bring the cost under $20.
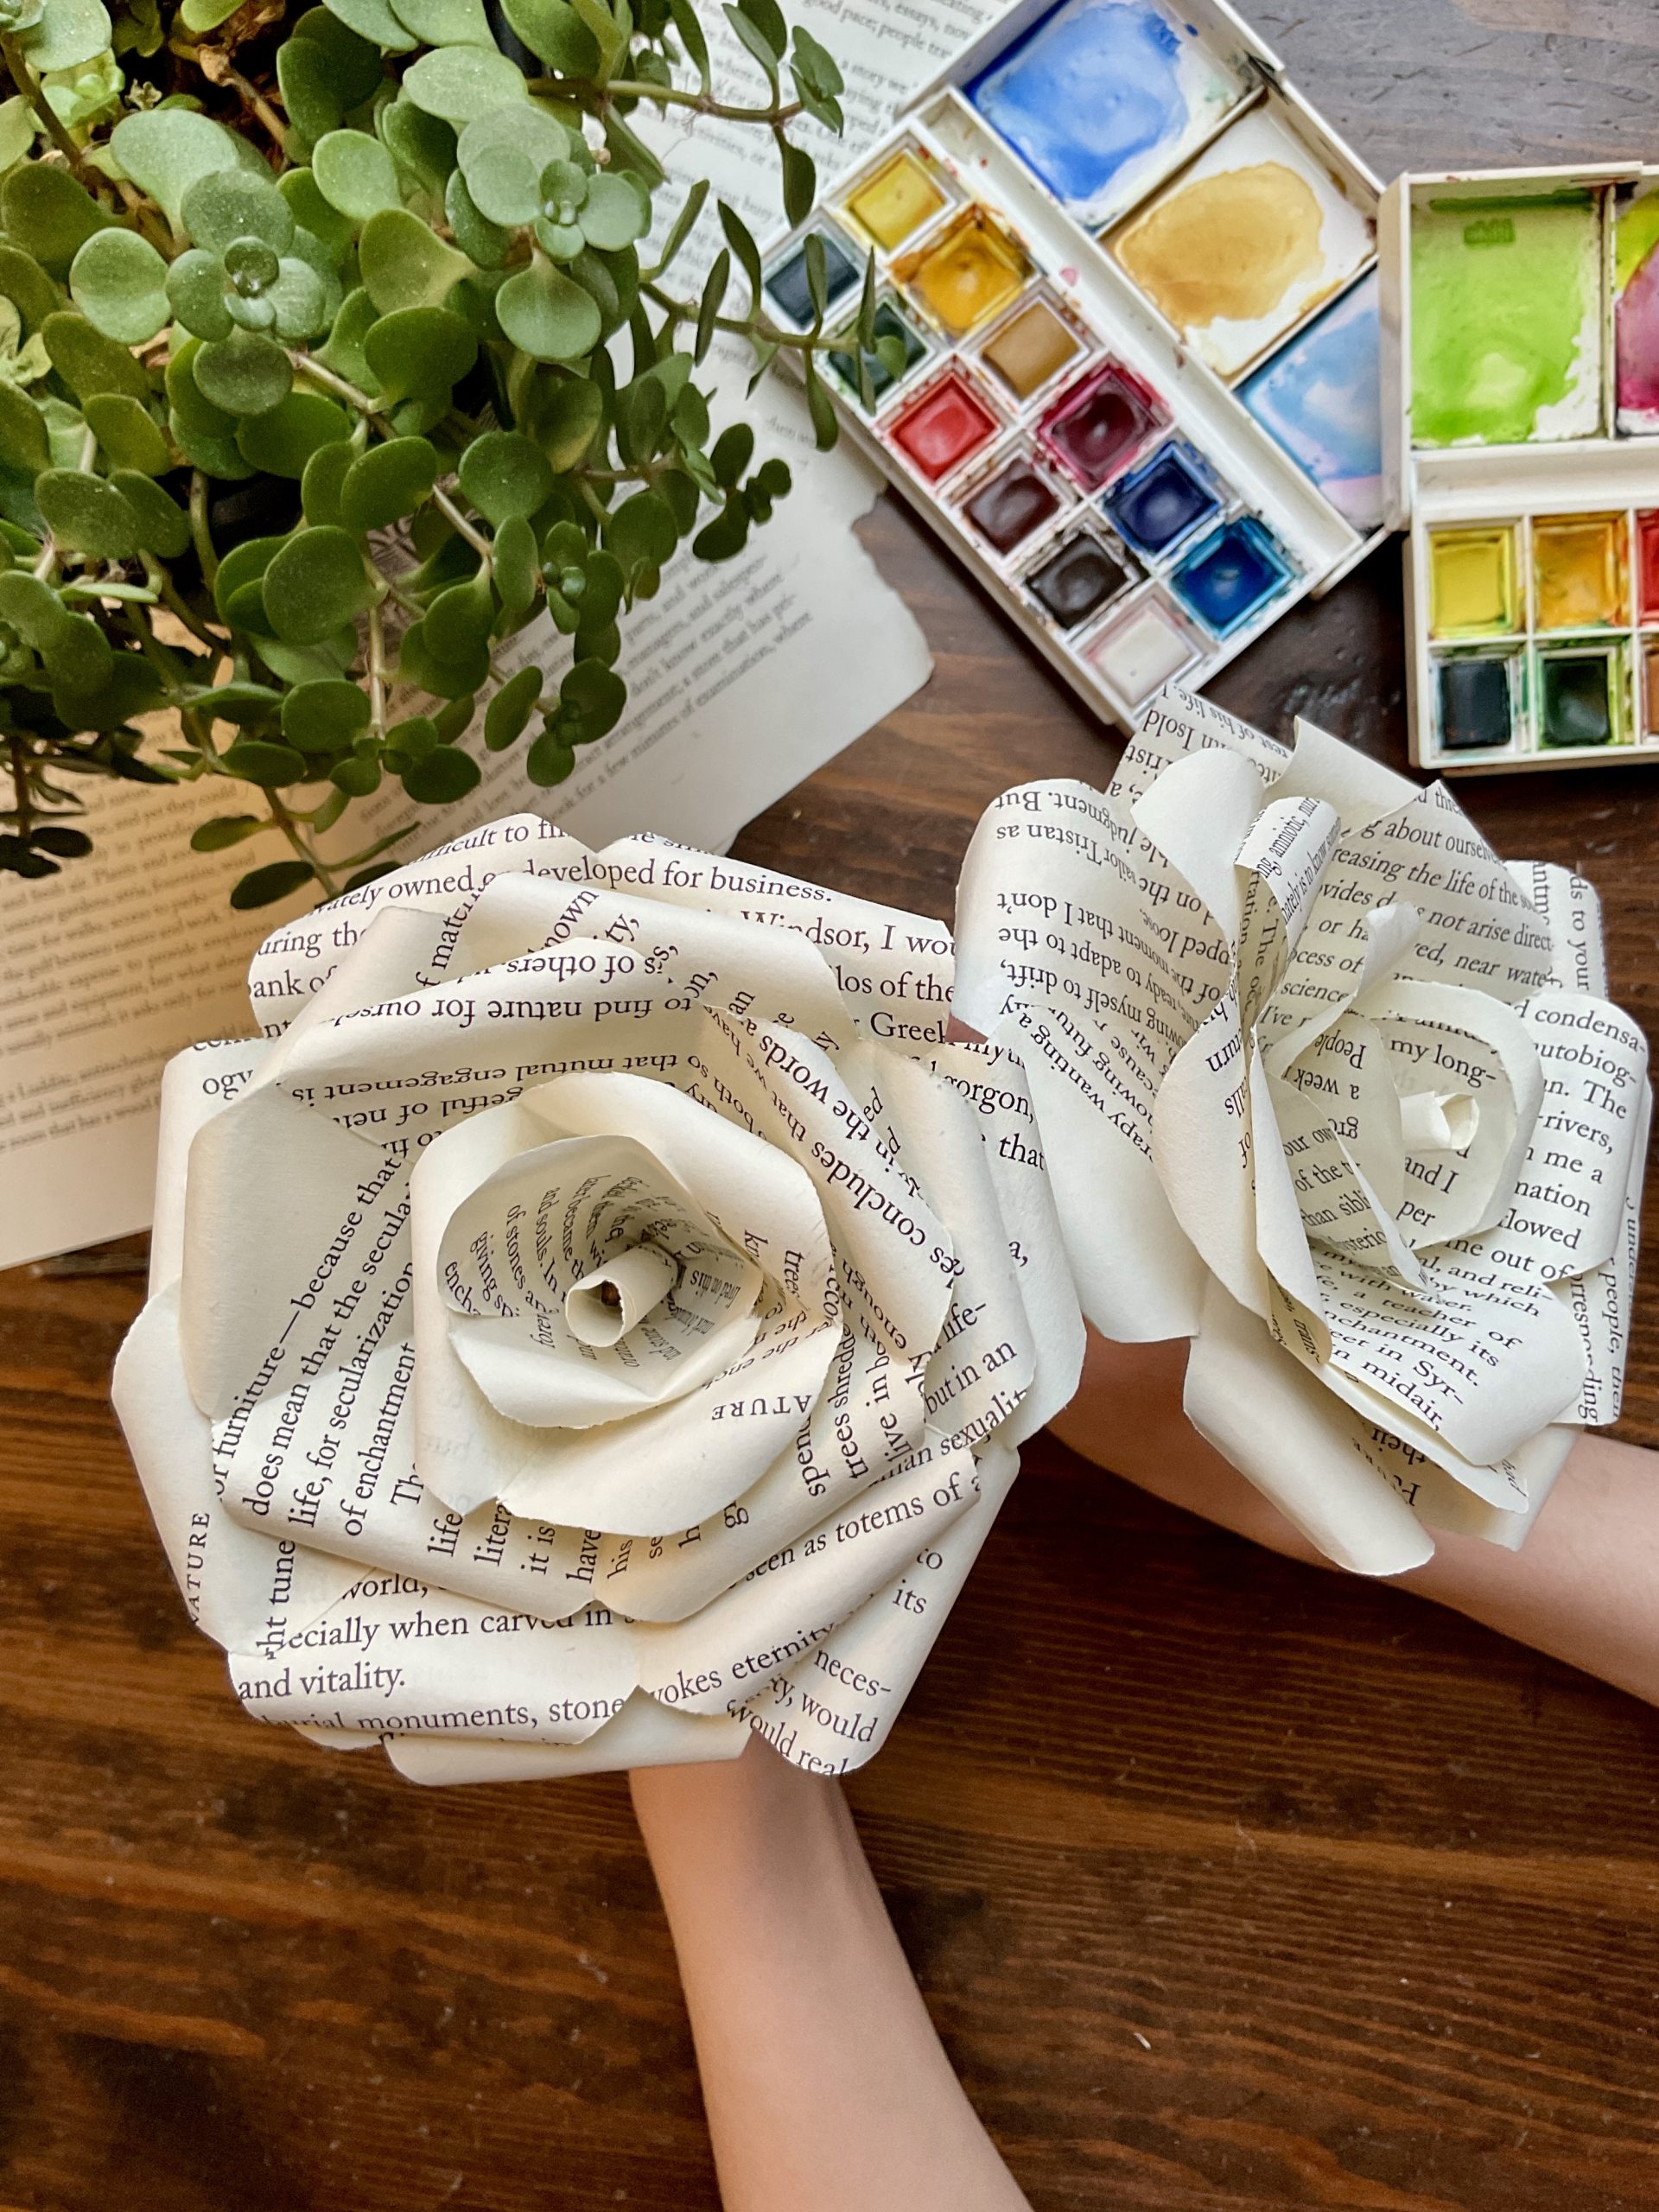
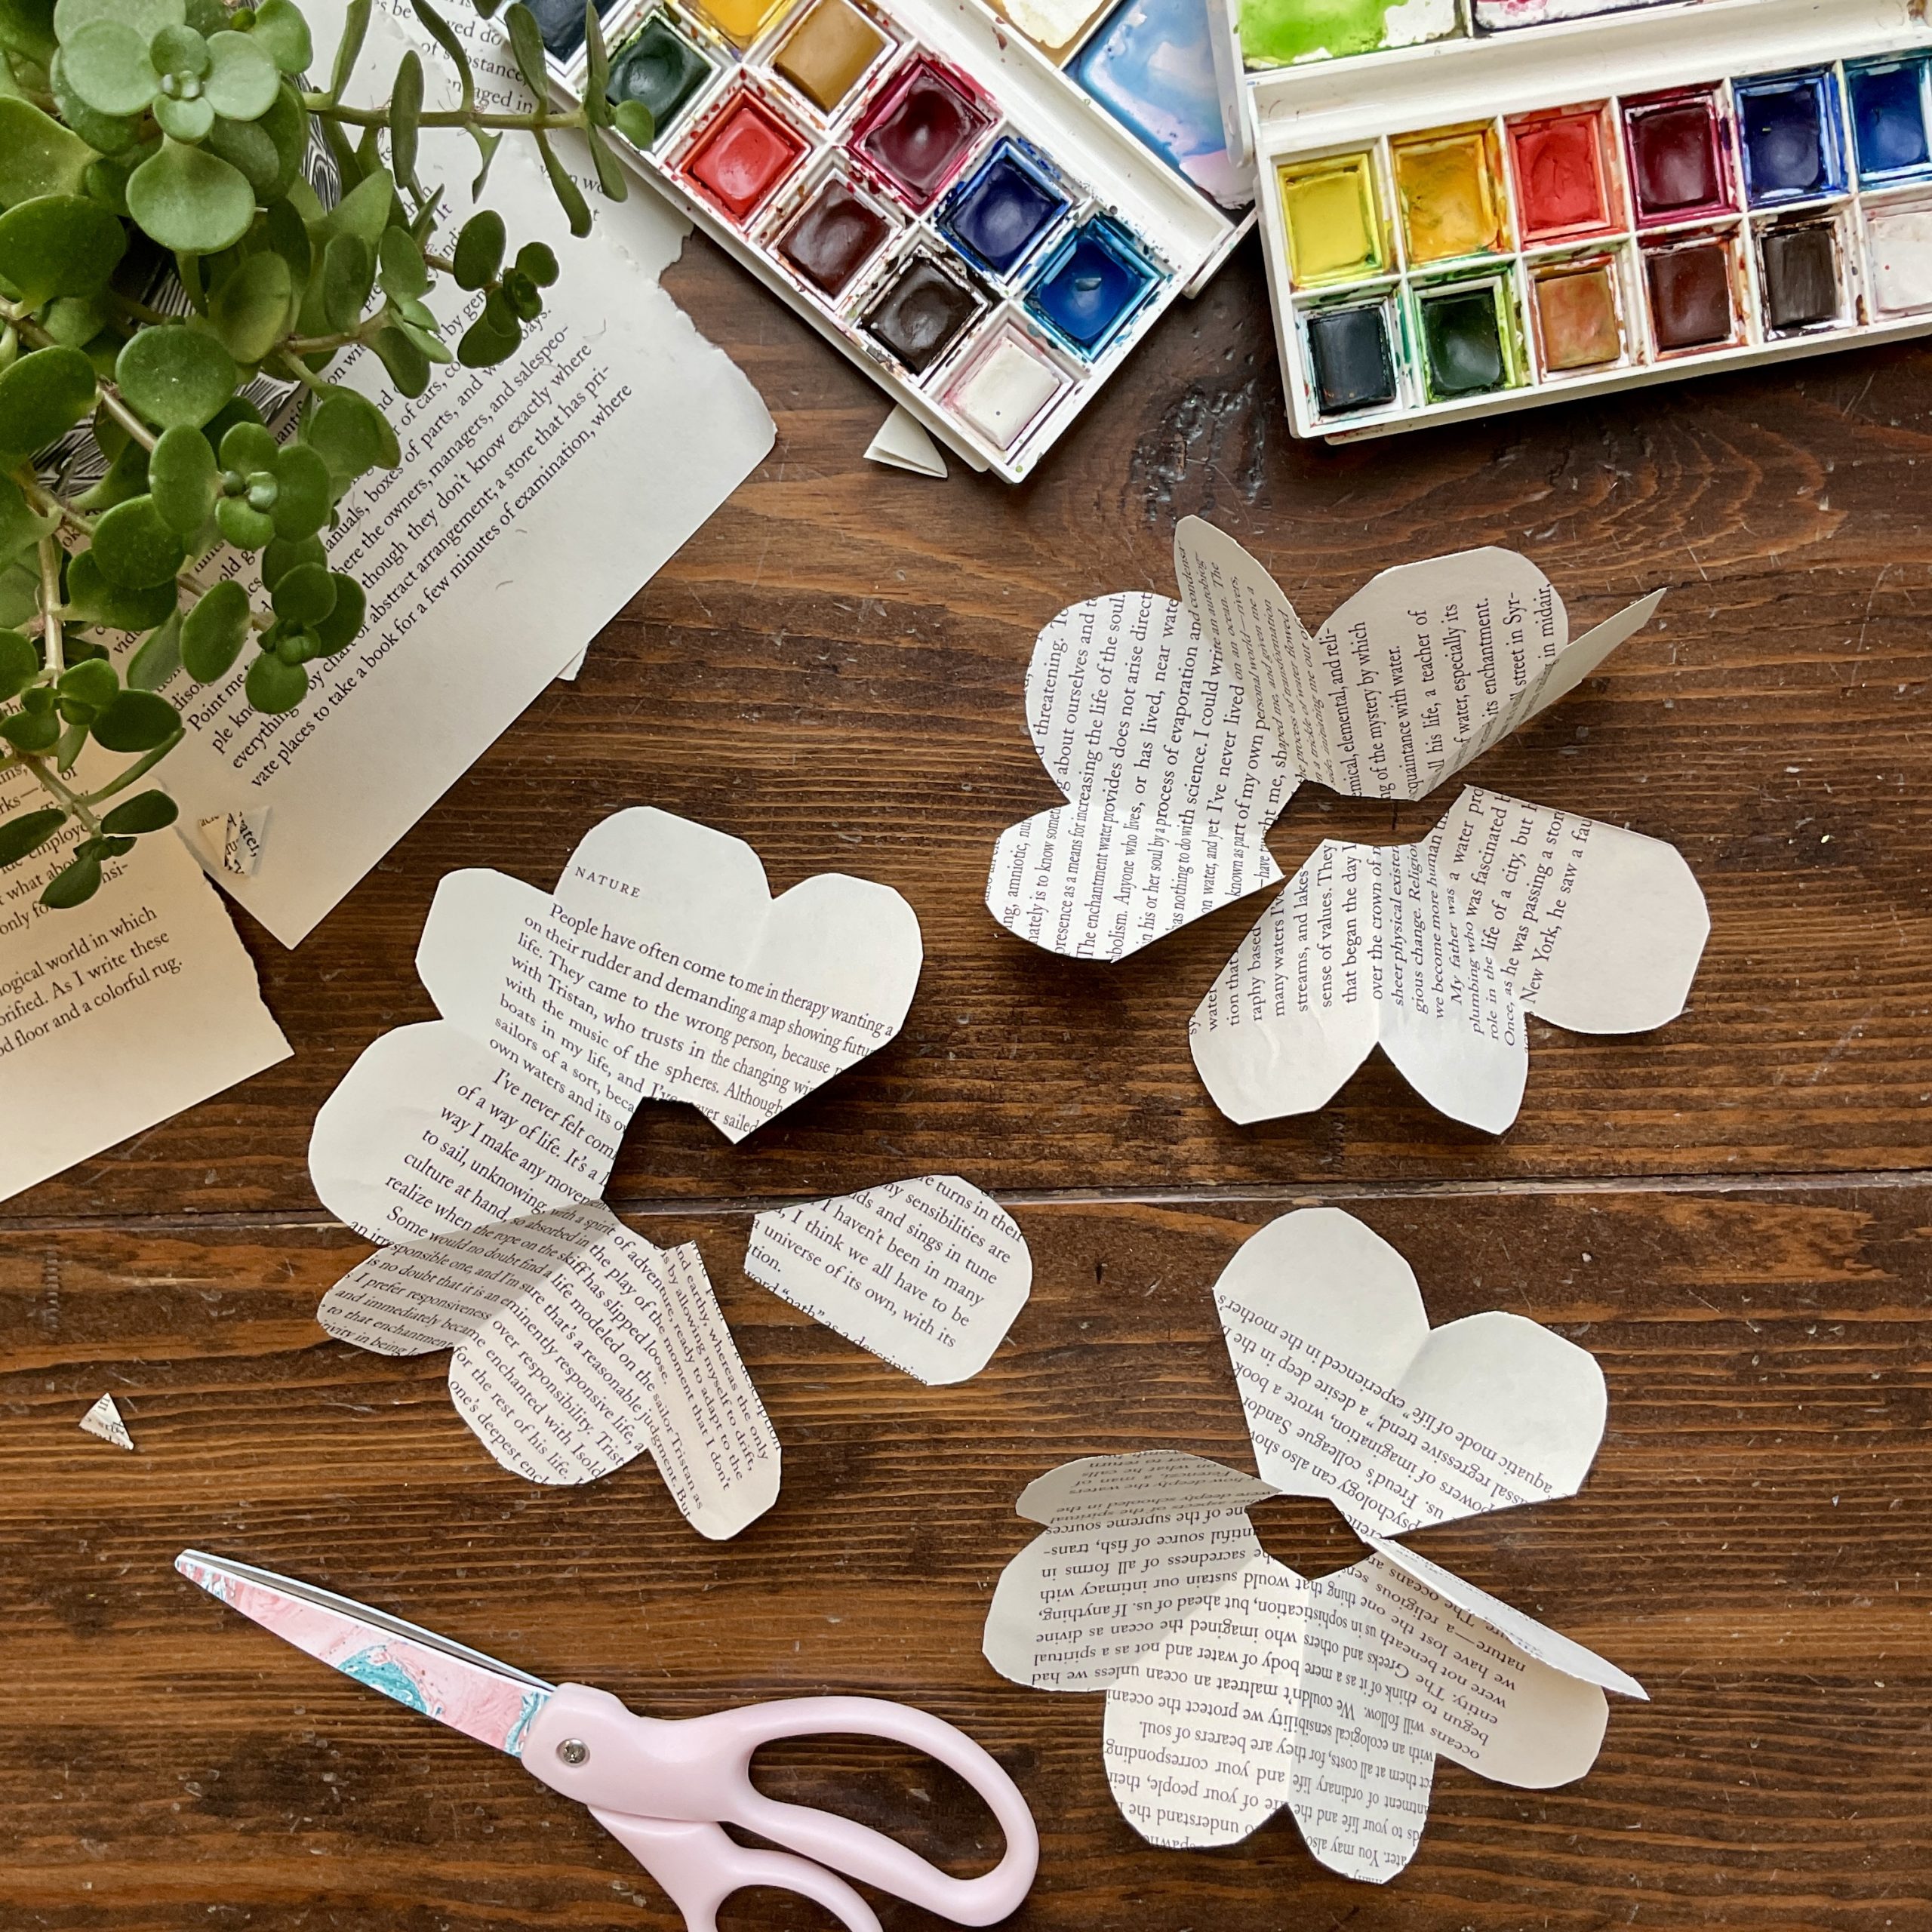
2. Fashion Delicate, Romantic Roses from Vintage Book Pages
Making these paper roses is a skill that opens up a ton of other decor projects. It’s simpler than it looks, but patience is key for a polished result.
- Prep your pages: Cut your book pages into circles of three different sizes (e.g., 2″, 3″, and 4″ diameters). You’ll need about 8-10 circles per flower.
- Shape the petals: Cut a spiral into each circle, starting from the outside and working your way in. The wider the spiral, the thicker your petals will be.
- Roll the rose: Starting from the outer end of the spiral, begin rolling the paper strip tightly around a pair of tweezers or a thin dowel. Keep the bottom edge aligned.
- Secure the flower: Once you reach the center of the spiral (the small circle base), add a dab of hot glue to the base and press the rolled portion onto it. Hold for 30 seconds until set.
It should take about 15-20 minutes to make your first one, but you’ll get faster with practice.
🔧 How-To Brief
Here’s a tip that makes a huge difference: pay attention to the paper. Not all book paper is created equal. Thinner, more brittle pages from older paperbacks are fragile and can tear while you’re rolling them. Look for books from the 80s or 90s, which often have slightly thicker, more flexible paper that’s still off-white from age. If you only have new, bright white paper, you can “age” it by lightly spraying it with cooled black tea or coffee and letting it dry completely before cutting.
3. Arrange Book Page Roses into a Rustic Teacup Centerpiece
Once you’ve mastered making the roses from Idea #2, arranging them is all about balance. Think of it like a simple recipe. Your formula is: 60% Book Page Roses + 30% A Vintage Vessel + 10% Natural Filler. For the vessel, a thrifted teacup, a small wooden crate, or even a glass jam jar works perfectly. The filler is what gives it a rustic touch—tuck in small sprigs of dried lavender, eucalyptus, or a few twigs from your yard. This approach ensures your beautiful roses are the star, but the overall piece feels complete and intentional.
⭐ The One Thing
You absolutely do not need to spend a lot to create this charming look. A high-end boutique might charge $50+ for a similar arrangement. You can make one for the cost of a coffee. Scour your local thrift store or Goodwill for vintage teacups—they rarely cost more than $1-$3. An old paperback can be found for under $1. With a hot glue gun and some twigs from the garden, you can easily create this entire centerpiece for under $5. It’s a perfect, thoughtful gift or a sweet decoration for a bookshelf.
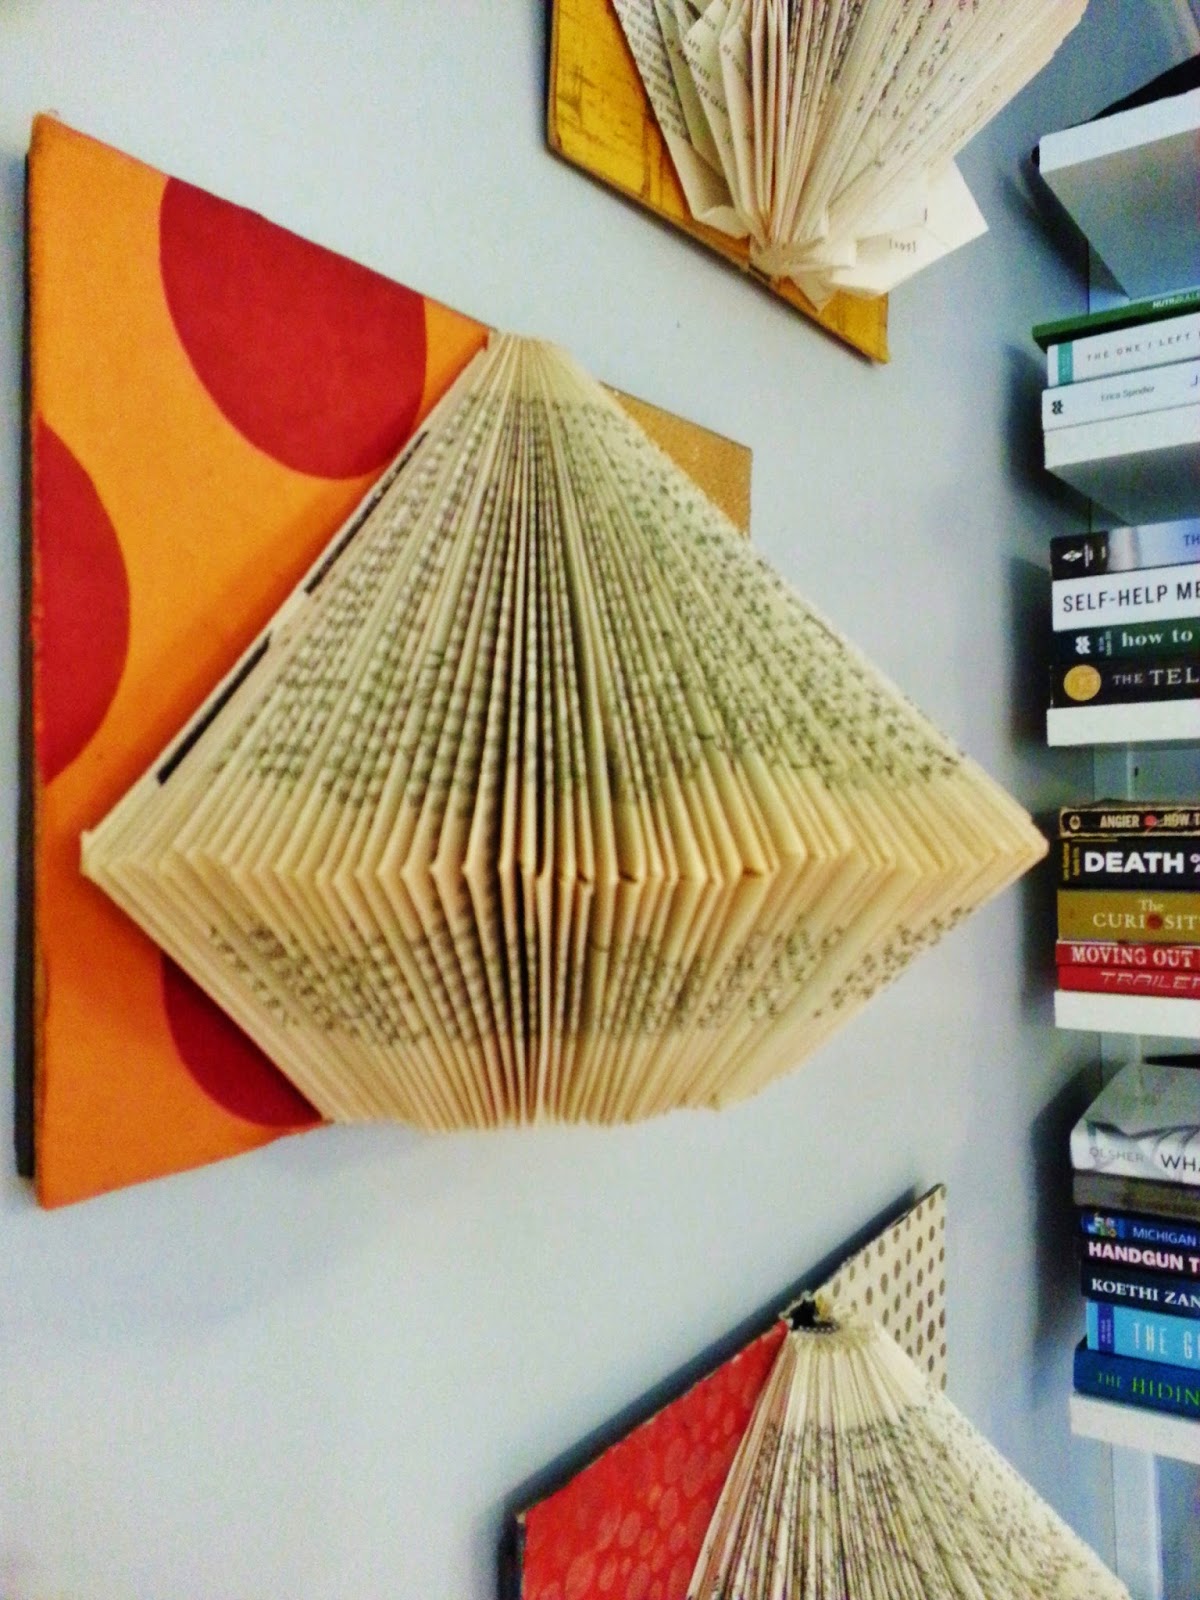
4. Create Playful Wall Decor with Folded Book Pages on Geometric Backings
The charm here comes from a classic design principle: contrast. You have the soft, organic, fanned-out folds of the book pages, full of texture and history. Then you place that against a very rigid, flat, and modern shape—a colorful square with a graphic pattern like polka dots. The book pages say ‘cozy library,’ while the bright, geometric backing says ‘modern art.’ When you put them together, they create a visual tension that is incredibly eye-catching and fun. It’s unexpected, and that’s why it feels so creative and fresh.
💰 Budget Breakdown
Let’s be honest: folding book pages this precisely is a time commitment. This isn’t a quick 20-minute craft. To get those clean, uniform folds, you need to work carefully and use a template. If you rush it, the final shape will look sloppy and uneven. Also, consider the dust factor. These fanned-out pages create dozens of little ledges for dust to settle. They’ll need regular dusting with a soft brush or a can of compressed air to keep them looking sharp, especially if they’re displayed on an open wall.
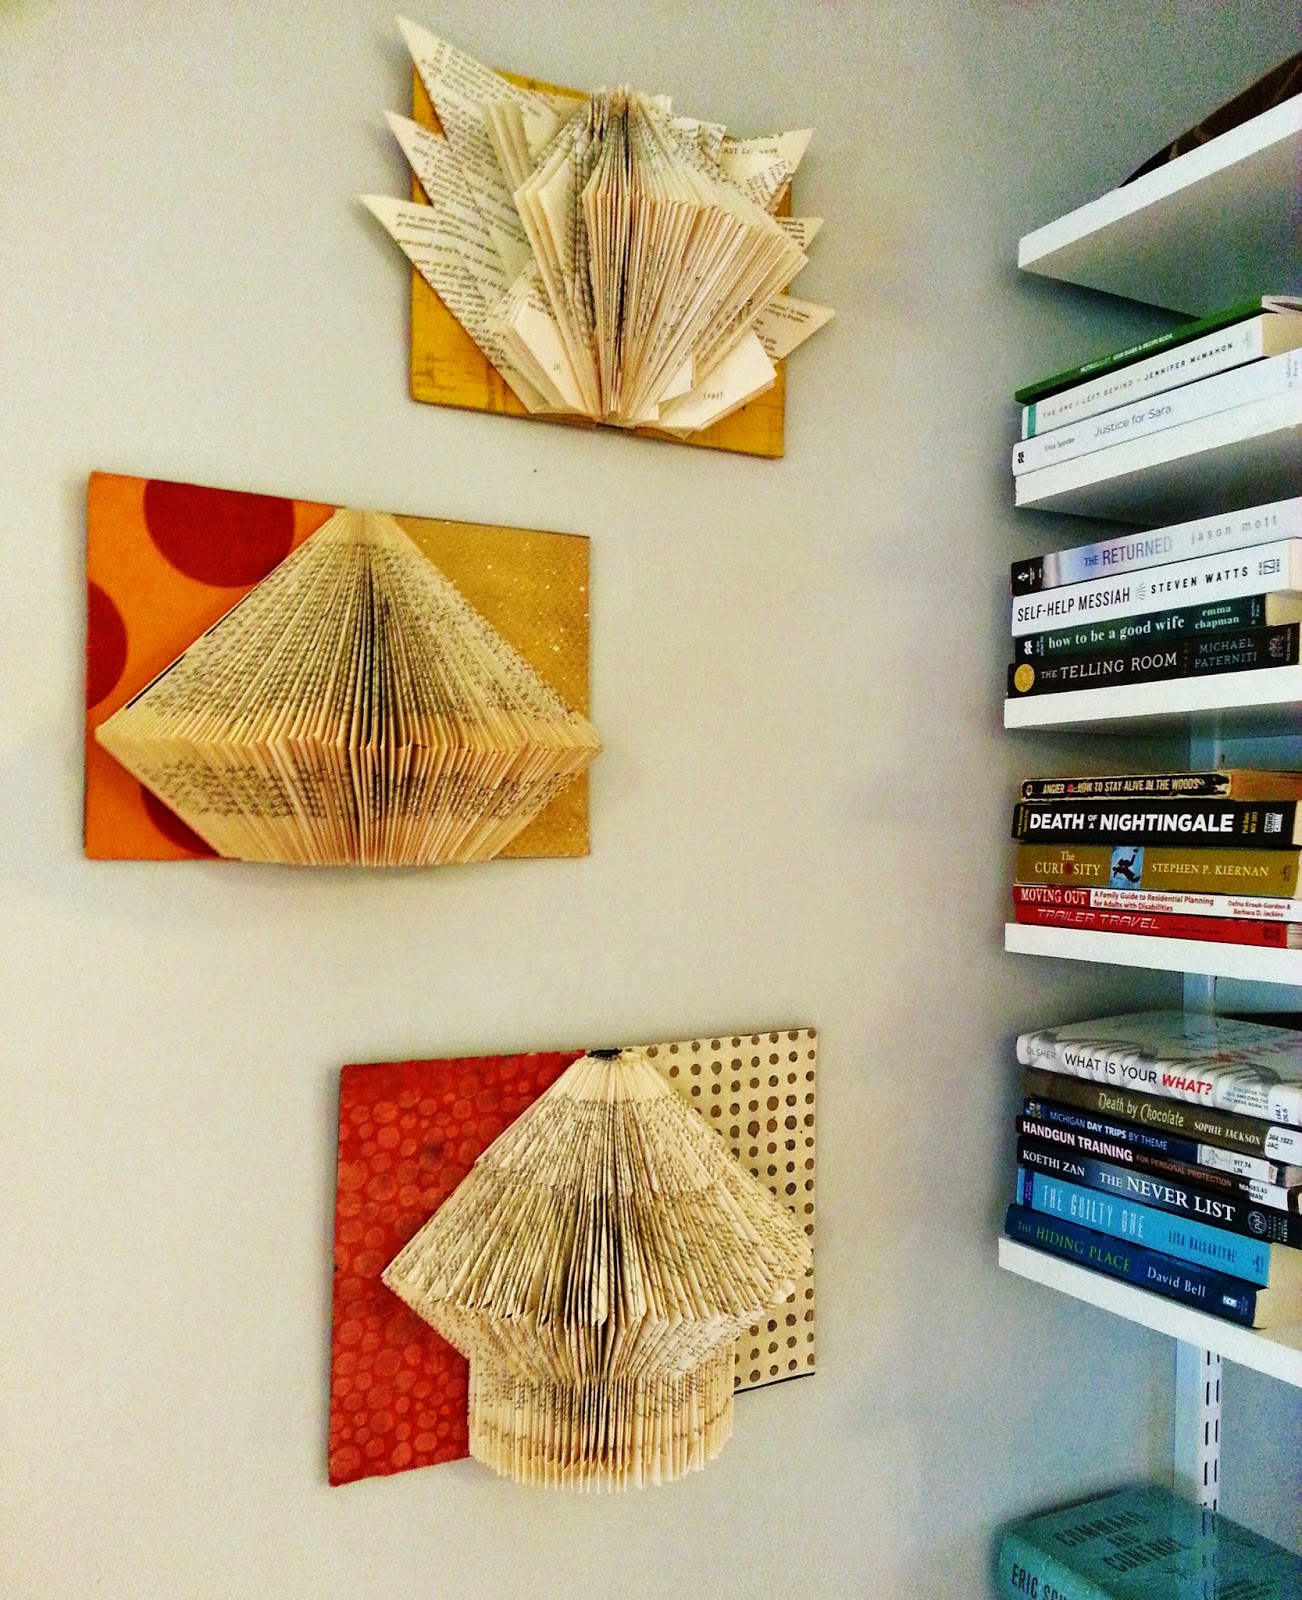
5. Design a Vertical Gallery with Folded Book Sculptures on Canvas
This kind of vertical arrangement is a fantastic solution for those awkward, narrow walls in your home—like the space next to a doorway, at the end of a hallway, or between two windows. To pull this off, you need a wall space that is at least 24 inches wide; any narrower and the composition will feel cramped. The ceiling height should be standard (8 feet) or taller. The key is the verticality; it draws the eye upward, making the space feel taller. It’s a great alternative to a single, skinny piece of art. Compare this to the more spread-out arrangement in Idea #4.
🎯 What Makes It Work
When you’re mounting these on patterned canvases, the goal is for the background to complement the book sculpture, not compete with it. A simple rule of thumb is to choose small-scale patterns with a limited color palette. Think simple polka dots, thin stripes, or a subtle geometric print. Pick a dominant color from your room’s decor and find patterns that use it. To create a cohesive look for a trio like this, use one patterned canvas as your “hero” piece and pull solid colors from that pattern for the other two canvases.
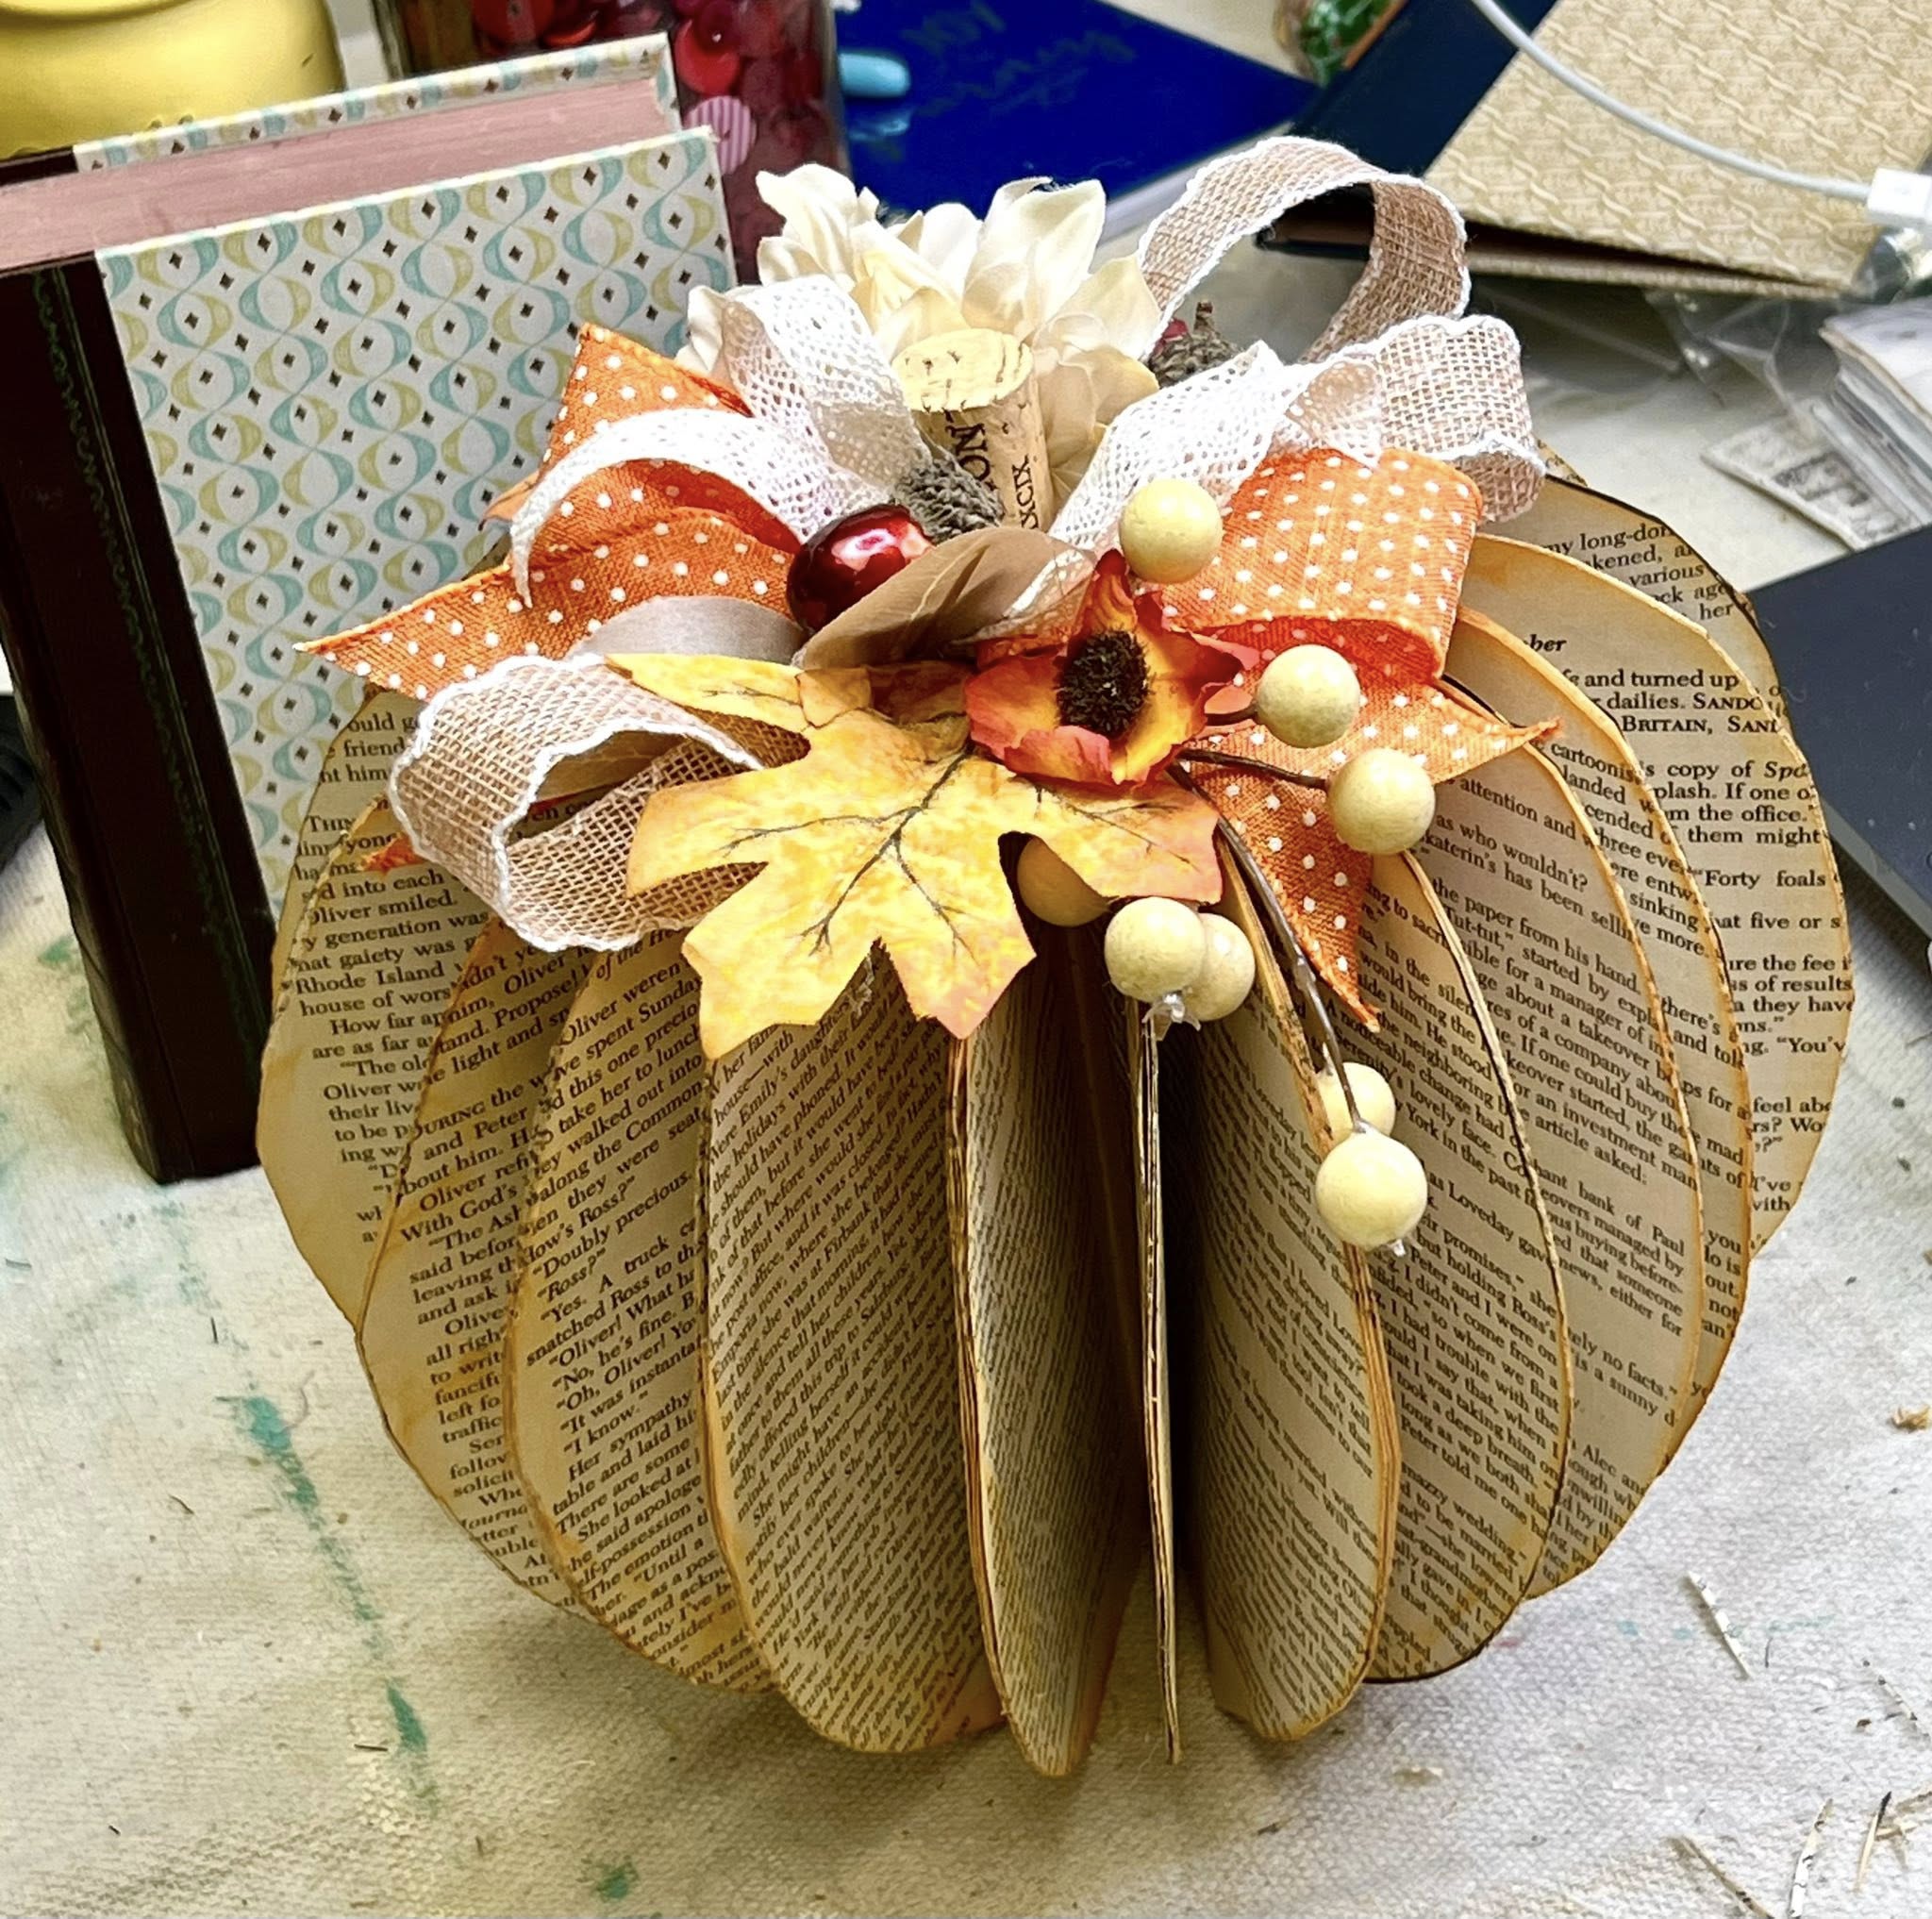
6. Craft a Charming Autumn Pumpkin from Upcycled Book Pages
This is a go-to weekend craft for autumn, and it’s surprisingly forgiving for beginners. The whole project shouldn’t take more than an hour and costs less than $10 in materials.
- Create a template: Draw half a pumpkin shape on a piece of cardboard and cut it out.
- Trace and cut: Stack 5-10 book pages together. Trace your pumpkin template onto the top page. Cut through all the layers at once to get multiple identical shapes. Repeat until you have 40-50 cutouts.
- Fold and glue: Fold each pumpkin cutout in half, with the printed text facing inward.
- Assemble the pumpkin: Take two folded cutouts and glue their back halves together. Continue adding pieces, one by one, gluing back-to-back, until you have a full circle.
- Add the stem: Fan out the pages to create the 3D pumpkin shape. Use a hot glue gun to secure a wine cork, a small twig, or a cinnamon stick in the center as a stem.
🧹 Maintenance Reality
The single element that makes this craft absolutely sing is the wine cork stem. Without it, you have a perfectly nice paper pumpkin. But the cork adds a layer of rustic, found-object charm that is just delightful. It’s a witty nod to autumnal comforts (a glass of red wine on a chilly evening) and its texture and shape are the perfect organic counterpoint to the uniform paper pages. It’s what elevates the project from a simple kid’s craft to a piece of decor you’ll be excited to display on your mantel.
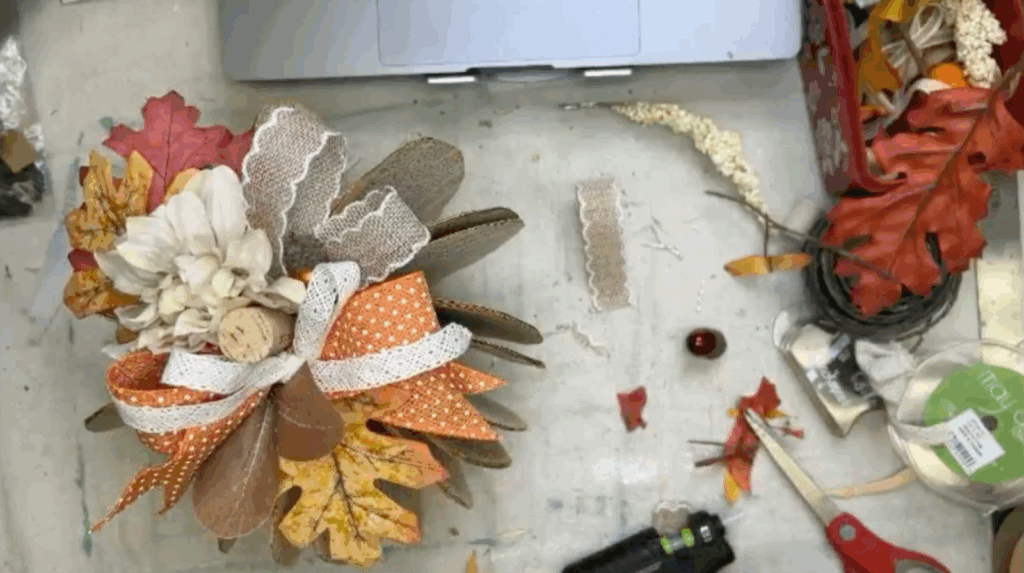
7. Fashion a Full, Ruffled Wreath from Repurposed Book Pages
Book page wreaths are having a major moment on Pinterest and Etsy right now, and it’s easy to see why. As home decor in 2026 leans more into authentic, sustainable, and personalized elements, this craft hits all the right notes. It’s an antidote to mass-produced, generic decor. Each wreath is unique, carrying the faint imprint of the stories on its pages. It speaks to a love of reading and a desire for a home that feels curated and cozy, not just decorated. This trend has staying power because it’s not about a specific color or pattern, but about texture and personal meaning.
📐 Style Math
Be prepared for a paper-cutting marathon. To get this full, fluffy look, you need a *lot* of paper strips or circles, way more than you probably think. This can be a tedious and time-consuming process, so put on a good podcast or audiobook first. Also, paper is flammable. While these wreaths are gorgeous, they are not suitable for displaying near open flames. If you want to place it near candles, make sure they are battery-operated LEDs. This is especially important if you plan to make a holiday version like the one in Idea #10.
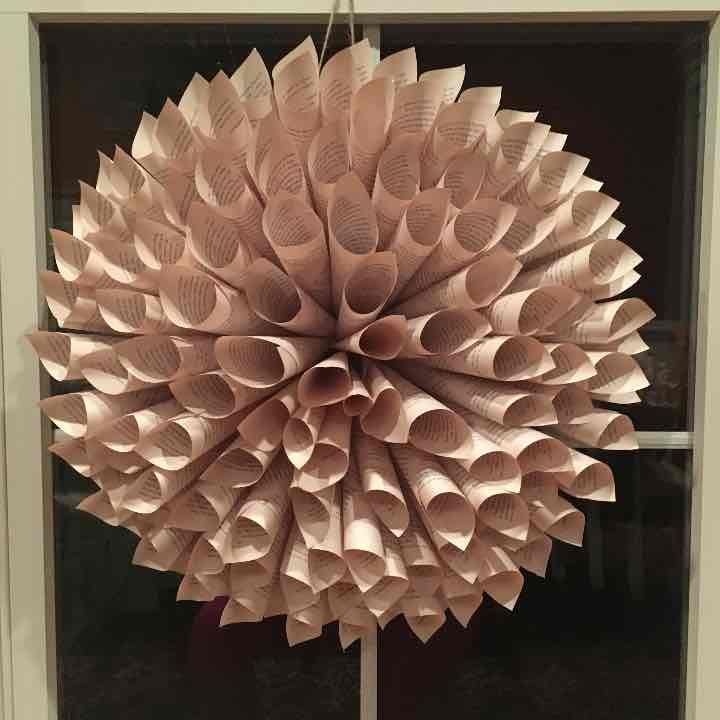
8. Assemble an Intricate Wreath from Rolled Book Page Cones
This wreath design is visually compelling because of one key principle: repetition. The entire piece is made of a single, simple shape—a paper cone—repeated dozens of times. Our brains are wired to find patterns pleasing, and the uniform texture created by all those cone tips is incredibly satisfying to look at. The second thing that makes it work is the ‘whole is greater than the sum of its parts’ effect. A single paper cone is nothing special, but when you multiply it by a hundred and arrange it in a circle, it becomes a complex, sculptural object that looks far more expensive and difficult to make than it actually is.
💸 Get This Look For Less
While this wreath is a showstopper, its intricate structure makes it a magnet for dust. A simple wipe-down isn’t possible. The best way to clean it is with a can of compressed air (the kind you use for keyboards), holding it about 8-10 inches away and using short bursts to dislodge dust from between the cones. You’ll want to do this every month or two. Over time, the aged paper can become more brittle, especially if it’s in a room with fluctuating humidity. Store it flat in a box after the holidays to prevent sagging or distortion.
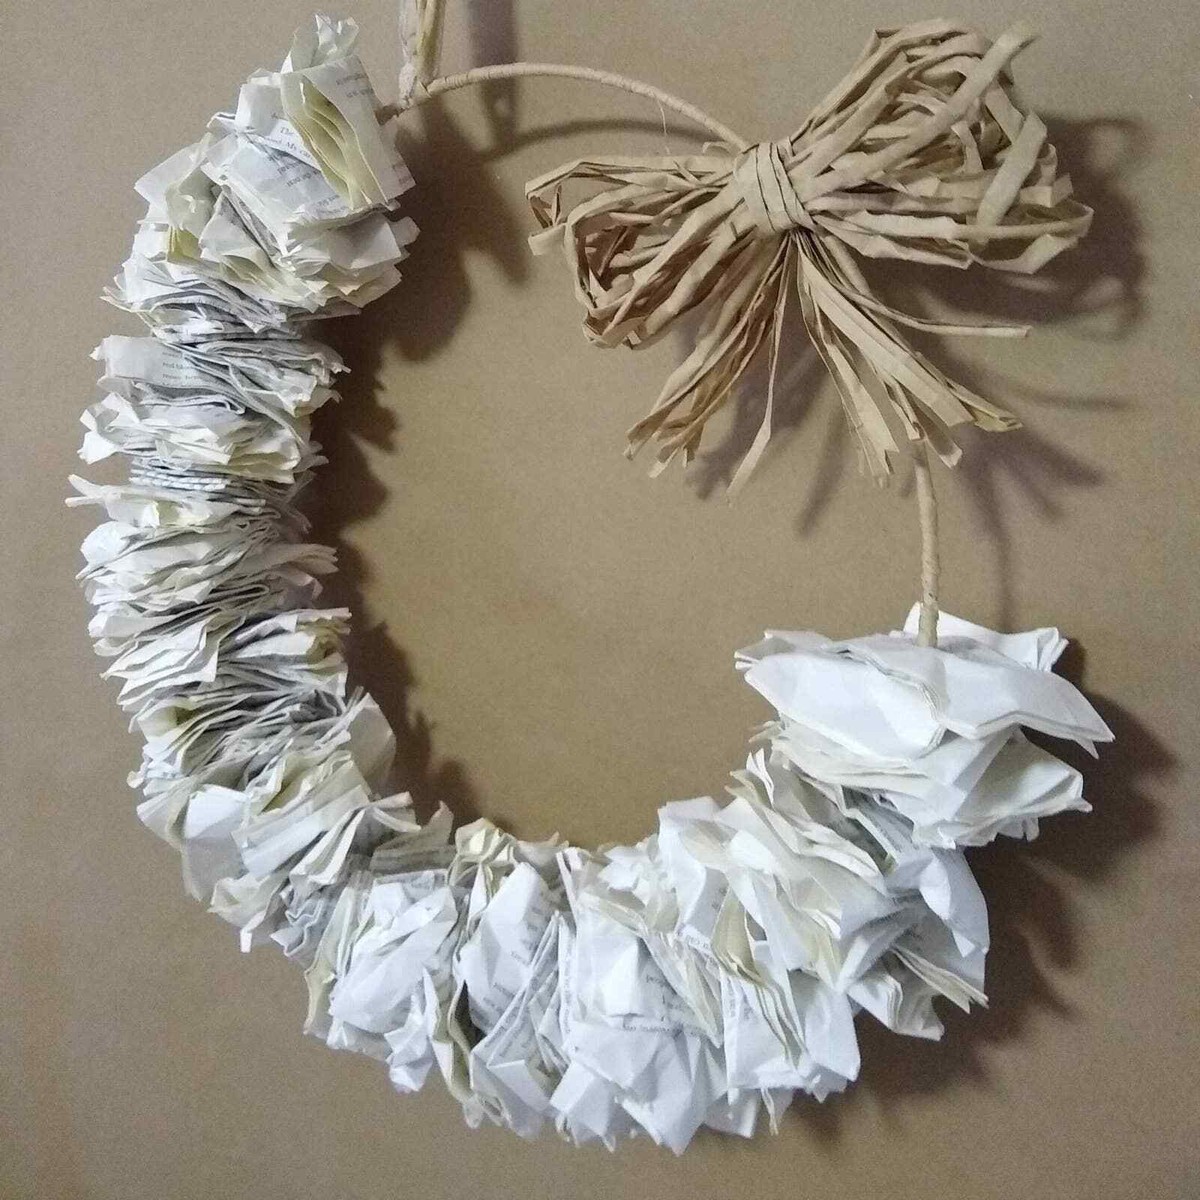
9. Craft a Rustic Wreath with Ruffled Pages and a Raffia Bow
The beauty of this simple, rustic wreath lies in its textural formula. It’s approximately 70% soft, ruffled book pages + 20% a natural, fibrous material + 10% a simple wreath base. The book pages provide a delicate, almost floral volume, while the raffia bow adds a completely different kind of rustic texture—it’s more coarse and linear. You can easily swap the elements while keeping the formula. Instead of raffia, you could use jute twine or a burlap ribbon. Instead of ruffled pages, you could use rolled cone pages like in Idea #8, but the core balance of soft paper and rustic fiber is what makes this style work.
⚠️ Real Talk
To get that perfectly imperfect ruffled edge on your paper, don’t use scissors. Tearing the paper gives you a much softer, more organic-looking edge that adds to the rustic charm. The easiest way to do this is to fold the paper where you want the tear, crease it sharply with your thumbnail, unfold it, and then gently pull the two sides apart along the crease. The paper fibers will separate naturally, creating a beautiful, slightly feathered edge that catches the light wonderfully.
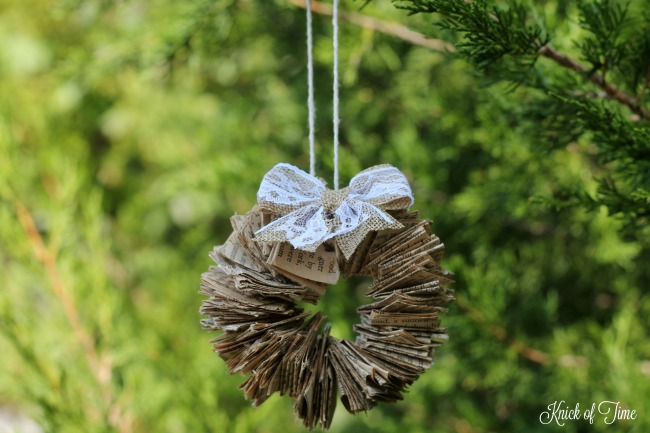
10. Assemble a Festive Christmas Wreath from Upcycled Book Pages
that truly transforms a standard book page wreath into a Christmas wreath is the thoughtful addition of color and seasonal texture. Without the sprigs of red berries or tiny pinecones tucked in, it’s just a paper wreath. But those small, festive embellishments instantly signal ‘holiday.’ They provide a pop of color against the neutral backdrop of the aged paper and connect the literary craft to the natural elements of the season. It’s the simplest detail, but it’s the most important for setting a festive mood.
🔥 Trending Context
Before you dive into this holiday project, run through this quick checklist to make sure you’re prepared.
- Gather your book pages: Do you have a book with paper that is the right color and thickness? Make sure you have enough to cover the entire wreath form.
- Choose your wreath form: A foam or straw wreath form from a craft store is ideal. Do you have one in the right size for your door or wall? (12-16 inches is standard).
- Pick your accents: Decide on your festive elements *before* you start gluing. Will you use faux berries, mini ornaments, a ribbon, or something else? Having a clear plan prevents the final piece from looking cluttered.
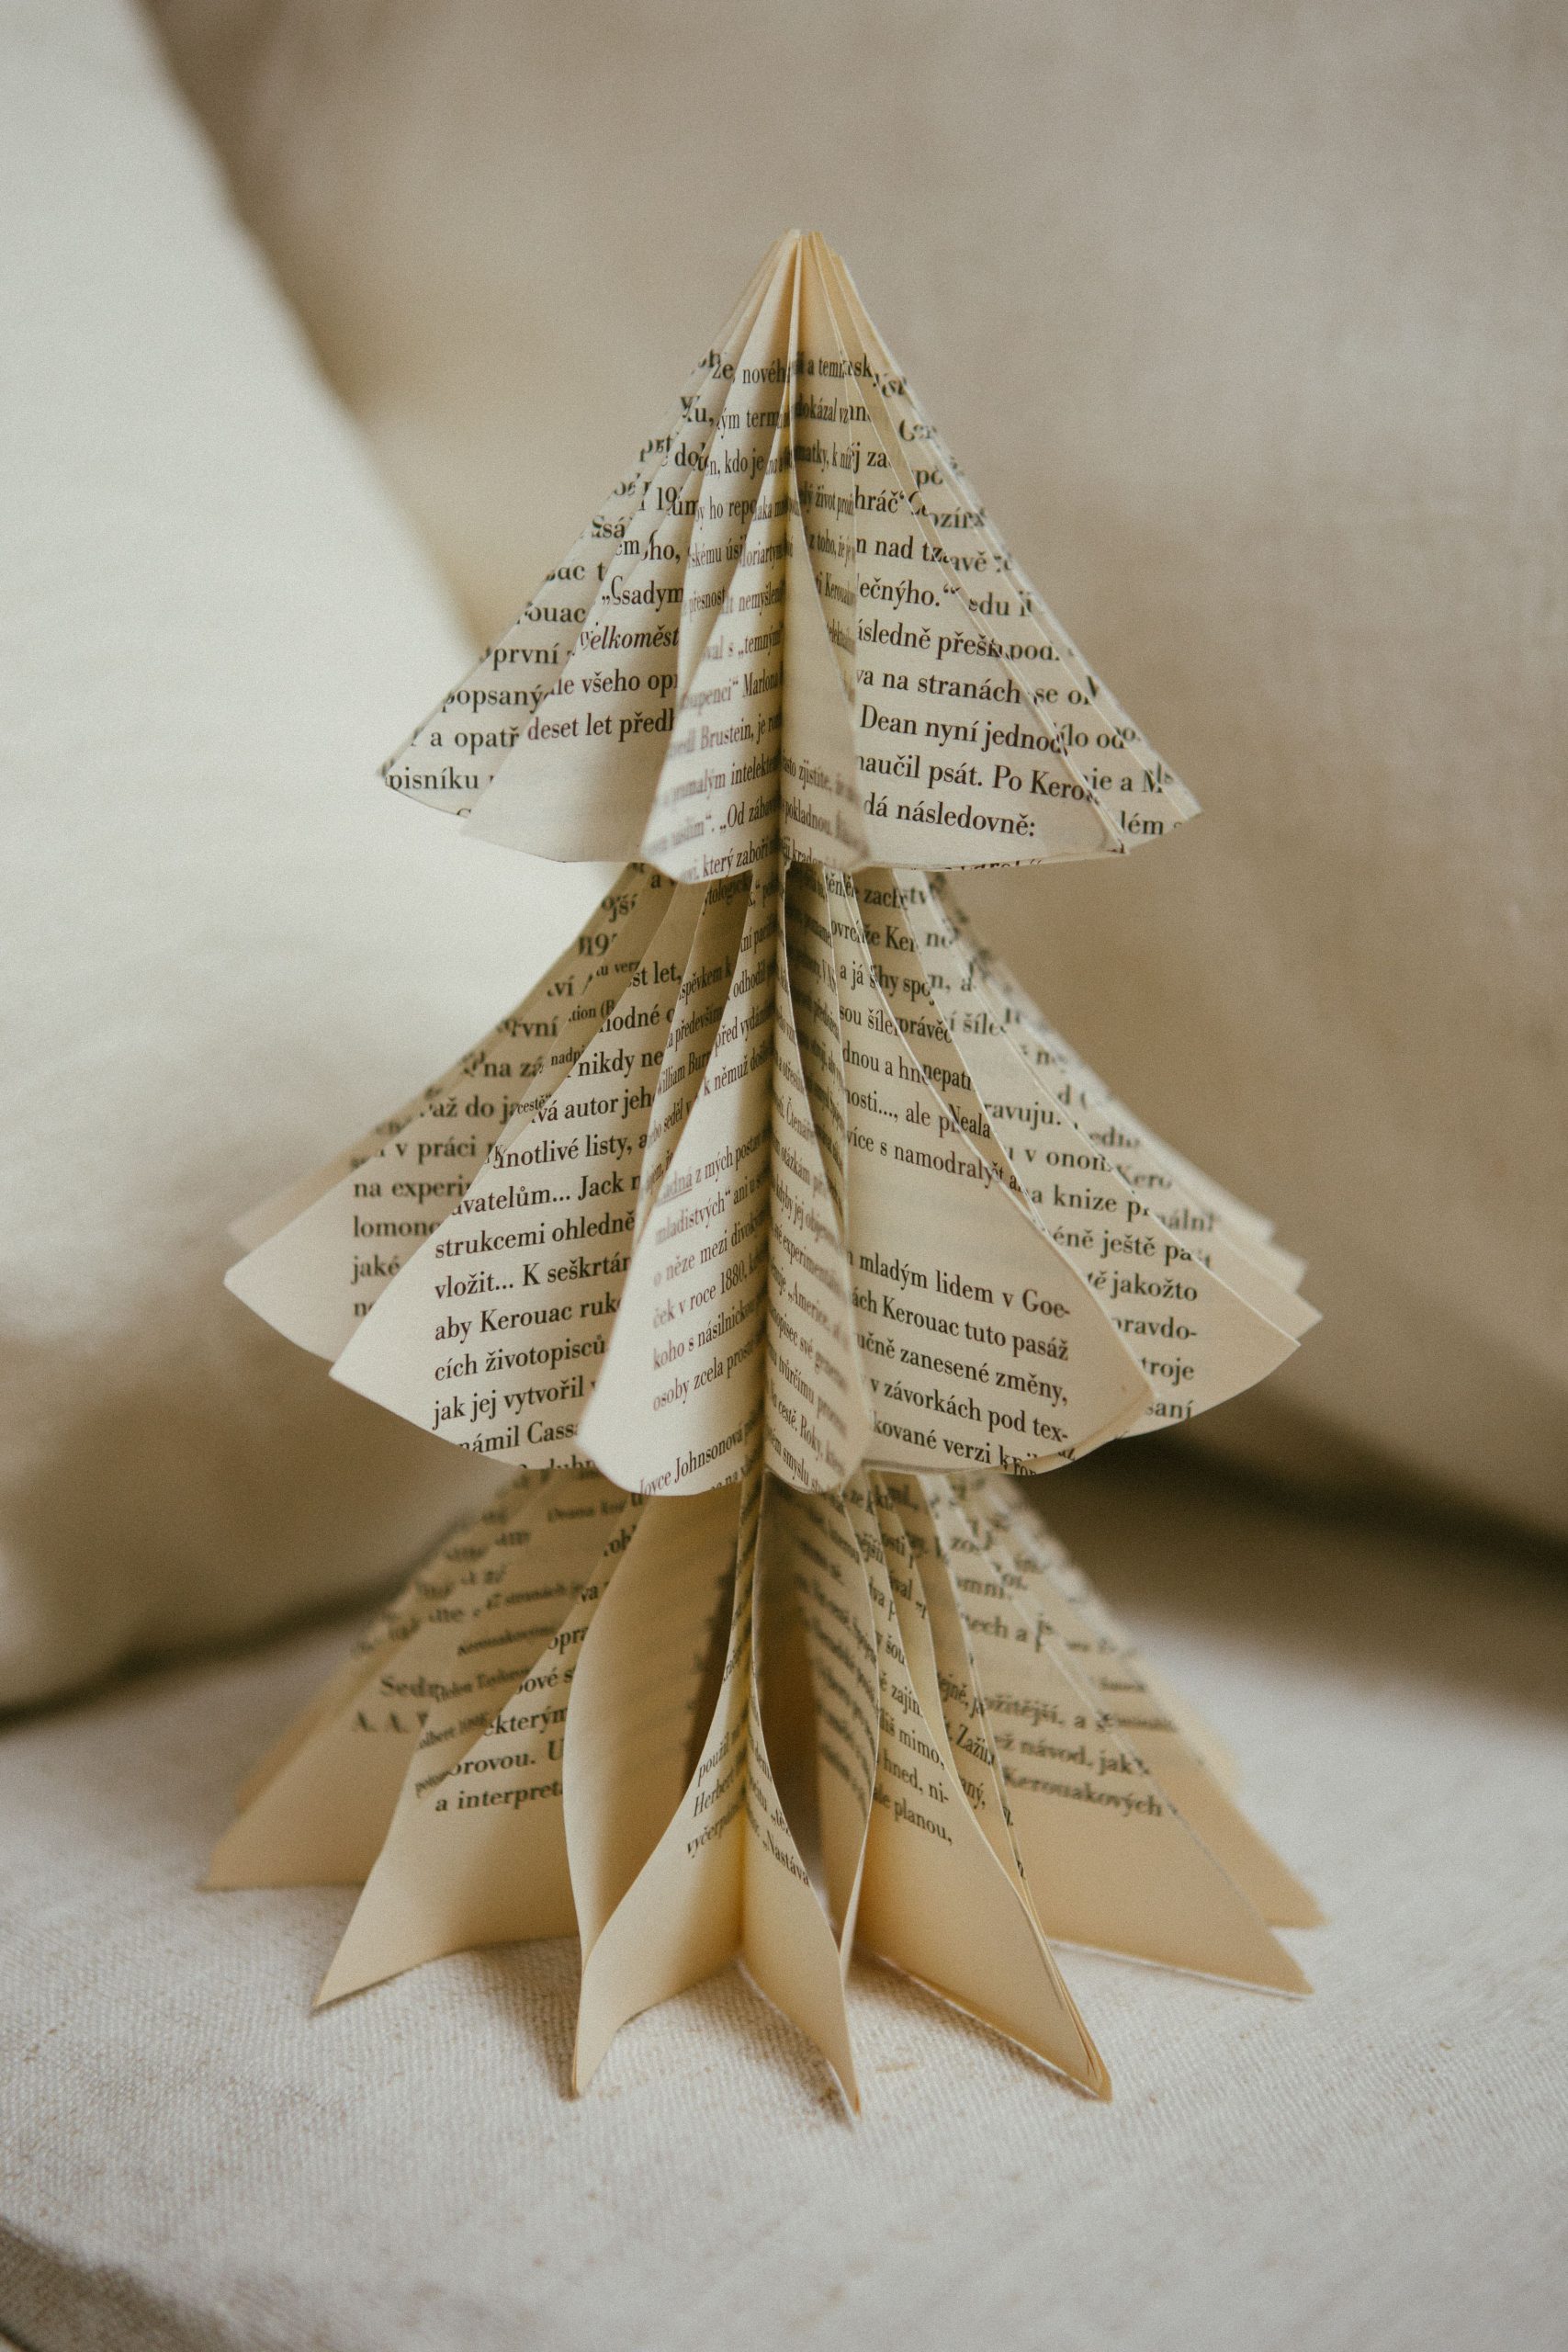
11. Fold an Old Book into a Three-Dimensional Christmas Tree
This is a classic book craft that looks much more complicated than it is. It’s all about a simple, repeated fold. This project requires a paperback book of at least 200 pages for a full-looking tree.
- Position the book: Place the book with its spine to the left and the cover open.
- The first fold: Take the top right corner of the first page and fold it down so it meets the inside of the spine. The page will form a triangle.
- The second fold: Take the same page and fold it again. This time, bring the new folded edge on the right over to meet the spine.
- Tuck the tail: You’ll have a small ‘tail’ of the page sticking out at the bottom. Fold this little triangle up so it tucks neatly into the main folds.
- Repeat, repeat, repeat: Do these three folds on every single page of the book.
After you’ve folded all the pages, you can fan them out to create the tree shape.
💡 Designer Tip
So, a word of warning: this project is a hand-cramper. You are folding hundreds of pages in exactly the same way. It’s incredibly repetitive. Put on a movie, because you’re going to be here for a while. The biggest potential pitfall is inconsistency. If you start folding loosely or don’t crease the edges sharply, your final tree will look lopsided. The key to a professional-looking result is making every single fold as precise and crisp as the first one. Using a bone folder (a dull-edged hand tool for folding paper) can save your fingers and create much sharper creases.
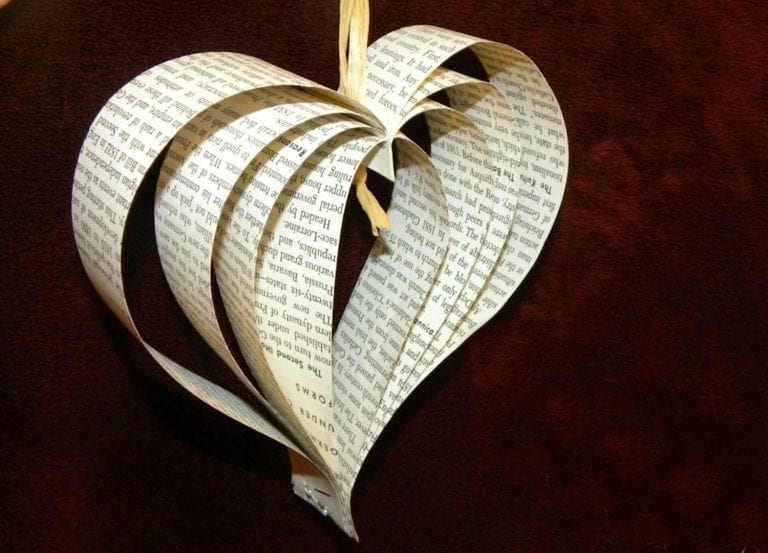
12. Craft a Whimsical Heart Ornament from Curled Book Page Strips
This is the perfect craft for using up scraps from other projects, making it incredibly budget-friendly. You can create a dozen of these for just a few dollars. All you need is an old book (even one that’s falling apart is perfect for this), which you can find at any thrift store for $1 or less. You’ll also need a glue gun and some twine or ribbon, which many crafters already have on hand. Don’t have a book you’re willing to cut up? Use old sheet music, maps, or even junk mail for a more modern, eclectic look. It’s a high-impact decoration with a very low cost.
📏 Scale Guide
This ornament is so charming because of the sense of movement and volume it creates from a flat material. The curled paper strips aren’t just glued flat; they are shaped to create negative space, giving the heart a light, airy, almost three-dimensional quality. The visible text on the pages adds a layer of depth and story, making you wonder what words are hidden in the curves. The simple, rustic rafia hanger provides a textural contrast to the delicate paper, grounding the piece and keeping it from feeling too fragile.
13. Create a Stunning Paper Rose with Autumnal Accents
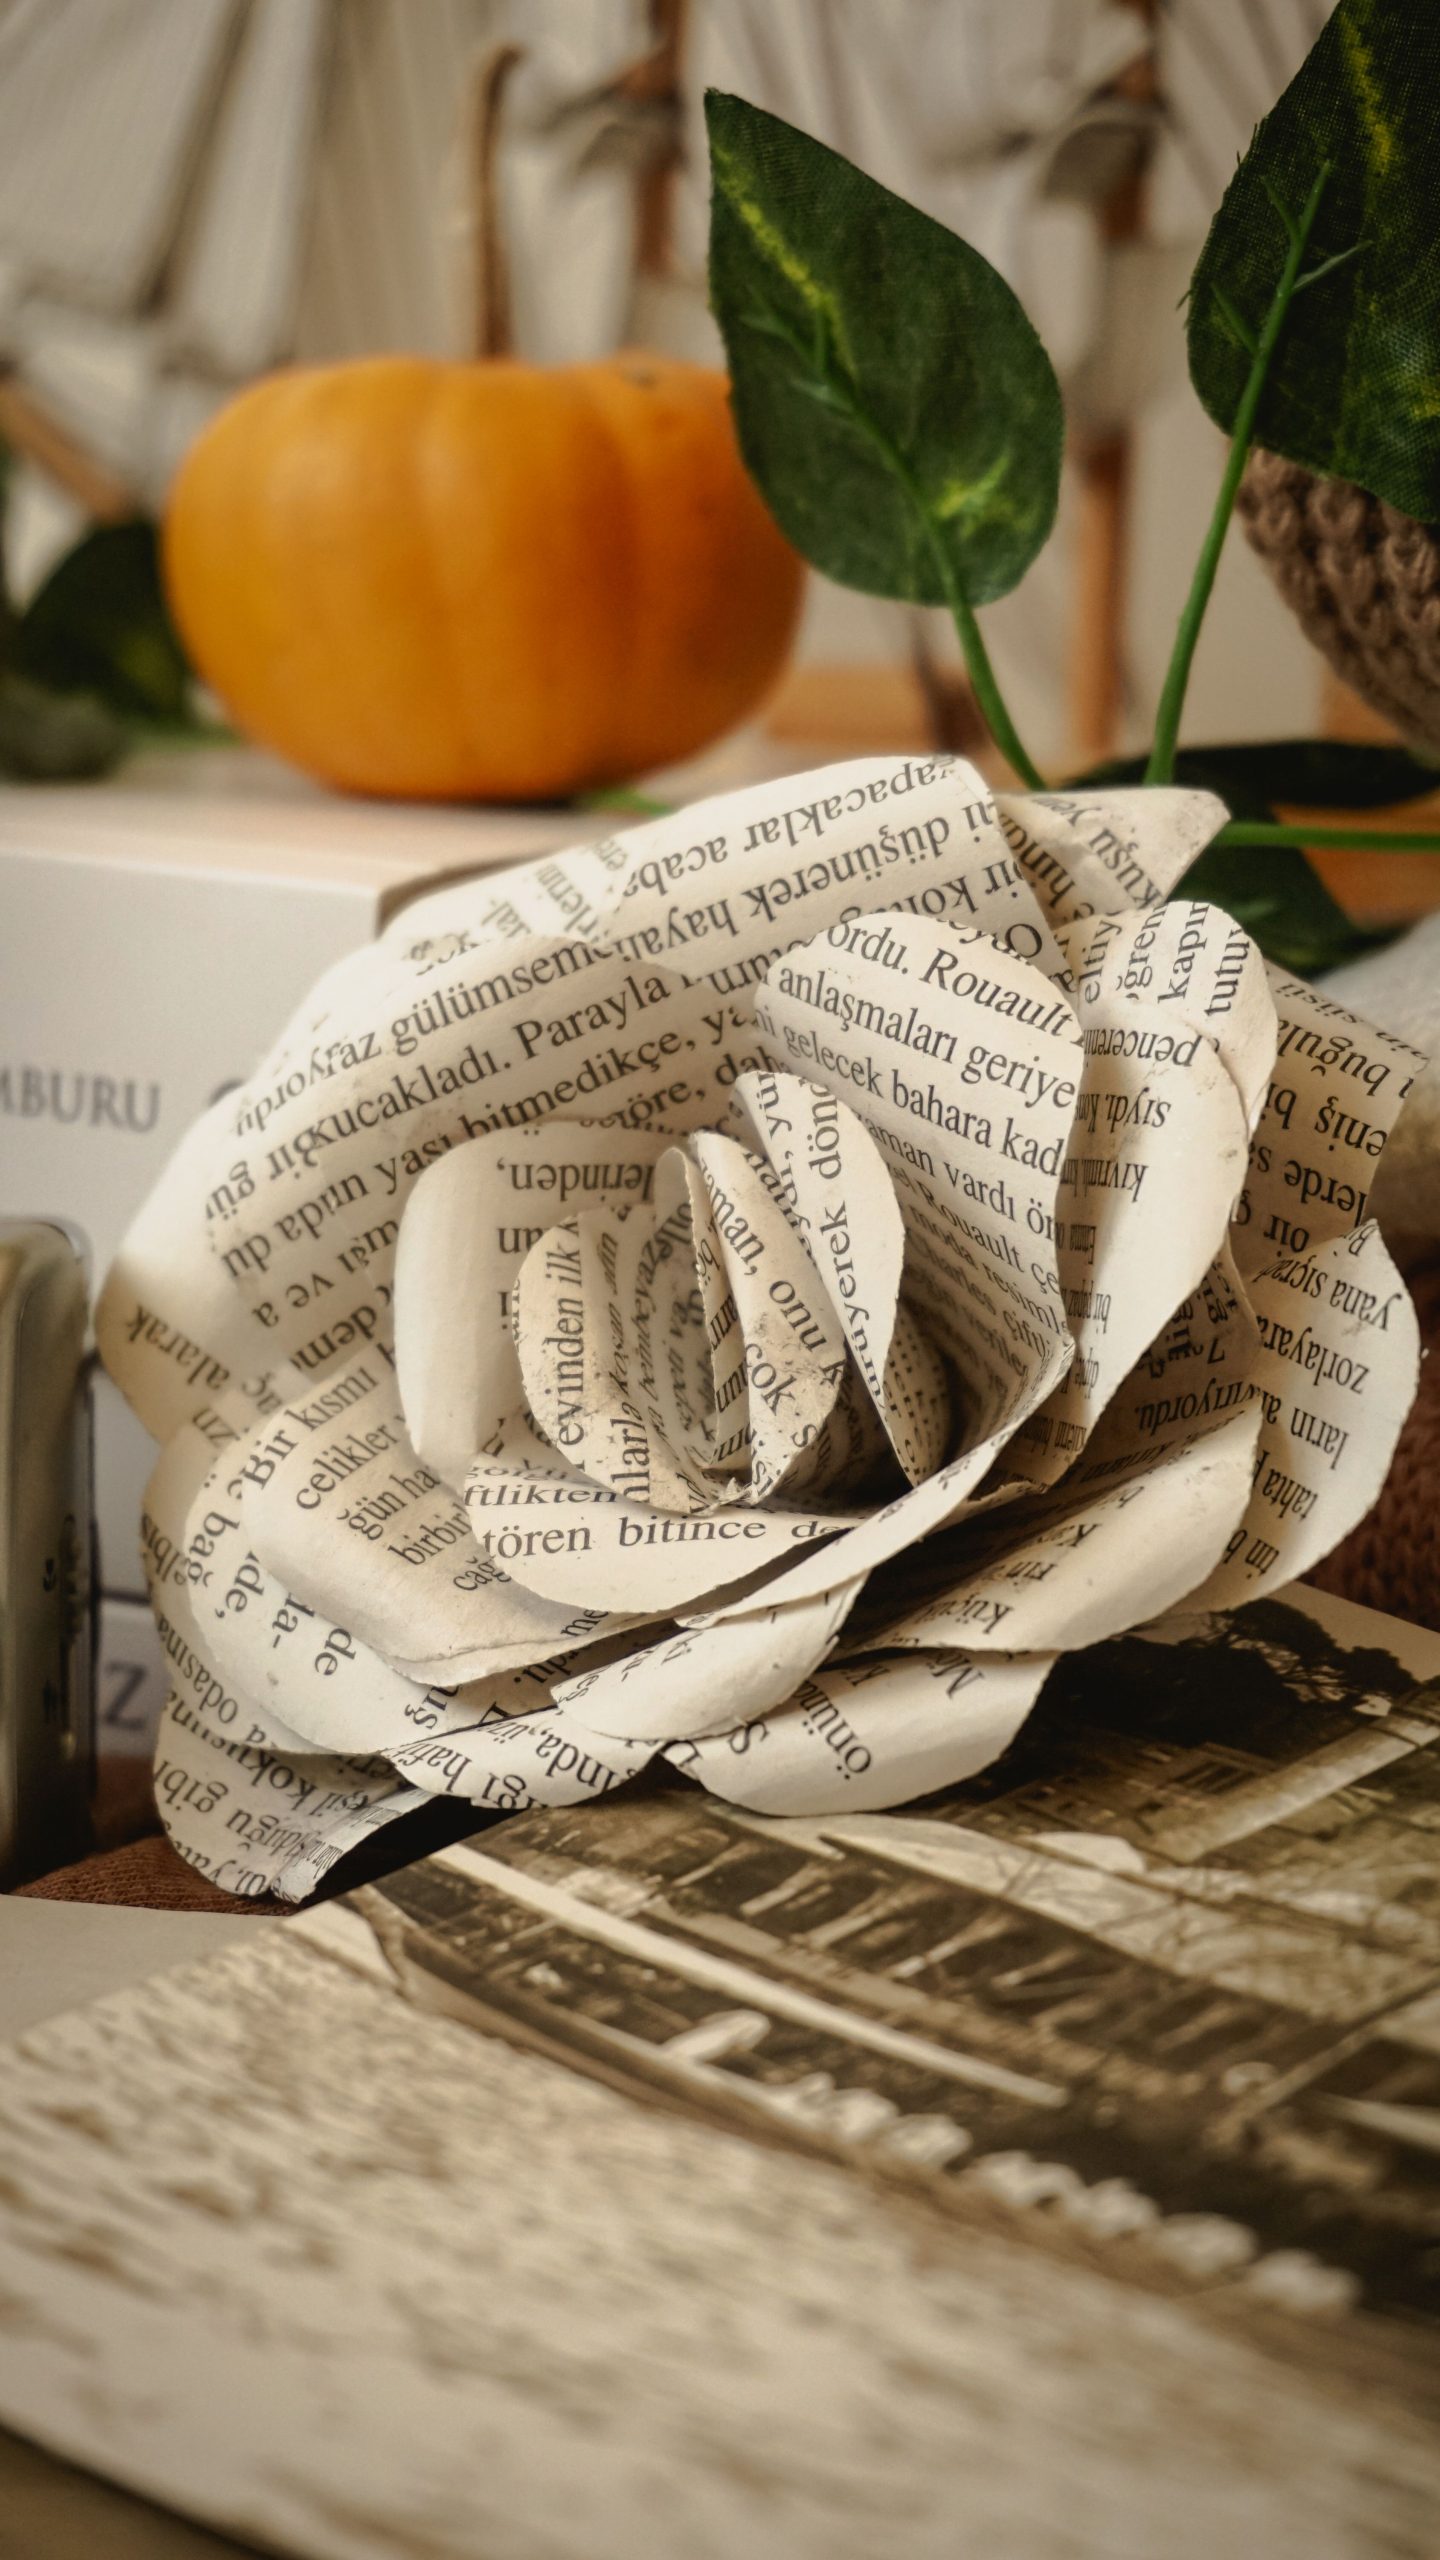
The single most important element in this little vignette is the visible text on the rose petals. Without it, you’d have a pretty paper flower. But the lines of print, peeking out from the folds, are what give the rose its soul. They transform it from a mere imitation of a flower into a literary object. The text adds a layer of narrative and history that a plain paper rose just can’t match. It’s what makes the object feel special, upcycled, and clever, rather than just decorative. It tells you immediately that this isn’t just any paper—it’s a page from a story.
✅ Before You Start
This look is a beautiful exercise in autumnal layering. The formula is simple: 40% Literary Element (the book page rose) + 40% Seasonal Color Pop (the orange pumpkin) + 20% Natural Texture (the artificial green leaves and woven background). You can easily adapt this. Swap the orange pumpkin for a deep red pomegranate for a richer winter look. Exchange the green leaves for some silvery dusty miller to make it feel more formal. As long as you maintain that core balance of a literary feature, a bold color, and some natural texture, you’ll achieve the same rustic, thoughtful vibe.
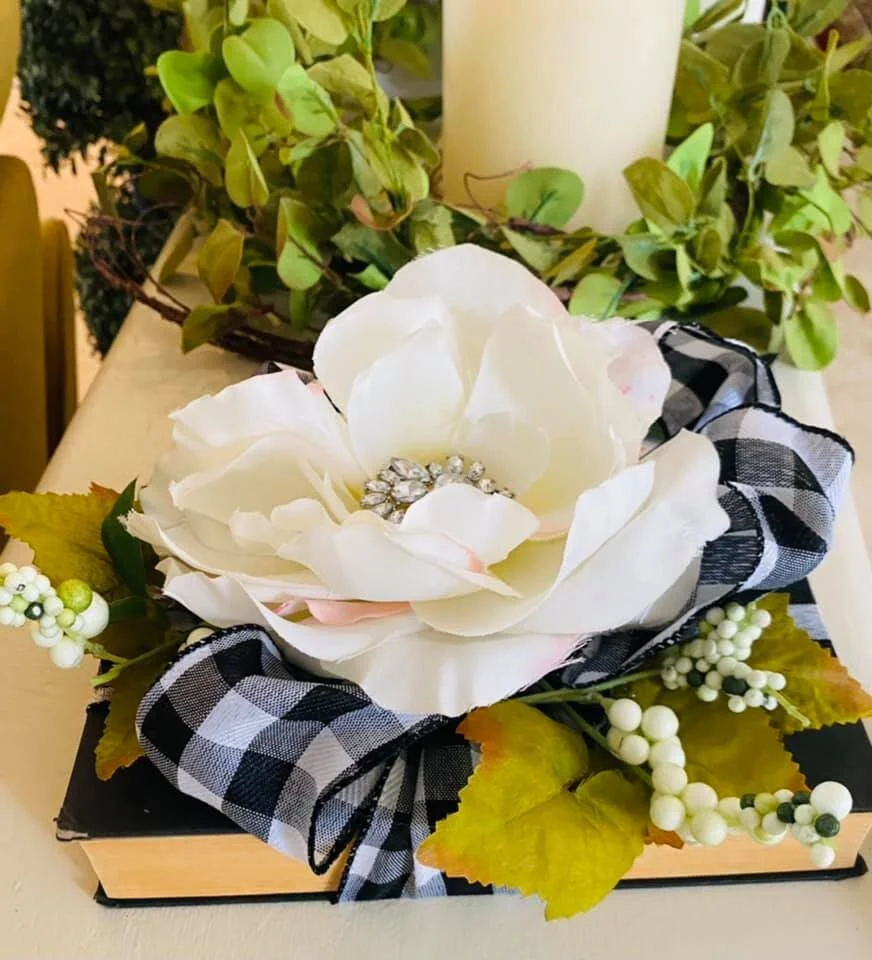
14. Adorn a Black Book with a Bold White Flower and Buffalo Check Ribbon
When you’re creating a decorative piece like this, pay close attention to the scale of your embellishments. The large white flower here works because it’s unapologetically bold and its size is proportional to the book. A common mistake is using several small, dinky decorations. One large, high-quality statement piece—like this flower with its rhinestone center—will almost always look more expensive and intentional than a cluster of ten tiny, cheap-looking items. When in doubt, go for fewer, larger, and better-quality embellishments.
🔧 How-To Brief
The power of this design comes from its high-contrast color scheme. The stark black of the book cover against the pure white of the flower creates a dramatic, eye-catching effect. It’s a classic, timeless combination that always feels chic. The black and white buffalo check ribbon is a clever addition because it bridges the two main colors and introduces a graphic pattern, adding another layer of visual interest. The sprigs of green provide a necessary touch of organic color, keeping the arrangement from feeling too harsh or sterile.
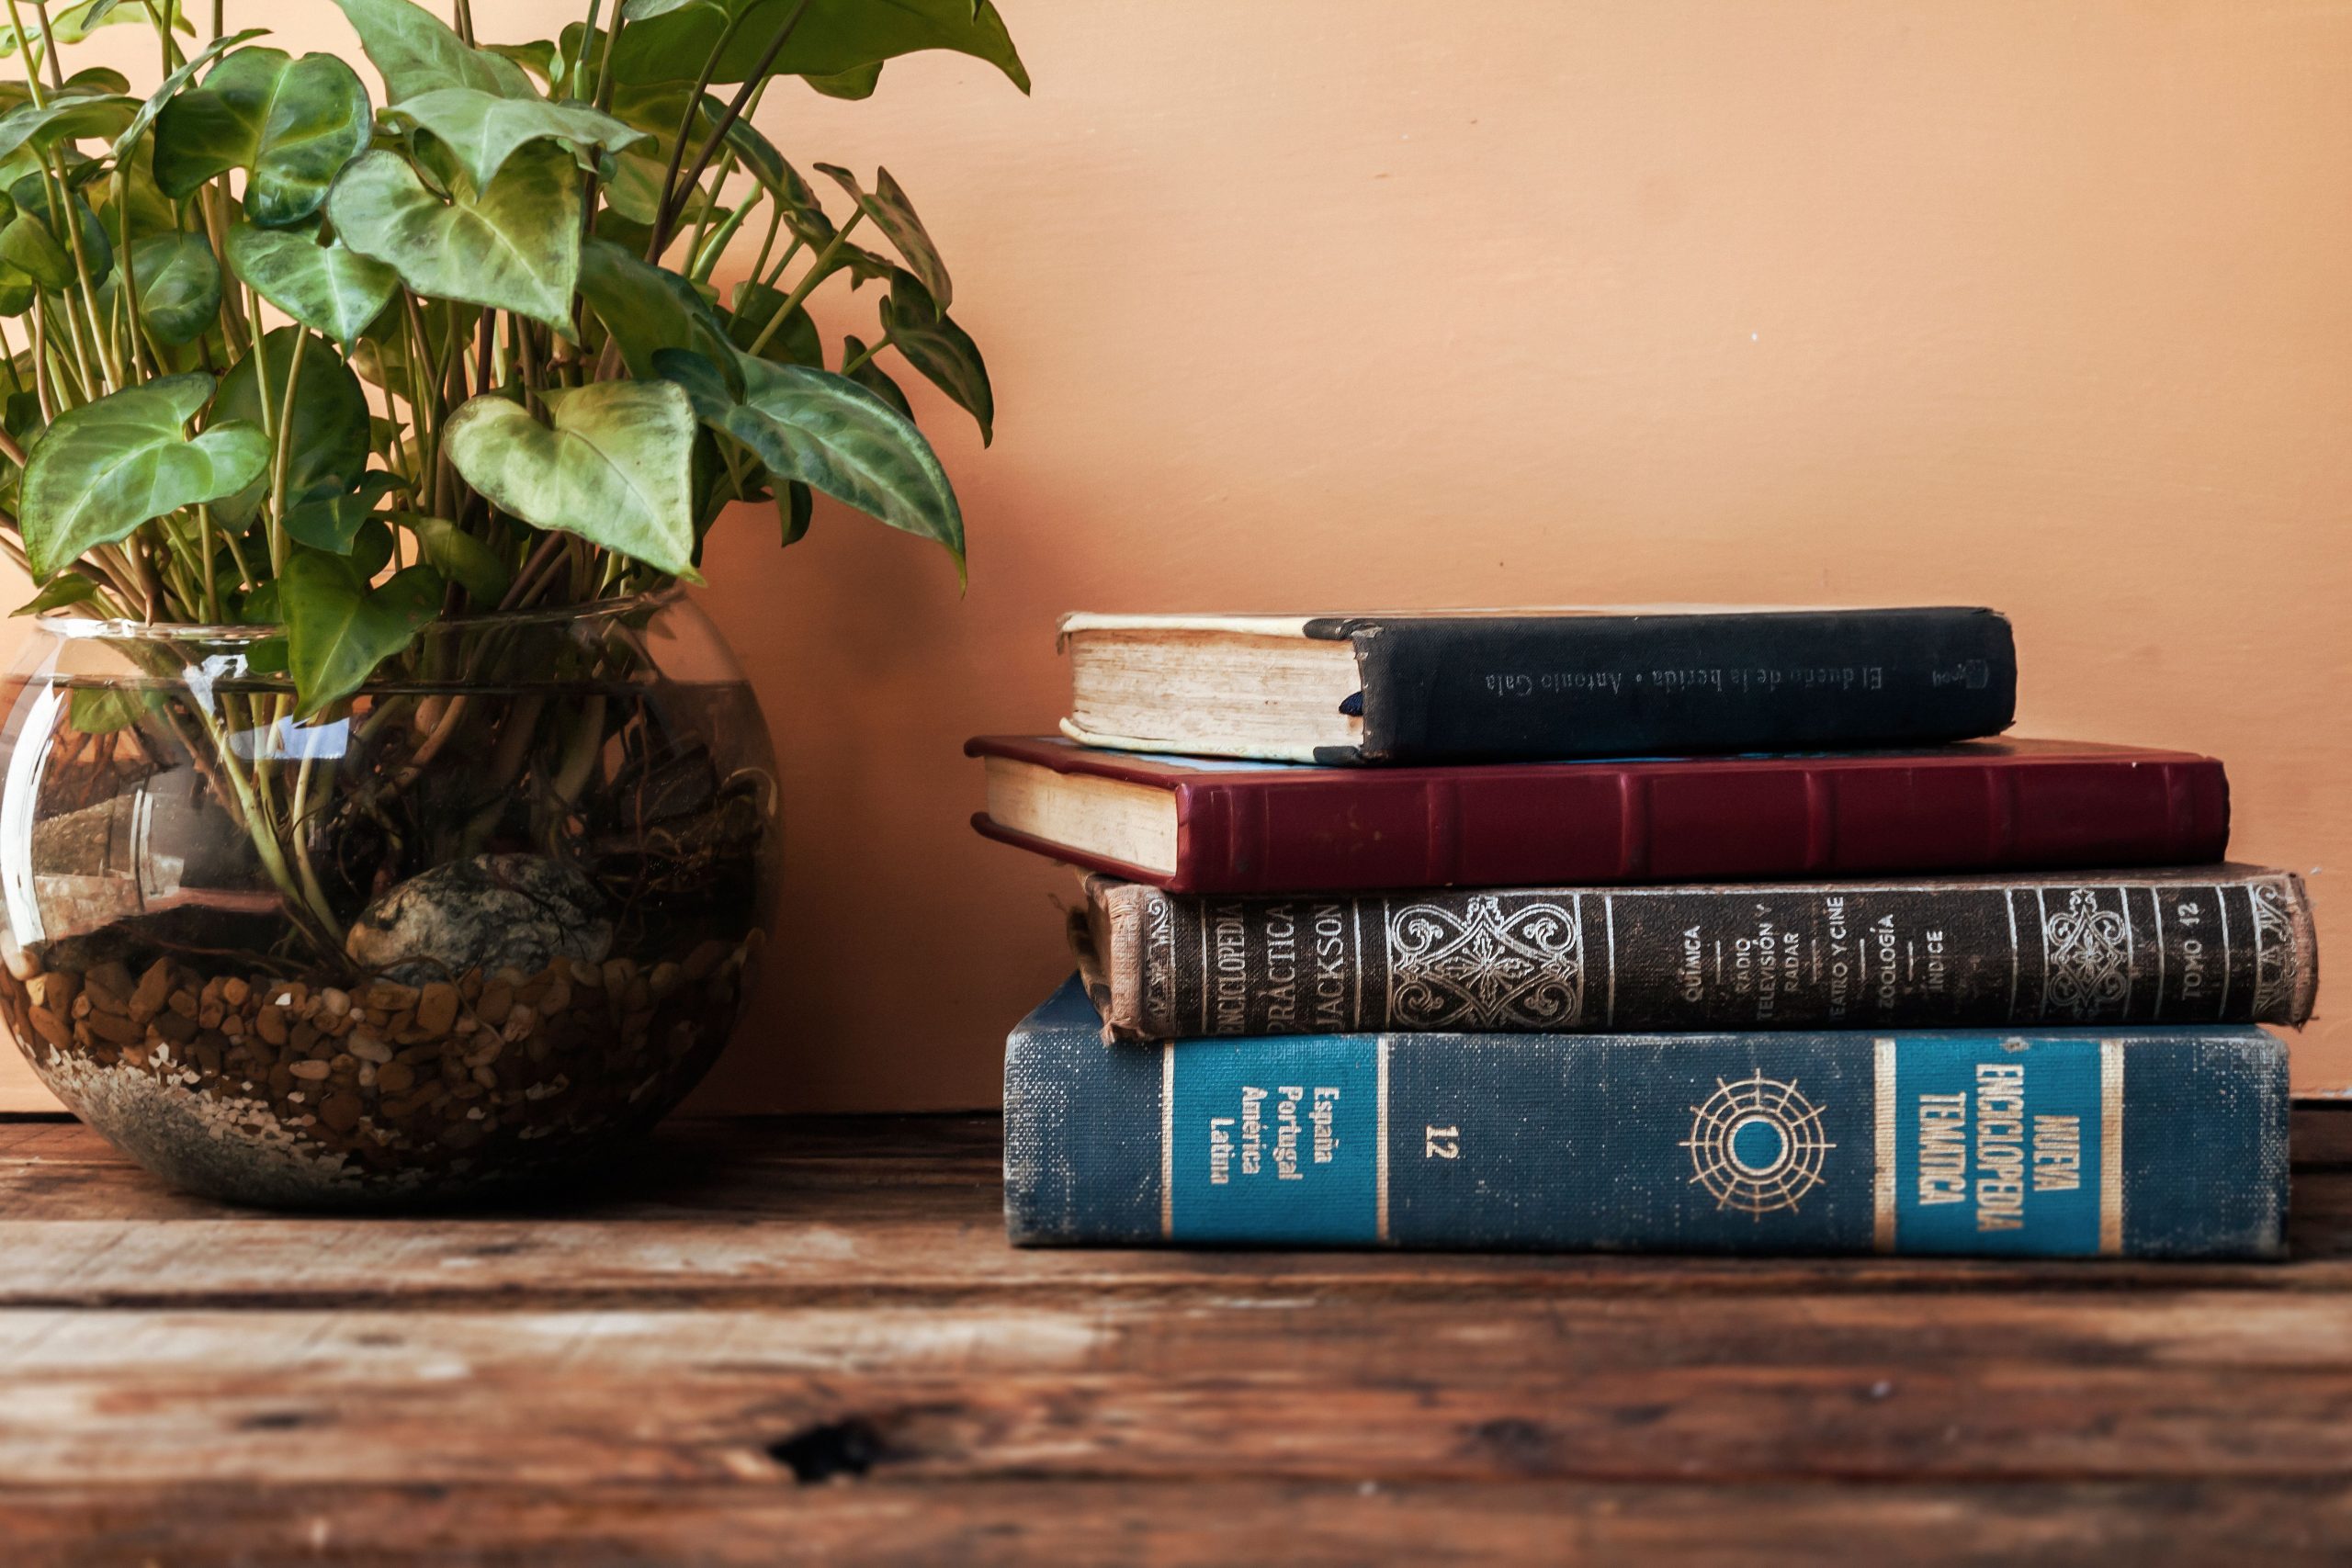
15. Style a Simple, Rustic Vignette with Stacked Vintage Books and a Plant
This isn’t a ‘craft’ in the cutting-and-gluing sense, but ‘shelf styling’ or creating ‘shelfies’ is a huge trend that’s all over Pinterest and Instagram. In 2026, creating these small, curated moments in our homes is a form of personal expression. It’s about moving beyond just having things and moving toward arranging them in a way that tells a story. This look—combining the warmth of vintage books with the life of a green plant—taps directly into the ‘grandpa chic’ and ‘dark academia’ aesthetics. It feels nostalgic, intellectual, and cozy all at once, which is a vibe many people are craving.
⭐ The One Thing
You can get this exact look for next to nothing. The key is shopping smart. Head to Facebook Marketplace or your local thrift store’s book section. You’re not looking for valuable first editions; you’re looking for books with interesting, worn covers and aged, cream-colored pages. You can often find them for $1-$2 each. For the plant, look for a small potted succulent or ivy at a hardware store like Lowe’s or a budget-friendly shop like IKEA, where they can be found for under $10. The entire vignette can easily be assembled for less than $15.
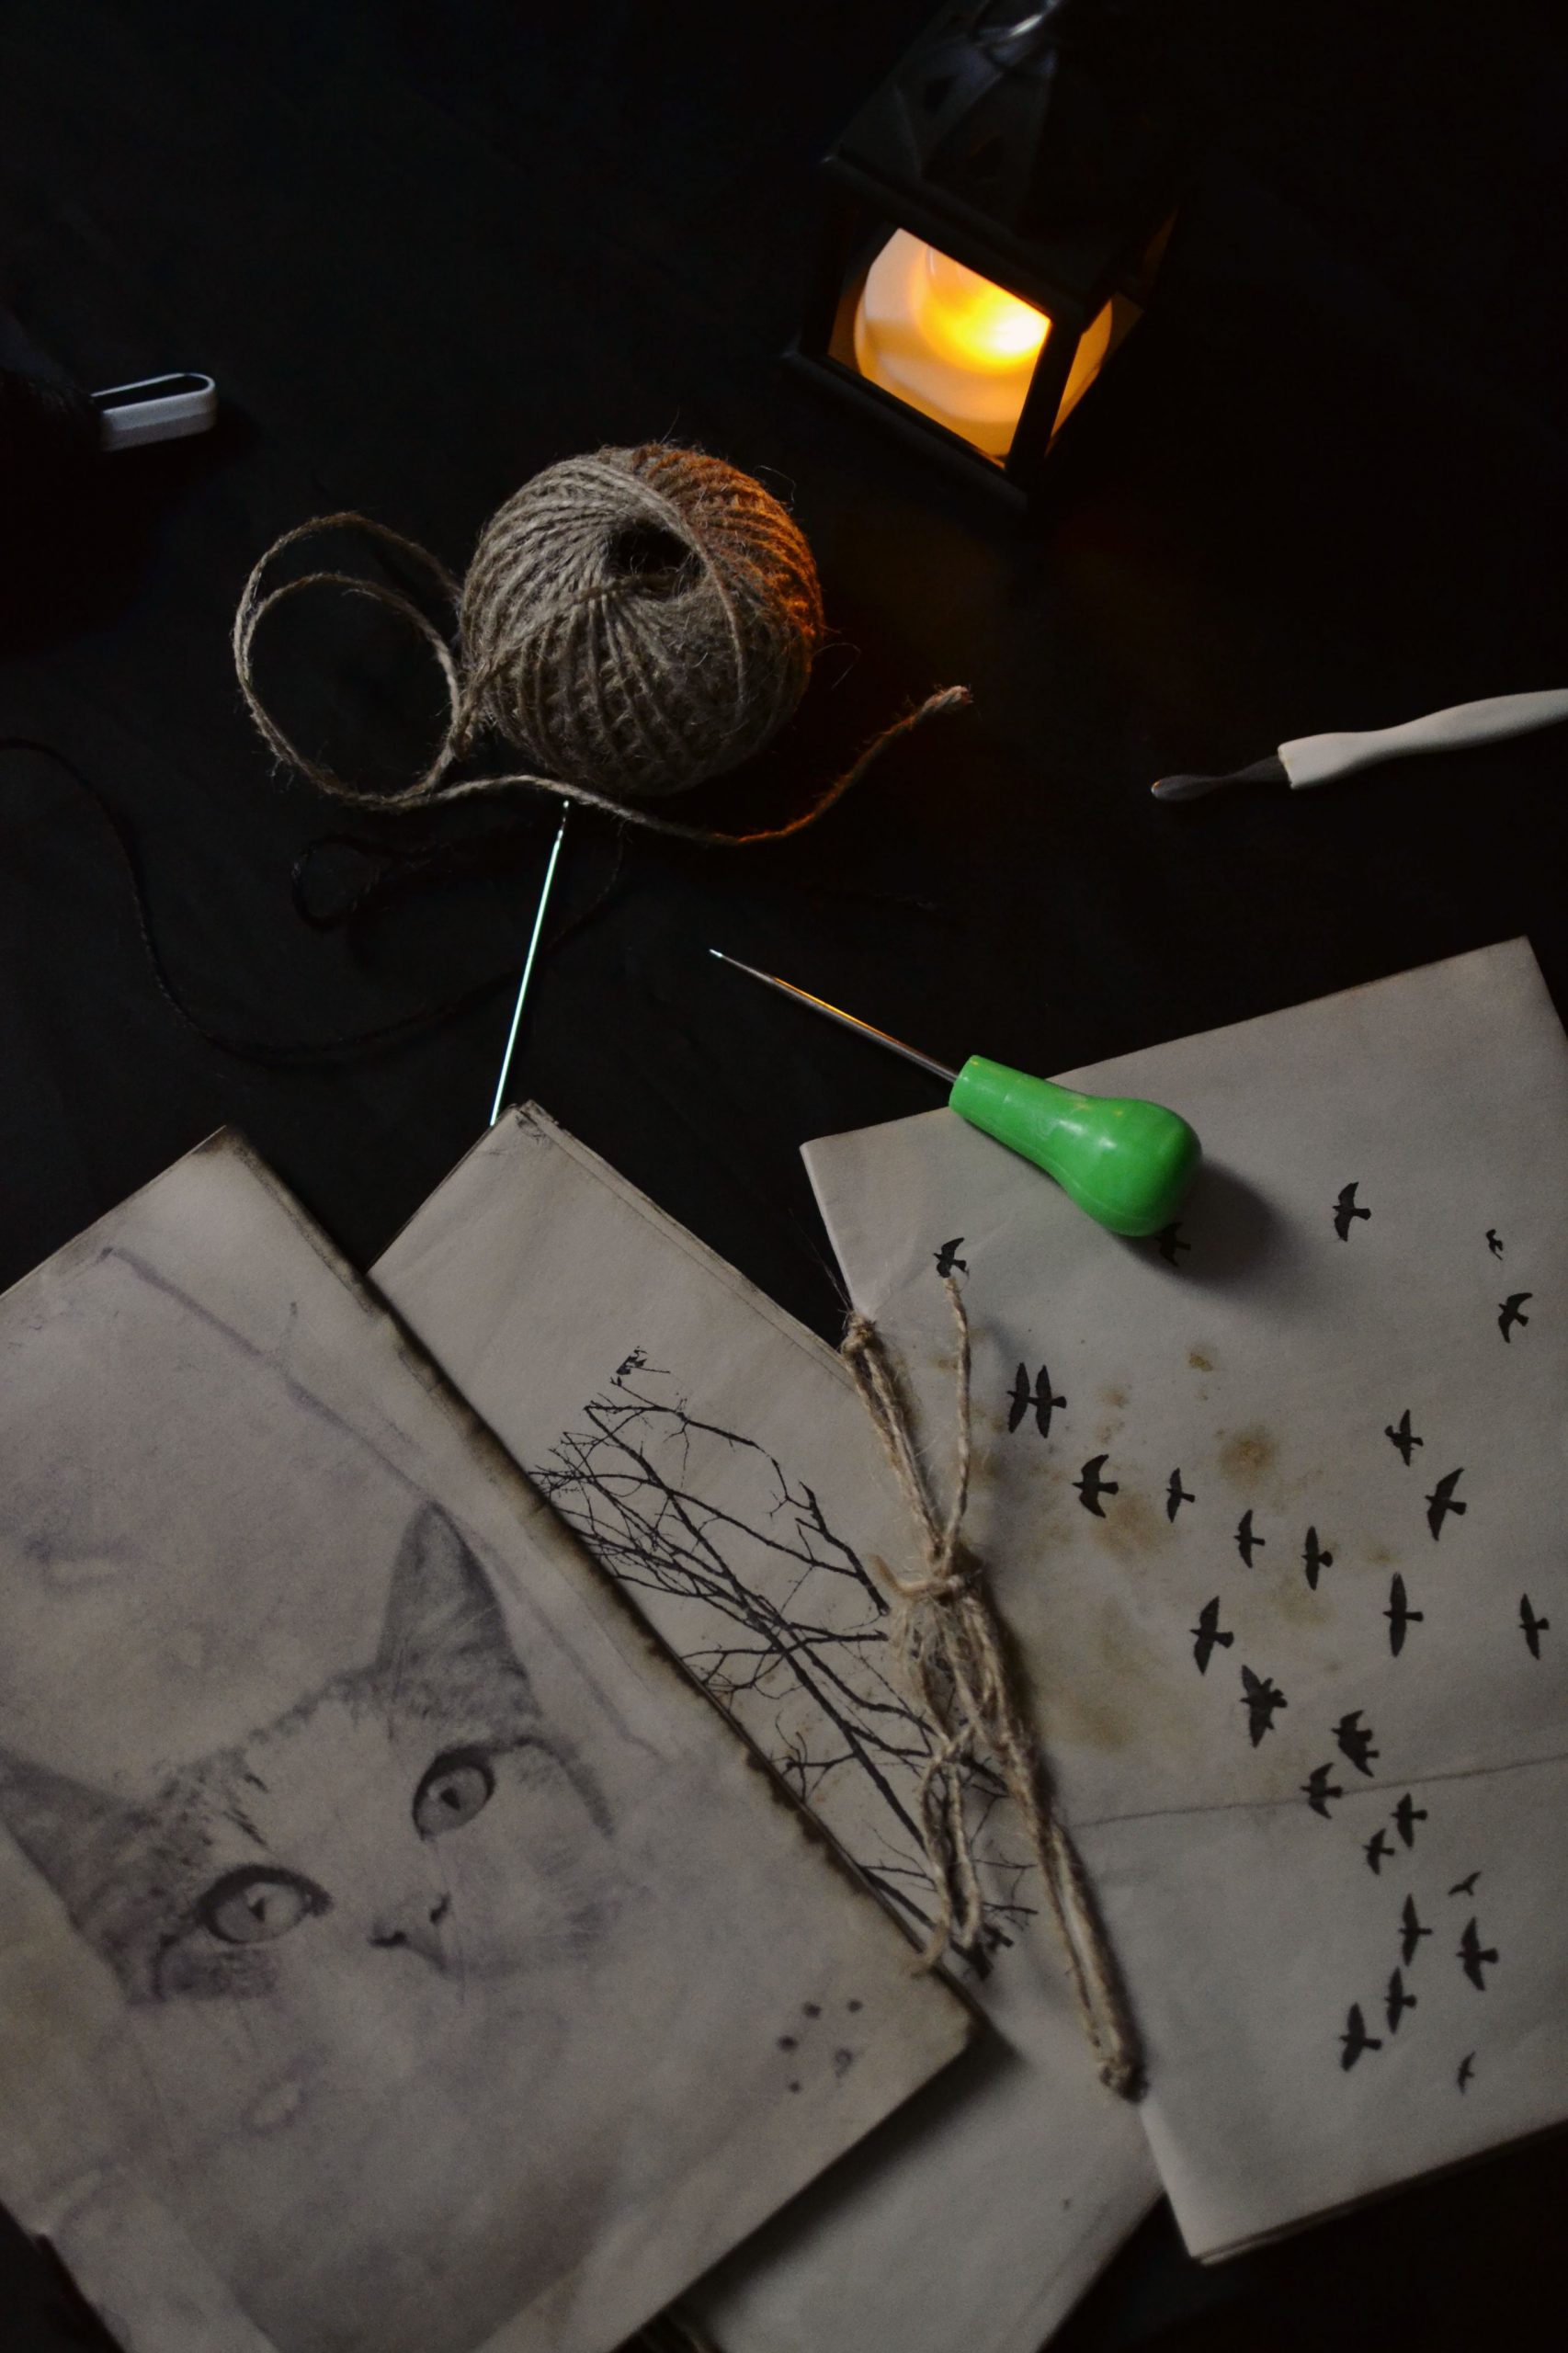
16. Create an Aged Paper Journal with Hand-Drawn Art and Twine
The single element that breathes life and mystery into this scene is the warm glow of the lantern. Without it, you would have a simple flat-lay of crafting supplies on a dark surface. The lantern’s light, however, transforms the mood entirely. It creates deep shadows and soft highlights, emphasizing the texture of the aged paper and the fibers of the twine. It suggests a cozy, candlelit evening spent writing or drawing, adding a powerful sense of atmosphere and storytelling to what would otherwise be a static image of objects.
💰 Budget Breakdown
Handmade journals with untreated, aged paper require a bit of special care. The paper is more absorbent and often more fragile than standard notebook paper. Be mindful of the pens you use; gel pens or fountain pens with heavy ink flow can bleed through the pages. A fine-tipped ballpoint pen or artist’s micron pen is a safer bet. Keep the journal in a dry place, as humidity can cause the aged pages to become brittle or musty over time. The twine binding, while beautiful, can loosen with heavy use. You may need to re-tie or tighten it occasionally to keep the pages secure.
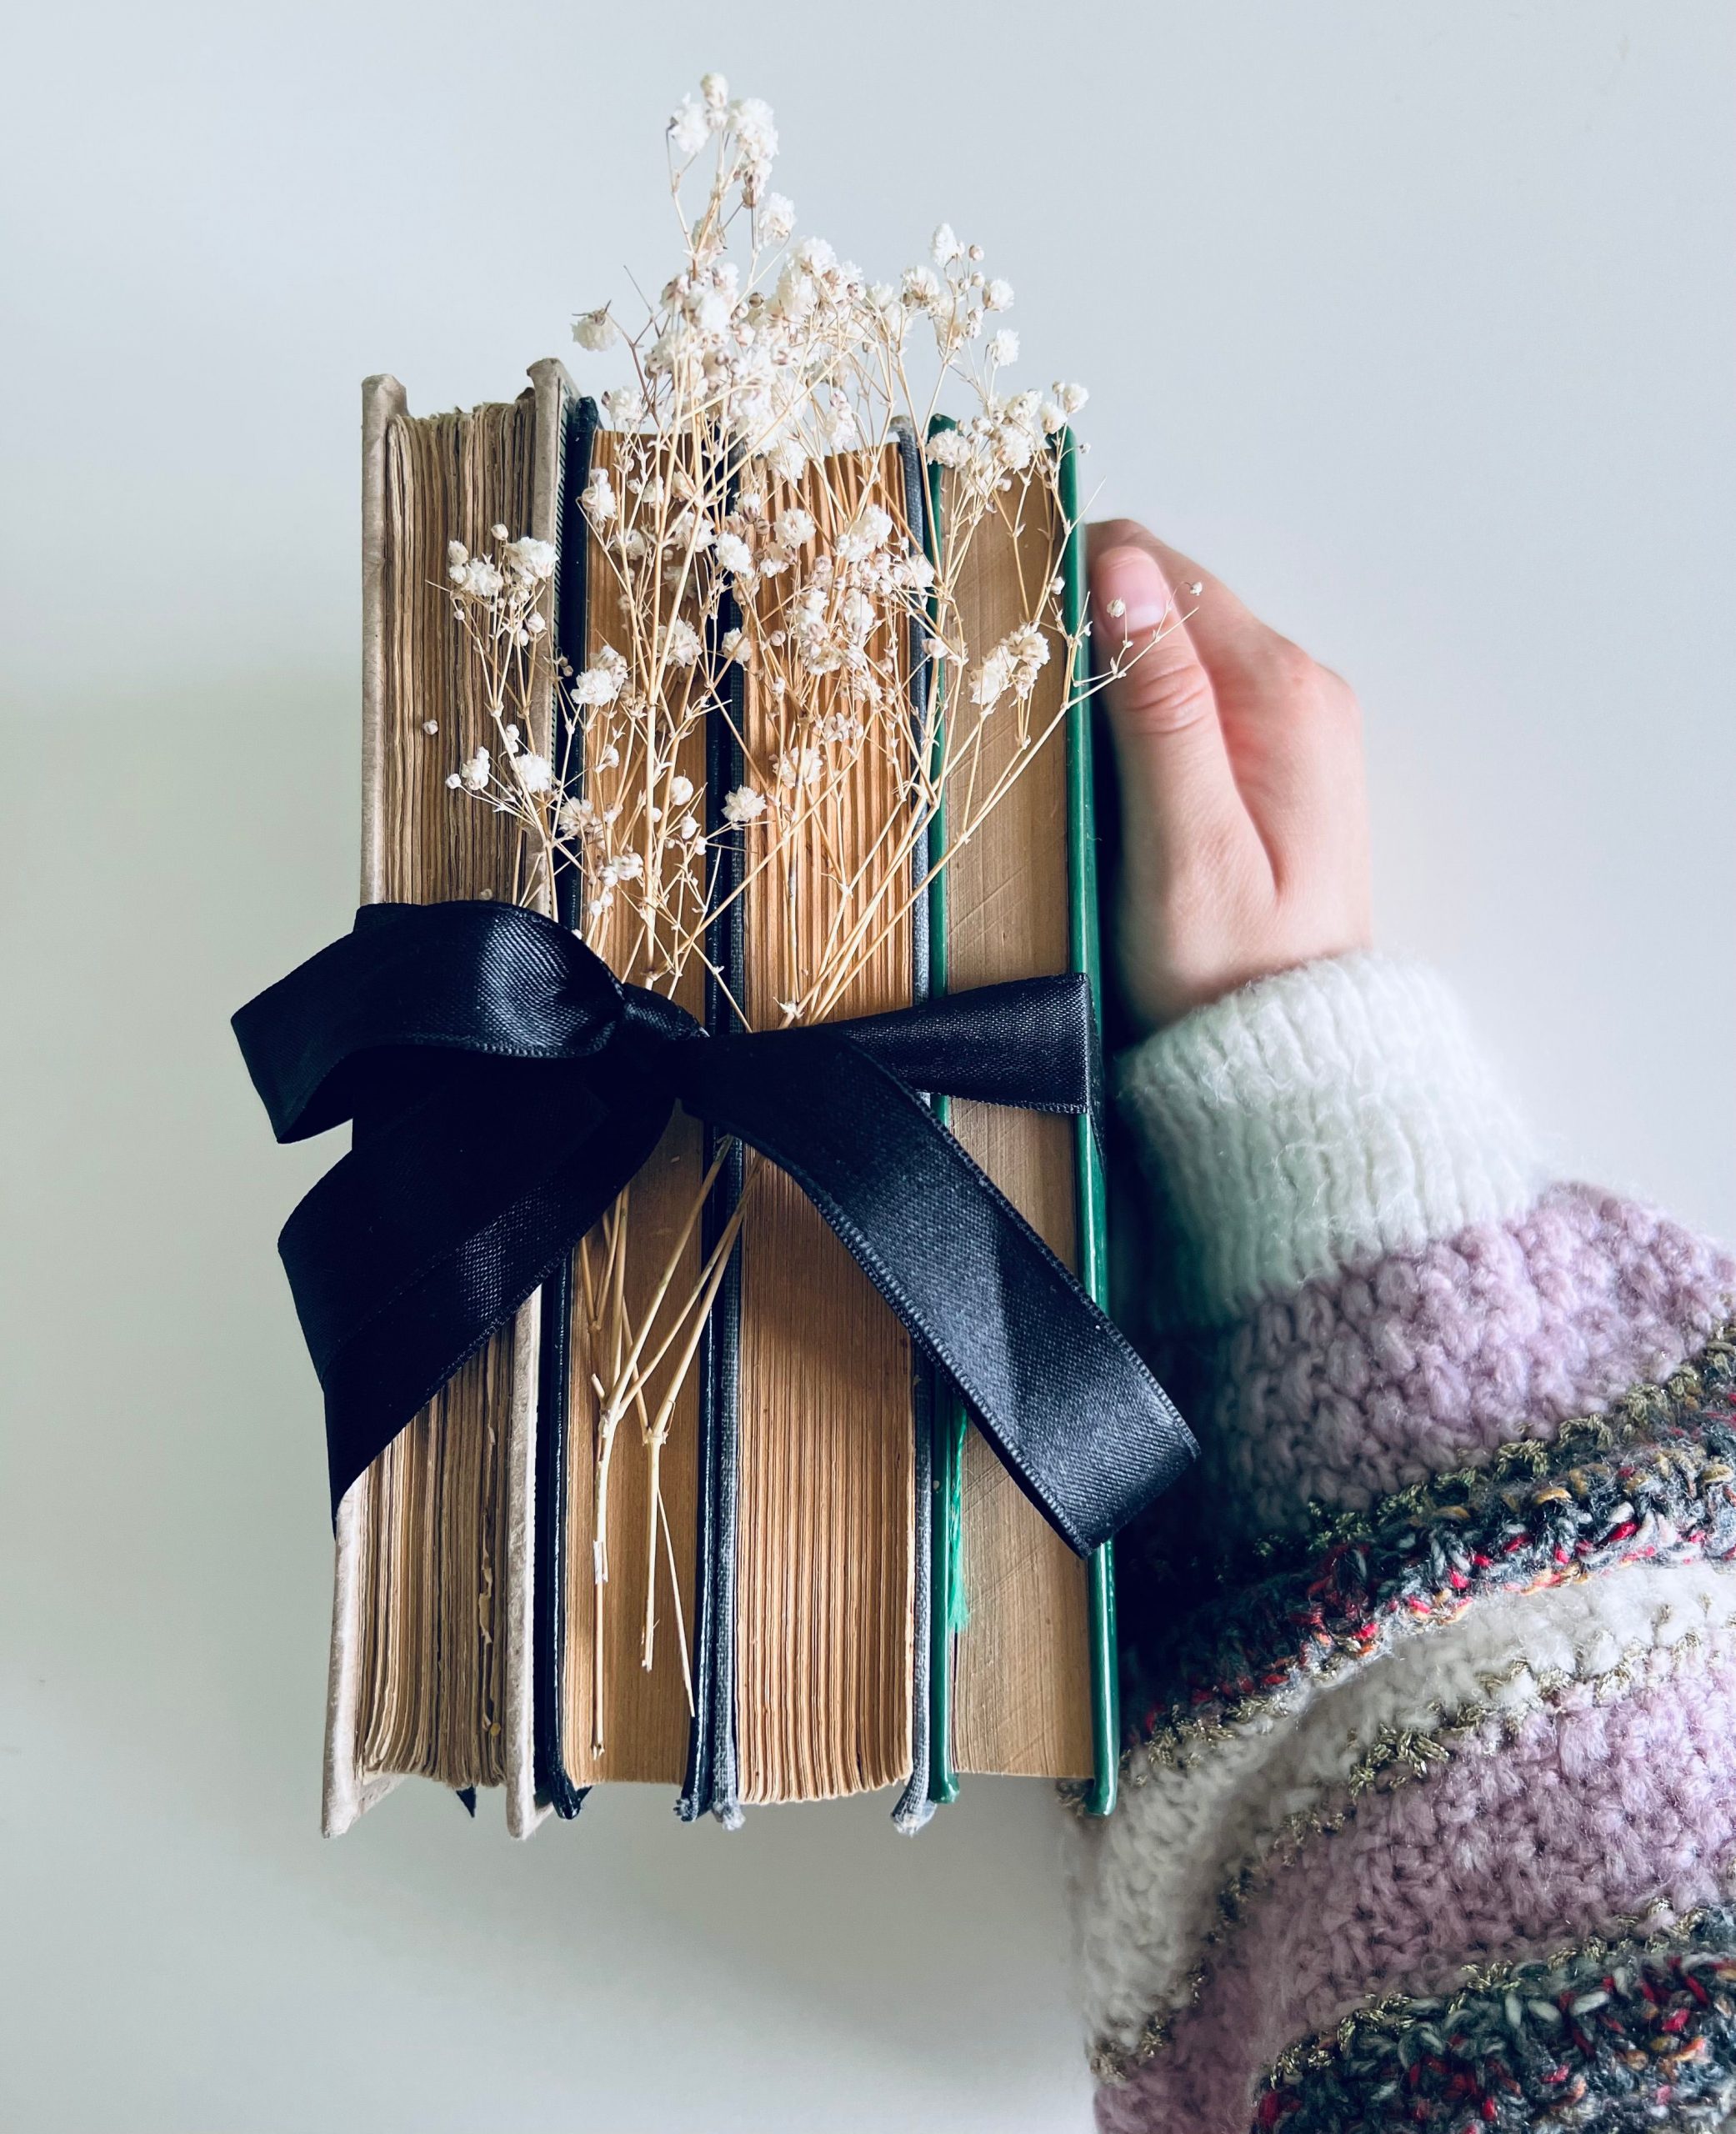
17. Assemble a Decorative Stack of Books with a Satin Ribbon and Dried Flowers
The elegance of this simple arrangement comes from a balance of textures. Think of it as: 60% Rustic Structure (the stacked old books) + 30% Delicate Detail (the baby’s breath) + 10% Luxe Accent (the black satin ribbon). The worn book covers provide a sturdy, historical base. The baby’s breath adds a soft, airy, and natural quality. Finally, the satin ribbon introduces a touch of smooth, modern elegance that contrasts beautifully with the other two elements. You could swap the satin for velvet for a more wintry feel, or the baby’s breath for dried lavender for a pop of color, but the formula remains the same.
🎯 What Makes It Work
While this looks absolutely lovely, it’s important to remember that dried flowers are delicate and… messy. Baby’s breath, especially, is notorious for shedding tiny white flecks everywhere. This is not an arrangement you’ll want to move around frequently. Place it where you intend for it to live and try not to bump it. Over time, the dried flowers will become increasingly brittle and may crumble. Consider this a temporary or semi-permanent arrangement that you might need to refresh every year or so when the flowers start to look too sparse.
18. Bundle Rolled Book Pages into Rustic Scrolls Tied with Twine
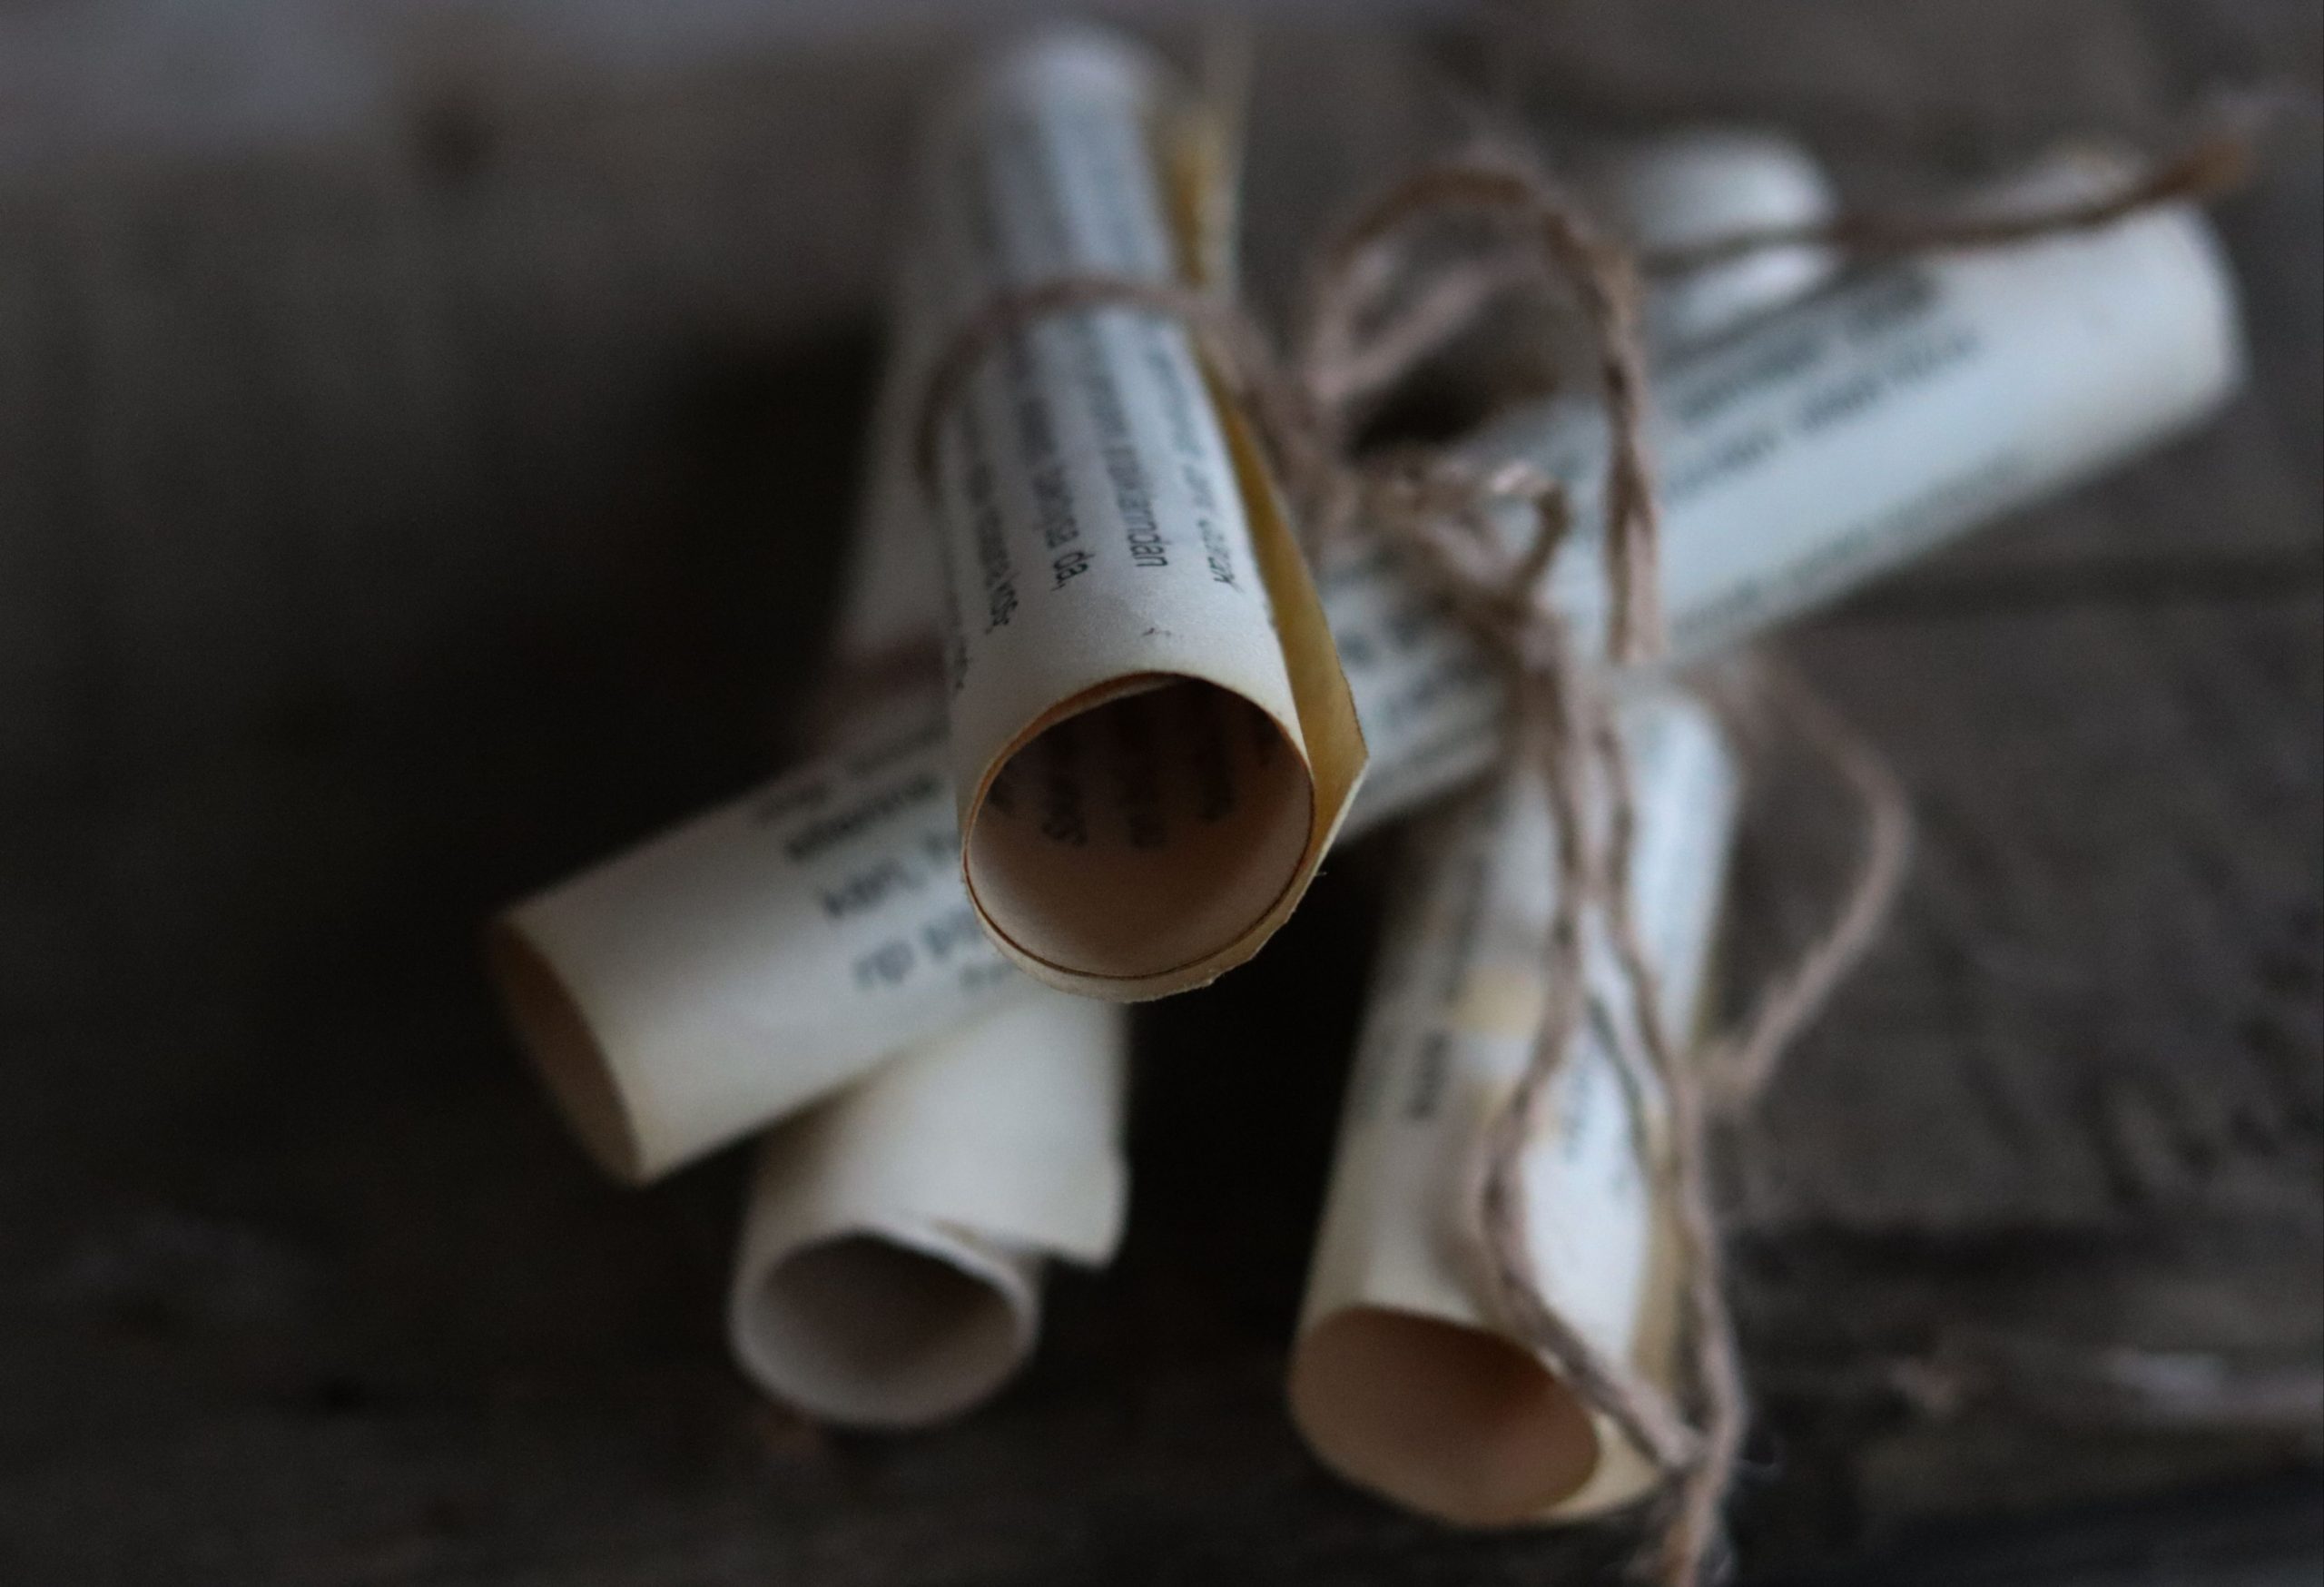
This idea is powerful because it taps into a deep, almost archetypal imagery. Rolled scrolls suggest something ancient, important, and mysterious—secret messages, historical documents, or old maps. By taking ordinary book pages and rolling them into scrolls, you elevate them from something commonplace to something that feels significant and full of untold stories. The simple, rustic twine adds to this effect, suggesting a practical, pre-modern way of bundling things. It’s a craft that’s all about evoking a mood and a sense of history.
🧹 Maintenance Reality
This is easily one of the most budget-friendly projects in the entire article. The cost is practically zero if you have a few basic supplies on hand.
- Old Paperback Book: $1 (Thrift Store) or Free (if you have one)
- Twine or Jute String: $3 – $5 for a large roll (you’ll use pennies’ worth)
- Optional: Tea bags for aging the paper: $1
- TOTAL: $1 – $9
- Budget Alternative: There’s really no need for an alternative here, as this is the definition of a low-cost craft. Use junk mail or old magazines for a more modern take at no cost.
19. Use Faux Vintage Books as Secret Storage Boxes
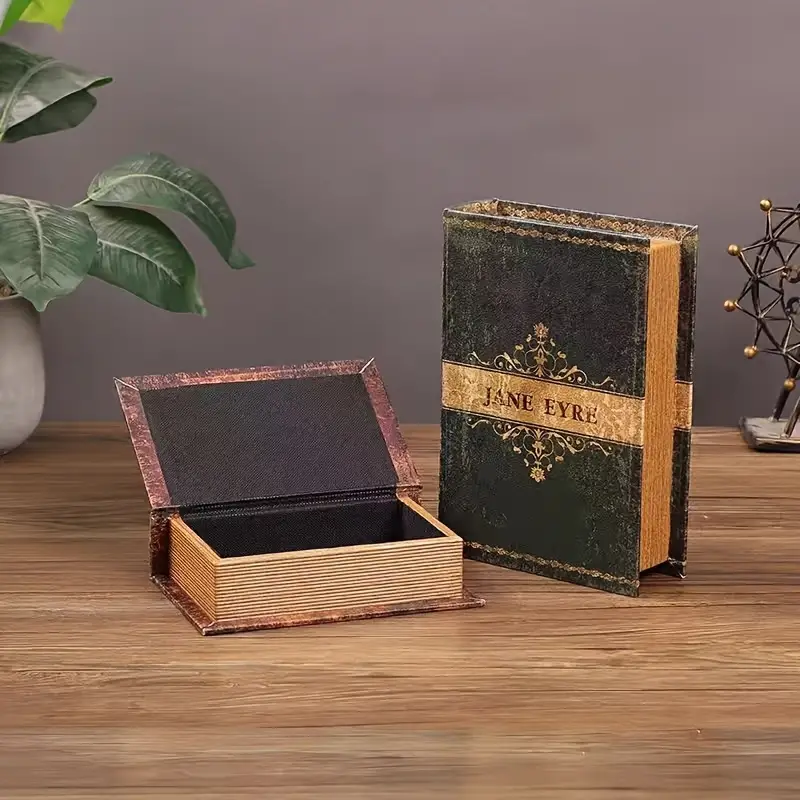
that makes this idea so satisfying is the element of surprise. It’s the secret functionality hidden within a decorative object. On the surface, you see a handsome stack of vintage books, adding a touch of literary charm to a shelf or table. But the secret is that one of them opens up to reveal a hidden compartment. It’s a small, delightful discovery that feels both clever and practical. This duality—beautiful form and secret function—is what makes these objects so appealing. They solve a storage problem without creating visual clutter. Compare this to the handmade storage in Idea #26.
📐 Style Math
Let’s have a moment of honesty: these faux book boxes are not high-security safes. They are great for stashing away clutter like remote controls, charging cables, or maybe some extra cash. However, they are not the place to store your priceless family heirlooms or sensitive documents. Their primary purpose is decorative organization, not security. Also, be mindful of their construction. Cheaper versions can have flimsy hinges or ill-fitting lids. It’s worth spending a few extra dollars for a well-made one that will stand up to regular use.
20. Create a Dreamy Scene with a Paper Boat on an Open Book
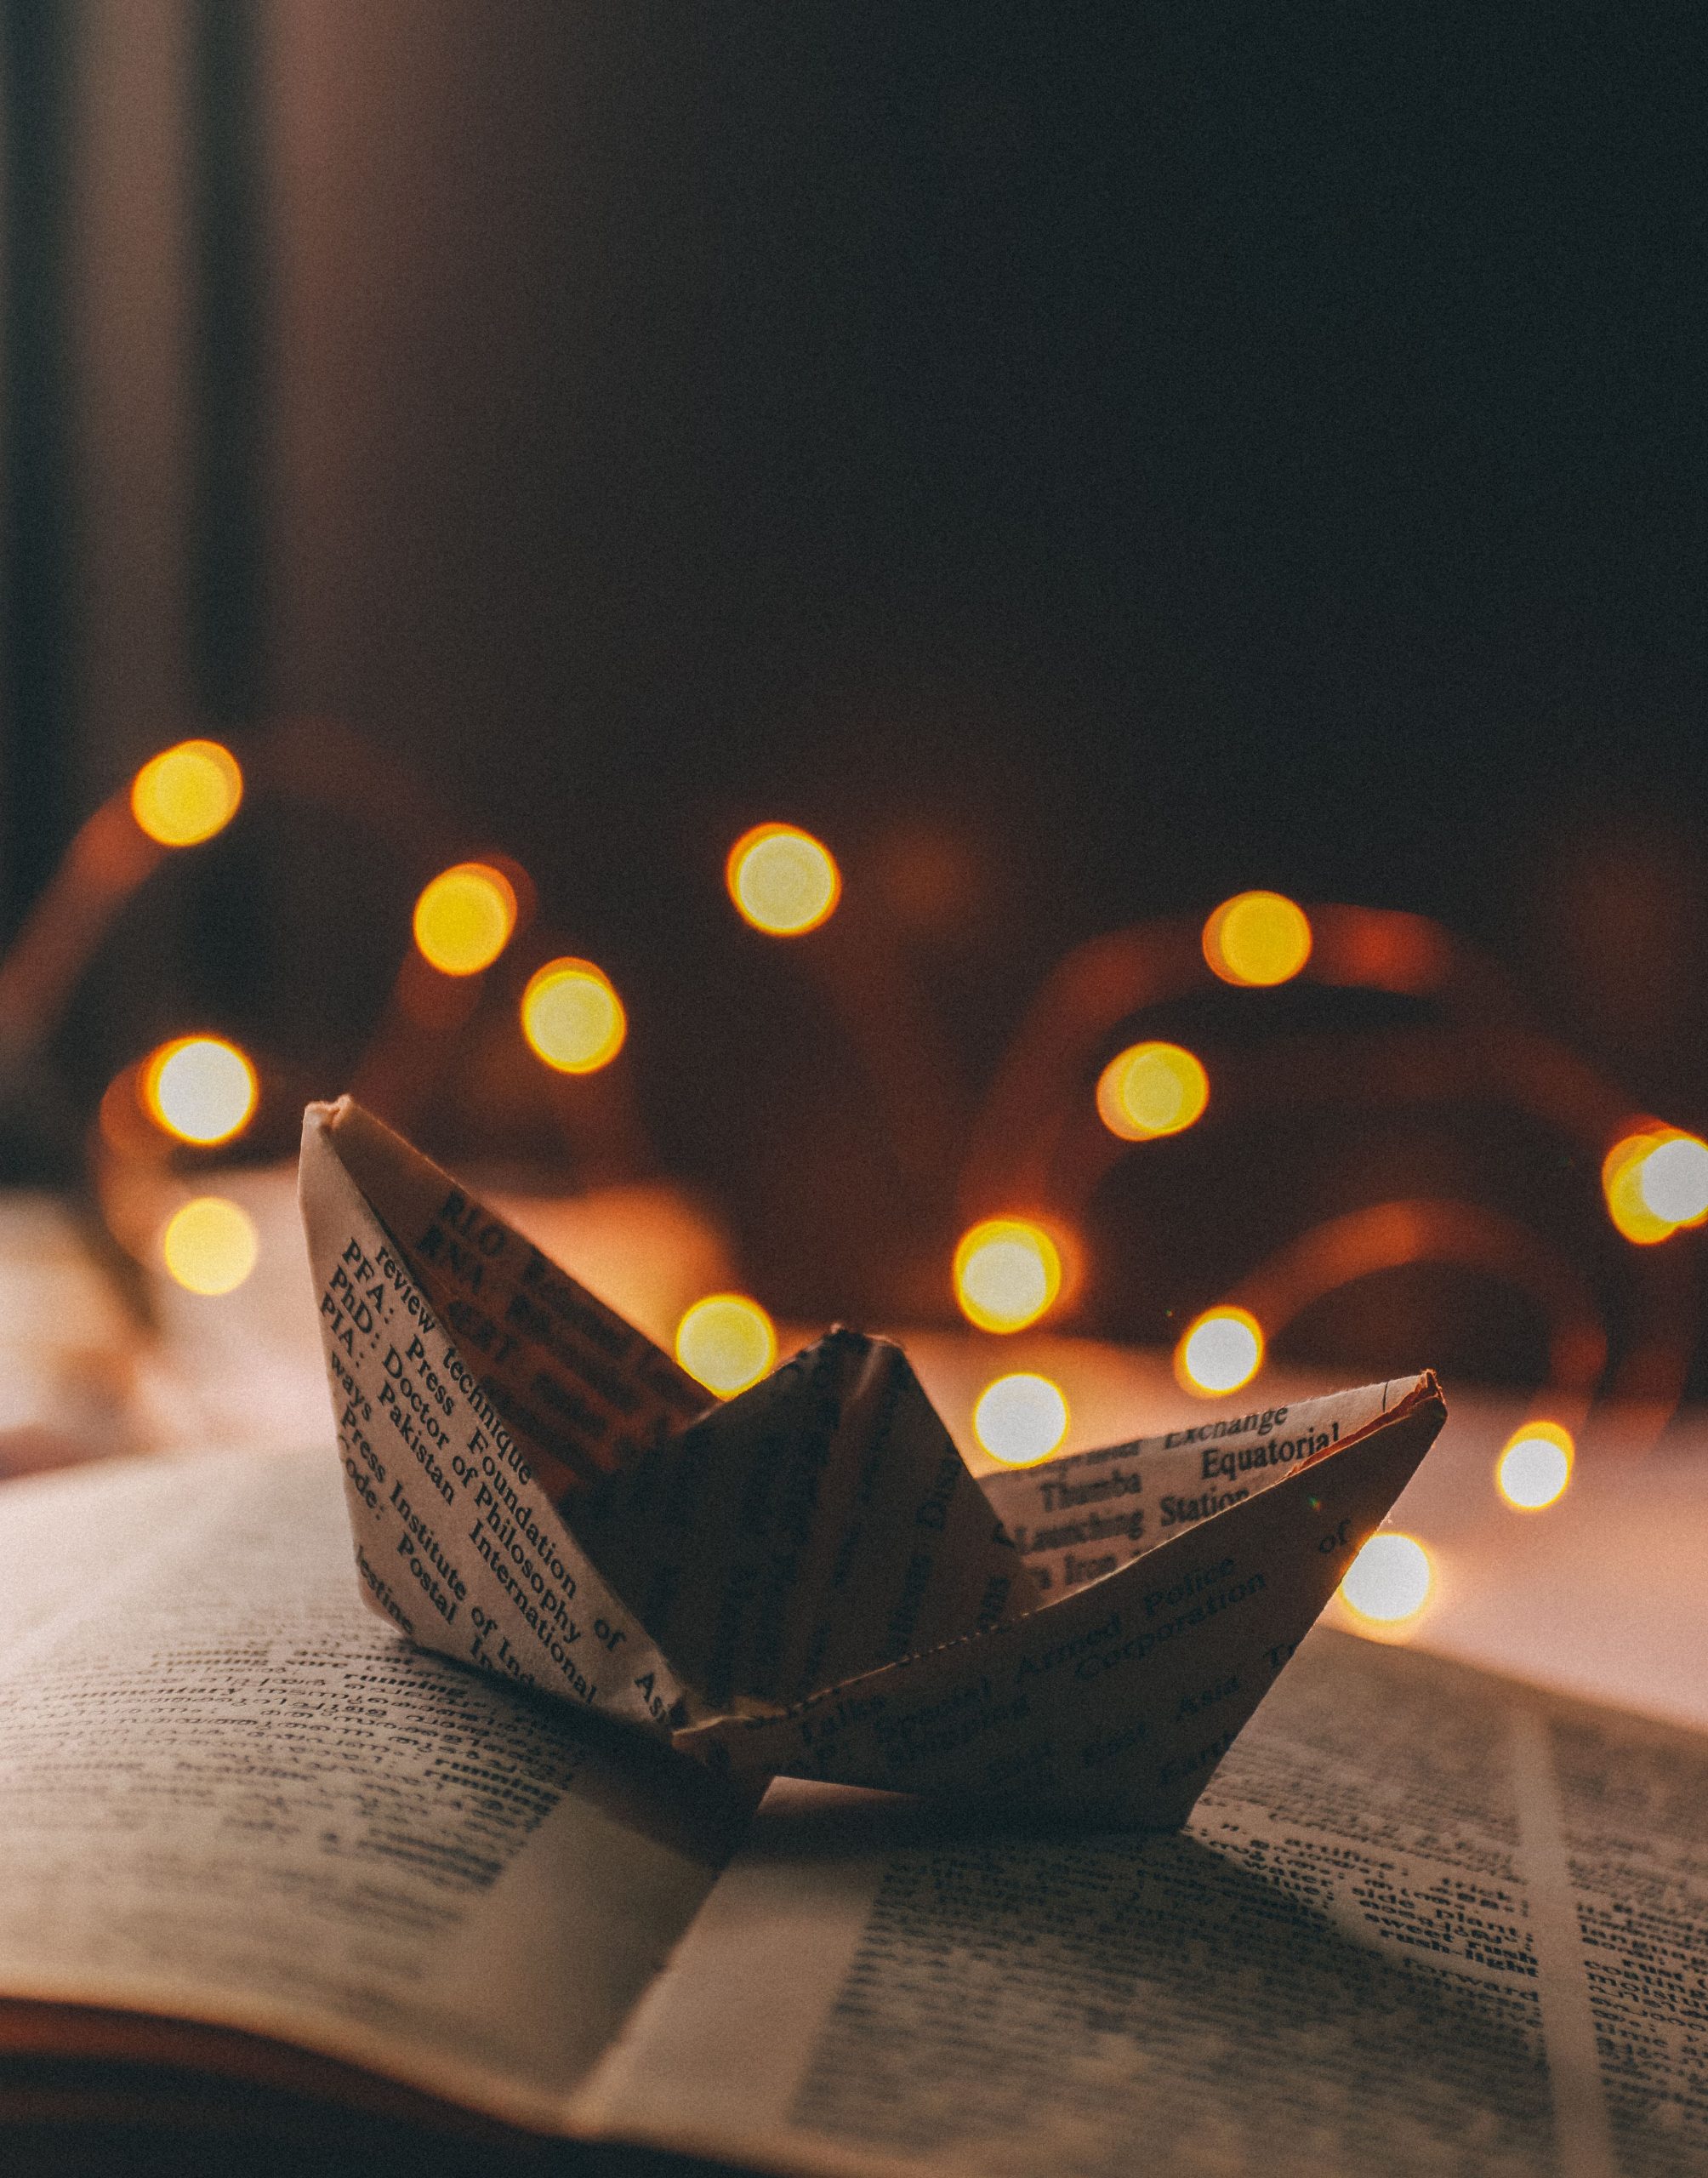
This image is pure magic, and it works by combining two powerful concepts: storytelling and atmosphere. The paper boat on the
21. Construct a Dramatic Floating Art Installation with Suspended Books
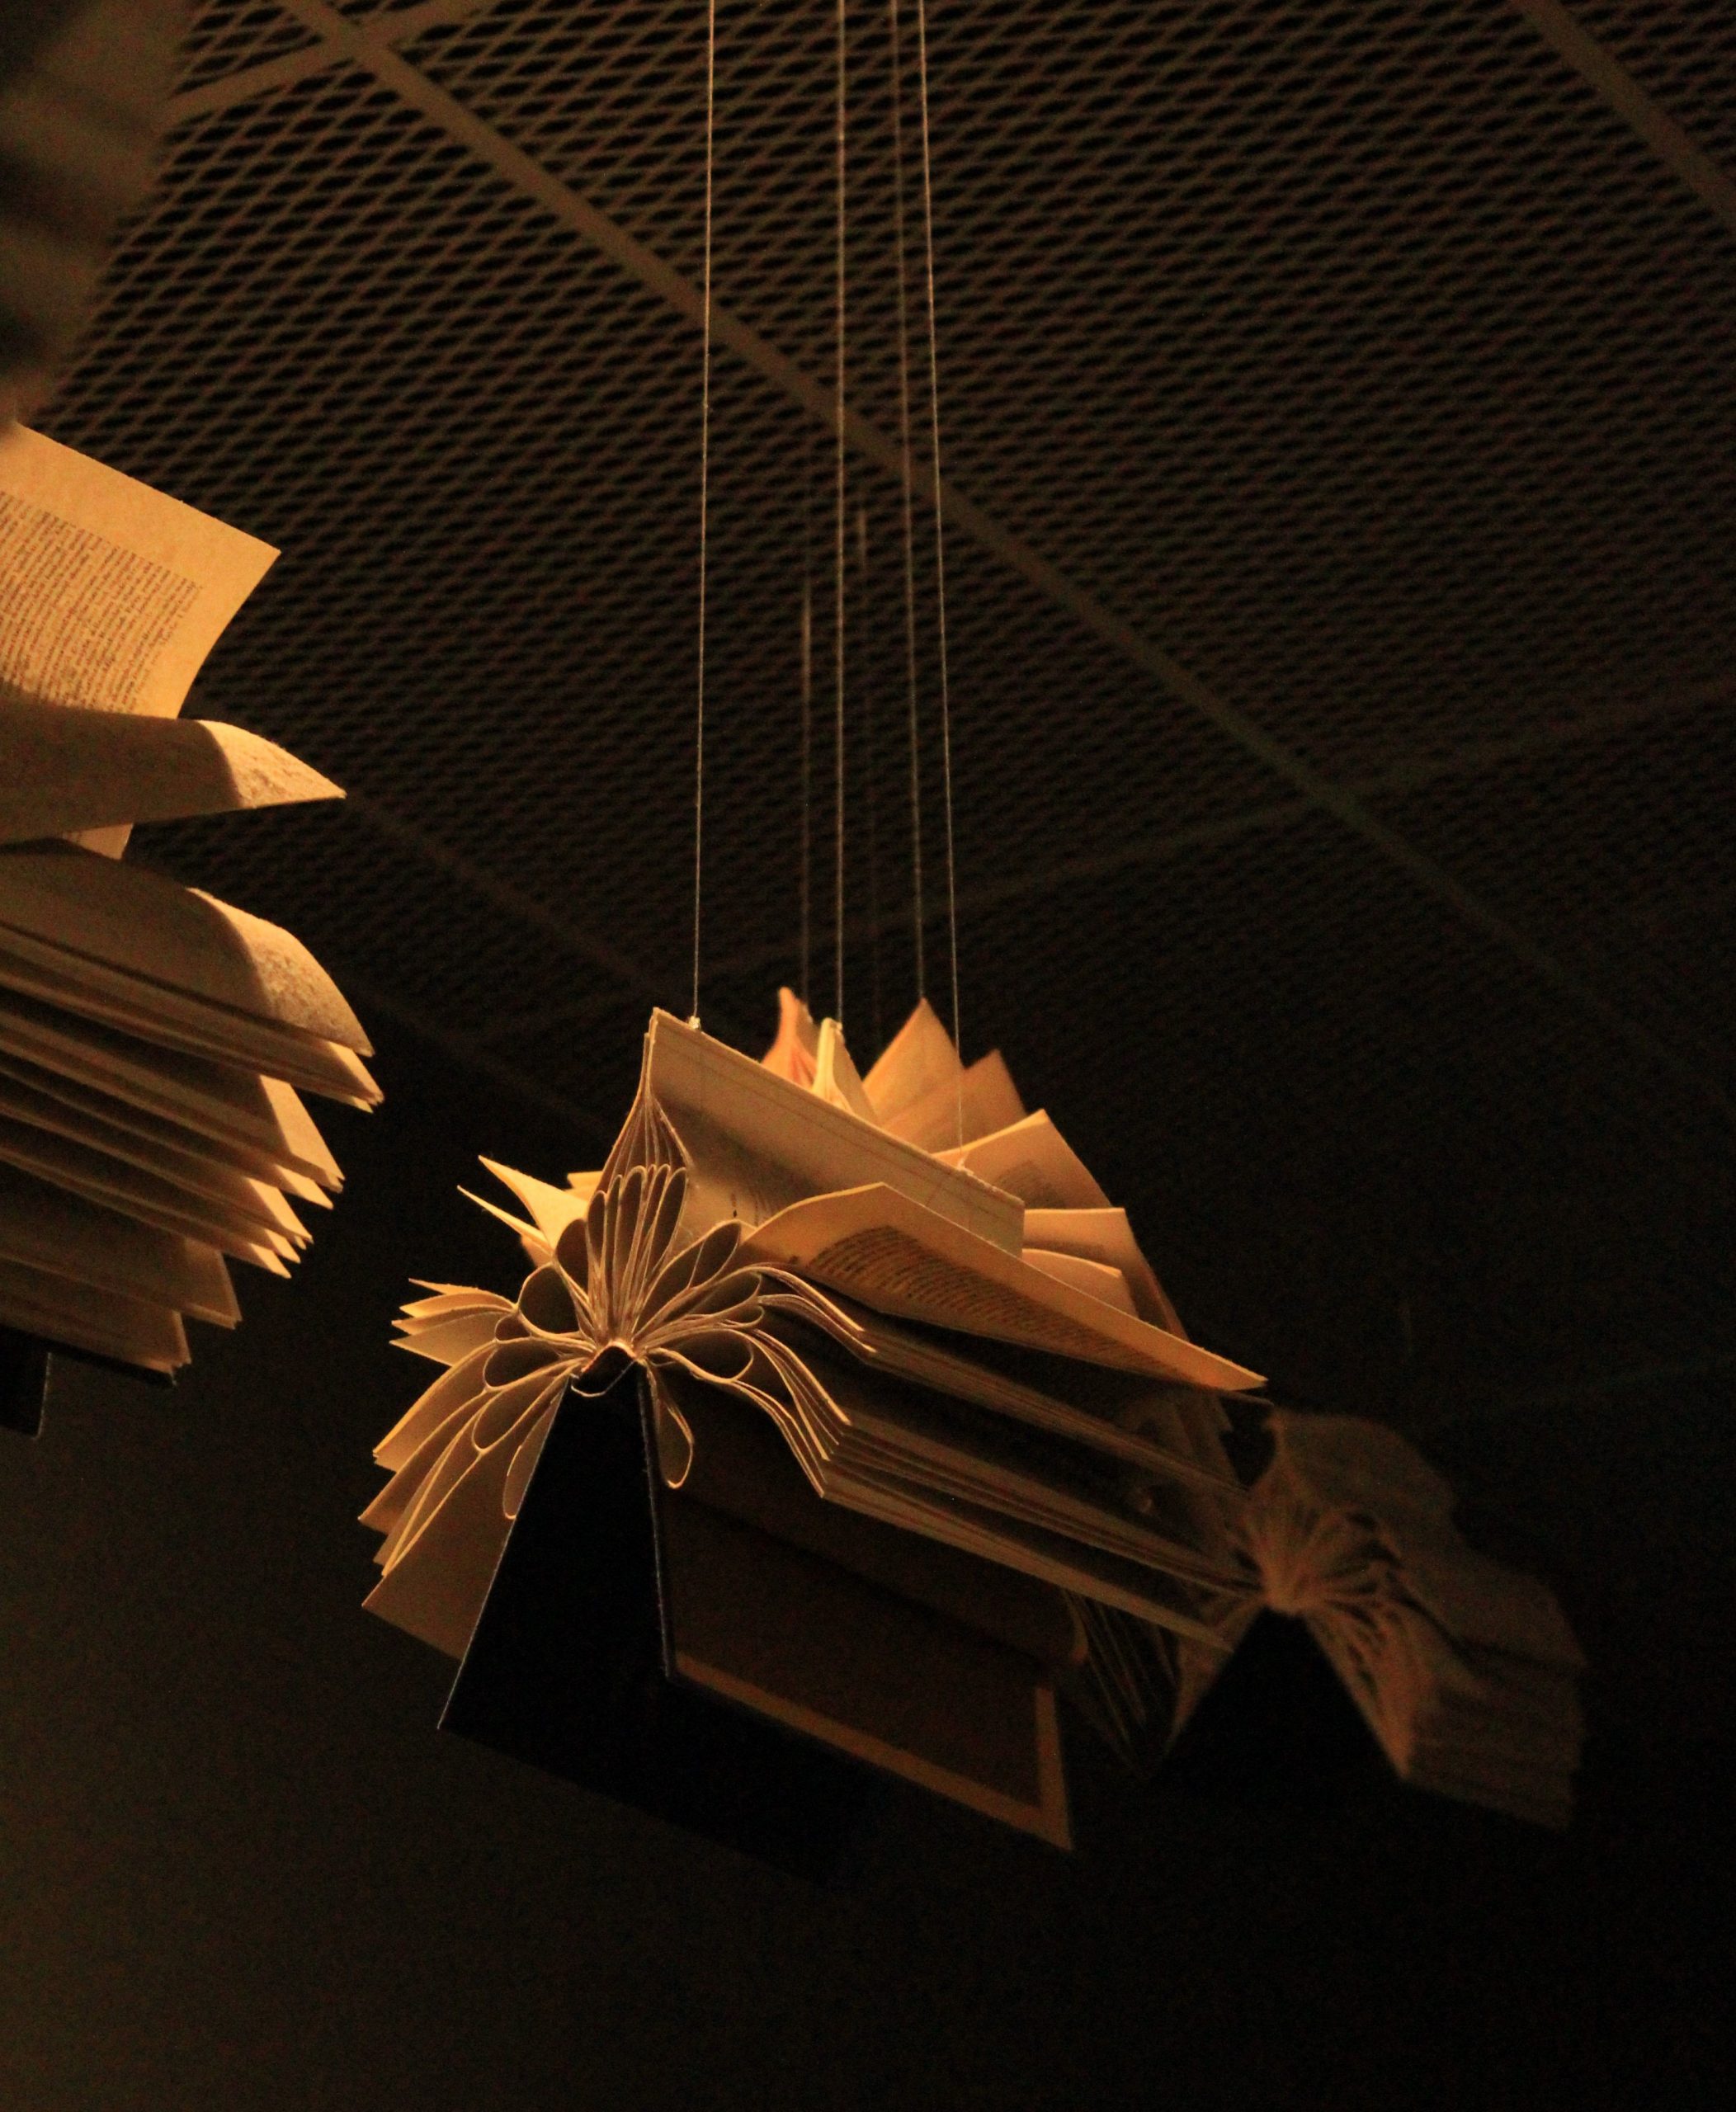
This is a high-impact, large-scale installation that needs the right environment to work. This isn’t for your standard 8-foot ceiling living room. To get this dramatic, floating effect, you need significant ceiling height—at least 10 feet, but 12 feet or more is ideal. It’s perfect for a two-story entryway, a loft space with high ceilings, or a room with a vaulted ceiling. The goal is for the books to float well above head height, creating a sense of wonder. If they hang too low, the effect is ruined and they just become obstacles.
⚠️ Real Talk
This is not a beginner’s DIY project. Suspending heavy objects like books from the ceiling requires serious attention to safety. You cannot simply use thumbtacks. Each book must be securely anchored to a ceiling joist or a properly installed ceiling grid. You’ll need to use sturdy hooks and a strong, rated line (like fishing line or thin wire). If you are not 100% confident in your ability to install these safely, hire a professional handyman. The last thing you want is for your art installation to come crashing down.
22. Appreciate the Textural Beauty of Aged Book Page Edges
This isn’t a craft, but a lesson in appreciation. The beauty here is pure texture. By focusing closely on the edges of the pages, you see a landscape of subtle color variation—from creamy white to deep tan and pale yellow—and the gentle, organic fraying of the paper. It’s a celebration of imperfection and the passage of time. The slight unevenness of the stacked pages creates a rhythm and pattern that is deeply satisfying. It reminds us that books are physical objects, not just containers for words, and their wear and tear is part of their story.

🔥 Trending Context
This appreciation for the humble, aged object is a direct reaction against the sleek, perfect, and often soulless feel of our digital world. As we spend more time swiping on glass screens, there’s a growing desire for tactile, imperfect, and authentic objects in our homes. Displaying old books this way—focusing on their physical nature—is part of the larger ‘dark academia’ and ‘vintage eclectic’ trends. It’s about finding beauty in things with history, character, and a story to tell, which is something a brand new, mass-produced object rarely has.
23. Fold a Simple, Elegant Heart into the Pages of a Book
This is one of the simplest forms of book folding, and it makes a beautiful, heartfelt gift. All you need is a hardcover book you don’t mind altering.
- Decide on the heart’s size and position on the page.
- Starting from the center pages of your book, take the top corner of a page and fold it down to create a diagonal crease that points toward the book’s spine. This forms the top curve of the heart.
- Take the bottom corner of the same page and fold it up to meet the tip of the first fold. This forms the point of the heart.
- Repeat this process on about 50-100 pages, depending on the thickness of the paper and how full you want the heart to appear.
That’s it! It’s a simple process of repetition that creates a lovely result.

💡 Designer Tip
that makes this idea so effective is its simplicity. Unlike more complex book folding patterns, this single, clean heart shape is instantly recognizable and emotionally resonant. It doesn’t try to be overly clever or intricate. It’s a straightforward, elegant gesture that turns a simple book into a symbol of love—love for a person, for reading, or for the book itself. Its power lies in its restraint. It doesn’t overwhelm the book; it just adds a single, quiet touch of artistry.
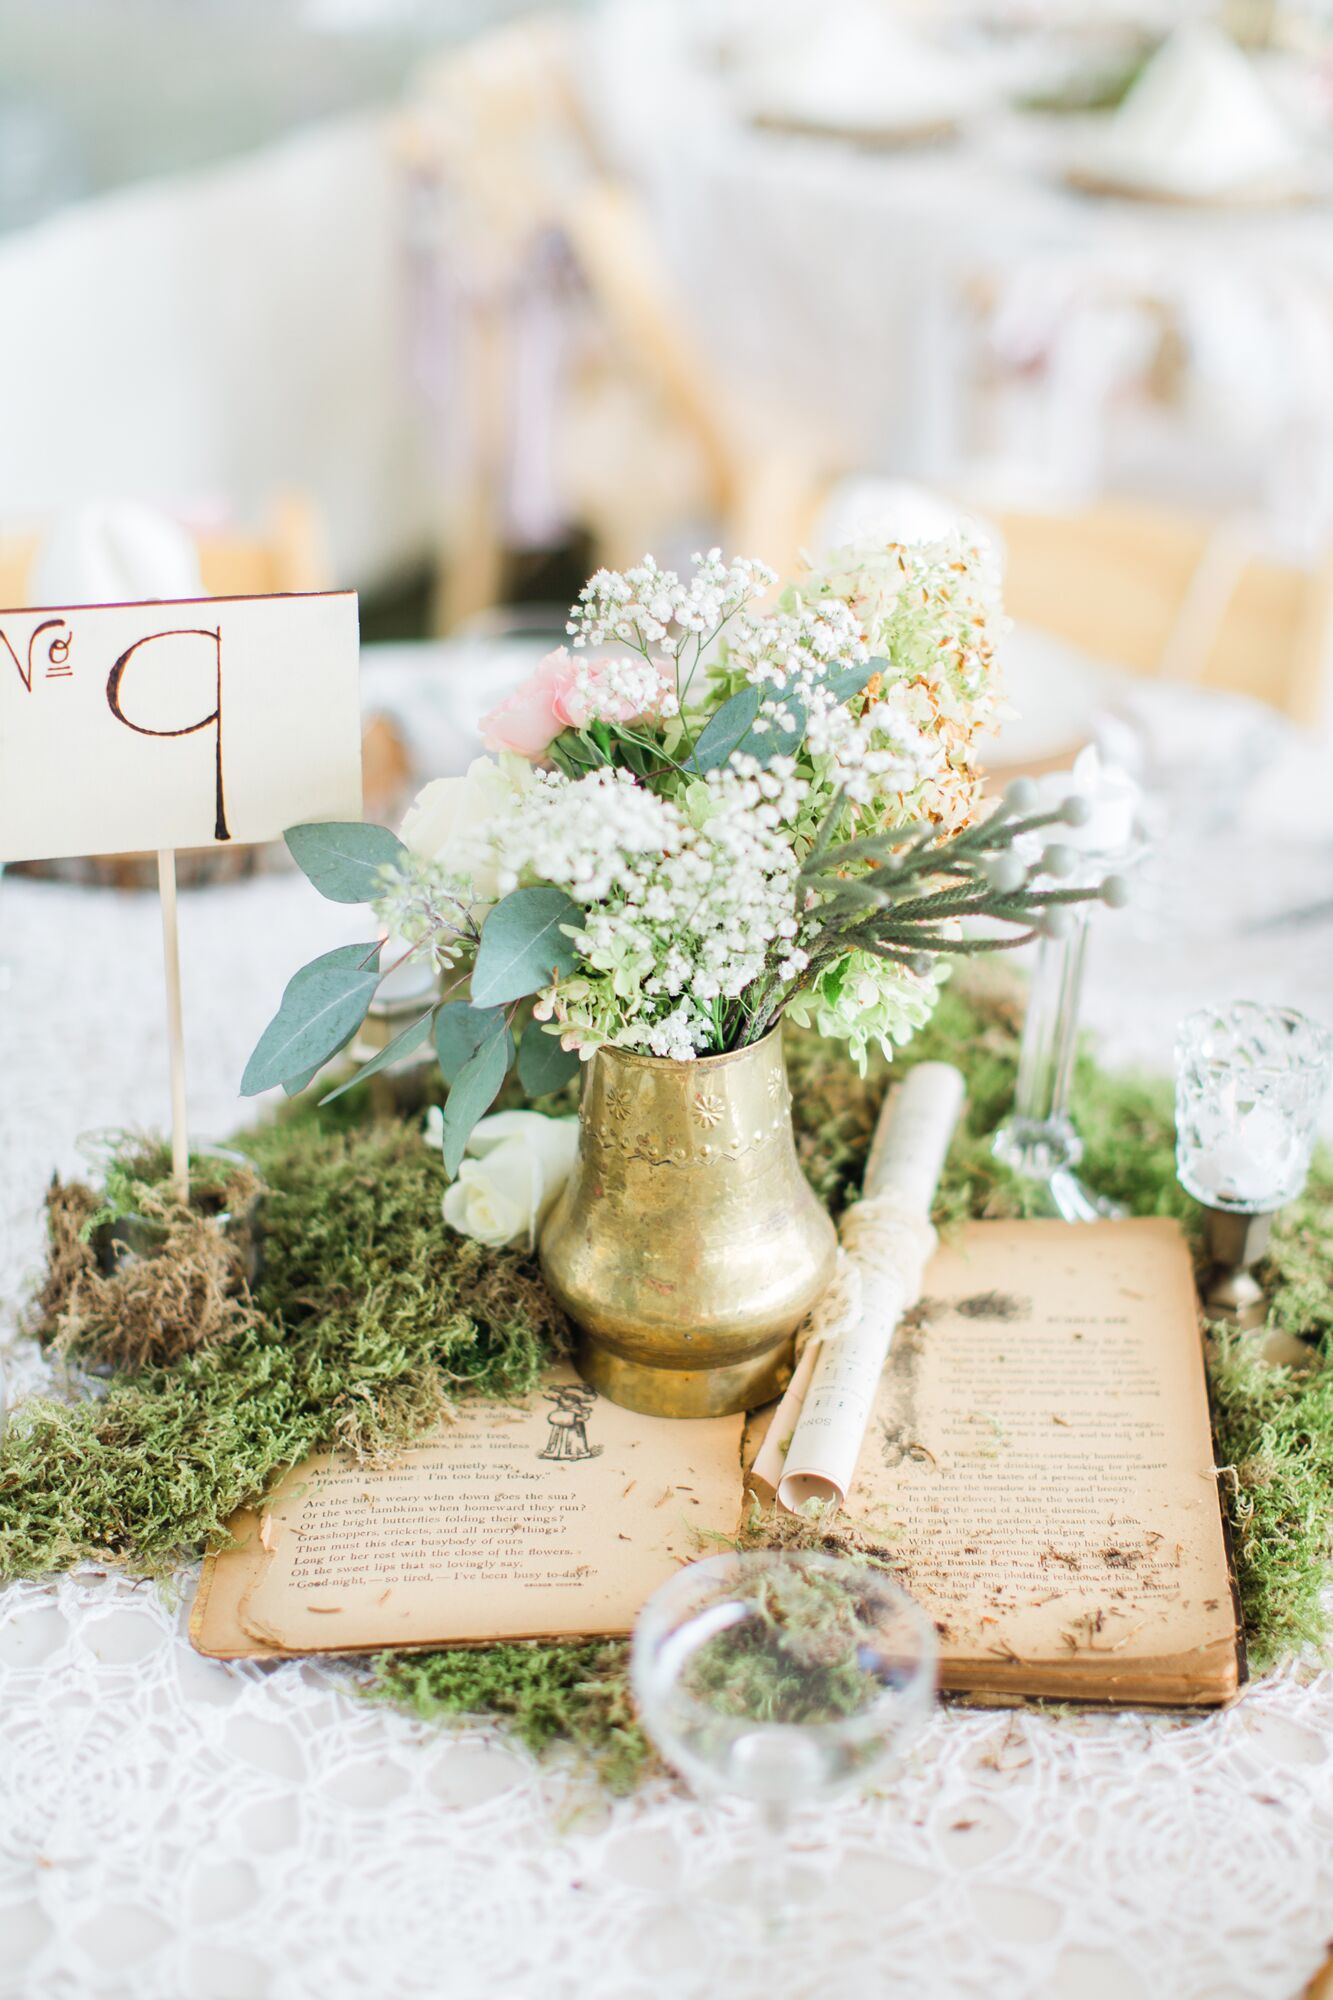
24. Design a Whimsical Wedding Centerpiece with a Book, Moss, and Brass
Creating this romantic look for a wedding or event involves combining vintage and natural elements. The costs can vary widely based on the flowers you choose.
- Antique Book: $5 – $15 (Flea Market or Etsy)
- Sheet Moss: $10 – $20 (Floral Supply Store)
- Brass Vase (small): $15 – $30 (Thrifted or online)
- Fresh Flowers (mixed bouquet): $25 – $50
- Parchment Paper and Ribbon: $5
- Table Number & Glassware: (Varies – often part of rental package)
- TOTAL: $60 – $120 per table
- Budget Alternative: Use a book you own, use more greenery and fewer expensive blooms, and find a simple glass jar instead of a brass vase to bring the cost down to $30-$40.
📏 Scale Guide
This centerpiece works because it tells a story of timeless romance. The aged book and parchment scroll evoke a sense of history and classic love stories. The lush green moss brings in a natural, almost magical forest-floor element, softening the entire arrangement. The metallic gleam of the brass vase adds a touch of warmth and vintage elegance, a step above simple glass. Finally, the fresh flowers provide life, color, and delicate beauty. Each element contributes to a cohesive theme of enchantment and natural elegance. This is a much more elaborate version of the centerpiece in Idea #1.
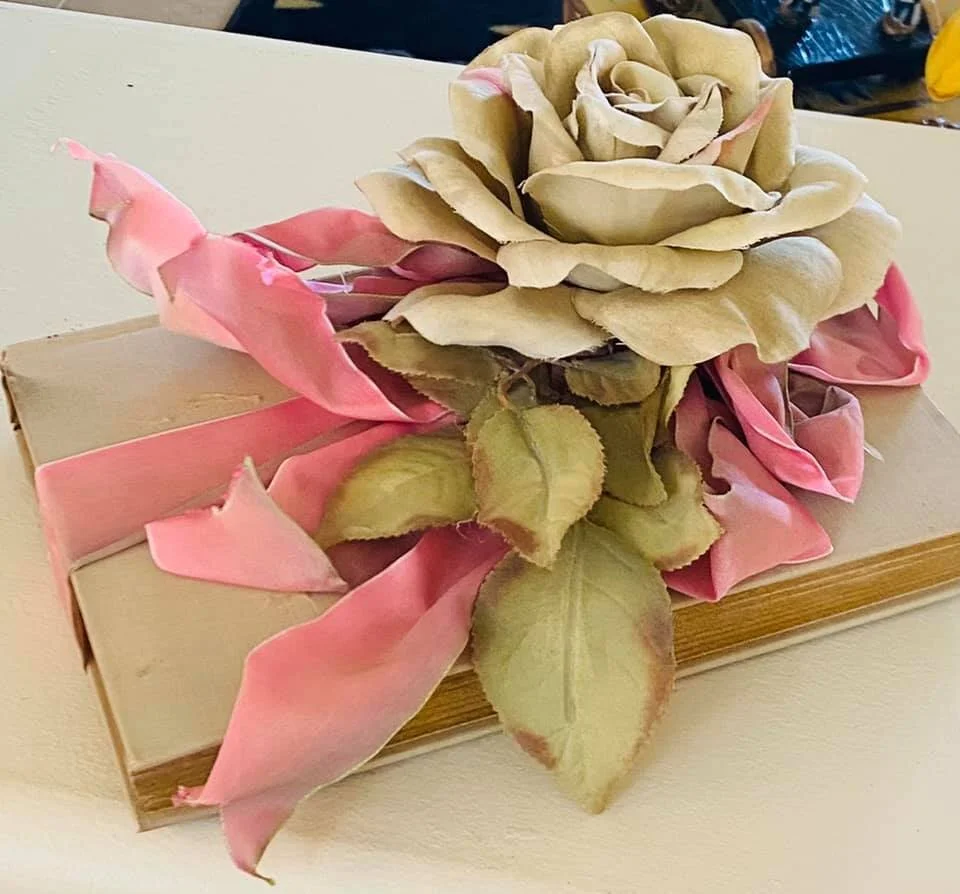
25. Embellish a Vintage Book with a Large Fabric Rose and Pink Ribbon
This purely decorative look is all about creating a romantic, shabby-chic vibe. The formula behind it is a study in softness: 50% Vintage Object (the distressed book) + 40% Soft Embellishments (the fabric rose and flowing ribbon) + 10% Natural Color (the fabric leaves). The key is that all the additions are soft and textural. There are no hard, shiny, or plastic elements. This commitment to fabric, ribbon, and a worn object creates a cohesive, gentle aesthetic. You could swap the rose for a fabric peony or the pink ribbon for a cream-colored lace, and the romantic feel would remain.
✅ Before You Start
Let’s be real: a book decorated this way is no longer a book for reading. The embellishments often seal the cover shut or make it incredibly awkward to open. This is a project that transforms the book from a functional item into a purely decorative object—a ‘book sculpture,’ if you will. You need to be okay with that before you start gluing things to a beautiful vintage cover. Always choose a book for this project based on its cover’s appearance, not its content, because the content will likely become inaccessible.
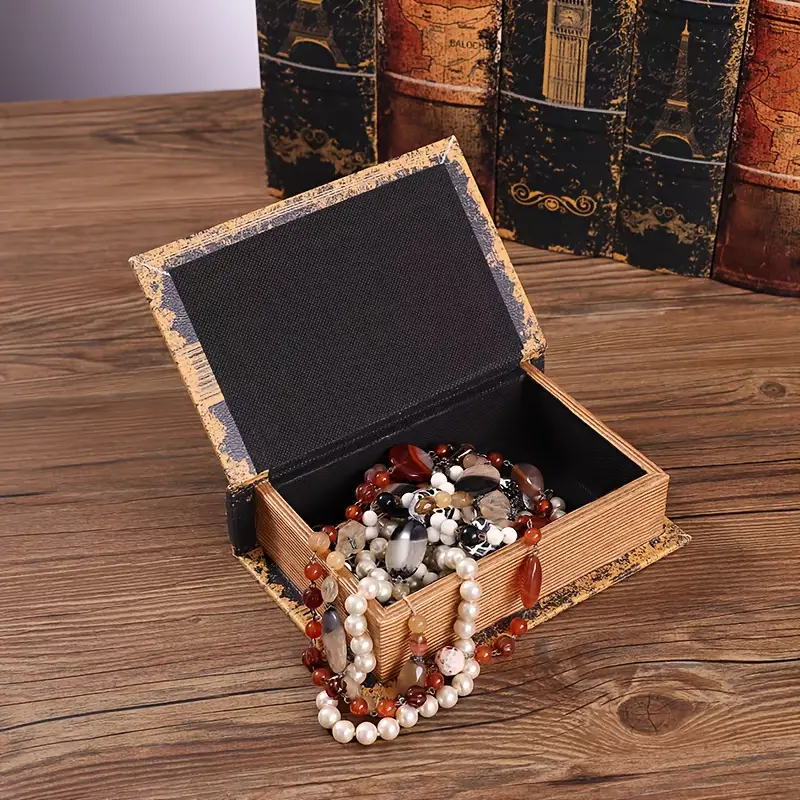
26. Create a Hidden Jewelry Box from a Faux Book
This idea is so appealing because it combines aesthetics with practicality in a very satisfying way. It plays on the idea of hidden treasures, making the act of storing and retrieving your jewelry feel a little more special. The rustic, distressed look of the an ‘old book’ on a wooden surface creates a warm, vintage atmosphere. But inside, it holds personal, valuable items. This contrast between the rustic exterior and the precious interior is what makes it so charming. It’s organization, but with a story. A similar concept is seen in Idea #19, but for general clutter.
🔧 How-To Brief
While you can buy these pre-made, you can create a DIY version for much less. Find a simple wooden craft box at Michaels or Hobby Lobby (usually $5-$10). You can then use decoupage techniques with printed paper that looks like a vintage book cover, or even paint and distress it yourself. Line the inside with a piece of felt or velvet from the fabric store ($2-$3 for a small piece). With a little bit of creative effort, you can make a personalized version of this for under $15, instead of paying $30-$40 for a store-bought one.
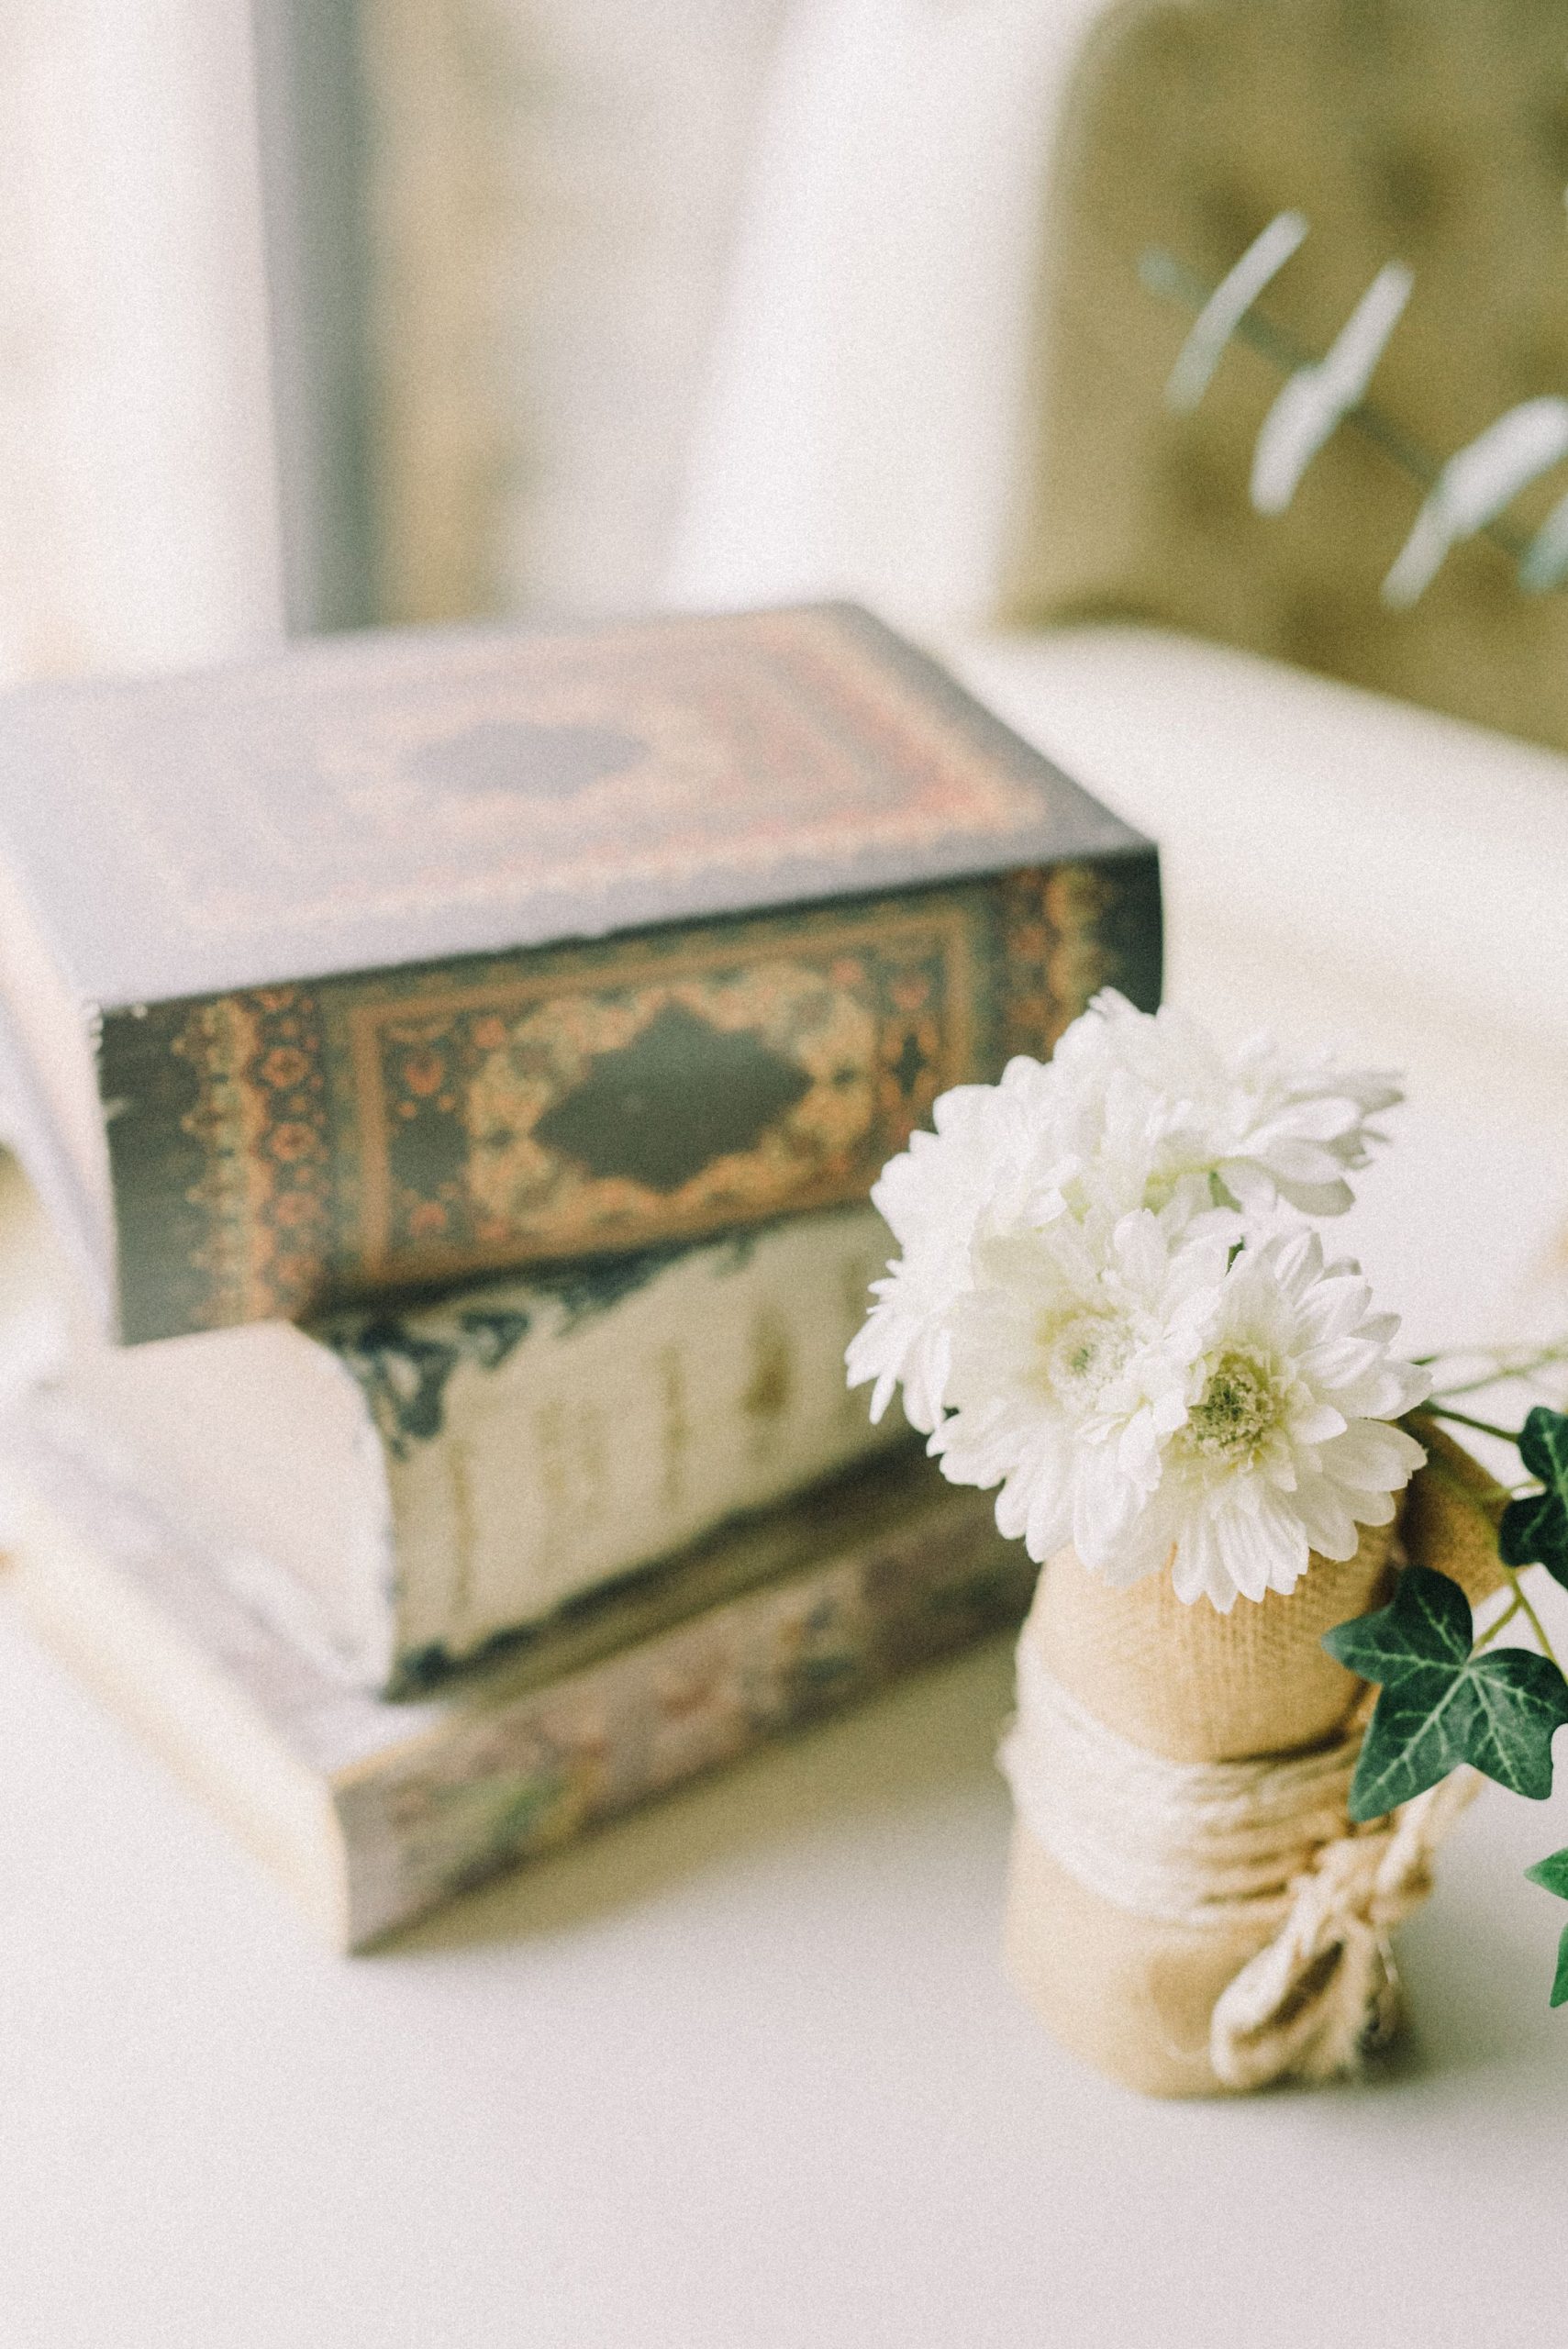
27. Style a Cozy Vignette with Stacked Decorative Books and Flowers
The single element that elevates this from just a pile of stuff to a styled vignette is the small floral arrangement. Without it, you just have two books on a table. The flowers, however, add life, a touch of nature, and a much-needed softness to the hard lines of the books. The burlap-wrapped container and twine reinforce the rustic, cozy aesthetic established by the patterned book covers. It’s the piece that ties everything together and makes the arrangement feel intentional and complete.
⭐ The One Thing
When creating a small decorative arrangement like this, think in triangles. Notice how the stacked books, the flowers, and the ivy leaves form a rough triangular shape? This is a classic composition technique that creates a sense of balance and visual stability. The tallest point is the floral arrangement, and the books form the wider base. This structure guides the eye through the scene naturally. Avoid placing items of the same height right next to each other, as this creates a static, boring line.
28. Create Delicate Art with an Altered Book Page and Pressed Flowers
This craft is so beautiful because it’s a layered story. The bottom layer is the book page itself, with its aged color and lines of text hinting at a forgotten narrative. The next layer is the collection of pressed flowers, which tells its own story of a season, a walk in a garden, or a special occasion. Finally, the wrapped gift suggests generosity and connection. All these layers of meaning—literature, nature, and relationships—are combined into one small, delicate piece of art. It feels deeply personal and nostalgic.
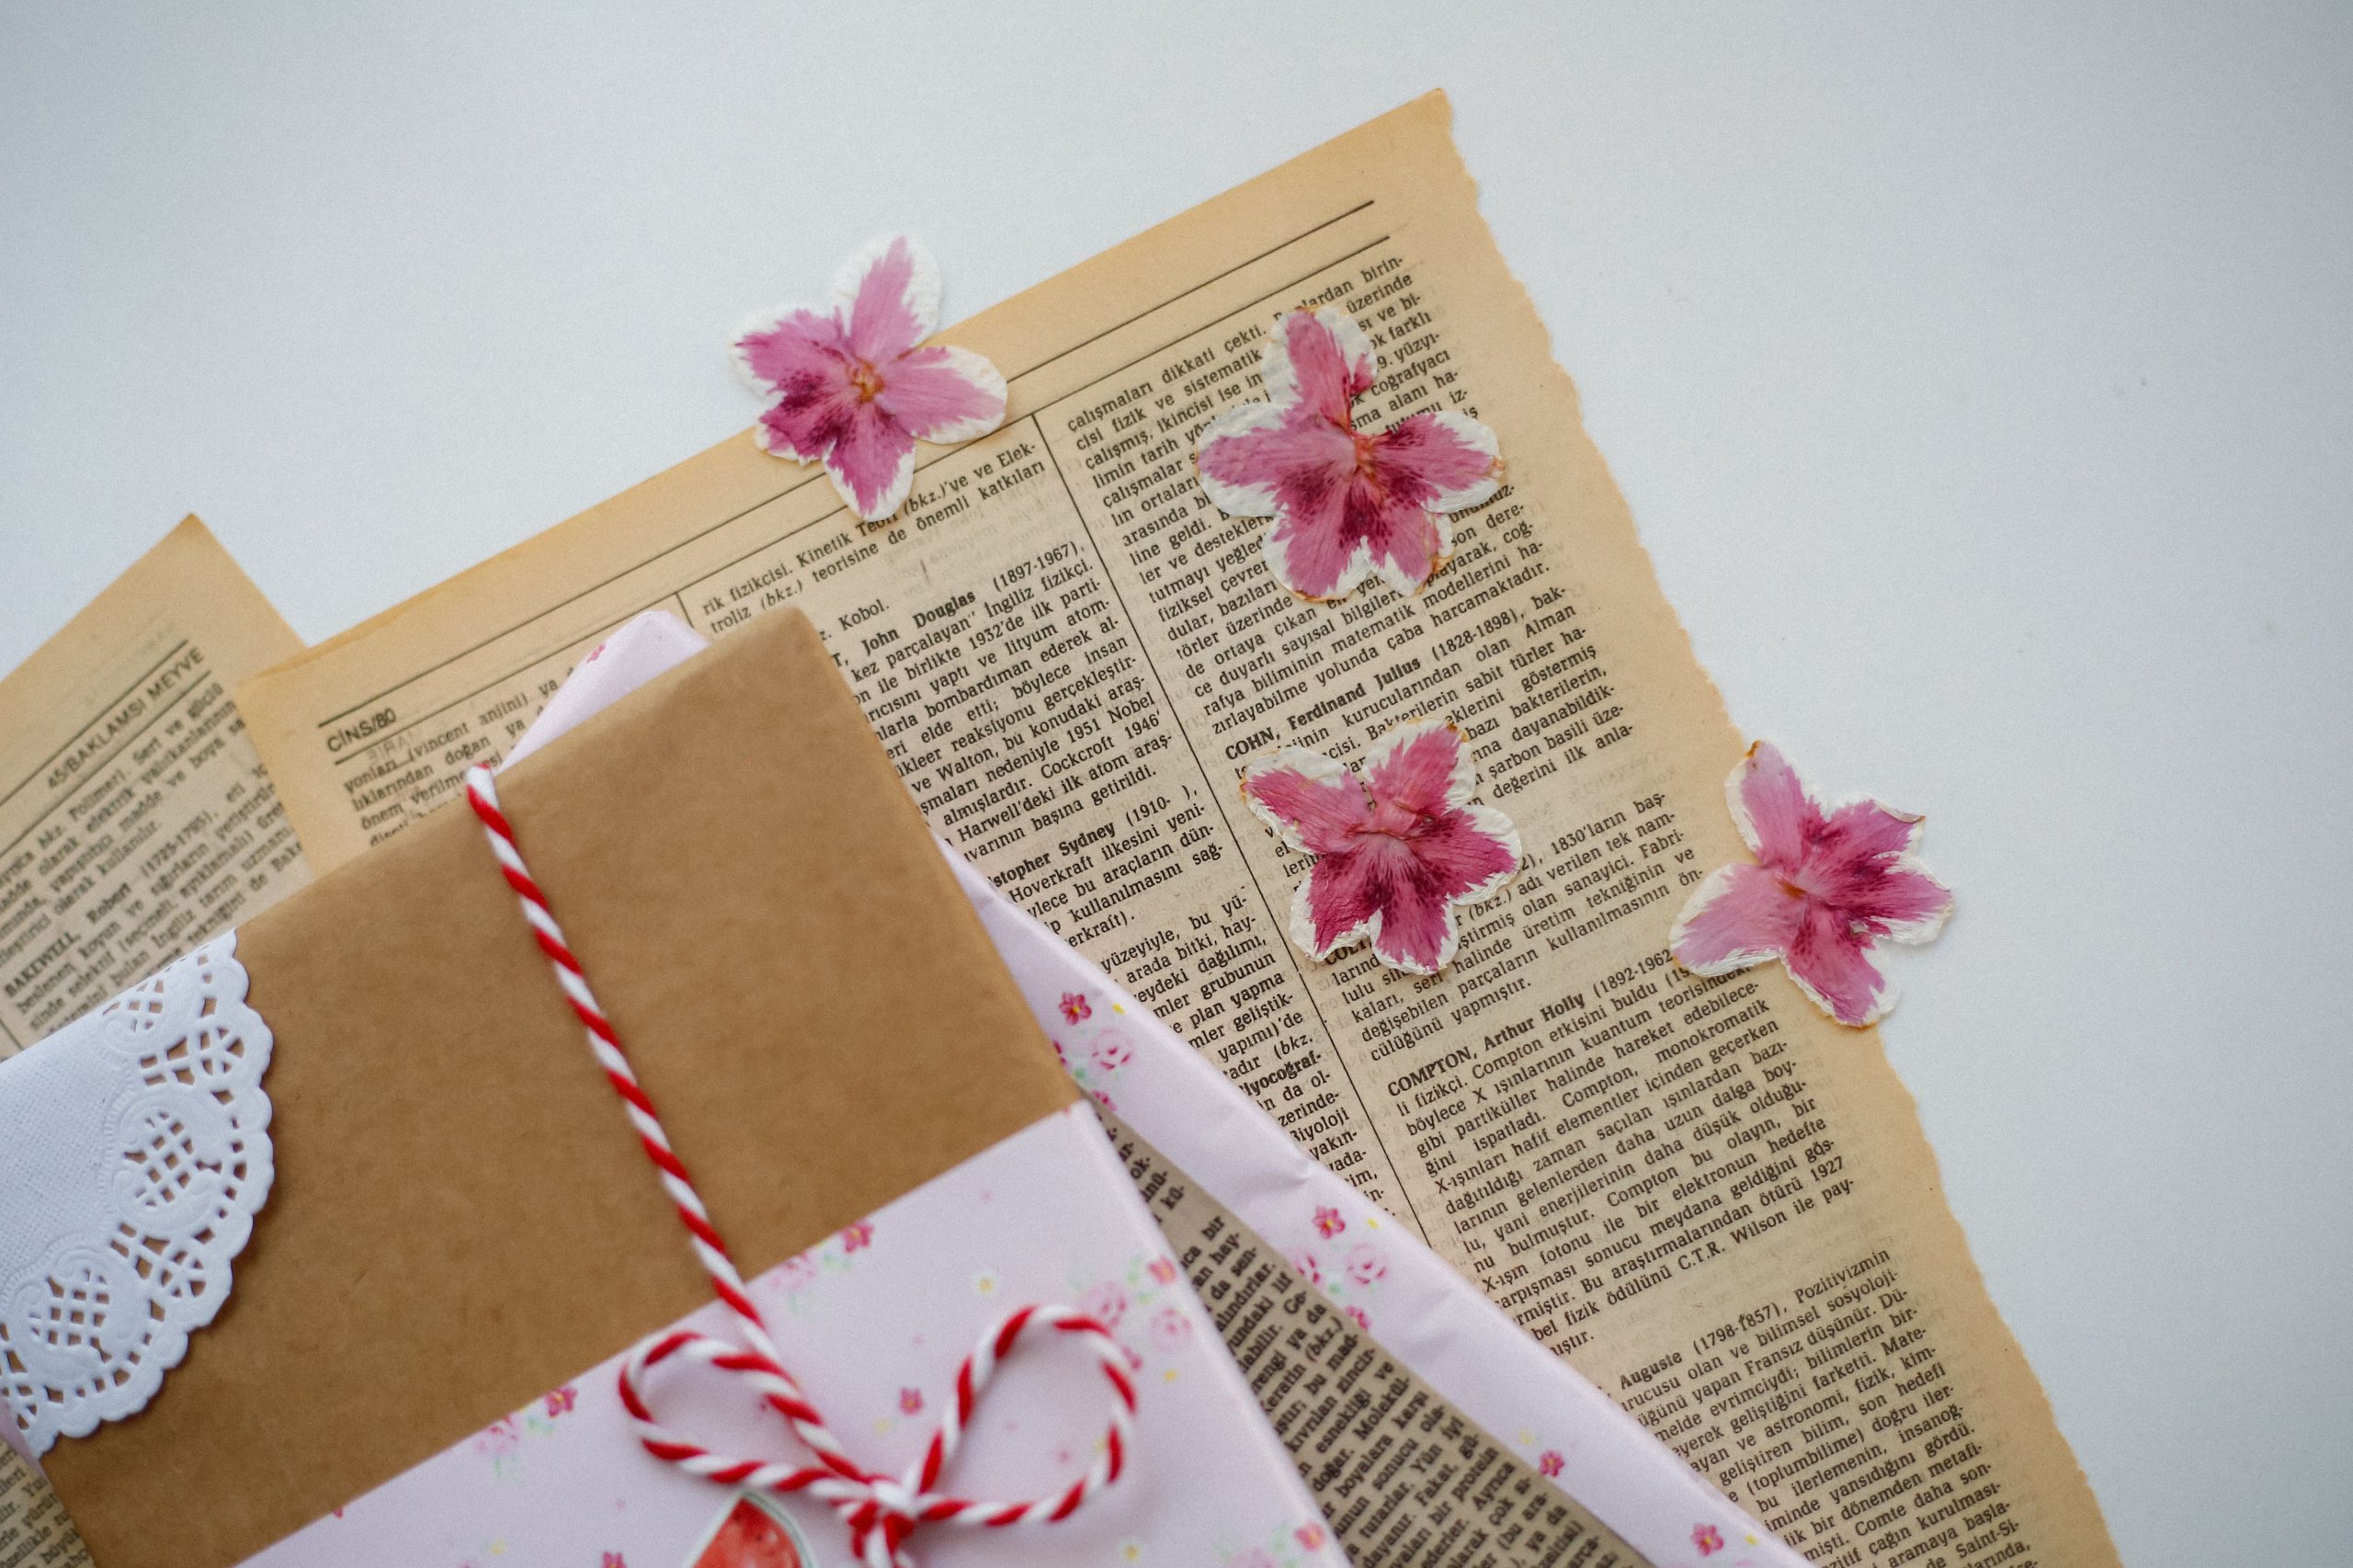
💰 Budget Breakdown
This is a delicate project, so make sure you have everything ready before you begin.
- Press your flowers properly: Have you pressed your flowers for at least 2-3 weeks in a heavy book or flower press until they are completely dry and paper-thin? Any moisture will ruin the book page.
- Choose your page: Have you selected a book page that has a warm, even color and text that isn’t too distracting?
- Handle with care: Do you have tweezers on hand? Pressed flowers are incredibly fragile, and you should not handle them with your fingers.
29. Build a Desk Organizer from a Stack of Old Books
This project creates a wonderfully thematic desk accessory, especially for a writer or student. It’s a bit of a construction project, but the result is sturdy and unique. The cost is low, mainly for the adhesive.
- Select your books: Find 3-4 hardcover books of a similar size that you don’t mind sacrificing.
- Prepare the base: Open the cover of your bottom book. Drill two holes through the cover, sized to fit your metal pencil holders.
- Glue the stack: Apply a generous amount of strong construction adhesive or PVA glue between each book, stacking them up. You are gluing the bottom cover of one book to the top cover of the one below it.
- Press and dry: Place something very heavy on top of the stack and let it dry for at least 24 hours to ensure a solid bond.
- Attach holders: Once dry, insert the metal pencil holders into the holes you drilled in the top book.
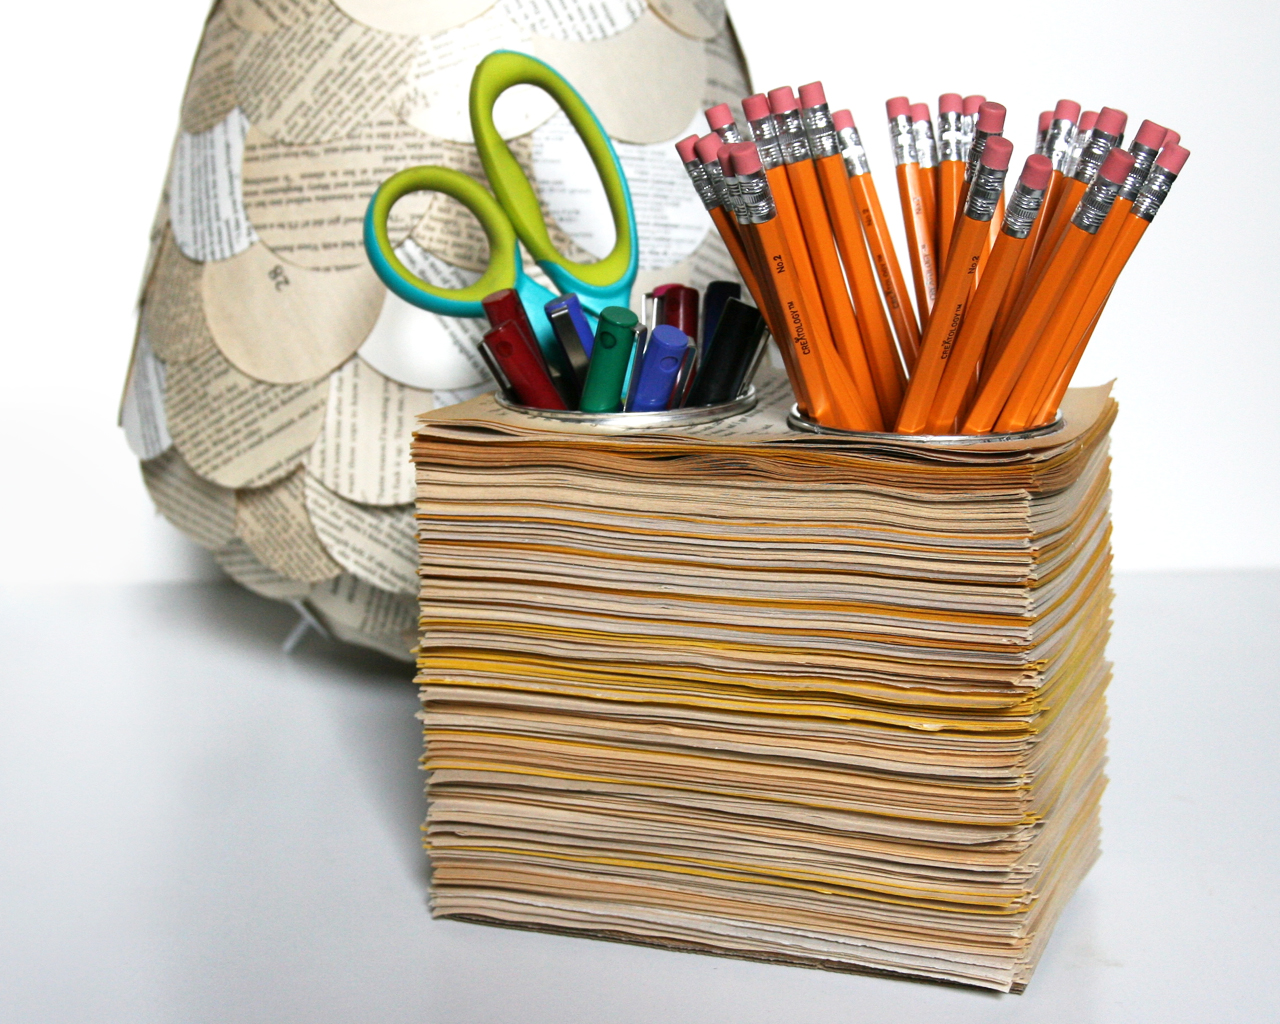
🎯 What Makes It Work
This is a fantastic idea for a desk with a decent amount of surface area, but it’s not ideal for a very small or crowded workspace. The finished organizer will have a footprint of roughly 8×10 inches and stand about 6-8 inches tall, depending on your books. It’s a solid, heavy object. Make sure you have a dedicated spot for it where it won’t need to be moved often. It works best on a study desk, a library table, or a spacious crafting surface where its literary charm can be appreciated without adding to the clutter.
30. Design a ‘Little Women’ Themed Keepsake Box
This keepsake box is so effective because it commits fully to its theme. It isn’t just a box with a flower on it; it’s a tribute to ‘Little Women.’ The use of specific illustrations and text related to the novel creates a rich, narrative experience. The color palette of dark green, peach, and cream feels appropriately vintage and romantic. The choice of embellishments—fabric roses, lace, pearls—all align with the 19th-century setting of the story. This strong thematic cohesion is what makes the object feel like a precious artifact rather than a random craft project.
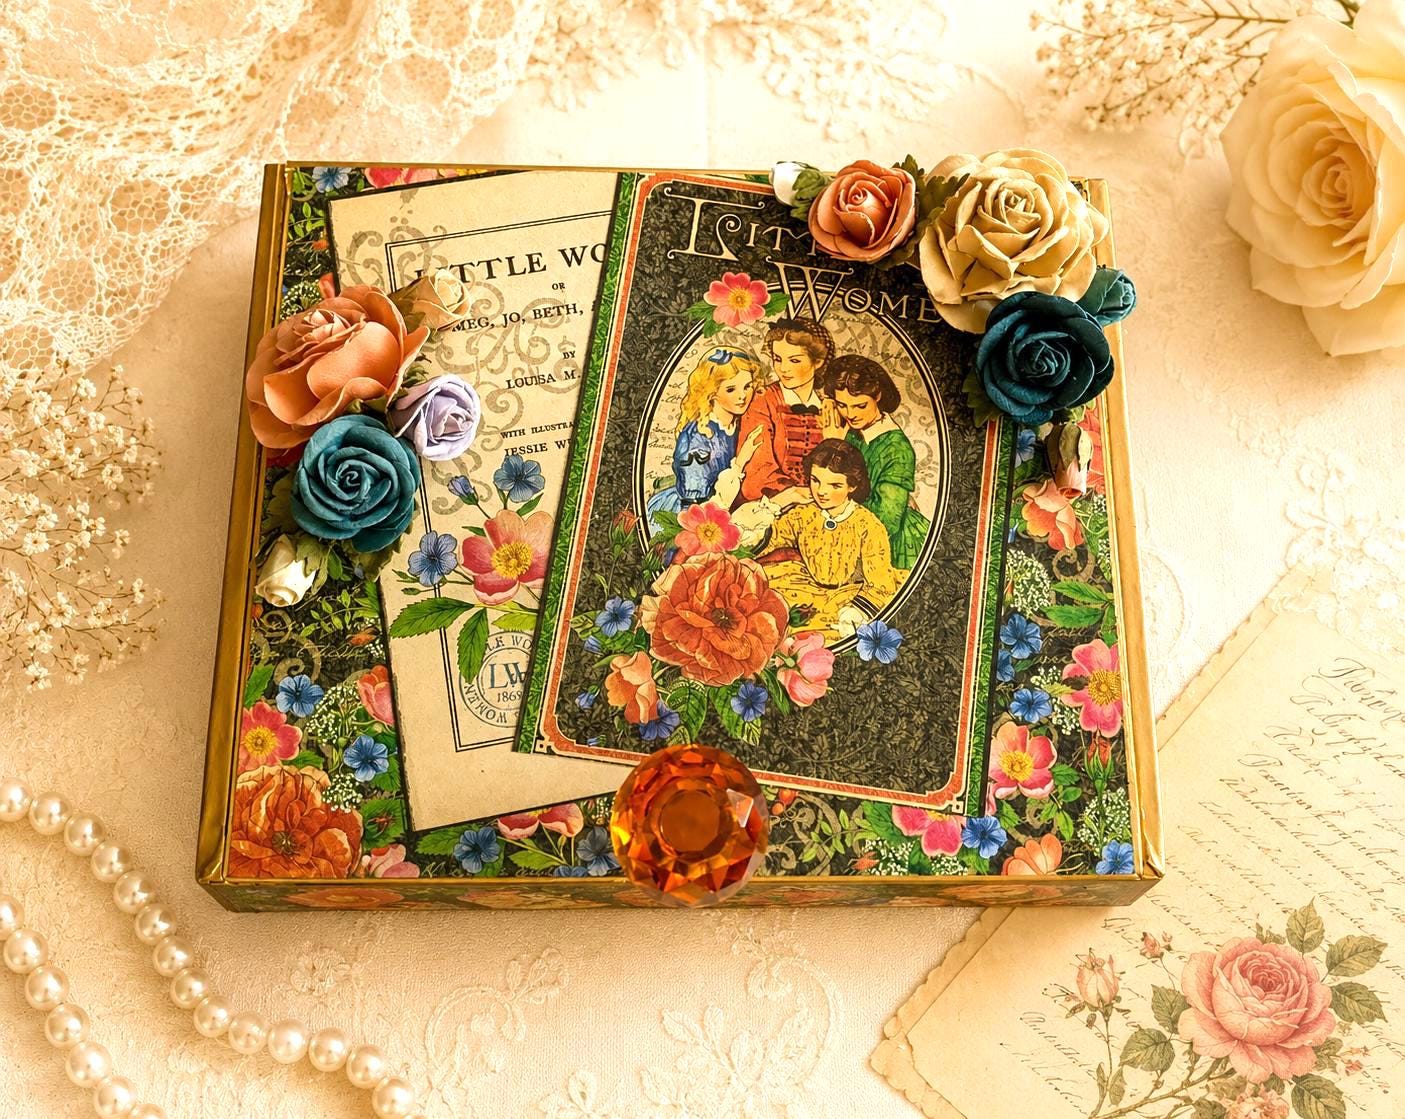
🧹 Maintenance Reality
The single element that anchors this entire design is the amber-colored faceted button. Amidst all the soft fabrics, delicate papers, and floral patterns, that one hard, jewel-like object provides a crucial focal point. Its warm color complements the peaches and creams, but its faceted surface catches the light in a way nothing else does. It feels like a piece of antique jewelry or a clasp on a treasured diary, adding a sense of importance and value to the box. It’s the perfect finishing touch that completes the vintage aesthetic.
31. Arrange a Vintage-Inspired Still Life with Old Books and a Typewriter
Creating this nostalgic, intellectual vibe is about balancing hard and soft textures. The formula is: 50% Hard, Historic Objects (the stacked books and typewriter) + 30% Light, Natural Element (the translucent dried flowers) + 20% Warm Foundation (the light wood surface). The books and typewriter provide a sense of weight, history, and seriousness. The dried flowers in the clear glass vase add a necessary touch of delicacy and lightness, preventing the scene from feeling too heavy or cluttered. The wood grain provides a warm, organic base for everything.
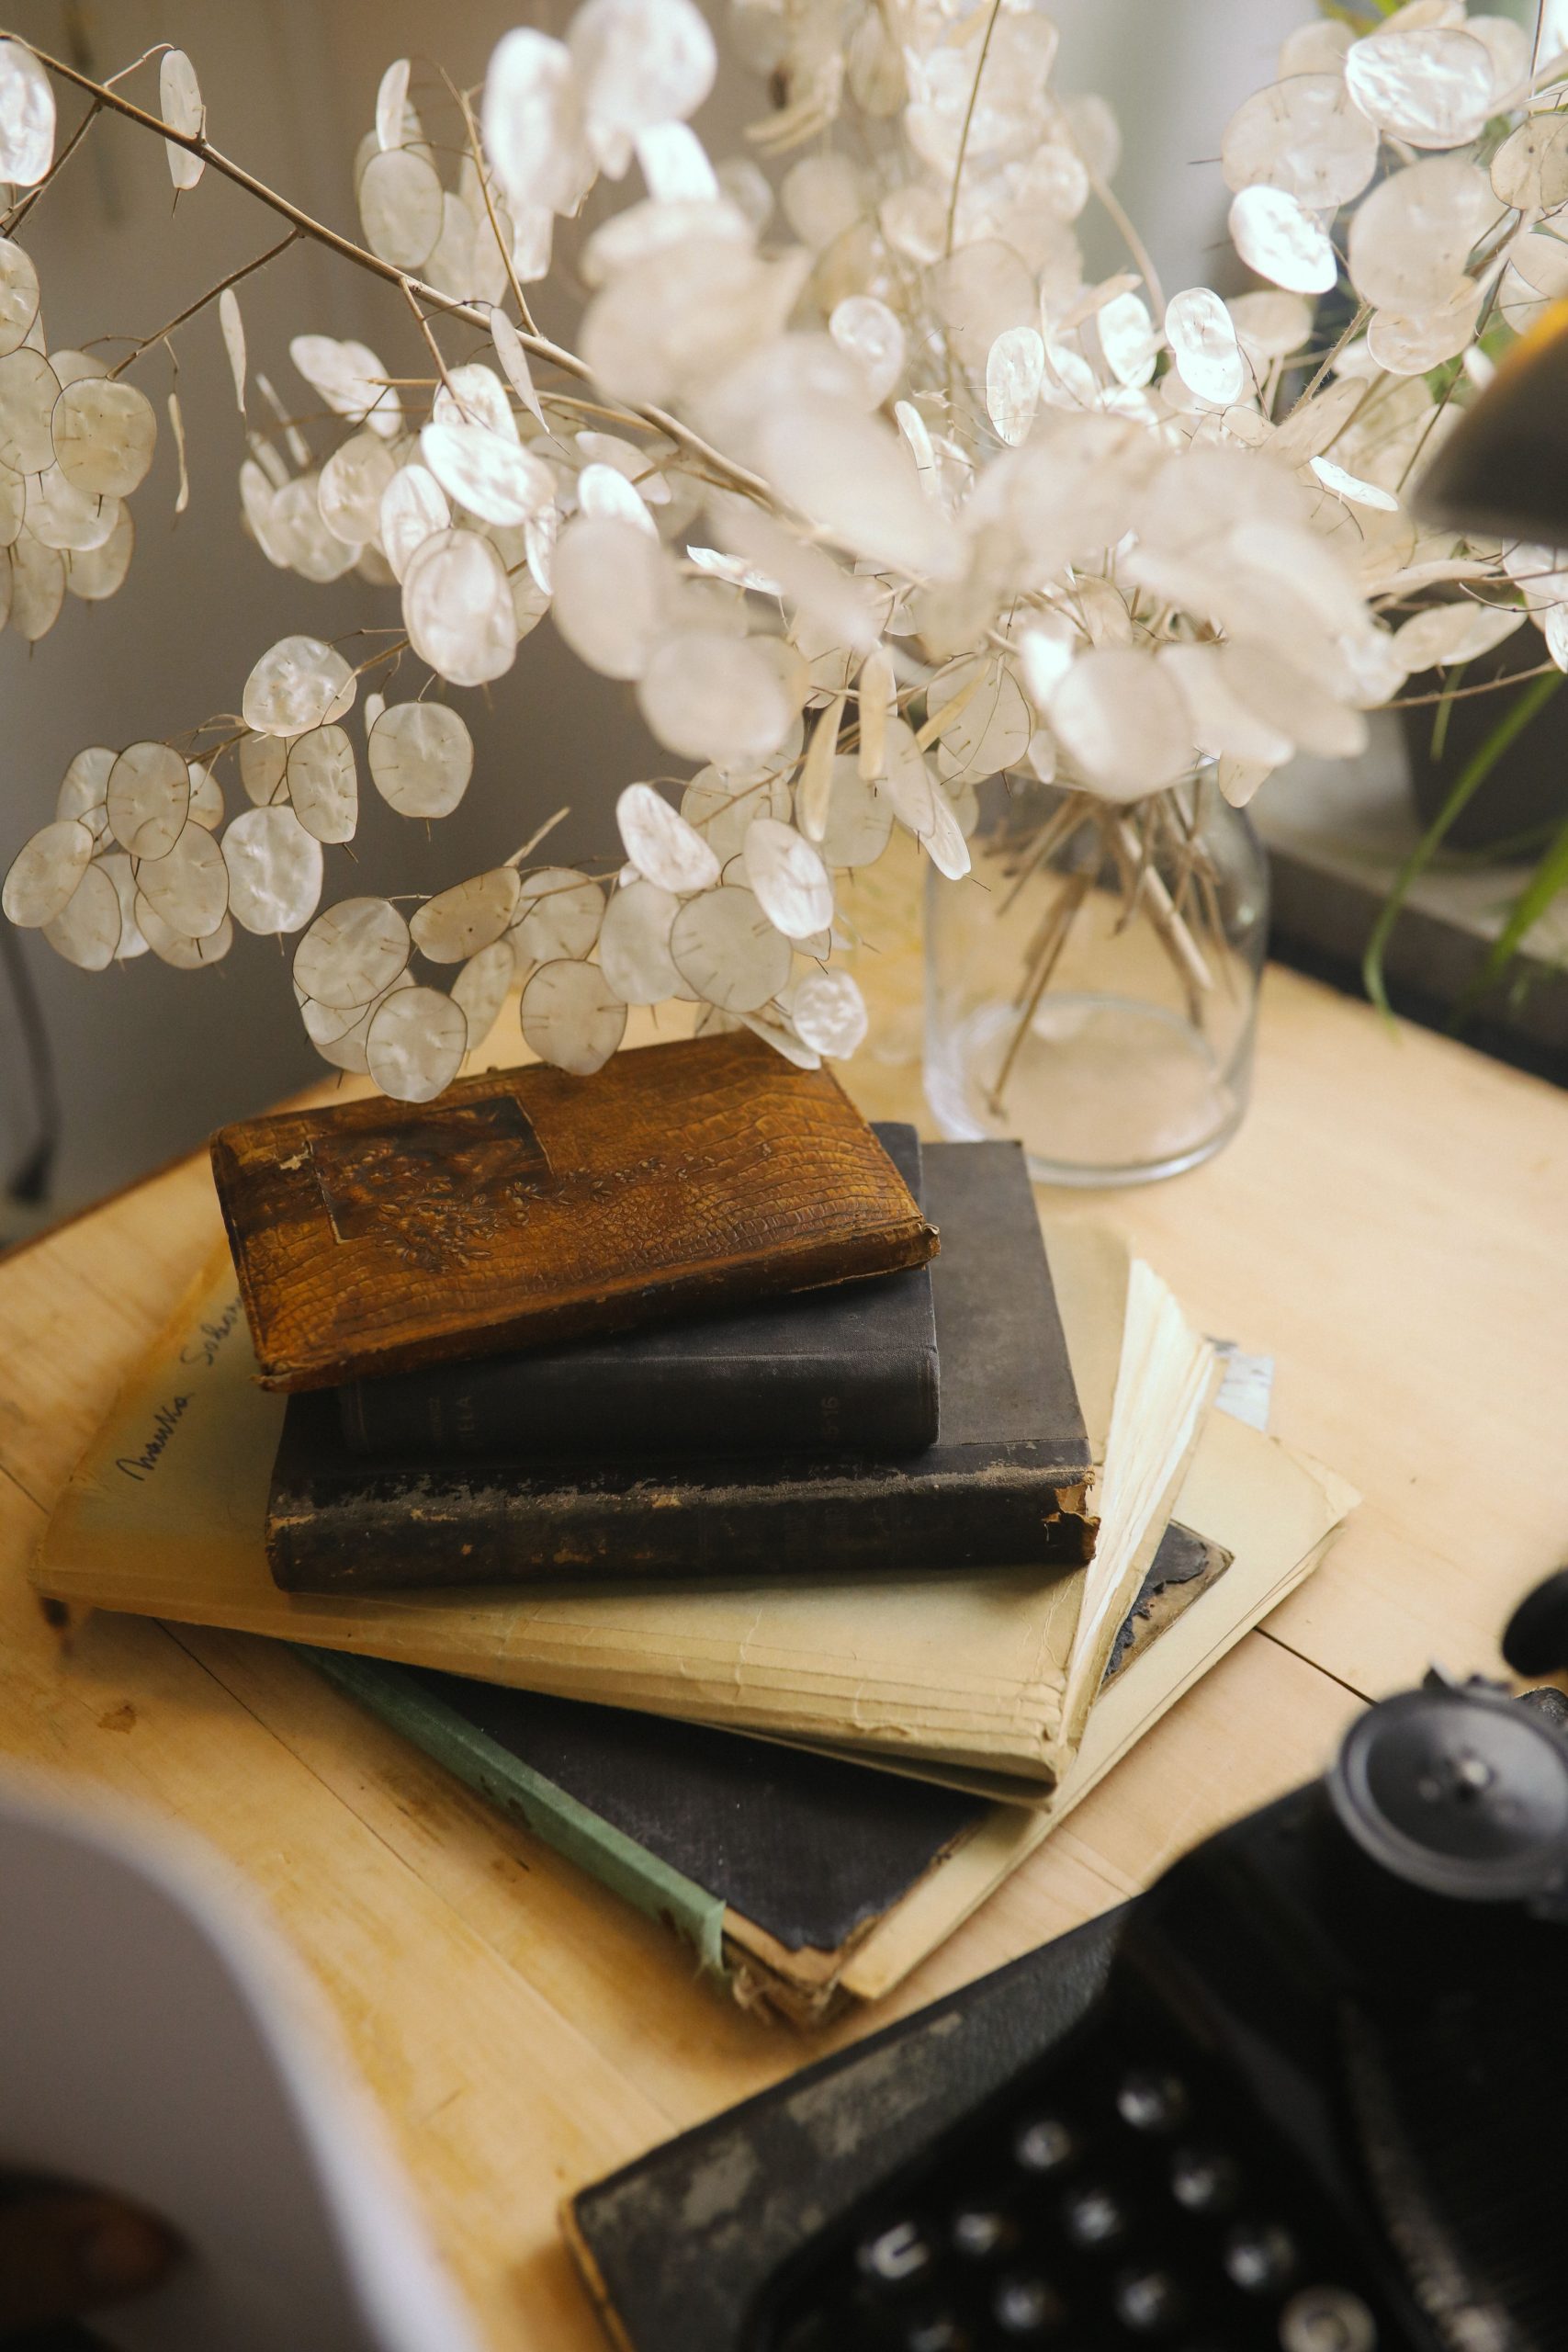
📐 Style Math
When styling a still life like this, don’t be afraid of partial views. Notice how the typewriter isn’t fully in the frame? This is a pro styling trick. Showing only part of an object makes the scene feel more natural and less staged, as if it’s a genuine snapshot of a real desk. It also adds a bit of mystery and invites the viewer’s brain to fill in the rest of the image. If every object was perfectly and completely displayed, the scene would feel static and rigid, like a catalogue photo.
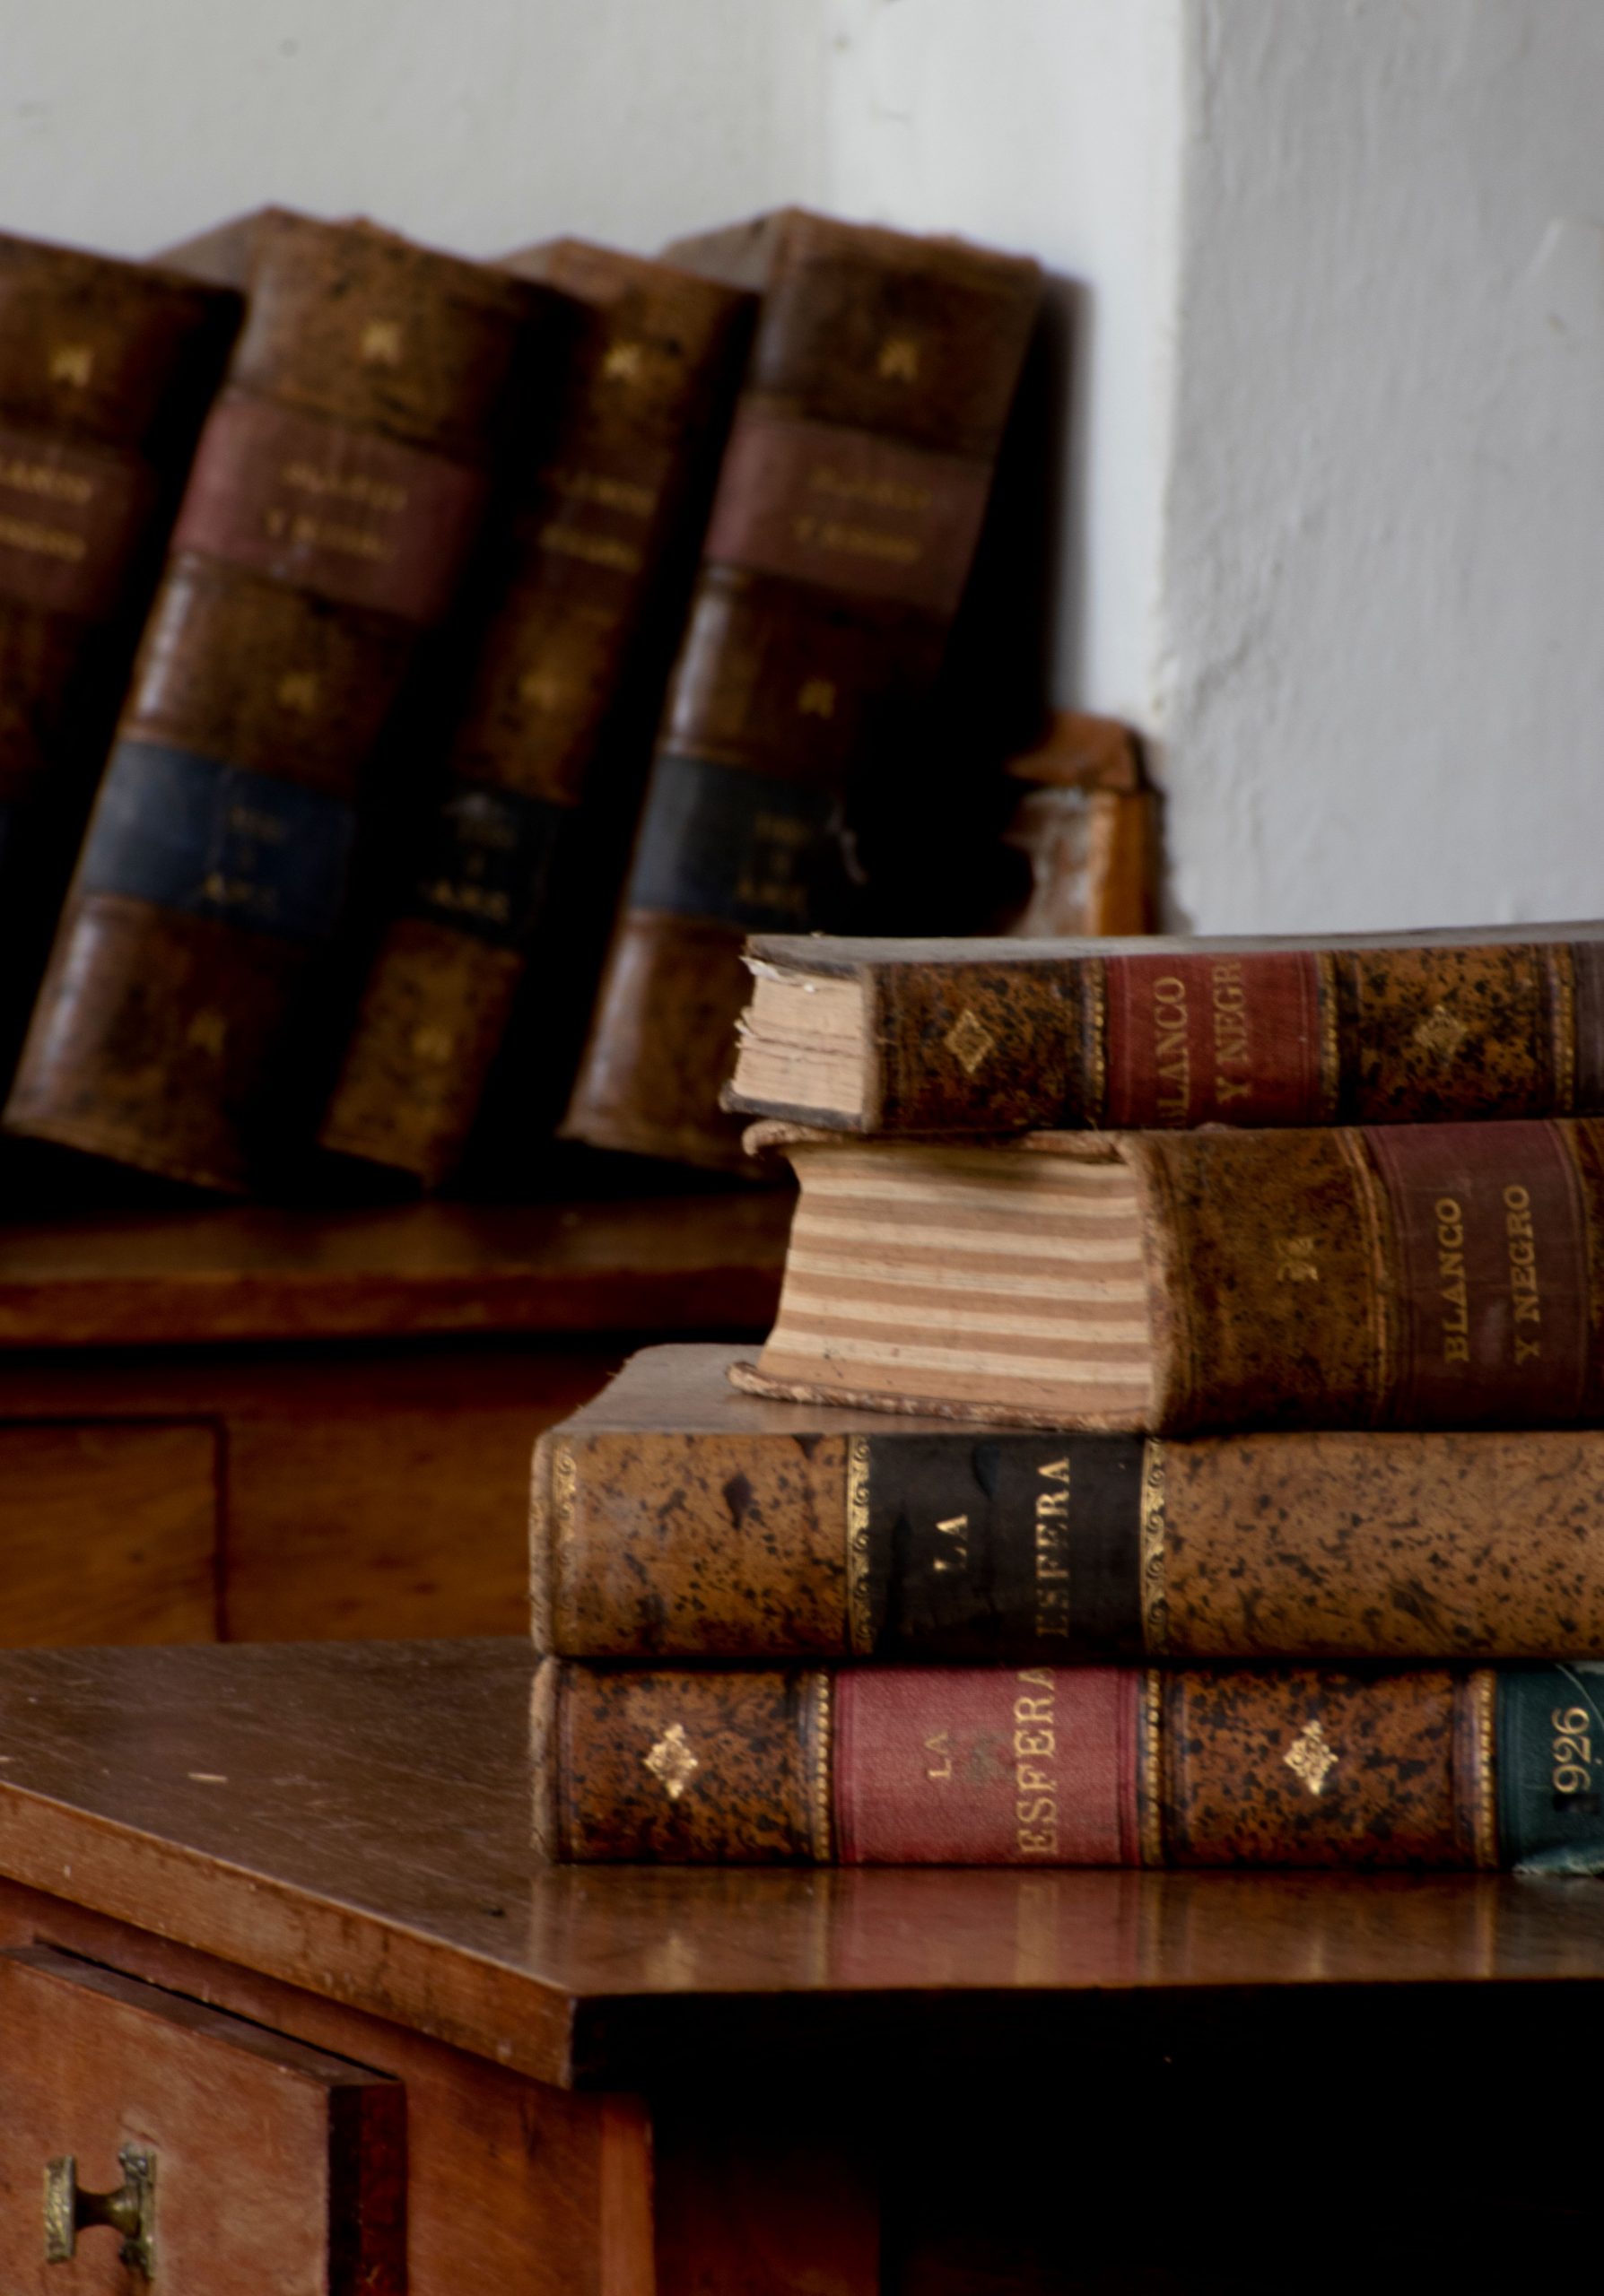
32. Curate a Classic Library Look with Stacked and Lined-Up Vintage Books
This look is all about creating visual rhythm and depth. The combination of stacked and vertically-lined books breaks up the monotony. The horizontal stacks in the foreground create a strong, grounding base and allow you to appreciate the texture of the page edges. The vertical books in the background draw the eye upward and back, creating a sense of a larger collection. This variation in orientation is what makes the arrangement feel dynamic and curated, rather than just like a pile of books. The ornate, gold-accented spines add a touch of classic, academic elegance.
💸 Get This Look For Less
You don’t need a collection of genuine 19th-century first editions to get this look. Many books from the 1960s to the 1980s were designed with beautiful, ornate covers and spines to mimic older styles. These can be found in abundance at thrift stores, library book sales, and flea markets for just a few dollars each. Focus on finding books with interesting cloth or faux-leather covers and decorative gold or colored text on the spine. It’s the collective look that matters, not the individual value of the books.
Turn the Page on Your Home’s Decor
Old books have stories in them, and now you have 32 ways to make them part of your home’s story. Don’t be afraid to experiment, mix these ideas, and make them your own—the most beautiful result is one that feels personal to you. Ready for more inspiration? Follow us on Pinterest for your next favorite project!