You know that feeling when you finally find the one bathroom photo that looks exactly right for your space? It stops the endless scrolling and starts the real planning. If your current bathroom has been bothering you for longer than you’d like to admit, this is your sign to start fresh. After filtering through hundreds of real designer projects and the best of Pinterest, we narrowed it down to the looks that actually deliver for 2026. Inside, you’ll find 28 distinct bathroom remodel ideas, with a focus on everything from warm minimalism to bold, color-drenched spaces. And stay until the end — we break down the most common mistakes that can ruin these beautiful looks. 📌 Save this to Pinterest for later — you’ll want to revisit these ideas.
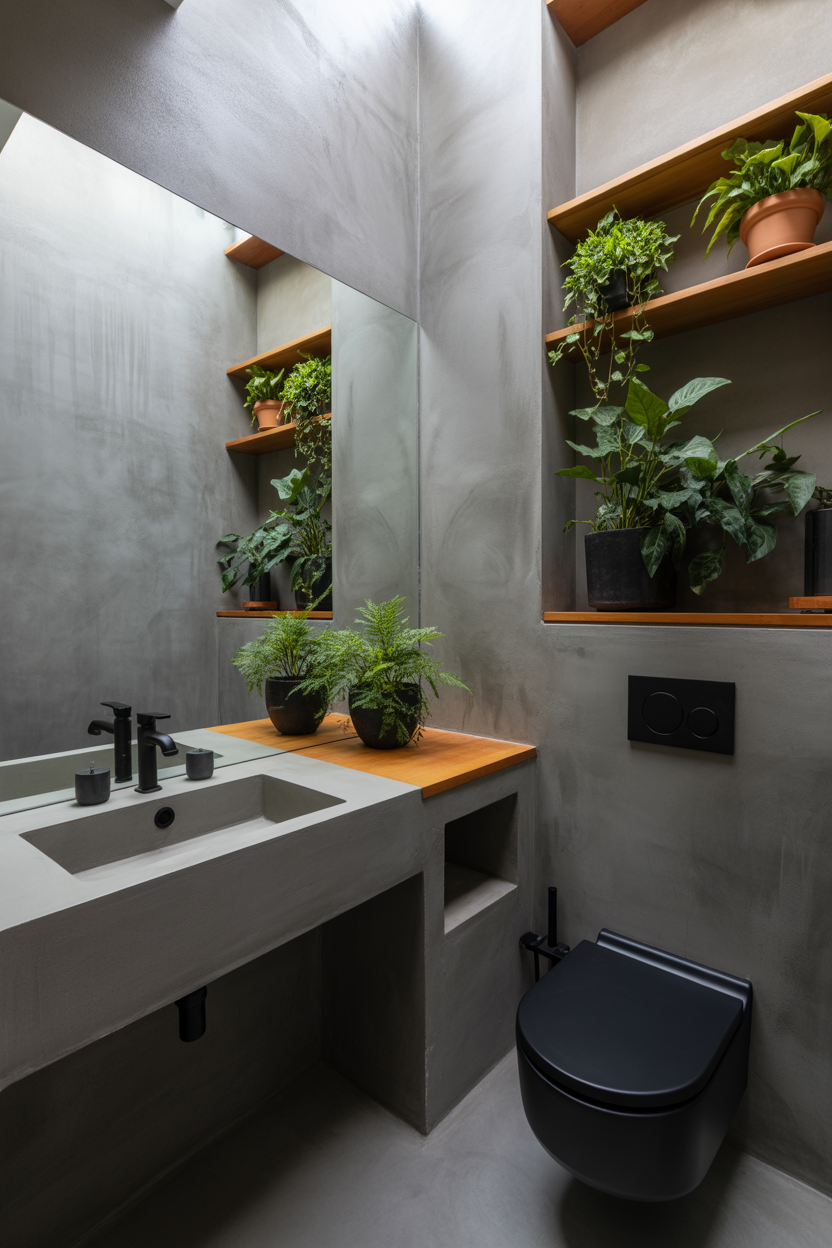
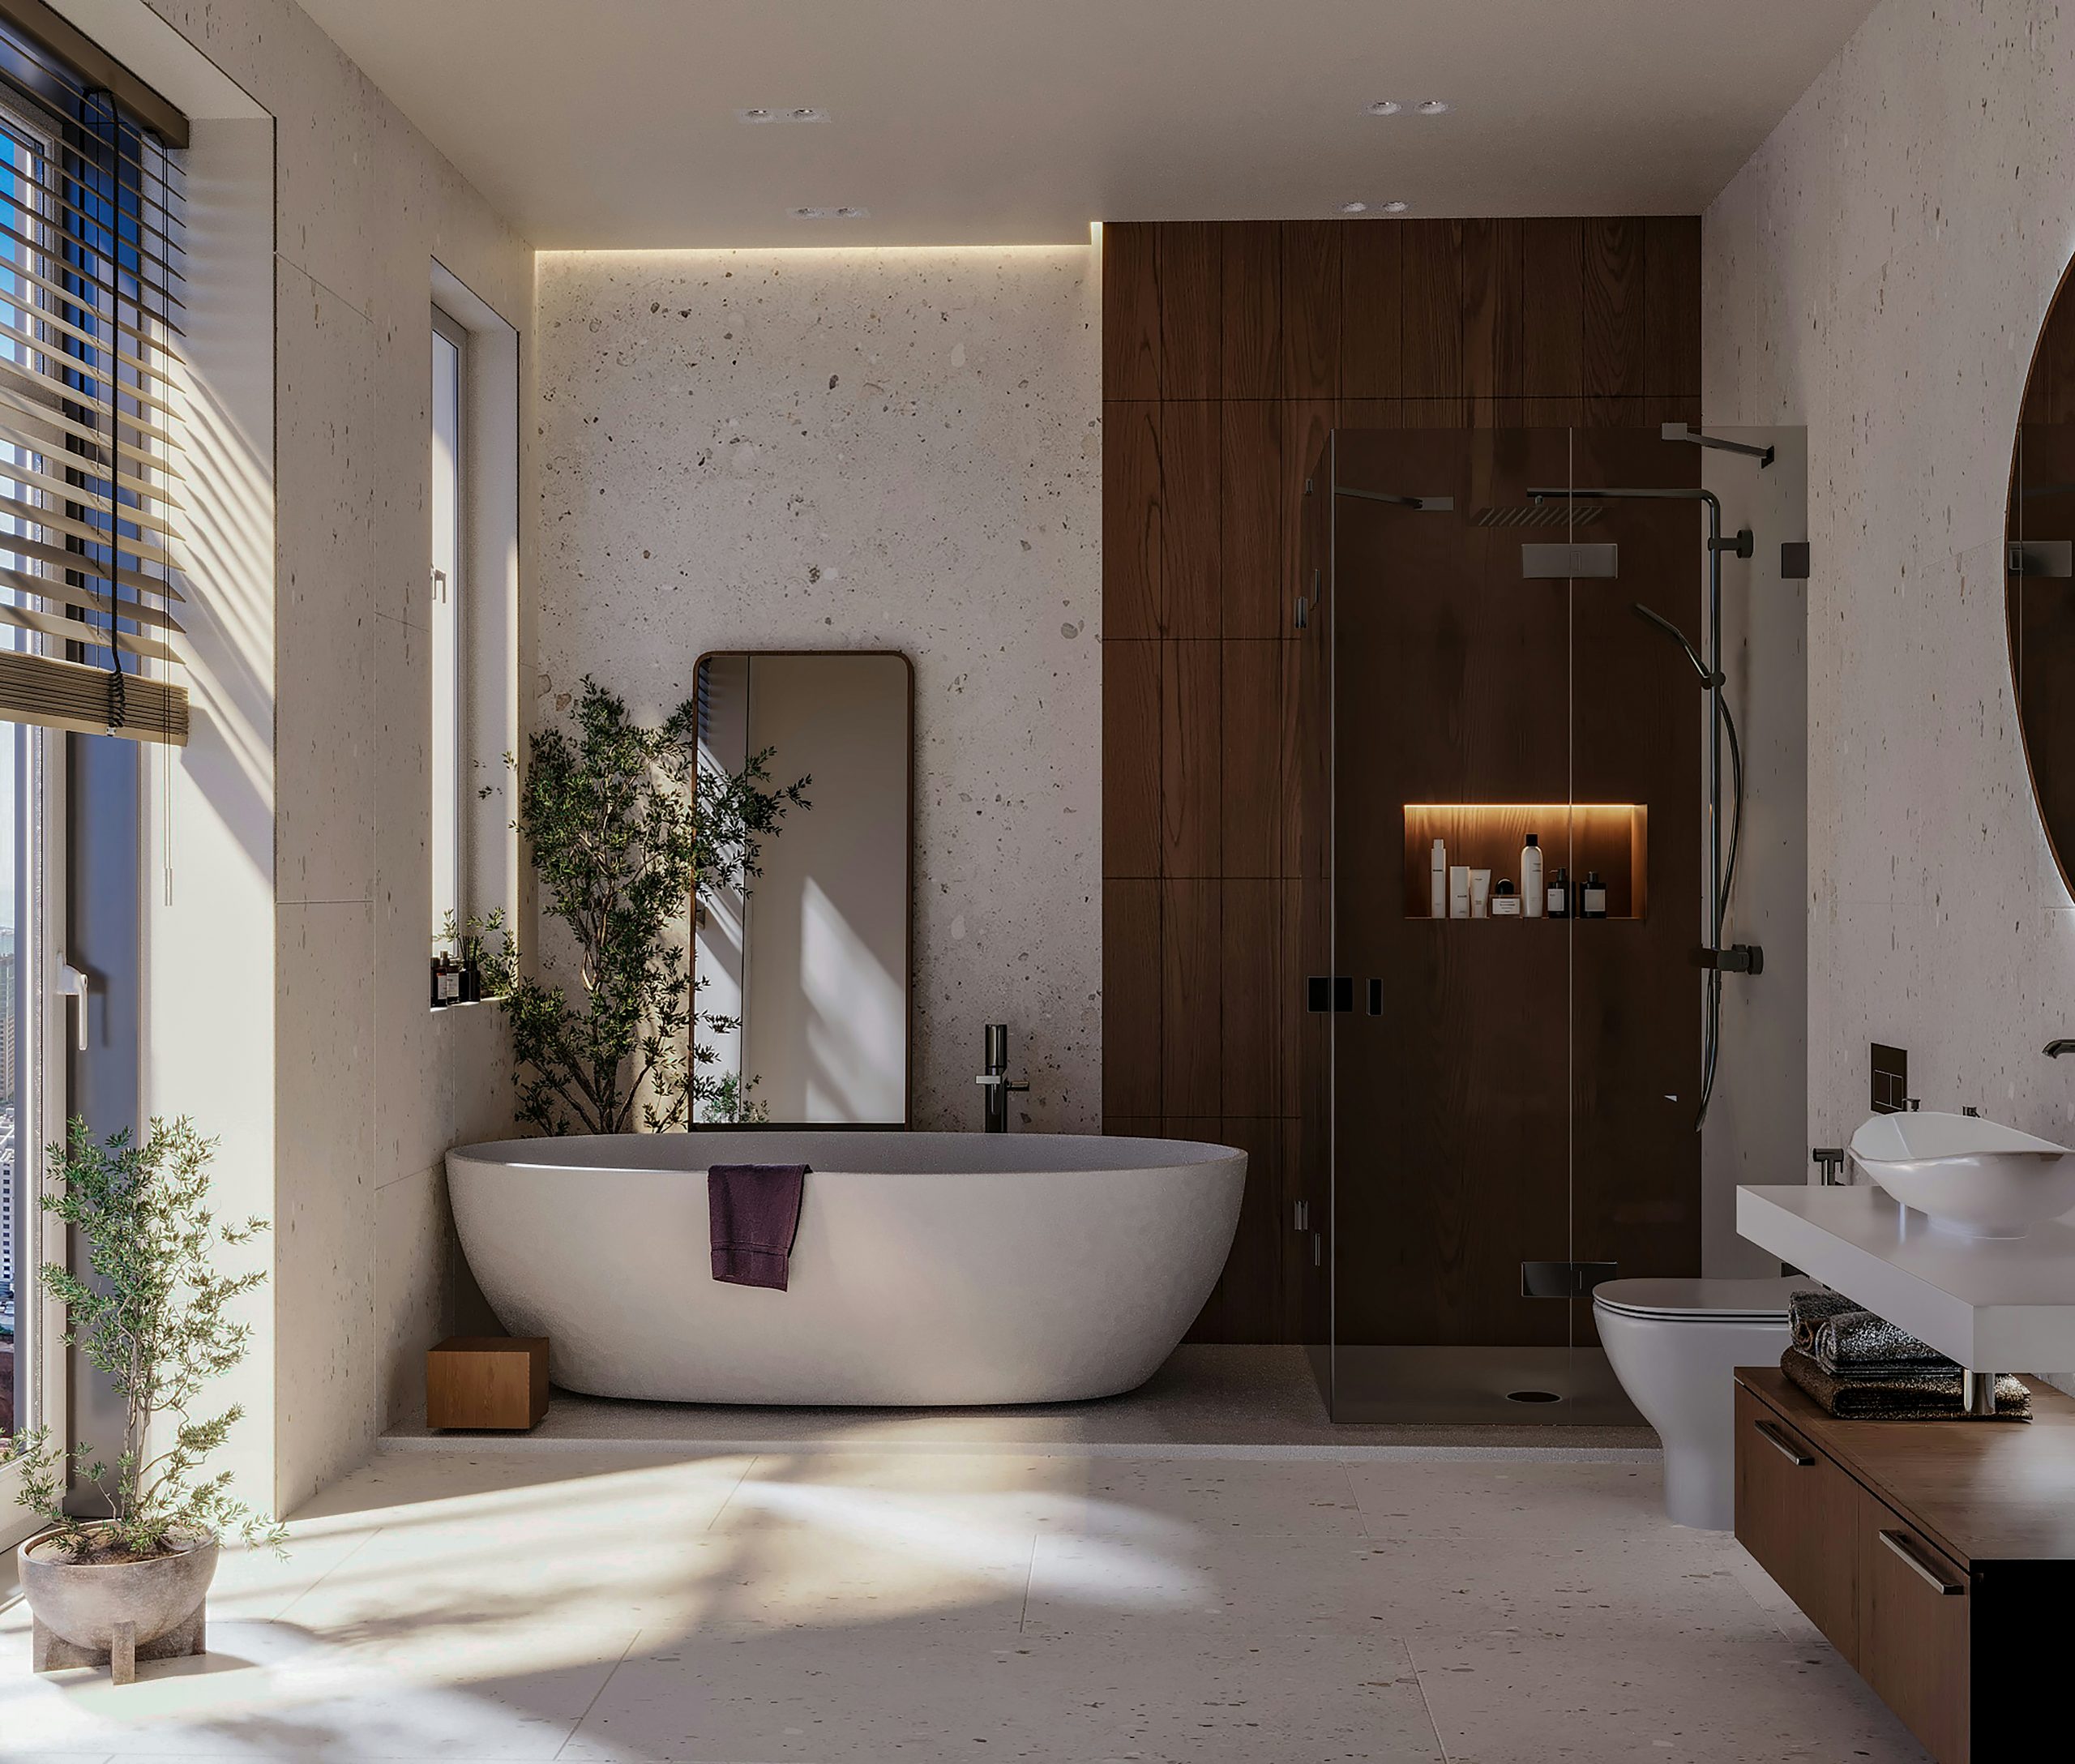
1. Modern Minimalism with Terrazzo and Warm Wood
This design succeeds by perfectly balancing texture and tone. The light, speckled terrazzo creates a bright, continuous surface on the floors and walls, making the room feel larger and more cohesive. The masterstroke is introducing the dark wood paneling in the shower. This sharp contrast in color and material carves out a visual feature, preventing the minimalism from feeling sterile. It adds warmth and a natural, organic element that feels grounding. The integrated, warm-toned lighting is the final layer, softening all the hard surfaces and creating an undeniable spa-like glow.
📏 Scale Guide
To keep a minimalist design like this from feeling cold, pay close attention to the color temperature of your lighting. Specify LED strips and bulbs in the 2700K to 3000K range. This is the “warm white” zone that mimics the gentle glow of incandescent bulbs. Anything higher (like 4000K+) will cast a bluish, clinical light that completely undermines the relaxing, spa-like vibe. When in doubt, buy a few different bulbs and test them in the space before committing to a full installation.
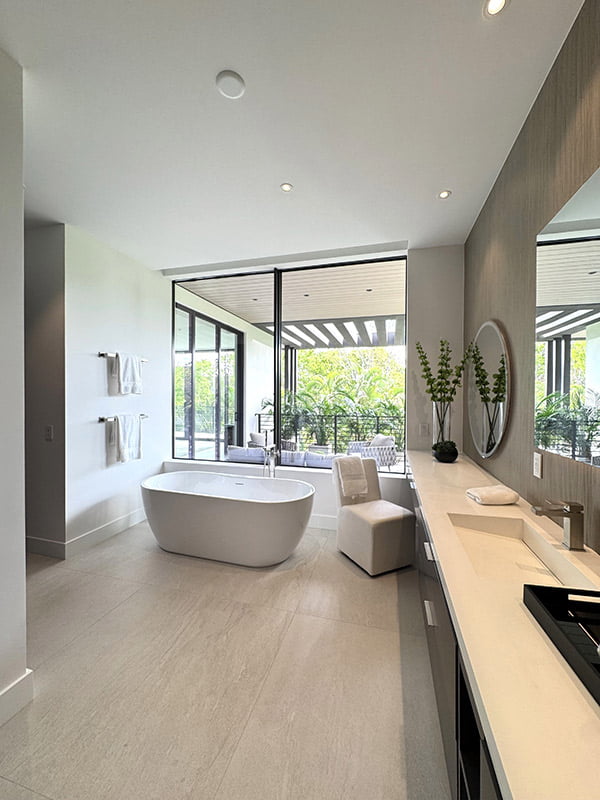
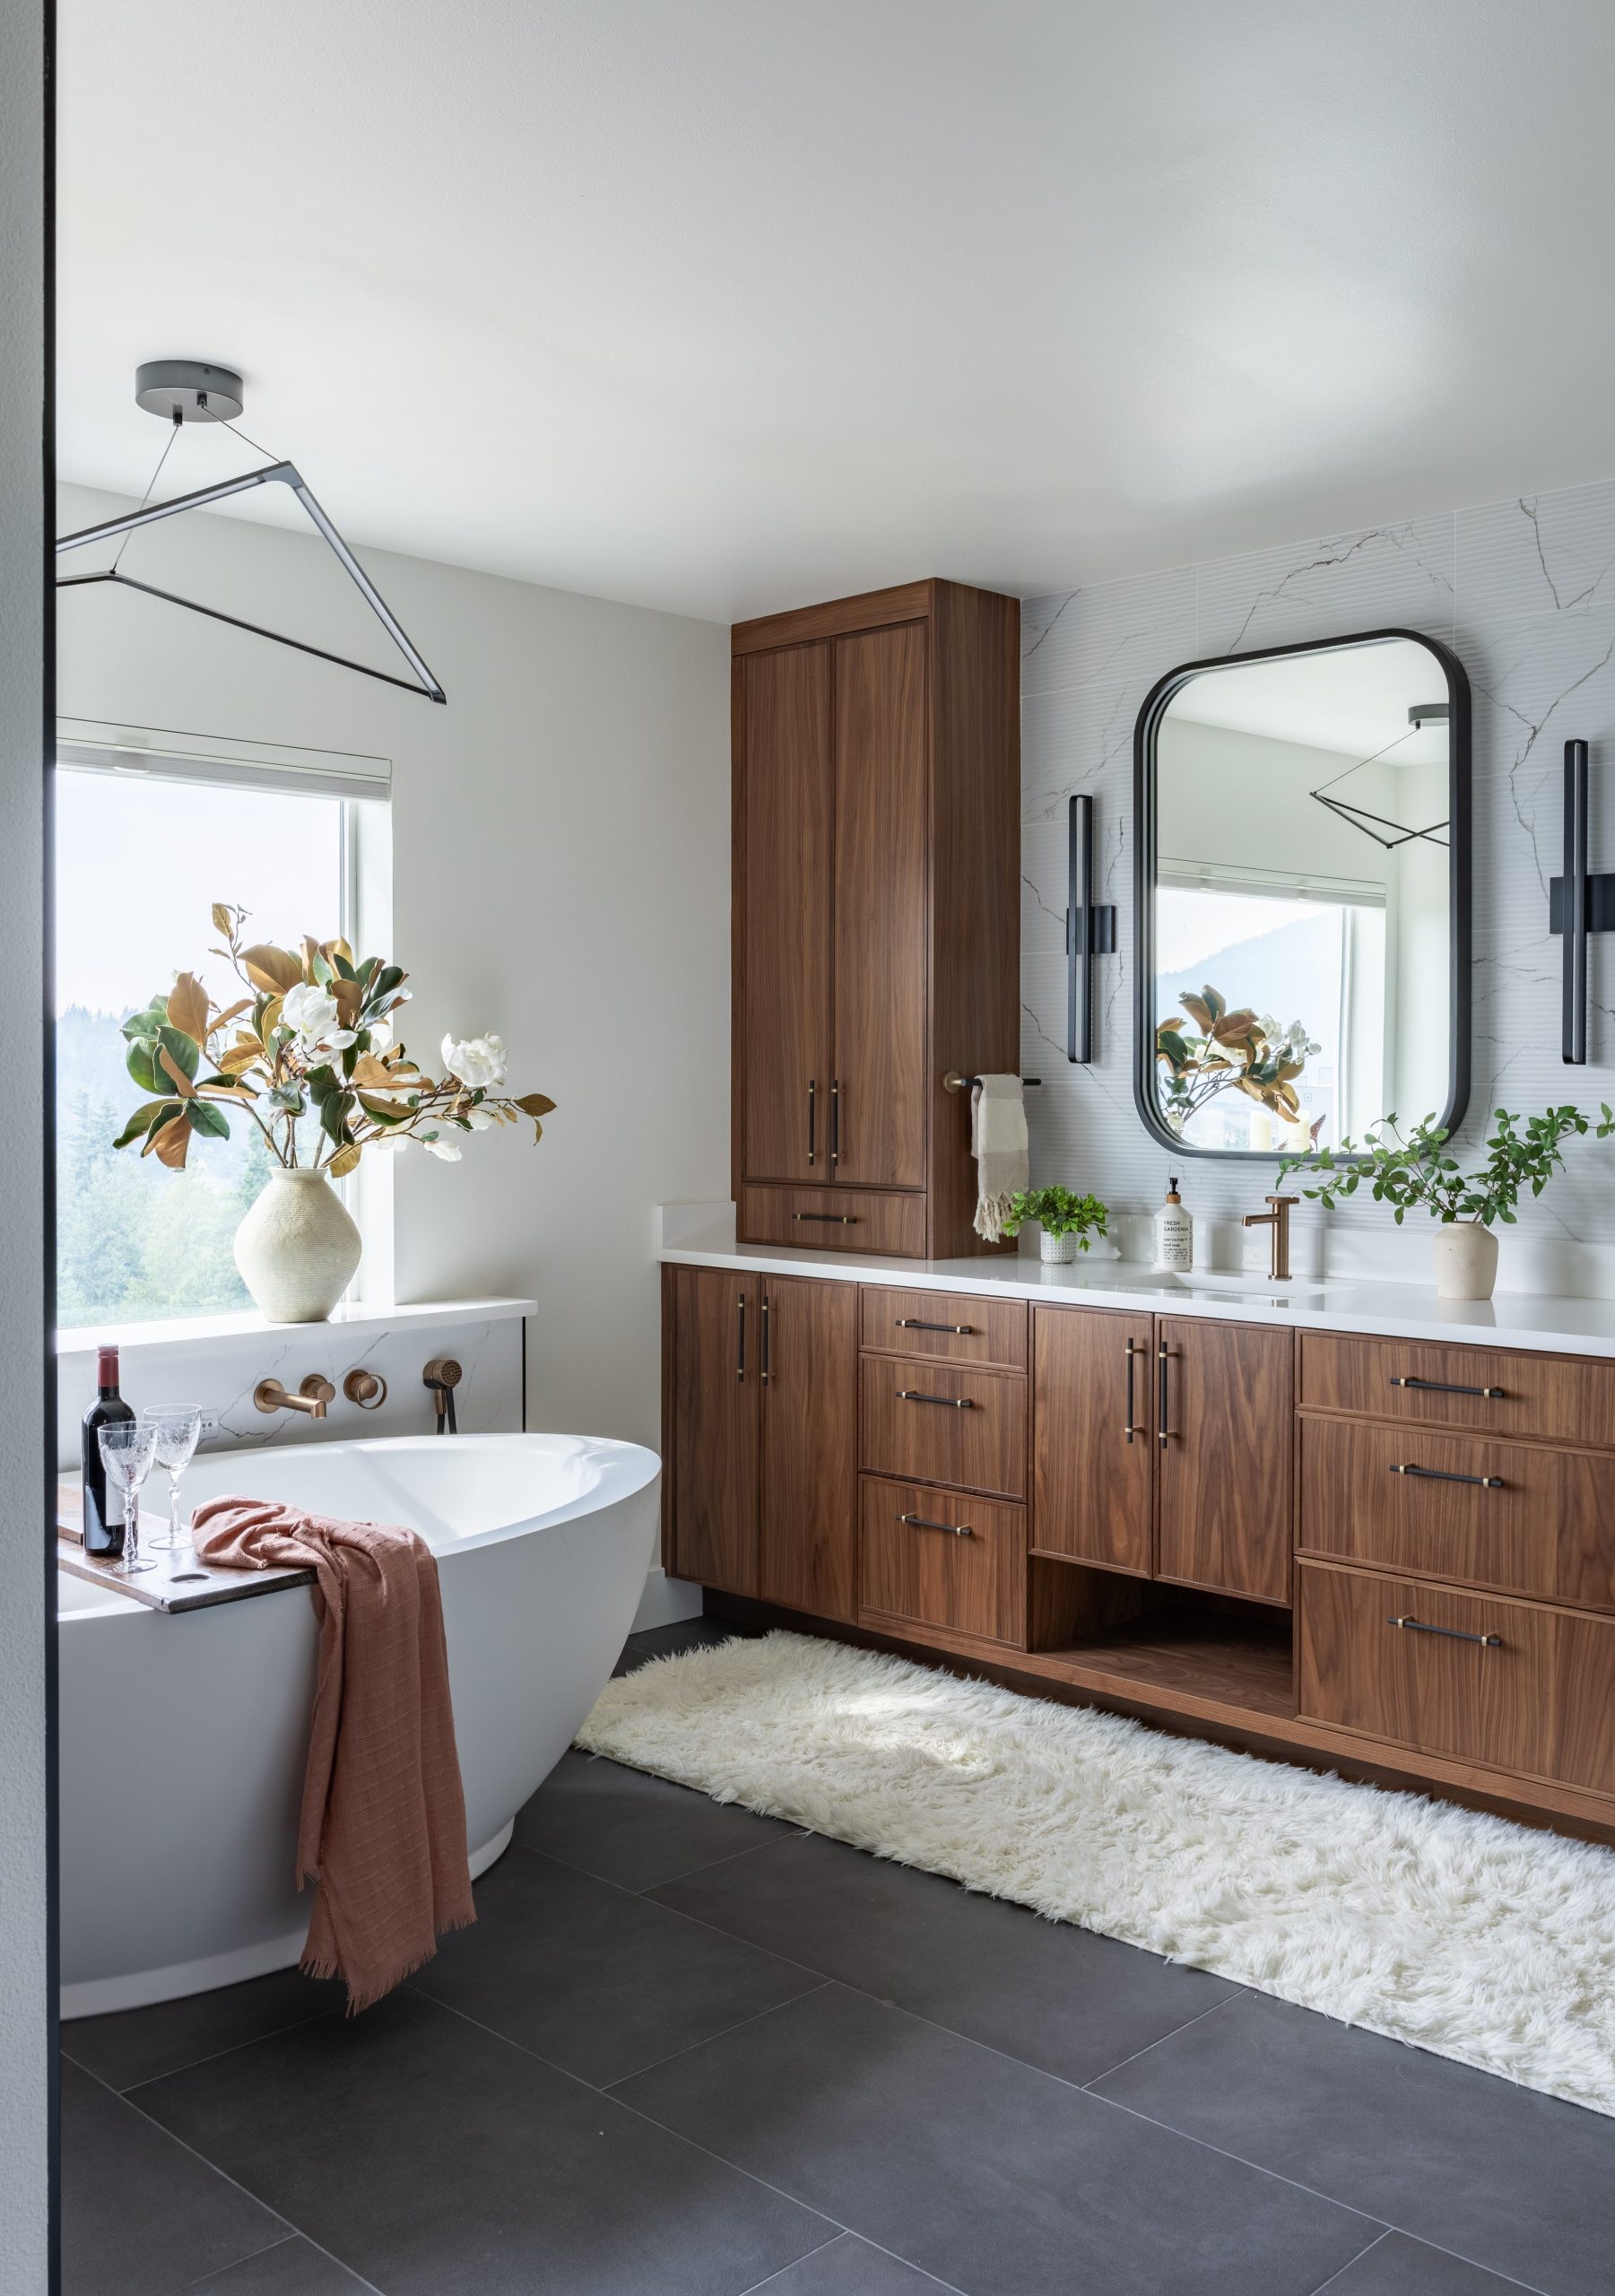
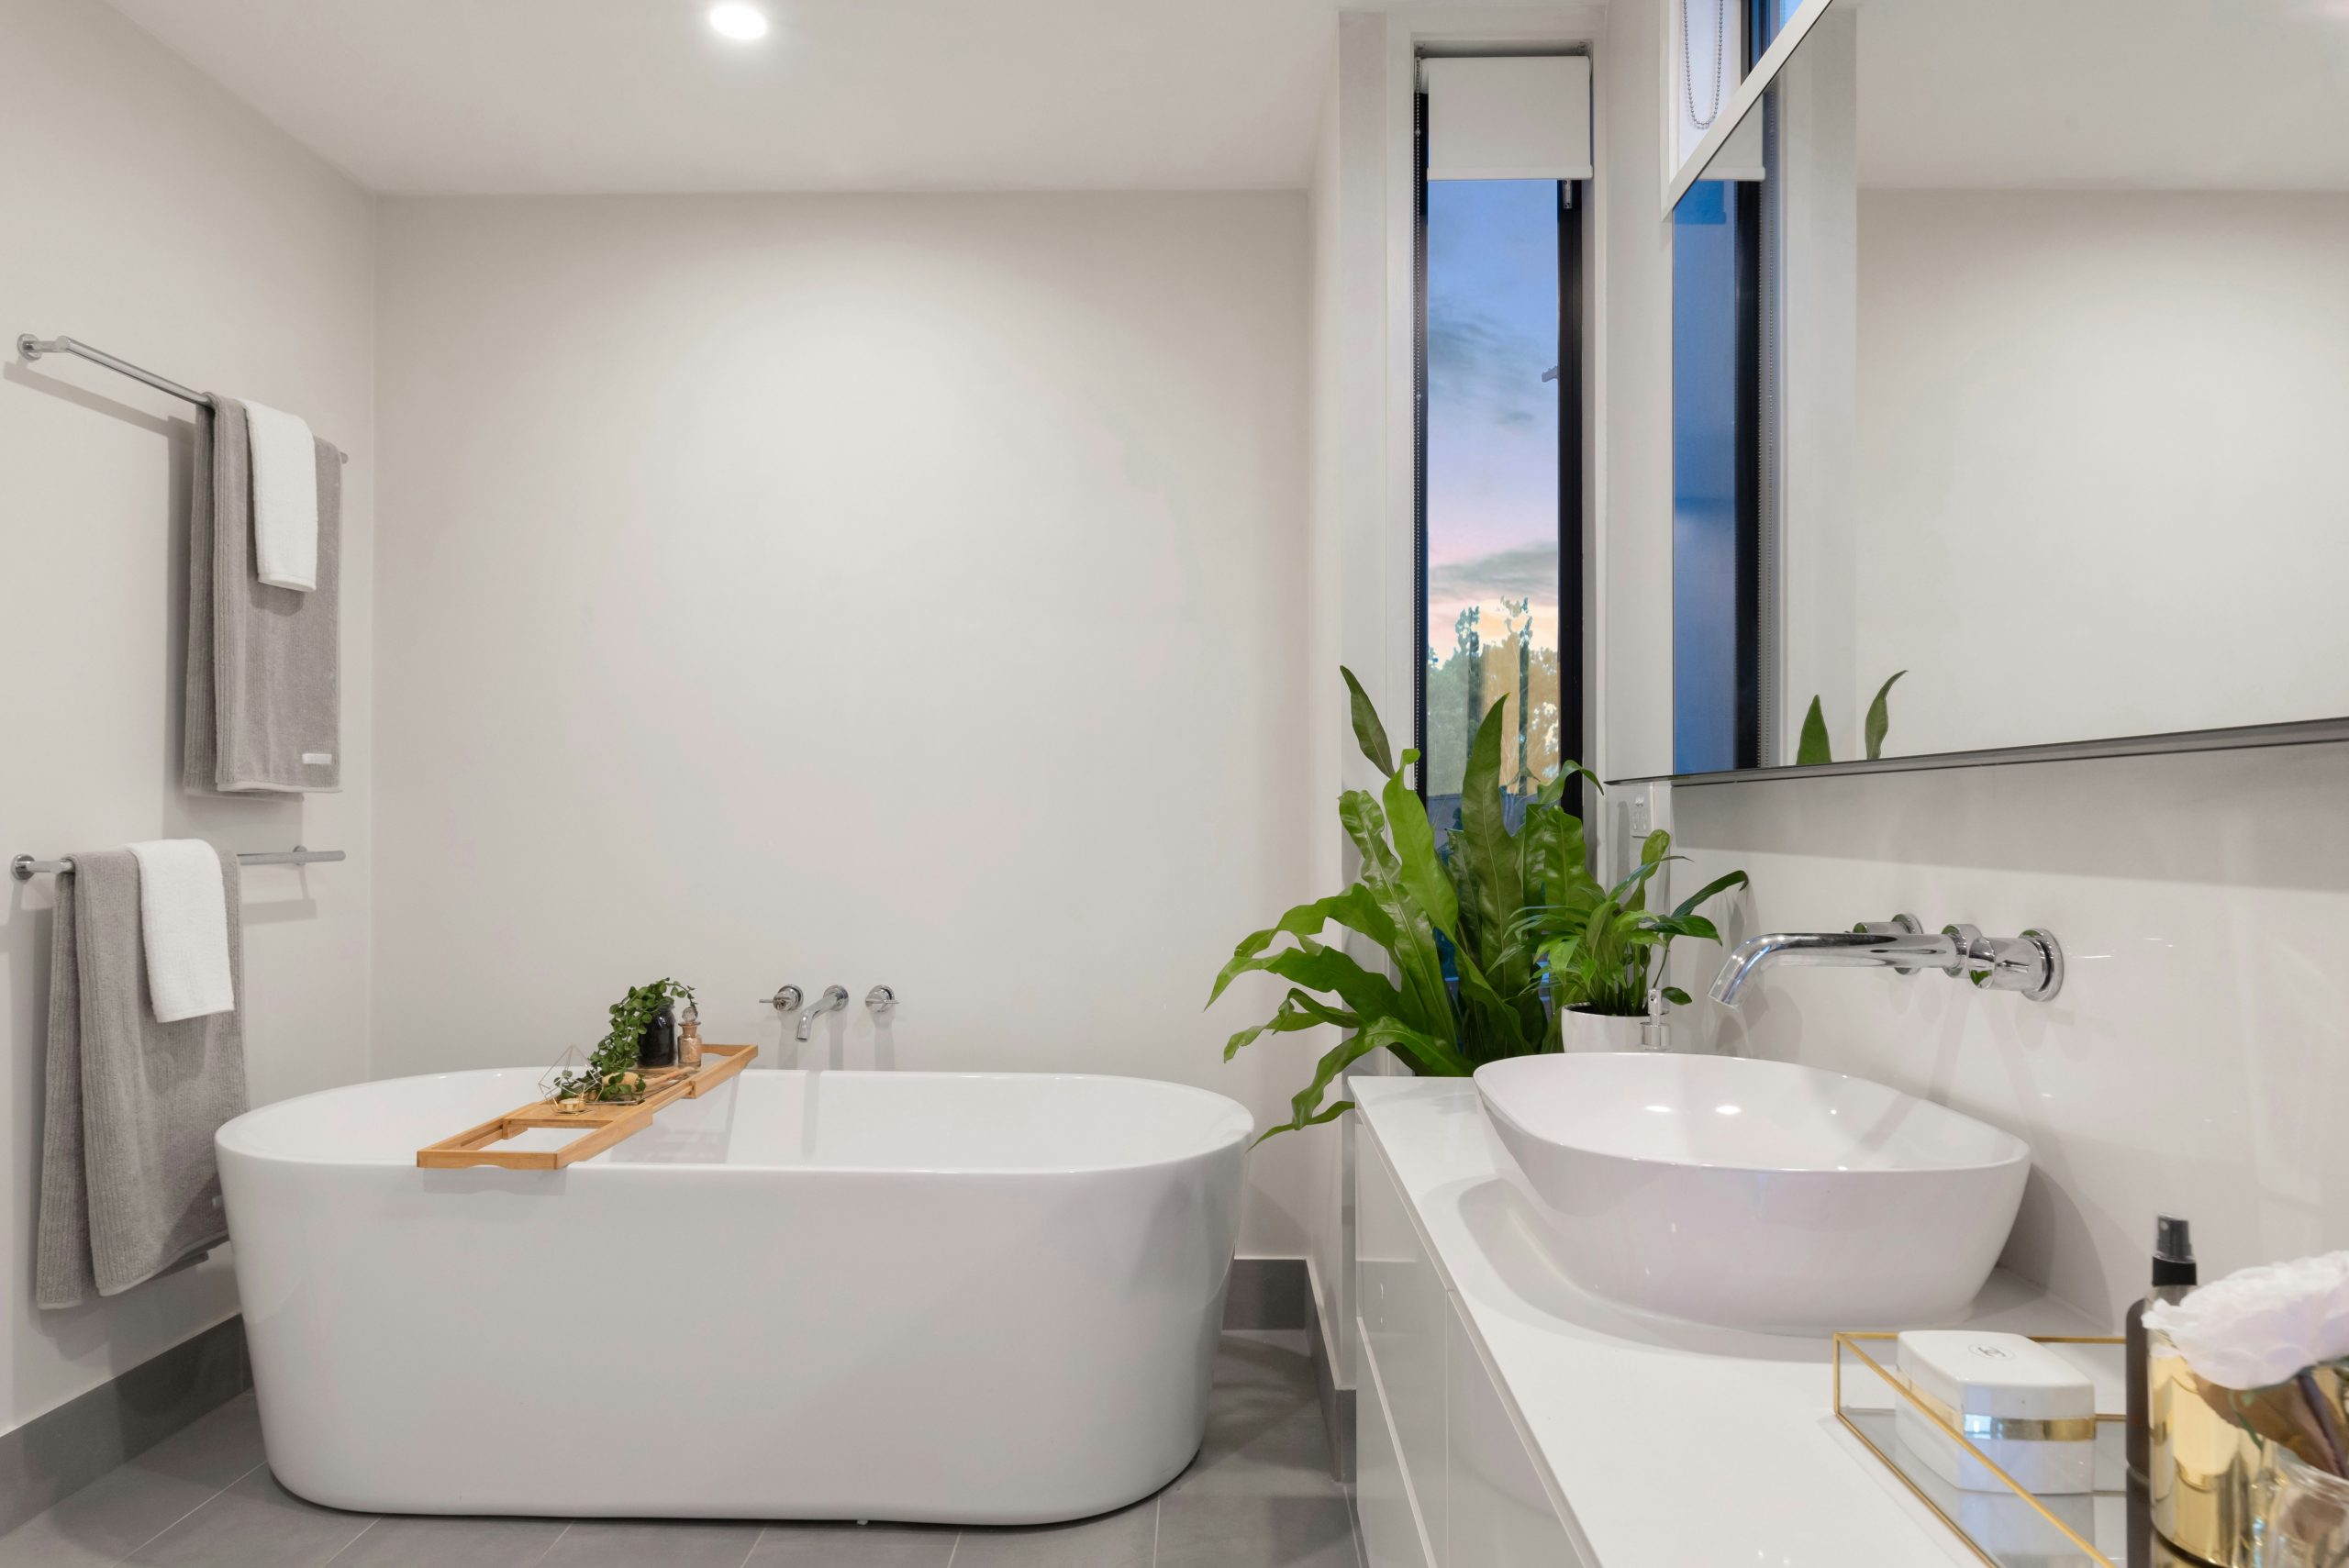
2. Warm Wood Double Vanity and Textured Tile
The visual recipe here is all about elegant balance. Think of it as 50% Natural Wood + 30% Textured Neutral + 20% Dark Accents. The long, warm wood vanity is the hero piece, providing a substantial, organic base. The textured grey wall tile adds subtle pattern and sophistication without overwhelming the space. The final 20% comes from the dark floor tiles, black mirror frame, and modern light fixtures, which ground the design and give it a contemporary edge. You could swap the textured grey tile for a different neutral, like a plaster-finish cream, and the formula would still hold perfectly.
💡 Designer Tip
A freestanding tub next to a large window is the absolute dream for a relaxing soak, but let’s be practical. If that window faces a neighbor or a public path, your serene escape can quickly become an awkward encounter. Before you fall in love with this layout, assess your privacy. You’ll likely need to invest in high-quality window treatments, like top-down/bottom-up cellular shades or a permanent frosted film, which can add a few hundred dollars to your budget and slightly alter the clean aesthetic.
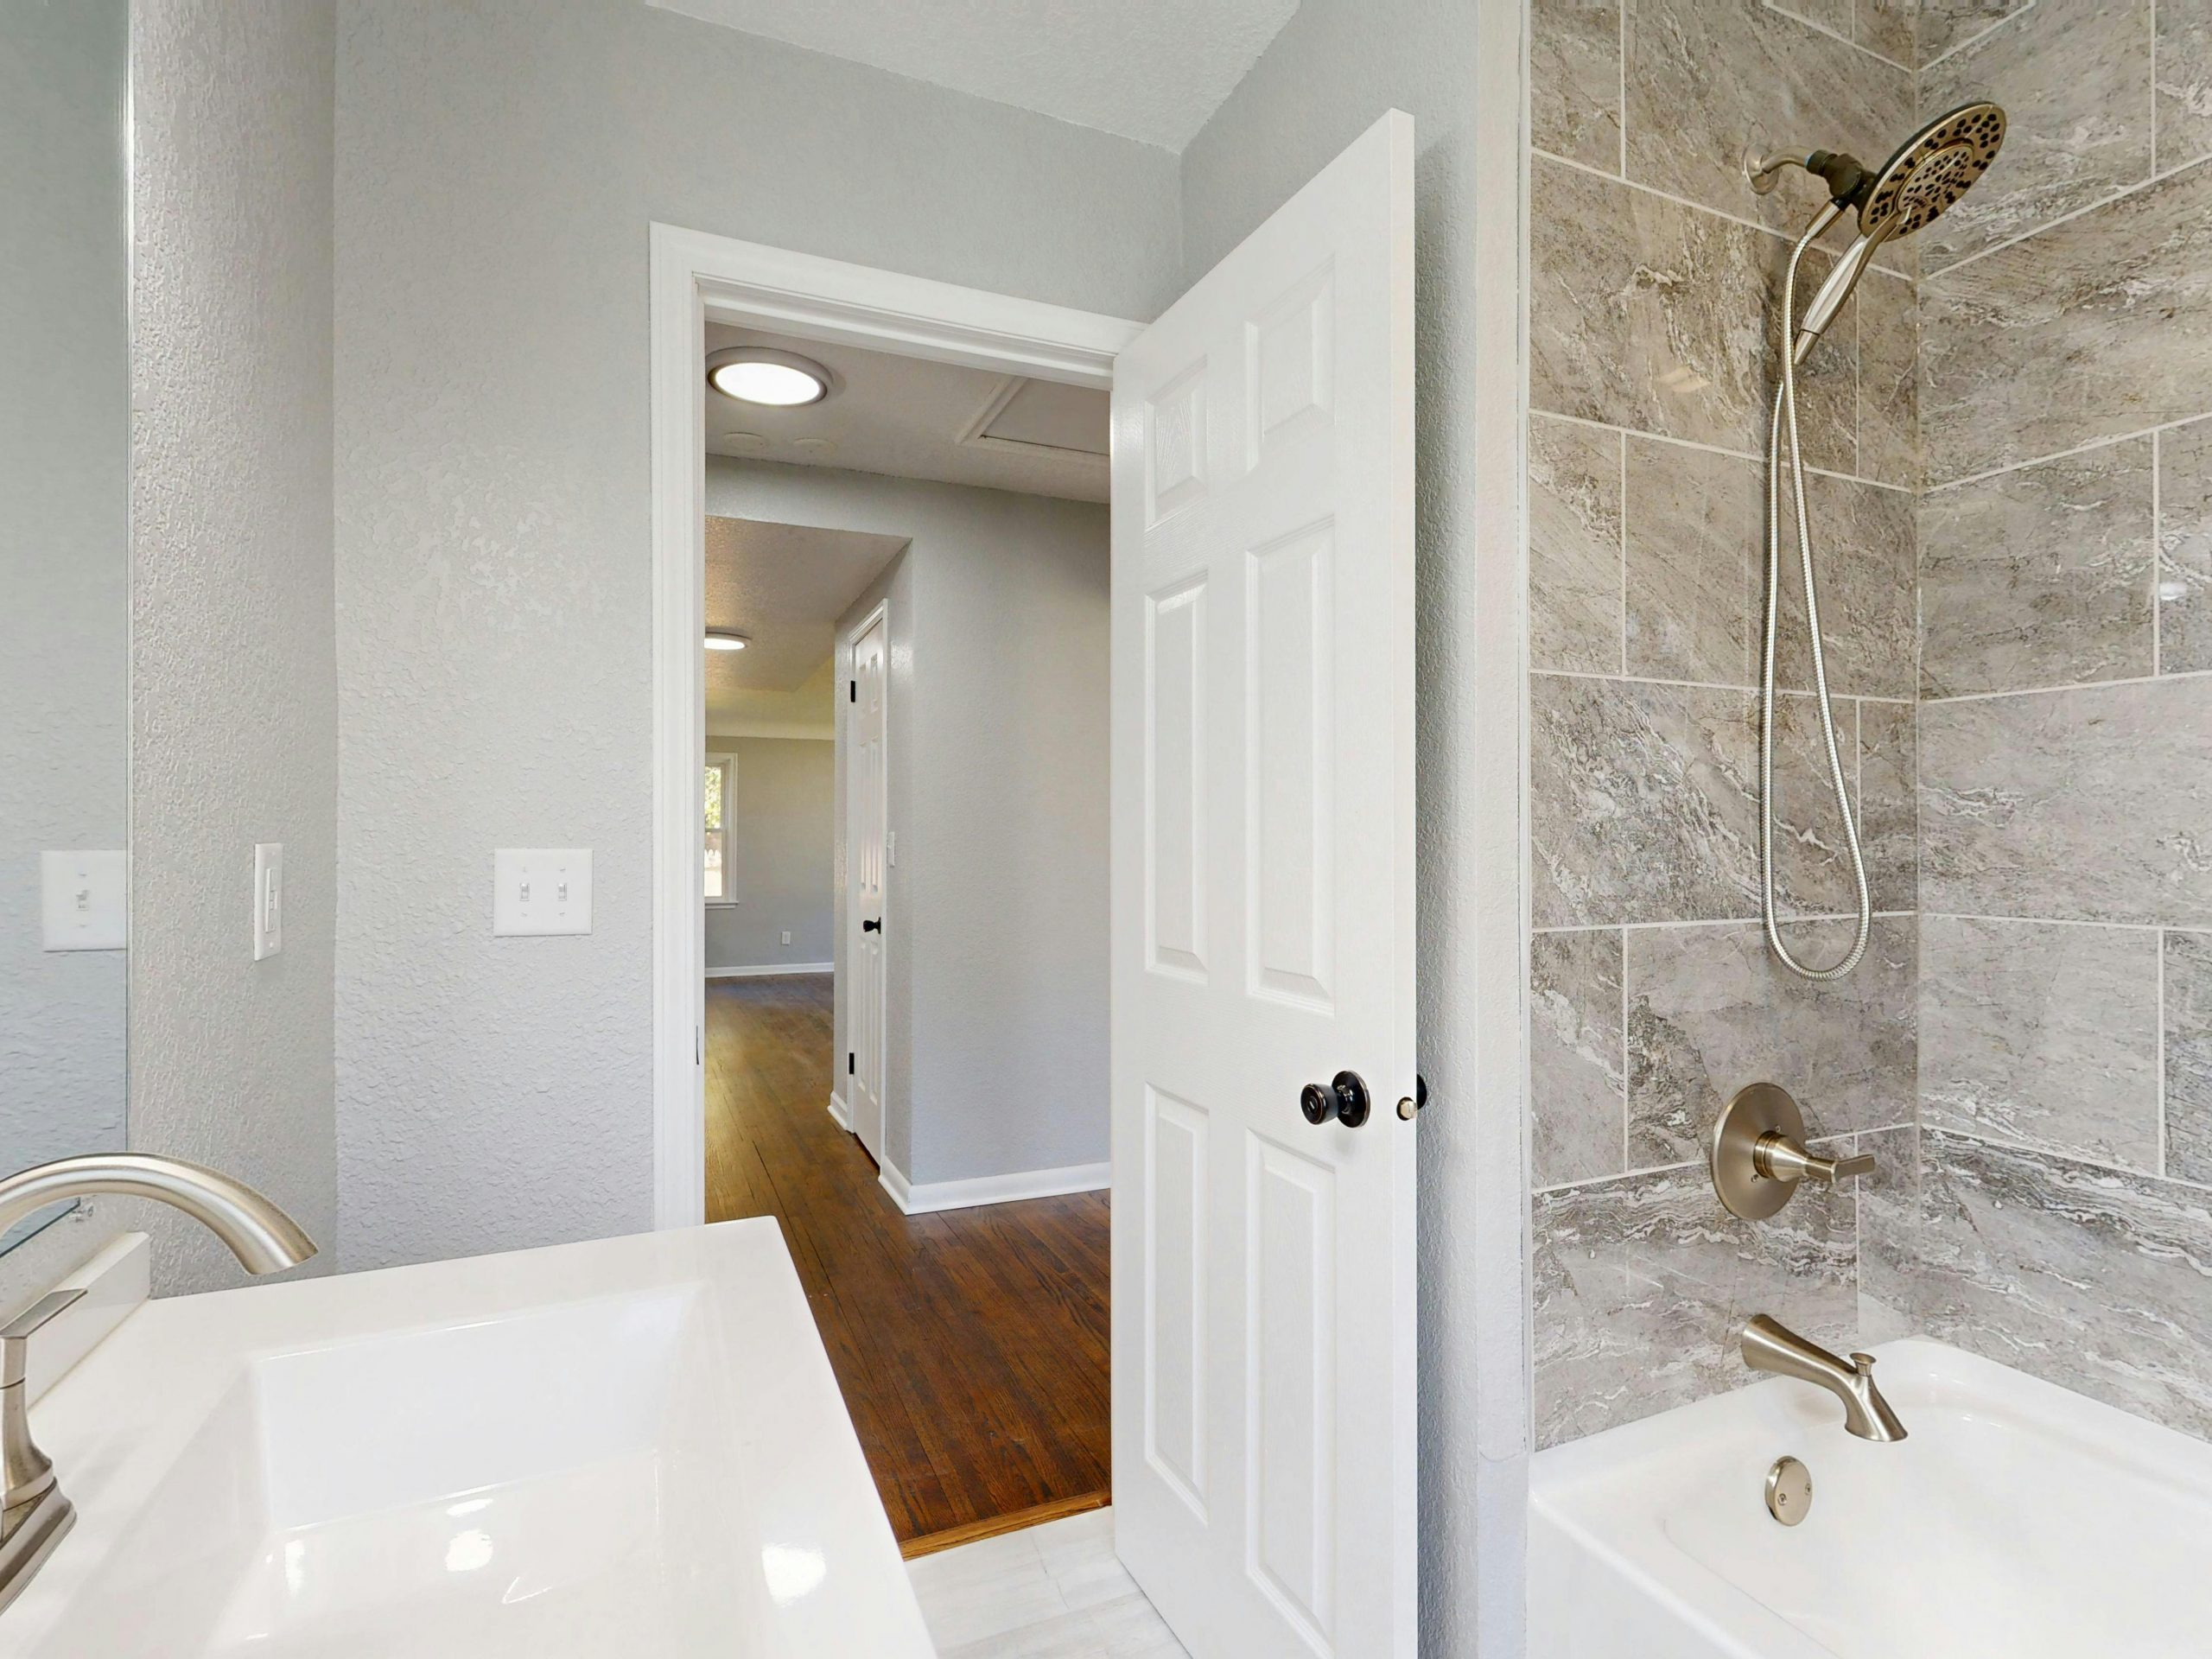
3. Simple & Clean with Grey Tiles and Brushed Nickel
Achieving this clean, functional look doesn’t require a top-tier budget. The core components are widely available and affordable. You can find similar large-format grey porcelain tiles at Home Depot or Lowe’s for $2-$4 per square foot. A standard white built-in bathtub runs about $300-$500. For the fixtures, look to brands like Delta or Moen, which offer stylish brushed nickel faucets and showerheads starting around $150. Paired with a simple integrated sink/vanity combo from a big-box store, you can recreate this entire material palette for under $2,000, plus labor.
🔧 How-To Brief
While light grey walls and tiles are great for creating a bright and airy feel, they are not the most forgiving when it comes to dirt and grime. Soap scum and water spots will be more visible on the grey tiles around the tub than on a darker or more patterned surface. Likewise, scuffs and marks on the light grey painted walls will stand out. Plan for a weekly wipe-down of the shower area with a squeegee or microfiber cloth, and use a magic eraser for any wall scuffs to keep it looking pristine.
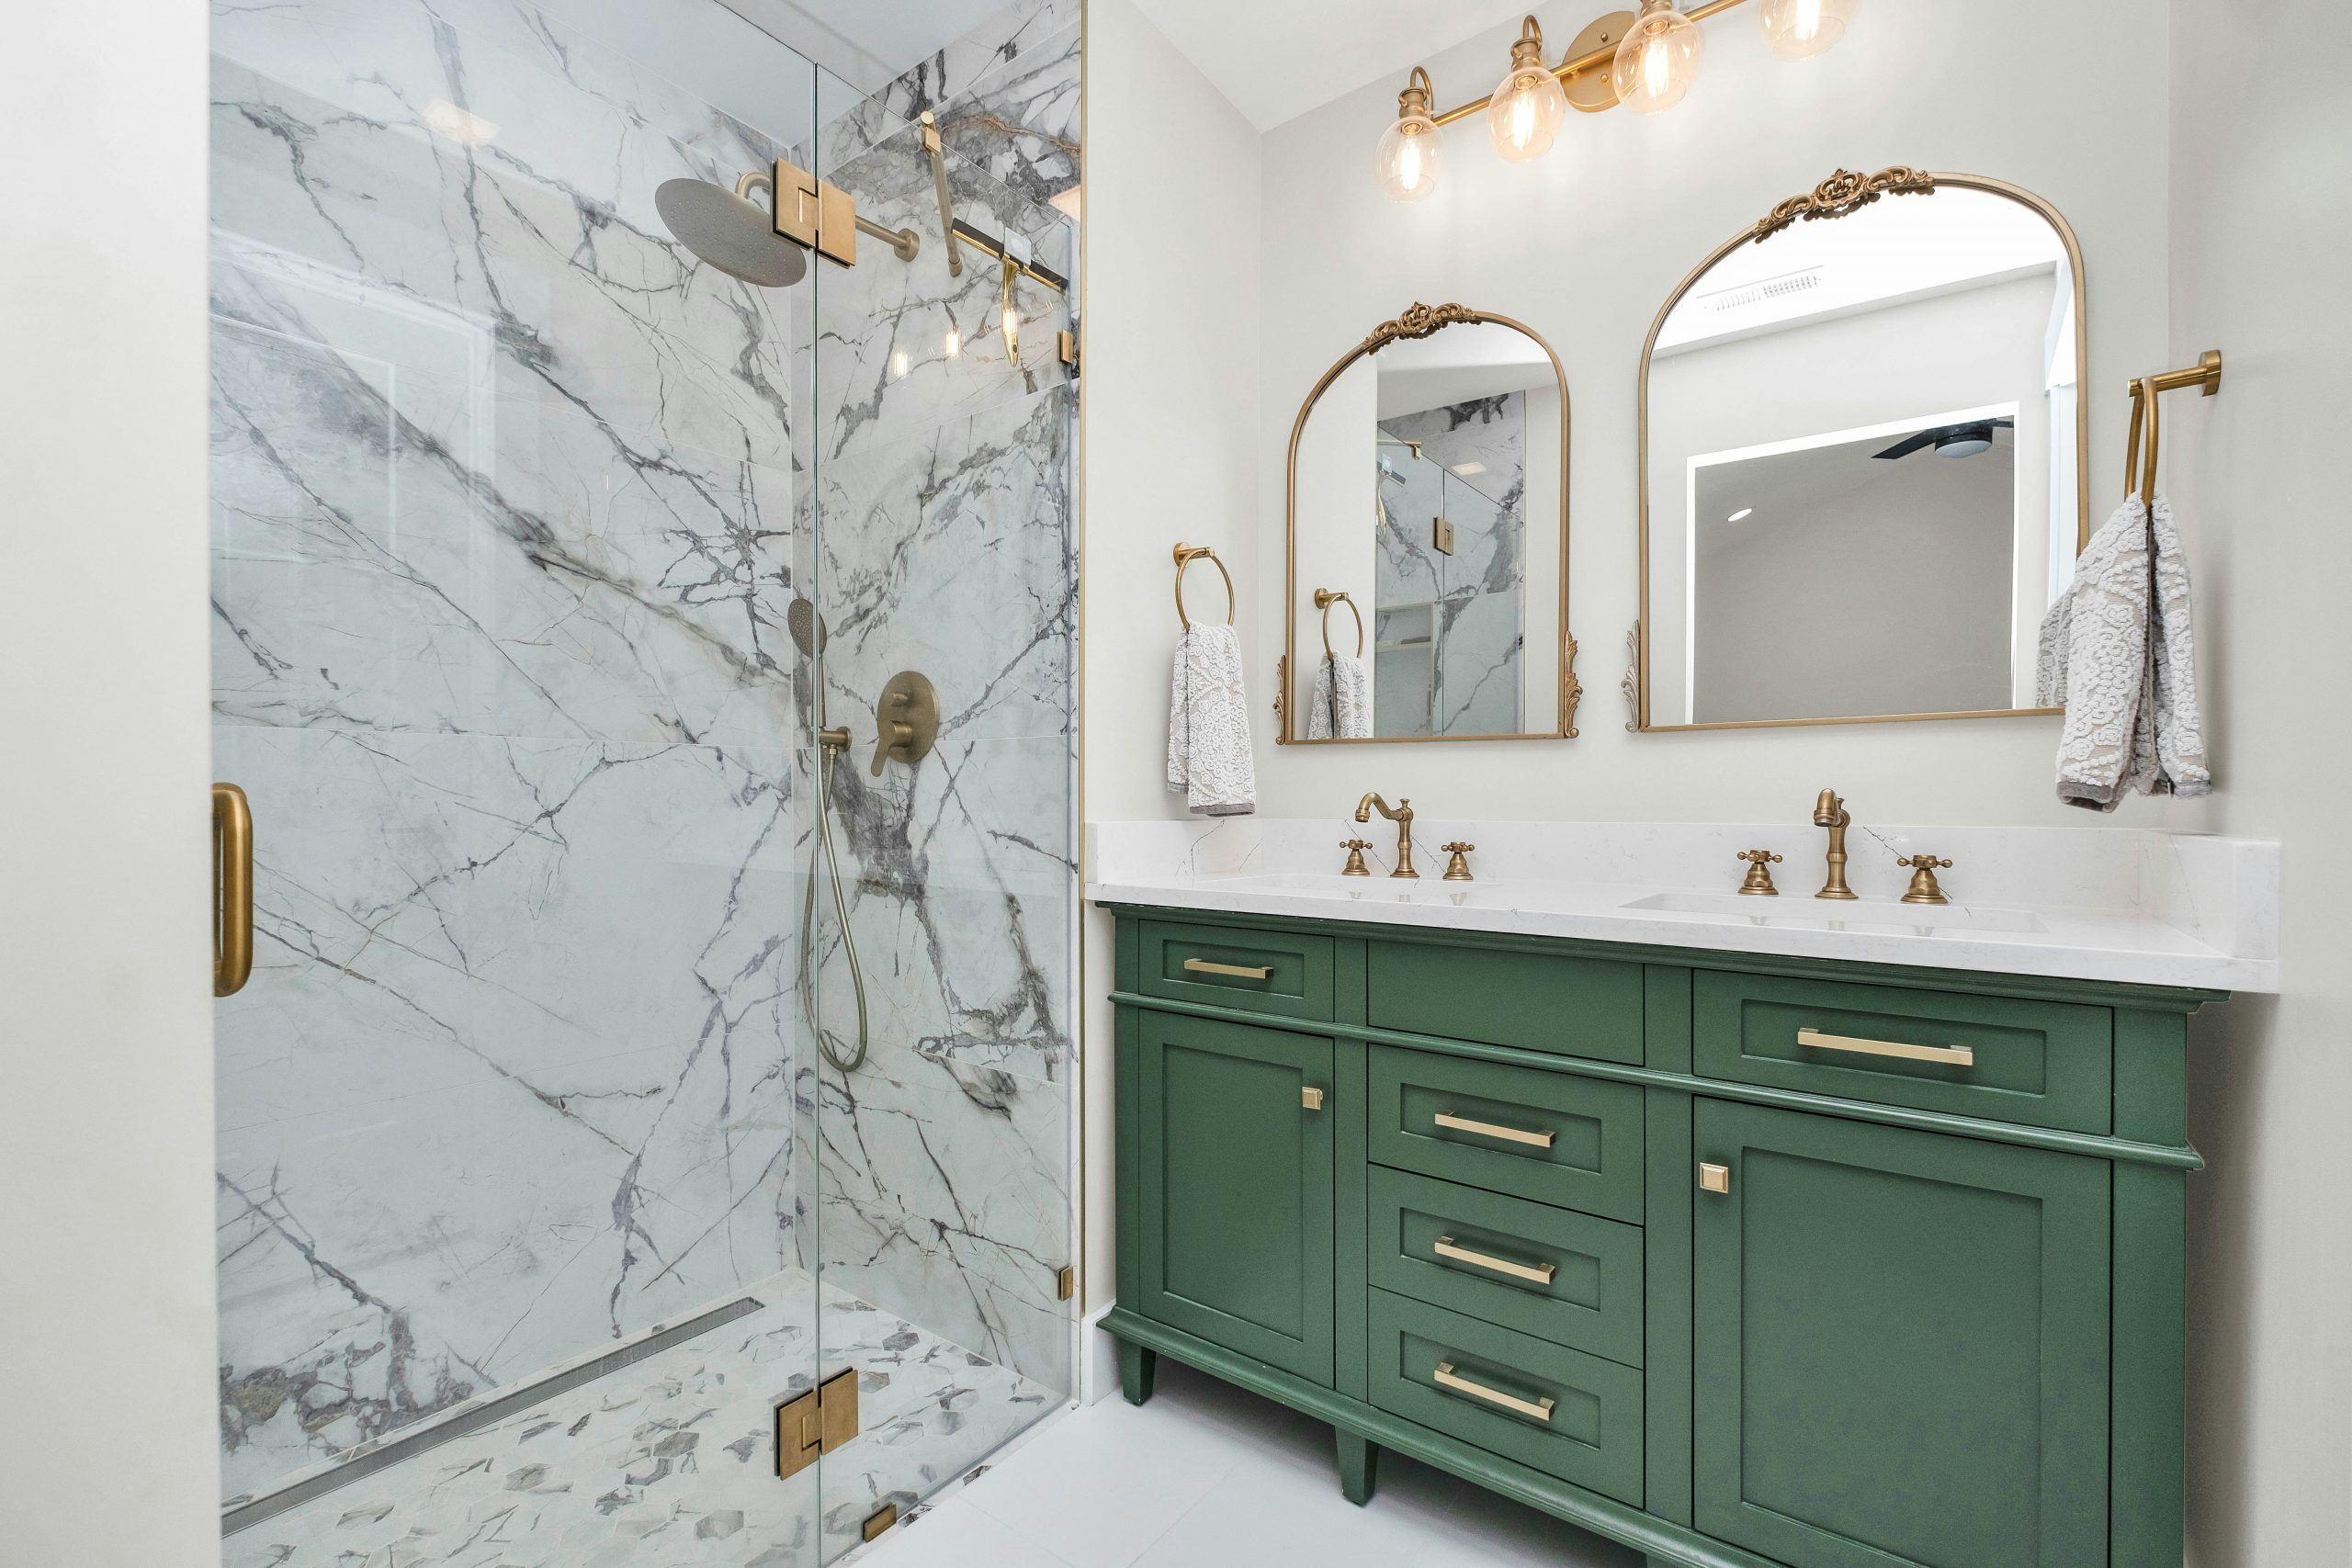
4. A Bold Green Vanity with Marble and Gold Accents
Recreating this luxurious look involves a mix of statement pieces and classic materials. Here’s a potential cost breakdown:
- Main Furniture: Green double vanity with countertop: $1,800 – $4,000
- Lighting: Pair of ornate, gold-framed mirrors: $500 – $1,200
- Tile: Marble-look porcelain shower tile (80 sq ft): $800 – $2,000
- Fixtures: Brushed gold faucets and shower system: $700 – $1,800
- Glass: Frameless glass shower enclosure: $1,200 – $2,500
- Budget alternative: Find a secondhand vanity and paint it a deep green (like Farrow & Ball’s ‘Studio Green’). Use gold spray paint on budget-friendly mirror frames and opt for porcelain tile instead of real marble to cut costs by 50-60%.
- ESTIMATED TOTAL: $5,000 – $11,500
🧹 Maintenance Reality
that makes this entire room work is the commitment to the dark green vanity. Without it, you have a perfectly nice, but fairly conventional, marble and gold bathroom. The vanity provides a powerful anchor of color, grounding the entire design and giving it a distinct personality. It’s a brave choice that moves the aesthetic from simply ‘elegant’ to ‘unforgettable.’ Everything else — the gold fixtures, the marble tile, the arched mirrors — is there to support and complement that central color story.
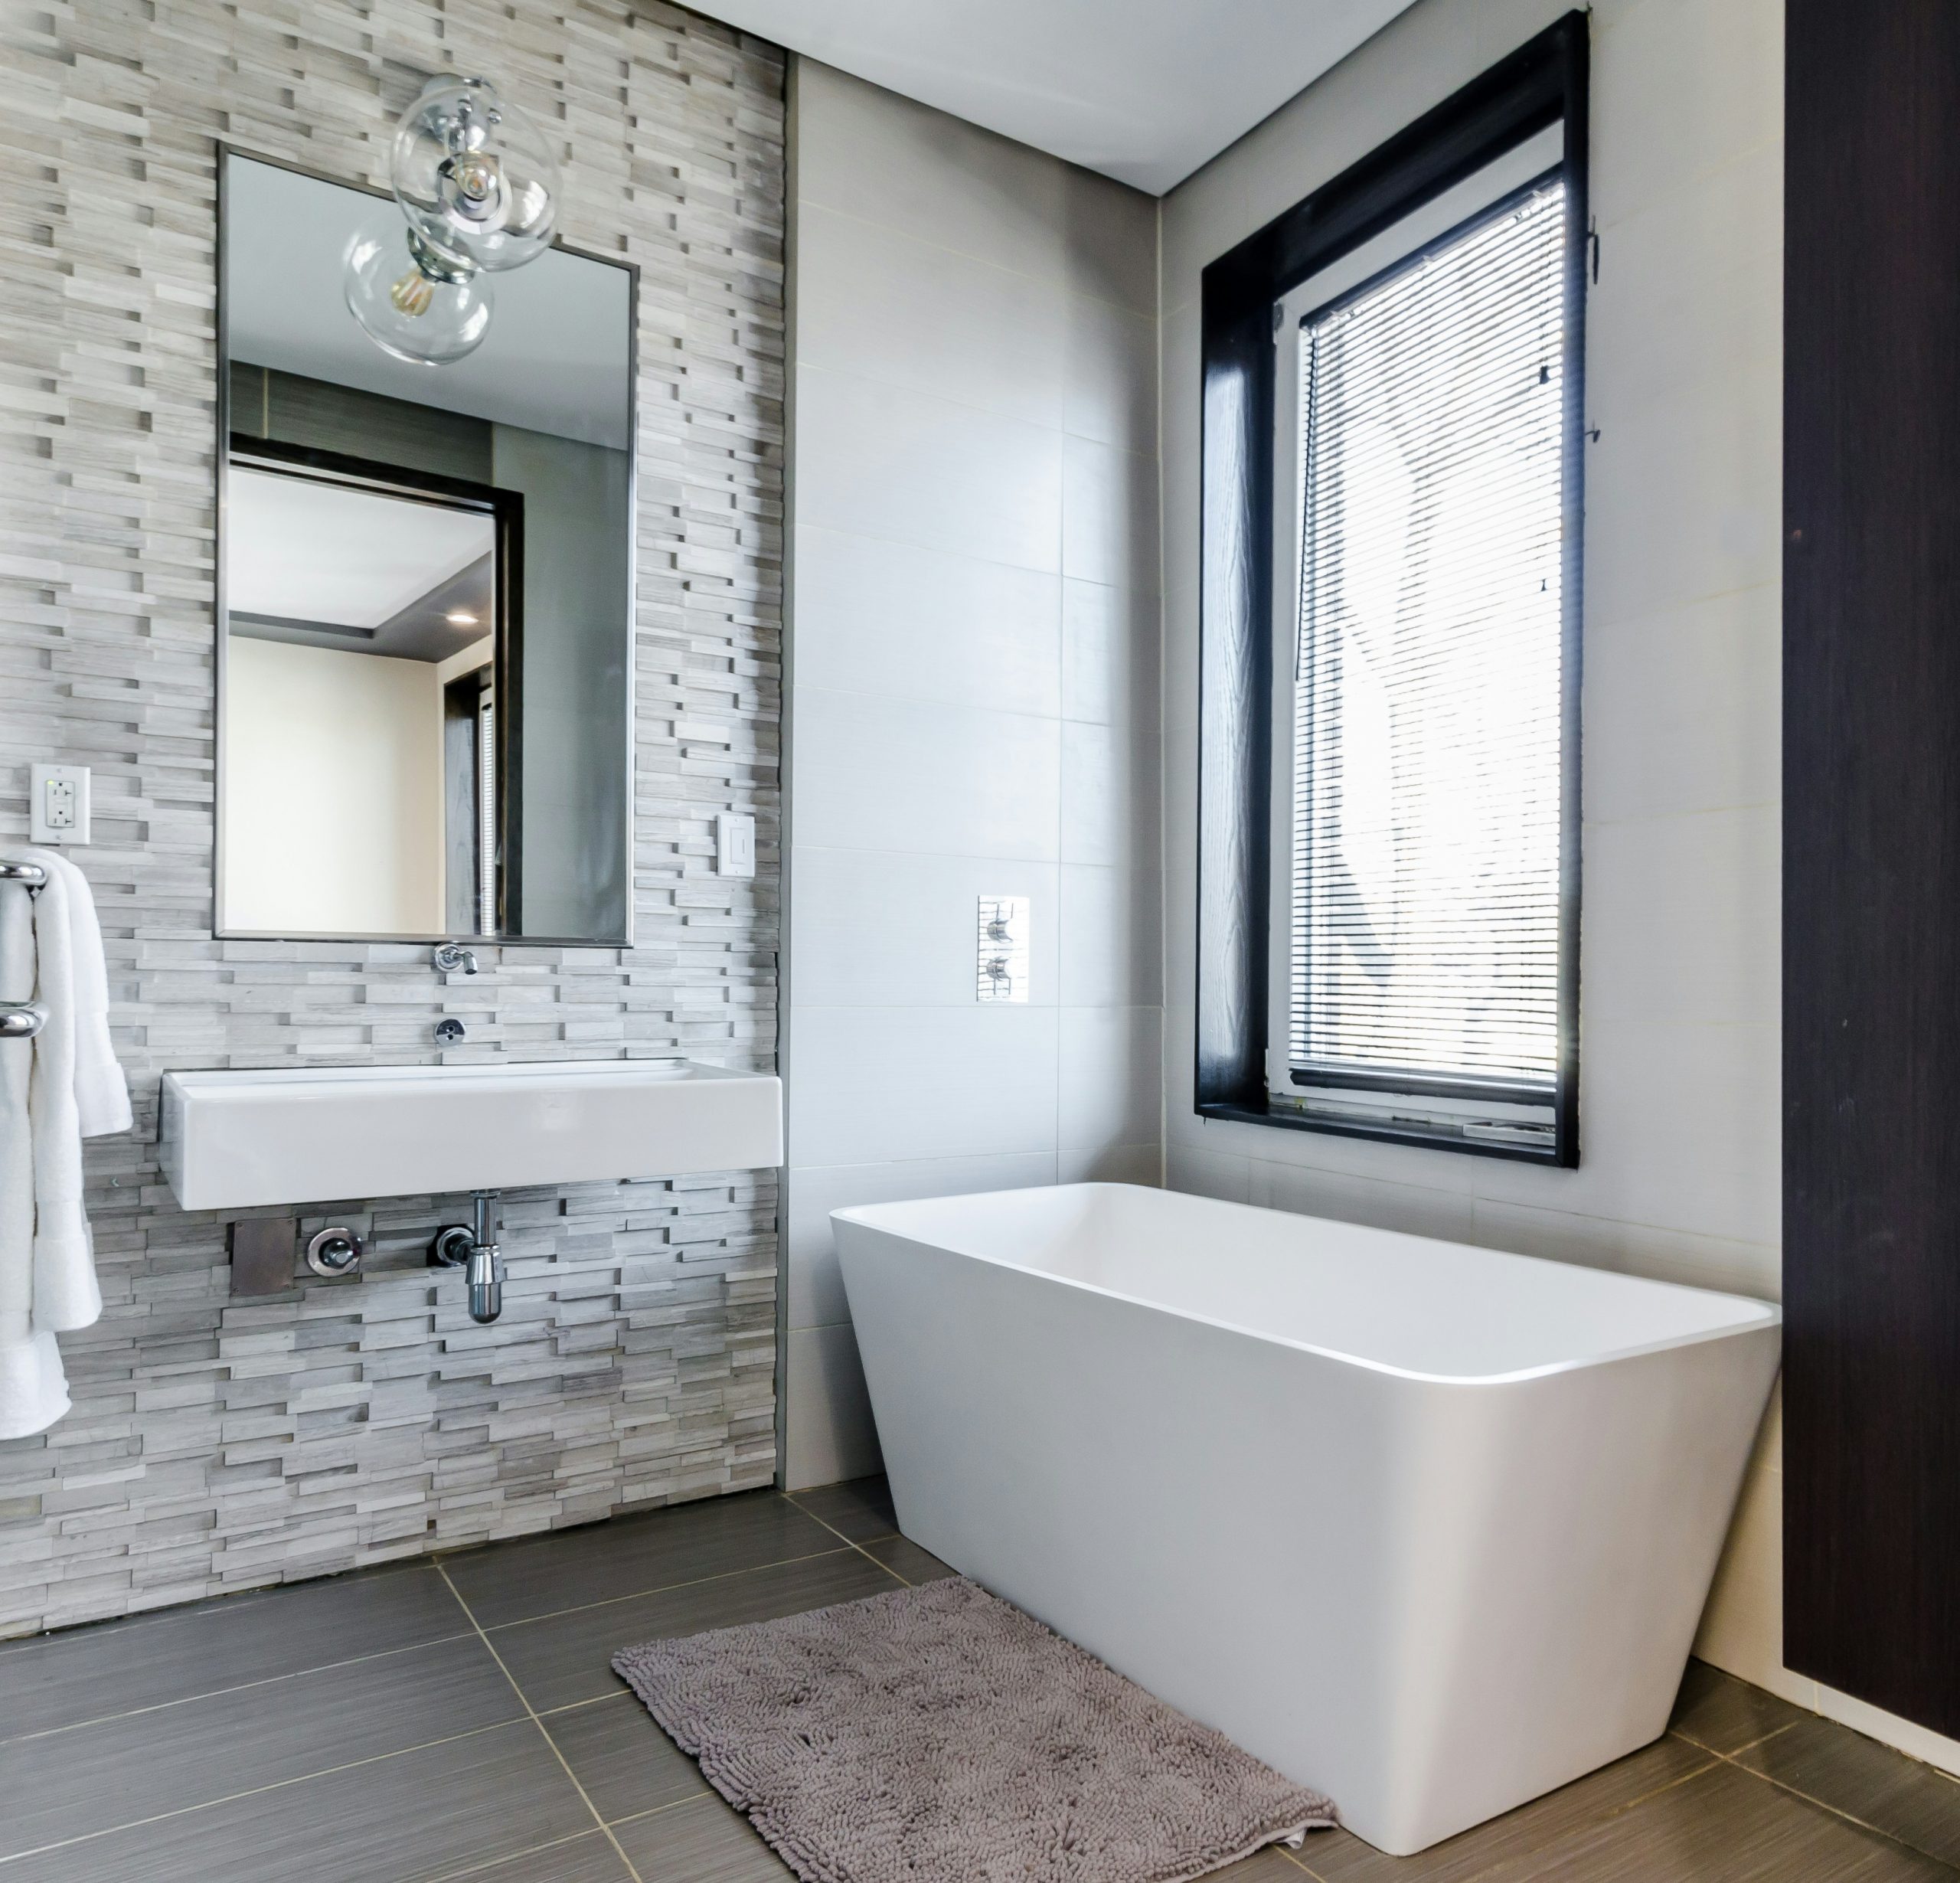
5. Serene & Minimal with a Freestanding Tub and Natural Light
This minimalist approach works best in a bathroom that has at least 70 square feet to spare. The key is negative space; you need enough room around the freestanding tub (at least 12 inches on all sides) for it to feel like a sculptural object rather than something crammed in. A ceiling height of at least 8 feet is also important to maintain the airy, open feeling. For smaller spaces, consider the built-in tub shown in Idea #3, which offers a similar clean aesthetic without requiring as much floor space.
📐 Style Math
The success of this space lies in its strict adherence to a limited palette and simple forms. The repetition of white in the tub, sink, and walls creates a seamless, serene backdrop. The clean, geometric lines of the vanity, window, and mirror reinforce the modern, uncluttered feel. The only curves are the gentle shapes of the tub and vessel sink, making them feel special. Finally, the contrast of the green plants and light wood bath caddy adds just enough organic texture and color to keep the room from feeling sterile. It’s a study in controlled, intentional design.
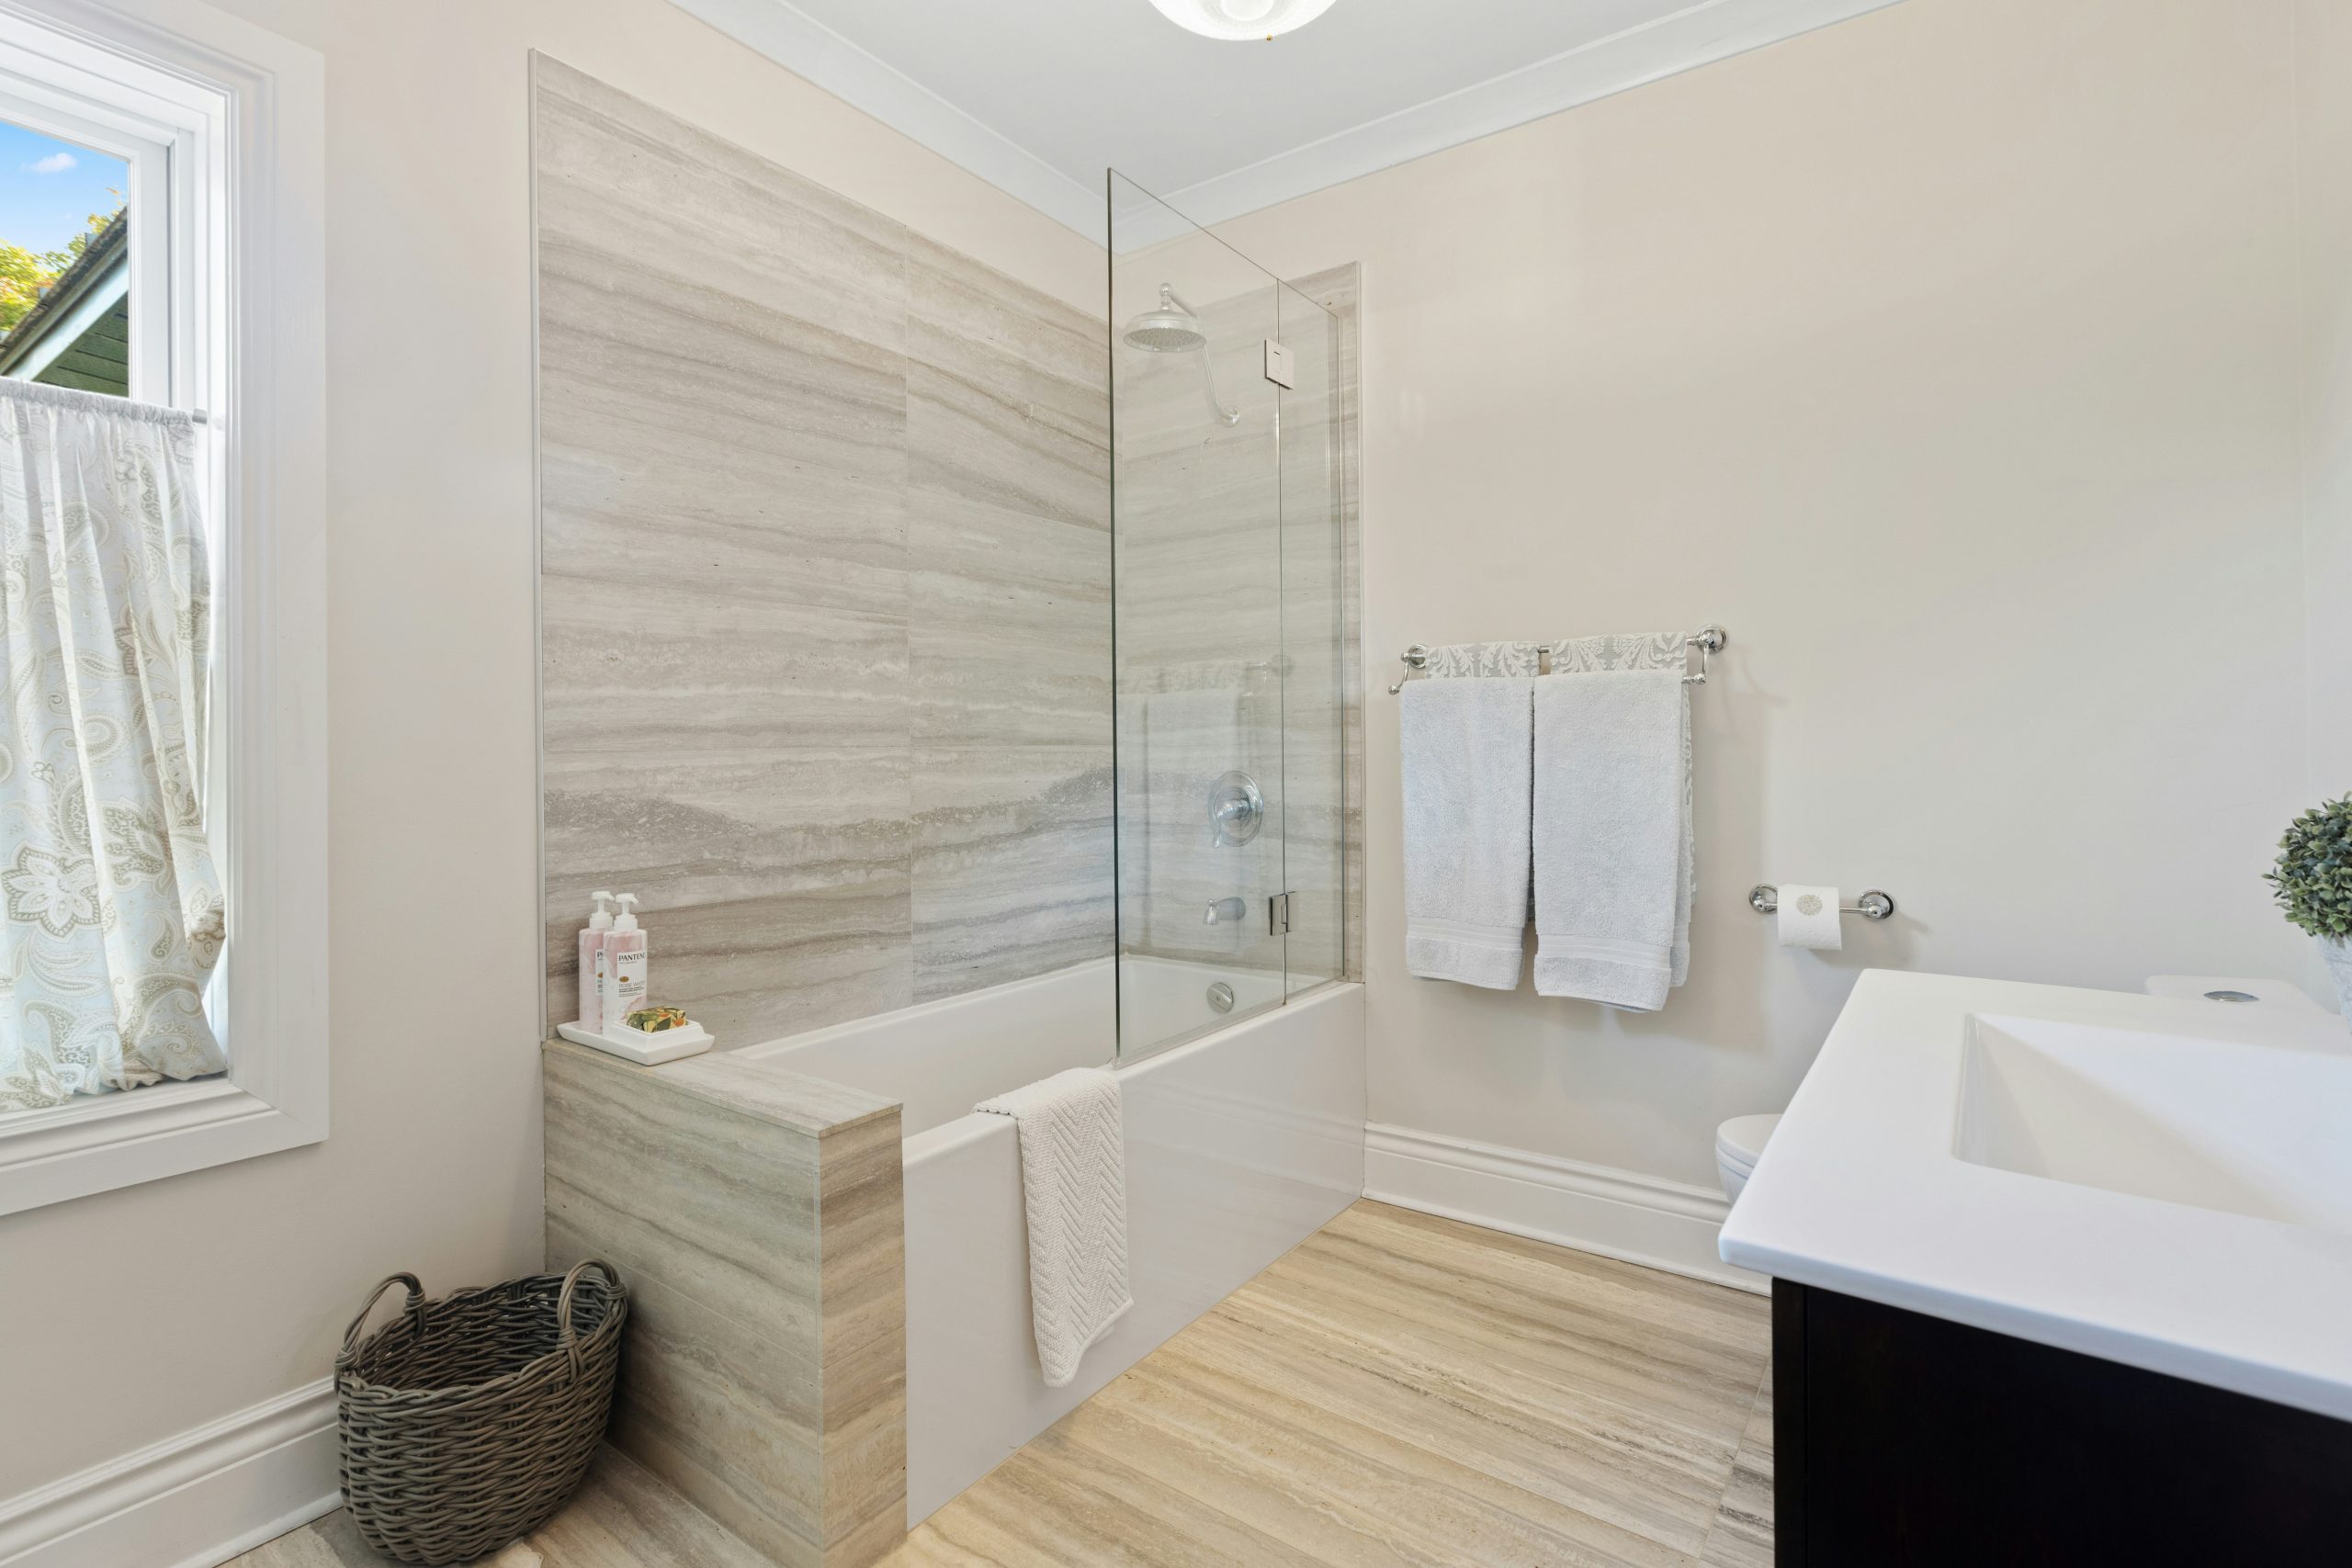
6. Bright & Modern with Wood-Look Floor and Tiled Tub
When using a striated or directional tile, the direction you lay it has a huge impact on the feel of the room. In this bathroom, the wall tiles are laid horizontally. This simple choice makes the tub area feel wider and more expansive. If they were laid vertically, it would draw the eye upward, making the ceiling feel higher but the space narrower. For most standard-sized bathrooms, laying linear tiles horizontally is a great trick to create a sense of spaciousness.
⭐ The One Thing
The core elements of this design are very accessible. You can find light wood-look porcelain floor tiles at places like Floor & Decor for under $3/sq. ft. The horizontally-striated wall tile might be a specialty item, but you can get a similar effect with a widely available linen-textured or concrete-look tile. A black vanity with an integrated sink is a staple at IKEA or Wayfair, often for under $400. This look proves you don’t need high-end finishes to achieve a clean, modern, and bright bathroom.
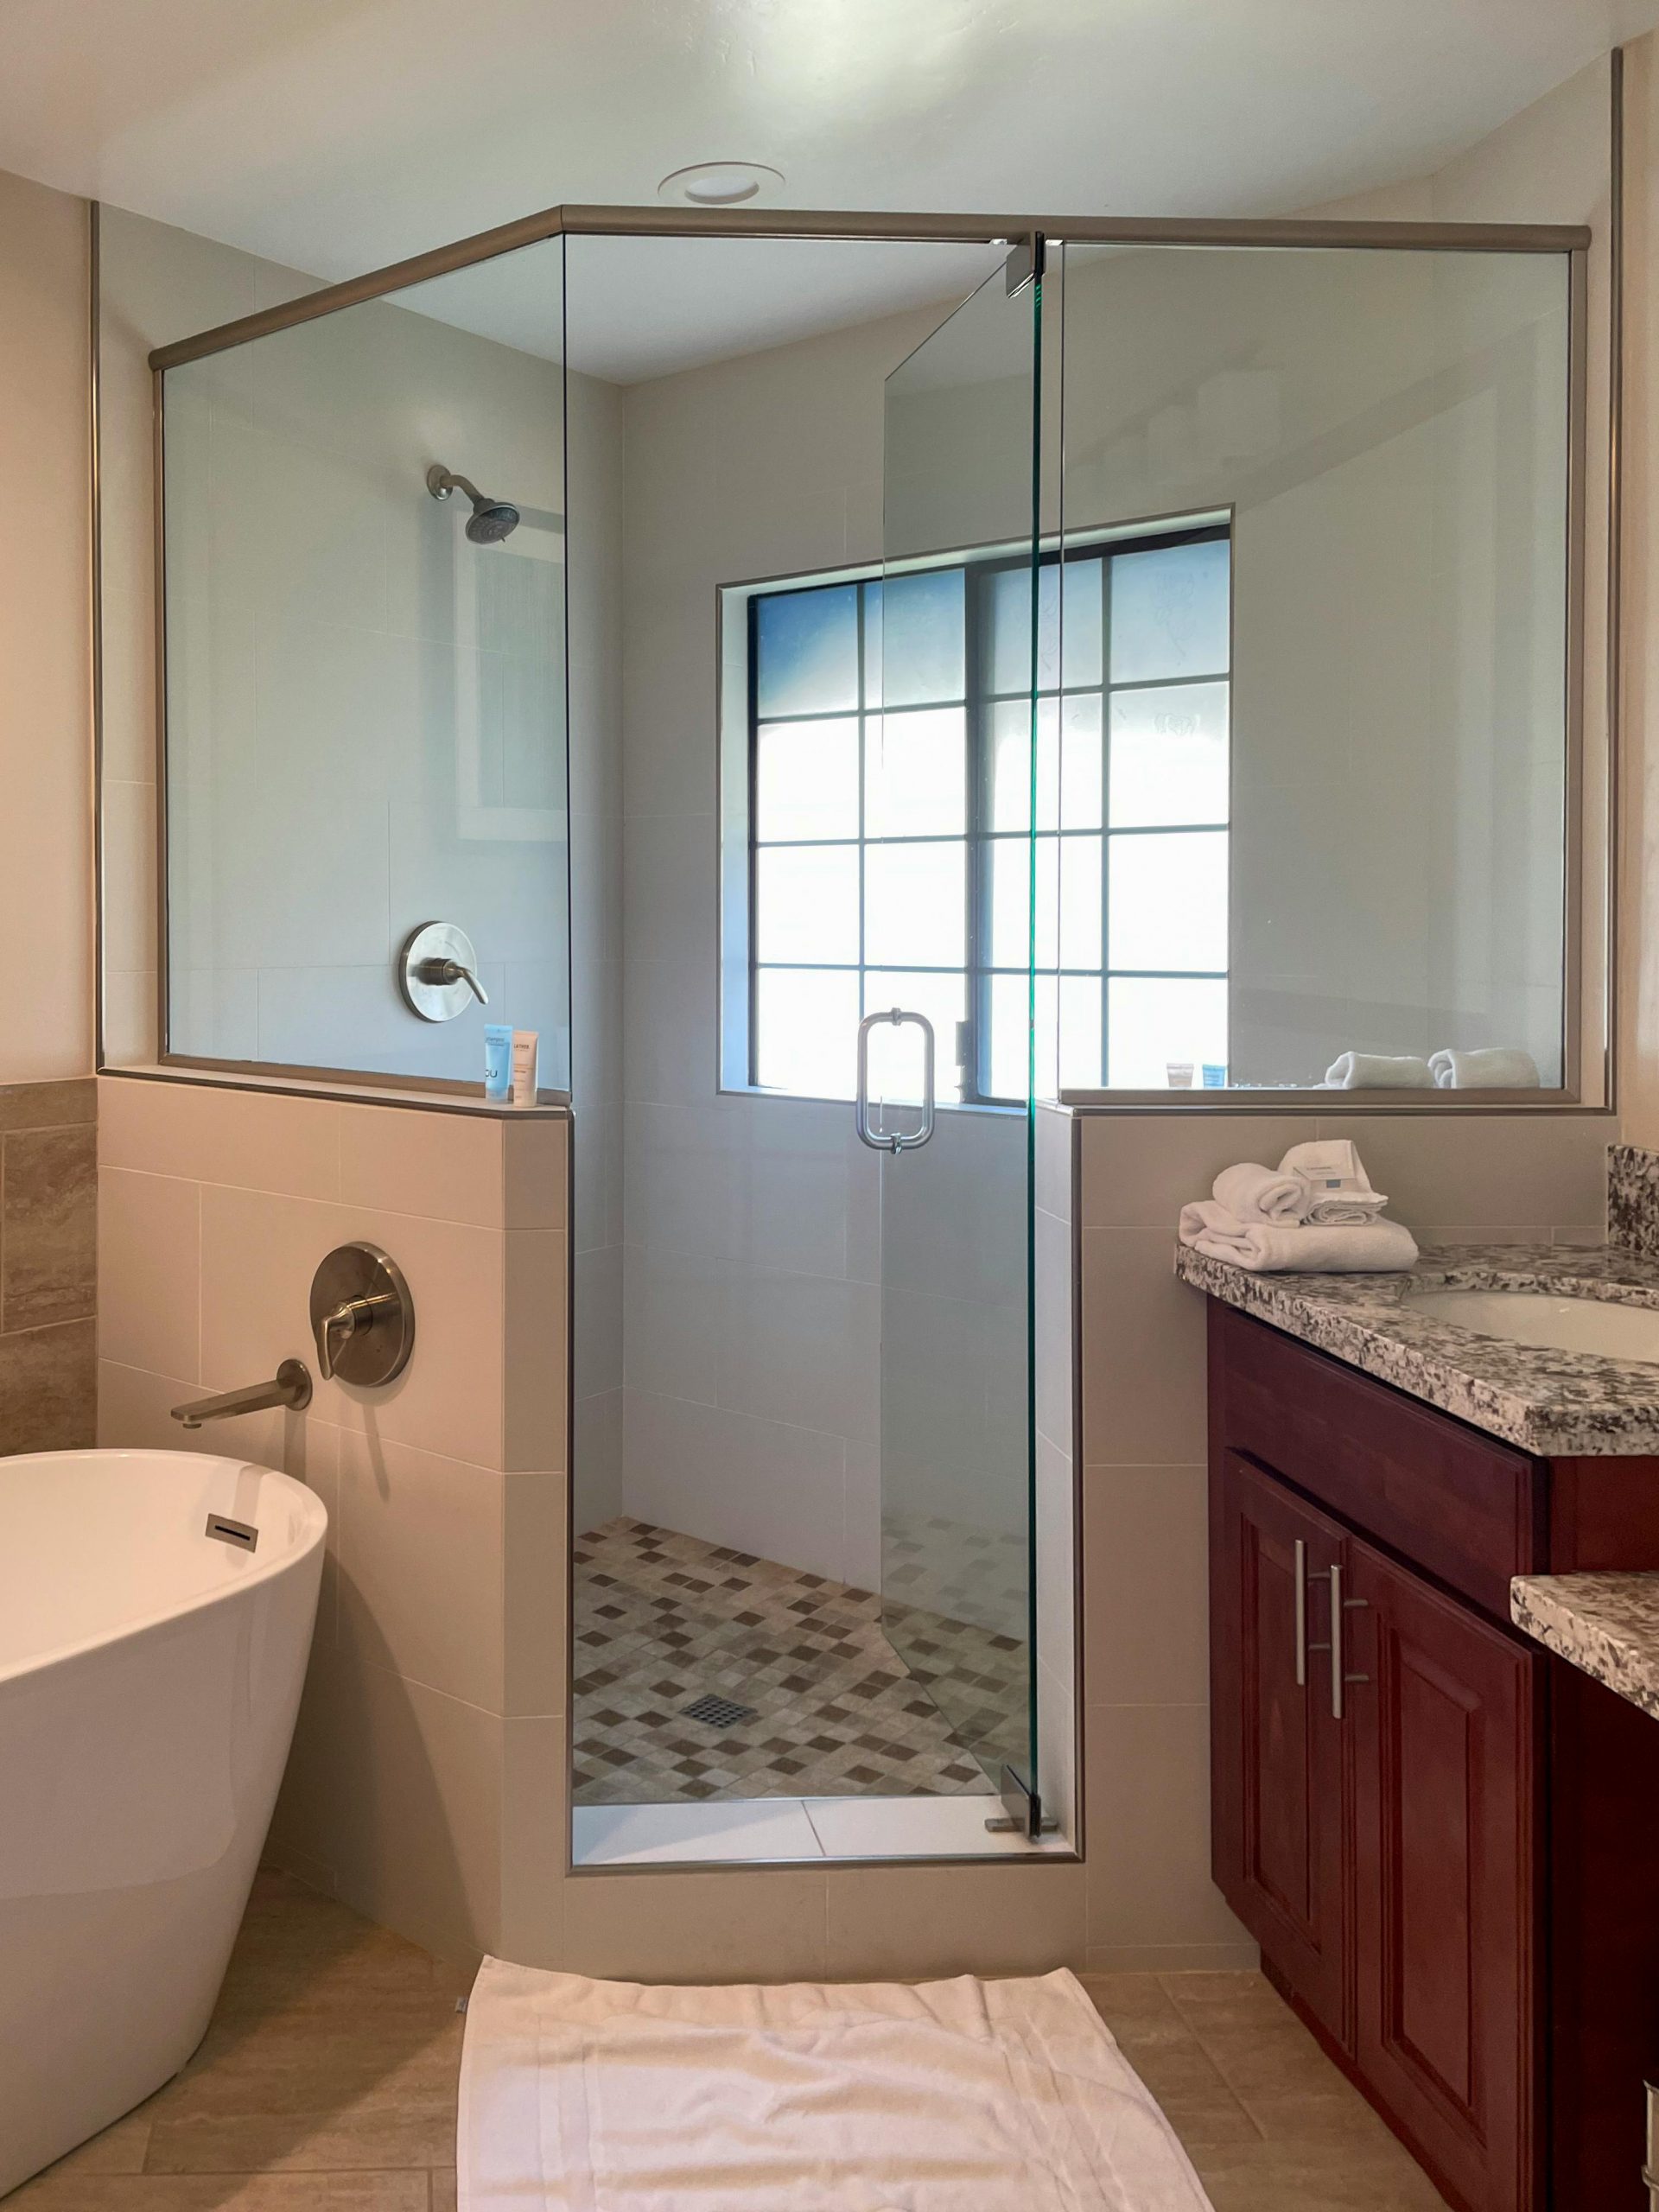
7. Contemporary Layout with Freestanding Tub and Glass Shower
Before committing to placing a freestanding tub right next to a glass shower, consider these practical points:
- Cleaning Zone: How will you access the space between the tub and the glass? Ensure there’s at least a 6-inch gap, otherwise it will become a trap for dust, moisture, and cleaning nightmares.
- Plumbing Access: For a freestanding tub, the plumbing is either exposed or comes up through the floor. Confirm with your plumber that your subfloor and joist layout can accommodate the drain and supply lines in the desired location.
- Water Splash: Even with a glass enclosure, water can splash out of the shower. The area around the freestanding tub needs to be fully waterproofed, just like the shower itself.
💰 Budget Breakdown
A full glass shower enclosure looks stunning and makes a room feel open, but it is a commitment to squeegeeing. If you have hard water, you’ll see water spots on that glass within a day. To keep it looking crystal clear like this, you need to squeegee the glass after every single shower. It’s a non-negotiable, 60-second task. If you’re not up for that level of daily maintenance, consider a frosted or patterned glass that helps to obscure water spots, or a more traditional shower curtain setup.
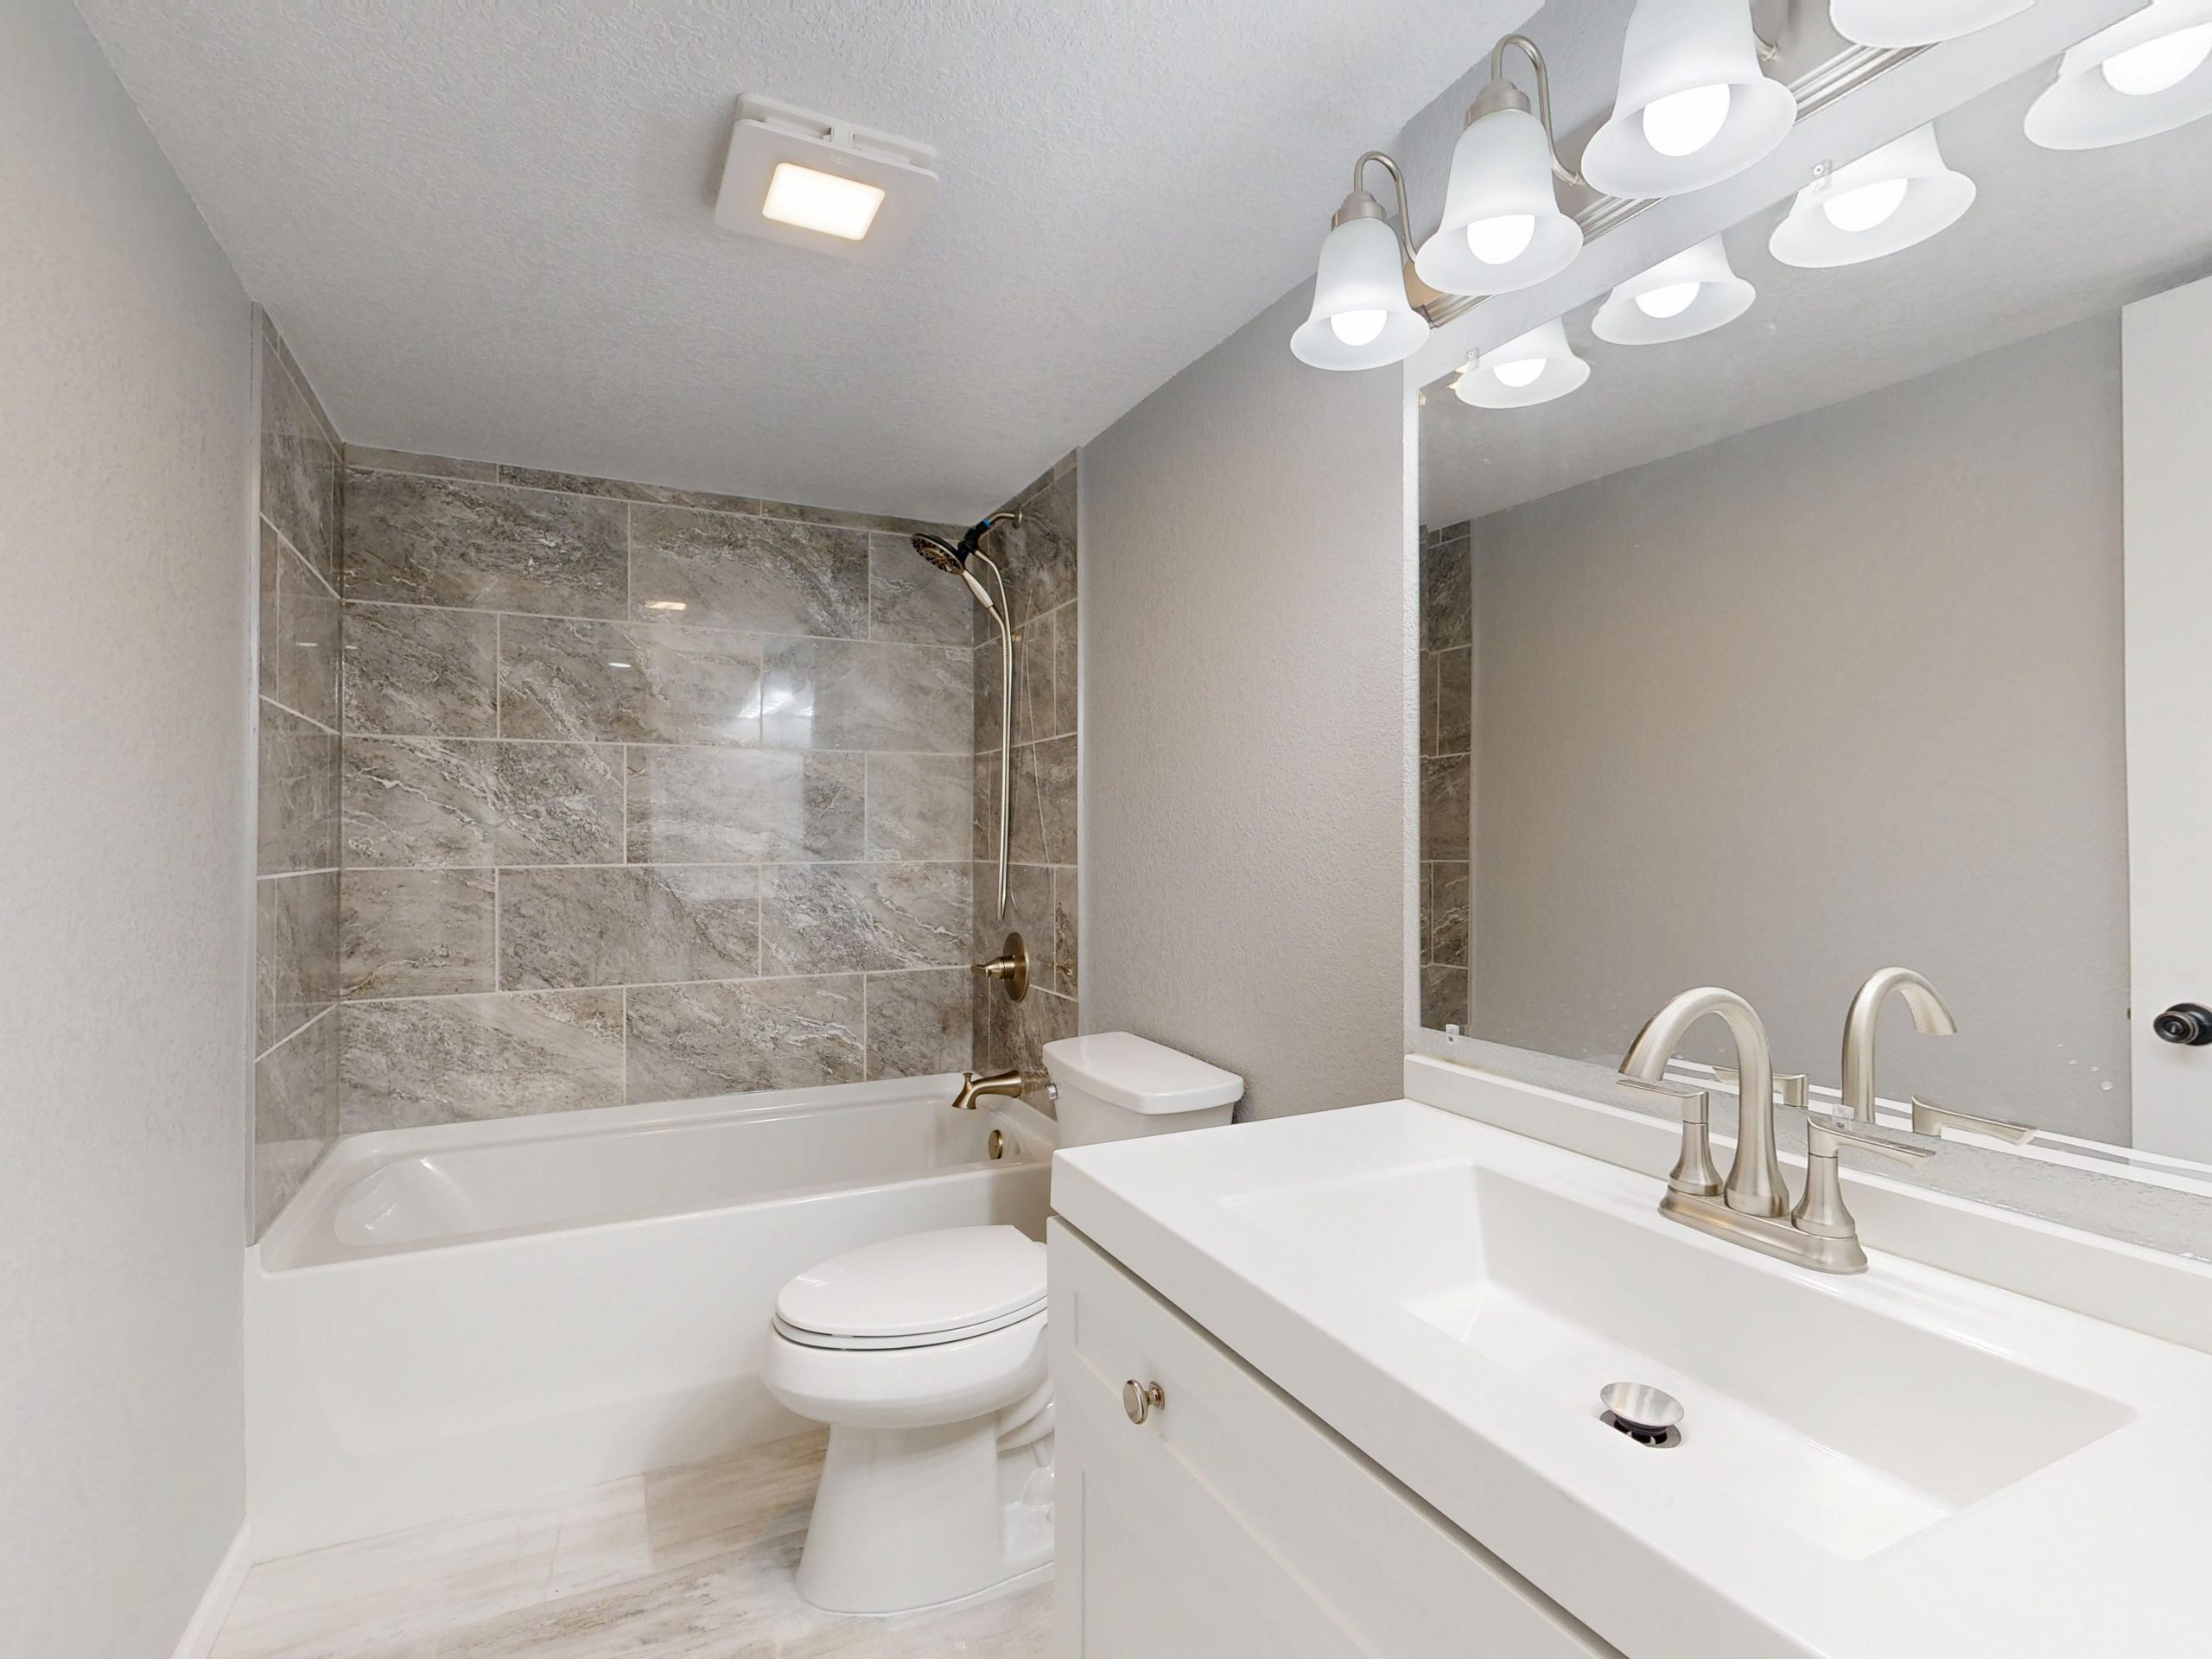
8. Modern Grey and White Bathroom with Brushed Nickel Accents
This room’s formula is a classic: 60% Neutral Tile + 30% Crisp White + 10% Metallic Accents. The large-format grey marbled tiles provide a soft, textured backdrop that covers the main functional area. The crisp white of the vanity, tub, and ceiling keeps the space feeling bright and clean. The final 10% is the brushed nickel (and hint of brass) which acts as the ‘jewelry’ of the room, adding a touch of polish and warmth. You could easily swap the grey tile for a beige travertine-look tile and exchange the brushed nickel for matte black for a slightly warmer, more dramatic take on the same balanced principle.
⚠️ Real Talk
This look represents a subtle shift we’re seeing in 2026: a move away from the stark, high-contrast marbles of the past few years towards softer, more blended patterns. Homeowners are looking for a sense of calm and longevity, and this kind of grey, earthy marbling feels less trend-driven and more timeless. It provides texture and interest without being visually demanding. Paired with a functional, wall-to-wall mirror, it hits the perfect note of practicality and quiet luxury that people are craving.
9. Sleek Geometry with a Floating Sink and Textured Accent Wall
This design is a masterclass in using geometric forms. The textured wall is composed of stacked horizontal rectangles, which is echoed by the crisp horizontal line of the floating sink. This strong linearity is then beautifully contrasted by the perfect sphere of the pendant light. The square floor tiles provide a stable grid, and the round tub offers a soft, sculptural counterpoint. It’s this intentional play between straight lines and curves that makes the space feel so dynamic and thoughtfully designed.
🔥 Trending Context
The single element holding this entire design together is the textured grey accent wall. Without it, you’d have a collection of nice white and grey bathroom fixtures in a plain room. The tile wall adds depth, shadow, and a tactile quality that elevates the entire space. It serves as the perfect backdrop for the minimalist floating sink, making it pop, and it gives the room a focal point and a strong sense of architectural intention. All other elements are secondary to the impact of this feature wall.
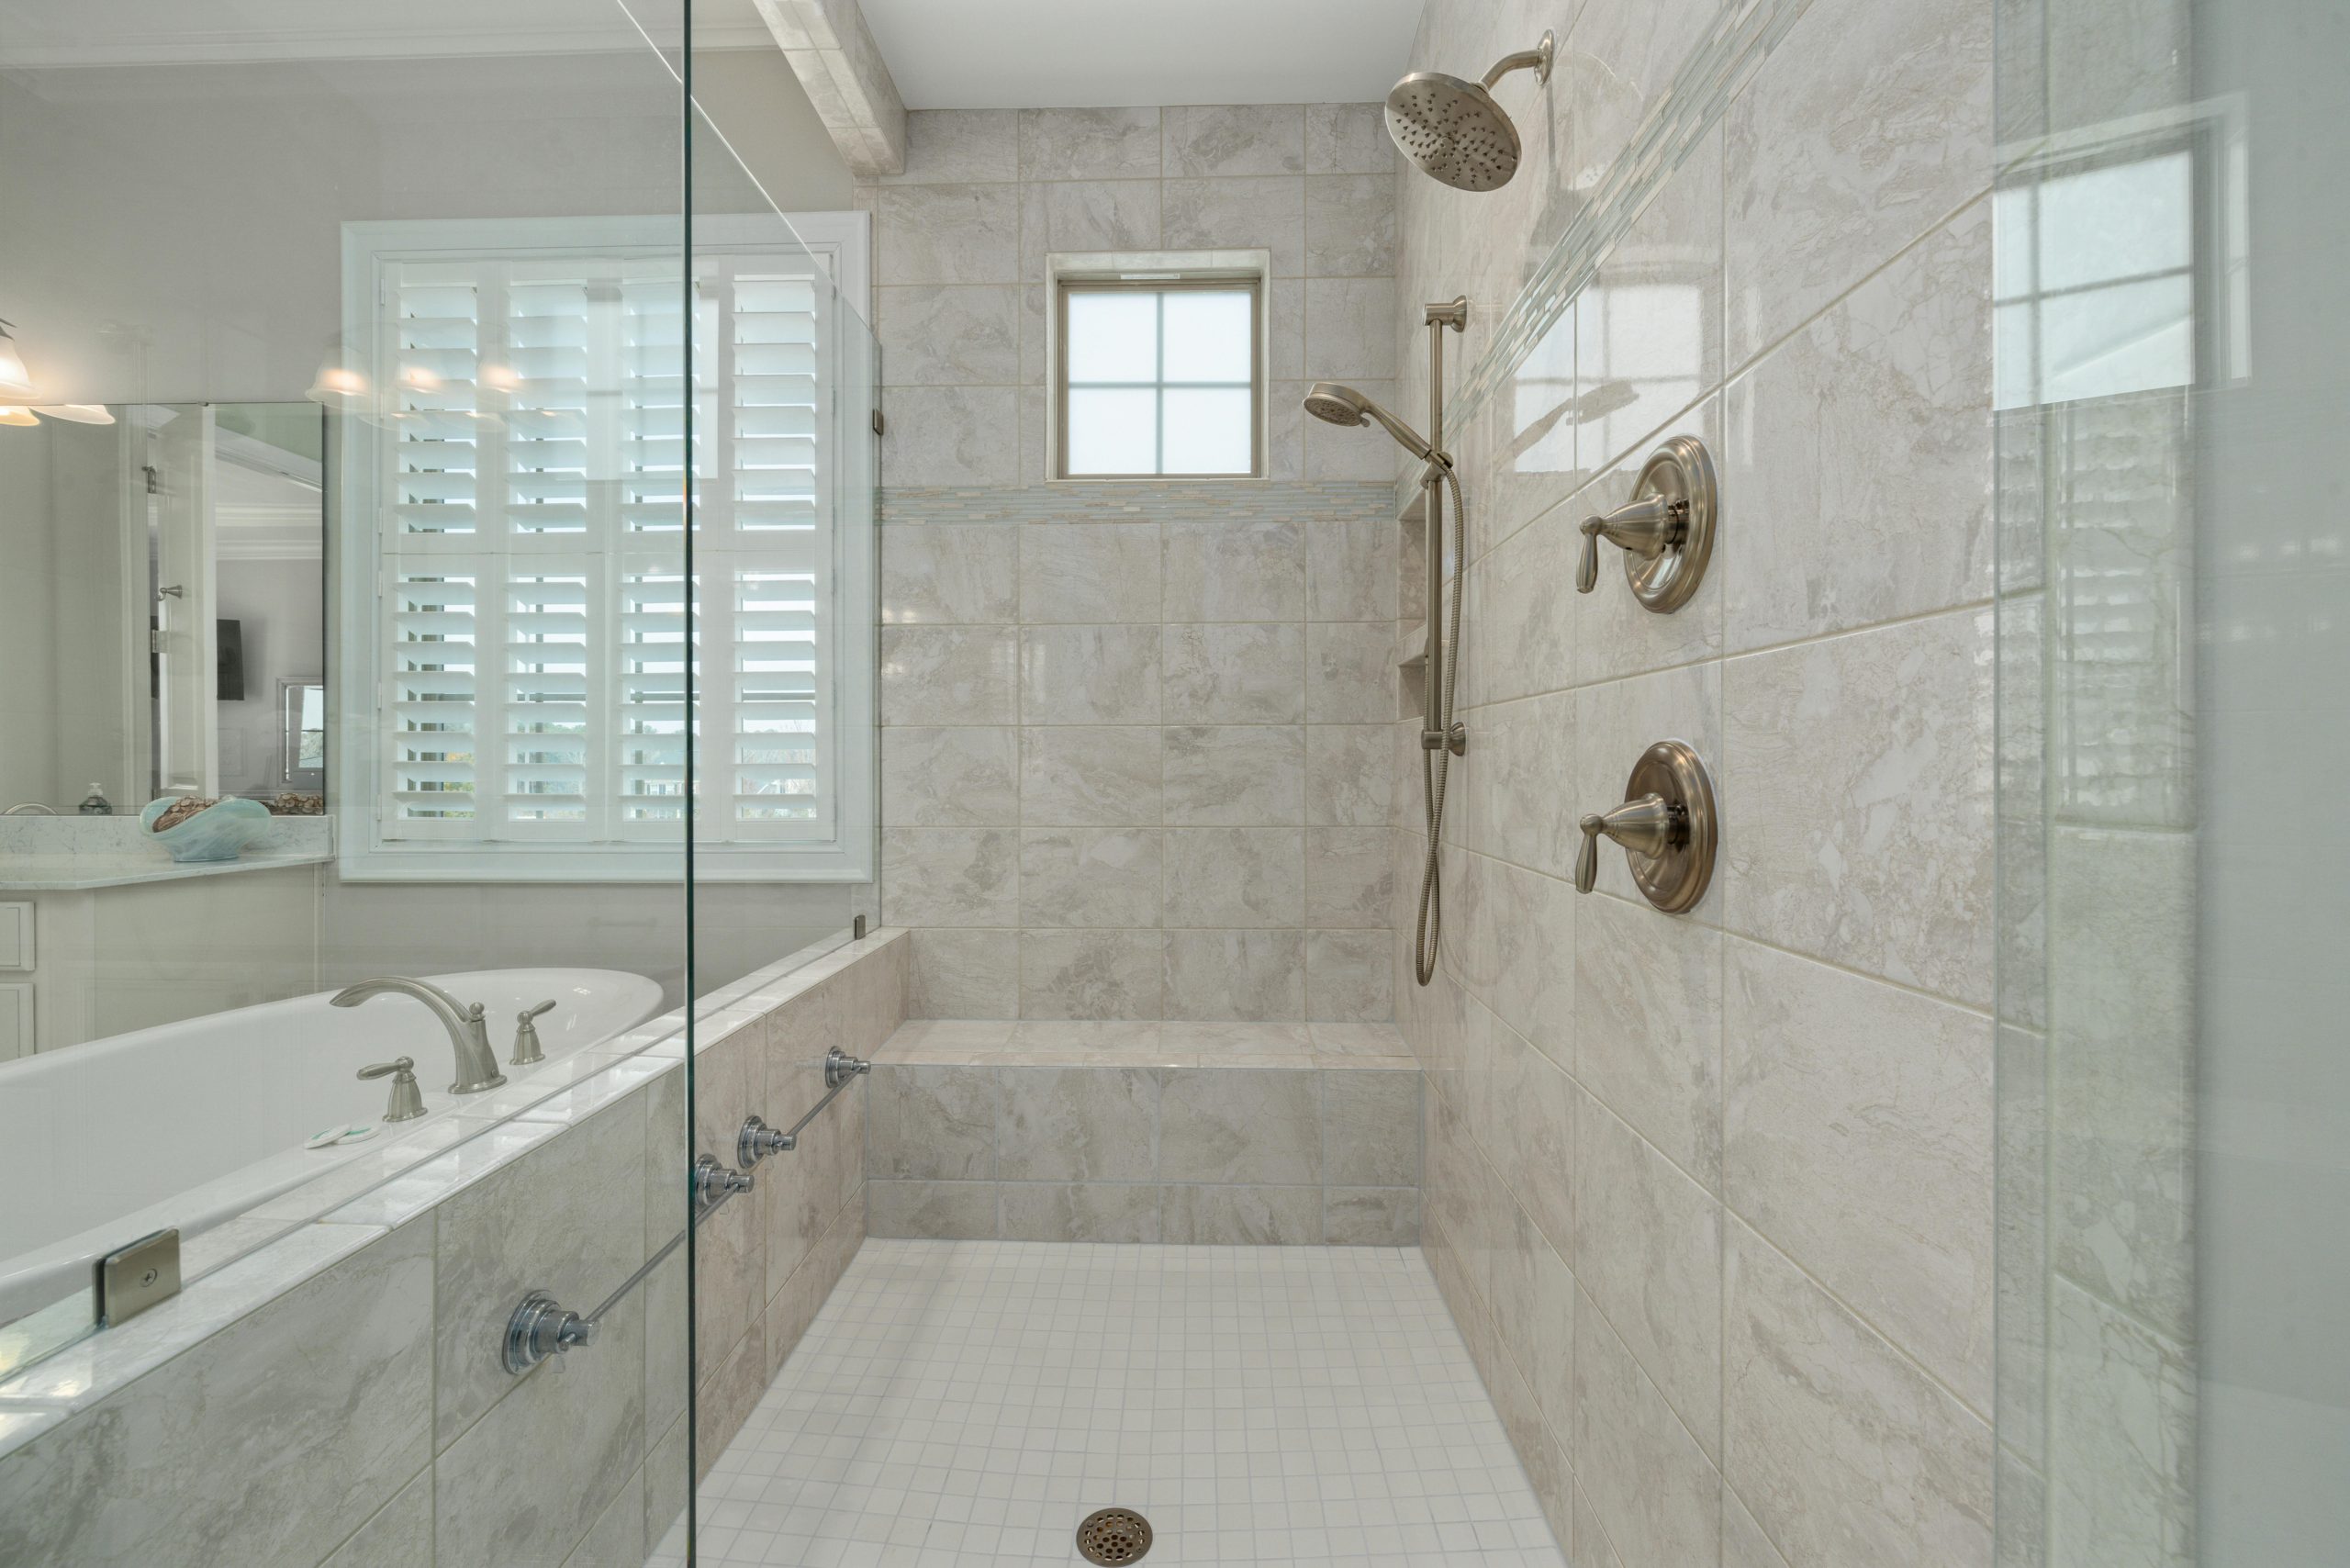
10. A Luxurious Marble Tiled Shower with an Integrated Bench
Creating a decorative accent band like this is a great way to add a custom touch to your shower. Here’s a quick guide:
- Plan the Height: Decide on the vertical position. A good rule of thumb is to place it at eye level, typically between 48 and 60 inches from the shower floor.
- Purchase Materials: You’ll need the mosaic tile sheets, a high-quality tile adhesive (mastic or thin-set), and unsanded grout (for tight grout lines).
- Leave a Gap: As you install the main field tile, leave a gap of the precise height of your mosaic sheet, plus about 1/8 inch for grout lines.
- Install the Mosaic: Apply adhesive to the wall and gently press the mosaic sheet into place. Use a grout float to ensure it’s flush with the surrounding tile.
- Grout and Seal: After the adhesive cures (24-48 hours), grout the entire shower, then seal everything after the grout has fully cured (about 72 hours).
💸 Get This Look For Less
That beautiful glass mosaic accent stripe can be a real pain to keep clean. The numerous small grout lines are a magnet for soap scum and mildew. Unlike the large format tiles around it, this strip will require targeted scrubbing with a grout brush at least every other week. Using a daily shower spray can help, but you can’t escape the fact that more grout lines equals more maintenance. Also, the integrated tiled bench is lovely, but be sure it’s sloped properly towards the drain to prevent water from pooling.
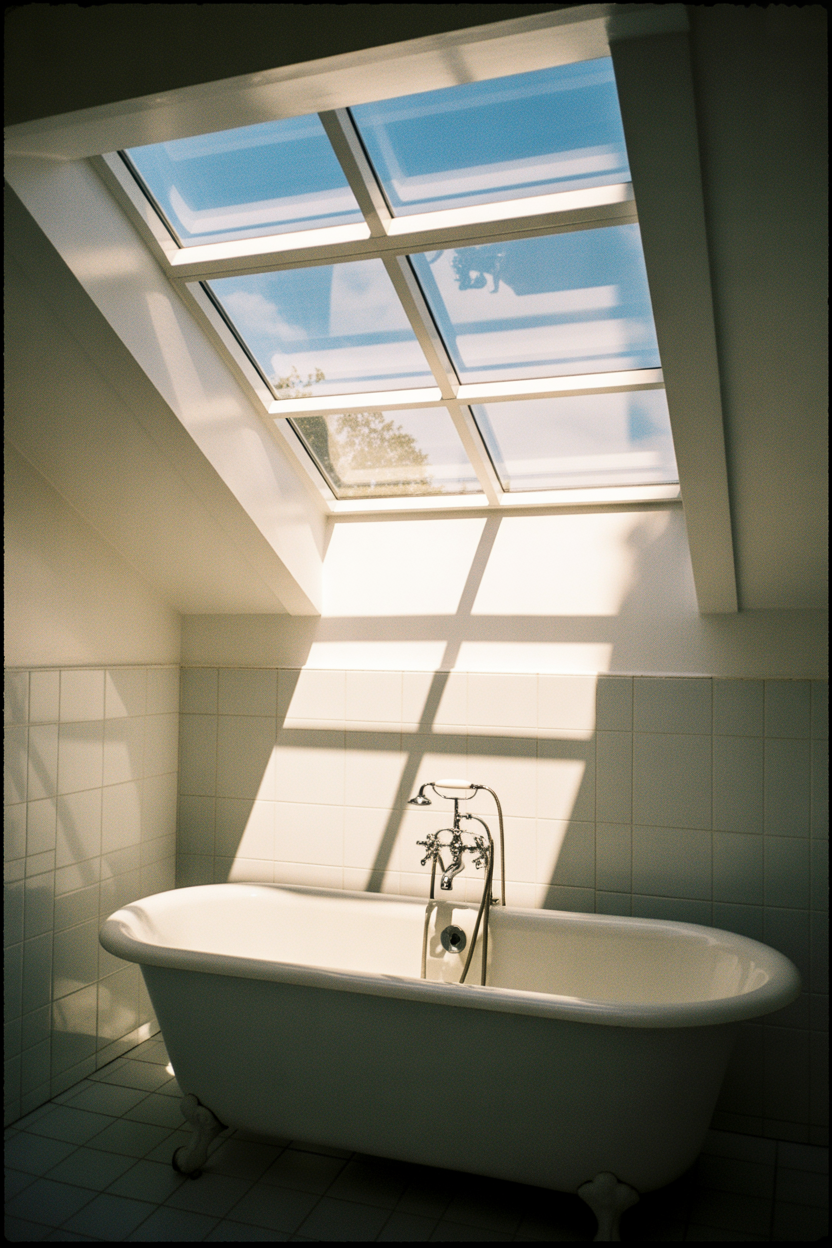
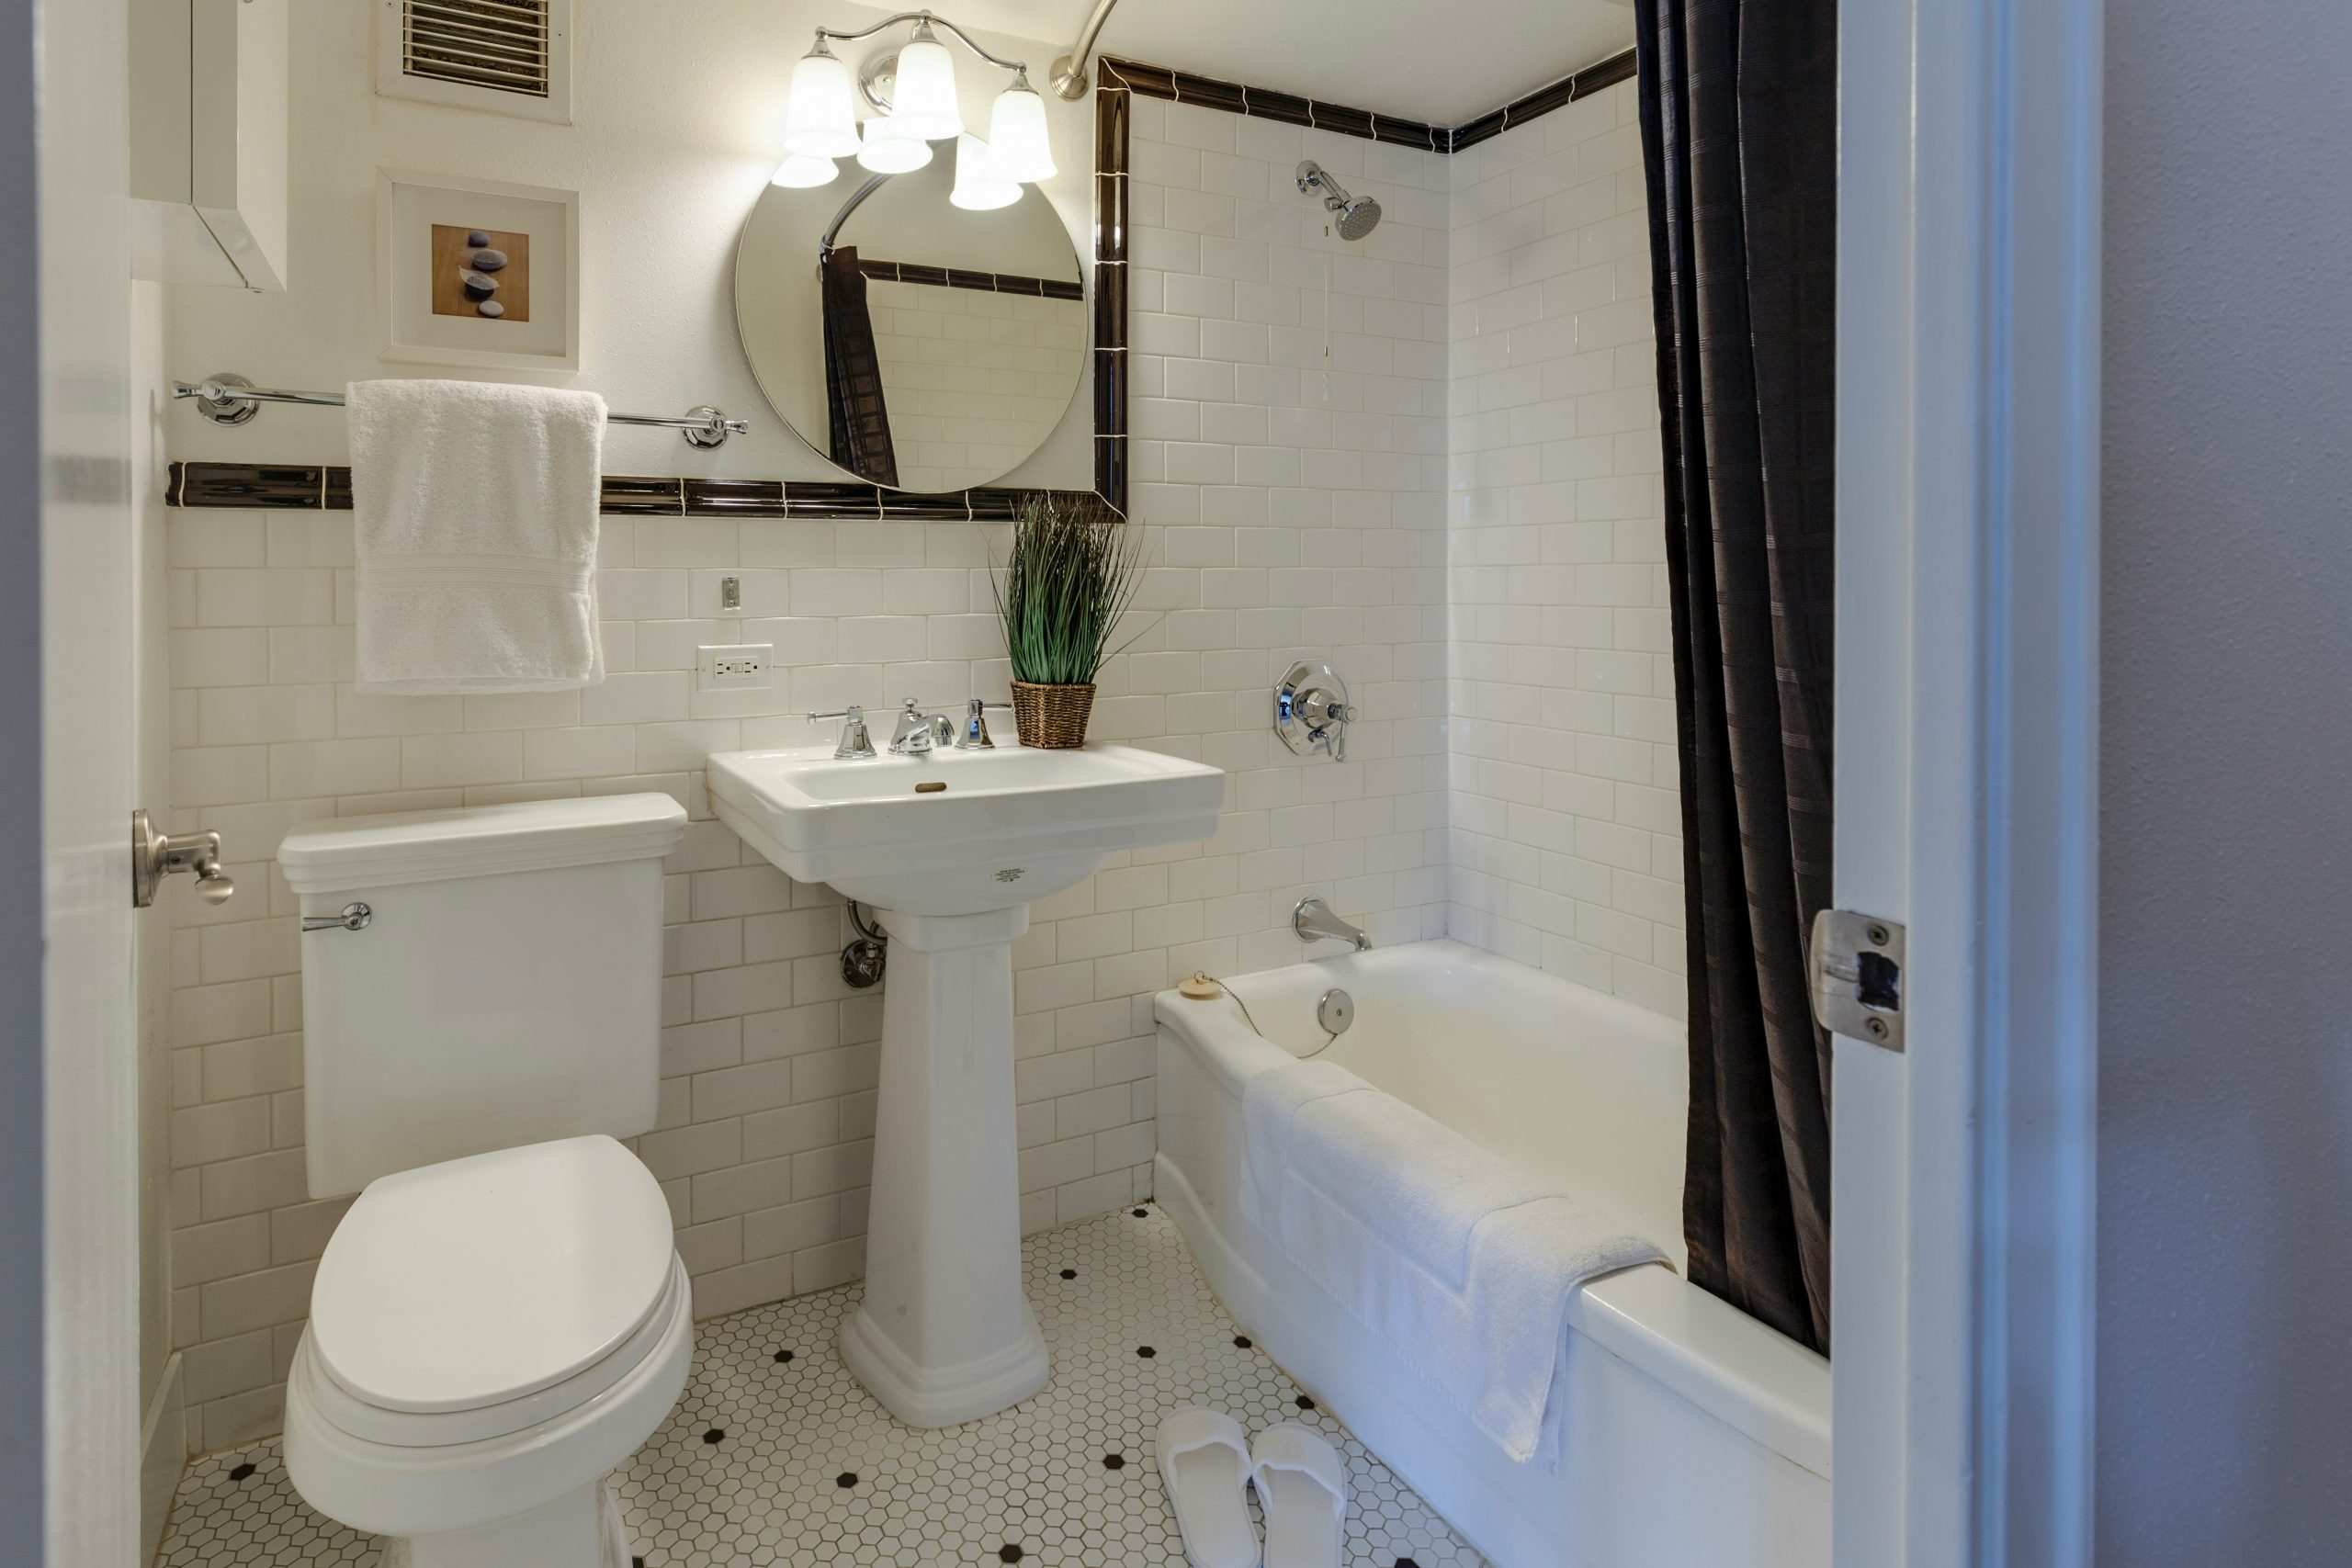
11. Timeless All-White Bathroom with Classic Subway and Hexagon Tile
This look is a perennial favorite because it flawlessly combines practicality and vintage charm. The white subway tile on the walls creates a bright, reflective surface that is incredibly easy to clean and feels historically grounded. The hexagonal floor tile adds a layer of pattern and detail underfoot, with the small black accents providing just enough visual punctuation to keep it interesting. The pedestal sink is key; its open design prevents the small room from feeling weighed down by a bulky vanity, enhancing the sense of space.
🎯 What Makes It Work
You can get this entire look for a song. White subway tile is famously one of the most affordable tiles you can buy, often coming in at under $0.30 per piece. White hex floor tile is similarly budget-friendly, and you can even buy sheets with the black accent pattern already included. A classic pedestal sink from a big-box store can be had for $100-$200. This is a prime example of how thoughtful selection of classic, affordable materials can create a look that feels more expensive and custom than it actually is. It’s a victory for timeless, accessible design.
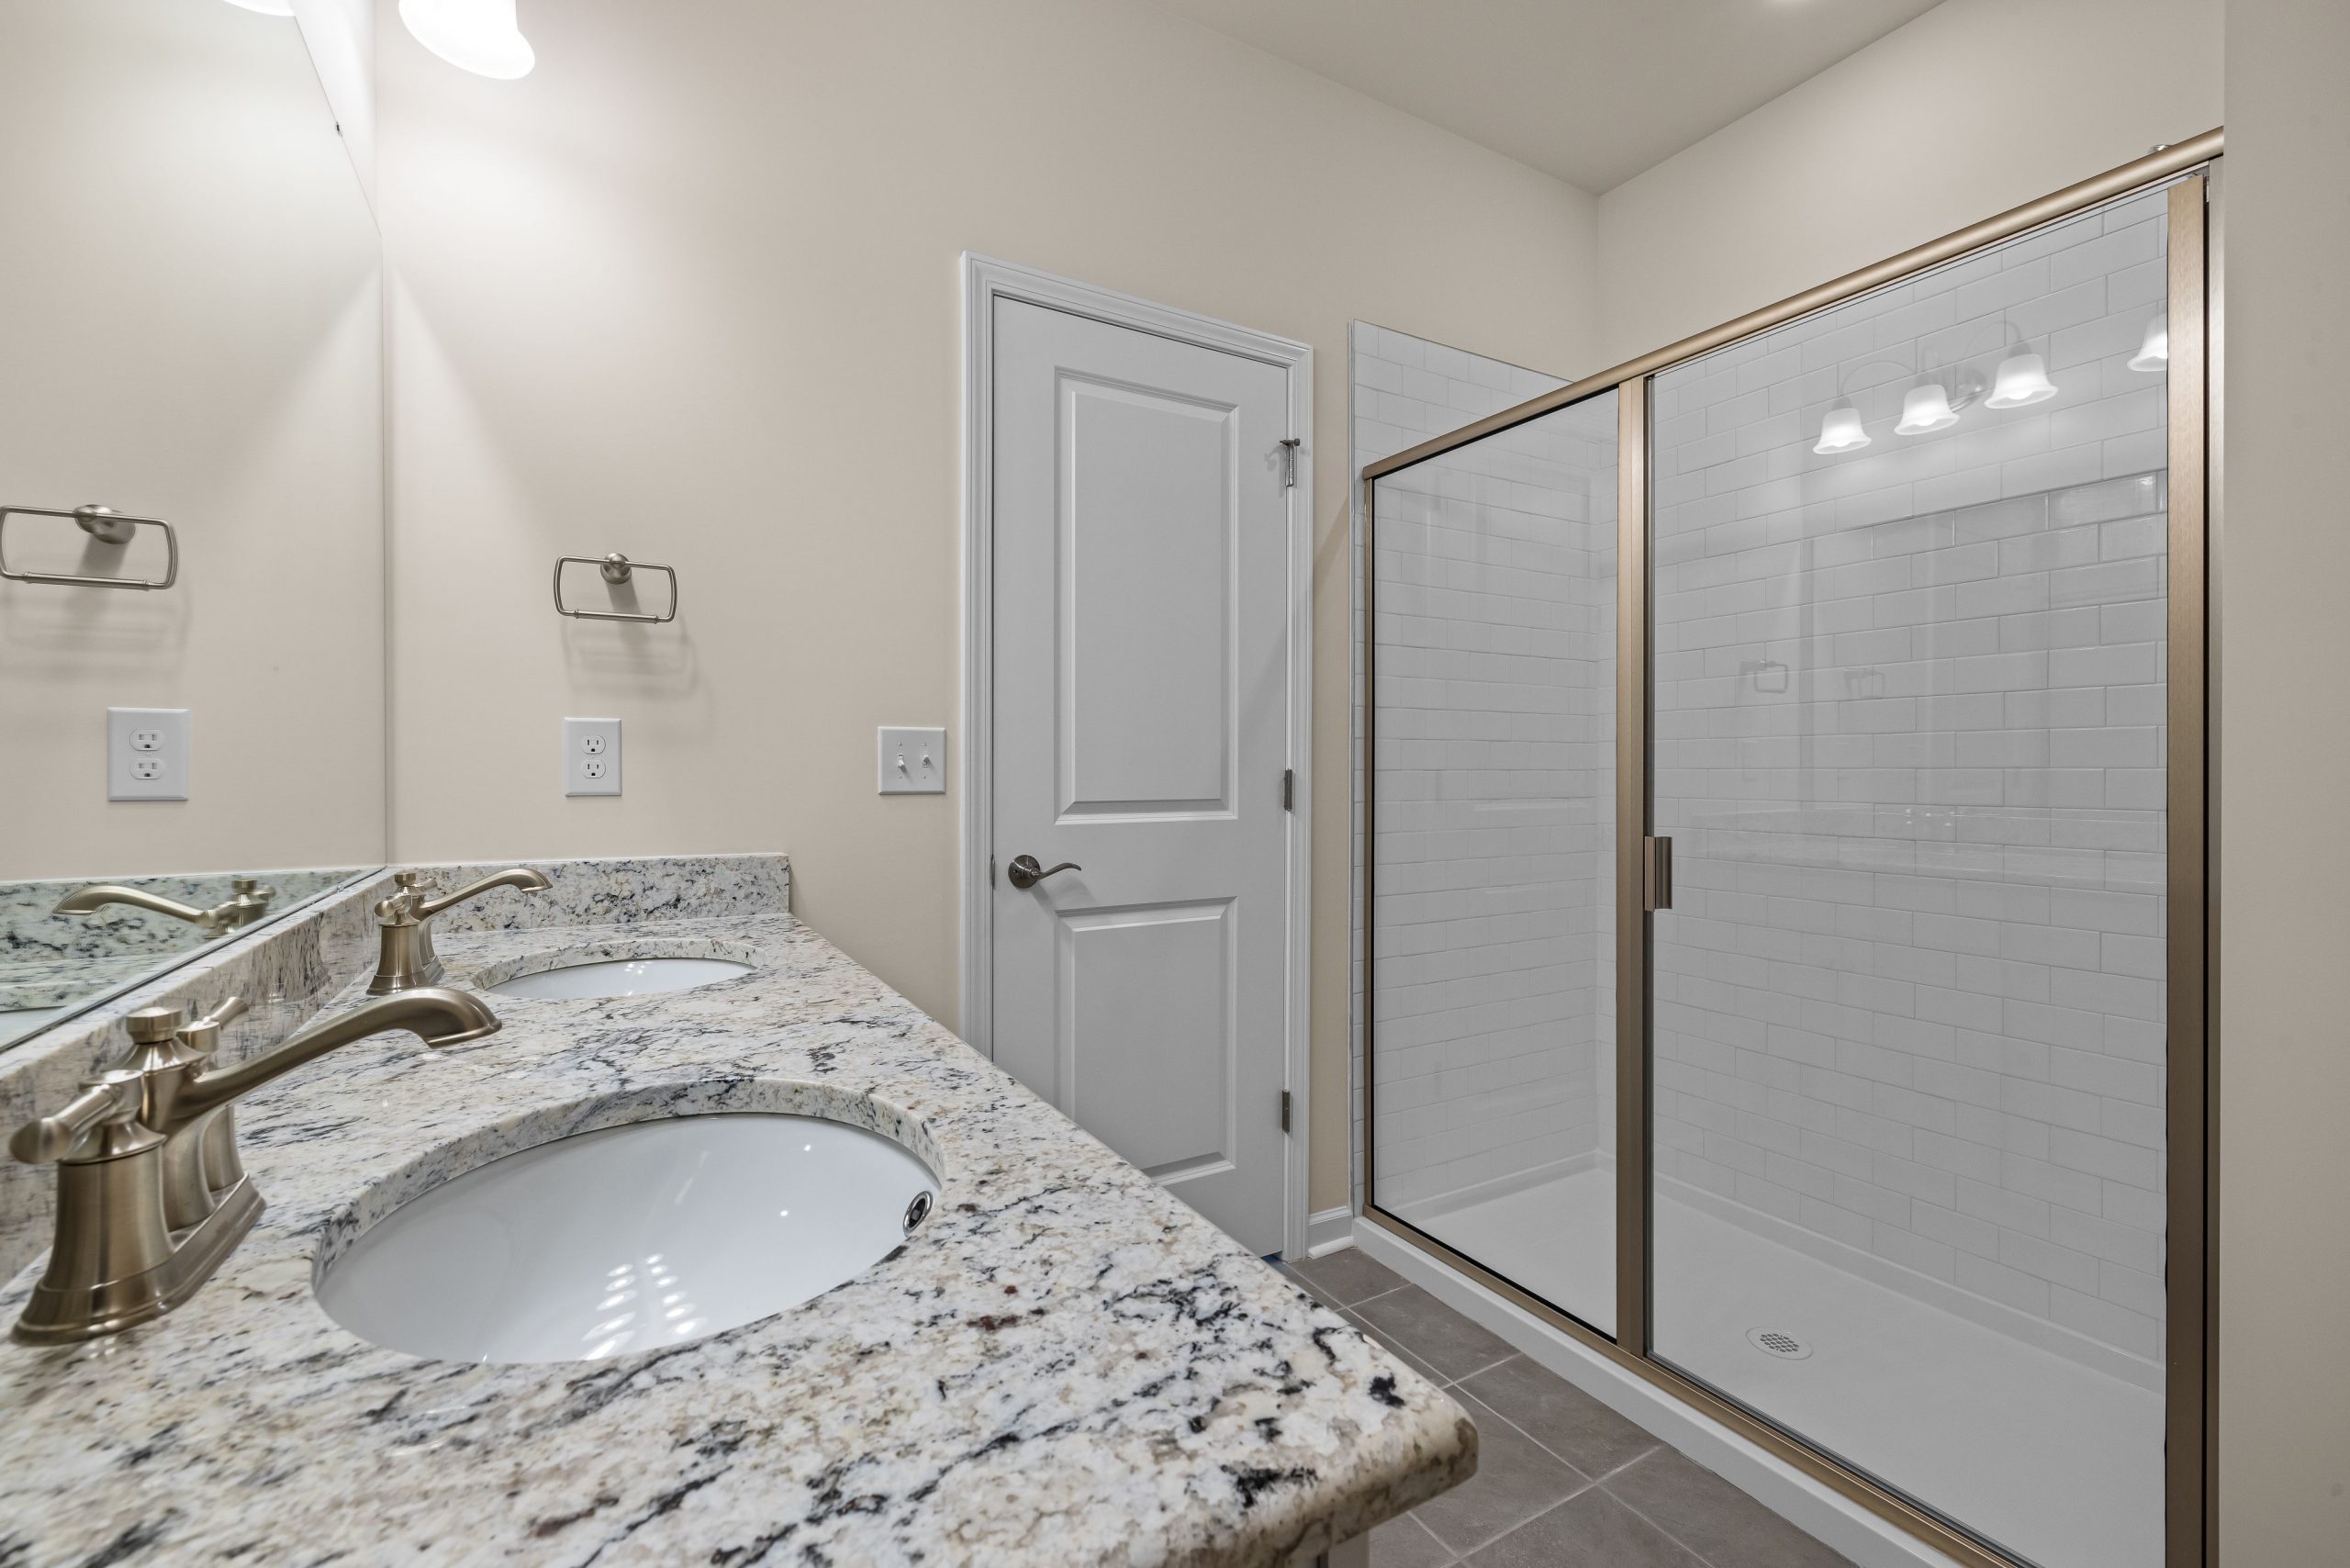
12. Neutral Double Vanity with Granite and White Subway Tile
A full-width double vanity like this is best suited for a primary bathroom with a dedicated wall of at least 72 inches, and ideally 84 inches or more. This allows for two standard sinks and a generous amount of counter space in between without feeling cramped. The room itself should be at least 100 square feet to accommodate the vanity, a separate shower, and comfortable circulation space. If your space is smaller, consider a single sink vanity of 48-60 inches to maintain a sense of balance and proportion.
✅ Before You Start
When you have a busy granite countertop with lots of movement and color flecks, everything else around it should be calm and simple. Notice how this design pairs the granite with simple, crisp white subway tile in the shower and a neutral, solid color on the walls. This allows the granite to be the star without creating visual chaos. If you were to pair this countertop with a patterned floor tile or a busy backsplash, the two elements would fight for attention and the whole room would feel jarring. Let one surface be the hero.
13. Bright Blue Tiling with a Classic Pedestal Sink
The single most defining element here is the unapologetic use of blue tile. It’s not just an accent; it’s the entire identity of the bathroom. The choice to run it across most of the wall surface, combined with the decorative border, creates an immersive color experience. If you were to replace the blue tile with plain white, the room would lose all of its personality and become a forgettable, purely functional space. The color is what gives it a story and a memorable, albeit dated, character.
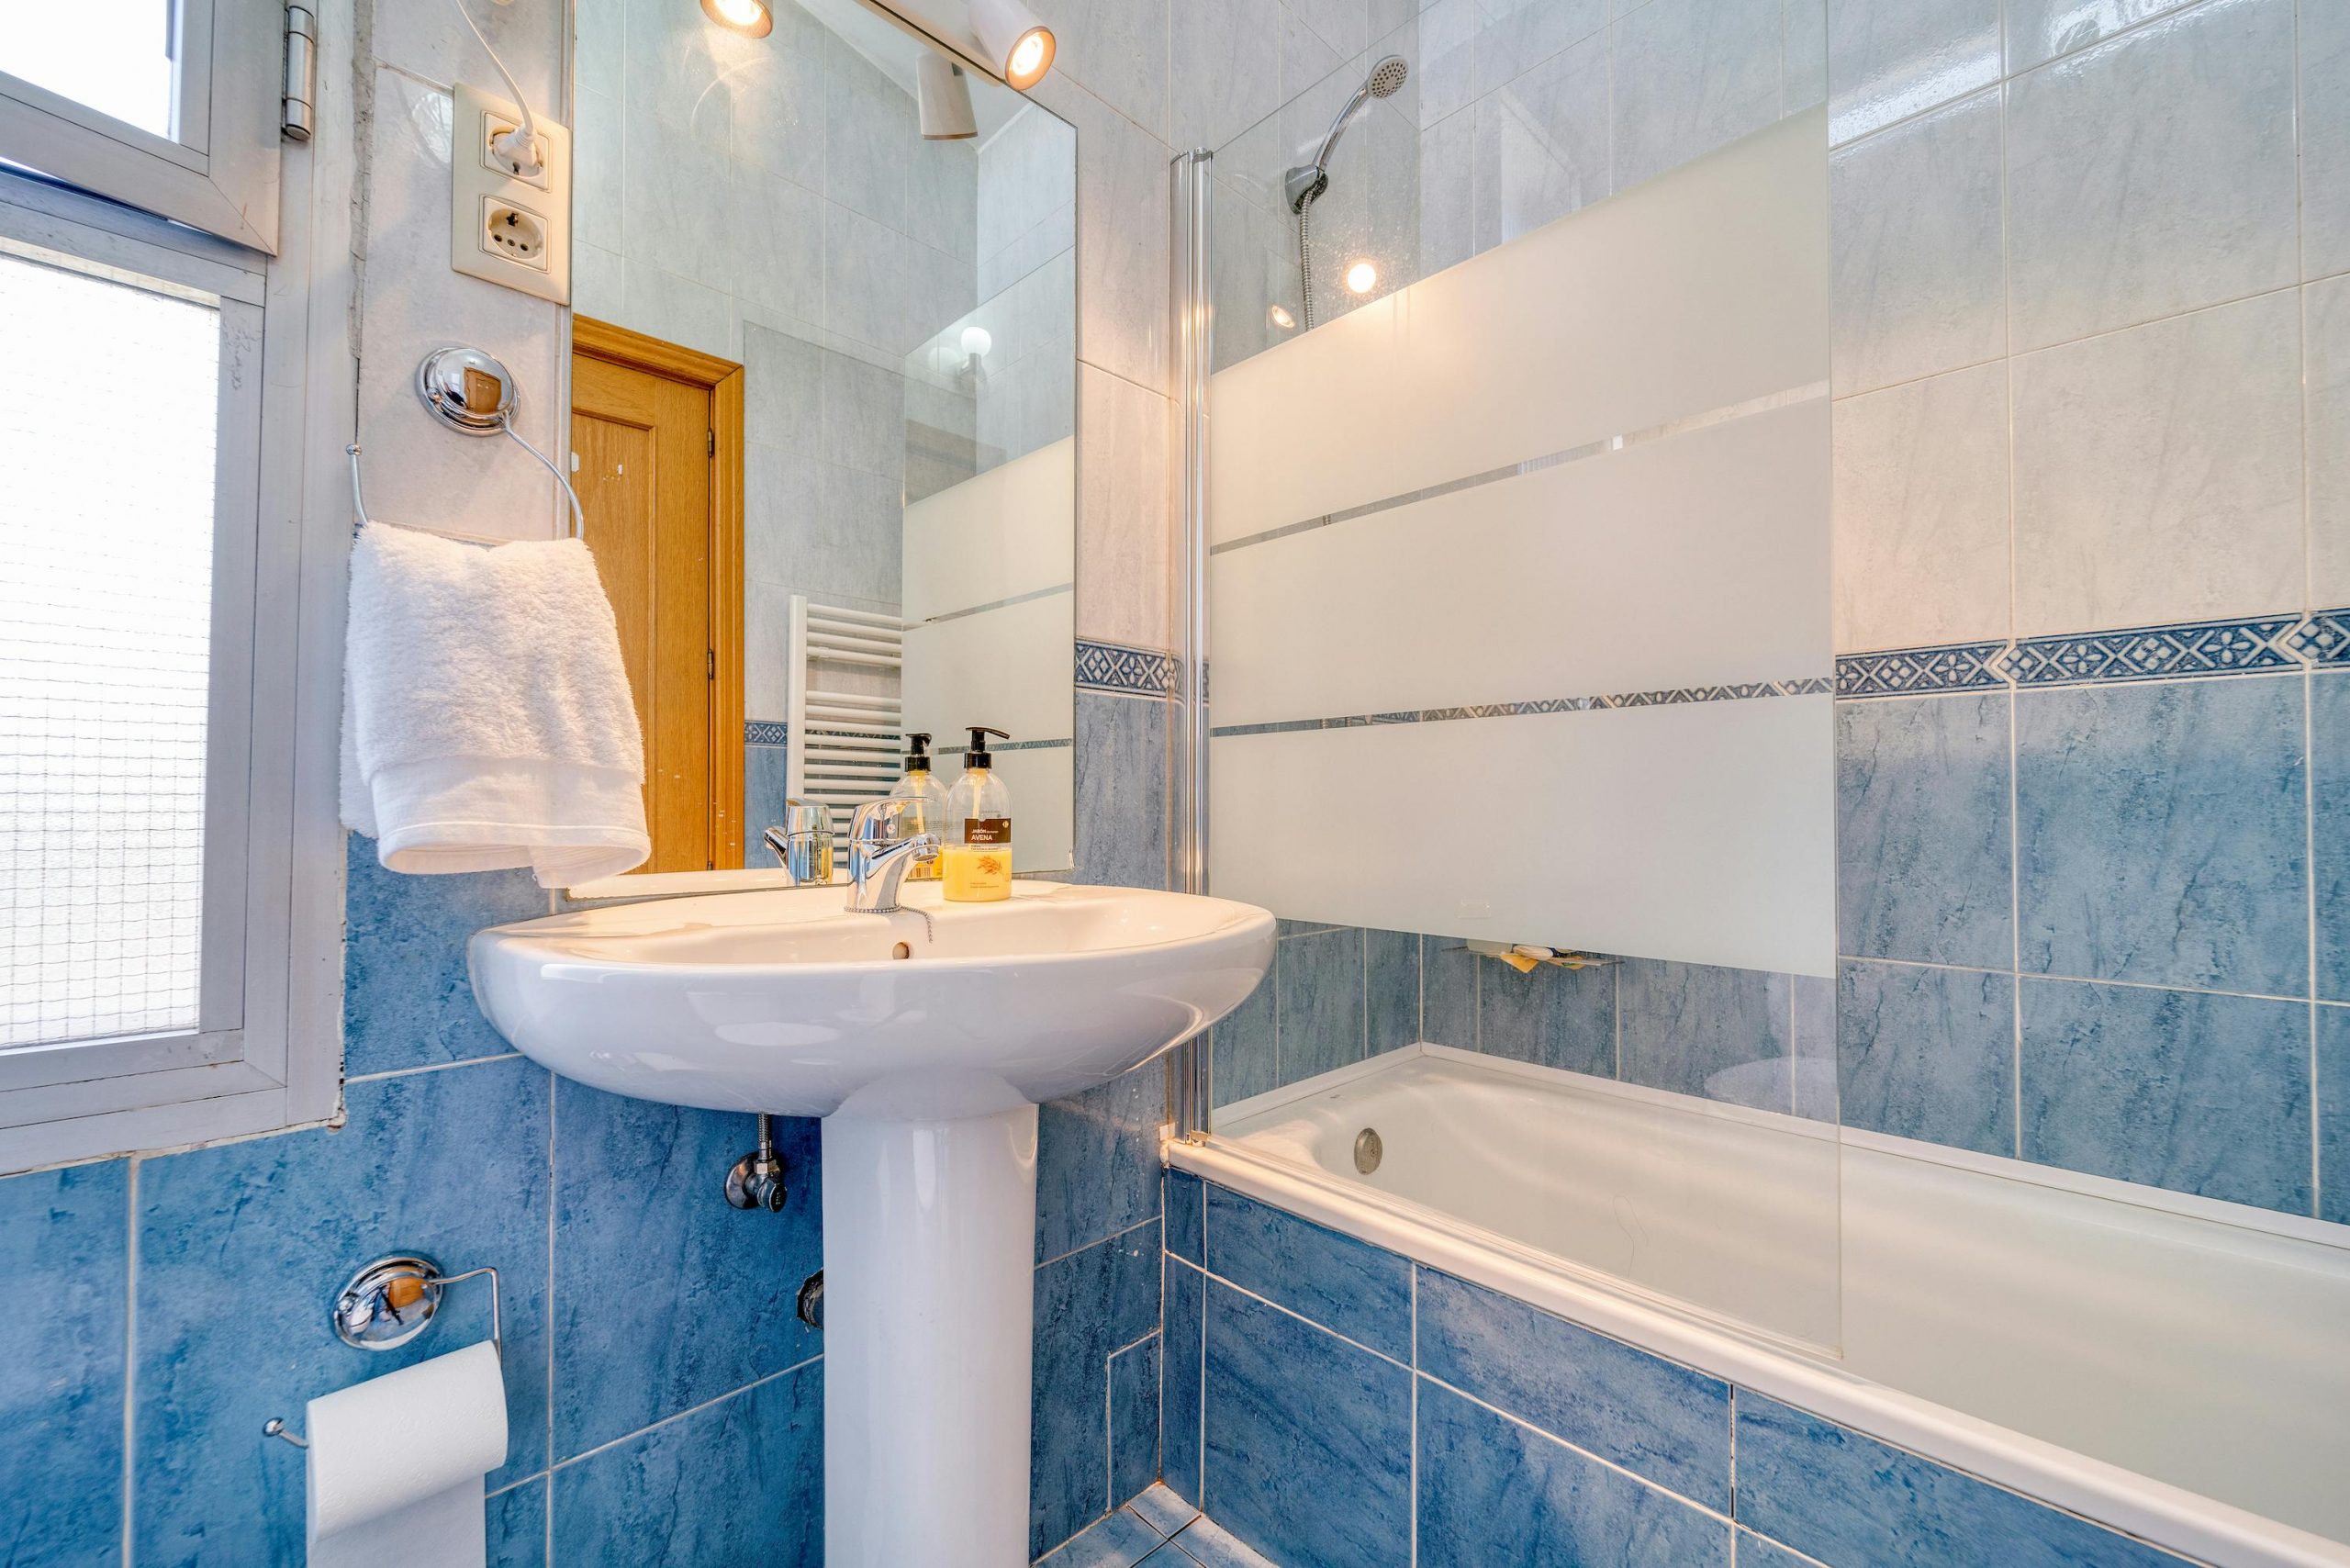
📏 Scale Guide
Let’s be honest, this look is very taste-specific and could be a tough sell for future home buyers. Bold, colorful tile, especially with a patterned border, can firmly date a bathroom to the era it was installed. While it may be perfect for your personal taste right now, it lacks the timeless appeal of the neutral palette in Idea #8. If you’re planning to sell your home within the next 5-10 years, you might consider using a color like this as paint, which is much easier and cheaper to change than a fully tiled wall.
14. A Simple & Functional Mix of Sage Green and Oak
This bathroom operates on a simple, earthy formula: 50% Cool Color + 40% Warm Wood + 10% Classic White. The sage green walls provide a soft, calming color base that feels connected to nature. The light oak of the vanity and door introduces a necessary warmth and organic texture, preventing the green and white from feeling too clinical. The white floor tiles and fixtures are the clean, practical elements that make it feel like a bathroom. This balance of cool, warm, and neutral is a foolproof recipe for a pleasant and grounded space.
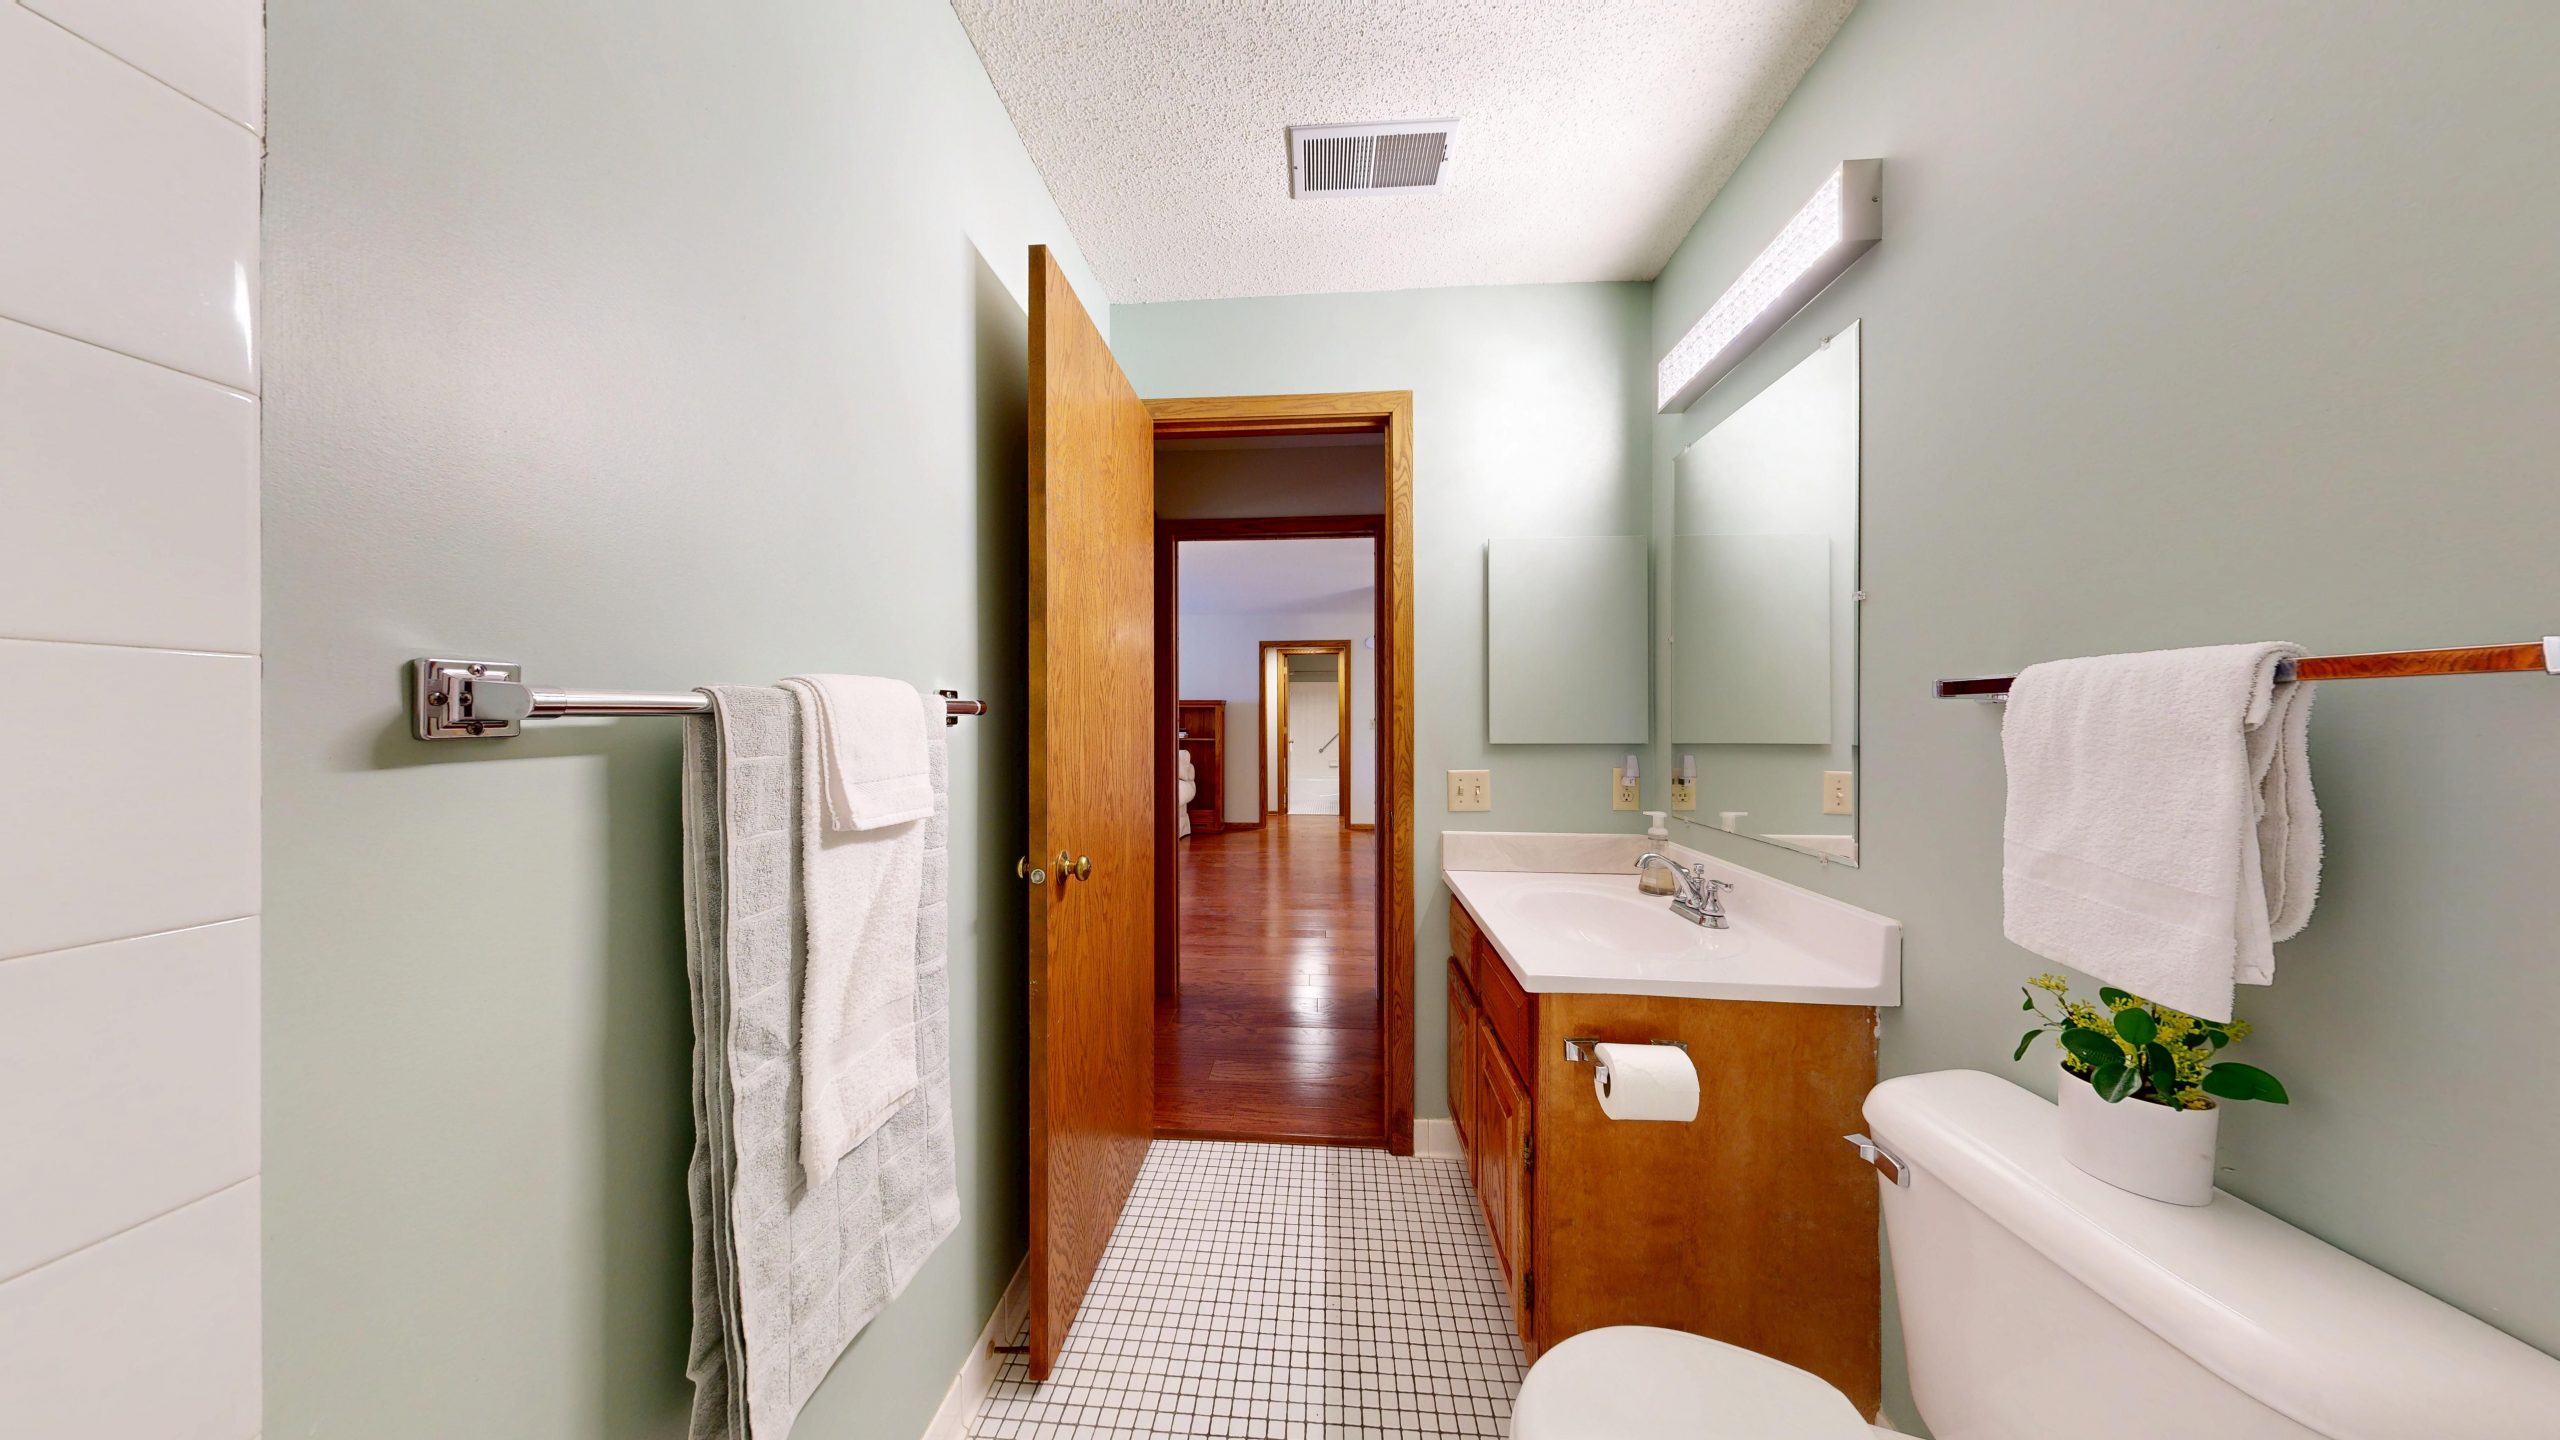
💡 Designer Tip
While the combination of oak and sage green might feel a bit reminiscent of the early 2000s, this color pairing is seeing a major resurgence in 2026, but with a modern twist. The current trend leans into more muted, dustier versions of sage and pairs them with rift-cut or white oak for a more minimalist, Scandinavian vibe. This bathroom is a great example of a ‘good bones’ design; by simply updating the chrome hardware to matte black and swapping the mirror for a round, modern shape, you could bring this entire look right up to date.
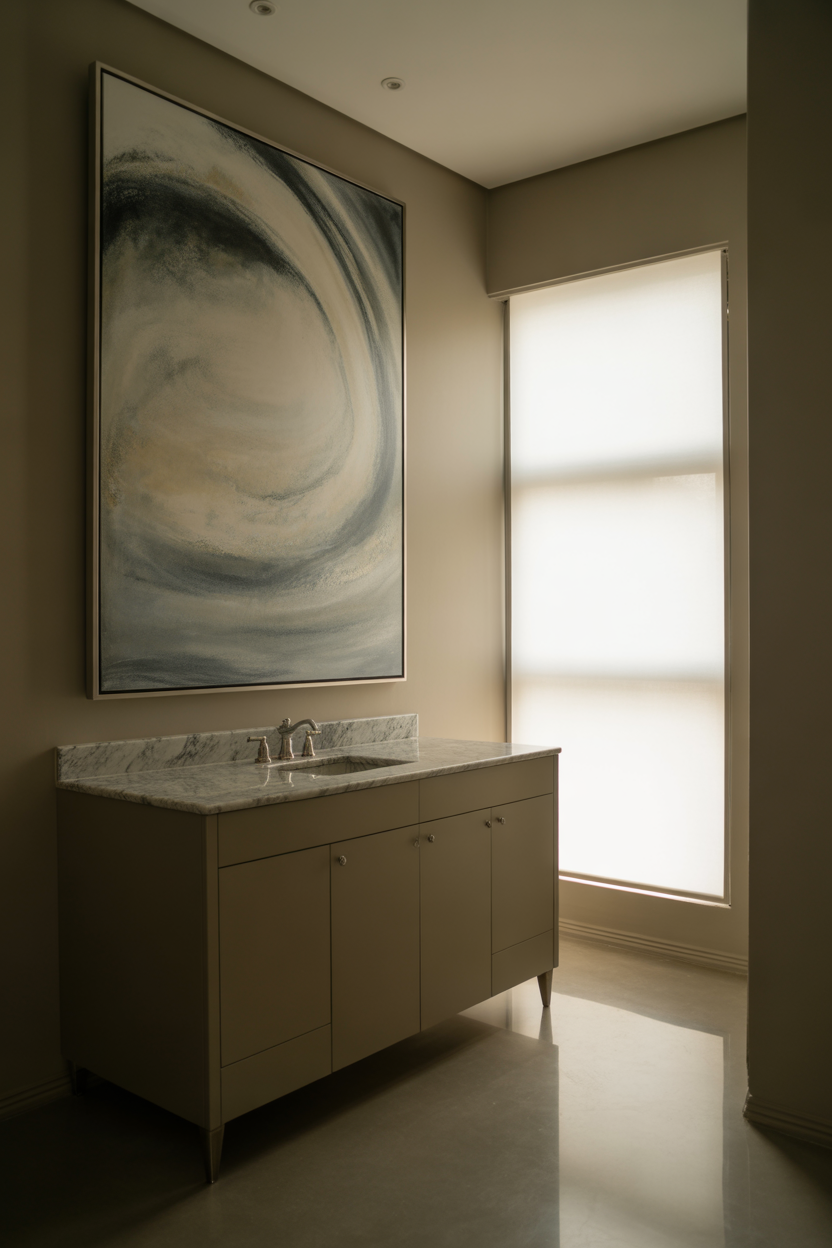
15. Classic White Vanity with a Striking Dark Blue Countertop
This design creates visual interest through high contrast. The crisp white vanity provides a bright, clean base, which makes the dark blue marbled countertop the undisputed focal point. The eye is immediately drawn to its rich color and swirling pattern. The gold accents in the hardware and mirror frame add a third layer of material and warmth, elevating the look and giving it a touch of classic elegance. The repetition of the gold and the simple color scheme (white, blue, gold) keeps the design feel cohesive and intentional.
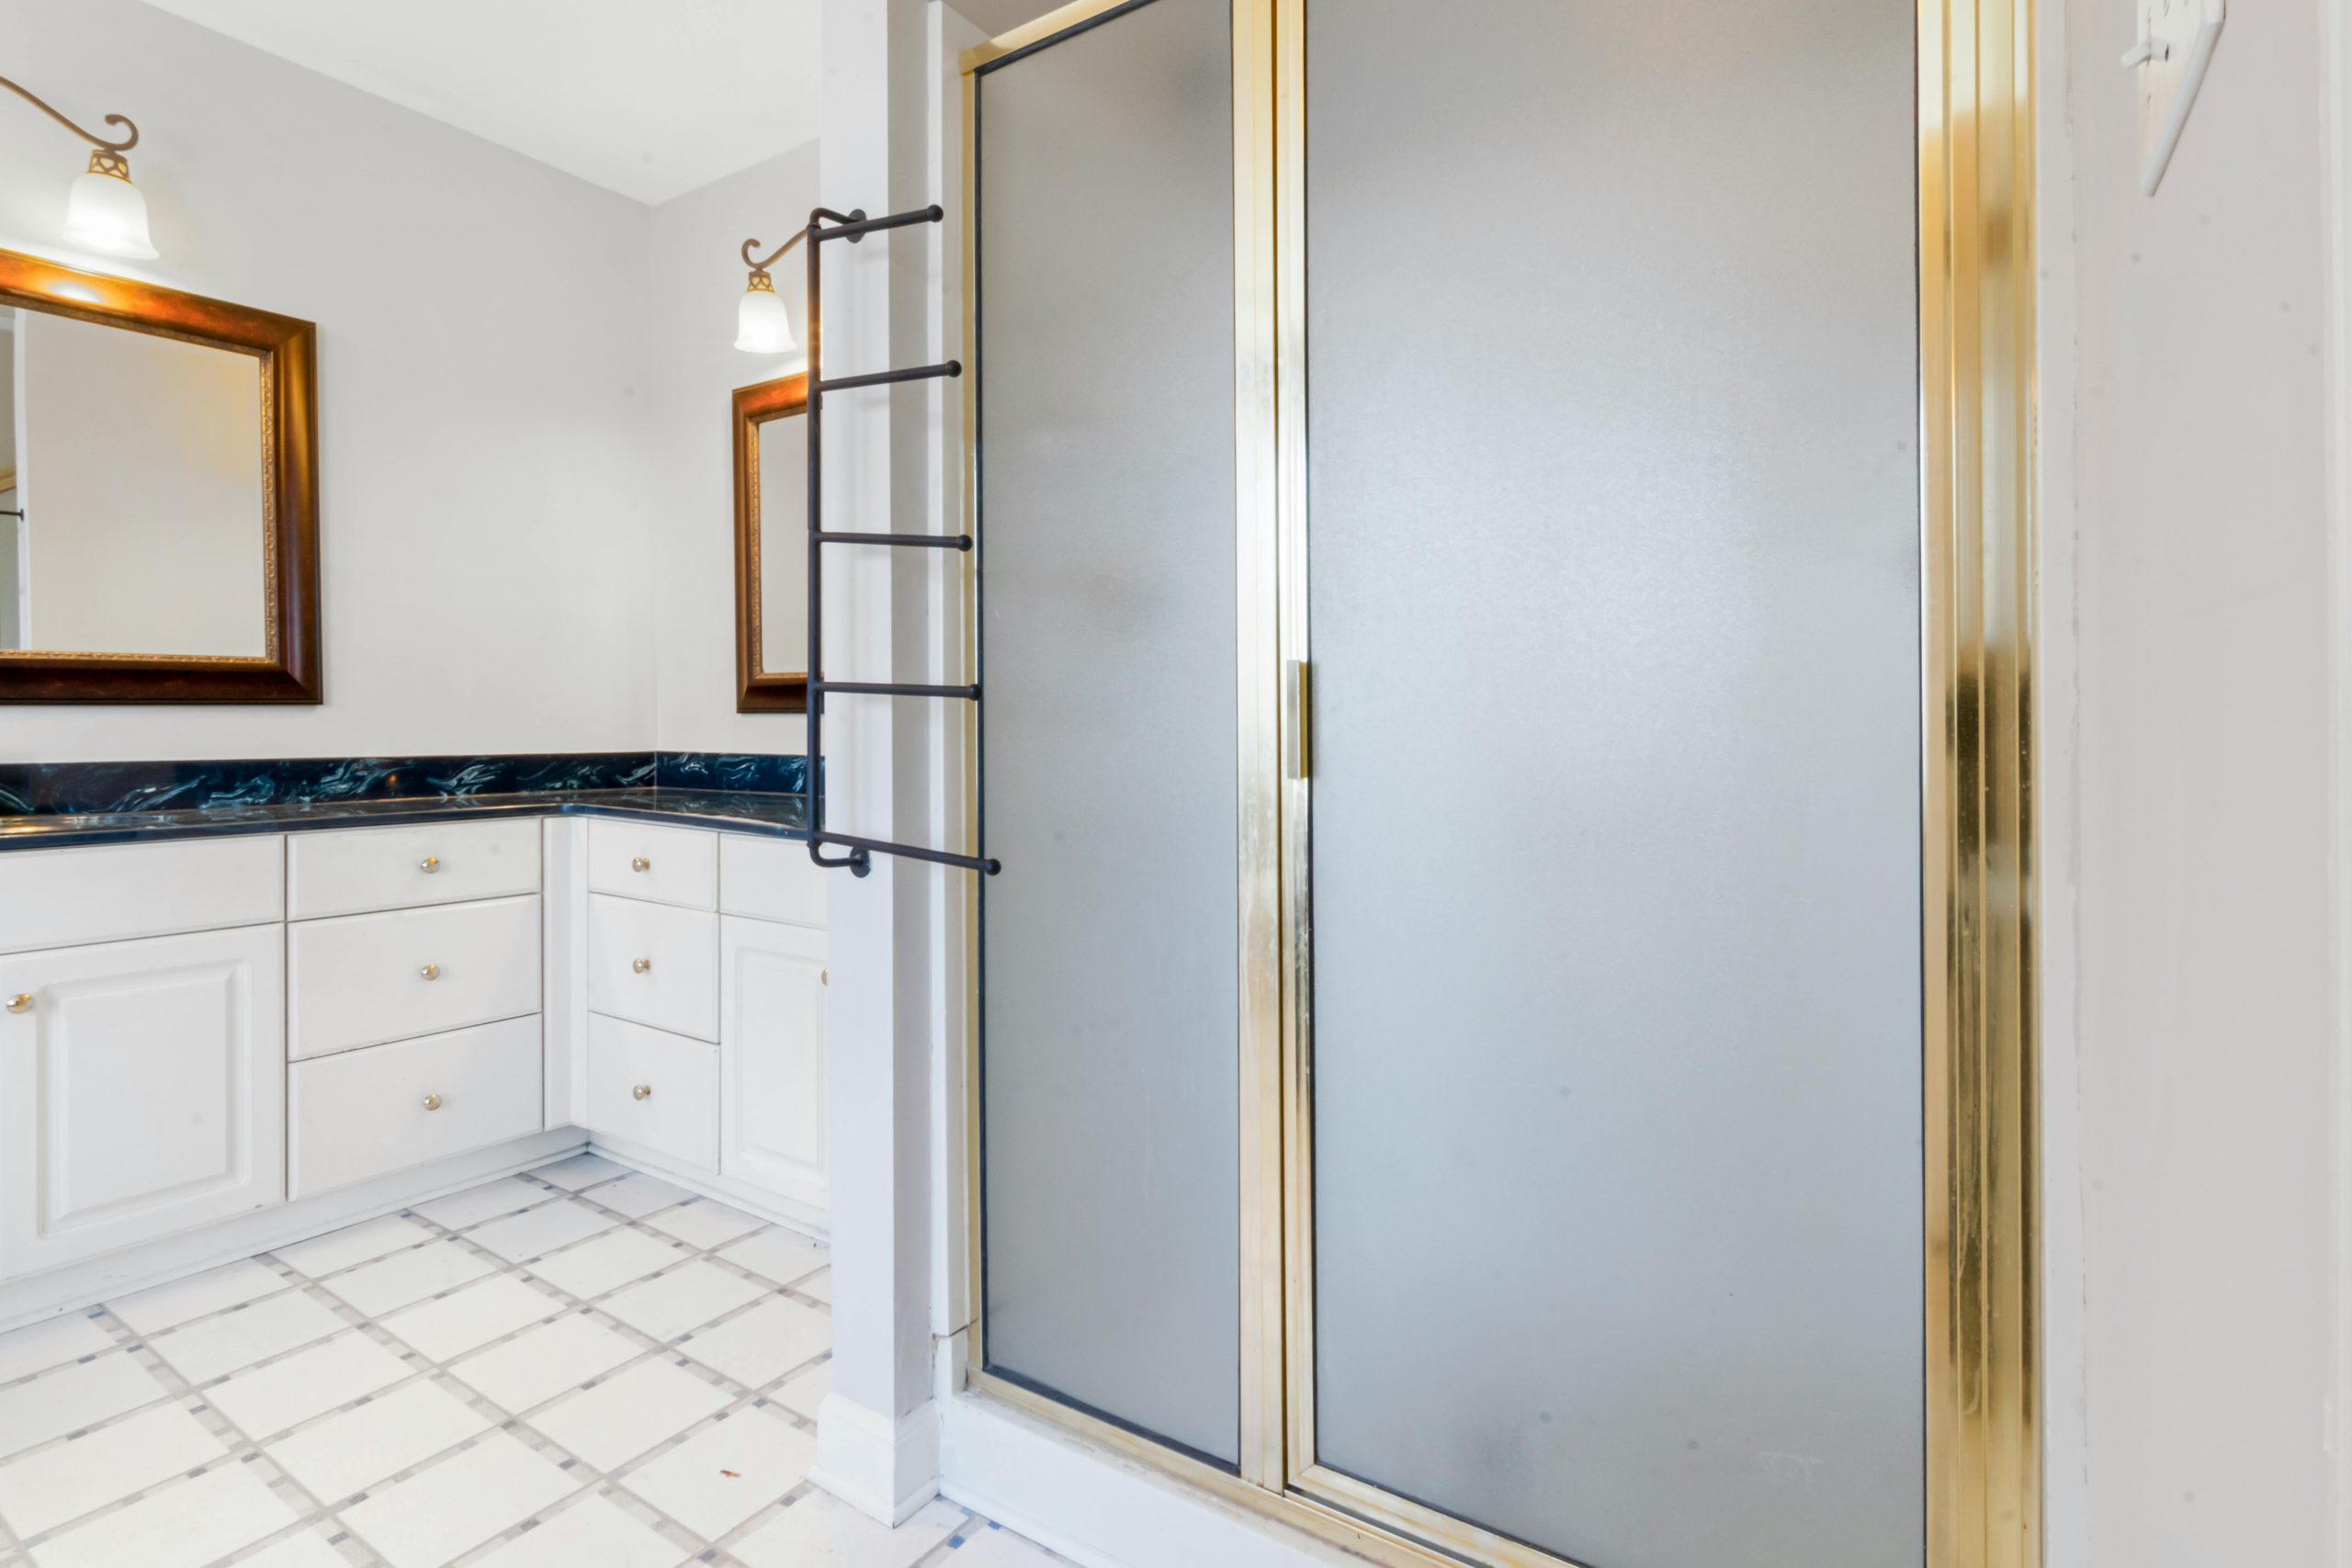
🔧 How-To Brief
You don’t need a custom vanity or expensive stone to get this look. A standard white shaker vanity is available at any home improvement store. The key is the countertop. Look for laminate countertop options in a dark blue or navy marble pattern. Brands like Formica and Wilsonart offer incredibly realistic and durable laminates for a fraction of the cost of natural stone or quartz. Pair it with affordable gold-toned hardware from Amazon or Target, and you have a high-contrast, custom look on a serious budget.
16. Zen-Inspired Spa Bath with Textured Walls and River Rocks
that transforms this from a nice minimalist bathroom into a true spa-like sanctuary is the bed of white river rocks around the base of the tub. It’s an unexpected, highly textural element that immediately evokes a sense of nature and tranquility. Removing the rocks would leave you with a tub on a tiled floor. Functional, yes, but the magic would be gone. This single, thoughtful detail communicates a commitment to a zen, resort-like experience, telling you this is a space designed for true relaxation, not just bathing.
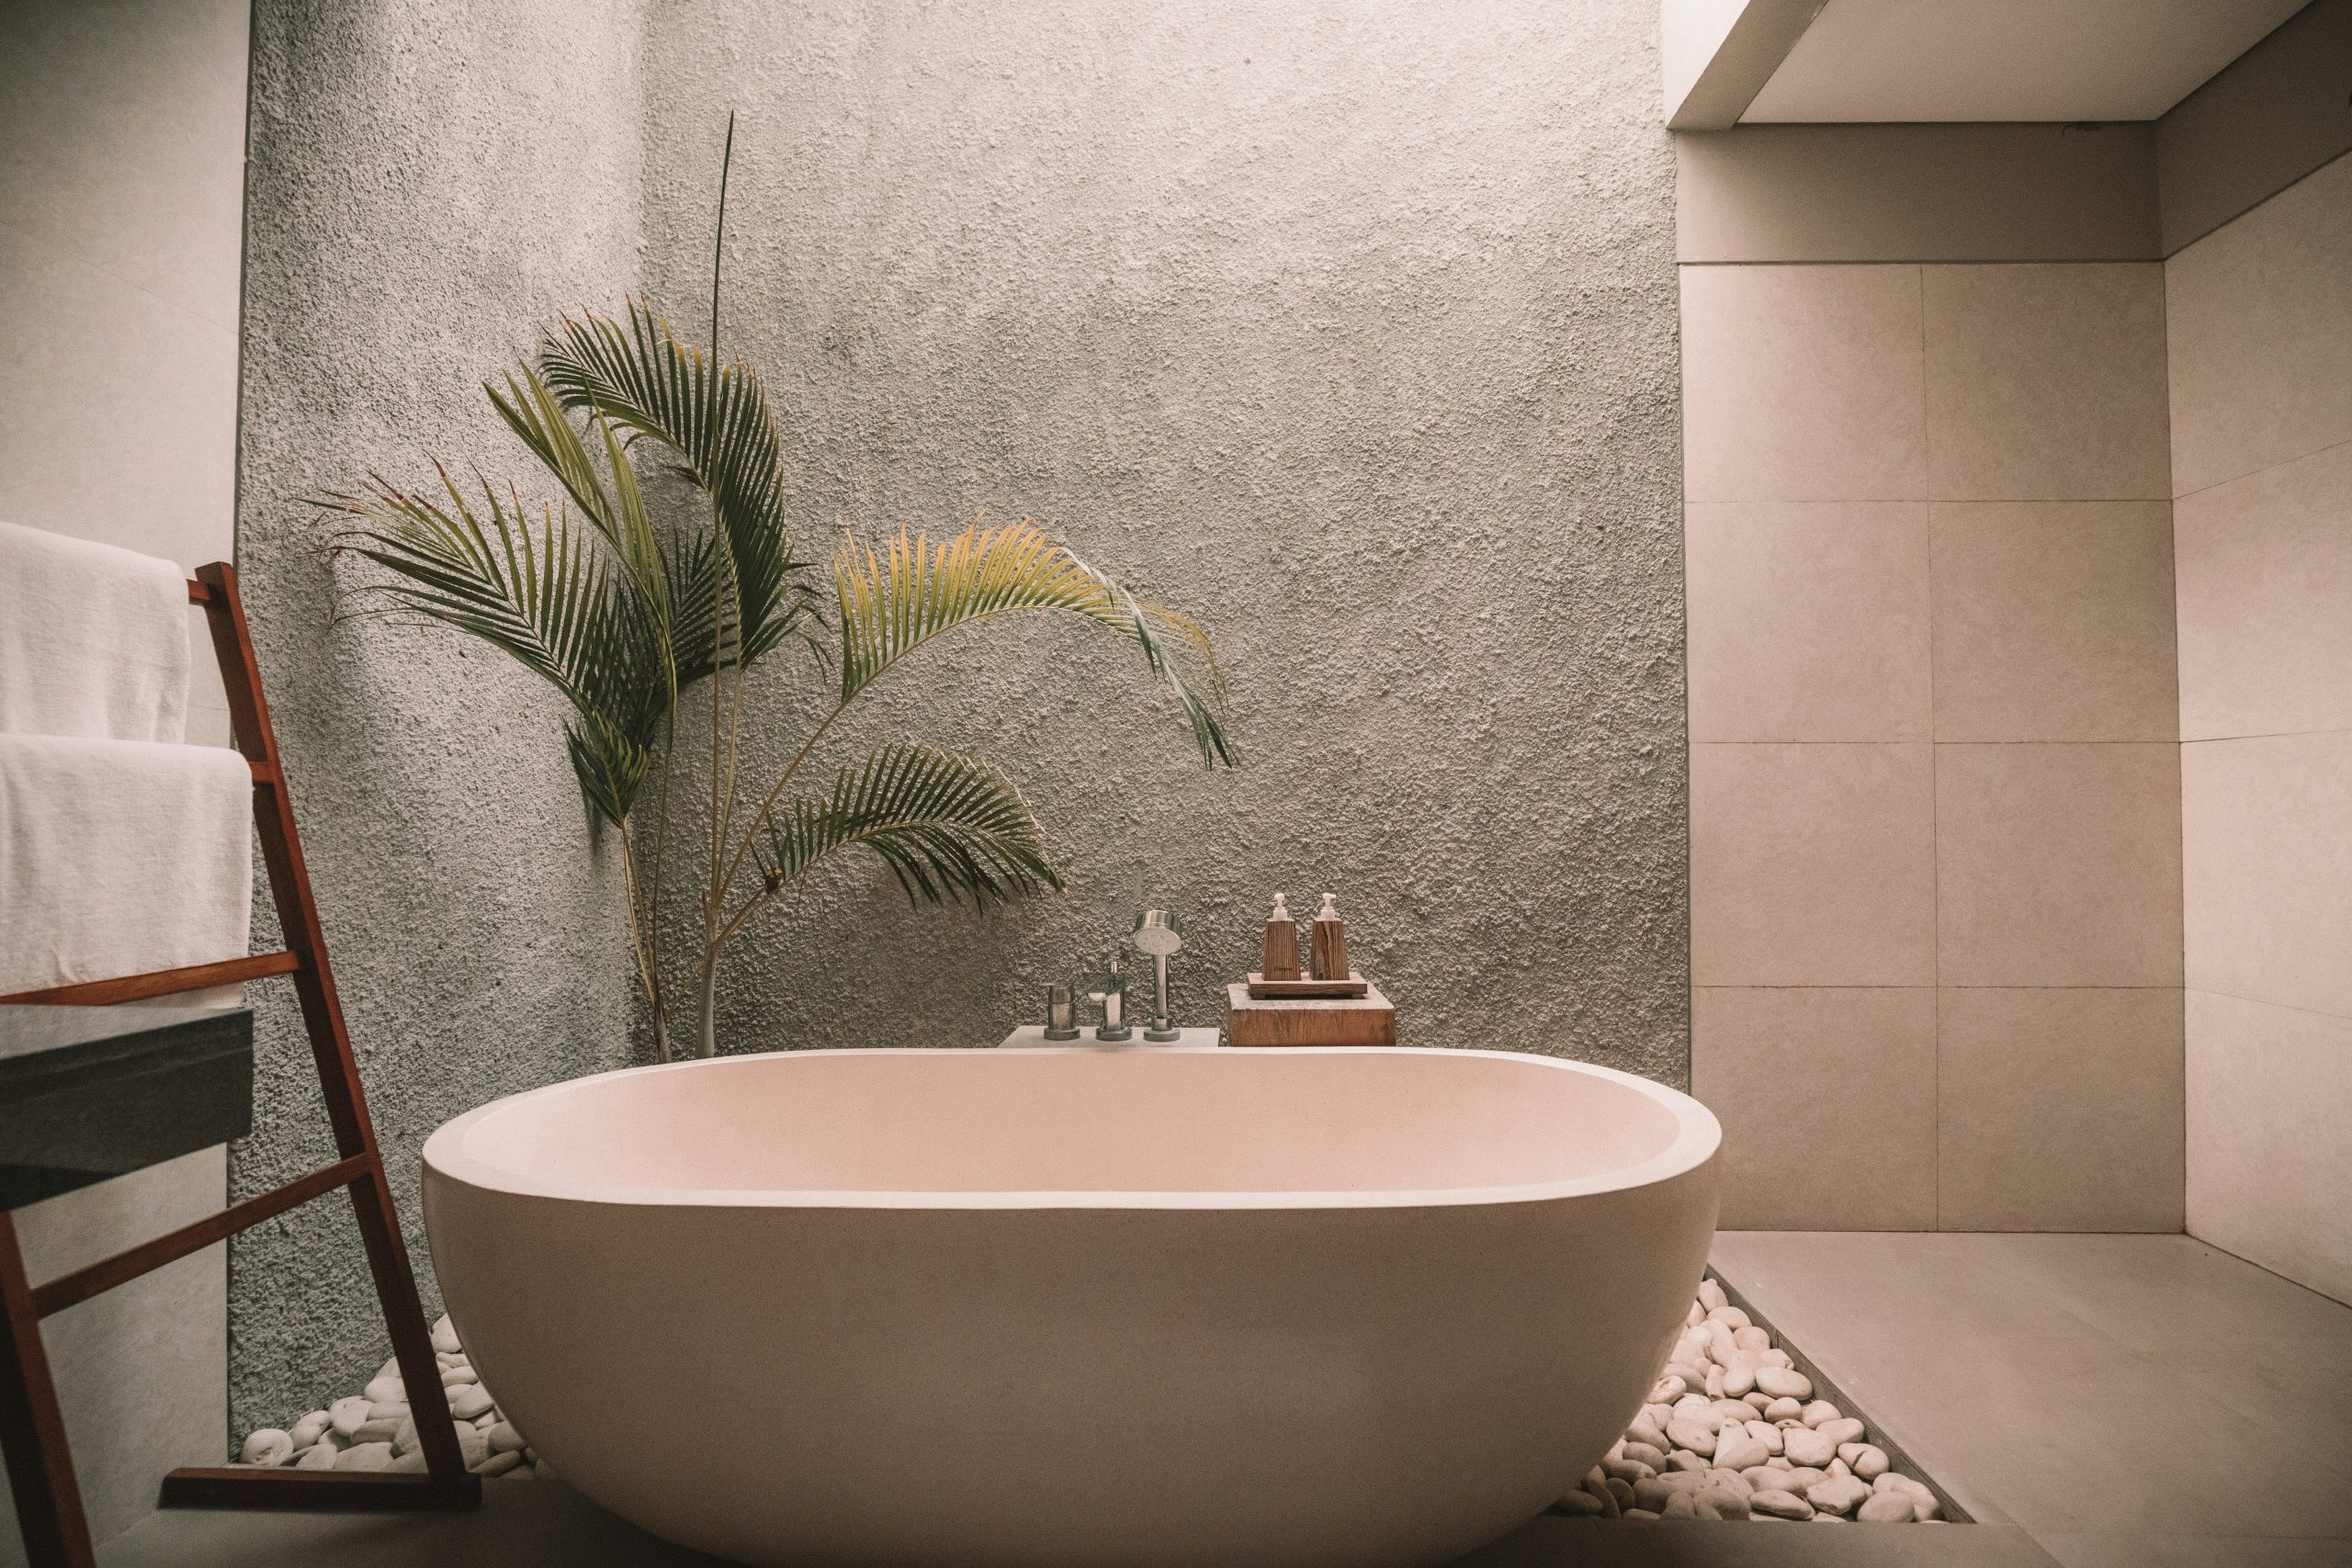
🧹 Maintenance Reality
Thinking of creating a rock basin like this? It’s a stunning look, but plan carefully first.
- Waterproofing is Non-Negotiable: The recessed area beneath the rocks must be fully waterproofed like a shower floor, with a proper membrane and a drain to handle tub overflow or splashes. This is a job for a pro.
- Cleaning Commitment: Those beautiful rocks will collect dust, hair, and moisture. Plan on a quarterly deep clean, which involves removing the rocks, washing them, and cleaning the basin beneath.
- Tub Placement: This works best with a freestanding tub where the plumbing comes up from the floor. It’s much more complex to execute with a tub that sits flush against a wall.
17. Warm Copper Fixtures Against Textured Green-Grey Tile
When mixing wall textures, a good rule is to keep them in the same color family. Here, the square, textured tiles have a soft green-grey hue, while the adjacent marble-look panel is white with earthy brown veining. Although the patterns are different, the tones are cohesive and nature-inspired. This creates a layered, interesting look that feels intentional rather than chaotic. Avoid pairing a cool-toned texture (like a blue tile) with a very warm-toned one (like a yellow-based stone) unless you’re aiming for a very high-contrast, eclectic style.
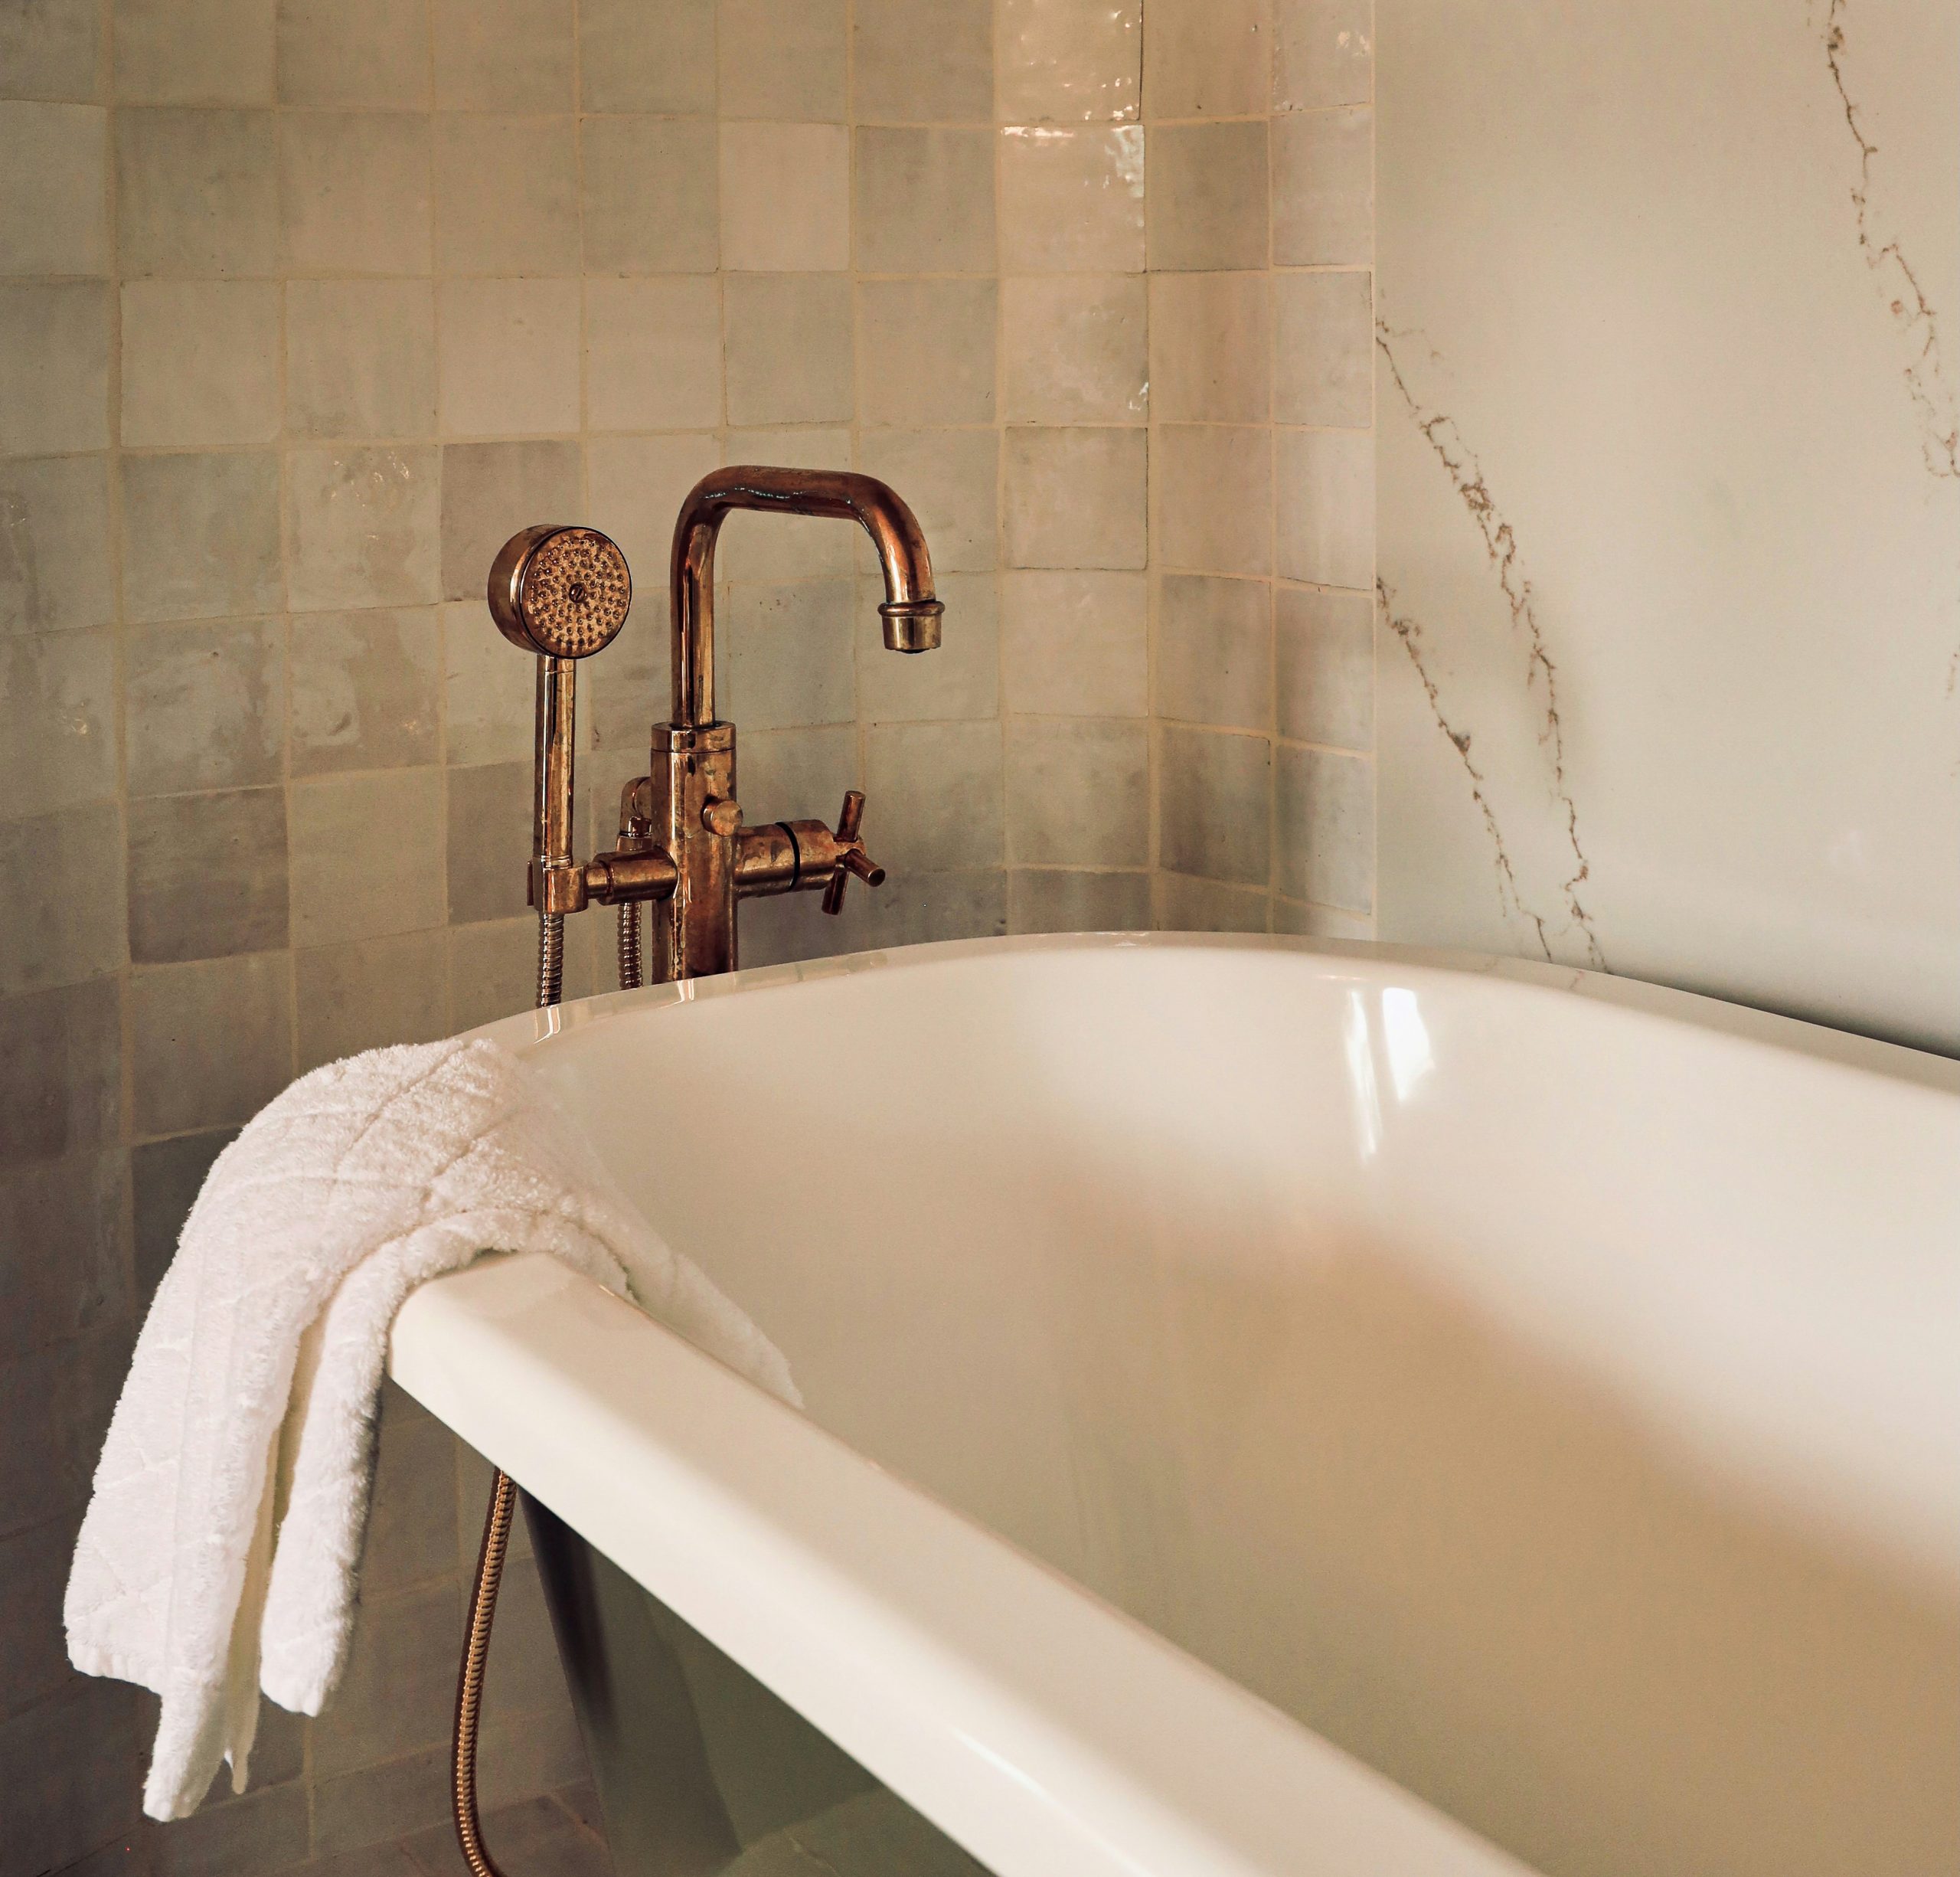
📐 Style Math
Copper and brass fixtures are stunning, but they can require more maintenance than their chrome or nickel cousins. Unlacquered brass or copper will develop a natural patina over time, which can be beautiful if you love a living finish. If you prefer a consistent, polished shine, you’ll need to polish them periodically with a dedicated metal cleaner. Be sure to check if your fixtures are sealed with a lacquer; if they are, use only mild soap and water, as harsh chemicals can damage the protective coating.
18. A Bold, Patterned Faucet on a Dark Marble Backdrop
This design is all about the power of texture and contrast. The rough, dramatic veining of the dark marble panel provides a moody, organic background. This is juxtaposed with the smooth, cool white of the vessel sink. But the real genius is the faucet itself—its diamond-patterned texture creates a third layer of detail. This interplay between rough stone, smooth ceramic, and patterned metal makes the small area feel incredibly rich and sophisticated. The final touch of the light wood-textured panel below adds warmth and prevents the dark marble from feeling too heavy.
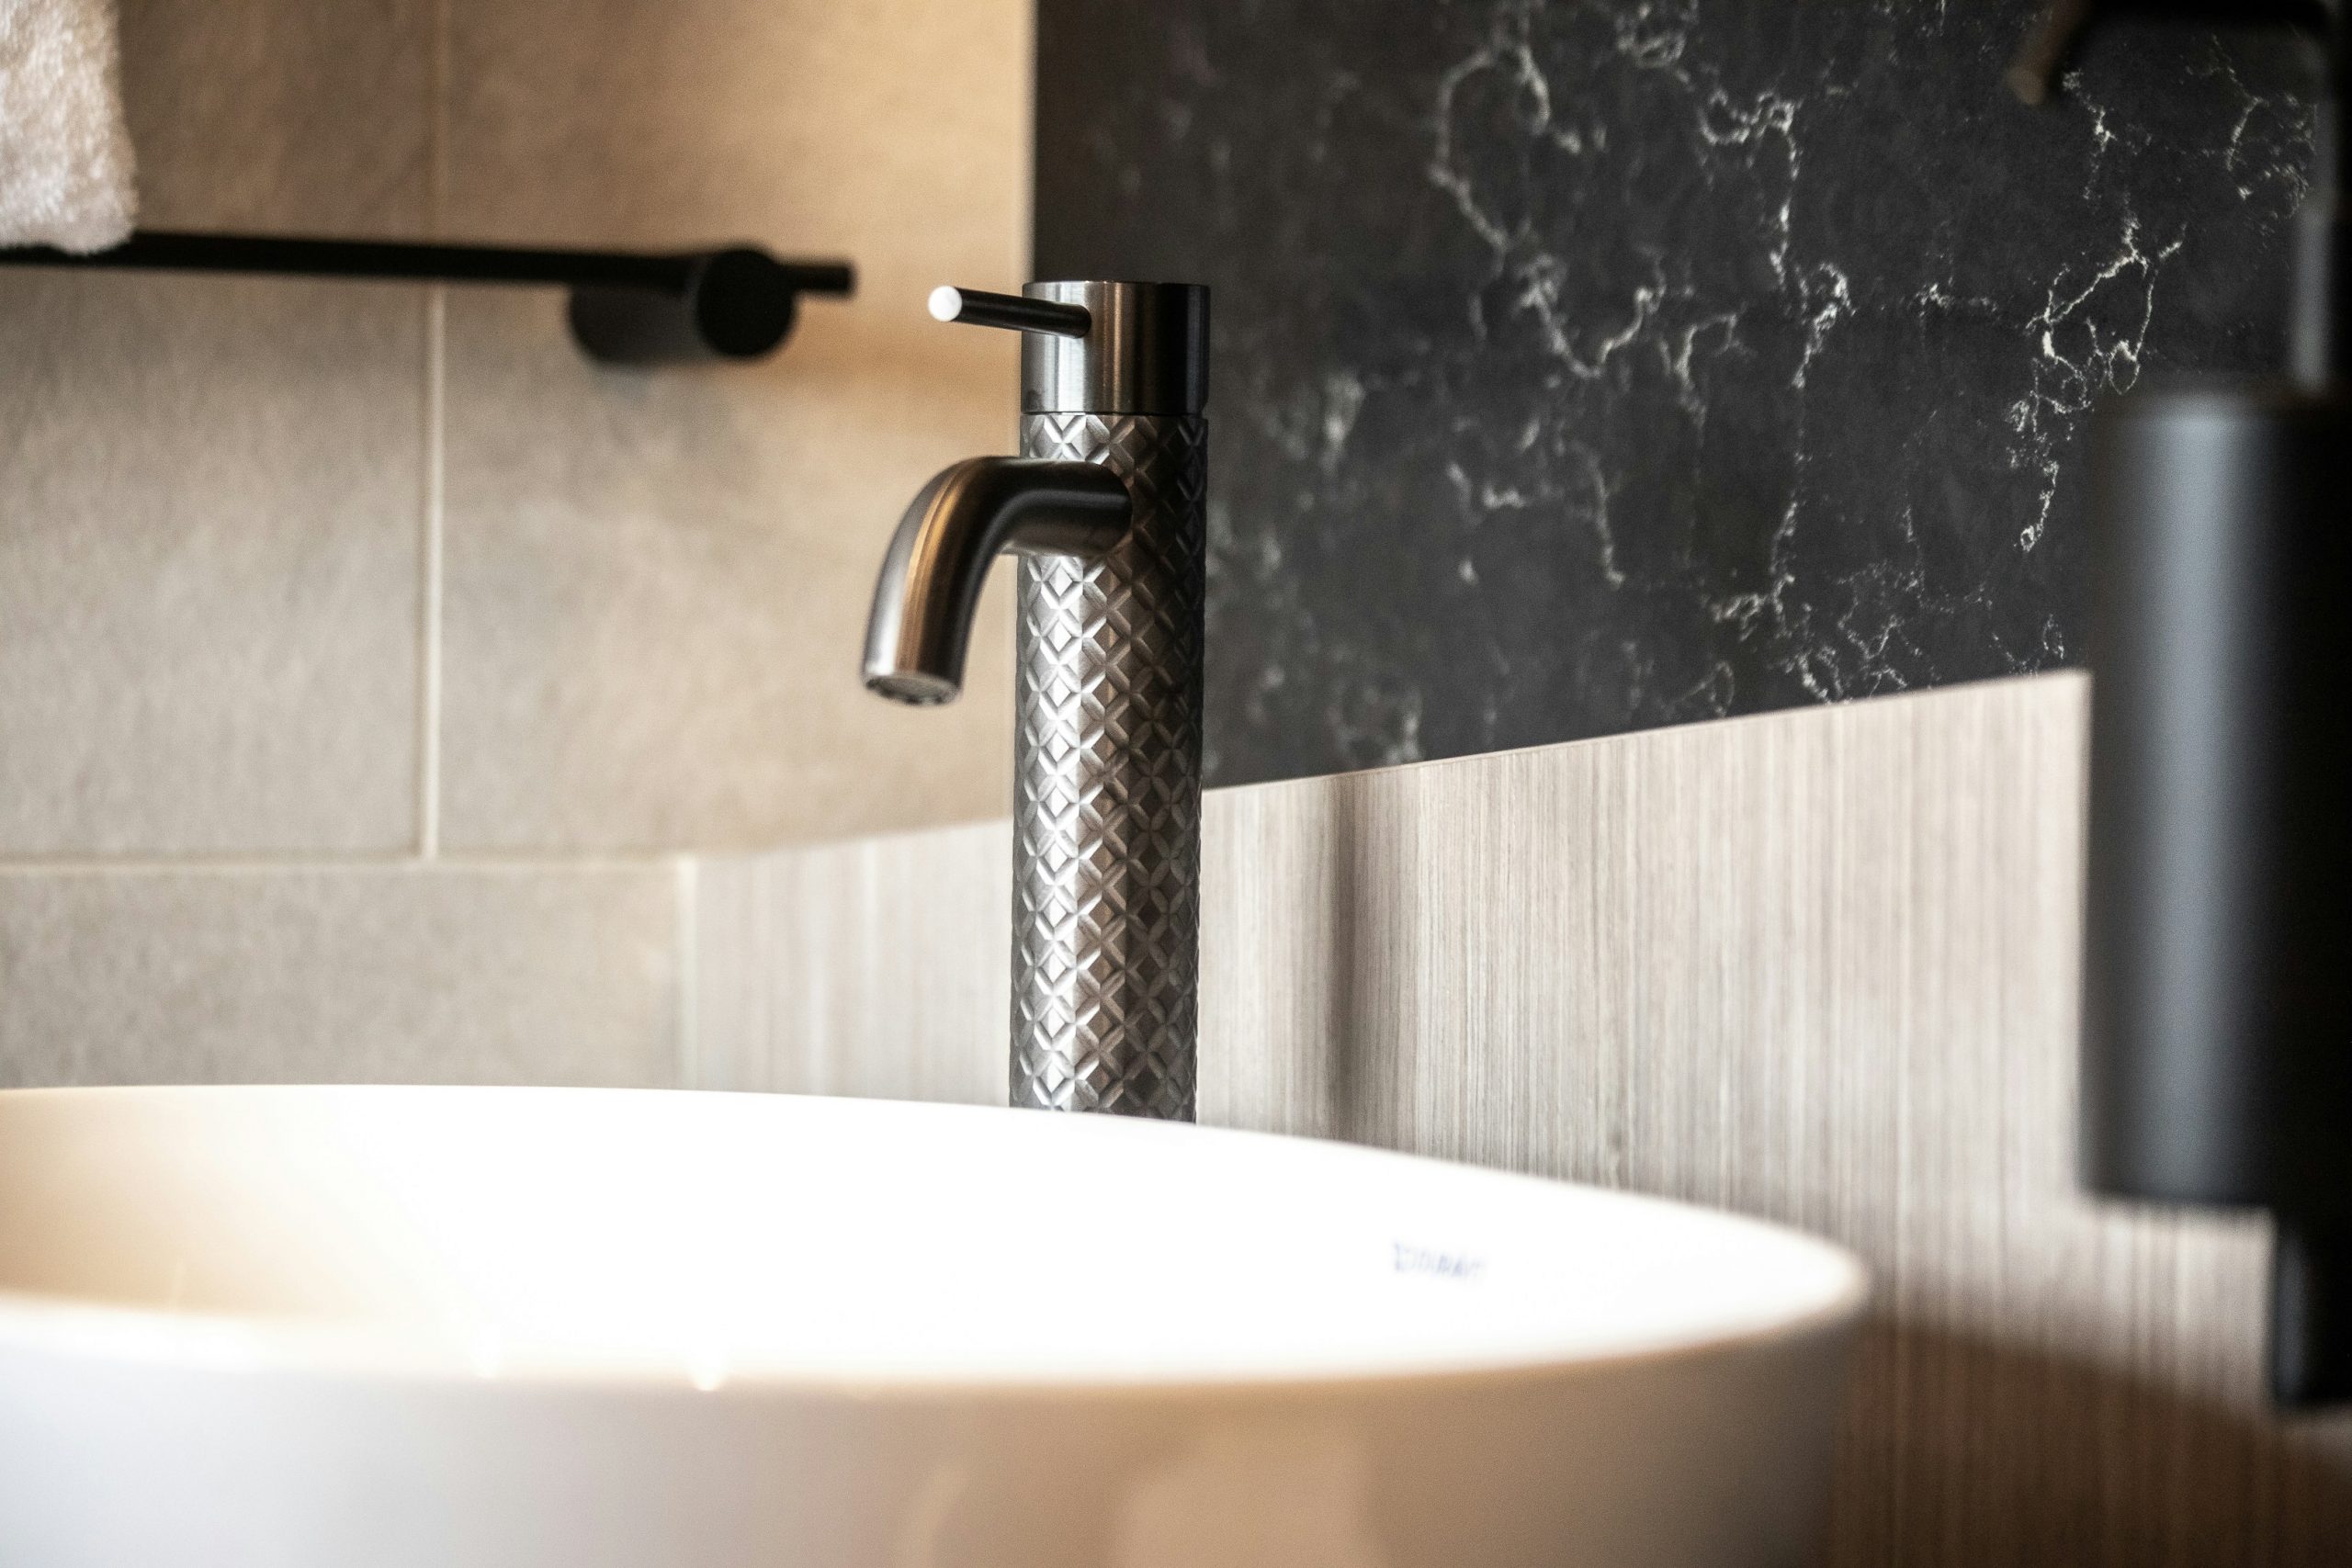
⭐ The One Thing
The clear hero in this composition is the faucet. It’s not just a functional piece of hardware; it’s a piece of jewelry for the sink. The intricate diamond pattern catches the light and adds a level of detail you don’t typically see. In a small space or vignette like this, swapping a standard, smooth chrome faucet for one with a unique texture or finish is the fastest way to add a major dose of personality and a high-design feel. It’s a relatively small upgrade that makes a massive impact.
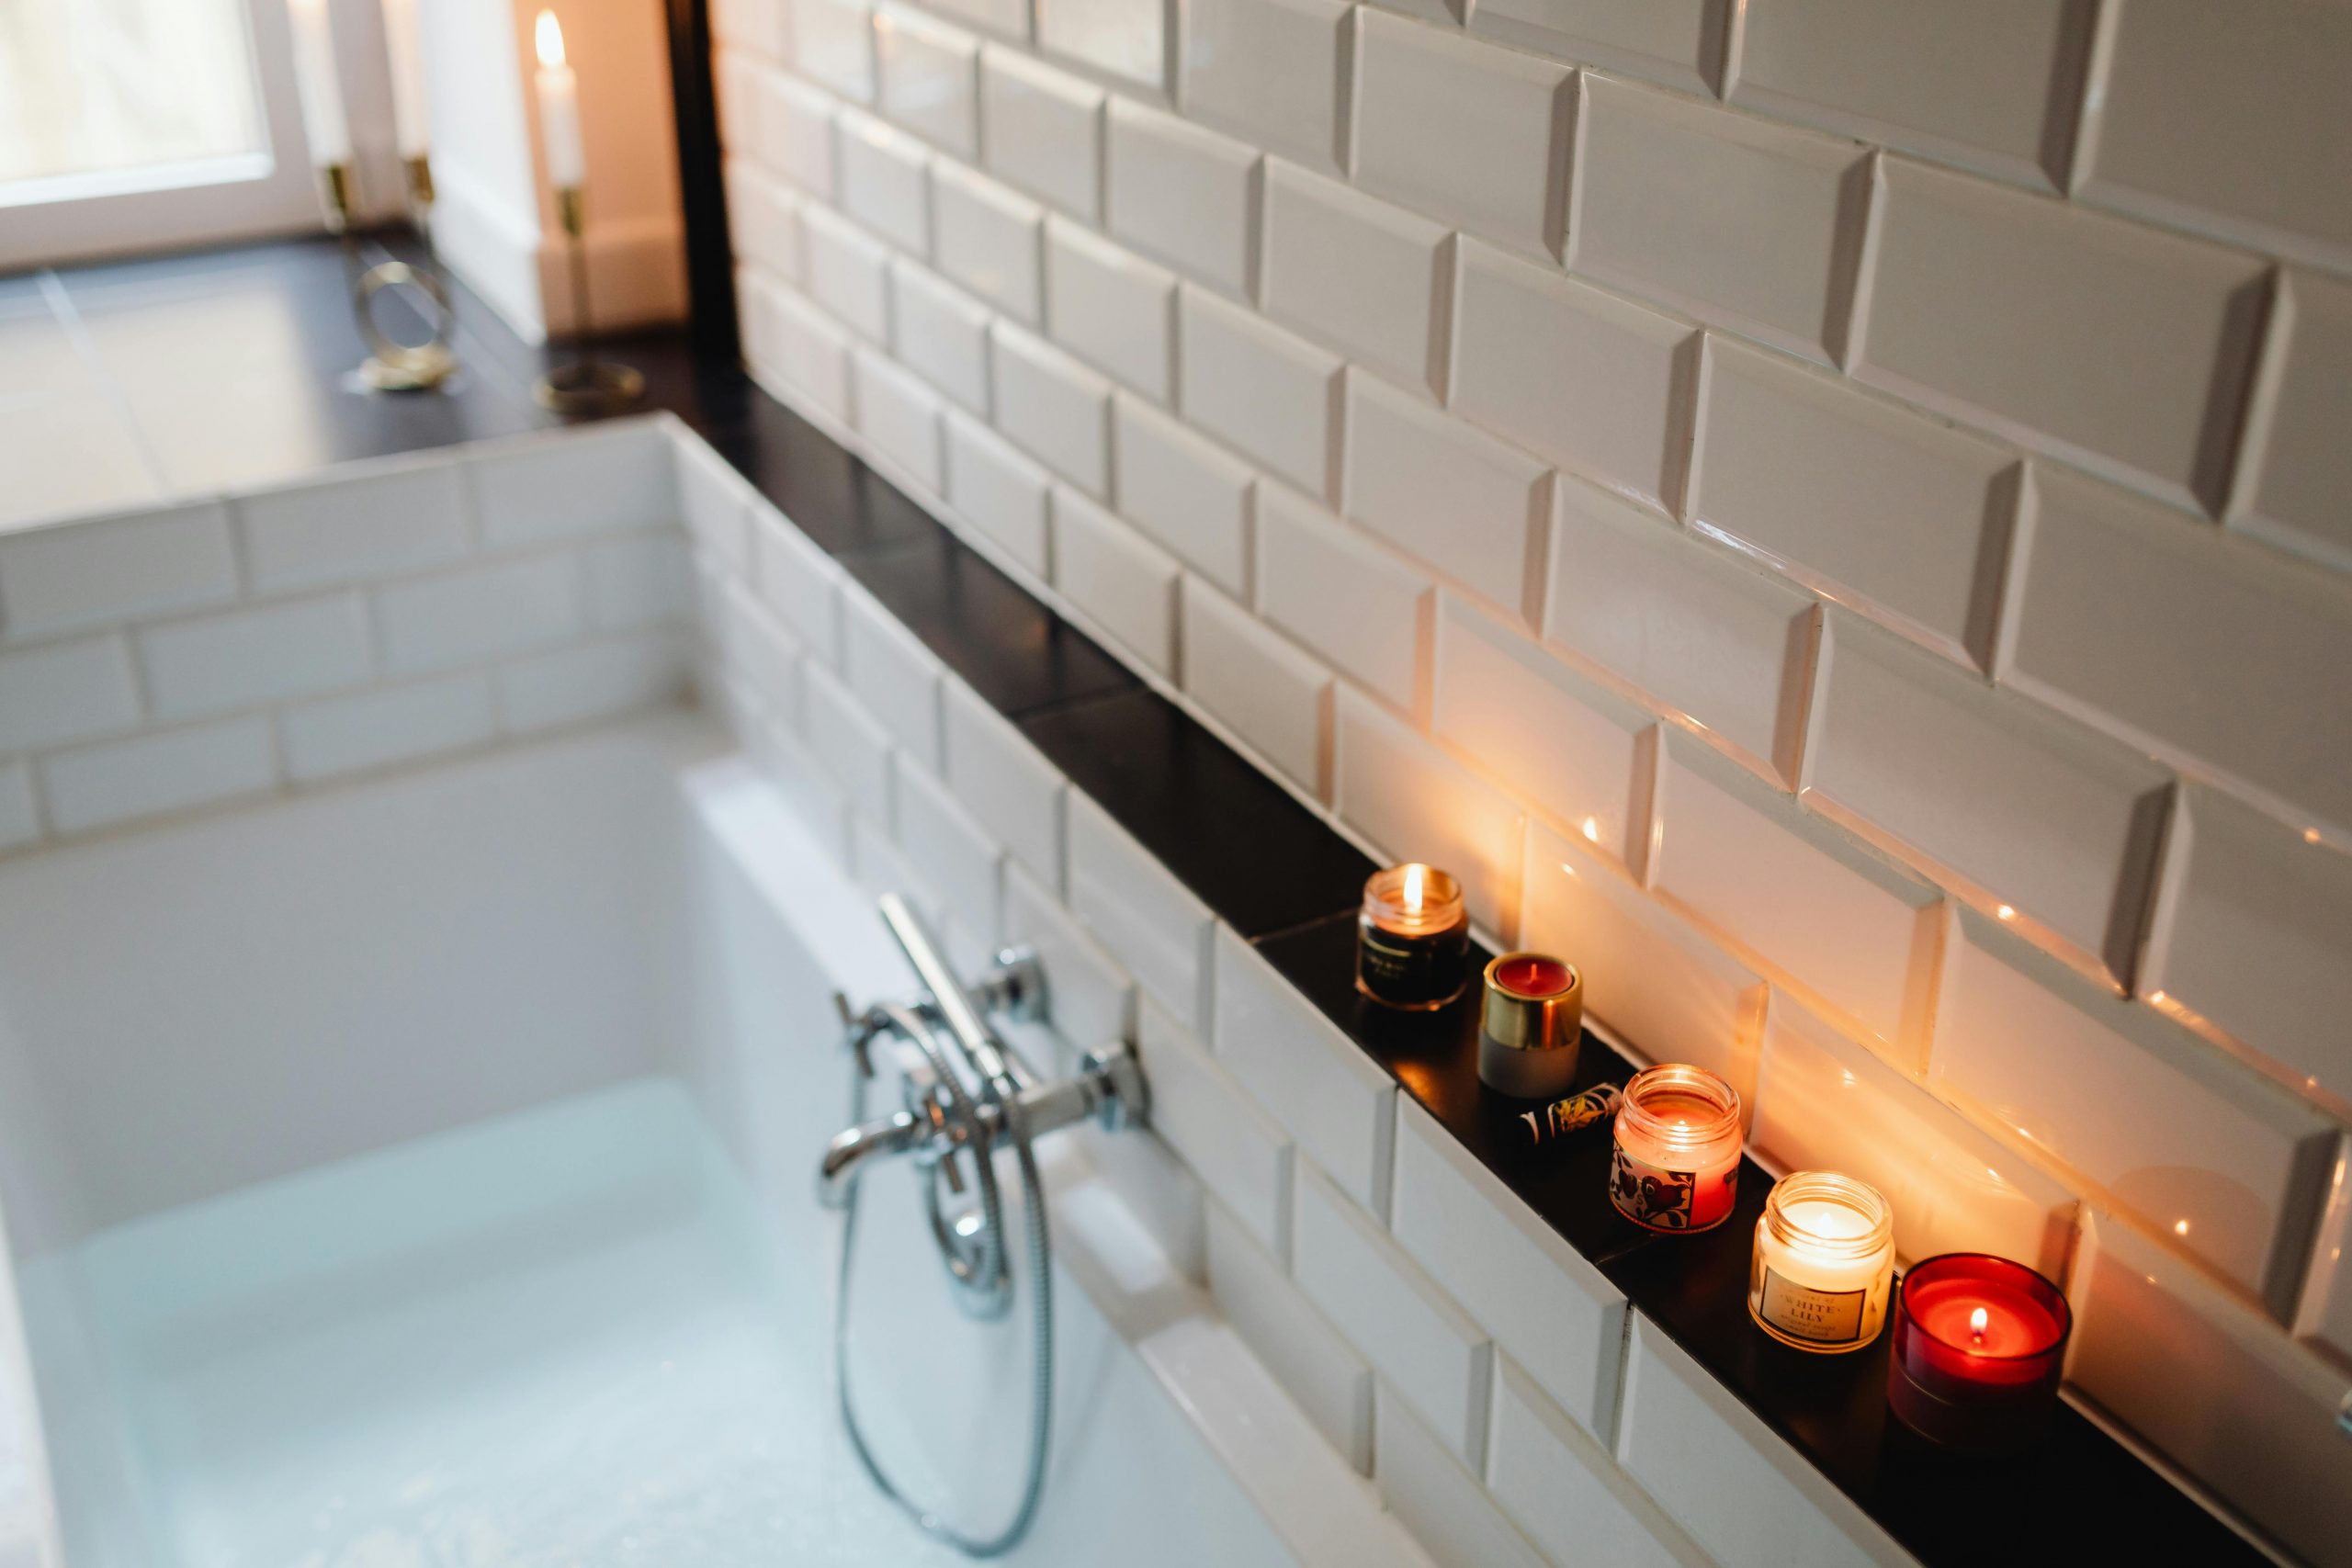
19. Cozy Ambiance with Subway Tile and a Candle Shelf
An integrated tile shelf is a sleek, waterproof storage solution. Here’s the simplified process to build one:
- Frame it Out: Before you put up cement board, frame a rectangular box in the wall studs where you want the niche. A typical depth is 3.5 inches (the depth of a stud).
- Board and Waterproof: Line the box with cement board, ensuring all seams are taped and mudded. Apply a paint-on waterproofing membrane to the entire inside of the niche—this is critical.
- Tile the Inside: Start by tiling the back wall of the niche, then the top, bottom, and sides. Ensure the bottom shelf has a very slight downward slope toward the tub so water drains out.
- Install the Accent Shelf: For the dark shelf look, use a solid piece of tile or stone. Set it in place with tile adhesive on the bottom surface of the niche.
- Finish & Grout: Tile the rest of the wall around the niche, then grout everything at once for a seamless look.
💰 Budget Breakdown
A tub-side shelf lined with lit candles is the absolute pinnacle of relaxation goals, but please be smart about it. Open flames and bathrooms can be a dangerous mix. Never leave lit candles unattended, even for a minute. Keep them far away from towels, curtains, and your hair. A much safer alternative that gives you the same warm, flickering ambiance is to use high-quality flameless LED candles. The best ones are made from real wax and have a realistic flicker, giving you all the cozy vibes with zero fire risk.
20. Chic & Modern with a Black Marble and Wood Vanity
Wall-mounted faucets and soap dispensers are a secret weapon for making a bathroom feel more spacious and easier to clean. By lifting everything off the countertop, you create an unbroken horizontal surface that is incredibly simple to wipe down. There are no faucet bases or soap bottle bottoms to collect grime. This also creates a clean, high-end, hotel-like aesthetic. It requires more planning, as the plumbing and mounting hardware must be installed inside the wall before the tile goes up, but the sleek, clutter-free result is well worth the effort.
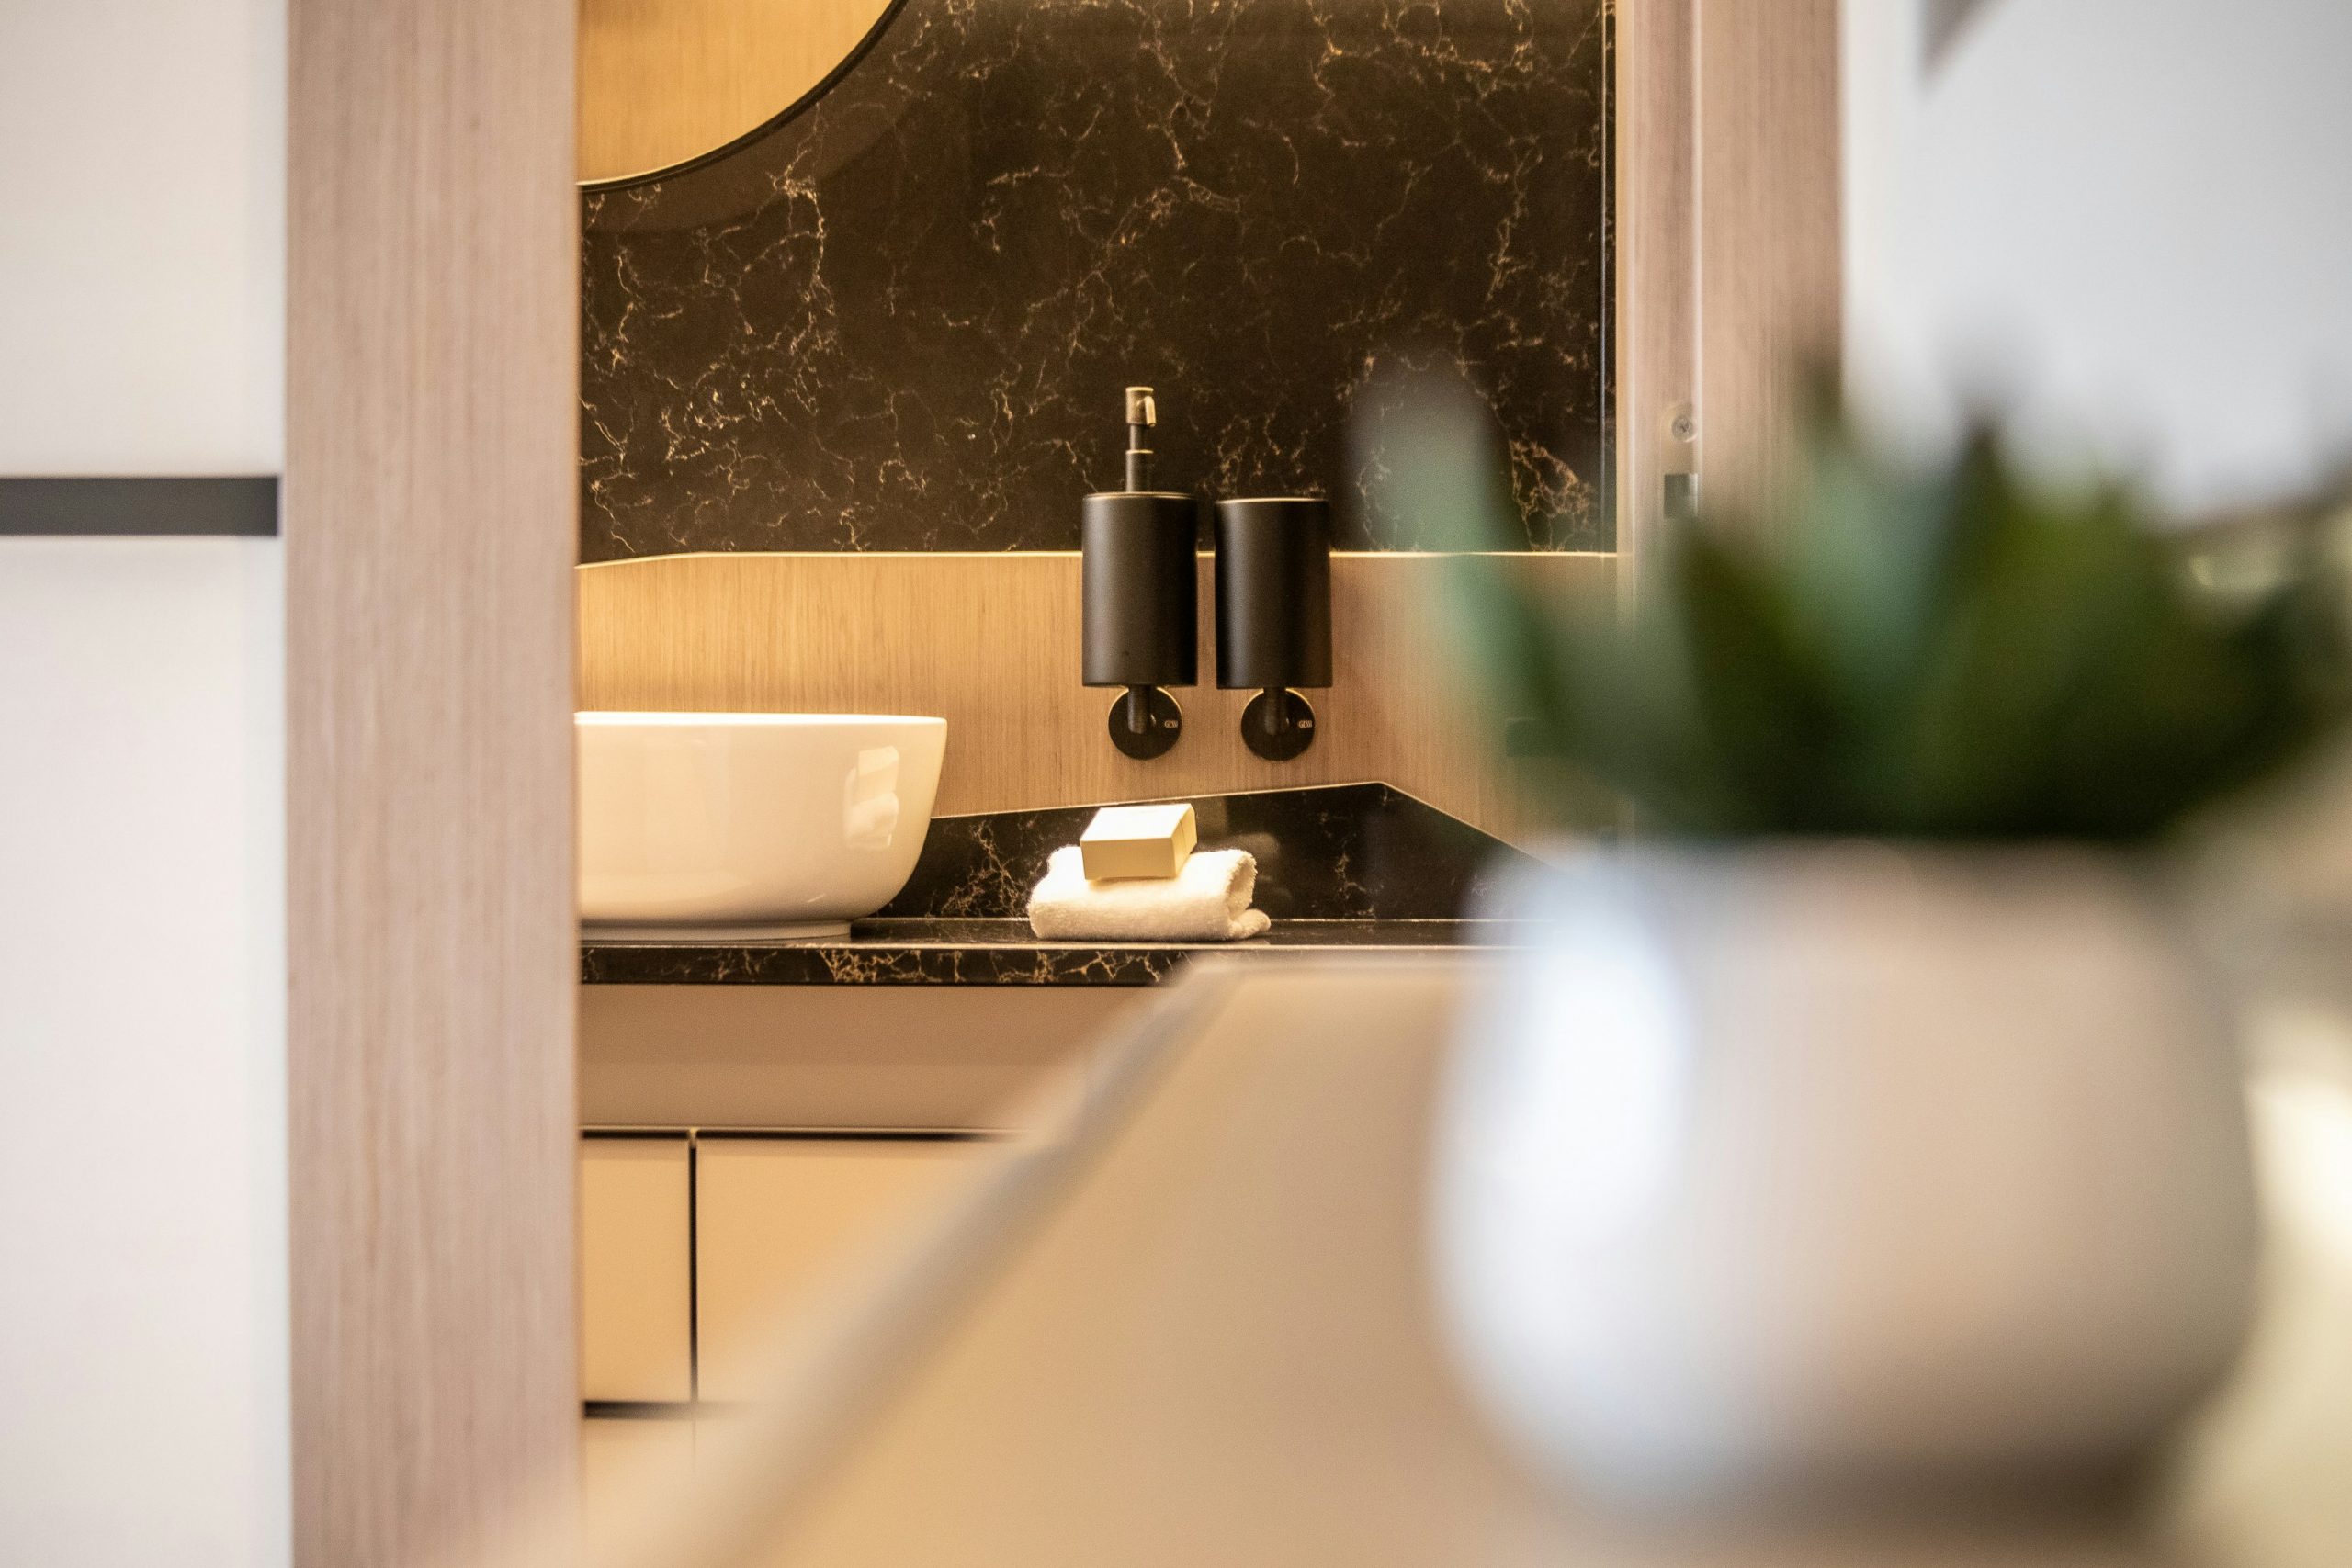
⚠️ Real Talk
This look follows a sophisticated urban formula: 50% Dramatic Stone + 40% Natural Wood + 10% Crisp White & Black. The black marble with its striking white veining provides the drama and focal point. The light wood vanity base and wall paneling bring in essential warmth and organic texture, keeping the look from feeling too cold or severe. The white vessel sink and black dispensers are the clean, functional accents that complete the composition. It’s a perfect balance of moody, warm, and modern.
21. Eclectic Elegance with a Carved Green Vanity and Chevron Floors
This bathroom is a lesson in confident pattern mixing. The key to its success is that the patterns operate on different scales and planes. The bold, large-scale chevron of the floor creates a strong graphic foundation. The delicate, traditional carving on the vanity provides a much finer, more detailed texture on a vertical surface. Because one pattern is on the floor and the other is on a piece of furniture, and their scales are so different, they don’t compete. They complement each other, creating a rich, layered, and deeply personal space. For a softer look, compare with the colors in Idea #14.
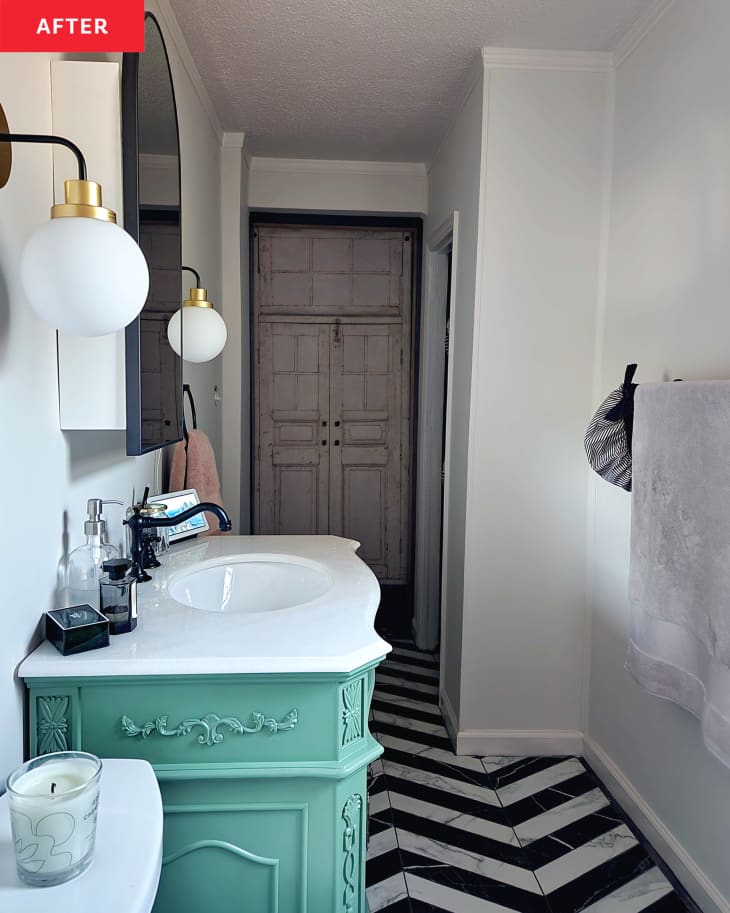
🔥 Trending Context
A design with this much personality works wonderfully in a small space like a powder room or guest bath. A bold floor or a colorful vanity can overwhelm a large master bathroom, but in a compact area (around 30-50 sq ft), it feels like a delightful jewel box. The narrow footprint is actually an asset here, as it allows the chevron floor pattern to be the hero without requiring a huge amount of expensive tile. Using a pedestal sink or a narrow vanity like this is essential to keep the limited floor space as open as possible.
22. Warm Neutrals with Wood-Look Tile Accents
The most important element in this room is the horizontal banding of the dark wood-look tile. Without these bands, you would have a simple, pleasant, beige-tiled bathroom. By introducing these strong horizontal lines, the design gains a sense of structure and intention. It breaks up the monotony of the single main tile, adds a welcome touch of warmth and contrast, and subtly makes the room feel wider. It’s a simple, graphic trick that elevates the entire aesthetic from basic to thoughtfully designed. For more wood-look tile inspiration, see Idea #25.
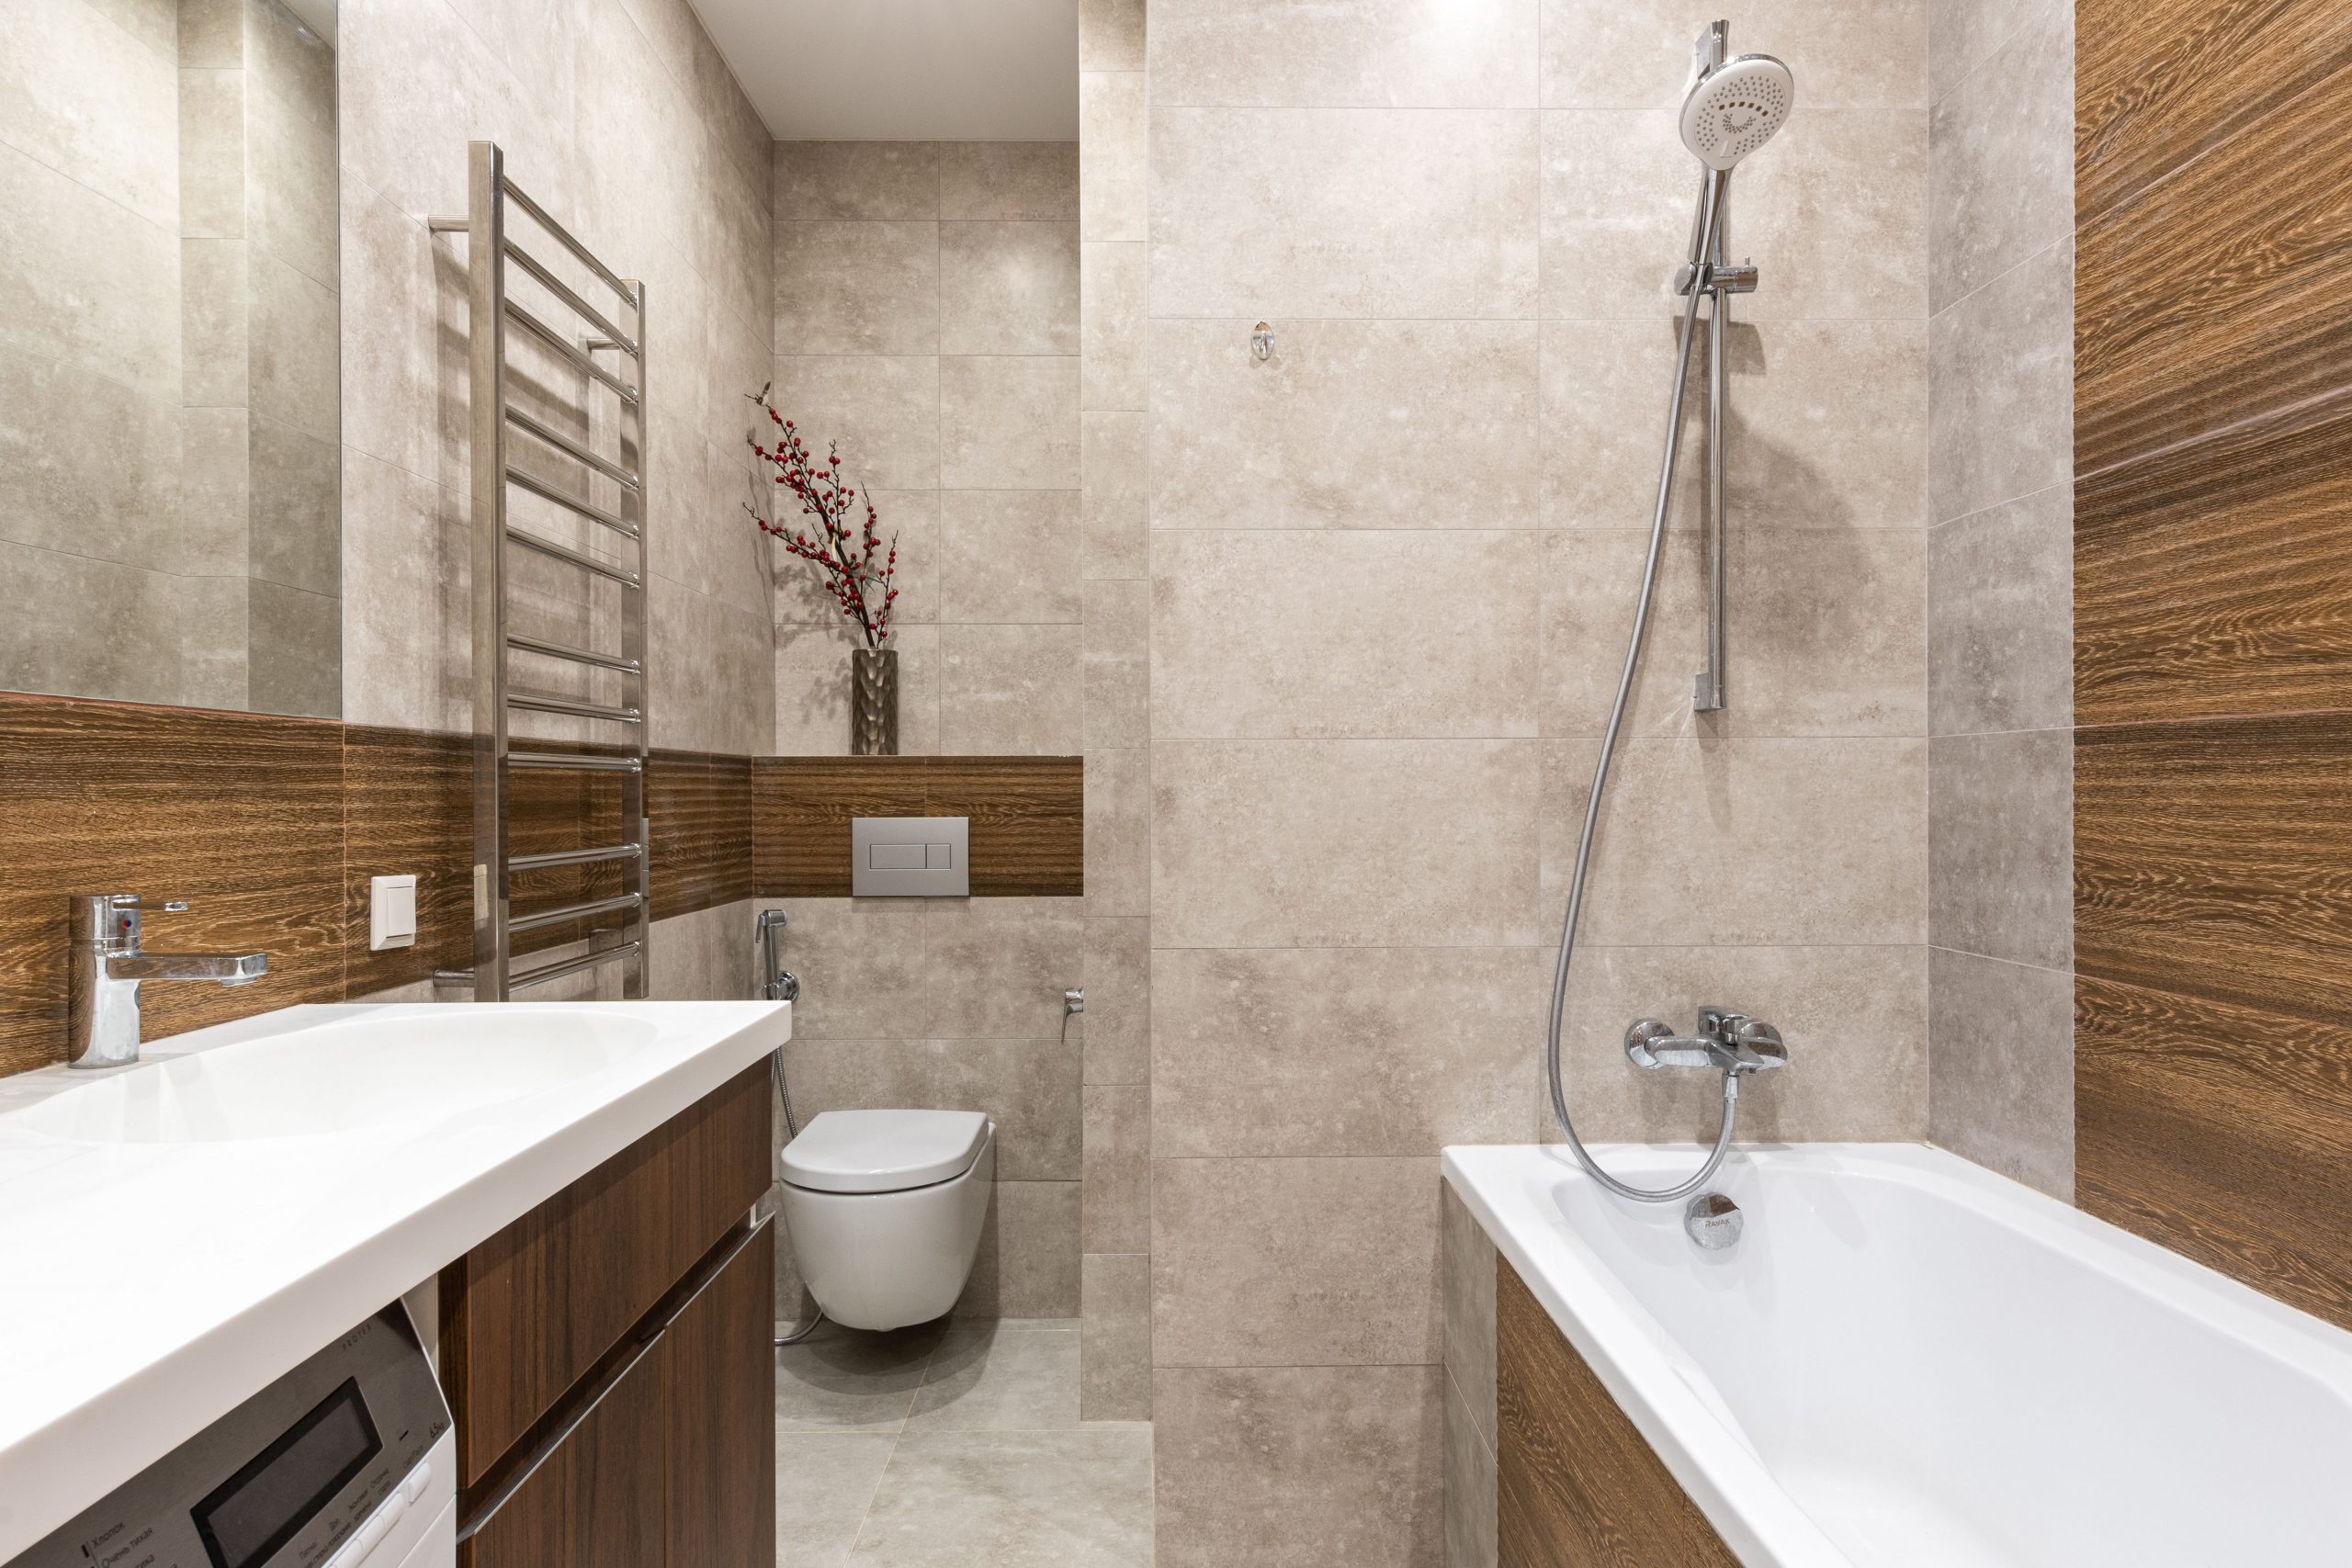
💸 Get This Look For Less
When using multiple tile styles, create a clear hierarchy. In this bathroom, the light beige tile is the dominant ‘field’ tile, used on the largest surfaces. The dark wood-look tile is the ‘accent’ tile, used sparingly in deliberate bands to create a specific graphic effect. Don’t try to use two different, busy tiles in a 50/50 split. This will almost always result in a chaotic, competitive look. Let one tile be the quiet background and the other be the special, featured element. This creates a much more cohesive and calming result.
23. A Study in Modern Minimalism with Black Accents
The formula here is a minimalist’s dream: 60% White/Light Gray + 30% Dark Gray/Charcoal + 10% Matte Black. The bright white countertop and light gray walls create an airy, open feeling. The dark gray vanity provides a weighty, grounding element. Then, the matte black faucet, mirror frame, and cabinet hardware act as sharp, graphic punctuation points. The small touch of greenery is the only non-neutral element, making it pop. This strict, curated palette is the key to achieving that clean, intentional, and calming minimalist vibe.
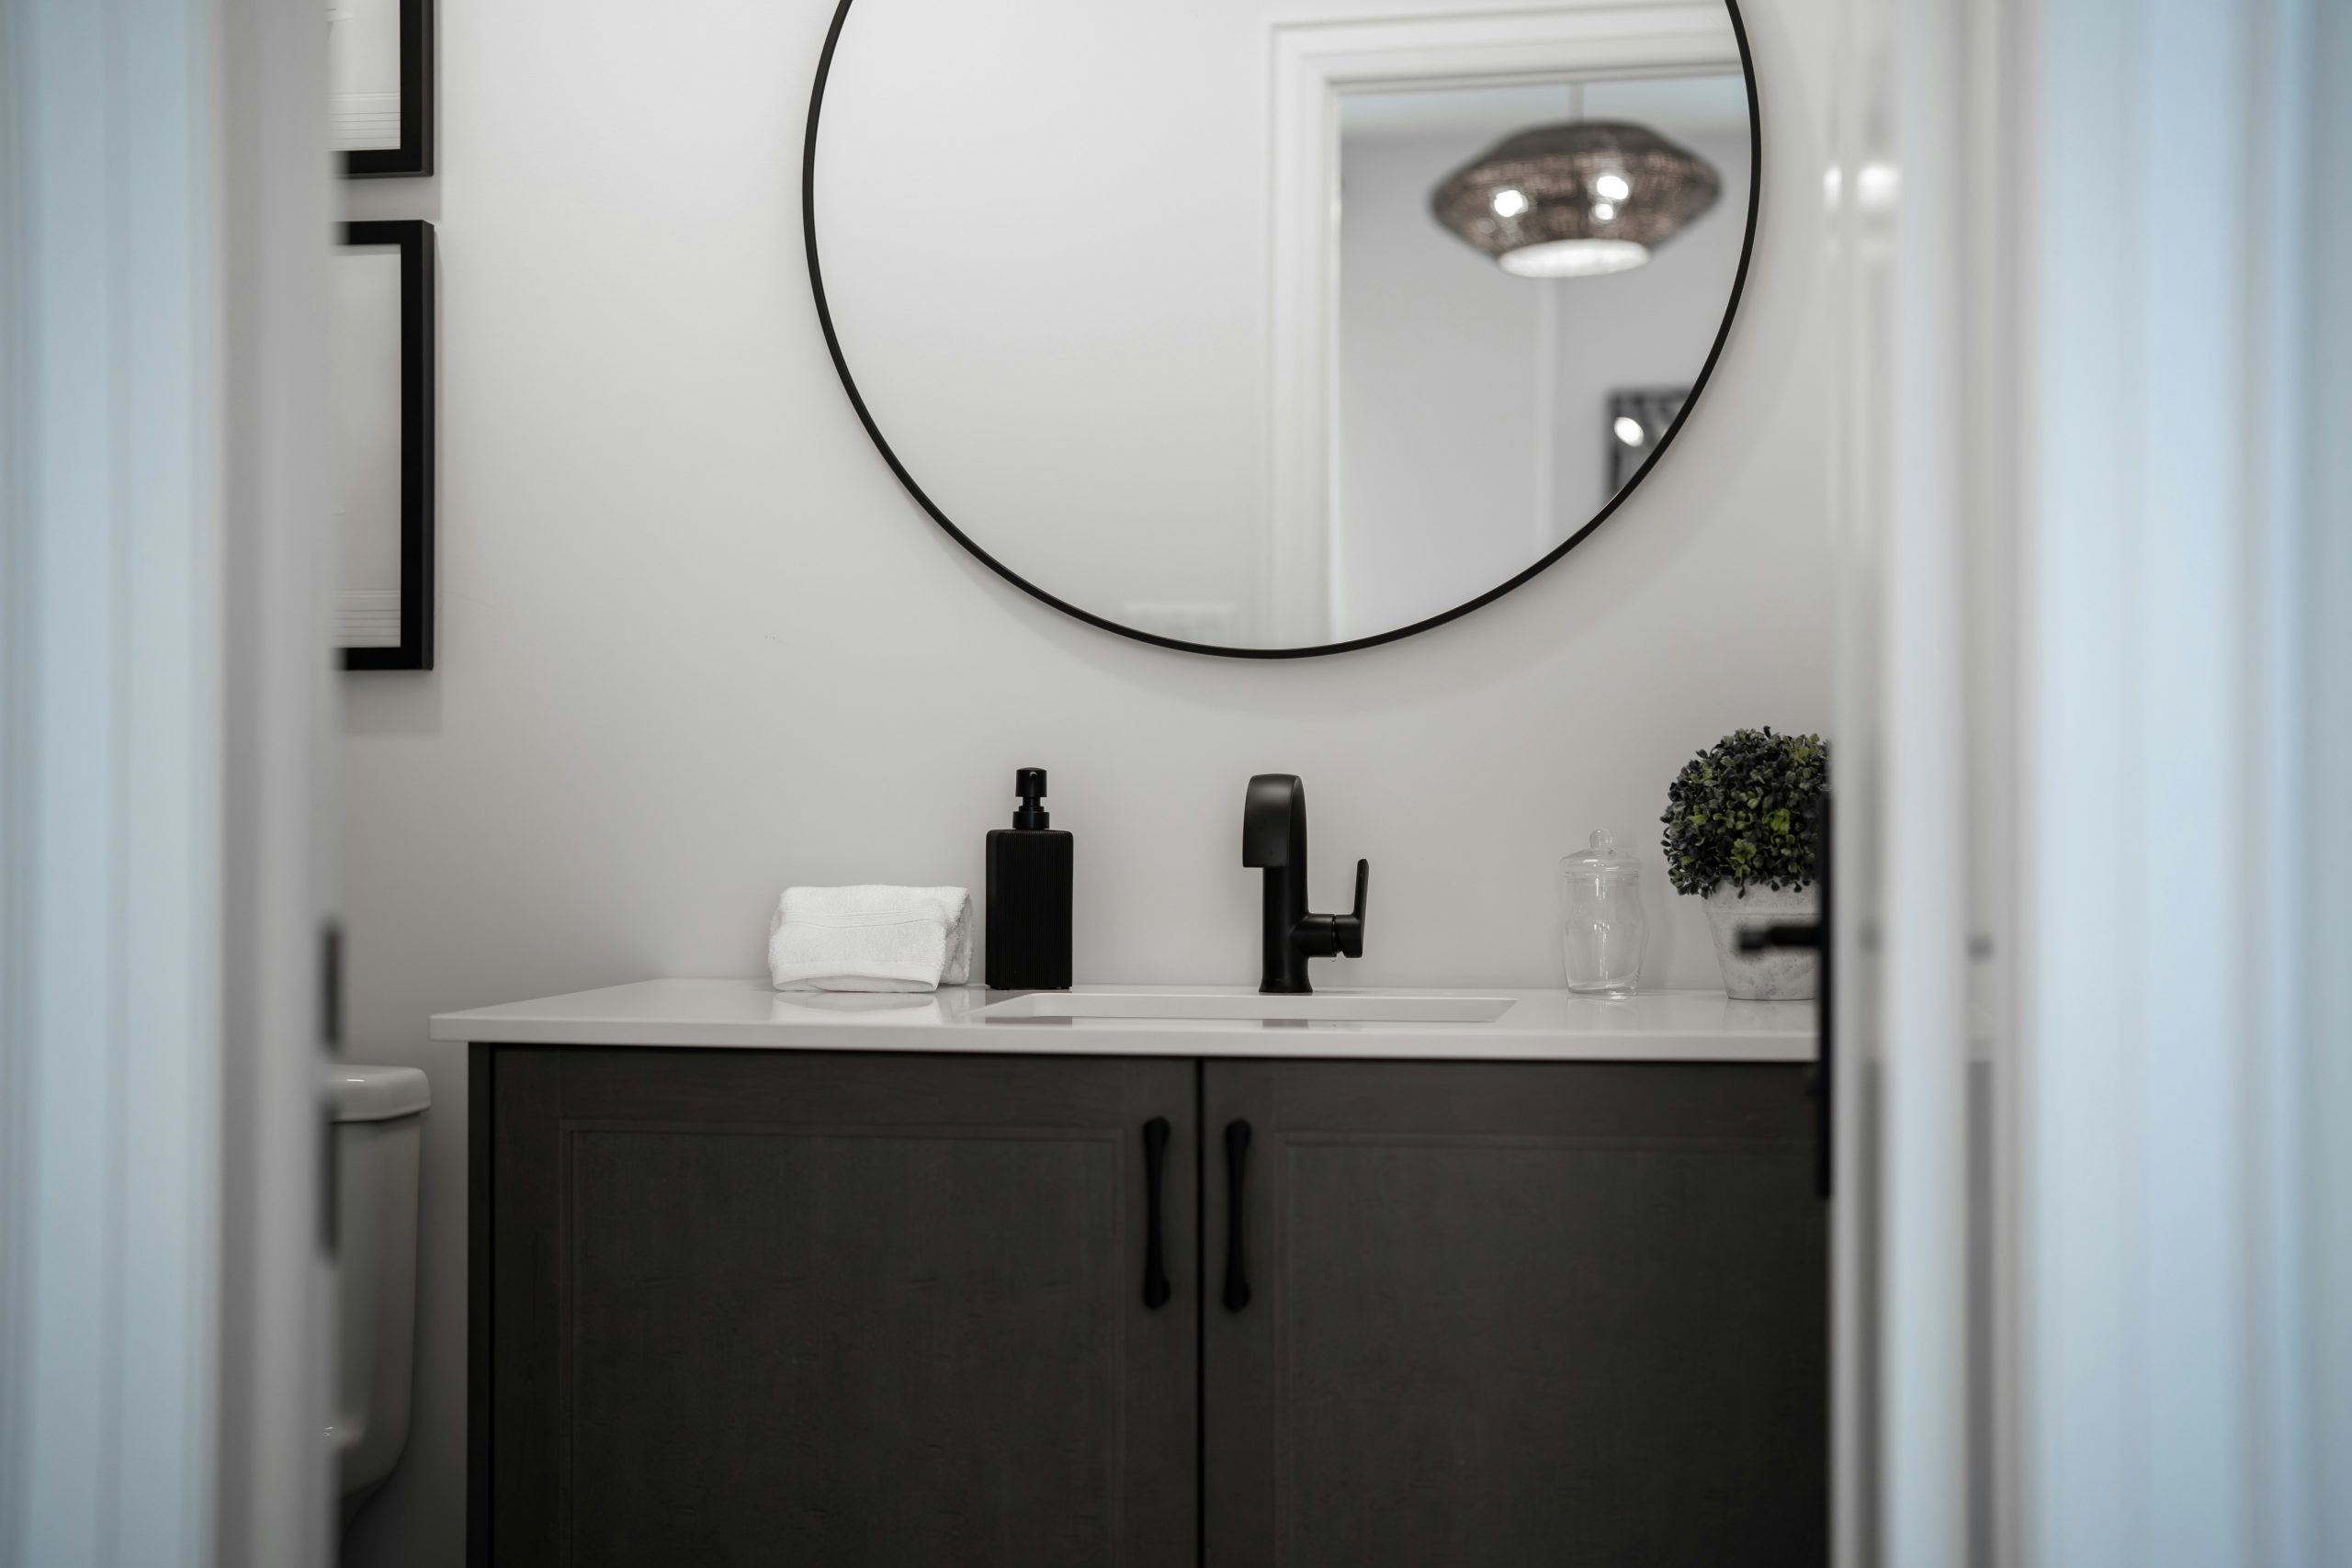
🎯 What Makes It Work
You can achieve this high-end minimalist look on a surprisingly small budget. Start with a gray vanity from the IKEA AXTAD or VEDDINGE lines ($300-$500). Find a large, simple round mirror with a black frame from Target or Walmart ($60-$100). For the faucet, search for ‘matte black bathroom faucet’ on Amazon, where you can find well-rated options for under $75. The key is sticking to the simple color palette and clean lines; the materials themselves don’t have to be expensive to look this chic.
24. A Serene Retreat with a Teal Accent Wall and Soaking Tub
To create this spacious and serene primary bath, here is a potential budget outline:
- Main Fixture: Large rectangular soaking tub with tile surround: $1,500 – $3,500
- Furniture: Two wooden single-sink vanities: $1,200 – $3,000
- Countertops: Granite or Quartz for both vanities: $1,000 – $2,500
- Paint & Tile: Teal paint, neutral paint, floor and wall tile: $800 – $2,000
- Fixtures & Mirrors: Black faucets, shower controls, and two mirrors: $900 – $2,200
- Budget alternative: Use one larger double vanity instead of two separate ones. Opt for a high-quality paint for the accent wall, and choose a more affordable porcelain floor tile that mimics the wood look. This could lower the total cost by 40-50%.
- ESTIMATED TOTAL: $5,400 – $13,200

✅ Before You Start
This design masterfully uses color and repetition to create a cohesive and calming space. The teal accent wall provides a single, bold statement of color, but because it’s a cool, nature-based hue, it feels serene rather than jarring. The repetition of the black metal in the mirror frames, faucets, and window hardware creates a visual rhythm that ties the whole room together. The warmth of the wood vanities balances the coolness of the teal and grey tones, creating a perfectly harmonious environment.
25. A Rich Mix of Wood-Look Tile and a Stacked Stone Accent Wall
This bathroom is a showcase of textures, but be careful when mixing so many dominant materials in a small space. The combination of wood-look plank tiles on the main wall, a different wood-look tile on the floor, *and* a stacked stone accent wall is a lot for the eye to process. In a very small room, this can feel busy and even a bit claustrophobic. If you love this idea, consider using the same wood-look tile on both the floor and the main wall for better continuity, which will make the stacked stone accent pop even more. Compare with the simpler texture mix in Idea #1.
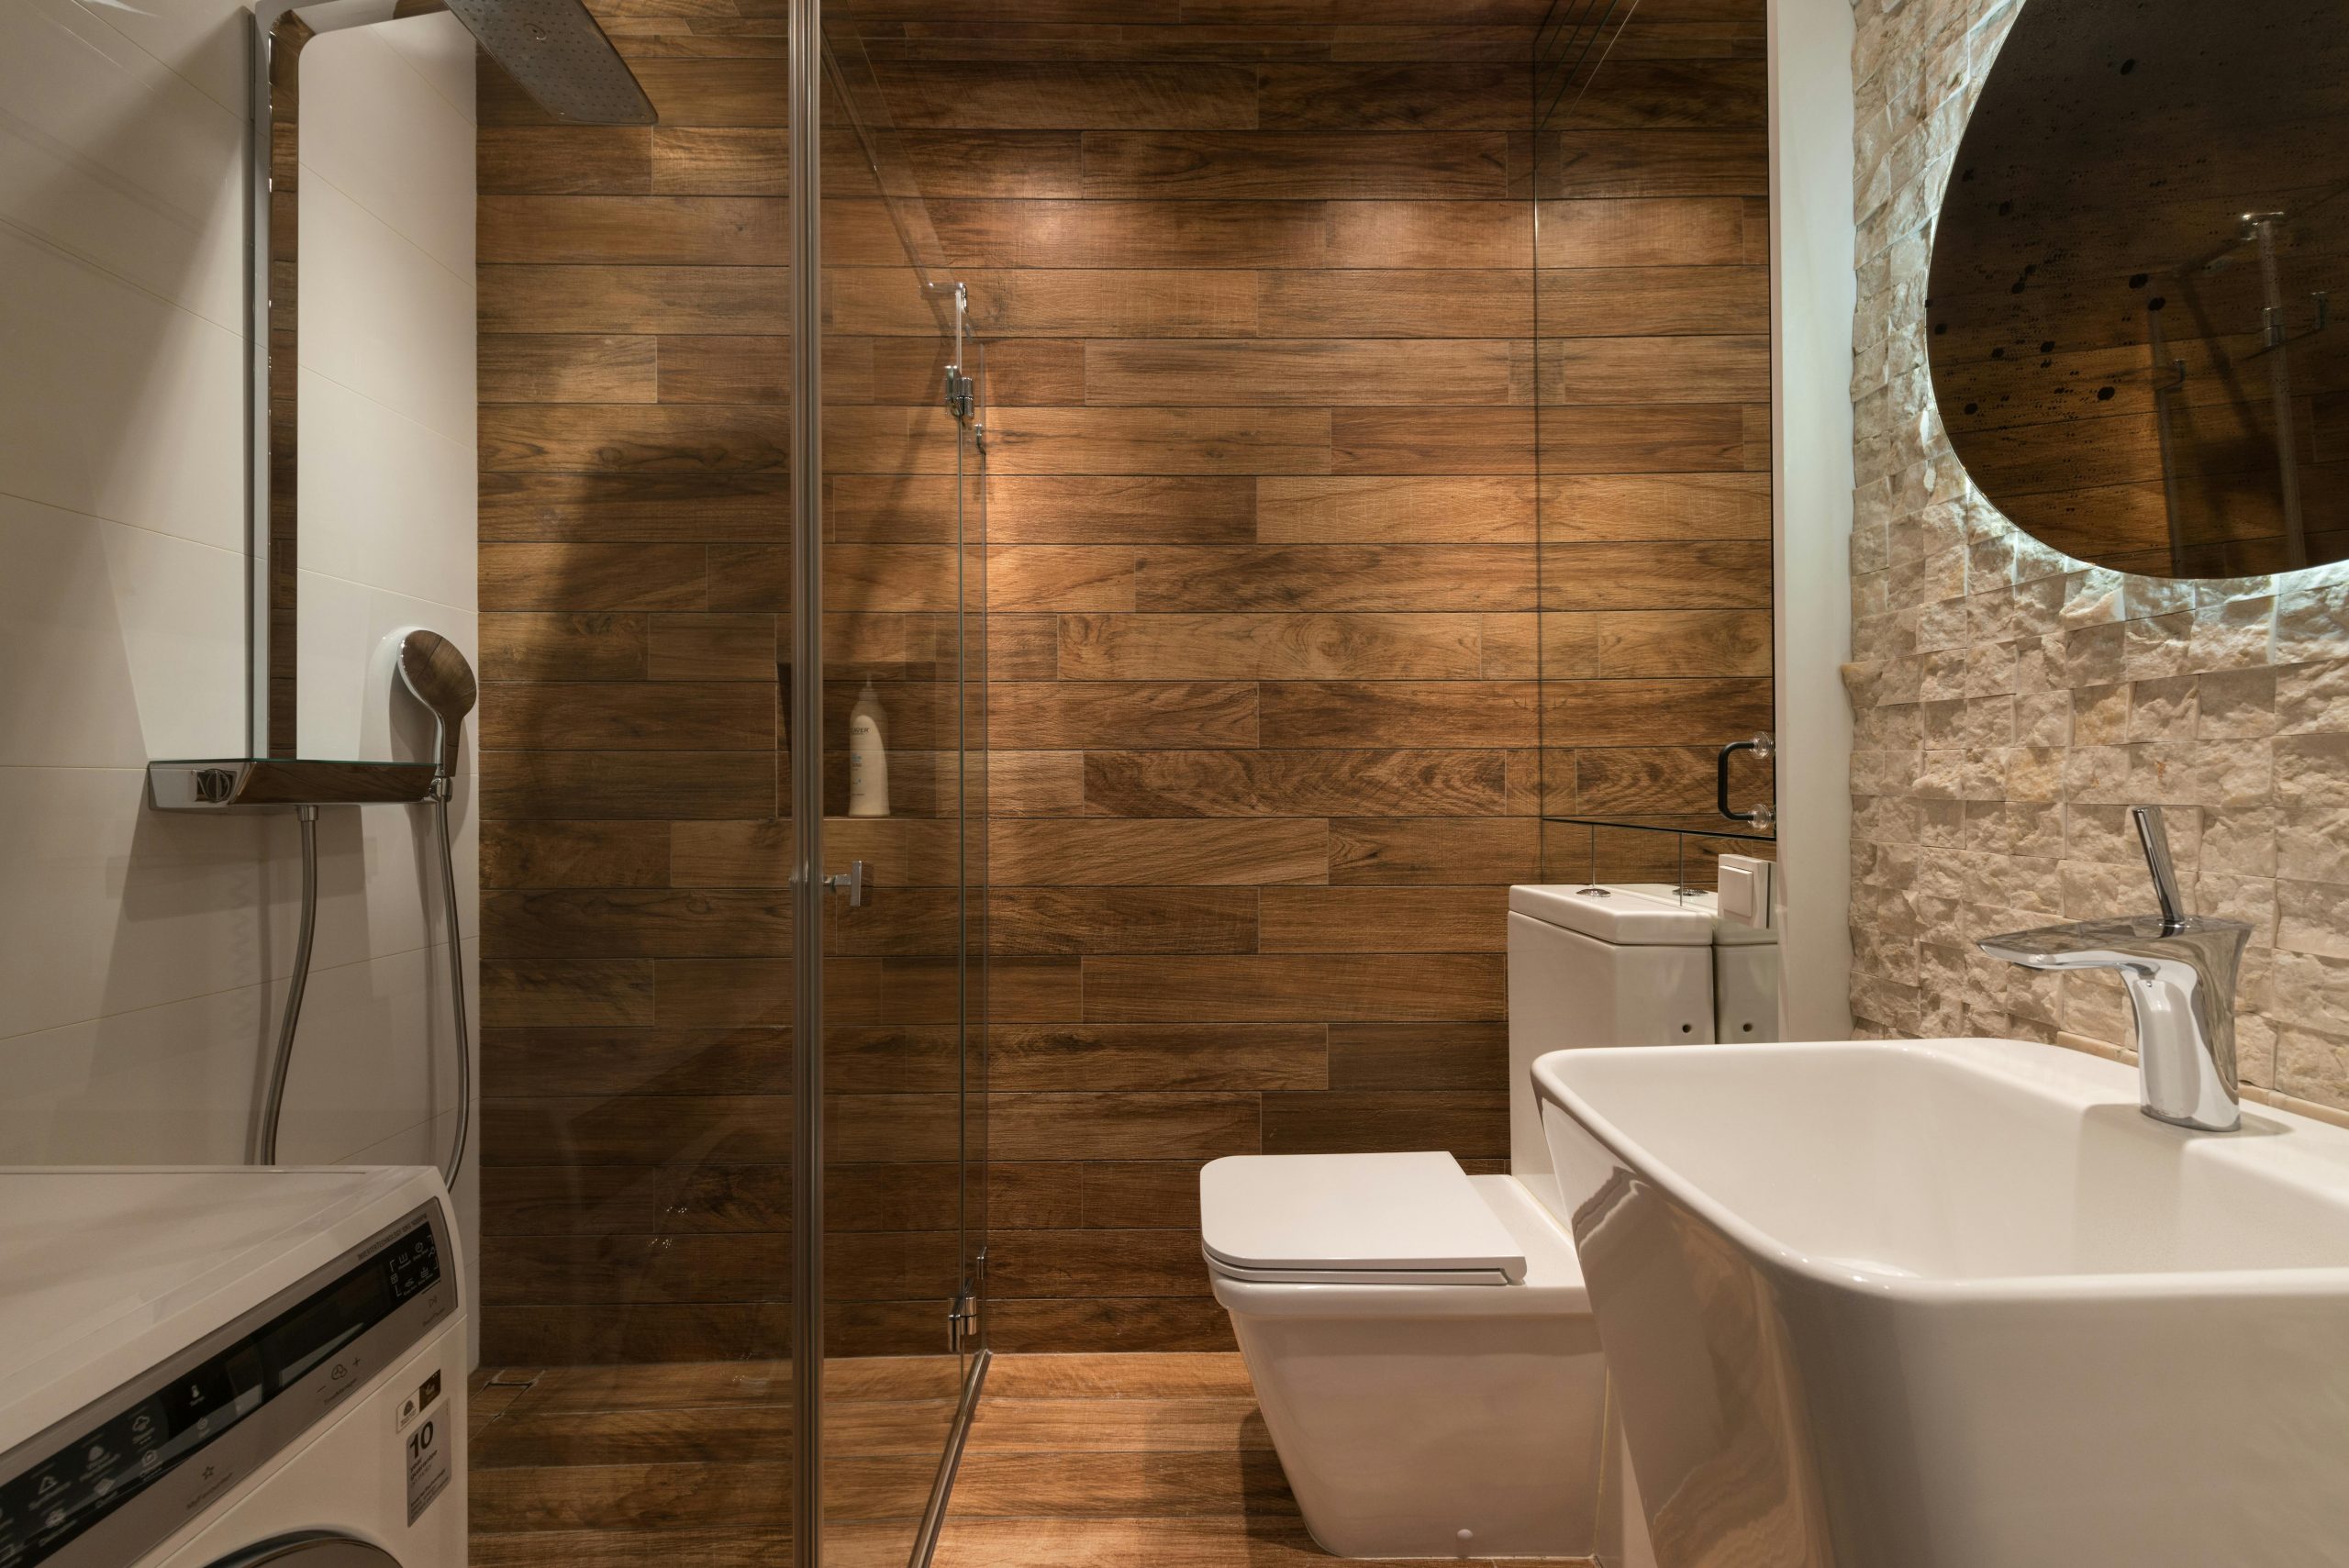
📏 Scale Guide
The desire to bring natural, tactile surfaces into our homes is a major trend for 2026, and this bathroom is a prime example. After years of smooth, glossy, minimalist surfaces, people are craving texture that feels authentic and grounding. Wood-look porcelain offers the warmth of wood with the durability of tile, while stacked stone brings a rugged, earthy element indoors. This trend is a direct reaction to our increasingly digital lives, an attempt to create a home environment that feels more connected to the natural world.
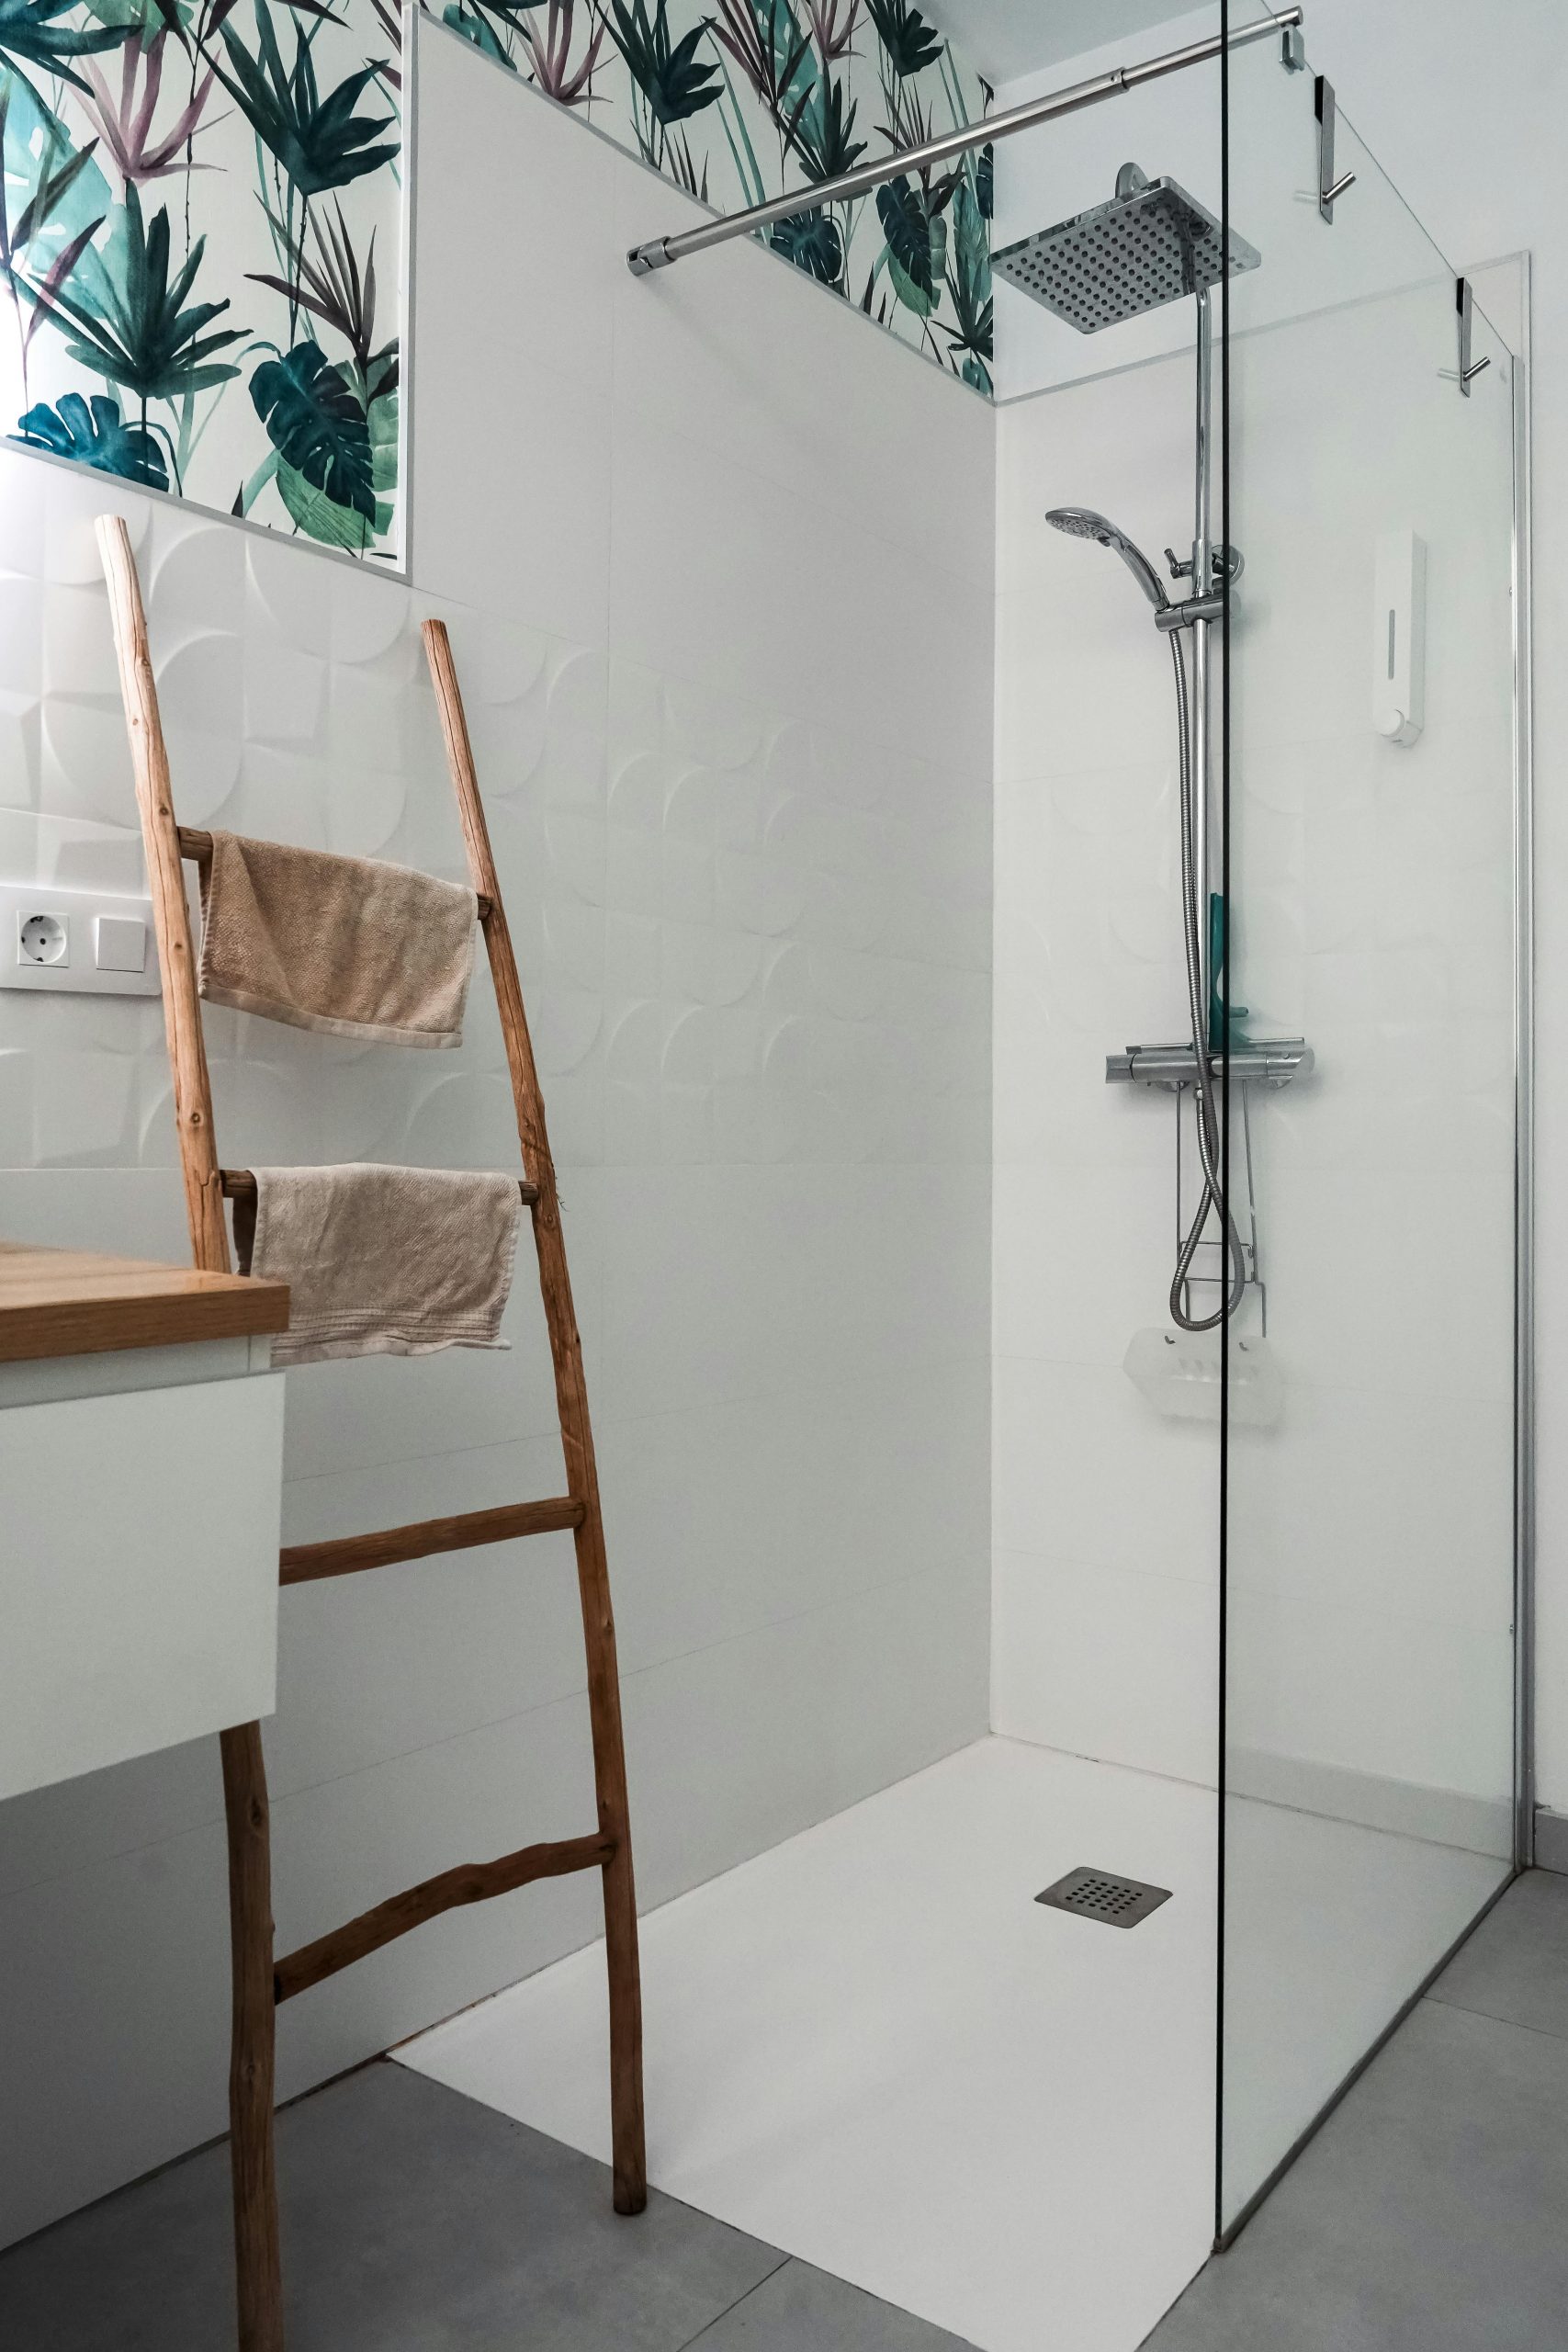
26. Modern & Fresh with a Tropical Wallpaper Accent
When adding a bold pattern like this tropical wallpaper, a little goes a long way. Notice how it’s used only as a border above the clean, white shower tiles. This approach gives you the fun and personality of the pattern without overwhelming the small space. If the entire wall was covered in the wallpaper, it would feel chaotic and shrink the room. Using it as a ‘crown’ or accent band is the perfect compromise, adding a splash of style while maintaining a bright, open feel. It’s a great strategy for any small room where you want to add pattern without committing to four full walls.
💡 Designer Tip
A rough, reclaimed wood ladder is a stylish and functional alternative to a standard towel bar. Here’s how to make a simple one.
- Source the Wood: Find two long, straight branches or reclaimed wood posts (about 1.5-2.5 inches thick) and 3-4 shorter pieces for the rungs.
- Cut to Size: Cut the two main posts to your desired height (e.g., 5-6 feet). Cut the rungs to your desired width (e.g., 18-24 inches).
- Drill Holes: On the main posts, mark and drill holes slightly smaller than your rungs’ diameter. Space them about 12-15 inches apart.
- Assemble: Use a rubber mallet to carefully tap the rungs into the holes on one post. Then, attach the second post. Add wood glue for extra stability.
- Finish: Lightly sand any rough spots but keep the natural texture. Apply a clear matte sealant to protect the wood from moisture.
27. Simple & Neutral with a Beige and Gray Tiled Tub
This is an incredibly achievable look for anyone on a tight budget. The core components—beige wall paint, standard square ceramic tiles, and a basic acrylic built-in tub—are some of the most affordable materials on the market. You can find 6×6 gray ceramic tiles for under $2 per square foot. A gallon of quality beige paint is about $50. The chrome faucet with clear acrylic handles is a classic budget-friendly hardware store find. This entire aesthetic is built on widely available, low-cost essentials, proving that a clean and functional bathroom doesn’t have to be expensive.
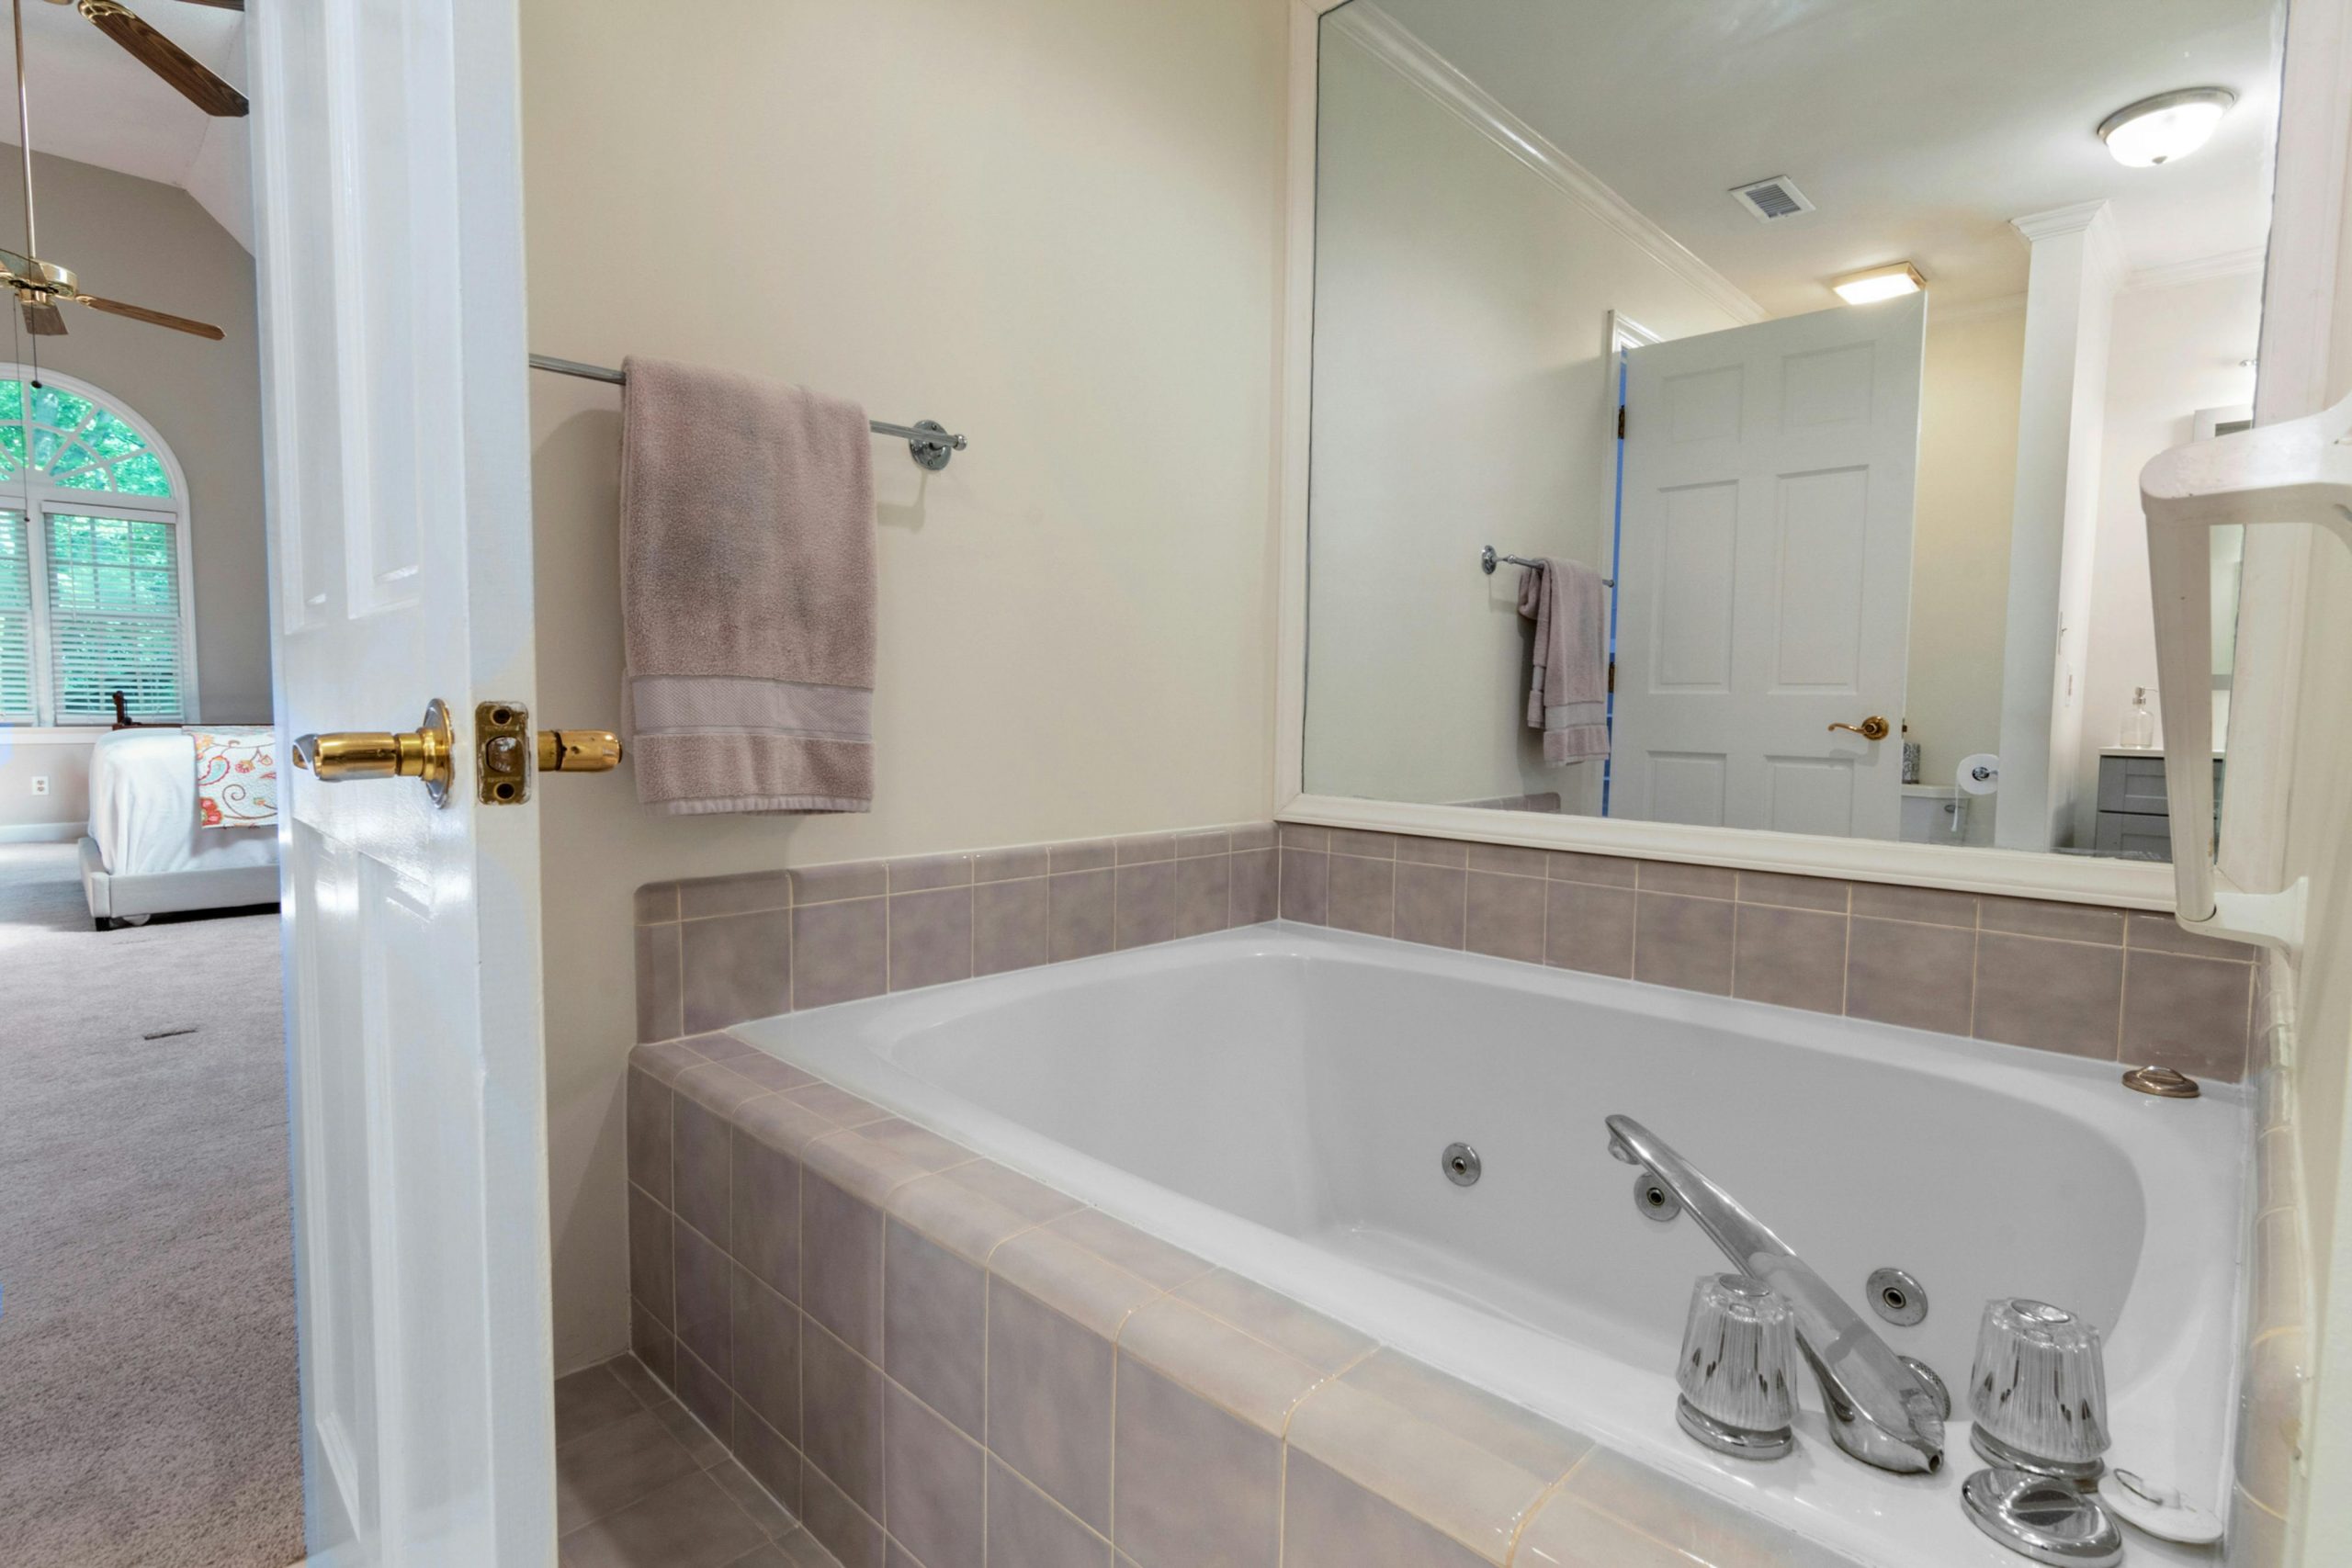
🔧 How-To Brief
While this neutral palette is certainly safe, the combination of beige walls, gray tile, and a mix of chrome and brass hardware feels dated and lacks a clear design point of view. The clear acrylic faucet handles especially place the design firmly in the 1990s or early 2000s. To update this space, the simplest and most impactful change would be to replace the faucet with a modern, single-handle fixture in a consistent finish, like the brushed nickel used in Idea #3. Painting the walls a crisp white would also instantly modernize the space.
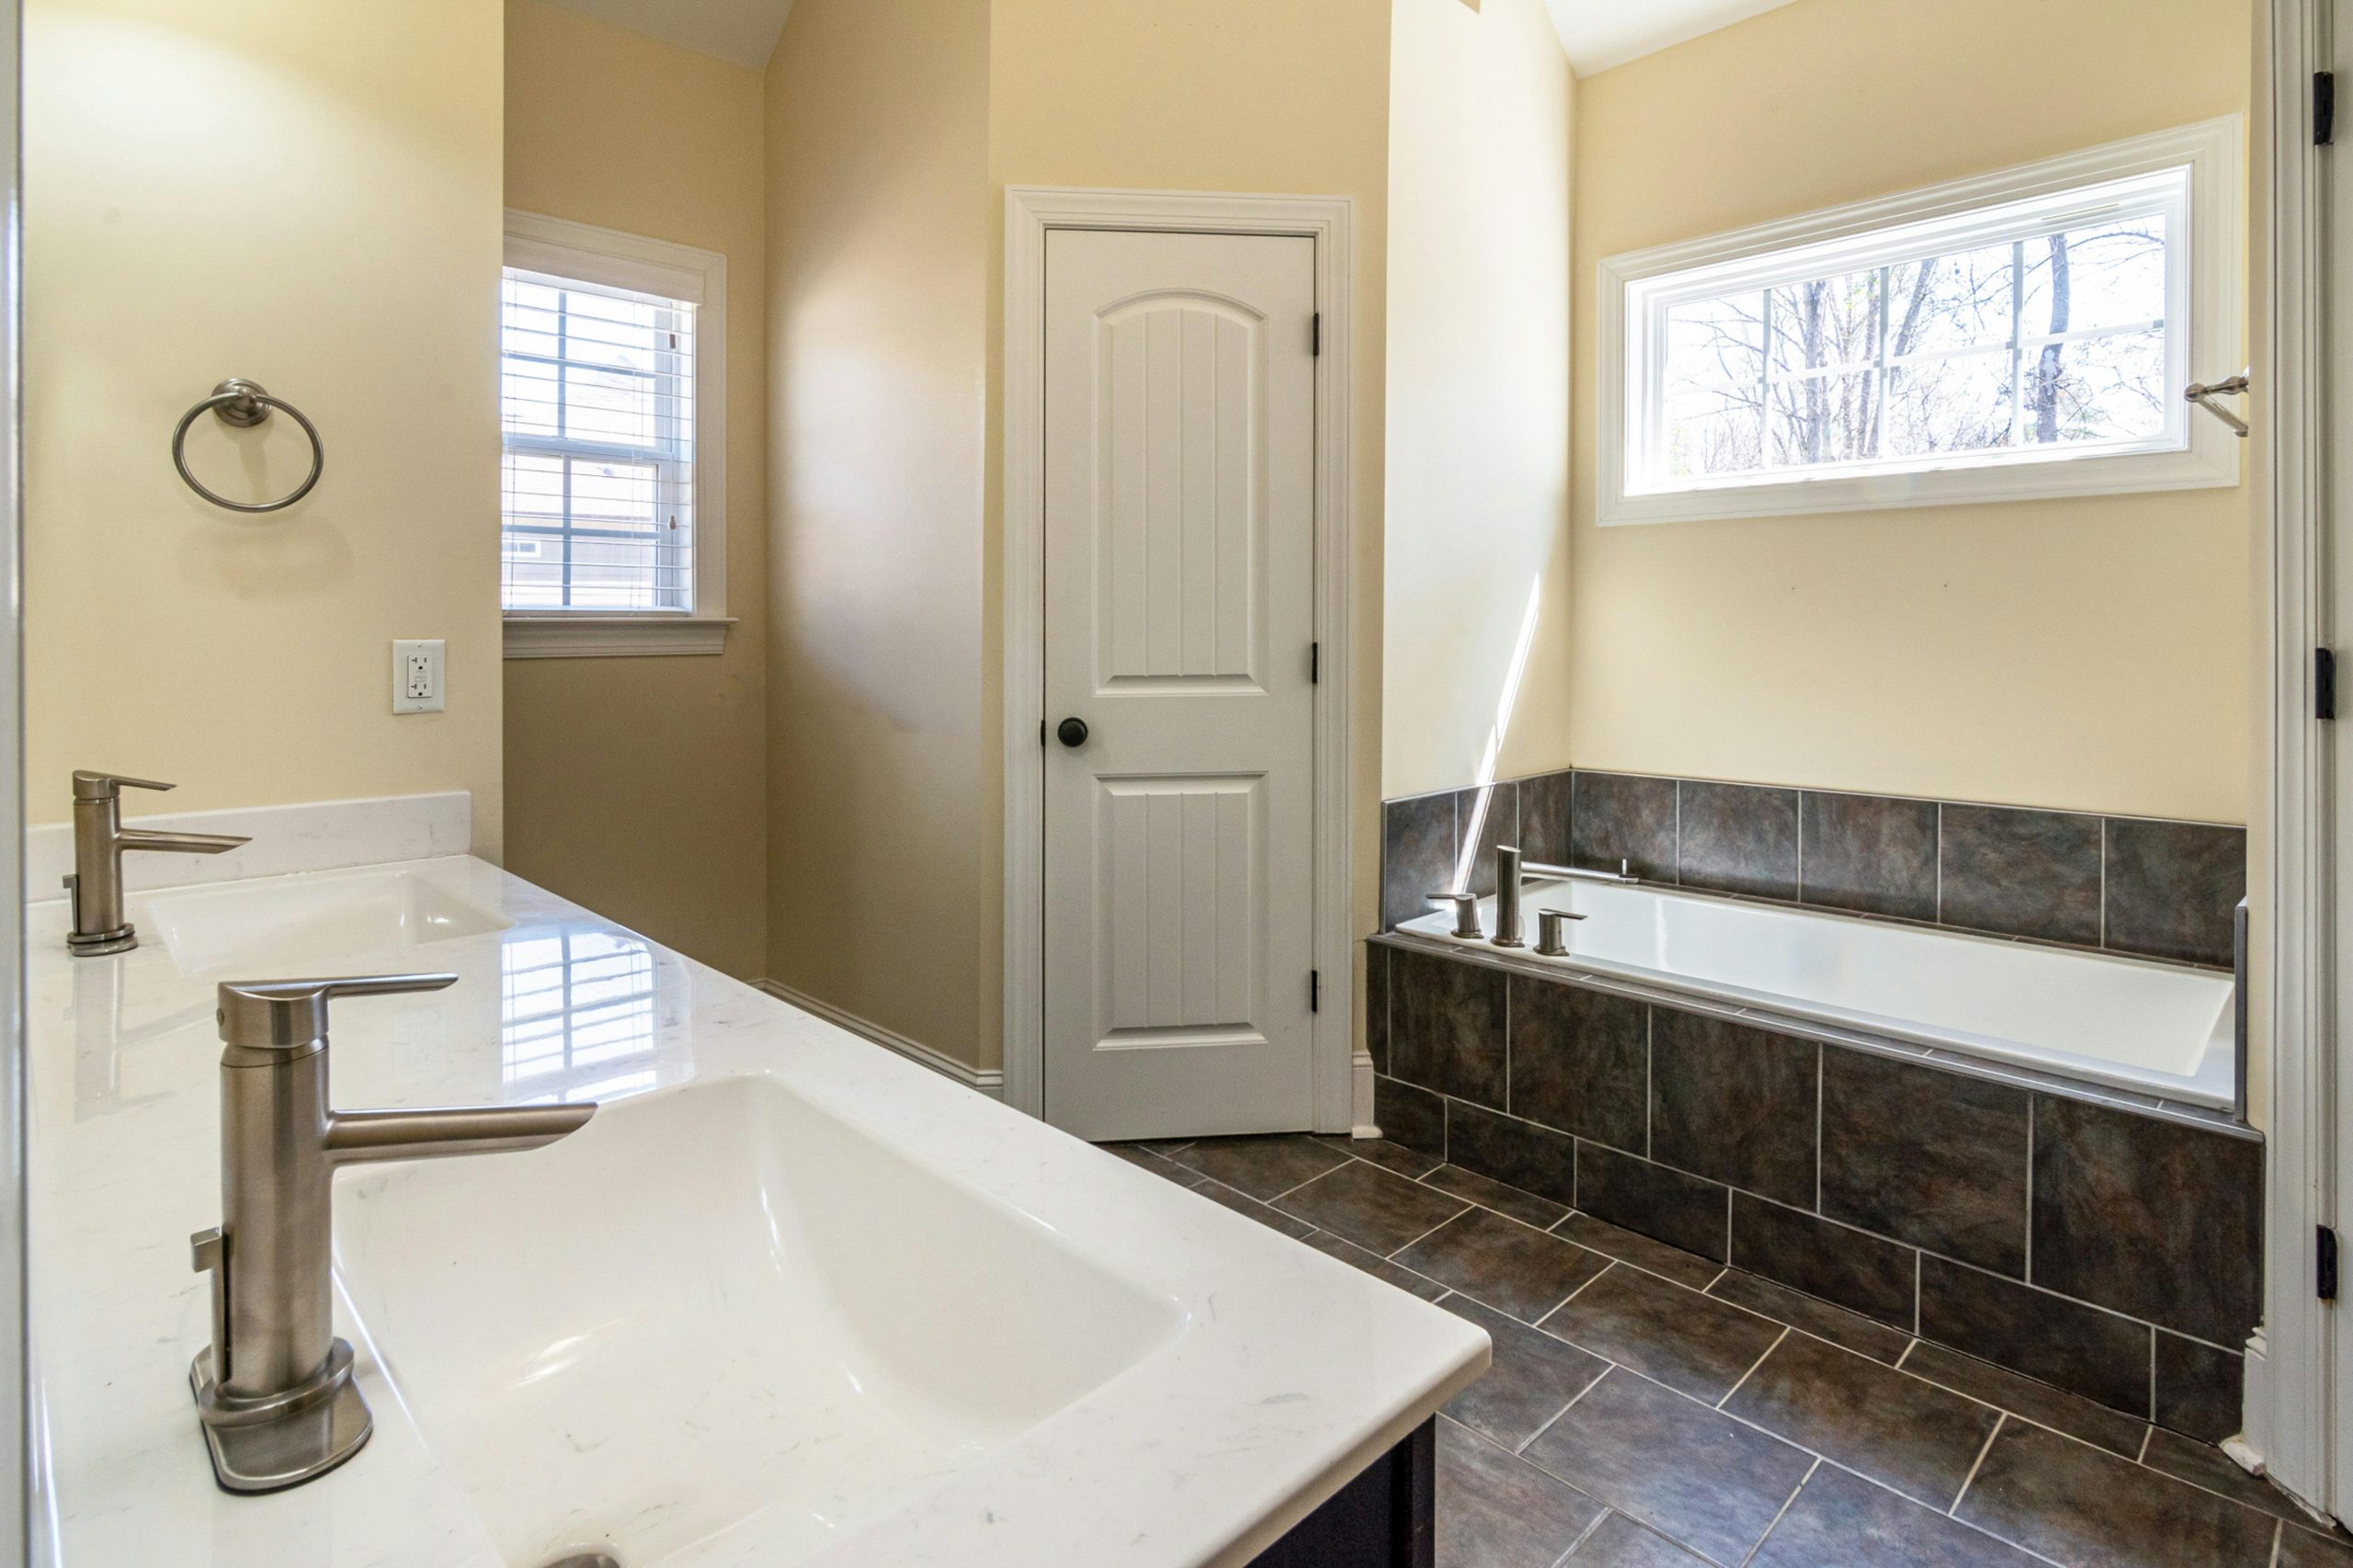
28. Classic Layout with a Double Vanity and Dark Brown Tile
This bathroom design feels so bright and spacious due to a clever use of contrast and light. The pale beige walls and crisp white trim, doors, and vanity create a light-reflecting envelope that makes the whole room glow. The dark brown floor and bath surround ground the space and provide a sophisticated contrast, preventing the all-light palette from feeling washed out. The large, unobstructed windows flood the room with natural light, which is the most crucial element for making any space feel bigger and more inviting.
🧹 Maintenance Reality
When using a dark floor tile, using a contrasting grout color (like the light gray or white used here) can be a great choice for a few reasons. First, it highlights the shape of the tiles, turning the floor into a subtle graphic pattern. Second, light-colored grout is actually easier to keep looking clean on a floor than pure white grout, as it hides minor dirt more effectively. However, be sure to use a high-quality, stain-resistant grout and seal it properly, especially in a high-traffic area like a bathroom, to prevent discoloration over time.
Your Dream Bathroom Awaits
You’ve seen the inspiration, from small updates to total transformations. The most important takeaway for your 2026 remodel is to create a bathroom that feels like a personal retreat, not just a functional room. It’s about finding the right mix of materials, colors, and textures that make you feel genuinely good. So, which idea sparked something for you? Start a Pinterest board with your favorites, and begin dreaming up the beautiful, functional sanctuary you absolutely deserve.