You know that feeling when you finally find the Modern Bathroom Ideas 2026 that looks exactly right for your space? It’s that perfect mix of function and “wow” that stops your scroll. After filtering through hundreds of options across IKEA, Target, and Facebook Marketplace, we narrowed it down to 27 ideas that actually deliver. We found looks that range from a simple $1,500 refresh to a $25,000 luxury overhaul. In this guide, you’ll find 27 curated ideas covering minimalist, rustic, mid-century, and full-on luxury styles. The rise of the “home as a sanctuary” mindset in 2026 means our bathrooms are becoming more important than ever as personal retreat spaces, and these designs reflect that shift. And stay until the end — we break down the most common mistakes that can ruin these looks. 📌 Save this to Pinterest for later — you’ll want to revisit these ideas.
1. Warm Minimalism with a Light Wood Vanity and Matte Black Fixtures
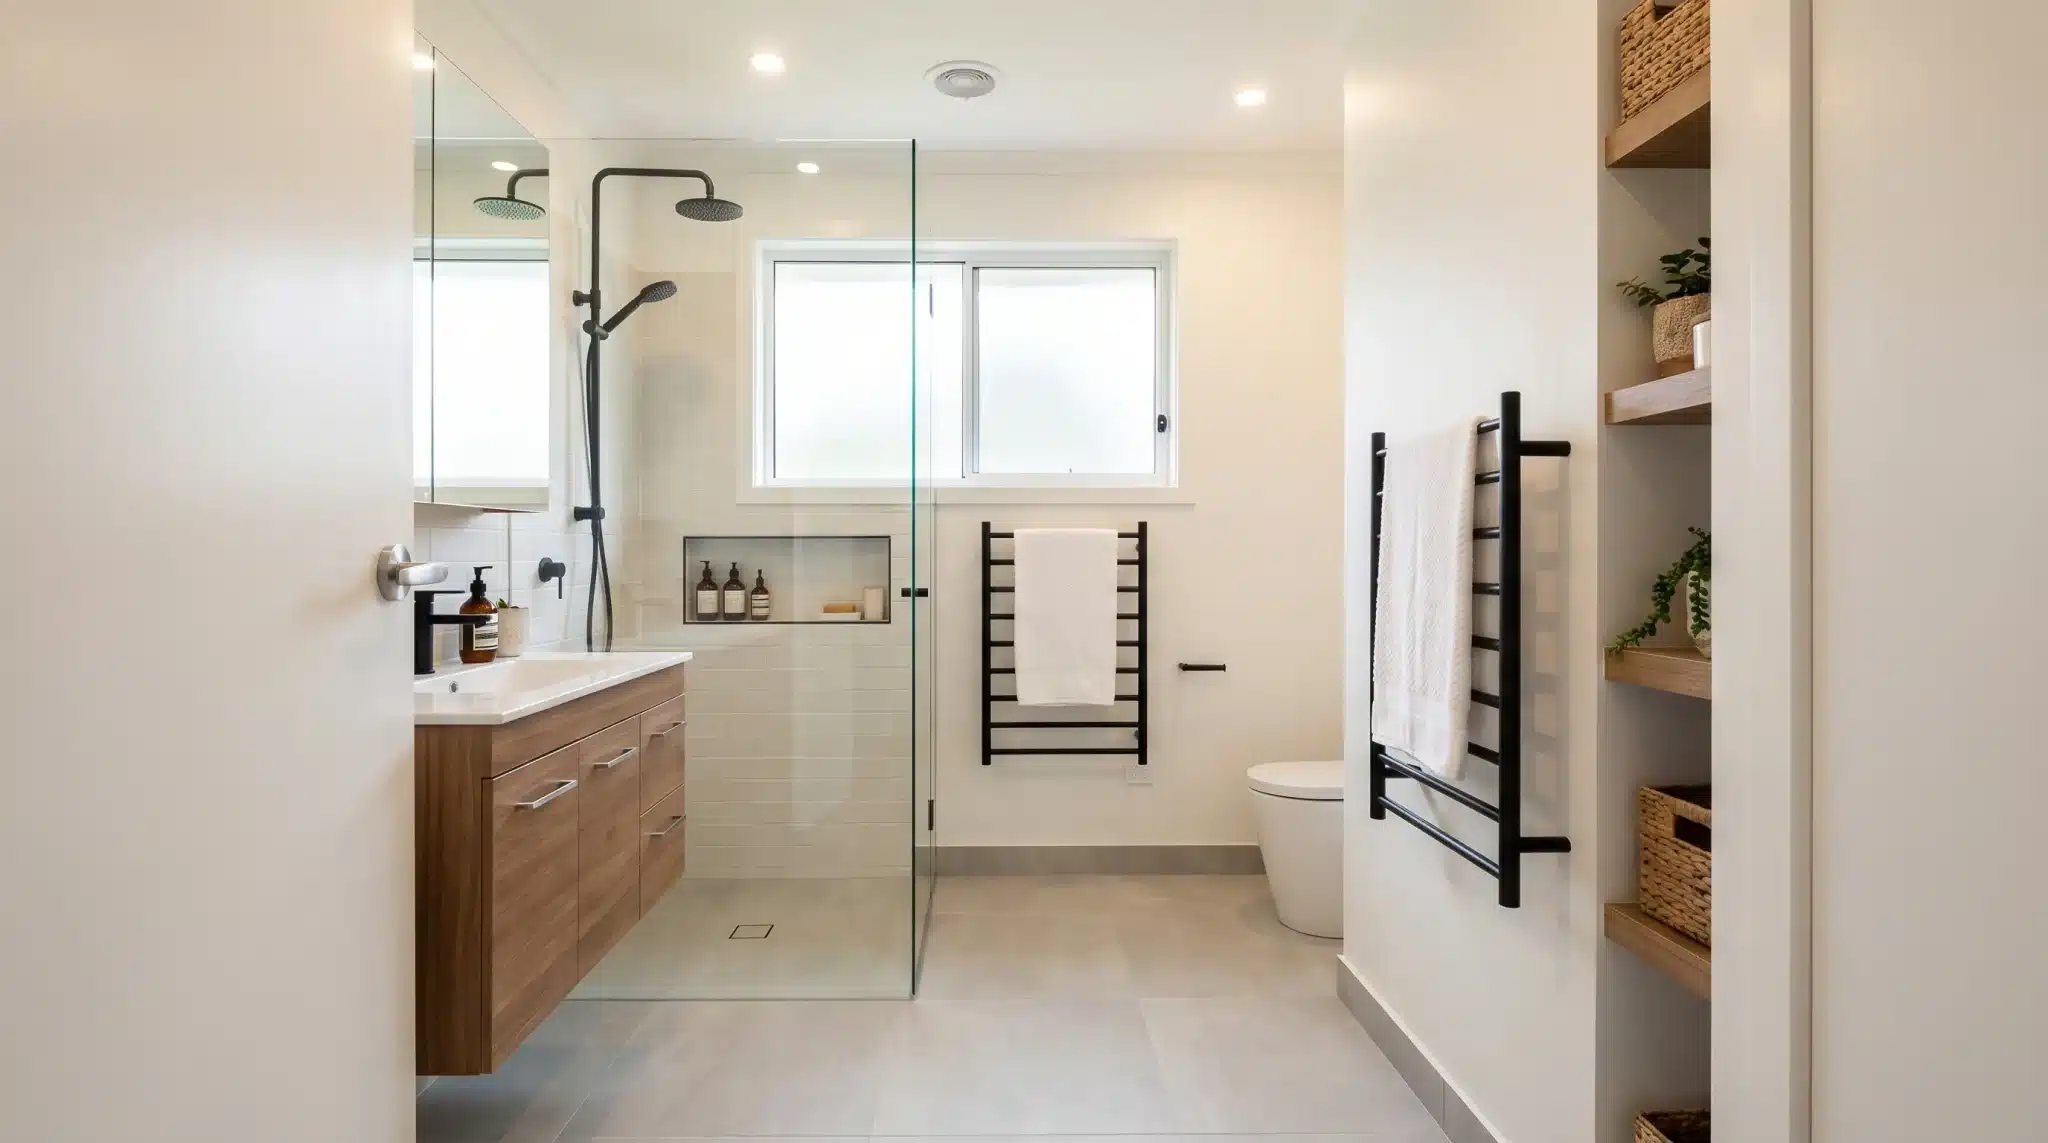
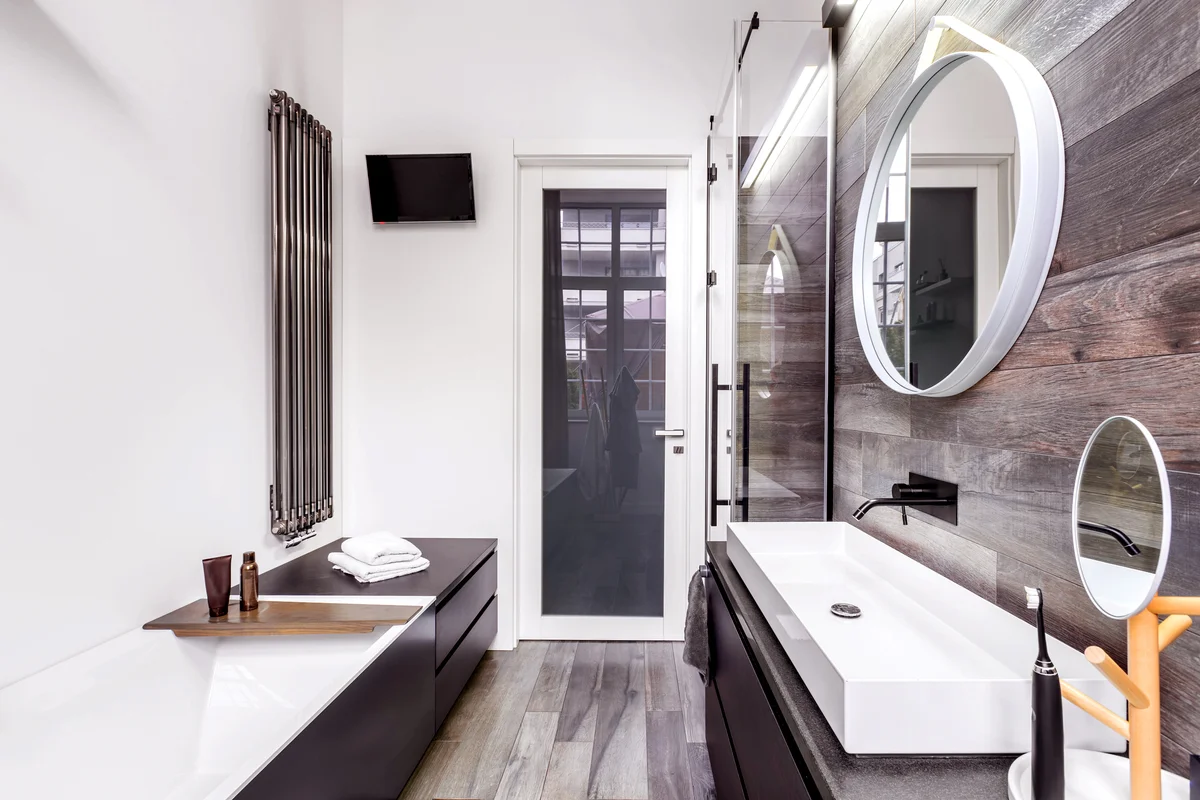
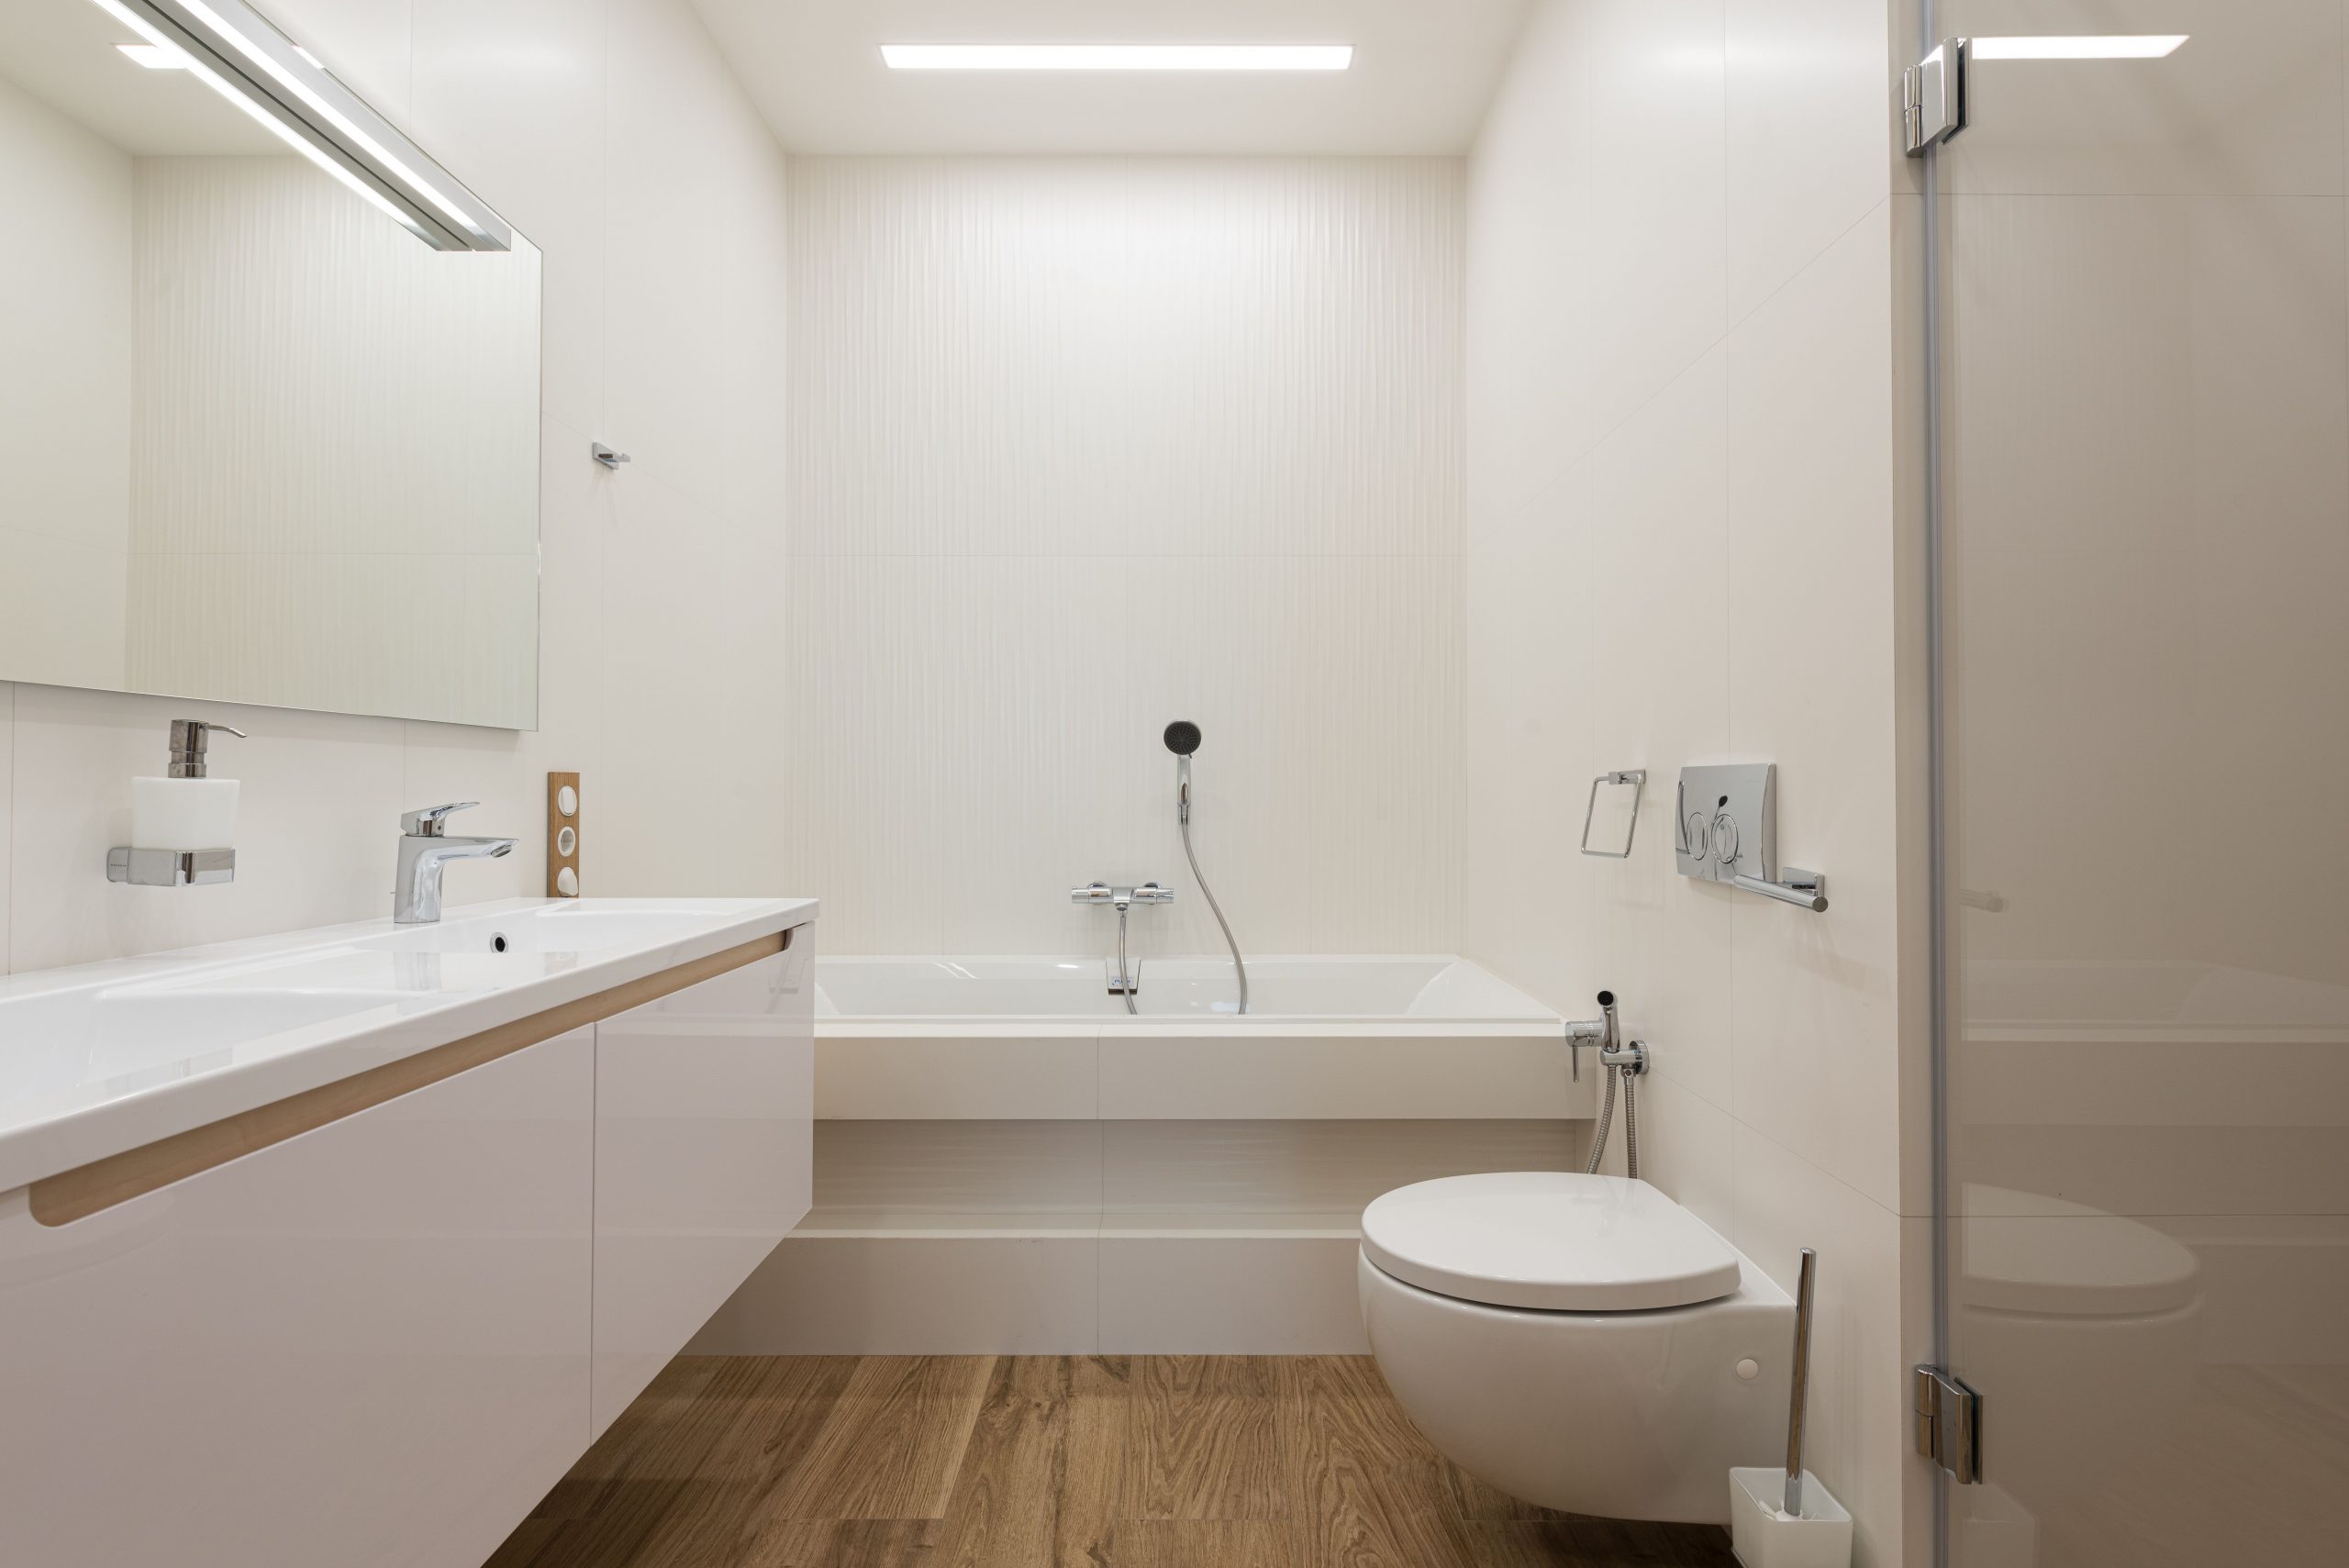
This look is a masterclass in balance. The warmth and organic grain of the light wood floating vanity prevent the room from feeling sterile, which can sometimes happen in minimalist designs. It’s perfectly counteracted by the cool, graphic punch of the matte black fixtures and towel rail. The large format gray tiles on the floor act as a quiet, neutral foundation that ties the warm and cool elements together without competing for attention. It’s a simple palette that relies on the strength of its materials.
⭐ The One Thing
For a floating vanity like this one, the standard height is to have the top of the countertop 34 to 36 inches off the finished floor. However, consider who will be using it. For a primary bathroom used mostly by taller adults, you can comfortably go up to 38 inches. This reduces how far you have to bend over. For a kids’ or guest bathroom, stick to the 34-inch standard to ensure it’s comfortable for everyone. Always confirm before plumbing is roughed in!
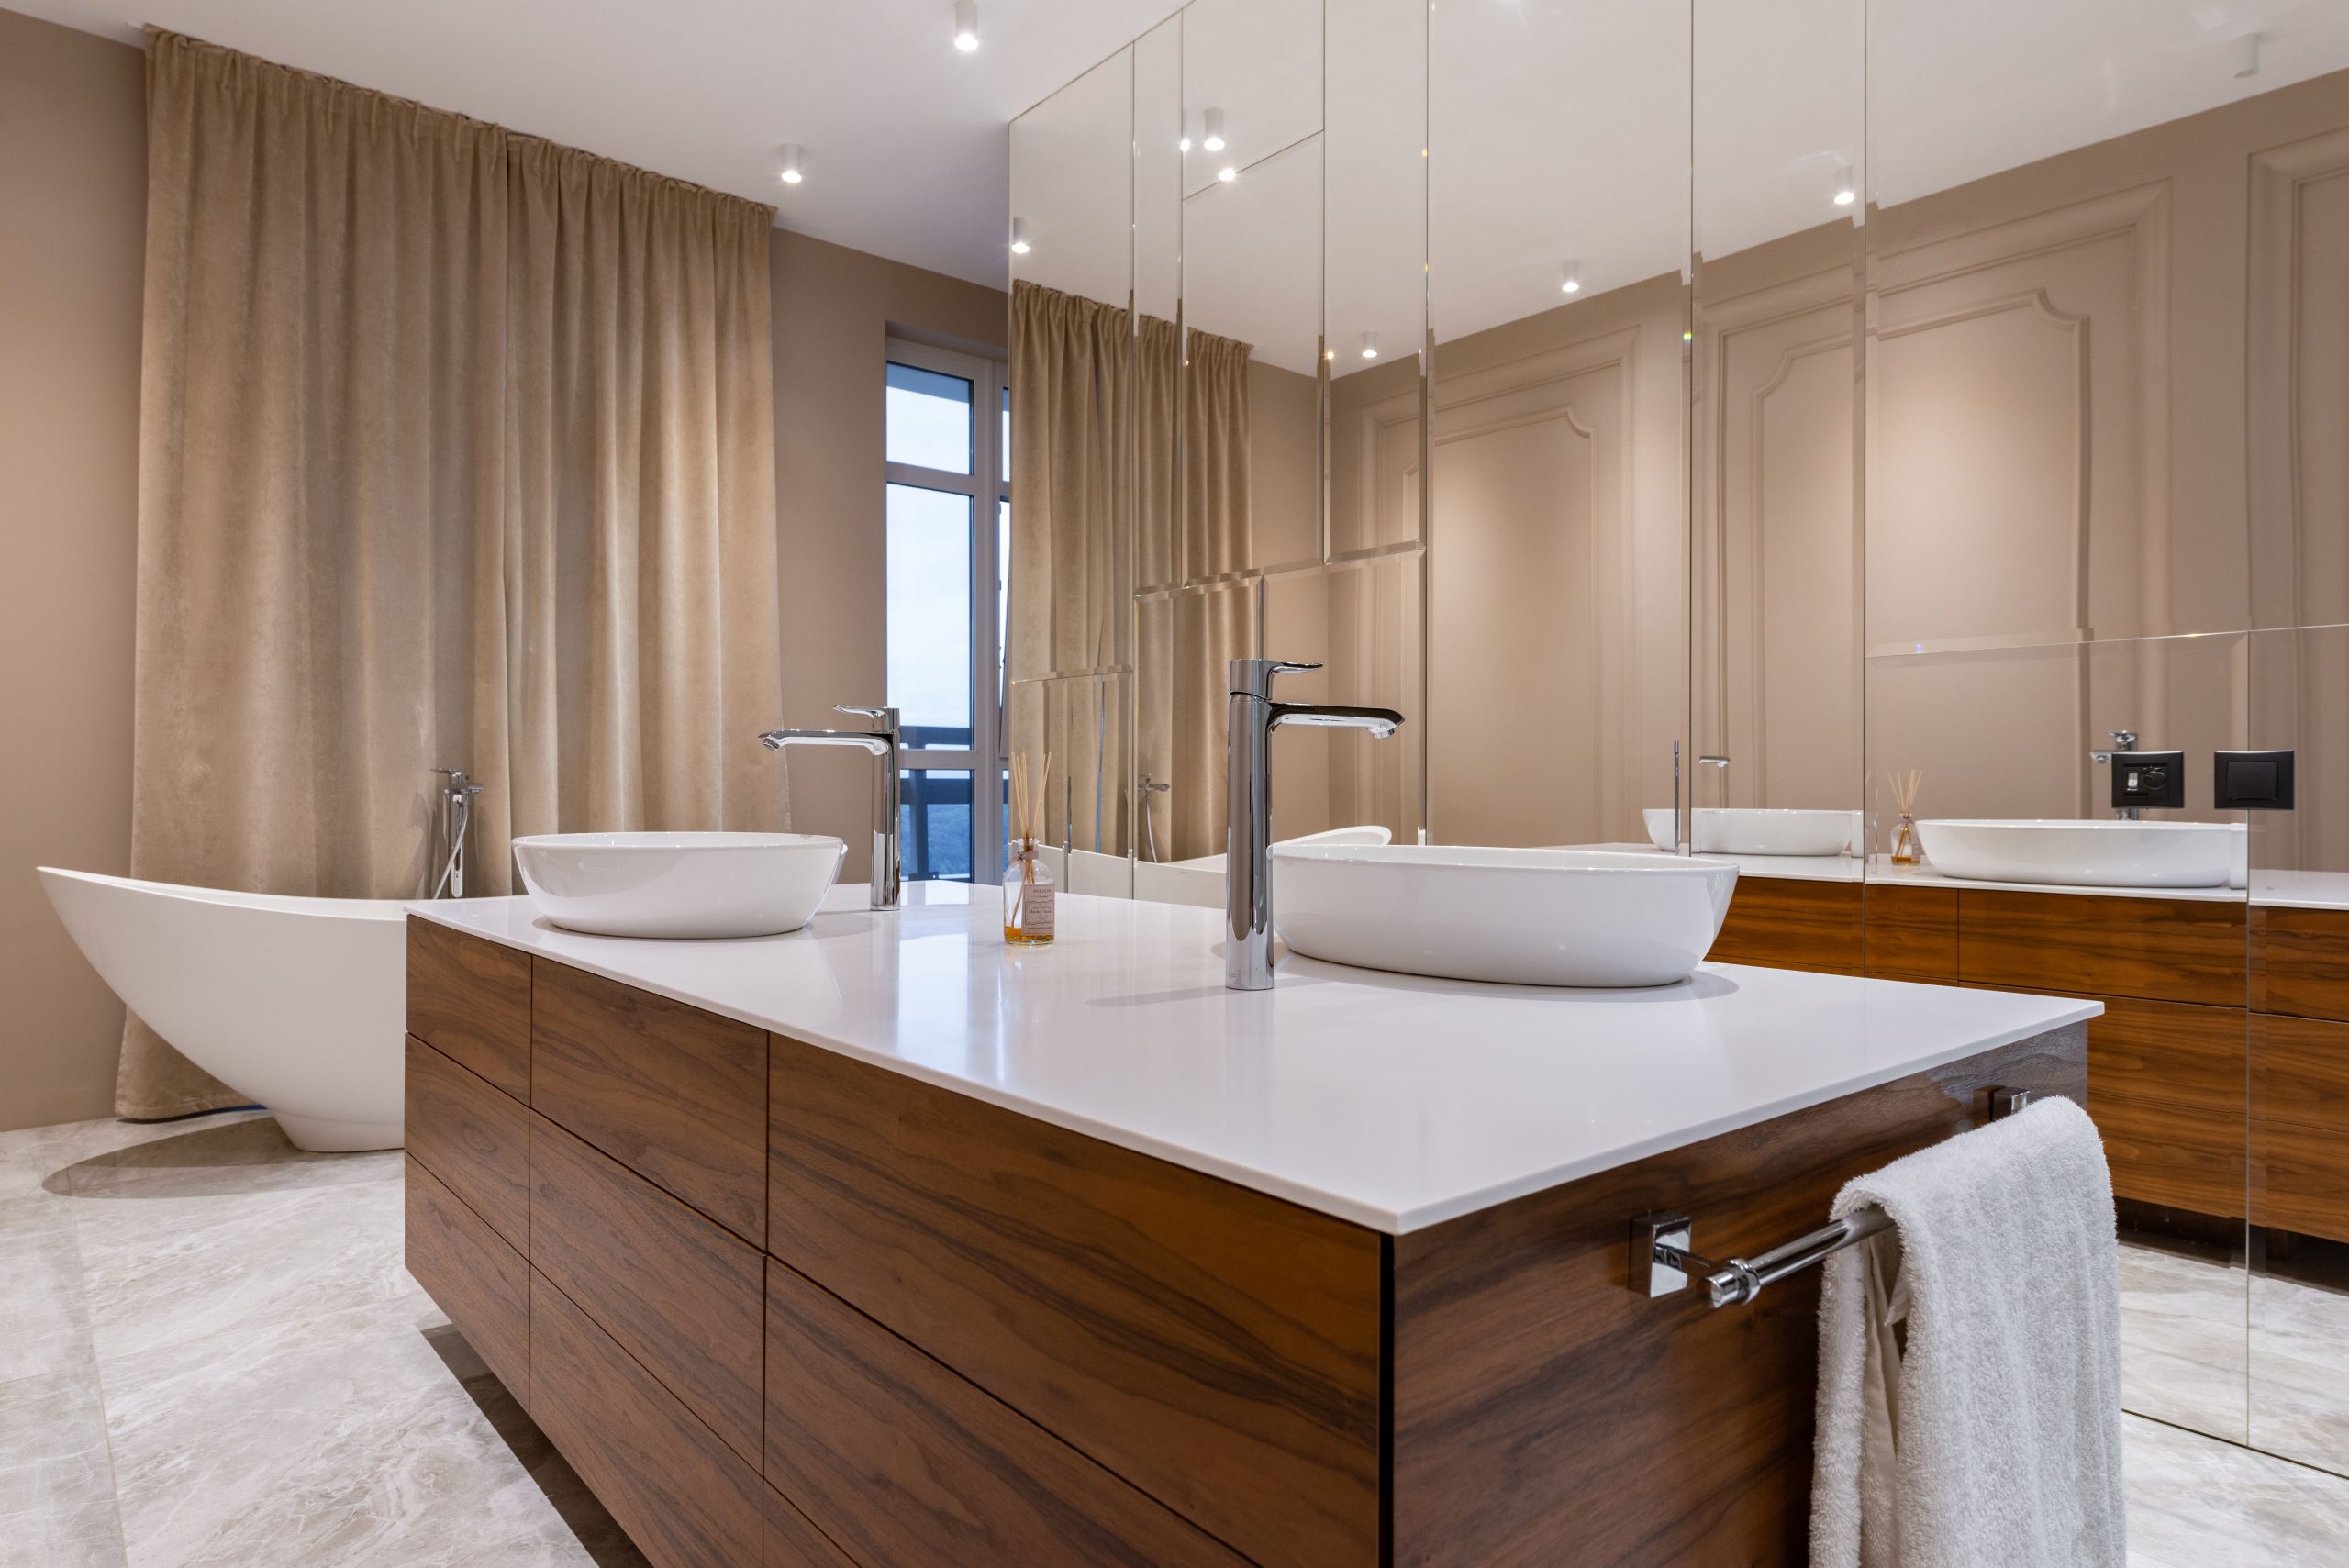
2. Serene Luxury with a Floating Double Vanity and Freestanding Tub
- Main Furniture (Double Vanity, Tub): $3,000 – $7,000
- Lighting & Mirrors: $800 – $2,000
- Textiles (Curtains): $300 – $600
- Fixtures (Faucets, Drains): $1,000 – $2,500
- Tile & Installation: $4,000 – $9,000
- TOTAL: $9,100 – $21,100
- Budget alternative: A similar look can be achieved for around $5,000 – $8,500 using a stock vanity from a big box store, acrylic tub, and more affordable tile.
📐 Style Math
A layout with both a freestanding tub and a spacious double vanity requires a generous footprint. You’ll want a room that is at least 10 feet wide to allow for comfortable clearance. The absolute minimum depth for this setup is around 12 feet. This allows for the tub (approx. 30-36 inches), a comfortable walkway (36 inches), and the vanity (21-24 inches deep). Anything less will feel cramped and ruin the luxurious, open feeling this design is meant to evoke. Compare this to the clever space-saving in Idea #5.
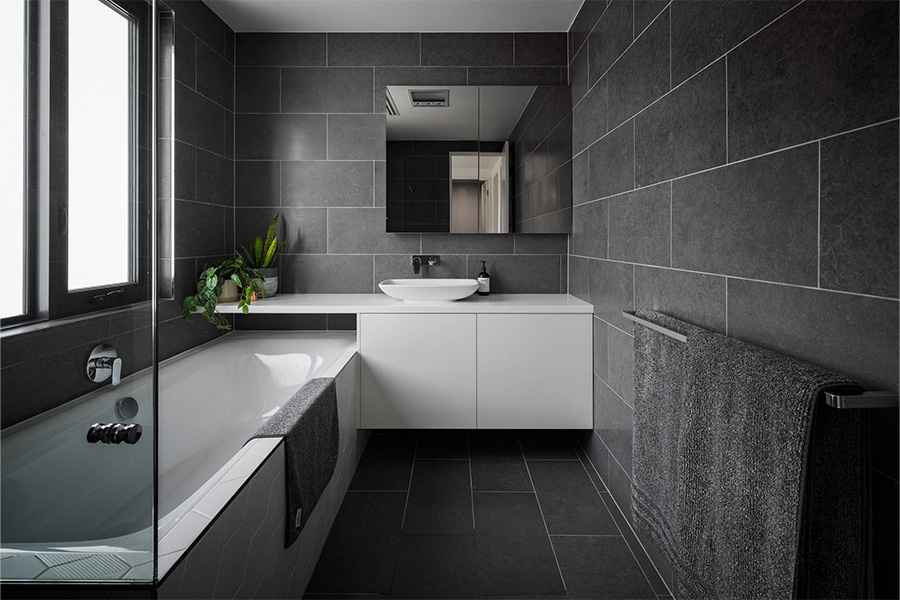
3. Embrace Monochromatic Mood with Dark Grey Tiling
The formula here is simple but incredibly effective. Think of it as 70% core neutral + 25% contrasting neutral + 5% accent. The dominant element is the dark grey tile (70%), which creates a dramatic, enveloping feel. This is then lifted and kept from being oppressive by the crisp white fixtures—the floating vanity, sink, and tub—making up about 25% of the visual space. The final 5% comes from the glint of chrome fixtures and the small touch of green from plants, which adds just enough life and polish.
⚠️ Real Talk
Let’s be honest: dark, matte, or semi-matte tiles look incredibly chic, but they are unforgiving when it comes to water spots, soap scum, and dust. If you live in an area with hard water, you will be wiping these surfaces down constantly to keep them looking clean. To mitigate this, apply a high-quality tile sealer after installation and consider installing a water softener for the whole house. If that’s not an option, keep a squeegee in the shower and a microfiber cloth under the sink for daily wipe-downs.
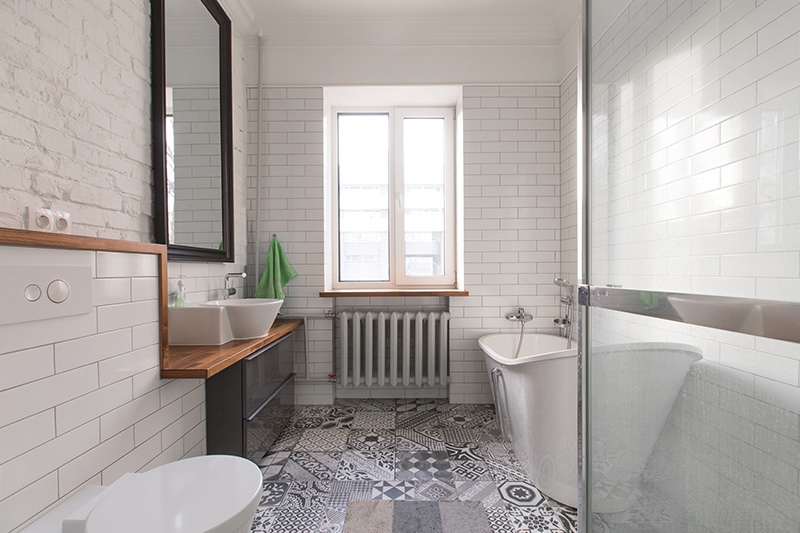
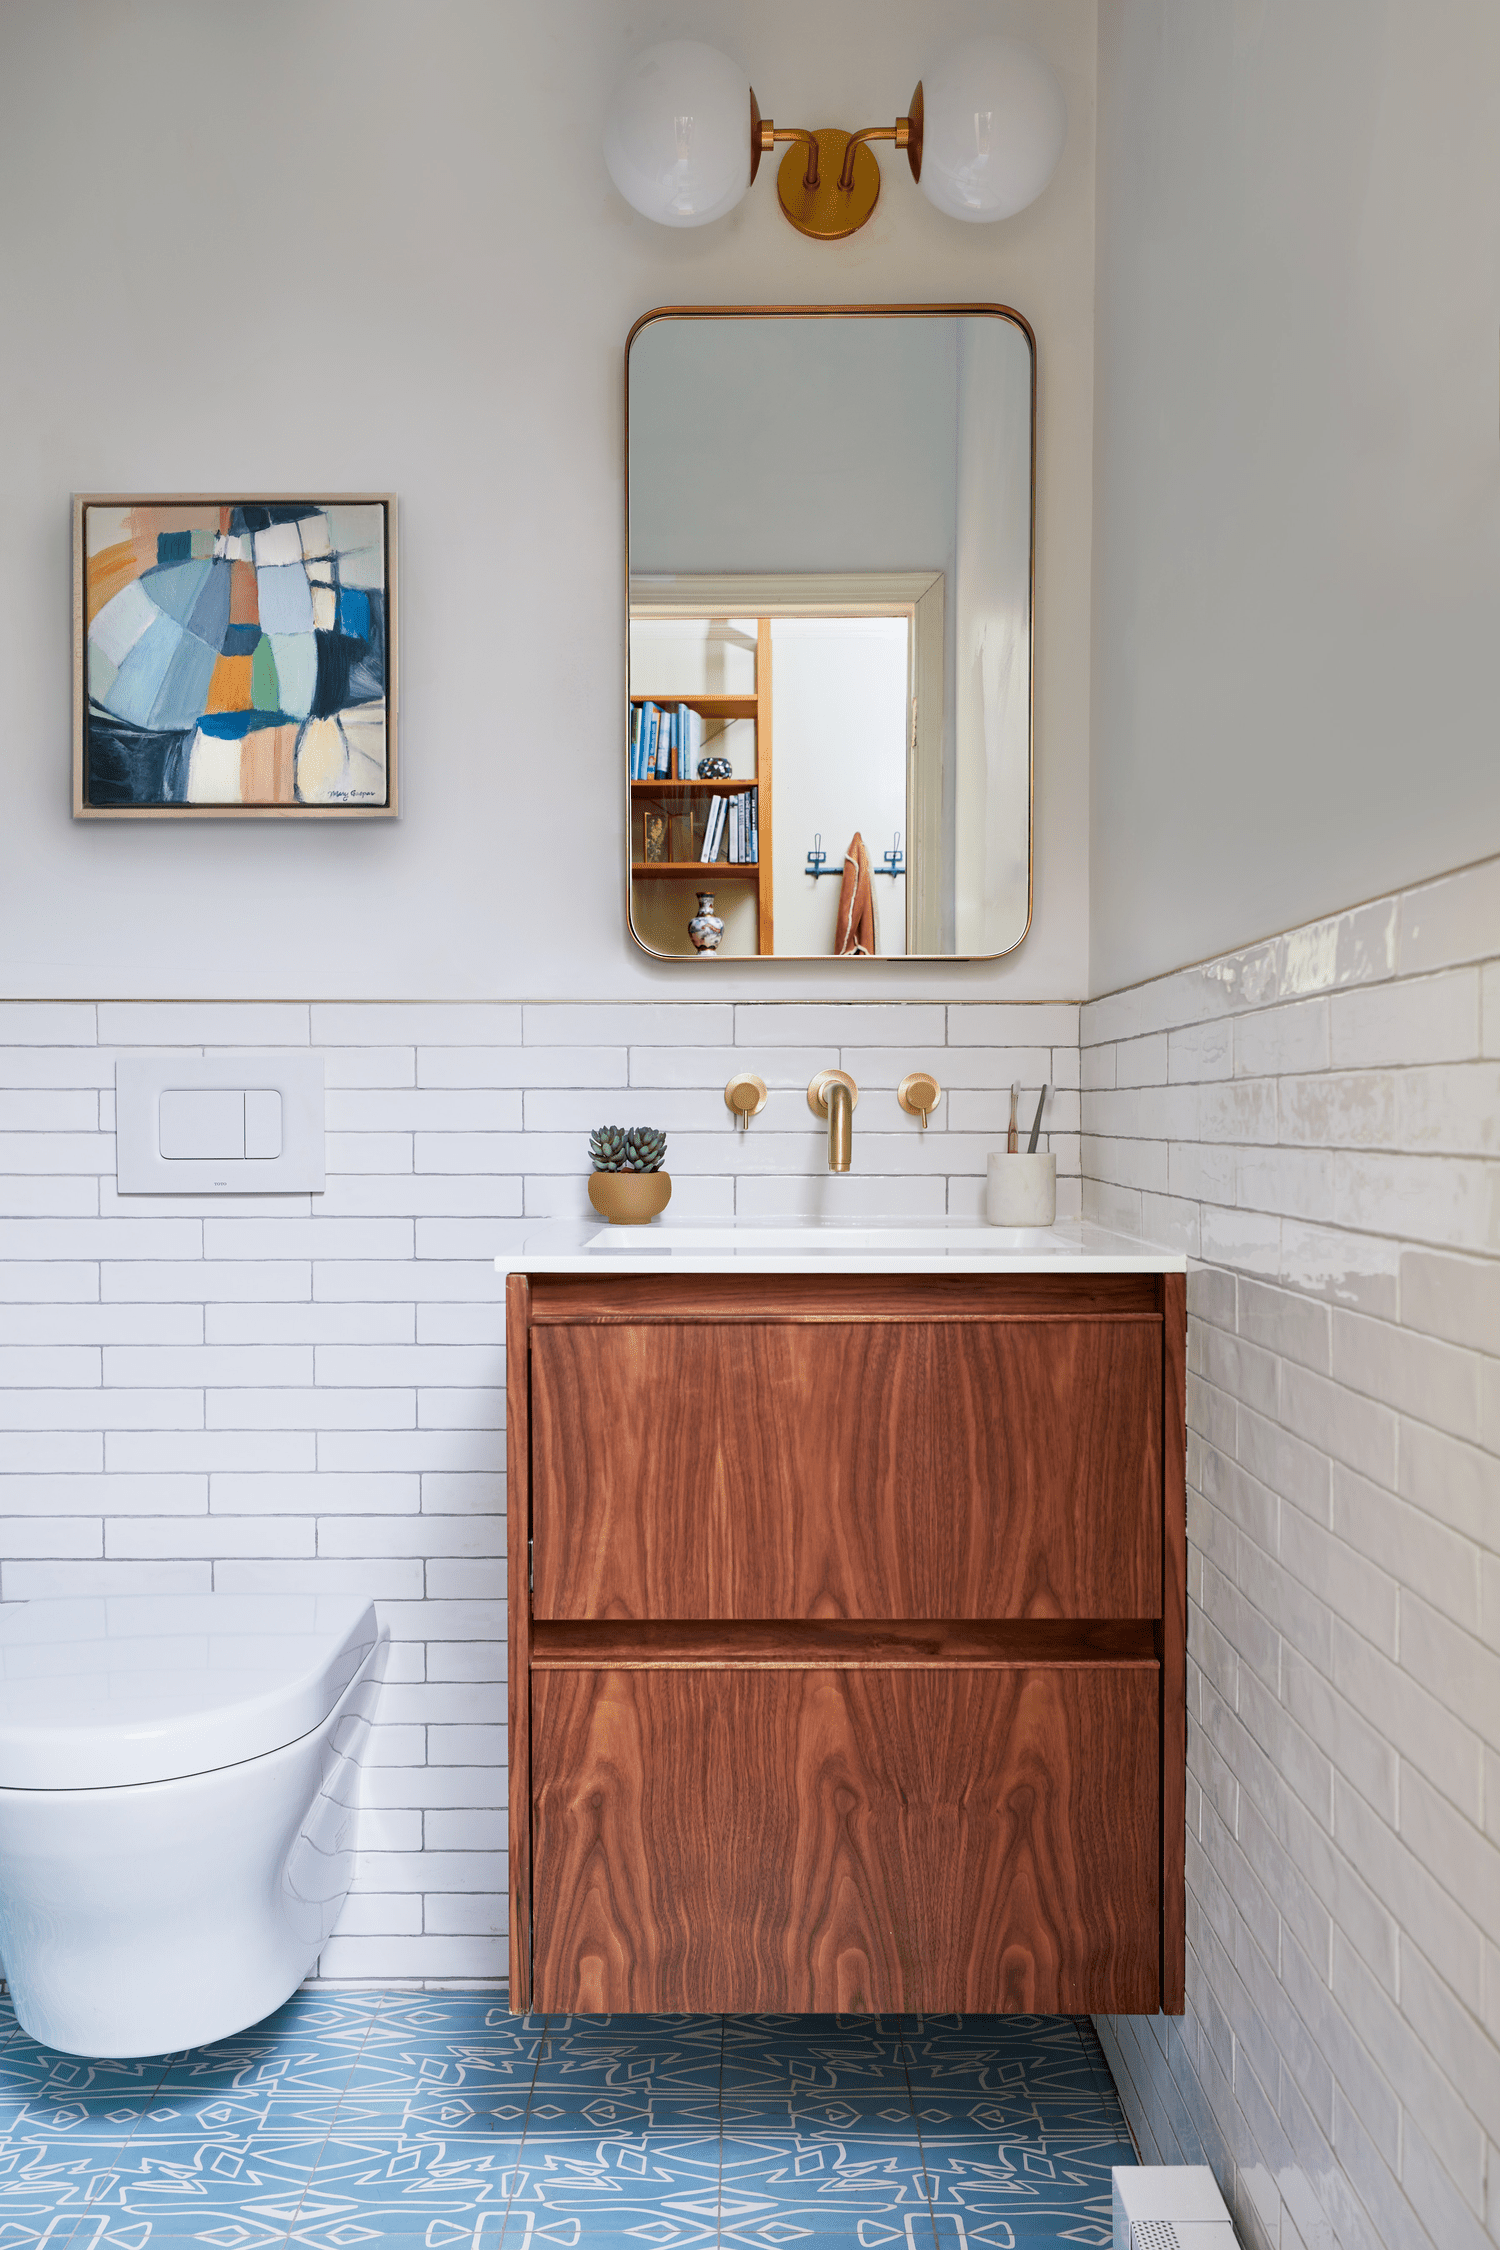
4. Eclectic Charm with Patterned Floors and Classic Subway Tile
The floor. Absolutely, 100% the floor. If you take away the bold, patterned tile, you have a perfectly nice but fairly standard bathroom: white subway tile, wood vanity, freestanding tub. It’s the eclectic, almost quilt-like pattern on the floor that gives the entire room its personality and soul. It acts as a stunning piece of art that you get to walk on, anchoring the otherwise simple elements and making the whole space feel custom, curated, and intentionally designed. It proves you don’t need color to make a bold statement.
💰 Budget Breakdown
You don’t need to spend a fortune on imported cement tiles to get this high-impact look. You can find incredible ceramic and porcelain versions for $5-$15 per square foot. Even better? The peel-and-stick market has exploded with stylish options. Stores like Target, Wayfair, and even Amazon offer gorgeous, durable peel-and-stick tiles for under $2 per square foot. It’s a fantastic weekend DIY project that can completely transform a builder-grade bathroom with minimal cost and commitment. This budget-friendly approach is a great alternative to the pricier finishes seen in Idea #2.
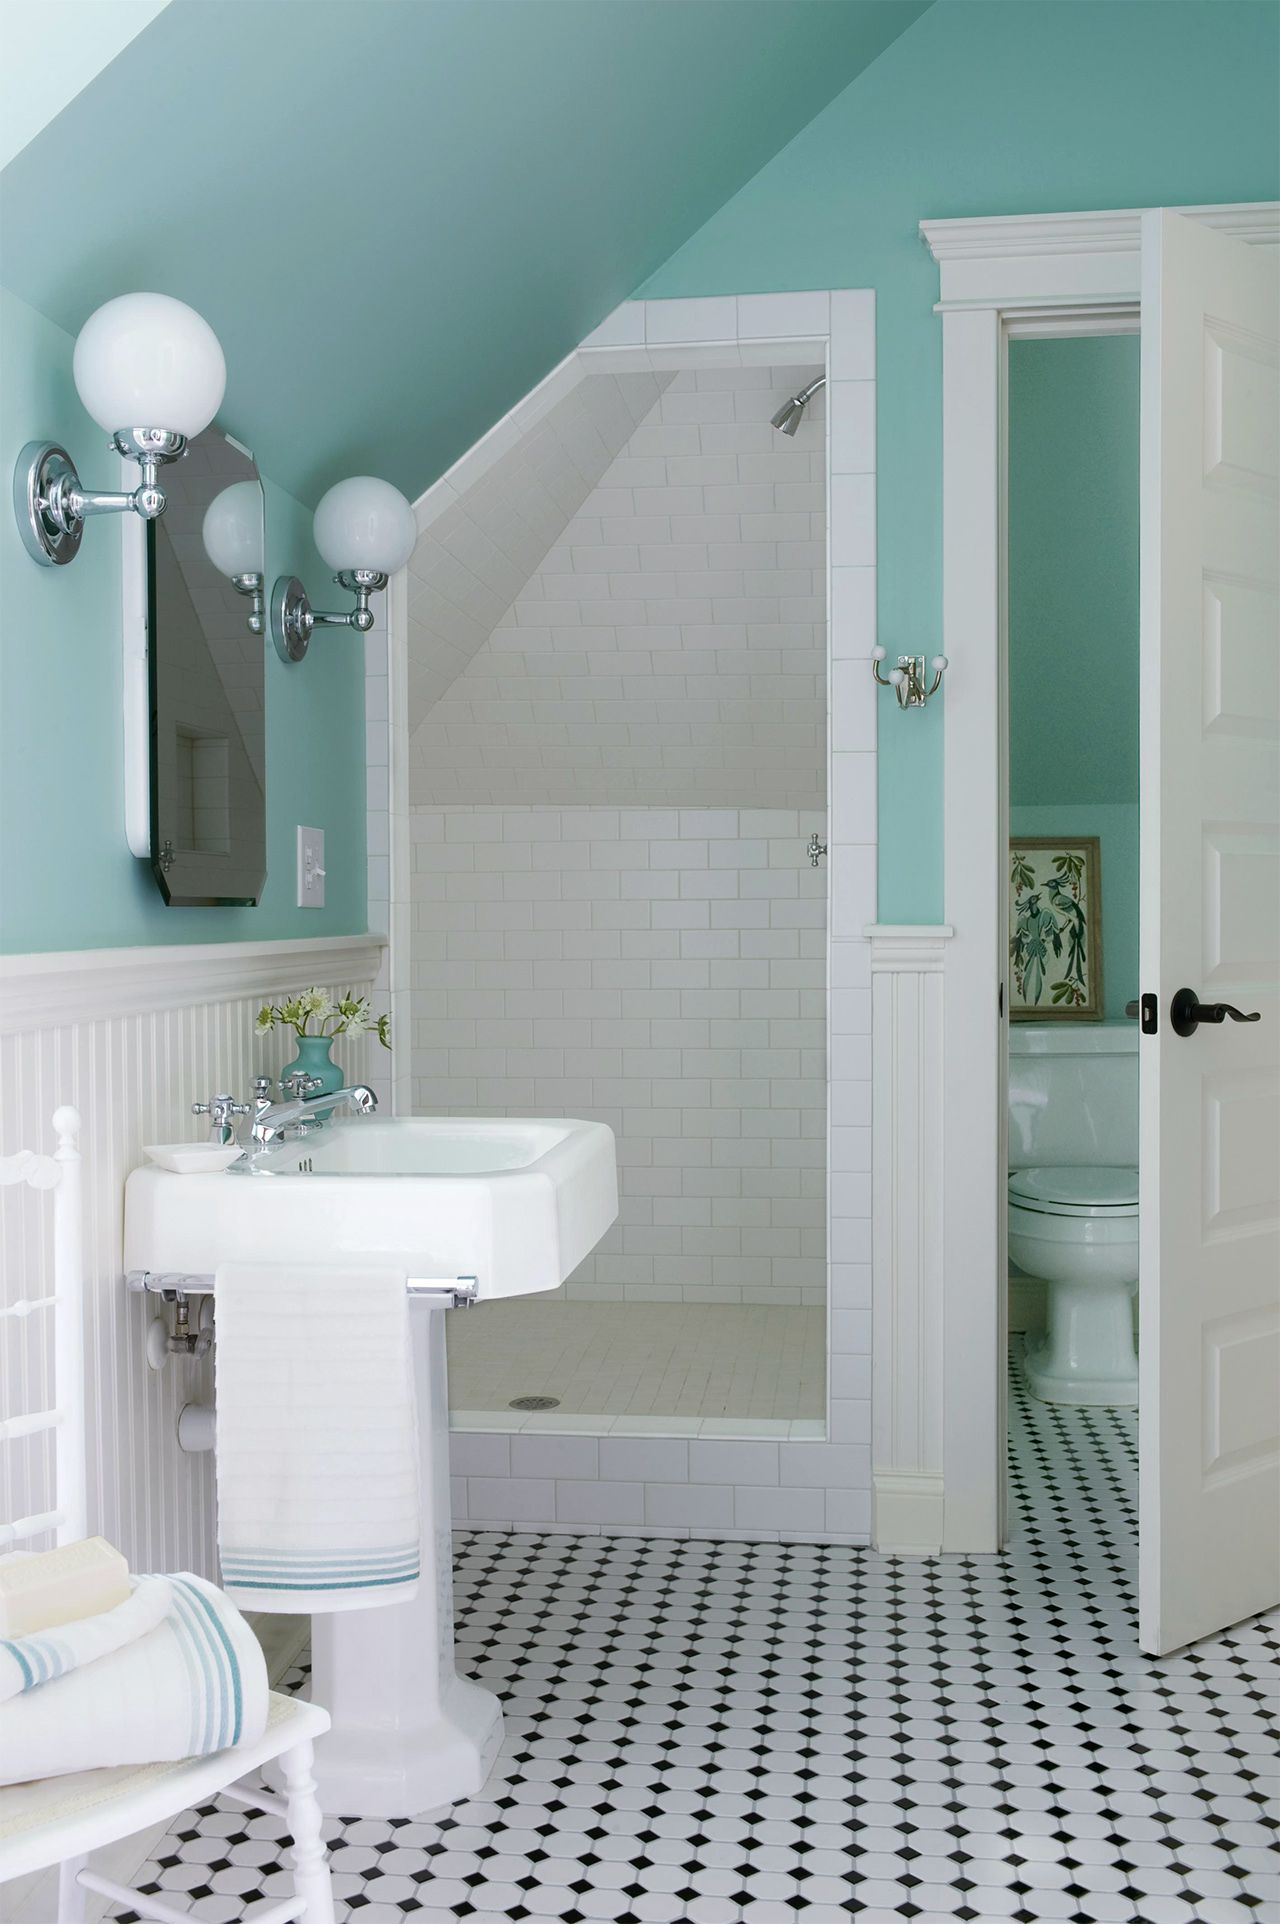
5. Maximize a Small Space with a Curved Shower and Smart Storage
This design is perfect for a small full bath, typically around 40-50 square feet (e.g., a 5’x8′ or 6’x8′ room). The curved shower enclosure is the key space-saver here; its rounded front provides more elbow room inside the shower while “giving back” precious floor space to the main area, making it easier to move around the toilet and sink. A typical square shower of the same size would create a sharp corner that juts into the room. This layout is a brilliant solution for narrow bathrooms in older homes or apartments.

💡 Designer Tip
- Time Estimate: 2-3 hours. Material Cost: $100-$300.
- Step 1: Locate and mark the studs in the wall where you plan to hang the wooden shelving unit.
- Step 2: Assemble the shelf unit on the floor according to the manufacturer’s instructions.
- Step 3: Have a partner help you lift the unit into place, and use a level to ensure it is perfectly vertical.
- Step 4: Secure the unit to the wall by drilling screws through the pre-drilled holes in the unit and into the wall studs you marked earlier. Use wall anchors if a stud is not available in a specific spot.
- Step 5: Style your shelves and enjoy your new storage!
6. Channeling Mid-Century Luxury in a Modern Retreat
Mid-century modern design continues to dominate Pinterest boards in 2026, and for good reason. It’s the perfect antidote to the cold, impersonal minimalism of the past few years. Homeowners are craving warmth, character, and a connection to nature. Mid-century design delivers this with its emphasis on organic shapes, high-quality natural woods like teak and walnut, and a seamless blend of indoor and outdoor living. This isn’t just a retro trend; it’s a move toward creating spaces that feel timeless, personal, and profoundly calming.
🔧 How-To Brief
The success of mid-century design lies in its honest use of materials and clean lines. The focus is on the inherent beauty of the wood grain, the sculptural quality of the furniture, and functionality above all else. In a bathroom, this translates to vanities with tapered legs, simple and elegant hardware (often brass or chrome), and an uncluttered feel. It’s about letting a few high-quality pieces shine rather than filling the space with excessive decor. It feels luxurious because it’s thoughtful and restrained.
7. The All-Over Wood-Look Tile Bathroom
Here’s the beauty of porcelain wood-look tile: you get all the warmth and visual texture of natural wood with none of the worry. Real wood in a wet environment like a bathroom is a recipe for warping, water stains, and potential mold. These tiles, however, are completely waterproof, incredibly durable, and ridiculously easy to clean. You can mop them, steam them, and splash all you want. The only real maintenance is ensuring the grout lines are sealed properly upon installation to prevent staining and mildew over time.
🔥 Trending Context
A recessed wall niche is one of the most functional upgrades you can make, and its placement is key. For a niche next to a bathtub, install it between 48 and 60 inches from the floor to its centerline. This keeps shampoos and soaps within easy reach whether you are standing in the shower or sitting in the tub. Placing it too low risks it being submerged during a bath, while placing it too high makes it awkward to reach. In this case, running it horizontally creates a beautiful, clean line that draws the eye.
8. Luxe Minimalism with Large-Format Marble and Integrated Lighting
- Main Fixtures (Tub, Toilet, Sink): $4,000 – $8,000
- Lighting (Integrated LEDs, Spots): $2,500 – $5,000
- Marble-look Tile & Installation: $7,000 – $15,000+
- Fixtures (Faucets, Mixers): $1,500 – $3,000
- Labor & Other: $5,000 – $10,000
- TOTAL: $20,000 – $41,000+
- Budget alternative: Get a similar vibe for $7,000 – $12,000 using large-format porcelain tile, a standard alcove tub, and well-placed vanity light bars instead of custom integrated lighting.
🎯 What Makes It Work
The single element holding this entire design together is the integrated linear lighting. Without it, you have a beautiful but static marble box. The seamless, built-in glow in the ceiling transforms the space from merely a room into an architectural experience. It highlights the veining in the marble, creates a sense of height and drama, and provides perfectly even, shadow-free illumination. It feels less like lighting was added *to* the room and more like the room itself is luminous. It’s a truly high-end detail.
9. A Bold Contrast: Wood-Look Shower Panels and Black Grout
This look is all about a balanced partnership. Think of it as: 40% warm texture + 40% clean geometry + 20% graphic accent. The wood-look panels in the shower provide that essential 40% of warmth and organic feel. This is perfectly matched by the 40% of crisp, white rectangular tiles that keep the room feeling bright and spacious. The final, crucial 20% is the matte black of the fixtures, window trim, and grout lines, which acts as the punctuation, adding definition and a modern edge to the whole composition.
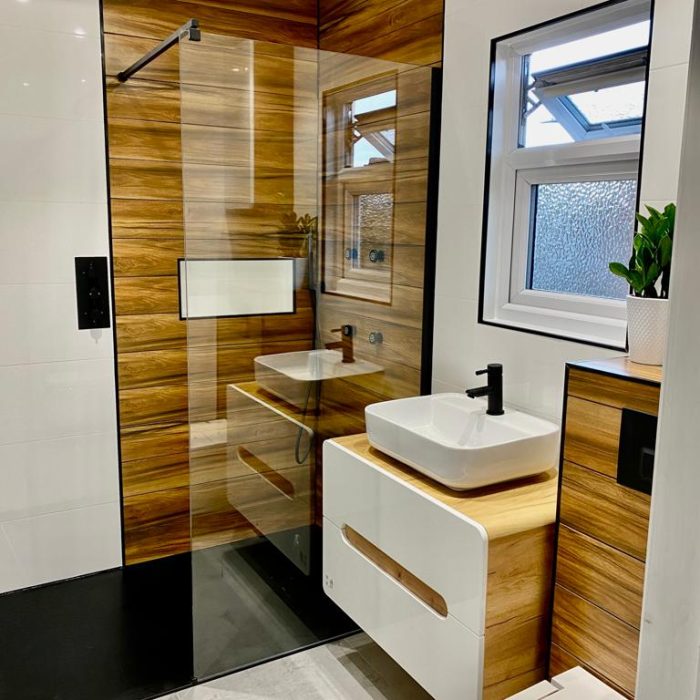
✅ Before You Start
Everyone loves the look of black grout right now, but you have to go in with your eyes open. In a shower, soap scum and mineral deposits will show up as a white or chalky film, making it look dirty much faster than light-colored grout. You’ll need to be diligent with a pH-neutral daily shower spray to prevent buildup. On the plus side, black grout is much less likely to show staining from mold or mildew, but it can fade over time if cleaned with harsh, bleaching chemicals. Gentle, consistent cleaning is the key.
10. Sophisticated Pairing: Wood Plank Walls and Black Marble
The genius here is in the contrast of both material and direction. The warm, horizontally laid wood-look tiles create a sense of width and have a natural, almost rustic softness. This is dramatically interrupted by the vertical panels of cool, polished black marble. The vertical lines of the marble draw the eye upward, adding height and a dose of high-end drama. It’s a brilliant use of texture and orientation to make a standard rectangular room feel dynamic and custom. The simple white fixtures are the perfect quiet counterpoint.
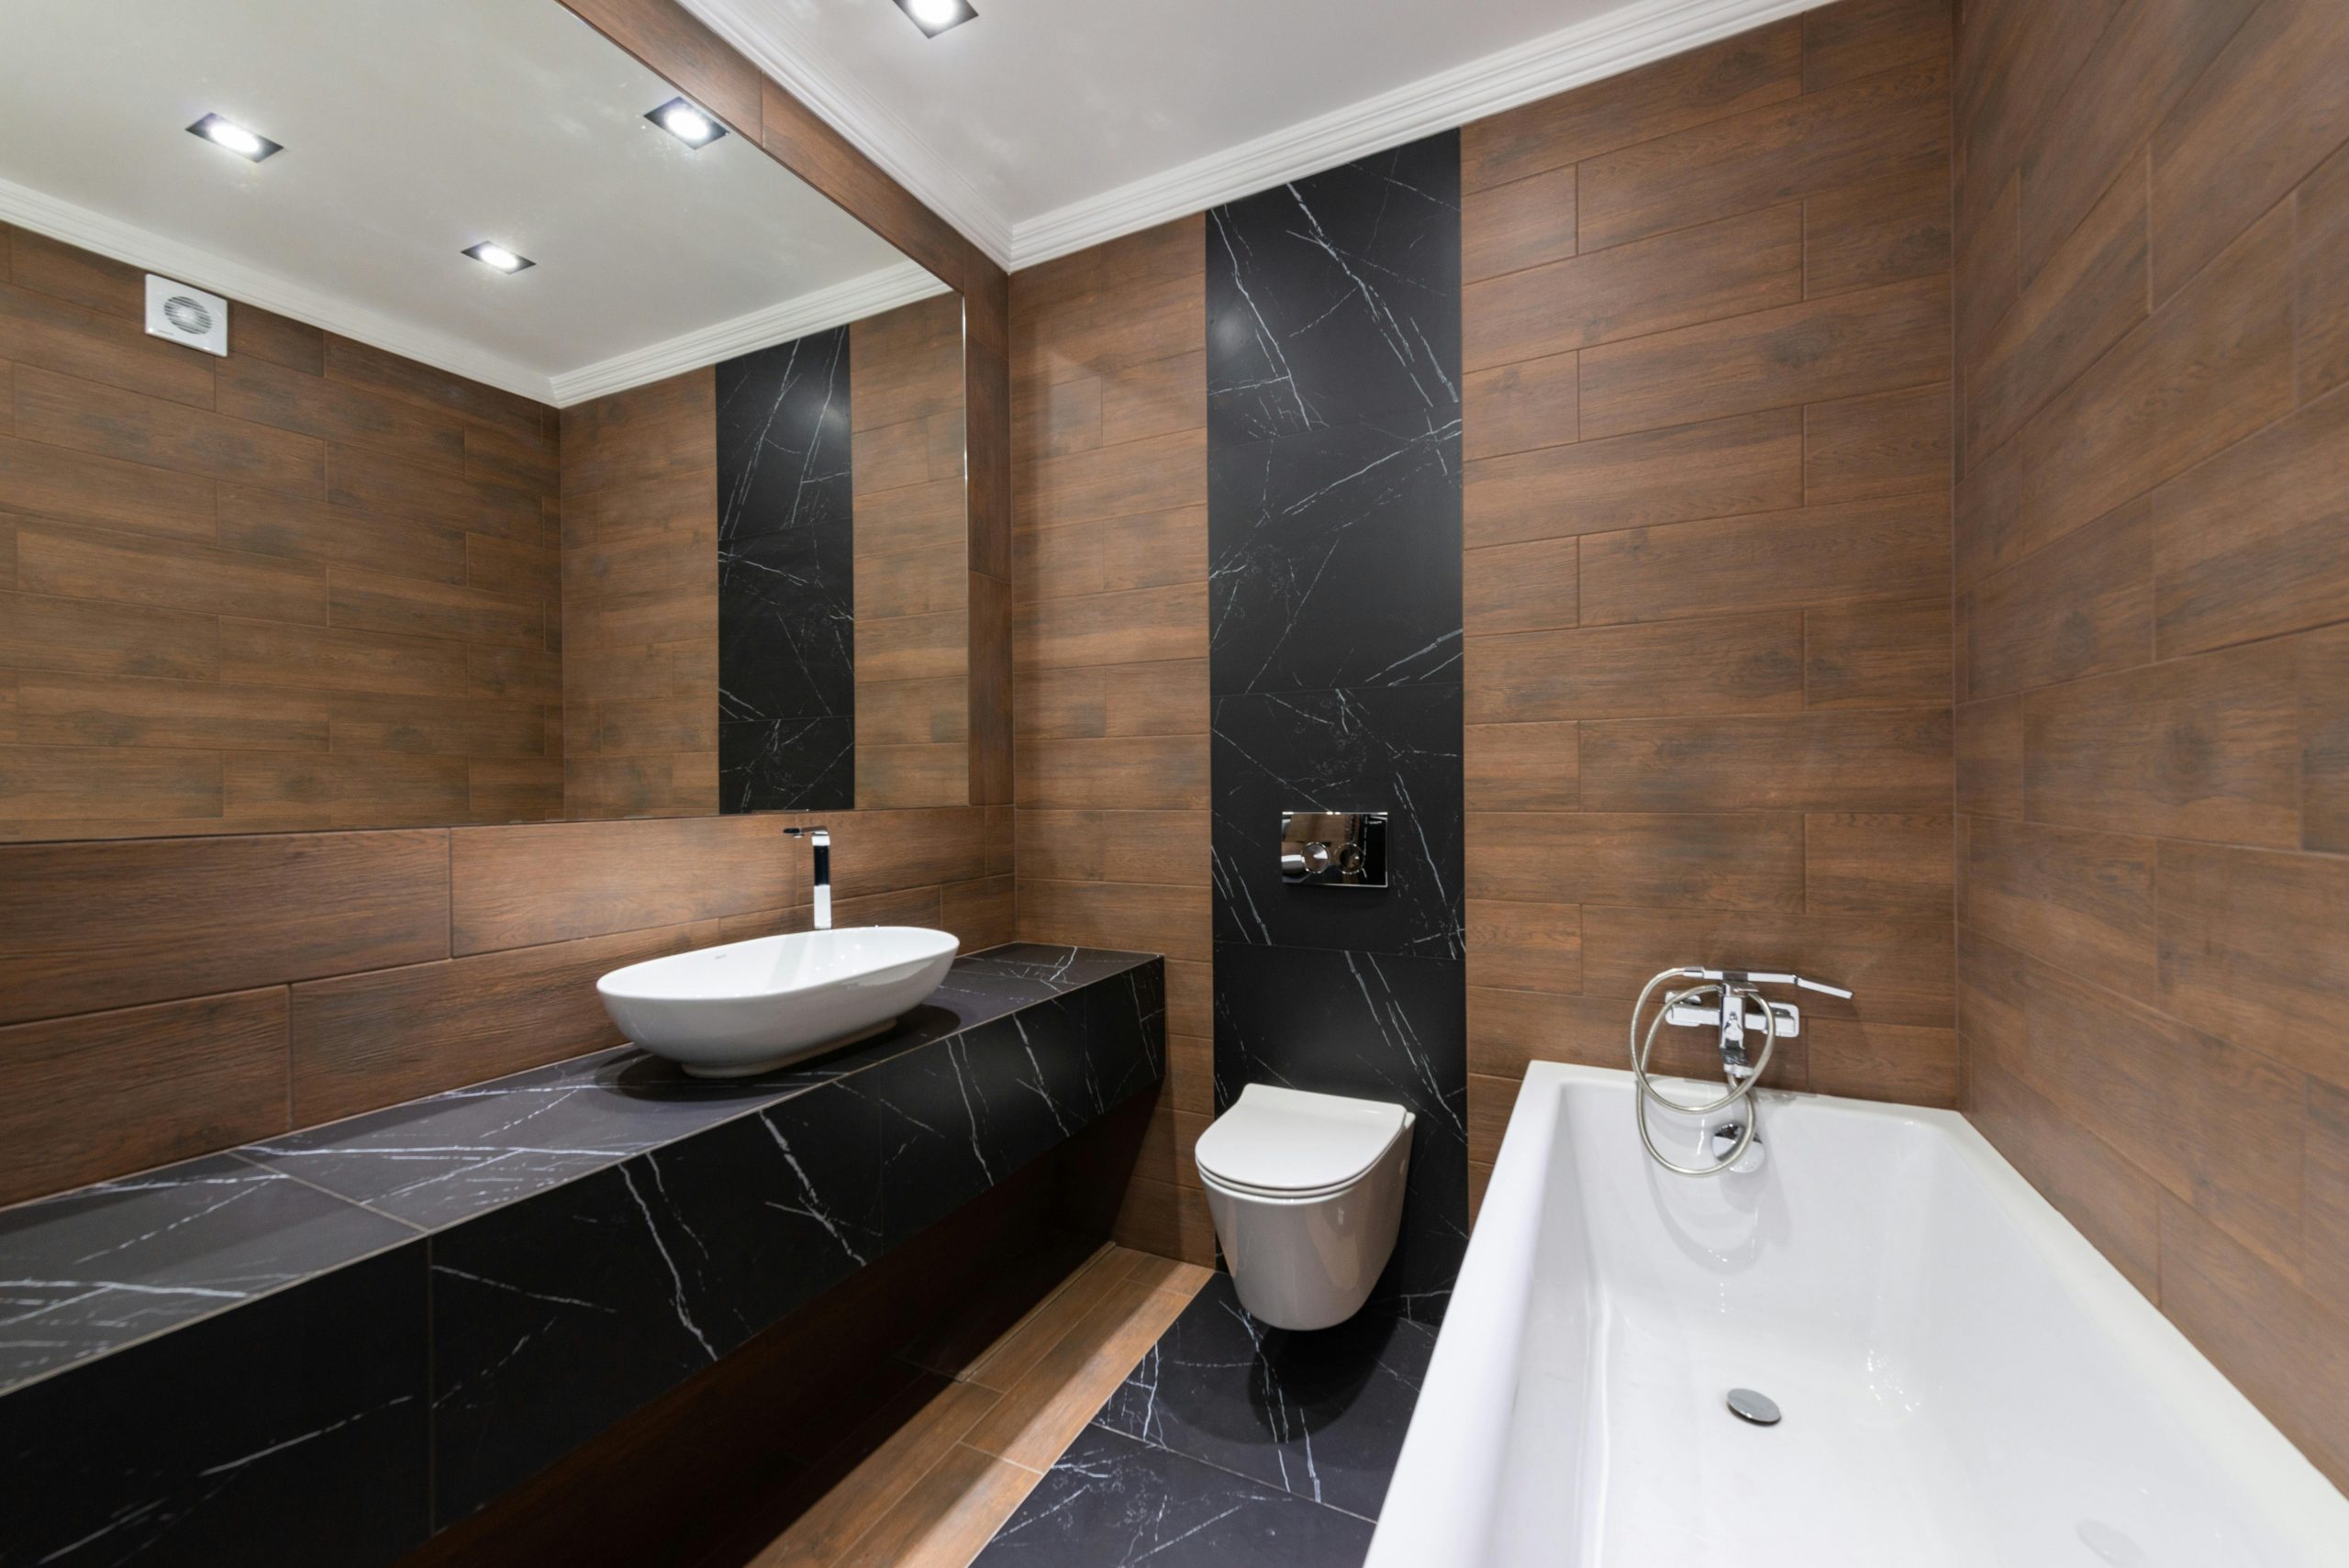
💸 Get This Look For Less
This is a bold, high-contrast look that needs room to breathe. It’s best suited for a medium to large primary bathroom, ideally 80 square feet or more. In a very small bathroom, the combination of dark marble and textured wood walls could feel overwhelming and visually cluttered. You need enough distance to appreciate the interplay of the materials. For a smaller space, consider using just one of these elements as an accent wall, rather than both. This approach is the opposite of the space-maximizing strategy seen in Idea #5.
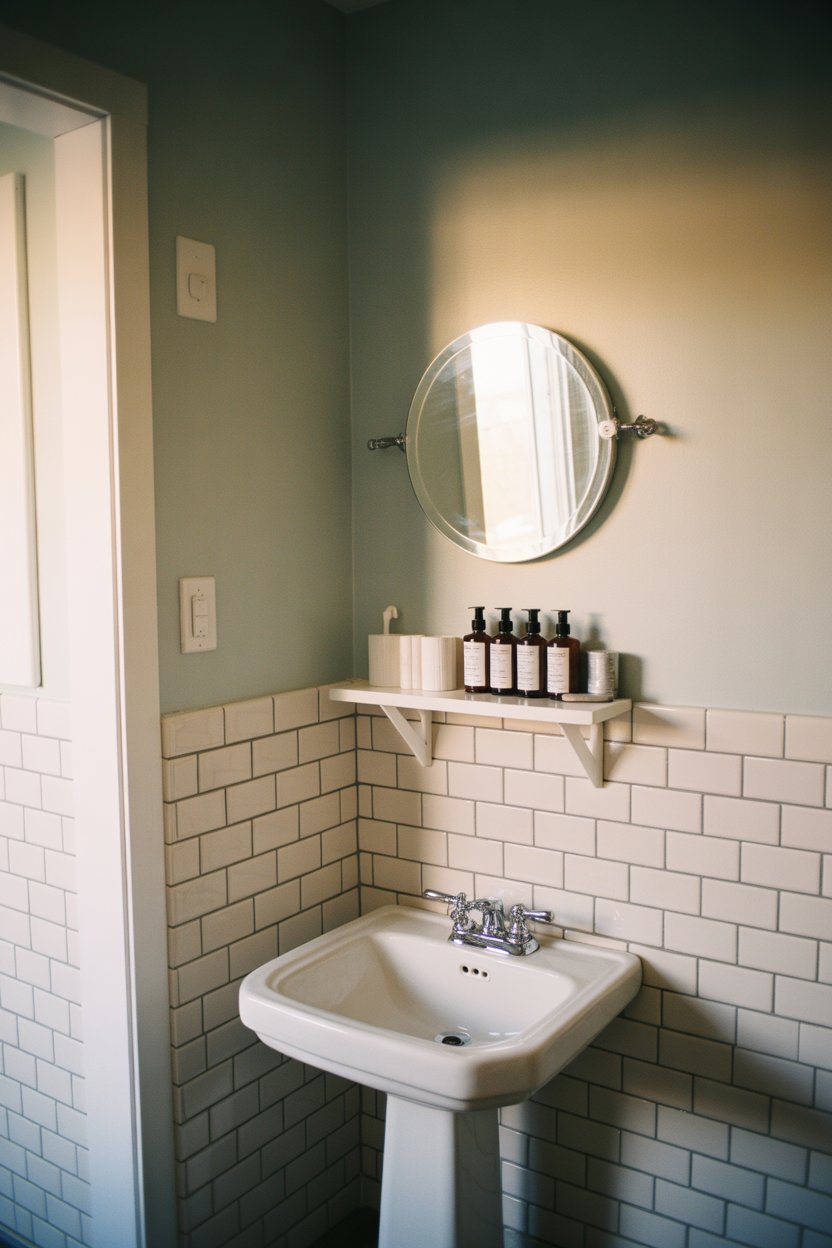
11. Modern Serenity with a Textured Tile Backsplash
The textured, gray and white stacked tile backsplash is the absolute star of this bathroom. Without it, the wall-mounted sink and freestanding tub are just nice, simple white fixtures. The backsplash introduces dimension, pattern, and a subtle focal point that elevates the entire design. It catches the light beautifully, creating a dynamic play of shadows and highlights that you wouldn’t get from a flat tile. It bridges the gap between the sleek white fixtures and the dark window frame, tying the entire palette together.
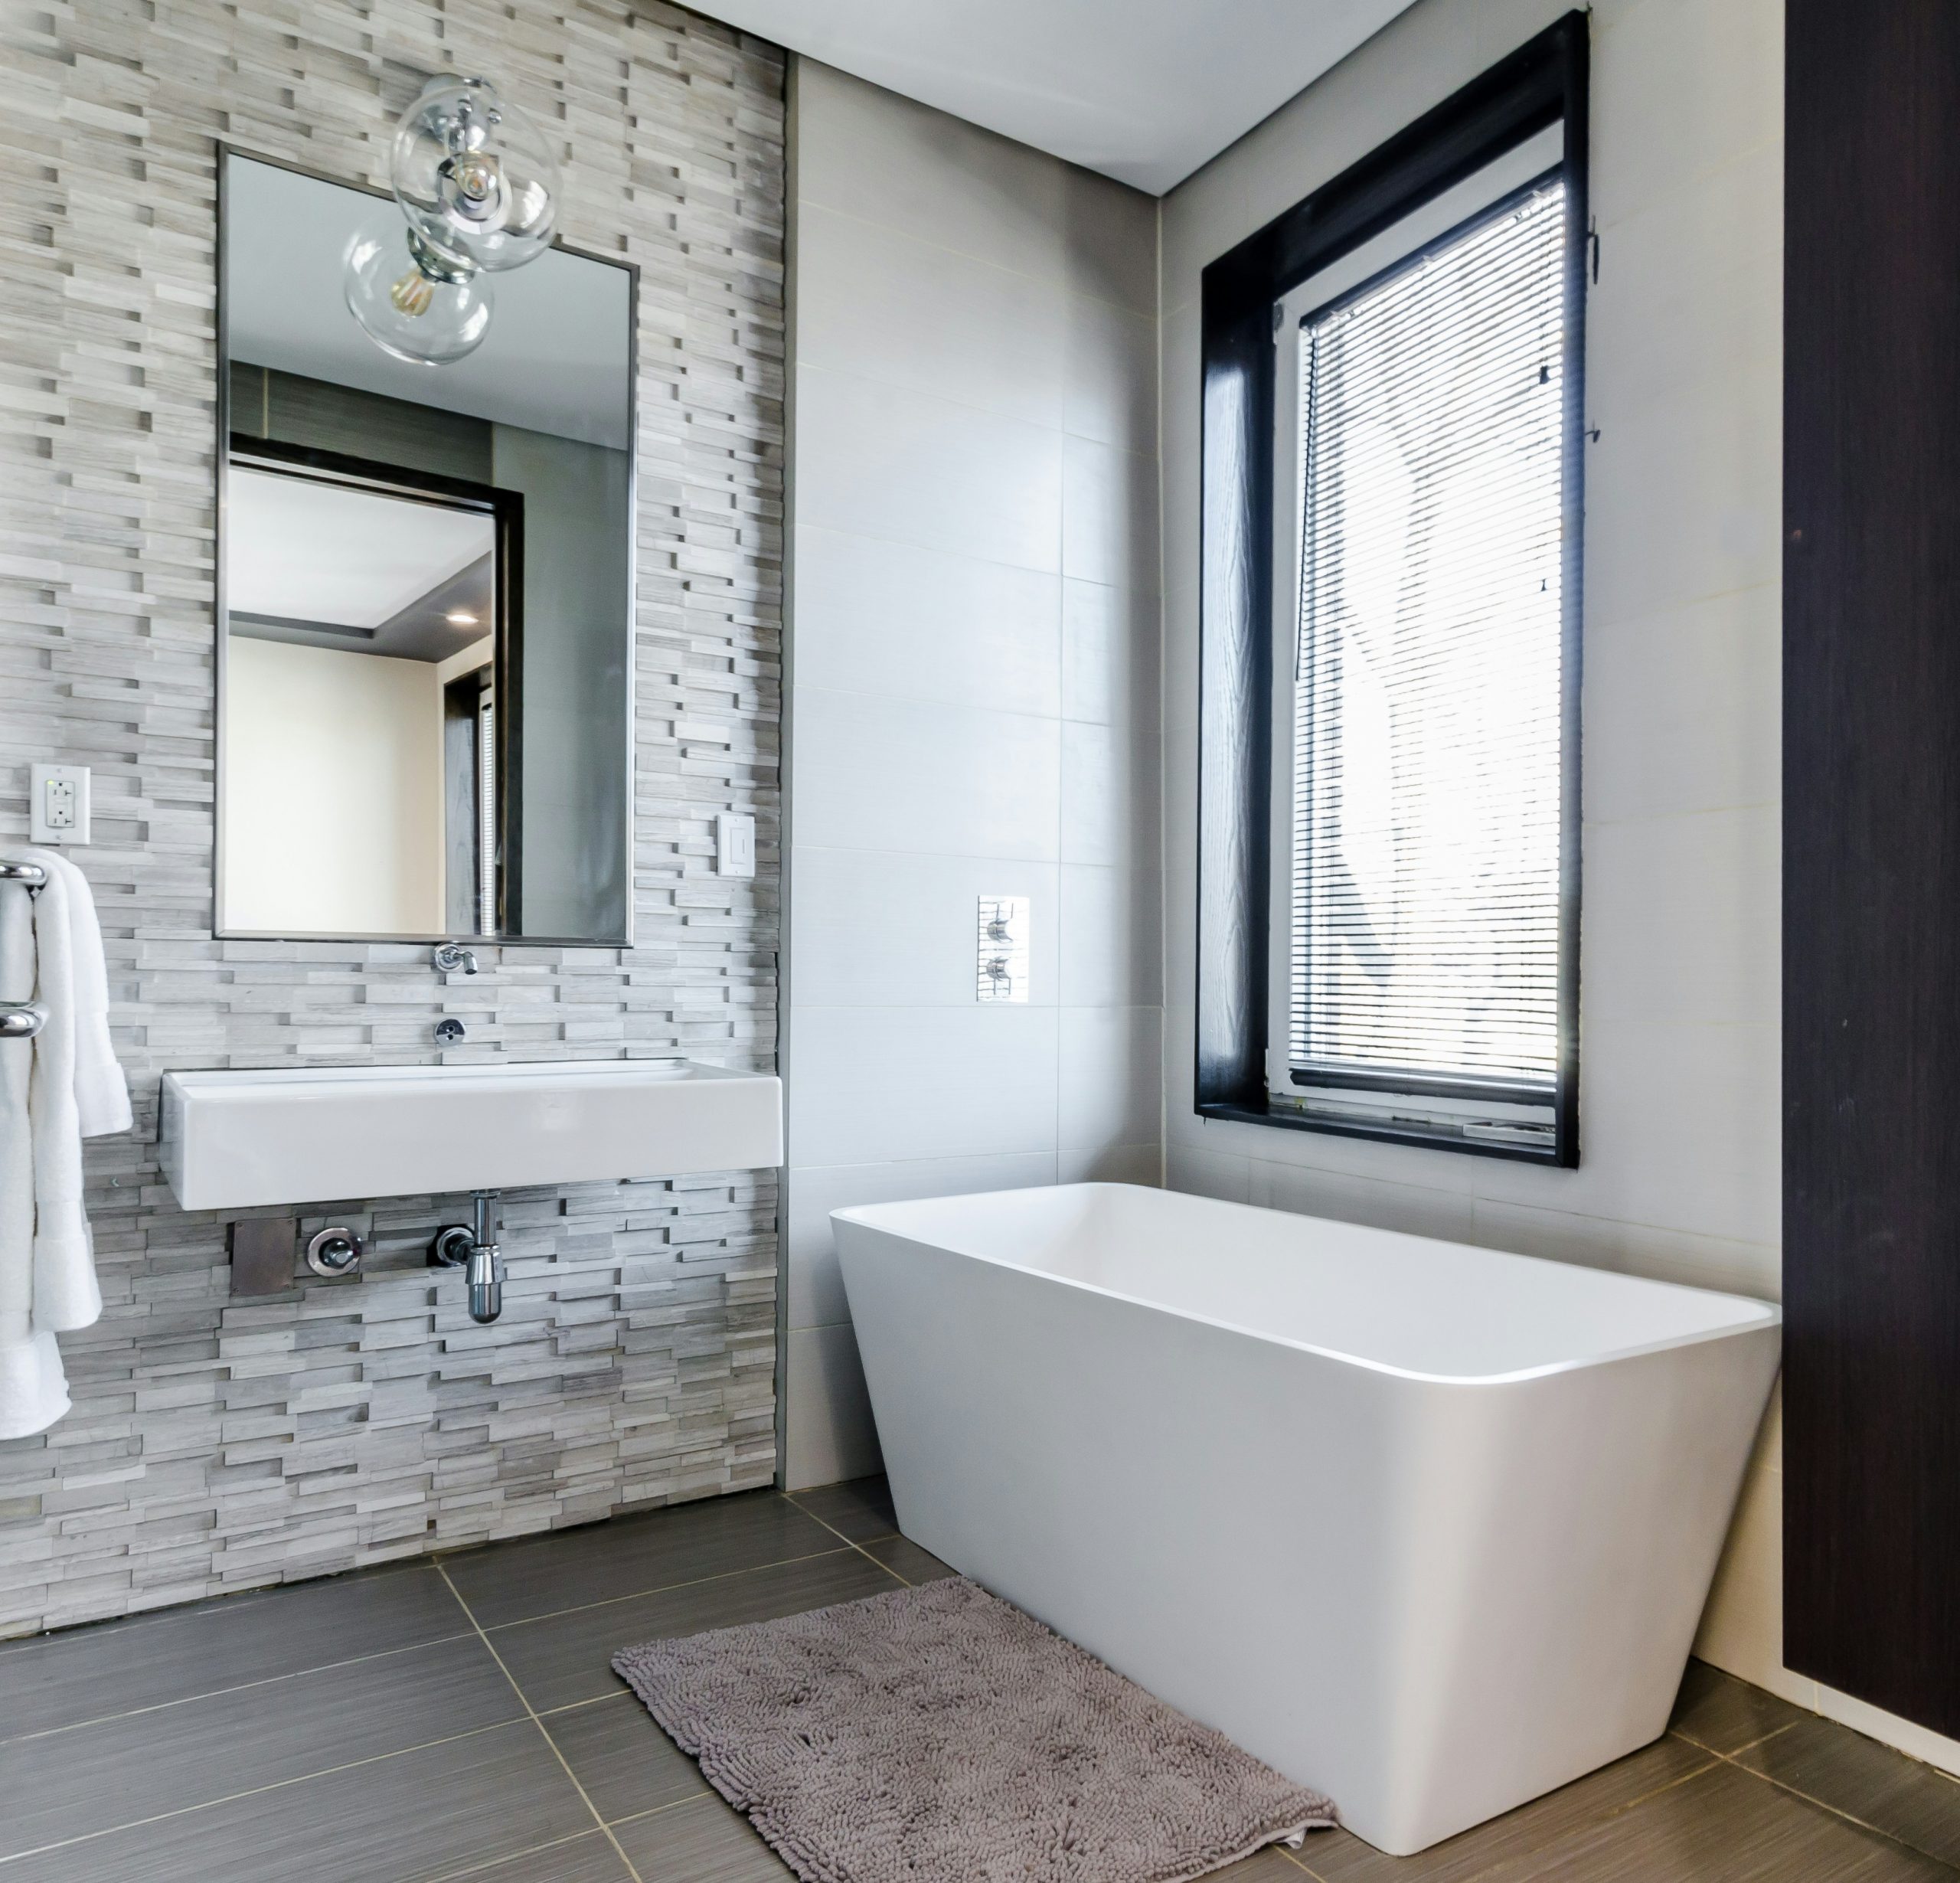
🧹 Maintenance Reality
A textured tile backsplash behind a sink looks amazing, but it can be trickier to clean than a smooth surface. Toothpaste splatters and soap splashes can get trapped in the grooves and crevices. The key is to wipe it down with a damp microfiber cloth regularly, before things have a chance to dry and harden. Avoid using abrasive sponges that could damage the tile’s finish. For a deeper clean, a soft-bristled brush and a pH-neutral cleaner will do the trick. It’s a little extra work, but Worth it for the visual impact.
12. Creating a Calm Nook with a Glass Block Window
Once considered a hallmark of the 80s and 90s, glass block is having a major comeback in 2026, and this is why. As homeowners look for ways to bring in more natural light without sacrificing privacy, glass block offers a perfect solution. It diffuses light beautifully, creating a soft, serene glow while completely obscuring the view. In an era of open-concept living, creating these small, private, light-filled sanctuaries feels more relevant and luxurious than ever. It hits the perfect note of nostalgia and modern functionality.
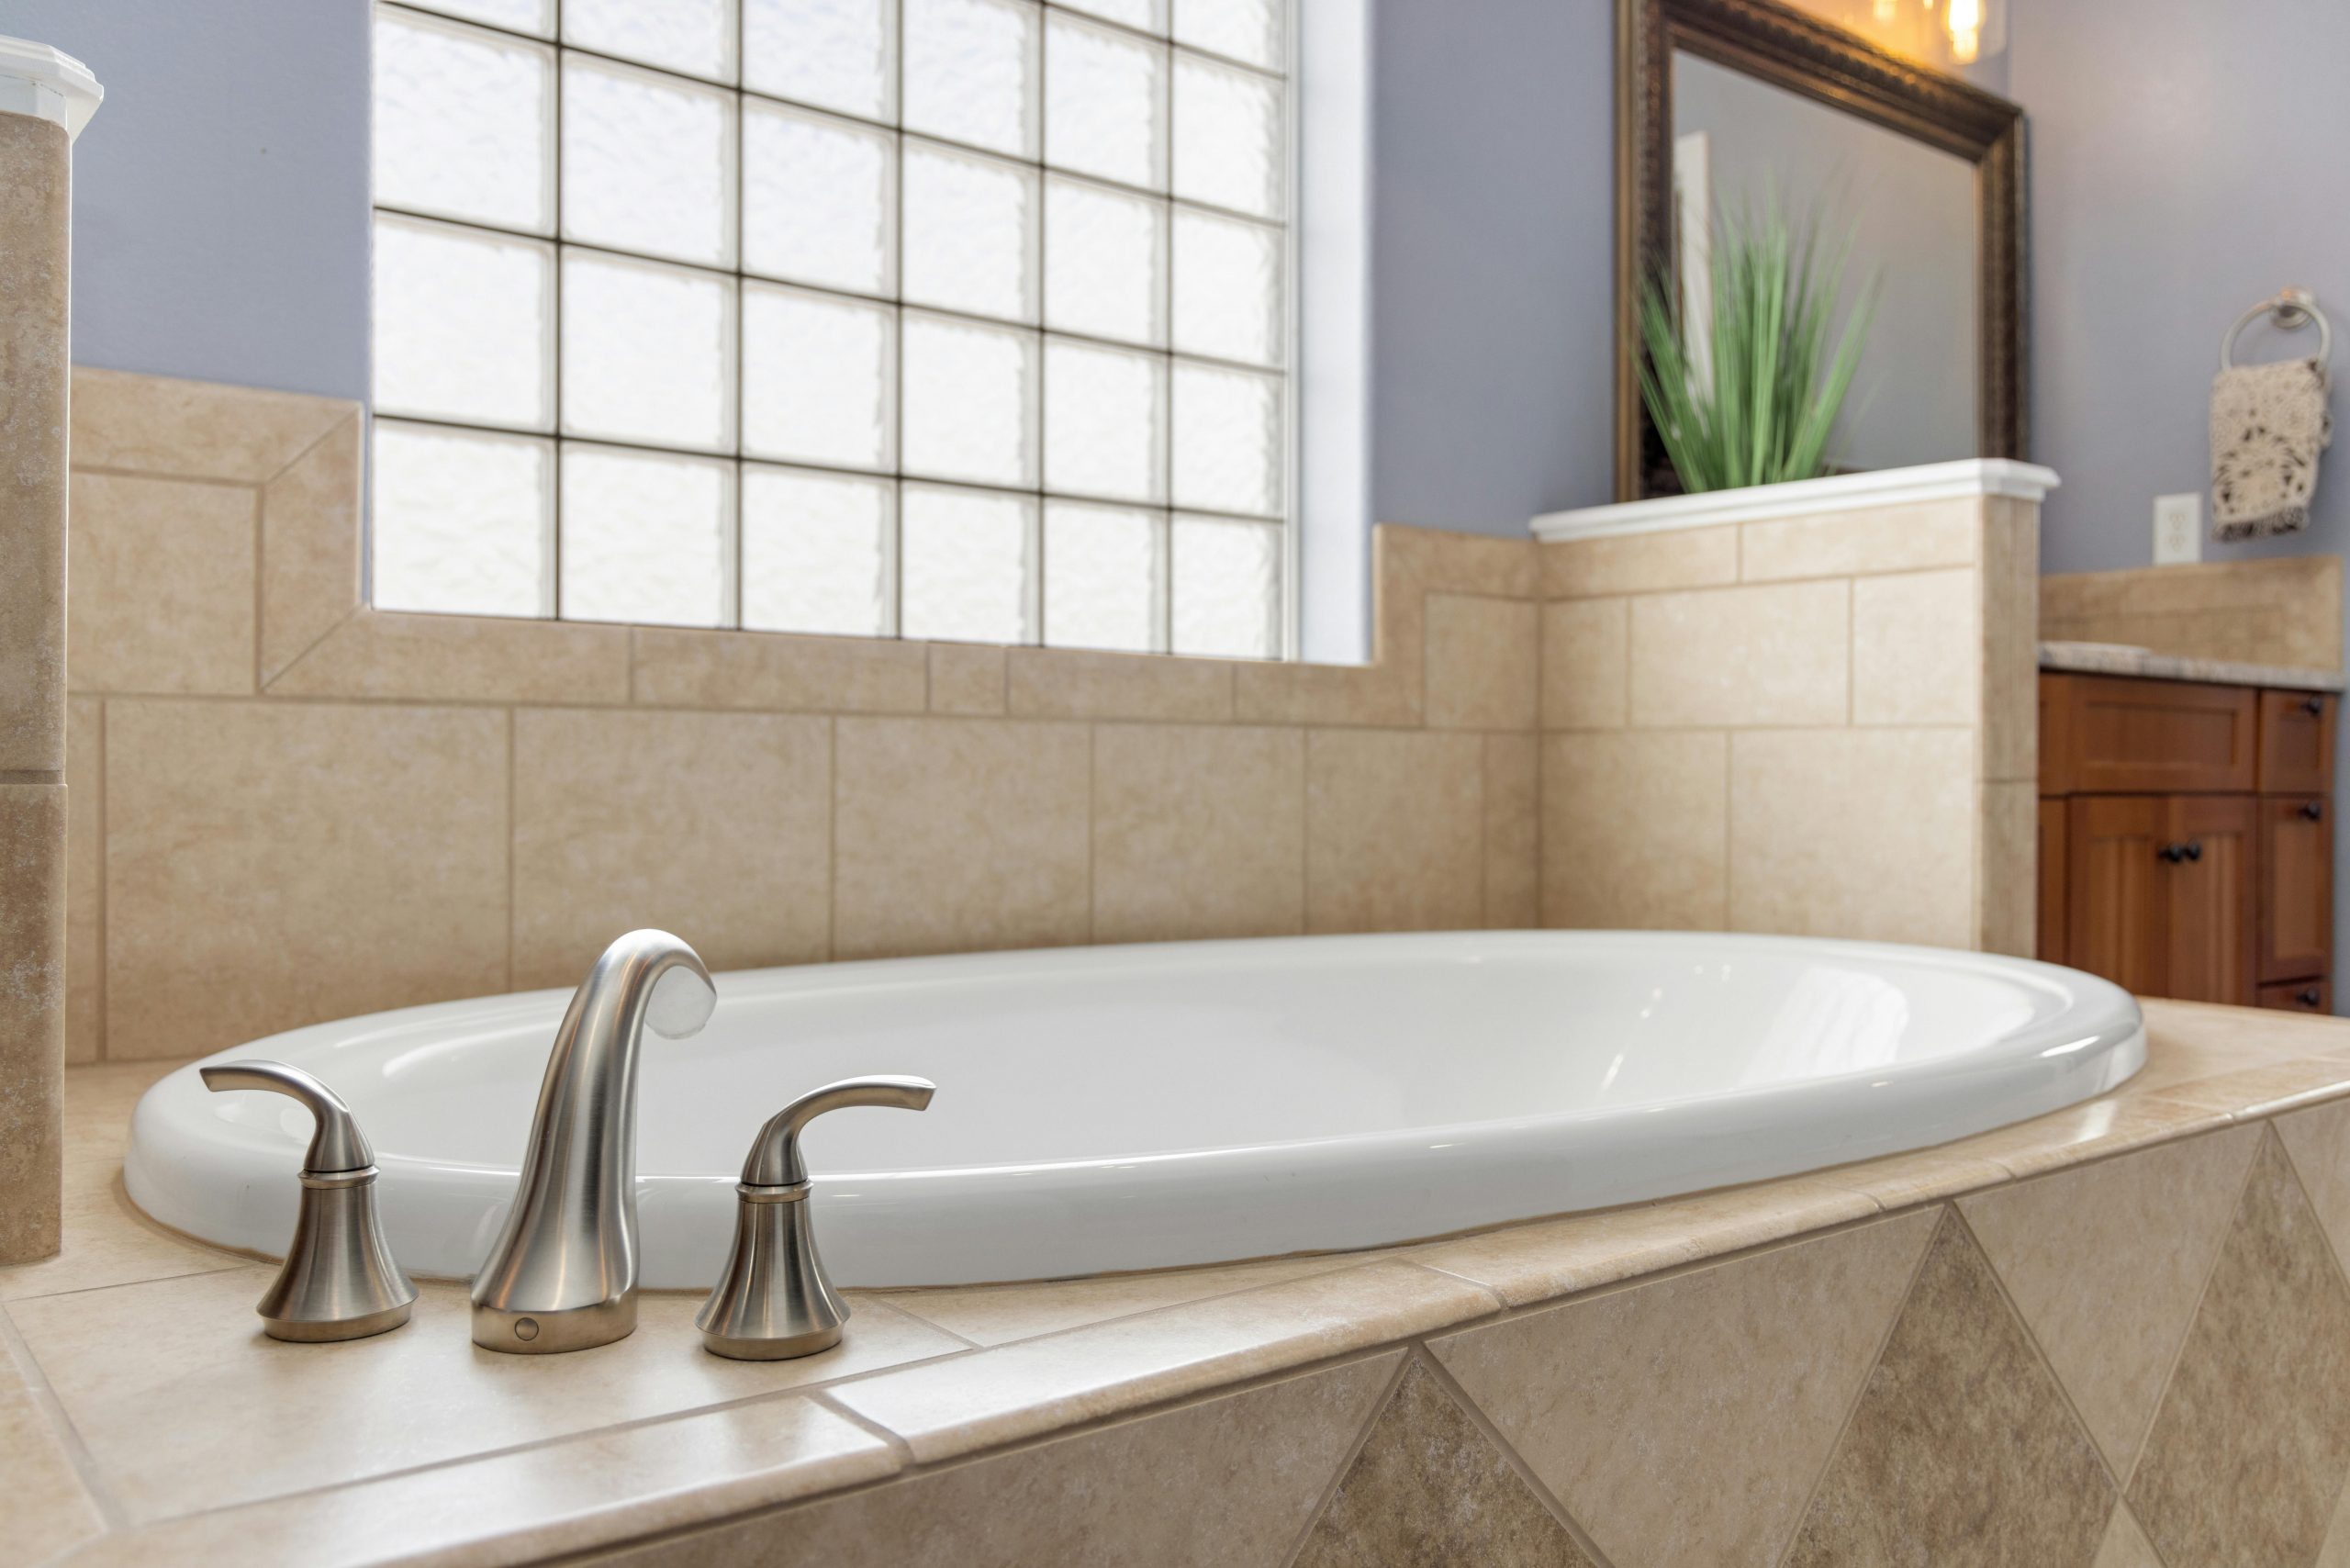
📏 Scale Guide
A custom glass block window installation can be pricey. For a more budget-friendly way to get that diffused light and privacy, consider applying a decorative window film to an existing clear glass window. You can find high-quality films that mimic the look of frosted, etched, or even ribbed glass for under $50. It’s a simple, DIY-friendly solution that takes less than an hour to install and is completely removable, making it a great option for renters or those who want to test out the look before committing.
13. Dynamic Drama with Copper Pendant Lights and Dark Tile
This bathroom design works because it confidently mixes moody tones with a brilliant metallic accent. The dark, textured wall tiles create an intimate, sophisticated backdrop that absorbs light, making the space feel cozy and dramatic. The floating white vanity and sink provide a sharp, clean contrast. But the knockout punch comes from the copper geometric pendants. Their warm, reflective metal and sharp angles catch the eye immediately, providing both a light source and a sculptural art piece that activates the entire room.
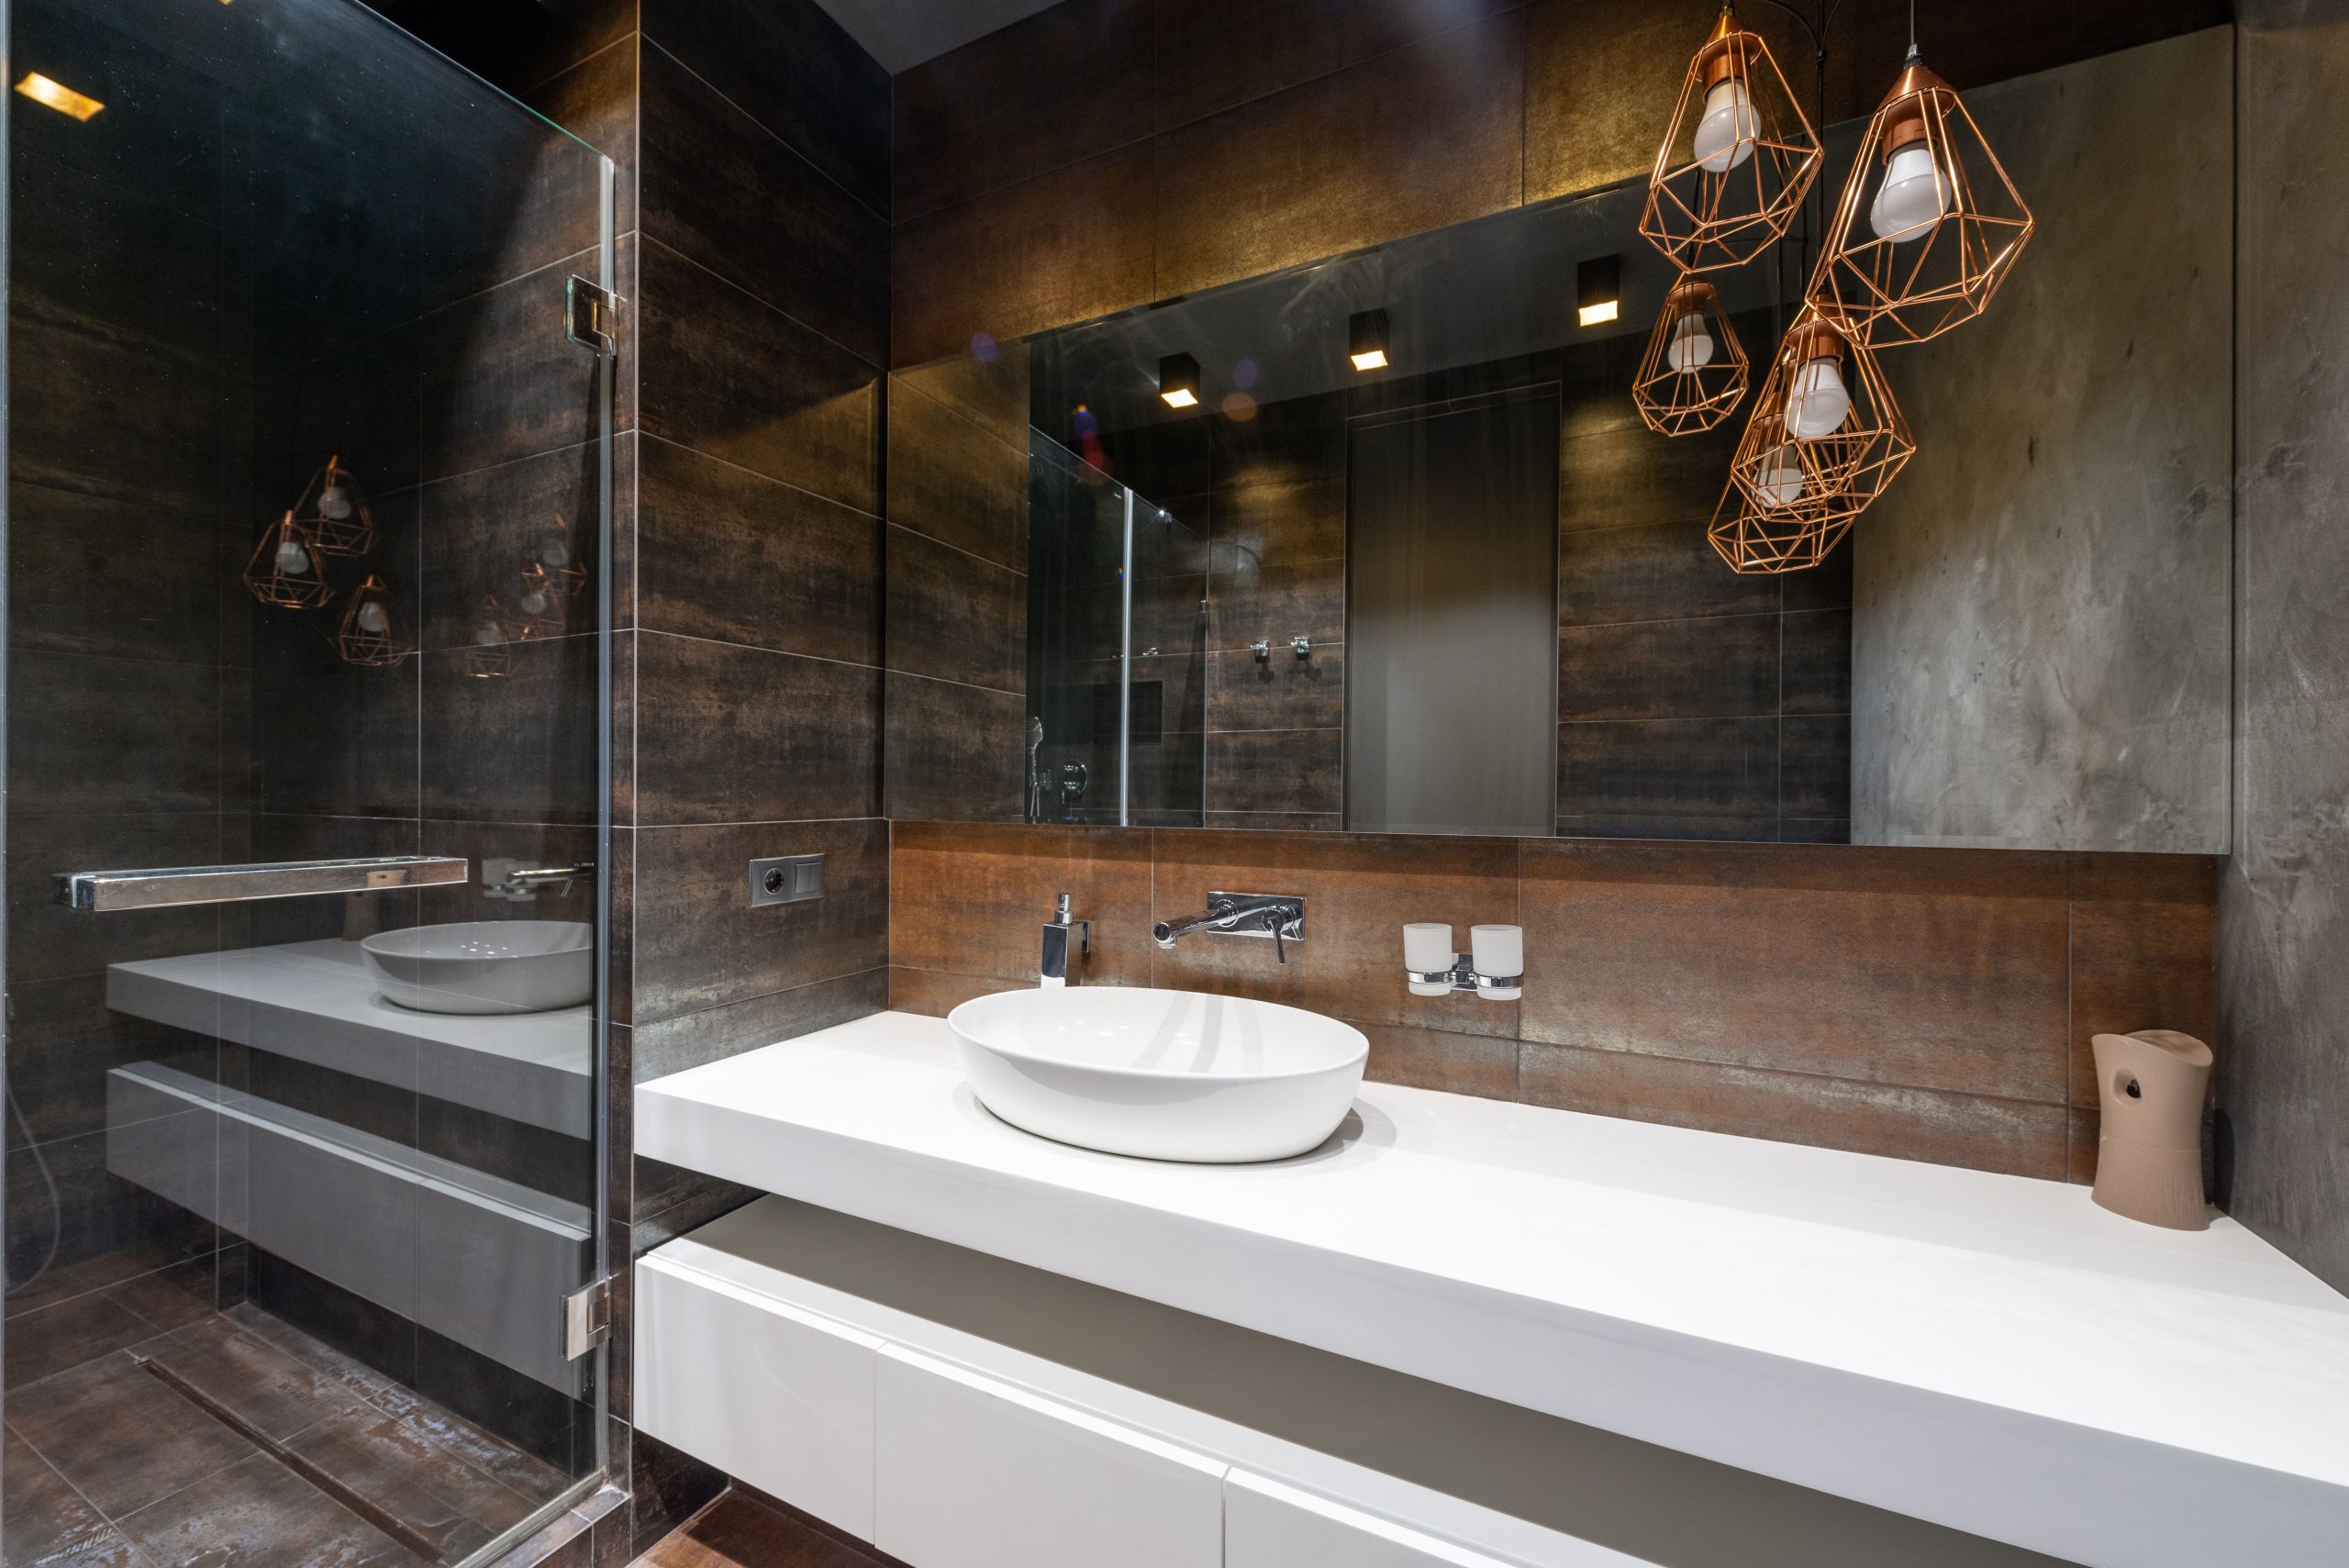
⭐ The One Thing
When hanging pendant lights over a vanity, especially multiple pendants, height and spacing are critical. Hang the bottom of the fixtures so they are between 75 and 80 inches from the floor. This ensures they are high enough not to block the view in the mirror but low enough to feel connected to the vanity. For a double sink vanity, center each pendant over its respective sink basin. For a single sink, you can hang one in the center or, for a more dynamic look like this, hang two or three in a cluster or a line.
14. Warm Luxury with a Golden Swirl Mosaic Tile
The golden swirl mosaic tile is, without a doubt, the element that defines this entire bathroom. Remove it, and you have a pleasant but generic cream-colored bathroom. The mosaic acts as a massive, waterproof piece of abstract art. It brings in movement, opulence, and a dramatic focal point. The swirling pattern of brown and gold creates a sense of luxury and energy that makes the simple, modern fixtures feel far more special. It’s a bold choice that pays off in a huge way, turning a functional space into a statement.
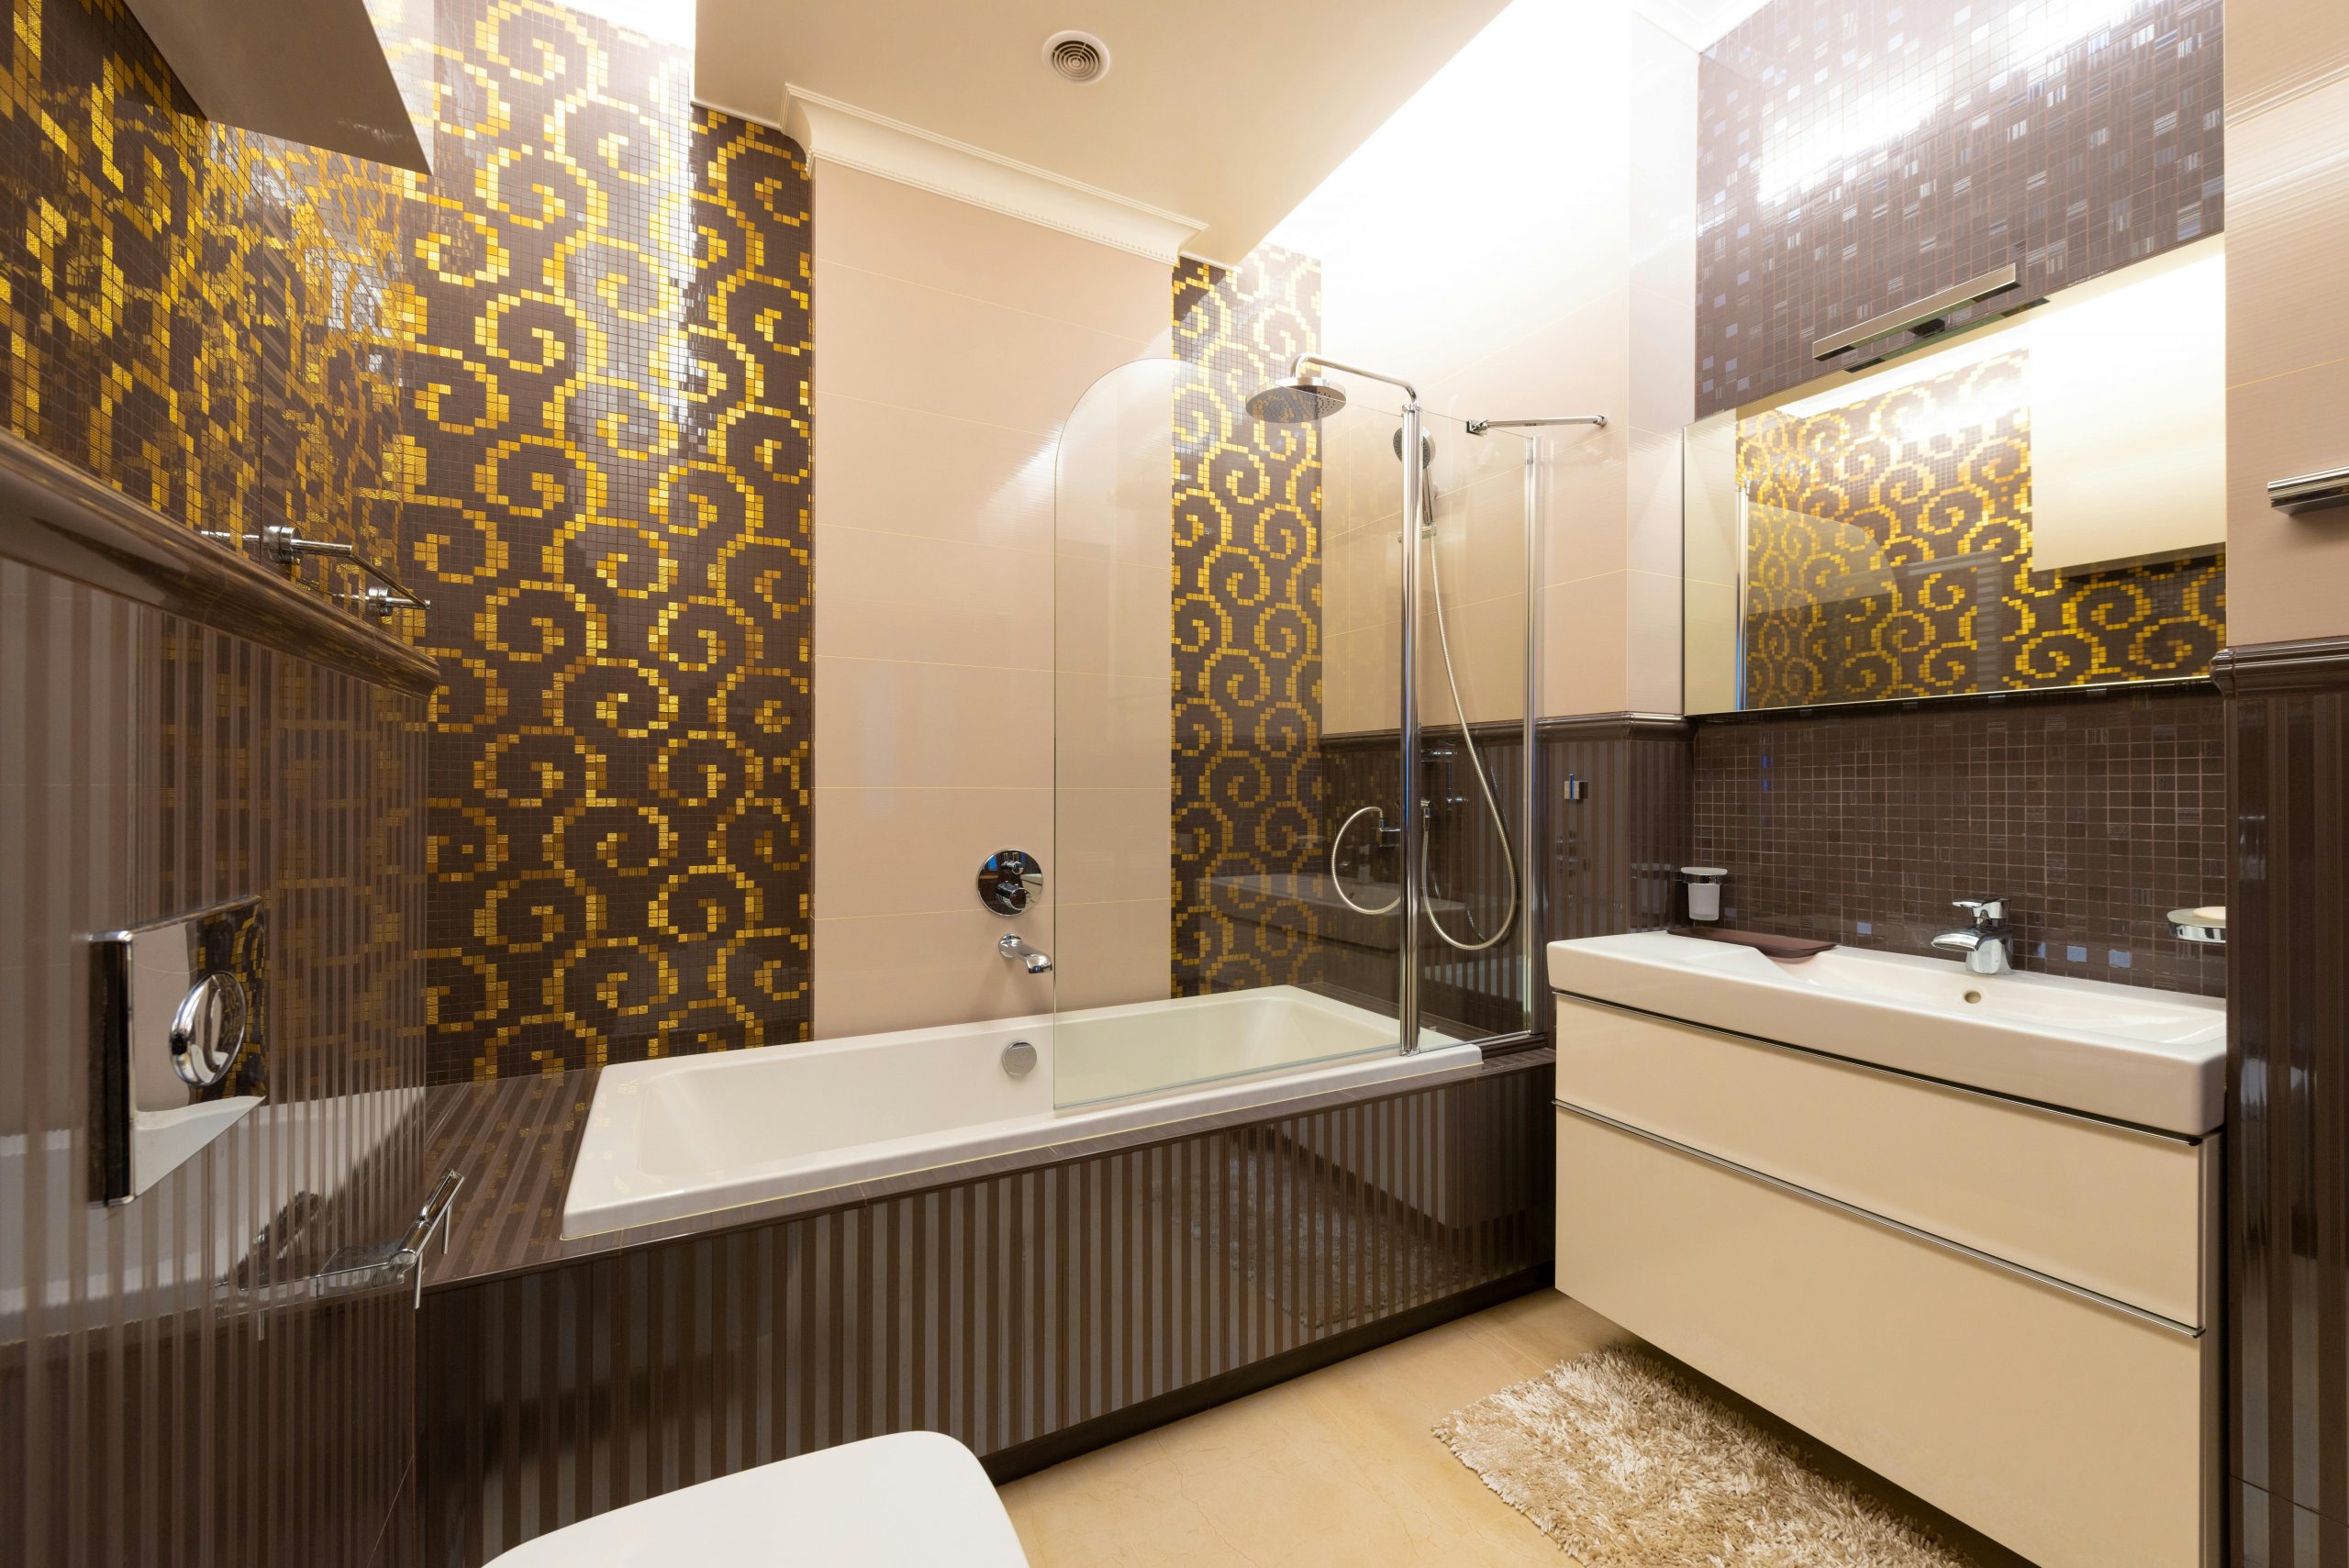
📐 Style Math
A bold, large-scale pattern like this golden mosaic is a significant commitment, both financially and aesthetically. Before you fall in love, order the largest sample you can—not just a single tile, but at least a 12×12 inch section—and live with it in the space for a few days. See how it looks in the morning light, in the evening, and with your artificial lighting on. A pattern this energetic can sometimes be overwhelming in a small space or might not look the way you expect once it covers an entire wall.
15. High-Contrast Modern with a Wood-Look Accent Wall
The success of this space comes down to a confident blend of modern neutrals. Think of it as: 50% Crisp White + 30% Dark Wood & Black + 20% Soft Grey. The white walls, tub, and sink provide a bright, gallery-like base (50%). The dark wood-look accent wall and matte black fixtures bring in drama and a strong focal point (30%). Finally, the grey wood-look floor tiles (20%) act as the perfect bridge, a mid-tone that connects the light and dark elements without competing with them. This formula ensures the room feels balanced and intentionally designed.
⚠️ Real Talk
- Check your lighting: A dark accent wall will absorb a lot of light. Do you have sufficient natural or artificial light to prevent the room from feeling dark?
- Confirm your focal point: An accent wall will draw the eye. Make sure you’re highlighting the best feature of the room, like the vanity area, not the wall with the toilet.
- Get your samples: Make sure the undertones of your wood-look accent wall and your wood-look floor tile complement each other. One being too warm or too cool can throw off the whole look.
16. Add Art Deco Glamour with Gold and Grey Striped Tile
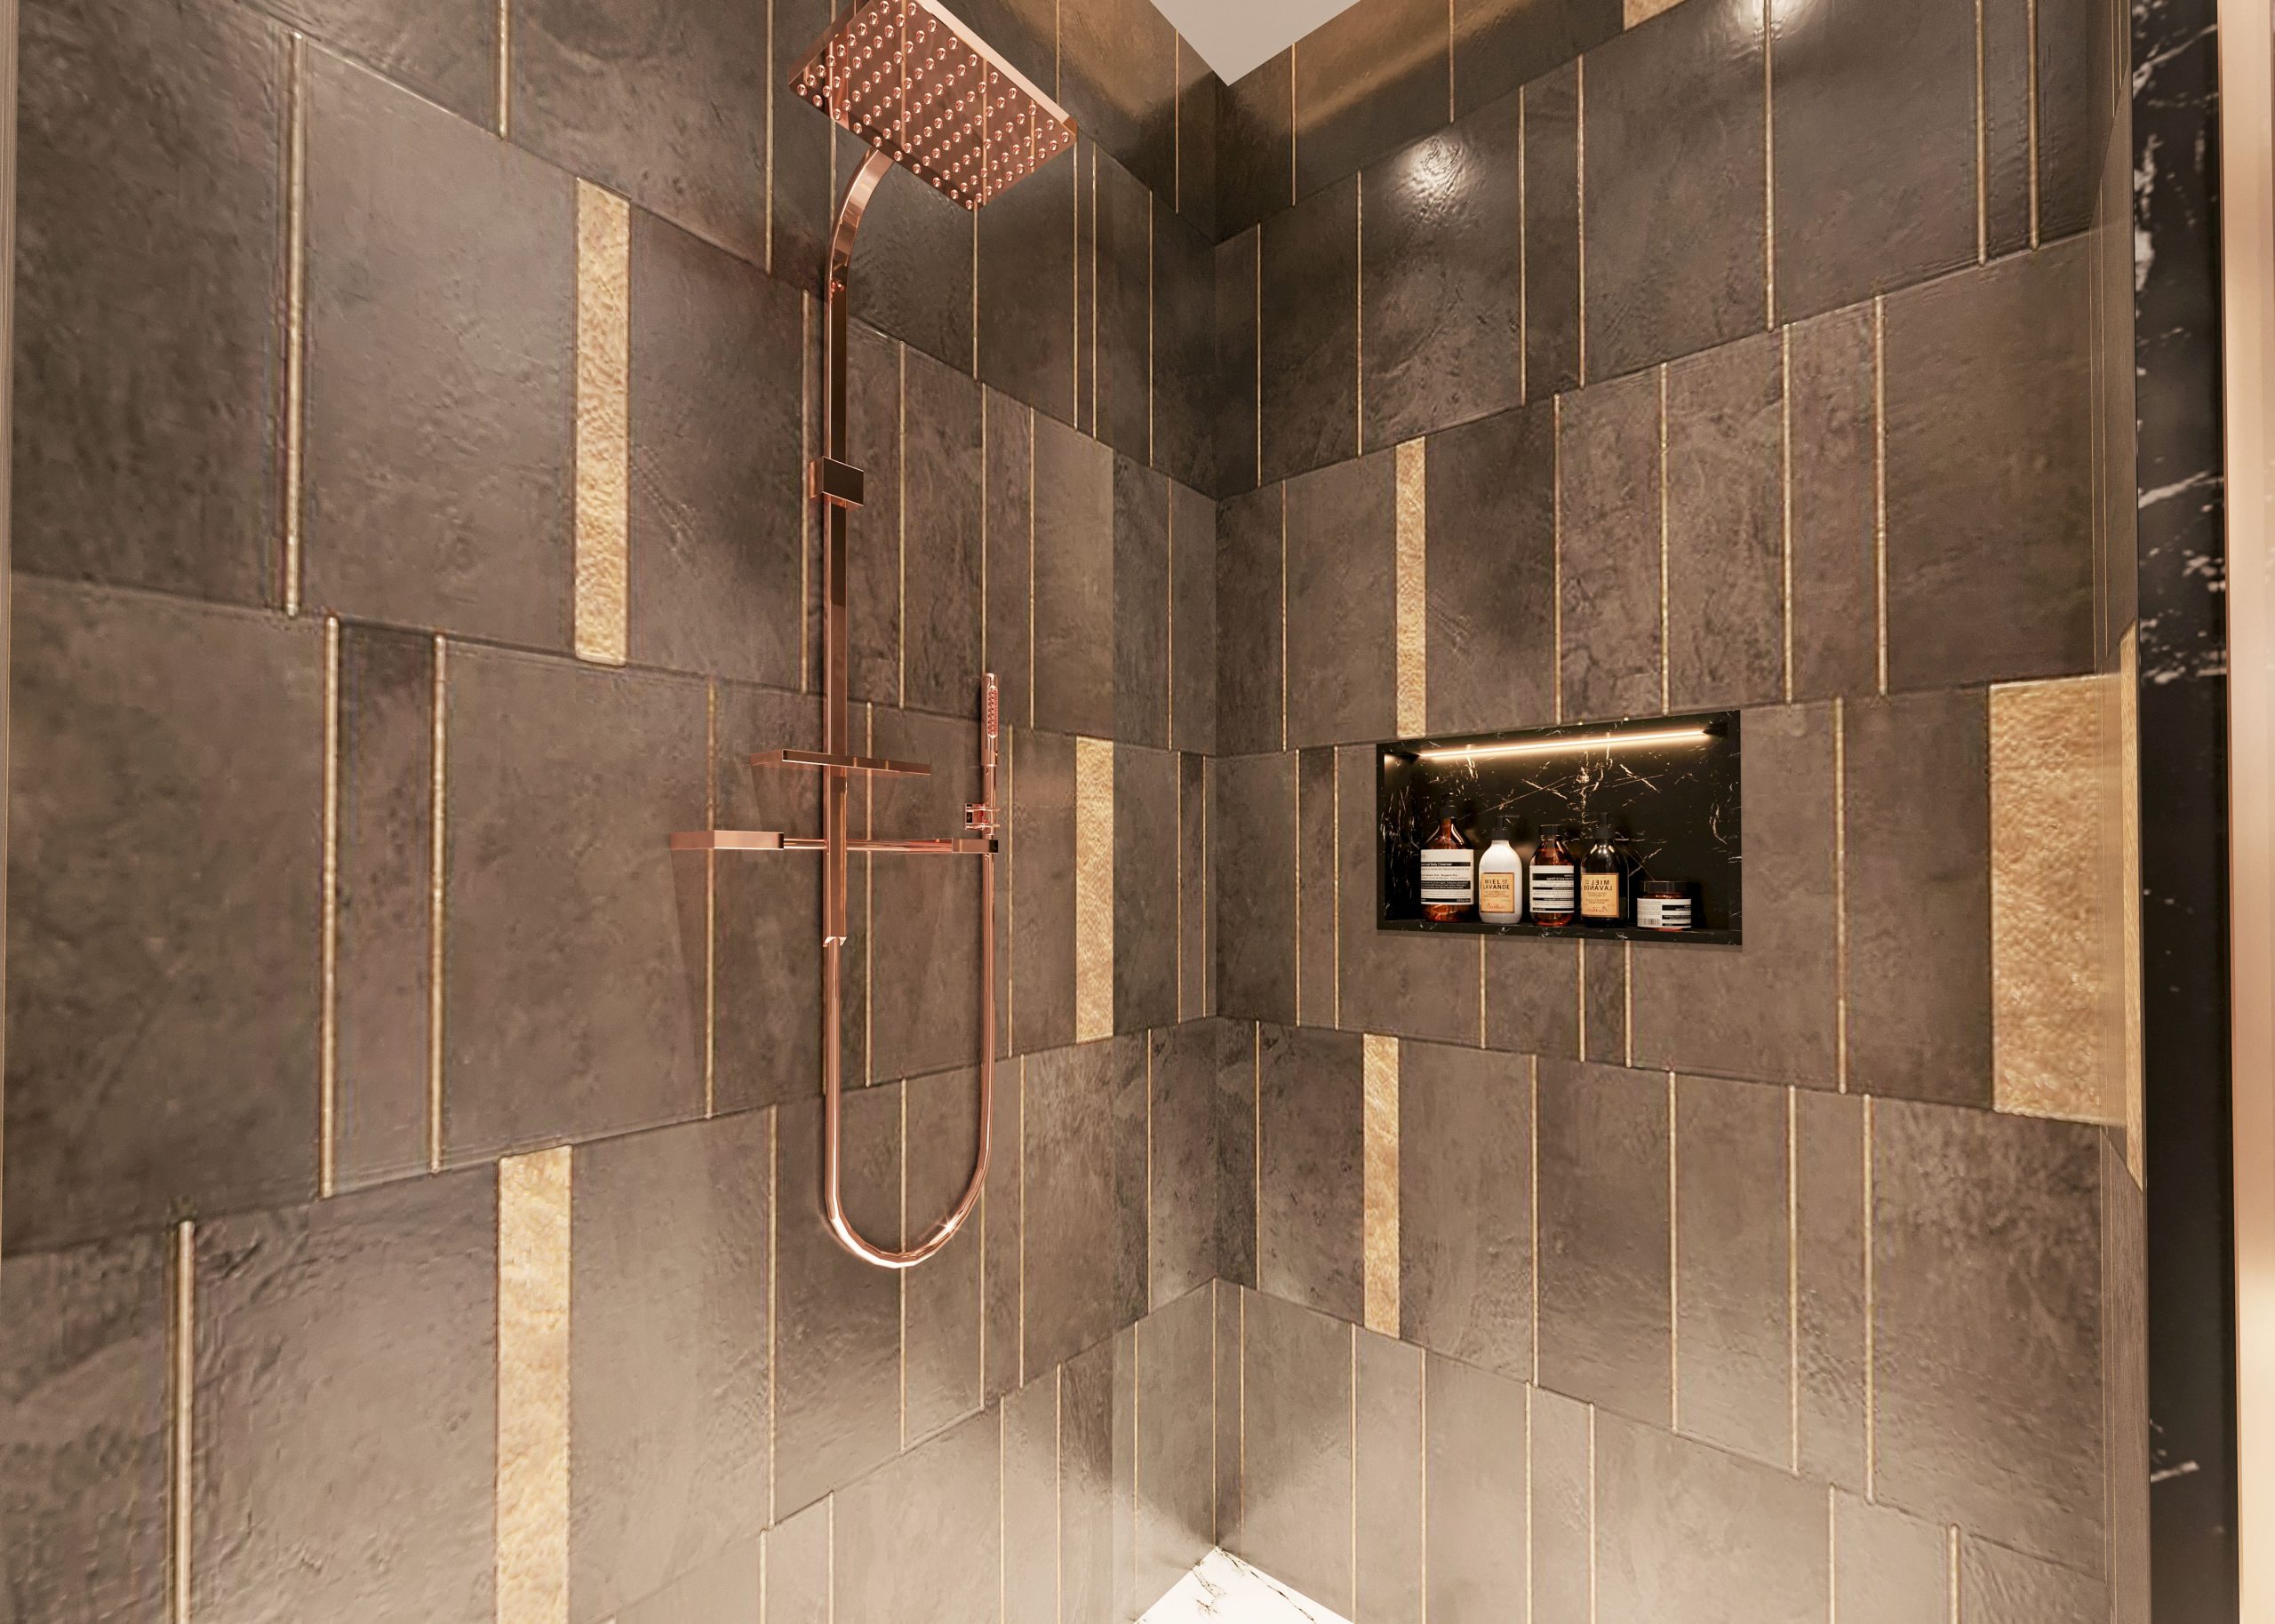
This shower design feels so luxurious because of the brilliant interplay between color, texture, and light. The dark grey vertical tiles create a sense of height and a moody, sophisticated base. The real magic, however, comes from the textured gold accent stripes. Not only do they add a shock of glamorous color, but their textured surface catches the shower light in a way that makes them shimmer. This is further amplified by the warm rose gold fixtures and the illuminated niche, creating layers of warm, glowing light that feel opulent and inviting.
💰 Budget Breakdown
- Time Estimate: 4-6 hours (plus tile setting time). Material Cost: $100-$500+ (depending on lighting kit).
- Step 1: During the tiling process, frame out a recessed niche box between your wall studs.
- Step 2: Have a licensed electrician run low-voltage wiring for an LED strip light into the niche location.
- Step 3: Install a waterproof LED channel and light strip, connecting it to the wiring.
- Step 4: Tile the inside of your niche, ensuring all edges are clean and waterproofed.
- Step 5: Connect the light to a switch outside the shower. Test to ensure it works before sealing everything.
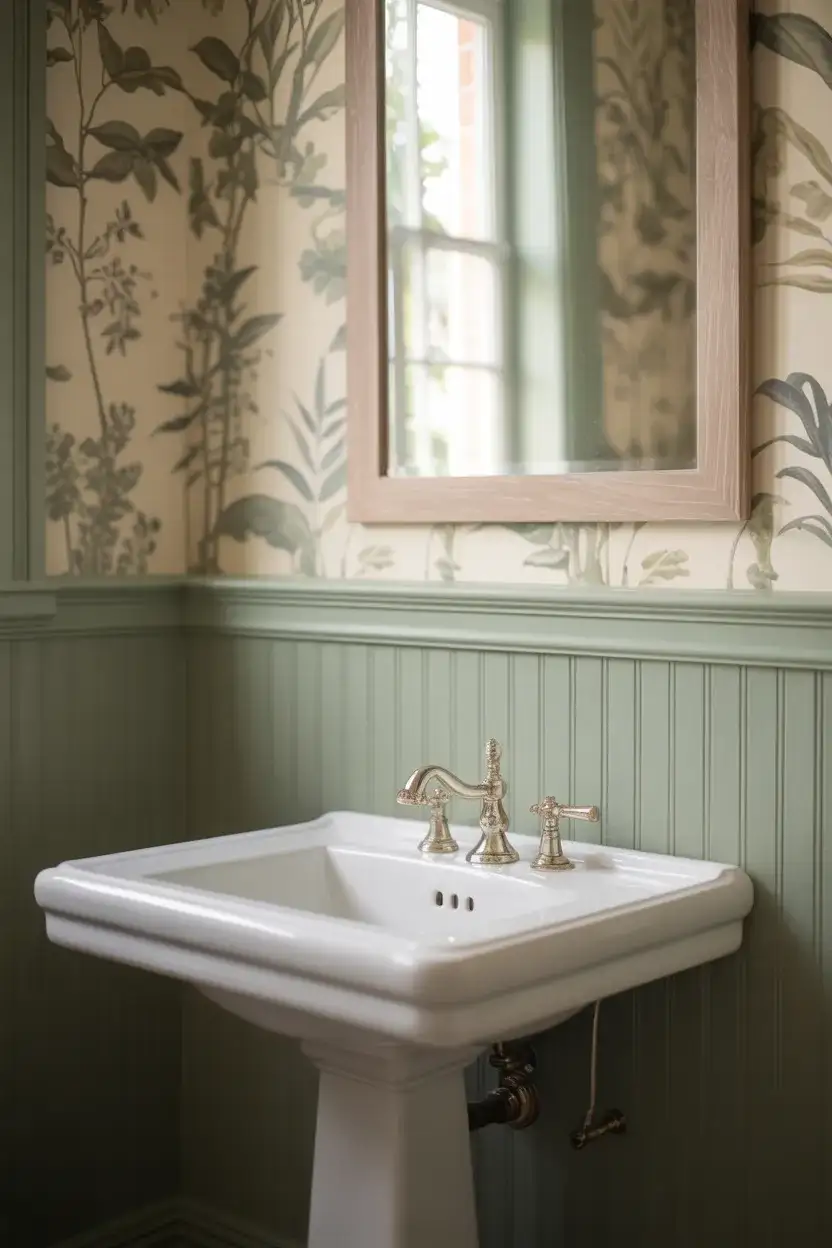
17. A Fresh Take on Traditional with Sage Green and Beadboard
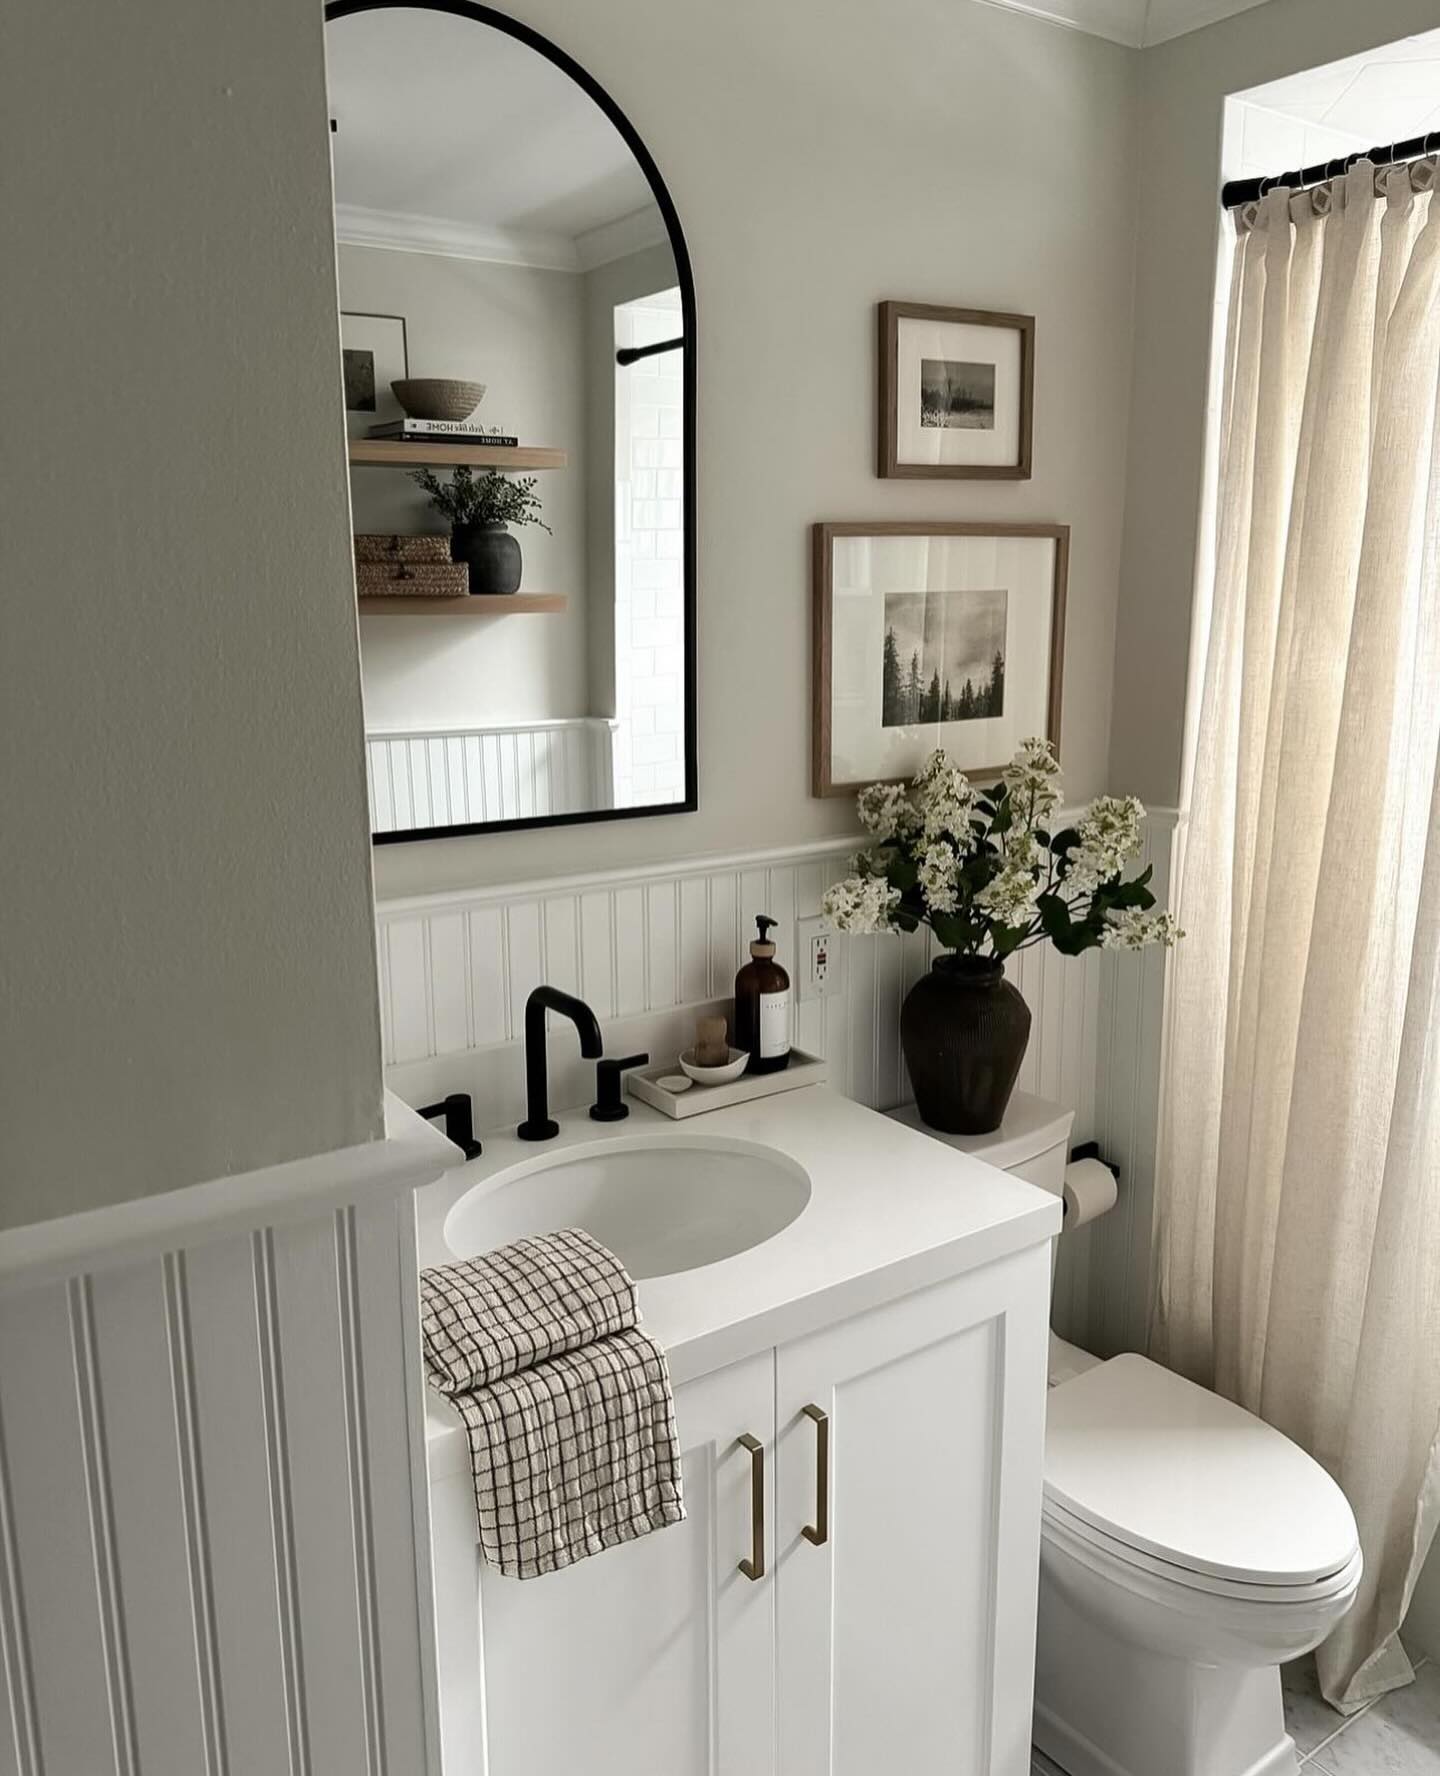
This look feels so custom and high-end, but it’s surprisingly achievable on a budget. The key is the beadboard wainscoting. Sheets of beadboard paneling are inexpensive (around $20-$40 for a 4’x8′ sheet at Home Depot) and can be a DIY-friendly project. It instantly adds architectural character. Pair it with a simple white vanity from IKEA or Wayfair, a budget-friendly arched mirror from Target, and some elegant brass handles ordered from Amazon. The most expensive part might be the matte black faucet, but even those can be found for under $150.
💡 Designer Tip
When using wainscoting like this beautiful vertical beadboard, the height is everything. A common mistake is to make it too short. For a standard 8-foot ceiling, the top of the wainscoting should fall between 36 and 48 inches from the floor. A taller wainscoting, heading towards the 48-inch mark, will feel more dramatic and traditional. For a more modern or transitional feel as seen here, aim for a height that neatly aligns with the top of your vanity backsplash for a clean, cohesive line.
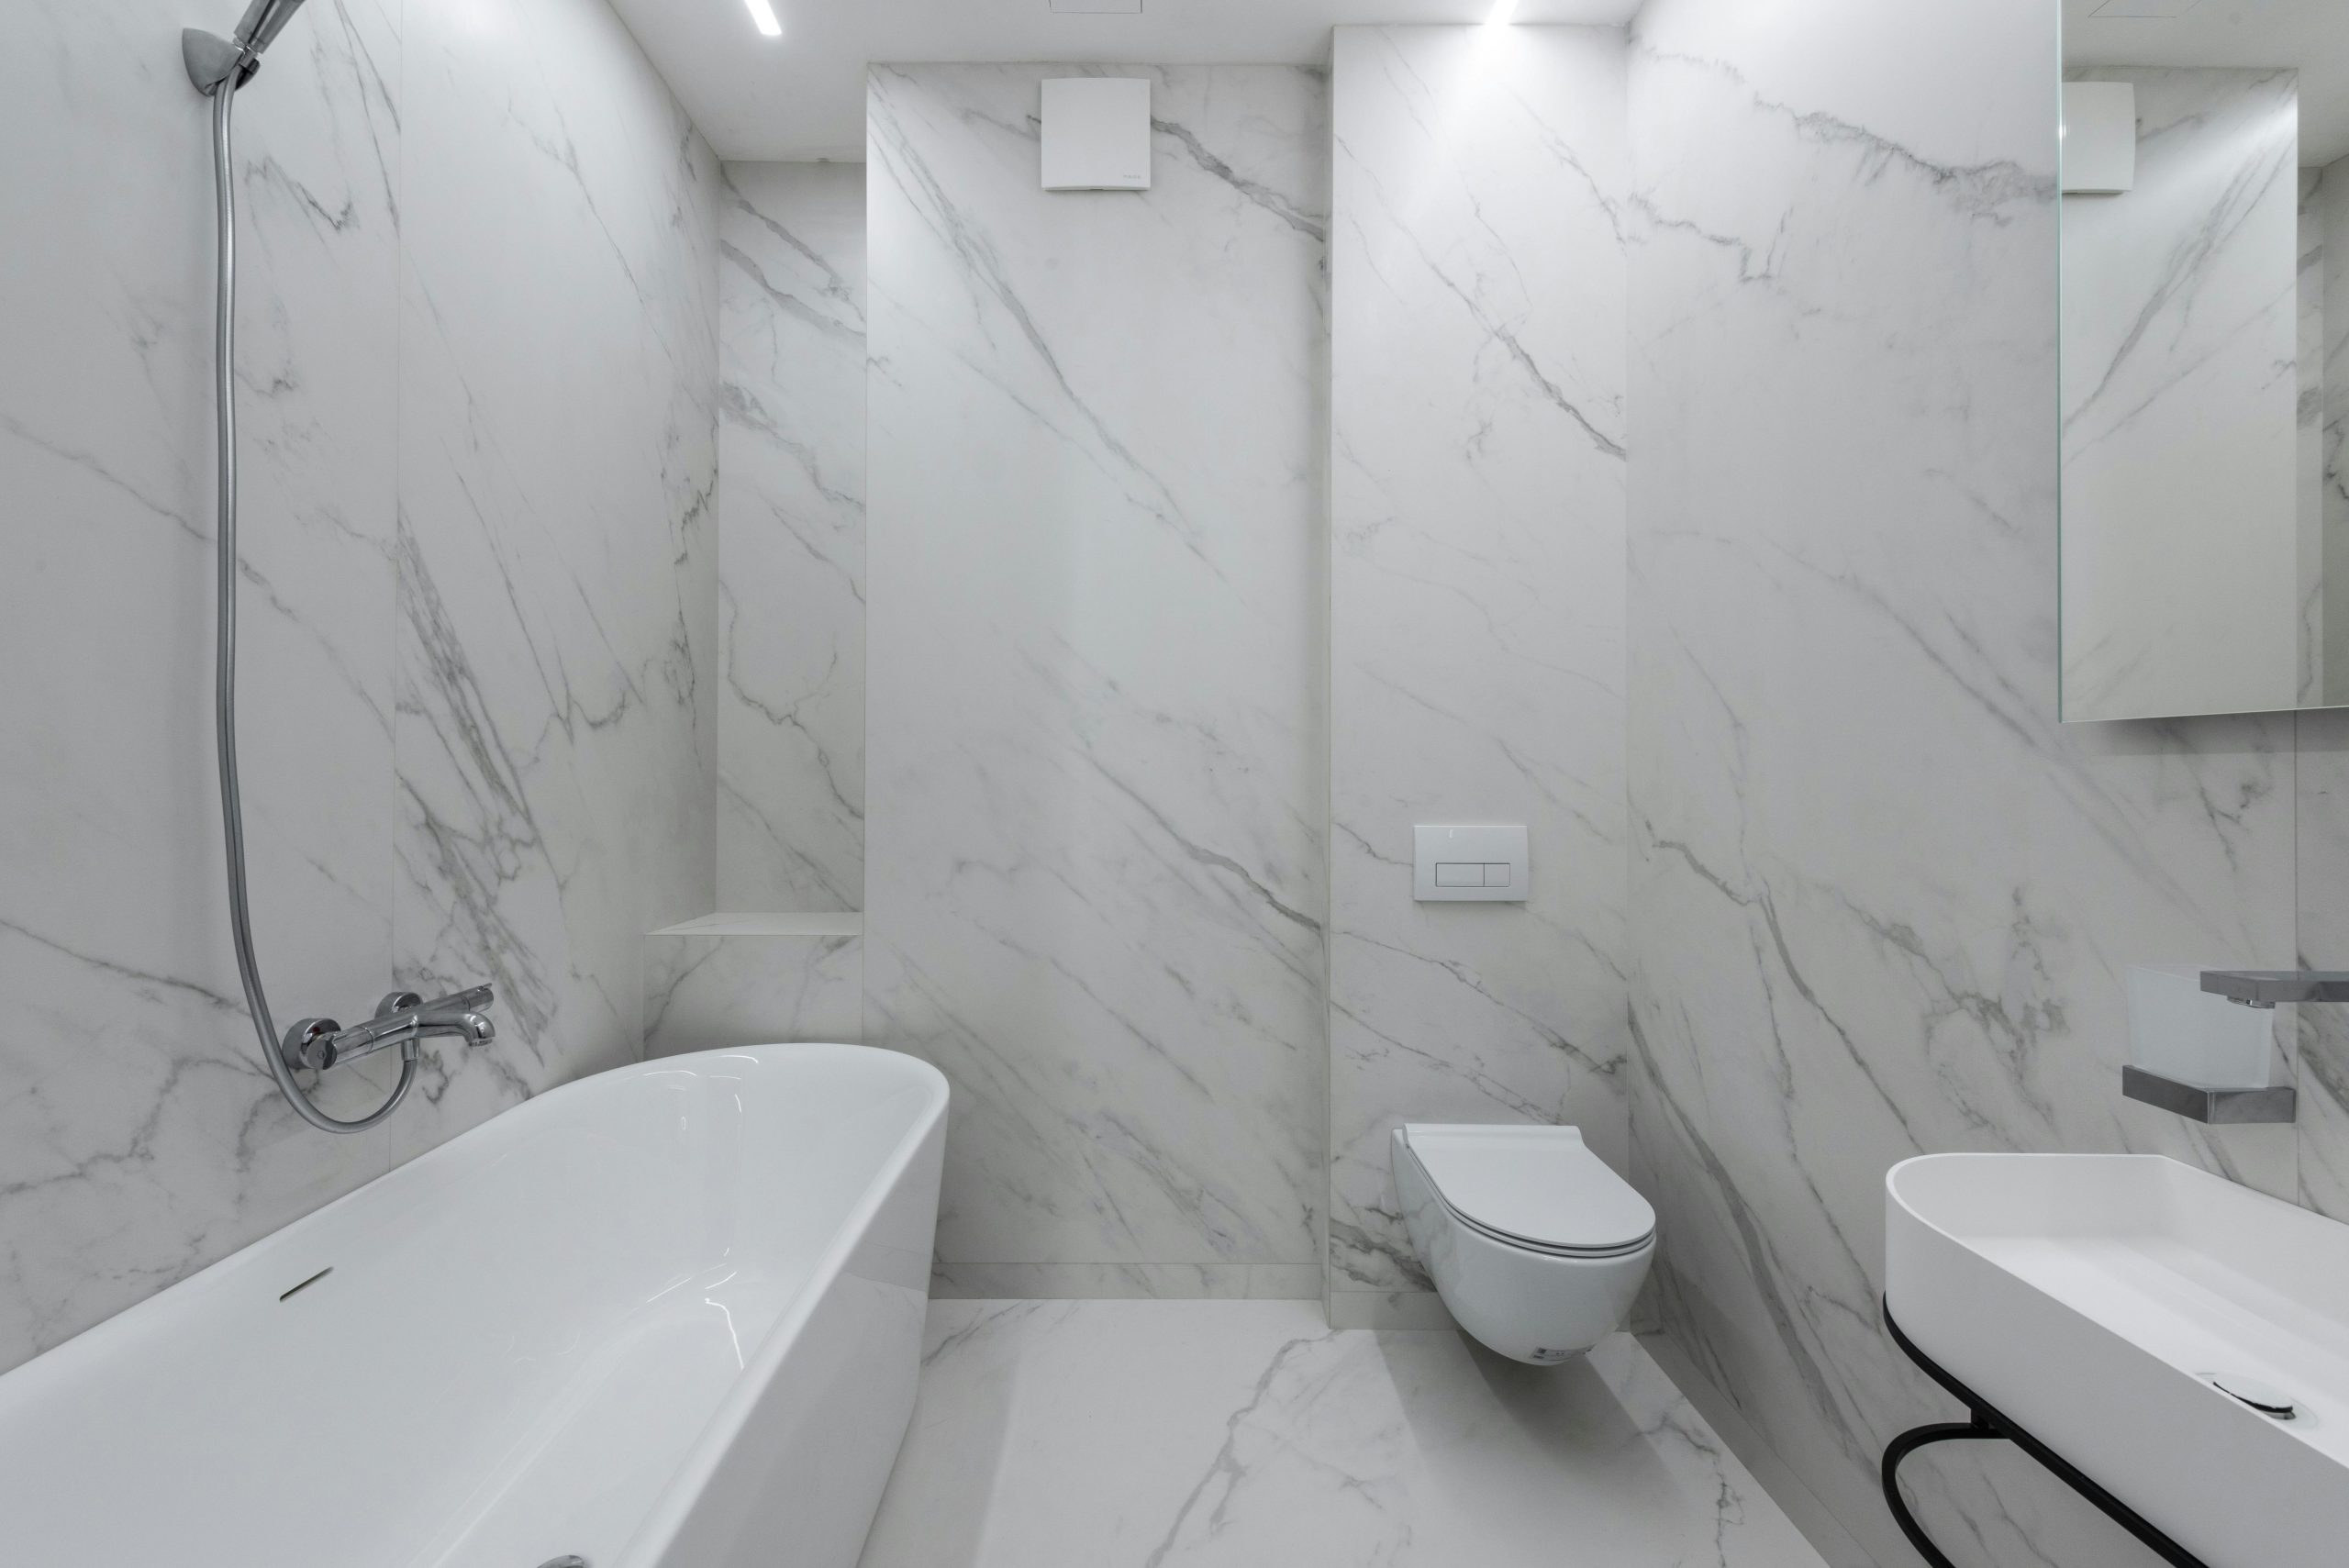
18. The Ultimate in Seamless Design: Textured Walls and a Floating Vanity
This sleek, minimalist design excels in both small and large bathrooms, but it’s particularly effective in spaces under 60 square feet. The floating vanity creates an uninterrupted sightline on the floor, making the room feel larger and much easier to clean. The wall-mounted toilet has the same effect. Using large-format textured tiles on the walls, as seen here, minimizes grout lines and adds dimension without overwhelming a smaller space. The overall effect is clean, open, and feels far more spacious than its actual footprint.
🔧 How-To Brief
Wood-look plank flooring in a bathroom is a fantastic choice, offering both warmth and durability that real wood can’t. Most options are luxury vinyl plank (LVP) or porcelain tile. Both are 100% waterproof. The main upkeep is simple sweeping or vacuuming and an occasional damp mop with a pH-neutral cleaner. Avoid abrasive scrubbers or harsh chemicals which can dull the finish over time. The biggest advantage? Unlike real wood, you’ll never have to worry about water spots, warping from humidity, or dents from dropped items.
19. A Simple, Clean Look with Marble-Look Tile and a White Vanity
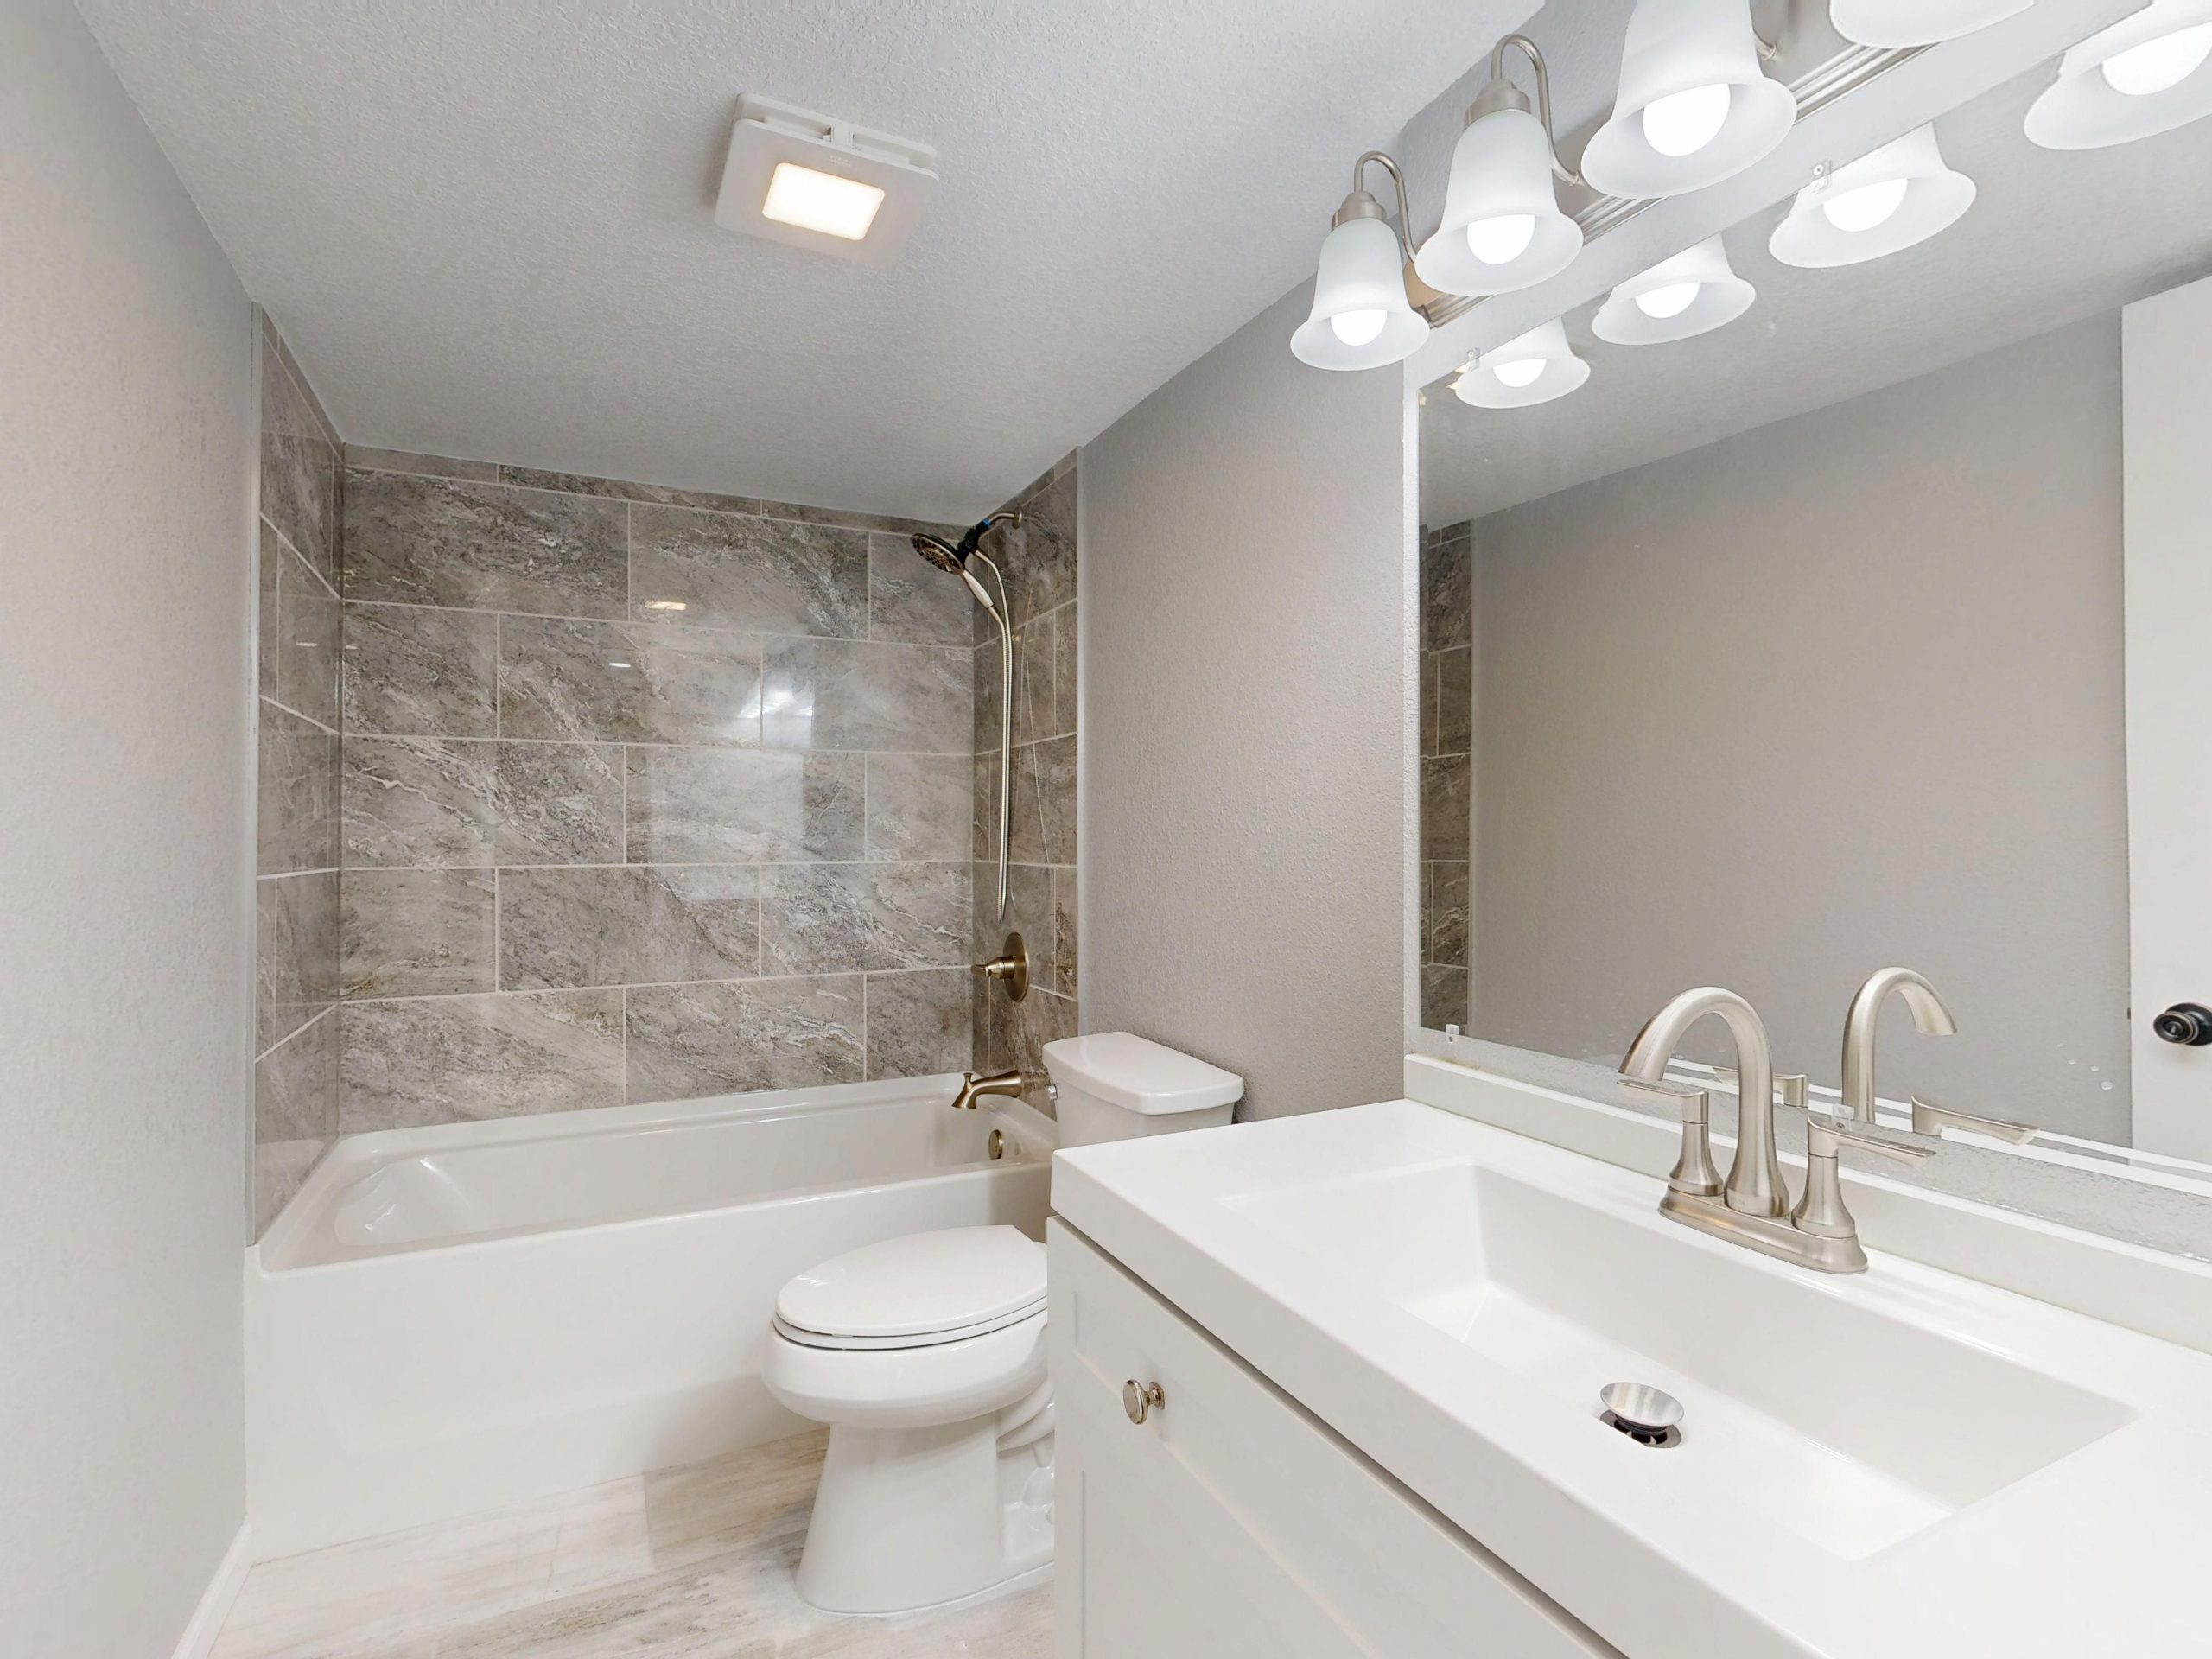
The reason this classic combination always works is its quiet, understated foundation. The grey-toned, marble-look rectangular tiles provide a subtle pattern and a touch of elegance without being overwhelming. They create a neutral, textured backdrop for the clean, crisp white of the vanity and bathtub. This allows the simple forms of the fixtures to stand out. The brushed nickel faucet and light fixture add a soft, metallic warmth that bridges the gap between the cool grey and the bright white. It’s a calm, cohesive, and timeless palette.
🔥 Trending Context
- Vanity Size: Have you measured your space to ensure the vanity size you want will fit, leaving enough clearance for doors to swing and for you to stand comfortably?
- Lighting Junction Box: Is there already an electrical junction box centered over your vanity for the new light fixture? If not, you’ll need to budget for an electrician to move it.
- Plumbing Lines: Check the location of your existing water supply and drain lines. Will they align with the new vanity and integrated sink, or will they need to be moved?
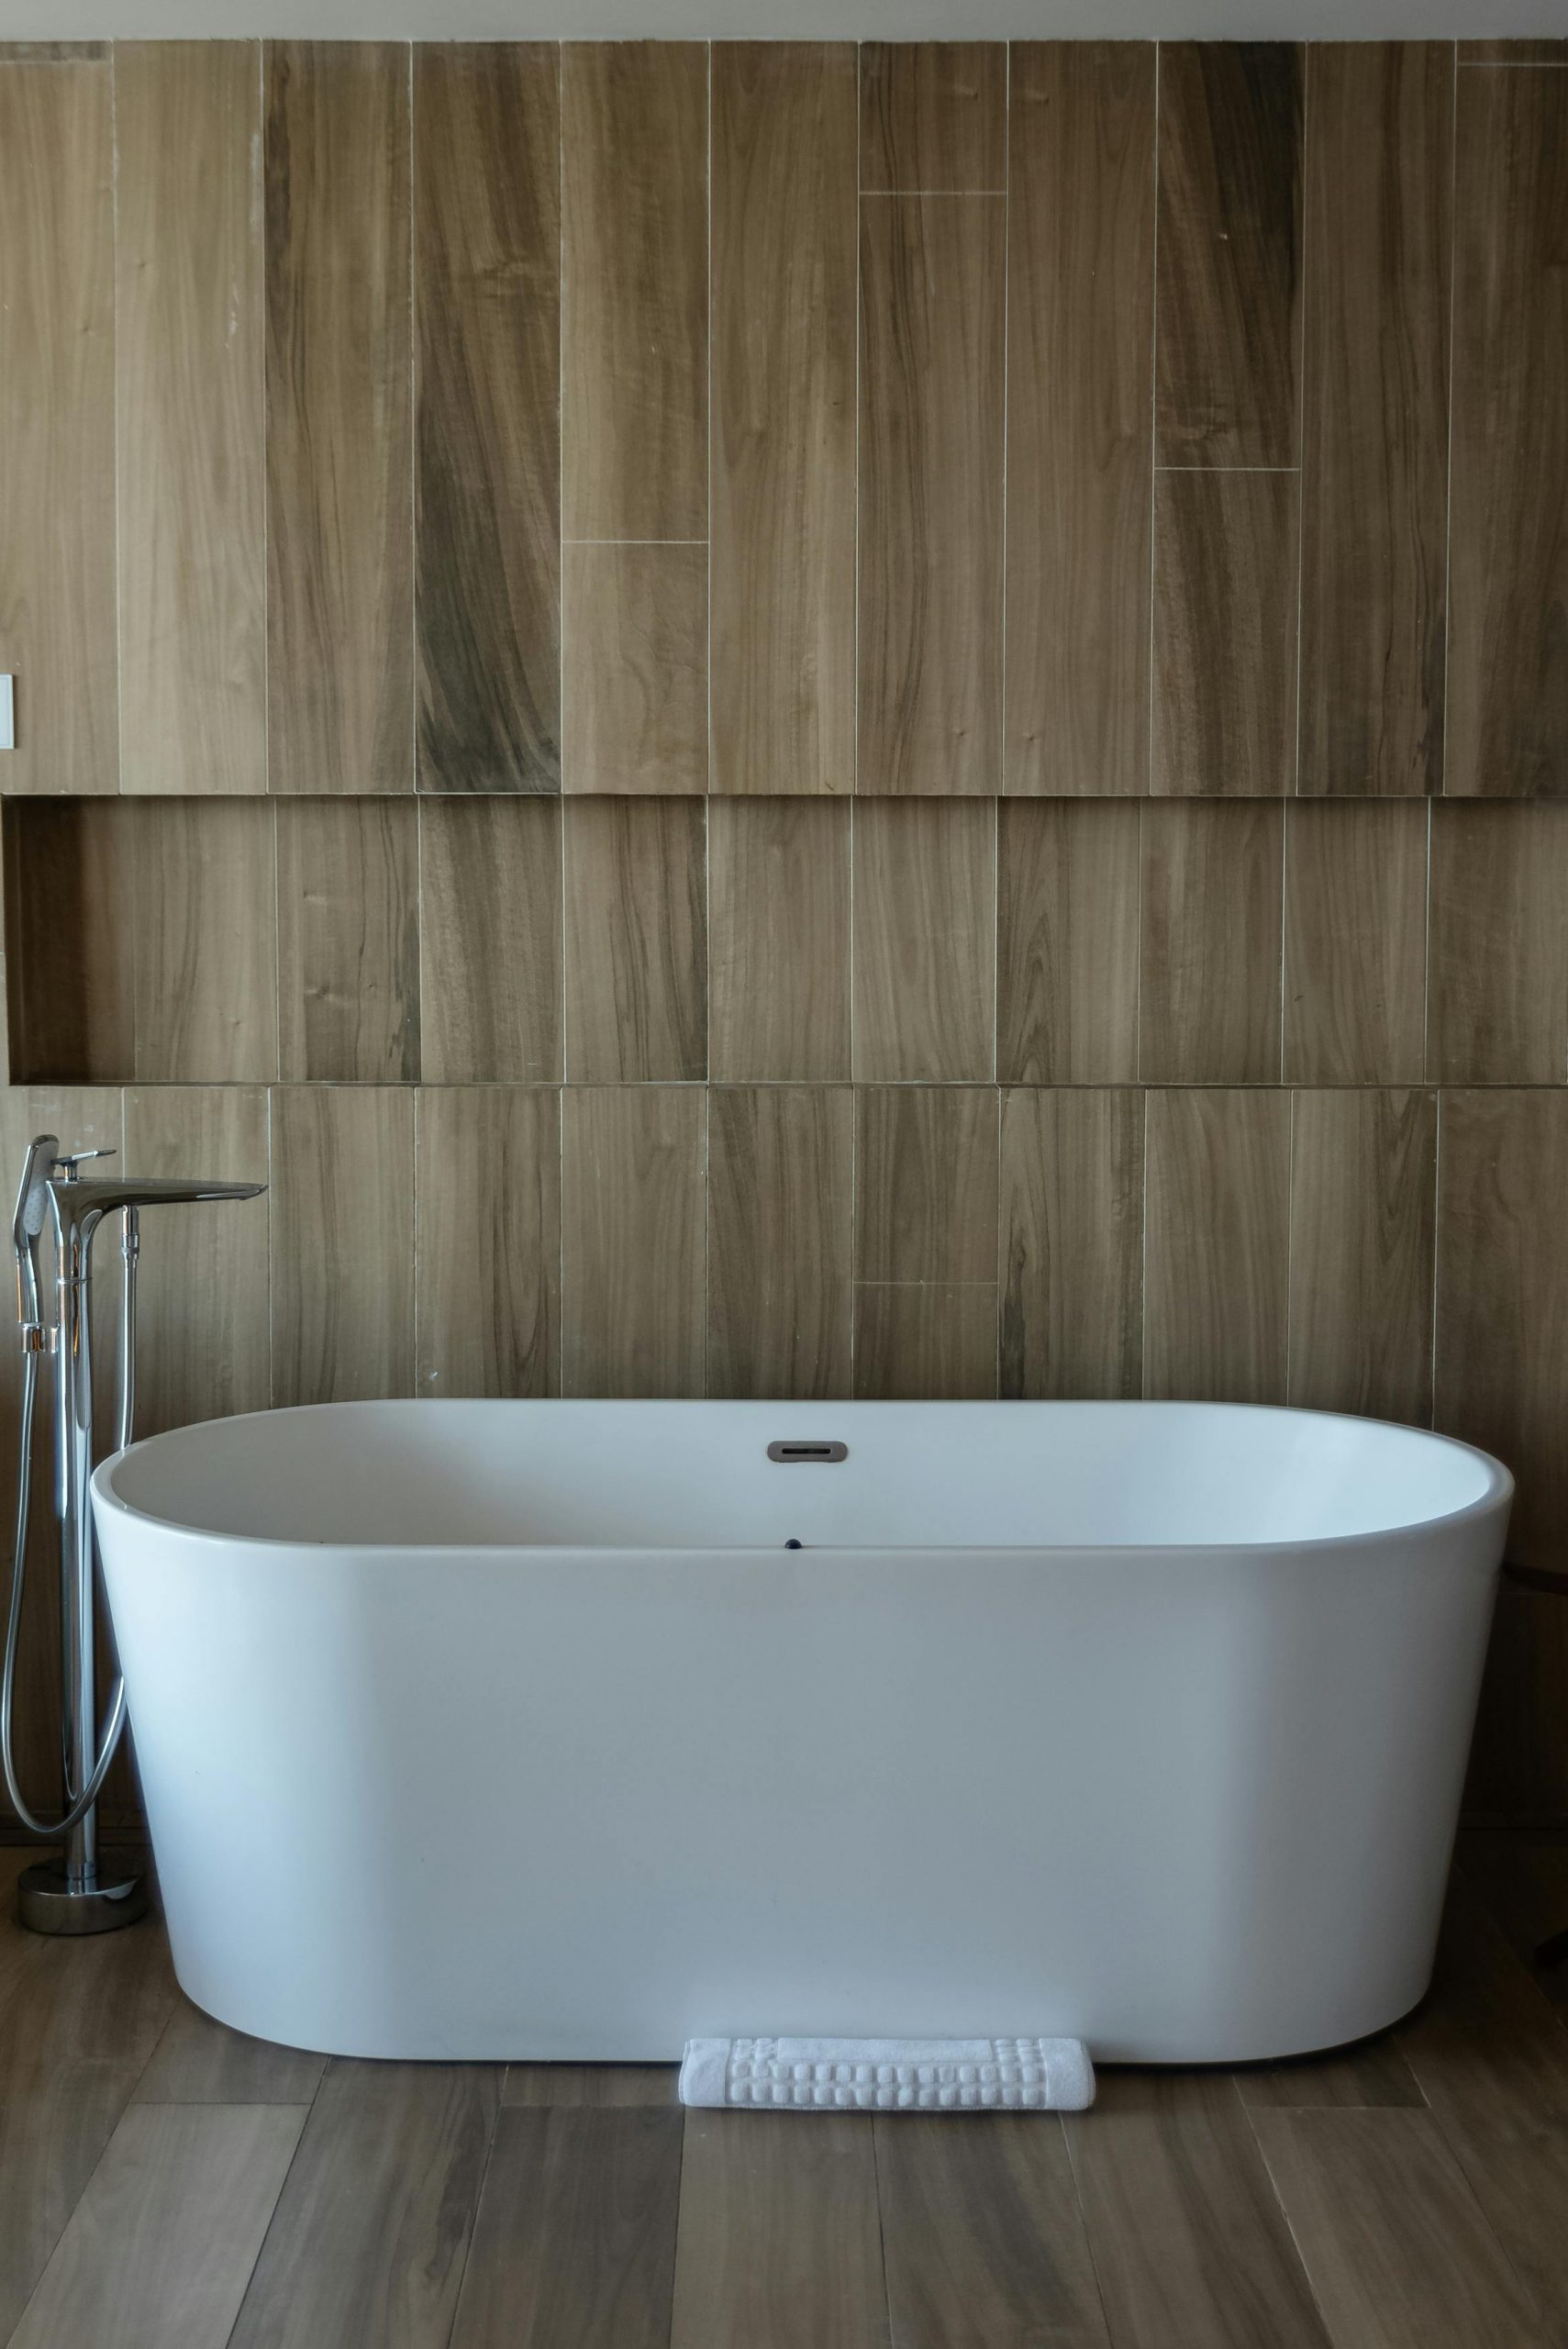
20. Bright and Classic: The Freestanding Tub as a Focal Point
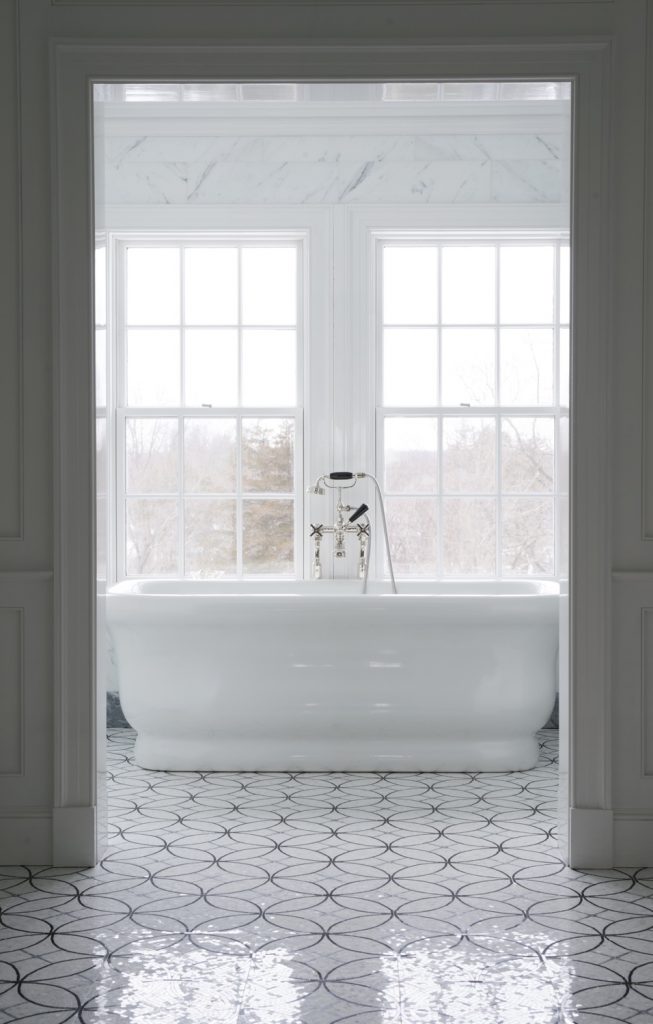
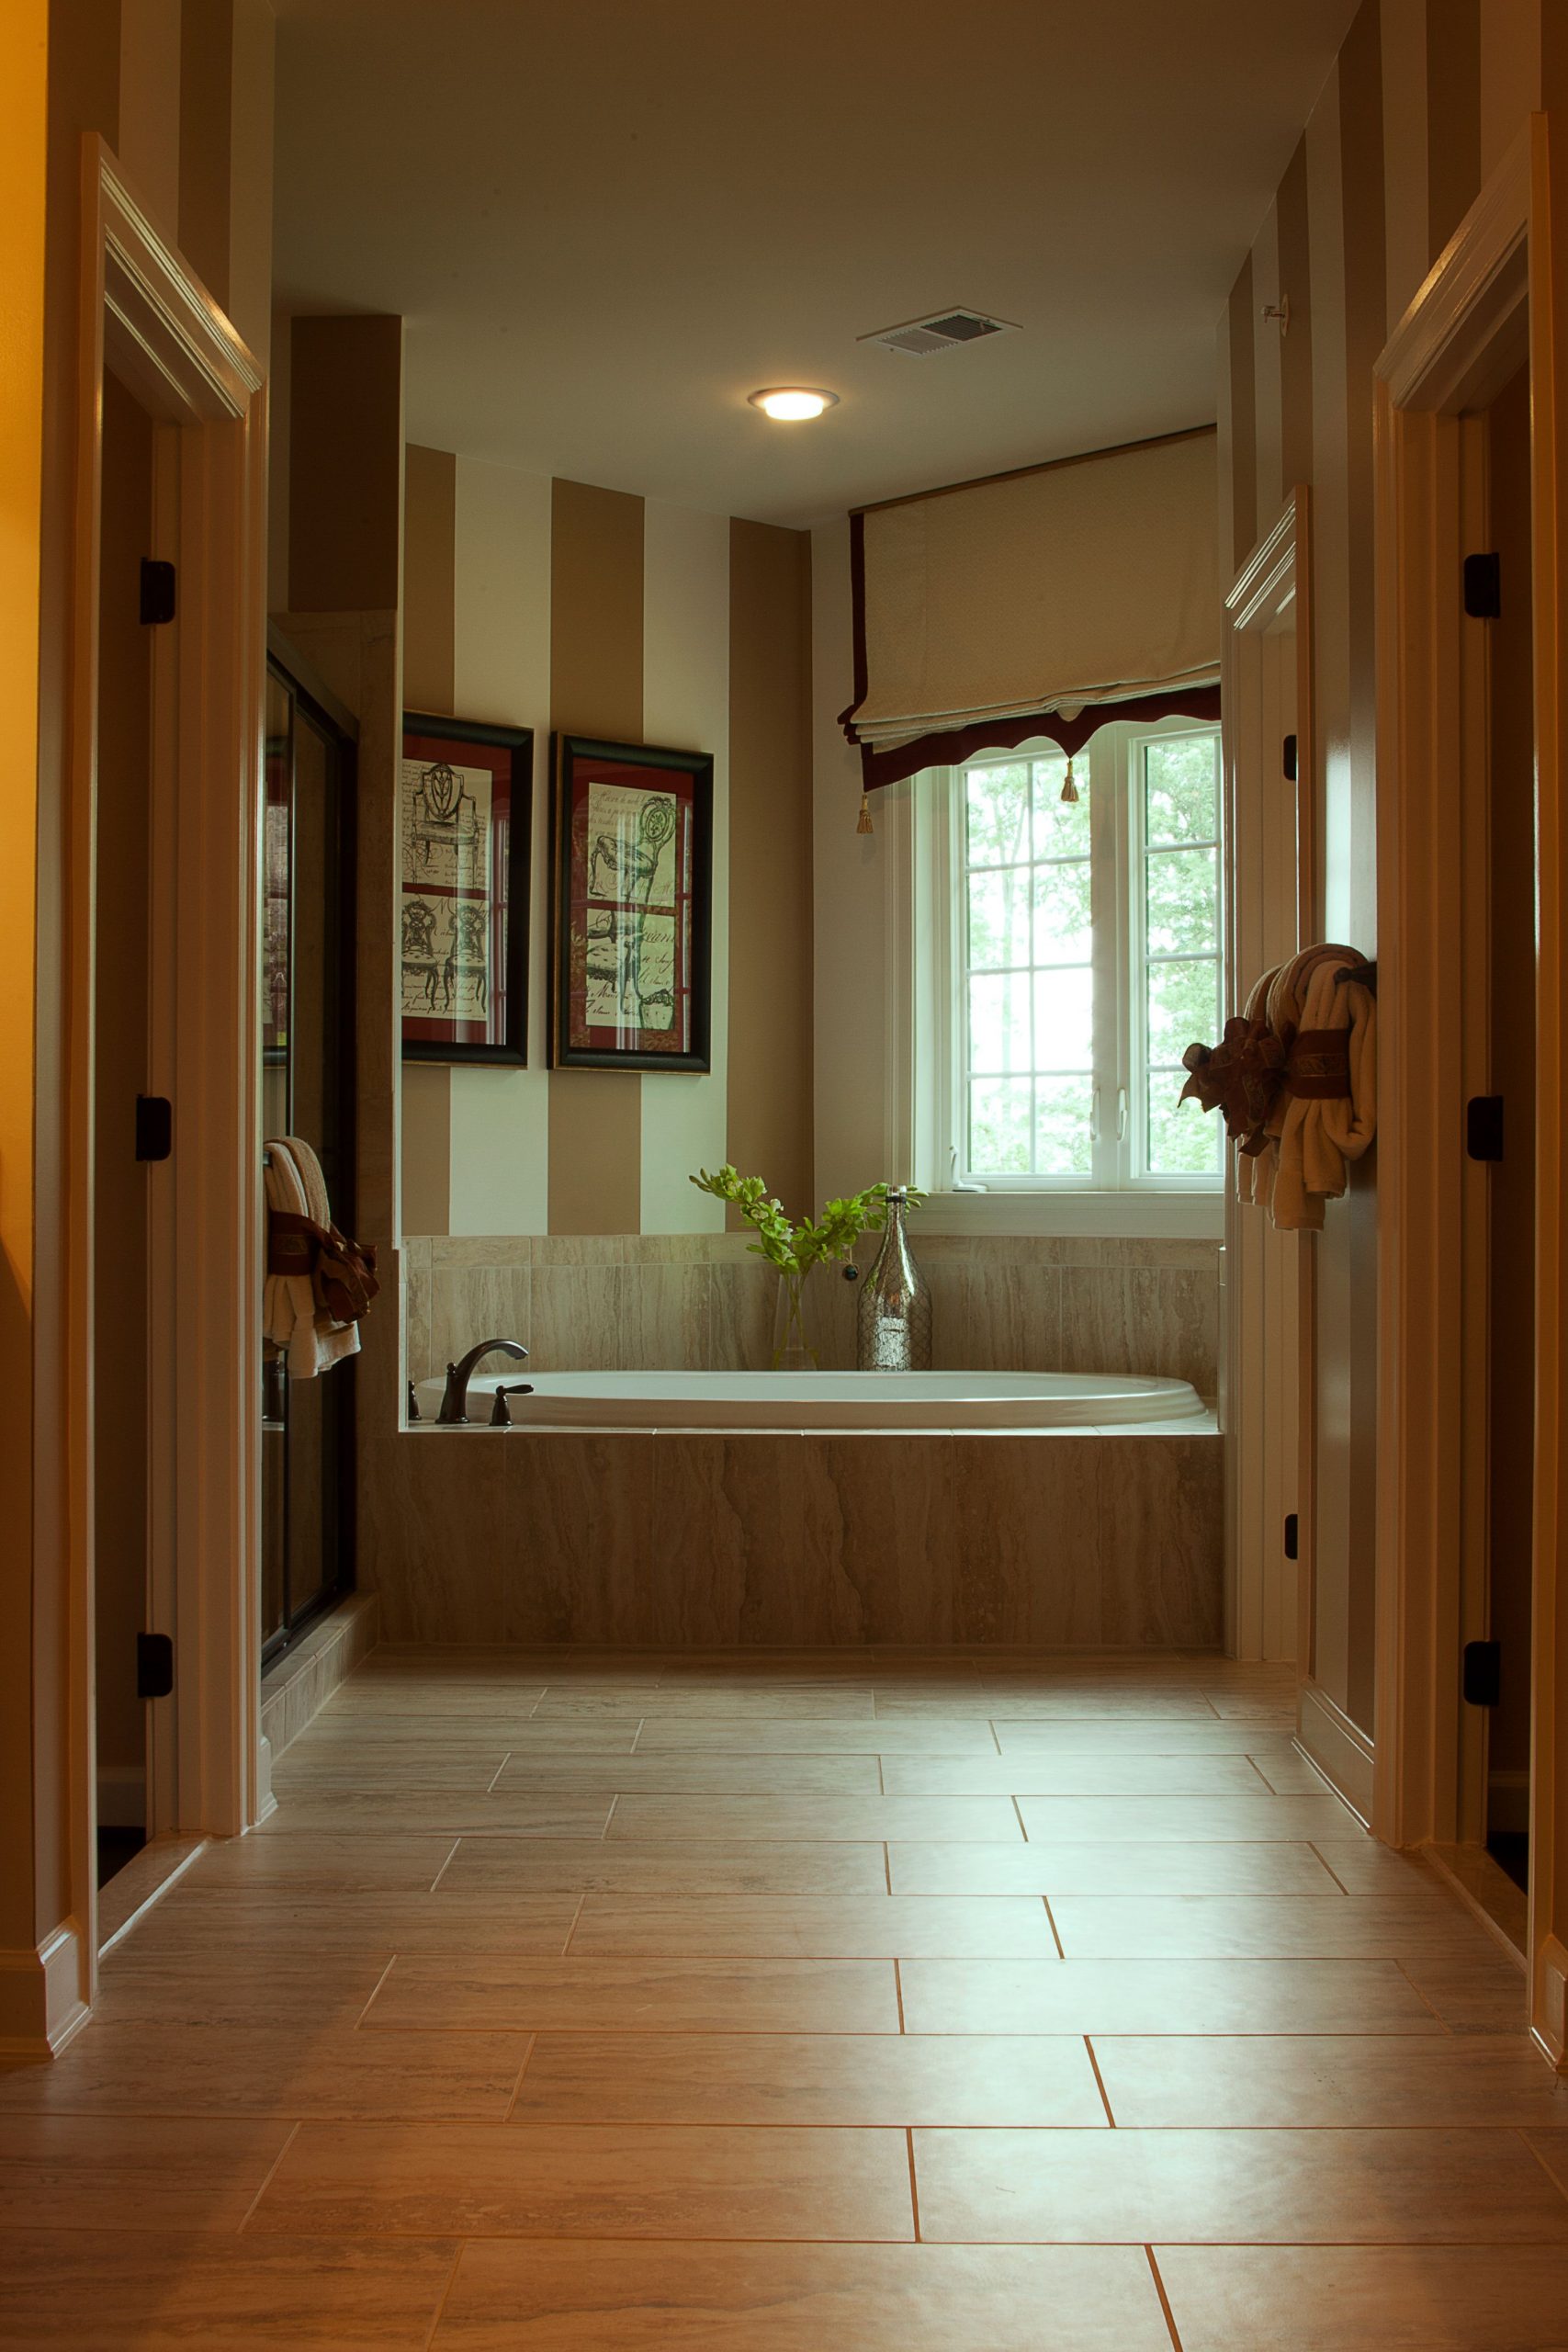
The single most important element in this room is the view. The freestanding tub, the classic paneling, and the elegant floor are all beautiful, but they are all in service of one thing: framing that gorgeous view of the trees outside. The large, dark-gridded windows act like a picture frame for nature. Placing the tub directly in front of them transforms the act of bathing into an experience of serene connection with the outdoors. Without that window and the natural light it provides, the room would lose its entire soul.
🎯 What Makes It Work
A freestanding tub looks incredible, but it comes with practical considerations. Cleaning behind and around it is much more difficult than with a built-in tub. Dust, hair, and water splashes will accumulate in the hard-to-reach space between the tub and the wall. You’ll need a long-handled duster or a specific mop to keep it clean. Also, they offer zero storage for shampoos and soaps, so you must plan for a nearby table, stool, or a floor-mounted caddy, unlike the built-in niche solution in Idea #7.
21. A Clean, Modern Look with a Double Vanity and Grey Tile
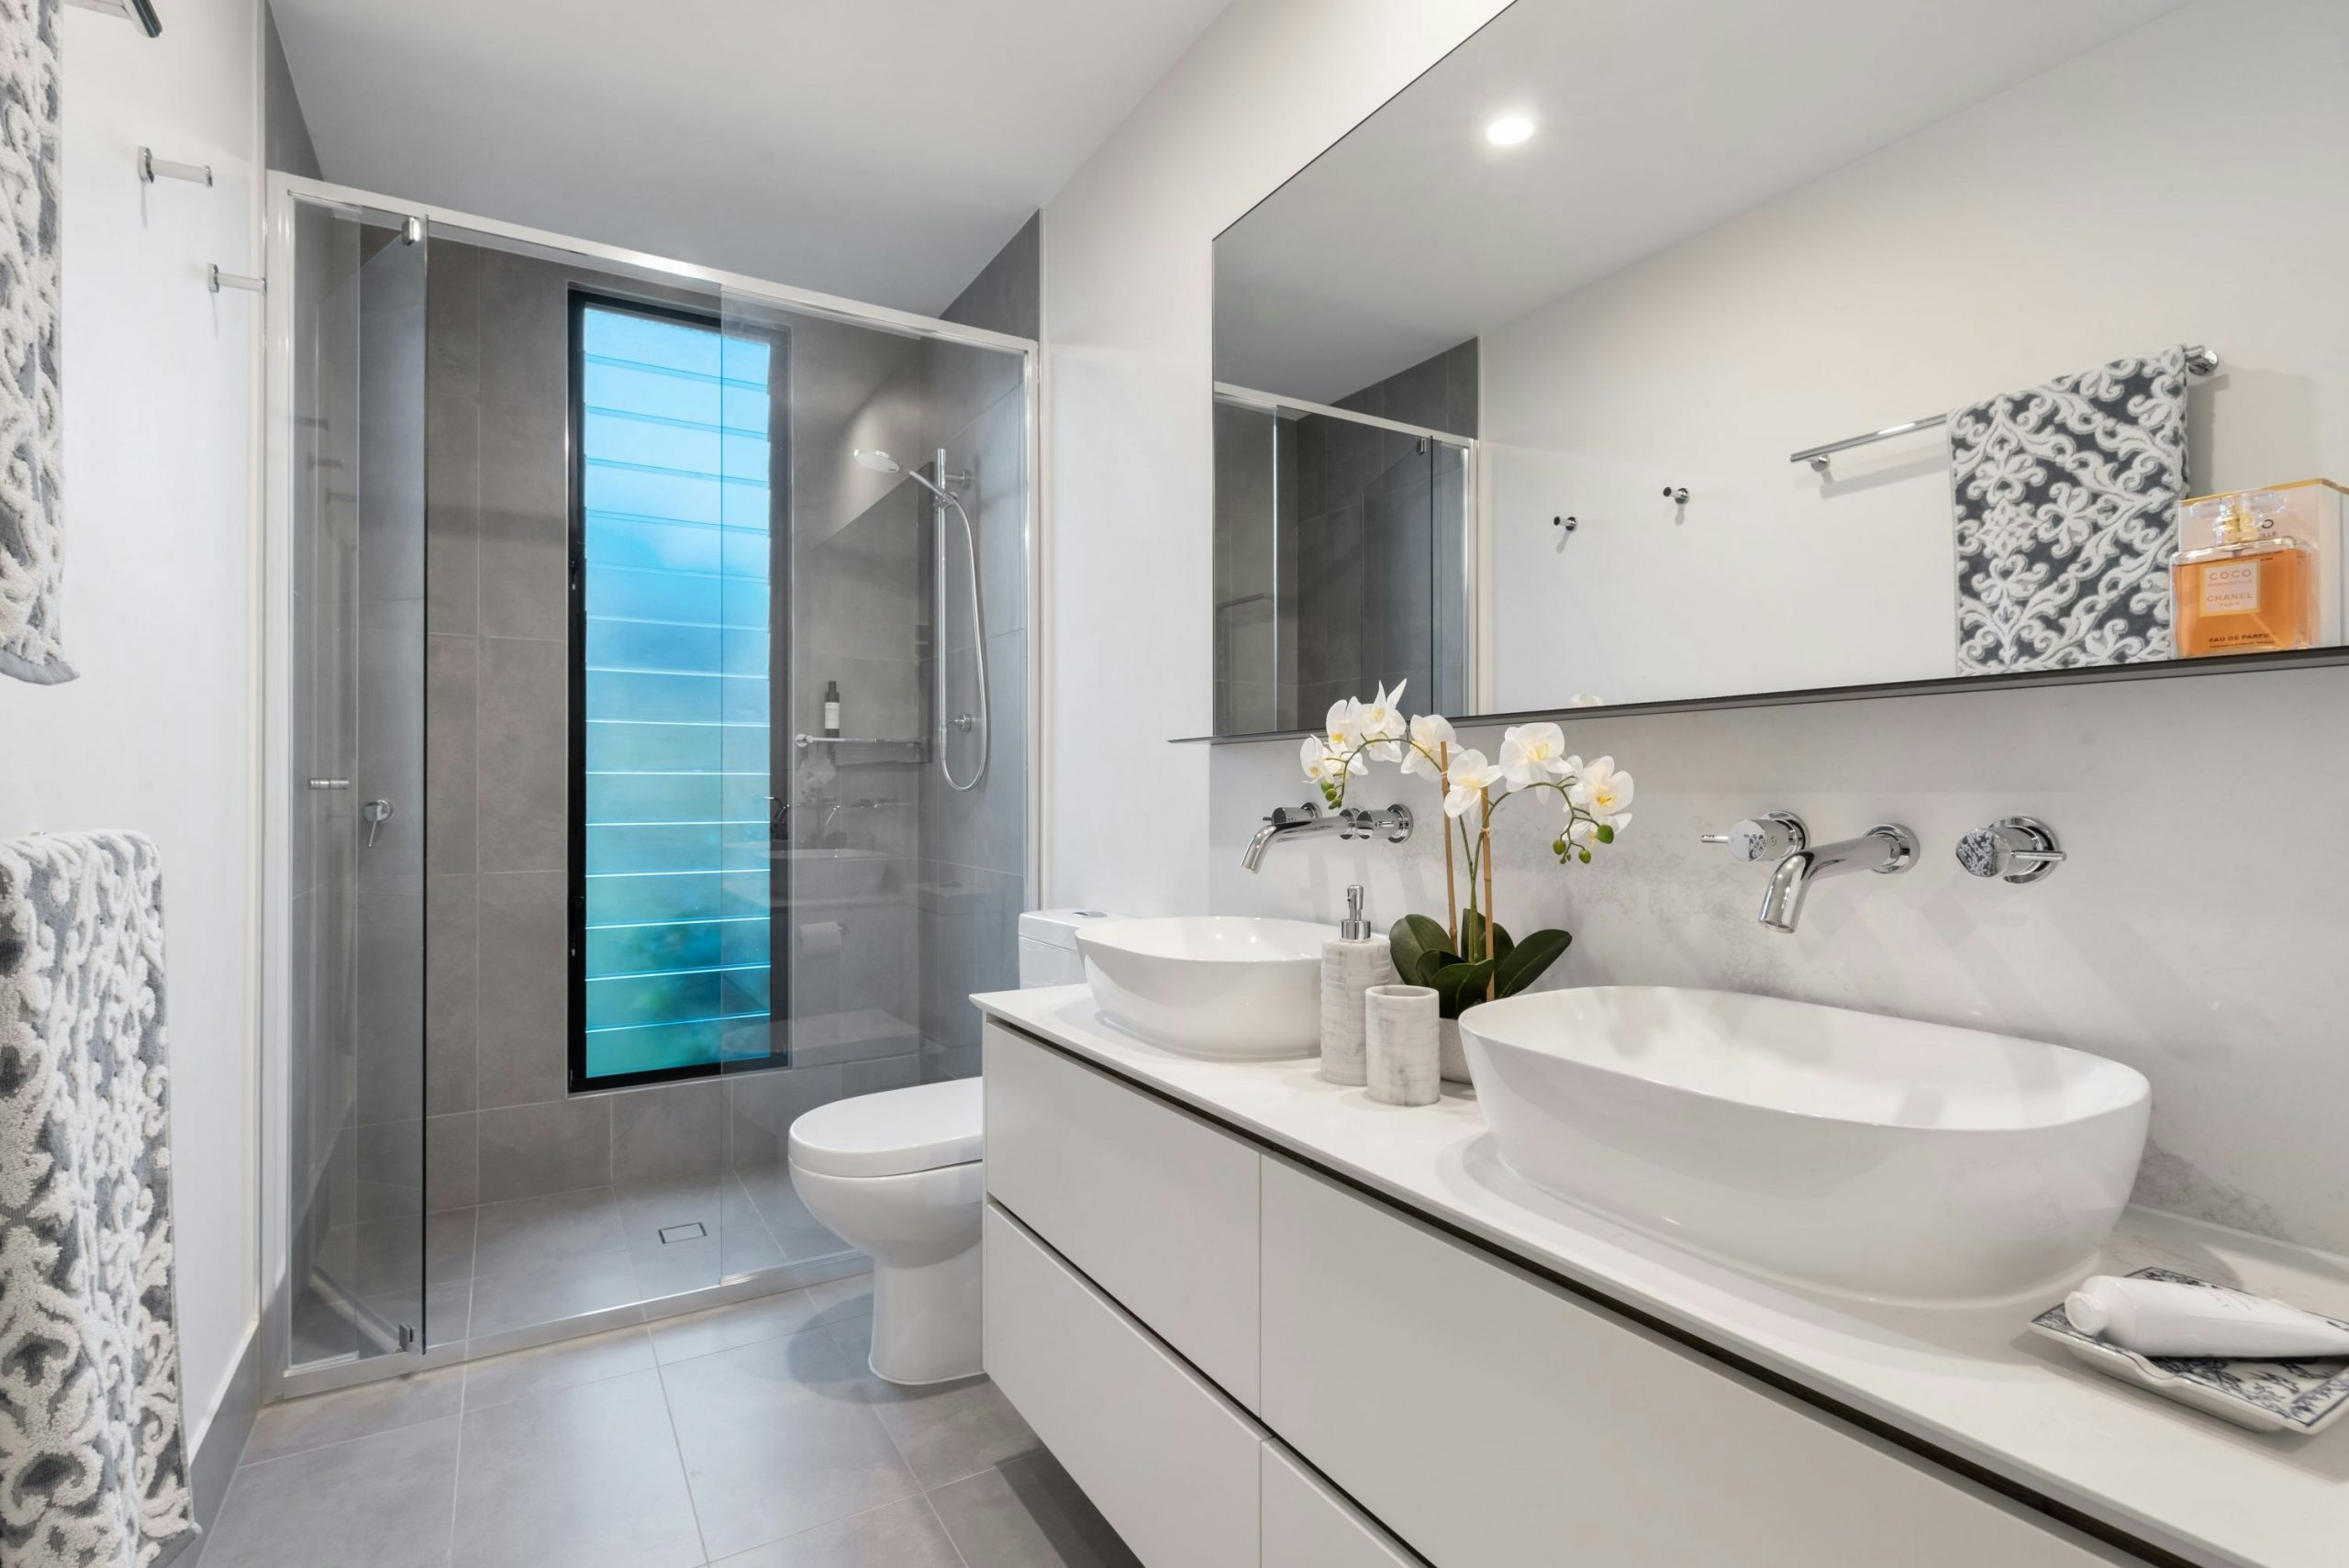
This design succeeds by adhering to a strict geometric language. Notice how everything is based on clean rectangles and squares: the floating vanity, the vessel sinks, the grey wall tiles, the mirrors, and even the louvered window panes. This repetition of form creates a powerful sense of rhythm and order, which is inherently calming to the eye. The minimal color palette of white, grey, and chrome allows the strong lines and shapes of the design to take center stage, resulting in a space that feels uncluttered, intentional, and deeply modern.
✅ Before You Start
When installing wall-mounted faucets for vessel sinks, the height is non-negotiable for proper function. The faucet spout should be positioned at least 1-2 inches above the rim of the sink basin. This provides enough anough clearance for hand washing without causing excessive splashing. The handles should be placed at a comfortable height to the side, typically with their centerline about 3-4 inches above the sink rim. Always have your sink and faucet on-site *before* the plumber roughs in the valves to ensure perfect placement.
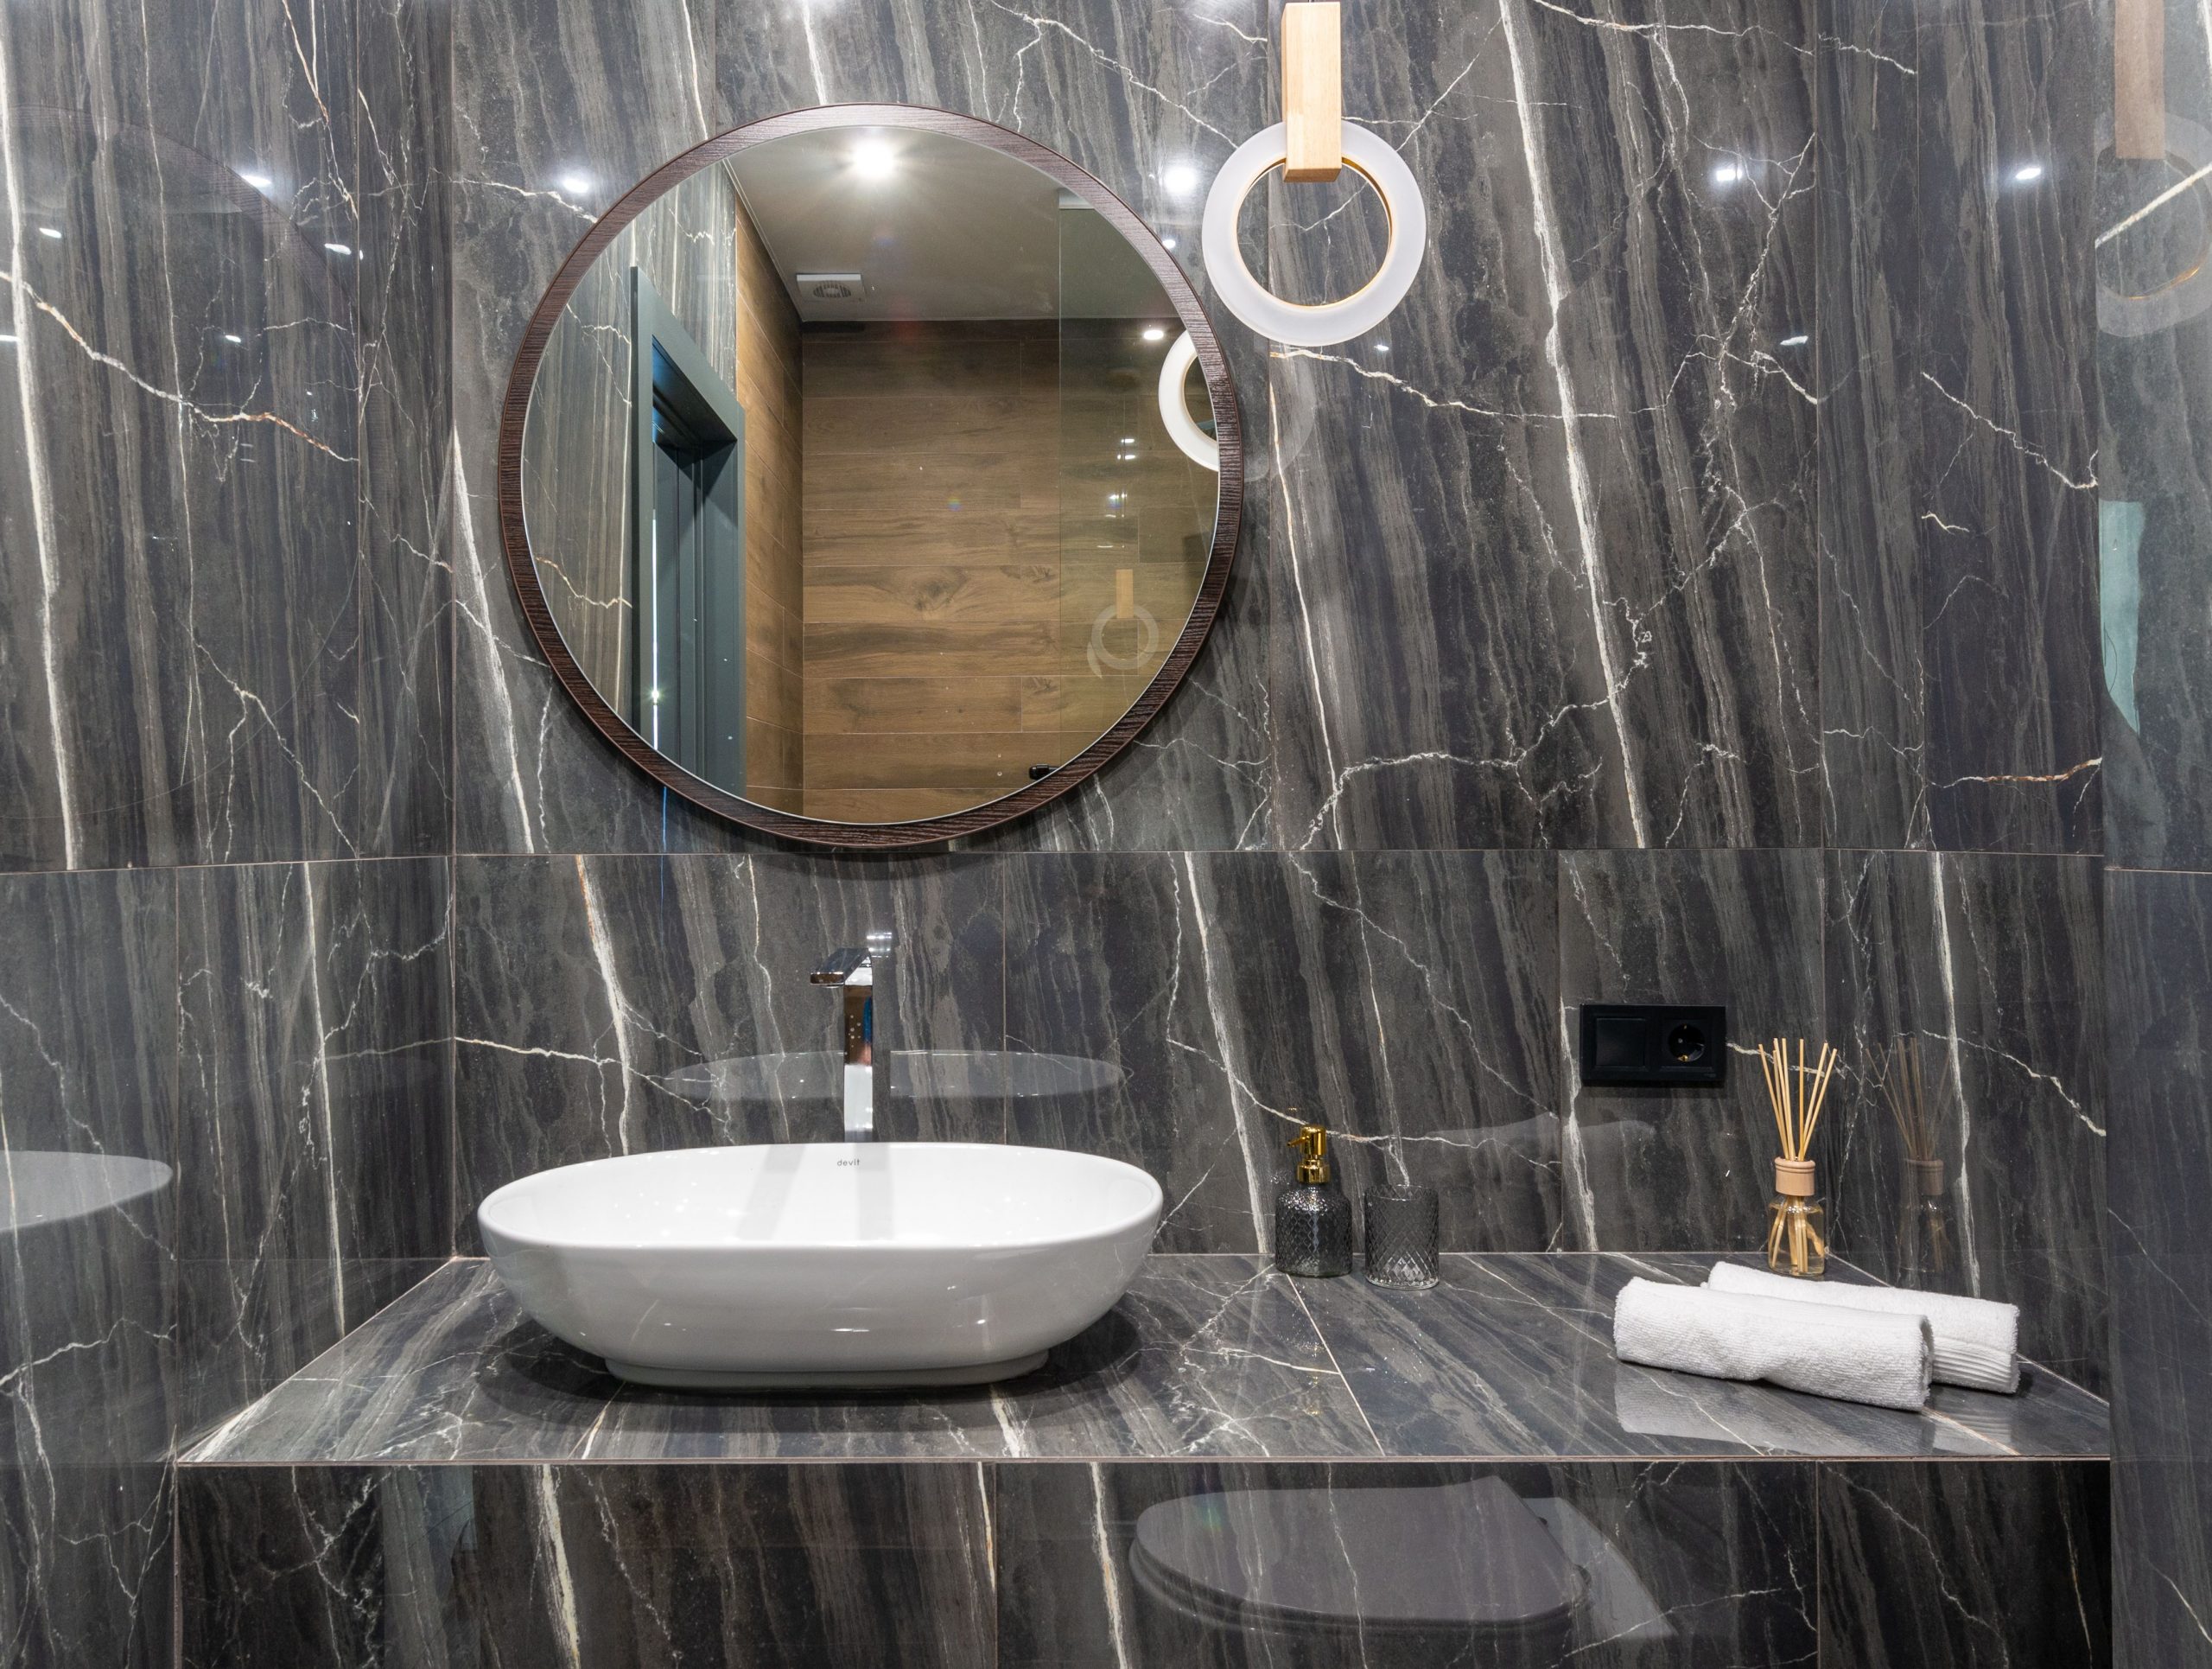
22. Sophisticated Drama with Dark Marble and a Round Mirror
The formula for this opulent look is about balancing a dramatic material with soft shapes and warm accents. It breaks down to roughly: 70% dark, dramatic marble + 20% soft, rounded shapes + 10% warm wood and light. The dark grey marble walls and counter create an enveloping sense of luxury. This is softened and made more approachable by the gentle curves of the oval vessel sink and the large round mirror (20%). The final 10% comes from the warm wood tone in the mirror frame and pendant light, which adds a crucial touch of organic warmth.
💸 Get This Look For Less
Real marble slab installation is a high-cost endeavor. To get this dramatic, moody look for a fraction of the price, look for large-format porcelain tiles that mimic the look of dark marble. Brands like MSI and Florim offer incredibly realistic options. For the vanity, consider a standard black or dark grey quartz countertop instead of marble. You can pair this with a simple round mirror from a store like West Elm or CB2 and a vessel sink from an online retailer for a total cost that is thousands less than the real stone version.
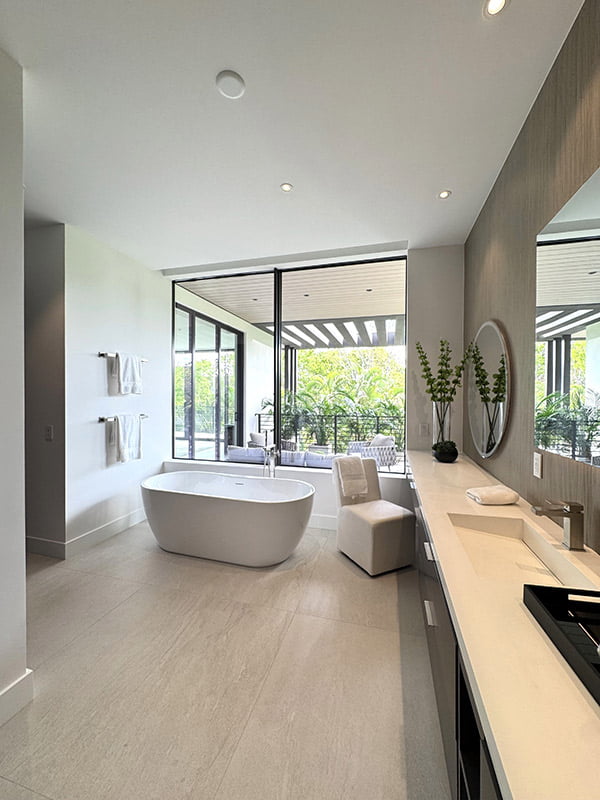
23. The Ultimate View: A Jacuzzi Tub with Floor-to-Ceiling Windows
It’s all about the windows. The jacuzzi tub, the wood accent wall, and the sleek chrome fixtures are all supporting actors to the main event: that breathtaking, floor-to-ceiling view. The use of expansive glass walls completely dissolves the boundary between the indoor bathroom and the outdoor landscape, creating an unparalleled sense of openness and luxury. It transforms a simple bath into an immersive experience. Without those windows, the entire purpose and “wow” factor of this design is lost. It’s a statement of confidence and a celebration of the location.

🧹 Maintenance Reality
A wall of windows in a bathroom raises immediate privacy concerns. This setup is only viable if the home is in a very secluded, private location with no direct line of sight from neighbors or public areas. If privacy is a potential issue, you’ll need to budget for high-end solutions like smart glass that turns opaque at the flick of a switch, or high-quality, motorized waterproof blinds that can be controlled remotely. These options can add thousands of dollars to the project cost but are essential for making the space usable and comfortable.
24. Warm and Inviting with Striped Walls and a Tiled Tub Surround
This bathroom feels so cozy and classic because it masterfully layers warm tones and traditional patterns. The wide, tone-on-tone vertical stripes on the walls add height and a soft, tailored pattern that feels more custom than simple paint. This is complemented by the rich, warm tones of the wood-look floor tiles and the natural stone look of the tub surround. The deep soaking tub itself becomes an inviting centerpiece. It’s a move away from stark minimalism towards a more layered, “new traditional” style that feels personal and lived-in. The look is more timeless than the stark modernism of Idea #8.
📏 Scale Guide
After years of cool greys and stark whites dominating design, we’re seeing a major swing back toward warmer, earthier tones in 2026. Homeowners are craving spaces that feel comforting, safe, and inviting. This bathroom, with its palette of beige, tan, and warm browns, is a perfect example of this shift. It’s part of the broader “soft minimalism” or “warm modern” trend, which prioritizes comfort and tranquility over stark, gallery-like aesthetics. People want their homes to feel like a hug, and this color scheme delivers.
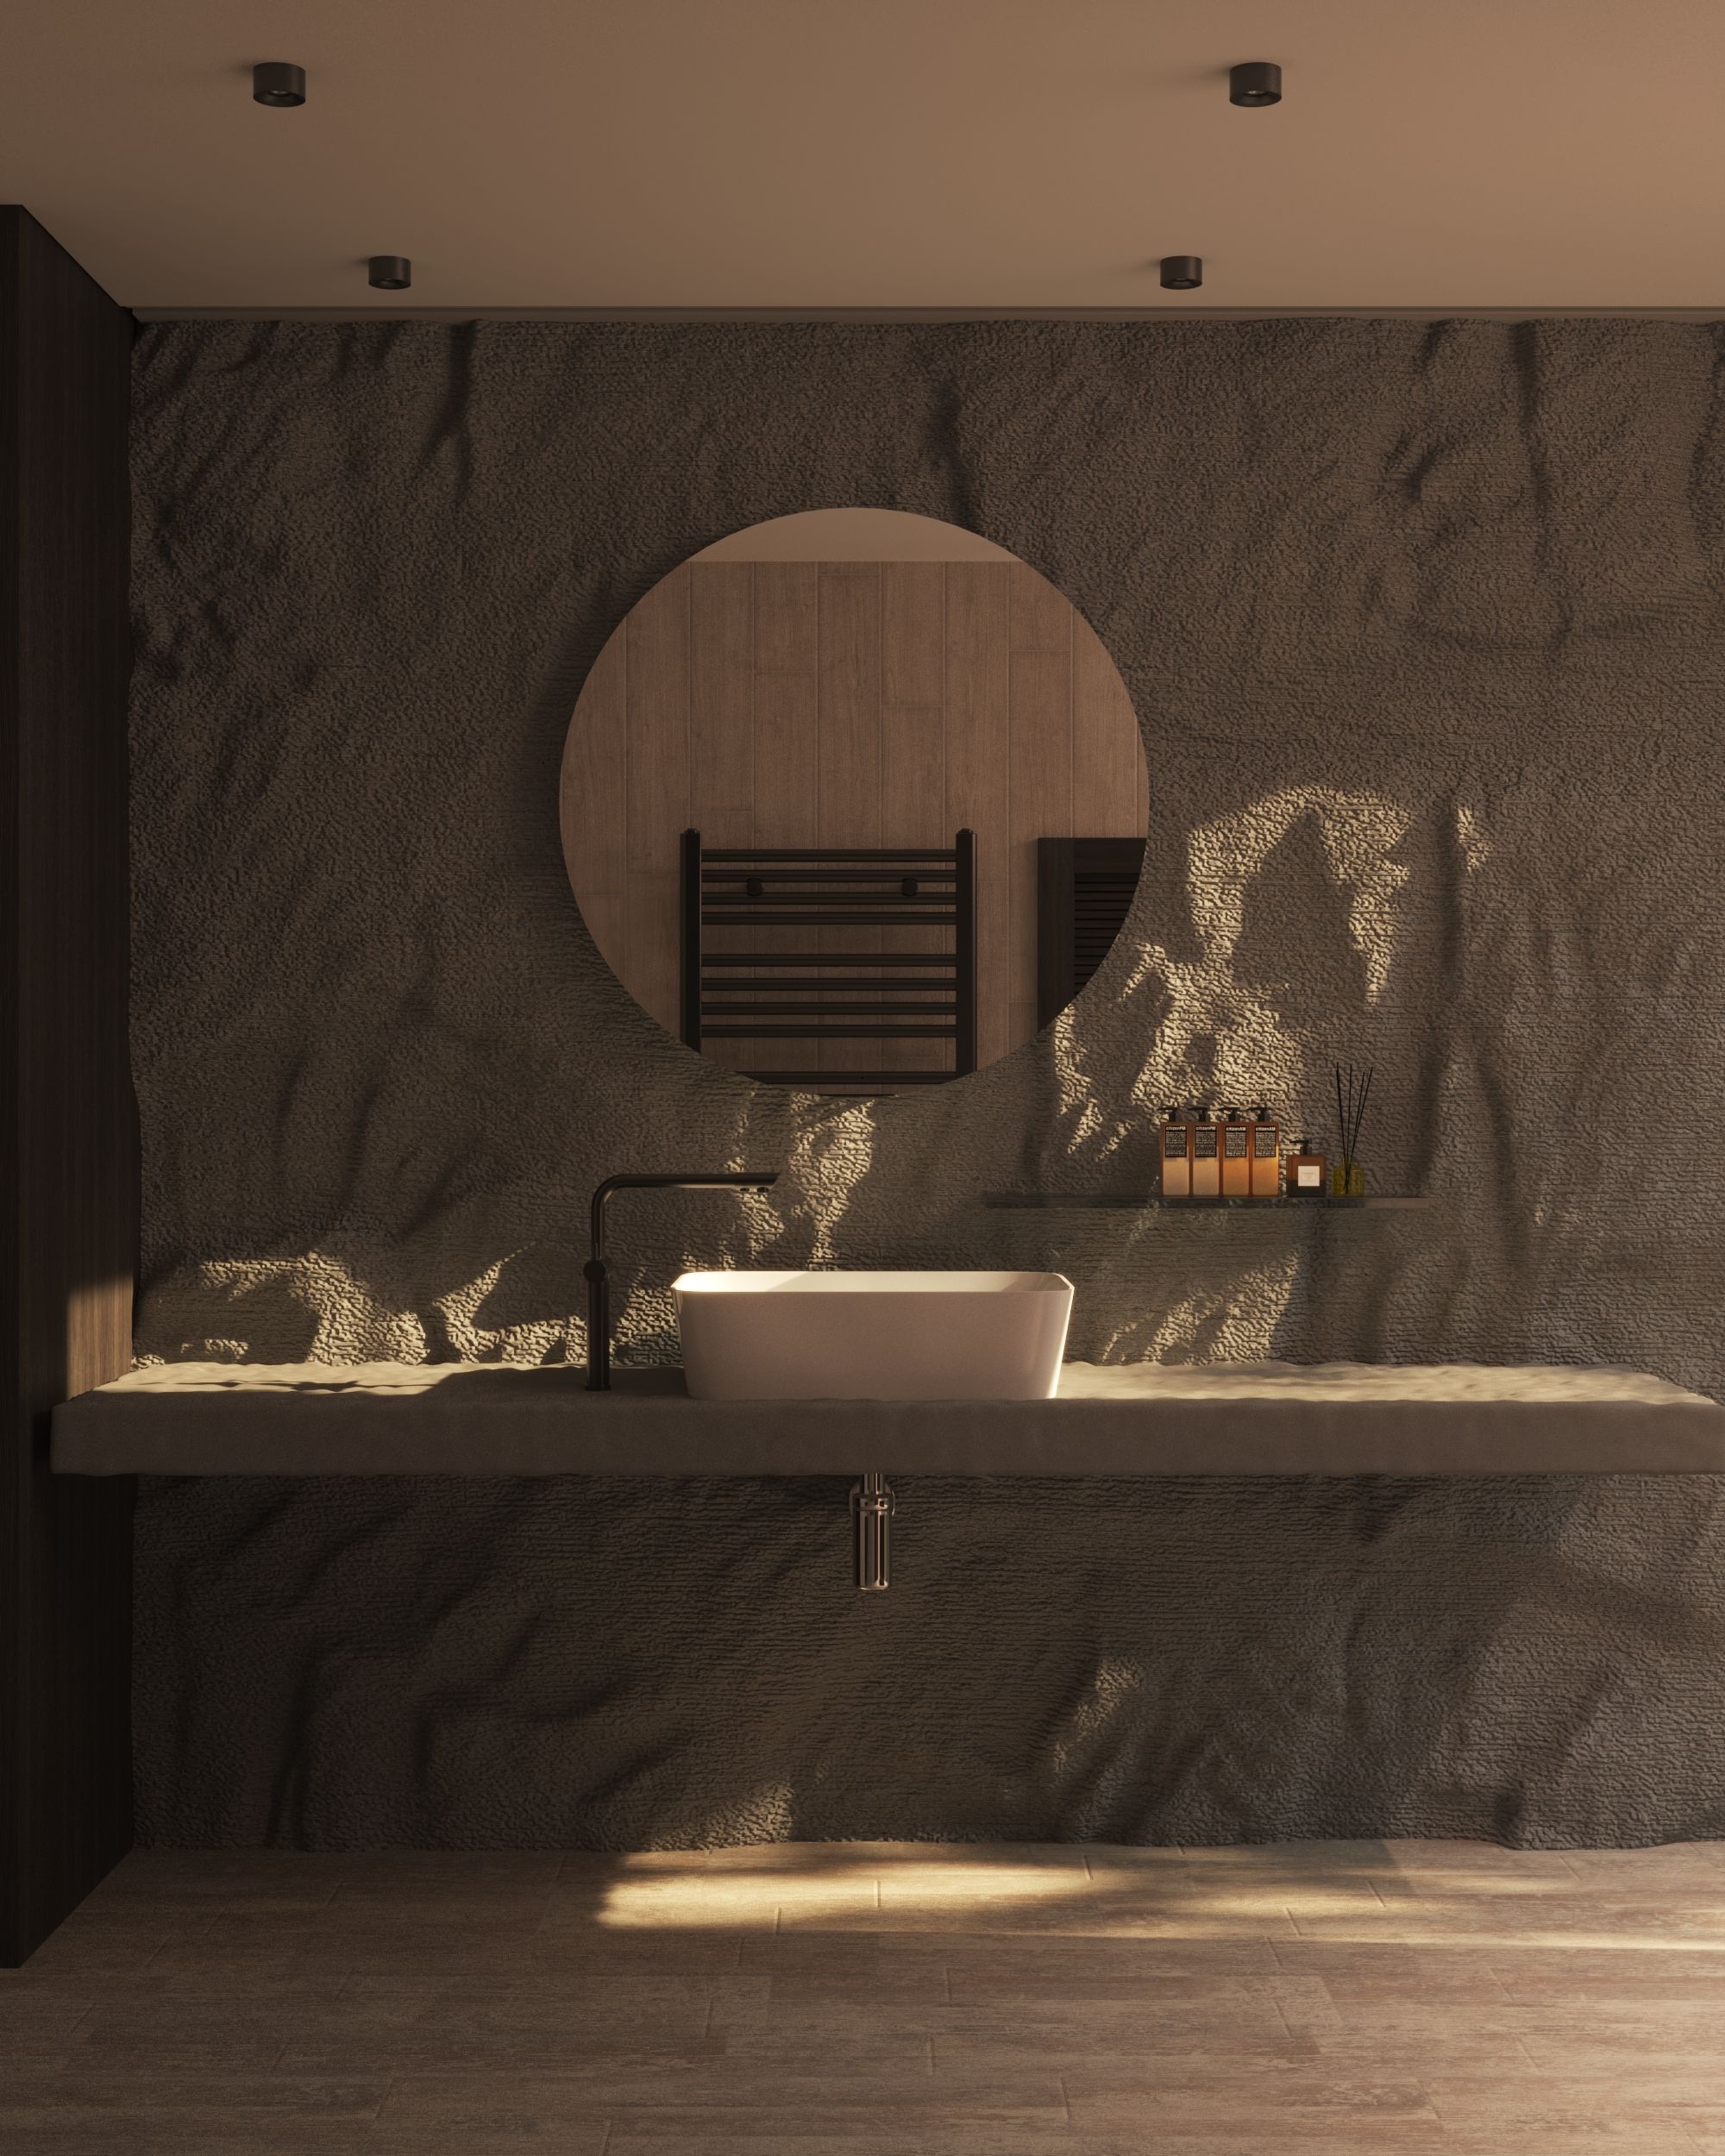
25. Earthy Modernism with a Textured Wall and Black Fixtures
A heavily textured wall, like this stunning dark masterpiece, requires a specific cleaning approach. It will collect dust more readily than a smooth wall. Regular light dusting with a soft brush attachment on a vacuum cleaner is the best way to maintain it. For any splashes or smudges, gently dab the area with a damp cloth rather than scrubbing, which could damage the texture. Avoid all-purpose sprays, as their residue can build up in the crevices and be difficult to remove. It’s a low-frequency but detail-oriented maintenance task.
⭐ The One Thing
The dark, heavily textured accent wall is the undeniable heart of this design. It provides a raw, earthy, and deeply tactile element that you rarely see in a bathroom. It’s a bold move that takes the space from merely modern to something truly memorable and atmospheric. The smooth finishes of the vanity, basin, and mirror all serve to emphasize the beautiful roughness of the wall. It’s a sensory experience, not just a visual one, and demonstrates how powerful a single, well-chosen texture can be. This focus on a single texture is a different approach than the mix seen in Idea #10.
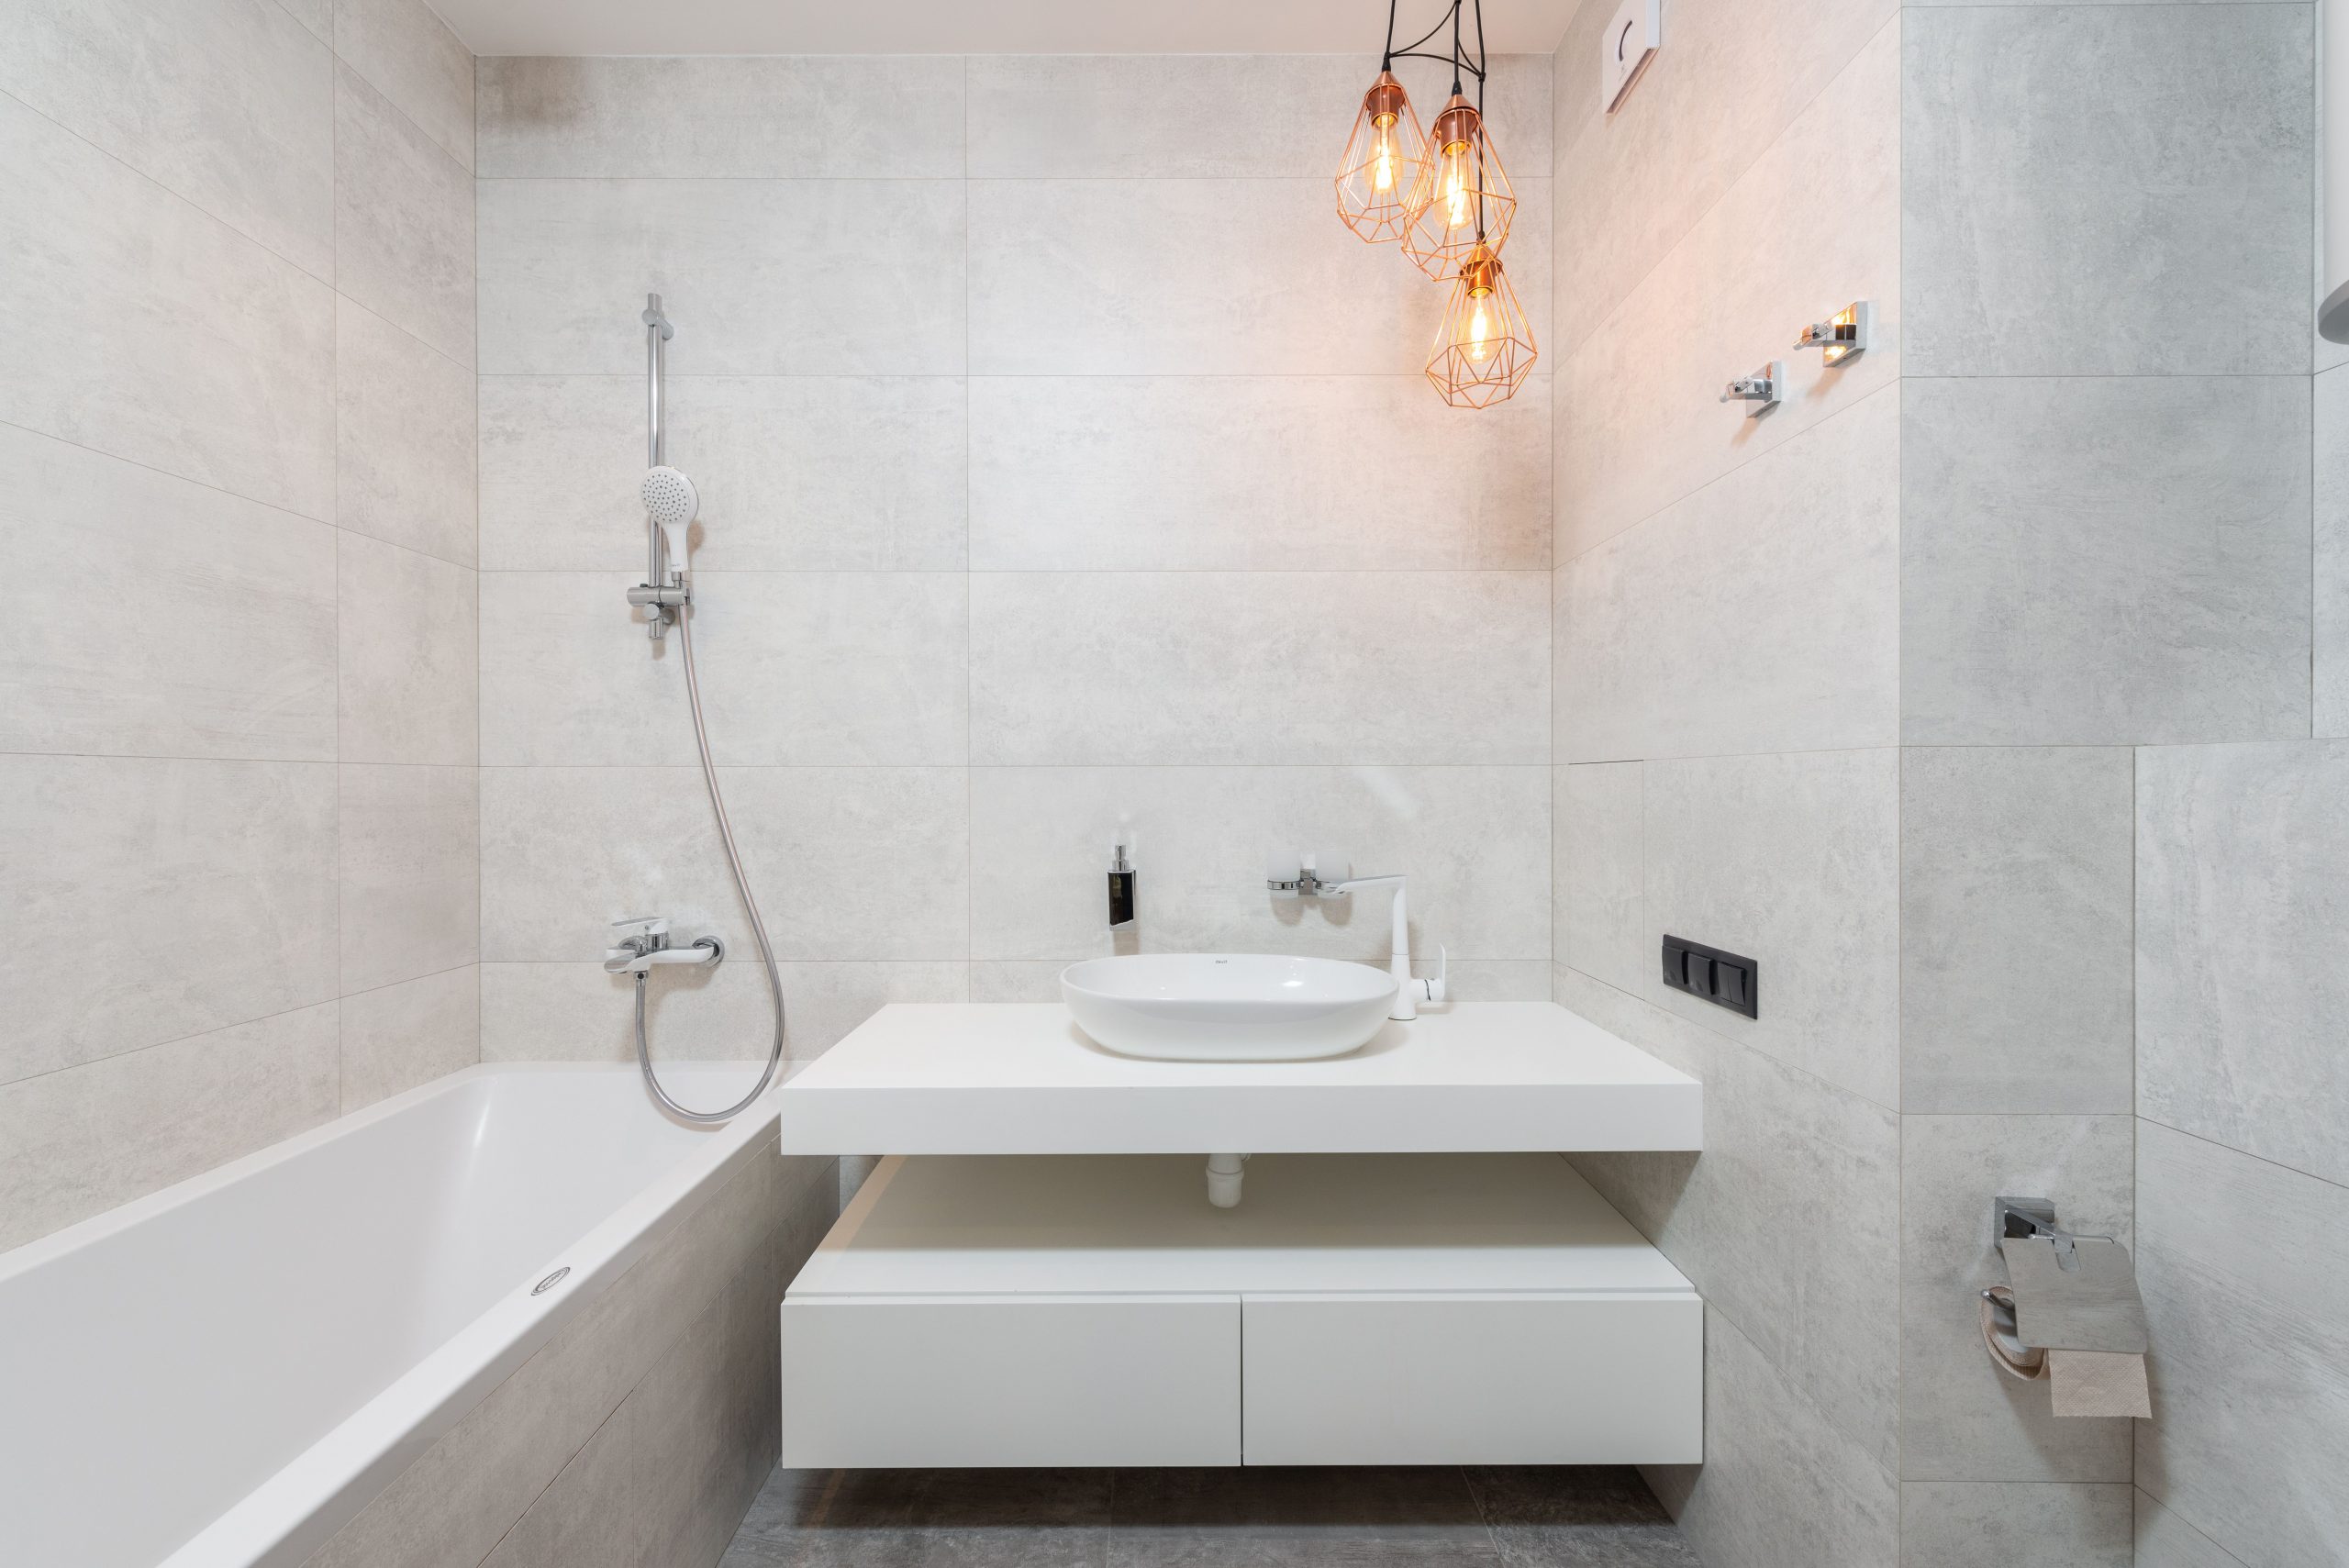
26. Industrial-Chic with Grey Tile and Copper Cage Lights
- Main Fixtures (Vanity, Tub, Sink): $1,200 – $3,500
- Lighting (Pendants): $200 – $600
- Fixtures (Faucets, Drains): $400 – $1,000
- Large Format Tile & Installation: $3,000 – $7,000
- TOTAL: $4,800 – $12,100
- Budget alternative: This is already a reasonably budget-conscious look. To save more, look for a vanity on Facebook Marketplace and choose a more basic chrome faucet, which can save you $500-$1000.
📐 Style Math
This bathroom design proves that minimalism doesn’t have to be boring. The foundation is a sea of calm, uniform light grey tiles on the walls and floor, which creates a serene and expansive feel. The magic comes from the strategic introduction of industrial-inspired accents. The copper wire cage pendant lights and their warm, exposed bulbs add a raw, slightly edgy element and a pop of metallic warmth. This contrast between the sleek, minimal background and the industrial details creates a look that is both clean and full of character.
27. A Luxurious Mix of Marble and Dark Wood
This stunning bathroom achieves its high-end feel with a classic high-contrast formula: 60% Bright & Polished + 30% Dark & Warm + 10% Sleek & Reflective. The large-format white marble on the floors and shower walls makes up the majority of the space (60%), keeping it bright and airy. This is anchored by the deep, rich tone of the floating wood vanity (30%), which adds warmth and substance. The final 10% comes from the chrome fixtures and frameless glass, which add a layer of sleek, reflective polish that completes the luxurious feel. It feels richer than the all-white look of Idea #20.
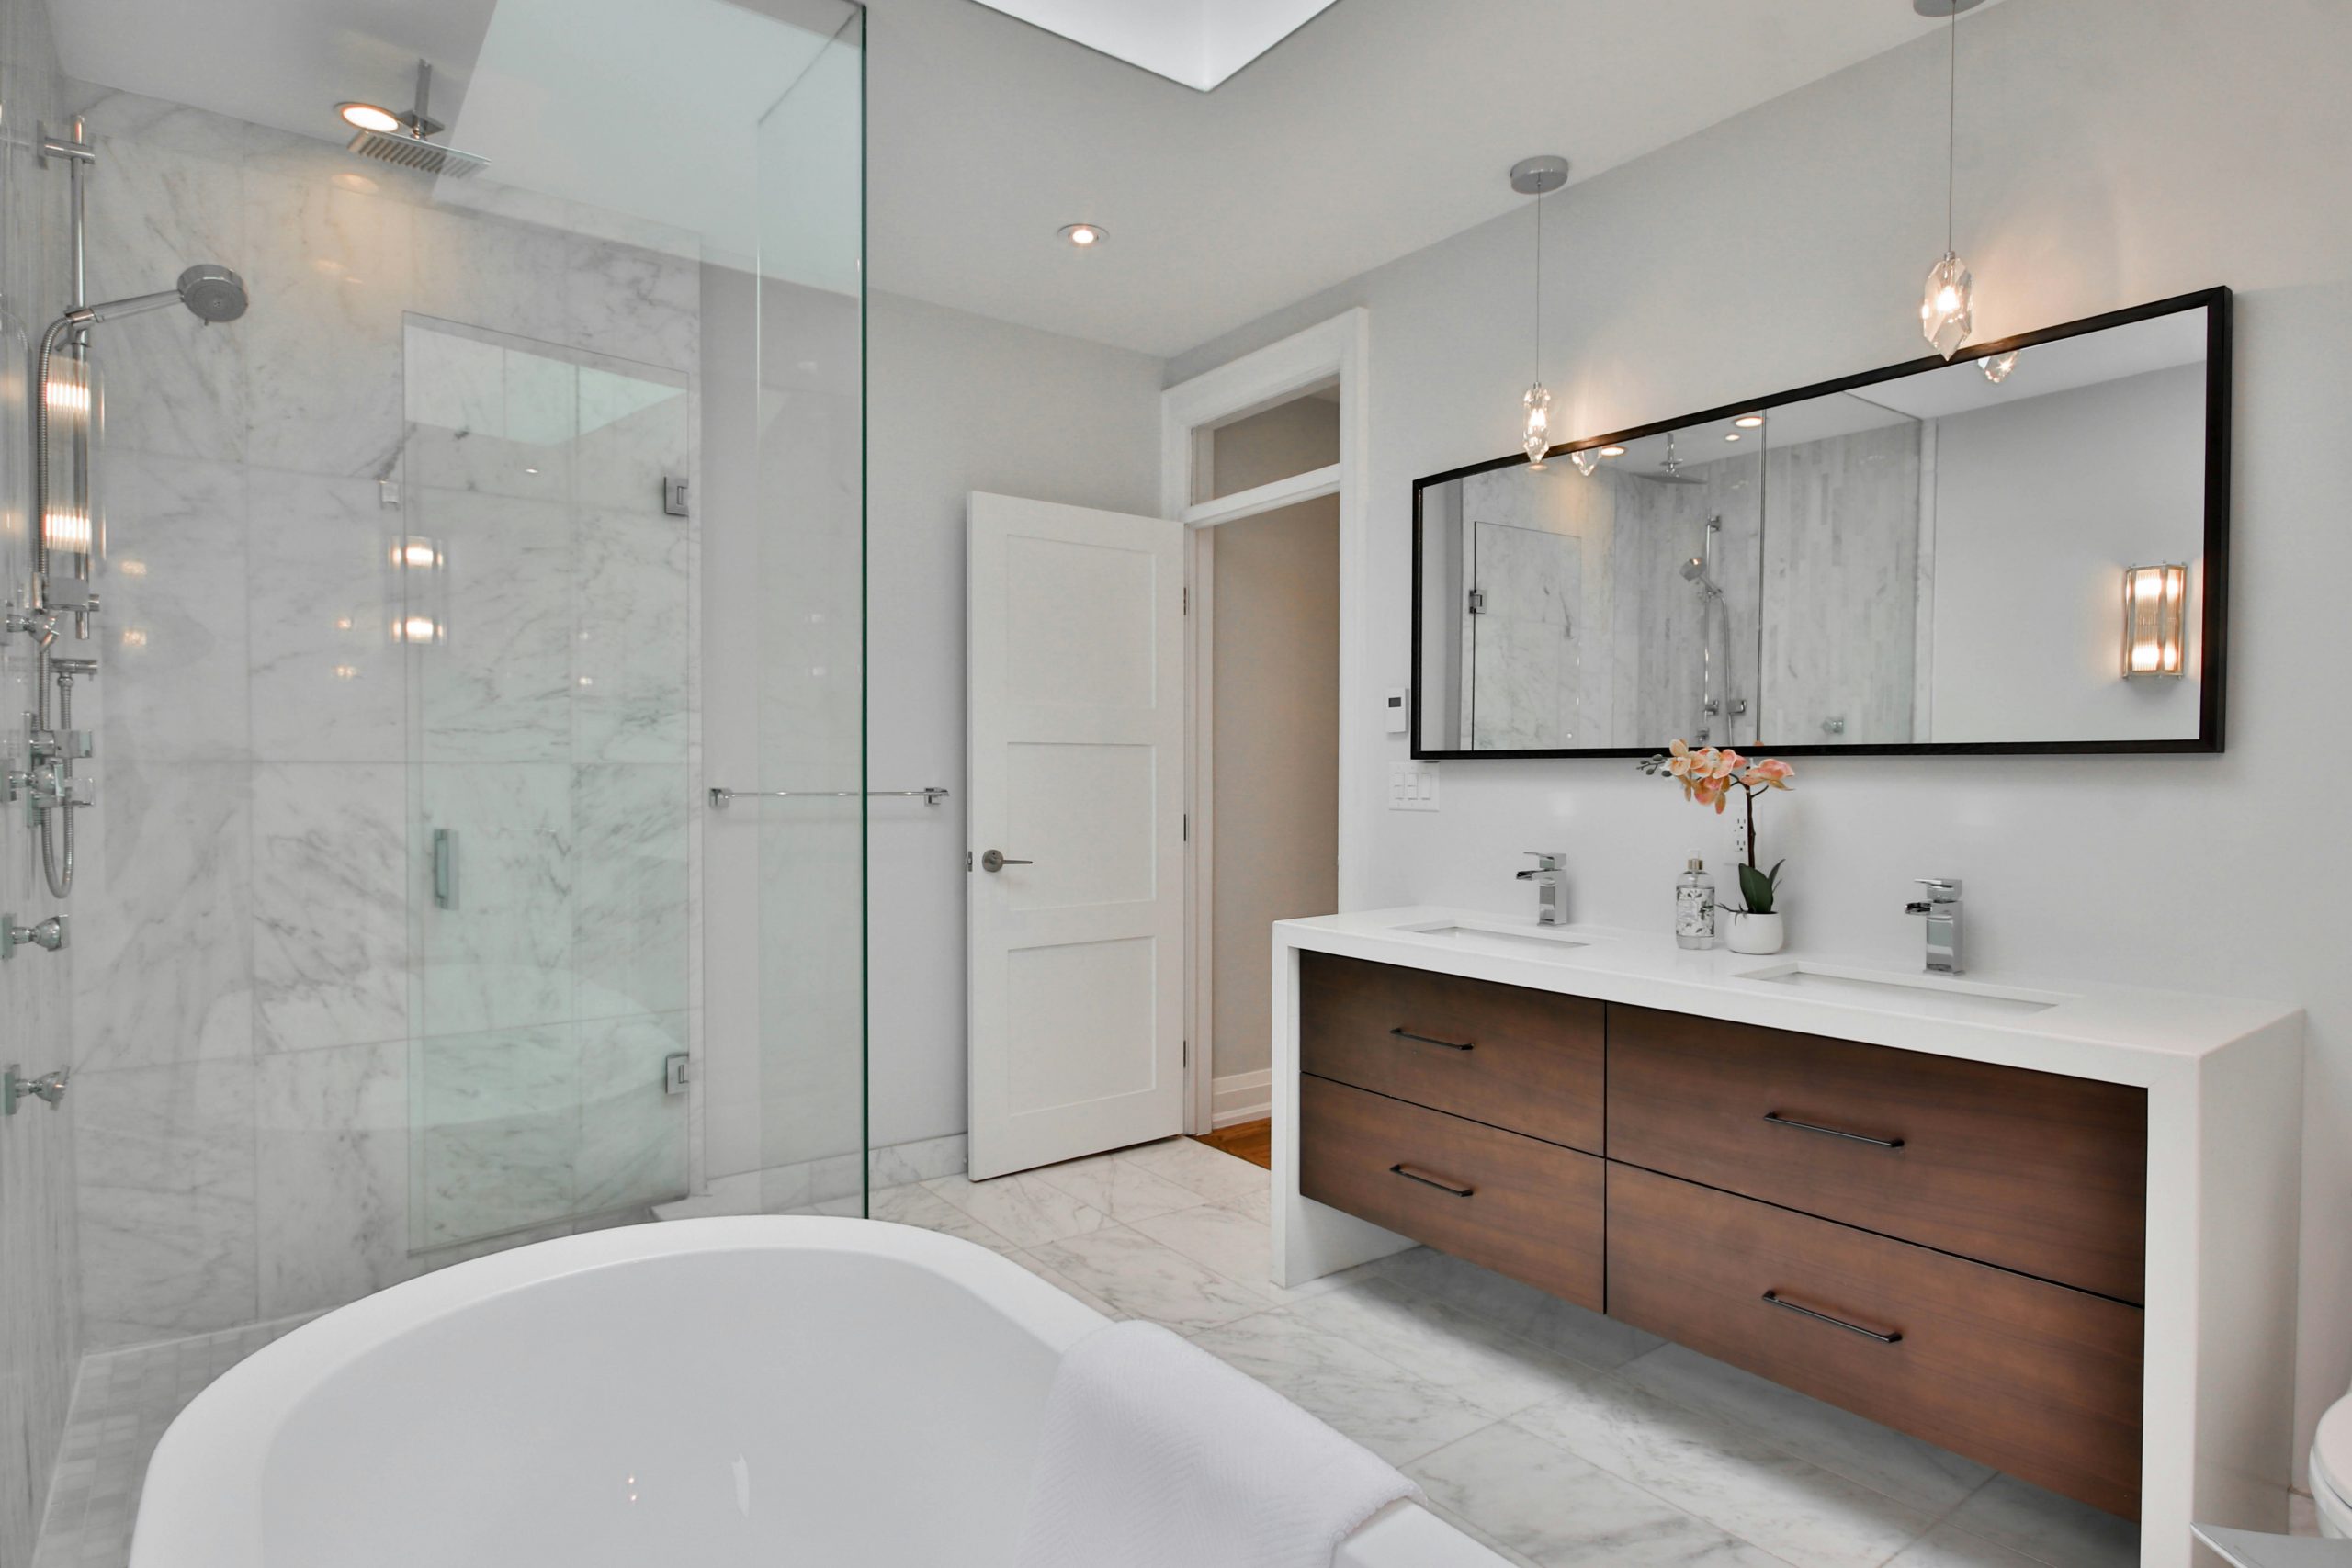
⚠️ Real Talk
Before committing to a frameless glass shower enclosure, take these steps:
- Check for structural support: Heavy glass doors need solid blocking in the walls to be installed securely. Verify this with your contractor before you tile.
- Measure your angles: Are your walls perfectly plumb and your floor perfectly level? Frameless glass is custom-cut, and any imperfections in the walls will result in unsightly gaps or a door that doesn’t seal properly.
- Confirm your budget: A true frameless glass enclosure is a significant investment, often costing $2,000 – $5,000+. Get a firm quote early in the planning process.
Your Modern Bathroom Refresh Starts Now
Now that you’re armed with 27 distinct ideas for 2026, the hardest part is picking just one. Whether you’re drawn to warm minimalism or high-contrast drama, the perfect bathroom for your home is within reach. Start by saving your favorites and planning your next steps. For more daily inspiration and design tips, be sure to follow us on Pinterest. Happy decorating!