31 Gorgeous Handmade Christmas Ornaments You Absolutely Need to Craft This Holiday Season

You know the moment: you are three rows deep into a Pinterest board, and the ornaments that stop your scroll are not from a big-box set. They are the ones somebody made with their own two hands. Handmade ornaments are the rare holiday project that actually gets finished, because each one takes forty minutes, not four weekends.
We poked through Michaels, Joann, Etsy, and more than a few thrift-store yarn bins to narrow this down to 31 ideas worth your December, with projects running from about $1 to $52 per ornament.
Inside you will find 31 curated ideas across rustic, whimsical, traditional, and modern-handmade styles, plus cost breakdowns and step-by-step briefs so you know exactly what you are getting into before you buy a single skein. And stay until the end — we break down the most common mistakes that can ruin these looks.
The 2026 shift is real: ornament collecting has gone the way of record collecting, one piece at a time, straight from the person who made it. 📌 Save this to Pinterest for later — you will want to revisit these ideas.
1. Fabric Birds, Beaded Bells, and a Gold Leaf Garland
Count your branch tiers before you hang a single thing. A 7-foot tree usually has 9 to 11 tiers, so place one large statement piece per tier — the gingham bird, the navy star, the felt bell with the red bow — then fill the gaps with 1.5- to 2-inch pieces. Anything over 4 inches reads as a focal point, which caps your showpieces at 8 to 10 for the entire tree. More than that and all that detailed beadwork stops reading as detail and starts reading as noise. Weave the gold leaf-and-bell garland in loose S-curves between tiers instead of spiraling it evenly; even spirals fight the handwork.
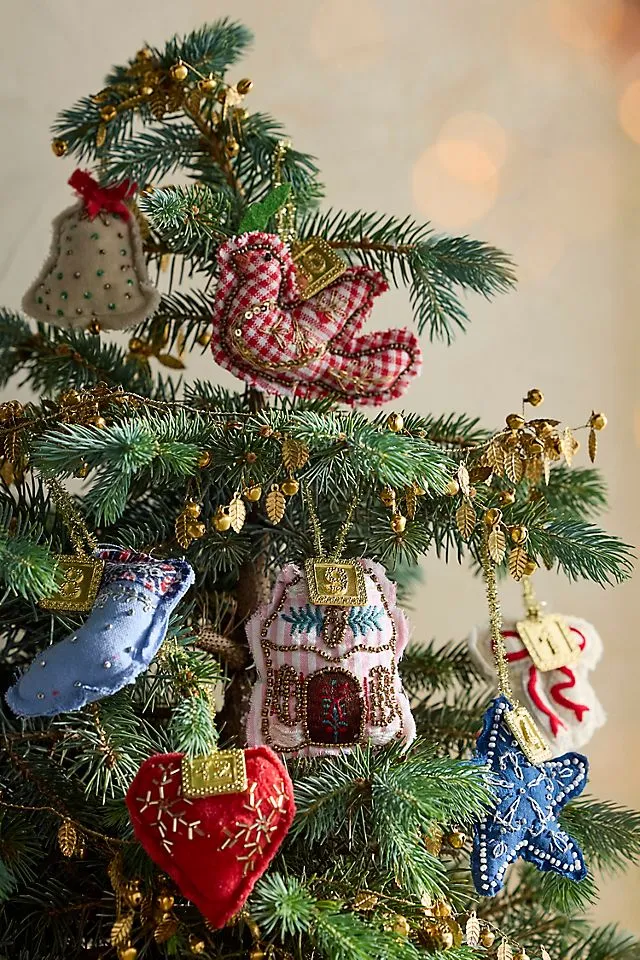
This collected, layered look feels current in 2026 because people are finished with boxed sets. Ornament collecting has gone the way of record collecting — one piece at a time, from a maker, because it means something to you. Pinterest boards have quietly shifted from “matching tree” to “ornament story,” and a tree gathered over years always reads warmer than one that arrived in a single afternoon delivery.
2. A Felt Tree, a Tiny Train, and Two Gift Boxes
Everything here is one flat silhouette packed with story: a dark green felt tree topped with a yellow star, a red oval base stitched to look like track, a blue train with yellow wheels, and two cream gift boxes tied with gold string. The proportions do the heavy lifting. The train and the boxes are each roughly a third of the tree’s height, so the eye reads a scene instead of a shape. That scale relationship is what separates a craft-fair ornament from a keepsake.
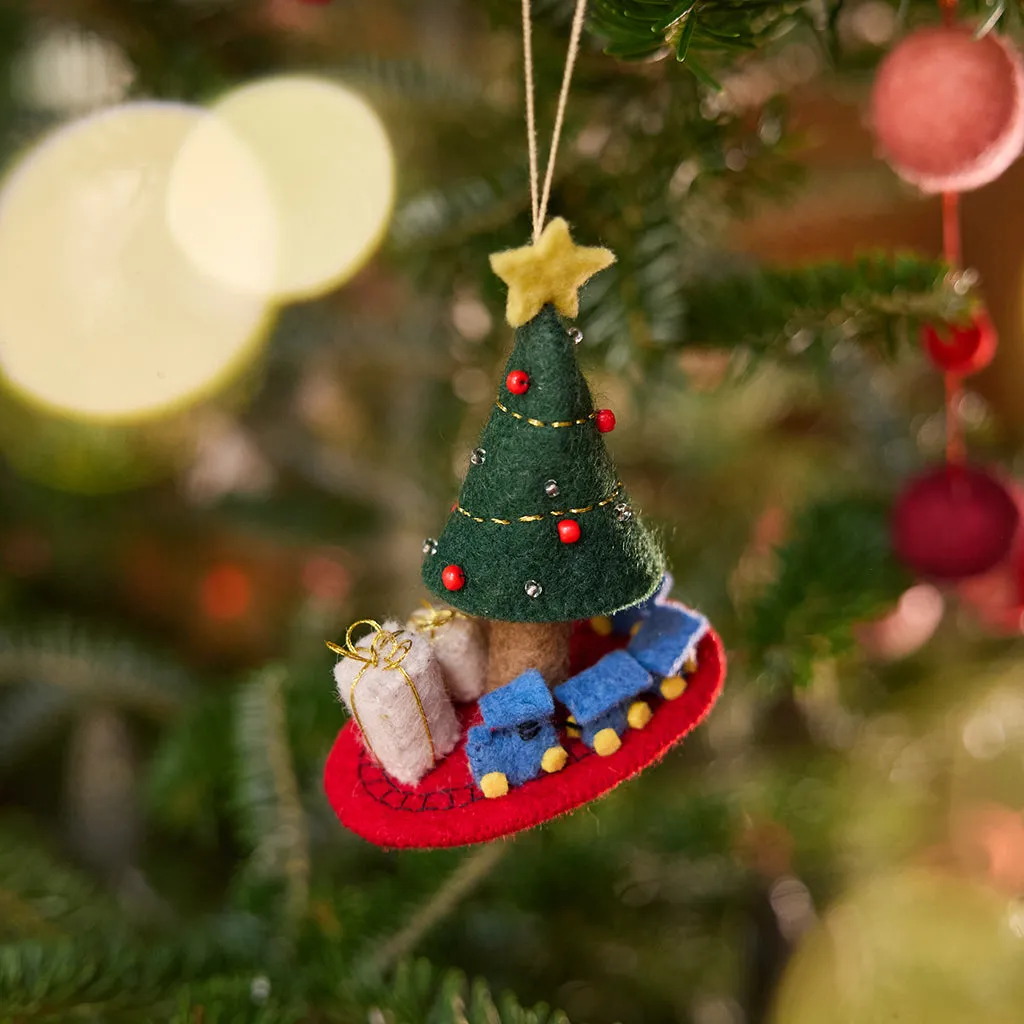
- Cut two 3-inch red felt ovals and a narrow 2.5-inch strip for the rail line.
- Stack the ovals, pin them, and blanket-stitch the edge in matching thread.
- Run a running stitch in dark thread down the center for the rail.
- Cross-stitch three short sleepers between the rails.
- Glue the train and gift boxes down with fabric glue and weight them for 20 minutes.
Time: about 45 minutes. Materials: under $6 in felt and thread. If you have never blanket-stitched, the tiered felt tree in Idea #6 is a much gentler first project.
3. Wine Bottles Dressed Up in Rickrack and Plaid
Honest talk about the bottle ornament: a corked 750ml glass bottle weighs close to 2.5 pounds. No branch on a standard tree will hold that, so these live on a mantel, a sideboard, or a sturdy rustic shelf. If you want them up in the tree, use the 375ml half-bottles, which weigh about a third as much and hang fine from heavy-gauge wire. Also, keep the ribbons unwired; wire fights the soft rickrack and plaid bow shown here.
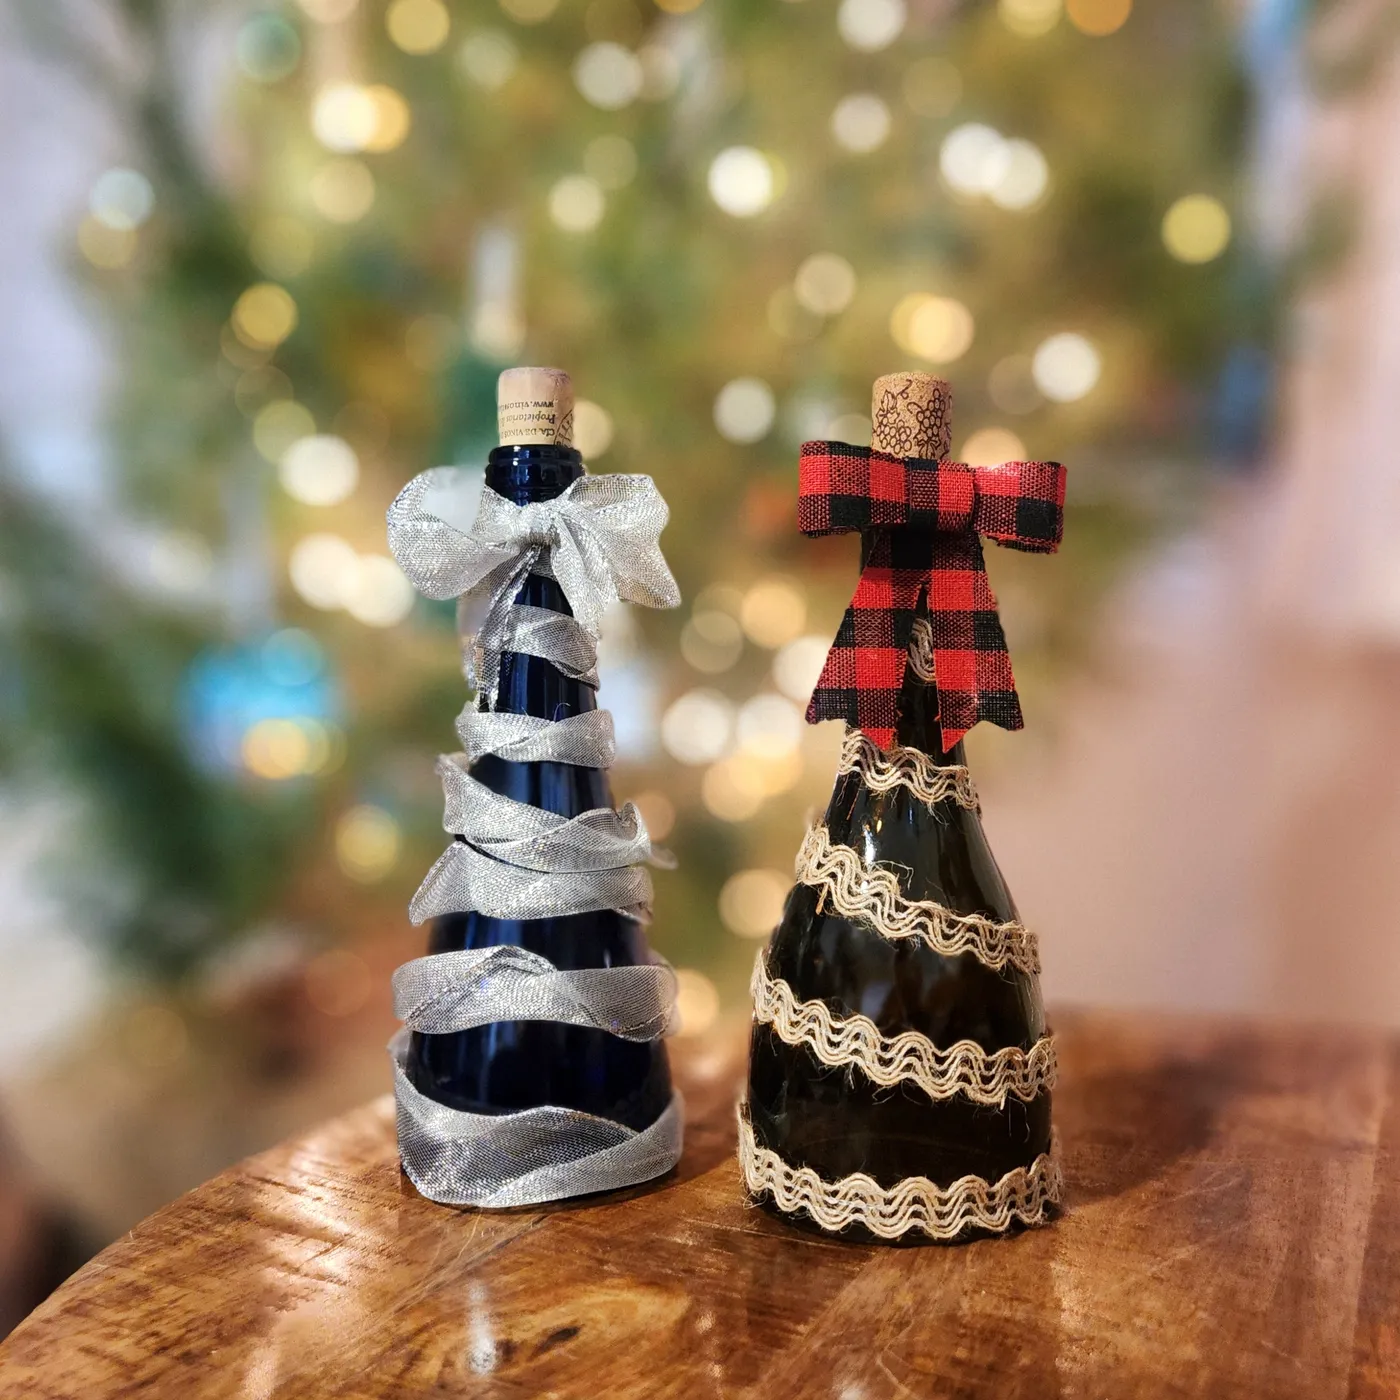
- Two empty glass bottles: $0 recycled, $12 purchased
- Silver mesh ribbon, one spool: $4 to $8
- Red-and-black plaid wired ribbon, one roll: $6 to $12
- Natural rickrack trim, 3 yards: $3 to $6
- Cork stoppers, 2-pack: $3 to $5
- Twine and tiny bells: $4 to $7
Total: about $20 to $50 for the pair. Budget alternative: skip the mesh ribbon and use a strip torn from an old silver scarf, then swap the plaid for a thrifted flannel shirt cut into 2-inch strips. That drops the pair to roughly $10.
4. Yarn Pom-Poms and Tassels in Every Crayon Color
The formula on this tree runs about 70% saturated brights — pink, orange, yellow, blue, purple — 20% white pom-poms and natural twine, and 10% sparkle from the gold glitter riding on the beads. Swap the brights for a tonal range, every shade of red or sage through emerald, and the same formula gives you a much calmer tree that still feels handmade. Keep the 10% sparkle either way. It is the thing that stops flat yarn from looking like laundry drying on a branch.
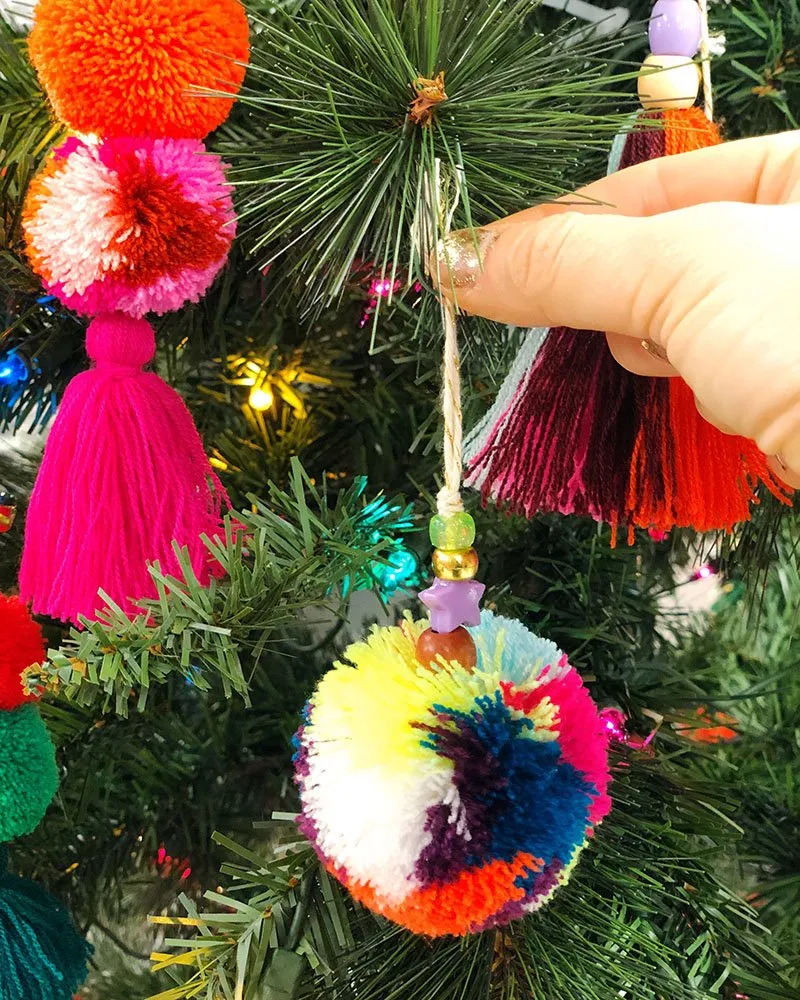
Every ornament here costs under $2 to make. Buy yarn at Walmart or dig through a thrift-store yarn bin, wind tassels around a fork if you do not own a pom-pom maker, and pull beads off a broken necklace nobody wears anymore. Facebook Marketplace regularly has yarn lots for $5 to $10. Skip the pre-packaged ornament kits entirely — they charge $25 for about $8 worth of components, and you get no say in the colors.
5. Cross-Stitch Pyramids on Little Twig Trunks
Cross-stitching onto a pyramid has one hard requirement: 14-count aida or an evenweave, or your design will skew the second the fabric wraps. The trick that saves the silhouette is pressing the finished pyramid over a cardstock template before you stitch the base closed. It keeps those four corners sharp instead of puffy. Then mount the whole thing on a 3/8-inch dowel or a foraged twig, so it reads as a miniature tree rather than a lump.
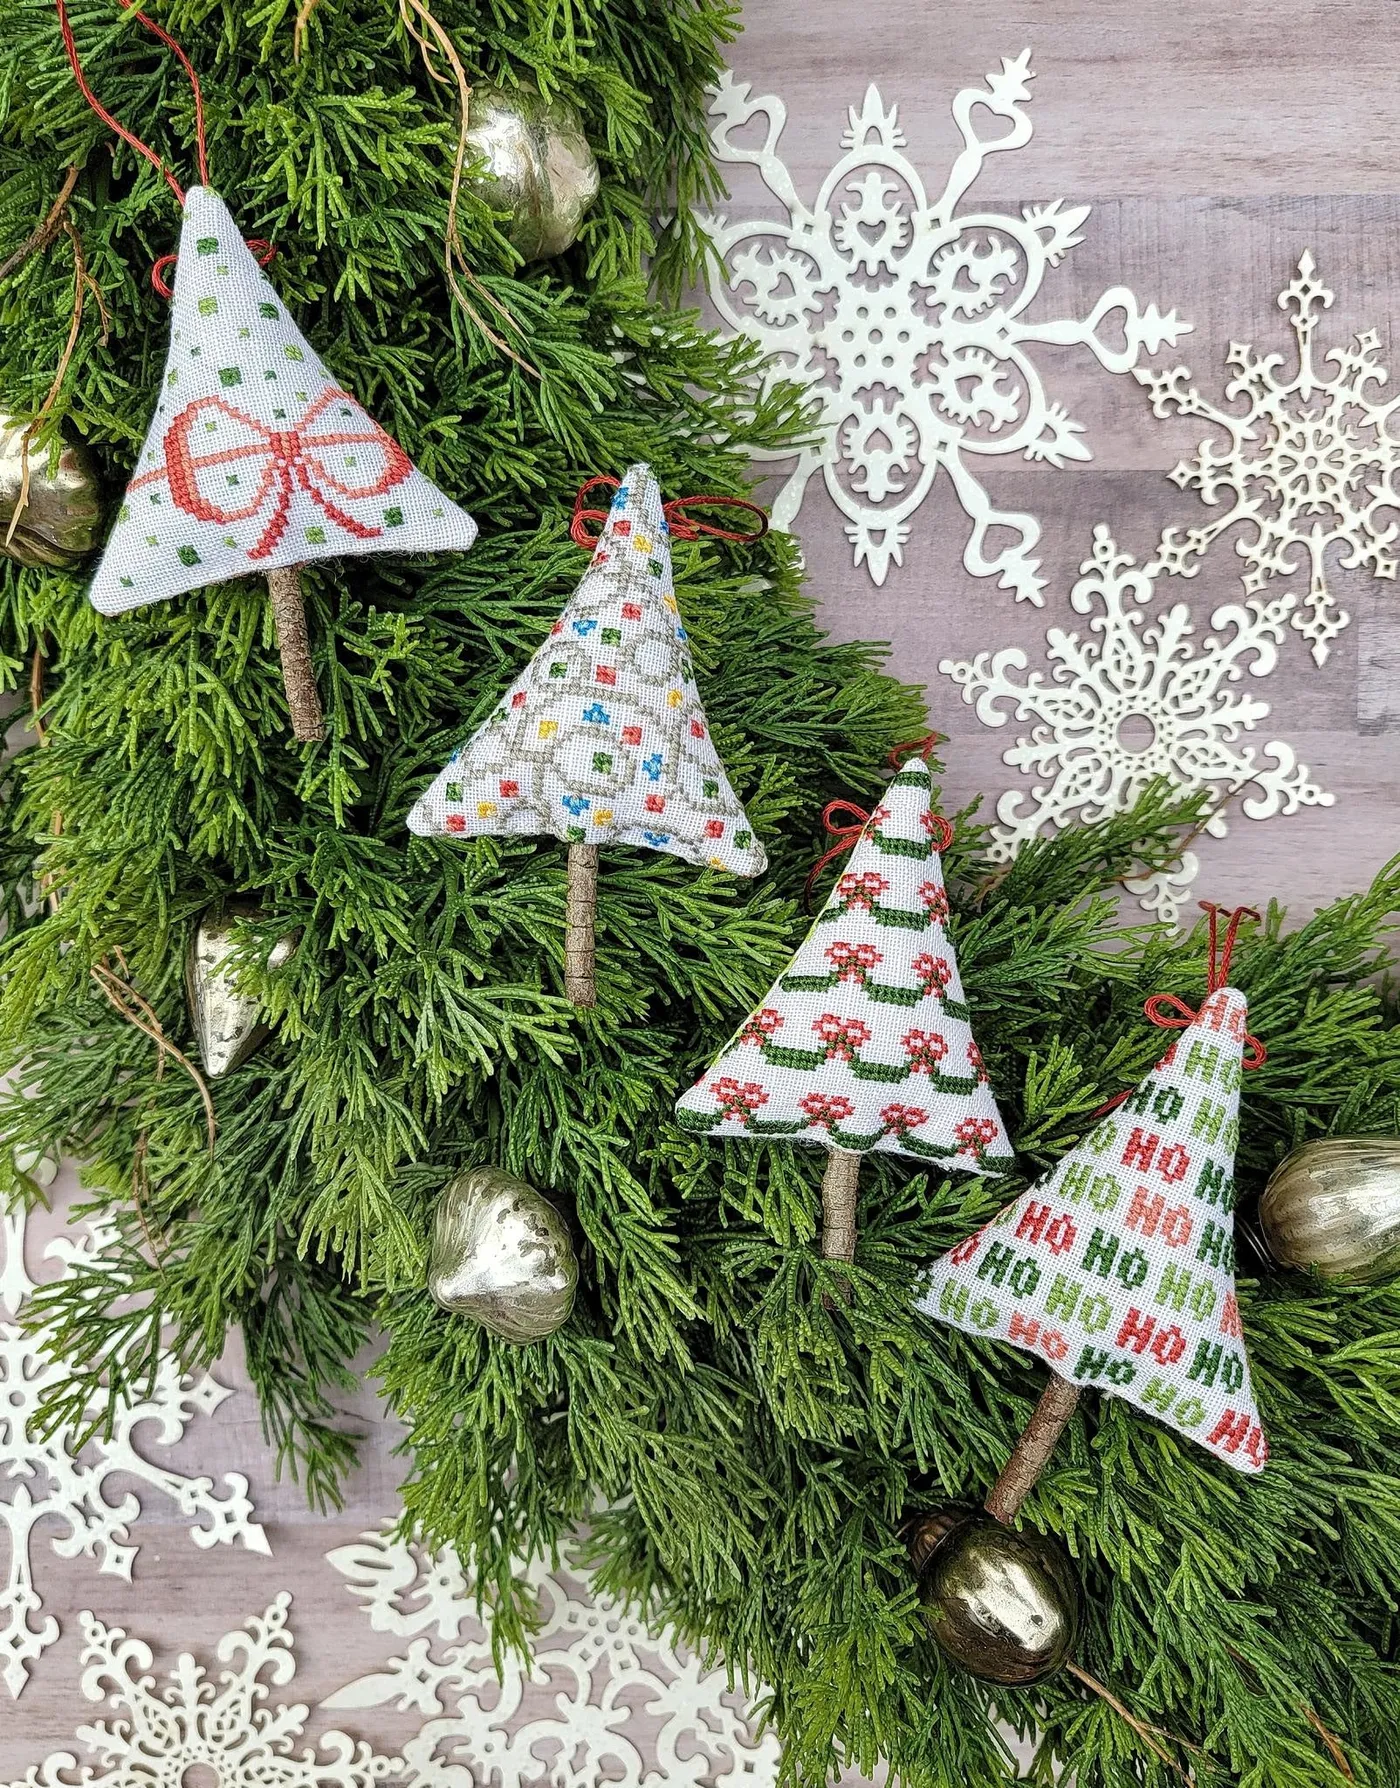
The twigs. Take them away and you have four cross-stitched pyramids — pretty, and completely forgettable. That little unstained wood base is what turns a needlework sampler into a miniature evergreen. It also does quiet structural work: with four different cross-stitch patterns in the mix, the eye needs one material that never changes. Set them among antique mercury glass baubles and white snowflake cutouts on a pale wood surface and the wood reads twice.
6. Tiered Felt Tree with Santa, Gingerbread, and Snow
Felt is a magnet for dust and pet hair, and glitter sheds for weeks. Vacuum the tree with a brush attachment on low every two or three weeks, or roll a lint roller gently over the flat pieces. Store everything flat in a zip bag with a dryer sheet, because moth larvae adore wool-blend felt. If the tree sits near a radiator or a sunny window, expect that gold glitter star and the reds to fade within a season or two.
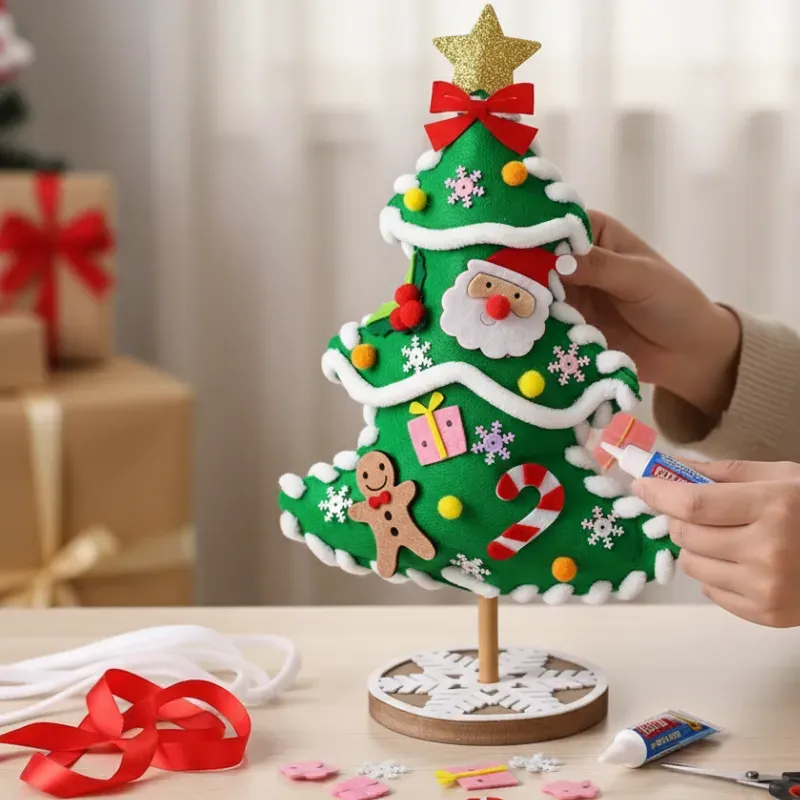
Repetition plus hierarchy. Santa, the gingerbread man, and the snowflakes each repeat, but they are cut at different sizes, which gives the tree depth without adding new shapes. The white felt snow trim around the base creates a horizontal band that stops your eye from sliding off the bottom. And the gold glitter star is the only metallic in the whole arrangement, which is exactly why it wins as the topper.
7. Macramé Trees with Wooden Star Toppers
Macramé trees read best between 4 and 6 inches tall. Under 3 inches the square knots turn to mush; over 8 inches the braid starts to look loose even when it is not. They are ideal for a 4- to 6-foot slim tree, where branch gaps run 6 to 8 inches, and for narrow rooms with under 4 feet of usable wall. Working with a full 7.5-foot tree instead? The layered treatment in Idea #19 holds this same deep green and off-white palette at a much bigger scale.
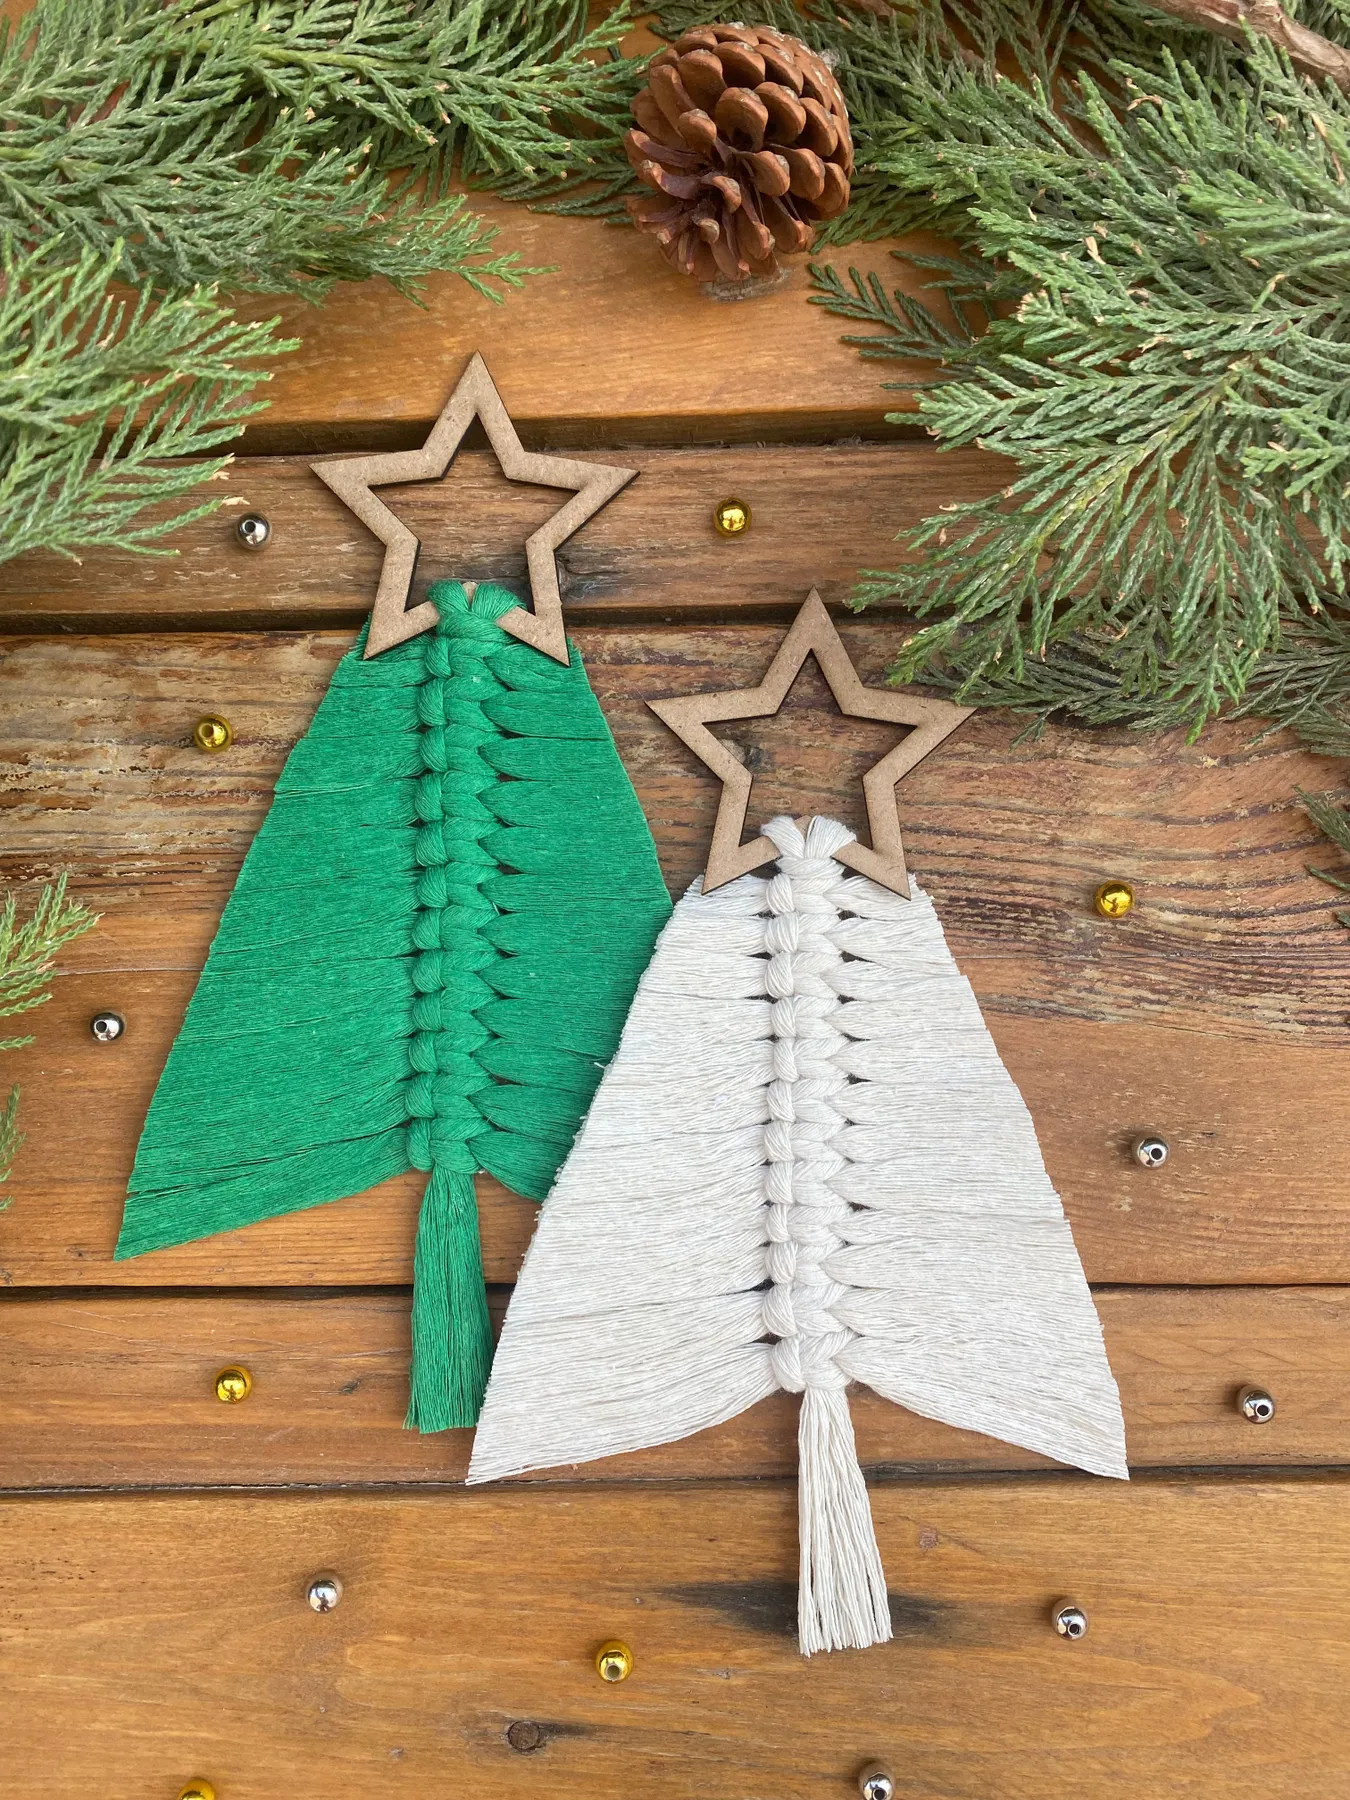
- Cut 12 strands of 3mm cotton cord, each about 24 inches long.
- Lark’s-head knot all 12 onto a 4-inch dowel or ring.
- Work three rows of square knots, dropping the two outer strands each row to taper.
- Gather the remaining cords into a tight wrapping knot for the trunk.
- Trim the ends to 1/2 inch, then fray them with a fine-tooth comb.
Roughly 1 to 1.5 hours per tree and about $3 in cord. That wooden star is a $1 craft-store button or a slice off a fallen branch.
8. A Pearl Angel Topper on a Beaded Miniature Tree
The angel. She stands about 2 inches tall, made of pearls and gold findings, and she is the only thing on this entire tree that is not a bead. Take her off and you have a gorgeous texture with no peak to it. Toppers on miniature trees are almost always an afterthought — a star, a scrap of ribbon — and that afterthought is precisely why this one lands. She is the difference between a craft and a composition.
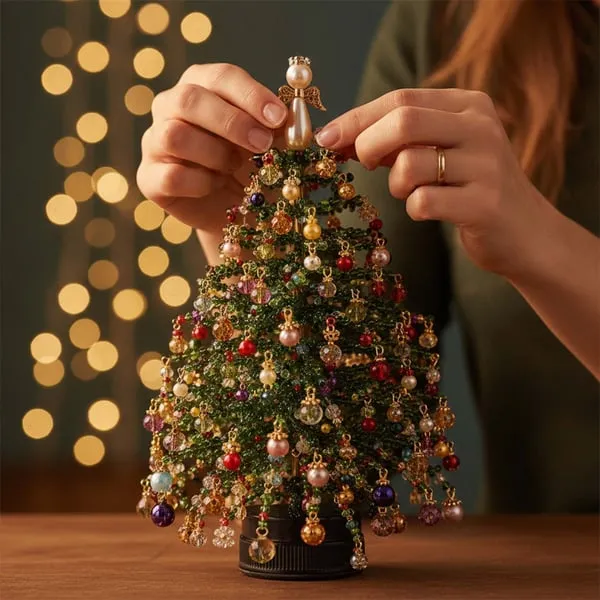
This is a display piece, not a tree ornament. Fully beaded at 12 inches, it weighs somewhere between 1.5 and 2 pounds, so no branch is going to carry it. It wants a tabletop, a mantel, or the dark wood surface it sits on here, where pearl and gold actually pop. Beaded wire grabs everything it touches, so keep it well above cat height and store it in a rigid box. Compare with Idea #18 — same beading logic, completely different scale.
9. Fabric Spheres Dressed in Pearls, Crystals, and Appliqués
- Fabric-covered styrofoam spheres, 3-inch, set of six: $8 to $14
- Resin floral appliqués, 6-pack: $6 to $12
- Mixed pearls and flat-back crystals: $10 to $20
- Silicone mold and resin for custom trims: $15 to $25
- Sheer and satin ribbon, 4 yards combined: $5 to $9
- Jewelry tweezers and tacky glue: $6 to $12
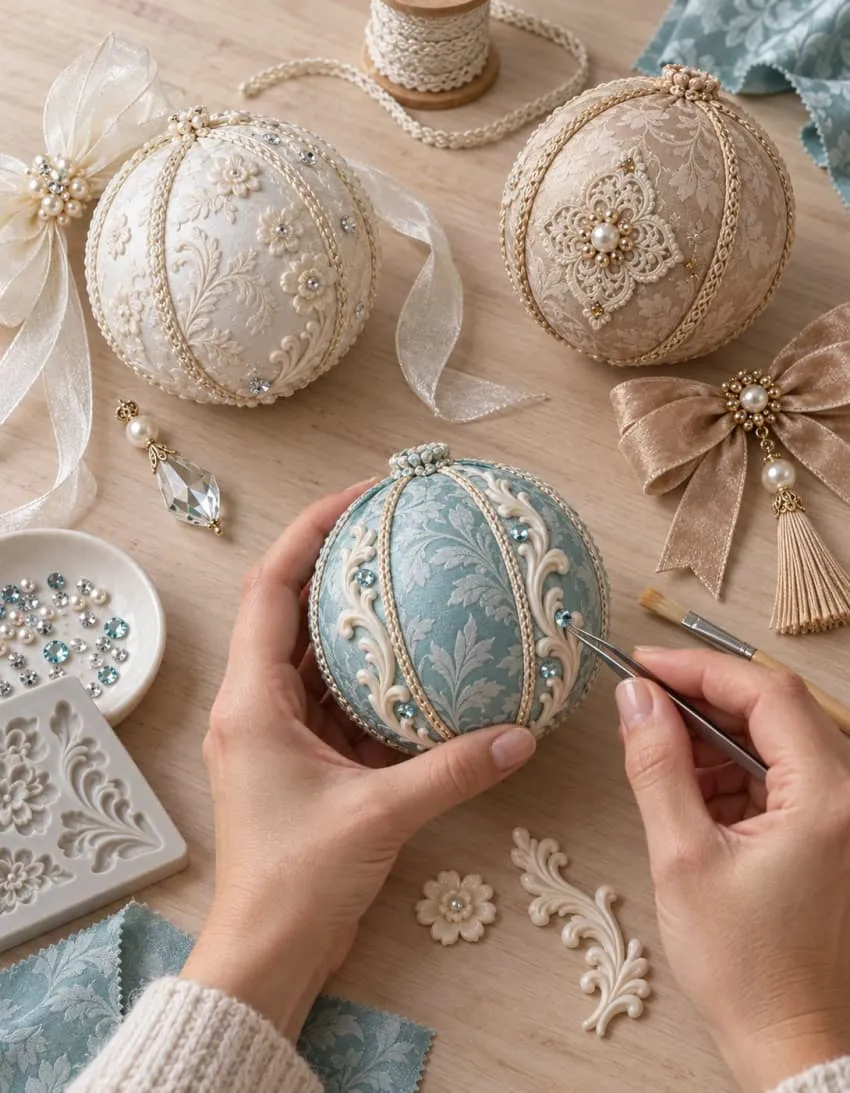
Total: $50 to $92 for a set of three, and closer to $8 each once you own the tools. Budget alternative: skip the resin entirely and use button-and-bead clusters from a thrifted costume jewelry lot. A $5 bag of broken earrings gave us enough pearls for four spheres.
Use tweezers for every pearl and crystal, not your fingers. Skin oils leave a dull haze on resin appliqués, and a 4-inch pair of pointed tweezers is what lets you place a 3mm crystal exactly where you want it, millimeters from the glue line, without smearing.
10. A Knitted JOY Ball with Holly and Candy-Cane Yarn
This palette is 70% off-white, 20% dark green, and 10% red. That is the whole formula. It works because the red only appears in the lettering and the berries — tiny, high-contrast exceptions to a two-color base. Swap to gray, evergreen, and berry for a cooler version, or cream, olive, and rust for something vintage. The off-white stays the majority in every version; the moment it drops below half, the ornament starts to look busy.
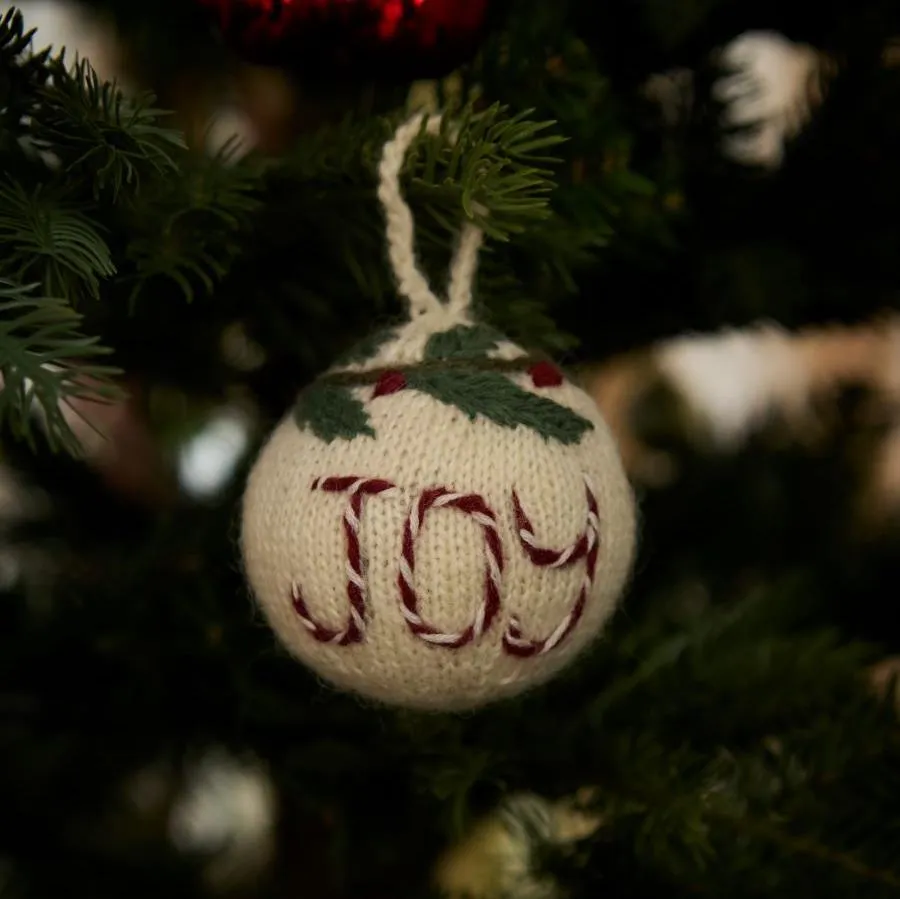
- Cast on 40 stitches on size 5 double-pointed needles and join in the round.
- Knit 4 inches in stockinette, then switch to a k2, p2 rib for 1 inch.
- Thread the tail through the remaining stitches and pull closed.
- Stuff to about 90% firm, then close the top and weave in the ends.
- Duplicate-stitch the word JOY in red and white twisted yarn, then add holly leaves and berries.
Time: 2 hours for the ball, 40 minutes for the lettering. Yarn cost if you already knit: about $4.
11. Hand-Painted Swirls with Gold Leaf on Chunky Knit
The styling does as much work as the ornament. Two white-based balls, two accent swirls, one metallic flake. The chunky cream knit underneath is a neutral, high-texture surface that mirrors the round shapes without competing with them. And that kraft box with the wide lace ribbon and cream satin bow in the corner says these are gifts without a single word. Contrast of finish — glossy glass, matte paint, fleece-soft knit — is the entire trick.
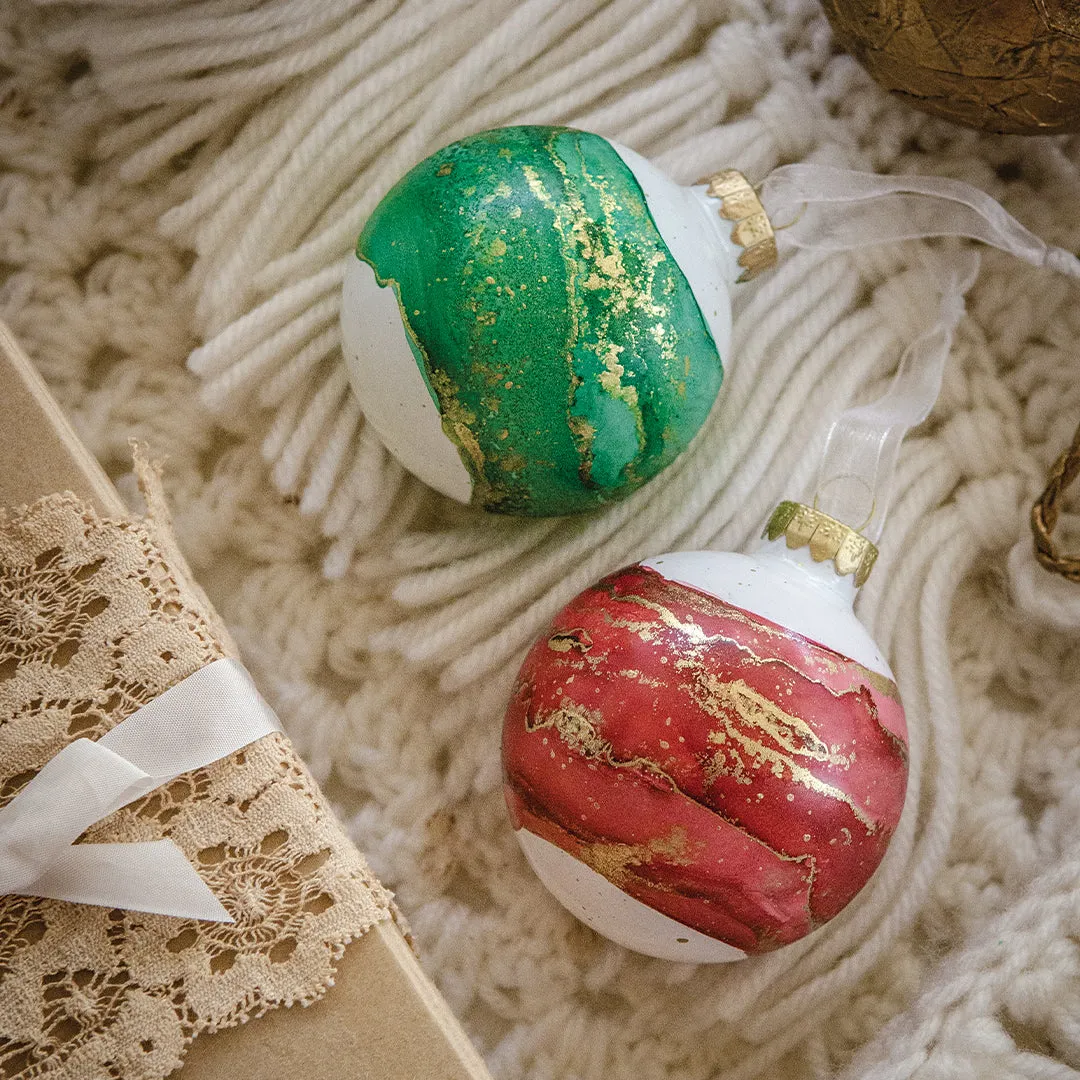
Plain white glass or plastic balls run about $6 for a six-pack at Walmart or Target. The swirl is two colors of acrylic paint marbled with a skewer while both are still wet. Gold leaf flakes are $5 a jar at craft stores, or use gold Rub ‘n Buff at $7 and get dozens of ornaments out of it. Total per ornament lands around $1.50, and the kraft box plus thrifted lace keeps the gift styling under $5.
12. Felt Surfers on Surfboards Riding the Christmas Tree
- Check your light strand wire color — black reads graphic against green; green wire makes felt figures disappear.
- Measure your bulb spacing so the surfers do not get swallowed between lights.
- Confirm you have pinecones or another matte brown texture to anchor the playful shapes.
- Decide whether this is a kid-accessible tree. Small felt pieces pull apart.
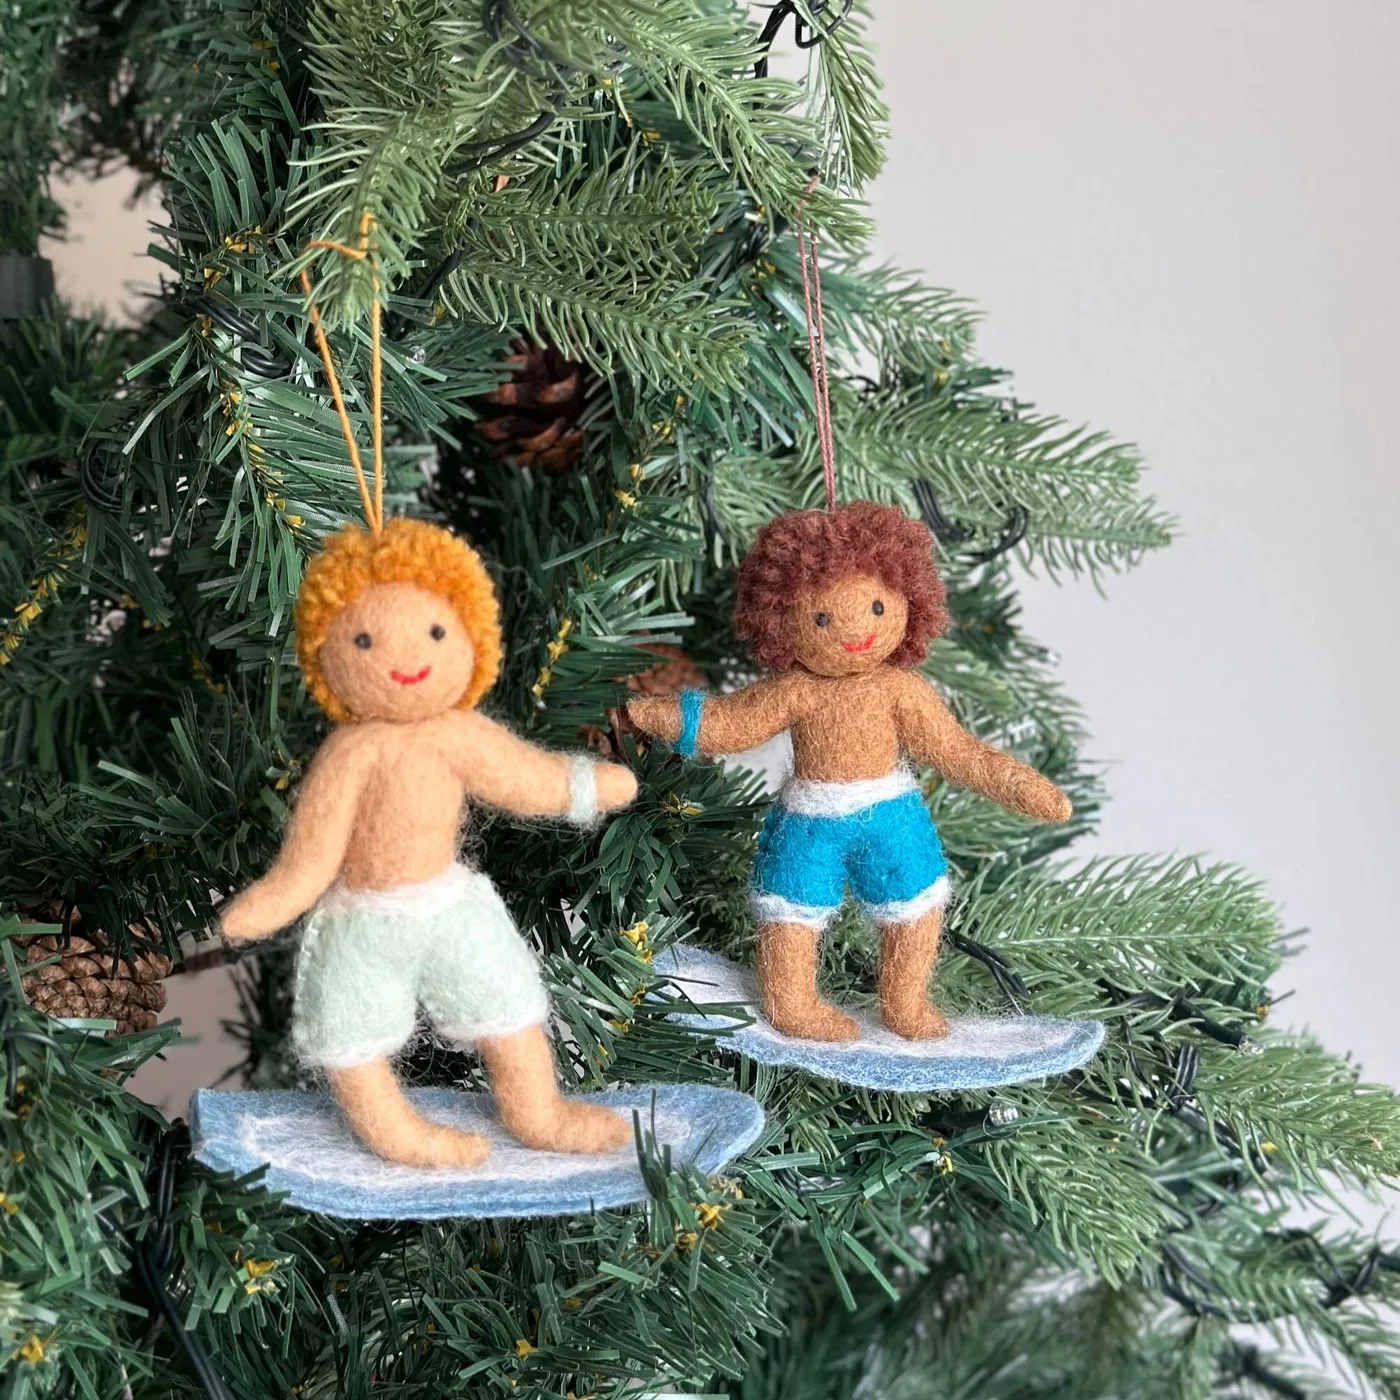
Novelty ornaments have moved from the back of the tree to the front, and coastal and hobby-themed figures are the fastest-growing handmade category for 2026. The reason it is sticking around is that it is personal, not seasonal. A surfer on a board says something about a household that a red ball never will, and no trend cycle is going to make your own hobby look dated.
13. Red and Fluffy White Crochet Stripes
Roughly 60% red, 30% fluffy white, 10% gold. The metallic fleck spun through the red yarn is doing the job of an accent color without introducing a new hue, which is a neat trick when you want a two-color tree that still has depth. To cool the whole thing down, switch the red for berry or burgundy and the fluffy white for ivory. The stripe rhythm carries the look no matter what palette you pour into it.
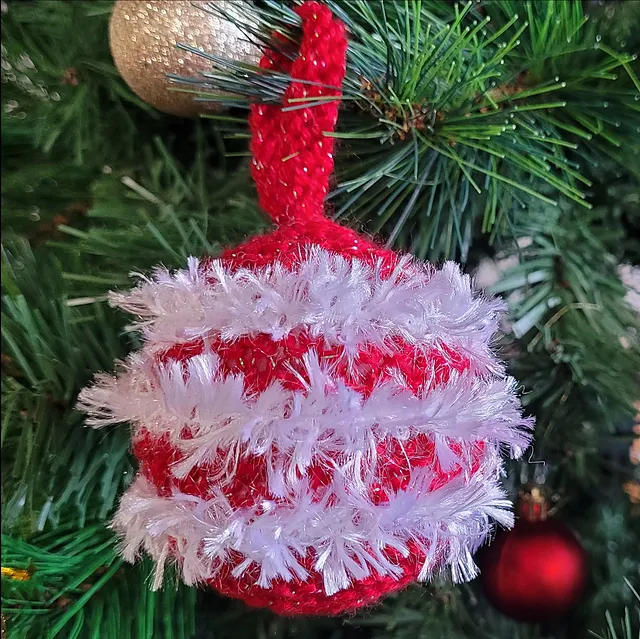
The fluffy yarn. It is the one element that makes this read as texture instead of pattern. Flat red-and-white stripes are a candy cane; add a row of eyelash or chenille and suddenly the ornament has a body. Keep the fluffy rows narrower than the flat ones, about a third of the height, or the whole shape turns into a fuzzy egg with a hanger on it.
14. Cinnamon Sticks, Felt Heart, and a Wooden Button
- Bundle three 4-inch cinnamon sticks with a rubber band, then wrap 18 inches of narrow cream ribbon around the center six to eight times.
- Tie off at the back in a square knot, leaving two 3-inch tails.
- Cut a 2-inch dark red felt heart and stitch a 1/2-inch wooden button at its center.
- Hot-glue the heart to the front of the bundle, slightly off-center.
- Thread natural twine through the ribbon knot for the hanger loop.
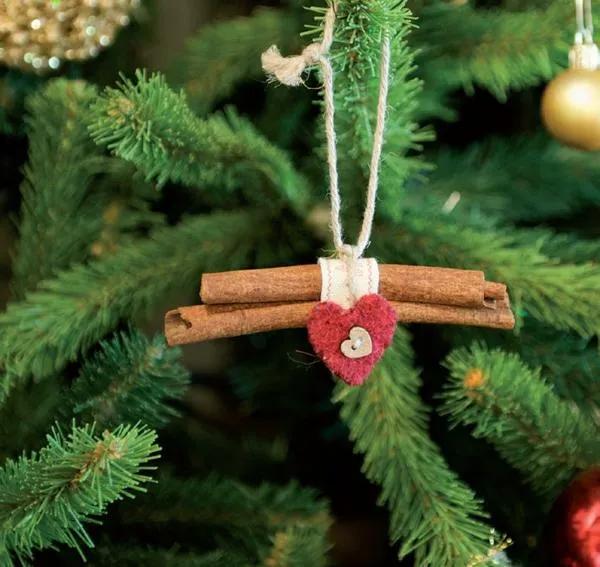
Time: 15 minutes. Cost: about $1.20 per ornament, and it smells like a bakery for two seasons.
Cinnamon sticks are the expensive part, at $6 to $10 for a 4-ounce bag. Buy the broken sticks sold as cinnamon pieces for about half that and cut them to length — the break is hidden behind the ribbon anyway. Felt squares run 30 cents at craft stores, buttons come free off old shirts, and a dollar-store ball of twine will make 40 ornaments.
15. Copper-Gold Mercury Glass Against Dark Green Pine
Mercury glass is a color problem solver. When a tree reads muddy or flat, swap in two or three warm metallic pieces with a red undertone — copper-gold, bronze, antique brass — and the whole thing warms up without adding a single new color. Keep the count low: three to five pieces on a 7-foot tree, spaced at least 18 inches apart, or the shine starts competing with itself. For a whole garland of the stuff, see Idea #21.
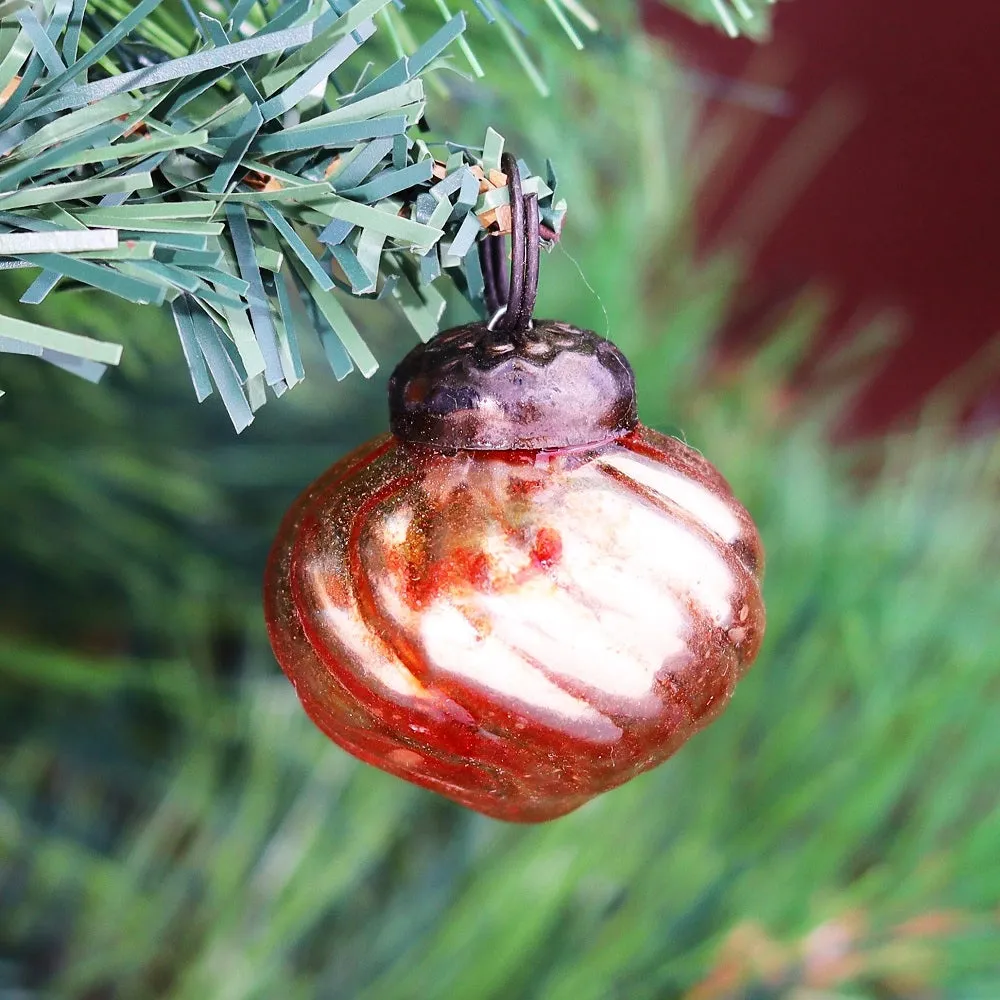
The ribbing is what makes it work. A smooth sphere reflects one long smear of light, but a swirl or a rib breaks that reflection into multiple highlights, which is why this reads expensive even though mercury glass is one of the cheapest finishes to fake. Notice the dark cap and black wire hanger too — they disappear into the pine instead of introducing a fourth color to the mix.
16. A Glass Ball Painted with Snowy Teal Trees
Painted glass scenery needs room to be seen. Keep these at 3 to 4 inches and hang them where they land at eye level on a 6- to 7-foot tree. On a tabletop tree under 3 feet, the same design disappears, so use it as a shelf piece on a stack of books instead, which is exactly how it is styled here. If you are working with a slim tree in a room under 100 square feet, this is your best bet in the whole article.
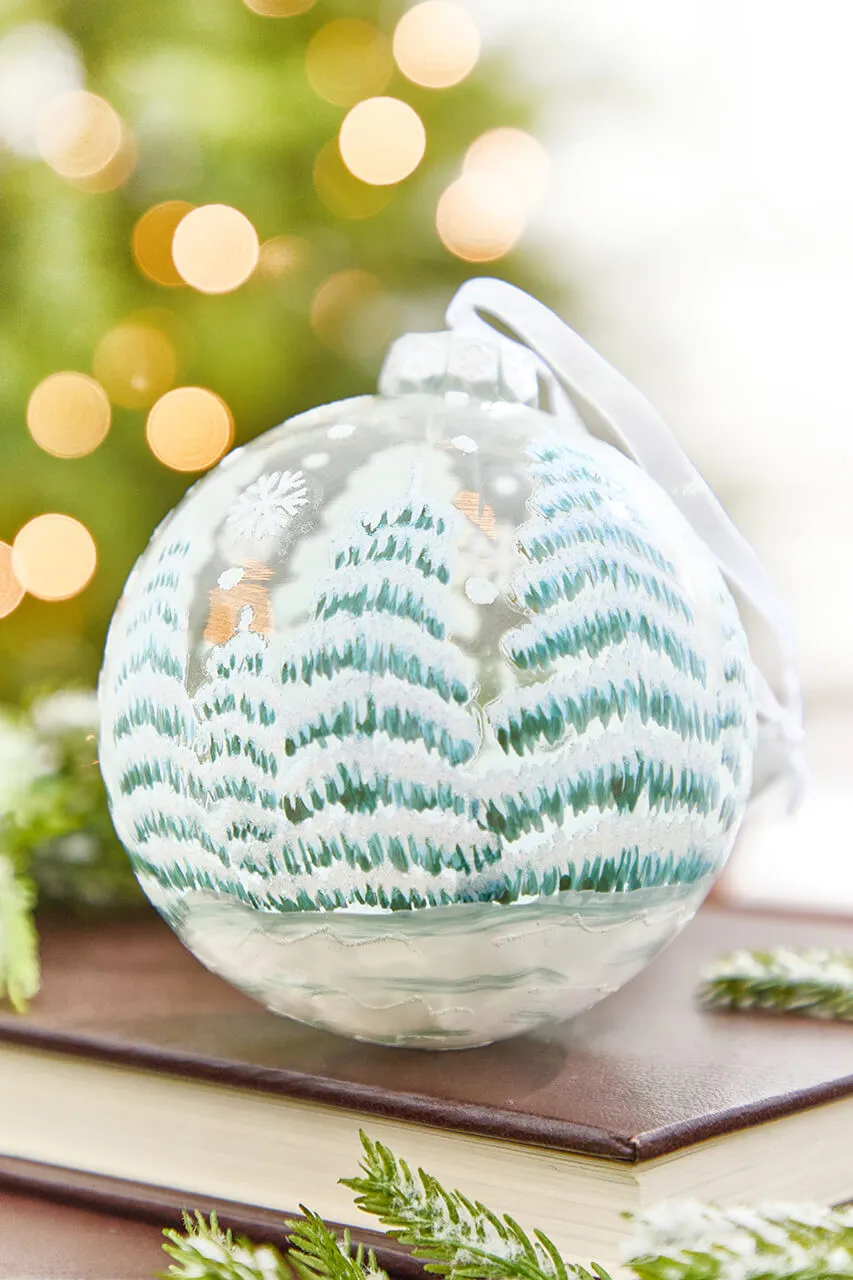
Hand-painted glass is the 2026 answer to a decade of mass-produced ornaments. People want the look of vintage Shiny Brite without the antique-store price tag, and paint plus a clear glass ball delivers it for under $5. The staying power is real here, because this is a technique rather than a color. A tree full of painted glass will still look right in 2035.
17. Felt Angel in an Ombre Dress with a Green Wreath
The ombre dress. It is only three felt tones — deep red at the hem, rose through the middle, pale pink at the bodice — but it turns a flat silhouette into something with weight. Remove it and you have a sweet felt angel that looks like every other felt angel on the craft-fair table. The little green wreath on her chest is her second-best detail, and it exists mostly to give your eye a rest from all that pink.
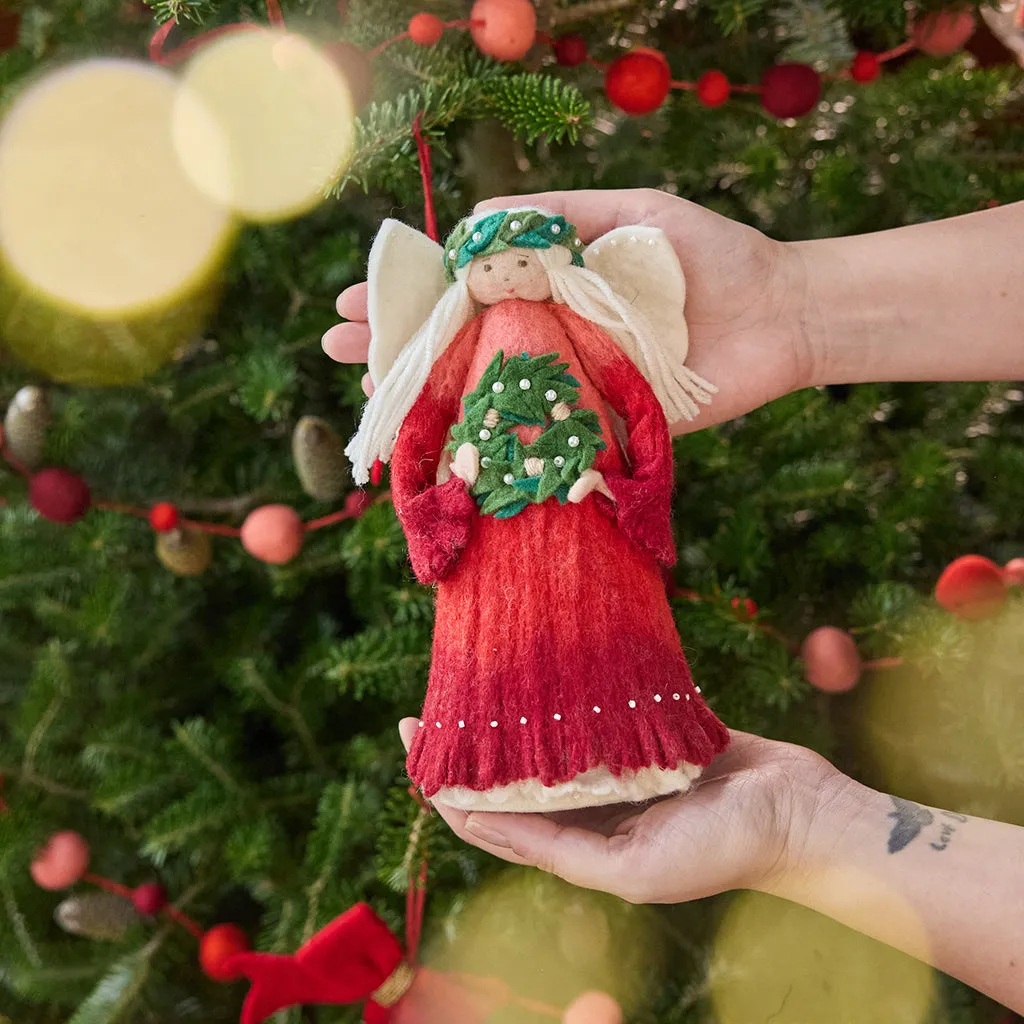
Wool-blend felt fades. One season in direct sun is enough to mush that ombre into a blur, so keep her out of a south-facing window. Dust with a soft brush. Water and felt do not mix, and a lint roller will peel the fuzzy surface right off the wool. Store her in a rigid box with acid-free tissue rather than a plastic bag, which traps moisture and invites mildew.
18. Beaded Tree Ornament on a Fuchsia Tinsel Backdrop
- Size 11 seed beads, three colors: $6 to $12
- Emerald bugle beads, one tube: $3 to $5
- Small pearl beads, mixed bag: $4 to $8
- Beading needle and Nymo thread: $6 to $10
- Felt backing and gold cord trim: $4 to $7
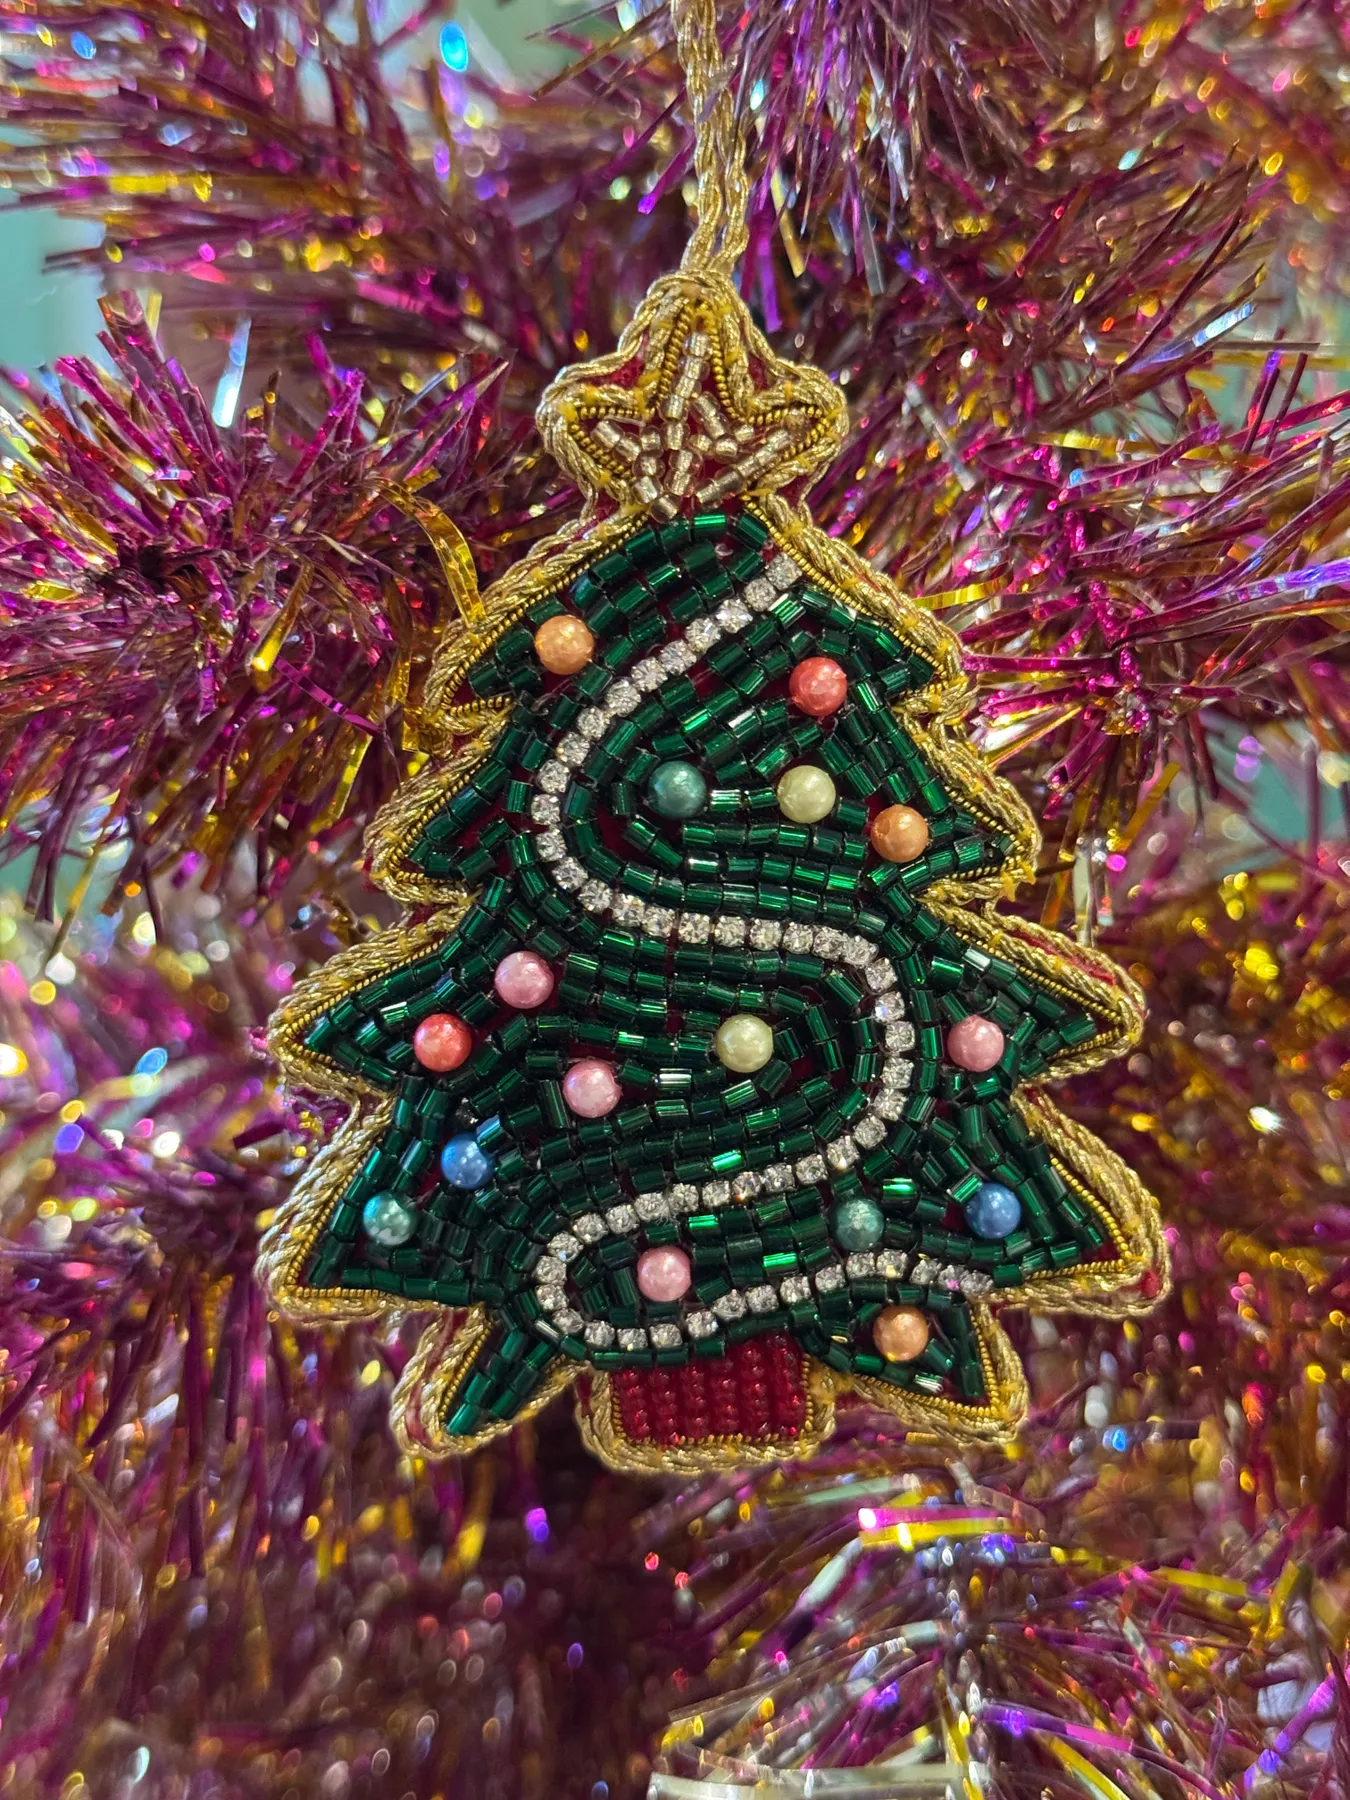
Total: $23 to $42 for the first one, and about $4 each after that. Budget alternative: buy a single mixed seed bead tube in cool greens and skip the pearls entirely. The gold cord trim can be swapped for a strand of metallic thread you already own, dropping the cost to roughly $15.
Beadwork has its own ratio, and it is the same 60/30/10 rule in bead form: emerald supplies the dominant color, gold the secondary outline, and the small multicolor pearls are the 10% that makes the whole thing sing. Break that ratio and detailed beadwork turns into static — beautiful up close, illegible from four feet away.
19. Sheer White Mesh and Pearl Garlands on a Full Tree
Wide mesh ribbon looks effortless in photos and fights you in person. It is stiff, it crushes, and once it has been packed away with a crease, that crease never fully leaves. Buy it in one continuous roll, because splices show under string lights. And be honest about tree size: this treatment needs a full tree at least 6.5 feet tall. On a 4-foot tree, mesh this wide swallows every ornament you own and you will wonder where your collection went.
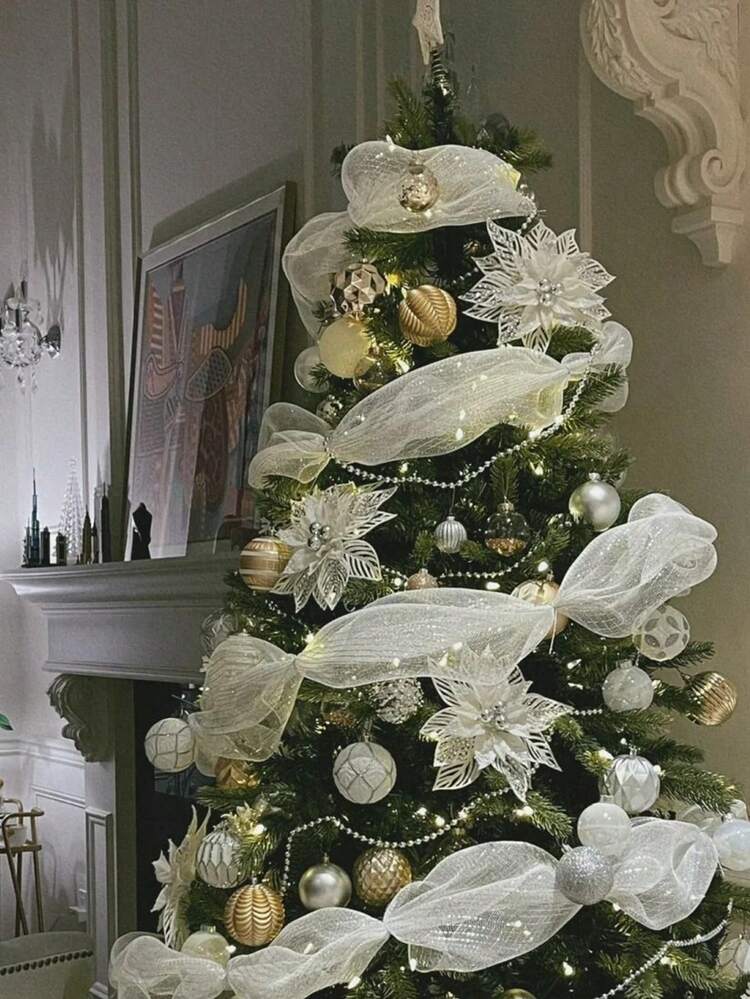
Two numbers make this work: ribbon width and drop spacing. Use 4- to 6-inch mesh on a 7-foot tree, and run each cascade down 12 to 15 inches before weaving it back into the branches. Anchor the ribbon every third tier with a wire twist so it does not creep downward over the season. Always run it in front of the lights, never behind them, or the mesh goes dark and flat.
20. Layered Wood Mrs. Claus with a Gingerbread Man
- Print the pattern at 100% and trace each layer onto 1/8-inch basswood.
- Cut the layers with a scroll saw, or order laser-cut blanks online.
- Sand the edges with 220-grit, then wipe with a damp cloth to raise the grain.
- Paint each layer separately — red tunic, tan skin, white trim — and let them dry fully.
- Glue the layers in order with wood glue and weight the stack for 30 minutes.
- Drill a 1/8-inch hole at the top and thread the red-and-white striped string.
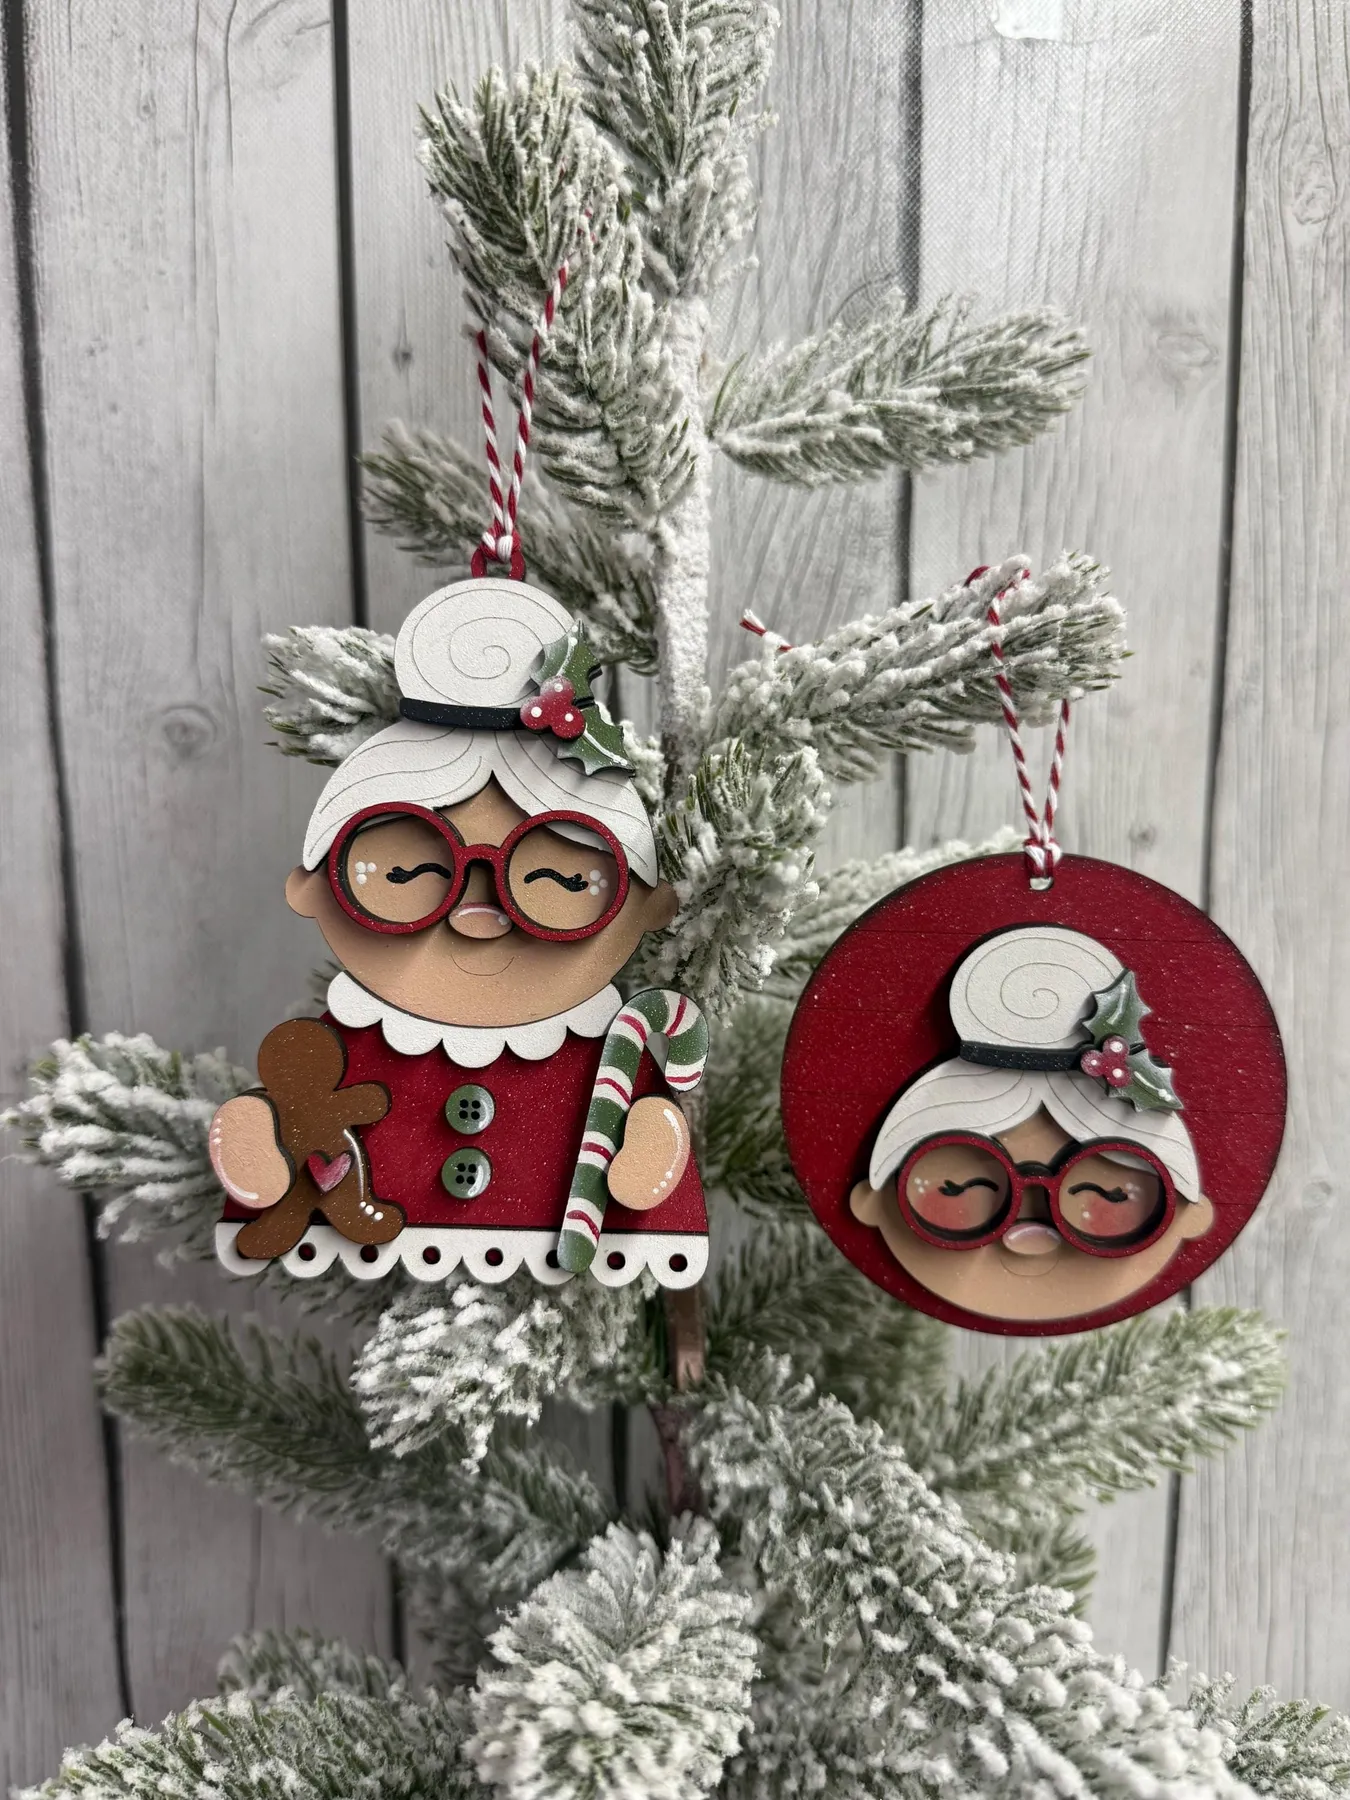
Time: 2 to 3 hours for a batch of six. Materials: about $2 per ornament.
The layers create real shadow, which flat painted ornaments never have. Every 1/8-inch step casts its own soft line, so the figure of Mrs. Claus reads clearly from across the room even though the painted detail is modest. The depth is doing the describing, and that is why these look like something you bought at a holiday market instead of something you glued together on a Tuesday.
21. Distressed Gold Mercury Glass in Evergreen Garland
Oversized ornaments belong to whatever they are sitting in. On a mantel garland, a 5- to 6-inch ball reads as the focal point. On a 7-foot tree, you want 4-inch pieces so they do not dwarf the branches. This setup — garland, candles, and the small mercury glass tree in back — wants at least 4 feet of mantel or sideboard to breathe. If your mantel is under 4 feet, drop the candles entirely and keep just the big ball and the garland.
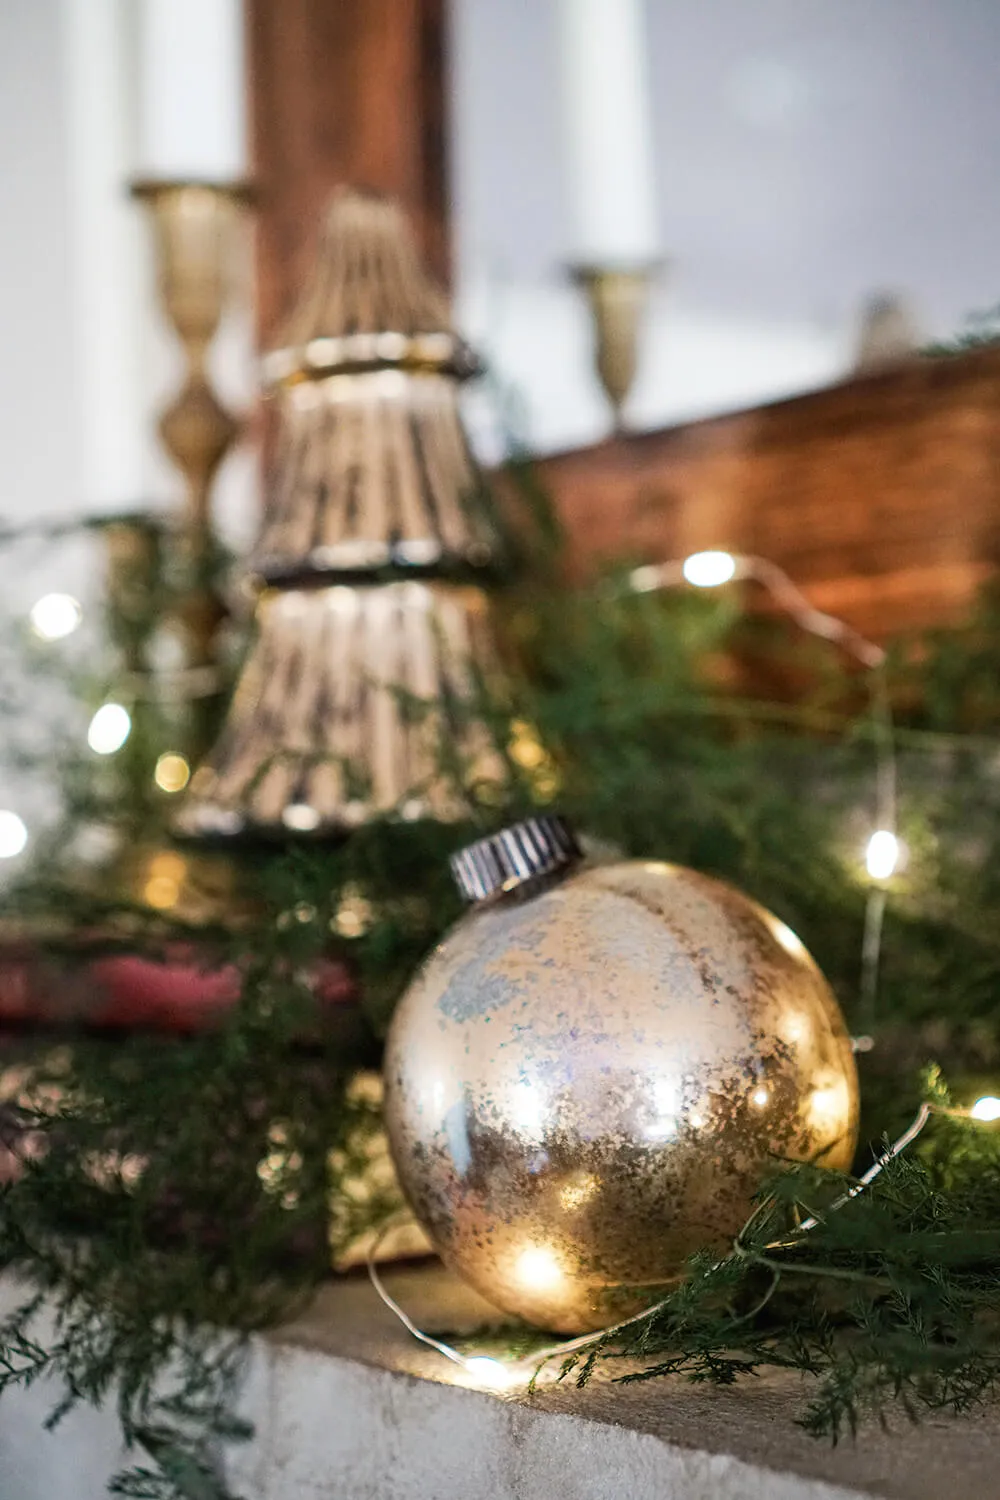
Real mercury glass balls run $8 to $18 each, which adds up fast across a garland. Buy 6-inch plastic ornaments with a mercury finish instead — about $12 for a set of four at Walmart or At Home — and mix in one real glass piece as the anchor. Distressed paint is easy to fake: dab warm brown acrylic over silver paint, wipe it back while still wet, and seal with matte spray. Nobody at six feet can tell the difference.
22. Craft Stick Tree Wrapped in Yarn and Baker’s Twine
The horizontal twine bands. Without them you have a green yarn triangle — pleasant, and completely generic. Two or three wraps of red-and-white baker’s twine give the eye a rhythm and instantly read as handmade with intent. It is a $2 detail holding a $10 project together. The variegated green yarn is doing its own quiet shading work too, so the twine does not have to fight it for attention.
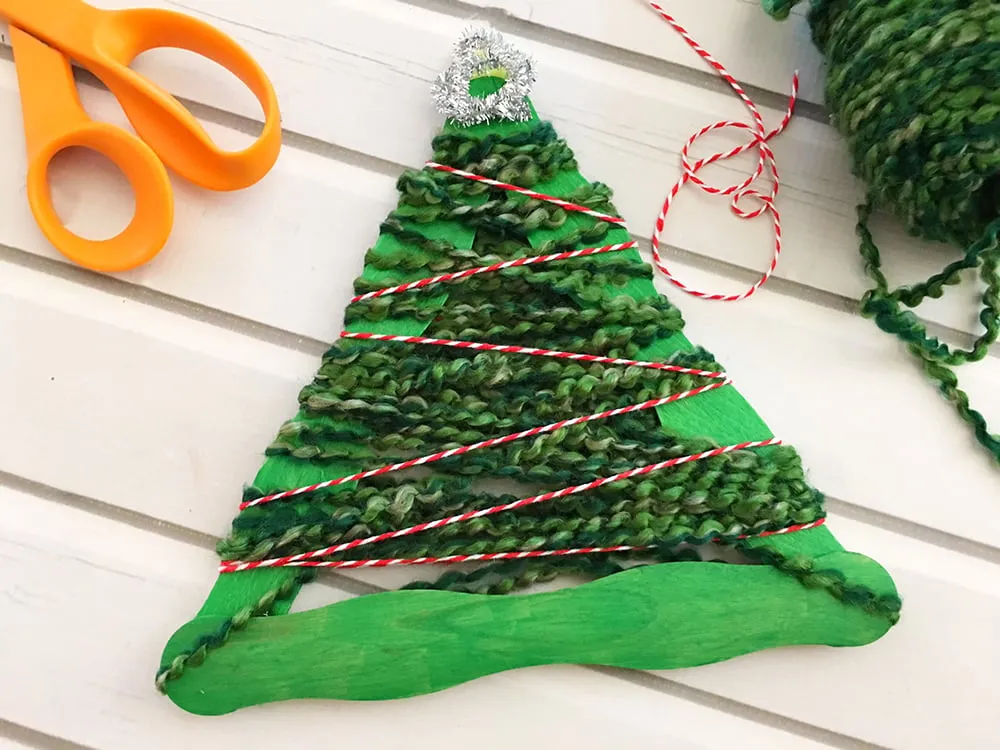
- Test your glue on a scrap first — some white craft glues yellow and will show through green yarn.
- Wrap one stick before committing; craft sticks vary in width and the yarn should sit flush.
- Decide on the hanger before you wrap, not after, or you will be gluing over finished yarn.
- Check for a matching green paint; a slightly different shade at the base is visible from across the room.
23. Three Fabric Candy Canes with Bells and Holly
The crook is the hard part. Stuff the straight leg to about 80% firmness, then leave the top two inches under-stuffed before you bend it — overfilled fabric will not hold a curve, it will just kink. Whip-stitch the inner edge of the curve to lock the shape in place. And hang the ornament from the crook itself, not from the top of the straight leg, or it will hang sideways every December for the rest of its life.
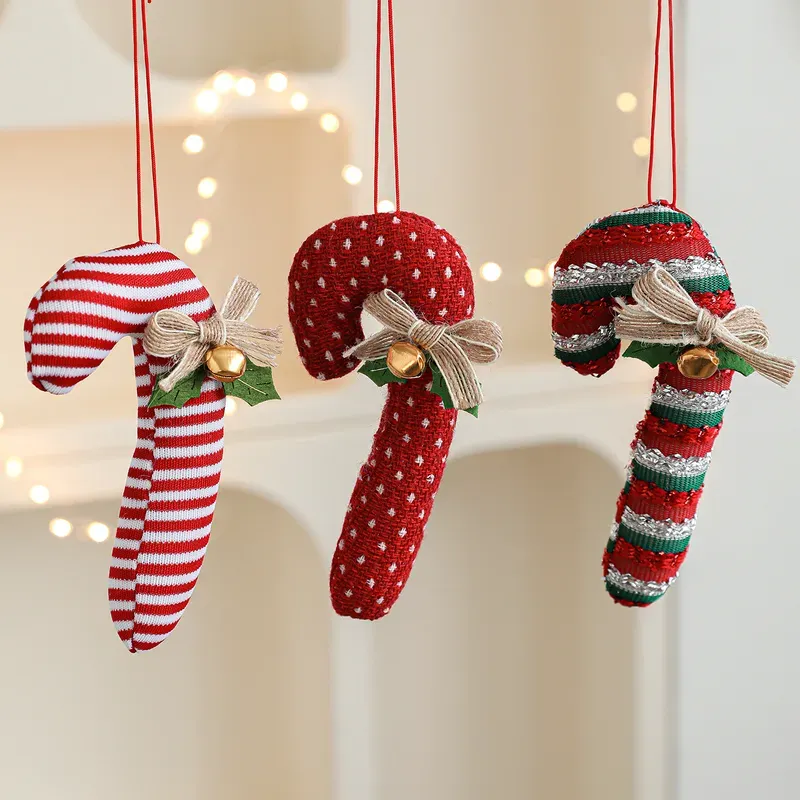
Roughly 60% red, 25% white, 10% green, 5% gold. The three canes here each have a different texture — striped knit, red with white dots, striped metallic ribbon — but they all hold the same ratio and the same silhouette. That is the formula for a set that looks collected rather than purchased. Swap to cream, olive, and copper for a vintage version and keep the ratio identical.
24. A Miniature Tree of Clear Beads on Gold Wire
This is the most fragile thing in the whole article. Clear beads on gold wire catch on everything, including each other, and one bent wire throws off the entire triangle. Budget 15 minutes to reshape it every time you unpack it. It is also not a tree you decorate — nothing hangs on it. It has to be a display piece on a tray of faux snow, which is exactly how it is staged here, and that snow is doing real work keeping the wire off the shelf surface.
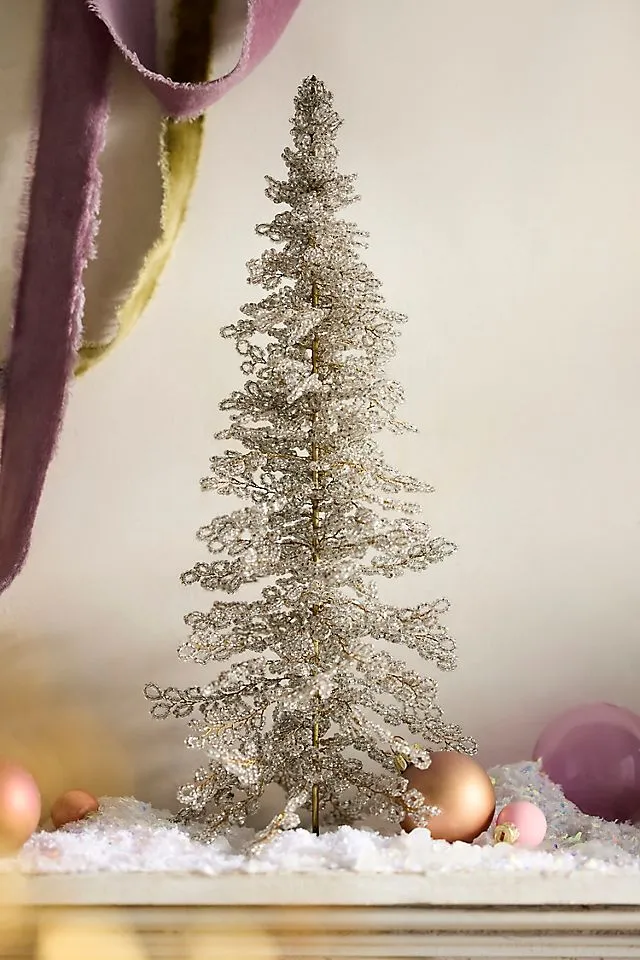
- Cut a 12-inch length of 20-gauge gold wire and form a cone base with a 1-inch loop at the bottom.
- Slide on clear beads in groups of three, twisting between groups to hold them.
- Build five or six graduated tiers, each smaller than the last.
- Finish with a single clear bead and a twist at the top.
- Set it in faux snow on a small tray beside rose gold and pink ornaments.
Time: about 1 hour. Beads and wire: roughly $10.
25. Dark Red Star Ornament with White Embroidery
At 2.5 to 3 inches, this is a filler-size ornament, and that is a compliment. Fillers are what keep a handmade tree from looking sparse in the gaps. Plan on 60 to 70 small pieces for a 7-foot tree, which sounds like a fortune until you realize they cost about a dollar each. The larger pieces — the bird, the navy star, anything over 4 inches — take the front-facing spots where they can actually be seen.
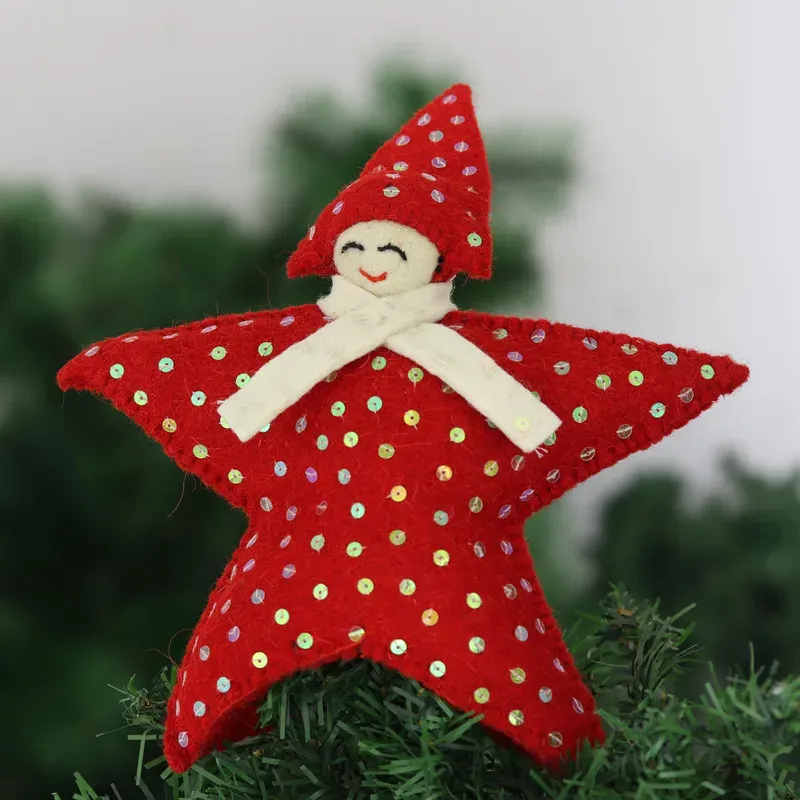
Dark red wool felt squares are around 49 cents each at Joann or Hobby Lobby, and one square makes three ornaments. A skein of white embroidery floss runs about 80 cents and covers a dozen. The metallic gold hanging loop is just 1.5 inches of narrow cord. If you do not embroider, cut the stars from heat-transfer vinyl and iron them on instead; cost per ornament drops to about 35 cents.
26. Felt Elves with Striped Legs and Bell Hats
Whimsical, slightly odd characters are driving handmade ornament sales in 2026 — the shift away from perfect symmetry and toward pieces with a face and a personality. Elves with striped legs and a bell on the hat are the friendly end of that spectrum, and the calmer felt angel in Idea #17 is the same idea in a quieter register. This trend has legs because it is rooted in craft, not in a color of the moment that will look dated by 2029.
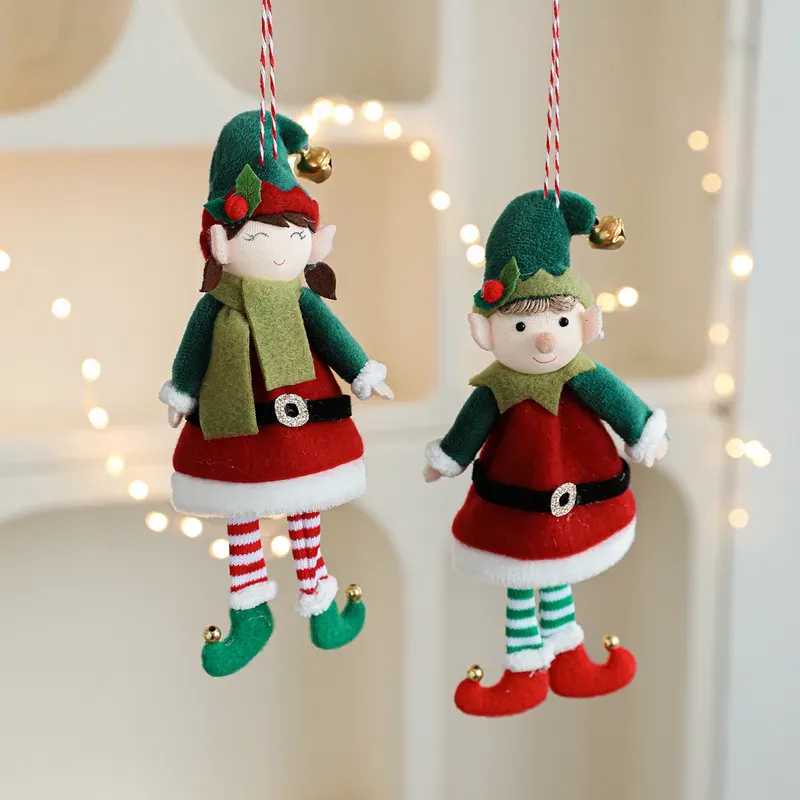
Bells fall off. Gold-tone craft bells are almost always attached with hot glue, and a warm room softens hot glue nicely. Re-glue with E6000 if your ornaments live in a hot attic. Striped chenille legs will pill within a season — a sweater shaver handles it in about ten seconds — and the felt itself should stay out of direct sun and be dusted with a soft brush, never washed.
27. A Fabric Tree Advent Calendar with Numbered Pockets
The shape is doing double duty — it is a tree and a calendar at the same time, so it earns its wall space all December and then packs into a shoebox. The red fabric star gives the eye one bright anchor at the top. The embroidery on the pockets — berries, leaves, candy canes, tiny lights — rewards you for walking closer. And one pocket holds a small nutcracker, a nice reminder that this is a display piece, not just storage.
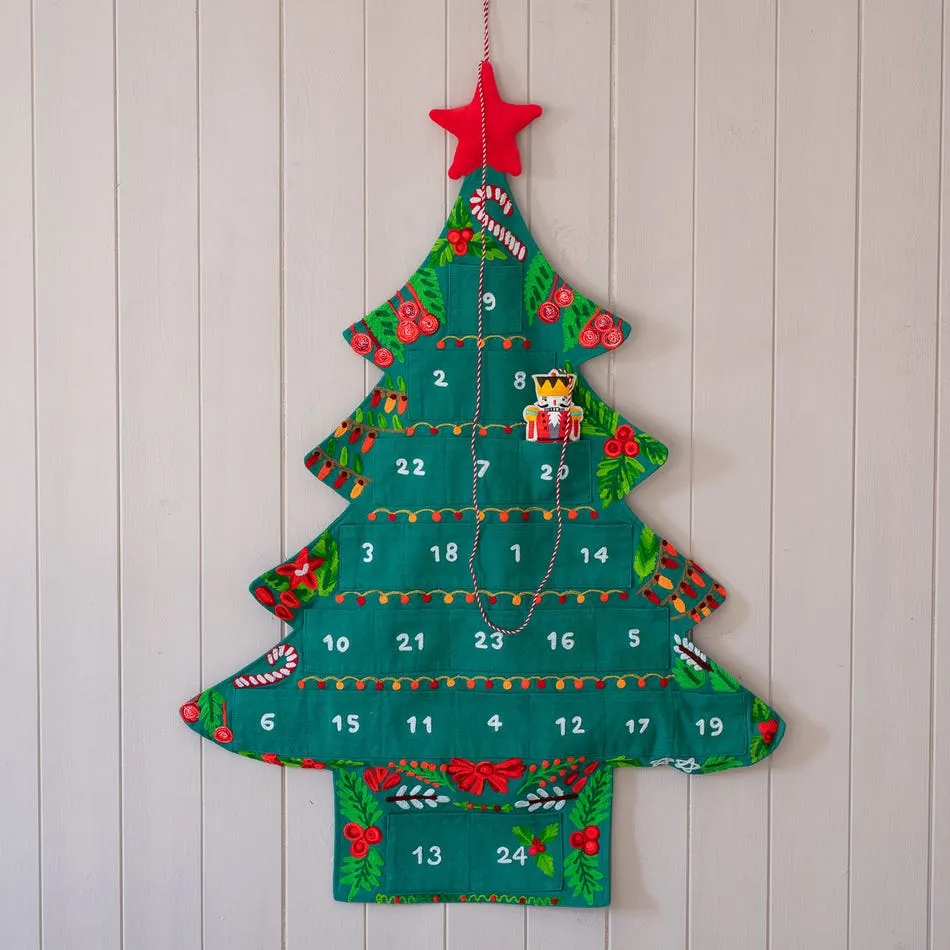
Sew the pockets with a 1/4-inch seam allowance, but cut each opening a full 1/2 inch wider than you think you need. Fully stuffed pockets bulge, and bulging pockets swallow the numbers. Back the whole tree with a stiff fusible interfacing too, or a loaded calendar will sag off the wall by December 12th. Quilting cotton in a midweight is the right fabric; anything lighter will not hold a stuffed pocket.
28. Felt Lighthouse with a Bird and a Tiny Tree
This style lives between 3 and 5 inches. Below 3 inches, the wavy blue base and the tiny green tree stop reading at all. Above 6 inches, felt goes floppy even with a stiffener, and the lighthouse starts to look like a sock. Pair it with 2- to 3-inch ornaments on a 5- to 6-foot tree so the lighthouse keeps its status as the odd piece out, which is the entire point of a souvenir-style ornament.
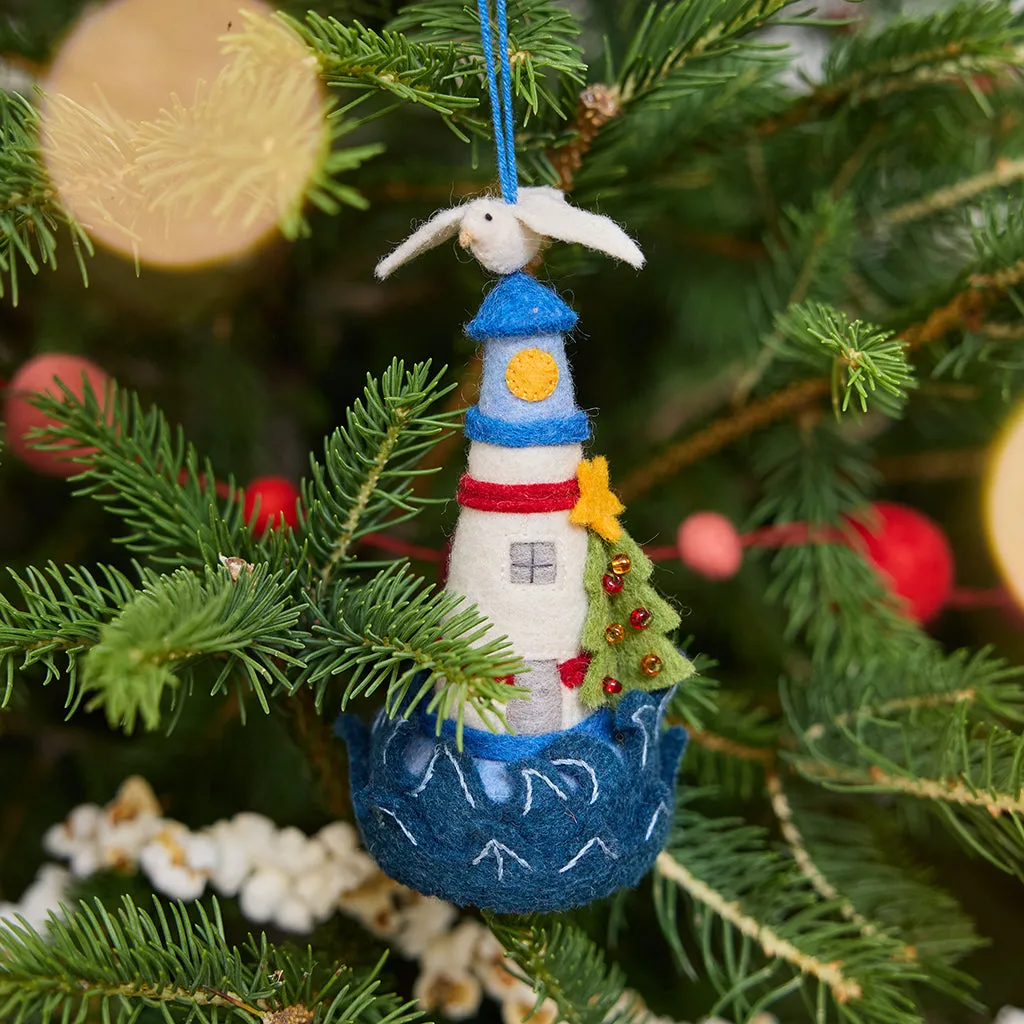
- Cut the navy wavy base, the red stripe, and the white body from stiffened felt.
- Glue the base down first, then the red stripe, then the white body — dark to light.
- Add the tiny green tree on the side, then the small white bird on top.
- Blanket-stitch around the outer edge in a contrasting thread.
- Attach a blue string loop at the top and press flat under a book for an hour.
Time: about 50 minutes. Felt and thread: under $3.
29. Wood Frame Tree with Plaid and Deer Cutouts
- 1/4-inch birch plywood, 12×12 sheet: $6 to $10
- Red-and-black plaid flannel, 1/4 yard: $3 to $6
- Scroll saw blade or a laser-cutting service: $0 to $25
- Jute twine, 10 yards: $3 to $5
- 220-grit sandpaper and wood glue: $5 to $8
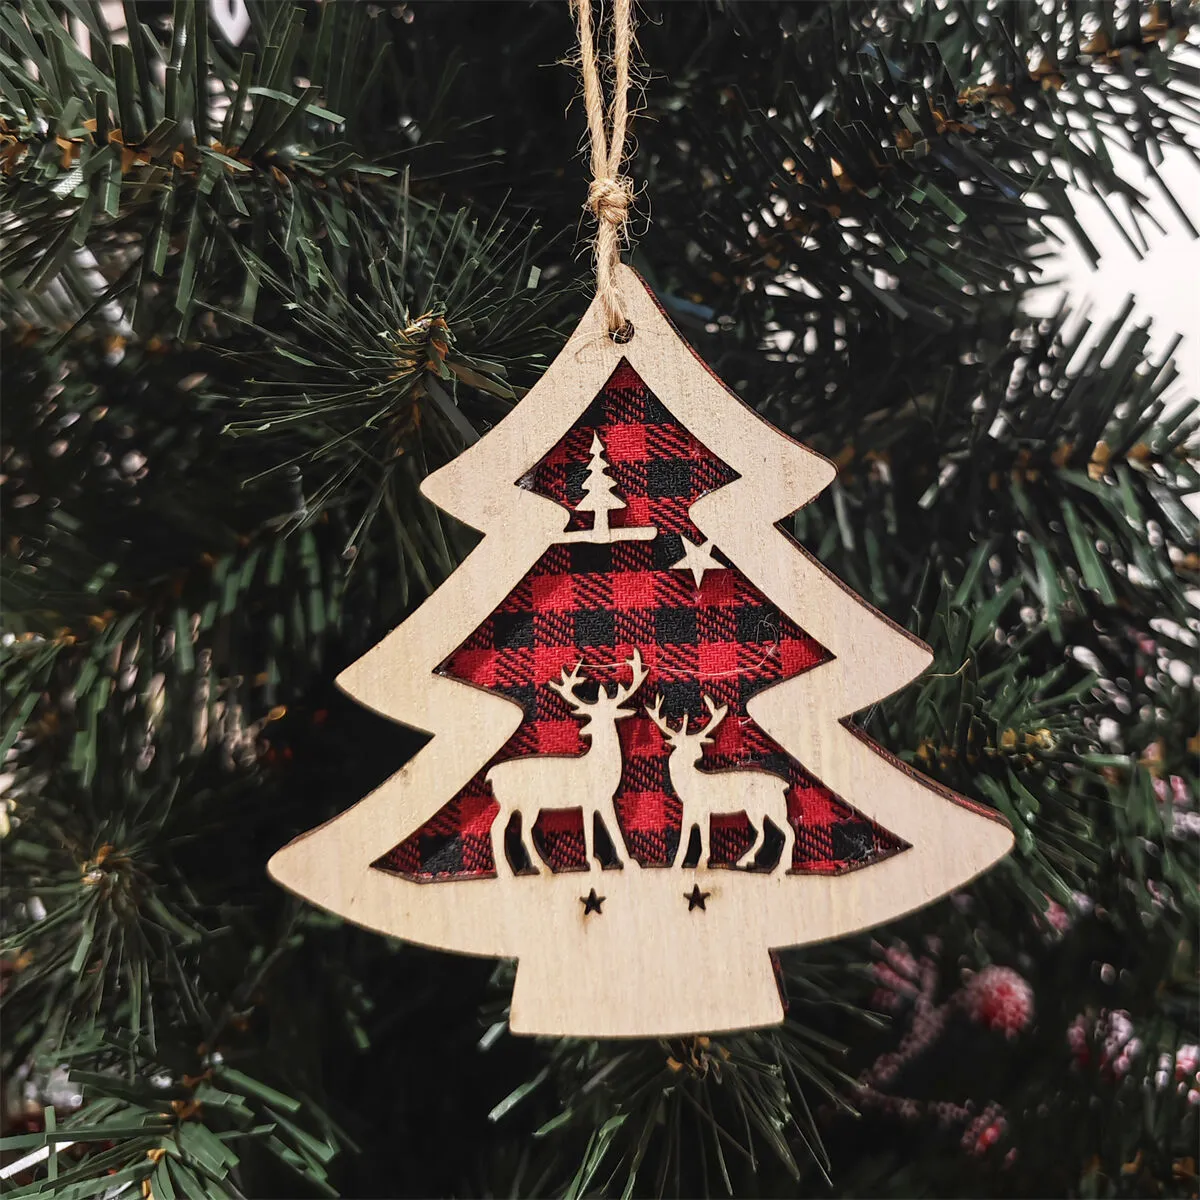
Total: $16 to $52, depending on whether you cut it yourself. Budget alternative: buy pre-cut wooden tree shapes from a craft store at about $1 each and glue on plaid scraps from a thrifted flannel shirt. Same look for under $8.
The plaid insert is the one thing. It is the only pattern in the piece, and it is sandwiched between light wood, so it never overwhelms the deer and star cutouts. Swap it for buffalo check and the ornament goes farmhouse; swap it for a Liberty print and it goes cottage. The wood frame stays neutral and lets the fabric carry all the personality.
30. A Glitter-and-Bead Golden Pear
Glitter sheds. Those hexagonal pieces on the upper half will drop onto the tree skirt, the floor, and your hands for the first several weeks. If that bothers you, seal the finished pear with two light coats of matte acrylic spray before hanging it. Also worth knowing: gold on dark green is a low-contrast pairing, so the pear needs a warm white light nearby to look as dramatic on your tree as it does in a styled photo. Compare with Idea #15 for the cooler metallic version of this finish.
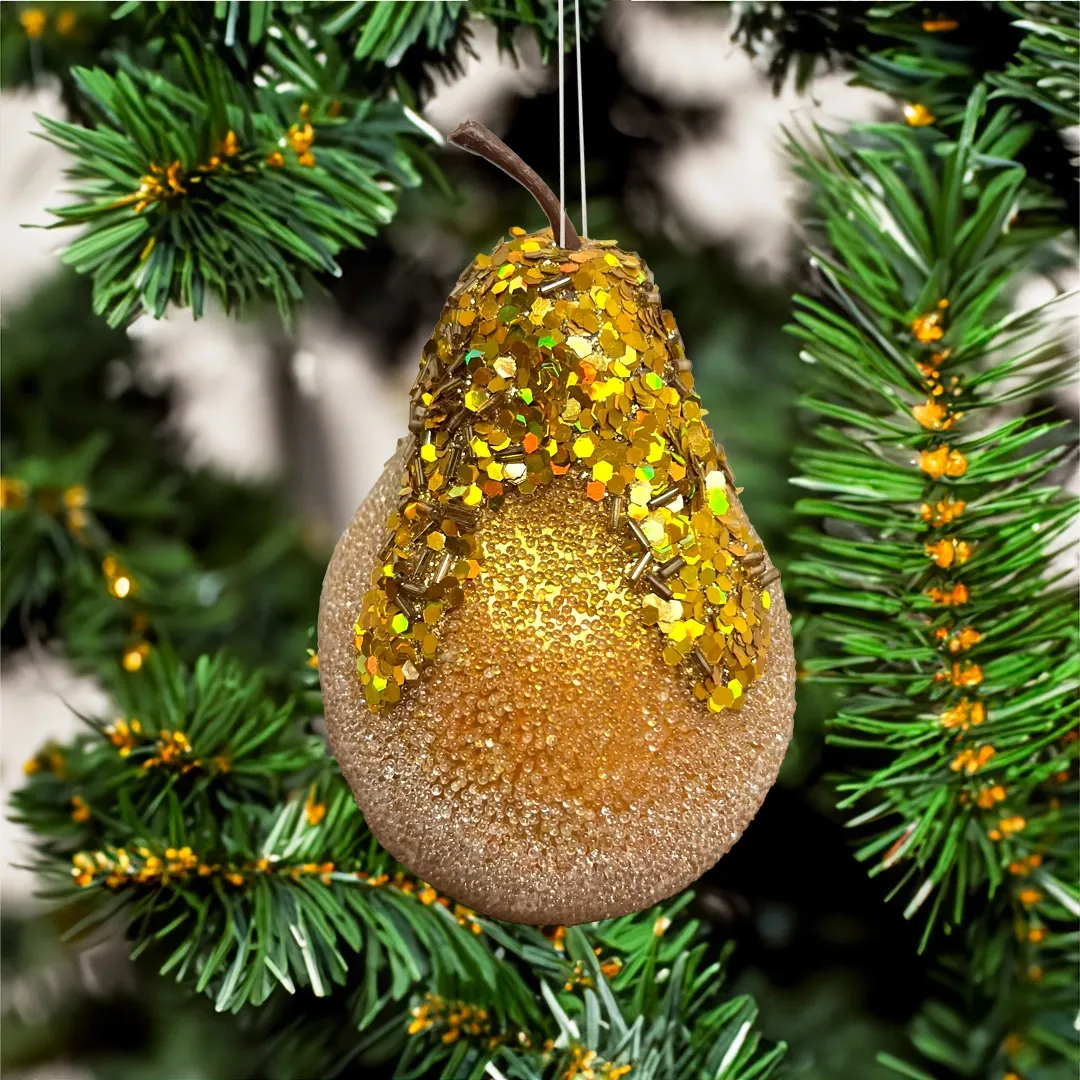
- Base-coat a papier-mâché or foam pear with two thin coats of gold acrylic and let it dry.
- Glue cylindrical gold beads in rows across the top third with tacky glue.
- Fill between the beads with chunky hex glitter while the glue is still tacky.
- Coat the lower half with fine gold glitter over a layer of Mod Podge.
- Trim a short twig for the stem, glue it in, and add a white string hanger.
Time: 1 hour plus drying. About $4 per pear.
31. Three Beaded Triangles with Metallic Disc Centers
Each triangle holds one dominant hue plus two supporting ones, which is the 60/30/10 rule dressed up in beads. The gold ribbon and that small metallic disc in the middle supply the final 10%. Swap the dominant hues between the three ornaments — cobalt, then amber, then scarlet — and keep all the neutrals identical. That is where the magic lives. Any set of handmade ornaments looks designed the moment the support colors match and only the star color changes.
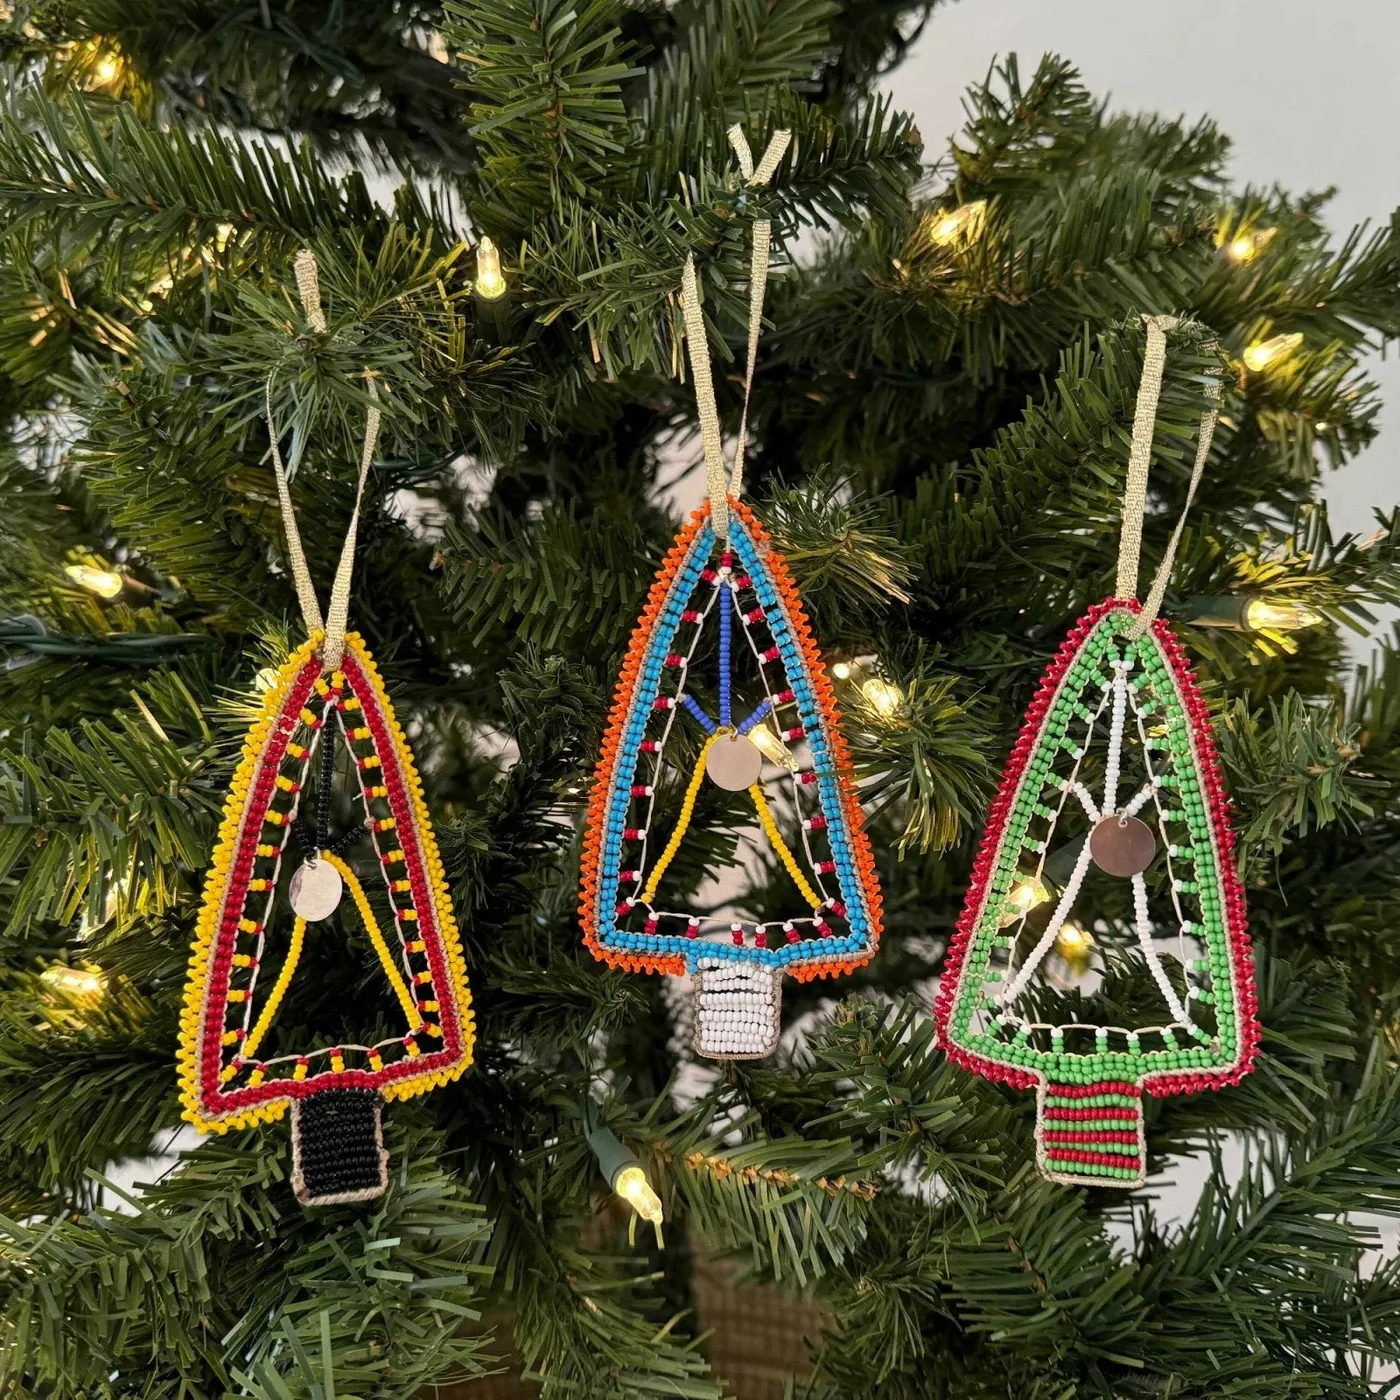
Three triangles, about $12 total. Size 11 seed beads in mixed bags run $3 to $5 at Walmart or Michaels. Those metallic discs are just paper-fastener brads from an office supply store — 100 for $4. String them on gold cord instead of ribbon; cord is cheaper and holds a knot far better. A full set of six costs less than a single mass-market beaded ornament.
Start With One Ornament, Not Twenty
You do not need a craft room, a Cricut, or a free weekend to build an ornament collection worth passing down. You need one evening, about $10 of supplies, and a willingness to make the first one slightly crooked — which, honestly, is the charm. Pick the idea that made you stop scrolling, make a single version of it, and hang it somewhere you will see it every day.
📌 Save this to Pinterest now so next December you are not starting from zero again.