You know that feeling when you finally find the concrete edging idea that looks exactly right for your yard? That perfect curve, that just-right texture. But then reality hits: how do you actually *do* it? After filtering through hundreds of options across landscape suppliers, big-box hardware stores, and specialty mold retailers, we narrowed it down to 30 ideas that actually deliver. We’re talking everything from poured-in-place modern lines to rustic stamped patterns. We’re covering the high-end custom looks and the weekend DIY projects. And stay until the end — we break down the most common mistakes that can ruin these looks. 📌 Save this to Pinterest for later — you’ll want to revisit these ideas.
1. Serene Curves: Concrete Edging with River Rock & Uplighting
This design feels so polished because it masters the art of contrast. The smooth, light gray concrete curb creates a crisp, clean line that stands out against two softer textures: the vibrant green lawn and the tumbled river rocks. The gentle curve of the edging prevents the design from feeling too rigid or formal, guiding the eye naturally through the space. The addition of warm uplighting transforms it from a simple daytime border into a dramatic evening feature, highlighting the plant textures and adding a layer of sophisticated ambiance.
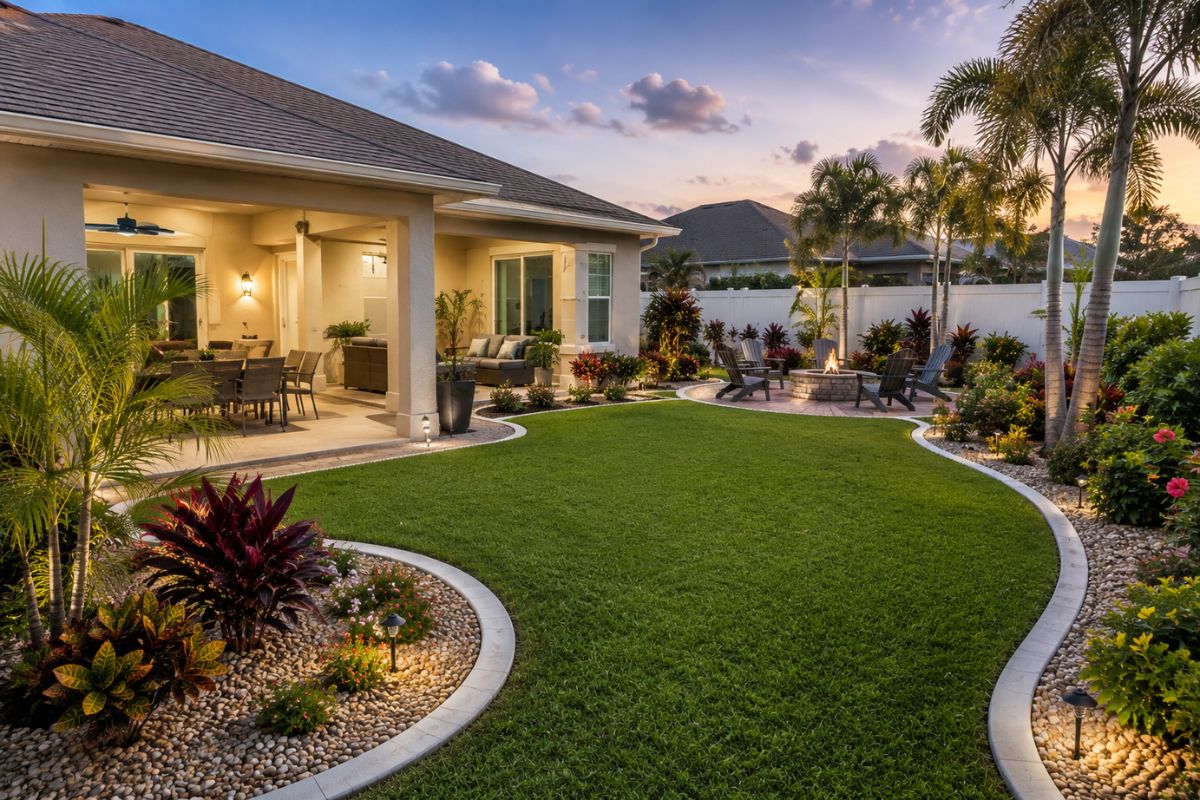
When planning landscape lighting, think in layers. For a look like this, you need two types. First, use small, wide-angle uplights (around 15-30 degree beam spread) placed every 6-8 feet and aimed at the foliage to create those soft glows on the plants. Second, add tiny, low-lumen ‘button’ lights directly into the paved patio or fire pit surround to mark edges for safety and add a subtle twinkle. Always use warm white bulbs (2700K-3000K) for an inviting, high-end feel; cool white can look sterile and cheap outdoors.
2. A Tale of Two Textures: Tan Concrete Edging Meets Gray Gravel
The visual success here is all about a balanced formula. Think of it as 50% Softscape + 50% Hardscape. The softscape is your green plants and rich brown mulch. The hardscape is then broken down further: about 60% gravel walkway, 30% stacked stone planters, and 10% smooth concrete edging. The key is that the edging acts as the mediator, a neutral buffer between all the other materials. You could swap the dark gray gravel for light pea gravel, but you’d want to ensure your edging color still provides a clean separation and doesn’t blend in too much.
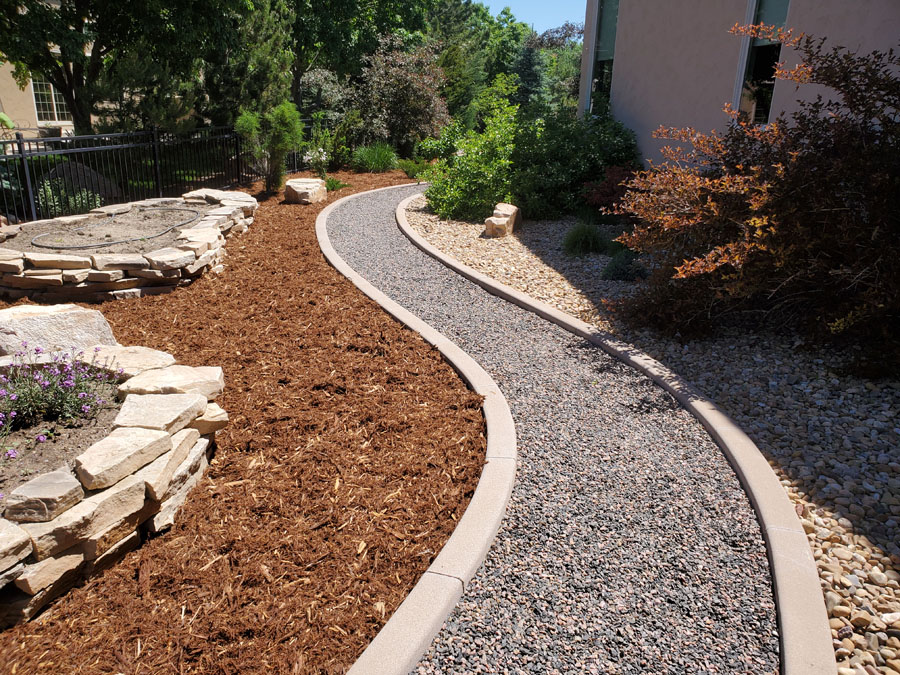
Let’s be honest about gravel paths: they are not maintenance-free. While they look fantastic, small bits of mulch, leaves, and dirt will inevitably mix in, requiring a leaf blower or careful raking to keep clean. Weeds are also persistent. Even with a high-quality landscape fabric underneath, some stubborn ones will find their way through the gravel or sprout from blown-in seeds. Plan on spending 15-20 minutes every couple of weeks on upkeep to keep it looking this crisp. It’s a trade-off for a beautiful, permeable surface.
3. Rustic Charm: Brown Concrete Edging with a Metal Inner Border
The single detail that makes this design more interesting than a standard setup is the thin metal landscape edging placed on the inside of the concrete border. Without it, the gravel would spill over and blur the line. With it, you get a super crisp, dark line that adds a layer of definition and a touch of modernism to an otherwise rustic look. It’s a small, inexpensive addition that elevates the entire bed, proving that high-impact design is often in the subtle details. It keeps the gravel tidy and makes the brown concrete edging look more intentional and substantial.
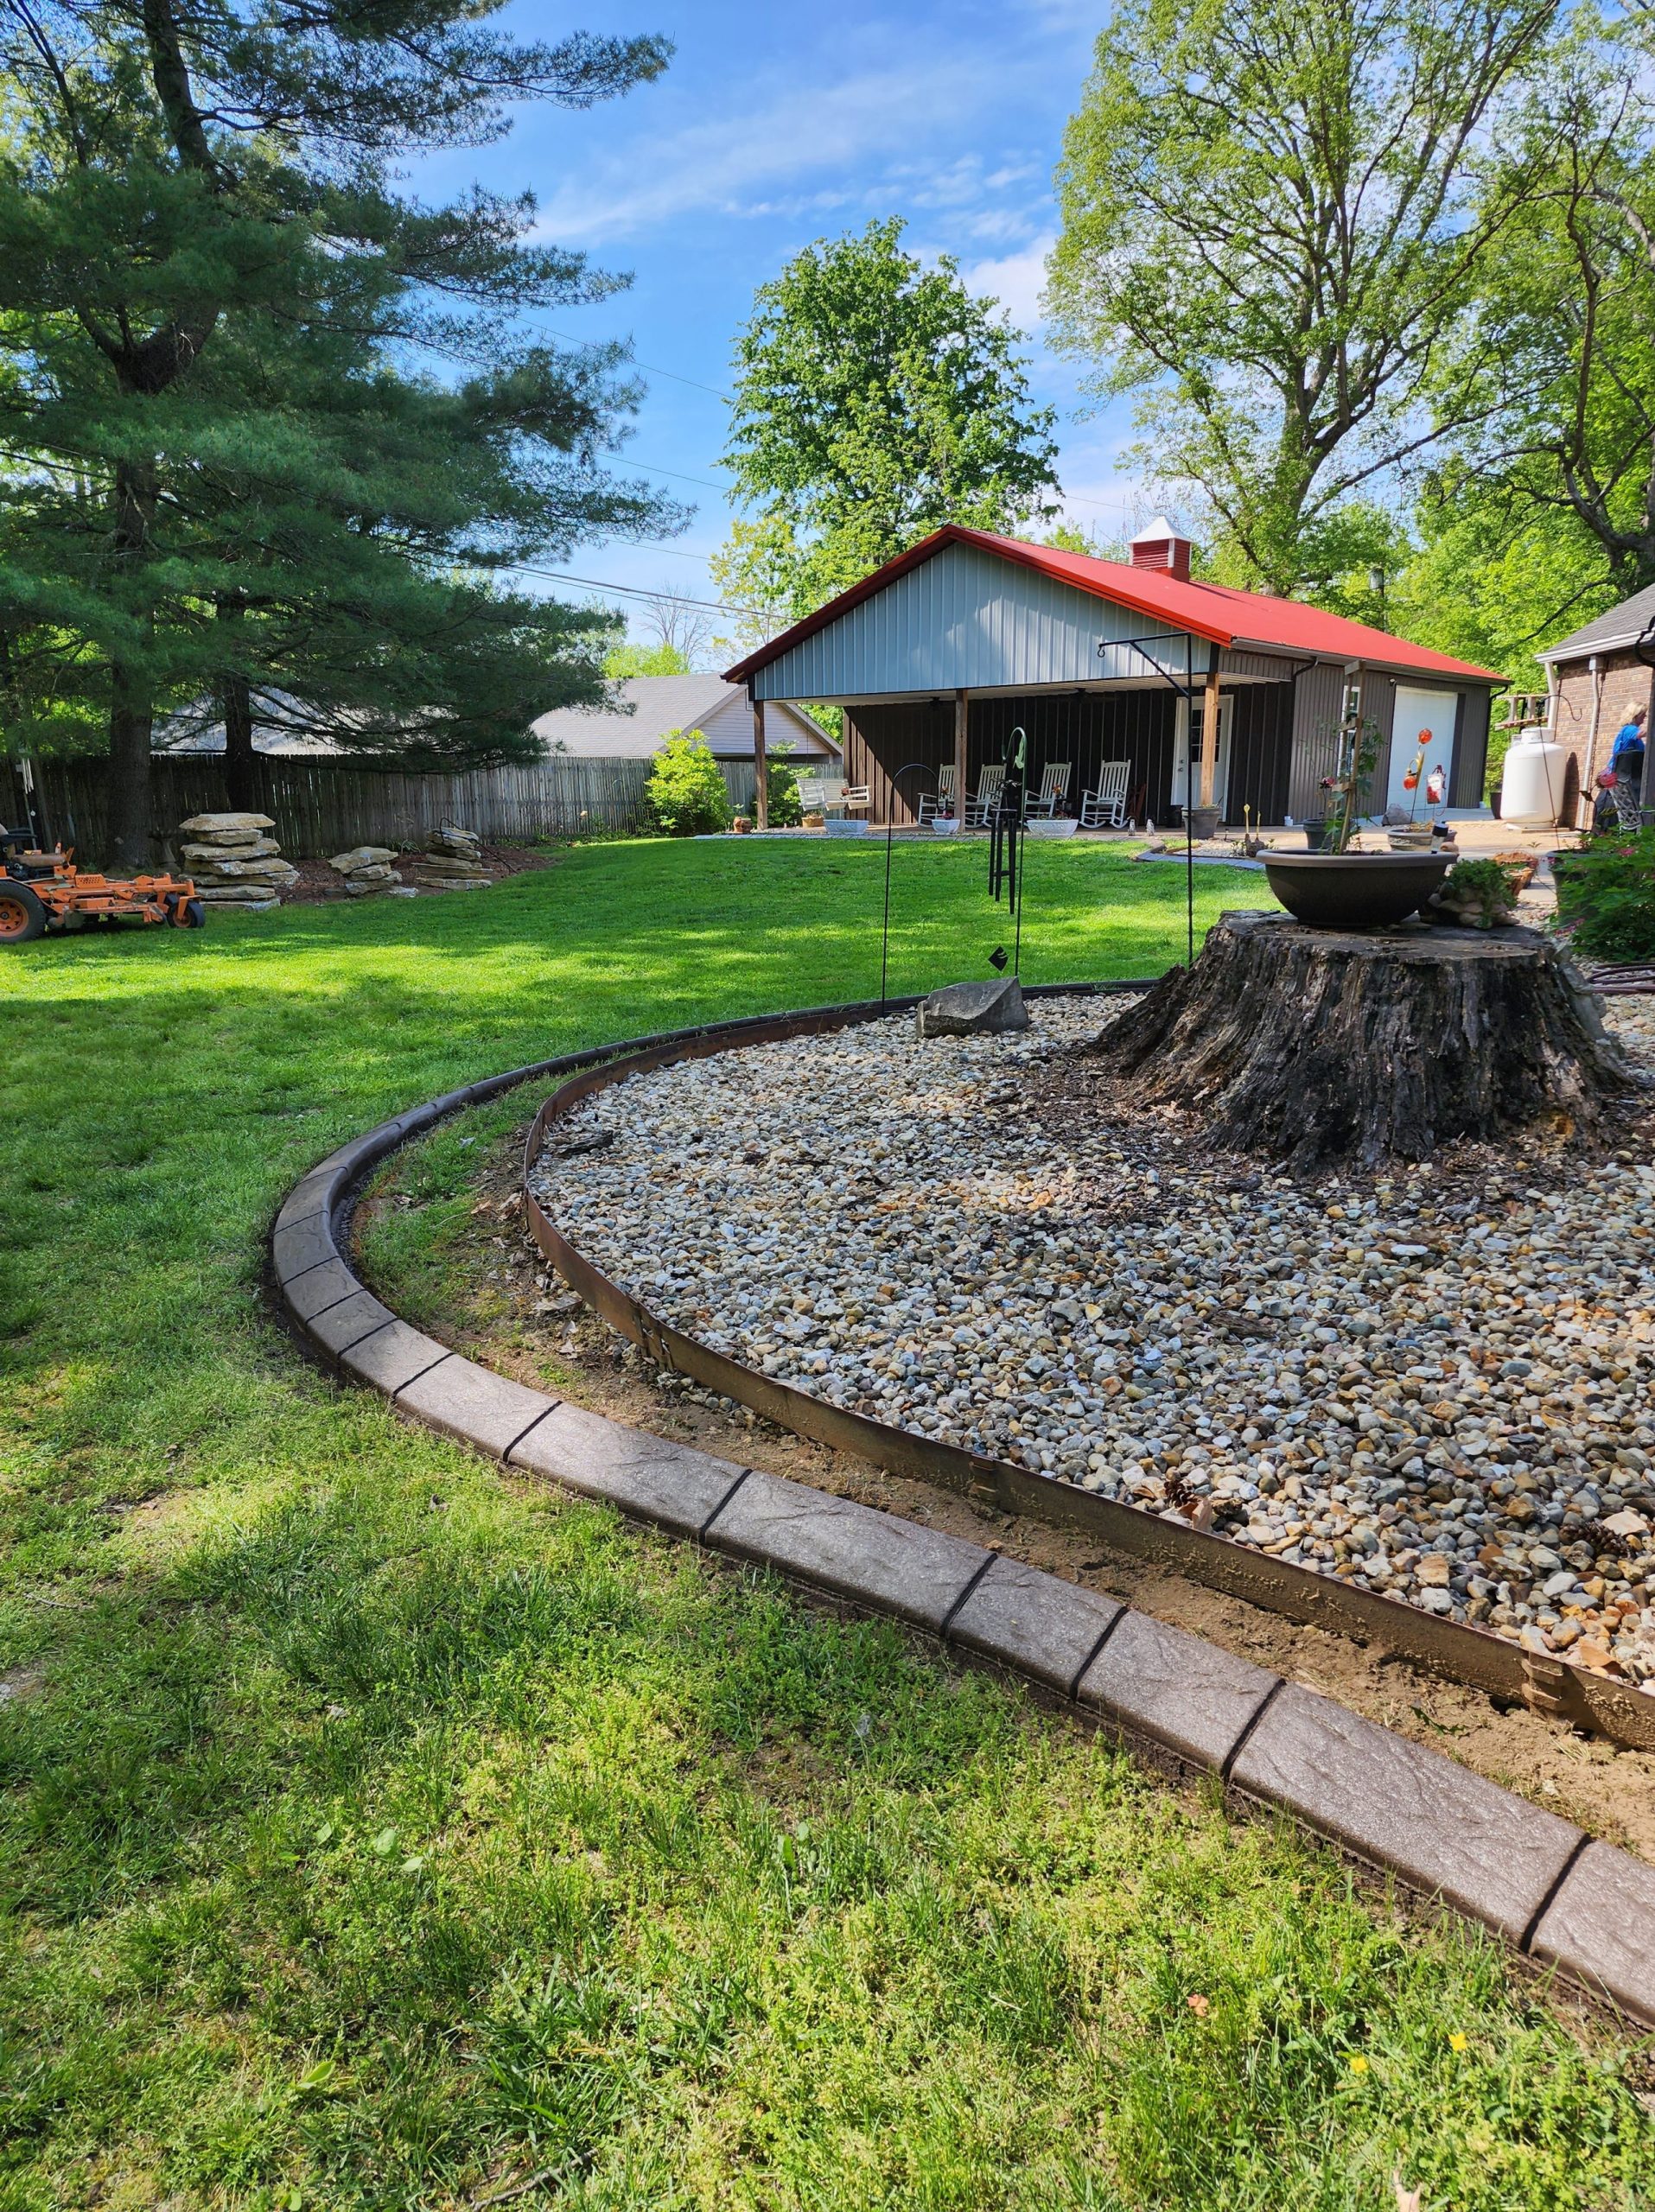
You don’t need custom concrete to get this rustic feel. You can find pre-cast scalloped or straight-edge concrete blocks at most home improvement stores for about $2-$4 per linear foot. The real savings comes from the fill. Instead of buying bags of decorative gravel, check with local quarries or landscape suppliers for bulk pricing on pea gravel or crushed stone—you can save up to 70%. The inner metal edging is also a bargain, often costing less than $1.50 per foot. This is a much more approachable version of the high-end look in Idea #1.
4. The Power of a Dark, Textured Concrete Border
Dark, textured concrete like this is fantastic for hiding dirt and minor stains, but it can be susceptible to efflorescence—that chalky white residue that sometimes appears on concrete. It’s a natural process, but you can minimize it by sealing the concrete every 2-3 years with a quality matte-finish sealer. The texture can also trap pollen and dirt, so a quick spray-down with a hose a few times a season will keep it looking fresh. Be mindful of using string trimmers right up against it, as the plastic cord can wear away the texture or color over time.
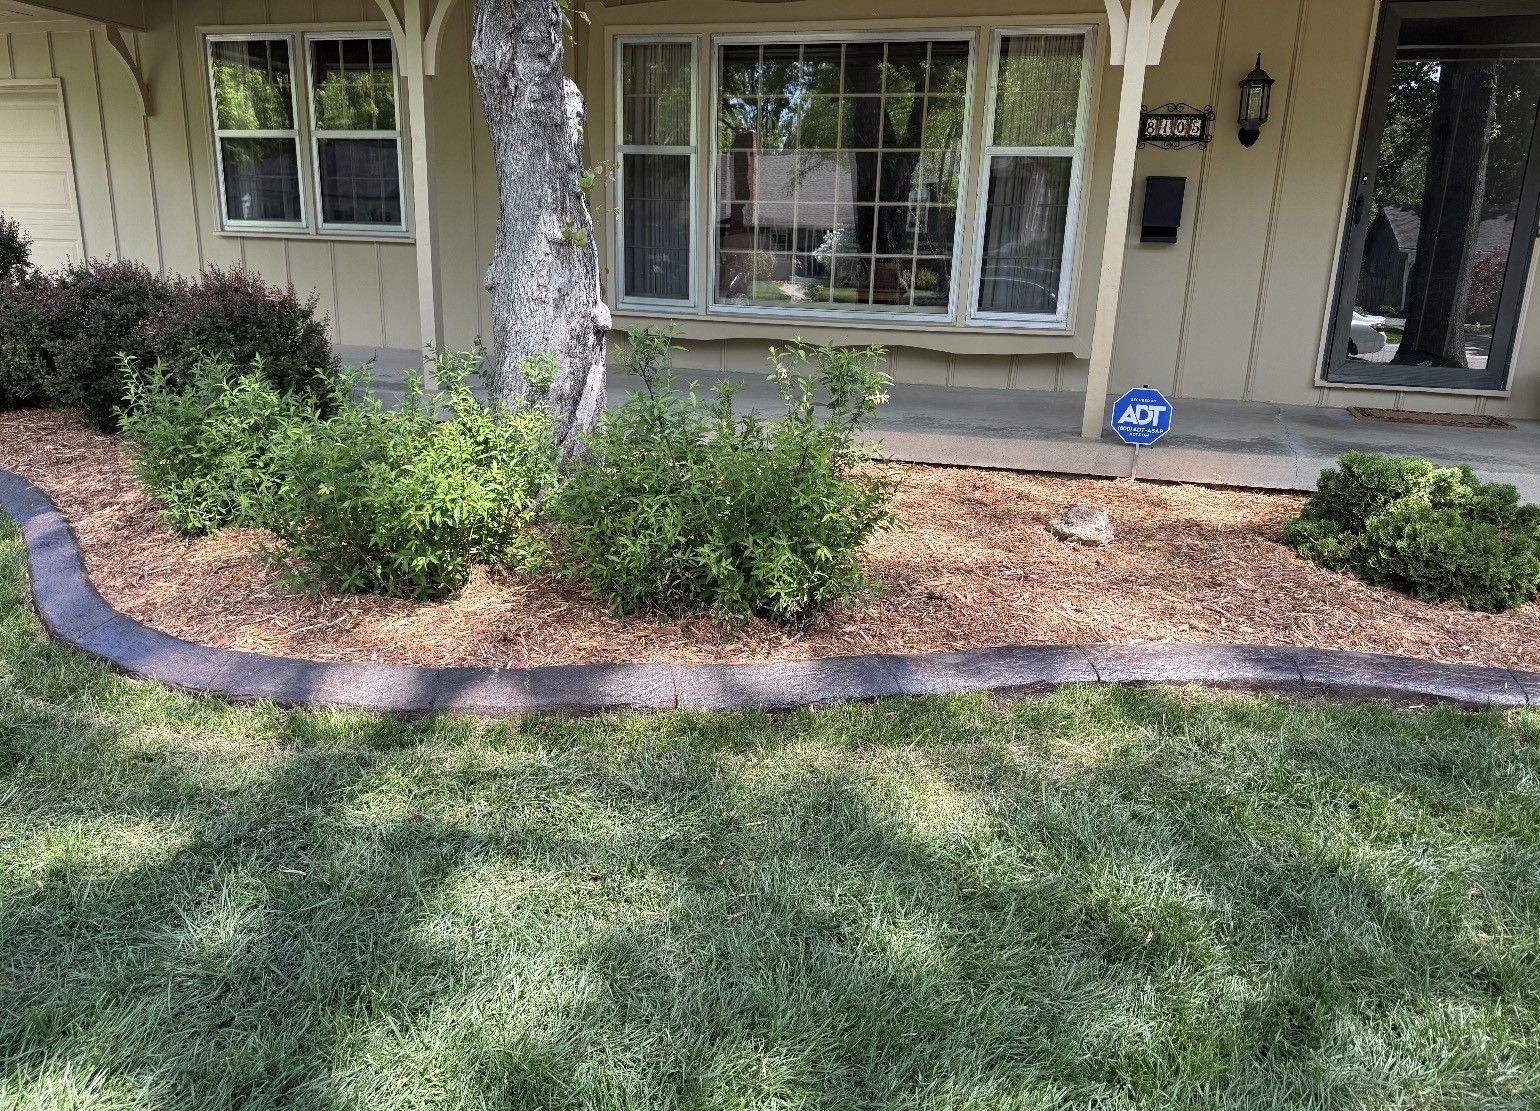
This design works so well because of repetition and a strong focal point. The dark gray of the concrete edging is subtly repeated in the shadows of the mulch and the deep greens of the shrubs, creating a cohesive color story. The curve itself isn’t random; it intentionally sweeps around the base of the mature tree, making the tree the undeniable star of the show. The edging’s job is to create a frame, guiding your eye directly to the most important element in the landscape bed. The clean line against the lawn provides a satisfying visual order.
5. Flowing Brown Concrete Edging with Contrasting Black Mulch
A flowing, decorative border like this is incredibly versatile. It works best in medium to large yards where the curves have room to breathe. For this specific ‘grouped paver’ look, you need a bed depth of at least 3 feet to avoid looking cramped. Trying to force dramatic curves into a small, narrow space will look busy and unnatural. If your yard is under 1,000 square feet, consider a simpler, gentler curve as seen in Idea #8 to maintain a sense of openness. Check these points before you start:
- Is the bed wide enough to accommodate the curve without looking pinched? (Min 3ft)
- Does the curve have a clear start and end point, like the corner of a house or a walkway?
- Is there enough lawn space so the curve doesn’t feel like it’s eating the yard?
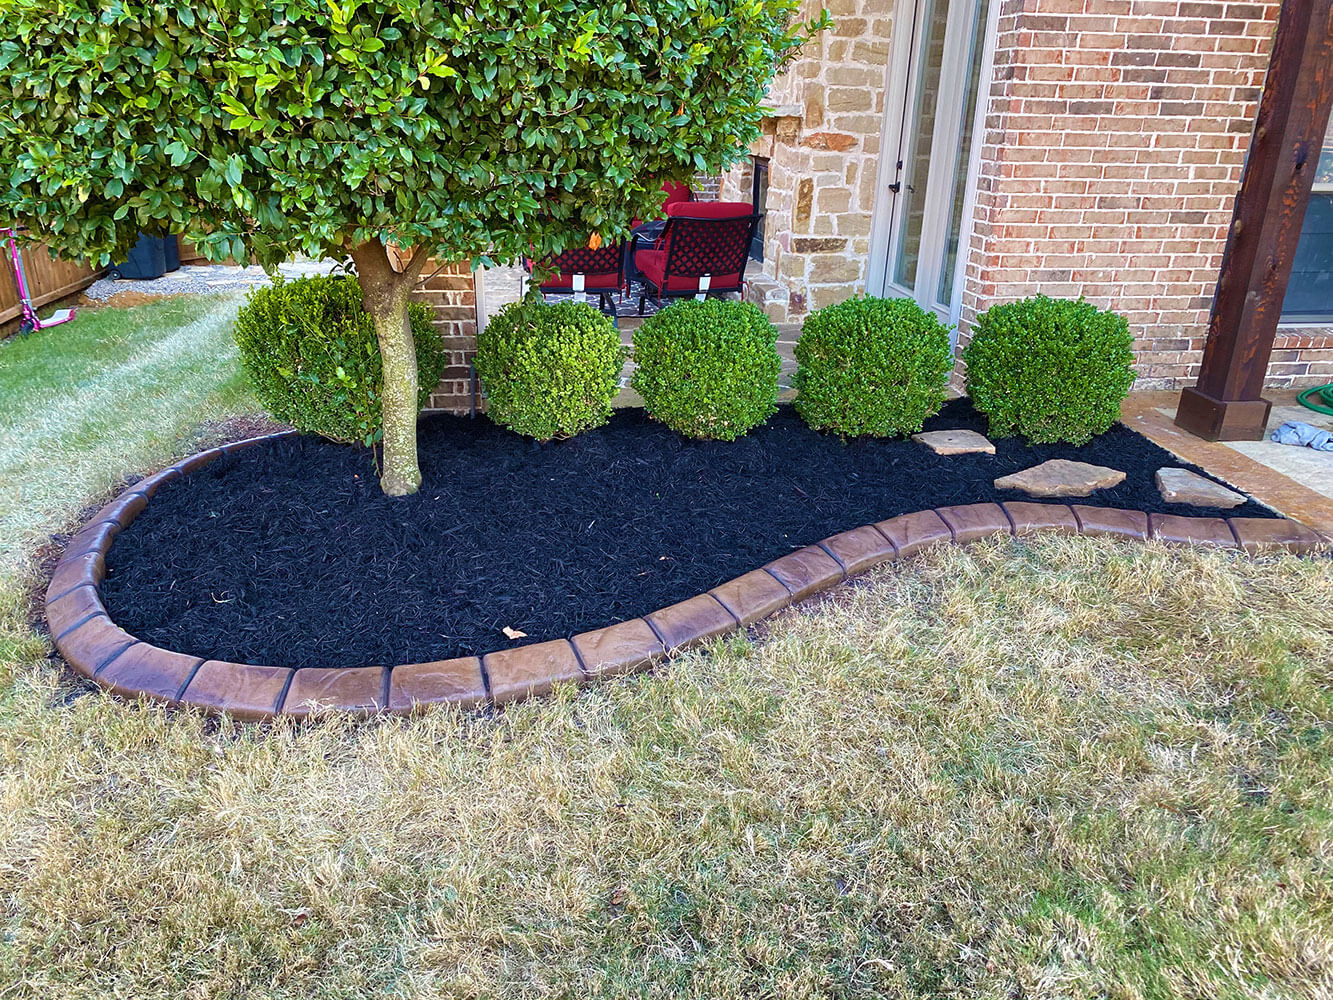
You can create a similar stamped look on existing plain concrete edging. It’s a weekend project that adds major character. Time: 4-6 hours. Cost: $50-$80.
- Thoroughly clean the existing concrete edging with a pressure washer or stiff brush and concrete cleaner. Let it dry completely.
- Apply a thin layer of concrete resurfacer or a stampable overlay mix with a trowel, following the manufacturer’s instructions. Aim for about a 1/4-inch thickness.
- While the overlay is still wet, spray a liquid release agent onto both the concrete surface and your stamping tool.
- Press the stamp form firmly into the overlay to transfer the pattern. Overlap the stamp slightly for a continuous look.
- Let it cure for 24-48 hours.
- Apply a concrete stain or color wash to achieve the mottled brown tone, then finish with a matte sealer to protect it.
6. Autumn Tones with a Grey Stamped Concrete Edge
When using stamped concrete, the key to a high-end look is subtlety. Ask your installer for a ‘light to medium’ impression. A stamp that’s pressed too deep can look chunky and artificial. For the color, always ask for a secondary ‘release’ color. In this example, the base is gray, but a charcoal release agent was likely dusted on top before stamping. This darker powder settles into the low spots of the texture, creating depth and a more authentic stone-like appearance. Without that second color, the finish would look flat and much less convincing.
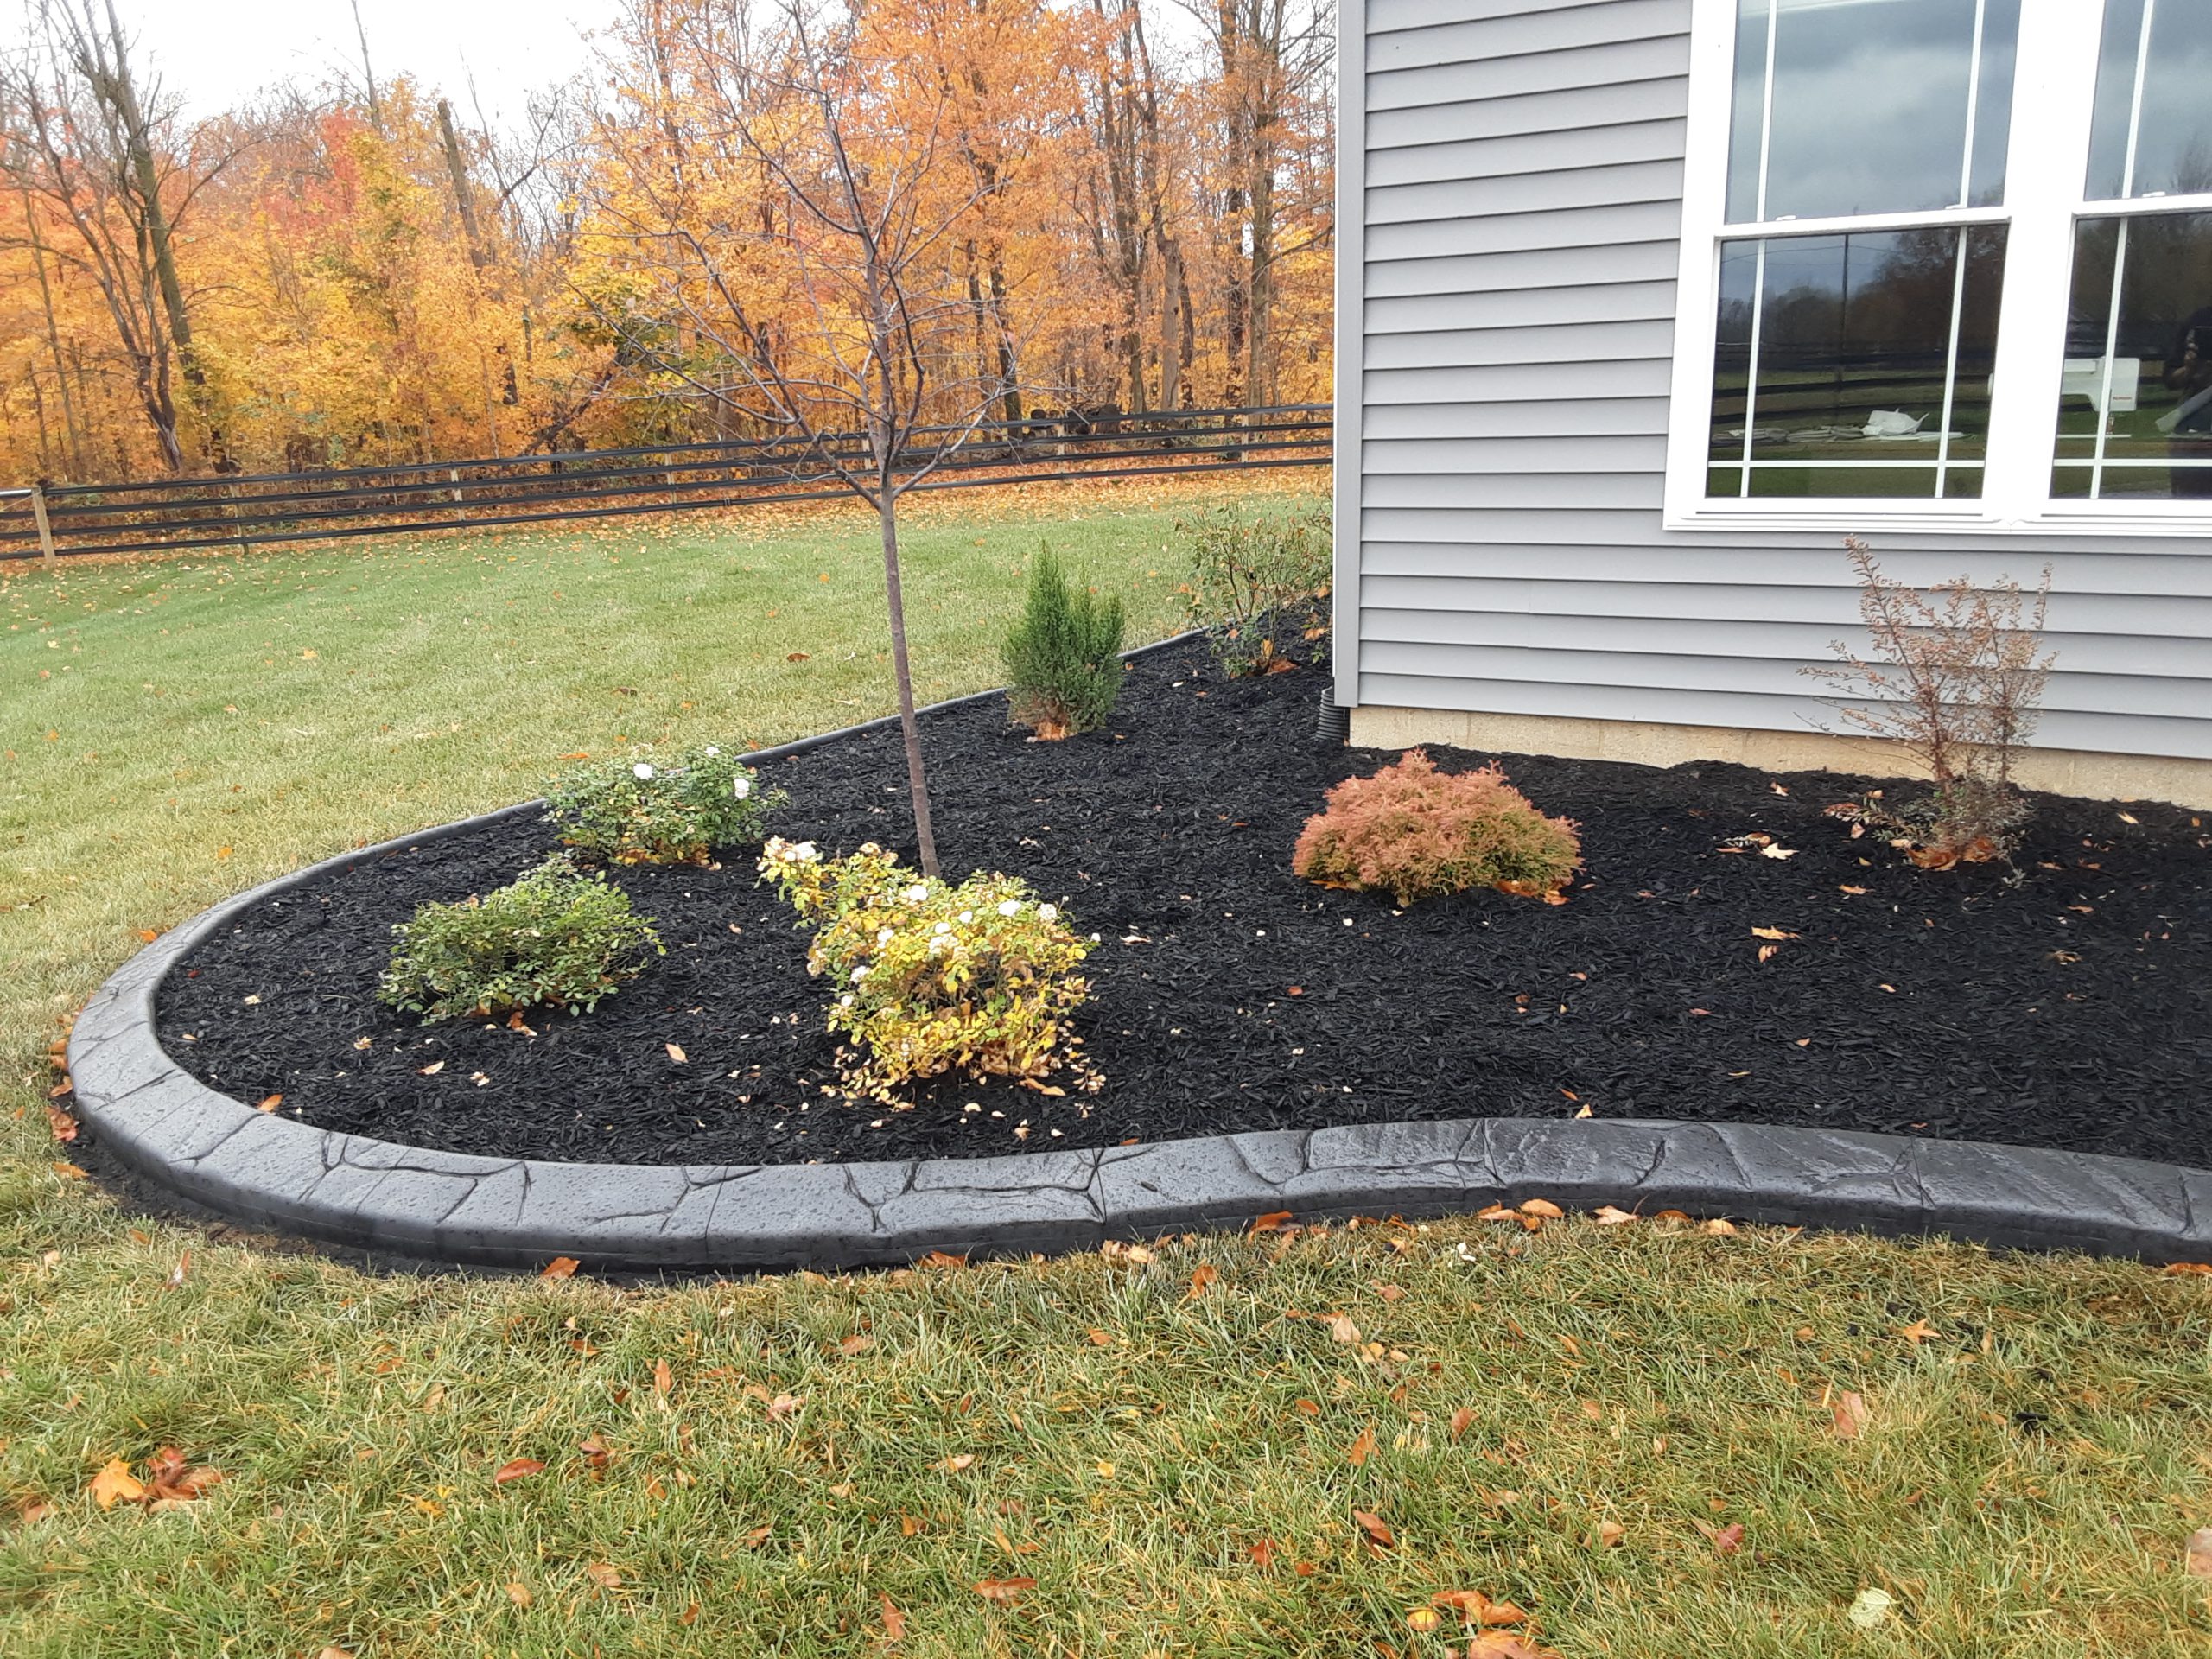
This look is a direct response to the ‘poured-in-place’ trend that can sometimes feel too stark or modern for traditional homes. Homeowners want the permanence and clean lines of concrete but with a softer, more classic texture. Stamped patterns, especially subtle brick or slate designs, offer a perfect compromise. It feels more established and integrates beautifully with older architectural styles, which is why it’s a perennial favorite on Pinterest for anyone with a colonial, craftsman, or ranch-style home. It provides structure without sacrificing charm.
7. Get a Rustic Vibe with Wood-Textured Concrete Edging
The wood-grain texture is everything here. If this were smooth concrete, it would be a perfectly fine, but forgettable, border. The molded wood texture instantly adds a rustic, naturalistic element that cleverly ties into the nearby wooden deck stairs. It bridges the gap between the hardscape (concrete) and the natural elements (mulch, plants, wood deck). This single choice of texture elevates the entire design from purely functional to thoughtfully curated, creating a cohesive and warm aesthetic that feels connected to its surroundings.
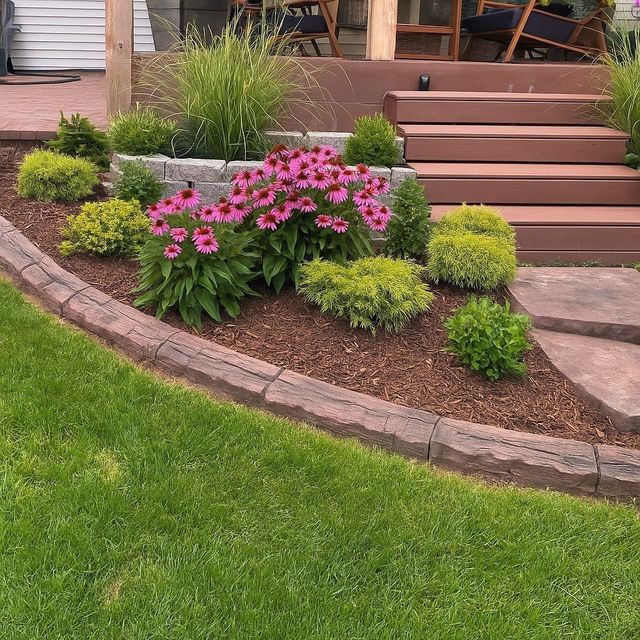
Be aware that pre-cast textured edging like this has its limits. The individual blocks or sections can shift over time due to ground freeze/thaw cycles, creating small gaps or uneven spots. This is especially true if the ground wasn’t properly compacted and leveled during installation. You might find yourself needing to readjust a few sections every spring to keep the line perfect. While it’s more durable than real wood edging (which would rot), it doesn’t offer the seamless, permanent stability of a continuous poured curb.
8. Classic Curves Using Simple Concrete Edging Blocks
This is a classic, achievable look with a very reasonable price tag. The cost is primarily in labor if you’re not doing it yourself.
- Main Materials (Pre-cast concrete edging blocks): $200 – $400
- Bed Prep (Mulch, soil, weed barrier): $150 – $300
- Plants & Shrubs: $300 – $800+ (highly variable)
- Decorative Boulders: $50 – $200
- TOTAL: $700 – $1,700
Budget alternative: Source your plants from local gardening groups or end-of-season sales to save 50-80%. Use your own found rocks instead of buying boulders. Install the edging yourself. Total cost could be as low as $300-$500.
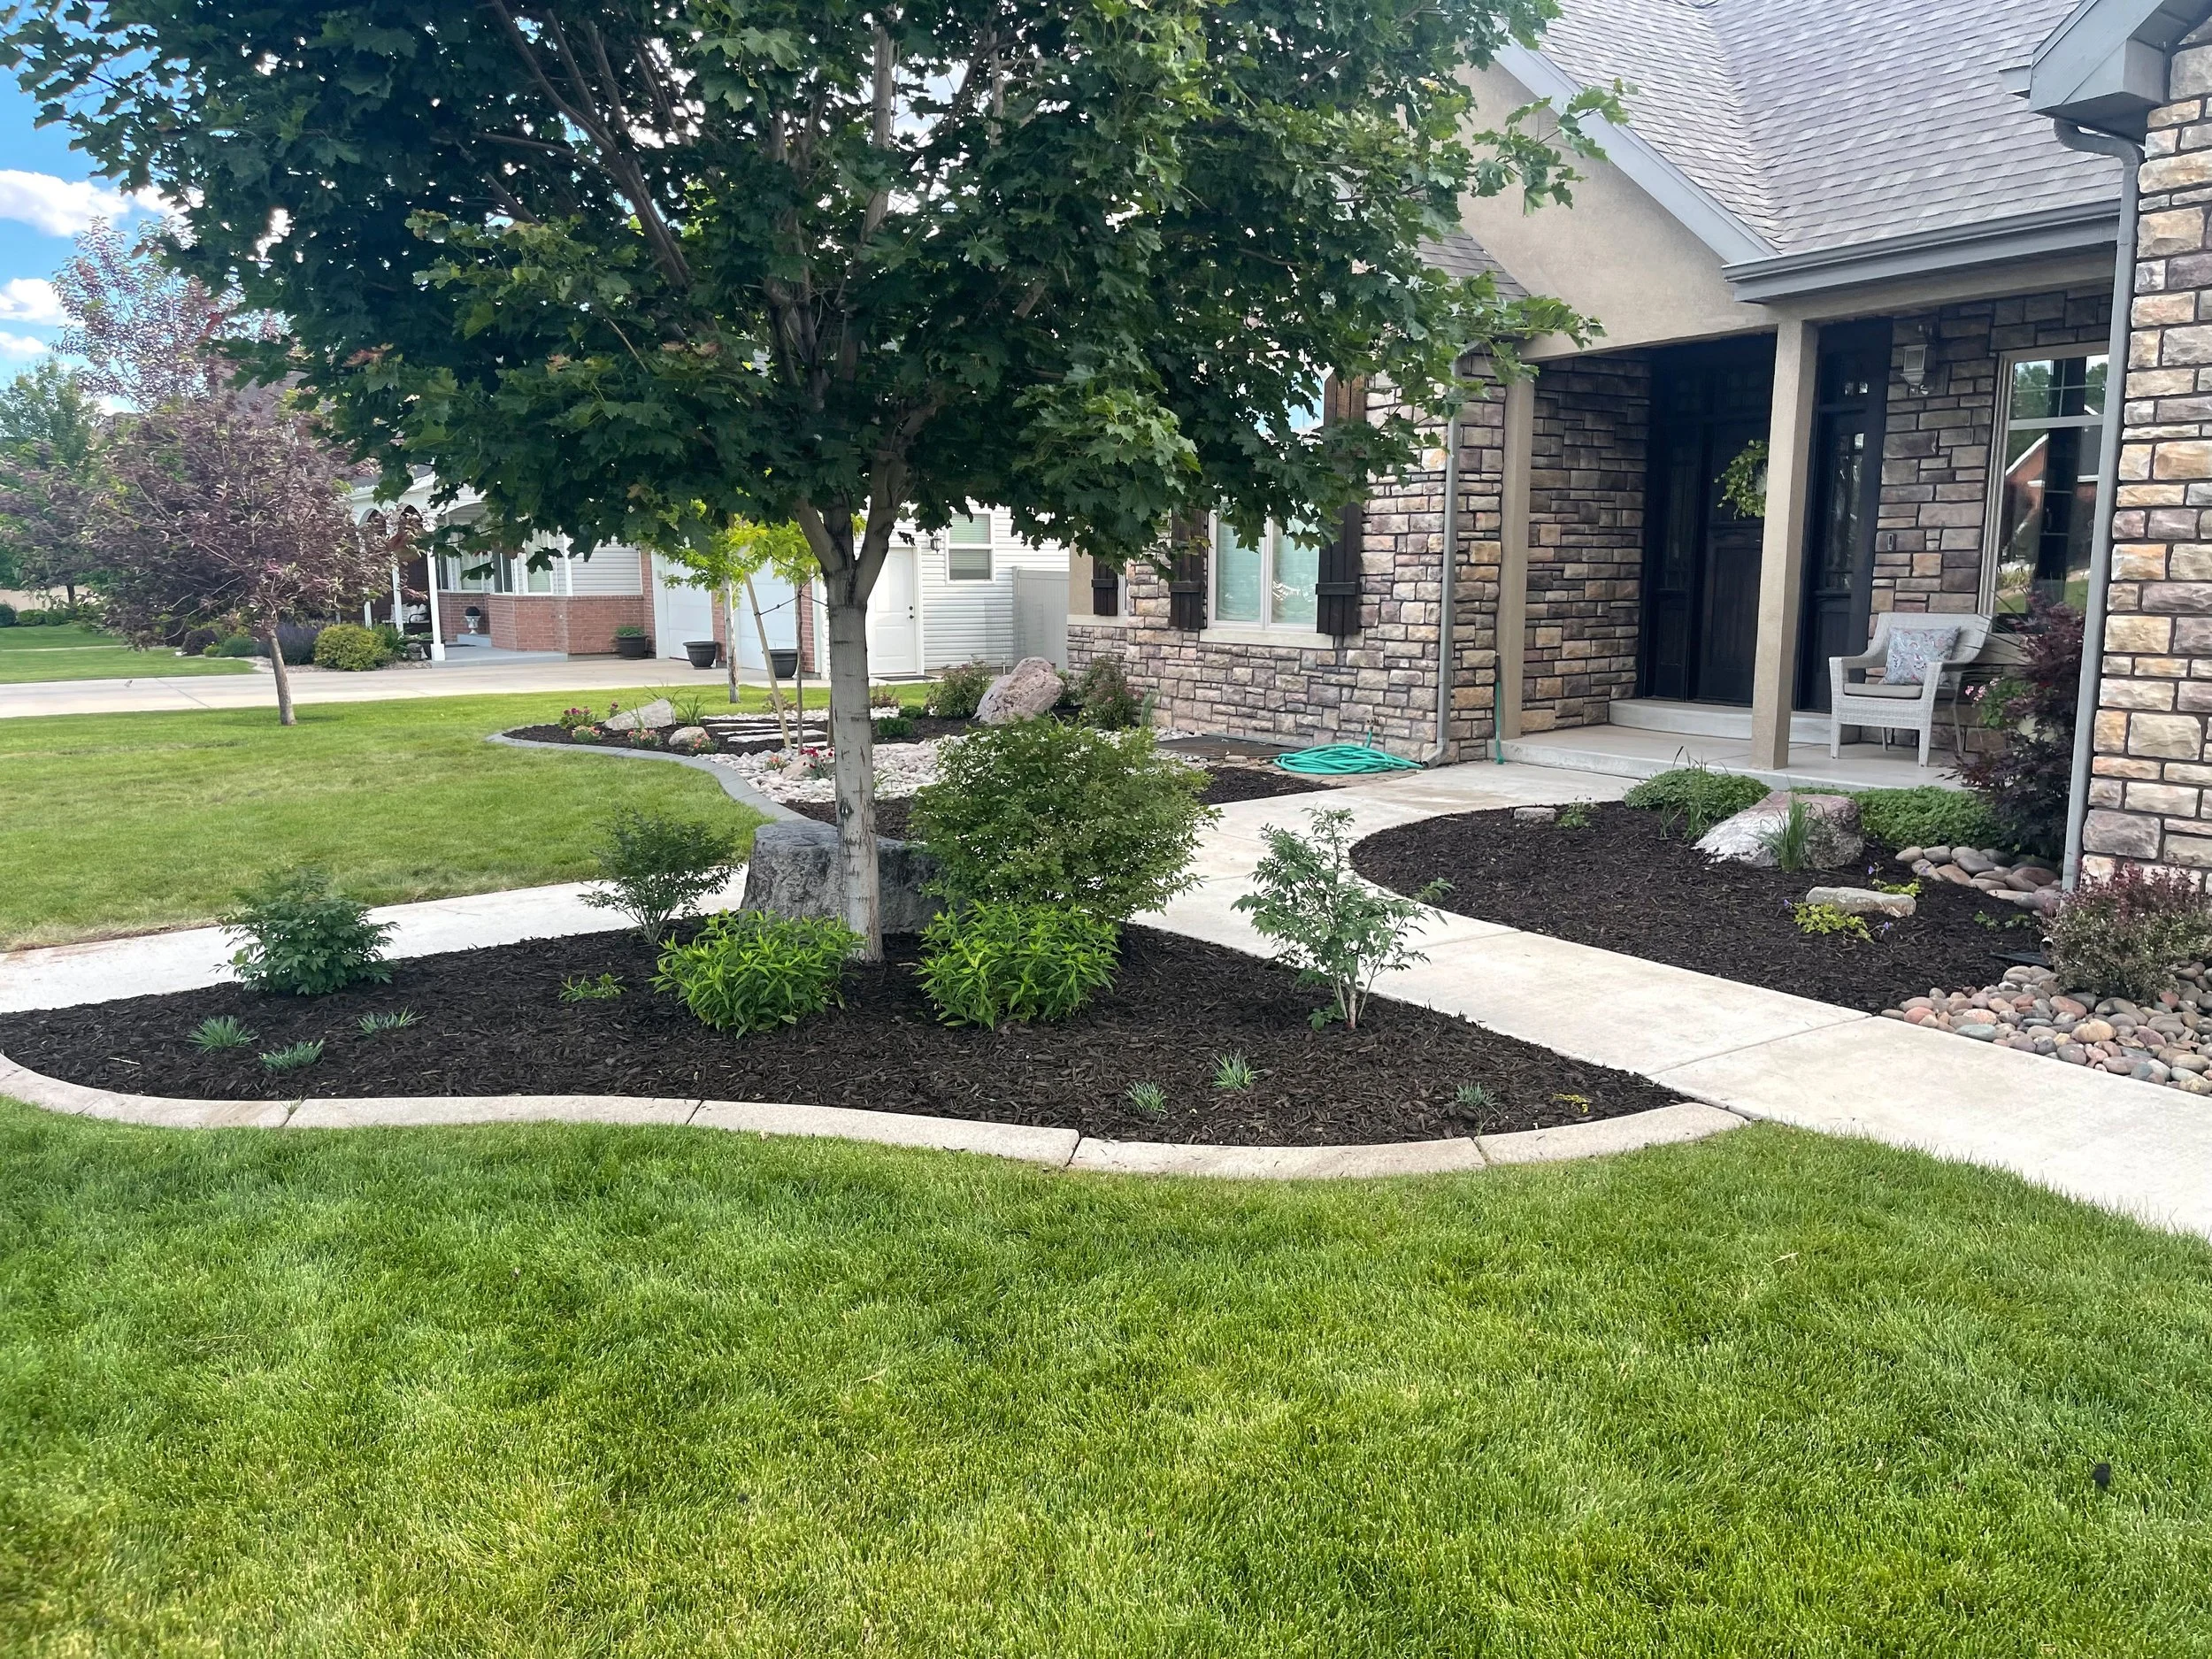
The effectiveness of this design lies in its simplicity and generous curves. The edging isn’t trying to be the star; it’s a quiet, clean frame for the lush plantings and the pop of texture from the boulders. The smooth, light gray concrete provides a visual break between the dark mulch and the green lawn, making both colors appear more vibrant. The curves are wide and sweeping, which feels more natural and less fussy than tight, complex shapes. For a more decorative version of a curved border, see Idea #16.
9. Winding Garden Beds with Pre-Cast Concrete Edging
This expansive, winding look is made for larger properties. To achieve this sense of flow, you need a lawn area of at least 2,500 square feet. The key is the ratio of lawn to bed. The ‘river’ of grass running through the landscape should be at least 15-20 feet wide at its narrowest point. Anything less, and the beds will feel like they are choking the lawn. The height of the edging is also crucial; for a large-scale design, use blocks that are at least 4-5 inches tall to ensure they are visually substantial and don’t get lost in the vastness of the space.
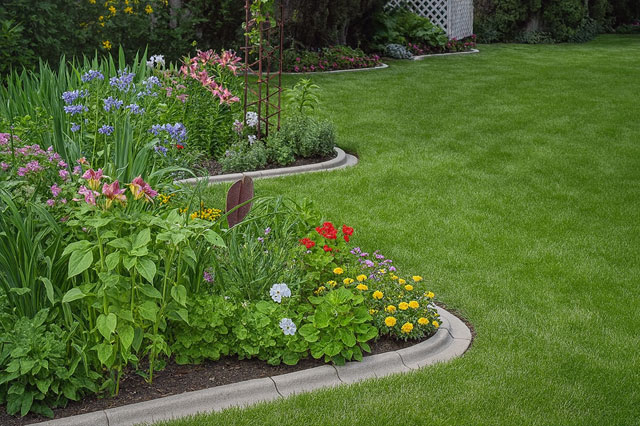
Think of this as 70% lawn, 30% garden beds. That ratio is what keeps it feeling open and park-like rather than overgrown. Within the 30% beds, the formula is roughly 80% plant material and 20% visible edging. The concrete border is the ‘outline’ in a coloring book—it’s essential for definition, but the real beauty comes from the color and texture you fill it with. The soft gray of the concrete acts as a neutral, allowing the vibrant pinks, blues, and greens of the perennials to take center stage without competition.
10. A Sharp Driveway Border with Dark Stamped Concrete
When adding a decorative border to a driveway, the color contrast is your most powerful tool. Here, the dark charcoal border makes the lighter gray driveway slab look cleaner and more intentional. For maximum impact, choose a border color that is at least three shades darker or lighter than the main field. Also, the pattern scale matters. A ‘soldier course’ or running brick pattern like this works best for linear spaces. Avoid busy, random stone patterns for driveway edges as they can look chaotic and fight with the texture of the main slab.
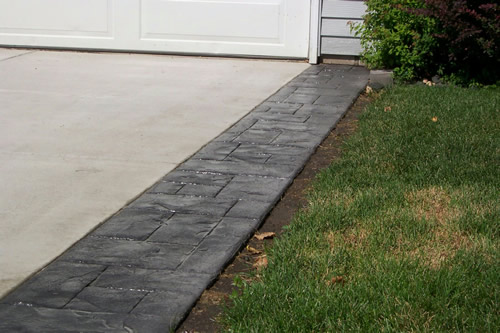
A stamped border on a driveway will require sealing every 2-3 years, no exceptions. This is a high-traffic area exposed to hot tires, oil, and de-icing salts in the winter, all of which can degrade the color and sealer. Without a good quality sealer, the color in the stamped portion can fade much faster than the plain concrete slab, leading to a patchy look. Also, be careful with snow shovels and plows, as a metal edge can easily chip or scrape the textured surface. Using a plastic shovel or setting the plow blade higher is a must.
11. Textured Brown Concrete Edging with Cream River Rock
This composition is successful because it balances warm and cool tones. The brown of the concrete edging is a warm, earthy color that is complemented by the warm creams in the river rock mulch. This warmth is then balanced by the cool tones of the green lawn and the gray brick wall in the background. The interlocking, textured pattern of the edging stones adds a layer of visual interest that’s more dynamic than a simple smooth curb, making the border a feature in its own right. The single, spiky plant acts as a perfect sculptural focal point.
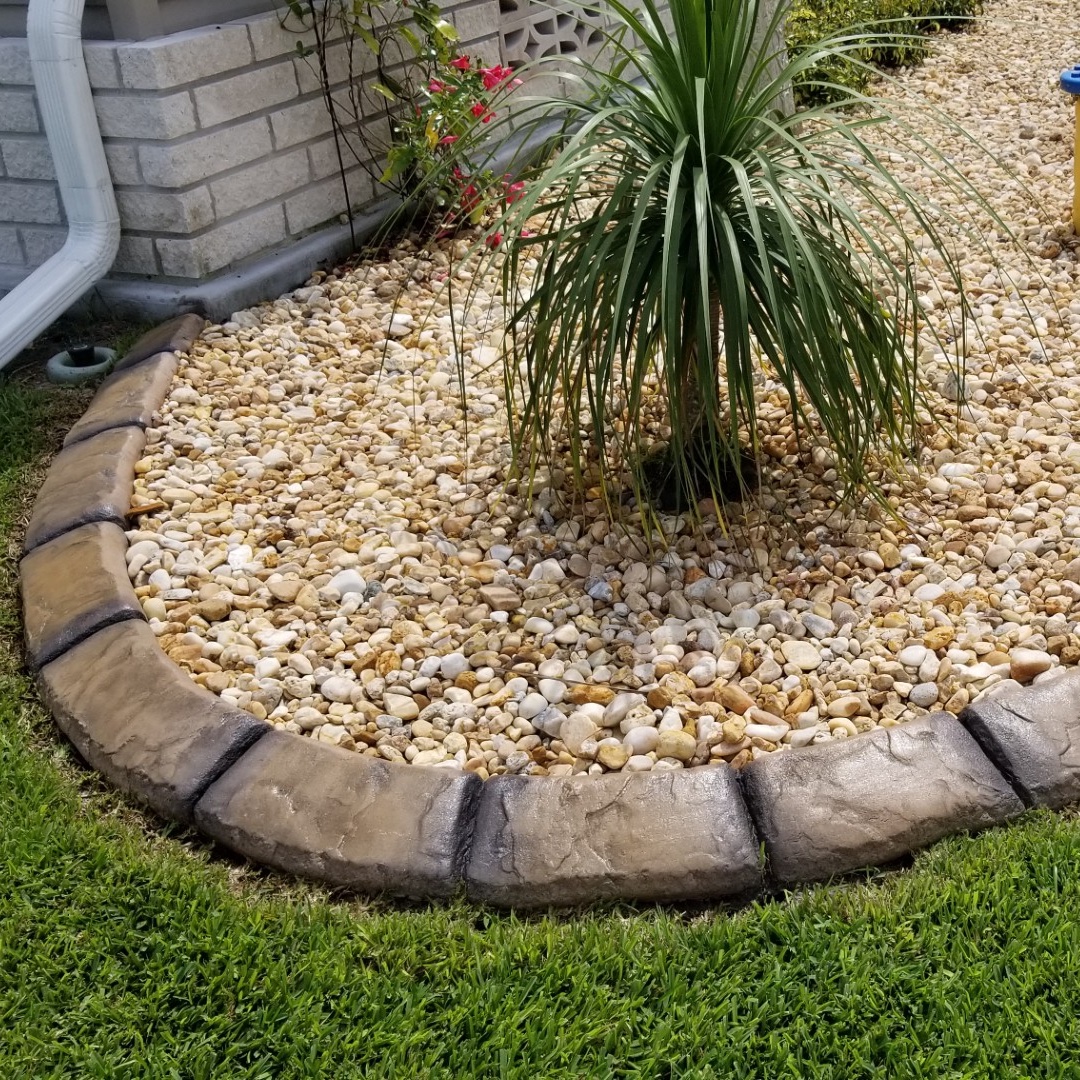
You can get this look for much less. Instead of individual interlocking concrete stones, which can be pricey, look for rubber landscape edging that comes in a similar textured brown finish. It’s a fraction of the cost, much easier to install on a curve, and requires less ground prep. For the filler, skip the bags of premium polished river rock. Buy ‘pea gravel’ or ‘drainage rock’ in bulk from a landscape supply yard. It will have a similar multi-toned look for about 40-60% less per cubic foot. You’re trading some permanence for significant cost and labor savings.
12. A Classic Tree Ring with Interlocking Stone Pavers
The generous scale is the one thing that makes this tree ring work. A common mistake is to make tree rings too small, which can look dinky and even harm the tree by constricting its root flare. This oval bed is wide enough to feel proportional to the large, mature tree. It gives the tree visual breathing room and creates a substantial feature in the lawn, rather than just a tight collar. The scale transforms it from a purely functional mowing guard into a deliberate, graceful landscape element. Anything smaller would have diminished the presence of that beautiful tree.
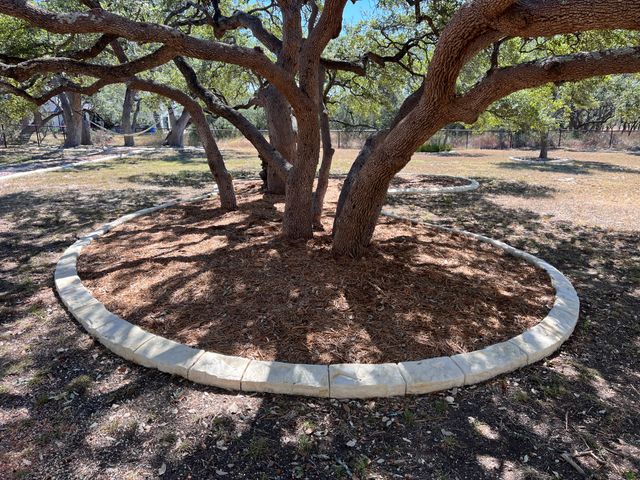
Creating a perfectly level paver ring like this is harder than it looks. The ground must be excavated, tamped, and layered with a base of compacted gravel and then a leveling layer of sand. If you skip this prep, the pavers will heave and shift within a single season, creating a wavy, unprofessional-looking mess. Also, be mindful of the tree’s health. Piling mulch too high against the trunk (a ‘mulch volcano’) can trap moisture and lead to rot and disease. The mulch should be kept a few inches away from the tree’s bark at the base.
13. Curved Garden Bed Edged with Low Concrete Pavers
This is a great example of ‘less is more.’ The low-profile concrete pavers don’t scream for attention. Instead, they create a clean, subtle line that allows the lush, green plantings to be the hero. The choice to use a simple, gray, flat-topped paver adds to the serene and natural feel. A more ornate or colorful edger would have competed with the plants and the texture of the brick wall. Here, the edging does its job perfectly: it neatly separates lawn from bed while remaining a quiet supporting character in the overall design.
- The gray pavers act as a neutral transition between the warm red brick and the green lawn.
- The curve of the bed softens the hard, straight lines of the building’s architecture.
- Raising the bed slightly makes the plants within it appear more prominent and lush.
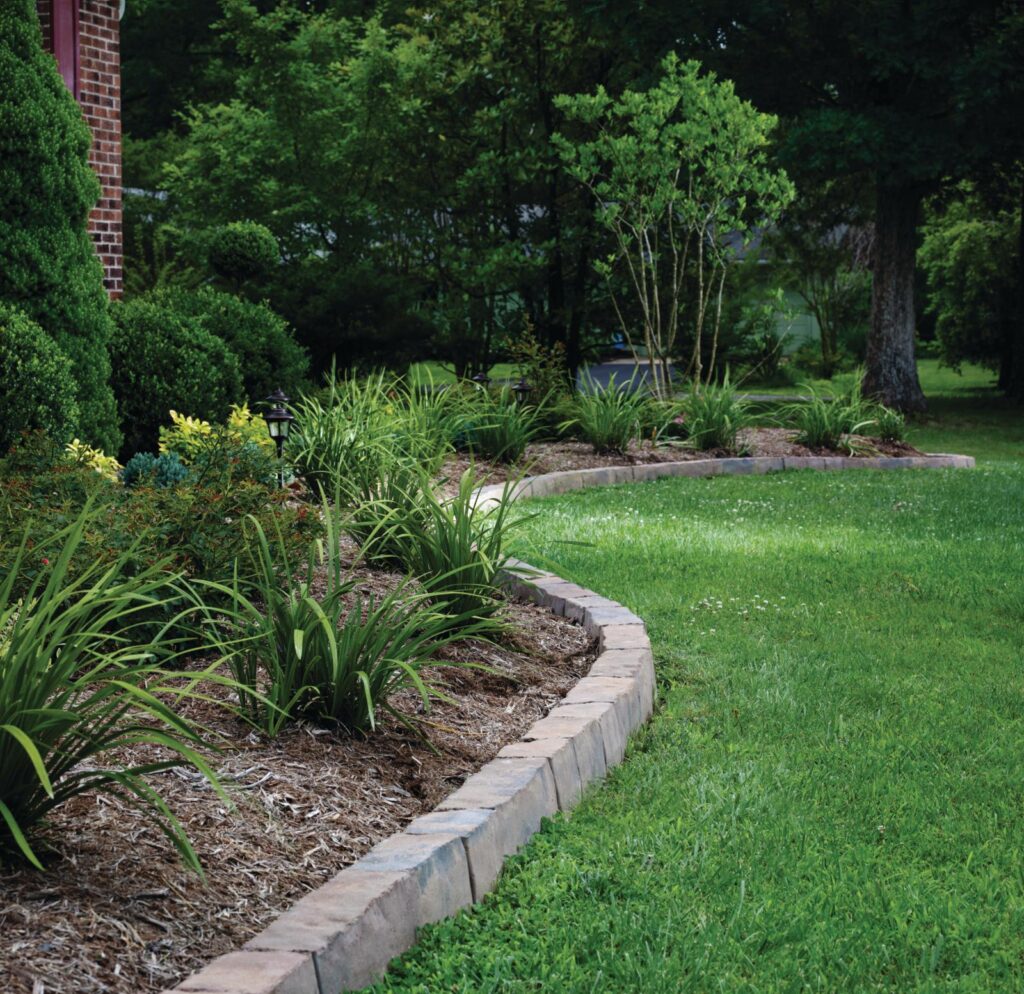
Before you commit to a paver-edged bed against a building, there are a few things to check. This simple list will save you a lot of headaches later on.
- Check your foundation’s drainage. Ensure the new bed won’t trap water against the wall. The soil level in the bed should always be a few inches below any siding or weep holes in the brick.
- Measure the sun exposure. Does this area get full sun, part shade, or deep shade? This will determine your plant choices entirely. Don’t buy plants until you know this.
- Confirm your material quantities. Calculate the linear feet for the pavers and the cubic feet for the mulch. Always buy 10% extra to account for cuts and adjustments.
14. Manicured Boxwoods Meet Dark Gray Stamped Concrete
The key to this ultra-clean, traditional look is the disciplined planting. The perfectly spaced, globe-shaped boxwood shrubs provide a strong sense of rhythm and order. If the plants were a random mix of heights and shapes, the formal feeling of the stamped concrete edge would be lost. The boxwoods reinforce the intentionality of the design. They are the soft, green counterpoint to the hard, gray curb, and their repetition creates a calm, stately feel that is deeply satisfying to the eye.
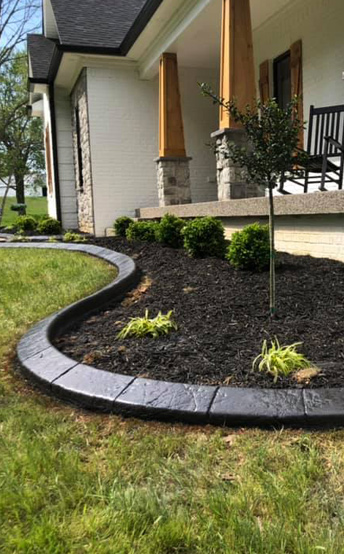
This look follows a very structured formula: 40% crisp green lawn, 30% dark mulch bed, 20% repeating green shrubs, and 10% strong concrete border. The dark gray concrete and the dark brown mulch create a low-contrast, moody base that makes the vibrant green of the lawn and shrubs pop. You could change the formula by using white marble chips instead of mulch. If you did that, you’d want to swap the dark gray edging for a lighter gray or white to maintain the same sophisticated, tonal feel. The key is keeping the border and the filler in the same color family.
15. A Subtle Brick Stamp on a Dark Gray Concrete Curb
If you’re opting for poured and stamped concrete edging, insist on control joints. You can’t see them in this photo, but they are essential. These are thin cuts made in the concrete every 8-10 feet. Concrete naturally expands and contracts with temperature changes, and without these joints, it will crack wherever it wants to—usually in ugly, jagged lines. Control joints give the concrete a designated, clean place to crack, hiding the inevitable within a neat line that looks like part of the design. It’s a non-negotiable step for long-term durability.
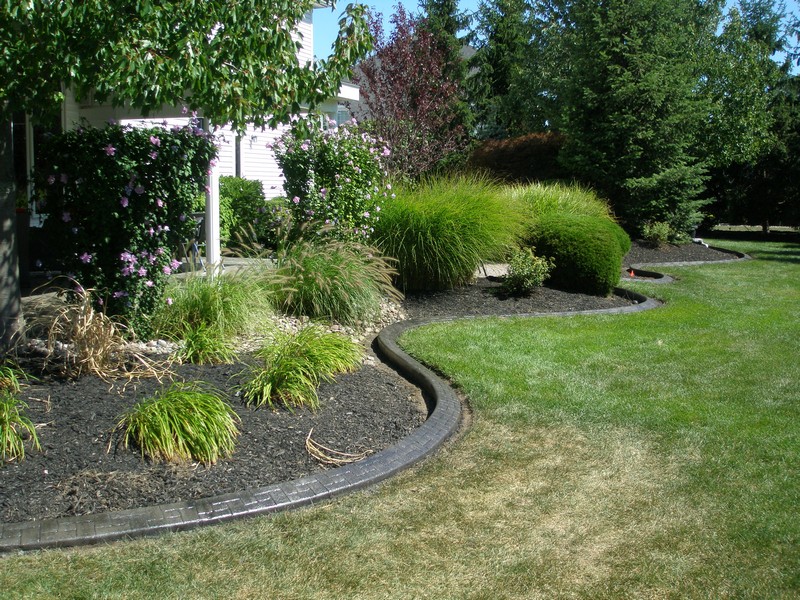
Poured concrete curbing is not a beginner-friendly DIY project. It requires a specialized curbing machine that extrudes the concrete mix while simultaneously creating the shape. The mix itself has to be very specific—not too wet, not too dry. Getting a smooth, consistent curve and a clean stamp impression takes a lot of practice. While you *can* rent the machines, this is one of those jobs where hiring a professional with the right equipment and experience is almost always worth the money to avoid a lumpy, uneven mess.
16. Decorative Concrete Curb with a Flagstone Pattern
This edging is so effective because its texture mimics a more expensive material—natural flagstone. The irregular, stamped pattern gives it an organic, hand-laid feel that’s much more dynamic than a simple smooth surface. This texture creates tiny shadows and highlights, adding depth and visual interest. By choosing a stamped pattern, the homeowner gets the durability and seamlessness of poured concrete with the classic, upscale look of natural stone. The clean separation between the dark mulch and the green lawn makes the entire landscape feel polished and professionally done.
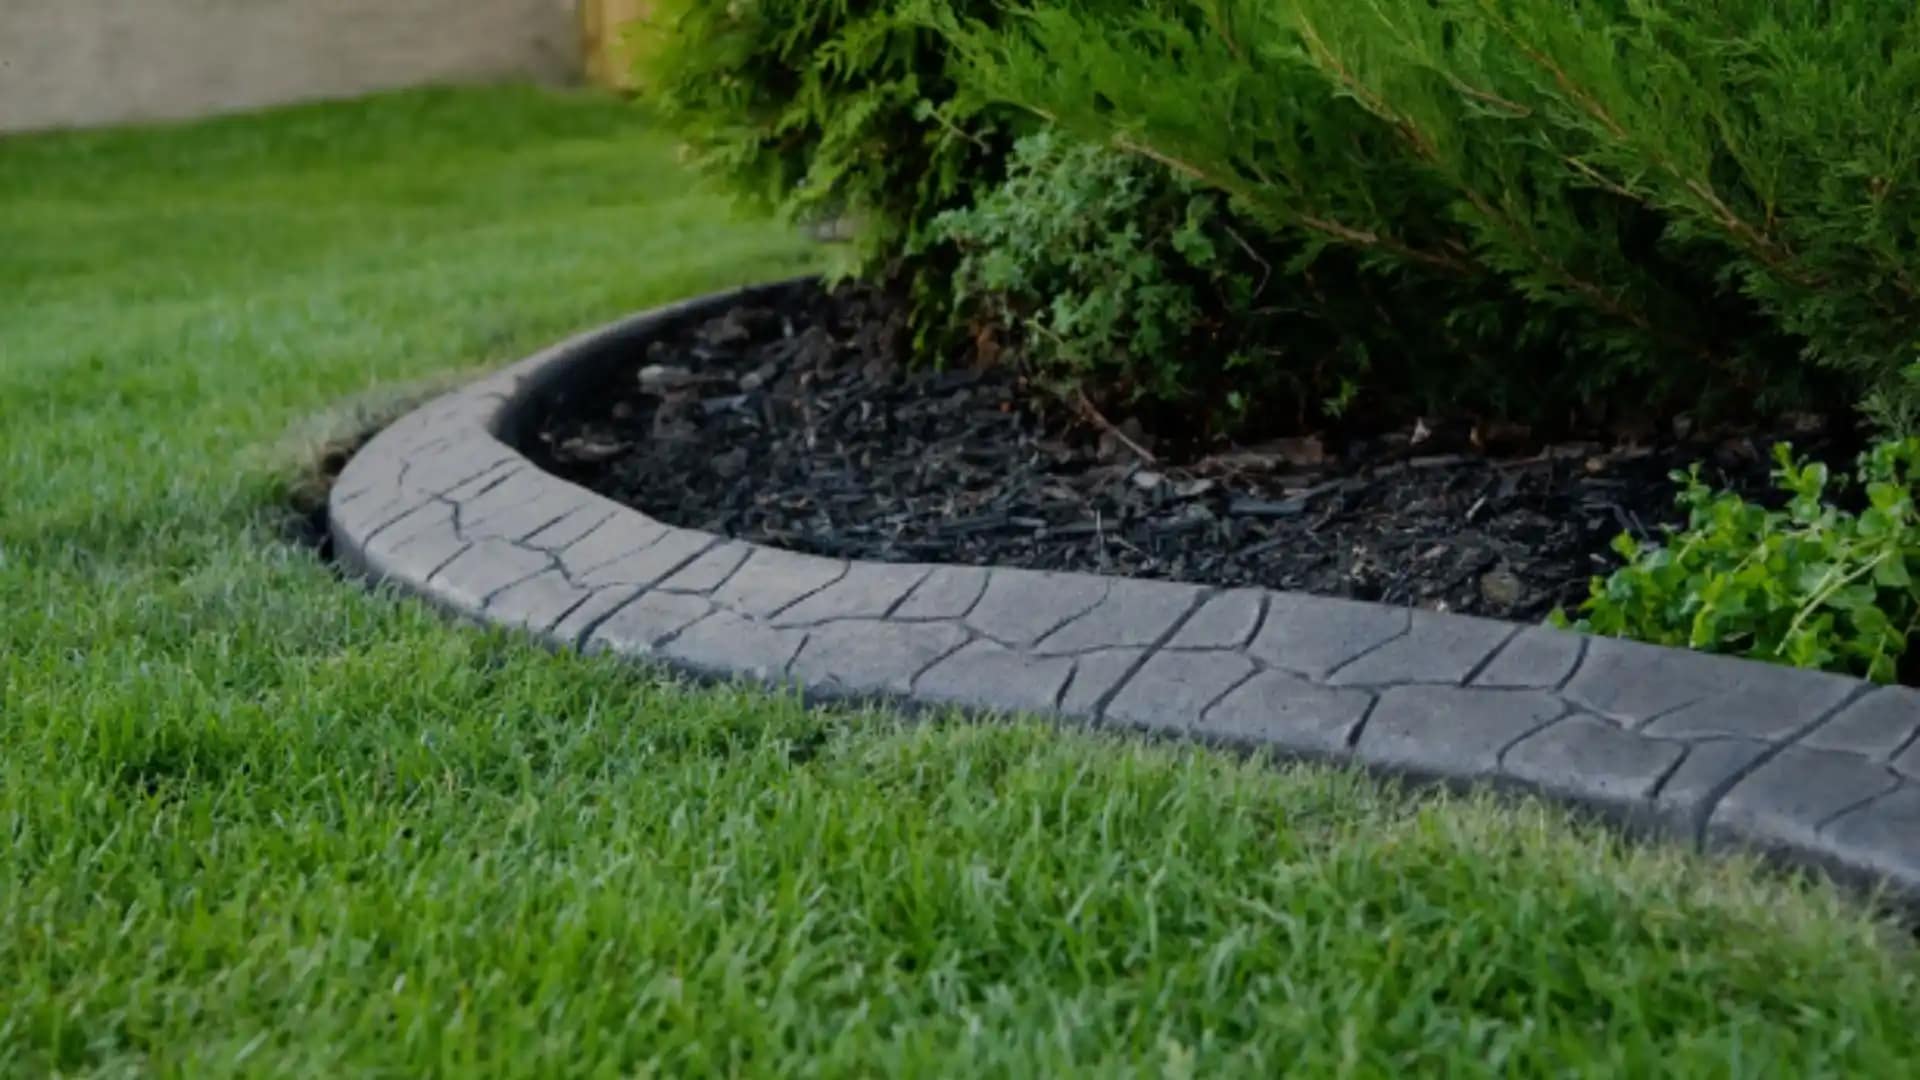
Hiring a professional for continuous stamped concrete curbing is the most common route for this polished look. The cost is usually calculated by the linear foot.
- Professional Installation (includes prep, materials, labor): $12 – $25 per linear foot
- Mulch & Plants for Bed: $5 – $10 per square foot
- TOTAL (for a 50-foot curve): $900 – $1,750+
Budget alternative: You can buy plastic molds with a similar flagstone pattern for around $30-$50. You mix and pour concrete into the mold, let it set, then move the mold to the next section. It’s extremely labor-intensive and slow, but the material cost is minimal. Your total could be under $200 if you’re willing to put in the sweat equity.
17. Charcoal Slate-Textured Edging Against a White House
The dramatic color contrast is the single element that makes this design pop. The deep, charcoal gray of the textured edging creates a bold, graphic line against the bright white of the house siding. If the edging were a lighter gray or beige, it would blend in and the entire look would lose its punch. This high-contrast choice is a deliberate statement. It frames the garden bed, defines the transition from house to yard, and adds a touch of modern sophistication. It’s a masterclass in using color to create definition.
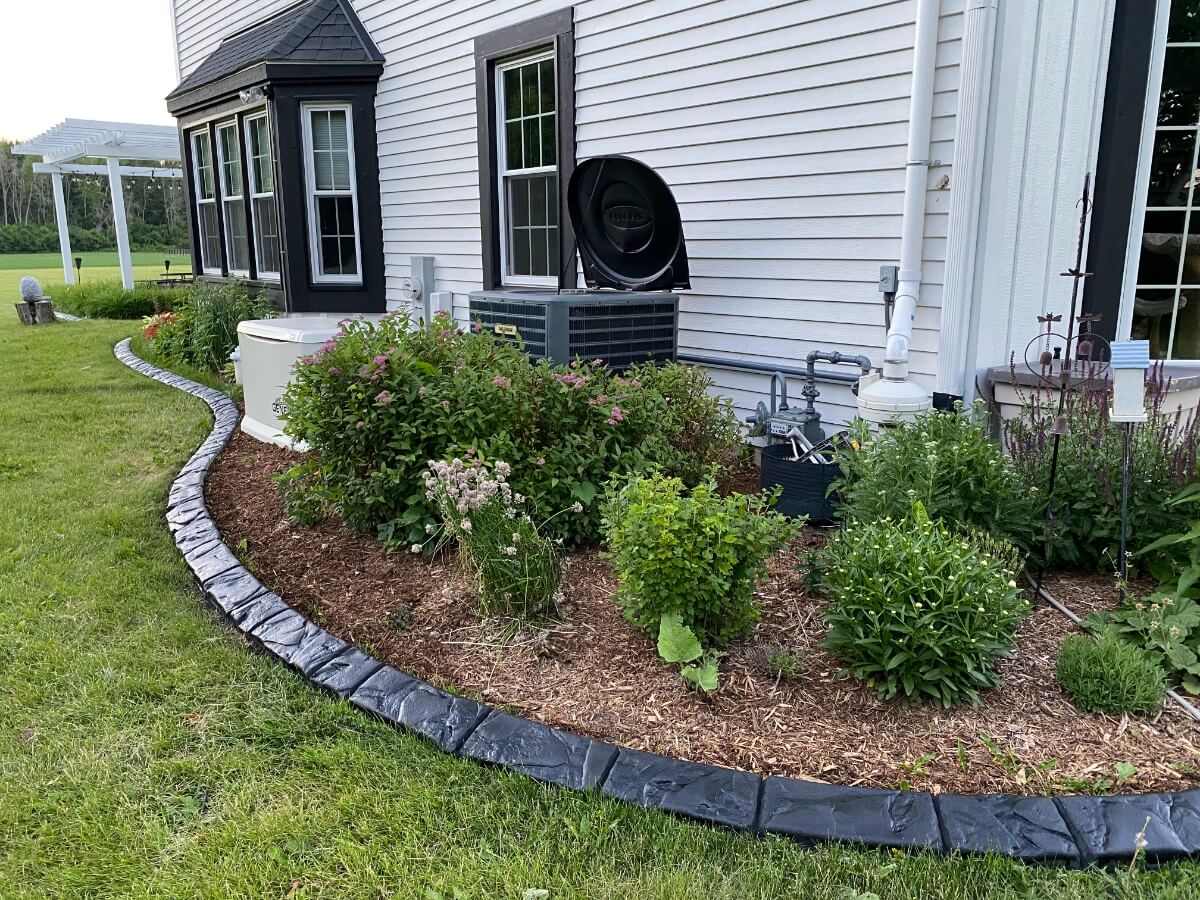
This design uses a classic high-contrast formula: 60% bright neutral (the white siding), 30% natural texture (the brown mulch and green plants), and 10% dark accent (the charcoal edging). The edging acts as the ‘eyeliner’ for the garden bed, making everything look sharper and more defined. You could swap the white siding for light beige, and the charcoal edging for a deep chocolate brown, and the formula would still work perfectly. The key is maintaining the significant difference in value between the house color and the edging color.
18. A Stamped Patio Framed by a Dark Concrete Border
When designing a multi-level patio with stamped concrete, always use a border to define the different zones and elevations. Here, the dark charcoal ‘soldier course’ border is not just decorative; it’s a critical visual cue. It clearly signals the edge of the patio and the transition to the lower level, which is a major safety feature. For steps, always use a contrasting border color and a texture with a bit more grip than the main field. Ask your contractor to add a fine, sand-like additive to the sealer on the steps for extra slip resistance.
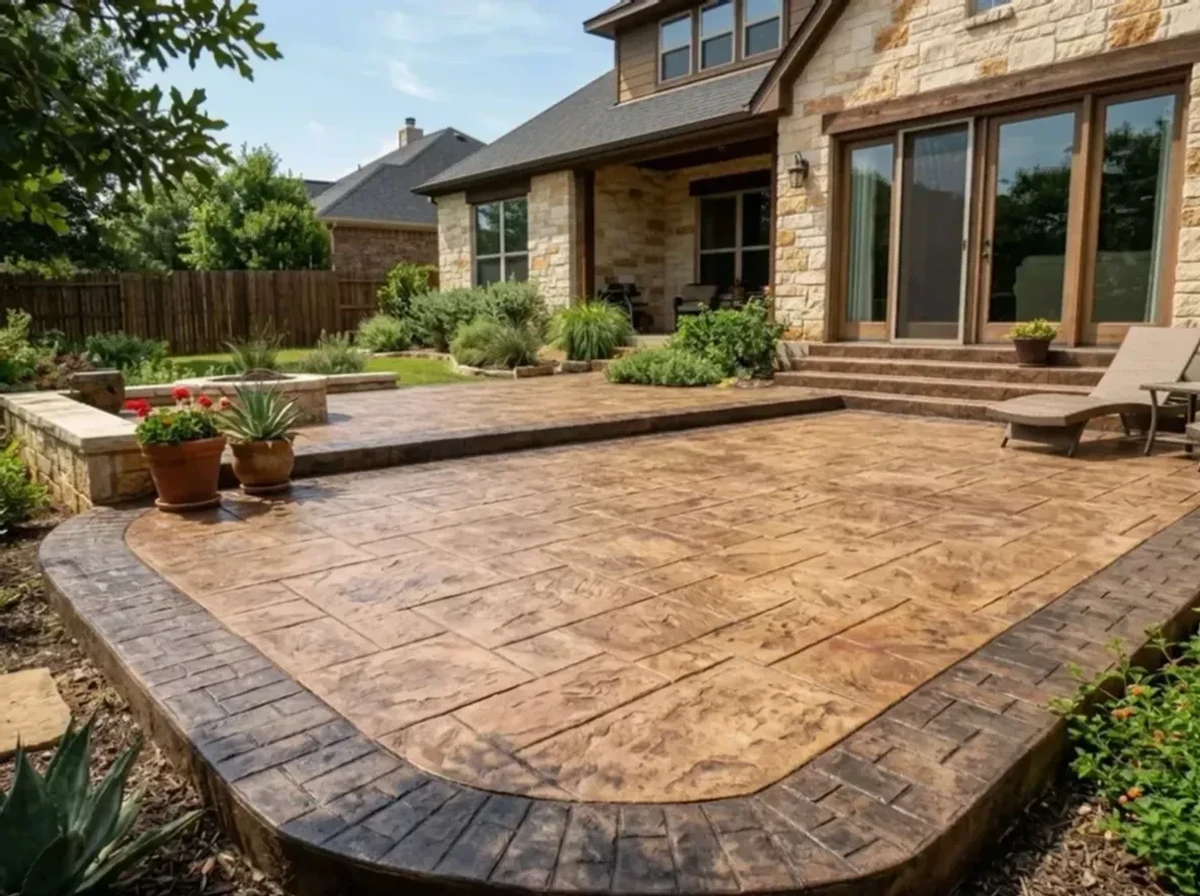
This patio feels so grand and established due to the principle of scale and repetition. The large-format stone pattern of the main patio area is appropriately scaled for the large space; a smaller pattern would have looked too busy. The dark charcoal color of the border is repeated in the dark window frames and subtle dark tones in the stone veneer of the house, creating a cohesive palette. This repetition of color ties the new patio directly to the existing architecture, making it feel like it was always meant to be there.
19. Curved Red Concrete Edging for a Pop of Color
A bold color choice like this reddish-pink concrete can be fantastic, but it comes with a warning. Colored concrete will fade over time with sun exposure. This terracotta shade will likely soften to a paler pink within a few years. To keep the color vibrant for as long as possible, it must be sealed with a UV-protectant sealer every 1-2 years. Also, this is a very specific color that can dictate other choices in your yard. It might look great now, but if you decide to change your fence or house trim color in the future, a strong red border can be limiting and potentially clash.
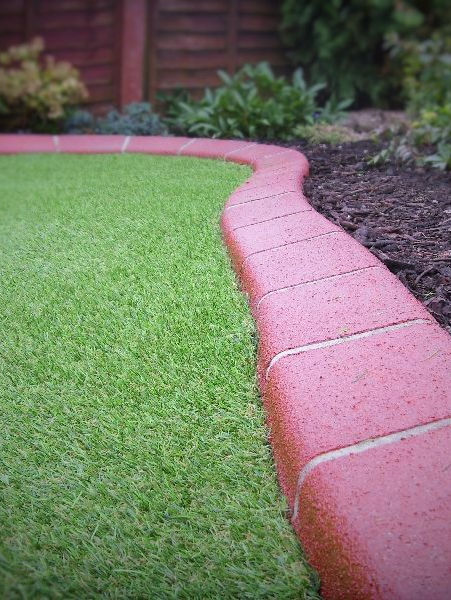
You don’t need custom-colored concrete to get this look. Many big-box stores sell pre-cast concrete or composite edging blocks in various colors, including terracotta and red brick tones. These are typically under $3 per piece and are very DIY-friendly. For an even cheaper route, buy plain gray concrete blocks and paint them with a high-quality exterior concrete stain. A gallon of stain costs around $40-$50 and will cover a significant length of edging, giving you complete control over the exact shade of red.
20. A Simple Circular Concrete Border for a Rustic Tree Bed
Creating a perfect circle with individual edging blocks is easier than it looks. It’s all about the setup. Time: 2-3 hours. Cost: $40-$100.
- Find the center of your desired circle and drive a stake into the ground.
- Cut a string to the length of your desired radius (half the diameter of the circle).
- Tie one end of the string to the stake and the other to a can of spray paint or a bag of flour.
- Walk around the stake, keeping the string taut, to mark a perfect circular guideline on the ground.
- Use a spade to dig a shallow trench along your marked line.
- Lay your concrete blocks in the trench, tapping them into place with a rubber mallet to ensure they are level.
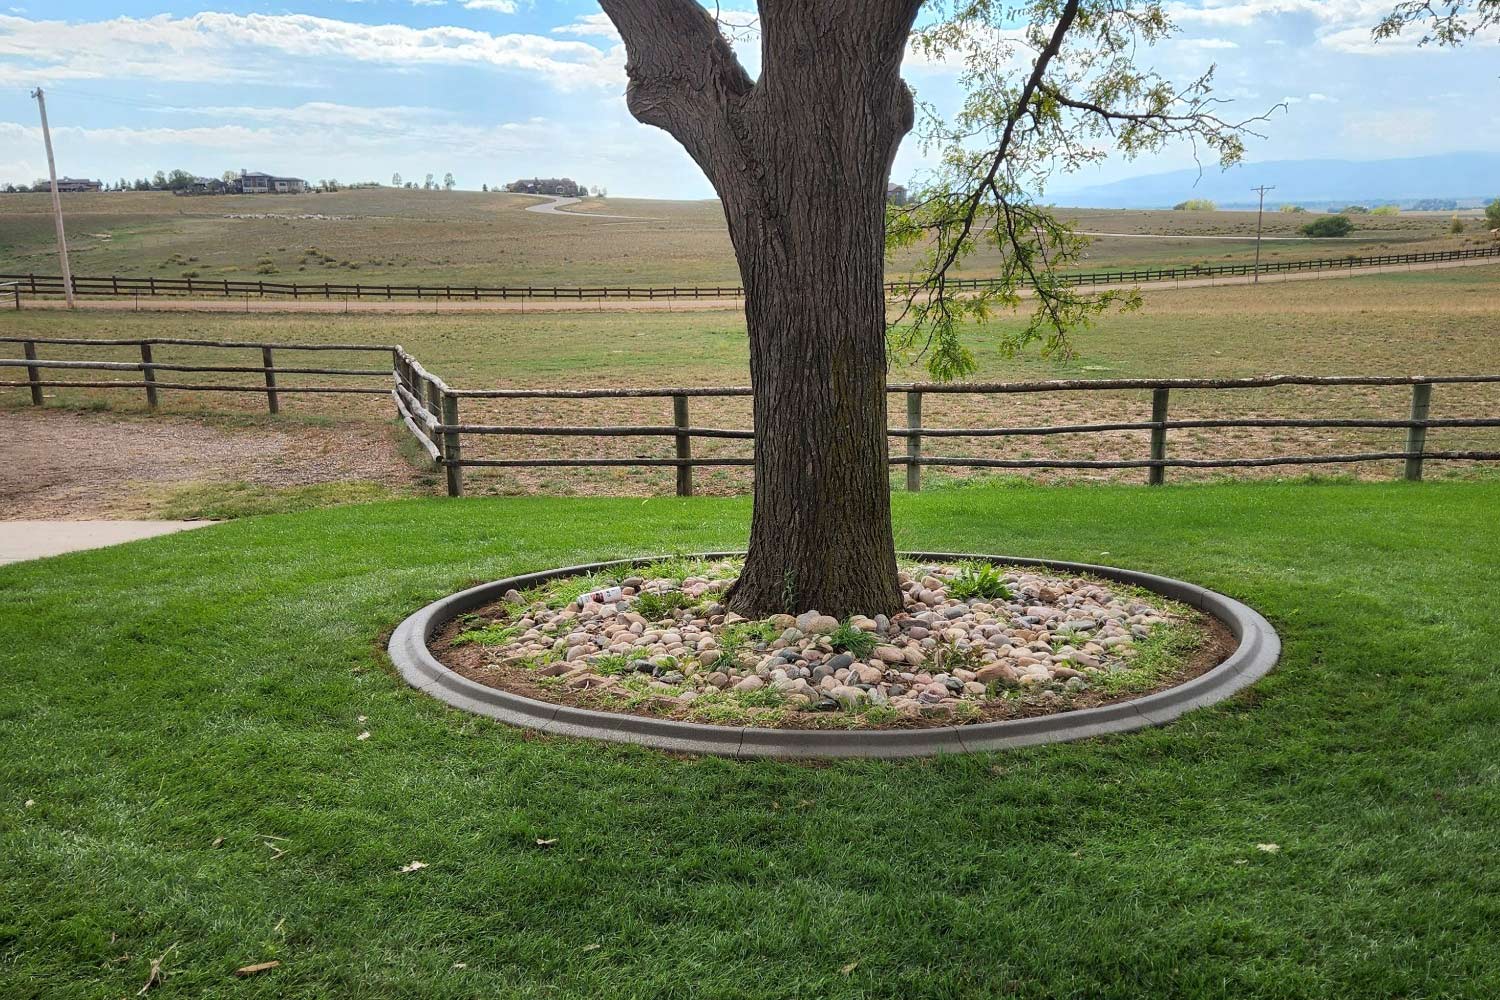
River rock looks great, but it’s a magnet for leaves, pine needles, and weeds. Unlike wood mulch, you can’t easily rake debris out of it. The best way to clean a rock bed like this is with a leaf blower on a medium setting. You’ll need to do this regularly, especially in the fall, to prevent organic matter from building up and turning into compost for weeds. Every few years, you might need to scoop out the rocks, clean them, and reinstall them over a fresh layer of landscape fabric to combat persistent weed growth.
21. Curved Stamped Concrete with Decorative Landscape Rocks
This design successfully combines formal structure with natural elements. The stamped concrete curb provides a crisp, defined line—the formal part. Inside that line, the arrangement feels more organic. The decorative rocks are placed asymmetrically, and the ornamental grasses have a softer, more wild texture than the neatly trimmed shrubs. This ‘structured wildness’ is a popular and effective landscape design strategy. It gives you the best of both worlds: the tidiness of a clear border and the beauty of a more natural-looking garden.
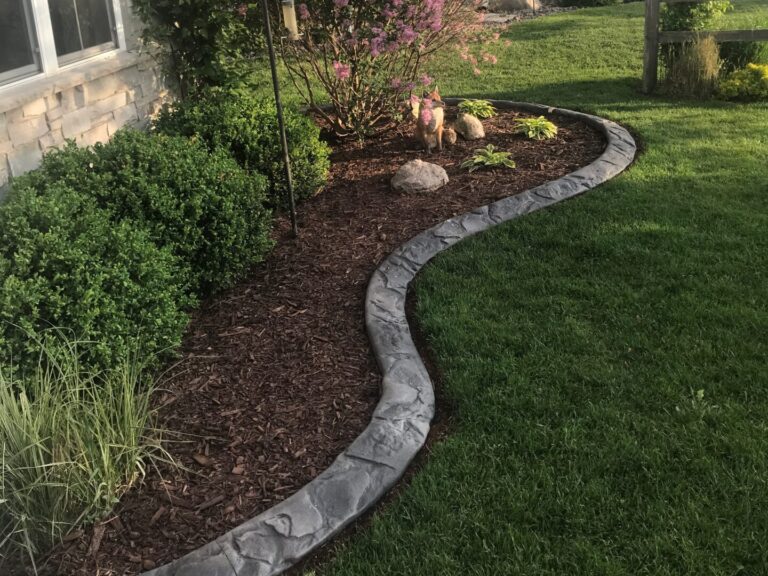
When placing decorative boulders or rocks in a garden bed, follow the ‘rule of three’ and think like a pyramid. Group them in odd numbers (1, 3, 5) and vary their sizes (large, medium, small). Bury the bottom third of each rock into the mulch and soil. This makes them look like they are naturally emerging from the ground, rather than just sitting on top. Placing them randomly and half-buried creates a far more convincing and professional-looking result than simply scattering them on the surface.
22. Modern Drama: Sweeping Dark Concrete with Gray Gravel
The sweeping, dramatic curve is the undeniable hero of this design. It’s not a gentle meander; it’s a bold, confident gesture that carves through the landscape. This single, powerful line defines the entire front yard, creating a dynamic visual path that leads the eye from the driveway towards the house. The choice to use dark concrete and dark gravel enhances the effect, making the curve feel like a single, unified river of stone. Without this ambitious curve, the design would be just a collection of nice plants; with it, it’s architectural. This is a much bolder approach than the gentle curves in Idea #9.
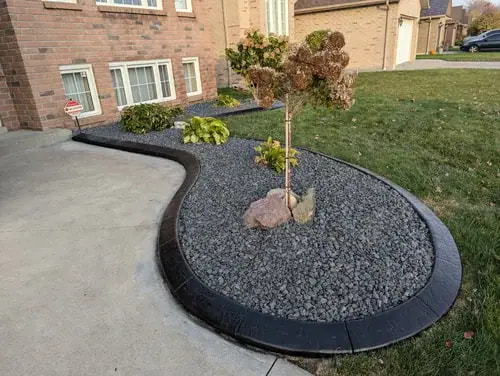
A design this bold requires careful planning. Don’t just start digging. Here’s a quick checklist to run through first.
- Use a garden hose or rope to lay out the curve on the ground first. Look at it from all angles, including from inside your house, to make sure you love the shape.
- Consider drainage. Will this large, non-permeable curb trap water on your lawn or driveway? You may need to incorporate small drainage gaps or a French drain.
- Get HOA approval. If you have a homeowners association, a dramatic change like this will almost certainly require you to submit a plan for approval before you start.
23. Curved Slate-Textured Concrete Edging
The beauty of a continuous, poured concrete curb like this is its permanence, but it does come with specific maintenance. The dark gray color, while great at hiding dirt, can show scratches or chips from mowers or string trimmers more readily than plain concrete. Keep a small amount of the colorant or stain used by the installer to touch up any nicks. Also, because it’s one continuous piece, if a section gets badly damaged (say, from a car or major ground heave), the repair can be more complex than simply replacing a single block. Sealing it every 2-3 years is key to protecting the color and texture.
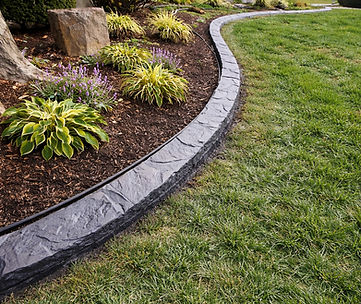
The slate texture is the key to making this look upscale. A smooth curb would have looked fine, but the subtle, irregular texture of slate adds a layer of sophistication and mimics natural stone. It catches the light in different ways throughout the day, creating more visual interest than a flat surface. This texture creates a perfect transition between the man-made lawn and the naturalistic plantings in the mulch bed. It feels both structured and organic at the same time, which is a hallmark of great landscape design.
24. Modern, Minimalist Poured Concrete Garden Edging
This hyper-minimalist look is gaining huge traction, especially in contemporary and modern homes. It’s a direct rejection of ornate, decorative styles. The appeal lies in its honesty and function. It’s clearly concrete, and it’s not pretending to be anything else. This style is part of a larger architectural trend towards clean lines, geometric forms, and a focus on natural materials. On Pinterest, this is the go-to look for homeowners seeking a serene, uncluttered, almost Japanese-inspired garden aesthetic. It’s all about quiet confidence rather than decorative flair. Compare this with its spiritual opposite, the decorative border in Idea #5.
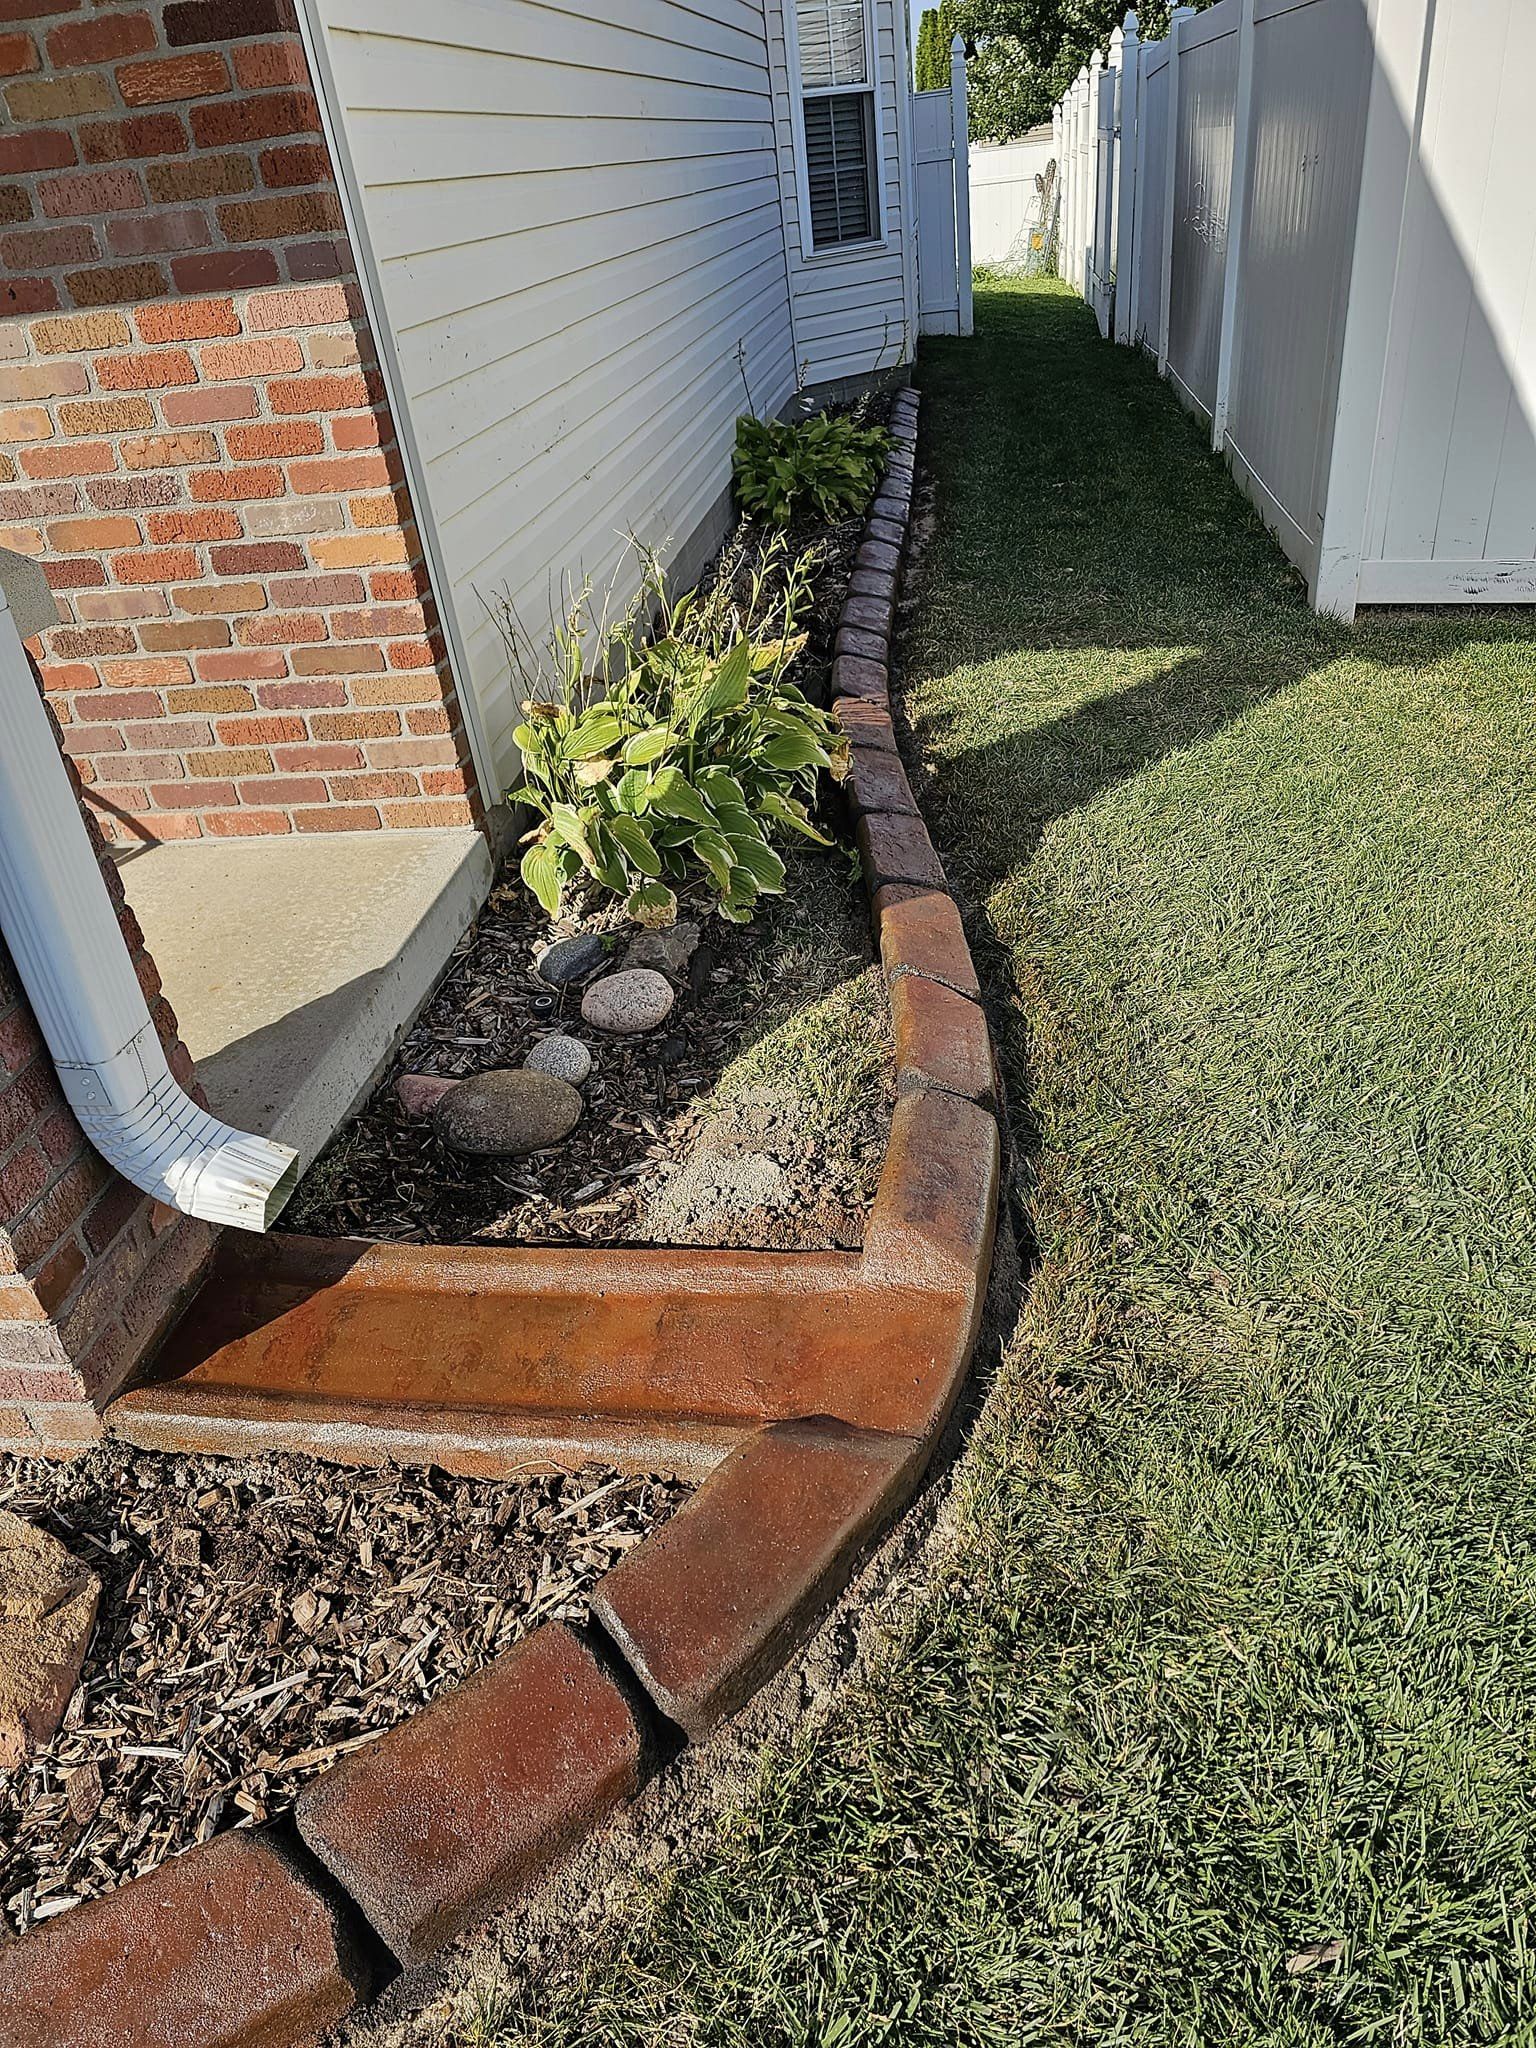
This minimalist style is all about precision, which means it’s surprisingly scale-dependent. It works best in smaller, more contained spaces or courtyards where the geometric lines can create a strong architectural statement. In a vast, sprawling lawn, these thin strips can get visually lost. The ideal setting is a space under 2,000 square feet. The height and width of the concrete strips should also be in proportion. For a small patio garden, a 4-inch by 4-inch profile is perfect. For a slightly larger yard, you might go up to 6 inches by 6 inches to ensure it has enough visual weight.
25. A Whimsical Border: Dark Stamped Concrete with a Garden Gnome
Let’s have some real talk about garden gnomes and other statuary. This is your yard, and you should fill it with things that make you happy! The key to making it look charming rather than cluttered is to commit. Don’t just place one tiny gnome in a huge bed. Create a little ‘moment’ or vignette for it. Here, the gnome is nestled among the flowers and river rocks, making it feel like a fun discovery. The dark, formal stamped concrete border actually provides a great structured backdrop that keeps the whimsical element from feeling too chaotic. It’s all about balance.
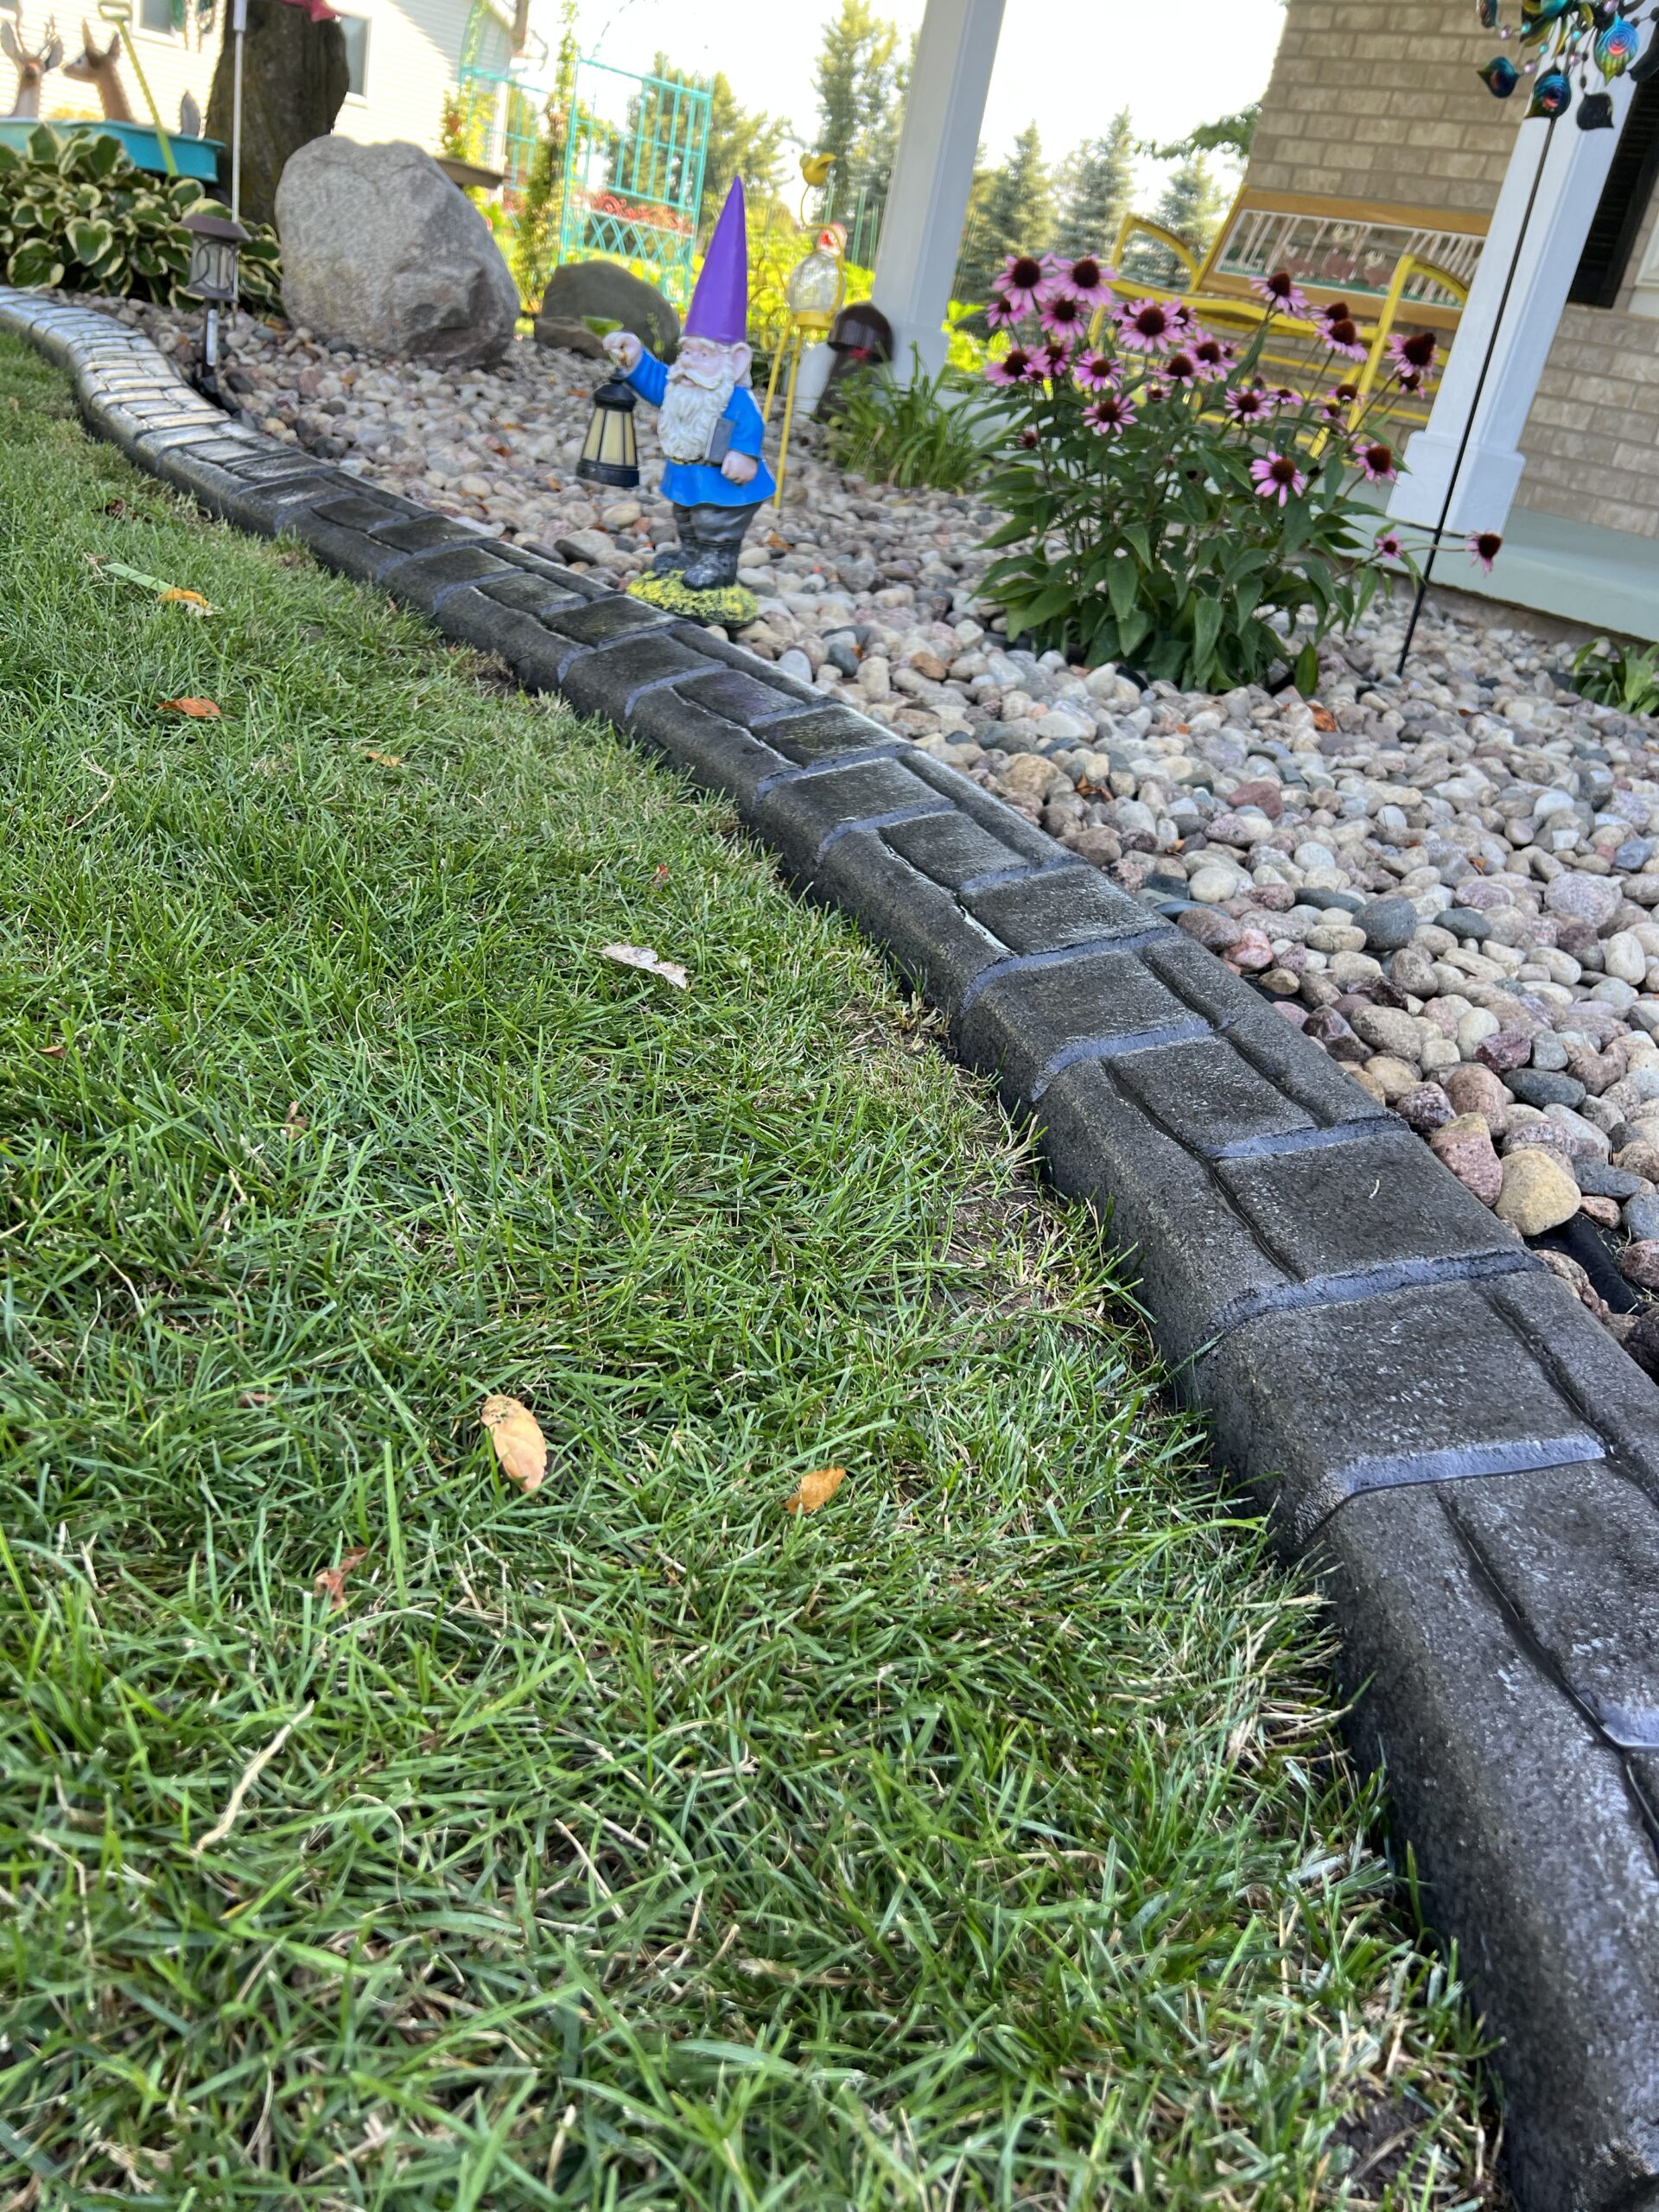
That professional-looking stamped concrete border is lovely, but you can get a similar vibe on a shoestring budget. The key elements are a dark border, a green lawn, and a light-colored filler. Use simple, inexpensive black plastic edging (about $1 per foot) to create the curve. Fill the bed with bulk pea gravel from a landscape supplier, which is much cheaper than bagged river rock. The real trick is to spend your money on a few vibrant perennial plants. The pop of color from the pink flowers will draw the eye and make the whole setup feel more expensive than it is.
26. Curved Brown Stamped Concrete Near a Stacked Stone Wall
This design is a masterclass in texture-mixing within a tight color palette. You have the rough, irregular texture of the stacked stone wall, the finer texture of the dark brown mulch, the smooth blades of the green grass, and the repeating pattern of the stamped concrete. Because they all live in the brown/gray/green family, the different textures create interest without looking chaotic. The stamped concrete acts as a perfect mediator, its semi-regular pattern being a bridge between the wildness of the stacked stone and the uniformity of the lawn.
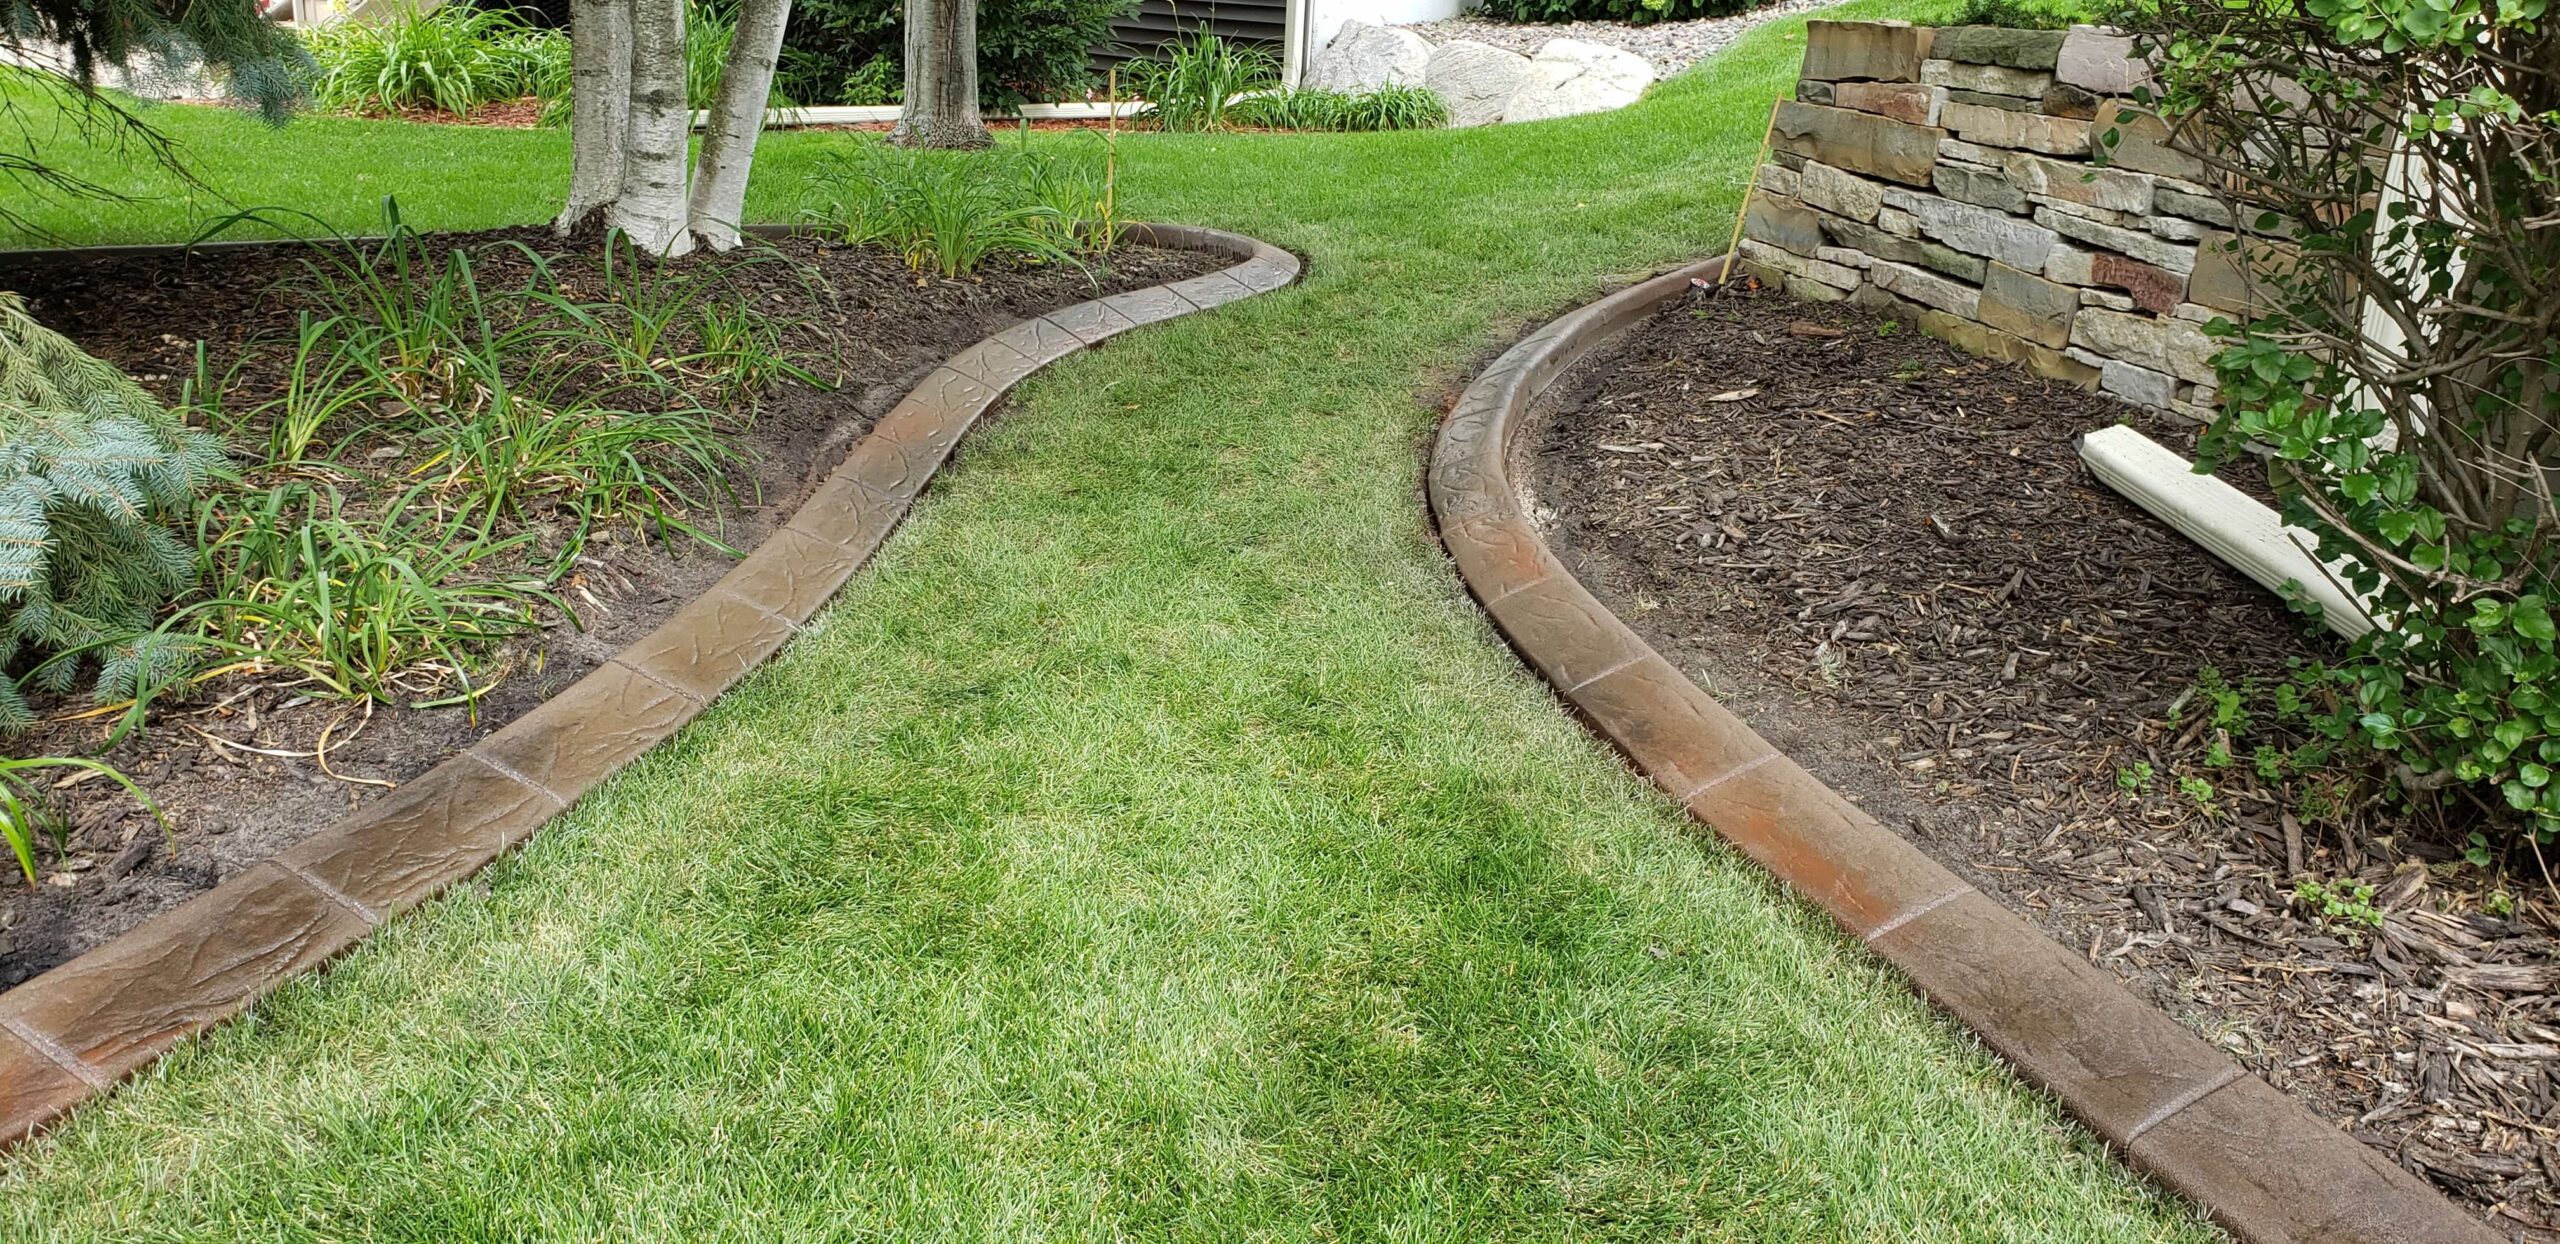
When you have multiple hardscape elements in one view, like the stamped concrete and the stone wall here, the key is to link them with color. Notice how the brown tones in the stamped concrete echo the earthy colors in the stacked stone wall. If the edging were plain gray, it would feel disconnected. When choosing your concrete stain or integral color, bring a photo of your existing stone or brick with you. Find a color that picks up on one of the secondary tones in your existing hardscape to create a cohesive, professionally designed look.
27. Stone-Textured Concrete Edging for Multi-Material Beds
The single most important element here is the stone-textured edging itself. In a complex bed that uses three different ground covers (grass, mulch, and pebbles), you need a strong, unifying border to keep it from looking like a chaotic mess. A simple, smooth edger wouldn’t be visually hefty enough to do the job. The chunky, irregular texture of this molded concrete border provides the necessary visual weight to confidently divide the different zones. It’s the visual anchor that makes the whole composition work.
This design is a study in dividing space. Let’s call the formula 50% Lawn + 50% Bed. But the ‘Bed’ half is where it gets interesting: it’s roughly 50% mulch, 40% pebbles, and 10% plants. The textured gray concrete border acts as the ‘frame’ for all these different sections. You could swap the materials—for example, use black mulch instead of brown, or black polished pebbles instead of tan river rock—and the fundamental balance would remain the same, as long as you keep that strong, textured border as the dividing line.
28. Sharp, Modern Lines: Poured Concrete and Gray Gravel
This works because of its bold simplicity and geometric purity. It’s a design of two elements: a plane of green (the lawn) and a plane of gray (the gravel), sliced by a clean white line (the concrete). There are no curves, no fussy textures, just clean, sharp angles. This minimalism creates a powerful graphic statement that feels incredibly calm and orderly. The high contrast between the lawn and the gravel, separated by the bright concrete, is what gives it such a striking, architectural quality. It’s a confident design that relies on form over ornamentation.
An all-gravel bed like this is sleek, but be prepared for the realities. Weeds are inevitable, even with landscape fabric. You’ll need to hand-pull them or use a targeted weed killer. Keeping the edge between the gravel and the concrete perfectly clean requires a blower or a broom. Leaves and grass clippings will stand out dramatically against the gray gravel, so frequent cleanup is necessary to maintain the minimalist aesthetic. Also, the light-colored concrete can show dirt and stains, requiring an occasional scrub with a brush to keep it looking pristine.
29. Curved Border with Textured, Weathered Concrete Blocks
This is a highly achievable and budget-friendly look, perfect for a DIY weekend project. The costs are straightforward and easy to manage.
- Materials (Textured Concrete Blocks): $150 – $250 for a 50-foot curve
- Bed Filler (Dark Mulch): $100 – $200 for bulk delivery
- Bed Preparation (Spade, level, tamper rental): $50 – $75
- Plants: Highly variable, but budget $100 – $300 for a start
- TOTAL DIY COST: $400 – $825
Budget alternative: Check Facebook Marketplace or Craigslist for leftover blocks from someone else’s project. You can often get them for 50% off or even free. Also, many municipalities offer free mulch—it might not be as dark and uniform, but it does the job!
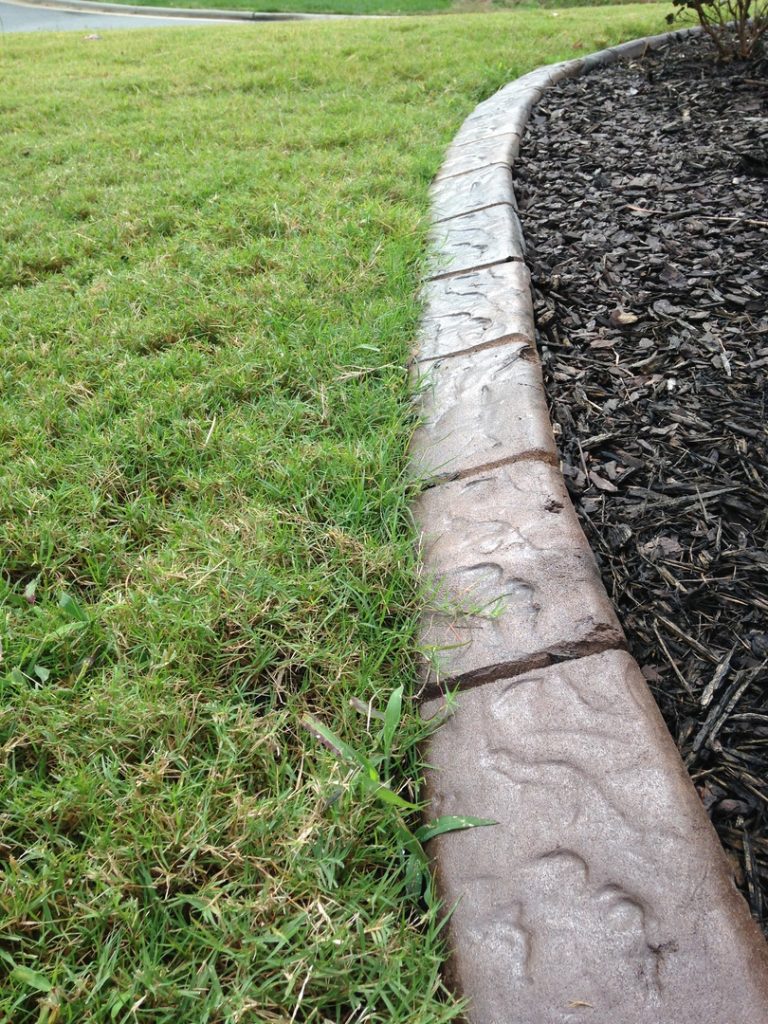
Here’s a dose of reality for DIY-ers using individual blocks: ground prep is 90% of the job. If you just place these blocks on top of the grass, they will be a wobbly, uneven mess in months. You *must* dig a trench at least 3-4 inches deep, fill it with a 2-inch layer of paver base (crushed gravel), tamp it down until it’s compacted, add a 1-inch layer of leveling sand, and *then* set your blocks. It’s hard work and takes way longer than you think. Skipping the prep will guarantee a failed project.
30. Natural Tones in a Curved Stamped Concrete Border
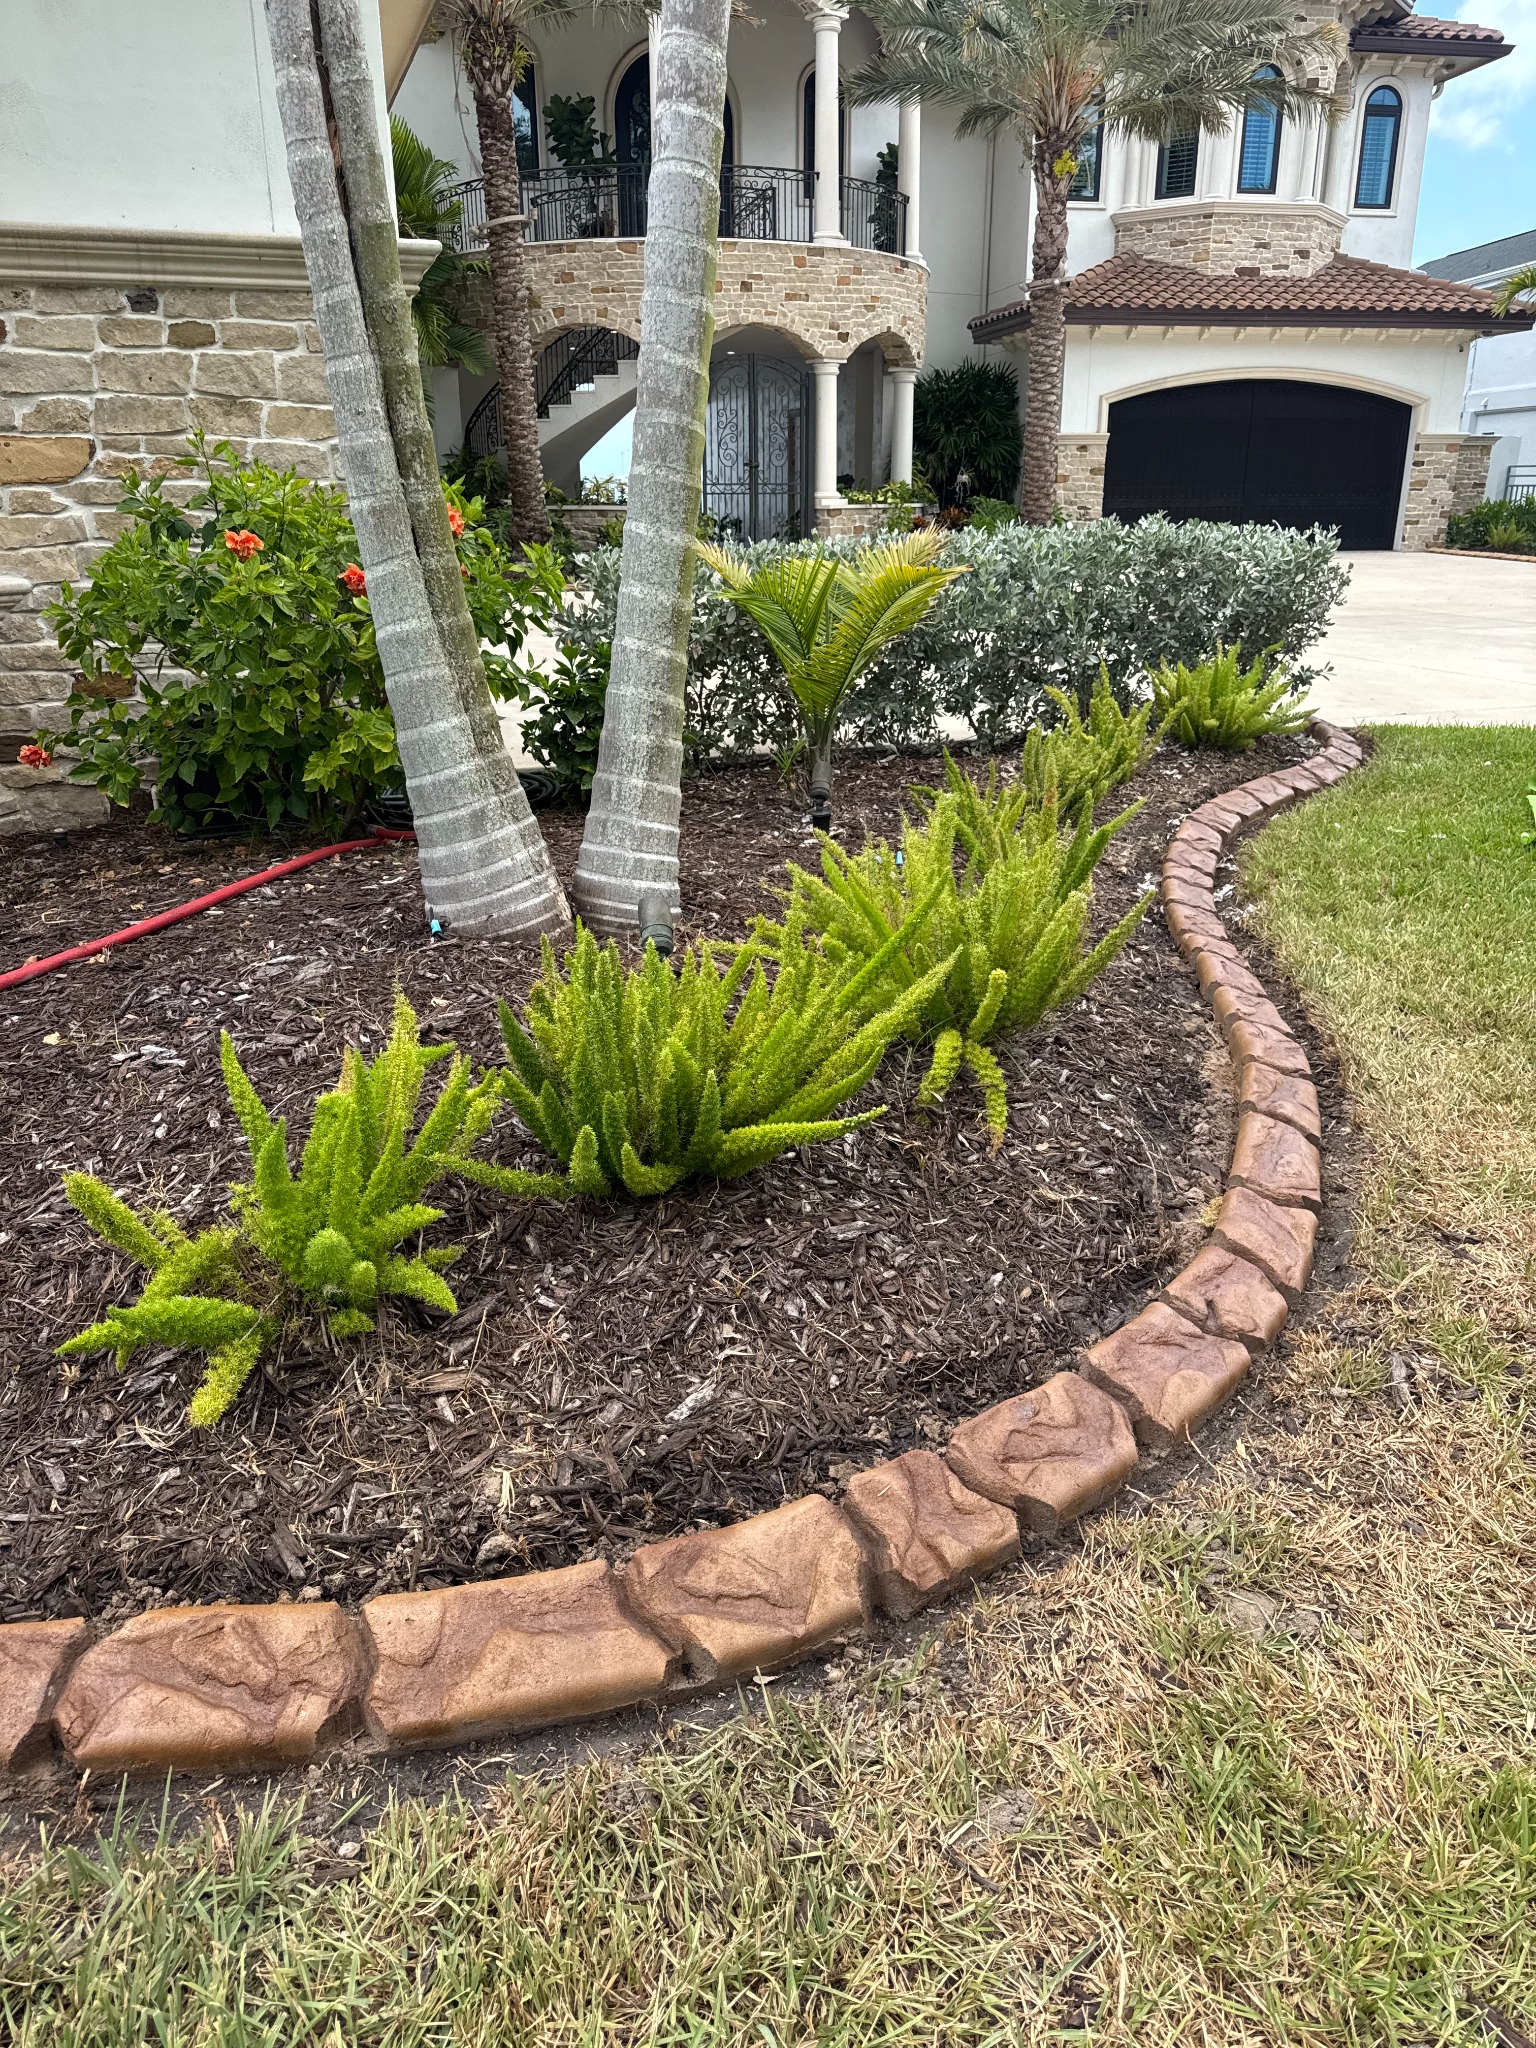
When going for a multi-tonal, natural stone look in stamped concrete, the magic is in the application of color. Don’t just pick one color. This look was likely achieved using a base color (a light tan or beige mixed into the concrete), a darker color release agent (charcoal or walnut), and then a final, light wash of a third color (a watery gray or brown stain) after it cured. This layering of colors is what creates depth and authenticity. Ask your installer about using multiple colors to avoid a flat, artificial finish. It might cost slightly more but the result is 100% worth it.
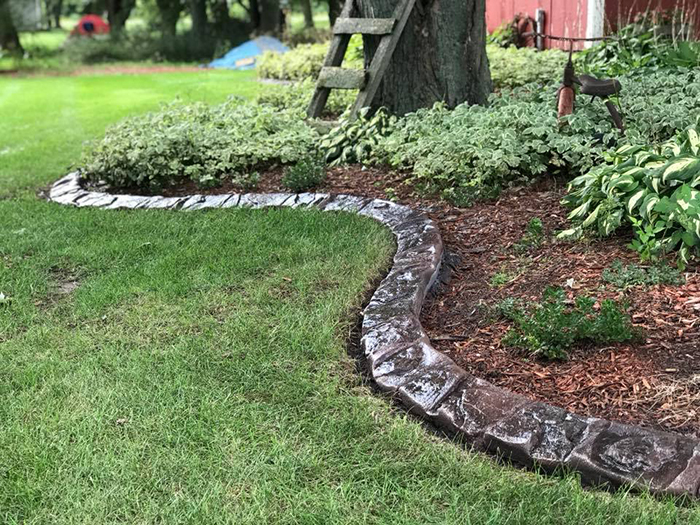
This design feels cohesive because all the elements share a similar ‘natural’ or ‘rustic’ character. The stamped concrete mimics stone. The mulch is a natural wood product. The plants are organic forms. Even the old wooden ladder leaning against the tree contributes to the story. The curve of the edging is gentle and flowing, not rigid or geometric. By ensuring every element fits the overarching theme of ‘natural and rustic,’ the design feels harmonious and intentional, rather than a random collection of parts.
Draw the Line: Your Landscape Awaits
Now that you’re armed with 30 distinct ideas, from minimalist lines to rustic stamped textures, the perfect concrete edging for your yard should feel much more attainable. The right border doesn’t just hold back mulch; it defines your space and tells a story. Pick the look that speaks to you, save it, and start planning. Your dream yard is waiting for you to draw the first line. Happy landscaping!