You know that feeling when you finally find the downspout landscaping idea that looks *exactly* right for your house, but you’re not sure how to pull it off? That’s about to change. Forget generic advice; this is about turning a boring, functional eyesore into a genuinely beautiful feature of your home’s exterior.
We filtered through hundreds of real-world examples to bring you only what’s worth your attention. We’re showing you 26 brilliant, photographer-approved ways to handle rainwater runoff, from sleek modern rain chains to charming, rustic dry creek beds. In 2026, it’s all about functional beauty—making even the most practical parts of our homes look intentional and thoughtfully designed. And stay until the end — we break down the most common mistakes that can ruin these looks. 📌 Save this to Pinterest for later — you’ll want to revisit these ideas.
1. Clean Pebble Border for a Red Brick Exterior
This is such a clean, effective solution for that tricky space between a wall and a driveway. The contrast between the warm red brick, the cool gray concrete, and the light river pebbles creates a crisp, architectural line. It works because it embraces simplicity. Instead of trying to force a tiny strip of lawn or mulch, this design defines the area with a new, durable texture that solves a drainage problem while looking incredibly tidy. The small landscape lights add a professional touch, making it look just as good at night.
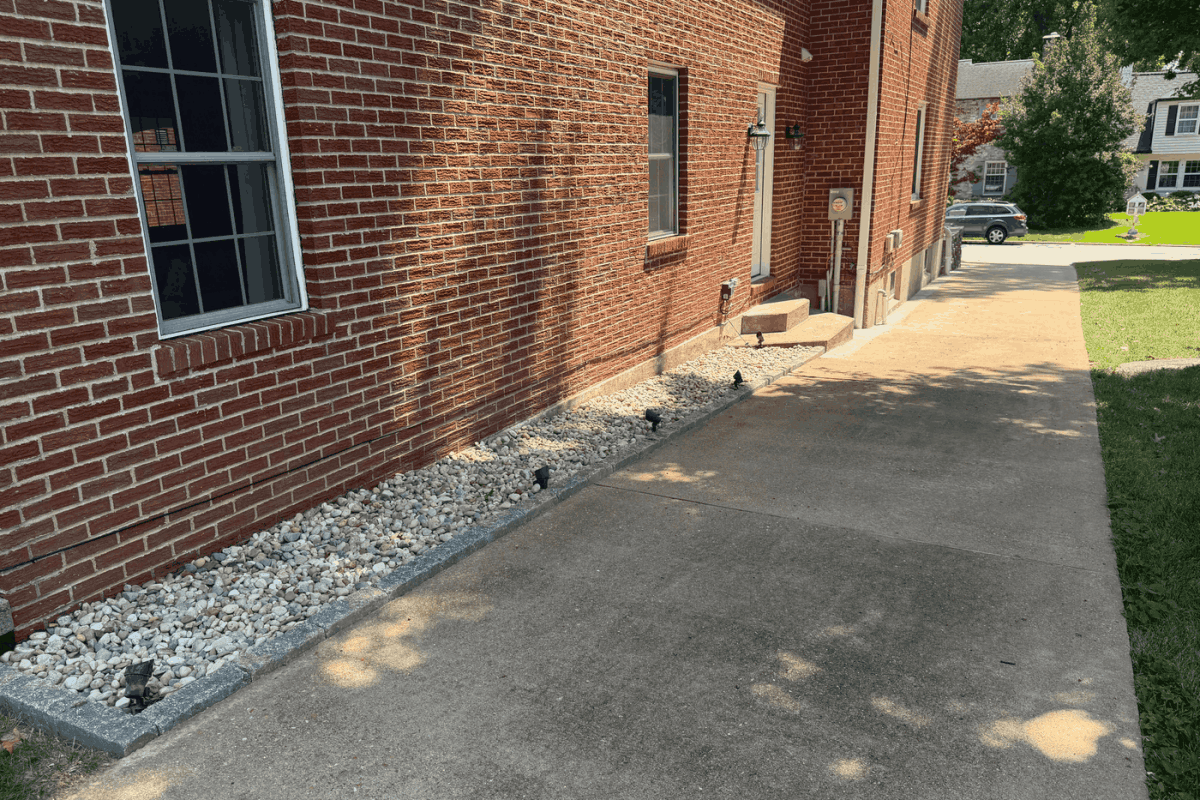
Let’s be honest: pebble beds are not a zero-maintenance dream. Weeds are persistent little things, and they will eventually try to pop up through the stones, especially if organic debris like leaves gathers and decomposes. To save yourself a major headache, you must install a high-quality, permeable landscape fabric underneath the rocks. It will block about 95% of weed growth. You’ll still have to do some occasional hand-pulling or spot-treating, but it makes the difference between a quick tidy-up and a weekend-long battle.
2. Rustic Dry Creek Bed Alongside a Fine Gravel Path
When you’re creating a dry creek bed for drainage, the key to a natural look is varying your rock sizes significantly. Don’t just order a ton of one-size-fits-all river rock. Use a base of 1-2 inch pebbles, then embed larger, 4-6 inch rocks along the edges, and finally, place a few statement-making mini-boulders (10-12 inches) at curves or intersections. This mimics how water would naturally deposit stones, creating visual interest and preventing the whole thing from looking like a flat, boring trench.
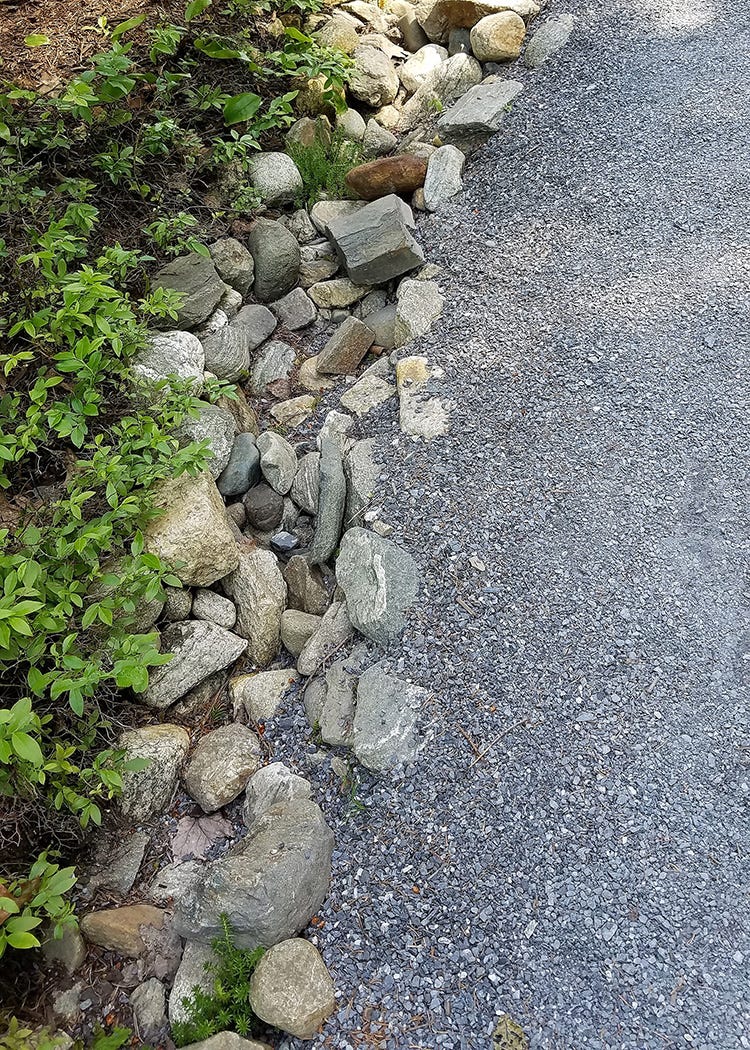
The visual recipe here is all about layered texture. Think of it as 50% functional drainage channel (the larger river rocks), 40% walking surface (the fine gray gravel), and 10% soft, green buffer (the lush ground cover). This formula ensures that the functional part of the design also feels like an intentional, beautiful garden feature. You could swap the gravel path for flagstones, but you’d need to maintain that same ratio of hardscape to softscape to keep the balance.
3. Modern Black Downspout Over Polished River Rock
You don’t need a massive budget to get this clean, modern look. The key components are the downspout, rocks, and edging. While a custom metal downspout can be pricey, a standard black vinyl one from Home Depot or Lowe’s is under $20. Instead of buying bags of polished river rock from a big box store (which gets expensive fast), call a local landscape supply yard. You can often get a small scoop of similar stones for $30-$50, far less than the bagged equivalent. A simple no-dig edging kit will run you another $25.
This design is so effective because of its high-contrast, clean-edged execution. The matte black of the downspout pops against the lighter foundation, the smooth, multi-colored river rocks provide a natural texture that feels sophisticated, and the crisp edge of the green turf acts like a picture frame. It’s a perfect example of how elevating a simple, functional spot with thoughtful materials can make the whole area feel more designed. It’s a more contained version of the larger creek bed in Idea #26.
4. Minimalist Dark Rain Chain into a Recessed Rock Basin
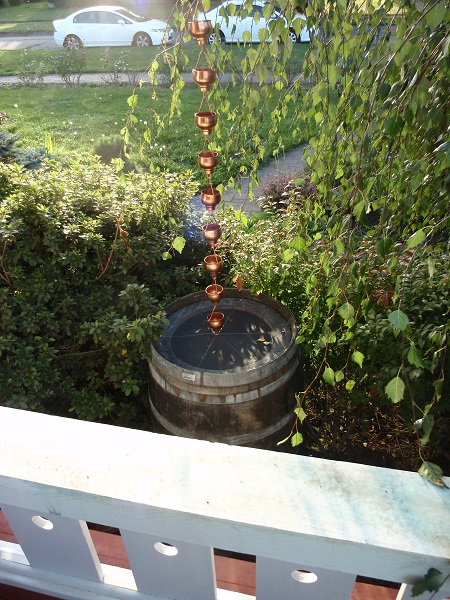
Rain chains are having a huge moment, and it’s easy to see why. They turn a purely functional process—guiding rainwater—into a sensory experience. Instead of water disappearing into a tube, you get to see and hear it flowing. This trend is part of a larger movement towards ‘mindful design’ and finding beauty in utilitarian objects. It’s a simple swap that adds an architectural, almost sculptural element to your home’s exterior, which is why they’re all over Pinterest boards for modern and Japanese-inspired homes.
For a rain chain to function properly and avoid splashing water all over your foundation, the basin below is just as important as the chain itself. A good rule of thumb is to make the basin’s diameter at least twice the width of your roof overhang. So, if your eave extends 18 inches from the wall, you’ll want at least a 36-inch wide basin filled with gravel or river rocks. This gives the water plenty of space to land and percolate down without creating a muddy mess.
5. Building a French Drain with a Gravel and Pipe Trench
Installing a French drain is a serious weekend project, but it’s the ultimate solution for a soggy yard. Here’s a quick overview for a small section:
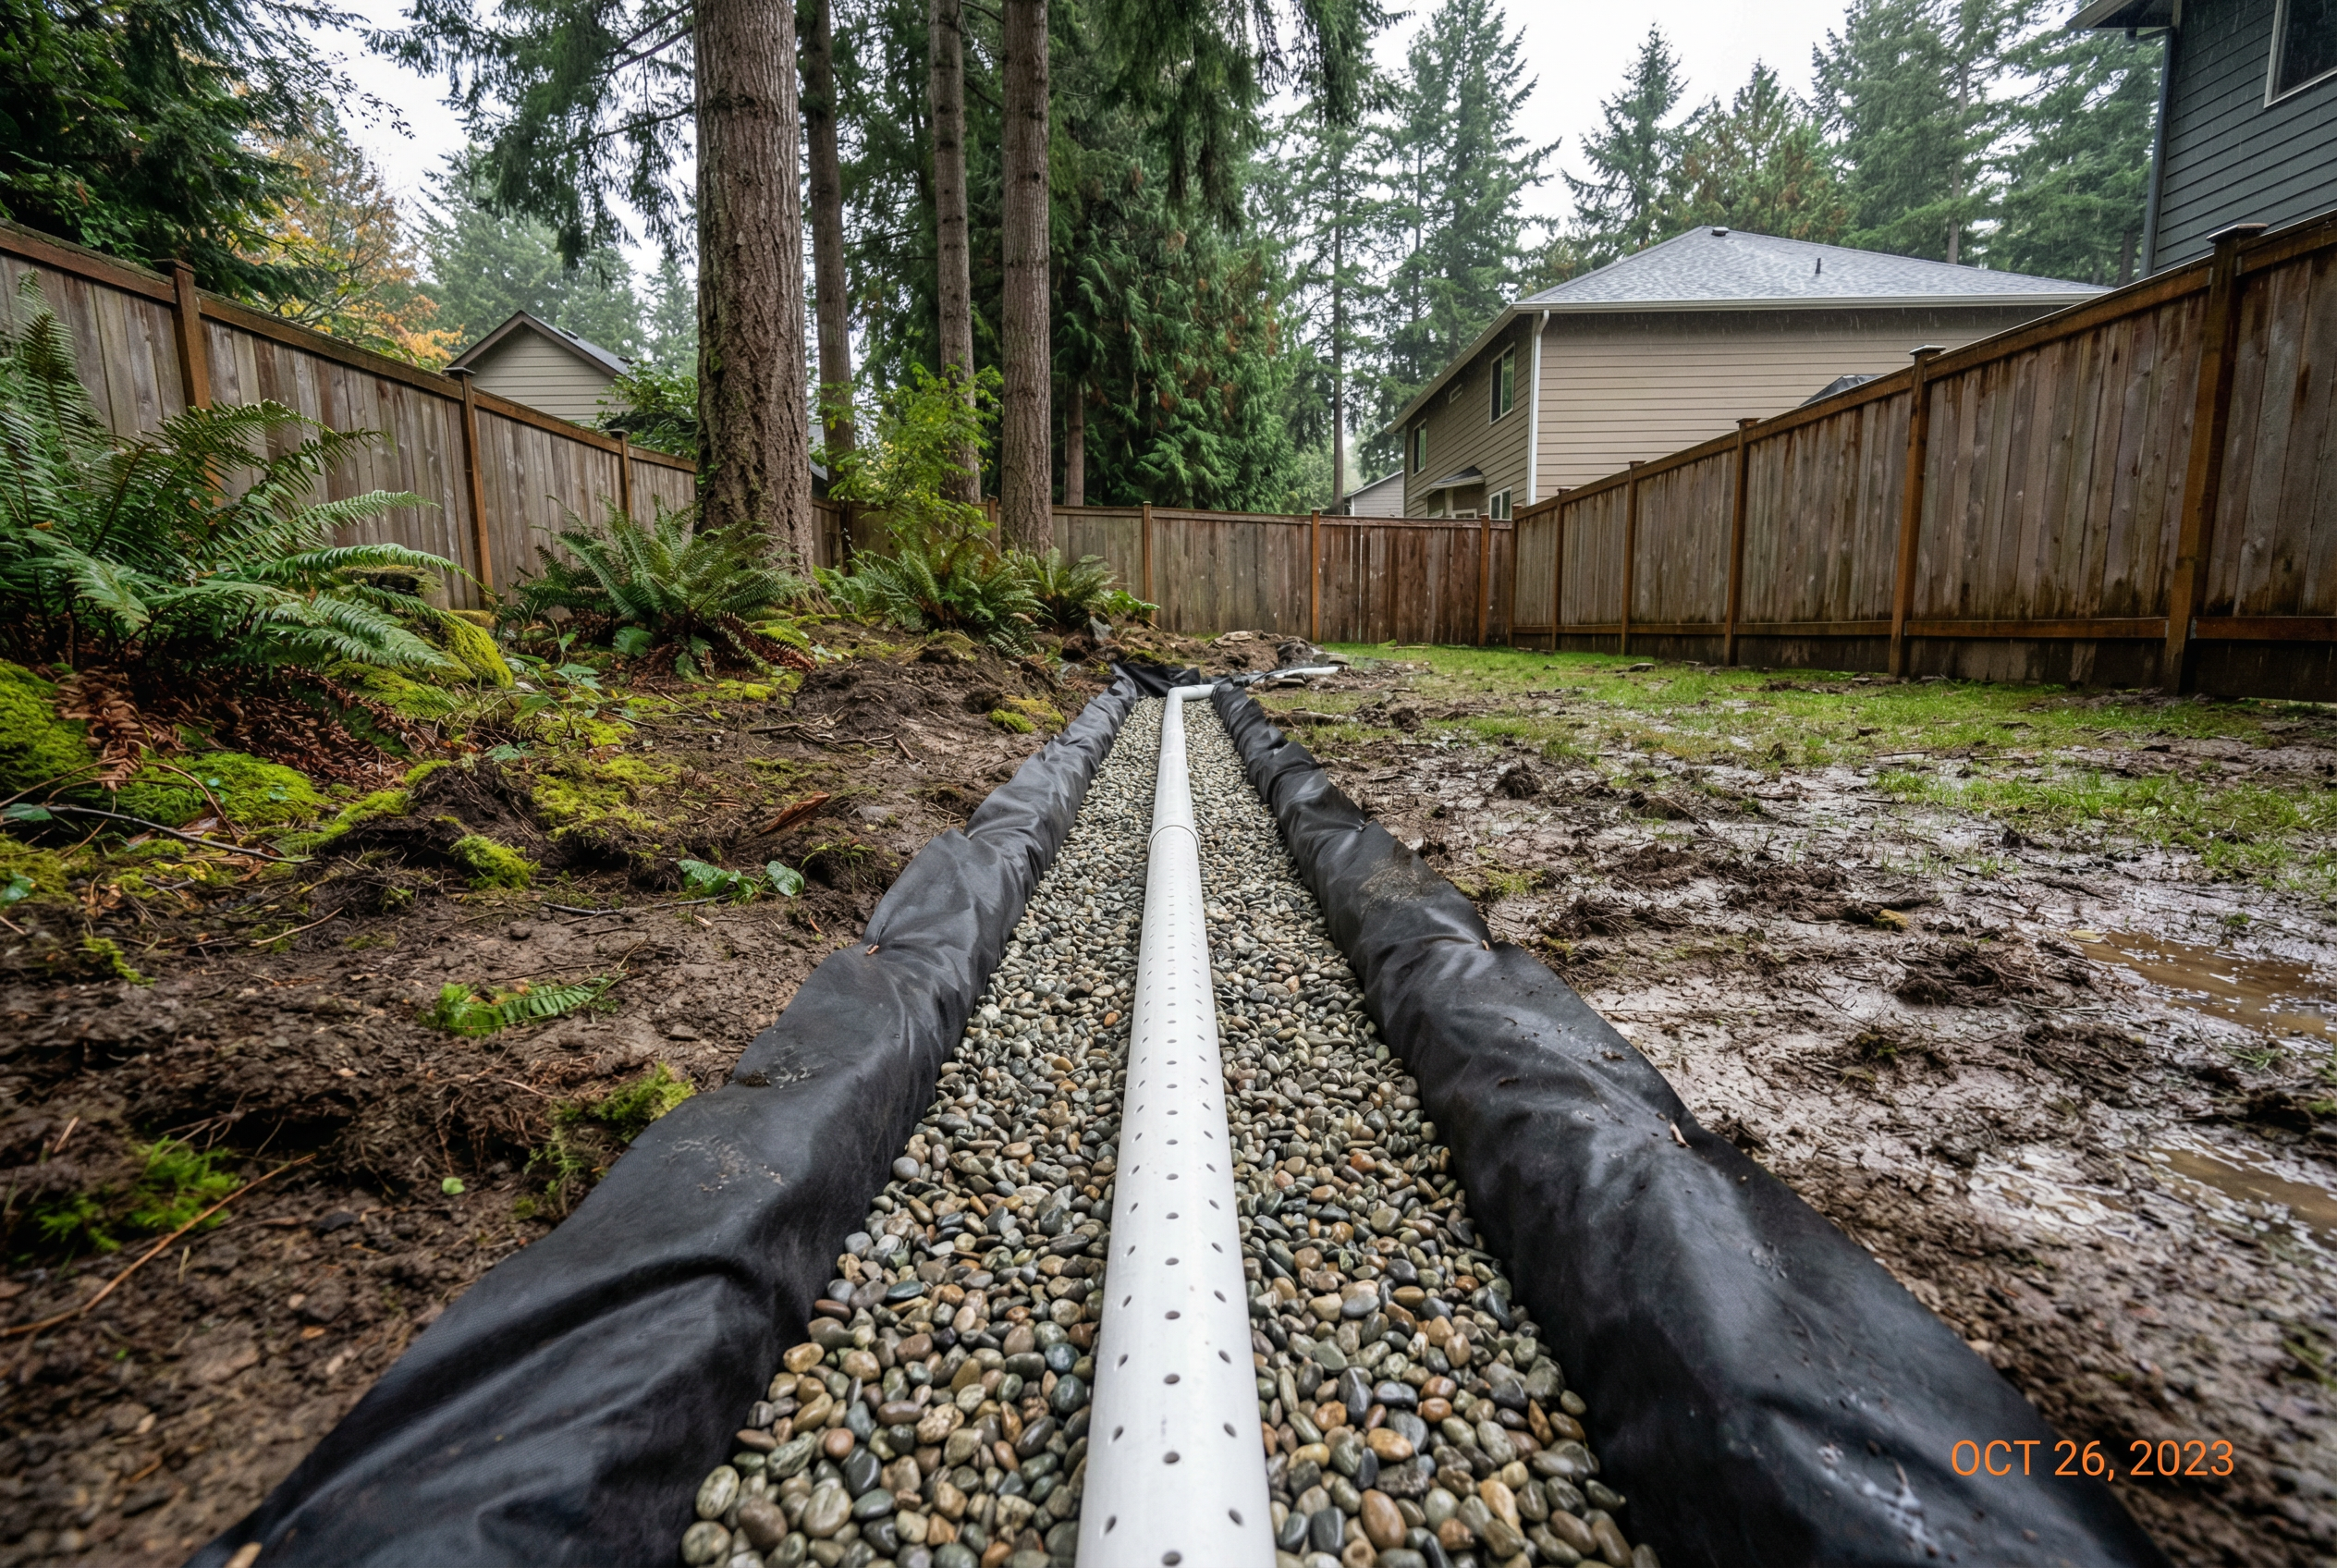
- Dig the Trench: Excavate a trench about 10-12 inches wide and 18-24 inches deep, ensuring it slopes downhill (about 1 inch for every 8 feet) away from your house.
- Line with Fabric: Lay permeable landscape fabric inside the trench, with enough excess on the sides to fold over the top later.
- Add Gravel Base: Fill the bottom 2-3 inches with drainage gravel (like 3/4″ crushed stone).
- Place the Pipe: Lay your perforated PVC pipe on the gravel bed, making sure the holes face down.
- Bury in Gravel: Cover the pipe completely with more gravel, leaving about 4 inches of space at the top.
- Wrap and Finish: Fold the excess fabric over the top of the gravel and cover with your choice of top layer—more decorative rock, sod, or mulch.
This is not a casual Saturday project. Before you even buy a shovel, you need to have a solid plan. Here’s your checklist:
- Call 811: Before you dig, you MUST call the utility locating service to mark any buried lines. It’s free and it’s the law.
- Confirm the Slope: Use stakes and a string level to ensure you have a continuous downward slope to carry water away from your foundation.
- Identify Your Discharge Point: Where will the water end up? A storm drain, a dry well, or a safe spot at the edge of your property? You can’t just dump it in your neighbor’s yard.
- Rent a Trencher: Unless you’re only digging a few feet, renting a power trencher for a day will save your back and an enormous amount of time.
6. A Cheerful Teal Rain Barrel Against a Brick Wall
A single rain barrel is a fantastic solution for small to medium-sized yards or for targeting a specific garden area. A standard 50-55 gallon barrel is perfect for capturing runoff from a small shed, garage, or a section of your main roof. It won’t solve major property-wide drainage issues, but it will provide plenty of free, non-chlorinated water for your container plants and flower beds. If you have a larger roof area, you can link two or three barrels together with a simple overflow kit to increase your storage capacity.
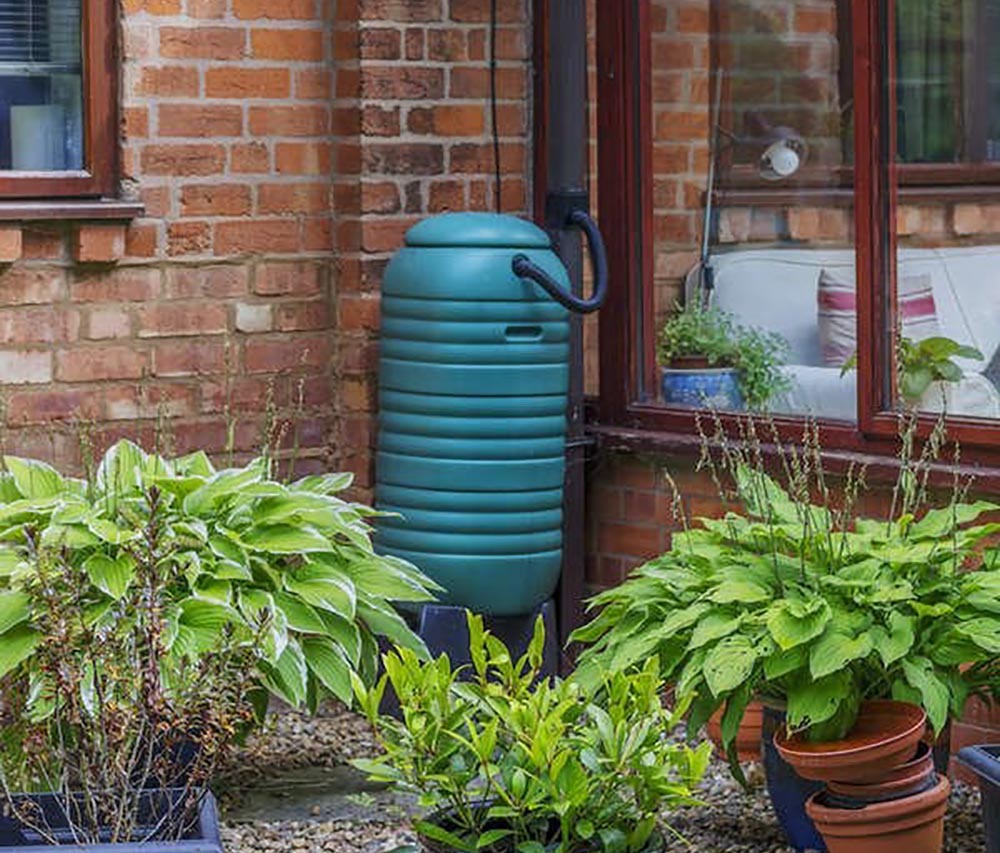
Getting this functional and charming look is surprisingly affordable. The barrel itself is the main expense, but it pays for itself in water savings.
- Rain Barrel (50-60 gallon): $90 – $150
- Downspout Diverter Kit: $25 – $40
- Potted Plants (Hostas, etc.): $40 – $75
- Gravel/Pebbles (2-3 bags): $15 – $25
- TOTAL: $170 – $290
Budget alternative: Check your local municipality! Many cities offer subsidized or even free rain barrels to encourage water conservation. You might just get one for a fraction of the retail cost. Compare this look with the blue barrel in Idea #22.
7. Dark Metal Rain Chain with a Lush Ground Cover Border
Rain chains are beautiful, but they aren’t magic. In a heavy downpour, they will splash more than a traditional enclosed downspout. If your chain is hanging right next to a wooden wall, a window, or your foundation, you need a plan. The ground cover here is doing more than just looking pretty—it’s helping to absorb that splash and prevent soil erosion. Without a proper basin or absorbent ground cover, you risk water damage to your home’s siding and foundation over time. This isn’t a set-it-and-forget-it feature.
The success of this design lies in its thoughtful combination of hard and soft materials. The dark, rigid metal of the rain chain provides a strong vertical line, which is then softened by the organic, mounding shape of the lush green ground cover. The smooth, cool river rocks act as a transitional texture between the two. This interplay of textures—metallic, leafy, and stony—is what makes the composition feel so balanced and complete.
8. Rustic Metal Barrel as a Downspout Catchment
If a new, brightly colored plastic rain barrel isn’t your vibe, this is for you. Hit up Facebook Marketplace, Craigslist, or a local farm supply store. You can often find old galvanized metal or steel barrels for $20-$40. They might be a bit dented or rusty, but that’s the whole point. You get an authentic, weathered look for a fraction of the cost of a new ‘rustic-style’ barrel from a catalog. A quick drill hole near the top for an overflow spout is all you need to make it functional.

Take away the weathered patina and this is just a metal can under a gutter. The peeling blue paint, the slight rusting, and the dull gray finish are what give this piece its soul. It tells a story. It feels like it’s been there forever, perfectly complementing the rough stone foundation and aged wood siding. It’s a powerful reminder that sometimes the most beautiful elements are imperfect and show signs of a life well-lived.
9. Sleek Rain Chain on a Modern Porch with Stacked Stone
This modern exterior gets its clean, tranquil feel from a strict material formula: 40% warm, natural texture (the stacked stone and grasses), 40% smooth, man-made surfaces (the tan stucco and concrete steps), and 20% dark, sharp accents (the dark brown trim and the rain chain). This balance of organic and architectural elements is key. The rain chain works as a vertical exclamation point, breaking up the strong horizontal lines of the porch and retaining walls.
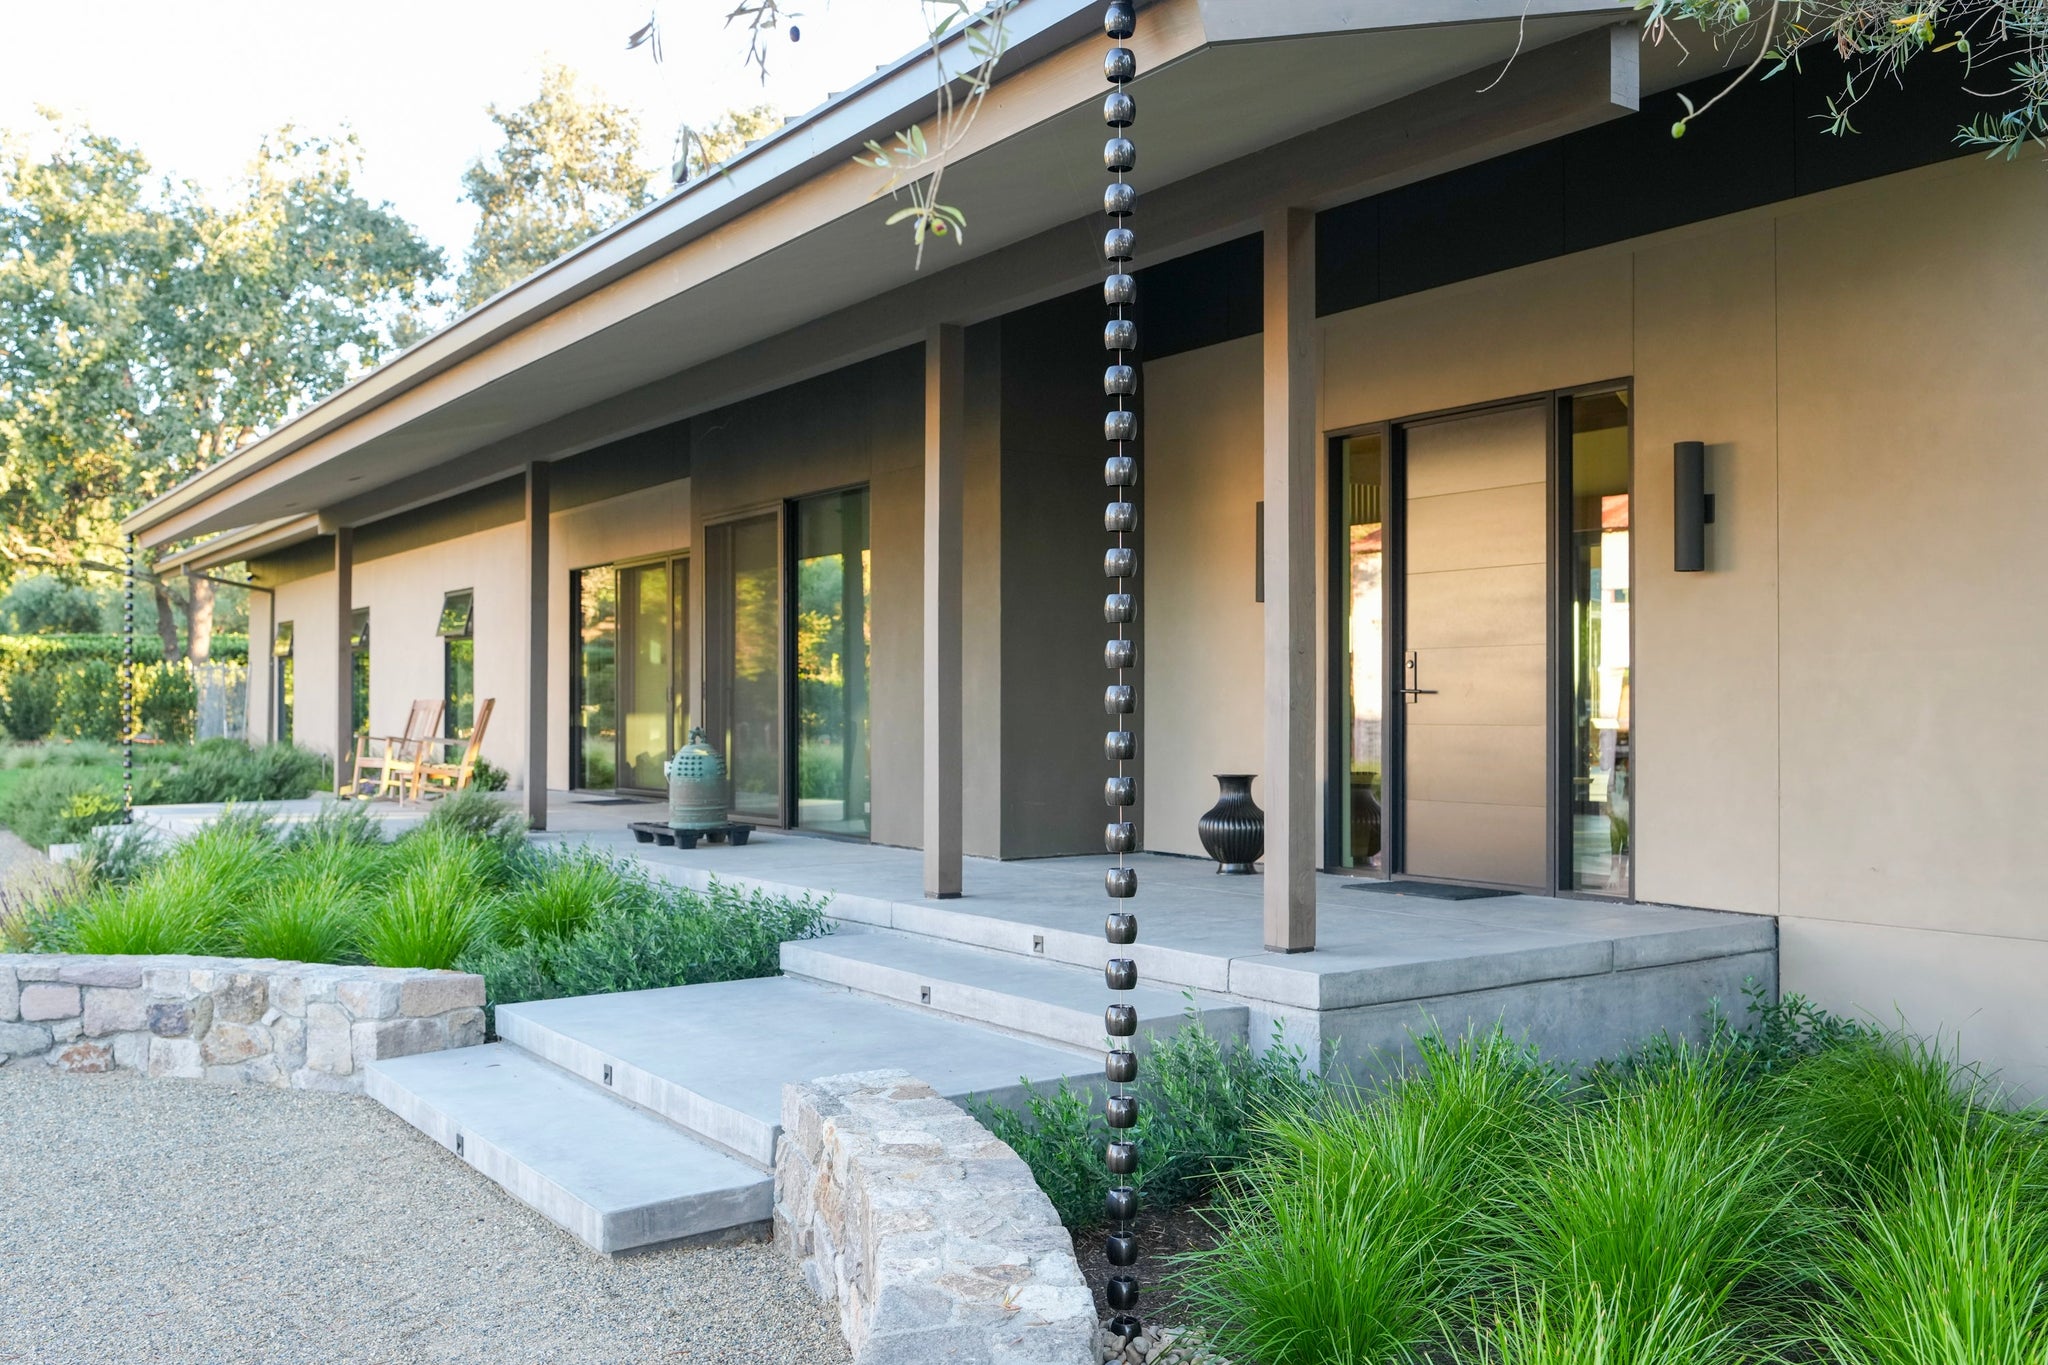
This idea is best suited for homes with some architectural presence and generous proportions. The long, uninterrupted drop of the rain chain needs vertical space to look its best, so it’s ideal for homes with higher rooflines or distinct overhangs. The scale of the stacked stone walls and wide concrete steps also suggests a larger property. On a very small, single-story cottage, this exact look might feel a bit overwhelming. For a more delicate modern option, see Idea #18.
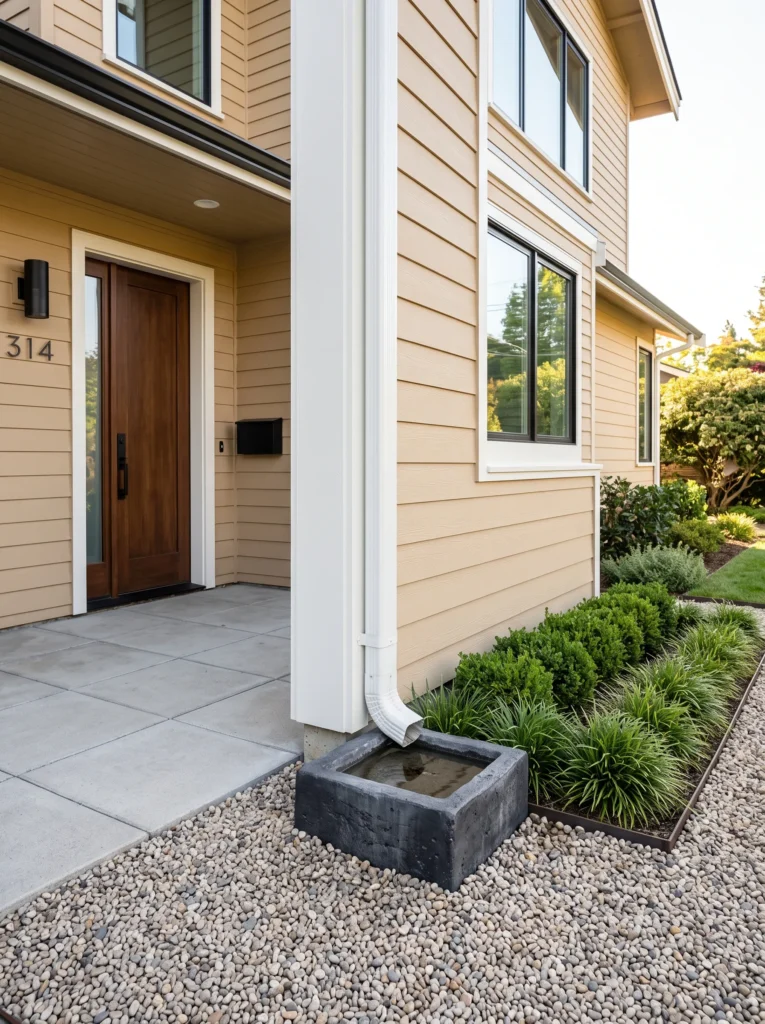
10. White Downspout with a Concrete Splash Basin
Creating a stable, level base for a pre-cast concrete splash basin is crucial for it to work correctly and look professional. It’s a quick project that makes a huge impact.
- Position and Trace: Place the basin where you want it and trace its outline on the ground with a spade.
- Excavate: Move the basin and dig out the area inside your outline to a depth of about 2 inches.
- Add Leveling Sand: Pour about 1-2 inches of paver sand into the excavated area.
- Tamp and Level: Use a small board to tamp down the sand and a level to ensure the surface is perfectly flat.
- Set the Basin: Carefully place the concrete basin onto the sand bed, pressing down firmly. Check for level one last time and adjust as needed.
- Backfill: Fill in the area around the basin with your decorative gravel.
When selecting plants to go around a drainage area like this, choose varieties that don’t mind ‘wet feet.’ While the gravel provides good drainage, the area will naturally be damper than the rest of your garden. Boxwoods, as seen here, are quite resilient. Other great options include Sweet Flag (Acorus), certain varieties of Iris, or Creeping Jenny, which will happily spill over the edges of the gravel bed.
11. Simple River Rock Splash Guard for a Teal House
The color palette here is a perfect lesson in complementary tones. The formula is approximately 60% cool color (the teal siding), 30% warm, earthy neutrals (the reddish-brown and tan river rocks), and 10% crisp white (the downspout, garage door, and trim). The white acts as a clean break, preventing the teal and the earthy stones from looking muddy together. The rocks pick up on the warmth of the brick foundation (not fully visible, but implied) and ground the bright, cool siding.
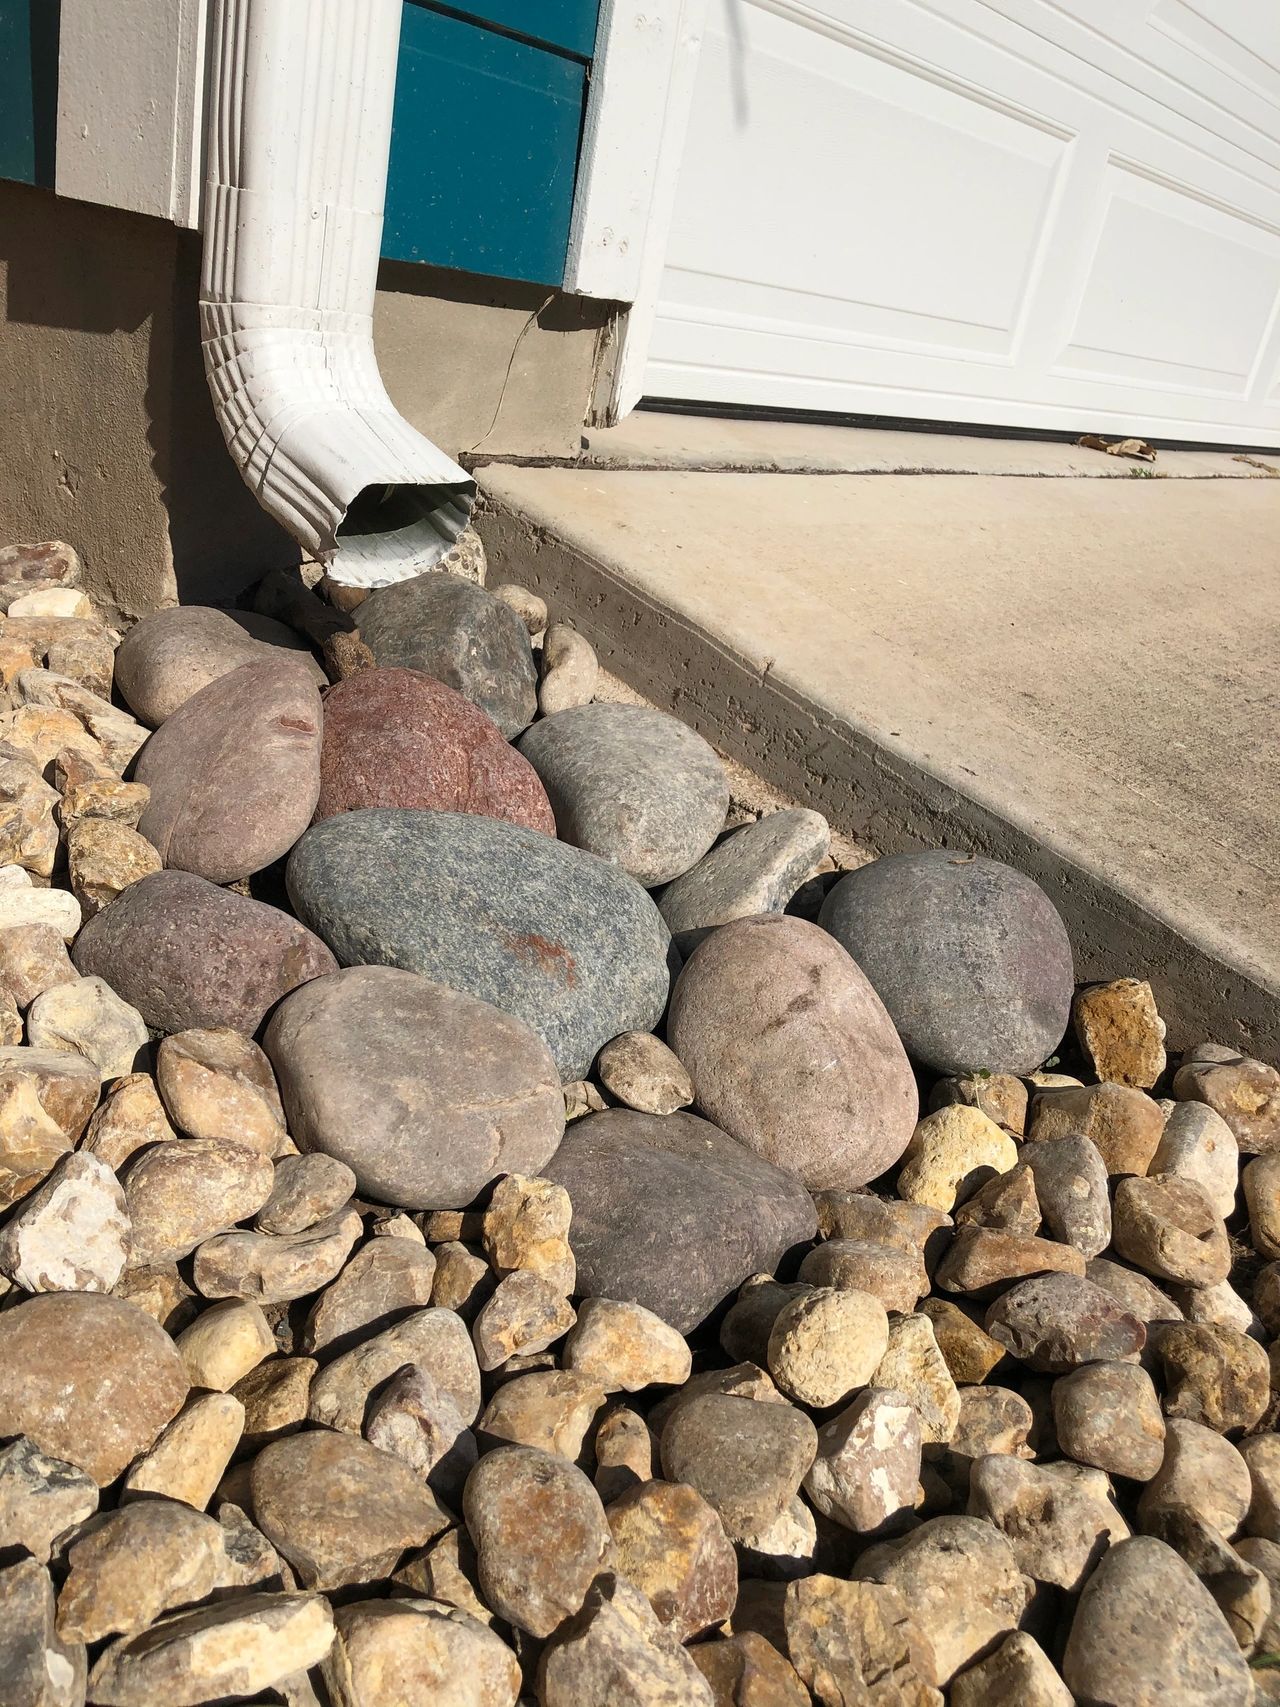
An open bed of river rocks looks great, but it’s a magnet for leaves, pine needles, and dirt. To keep it looking clean, you’ll need to clear it out a few times a year, especially in the fall. The easiest way is with a leaf blower on a low setting. For heavier debris, a shop vac on reverse can work wonders. If you let organic matter build up, it will decompose into soil and become a perfect nursery for weeds, defeating the purpose of the rock bed. A quick 10-minute cleanup each season is all it takes.
12. Layered Boulders and River Rock for a Textured Border
This design is a masterclass in using scale and texture. The large, rounded boulders act as strong anchor points, creating structure and depth. The smaller, darker river stones fill the space between them, forming a textured, flowing ‘stream’. This variation is what makes it look like a natural, intentional feature rather than just a pile of rocks. The fine, light-colored gravel path provides a smooth visual break, further emphasizing the texture of the rock channel. It’s a composition that is both organized and wild.
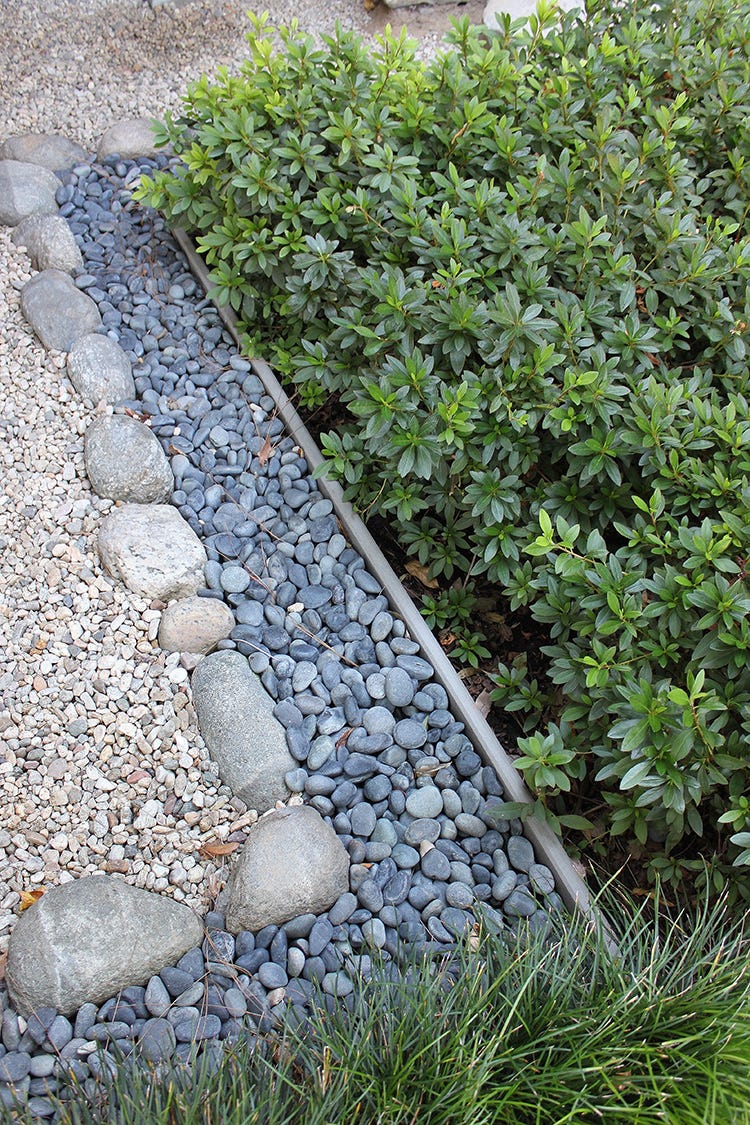
The secret weapon for any successful rock feature is high-quality landscape fabric underneath. But don’t just lay it flat. When placing your large boulders, cut an ‘X’ in the fabric and set the boulder *through* it, so it makes direct contact with the soil. This makes it look much more natural and settled, as if it’s emerging from the ground. Then, lay your smaller river stones over the fabric around the boulders. This gives you the best of both worlds: weed control and a natural, integrated look.
13. Decorative Cascading Basins and Leaf Splash Tray
Those molded resin splash blocks—like the leaf tray—are charming and widely available, but be aware of their limitations. They are lightweight, which means they can shift or be washed away in a truly heavy downpour. The resin can also become brittle and fade after a few years of direct sun exposure. They are a great decorative touch for areas with light to moderate rainfall, but for a high-flow downspout, you’re better off with a heavier concrete splash block or a deep bed of river rocks for more reliable performance.
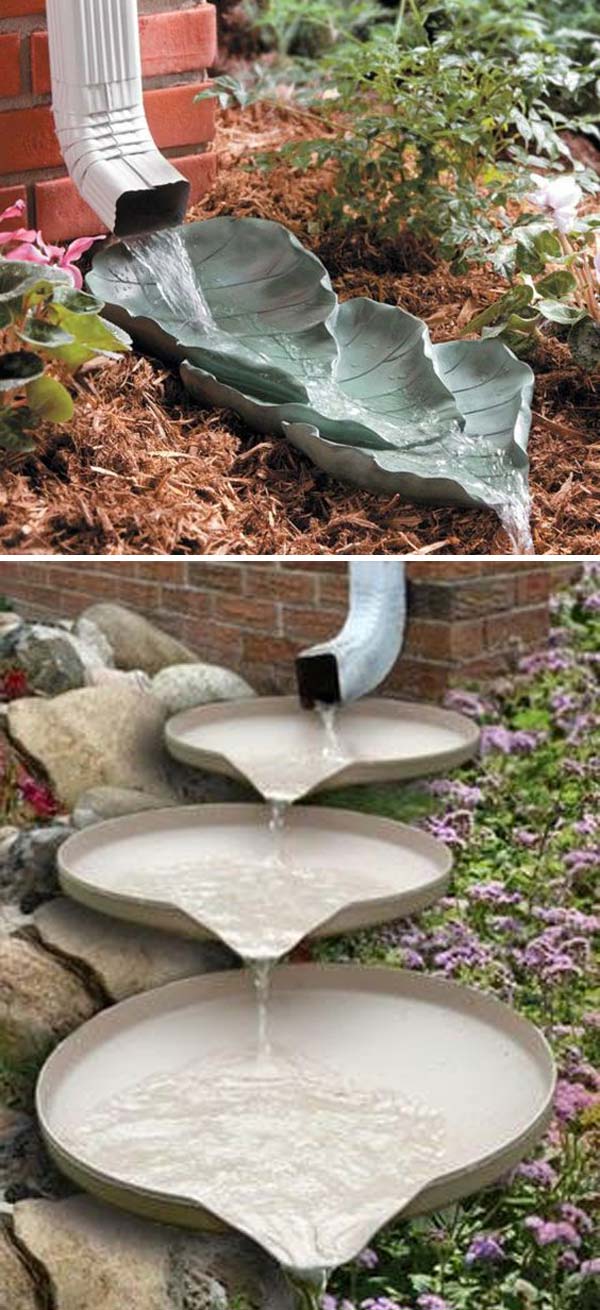
What makes these solutions stand out is that they refuse to be boring. Instead of a standard, ugly plastic splash block, these pieces introduce shape, personality, and a sense of playfulness. Whether it’s the organic form of the leaf or the rhythmic cascade of the tiered basins, they transform a mundane drainage point into a small, delightful garden vignette. They prove that even the most practical elements of your home can be an opportunity for creative expression.
14. Neat Gray Downspout Extension Over Decorative River Rocks
This works because it’s an exercise in restraint and color harmony. The downspout, the extension, and many of the stones all share a similar cool gray tone. This creates a cohesive, monochromatic base. The pops of warmer brown rocks and the vibrant green foliage then stand out as deliberate accents. By keeping the main components in the same color family, the entire setup feels calm, organized, and intentional. It’s a simple palette that reads as sophisticated.
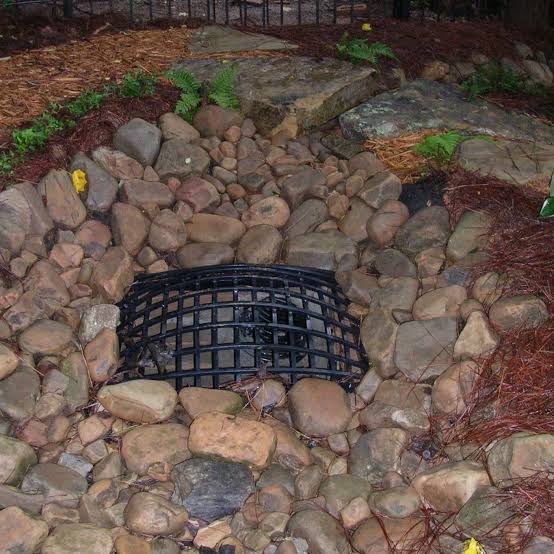
While this looks super tidy, the ground cover will eventually try to creep into the rock bed. To maintain that crisp line, you’ll need to do some light trimming once or twice during the growing season. An even bigger, unseen maintenance task is ensuring the downspout and extension are free of debris. Since the extension is low to the ground, it’s more prone to getting clogged with leaves. A quick flush with a hose in the spring and fall will prevent clogs and keep water flowing correctly.
15. Whimsical Hummingbird and Log Splash Block
The single element that defines this look is its unapologetic whimsy. This isn’t trying to be a chic, minimalist drainage solution. It’s a piece of garden art that happens to also be a splash block. The tiny log bridge and colorful hummingbirds are pure charm. Removing them would leave you with a generic, textured block. This piece is for someone who wants their garden to have personality and moments of unexpected delight. It’s a conversation starter, not just a water diverter.
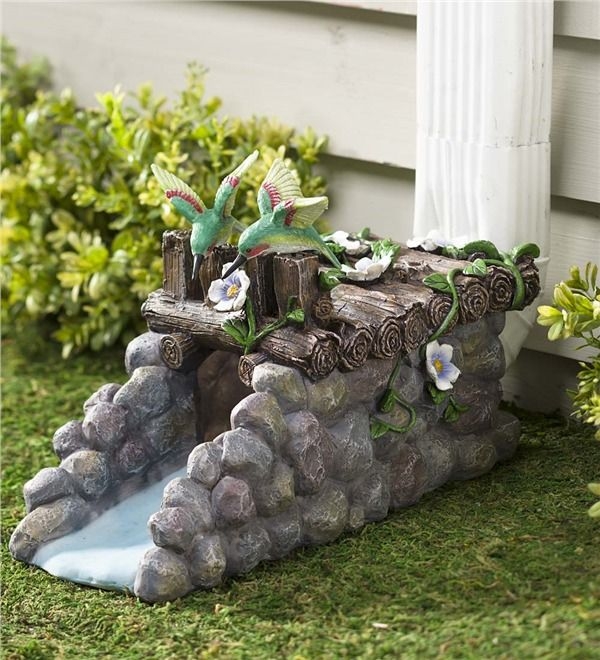
You love the idea of a decorative accent but don’t want a pre-made resin piece? Create your own! Start with a simple, inexpensive concrete splash block from any hardware store (around $10). Then, visit a craft store like Michaels or a thrift store. You can find interesting rocks, waterproof ceramic figurines, or even colorful sea glass. Using a strong, waterproof construction adhesive like Loctite Power Grab, you can create your own unique mosaic or sculpture on the splash block for a total cost of under $25.
16. Functional Dark Brown Rubber Splash Block
Rubber splash blocks are incredibly practical, but they have one major flaw: they’re lightweight. In a torrential downpour with water blasting out of the downspout, they can get pushed out of position, defeating their entire purpose. To prevent this, you can secure it. Drive a couple of long landscape spikes (10-12 inches) through the block and into the ground. It’s a simple, invisible fix that ensures your splash block stays exactly where you need it, no matter how hard it rains.
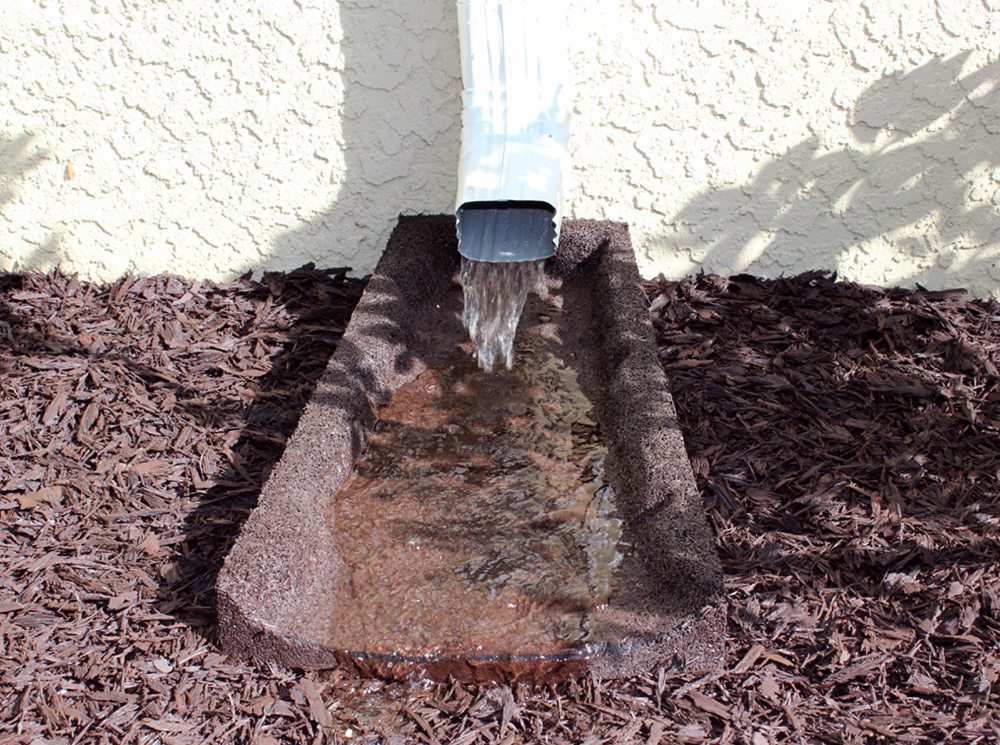
This is arguably the most budget-friendly and straightforward downspout solution you can implement in under five minutes. It requires no digging, no special tools, and very little cash.
- Dark Brown Rubber Splash Block: $10 – $18
- Bag of Dark Mulch: $4 – $7
- Landscape Spikes (optional but recommended): $5 – $8
- TOTAL: $19 – $33
Budget alternative: Honestly, this is the budget alternative! You can sometimes find these at yard sales or on Facebook Marketplace for just a few dollars, but at this price point, buying new is perfectly reasonable and gets the job done instantly.
17. Polished River Stones Bordering a Black Downspout
That crisp, clean edge between the rock bed and the lawn is key. Here’s how to get it with plastic garden edging:
- Define the Shape: Lay out your edging on the ground to create the desired curve or line.
- Cut a Trench: Use a flat-head spade or an edger tool to cut a narrow trench, about 4-5 inches deep, along your defined line.
- Install the Edging: Press the plastic edging down into the trench. The top of the edging should sit at or just slightly below the level of the cut grass.
- Stake it Down: Use the provided stakes to secure the edging in place, hammering them in every few feet.
- Backfill: Shovel soil back into the trench on both sides of the edging to hold it firmly in its vertical position. Now you have a barrier to hold in your rocks.
To make a small rock bed like this look more generous and intentional, slightly overfill it. The rocks should be mounded up a bit in the center, sitting just above the height of the surrounding edging and lawn. A flat, sparsely filled rock bed can look sad and unfinished. A little bit of volume makes it look much more lush and deliberate, and it helps with drainage by creating a slight slope away from the downspout.
18. Cylindrical Metal Rain Chain on a Wood-Sided Home
Love the look of a modern rain chain but not the $150+ price tag? You can DIY a surprisingly chic version. Purchase a few feet of simple, galvanized steel or black chain from a hardware store (look for links that are at least 2-3 inches). Then, find inexpensive metal funnels or even small galvanized pails from a craft or garden supply store. Use a drill to create a hole in the bottom of each funnel/pail and thread them onto the chain, securing them with wire or cotter pins. It’s a weekend project that gives you a custom, industrial look for under $50.
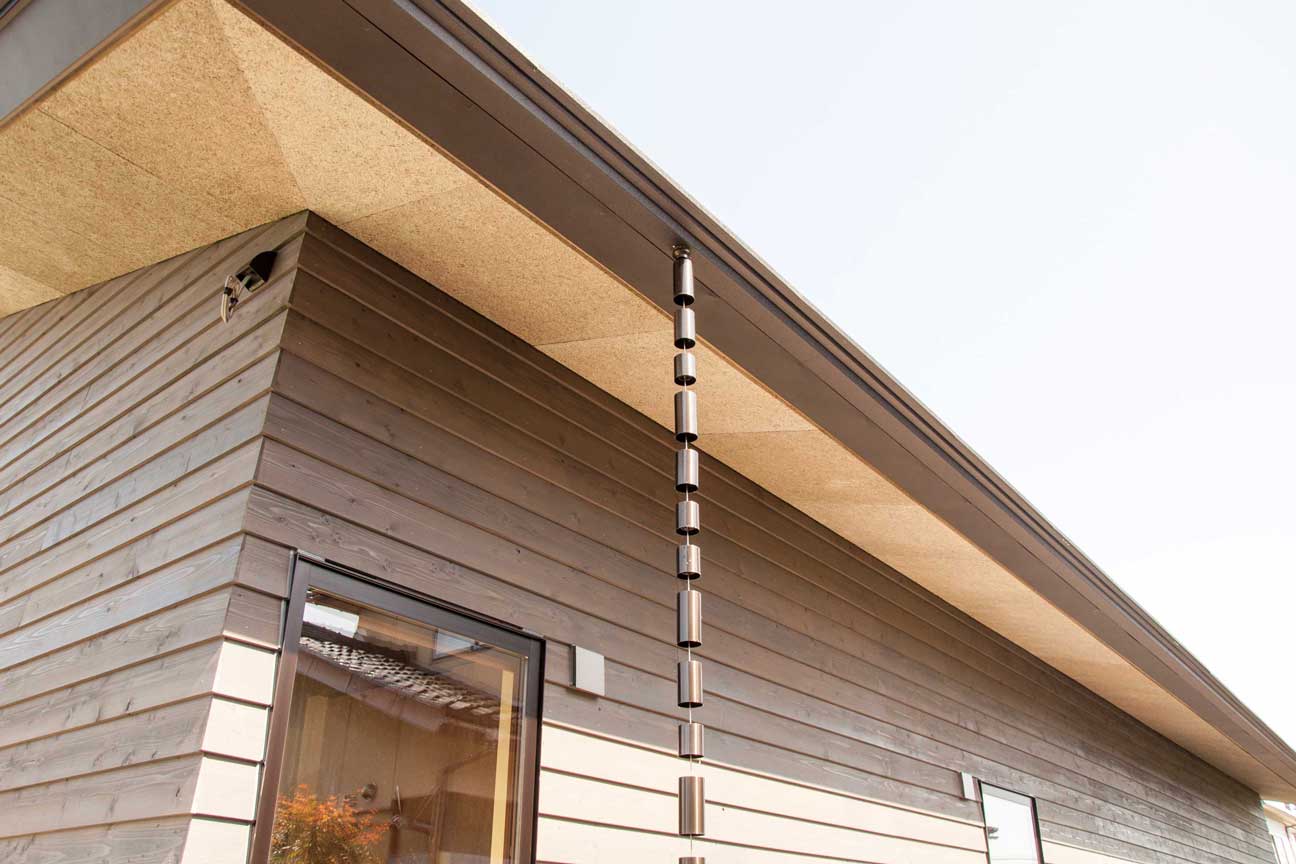
This clean, modern look is a simple equation: 70% warm, organic texture (the horizontal wood siding) + 20% crisp, neutral planes (the white corner panels and window frame) + 10% sleek, metallic detail (the rain chain). The wood provides the dominant character, the white provides the structure, and the rain chain adds that essential touch of polished, architectural jewelry. It’s a great reference for a more subtle modern look than the grander facade in Idea #9.
19. Geometric Black Rain Chains on a Stark White Exterior
The success of this ultra-modern look comes from a bold, graphic formula: 60% stark white walls + 30% sharp black lines (the rain chains and window frames) + 10% vibrant green geometry (the artificial turf squares). It’s a high-contrast palette that relies on clean lines and repeating shapes. The rain chains aren’t just for drainage; they are critical vertical elements that balance the horizontal grid of the pavers and turf, creating a dynamic architectural composition.
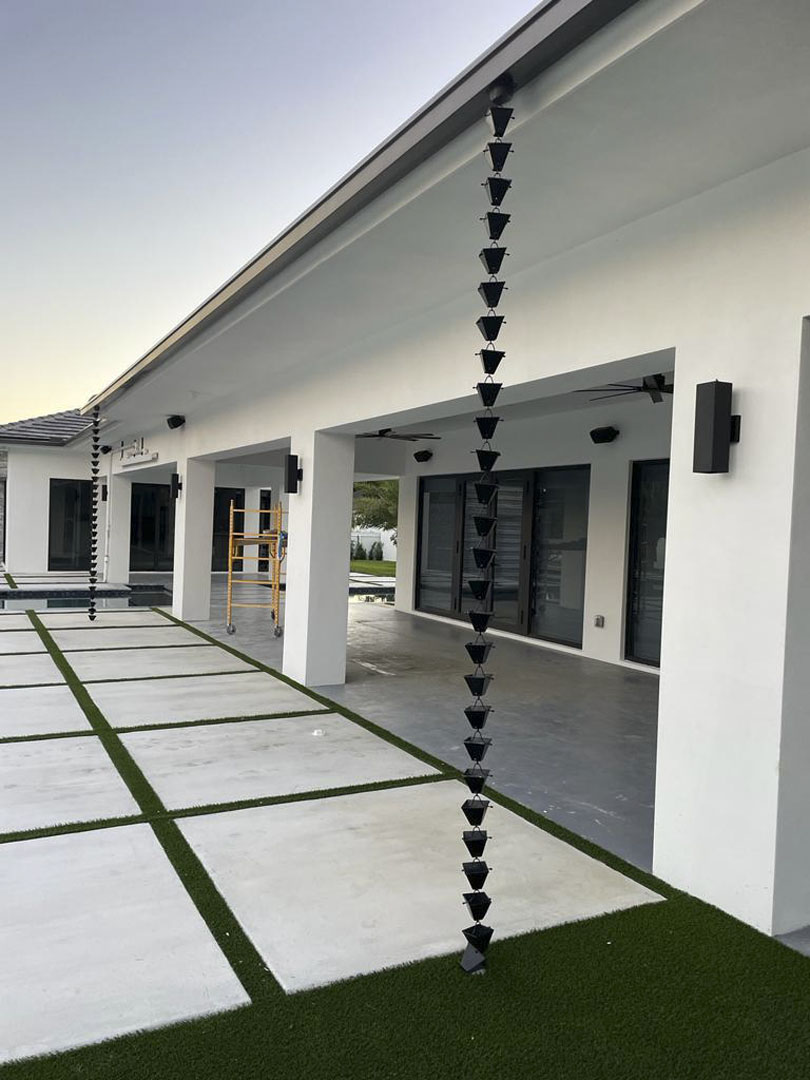
When laying out a grid of pavers and turf like this, spacing is everything. Don’t eyeball it. Use a measuring tape and chalk lines to ensure every gap is perfectly uniform. For large format pavers (18×18 inches or larger), a gap of 3-4 inches is ideal. This is wide enough for the turf to look substantial but tight enough to maintain the feeling of a cohesive surface. Any inconsistency in the spacing will be immediately obvious and will undermine the entire geometric effect.
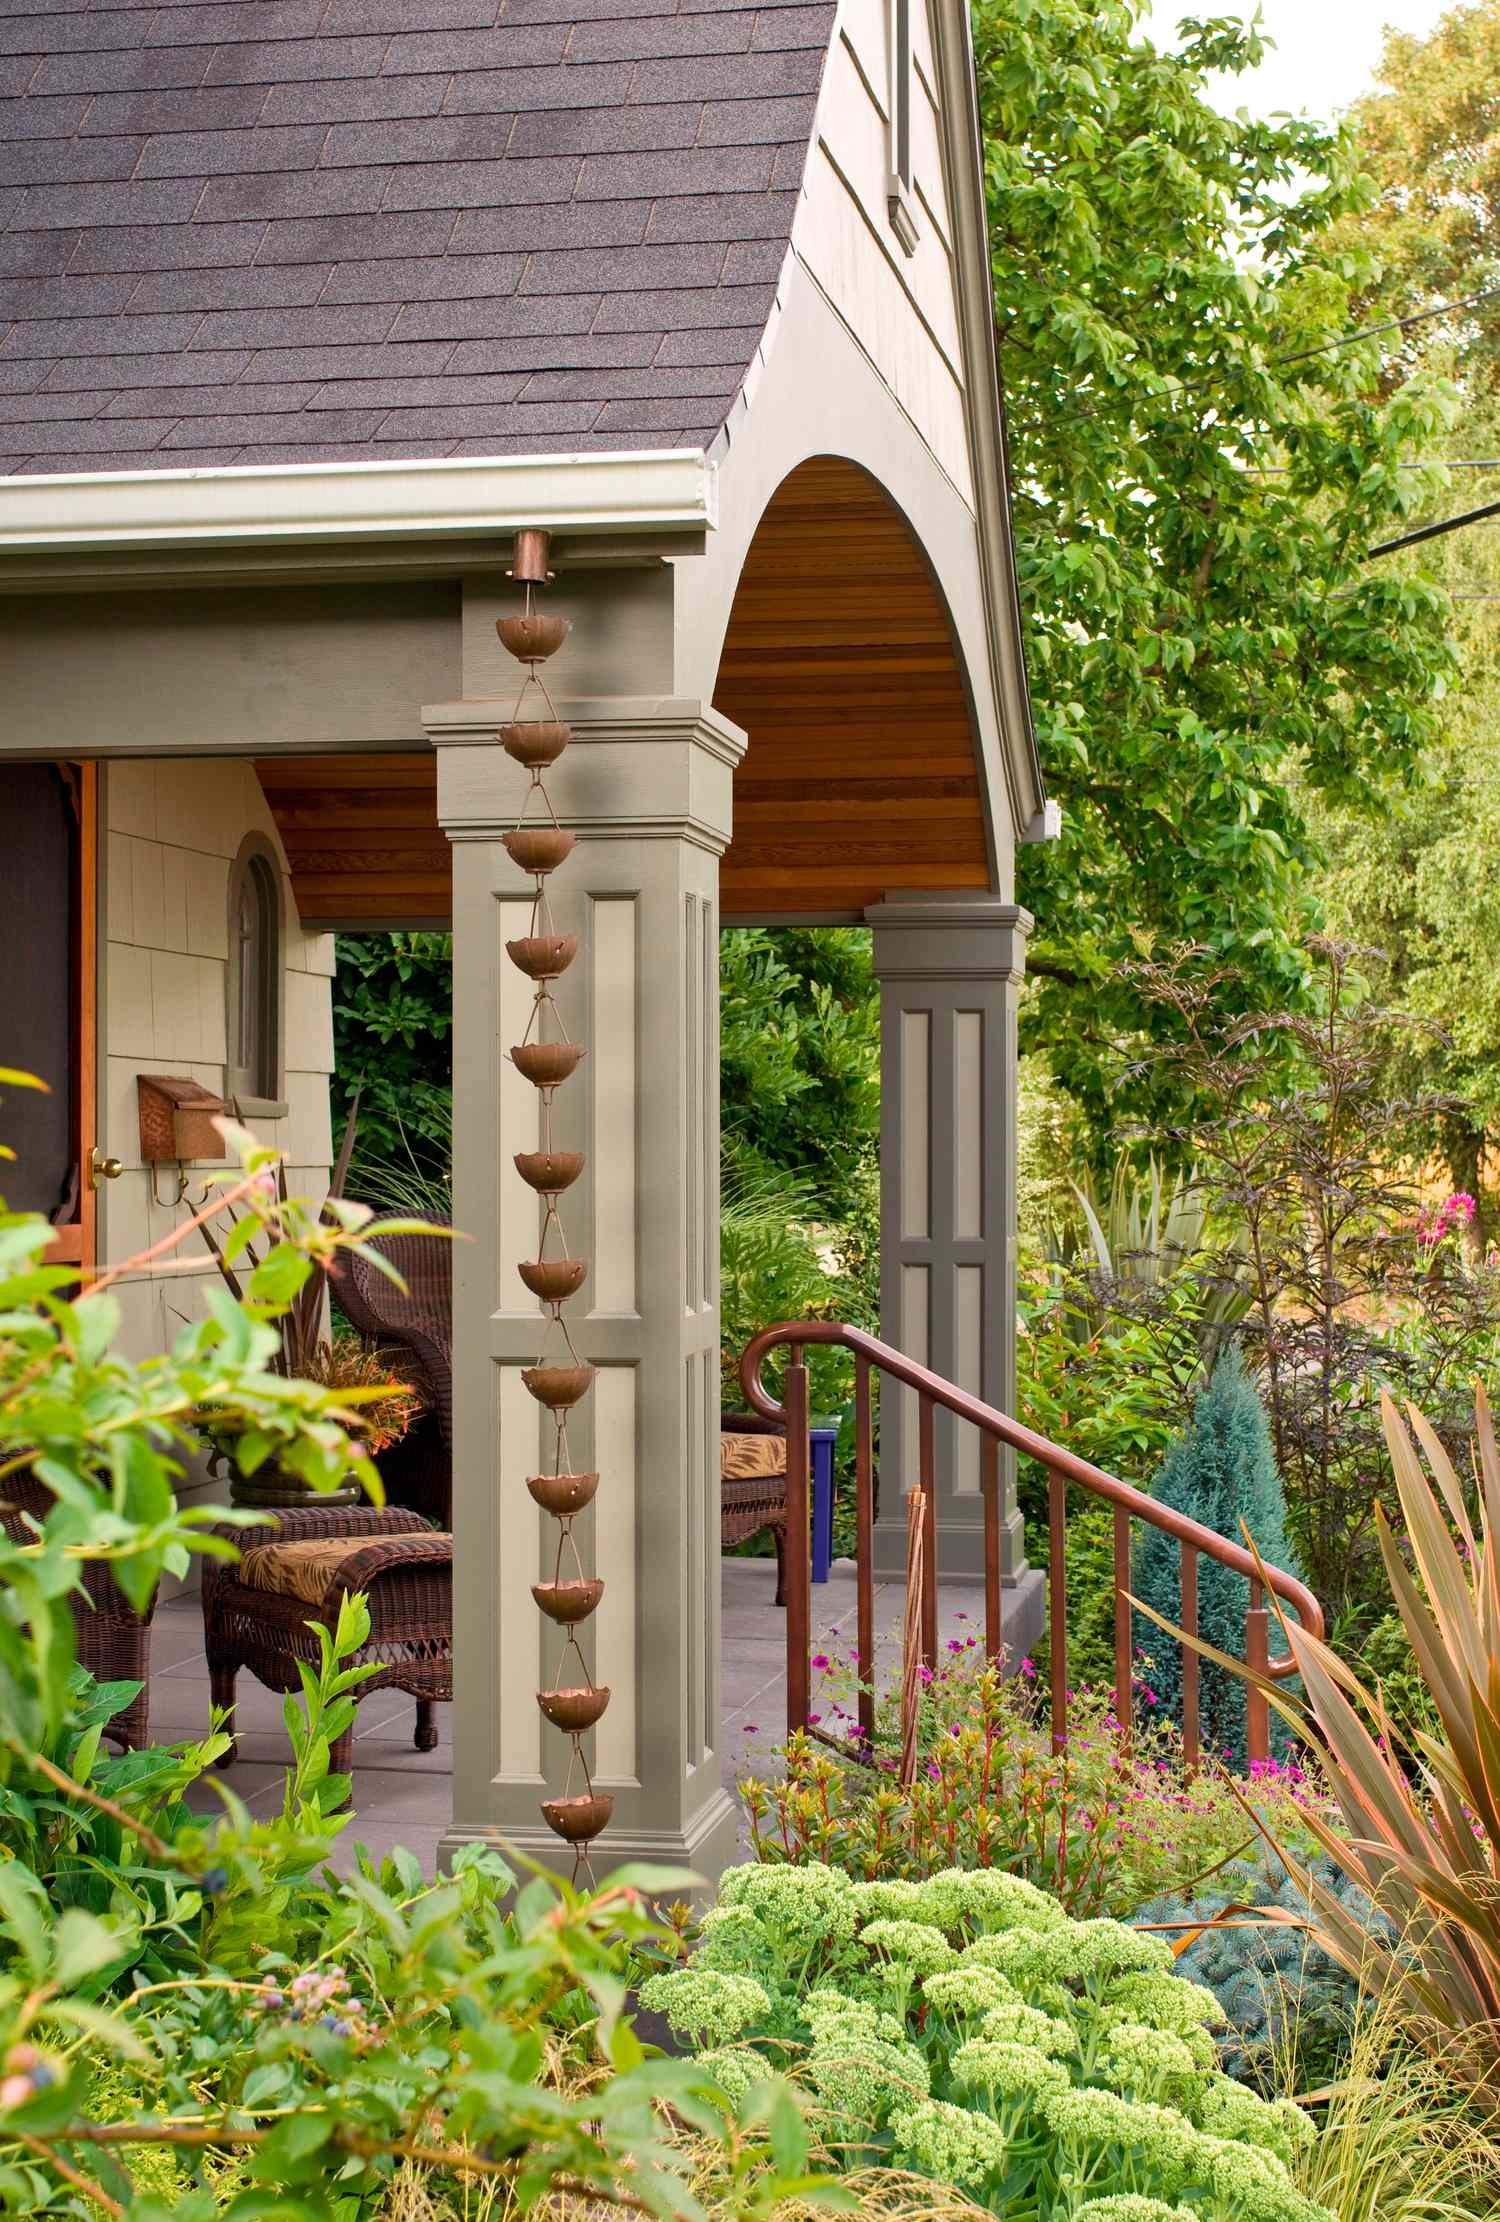
20. Elegant Copper Leaf Rain Chain
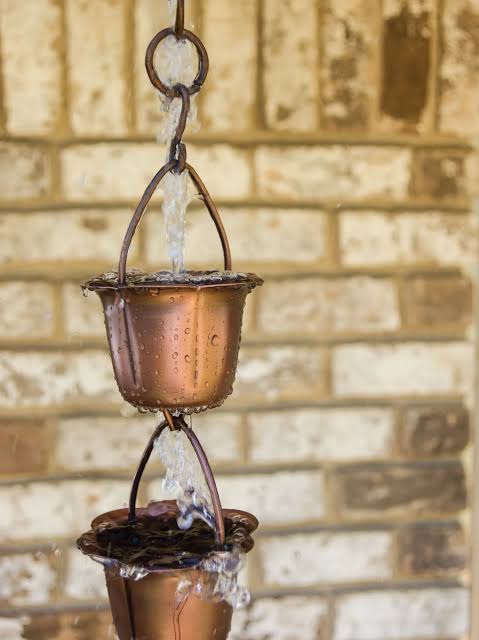
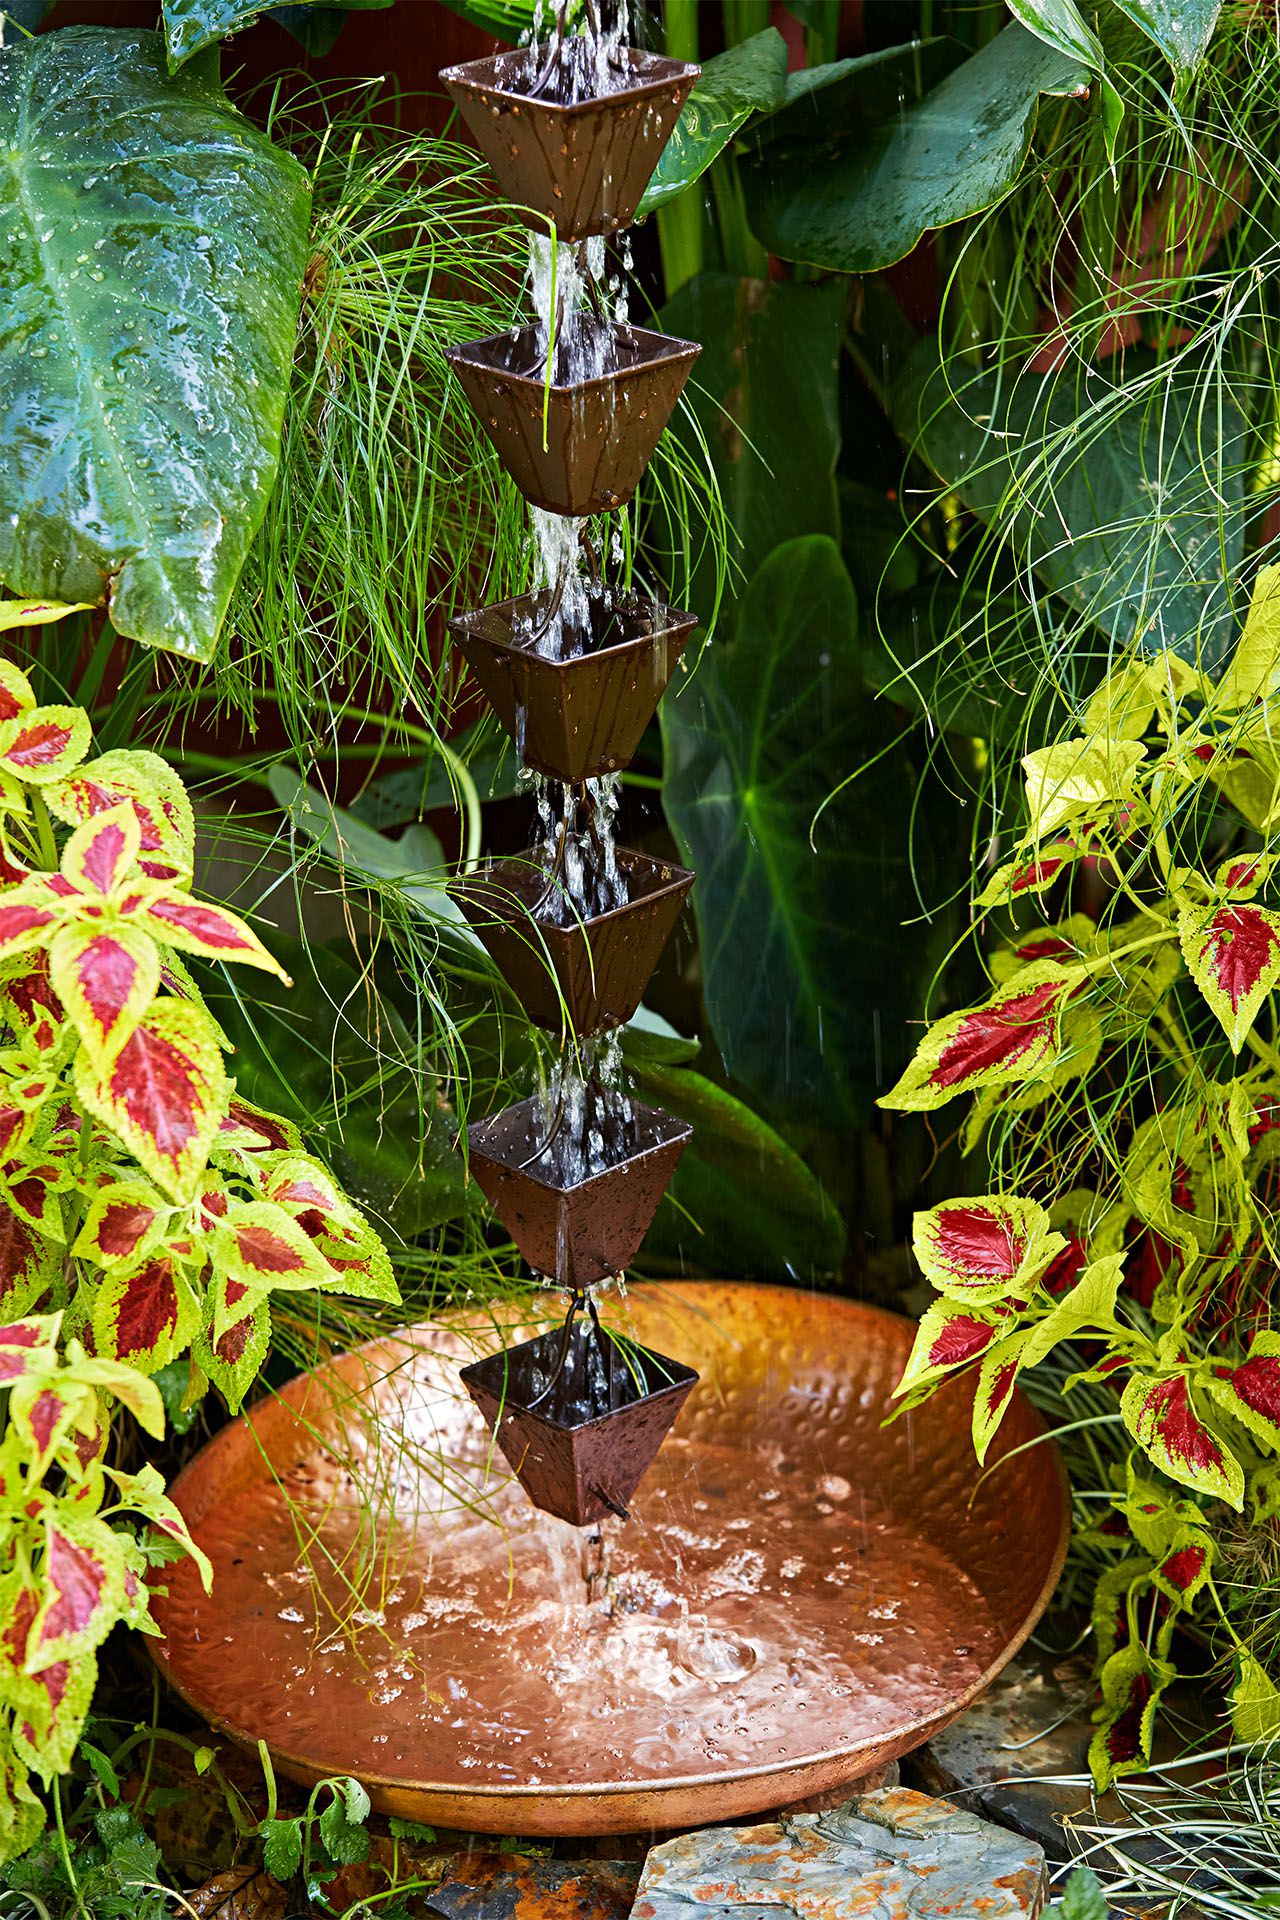
In this design, the material is the star. It’s not just a rain chain; it’s a *copper* rain chain. The warm, metallic glow of the copper is what makes this piece so special. It catches the light in a way that steel or aluminum doesn’t, and the leaf shape gives it an organic elegance. If you were to swap this for a simple black chain, you’d lose all of the warmth and decorative charm. The choice of copper elevates it from a utility item to a piece of garden jewelry.

Be aware that copper’s beautiful shine is temporary. When exposed to the elements, copper will naturally oxidize and develop a patina. It will first darken to a deep brown and eventually, over several years, develop that classic blue-green verdigris finish. Many people love this aged look, but if you’re set on keeping it shiny, you’ll need to periodically polish it or apply a special clear sealant. Embrace the patina—it’s part of the material’s story.
21. Large River Stones as a Simple Splash Guard
A pile of large rocks is one of the most effective and affordable splash guards there is. You don’t need fancy basins or expensive splash blocks. The key is to source the rocks smartly. Skip the small, expensive bags at the garden center. Go to a landscape supply or stone yard. Ask for ‘3-to-5-inch river rock’ or ‘small cobbles’. You can often buy them by the bucket for a few dollars. For an even cheaper option, look on Facebook Marketplace for people trying to get rid of rocks from a previous landscaping project. This is a much simpler approach than the mulched version in Idea #11.
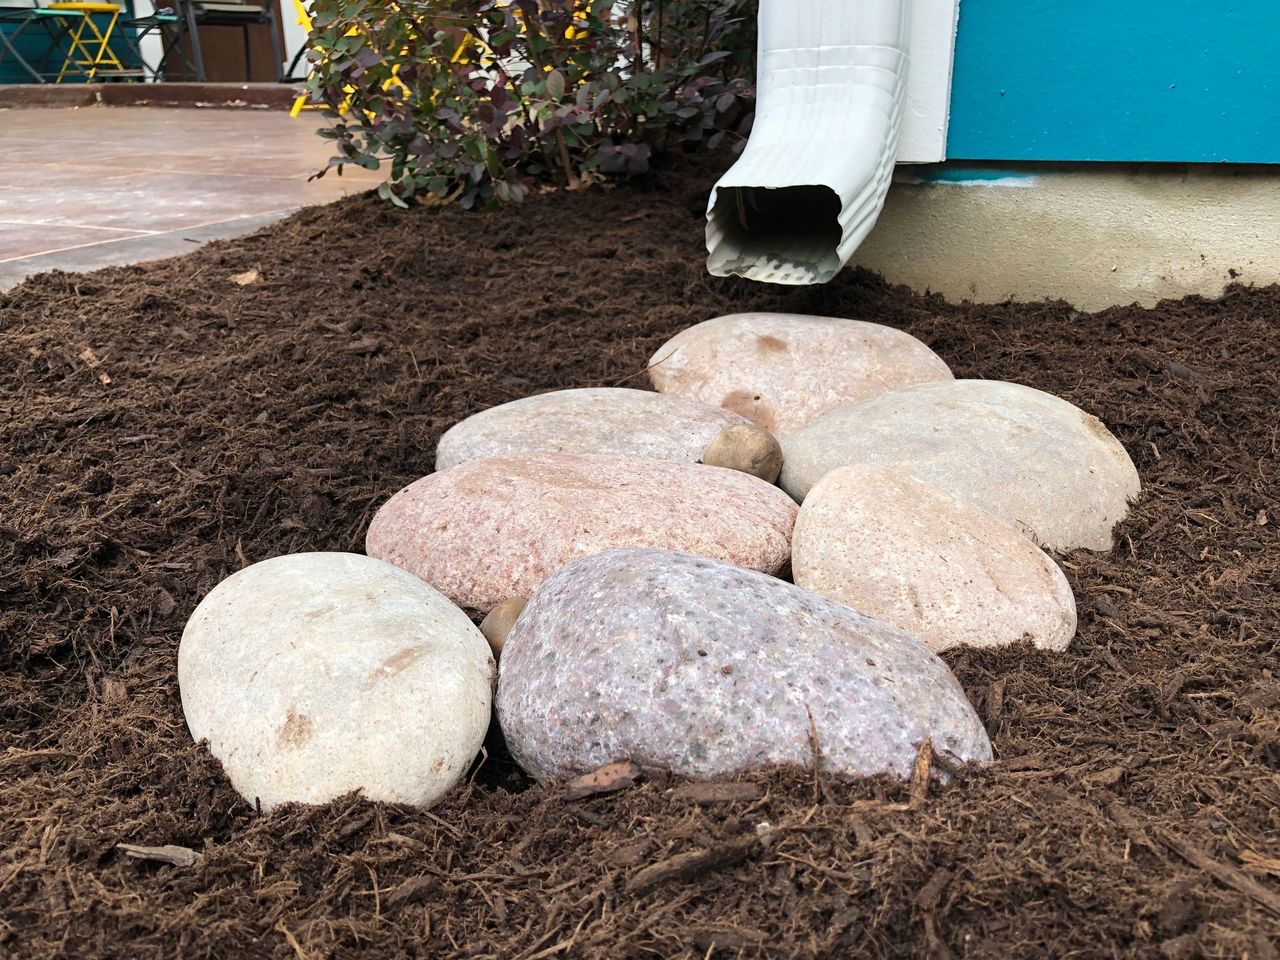
This simple solution works because of the power of scale. Using a handful of genuinely large, smooth stones makes a much bigger statement than a scattering of small pebbles. The large size gives them a pleasing weight and presence. It feels intentional and sculptural, not accidental. The smooth texture contrasts nicely with the rougher wood mulch and the texture of the turquoise siding, creating a little moment of visual interest right where you need it.
22. Bright Blue Rain Barrel on a Yellow-Sided House
A rain barrel is a perfect fit for a corner spot or a narrow side yard where a more extensive landscaping feature wouldn’t work. Most barrels are around 24 inches in diameter, so they tuck neatly against a wall without obstructing a pathway. By elevating it on a simple stand, you gain easy access to the spigot for filling watering cans and create the necessary gravity pressure for a soaker hose. It’s a high-impact, small-footprint solution for water conservation. The bright color, similar to the barrel in Idea #5, turns it into a focal point.
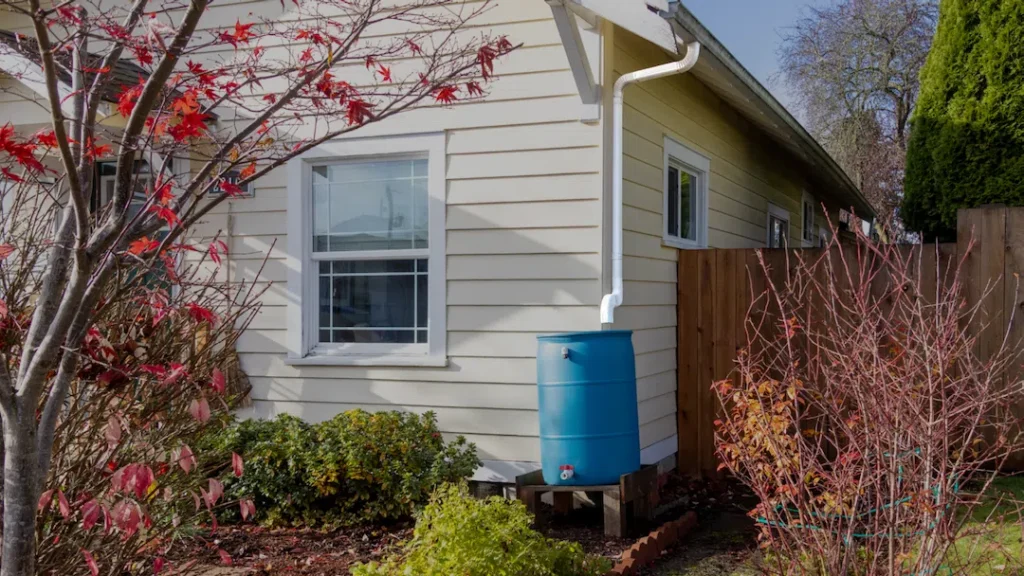
Rain barrels are low-maintenance, but not no-maintenance. Algae can grow inside, and mosquitoes can breed in standing water. Once or twice a year, empty the barrel and give the inside a good scrub with a simple vinegar and water solution. Most importantly, ensure your intake has a fine mesh screen to keep out debris and bugs. Before winter, you must drain the barrel completely and ideally store it indoors to prevent ice from cracking the plastic.
23. Architectural Rain Chain with a Wooden Soffit
This combination is successful because it masters the art of material conversation. The warm, natural grain of the horizontal wooden siding and soffit speaks to the dark, rigid lines of the roof trim and window frames. The bronze metal rain chain acts as the perfect translator between the two. Its metallic finish echoes the modern roofline, while its warm tone complements the natural wood. It’s a design where every material is thoughtfully chosen to enhance the others, creating a rich, cohesive architectural statement.
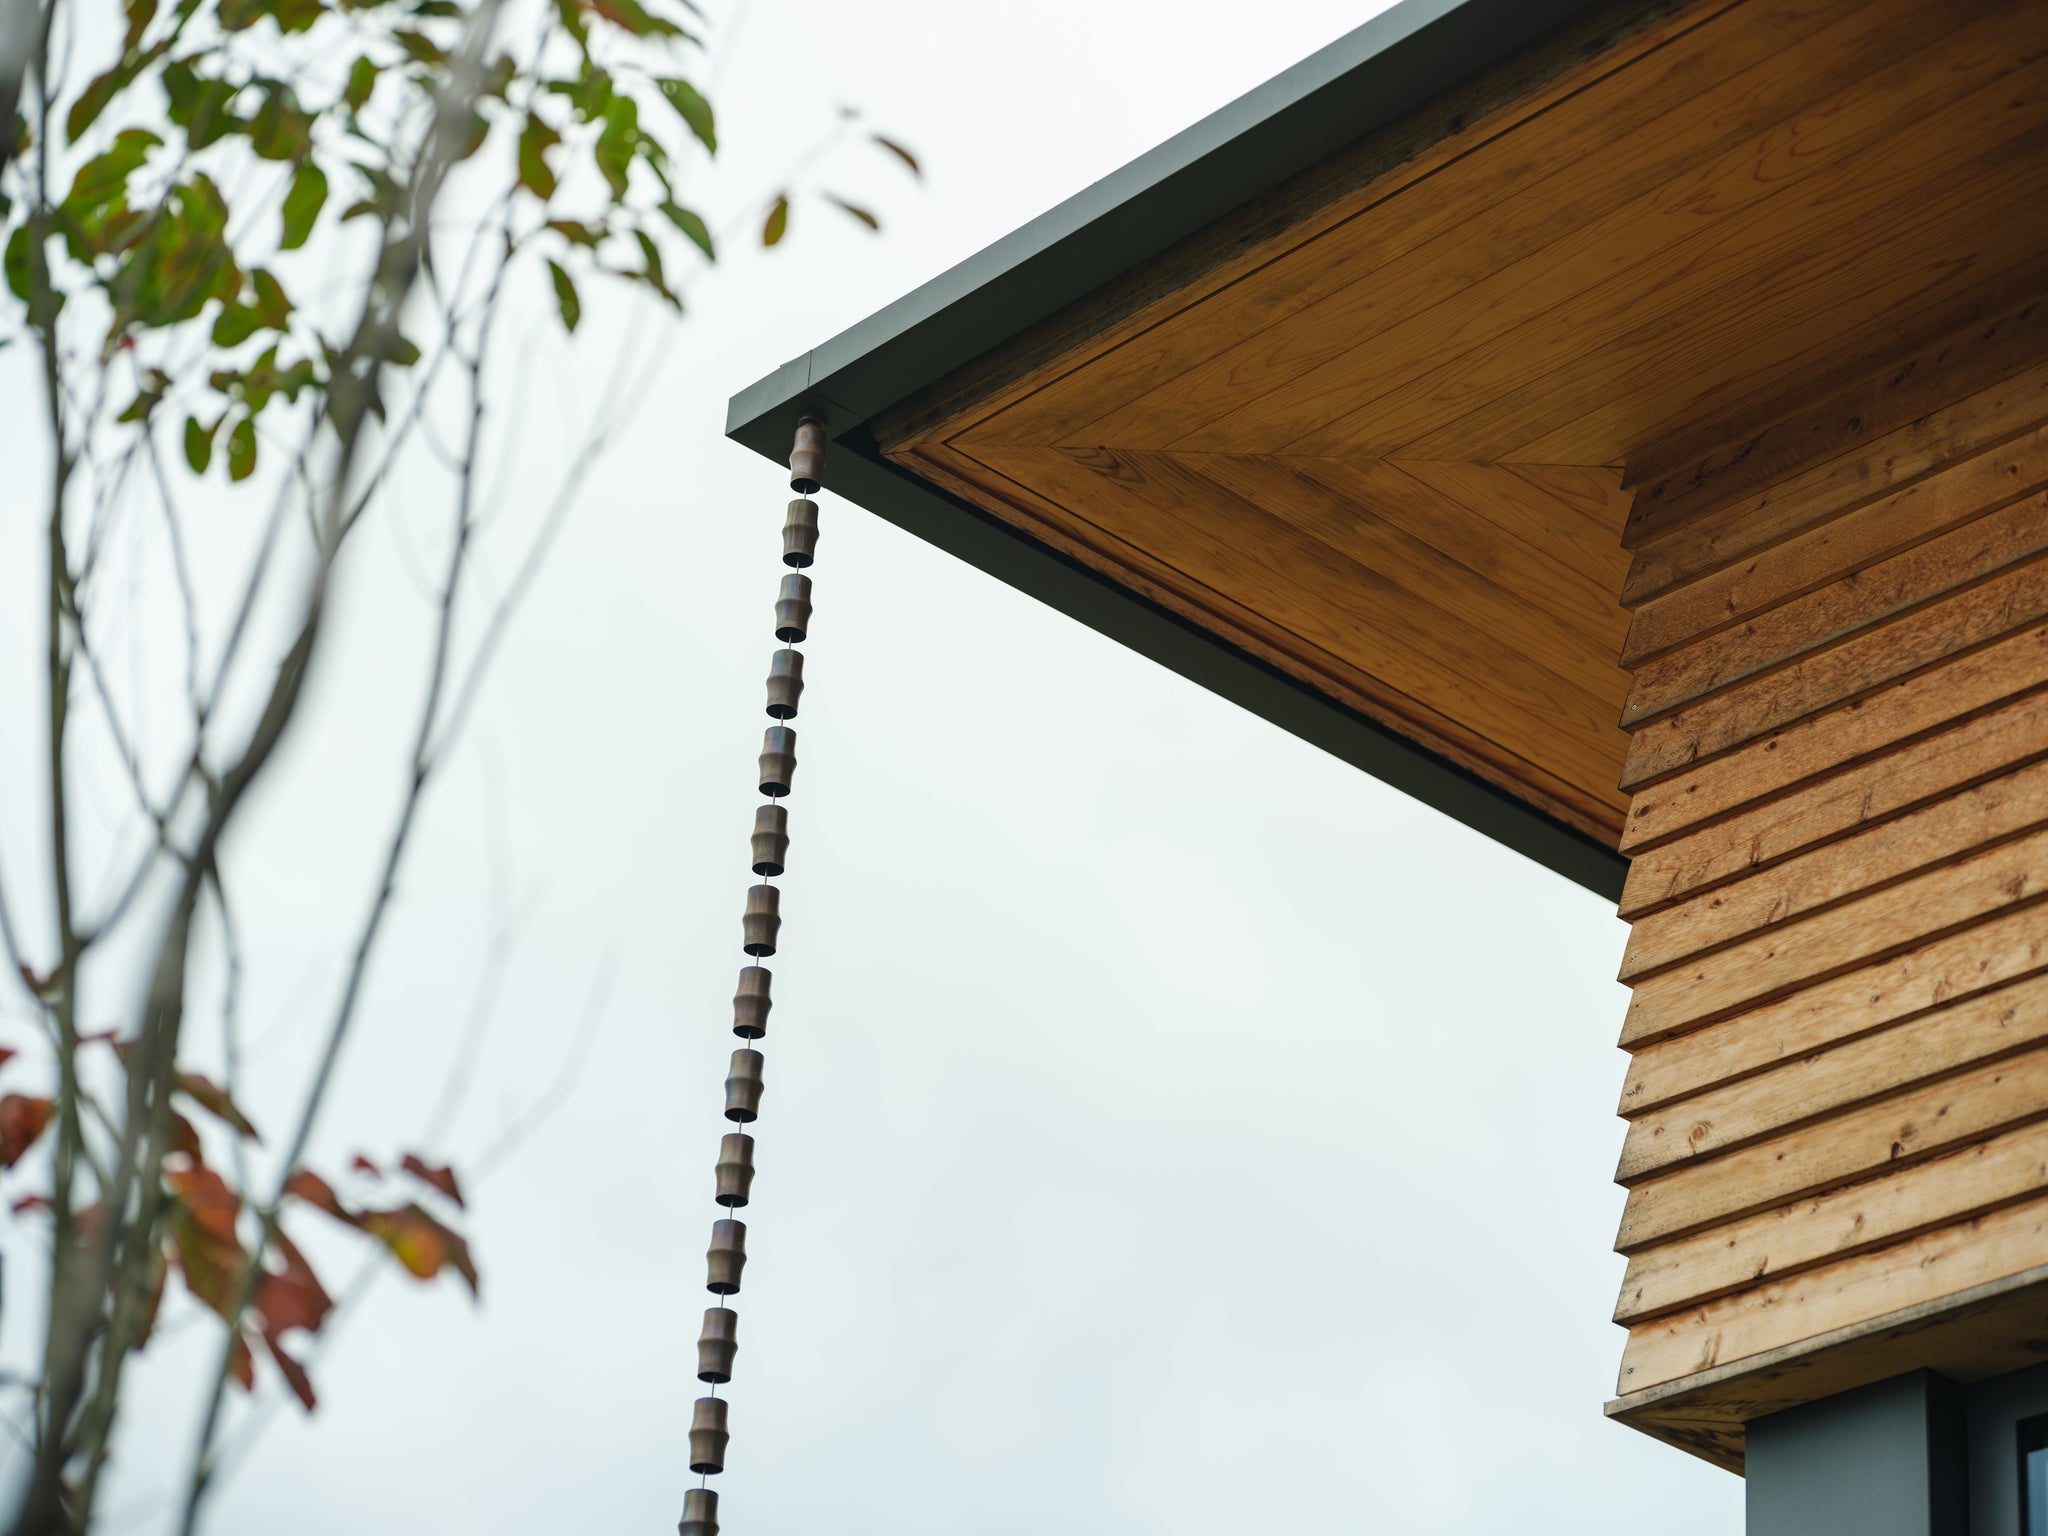
that makes this image so compelling is the way the rain chain is perfectly integrated with the angled wooden soffit. It doesn’t look like an afterthought; it feels like it was part of the original architectural plan. The clean lines of the soffit create a deliberate ‘frame’ for the rain chain, highlighting it as a special feature. This thoughtful integration of the functional element (the chain) with the architectural form (the soffit) is what elevates the entire design.
24. Linked Rain Chain Draining into a Framed Pebble Basin
Building a simple, attractive ground basin for your rain chain is an easy weekend project that contains splash and completes the look. Here’s how to make this wooden-framed version:
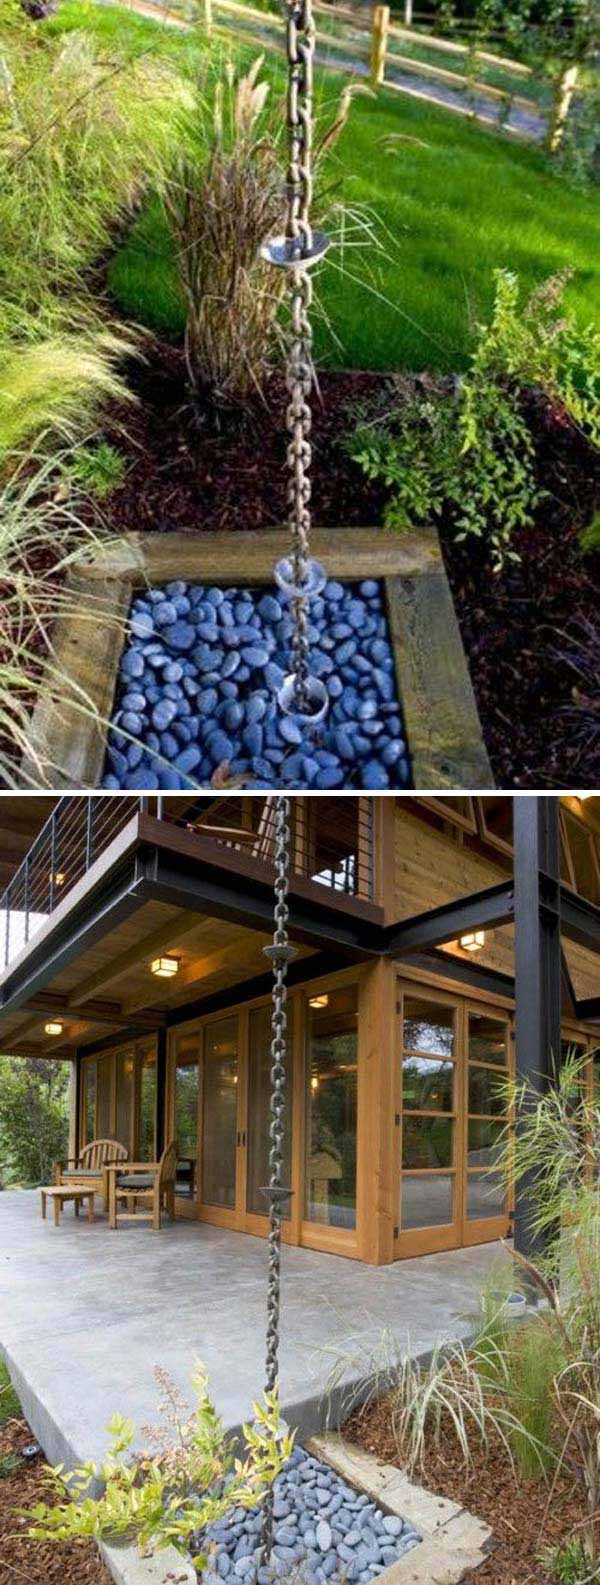
- Build the Frame: Create a simple square frame using four pieces of pressure-treated 4×4 lumber, joined at the corners with long exterior screws.
- Excavate: Dig a shallow pit about 6-8 inches deep, slightly larger than your frame.
- Add a Liner: Place a small piece of pond liner or heavy-duty plastic sheeting in the pit to prevent water from eroding the soil directly underneath.
- Position Frame & Add Gravel: Set your wooden frame in the pit and fill the bottom with a few inches of coarse drainage gravel.
- Top with River Rocks: Fill the rest of the basin to the top of the frame with your decorative blue-grey river rocks.
To make your basin even more effective, create a small depression in the river rocks directly under the rain chain. Don’t make the surface perfectly flat. A slight bowl shape, just an inch or two deep, will help collect the initial flow of water and guide it down into the gravel base more efficiently. This simple contouring minimizes splash during heavy rain and makes the entire feature function better.
25. Copper Rain Chain in a Desert Landscape
As xeriscaping and water-wise gardening become less of a niche trend and more of a mainstream necessity, every drop of water counts. A rain chain in a desert setting is the perfect symbol of this shift. It’s not just a pretty feature; it’s a tool for celebrating and directing precious rainfall. By guiding water from the roof to a specific, permeable spot like this rock basin, you’re actively helping to recharge the groundwater right where your plants need it, rather than letting it run off into the street. It’s beautiful, practical, and environmentally smart.
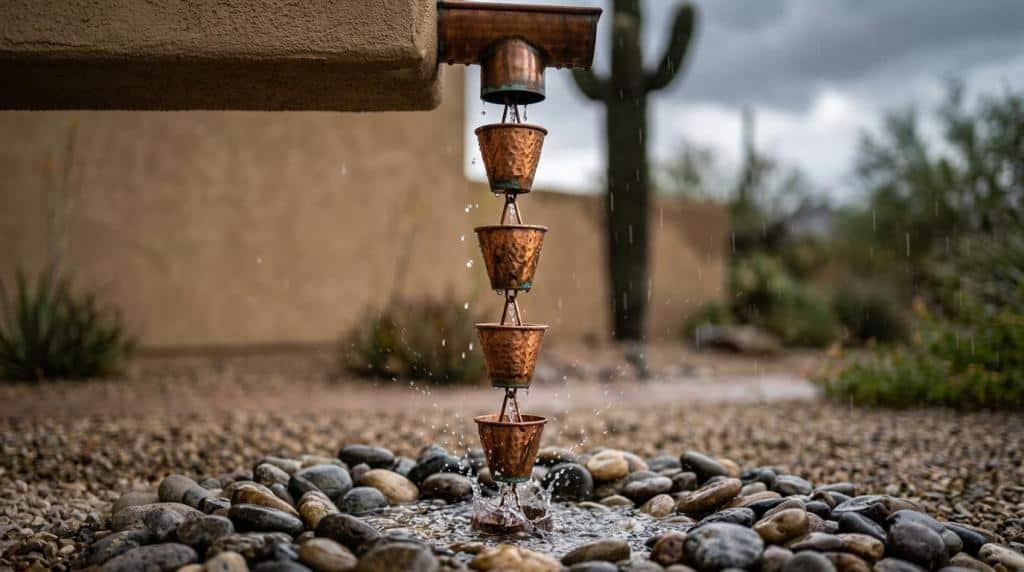
The design works through a powerful contrast of elements. The sleek, man-made geometry of the copper rain chain and the stucco overhang stands out against the rugged, organic textures of the desert. The warm, polished copper provides a focal point of color in an otherwise muted, earthy palette of tan, charcoal, and brown. It’s a perfect marriage of modern architecture and the natural landscape, each making the other look more dramatic.
26. Pebbled Dry Creek Bed With Water Pooling
A full-fledged dry creek bed is a project best suited for medium to large properties where you have enough space for it to meander and look natural. For a creek bed that is 3-4 feet wide, you’ll need a linear run of at least 15-20 feet to achieve a convincing, gentle curve. Trying to force this look into a tiny side yard will likely look cramped and artificial. This is a feature that needs room to breathe. For a smaller-scale rock solution, check out the more contained border in Idea #2.
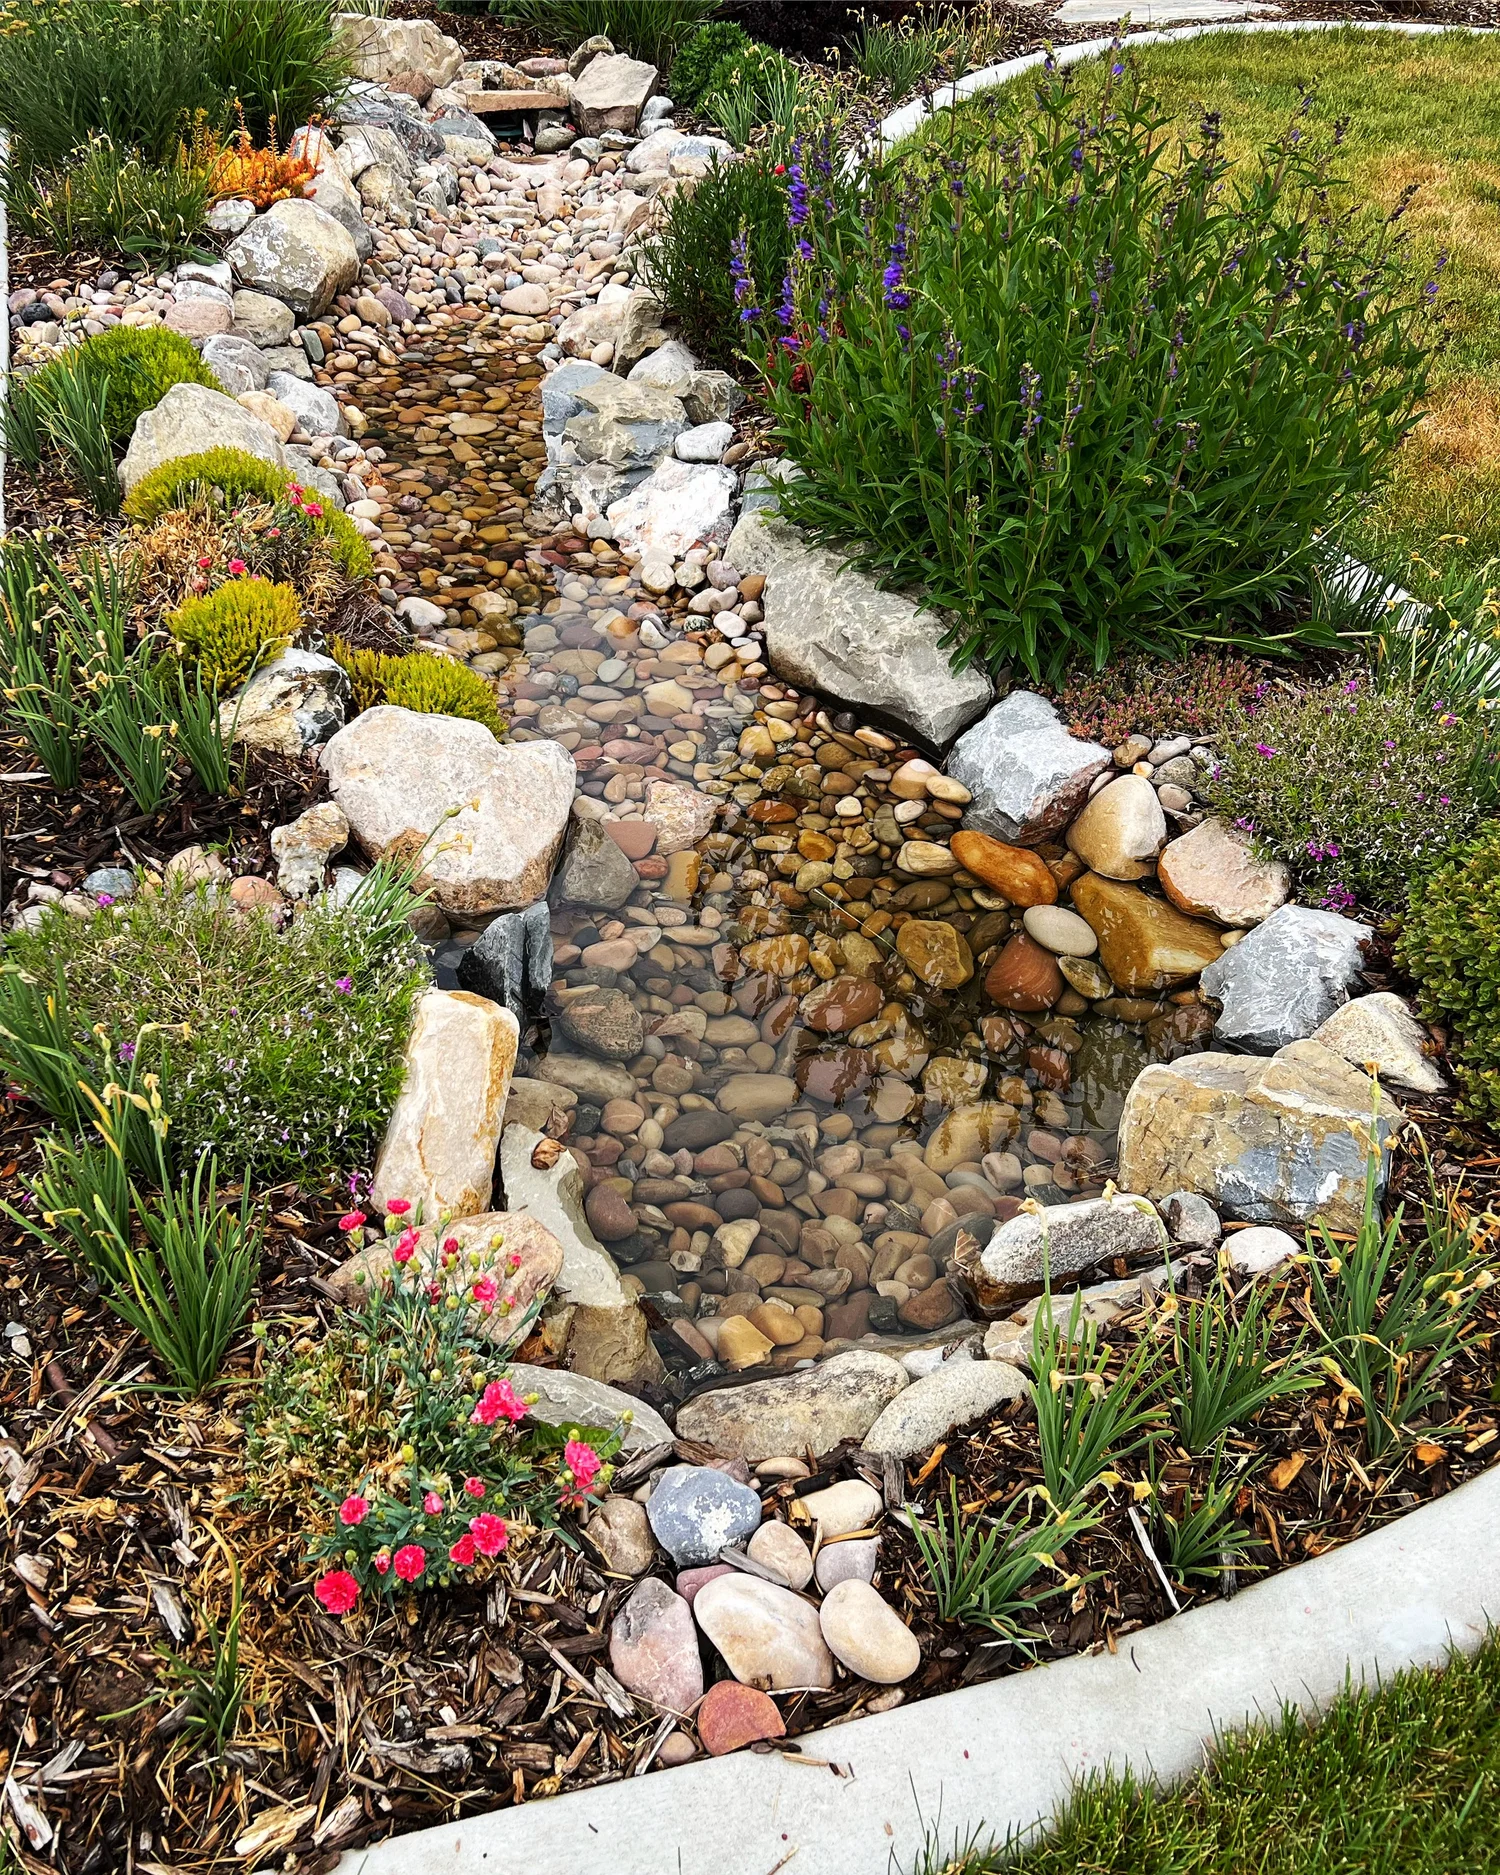
The secret to a professional-looking dry creek bed is creating ‘banks’ and ‘pools’. Don’t just make a flat-bottomed trench. Vary the depth. Dig slightly deeper, wider sections to create ‘pools’ where water can collect, and use your largest boulders along the outside of curves to create ‘banks’. This mimics the erosion patterns of a real creek and creates far more visual interest and depth than a uniform channel. This variation in depth and width is the key to a natural look.
Give Your Gutters the Glow-Up They Deserve
As you can see, that awkward spot under your downspout isn’t a problem to be solved, but an opportunity to add another layer of beauty and personality to your home. Whether you go for a simple bed of river rock or an elegant rain chain, a little bit of thought can transform it from an eyesore to a feature you genuinely love. Now go pick your favorite, and get ready to make it happen! Don’t forget to save your top picks to your landscaping board on Pinterest.