34+ Stunning Gingerbread Christmas Tree Ideas That Will Sweeten Your 2026 Holiday Season

You know that feeling when you finally spot a gingerbread Christmas tree that looks exactly right — and then lose it forever in a board you named “holiday stuff, maybe”? Same. So we did the digging for you.
After filtering through hundreds of options at Target, Etsy, World Market, and Walmart, we narrowed it down to 34 gingerbread Christmas tree ideas that hold up in a real living room, not just on a mood board. Everything here sits between $6 and $480, with budget and luxury versions compared side by side and every idea shoppable through direct product links.
Inside you’ll find rustic farmhouse displays, vintage Victorian candy-land tablescapes, maximalist candy-colored kitchens, and modern Scandinavian gingerbread styling — plus honest notes about what actually survives December. And stay until the end — we break down the most common mistakes that can ruin these looks.
Why now? Gingerbread stopped being a cookie in 2026 and became a whole-house motif, and Pinterest searches for it spike every year around the second week of November.
Go ahead and save this — you’re going to want to reference it. 📌 Save this to Pinterest for later — you’ll want to revisit these ideas.
1. A Marble Cookie Station That Doubles as Decor
Nothing in this shot is styled, and that is exactly the point — it is the honest mise en place of a decorating session, shot from about 30 inches up. The white marble does the heavy lifting, reading cool and expensive while making pink, yellow, and teal icing look intentional instead of chaotic. The little wooden spoon of sprinkles is the only round object in a frame full of straight edges, so your eye lands there last and lingers.

Containment is the whole trick. Keep all three icing bags standing upright in a 4-inch ramekin lined with a damp paper towel so the tips stay sealed and the colors stay bright between batches. Give the loose sprinkles one shallow bowl rather than four, and if your counters are not marble, a 12-by-18-inch marble pastry slab runs $30 to $45 and photographs identically.
2. Tiered Star Cookie Tree With Silver Dragées
It is a stack of five star cookies and a spoonful of icing, and it reads as a centerpiece worth photographing. The one thing holding the illusion together is the silver dragée pressed onto every single point. Remove them and you have a nice cookie tower; keep them and the light catches each tip, so the shape stays legible from across the room. Powdered sugar dusted from ten inches up finishes the trick.

- Bake five star cookies in graduated sizes — 3, 4, 5, 6, and 7 inches — at 350°F for 9 to 11 minutes, then cool completely. Warm cookies slide.
- Pipe a quarter-inch ring of stiff royal icing on the center of the largest star and set the next size down on top.
- Repeat, rotating each star slightly so the points do not stack in a straight line.
- Press a silver dragée onto every point while the icing is still wet.
- Dust with powdered sugar through a fine sieve. About 90 minutes start to finish, roughly $12 in materials.
3. A Gingerbread Man Tablescape Anchored by Tufted Leather
The formula here is roughly 60 percent warm brown, 25 percent deep red, and 15 percent evergreen. The brown comes from the tufted leather chairs, the bare wood table, and the gingerbread itself; the red lives in the plates, the stemmed goblets, and the berries threaded through the garland. Swap the red for burgundy and the evergreen for eucalyptus and the same table turns Tuscan without you buying anything new.
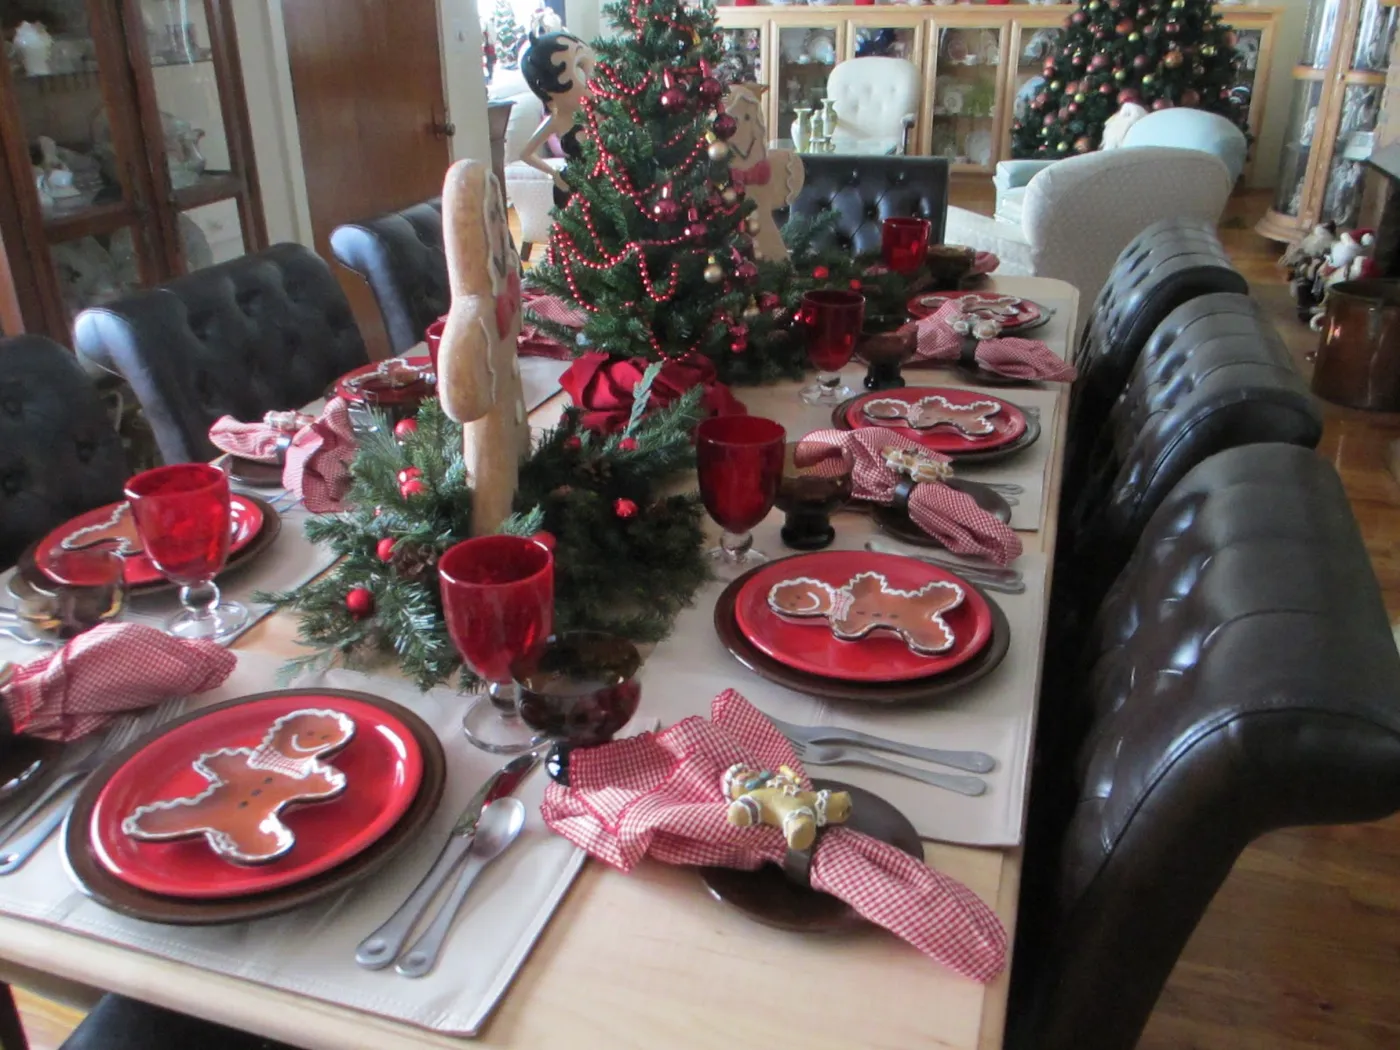
The tufted leather is doing quiet work — it is what keeps a dessert-themed table from sliding into kids’ birthday territory. Trade those chairs for painted white ones and the room resets to casual. Pinterest has been full of dessert-as-centerpiece tablescapes for a couple of seasons now, and the honest reason is that edible decor costs less than florals and photographs better under warm indoor light. Miniature trees down the middle beat a $90 bouquet on both counts.
4. Scalloped Icing Roofs and Candy Shapes on a Cake Stand
- Gingerbread house, kit or pre-built: $15–$40
- Assorted candy — canes, red and green shapes, figures: $10–$22
- Scalloped cake stand or white pedestal platter: $18–$45
- Faux evergreen sprigs: $8–$25
- Warm LED string lights: $8–$18
- Total: $59–$150
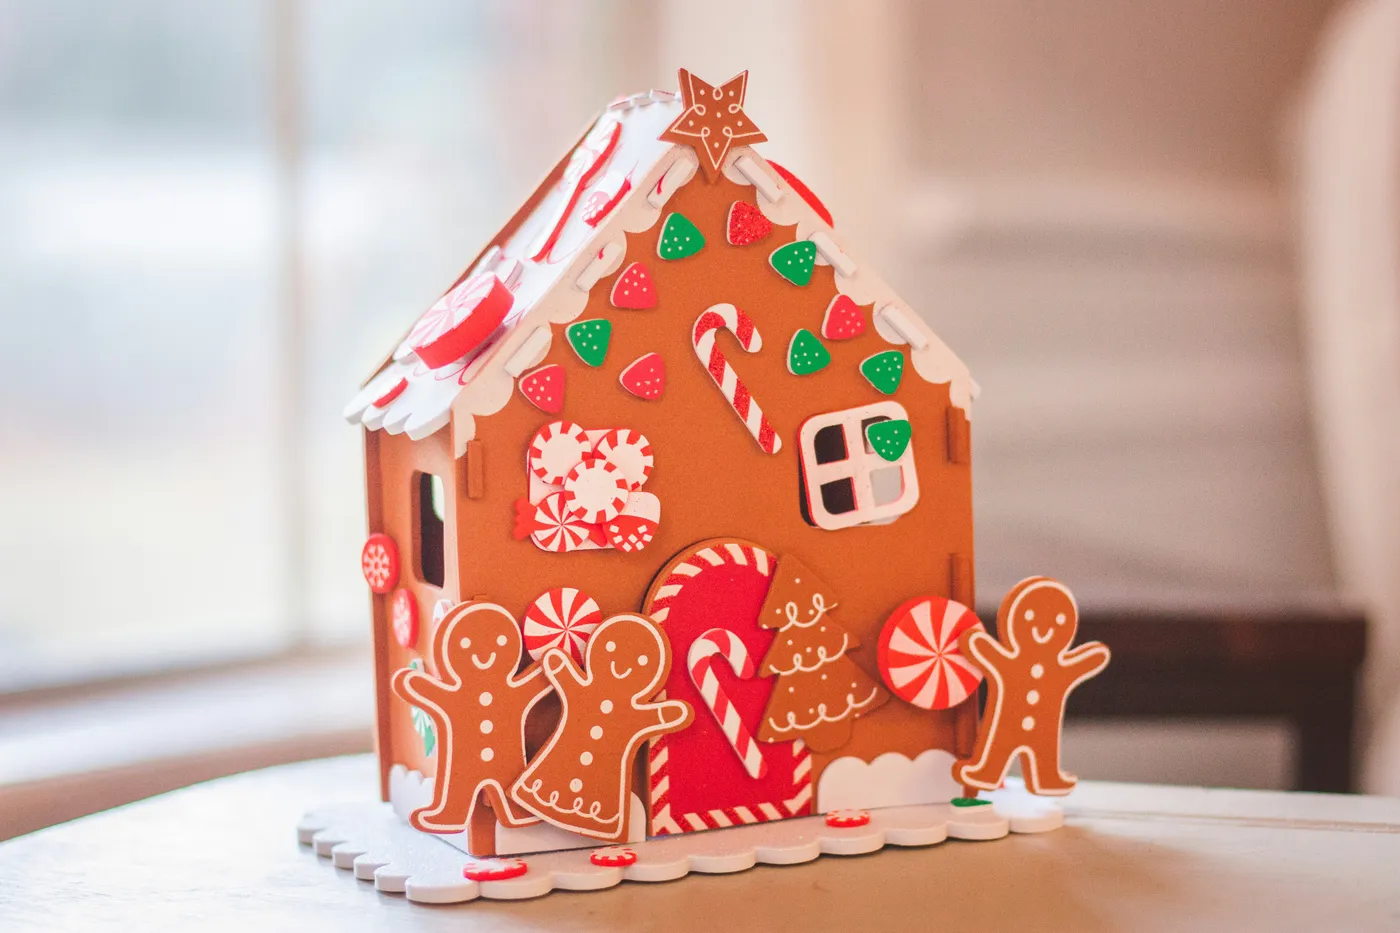
Budget alternative: a $6 boxed kit from Walmart plus thrifted brass candlesticks at $3 to $8 each as risers gets you about 60 percent of this look. Skip the string lights entirely — one real candle does the same warm work for free.
, though: royal icing is a fair-weather material. In a humid house it goes soft and slightly shiny within a week, and anywhere near a south-facing window the colors fade first and the structure sags second. Keep the stand off the floor if you have a dog, and skip it entirely with a toddler around — the candy is a choking hazard and the house will not survive the week.
5. Light-Up Gingerbread Houses on Deep Green Branches
Ornament scale is where most trees fall apart. The rule I use: every large statement ornament needs roughly three small ones nearby to feel anchored. A 4-inch gingerbread house should have about nine 1-inch filler pieces within a 10-inch radius, and ornaments want to sit 6 to 8 inches apart on center. That glowing doorway only reads as magical when there is space around it for the light to spill into.
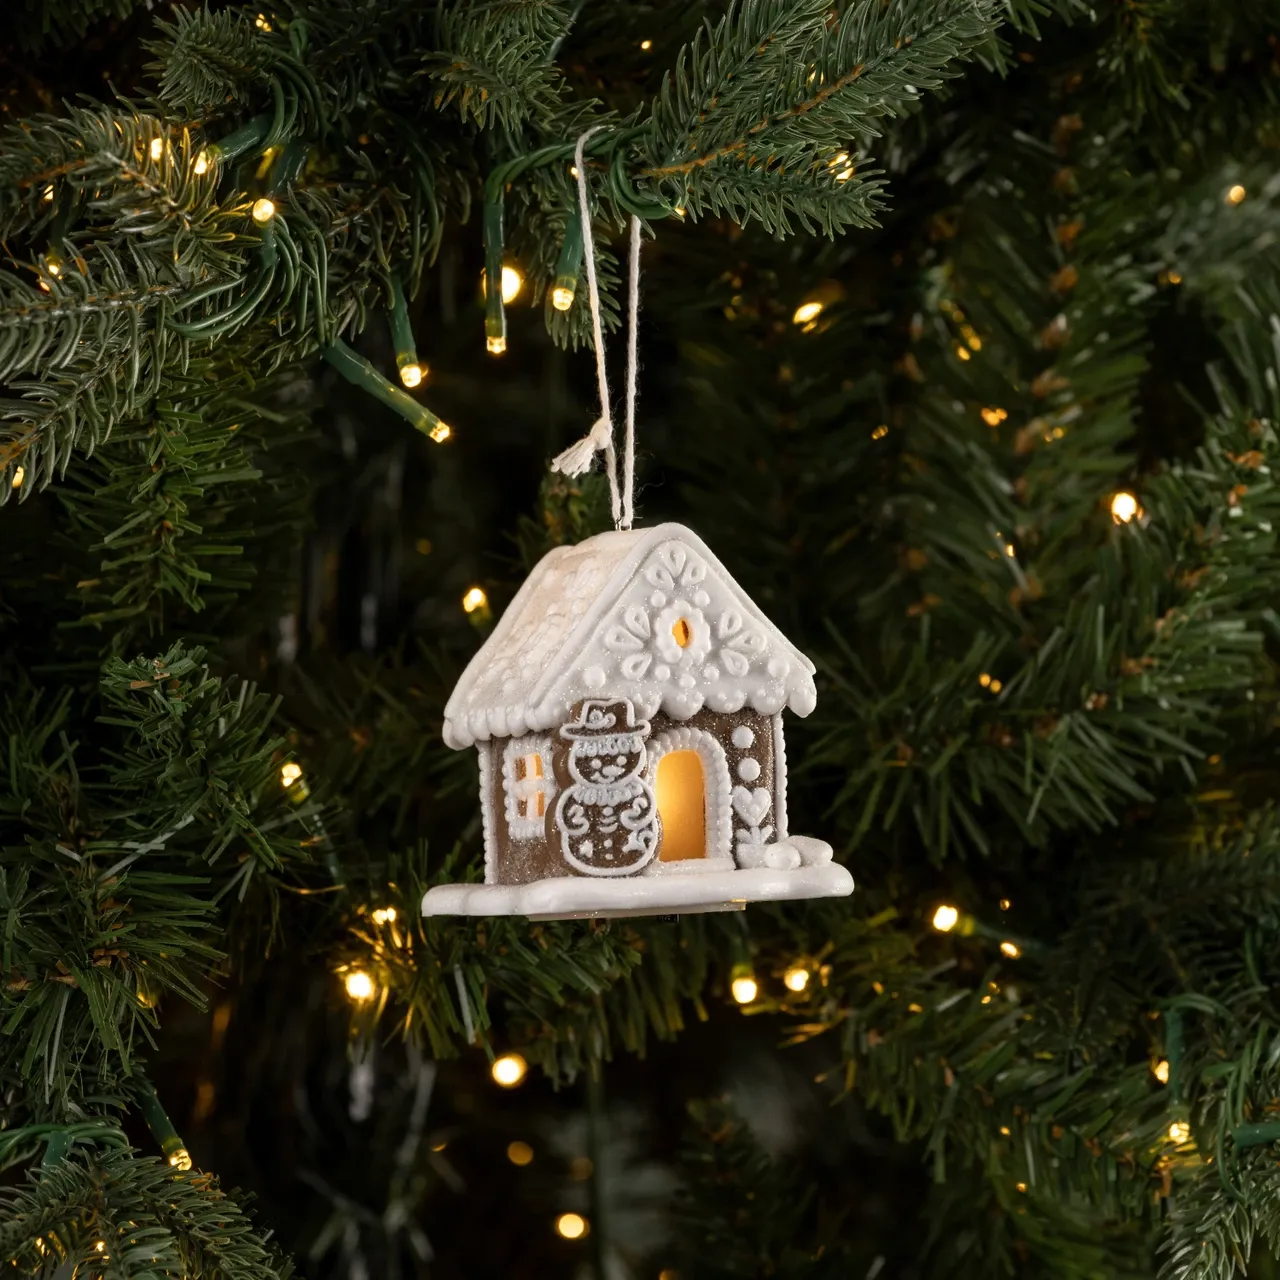
On a 6- to 7-foot tree, budget 40 to 60 ornaments and 300 to 400 warm white lights; a 4-foot tabletop version needs 20 to 25 ornaments and about 100 lights. Lit house ornaments want a cooler backdrop, so pair them with a flocked or bluish-green tree rather than a bright kelly green one. For the small-space version of this exact idea, see Idea #13, and if you want the full tree covered in gingerbread, jump to Idea #30.
6. Layered Cookie Tree With Green Frosting and Sprinkles
The rhythm is what sells it. Alternating tan cookie and thick green frosting gives you a stripe pattern that repeats every inch or so, which is why the eye reads tree before the brain reads dessert. The sprinkles do scale work too — a mix of stars, rounds, and elongated shapes in red, green, and white keeps the surface from going flat, and the black wire cooling rack underneath frames the whole thing in one clean line.

Now the honest part: real cookie towers are a two- to three-week decoration at best. Sugar softens in humidity, dust settles into the frosting, and by New Year’s the layers start to lean. Plan on making a fresh one each season rather than storing it. If you want the look permanently, a ceramic or resin version on a cake stand gives you 90 percent of the effect with zero upkeep — just wipe it with a dry microfiber cloth.
7. Icing Snow, a Red Door, and Gold Glitter Ornaments
Getting icing to look like snow instead of cake decoration comes down to consistency, tip, and gravity. Use royal icing at stiff peak with a #4 round tip, and pipe in short overlapping strokes rather than one continuous line.

- Hold the bag at a 45-degree angle, about a quarter-inch above the surface.
- Pipe a short 1-inch stroke, stop, then start the next one slightly overlapping the last.
- Let each roof edge set for 10 minutes before piping the one below it, or the weight pulls it down.
- Add a second pass of small dots along the eaves once everything is dry — that is your icicle effect.
a decorated kit at Target runs $12 to $18 in early December, and Walmart’s version is often under $10. Dollar Tree carries green icing trees and wreath picks for $1.25 each, and a bag of gold glitter balls at half off in late November is about $4 for a dozen. Build the whole thing under $30.
8. Pinecones and Mushrooms on a Woodland Gingerbread Tree
If you removed everything but the green piping, you would have a perfectly nice Christmas tree cookie. The red-and-white mushrooms sitting on that piped green foliage are what turn it into a forest floor. They are tiny, they cost almost nothing, and they are the reason this reads as woodland rather than generic holiday — the same way one real pinecone on a mantel does more than a bowl of plastic ones.
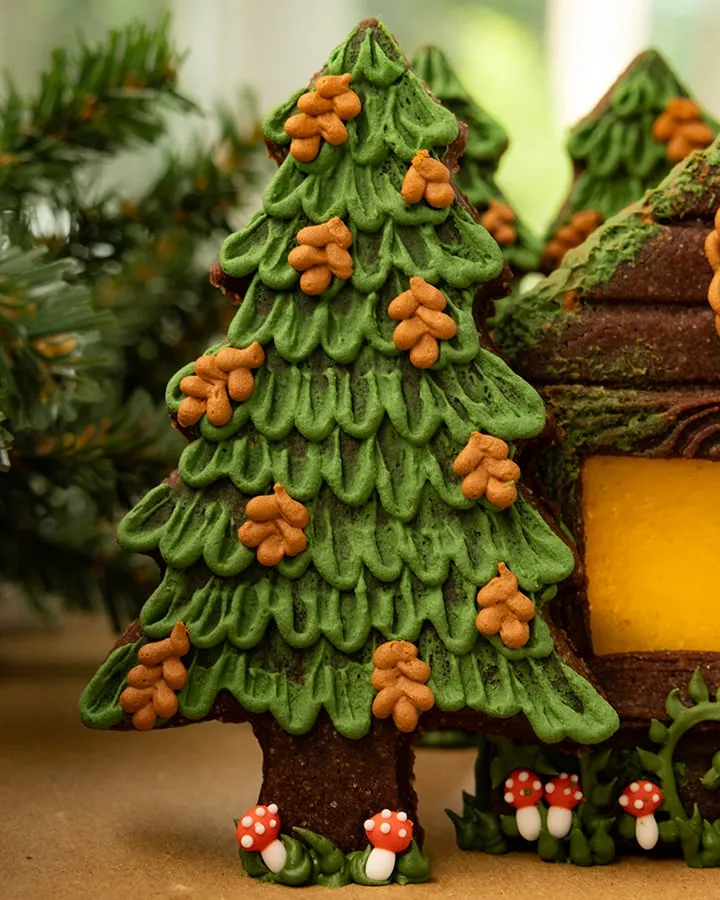
The color math runs roughly 70 percent dark brown, 25 percent forest green, and 5 percent red and white. Want it Scandinavian instead? Push the green toward sage and the brown toward oatmeal. Want it Mediterranean? Shift the green to olive and add a little ochre. The proportions stay put and only the temperature moves, which is the whole trick with themed baking.
9. Pastel Ornaments, Bottle Brush Trees, and a Gingerbread House
Pastels at Christmas used to be a niche thing. In 2026 they are everywhere, largely because the candy-colored look borrowed its palette from the Y2K revival — pink and lime and aqua sitting next to brown, not replacing it. The brown cookie base is what makes this work. Without it, bright pink and aqua read as Easter. Set the house on a green gift box, flank it with pink and green bottle brush trees, and it lands somewhere between sweet shop and design studio.
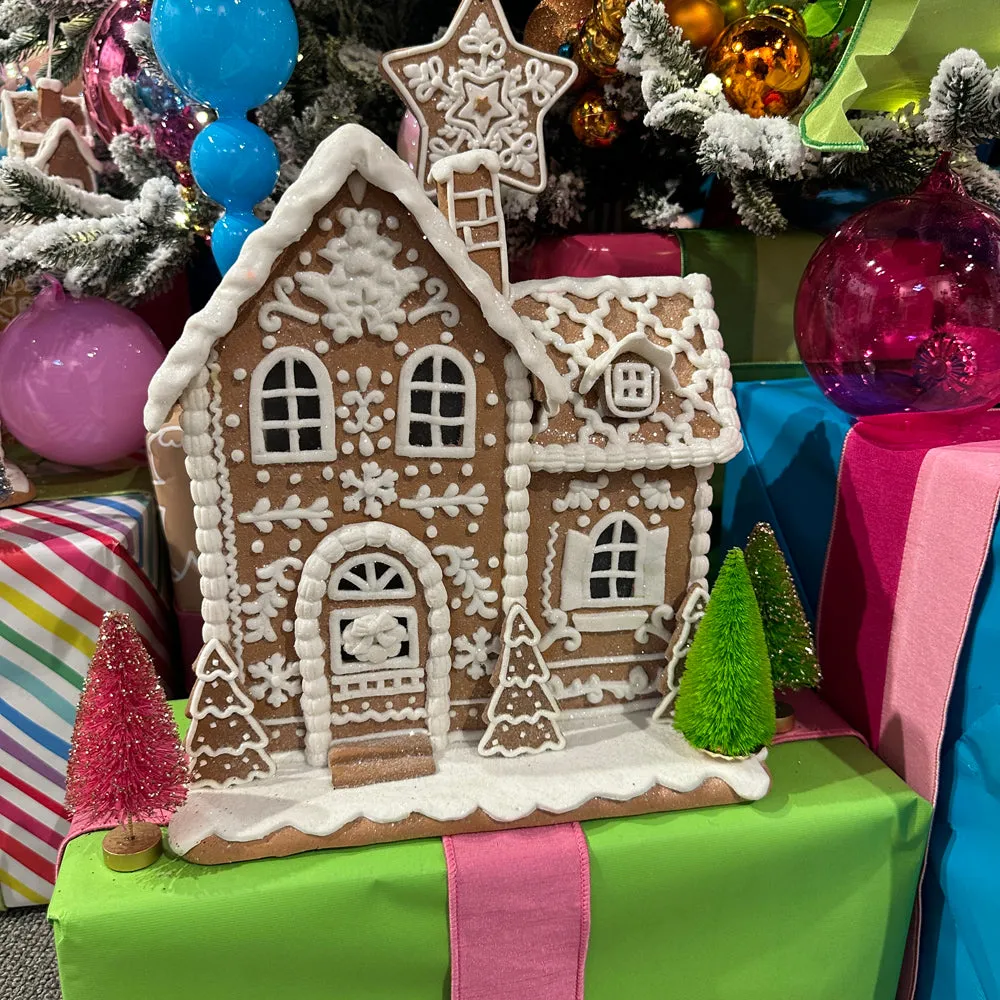
- Gingerbread house with white icing: $15–$40
- Bottle brush trees, set of three: $12–$30
- Glossy round and elongated ornaments, dozen: $10–$25
- Wrapped gift boxes as risers: $6–$18
- Total: $43–$113
Budget alternative: hit the dollar store for bottle brush trees at $1.25 each and wrap empty boxes you already own. Save the money for the ornaments — that is where the shine actually registers. For the kitchen version of this mood, see Idea #20.
10. Flocked Branches, Dried Seed Pods, and Gingerbread Houses
Flocked trees have a dirty secret: they read bluish under indoor light, which is exactly why warm white string lights and translucent pale-yellow accents matter so much. Dried seed pods — lotus pods and poppy heads are the ones you see most — cost $8 to $14 for a bundle and hang on 20-gauge floral wire hooked around the branch. Hang them slightly behind the light strand rather than in front, and they will glow from within instead of blocking the bulb.
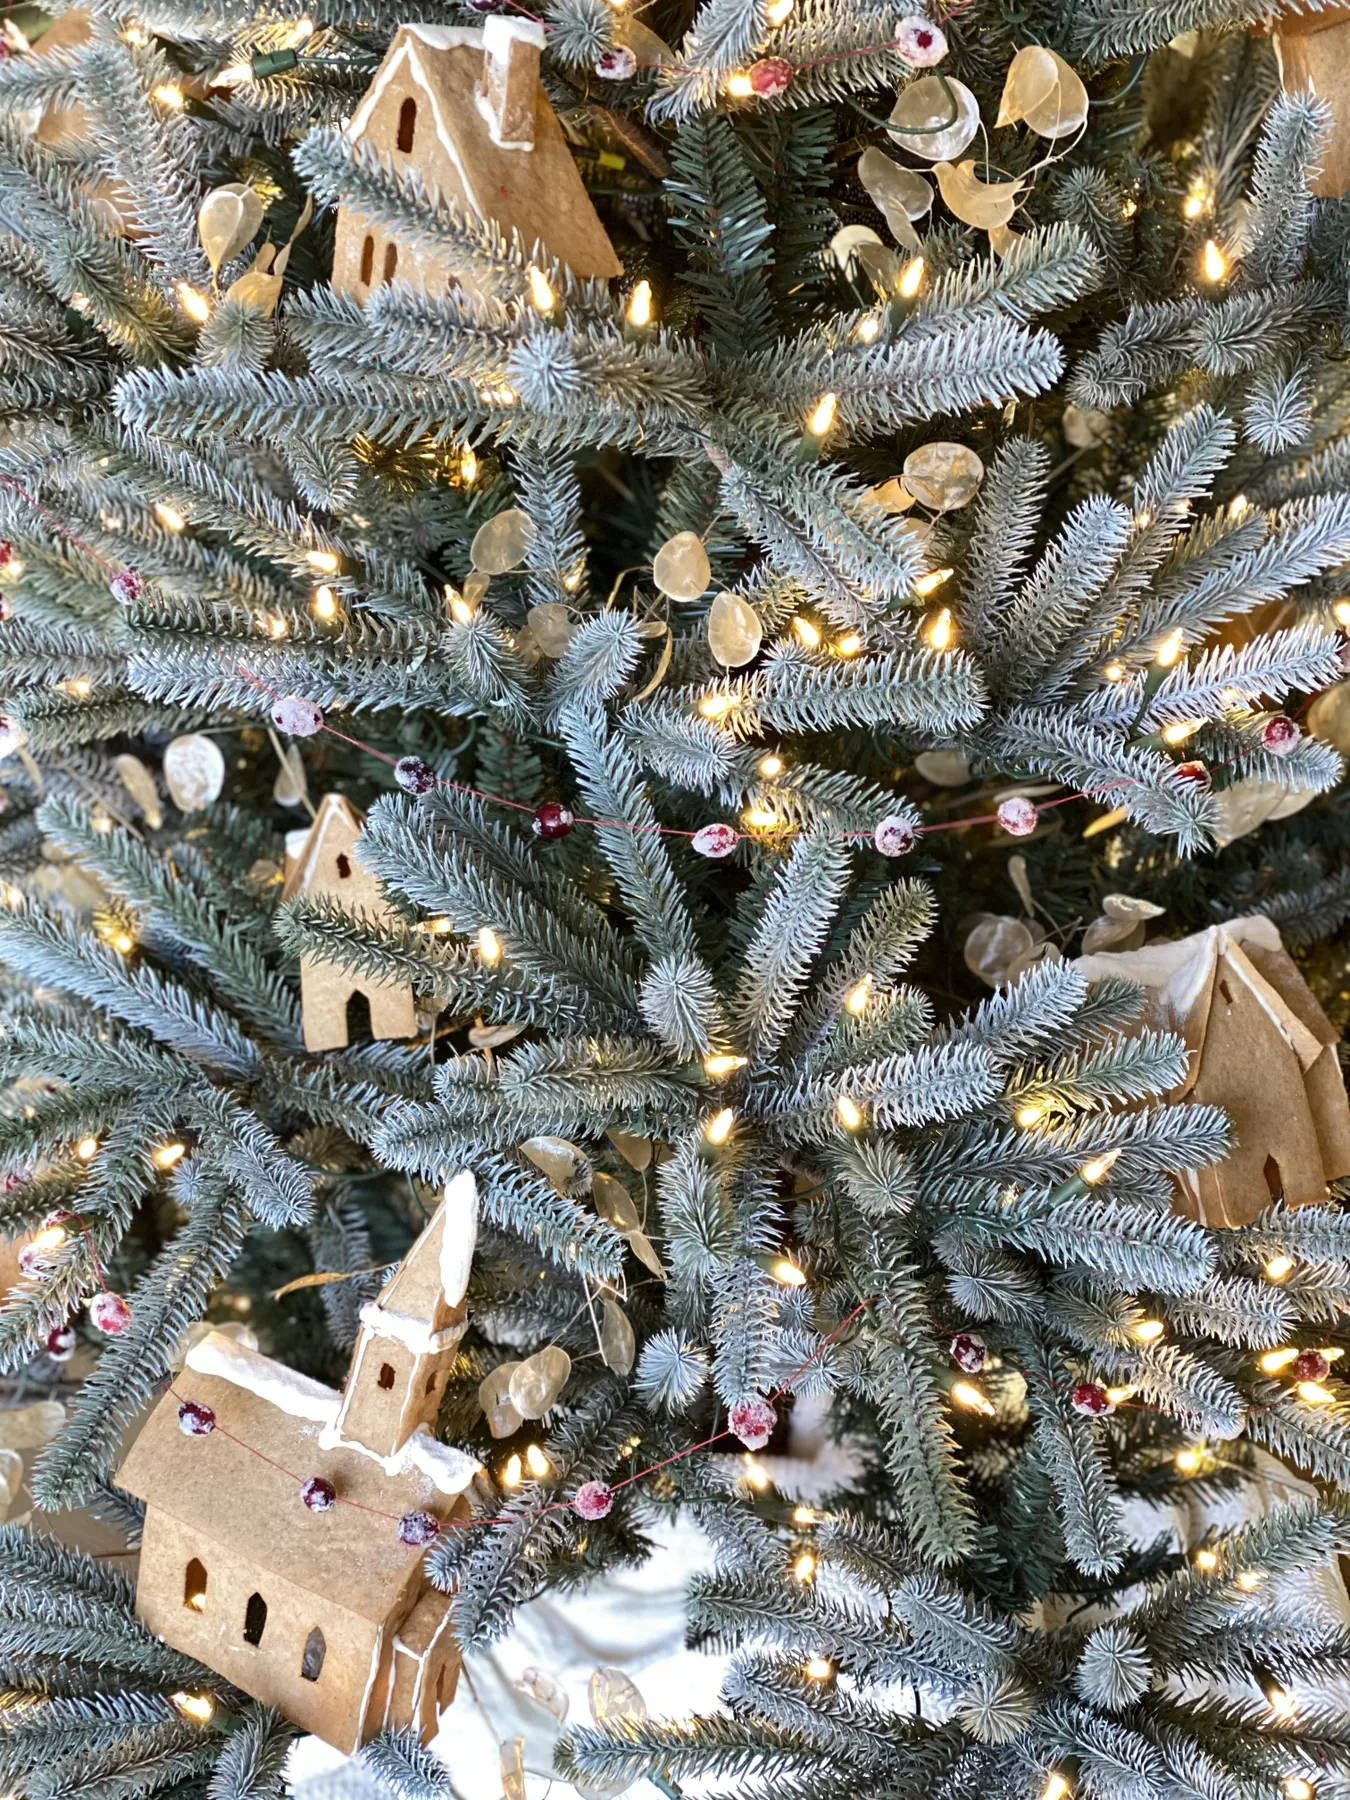
- Measure the tree height and check ceiling clearance — flocked trees need 4 to 6 inches of headroom for the topper.
- Confirm the tree is pre-lit warm white; cool white bulbs will make the bluish flock look gray.
- Count your gingerbread house ornaments and settle on spacing before you hang a single one.
- Test one dried pod on a branch to be sure it is not too heavy for a light branch tip.
- Keep a lint roller nearby — flock sheds, and it sheds most while you are decorating.
11. Up Close: Thick Green Frosting and Star Sprinkles
Shot this close, the alternating layers do something a wider photo cannot show: the frosting looks almost architectural. Each band is piped thick enough to hold its own edge, so you get a soft scalloped line every inch and a half. The sprinkles — red stars, white stars, and assorted rounds — land at uneven density on purpose, heavier at the edges where the frosting curves and lighter in the middle. Even spacing would have killed it.
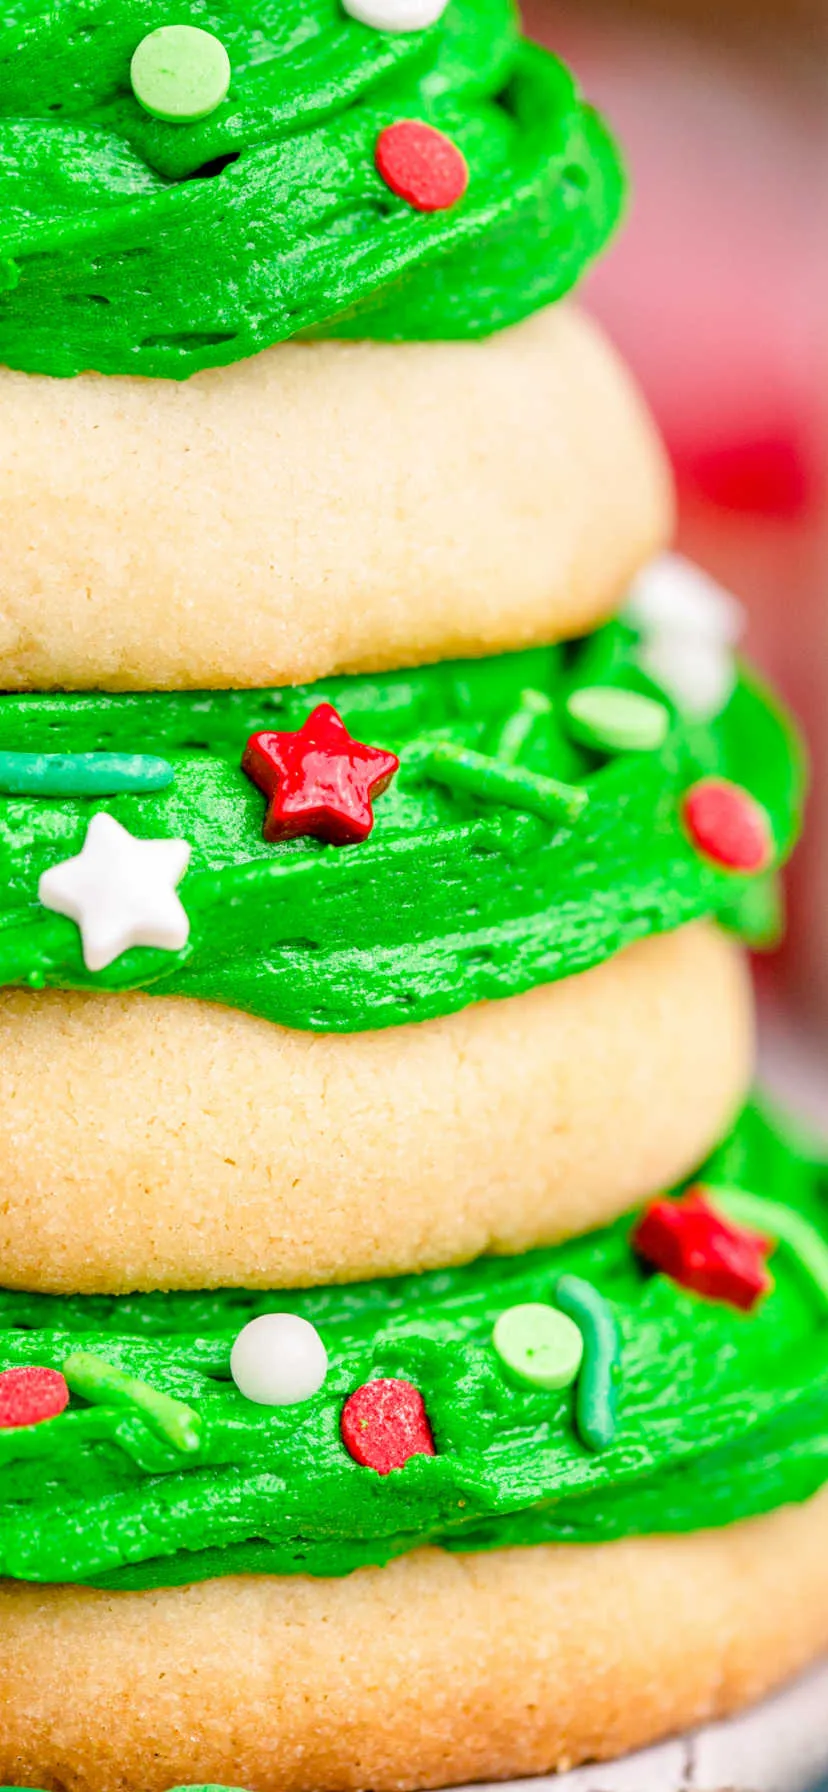
a box of plain round shortbread at IKEA or Trader Joe’s runs $4 to $7, and a tub of white frosting tinted with gel coloring costs about $3.50. Stack five of them with frosting between the layers, pipe the top one as a swirl, and press on whatever sprinkle mix you already own. Under $15 for a centerpiece that looks like it came out of a bakery case.
12. A Miniature Village With Deer and Bottle Brush Pines
This is a sideboard idea, not a coffee table idea. Plan on at least 30 inches of surface width and 12 to 18 inches of depth so the house, the trees, and the deer have room to read as separate objects. Keep the whole scene between 8 and 14 inches tall — any higher and it starts competing with whatever is on the wall above it. For the bigger, kid-friendly version of this, see Idea #22.
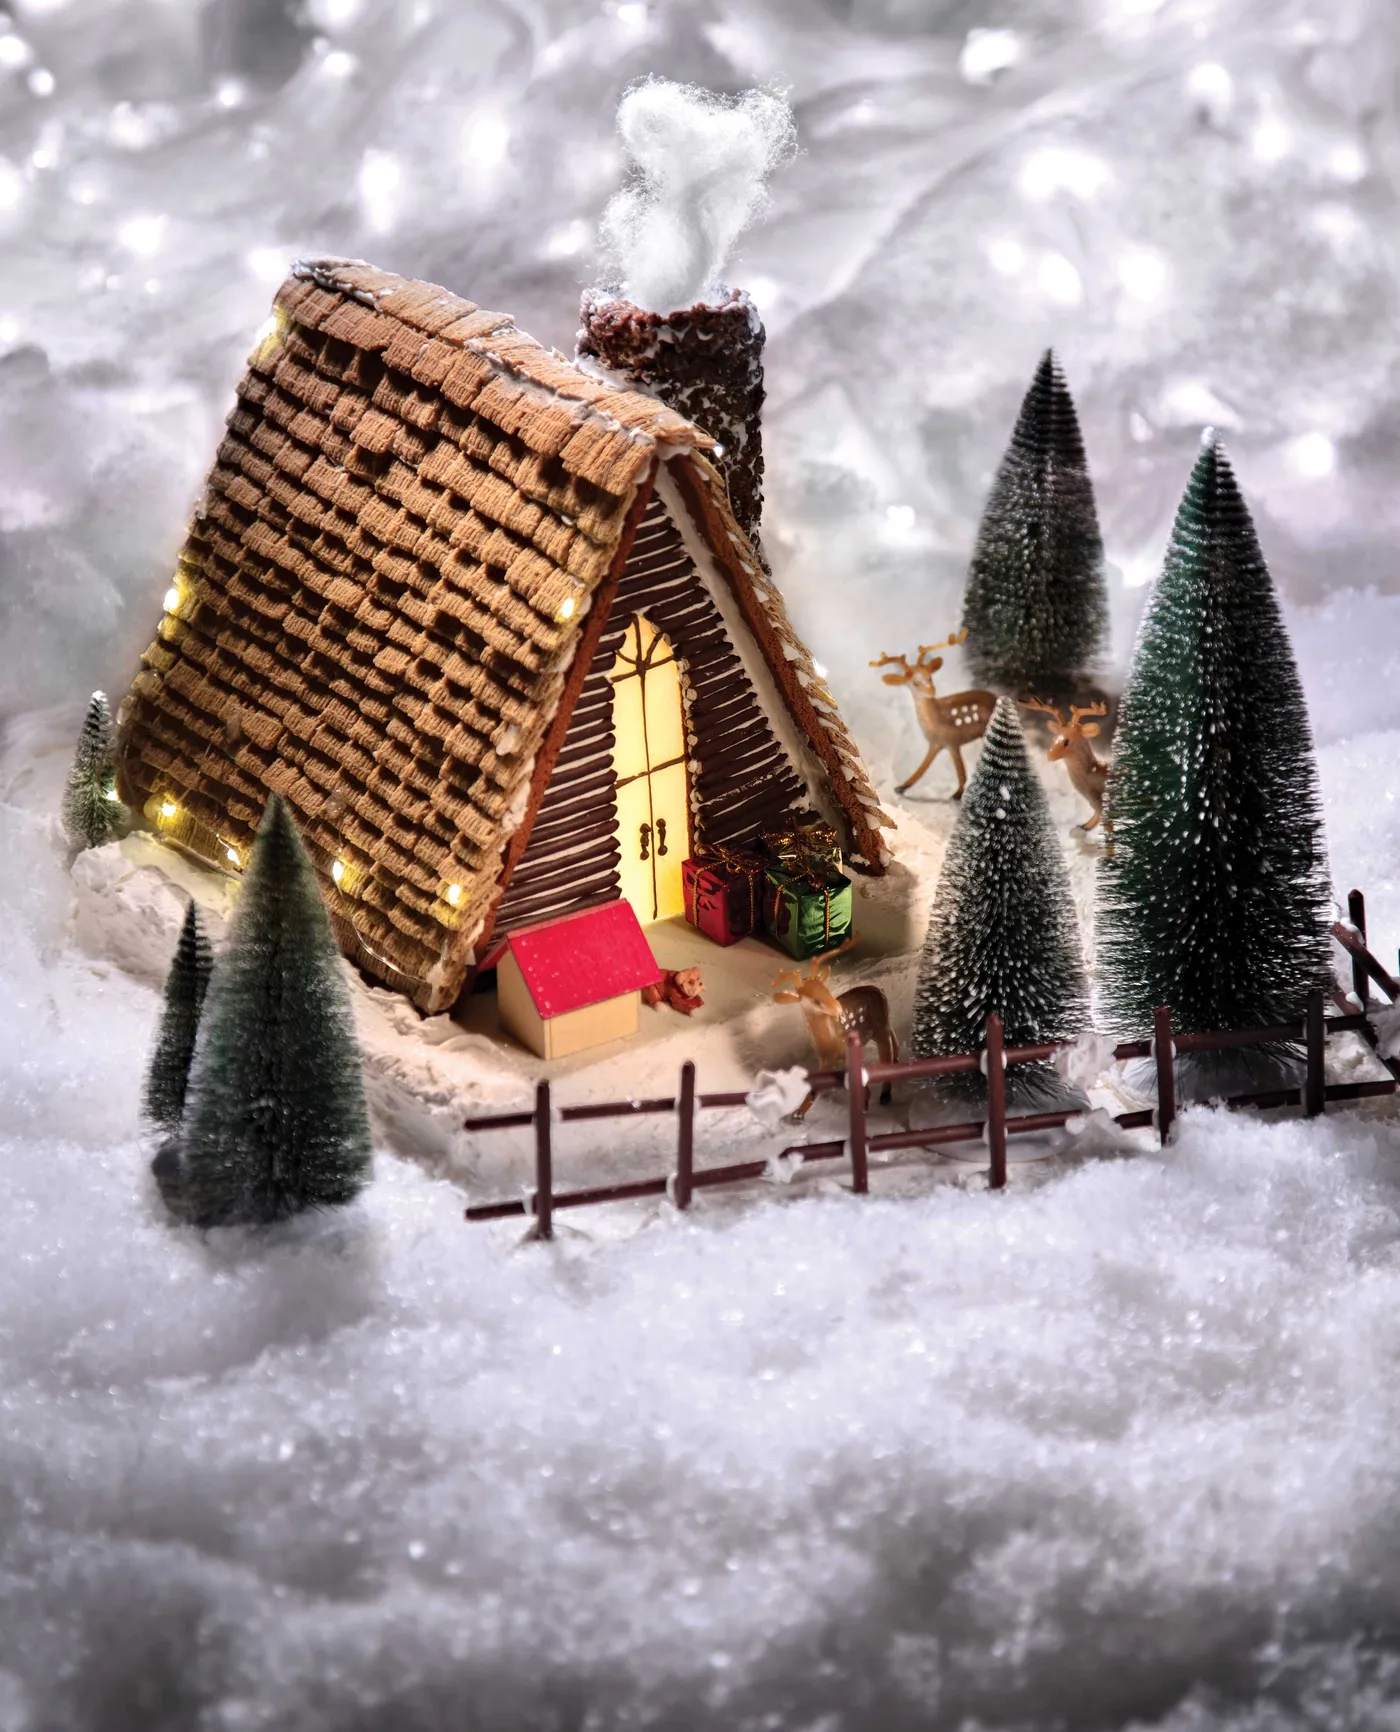
The one element you cannot remove is the warm light coming from inside. Nothing else in that snowy landscape matters as much: the miniature deer, the bottle brush trees, the tiny wrapped presents are all supporting cast for one glowing window. If you are building this yourself, a battery-operated tea light tucked inside the house does more than any amount of artificial snow.
For the snow itself, loose flakes beat batting in small scenes — they let objects sit in the snow instead of on top of it. Lay a thin base layer, place your house and trees, then sift a second layer over everything with a fine sieve, brushing the rooftops clear with a dry paintbrush.
13. Envelope String Lights and a Ribbed Green Pot
Small tabletop trees tip over. It happens because the pot is light and the tree is top-heavy, and the fix is embarrassingly simple: put a 2- to 3-pound bag of rice or a couple of clean bricks in the bottom of the pot before you set the base. Count your cords, too — envelope lights with a plug need an outlet within 3 feet, so if this is going on an entry console, go battery. A 24-inch tree like this one looks best when the top third carries the ornament weight and the bottom stays slightly bare.
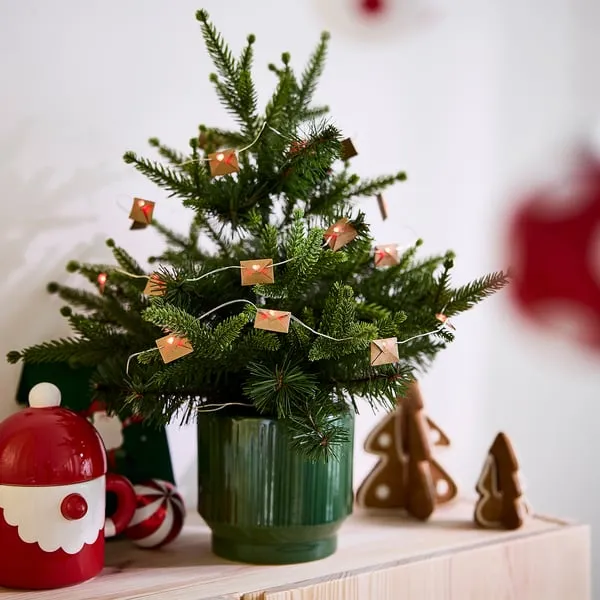
- Set the tree in the pot and secure it with rice or bricks at the base.
- Wind the string lights bottom-up in a spiral, about every 3 inches, leaving the plug at the bottom.
- Space the envelope covers evenly — every 6 to 8 inches reads as deliberate.
- Place the gingerbread tree figures to one side, not both, so the arrangement has an off-center focal point.
- Add one red element at counter height, like a Santa jar, to tie the tree to the surface below.
14. A Wood Slice Display With Cinnamon Sticks and Rosemary
The proportions here run about 50 percent natural wood, 30 percent evergreen, 15 percent gingerbread brown, and 5 percent red berries. The rough-cut wood slab is the anchor, and it is the piece people forget. Swap it for a slate tile and the vignette turns cooler and more modern; swap it for a marble tray and everything goes upscale. Add cinnamon sticks and fresh rosemary and you get a scent layer doing as much work as the visuals.
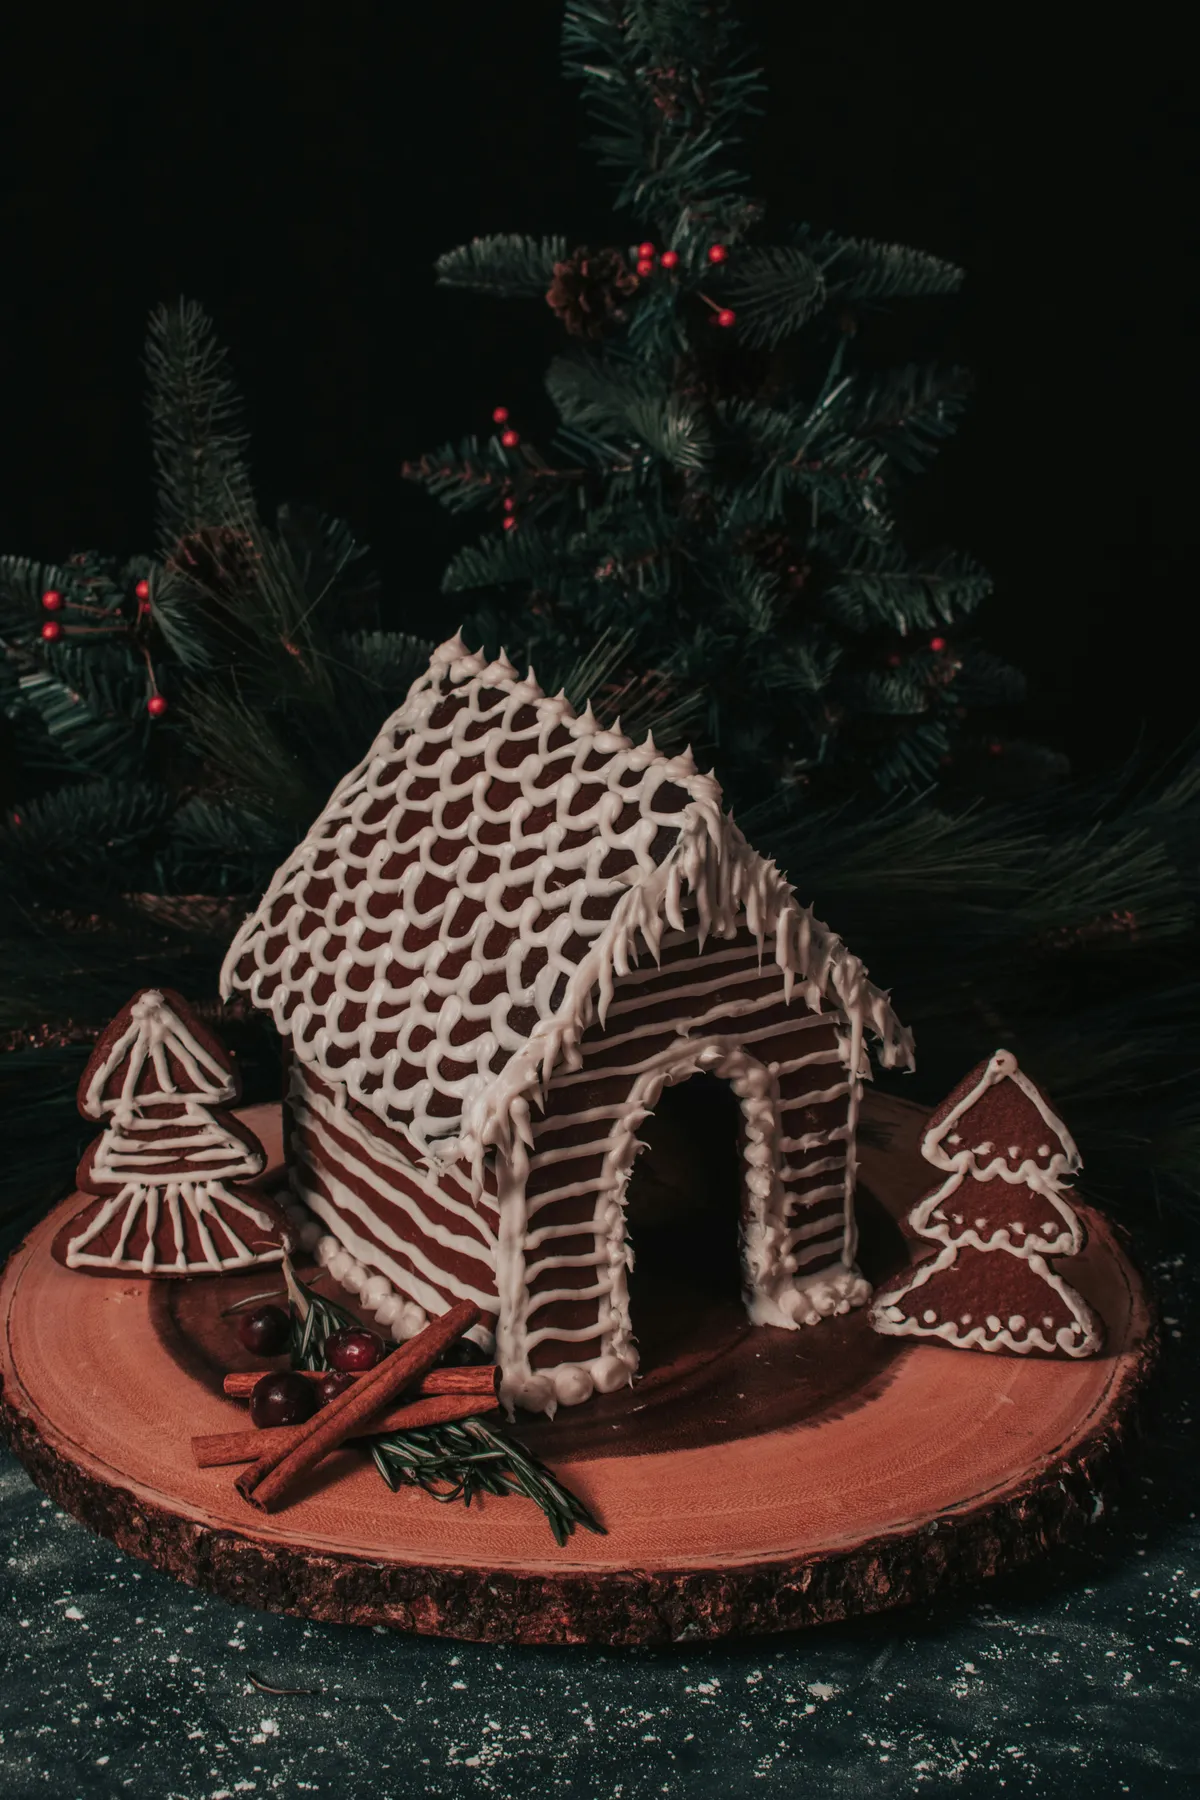
Maintenance is where this gets real. Fresh rosemary goes dull in three to four days and brown in about a week, so plan on replacing it twice during December — about $3 a bundle each time. Cinnamon sticks hold all season if you keep them away from moisture, and the ones tucked next to fresh greenery will mold within days, so keep them on the dry side of the slab. Preserved rosemary costs four or five times more and lasts years.
15. A Swirled Green Confectionery Tree, Piped by Hand
- Confectionery coating or white chocolate, 12 oz: $5–$8
- Leaf-green gel coloring: $4–$6
- 1M star piping tip and coupler: $5–$9
- Disposable piping bags: $4–$7
- Round sprinkles in red, green, and white: $4–$8
- Pedestal or small plate to display it on: $8–$25
- Total: $30–$63
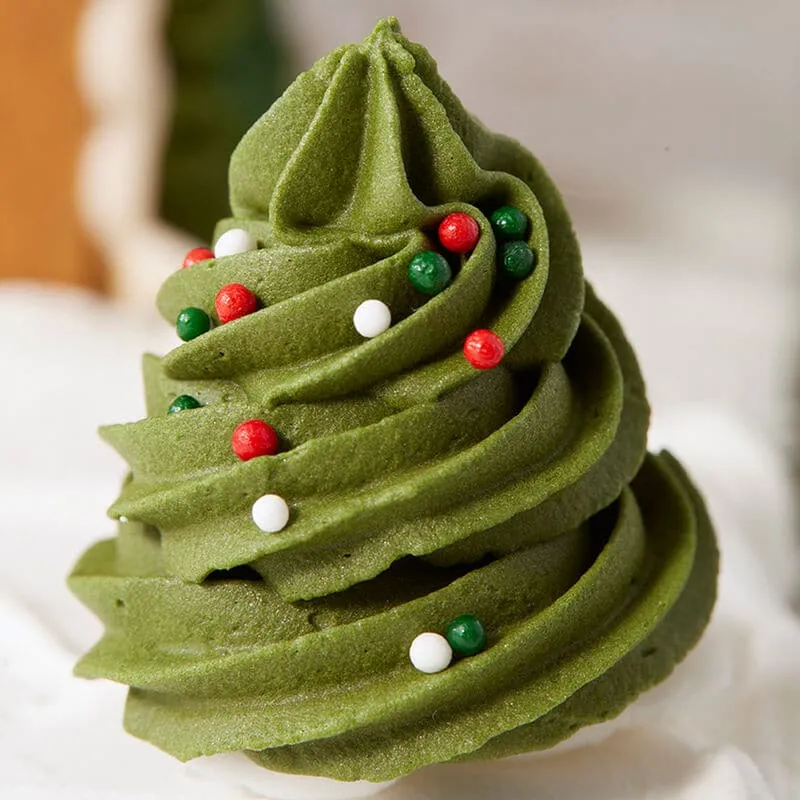
Budget alternative: skip the coating and buy two tubs of green frosting for about $7. It holds a swirl almost as well as a firm coating, and it is already the right consistency — no tempering, no thermometer, no guessing.
One technique note if you are doing it for real: hold the bag perpendicular to the surface, pipe one continuous spiral from the outside in, and drop the cone a quarter-inch with every two full rotations. Stop the moment the swirl starts to lean. Melted coating slides, so work in a cool room and let it set 20 minutes between the bottom third and the top.
16. A Gingerbread Doormat and Red Bow at the Front Door
a gingerbread-print mat with a rubber backing runs $12 to $18 at Target or Walmart, and it disappears underfoot fast, so buy the inexpensive one. The oversized red satin bow is the piece people overspend on — ribbon by the yard at a craft store is about $6 for 3 yards, and a 14-inch bow takes maybe 2 of them. Two small decorated trees flanking the door can be 3-foot artificials at $25 to $40 each, and pinecone garland is the cheapest part at $10 to $14 per 9-foot strand.
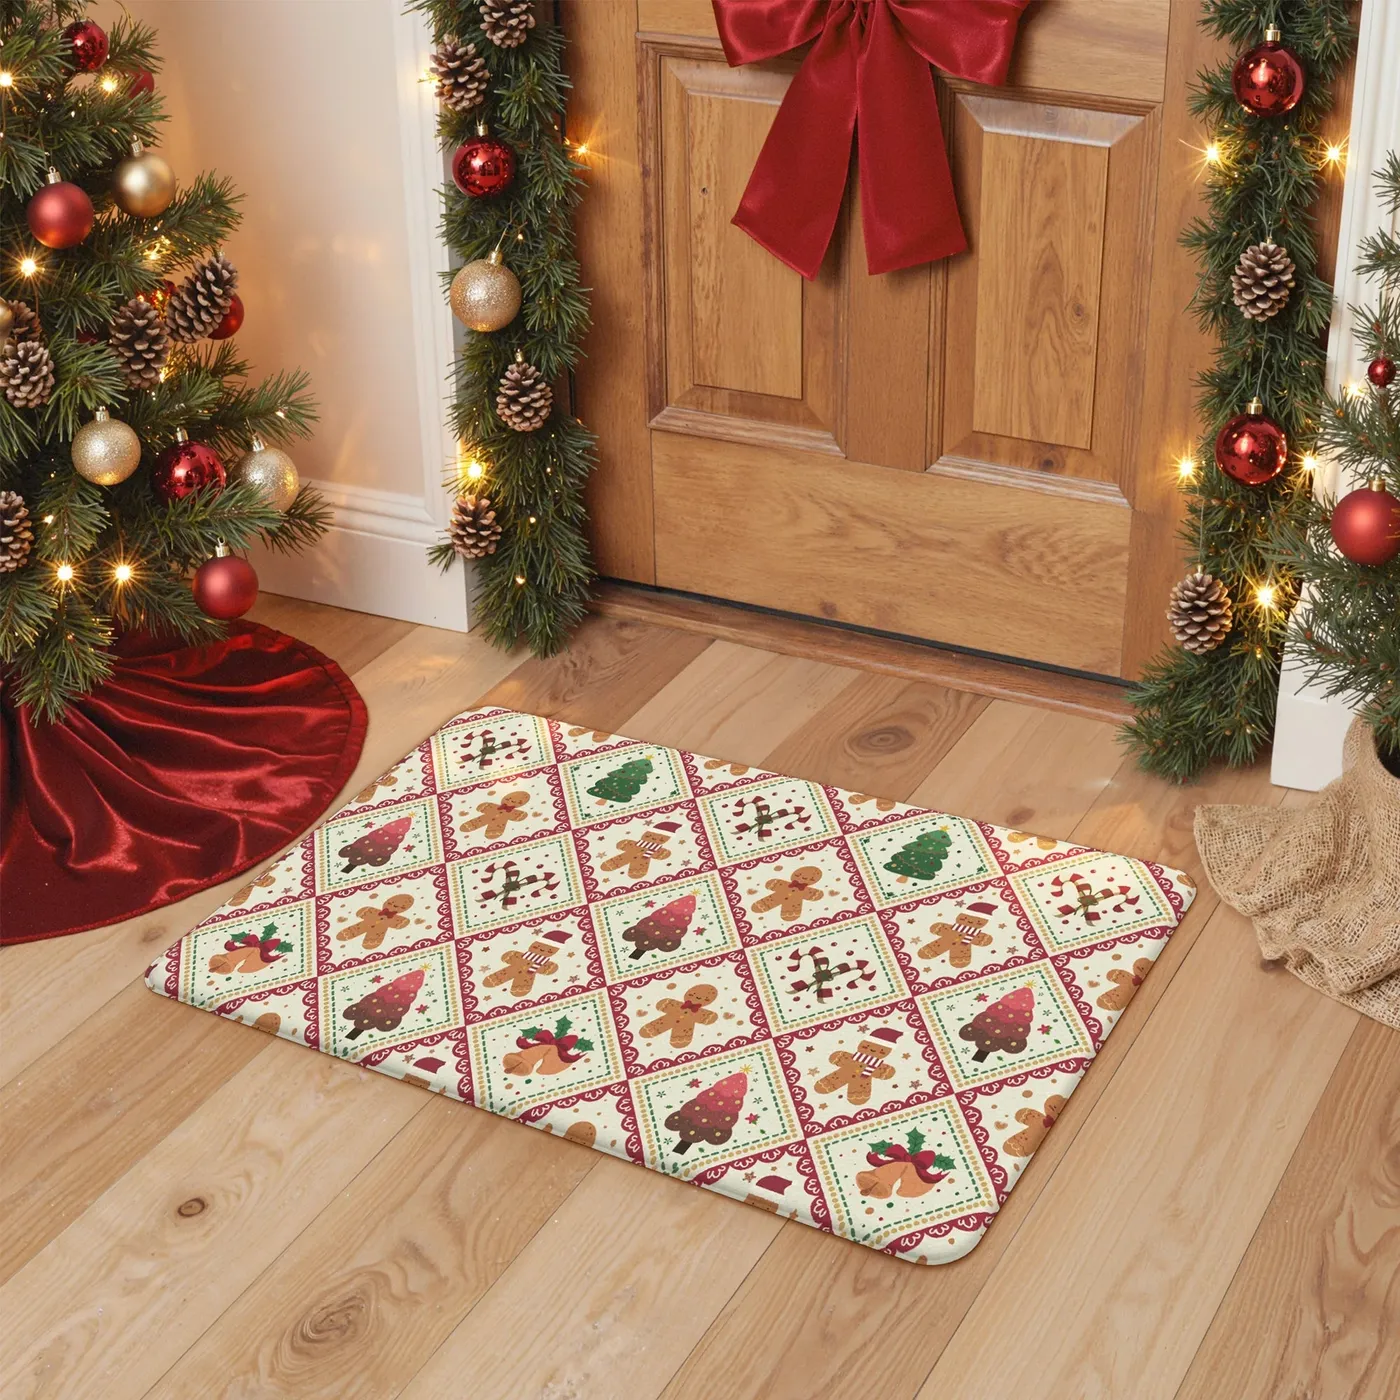
Scale matters more than you would think. A standard front door is 32 to 36 inches wide, and the garland plus a bow eats about 8 inches, so keep each tree within 24 inches of the frame or you will crowd the walkway. Leave at least 30 inches of clear floor in front of the mat for foot traffic and wet boots.
doormats in a heavy-traffic entry take about one season of hard wear. Coir sheds, rubber curls, and anything with a printed design fades fastest where shoes land. Buy two and rotate them weekly — you will get two years instead of one.
17. Gingerbread Teepees: The Village That Isn’t Houses
Every gingerbread village uses the same shape — four walls and a peaked roof — which is exactly why a row of teepees stops people mid-scroll. The silhouette is different, so the eye reads it as a scene rather than a set. The white royal icing is doing structural work: piping at the seams, small dots along each edge, and a scalloped hem at the base that grounds each shape on the wood-grain surface.
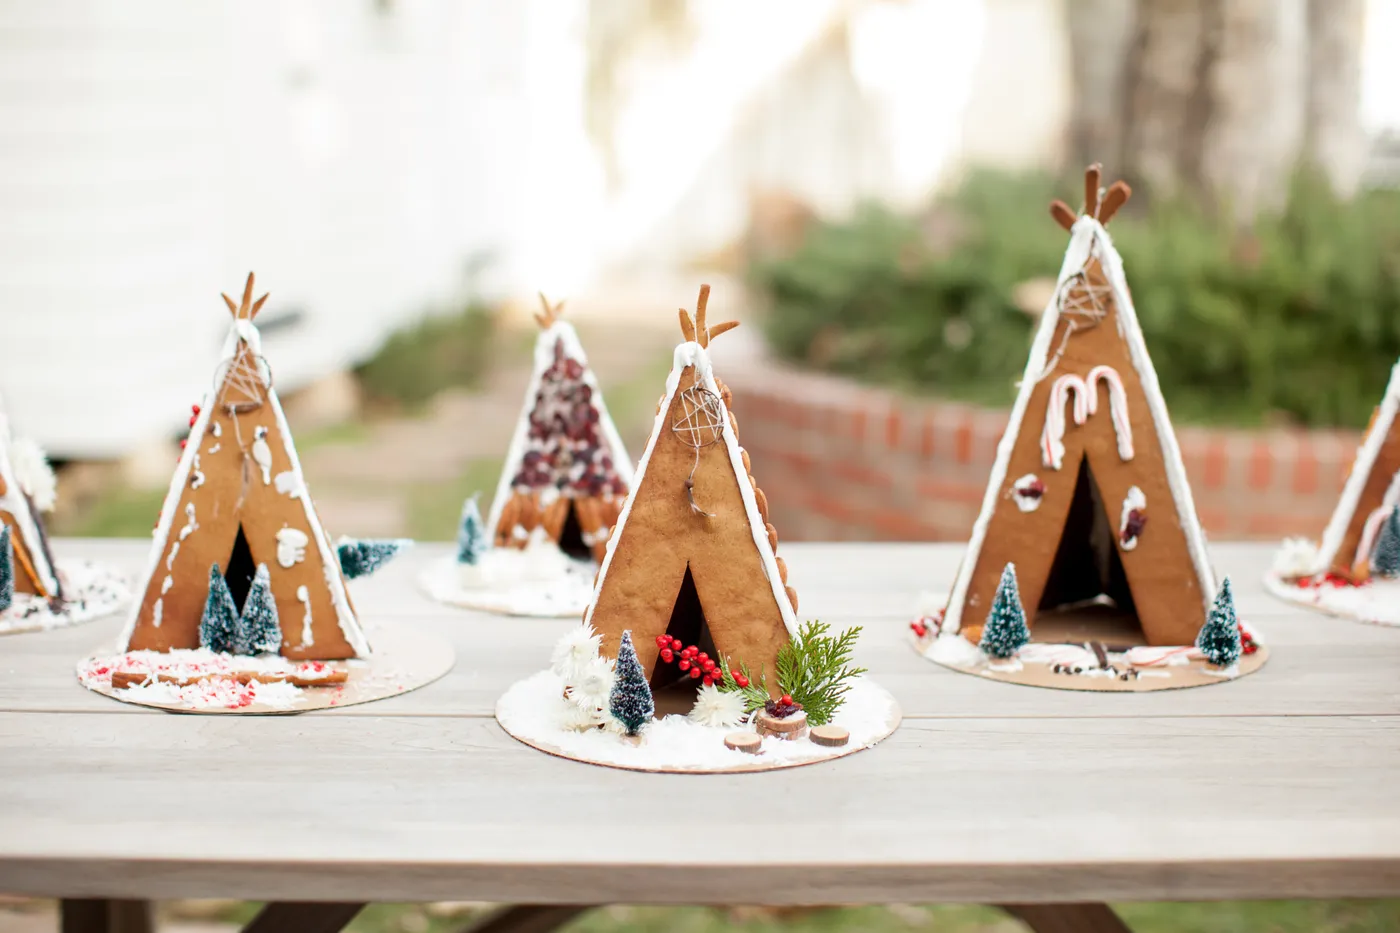
The one element that turns a cluster of triangles into a village is the scale layer behind them — the miniature bottle brush trees, red berries, and green foliage. Those tiny pines tell you the teepees are large. Remove them and you have three cookies on a board. Add the candy canes and cinnamon sticks as scattered props and the scene gets the looseness that makes people think it happened by accident.
18. Stacked Tree Cookies Tied With Dark Green Satin Ribbon
Piping a tree cookie in two colors sounds harder than it is. The trick is doing the border first and letting it set completely before you flood.
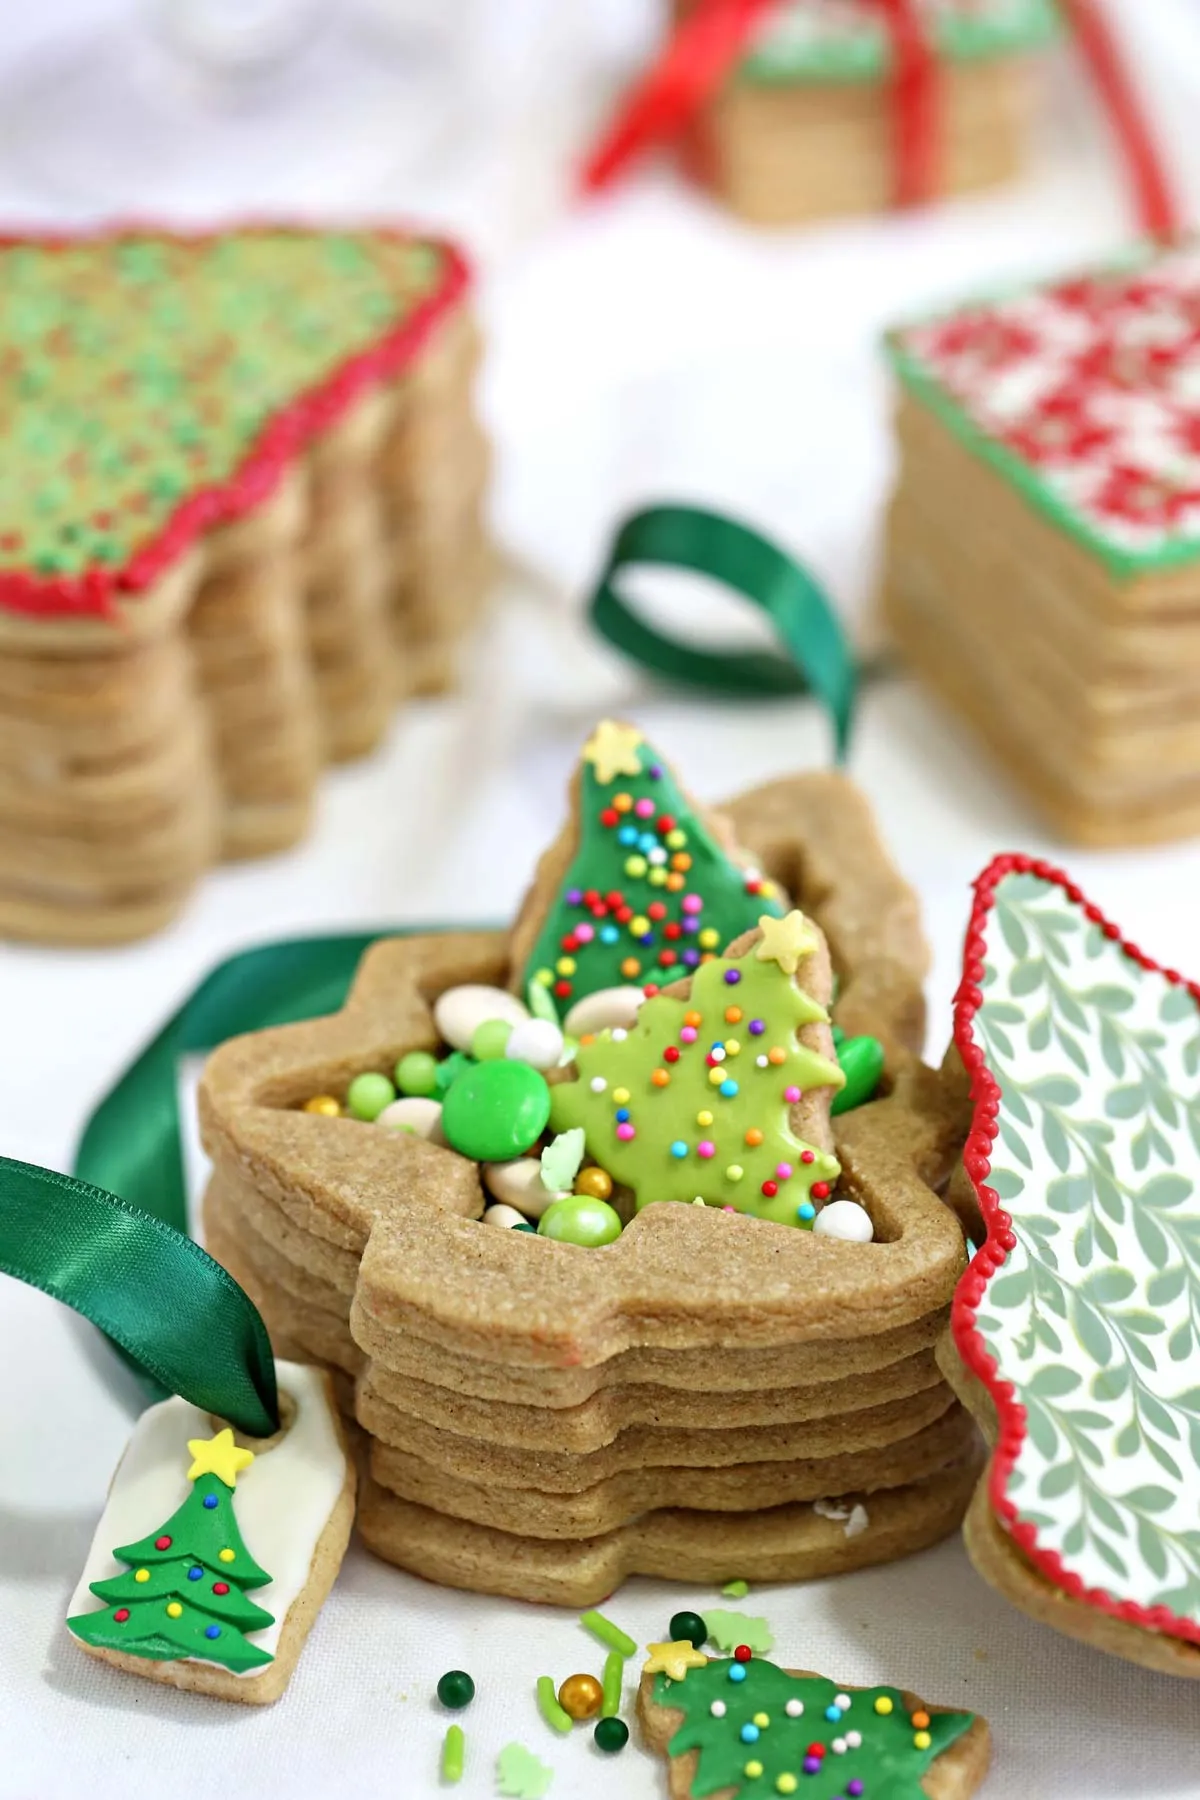
- Pipe a red outline around the tree shape with a #2 tip and let it dry 20 minutes.
- Fill the interior with thinned green icing using a #4 tip, working in small circles from the inside out.
- Tap the cookie gently on the counter twice to level the icing.
- Add candy pearls and confetti while the flood is still wet — they will sink in and stay put.
- Dry uncovered for 6 to 8 hours, then stack and tie with 1-inch satin ribbon.
The color formula is roughly 80 percent light brown cookie, 15 percent green icing, and 5 percent red and gold accents. Push the green toward emerald and the whole stack reads traditional; pull it toward mint and you get something closer to a candy shop.
19. Dried Oranges, Pinecones, and Burlap on a Gingerbread Tree
If you are drying your own orange slices, cut them a quarter-inch thick — any thinner and they curl into chips, any thicker and they stay sticky in the middle. Bake at 200°F for 3 hours, flip once at the 90-minute mark, then cool on a rack overnight. One large navel orange yields 8 to 10 usable slices, and a tree this full takes about three oranges, a bag of pinecones, and a 4-inch-wide burlap ribbon.
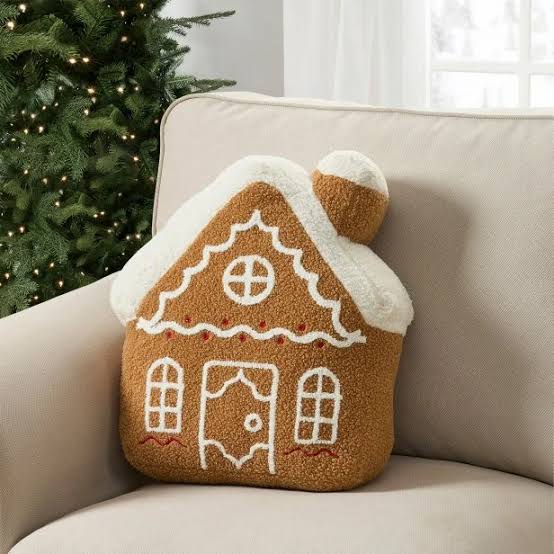
Here is why this look has legs: it is the edible-decor idea without the perishability problem. Cinnamon ornaments, dried citrus, and pinecones are basically free if you make or gather them, they compost instead of heading to a landfill, and they hold up for years in a dry box. Compare with Idea #32 — same gingerbread tree, completely different energy, and that one leans hard into candy. This version leans into texture, which is why it still looks good with the lights off.
20. Sage Cabinets, Floral Wallpaper, and a Gingerbread Runner
Before you commit to a gingerbread-themed kitchen, run through this:
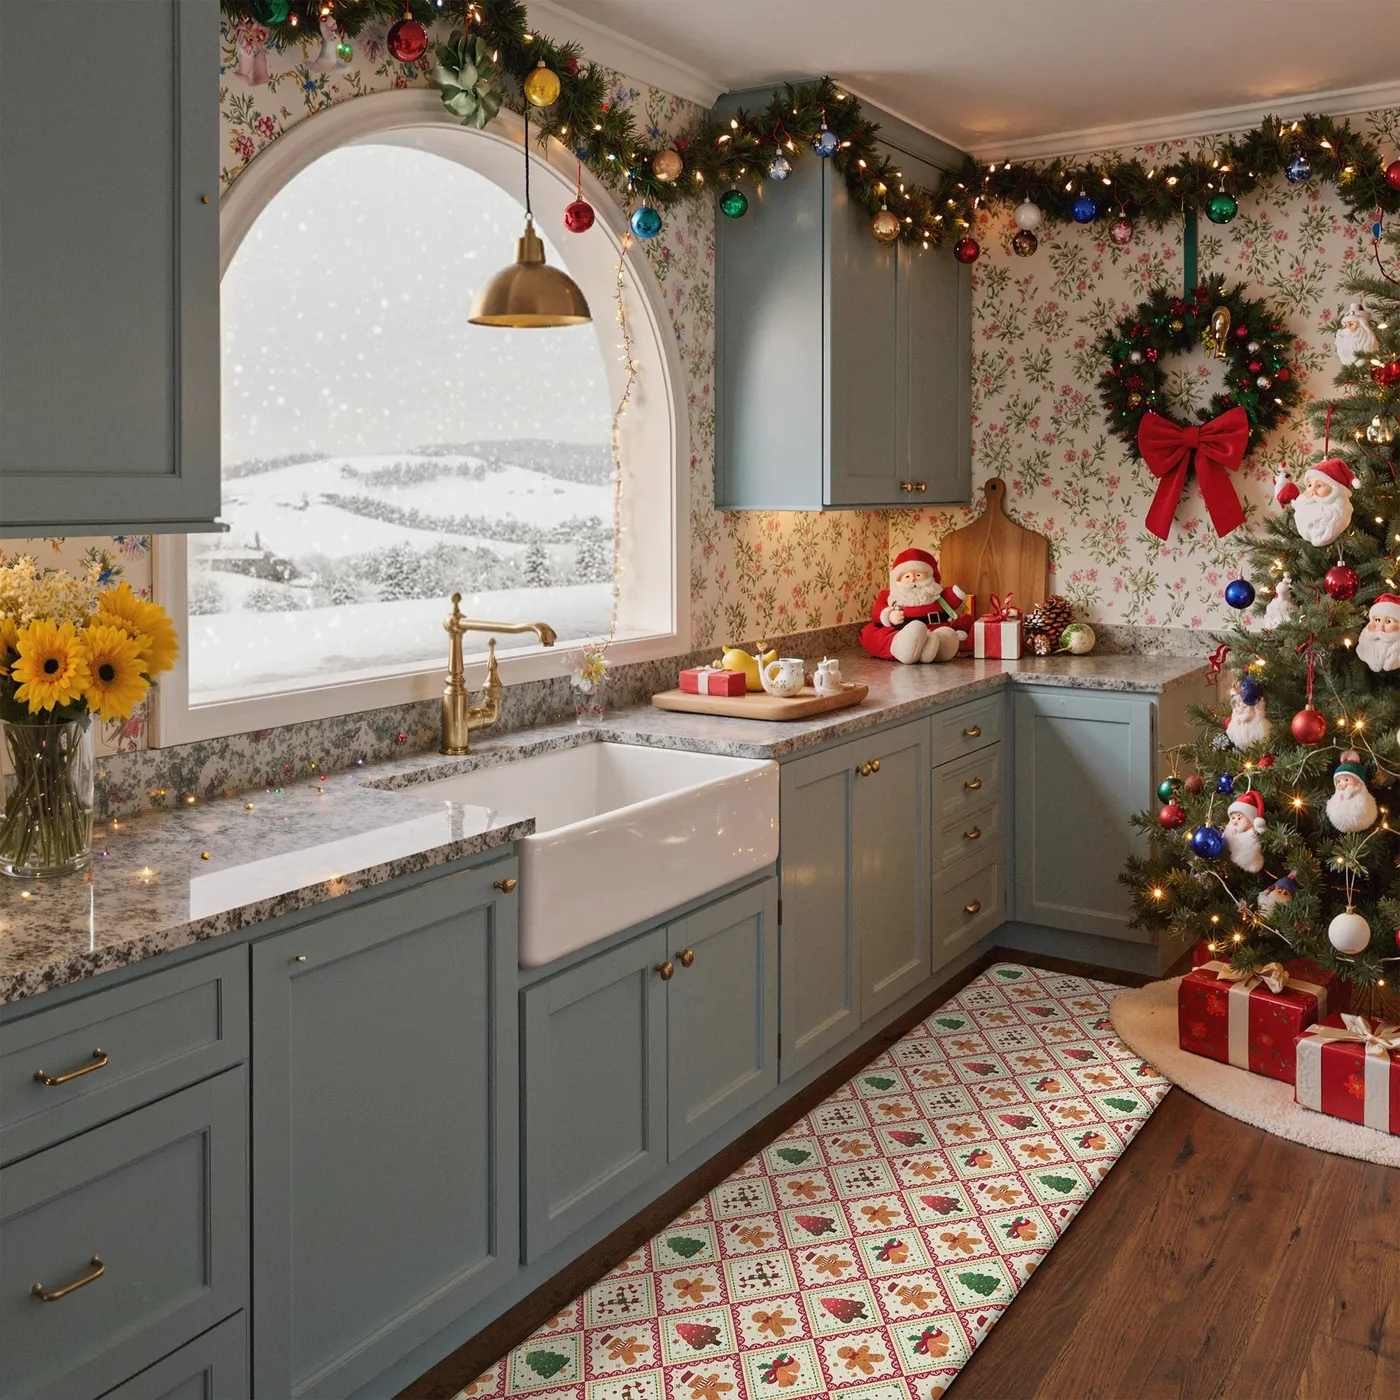
- Measure your floor run — a 2-by-6-foot runner covers the sink zone, a 2-by-8 covers sink plus prep.
- Check your cabinet color temperature against the runner. Sage goes warm with red and gold; it goes muddy next to bright orange.
- Confirm the rug has a non-slip backing, or add a pad. Kitchen runners slide on tile.
- Look at the wallpaper pattern in daylight and again at night — floral behaves very differently under warm bulbs.
- Decide now whether the runner is seasonal or year-round, because that changes the fiber you buy.
about kitchens specifically: a runner near the stove picks up grease within a month, whatever the label claims. Look for a flat-weave or machine-washable polypropylene rather than plush wool, and plan on laundering it every three to four weeks through December. Wallpaper in a kitchen is a bigger commitment than it looks — steam from the sink and range finds the seams. If your heart is set on the floral, consider peel-and-stick on one wall instead of the whole room.
21. Plaid-Iced Gingerbread Cookies on a White Platter
- Gingerbread cookie mix or scratch ingredients: $5–$10
- Gel food coloring in magenta, teal, and green: $9–$15
- White royal icing or piping gel: $4–$7
- Small round and star piping tips: $6–$12
- White rectangular platter: $12–$30
- Faux pine sprigs and pinecones for the base: $8–$18
- Total: $44–$92

Budget alternative: skip the gel colors and use three tubes of ready-made icing — about $12 total at any grocery store. The plaid is just three sets of stripes at different angles, and nobody will know you did not mix anything yourself.
What makes the plaid work is contrast of tempo. A gingerbread man is soft and rounded; a plaid grid is rigid and mathematical. Putting the two together keeps the cookies from tipping into saccharine, and the fluffy white piping — scarves, stocking tops, little snow drifts — gives your eye one place to rest.
22. A Candy-Cane Fence and Lollipop Trees Around the Village
you cannot take away is the fence. Everything else in that gingerbread village — the shingled roof, the gingerbread horses, the candy-cane poles — would still be charming without it, but the fence is what makes the scene feel like a place rather than a pile of sweets. It also quietly contains the composition: the eye stops at the boundary and stays inside. Build it from full-size candy canes pushed into the icing base at 2-inch intervals with the hooks turned out.
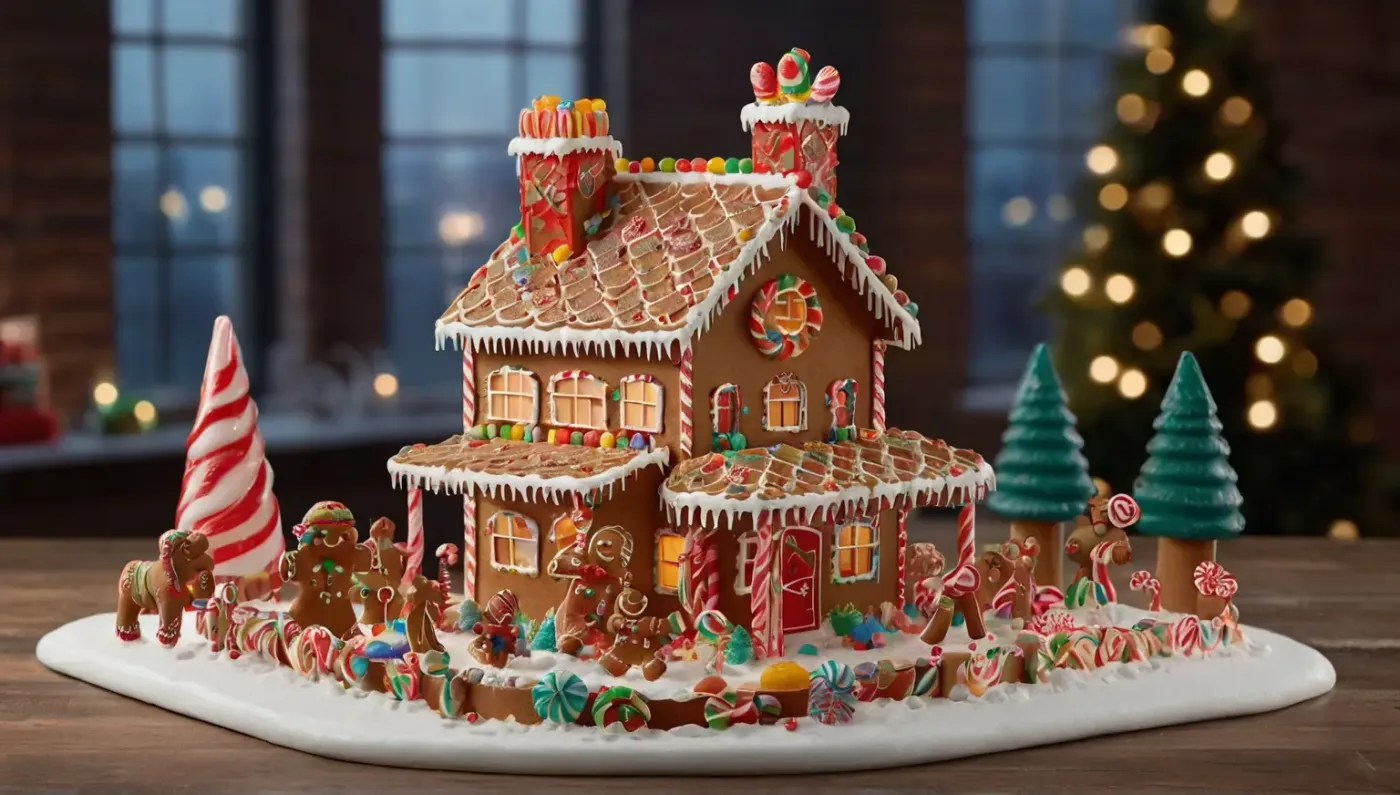
dollar-store candy canes are $1.25 for a box of 12, and that is the entire fence plus most of the trim. Gummy candies and green candy trees run $3 to $6 a bag. Gingerbread people and animal figures come from a $7 box of cookies and a small cutter. Start with a $6 house kit and build the village outward across two or three seasons — nobody says it has to be finished in one December.
23. A White Cake Stand Turns Cookies Into a Centerpiece
Stand height is the most ignored number in tablescaping. A 12-inch cake stand on a 36-inch counter puts your cookies right at eye level when you are standing in the kitchen, which is why the pedestal reads as a display rather than a snack. Go lower than 8 inches and the food disappears into the countertop; go higher than 16 inches and it blocks sightlines across an open-plan room.
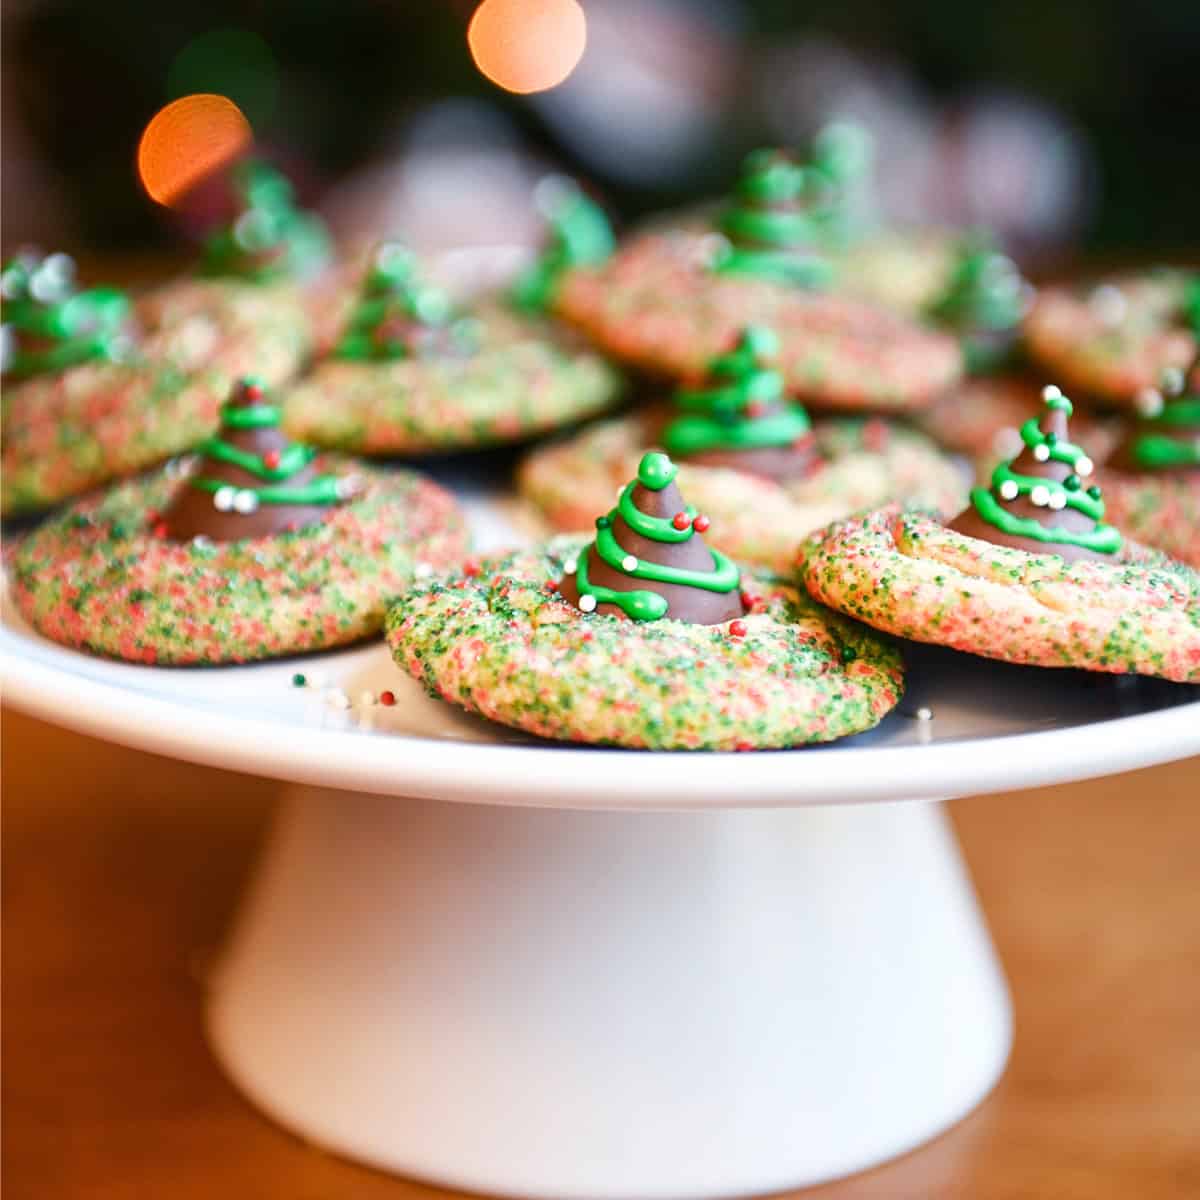
The cookies themselves work best at 2 to 2.5 inches across — big enough to see the piped tree, small enough that eight of them fit a 10-inch stand without crowding. Press a chocolate cone into the center before the icing goes on and the tree gets real height. The green piping should stop just short of the cookie’s edge so the sprinkle-crusted rim stays visible, and warm bokeh behind it is the difference between a food photo and a moment.
24. Two-Tone Tree Cookies: Green With Snowflakes, White With Garland
Two versions, one formula. The green-based cookies run roughly 70 percent green icing, 20 percent white snowflake detail, and 10 percent red and orange dots standing in for ornaments. The white-based ones flip it — 70 percent white, 20 percent green garland lines, 10 percent star topper. Same shapes, same sprinkles, opposite values. That is why they look like a set instead of leftovers, and it is the same logic behind a room with one dark wall and three light ones.

- Tree-shaped cookie cutter, 3.5 inches: $3–$8
- Gel icing colors, green and white: $8–$14
- Piping tips, #2 and #4: $6–$12
- Star topper candies and sprinkle mix: $5–$12
- Total: $22–$46
Budget alternative: piping gel plus a zip-top bag with the corner snipped is $4 total and handles the outlines just fine. See Idea #18 for the stacked version of these same cookies.
25. A Dark Metal Tray Makes Red and Green Icing Look Expensive
A textured dark metal tray is forgiving and then it is not. The pattern hides crumbs and fingerprints, which makes it the best surface for a cookie display, but it also shows water spots instantly and can tarnish at the rim if it is unsealed. Wipe it with a dry microfiber cloth rather than a wet sponge, and never leave it sitting on a damp counter overnight. Cookies themselves keep 5 to 7 days uncovered, longer in an airtight tin — but royal icing softens in humidity, so add a silica packet if you are storing a batch.

- Outline the tree shape with a #2 tip and let the border set for 15 minutes.
- Flood the interior with thinned icing, working in small circles from the center out.
- Tap the cookie gently on the counter once to level the icing — twice and it runs over the border.
- Add sprinkles immediately, then leave the cookies undisturbed for 8 hours.
26. Dripping Green Icing on a Gold-Rimmed Plate
That dripping edge looks effortless and is actually a timing problem. Icing drips when it is thinned to about 15-second consistency — thin enough to run, thick enough to stop. Too thin and the whole tree slides off the cookie; too thick and you get a lumpy edge instead of a clean drip. Work on a level surface, do not move the plate for 20 minutes, and keep the room below 75°F. Humid kitchens are the enemy of every one of these drip cookies.

is the plate. Bright green icing on a plain white plate reads like a kids’ craft project; the same icing on a white plate with a thin gold rim reads like a pastry case. One gold line changes the entire perceived price of the thing — the same reason a brass faucet makes builder-grade granite look intentional.
For a dessert plate, 7 to 9 inches is the sweet spot. Big enough for one cookie and a few crumbs, small enough that the cookie does not look lost. A 10-inch plate with a single cookie on it always looks like something went missing.
27. Textured Green Frosting and Silver Star Candies
Textured frosting needs a star tip, not a round one, and it needs to be stiff. Use a #21 or #1M open star tip, hold the bag straight down, and pull up as you squeeze so each rosette sits on the cookie like a tiny tree branch. Then, while the frosting is still soft, place a silver star candy at the peak. Dragées and luster-dusted star candies run about $5 to $9 a jar at baking supply shops, and one jar covers a couple dozen cookies.

The single most important element is the texture itself. Swap the piped ridges for a flat flood of green icing and you have a perfectly nice cookie that nobody photographs. The ridges catch light, cast tiny shadows, and make the red candy dots read as ornaments sitting on a branch rather than paint on a surface. Everything else here is supporting cast.
28. Tree-Shaped Frosting on a Blondie Bar
Dessert bars overtook decorated cookies a few seasons back and they have not slowed down — mostly because a 9-by-13 pan gives you twelve identical desserts in one bake, and identical is what makes a photo look good. The blondie base matters: it is dense and flat, so piped frosting stays put instead of sliding, and the light brown sets off bright green better than a white cookie would. Pipe the tree with a star tip, add snowflake and red stick sprinkles while the frosting is wet, and finish with a yellow swirl at the peak.
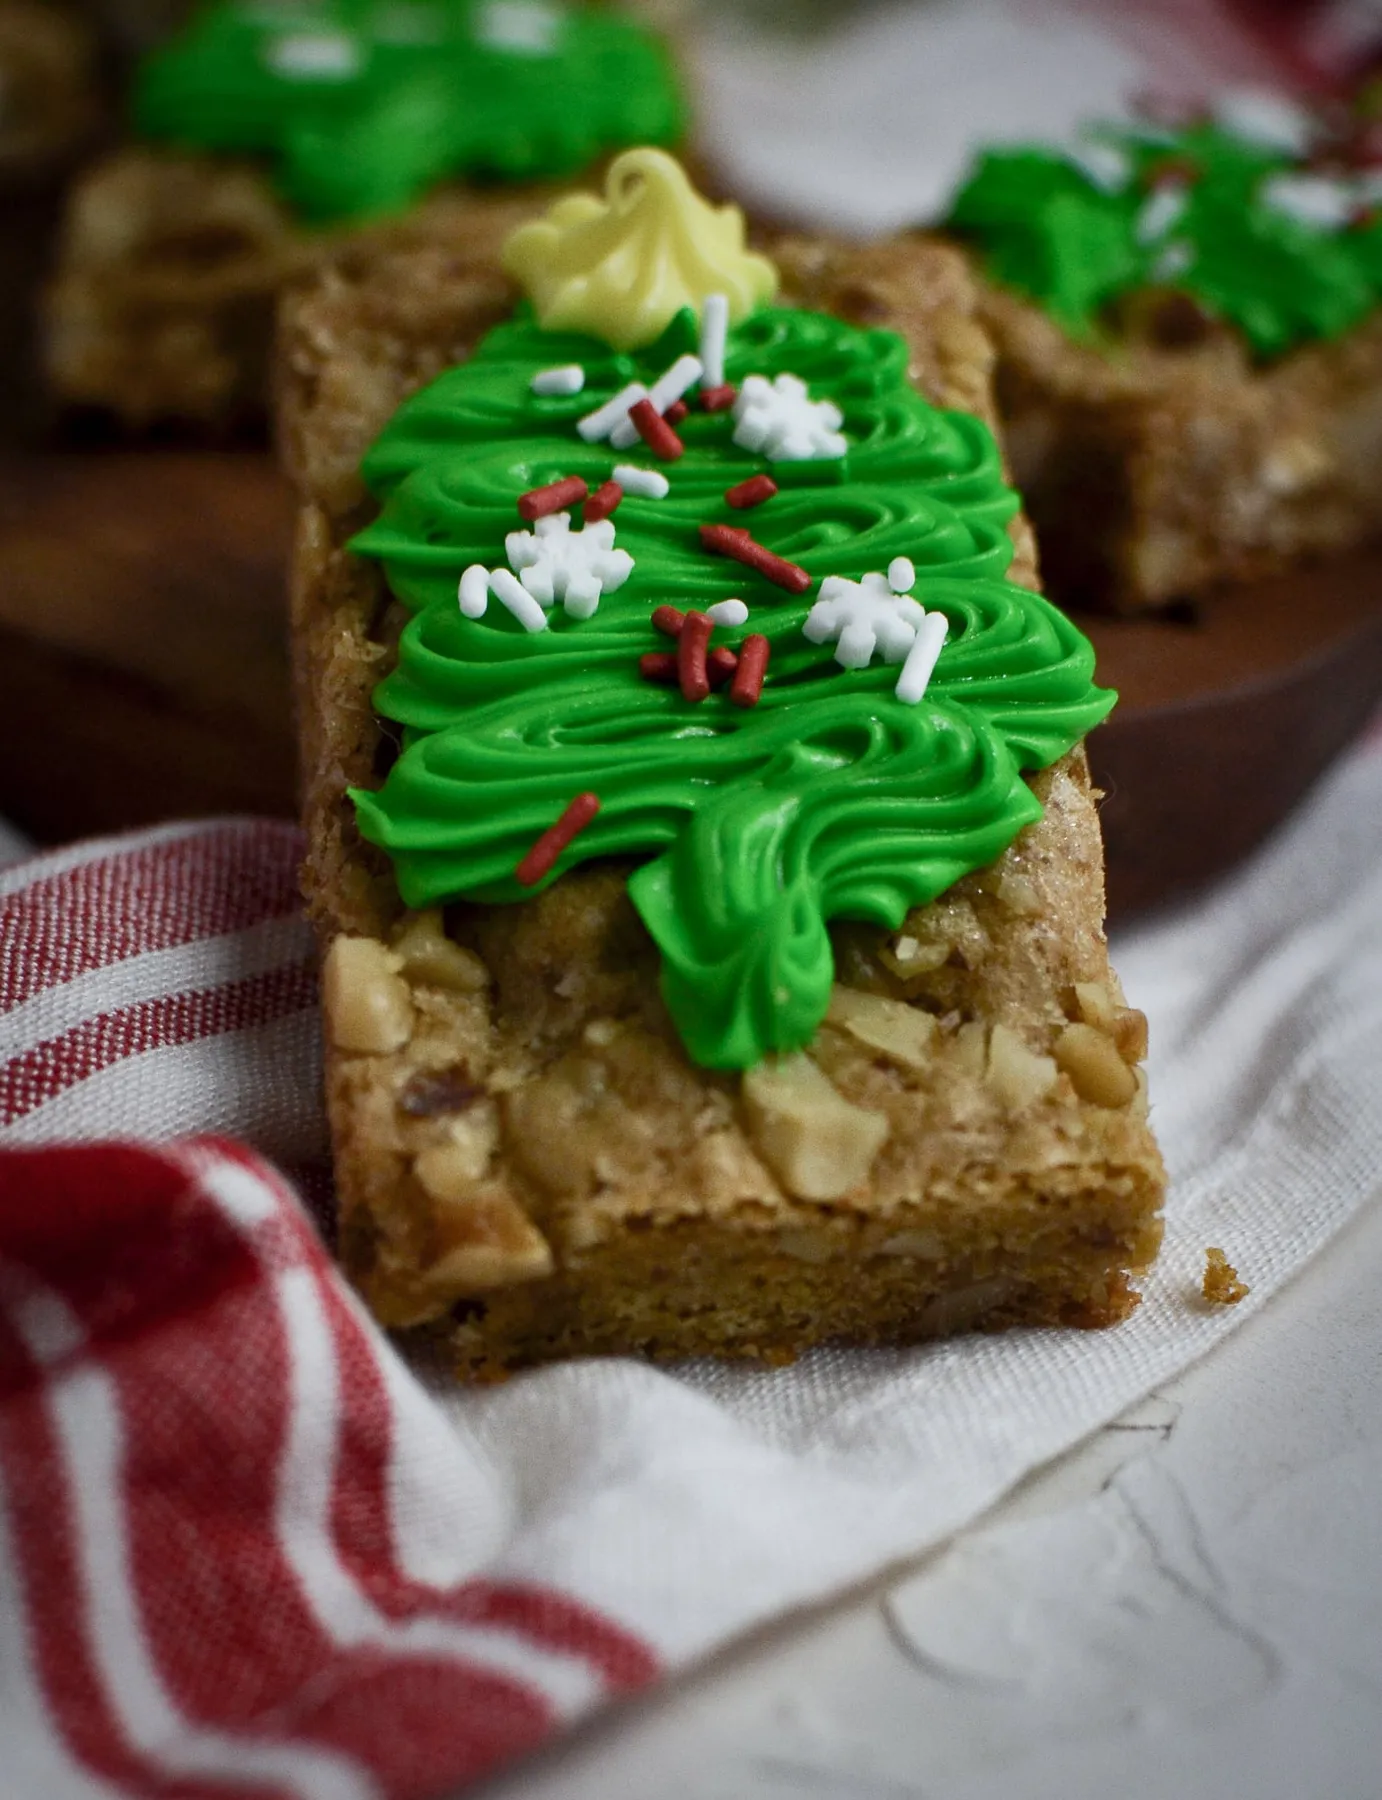
a standard 9-by-13 pan cut into 12 bars gives you pieces about 3 by 3.25 inches, which is ideal for piped decoration — big enough for a full tree, small enough to hold in one hand. Cut into 16 and the trees get cramped. Serve them on a white fabric with a red stripe and the tray instantly looks like it came from a bakery.
29. A Macaron Tree on Draped Teal Fabric
- Macarons, 30 to 40 pieces: $60–$140
- Foam cone, 12 inches: $5–$9
- Royal icing or melted white chocolate as adhesive: $4–$8
- Gold and white sugar pearls: $6–$12
- Dark teal fabric for draping, 2 yards: $12–$30
- Assorted macaron wreaths: $25–$60
- Total: $112–$259
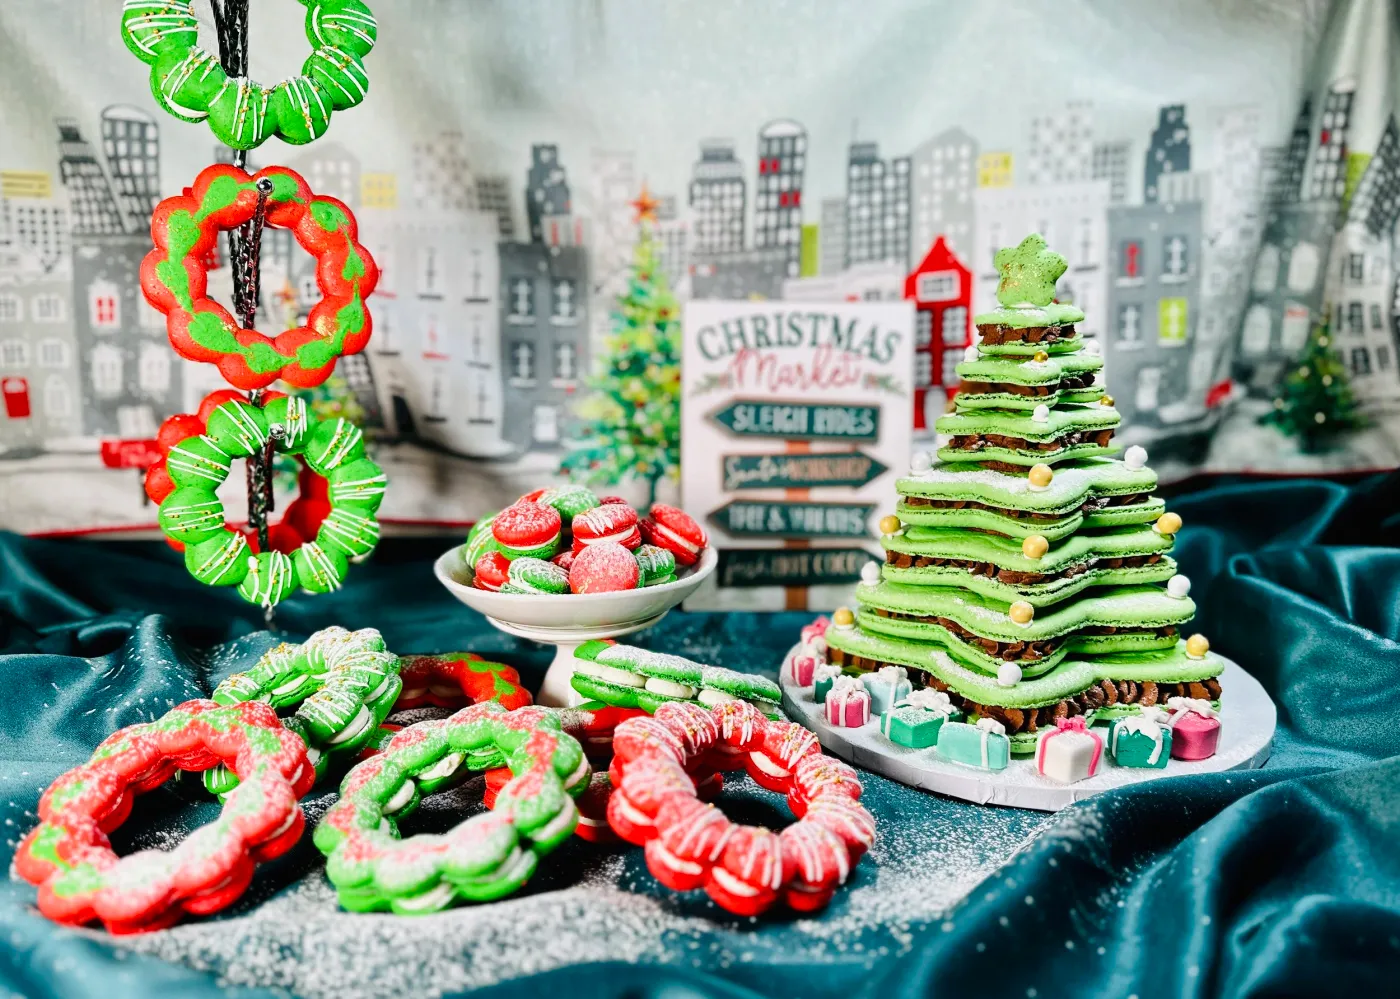
Budget alternative: frozen macarons are about $5 for a dozen at Trader Joe’s and taste better than most bakery versions once thawed. Three boxes covers a 12-inch cone for $15 total. Skip the wreaths entirely — a few scattered macarons on the fabric reads as abundance without the price tag, and a dusting of powdered sugar unifies everything for free.
30. The Full Gingerbread Tree: Men, Houses, and Snowflakes
- Sort every ornament by size before you hang anything — houses, men, snowflakes, candy canes.
- Place the largest gingerbread houses first, spacing them roughly 10 inches apart around the tree.
- Fill between them with gingerbread men, angling each one slightly so they do not all face forward.
- Tuck snowflakes into the gaps at the branch tips, where they will catch the light.
- Finish with candy canes hung in pairs, hooks turned the same direction, for a tidy rhythm.
The formula runs about 55 percent green tree, 30 percent gingerbread brown, 10 percent white lights, and 5 percent red. Swap the red candy canes for gold and it goes elegant; swap them for pastel and it goes candy shop. Swap the ribbon for a white tree skirt and the whole thing gets quieter.
The one element that makes it read as a collection rather than a random assortment is consistency — every gingerbread ornament on that tree sits in roughly the same brown range, so your eye reads one family of objects instead of a dozen unrelated ones. Mix in three different cookie tones and it gets noisy fast.
31. Leaping Reindeer Cookies With Glittered Antlers
Edible glitter is a different product from craft glitter, and it matters. Sanding sugar and disco dust are made for food; the craft-store stuff is not, and it will also shed onto everything the cookie touches. If you want the shimmer, brush a thin line of piping gel along the antlers and dip them into gold sanding sugar — about $6 for a 4-ounce jar that covers two dozen cookies. Press the sugar in with a dry brush rather than sprinkling it, and you will use half as much for a cleaner line.

glitter gets everywhere. If these are going on a platter people will actually eat from, expect sugar to migrate onto the cookies next to them. That is fine — it is sugar — but keep craft glitter and metallic foil out of the kitchen entirely. And if you are decorating with kids, skip loose glitter and hand them candy dots and icing instead. See Idea #21 for how far candy dots can carry a whole display. The cleanup is the difference between a fun afternoon and a two-week problem.
32. Candy Cane Garland Wrapped Around a Gingerbread Tree
The garland is the whole idea. Without it, a tree full of gingerbread ornaments is a nice theme; with it, the tree has movement and a helix the eye can follow from base to tip. Width matters: a 2.5- to 3-inch-wide candy-cane garland reads from across the room, while a 1-inch version looks like confetti. Wrap it loosely so it sits on the branch tips rather than pressing into the tree, space the wraps 10 to 12 inches apart, and let the ornaments breathe against a soft white tree skirt.

ribbon is cheaper than pre-made garland and looks better. Two rolls of 1.5-inch red-and-white striped ribbon at $4 each, twisted together as you wrap, gives you a chunky candy-cane effect for $8 total. Dollar store gingerbread man ornaments run $1.25 each; twelve of them plus a warm white string light strand and a white skirt is a fully decorated tree for under $40.
33. Crocheted Gingerbread Houses, the Heirloom Version
Matte yarn against glossy glass or plastic is the entire reason these read as special. Crochet absorbs light instead of throwing it, so these ornaments sit quietly on a green tree while still holding detail — the white yarn icing, the red-and-white striped sides, the tiny colored candies stitched onto the roof. Everything else on that branch, including the red beaded garland behind it, is shiny. The contrast is the point.

Maintenance is genuinely easy. Dust is the only real enemy, and a lint roller once a month handles it. Store them in a sealed bin with a cedar block rather than mothballs, and hand-wash in cool water with a drop of mild soap if something spills, then reshape and air dry flat — never in a dryer. These will outlive the tree.
Handmade ornaments have been climbing for a few years, and this is the loudest it has been — Pinterest searches for crochet ornaments keep rising every November, and thrift stores cannot keep yarn crafts on the shelf. This is one trend with real staying power, because it is less about a look than about how people feel about the things they own.
34. Red-and-Green Striped Cookies Finished With a Santa Hat
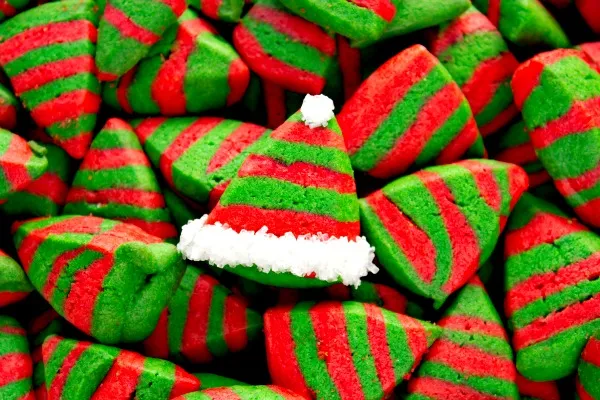
A pile like this works because of uniformity. Cut triangles at about 3 inches on the base and 3.5 inches tall, and you will fit 24 to 30 on a standard 12-inch platter with a little natural mounding in the center. Any smaller and the stripes get noisy; any larger and you can only fit eight, which reads as sparse rather than abundant. Stack them with the points alternating so the pile has texture from every angle.
- Chill the dough at least 30 minutes — stripe layers hold their edge much better cold.
- Mix your red and green icings to the same consistency, or one stripe will dry flatter than the other.
- Set aside the cookies you will top with the white Santa hat before you pipe any stripes.
- Have a level platter ready; a warped one makes a tall pile lean.
pre-made sugar cookie dough at $3.50 a log plus two tubes of red and green icing at $4 each gets you there for about $12. The white hat brim is just stiff icing piped in a thick, short line with a small round tip and one dot for the pom-pom. See Idea #29 for how this same stacked-pile logic scales into a full dessert display.
From Saved Folder to Living Room Corner
You do not need a bakery-level skill set or a designer budget to pull any of these off — you need one good focal point, honest materials, and a Saturday. Start with the idea that made you stop scrolling, buy the two or three things it actually needs, and let the rest of the room catch up next year.
When you build yours, take a photo and pin it — someone else is staring at the same saved folder you were.