You know that feeling when the tree is up, the lights are on, and the mantel still looks like it’s waiting for someone to arrive? That’s usually the moment a homemade advent calendar earns its spot — twenty-four small daily rituals that do more for a room’s warmth than another garland ever could.
We spent serious time combing through Etsy, Michael’s, Target, Amazon, and Anthropologie to bring you only what’s worth your attention this year, from about $8 in kraft paper and twine to a $220 heirloom wooden village with lit windows.
Inside you’ll find 33 curated ideas spanning rustic kraft-paper tags, felt and fabric pocket banners, tiered wooden villages, and clean modern paper craft. Budget and luxury versions sit side by side, and every idea comes with a shoppable path if you’d rather buy than build.
In 2026 the shift is toward reusable, made-to-last calendars — felt and fabric countdowns have climbed on Pinterest for three straight seasons, while the paper-and-twine crowd has gone full craft-store feral.
And stay until the end — we break down the most common mistakes that can ruin these looks. 📌 Save this to Pinterest for later — you’ll want to revisit these ideas. (Heads up: this post contains affiliate links, and if you buy through one we may earn a small commission — it never changes what we recommend.)
1. Striped Paper Bags Tucked Into a Ribbon-Wrapped Box
- Sturdy kraft box plus wide red satin ribbon: $8–$18
- 24 red-and-green striped paper bags: $10–$22
- Round kraft number tags and mini wooden clothespins: $6–$14
- Felt hearts, trees, paw prints, and star cutouts: $5–$12
- Pine garland with warm fairy lights and berries: $12–$30
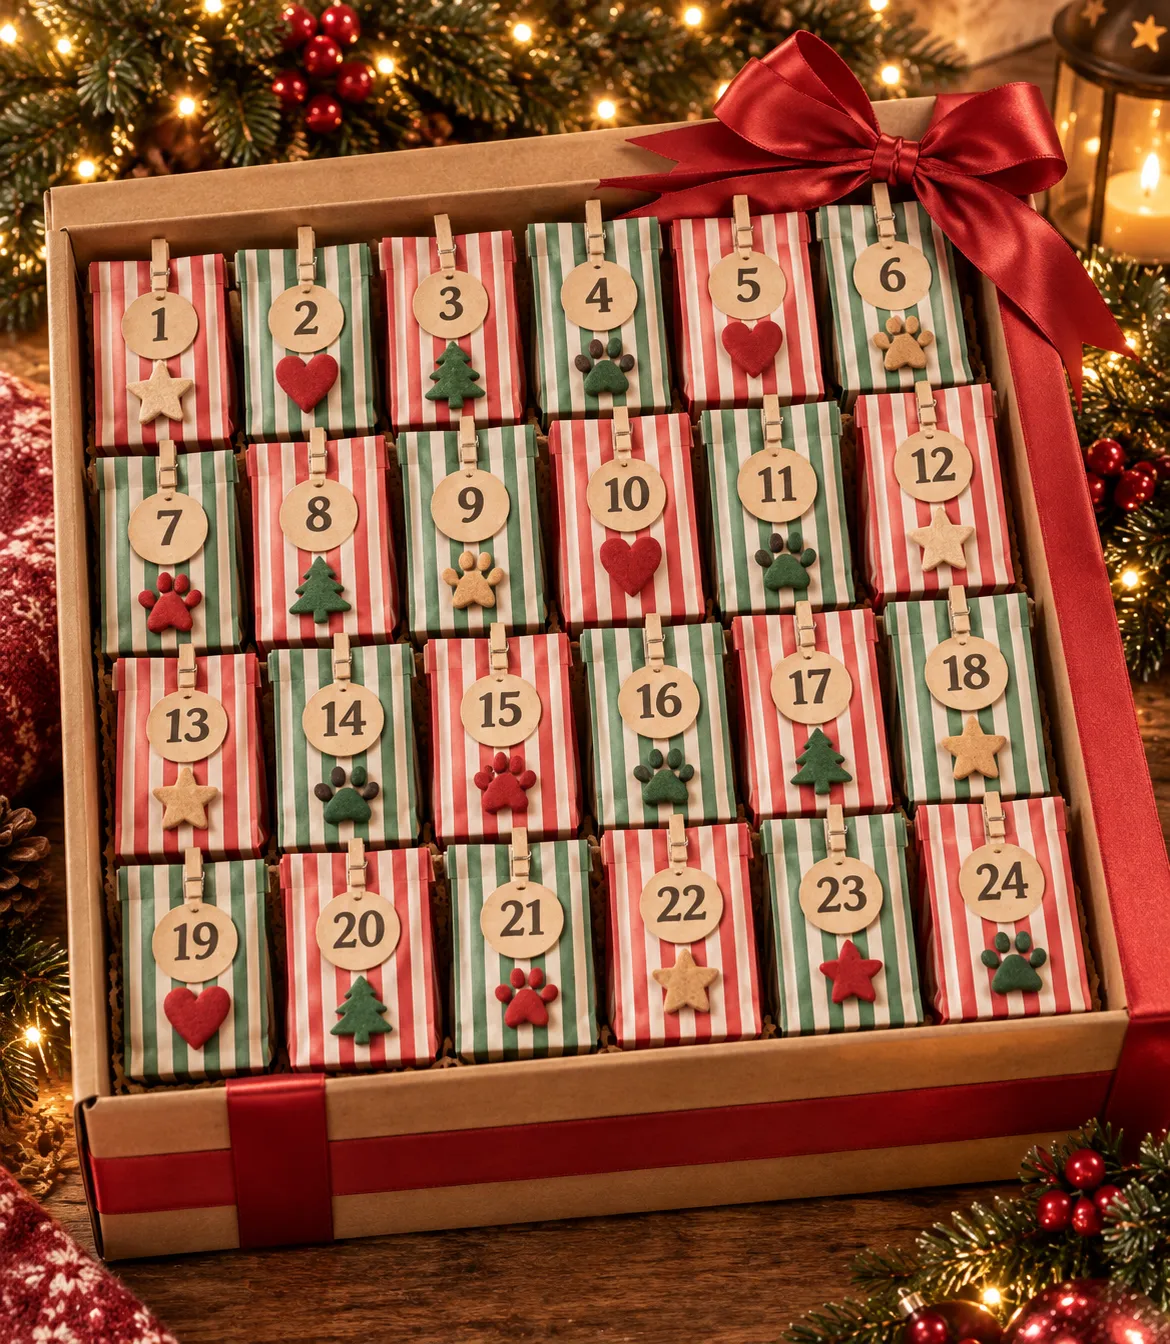
Total: about $41–$96 for something that reads like a boutique window display. Budget alternative: plain kraft lunch bags ($4 for 24) hand-numbered with a white gel pen cut this to roughly half.
Don’t line those bags up like soldiers. Nudge every third one about half an inch off-axis and let the tags hang at slightly different heights — the eye reads the whole box as handmade rather than printed. And do the math before you buy: a 20-inch box holding 24 bags gives each one roughly 3¼ inches of width, so keep bags at 3 inches or under or the last row won’t sit flat.
2. Embroidered Felt Pockets Against White Painted Brick
Three things are doing the heavy lifting here. First, contrast — soft green felt and stitched thread against hard white painted brick makes both materials look better than they do alone. Second, repetition: a tidy grid of pockets satisfies the eye because it can be counted in one glance. Third, a single pop of red in the embroidery pulls the composition together without adding one more object to the wall.
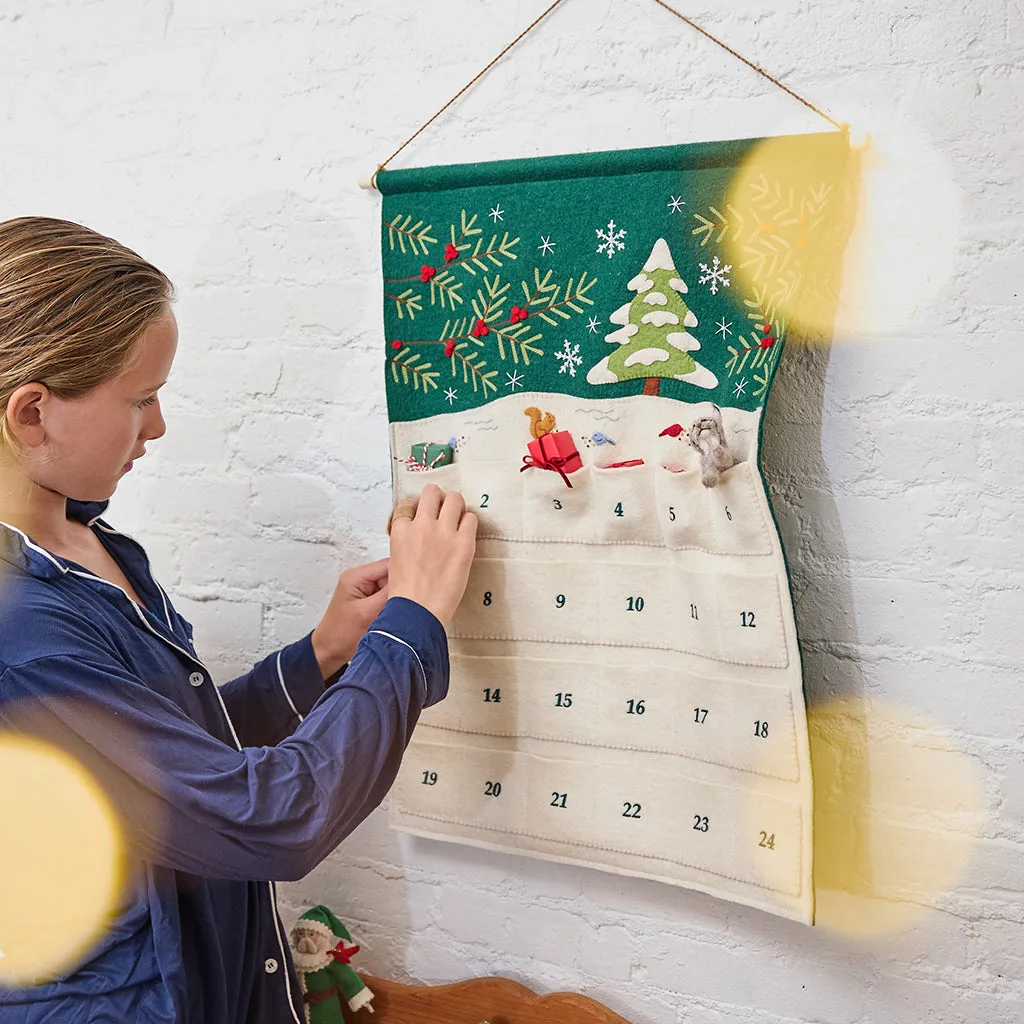
Two practical notes before you commit. Felt calendars aren’t light — a 24-pocket version with plush toys tucked inside can hit four or five pounds, so a single nail will eventually sag. Use two anchored hooks at the dowel ends. And those pockets are usually three to four inches square: a candy cane fits, a bag of gummy bears doesn’t. Plan the treats around the pocket, not the other way around.
3. A Plaid Forest Scene Above Twenty-Four Wooden Drawers
It’s the plaid deer. Not the drawers, not the wood — the deer. Everything else in this calendar is a neutral: pale wood, red numbers, simple tree cutouts. The moment that red-and-black plaid animal appears, the piece gets a point of view. Take it away and you have a nice wooden box. Leave it in and you have a story about a forest where somebody lives.
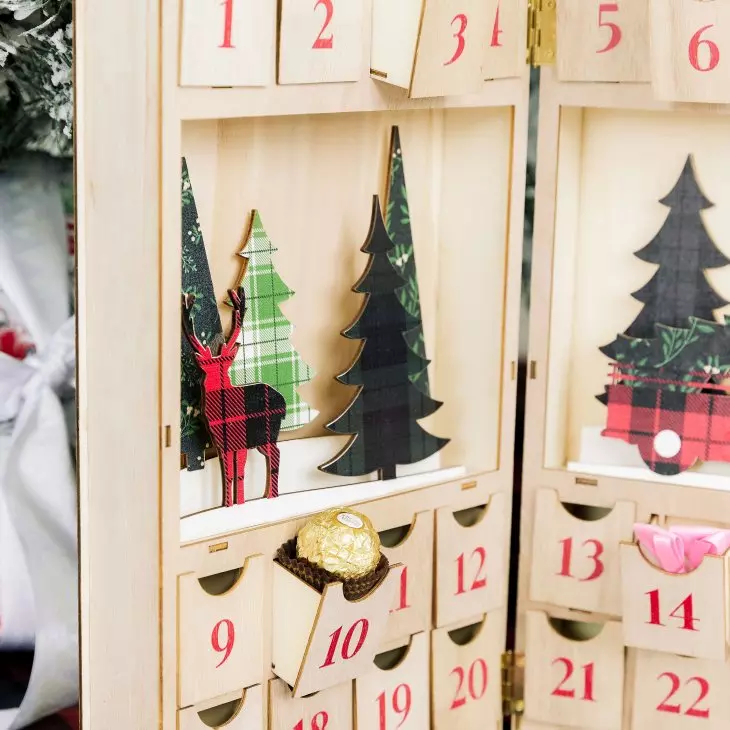
The formula runs roughly 65% pale natural wood, 20% red plaid, 10% deep green, and 5% gold. Wood does the calm work, plaid carries the personality, green keeps the whole thing from turning candy-cane sweet, and the gold-wrapped chocolate in the open drawer is the only shine you need. Swapping to a blue Christmas? Switch the plaid for navy-and-white checks and keep every other ratio identical.
4. Patterned Mini Boxes Lined Up on a Red Tray
The patterned boxes are the easy part — the fabric-wrapped handle is what sells this tray as a keepsake rather than a storage solution.
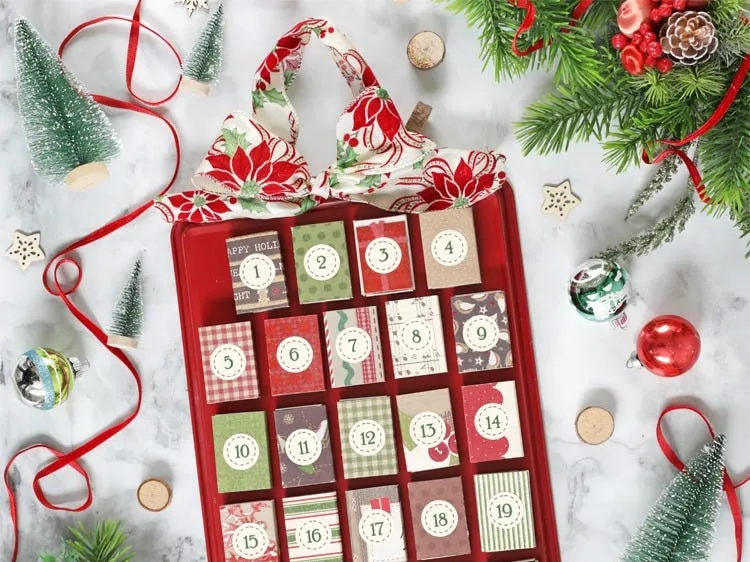
- Measure the tray’s short side and add 1 inch to each end.
- Cut a 4-inch-wide strip of poinsettia cotton, fold in half lengthwise, right sides together.
- Stitch or fuse the long edge, turn it right side out, and press it flat.
- Sandwich the strip ends inside the tray rim and hot-glue from underneath.
- Let it cure 20 minutes before you pick the tray up by the handle.
About 45 minutes and $6 in fabric, assuming the tray is already in the house.
The version in the photo looks expensive because no two boxes match. You can get that same rhythm for under $25: Target’s dollar section and Michael’s both sell 2-inch patterned favor boxes in multipacks, and matte Mod Podge over plain kraft works just as well. The tray is the free part — hunt Facebook Marketplace and thrift stores for a red or brass rectangle, then spray-paint it if the color is wrong.
5. A Pastel Fabric Tree With Paper Stars Around It
Those paper stars and folded spheres are the difference between a wall hanging and a wall moment. Here’s how to get the same scattered-but-composed look: think in a rough triangle that mirrors the tree, placing three pieces at the upper left, two at the upper right, and one low and off to the side. Never space them evenly. Even spacing reads as a store display; uneven spacing reads as a home.
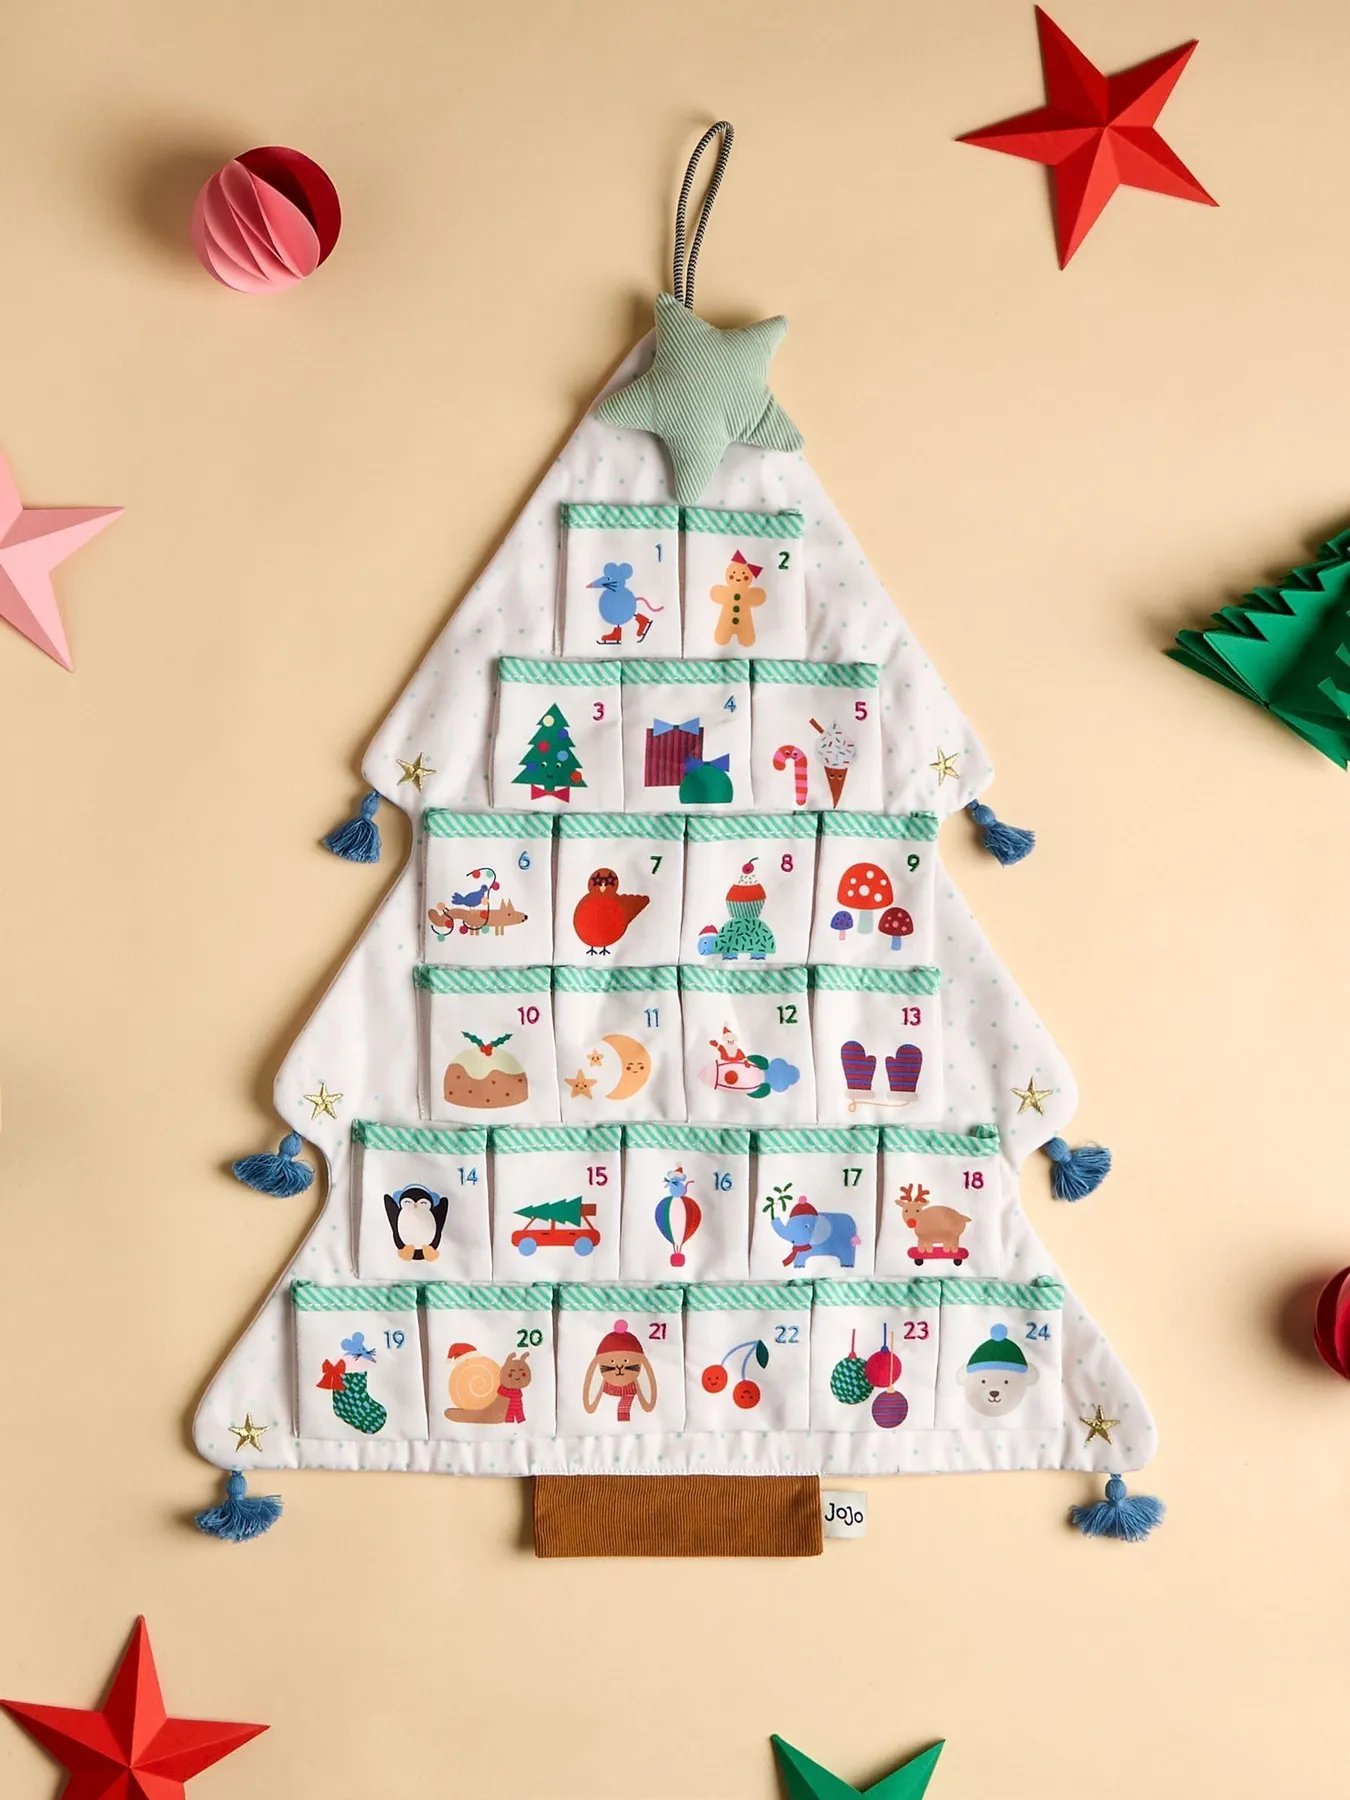
This one needs a genuinely blank wall — figure about 30 inches wide by 48 inches tall of clear space, plus 12 inches of breathing room on either side once the paper ornaments go up. It’s an ideal nursery or hallway piece because the illustrations stay legible from roughly four feet away. Working with a tighter wall? The dowel-hung felt tree in Idea #8 is narrower and hangs from a single point.
6. Felt Ornaments That Come Off the Tree Every Morning
Detachable ornaments are the most fun version of this idea and also the most fragile. Hook-and-loop felt fuzzes out after a few seasons of daily handling, and once the loop side pills, ornaments start sliding off on their own. Reinforce the heavy ones with a hidden stitch of thread, and expect to replace two or three pieces a year. That isn’t a flaw — it’s the cost of a calendar kids actually touch.
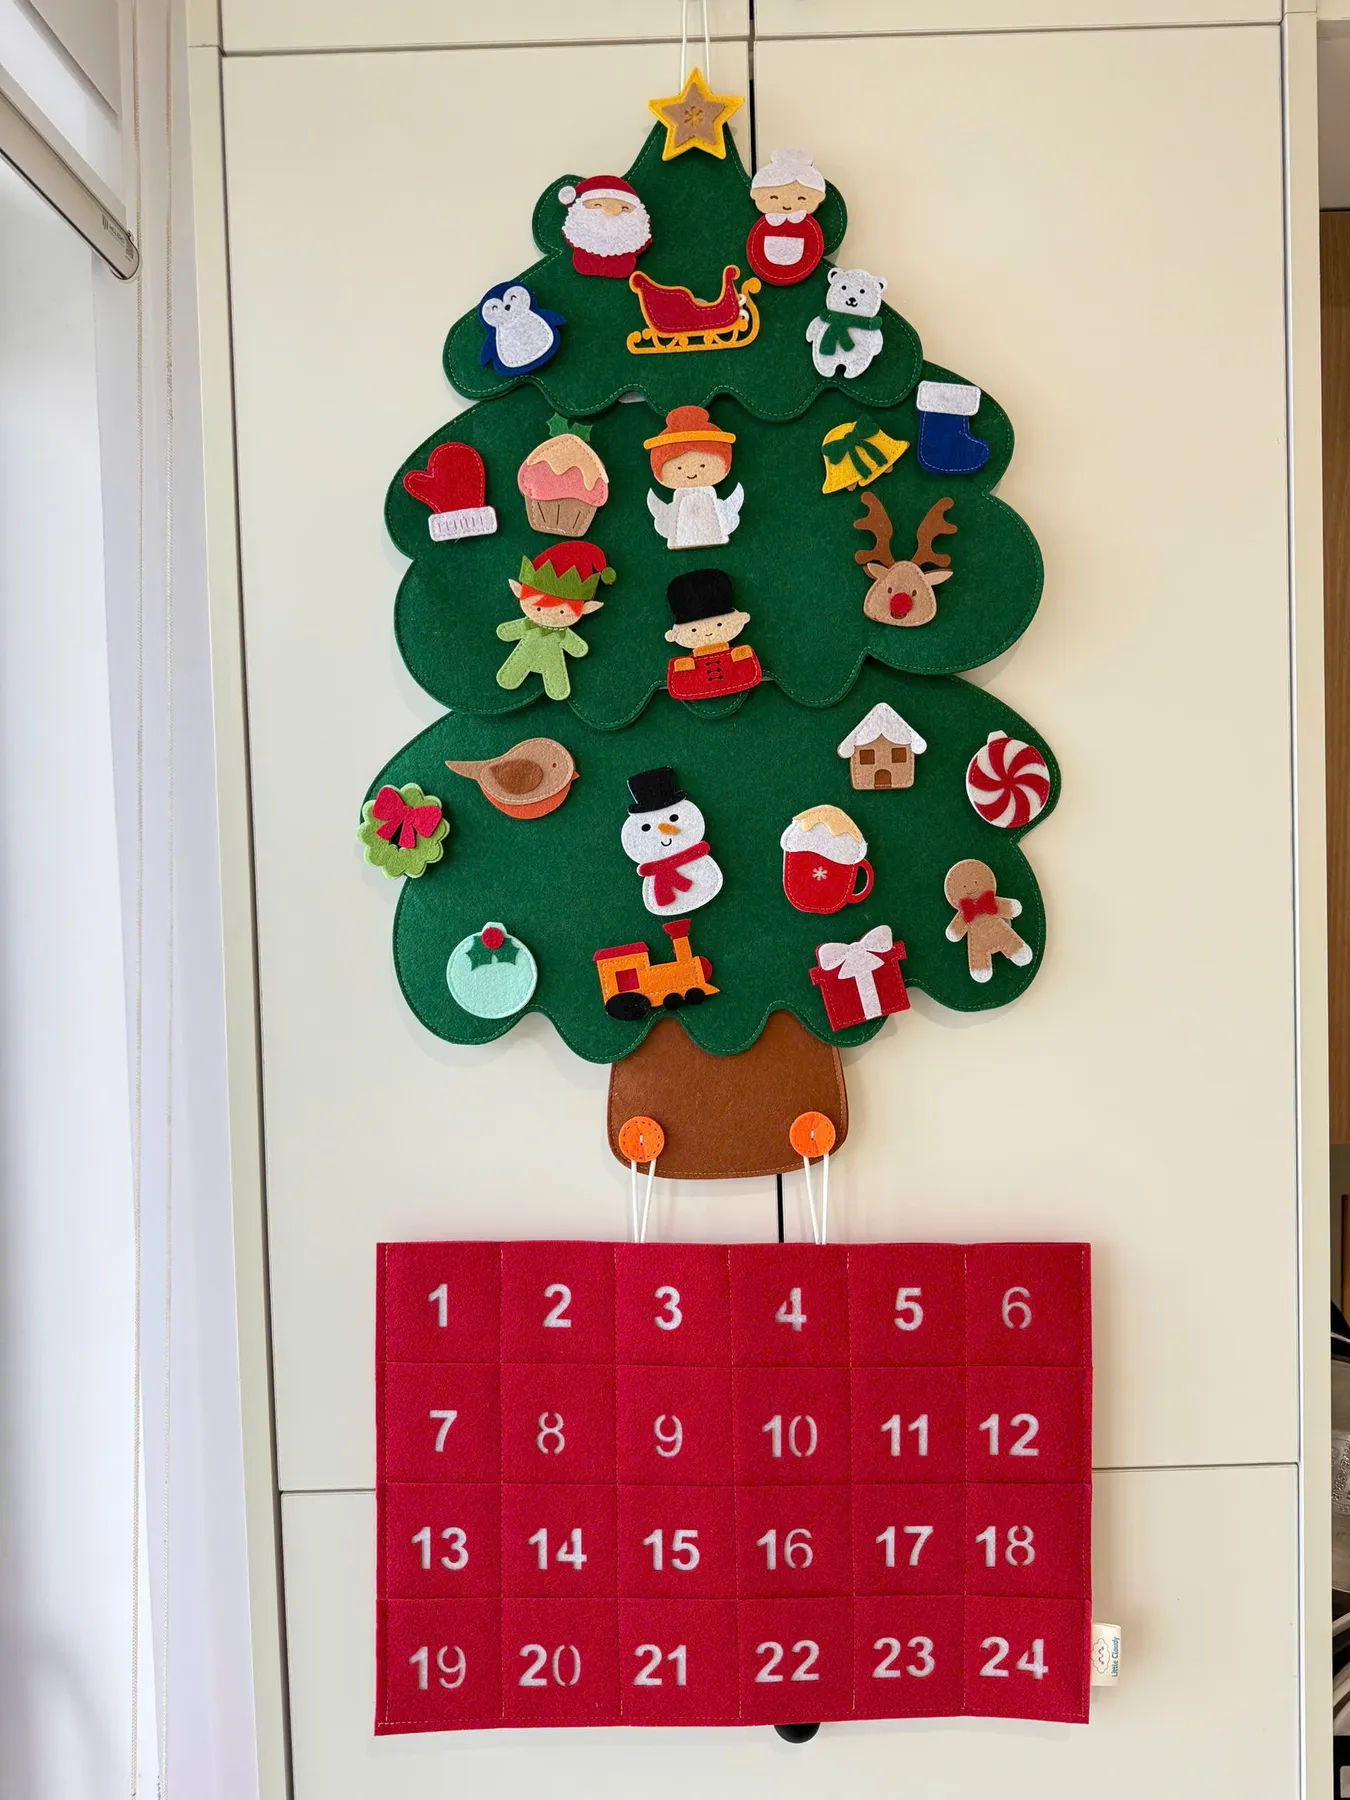
The real genius is that the calendar is also the activity. Opening a pocket and hanging an ornament gives a kid two actions instead of one, which is why this format holds attention past December 4th — the graveyard where most advent calendars go to die. Mounting it against the side of a kitchen cabinet is a smart move too: felt against flat cabinetry reads as intentional decor rather than a craft project stuck to a wall.
7. A Tiered Wooden Village With Tiny Lit Windows
Count the proportions: about 70% bare natural wood, 20% warm white light, and 10% red-and-black accents. The wood does the quiet work, the little illuminated houses carry the glow, and Santa, the reindeer, and the snowman supply just enough color to keep it from going minimal. Prefer a cooler look? Swap warm bulbs for daylight ones and the red figures for white ceramic — the ratio stays exactly the same.
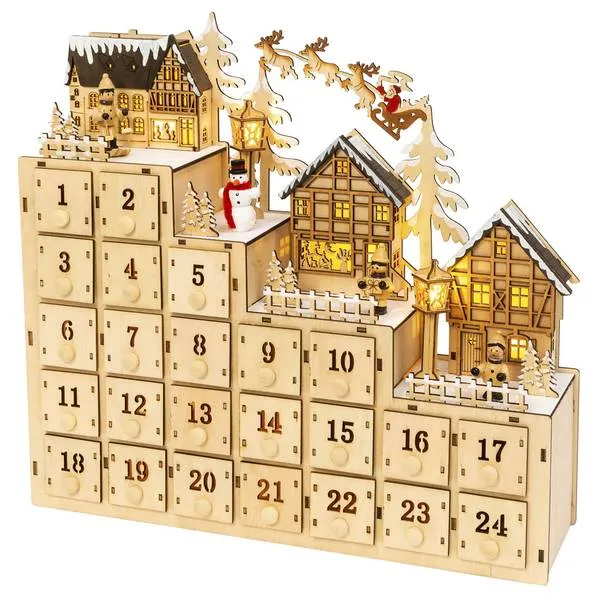
- Tiered wooden calendar with 24 drawers: $55–$140
- Miniature wooden houses and trees: $12–$28
- Battery fairy lights or LED tea lights: $8–$16
- Small Santa, reindeer, or snowman figures: $6–$18
- Wood wax or clear finish for yearly touch-ups: $8–$12
Total: roughly $89–$214, and it’s the kind of piece you’ll still be setting out in 2040. Budget alternative: buy the plain drawer tower and add village houses from the dollar store one at a time over two years.
8. A Window-Lit Felt Tree on a Simple Wooden Dowel
White-on-white Christmas has been quietly gaining ground since the Scandinavian soft-minimal wave, and 2026 is the year it went mainstream — Pinterest boards are full of snowy windows, cream textiles, and countdowns that disappear into the room instead of shouting at it. What gives it staying power is that it photographs beautifully in low winter light and doesn’t fight whatever else is already sitting on the windowsill.
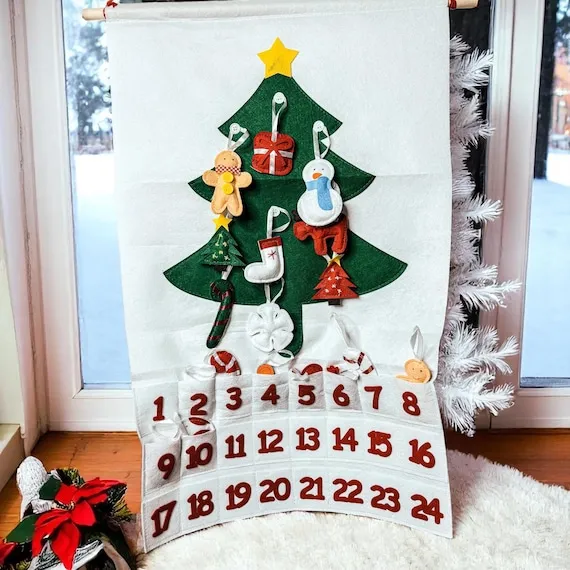
Hanging a felt calendar in a window is gorgeous and slightly risky. Direct sun fades dyed wool within a single season, so choose the window side that gets morning light rather than the one that bakes all afternoon. And hang the dowel so the top of the tree sits about 8 inches below the upper window trim — any higher and the proportions look pinched.
9. Crochet, Fringe, and Three Bold Pocket Colors
Crochet is washable but not carefree. Expect visible dust within a month of hanging — vacuum it on the lowest setting with a mesh screen over the nozzle rather than scrubbing at it. Hand wash in cool water with a wool-safe detergent once a year, roll it in a towel instead of wringing, and dry it flat or the fringe will stretch into a lopsided smile. Budget for one re-blocking every few years.
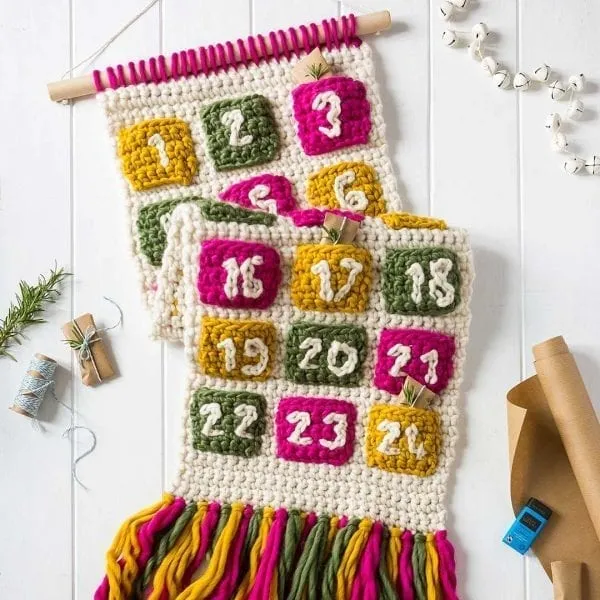
If you don’t crochet and don’t want to pay handmade prices, this look is still reachable. Thrift stores and estate sales turn up crocheted afghans for $10–$20 — cut one into 24 rectangles, back each with felt, and stitch on a hanging loop. Or buy a woven cotton wall hanging and clip numbered tags to it instead of pockets. You’ll lose the fringe detail and keep every bit of the warmth, for about a quarter of the price.
10. Kraft Tags Pinned Straight to the Wall
It’s the discipline of one embellishment per tag. A wooden snowflake, a pinecone, a sprig of evergreen, a cork tree with white painted dots — each tag gets exactly one thing plus a number, and then it’s finished. That restraint is why two dozen little tags on a white wall look like a curated collection instead of a scrapbook explosion. Add a second ornament anywhere and the whole arrangement starts to feel noisy.
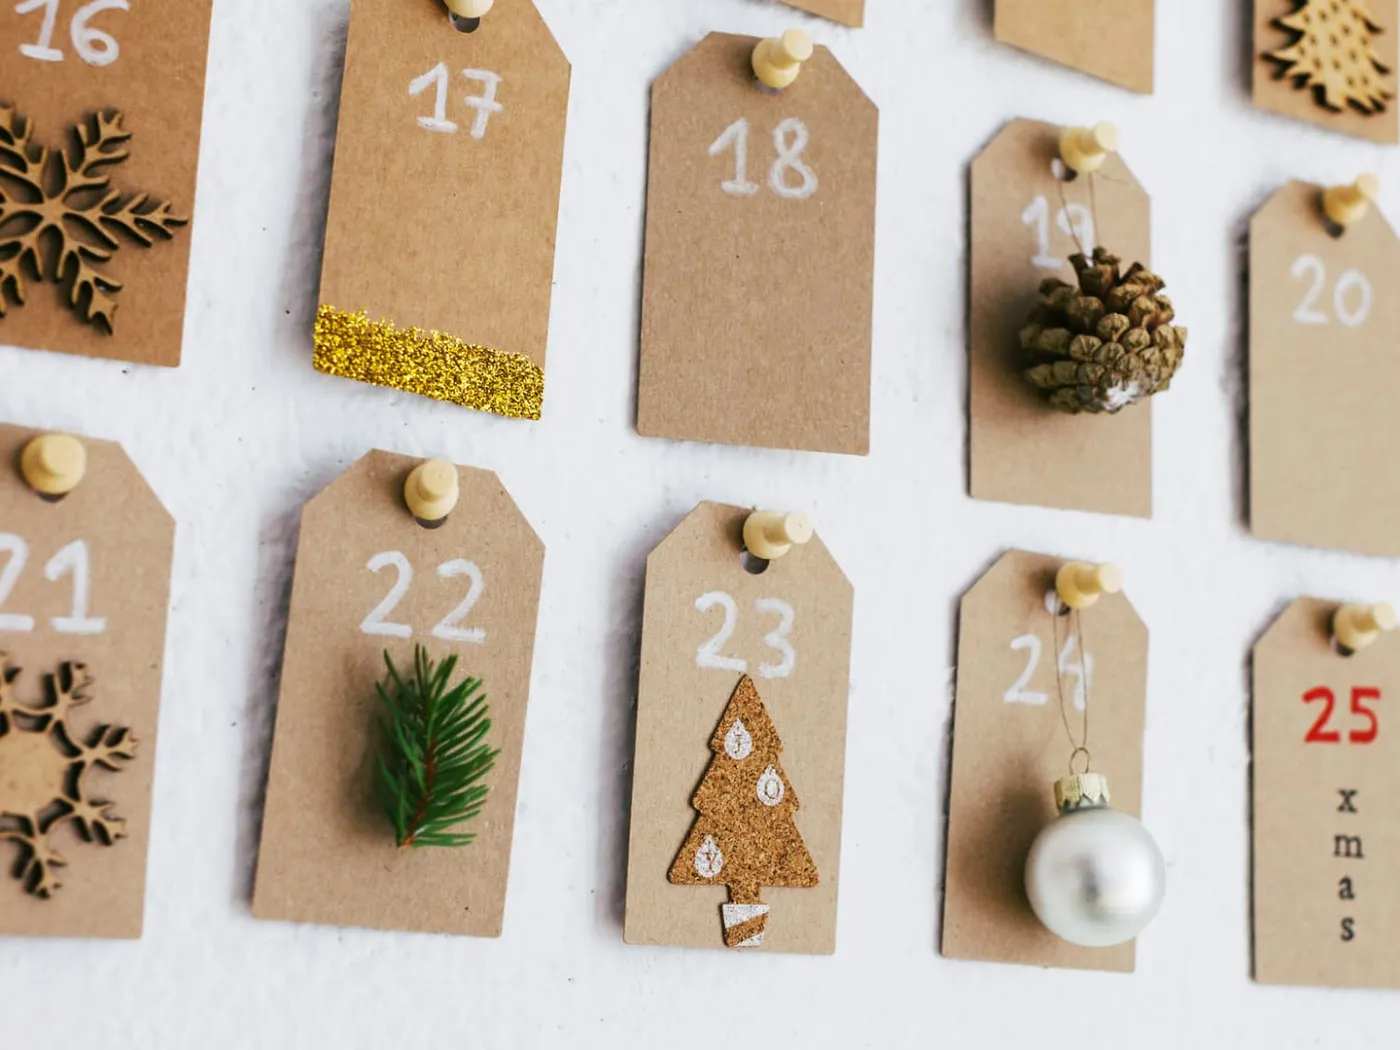
Pinned tags need generous negative space to work. Plan on a 24-inch-wide by 36-inch-tall zone for 24 tags, with at least two inches between each — any closer and the wall texture disappears behind the clutter. A hallway, a kitchen wall, or the sliver beside a pantry door all work beautifully. Under about 18 inches wide and you’ll need to hang them in two staggered columns instead of a grid.
11. Activity Notes Hidden in a House of Tiny Drawers
Activity calendars live or die by drawer dimensions. Measure the interior before you commit to paper slips: most house-shaped calendars have drawers around 2 by 2 inches, which means your notes need to be 1¾ inches square or they’ll jam. Buy 2-inch kraft cards, write all 24 tasks in one sitting with the same pen, and number the backs so you can’t accidentally double up on day 9.
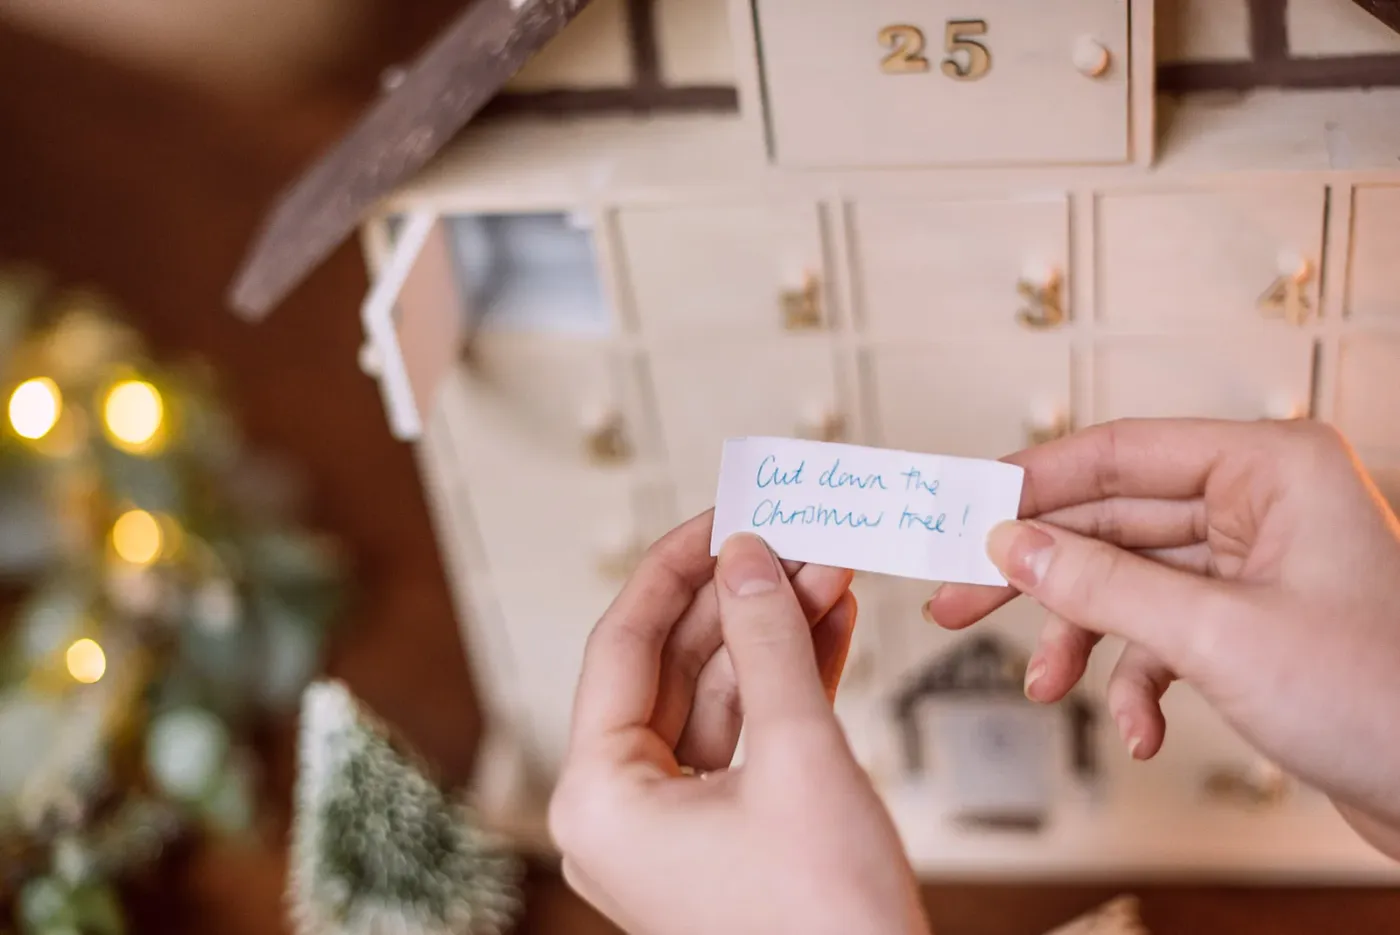
- Measure one drawer’s interior — width, depth, and clearance above the pull.
- Decide treat, task, or both, and confirm the drawer actually fits the treat.
- Count the drawers: some designs run 24, some 25, some 1–24 plus a bonus.
- Check whether pulls are inset or protruding before hanging near a doorway.
- Pick a wall where the drawer faces sit at chest height for the tallest user.
12. A Wooden Train That Hauls Twenty-Four Drawers
- Wooden train calendar with numbered drawers: $45–$120
- Miniature wooden houses and bottle-brush trees: $10–$24
- Red and green craft paint for touch-ups: $6–$10
- Track base or a length of 1×3 lumber: $0–$14
- Small filler gifts (stickers, coins, tiny chocolates): $15–$35
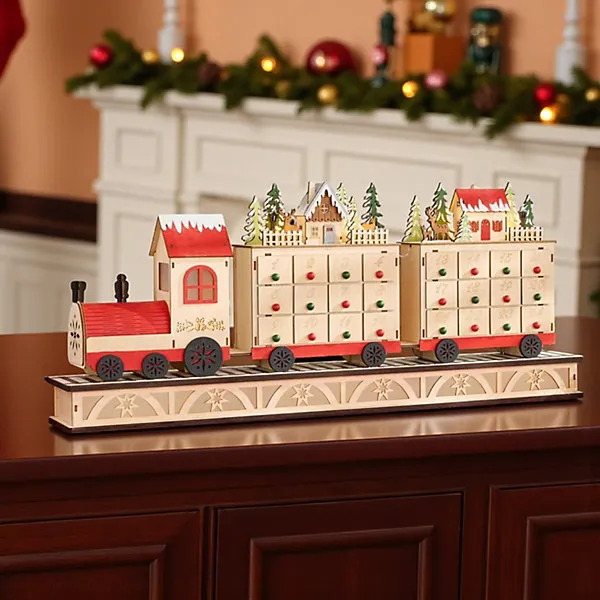
Total: $76–$203, depending on how much of the village you already own. Budget alternative: skip the ready-made train and build three cars from unfinished wooden cigar boxes — same silhouette, roughly 40% less, and you can paint the numbers yourself.
Trains solve the problem most calendars have: length. A flat board of 24 drawers is a rectangle and reads as one object, but a train reads as three, which lets it sprawl across a console or mantel without feeling heavy. The miniature houses on top also give your eye somewhere to travel vertically, so a horizontal piece doesn’t get lost against a horizontal surface. Compare with the tiered village in Idea #7 — same wooden language, completely different footprint.
13. Twine-Hung Tags With Fresh Evergreen Sprigs
Fresh sprigs are the whole charm here, and they’ll last about ten days before they start dropping. Extend them cheaply:
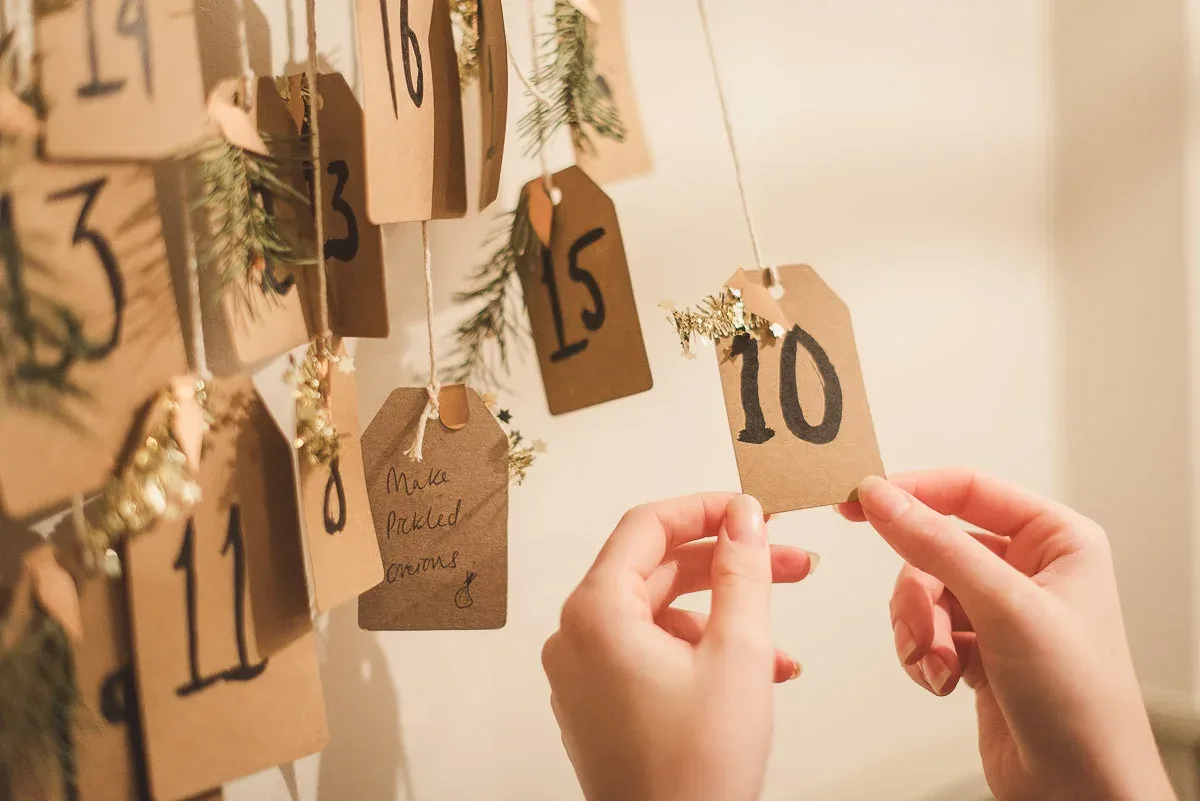
- Cut 2-inch tips of cedar, fir, or boxwood the day you hang the tags.
- Wrap each cut end in a damp cotton ball and a small square of foil.
- Tuck the wrapped end behind the tag and secure with a dot of hot glue.
- Refresh the sprigs around day 12 from the same branch.
- Keep the arrangement away from radiators — heat dries them in two days.
Budget about $10 for a bundle of greenery and 15 minutes of assembly.
fresh evergreen sap and kraft paper are not friends. Within a week you can get a translucent mark where a sprig rested, and it doesn’t come off. If your tags are keepsakes, use preserved or dried greens instead — they hold color for years and leave no residue. And if there’s a cat in the house, assume the bottom row is a toy. Hang it at least 30 inches off the floor.
14. Twenty-Four Illustrated Squares on One Flat Box
The palette runs about 50% soft green field, 20% red, and 30% split between blue, orange, and yellow accents — a ratio that keeps 24 different illustrations from turning into visual noise. The green background is the referee. If you’re making your own, pick one base color and let everything else be a supporting character; two competing backgrounds and the grid collapses into confetti.
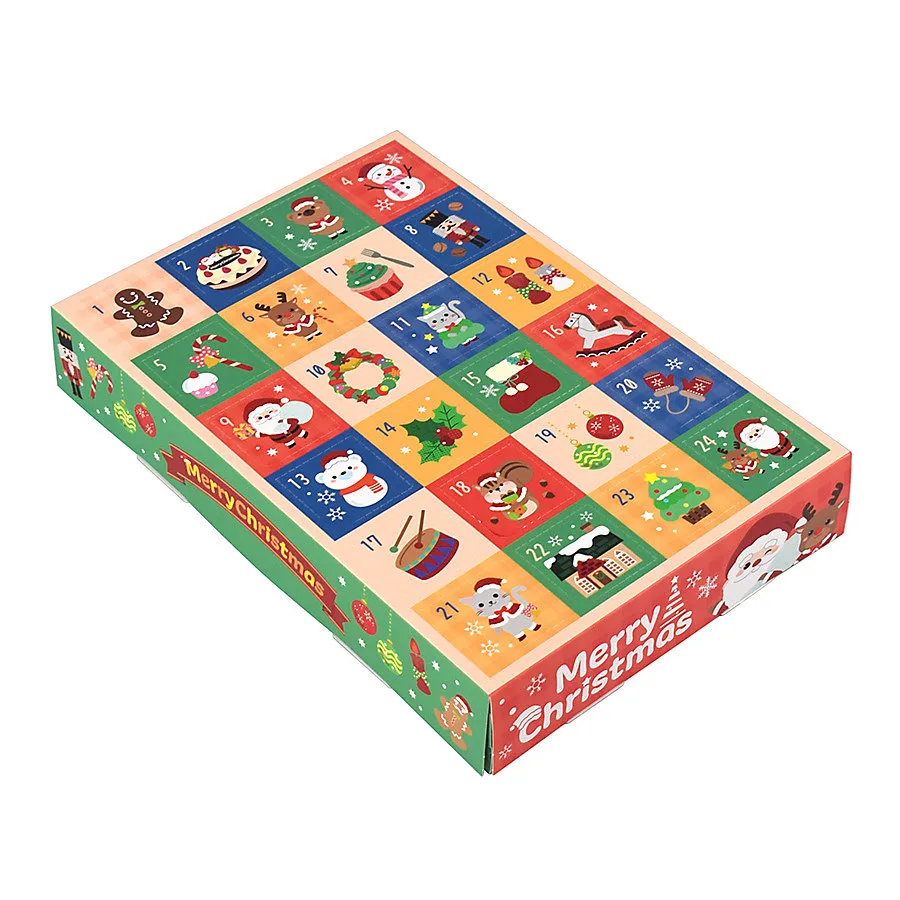
A flat 24-square box needs to be seen from above or straight on — a low bookshelf, a console, a kitchen counter where people actually stand. Aim for a surface at least 22 inches wide and 14 inches deep so the box doesn’t overhang. Watch the height too: if the top of the box sits above 60 inches, adults end up looking up at illustrations meant to be read at a glance.
15. A Fabric House Calendar With a Gold Sign Beside It
House-shaped fabric calendars are one of the few things that are genuinely cheaper to buy than to make — Etsy sellers list them for $28–$45, and the fabric alone would run $20 plus an afternoon of fussing with fusible interfacing. Where you save is the styling: the gold “Merry Christmas” sign, the small white house, and the pine garland are all Target and Walmart seasonal finds under $15 each. Buy the calendar, build the vignette.
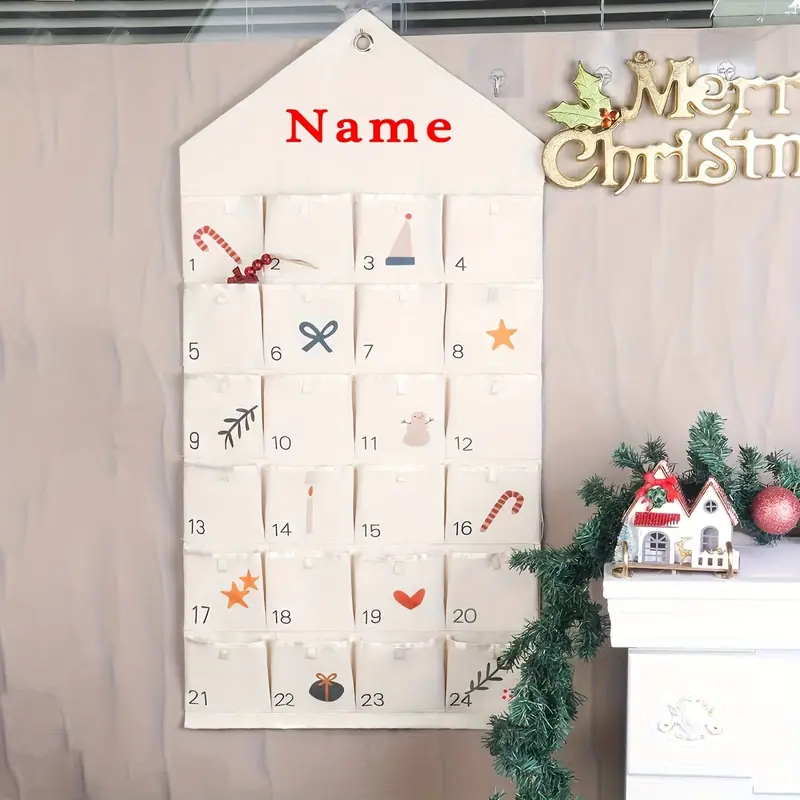
Notice how the decorations sit to one side rather than flanking the calendar on both? That asymmetry keeps the wall from looking like a store aisle. Styling your own? Group all the supporting objects — sign, garland, little house, pink ornament — on a single side and let the other side stay quiet. Odd numbers help too: three objects beats four every time.
16. The Arched Cabinet That Became a Calendar Display
A glass-front cabinet is basically a display case with better bones, and putting an advent calendar inside does three things at once: it protects the piece from dust and sticky hands, it gives the calendar a frame, and it lets you light the whole thing from above so every drawer face catches a highlight. The garland draped over the top is the exclamation point — it signals that this cabinet is dressed, not just filled.
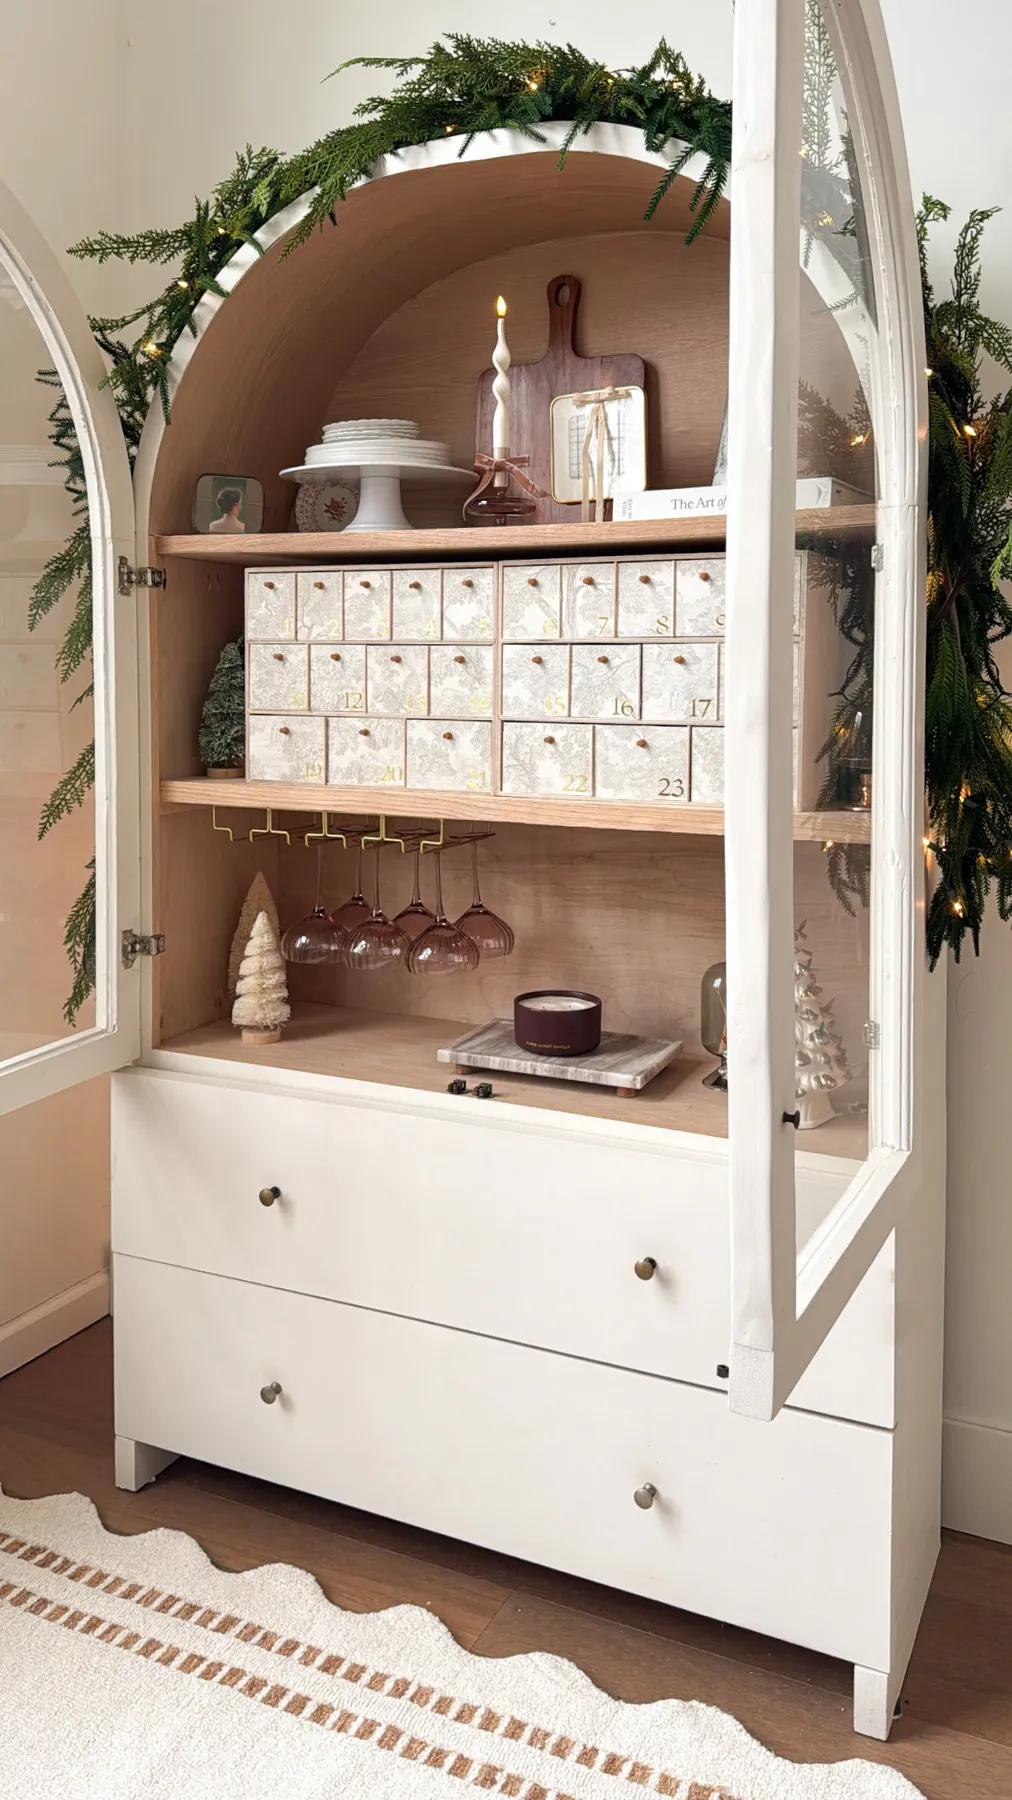
The lighted greenery over the arch. Without it, the cabinet is a nice piece of furniture with a calendar inside — architectural, a little cold. With it, the room reads as somewhere that’s waiting for something. If you steal one move from this setup, steal that one. A warm plug-in garland, draped slightly heavier on one side so it doesn’t look rented.
17. Brown Bags First, Fairy Lights Second
The whole point of paper bag calendars is that small hands can reach them, so height is the design decision that actually matters. Put the top of the bag line at 48 inches and the bottom at 34 — that keeps day 1 through 24 within reach of a standing four-year-old without a stool. If adults are the only audience, move the whole line up to 60 inches and it reads as a wall feature instead of a play station.
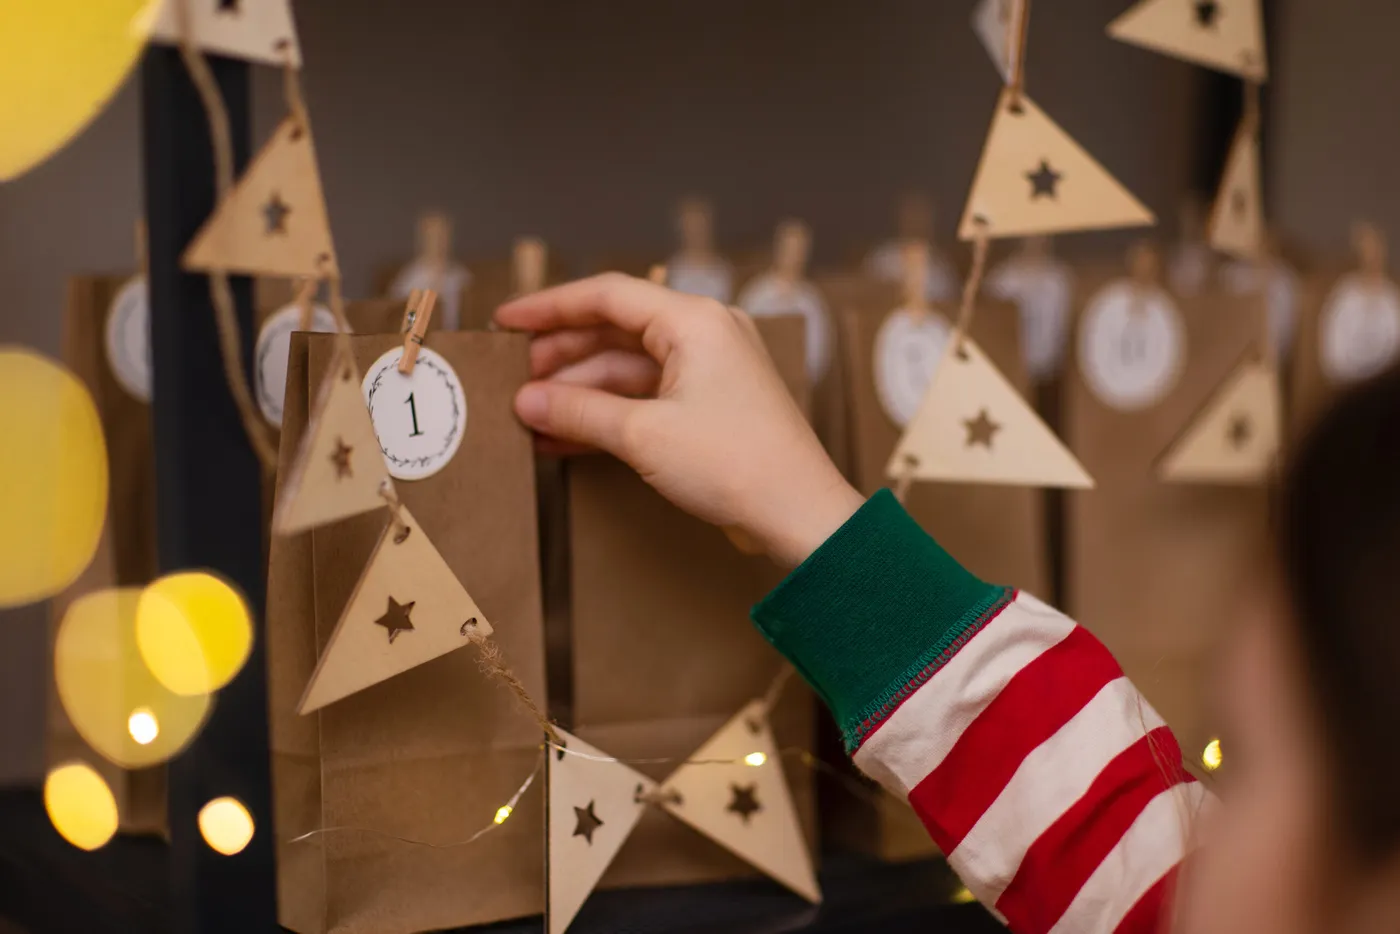
The wooden star garland above the bags works harder than it looks. Here’s how to build one:
- Cut 12 triangles from ⅛-inch basswood, about 3 inches per side.
- Sand the edges, then paint or leave them bare.
- Drill a small hole near the top of each triangle.
- Thread onto jute twine, spacing them 5 inches apart.
- Knot between each shape so they stop sliding.
Roughly $12 in materials and an hour, and you’ll reuse it for years.
18. Candy-Shaped Boxes on an Ornate Dark Tray
- Candy-shaped paper favor boxes (24): $12–$26
- Ornate metal tray: $0–$35 (thrift it)
- Patterned scrapbook paper for wrapping: $6–$12
- Pine sprigs and small round ornaments: $8–$18
- Number stickers or a fine-tip paint pen: $4–$9
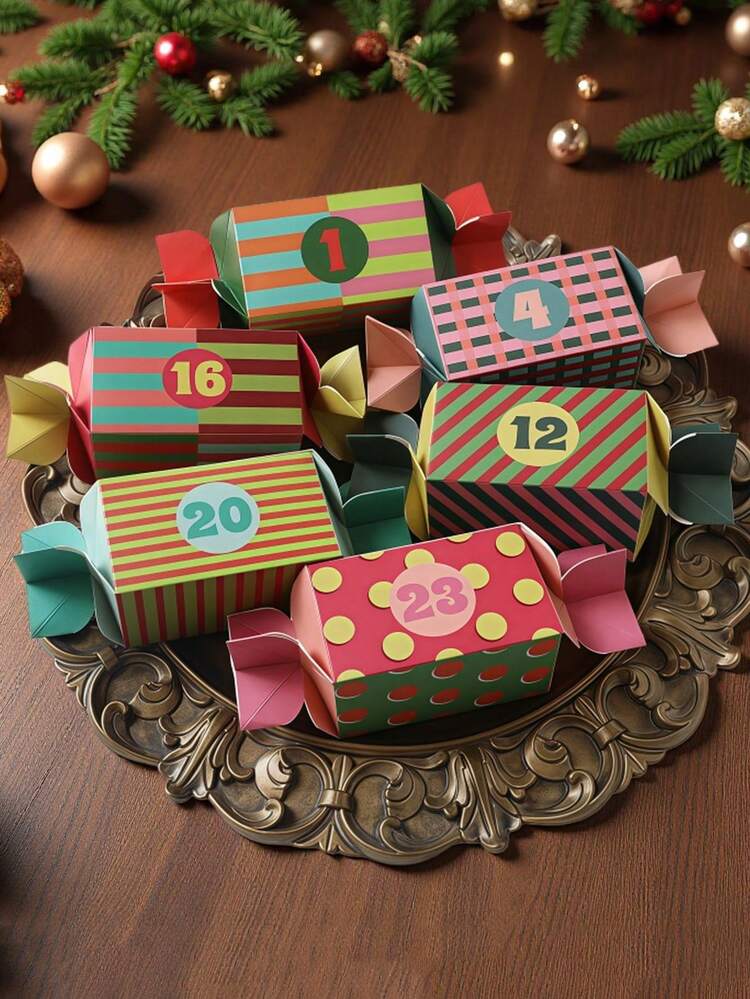
Total: $30–$100, and the only real variable is the tray. Budget alternative: pinch toilet-paper tubes at both ends, wrap them in leftover wrapping paper, and number them — 24 for about $5, and no kid under eight can tell the difference.
The palette here is red, green, and pink at roughly equal weight, held down by a dark bronze tray and a dark wood surface. That’s the trick: three bright colors only work when something dark underneath anchors them. Swap the tray for white ceramic and the same boxes start floating. Want it calmer? Cut pink entirely, let red and green split fifty-fifty, and keep the metal dark.
19. A Pyramid Stack Within Arm’s Reach of the Fireplace
A freestanding pyramid calendar on a coffee table is charming right up until a toddler body-checks it. If you have kids under three or a large dog, either weight the bottom boxes with something heavy or move the stack to a side table with a lip. And keep it well clear of the fireplace — thin cardboard near an open hearth is a bad combination no matter how good it looks in photos.
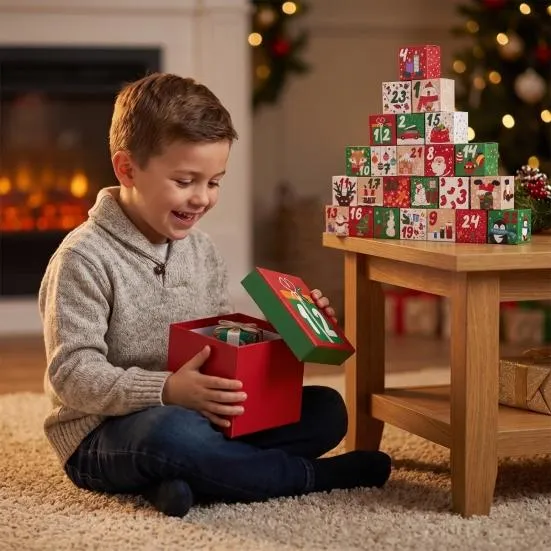
The calendar-as-furniture idea has been building for a couple of years and peaked in 2026, largely because people stopped treating December decor as a shelf-only affair. Stacking boxes into a pyramid turns a countdown into a centerpiece you sit beside, which is why so many of this year’s setups land on coffee tables and hearths instead of mantels. It has staying power, too — the format works with whatever paper you like next year.
20. Cardboard Cubes, a Red Candle, and One Hot Mug
Cardboard is a sponge. A mug set down too close leaves a ring that never lifts, and a candle flame within a foot will warp a box corner before you notice. Keep the stack at least 18 inches from anything lit, use a coaster, and rotate the pyramid a quarter turn each week so a sun-faded side doesn’t become permanent. If you want this arrangement to survive past one season, seal each box with matte Mod Podge first.
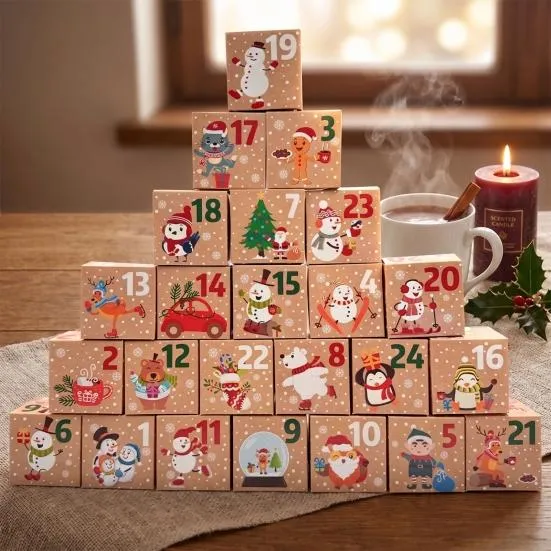
What keeps this from feeling cluttered is the negative space around it — one mug, one candle, one sprig of holly, and a wide margin of empty textile. When you style a stack like this, resist filling every gap. Put your supporting objects in a loose triangle no closer than 6 inches from the boxes, and choose a surface with visible texture so the smooth cardboard has something to argue with.
21. The Crafting Afternoon Behind a Tall Wooden Tower
Building a tall wooden tower from scratch is a weekend project. The short version:
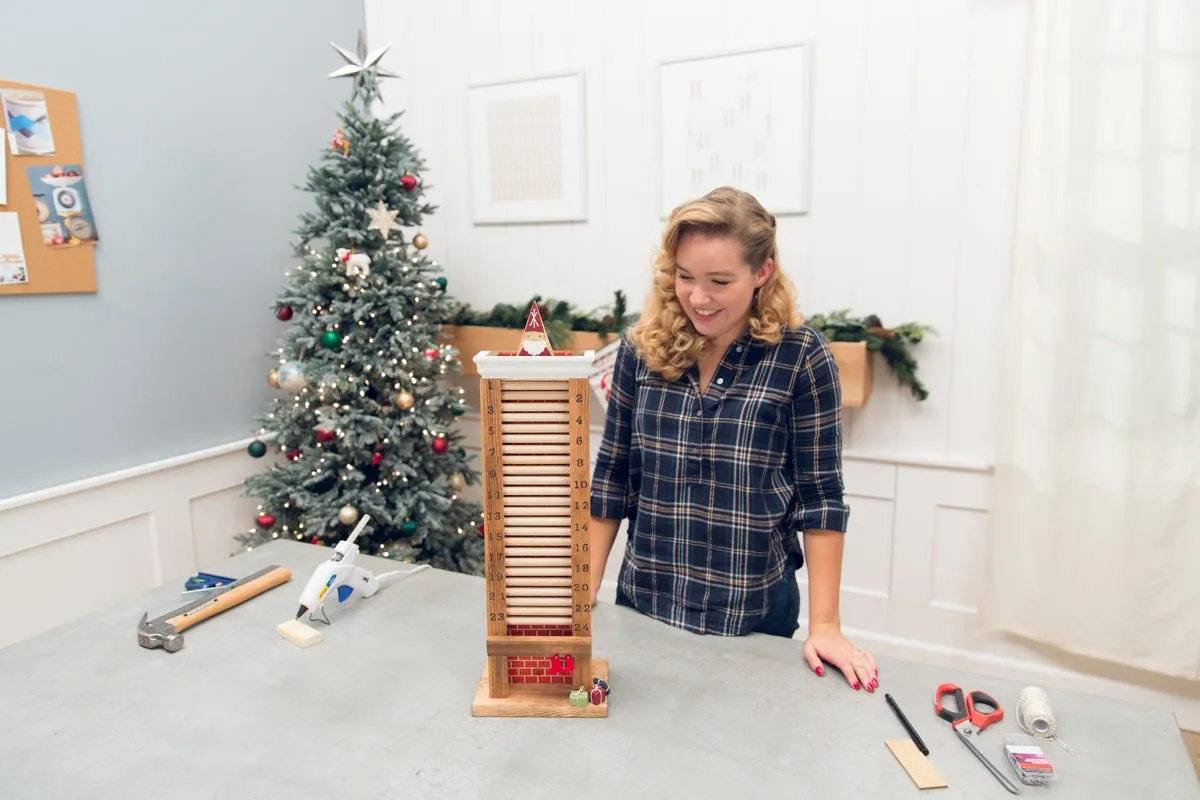
- Cut 24 boxes from ¼-inch plywood, 3 inches square with 1½-inch sides.
- Assemble with wood glue and painter’s tape, then cure overnight.
- Sand every edge, then prime and paint the interiors if you like.
- Stencil numbers 1–24 with a small brush and dry flat.
- Stack in a staggered tower and secure with removable adhesive putty.
About $40 in materials and a Saturday, plus drying time.
If a weekend of sawdust isn’t happening, the same silhouette is available for less than you’d guess. IKEA’s wooden drawer organizers stack into something very close to this shape, and a set of unfinished wooden boxes from Michael’s runs about $18 for 12. Paint the fronts, stencil the numbers, and you’ve got a tower for under $50. Check Idea #12 if you’d rather buy one finished piece and be done with it.
22. Dark Wood, Drawstring Pouches, and a Black Star
It’s the little black star. A calendar where you simply find the right number is a checklist; a calendar with a single movable marker that gets shifted forward every morning is a ritual. That one small object turns 24 hooks into a countdown with a physical, satisfying click. Everything else — the dark wood, the sawtooth edge, the off-white pouches — is beautifully restrained furniture built for that one gesture.
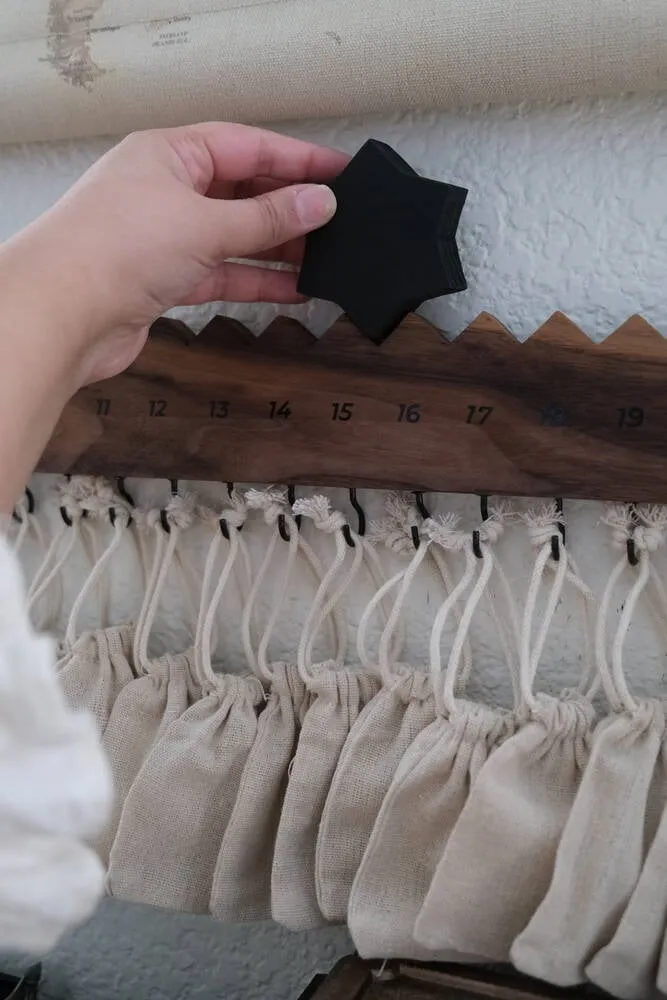
Twenty-four fabric pouches holding small gifts get heavier than they look, and a board mounted with two screws into drywall will start to pull within a week. Use toggle anchors or hit a stud. Also, off-white cotton shows every chocolate smudge — treat the pouches with a fabric protector spray before December 1st, and wash them in a mesh bag so the drawstrings don’t vanish into the machine.
23. A Felt Snowman Greeting You From the Wall
Slot-style calendars are the only ones where gift size is truly non-negotiable. Measure the slot before you shop: at 2 inches wide you’re looking at candy canes, single chocolates, scratch-off tickets folded in half, or nothing at all. The fix is to let the slots be decorative and put the real gift in a basket below — the calendar counts down, the basket delivers.
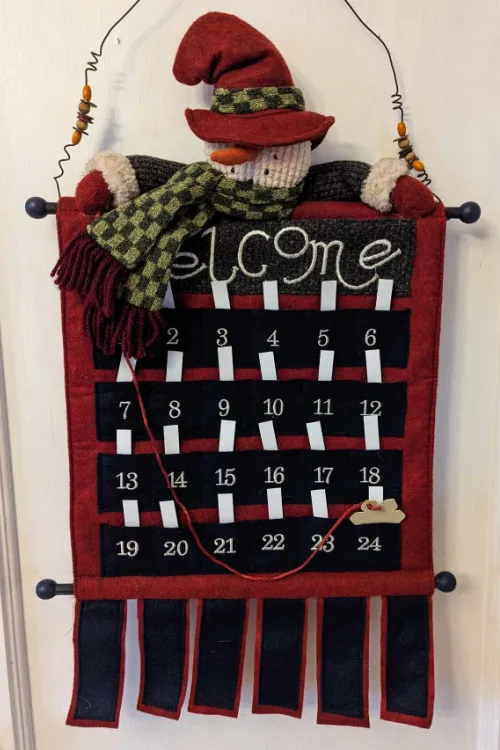
Felt banners hold up well but they hold onto everything: pet hair, glitter, lint from every sweater that walks past. Run a lint roller over the whole thing once a week in December and spot-clean marks with a barely damp cloth and a drop of dish soap. Never machine wash a felt banner with embroidered lettering — the fill mats and the stitching puckers. Air it out in January and store it flat, never folded.
24. A Woodland Scene Embroidered Above the Pockets
The embroidered panel above the pockets is what lifts this from craft project to composition. Without it you’d have a grid of cream pockets — pleasant, forgettable. The snowy woodland scene gives your eye somewhere to land first, then the numbers pull you down through the grid. It’s the same top-heavy principle as a gallery wall built around one oversized anchor piece.
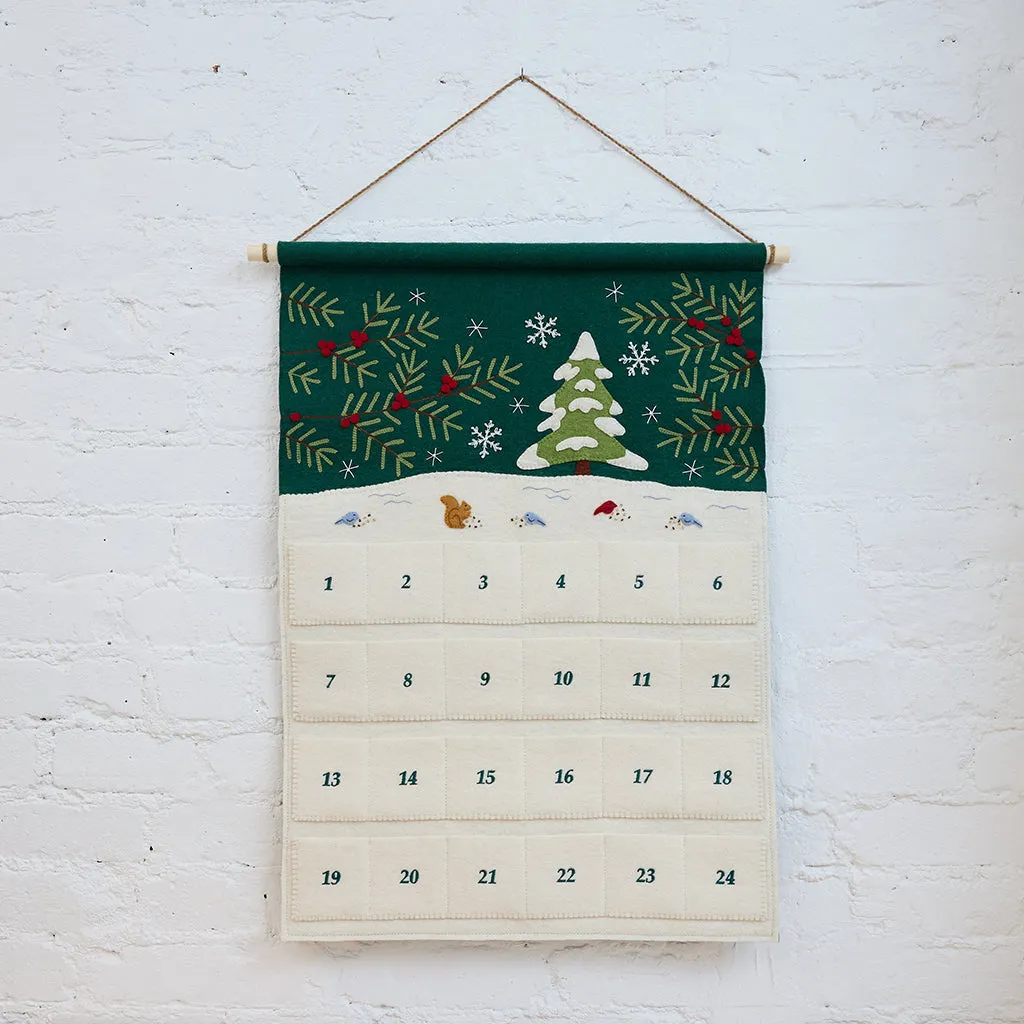
That dark green embroidered panel is doing three jobs at once: it anchors the top of a long vertical piece, it introduces a color that makes the cream pockets look warm instead of washed out, and it gives the calendar a theme without adding a single extra object to the wall. Remove it and the whole thing goes flat. Compare with Idea #2 — same brick wall, same format, completely different mood because of one color block.
25. Linen Pouches Mixed With Fresh Foliage and Berries
Aim for roughly 70% light neutral from the linen pouches, 20% green foliage, and 10% dark accent from the berries and wooden number cutouts. That ratio is why the arrangement reads as natural rather than Christmas-shop — the greens look foraged, not purchased. Want it warmer? Swap the dark berries for dried orange slices and keep everything else identical, scalloped kraft tags included.
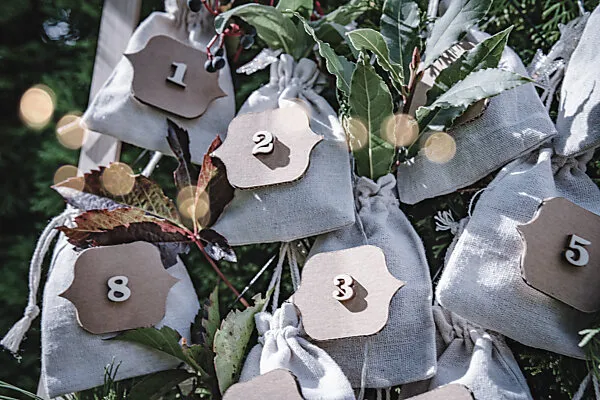
- 24 linen or muslin drawstring pouches: $18–$40
- Scalloped kraft tags with wooden numbers: $9–$22
- Fresh or preserved greenery and berries: $10–$25
- Jute twine and small hooks: $5–$10
- Filler gifts (tea, chocolate, tiny soaps): $25–$60
Total: $67–$157, and the pouches come back out every December. Budget alternative: buy muslin favor bags in bulk ($12 for 50) and stamp the numbers yourself — nobody notices at arm’s length.
26. Illustrated Drawers Dressed With Baubles and Tiny Mushrooms
Illustrated drawer calendars want to sit at table height, not wall height — the artwork only earns its keep if you can actually see it. Set the piece on a sideboard, dresser, or wide shelf between 28 and 34 inches off the floor, and leave 6 inches of clearance above so the top row opens fully. On a surface less than 20 inches deep, go slimmer than this; these pieces tend to run 14 to 16 inches deep.
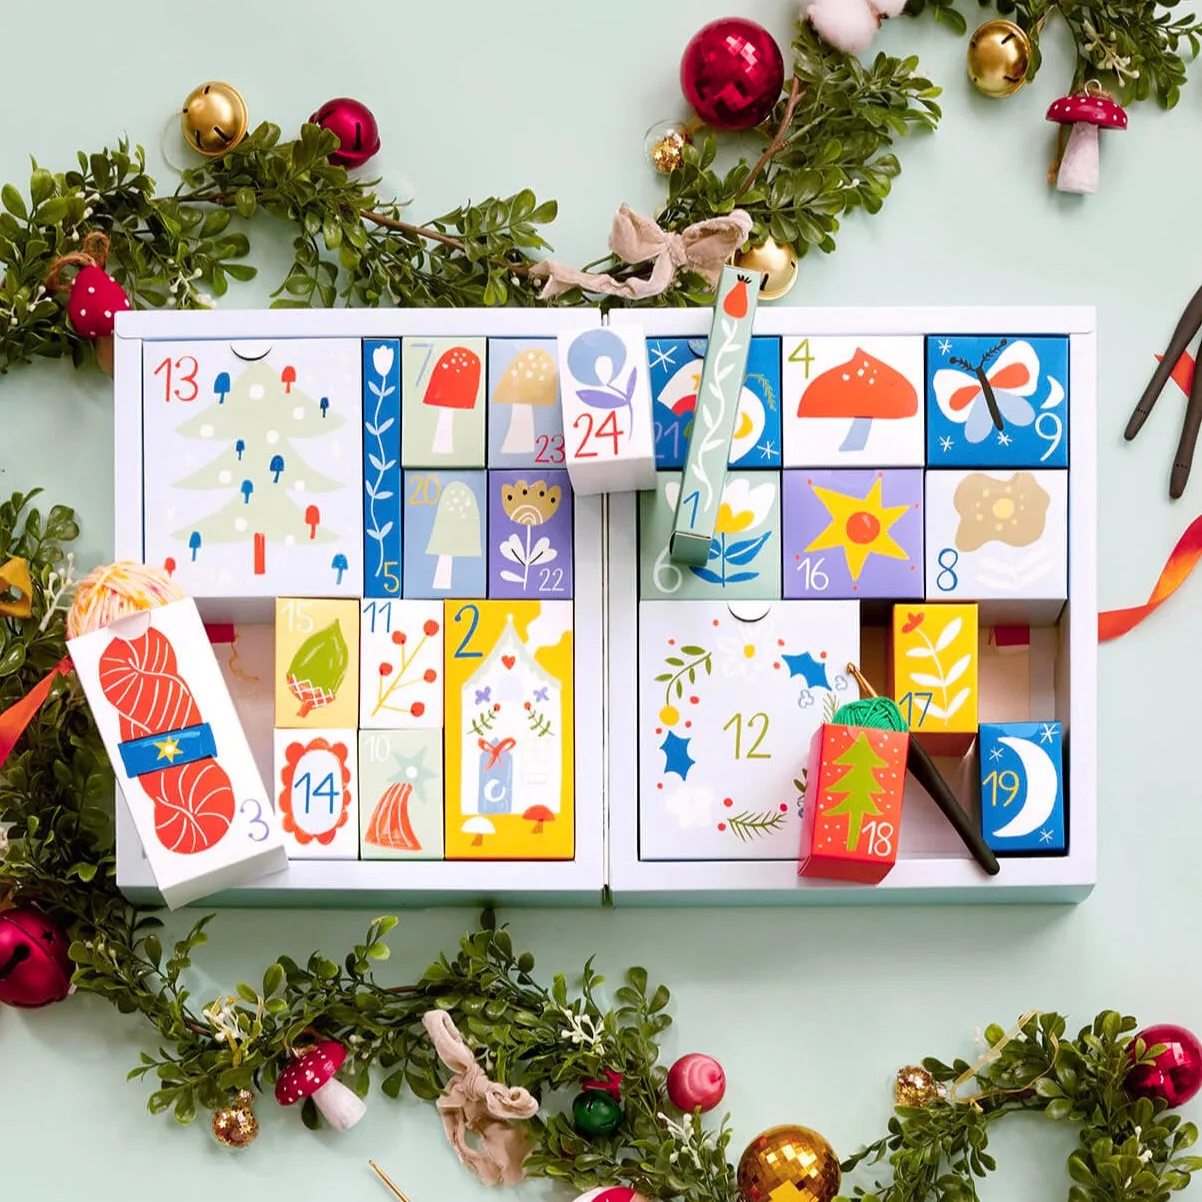
The garland around this calendar is dressed, not draped — ornaments, bells, and tiny mushrooms tucked in on a repeating rhythm. Copy that structure: for every 10 inches of greenery, add one round bauble, one small novelty, and one bell, then repeat. Random isn’t the goal. A repeating pattern reads as intentional and keeps a garland from looking like it fell out of a box.
27. The Chocolate One, Because Someone Has To
Chocolate calendars have one design flaw: temperature. Store yours near a radiator, on a sunny windowsill, or above the stove and you’ll get bloomed, streaky chocolate by week two — perfectly safe, slightly sad. Keep it in a cool room and away from the tree lights. Also, if this is a shared calendar, decide now whose job it is to open door 14, or you’ll be mediating a dispute on December 14th.
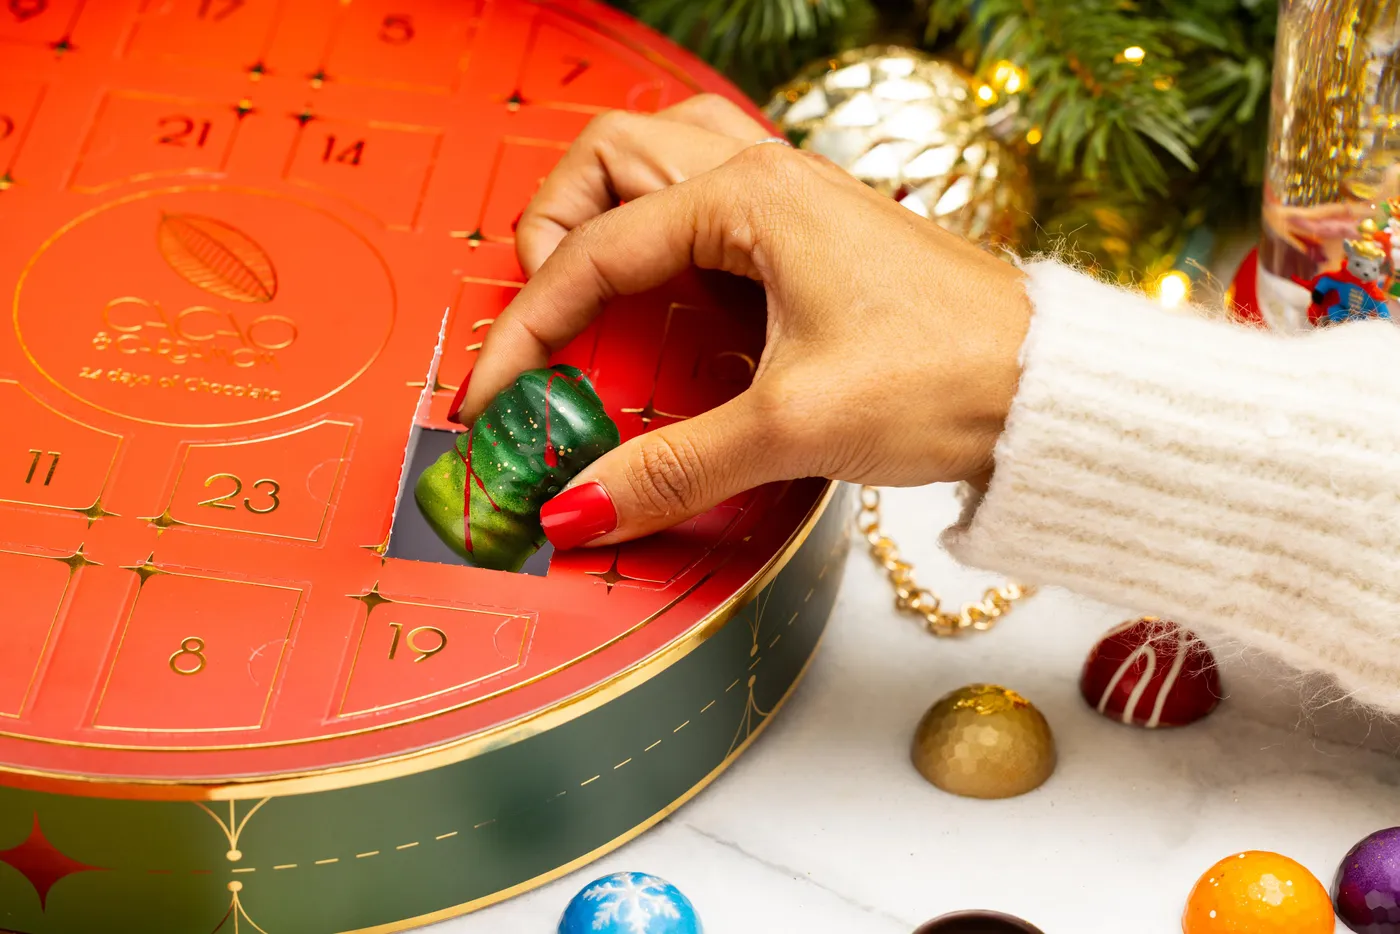
- Check the door depth — truffles are taller than flat chocolates.
- Confirm each chocolate is individually wrapped if it will sit out for a month.
- Find a cool spot away from heat sources and direct sun.
- Decide whether it’s a shared calendar or one per person, and label it.
- Note any allergies before buying a mixed assortment.
28. Kraft Houses Tied Up With Red String
These little kraft houses come together fast once you have a template:
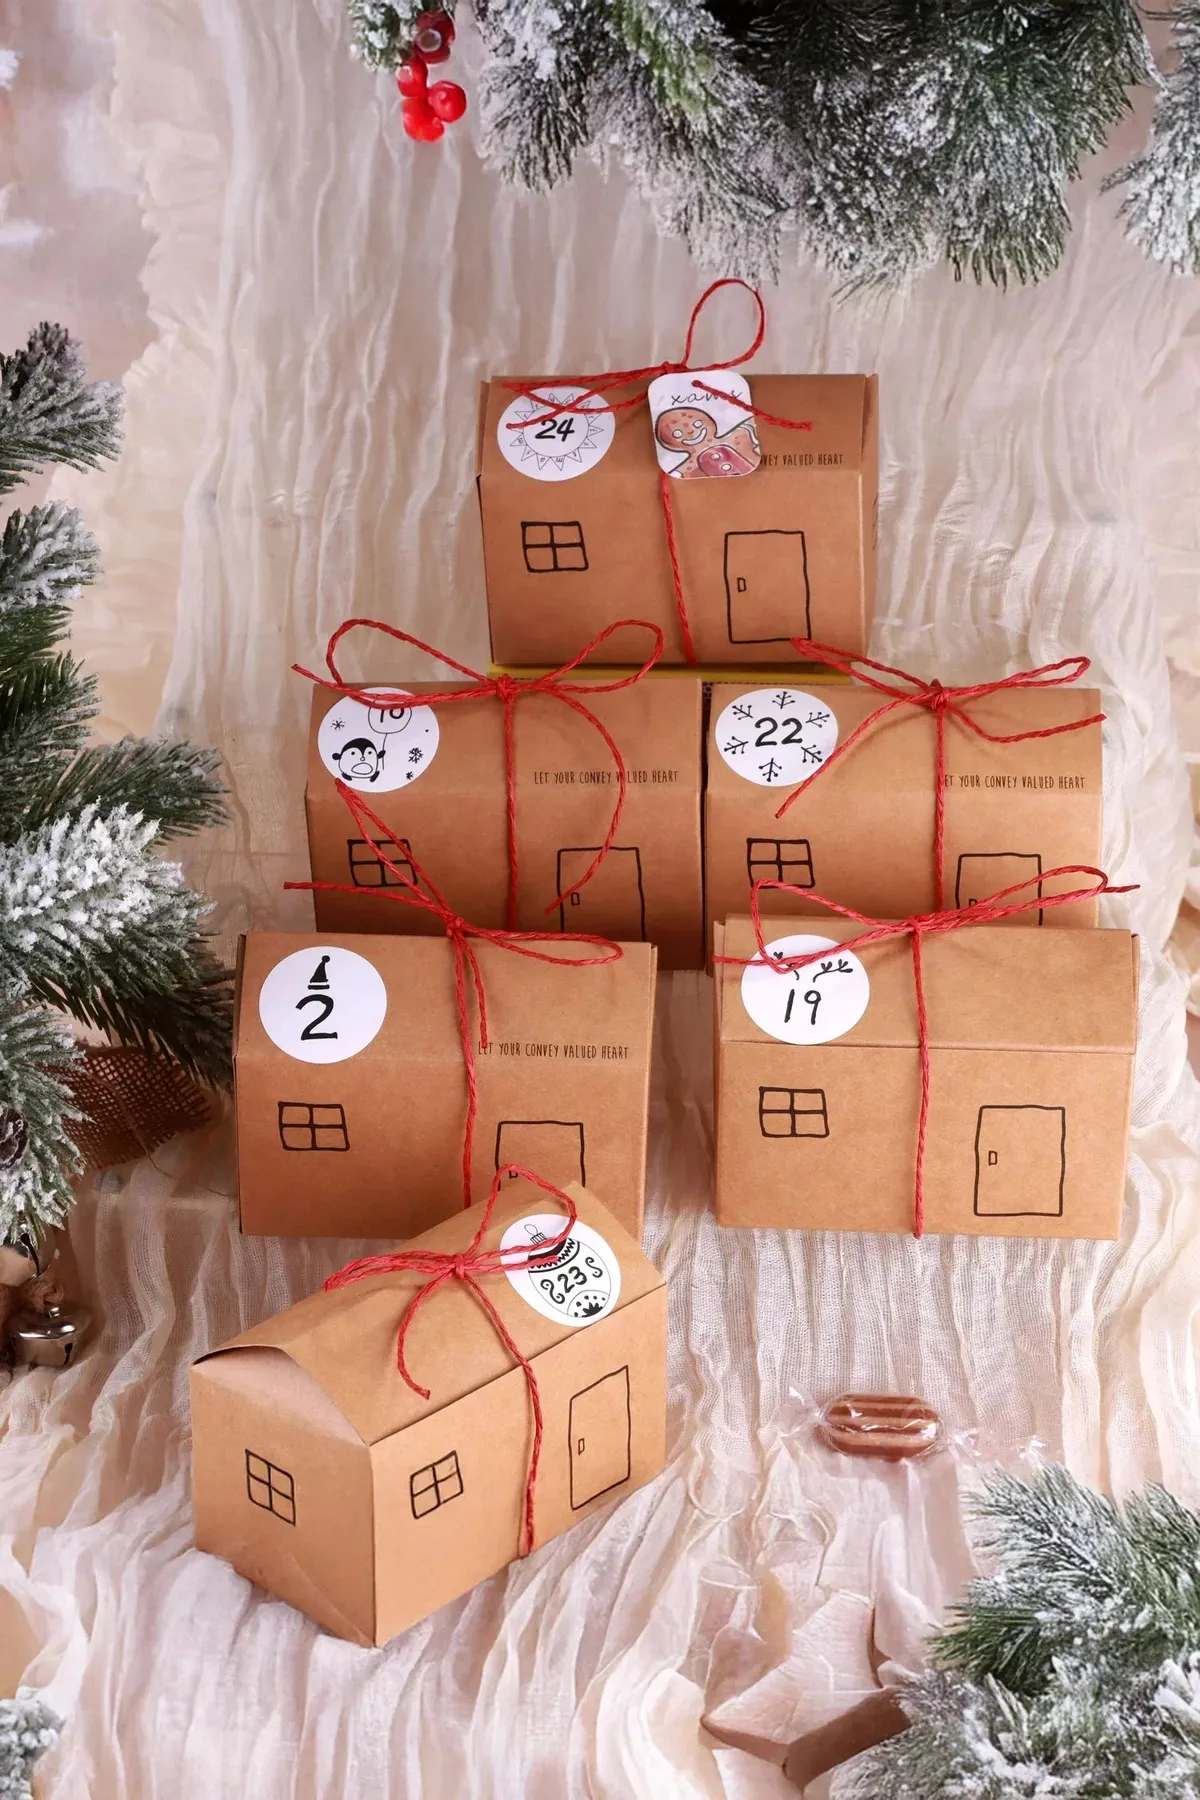
- Draw a simple house shape with a 2-inch square base and a peaked roof.
- Cut from medium-weight kraft cardstock, scoring every fold line first.
- Fold and glue the seams with a glue stick, holding each for 20 seconds.
- Draw windows and a door with a fine black pen.
- Punch two holes in the roof, thread red string through, and tie on a numbered sticker.
About $12 for 24 houses and roughly 90 minutes of folding.
Cardstock and string are already the cheap version, but you can go lower. Save cereal and cracker boxes for a month, cut them into house shapes, and cover the printed side with kraft paper from a roll — 24 houses for under $6. Numbered stickers come from the office aisle, and baker’s twine is cheaper by the spool than by the yard. The snow-dusted greenery is the one thing worth spending on.
29. Drawers That Hold Yarn Instead of Candy
Craft-supply countdowns are having a genuine moment — 2026’s big shift is toward calendars that build something instead of feeding someone. A drawer holding a crochet hook on day 1 and a skein of variegated yarn on day 4 turns the whole thing into a project kit, and by Christmas you have a finished object. It’s stitch-along energy, just packaged for December.
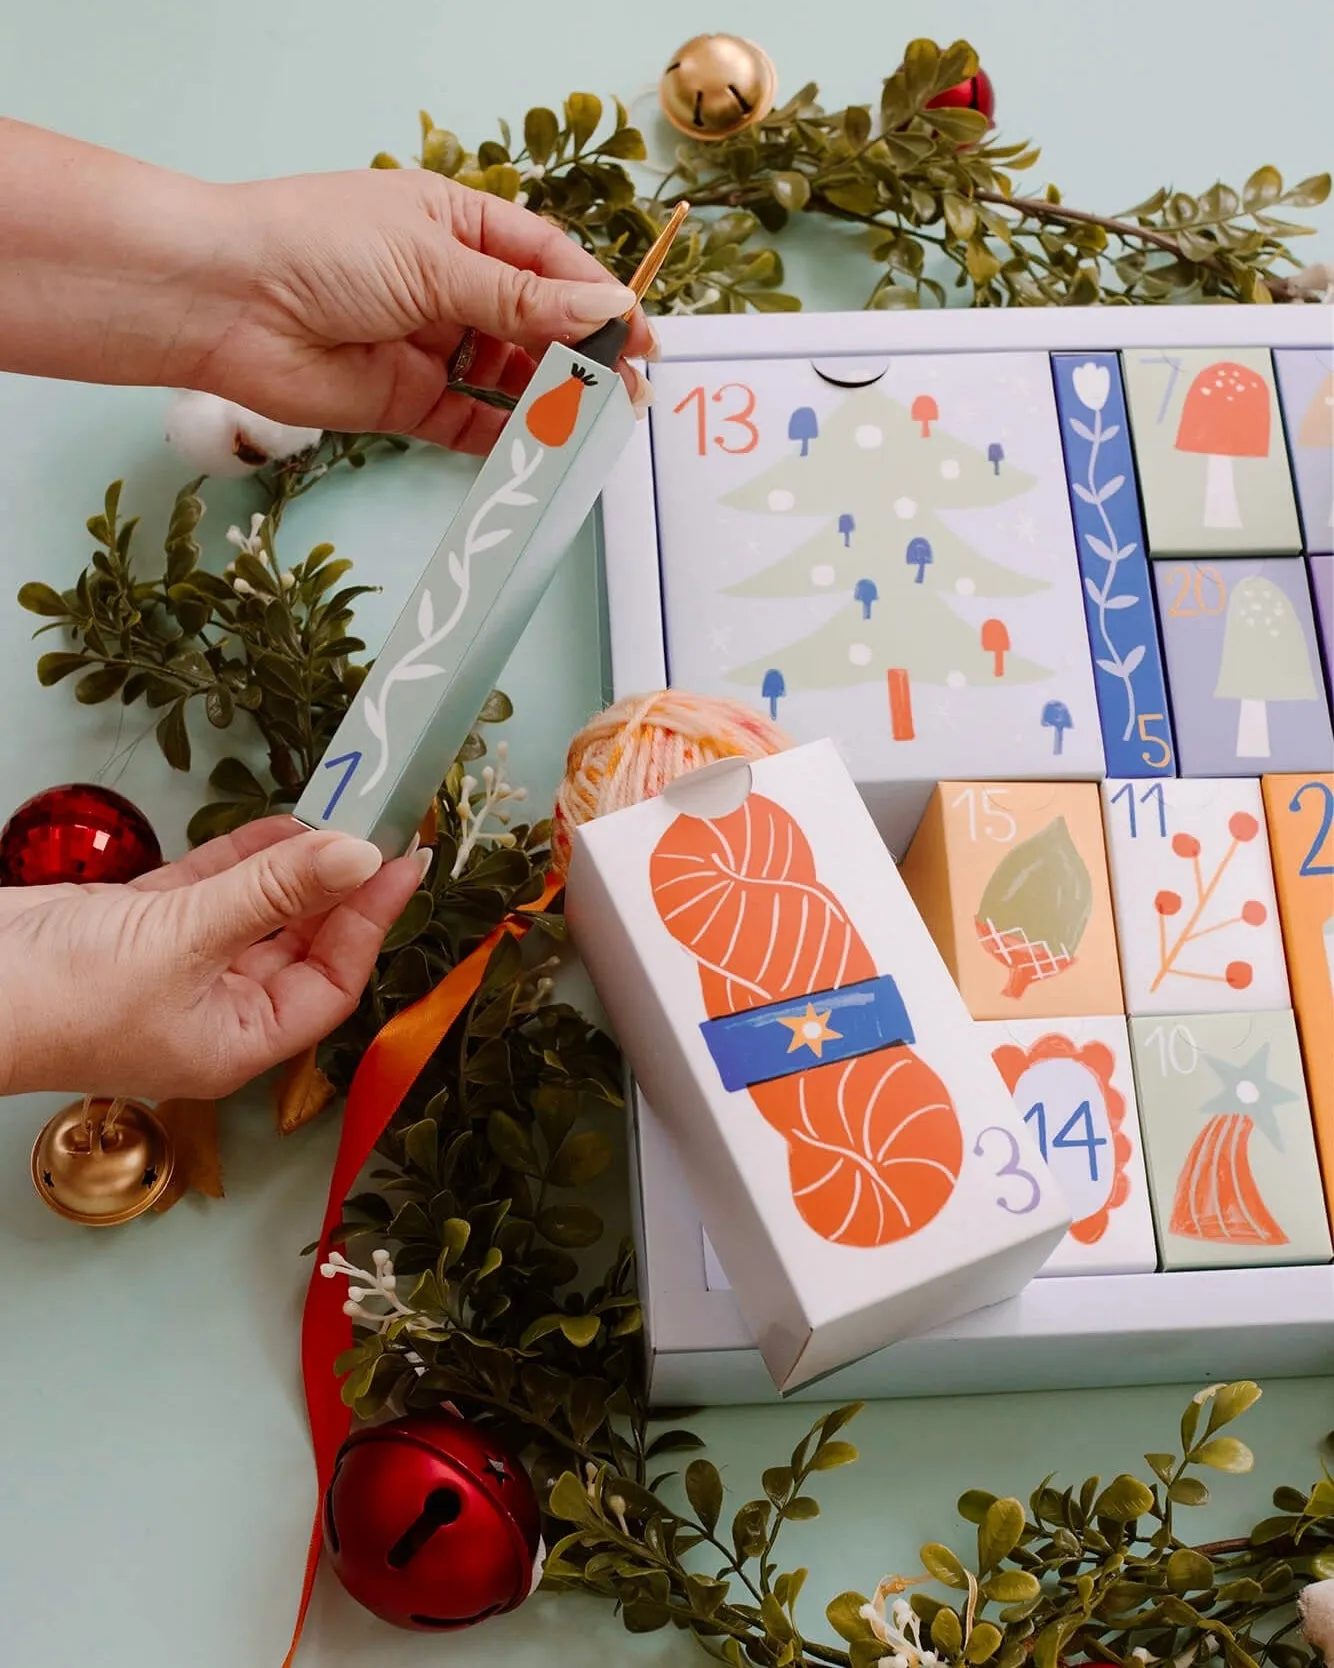
If you’re building a supply calendar, sequence matters more than the gifts themselves. Put the tool in day 1 so nobody stares at yarn they can’t use yet, then alternate consumables with small notions — stitch markers, a tape measure, a nice pair of scissors. Keep each drawer to one item so nothing gets crushed, and tape a tiny numbered card to anything smaller than a quarter.
30. Little Figurines Behind Every Illustrated Window
Roughly 60% of this box is illustration, 25% is the green banner and border, and 15% is white breathing room. That’s a high-image ratio, and it works because the illustrations share one line weight and a limited palette. Making your own? Pick five colors maximum and stick to them across all 24 squares — cohesion is what makes a busy grid read as a single designed object instead of a wall of stickers.
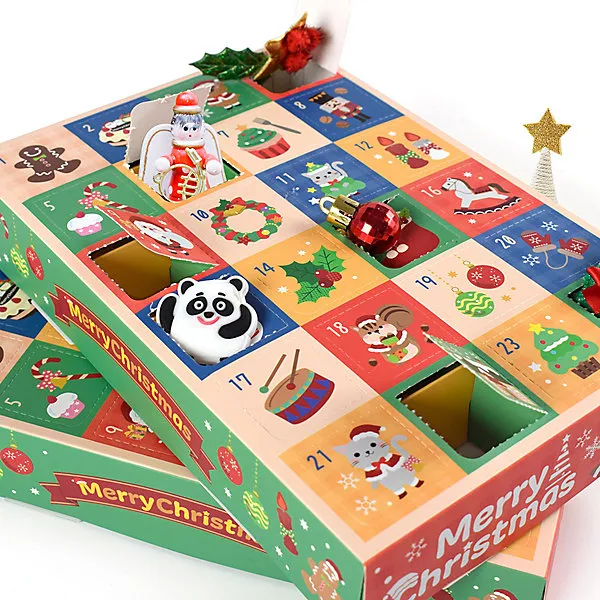
The figurines are the payoff. An illustrated calendar promises something behind the door, and this one delivers a small object with weight and personality — a nutcracker, a panda, a shiny red bauble — instead of another flat chocolate. Objects get played with long after December, which means the calendar keeps earning its place in the room well past the countdown.
31. A Santa Face Where the Beard Counts Down
The beard is the entire design. Everything else — the red hat, the rosy cheeks, the pink nose — is setup, and the twenty-five numbered circles hidden in the white beard are the punchline. That’s a genuinely clever bit of visual problem-solving: the countdown becomes Santa’s facial hair, and by Christmas morning the beard is a constellation of empty holes. Lose the numbering concept and it’s just a decoration with a hat.
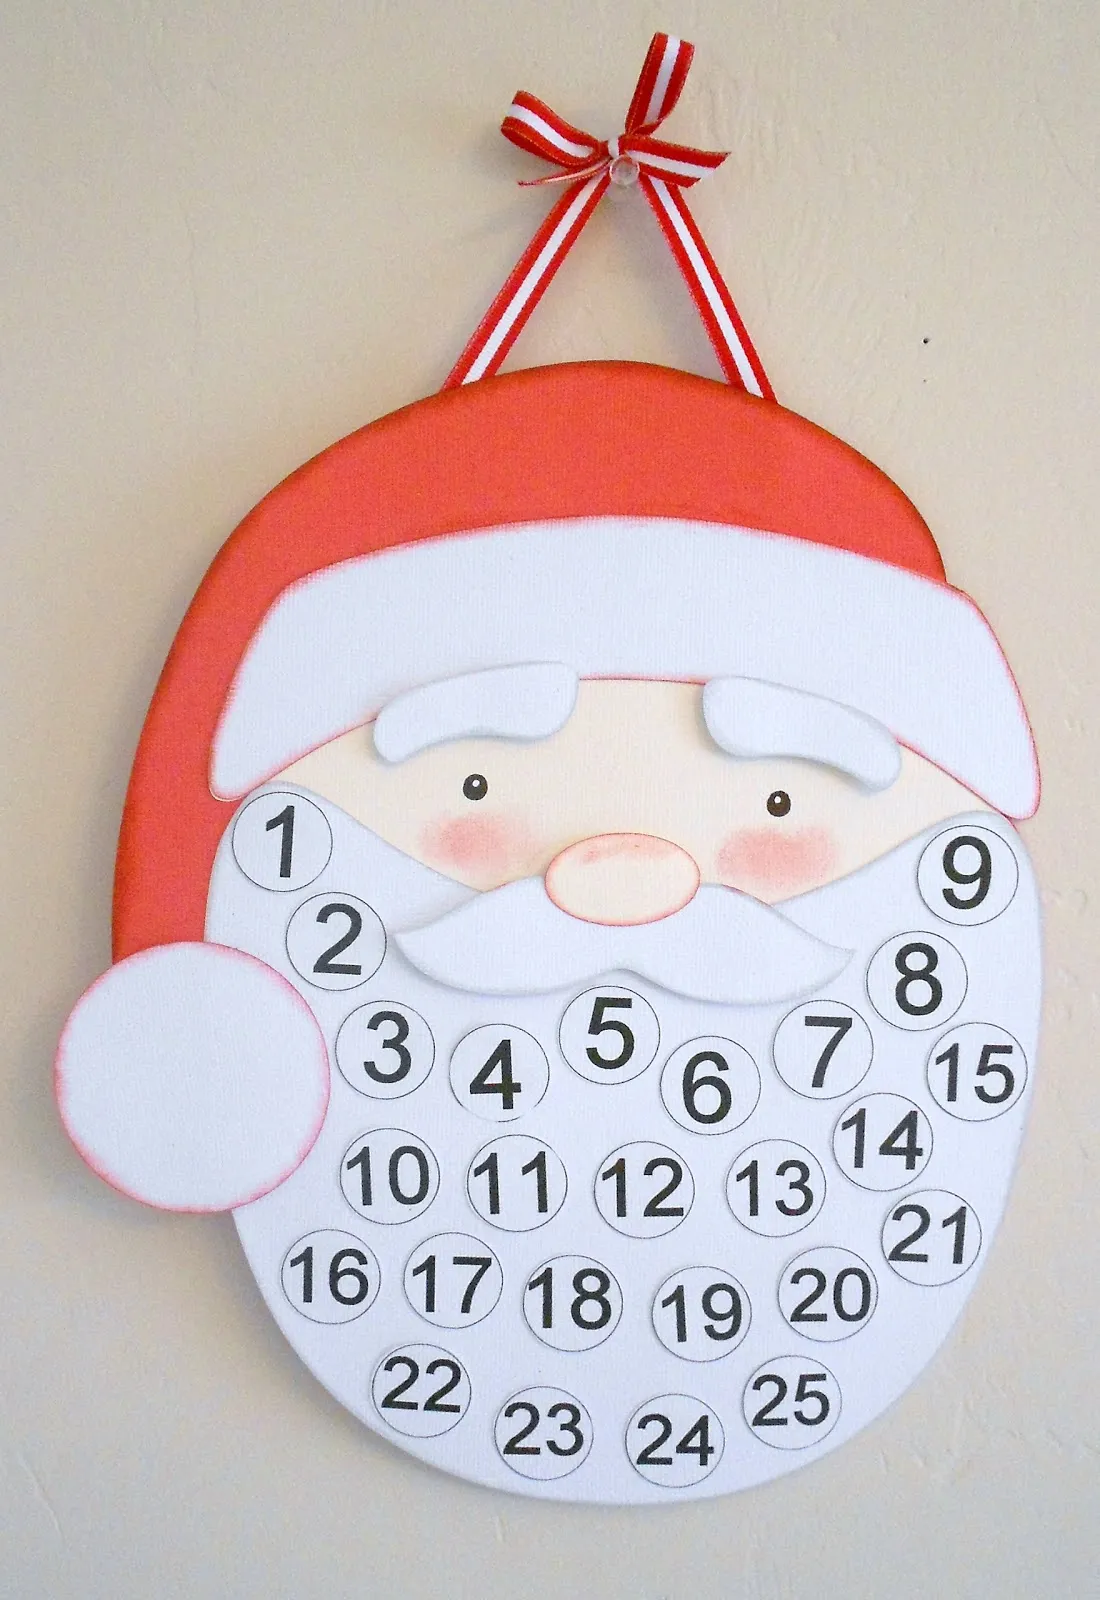
Flat shaped calendars like this work best on a wall you walk past rather than sit across from — a hallway, a kitchen doorway, the strip of wall beside a fridge. Give it about 20 inches of width and 30 inches of height, and hang the top at roughly 66 inches so the beard lands near eye level. In a small apartment it’s the low-commitment choice compared with the shelf-hung pieces in Idea #25.
32. Kraft Bags, Paper Doilies, and a Light Blue Wall
- 24 kraft paper bags: $6–$14
- White paper doilies: $3–$6
- Numbered tags in red, light blue, and patterned paper: $5–$12
- Snowflake and star stickers: $3–$8
- Natural twine plus a decorative hole punch: $6–$14
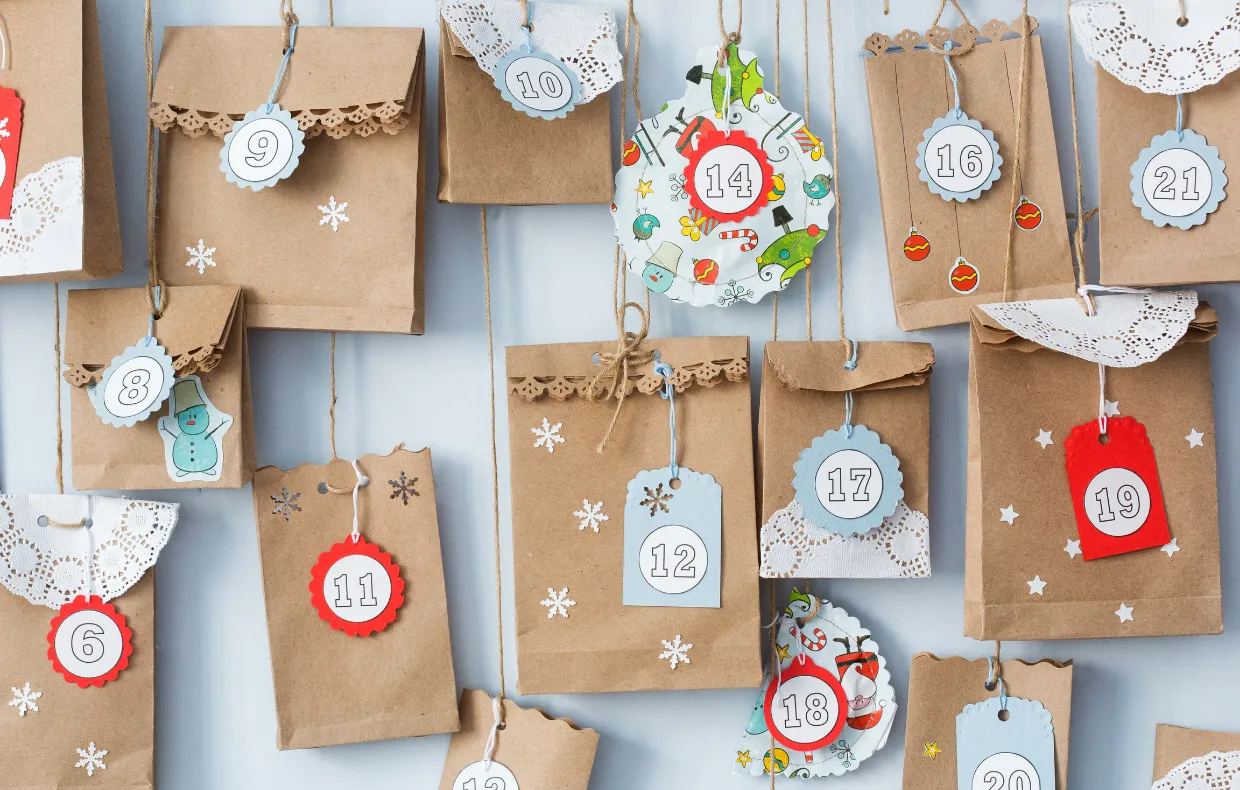
Total: $23–$54 for the entire wall, which makes this the cheapest idea in the bunch. Budget alternative: skip the doilies and let the punch do the work on folded paper — about $4 and nearly the same lacy effect.
The doily-plus-punch combination is what makes these bags look store-bought. Order of operations:
- Fold the top flap of each bag down 1 inch and crease it hard.
- Punch a decorative border along the fold, spacing holes ⅜ inch apart.
- Cut a doily in half and glue it to the front, deliberately off-center.
- Add one snowflake sticker over the doily’s center.
- Thread twine through two punched holes and knot at the back.
About four minutes per bag, so an evening and $20 total. Compare with Idea #1 — same kraft-and-twine instinct, boxed instead of hung.
33. Snowflake-Stamped Pouches on a Lace-Trimmed Panel
The blue snowflake stamps are the quiet hero: one motif, one color, repeated 24 times, which is exactly why a single stamp set outperforms a mixed bag of stickers. Use a stamp block and press straight down for a crisp image, and stamp all 24 pouches in one sitting so ink saturation stays consistent. Two ink colors on one project is one too many.
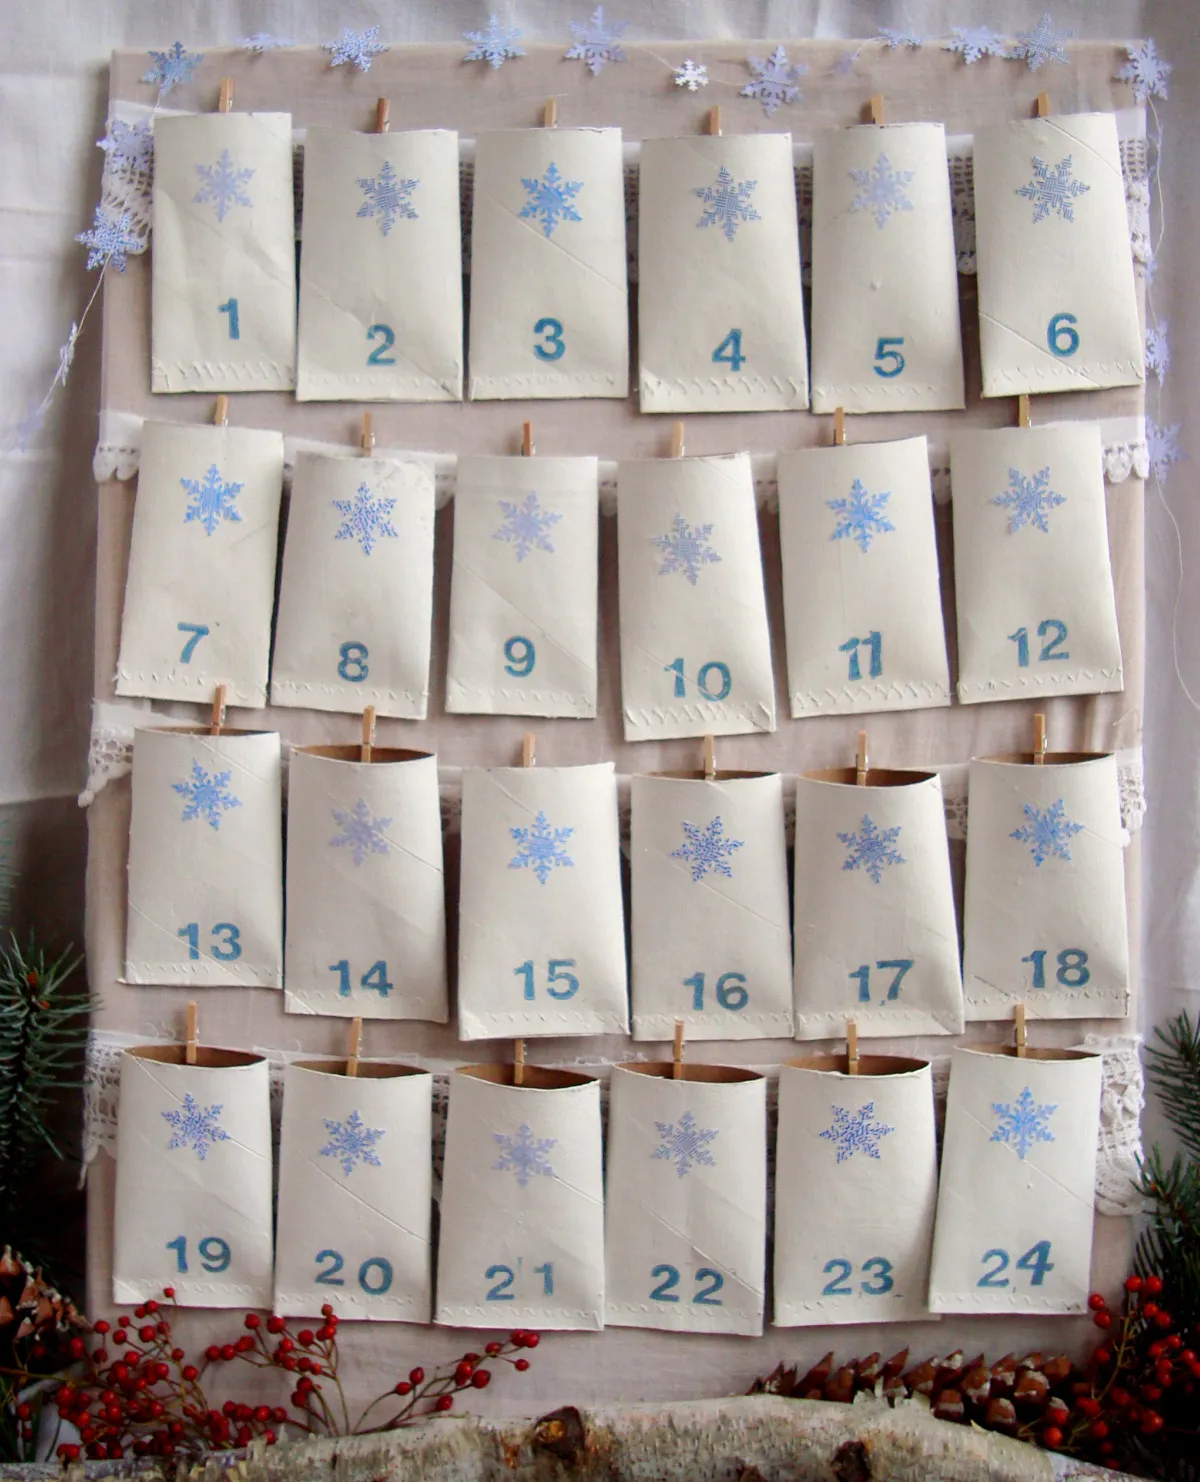
Paper pouches are a one-season proposition if they get handled daily, and that’s fine — some of the charm lives in the wear. Reinforce the clothespin grip with a strip of clear tape on the back of each pouch, and keep the panel off radiators and steamy kitchen walls, where paper cockles within a week. Lace trim yellows in direct sun, so a north or east wall is your friend.
Twenty-Four Mornings, One Wall
Here’s the thing nobody tells you about homemade advent calendars: the charm was never in perfection. It’s in the crooked number, the bag that’s slightly off-kilter, the ornament a kid rehung in the wrong spot on day three. Pick one idea, give yourself an afternoon, and let it be a little handmade.
📌 Pin your favorite to your holiday board now — December arrives faster than any of us plan for.