35 Jaw-Dropping Salt Dough Christmas Ornaments You Absolutely Need to Craft This Holiday Season

You’ve pinned maybe forty salt dough ornament photos this month and still haven’t boiled the water. That’s the funny thing about a craft this simple — the ideas pile up faster than the ambition, and then December arrives and you’re hot-gluing ribbon to a store-bought bauble at 11 p.m.
We spent a few evenings combing the craft aisles at Michaels, the baking section on Amazon, and the handmade shops on Etsy to pull 35 ideas that are actually makeable — from pantry-cheap (flour, salt, water) up to about $40 if you invest in stamps, ribbon, and proper acrylics. No $200 supply list. No you’ll-need-a-Cricut nonsense.
Inside you’ll find four moods: matte-white minimalism, painterly whimsy, vintage gingerbread charm, and full-on rustic twine-and-pinecone. Budget and luxury versions sit side by side, so you can see exactly what an extra twenty dollars buys. And yes, 2026 is the year of the handmade tree — Pinterest’s slow-crafting wave has turned salt dough from a preschool activity into a legitimate design choice.
And stay until the end — we break down the most common mistakes that can ruin these looks. 📌 Save this to Pinterest for later — you’ll want to revisit these ideas. (Some links below are affiliate links; we may earn a small commission at no cost to you.)
1. Painted Salt Dough Ornaments, Mid-Splatter on a Wooden Table
Thin your base coat. Mix acrylic craft paint 50/50 with water and brush it onto fully dried dough — it sinks into the porous surface instead of sitting on top like a sticker. Give it 20 minutes, then switch to undiluted paint for the details: a star outline, a heart, a name. Two coats of matte polycrylic at the end, and the color reads as dyed dough rather than painted cardboard.
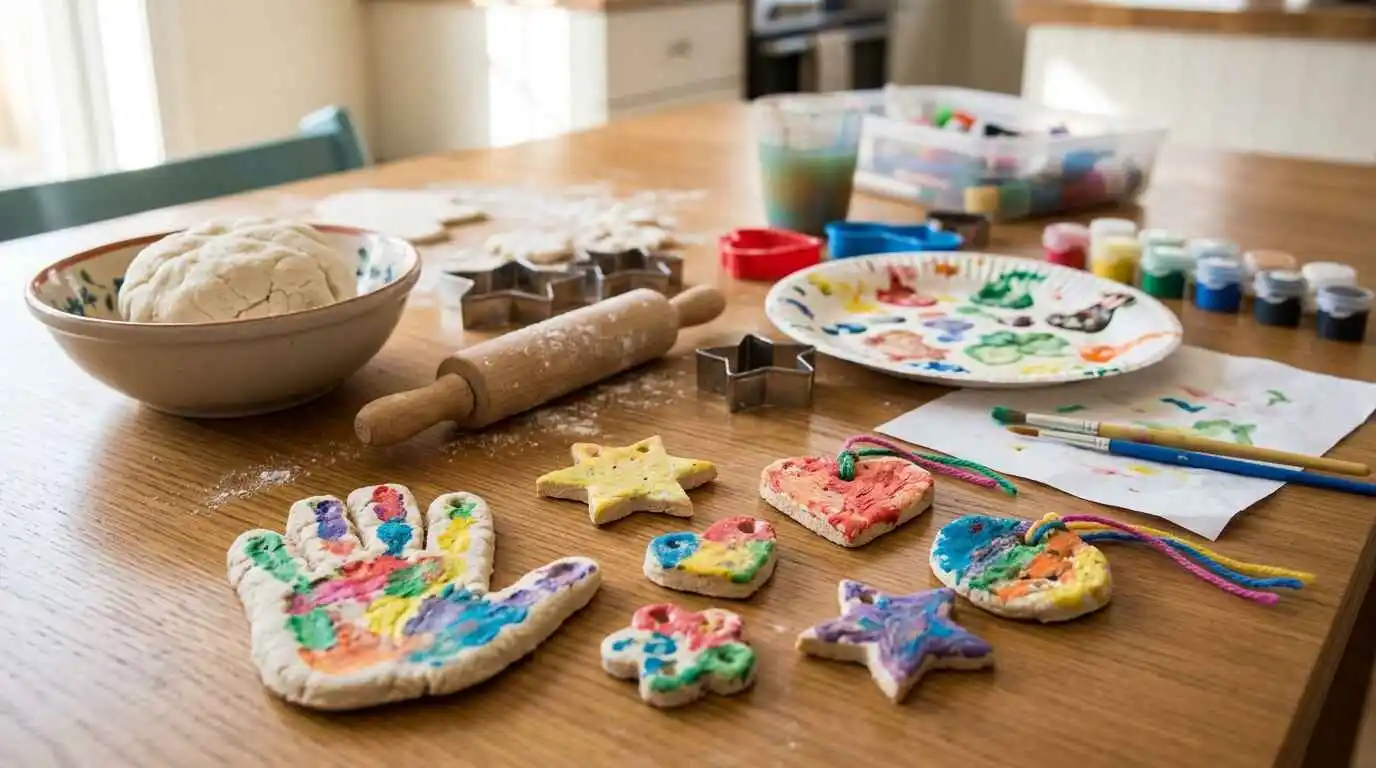
What keeps a busy table from looking like a mess is contrast in scale. Big, loose shapes — handprints, wide hearts — need tiny marks nearby, which is exactly what those painted dots and thin outlines do. Keep five brights against the cream dough and repeat each one at least twice across the batch. Repetition is what turns a pile of ornaments into a set.
2. Name-Stamped Bears and Leaf Veins on a Matte Black Tray
- Roll the dough to 1/4 inch between two sheets of parchment — never on bare counter.
- Dust your letter stamps with flour, press straight down, and lift before you wiggle.
- For leaf veins, lay a real leaf face-down and roll over it once with the pin.
- Punch the hanging holes with a plastic straw while the dough is still soft.
- Bake at 200°F for two hours, flip, then one more hour. Cool completely flat on the tray.
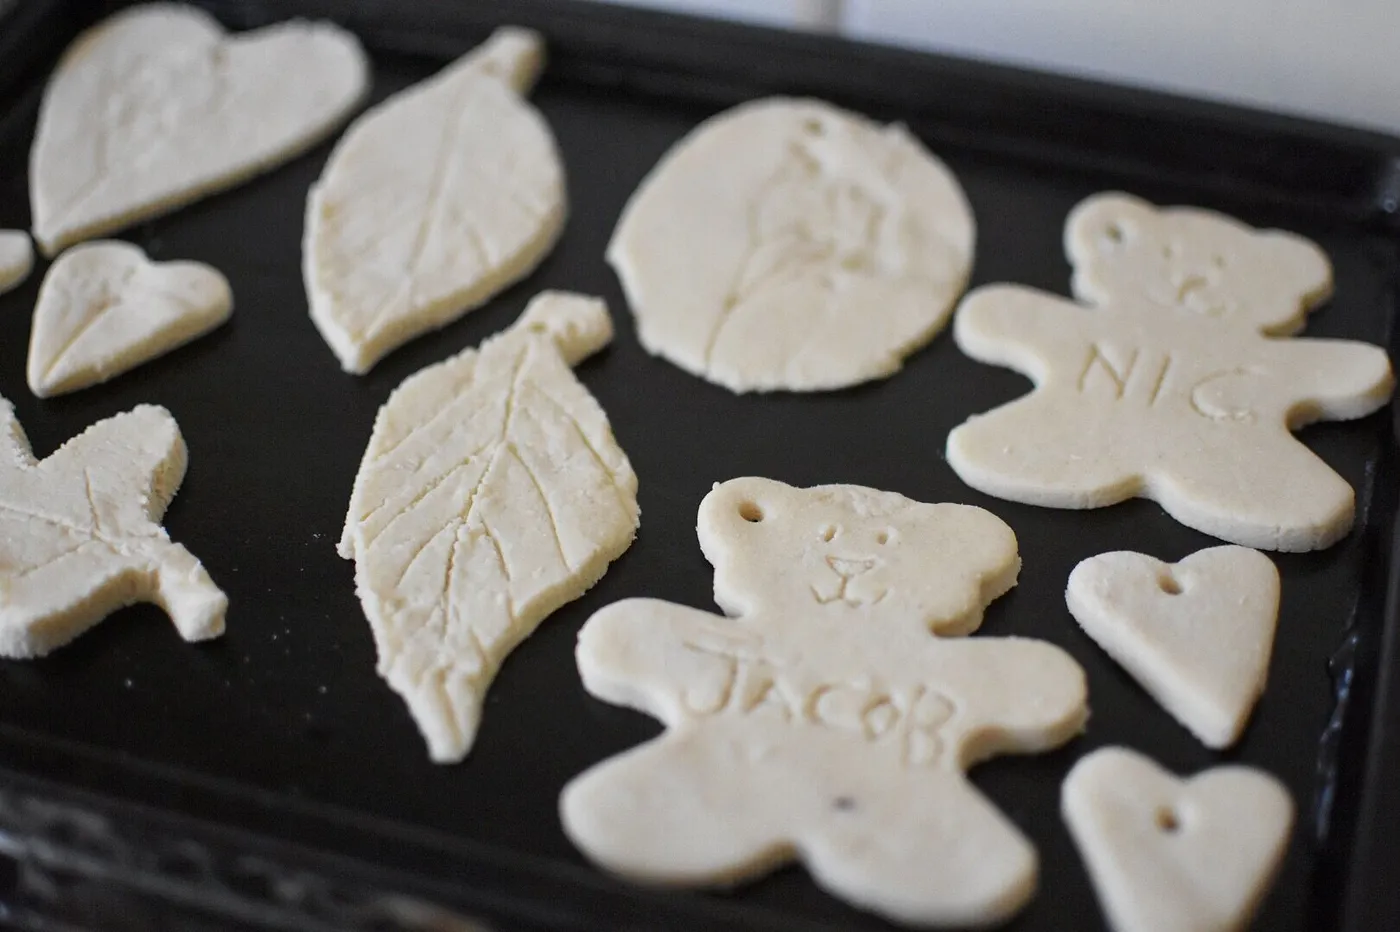
Twenty minutes of hands-on work, and under a dollar of ingredients per batch.
- Roll to exactly 1/4 inch — thicker centers crack, thinner edges curl.
- Bake one test ornament before committing the whole tray.
- Set a timer for the flip; forgetting is what browns the edges.
- Keep the tray flat until the dough is fully cool, or the shapes warp.
3. Embossed Snowflake Cookies Tied With Red Baker’s Twine
Take away the embossed snowflake and you’ve got a plain beige disc. That impression — pressed in while the dough is soft, deep enough to cast a shadow — is the entire personality of this set, and it solves the too-plain problem without a single speck of paint. One stamp, one firm press, and the ornament looks like it came from a shop charging eleven dollars apiece.
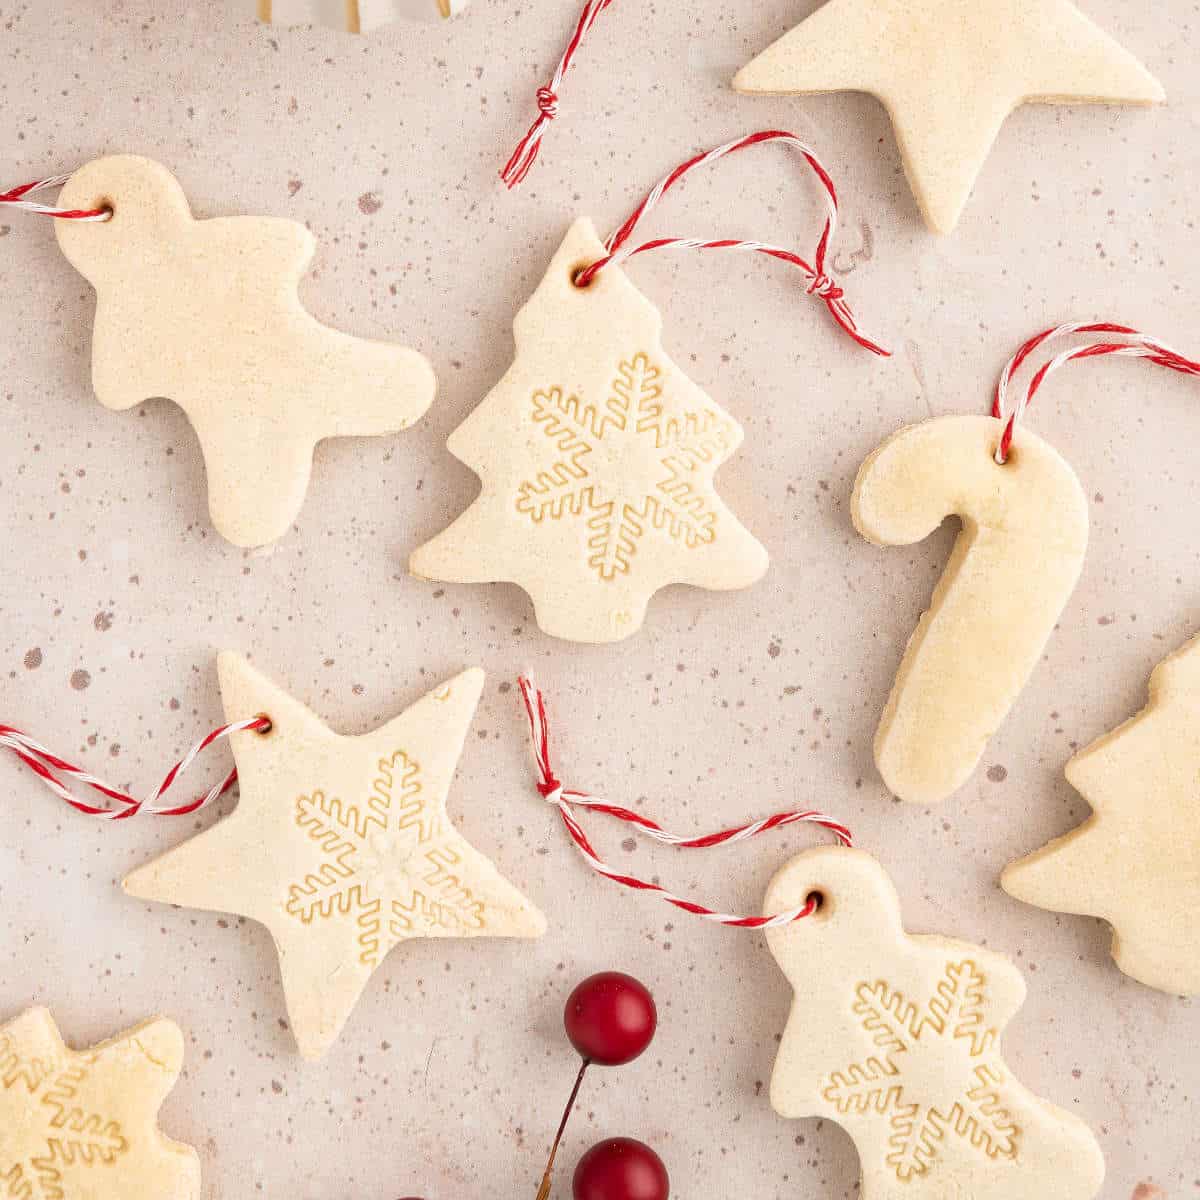
- Cookie cutters, set of 6–12: $8–$14
- Wooden or acrylic texture stamp: $6–$12
- Red-and-white baker’s twine: $4–$6
- Acrylic paint plus matte sealer: $10–$18
- Dough ingredients: under $2
Total: $30–$52 for 20-plus ornaments. Budget alternative: use a drinking glass as your cutter and the back of a fork for texture — you’re down to about $12, basically twine and sealer.
4. A Cream House Ornament With a Heart Cutout Window
The heart cutout and the little rectangular windows do the heavy lifting here. Negative space makes a flat disc read as a house, and it throws a tiny shadow onto the tree lights behind it — something a solid shape simply can’t do. Then one saturated note: the red-and-white striped string. Everything else stays quiet so that single red line gets to be the star.
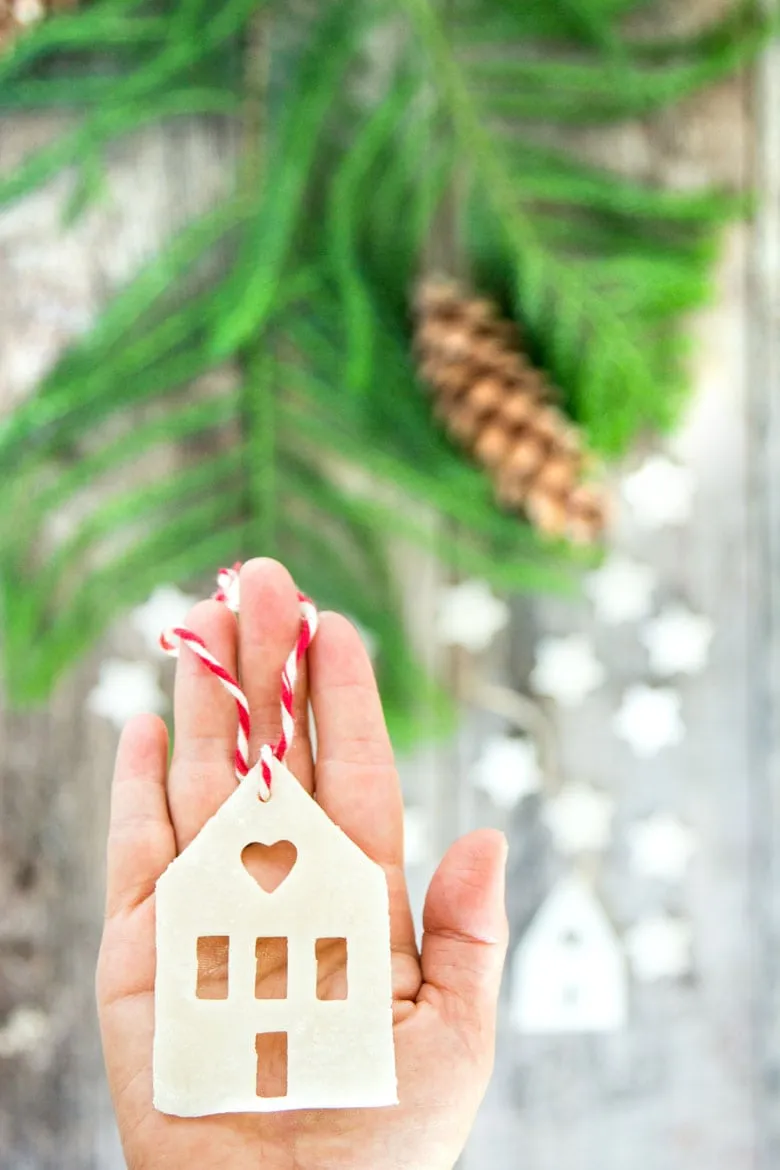
Think of it as 80% creamy white, 15% natural texture, 5% red. The white is the dough itself, the natural 15% is pine needle, pinecone, and raw wood, and the red lives only on the string. Swap red for forest green and it turns Scandinavian; swap it for gold cord and it goes slightly formal. Keep the split and it works in any color story.
5. A Tray of Gingerbread Men Drying on Parchment
Salt dough browns unevenly, and evenly isn’t really the goal anyway. If your gingerbread men come out pale and blotchy, don’t panic and don’t crank the heat — 300°F is how you get cracked, curling arms. Instead, knead a tablespoon of cocoa powder and a teaspoon of cinnamon into each cup of flour before you start. You get a warm brown that never depends on oven luck.
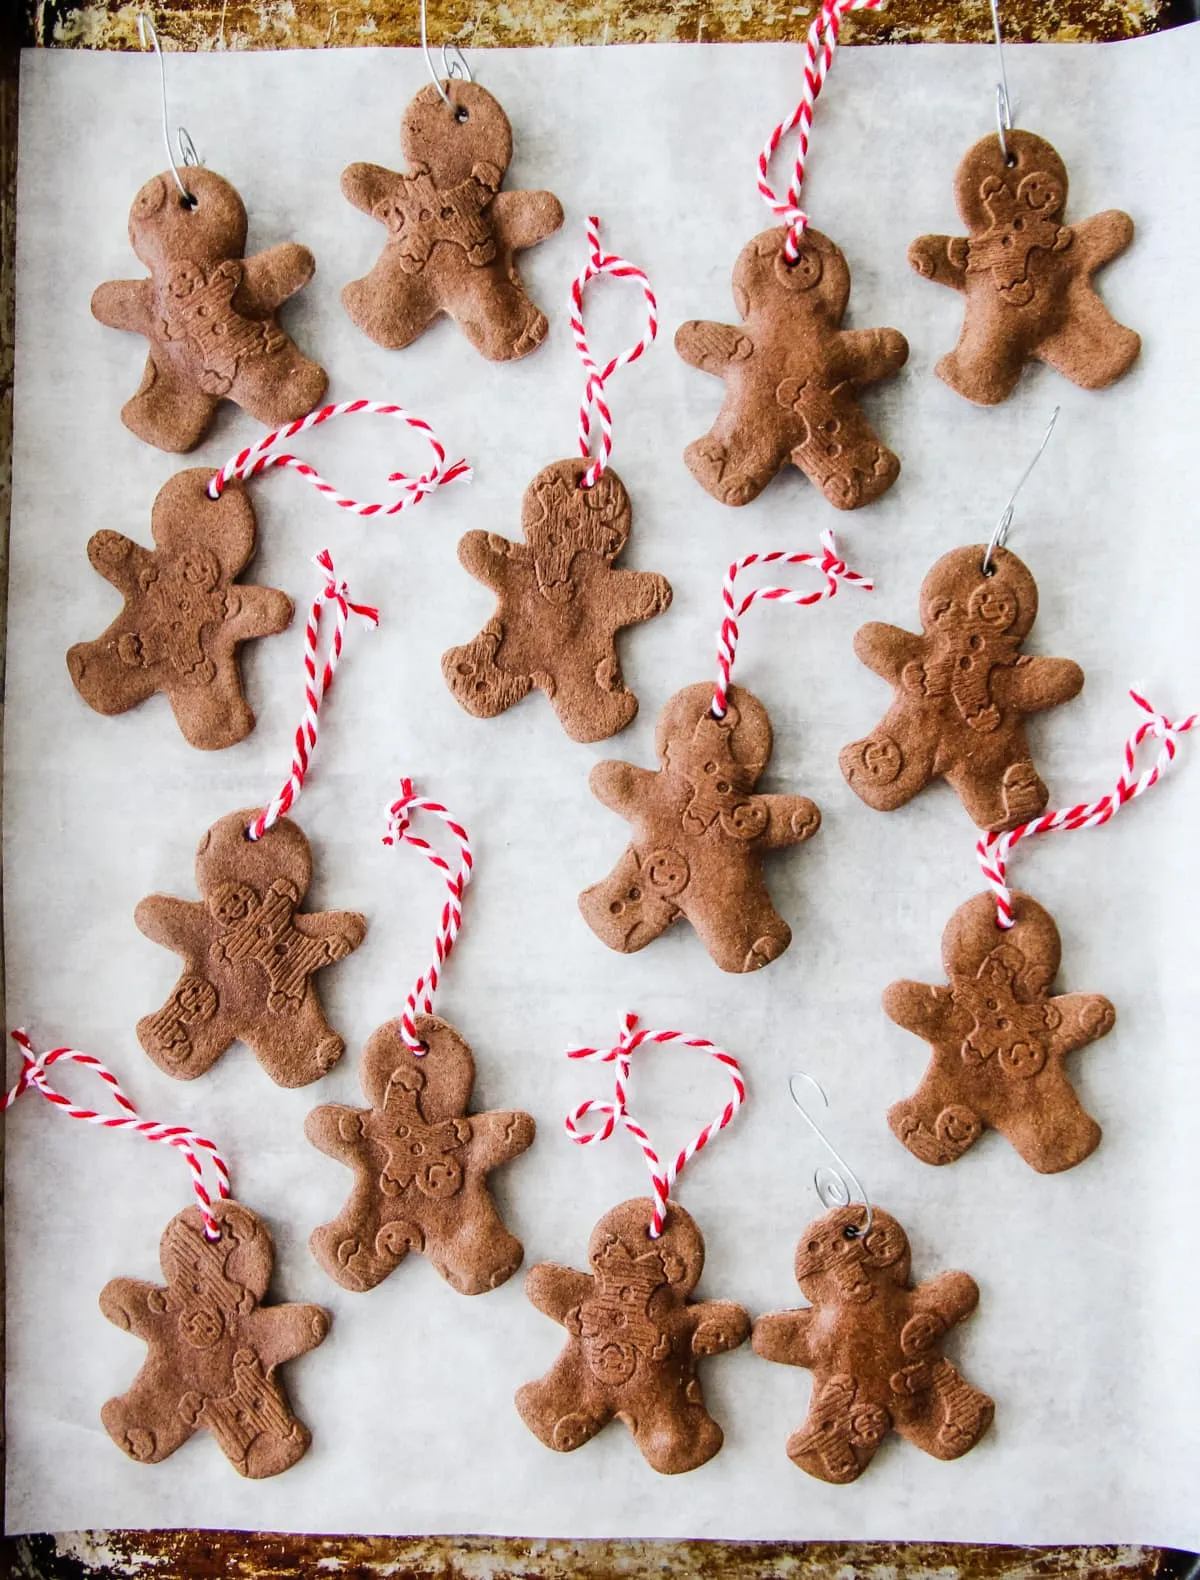
Notice the mix of twine loops and thin silver wire hooks on that tray — that’s not indecision, it’s strategy. Baker’s twine is the pretty option for a tree or a gift tag, but wire hooks are what you want on ornaments that get handled and re-hung by kids. Make half and half. The wire costs pennies and saves you rethreading twine every December.
6. Checkered Ribbon Collars and Black Bead Buttons
Every gingerbread man on earth has beads for eyes. What makes this row feel styled is the ribbon tied around each neck — fabric, not string, cut narrow and knotted once so the ends stick out like a scarf. It’s the only textile in the entire set, and it flips the ornaments from baked cookies to dressed characters. Skip it and you lose the charm completely.

Hot glue is the weak link. Beads pop off, especially in a dry house in January, so check each ornament before it goes in the box and keep the glue gun nearby — you’ll use it. Store these wrapped in tissue in a divided box, not loose in a bin, because salt dough chips at the edges and the checkered ribbon creases permanently.
A 3.5- to 4-inch gingerbread man is the sweet spot for a standard 7-foot tree — big enough to read from the sofa, small enough not to fight the branches. On a 4-foot tabletop tree, scale down to 2.5 inches. For a wreath or garland, go up to 5 inches, because small ornaments vanish in a cluster.
7. Iced Edges and Three Red Candies on a Golden String
- White dimensional paint, fine tip: $4–$6
- Red bead candies or small pom-poms: $3–$5
- Gold braided cord: $4–$7
- Acrylic paint and sealer: $10–$16
- Dough: under $2

Total: $21–$36 for a dozen. The cheap version: skip the beads entirely and dot the candies with red puffy paint straight from the tube — same look, about $8 total, and nothing to glue or lose.
The formula is 70% warm brown, 20% white, 10% red and gold. Brown owns the shape, white draws the scalloped icing line, and that last tenth — three red candies plus a metallic cord — is what makes it read festive instead of just brown. Want it cooler? Push the white to 30% and swap gold for silver.
8. Handprints Painted Into Grinches and Gnomes
Trace the hand first, cut the shape, and then paint the character so the child’s fingers become part of the design — the fingertips turn into a gnome’s hat point or the Grinch’s swoop of hair. That’s the whole trick. You’re not painting on a handprint; you’re letting the handprint decide the composition. Give the paint 24 hours to cure before the first coat of sealer.
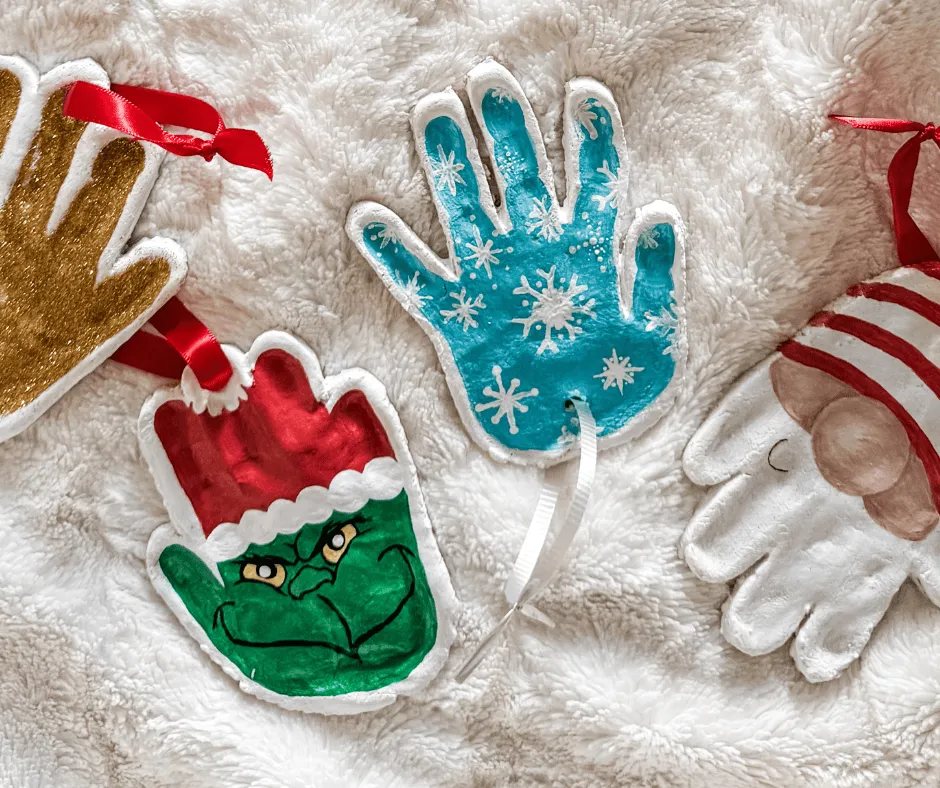
The actual handprint silhouette. Not the Grinch — the shape. Fifteen years from now nobody will care that the green was slightly the wrong shade, but the length of those fingers is a fossil. That’s why the glittery gold version here works just as well as the character ones: it kept the hand and dropped the detail.
9. Santa, Snowman, and Gingerbread on One Red String
Three shapes, one thin red string, one story. Santa, snowman, gingerbread man — that’s a narrative sequence, not a random collection, and the eye reads it left to right the way it reads a sentence. The red string connectors matter too: they carry color through all three pieces so nothing looks orphaned. Hang them together, always, or the set loses its plot.
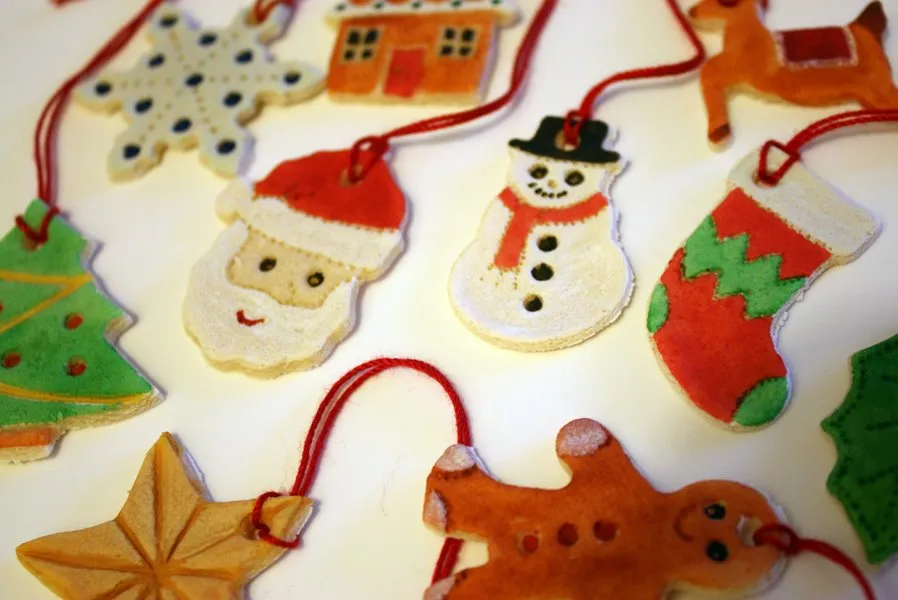
You don’t need a craft store for this. Dollar-store acrylics in eight basic colors cover the whole trio, and a chopstick end gives you dots as clean as any specialty tool. Cut shapes with a drinking glass and a butter knife. Total spend: about $10 if you already own flour and salt, $18 if you don’t. Compare with Idea #31 — same handmade logic, fancier finish.
10. Gold-Rubbed Stars and a Candy Cane on Dark Wood
Matching, store-bought ornament sets have been losing ground for a couple of years, and 2026 is when the pendulum really swings. People want the wobbly edge, the uneven gold rub, the star that’s slightly bigger than its neighbors. Pinterest boards full of collected-over-time trees are driving it — the look reads as a life, not a purchase. That’s a trend with legs.
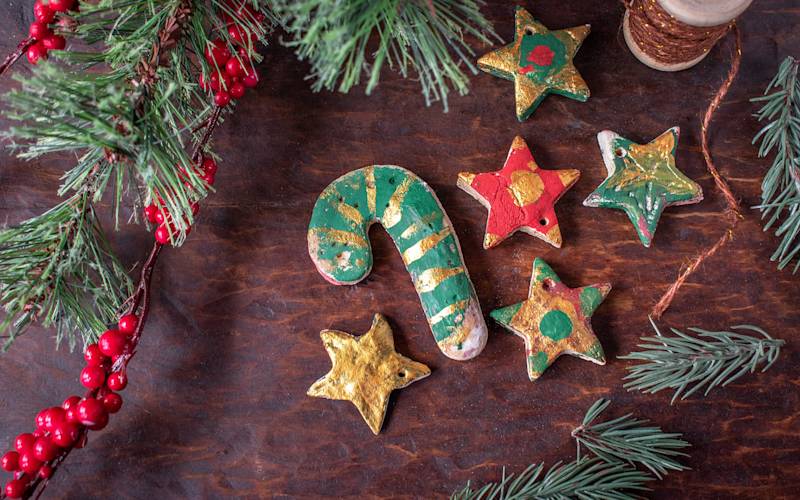
Roughly 60% forest green, 25% warm brown and natural twine, 10% red, 5% gold. The green and red do the Christmas work, the brown keeps it from going candy-colored, and the gold is only a rub on the raised edges — no full gold ornaments anywhere. Trade the gold for silver and you get a cooler, snowier version of the same formula.
11. Plain White Stars on Kraft Paper With a Peach Ribbon
This whole arrangement costs almost nothing, which is the point. Unpainted white stars, a roll of kraft paper, pinecones from the yard, and one ribbon in a soft peach. Skip the craft-store spool and raid the post-holiday clearance bin instead — or use a fabric scrap, torn rather than cut, which is exactly why those ribbon ends look frayed and good. Under $10, start to finish.
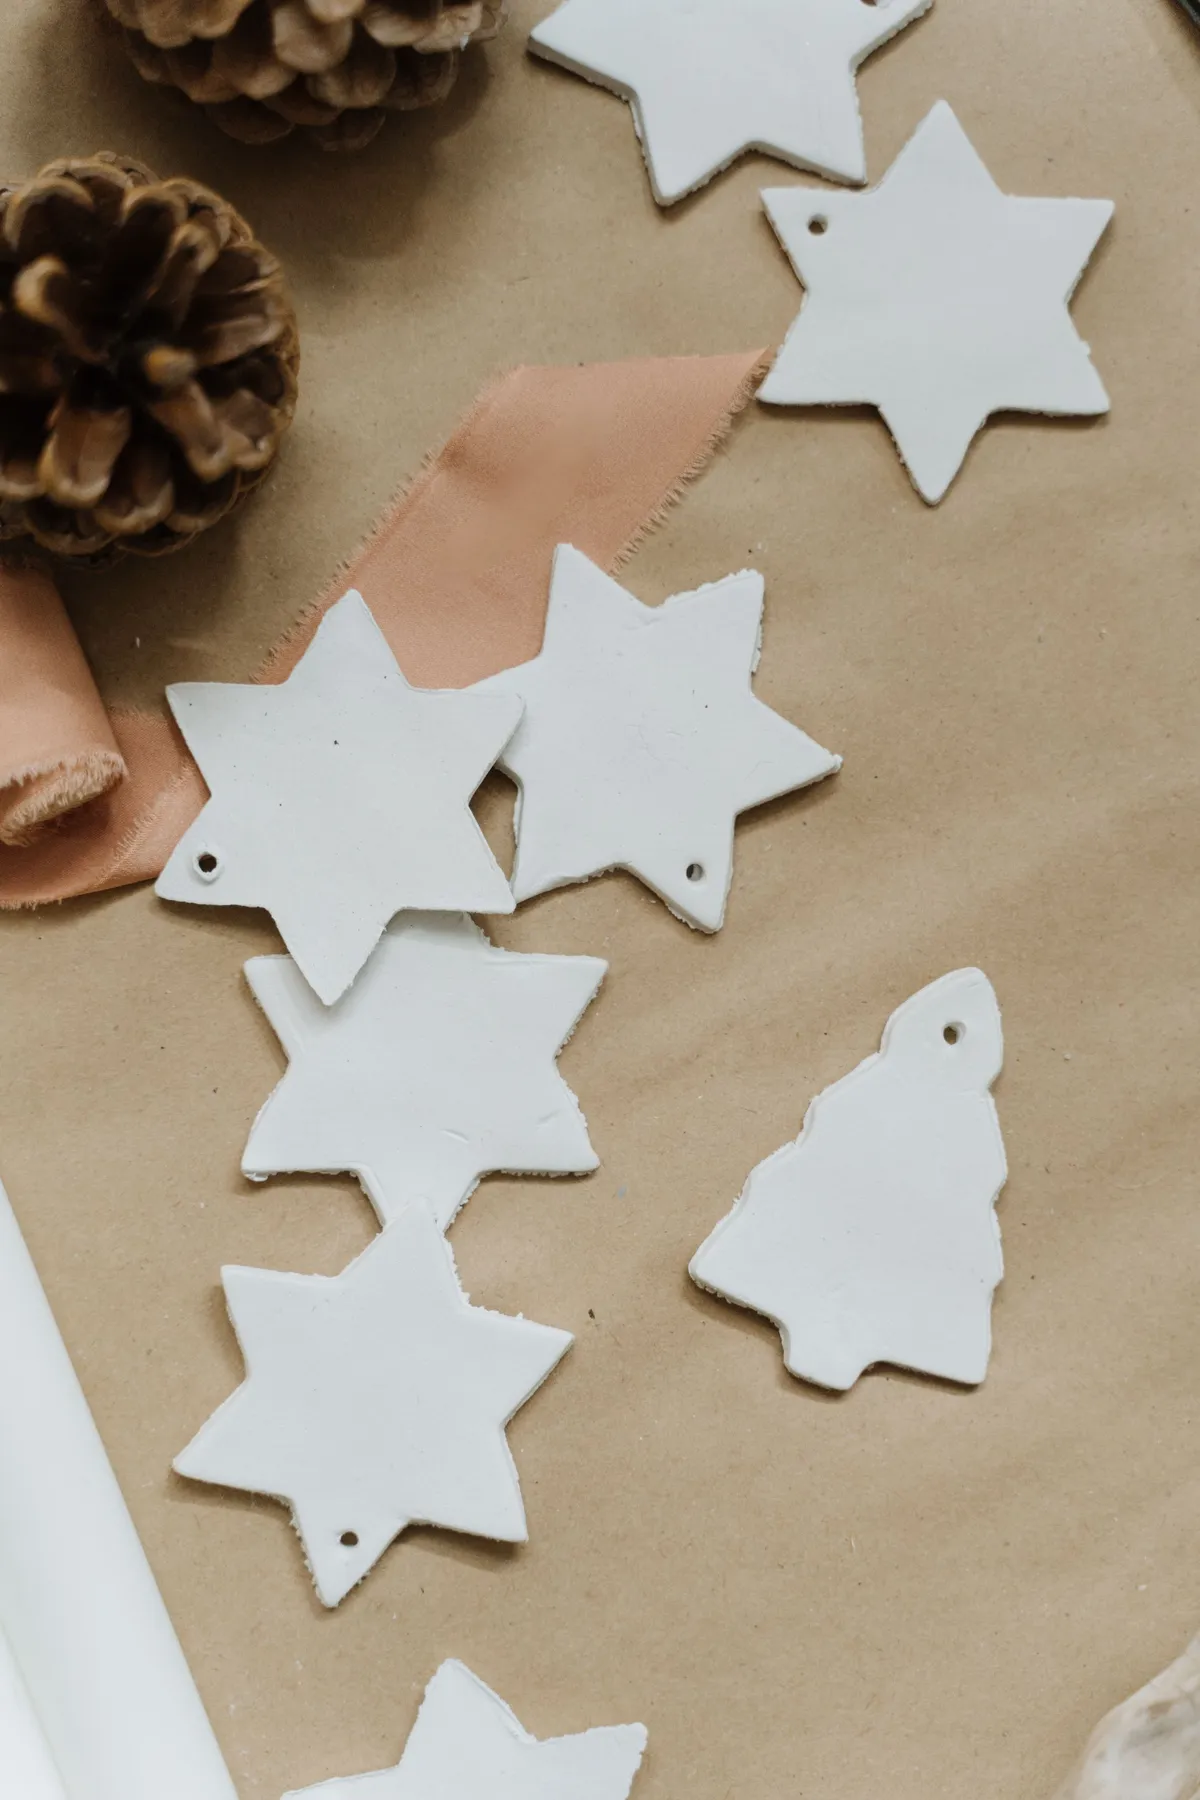
Keep the ornaments small here — 2 to 3 inches — because the kraft paper and pinecones are co-stars, and big stars would steamroll them. Stringing these into a garland? Plan on 12 to 15 pieces for a 6-foot run, spaced about 5 inches apart. If your mantel is deep enough for oversized decor, go up to 4 inches and skip the garland entirely.
12. Bone-Beige Snowflakes Lined Up on Marble
If you want that pale bone color instead of toast, control the heat, not the ingredients. Bake at 200°F and check at the 90-minute mark — anything above 250°F browns the edges long before the center dries. A quarter-inch ornament needs roughly two and a half hours at 200°F with one flip. Pull them when the surface feels chalky and the underside is dry to the touch.
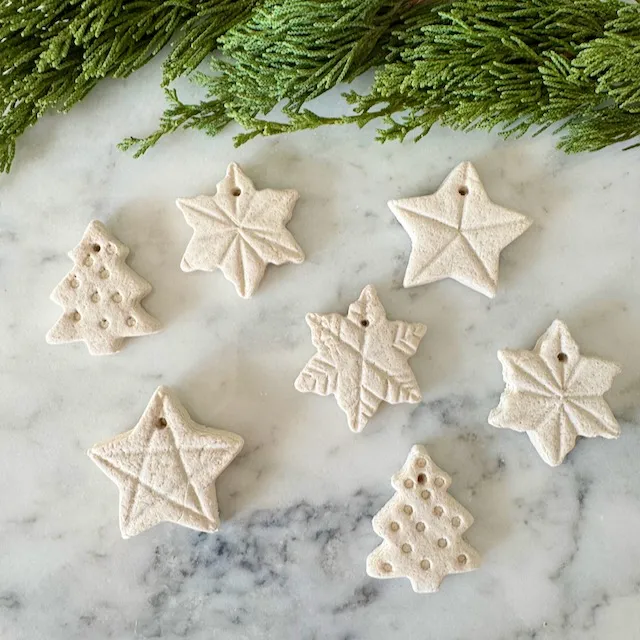
Marble is gorgeous and it is not your friend while crafting. Dough carries salt, salt etches polished stone, and a white ring on a marble countertop is permanent. Put parchment down first, every single time, and keep a damp cloth for stray crumbs. Same warning for granite and quartz — this isn’t about being precious, it’s about not explaining a stain for twenty years.
13. A Star Garland Threaded Through Pine Branches
- Bake 12–15 stars in graduated sizes and punch the holes before baking.
- Let them cool completely — warm dough chips when you thread it.
- Thread a long needle with light brown twine and push up through the first star.
- Knot, leave 4–5 inches of twine, then add the next star.
- Tie a loop at both ends and drape it through the branches, not across them.
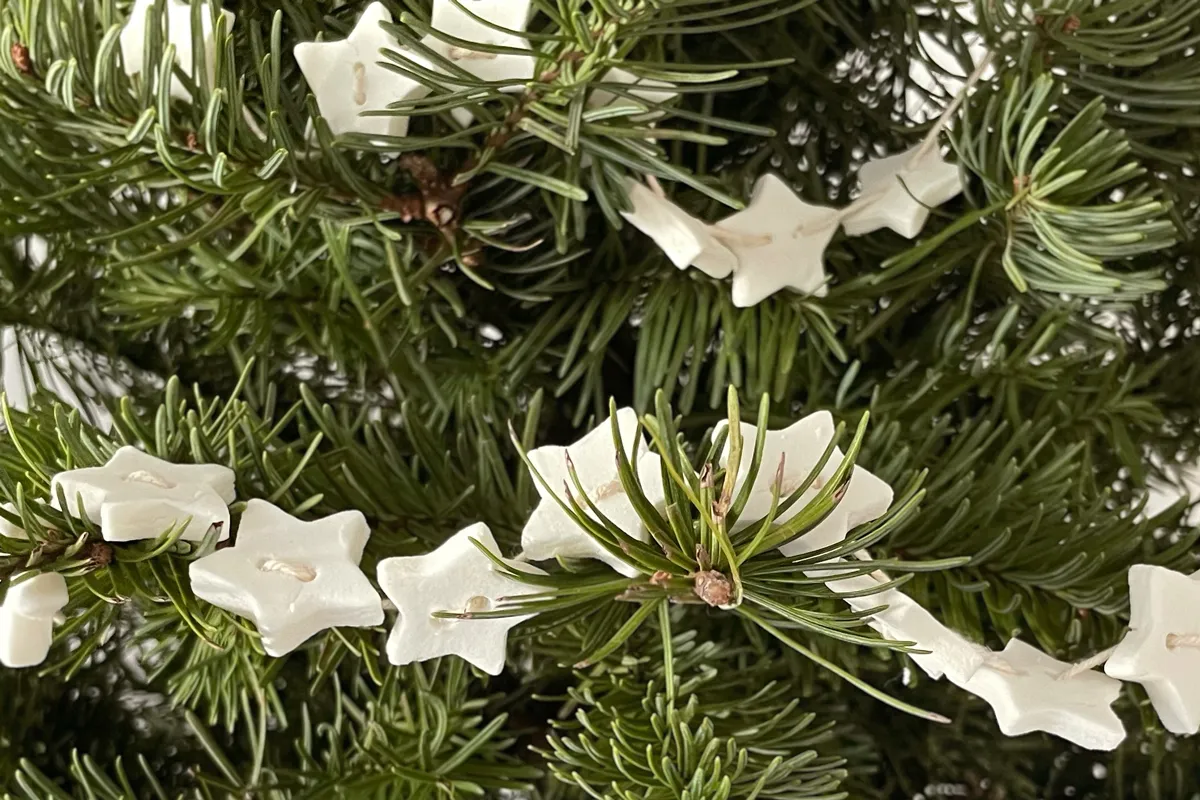
Twenty minutes of assembly for a 6-foot garland and about $4 in materials.
White stars on green needles work because of the pause between them. That bare stretch of twine does as much as the ornaments — it lets the eye rest and lets the green show through, which is the whole reason you’re hanging this on a tree and not a wall. Crowd them and the same idea turns into a white blob.
14. Textured Fish Shapes and a Very Lime Cutting Board
- Cover the table — flour works into grout lines and stays there.
- Portion dough into golf-ball pieces so small hands don’t dry out the batch.
- Keep craft tools and kitchen tools on separate sides of the table.
- Have a damp towel ready; dough cracks when it’s too dry to work.
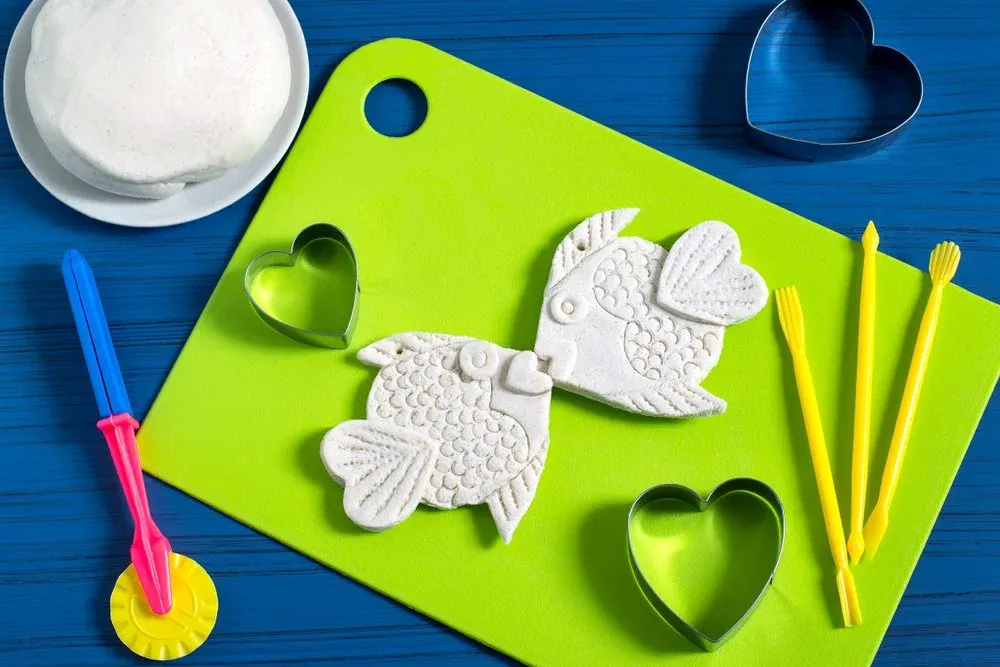
Two minutes of setup saves twenty minutes of cleanup, and it’s the difference between a craft afternoon and a craft afternoon you regret.
A lime green cutting board and yellow plastic sculpting tools are lovely, and none of them are necessary. A butter knife, a fork, a skewer, and the back of a spoon texture dough just as well, and a cereal box cut into strips makes a fine straightedge. Everything here is under $10 if you raid the kitchen.
15. An Abstract White Tree With a Watercolor Blush
The faint watercolor stain near the base. Look closely — pale blue, pale pink, barely there. That’s what saves an abstract white tree from looking like an unfinished project. It isn’t a painted design, it’s a wash, and it gives a flat surface the sense of having been used. Remove it and you’ve got a blank shape. Leave it and it looks intentional.
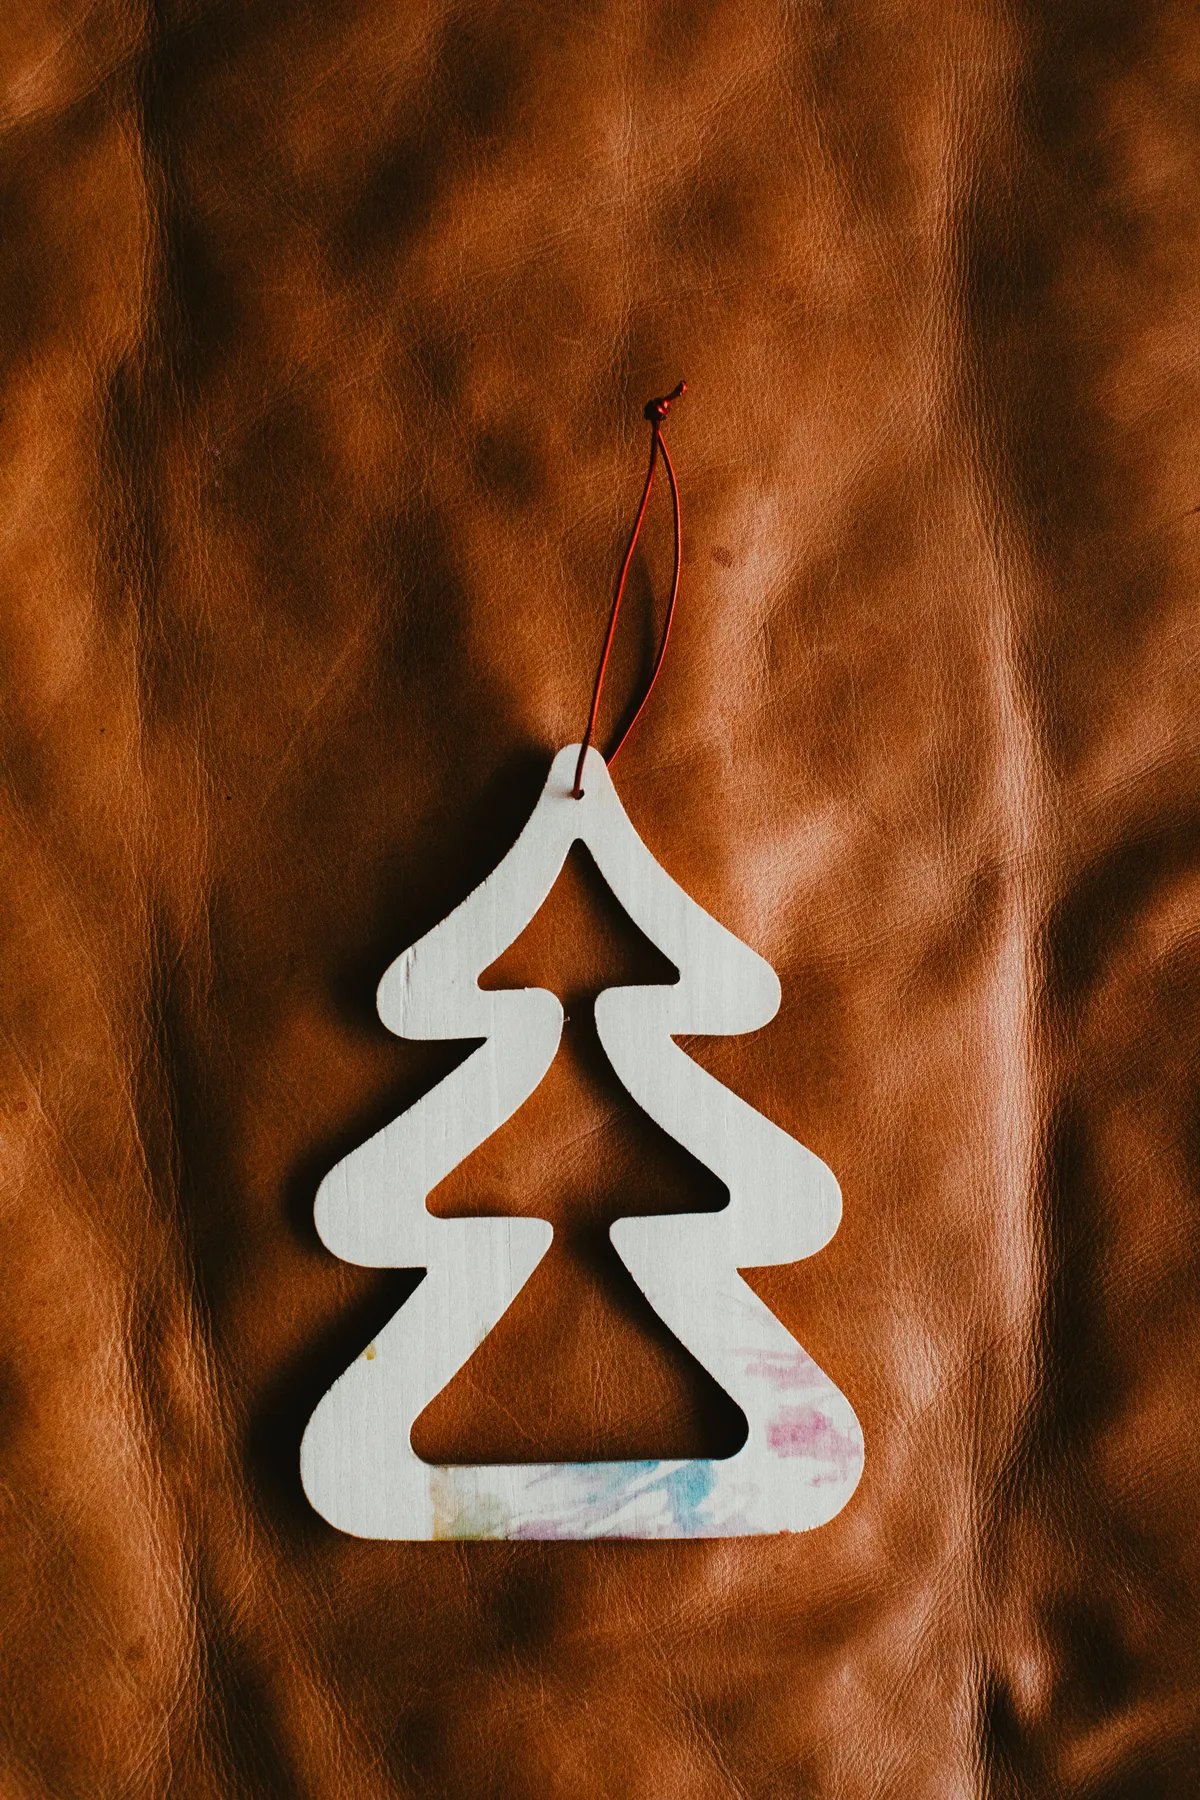
Watercolor and dye washes fade in sunlight faster than acrylic, and salt dough is porous enough to keep drinking moisture out of the air. Seal these with two coats of matte polycrylic and keep them off a south-facing window tree. Store them flat, wrapped in paper, never in a damp basement — dough that absorbs humidity goes soft and eventually smells like a cellar.
16. A Dark Cocoa Gingerbread House With Scalloped Icing
75% dark brown, 20% white, 5% warm glow. The brown comes from cocoa-heavy dough, the white from icing lines around the windows and a scalloped roof edge, and the last five percent is just the tree lights behind it. Lighten the dough and the house turns gingerbread-cute; darken it and it reads almost architectural. The white is what sells it either way.
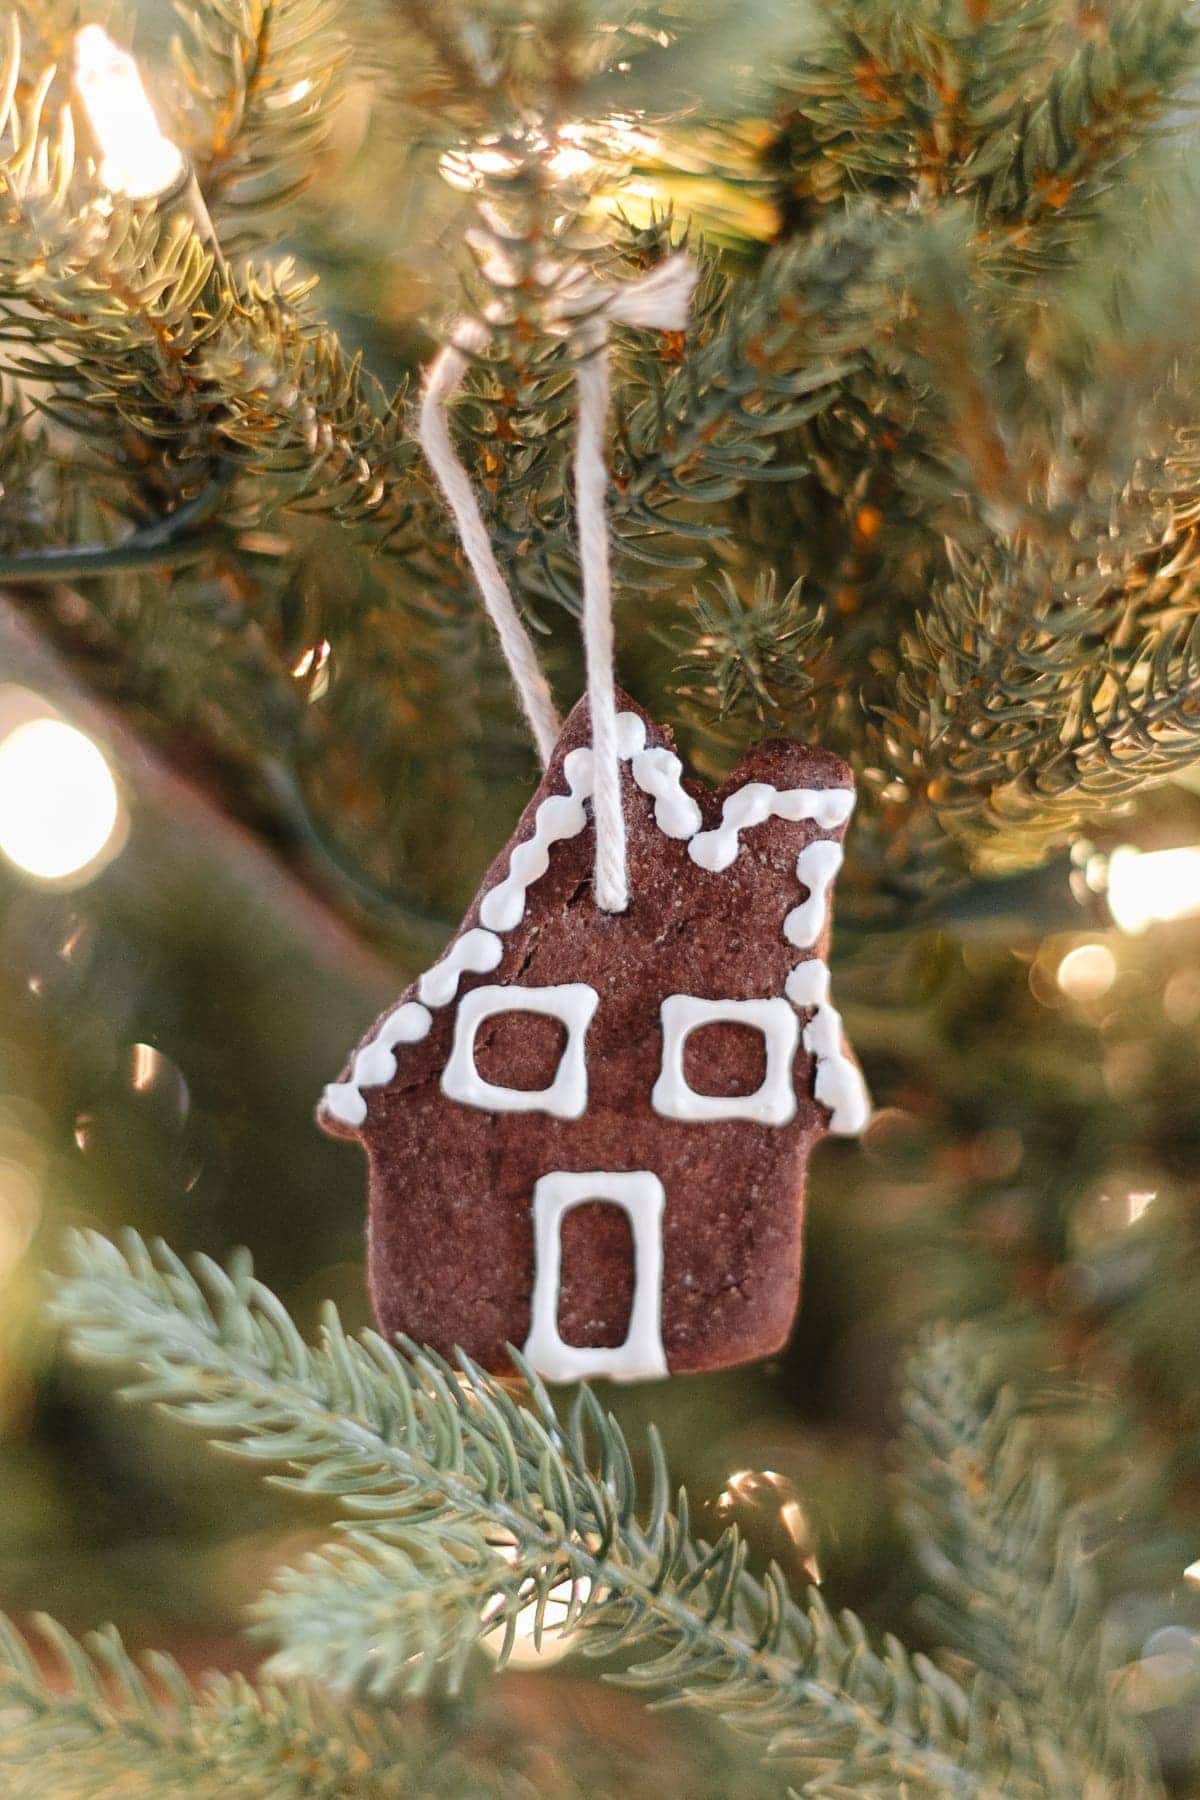
White detailing on a dark ornament is unforgiving — one wobble and everyone sees it. Puffy fabric paint with a fine tip gives you more control than a brush, and it holds a raised line that catches light like real icing. Watch the weight, too: a thick house with a heavy roofline drags a light branch down. Hang it near the trunk, not on a tip.
17. A Little Sheep With Spiral Wool in the Fir Branches
The spiral wool comes from a single tool: the round end of a skewer or a small ball stylus. Press and twist a quarter turn, lift, repeat in a staggered grid — roughly 20 impressions for a body this size. Do it before baking while the surface is still soft, and work from the center outward so you don’t crush what you’ve already textured.
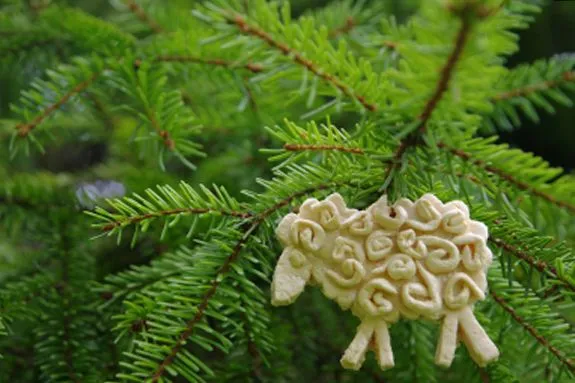
This one is small, around 2.5 to 3 inches, and that’s deliberate. Animal shapes read best at a size where the silhouette stays simple — blow a sheep up to 5 inches and the legs turn fragile and the wool pattern goes busy. Tuck it into the inner branches of an evergreen where people have to lean in to find it.
18. Orange-Brown Gingerbread Men on Charcoal Woven Cloth
- Acrylic paint set, 12–24 colors: $8–$15
- Red-and-white striped twine: $4–$6
- Fine-tip brushes: $6–$10
- Matte sealer: $6–$10
- Dough: under $2

Total: $24–$43 for a set of 12. The shortcut: a three-color pack in white, red, and brown covers everything on this table for about $5 — you’ll mix your own orange from red and yellow anyway.
Charcoal grey fabric under orange-brown ornaments. That’s a warm-cool pairing, and it’s why these three pop so hard. Put the same gingerbread men on beige linen and they go quiet. If you’re styling warm-toned ornaments, give them a cool, dark surface somewhere in the frame — a slate tray, a grey wool stocking, a black bucket.
19. Snowflake Stamps and a Straw for the Holes
- Roll the dough to 1/4 inch on parchment paper.
- Flour the wooden stamp lightly and press it in before you cut the circle — the outline guides the cut.
- Wiggle the stamp free rather than pulling straight up.
- Cut the circle with a metal cutter, then punch the hole with a straw.
- Bake at 200°F for 2–2.5 hours, flipping once.
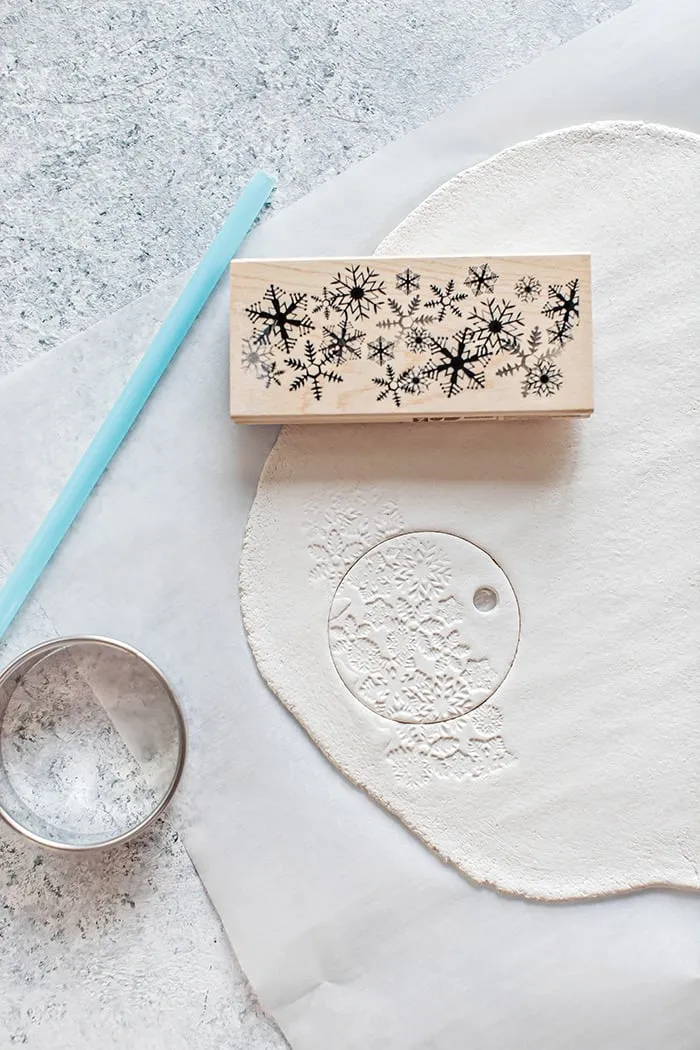
About 15 minutes of handwork per batch; the stamp pays for itself in one afternoon.
A light blue plastic straw makes the cleanest hanging hole you’ll get — cleaner than a skewer, because it removes a plug instead of pushing dough aside. Punch from the front, blow the plug out, and place the hole about a quarter inch from the edge. Closer and the dough crumbles there; farther and the ornament tips forward.
20. Painted Fairy Lights and the Year at the Base
Dated ornaments are having a moment, and it isn’t nostalgia for its own sake. Writing the year on the base turns a craft project into an archive — a row of trees with 2026, 2027, 2028 becomes a record of December after December. Pinterest is full of one-ornament-per-year family traditions right now, and this is the cheapest, most personal version of it.
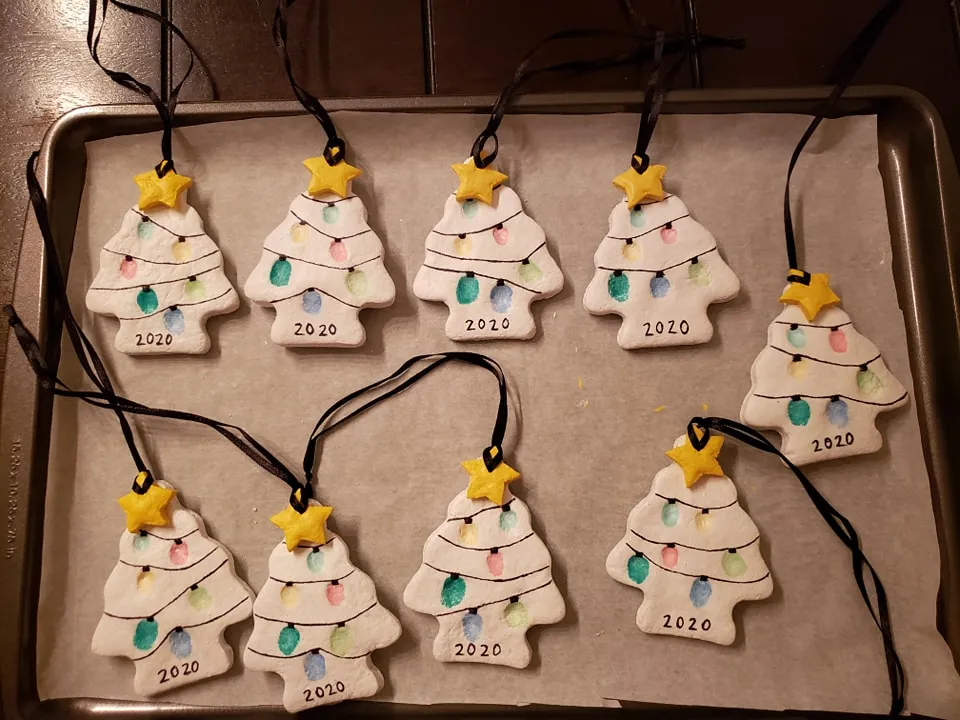
The hand-written year at the base. Everything else — the painted string of colored lights, the yellow star, the black ribbon — is interchangeable. That little number is the only part that can’t be reproduced later. Use a fine-tip paint pen rather than a marker; paint pens hold up under sealer and won’t fade to purple in five years.
Painted details on pale dough are only as permanent as the sealer over them, and black ribbon fades to grey in a few seasons of direct sun. Store these flat in a single layer, never stacked, because dimensional paint sticks to itself and pulls off in chunks. Skip the attic, too — heat cycling is what makes salt dough brittle.
21. Glossy Bears in Santa Hats and Red Berets
The ornaments aren’t the expense here — it’s the tiny accessories. A basket, a broom, a pitcher, a yellow plate: that’s forty dollars of miniatures if you buy them. Make them instead. A scrap of copper foil becomes a pitcher, a toothpick plus bristle trim becomes a broom, and a bottle cap is a plate. About $12 total, and the kid-built versions are the ones that get kept.
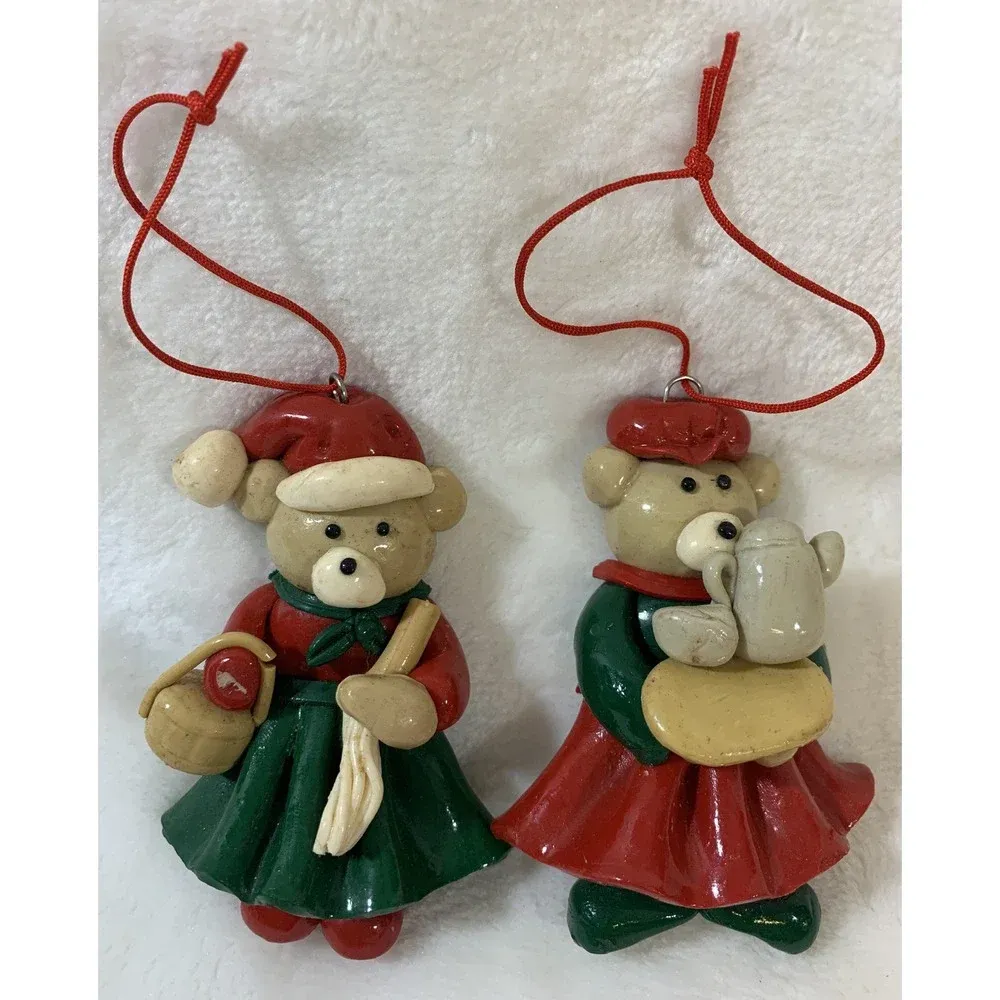
Small glued-on parts and a house with a toddler are a bad combination. If these are headed for a family tree rather than a display shelf, either skip the accessories or use two-part epoxy instead of hot glue, and give it 24 hours. Expect paint to chip at the base — a dab of matching red fixes it, but keep the bottle.
22. A Bell and a Snowflake in a Gridded Baking Tray
- Cut shapes and lay them in the tray compartments so nothing touches.
- Punch the holes now — after baking, the dough chips.
- Bake at 200°F for two hours, then flip each piece with a thin spatula.
- Go another hour, then switch the oven off and leave them in until cool.
- Cool completely flat before decorating; warm dough rejects paint.
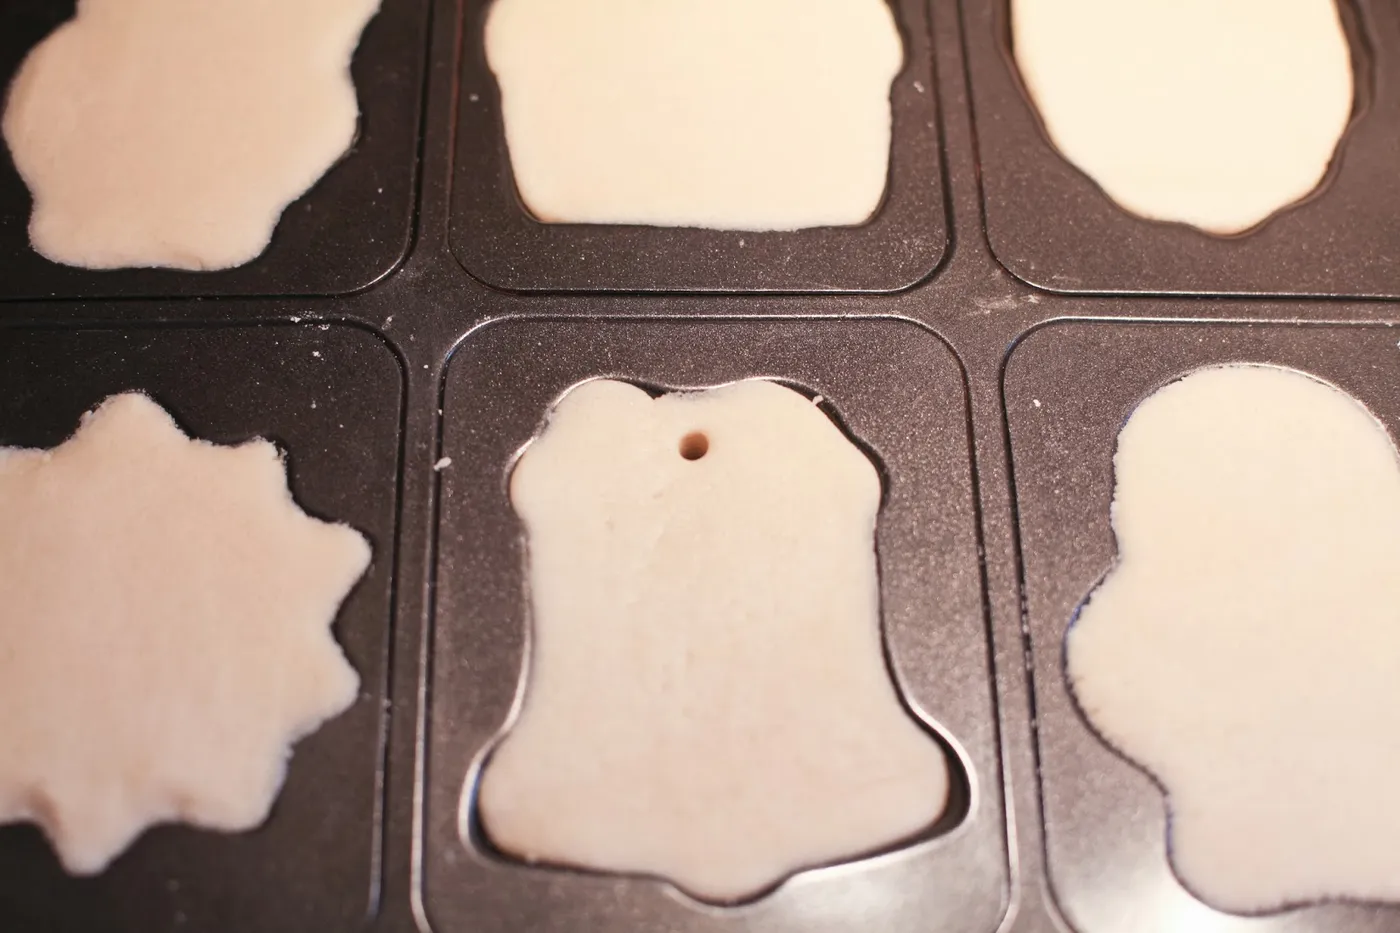
Roughly four hours total, most of it hands-off.
Most salt dough failures happen in the first week, not the first year. A bell that looks dry outside can still be damp inside, and it cracks along the curve two days later when the core finally dries. Thinner is safer: a quarter inch dries evenly, a half inch needs a full week of air. If something cracks, sand the edge and repaint — nobody will know.
23. A Glazed Teddy Bear With Cream Paws and a Red Bow
60% light brown, 25% cream, 10% red, 5% black. The brown is the bear, the cream lives on ears, paws, and muzzle, red is the bow, and black is only eyes, nose, and mouth. Push the cream up to 40% and you get a polar bear; drop the red bow and you have a woodland ornament. Same proportions, different animal.
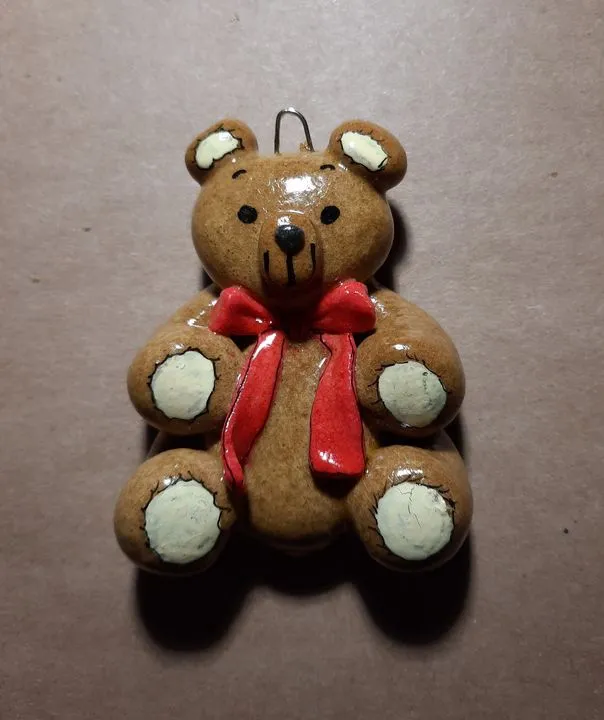
Gloss is the expensive-looking part, and it costs about seven dollars. Acrylic gloss varnish does what a specialty glaze does — two thin coats, 30 minutes apart, and the bear looks ceramic. Skip the boutique bear cutter and shape one from a gingerbread man cutter by pinching the arms shorter. Around $15 for a set of four, and nobody will guess.
24. The Basic Salt Dough Ratio You’ll Use All Season
Before anything else, the ratio: one cup all-purpose flour, half a cup table salt, half a cup water. Mix the dry first, add water a tablespoon at a time, and knead five minutes until smooth. A shaggy dough bakes into a cracked ornament, so knead past the point where it feels done.
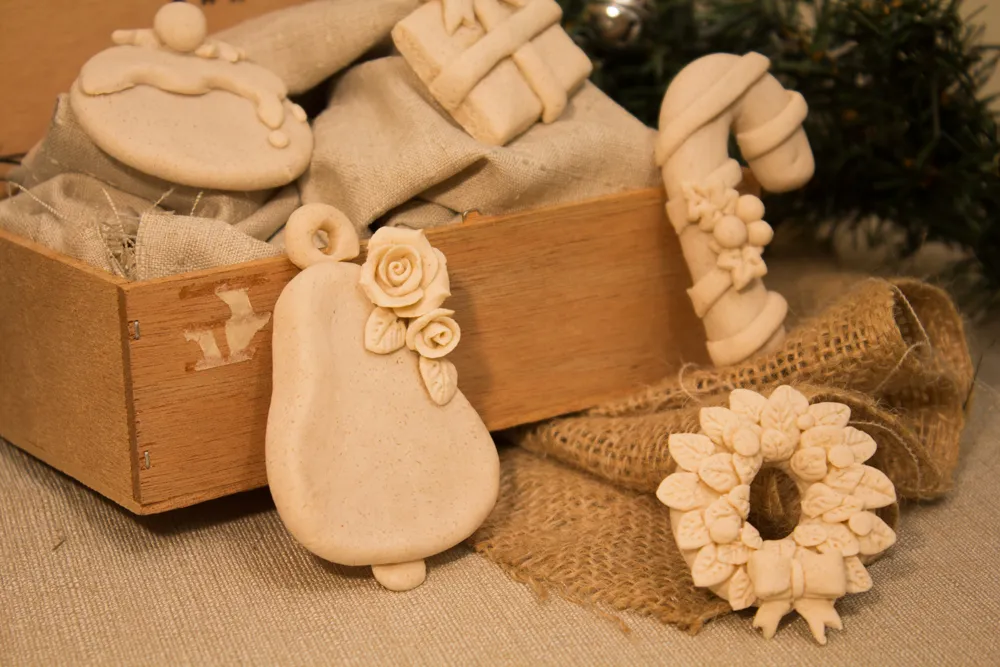
- Table salt, not coarse sea salt — crystals tear the surface.
- Plain all-purpose flour; self-rising puffs and splits.
- Parchment paper, not wax paper, which sticks and ruins a batch.
- A clear hour on the calendar — the dough crusts if you walk away.
Three things go wrong in almost every first batch. Coarse salt leaves pits, self-rising flour cracks, and walking away mid-project creates flaky edges that show up after baking. None are disasters, all are avoidable, and the fixes cost nothing. See Idea #2 for the stamping steps that come next.
25. A Painted Santa Face Among Jute Twine and Pine
The round format is doing quiet work. A face on a circle reads as a portrait; the same face on a star reads as a confused star. Then the styling: raw jute twine on a spool, fresh pine needles, a warm wood surface. Nothing shiny except a thin gold ribbon, which is the only thing your eye lands on first. Restraint, then one glint.
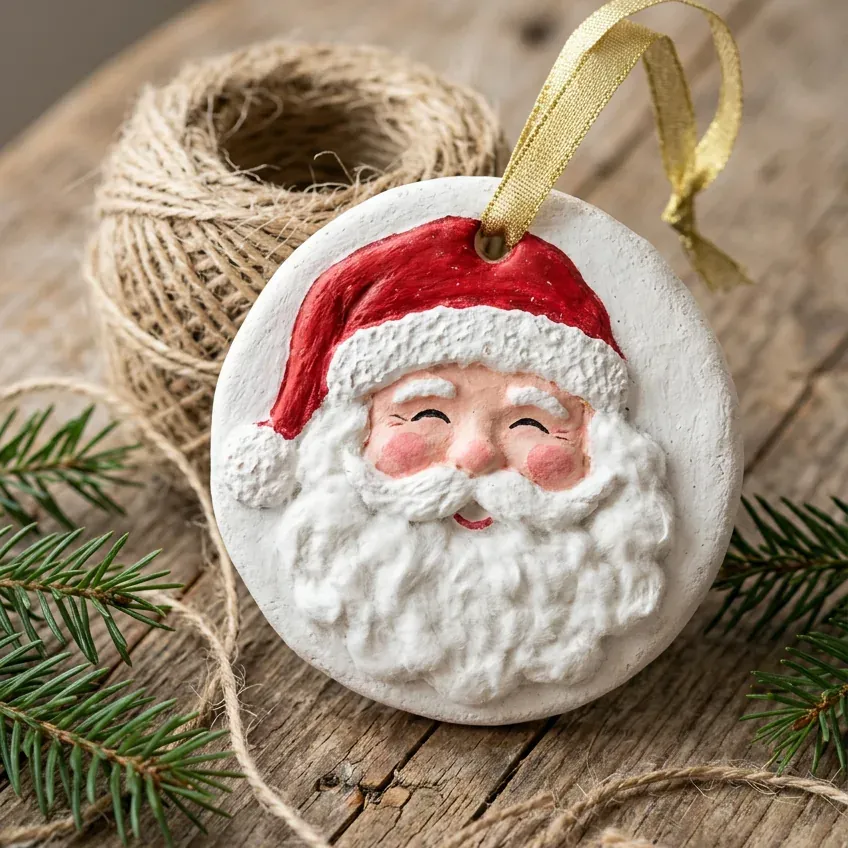
- Acrylic paint, flesh/red/white/black: $8–$14
- Fine-tip brush set: $6–$10
- Gold ribbon, 2 yards: $3–$5
- Jute twine spool: $4–$6
- Dough: under $2
Total: $23–$37 for a dozen faces. Budget version: a $5 primary-color paint set mixes every skin tone and red hat you need — you’re saving fifteen dollars and losing nothing visible.
26. Two Kids, Green Paint, and a Bowl of Sprinkles
Sprinkles do not stick to baked salt dough. Not with hope, not with pressure. They stick to wet paint, white glue, or nothing at all — so sprinkles go on while the paint is still tacky, and then everything gets sealed so they don’t migrate. Set that expectation before the bowl comes out, or you’ll be sweeping sugared sprinkles off the floor until New Year’s.

Set up two zones: a wet station with paint and brushes, a dry station with sprinkles, ribbon, and finished pieces. Kids move between them constantly, and one crowded table turns into green fingerprints everywhere. A rimmed baking sheet under each zone contains 90% of the mess, and cleanup becomes lifting a tray instead of scrubbing a table.
- Flour the table lightly, not heavily — too much and the dough won’t hold an impression.
- Aprons on, sleeves rolled, hair tied back.
- Paper towels and a damp cloth within arm’s reach.
- Finished ornaments go on a separate tray, never back into the flour.
27. How Long Salt Dough Ornaments Actually Take to Dry
- Air-dry flat on parchment, turning each piece once a day.
- Expect three to five days for a quarter-inch ornament in a dry room.
- To speed it up, bake at 200°F for two hours, flip, then one more hour.
- Test the center by tapping — a dull thud means it’s still damp.
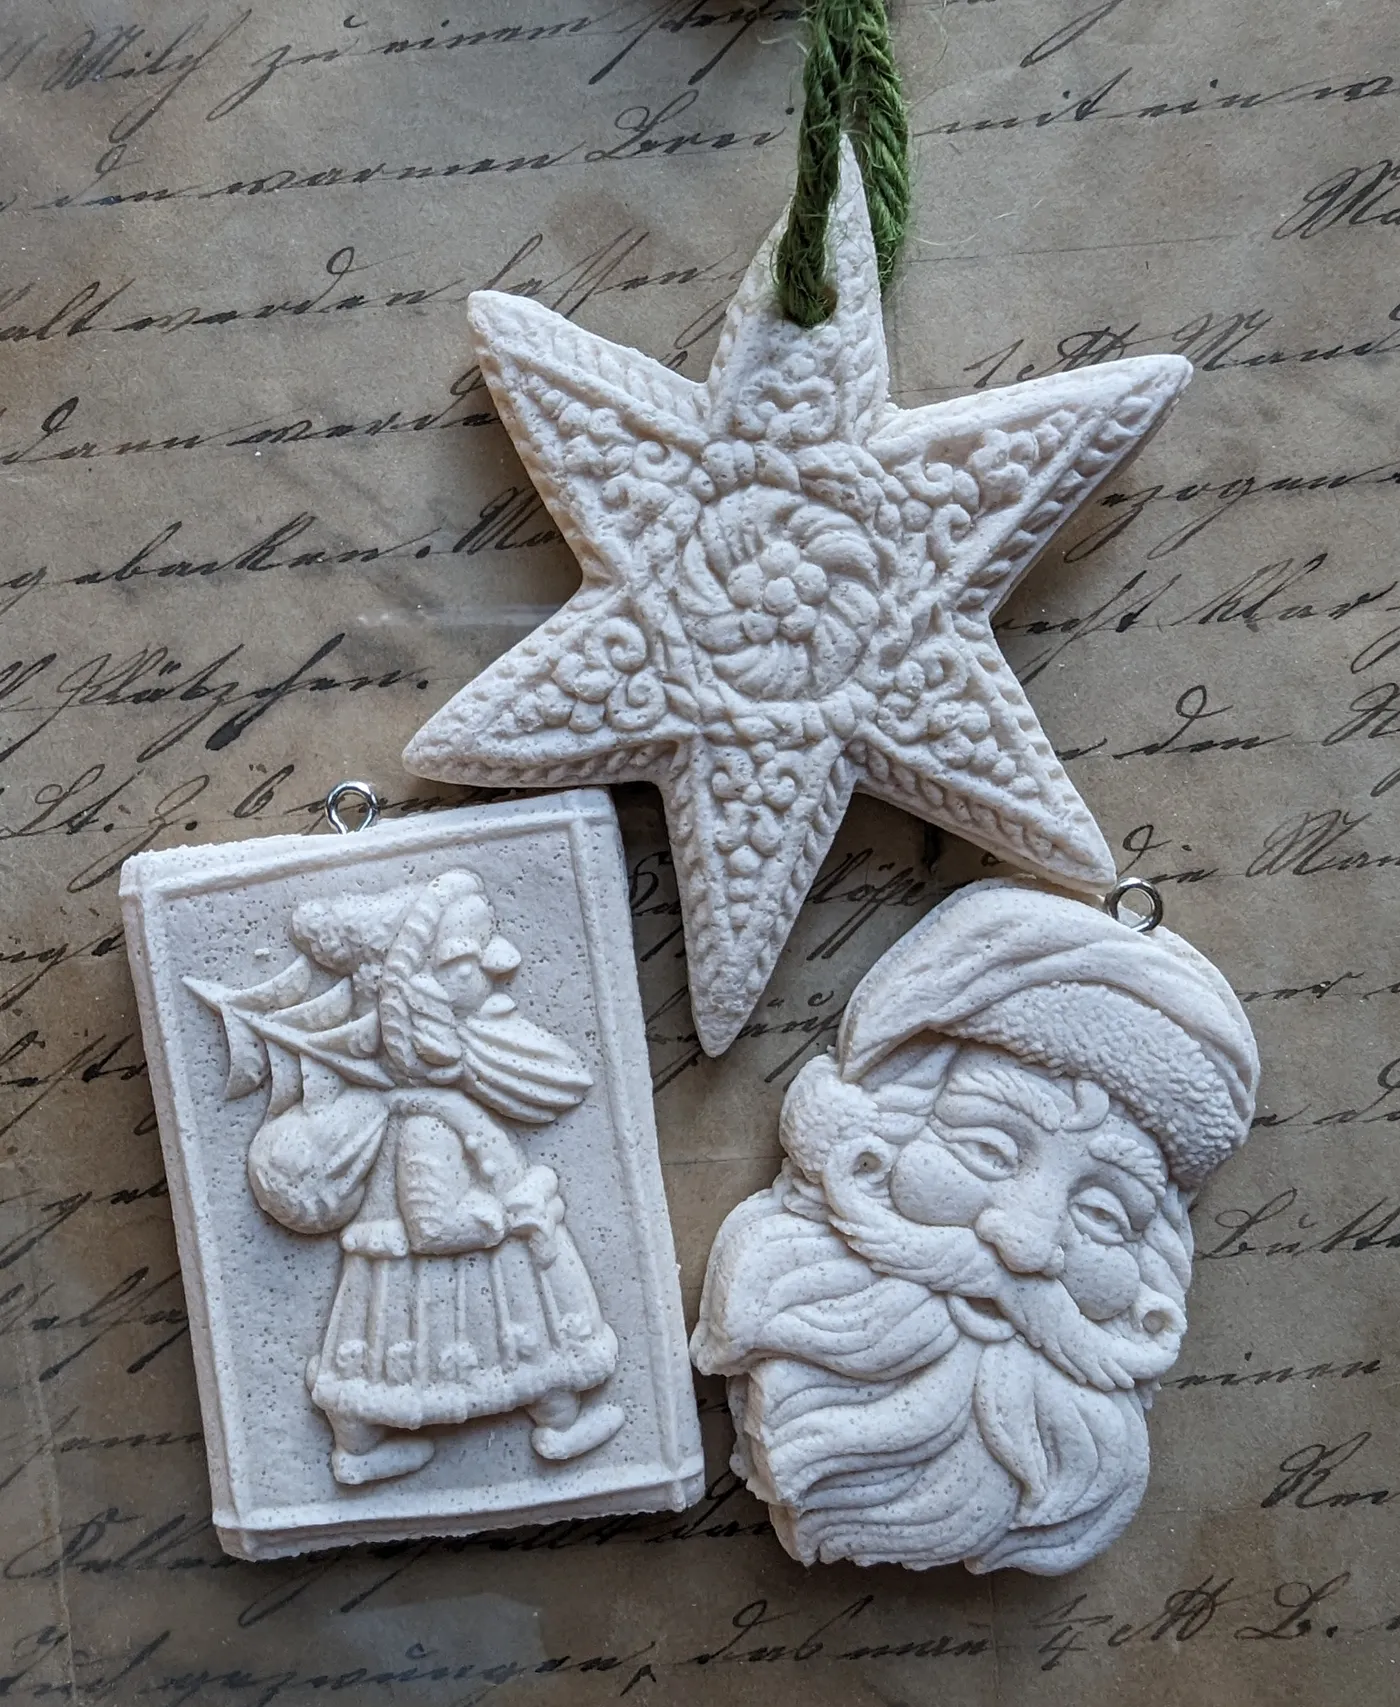
Air drying costs nothing but patience; oven drying costs three hours and a little electricity.
Thickness dictates time, not size. A quarter-inch ornament dries in three to five days on a counter; a half-inch one needs a full week, and the middle stays soft longest. If you’re making 30, keep them all the same thickness so they finish together — otherwise you’re babysitting a tray for eight days. A quarter-inch batch of 30 fits on two standard sheets.
28. Three Green Trees on a Snowflake Textile
One tree has a white satin ribbon. Just one. That’s the detail worth stealing — a single ornament in a set gets an upgrade, and suddenly the group looks collected rather than manufactured. The ribbon is narrow, tied in a simple loop, and it’s the only shine in an otherwise matte trio. Try it with your own sets; it costs a foot of ribbon and changes everything.
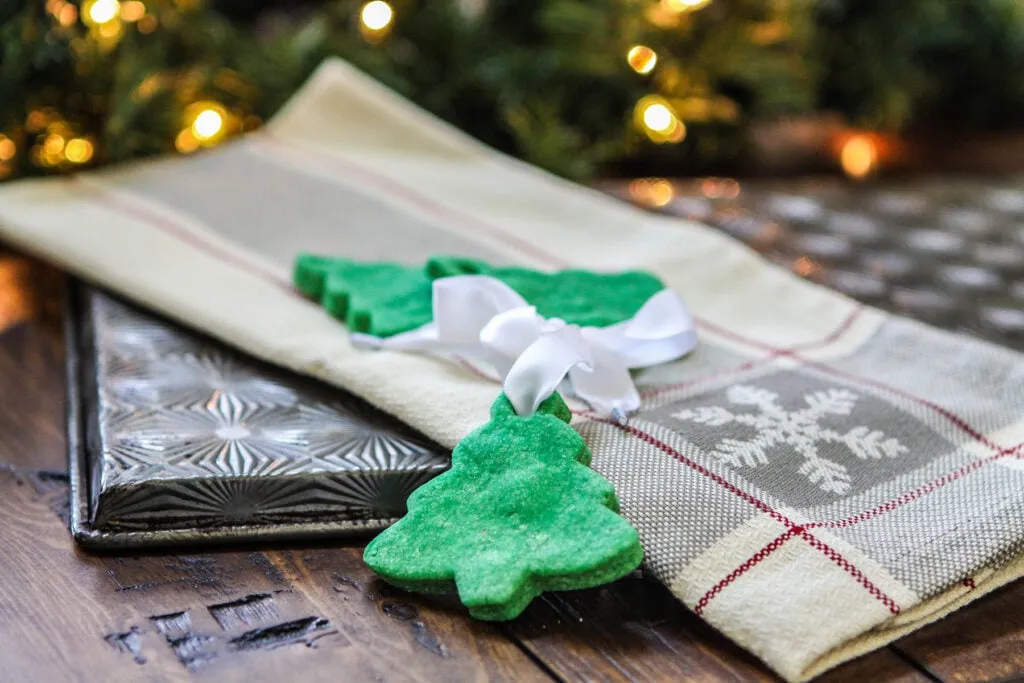
Colored ornaments are back after a long white-and-wood decade, and not in the matched-set way your grandmother did them. The 2026 version is small groups of three or five in one saturated color, styled against vintage textiles — a snowflake-print runner, an embossed metal tray, a dark wooden table. It photographs like an inherited collection, which is exactly the point.
29. A Toasted Snowflake on Black-and-White Twine
To get that toasted, almost-cookie brown without risking a crack, brush the raw dough with a wash of one teaspoon cocoa powder dissolved in two tablespoons water before baking. Bake at 200°F for two hours, flip, and give it another hour. The wash browns evenly and the low heat keeps the center from splitting. Test on one sacrificial ornament first.
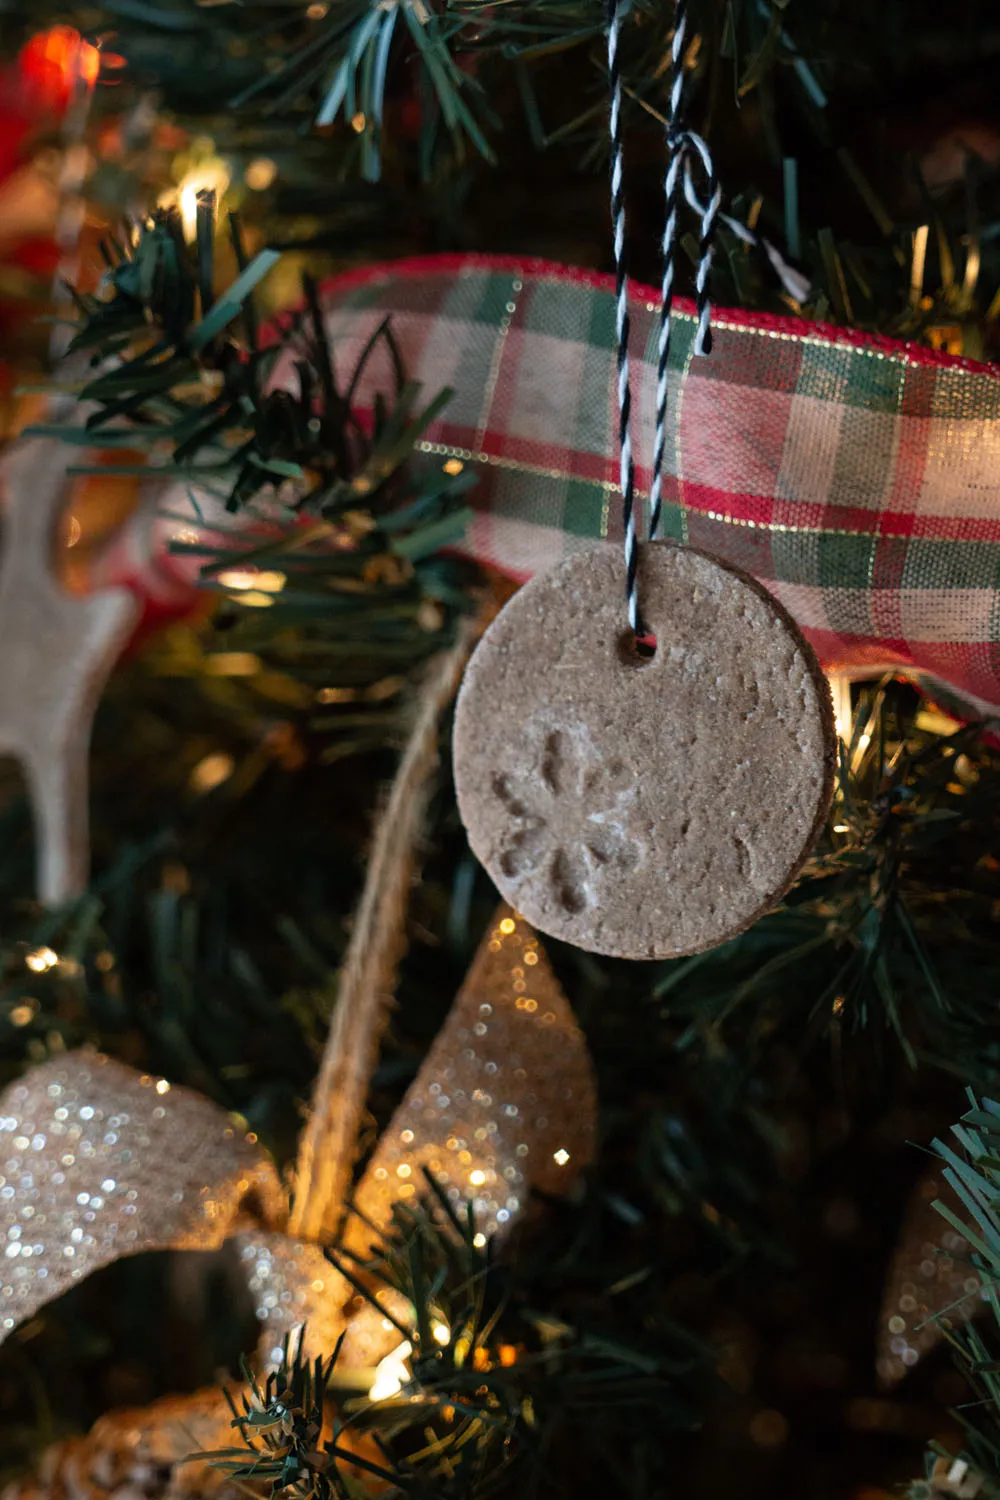
Black-and-white baker’s twine is one of the cheapest good-looking things in a craft aisle — a 25-yard spool runs about four dollars and strings fifty ornaments. That plaid ribbon behind it? Leftover wrapping ribbon, curled with scissors. Skip the glitter ornament entirely and dust a branch with a little gold craft paint on your fingertip. Under $10.
30. Mottled Teal and Terracotta Glazes in Neat Rows
- Acrylic craft paint in four glaze colors: $12–$18
- Matte or satin varnish: $6–$10
- Cookie cutters, tree/star/snowman: $8–$14
- Twine for hangers: $4–$6
- Dough: under $2
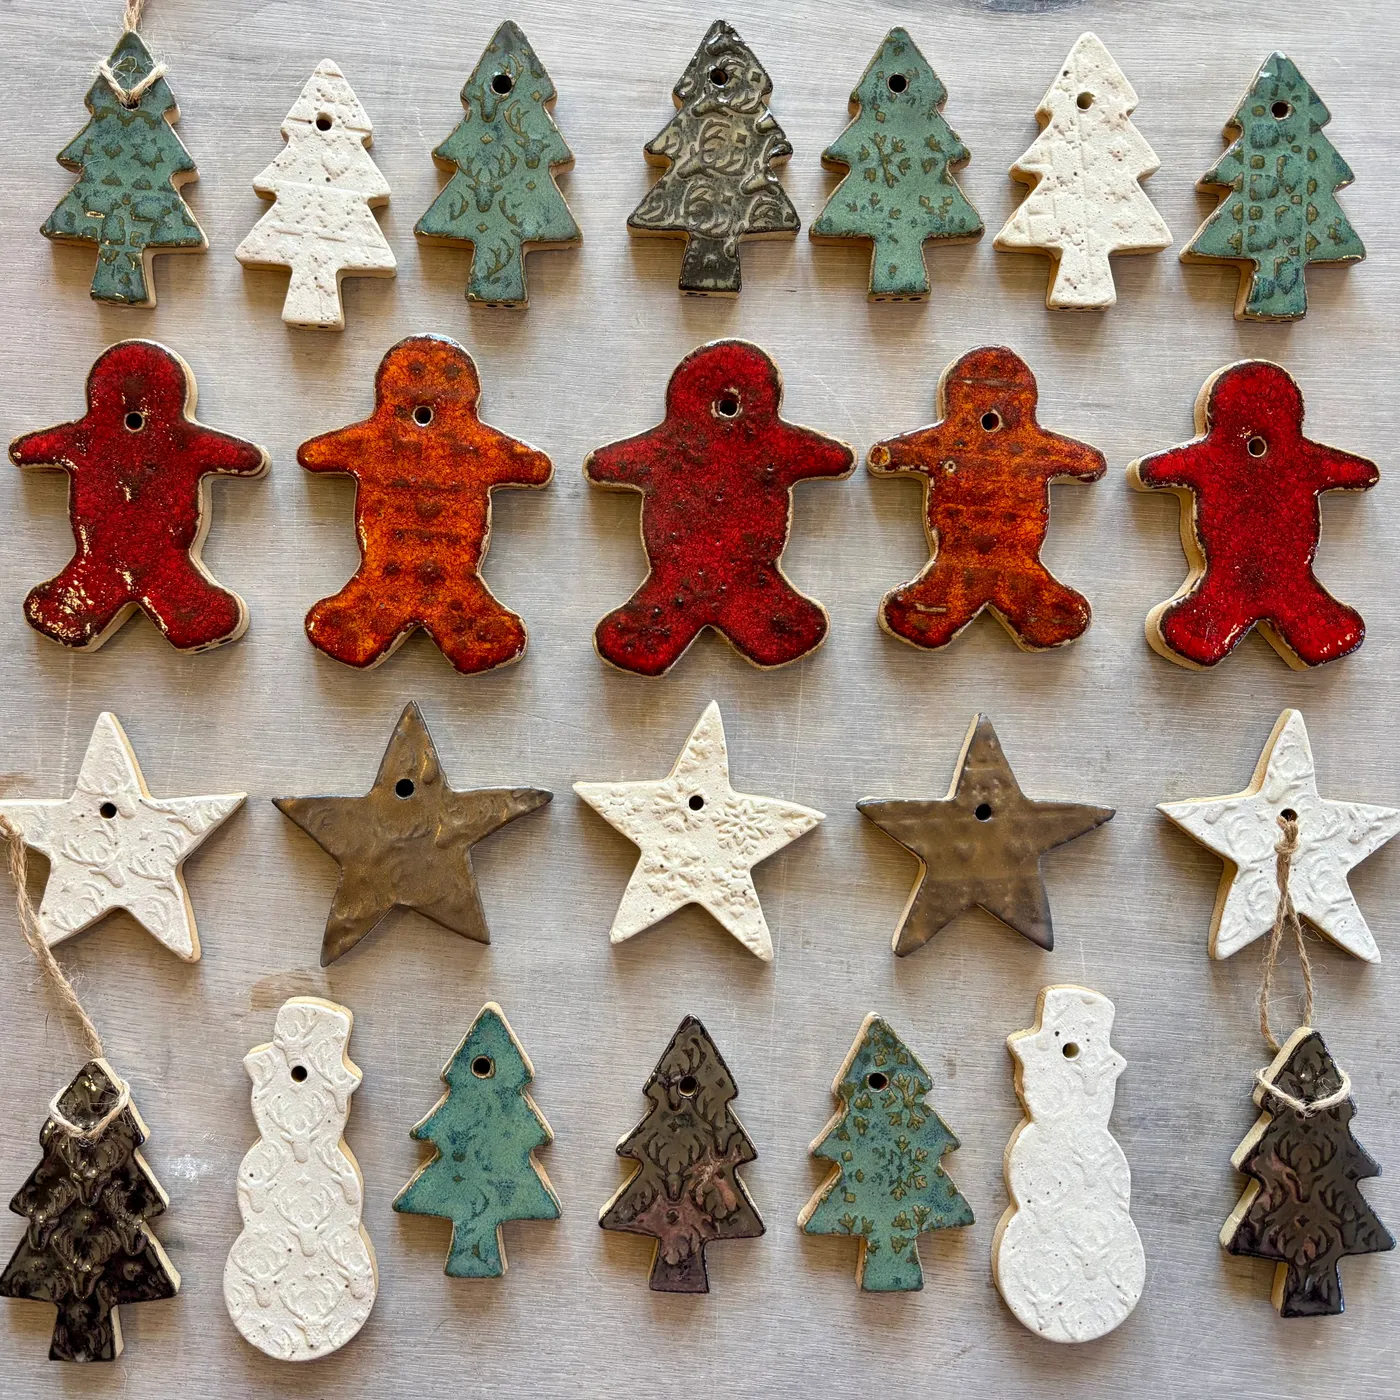
Total: $32–$50 for two dozen. Cheaper route: mix your own glaze by stirring a drop of brown into teal and terracotta — one $8 paint set and a $6 varnish gets you there for around $16.
It’s the mottling. Flat painted ornaments look like plastic; a glaze that pools in the texture and leaves raised areas lighter reads like fired ceramic. Thin the paint two parts to one part water, brush it on, and dab the high spots back with a paper towel before it dries. That thinning is what creates depth a single coat can’t fake.
31. Blue-Washed Crosses With Gold Ribbon and Sequins
The tiny hand-lettered INRI above one cross. Six letters, painted with the world’s smallest brush, and it turns a craft ornament into an object with intent. The glitter and sequins are lovely, but they’re decoration; the inscription is narrative. Don’t letter all six — one is enough, and the restraint is what makes it feel considered.
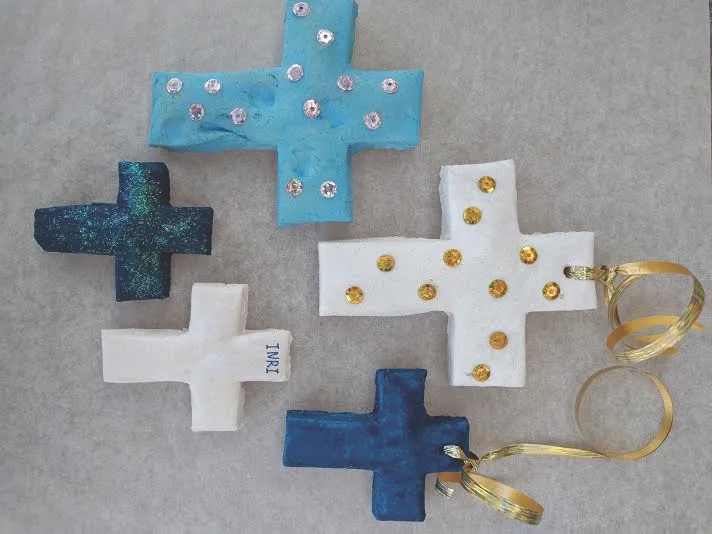
Gold metallic ribbon is the one thing worth buying properly, because the cheap version frays and looks brassy. Everything else is negotiable: one pot of fine glitter does the work of three specialty glitters, and white craft glue holds sequins as well as anything. About $14 for six crosses, and $9 of that is the ribbon. Compare with Idea #9 — same handmade logic, entirely different mood.
32. Dot-Painted Hearts and Snowflakes on Red Satin
Perfect dots come from the wrong end of a paintbrush. Dip the handle tip in paint, touch it straight down, lift straight up — no dragging. Vary sizes with a chopstick for big dots and a toothpick for small ones. Space them unevenly on purpose; a grid of identical dots looks printed, while a loose scatter looks painted by hand, which is the whole charm.
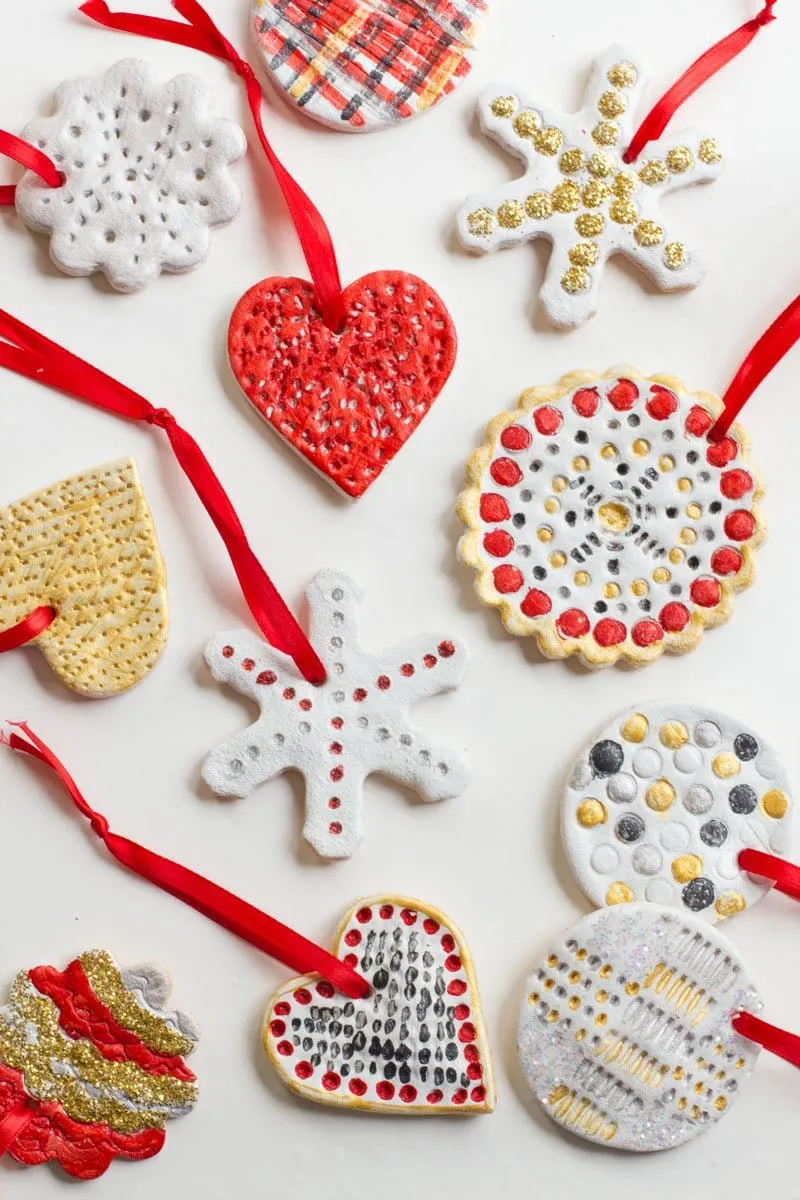
70% matte white, 20% red ribbon, 10% gold and silver. The white dough owns the shapes, the satin ribbon carries all the red so you don’t need red paint anywhere, and metallics stay limited to glitter accents. Trade the red satin for black velvet and the collection goes dramatically moody — same white base, completely different holiday.
33. An All-White Tree Full of Matte Stars
White-on-white needs volume. On a 7-foot white tree, plan on eight to ten ornaments per foot of height — roughly double what you’d use on a green tree, because the low contrast eats them otherwise. Mix three sizes: 2-inch stars for the interior, 3-inch for the outer branches, and a few 4-inch pieces to anchor the whole thing.
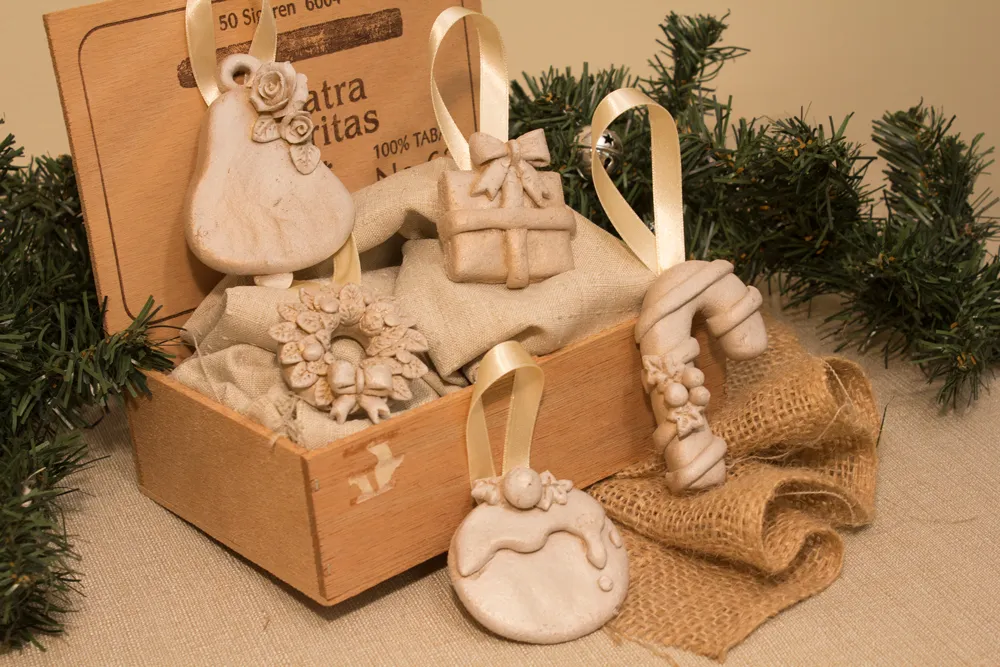
White shows every fingerprint, every dust mote, every bit of tinsel residue. Wipe ornaments with a dry microfiber cloth at the end of the season before packing, and store them in acid-free tissue rather than newspaper, which transfers ink. White dough also yellows over years if it’s sealed with an oil-based product — matte water-based polycrylic stays truer longer.
34. Green Dough Trees and a Skewer for the Holes
- Knead gel food coloring into the dough a drop at a time — gloves on, or you’ll wear green for two days.
- Roll to 1/4 inch and cut the tree and star shapes.
- Poke the hanging hole with a skewer while the dough is still soft.
- Bake at 200°F for two hours, flip, then one more hour.
- Seal once fully cool; food coloring bleeds without it.
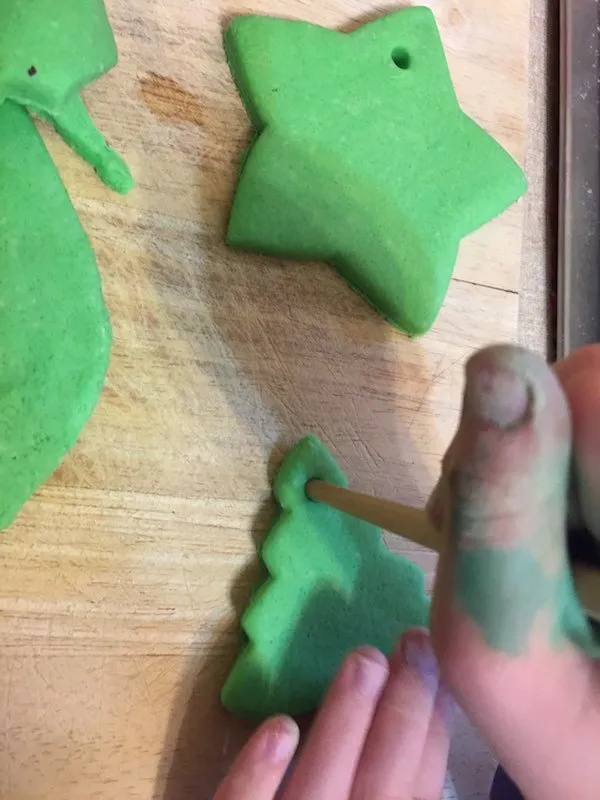
Ten minutes of mixing, and about $2 of coloring covers four batches.
- Gel coloring, not liquid drops — liquid thins the dough and it slumps.
- Small hands need dull tools; a skewer is safer than a needle.
- Roll on parchment so the shapes lift without stretching.
- Set a timer for the oven flip; green dough browns first at the edges.
For the full kid-table setup, see Idea #26.
35. White Ornaments Styled With Plaid and Velvet Ribbon
70% white, 20% deep green plaid, 10% soft blue velvet. The ornaments stay neutral, the gift wrap carries the pattern, and the velvet ribbon is the one luxurious note. Swap the plaid for red-and-white gingham and the same white ornaments go country; swap the velvet for cream satin and it turns quietly formal. Three materials, endlessly adjustable.
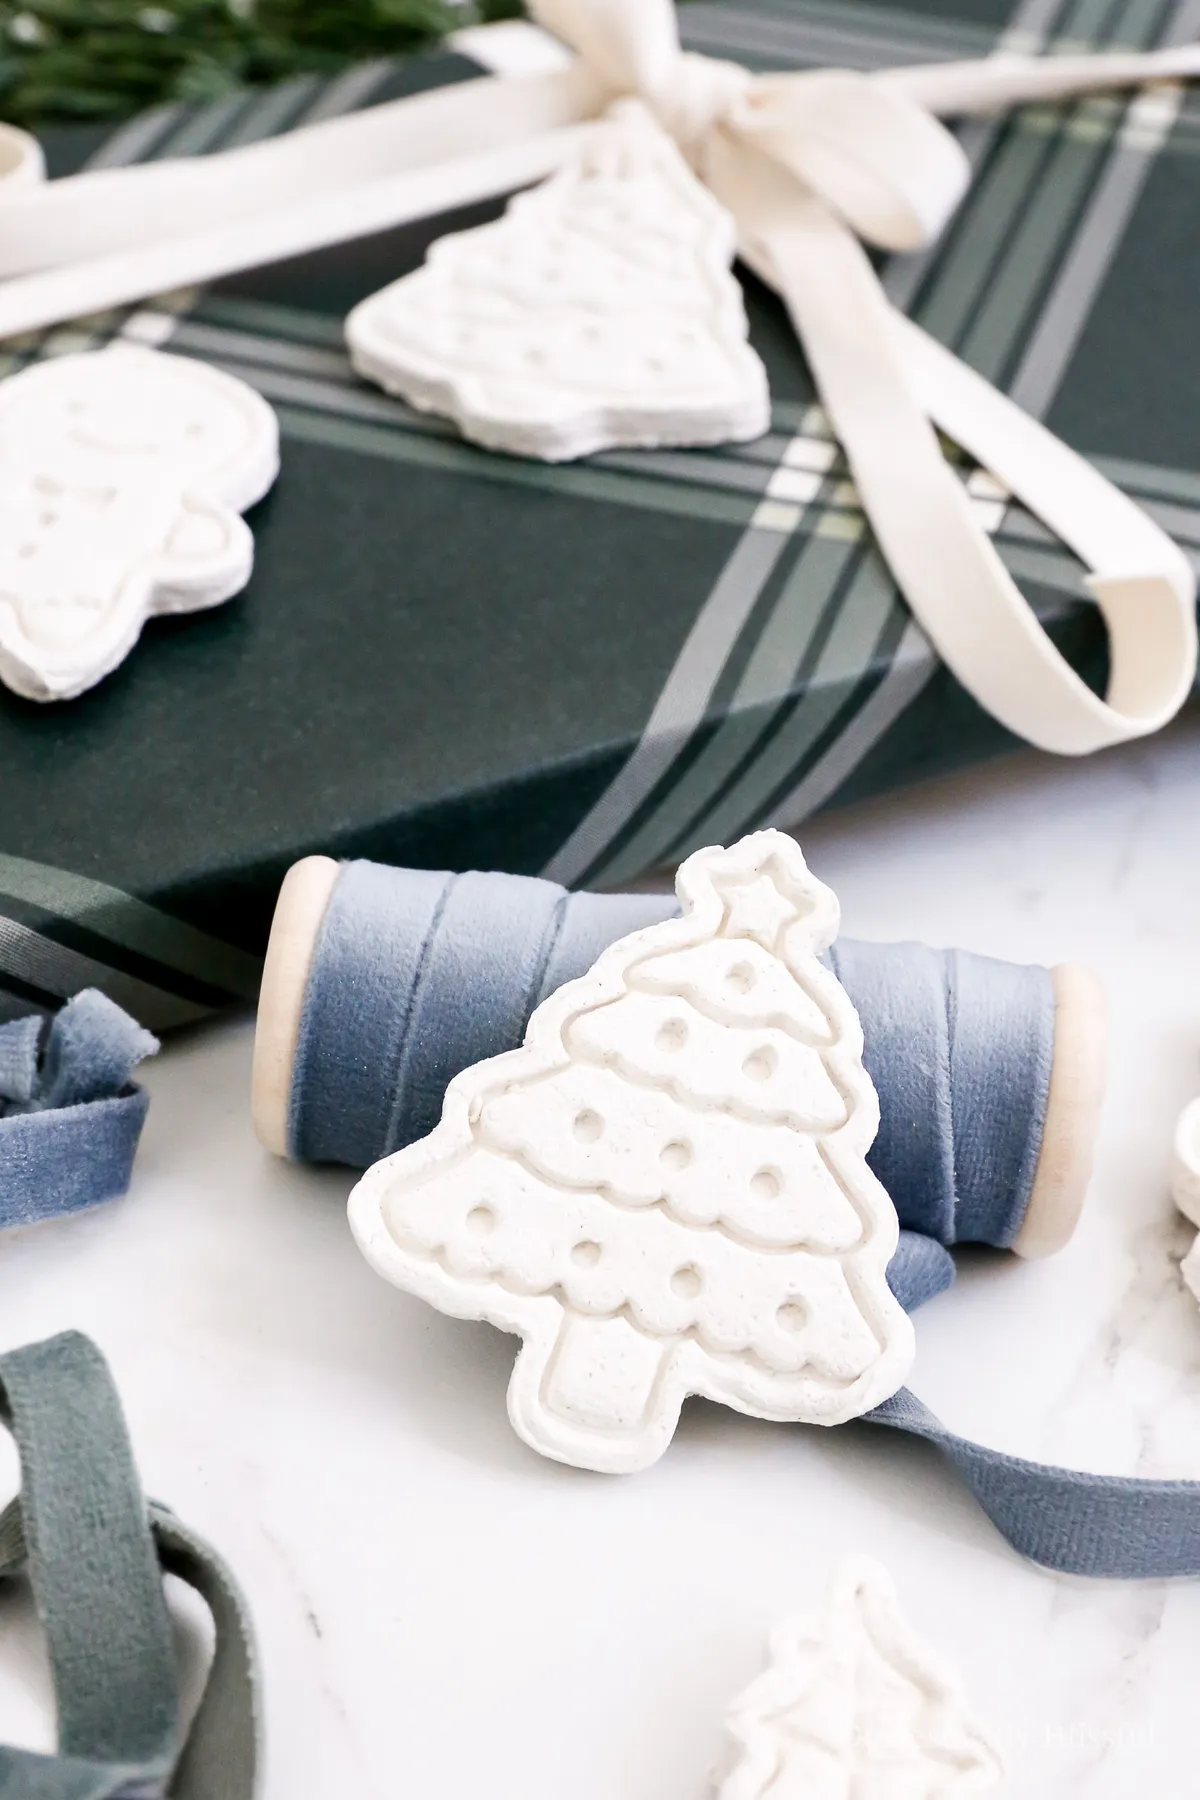
Velvet ribbon had a serious year and it’s still the fastest way to make a paper-wrapped box look expensive. The 2026 version pairs it with plaid and matte white — a softer, less glossy Christmas than the metallic-everything era. If you’ve been buying one nice ribbon a year instead of a new ornament set, this is the aesthetic you’re already building.
Your Tree Deserves Something Made by Hand
None of this requires talent — it requires flour, salt, water, and one free evening. Start with a single batch of stars, see how the dough feels in your hands, and let the fancy stuff wait until next weekend. The ornaments that survive twenty Decembers are never the perfect ones; they’re the lopsided ones somebody actually made. 📌 Pin this guide now so it’s waiting for you when the flour comes out.