You know that feeling when you finally find the painted pumpkin idea that looks exactly right for your home? The one that makes you stop scrolling and start planning. We’ve all been there, saving dozens of pins but feeling overwhelmed by where to begin. That’s why we did the hard work for you.
After filtering through hundreds of options across Michaels, Hobby Lobby, and local craft suppliers, we narrowed it down to 30 incredible ideas that actually deliver. We’re covering every style, from minimalist and graphic designs to elegant Chinoiserie and whimsical painted faces. This isn’t just about slapping paint on a gourd; it’s about creating a piece of seasonal art you’ll be proud to display. These personalized, handcrafted decorations are taking over in 2026 as we move away from mass-produced decor and toward pieces with a personal story. And stay until the end — we break down the most common mistakes that can ruin these looks. 📌 Save this to Pinterest for later — you’ll want to revisit these ideas.
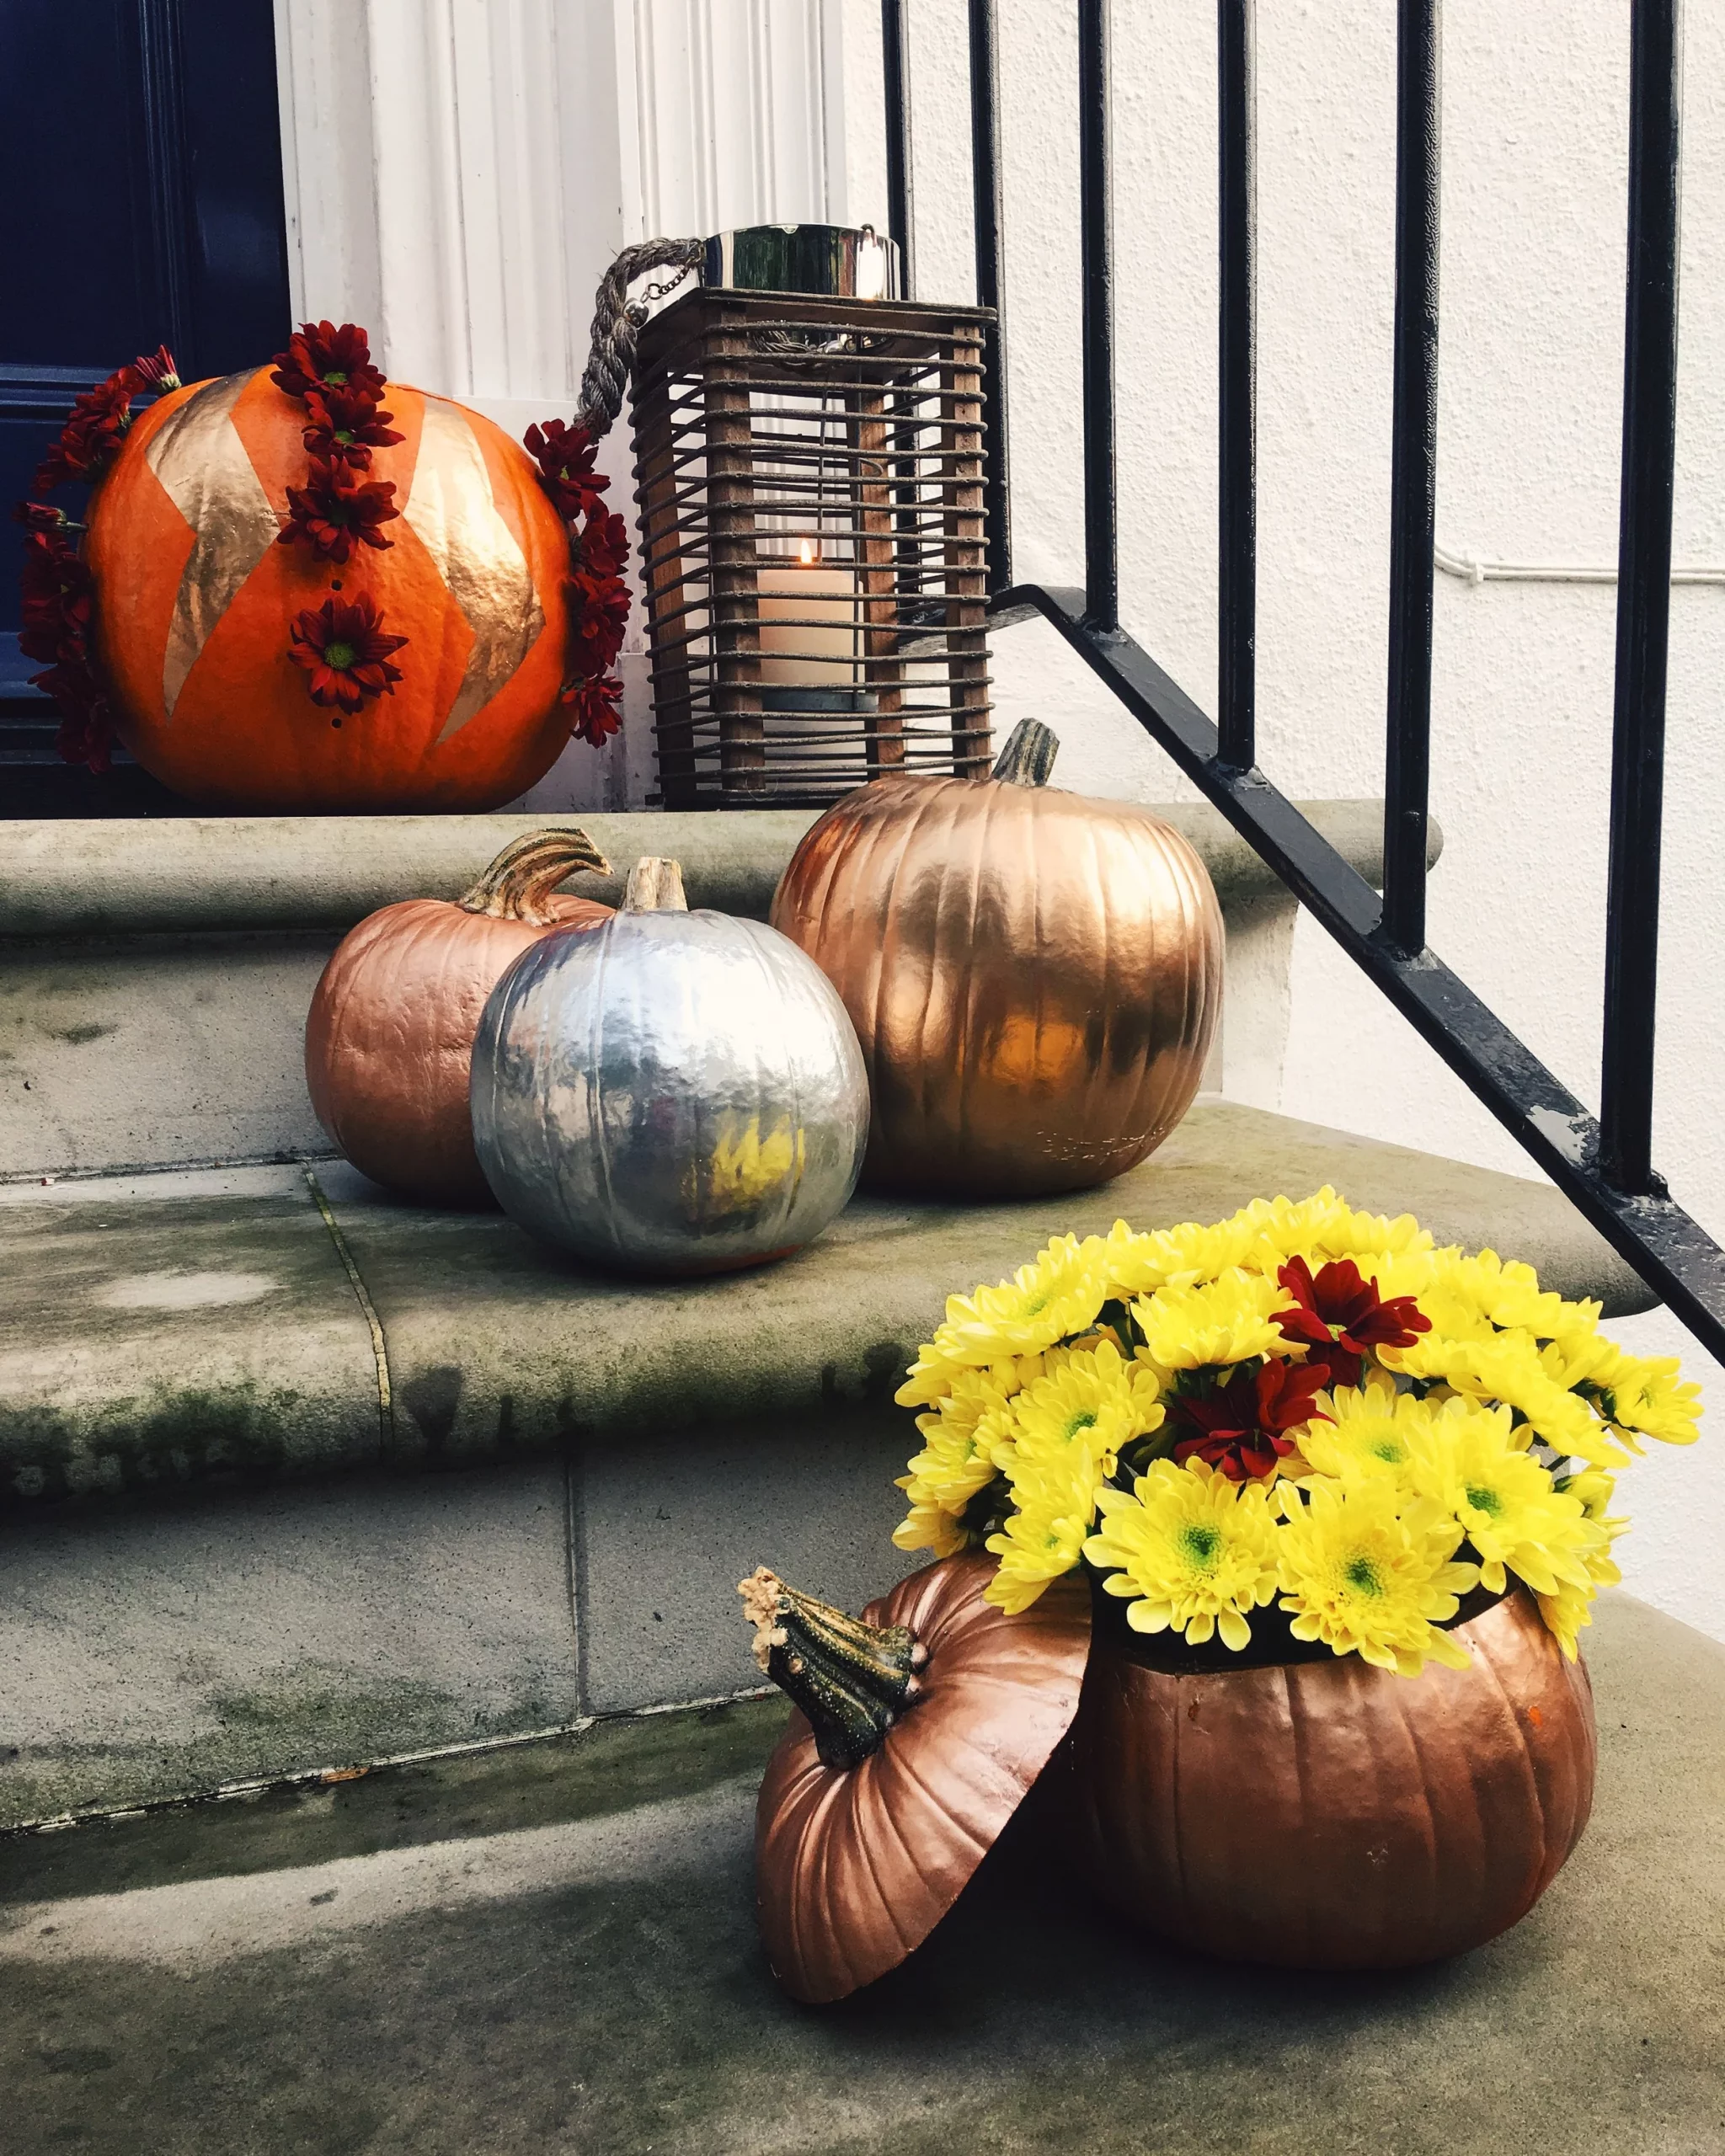
1. Metallic Pumpkins with Floral Accents on Stone Steps
This arrangement feels so luxurious because it masters the art of mixed materials. The coolness of the gray stone steps and black metal railing provides the perfect neutral backdrop for the warm, reflective metallics to really pop. The combination of different metallic finishes—gold, silver, copper, and bronze—creates visual depth and avoids a look that’s too uniform or matchy-matchy. Adding natural elements like the vibrant chrysanthemums and the warm wood of the lantern prevents the metallics from feeling cold or sterile, resulting in a display that’s both chic and inviting.
🔧 How-To Brief
When working with metallic paints, especially on a porous surface like a real pumpkin, sealing is non-negotiable. To get that ultra-smooth, reflective finish, start with two thin coats of a quality acrylic primer. After your metallic paint has fully cured (wait at least 24 hours), apply a high-gloss spray sealant. Hold the can 10-12 inches away and use sweeping, even strokes to avoid drips. Two light coats of sealant will protect the finish from moisture and chipping, ensuring your metallic beauties shine all season long.
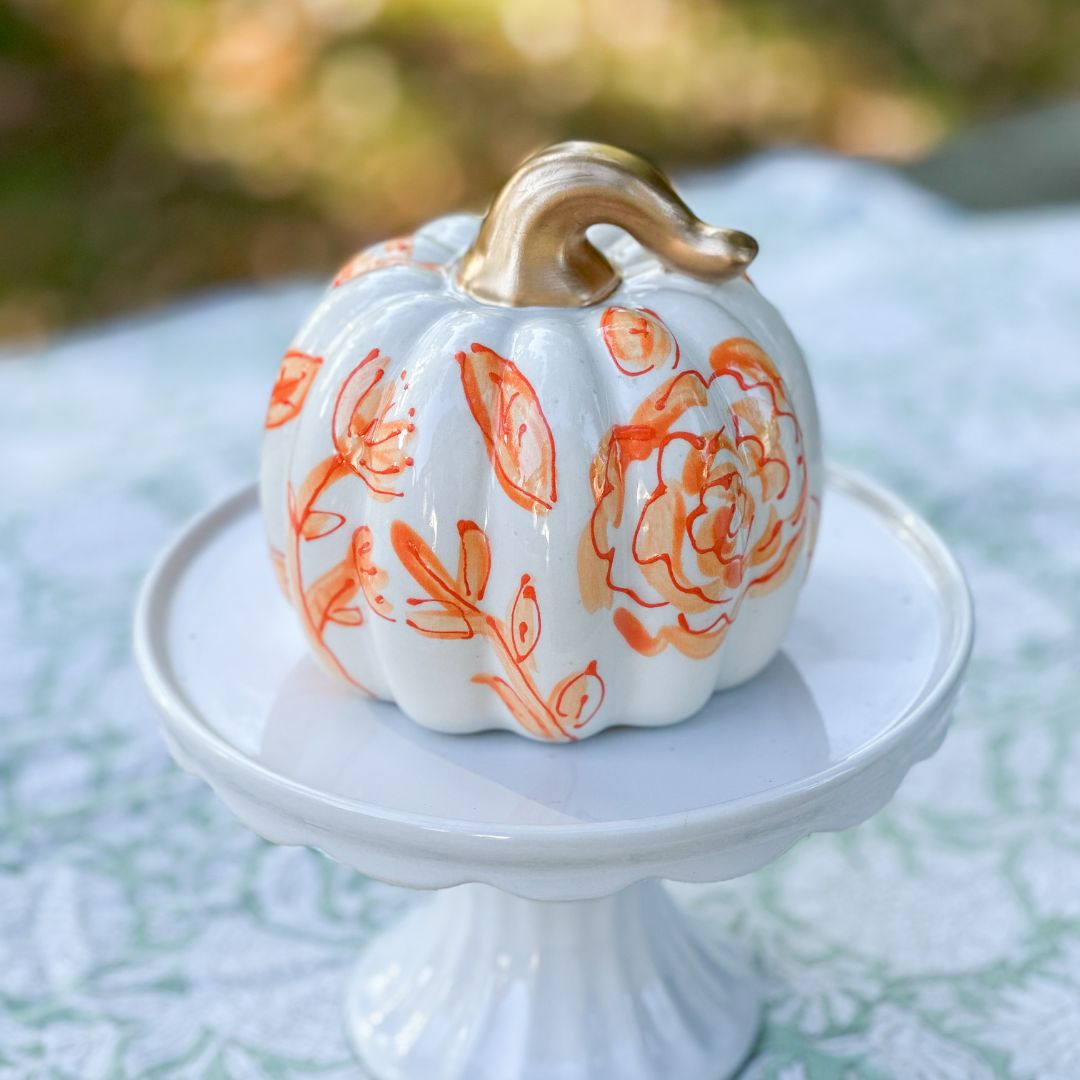
2. White Ceramic Pumpkin with Hand-Painted Orange Florals
The single element that elevates this piece from simple fall decor to something special is the loose, watercolor-like painting style. If the florals were perfectly rendered and precise, the pumpkin could feel stiff or mass-produced. Instead, the free-flowing brushstrokes give it an effortless, artistic quality. It’s a reminder that charm often lies in imperfection. This handcrafted feel is what makes you look twice and appreciate the artistry involved, making it feel like a unique find from a local artisan market rather than a big-box store item.
📐 Style Math
This look follows a simple but effective formula: 80% crisp white + 15% warm accent color + 5% metallic hardware. The dominant white surface acts as a clean canvas, making the orange floral pattern the undeniable hero. The small touch of metallic gold on the stem adds a necessary bit of polish and warmth, keeping the piece from feeling too rustic. You could easily swap the orange for a deep navy or a soft sage green and still achieve the same balanced, elegant effect, as long as you maintain those core proportions.
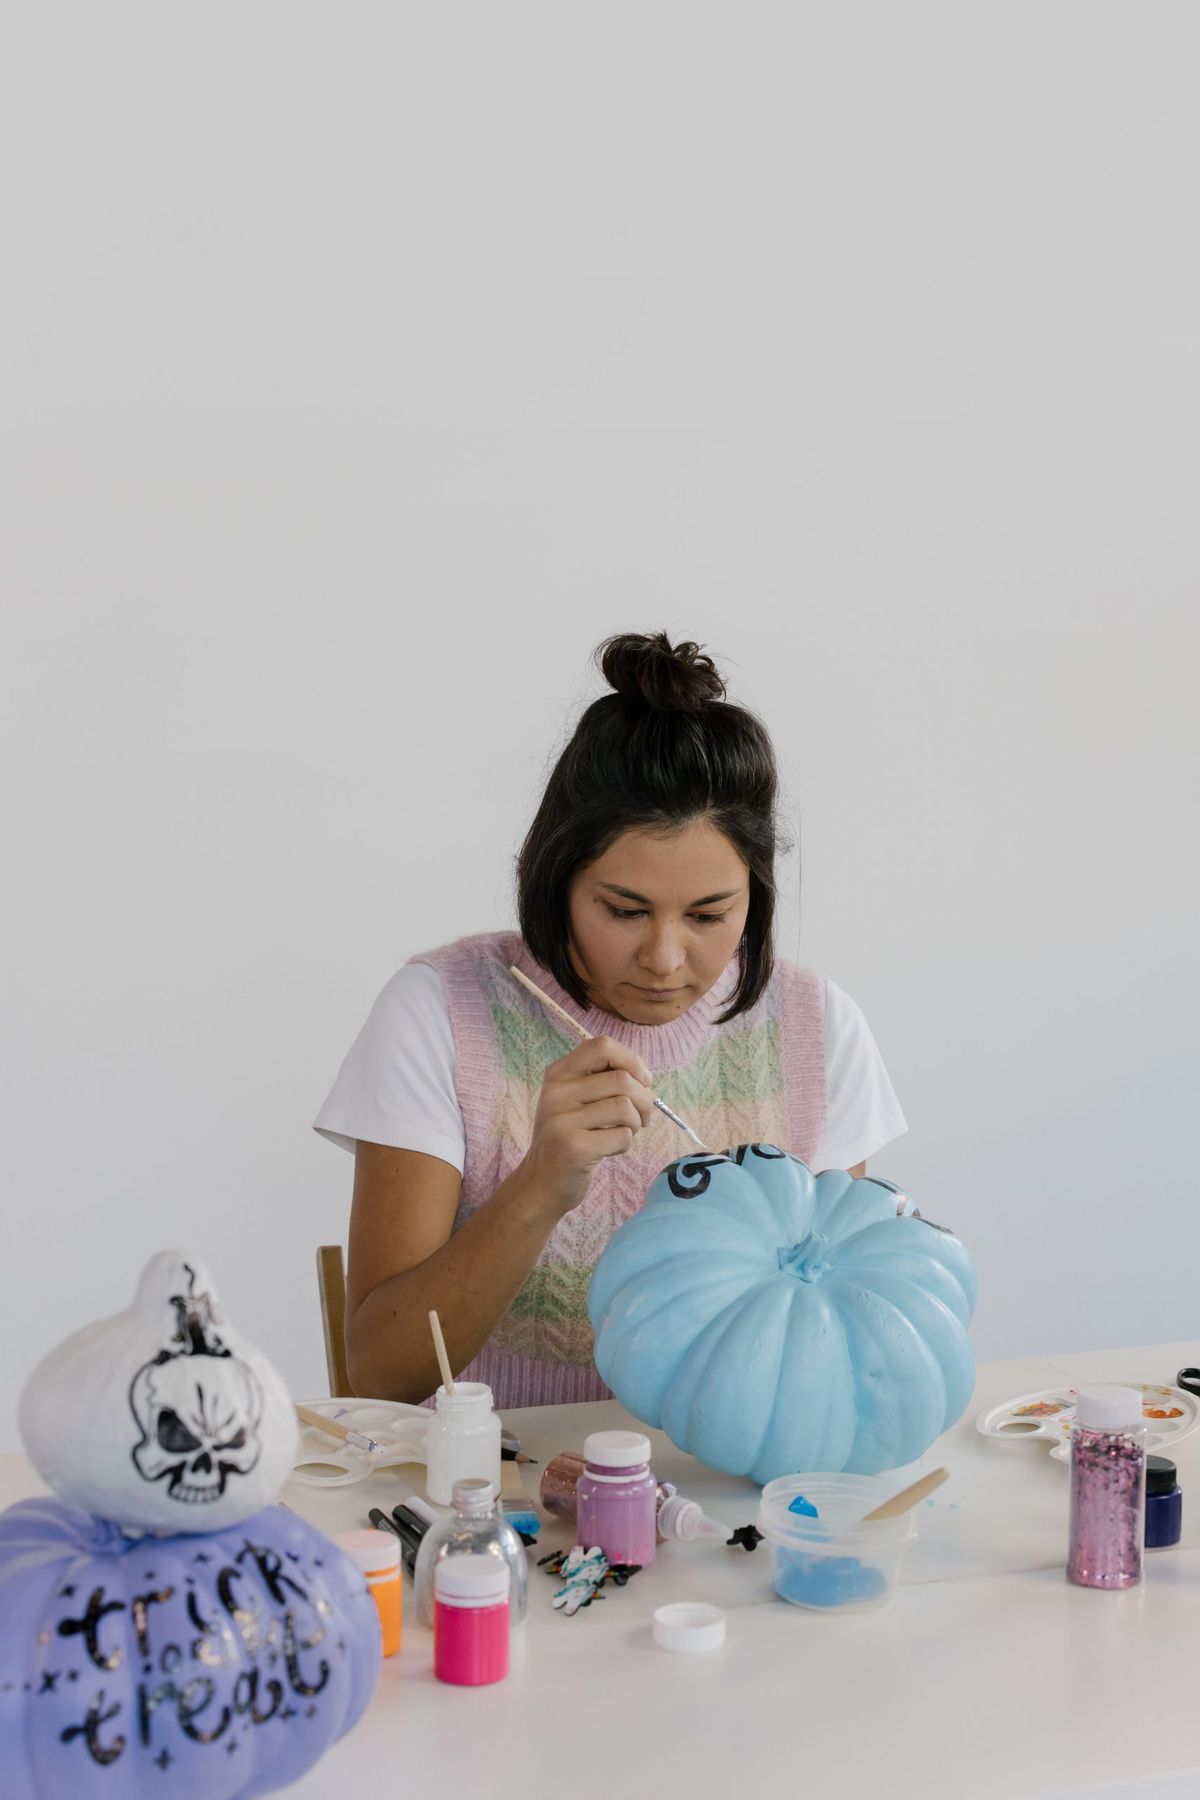
3. A Creative Session with Pastel Painted Pumpkins
Achieving that perfectly smooth, opaque pastel finish is the key to this look. Here’s how to get a flawless base coat. Estimated time: 2 hours (plus drying). Material cost: $15-$25.
- Clean your pumpkin thoroughly with a damp cloth and let it dry completely. If it’s a real pumpkin, wipe it with a diluted white vinegar solution to inhibit mold.
- Apply one thin coat of white acrylic gesso or a spray-on primer. This gives the paint something to grip onto and prevents the pumpkin’s natural color from showing through.
- Once the primer is dry, apply your first coat of pastel acrylic paint using a wide, soft-bristled brush to minimize streaks. Let it dry for at least 30 minutes.
- Apply a second, and if needed, a third coat, allowing for drying time between each. Patience is key for an even, non-streaky finish!
✅ Before You Start
Let’s be honest: pastel colors are notoriously unforgiving. Unlike darker, more saturated hues, light shades like baby blue, lavender, and soft pink will highlight every single bump, scrape, or uneven texture on your pumpkin’s surface. If you’re using real pumpkins, you’ll need to find the smoothest, most blemish-free specimens you can. For faux pumpkins, any seams from the manufacturing mold will be glaringly obvious. You may need to spend extra time sanding and priming to get a canvas worthy of these delicate colors. Don’t expect to just slap on a coat of paint and call it a day.
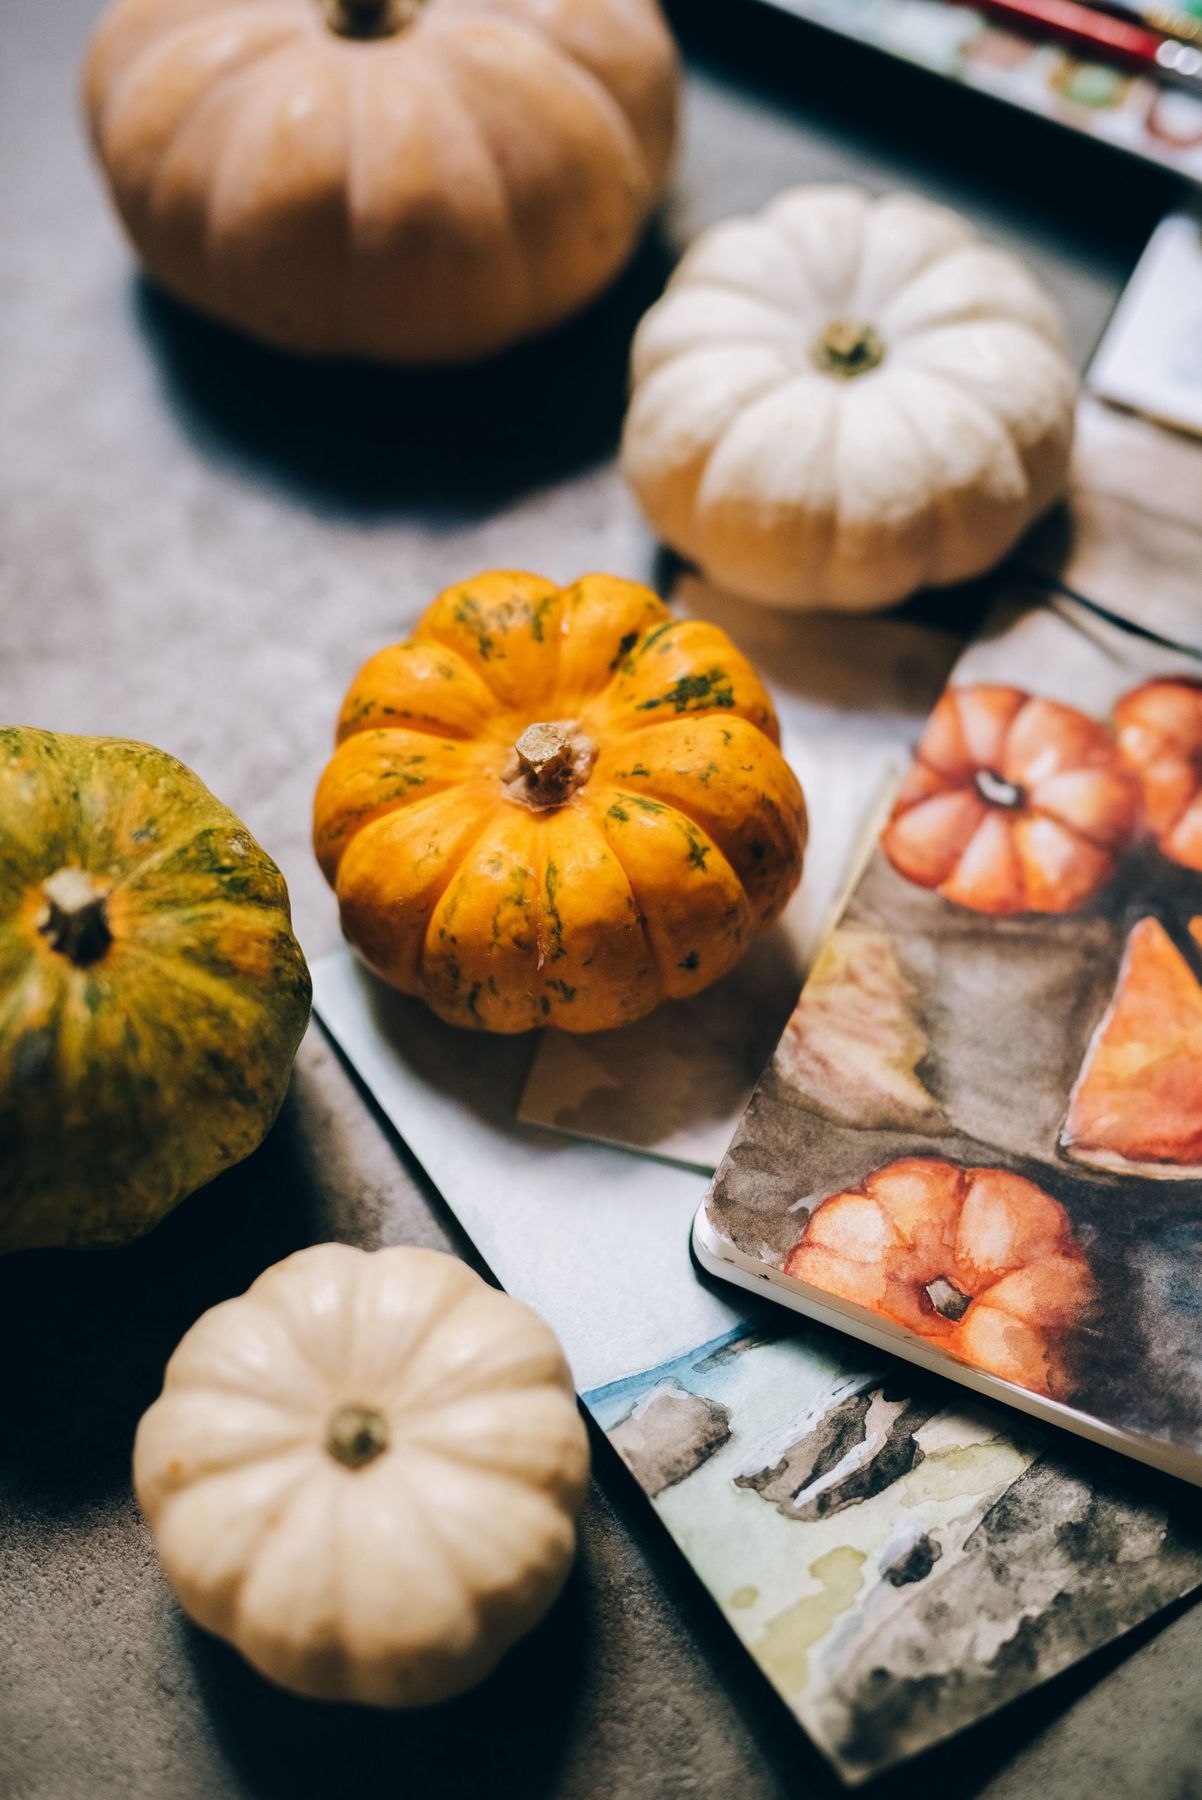
4. Autumnal Still Life with Watercolor Pumpkin Art
This entire setup taps directly into the ‘Artful Autumn’ or ‘Artist’s Studio’ aesthetic that’s huge on Pinterest right now. It’s about more than just placing a pumpkin on a table; it’s about curating a scene that tells a story of creativity and seasonal appreciation. Displaying the art alongside the subject matter (the real gourds) feels authentic and personal. It romanticizes the creative process and suggests that your home is a place where beautiful things are not just displayed, but made. This trend has staying power because it celebrates personal skill and a slower, more mindful approach to seasonal decorating.
🔥 Trending Context
You don’t need expensive, professional-grade art supplies to create this artistic vibe. A set of student-grade watercolors from a craft store ($15-$20) and a basic mixed-media sketchbook ($10) are all you need to get started. The natural pumpkins and gourds can be found at any grocery store or farmer’s market for a few dollars each. Arrange them on a simple slate cheeseboard or a piece of dark fabric you already own. The goal is to capture the mood, not to replicate a masterpiece. The entire look can be achieved for under $40, proving that an artistic home is about curation, not cost.
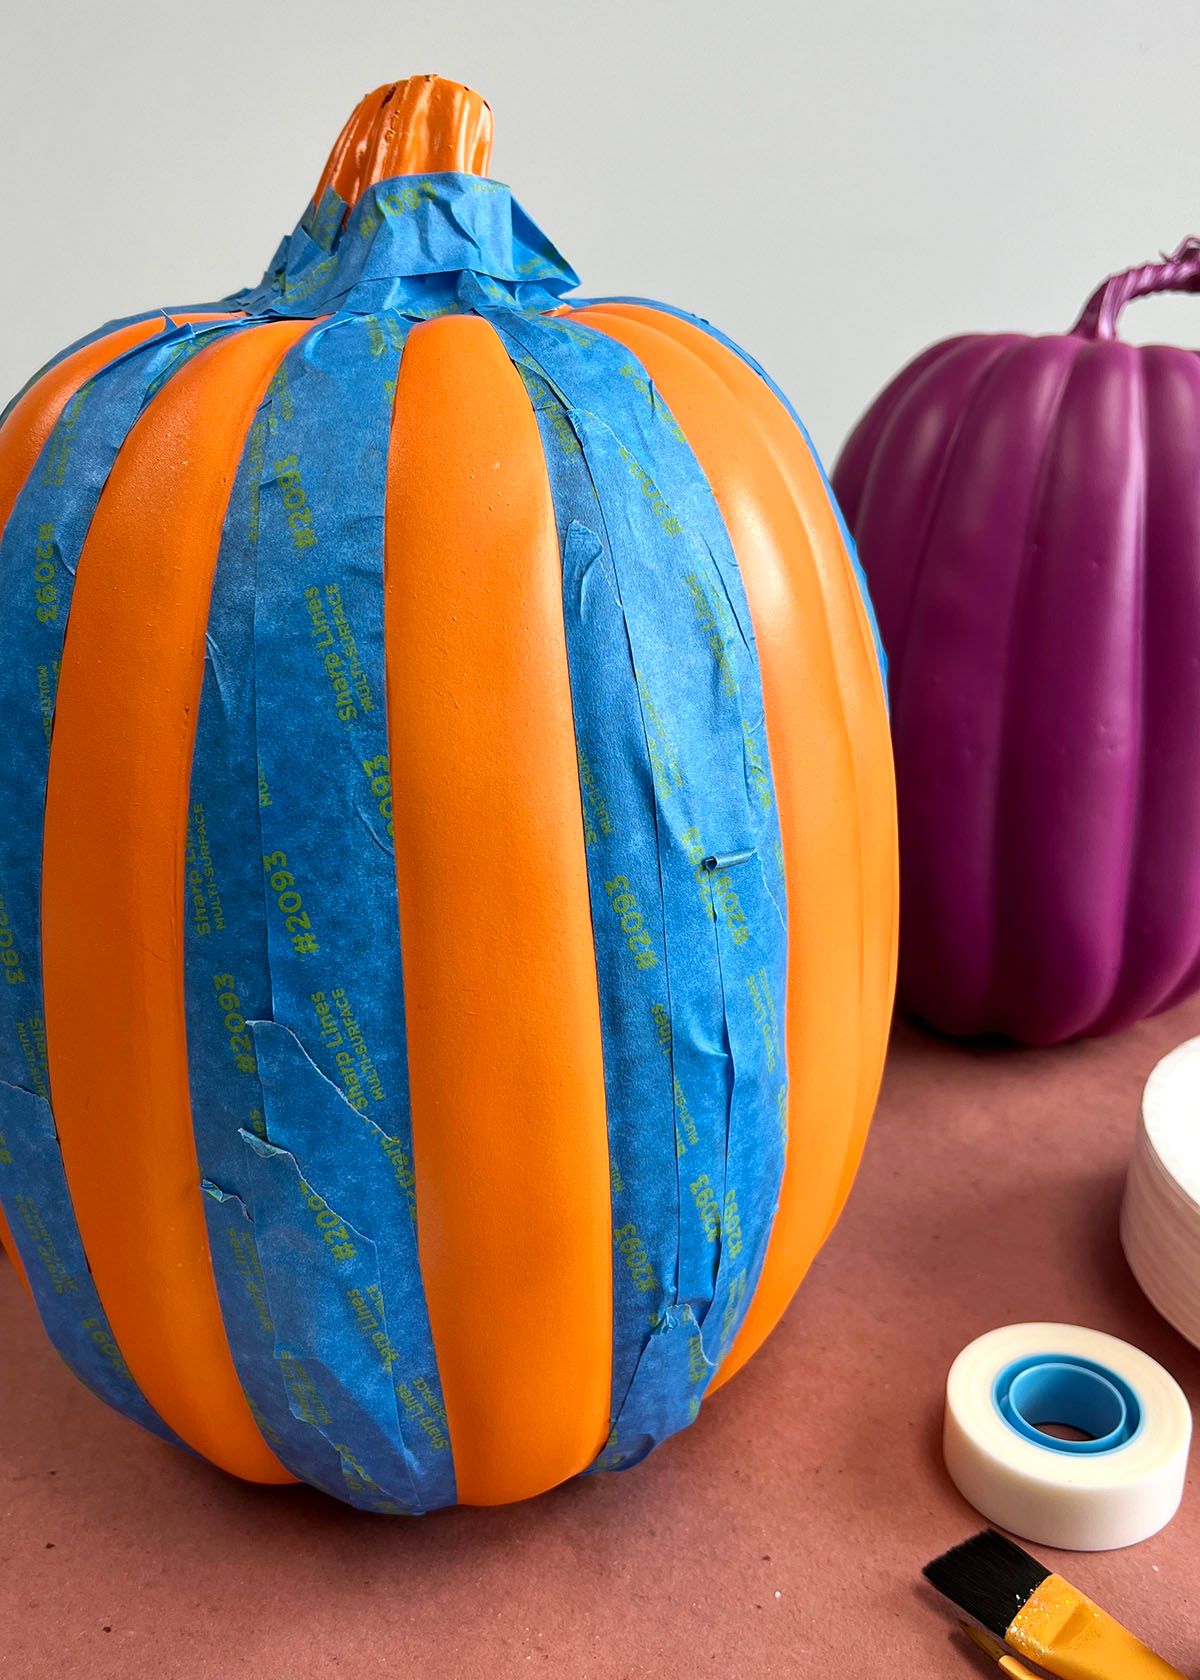
5. Crafting Sharp Stripes with Blue Painter’s Tape
Before you even think about painting stripes, run through this quick checklist to ensure you get those crisp, clean lines everyone envies.
- Is your base coat fully cured? Wait at least 24 hours. Applying tape to tacky paint is a recipe for disaster.
- Have you ‘de-tacked’ your painter’s tape? Press the sticky side against your jeans or a clean cloth once or twice to reduce its aggressiveness. This prevents it from pulling up your base coat.
- Did you seal the tape’s edge? After applying the tape, paint a thin layer of your base color along the edge of the tape. This seals the edge, so any bleed-through will be in the base color, rendering it invisible.
- Are you pulling the tape off at the right time? Remove the tape while the top coat is still slightly wet, pulling it away from the painted section at a 45-degree angle.
🧹 Maintenance Reality
If you’re using real pumpkins for a project like this, be prepared for a short lifespan. The thick layers of paint—primer, base coat, and top coat—will suffocate the pumpkin’s skin, accelerating the rotting process significantly. A fully painted real pumpkin, especially one that isn’t carved, will start to soften and decay from the inside out in about one to two weeks, even in a cool, dry environment. This striped design is gorgeous, but it’s best executed on a faux craft pumpkin if you want it to last the entire season. Think of this as a temporary work of art if you’re using the real thing.
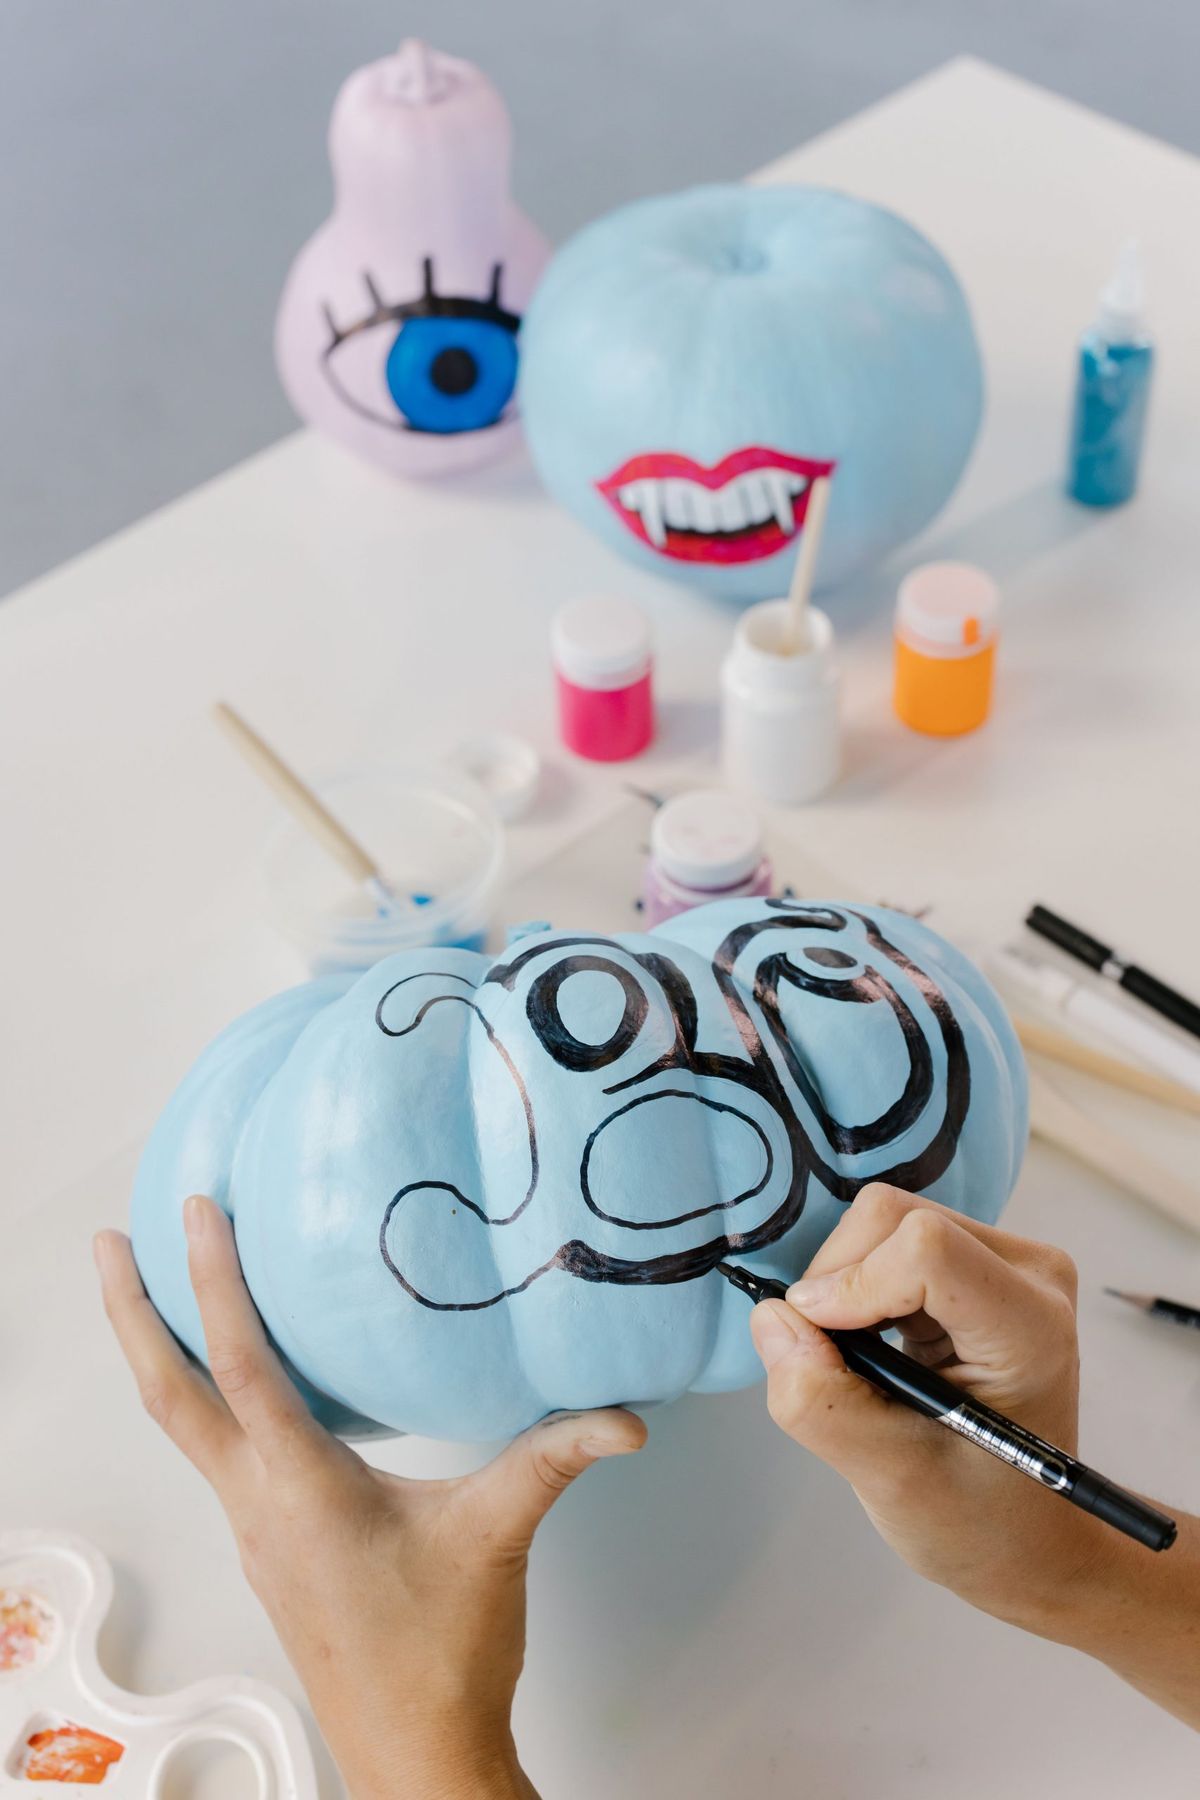
6. Pastel Pumpkins with Whimsical Painted Faces and Abstract Lines
The charm of these pumpkins lies in their playful asymmetry and exaggerated features. The design forgoes a realistic face in favor of expressive, cartoonish elements like a single giant eye or oversized vampire fangs. This creates a sense of whimsy and personality that’s much more engaging than a perfectly symmetrical, boring smiley face. The addition of abstract black line art on the light blue pumpkin adds a modern, graphic touch that keeps the overall look from feeling too juvenile. It’s the confident, artistic combination of simple shapes and bold lines that makes them feel intentionally designed.
⚠️ Real Talk
For crisp, clean lines like the abstract patterns and facial details seen here, ditch the traditional paintbrush and grab a set of acrylic paint pens. Using a pen gives you far more control than a brush, especially on a curved, bumpy surface. For the best results, get a set with multiple tip sizes. Use a medium tip for filling in areas like the lips and a fine or extra-fine tip for outlines and delicate details like the fangs. This is the secret to getting that sharp, illustrative quality without the frustration of a shaky hand and a flimsy brush. You’ll find them at any art supply store.
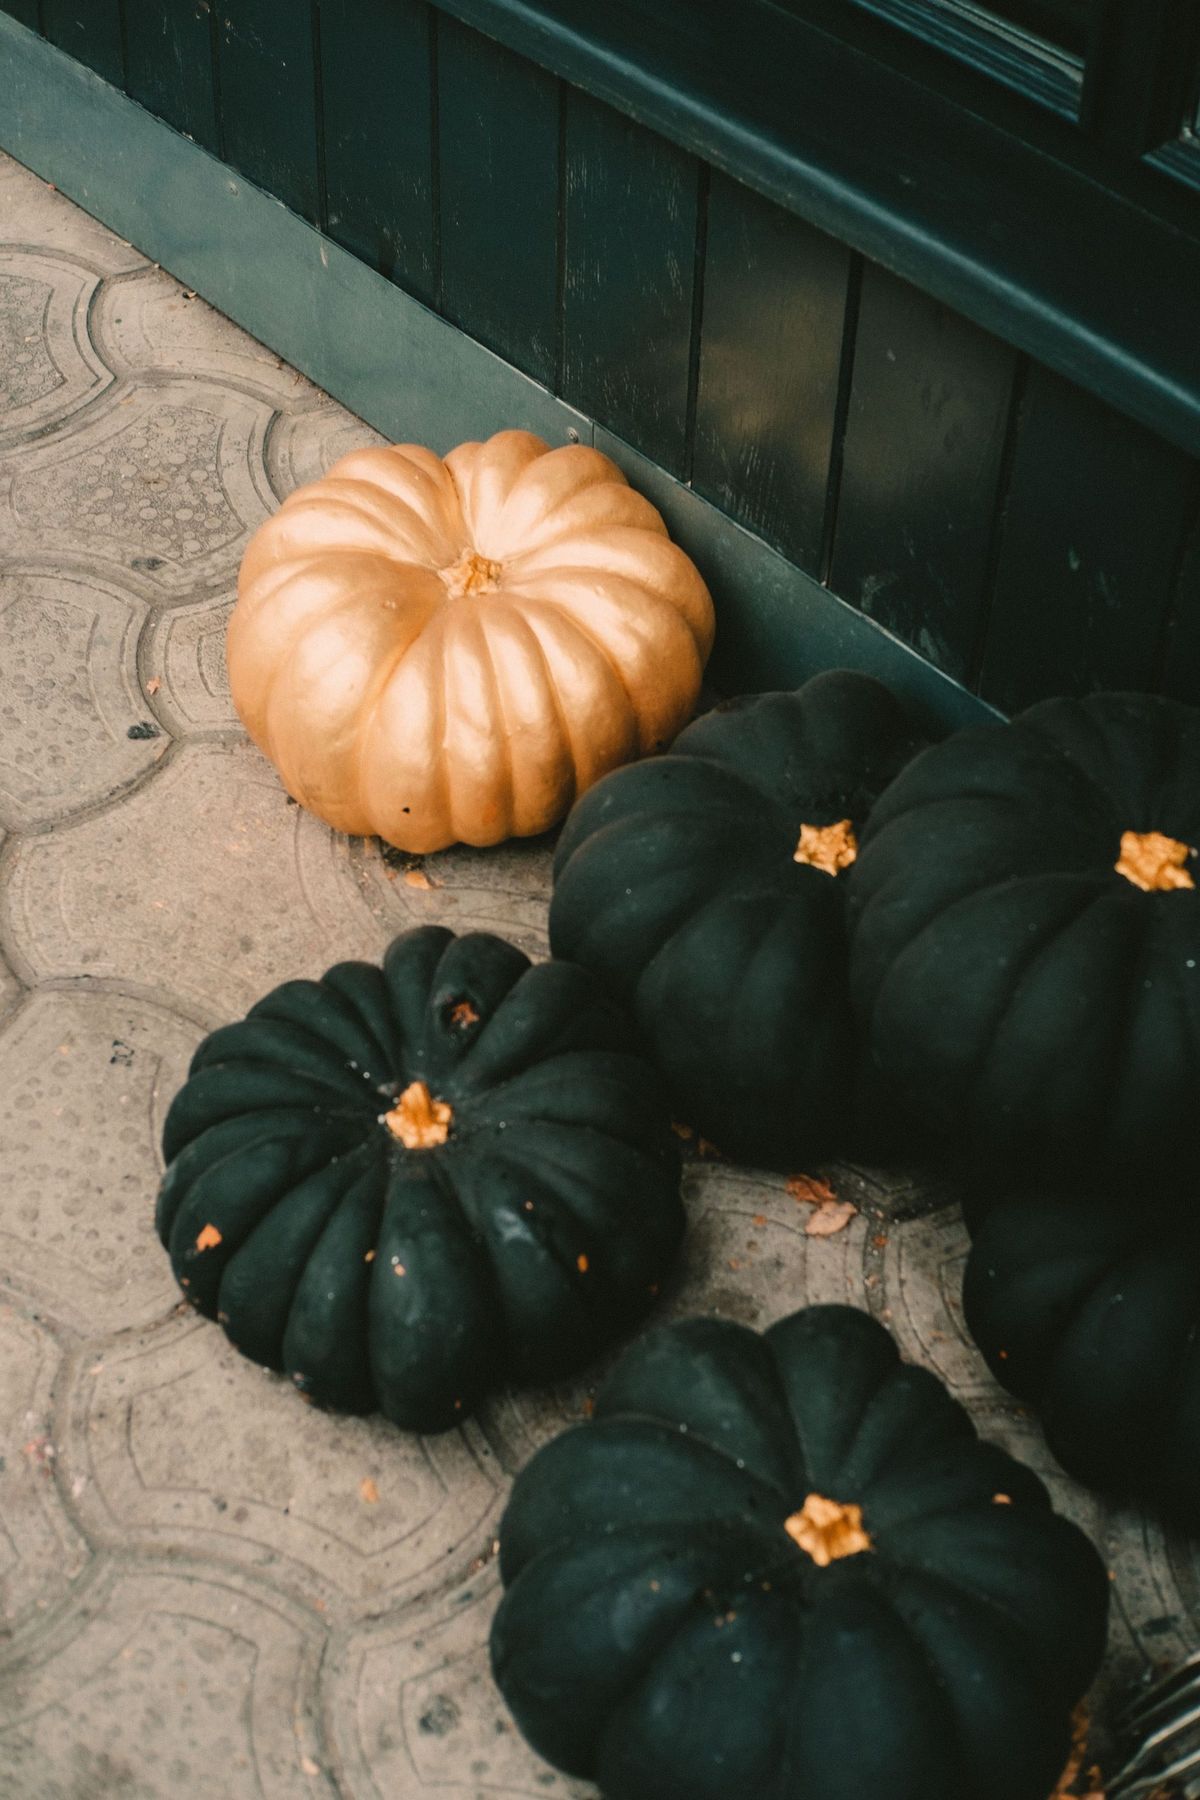
7. Elegant Gold and Dark Green Painted Pumpkin Display
A high-contrast display like this is perfect for making a statement in an entryway or on covered porch steps. It needs a bit of room to breathe. For this to work well, you’ll want a space that’s at least 4-5 feet wide. This allows you to cluster the pumpkins in a visually pleasing, asymmetrical group rather than a stiff line. The use of one large gold pumpkin as a focal point surrounded by smaller dark green ones works best in a space where they can be viewed from a slight distance, allowing the dramatic color combination to be fully appreciated. It’s less suited for a small coffee table where it might feel overwhelming.
💰 Budget Breakdown
that makes this look so chic and sophisticated is the color palette. The combination of deep, moody hunter green and shimmering gold is unexpected and feels incredibly upscale. It moves away from the traditional oranges and blacks of Halloween, landing in a more mature, autumnal territory. If you removed the gold pumpkin, you’d just have a nice pile of green pumpkins. But that single, glamorous gold element introduces contrast, warmth, and a touch of luxury that transforms the entire arrangement into a curated design moment. It’s a classic pairing for a reason.
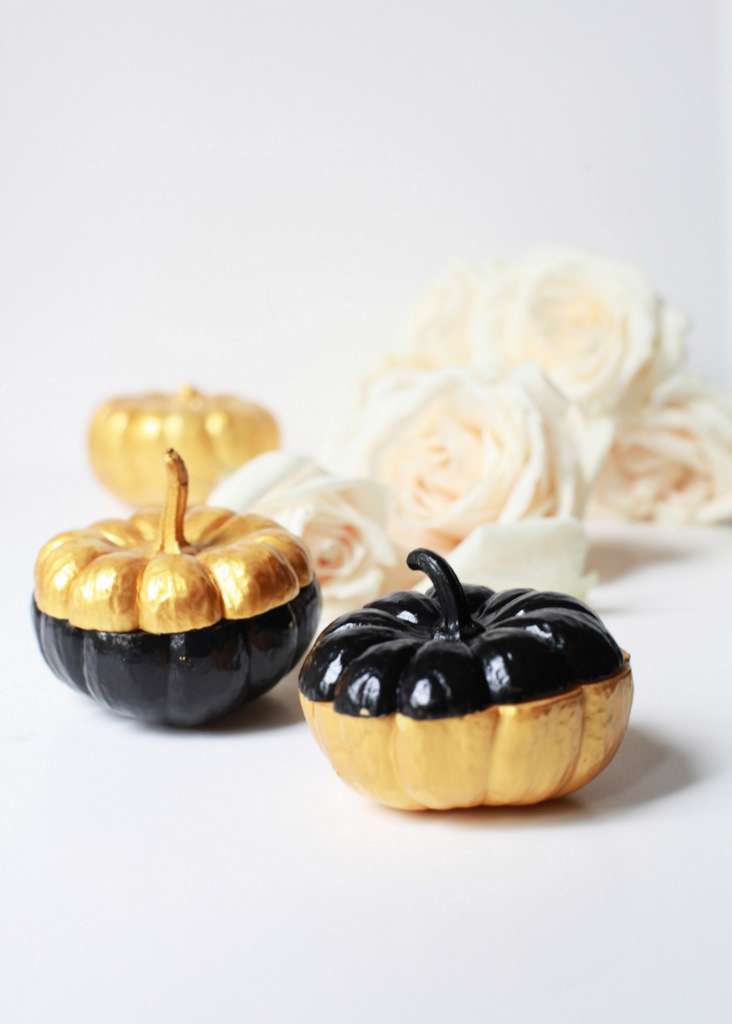
8. Mini Two-Tone Black and Gold Painted Pumpkins
The formula here is pure, graphic simplicity: 50% glossy black + 50% metallic gold. This two-tone, color-blocked approach is what gives these mini pumpkins their modern edge. By splitting the pumpkin exactly in half and inverting the pattern on the second one, you create a dynamic duo that feels intentional and cohesive. The high gloss of the black paint contrasts beautifully with the shimmer of the gold, adding textural interest. You could adapt this with other high-contrast pairs like navy and silver, or even hot pink and white, as long as you stick to that clean 50/50 split.
💡 Designer Tip
Recreating this chic look is surprisingly affordable, as you’re working with miniature pumpkins.
- Mini Pumpkins (3): $5 – $10
- Gold Metallic Craft Paint: $3 – $7
- Glossy Black Craft Paint: $3 – $7
- Brushes/Supplies: $5 – $10
TOTAL: $16 – $34
Budget alternative: Use spray paint instead of craft paint for faster, more even coverage, which can bring the total cost down to around $15. This is a high-impact look for a very low investment, making it perfect for decorating on a dime.
9. Hand-Painted Ghost Pumpkins on a Festive Table
Painting these simple, charming ghosts is easier than it looks. Here’s a quick guide to getting it right. Estimated time: 1 hour. Material cost: $10.
- Start with a clean, dry orange pumpkin. You don’t need to prime it for this rustic look.
- Using a medium round brush and white acrylic paint, create the ghost shapes. Don’t overthink it! A simple, slightly wavy ‘U’ shape with a rounded top works perfectly. Let them be a little imperfect and vary their sizes.
- Allow the white paint to dry completely. This is crucial for the next step.
- With a very fine-tipped brush or a black paint pen, add two simple dots for eyes and a slightly larger oval for the open mouth.
- Let the black details dry, and you’re done! The key is to keep the shapes simple and embrace the hand-painted feel.

💸 Get This Look For Less
Here’s the truth about painting white on a vibrant orange pumpkin: it can be a streaky nightmare. White acrylic paint, especially cheaper craft-grade paint, often has poor opacity. You’ll likely need to apply at least two, maybe even three, coats of white to get a solid, non-streaky ghost shape. Be sure to let each coat dry completely before adding the next, or you’ll just end up pushing around wet paint and making a mess. If you’re impatient, this project will frustrate you. Consider investing in a higher-quality ‘titanium white’ acrylic paint, which has much better coverage from the start.
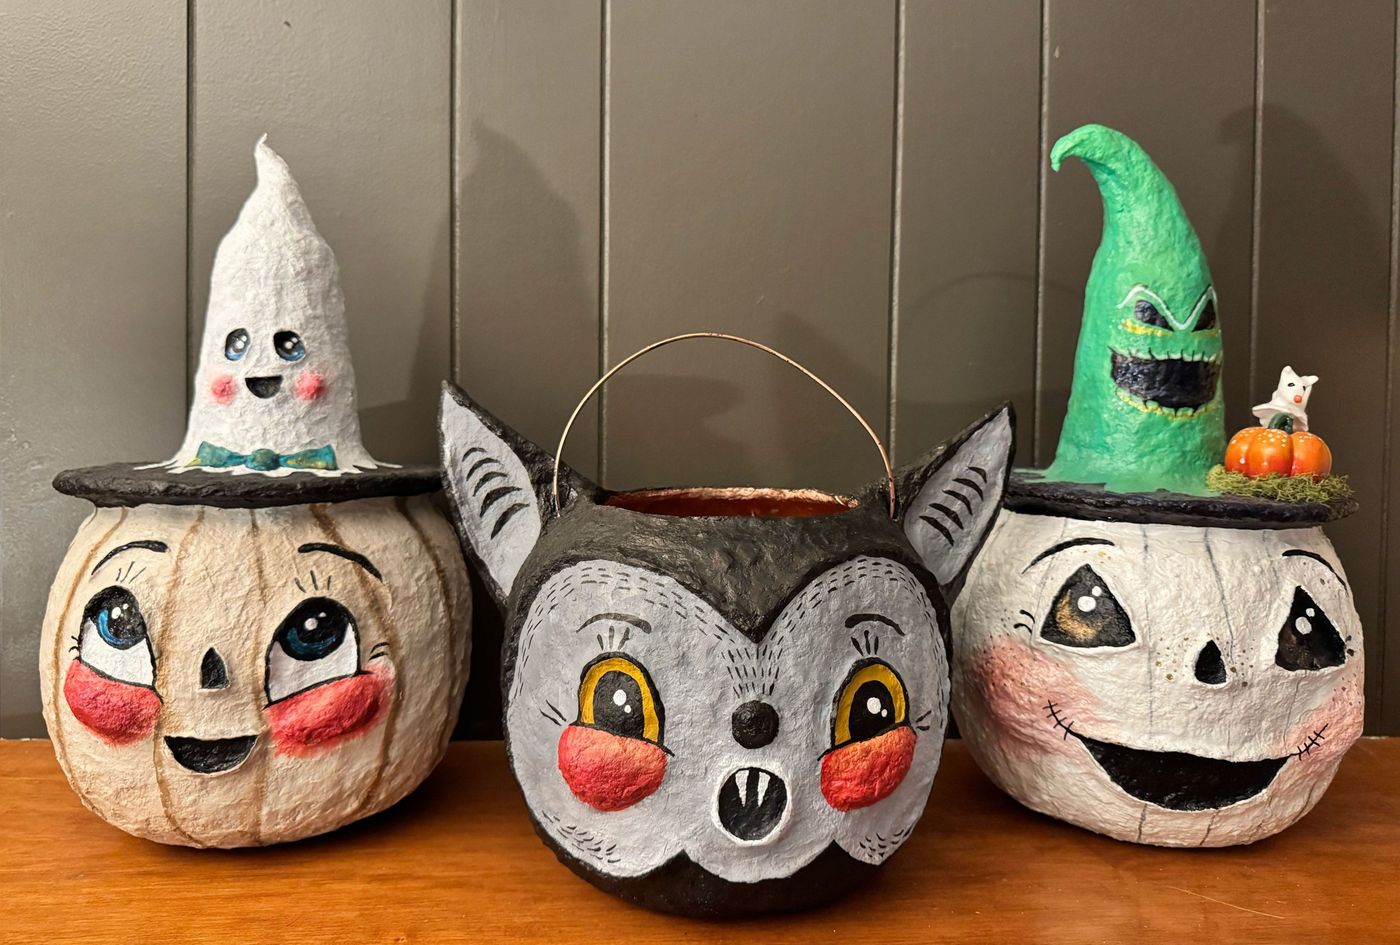
10. Minimalist White and Black Stenciled Pumpkins
The secret to preventing ‘stencil bleed’—that fuzzy, messy edge you get when paint seeps under the stencil—is a technique called ‘sealing the edge.’ After you’ve positioned your stencil, use a sponge brush to dab a very light coat of your base color (in this case, white) over the stencil openings. Let it dry. This seals the tiny gaps along the stencil’s edge. Any paint that bleeds underneath will be the same color as the pumpkin, so it will be invisible. Then, you can apply your contrasting color (black) over the top without any risk of fuzzy lines. You’ll get perfectly crisp, professional-looking results every time.
⭐ The One Thing
If you invest time in painting beautiful faux pumpkins like these, you’ll want them to last for years. Storage is everything. Don’t just toss them in a box in the attic. The extreme heat and temperature fluctuations can cause the paint to crack, yellow, or become sticky. The best way to store them is to wrap each pumpkin individually in tissue paper (avoid newspaper, as the ink can transfer) and place them in a sturdy plastic bin. Store the bin in a climate-controlled area of your home, like a closet or under a bed, rather than a garage or attic. This prevents damage and ensures they look just as good next year.
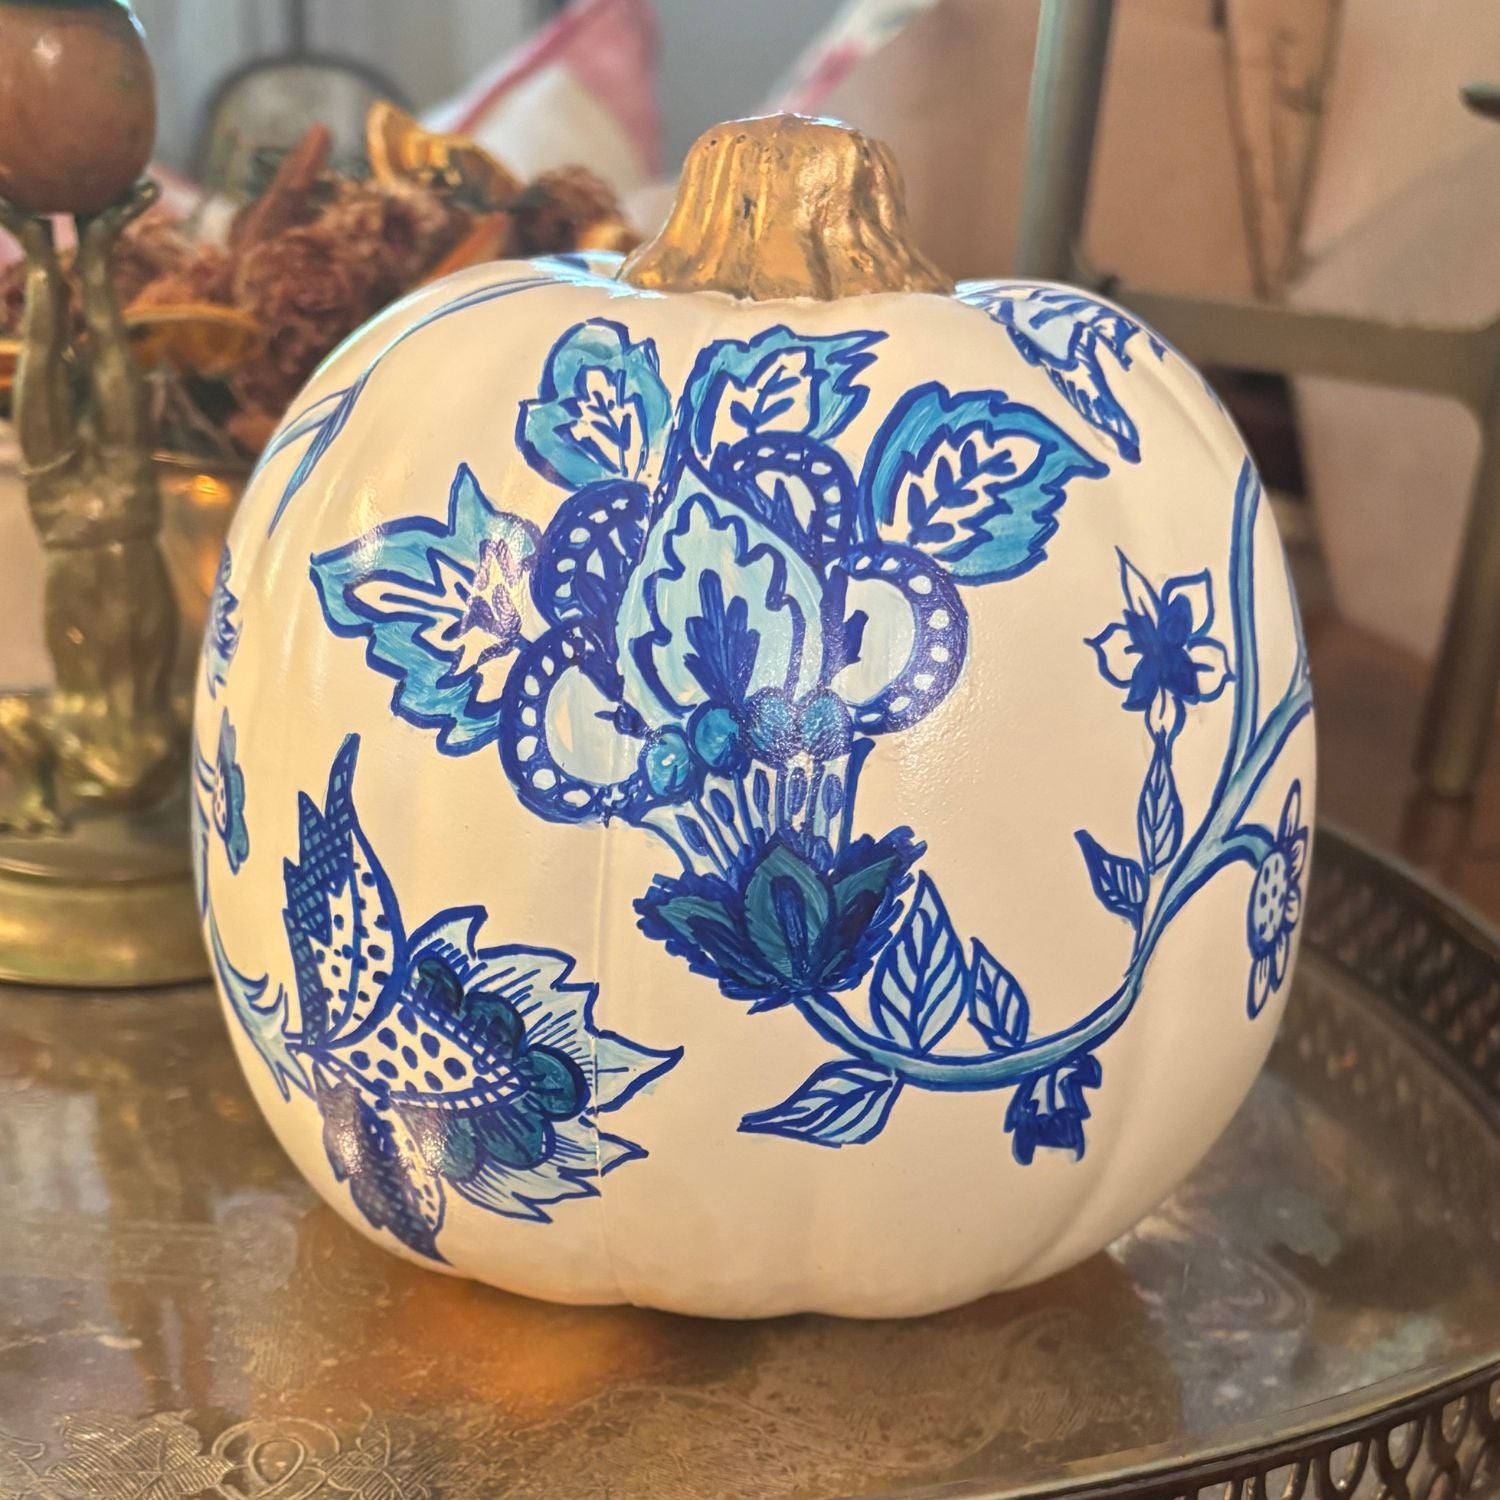
11. Elegant White Pumpkin with Blue Floral Pattern and Gold Stem
This design works so well because it borrows its aesthetic directly from classic porcelain and ceramic arts, specifically Delftware or Chinoiserie. By applying a traditional blue-and-white botanical pattern to an unexpected, organic form like a pumpkin, it creates a fascinating juxtaposition. The elegance of the fine china pattern contrasts with the rustic, humble nature of the gourd. The gold stem acts as the perfect finishing touch, reinforcing the feeling of a precious object. It feels less like a temporary piece of fall decor and more like a piece of decorative art. Check out the more intricate Chinoiserie version in Idea #21 for a full set.
📏 Scale Guide
The single most important element here is the delicate, intricate linework. Without the fine details in the petals, leaves, and stems, the design would lose all of its elegance. The variation in line weight and the careful rendering of the botanical shapes are what make it feel hand-painted and sophisticated. If the lines were thick and clumsy, the entire piece would feel cartoonish. It’s this commitment to detailed artistry that transforms a simple white pumpkin into a statement piece. It’s a more advanced project, but the stunning result is worth the effort. A similar, more whimsical take on this concept can be seen in Idea #15.
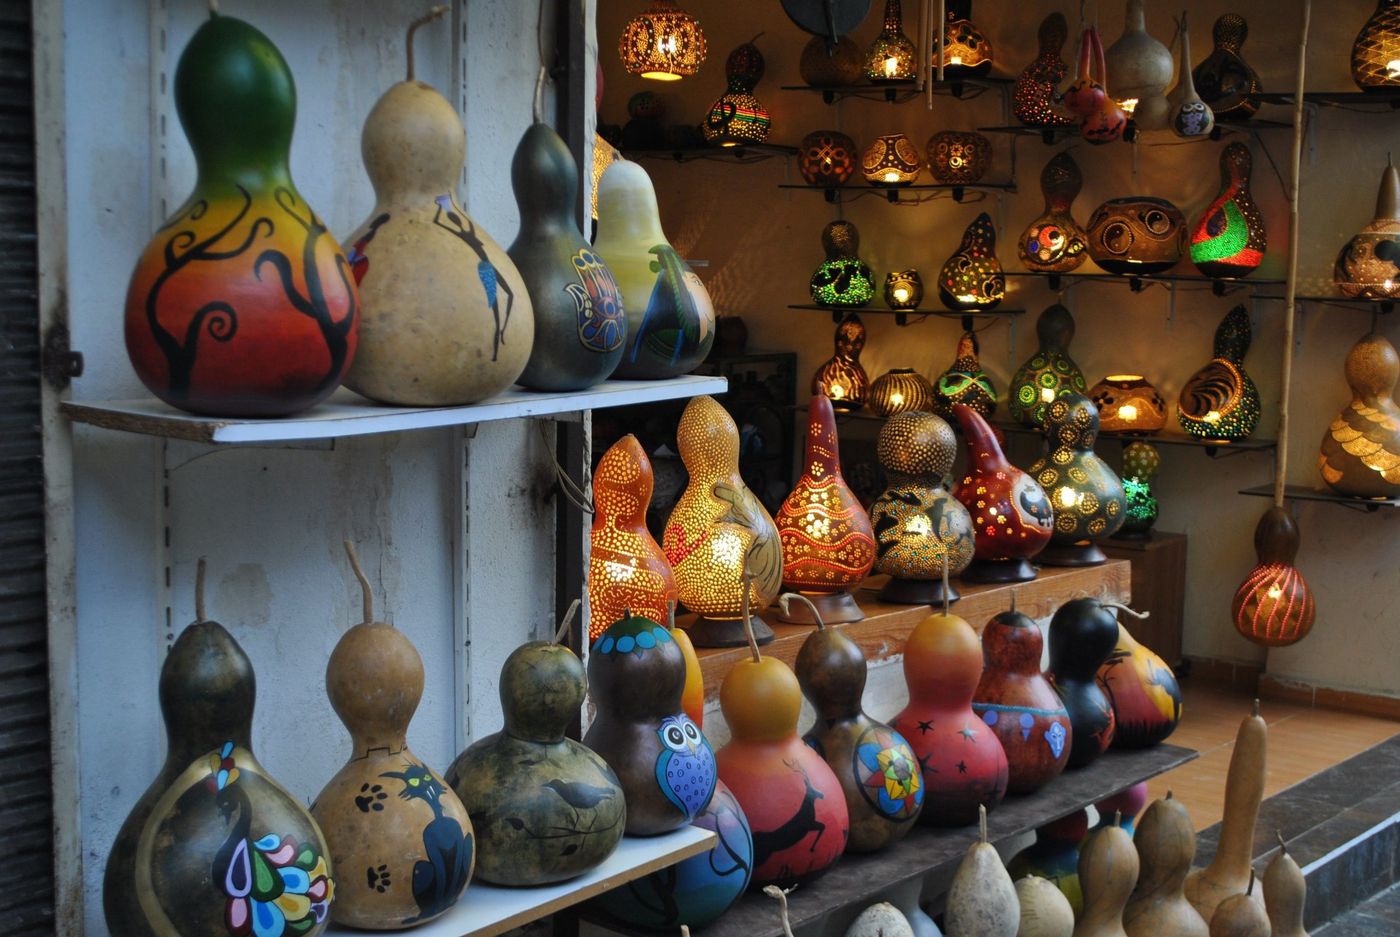
12. Eclectic Display of Painted and Perforated Gourd Lamps
Before you get inspired to create your own gourd lamp, let’s talk safety. Hollowing out and drying a gourd is a long process, and if not done correctly, residual moisture can lead to mold or, even worse, a fire hazard when combined with electronics. Never use a real candle or a hot incandescent bulb inside a dried gourd. The material is flammable. Always use a low-temperature LED puck light or a string of battery-operated fairy lights. Even then, ensure your gourd is bone-dry and has plenty of ventilation holes (the decorative perforations help with this) to prevent any heat buildup.
🎯 What Makes It Work
This kind of decor is thriving because it hits on two major design movements: biophilic design (incorporating natural shapes and materials into our homes) and a renewed appreciation for authentic, handcrafted goods. In a world of mass-produced everything, a unique, hand-carved gourd lamp feels special and soulful. It tells a story of skill, patience, and artistry. The warm, organic glow they produce is a direct antidote to the harsh blue light of our screens, creating a cozy, calming atmosphere that people are increasingly craving in their personal spaces.
13. Expressive Hand-Painted Gourd Figures on a Wooden Stand
Creating these artisanal figures requires more than just paint; the cost lies in finding the right gourds and having a good set of supplies.
- Dried, art-quality gourds (2): $20 – $50 (specialty shapes cost more)
- Acrylic paint set (multiple colors): $15 – $30
- Set of fine-detail paintbrushes: $10 – $20
- Clear matte or satin sealant spray: $8 – $12
- Rustic wood slab for display: $15 – $40
TOTAL: $68 – $152
Budget alternative: Grow and dry your own gourds (a long-term project!) and use a found piece of wood for the base. This can bring material costs down to under $50.

🔧 How-To Brief
These pieces are so captivating because they use the principle of anthropomorphism—giving human characteristics to non-human objects. The artist didn’t fight against the gourds’ natural, bumpy shapes; they leaned into them, using the organic forms to inform the posture and clothing of the figures. The stylized faces and traditional garments transform the gourds from simple produce into characters with a story. This imaginative leap is what makes them engaging art rather than just decorated vegetables. You can see this same idea applied with a slightly different style in Idea #29.
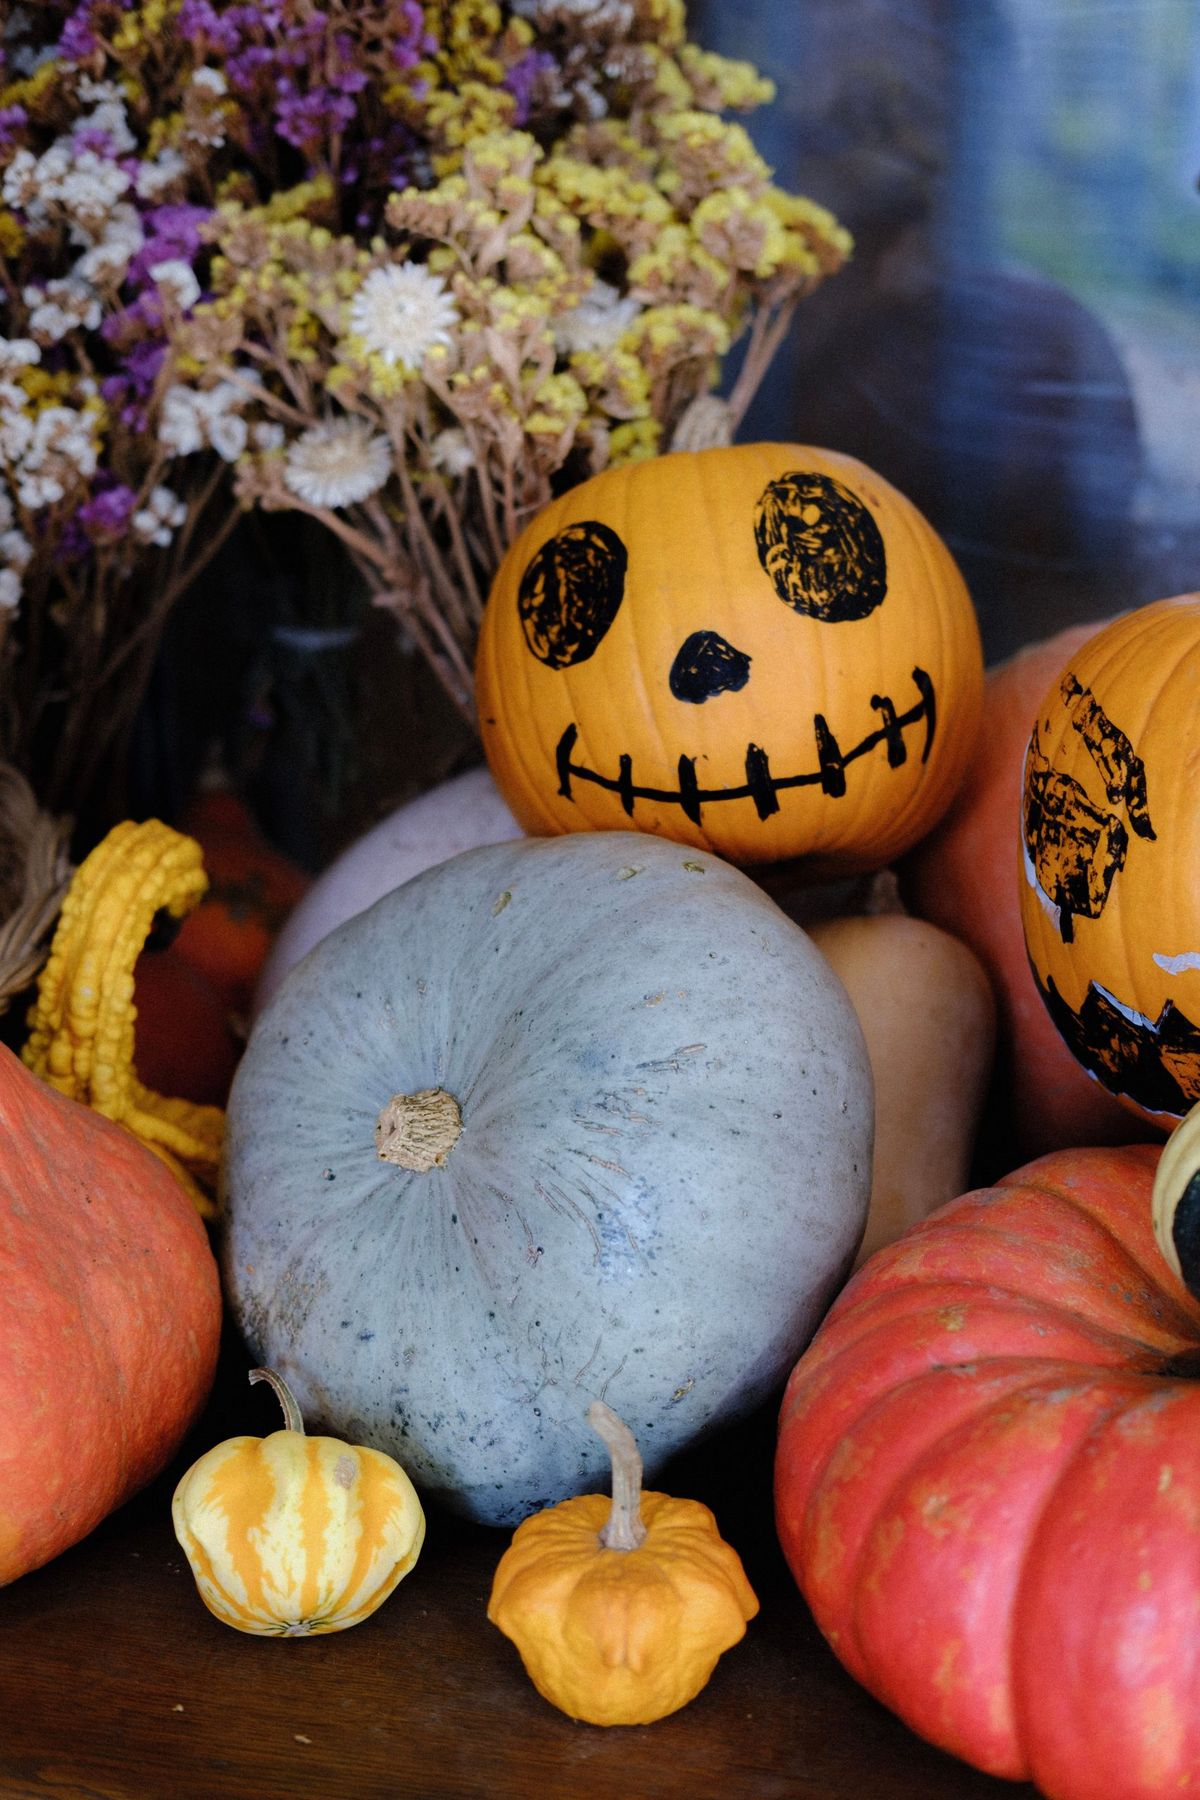
14. A Festive Mix of Painted and Natural Pumpkins and Gourds
When creating a mixed arrangement like this, the key to success is varying scale and orientation. This display works on a console table, buffet, or mantel that’s at least 36 inches wide. You need enough surface area to create layers. Place your largest pumpkin (like the one with the Jack-o’-lantern face) slightly off-center to act as an anchor. Then, build around it with medium-sized pumpkins (like the blue-grey one) and scatter the smallest gourds in the foreground and gaps. Turn some on their sides and overlap them to create a sense of effortless abundance rather than a lineup of soldiers.
📐 Style Math
This is the perfect opportunity to embrace a ‘found and foraged’ decorating style. The base of this look comes from inexpensive pumpkins and gourds from a local farm stand or even the grocery store ($20-$30 for a good haul). The real budget saver is the dried floral arrangement in the back. Instead of buying a pricey pre-made bouquet, gather interesting weeds, grasses, and branches from your own backyard (or a willing friend’s). Many common plants dry beautifully and add authentic, natural texture for free. The entire festive look can easily be assembled for under $40.
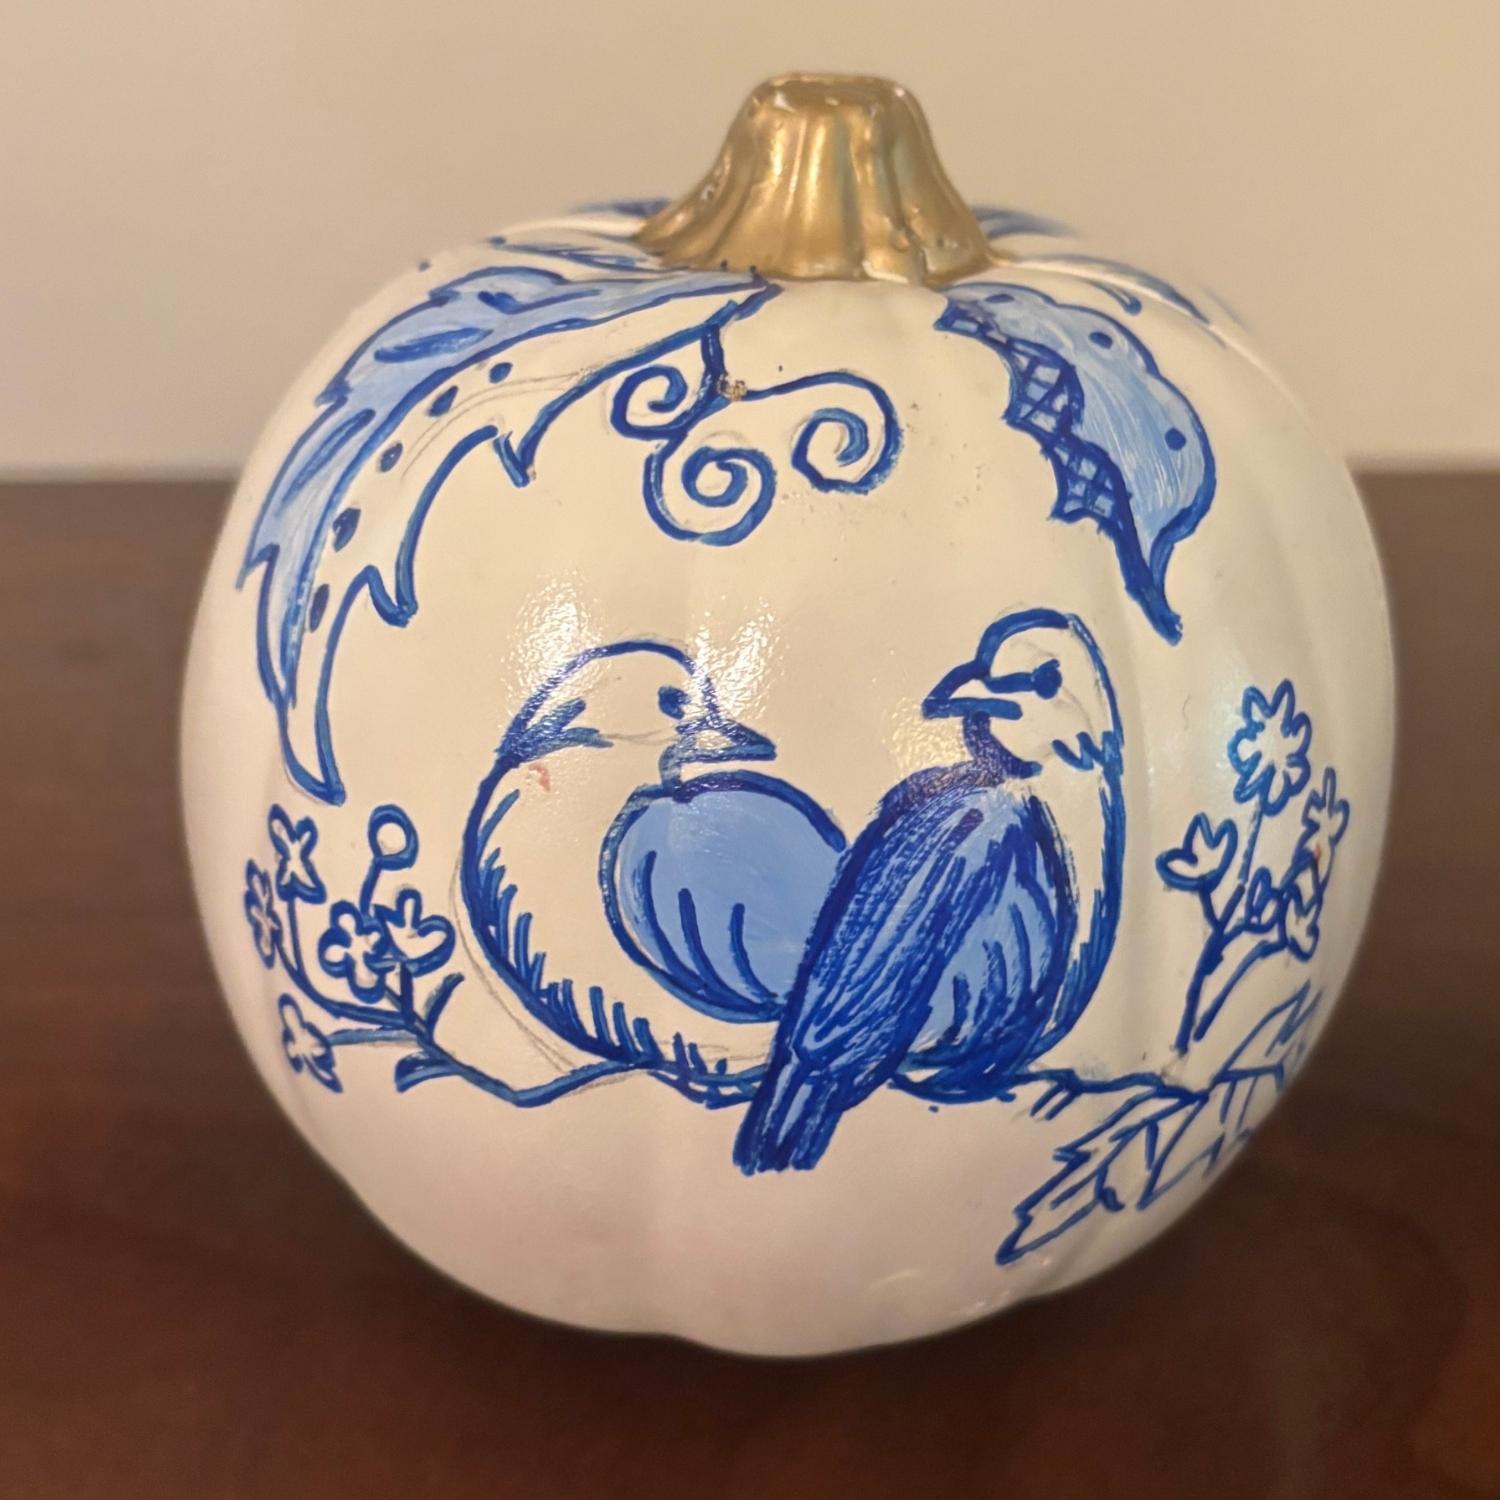
15. White Pumpkin with Hand-Painted Blue Birds and Floral Motifs
While the floral patterns are lovely, the single element that brings this piece to life is the pair of birds. They introduce a narrative, a tiny story unfolding on the side of the pumpkin. Are they building a nest? Are they singing to each other? This storytelling component transforms the object from a static decoration into a dynamic little scene. It invites closer inspection and sparks the imagination in a way that a simple floral pattern alone cannot. Removing the birds would leave you with a pretty pumpkin, but keeping them makes it a piece of art. This is the deluxe version of the pumpkin in Idea #11.
✅ Before You Start
This charming design relies on a classic and calming visual recipe: 70% clean white background + 25% coordinated accent color + 5% metallic highlight. The expansive white canvas ensures the design feels bright and uncluttered, not busy. Using various shades of a single color, blue, for the artwork creates a cohesive and sophisticated look. The final touch of gold on the stem is crucial; it adds a drop of warmth and luxury that elevates the entire piece. You could swap the blue for a deep green or even a rich burgundy and the formula would still hold true, creating a balanced and beautiful result.
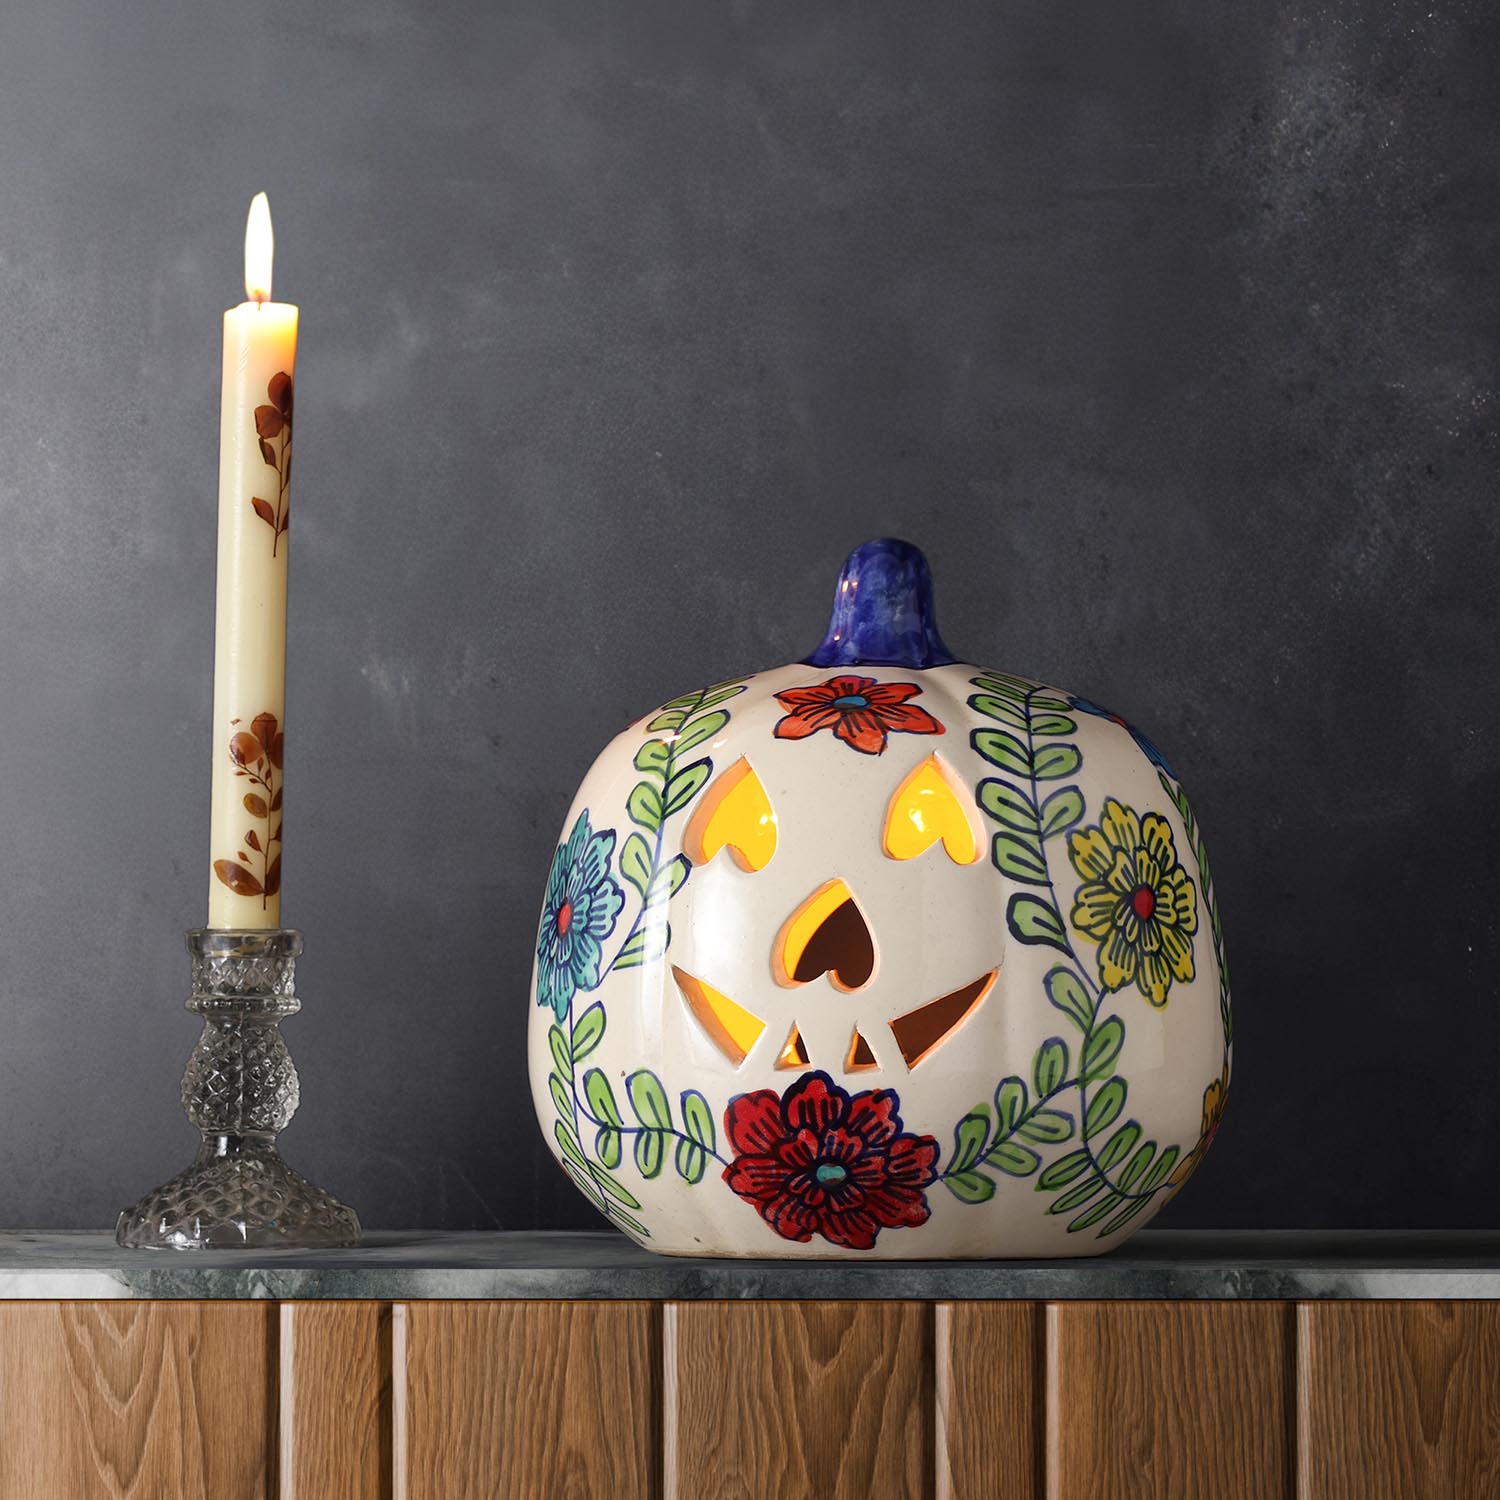
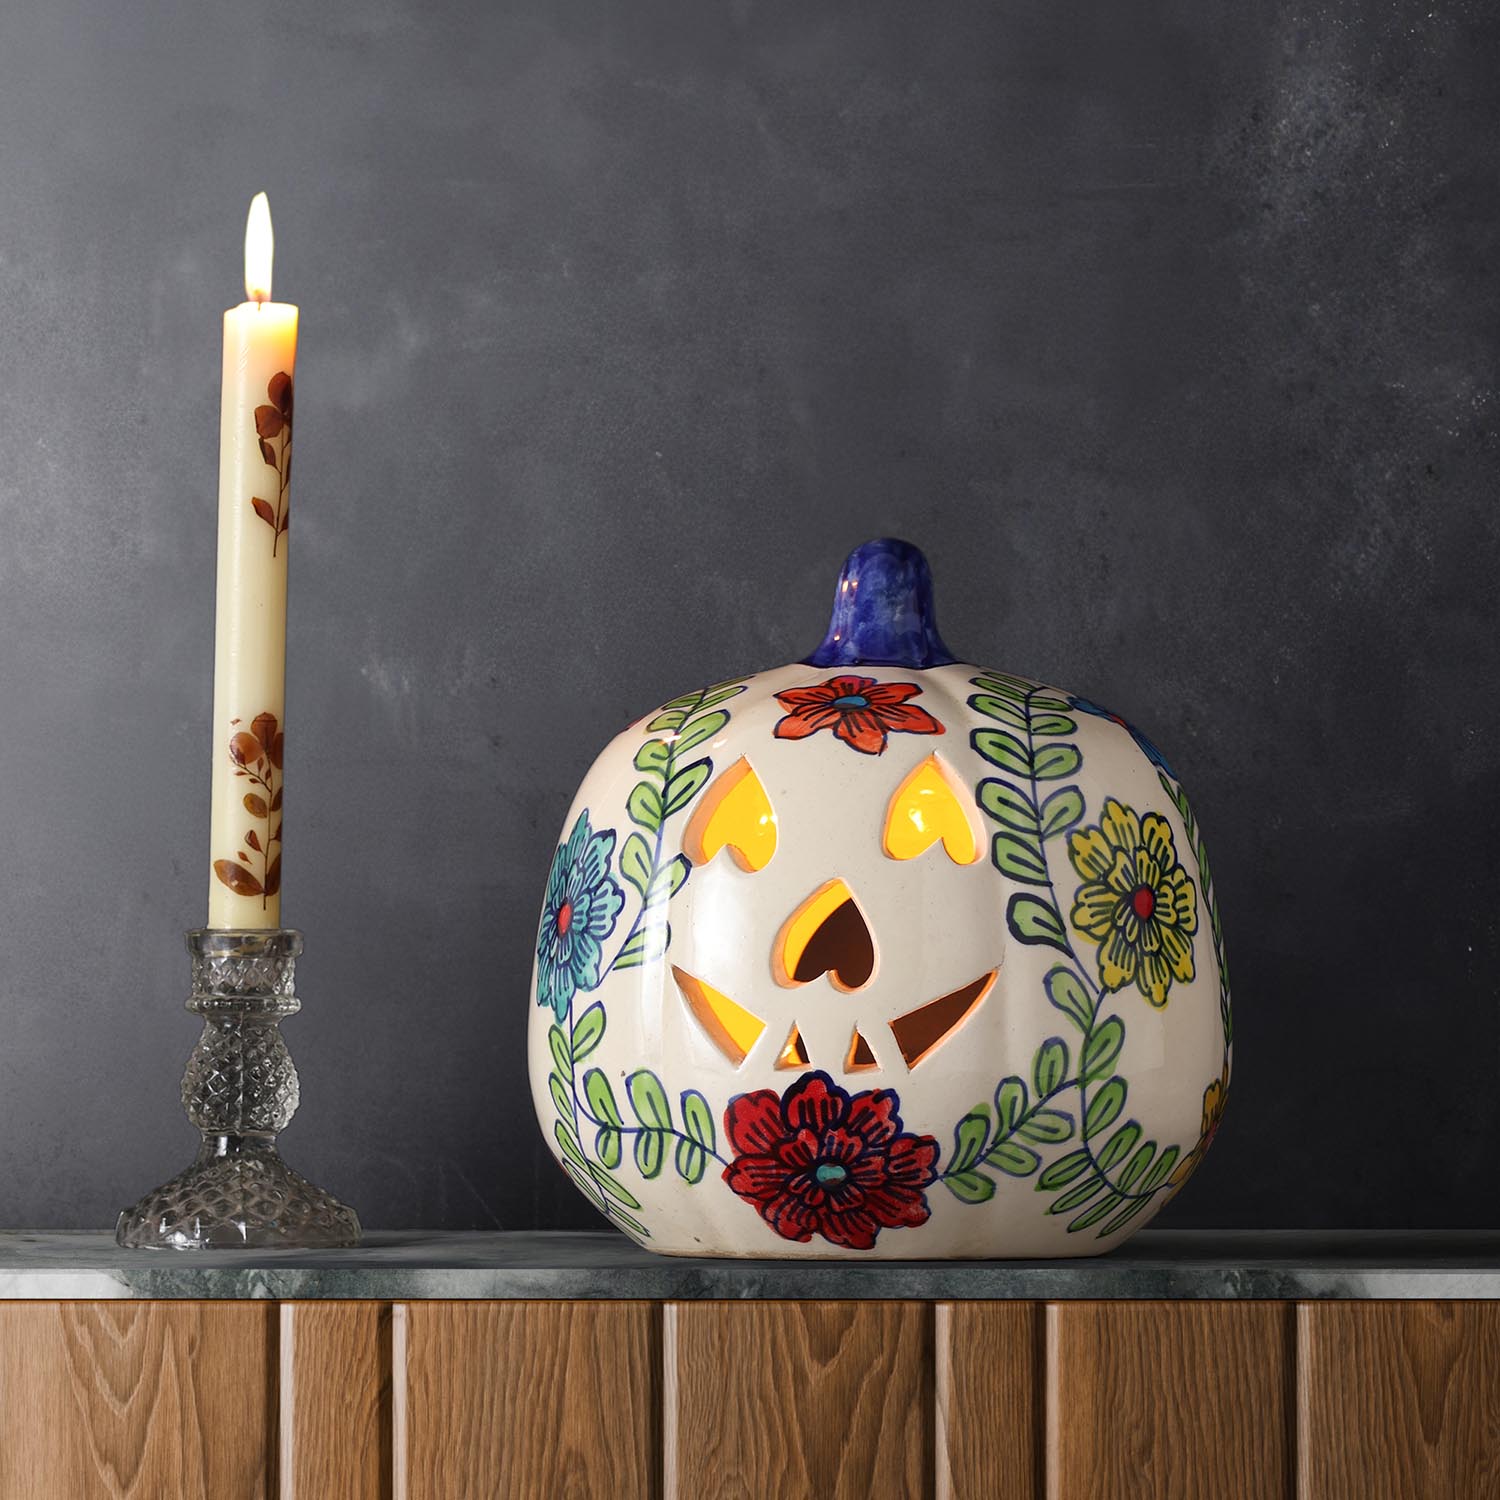
16. Whimsical Floral Ceramic Pumpkin Lantern with Candle
This decoration is effective because it engages multiple senses and design elements. The interplay between the internal light of the pumpkin lantern and the external light of the taper candle creates a dynamic, layered glow that’s instantly cozy. The whimsical, brightly colored floral pattern on the ceramic provides visual interest during the day, while the heart-shaped cutouts create charming light projections at night. It’s a piece that works around the clock. The texture of the dark gray wall and the smooth marble surface adds another layer of contrast, making the whole vignette feel rich and thoughtfully composed.
🔥 Trending Context
Ceramic decor like this is beautiful, but it can be a dust magnet, especially with intricate painted surfaces. To clean the pumpkin lantern, use a soft, dry microfiber cloth or a feather duster for regular upkeep. For a deeper clean, slightly dampen the cloth with water, but avoid any harsh chemical cleaners which could damage the painted finish. The biggest maintenance challenge is wax drips from the taper candle. If wax gets on the green-veined marble, don’t scrape it with a knife. Instead, place a bag of ice over the wax to make it hard and brittle, then gently pry it off with a plastic scraper or an old credit card.
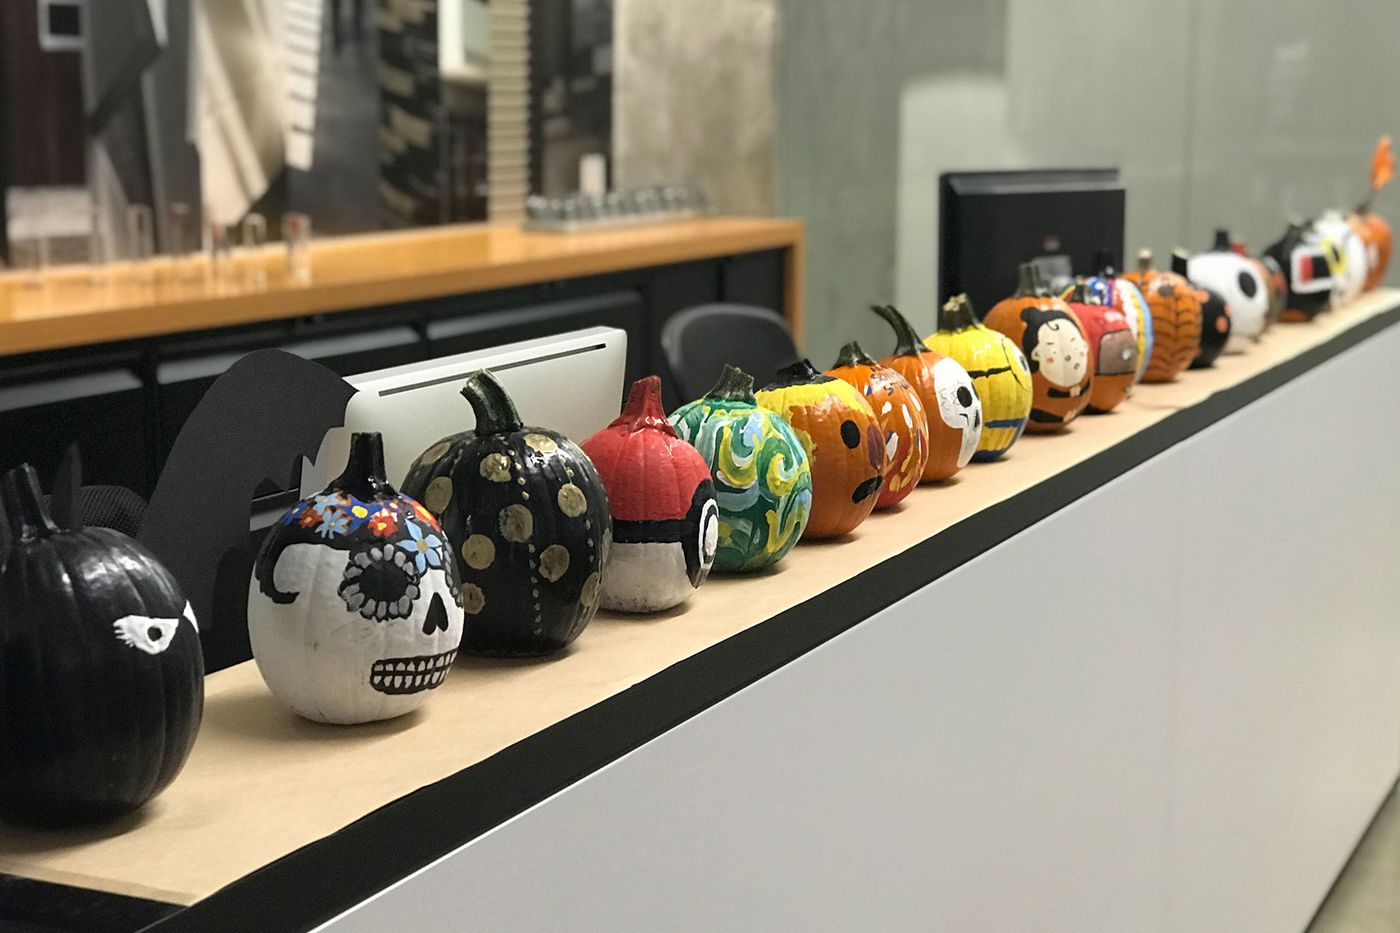
17. A Diverse Lineup of Hand-Painted Pumpkins on an Office Counter
Bringing seasonal decor into the workplace is a growing trend, especially in creative or collaborative office environments. It’s a simple, low-cost way to boost morale, foster a sense of community, and add a touch of personality to often sterile corporate spaces. A pumpkin painting contest or a collaborative decorating session, as suggested by this varied display, can be a fantastic team-building activity. It reflects a larger cultural shift towards more humane and personalized workspaces where employees feel comfortable expressing themselves.
🧹 Maintenance Reality
If you’re planning a pumpkin painting party at the office or bringing your creations into a shared workspace, it’s crucial to think about the materials. Many craft paints and, especially, spray paints and sealants contain VOCs (Volatile Organic Compounds) that can off-gas and affect air quality, which is a major issue in poorly ventilated office buildings. Some colleagues may be sensitive to the fumes. Opt for water-based, non-toxic acrylic paints and low-odor or zero-VOC sealants. It’s a small consideration that shows respect for your coworkers’ health and well-being.
18. Glossy Black and Orange Swirl Jack-o’-Lantern
That mesmerizing swirl effect, known as a ‘paint pour’ or ‘dirty pour,’ is a fun and surprisingly easy technique. Here’s a simplified version for a pumpkin. Estimated time: 30 minutes (plus drying). Material cost: $15-$20.
- Start with a craft pumpkin (real ones are too porous). Prime it if it’s not already white.
- In a disposable cup, layer your paint colors. Pour in some orange, then some black, then more orange, without mixing them.
- Place your pumpkin on a protected surface (this gets messy!).
- Slowly pour the contents of the cup over the top of the pumpkin, moving the cup around to guide the flow of paint.
- Gently tilt the pumpkin to let the paint run and cover the entire surface, creating the swirl patterns.
- Let it dry for at least 48 hours on a rack so the bottom doesn’t stick.

⚠️ Real Talk
Love the look but don’t want to buy a pre-made ceramic piece? You can get this exact vibe for about $15. Head to a dollar store or craft store and pick up a cheap plastic or foam pumpkin for a few bucks. Then, get two small bottles of craft paint—one gloss black and one gloss orange ($2-$3 each). Following the paint pour method described above, you can create your own version in under an hour. The result will be a lightweight, custom piece of decor with the same high-impact, glossy swirl effect for a fraction of the cost of a ceramic original.
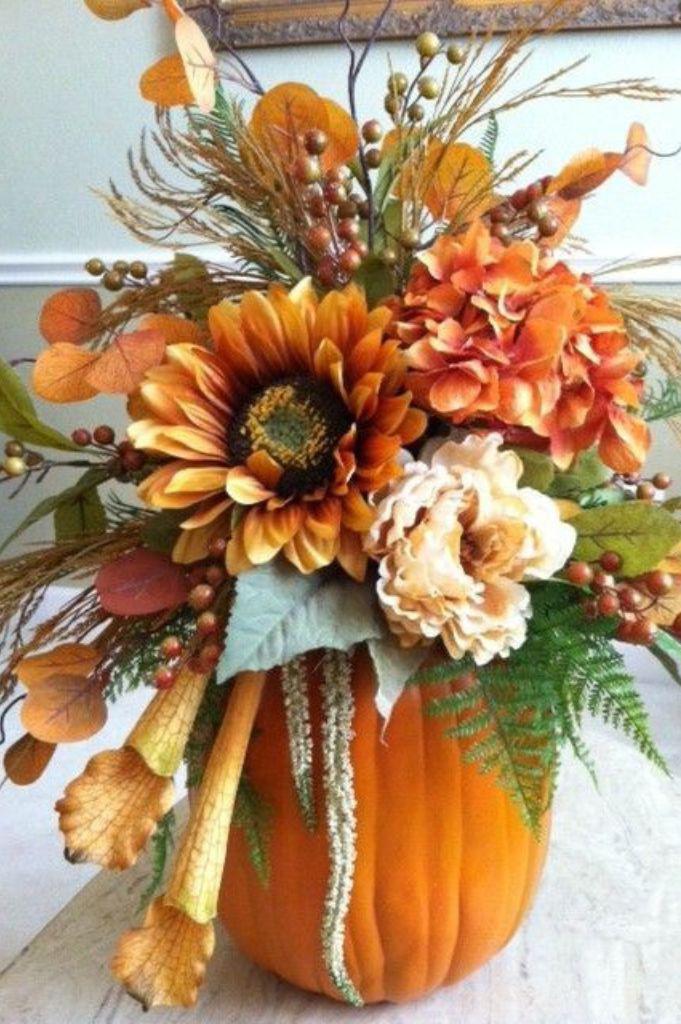
19. Faux Pumpkin Vase with Vibrant Autumn Sunflowers
When using a hollow faux pumpkin as a vase for a large artificial arrangement, the biggest problem is that it can be top-heavy and unstable. To prevent your beautiful creation from toppling over, you need to weigh it down before you start arranging. The easiest way is to fill the bottom with a few pounds of sand, gravel, or even dried beans. Pour them in before you add your floral foam. This lowers the center of gravity and creates a solid, stable base that can support even the most abundant and top-heavy bouquet of sunflowers and ferns.
💰 Budget Breakdown
The key to a successful pumpkin vase arrangement is getting the proportions right. A good rule of thumb is that the height of the floral arrangement should be about 1.5 to 2 times the height of the pumpkin vase itself. This creates a balanced and visually pleasing silhouette. If the arrangement is too short, it will look squat and stunted. If it’s too tall, it will look precarious and out of scale. This specific arrangement nails the proportion, creating a look of lush abundance that feels balanced and intentional. A smaller version would be perfect for a side table, while this larger scale is ideal for a dining table centerpiece or entryway statement.
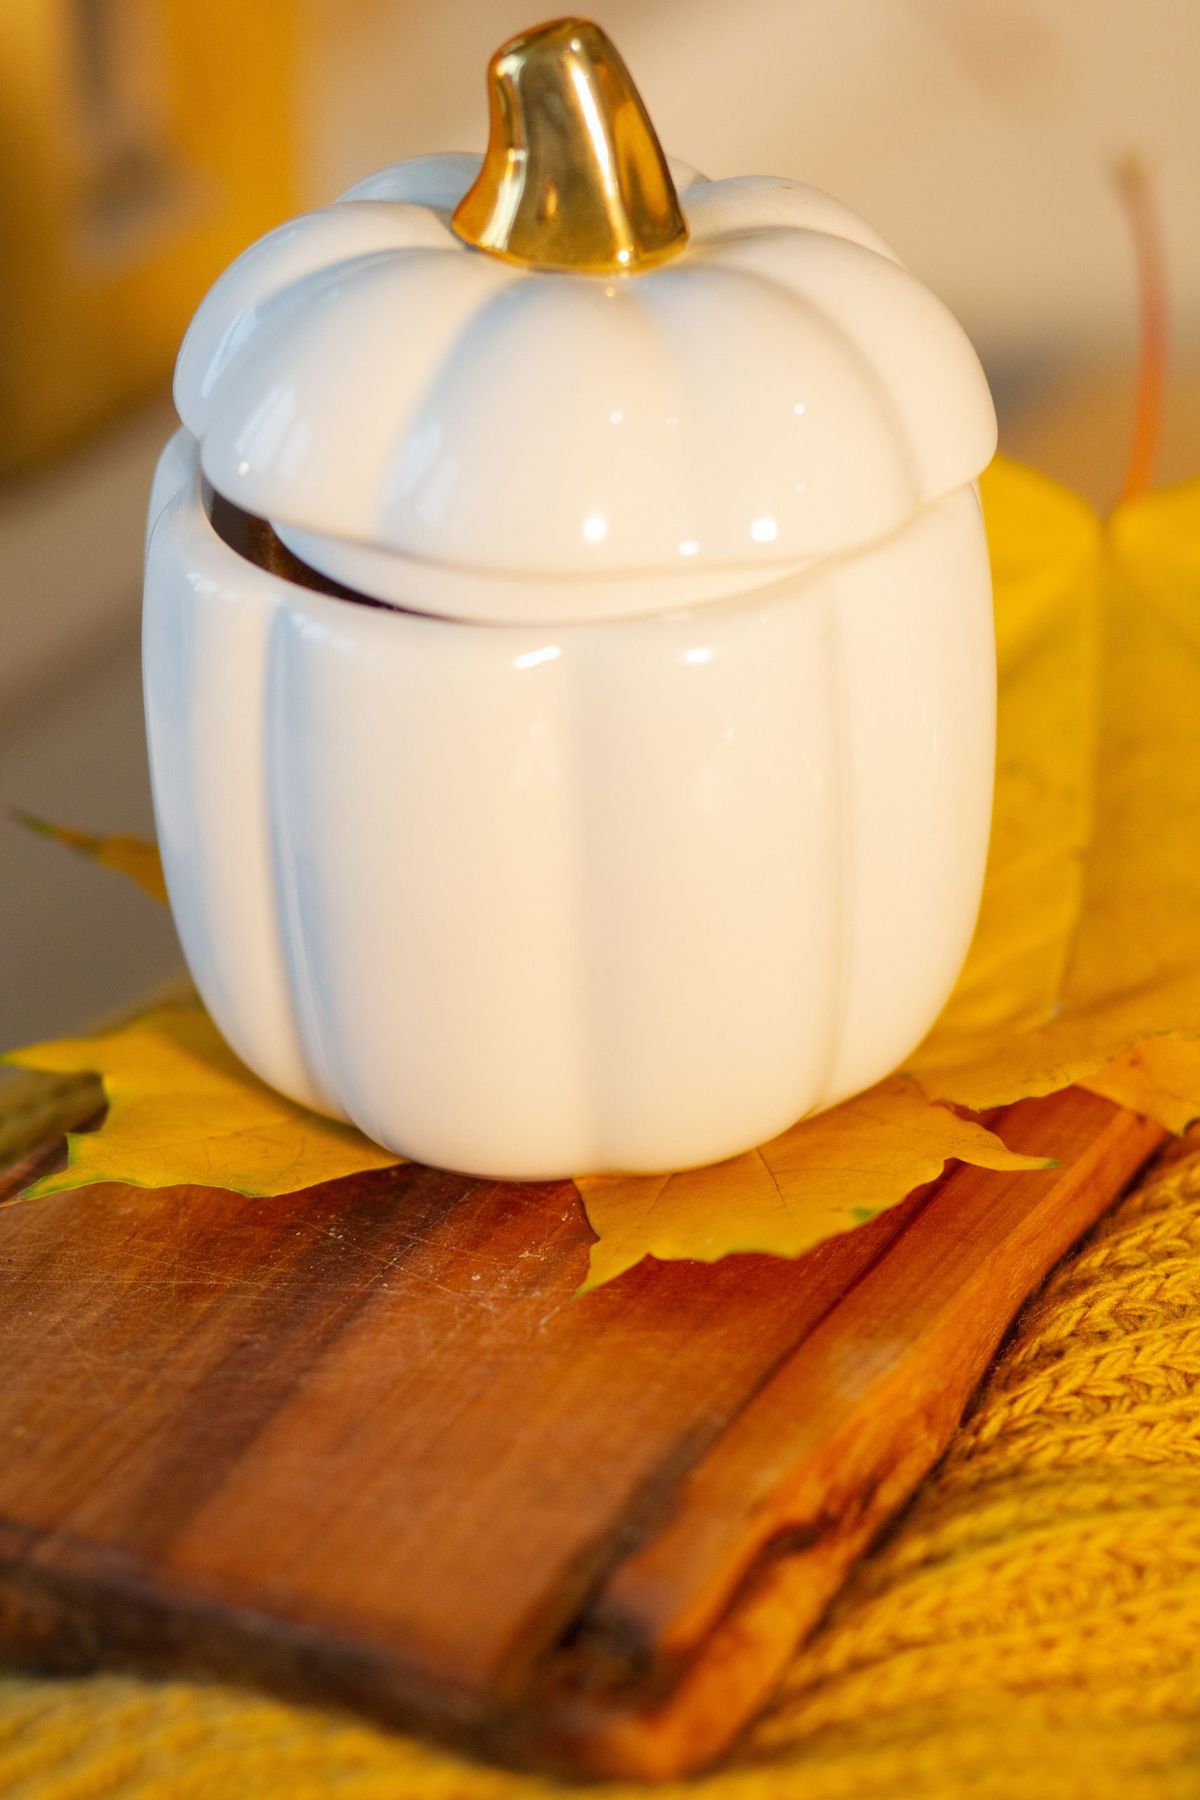
20. Glossy White Ceramic Pumpkin with Gold Stem
The single detail that makes this pumpkin feel modern and chic is its high-gloss finish. A matte white pumpkin can feel rustic or farmhouse, but the glossy, reflective surface immediately reads as more contemporary and polished. It catches the light beautifully and feels more like a piece of modern sculpture than a simple gourd. This lustrous finish, combined with the metallic gold stem, is what gives it that touch of glam and makes it stand out against the natural textures of the wooden board and yellow leaves.
💡 Designer Tip
This cozy, bright autumn vignette is a masterclass in textural and color balance. The formula is approximately 60% smooth/glossy surfaces + 40% soft/natural textures. The glossy white pumpkin and its gold stem provide the smooth, polished element. This is perfectly balanced by the organic texture of the vibrant yellow maple leaves and the super soft, chunky yellow knitted fabric. The color story is just as simple: a crisp white base allows the vibrant, monochromatic yellow accents to be the undisputed star of the show, creating a look that is both cheerful and sophisticated.
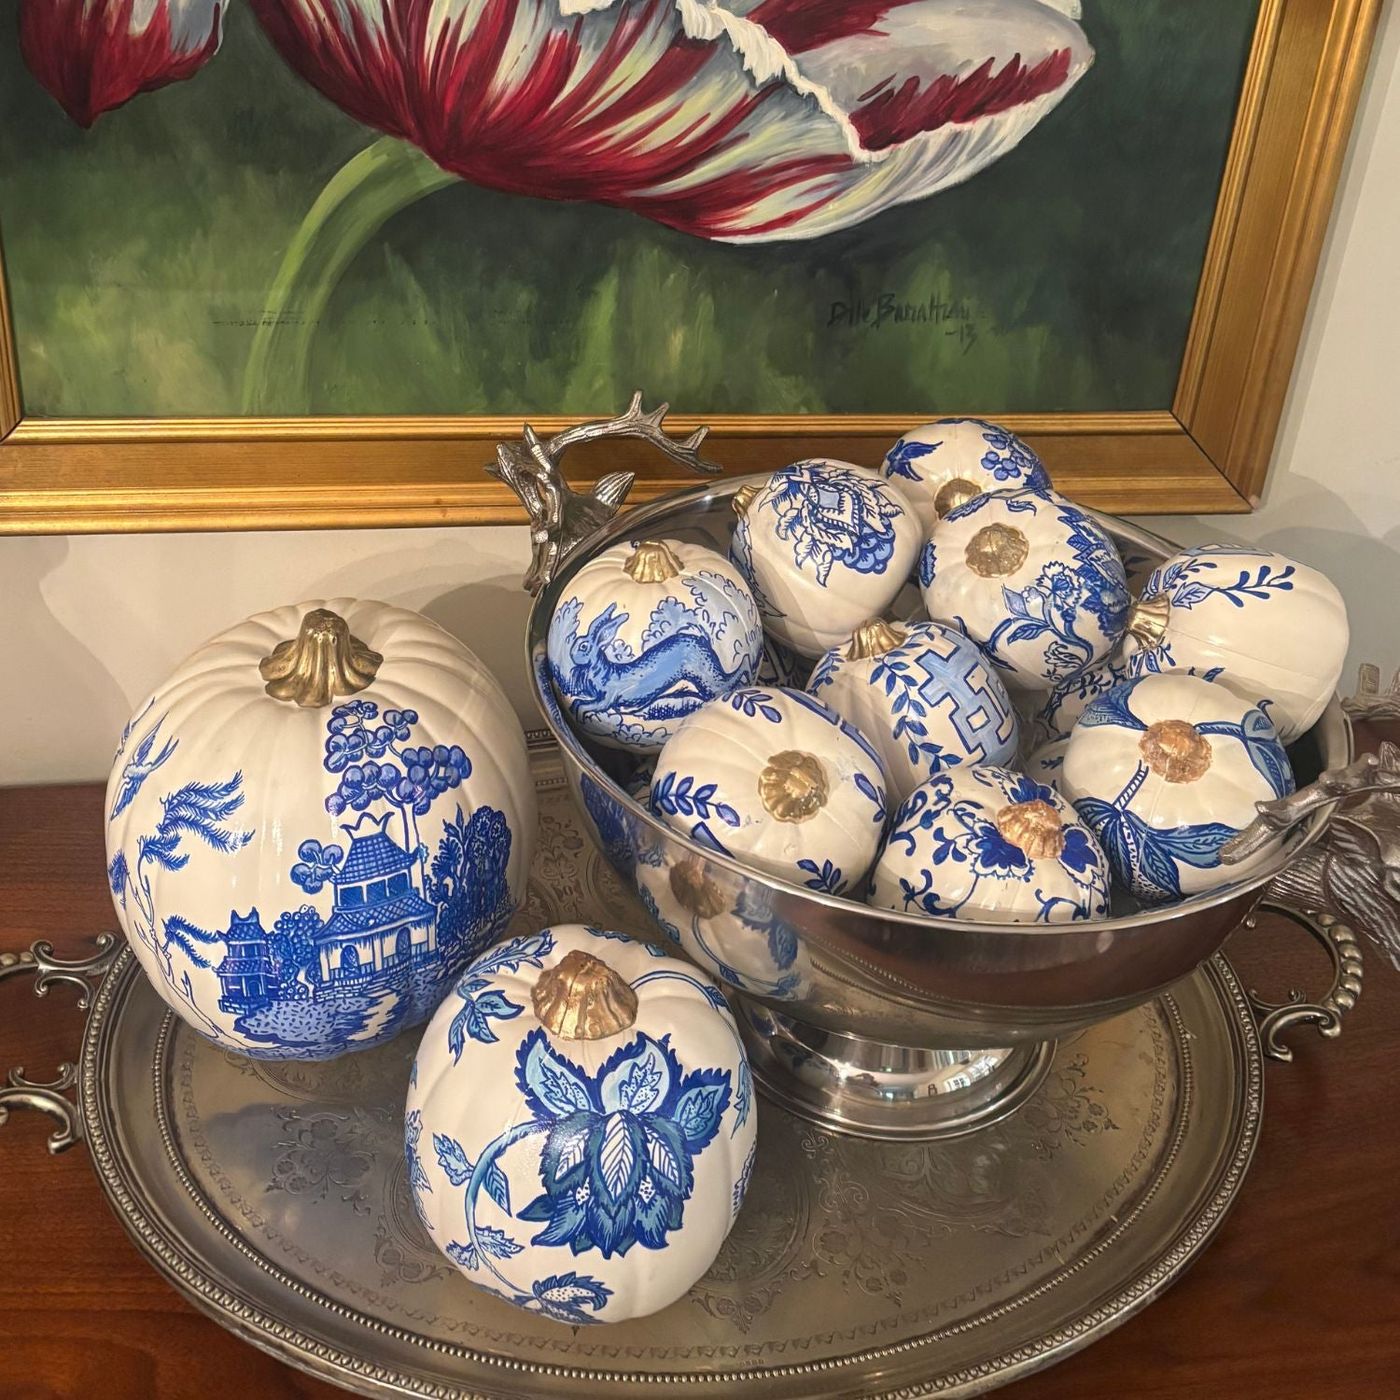
21. Elegant Chinoiserie Pumpkins with Gold Stems on Silver Trays
This is a decidedly high-end, luxurious look. The cost is not just in the pumpkins, but in the elegant serveware used to display them.
- Faux white craft pumpkins (5-7, various sizes): $50 – $100
- High-quality paints (cobalt blue, gold) and fine brushes: $30 – $50
- Ornate silver punch bowl: $150 – $400+ (new or vintage)
- Large scalloped silver tray: $100 – $300+ (new or vintage)
TOTAL: $330 – $850+
Budget alternative: Source silver-plated trays and bowls from thrift stores or Facebook Marketplace for $20-$50 total. The look is entirely achievable with some savvy second-hand shopping. Compare this to the simpler version in Idea #11.
💸 Get This Look For Less
What makes this display so breathtakingly elegant is the concept of ‘material transference.’ It takes a pattern—blue and white Chinoiserie—that is culturally associated with one material (fine porcelain) and applies it to another, completely unexpected one (pumpkins). This clever act of transference elevates the humble pumpkin into an object of art. The look is further amplified by displaying them on silver serveware, reinforcing the ‘fine dining’ or ‘heirloom’ aesthetic. It’s a brilliant mix of high-brow and rustic that feels both traditional and totally fresh.
22. Floral Painted Ceramic Pumpkin Lantern and Taper Candle
When displaying decorative objects that produce their own light, like this pumpkin lantern, always use an odd number and vary their heights for the most dynamic effect. Here, the pairing of the short, stout pumpkin with the tall, slender taper candle is a classic designer trick. It creates vertical interest and guides the eye up and down, making the vignette more engaging. If you were to add a third element, it should be of a different height still—perhaps a small votive. The clear glass candlestick is also a smart choice, as it doesn’t compete visually with the decorated candle and lantern, keeping the focus on the main pieces.
⭐ The One Thing
You can get this whimsical, illuminated look without spending a lot on a pre-painted ceramic piece. Start with a plain white or cream ceramic pumpkin lantern from a craft store, which usually costs around $15-$20. Then, using a set of multi-surface acrylic paint pens (about $15), you can draw your own floral designs. You don’t have to be a master artist; simple, colorful flowers and leaves will create the same cheerful vibe. Pair it with a plain taper candle from the dollar store. You get a completely custom look with the same warm, festive glow for about half the price.
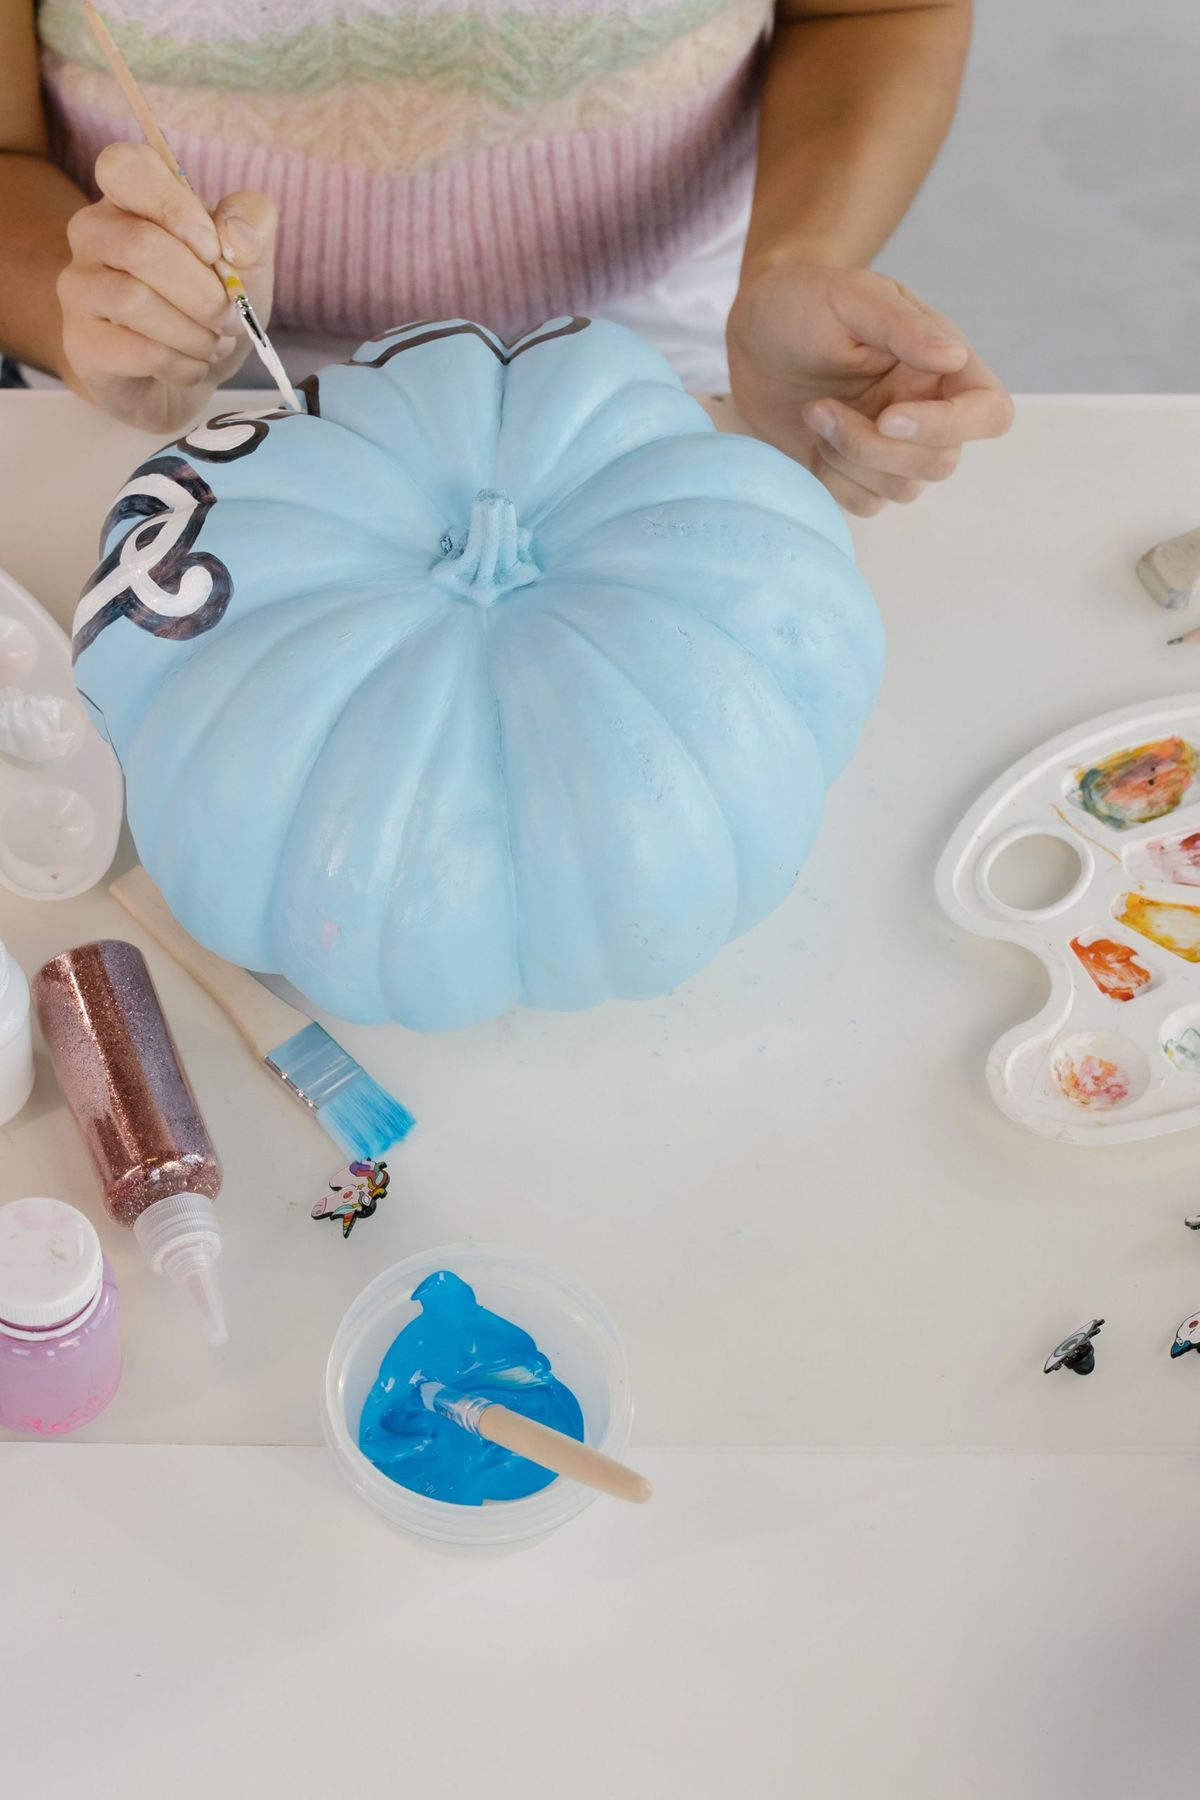
23. Hand-Painting a Light Blue Pumpkin with Intricate Patterns
An intricate project like this requires a well-prepared workspace to keep your creative flow going and minimize mess. Check these items off your list before you start.
- Have you covered your table? A cheap plastic tablecloth or some old newspaper is a must to protect your surfaces from paint and glitter.
- Are all your supplies within arm’s reach? Arrange your paints, brushes, water cup, and palettes so you don’t have to awkwardly reach across your wet project.
- Is your lighting adequate? Good, direct lighting is crucial for detailed work. A simple desk lamp can prevent eye strain and mistakes.
- Do you have paper towels or a damp cloth ready for spills and brush cleaning? Don’t wait until the paint is everywhere to find them.
📏 Scale Guide
A project this detailed and intricate requires a significant time commitment and a steady hand. Be honest with yourself: do you have the patience for this? That delicate white and dark brown pattern isn’t a quick 30-minute job. This is likely a multi-hour, possibly multi-day, project, especially when you factor in drying times between layers and colors. Furthermore, sitting hunched over a pumpkin for hours can lead to serious neck and hand fatigue. Remember to take breaks, stretch, and give your eyes a rest. Don’t let your pursuit of the perfect pumpkin lead to a literal pain in the neck.
24. White Pumpkin with Botanical Patterns and Heirloom Gourds
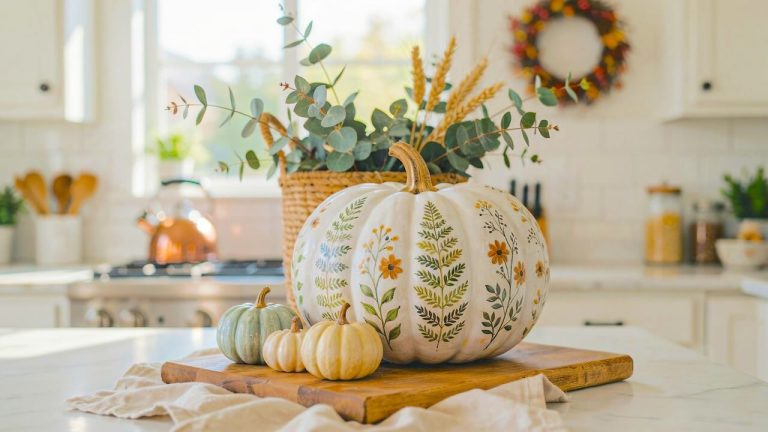
This kitchen countertop display is so successful because it creates a cohesive story by connecting with its environment. The painted botanical elements—ferns, leaves, and small flowers—echo the natural items you’d find in a kitchen or garden. The use of a wooden cutting board as a display base and the woven basket of eucalyptus and wheat in the background reinforce this ‘kitchen garden’ theme. It feels authentic and thoughtfully integrated into the space, rather than like a random piece of decor dropped onto the counter. The white subway tile and light countertop provide a clean, bright canvas that lets the natural textures shine.
🎯 What Makes It Work
The single element that makes this pumpkin feel special is the delicate fern pattern. While the small flowers add a pop of color, the gracefully arching fern fronds are what give the design its structure and elegance. Ferns have a timeless, slightly vintage feel that adds a layer of sophistication. The pattern is intricate enough to be interesting but simple enough not to overwhelm the pumpkin’s natural shape. It strikes the perfect balance between artistic embellishment and natural beauty, which is the essence of this entire look.
25. Cozy Autumn Gourds and Candlelight on a Coffee Table
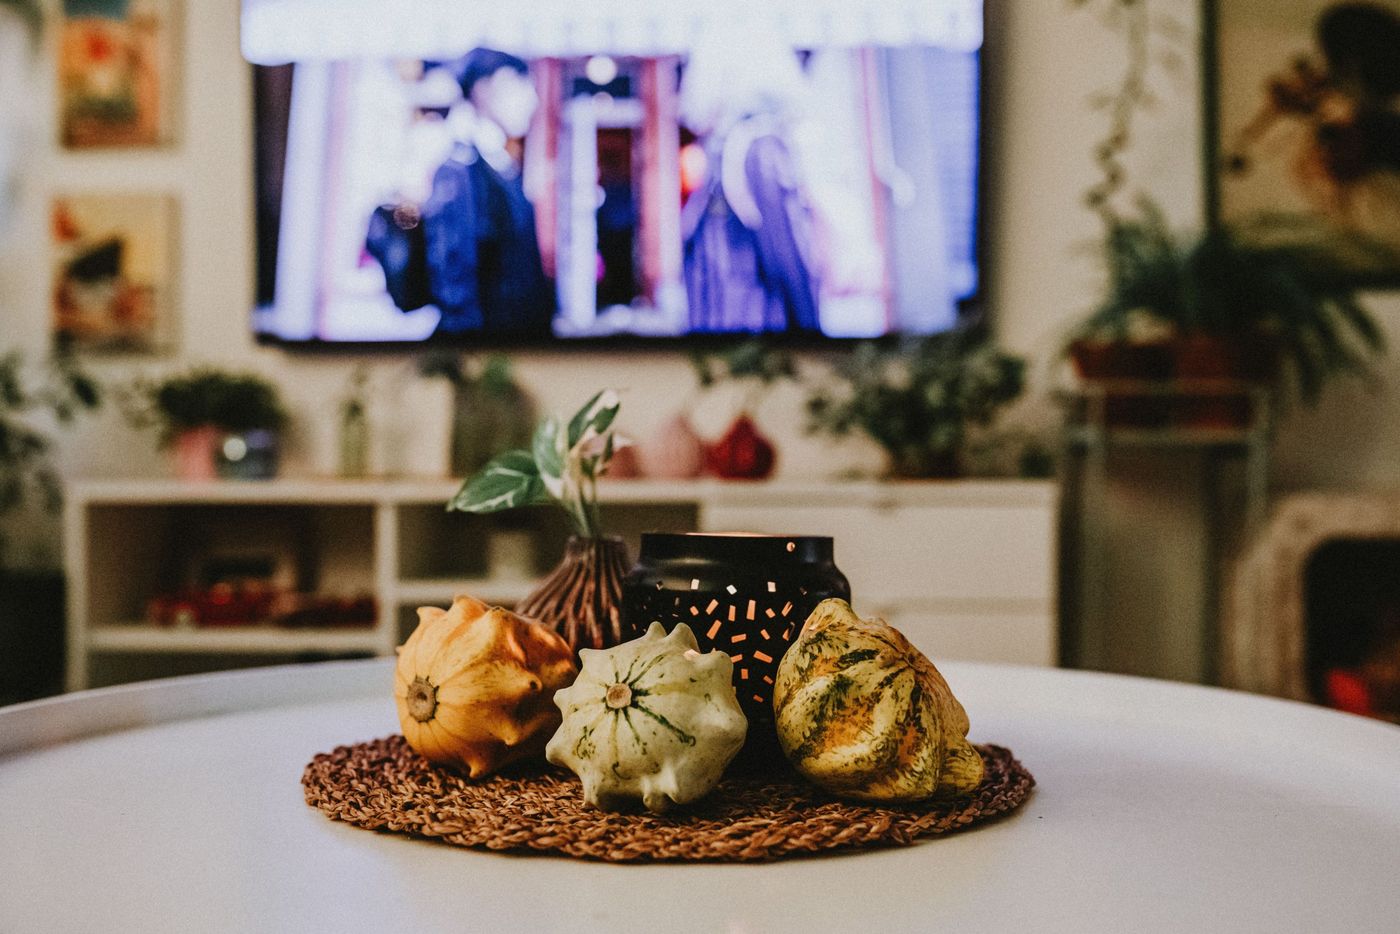
A centerpiece on a round coffee table needs to feel balanced from all angles. For a small-to-medium round table (24-36 inches in diameter), a centerpiece should occupy the central third of the surface, as shown here. The round woven mat acts as a perfect visual anchor, defining the centerpiece area. The grouping is kept low-profile, ensuring it doesn’t block sightlines to the television or across the room to someone sitting on the sofa. By clustering the three gourds, the candle, and the vase tightly together, it creates a single, cohesive focal point rather than scattered clutter.
🔧 How-To Brief
You don’t need to splurge on fancy decorative gourds from a home decor store. The most beautiful and interesting ones are often found at your local grocery store or a farmer’s market in the fall. You can typically get a bag of assorted mini gourds and squashes for under $10. Look for a mix of colors (yellow, green, cream), shapes, and textures (bumpy, smooth, striped). The black votive holder can be replicated with a simple glass holder and some black spray paint, or you can find similar ones at Target or Walmart for under $5. This entire cozy, autumnal look can be pulled together for less than $20.
26. Pumpkin Container with Abundant Autumn Floral Arrangement
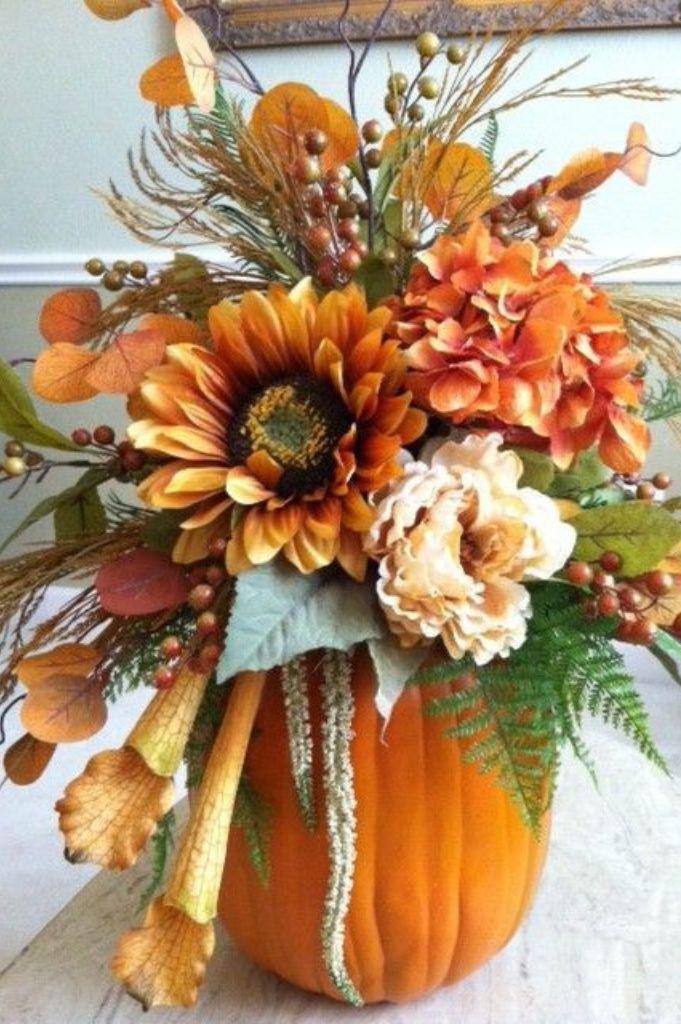
Securing floral foam is the secret to a professional-looking arrangement that stays put. Here’s how to do it in a faux pumpkin container. Estimated time: 10 minutes. Material cost: $5-$10.
- Choose dry floral foam, the kind meant for artificial flowers.
- Cut the foam brick with a serrated knife to fit snugly inside the pumpkin’s opening. You want it to be tight.
- The top of the foam should sit about an inch above the rim of the pumpkin opening. This allows you to insert stems into the side of the foam for a fuller look.
- For extra security, use waterproof floral tape. Create an ‘X’ shape with the tape, running it from one side of the pumpkin’s rim, over the foam, to the opposite side. This will lock the foam in place, even with heavy stems.
📐 Style Math
An abundant artificial arrangement like this is a fantastic, long-lasting piece of decor, but it is a major dust trap. All those beautiful petals, leaves, and berries create countless tiny ledges for dust to settle on. To keep it looking fresh, you’ll need to dust it weekly. The most effective method is to use a hairdryer on its coolest, lowest setting to gently blow the dust away. For more stubborn dust, a can of compressed air (like for keyboards) works wonders. About once a season, you may need to wipe individual leaves and petals with a barely damp microfiber cloth.
27. Textured Pumpkin House with Leaf Roof and Glowing Window
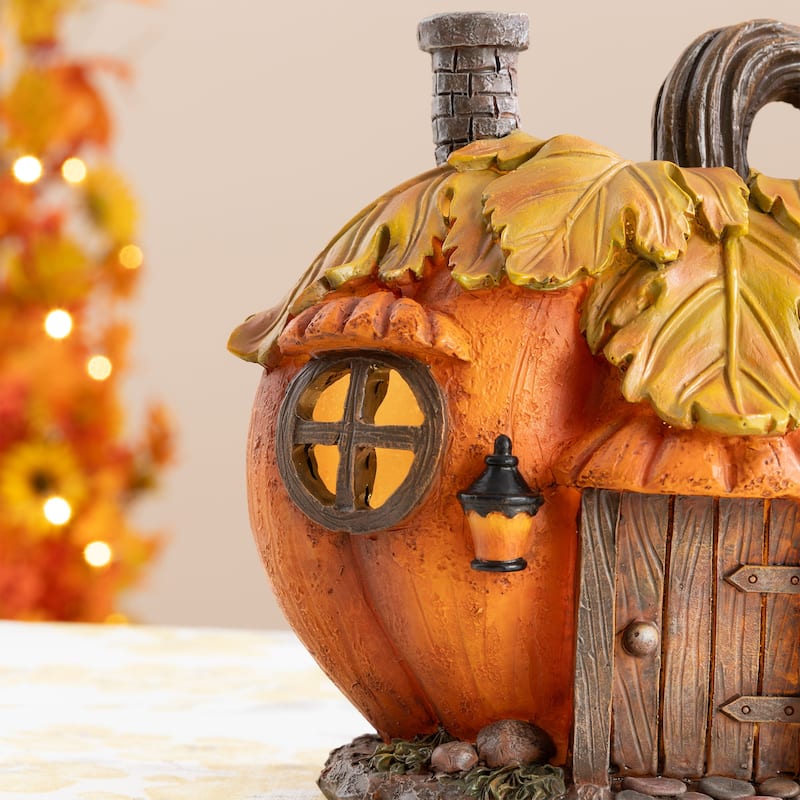
To give a plain craft pumpkin that wonderful, textured ‘skin’ seen here, you don’t need a special pre-made piece. You can create it yourself using paint additives. For a subtle, gritty texture, mix a small amount of fine sand or baking soda into your orange acrylic paint before applying it. For a more pronounced, stucco-like effect, mix in a texture gel medium or even drywall joint compound. Apply it with a palette knife or a stiff brush, creating uneven patches. This simple trick adds incredible depth and a rustic, organic feel that makes your pumpkin house look much more realistic and charming.
✅ Before You Start
This little pumpkin house is so enchanting because it excels at miniature world-building. Every detail is designed to create a believable, tiny narrative. The leaf-patterned roof, the dark brick chimney, the rustic ‘wooden’ door with its hinges, and the small black lantern all contribute to the illusion of a functional, lived-in dwelling. The warm glow from the single round window is the most crucial element, as it suggests life inside, instantly making the scene feel cozy, safe, and magical. It taps into a childlike sense of wonder, inviting us to imagine who might live in such a whimsical home.
28. Classic Carved and Uncarved Pumpkins on a Wooden Window Sill
There’s a reason we carve pumpkins right before Halloween. The moment you pierce the skin and expose the flesh to air, the clock starts ticking. A carved jack-o’-lantern will only last for about 5 to 10 days, and that’s in a cool, dry climate. In a warmer, more humid area, you might only get 3 days before it starts to mold, slump, and collapse into a sad, fuzzy puddle. Wiping the inside and cut edges with a bit of petroleum jelly or a bleach solution can help prolong its life by a day or two, but there’s no stopping nature. This is a beautiful but fleeting decoration.

🔥 Trending Context
In a world of overly complex and sometimes competitive decorating trends, there’s a strong cultural swing back towards simple, classic, and nostalgic traditions. This display embodies that movement perfectly. It’s not trying to be overly clever or glamorous; it’s just pumpkins on a windowsill, one with a familiar, friendly face. This return to basics feels comforting and authentic. It’s a low-stress, accessible way to celebrate the season that connects with core memories of autumn and Halloween, which is why this timeless look will never truly go out of style. Sometimes, the simplest ideas are the most powerful.
29. Hand-Painted Gourd Figures with Traditional Japanese Motifs
When your project involves recreating cultural motifs, like the traditional Japanese garments seen here, a bit of thoughtful preparation is essential to ensure your work is respectful and well-informed.
- Do some basic research. A quick search for ‘traditional Japanese kimono patterns’ or ‘samurai attire’ will provide you with authentic visual references. Notice the colors, symbols, and ways the garments are worn.
- Don’t aim for a caricature. Strive to capture the essence and beauty of the design, rather than creating an exaggerated or cartoonish version.
- Understand the symbolism if you can. Some patterns and colors have deep cultural meanings. While you don’t need to be an expert, having a basic awareness shows respect for the source of your inspiration.
- Acknowledge your inspiration if you share your work. Giving credit to the culture that inspired you is always a good practice.

🧹 Maintenance Reality
The single most brilliant thing about this creation is how the artist used the gourds’ natural shape to dictate the design. Instead of fighting the asymmetry and bumps, they embraced them. The narrow neck of the gourd becomes the head and torso, while the wider, rounder base perfectly mimics the volume of a traditional kimono or flowing robes. This synergy between the natural object and the painted design is what makes these figures so successful and harmonious. It’s a masterclass in seeing the artistic potential within an organic form. Compare this with the similar approach in Idea #13.
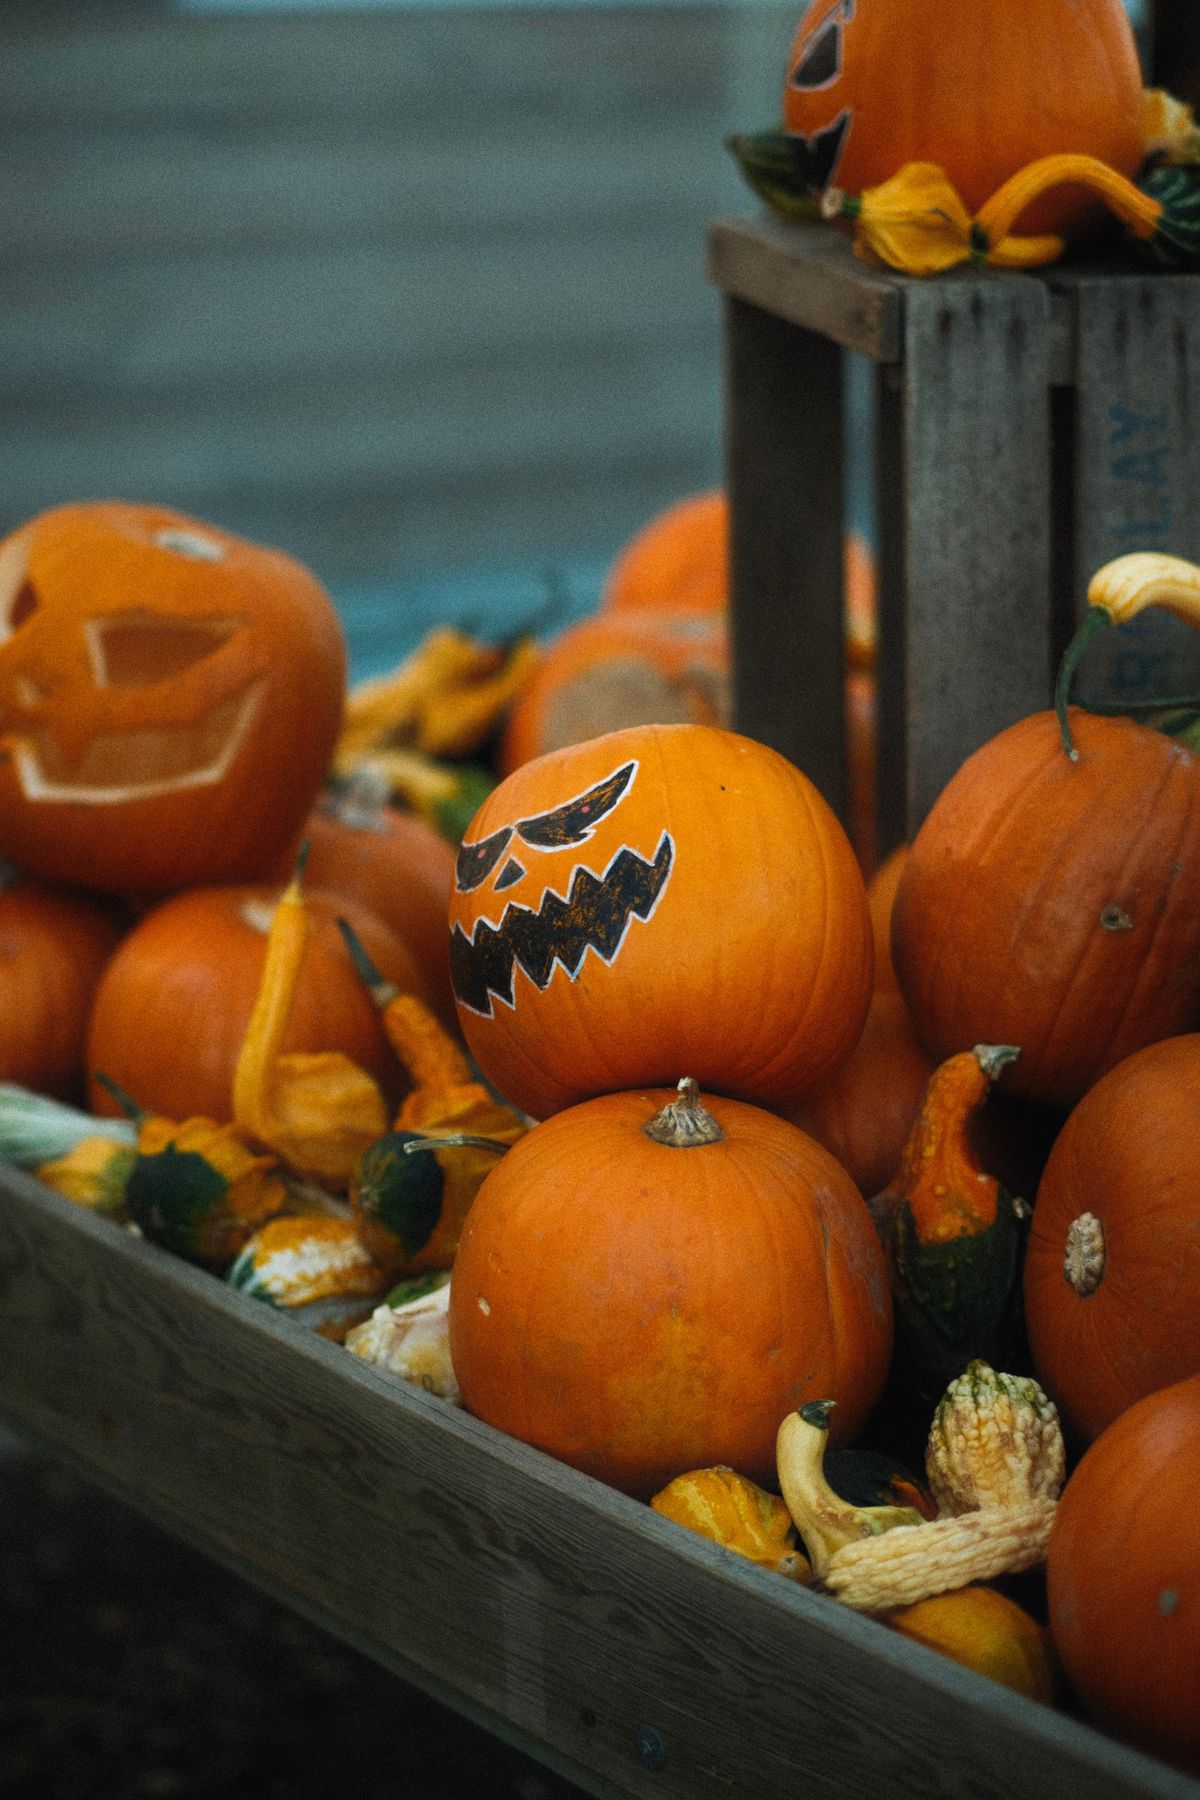
30. Rustic Display of Painted and Carved Jack-o’-Lanterns in Crates
This abundant, rustic look is all about volume and found objects, making it very budget-friendly.
- Assorted pumpkins and gourds: $30 – $60 (the biggest expense, depends on how many you get)
- Weathered wooden crates (2-3): $0 – $40 (Free if you can find them, or buy new from a craft store)
- Black and white craft paint: $5 – $10
- Carving tools: $5 – $10
TOTAL: $40 – $120
Budget alternative: Ask local grocery stores or farms for old wooden crates they plan to discard. Many are happy to give them away for free. This can cut your cost significantly, putting the whole look in the $40-$70 range for a huge impact.
⚠️ Real Talk
This type of layered, multi-level display is perfect for a front porch, entryway, or the base of a fireplace hearth. To make it work, you need a footprint of at least 3×2 feet. The key is creating height and depth. Use one crate laid on its side and another standing upright or stacked on top. Place the largest pumpkins, like the painted and carved ones, at different levels to draw the eye around the arrangement. Fill the crates and the surrounding floor space with the smaller pumpkins and gourds, letting them spill out naturally. This creates a sense of casual, rustic abundance that feels effortless and charming.
Your Autumn Canvas Awaits
With these ideas, your pumpkins can be so much more than just seasonal decor—they can be a reflection of your personal style. Whether you go for a simple, chic metallic or an intricate, hand-painted story, the most important thing is to have fun with it. Pick an idea that excites you, put on some good music, and start creating.
Don’t forget to save your favorites to your Pinterest board for when inspiration strikes. Happy painting!