You know that feeling when you finally find the no-carve pumpkin idea that looks exactly right for your home? It’s a mix of relief and pure creative excitement. We’ve all been there, endlessly scrolling Pinterest, saving pins that don’t quite hit the mark. This year, the endless search stops here.
After filtering through hundreds of options across Michaels, Target, and Hobby Lobby, we narrowed it down to the 29 most inspiring and genuinely doable ideas for 2026. This guide is packed with curated inspiration, from elegant botanical arrangements to whimsical, kid-friendly painted pumpkins. We’ve focused on designs that feel personal and artistic, not like something you’d find in a generic seasonal aisle.
For 2026, the trend is all about ‘permanent botanicals’—using dried flowers, grasses, and even glass to create decor that feels both seasonal and timeless. And stay until the end — we break down the most common mistakes that can ruin these beautiful looks.
📌 Save this to Pinterest for later — you’ll want to revisit these ideas.
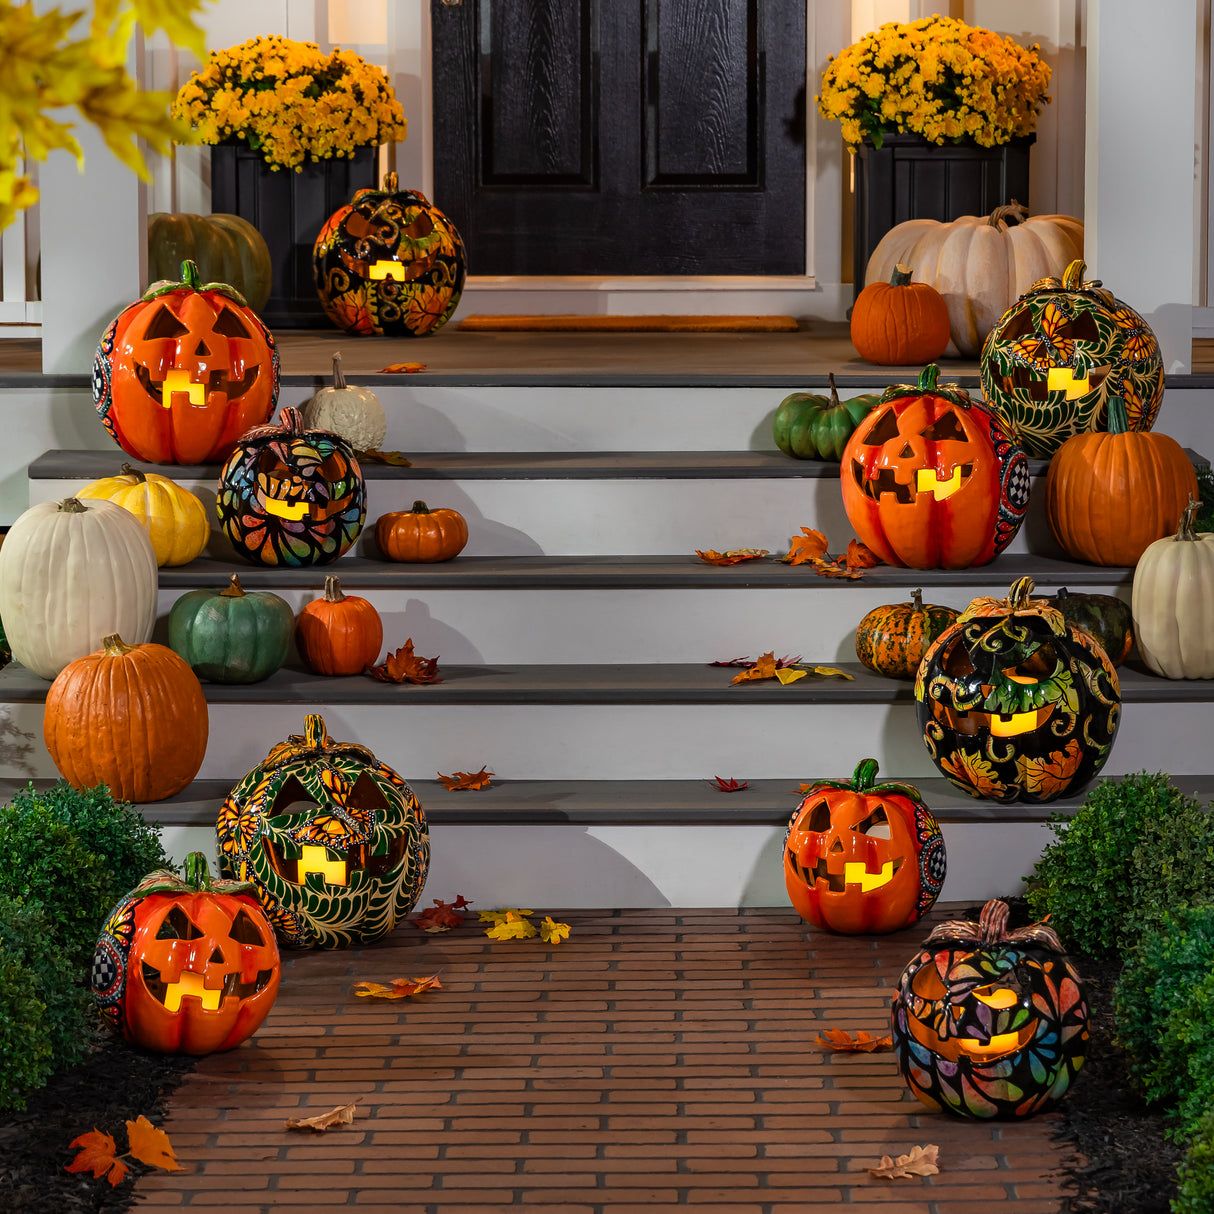
1. Frame a Staircase with Painted and Carved Pumpkins
This grand display works because of its confident use of repetition and variation. By alternating intricately painted pumpkins with classic, glowing jack-o’-lanterns, the arrangement feels dynamic rather than monotonous. The simple, bold color palette—bright orange, black, and white against the gray steps—creates a high-contrast look that reads clearly from the street. The potted yellow chrysanthemums act as framing devices, adding a pop of color and softness that bookends the entire scene, making the brick entryway feel incredibly welcoming and festive.
💰 Budget Breakdown
The key to a successful large-scale display like this is creating visual rhythm. Don’t just place pumpkins randomly. Create a pattern, such as ‘painted-carved-natural-painted-carved-natural,’ as you go up the steps. This creates a pleasing cadence for the eye to follow. For a display of this size, you’ll need at least 15-20 pumpkins of varying sizes. Also, ensure your painted designs have enough ‘negative space’—areas without pattern—so the gourds don’t look overly busy when grouped together.
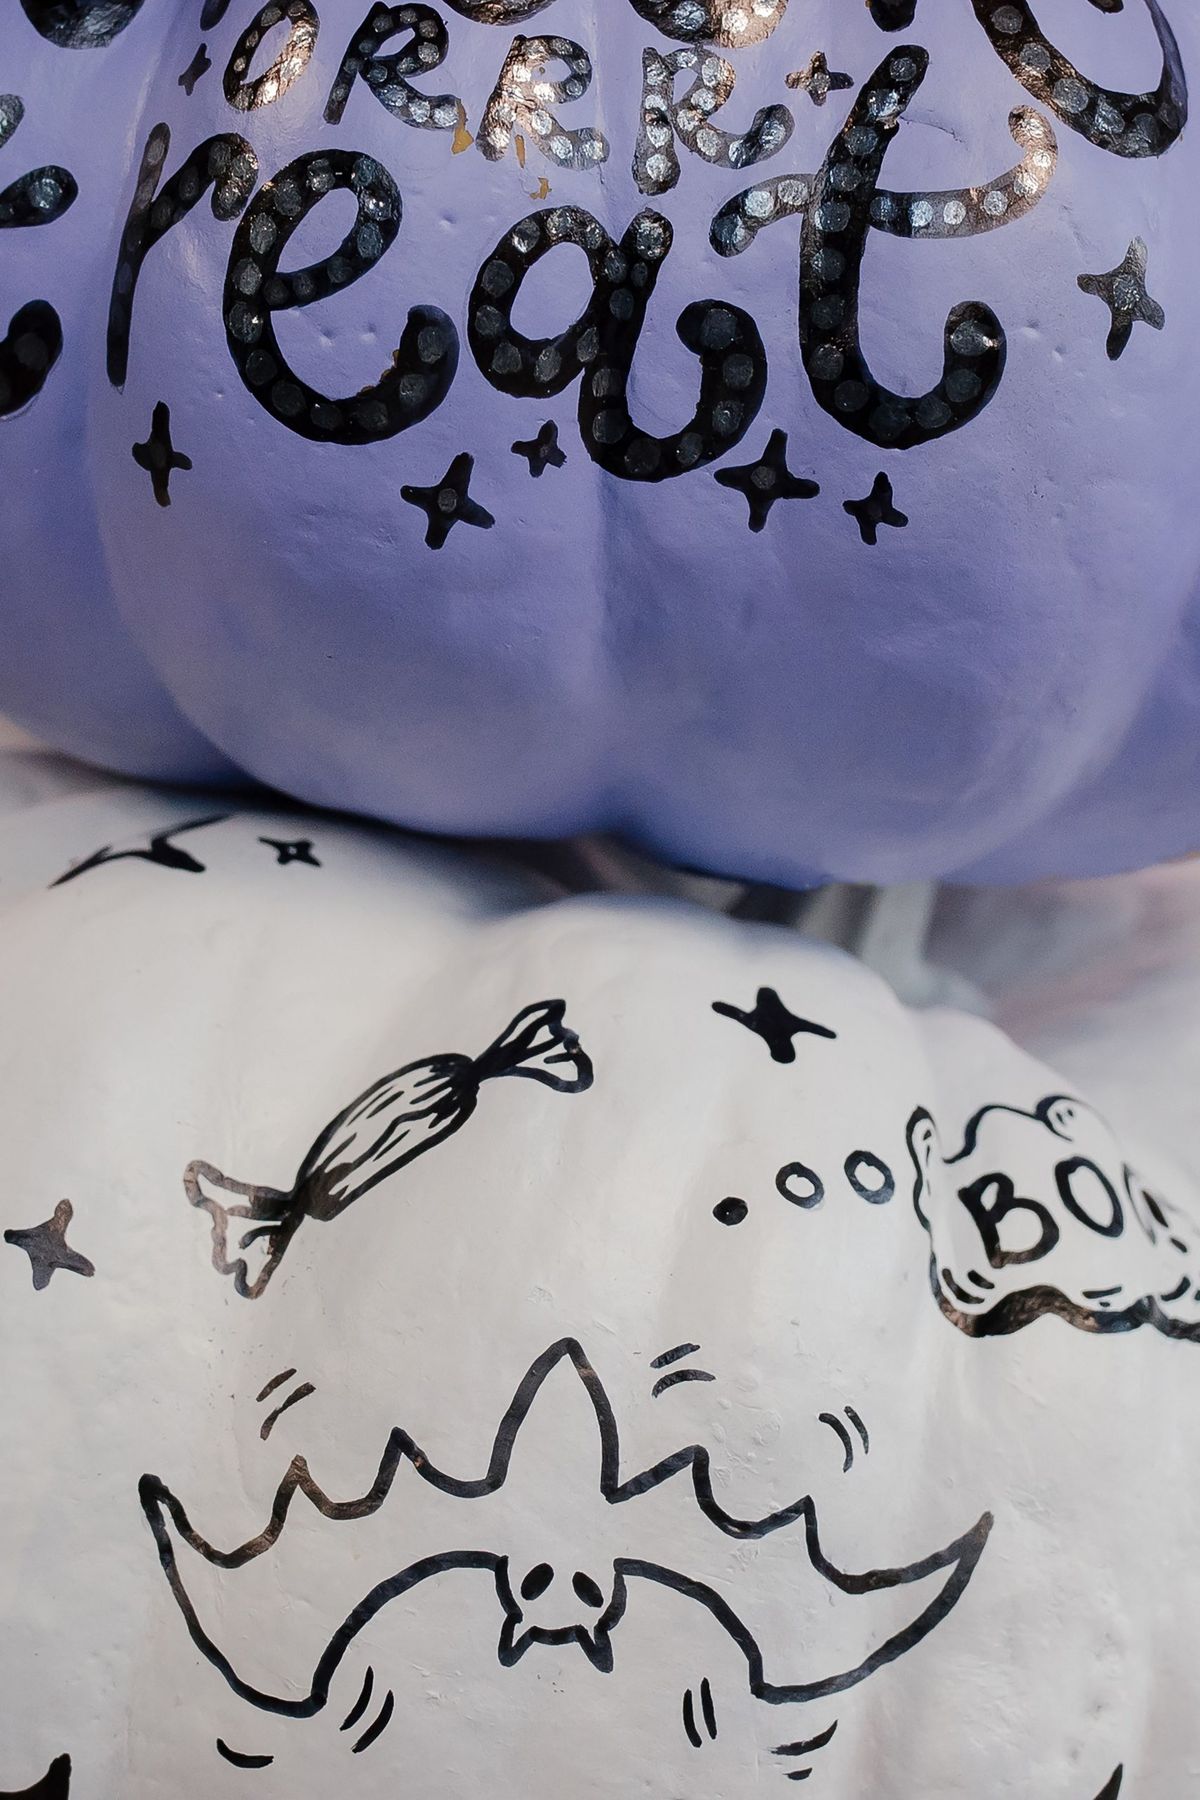
2. Stack Pastel Pumpkins with Whimsical Hand-Drawn Doodles
This playful look is a perfect formula for anyone who loves a bit of handmade charm. Think of it as 60% pastel base + 30% black ink doodles + 10% metallic sparkle. The key is the high contrast between the soft lavender and white paint and the sharp, graphic quality of the black doodles. The silver glitter is just the right amount of punctuation. You could easily swap the pastels for autumnal tones like mustard yellow and sage green, or even go monochrome with black and white pumpkins, and the formula would still hold up beautifully.
📐 Style Math
Let’s be honest: this is a project for a steady hand. If you’re not confident in your freehand drawing skills, the whimsical vibe can quickly turn messy. Use a fine-tipped permanent marker (like a Sharpie) for best results, but be aware that it’s truly permanent. Practice your doodle designs—stars, ghosts, spooky words—on paper first. Also, glitter has a way of getting everywhere. Work over a tray or newspaper and use a spray sealant afterward to lock the glitter in place and prevent a sparkly mess all season long.
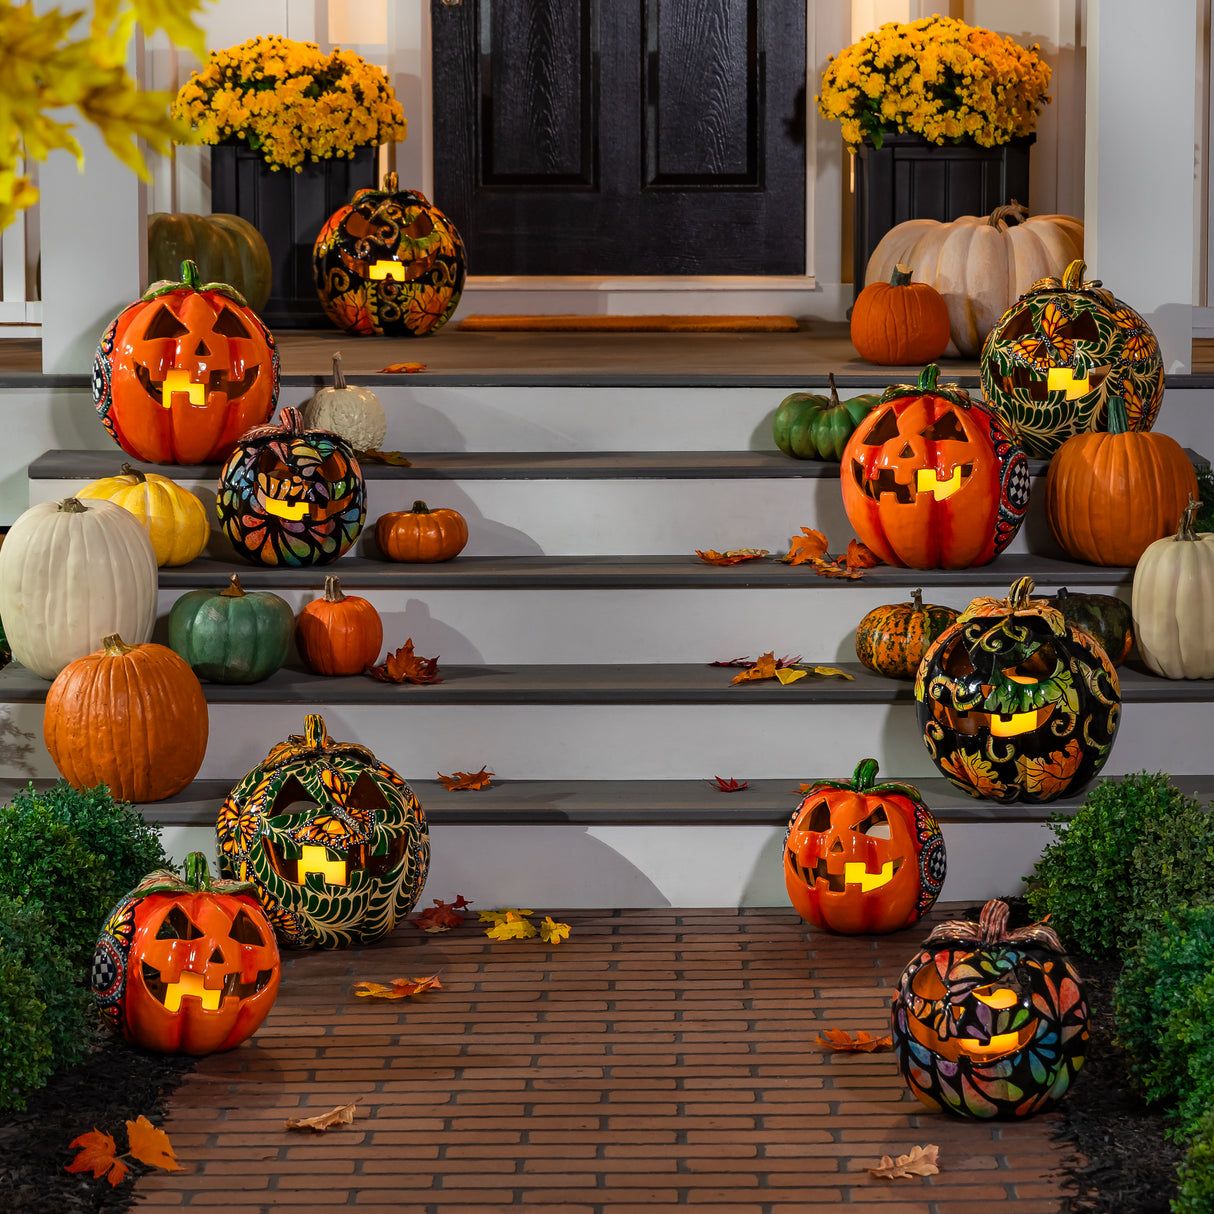
3. Layer a Porch with Ornate Butterfly and Floral Painted Pumpkins
that makes this porch so memorable is the inclusion of pumpkins painted with intricate butterfly and floral motifs. While the carved jack-o’-lanterns and natural gourds are classic, the hand-painted elements introduce a level of artistry and sophistication that’s completely unexpected for seasonal decor. They transform the display from a simple Halloween setup into a curated autumnal art installation. Without them, it would be a perfectly nice porch, but with them, it becomes a conversation starter that feels personal and unique.
✅ Before You Start
This dense, layered look is perfect for a porch with at least two or three steps and a landing area of about 4 ft by 6 ft. The tiered steps are essential for creating the cascading effect and ensuring each pumpkin is visible. If you have a single-level porch, you can replicate this by using apple crates or small wooden stools to create different height levels. Be mindful not to block the swing of your front door! Allow at least 3 feet of clear walkway space for safety and function.
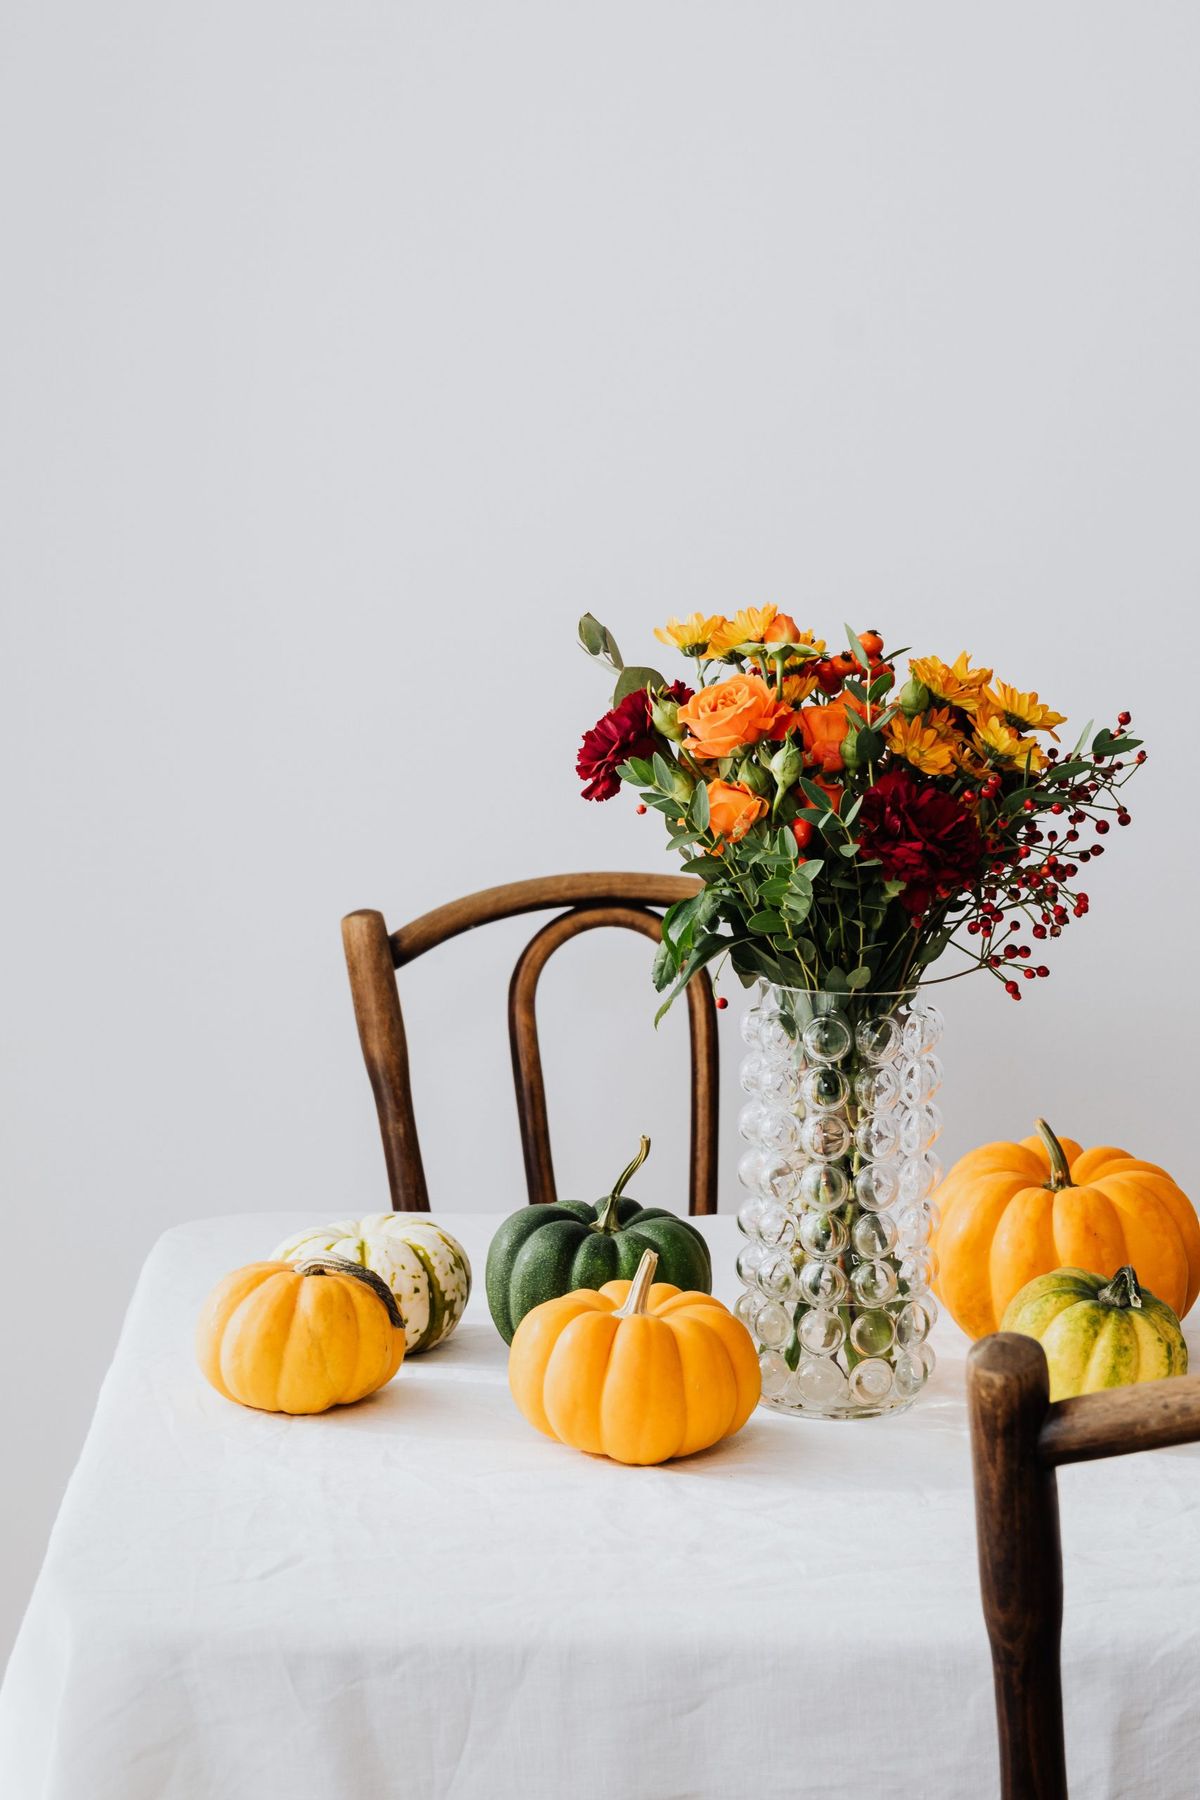
4. Create a Simple Still Life with Miniature Gourds and Autumn Flowers
You don’t need a huge budget to create this cheerful, organic moment. The whole look hinges on affordable, natural elements. A bag of assorted miniature gourds from the grocery store or a farmer’s market will run you about $5-$10. Instead of a pricey floral arrangement, grab a bunch of seasonal mums or sunflowers for under $15. The ‘textured bubble-glass vase’ can be a find from a thrift store or Target for around $20. Paired with a simple white tablecloth you already own, you can achieve this entire elegant look for under $50.
🔥 Trending Context
While this arrangement is stunning, using a real floral bouquet means it has a limited lifespan. To keep it looking fresh, you’ll need to change the water in the vase every other day and trim the flower stems at an angle. The miniature pumpkins themselves will last for several weeks, if not a couple of months, as long as they are kept dry and haven’t been bruised or punctured. Keep an eye on the gourds resting on the tablecloth; any moisture can cause them to rot prematurely and potentially stain the fabric.
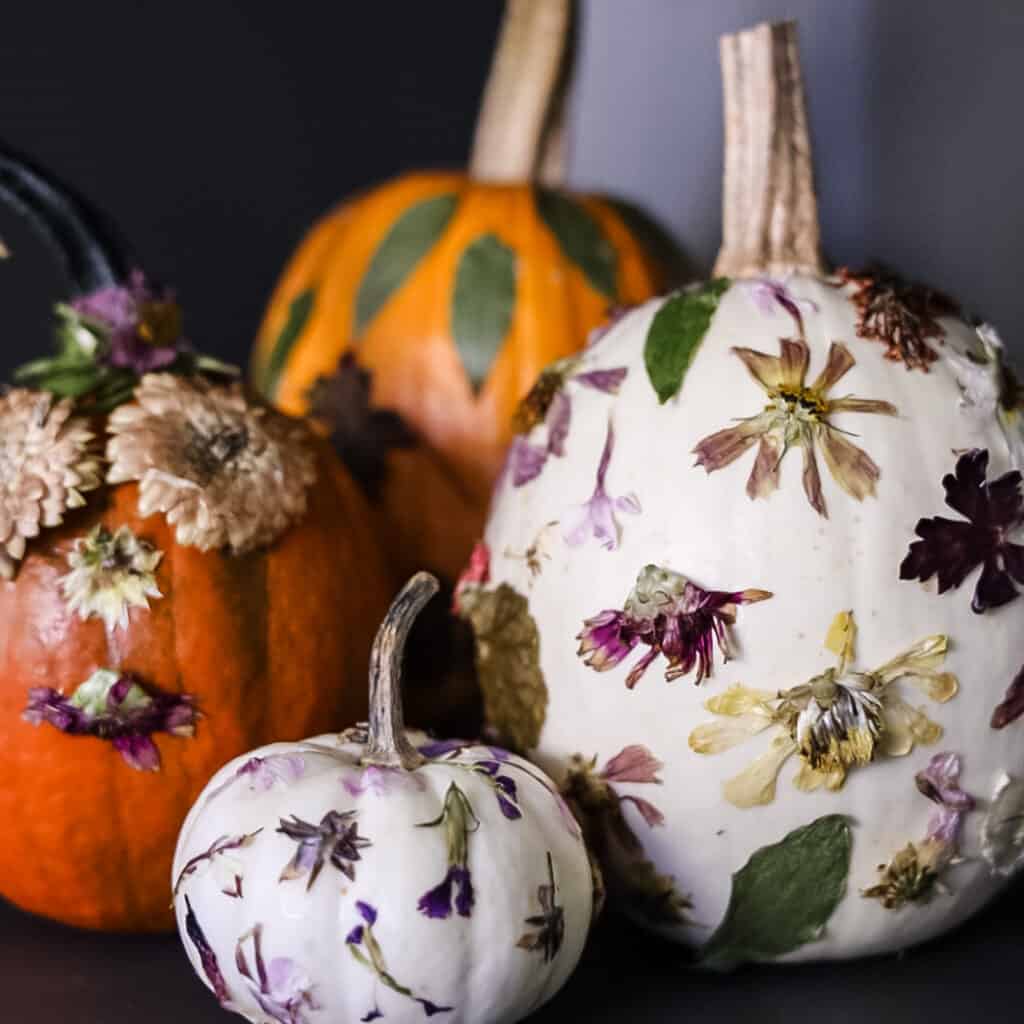
5. Adorn Pumpkins with Delicate Pressed Dried Flowers and Greenery
Recreating this botanical look is simpler than it seems. Here’s a quick guide to applying pressed flowers to a pumpkin. (Time: 45 mins. Cost: ~$15 for glue/sealer).
- Clean your pumpkin surface with a damp cloth and dry it completely.
- Plan your design by arranging the dried flowers on the pumpkin without glue first. Take a quick photo with your phone to remember the placement.
- Using a small paintbrush, apply a thin layer of Mod Podge (matte finish works best) to a small section of the pumpkin.
- Carefully place a pressed flower onto the glued area using tweezers. Gently pat it down with your finger.
- Once all flowers are placed, apply a thin top coat of Mod Podge over the entire design to seal and protect it. Let it dry completely.
🧹 Maintenance Reality
For a truly professional finish, the key is in the top coat. Many people make the mistake of leaving the pressed flowers exposed, but they will quickly become brittle and fall off. Apply a thin, even layer of a decoupage medium like Mod Podge over the top of the flowers. Don’t worry, it dries clear! Use a soft-bristle brush and apply it in one direction to avoid streaks. This not only protects the delicate botanicals but also gives the pumpkin a beautiful, uniform finish. This is a very different vibe from the stacked pumpkins in Idea #21.
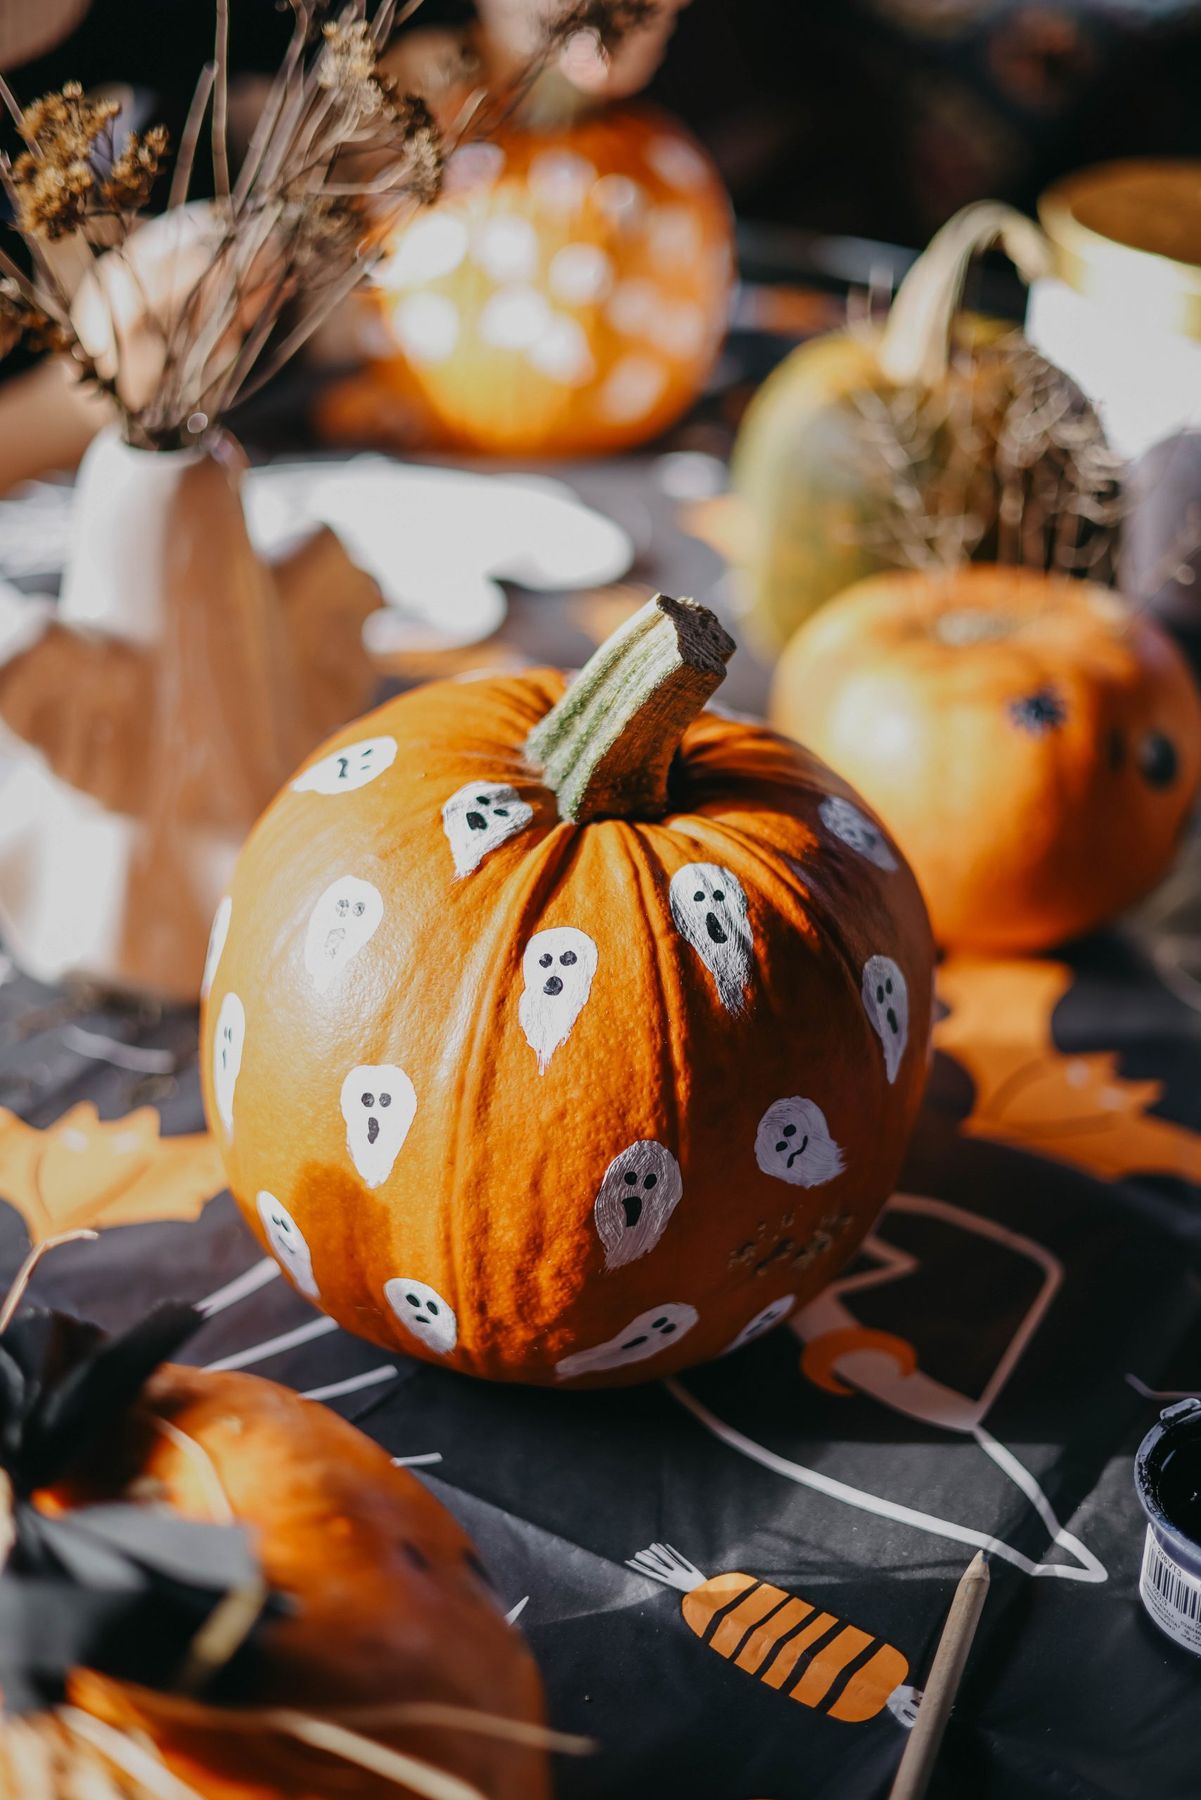
6. Paint Playful White Ghosts on Natural Orange Pumpkins
This charmingly spooky design follows a simple but effective visual recipe: 70% natural pumpkin texture + 20% bold white shapes + 10% quirky black details. The magic is in the contrast. The smooth, opaque white paint of the ghost figures pops against the vibrant, slightly bumpy orange rind of the natural pumpkins. The tiny, hand-painted black eyes and mouths give them personality without overpowering the design. It’s a formula that celebrates the pumpkin itself, using paint as a clever accent rather than a total cover-up. Compare this with the botanical look in Idea #8, which uses a similar ratio of natural surface to decoration.
🎯 What Makes It Work
Painting on a round, ribbed pumpkin surface is trickier than it looks. Your perfectly shaped ghost on paper might look stretched and wonky on the gourd. Use a pencil to lightly sketch the outline of your ghosts first, allowing you to adjust the shape to fit the pumpkin’s curves. Also, getting opaque white coverage on a bright orange pumpkin can require two or three coats of acrylic paint. Be patient and let each coat dry completely before adding the next, or you’ll end up with a streaky, translucent mess.
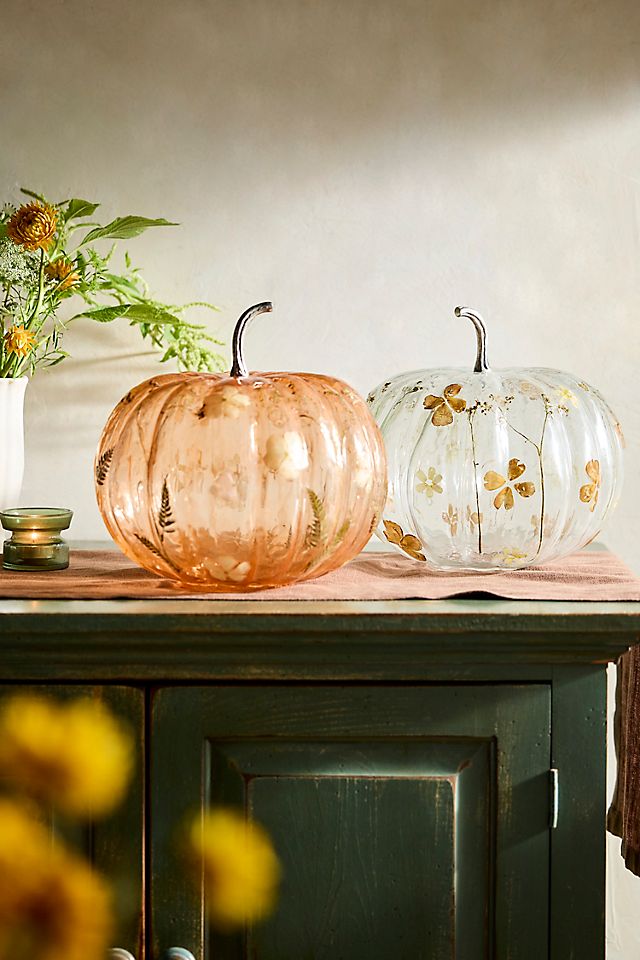
7. Display Elegant Glass Pumpkins with Internal Pressed Botanicals
This look is all about quiet sophistication, and it works because of the interplay between transparency and texture. The delicate, preserved botanicals—ferns and flowers—are encased in amber and clear glass, creating a museum-like quality. Placing them on a dark green cabinet makes the warm tones of the glass glow, while the silver stems add a touch of cool metallic contrast. The muted linen runner beneath them adds a layer of soft, organic texture, preventing the display from feeling too cold or sterile. It’s a study in refined, thoughtful layering.
⭐ The One Thing
Before you invest in glass pumpkins, here’s a quick checklist to make sure they’re right for your space:
- Do you have a stable, low-traffic surface to display them? These are delicate and not suited for a busy coffee table or a narrow hallway console.
- Is the display area away from direct sunlight? Intense sun can cause the dried botanicals inside to fade over time.
- Do you have pets or small children? If so, consider placing these on a high shelf or inside a glass cabinet for safety.
- Does your existing decor support this elegant, refined aesthetic? These work best in spaces that already have a calm, curated feel.
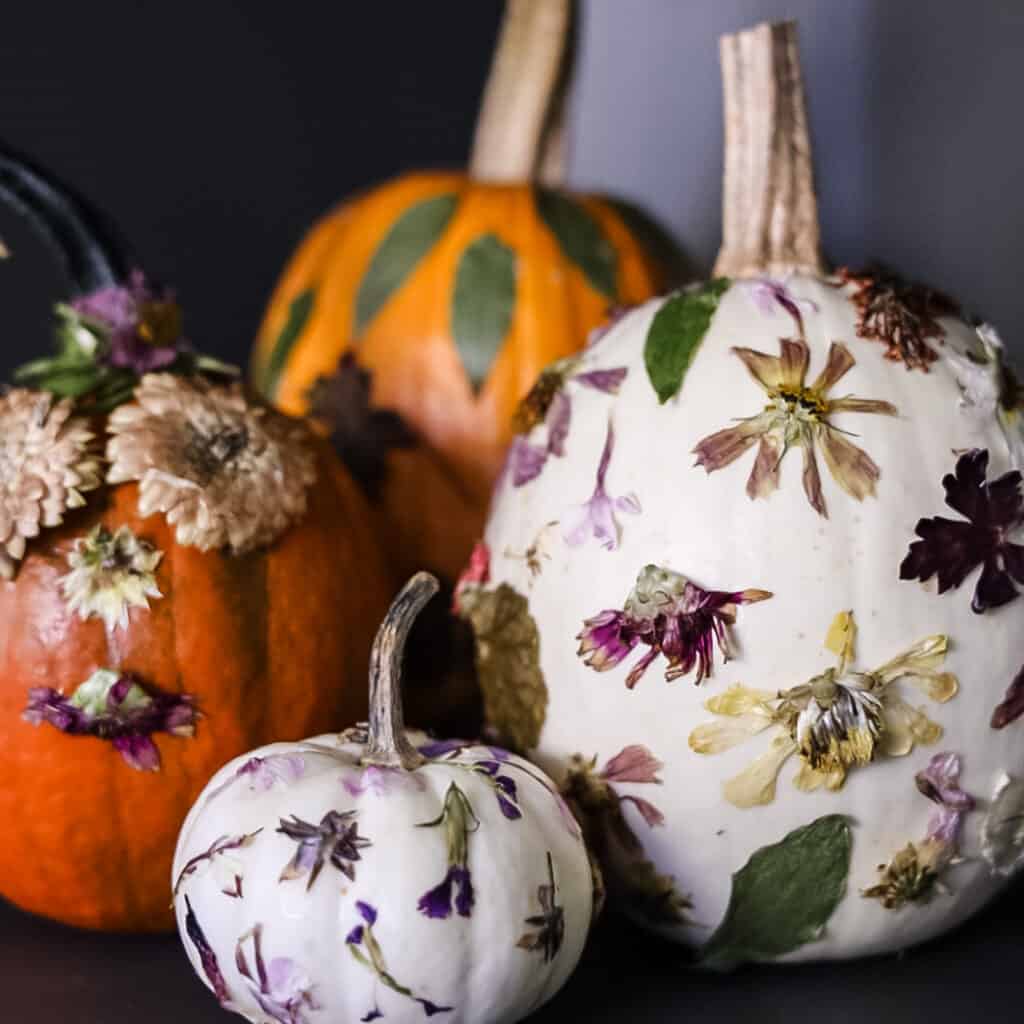
8. Decorate Pumpkins with an Assortment of Pressed Flowers and Leaves
The single element that defines this look is the use of whole, recognizable flowers like zinnias and full leaves. Unlike more abstract botanical arrangements, you can clearly identify the individual floral elements, which gives it an honest, straight-from-the-garden feel. It’s a celebration of the harvest season in its most authentic form. If you were to replace these with crushed petals or generic greenery, you would lose that specific, romantic connection to a late-summer garden. It feels less like a ‘craft project’ and more like preserving a beautiful moment in time.
💸 Get This Look For Less
This style, often called ‘cottagecore’ or ‘grandmacore,’ is having a huge moment because it taps into our collective desire for nostalgia, authenticity, and a connection to nature. In a world of mass-produced decor, creating something by hand with materials from your own garden (or a local florist) feels incredibly personal and meaningful. This trend has real staying power because it’s not about a specific color or pattern, but about an ethos of slowing down and appreciating natural beauty. Think of it as a quiet rebellion against disposable holiday decorations.
9. Style a Whimsical Trio with Dried Wheat, Flowers, and Petals
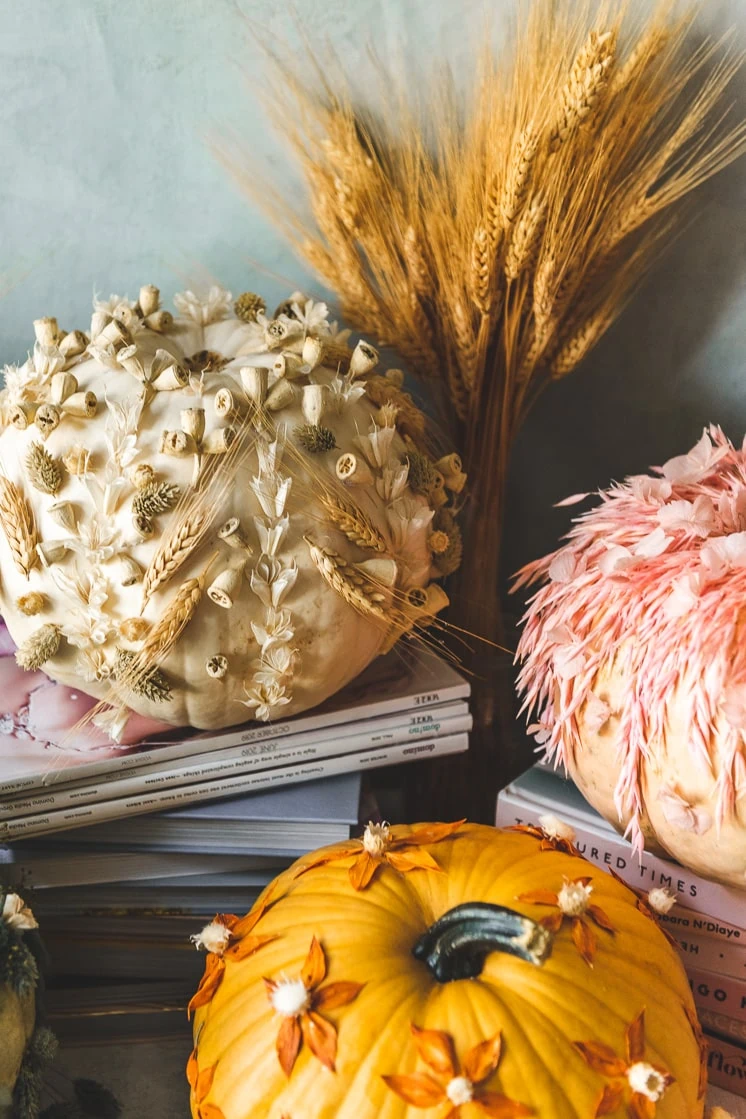
Creating this whimsical, layered look is surprisingly affordable, as it relies on a mix of natural and found objects.
- Pumpkins (3, assorted sizes): $15 – $30
- Dried Elements (wheat, seed pods, flowers): $20 – $40 (or free if foraged!)
- Adhesives (hot glue or craft glue): $5 – $10
- Accent Items (magazines): $0 (use what you have)
- TOTAL: $40 – $80
Budget alternative: Grow and dry your own flowers from your garden over the summer. Collect interesting seed pods and grasses on walks. This approach brings the materials cost down to almost zero, making the project a true labor of love.
💡 Designer Tip
When creating a grouping of decorated pumpkins, the secret is to give each one its own distinct ‘personality’ while keeping the color story cohesive. Notice how one pumpkin is all about linear texture with the wheat stalks, another is about pattern with the pressed orange blossoms, and the third is about soft texture with the pink petals. To tie them together, ensure the base pumpkins (cream, orange, pink) are in a complementary palette and display them at varying heights—using a stack of magazines is a perfect, casual way to do this.
10. Arrange Delicate Pressed Florals on Miniature White Pumpkins
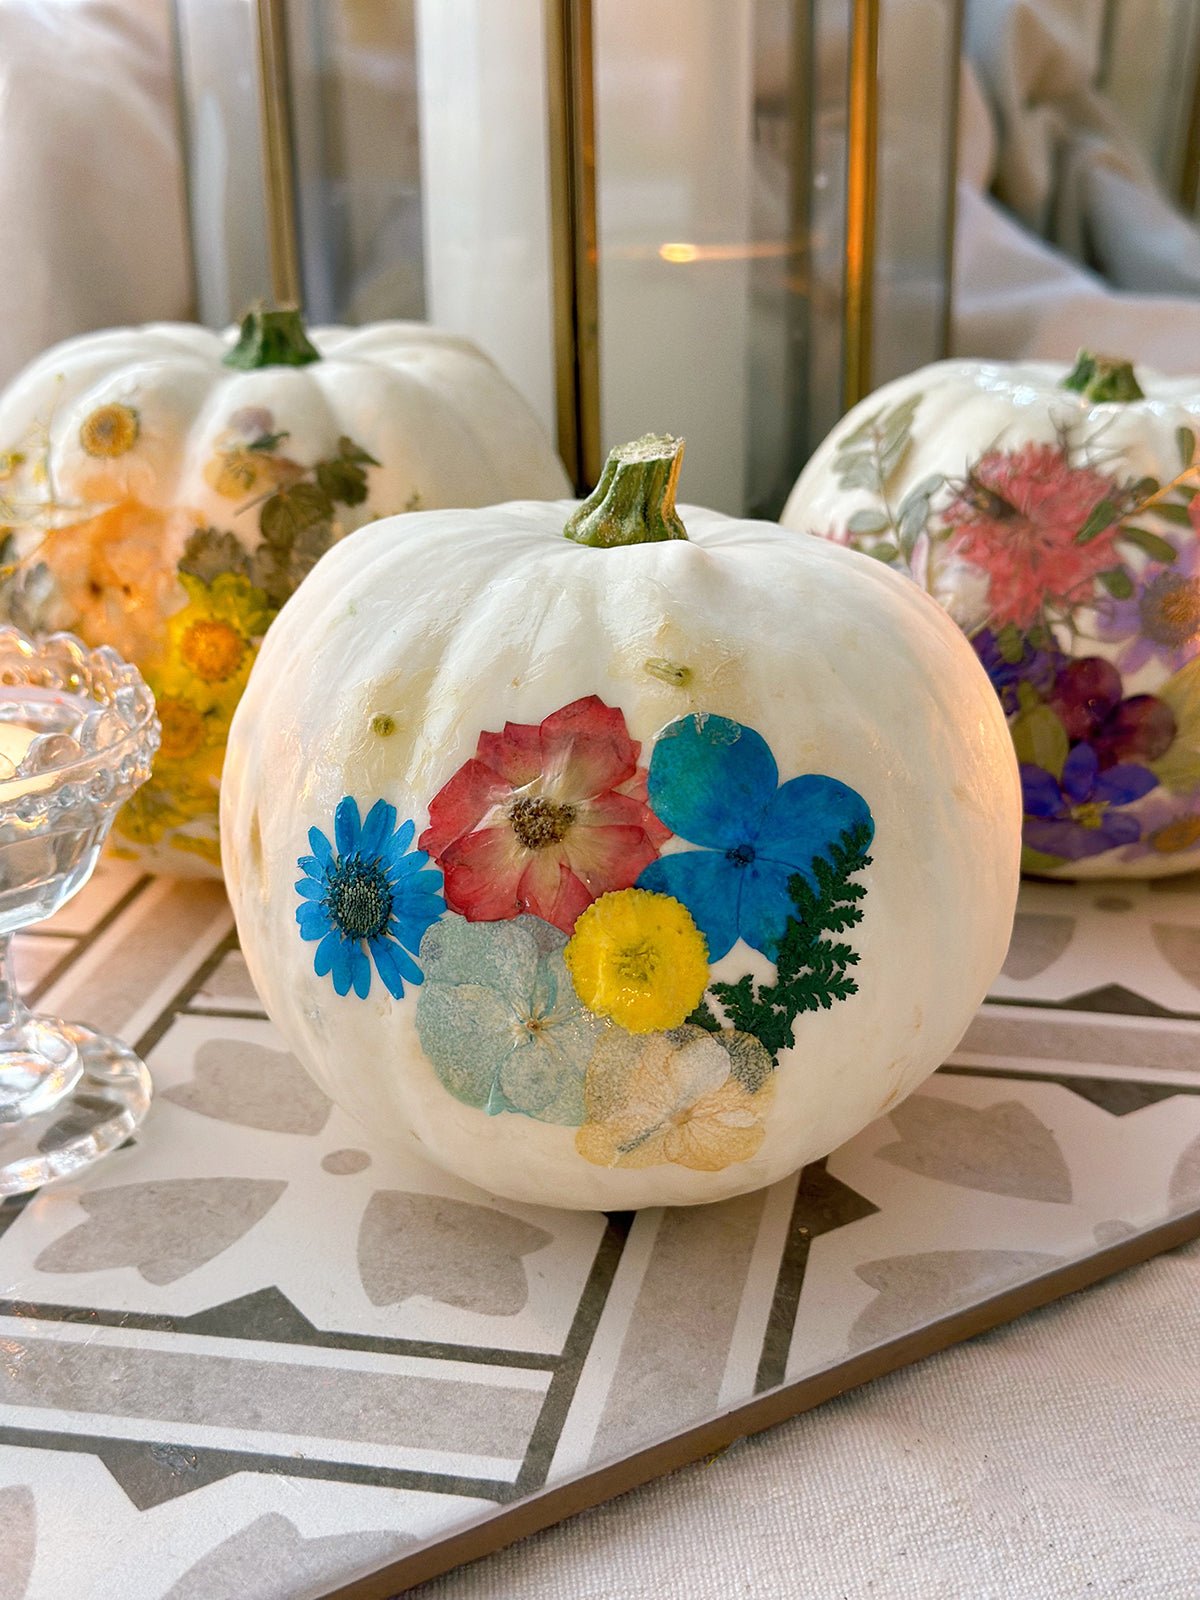
This design is so effective because of the stark contrast in scale and color. The tiny, vibrant pressed flowers look like precious jewels against the pure white canvas of the miniature pumpkins. The white surface allows the bright blues, pinks, and yellows of the botanicals to truly sing. Placing them on a surface with a bold geometric pattern adds another layer of visual interest, grounding the delicate, organic pumpkins with a strong, modern base. It’s a masterful mix of natural and graphic elements. This is a more delicate take than the very similar concept in Idea #15.
⚠️ Real Talk
This idea is perfect for small spaces. Because it uses miniature pumpkins, it’s ideal for a bathroom vanity, a narrow entryway table, or a small kitchen countertop where a larger display would feel overwhelming. The entire arrangement can fit comfortably in a space as small as 12 by 12 inches. It’s a great way to bring in seasonal charm without sacrificing precious surface area. For larger rooms, consider creating a grouping of three or five of these small arrangements along a mantelpiece or down the center of a dining table.
11. Craft a Centerpiece with a Pumpkin and Dried Autumn Florals
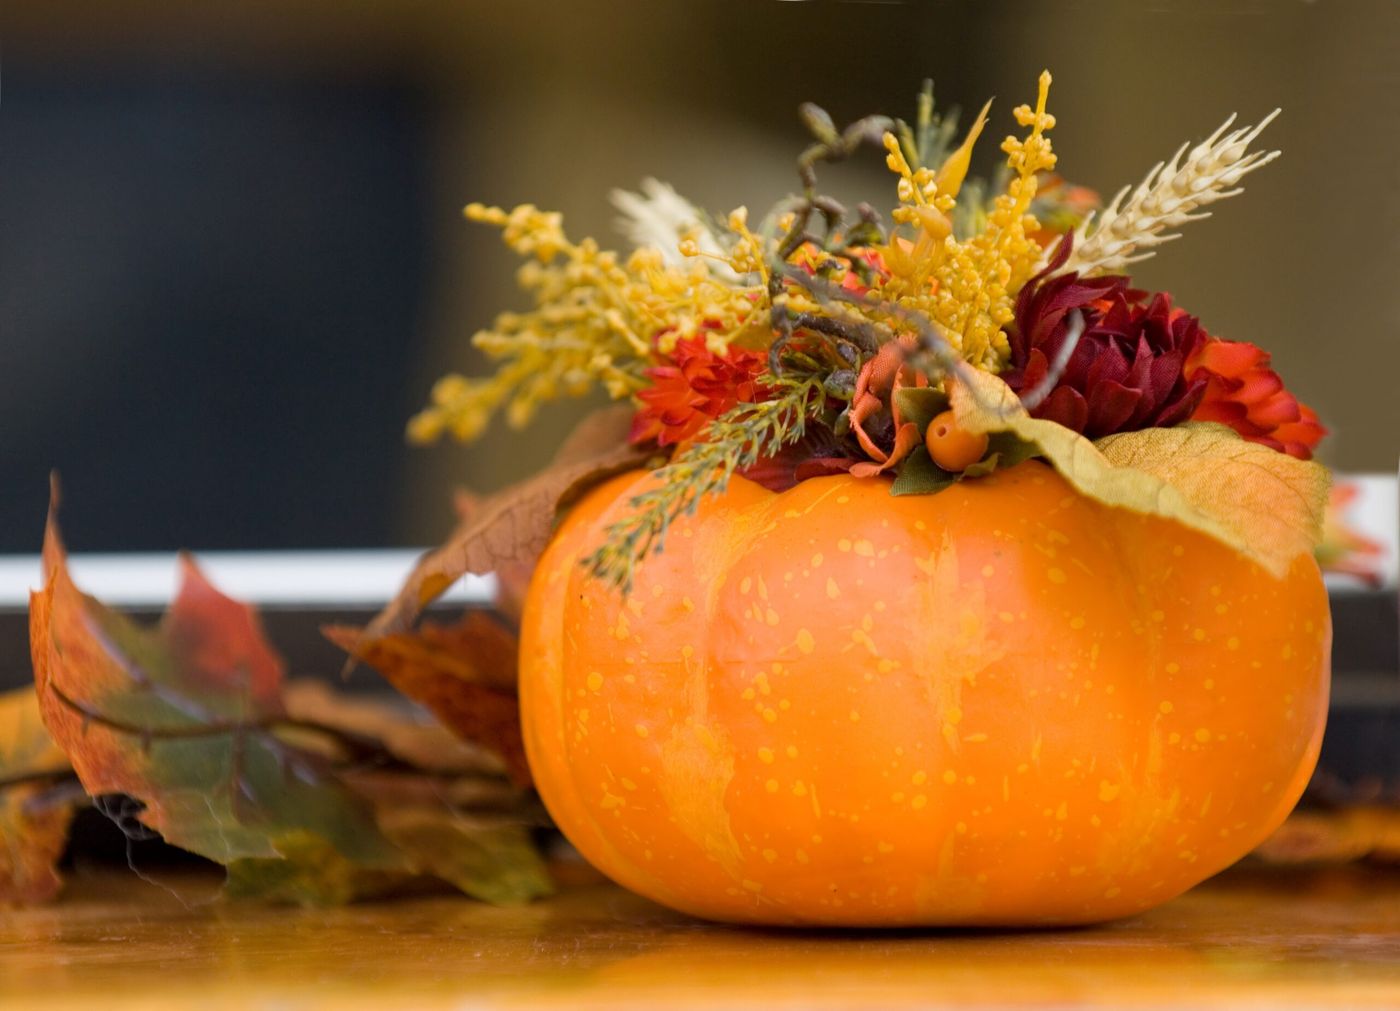
You can get this traditional, cozy look for a fraction of the cost of buying a pre-made arrangement. Start with a faux craft pumpkin from a store like Michaels or Hobby Lobby during a sale (around $10-$15). Then, head to a dollar store or Walmart for bunches of artificial autumn leaves, faux marigolds, and berry sprigs. You can easily assemble a lush arrangement for under $30 total. The key is to buy more foliage than you think you need—density is what makes these arrangements look expensive and full.
📏 Scale Guide
While using a faux pumpkin as a base means this centerpiece will last forever, it also means you have to be careful with your assembly. If you’re using hot glue to attach the dried wheat and flowers, know that it’s a permanent commitment. It can be difficult to remove without damaging the surface of the craft pumpkin. If you want the flexibility to change the arrangement next year, consider creating a floral foam base that sits on top of the pumpkin, which you can then insert the floral stems into without any glue.
12. Display a Hand-Painted Sunflower on a White Ceramic Pumpkin
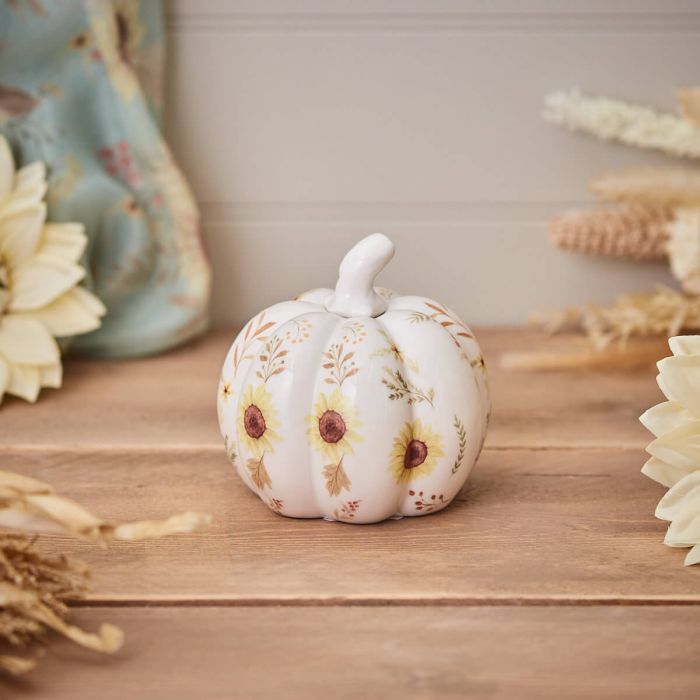
This charming look is a beautiful equation: 50% rustic texture + 40% clean white space + 10% detailed illustration. The light wood plank tabletop and dried botanicals provide a warm, rustic foundation. The glossy white ceramic pumpkin offers a clean, modern counterpoint, preventing the scene from becoming too country. The hand-painted sunflower is the artistic detail that ties it all together, adding a touch of personality and craft. You could swap the sunflower for a painted maple leaf or a delicate fern and the formula would still work perfectly.
🔧 How-To Brief
that makes this feel special is the hand-painted artwork. In a sea of printed decals and mass-produced decor, the slight imperfections and visible brushstrokes of a painted design feel incredibly authentic and personal. It suggests care and intention. Removing the hand-painted element and replacing it with a sticker would instantly diminish its charm, turning it from a unique piece of art into a generic seasonal object. It’s the human touch that truly elevates this simple ceramic pumpkin.
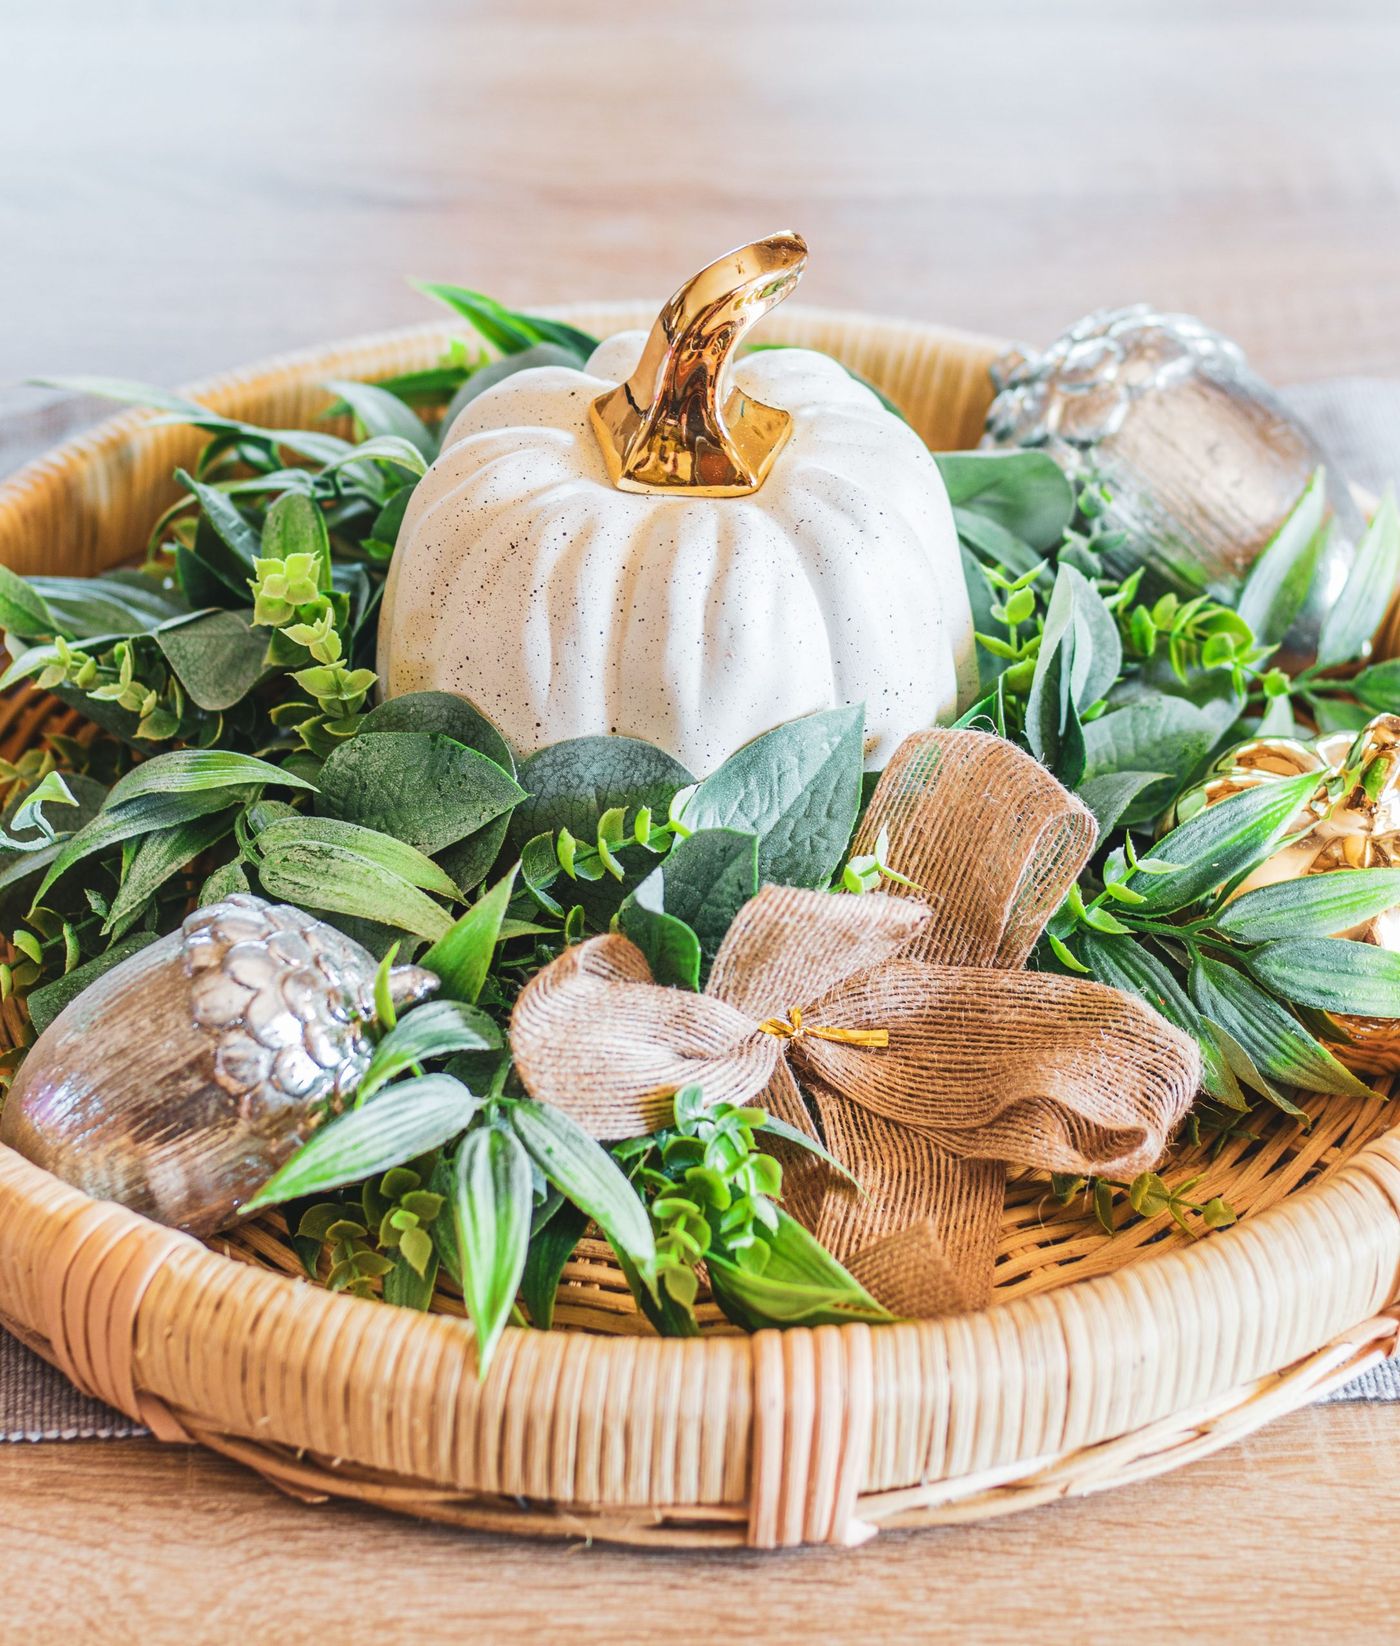
13. Create a Rustic Centerpiece with a Speckled Pumpkin on a Wicker Tray
When mixing metallics in a single arrangement, the rule of thumb is to choose one dominant metal and use the other as a small accent. Here, the warm, glossy gold of the pumpkin stem is the star. The metallic silver acorns are used sparingly, providing just a small pop of cool contrast. To make it feel cohesive, make sure the finishes are different. For example, pair a shiny primary metal (the gold stem) with a more matte or brushed secondary metal (the silver acorns). This creates a sophisticated, layered look rather than a chaotic clash.
💰 Budget Breakdown
Wicker and burlap are fantastic for achieving a rustic, cozy vibe, but they are magnets for dust and can be tricky to clean. To maintain this centerpiece, you’ll need to dust it weekly with a soft-bristled brush or the brush attachment of your vacuum. Avoid using any water or cleaning sprays on the wicker tray or burlap bow, as moisture can lead to mildew or discoloration. Store it in a dry, covered container after the season to prevent it from getting dusty and musty in storage.
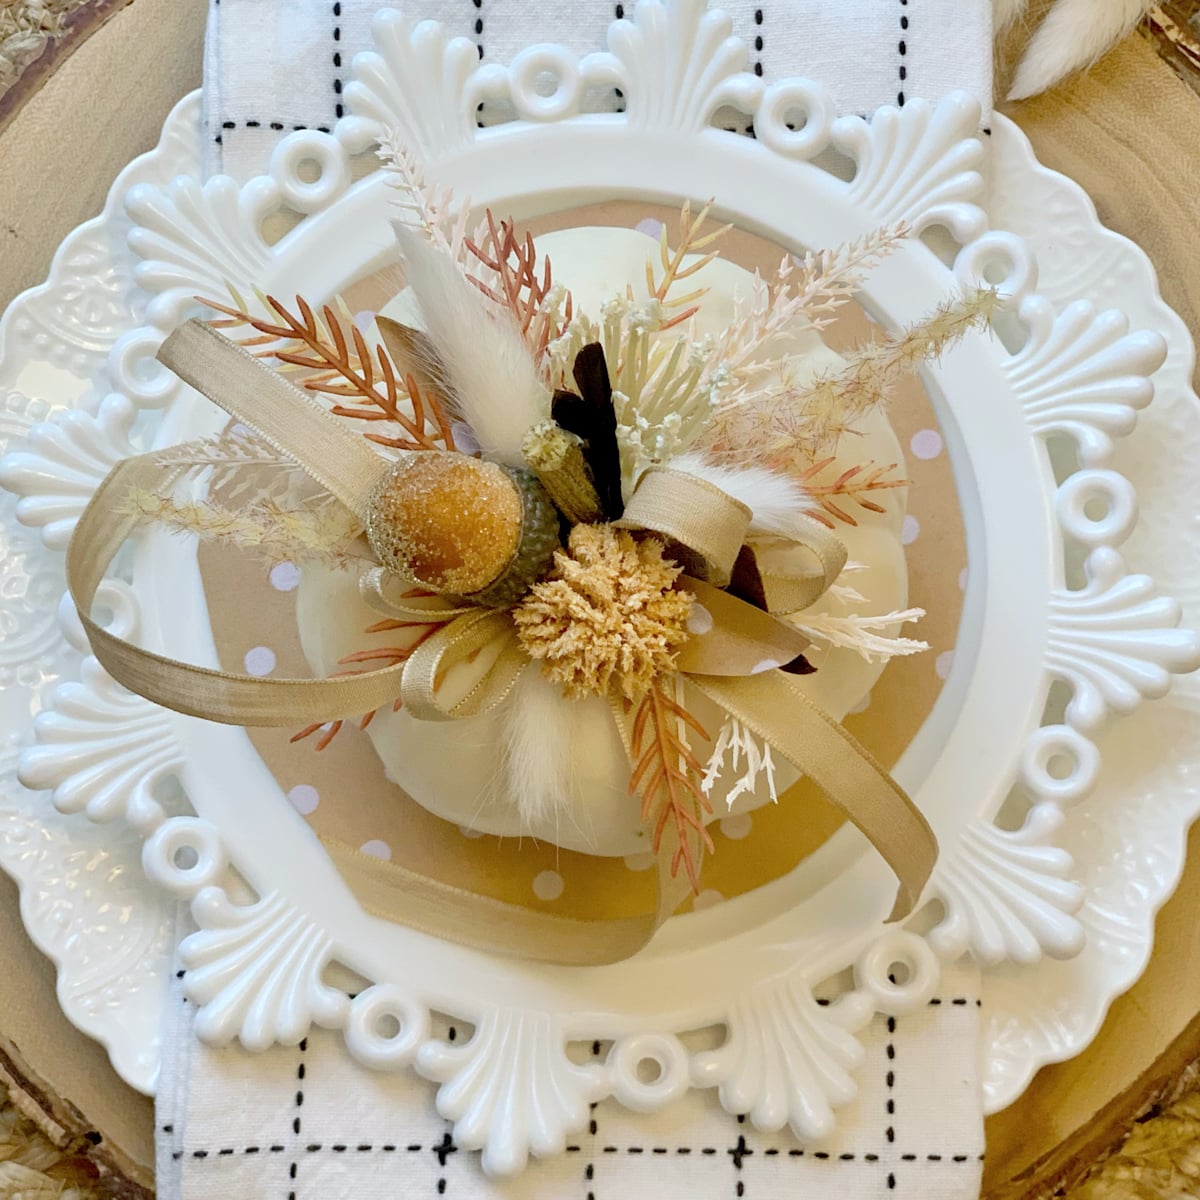
14. Adorn a Mini Pumpkin with Dried Florals and a Satin Ribbon
Crafting the elegant floral topper for this mini pumpkin is a quick and satisfying project. (Time: 15 mins. Cost: ~$10 for materials).
- Start with a small white craft pumpkin. If using a real one, make sure the stem is intact.
- Gather a small bundle of dried elements: feathery plumes, grasses, and a felt acorn. Trim the stems to about 2-3 inches long.
- Arrange the bundle in your hand until you like the composition. Use a small piece of floral wire or twine to tightly bind the stems together.
- Tie a 12-inch piece of beige satin ribbon into a simple, elegant bow. Leave the tails long.
- Use a hot glue gun to attach the floral bundle to the top of the pumpkin, right next to the stem. Then, glue the satin bow directly in front of the bundle to hide the stems.
📐 Style Math
This design is a masterclass in texture mixing. It works because it combines a wide range of surfaces in a tight, monochromatic color palette. You have the smooth, painted pumpkin, the glossy scalloped plate, the soft sheen of the satin ribbon, the delicate texture of the paper doily, the feathery plumes, and the fuzzy felt of the acorn. Because the colors are all within the same family of creamy whites and beiges, the mix of textures feels sophisticated and rich rather than busy or chaotic. It’s a feast for the eyes.
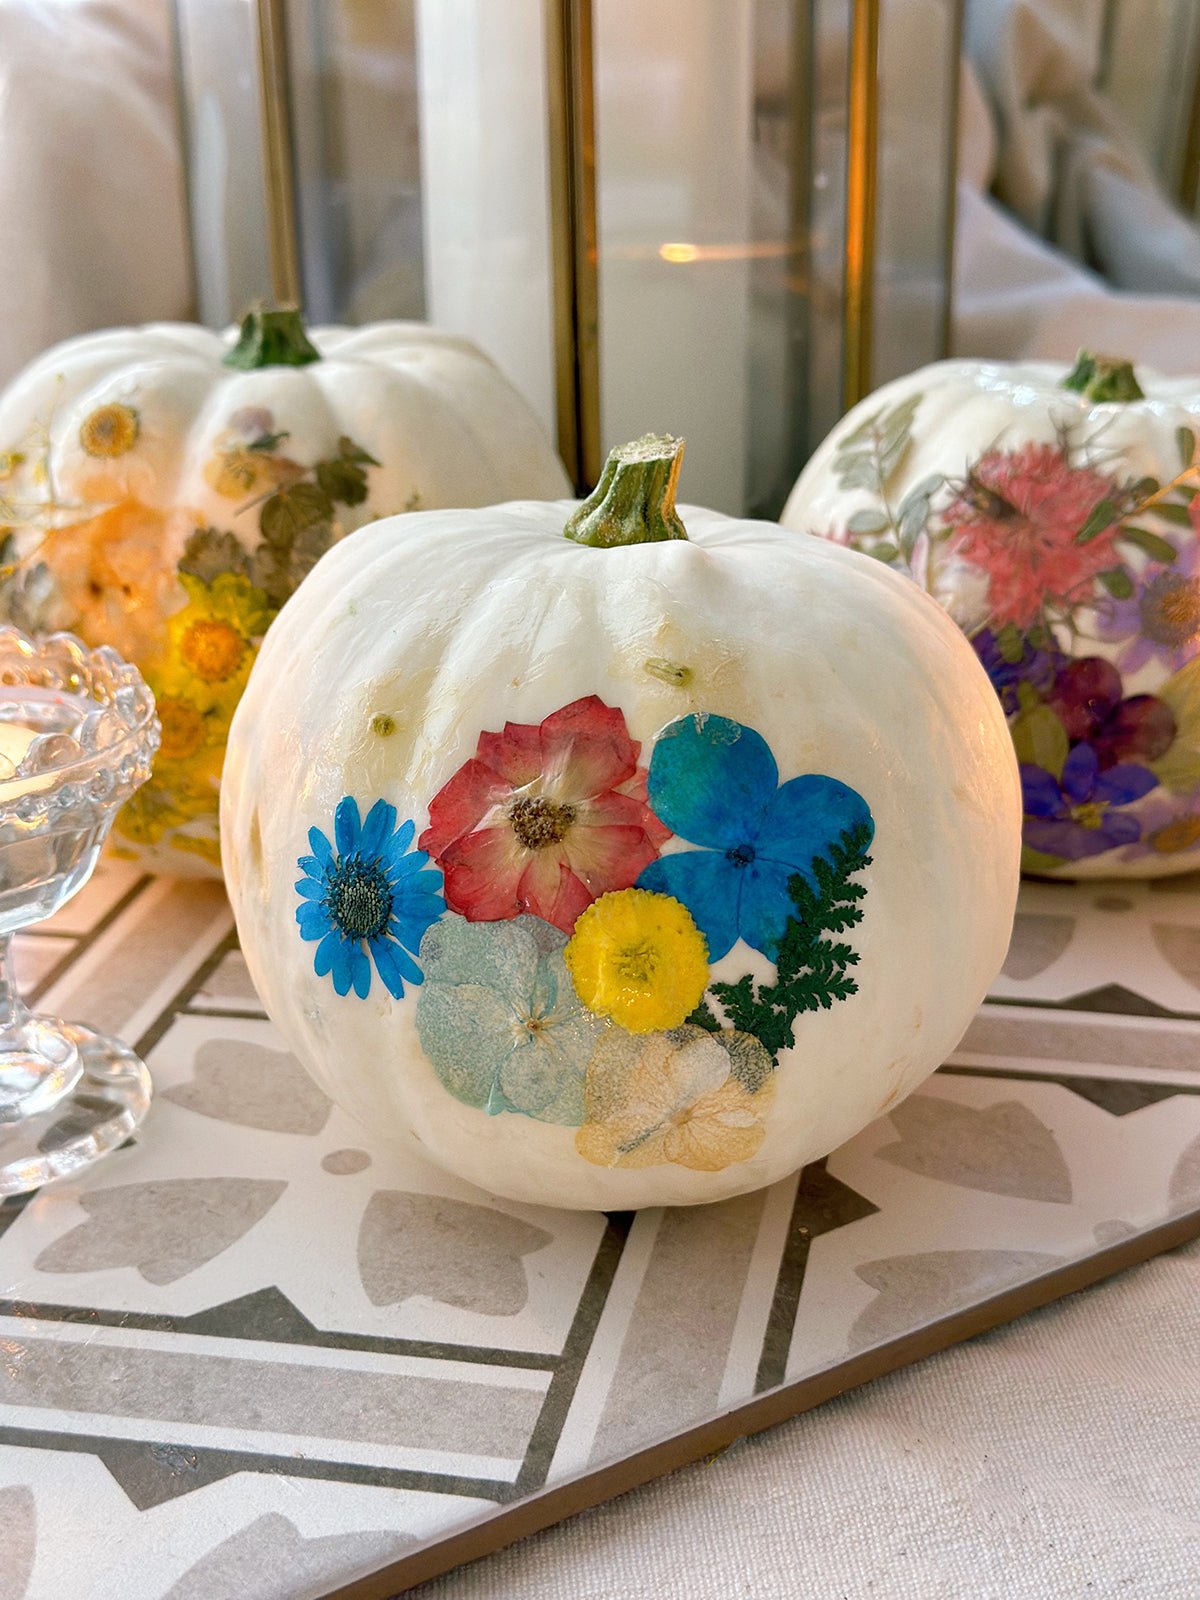
15. Apply Botanical Decals to White Pumpkins on Patterned Tile
This is the high-style, low-effort botanical pumpkin you’ve been looking for. The secret is using floral temporary tattoos or waterslide decal paper instead of painstakingly decoupaging real pressed flowers. A pack of floral temporary tattoos is less than $10 online. You can get the same delicate, detailed look as seen in Idea #10 for a fraction of the time and cost. Just apply them to a clean pumpkin surface the same way you would to skin. For a more custom look, print your own designs onto waterslide decal paper (around $15 a pack) using an inkjet printer.
✅ Before You Start
Ready to try this clean, botanical look? Run through this quick checklist before you begin.
- Have you thoroughly cleaned the pumpkin’s surface? Any dust or oil will prevent the decals from adhering properly. A simple wipe with rubbing alcohol works wonders.
- Are you using white or light-colored pumpkins? These decals are often translucent, and their colors will pop best against a light background.
- Do you have a clear sealant spray? While not strictly necessary for temporary decor, a quick spray of matte acrylic sealer will protect the decals from scratches and moisture.
- Where will you display them? The patterned tile is a key part of this look. Find a spot with a graphic background, like a kitchen backsplash or a patterned tray.
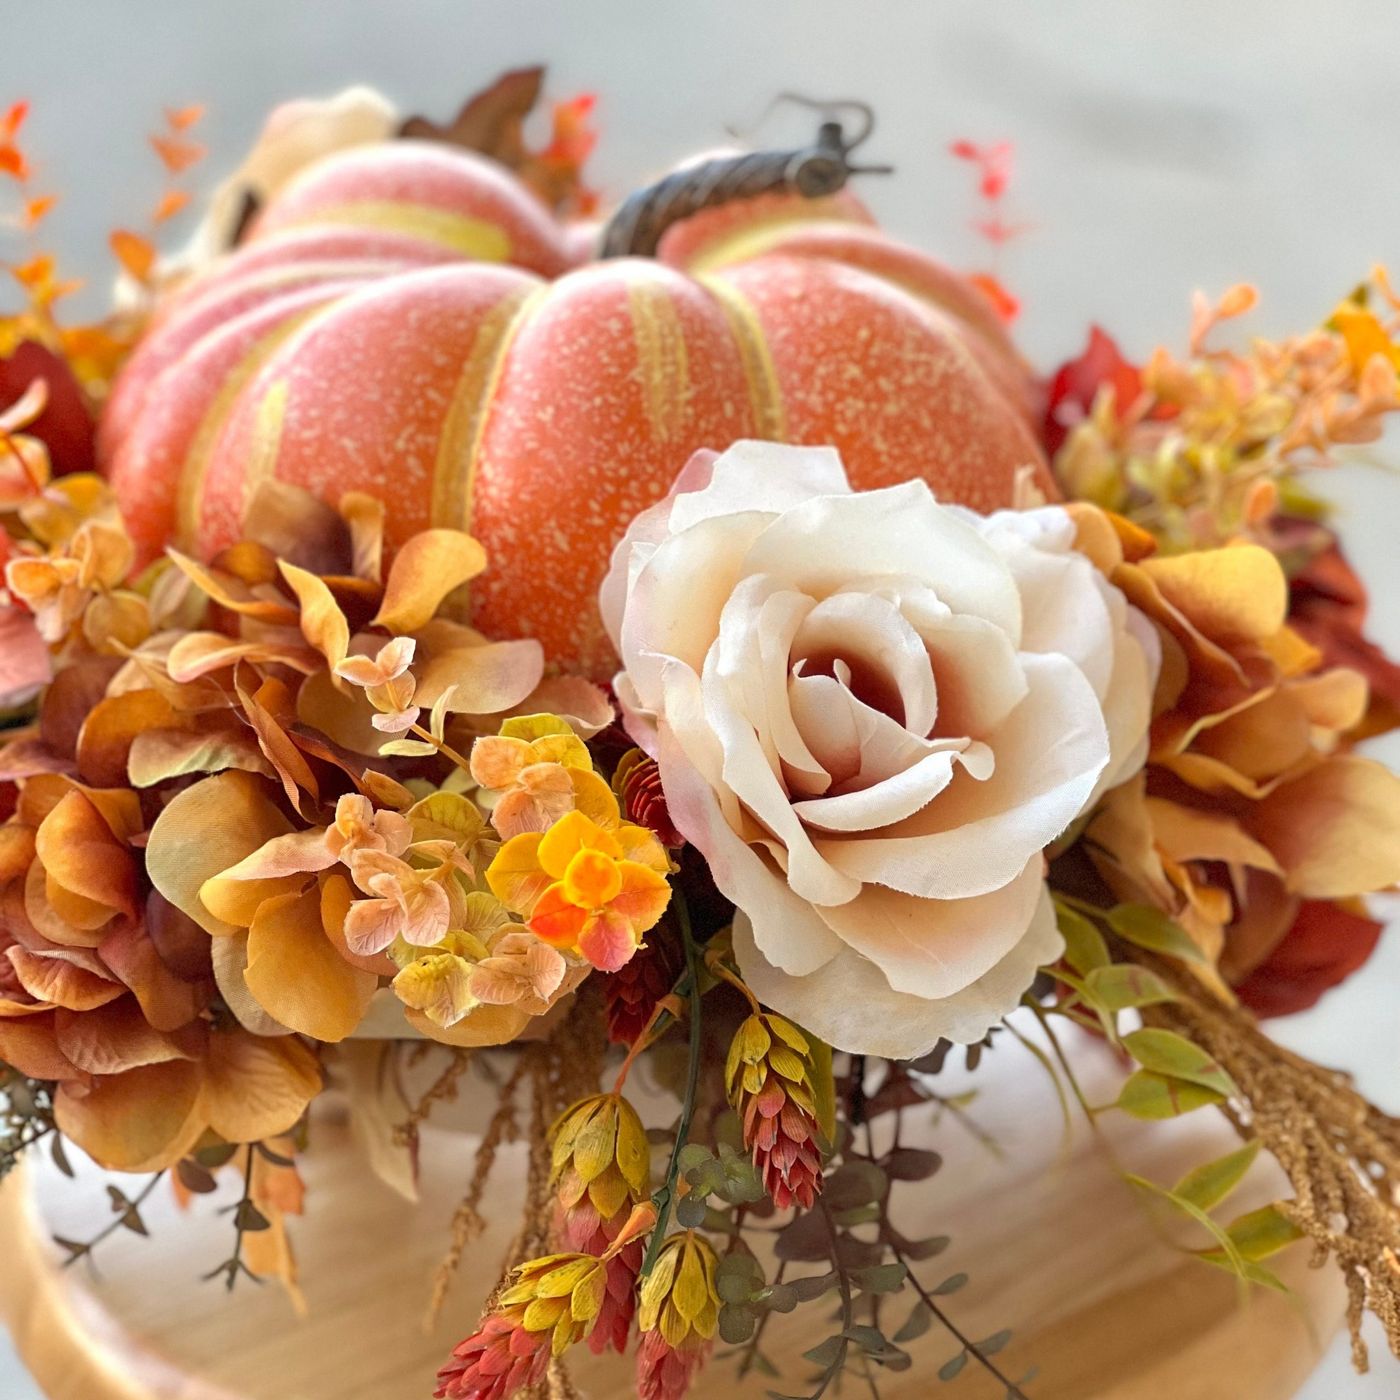
16. Assemble a Lush Centerpiece with a Faux Pumpkin and Silk Florals
This elegant arrangement breaks down into a simple formula: 40% dominant floral (the large cream silk rose) + 30% secondary floral (the orange hydrangeas) + 20% textured foliage + 10% rustic base (the speckled pumpkin). The key is to have one flower that clearly stands out in size and color to act as the focal point. The surrounding flowers and leaves should support it, not compete with it. You can switch up the flowers—a large dahlia or peony would also work—as long as you maintain that clear visual hierarchy.
🔥 Trending Context
The secret to making faux floral arrangements look expensive is to invest in high-quality ‘real touch’ flowers for your focal point, like the prominent cream rose here. Cheaper silk flowers can look plasticky and flat. While a single high-quality stem might cost $10-$15, it makes the entire arrangement look more realistic. You can then fill in the surrounding space with more budget-friendly foliage and secondary blooms. Don’t be afraid to gently bend the stems and fluff the petals to give them a more natural, less rigid shape right out of the box.
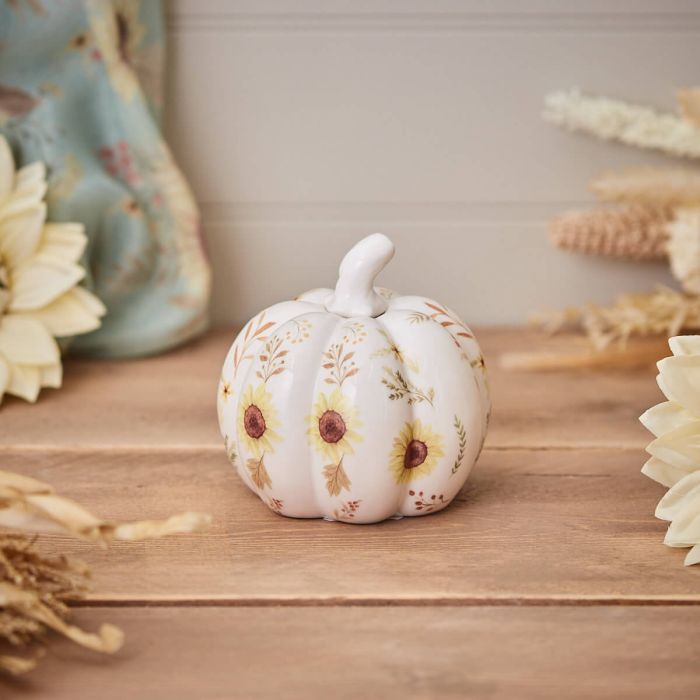
17. Style a Ceramic Pumpkin with Sunflower Decals on a Rustic Wood Surface
The single element that makes this image feel so cozy and complete is the rustic wood tabletop. It provides the perfect foundation of warmth and texture. If you placed this same ceramic pumpkin on a cold granite countertop or a plain white table, it would feel stark and unfinished. The wood grain connects the piece to nature, enhances the rustic charm of the sunflower illustrations, and makes the entire vignette feel intentional and thoughtfully styled. It’s the context that gives the object its soul.
🧹 Maintenance Reality
This look is part of the ‘Modern Farmhouse’ trend that continues to dominate home decor. What makes it feel current for 2026 is the move away from word art and black-and-white buffalo check towards more subtle, artistic interpretations of rustic style. The focus on botanical illustrations, like the delicate sunflowers, and natural materials feels more authentic and less theme-y. It’s a softer, more mature version of farmhouse decor that has greater longevity and blends more easily with other design styles.
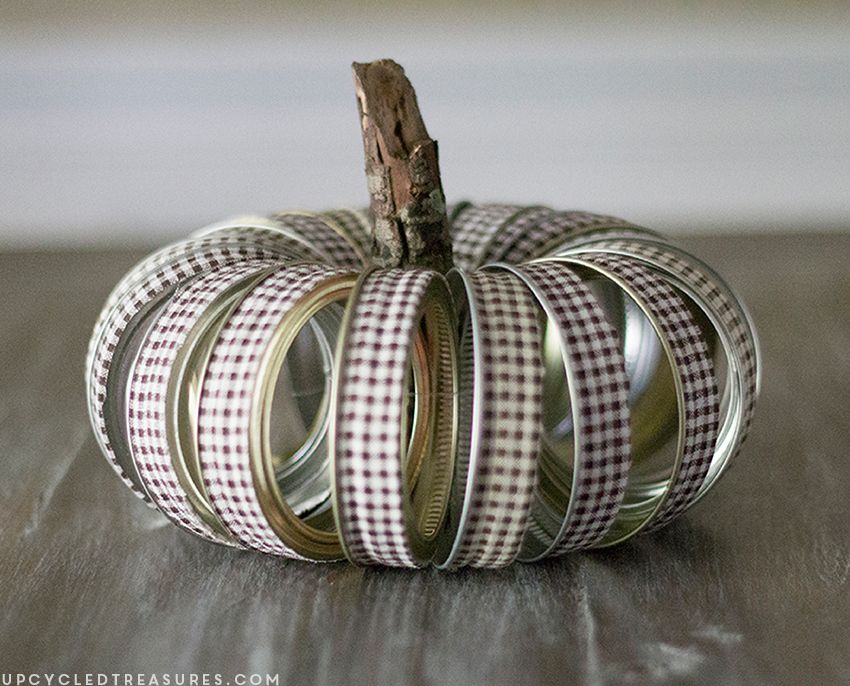
18. Craft a Farmhouse Pumpkin from Metal Jar Rings and Gingham Ribbon
This clever DIY pumpkin is a fantastic upcycling project. Here’s how to assemble it. (Time: 30 mins. Cost: ~$15 if you need to buy supplies).
- Gather about 15-20 standard-size metal mason jar rings (just the rings, not the lids).
- Thread all the rings onto a piece of sturdy twine or wire, like you’re making a giant keychain.
- Pull the twine tight and tie it securely, arranging the rings so they fan out into a spherical, pumpkin-like shape.
- Cut a 5-foot length of gingham ribbon. Starting at the top, weave the ribbon around each metal ring, securing the start and end with a small dot of hot glue.
- Find a small, interesting twig from your yard, about 3-4 inches long, and wedge it into the center hole at the top to serve as the stem.
🎯 What Makes It Work
This farmhouse-chic pumpkin is one of the most budget-friendly ideas on our list, especially if you’re an avid canner or have supplies on hand.
- Metal Jar Rings (20 count): $0 – $12 (you might already own these!)
- Gingham Ribbon (1 spool): $3 – $7
- Twig Stem: $0 (foraged from the yard)
- Hot Glue / Twine: $1 – $5 (staple craft supplies)
- TOTAL: $4 – $24
Budget alternative: Ask for spare jar rings on a local Buy Nothing group on Facebook or check thrift stores. You can often find bags of canning supplies for just a few dollars, which is far cheaper than buying them new.
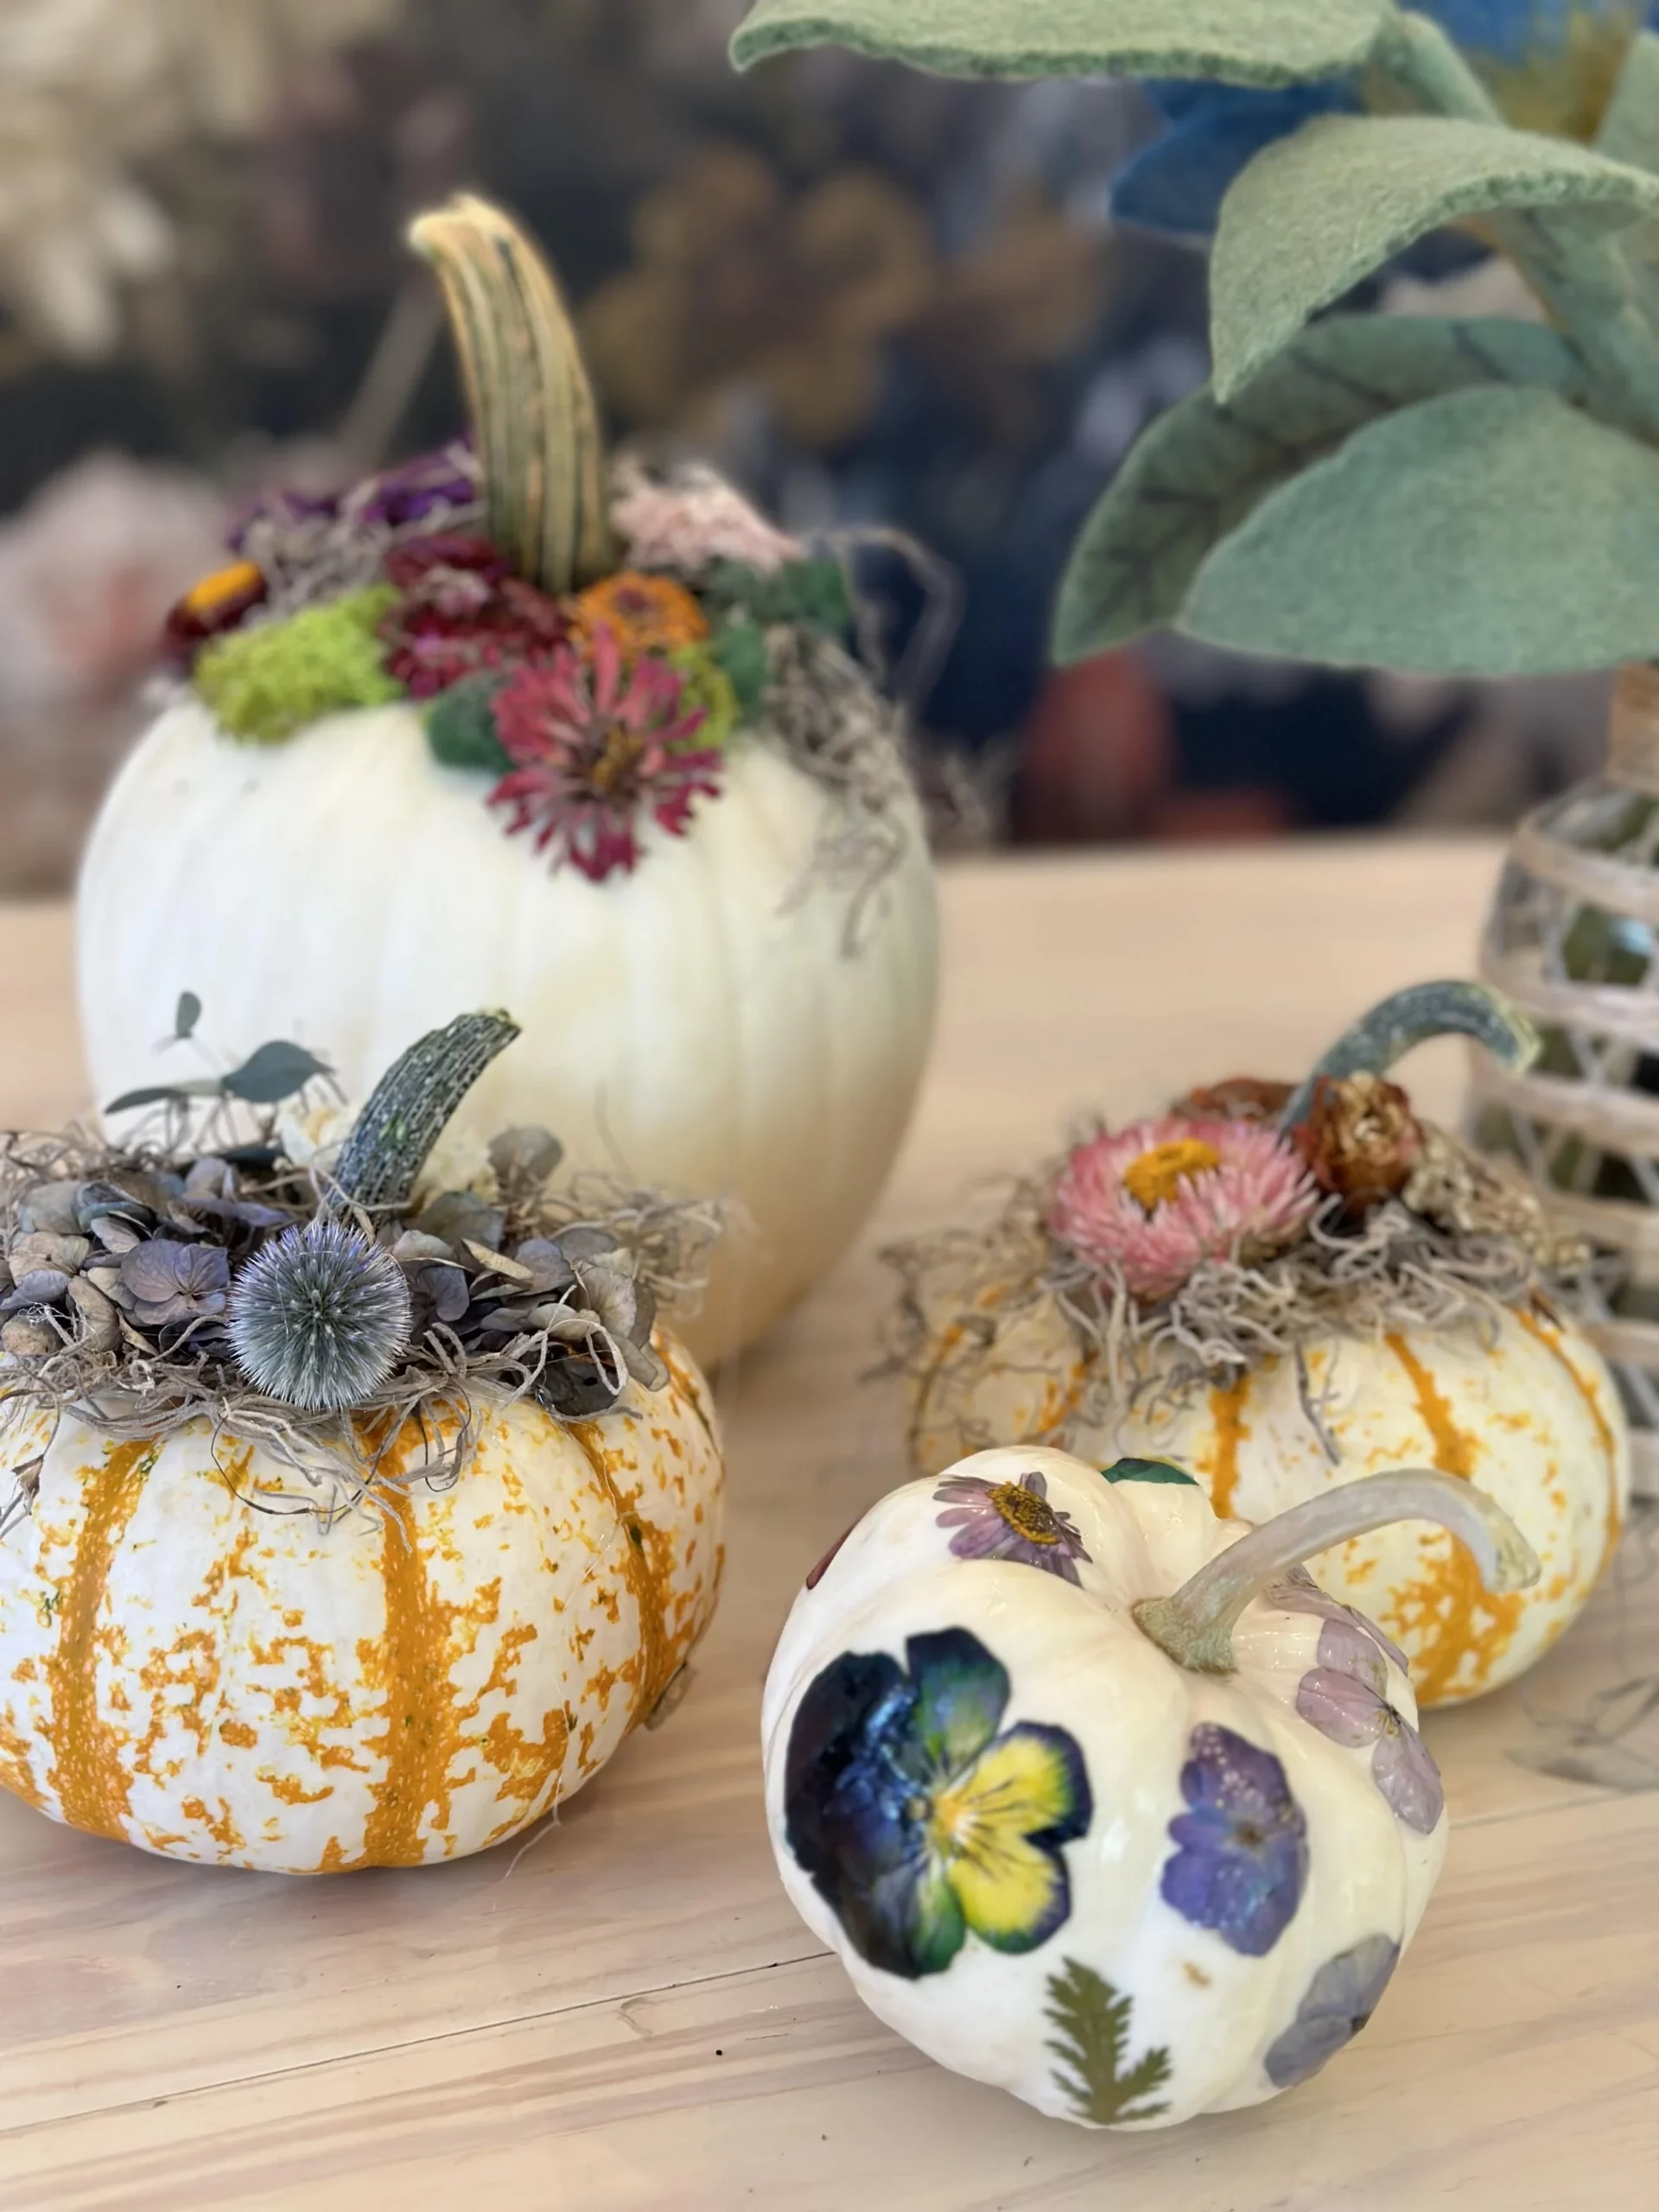
19. Design Artistic Pumpkins with Pressed Pansies and Dried Moss
When working with multiple types of dried botanicals on one piece, create distinct ‘zones’ for each material. Notice how the pressed pansies are applied to the smooth face of the pumpkin, while the more textural elements like dried strawflowers and moss are clustered around the stem. This prevents the design from looking chaotic. This technique, called ‘material blocking,’ allows each element to be appreciated on its own while contributing to the overall composition. It gives the piece a more curated, intentional feel than a random scattering of materials.
⭐ The One Thing
This design is a masterclass in textural storytelling. It works because it engages the sense of touch, even from a distance. You have the papery, delicate texture of the pressed pansies, the fluffy, airy quality of the Spanish moss, the bristly nature of the thistle, and the crisp, full shape of the strawflowers, all set against the smooth, waxy skin of the pumpkin. This rich tapestry of textures creates a deep visual interest that a simple painted design could never achieve. It feels organic, complex, and alive.
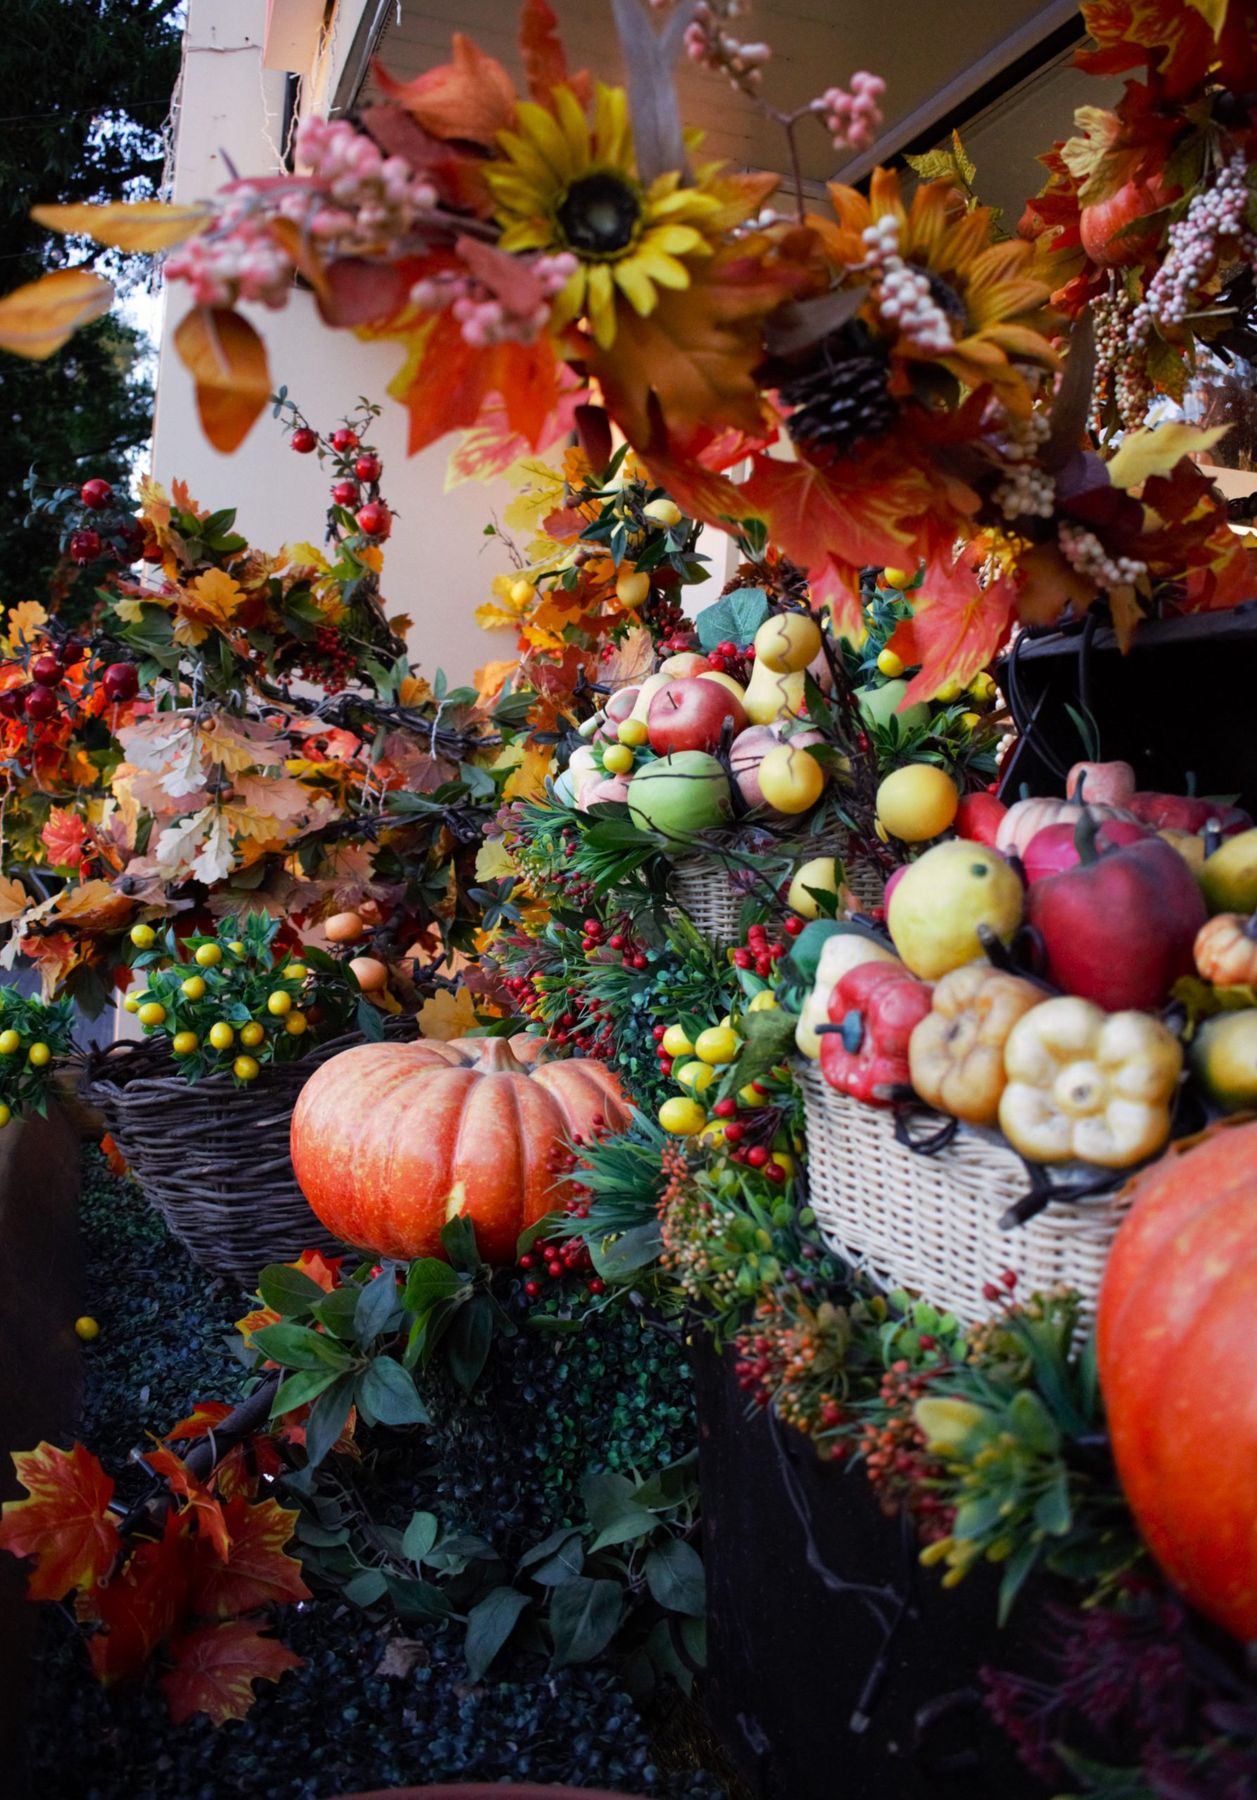
20. Create an Abundant Harvest Display in Woven Baskets
This overflowing, abundant look is perfect for making a big statement in a larger area, like a front porch, a fireplace hearth, or a wide entryway. To get this dense, layered effect, you need a space that’s at least 3 feet wide and 2 feet deep. The key is using large containers, like the wicker baskets shown, to corral all the elements. Without the baskets, the same amount of decor would look messy and scattered. The baskets give the abundance structure and purpose. For a similar but more vertical look, check out the tiered porch steps in Idea #26.
💸 Get This Look For Less
Don’t sleep on thrift stores for this project! You can often find large wicker baskets for $5-$10 apiece, which is a huge saving compared to buying them new. The faux pumpkins, fruits, and foliage can also be found in grab-bags at Goodwill or other secondhand shops after the holiday season. The ‘used’ nature of these items often adds to the rustic charm. With a budget of around $40 and a bit of thrifting luck, you can create a massive, impactful display that looks like it cost hundreds.
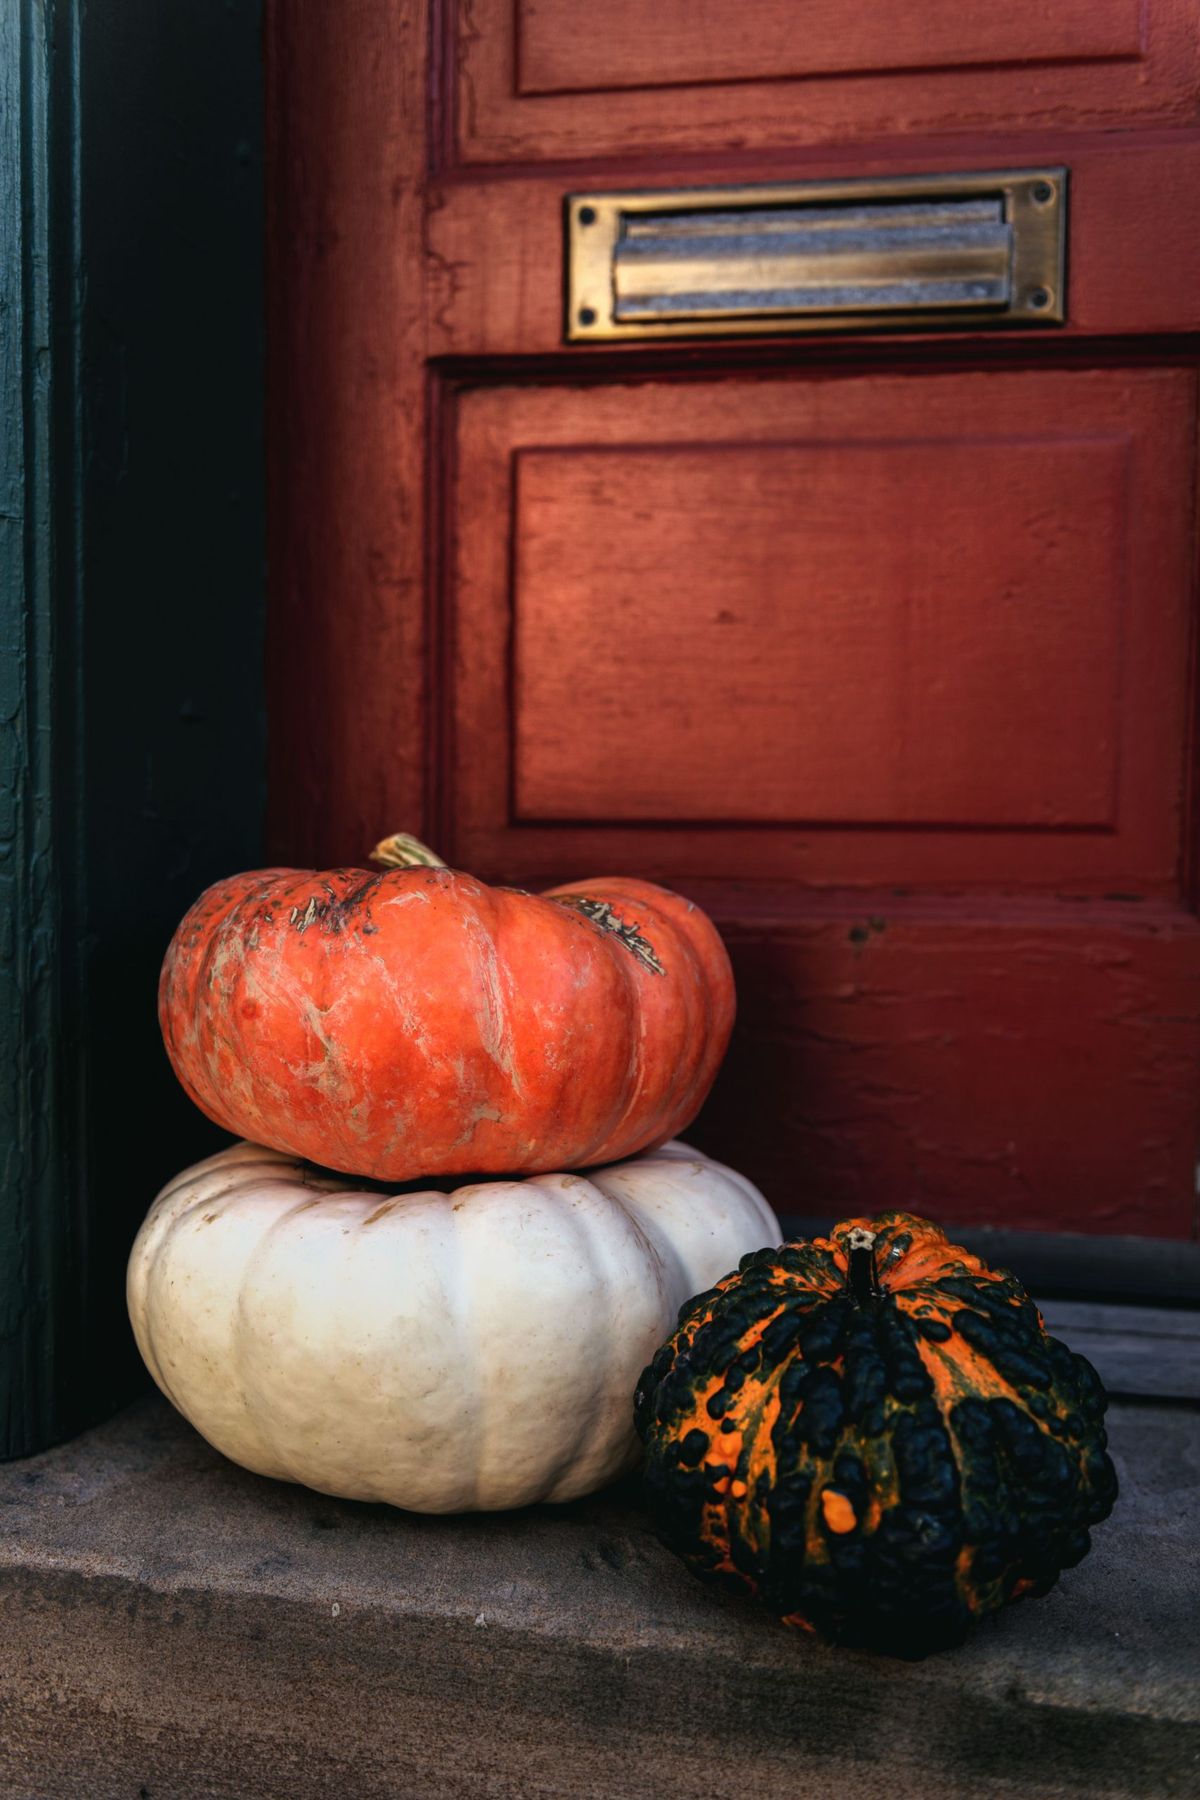
21. Stack Heirloom Pumpkins Against a Weathered Red Door
Stacking real pumpkins requires a bit of engineering. Choose a large, flat-topped pumpkin for the base, like a ‘Fairytale’ or ‘Cinderella’ variety. The pumpkin on top should be significantly smaller and lighter. For stability, especially if you live in a windy area or have curious pets, you may need to core the top pumpkin and part of the bottom one and insert a small wooden dowel to connect them. Be aware that any puncturing of the pumpkin’s skin will dramatically shorten its lifespan, so this beautiful display might only last a couple of weeks.
💡 Designer Tip
that makes this scene so utterly charming is the deep, weathered red of the wooden door. It provides the perfect autumnal backdrop. The red hue makes the creamy white and vibrant orange of the pumpkins pop, and its aged texture complements the rustic, natural feel of the gourds. The small detail of the brass mail slot adds a touch of warmth and history. Against a plain white or gray door, this same pumpkin stack would look nice, but it wouldn’t have the same rich, storybook quality.
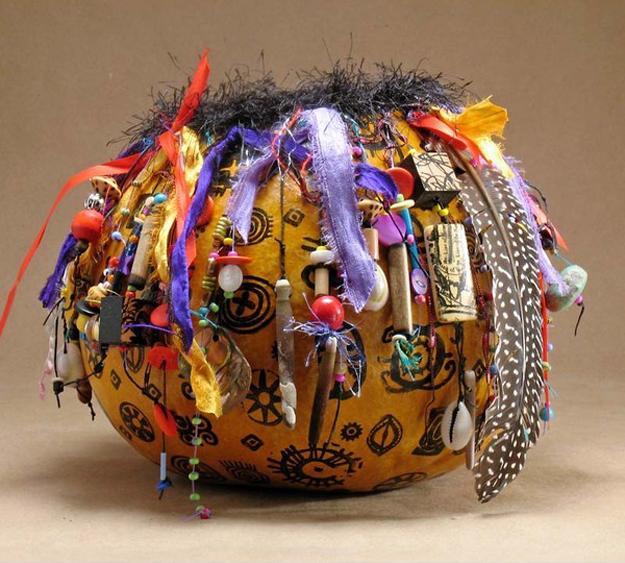
22. Decorate a Pumpkin in Bohemian Style with Charms and Feathers
To achieve a maximalist, bohemian look that feels curated instead of chaotic, focus on layering with a common thread. Here, the common thread is texture and natural materials. Even though there are ribbons, beads, shells, and a feather, they all feel connected through an earthy, handmade quality. When you’re adding layers, work from largest to smallest: start with the bold ink patterns, then add the fringe and ribbons, and finish with the smallest details like the beads and charms. This creates a logical visual path for the eye to follow through the complexity.
⚠️ Real Talk
This eclectic look is a brilliant exercise in controlled chaos. The formula is approximately: 40% graphic pattern (the black ink drawings) + 30% layered textiles (ribbons and fringe) + 20% natural elements (feather, shells) + 10% beaded accents. The key is that the pumpkin itself is still very visible, acting as the warm, grounding base color for all the decoration. If you were to cover the entire pumpkin, you’d lose the beautiful tension between the natural gourd and the artistic embellishments.
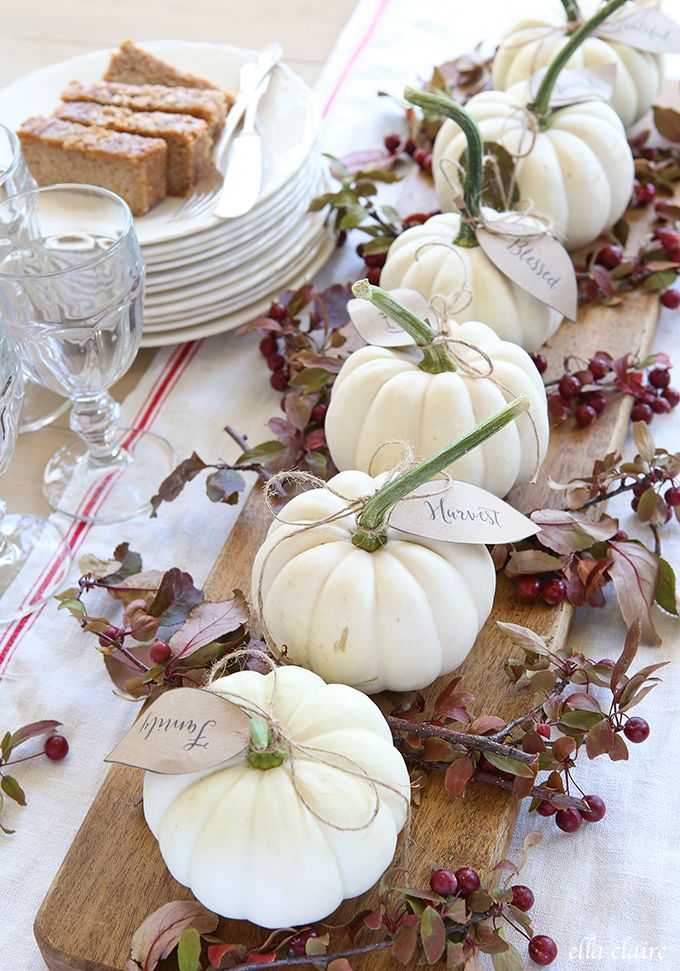
23. Design a Rustic Table Runner with White Pumpkins and Kraft Paper Tags
Planning to use this as your Thanksgiving centerpiece? Here are a few things to check off your list before you assemble it:
- Measure your table and the wooden board. Ensure you leave at least 12-15 inches of space on each side for place settings.
- Do a trial run with your handwriting on a spare kraft tag. If you’re not confident, use alphabet stamps for a charming, uniform look.
- Are you using real or faux berry sprigs? Real berries can stain your table runner as they age, so faux might be a safer choice for a long-lasting display.
- Check your pumpkins for blemishes. Since they are the main event, you want smooth, unbruised gourds for this clean, serene look.
📏 Scale Guide
While this centerpiece is stunning, it’s not a ‘set it and forget it’ arrangement if you’re using real pumpkins. You’ll need to check them every few days for soft spots or signs of rot, especially where they touch the wooden board or each other. Any moisture trapped underneath can accelerate decay. To extend their life, ensure the pumpkins are completely dry before placing them and consider putting tiny, invisible felt pads on the bottom of each one to allow for some air circulation. The jute twine can also shed fibers, so expect a little light cleanup.
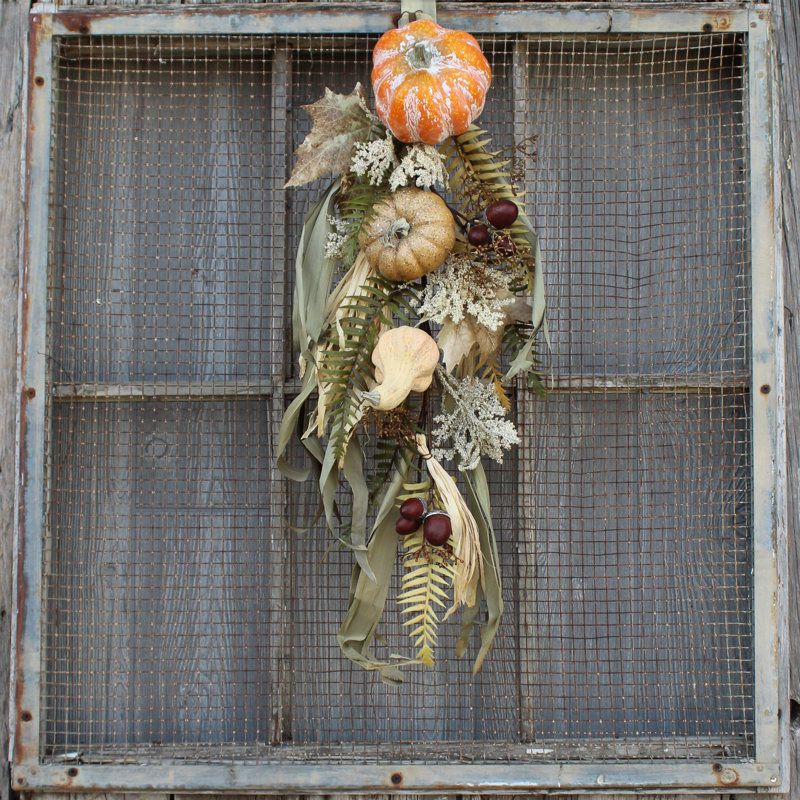
24. Mount an Autumnal Floral Swag on a Chicken Wire Frame
Creating this rustic wall hanging is a straightforward project using an old window frame. (Time: 1 hour. Cost: ~$25 if you have the frame).
- Find an old, multi-pane window frame. Clean it thoroughly but don’t worry about preserving the weathered paint—that’s part of the charm.
- Using a staple gun, attach a piece of chicken wire mesh to the back of the frame, pulling it taut.
- Poke the stems of your smallest faux pumpkin through the wire at the top. Secure it by bending the stem back on itself.
- Add your larger floral elements, like dried ferns and preserved leaves, weaving their stems through the chicken wire to create the basic shape of your swag.
- Add the other two pumpkins, securing them in the same way.
- Fill in any gaps with smaller elements like acorns and extra leaves until the arrangement looks full and balanced.
🔧 How-To Brief
This design works so well because it layers different types of rustic charm. You have the architectural rusticity of the antique window frame, the industrial rusticity of the chicken wire, and the natural rusticity of the pumpkins and dried foliage. The contrast between the rigid, geometric lines of the window frame and the soft, organic shapes of the botanical swag is what creates the visual excitement. The chicken wire acts as the perfect invisible bridge, connecting these two contrasting elements into one cohesive piece.
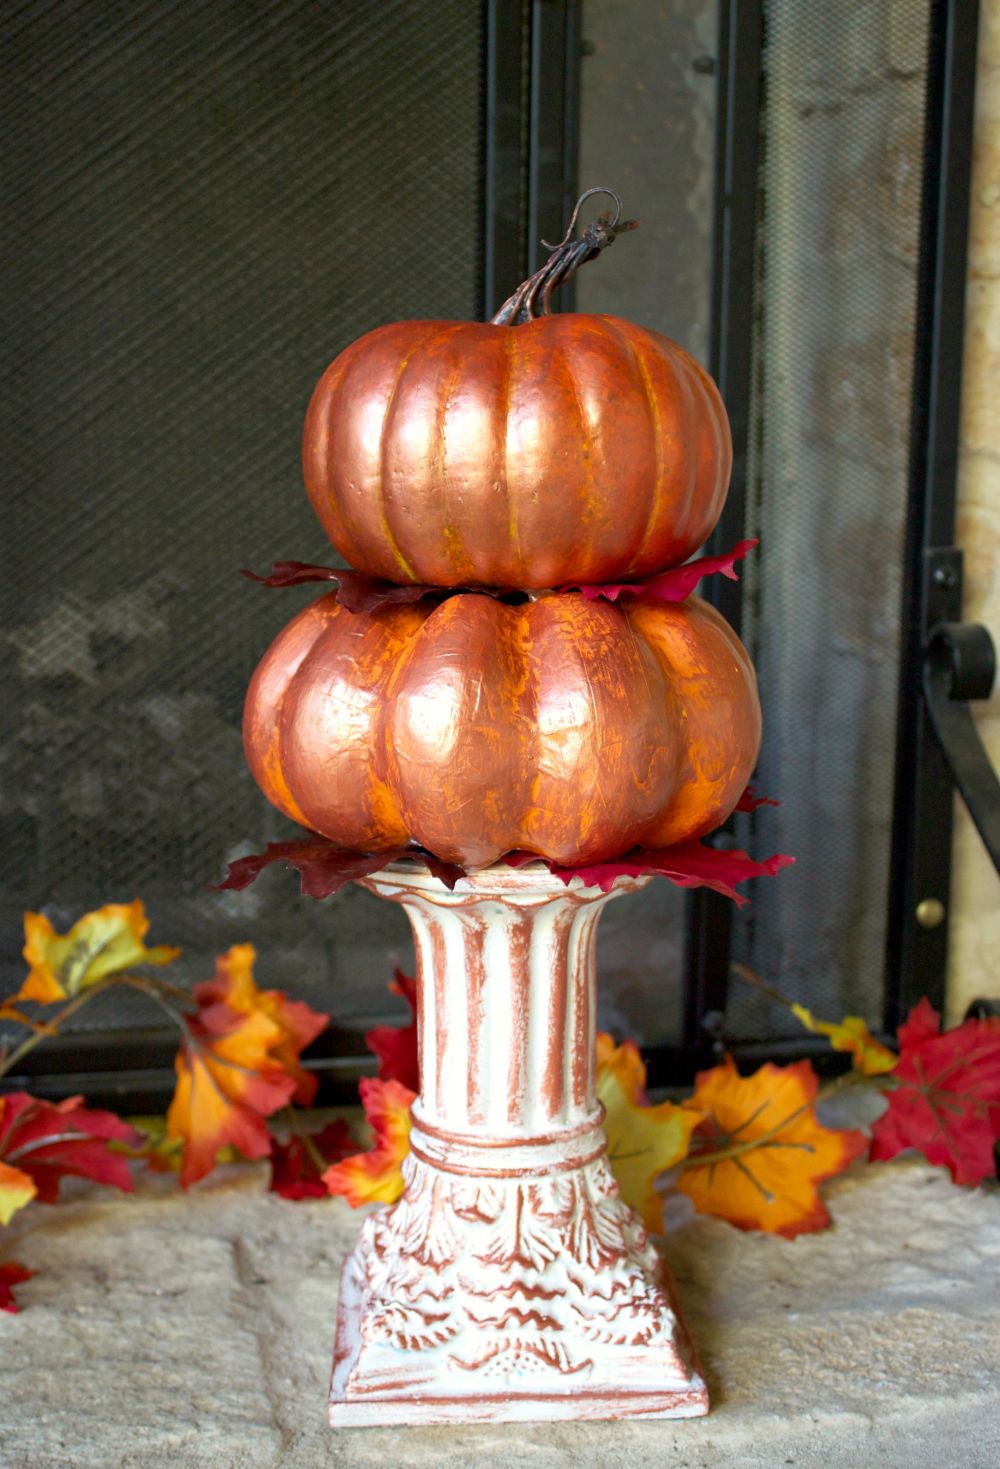
25. Stack High-Sheen Metallic Copper Pumpkins on a Pedestal
Achieving this luxe, metallic look is more about finding the right statement pieces than extensive crafting. Here’s a possible cost breakdown for this elegant vignette:
- Metallic Copper Pumpkins (Set of 2): $40 – $75
- Ornate Distressed Pedestal: $50 – $120 (a major focal piece)
- Artificial Fall Foliage (high quality): $20 – $35
- Metal Fireplace Screen (if needed): $80 – $150+
- TOTAL (display only, without screen): $110 – $230
Budget alternative: Find a cheap pedestal or plant stand at a thrift store and give it a distressed finish yourself using chalk paint and sandpaper. Use metallic copper spray paint on a pair of plastic craft pumpkins for a similar high-sheen effect at a fraction of the cost.
💰 Budget Breakdown
Warm metals like copper, brass, and bronze are majorly trending in interior design, and this look is a perfect way to bring that trend into your seasonal decor. It feels more sophisticated and integrated with year-round design than traditional orange and black. The high-sheen finish, in particular, taps into the ‘luxe’ and ‘quiet luxury’ aesthetics popular on Pinterest. This isn’t just Halloween decor; it’s a seasonal style statement that feels elevated and intentional, blending seamlessly with a well-decorated home. It’s a departure from the more rustic look of Idea #13, but still feels very autumnal.
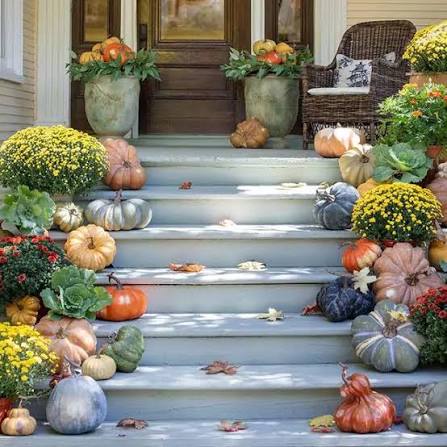
26. Create a Cascading Porch Display with Heirloom Pumpkins and Mums
This is a go-big-or-go-home look that requires significant space. It’s best suited for a wide staircase with at least 4-5 steps and a generous landing. The key to the ‘cascading’ effect is having enough depth on each step to layer pumpkins in front of each other. You’ll need a porch that is at least 6-8 feet wide to accommodate the large urns and potted mums without feeling cramped. If your porch is smaller, scale it down by using one large urn and focusing the pumpkin display on one side of the steps, as seen in Idea #21.
📐 Style Math
To get that effortlessly abundant, ‘magazine-worthy’ look, the secret is to use an overwhelming majority of real, heirloom pumpkins. Faux pumpkins have their place, but for a display of this scale, the subtle variations in color, shape, and texture of real gourds are essential. Mix in at least 5-7 different varieties: the warty, muted green ones, the flat, deeply ribbed ‘Cinderella’ types, and classic orange ones. This variety is what creates the rich, authentic, and truly impressive visual tapestry.
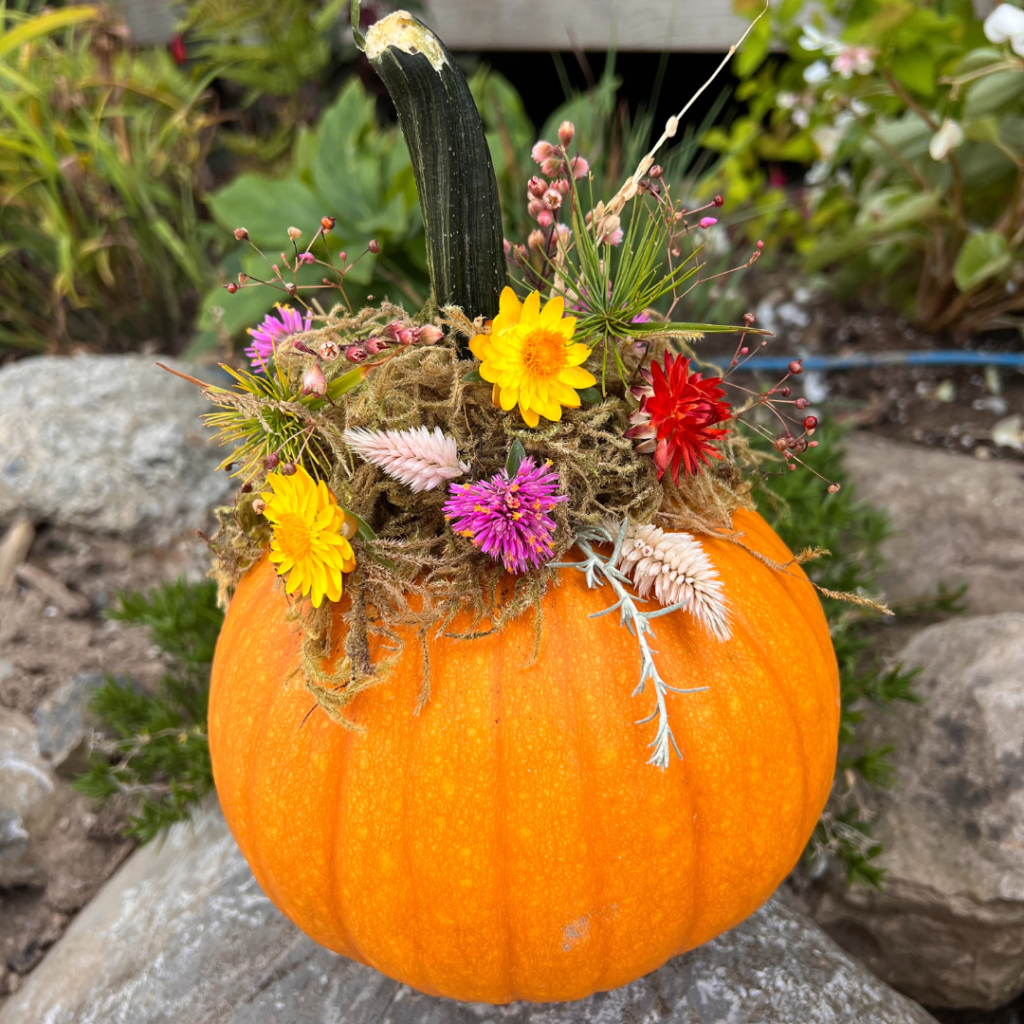
27. Top a Pumpkin with Dried Moss and Vibrant Dried Flowers
This cheerful, rustic topper is a fantastic budget-friendly project that packs a big visual punch. The costs are minimal and the materials go a long way.
- Medium Orange Pumpkin: $5 – $10
- Bag of Green Reindeer Moss: $8 – $12
- Assorted Small Dried Flowers: $15 – $25 (or free if you dry your own!)
- Hot Glue Gun and Glue: $5 (staple craft supply)
- TOTAL: $33 – $52
Budget alternative: Instead of buying packs of dried flowers, look for a single, inexpensive bunch of ‘potpourri’ or a small bouquet of dried statice or strawflowers from a craft store. You can deconstruct it to get a wide variety of colors and textures for under $10.
✅ Before You Start
While this is a no-carve design, it’s not necessarily a ‘no-mess’ design. Reindeer moss, while beautiful, can be quite crumbly and shed bits of green dust everywhere during assembly. Work on a covered surface and have a vacuum ready. Also, dried flowers are delicate. If you plan to display this pumpkin outdoors on a porch, make sure it’s in a covered area protected from rain and strong winds, which could easily damage or blow away the beautiful floral topper you worked so hard to create.
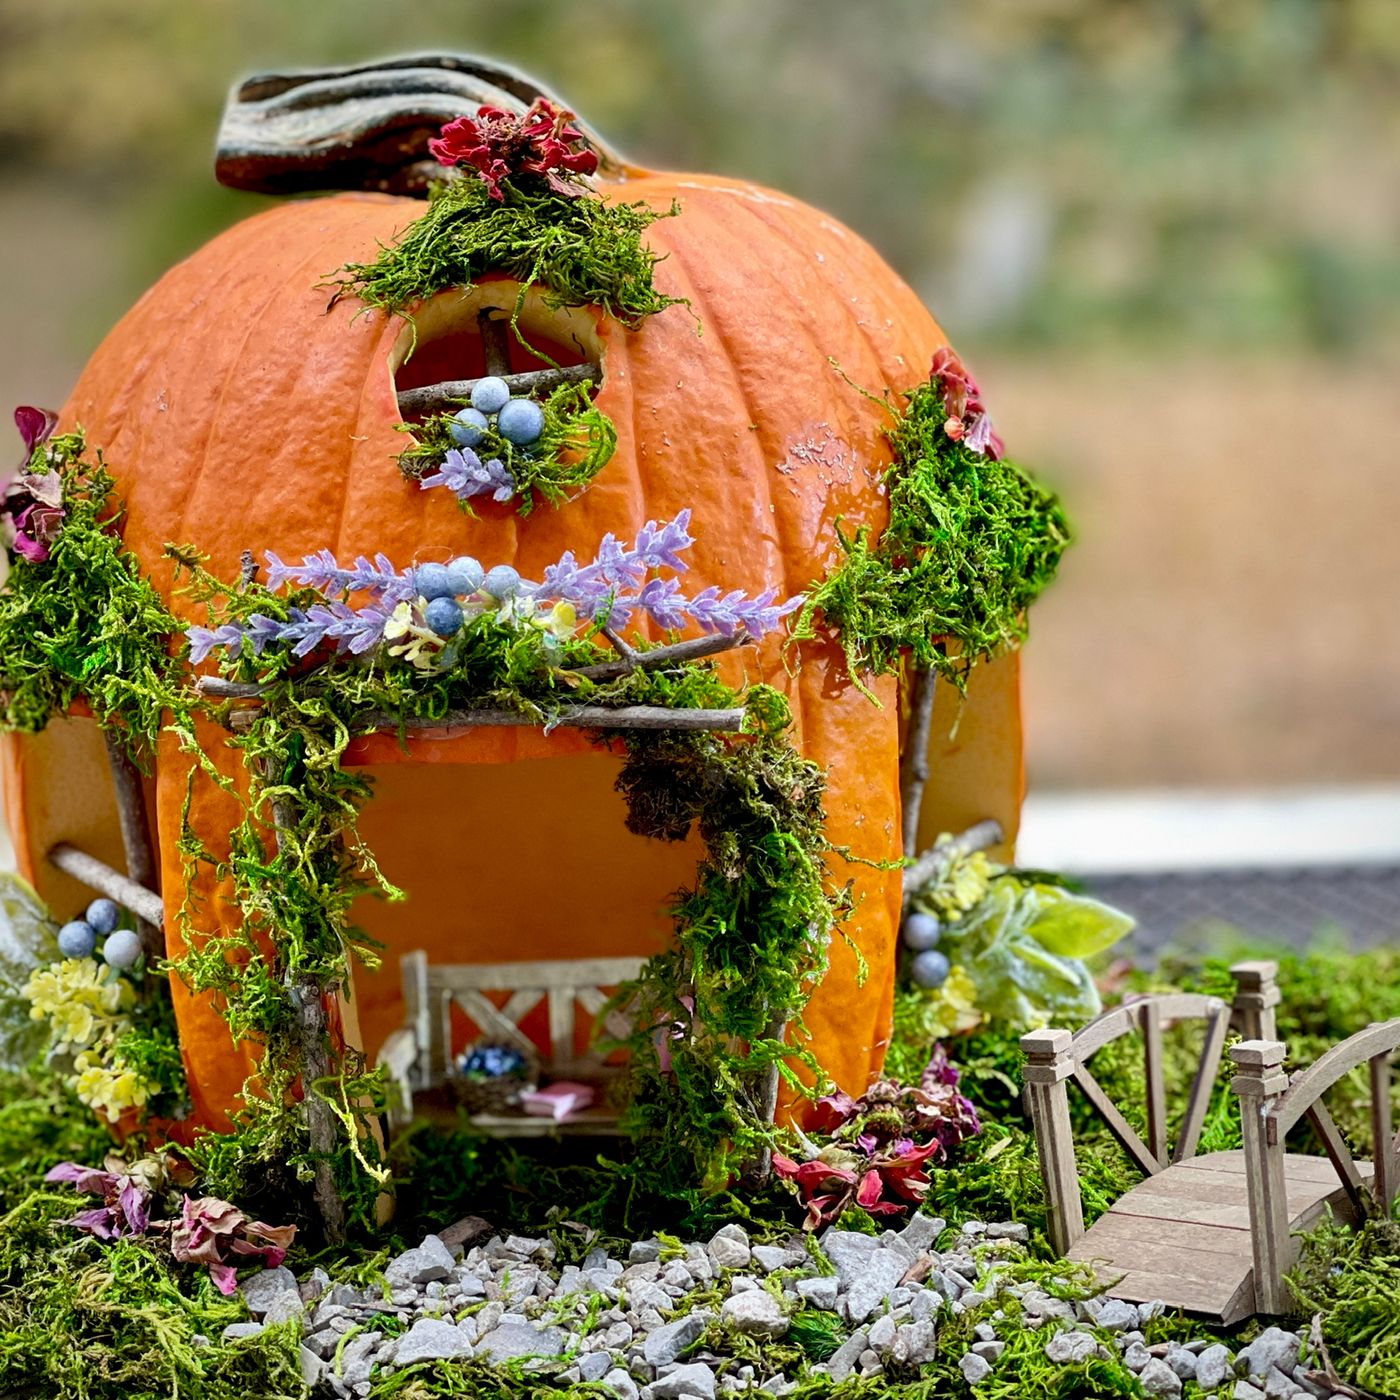
28. Craft a Whimsical Fairy Tale Pumpkin Cottage
that transforms this from a simple craft into a piece of magic is the miniature scale. The tiny wooden footbridge, the minuscule bench tucked inside, and the small sprigs of lavender all work together to create a believable, enchanting little world. It invites the viewer to lean in close, to inspect the details, and to engage their imagination. Without these miniature elements, it would just be a hollowed-out pumpkin with moss on it. With them, it’s a fairy’s home, sparking a sense of wonder and delight.
🔥 Trending Context
This enchanting scene works because it expertly plays with scale and texture to create a sense of realism within a fantasy. The choice of materials is key: the rough texture of the gravel path, the organic feel of the preserved moss, and the natural grain of the tiny wooden bridge all feel authentic to a miniature world. Hollowing out the pumpkin to create a dark, recessed interior adds depth and mystery, making it feel like a real, inhabited space. The purple lavender sprigs provide the perfect pop of complementary color against the orange pumpkin, adding to the magical feel.
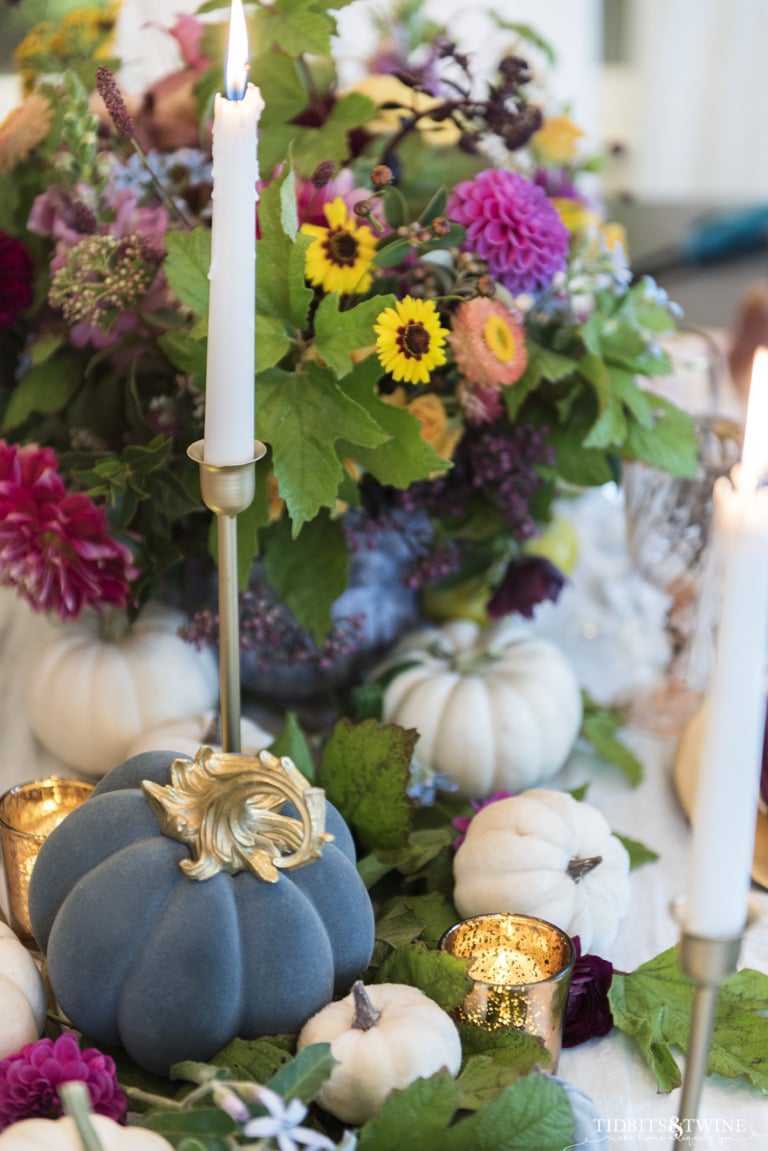
29. Create a Centerpiece with a Velvet Pumpkin and Fresh Flowers
When mixing fresh and faux elements in a centerpiece, the key to a cohesive look is to repeat colors across the different materials. Notice how the deep magenta of the fresh dahlias is a beautiful, jewel-toned complement to the navy blue velvet of the pumpkin. The metallic gold of the pumpkin stem is echoed in the warm glow of the mercury glass votives. This intentional color repetition tricks the eye into seeing the entire arrangement as one unified piece, rather than a collection of disparate objects. It feels thoughtful and professionally styled.
🧹 Maintenance Reality
Love this sophisticated, moody look but not the price tag of boutique velvet pumpkins? You can DIY it! Buy an inexpensive craft pumpkin (about $8-$12 from a craft store). Purchase a quarter yard of stretch velvet fabric in a jewel tone like navy, emerald, or burgundy for about $5. Remove the plastic stem from the craft pumpkin, then wrap the fabric tightly around the pumpkin, tucking it into the hole at the top. Secure with hot glue. Finish by hot-gluing a real, dried pumpkin stem (you can buy them online) or a metallic-painted twig into the top for an elevated finish.
Your Autumn Story, Creatively Told
And there you have it—29 ways to step up your pumpkin game without ever picking up a carving knife. The best part about these ideas is that they are jumping-off points for your own creativity. Mix and match techniques, play with color, and don’t be afraid to try something new. After all, the goal is to create something that feels like *you*.
Feeling inspired? We thought so. Go ahead and save your favorite ideas to your Pinterest board, and when you create your masterpiece, be sure to tag us. We can’t wait to see what you make!