You know that feeling when you finally find the pumpkin decorating idea that looks exactly right for your home? That’s what this guide is all about. After filtering through hundreds of options at Target, Michaels, and local craft fairs, we narrowed it down to the 29 ideas that actually deliver style and personality. We found great options across every price point, from simple $5 projects to more elaborate $150 centerpieces.
This guide is packed with 29 curated ideas covering everything from elegant tablescapes and rustic displays to creative no-carve painted pumpkins. In 2026, it’s all about personal expression and moving beyond the basic jack-o’-lantern. We’re seeing a huge trend on Pinterest towards unique materials and handcrafted touches that truly reflect your home’s style. And stay until the end — we break down the most common mistakes that can ruin these looks. Pin this guide for later—your future self will thank you when it’s time to get creative.
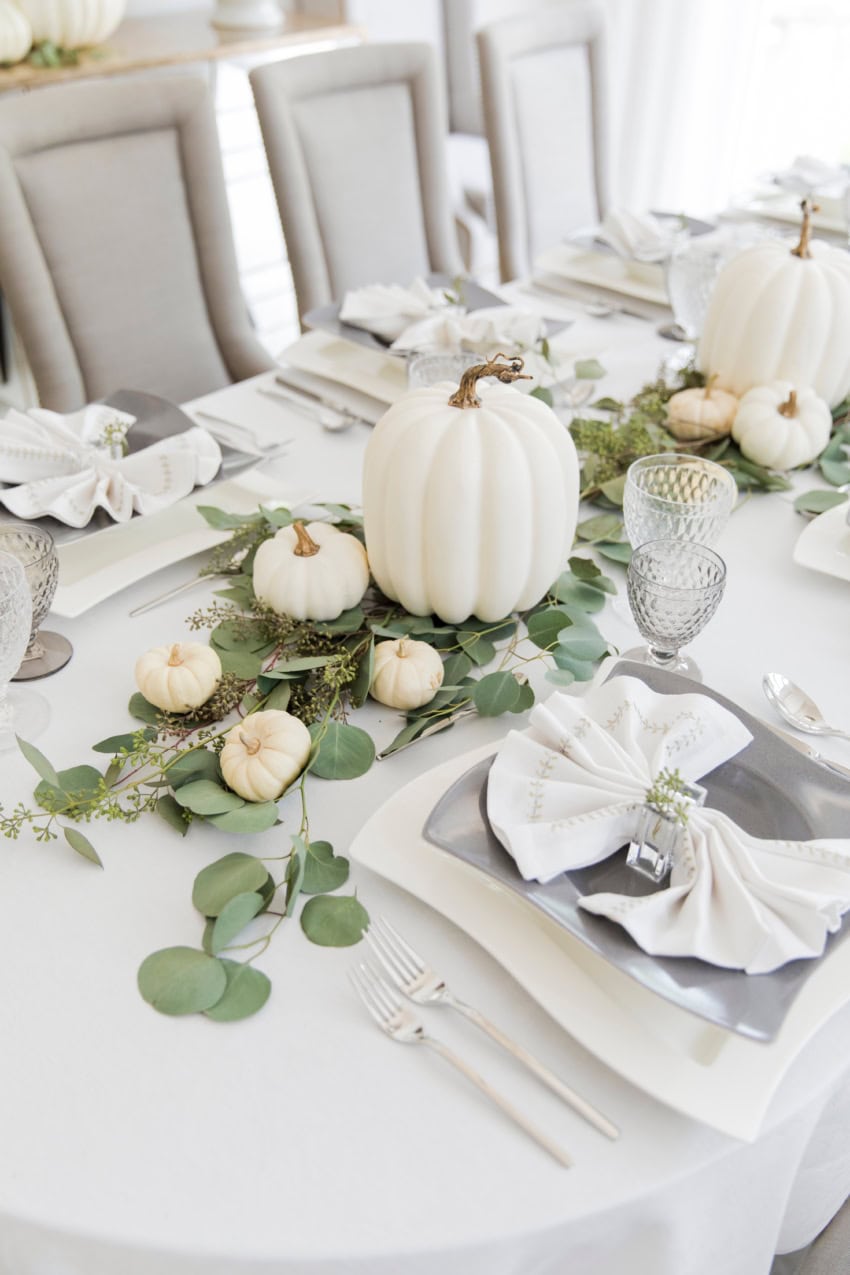
1. Elegant White Pumpkin & Eucalyptus Tablescape
This entire tablescape is a masterclass in texture and restraint. By keeping the color palette limited to white, cream, and shades of green, the different shapes and surfaces get to be the stars. The smooth skin of the pumpkins, the rustic texture of the eucalyptus leaves, and the delicate embroidery on the linen napkins all work together to create a look that feels layered and sophisticated without being loud.
💡 Designer Tip
The repetition of natural, curved shapes—from the pumpkins to the glassware to the plates—creates a gentle, harmonious rhythm. It feels organic and intentional, proving you don’t need a riot of color to make a strong design statement. It’s a calm, collected take on fall decor that feels incredibly refreshing.
When creating a centerpiece with a garland, use pumpkins of varying sizes to create visual peaks and valleys. Place the largest pumpkins near the center and taper down to the smallest ones at the ends. This technique draws the eye along the length of the table and feels more dynamic than using pumpkins of all the same size. For extra stability, use a small dab of museum wax on the bottom of any pumpkins that seem wobbly.
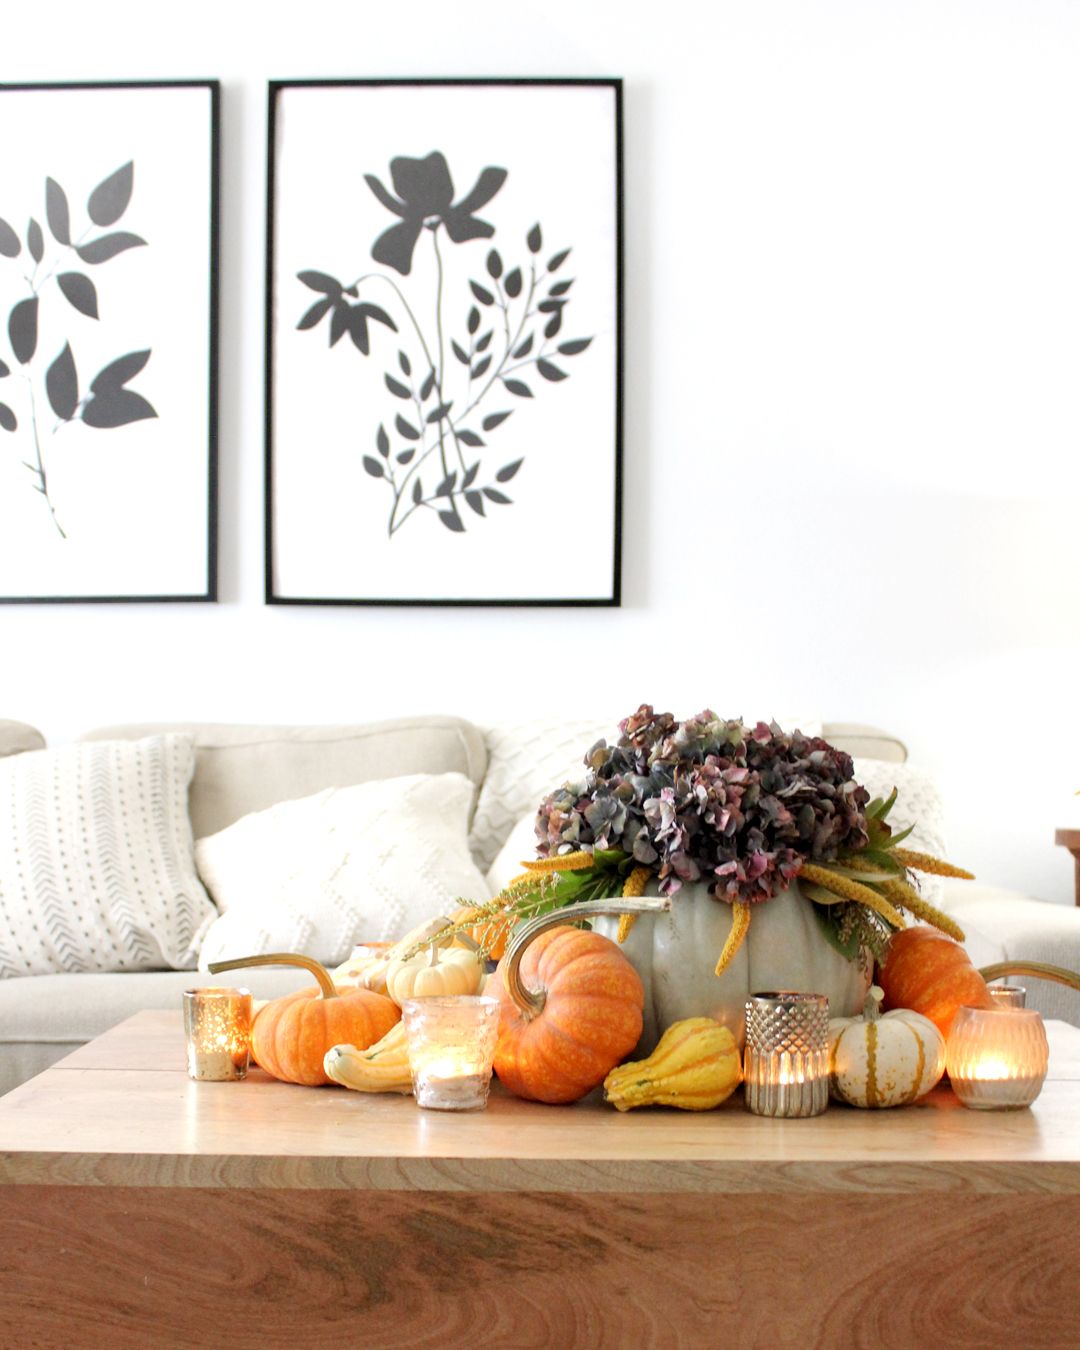
2. Rustic Coffee Table with a Pumpkin Full of Hydrangeas
The single element holding this entire rustic vignette together is the pale grey pumpkin acting as a floral vase. It’s an unexpected and clever twist that elevates the arrangement from a simple collection of gourds to a designed centerpiece. Remove it, and you just have pumpkins on a table. With it, you have a story. It introduces a unique silhouette and purpose, proving that the most memorable decor often comes from repurposing an object in a creative way.
🔧 How-To Brief
While this coffee table look is stunningly cozy, be mindful of the materials. Dried hydrangeas are beautiful but incredibly delicate and can shed if bumped. Place this arrangement in a lower-traffic area where it won’t be constantly disturbed. Real mini pumpkins and gourds will last for several weeks, but you should check them every few days for soft spots or mold, especially if your home is humid. A quick wipe-down can help, but they won’t last forever.
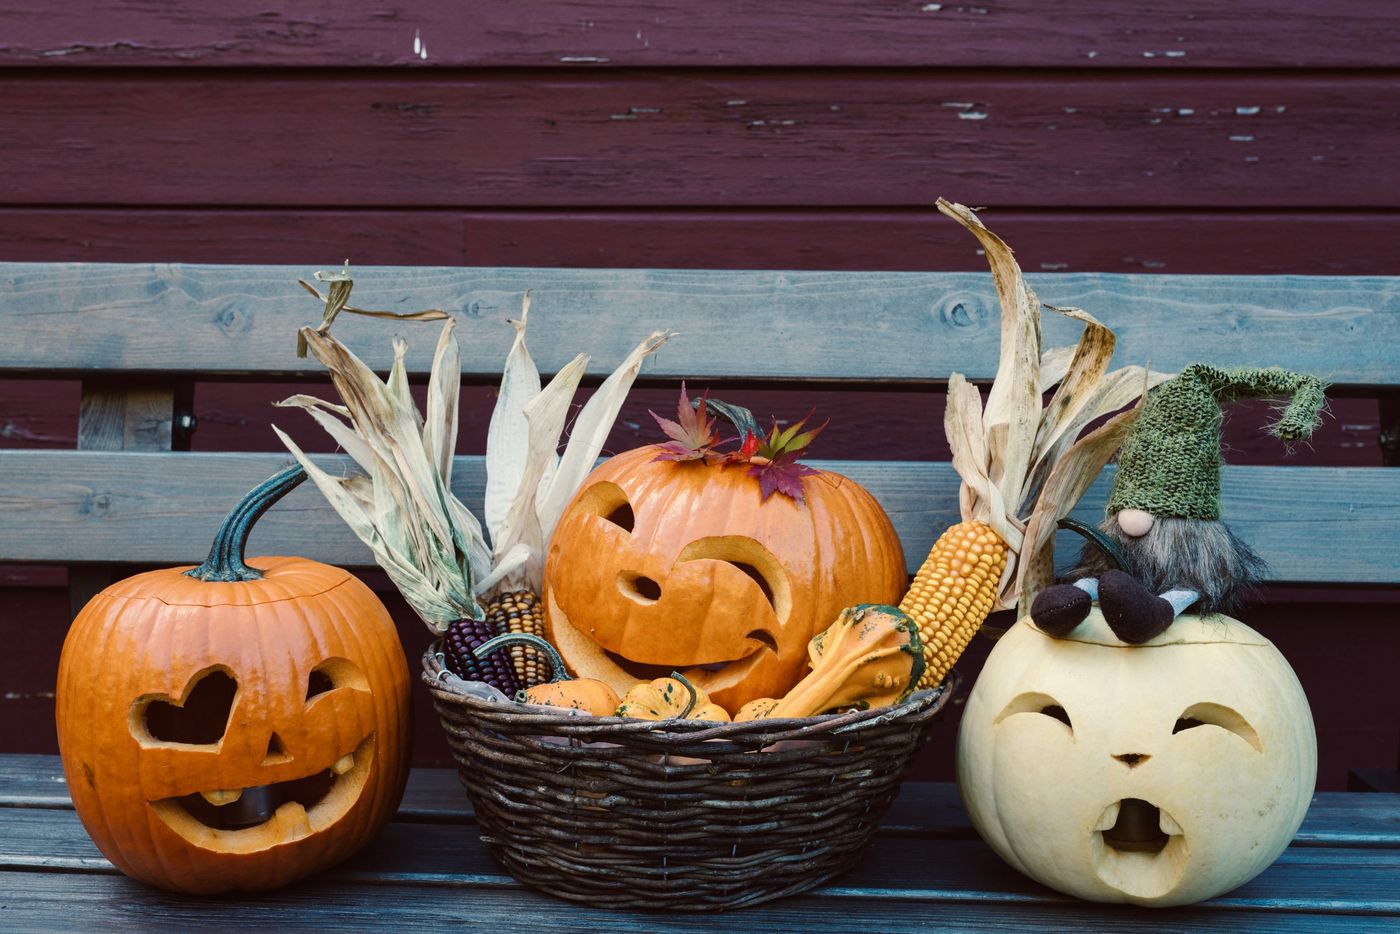
3. Classic Carved Pumpkins on a Rustic Wooden Bench
A classic carved pumpkin is a timeless project that anyone can tackle. This rustic look, with colorful pumpkins and corn on a simple wooden bench, is pure autumn charm and incredibly easy to recreate.
⚠️ Real Talk
- Choose Your Pumpkin: Find one with a flat bottom so it won’t roll, and a smooth, firm surface for easy carving.
- Prep Your Station: Lay down newspaper or a disposable tablecloth. Use a large, sturdy spoon or a pumpkin scooping tool to clear out the seeds and stringy bits. Scrape the inside wall where you plan to carve until it’s about one inch thick.
- Draw or Transfer a Design: Sketch a face directly onto the pumpkin with a dry-erase marker (it wipes off easily!) or print a template, tape it on, and poke holes along the lines to transfer the pattern.
- Carve Safely: Use a small, serrated pumpkin carving knife. Work slowly, using gentle sawing motions. Always cut away from your body.
You don’t need a fancy setup for this look. Skip the decorative bench and use your own front steps or a simple wooden crate. Farmer’s markets are often the cheapest source for pumpkins and decorative corn, far less expensive than craft stores. A simple carving kit costs less than $10, and you can get a classic, festive look for under $30 total. The most important part is the charm of the pumpkins themselves, not what they’re sitting on.
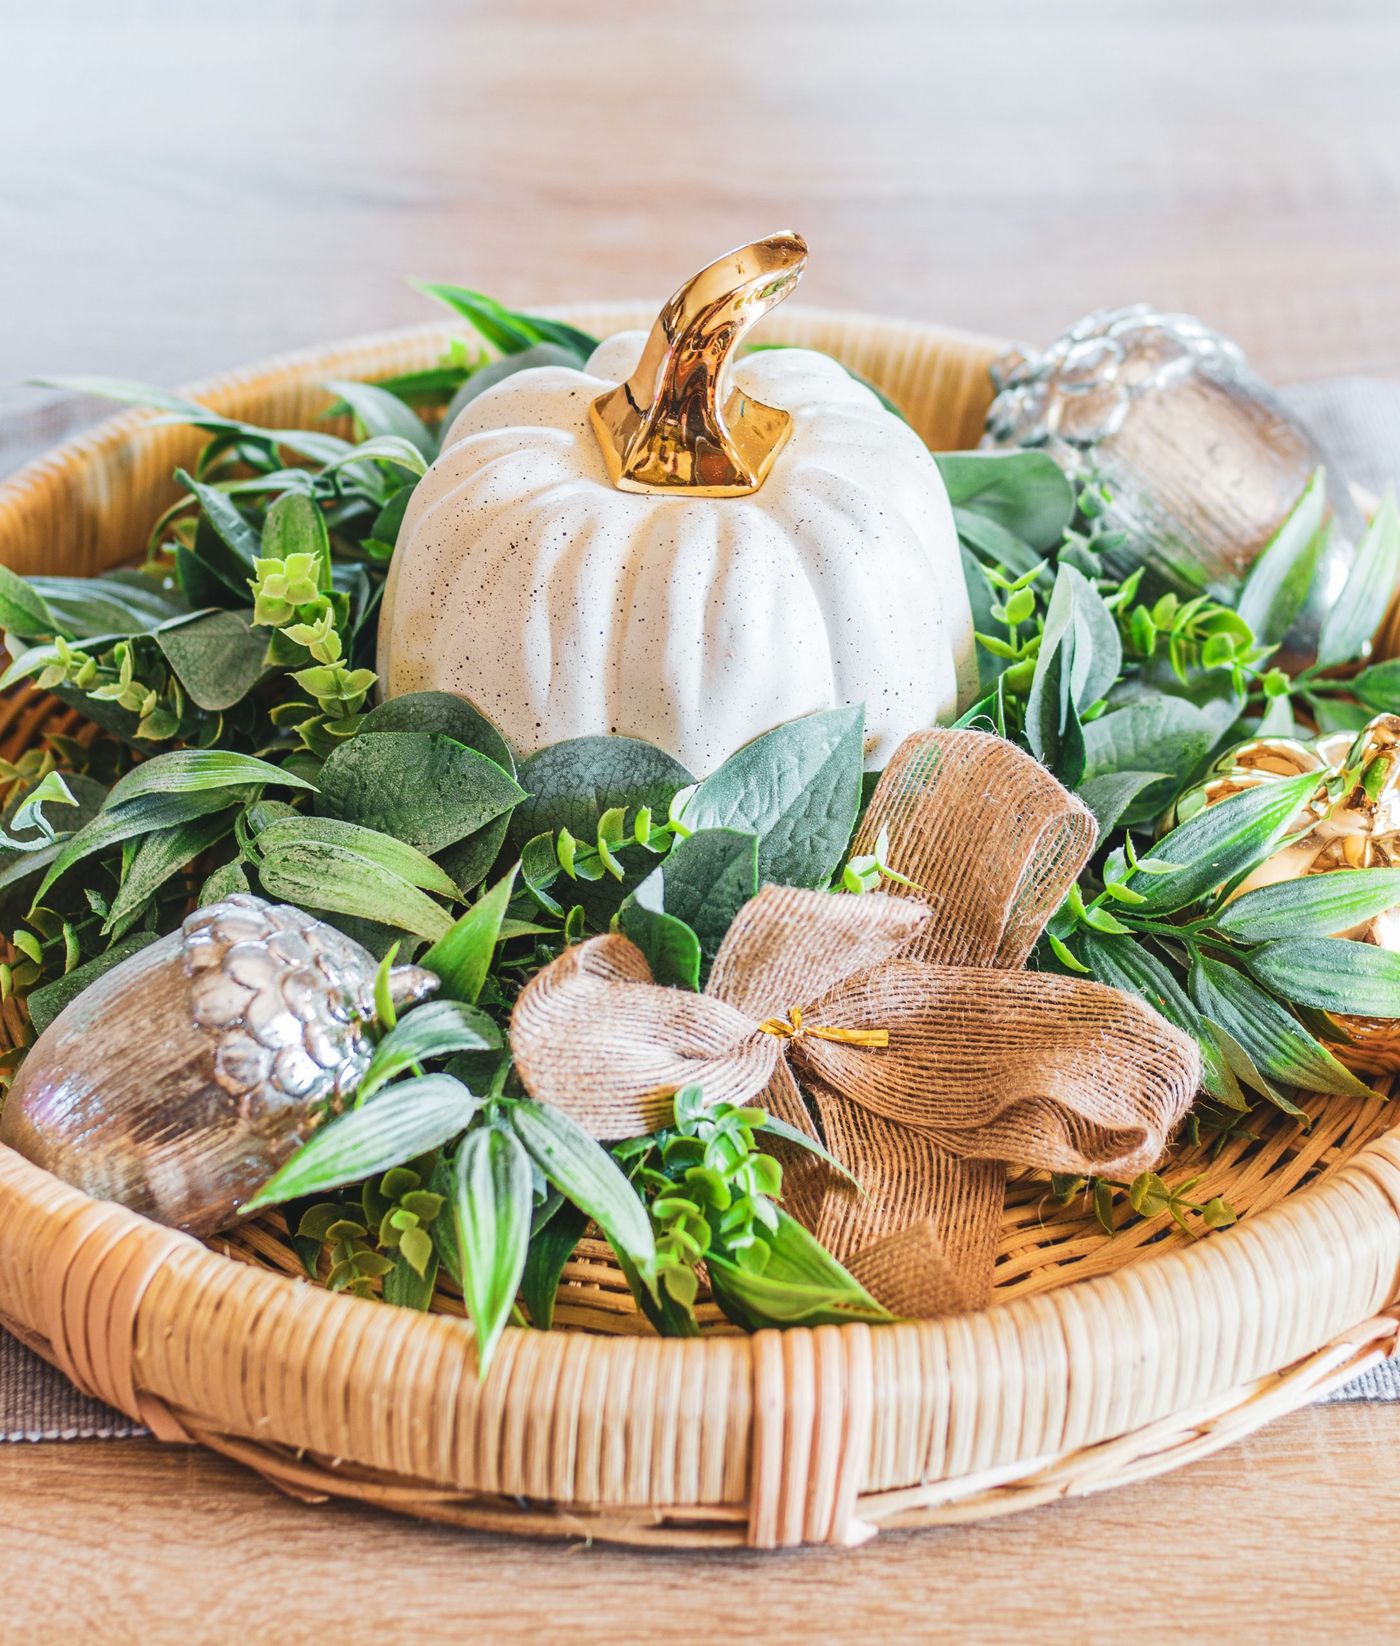
4. White Pumpkin with a Gold Stem in a Greenery Basket
This elegant basket arrangement follows a simple but effective design formula that you can easily adapt. Think of it as 50% Neutral Base + 30% Greenery + 20% Metallic Accents. The neutral base is the white pumpkin and the woven basket. The lush greenery fills out the arrangement and adds life. Finally, the gold stem and metallic acorns provide that little bit of sparkle and polish. You could easily swap the white pumpkin for a pale green one or change the gold accents to copper and still achieve the same balanced, high-end feel.
🔥 Trending Context
This look is beautiful, but it relies on artificial elements, which can be a pro or a con depending on your preference. While the faux greenery means zero maintenance, it can look cheap if you don’t buy good quality stems. Be prepared to spend a little more on realistic-looking foliage. Also, that glossy gold stem is likely painted. Be careful when handling and storing it after the season, as chipped paint can quickly ruin the elegant effect. Keep it wrapped in soft cloth to prevent scratches.
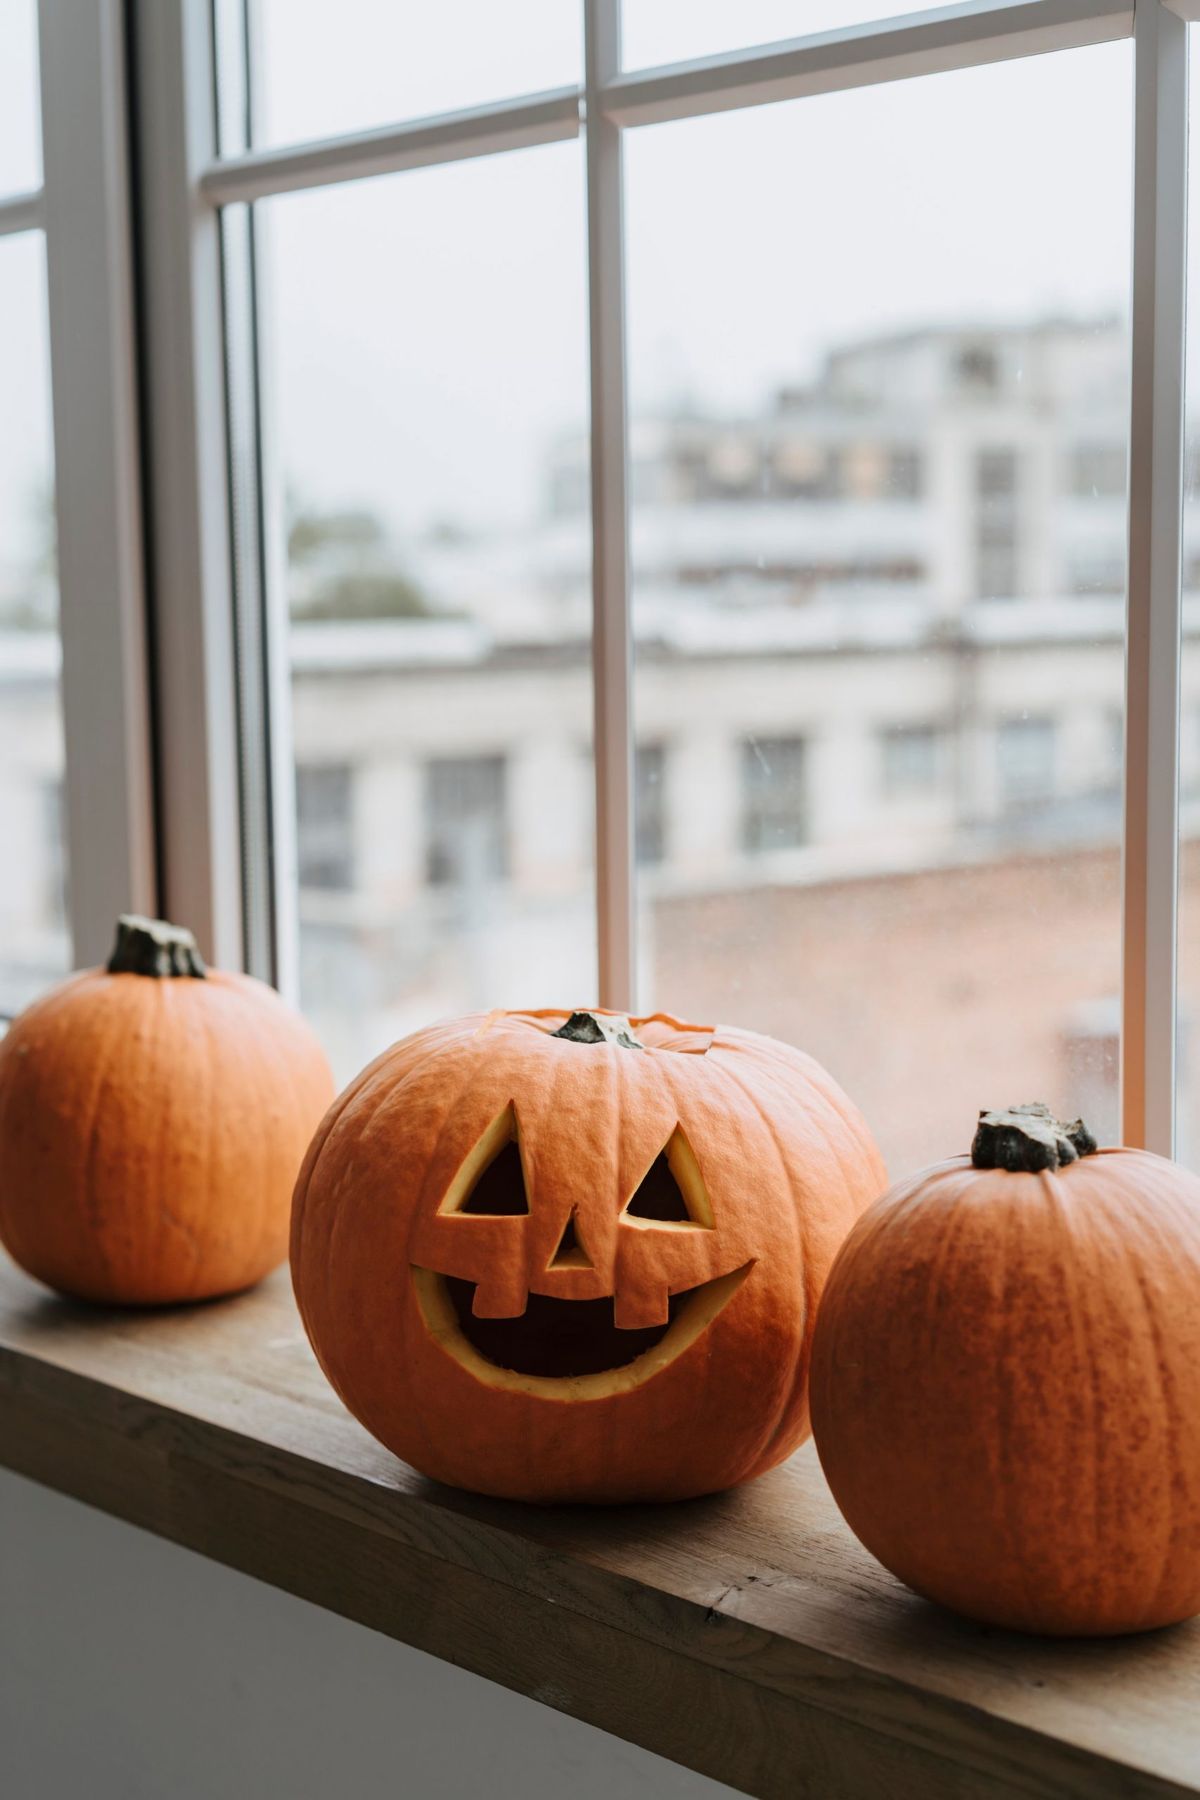
5. Classic Jack-o’-Lantern Trio on a Wooden Windowsill
The power of this image is in its simplicity. The composition uses the rule of thirds, with the three pumpkins grouped together, leaving negative space that makes the arrangement feel calm and uncluttered. The texture of the light brown wood windowsill provides a warm, natural contrast to the smooth, vibrant orange of the pumpkins. It’s a classic, no-fuss approach that celebrates the natural beauty of the season without adding any extra clutter.
⭐ The One Thing
Before you get started on a classic carving project, run through this quick checklist to make sure you’re prepared. A little prep saves a lot of headache.
- Check your surface: Do you have a stable, well-lit spot to carve? A kitchen counter or sturdy table is ideal.
- Gather your tools: Do you have a carving kit, a large bowl for the pumpkin guts, and a spoon or scraper?
- Measure your pumpkin vs. your candle: If you plan to use a real candle, ensure your pumpkin is large enough to allow for proper ventilation so it doesn’t become a fire hazard. A battery-operated LED candle is a much safer bet.
- Confirm placement: Will this be indoors or outdoors? If it’s going inside, place it on a plate or tray to protect your furniture from moisture.
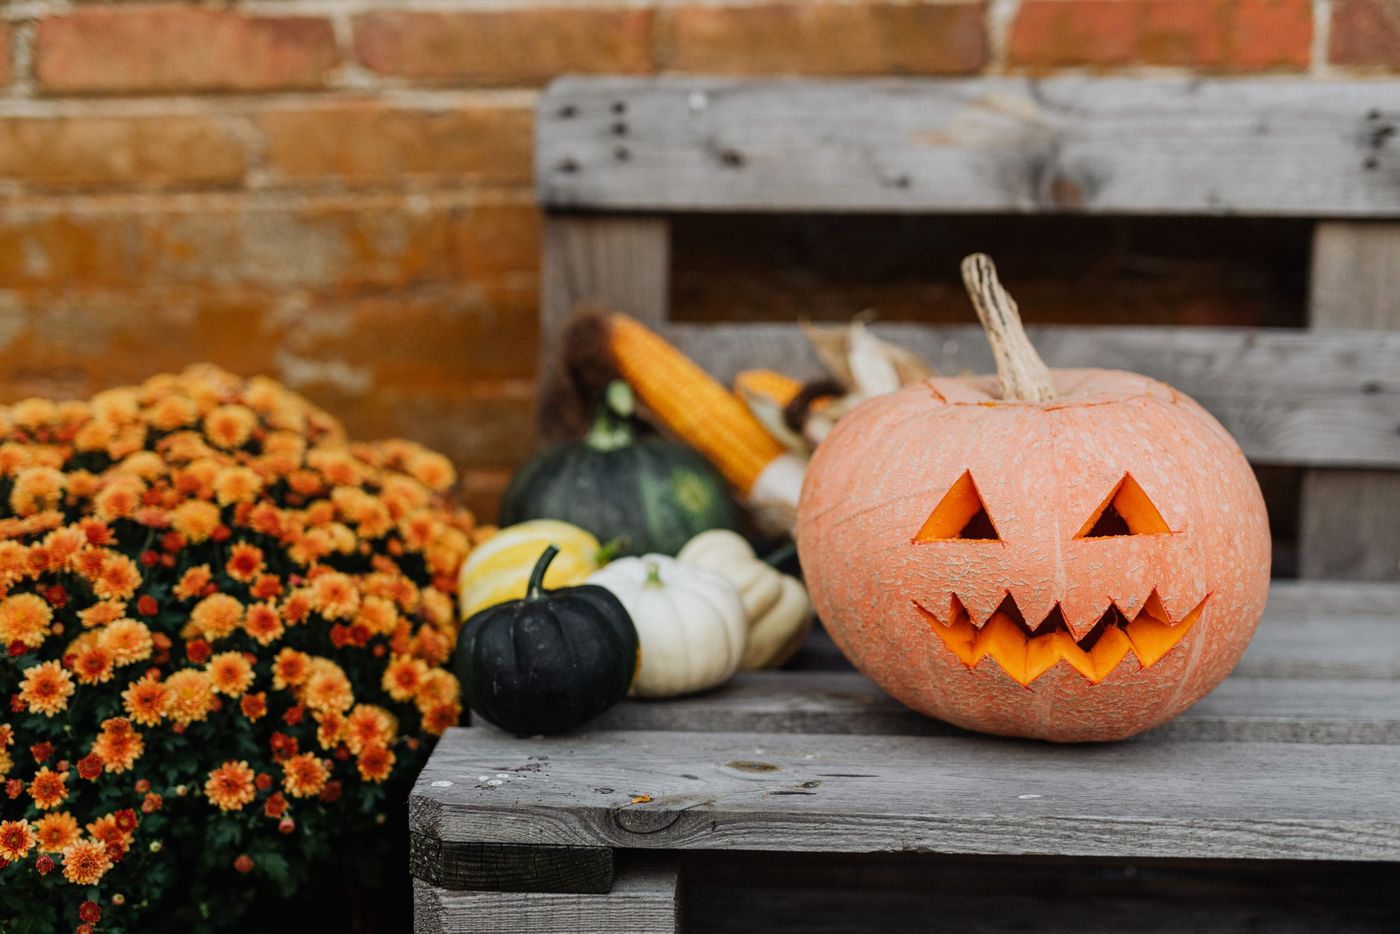
6. Autumn Decor with a Carved Pumpkin, Mums, and a Pallet Bench
When creating an outdoor vignette like this, think in layers of texture. The smooth, carved pumpkin is your focal point. Surround it with the rough, weathered wood of the pallet, the delicate petals of the chrysanthemums, the bumpy texture of the small gourds, and the papery feel of dried corn husks. This multi-layered approach is what gives the display depth and a professionally styled look. Don’t just place items next to each other; overlap them slightly to make them feel connected.
💸 Get This Look For Less
Using reclaimed or rustic elements like old wooden pallets is a huge trend right now, driven by a collective desire for authenticity and sustainability. People are moving away from mass-produced plastic decor and embracing objects with history and character. This look feels grounded and real. It taps into the cottagecore and modern farmhouse aesthetics that are so popular on Pinterest, blending natural elements with a touch of DIY spirit. It’s less about spooky Halloween and more about celebrating the harvest season.
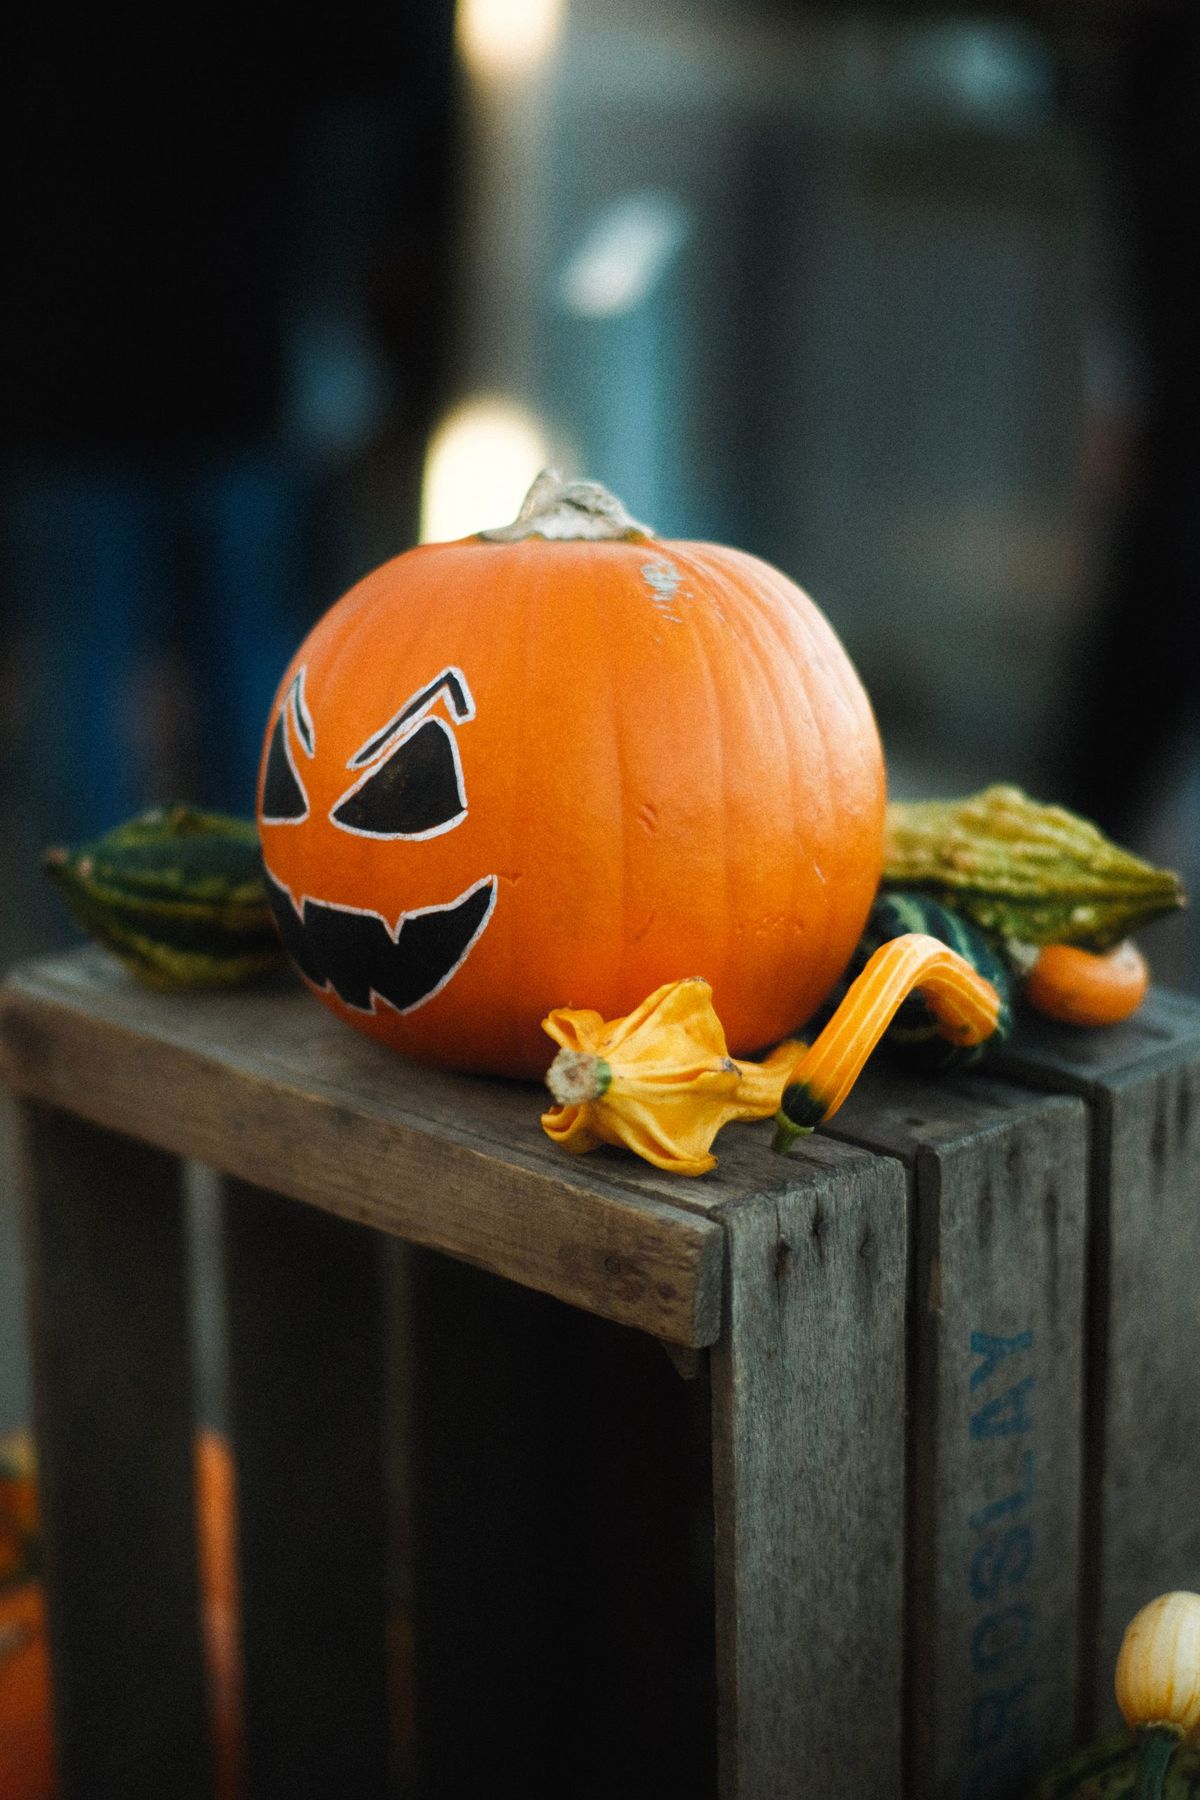
7. Painted Jack-O’-Lantern on a Rustic Wooden Crate
The key to this entire look is the hand-painted face. Instead of carving, which can be messy and deteriorates quickly, the crisp black and white paint gives the pumpkin a sharp, graphic quality that really pops. It turns a simple pumpkin into a piece of folk art. This technique also allows for much more detail and personality than most amateur carving attempts. Without the painted face, it’s just a pumpkin on a box; with it, it’s a character with attitude.
📐 Style Math
This type of single-pumpkin display works best in smaller, focused areas. It’s perfect for a front porch step, a small entryway table, or as a centerpiece on a round kitchen table (3-4 feet in diameter). For a larger space, like a long dining table or a wide front porch, a single pumpkin can look a bit lost. In that case, consider grouping it with two other pumpkins of varying sizes to create a more substantial arrangement. Compare this to the multi-pumpkin display in Idea #8.
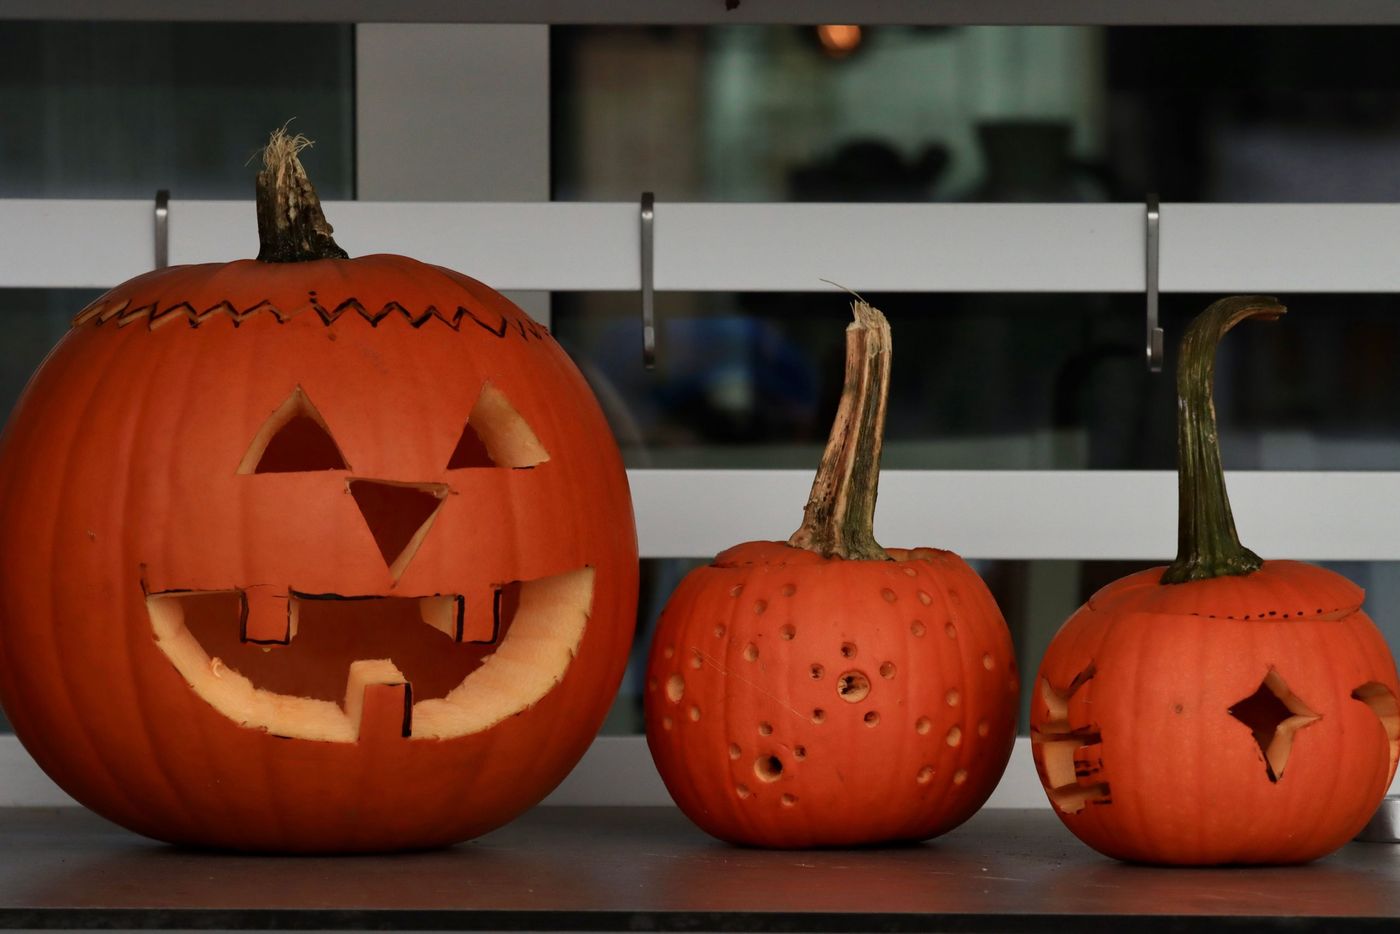
8. Three Carved Pumpkins with Unique Halloween Cutout Designs
This display is a great example of using repetition with variation. All three objects are pumpkins, but they each have a distinct personality and design. The traditional carved face, the modern perforated pattern, and the whimsical star cutout create a visual rhythm that is interesting and engaging. Your eye is encouraged to move from one to the next, discovering the unique details of each. Grouping them together makes a much stronger statement than displaying them separately.
💰 Budget Breakdown
Carving tools can get expensive, but you can create amazing designs with things you already have in your kitchen. The pumpkin with circular perforations can be easily replicated using an apple corer or even different-sized metal piping tips from a baking set. For the star pumpkin, use a metal cookie cutter and a rubber mallet to gently punch the shape through the pumpkin wall. It’s a fantastic way to get crisp, clean shapes without needing to be an expert with a tiny saw. This is a much more affordable and kid-friendly approach!
9. Front Porch Decor with a Painted Monster Gourd and Mums
Drawing a monster face on a gourd is a fantastic no-carve idea, but be warned: a standard permanent marker can sometimes bleed or fade on a pumpkin’s waxy skin, especially if it’s exposed to moisture. For a design that truly lasts, use an oil-based paint marker. They provide a much more opaque and durable finish that will hold up to a little autumn drizzle. Also, remember that the artificial spiderwebs look great but can be a real pain to clean up after the season is over!
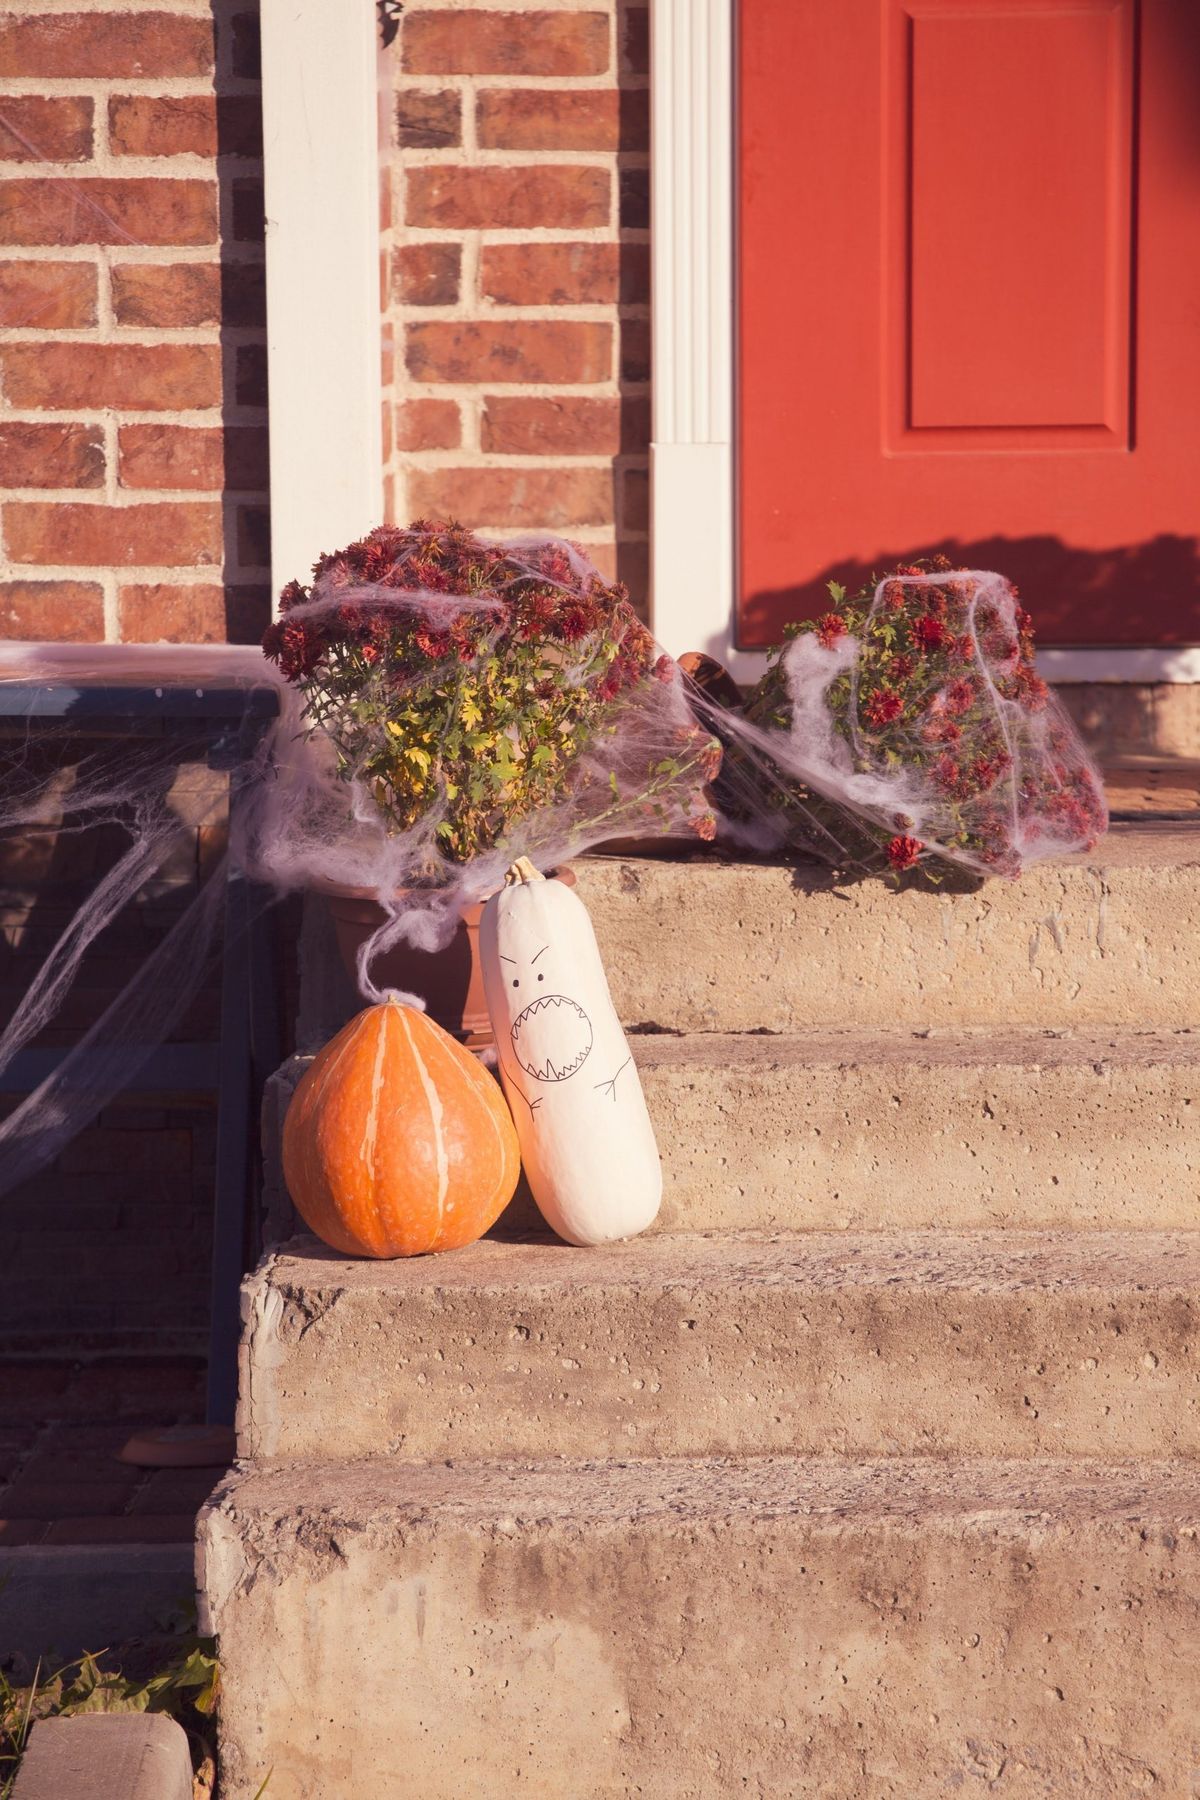
🎯 What Makes It Work
This charming front porch display is a simple recipe for Halloween fun: 40% Natural Pumpkins + 30% Potted Mums + 20% Quirky DIY + 10% Spooky Accents. The classic orange pumpkin and the potted mums ground the look in traditional autumn decor. The hand-drawn monster gourd provides a dose of playful personality, and the spiderwebs add just the right amount of spooky texture. You could swap the monster for a ghost or a cat face and still have a winning combination.
10. Hand-Painted Ghost Pumpkin with Festive Table Decor
The hand-painted ghosts are what make this pumpkin truly special. The sheer number of them, each with a slightly different floaty shape and expression, creates a wonderful sense of movement and whimsy. It’s this repetitive pattern that transforms the pumpkin from a simple piece of decor into a captivating focal point. This is a much more creative and visually interesting approach than painting one single large ghost, and it feels more like a custom piece of art.
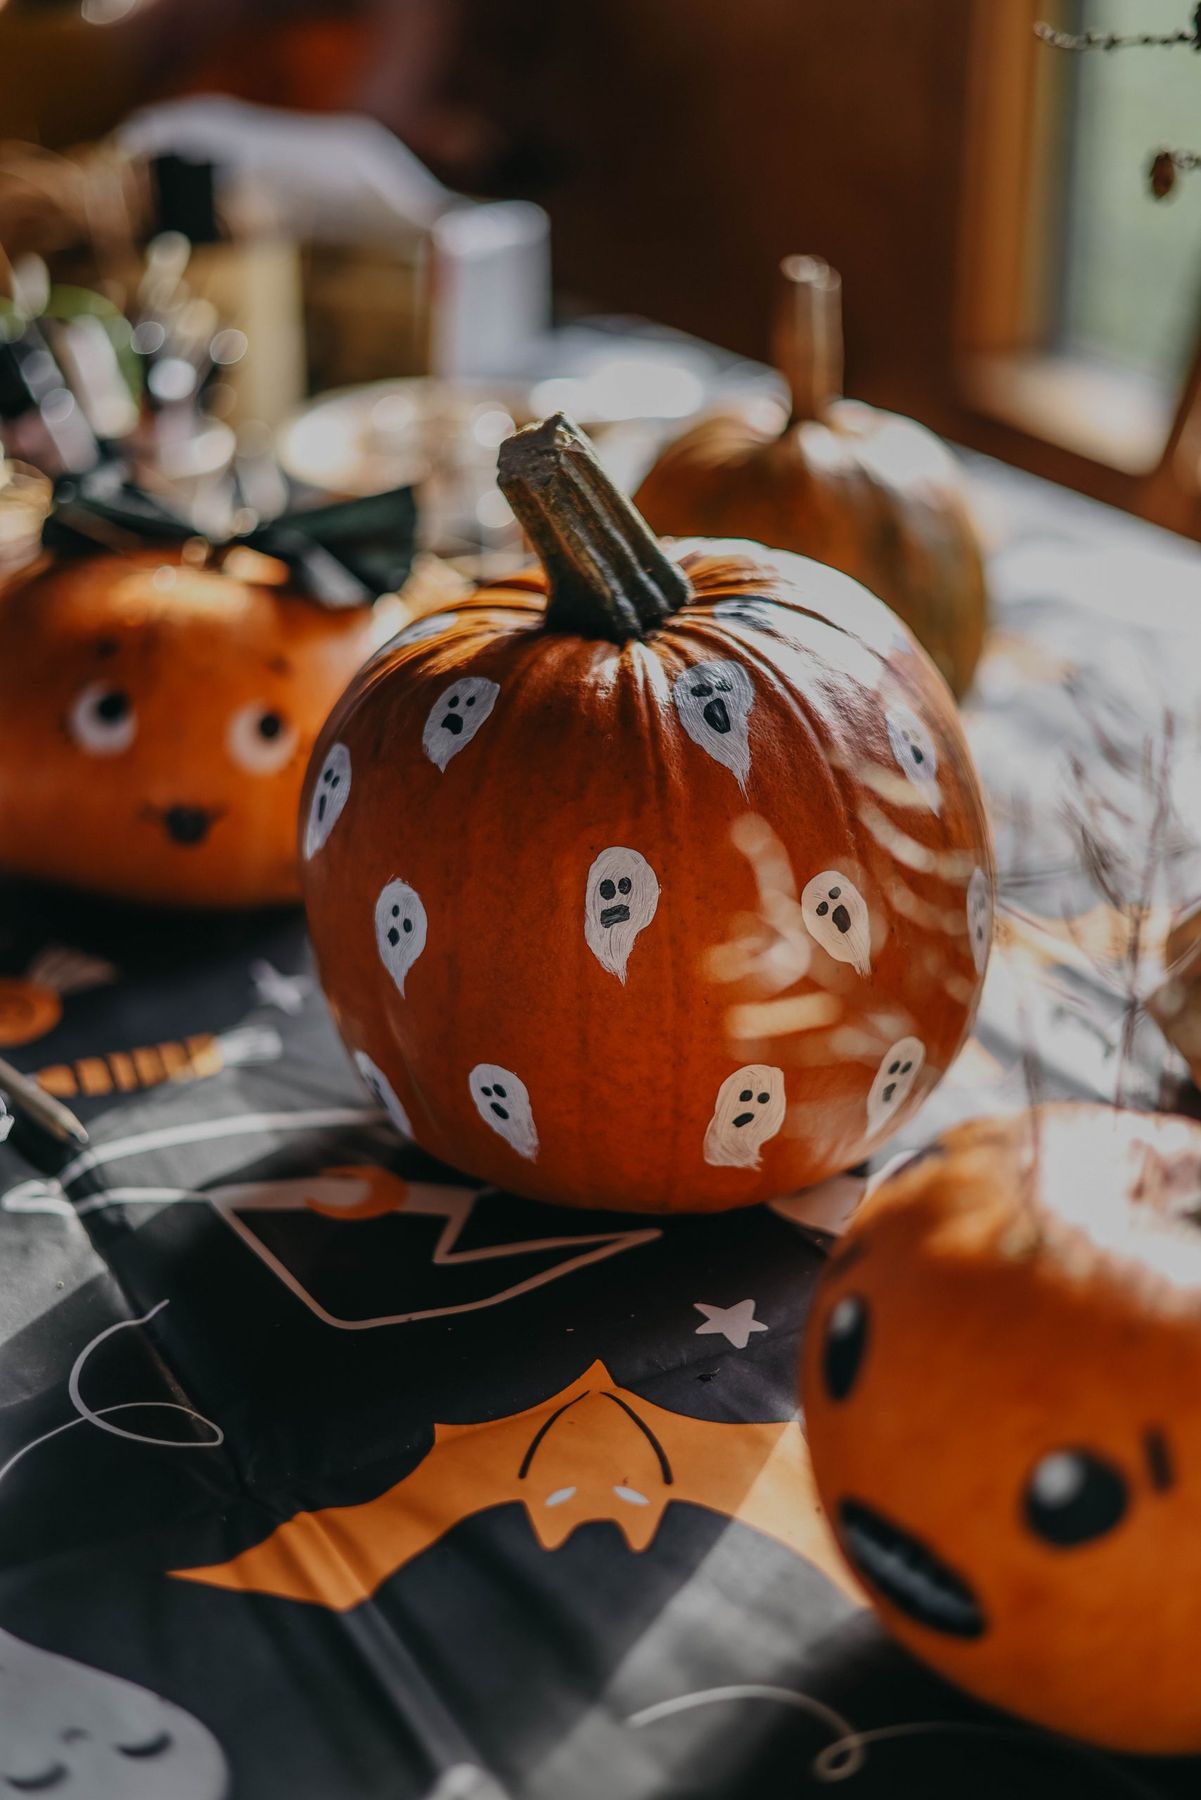
🧹 Maintenance Reality
When painting fine details like the ghosts’ eyes and mouths, don’t use the brush that comes with a craft paint set. Head to an art supply store and buy one fine-tipped detail brush (often called a ‘spotter’ or ’round’ brush in a size 0 or 1). This will give you so much more control and allow you to create crisp, clean lines instead of clumsy blobs. A quality brush is an inexpensive tool that makes a huge difference in the final result. For a similar but more colorful take on painted pumpkins, check out Idea #11.
11. Pastel Painted Pumpkins with Quirky Faces and Patterns
Painting pumpkins is a blast, but a little prep goes a long way. Before you even think about picking up a brush, make sure you’ve got your game plan sorted. This checklist will help you avoid common frustrations and get a result you’re proud of.
- Clean your canvas: Wash your pumpkins and gourds with mild soap and water, then dry them completely. Paint won’t adhere well to a waxy or dirty surface.
- Choose the right paint: Standard acrylic craft paint works perfectly. For the pastel colors seen here, you may need a white base coat for the colors to really pop.
- Gather your tools: You’ll need a variety of brushes for different details, a palette or paper plate for mixing colors, and a cup of water for rinsing brushes.
- Protect your workspace: Lay down newspaper or a plastic tablecloth. Things are about to get colorful!
Creating the swirling patterns is easier than it looks. It’s a great way to add a lot of visual impact without needing to be a master painter. Time estimate: 20 minutes per pumpkin. Material cost: less than $15.
- Start with a clean, dry, painted pumpkin.
- Choose a contrasting color in a paint marker (oil-based works best for clean lines).
- Start at the top, near the stem, and draw a single, continuous spiral line down the side of the pumpkin, following its natural curve.
- Add a second and third spiral, varying the distance between them for a more organic look.
- Fill in with smaller swirls, dots, or other simple patterns to add detail.
- Let it dry completely before handling to avoid smudges.
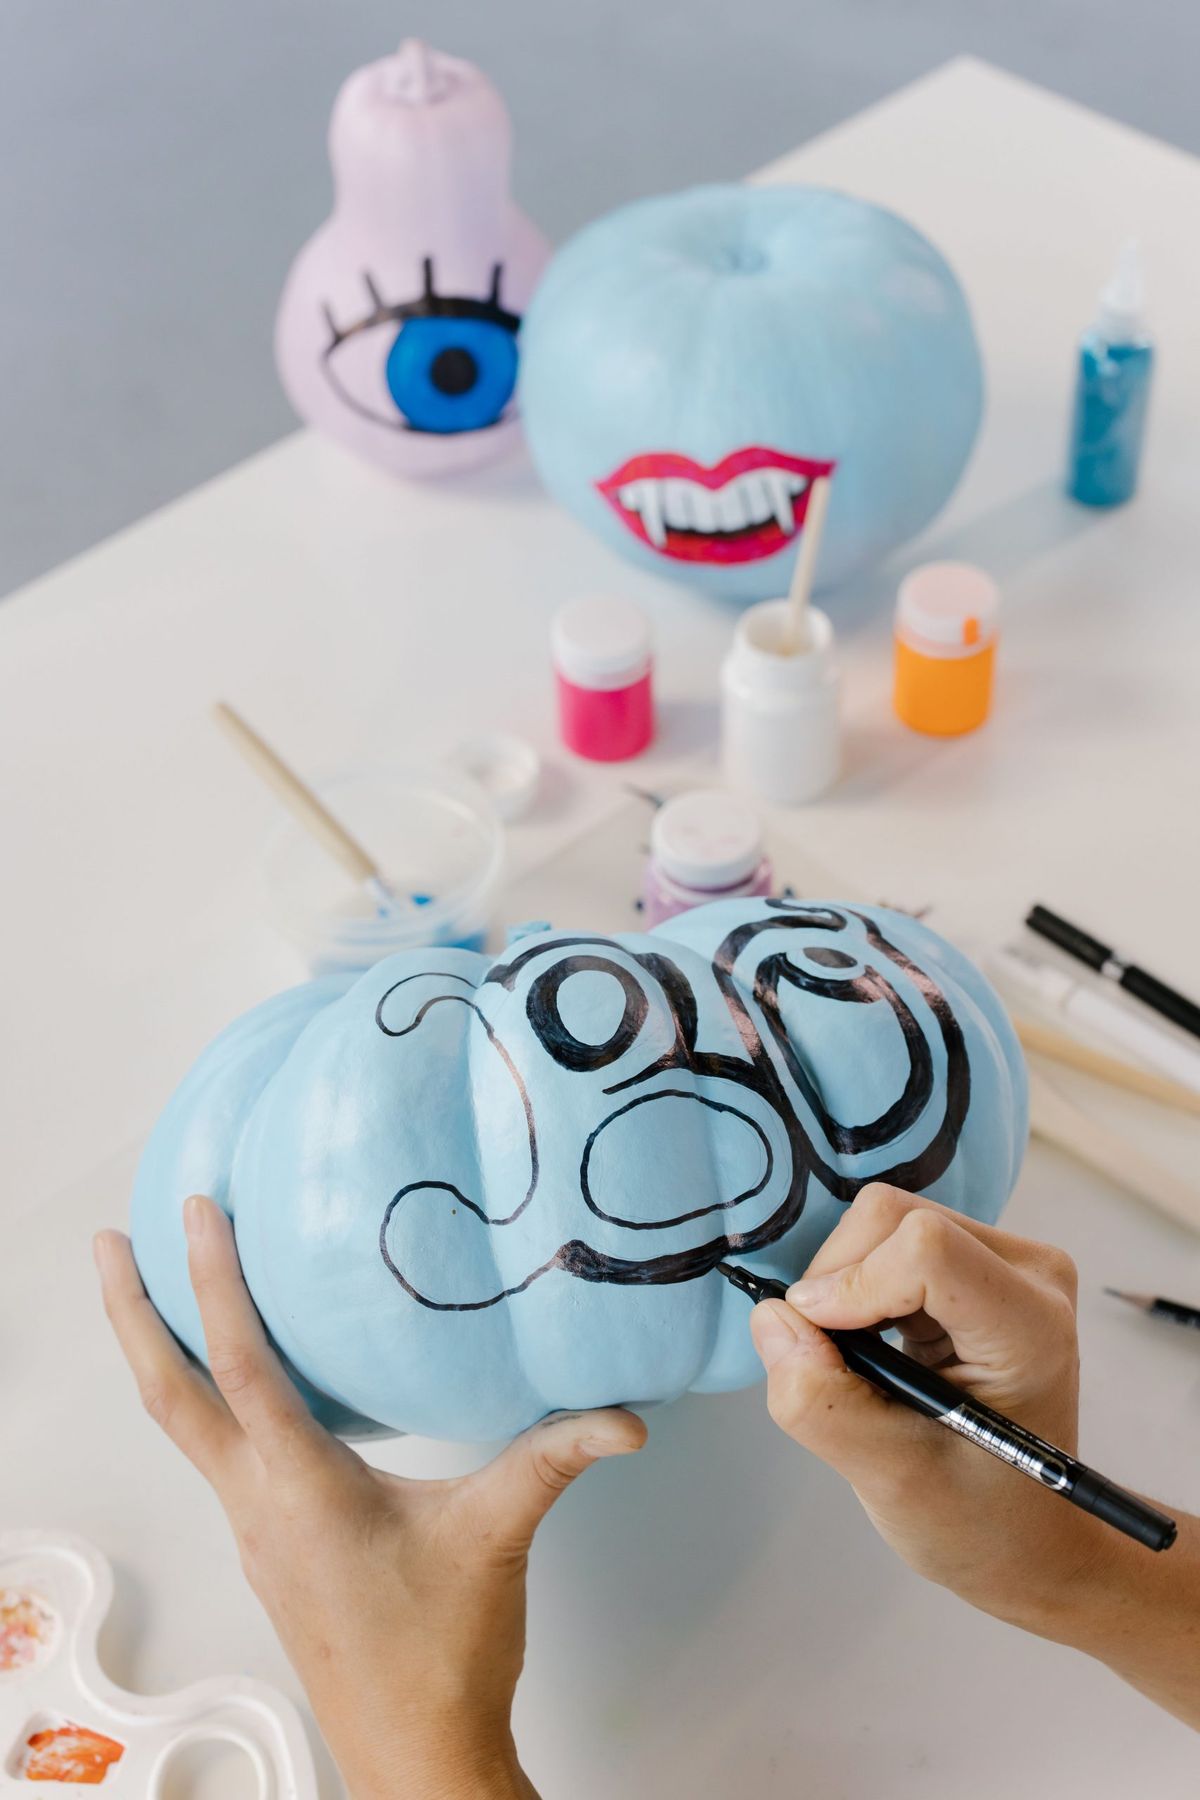
12. Artistic Painted Pumpkins with Craft Supplies
This look is all about using your imagination and simple art supplies. The unexpected pastel colors immediately set these pumpkins apart from the traditional orange. It works because it leans into a playful, whimsical aesthetic. By using simple, bold graphics—a vampire mouth, a single large eye—the designs are easy to read and have a strong visual impact. It’s a reminder that pumpkin decorating doesn’t have to be serious or scary; it can be fun and full of personality.
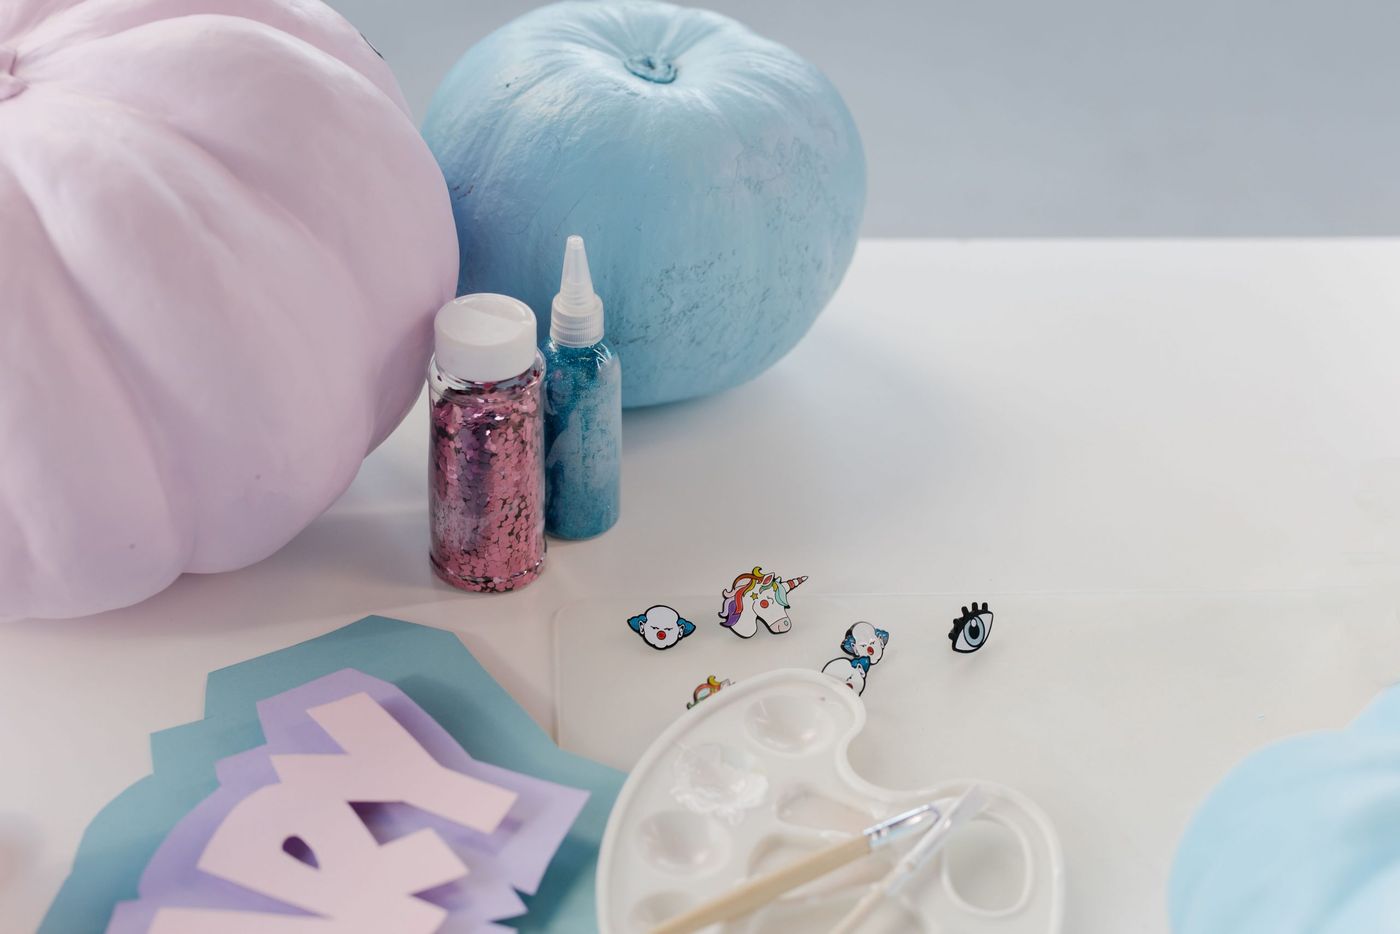
📏 Scale Guide
This style of decorated pumpkin is perfect for indoor displays where they can be appreciated up close. They would be fantastic as a centerpiece on a kids’ table for a Halloween party, or arranged on a bookshelf or entryway console. Because of the detailed, artistic nature of the designs, they are less suited for a faraway porch display where the nuances would be lost. This is decor for a space where people will be within a few feet of the objects, allowing them to see and enjoy the creative details.
13. Minimalist Spooky Pumpkins with Candles Against a Dark Brick Wall
The single most important element making this spooky scene work is the stark contrast. The vibrant, warm orange of the pumpkins pops dramatically against the cool, dark tones of the brick wall and metal floor. This high-contrast palette is what creates the visual tension and moodiness. If the background were light-colored, the pumpkins would lose half their impact. The simplicity of the single drawn face prevents it from becoming too busy, keeping the focus on that powerful color story.
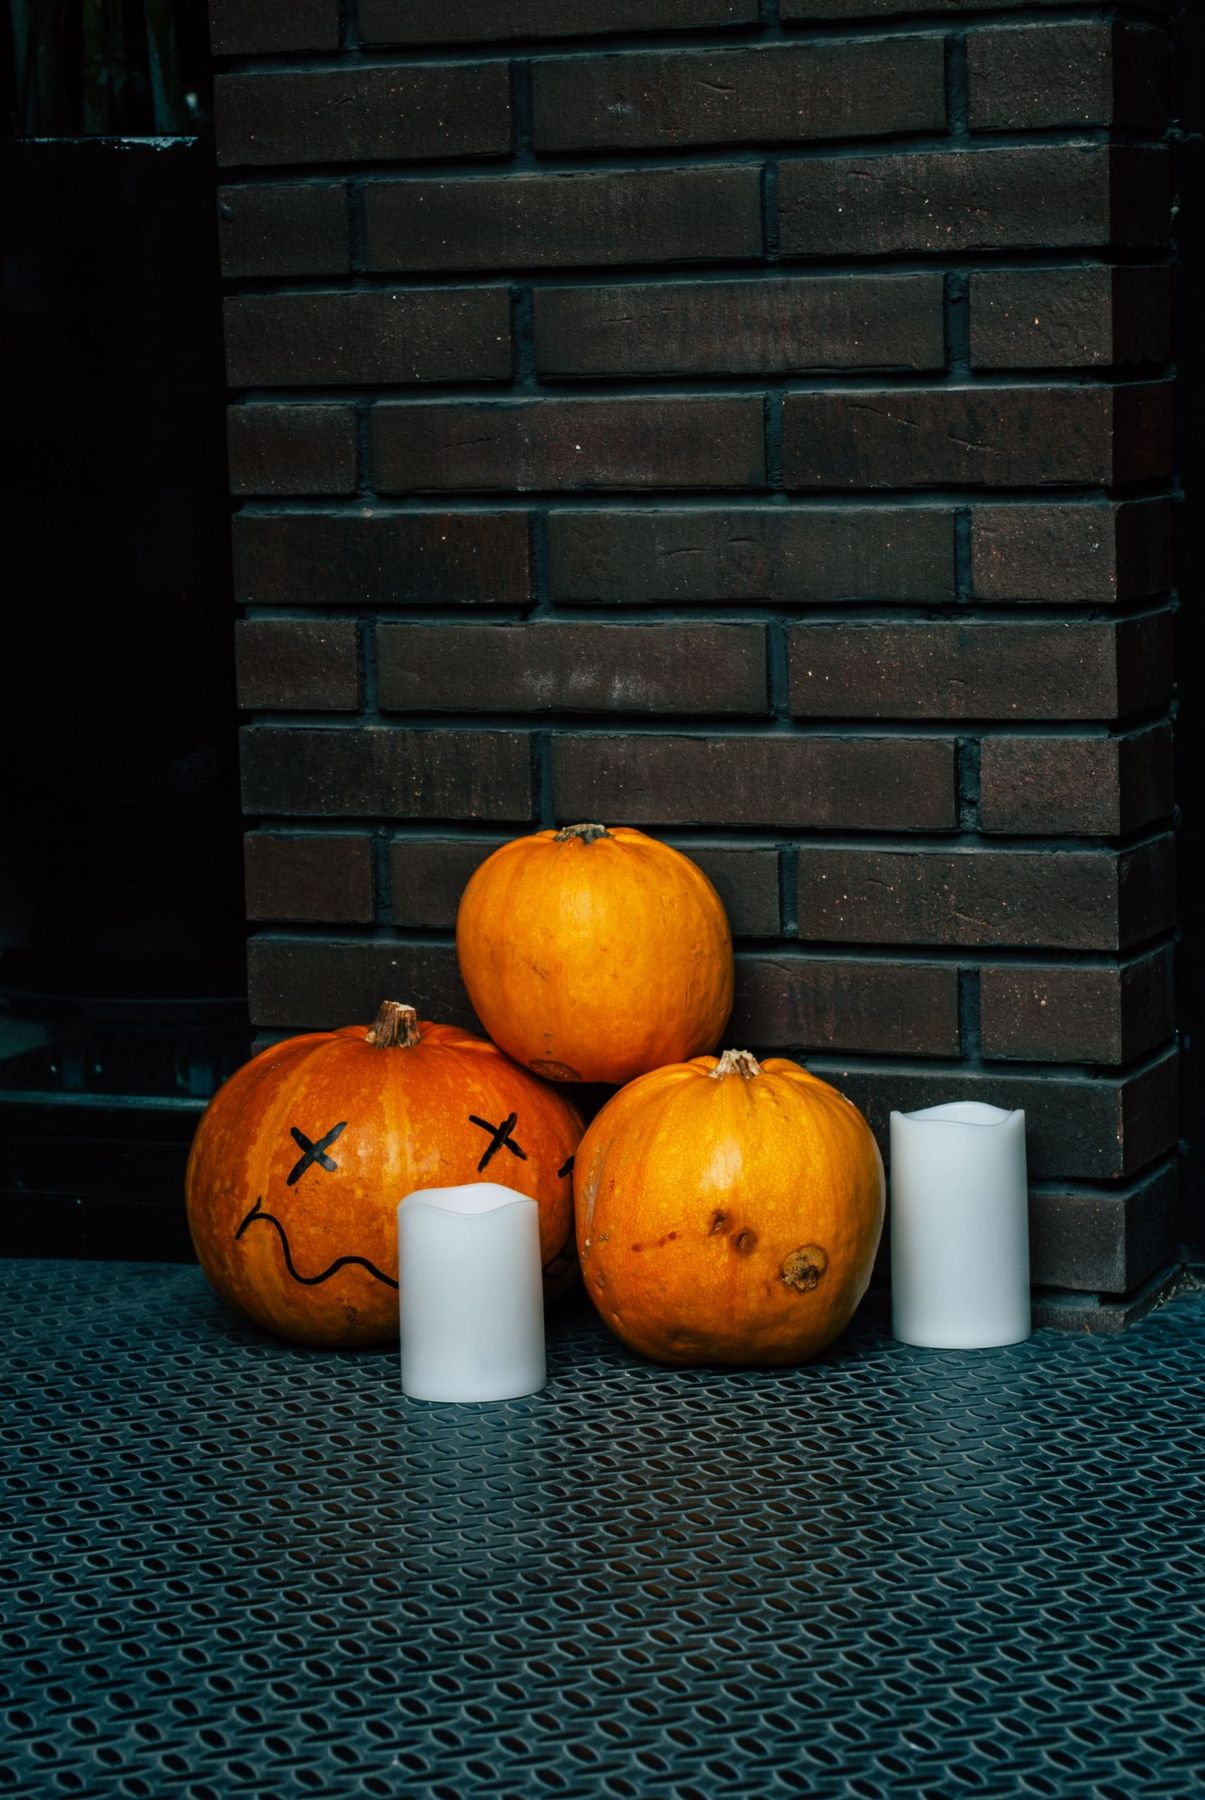
💡 Designer Tip
While adding candles to a pumpkin display creates a wonderfully spooky ambiance, please be extremely careful with open flames. Never leave lit candles unattended, especially if you have pets or small children. A much safer option is to use high-quality flameless LED candles. Many now have realistic flicker effects and timers, so you can get the same moody glow without any of the fire risk. Also, the drawn-on face with ‘X’ eyes is a great no-carve option, but be aware that marker can be difficult to remove from the pumpkin’s porous skin if you change your mind.
14. Orange Paper Jack-o’-Lantern String Lights
This decoration works because of its simplicity and iconic imagery. The combination of the color orange and the jack-o’-lantern face is instantly recognizable as Halloween. The ribbed texture of the paper lanterns adds a nice tactile quality and diffuses the light softly, creating a gentle glow rather than a harsh glare. Hanging them as a string creates a sense of festive rhythm and repetition. It’s a cheerful and effortless way to signal that it’s time for some spooky fun.
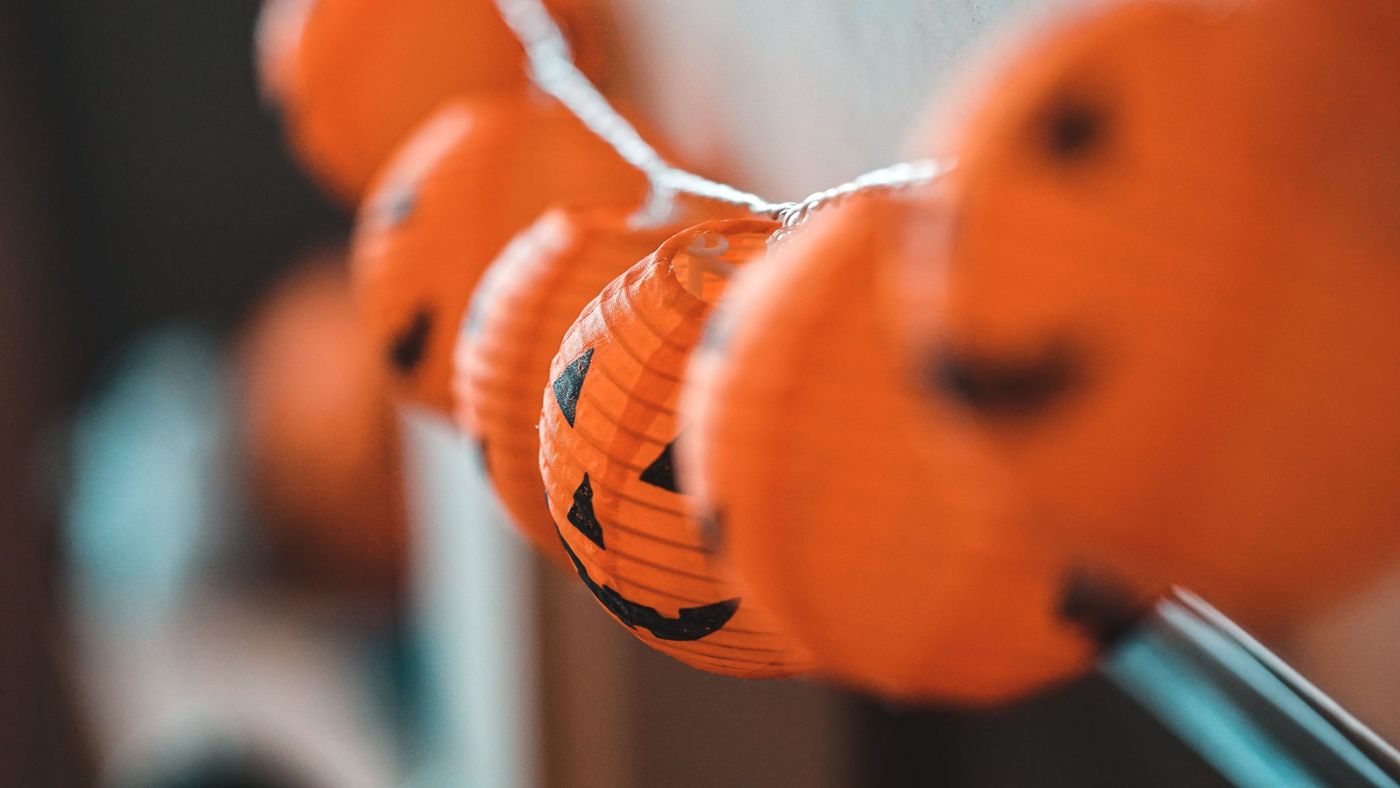
🔧 How-To Brief
A string of paper lanterns is one of the most budget-friendly ways to decorate a large area. Instead of buying dozens of real pumpkins, a single string of 10 or 20 lanterns can bring festive color to an entire room, doorway, or porch railing for under $20. You can find these at party supply stores, Target, or online. They are lightweight, easy to hang with a few pieces of tape or temporary hooks, and store flat, taking up almost no space for next year. It’s maximum impact for a minimal investment.
15. Creative Painted Pumpkins for a Fall Front Porch
This outdoor display proves that you don’t need a lot of different elements to create a beautiful autumn scene. The formula is simple: 70% Natural Elements + 30% Creative Touch. The pumpkins, the porch, and the surrounding fall colors provide the vast majority of the visual appeal. The painted designs are the creative touch that adds personality and a focal point. It’s a reminder that sometimes the best decorating approach is to work with the natural beauty of the season, adding just a small, personal accent.
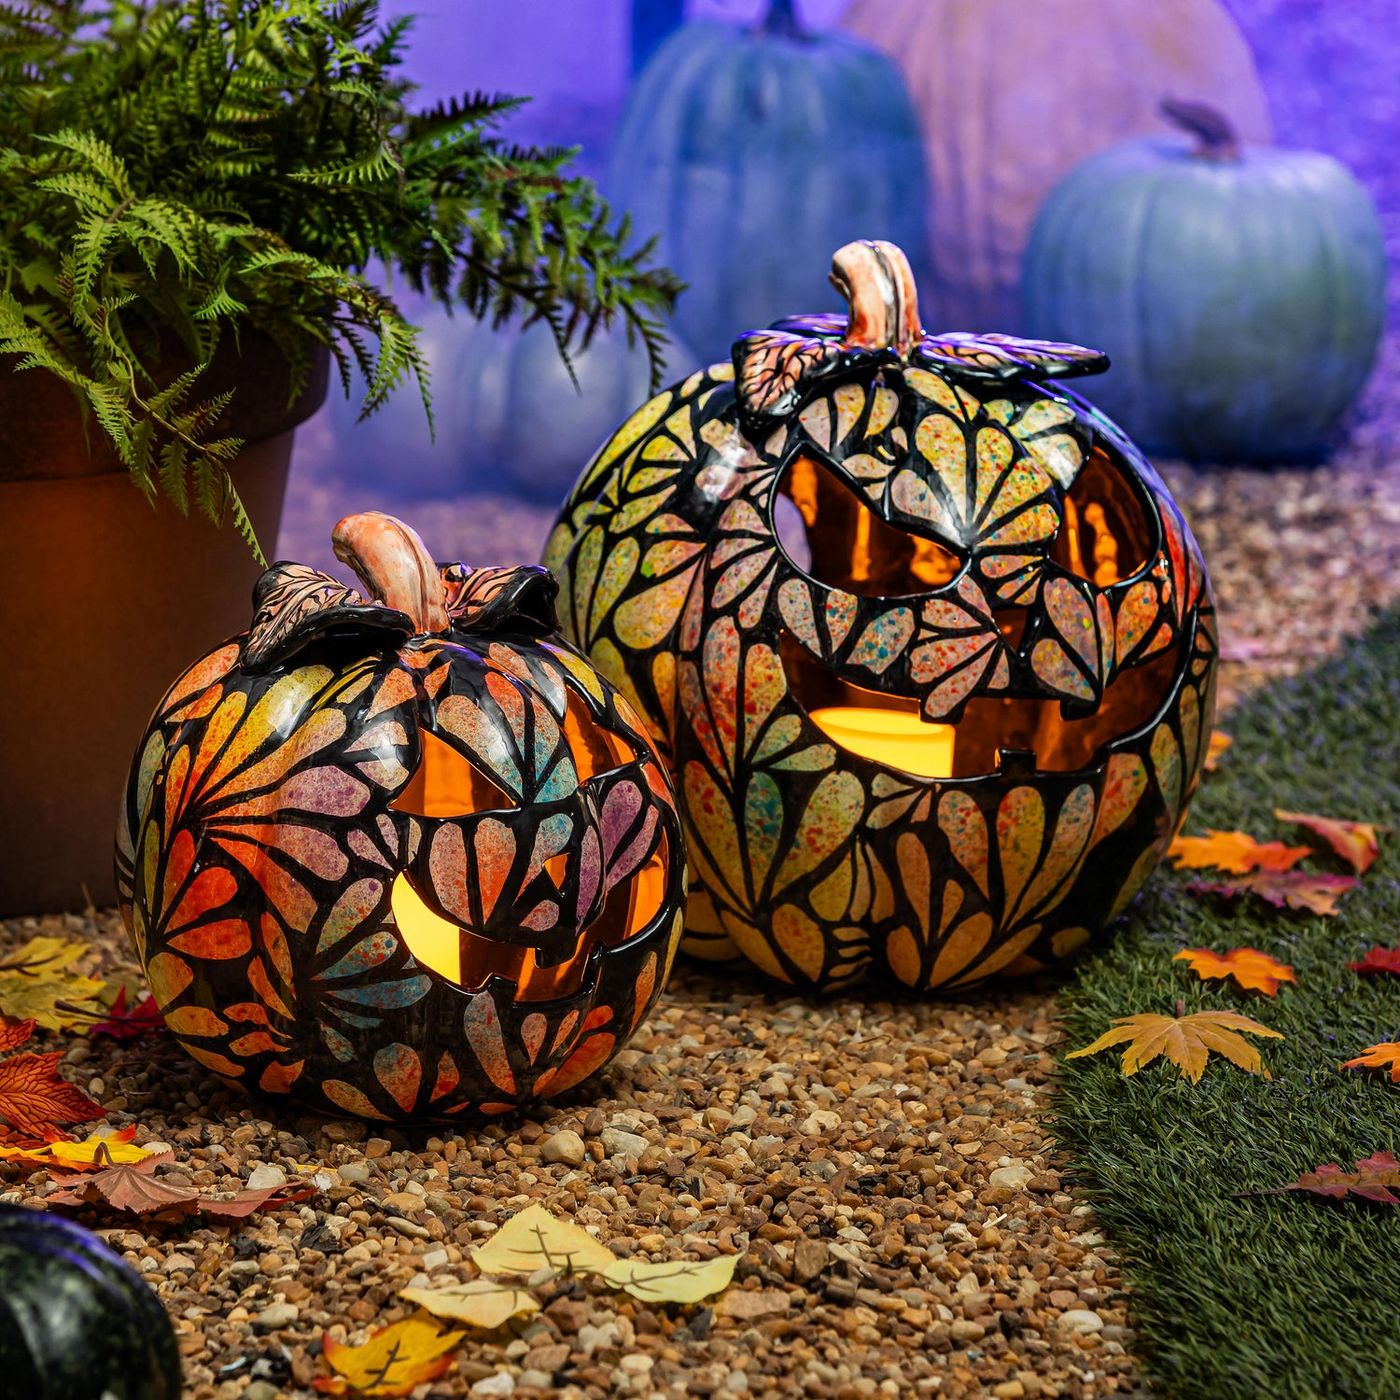
⚠️ Real Talk
When painting pumpkins for an outdoor display, don’t forget to seal your work! After your acrylic paint has fully dried, apply a coat or two of a clear spray sealant (available at any craft or hardware store). This will protect your beautiful designs from moisture and prevent the paint from peeling or running in the autumn rain. It’s a simple extra step that ensures your painted pumpkins look great all season long. Choose a matte or satin finish for a more natural look.
16. Glowing Jack-o’-Lanterns on a Dark Ribbed Wooden Deck
The magic here comes from the high contrast between the warm, inviting glow of the pumpkins and the cool, dark surroundings. The carved faces become the undisputed focal points because they are the main sources of light in the scene. The ribbed texture of the wooden deck planks catches the light, creating lines that lead the eye towards the jack-o’-lanterns. This play of light and shadow is what creates that classic, spooky-yet-cozy Halloween atmosphere.
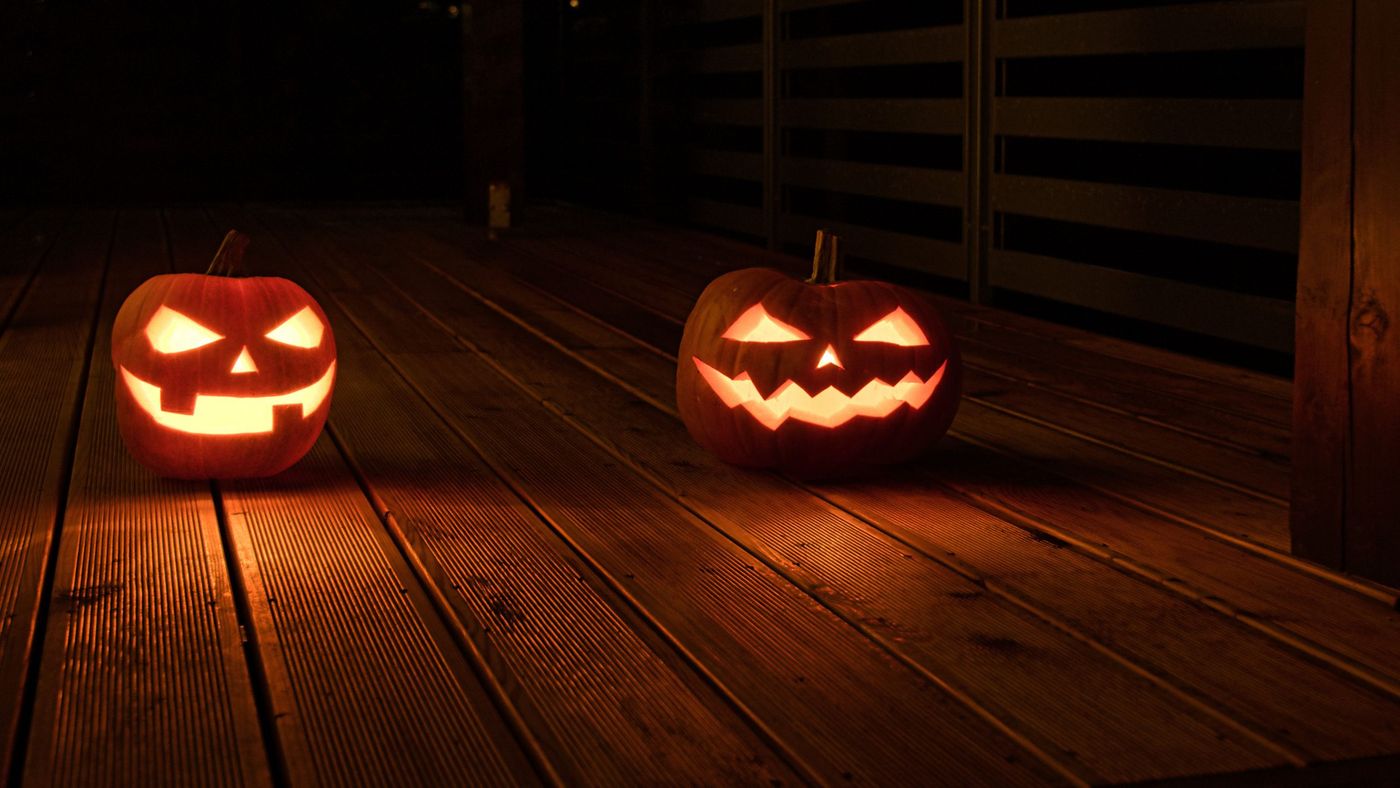
🔥 Trending Context
If you choose to light your jack-o’-lanterns with real candles, you’re signing up for some daily maintenance. You’ll need to remember to light them each evening and, more importantly, extinguish them before you go to bed. A carved pumpkin will also begin to dehydrate and shrivel much faster with a heat source inside. To prolong its life, you can rub petroleum jelly on the cut edges to seal in moisture. Or, make your life easier and safer by using battery-operated LED candles. For a no-carve option that lasts all season, consider the fabric pumpkins in Idea #28.
17. Rustic Fall Table with Mini Pumpkins, Candles, and Pinecones
The key to this abundant, glowing tablescape is the mix of different light sources. It’s not just one type of candle. The tall, elegant pillar candles in their brass holders provide height and a traditional feel, while the shorter, wider candles in the clear glass jars add a lower level of warm, amber light. This variation in height and vessel is what makes the arrangement feel so rich, layered, and dynamic. Without this mix, the display would feel much flatter and less interesting.
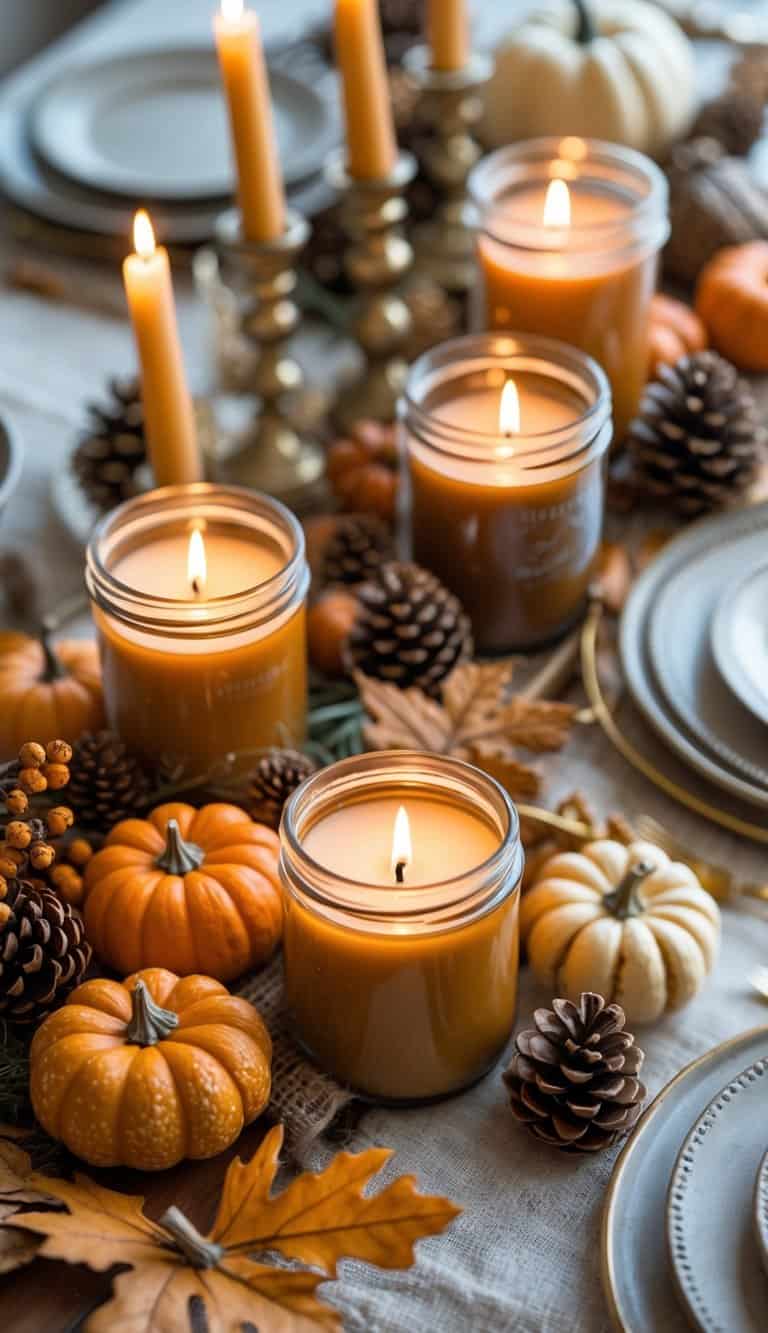
⭐ The One Thing
This kind of sprawling, multi-element centerpiece is best suited for a large dining table (6 feet or longer) or a wide buffet or console table. On a smaller table, it would feel overwhelming and leave little room for place settings. When planning a centerpiece with this much going on, ensure you leave at least 12-15 inches of clear space for each guest’s plate and glass. For smaller tables, consider a more contained version of this look, perhaps using a long tray to group the elements together. You could also try the simpler centerpiece from Idea #22.
18. Carved Cat and Jack-o’-Lantern with Autumn Leaves Display
This charming fireplace scene is a perfect equation for whimsical Halloween decor: 1 Part Spooky + 1 Part Cute + a Dash of Nature. The classic smiling jack-o’-lantern brings the traditional “spooky” element. The carved cat pumpkin, with its pointy ears and playful expression, adds the “cute” factor. The scattered yellow autumn leaves provide a natural, organic touch that ties it all together. This balance is what makes the scene feel festive and fun, rather than genuinely scary.
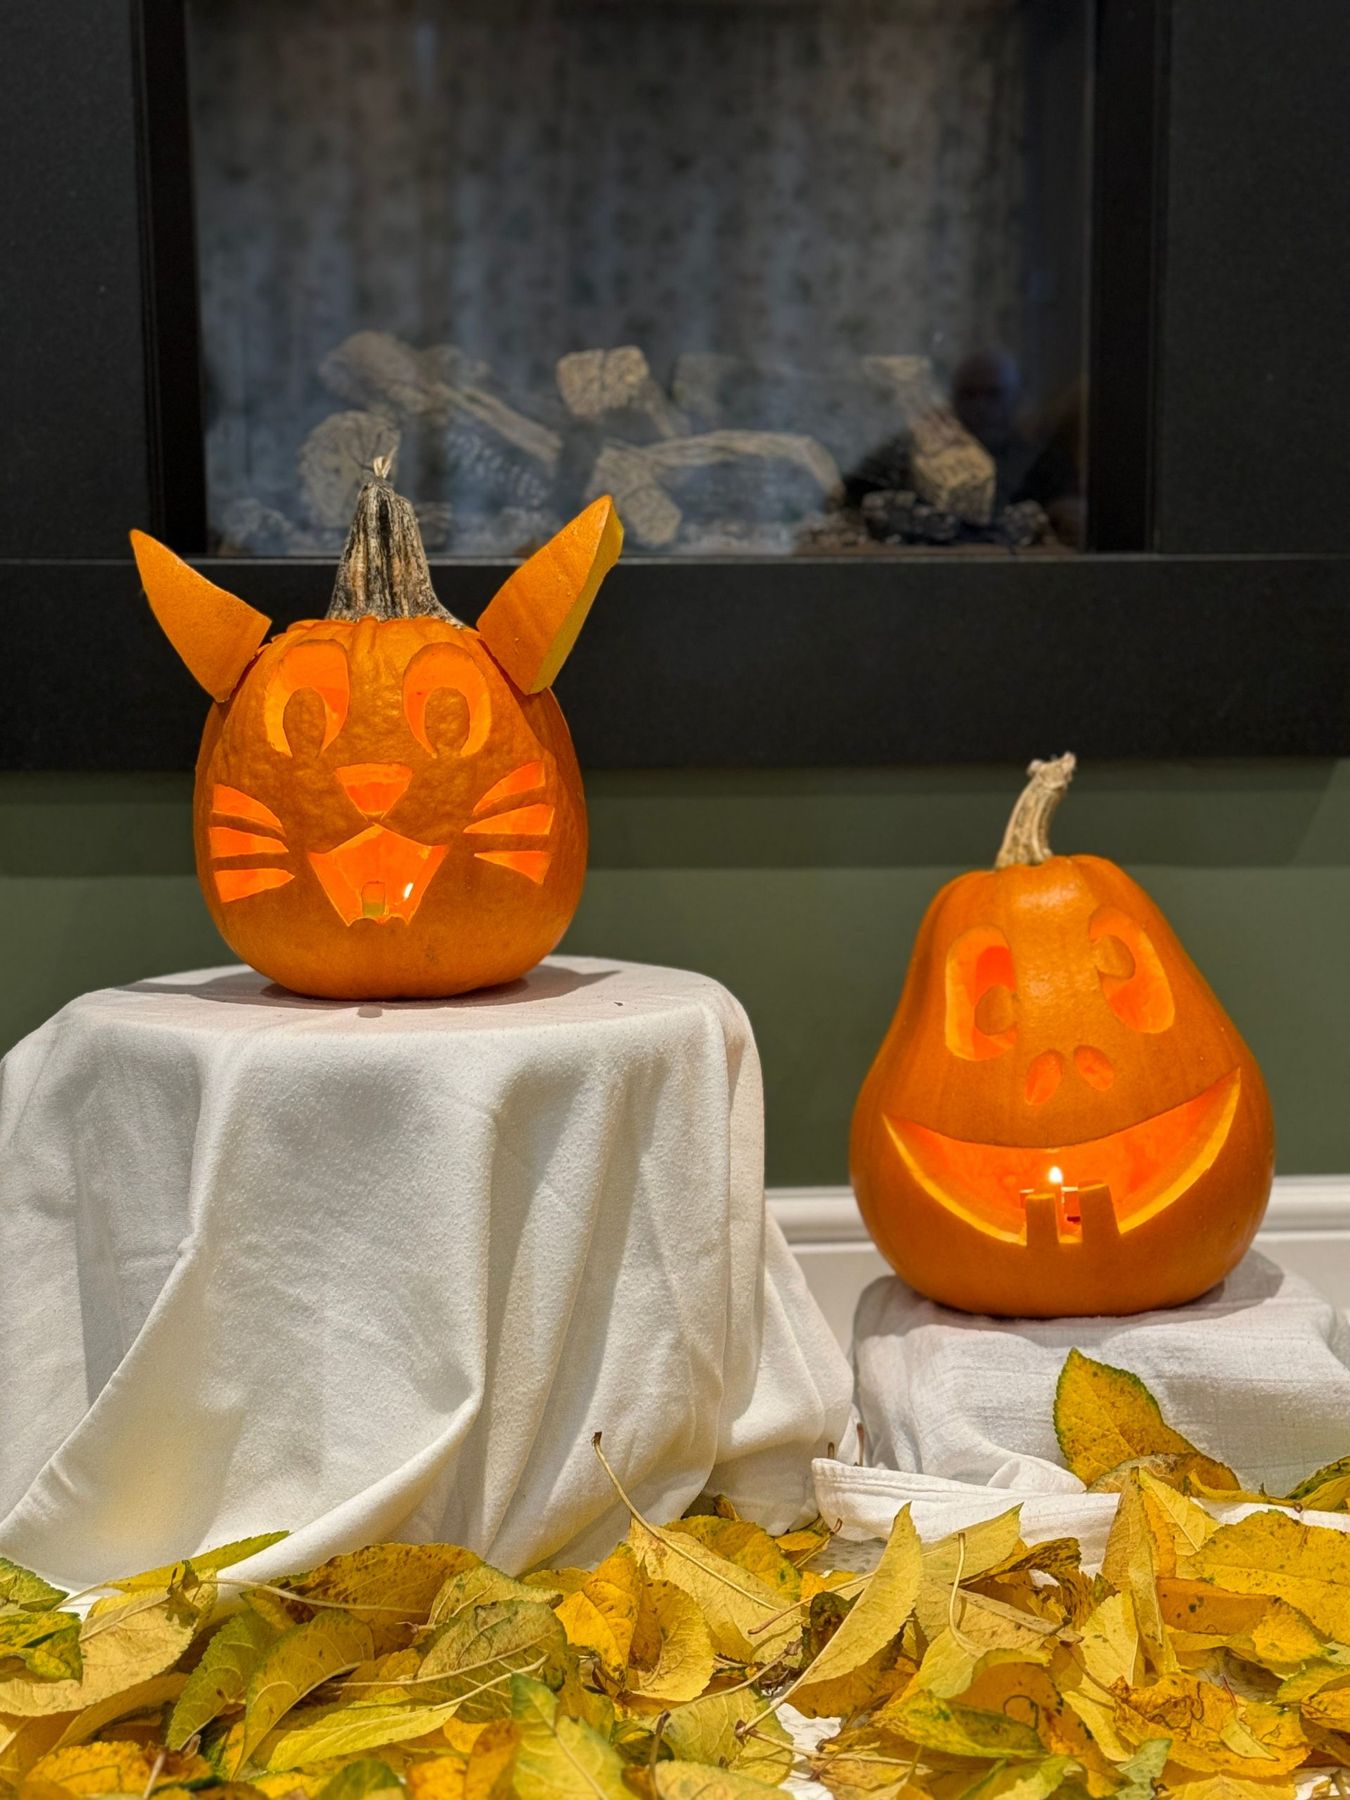
💸 Get This Look For Less
The use of pedestals—in this case, simple white draped fabric—is a classic design trick that works wonders here. By elevating the two pumpkins to different heights, the arrangement instantly becomes more dynamic and visually interesting. It breaks up the static, horizontal line and creates a more engaging composition. This simple act of changing the elevation of objects is a powerful tool for turning a simple collection of items into a thoughtfully designed vignette.
19. Vibrant Pumpkin Decorated with Hand-Painted White Ghosts
This look is all about the power of a repeating, hand-painted motif. The tiny white ghosts create a pattern that is both spooky and incredibly charming. When you’re tackling a design like this, don’t strive for perfection. The slight variations in the shape and expression of each ghost are what give the piece its personality and handcrafted appeal. It’s the imperfections that make it feel authentic and unique. Let go and have fun with it!
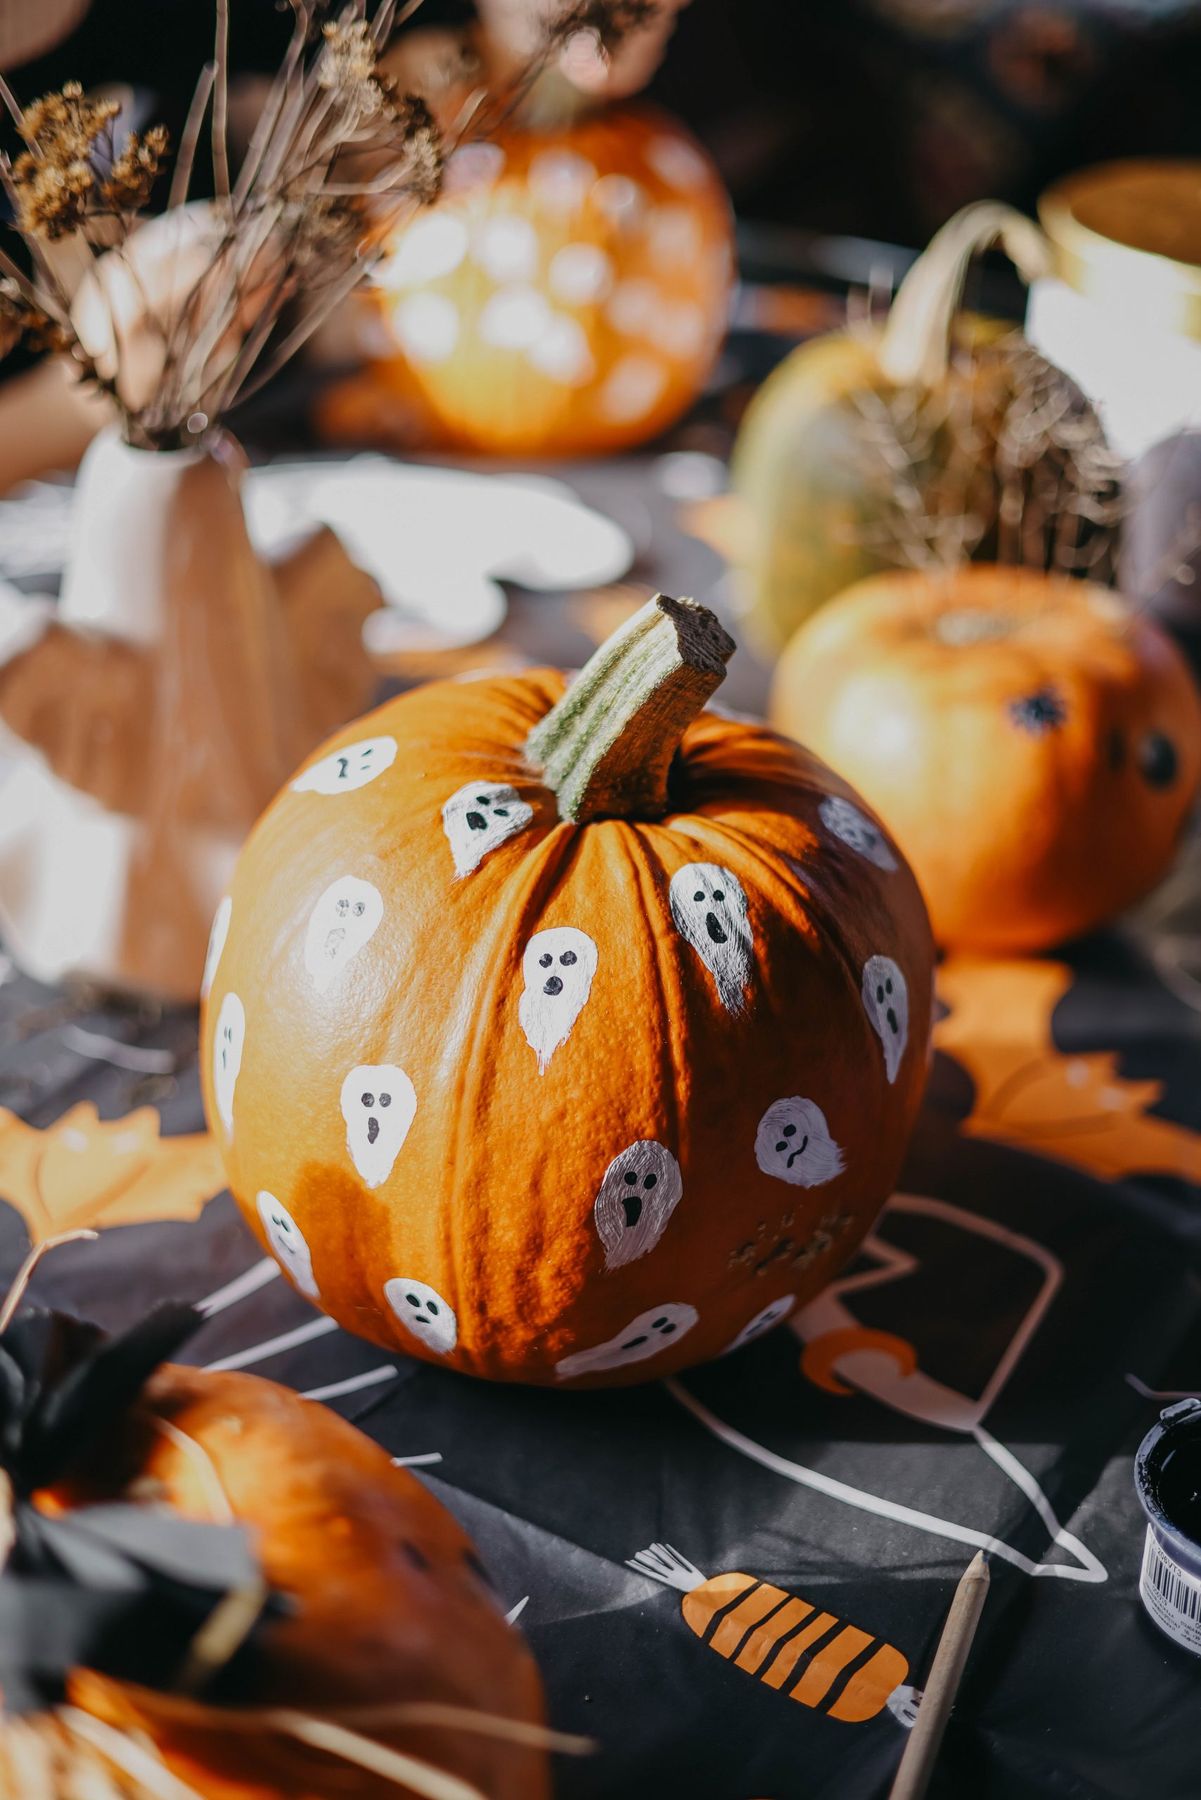
📐 Style Math
You don’t need to buy a dozen pumpkins to create a festive scene. This idea shows how one large, creatively decorated pumpkin can serve as the focal point for an entire display. Surround it with a few smaller, unadorned gourds or pumpkins from the grocery store to fill out the scene without breaking the bank. The focus will remain on your artistic creation, and the supporting cast adds color and texture for just a few extra dollars.
20. Glowing Jack-o’-Lantern on Stone Steps by a Dark Wood Door
A beautifully carved jack-o’-lantern sitting by a rustic wooden door is a classic for a reason, but be realistic about its lifespan. Once carved, a pumpkin is exposed to air and bacteria and will start to decay within 5-10 days, depending on your climate. To make it last as long as possible, carve it only a few days before Halloween and keep it in a cool, shaded spot. A daily spritz with a bleach-and-water solution can also help slow down the growth of mold.
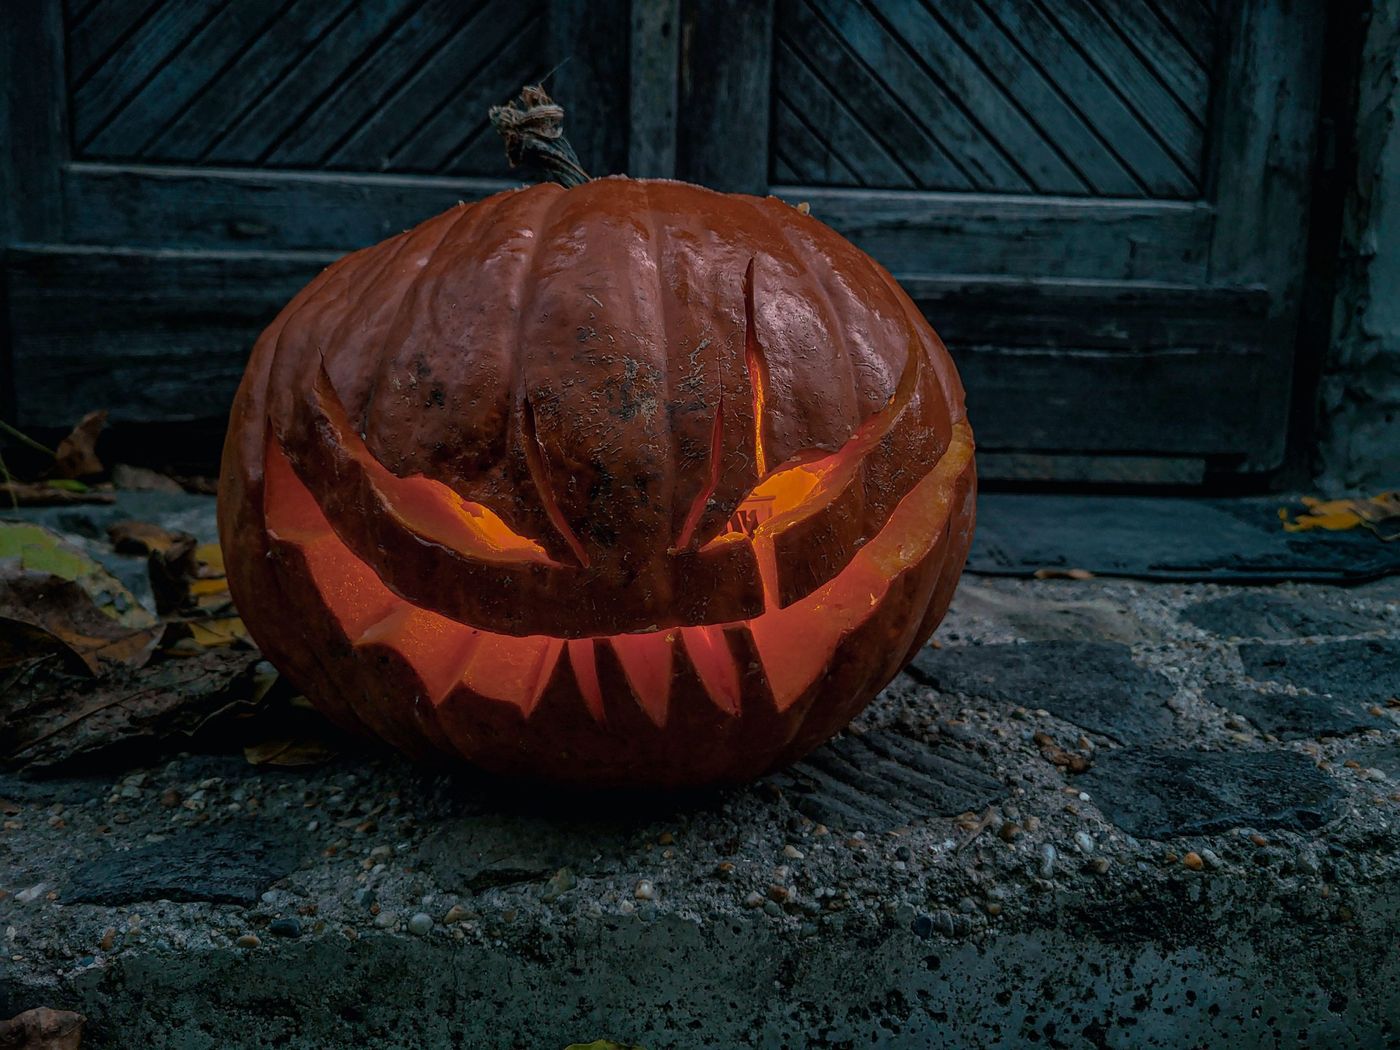
💰 Budget Breakdown
The single element that gives this scene its powerful, eerie mood is the internal amber light. It’s not just a light; it’s a specific color of light. The warm, almost fiery glow contrasts dramatically with the cool, dark tones of the stone steps and wooden door. This intense color contrast is what creates the drama and atmosphere. If you were to use a standard white or cool-toned LED, the entire feeling of the scene would be lost. It’s all about that warm, spooky glow.
21. Carved Pumpkin ‘Eating’ a Gourd with a Halloween Log Sign
This playful scene works because it tells a mini-story. The large pumpkin isn’t just carved; it’s performing an action—”eating” the smaller gourd. This bit of narrative anthropomorphism is instantly engaging and humorous. It elevates the display from a static arrangement to a dynamic, amusing moment. The “HALLOWEEN” log sign reinforces the theme and provides a solid base for the scene, grounding the playful elements with a rustic, substantial object.
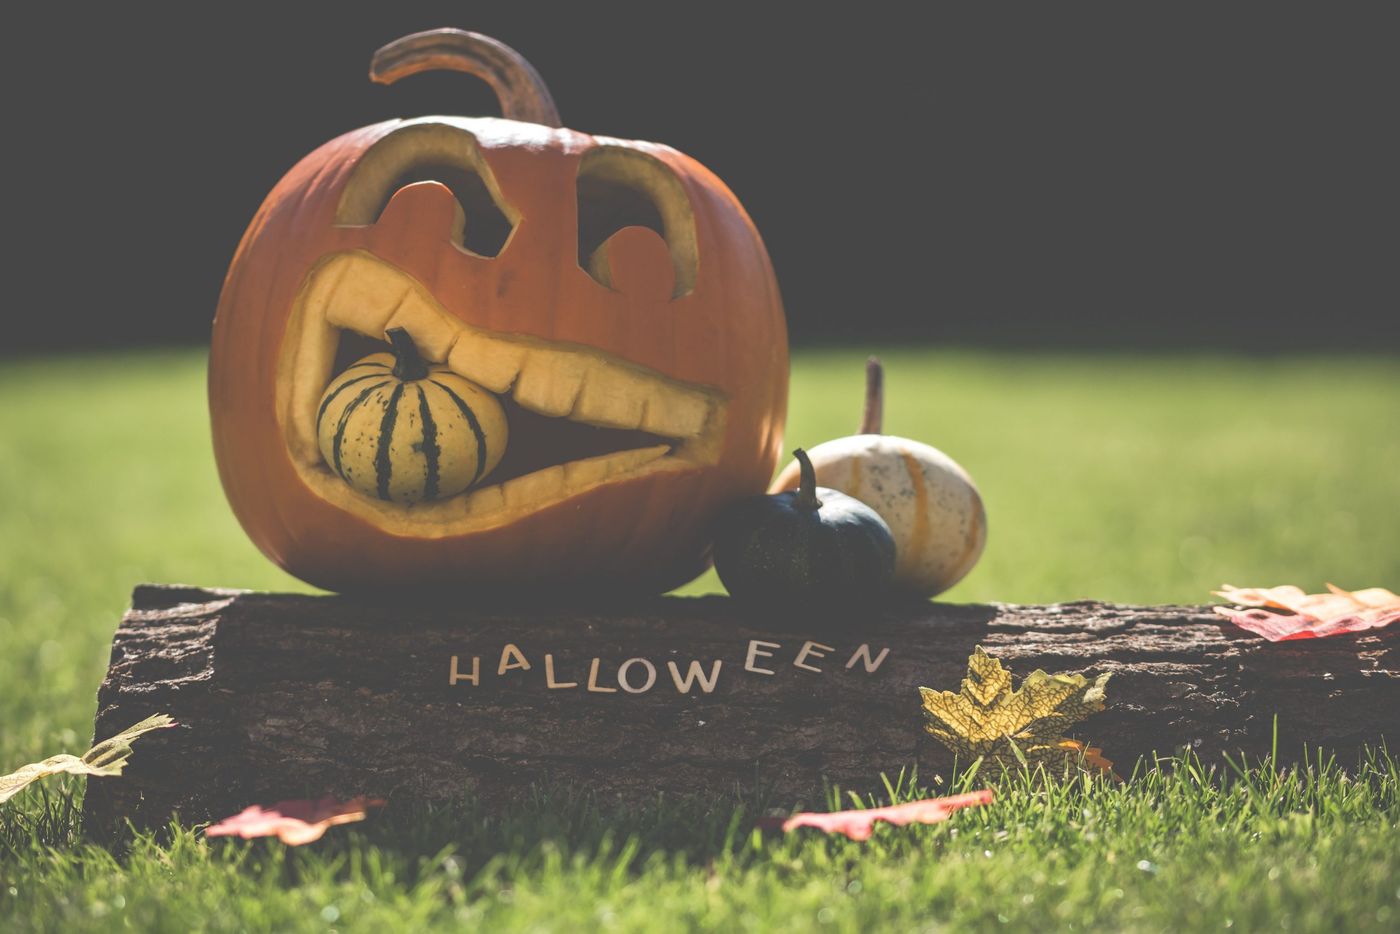
🎯 What Makes It Work
When creating a scene with multiple elements, think like a photographer and consider your angles. This arrangement is clearly designed to be viewed from the front. Don’t waste time and effort decorating the back of the pumpkin that no one will see. Instead, focus all your carving and styling energy on the side that faces your audience. This saves you time and ensures your display has maximum impact from the intended vantage point.
22. Simple Fall Table Decor with Three Pumpkins and a Floral Bouquet
This fresh and simple table decor follows a minimalist autumn formula: 60% White Space + 30% Natural Objects + 10% Vibrant Color. The crisp white tablecloth and background create a bright, airy canvas. The three orange pumpkins provide the natural, seasonal element. The floral bouquet delivers that concentrated pop of vibrant red and yellow. This balance ensures the scene feels autumnal without being dark or cluttered. It’s a modern take on fall decorating that feels clean and chic.
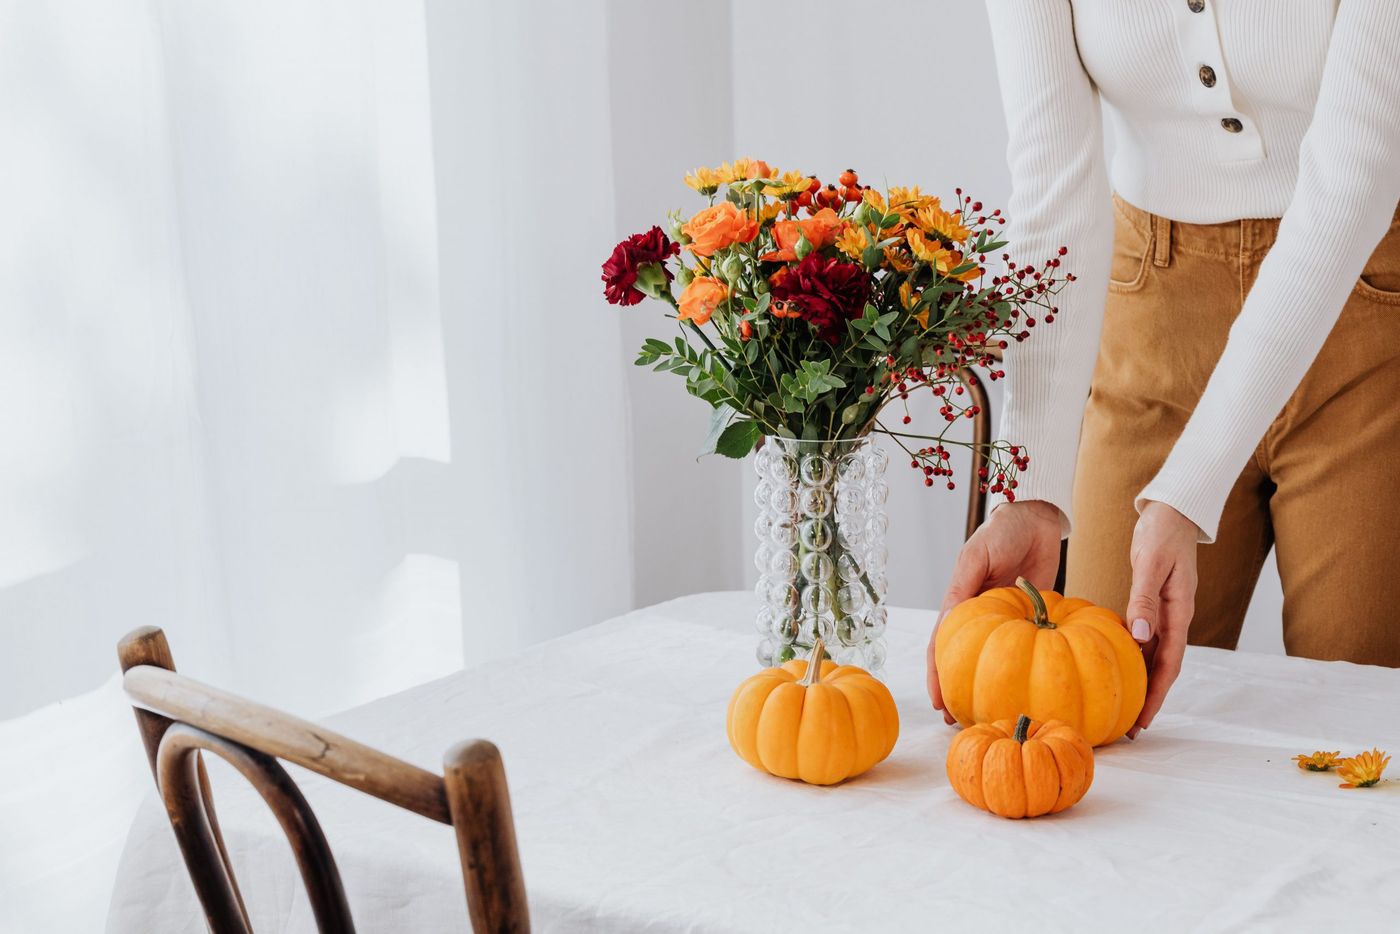
🧹 Maintenance Reality
A beautiful bouquet of fresh flowers is a wonderful addition to any decor, but it does require some upkeep. Be sure to change the water in the vase every day or two to keep the flowers looking their best and prevent bacteria from building up. Snip the stems at an angle every couple of days as well. Also, be mindful of where you place this. Direct sunlight can cause both the flowers and the pumpkins to fade and wilt much faster. A spot with bright, indirect light is ideal.
23. Neutral Pumpkin and Greenery Centerpiece with Woven Placemats
This tablescape is a perfect example of mixing warm and cool tones for a sophisticated, natural look. The creamy white pumpkins and brown pinecones provide warmth, while the ribbed grey-green pumpkins and eucalyptus foliage introduce cooler, earthier tones. This subtle color variation makes the centerpiece feel much more complex and visually rich than a purely monochromatic scheme. Compare this with the all-white elegance of Idea #1 to see the difference.
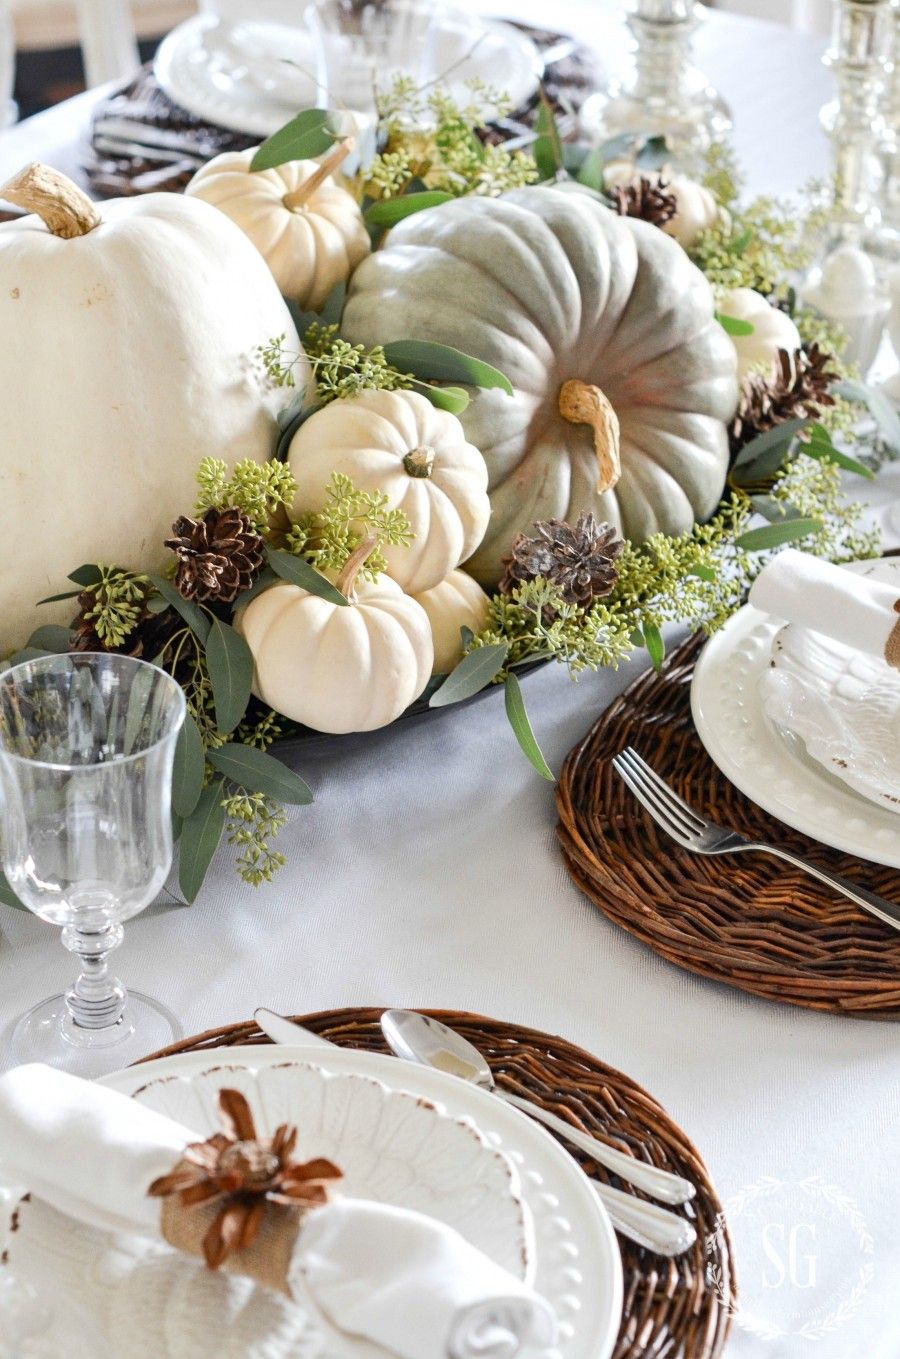
✅ Before You Start
To make your centerpiece feel integrated with the rest of the table, pull small elements from it into your place settings. The rustic, flower-embellished napkin rings used here are a perfect example. They echo the natural, slightly wild feel of the central arrangement, creating a cohesive design thread that runs through the entire tablescape. You could achieve a similar effect by tucking a single sprig of eucalyptus into each napkin.
24. Vibrant Autumn Floral Arrangement with Playful Halloween Decor
The star of this show is undoubtedly the voluminous floral arrangement. While the ghost and jack-o’-lantern are fun, festive accents, it’s the sheer abundance and vibrant color of the orange dahlias and deep purple flowers that command attention. This is a floral-forward approach to Halloween decor. It proves that you can create a festive atmosphere that is also incredibly elegant and beautiful, moving beyond the typical spooky-and-silly aesthetic.
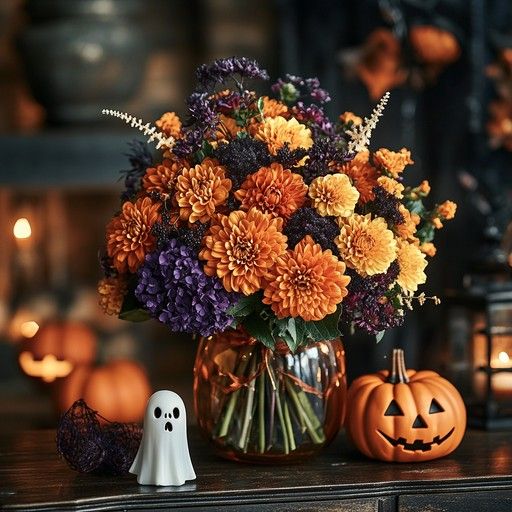
📏 Scale Guide
We’re seeing a huge trend towards “dark floral” or “moody botanical” arrangements in interior design, and this is the perfect Halloween interpretation of that. It pairs the bright, cheerful orange of the season with deep, dramatic purples and a dark, textured background. This look has staying power because it feels sophisticated and layered. It’s less about a specific holiday and more about capturing the rich, dramatic mood of the late autumn season.
25. Cream and Orange Pumpkins with a Pot of Yellow Mums
This display works because of the pleasing contrast in both color and shape. The smooth, round, cream-colored pumpkin provides a soft, neutral base, while the tall, textured, vibrant orange pumpkin adds a strong vertical element and a punch of classic autumn color. The bright yellow chrysanthemums complete the primary color trio, creating a composition that feels balanced and complete. The different heights and shapes create a dynamic visual rhythm.
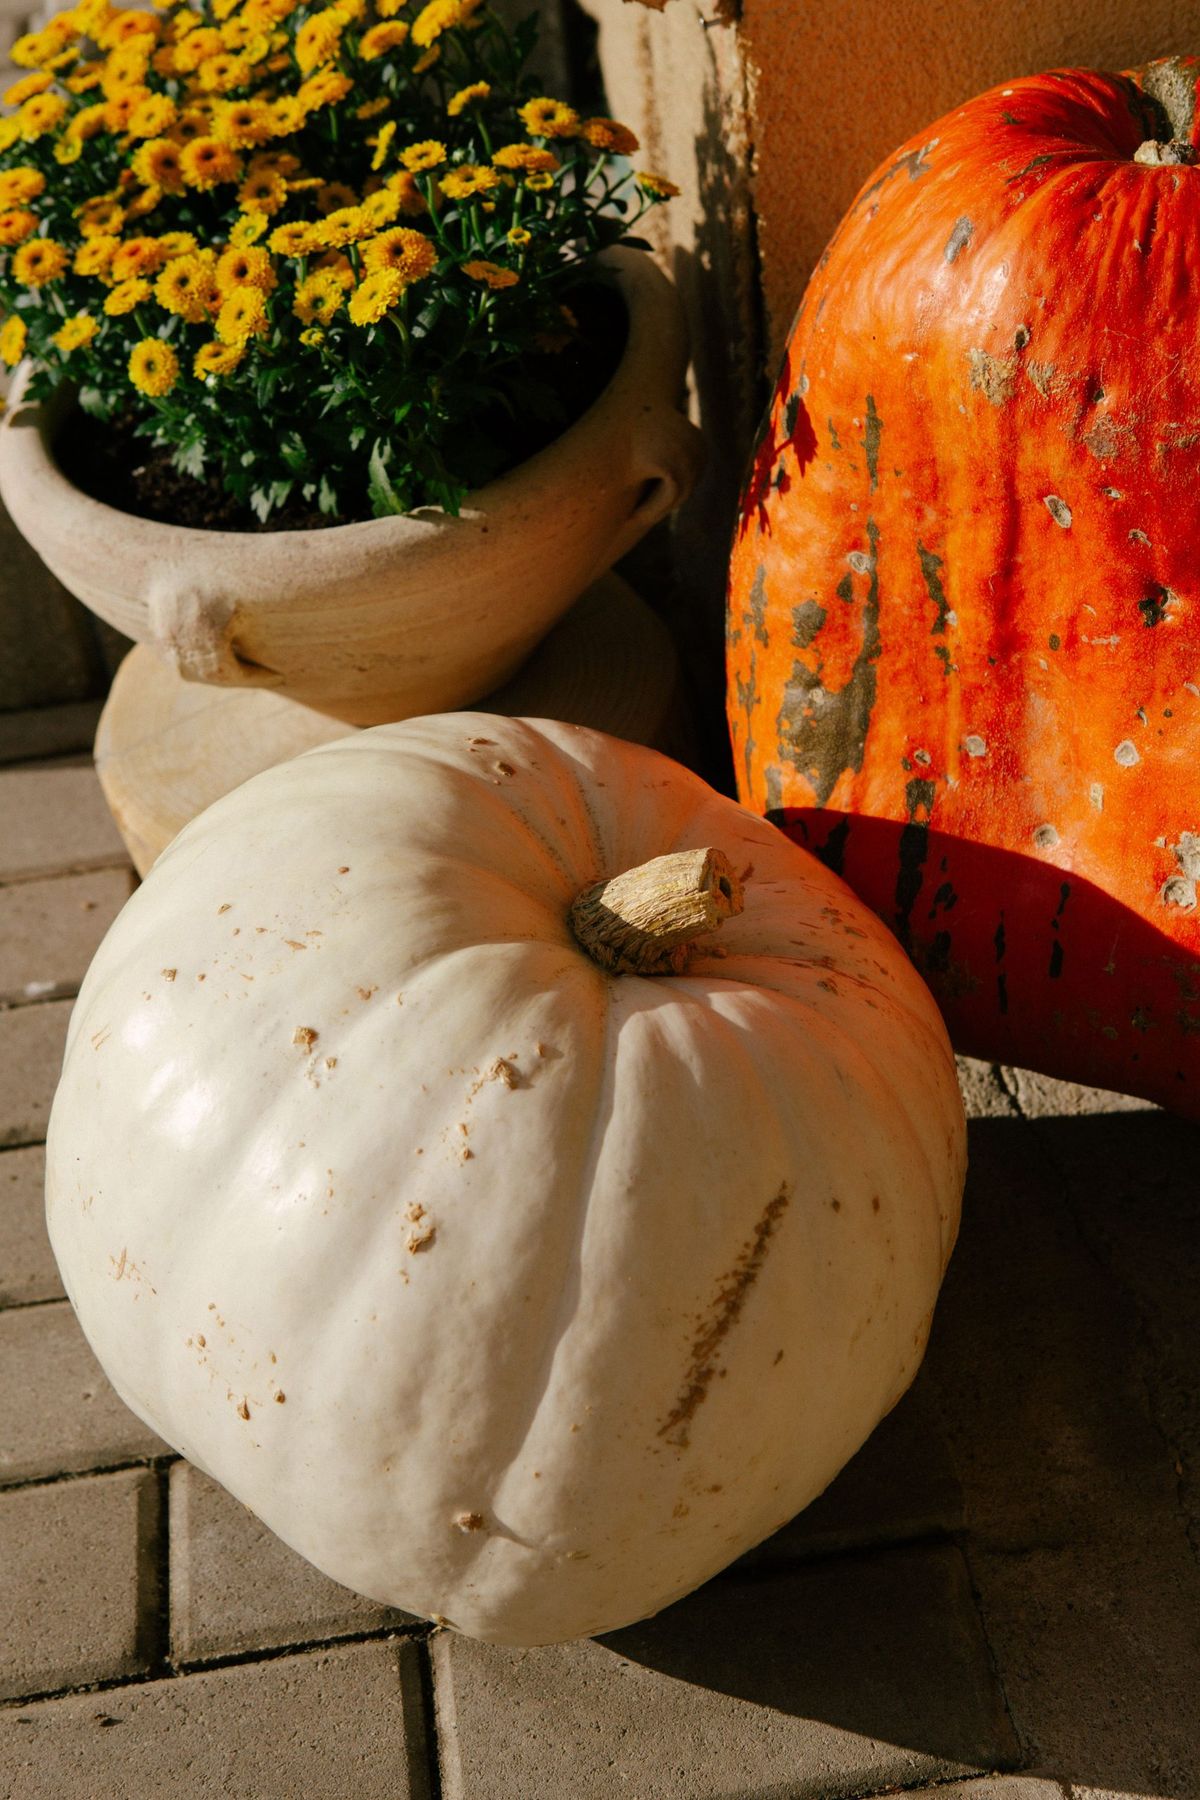
💡 Designer Tip
This is a fantastic decorating idea for an outdoor space with varying levels, like front steps or a tiered patio. The different heights of the pumpkins and the potted plant allow you to create a cascading effect. You could place the tallest pumpkin on a higher step, the mums on a middle step, and the shorter cream pumpkin on the lowest step to draw the eye down. This arrangement is substantial enough to work well in an open outdoor space where smaller decor might get lost.
26. Jack-o’-Lantern Vase Filled with Peach Chrysanthemums
The absolute heart of this cozy scene is the jack-o’-lantern vase. It’s a brilliantly creative idea that combines two quintessential autumn elements—pumpkins and mums—into one charming object. It serves as the undeniable focal point and sets the entire festive, playful tone. Everything else in the vignette, from the gourds to the leaves, is there to support and enhance this central piece. It’s a perfect example of how a single, clever idea can define a whole look. For another pumpkin vase idea, see Idea #29.
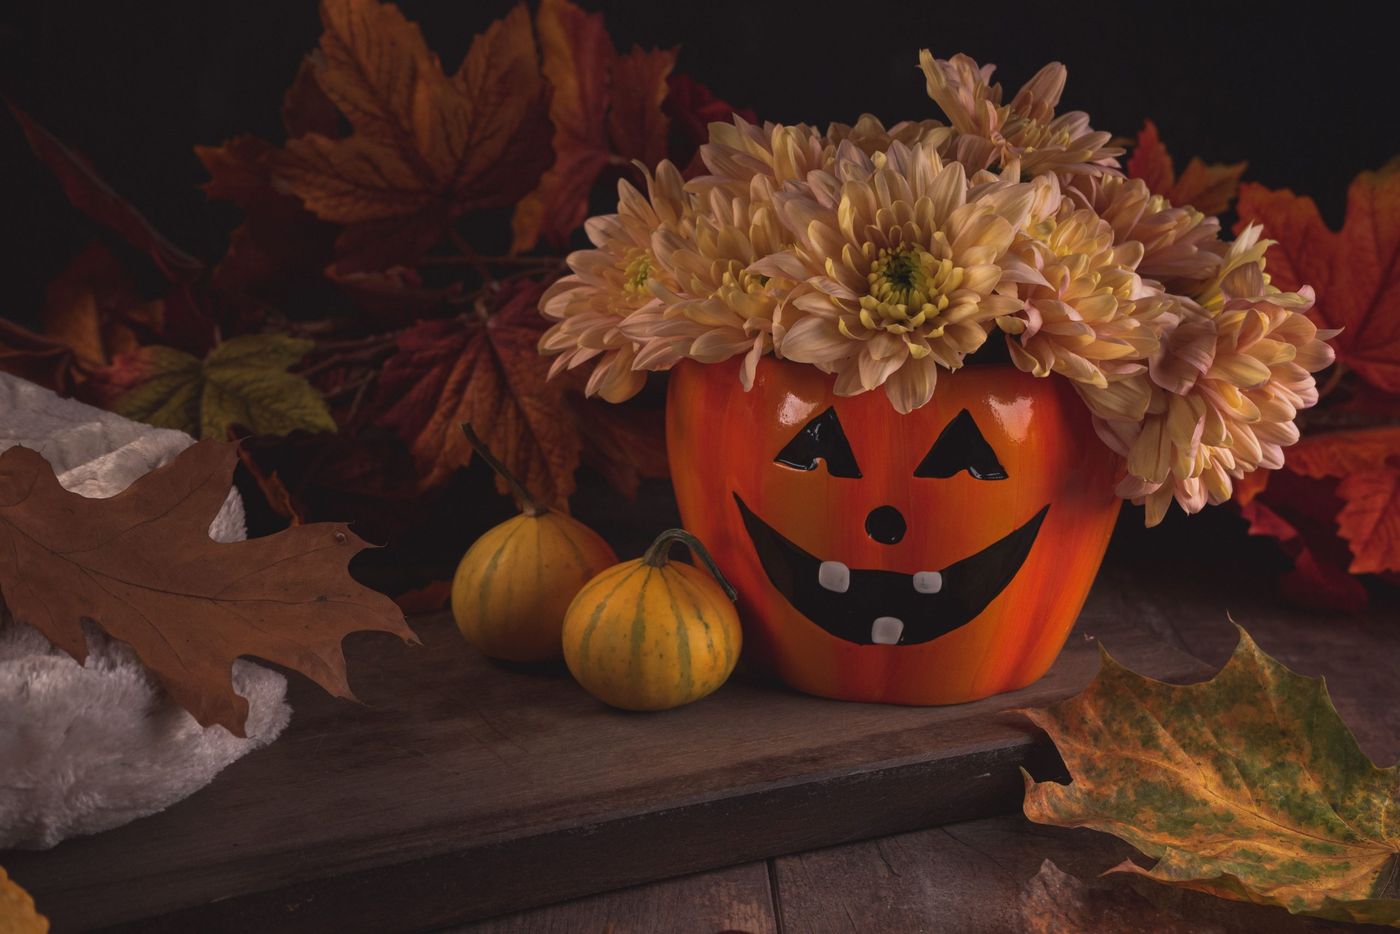
🔧 How-To Brief
To create a fuller, more professional-looking floral arrangement in a wide-mouthed vase like this one, use a simple grid of clear tape across the opening. This will give you a structure to place your stems into, preventing them from flopping to the sides and leaving a gap in the middle. Place the fullest chrysanthemum blooms in the center and use the smaller buds and more greenery towards the edges to create a pleasing, rounded shape. It’s a simple trick that designers use all the time.
27. Colorful Autumn Display with a Hand-Painted Pumpkin
This colorful display demonstrates a classic principle of arrangement: grouping. By bringing together a variety of autumn elements—a hand-painted pumpkin, colorful leaves, and perhaps some gourds or corn—it creates a sense of abundance and celebration. The formula is simple: 60% Main Feature (the decorated pumpkin) + 40% Supporting Scatter (leaves and other natural bits). This ensures the eye is drawn to the most important element while still appreciating the rich texture of the whole.
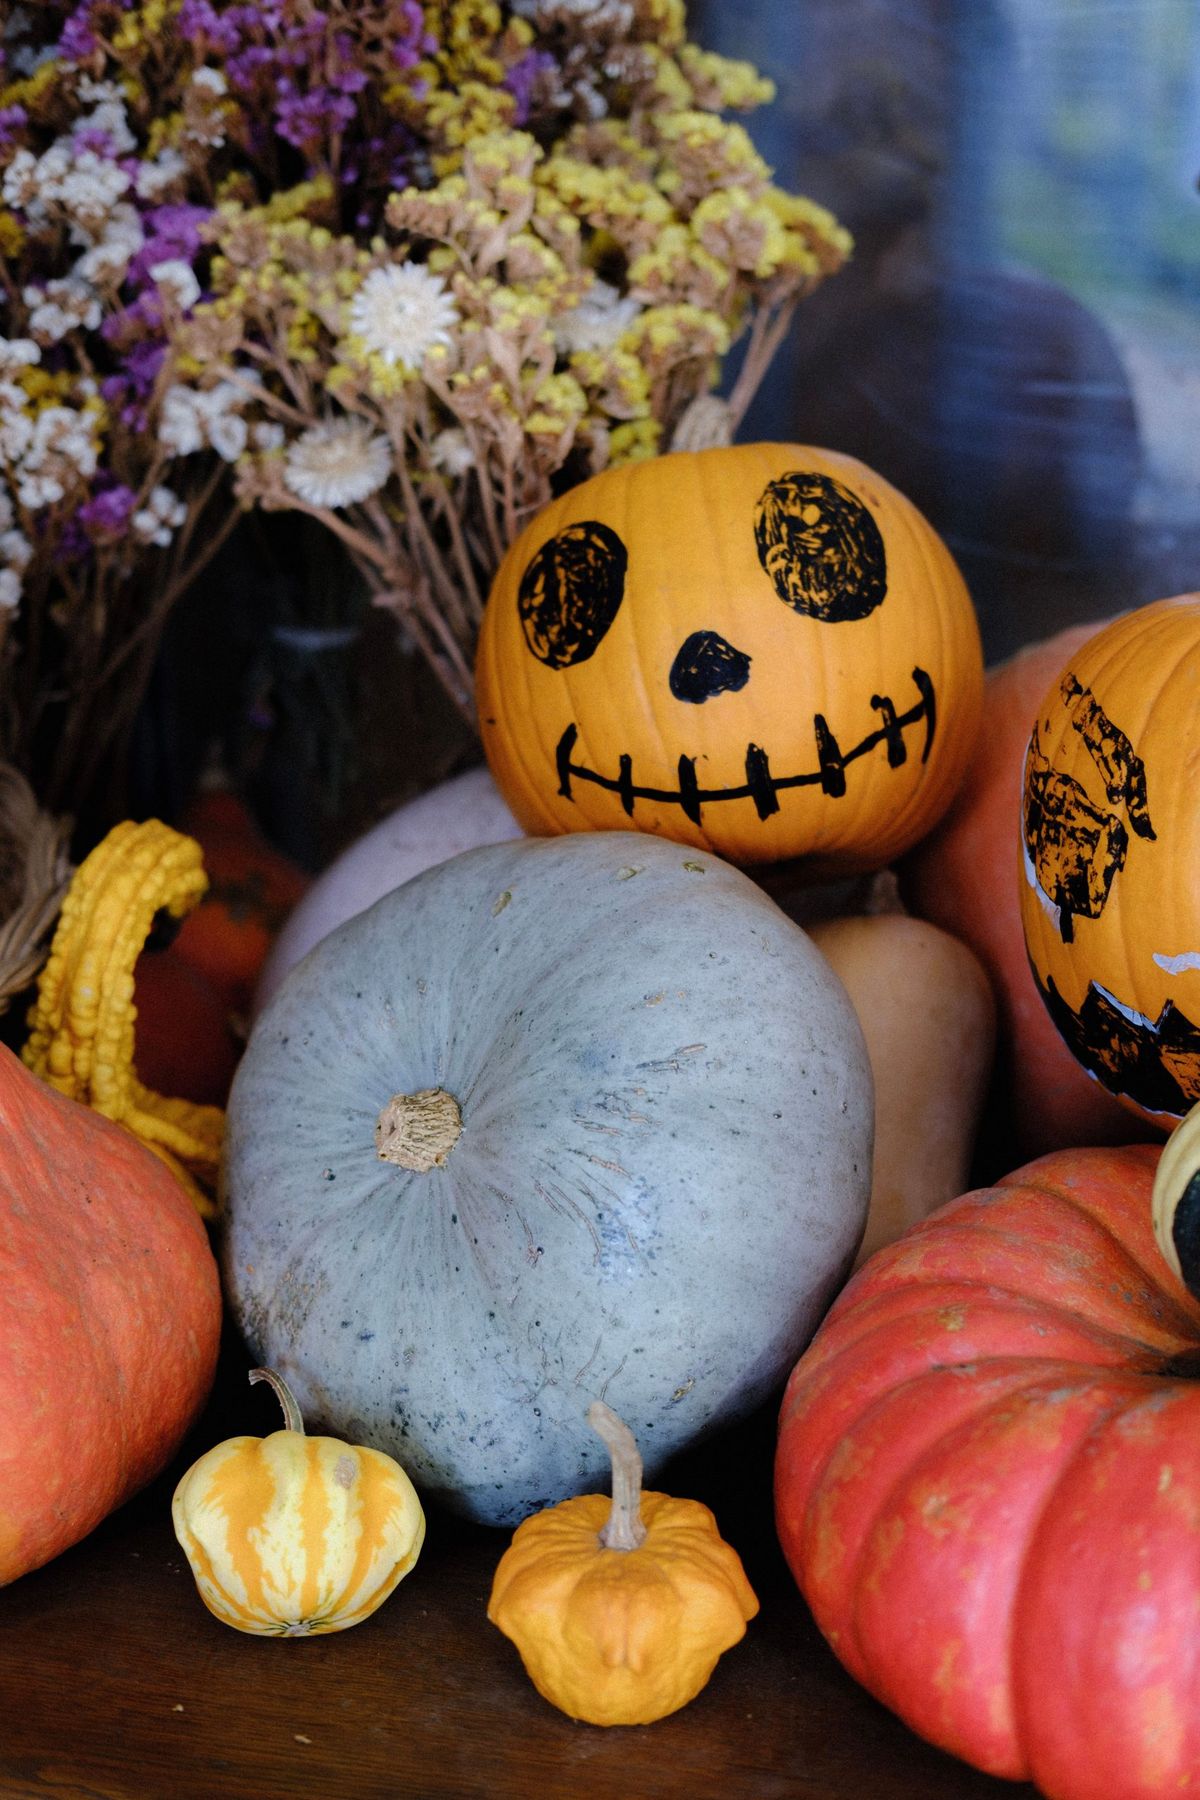
⚠️ Real Talk
Hand-painting leaves onto a pumpkin is a wonderful way to bring the colors of the season to your decor, and it’s easier than you might think. Time: 45-60 minutes. Cost: Under $20.
- Start with a clean, dry pumpkin. A white or cream pumpkin works best to make the colors pop.
- Gather acrylic paints in fall colors: red, orange, yellow, brown, and green.
- Use a medium-sized flat brush. Load it with two colors at once (e.g., red and yellow) without mixing them completely.
- Press the brush onto the pumpkin and pull down slightly to create a simple leaf shape. The two colors will blend on the pumpkin, creating a natural, variegated look.
- Repeat to create a cascading pattern of leaves down the side of the pumpkin.
- Use a fine-tipped brush and brown paint to add simple stems and veins once the leaf shapes are dry.
28. Cozy Fall Coffee Table Decor with Fabric Pumpkins
This cozy coffee table vignette works so well because it’s contained and curated. Using the black metal tray as a base is a brilliant move. It corrals all the decorative items—the lantern, the pitcher, the fabric pumpkins—into a single, intentional arrangement. This prevents the coffee table from looking cluttered and makes the collection of objects feel like one cohesive centerpiece. The mix of materials (metal, ceramic, fabric, wheat) adds a ton of textural interest.
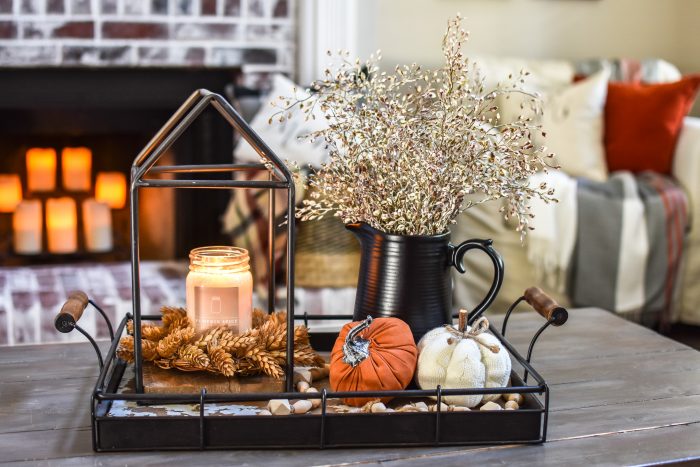
🔥 Trending Context
Creating this cozy, layered look is more affordable than it appears, especially if you build it over time. The key is mixing textures and finishes.
- Black Metal Tray with Wood Handles: $25 – $45
- House-Shaped Metal Lantern: $20 – $40
- Black Ceramic Pitcher: $15 – $30
- Decorative Stems/Wheat: $10 – $20
- Fabric Pumpkins (set of 2-3): $15 – $35
- TOTAL: $85 – $170
- Budget Alternative: Use a thrifted tray and paint it matte black. Find a simple glass vase instead of a pitcher and make your own fabric pumpkins from leftover scrap fabric or old sweaters for a total cost of around $30.
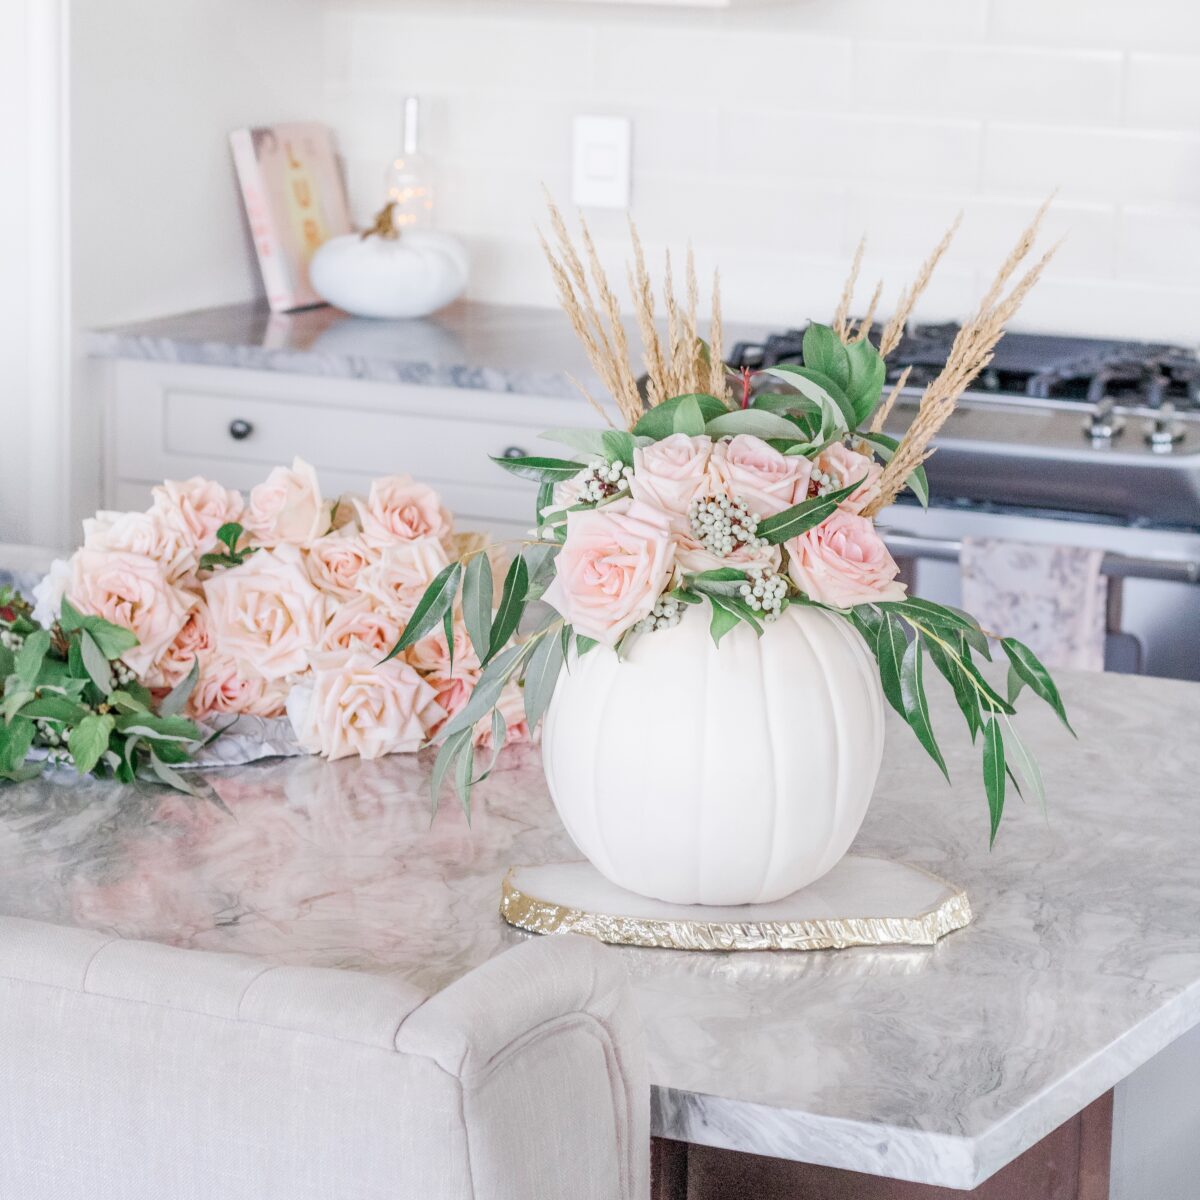
29. Matte White Pumpkin Vase with Blush Roses and Dried Grass
The element that elevates this arrangement from pretty to truly elegant is the matte white finish of the pumpkin vase. In a world of glossy ceramics, the soft, velvety texture of the matte surface feels modern, sophisticated, and unexpectedly chic. It provides a quiet, textural backdrop that allows the delicate pink roses and feathery dried grass to take center stage. A glossy vase would have created glare and competed for attention; the matte finish is all about quiet confidence.
⭐ The One Thing
This stunning arrangement achieves its high-end look with a beautifully balanced formula: 50% Soft Texture (Matte Vase & Roses) + 30% Wild Texture (Dried Grass) + 20% Glam Finish (Gold Coaster). The soft textures create a romantic, gentle base. The tall, feathery grass adds a touch of natural, untamed beauty and much-needed height. The gold-edged coaster provides a single point of glamour and polish, anchoring the arrangement and giving it a luxurious feel. It’s a sophisticated recipe for modern autumn decor.
Ready to Carve Out Your Autumn Style?
Don’t just decorate—tell a story with your choices this season. Whether you go for a single, elegant white pumpkin or a whole family of spooky characters, the best designs come from the heart.
For even more inspiration, head over to Pinterest and see what new ideas are sprouting up.