You know the moment: you’re three hours into Pinterest, and the one photo you can’t stop looking at is a wooden Christmas tree somebody built from a sheet of plywood and a strand of fairy lights. Good news — you don’t need a full workshop or a scroll saw to get anywhere near it.
We spent serious time browsing Etsy, Michaels, Home Depot, and Amazon to bring you only what’s worth your attention this year, covering projects that start around $8 in craft supplies and run up to roughly $180 for a finished showpiece.
Inside are 26 DIY Christmas wood projects — wall-mounted plank trees, A-frame shelf displays, laser-cut ornaments, wood-burned nativity slices — spanning rustic farmhouse, minimalist Scandinavian, traditional, and handcrafted folk styles, with budget and luxury versions compared side by side.
In 2026 the shift is toward raw, unfinished wood and warm 2700K light instead of glitter and plastic: quieter, more handmade, and far more forgiving if your paint lines aren’t perfect.
And stay until the end — we break down the most common mistakes that can ruin these looks.
📌 Save this to Pinterest for later — you’ll want to revisit these ideas.
1. Tree-Shaped Wall Shelves Lit Against White Shiplap
The trick here isn’t the tree silhouette — it’s that the string lights are woven across the shelf ledges instead of wrapped around them. That puts the glow behind the bottle brush trees and the candle votives, so each shelf reads as its own small lit scene. Against white shiplap the pale wood stays quiet, and the big snowy window does the rest of the decorating for free.
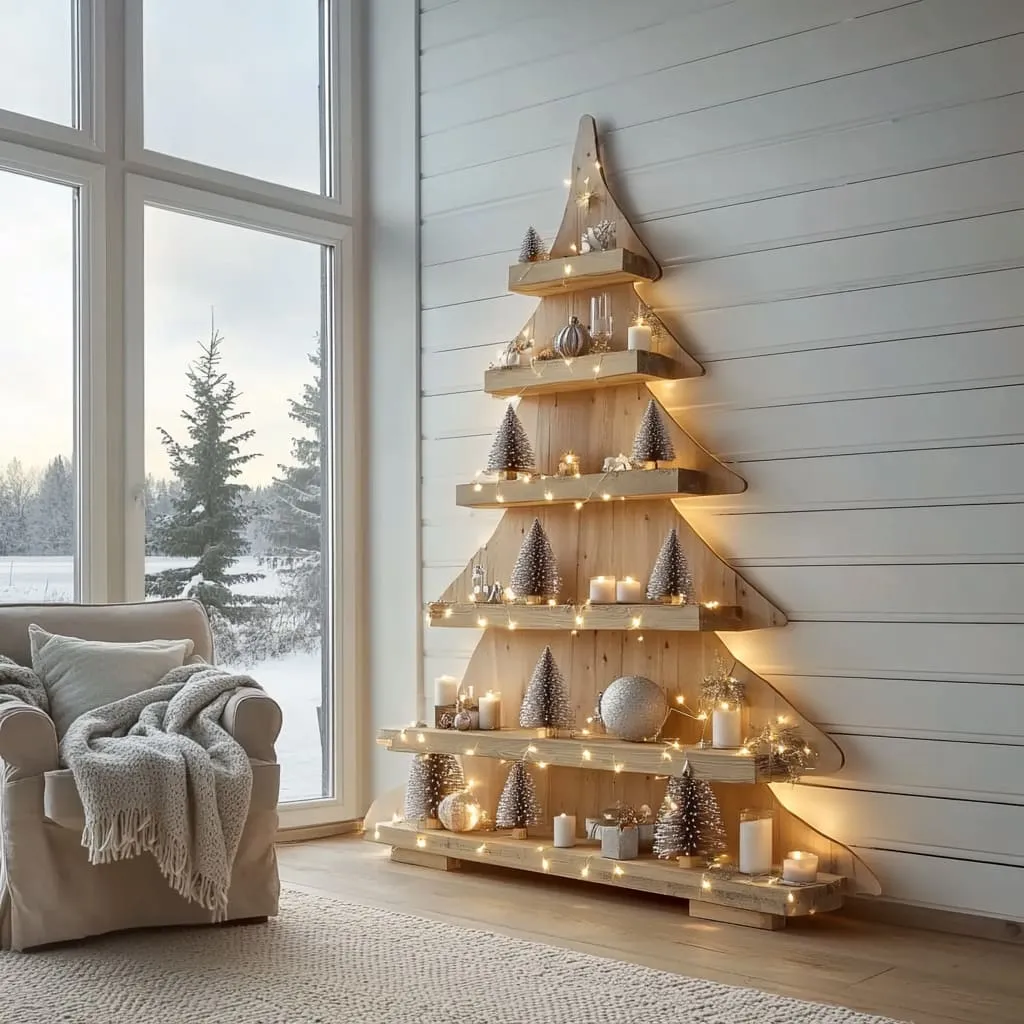
Recreating this one is mostly a woodworking budget, not a decor budget:
- Tree-shaped shelf — quarter-inch plywood cut yourself, or an Etsy kit: $45–$180
- Warm-white LED string lights, two strands: $12–$25
- Bottle brush trees, candles, small ornaments: $20–$50
- Shiplap-look paneling or paint for the wall: $30–$90
- Textured throw to dress the nearby armchair: $25–$60
Total: $132–$405. Budget alternative: skip the wall treatment entirely, cut the tree from a $22 sheet of sanded plywood, and buy your bottle brush trees on December 27th at 60% off — you’ll land closer to $85.
2. A Corner Christmas Village on a Triangular Wood Shelf
Miniature villages are having a real comeback, just not the cottagecore version that lived on your grandmother’s buffet. The 2026 take is architectural: a triangular corner shelf, snow-textured liner, and tinsel garland outlining the whole structure like a picture frame. It works because it hugs dead corner space nothing else fits into, and because it gives all those little lit houses a stage instead of a scatter.
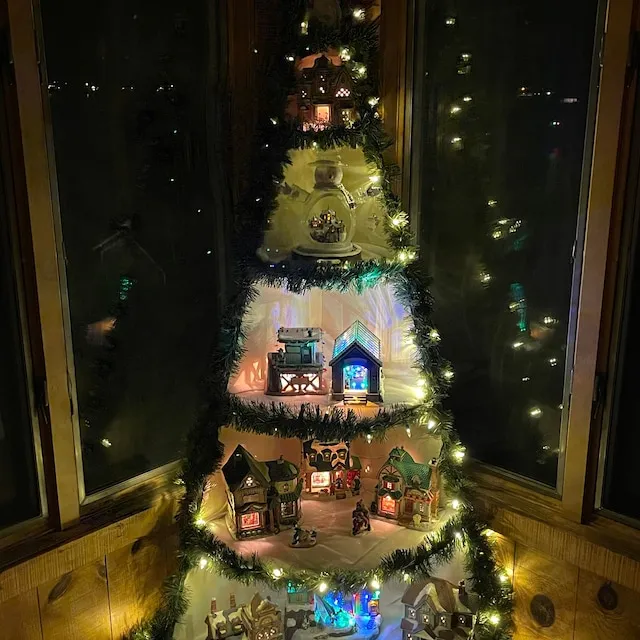
Building the lit outline is an evening, not a weekend:
- Measure the corner and cut three shelf boards to the same depth — 8 to 10 inches is plenty for village houses.
- Line each shelf with faux snow blanket or white batting, tucked so no raw edge shows.
- Run warm-white string lights up the back edge first, then drape green tinsel garland over the cord to hide it.
- Set the houses in staggered heights — tallest on the bottom shelf, smallest up top — and leave one shelf nearly empty.
Time: about 3 hours. Materials: roughly $40 if you already own the lights and garland.
3. A Minimalist Wood Slat Tree with Gold and Cedar
The formula is almost embarrassing: 70% light wood, 20% white and green, 10% gold. The slat tree carries the wood, the cedar sprigs and white poinsettias carry the green, and that single gold cylinder vase is the only shine in the frame. Swap the gold for matte black and it turns modern; swap the cedar for eucalyptus and the whole thing goes coastal.
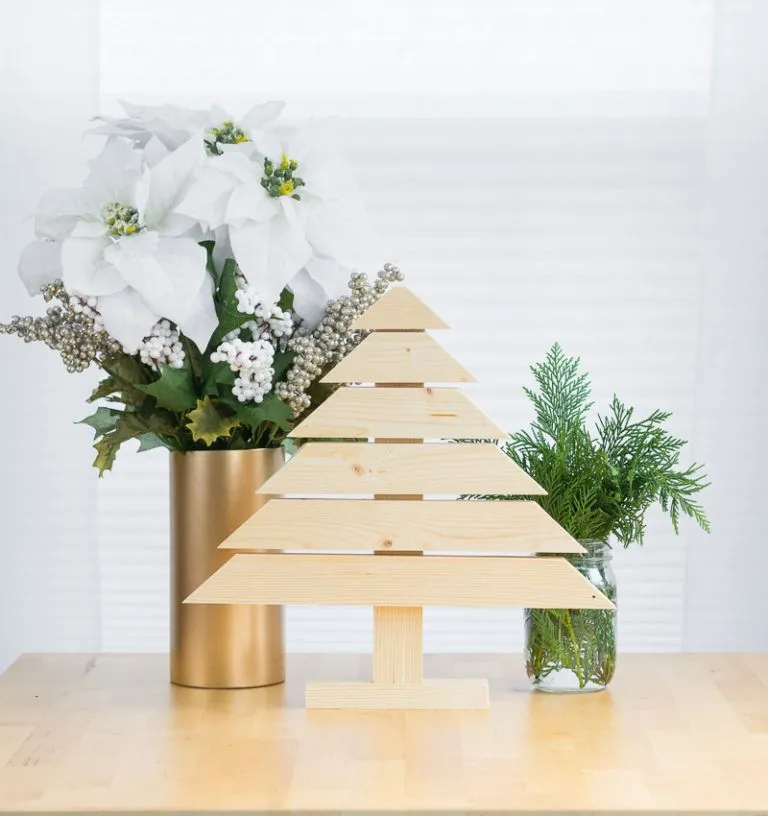
Slat trees look cheap when the gaps are uneven. Cut every slat to a consistent 1.5-inch width and space them exactly 1 inch apart, shortening each slat by 2 to 3 inches per tier so the taper stays smooth. Cap the finished height at 18 inches for a tabletop — past 24 inches it stops reading as a tree and starts reading as a fence panel.
4. Light Wood Floating Shelves Dressed in Pine and Brass
This one wants wall, not floor. You need at least 36 inches of clear wall width and a counter or console below it to catch the eye line, so it shines in kitchens from about 80 square feet up, and in bathrooms 5 by 7 feet or larger. In a tight galley under 60 square feet, drop to a single floating shelf and hang the oversized brass bells beneath it instead of on it.
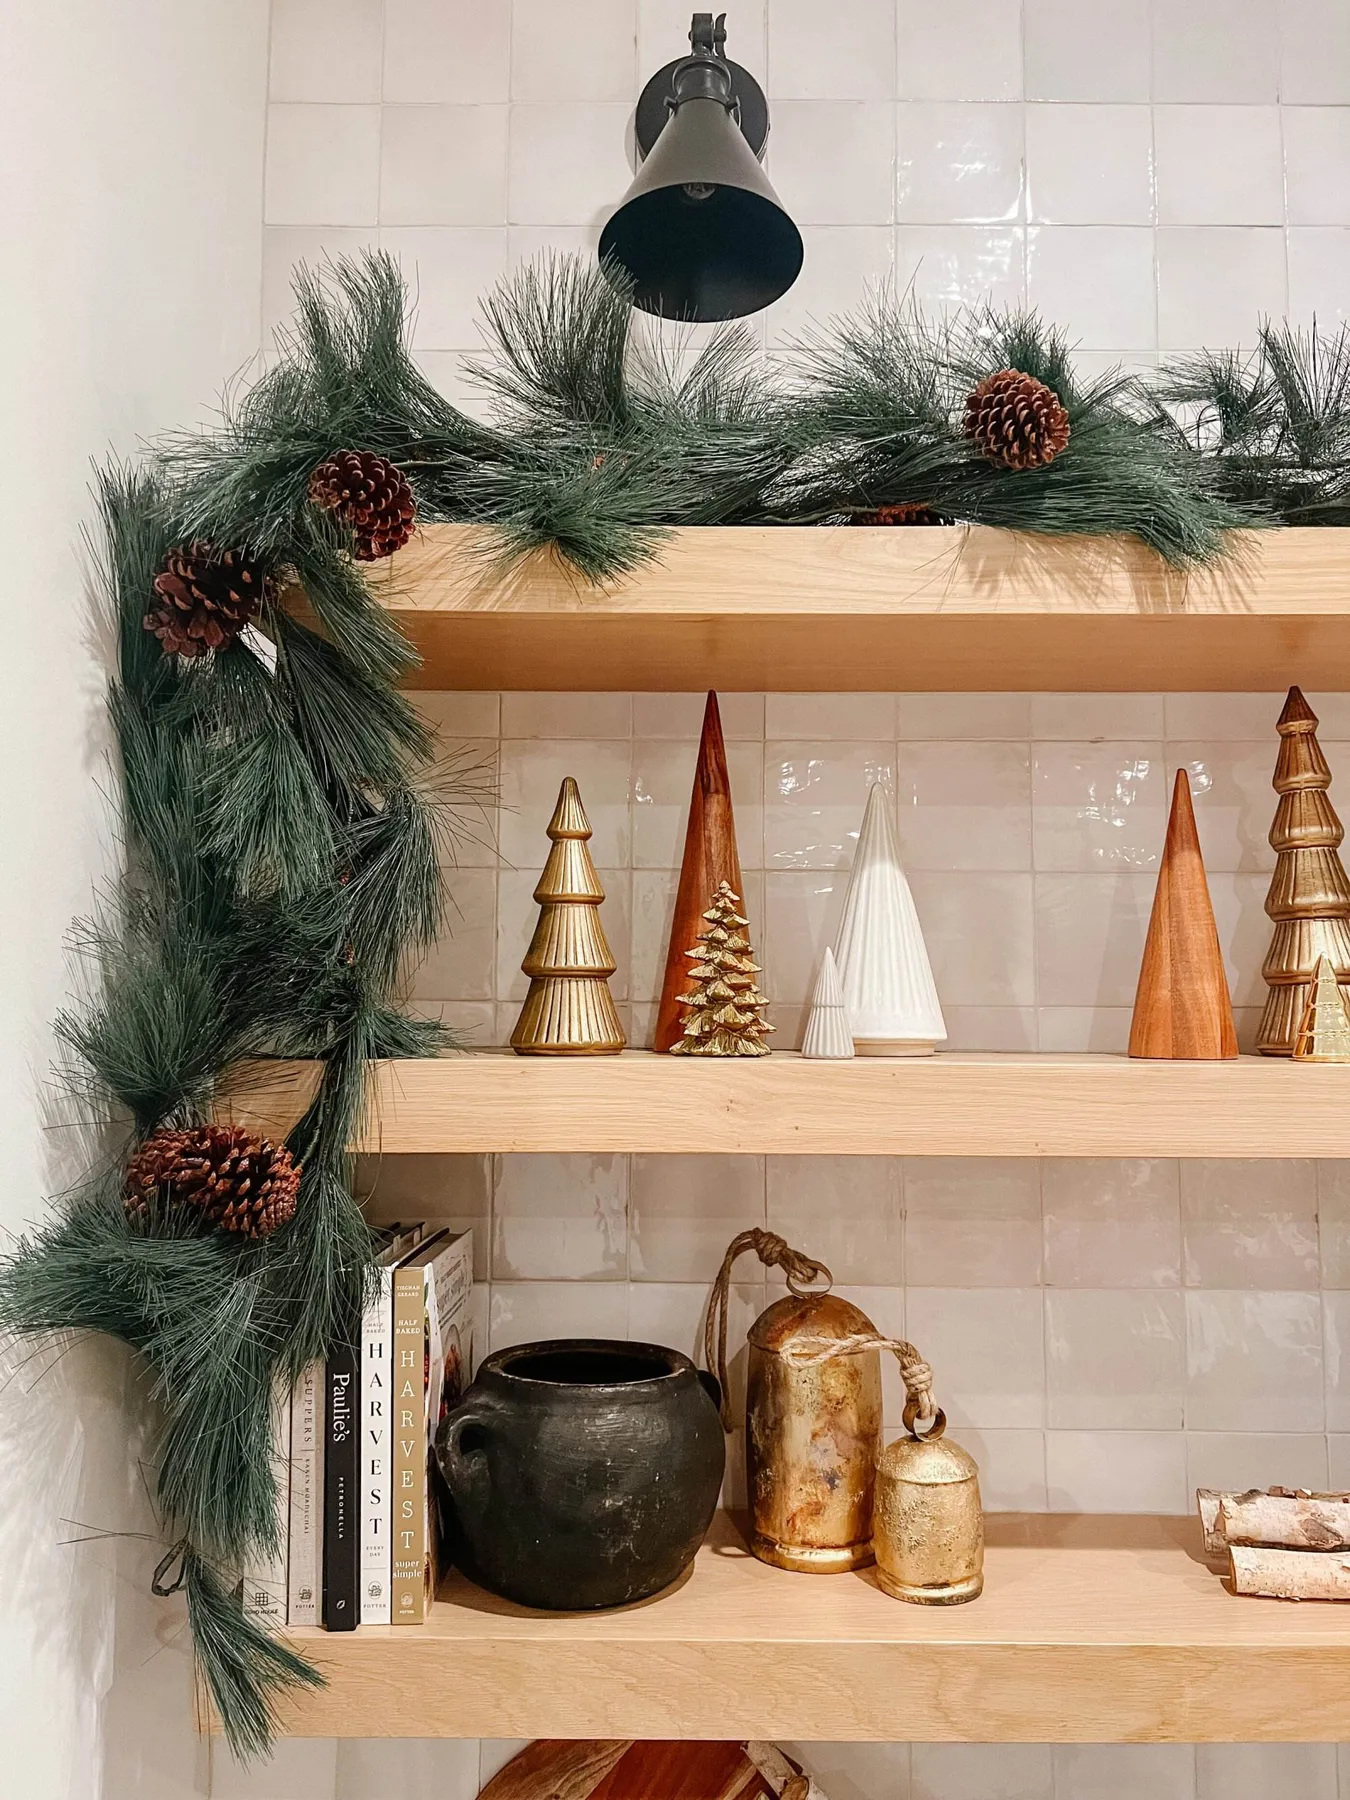
Fresh garland is gorgeous for about ten days, then it starts dropping needles on your counter. Plan on a weekly misting and a quick shake-out over the trash can. Faux cedar holds the look all season and wipes clean with a damp cloth, but pinecones on real greens collect dust fast — blow them off with a hair dryer on the cool setting once a week and they’ll stay photo-ready.
5. A Stacked-Plank Geometric Tree on a Striped Runner
Take away the striped runner and this entire vignette collapses into a brown blob on a white wall. That runner separates the stained wood from whatever surface it sits on, and its horizontal stripes echo the angled stacked planks above it. It costs about $15 and does more work than every ornament on the tree combined.
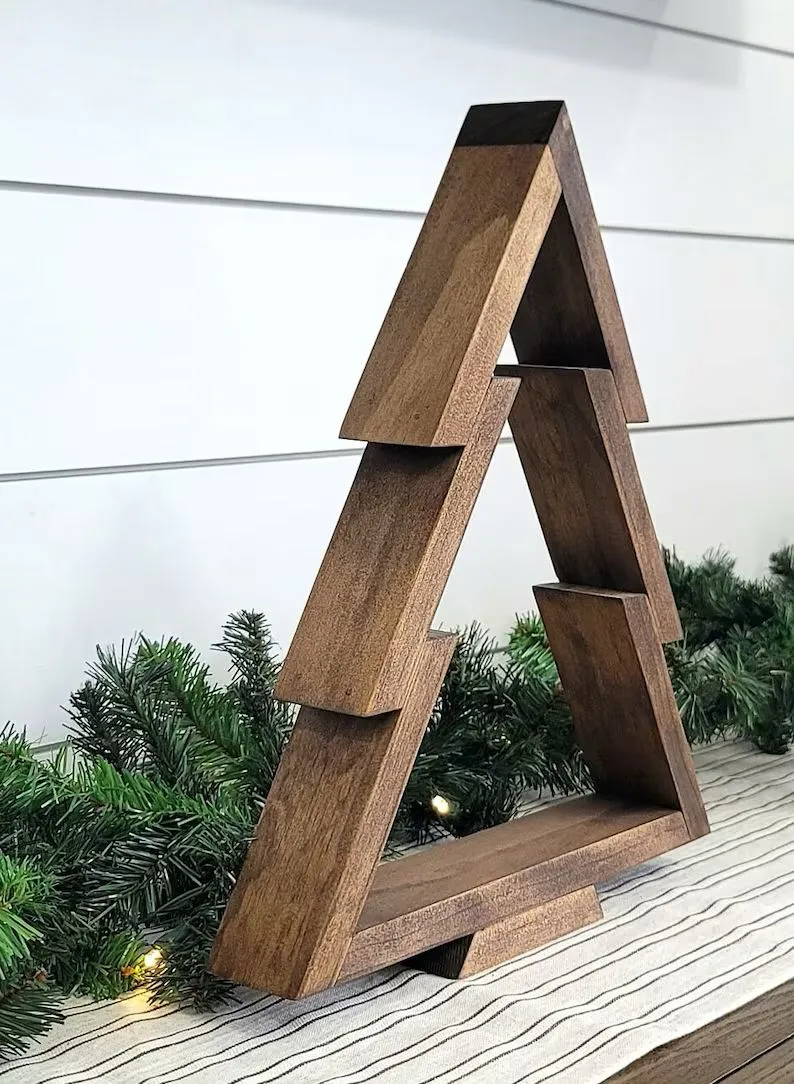
Stained wood plus warm fairy lights is a beautiful combination that photographs badly in a dark room. If your table sits away from windows, tuck a small lamp behind the runner for bounce light — the same trick that saves the mantel display in Idea #26. Also, stain outdoors or in a garage: gel stain fumes linger indoors for days no matter how many windows you open.
6. Buffalo Check Wooden Trees with Knob Ornaments
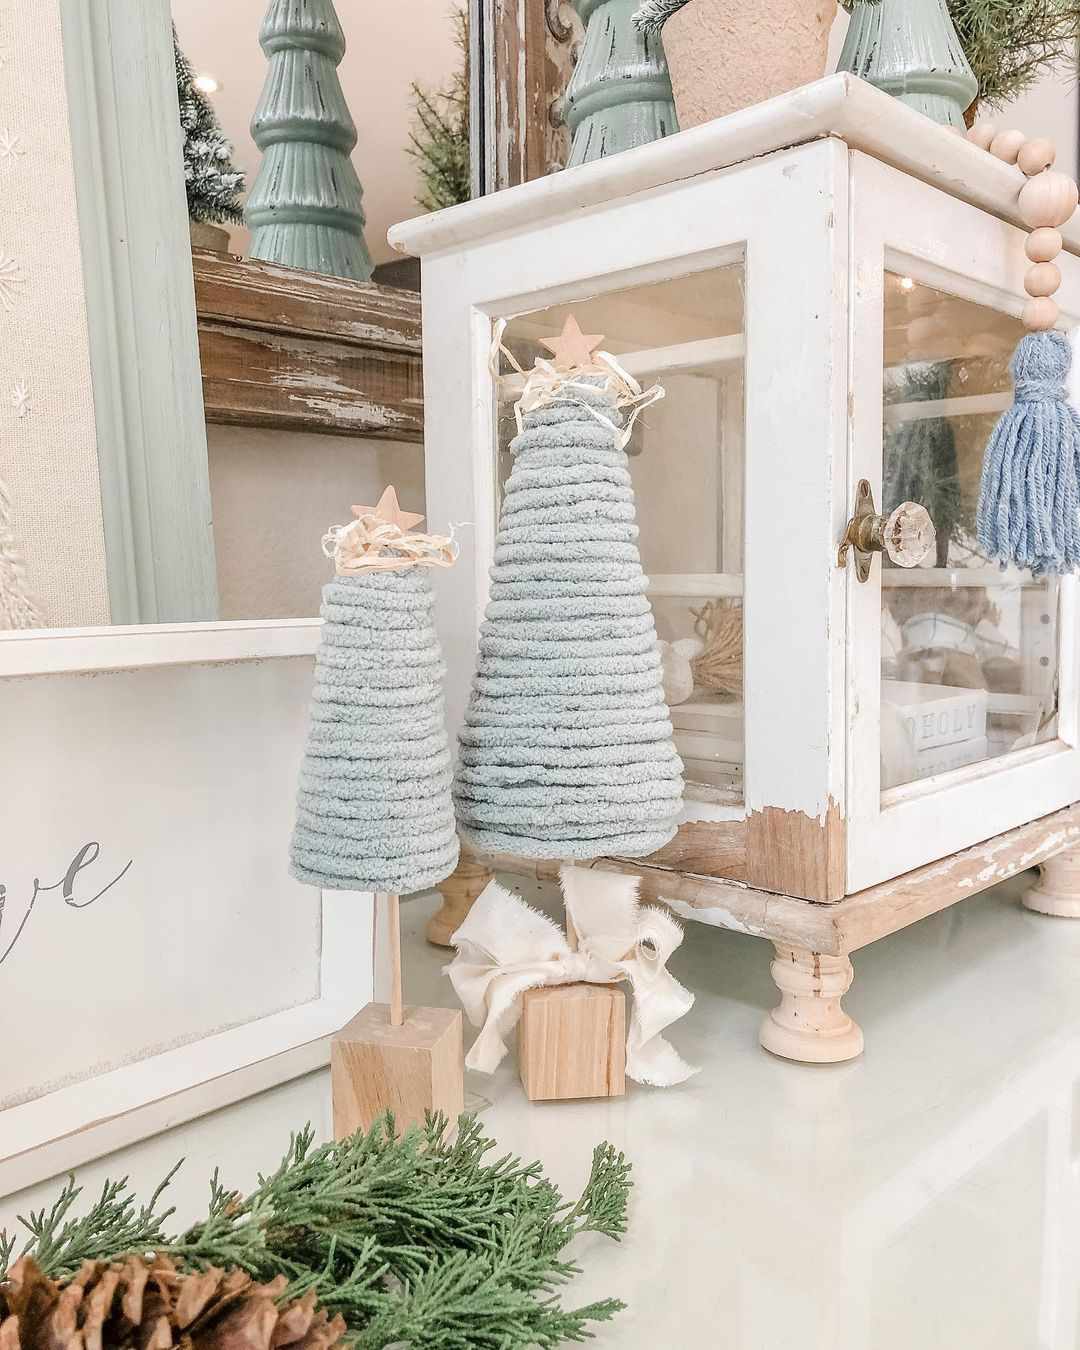
You don’t need a scroll saw for this one. Start with a plain three-tier wood tree blank at $6–$12, then add buffalo check with a $4 roll of patterned vinyl or a stencil and two chalk paint sample pots. Round wooden knobs run about $3 for a pack of ten at Walmart or Michaels. Both trees, finished, for under $30 — versus $70 to $90 to buy them already made.
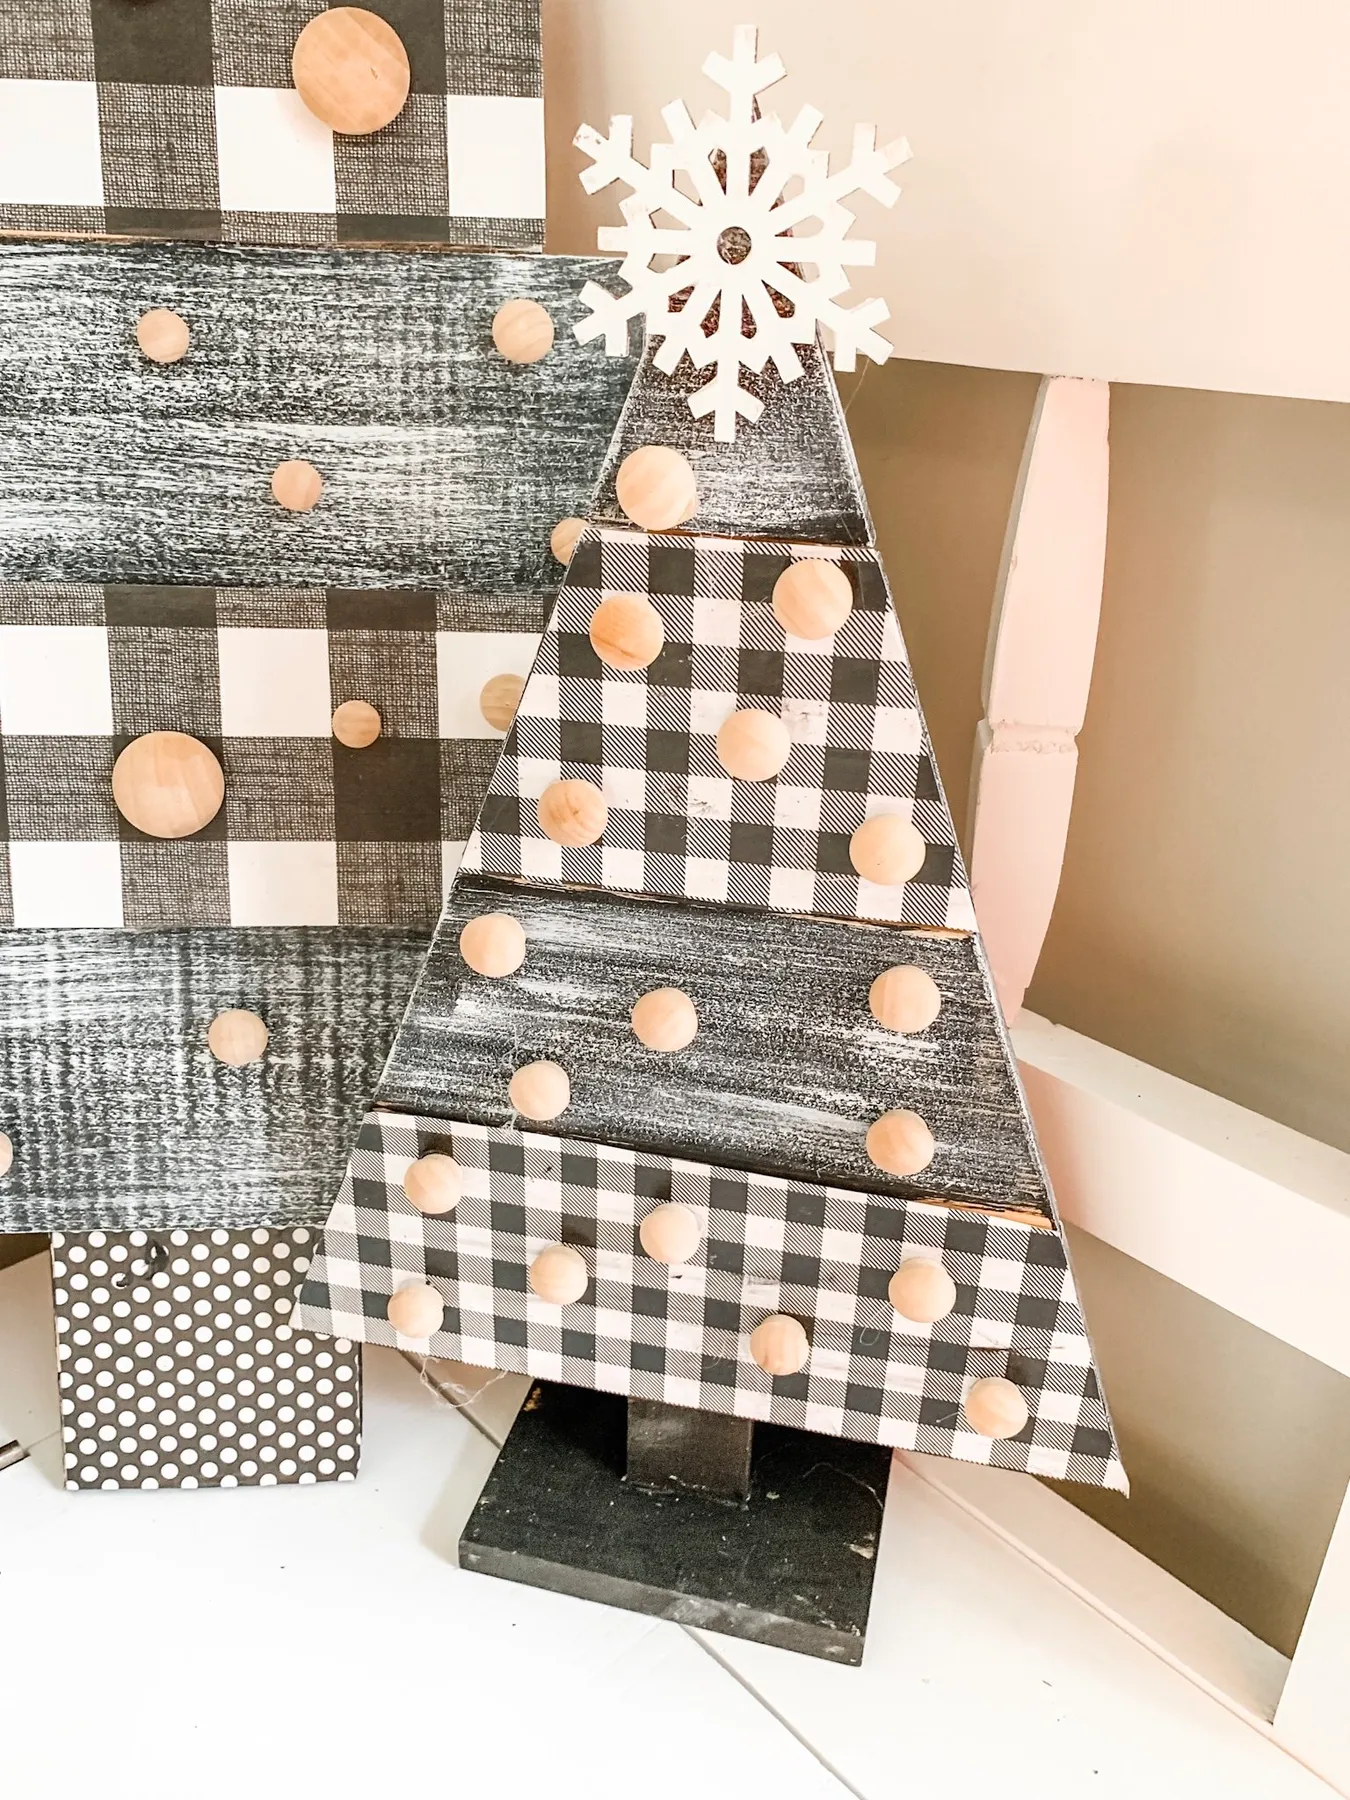
Distressing is a directional trick: always sand with the grain, never against it, and stop while you can still see a little of the original finish. Start with 120-grit, then one light pass with 220. On the black-and-white check, wear the edges and one corner only — uniform wear reads as a mistake, uneven wear reads as age.
7. An A-Frame Shelf Tree Beside the Red Brick Fireplace
- Measure floor-to-ceiling clearance — a 5-foot A-frame wants about 30 inches of clear depth around its base.
- Check the fireplace: standing wood within 36 inches of an active firebox is a no-go, so shift it to the flank or switch to battery LED candles.
- Confirm the silhouette against your wall — the tiered shelves read best on brick, stone, or tile, where the horizontal lines have something to echo.
- Decide your ornament story before you build: this frame holds about 12 ornaments and no more.
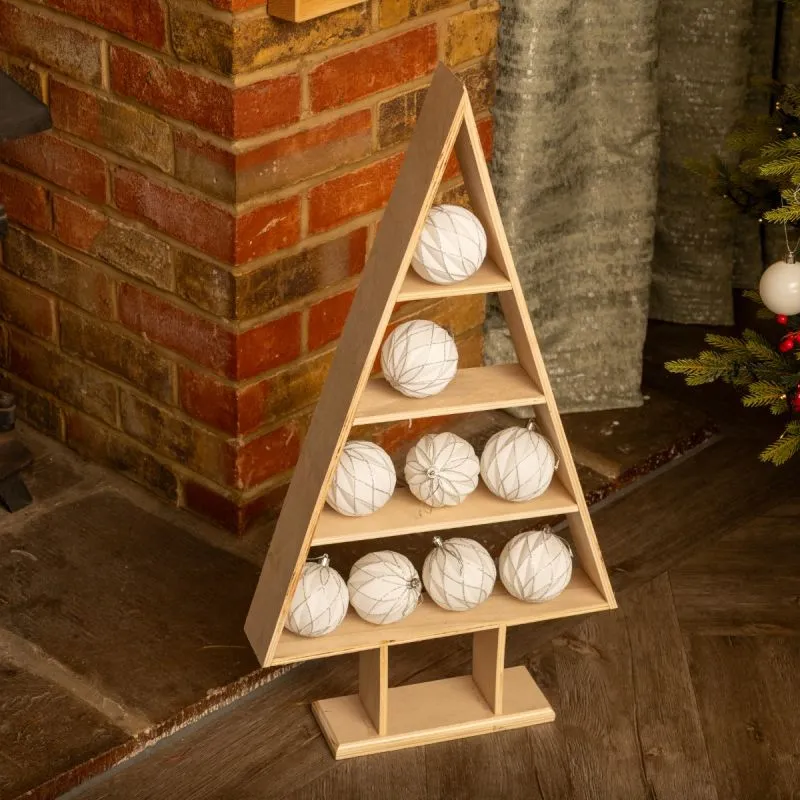
The A-frame succeeds because it’s honest about being mostly empty. Three open tiers mean negative space does as much work as the wood does, and the white ornaments with silver grid patterns repeat without turning cluttered. Placed beside an exposed brick fireplace, the warm red gives the pale wood something to play against — which is exactly why Idea #20 works beautifully on brick too.
8. A Stacked Plank Tree Mounted on White Shiplap
Five planks, one afternoon:
- Sketch the taper on paper first — five boards, each 4 inches shorter than the one below it, gives a clean triangle.
- Cut 3/4-inch pine to length, sand to 220-grit, then dry-fit everything on the floor before you touch the wall.
- Join the planks from behind with two vertical furring strips and 1.25-inch screws. No glue required.
- Mount with a French cleat rated for 40 pounds — this piece is heavier than it looks.
- Add candle cups and one small hook per plank for the pinecone ornaments.
Time: a weekend afternoon, roughly 4 hours. Materials: $35–$50.
The palette is doing something specific here: 60% white wall, 30% natural wood, 10% green and black. That ratio is why the candles read festive rather than religious and the pinecones don’t look like they wandered in from outside. Want a different mood? Keep the 60/30 split and swap green for deep navy — same tree, entirely different room.
9. A Tiered Wooden Tree Loaded with Lights and Tiny Gifts
- Tiered wood tree blank or plywood cut: $25–$70
- Warm-toned fairy lights: $10–$20
- Glass votive holders and candles: $12–$30
- Air plants, pinecones, small figurines: $15–$40
- Mini wrapped gift boxes and ribbon: $8–$18
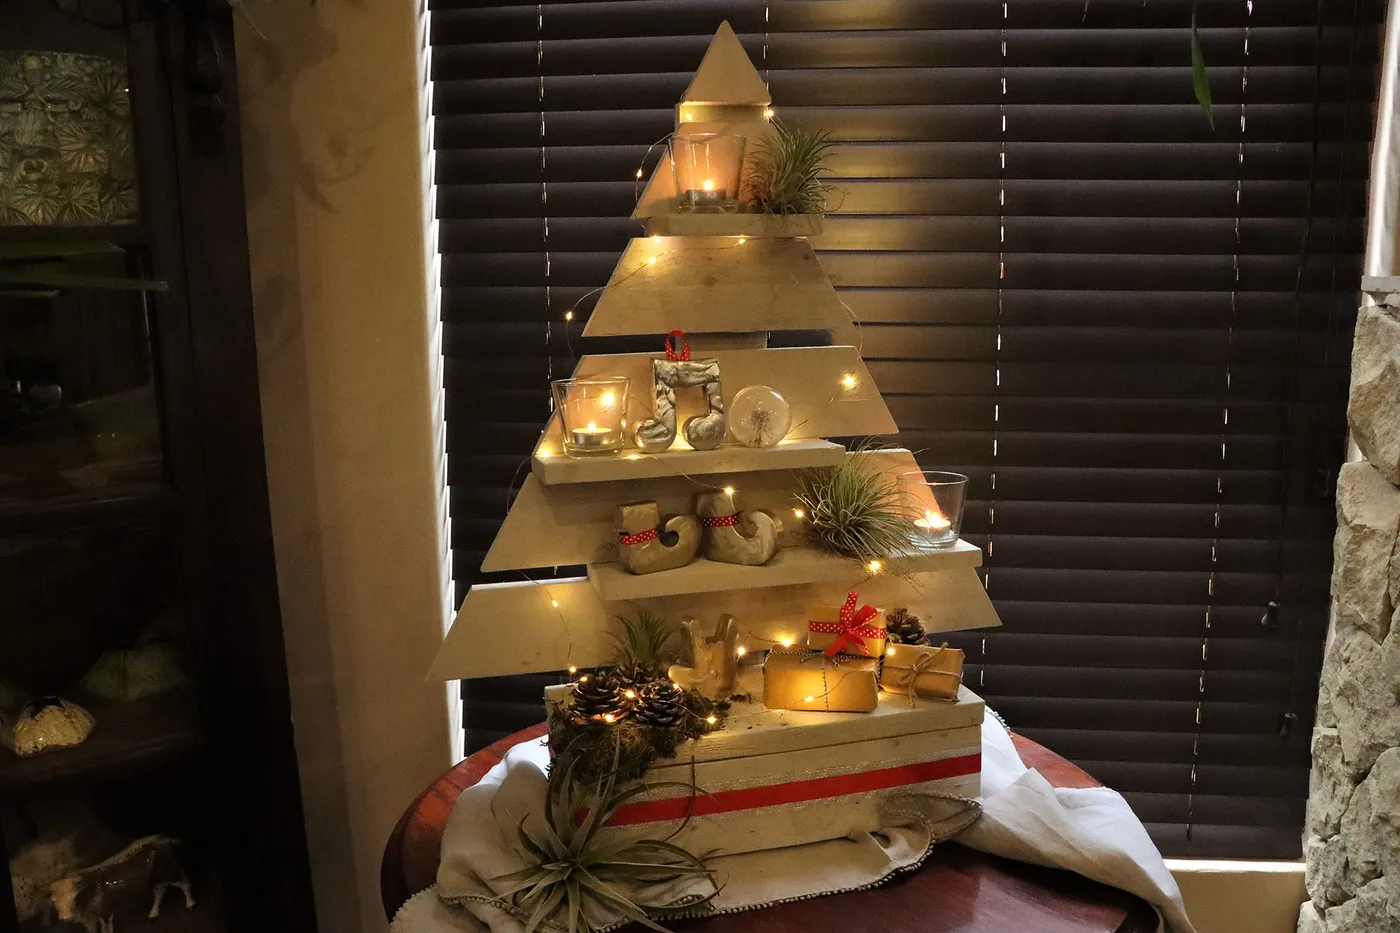
Total: $70–$178. Budget alternative: a $6 craft-store wood blank, one strand of lights, and empty jewelry boxes rewrapped with ribbon you already own gets you the same silhouette for about $30.
This is a table hero, so give it a table worth leading. Round tops between 30 and 36 inches in diameter are ideal; anything narrower and the little gifts crowd the edge. If your dining room is under 100 square feet, scale the tree down to 14 inches tall. In a taller room with open shelving, look at Idea #13 for a version that stands on the floor instead of on your table.
10. A Rustic Wood Cutout Tree with Mini Evergreens and Plaid
The plaid is the plot twist. Without it, a wood cutout tree holding faux evergreens and a tiny wooden house is just a shelf. That red-and-black plaid fabric — used as a small runner rather than a full tablecloth — pulls the pine green and natural wood together and gives the scene a specific season instead of a general holiday vibe. If you swap it, go to ticking stripe. Anything busier kills the calm.
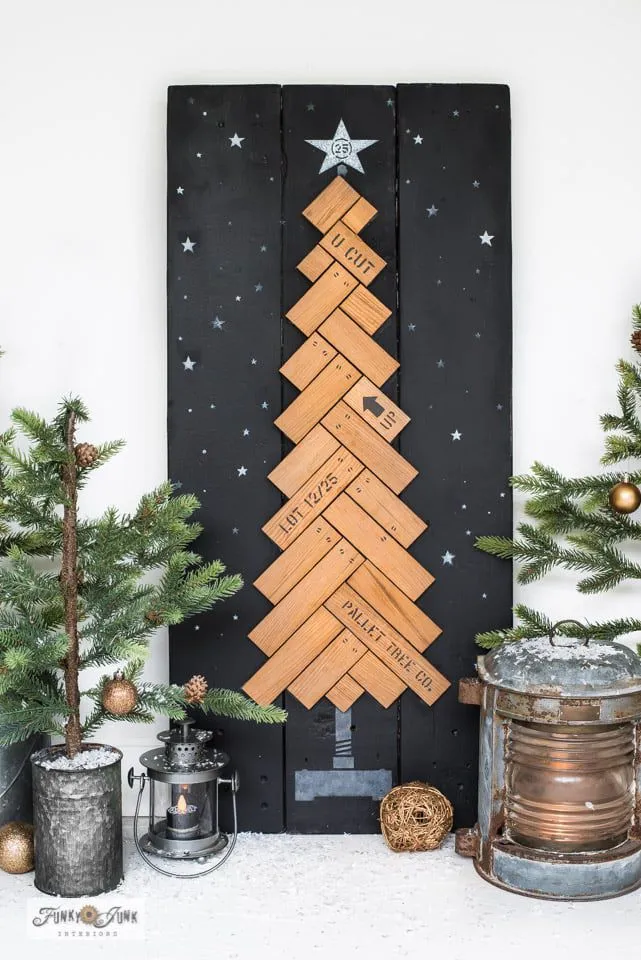
Thrift stores and Facebook Marketplace are goldmines for this one. A tree-shaped wooden tray or cutting board turns up for $4–$8, and mini potted evergreens run about $3 each in Target’s dollar aisle in early November. The mini wrapped gifts are the trick — reuse jewelry boxes and ribbon scraps. Total: roughly $25. If your style leans cleaner, the slat version in Idea #3 hits the same note with less pattern.
11. A Carved Wooden Tree with a Silver Reindeer at Its Base
Mixing wood and metal on one object only works when the metal is a single, deliberate accent. Here the deer is the only cool tone in the whole piece, which is precisely why it pops. Keep the metal under 20% of the visual area, mount it with a keyhole hanger or a 3M strip rated for 5 pounds, and resist adding a second metal element — no brass stars, no silver snowflakes. One is a punctuation mark; two is a theme.
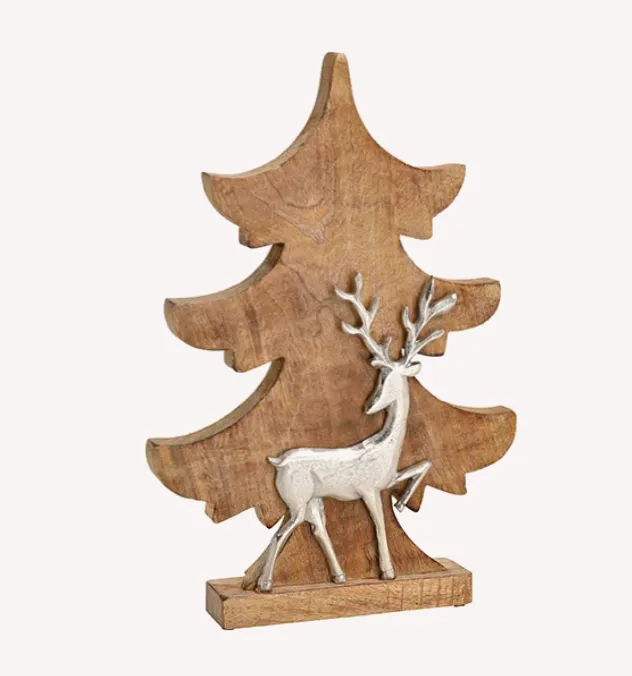
Thin freestanding cutouts tip. A 12-inch base under a 16-inch-tall tree will wobble every time someone walks past on hardwood. Add adhesive rubber bumpers underneath, and if you have kids or a big dog, weight the base with a small bag of rice tucked discreetly behind. Or set the whole thing on a tray, the way the cutout display in Idea #10 does.
12. Laser-Cut Layered Tree Shapes Waiting for Paint
- Lay all three cutouts flat and wipe them with a tack cloth — dust ruins the first coat of paint.
- Prime the layered edges with a foam brush; spray primer leaves the inner layers dry and rough.
- Paint the back panel first, let it cure 24 hours, then attach the front layer with wood glue and clamps.
- Slide each tree into its oval base slot before painting the base — the fit is tighter than it looks.
- Finish with a matte sealer so the raw edges don’t pick up fingerprints all season.
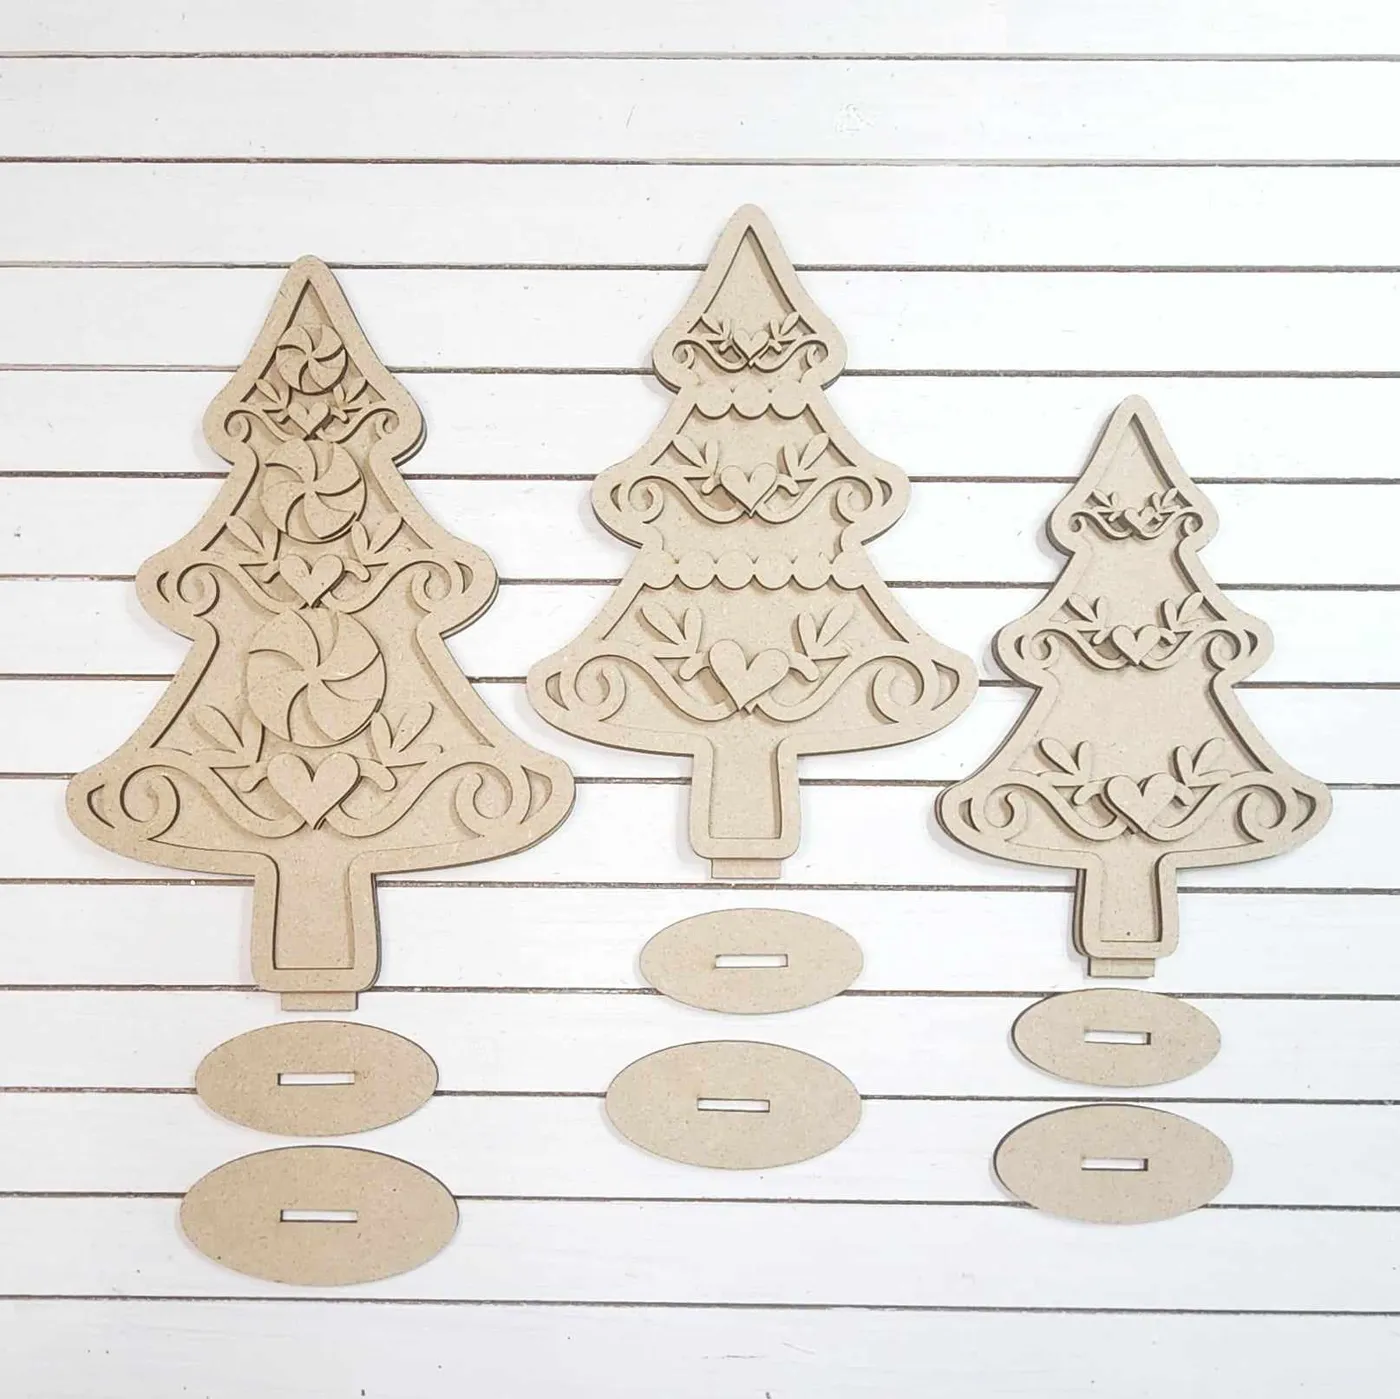
Time: 2 hours of hands-on work plus overnight drying. Paint, glue, and sealer: about $22.
Unfinished wood is the 2026 move, and not just for cost. It ships flatter and cheaper, it’s honest about being handmade, and it lets you decide the color instead of the retailer. Laser-cut blanks with scrollwork, hearts, and candy cutouts are climbing on Etsy and lining the Michaels aisles for the same reason — you get the intricate detail without owning a scroll saw or a very steady hand.
13. A Freestanding Tree Shelf with Three Triangular Compartments
This unit needs table real estate: plan on 16 to 20 inches of width and about 22 inches of height. It’s the go-anywhere size — counters, consoles, dressers, even a deep windowsill. In a small apartment under 700 square feet it can carry an entire corner on its own; in a large living room, treat it as a supporting player next to a full-size tree and a layered mantel.
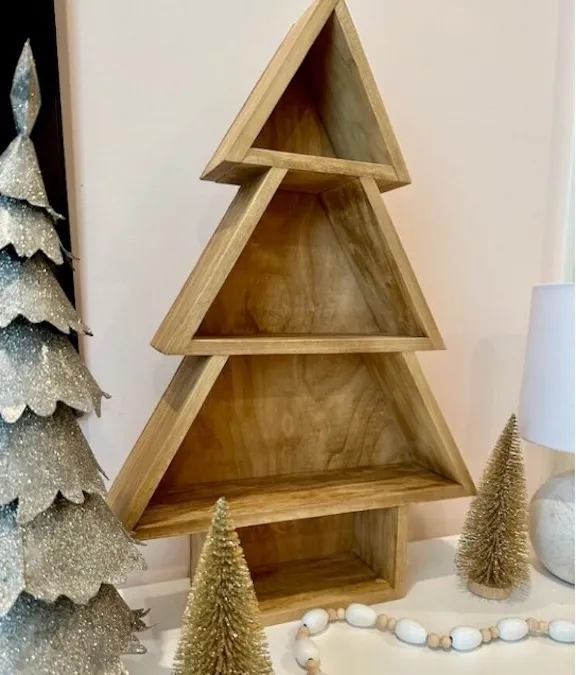
The compartments are the point. Three triangular cubbies force you to style in threes instead of scattering, which is exactly why this piece reads expensive. Fill one compartment, half-fill the second, and leave the third mostly empty — that’s the ratio. Every craft-store display ignores it; every designer uses it. It’s the same restraint that makes the single gold vase work in Idea #3, just applied horizontally.
14. A Layered Wood Advent Tree on a Distressed Plank Wall
- Measure the wall span and mark your center line in pencil — a laser-cut tree looks crooked at even a half-inch off.
- Check your surface: this display reads best against whitewashed or distressed horizontal planks, not flat drywall.
- Order the small shapes separately so you can space snowflakes, bows, and stars after the main tree is up.
- Settle on hanging hardware first — Command strips rated for the weight, or one nail for the detached oval base.
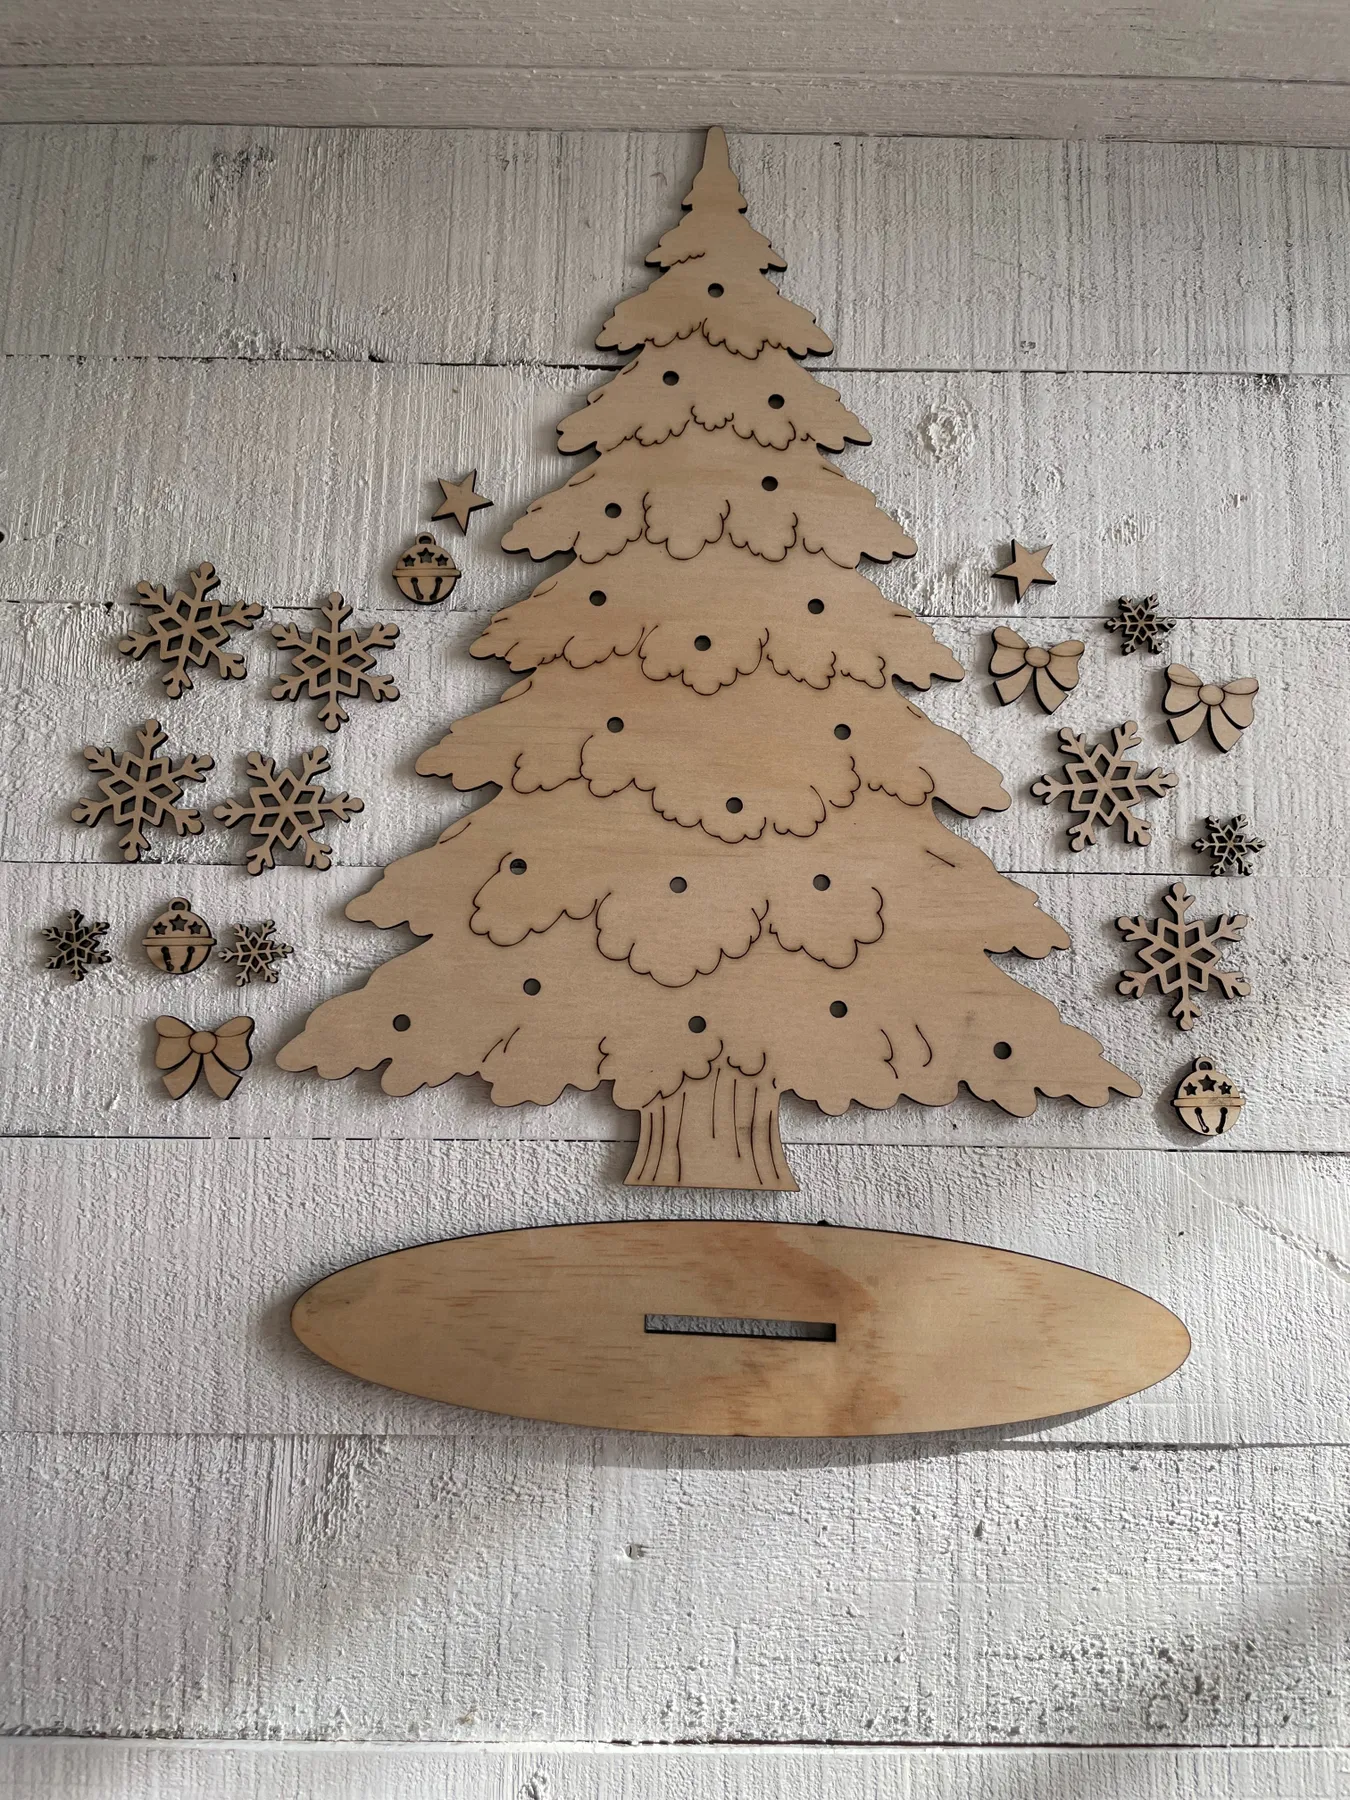
Advent displays usually get cluttered because every day adds another object. This one solves that by separating the tree from the counter — the little cutouts float around it like snow, so day twelve doesn’t change the composition at all. Light unfinished wood against distressed white planks is the quietest high-contrast palette in this entire list, and it survives a busy December without needing to be restyled.
15. A White Brick Fireplace with Frosted Trees and Red Plaid
Flocked trees are lovely and they absolutely shed. That white snow coating flakes off every time you move one, and it lands on the brick, the hearth, and your coffee table. Set them on felt pads, vacuum the hearth weekly, and never place flocked branches within 3 feet of a real flame — those trees are coated in flammables, not just decoration.
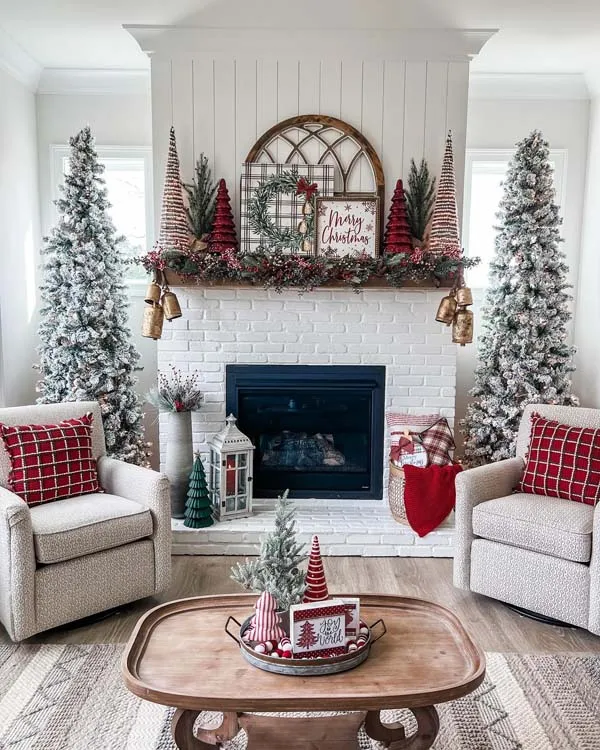
This full mantel moment needs a room that can hold it: at least 200 square feet, a fireplace wall 6 feet or wider, and 30 inches of clearance in front. In a smaller living room, keep the garland and both armchairs, drop to one frosted tree, and move the pair of plaid pillows onto a single accent chair. For a scaled-down version of the same idea, compare with Idea #24, which lives entirely on one mantel ledge.
16. Light-Up Winter Wall Plaques with Gray Metal Trees
Battery fairy lights on wall decor are the most annoying upkeep item in this whole list. Expect to swap AAs every three to four weeks if the lights run four hours a night — roughly $12 a season, plus the trip to the store you’ll never remember to make. Better plan: buy a plaque with a USB cord and hide it behind the board, or spend $20 on rechargeable batteries and a charger right now.
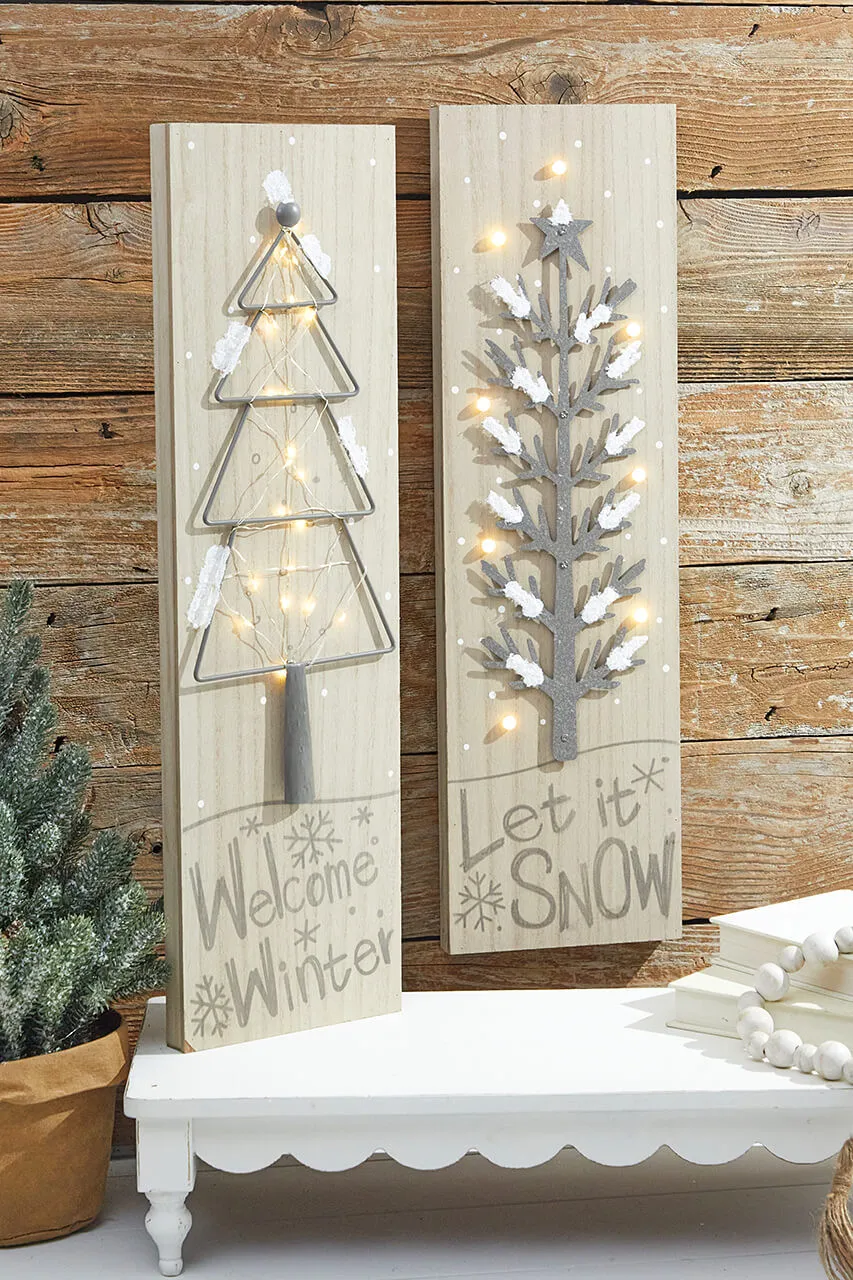
Light wood, gray metal, warm white glow, and a whisper of brown typography. That breaks down to 60% light wood, 25% gray, 15% warm light. The gray is what keeps it from going full farmhouse — swap it for black metal and the pair turns cabin-modern; swap the wood boards for painted white ones and you’ve got coastal Christmas instead.
17. An Illuminated Wooden House Glowing on the Table
Small cut-out windows only glow if there’s nothing bright behind them. Use a warm 2700K LED inside — never a cool white — and line the interior floor with parchment paper so the light diffuses instead of throwing hard shadows. One tea light LED puck is plenty for a house this size. Add more and the windows stop reading as windows and start reading as white rectangles.
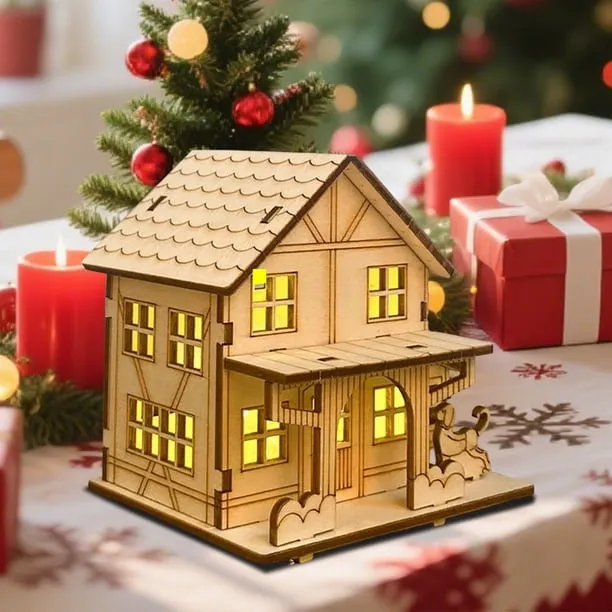
Assembly order matters more than the finish:
- Glue the walls and roof with wood glue, clamp, and let cure overnight — laser-cut edges are thirsty.
- Fit the roof before painting so the pitch sits flush, then sand any proud edges after assembly.
- Drill a quarter-inch hole in the back wall, low and hidden, for the light wire.
- Finish with matte polycrylic, not polyurethane — it dries clearer and won’t yellow over the years.
Time: 3 hours plus drying. Materials: $15–$35 for the kit and finish.
18. A Trio of Carved Wooden Reindeer on a Warm Console
Three is the number that works, and the heights aren’t equal on purpose — the tallest deer sits center while the two shorter ones flank it at slightly different angles. That’s the rule of thirds doing quiet work. The dark brown carvings also repeat the console’s warm wood and the beige lampshade above, so nothing looks like it wandered in from a different room.
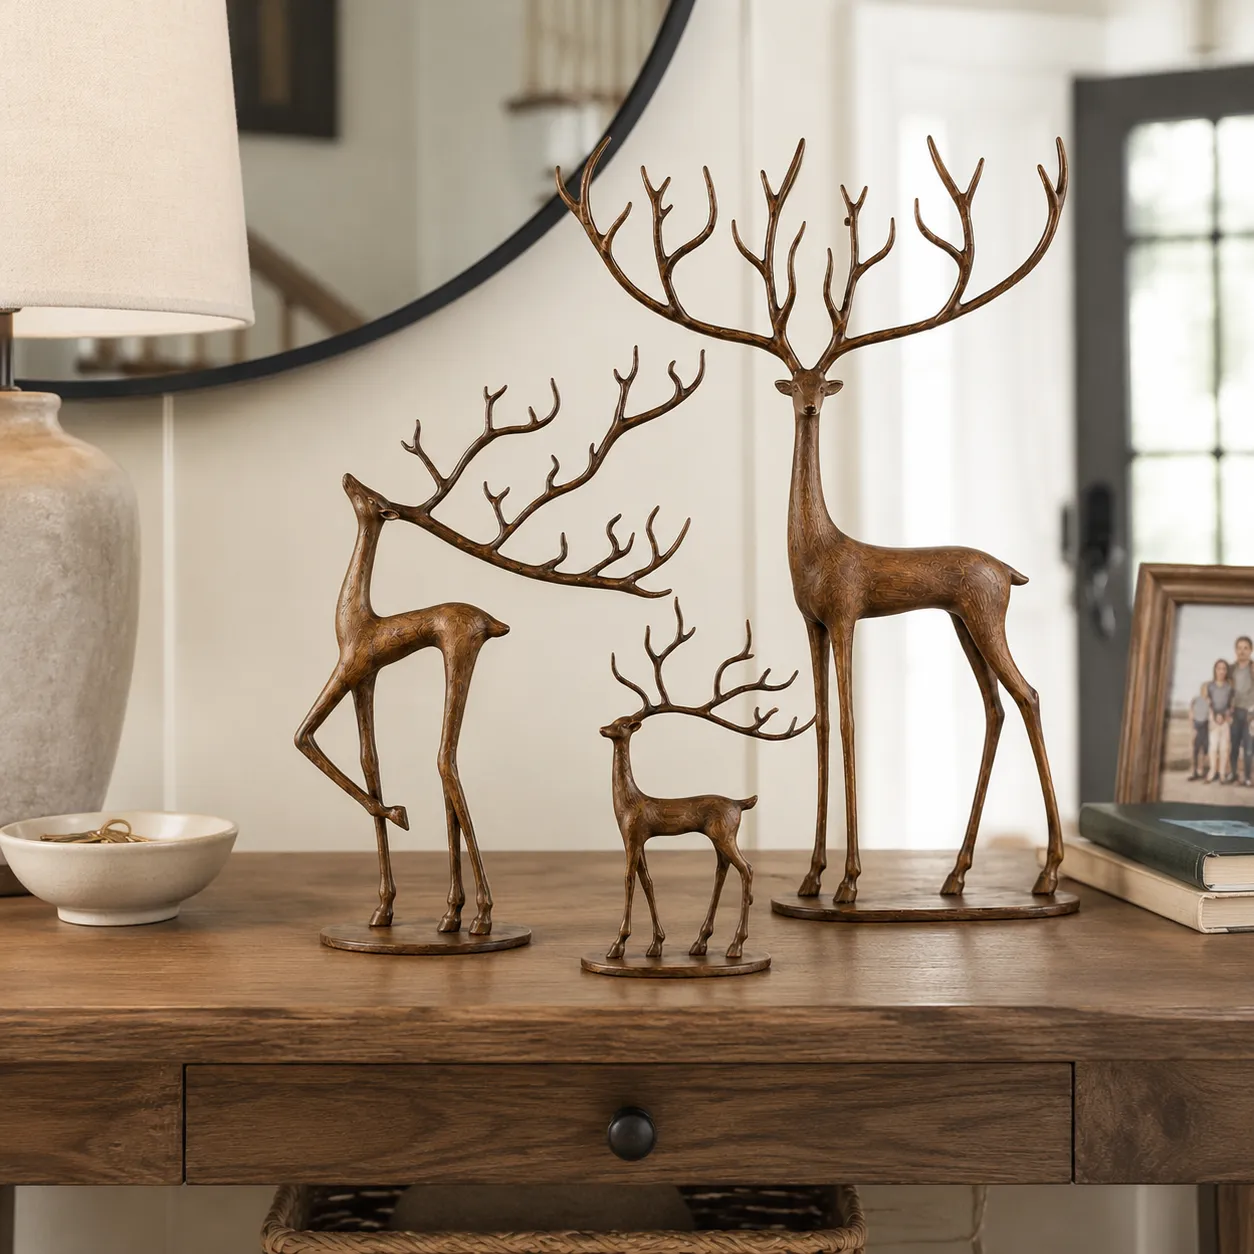
Carved reindeer get expensive fast — $40 to $120 apiece for solid wood. Facebook Marketplace and estate sales turn up singles for $8–$15 if you start looking in October. If you’re not the patient type, unfinished wood blanks at Michaels run $6–$12, and one coat of dark walnut stain applied with a rag gets you maybe 80% of the look for a fifth of the money.
19. A Farmhouse Mantel Layered with Wood Signs and Burlap
Layered mantels need depth and width — a 5-foot ledge minimum, 8 to 10 inches deep, with 24 inches of wall above the garland so nothing crowds the ceiling. If your mantel is narrow or the ceiling sits under 8 feet, hang the vintage window frames on the wall instead of propping them, and use two stockings rather than five. Rooms under 150 square feet will read this as cluttered, not cozy, no matter how good the styling is.
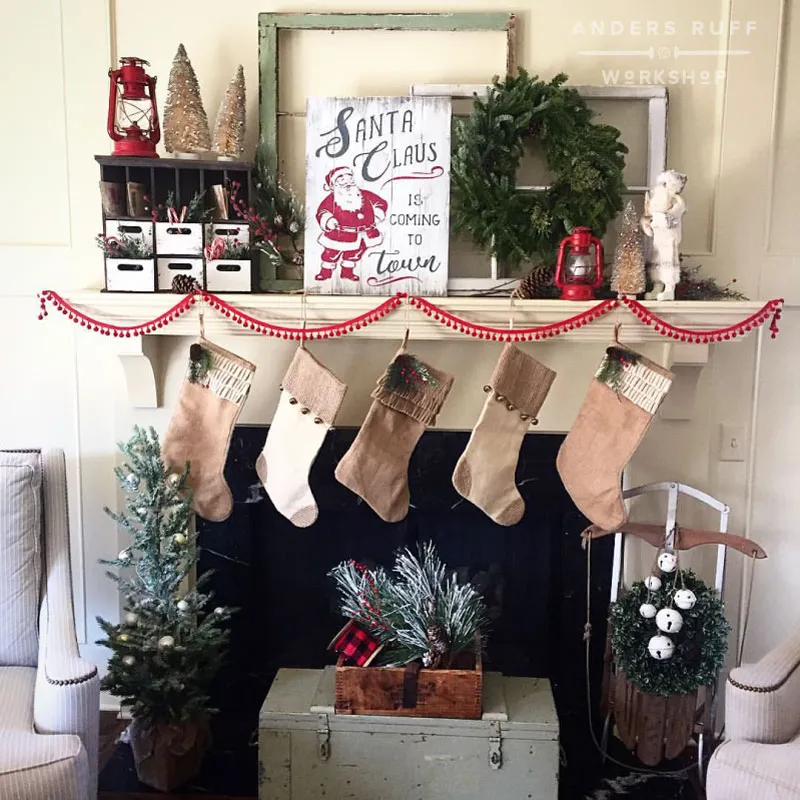
The maximal farmhouse mantel never fully left, but the 2026 version is more edited: fewer signs, more texture from wood and burlap, and one bright red moment instead of five. It’s a natural pushback against the all-white minimal Christmas that dominated the last few seasons, and it photographs like a dream, which is half the reason it keeps showing up in your feed.
20. A Stacked Branch Tree on an Exposed Brick Wall
The twig star topper. Everything else here — the horizontal branches, the fairy lights, the simple hanging ornaments — you’ve seen before. A star built from five twigs wired together at the points changes the piece from rustic decor into something someone made. Skip the store-bought star and the branches stop looking like a tree and start looking like a pile of sticks on a brick wall.
Real branches on a wall mean real dust and, occasionally, real bugs. Seal yours with a matte spray sealer within a day or two of cutting, and give the whole piece a weekly once-over with a microfiber duster — exposed brick traps dust on every ledge too. If you’ve ever had insects in stored firewood, go with kiln-dried branches or a faux set instead.
21. An Unfinished Slat Tree Kit Ready for Paint and Buttons
- Sand the slat cutout with 220-grit and wipe it with a tack cloth — chalk paint grabs every speck of dust.
- Paint the base color in thin coats, two or three rather than one thick pass, letting each dry 45 minutes.
- Glue the wooden buttons on with wood glue, spaced about 2 inches apart and only on the front face.
- Distress the edges with a sanding block once the paint has fully cured — at least 12 hours.
- Seal with clear wax so the finish survives a season in a storage bin.
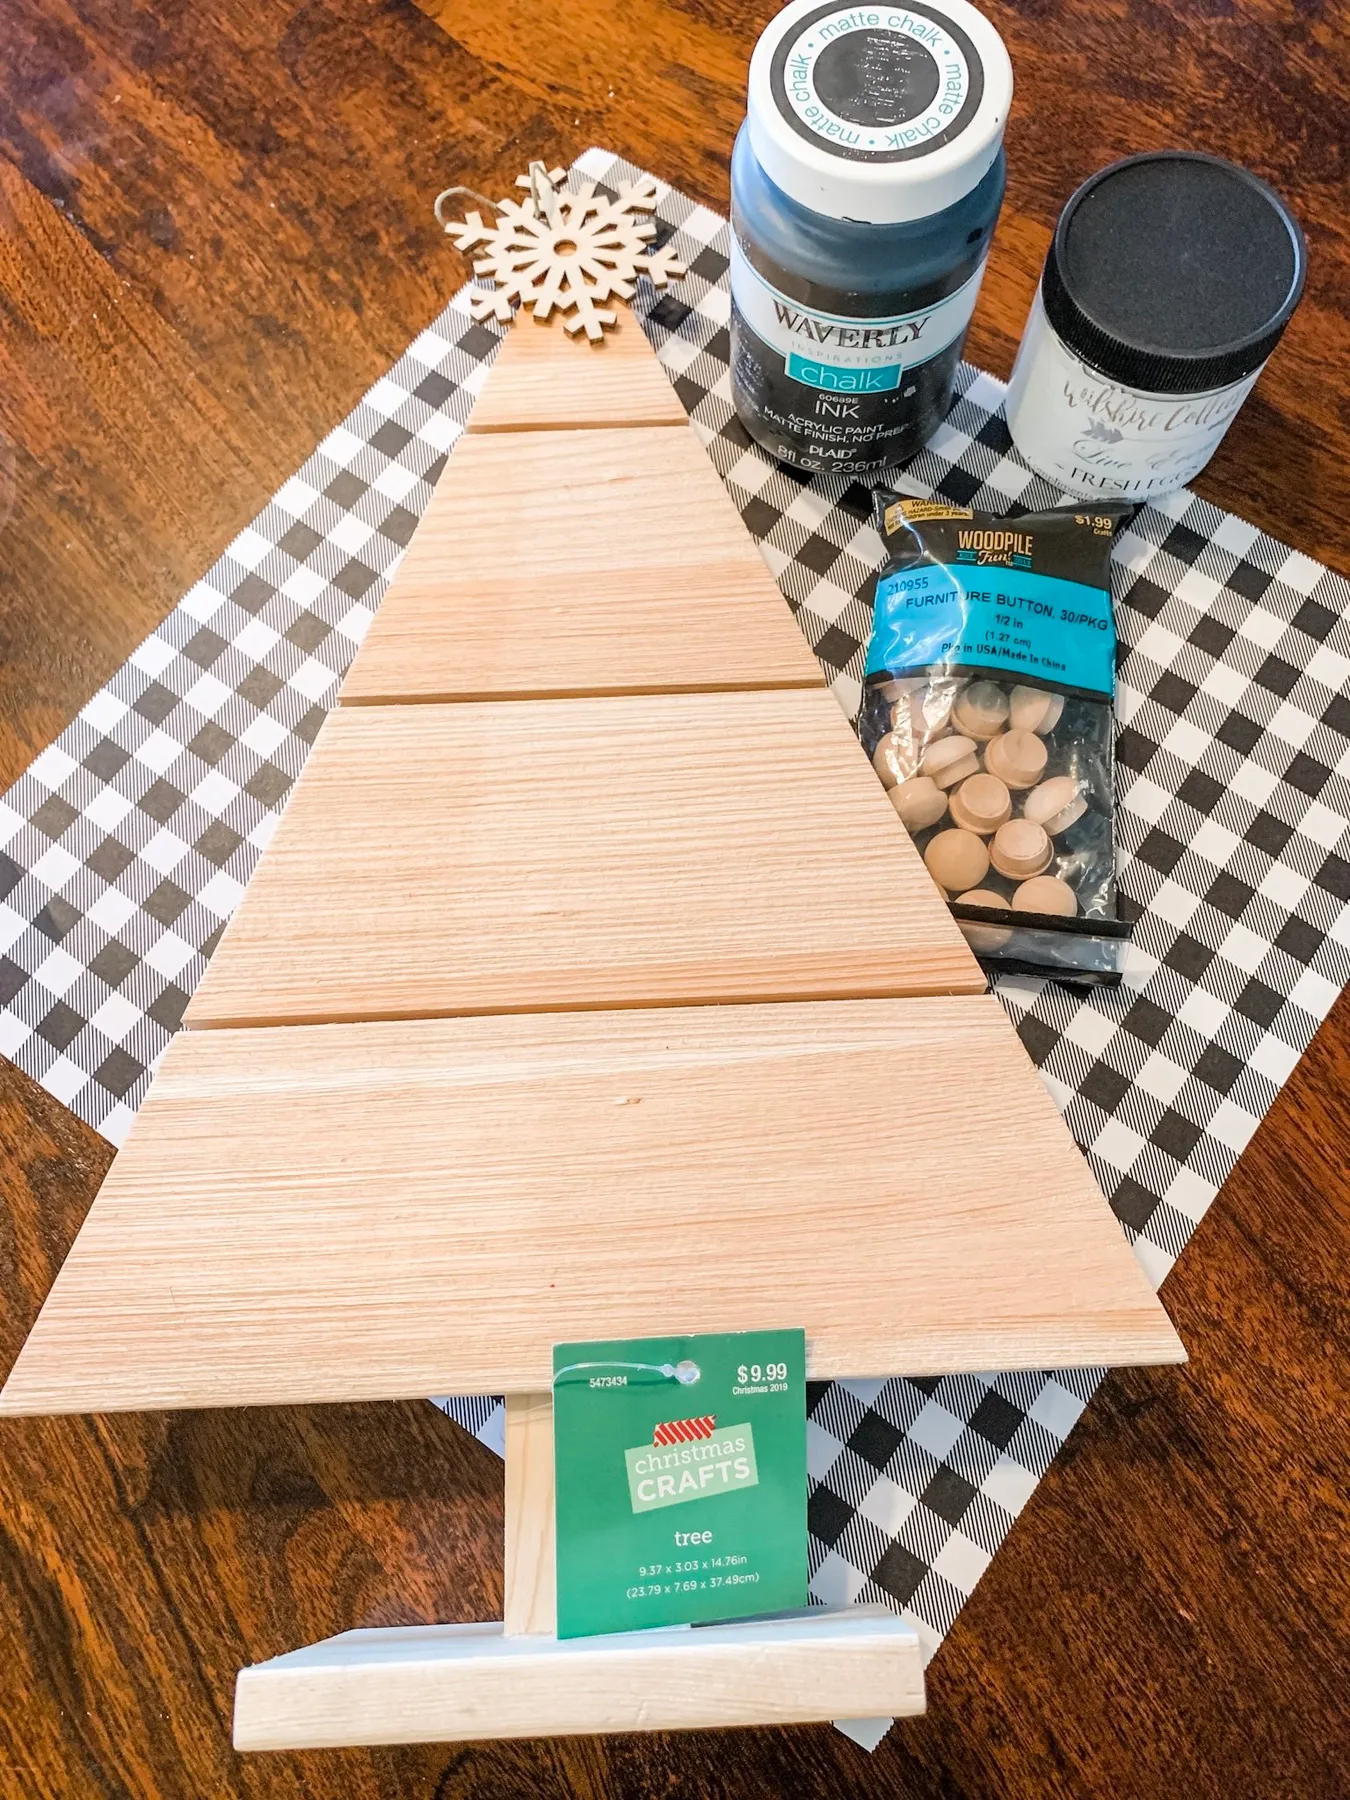
Time: about 2 hours of hands-on work. Supplies: $20–$28.
This is the cheapest idea in the article if you shop it right. The unfinished tree blank runs $5–$10, a 2-ounce jar of chalk paint is $2–$4, and a pack of wooden furniture buttons is under $4 at Walmart. A buffalo check placemat doubles as your work surface and your styling prop for about $3. All in, roughly $18 for a piece nobody will believe you made.
22. Wooden Reindeer with a Personalized Name Tag
Think of this as the smaller, more personal sibling of the trio in Idea #18. Personalization works best when it’s small and slightly hidden. Keep the tag under 3 inches wide and tie it with the same ribbon used for the bow — here that’s a plaid bow with tiny red berries. A pyrography pen or a fine paint pen both work; the paint pen is easier to control on curves, and sealing the finished tag with wax keeps the name from rubbing off.
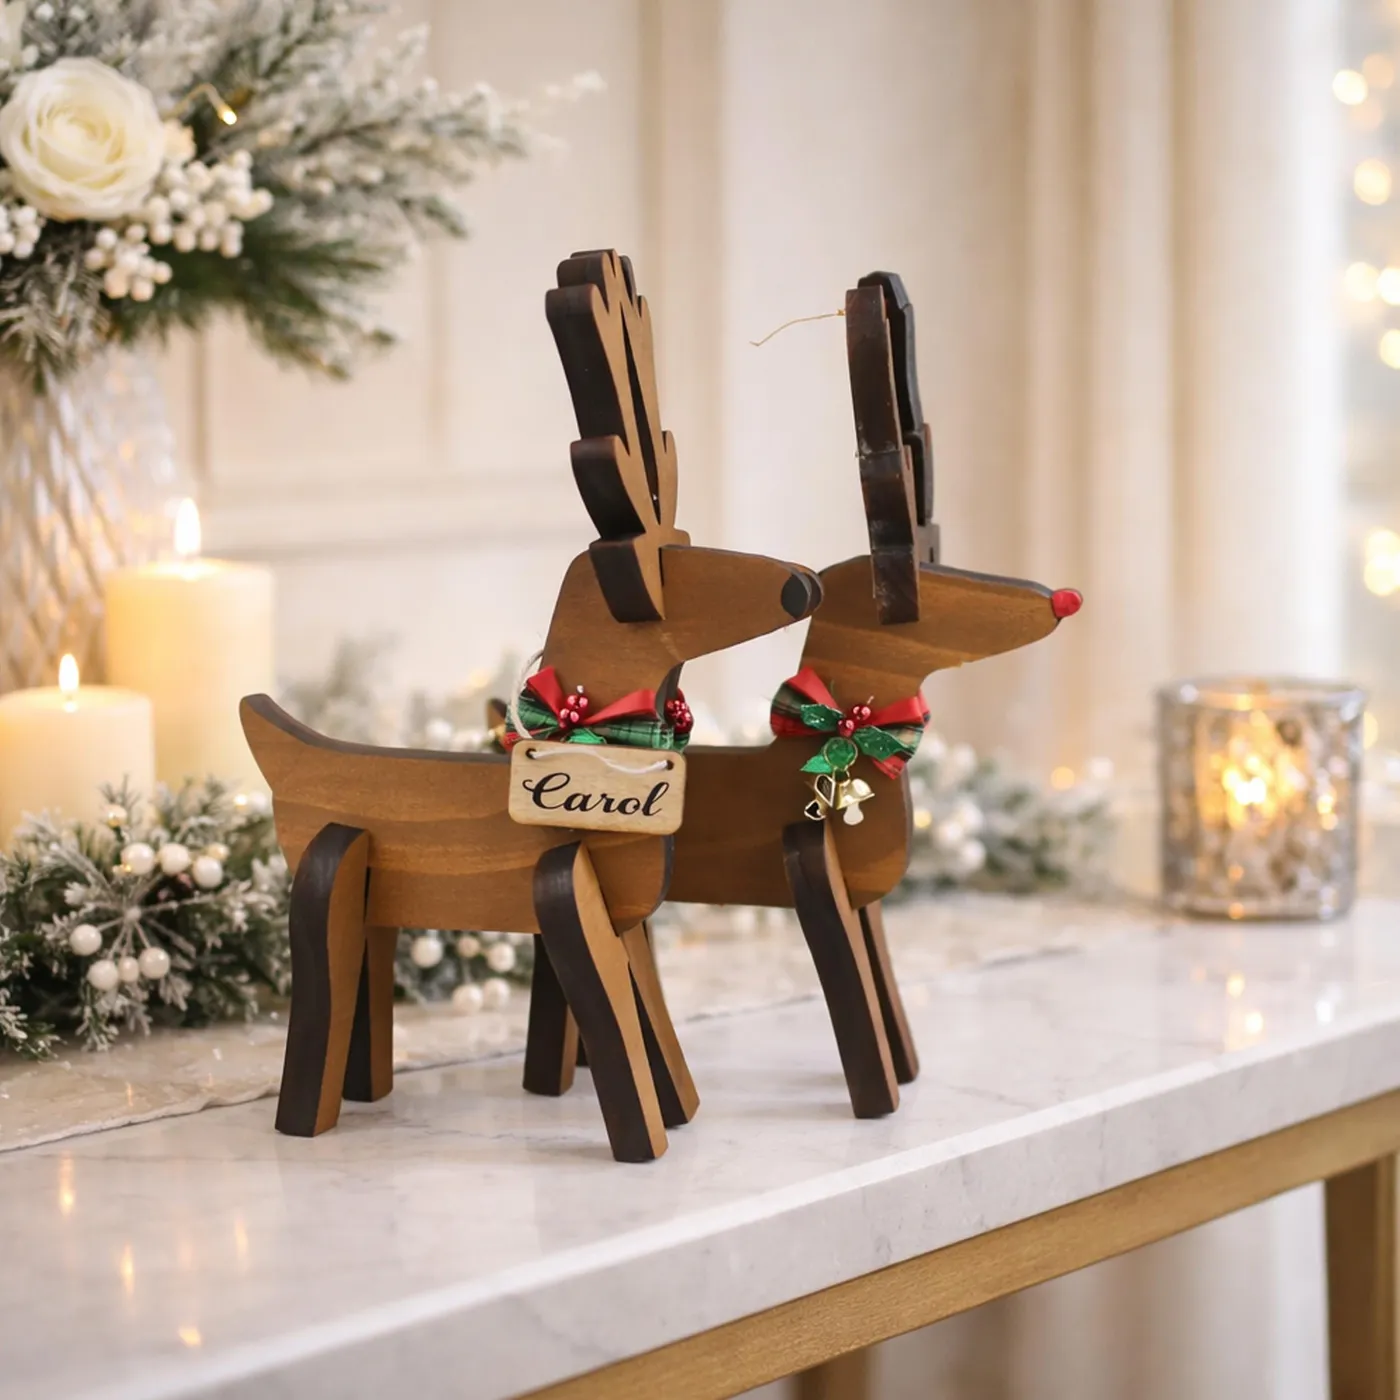
The white marble surface here is doing something your kitchen table probably can’t — it reflects candlelight and hides crumbs. If you’re styling this on wood, slide a white cloth or a marble tray underneath, or the warm wood deer will disappear into the tabletop. And keep lit pillar candles off the tray the reindeer stand on; two inches of clearance is not enough.
23. Laser-Cut Fox Ornaments Nestled in Cedar and Orange Slices
Here’s the formula: 50% evergreen green, 30% pale wood, 15% burnt orange, 5% blue-and-white twine. The dried orange slices are what make it feel warm rather than twee — they’re the only saturated note in the arrangement. Keep those proportions and you can swap foxes for laser-cut birds, or cedar for fir, without losing the mood. Change the orange to cranberry red and it turns traditional fast.

The details cost more than the ornaments do. Laser-cut foxes run $4–$9 each on Etsy, but dried orange slices made at home are about $2 worth of oranges and 3 hours in a 200°F oven. Pinecones are free if you know a good park. Baker’s twine is $3 a spool. Whole garland-and-ornament setup: under $40, and half of it came from the backyard.
24. Whitewashed Carved Reindeer on a Panelled Mantel
Whitewashed finishes show fingerprints and dust like nothing else — the grain is thirsty and the chalky surface grabs everything. Dust these with a dry, soft brush rather than a damp cloth; moisture lifts the whitewash unevenly and leaves gray patches that you cannot spot-fix. If you want the look with a third of the upkeep, ask for a sealed lime-wash finish or a matte lacquer topcoat before you buy.
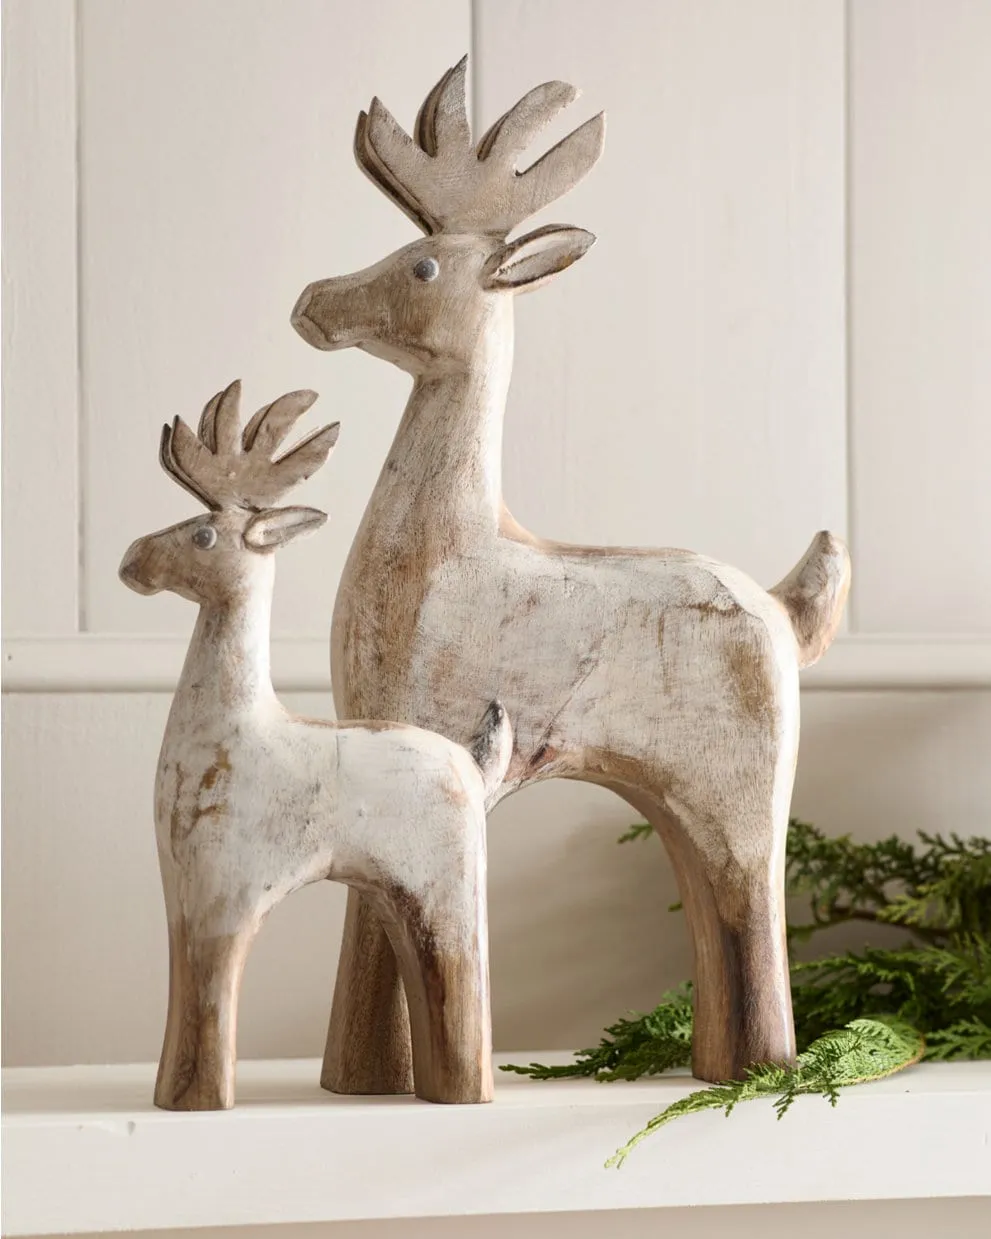
The whitewash is the entire argument. Natural wood deer next to vertical paneling go invisible; whitewashed ones catch the same light as the wall and read as sculpture instead of clutter. Add the single pine sprig at the base and you’ve got contrast, texture, and restraint — three things most mantels try to fake by adding more objects instead.
25. Wood-Burned Nativity Slice Ornaments
- Dry your wood slices for two weeks in a warm room, or buy kiln-dried ones — green wood cracks as it dries.
- Sand the face to 320-grit and sketch the design lightly in pencil; burns follow pencil lines better than ink.
- Work the pyrography pen on a low setting first, building darkness in passes instead of pressing hard.
- Drill a 1/8-inch hole near the top edge, thread jute twine through, and knot it snug.
- Finish with a thin coat of clear wax on the face only — leave the bark raw.

Time: 1–2 hours per ornament once you’re warmed up. A pyrography pen runs $25–$40 if you don’t own one.
The bark edges are everything. Anyone can burn a design onto a sanded disc, but keeping the natural bark ring intact is what makes these feel like they came off a real tree instead of a craft aisle shelf. It also frames the artwork for free. If you’re buying pre-cut slices, press the bark with your thumbnail first — loose bark flakes off within a season.
26. Dark Stained Light-Up Tree Silhouettes on the Mantel
- Dark-stained plywood cutouts, two made or bought: $30–$90
- Warm fairy lights, battery or plug-in: $12–$25
- Evergreen garland for the mantel: $25–$60
- Snowflake cutouts, baubles, small bells: $15–$35
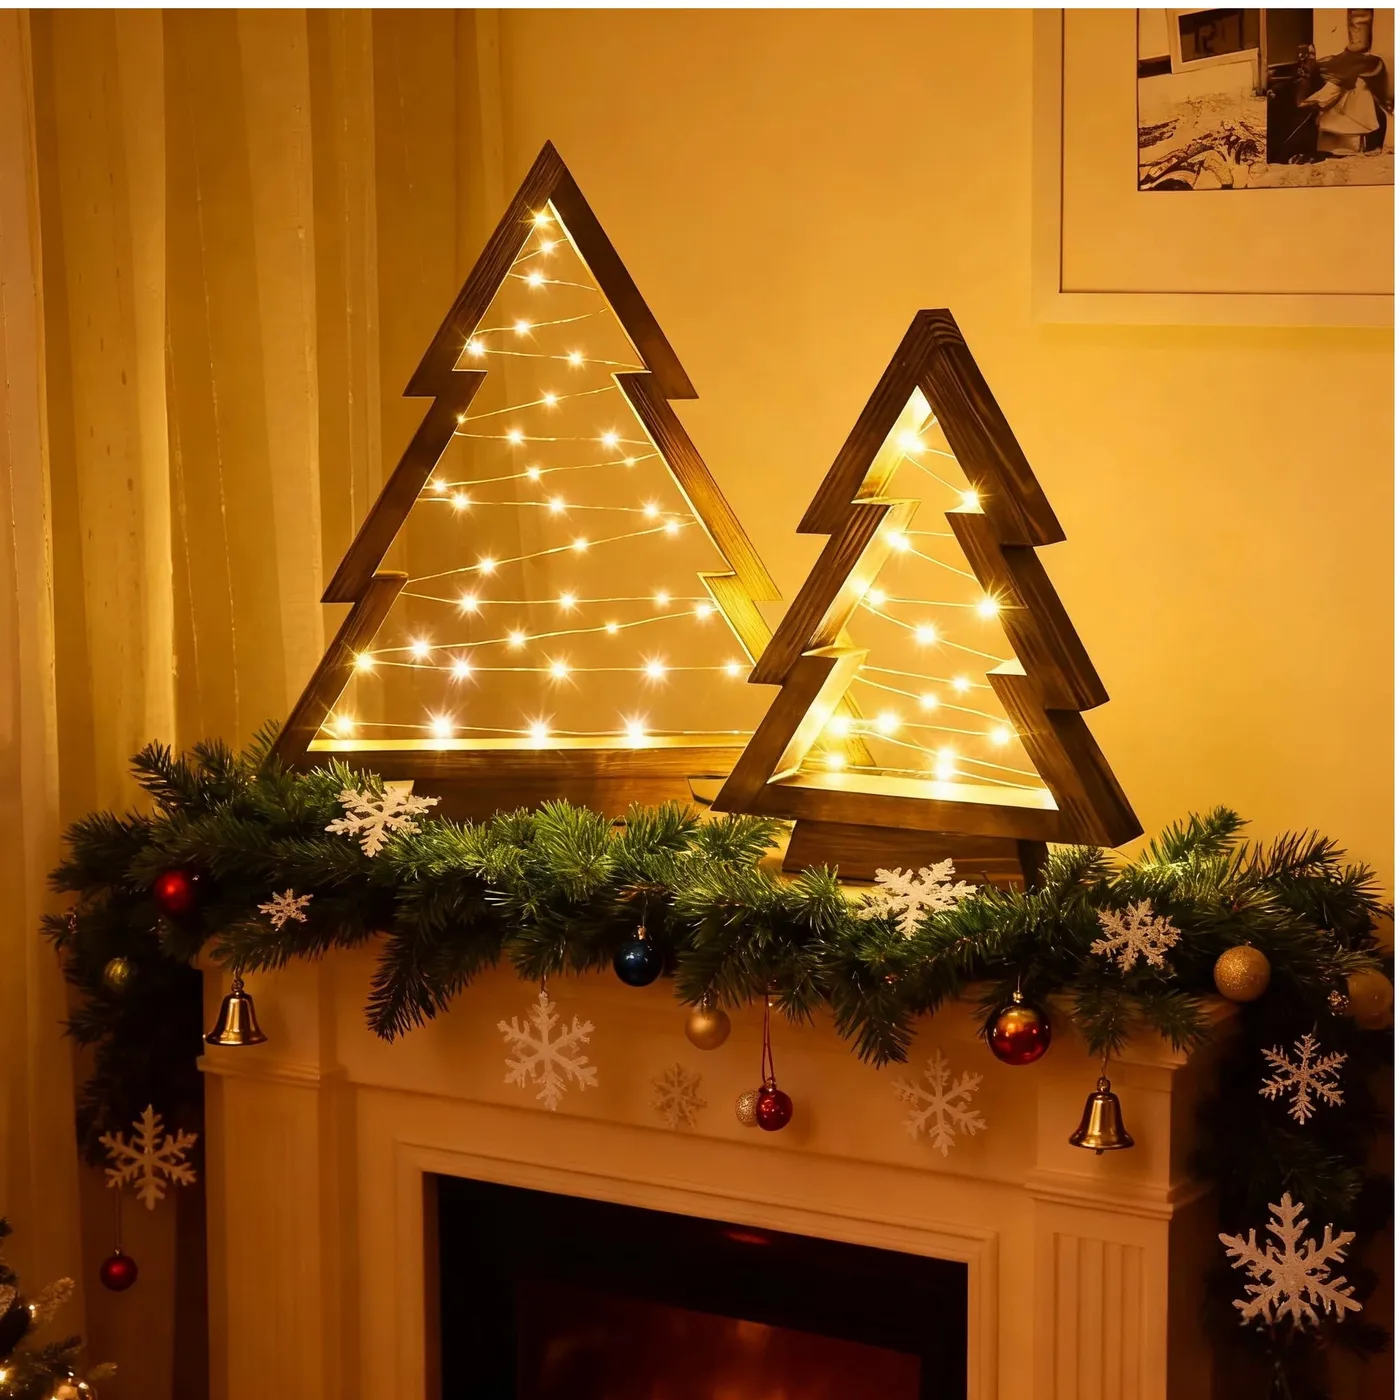
Total: $82–$210. Budget alternative: cut both trees from one $20 sheet of plywood, use two strands of dollar-store lights, and decorate with ornaments you already own — under $45 for the pair.
Drill the light channels before staining, not after — a fresh bit tears stain right off the face and you’ll never blend the repair. Space the holes 1.5 to 2 inches apart along the outline, and run each strand bottom-up so the battery pack hides behind the garland. Dark stain plus warm 2700K light is the entire mood. Cool white bulbs will kill it in one evening.
Sawdust, Twine, and a Season of Made-By-You
Here’s the honest truth: the pieces people stop and photograph are almost never the expensive ones — they’re the plywood tree with uneven edges, the twig star held together with craft wire, the ornaments that took an afternoon and a little burned finger. Start with one project this weekend, and let next December be the year you add a second.
📌 Pin your favorite idea now so you can find it when the sawdust starts flying — and send this to the friend who always says they’re not crafty.
