You know that feeling when a photo of someone’s Christmas tree stops your thumb mid-scroll — and then you realize you could actually pull it off this weekend? That’s exactly the energy behind this list. We spent serious time browsing Target, Etsy, IKEA, Amazon, and Facebook Marketplace to bring you only what’s worth your attention this year, then filtered hundreds of options down to 20 ideas that actually deliver — from $3 paper snowflakes to a $180 silver table setting.
Inside you’ll find rustic woodland pieces, modern minimalist trees, warm vintage traditional looks, and neutral natural arrangements, with budget and luxury versions compared side by side. Handmade holiday decor is having a genuine moment in 2026 — Pinterest searches for DIY Christmas crafts keep climbing because people want rooms that look collected, not catalog-ordered. And stay until the end — we break down the most common mistakes that can ruin these looks.
A few links below may earn us a small commission — it never changes what we recommend. 📌 Save this to Pinterest for later — you’ll want to revisit these ideas.
1. Holly and Berry Tree Ornaments That Look Vintage Store Bought
Holly-and-berry ornaments are the quiet comeback story of 2026. After a few seasons of muted, monochrome trees, searches for classic red-and-green trimmings climbed again — especially the kind of faux holly picks that read like vintage shop stock rather than dollar-store filler. The reason is simple: they photograph beautifully against white string lights, and they age well. A set of ten holly sprigs will still look right in 2031, which is more than you can say for most trend-driven ornaments.

Here’s a tip that changes how a tree reads from across the room: budget roughly 60 to 80 ornaments for a 6-foot tree, and hang the largest pieces at eye level and slightly inside the branches, not on the outer tips. Deep-set ornaments catch the string lights and glow from behind. For holly picks like these, swap the standard hooks for 24-gauge floral wire bent into a hook — the wire lets you angle each sprig downward so the red berries face forward instead of spinning sideways.
2. Hand-Cut Paper Snowflakes Under a Tinsel Light Garland
Coffee filters and copy paper make snowflakes for pennies, and the whole batch takes about twenty minutes once you find the folding rhythm. The six-fold method is what gives you real symmetry.
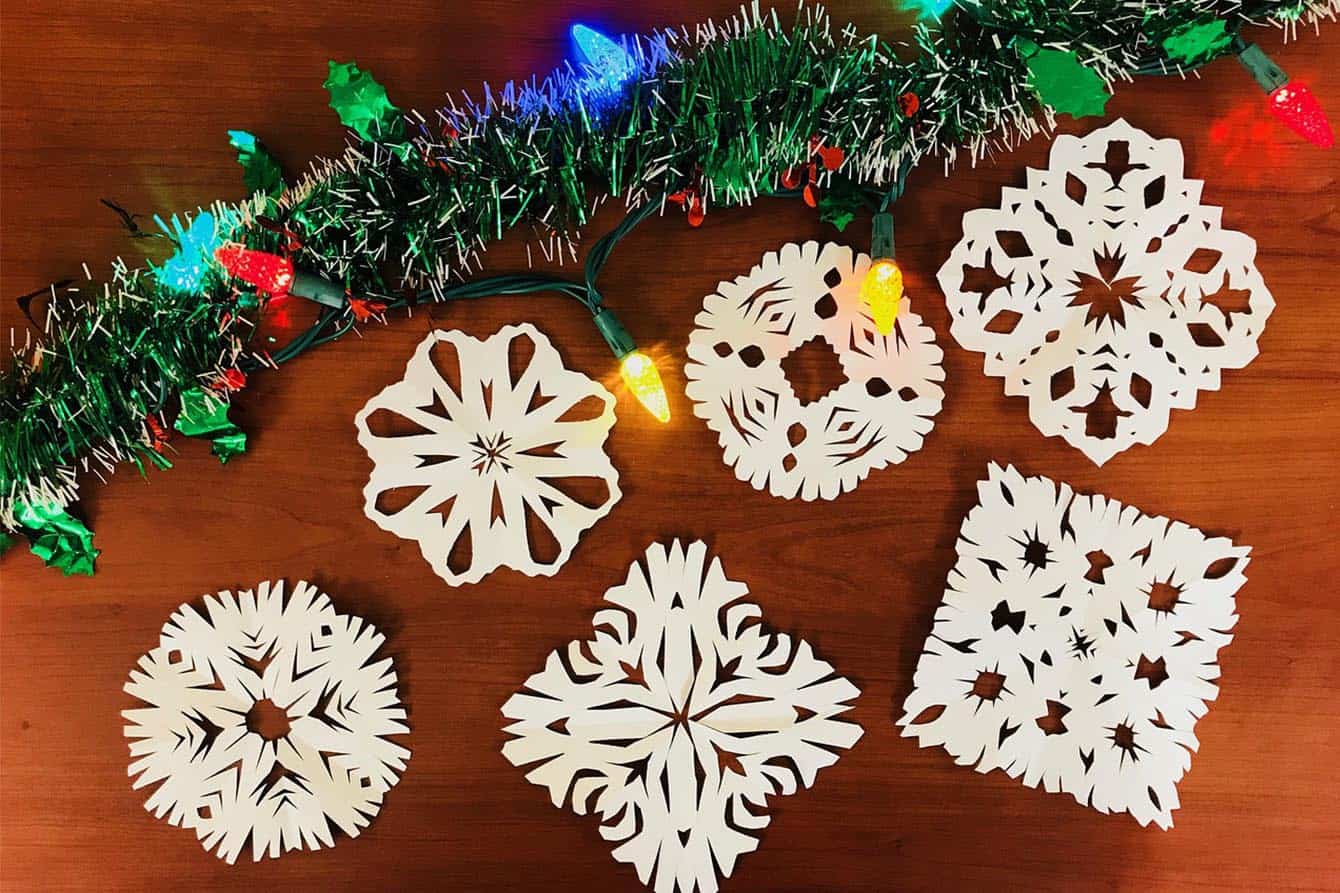
- Fold a square in half into a triangle, then fold twice more into a narrow wedge.
- Trim the open edges so every layer lines up — this is the step most people skip.
- Cut shapes from the folded edges only; leave the outer fold intact or the flake falls apart.
- Unfold slowly, then press flat between two towels with a warm iron.
- Thread with white thread and hang at staggered heights near a window.
Materials: paper, small sharp scissors, an iron. Total cost under $5.
The expensive version of this look is laser-cut wooden snowflakes at $8 to $14 apiece. The cheap version is coffee filters — 200 for about $3, and their scalloped edges already look like cut paper. Dollar Tree carries pre-cut doily packs for $1.25 that skip the folding entirely; glue two together back to back and they hold their shape on a garland. Wax paper pressed flat with an iron makes translucent flakes that glow when backlit. Under $10 for a whole mantel’s worth — compare with Idea #7, which trades paper for wood slices.
3. A Distressed Planter Packed With Eucalyptus and Red Berries
The formula inside this planter is easy to copy: about 55 percent evergreen branches, 25 percent textured brown from pinecones and seed heads, 15 percent silver-blue eucalyptus, and 5 percent red berries. That last 5 percent does enormous work — it’s the only warm color in a cool arrangement, so the eye lands there first. Swap the eucalyptus for olive branches and the berries for orange bittersweet and you keep the exact same structure with a warmer feel. Same math, different mood.
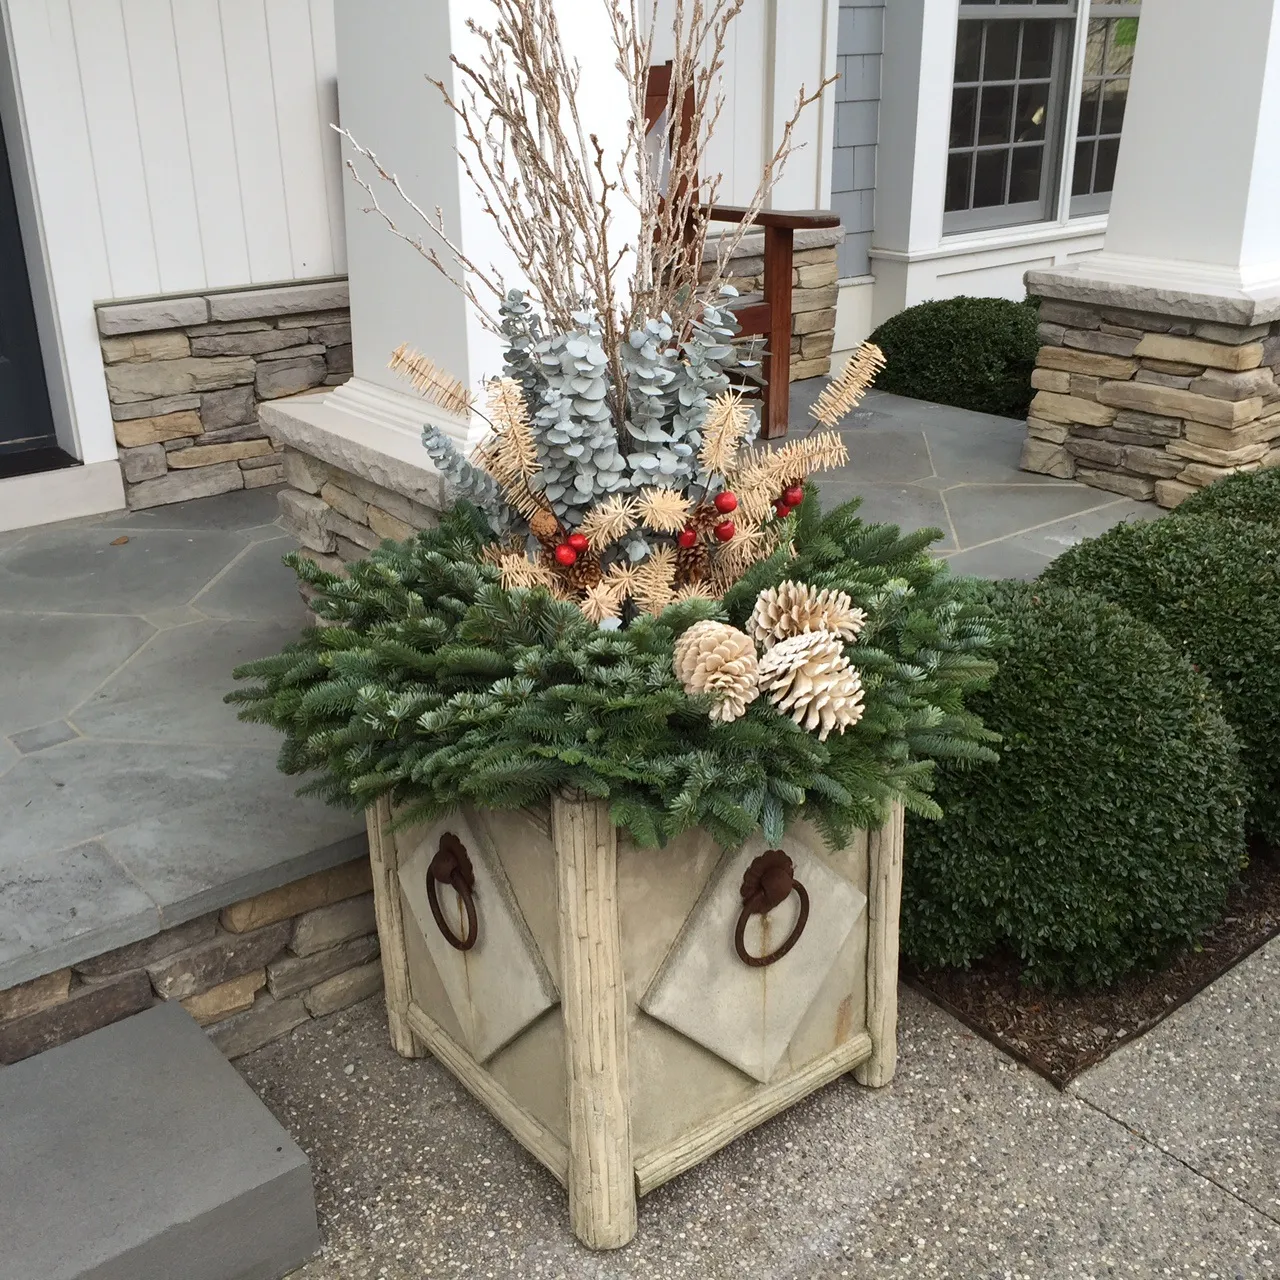
Three things make this work. First, height: the branches rise roughly twice the height of the square planter, which is what stops a boxy container from looking stumpy. Second, the silver-blue eucalyptus breaks up the deep green so the whole thing doesn’t read as one dark mass. Third, the planter itself is distressed and light-colored, so it never competes with the arrangement. That’s the same principle behind Idea #18 — the container stays quiet, the greenery does the talking.
4. The Brick-Built Candle Centerpiece Your Kids Will Fight Over
The single element holding this centerpiece together is the tall red candle with the flame-shaped tip. Take it away and you have a charming ring of greenery, berries, and gold snowflake accents — pretty, but flat. Put it back and the whole arrangement gains a vertical spine your eye follows upward. It’s also the piece that says “candle” out loud, so guests instantly read the table as a holiday setting. Everything else exists to frame that one red column.
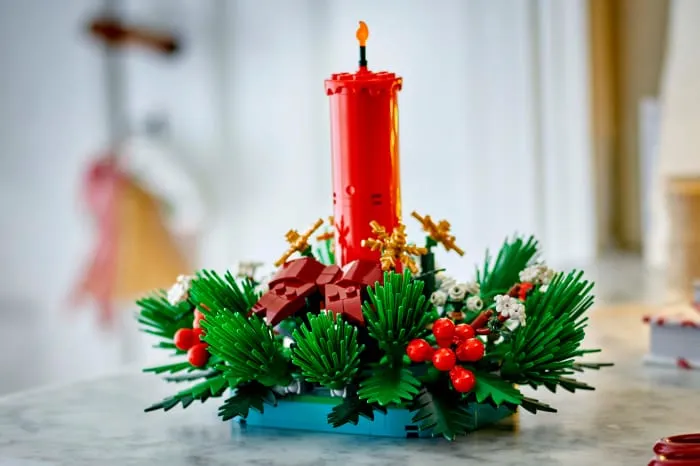
One honest caveat: build this out of real bricks and it will not survive a curious five-year-old. The good news is that’s the point — half the fun is that it gets rebuilt differently every December. Keep it out of direct sun, since ABS plastic yellows over time, and skip the real flame completely. The plastic flame tip is doing all the visual work, and a lit tea light tucked inside a brick structure is a bad idea no matter how carefully you assemble it.
5. A Slender White Tree Against a Charcoal Wall
White trees fail for one reason: no contrast. This one works because it stands against a dark charcoal wall, which turns every white bauble into a silhouette. If your walls are pale, don’t buy a white tree — get a dark green or flocked one instead. For ornament sizing, stick to three sizes only: roughly 2-inch, 3-inch, and 4-inch baubles, and hang them so no two identical sizes touch. Mixing four or more sizes is what makes a tree look cluttered rather than curated.
Slender white trees are built for the spaces nothing else can decorate. A 7-foot pencil tree is usually 20 to 24 inches wide at the base, which means it fits a corner, a narrow entry, or beside a hallway console where a full tree would block the walkway. You want at least 8 feet of ceiling to clear the topper. If your living room is large with 10-foot ceilings, a pencil tree will look lost — go full-size instead.
6. Red Roses Meet Pinecones in a Stone-Toned Arrangement
- Vase or stone-textured vessel: $15–$45
- Roses (8–12 stems, or a mix of fresh and faux): $22–$55
- Pine and cedar greenery stems: $10–$22
- Pinecones (free if you gather them, $6–$12 if you buy): $0–$12
- Cotton boll stems: $8–$16
- Red berry sprigs: $5–$12
Total: $60–$162

Budget alternative: skip the roses and use red carnations at $8 a bunch, pinecones from your own yard, and faux cotton from Dollar Tree. That lands you around $30–$45 for nearly the same silhouette.
What separates this from a grocery-store bouquet is the texture mix — soft petals, sharp needles, brittle cones, and fuzzy cotton all in one footprint. Texture range is what makes an arrangement feel expensive. The color story is tight too: deep red, forest green, brown, and white. Nothing else. The gray stone surface stays neutral so the red can carry. This is the same discipline as Idea #3, just in floral form.
7. Wood Slice Snowflake Garland You Can Make in an Afternoon
Wood slice garlands look like boutique-farmhouse merchandise and cost almost nothing if you have a saw and a fallen branch.
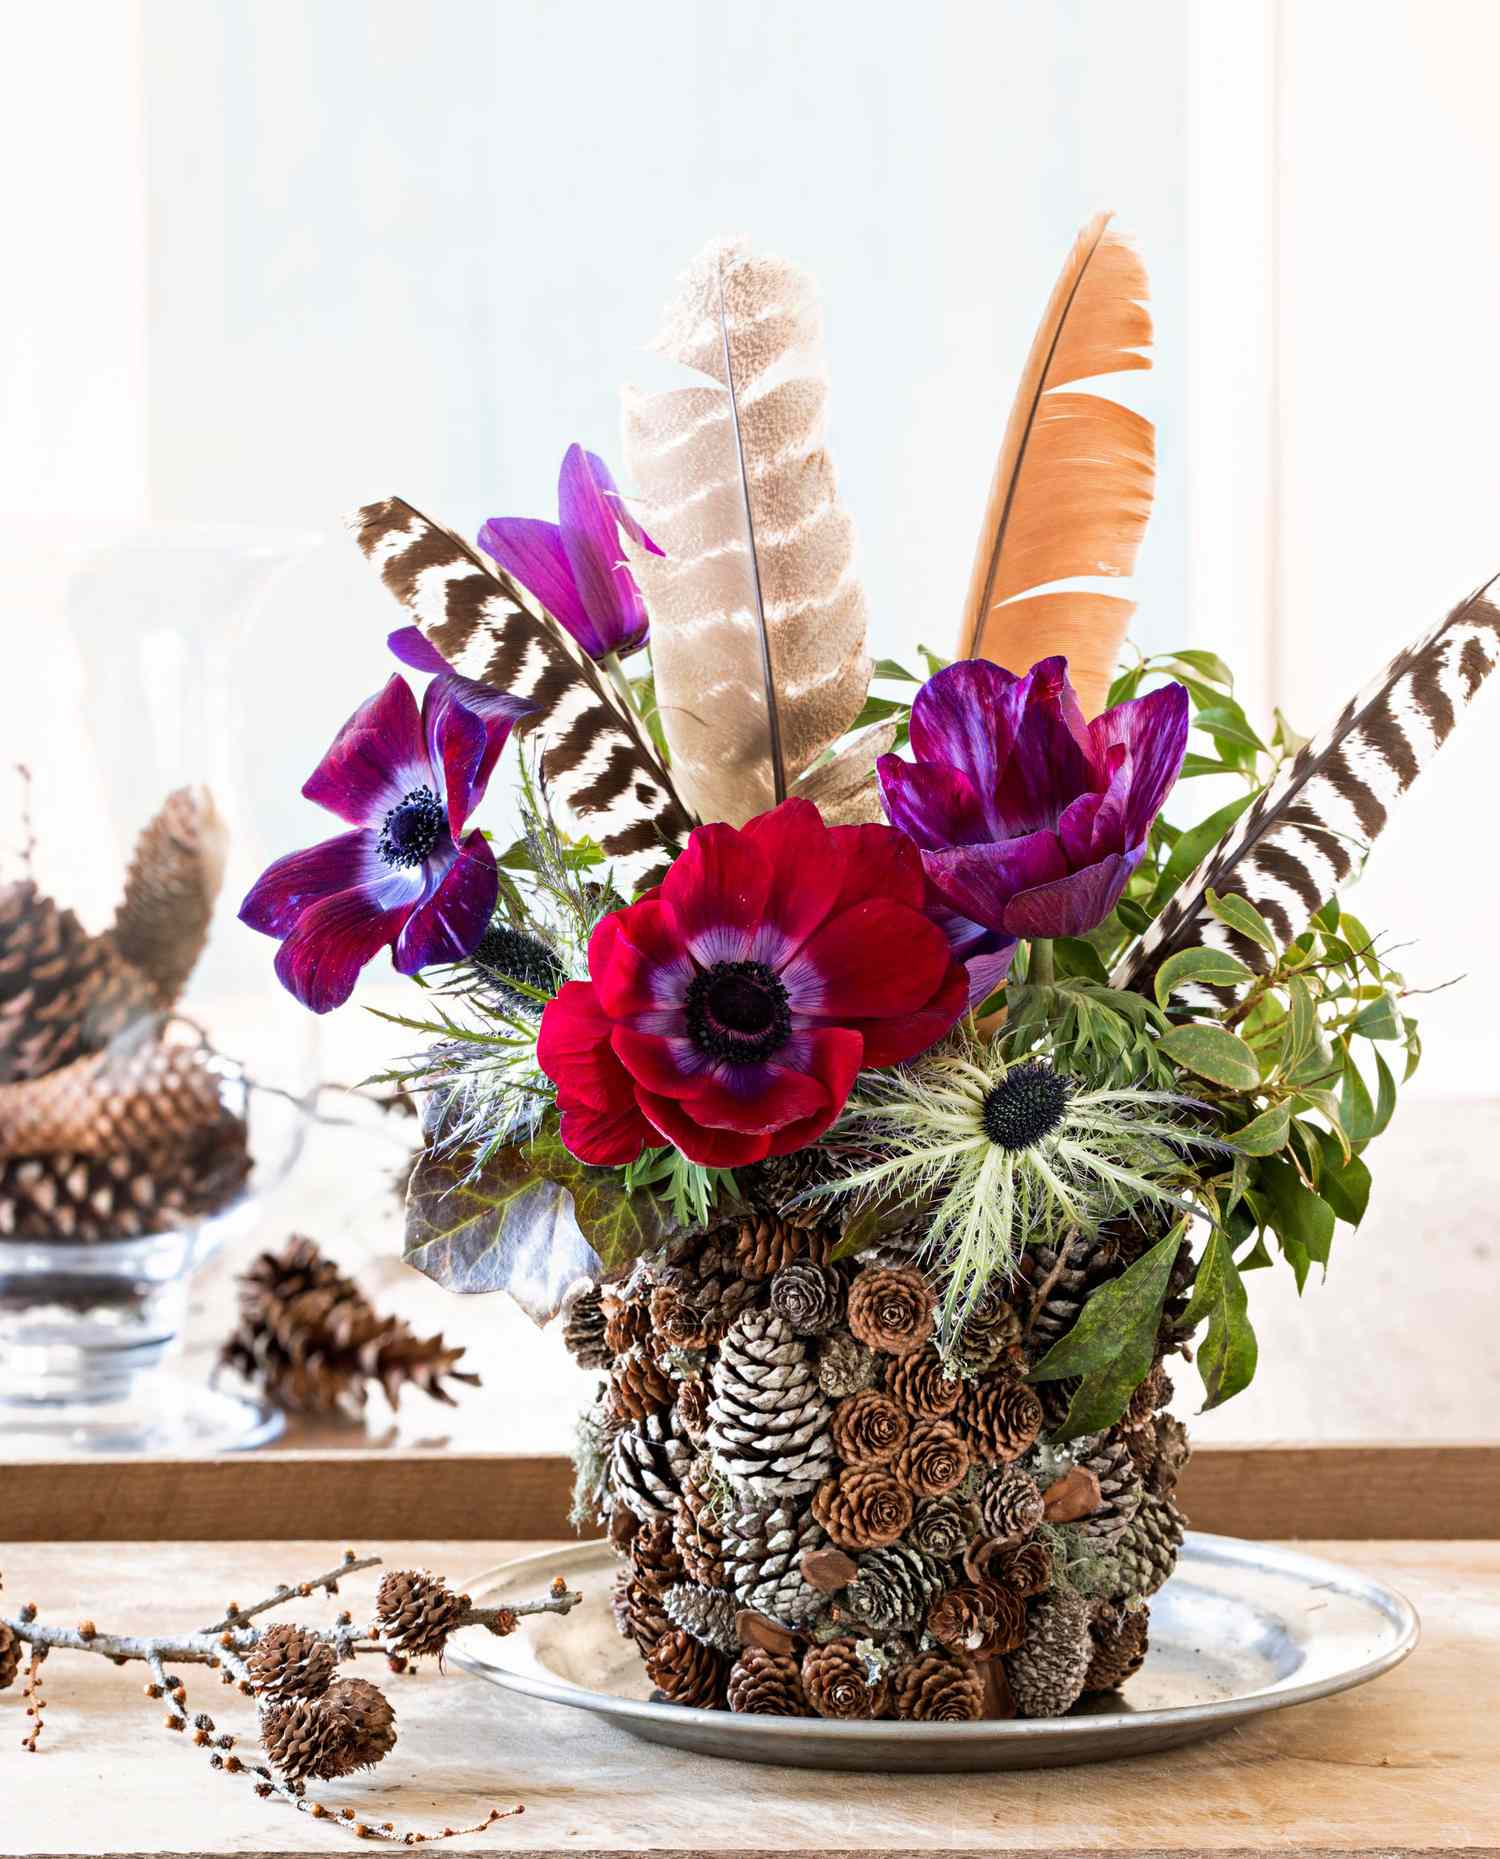
- Cut 1-inch thick discs from a branch, 1.5 to 2.5 inches across.
- Sand the faces with 120-grit paper, then wipe clean.
- Drill a single 1/8-inch hole near the top edge of each disc.
- Paint a six-line snowflake with white acrylic and a fine liner brush.
- Thread onto cotton twine with a knot between each slice so they stop sliding.
Time: about 90 minutes for 15 discs. Cost: $8–$15 if you buy the branch.
No saw, no problem. A 15-pack of pre-cut wood slices runs $9–$14 online, and you can skip painting altogether with white paint pens, which are far easier to control than a brush. For nearly free, use cardboard circles with white paint and a wash of watered-down brown for grain — nobody inspects a garland from six inches away. Facebook Marketplace and Buy Nothing groups regularly post free branch trimmings after storms.
8. Wax-Dipped Pinecones in a Beige Bowl, Lit by String Lights
Wax-dipped pinecones are sturdier than they look, but they do have rules. Keep them away from direct sun and radiators — the wax gets tacky above 75°F and can leave marks on a wood table. Never wash them; dust with a soft brush. The tinsel strands in this bowl shed for the first week, so set the whole thing on a tray or marble surface rather than a linen runner. Plan on refreshing the arrangement every two or three seasons. Faux cedar gives you similar softness with zero shedding if that’s a dealbreaker.

The palette here is 70 percent natural brown, 20 percent creamy wax and tinsel, and 10 percent warm light. That ratio is why it feels calm rather than busy — brown does the heavy lifting, cream softens it, and the LED string does the rest. Want it cooler? Swap the cream tinsel for silver and the warm-white lights for cool white. Want it warmer? Add one copper-toned ornament. The proportion stays fixed; only the accent changes.
9. Silver Candelabras, White Roses, and Frosted Pinecones
If you remove one thing from this table, remove nothing but the candelabras — and then watch the whole scene collapse. Those tall silver stems pull the eye upward and make the roses feel like part of a larger composition instead of a centerpiece sitting on a plate. Height is the difference between “nice flowers” and “a dressed table.” If you own exactly one pair of tall candlesticks, this is the season to actually use them.

- Silver candelabras (pair): $45–$140
- White taper candles: $6–$14
- White roses (12–18 stems): $30–$65
- Silver-frosted pinecones: $10–$20
- Eucalyptus stems: $10–$22
- Round silver tray and glass ornaments: $20–$60
Total: $121–$321
Budget alternative: thrift stores sell brass candlesticks for $3–$8 each, and a coat of silver spray paint gets you the same gleam for under $25. Pair that with grocery-store roses and pinecones frosted with spray adhesive and Epsom salt and you’re at $60 total. For a warmer, earthier take on the same table, see Idea #6.
10. A Single Pillar Candle Ringed in Evergreen on Dark Wood
A candle ring lives or dies by proportion. For a 3-inch pillar, the greenery ring should be 12 to 16 inches across — roughly four to five times the candle’s width. That footprint fits a 42- to 54-inch round table with room left for place settings. On a narrow console or a 30-inch bistro table, scale the whole thing down to a 2-inch candle with an 8-inch ring. Ceiling height doesn’t matter here; what matters is that guests can still see each other across the table.
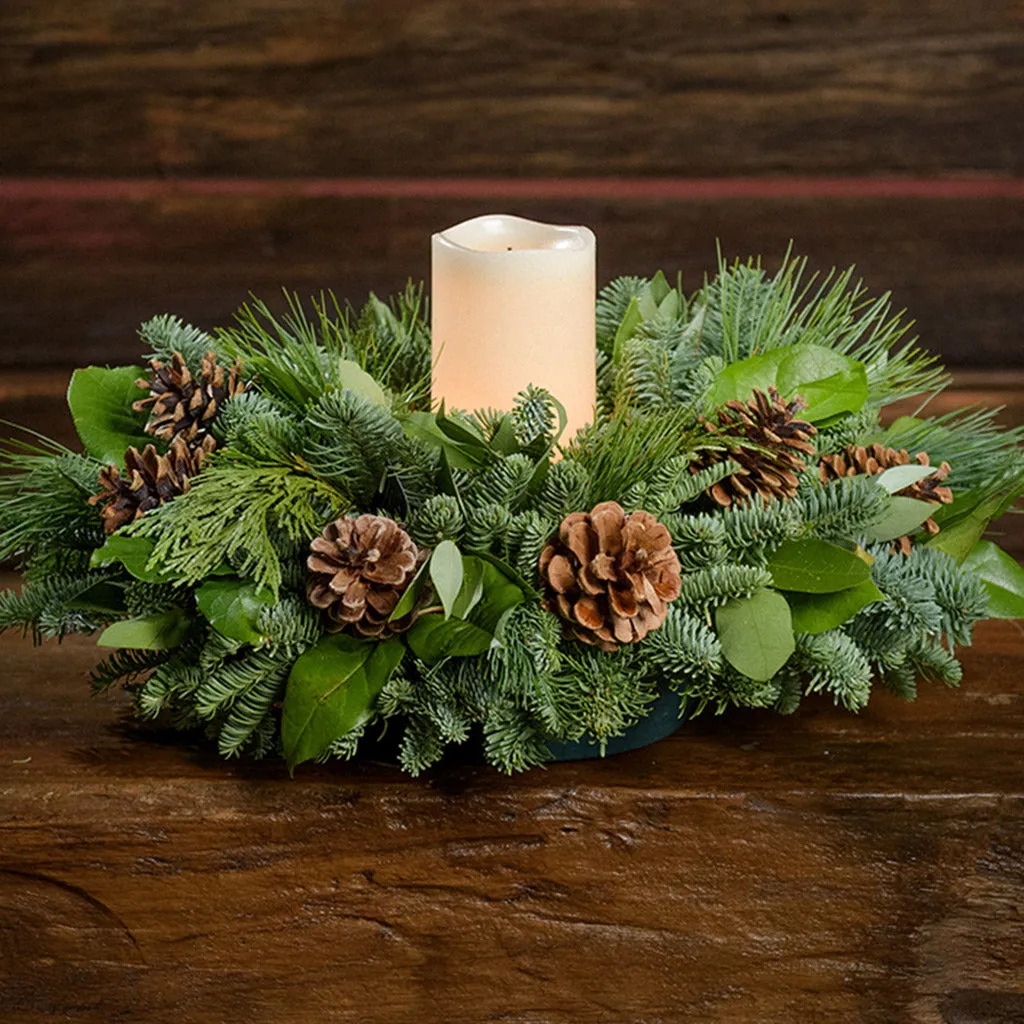
Two principles are doing all the work. The first is contrast of finish — glossy green leaves against rough, matte wood grain, with a soft candle glow bouncing between them. The second is a single focal point: exactly one off-white element in a field of green and brown, so your eye has nowhere else to go. That’s the same reason a white mantel works in a wood-paneled room. One light object, everything else quiet.
11. Little Clay Figurines That Make Guests Ask Where You Found Them
Hand-painted clay ornaments and figurines are genuinely special, and they’re also fragile in ways plastic never is. Glazed clay chips at the edges if it knocks against a shelf, and unglazed pieces absorb moisture — a humid kitchen windowsill will eventually dull the paint. Never submerge them in water; dust with a dry, soft brush instead. If you have toddlers or a cat with a tail-height agenda, put them on a high shelf or inside a glass cabinet. They’ll survive decades that way, and probably not one December on a low coffee table.
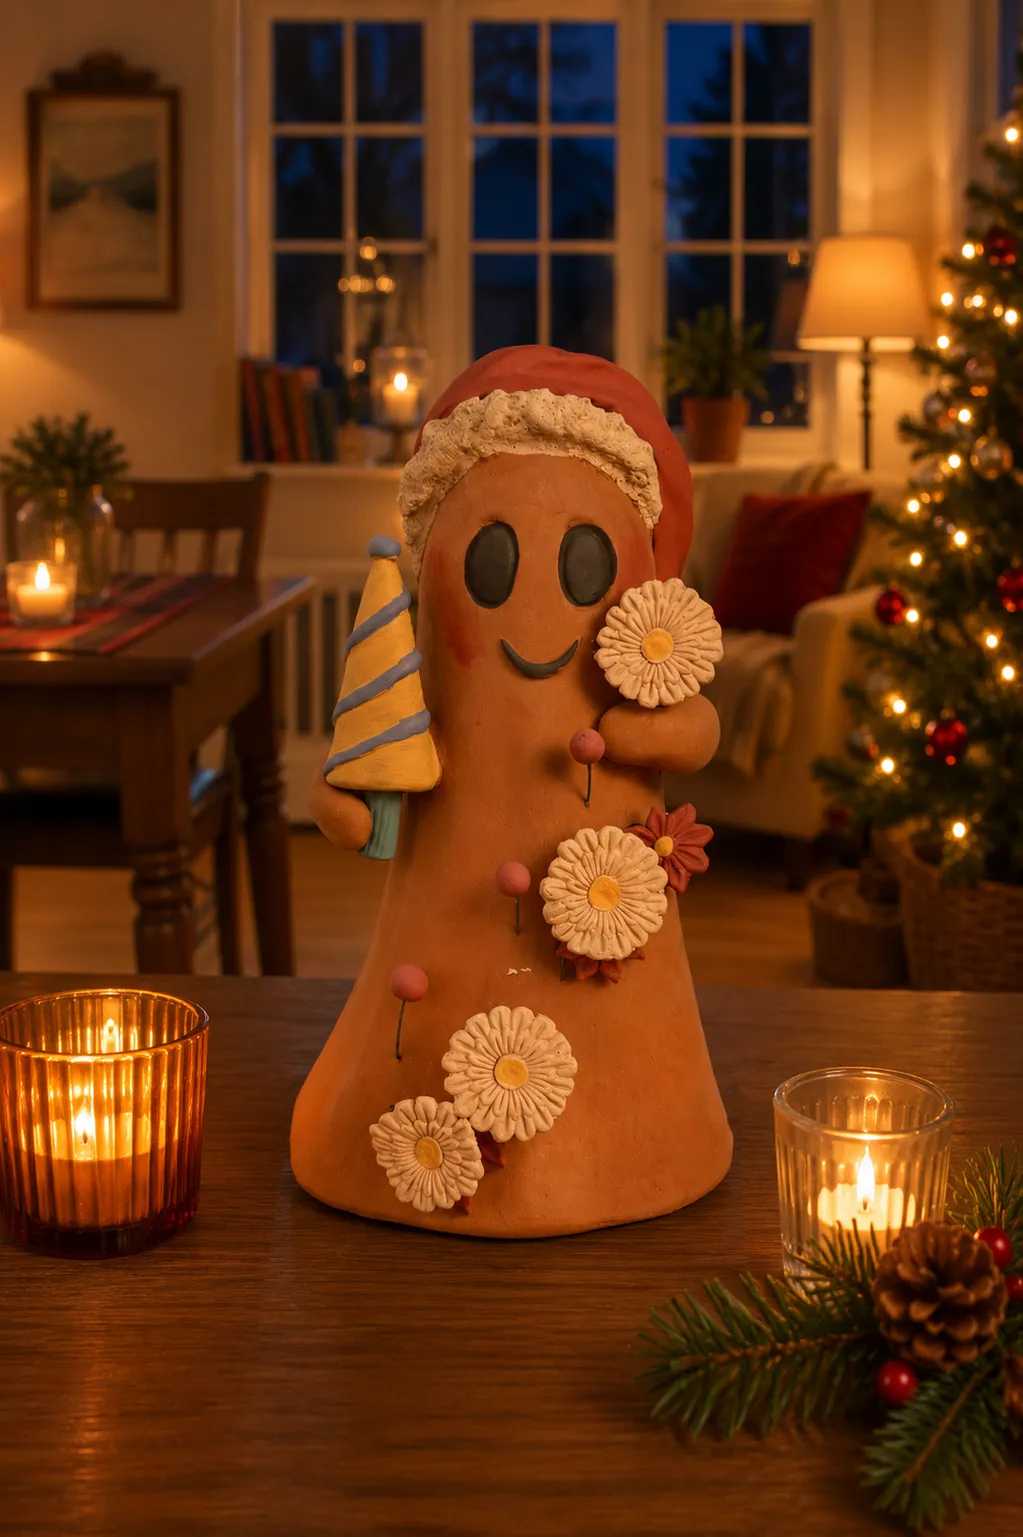
- Measure the shelf or mantel depth — most figurines need 4 inches of clearance front to back.
- Check the finish: matte clay scratches, glazed clay chips.
- Pick a stable surface away from doorways and tail height.
- Confirm the colors work with your existing palette before committing to a set.
- Set a budget ceiling — handmade pieces run $15–$60 each, so two or three is a collection.
12. A Black Sphere Vase With Cherry Blossoms on a Woven Tray
The designer version of this tray uses real branches in a ceramic vessel that starts around $80. You can get the silhouette for about $35. Target and Walmart both carry textured black sphere vases under $20, and a faux cherry blossom bundle runs $8–$12 at Michaels with a coupon. The woven tray is the sleeper find — thrift stores and HomeGoods run $10–$25, and IKEA’s rattan trays start near $15. Pinecones are free, and a cream pillar candle is $4 at any grocery store.
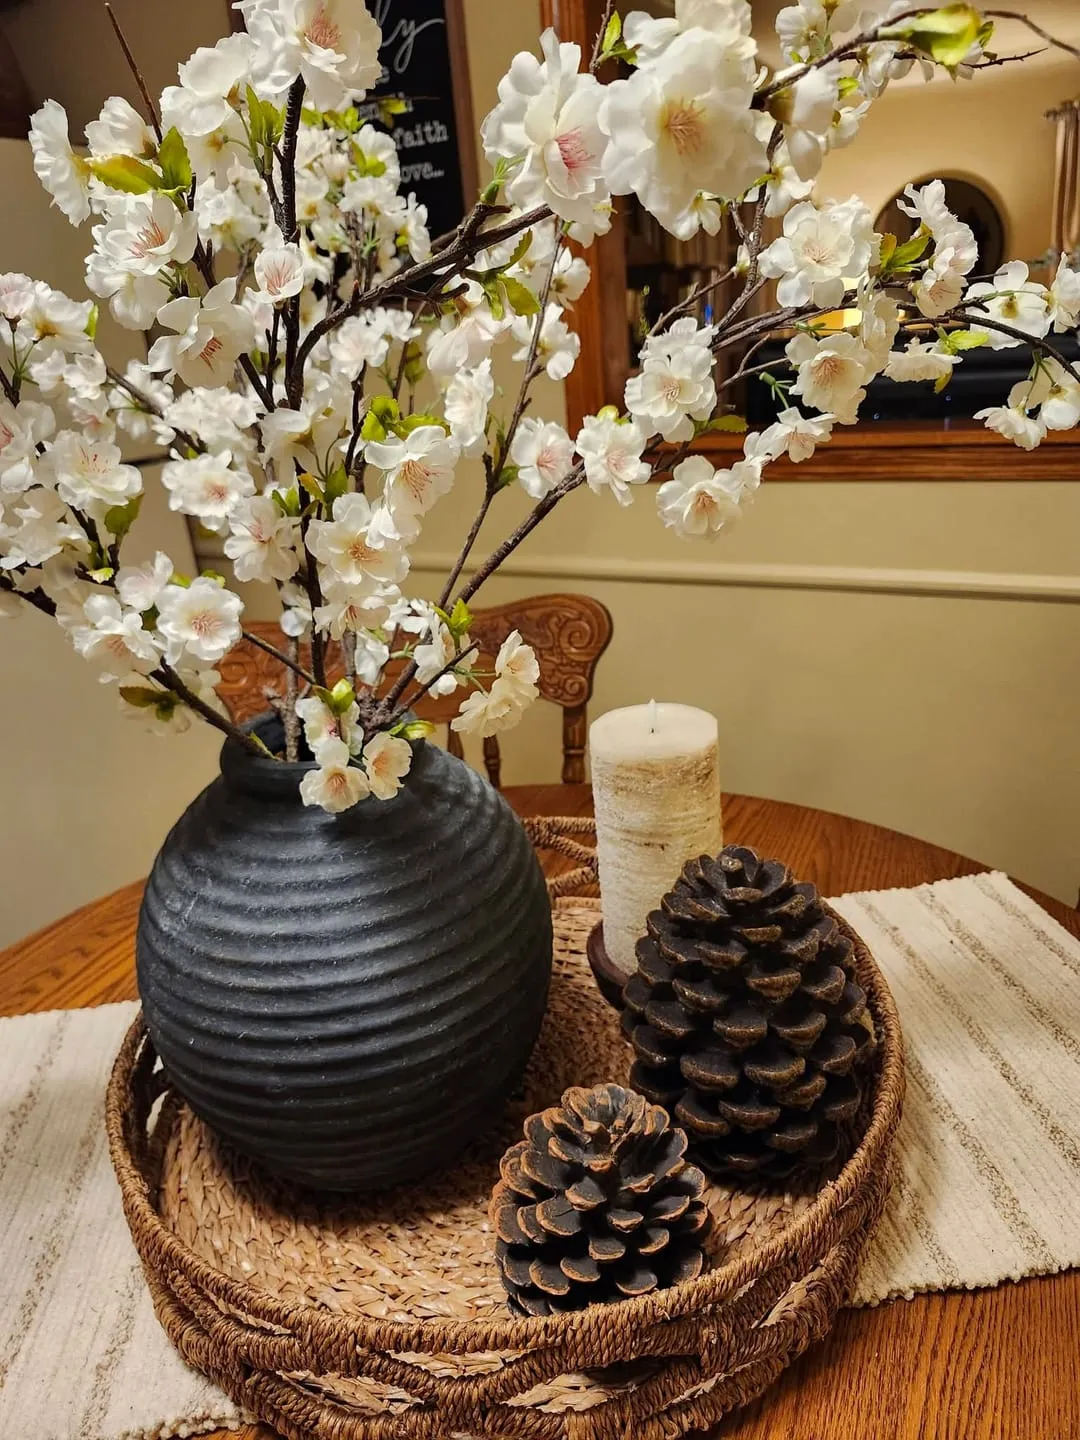
A tray centerpiece is the easiest thing to build in a rental because nothing has to be permanent.
- Set the tray first and mark its footprint with painter’s tape so you don’t crowd it.
- Place the tallest element — the vase with branches — slightly off center, never dead middle.
- Add two pinecones at the base, angled so they read as one cluster.
- Slot the pillar candle to one side, not directly in front of the vase.
- Step back three feet and remove anything that doesn’t earn its spot.
Time: 15 minutes. Compare with Idea #10, which uses the same focal-point rule without the tray.
13. A Pinecone-Shaped Candle Nestled in a Wicker Basket
- Wicker basket with handles: $12–$32
- Pinecone-shaped pillar candle: $18–$38
- Fresh pine needle bunches (3–4): $0–$10
- Plastic liner or foil to protect the basket: $2–$5
- Extra pinecones for filler: $0–$8
Total: $32–$93
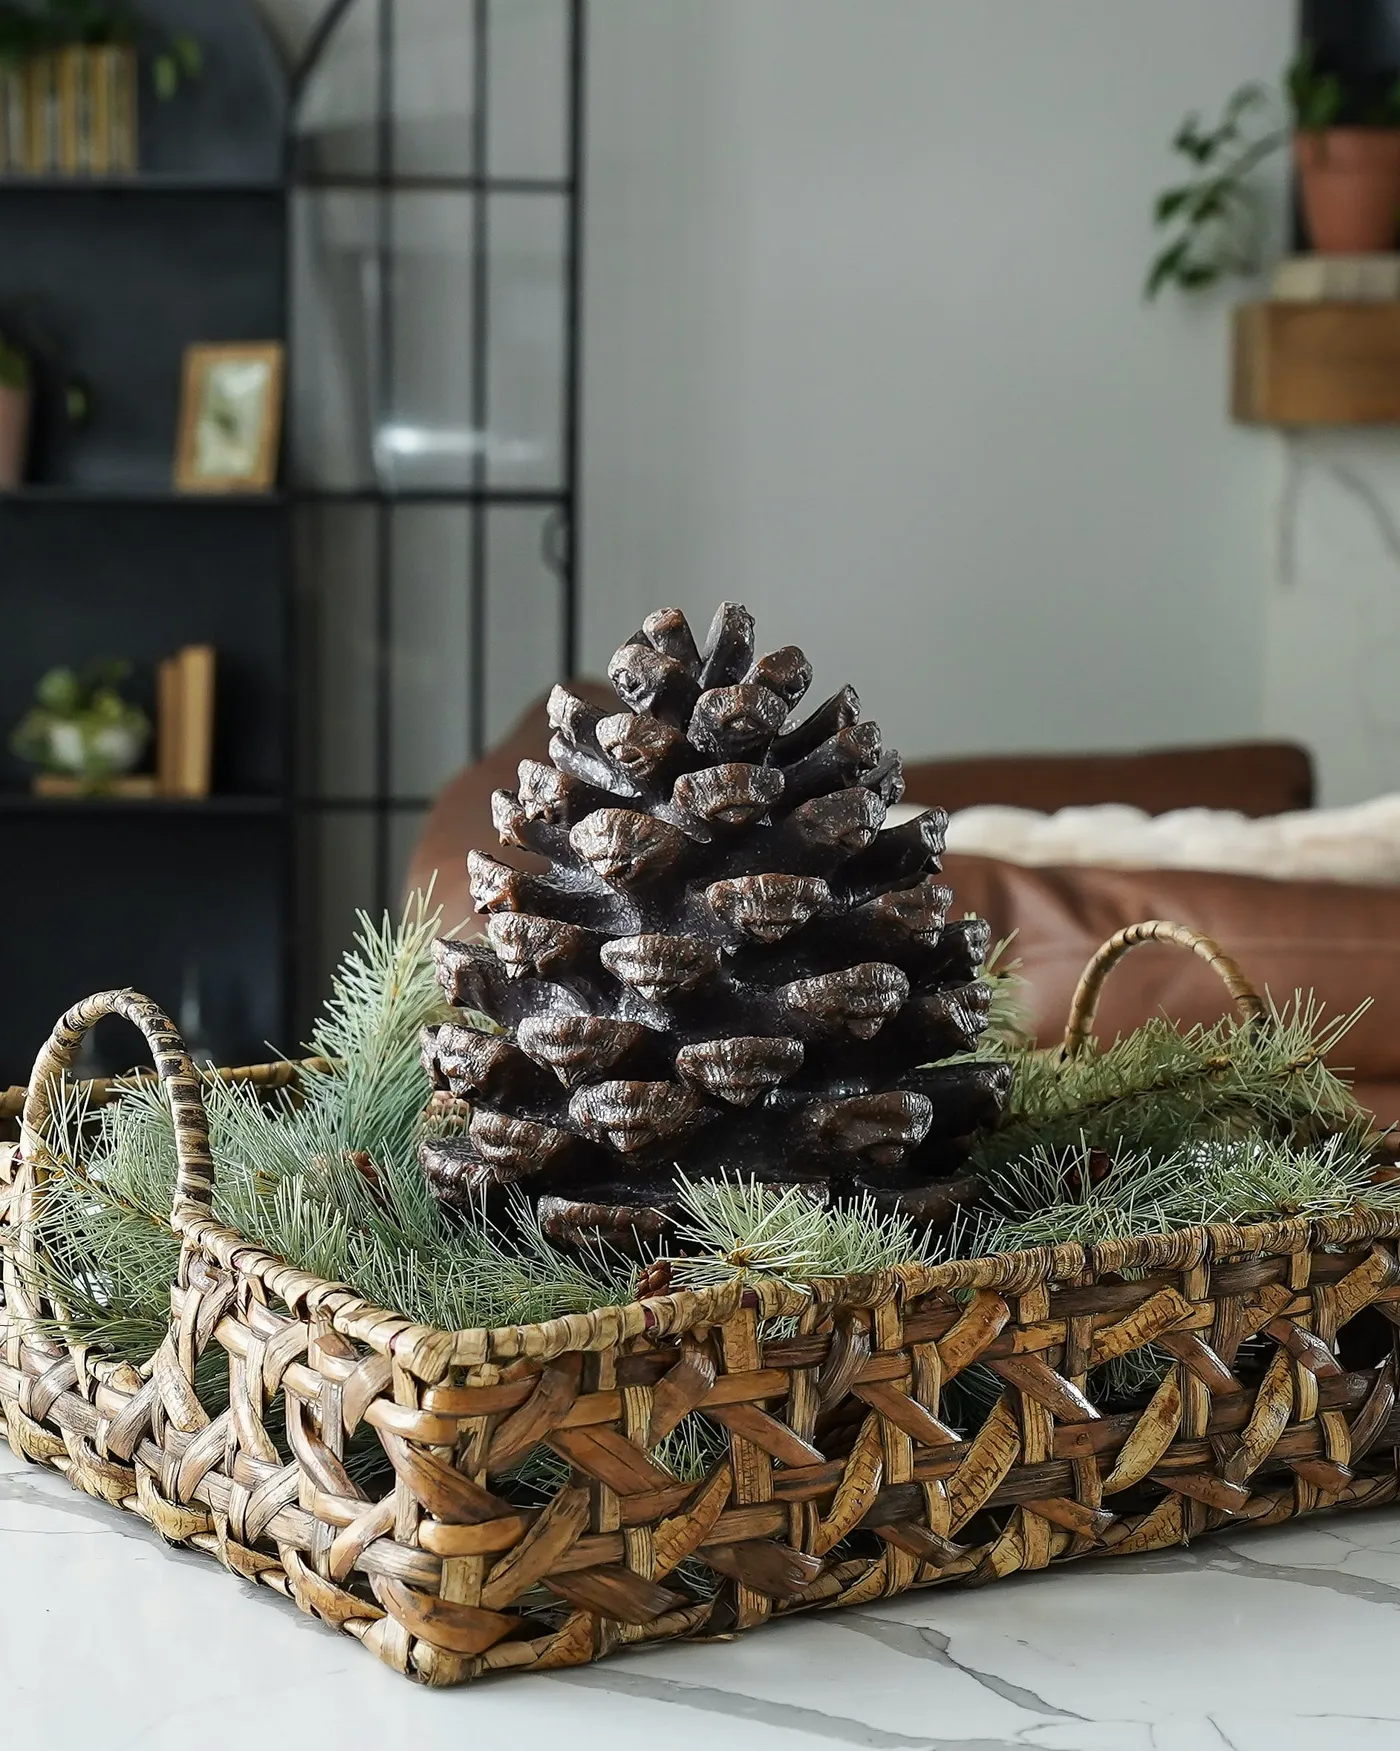
Budget alternative: dollar-store baskets run $5, and a plain cream pillar wrapped in pinecone-textured beeswax sheets gets you 90 percent of the look for under $20. Clip a few branches from a friend’s tree — most people are delighted to have them trimmed.
Fresh pine needles are gorgeous for about ten days, then they start dropping and turning brittle. Mist them every other day and keep the basket away from heat vents. More importantly: never light a candle sitting in a bed of dry needles. If you want to burn it, set the candle on a glass or metal plate raised above the greenery, or swap to faux needles once the fresh ones dry. Faux cedar looks nearly identical from three feet away and doesn’t shed.
14. Dried Strawflowers and Eucalyptus in a Rustic Study
Dried botanicals have been creeping into holiday decor for a few years, and 2026 is the year they went fully mainstream. The shift is part practical — dried arrangements last for years, cost less than fresh flowers, and never need water — and part aesthetic. People are tired of glitter. Strawflowers, eucalyptus, and dried grasses give you a holiday arrangement that still looks good in January, which is not something you can say about a poinsettia.
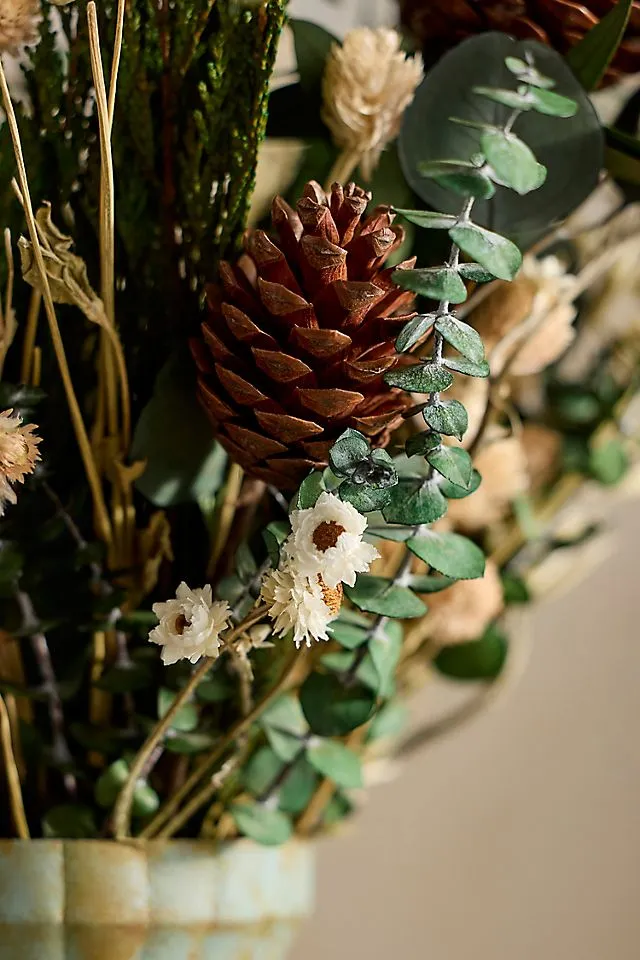
The vertical dried grass stems are the element that makes this read as designed rather than gathered. Without them you have a pleasant cluster of pinecones and greenery. With them, the arrangement has a silhouette — tall, narrow lines that pull the eye up and give it somewhere to rest above the dense brown mass below. Every dried arrangement needs one element that breaks the round shape. Grasses, seed pods, or bare twigs all do the job.
15. A Woodland Wreath Built From Twigs, Moss, and Seed Pods
Wreath sizing is the mistake almost everyone makes. A wreath should be roughly half the width of your door — a standard 36-inch door wants a 16- to 20-inch wreath, not the 12-inch one on sale. Hang it so the center sits at eye level when you’re standing on the porch, which usually means the top of the wreath lands 6 to 8 inches below the top of the door. For a heavier natural wreath, use two hooks 12 inches apart and a loop of floral wire so it can’t sag to one side.

The formula for a woodland wreath is roughly 60 percent twig base, 25 percent moss and green filler, and 15 percent hard elements — pinecones, seed pods, dried pods. That last group is what gives the wreath its crunch and keeps it from looking like a pile of moss. Swap the pinecones for cinnamon sticks and dried orange slices and you have a kitchen version. Swap them for white frosted pinecones and it turns formal. The split stays the same.
16. A Bare Branch Strung With Minimal Ornaments
A hanging branch display is the answer for narrow walls where a wreath looks cramped. Aim for a branch 24 to 36 inches long, centered on the wall, with the bottom of the longest ornament at least 30 inches above the floor if people walk past it. This works in entryways as narrow as 36 inches. On a wall over 6 feet wide, a single branch will look lonely — go with two at staggered heights instead.
Hanging a branch is easier than it looks, and it costs almost nothing if you have a tree nearby.
- Find a straight branch with a few small side twigs, 24–36 inches long.
- Sand lightly and wipe with a damp cloth; leave the bark on.
- Screw two small cup hooks into the branch, 10 inches in from each end.
- Hang with clear fishing line from two picture hooks rated for at least 5 pounds.
- Level it with a spirit level, then hang 3 to 5 ornaments per foot, spacing them unevenly.
Time: 30 minutes. Cost: under $10.
17. A Pinecone Reindeer With Pipe Cleaner Antlers
The acorn cap head is what turns a pinecone and some pipe cleaners into a reindeer. Set a small pinecone or a walnut in its place and you get a lumpy animal nobody recognizes. The cap gives it a face, a scale, and a little natural texture that matches the body underneath. If you’re making a batch of these with kids, hoard the acorn caps — they’re the one part you can’t substitute.

Two things to know before you start gluing. Pipe cleaner legs are wobbly, so anchor each one with a dab of hot glue at the joint and set the finished figure on a small felt or cork base — otherwise the whole herd tips over every time someone breathes near the mantel. And if there are kids under three in the house, treat these as supervised-only decor: acorn caps and small pipe cleaner pieces are choking hazards, and nobody wants that memory attached to a holiday craft.
18. A Wooden Box Overflowing With Cedar and Red Berries
- Measure your table first — a low box looks best at about one-third the table’s width.
- Line the inside with plastic sheeting or foil before anything goes in.
- Decide between wet floral foam (fresh greens) and dry foam (faux) — they are not interchangeable.
- Confirm the box has a liner or drainage if you’re using fresh branches.
- Set your red berry count before you start: 6 to 10 sprigs, no more.

Build this in layers, not handfuls. Push the longest cedar and pine branches into the foam first, angled outward and slightly down so they drape over the box edge. Then add medium evergreen sprigs to fill the middle, and only after that tuck in pinecones, berries, and small metallic ornaments in clusters of three. Space the pinecones 4 to 6 inches apart — evenly scattered pinecones look manufactured, clustered ones look gathered.
19. Wood Slice Chargers and a Pinecone Table Runner
The ratio on this table runs about 50 percent greenery, 30 percent pinecones and natural wood, 15 percent tableware like white plates and wood slice chargers, and 5 percent red plaid ribbon. That tiny ribbon percentage is the entire holiday signal — pull it and you have a fall table. Want a cooler palette? Swap the red plaid for black-and-white gingham and the pinecones for silver-dipped ones. The structure holds either way.
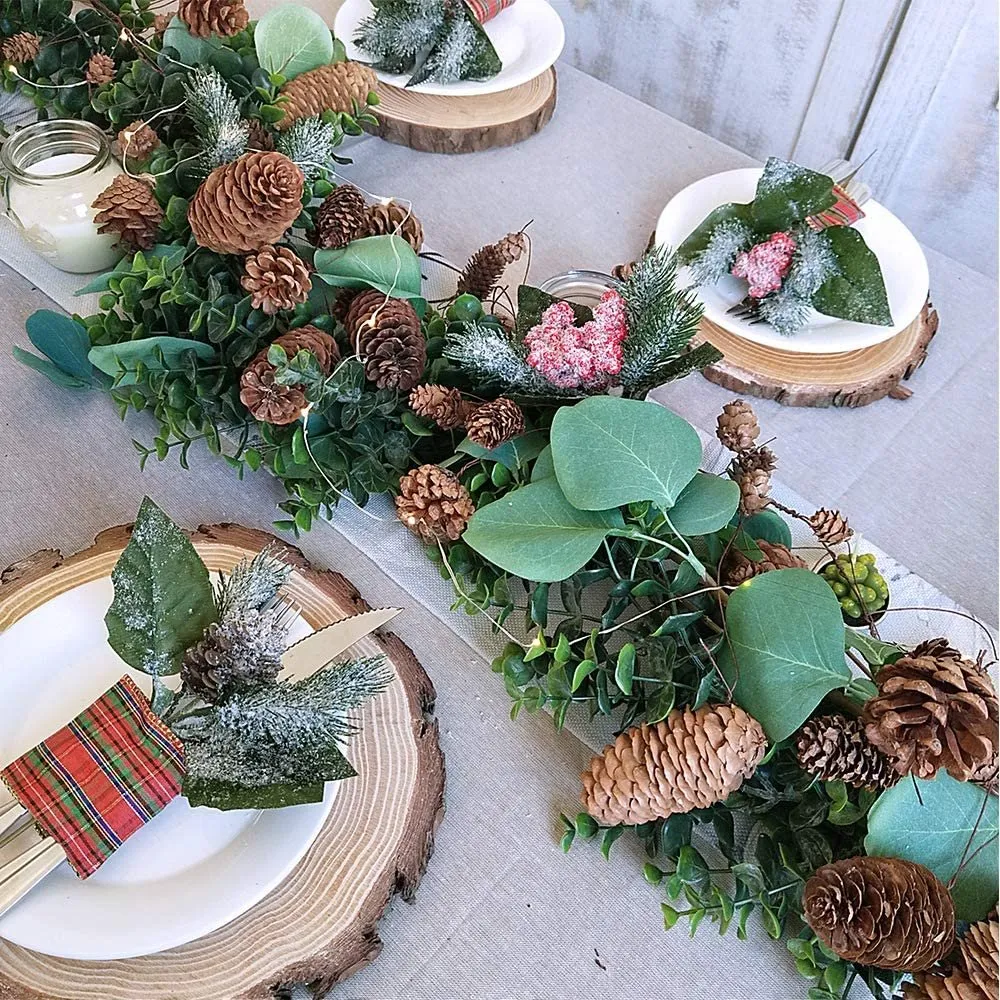
Repetition is the trick. Pinecones appear in the runner, along the charger edges, and in the frosted sprigs on each napkin. That’s three separate placements of the same element, which is what makes a table feel cohesive instead of merely decorated. The wood slice chargers also solve a real problem: they add warmth and texture under a plain white plate, stopping a simple setting from looking like a hotel banquet. Compare with Idea #13 — same natural palette, very different scale.
20. Faux Cedar in a Textured White Vase, Flanked by Pillar Candles
Candle height is where most holiday tables go wrong. Use an odd number — three or five — and vary the heights by 2 to 4 inches so the eye travels in a zigzag. Keep every flame below eye level when guests are seated, which means tapers top out around 12 inches above the table. And put the candles in glass cylinders like these; they block drafts, catch drips, and make inexpensive candles look considerably more expensive than they are.
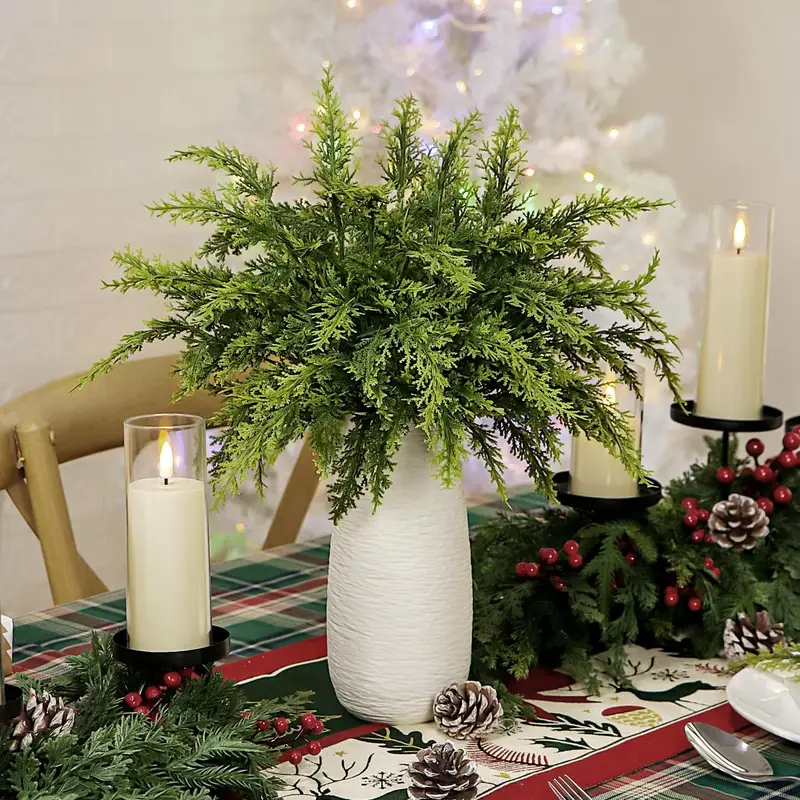
For a 60-inch round table, the entire centerpiece footprint should stay within 24 to 30 inches so nobody has to move a vase to reach the salt. This arrangement — one textured vase flanked by two candle holders — fits comfortably on tables from 48 to 72 inches long. If your table seats eight or more, duplicate the setup at each end rather than stretching one arrangement thin. In a small dining nook under 40 inches wide, drop to a single small vase and two short pillars.
Deck the Halls With Whatever You’ve Got in the Garage
None of these twenty ideas require a craft room, a Cricut, or a single trip to a specialty store — most of them start with a branch, a coffee filter, or a bowl you already own. Pick one, give it an afternoon, and let it be imperfect. 📌 Pin this guide now so it’s waiting for you when December sneaks up again.
