If your yarn collection has been slowly taking over every available surface, you’re in the right place. That feeling of wanting a beautiful, inspiring craft space but not knowing where to start is all too common. We’ve seen those perfect setups on Pinterest, and the good news is, they’re more achievable than you think.
After filtering through hundreds of options across IKEA, Target, and The Container Store, we narrowed it down to the 32 best ideas that genuinely work for real homes and real yarn habits. Forget generic advice; this is a curated lookbook of what’s practical and beautiful right now.
Inside, you’ll find 32 distinct ways to get your stash in order, covering rustic, modern, and minimalist styles. For 2026, it’s all about “visible storage”—treating your yarn not as clutter to be hidden, but as a colorful art supply to be celebrated. This trend is about making your creative materials part of your home’s decor.
And stay until the end — we break down the most common mistakes that can ruin these looks. 📌 Save this to Pinterest for later — you’ll want to revisit these ideas.
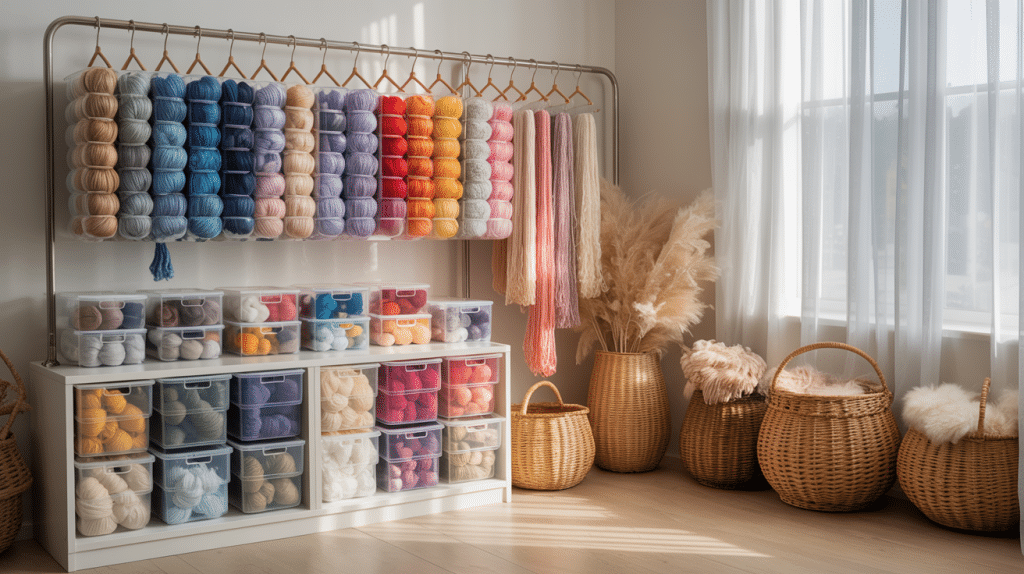
1. Organize a Spectrum of Yarn with Clear Bins and Woven Baskets
This setup is so successful because it masters the art of mixing storage types. It combines the practical visibility of clear hanging organizers and plastic bins with the decorative warmth of woven rattan baskets. You get the best of both worlds: instant color recognition for your most-used yarn on the shelves and rack, while the baskets conceal less-used items or works-in-progress, reducing visual clutter. The contrast between the industrial metal rack and the natural fiber baskets creates a dynamic, modern look that feels both organized and inviting.
⭐ The One Thing
Recreating this look involves a mix of shelving and containers, which can be scaled to your budget.
- Metal Clothing Rack: $50 – $120
- White Shelving Unit: $80 – $250
- Clear Hanging Organizers: $20 – $40
- Large Clear Bins (set of 4): $40 – $80
- Woven Rattan Baskets (each): $30 – $70
- TOTAL: $220 – $560
- Budget alternative: Use a secondhand garment rack and cube storage from Facebook Marketplace, with budget-friendly bins from Target or IKEA to get a similar vibe for around $100 – $180.
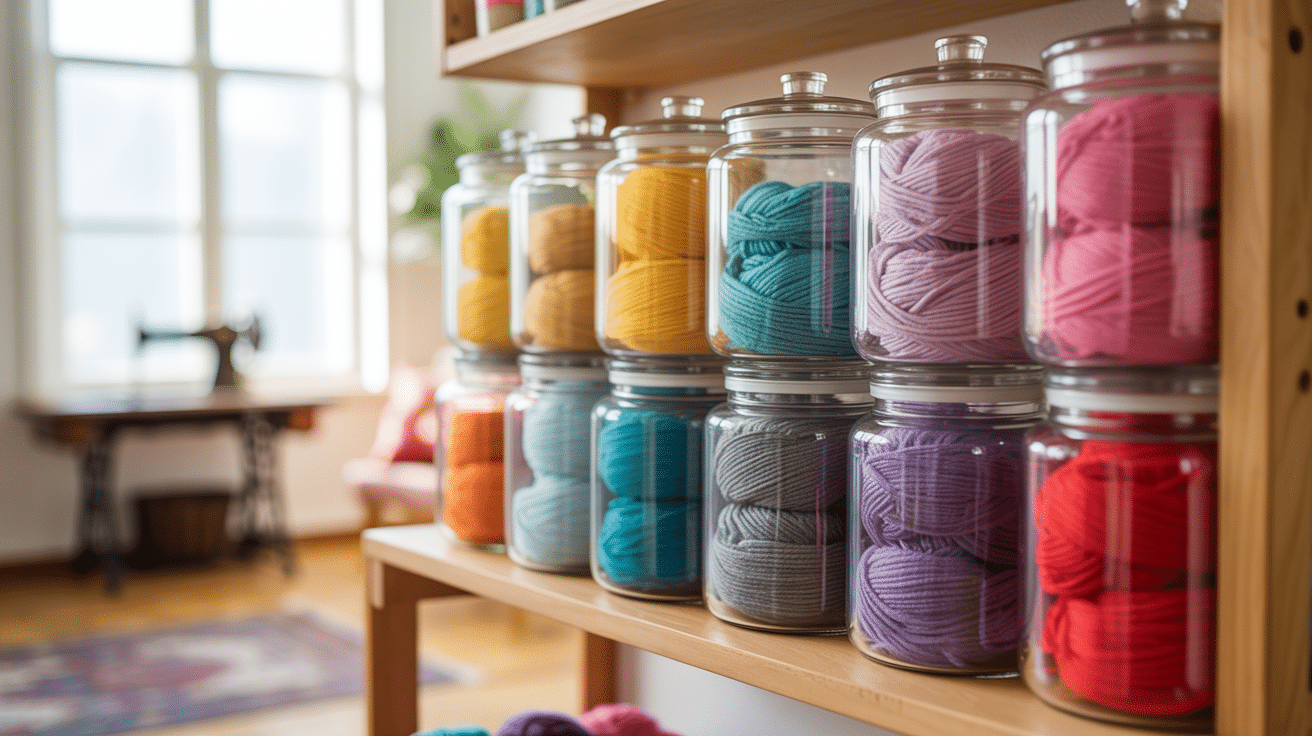
2. Display Vibrant Yarn in Clear Glass Jars on Wood Shelves
Let’s have some real talk about this gorgeous display. While it’s stunningly beautiful for a photo, using lidded glass jars for your main yarn supply isn’t the most practical solution for an active crafter. Glass is heavy, can be expensive, and is obviously fragile. This method is best suited for showcasing your most special, high-end yarn—the kind you admire more than you use. For your everyday acrylics and workhorse wools that you need to access constantly, this could quickly become a frustrating system of unscrewing and restacking heavy jars.
✅ Before You Start
To make a jar display look truly intentional, the key is disciplined color grouping. Dedicate each jar to a specific color family. For example, one jar for all your blues and teals, another for warm oranges and yellows. Arrange the yarn balls inside to show off their unique shapes and textures—don’t just stuff them in. This little bit of styling effort is what separates a curated display from a simple container of yarn. It transforms it from mere storage into a piece of decor.
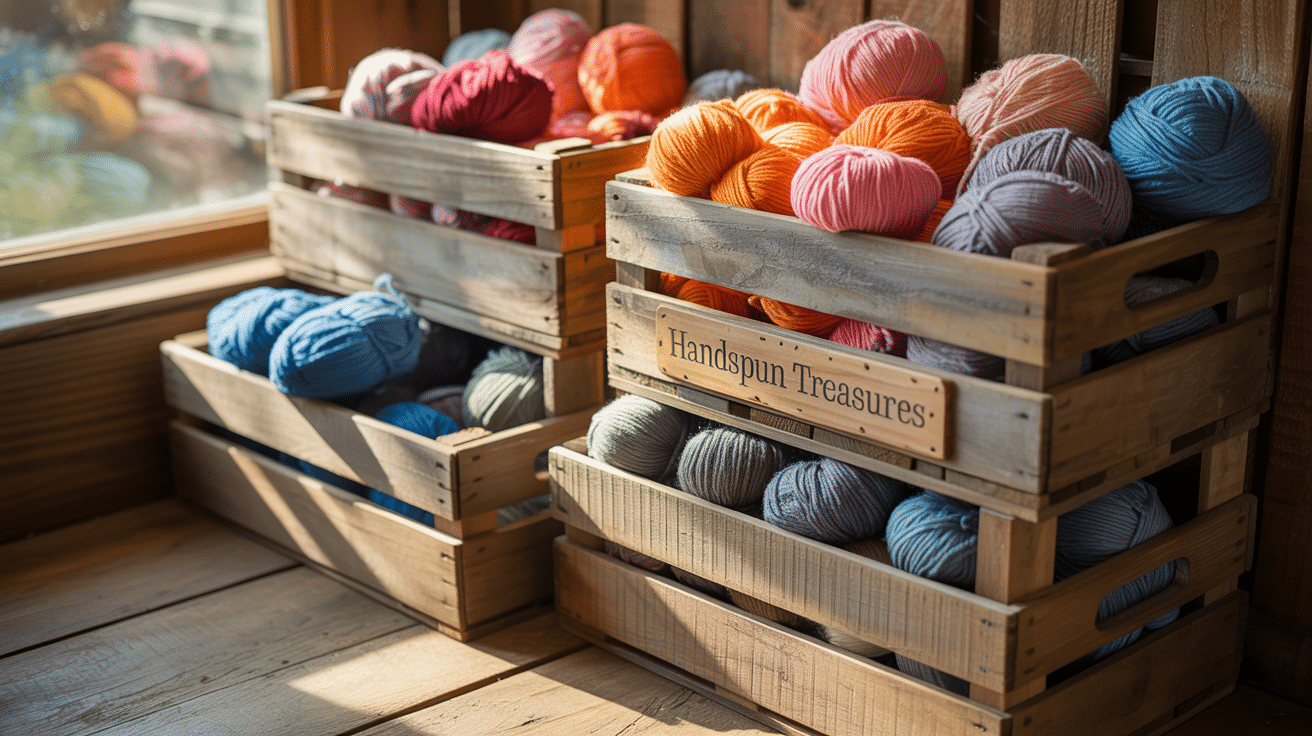
3. Create a Rustic Vibe with Stacked Wooden Crates Near a Window
The single element that makes this idea feel special is the small wooden plaque reading ‘Handspun Treasures.’ Without it, you just have yarn in boxes. With it, the entire display is infused with personality and story. It transforms generic storage into a curated collection, suggesting that the contents are not just materials but cherished, unique creations. This tiny detail shifts the mood from purely functional to deeply personal and proud. It’s a powerful reminder that the smallest touches often have the biggest impact on how a space feels.
🧹 Maintenance Reality
You don’t need to hunt for expensive vintage crates to achieve this cozy, rustic aesthetic. Unfinished pine crates from craft stores like Michaels or even Walmart are a fantastic starting point and usually cost between $10 and $20. You can leave them raw for a natural look, apply a dark stain for a more traditional feel, or give them a quick coat of chalk paint. For an even more budget-friendly option, keep an eye on Facebook Marketplace for used apple or wine crates that come with authentic, built-in character.
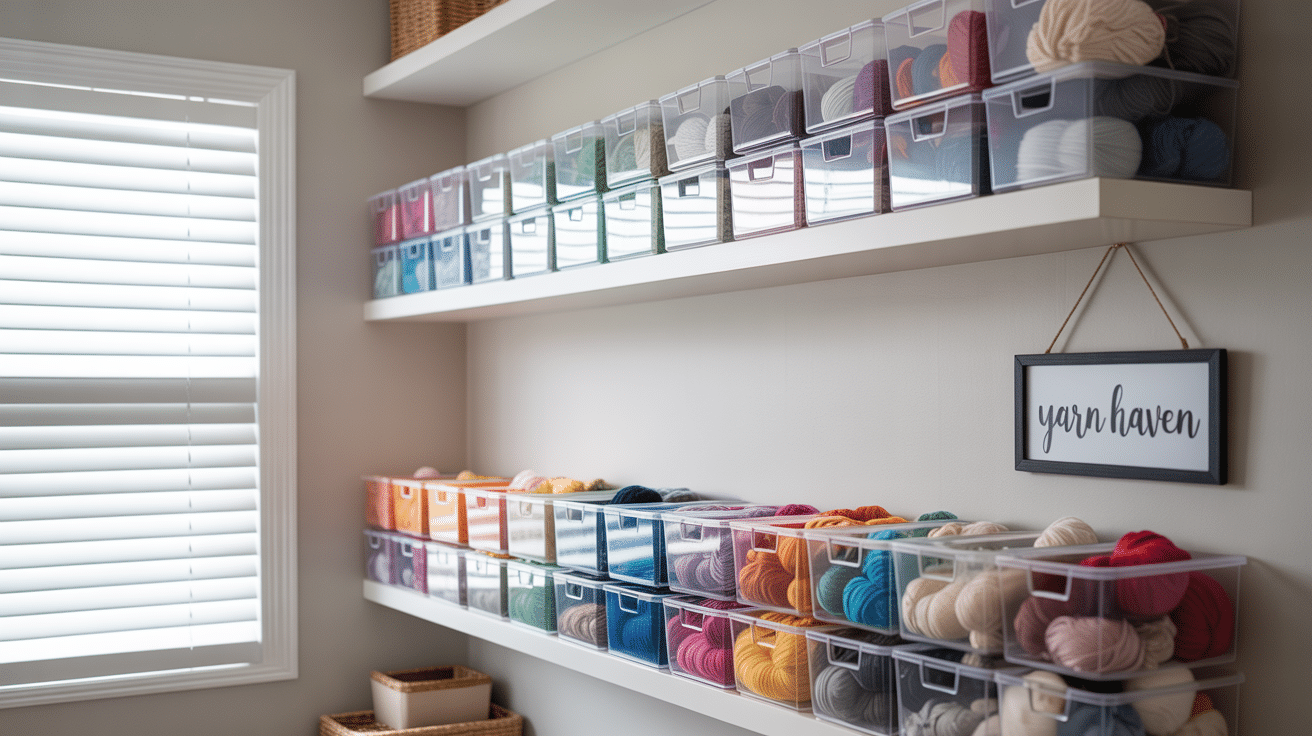
4. Achieve a Clean Look with Floating Shelves and Clear Bins
This is a brilliant solution for smaller rooms or for carving out a craft corner in a multi-use space. It works best on a dedicated wall that is at least 4 feet wide to allow the shelves to breathe. For a standard 8-foot ceiling, start the lowest shelf about 40-48 inches off the floor, then space the shelves 16-18 inches apart vertically. This provides ample vertical clearance for the clear bins without making it feel cramped. It preserves valuable floor space, a great alternative to the floor-to-ceiling commitment of Idea #24.
📐 Style Math
This design succeeds by imposing order on visual chaos. The yarn itself is a riot of different colors, textures, and sizes. By containing it all within identical, minimalist clear bins and arranging them on clean, white floating shelves, you create a strong grid-like structure. This uniformity in the storage elements allows the colors of the yarn to be the star of the show without overwhelming the space. The neutral greige wall is the perfect quiet backdrop, letting the vibrant yarn pop like little works of art.
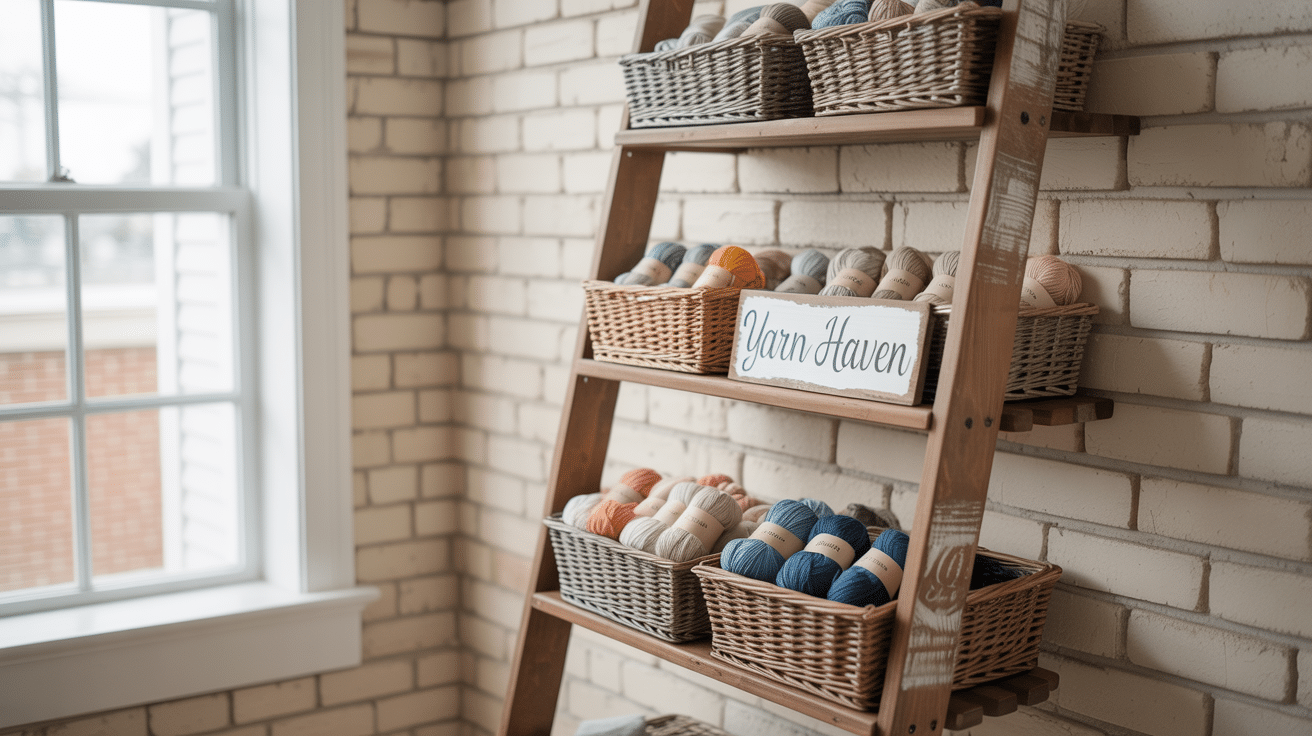
5. Style a Rustic Ladder Shelf with Woven Yarn Baskets
The ladder shelf continues to be a darling of the ‘Modern Farmhouse’ and ‘Rustic Chic’ aesthetics you see all over Pinterest. Its popularity comes from its ability to provide vertical storage without the visual weight of a traditional bookcase. It feels airy and casual. For crafters, it’s a way to integrate their hobby into their home’s decor seamlessly. Displaying yarn in natural woven baskets on a wooden ladder feels more like styling a living room and less like organizing a messy craft closet, which is a huge part of its appeal in 2026.
💡 Designer Tip
While undeniably stylish, leaning ladder shelves are not the most stable pieces of furniture. It is absolutely crucial to anchor the top of the shelf securely to the wall, especially if you have children or pets. A simple ‘anti-tip kit’ is inexpensive and easy to install. Also, be smart about weight distribution: always place the heaviest baskets filled with the most yarn on the bottom two shelves. This lowers the center of gravity and makes the entire unit significantly more stable and safe.
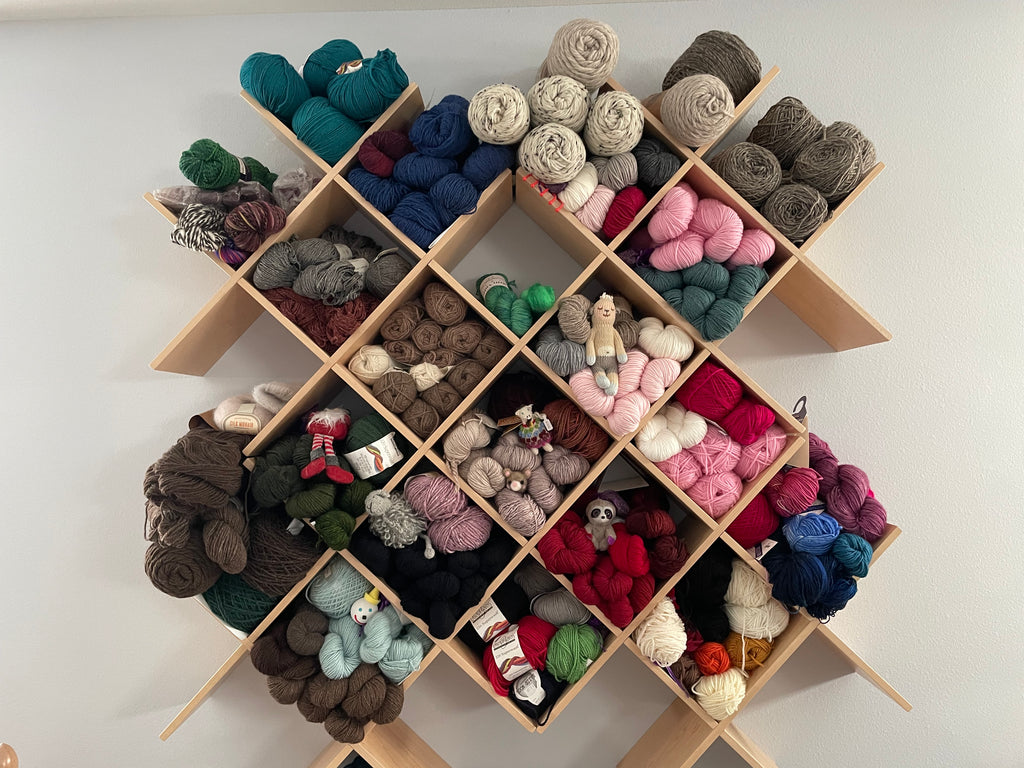
6. Go Geometric with a Diamond-Cubbied Yarn Organizer
It’s the sheer, unapologetic abundance that makes this a showstopper. This isn’t just a shelf; it’s a floor-to-ceiling fiber art installation. The organizer is packed so full that yarn is practically bursting from the cubbies. This sense of overflowing creativity is its defining feature. If this unit were only half-full, it would look incomplete. But by filling every single space, it becomes a powerful statement about passion and prolific making. The little stuffed figures tucked in add a layer of whimsy and personality that makes it feel truly unique.
💰 Budget Breakdown
When filling a large, geometric unit like this, resist the urge to organize strictly by color. To create a more sophisticated, dynamic display, think in terms of texture. Intentionally place a cubby of shiny, smooth yarn next to a cubby of rustic, tweedy yarn. Then place that next to a cubby of fluffy, haloed mohair. This contrast in textures will create visual depth and encourage the eye to travel across the entire wall, making the display far more interesting and engaging than simple color blocking alone.
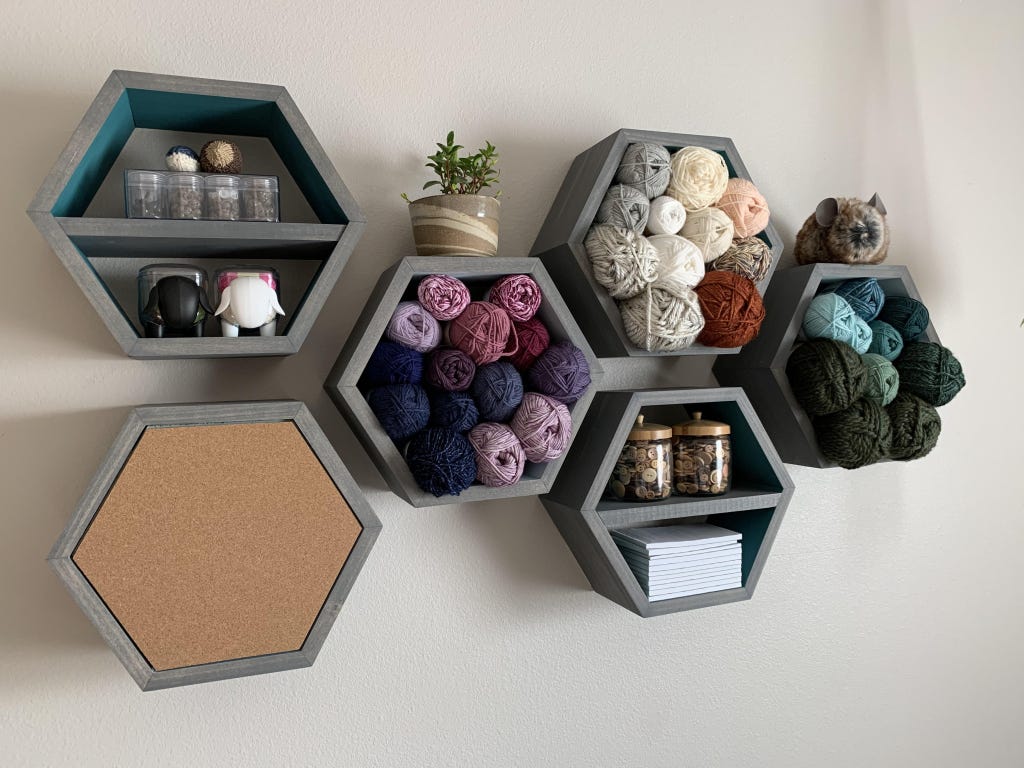
7. Arrange Honeycomb Shelves for Eclectic Craft Storage
The success of this design lies in its delightful lack of uniformity. Unlike a rigid grid, the organic, clustered arrangement of the honeycomb shelves feels playful and creative. The mix of contents—some hexagons holding yarn, others holding jars, plants, or decorative objects—prevents it from looking like a boring storage unit. It’s a curated collection of things that bring joy. The pop of teal inside the grey-stained frames adds a consistent thread of color that ties the whole eclectic arrangement together. Compare this to the more uniform geometric look of Idea #6.
⚠️ Real Talk
This look follows a simple formula for curated eclecticism: 50% Fiber + 30% Functional Items + 20% Decor. Half the shelves are dedicated to your primary passion: yarn. The next third holds other useful craft items like tools in jars or a corkboard for swatches. The final fifth is reserved for purely decorative pieces—a small plant, a favorite figurine. This ratio ensures the display feels personal and multi-dimensional, not just like a wall of wool.
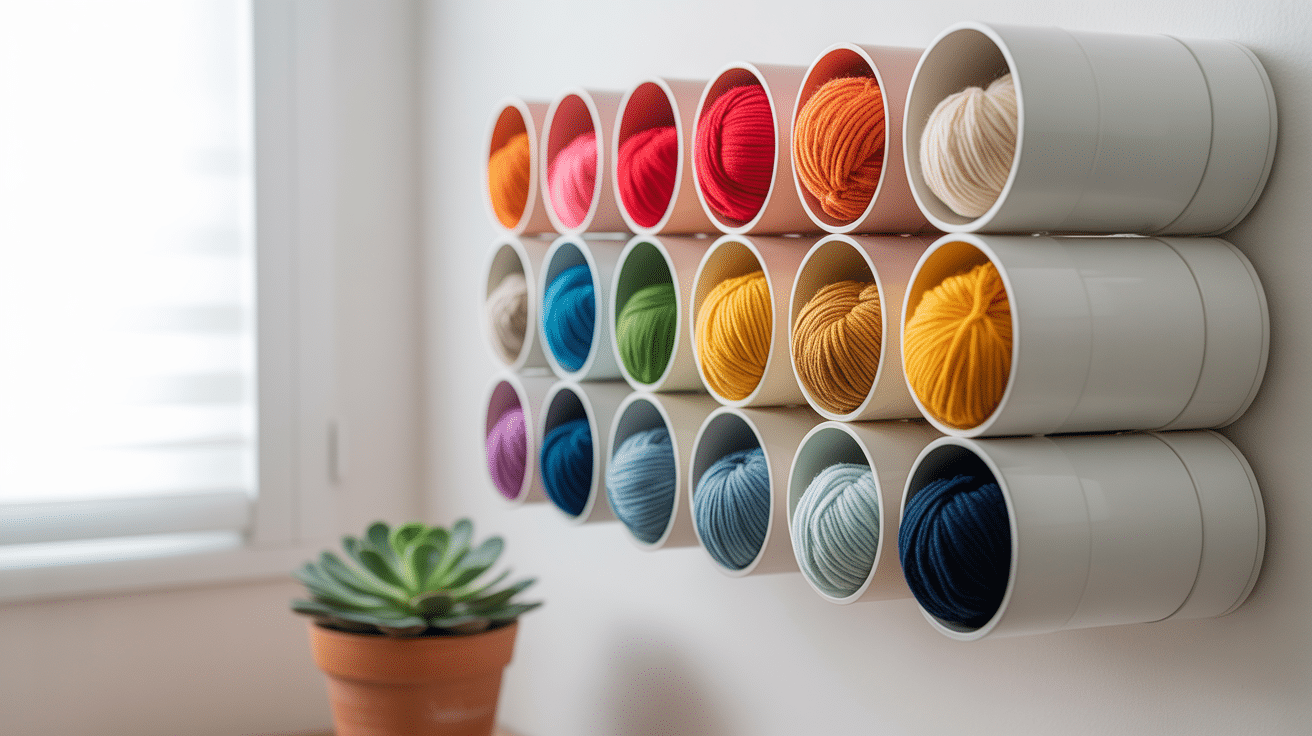
8. Use Wall-Mounted Cylindrical Tubes for a Clean Yarn Display
A system of open tubes like this is a dust magnet. Since each skein is exposed, you’ll need to commit to regular cleaning to keep your yarn fresh, especially for lighter colors. A can of compressed air or the brush attachment on your vacuum cleaner will be your best friend. Plan to give the whole unit a quick dusting every 1-2 weeks. For long-term storage of valuable fibers, this open-air system is risky due to potential fading and dust accumulation. It’s best for yarns you plan to use in the near future.
🎯 What Makes It Work
This type of linear, wall-mounted storage is incredibly versatile and works well in narrow spaces where a bulky shelving unit wouldn’t fit. You could install these tubes along a hallway, above a desk, or in a small studio apartment. A single row of 10 tubes would be about 4-5 feet long. To make a real statement, plan for a grid of at least 3 rows of 10. Just ensure the wall you’re mounting to can handle the weight—use drywall anchors for every single tube mount.
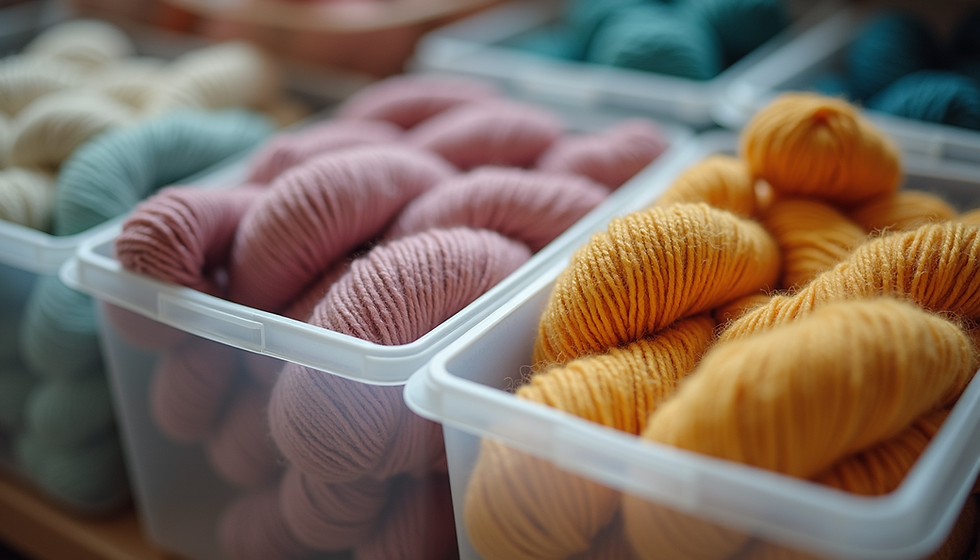
9. Soften Your Storage with Clear Bins and Warm Hues
This image demonstrates how powerful a cohesive color story can be. While the yarns are different shades—creamy white, dusty rose, golden yellow—they all share a warm, soft undertone. This limited palette creates a serene and inviting mood that feels curated and calm, not chaotic. The clear bins allow the colors to blend visually, and the soft-focus lighting enhances the feeling of warmth and texture. This is less about storing yarn and more about creating a mood with color.
💸 Get This Look For Less
that makes this feel so gentle and inviting is the lighting. The soft, warm light diffuses through the clear plastic bins, making the yarn itself appear to glow from within. It highlights the fuzzy textures and rich colors in a dreamy, appealing way. If this were lit with harsh, cool fluorescent light, the effect would be completely different—it would look like a sterile stockroom. The lighting is the key ingredient that transforms it from functional storage to an atmospheric scene. See how a cooler palette feels in Idea #13.
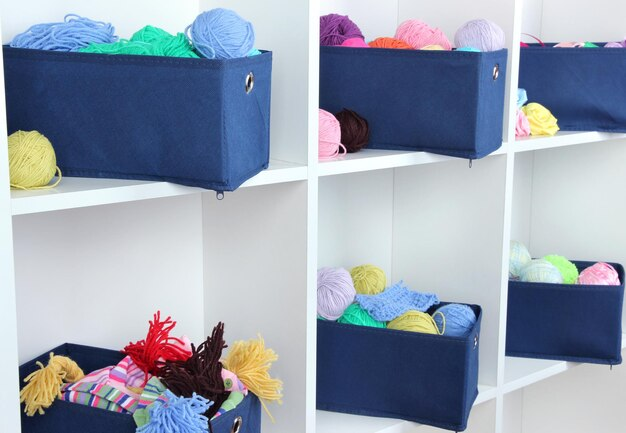
10. Use Navy Fabric Baskets in a White Cubby Shelf for Bold Contrast
Here’s a simple recipe for a crisp and graphic craft corner: 60% clean white structure + 30% deep accent color + 10% multicolored chaos. The white cubby shelf provides a bright, neutral background. The navy blue fabric bins offer a bold, sophisticated block of color that grounds the design. The final 10% is the joyful, messy reality of colorful yarn peeking out from the bins. This formula keeps the overall look feeling tidy and intentional, even when the contents are a little wild.
📏 Scale Guide
When using fabric bins in a cubby system, choose bins that are slightly smaller than the actual cubby dimensions. You want about half an inch of space on either side. This negative space is crucial—it prevents the unit from looking stuffed and clumsy. It creates a cleaner, more tailored appearance and makes pulling the bins in and out much easier. Those little details are what give your storage a polished, high-end look.
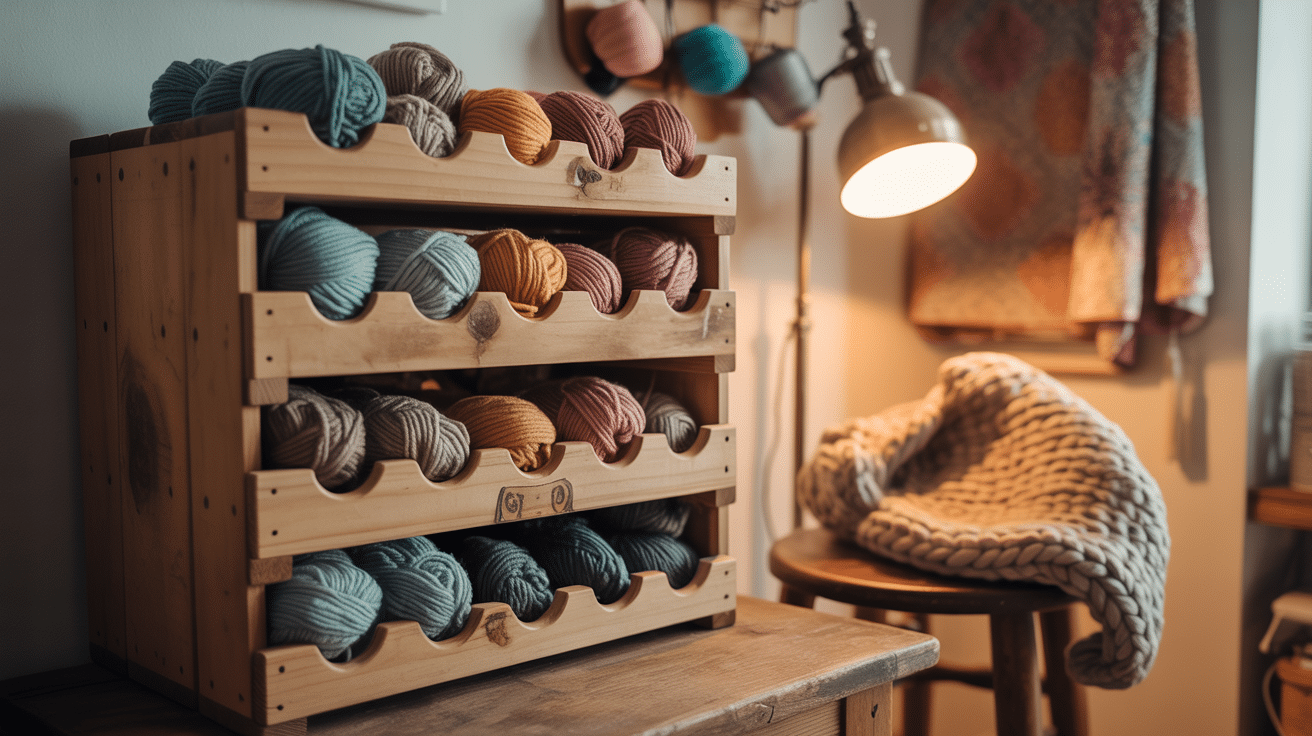
11. Repurpose a Wooden Wine Rack for Cozy Yarn Storage
This idea is brilliant because it’s an unexpected use for a common object. A wine rack is already designed to hold cylindrical objects, making it a perfect, ready-made solution for storing yarn balls. The warm wood tones of the rack, combined with the focused glow of the floor lamp and the chunky knit blanket nearby, create an incredibly cozy and inviting atmosphere. It feels less like a storage solution and more like a feature in a comfortable, lived-in-and-loved room. It says ‘a crafter lives here’ in the warmest possible way.
🔧 How-To Brief
Before you run out and buy a wine rack, take a look at how your yarn is wound. This system works beautifully for yarn wound into tidy, compact balls or cakes. However, it’s not at all suitable for traditional skeins or hanks, which would be floppy, messy, and get tangled. This is a great solution if you own a yarn winder and cake all your yarn upon purchase, but if you prefer to store your yarn in the skein it came in, this method will only lead to frustration and a tangled mess.
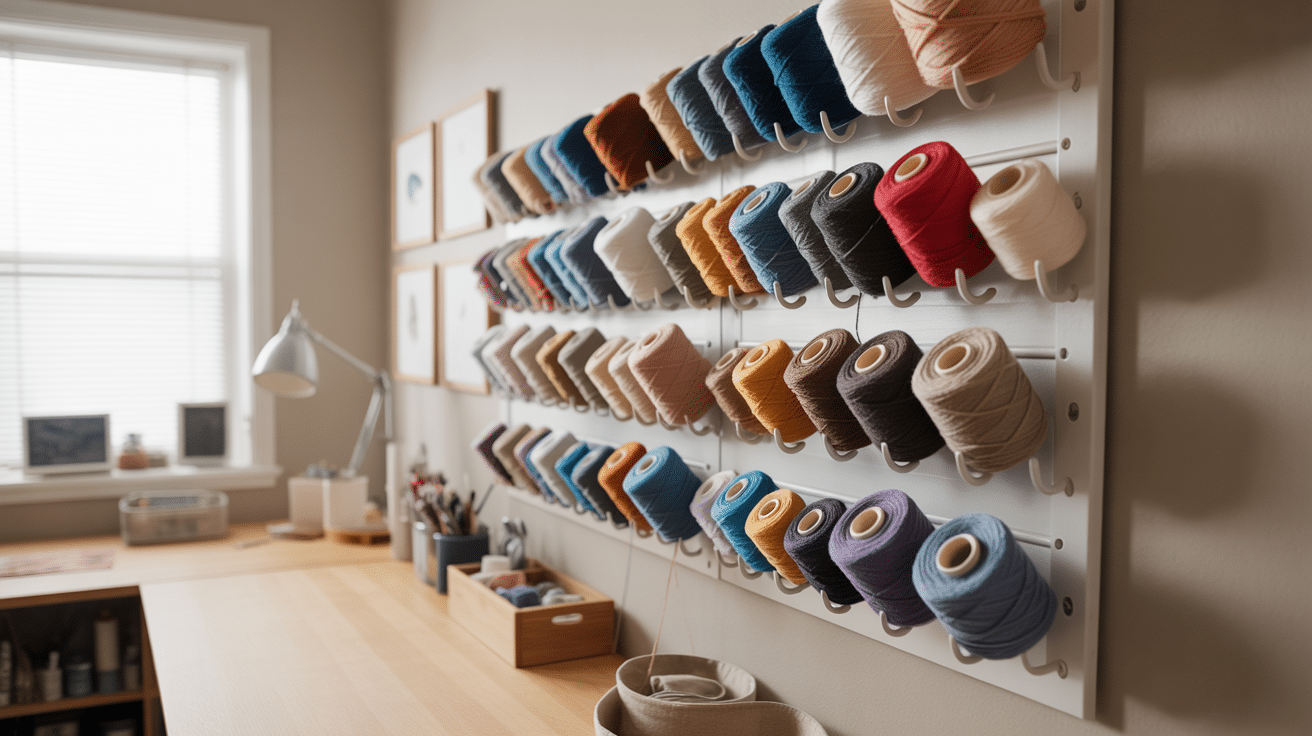
12. Create a Yarn Library Wall with a White Pegboard System
A pegboard wall is a fantastic, flexible solution, but you need to plan ahead before you start drilling.
🔥 Trending Context
- Measure Your Spools: Measure the diameter and depth of your largest yarn spools. This will determine the spacing of your pegs and how far the board needs to stand off from the wall.
- Check Wall Integrity: A fully loaded pegboard of yarn is heavy. Ensure you are mounting it into studs or using heavy-duty drywall anchors designed to hold significant weight. A simple tack-in anchor won’t cut it.
- Plan Your Layout: Don’t just start putting up pegs. Lightly sketch out on the board where your color groups will go. Think about creating gradients or blocks of color for the most impactful visual effect.
Setting up your pegboard is a project in itself, but it pays off in organization. Here’s a quick guide:
- Time Estimate: 2-3 hours. Cost: $50 – $150.
- Frame the Board: Mount 1×2 wood furring strips to the wall, creating a frame where your pegboard will hang. This creates the necessary space behind the board for the peg hooks to lock in. Make sure the frame is level and screwed into studs.
- Mount the Pegboard: Screw the pegboard sheet onto the furring strip frame.
- Install Hooks: Insert your peg hooks into the board, spacing them according to the size of your yarn spools. Use the small plastic hook locks to keep them from pulling out.
- Load Your Yarn: Arrange your yarn spools on the hooks, stepping back frequently to see how your color composition is coming together.
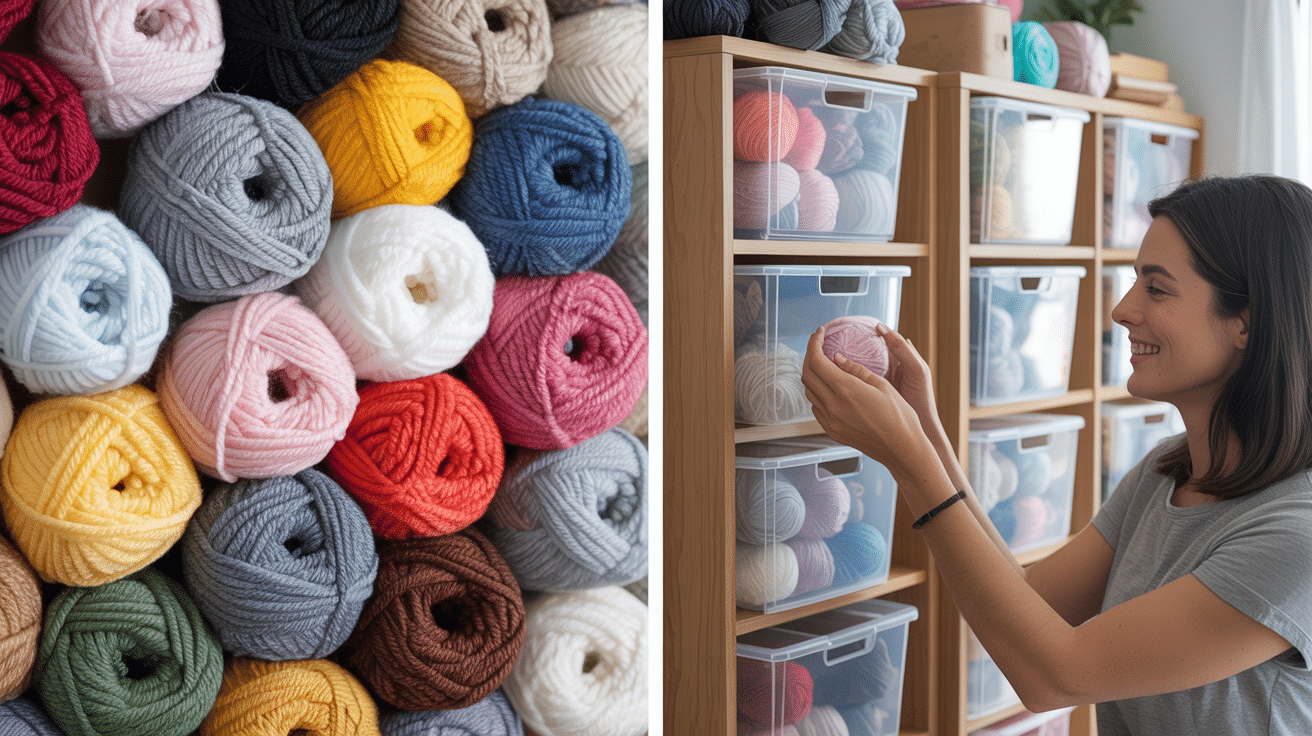
13. Combine Clear Bins and Open Shelving for a Joyful Display
Joy is the defining principle here. The combination of open shelving and clear bins offers a flexible, ‘best of both worlds’ approach that you can tailor to your own collection. The most beautiful, colorful skeins get to be out on display on the open shelves, while the clear bins provide tidy, dust-free homes for everything else. The presence of the smiling woman reminds us of the whole point of the hobby: happiness. It’s a storage system designed around the contentment that crafting brings. For a cooler, more minimal take, see Idea #9.
⭐ The One Thing
You don’t need a custom built-in to get this look. An IKEA KALLAX or BILLY shelving unit is the perfect, affordable backbone for this system. A light wood or white finish will give you the same bright, clean aesthetic. You can find a wide variety of perfectly-sized clear bins at Target, Walmart, or The Container Store. A setup like this can easily be put together for under $200, making it one of the most accessible and effective solutions for a large stash.
14. Use a Sage Green Perforated Drawer for Earthy Toned Yarns
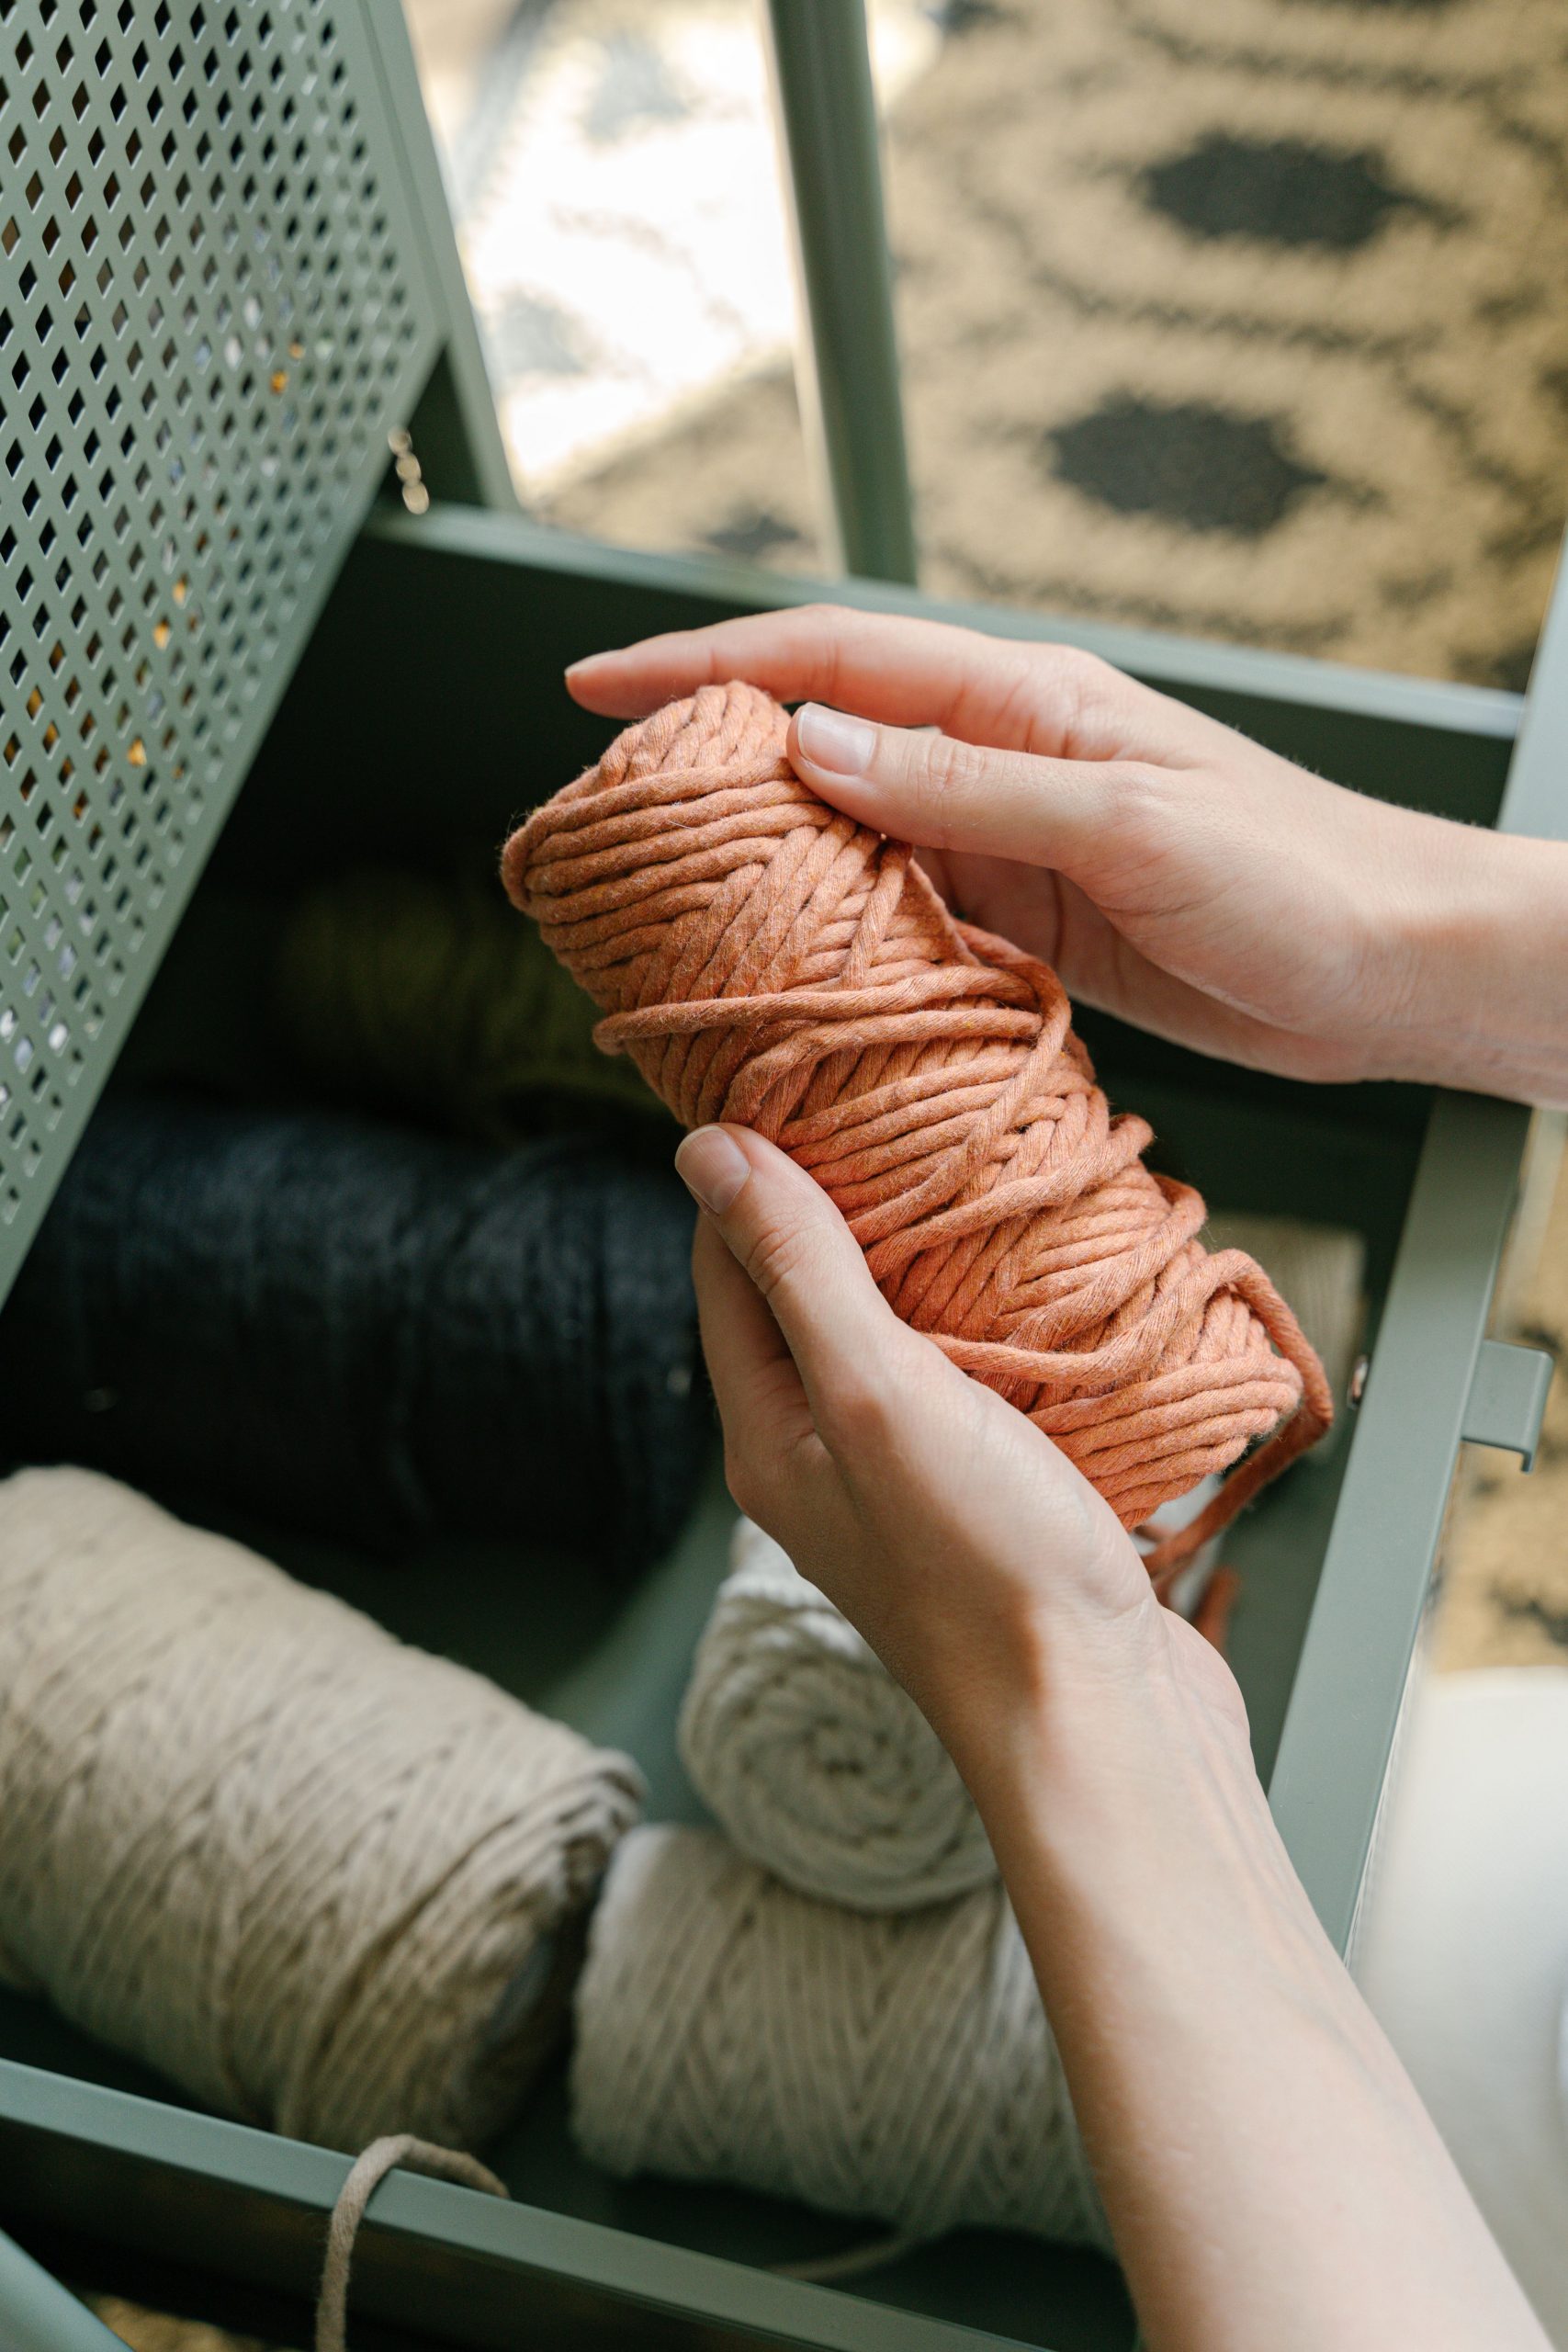
The single most compelling element in this image is the color palette. The combination of sage green, terracotta, beige, and charcoal gray is incredibly sophisticated and grounded. It feels earthy, natural, and very current. This isn’t the primary-colored yarn of childhood craft projects; this is the color world of a modern, style-conscious maker. The palette alone elevates the simple act of storing yarn into a statement of personal aesthetic. It’s a perfect example of how your materials can become part of your home’s color story.
✅ Before You Start
Earthy, muted tones have been dominating interior design, and this trend is clearly influencing the craft world in 2026. Colors like sage green, terracotta, and rust have replaced the bright pastels of previous years. This yarn drawer reflects a broader cultural shift towards natural materials, handmade objects, and a calmer, more grounded aesthetic in our homes. People want their hobbies to integrate seamlessly with their living spaces, and this sophisticated color palette is the perfect way to do it.
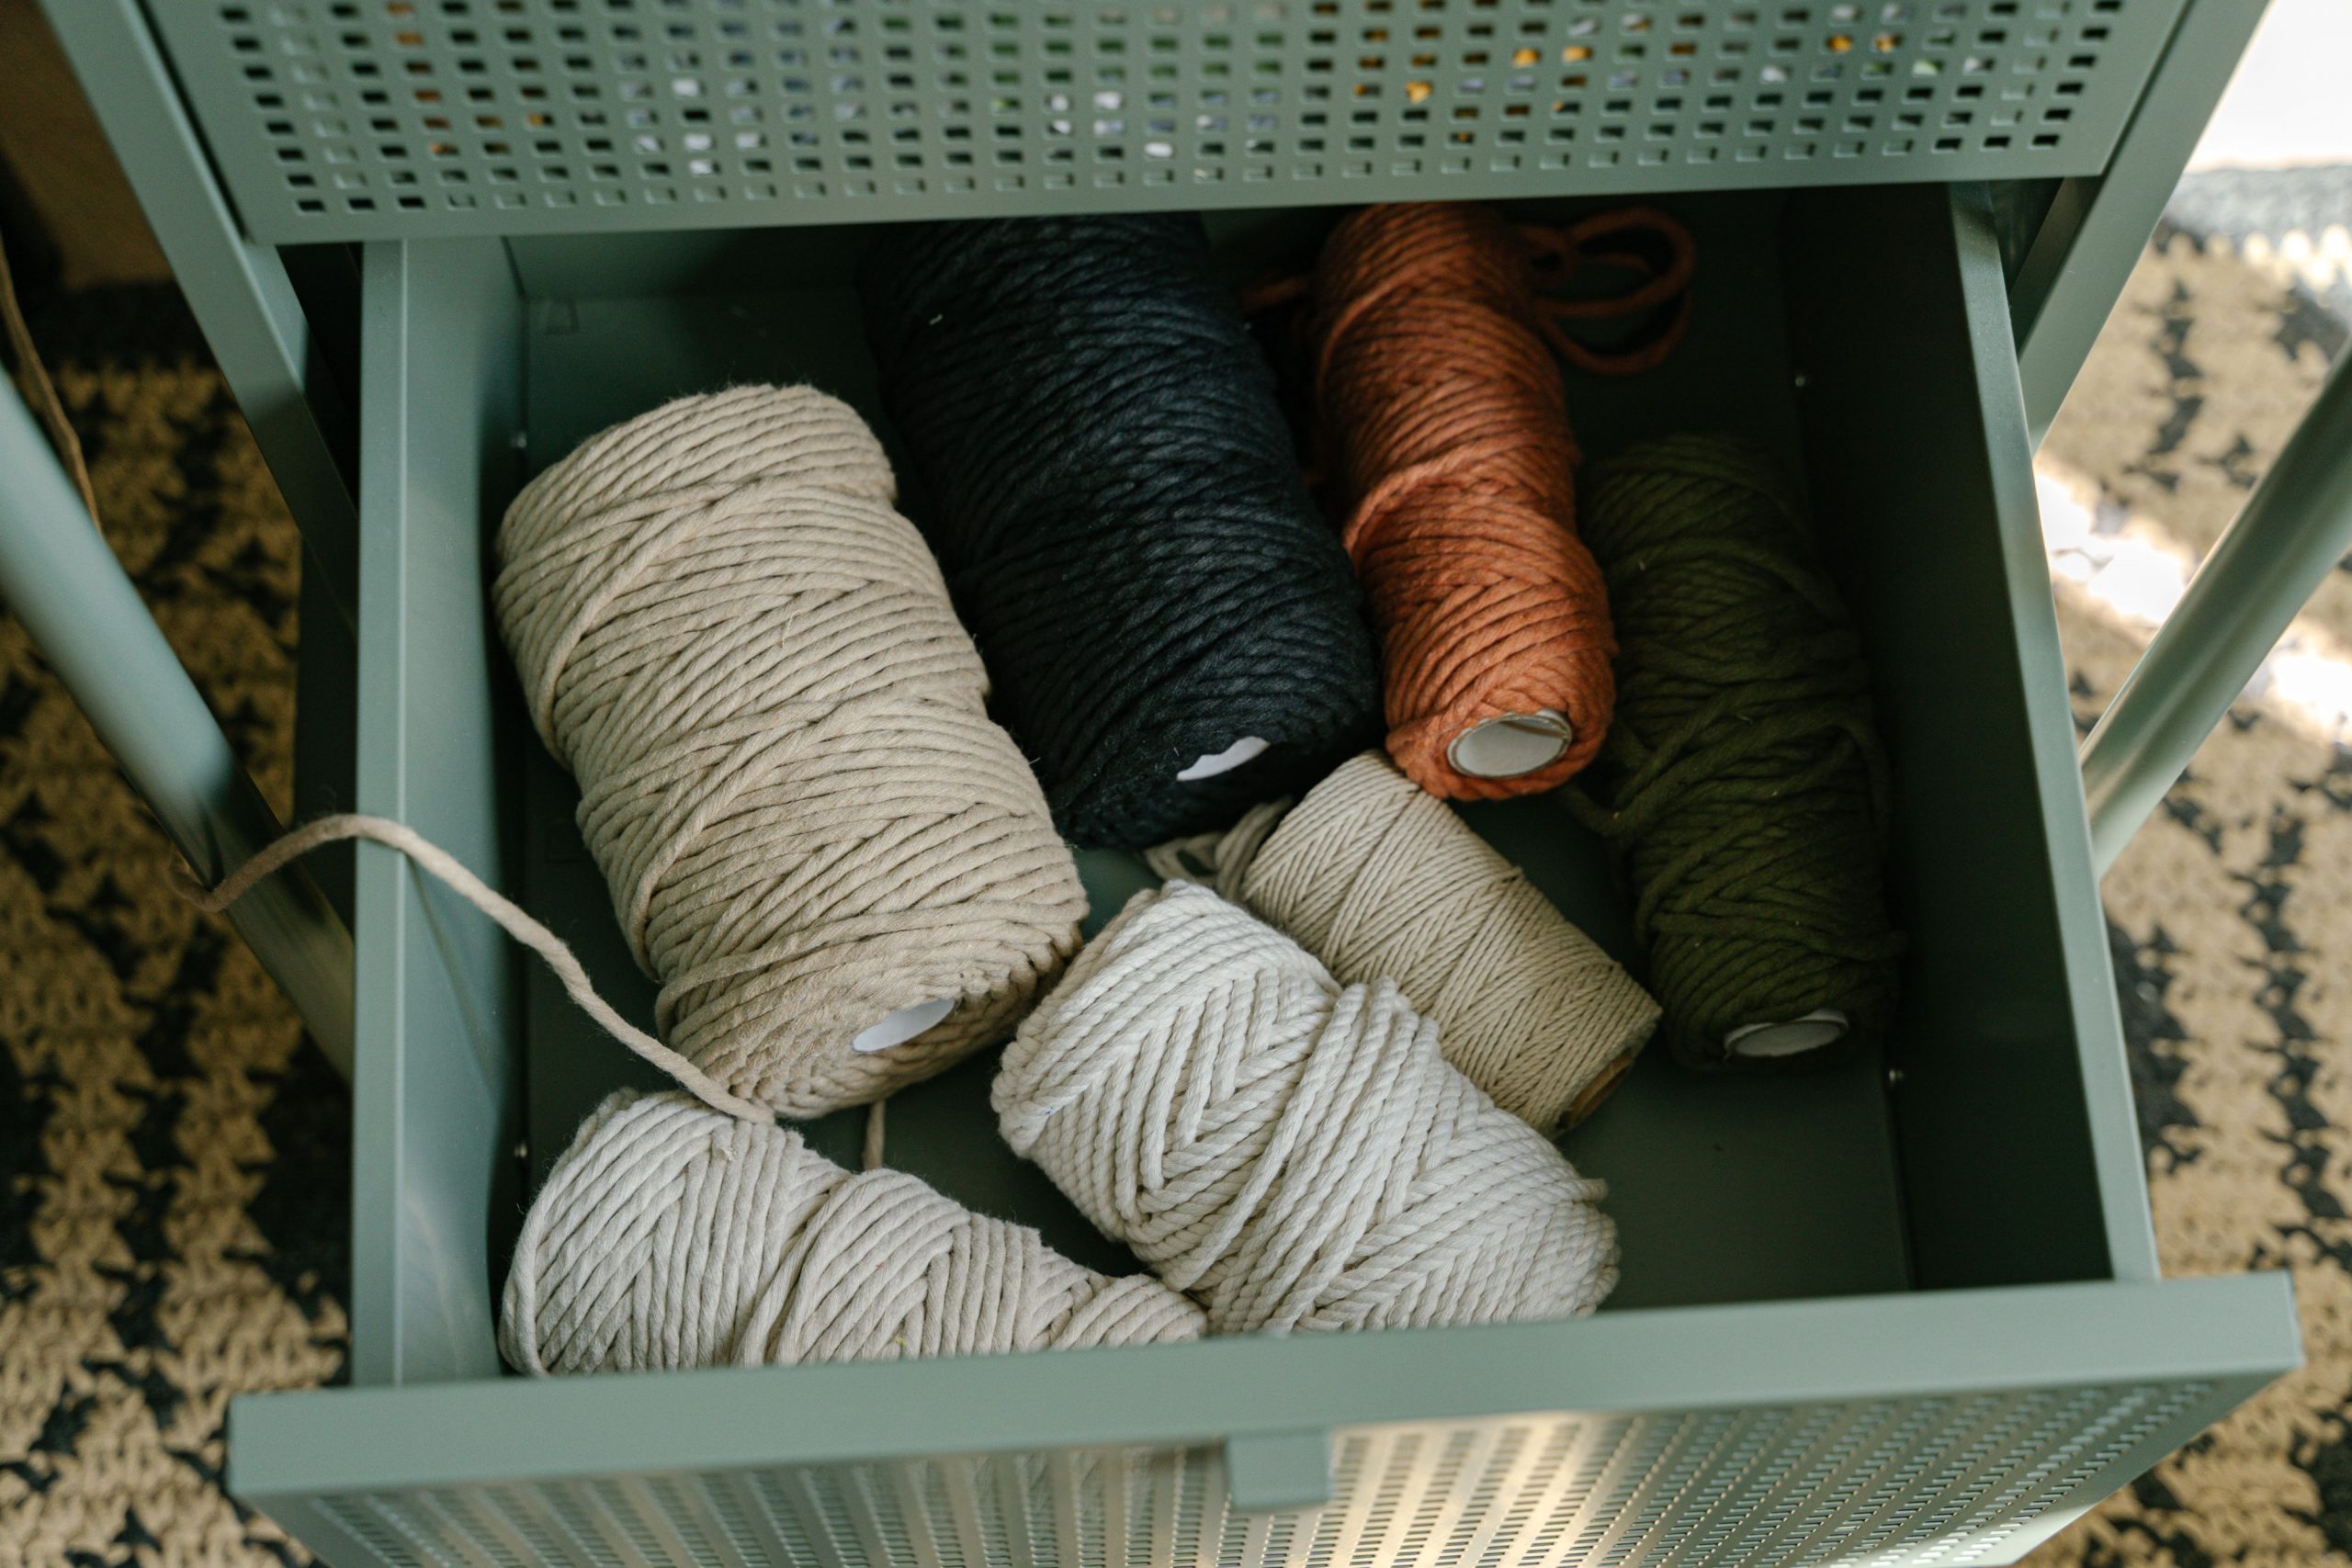
15. Organize Macrame Spools in a Teal Perforated-Metal Drawer
When storing spools of macrame cord or other yarns that can unwind, use the ‘tail tuck’ trick. After you’ve used some of the cord, don’t just leave the end loose in the drawer where it can tangle with others. Gently tuck the loose end underneath one of the taught strands on the spool itself. This creates just enough friction to hold it in place, preventing a tangled mess and making your drawers look infinitely tidier. This simple habit will save you a lot of detangling headaches later on.
🧹 Maintenance Reality
This works because of the pleasing harmony between form and function. The industrial vibe of the teal perforated metal cart is a perfect match for the rustic, textured nature of macrame cord. The colors—teal, rust, olive green, black, and natural beige—create a rich, earthy palette that feels both creative and cohesive. This storage solution looks exactly like what it is: a tool for a specific, trendy craft. It feels authentic. See the same cart used with a softer palette in Idea #14.
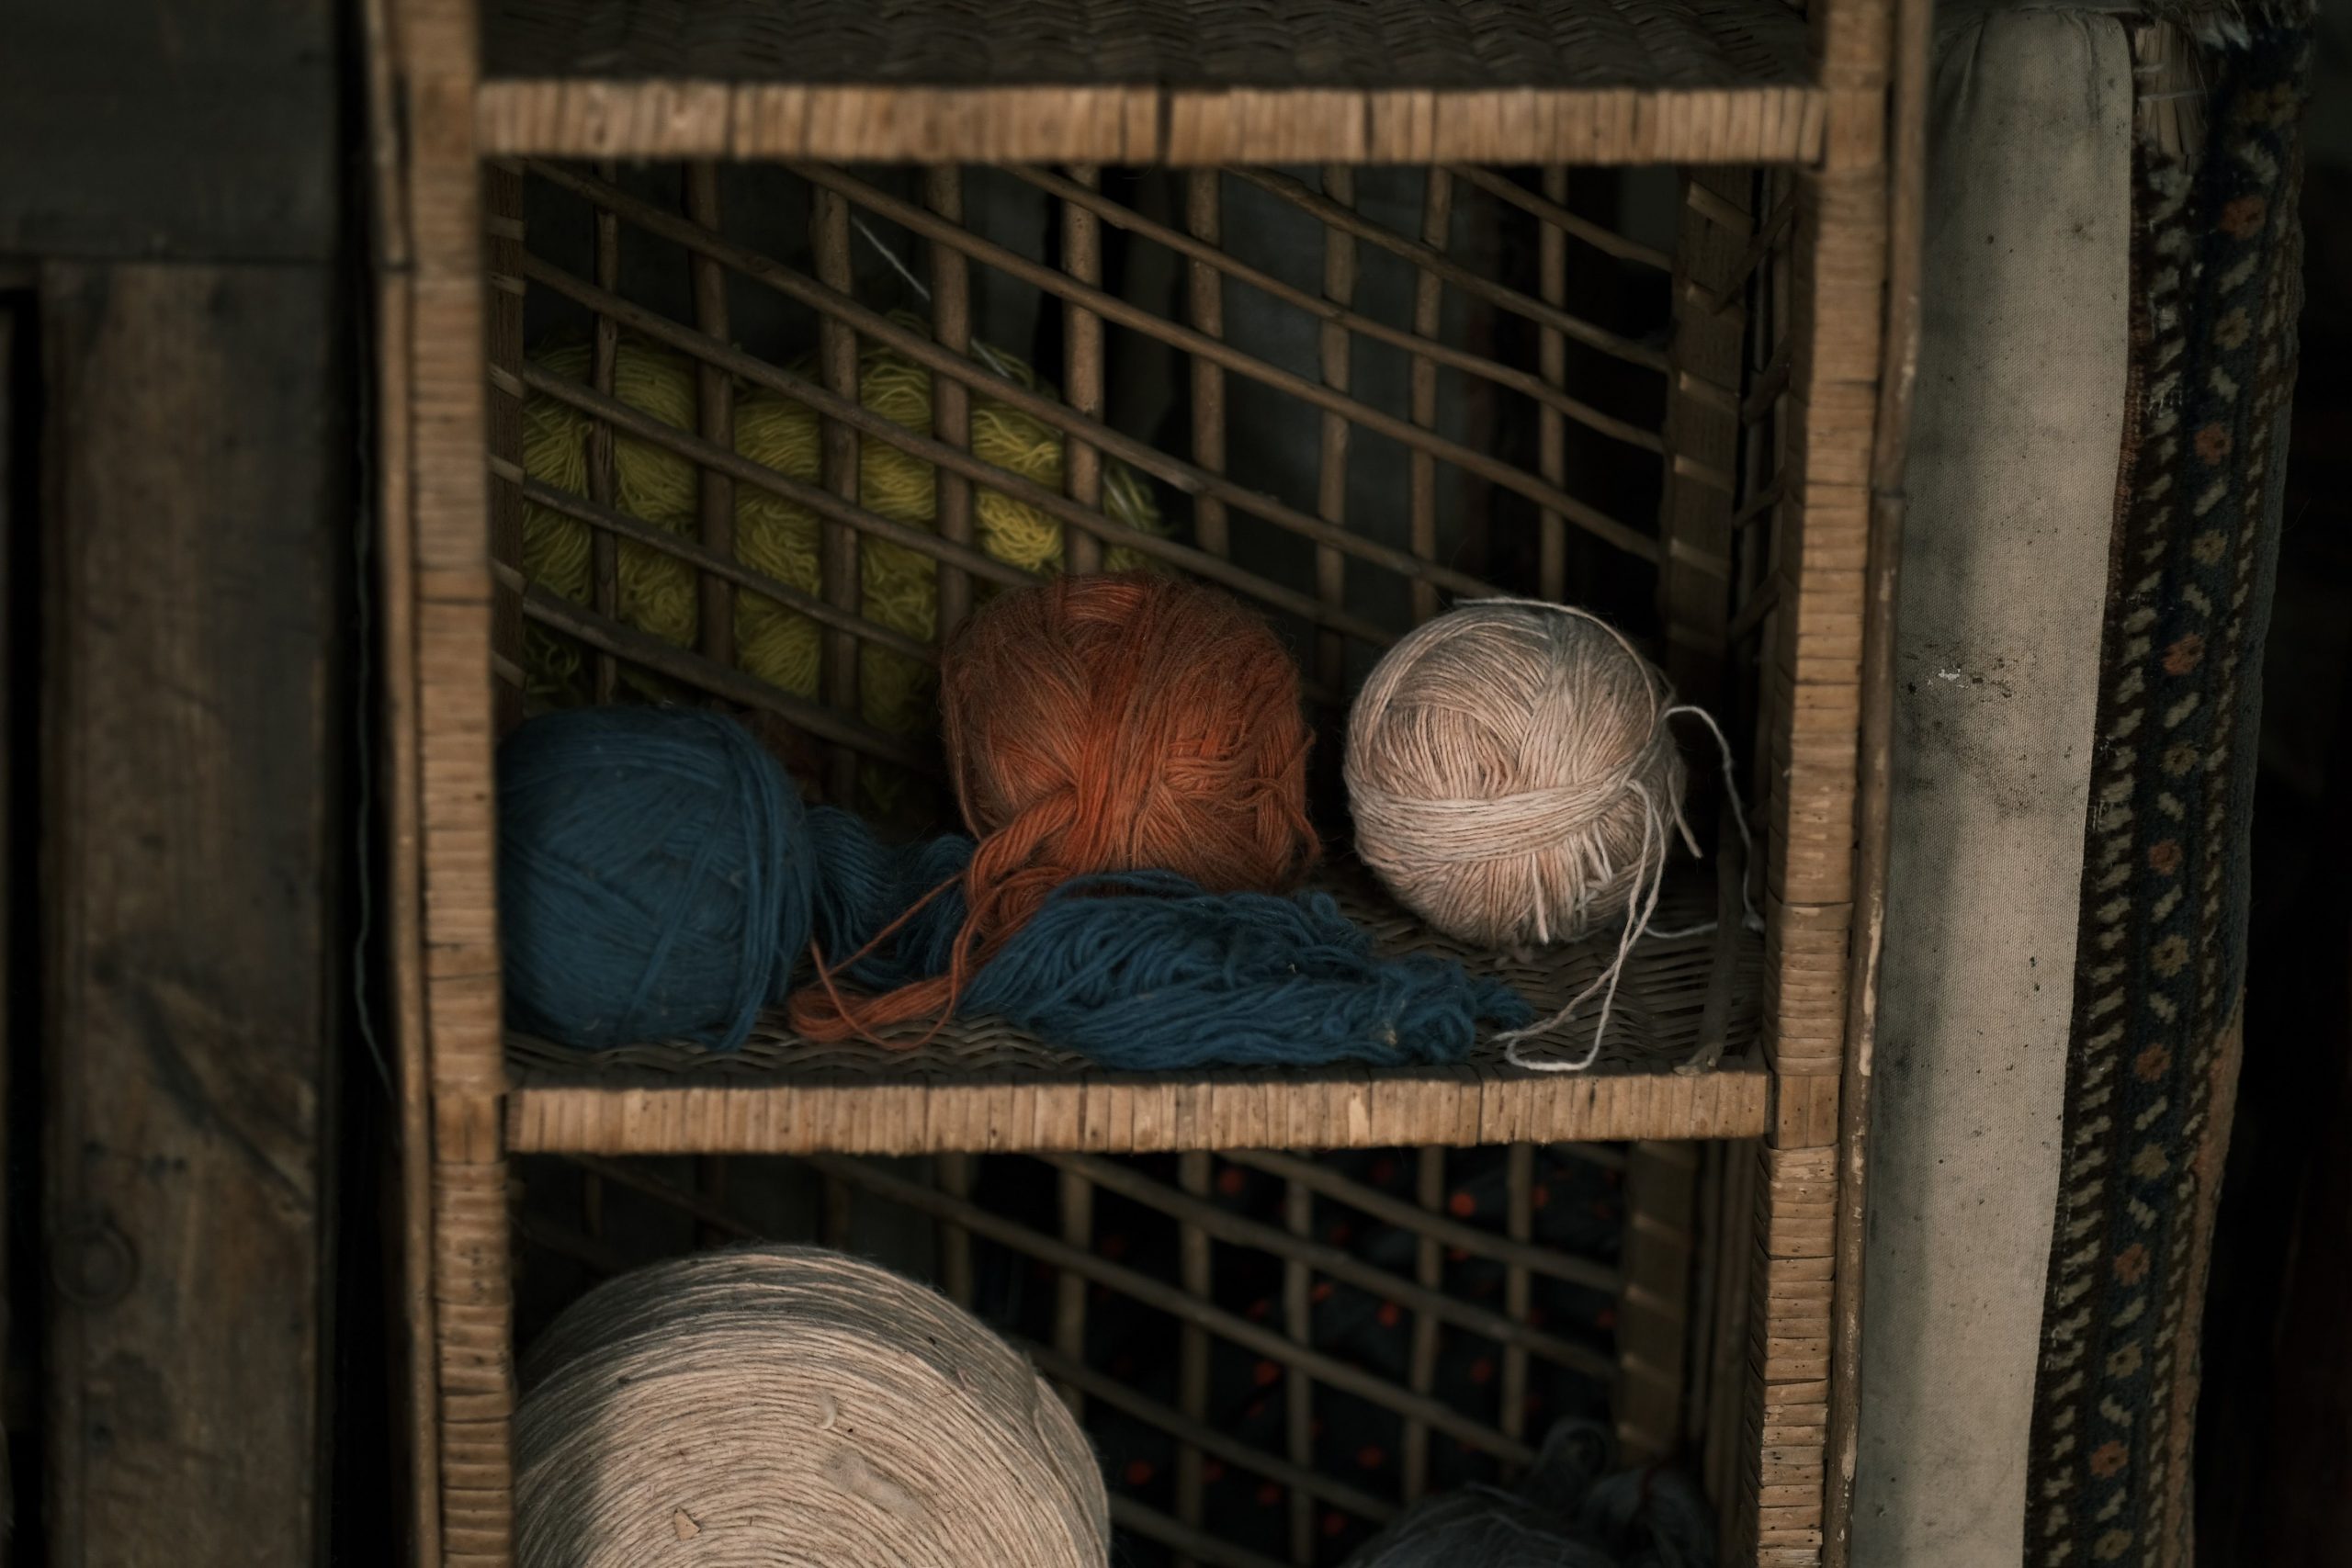
16. Display Earthy Yarn Balls on a Woven Rattan Shelf
To capture this natural, crafty vibe, use this simple equation: 70% Natural Texture + 30% Bold Color. The woven rattan of the shelf itself provides the dominant textural base. You can get a similar feel with seagrass, hyacinth, or even light-colored wood. Then, punctuate that neutral background with pops of strong, saturated color from the yarn itself—like the deep teal and ginger orange shown here. This combination keeps the look grounded and organic but adds a necessary dose of energy and visual interest.
📐 Style Math
Rattan and other natural woven materials are beautiful, but they can be magnets for dust and prone to snagging delicate yarn. To clean, use the soft brush attachment on your vacuum cleaner once a month to get into all the woven crevices. Be careful when placing unwound skeins of fine yarn (like silk or alpaca) directly on the surface, as stray fibers from the rattan could catch and pull. This type of shelf is best for neatly wound balls of sturdy wool or cotton, or for yarn stored in protective bags.
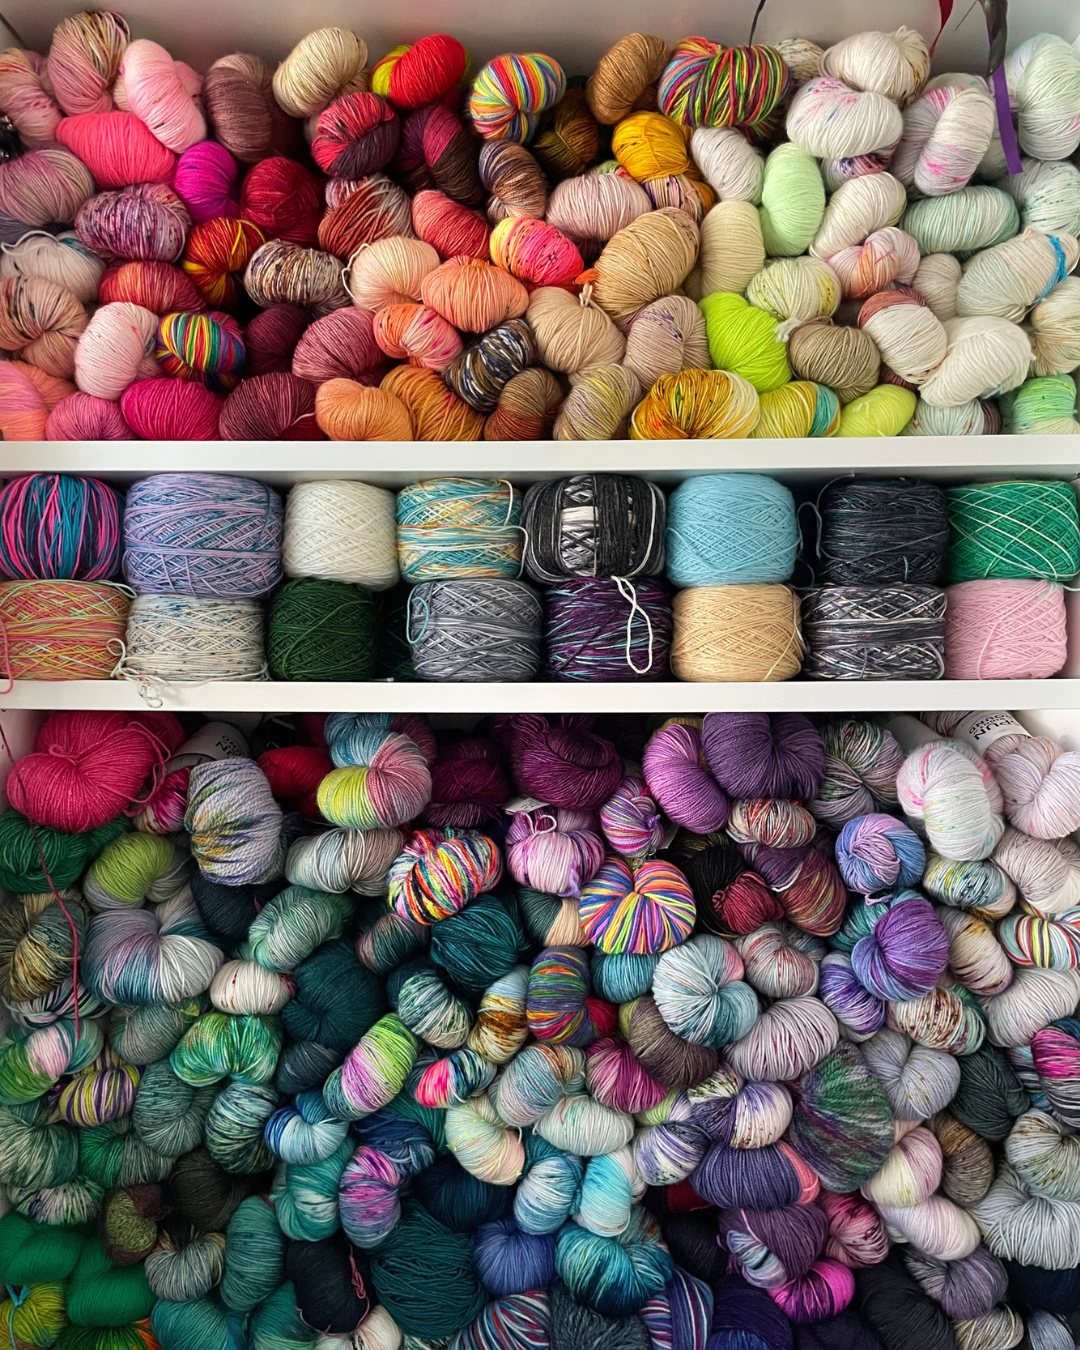
17. Create a Rainbow Wall with Gradient Yarn in a Recessed Nook
The singular element that gives this storage solution its breathtaking impact is the color gradient. It’s not just yarn on shelves; it’s a carefully orchestrated rainbow. The smooth transition from reds and oranges at the top down to blues and purples at the bottom is what elevates this from a simple storage nook into a major architectural feature and a work of art. This dedication to color organization is what makes it so satisfying to look at and a true celebration of the material.
💡 Designer Tip
This idea is perfect for anyone with an awkward, unused wall recess or a shallow closet they can remove the doors from. The nook needs to be at least 12 inches deep to comfortably fit standard yarn skeins. The width can vary, but a span of at least 3 feet is needed to get a really impactful color gradient effect. For shelving, use simple white MDF or plywood cut to size and mounted on basic shelf brackets—the yarn is the star here, so the shelving itself can be very simple and inexpensive.
18. Keep Brightly Colored Yarn Balls in a Simple Light Wood Drawer
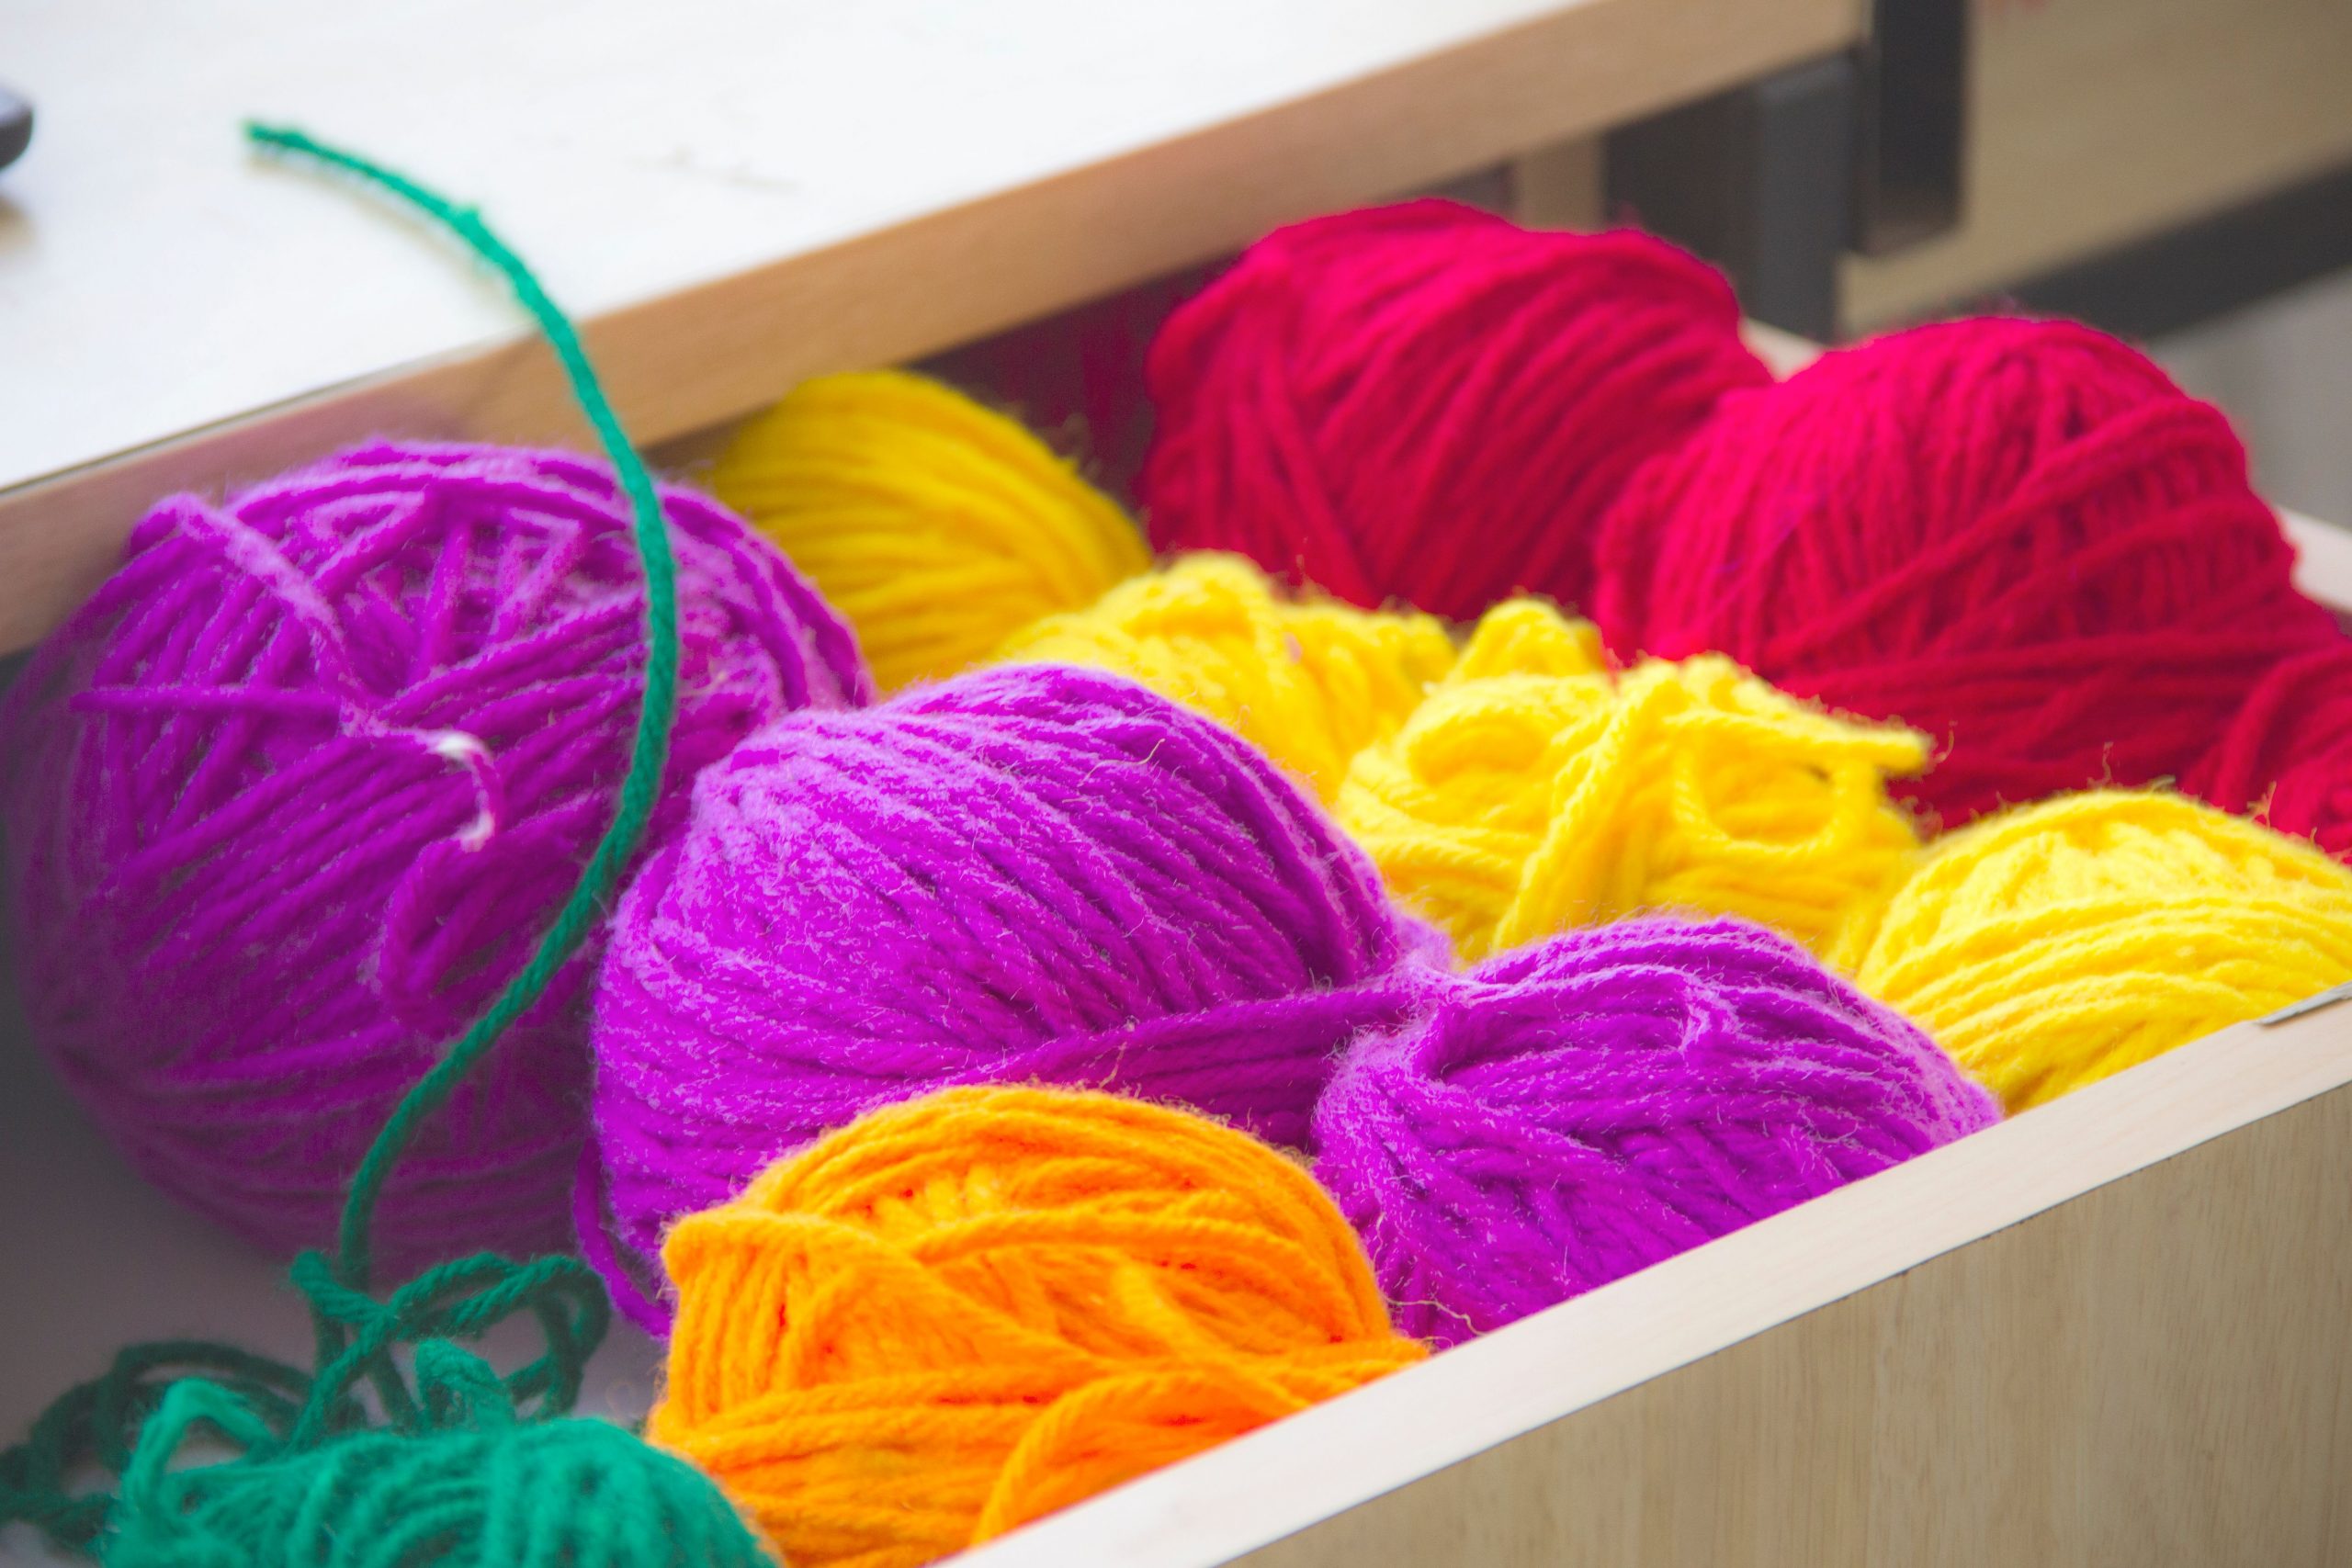
Sometimes, the simplest solution is the most effective. This works because of its utter simplicity. There are no complicated dividers or systems—just a riot of colorful yarn contained within a plain wooden box. The clean lines and neutral light wood of the drawer provide a calm frame for the vibrant, joyful chaos of the yarn inside. It’s an accessible, honest approach to storage that prioritizes function but still delivers a delightful pop of color when you open it. It perfectly captures the feeling of a creative project waiting to happen.
💰 Budget Breakdown
There’s no need for expensive, custom-built drawers to get this effect. Look for shallow wooden crates at craft stores or home goods stores. Even better, check out thrift stores for old silverware trays or office desk organizers. These often have the perfect shallow depth and simple construction. You could even use a sturdy cardboard photo box and cover it with wood-grain contact paper for an ultra-thrifty option. The goal is a simple, neutral container to let the yarn’s color shine.
19. Use a Beige Plastic Bin for Fuchsia Yarn and Knitting Needles
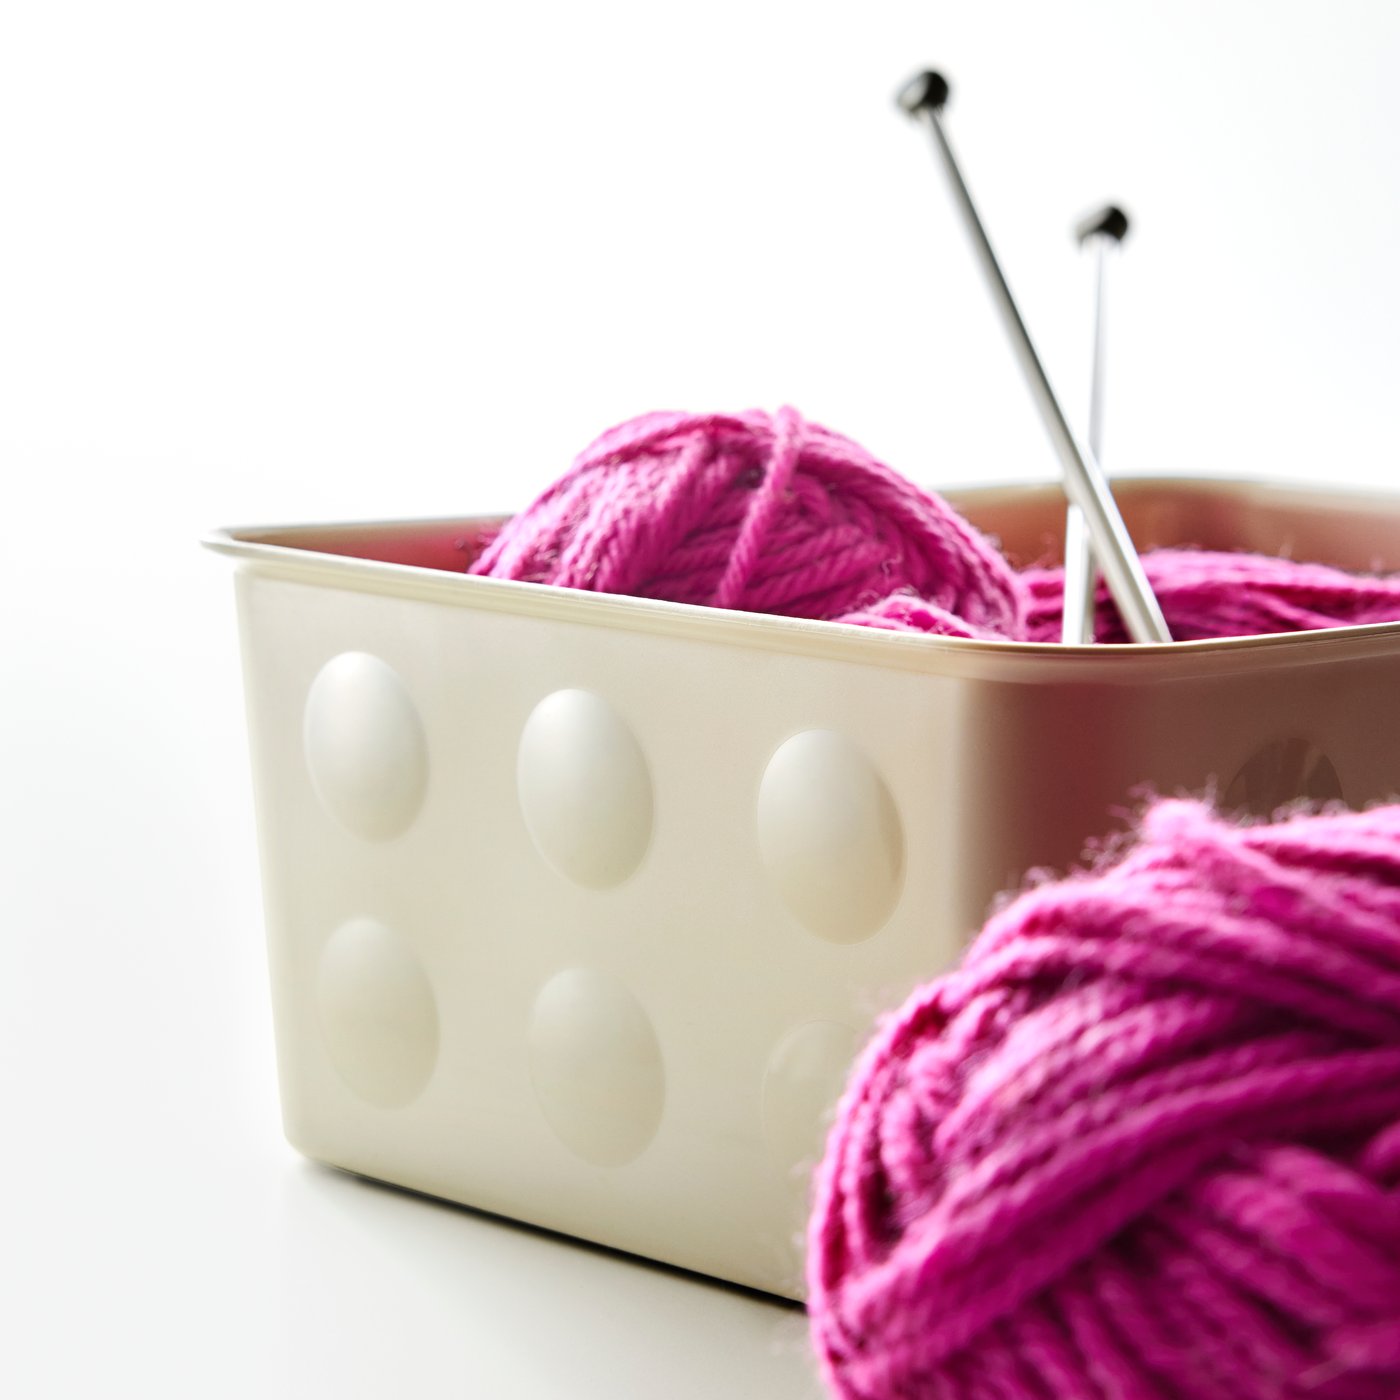
When you’re in the middle of a project, create a ‘project box’ like this. It’s a dedicated bin that holds only the yarn, needles, pattern, and any other tools you need for that specific piece. This is a game-changer for organization. It keeps everything together so you can grab it and go, and it prevents the half-finished sweater from getting tangled up with your general stash. Use a small, open-topped bin so you can easily see your progress and be tempted to pick it up and knit a few rows.
⚠️ Real Talk
that makes this simple photo so visually appealing is the bold color contrast. The electrifying, saturated fuchsia yarn is so vibrant against the calm, neutral beige of the bin and the plain white surface. This high-contrast combination makes the yarn feel exciting and special. If the yarn were a similar beige or gray color, the image would be flat and uninteresting. It’s the pop of unapologetic color that gives it energy and focus. It’s a great reminder to not be afraid of bold hues!
20. Pack a Rainbow of Yarn Balls into a Light Green Fabric Container
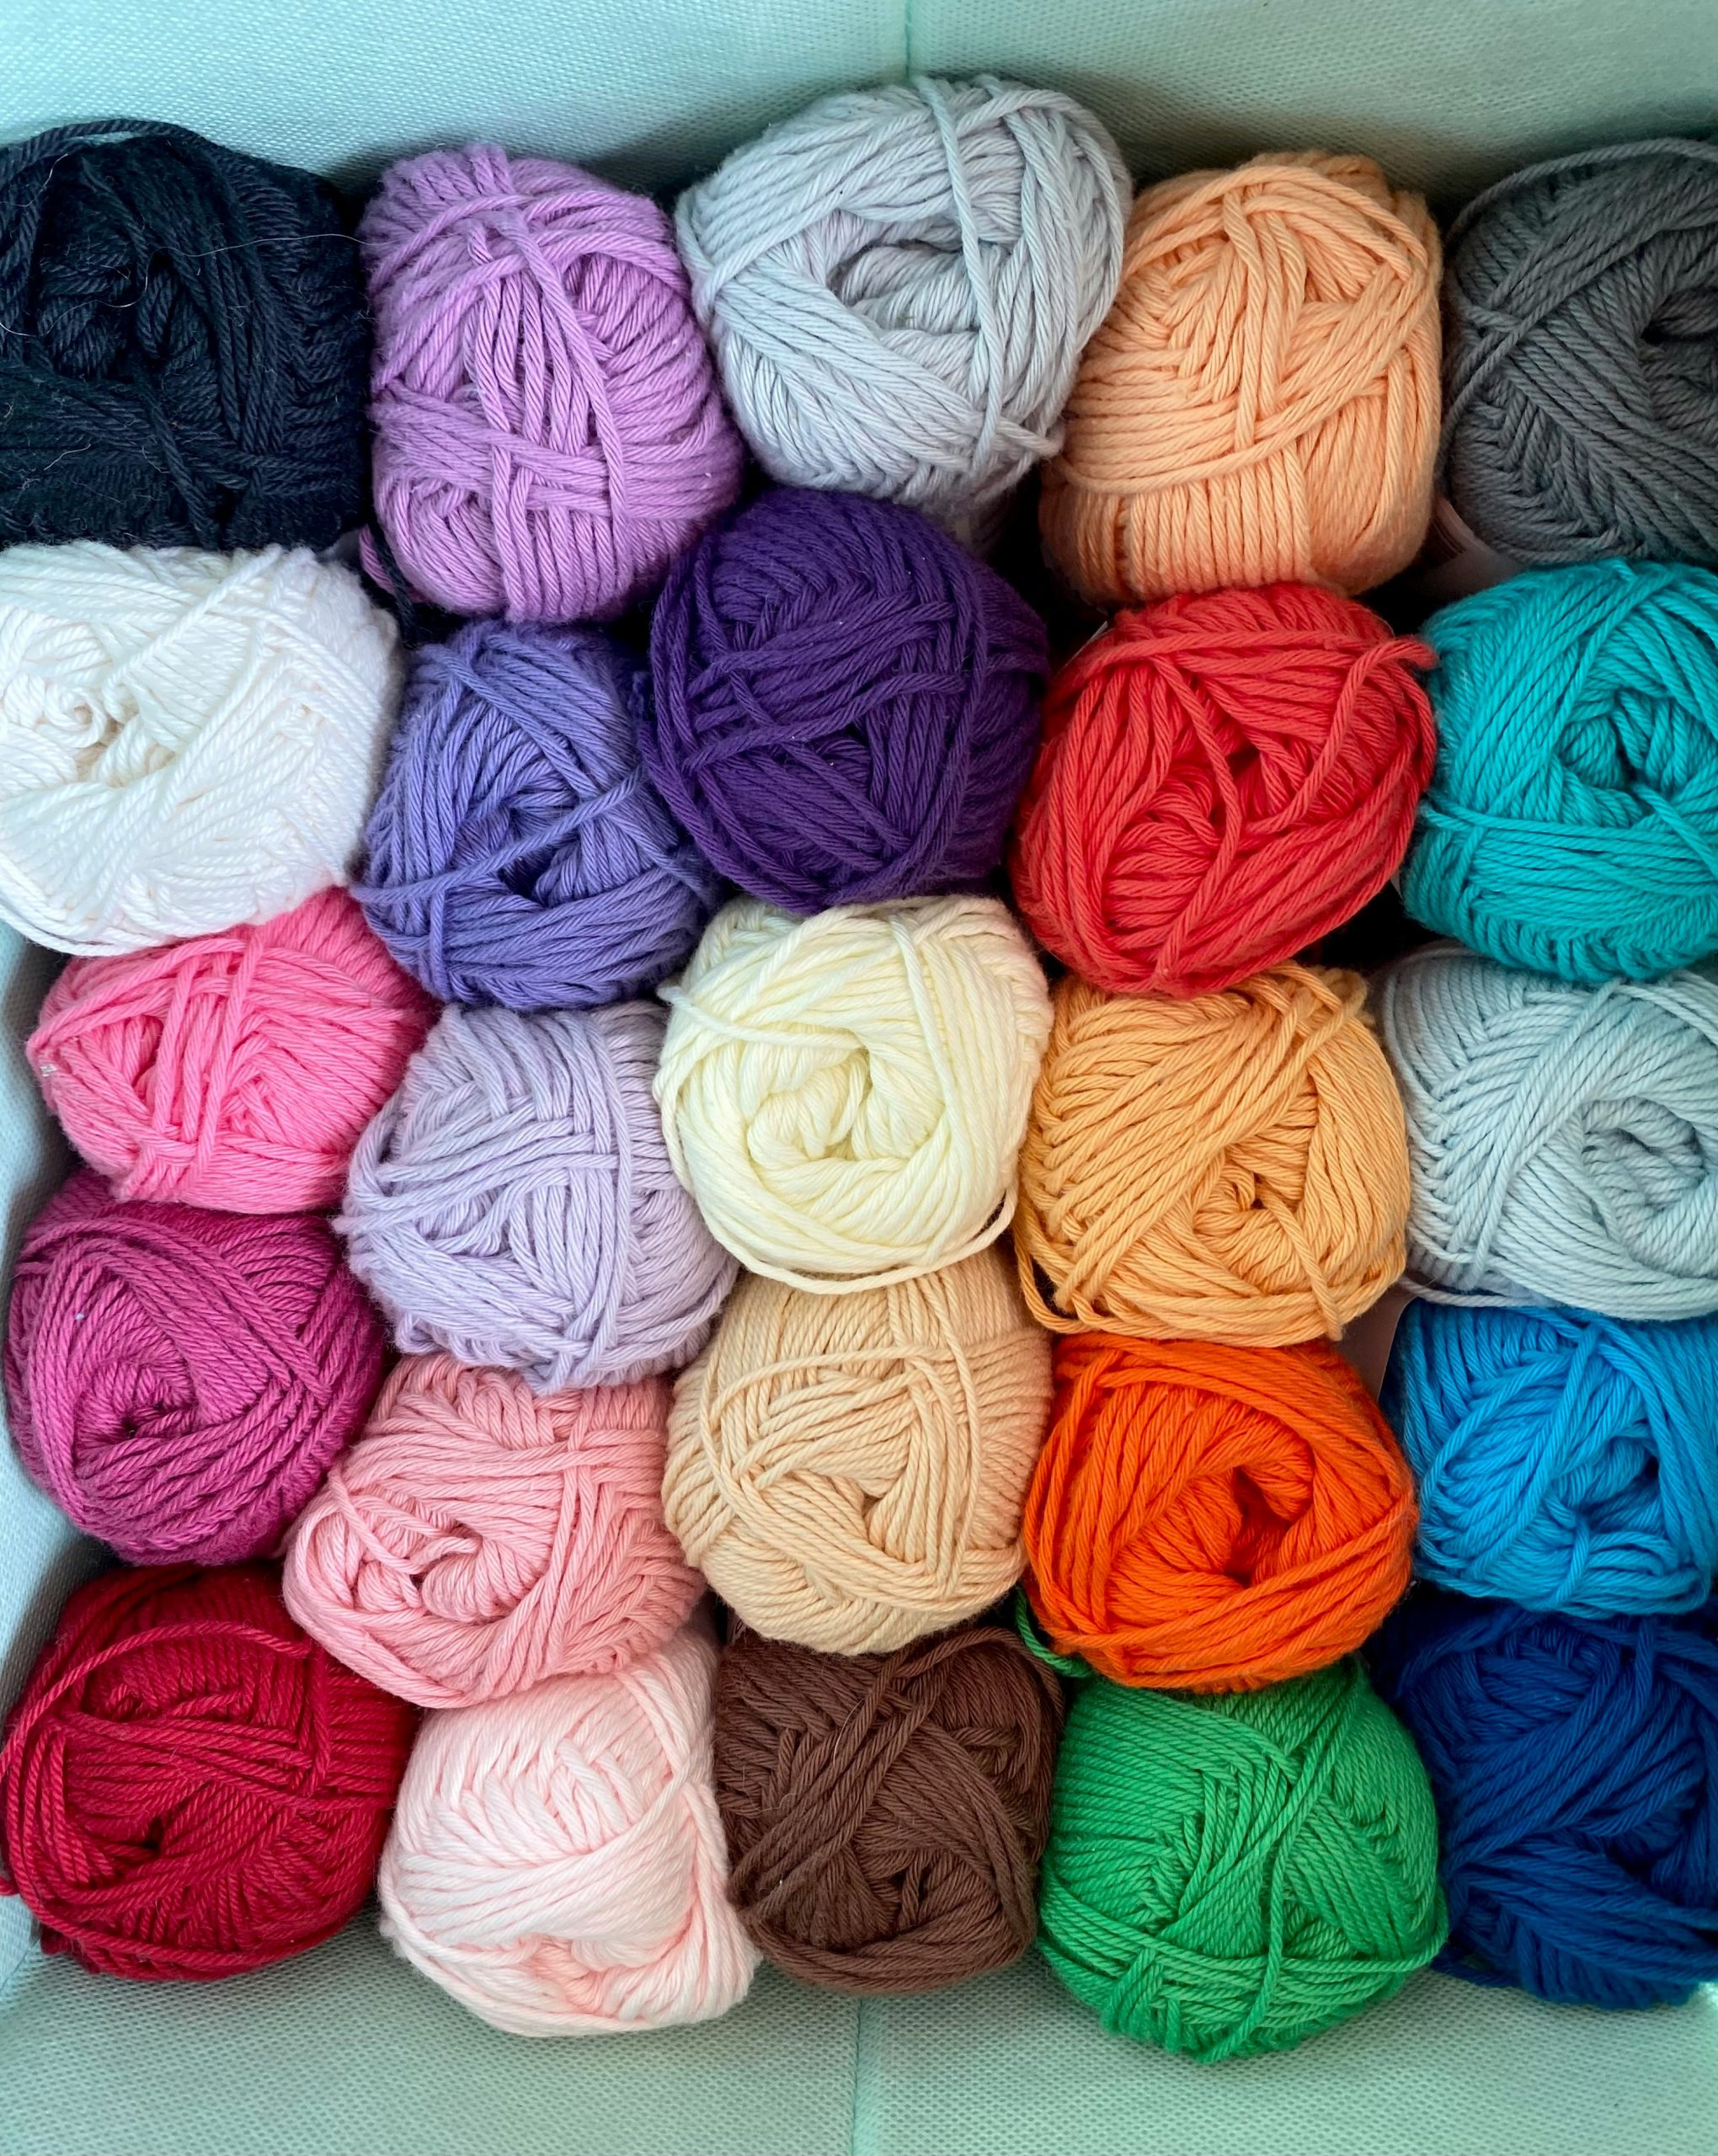
This looks incredibly satisfying, but be honest with yourself about your crafting habits. If you’re the type of person who needs to see every single shade you own, this method of packing yarn tightly into an opaque bin might drive you crazy. You can only see the top layer, and you’ll have to dig through everything to find that specific color you need. This is great for bulk storage of a yarn type you’re very familiar with, but less ideal for finding a specific skein in a varied collection. For better visibility, consider the clear bins in Idea #1.
🎯 What Makes It Work
The visual appeal here comes from the principle of repetition and pattern. The yarn balls are all similar in size and shape, and they are packed together in neat rows, creating a pleasing, almost mosaic-like texture. The sheer density of the yarn, with no wasted space, gives a feeling of abundance and satisfaction. The soft, light green color of the bin is a gentle, complementary frame for the riot of color within, containing the chaos without suppressing it.
21. Mix White Bins, a Yellow Pegboard, and Glass Jars for Playful Storage
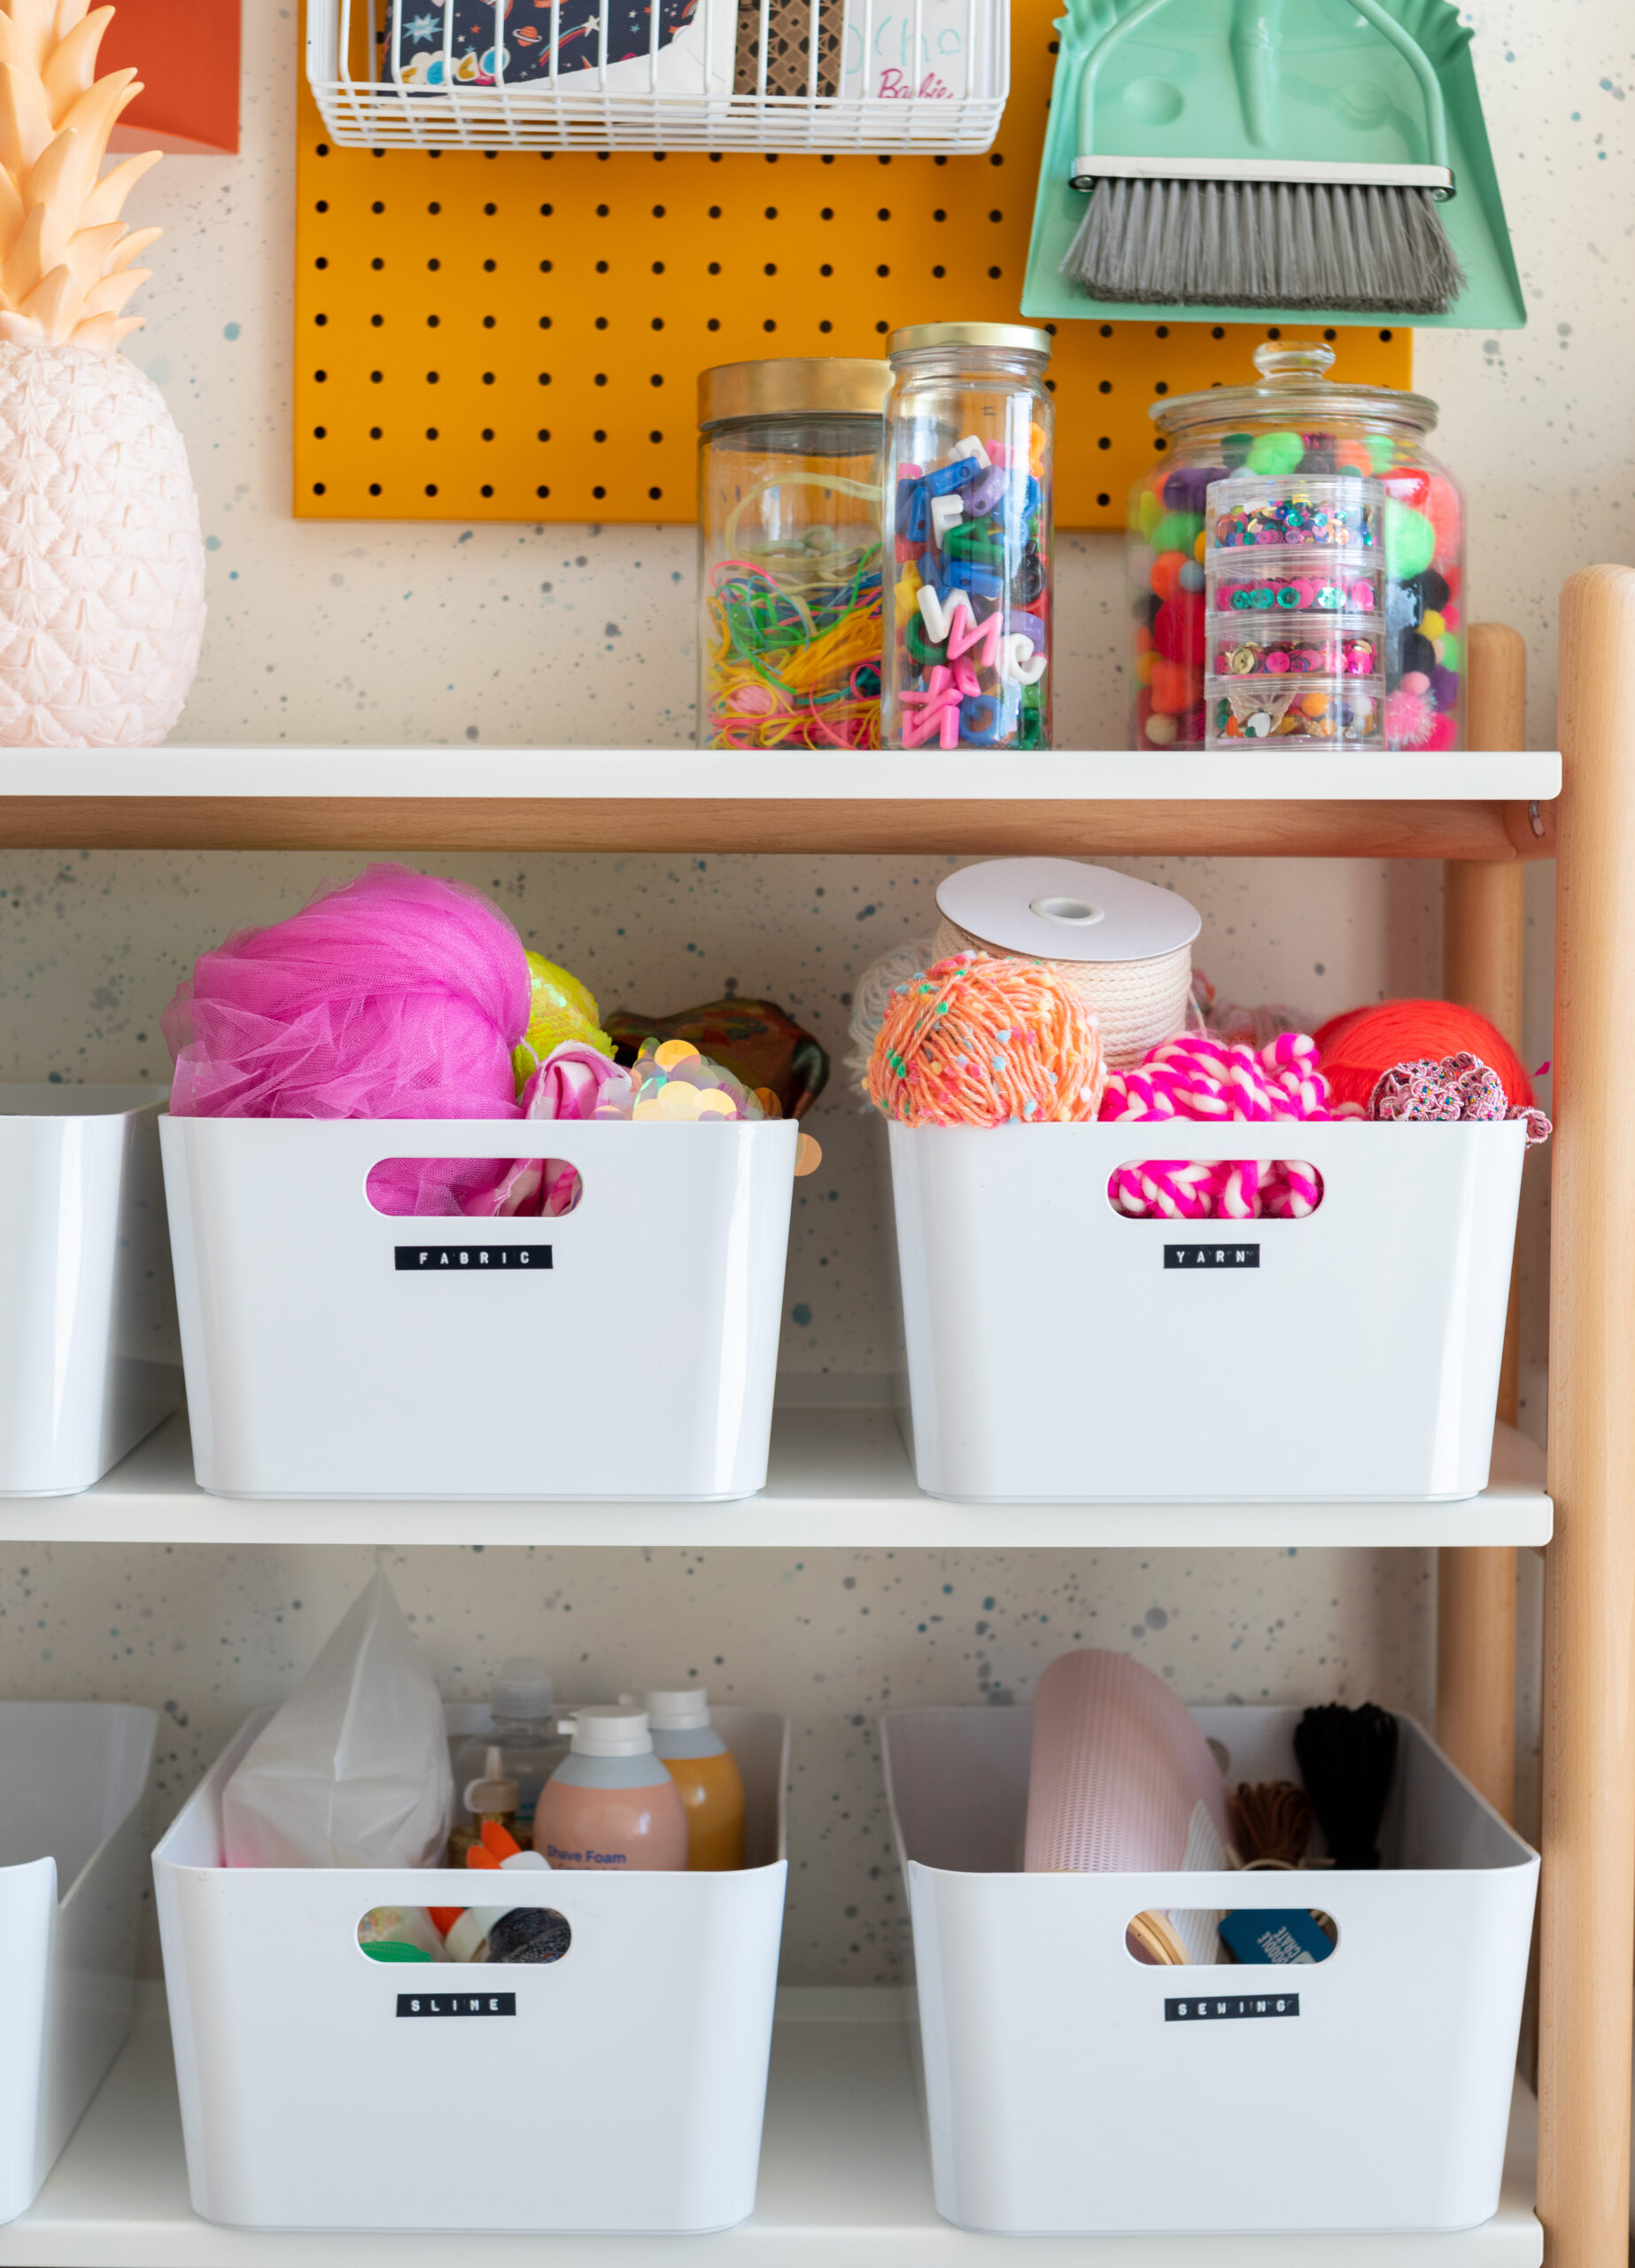
Want to create your own labeled bin system? It’s easy, and it makes finding supplies a breeze.
💸 Get This Look For Less
- Time Estimate: 1 hour. Cost: $15 – $30.
- Choose Your Bin: Select simple, uniform bins. The white ones here are perfect because they create a clean slate.
- Get a Label Maker: A simple handheld label maker is a crafter’s best friend. Use a clear or white tape with black text for a clean, minimalist look.
- Be Consistent: Decide on a labeling convention. Are you organizing by material type (e.g., ‘COTTON YARN’), by color, or by tool type (‘KNITTING NEEDLES’)? Stick to your system.
- Apply Labels Carefully: Place each label in the exact same spot on each bin—for example, centered and one inch from the top. This uniformity is what makes the whole system look so polished and professional.
This cheerful craft space is a perfect equation for functional fun: 50% neutral base + 30% accent color + 20% colorful clutter. The white shelves and white bins provide a clean, organized foundation. A single, bold accent color—in this case, the sunny yellow pegboard—adds a big dose of personality. The remaining 20% is the vital, colorful ‘clutter’ of the craft supplies themselves in jars and on the pegboard. This formula ensures the space feels playful and creative, not sterile.
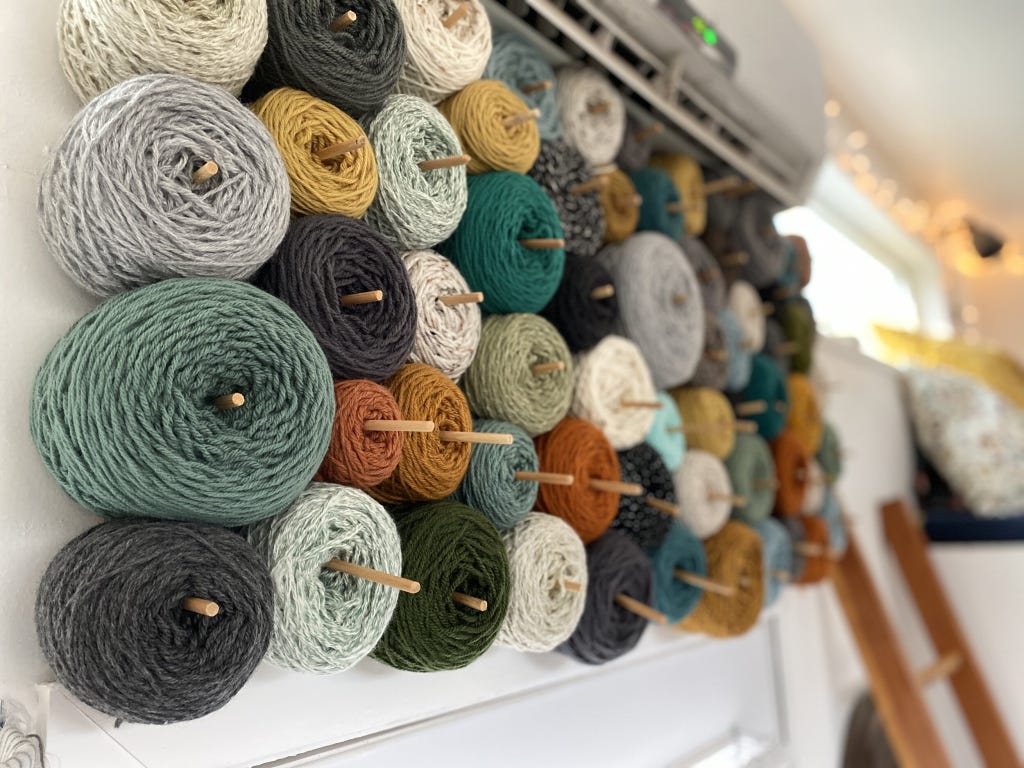
22. Mount a Wall Display with Yarn on Wooden Pegs
This is a brilliant use of the Z-axis, or depth. By mounting the skeins on pegs, the yarn comes off the wall, creating a highly textural, three-dimensional surface. The shadows cast by the skeins add another layer of visual interest that you wouldn’t get from yarn stored flat against a wall or on a shelf. The horizontal arrangement leads the eye across the room, and the cohesive, earthy color palette of greens, grays, and terracotta makes it feel like a custom piece of fiber art rather than just storage.
📏 Scale Guide
For a display like this, organizing by color is key to making it look intentional. Create a ‘color story’ across the wall. You could create a gradient, moving from light shades to dark shades. Or, as seen here, you can create distinct blocks of color. Group all your sage greens together, then your olive greens, then your mustard yellows. This creates a much more powerful visual statement than a random jumble of colors and is incredibly pleasing to the eye.
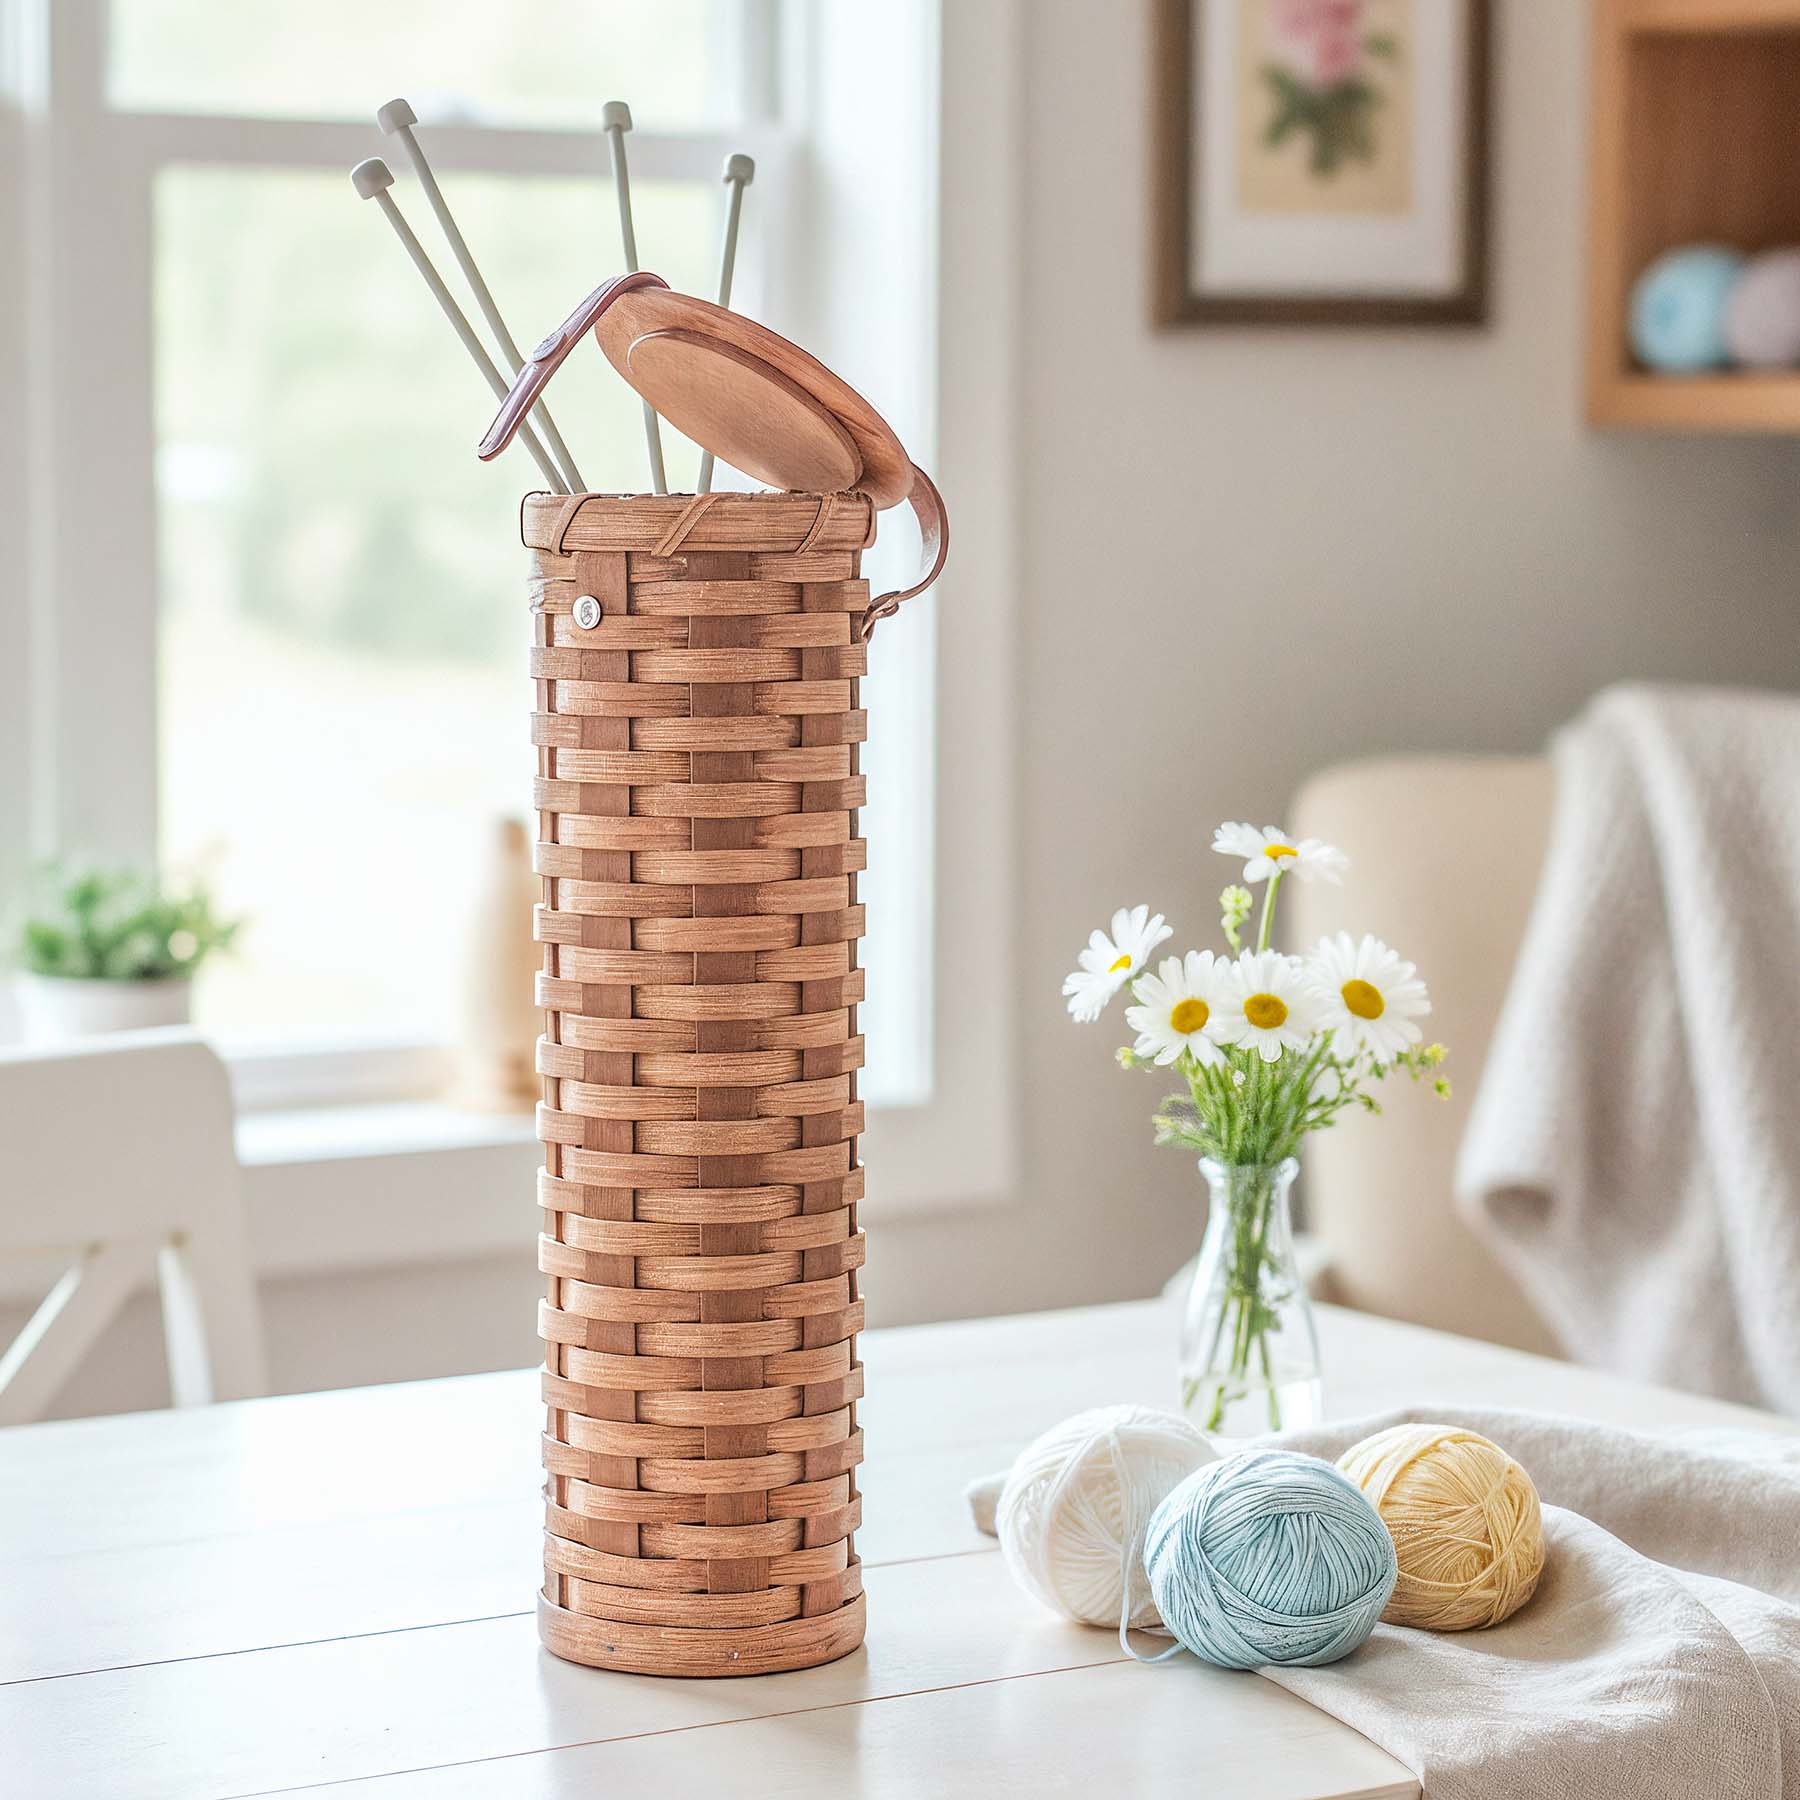
23. Style a Crafter’s Nook with a Tall Woven Basket for Needles
that makes this scene feel so serene and complete is the small vase of daisies. It’s not a storage item, but it is essential to the mood. It adds a touch of life, freshness, and simple beauty to the arrangement. Without the flowers, it’s a functional but slightly sterile collection of craft supplies. With the flowers, it becomes a thoughtful, curated vignette—a little moment of peace and beauty that elevates the everyday act of knitting into a cherished ritual. It’s a reminder to find beauty in the small things.
🔧 How-To Brief
You don’t need to spend a fortune on specialized ‘knitting needle holders.’ A tall, cylindrical woven basket like this is perfect, but you can get the same functionality for less. Look for woven utensil caddies at stores like Target or HomeGoods; they often have the perfect height and a stable base. Even a simple, tall glass vase or a ceramic planter from a thrift store can work beautifully. The goal is a tall, stable container that keeps your needles upright and easily accessible.
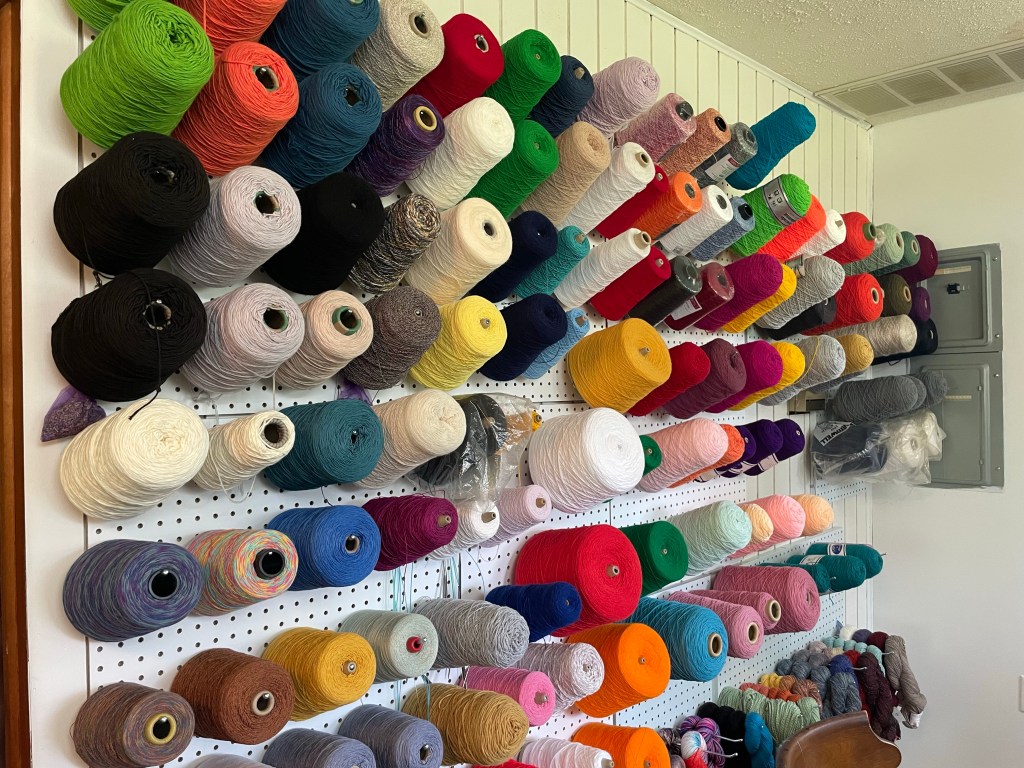
24. Install a Floor-to-Ceiling Pegboard for an Epic Yarn Wall
This is a go-big-or-go-home solution for the truly dedicated fiber artist with a massive collection. This idea requires an entire, uninterrupted wall, ideally one that’s at least 8 feet wide and has standard 8-foot ceilings. Anything smaller will feel cramped rather than epic. It’s a full commitment, essentially turning one wall of your room into a functional, storage-focused art installation. This is not for the casual hobbyist; it’s for someone whose yarn stash is a defining feature of their home and creative life.
🔥 Trending Context
A yarn wall of this magnitude is a major dust collector. All those spools and surfaces create endless places for dust to settle. You will need to commit to a regular cleaning routine involving a vacuum with a soft brush attachment and possibly a stepladder. Also, consider the long-term effects of light exposure. Unless the room is protected from direct sunlight, the yarn on the outer layers of the spools will fade over time. This is best for a basement studio or a room with north-facing windows.
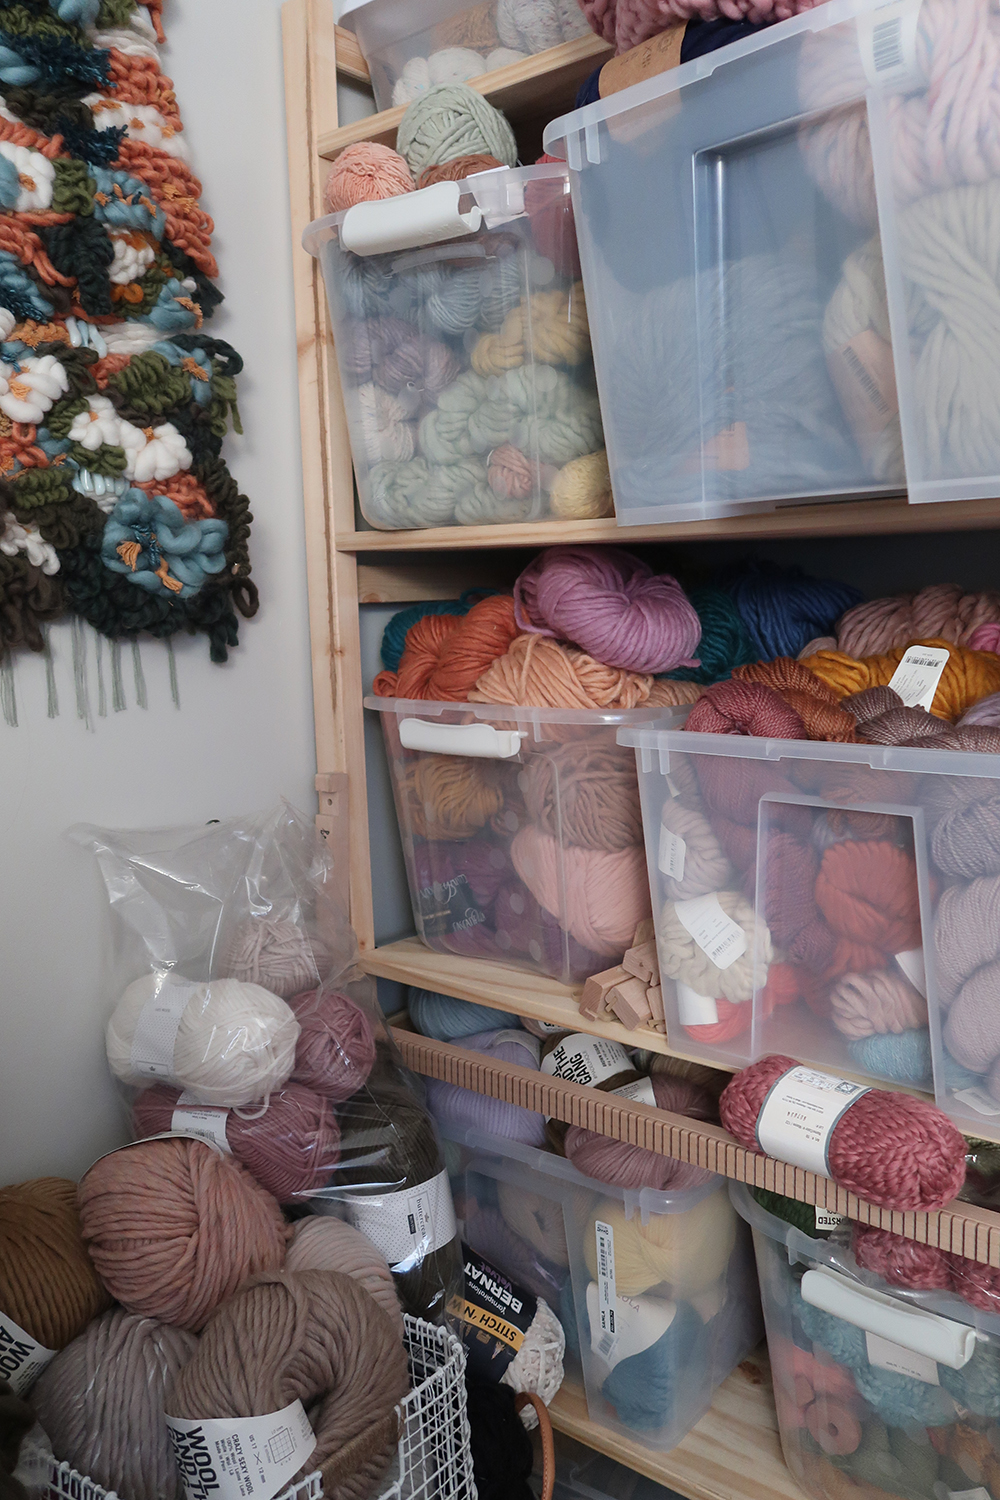
25. Mix Clear Bins and Open Shelves with a Large Fiber Art Piece
This is a masterclass in making your hobby your decor. The storage system works because it directly echoes the colors and textures of the large fiber art piece hanging on the wall. The muted greens, rusty oranges, and pinks in the yarn on the shelves are the same colors used in the wall hanging. This creates a powerful, cohesive look where the raw materials and the finished product are in conversation with each other. It tells a complete story of the creative process, from stash to finished art.
⭐ The One Thing
Before you invest in a big shelving unit, map out your storage needs.
- Inventory Your Stash: Do you have more skeins or more balls? More bulky yarn or more fine yarn? This will tell you if you need more open shelf space or more bin space.
- Measure Your Wall: Get the exact height and width of your available wall space. Don’t forget to account for baseboards and any outlets you need to keep accessible.
- Check for Studs: For a tall unit like this, it’s essential to anchor it to the wall for safety. Use a stud finder to locate the studs so you know you can secure the shelving unit properly.
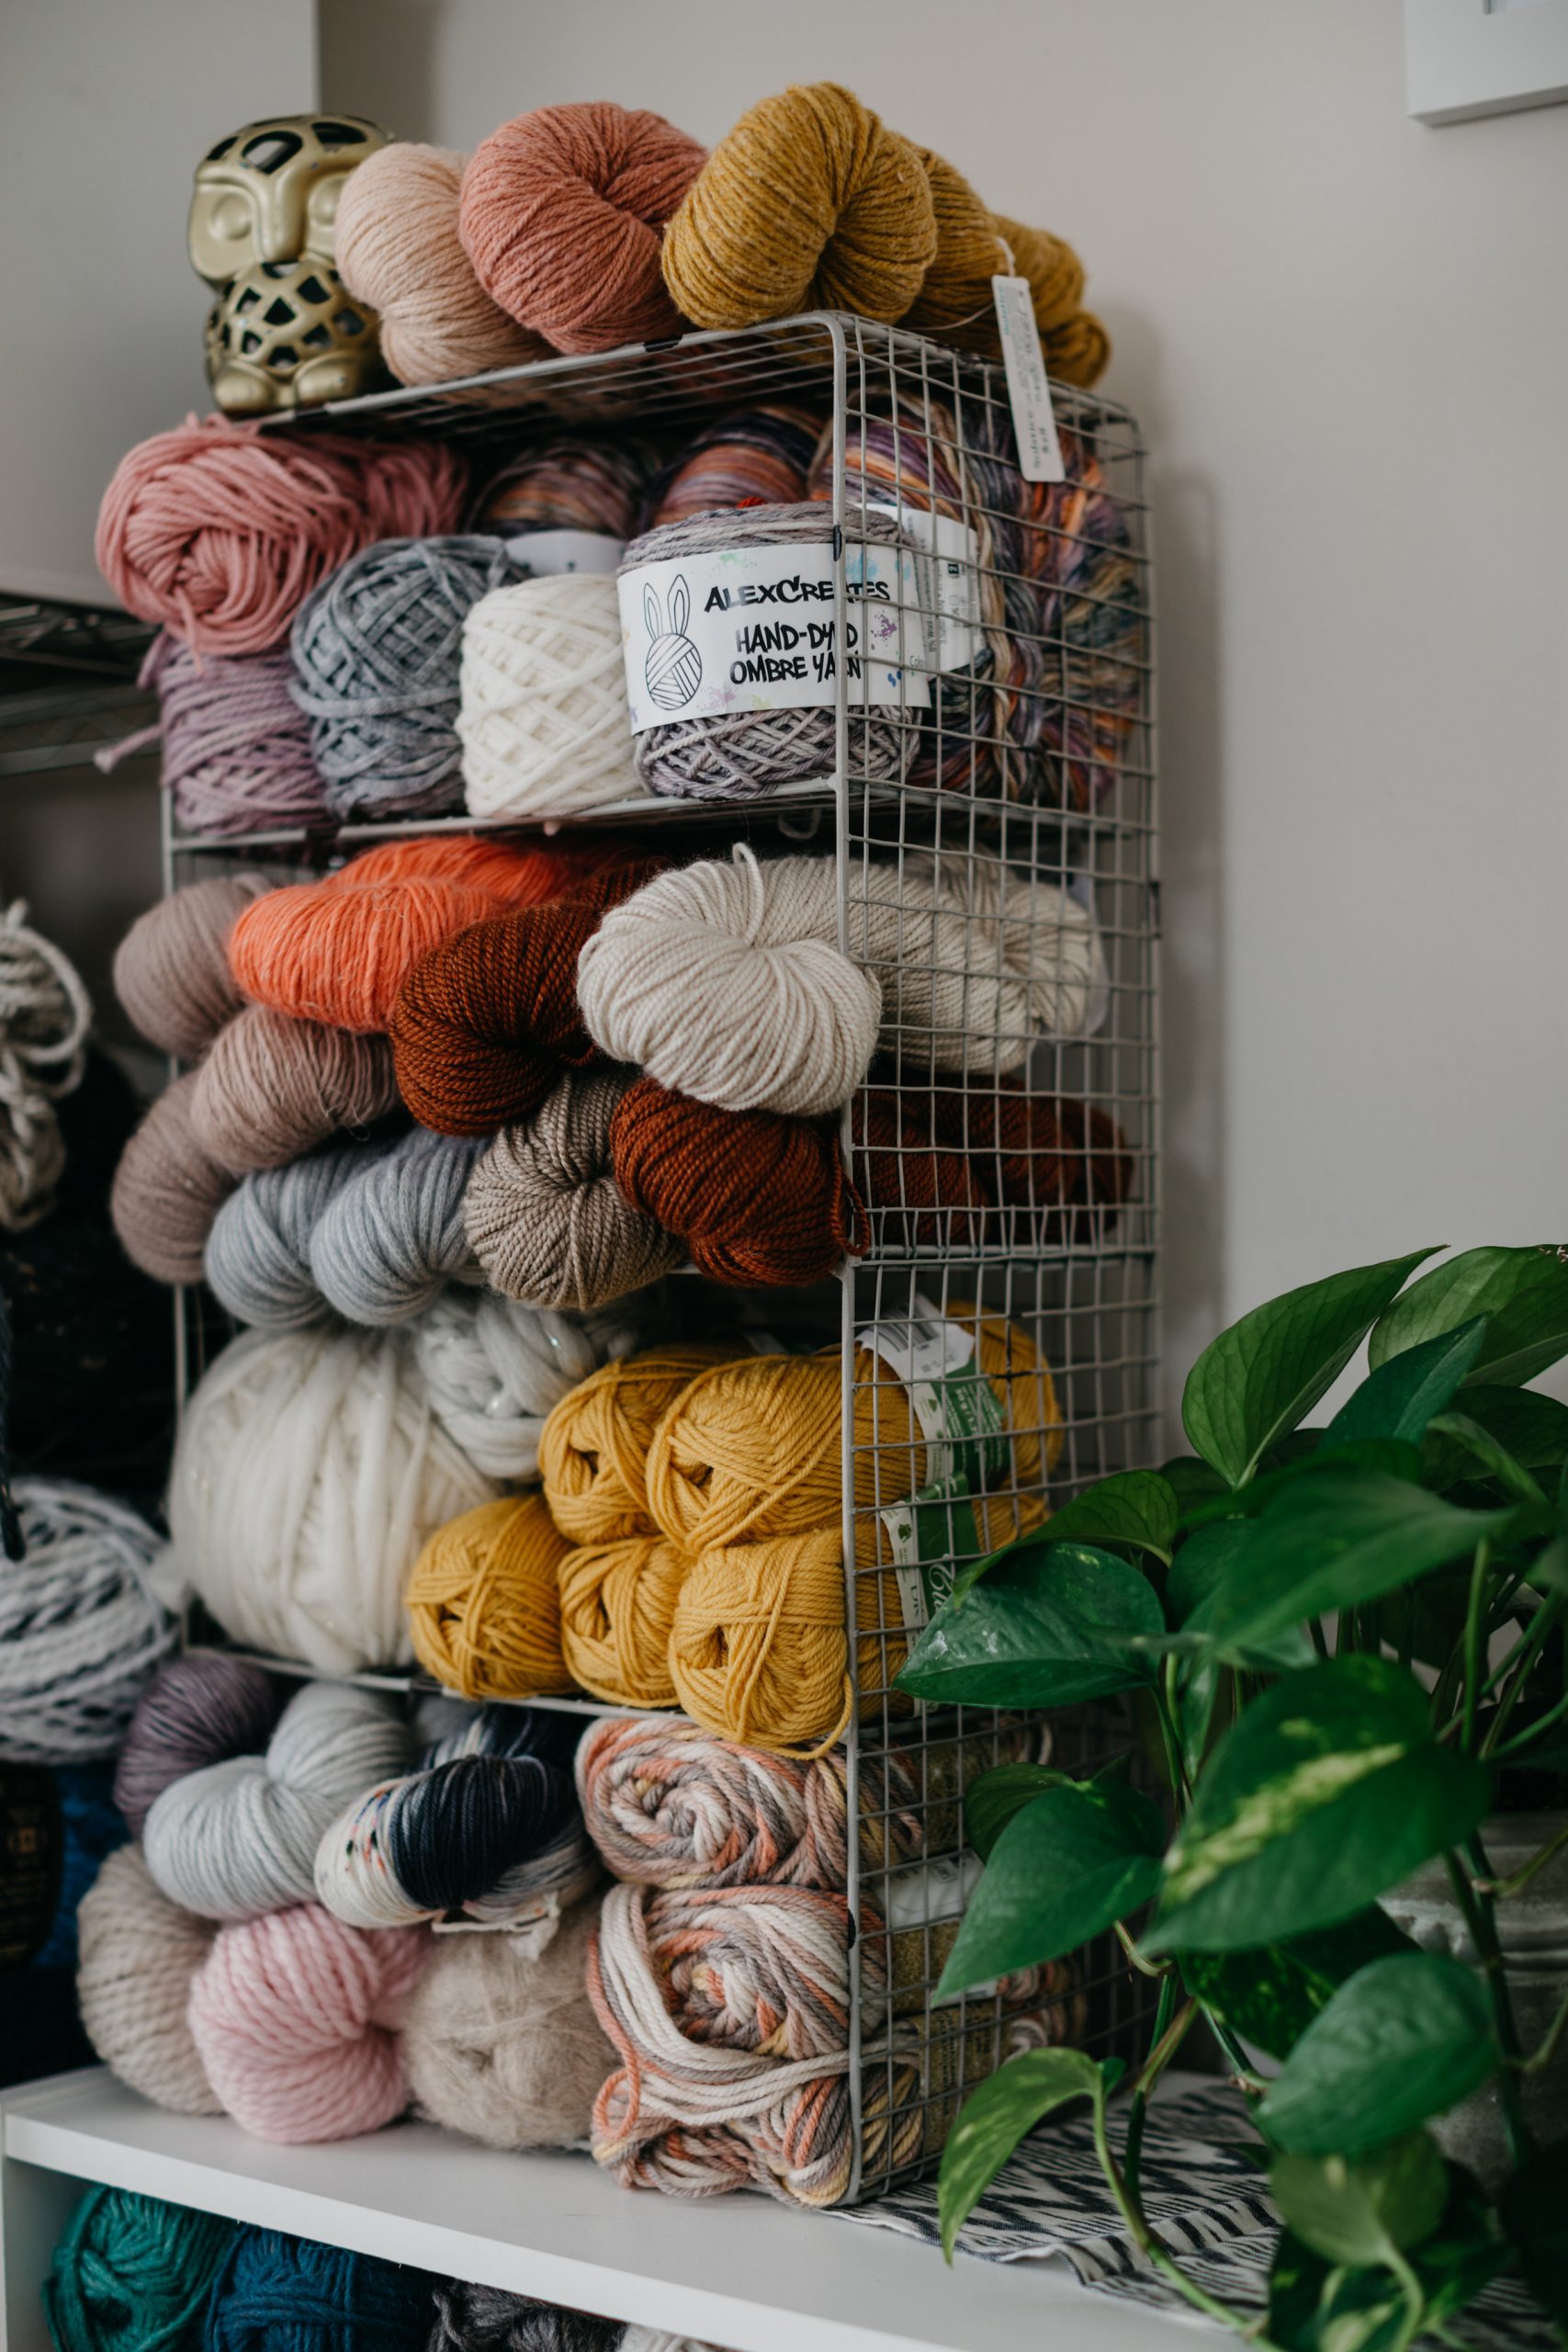
26. Use a Narrow Wire Basket Rack for Colorful Yarn Storage
A tall, narrow storage rack is a fantastic solution for small spaces, and you don’t need a designer version to get the look. Look for over-the-door pantry racks or narrow bathroom storage shelves at stores like Walmart or on Amazon. These are often designed for exactly this kind of vertical, small-footprint storage and can be found for as little as $25-$40. While many are designed to be wall-mounted, they are often stable enough to simply stand against a wall or the side of a desk, as seen here.
✅ Before You Start
When stacking yarn in open-front baskets like this, use the ‘bookend’ method to keep things from looking sloppy. Place your most solid, firmly wound skeins or cakes at either end of the row. These act as bookends, providing structure and support for the softer, more squishable skeins in the middle. This prevents the dreaded ‘yarn slump’ where everything starts to sag and spill out of the front, keeping your shelves looking neat and tidy for much longer.
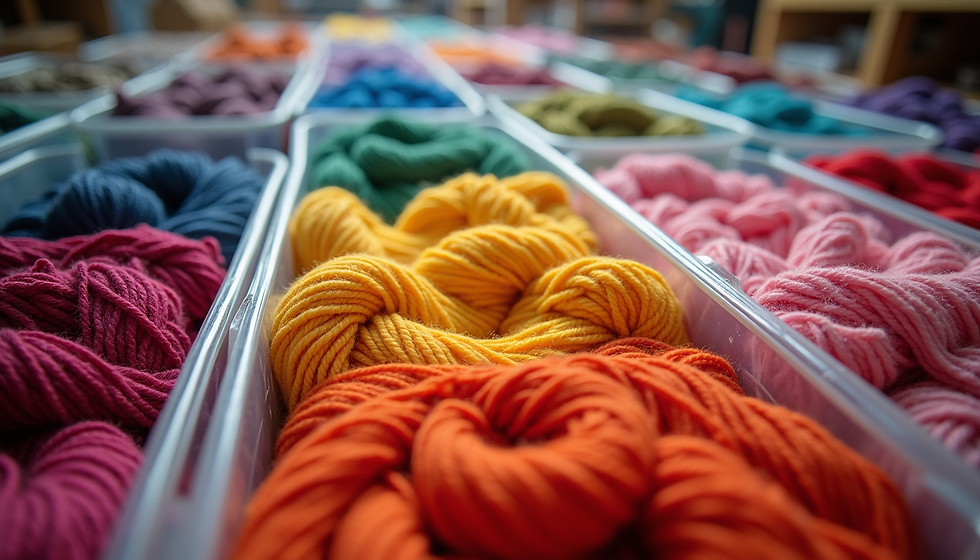
27. Organize Skeins in Long, Clear Plastic Containers
This shallow container method is ideal for those who have standardized a large part of their stash. It’s particularly effective if you use a yarn winder to turn all your skeins into uniform ‘cakes’. The containers shown are likely under-bed storage boxes or shallow drawer organizers. They work best on deep shelves (at least 14-16 inches) or stacked in a closet. The shallow depth is key; if the containers are too deep, you lose the benefit of being able to see everything at a glance.
🧹 Maintenance Reality
This system’s success comes from its almost scientific level of organization. By placing the yarn in long, clear containers, it creates a ‘library’ of color. You can pull out a whole ‘drawer’ of reds or blues to find the exact shade you need. The clear plastic protects the yarn from dust and pests while allowing for perfect visibility. It satisfies the part of the crafter’s brain that loves order, precision, and having the perfect material ready and waiting. It is the visual equivalent of a perfectly organized spreadsheet.
28. Combine White Shelving and a Garment Rack for Ultimate Yarn Display
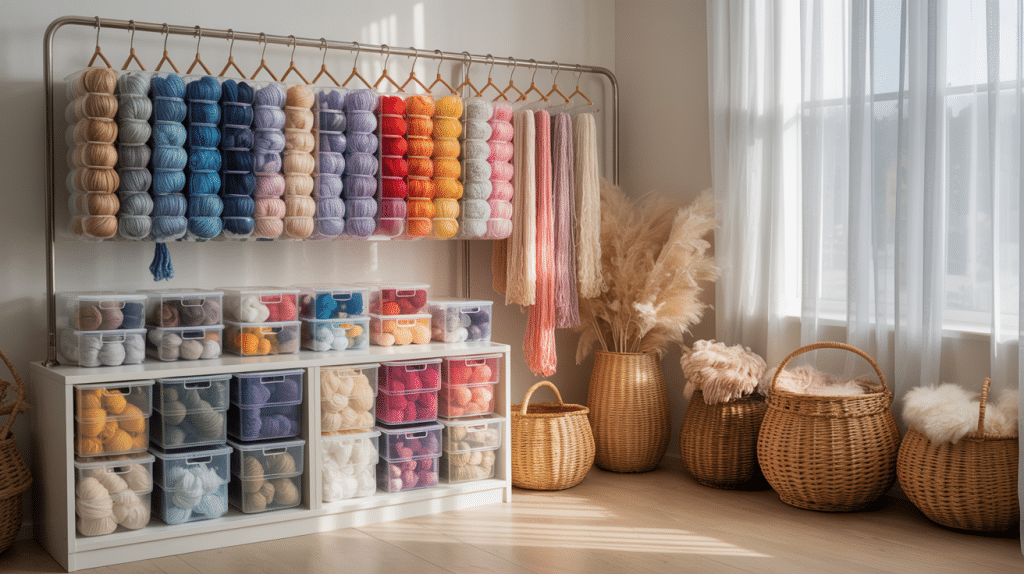
The single most important element in this craft room is the abundance of natural light. The sheer white curtains diffuse the light from the large window, filling the space with a bright, even glow. This is not just pleasant; it’s crucial for anyone who works with color. Natural light allows you to see the true hues of your yarn, which is essential for color matching and creating beautiful palettes. The entire setup is oriented around maximizing this light, making the space both beautiful and highly functional. This is a larger version of the setup in Idea #1.
📐 Style Math
A setup this beautiful and extensive requires maintenance. Sheer white curtains and bright white shelves show every speck of dust and lint. And with this much fiber in one room, there will be a lot of it. You’ll need to commit to weekly dusting of all surfaces and regular washing of the curtains to keep it looking this fresh and bright. Also, be mindful of sun exposure—even with sheer curtains, direct afternoon sun can fade yarn over time. Consider UV-protective film for the windows if this is a concern.
29. Flank a Craft Table with White Cube Shelving for Symmetrical Storage
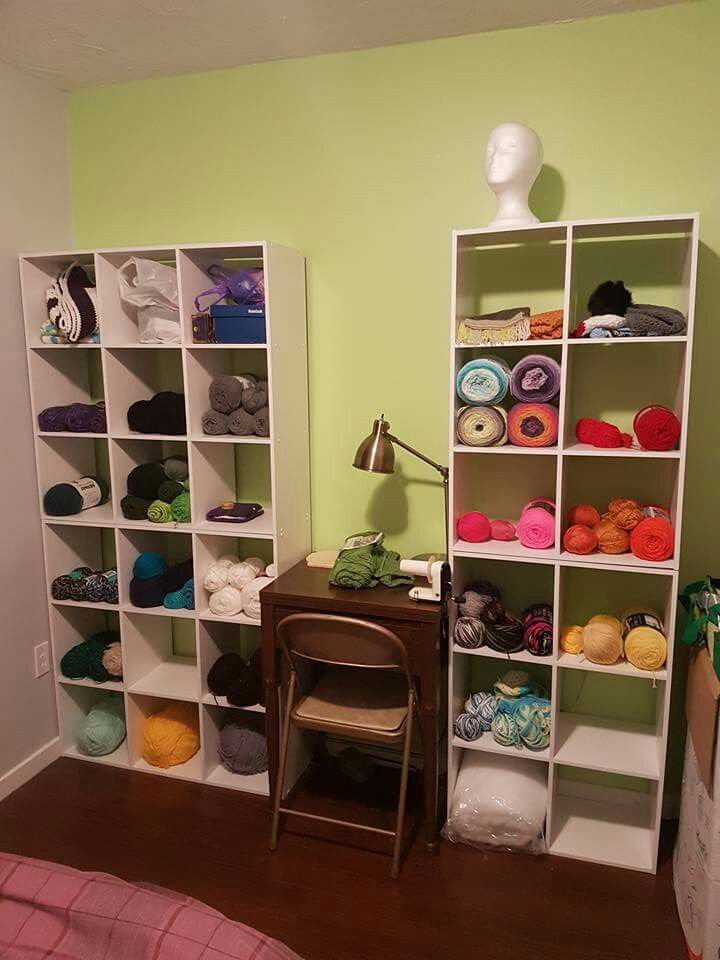
This layout works because of the power of symmetry. Placing two identical shelving units on either side of the craft table creates a sense of balance, order, and intention. This formal arrangement frames the workspace, making it feel like a dedicated and important zone. The bright lime green walls provide an energetic, creative backdrop, while the white furniture keeps the look clean and prevents the strong wall color from becoming overwhelming. It feels purposeful and put-together.
💡 Designer Tip
Achieve this balanced and energetic look with a simple formula: 40% Bold Wall Color + 40% White Furniture + 20% Dark/Metallic Accents. The energizing green and the clean white are the two dominant partners, creating a high-contrast, graphic look. The final 20% comes from the dark wood of the table and the brass of the lamp, which add necessary warmth and sophistication, preventing the space from looking too juvenile. This recipe provides both creative energy and visual structure.
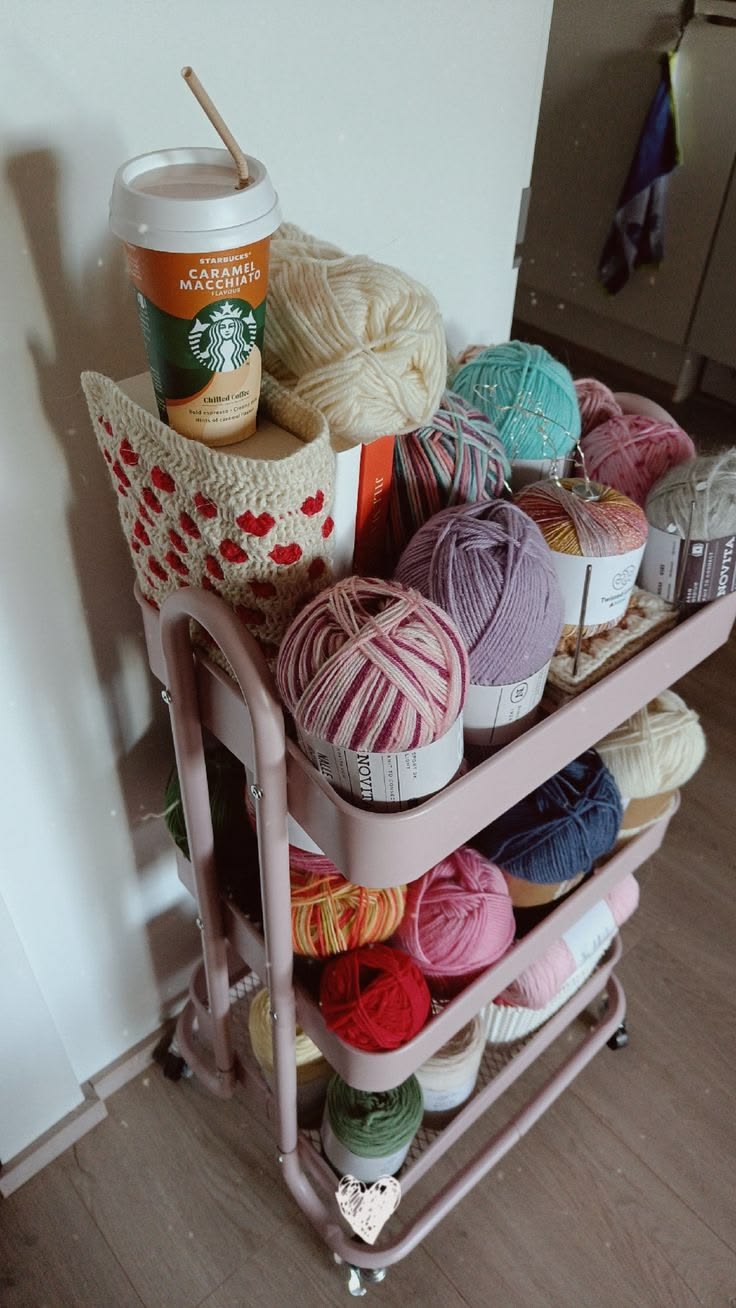
30. Use a Blush Pink Rolling Cart for a Mobile Yarn Collection
The three-tiered rolling utility cart is an absolute icon of craft and hobby storage, and it’s not going anywhere in 2026. Its enduring popularity is due to its perfect combination of compact size, mobility, and accessibility. You can keep your current project and all its associated tools in one place, and then wheel it from your craft room to the living room to binge-watch a new show. The blush pink color taps into the ongoing trend of ‘soft pastels’ and making functional items beautiful. It’s the ultimate ‘craft caddy’.
💰 Budget Breakdown
To maximize the usefulness of a project cart, dedicate each tier to a different function. Use the top tier for the items you reach for most often: your current yarn, needles or hook, a cup of coffee, and your pattern. Use the middle tier for secondary supplies like scissors, a tape measure, and stitch markers. The bottom tier is perfect for storing the rest of the yarn for the project or for holding the finished parts before assembly. This ‘top-down’ organization makes your workflow incredibly efficient.
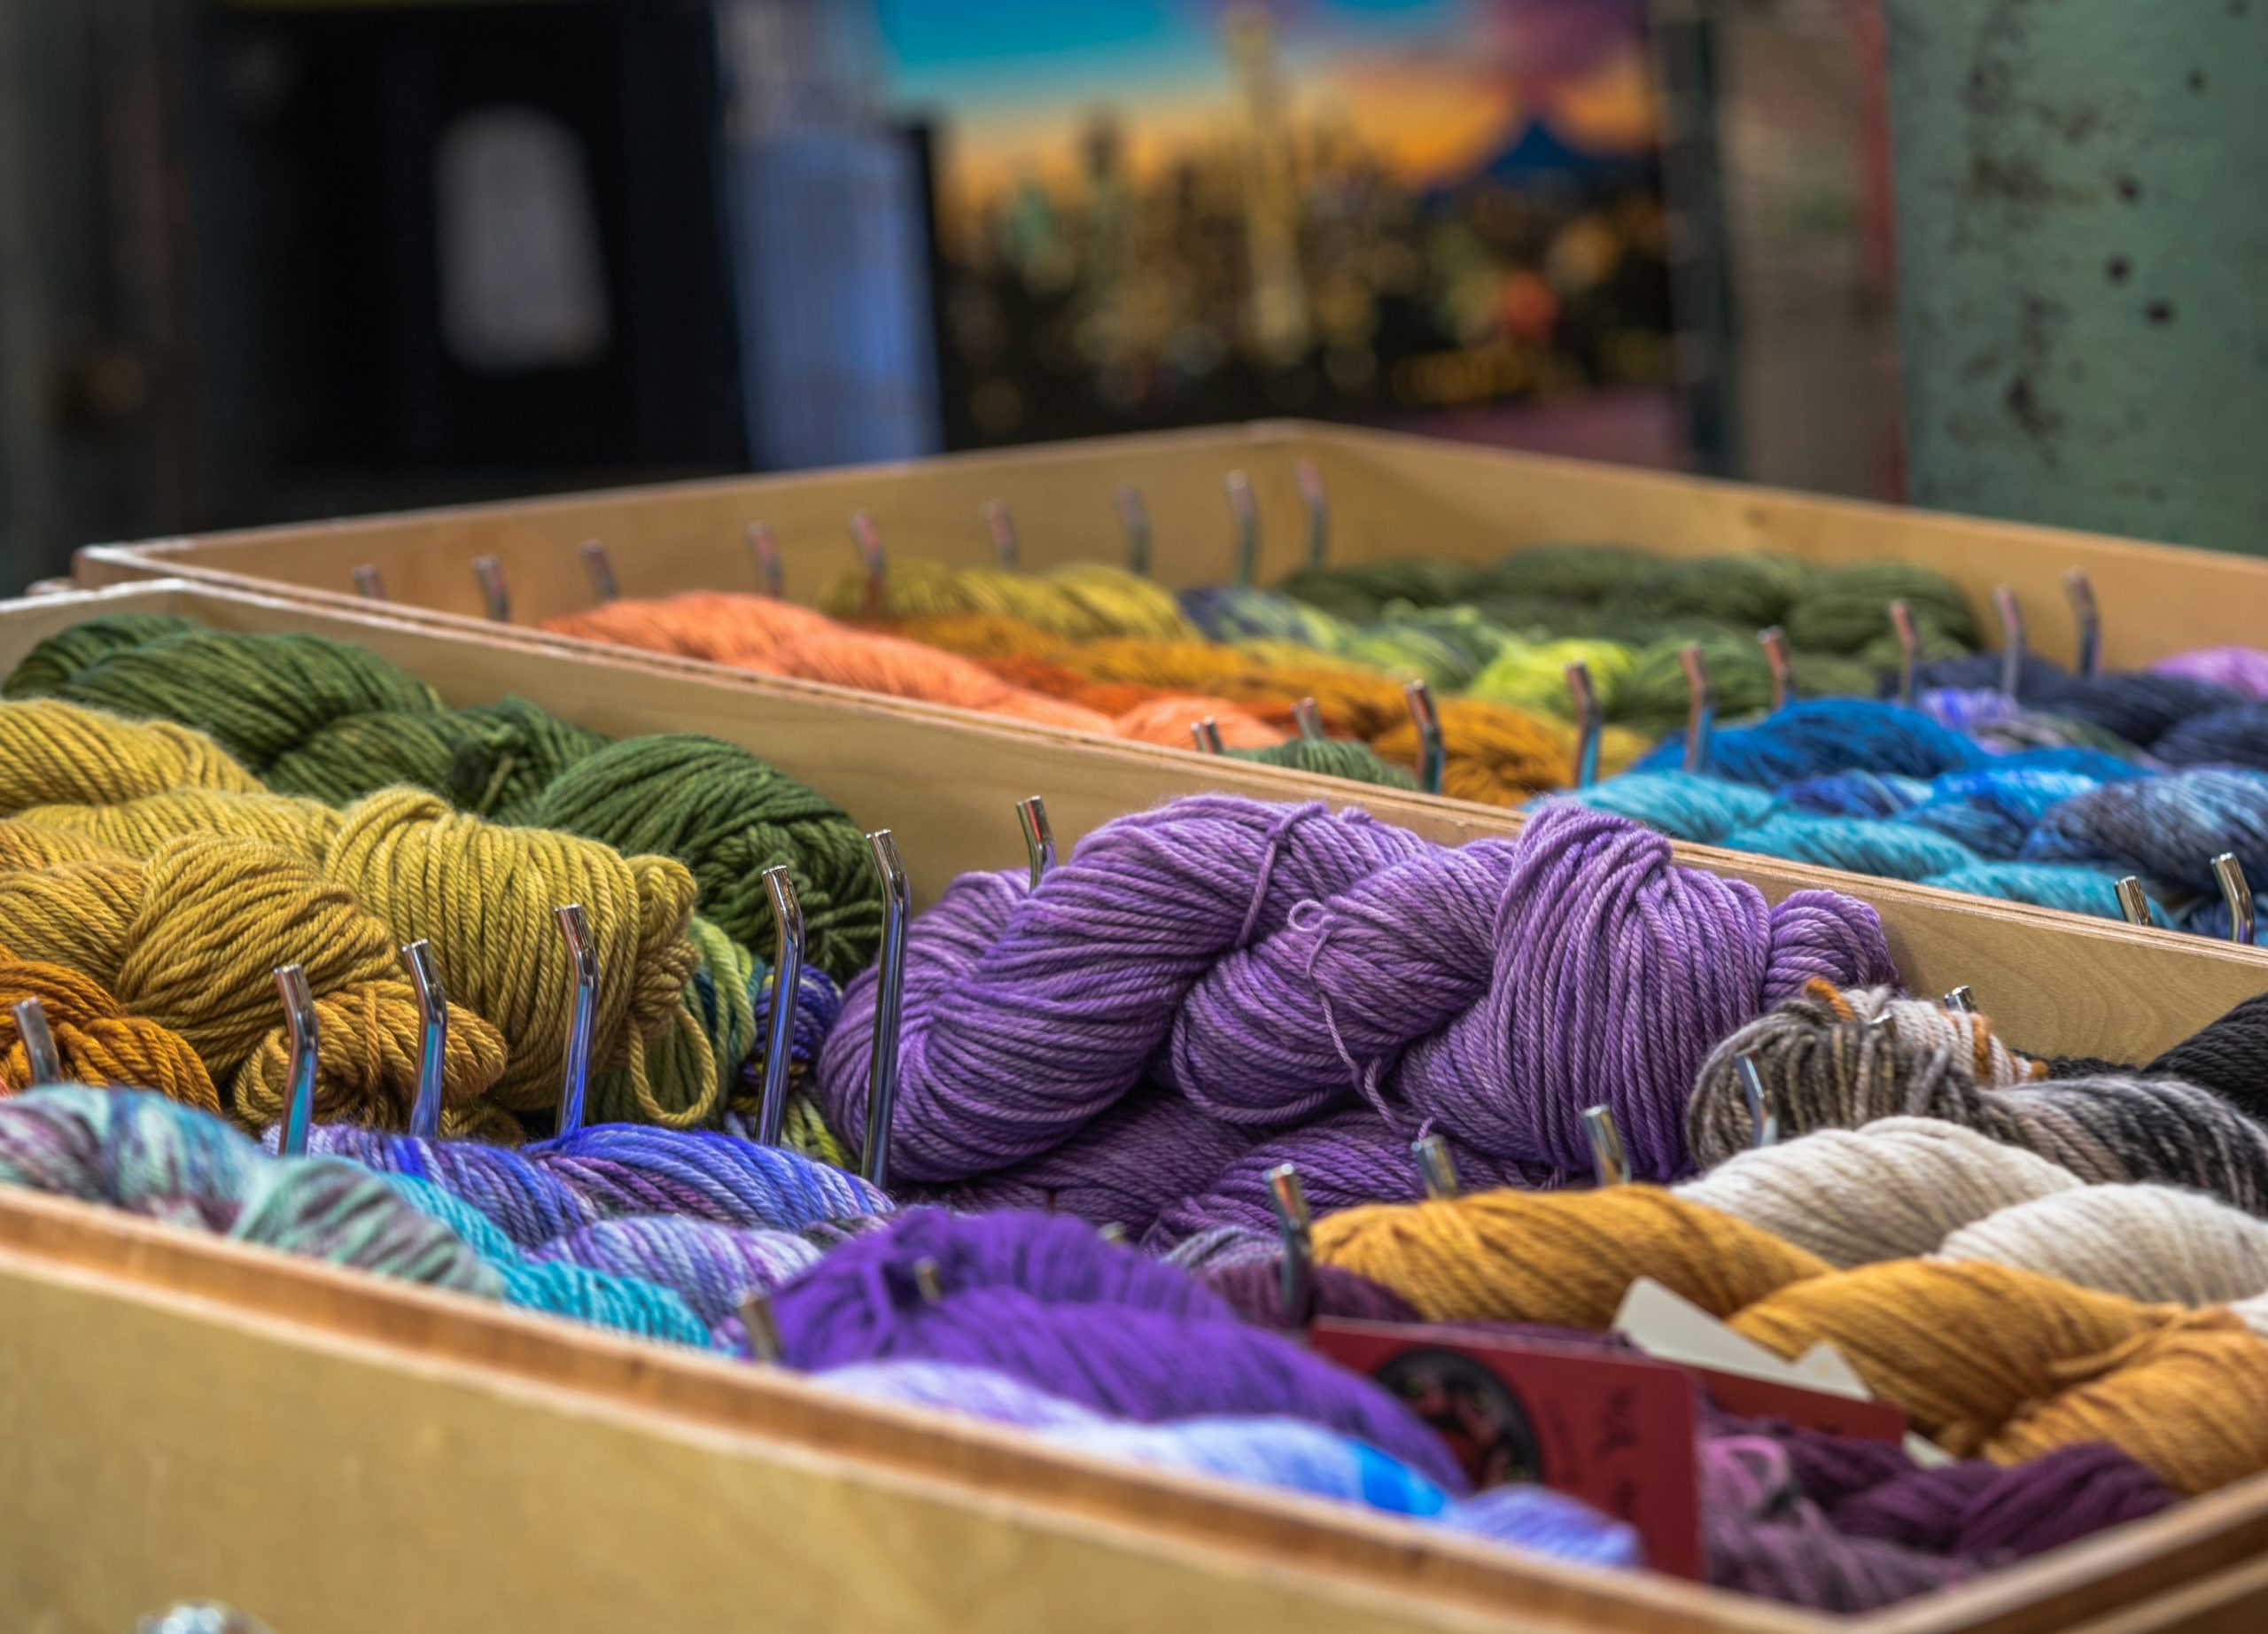
31. Sort Yarn by Color in Wooden Boxes with Metal Dividers
This solution is so visually satisfying because it provides a designated ‘home’ for every single skein. The curved metal dividers create little cradles that keep the yarn from unravelling or getting squished. This level of granular organization appeals to our desire for order. The warmth of the light wood boxes provides a beautiful, natural contrast to the industrial feel of the metal dividers, while allowing the rich colors of the yarn—mustard yellow, earthy green, deep purple—to be the main attraction.
⚠️ Real Talk
You don’t need custom-made boxes to achieve this look. Start with simple, unfinished wooden crates or boxes from a craft store. For the dividers, you can get creative. Look for heavy-gauge aluminum crafting wire that you can bend into the curved U-shape yourself. Alternatively, tension curtain rods or even repurposed wire coat hangers could be cut and bent to create similar dividers. This DIY approach gives you the same level of organization for a fraction of the cost.
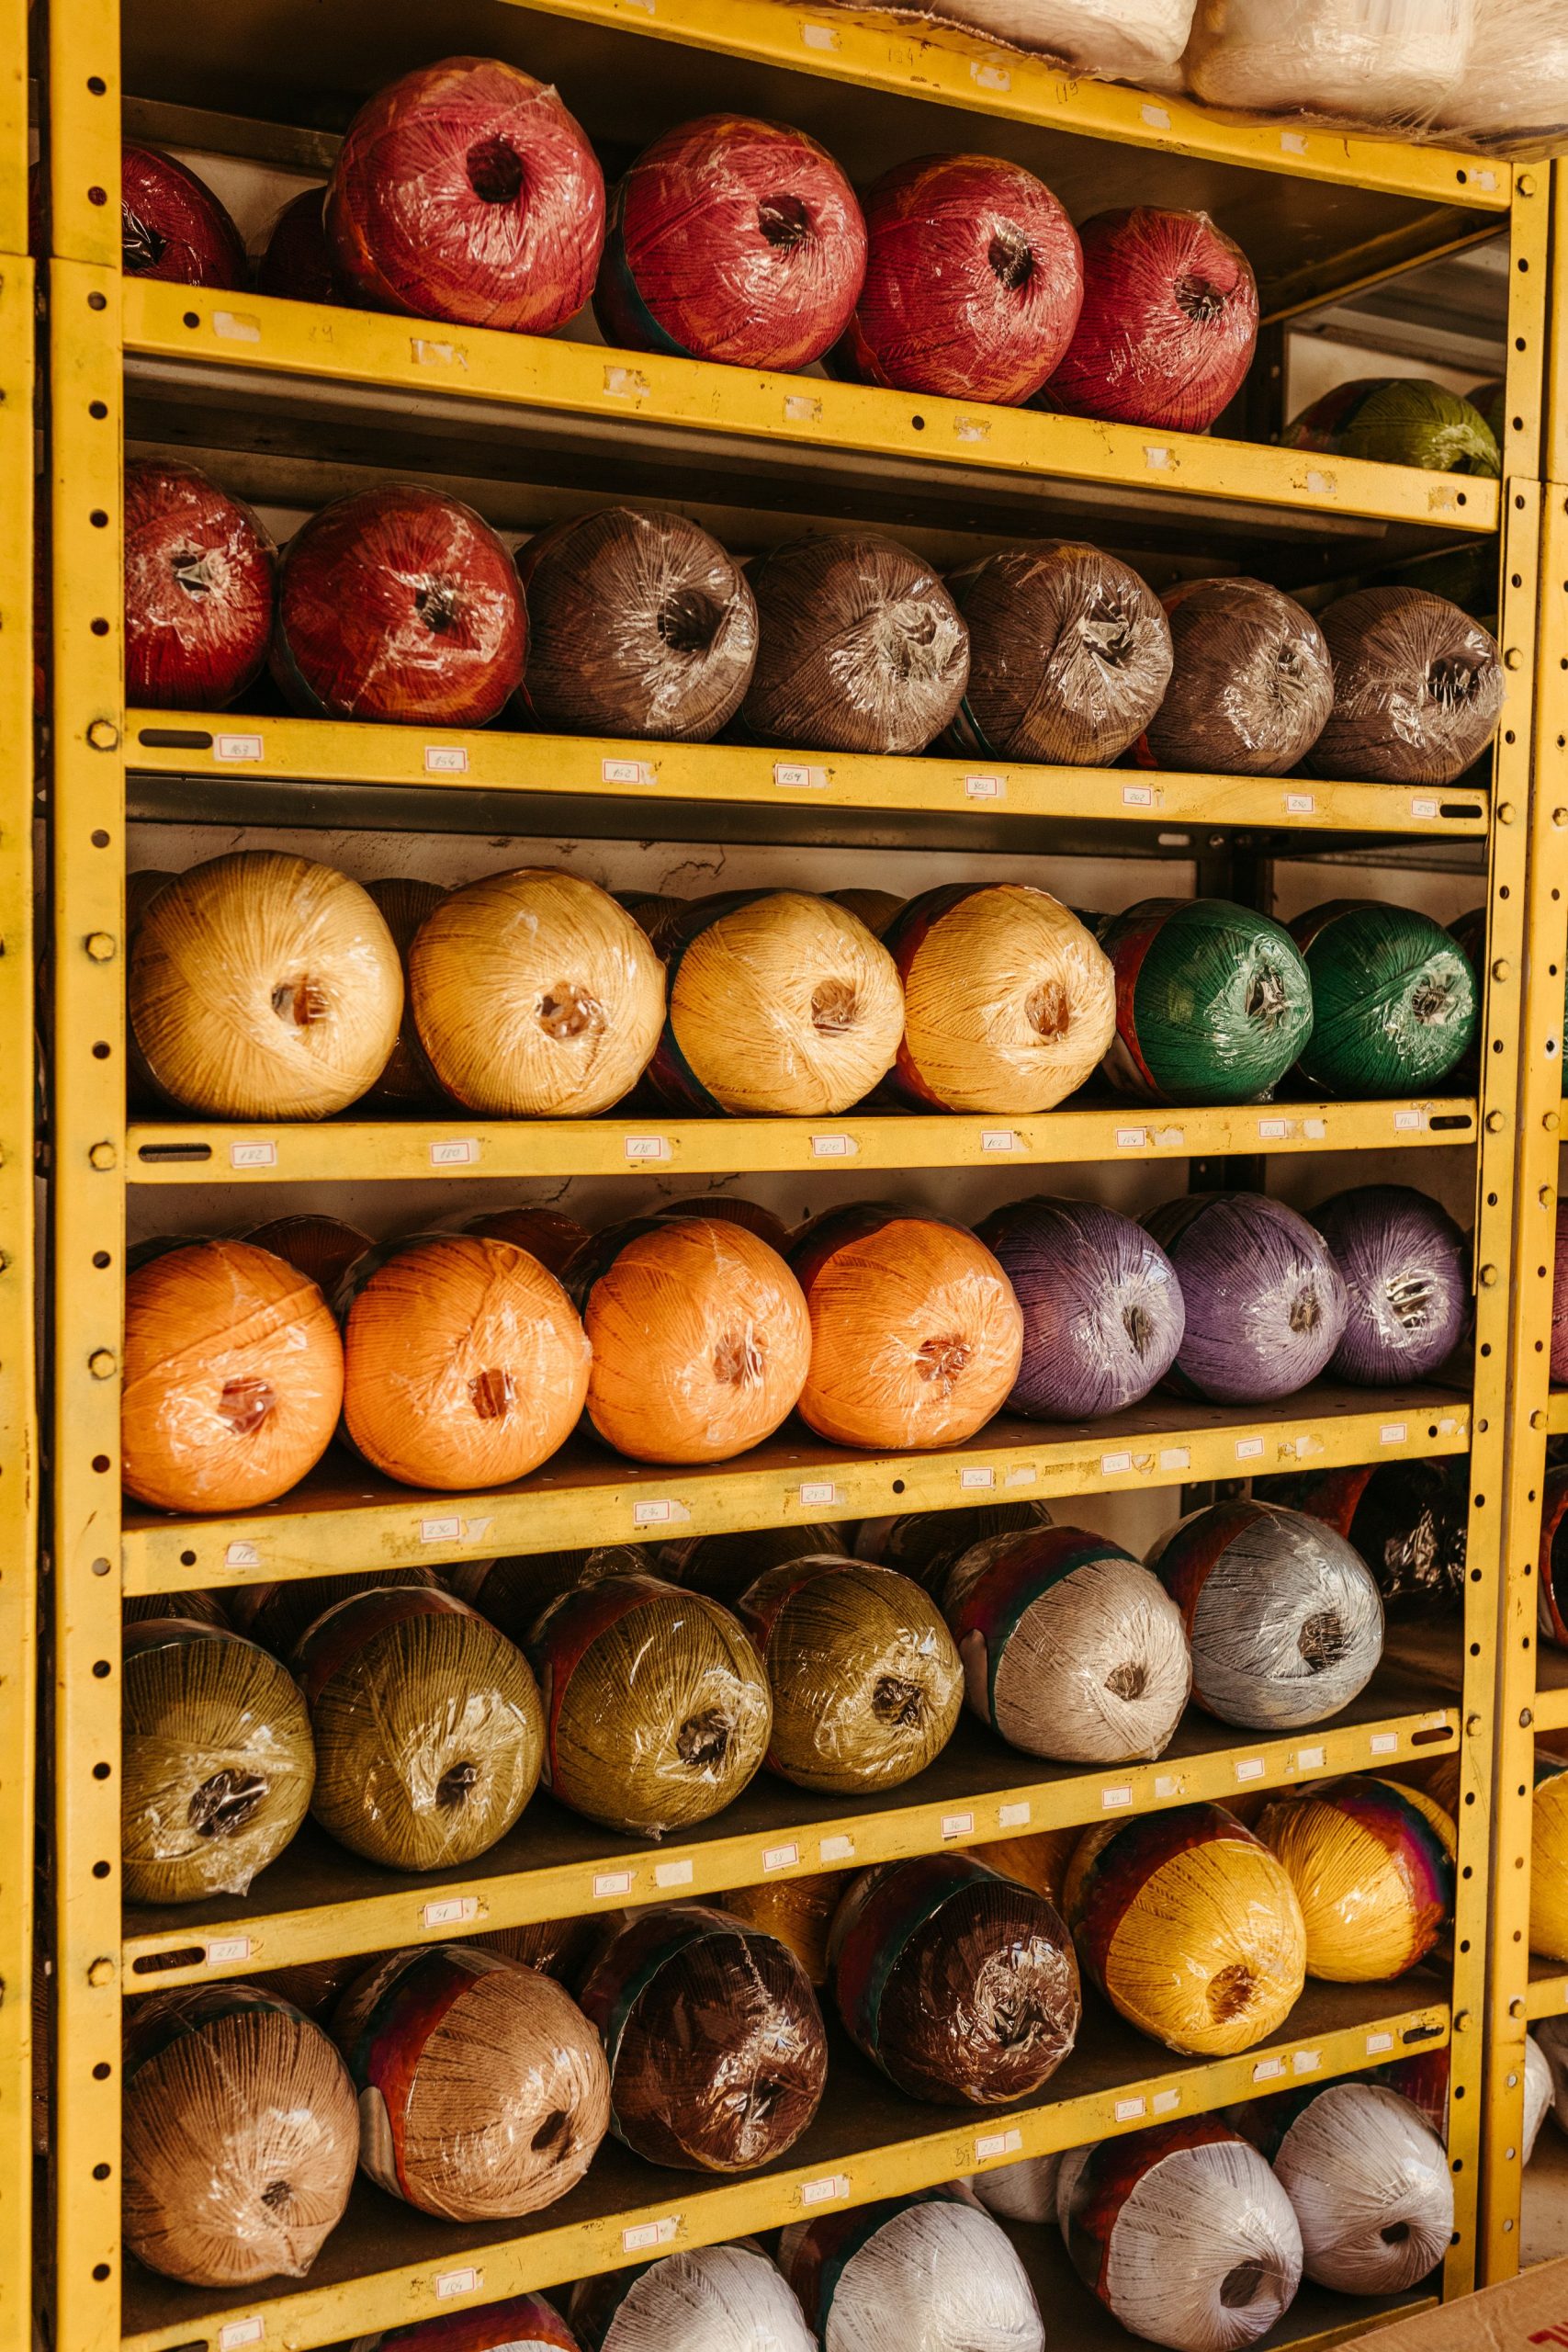
32. Go Industrial with Yellow Metal Shelving for Wrapped Yarn
This heavy-duty industrial shelving is a dream for anyone with a truly massive, shop-sized yarn stash. This isn’t for a corner of the living room; it’s a solution for a dedicated studio, garage, or basement workshop. These units are typically 6-7 feet tall, 3-4 feet wide, and at least 18 inches deep. The sheer size and weight capacity are perfect for storing hundreds of large, heavy yarn balls. The open-sided design allows for easy access from multiple angles, making it a true workhorse.
🎯 What Makes It Work
This looks like a yarn store, and it comes with yarn store realities. The yarn is individually wrapped in plastic for a reason: protection. In a high-volume, semi-open environment like this, plastic wrapping is essential to protect the yarn from dust, moisture, and pests. If you adopt this method for your own large-scale storage, you must either commit to keeping the yarn in its original packaging or investing in clear bags to protect your investment, especially for natural fibers like wool.
Your Yarn Stash Is Telling a Story. Let’s Organize It.
Whew, that was a lot of inspiration! But remember, the goal isn’t to have a perfectly styled, magazine-worthy craft room overnight. The goal is to create a system that works for *you*—one that makes you feel happy, creative, and ready to make things. A well-organized stash can re-ignite your passion and help you rediscover forgotten treasures.
So pick one idea that sparks joy, start small, and enjoy the process of building a space that truly reflects your creative spirit. Now, head over to Pinterest and start creating your dream yarn storage board!