29+ Jaw-Dropping Cinnamon Ornaments DIY Ideas You Need to Try for a Festive 2026 Holiday Season

There’s a reason your Pinterest feed smells like a spice market lately — cinnamon ornaments are having a serious moment, and not just because they cost less than a latte. Somewhere between the sourdough phase and the pressed-flower phase, we all remembered that decorations made from pantry staples look better than half the plastic on the shelf.
We spent real time digging through Etsy, Michaels, Amazon, and Target to sort out which versions are actually worth your glue gun in 2026, from the handmade pieces running around $4 to the heirloom-worthy buys closer to $68. What came back is 29 ideas that range from five-minute cinnamon stick stars to a whole afternoon of baked dough ornaments. You’ll see rustic natural palettes, warm gingerbread browns, dried orange and star anise accents, and a whole lot of baker’s twine, with budget and luxury versions of the same look compared side by side.
And stay until the end — we break down the most common mistakes that can ruin these looks.
📌 Save this to Pinterest for later — you’ll want to revisit these ideas.
1. Cinnamon Stick Bundles, Dried Orange, and a Felt Star
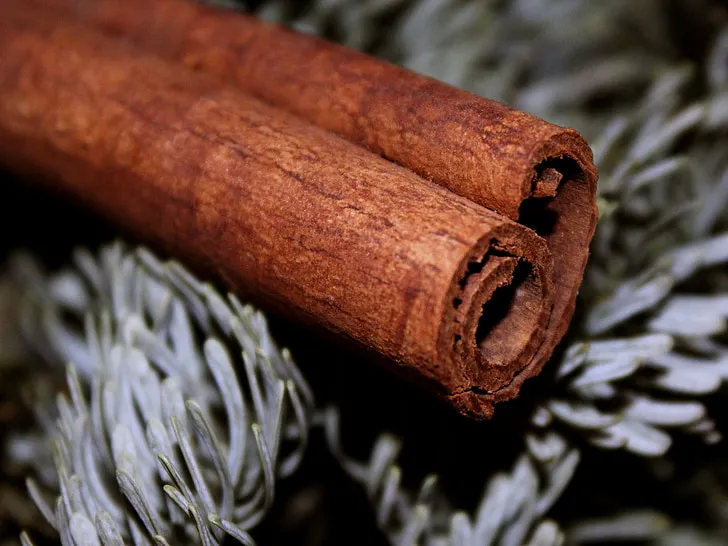
If you’re bundling cinnamon sticks to hang, work in odd numbers — three or five reads more natural than four every single time — and wrap your twine twice around the middle before you knot it. A single wrap slides. Keep the finished bundle under 3 inches tall and glue one extra stick horizontally across the back as a spine. That hidden piece is what stops the whole thing from pivoting sideways the second it’s on a branch.
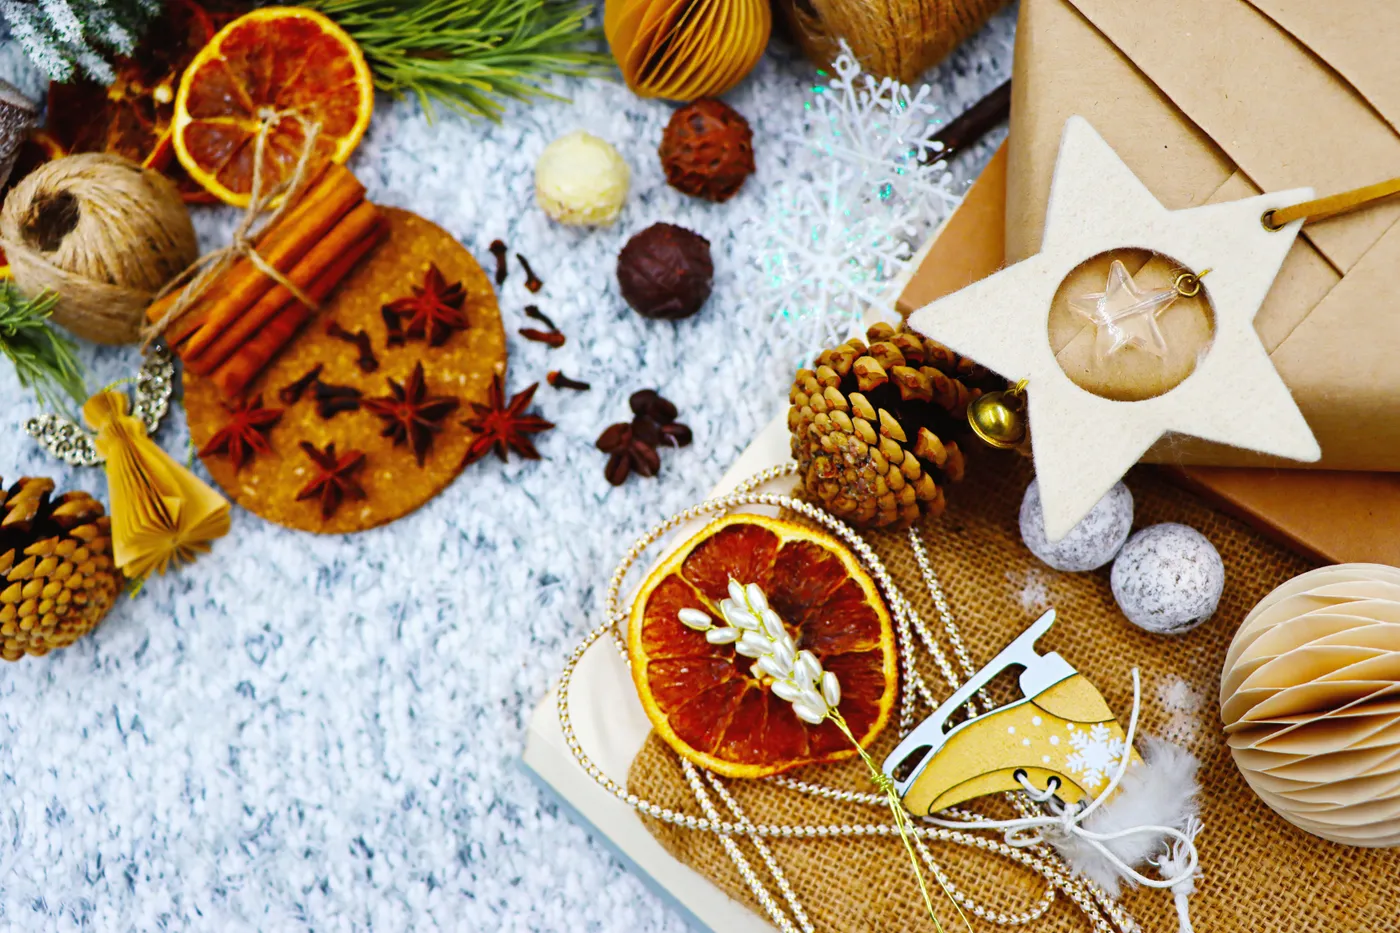
What makes this flat lay work is temperature matching. Cinnamon brown and deep orange are both warm, the pinecone and greenery supply the only cool note, and the cream felt star gives your eye somewhere to rest. Call it 60 percent brown and orange, 30 percent cream and green, 10 percent gold. Trade the orange slices for dried apple and the formula still holds.
2. Flour on the Table: Gingerbread Cutters and Bird Ornaments
- Stir 1 cup of applesauce into 1½ cups of ground cinnamon until the dough pulls away from the bowl, then rest it 30 minutes.
- Roll to ¼ inch between two sheets of parchment — thinner cracks, thicker gets heavy.
- Cut your shapes and punch a hole with a straw, half an inch from the top edge.
- Bake at 200°F for two hours, flipping once at the hour mark.
- Cool completely before threading twine, or the hole tears.
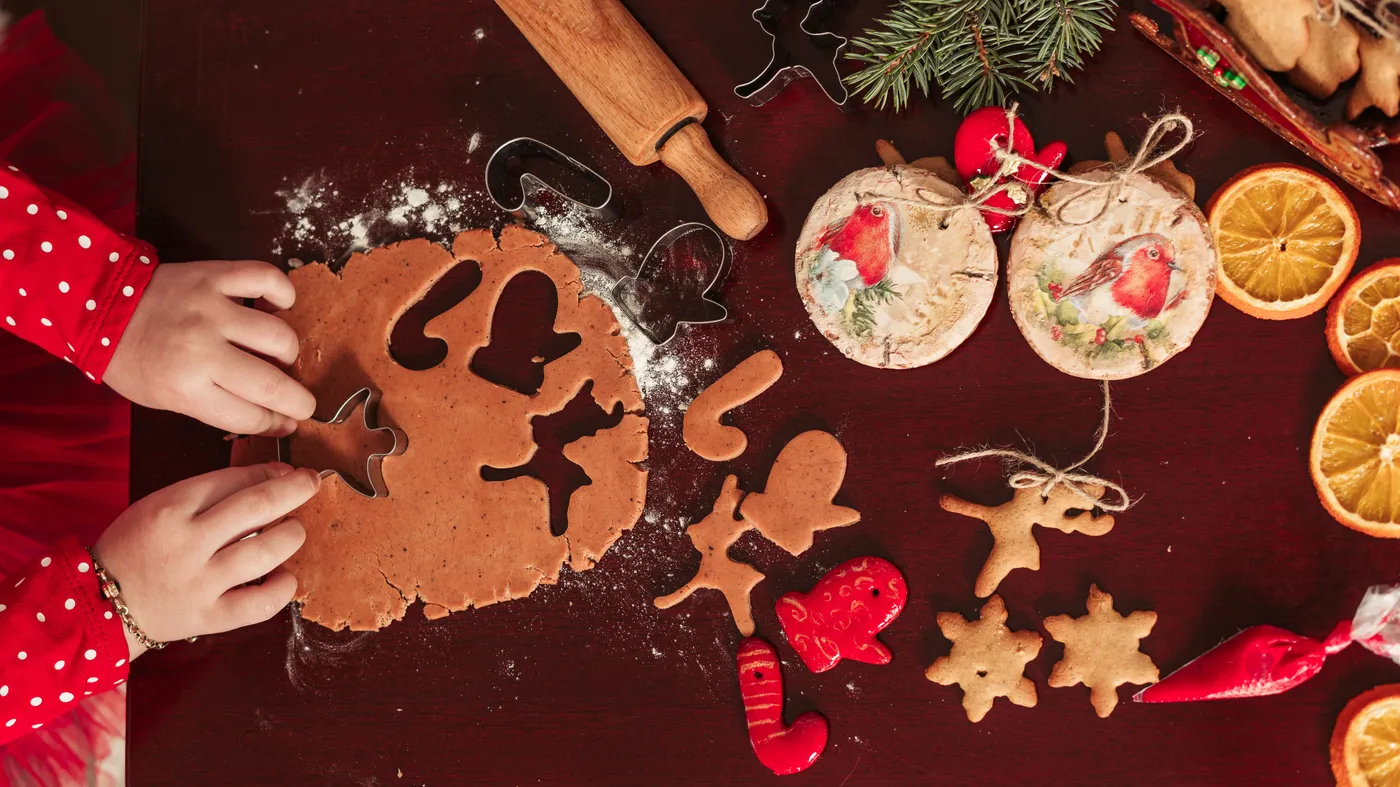
Budget about two and a half hours, most of it hands-off, and roughly $8 in spices for a dozen ornaments. Set the kids up with the cookie cutters and a bowl of flour — the mess is part of the memory.
Two honest warnings before you give up an afternoon. Cinnamon dough is decorative only, and it will tempt a toddler precisely because it looks like a cookie. Also, an ornament that hasn’t fully dried will crack within a week; if the center still feels cool and faintly soft, back in the oven it goes. Skip the polyurethane sealer if you want the smell to survive past December.
3. Frosted Pinecones, Star Anise, and a Square of Burlap
The formula here is 50 percent matte natural (pinecone, burlap, walnut shells), 30 percent warm brown spice, 15 percent red berry, 5 percent white frost. That final five percent does more work than it looks — the flocking is what keeps the grey surface from swallowing the whole arrangement. Swap the bright red berries for dried cranberries in a deep burgundy and you get the same recipe with a moodier, more grown-up result.
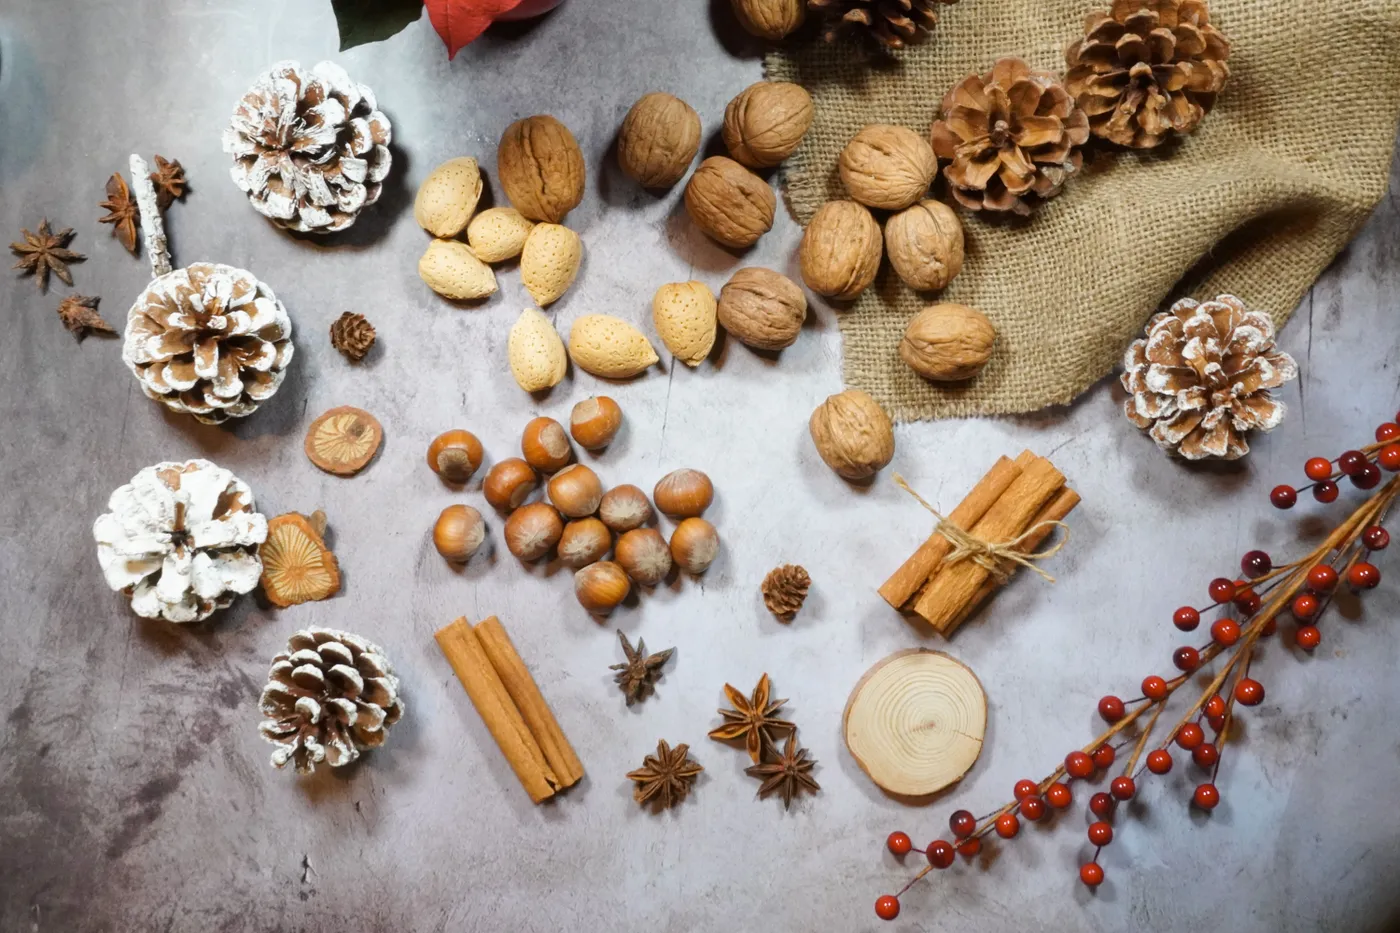
It’s the burlap square, and I’ll defend that. Without it you have a scatter of pretty objects on a grey table; with it, the arrangement gets a matte floor that makes the frosted pinecones look brighter and the cinnamon sticks look richer. Nothing else in the pile can be removed with as much loss. Cut a piece about two inches wider than your cluster on every side — no hemming, the frayed edges are the point.
4. A Bamboo Tray Set Up for Fabric Cone Ornaments
- Bamboo tray, roughly 12×8 inches: $12–$22
- Two quarter-yard cuts of patterned cotton: $6–$12
- Bulk cinnamon sticks, about 40 pieces: $8–$14
- Fabric shears with black handles: $10–$18
- Red and white baker’s twine: $4–$6
- Holly-print tablecloth for styling: $15–$30
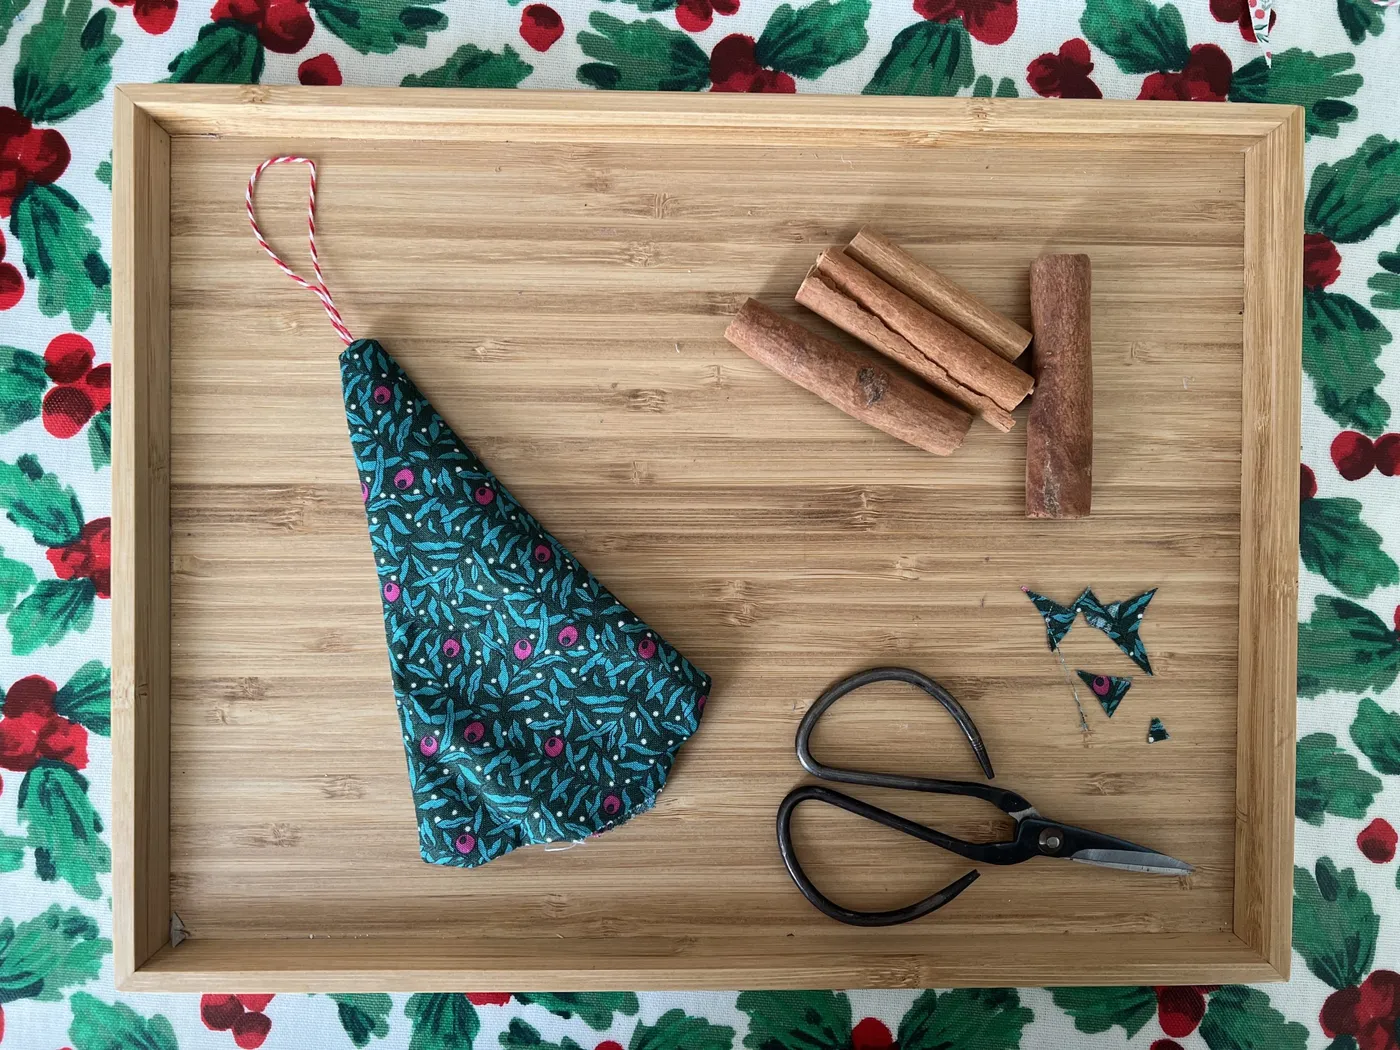
Total: $55–$102 for a setup that makes about twelve cones and leaves you with tools you’ll use for years.
Budget alternative: a thrifted bamboo tray at $4, a secondhand curtain cut into circles, and dollar-store cinnamon — under $20 for the same table.
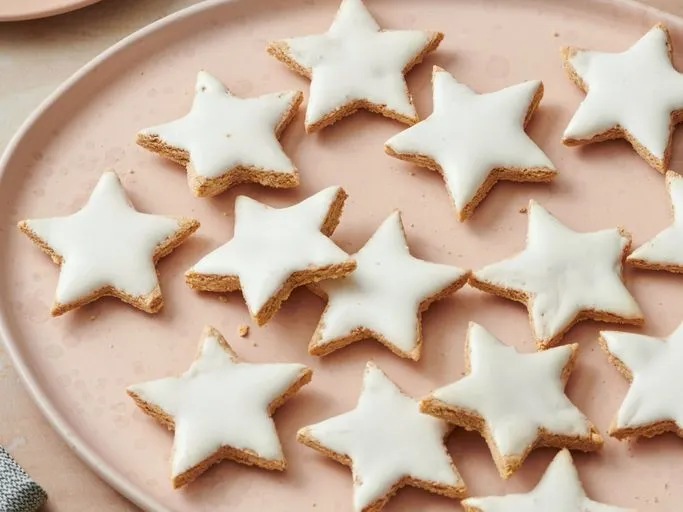
Cut your fabric as a half circle, not a full one, and let the radius equal the finished ornament height — a 4-inch cone wants a 4-inch radius, which gives you a base circumference near 12½ inches. Run Fray Check or pinking shears along the curved edge before you roll. Then glue a short cinnamon stick bundle into the wide opening so it shows, and the cone hangs straight instead of listing to one side.
5. Star Ornaments Wearing Dried Orange Slices and Tiny Berries
The thin dried orange slice is the whole ornament. A star cut from cinnamon dough is a nice brown shape; add a translucent orange wheel and suddenly light passes through it and the thing reads as finished. Keep the slice at an eighth of an inch or it becomes a heavy disc that pulls the star off balance. This is the same orange-and-cinnamon palette as Idea #1, just translated into something you can hang.
- Cut or bake your star base and let it cure completely.
- Lay it flat and dry-fit the orange slice, two berries, and a tiny green sprig before any glue goes down.
- Use a wax-tip or low-temp glue pen so the thin slices don’t scorch.
- Thread twine through the hole and knot it snug against the back.
About 20 minutes per ornament once everything is dry, and under $10 for a set of six.
6. A Five-Stick Cinnamon Star on a Snow-Flocked Branch
Five cinnamon sticks, glued at their midpoints, produce a shape your brain reads instantly as a star even though no two sticks are identical. That’s the trick — the geometry does the work, so the material can stay rough and uneven. Against flocked branches the brown reads almost black in the best possible way, and the fake snow gives it something to sit on rather than float against.
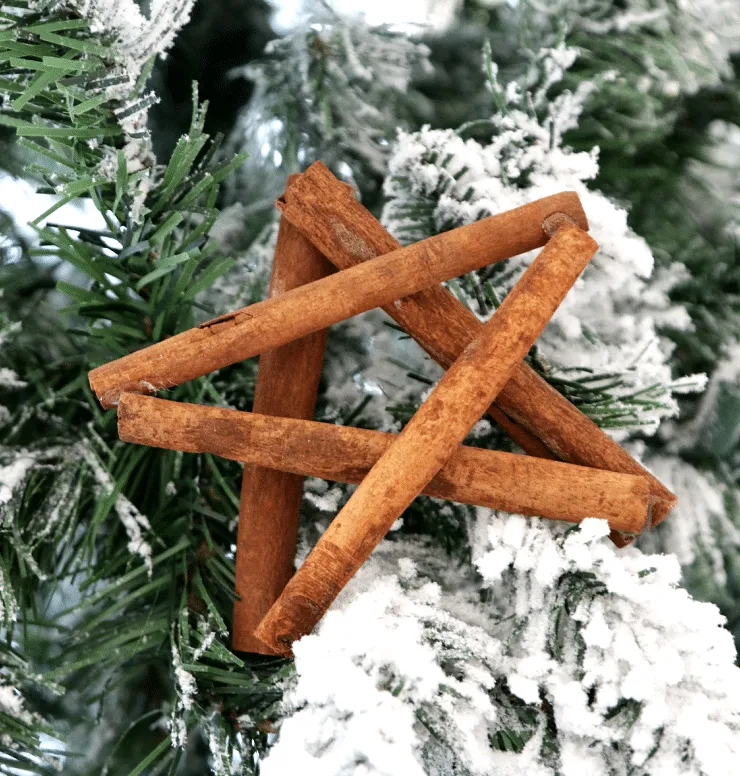
These want to be 5 to 6 inches across: big enough to register from across a room, small enough that five sticks still glue cleanly. They work on a full-size tree, but honestly they’re better on a 4-foot tabletop tree or hung in a window where the silhouette shows. Compare with Idea #22, the same star with jingle bells added — that one is heavier and wants sturdier branches.
7. A Cinnamon Stick Stable With a Star Anise on Top
- Cut two 3-inch sticks for the sides and two 2½-inch sticks for a peaked roof, trimming the roof ends at an angle with garden pruners.
- Lay the frame flat and glue each corner, holding for 20 seconds.
- Wrap light twine twice around every joint and knot at the back.
- Glue three tiny spice figures to the base and a whole star anise at the peak.
- Add the hanging loop at the top center, not the corners, so it hangs level.
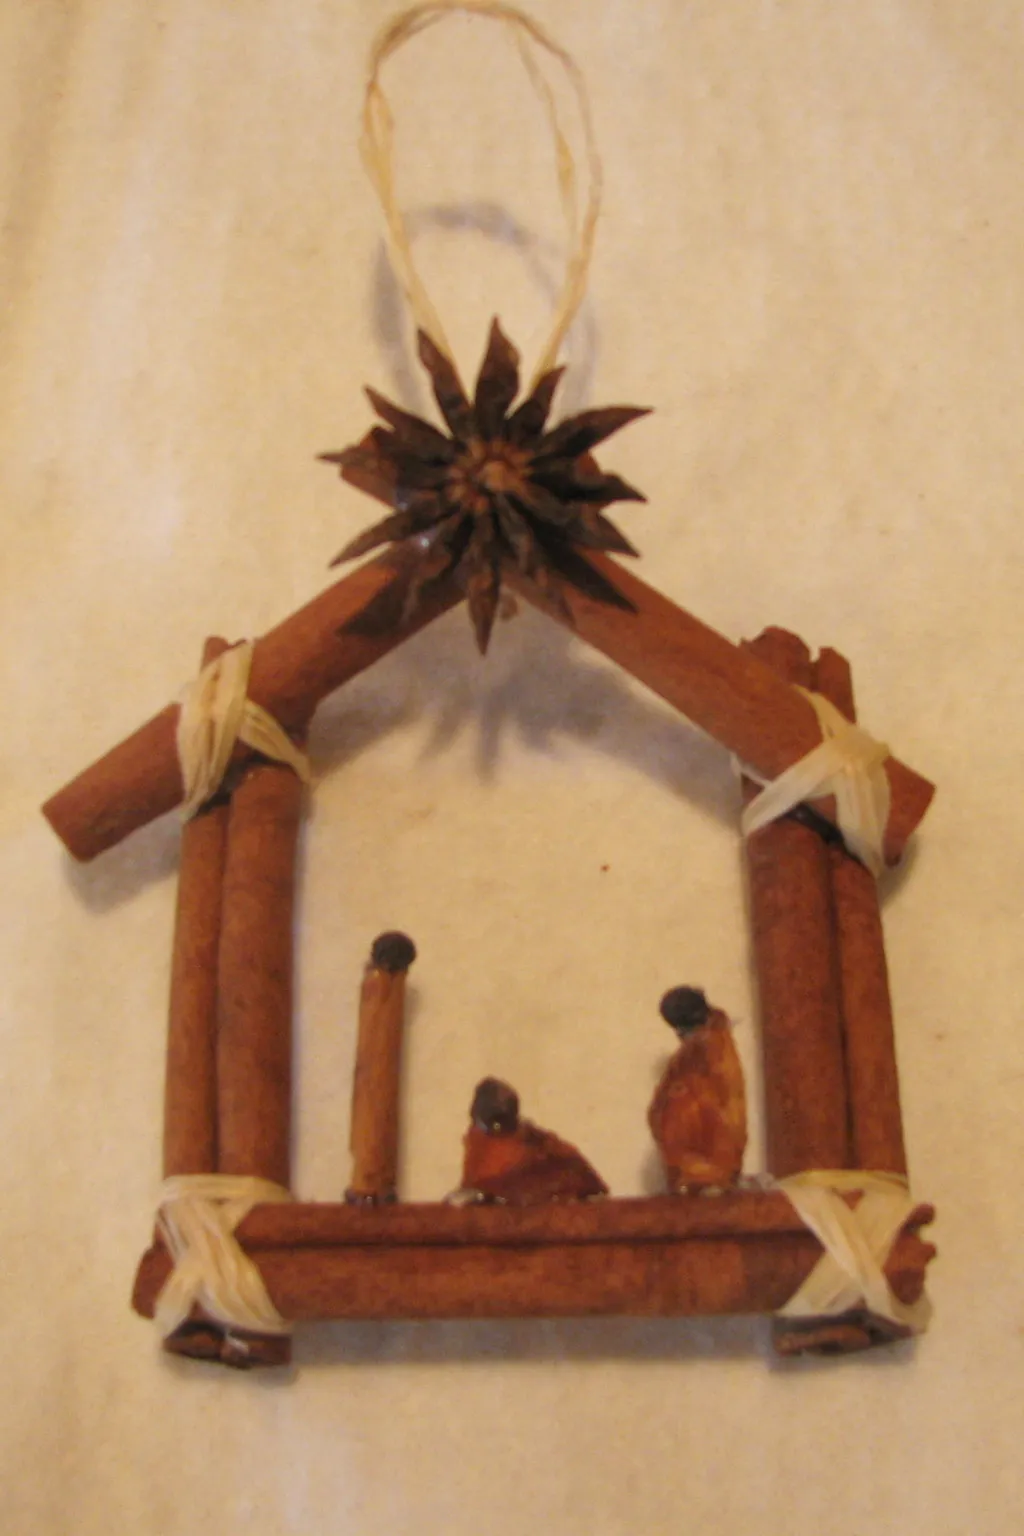
About 45 minutes and roughly $6 in materials per ornament.
Take away the star anise and you have a cute little stick hut. Put it back and the whole thing becomes a nativity. One spice is carrying the narrative work of an entire scene, and it costs about fifteen cents. Set it at the peak and slightly forward of the frame so it casts a small shadow inside the stable — that shadow is what makes the depth read.
8. Un-Iced Cookie Ornaments With Holes Already Punched
The un-iced look is having a moment, and it’s the same instinct behind the bare kraft-paper gift wrap everyone’s pinning. In 2026 the pull is toward ornaments that look like they came out of a real kitchen rather than a craft aisle — visible texture, no glitter, one hole punched cleanly at the top. It has staying power because it photographs beautifully in low light and doesn’t date the way a trend color does.
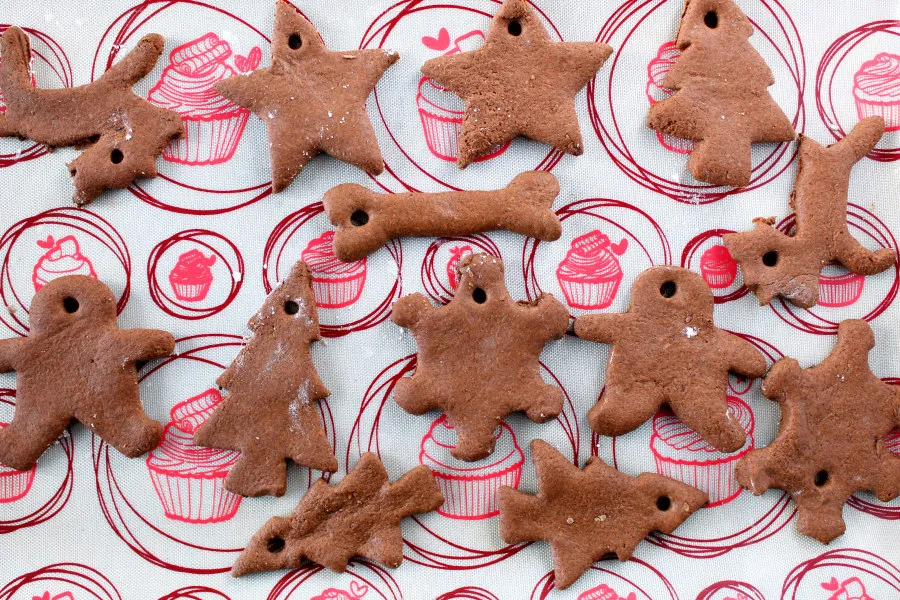
Punch your hanging holes while the dough is still warm and barely set — a skewer at that stage pushes through cleanly, while a fully cured ornament chips and crumbles. Go to ⅛ inch, not 1/16; baker’s twine needs the room. Then reinforce the rim with a thin dab of craft glue and let it dry before stringing. That’s the difference between an ornament that survives three seasons and one that doesn’t survive the car ride home.
9. A Puzzle Piece Reindeer With a Red Pom Nose
Puzzle-piece ornaments are the most kid-friendly project on this list and the most likely to fall apart. Two things matter: use matte or older puzzle pieces, because the glossy coated ones shed hot glue within a week, and skip the cheap googly eyes that peel. A dot of tacky glue under each eye, pressed for ten seconds, holds far better than any peel-and-stick backing. Working with a four-year-old? Pre-glue the body and let them handle the face.
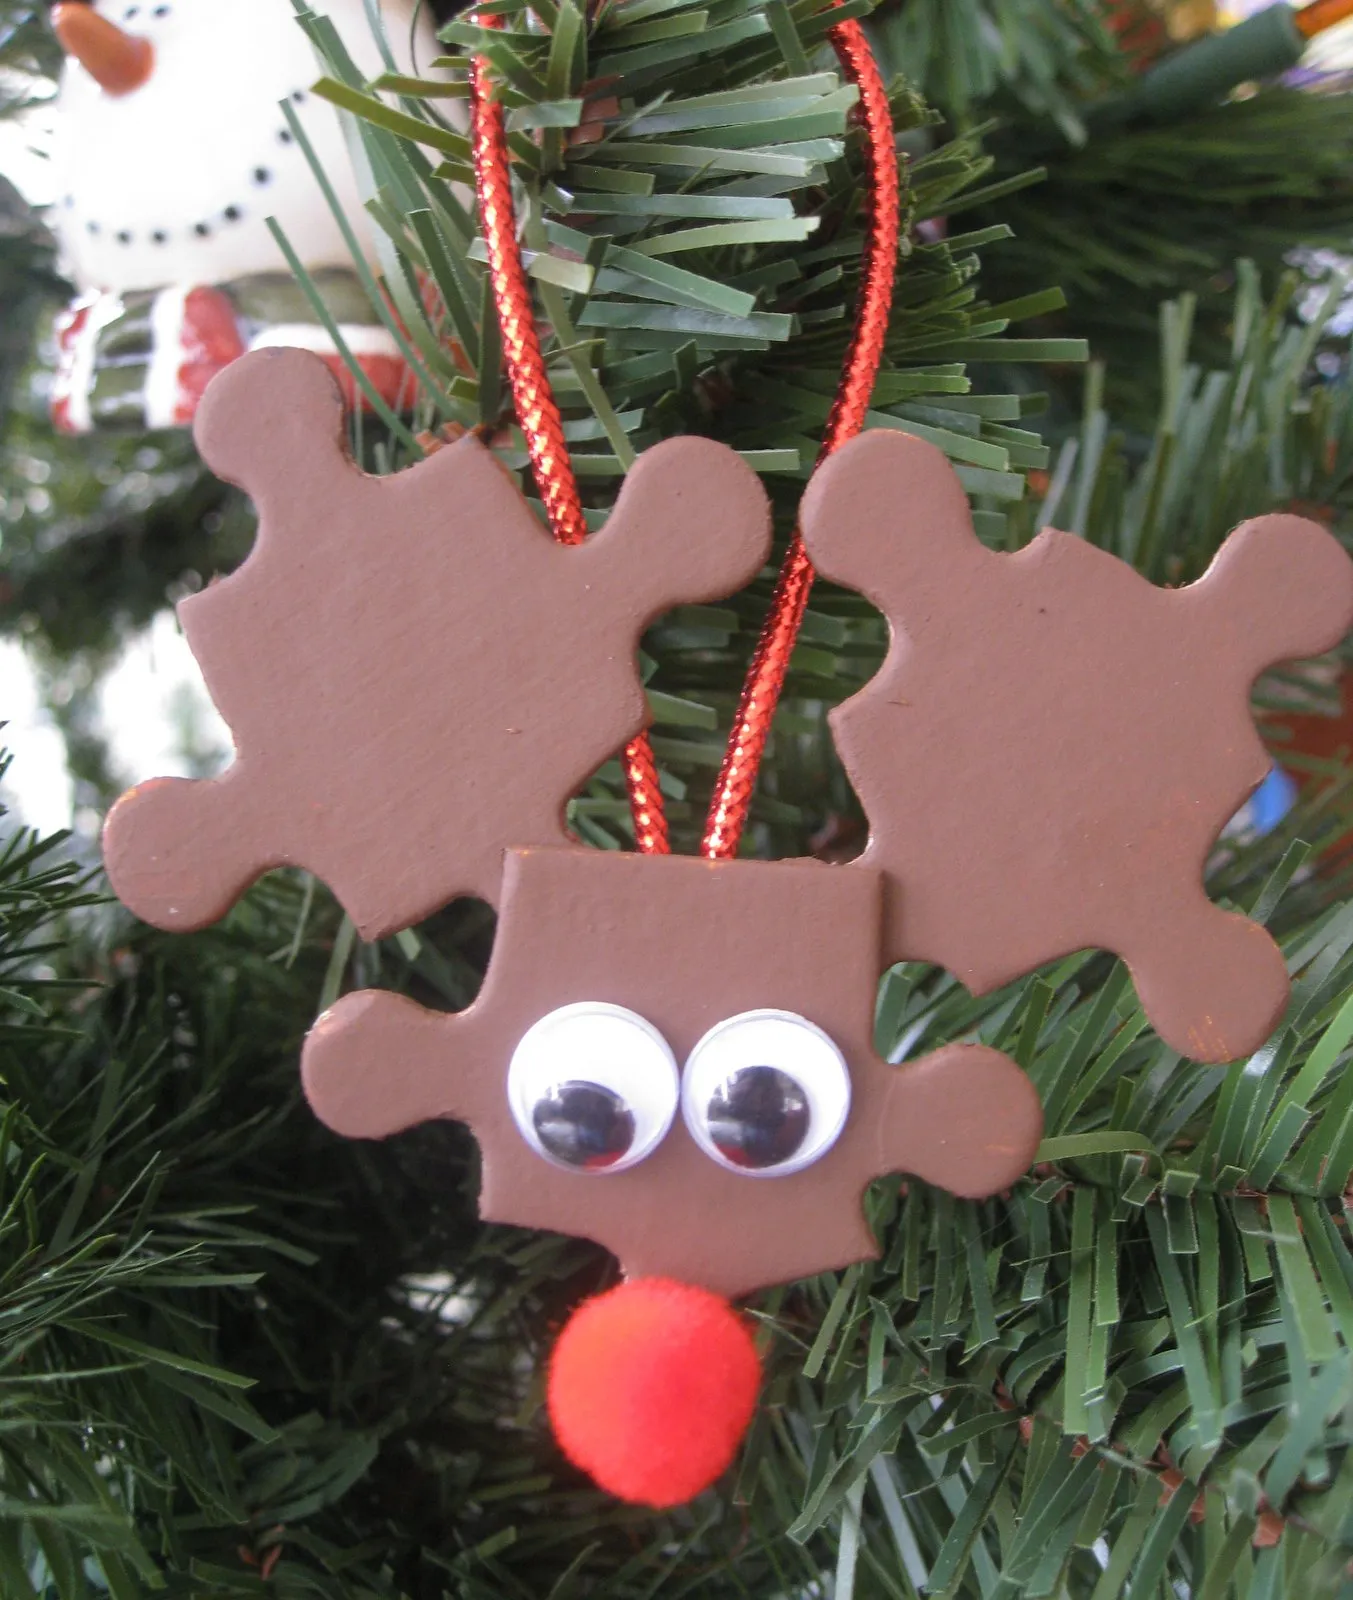
The whole thing costs about $3 if you buy nothing new. A thrift-store puzzle with a few missing pieces runs a dollar, pom-poms and googly eyes live in most junk drawers, and the red glitter string is a ribbon scrap. If you want the grown-up version of the same idea — handmade but not preschool — look at Idea #11, where those pieces get mixed into a full tree.
10. Three Dark Brown Ornaments, Two Striped Bows, One Gold
The ribbon math: 70 percent of your visual weight is the dark brown ornament, 20 percent is the green branch, and only 10 percent is ribbon — but that 10 percent is where all the contrast lives. Striped ribbon at ⅜ inch reads crisp at ornament scale; anything wider starts looking like a gift-wrap sample. Two striped bows to one gold glitter bow is the ratio this tree lands on, and it’s a good one to steal.
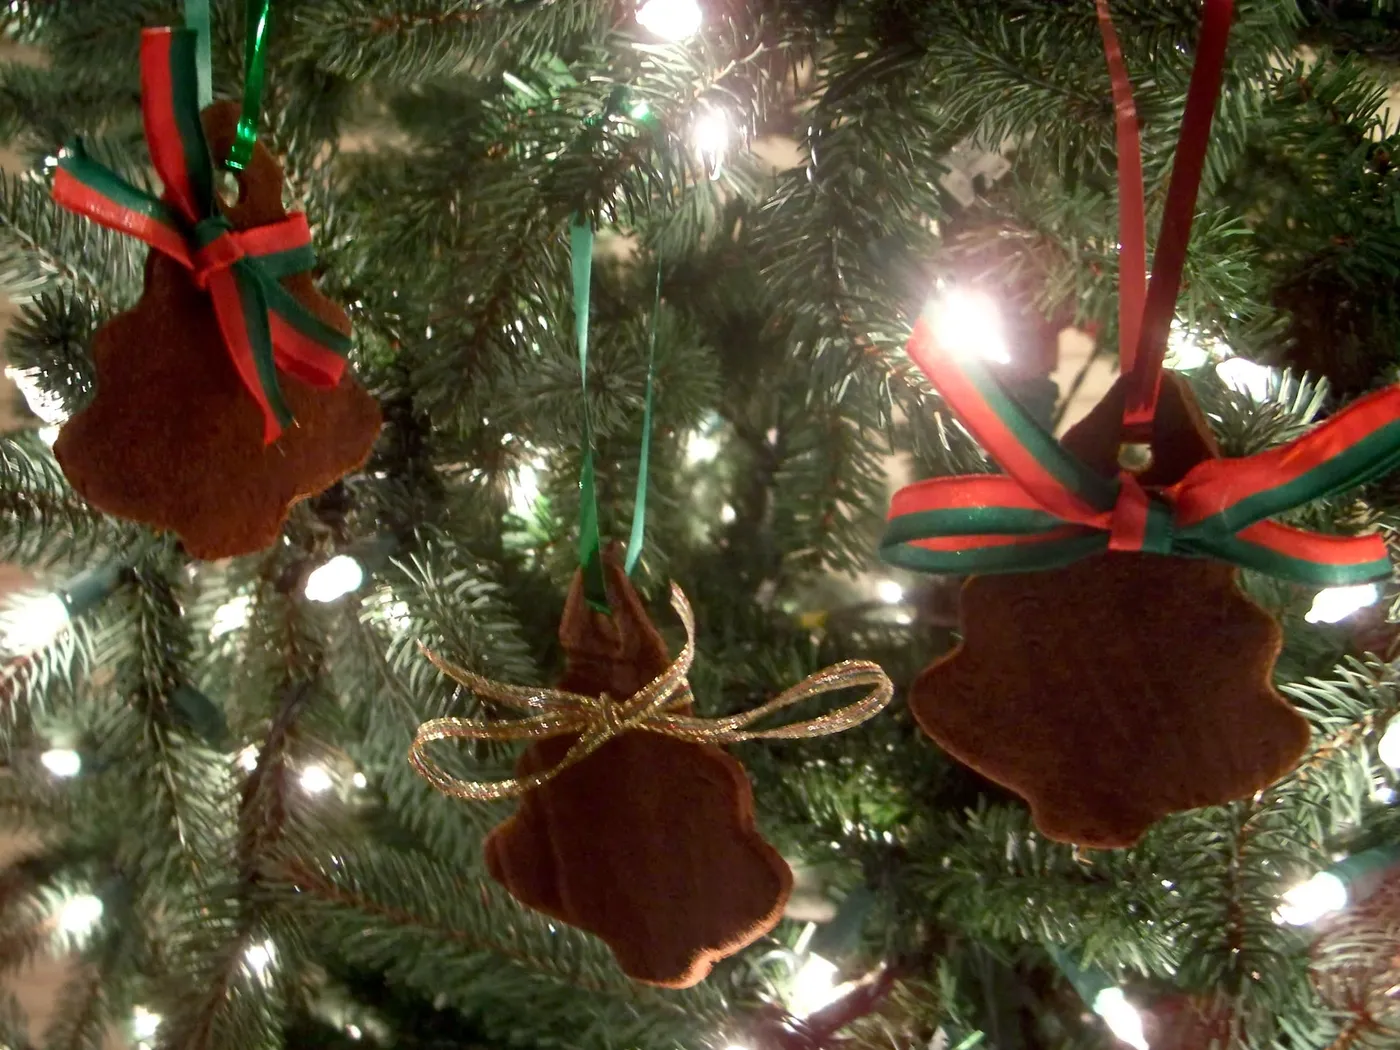
Glitter ribbon sheds. Forever. A light mist of hairspray before it goes on the tree cuts the fallout roughly in half. Cinnamon ornaments themselves need almost nothing — a dry microfiber pass in January, then storage in a breathable box rather than a sealed plastic bin so they don’t go soft in July humidity. Skip the attic. Heat plus a sealed bin is exactly how a stiff cinnamon star becomes a sad, floppy cookie.
11. A Tree Loaded With Cookies, Felt, and Cinnamon Stick Figures
A 7-foot tree like this one carries 60 to 80 ornaments comfortably before it starts looking crowded. Space them 4 to 6 inches apart and start hanging at eye level, not at the top — that’s where hands and eyes go first. A 4-footer wants about 30. Where Idea #10 keeps it to three ornaments on a single branch, this one commits to the full collection, so every piece needs a loop that matches.
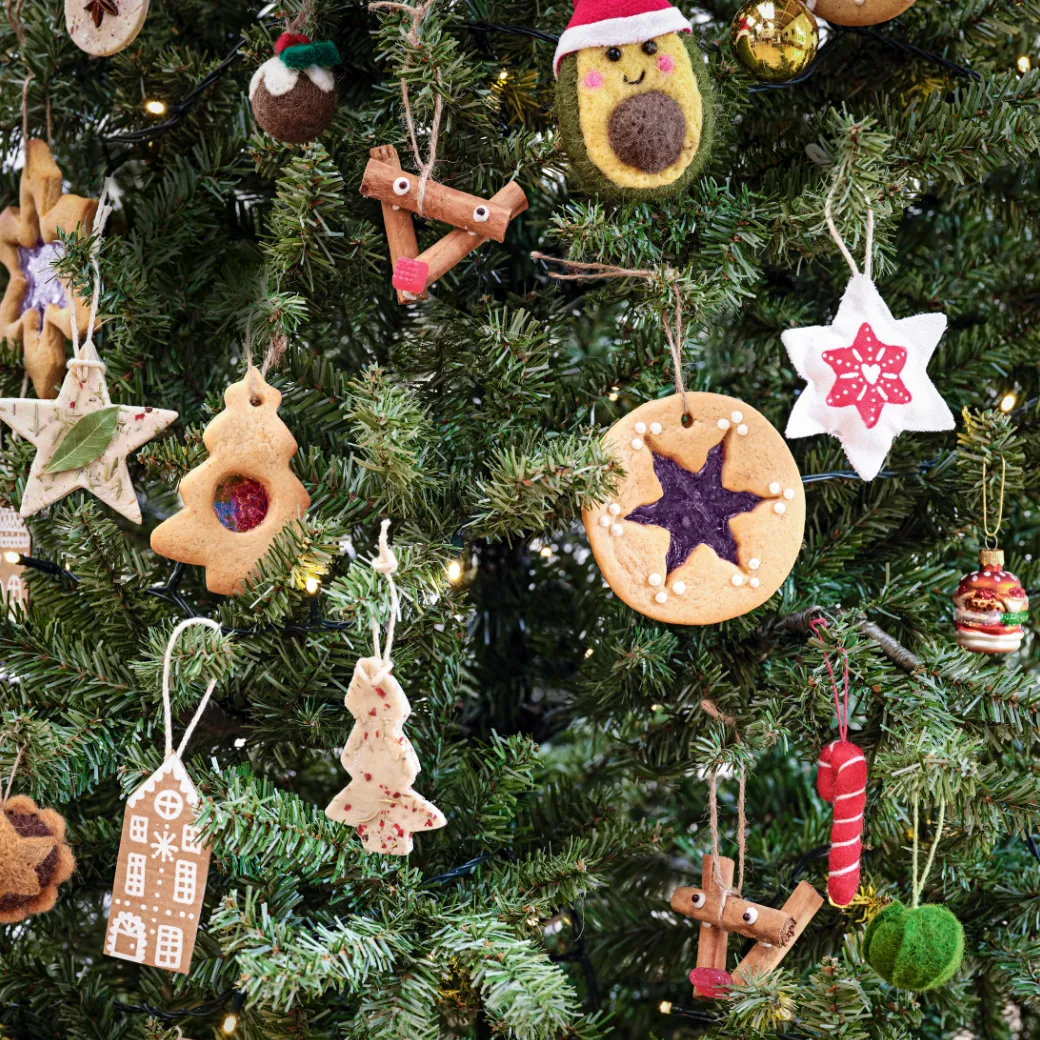
Three things hold this tree together. Repetition: every ornament hangs from the same natural twine, so wildly different objects read as one collection. Scale variety: tiny cinnamon figures next to palm-sized fabric stars keeps your eye moving. And one deliberate oddball — a felted avocado in a Santa hat — which is the piece everyone points at. Without it, the tree is tasteful and forgettable.
12. A Felt Chai Cup Next to a Terracotta Mug of Foam
- Hold your felt swatches against a real mug from your cupboard — mustard reads warmer next to terracotta than next to white.
- Confirm you have matching thread. A contrasting stitch is charming; a wrong-colored one is not.
- Cut a paper template and pin it to the felt before committing to scissors.
- Test your beads against the felt in daylight — gold disappears on mustard under warm bulbs.
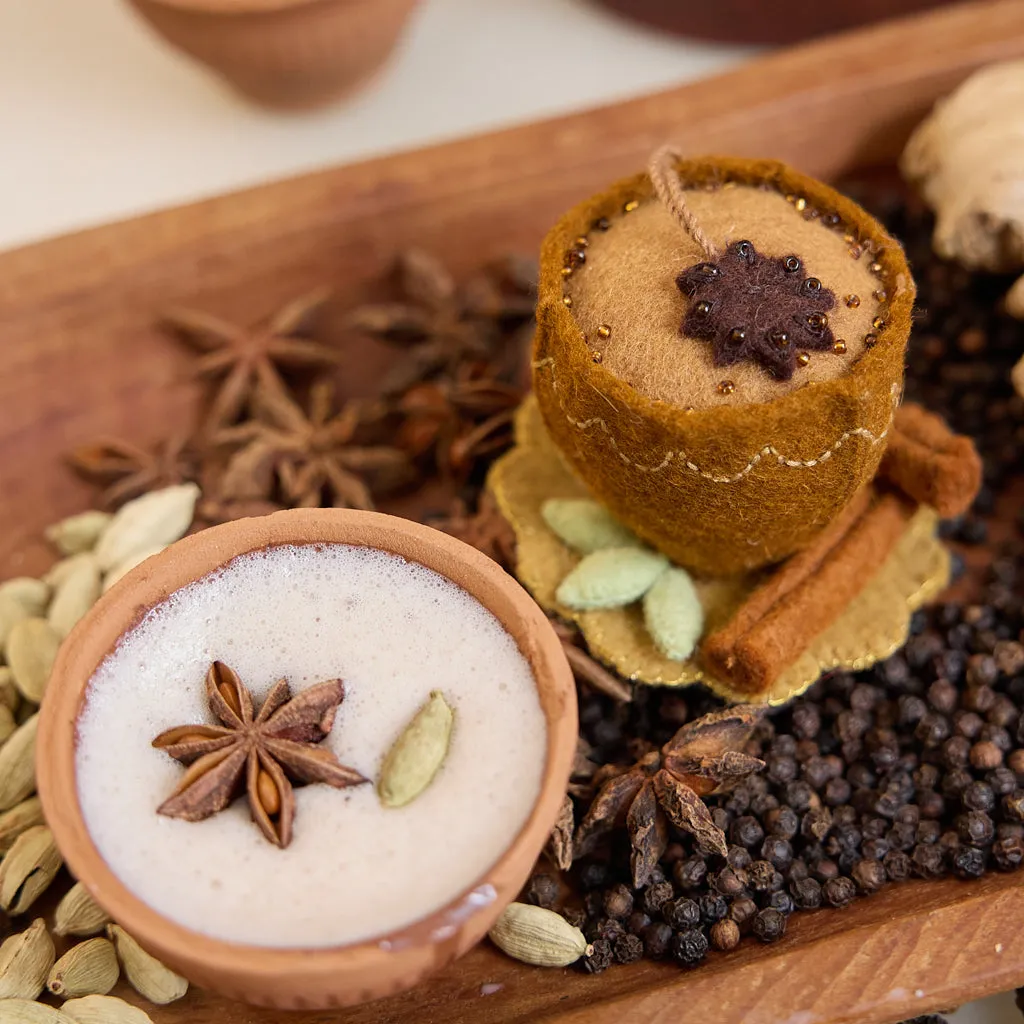
For tiny felt appliques, cut the shape from freezer paper first, iron it shiny-side down onto the felt, and cut around it. Crisp edges, no template slipping. Use two strands of embroidery floss, not six, for the star outline — a heavy stitch swallows a small shape. And stuff the cup with a scrap of the same felt rather than polyester fill, which lumps after a season of hanging.
13. Three Fabric Cones Standing on Cinnamon Stick Bases
- Three handmade cones at a craft fair: $36–$54
- Fabric remnants from a quilt shop bargain bin: $3–$8
- One bundle of cinnamon sticks, enough for nine cones: $6–$10
- Red and white baker’s twine: $4
- Small wooden tray for display: $10–$18
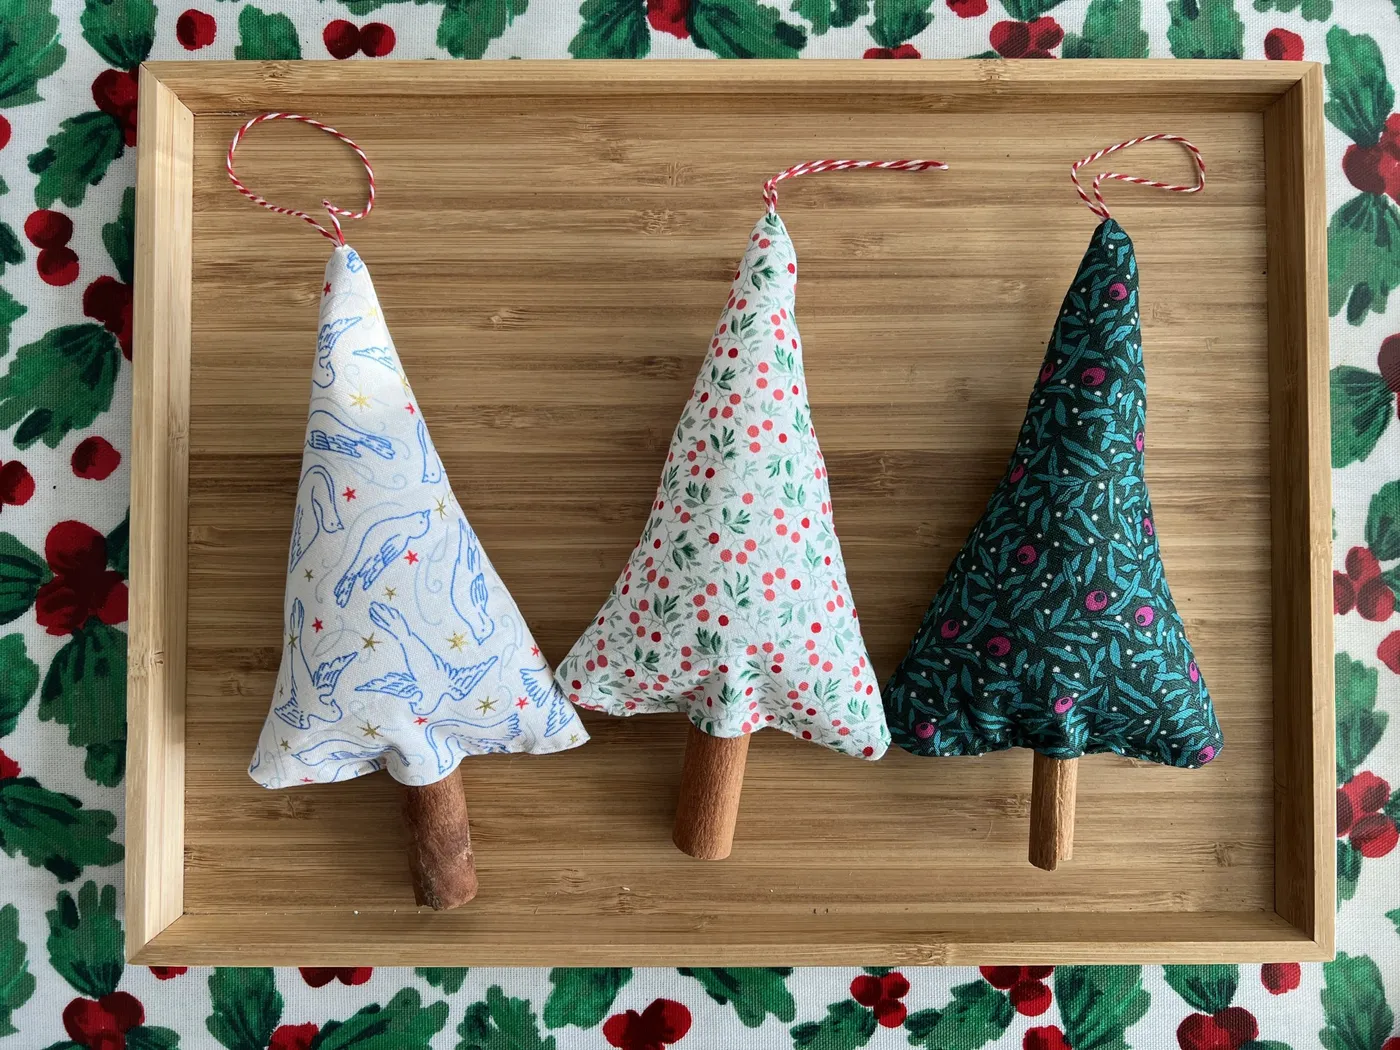
Making a set of three runs about $15 once you already own scissors and glue, and the tray is the only piece you’d buy new.
Budget alternative: a thrifted bread board does the tray’s job for $4, and a leftover curtain panel yields six cones instead of three.
The pattern rule for a set of three: one large-scale print, one small-scale print, one near-solid. Three busy prints turn into visual static at ornament size, which is roughly 4 inches tall. Keep the palette to two colors plus a neutral — here it’s red and green on cream — and let the bare cinnamon base act as the neutral. Want a calmer set? Drop the large print and use two solids with different textures.
14. Cinnamon Stick Ornaments, Turned and Shot From Every Angle
Cinnamon stick ornaments are three-dimensional objects pretending to be flat, so decide which face is “front” before you glue on the hanging loop. Set the piece on the table, rotate it a quarter turn at a time, and pick the angle where the sticks overlap most evenly — then attach your twine directly above that point. Skip this step and you’ll hang a beautiful ornament backward for the entire month of December.
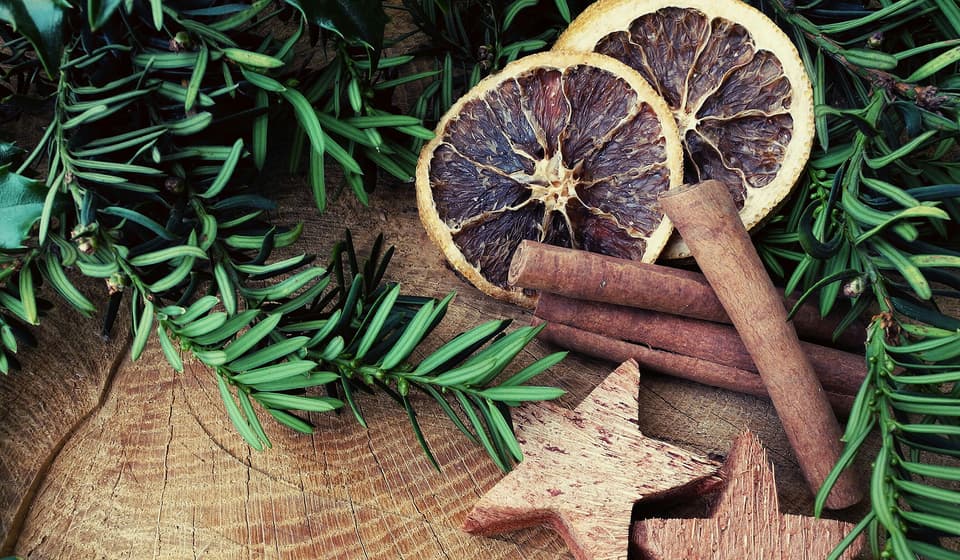
Natural cinnamon sticks are not uniform. Widths vary by a third, curls differ, and a bundle that looked perfect in your hand can hang lopsided once gravity gets involved. Sort your sticks by thickness before you start — thick on the outside, thin in the middle — and expect to reject about one in five. Buy a bag of 40 for a project that needs 24; it’s cheaper than a second trip to the store.
15. Iced Cinnamon Cookies on a Soft Green Plate
- Let your iced cookies dry completely — at least four hours — before you touch them.
- Snip the very tip off a zip bag, less than 1/16 inch, and pipe dots with steady pressure, lifting straight up.
- Flood the center of a shape with thinned icing and drag a toothpick through it for swirls.
- Dry flat overnight; icing that’s still tacky will smear when you thread the twine.
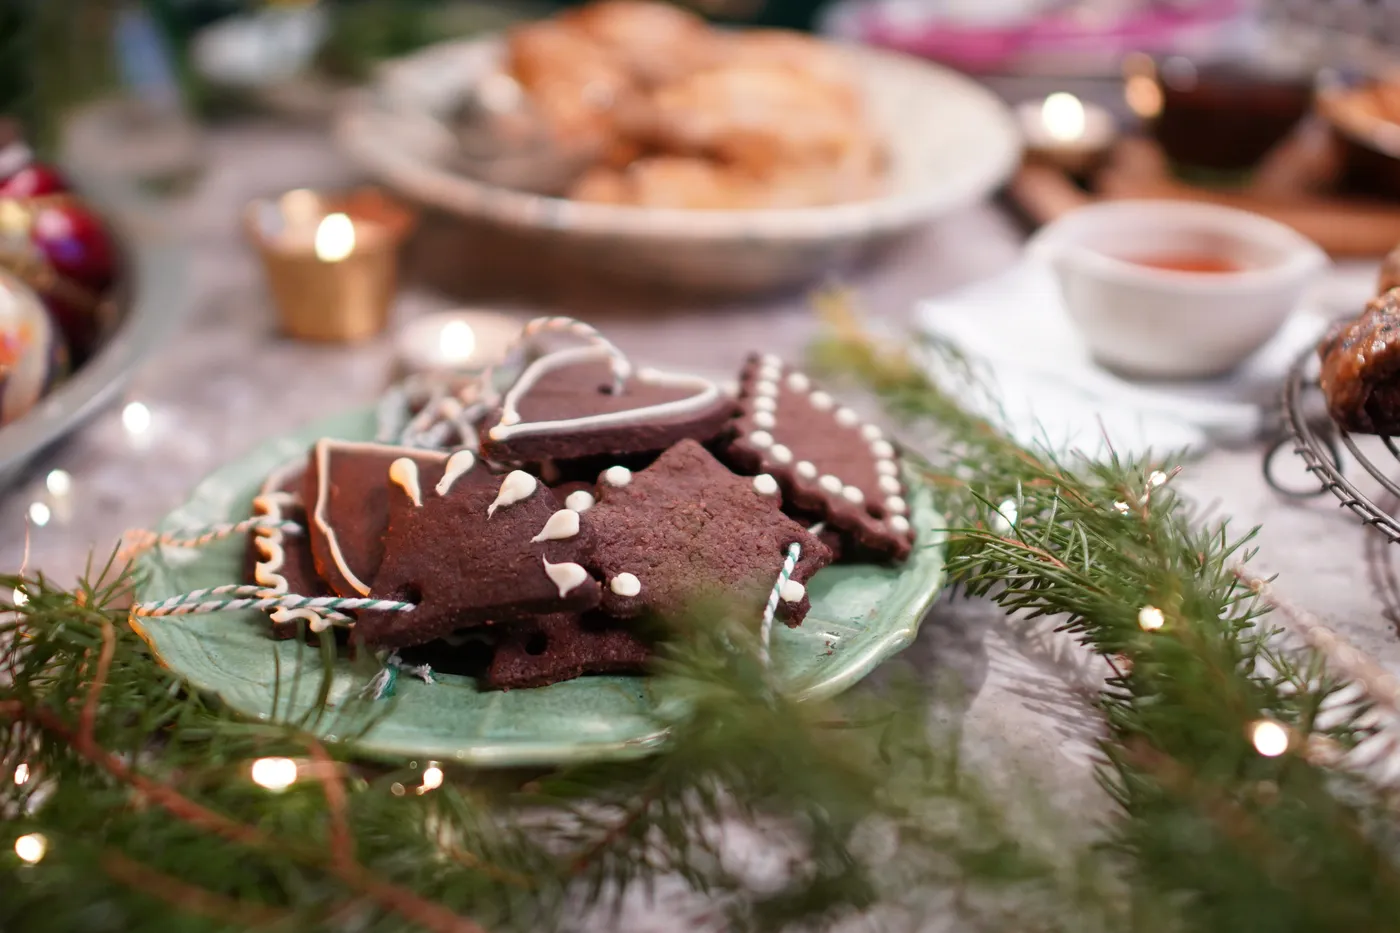
Roughly 15 minutes of actual decorating per dozen, and about $4 in sugar and meringue powder.
You do not need a piping kit. A zip bag with the corner snipped does 90 percent of what a $30 tip set does at this scale, and a toothpick handles the rest. The soft green plate came from a thrift store for $3, and the garland is dollar-store evergreen with a strand of battery lights wound through it. Under $15 for the entire scene, plate included.
16. Cement Stars, Cinnamon Bundles, and Fresh Rosemary
This cluster wants a surface at least 24 inches wide — a sideboard, a console, a mantel shelf — because the pieces need air between them to read as a collection rather than clutter. The cement star should be the tallest thing in the group at 5 to 6 inches; the cinnamon bundles stay under 4. On a narrow entry table, cut it down to three objects and let one of them be the star. See Idea #29 for the same palette arranged as a ring instead.
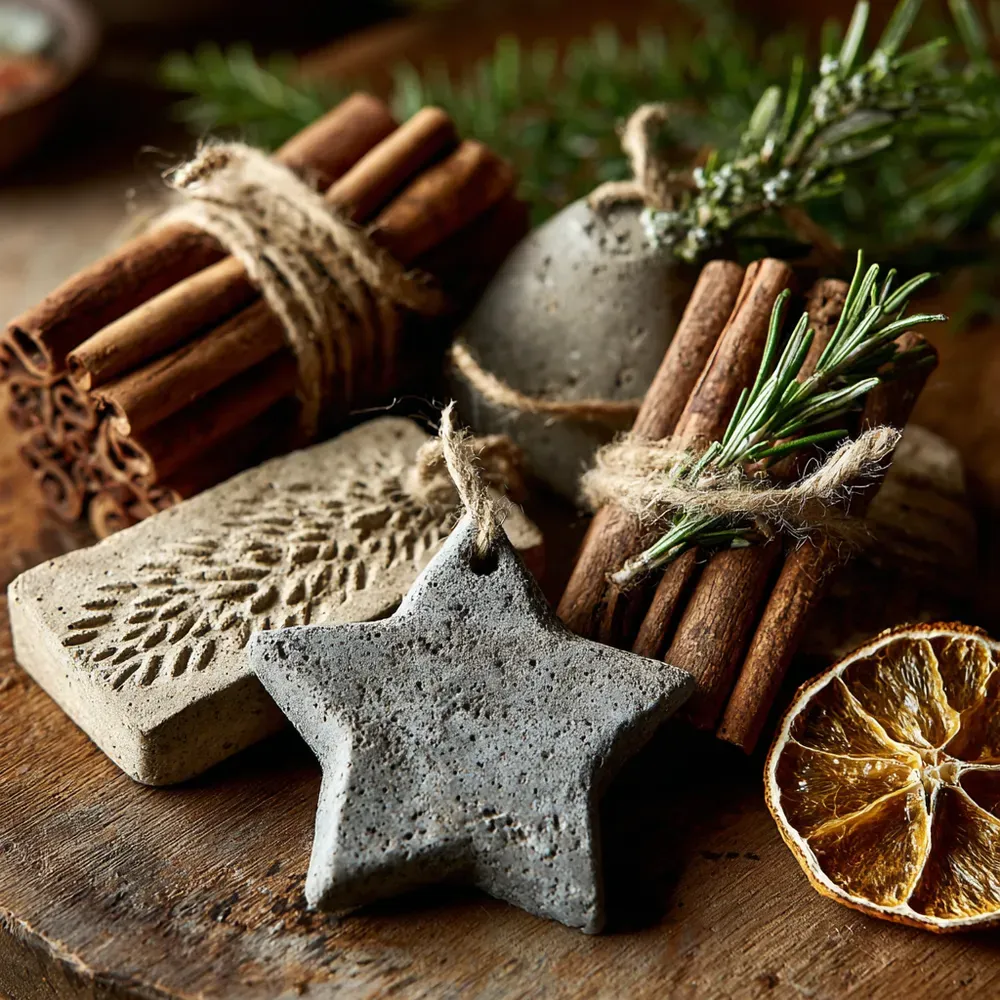
The cement star. Everything else here is warm — brown cinnamon, orange citrus, green rosemary, wood — and grey cement is the only cool, matte, mineral note in the entire picture. Remove it and the arrangement goes soft and vaguely autumnal. It costs about $6 in a bag of cement and a silicone mold, and it’s the piece that makes the vignette look styled rather than gathered.
17. One Cinnamon Bundle Standing on Bare Wood
Cinnamon loses its scent long before it loses its looks. That bundle on the shelf will smell incredible for about eight weeks, then settle into a faint whisper. Revive it by roughing the bark with a fine rasp or adding a drop of cinnamon oil to the twine — not to the sticks themselves, which stain. Replace whole sticks once a year; the essential oil fades permanently after that, no matter what the internet tells you.
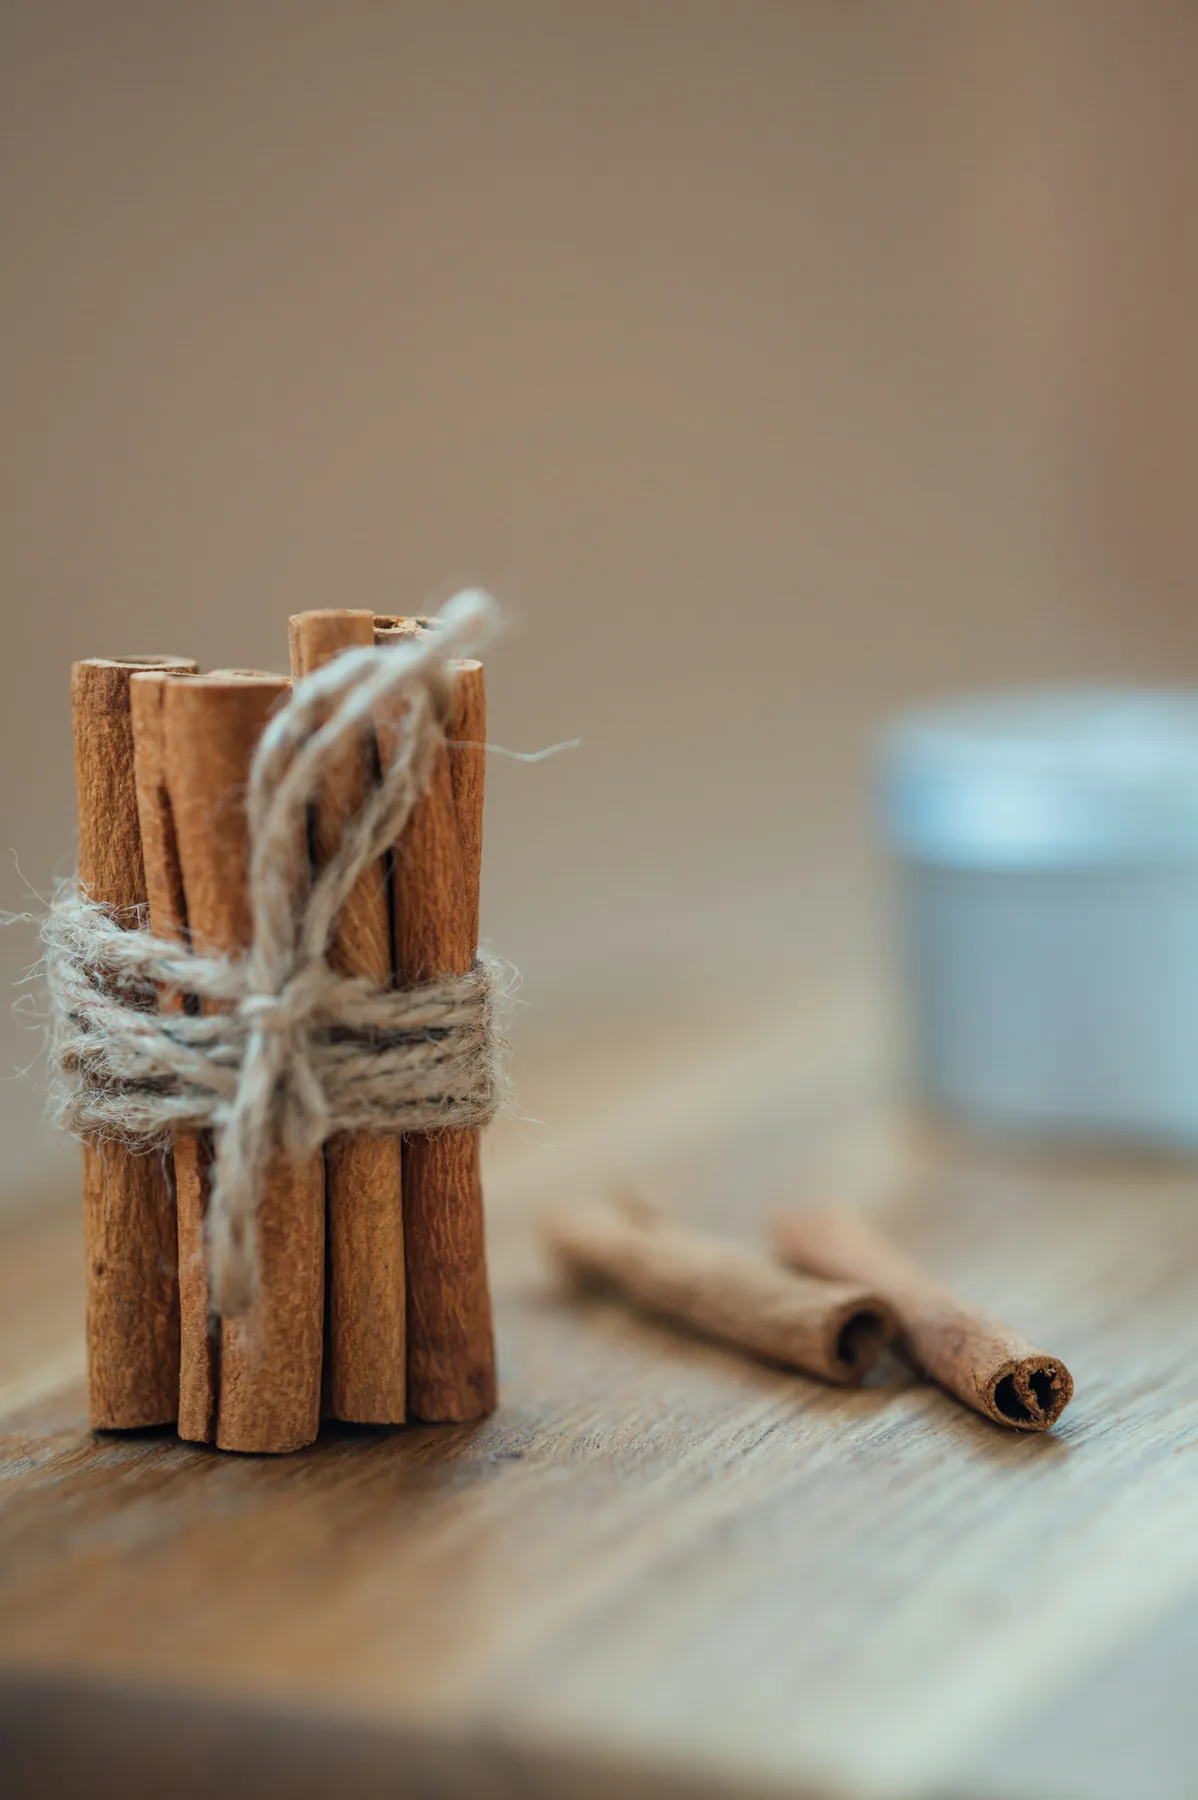
Standing a bundle upright on bare wood is harder than it looks. Instead of gluing it down, wrap the twine tight around the bottom third rather than the middle — a low cinch widens the base and the bundle stands on its own. If it still wobbles, a pea-sized dot of museum putty under three sticks holds it invisibly and lifts off clean. Never hot-glue to finished furniture; the residue takes the finish with it.
18. Hand-Painted Ornaments Lit by a Single Votive
One votive changes everything. Candlelight sits around 1800 to 2000 Kelvin, which flatters saturated paint in a way no overhead bulb can — reds go deep instead of chalky, blues warm up instead of going cold. The dark polished wood handles the second half of the work by giving all that color a shadowed floor. Put the same ornaments on a white table under a cool LED and they look like a craft fair display.
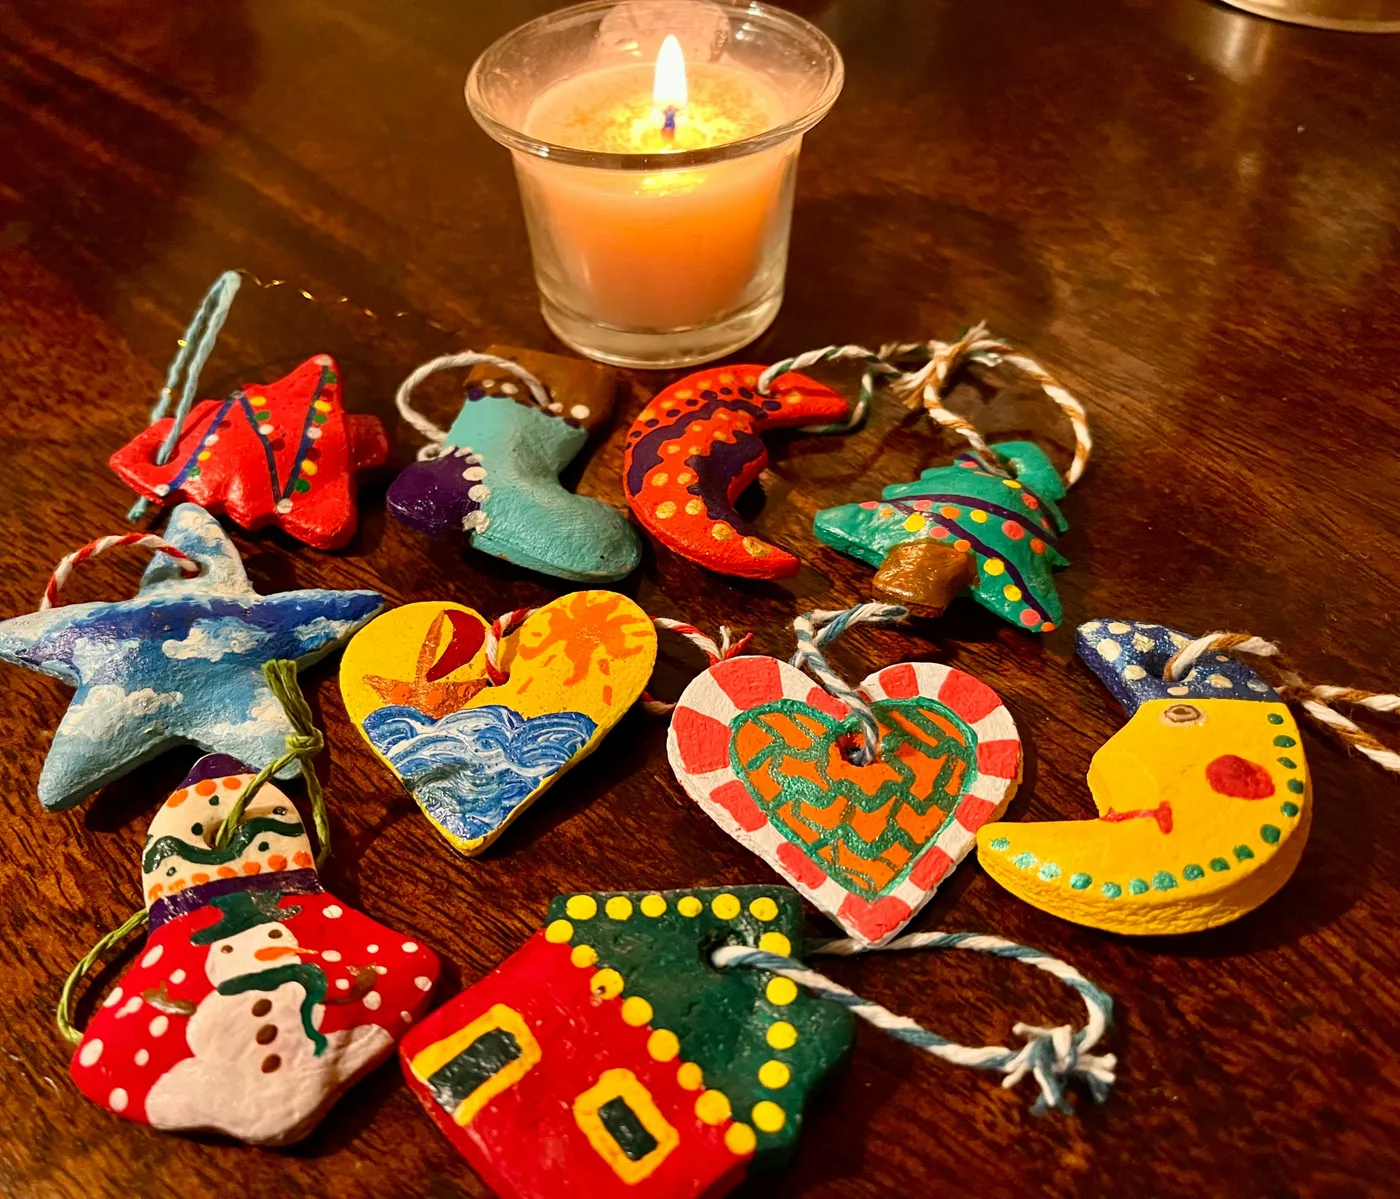
Hand-painted folk ornaments are back, and it’s a reaction against a decade of matching neutral trees. The 2026 version is deliberately imperfect: visible brushstrokes, colors that clash a little, shapes that aren’t quite symmetrical. Search interest in hand-painted ornaments climbs every November now, and unlike most micro-trends this one improves with age — chipped paint on a hand-painted ornament reads as character, not damage.
19. A Jar of Cinnamon Powder With a Stick Standing In It
An open jar of cinnamon powder is both a fire hazard and a spill waiting to happen — keep it at least a foot from that tea light, and never let a flame sit under a shelf where powder drifts. Ground cinnamon also clumps in a humid kitchen within a week of opening, so a display jar is a display jar. Keep your working spice sealed in the cupboard and refill the pretty one monthly.
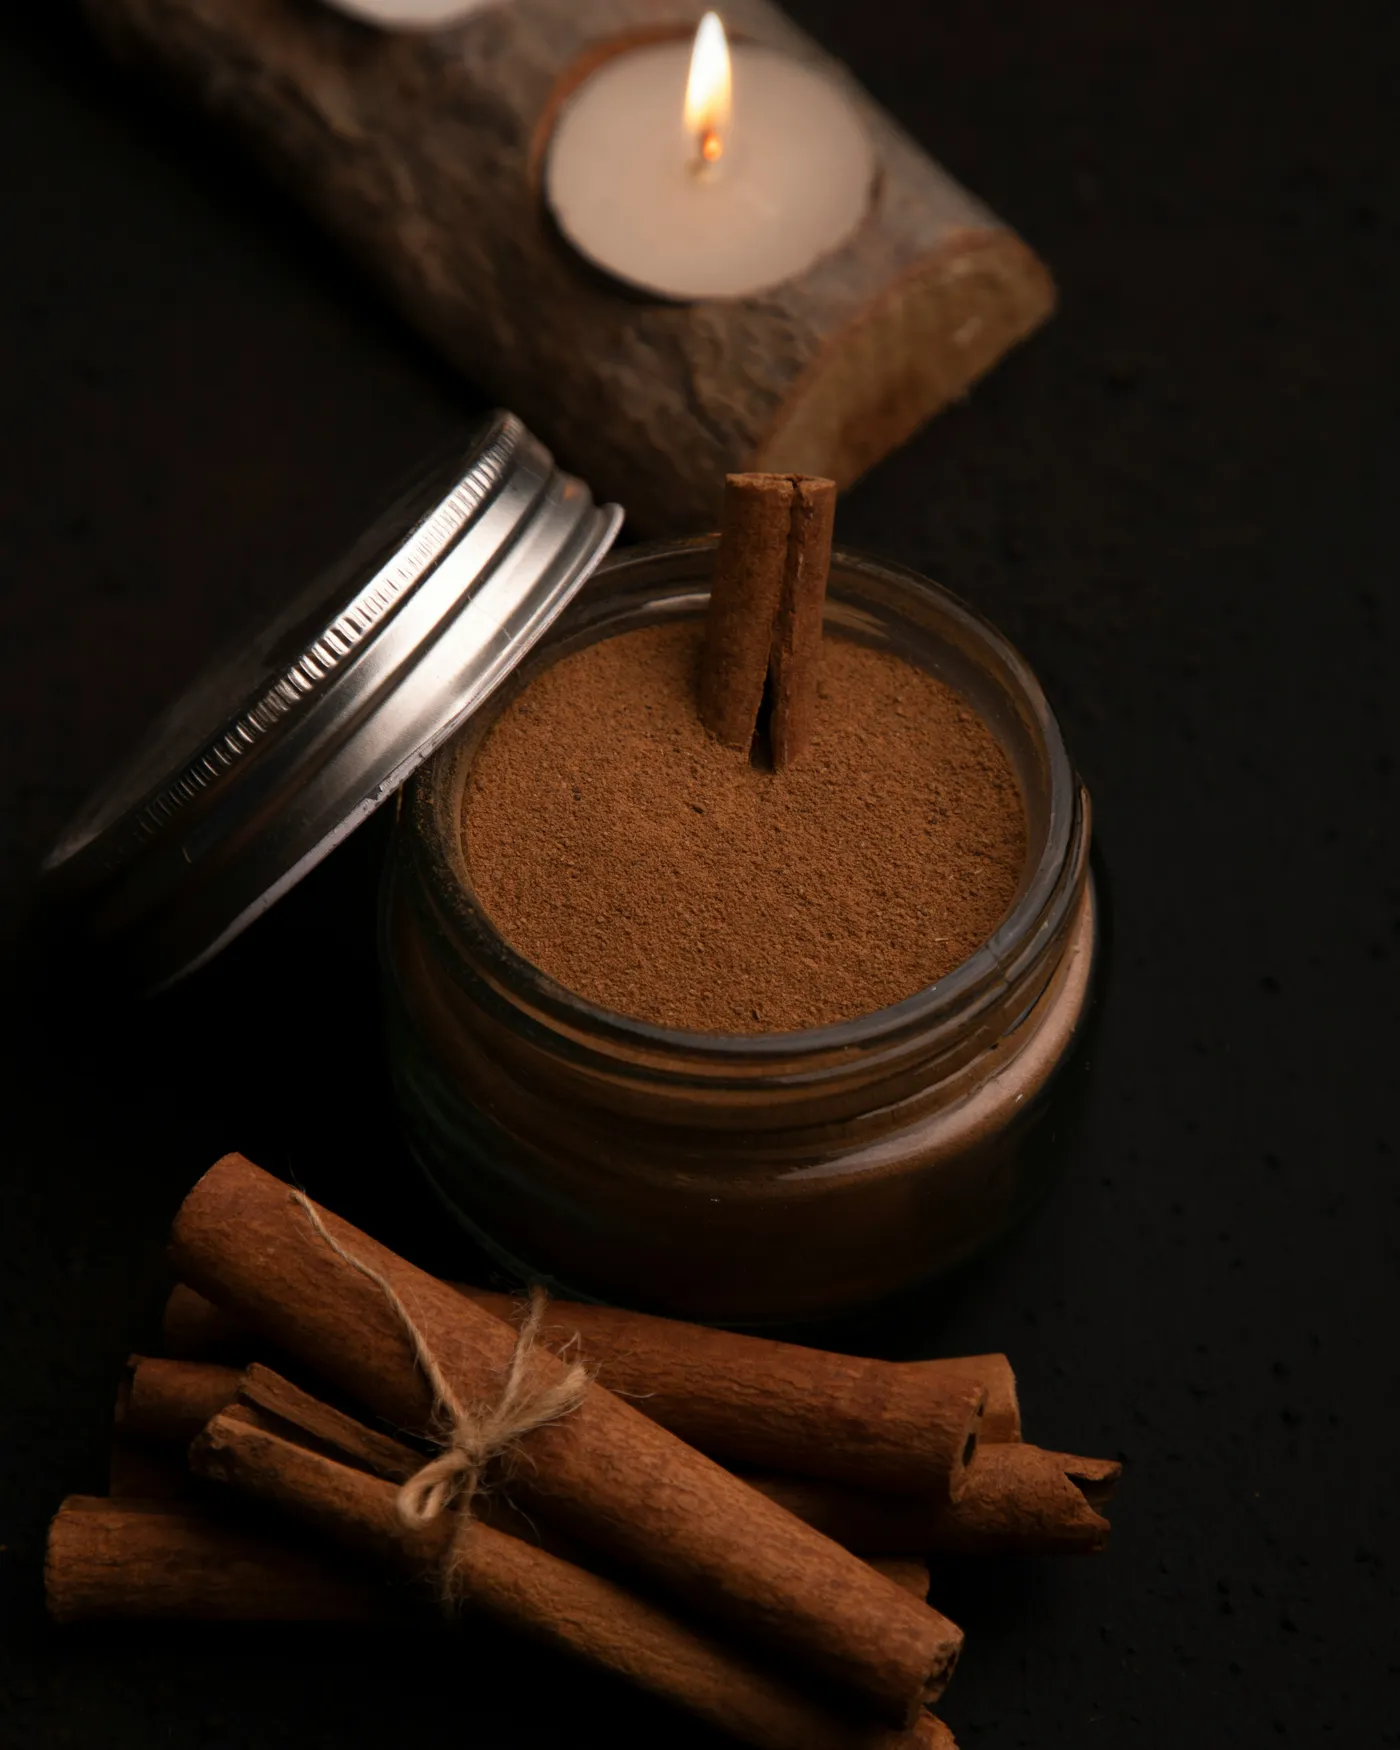
- Glass jar with a metal lid: $3–$7
- Cinnamon sticks, 8-ounce bag: $6–$12
- Rustic wooden tea light holder: $8–$16
- Tea lights, pack of 30: $5–$9
- Twine and a small scoop: $4–$6
Total: $26–$50 for a shelf vignette that costs less than one boutique candle.
20. White Clay Ornaments With Painted Stars and Gold Beads
- Roll air-dry clay to ¼ inch between two dowels — even thickness keeps pieces from warping.
- Cut your shapes and punch holes while the clay is still damp.
- Dry flat for 24 to 48 hours, flipping once at the halfway point.
- Smooth edges with a damp fingertip or fine sandpaper once dry.
- Paint details in acrylic and seal with matte medium.
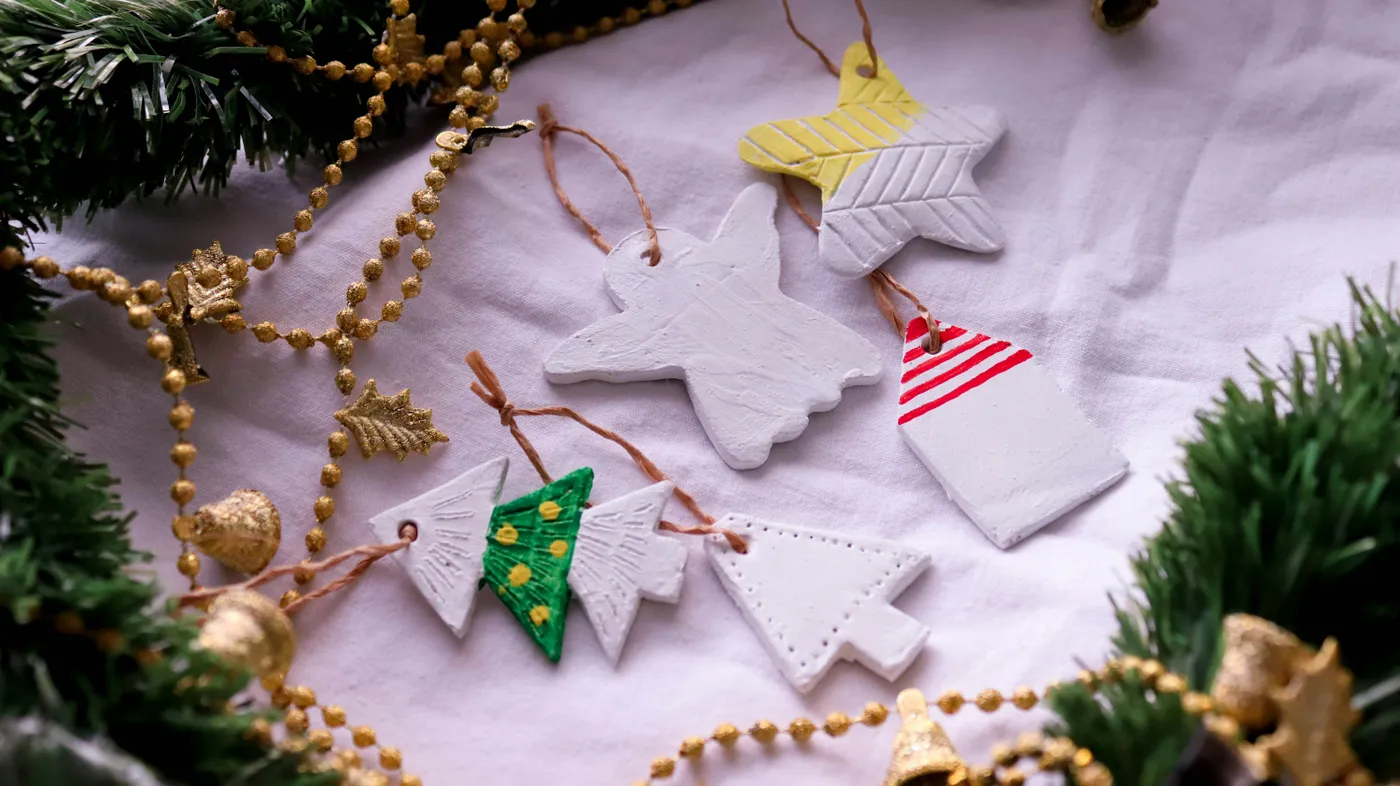
Two days of drying, maybe 30 minutes of actual work, and about $12 for a 5-pound box that yields three dozen ornaments.
The ratio on this garland is 65 percent white clay, 20 percent green pine, 10 percent gold bead, 5 percent paint. That tiny paint percentage is what keeps it from looking like a bathroom tile display — one yellow star, one red-striped tag, no more. Want a warmer version? Swap the gold beads for natural wood and the white clay for oatmeal. Same formula, completely different mood.
21. Cinnamon Bundles Tied With Orange Slices and Star Anise
It’s the dried orange slice layered right over the twine knot. That single move hides the messiest part of any handmade ornament and drops a burst of color exactly where your eye already goes. Layer order matters: knot first, orange slice second, star anise last and slightly off-center so the orange still shows behind it. Keep the slices thin enough to catch light and the whole set looks far more expensive than it is.
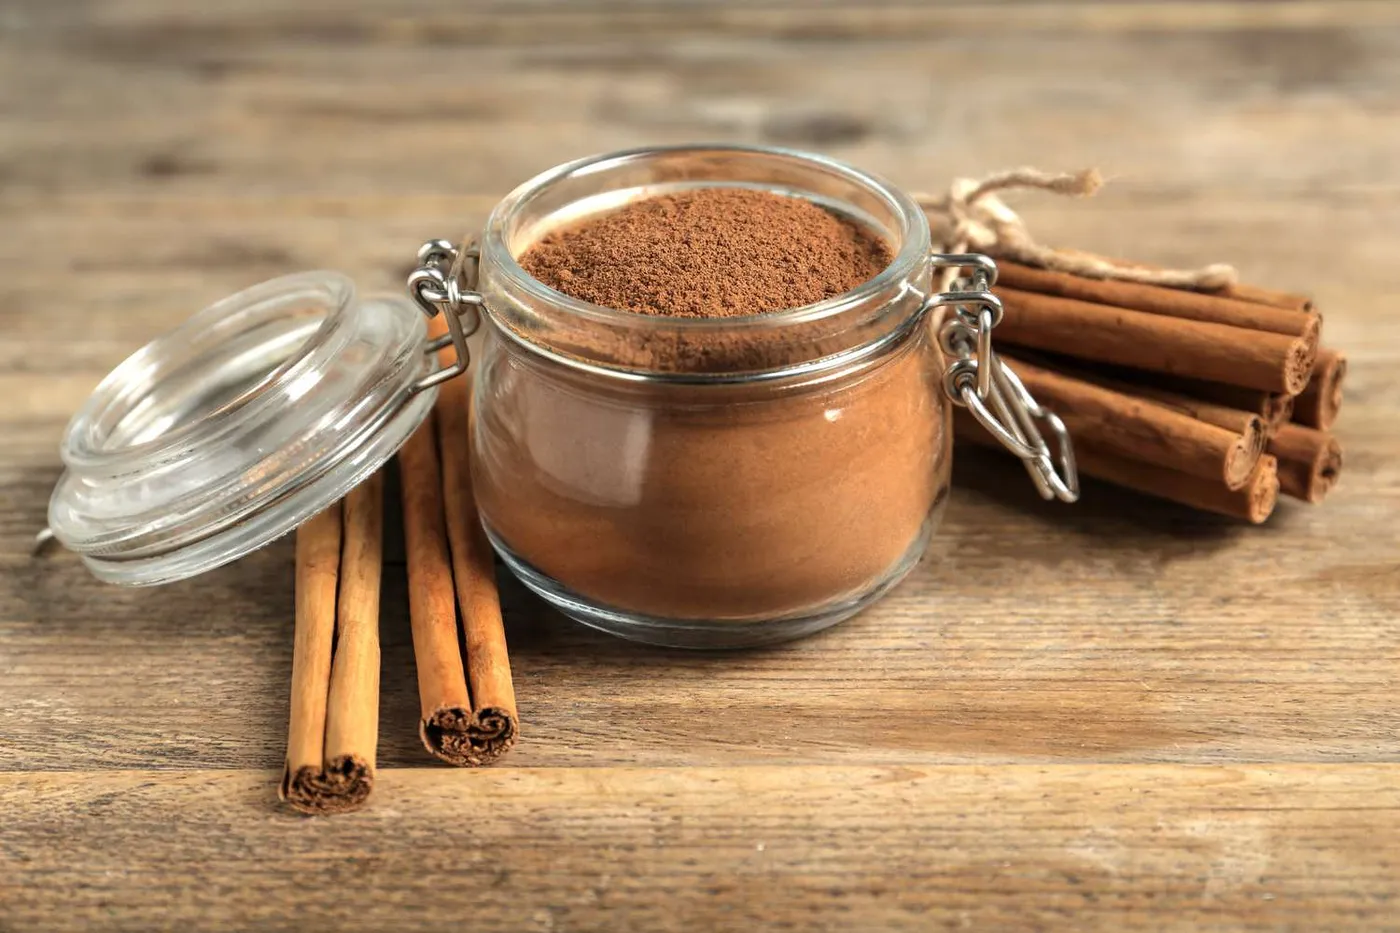
Dollar-store cinnamon sticks run about $1.25 a bundle, and one orange dehydrates into roughly 20 usable slices. Here’s the real math:
- Cinnamon bundle: $1.25
- Dried orange slices: about $0.05 each
- Star anise, a handful: $3
- Twine, per ornament: pennies
A set of twelve lands under $10 — less than one boutique ornament. No star anise? A whole clove pressed into the twine gives you the same dark accent. This is the finished, giftable version of the bare bundle in Idea #17.
22. A Cinnamon Star With Three Silver Jingle Bells
Three small bells will pull a five-stick star forward and tilt it, so attach them to the top stick rather than the hanging loop. Thread a needle with baker’s twine, pass it through the top stick’s center and through all three bell loops, then knot. The bells sit like a small crown and the weight pulls straight down instead of sideways. Silver stays quieter than brass against cinnamon bark, and it doesn’t compete with the red and white twine.
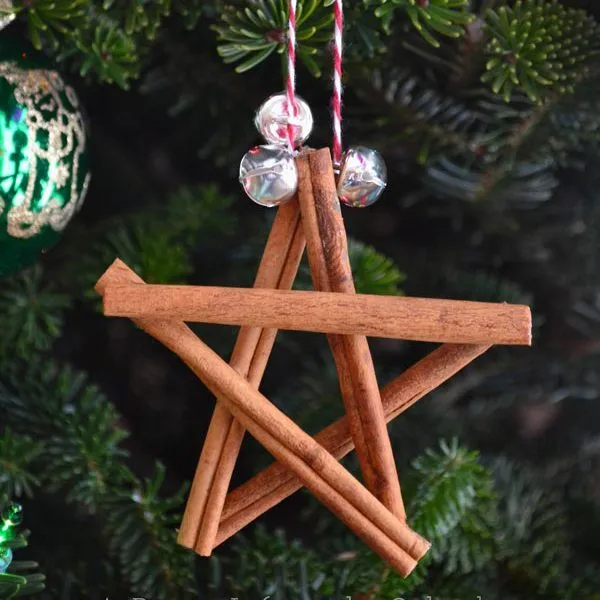
Silver and warm brown is an underrated pairing — the cool metal makes the bark look redder, and the bark keeps the silver from going frosty and cold. The baker’s twine ties it back to a traditional palette without adding a third color. And it makes noise, which almost no ornament does. That tiny jingle when someone brushes past is why people remember this one.
23. Six Flat Cinnamon Ornaments on Charcoal and Buffalo Check
- Confirm your work surface is truly flat — a warped batch is a batch of ornaments that spin.
- Weigh each finished piece: anything over 1.5 ounces belongs near the trunk, not on the tips.
- Check the humidity. Cinnamon dough needs a dry week to cure, not a rainy one.
- Lay out all six shapes before baking and confirm every single one has a hole.
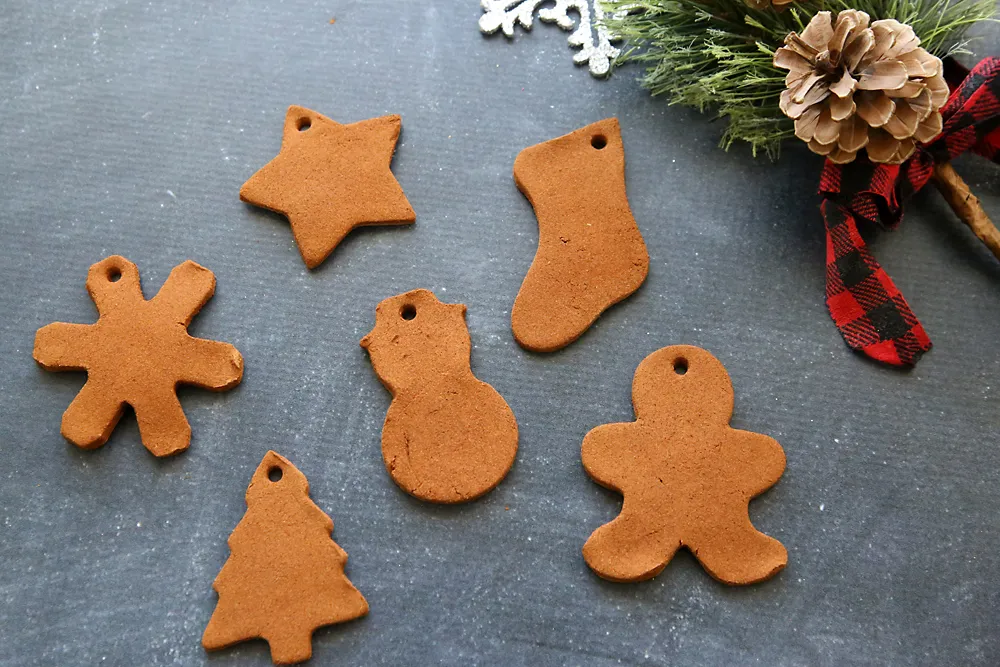
These read best at 3 to 4 inches — big enough to carry a gingerbread man silhouette, small enough to hang three on one branch. A 3-inch cinnamon ornament weighs next to nothing, so it works on a tabletop tree, a wire wreath, or as a gift tag on a package. Anything past 5 inches starts looking like a coaster. For a genuine statement piece, a five-stick star does the job better than a scaled-up cookie.
24. Dark Ornaments That Only Work Because of the Lights
Dark brown ornaments vanish on a dark tree unless something lights them. The fix isn’t expensive ornaments — it’s a $4 strand of warm white battery lights tucked behind the branches rather than wrapped around the front. Thrift-store ribbon in red and green stripe, a roll of gold glitter, and a batch of homemade shapes gets you this branch for under $15, string lights included.
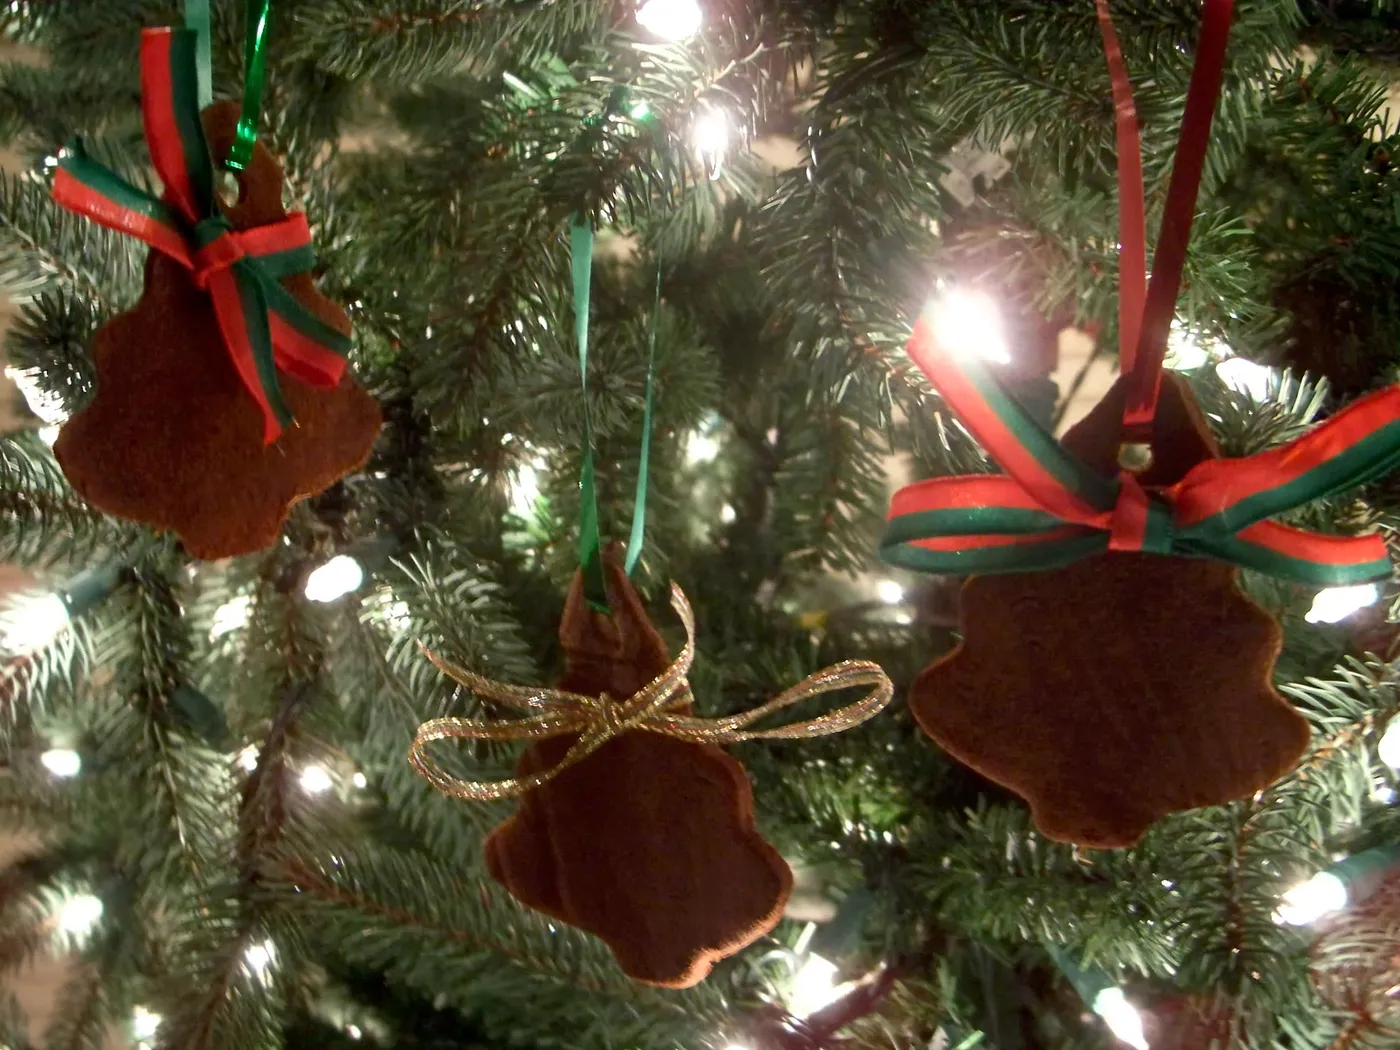
White mini lights are deceptively warm. A bulb resting against dried cinnamon bark for six weeks will make it brittle and, in a dry room, genuinely risky — leave a fist’s width between any bulb and a homemade ornament, and switch to LED if your tree runs eight hours a day. Dark ornaments also show dust more than anything else on the tree, so give them a dry microfiber pass around week three.
25. Star and Circle Cinnamon Ornaments on a Bare Branch
Branch displays follow simple math: aim for about one ornament per 6 inches of branch length, and keep the total weight under 30 percent of what the vase can balance. Here it’s roughly 60 percent bare branch, 30 percent brown ornament, 10 percent green sprig. Swap the stars for circles and the whole thing goes quieter; mix both and the irregular rhythm is what keeps it from looking like a mobile.

A bare branch in a vase is a balancing act. Fill the vase a third of the way with dry sand or glass marbles rather than water — water plus cinnamon dough is a mold experiment — and cut the branch deep enough that it won’t tip when a door slams. Berry accents need to be wired on, not glued; glue gives up under the weight of a cluster. And keep the whole thing out of the coat-swinging hallway.
26. A Bundle, Whole Spices, and a Star Cookie Cutter
- Bulk cinnamon sticks, 8 ounces: $6–$12
- Whole star anise, nutmeg, cloves: $8–$16
- Brown sugar crystals: $3–$5
- Fresh pine sprigs: free to $6
- Star-shaped cookie cutter: $2–$5
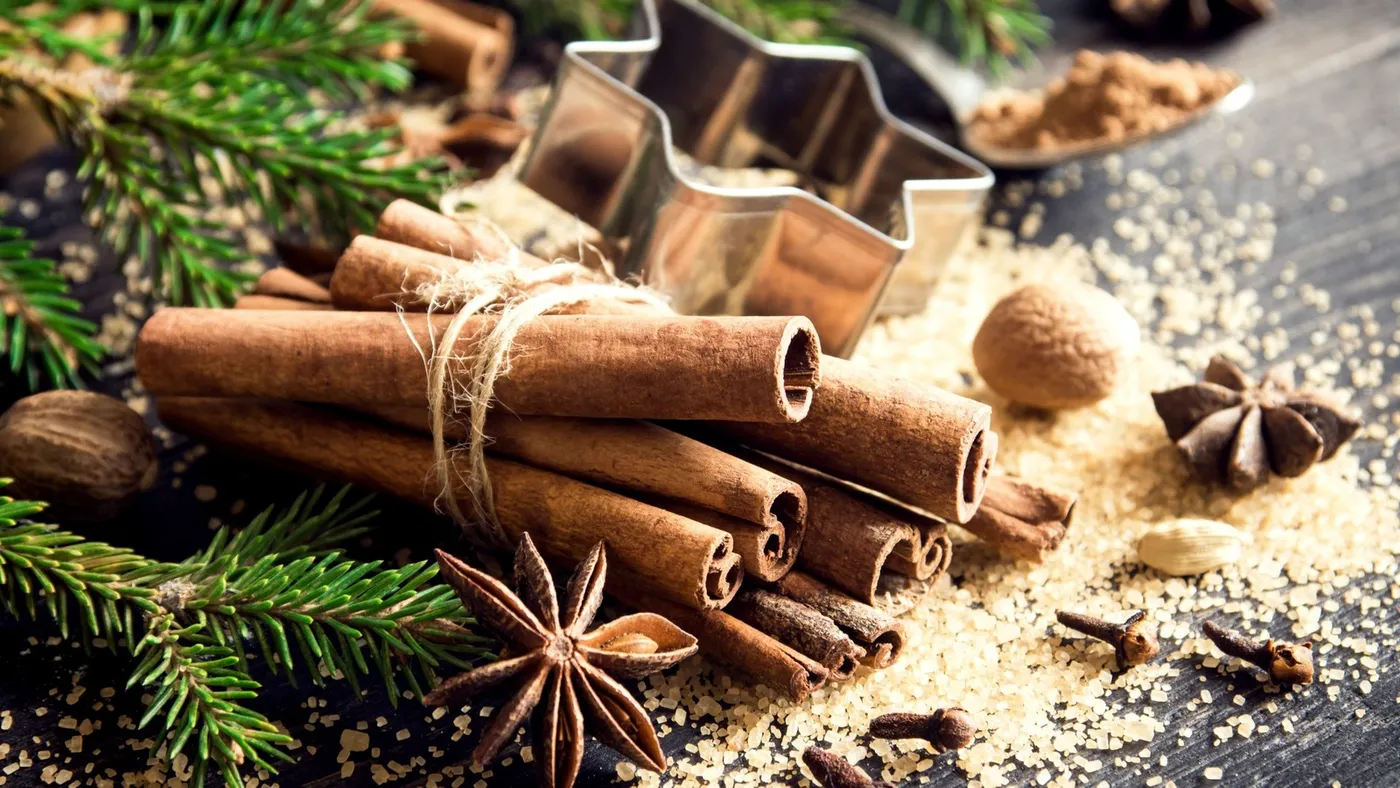
Total: $19–$44 for a setup you’ll reuse every December — the spices stay usable for years if you keep them dry.
Scatter, don’t sprinkle. Lay whole spices in clusters of three or five, leave one area completely empty, and let the loose brown sugar pool in a single irregular patch rather than spreading it evenly. The metallic star cutter earns its place by being the only shiny thing in a matte arrangement — one reflective object per vignette is the rule. Two, and it starts looking like a tablescape competition.
27. A Burlap Pouch Full of Cinnamon Sticks and Bay Leaf
- Cut two 6-inch squares of burlap; pinking shears keep it from unraveling.
- Stitch or glue three sides, leaving the top open.
- Fill two-thirds with cinnamon sticks, tucking a bay leaf against the front wall so it shows.
- Thread twine through the top hem as a drawstring and knot it.
- Trim the loose threads but leave a few — that’s the texture.
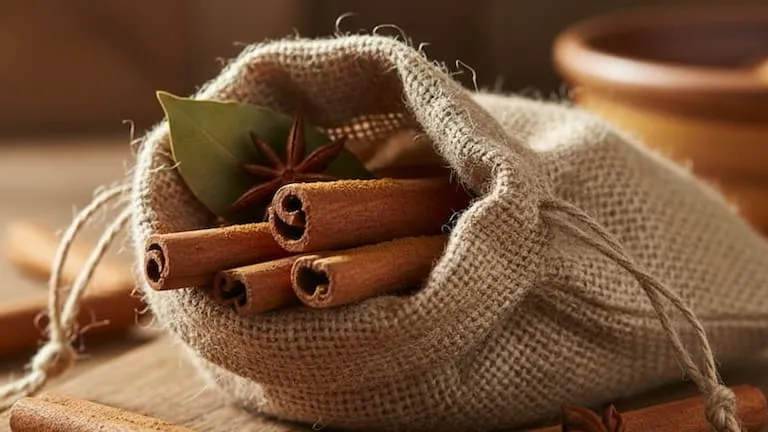
Twenty minutes and about $4 per pouch, less if you buy burlap by the yard.
The bay leaf. It’s the only green in the pouch and it does the same job a sprig of parsley does on a plate — it makes the brown look intentional instead of accidental. Tuck it flat against the inside wall before the sticks go in so it stays visible through the weave. One leaf, not three. A cluster reads as potpourri; a single leaf reads as a decision.
28. Iced Stars and Hearts With Twine and Green Leaves
Iced stars and hearts land between 2½ and 3½ inches, which makes them the most versatile size on this list — small enough for a tabletop tree, flat enough to use as a gift topper, light enough for a wire wreath. A set of twelve covers the front face of a 4-footer or dresses about eight packages. A full 7-foot tree would eat 100 of them, which is exactly why bigger shapes earn their keep.
White icing is powdered sugar and a drop of water — no meringue powder needed when the ornaments are decorative and nobody’s eating them. Skip the piping bag and use a small zip bag with the tiniest corner snip; the lines will be thicker than a professional’s and that’s the charm. Green leaves are clipped from a $4 grocery-store bunch and pressed between paper towels for two days. A dozen ornaments, under $8.
29. An Evergreen Ring Framing Spices and Gold Baubles
Wreath-adjacent styling — a ring of evergreen laid flat around a cluster of objects — has been creeping into holiday decor for a couple of years, and 2026 is the year it went mainstream. It’s a centerpiece that photographs like a wreath without needing a hanger, a door, or a hook. Expect this format to stick around: it’s cheap, it adapts to any color story, and the whole thing takes fifteen minutes to assemble.
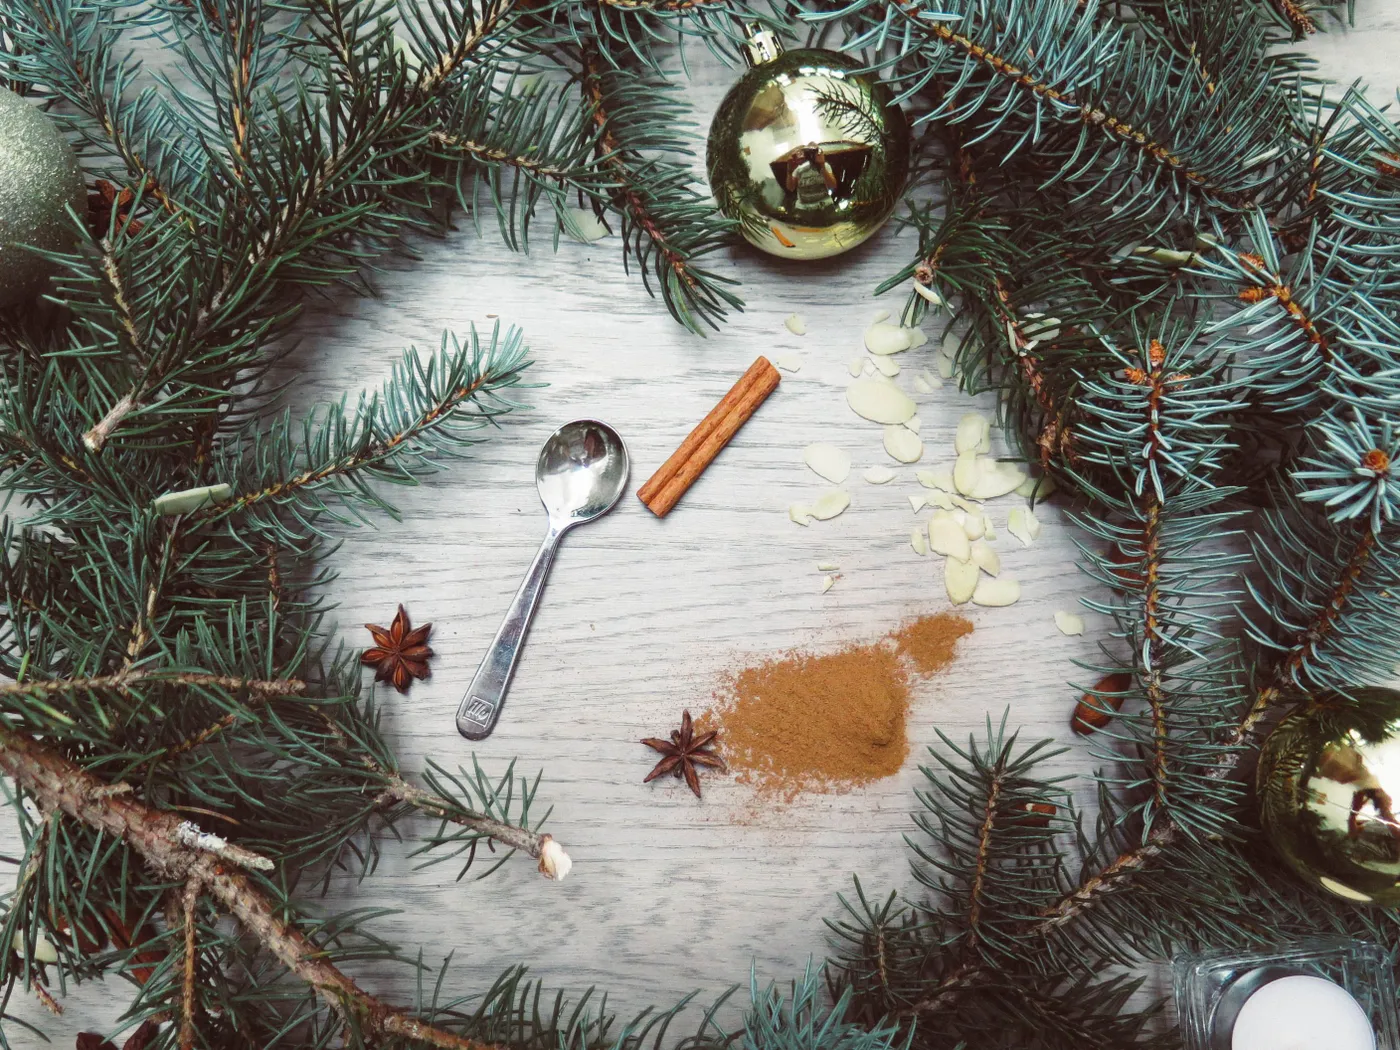
The ring does two jobs at once. It frames the center, so a pile of spices and a spoon suddenly looks composed, and it lets gold baubles read as accents instead of decoration. Gold on green is the only real contrast in the arrangement, which is why two baubles are enough. Straighten that evergreen into a line and the exact same objects look like a grocery haul.
Go Make Something That Smells Like December
Every ornament in this list started as something cheap and slightly ordinary — a bag of cinnamon sticks, a box of puzzle pieces, a cup of applesauce — and ended up as the thing people pick up off the tree to ask about. Start with the five-stick star if you want a win in ten minutes, or block out an afternoon for the dough ornaments if you’ve got kids and flour to spare.
📌 Pin your favorite idea now, so it’s waiting for you the next time you’re standing in the spice aisle wondering what to make.