Is your “built-in storage” Pinterest board overflowing with incredible ideas you don’t know how to actually execute? You’re not alone. The best built-ins feel like they were always part of the home’s architecture, but getting there requires a solid plan. We dove deep into the world of custom and semi-custom storage to find out what truly works for today’s homes. We narrowed it down to 28 distinct, achievable ideas that blend function with serious style.
From cozy reading nooks to hyper-organized closets and clever bathroom solutions, this guide is packed with real-life inspiration. For 2026, the biggest trend is “integrated living”—storage that doesn’t just hold stuff, but enhances how you use a room. And stay until the end — we break down the most common mistakes that can ruin these looks. 📌 Save this to Pinterest for later — you’ll want to revisit these ideas.
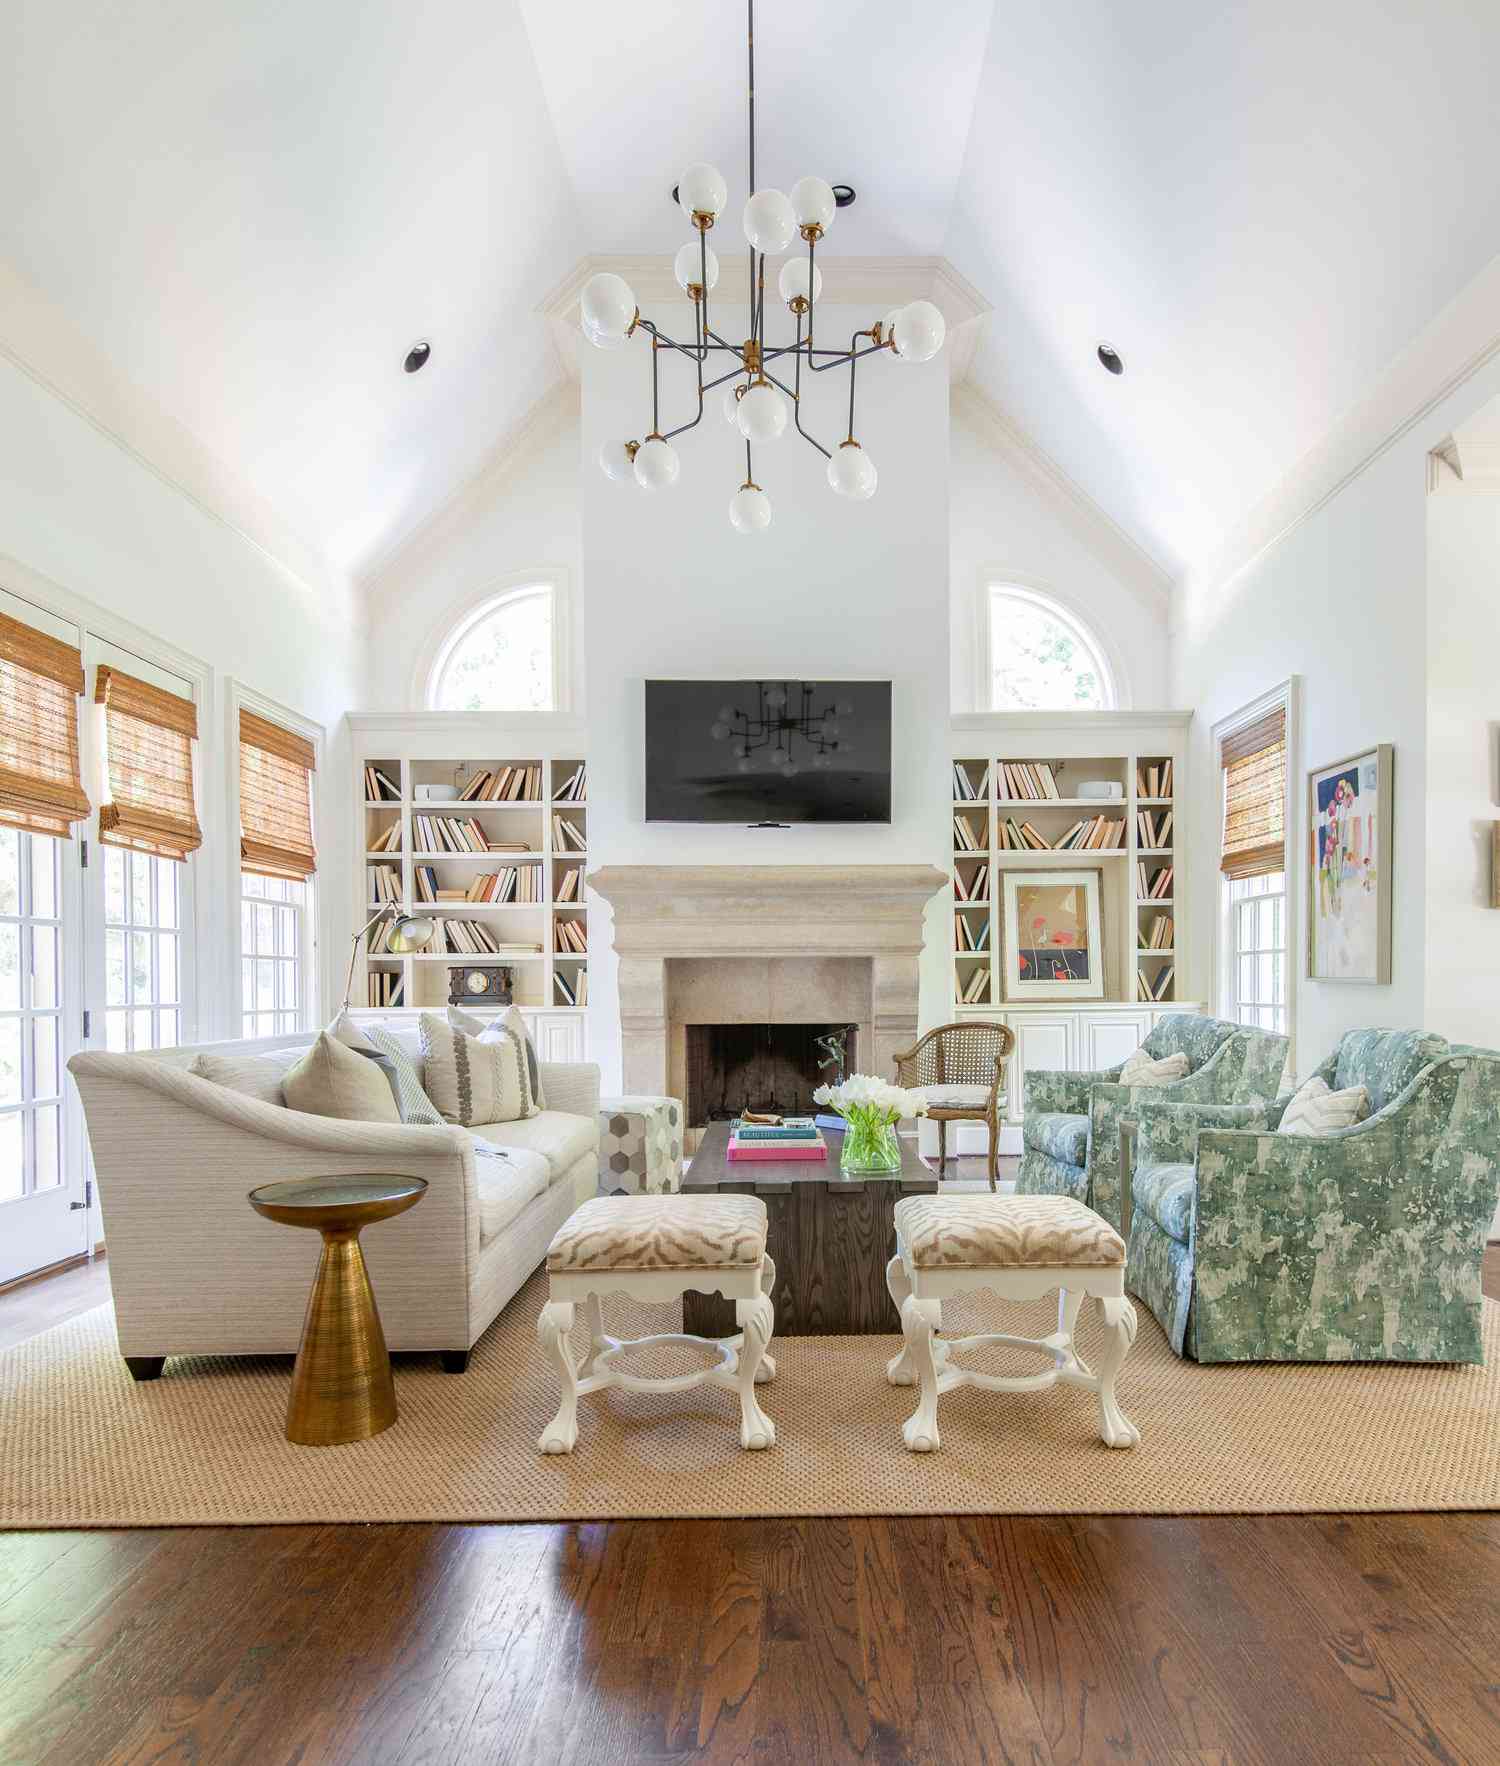
1. Grand Living Room Built-Ins Around a Stone Fireplace
Symmetry is the secret weapon here. By placing identical white bookshelves on either side of the stone fireplace, the design creates a sense of balance and formal elegance. This arrangement naturally frames the fireplace as the room’s focal point. The design also masterfully plays with vertical lines; the tall bookshelves and the grand arched windows above them draw the eye upward, making the already vaulted ceilings feel even more expansive and dramatic. It’s a classic architectural trick that adds grandeur to any space.
⭐ The One Thing
This look is all about grand proportions, making it ideal for rooms with high or vaulted ceilings—think 10 feet or more. To truly do it justice, you need a substantial wall, at least 15 to 18 feet wide, to comfortably fit the fireplace, the flanking bookshelves, and allow for some breathing room. In a smaller room, this much built-in storage could feel overwhelming. If you have a standard 8-foot ceiling, consider the more compact approach shown in Idea #6, which integrates a desk and media storage on a smaller scale.
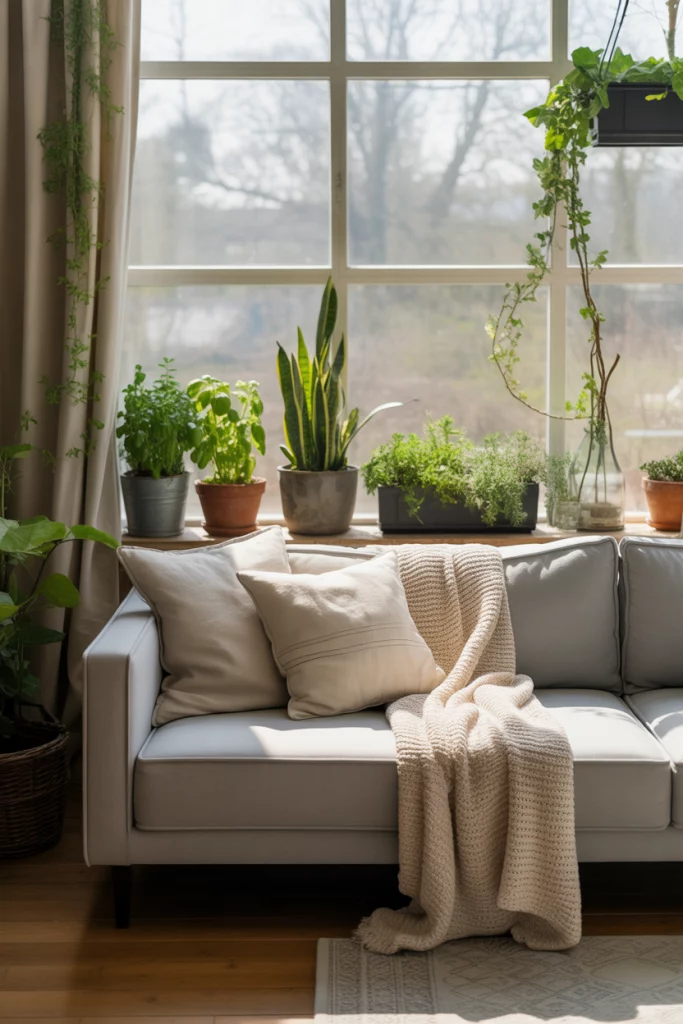
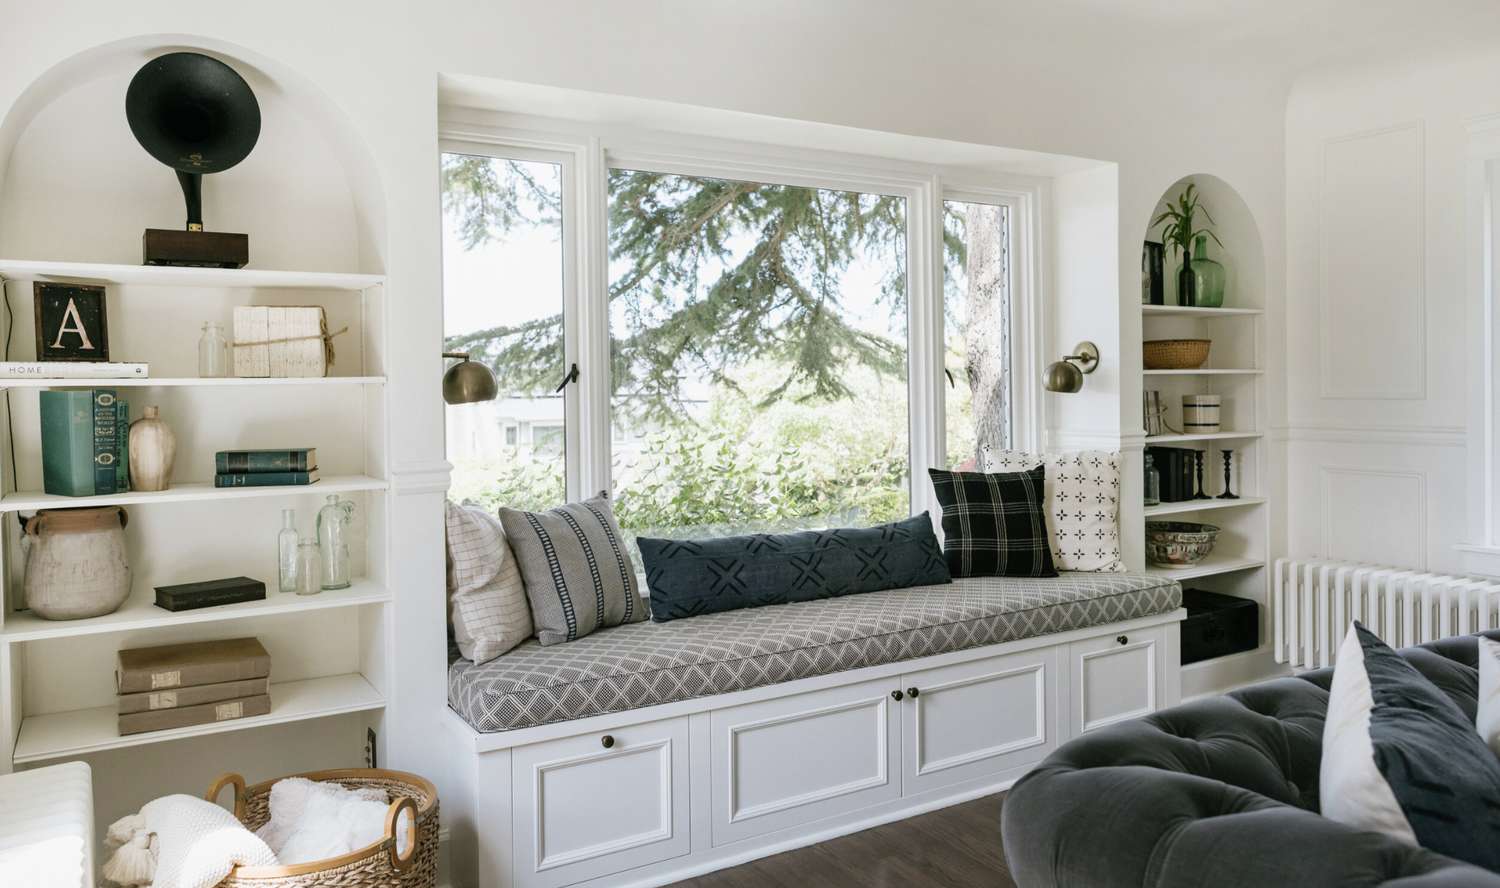
2. Window Seat with Arched Alcove Shelving
that truly elevates this design is the use of arches. Without the soft curve of the built-in shelves flanking the window, this would be a perfectly nice, but standard, window seat. The arches add an immediate layer of architectural interest and classic charm. They soften the lines of the room and create a bespoke, custom-designed feeling. It’s a detail that transforms a simple storage feature into a memorable design statement, turning a functional spot into a cozy, inviting nook you actually want to spend time in.
💰 Budget Breakdown
When designing a window seat, aim for a seat depth of 18 to 22 inches. This provides enough room to sit comfortably with your back against the window, legs outstretched, or with decorative pillows behind you. For the height, 18 inches (including the cushion) is standard and aligns with typical chair height, making it easy to get in and out of. Ensure your cushion is at least 3-4 inches thick and made from high-density foam so it holds its shape and provides real comfort over time. Using a performance fabric will make it durable and easy to clean.
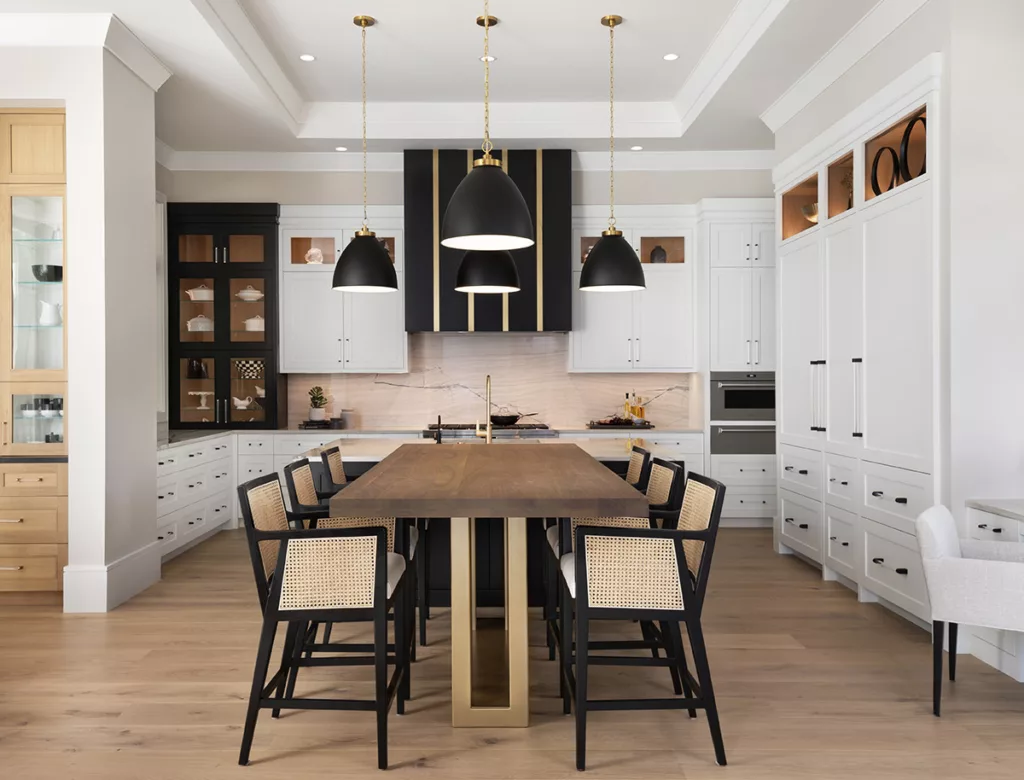
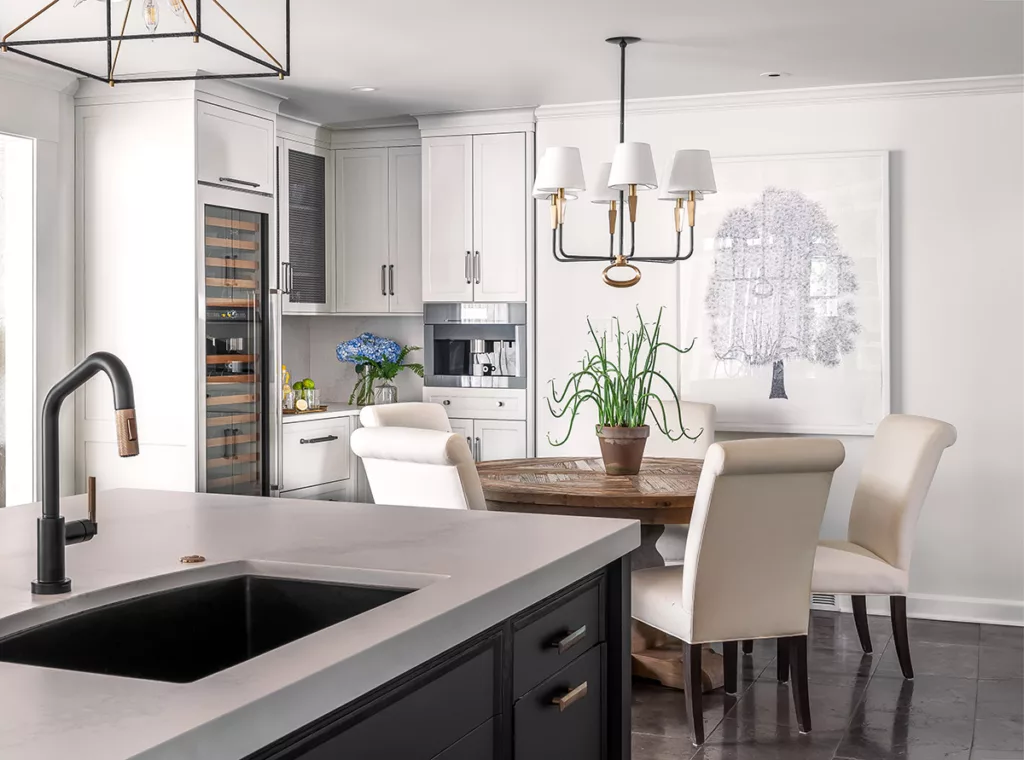
3. Mixed-Material Kitchen with White, Black, and Wood Built-Ins
The visual success of this kitchen lies in a balanced formula: 60% crisp white cabinetry as the main field, 20% bold black for dramatic accents (like the range hood and island stools), and 20% natural wood tones to bring in warmth and texture. The marble and metallics act as sophisticated jewelry. You could easily swap the palette while keeping the ratio. Imagine swapping the black for a deep navy or forest green, and the light wood for a richer walnut—the entire mood would shift, but the underlying balance would ensure it still feels just as cohesive.
✅ Before You Start
A wall of full-height cabinetry is a storage dream, but it can be a significant budget item. Be prepared for the reality of custom or semi-custom casework, which is priced by the linear foot. Also, a mix of materials—white lacquer, natural wood, marble, and metal—requires a skilled designer and installer to get the transitions just right. Misaligned cabinets or clashing undertones in the wood and marble can quickly cheapen the look. Make sure to get physical samples of all your proposed finishes and view them together in your actual kitchen light.
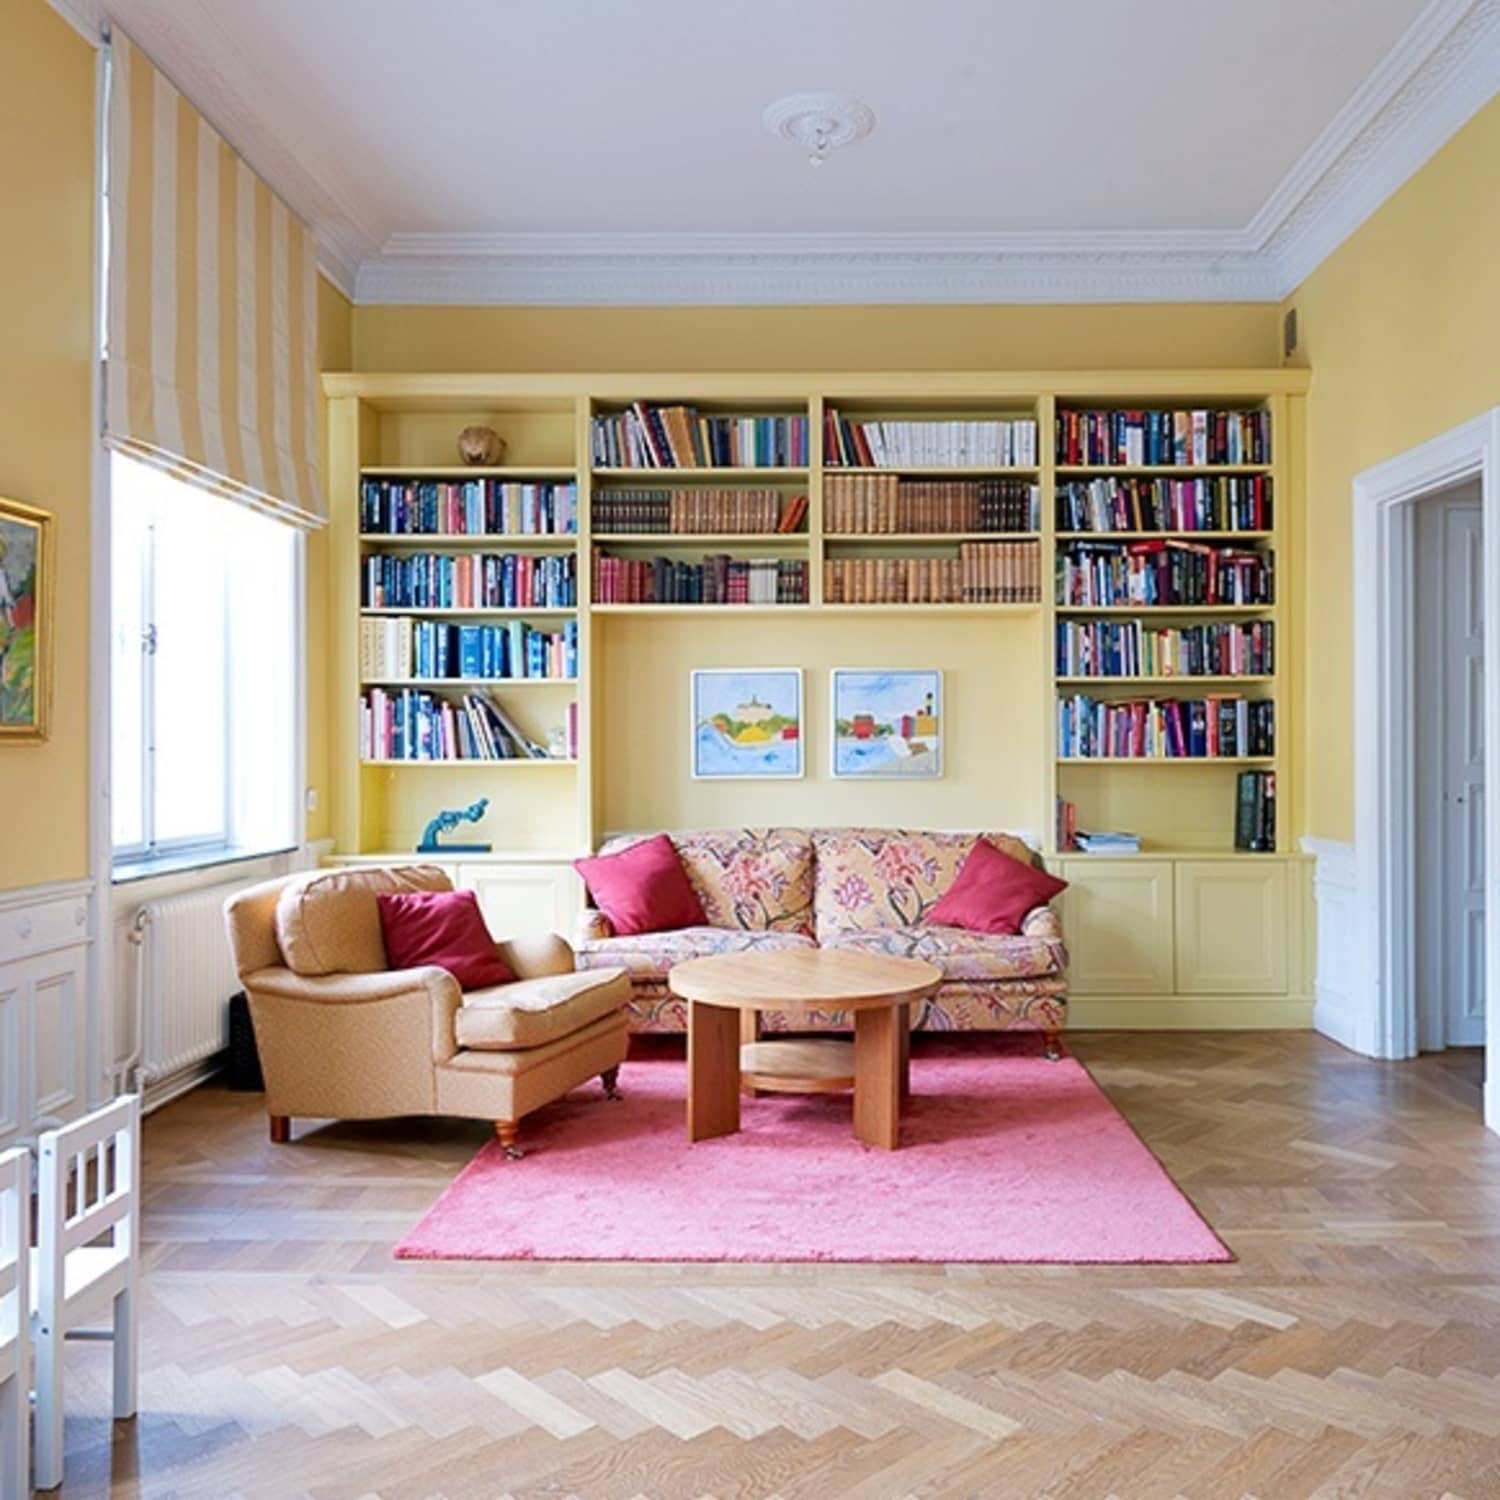
4. Floor-to-Ceiling Yellow Bookcase with Integrated Cabinets
Here’s a rough estimate to bring this sunny look home. Keep in mind that custom carpentry costs vary wildly by location.
🔥 Trending Context
- Custom Built-In Unit (materials & labor): $4,000 – $9,000
- Paint (high-quality satin or semi-gloss): $200 – $400
- Herringbone Wood Flooring (installed): $3,000 – $7,000 for a 200 sq. ft. room
- Area Rug: $300 – $1,000
- TOTAL: $7,500 – $17,400
- Budget alternative: Get a similar vibe for about 40% less using multiple IKEA Billy bookcases with Oxberg doors on the bottom, painted to match your wall color.
This design works because it commits wholeheartedly to its color story. By painting the walls and the massive built-in unit the same shade of cheerful yellow, the storage almost melts into the architecture of the room, feeling less like a bulky piece of furniture and more like an intentional feature. This monochromatic approach makes the room feel larger and more cohesive. The colorful rug and books then pop against the unified backdrop, creating a space that feels both incredibly organized and full of personality.
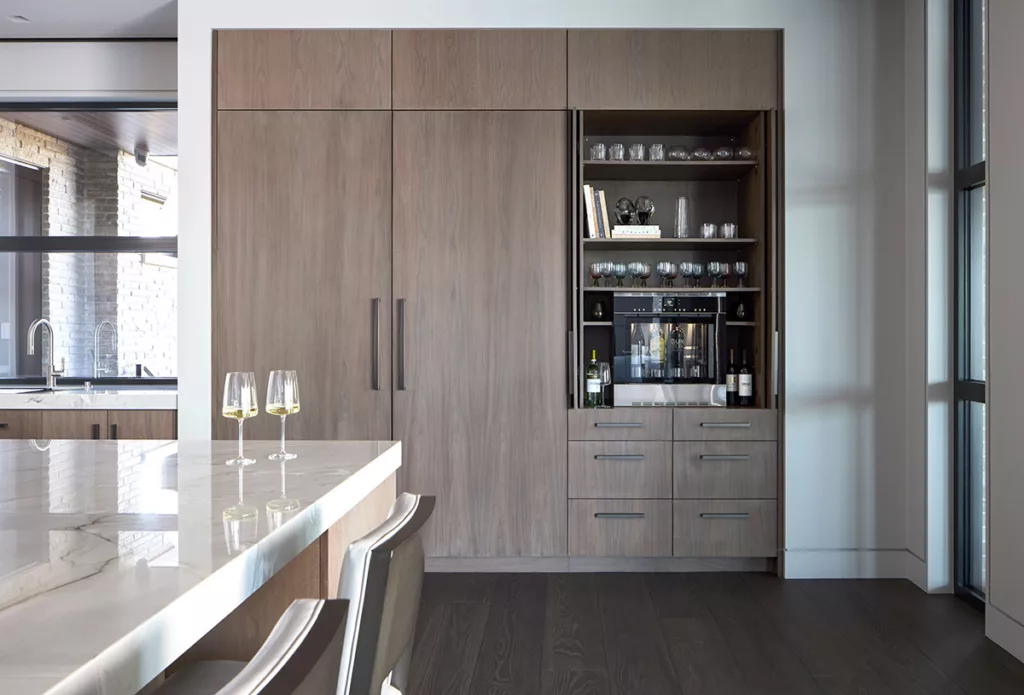
5. Modern Beverage Bar with Light Wood Cabinetry
The single element that defines this built-in is the contrast between the light, natural wood grain of the exterior cabinetry and the dark, moody interior of the beverage station. This contrast creates a ‘reveal’ moment. When closed, it’s a seamless part of the wall. When open, it’s a sophisticated, jewel-box space. Removing that dark interior would make it a standard cabinet; keeping it turns everyday coffee-making or wine-pouring into a small, luxurious experience. It’s a clever way to add depth and a touch of drama to an otherwise minimalist design.
🔧 How-To Brief
That beautiful, light wood-grained cabinetry likely has a matte or natural finish, which is stunning but can be prone to showing fingerprints and water marks, especially in a high-traffic area like a beverage bar. The white marble countertop is also a classic choice, but it is porous and can stain or etch if spills (especially coffee, wine, or citrus) aren’t wiped up immediately. An alternative with a similar look but less worry would be a high-quality quartz countertop that mimics marble and a wood-look laminate for the cabinetry.
6. Wall-Length Media Center with Integrated L-Shaped Desk
As hybrid work schedules become a permanent part of life, we’re seeing a huge surge in demand for built-ins that seamlessly blend home office function with living room aesthetics. This unit is the perfect example of that 2026 trend. It acknowledges that for many, a desk is a non-negotiable part of the living space, but it keeps it from feeling utilitarian. By integrating the desk into the larger media and storage unit, using the same materials and clean lines, the ‘work’ zone feels cohesive with the ‘relaxing’ zone, rather than being a visual afterthought.
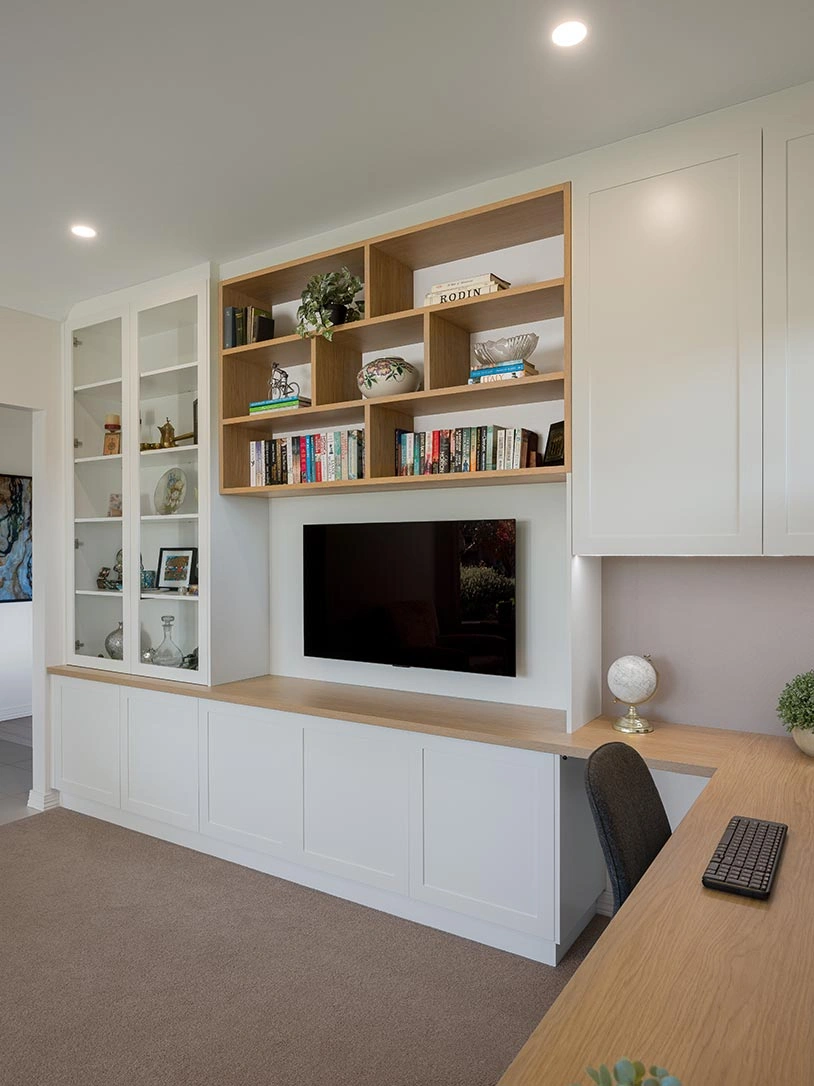
🎯 What Makes It Work
You don’t need a custom carpenter to get this look. You can recreate this concept using stock cabinetry from a big-box store or IKEA. Combine IKEA’s Sektion kitchen base cabinets (for the lower portion) with a custom-cut wood countertop from a hardware store. For the upper shelving, use their Lack or Bergshult floating shelves. The key is to paint everything a unifying color and install it wall-to-wall to create that seamless, built-in appearance. This DIY approach could bring the total cost down to $1,500 – $2,500, depending on the size.
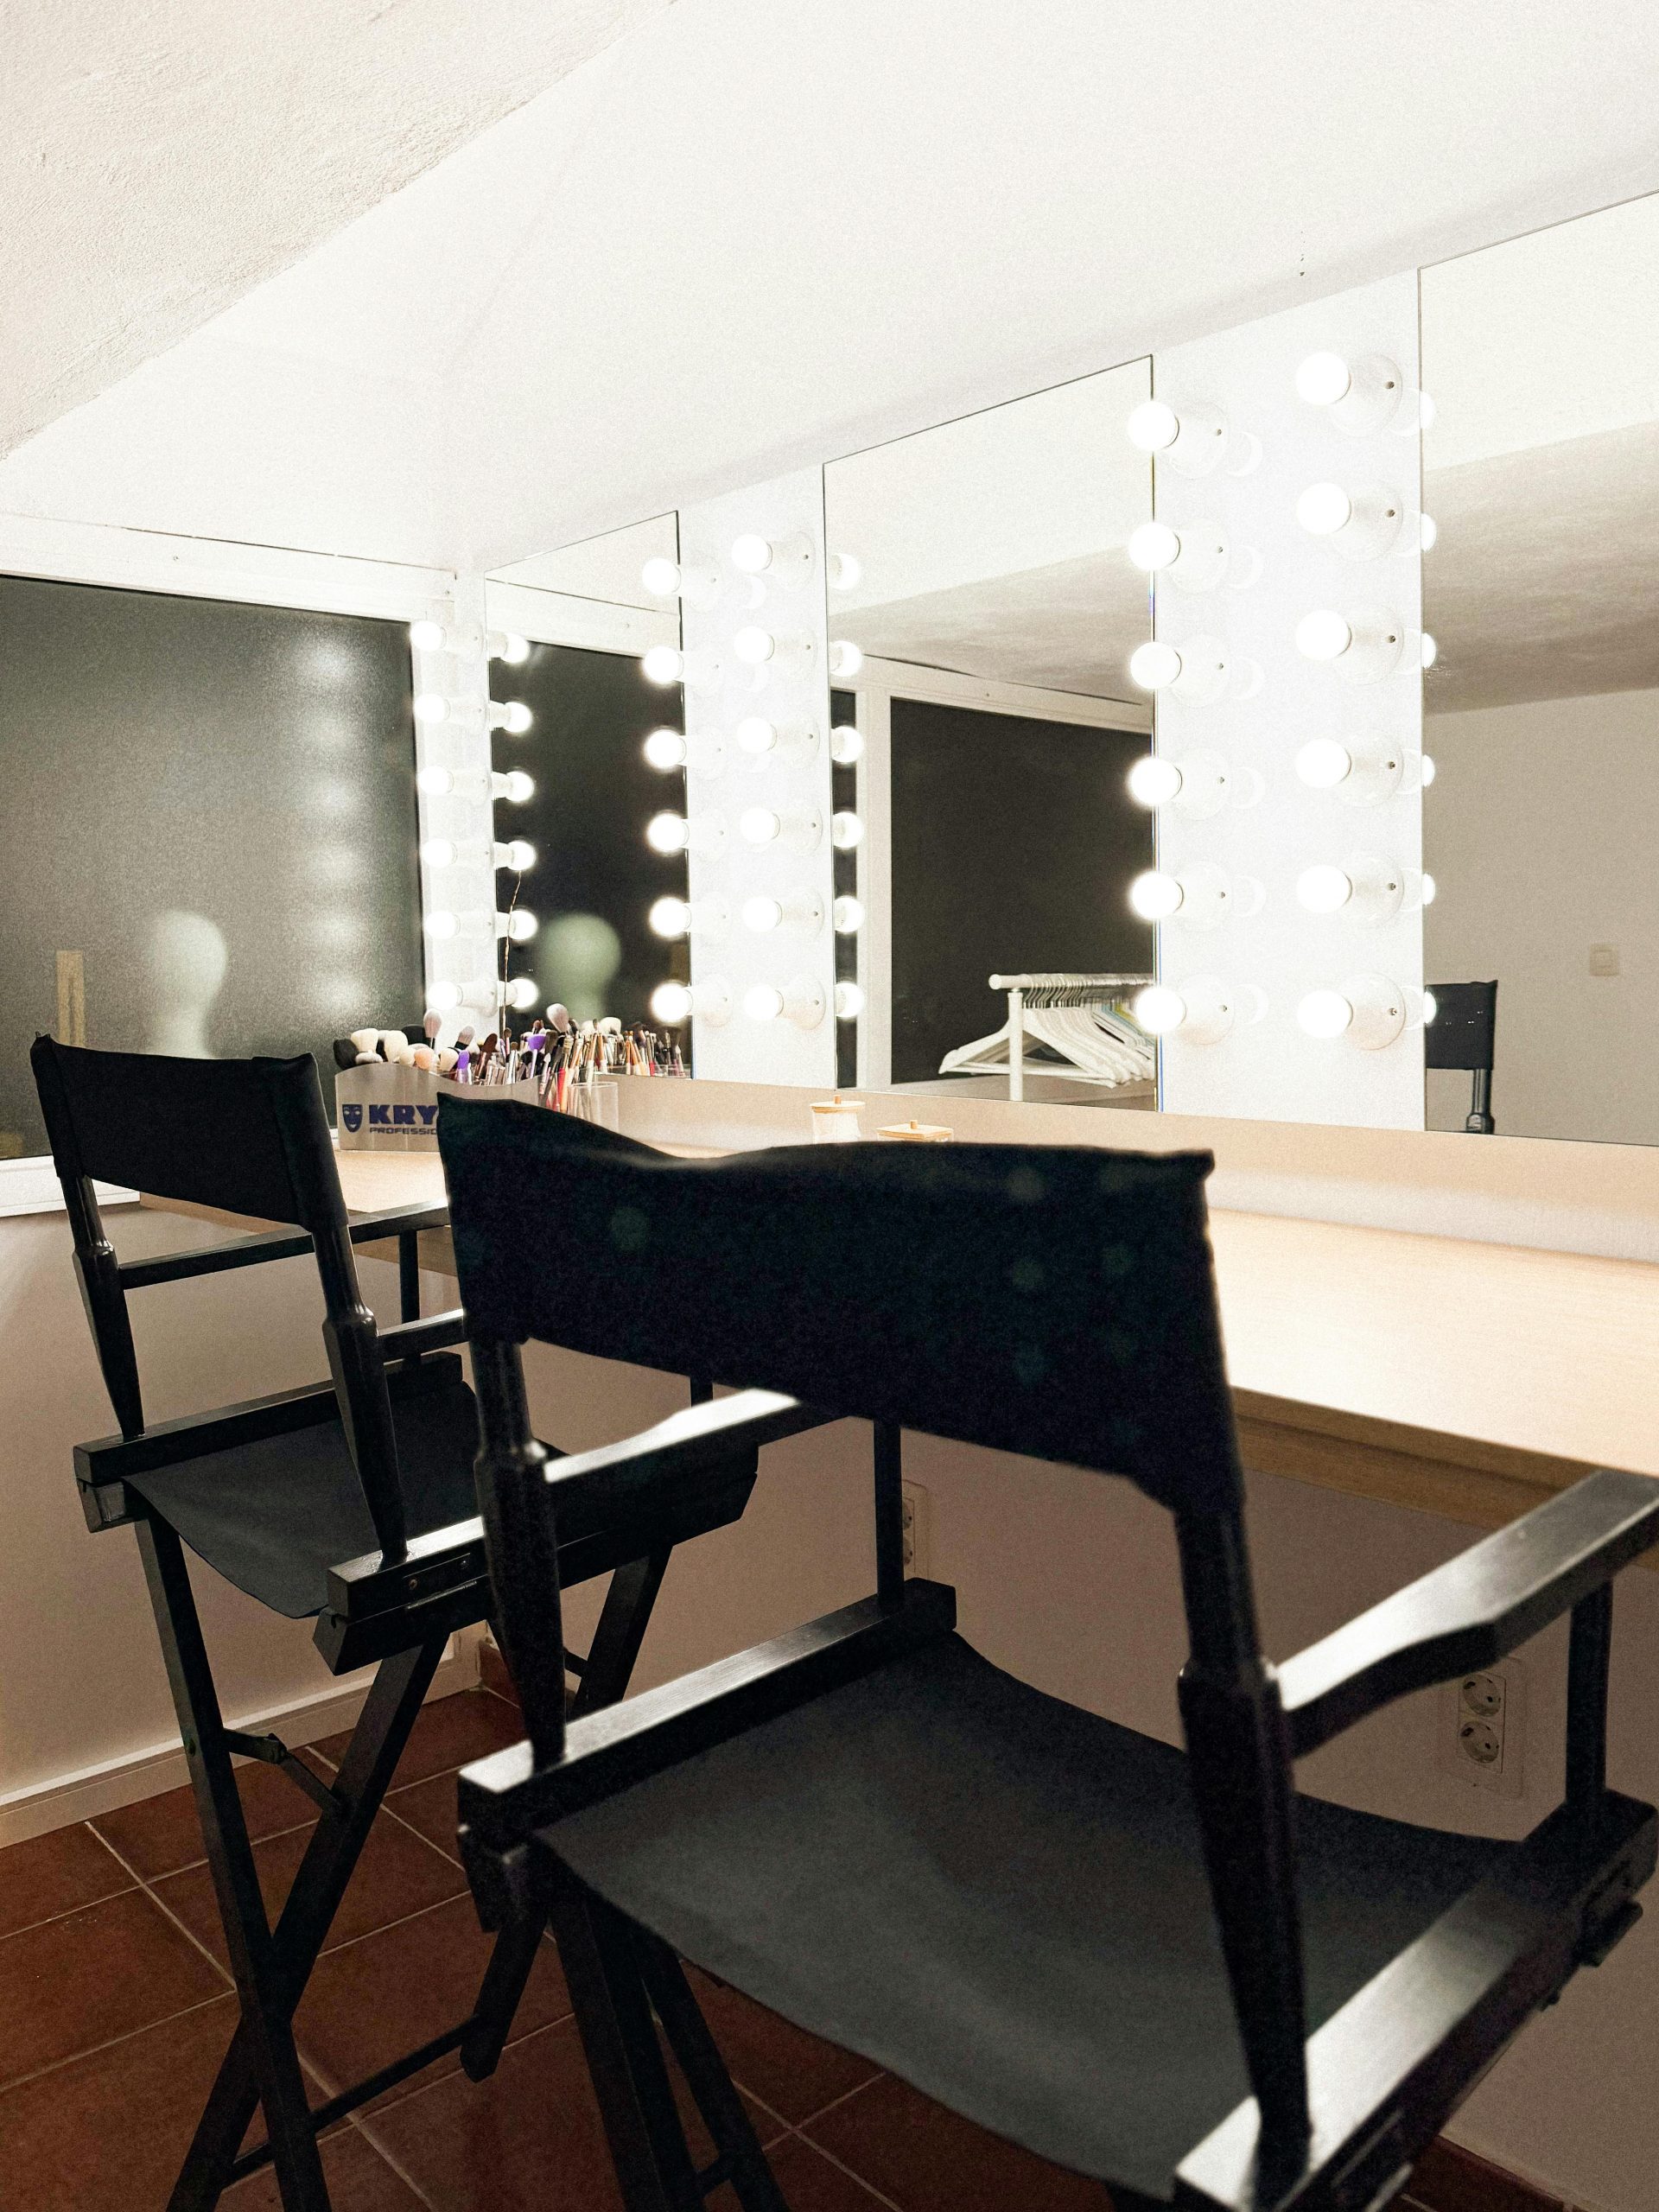
7. Modern Walk-In Closet with Integrated LED Lighting
When planning for integrated closet lighting, use vertical LED strips for the most even and dramatic effect. Opt for a color temperature between 3000K and 4000K; anything lower will be too yellow, and anything higher will feel like a sterile laboratory. Importantly, make sure the LED channel has a frosted or milky diffuser. This prevents you from seeing the individual ‘dots’ of the LEDs, creating a smooth, continuous line of light that looks far more high-end and is easier on the eyes.
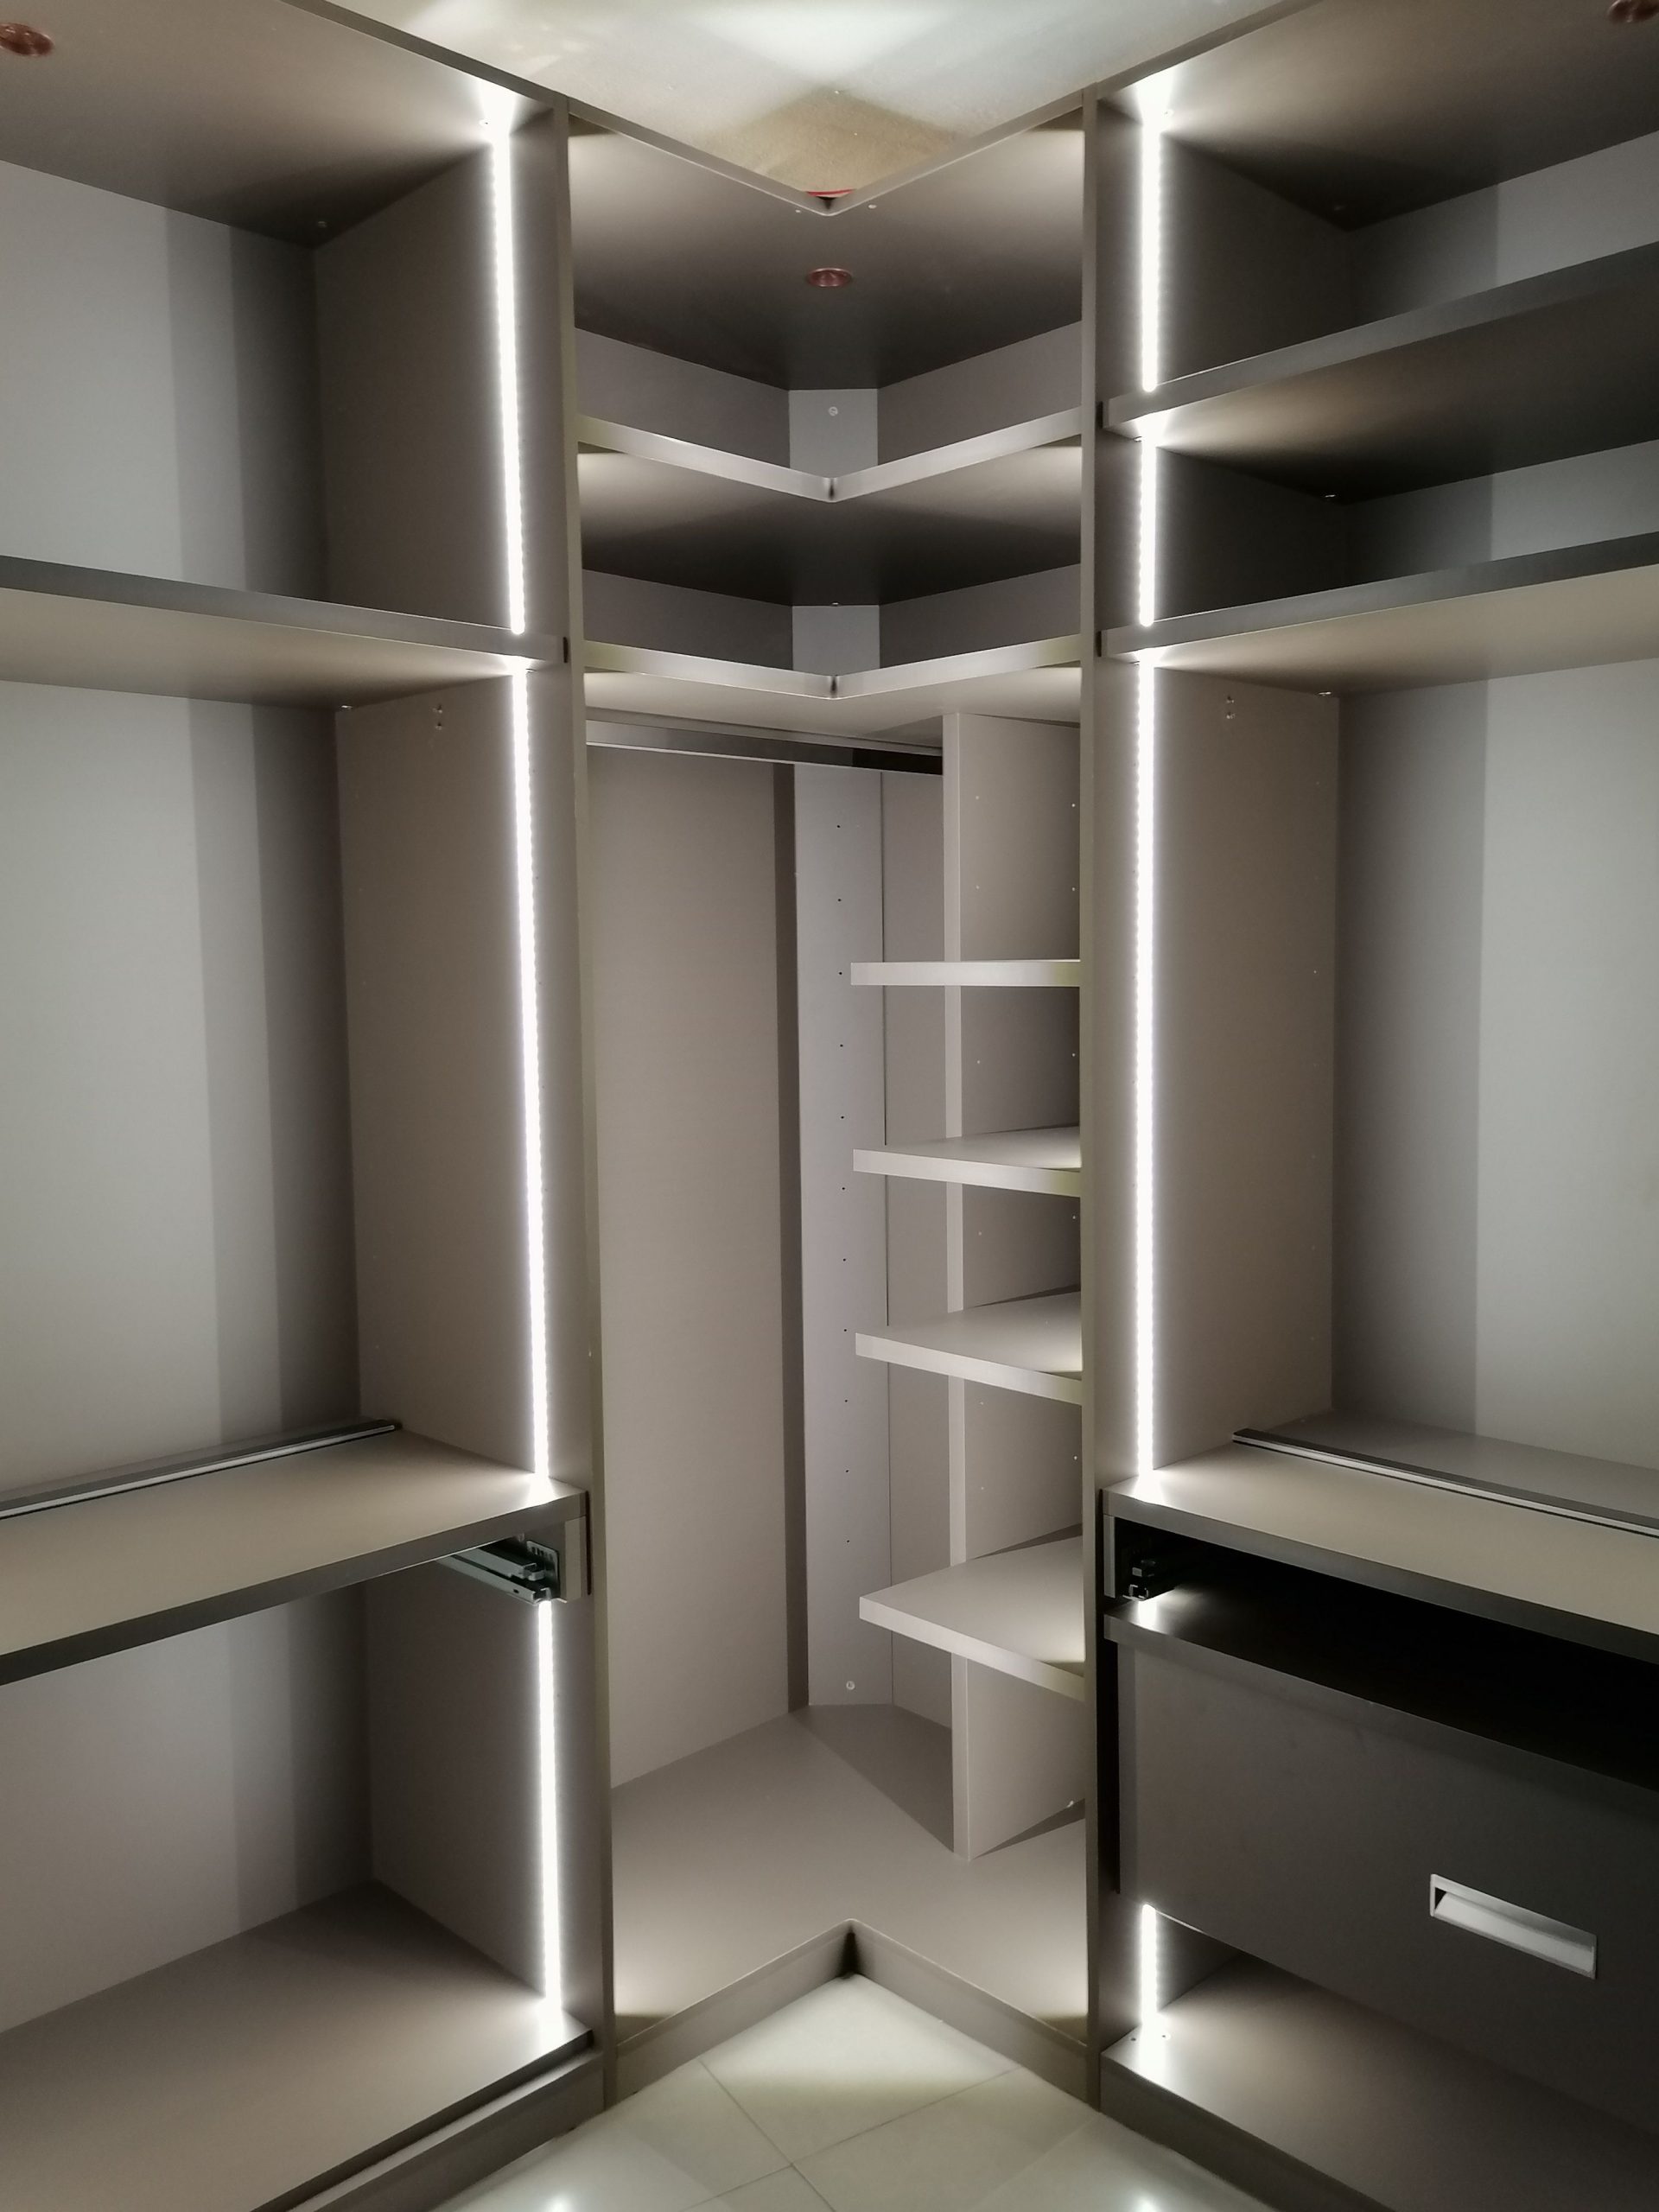
💡 Designer Tip
Want to add this sleek lighting to your own closet? Here’s a quick guide.
- Measure & Plan: Determine where you want the lights. Vertical placement alongside dividers, as shown here, works best. Measure the total length you need.
- Purchase a Kit: Buy an LED strip light kit that includes the tape, a channel with a diffuser, and a power supply. You can find these online for about $50-$150.
- Install the Channel: The aluminum channel can be surface-mounted. Screw it directly onto the front edge of your closet panels.
- Adhere the Strip: Peel the backing off the LED tape and press it firmly inside the channel.
- Connect Power: Run the wire discreetly to the nearest outlet or have an electrician hardwire it to a switch.
- Add the Diffuser: Snap the frosted plastic cover onto the channel for a clean, finished look.
This project can be done in an afternoon for a relatively low cost.
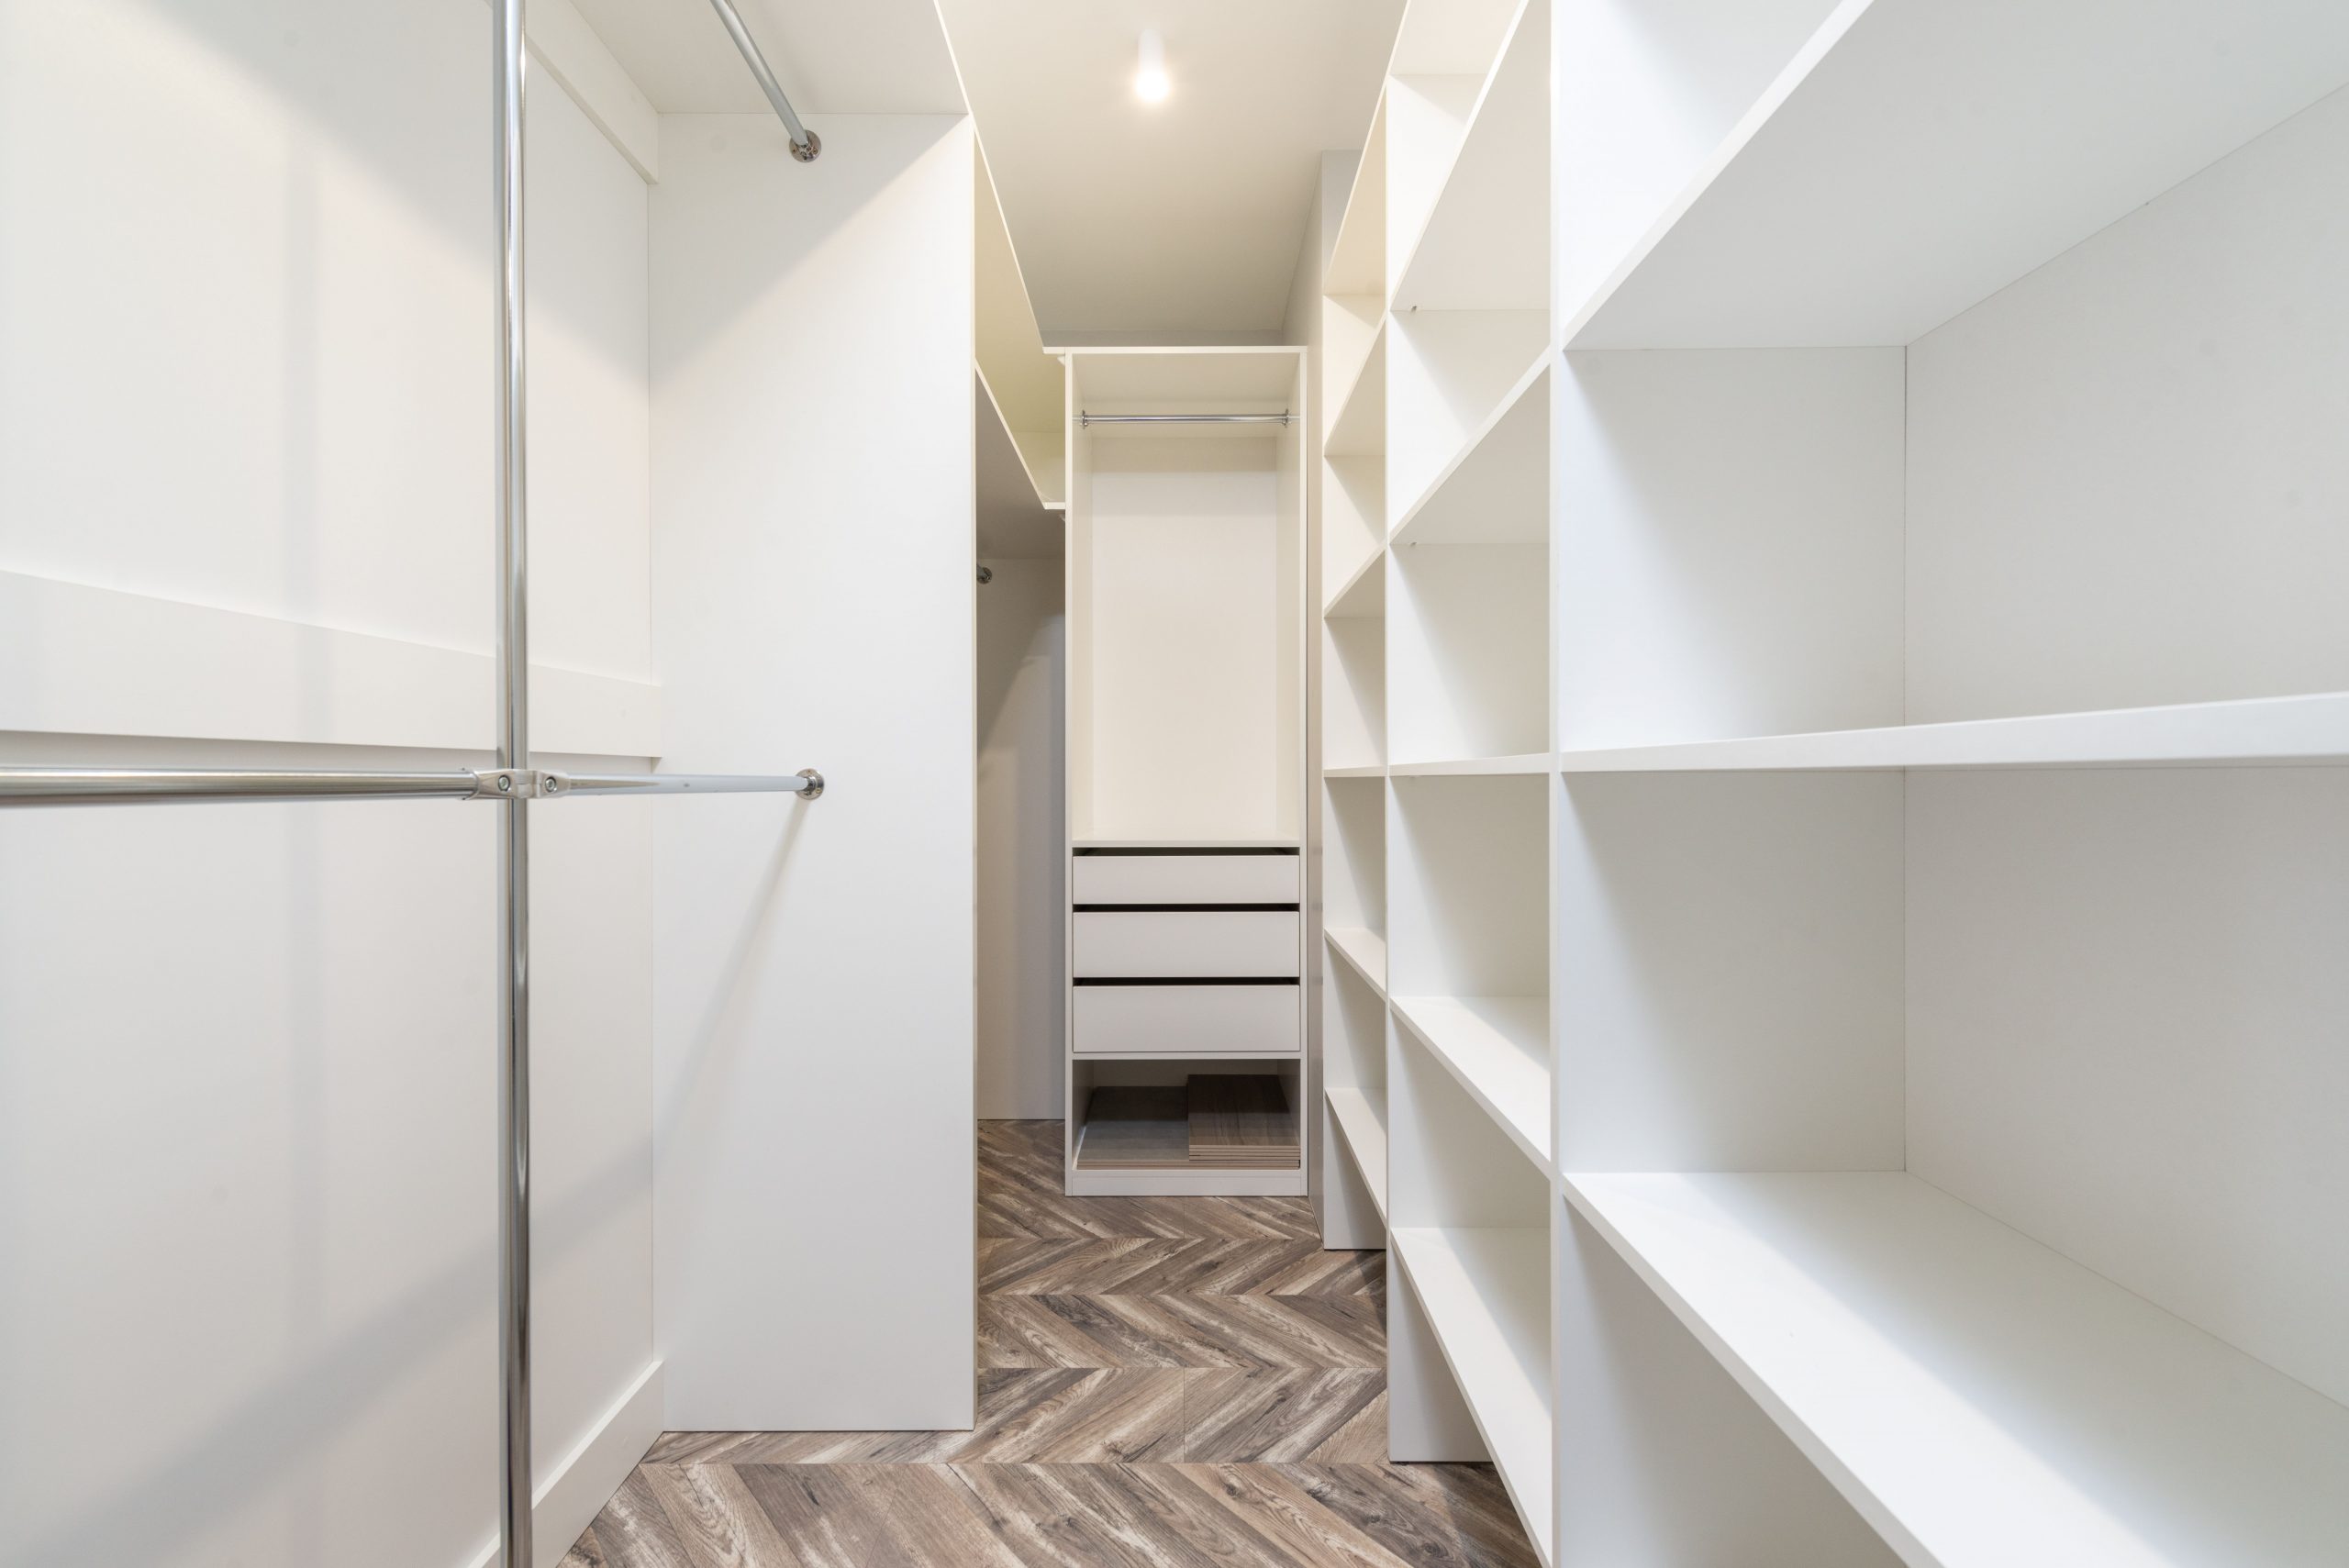
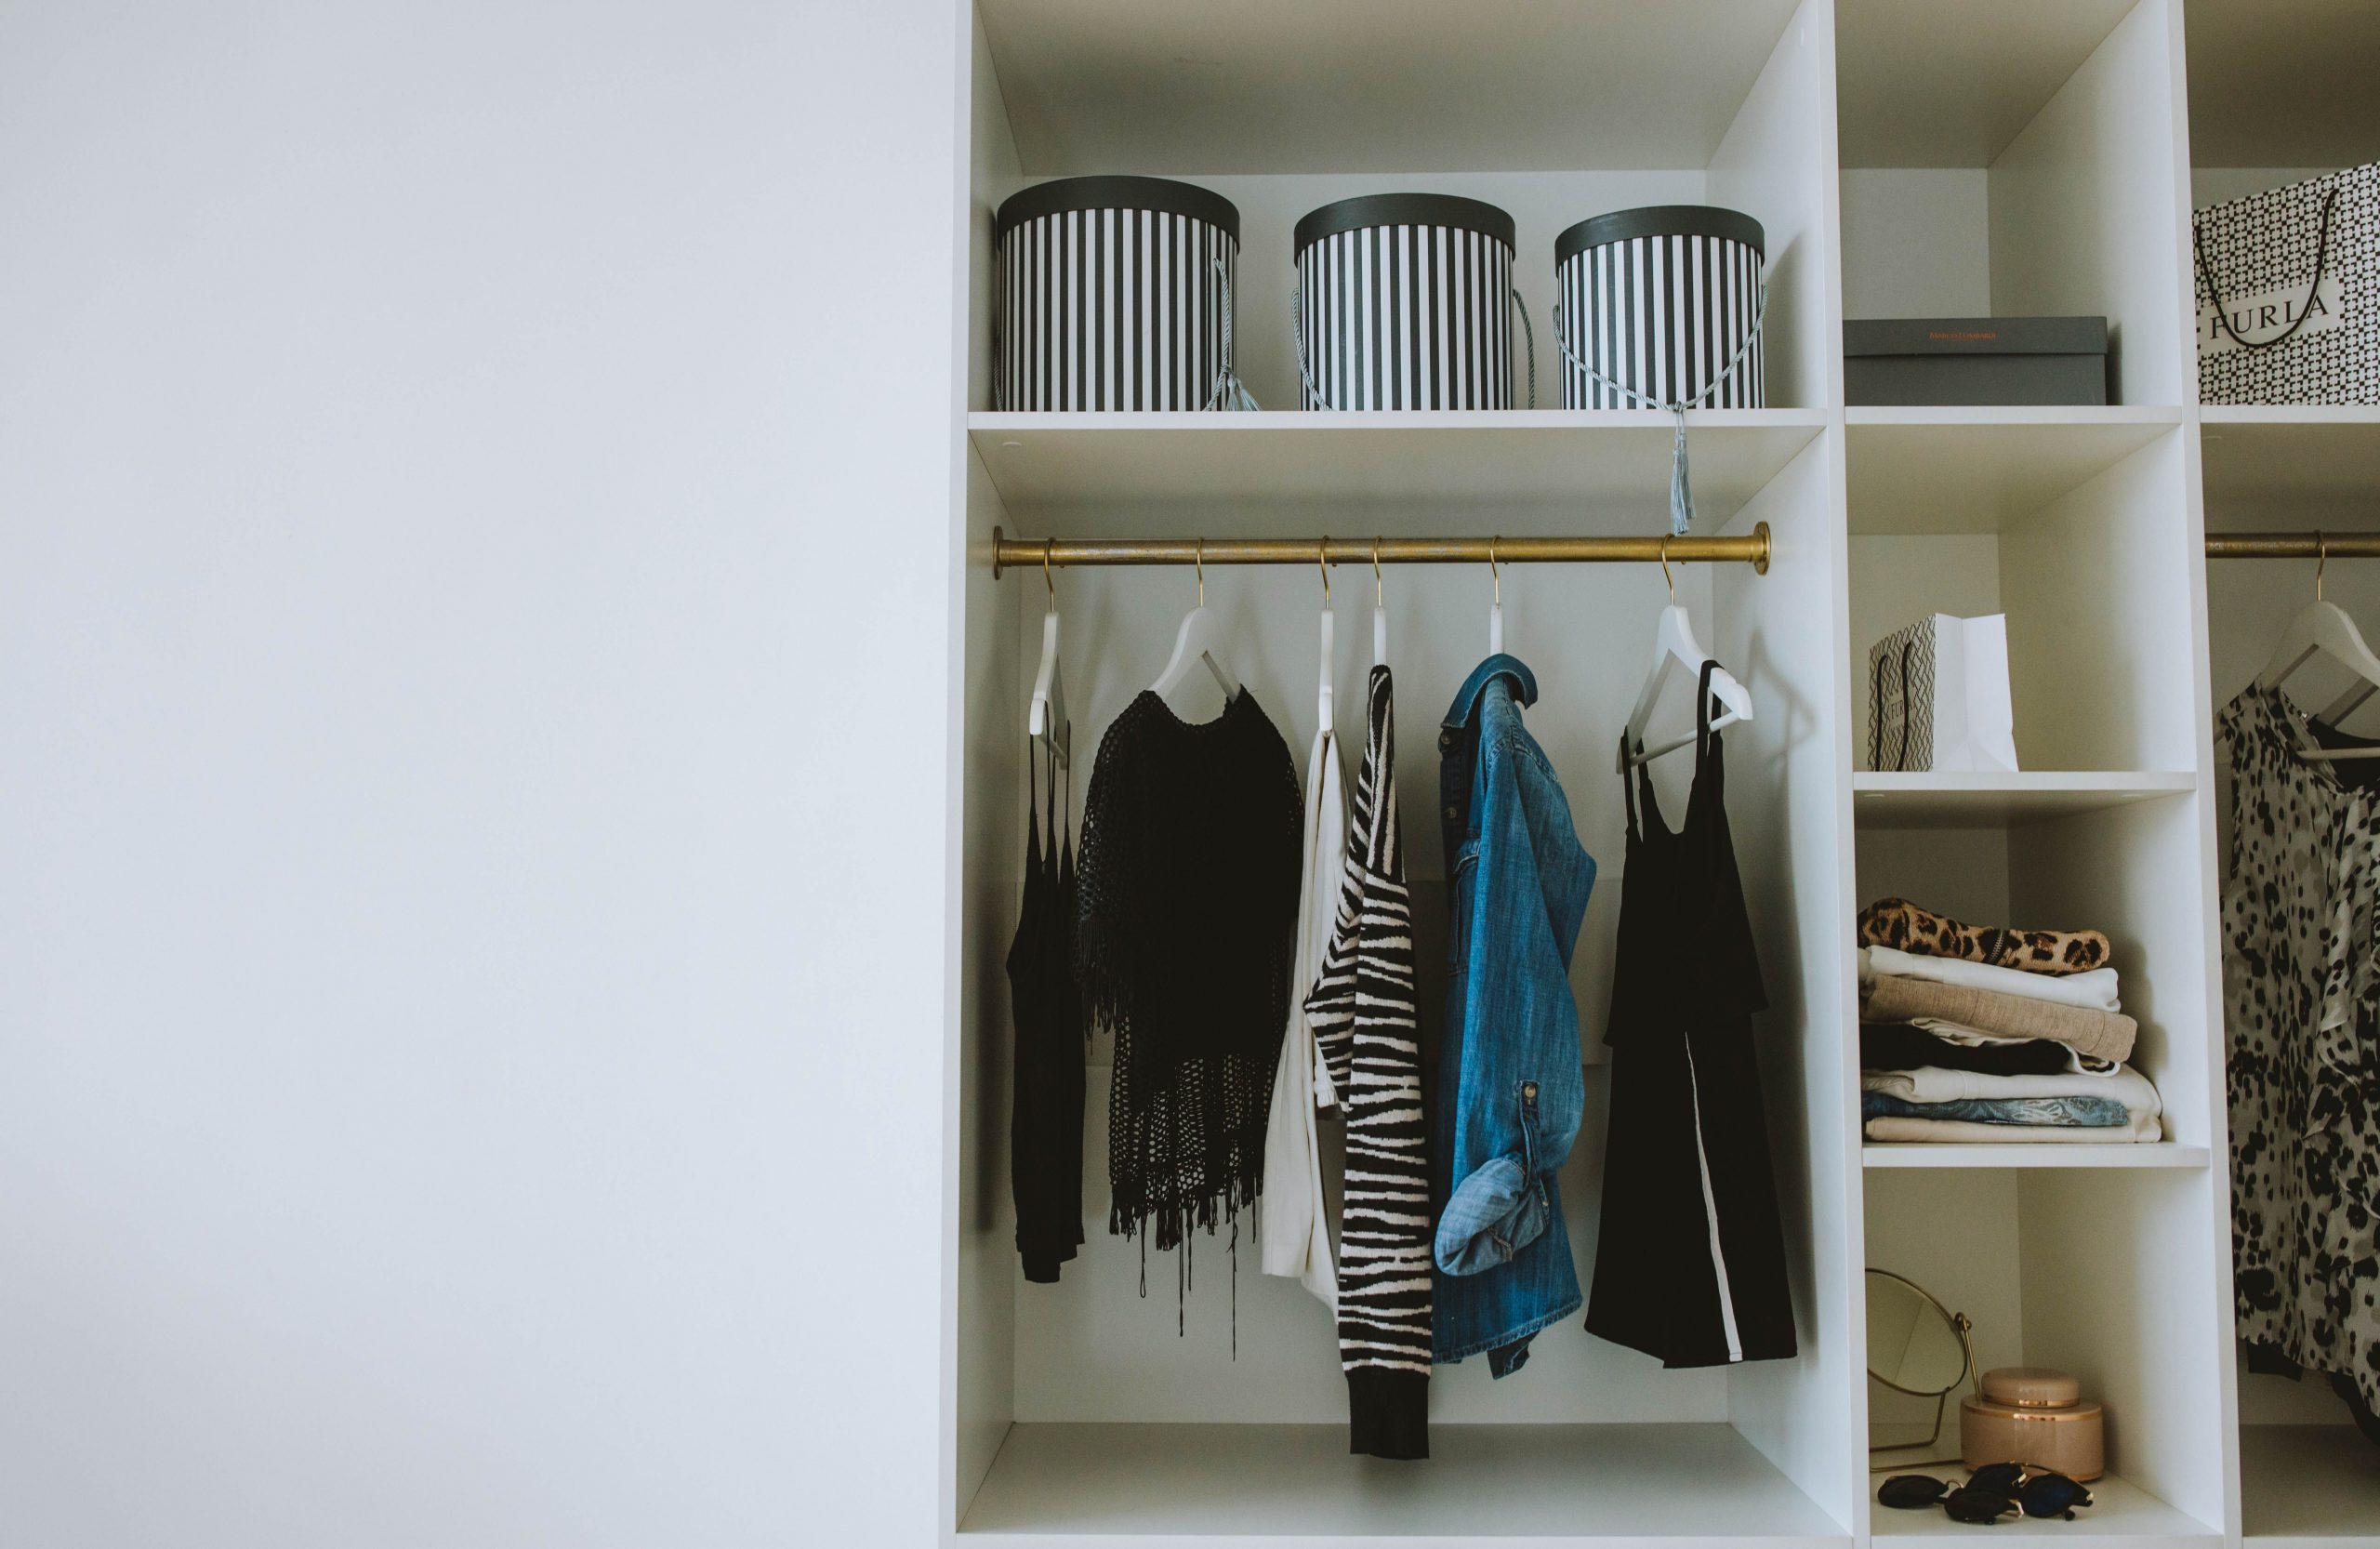
8. Minimalist White Walk-in Wardrobe with a Herringbone Floor
The beauty of this space is its simplicity and repetition. The all-white, open-shelf system creates a clean, gallery-like feel where the clothes themselves provide the color and texture. There are no complex doors or heavy hardware to clutter the visual field. This stark minimalism allows the herringbone floor to become a major design feature, adding a layer of subtle pattern and warmth that keeps the room from feeling sterile. It’s a smart balance of texture and clean lines. Compare this open concept with the more concealed storage in Idea #11.
📐 Style Math
An all-white, open-shelf closet looks absolutely stunning… when it’s perfectly tidy. The reality is that this system requires constant upkeep. Every folded sweater, pair of shoes, and handbag is on display. If you’re not a naturally neat person, this can quickly become a source of visual stress. Dust is also more visible on open white shelves. If you love the bright, airy look but crave a little more chaos-concealment, consider a system with a few well-placed drawers or cabinet doors to hide the small, messy stuff.
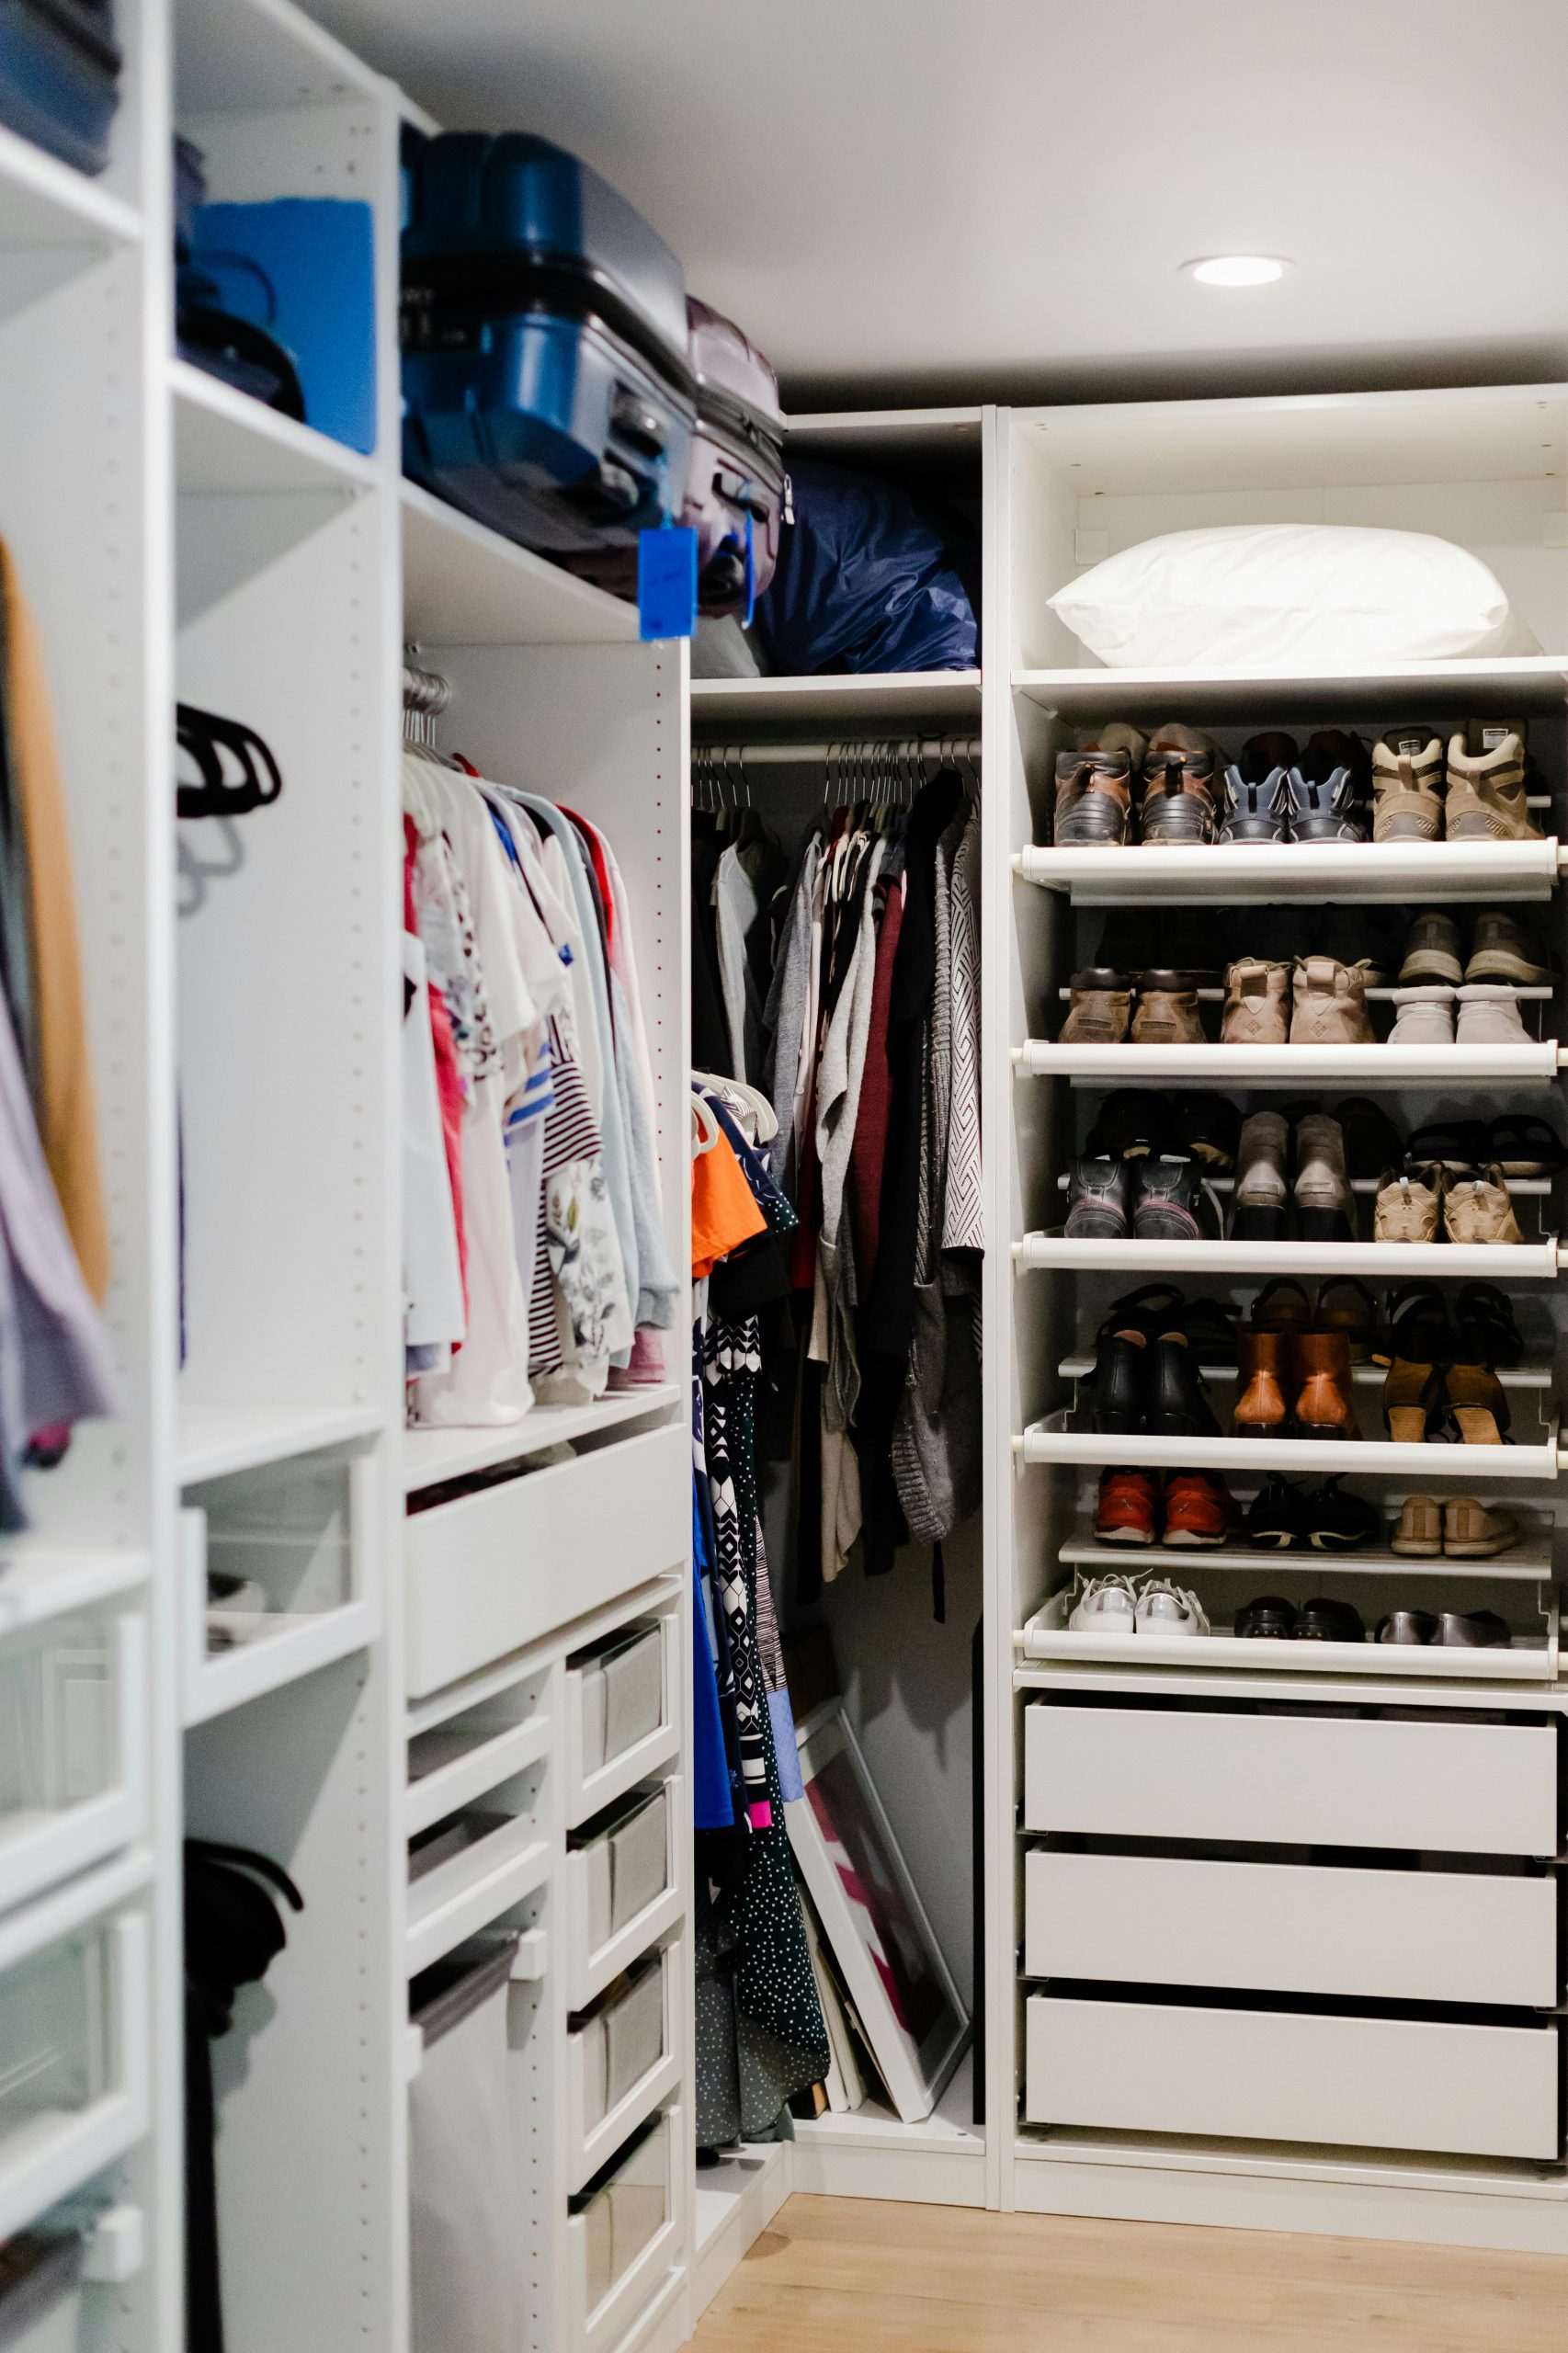
9. White Closet System with Varied Storage Compartments
The key to this closet’s success is its dedicated, purpose-built storage. It’s not just a series of generic shelves. It features slanted shelves specifically for shoes, pull-out wire baskets for loose items, deep shelves for luggage, and multiple rod heights for different types of garments. This level of intentional organization is what makes a closet truly functional. By assigning a specific home to every category of item, it becomes almost effortless to keep the space tidy. It moves beyond simple storage and into the realm of a personalized system that truly serves the user.
🧹 Maintenance Reality
Before you commit to a custom or semi-custom closet system, you have to do your homework. Here’s a quick checklist:
- Take a Full Inventory: Don’t just guess. Count your shoes, measure the linear feet of short-hanging vs. long-hanging clothes you own, and take stock of all your accessories.
- Measure Your Space Precisely: Get the height, width, and depth of your closet. Note the location of any obstacles like light fixtures or awkwardly placed doors.
- Set a Realistic Budget: A good system is an investment. Know what you’re willing to spend before you start getting quotes. Basic systems start around $1,000, while custom walk-ins can easily exceed $10,000.
10. Chic White Built-In Closet with Gold Hanging Rods
This look follows a simple but effective design equation: 80% simple, clean structure + 15% organized, color-coordinated contents + 5% luxe metallic accents. The basic white shelving is the workhorse—functional and inexpensive. The magic comes from the small details. The slivers of gold from the hanging rods and mirror frame instantly elevate the entire system, making it feel custom and chic. Keeping the visible clothing within a tight color palette (here, mostly neutrals) makes it feel curated, not cluttered.
📏 Scale Guide
You can achieve this high-end look on a serious budget. The core of this is a standard white closet system, like the IKEA PAX or ClosetMaid systems, which are very affordable. The transformative element is the hardware. Instead of using the standard silver-toned rods that come with the kit, purchase your own gold-finished closet rods and brackets from a hardware store or online. A can of metallic gold spray paint can also be used to transform standard rods and even picture frames. This simple swap costs less than $100 but makes the whole setup look twice as expensive.
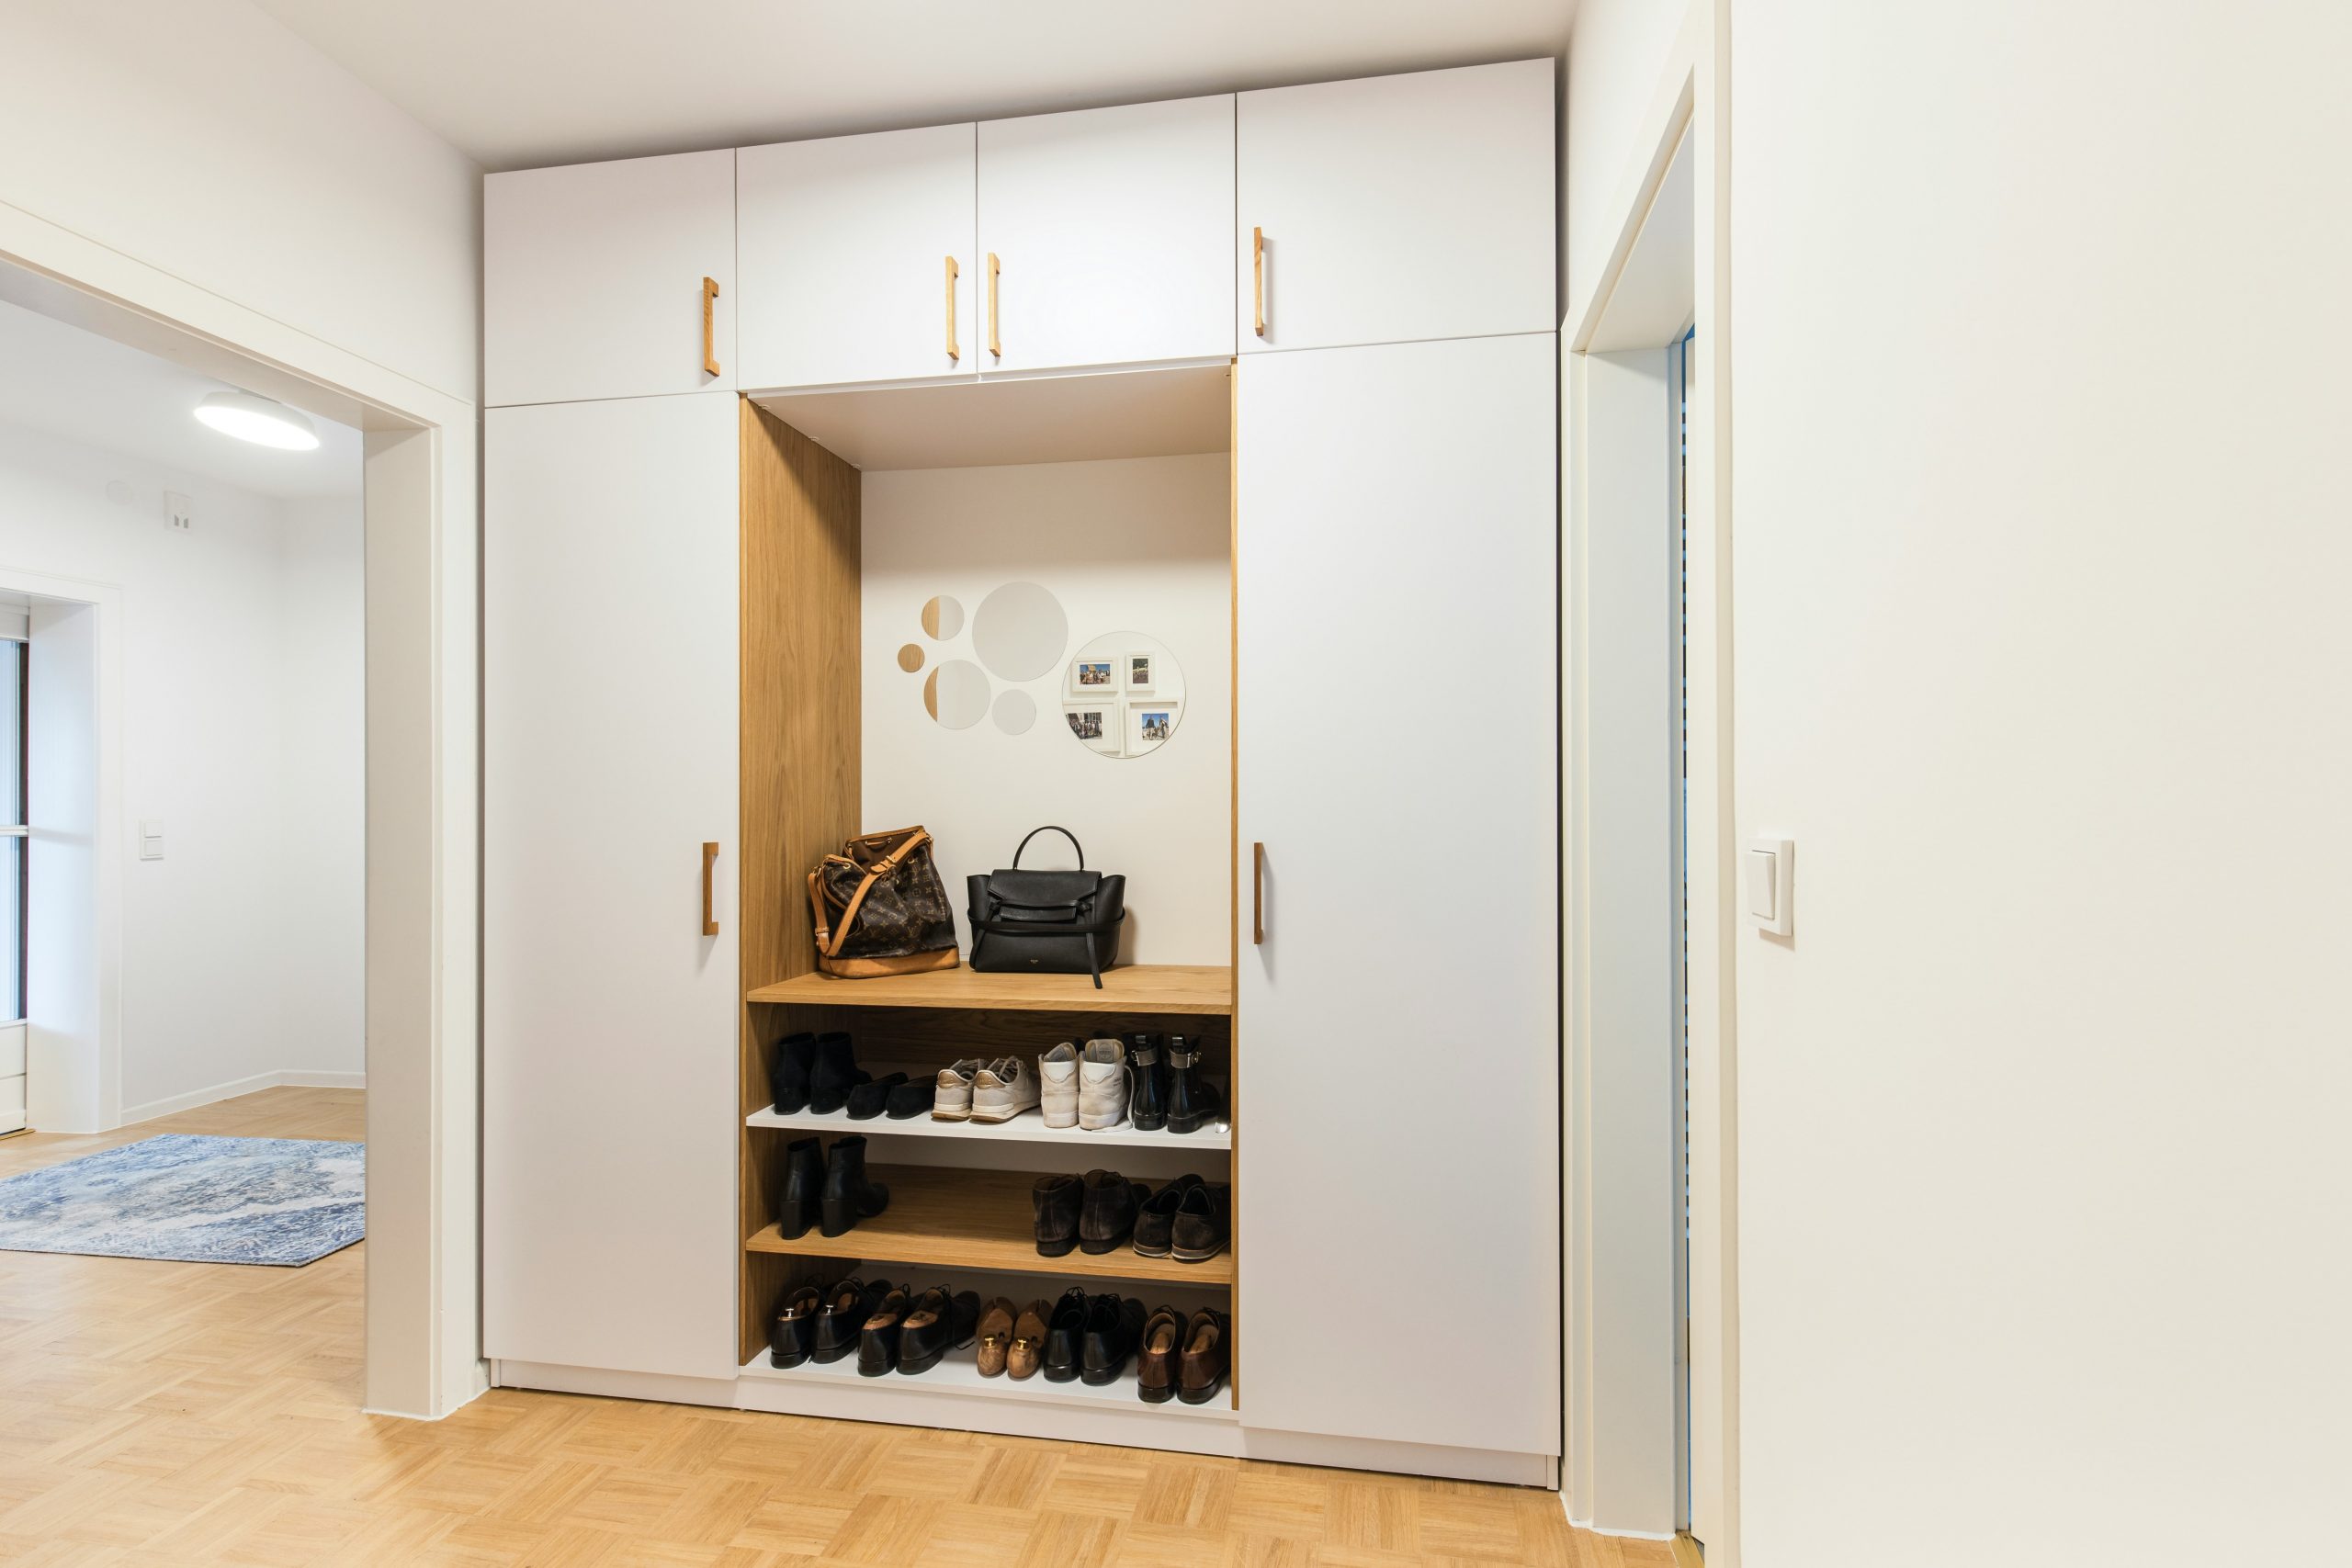
11. Full-Height White Storage with an Open Wood Niche
What makes this design so successful is the creation of a focal point within a field of storage. The wall of seamless white cabinets is incredibly practical, but could feel monotonous. By carving out a central niche and lining it with a warm, natural wood, the designers introduced texture, warmth, and a place for the eye to rest. This break in the color and material prevents the unit from feeling like a monolithic block. Using the same wood for the slim cabinet handles is a subtle touch that ties the whole look together beautifully.
⚠️ Real Talk
When designing a ‘landing strip’ or entryway built-in like this, the height of your central niche or bench is critical. If it includes a place to sit, the bench surface should be 18 inches off the floor. If it’s purely a display and drop-zone niche like the one shown, placing the main shelf at 30 to 34 inches (standard console table height) makes it a comfortable and ergonomic spot to drop your keys and mail. This deliberate planning for human scale is what makes a built-in feel truly custom and intuitive to use.
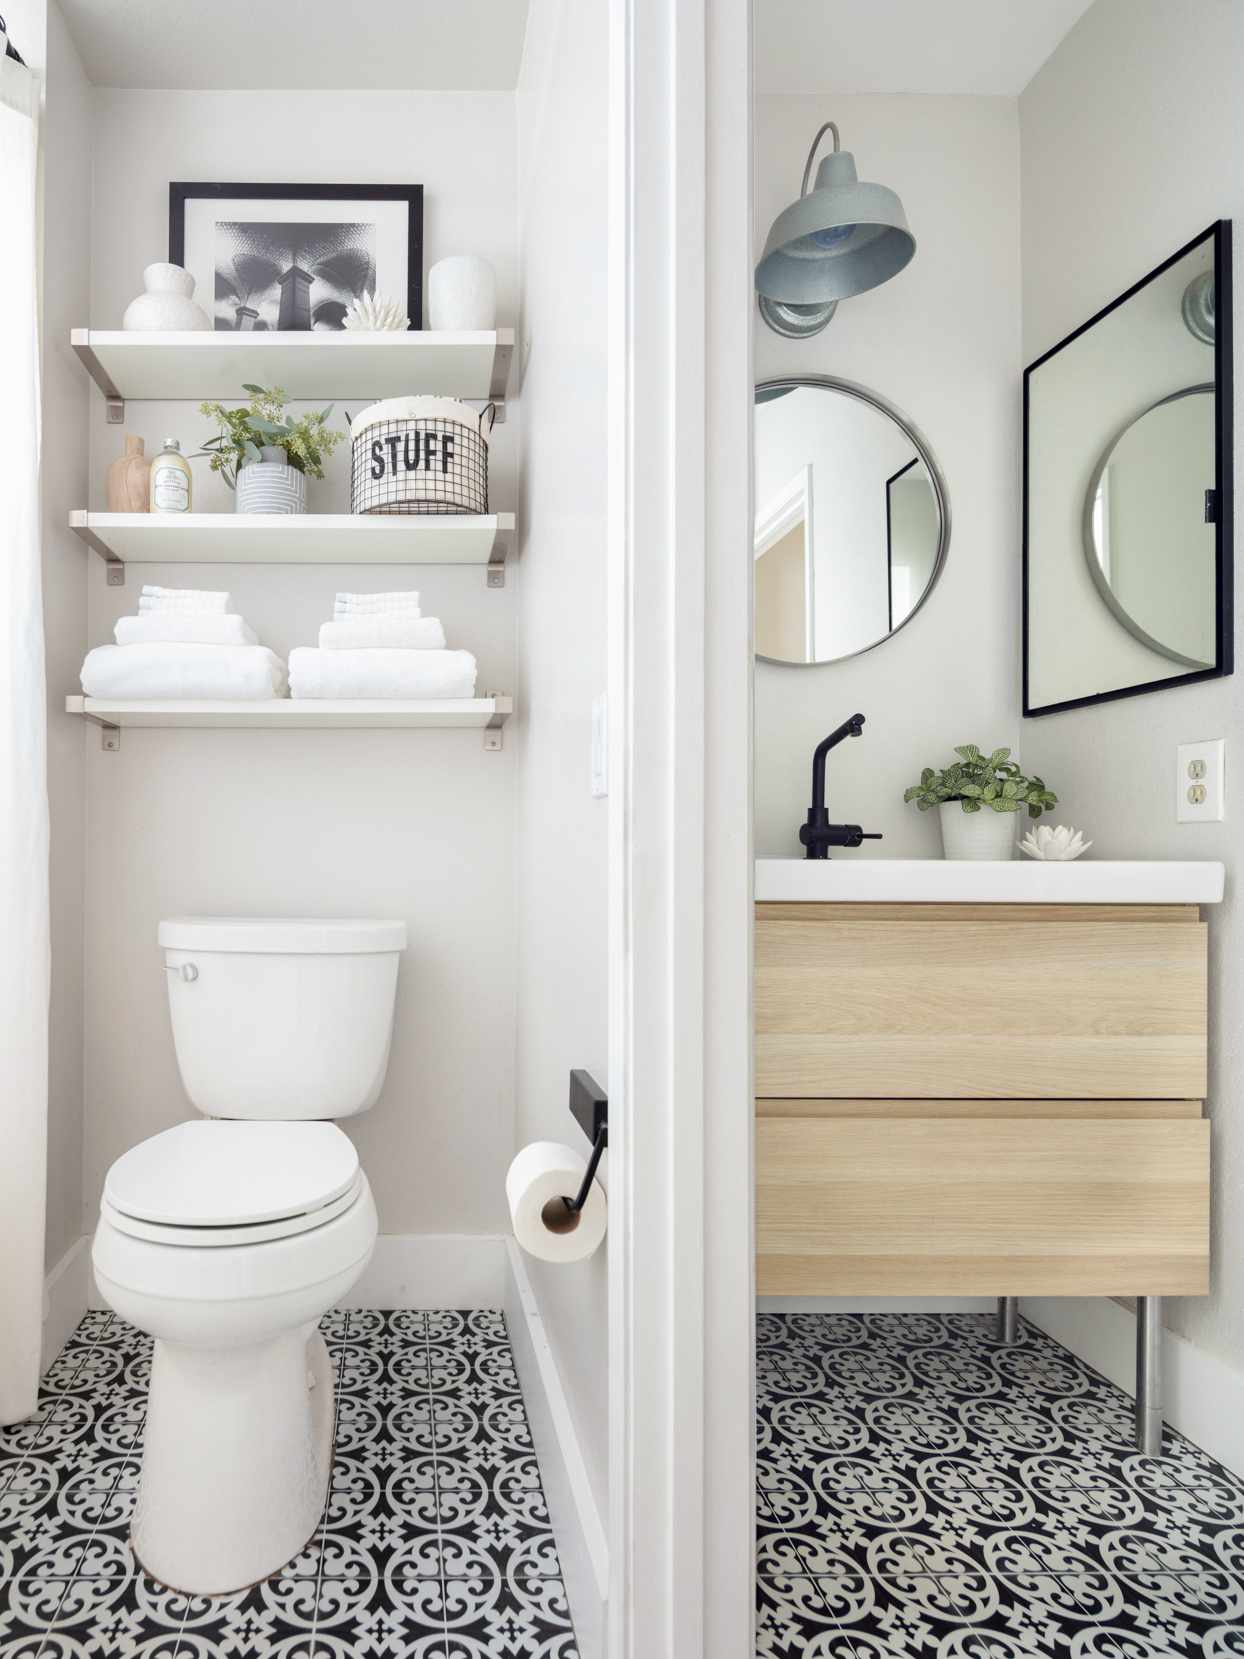
12. Three White Floating Shelves in a Modern Black and White Bathroom
This is a fantastically stylish and budget-friendly storage solution. Floating shelves, like the popular IKEA Lack shelves, can be purchased for $15-$30 each. The key to making them look elevated is in the styling. Use matching, neatly folded towels, corral small items in simple wire or woven baskets, and add one or two small decorative objects. The patterned floor tile does a lot of heavy lifting here, making the simple shelves feel like part of a more complex design. It’s a perfect example of how to get high-impact storage in a small space for under $100.
💸 Get This Look For Less
Floating shelves are great for display, but they aren’t the solution for hiding clutter. Every single item is visible, so it requires a certain level of daily tidiness to look good. If your bathroom counter is perpetually covered in a jumble of half-used products, this might not be the best choice for you. Also, be realistic about installation. To hold anything with weight (like stacks of towels), these shelves MUST be anchored into wall studs. Using drywall anchors alone is a recipe for a future disaster.
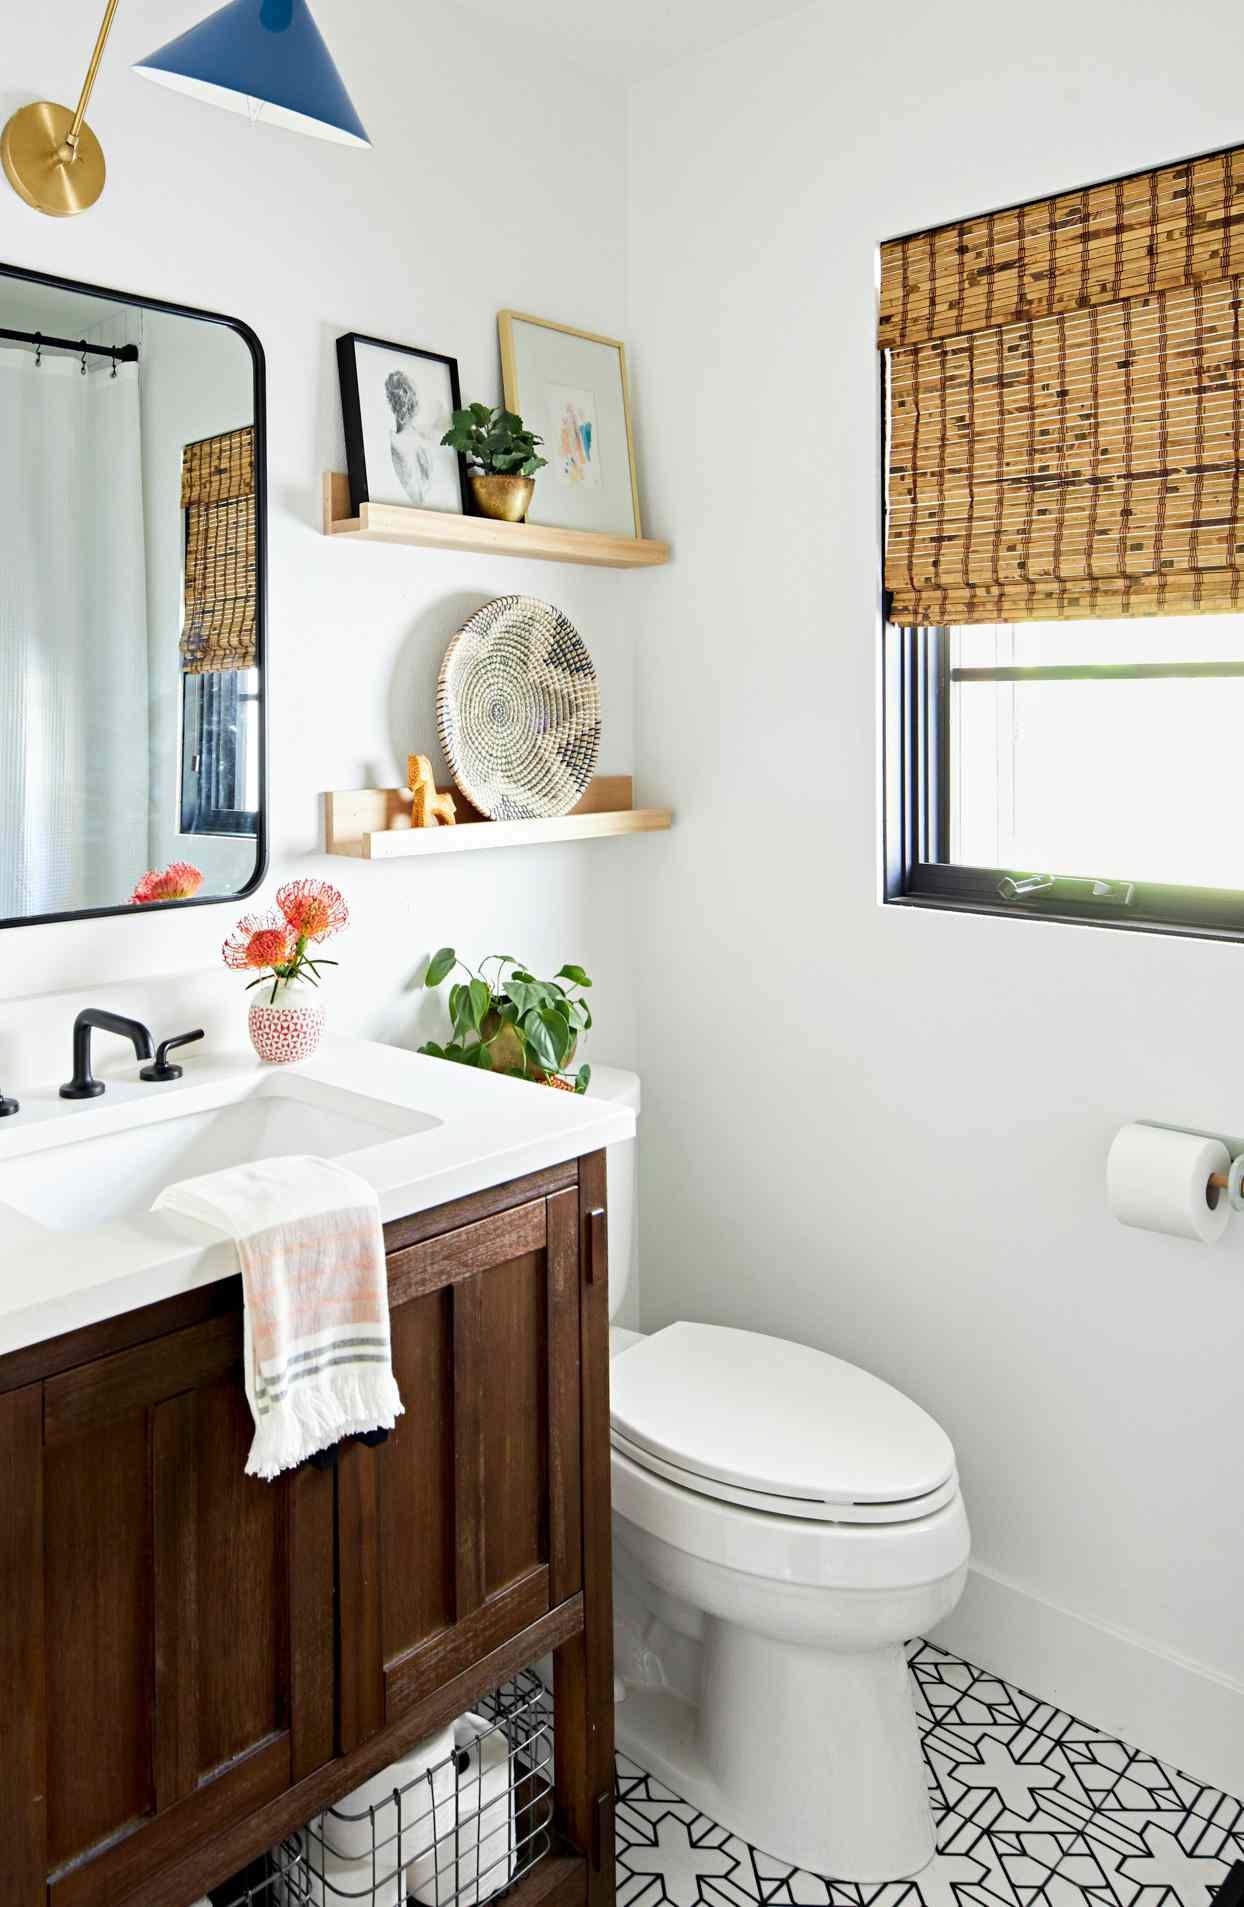
13. Modern Bathroom with Mixed Wood Tones and Patterned Tile
This bathroom nails a popular design formula: 50% clean, white surfaces (counter, sink, walls) + 30% warm wood tones (vanity, shelves, blinds) + 20% bold graphic pattern (floor tiles). This ratio ensures the space feels bright and airy, but not cold. The wood adds organic texture and warmth, while the floor provides a strong dose of personality without overwhelming the small space. The small hits of metal in the faucet and sconce act as the finishing touch. This is a great blueprint for a bathroom that feels both modern and inviting.
⭐ The One Thing
The design works by creating a dialogue between contrasting elements. The dark wood of the vanity provides a grounding anchor for the room, while the much lighter wood of the floating shelves above it keeps the upper part of the room feeling open and light. This play on light and dark wood tones adds sophisticated layering. Similarly, the geometric complexity of the black and white floor tiles is balanced by the simple, clean lines of the vanity and rectangular sink. It’s a carefully considered push-and-pull that results in a dynamic but harmonious space.
14. Recessed Bathroom Cabinet Above a Wall-Mounted Toilet
The single most important element making this small bathroom feel spacious and uncluttered is the use of recessed and floating fixtures. By setting the storage cabinet *into* the wall instead of on it, and mounting the toilet *off* the floor, the design maximizes usable floor space. This creates unbroken visual lines, tricking the eye into seeing a larger, more open area. If that cabinet were a standard unit mounted on the wall, it would jut out and make the space feel instantly more cramped. This is clever, space-saving design at its best.
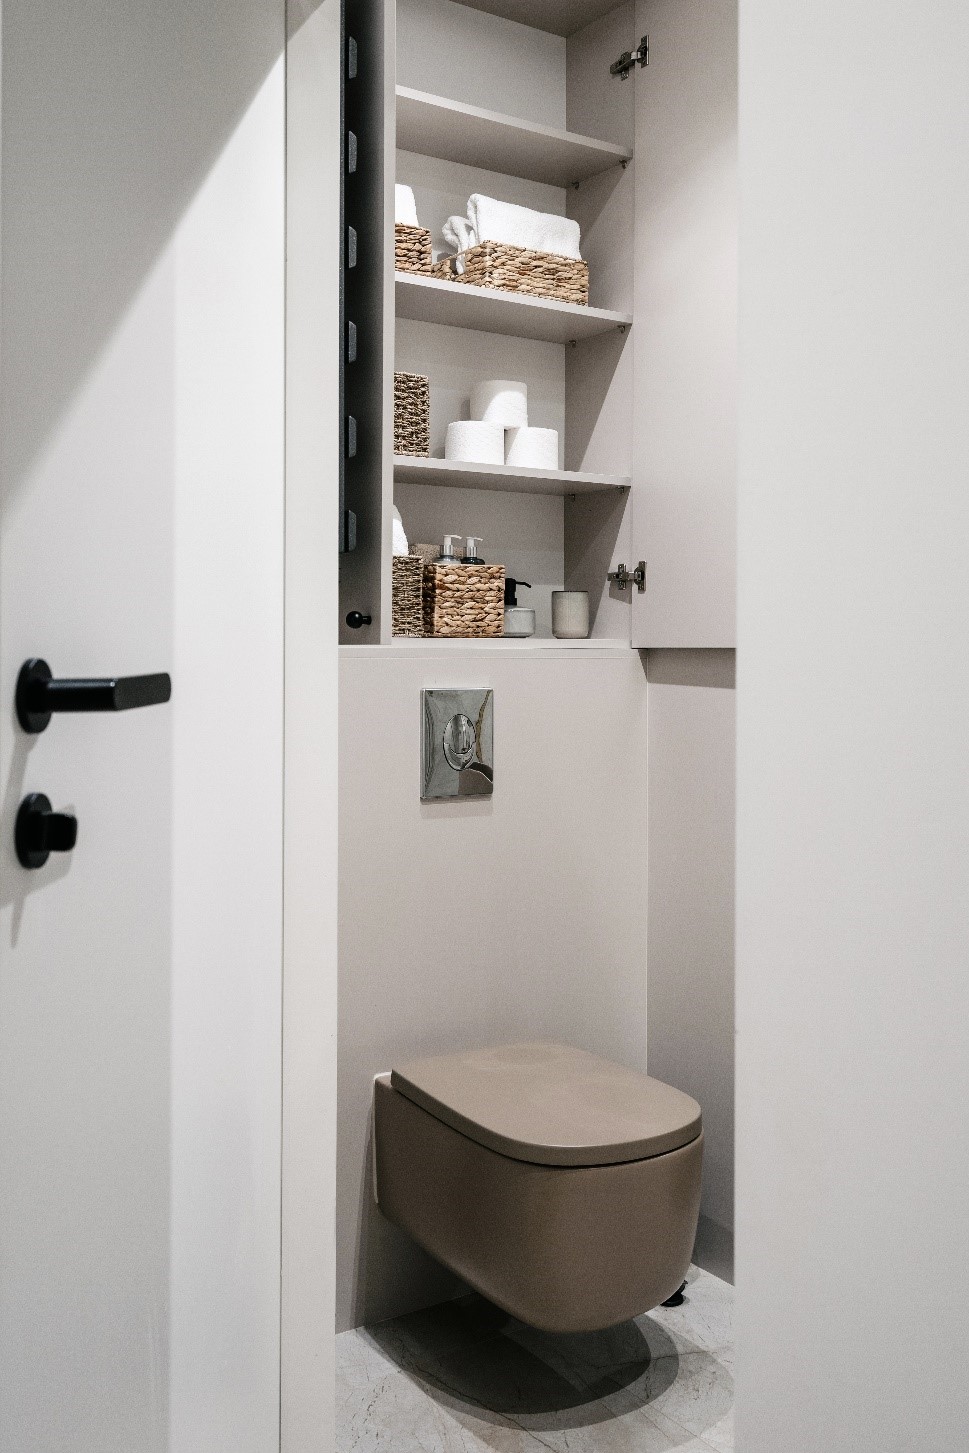
💰 Budget Breakdown
This approach is specifically designed for small bathrooms or powder rooms, typically those under 40 square feet. Recessing a cabinet requires that the wall be thick enough to accommodate it, which usually means it needs to be a 2×6 framed wall rather than a standard 2×4. A floating toilet also has specific installation requirements, including a concealed in-wall tank and carrier system. While the visual payoff is huge, both of these features require more intensive planning and labor during a remodel than simply hanging a cabinet on the wall. For a simpler take, see Idea #12.
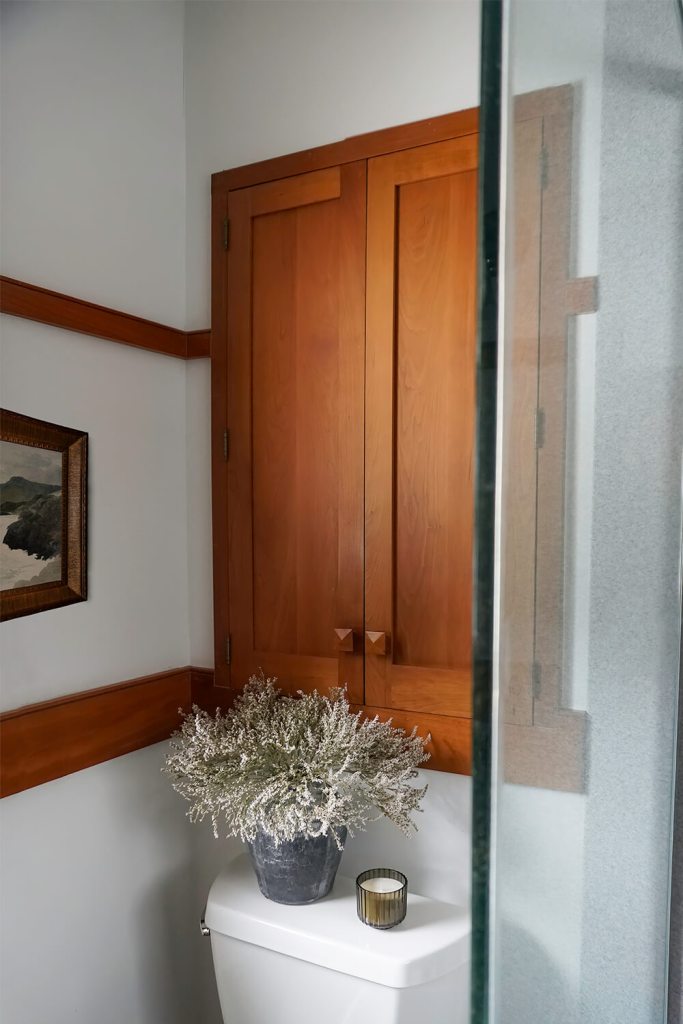
15. Wood Built-In Bathroom Cabinet with Matching Wall Trim
Getting this cohesive look requires some careful pre-planning. Here’s what to confirm before you begin:
✅ Before You Start
- Verify Wall Cavity Depth: For a recessed cabinet like this, you need to know what’s behind the drywall. Ensure you have enough depth between studs and that there are no pipes or major electrical lines in the way.
- Match Wood Species and Stain: To get the seamless look between the cabinet and the wall trim, you must use the same wood species and finish. Order all your materials from the same supplier at the same time to ensure they come from the same batch.
- Plan for Proportion: The height and width of the cabinet should feel balanced with the size of the toilet and the wall space. A good rule of thumb is for the cabinet to be no wider than the toilet tank itself.
This design decision is deceptively simple but incredibly effective. By using the exact same warm wood for both the built-in cabinet and the horizontal wall trim, the room gains a strong sense of intention and cohesion. The trim acts as a visual echo of the cabinet, tying the separate elements together into a single design statement. This repetition creates a rhythm that is calming and pleasing to the eye, making the small space feel thoughtfully designed and custom-built, rather than assembled from disparate parts.
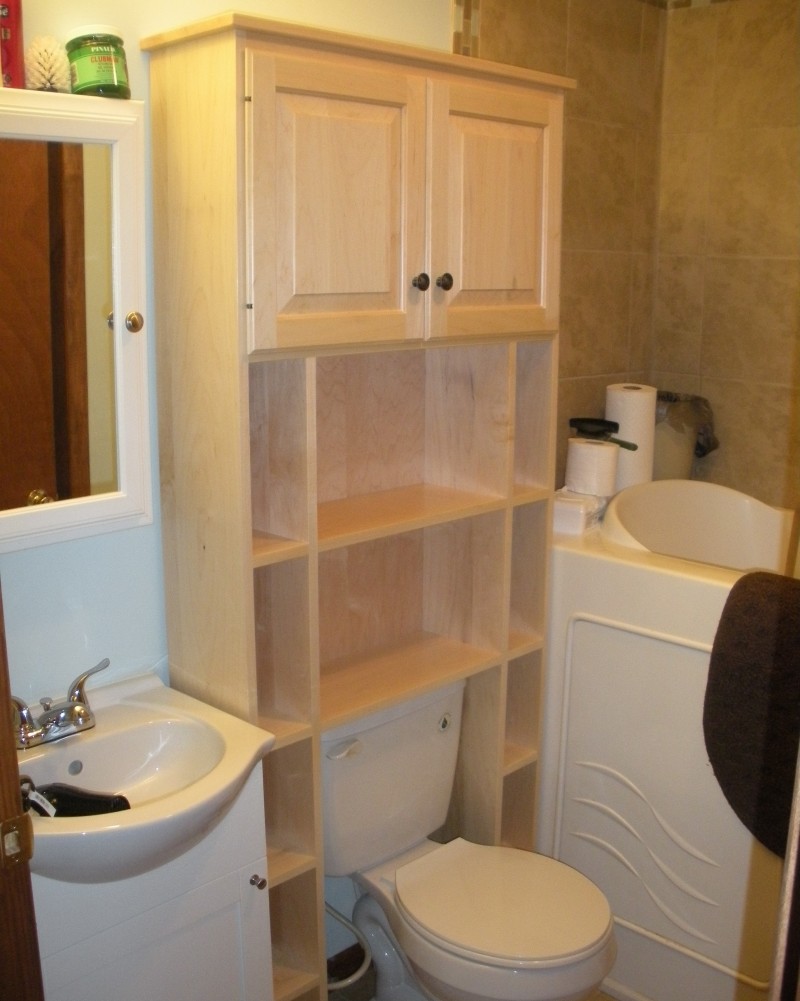
16. Floor-to-Ceiling Over-the-Toilet Storage Unit
While an over-the-toilet storage unit (often called an ‘etagere’) is a space-saving champion in tiny bathrooms, be mindful of the practicalities. The open shelves close to the toilet can be exposed to aerosolized particles when the toilet is flushed (the dreaded ‘toilet plume’). It’s wise to use these lower shelves for decorative items or less-frequently used supplies stored in containers, and keep daily-use items like toothbrushes on the vanity. Also, a floor-to-ceiling unit can feel imposing in a very small powder room if the finish is too dark.
🔥 Trending Context
While a custom built-in provides a seamless look, you can find freestanding over-the-toilet storage units that offer a very similar function for a fraction of the price. Stores like Target, Wayfair, and Walmart offer a huge variety of these, often for $100-$300. Look for one with a light wood or white finish to replicate the airy feel of this example. To make it look more custom, ensure it’s securely anchored to the wall for stability and consider swapping out the basic knobs for something a little more stylish.
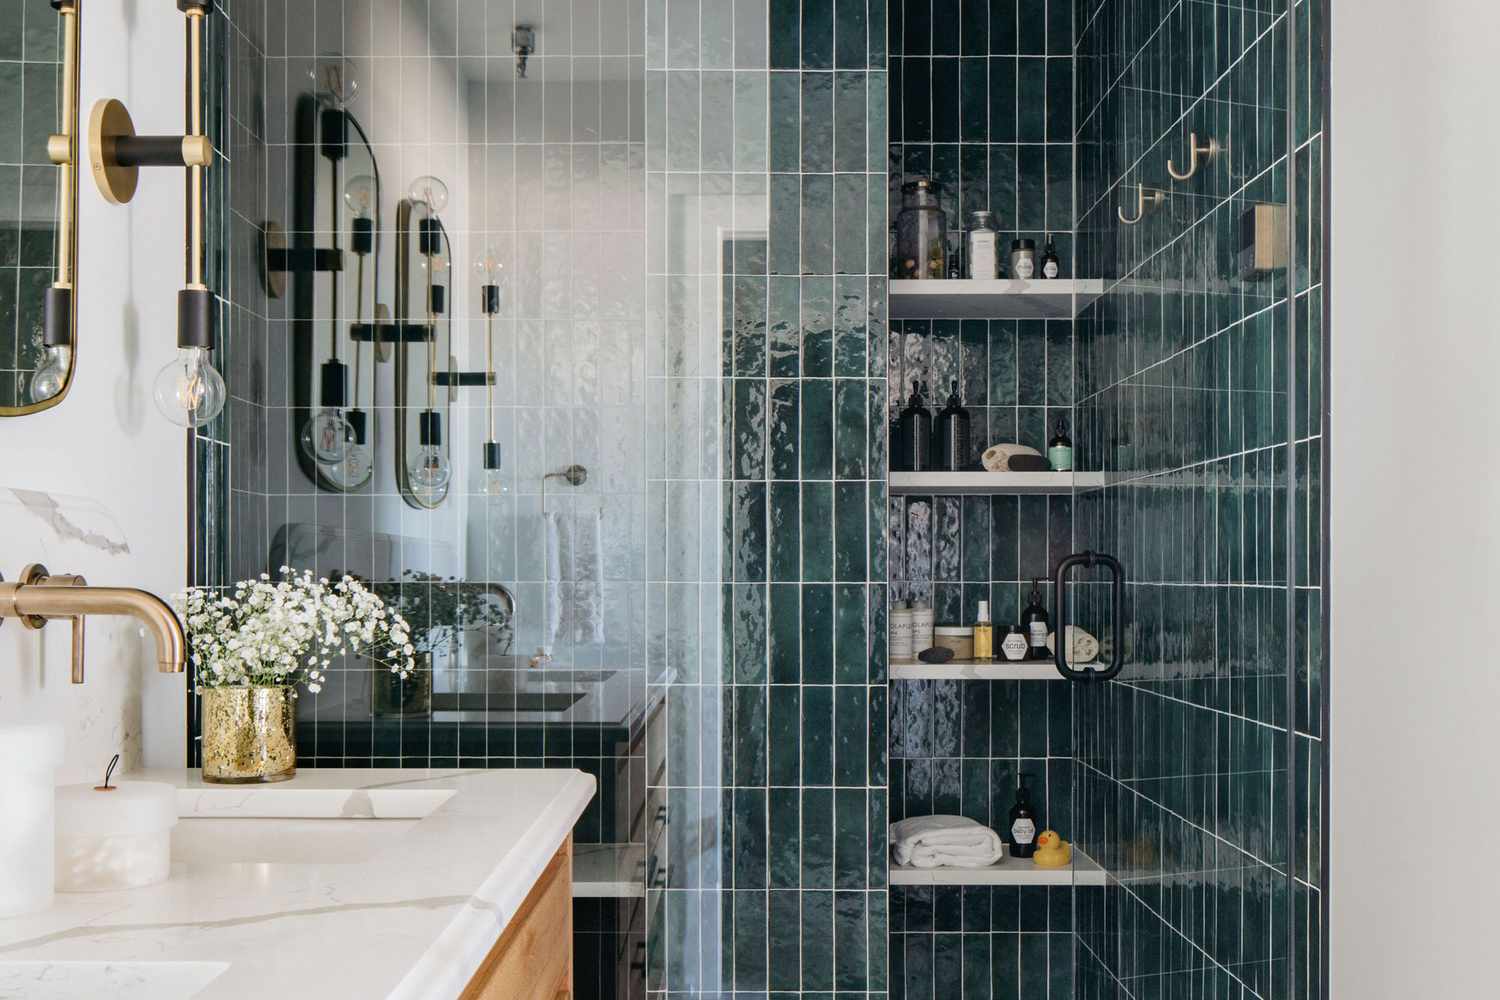
17. Shower Nook Storage in a Dark Teal Tiled Wall
Building a waterproof shower niche is a job that requires precision. Here’s a simplified overview:
🔧 How-To Brief
- Frame the Opening: During the framing stage, build a box between the wall studs where you want the niche. Standard stud spacing is 16 inches, so your niche will be about 14.5 inches wide.
- Install Backer Board: Line the inside of the framed box with cement backer board, just like the rest of the shower walls.
- Waterproof Thoroughly: This is the most critical step. Apply a liquid waterproofing membrane (like RedGard) or a sheet membrane (like Kerdi) to the entire interior of the niche, ensuring all seams are sealed.
- Tile and Grout: Tile the inside of the niche, ensuring the bottom shelf is slightly sloped forward so water drains out.
- Seal the Grout: After the grout has cured, apply a grout sealer to prevent moisture penetration and mildew.
For a shower niche, always use a solid surface material for your shelves, such as a piece of quartz, marble, or a solid-body porcelain tile. Do not use the same small tiles as the wall, as this creates numerous grout lines on the shelf surface itself. Grout is porous and can collect soap scum and mildew, making it difficult to keep clean. A solid, non-porous shelf surface can be easily wiped down, looks much cleaner, and will be far easier to maintain over time.
18. Bathroom Floating Shelves with Ruffled Shower Curtain
The charm of this bathroom comes from the successful blending of different style personalities. You have the clean, almost modern lines of the simple white floating shelves. This is paired with a rustic, industrial-style vanity light and dark metal accents. Then, the soft, slightly feminine ruffle of the shower curtain and the woven texture of the storage baskets are introduced. This mix works because it’s all unified by a tight color palette of whites, tans, and an airy blue-green wall color. The result is a space that feels collected and personal, not decorated from a single store aisle.
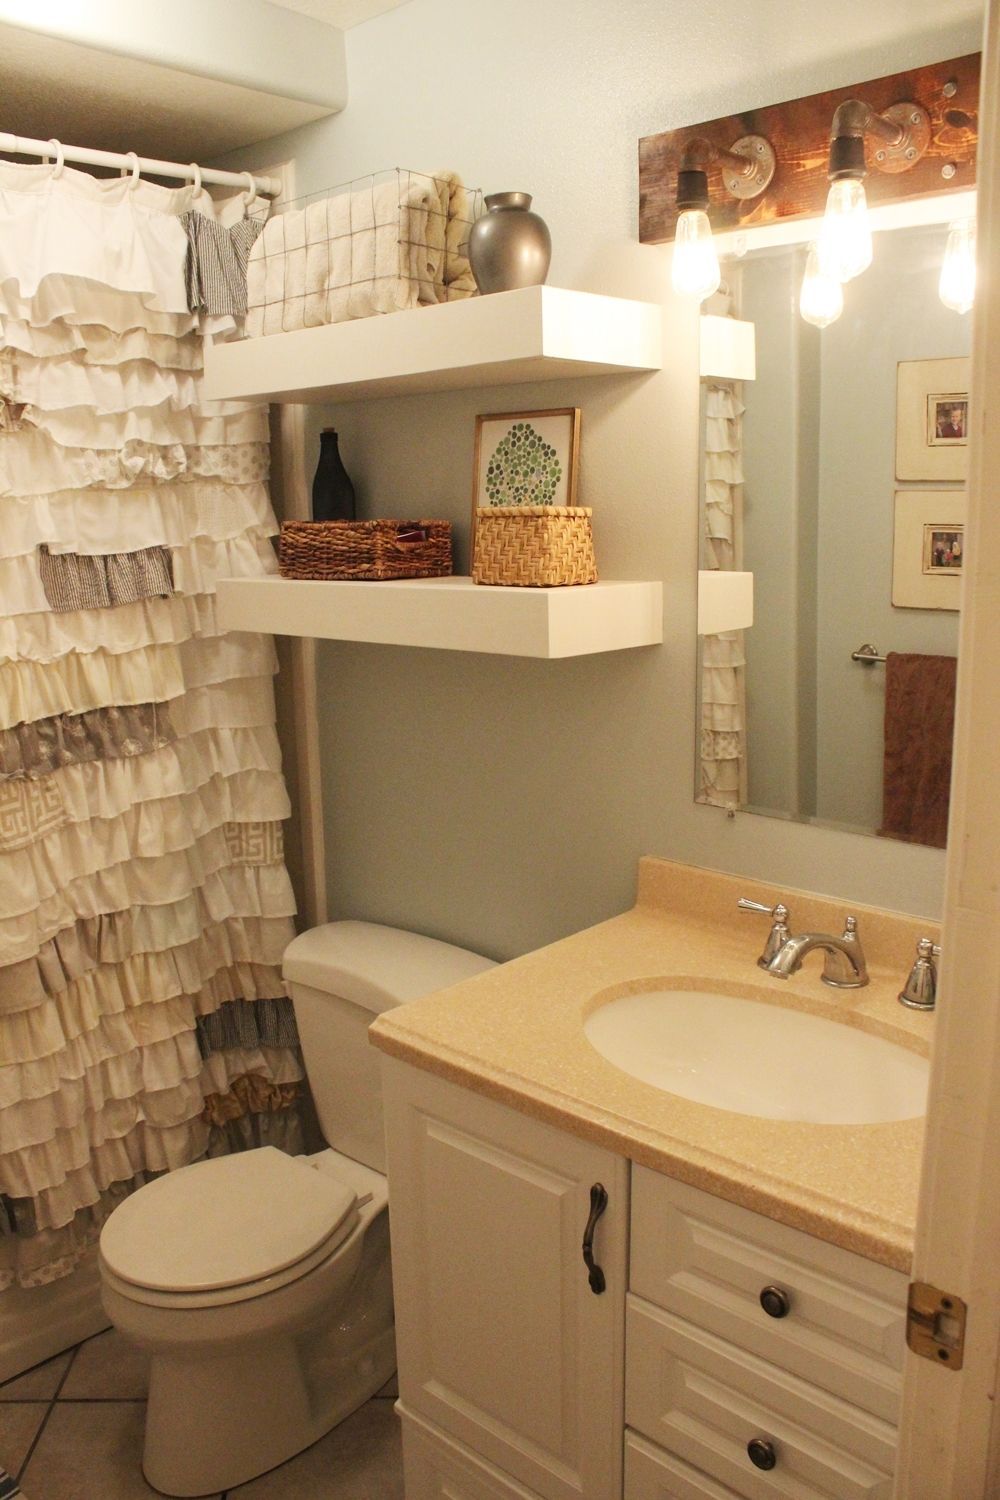
🎯 What Makes It Work
This is a perfect example of a high-impact, low-cost bathroom update. Here’s how the costs could break down:
- Floating Shelves (Set of 2): $40 – $80
- Vanity Light Fixture: $70 – $150
- Ruffled Shower Curtain: $30 – $60
- Woven Baskets & Decor: $50 – $100
- Paint (1 Gallon): $40 – $70
- TOTAL: $230 – $460
- Budget alternative: Thrift the baskets and decorative items, and look for a similar light fixture on Facebook Marketplace to get this look for under $150.
19. Bedside Built-In Shelving with Pastel Striped Accent Wall
This room’s gentle, playful energy comes from a clever use of color and pattern. Let’s call the formula: 60% serene white (bed, built-in, light fixture) + 30% soft, multi-toned pattern (the striped accent wall) + 10% bold, abstract art. The white base keeps the room feeling calm and airy, preventing the patterns from becoming overwhelming. The horizontal stripes subtly widen the feel of the room, while the abstract art provides a focal point and a jolt of stronger color. It’s a well-balanced composition that feels both restful and interesting.
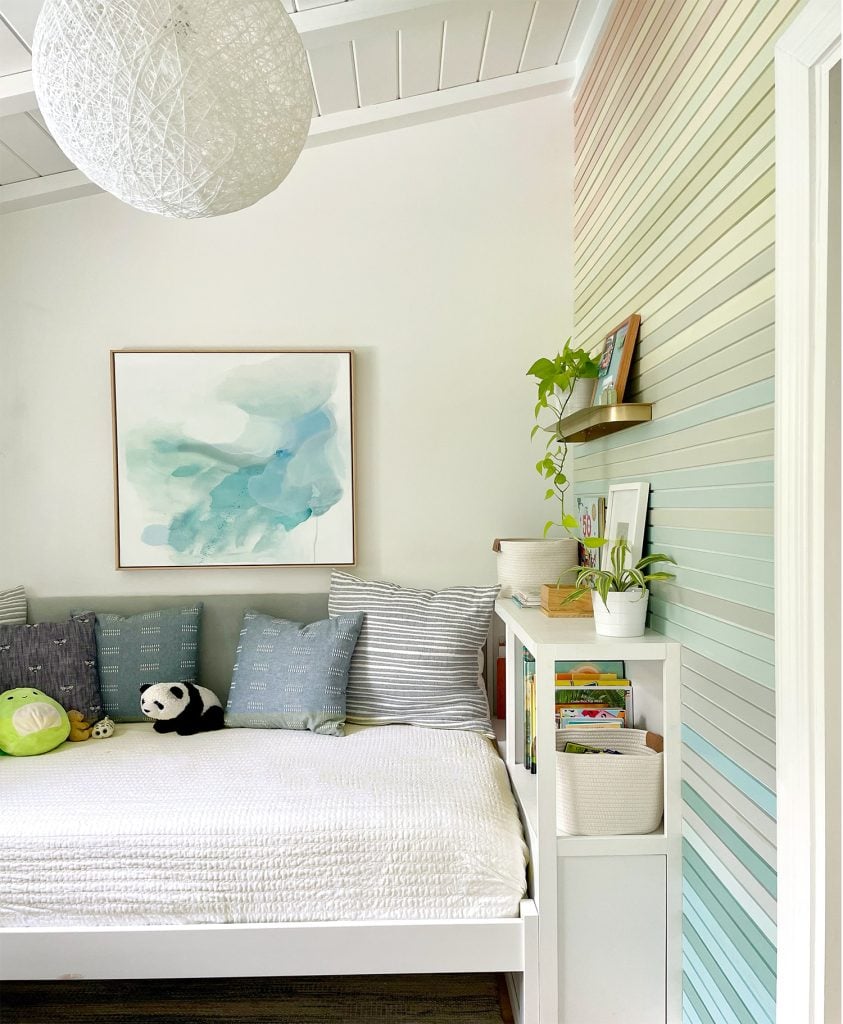
💡 Designer Tip
A built-in that serves as a nightstand is a brilliant space-saver, but think about practical needs before you commit. Where will you plug in your phone? Is there a spot for a glass of water? This design features deep shelves, which is great for books and baskets, but it lacks a drawer. Small, essential items like chapstick, charging cables, or medication can quickly make open shelves look messy. Consider incorporating at least one small drawer into a bedside built-in design to hide that inevitable nightly clutter.
20. Tall White Linen Tower Integrated with Vanity
A tall linen tower like this is an excellent storage solution for bathrooms of almost any size, but it’s particularly effective in spaces that are narrow but have vertical height. The footprint is minimal, typically only 15 to 24 inches wide and deep. By extending all the way up to the ceiling, it draws the eye upward and maximizes storage without eating into valuable floor space. The integration with the vanity countertop makes it feel custom and intentional, a more polished look than a freestanding tower. In a very small bathroom, a tower of 18 inches or less is ideal.
📐 Style Math
When integrating a storage tower with a vanity, extending the countertop material to run seamlessly into the base of the tower is a professional touch that makes a huge difference. However, the real pro-tip is to order the tower cabinet with an ‘integrated side panel’ on the side that faces out. This means it will have a finished, furniture-quality side panel that matches the cabinet doors, rather than a plain, flat side. This small detail is what makes it look like a cohesive piece of custom furniture, not just a cabinet stuck on the end.
21. Under-Stair Storage Bench with Wicker Basket Drawers
The single most important choice here is the use of wicker baskets instead of solid drawers or cabinet doors. This decision is what gives the unit its relaxed, slightly rustic charm. The natural texture of the wicker provides a welcome contrast to the smooth, white painted finish of the bench, adding warmth and visual interest. It keeps the hallway feeling approachable and not overly formal. Solid doors would have been more visually heavy; the baskets, with their fabric liners, feel light and airy, perfectly suiting the calm, neutral palette.
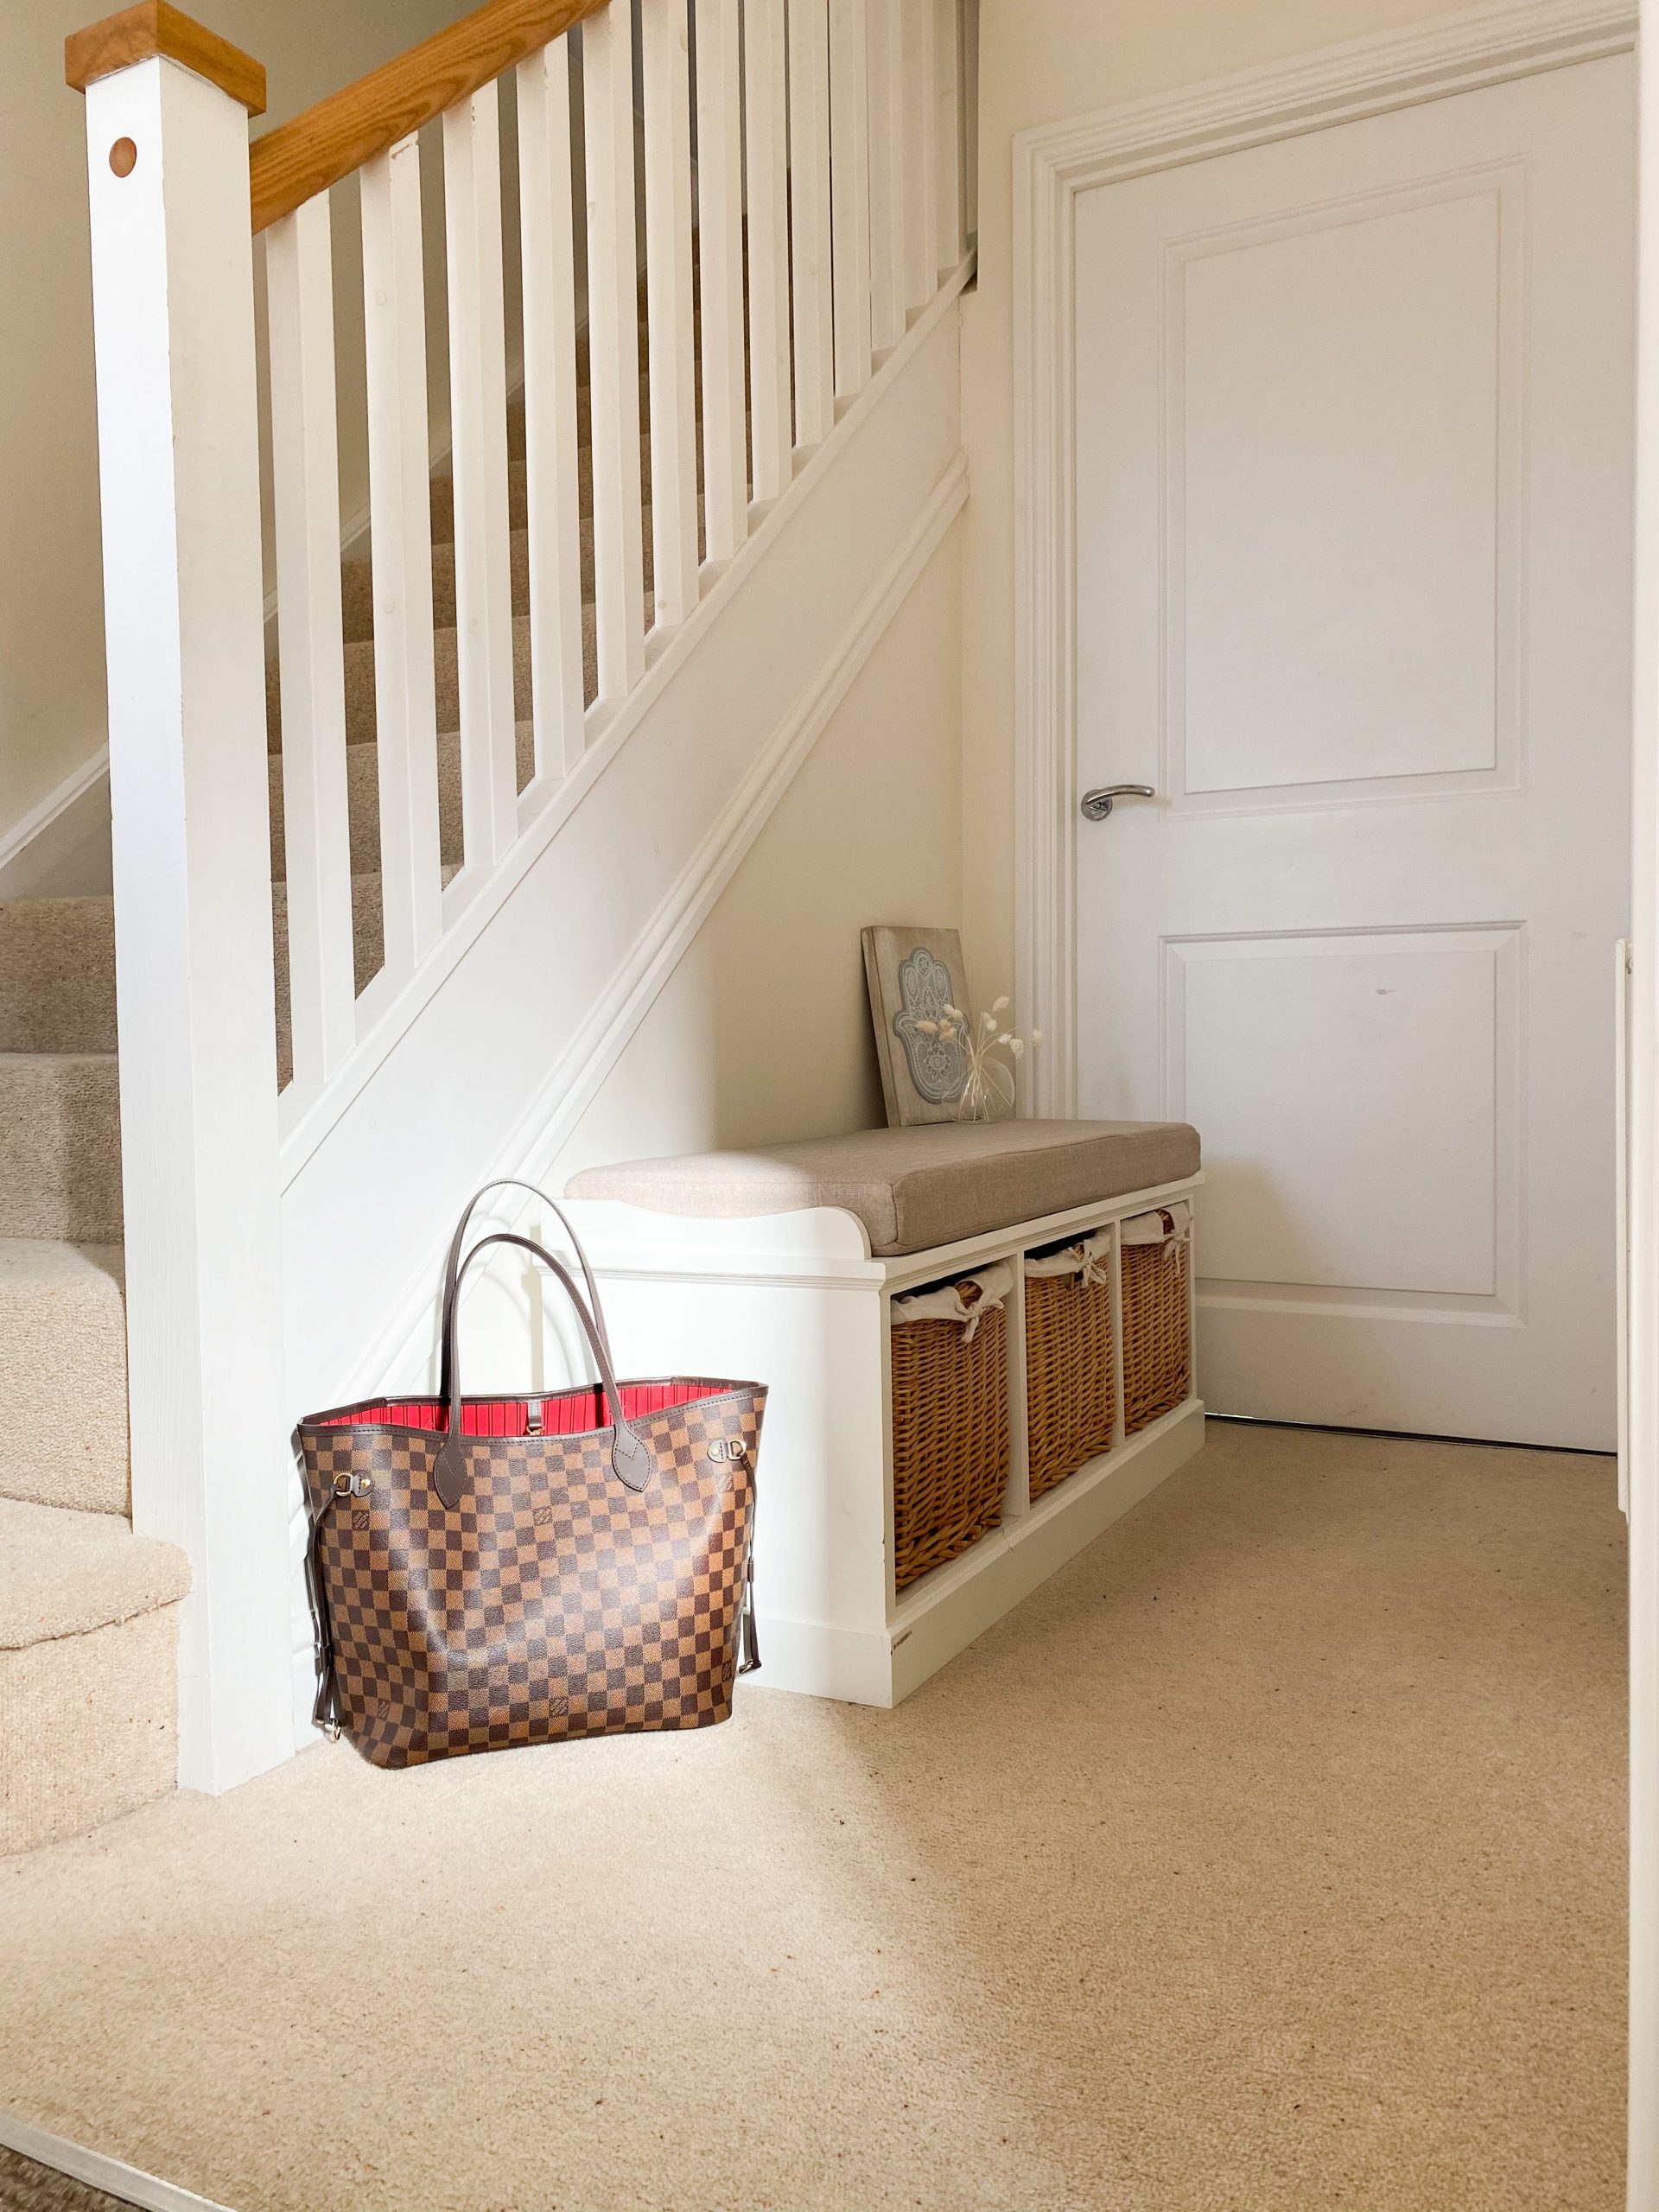
🧹 Maintenance Reality
You can build a simple version of this bench in a weekend. Here’s the plan:
- Build a Box Frame: Using 3/4-inch plywood or MDF, build a simple rectangular box to the dimensions of your nook. Add a vertical divider in the middle for support.
- Add a Face Frame: Attach a face frame made from 1×2 poplar or pine boards to the front of the box. This hides the raw plywood edges and gives it a finished, built-in look.
- Prime and Paint: Fill any nail holes, sand everything smooth, then prime and paint the unit in a durable semi-gloss trim paint.
- Measure for Baskets: Once built, measure your openings and purchase baskets that fit snugly.
- Top it Off: Have a cushion custom-made from an online foam store, or DIY one by wrapping 3-inch foam with fabric and stapling it to a thin plywood base.
22. Minimalist Corner Desk Flowing into a Built-In Daybed
This design’s success lies in its seamless continuity. The desk surface doesn’t just stop; its line continues and becomes the frame for the daybed. By using the same crisp white finish and clean, right angles for both the desk and the bed, the two distinct functions merge into one cohesive architectural feature. This makes the room feel incredibly intentional and uncluttered. It’s a masterful way to fit multiple functions—sleeping, lounging, and working—into a compact space without it feeling crowded or piecemeal.
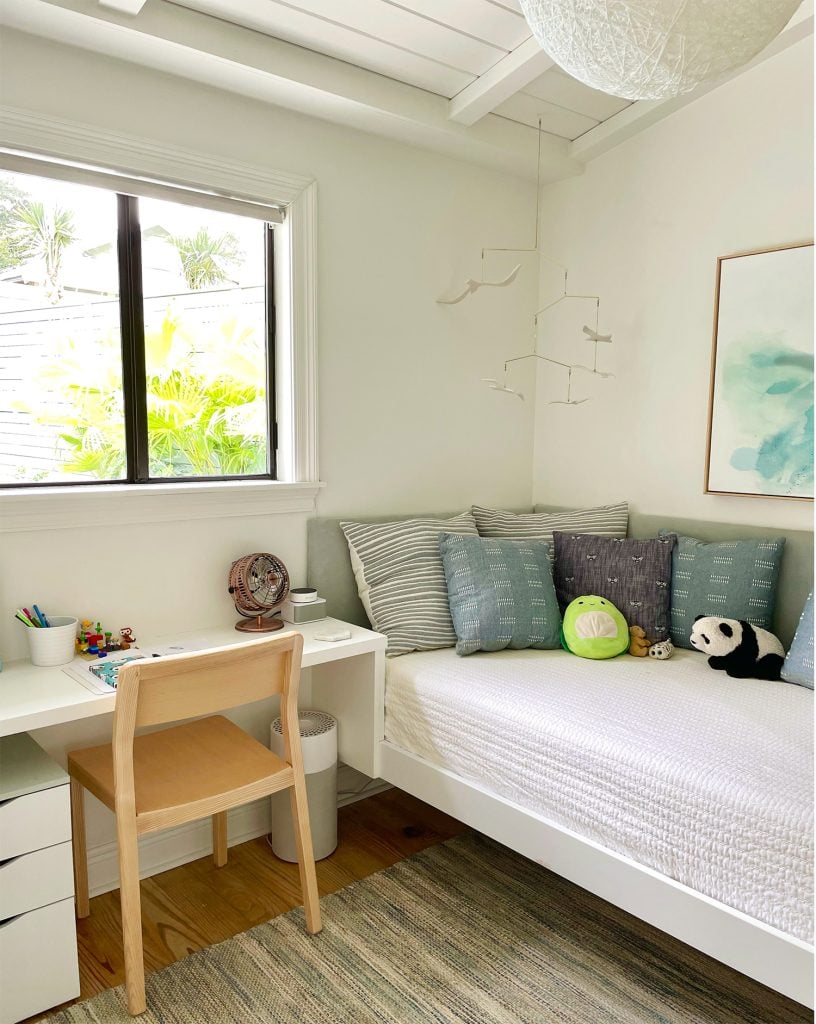
📏 Scale Guide
There’s a growing movement in design known as ‘functional minimalism,’ and this room is a perfect embodiment of it. It’s not just about having less stuff; it’s about having smarter, multi-purpose pieces that work harder. As homes, especially in urban areas, contend with smaller square footage, built-ins that can serve as a desk one moment and a bed the next are no longer a novelty but a necessity. This trend prioritizes clean lines, and integrated forms over standalone furniture, leading to spaces that feel serene and highly efficient.
23. Compact Bedroom Office with Integrated Bed and Desk
This ultra-functional layout is a dream for small bedrooms, studio apartments, or guest rooms that need to double as offices. It works best in rooms with at least 8 feet of wall width to accommodate the twin-size bed niche and a small desk area. The key is verticality; you need standard 8-foot ceilings to make the upper cabinets feel balanced, not claustrophobic. The entire unit likely has a depth of 20-24 inches for the desk and shelving, with the bed area recessed deeper. This is a much smarter approach for small spaces than the sprawling unit in Idea #6.
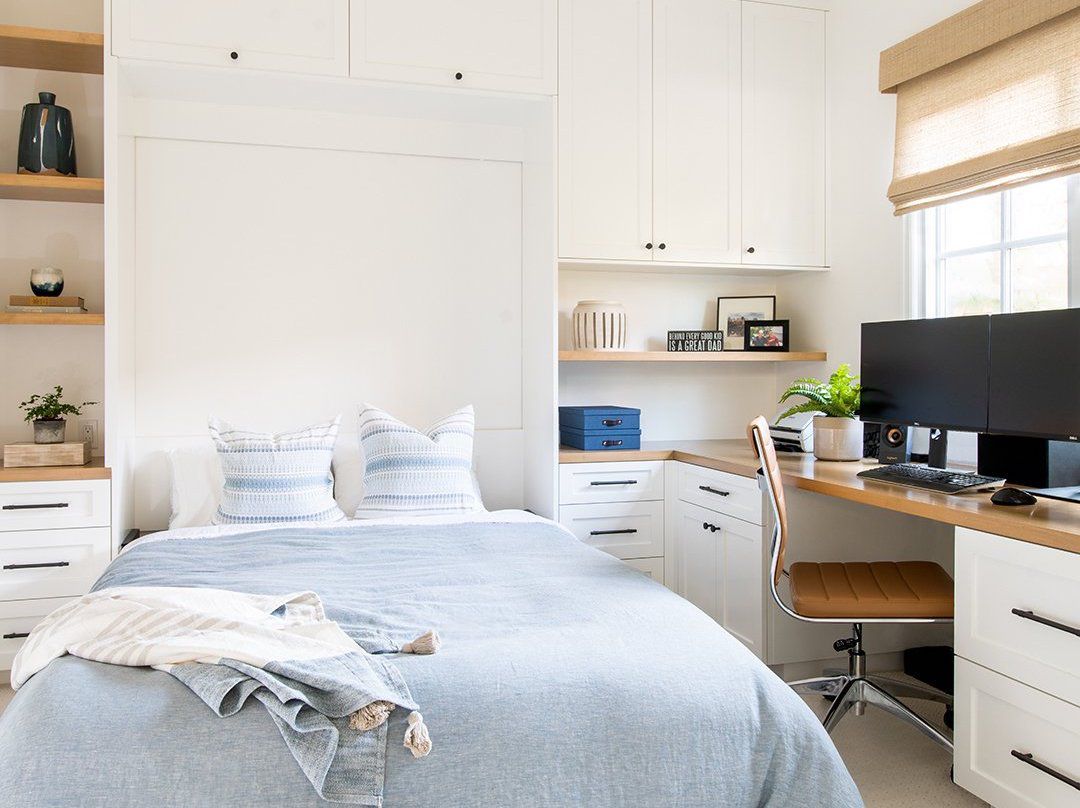
⚠️ Real Talk
Living and working in a single, compact space like this requires discipline. While the storage is fantastic, the line between ‘on’ time and ‘off’ time can become incredibly blurry when your desk is literally attached to your bed. A potential downside is the lack of psychological separation. To make this work long-term, you need to create rituals to signal the end of the workday—clearing the desk completely, closing the laptop, and tidying the space so it can transition back into a restful bedroom sanctuary.
24. White and Teal Kitchen with a Marble Slab Backsplash
When using a bold color on a kitchen island, the key to a high-end look is to treat the back and sides with the same level of detail as the front. Don’t just leave it as a flat, painted panel. Here, the island has the same shaker-style paneling on the side where the stools are as it does on the working side. This makes it feel like a substantial, finished piece of furniture from all angles. It’s a detail that elevates the entire kitchen and makes the island a true centerpiece.
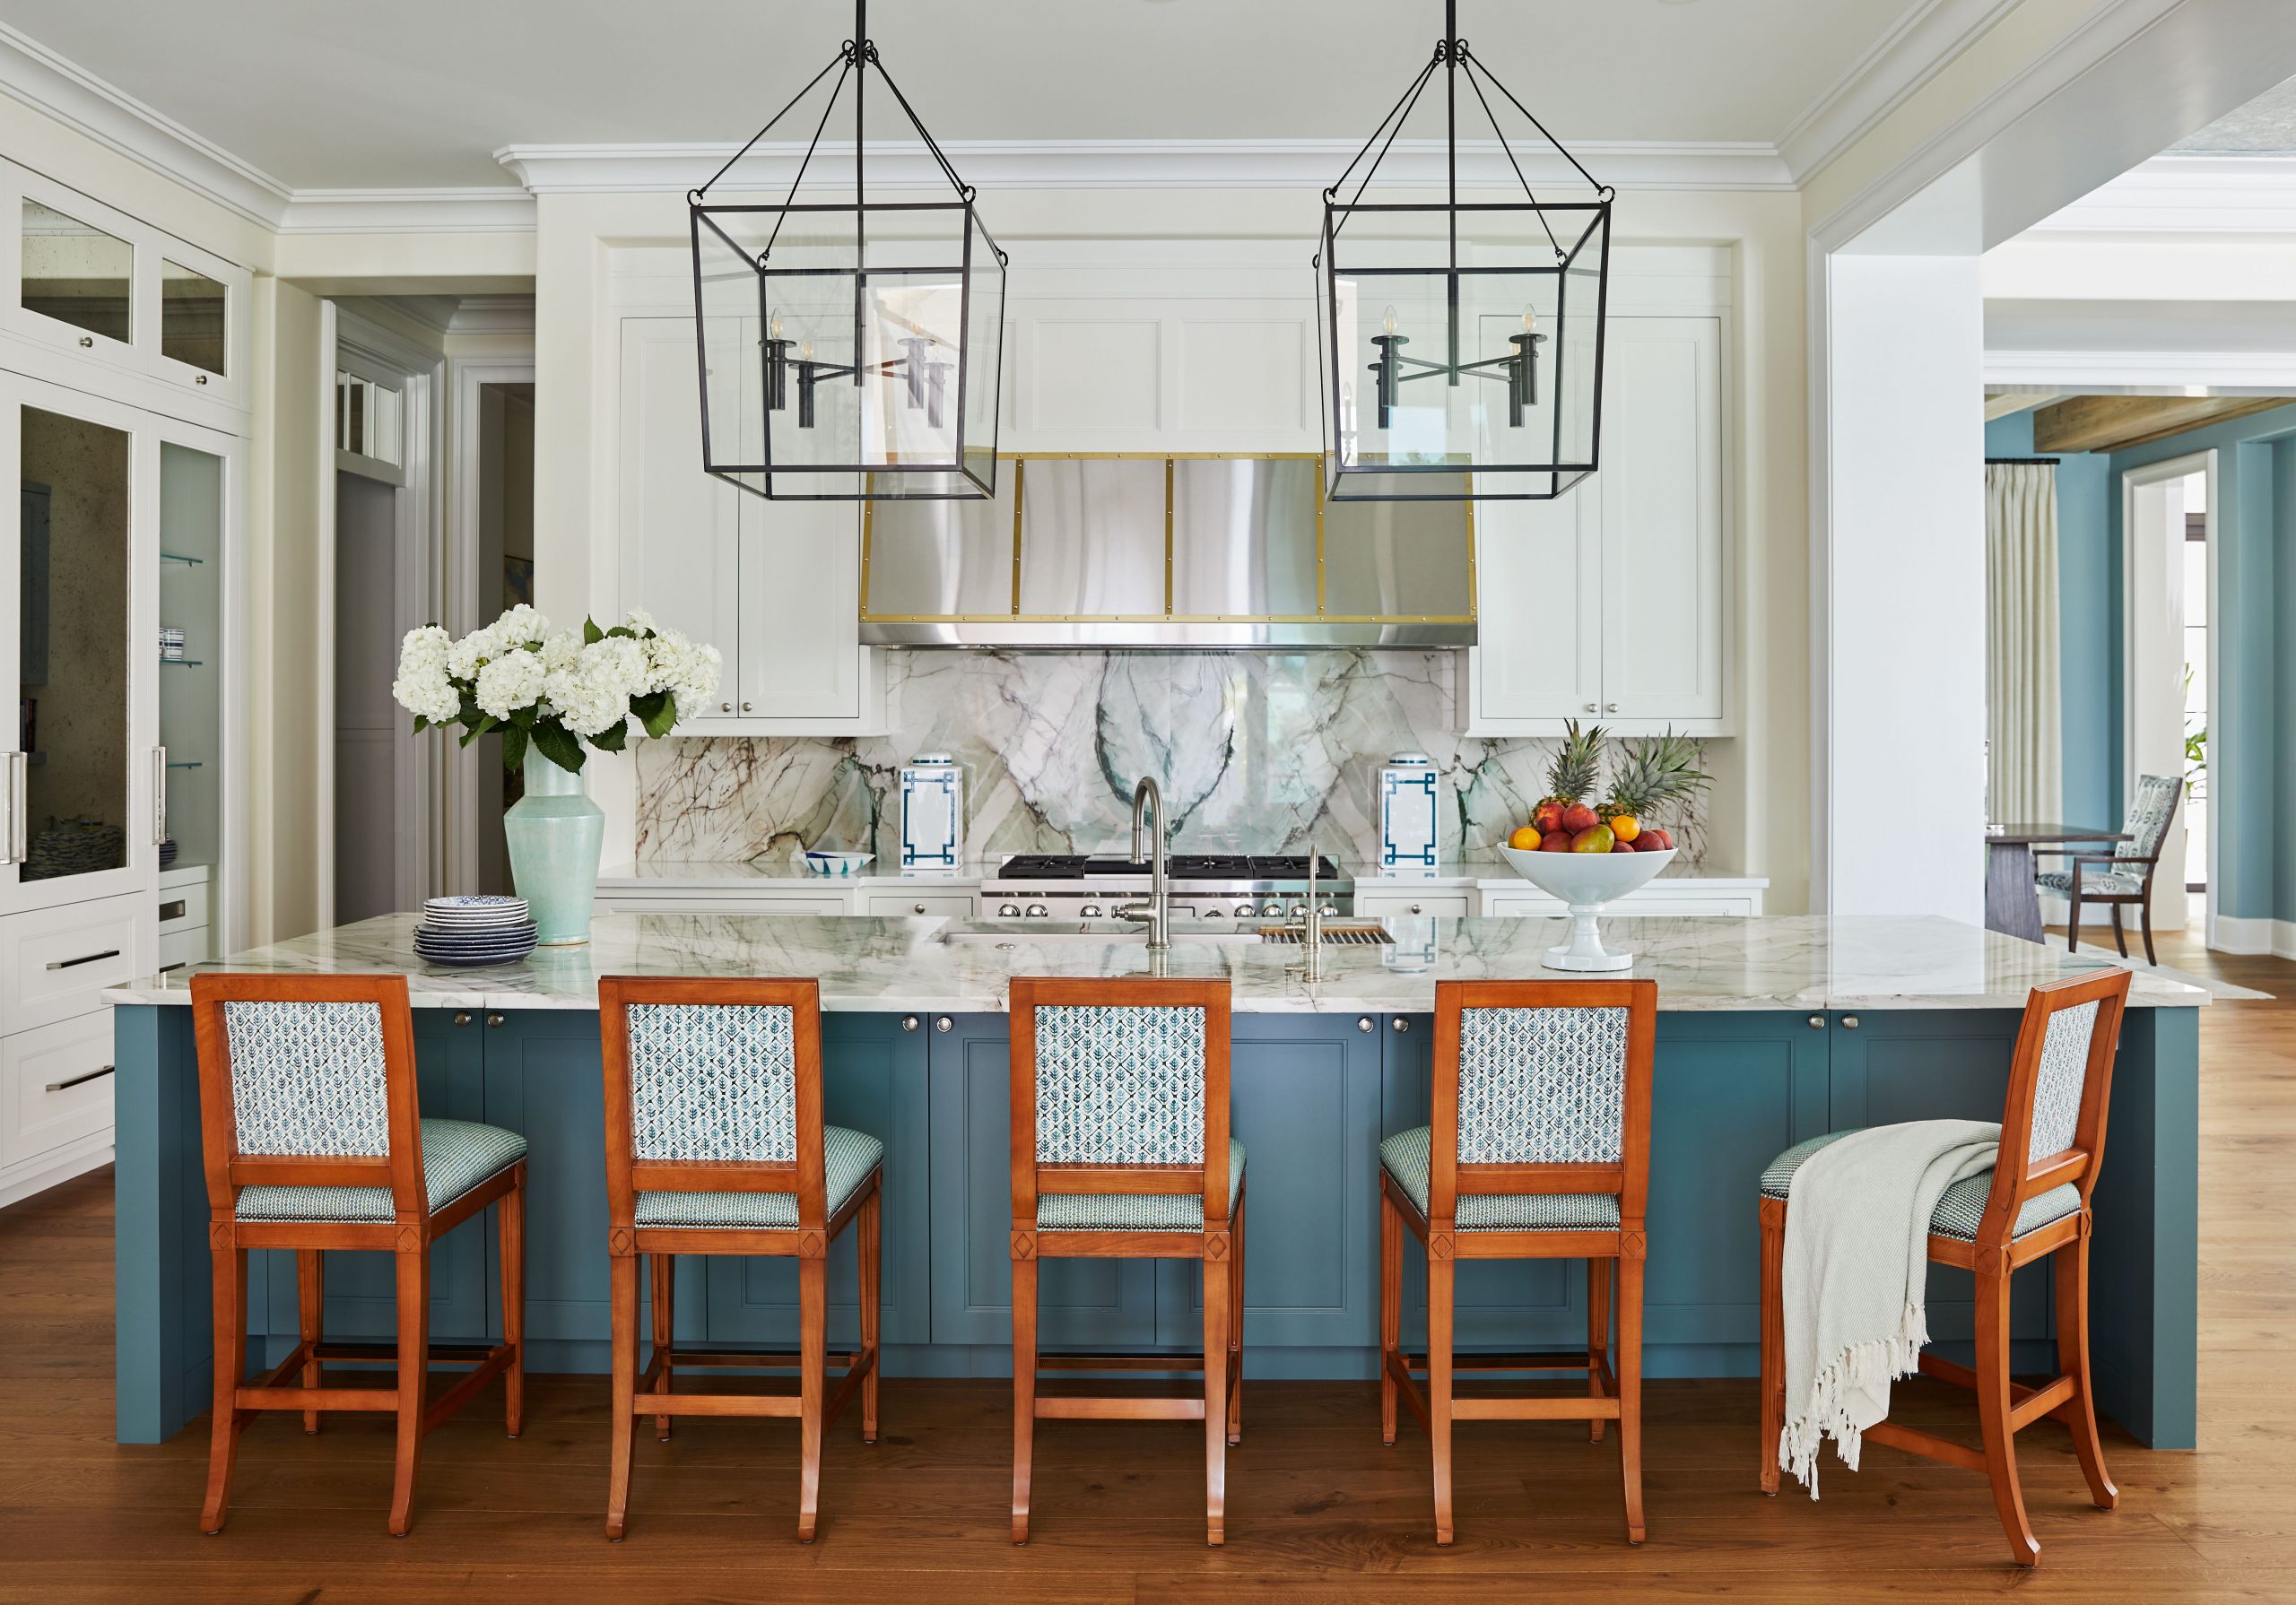
💸 Get This Look For Less
A full-height marble slab backsplash is the definition of luxury, but it comes with a high-maintenance personality. Marble is a natural stone that is both porous and soft. It can easily stain from splashes of tomato sauce or wine, and it can ‘etch’ (dull) from contact with acidic things like lemon juice or vinegar. It must be professionally sealed upon installation and resealed periodically (every 6-12 months). Wipe up all splatters immediately. If you love the look but not the worry, consider a porcelain or quartz slab that mimics marble—you’ll get 90% of the look with 10% of the stress.
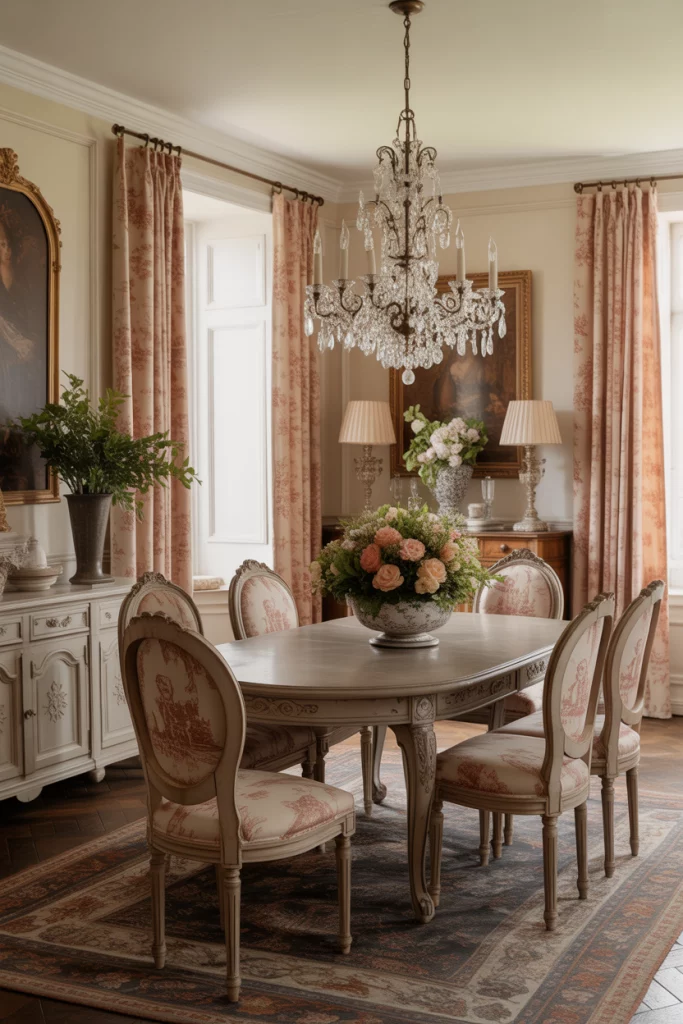
25. Built-In Dining Room Hutch with Eclectic Seating
This dining room feels both sophisticated and deeply personal because of the tension between classic and modern elements. The large, white built-in hutch with its glass doors is a very traditional, almost formal piece of cabinetry. However, it’s paired with a sleek, modern chandelier and an eclectic mix of dining chairs, including classic wood and contemporary black designs. This juxtaposition is what creates the room’s dynamic energy. It feels curated and collected over time, rather than bought as a matching set. The neutral rug and hutch provide a calm backdrop for the more characterful pieces.
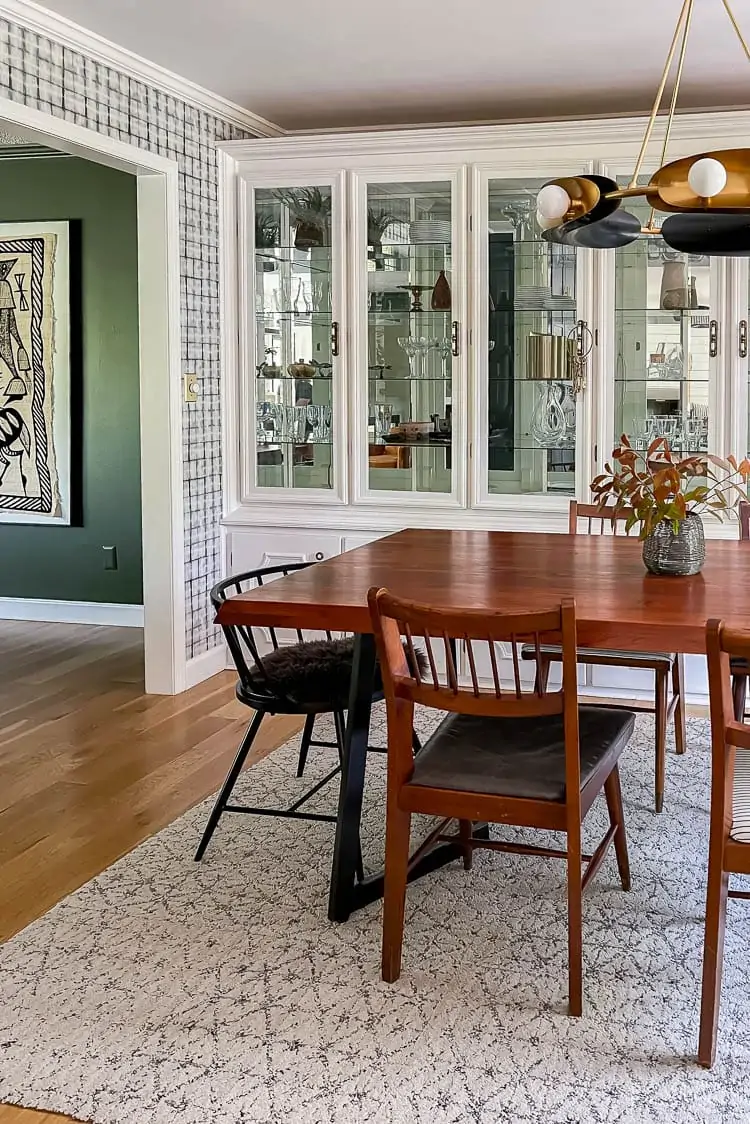
⭐ The One Thing
that holds this entire room together is the built-in cabinet. Without it, you would have a table and chairs floating in a room. The floor-to-ceiling hutch provides a powerful architectural anchor, giving the dining set a clear sense of place and purpose. It defines the dining area, provides essential storage, and creates a beautiful backdrop for the meals and conversations that happen around the table. It is the single element that elevates the space from just a room with furniture to a proper dining room.
26. Modern Kitchen with Integrated Wine Fridge and Coffee Station
Building a dedicated beverage station involves more than just cabinetry. Here’s a look at the potential costs, which can add up quickly:
💰 Budget Breakdown
- Semi-Custom Cabinetry (for this section): $3,000 – $8,000
- Under-Counter Wine Refrigerator: $800 – $2,500
- Built-in Coffee Maker: $1,500 – $4,000
- Countertop (quartz or similar): $500 – $1,500
- Labor (carpentry, electrical, plumbing): $1,000 – $3,000
- TOTAL: $6,800 – $19,000
- Budget alternative: Create a coffee/wine bar on an open countertop and use a high-quality freestanding wine fridge instead of an integrated one to save thousands.
A built-in coffee machine looks incredibly sleek, but be warned: they are expensive to purchase and can be even more expensive to repair. Unlike a countertop model that you can easily replace for a few hundred dollars, a broken built-in unit can cost upwards of $1,000 for a service call and parts. They also require regular, diligent cleaning cycles (descaling, degreasing) to remain in good working order. It’s a luxury feature that comes with a luxury commitment to maintenance and potential repair costs.
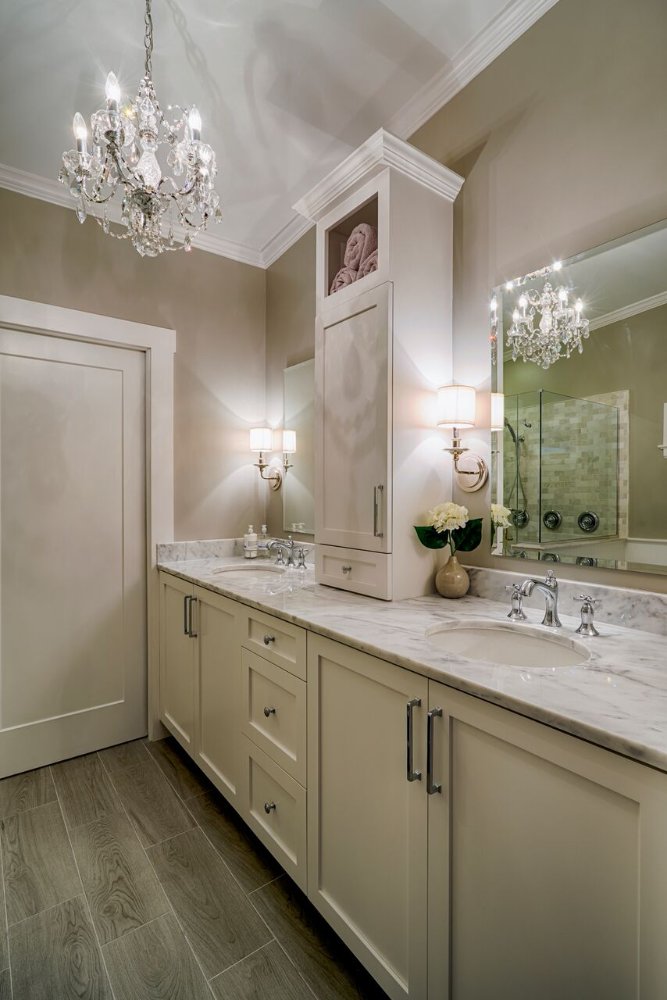
27. Symmetrical Double Vanity with Central Storage Towers
This perfectly balanced look is stunning, but it requires precise planning. Before you press go, check these items off your list:
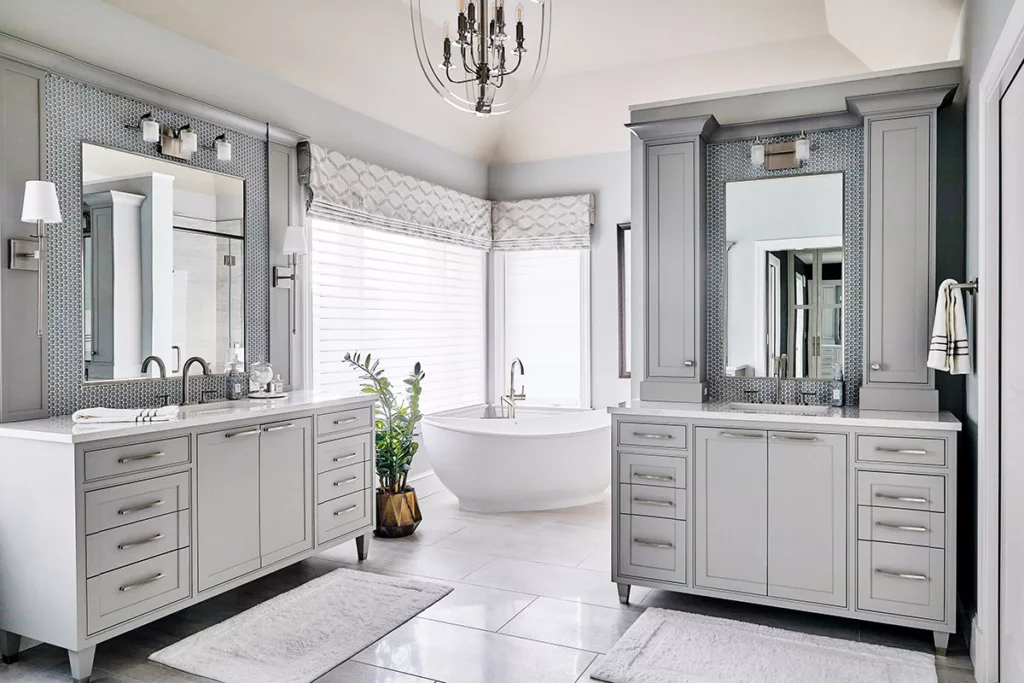
✅ Before You Start
- Confirm Your Centerlines: The entire design hinges on perfect symmetry. Ensure the centerline of the room aligns with the center of the bathtub and the space between the two vanities. The placement of plumbing and lighting must be exact.
- Plan for Electrical: Each vanity tower needs its own lighting (sconces) and likely hidden outlets inside for things like electric toothbrushes or hair dryers. Map this out with your electrician early on.
- Check Door and Drawer Clearance: With a freestanding tub so close, ensure all cabinet doors and drawers can open fully without hitting the tub or each other.
The power of this design comes from its absolute commitment to symmetry. The identical light gray vanities, the matching mirrors, the perfectly aligned sconces, and the twin storage towers create a powerful sense of order and calm. This repetition establishes a formal, elegant rhythm that is inherently pleasing to the eye. The freestanding tub, placed on the central axis, breaks the rectangularity of the cabinets and acts as a graceful focal point. It’s a classic formula for creating a serene, spa-like atmosphere. The effect is much more formal than the mixed-material look in Idea #13.
28. White Shaker Built-Ins with a Dark Wood Countertop
The single element that prevents this large wall of white cabinetry from feeling flat or sterile is the dark wood countertop in the central open section. This slash of rich, warm color and natural texture provides a crucial point of contrast. It breaks up the expanse of white, adds visual weight, and creates a focal point or ‘hearth’ for the unit. Without it, the design would be far less dynamic and would lack the warmth that makes it feel like part of a home rather than a storage facility.
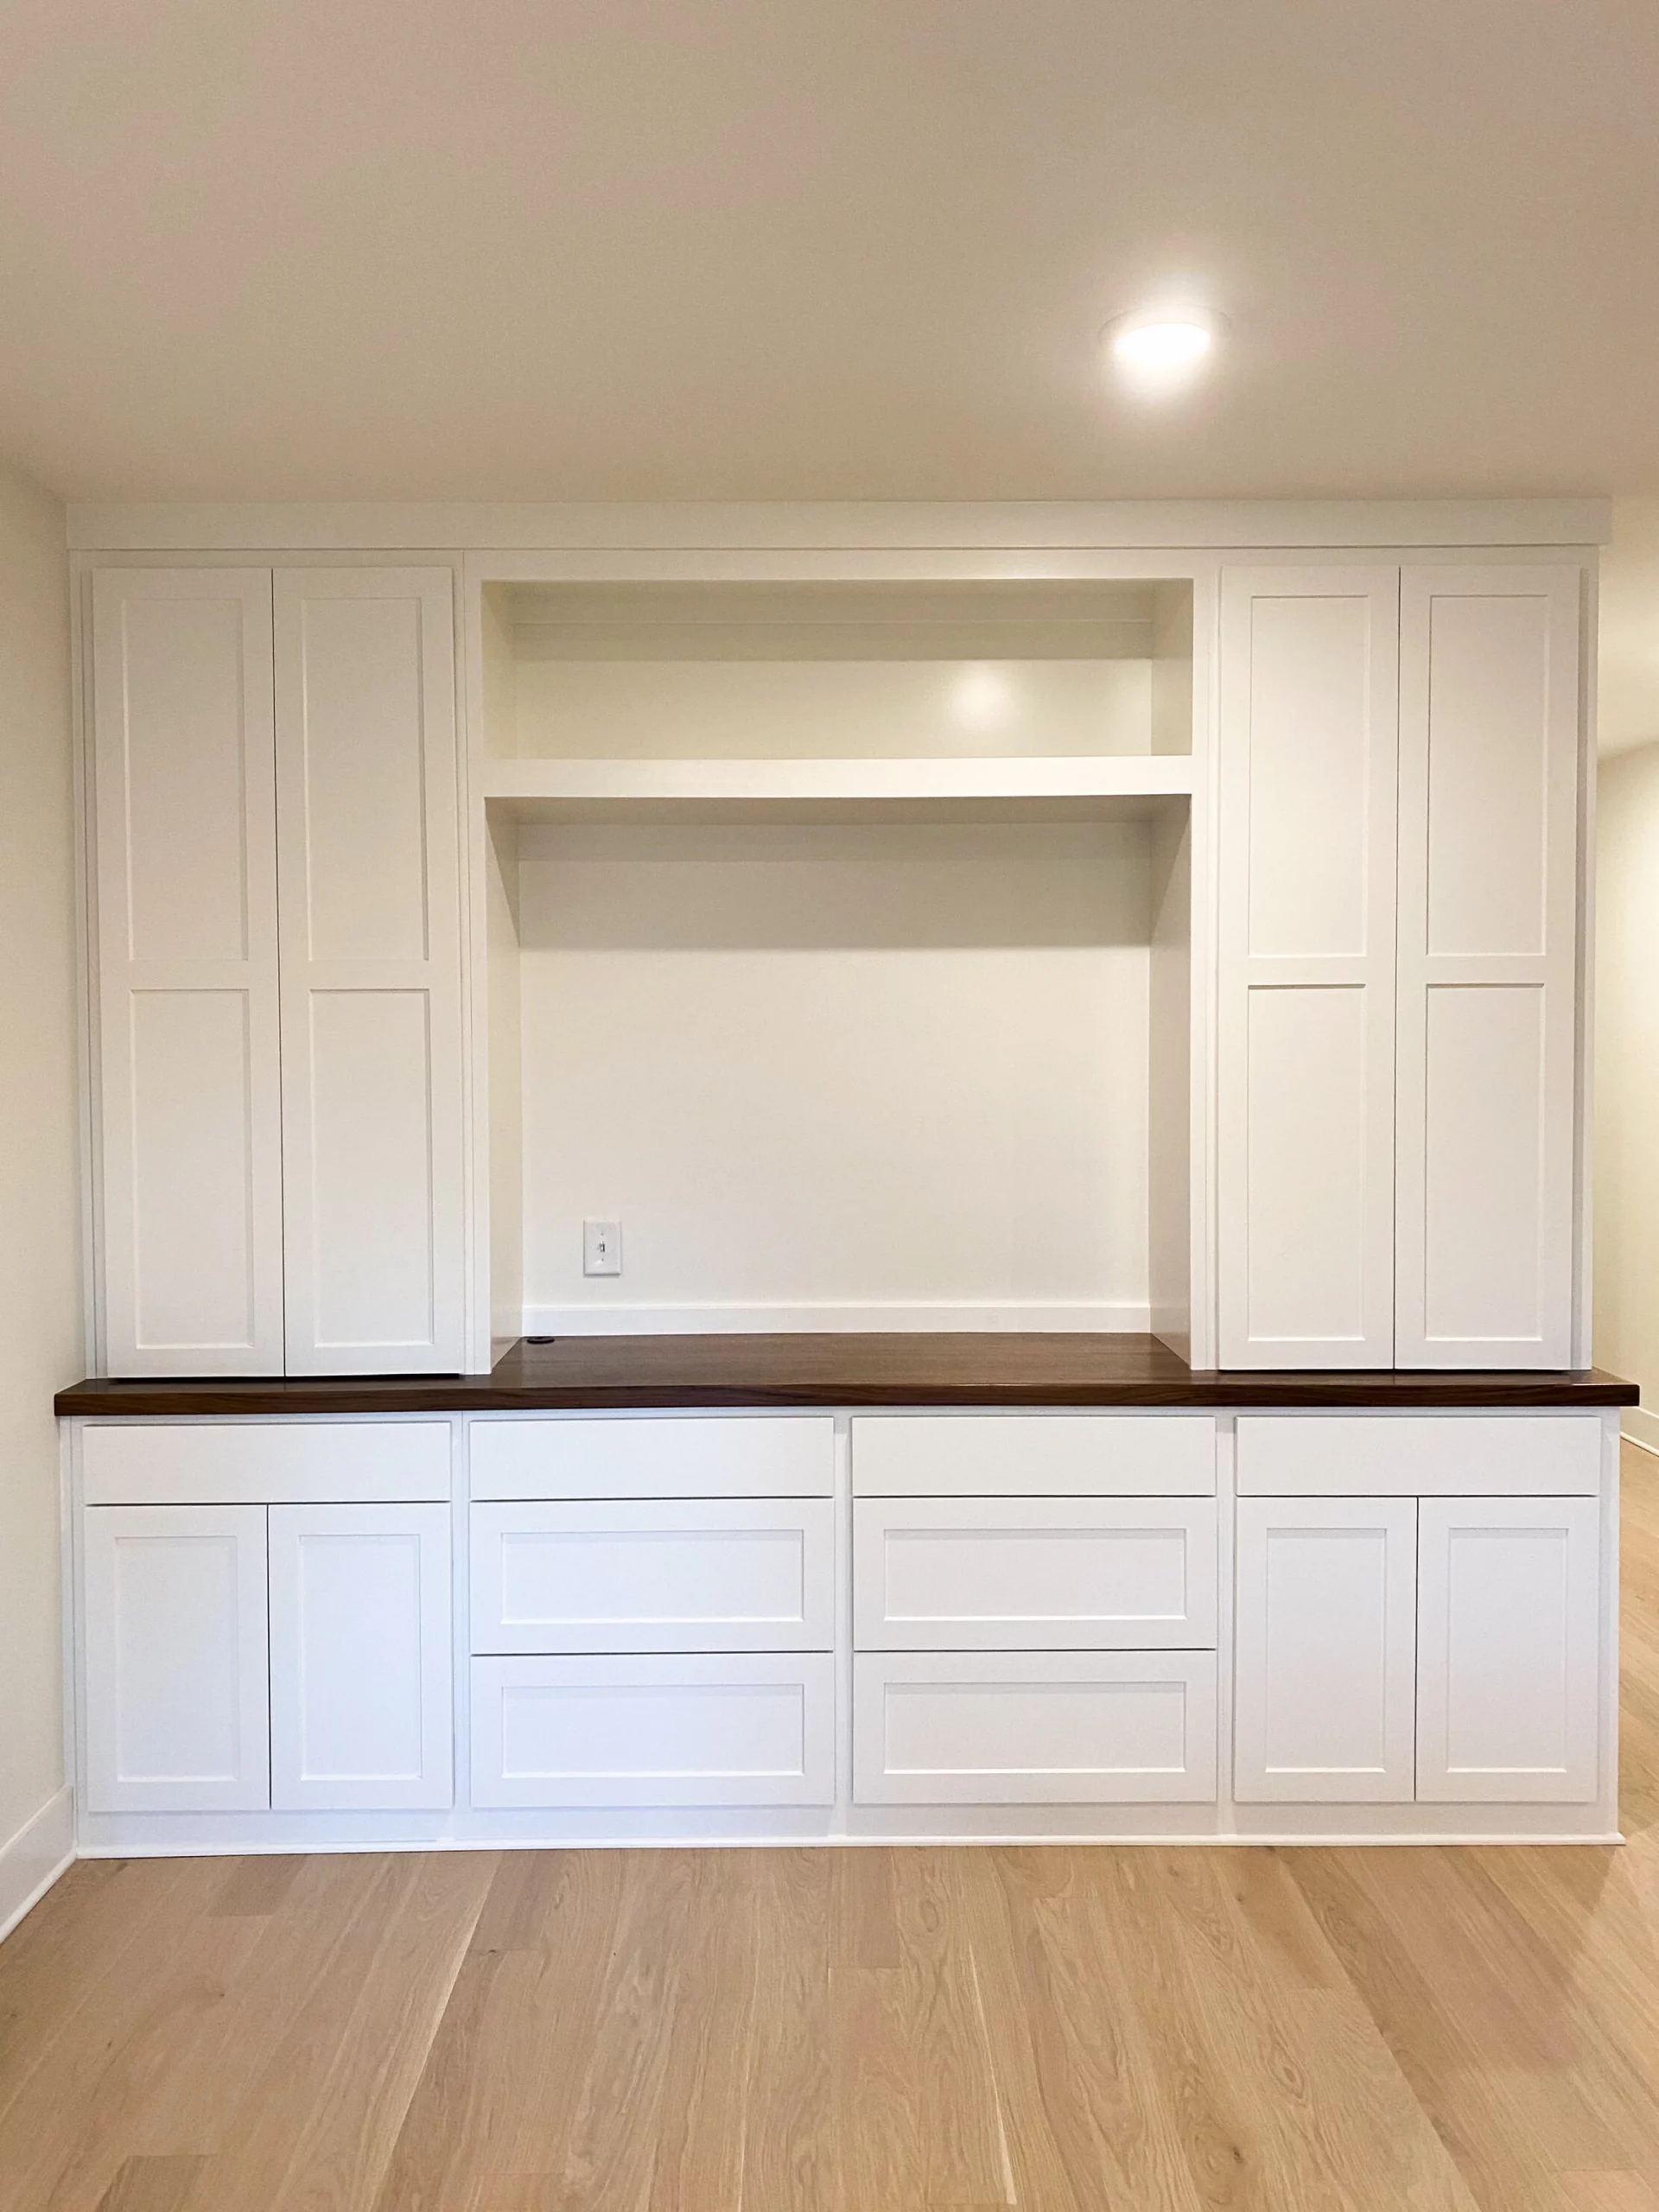
🔥 Trending Context
When selecting a wood countertop for a built-in, especially a dark-stained one, choose a hard wood species like oak, maple, or walnut. Softer woods like pine will dent and scratch very easily. More importantly, opt for a durable, water-based polyurethane top coat in a matte or satin finish. Avoid oil finishes in this application; they provide less protection and can transfer onto items you place on the shelf. The polyurethane will create a hard, protective shell that resists scuffs and makes it easy to wipe clean.
The Blueprint for a More Organized You
We hope these 28 ideas have sparked some serious inspiration for your own home. Remember, the best built-ins aren’t just about adding storage; they’re about enhancing your architecture and telling your family’s story through a more organized, intentional space. They are a true investment in how your home feels and functions every single day.
Now go ahead and start that Pinterest board—your perfectly designed space is waiting. 📌