26 Stunning Mason Jar Christmas Crafts That Will Transform Your Holiday Decor

You know the feeling: it’s the second week of December, your Pinterest board is full of mason jar ideas, and every single one either looks like a craft fair booth or requires a Cricut and a free weekend.
We spent a few evenings digging through Dollar Tree, Michaels, Etsy, and Amazon to find the ones that actually hold up — 26 ideas spanning rustic farmhouse, vintage canning, miniature dioramas, and pure nostalgia, from about $3 in thrift-store finds to a $79 tray trio. Budget and splurge versions of the same jar sit side by side, and every idea lists exactly what to buy.
Why now? The 2026 holiday look is all about using what’s already in your kitchen: jars you own, greenery from the yard, and one small bottle of paint.
And stay until the end — we break down the most common mistakes that can ruin these looks.
📌 Save this to Pinterest for later — you’ll want to revisit these ideas.
1. Candy Cane Striped Jars with Jingle Bell Collars
Two jars, two wide bands of hand-painted red and white, and the effect lands graphic rather than sugary. The stripes give the glass a spine, while the pine, red berries, and small pinecones keep it from reading like a candy store display. Scale is doing a lot of the work: the stripes run wide and horizontal, so they register from across the room, and the white jingle bells tied at the rim add one small moving detail right at eye level. Paint covers the glass but not the embossed Ball lettering, so the jar still looks like a jar.
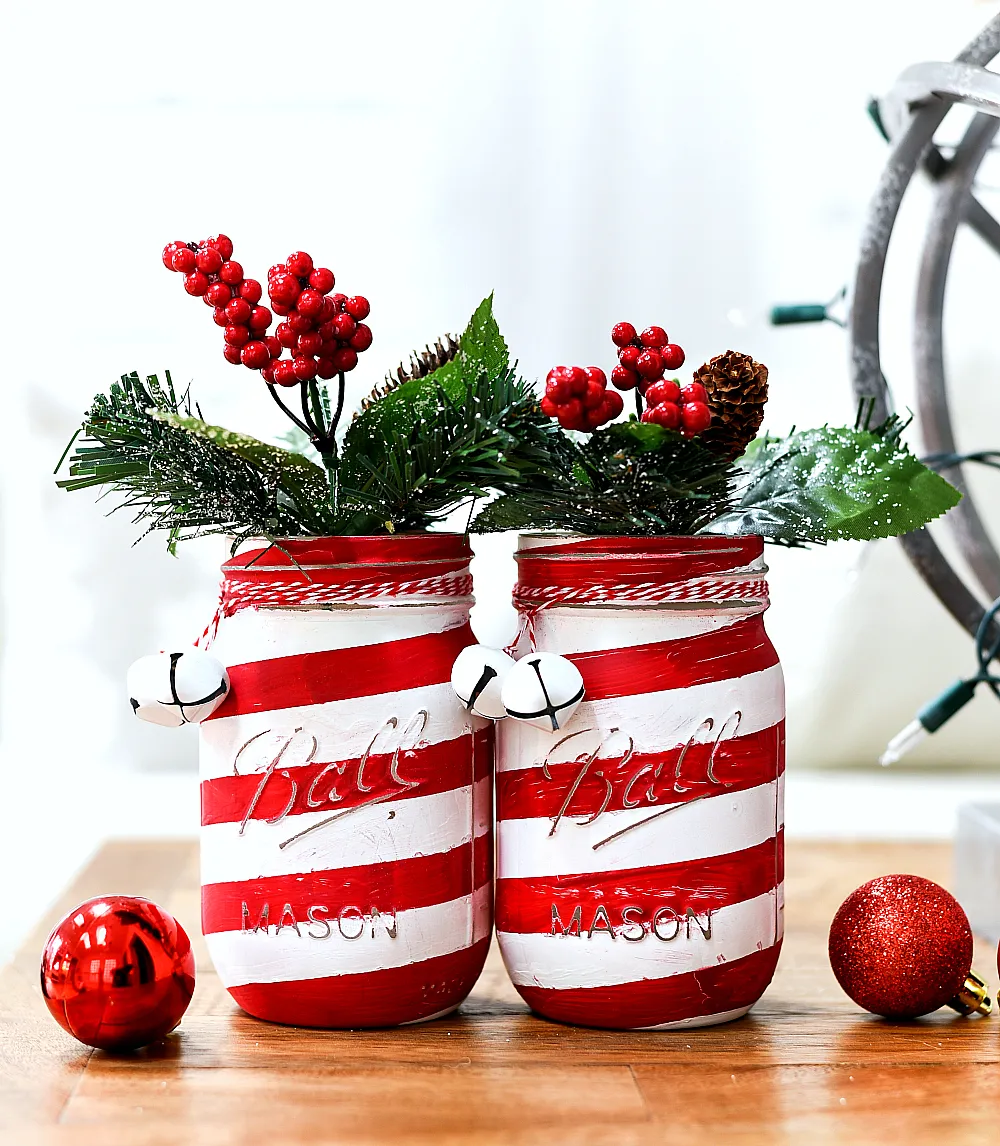
- Two quart mason jars: $4–$10 (or free from the pantry)
- Red and white enamel or acrylic paint: $8–$16
- Pine, berry, and pinecone picks: $10–$18
- White jingle bells and red twine: $5–$9
Total: $27–$53 for the pair.
Budget alternative: skip paint entirely and wrap each jar in wide red-and-white striped ribbon, about $3 a roll. Same candy cane read, and you can unwrap it in January.
2. Floating Cranberry Candles in Jute-Wrapped Jars
This one is a ten-minute project, which is exactly why it works:
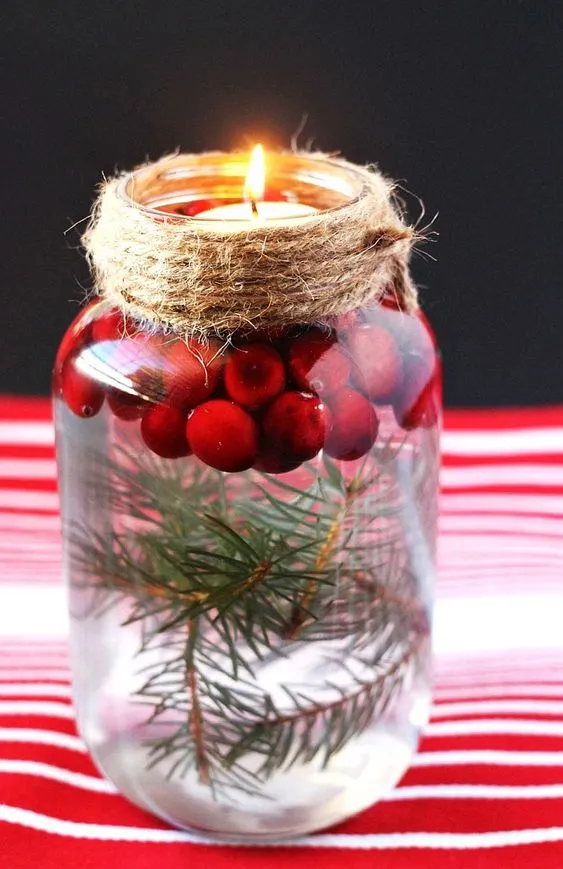
- Fill a wide-mouth quart jar three-quarters full with cool water.
- Slide a pine sprig down the inside wall and press it gently against the glass with a skewer so it stays put instead of sinking.
- Drop in a small handful of fresh cranberries — they float, and they’ll circle the top like a wreath.
- Lower a floating tea light onto the surface and light it.
- Wrap jute twine twice around the rim, knot it, and trim the ends.
Time: 10 minutes per jar. Materials: about $6.
Keep the water level an inch below the rim, and choose a floating candle no wider than 1½ inches. Wider candles bob against the glass and leave a wax film you’ll be scraping off with a razor blade in January. Swap the water every second day — cranberries cloud it fast in a warm room — and always set the jar on a coaster, because condensation shows up on wood within an hour.
3. Frosted Luminaries with Twine Bows and Pine Sprigs
It’s the frost. Take that away and you’ve got a jar with a string of lights inside — you’d see every bulb, every wire, every battery pack. The frosted glass turns a cheap strand into a soft, even glow, which is what lets three jars sit in a row and read as one light source instead of three gadgets. The twine bow and the evergreen sprig tucked under it are lovely, but they’re garnish. The frost is the trick.
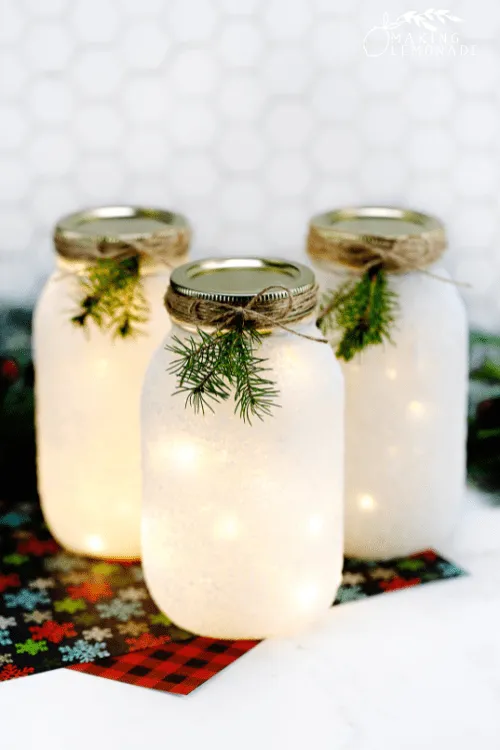
Fairy lights are battery-hungry: with nightly use, plan on fresh batteries every three to four weeks, so buy a strand with a built-in timer and save yourself the ritual. Frosted finishes chip at the rim when you handle a jar roughly, so lift it by the lid, not the glass. Dust with a dry microfiber cloth — never a damp one, which streaks the coating — and budget about $8 a can if you re-spray next season.
4. Silver Glitter Silhouette Jars with Candy Stripe Ribbon
The recipe is roughly 70% reflective silver, 20% black silhouette and ribbon, and 10% clear glass showing through. That ratio is why it reads theatrical instead of cute. Swap the silver glitter for gold, replace the character with a sleigh and reindeer, keep the numbers exactly the same, and you get a completely different jar from identical math. Drop the black element below 10% and the whole thing goes soft and generic.
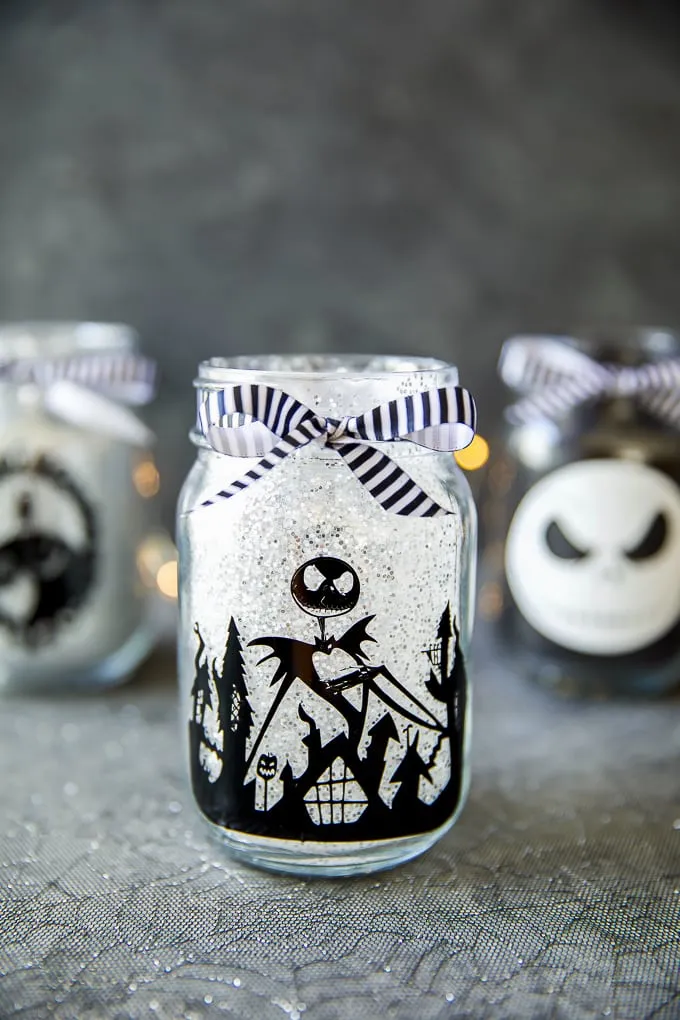
This is a five-dollar project if you shop it right. Dollar Tree sells fine silver glitter for $1.25, black cardstock is pennies a sheet, and a printed silhouette from a free template costs you nothing but printer ink. Ribbon runs about $2 at Walmart. If you want something calmer for the same shelf, see Idea #3 — frost instead of glitter, and it plays nicely with the rest of the room.
5. Lid-Lit Woodland Diorama Jars
Hot-glue the deer and the mushroom to a penny or a scrap of cardboard before you set them in the snow. It gives you something to grab when you want to reposition them, and it stops the figurine from tipping over the minute you carry the jar to another room. For proportion, keep the tallest piece no more than two-thirds the height of the jar’s interior — any taller and the light coming down from the lid flattens it into a silhouette.
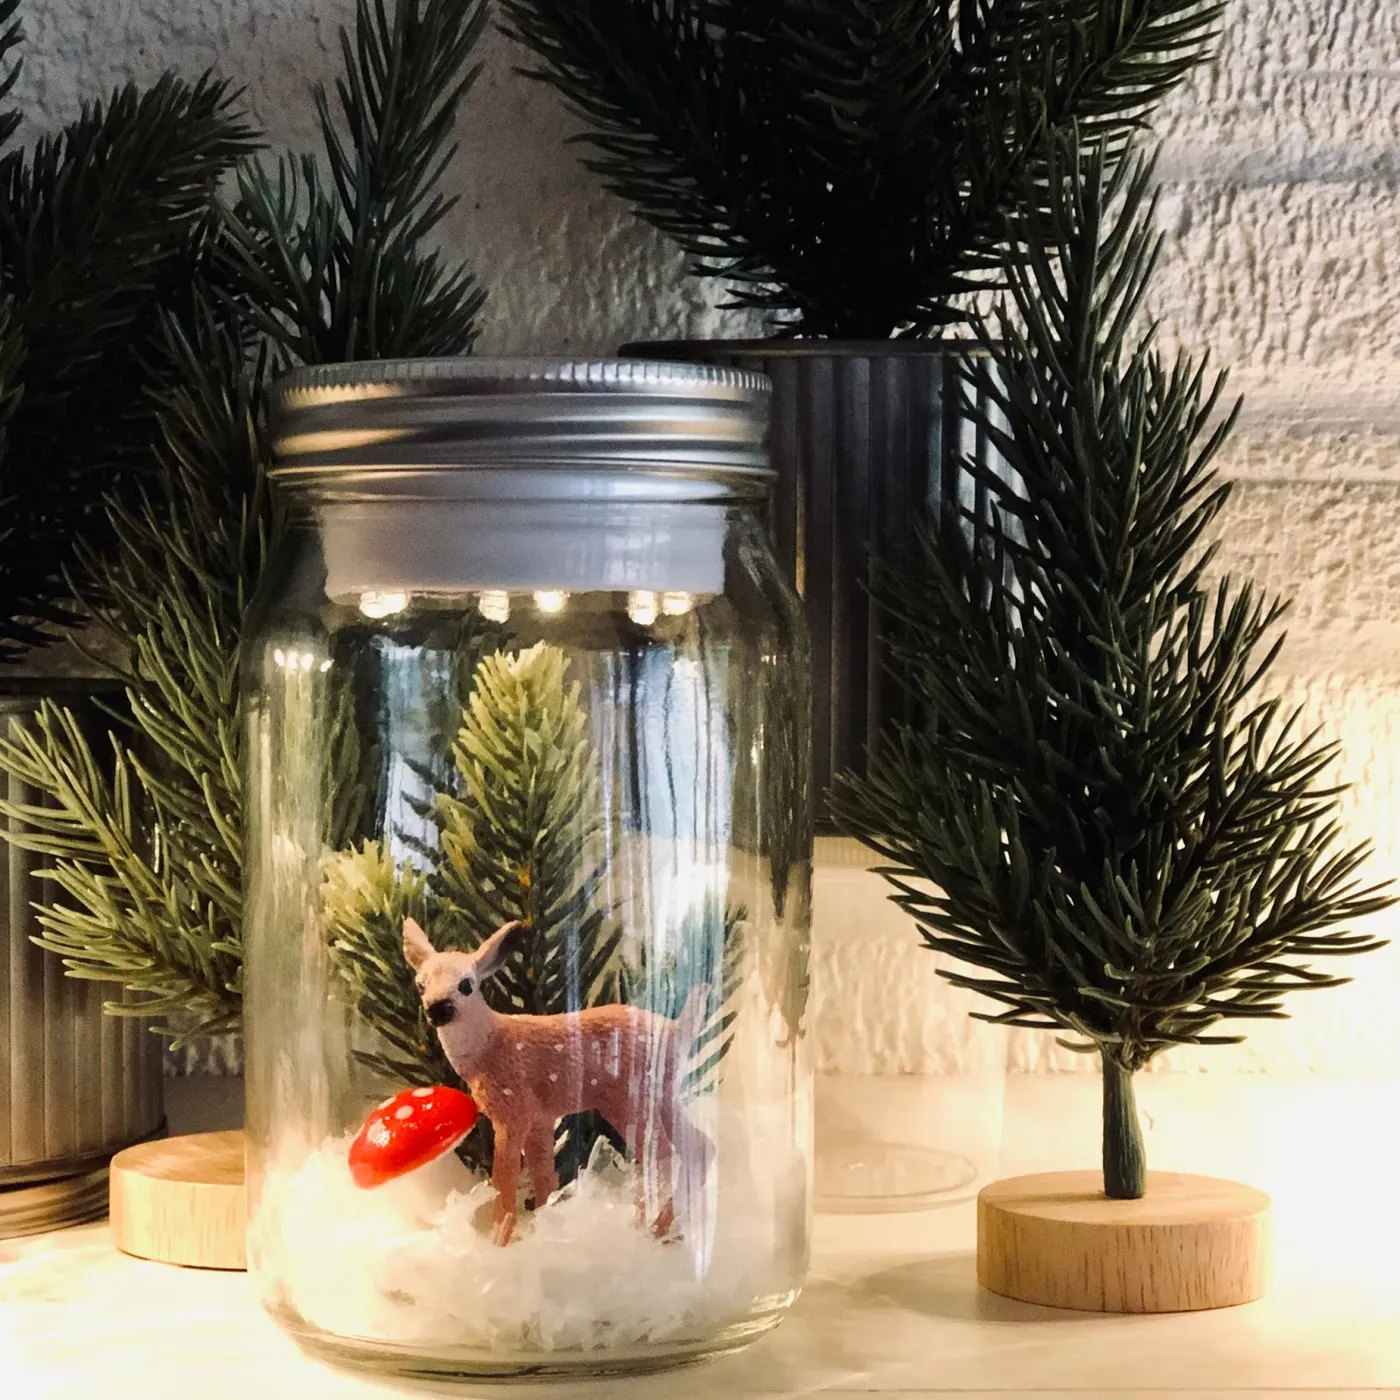
A few things worth checking before the glue gun comes out:
- Measure the jar opening — the deer and mushroom have to fit through sideways.
- Test the figurines together on the table first; scale is easier to judge flat than inside glass.
- Decide where the jar will live, so you know whether you’re building for eye level or above it.
- Wipe the inside of the jar dry and dust-free — glue won’t hold on dusty glass.
- Have a battery puck light or short strand ready, and leave a little slack in the wire for easy battery swaps.
6. Upside-Down Snow Globe Jars on Wood Blocks
- Quart jar: $3–$6
- Snow-dusted bottlebrush tree: $3–$8
- Square wood block or a scrap of 4×4: $0–$6
- Kraft tag and snowflake stamps: $4–$8 for a set you’ll reuse for years
- Faux snow: $3–$5
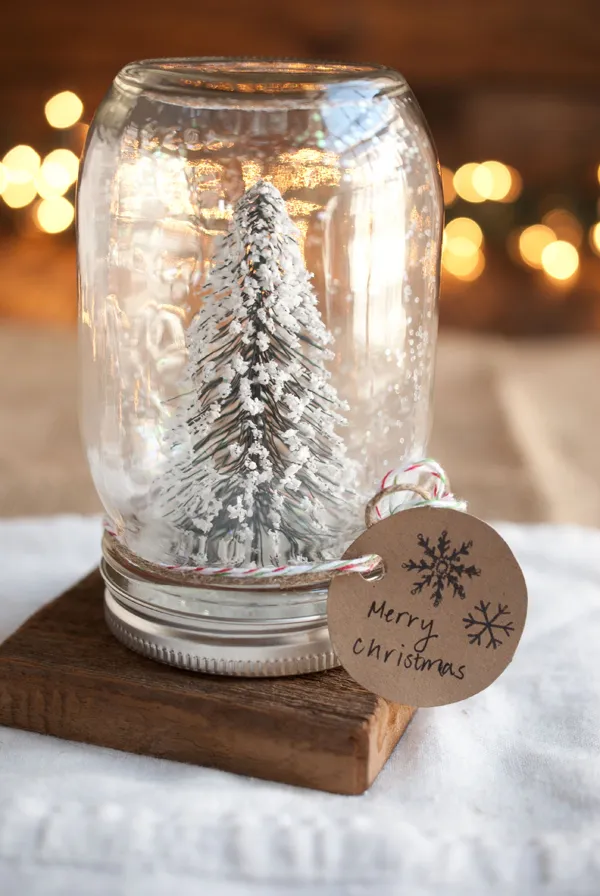
Total: $13–$33.
Budget alternative: thrift the jar, dig a scrap block out of the garage, and stamp the tag on the back of a paper grocery bag. That version comes in around $6.
The moment you add water to a jar that sits upside down on its lid, you’ve signed up for a relationship. Water finds the threads, the metal lid starts to rust, and every time the room warms up you get condensation on the outside of the glass. The version that lasts is dry — faux snow, a plastic tree, no water at all. If you want the shimmer anyway, seal the lid threads with a thin ring of silicone and always set the jar on a coaster, never directly on wood.
7. Mason Jar Lid Dioramas Under Glass Domes
- Set a lid insert flat and hot-glue a pad of dried moss over it, right to the edges.
- Press the figurines in — odd numbers read better, so three pieces rather than four.
- Add the smallest details last: a ladybug on a leaf, a mushroom at the rim, a mini bench.
- Wrap jute twine twice around the lid band and knot it at the back.
- Lower a clear dome over the scene, and you’re finished.
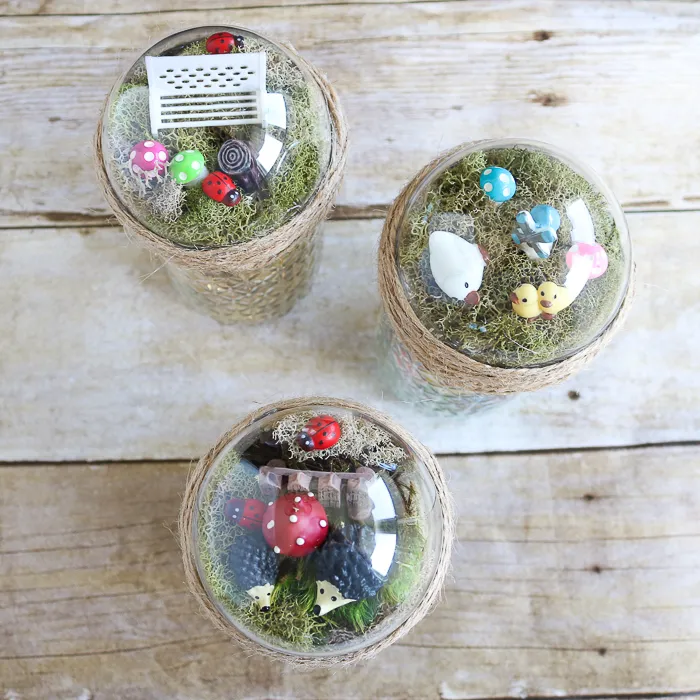
Time: about 20 minutes each. Materials: $4–$7 if you already have spare lids.
These are the smallest projects on this list, and scale is where they earn their keep. A three-inch dome plus a one-inch ladybug and your eye happily fills in an entire forest. Repetition does the rest: three lids in a row, all the same diameter, all wrapped in the same twine, read as a collection. Change one element — a different twine, an oversized mushroom — and the set instantly looks accidental.
8. Vintage Figurine Snow Globes in Glass Jars
The reason snow globes are everywhere right now isn’t nostalgia for the souvenir version — it’s the thrift-store figurine. Ceramic animals, cake toppers, and orphaned ornaments cost a dollar or two, and a jar is the cheapest display case ever made. Pinterest has been flooded with these because the formula repeats endlessly: same container, new contents. That’s also why the trend has staying power. When it fades, you still own a jar.
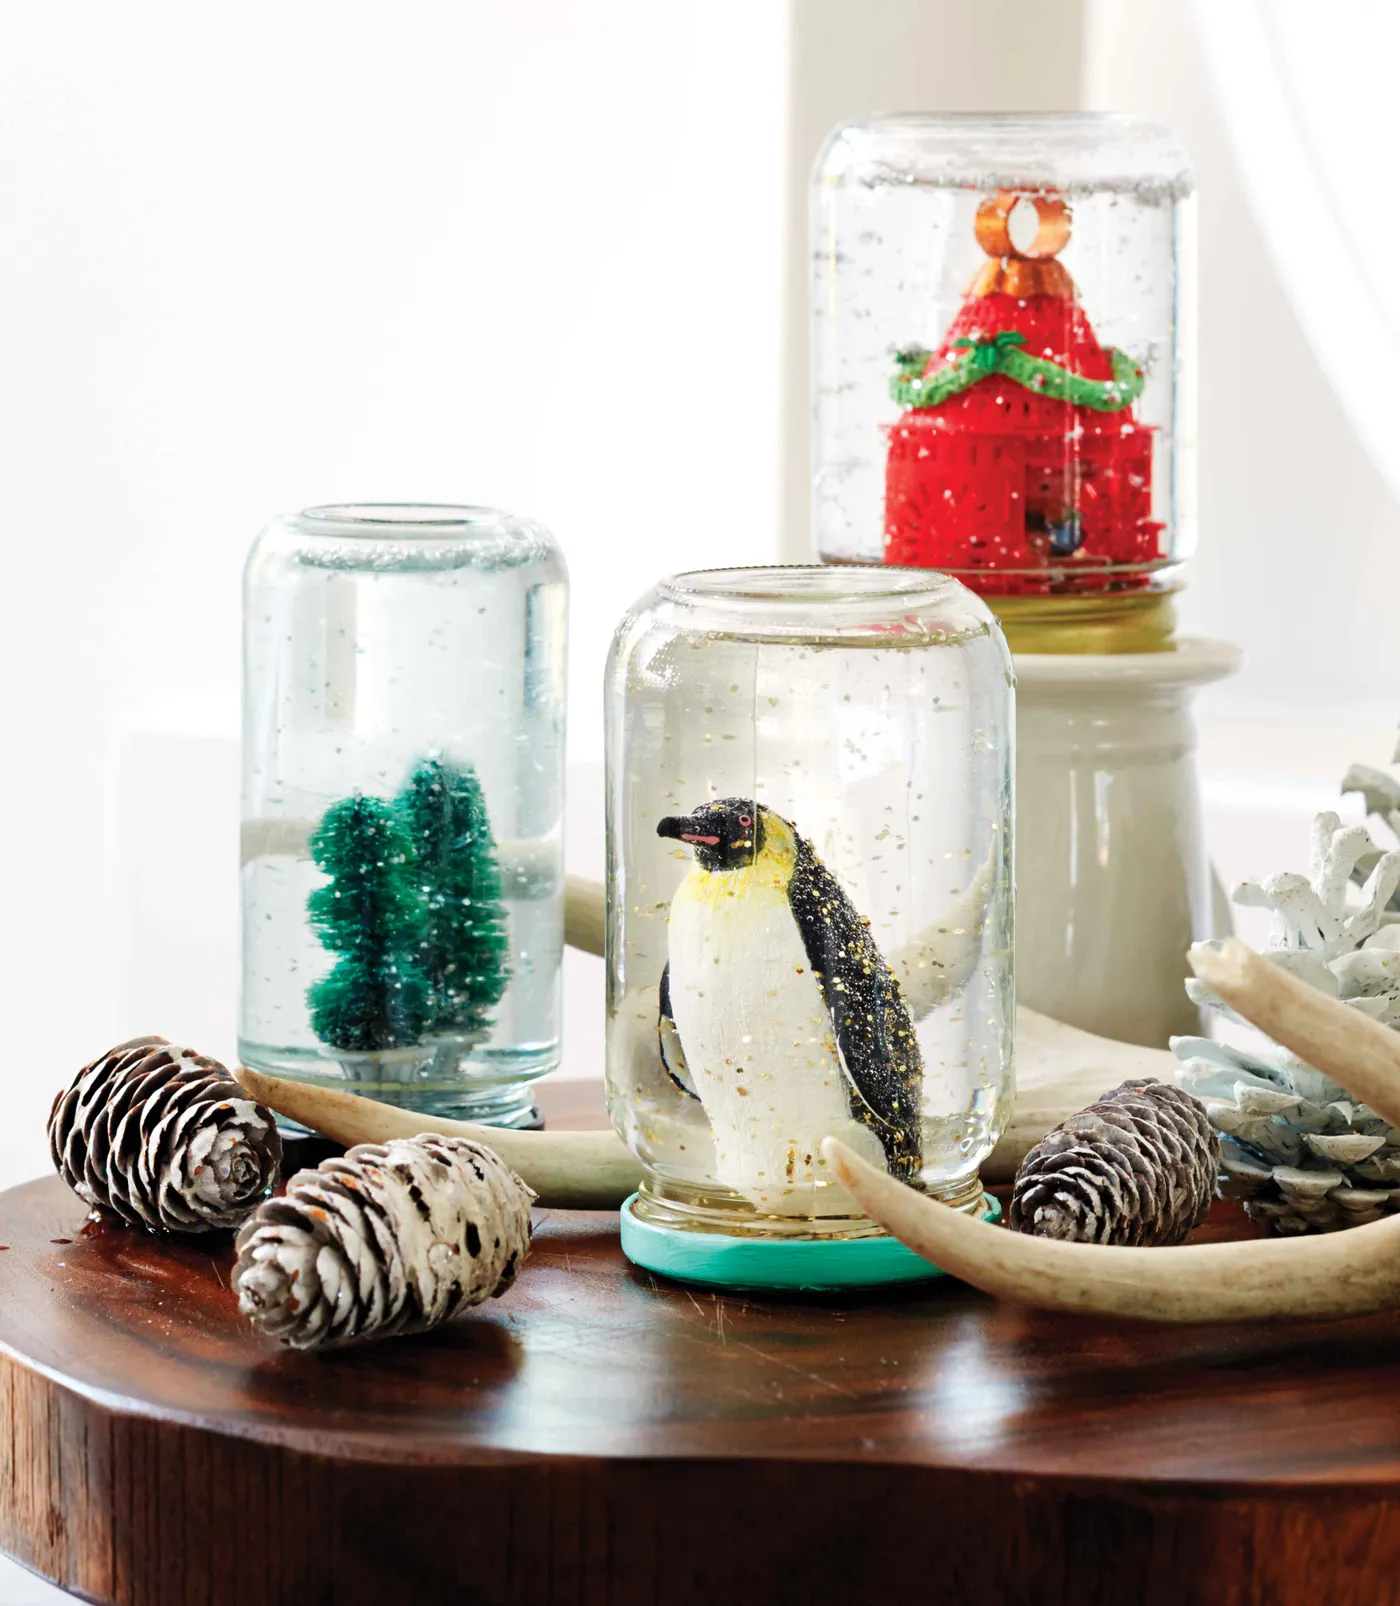
Three jars read best on a surface at least 40 inches wide and 16 inches deep — a sideboard, a dresser top, a long console. Narrower than that, drop to two; a trio on a 30-inch table looks like a shelf that gave up. Height matters even more: keep them at least 24 inches off the floor or the figurines disappear below the sight line. A dark wood surface is the most forgiving backdrop if you want the glass to vanish and the little scenes to pop.
9. Snowflake Painted Jars Filled with Fresh Evergreen
Glass paint needs something to grip. Scuff the outside with 220-grit sandpaper, wipe it down with rubbing alcohol, then brush on two thin coats of acrylic with a foam brush, waiting about 30 minutes between them. One thick coat looks wet, dries unevenly, and peels within a month. Two thin ones will still be here next December, and the foam brush leaves no bristle marks in the paint.
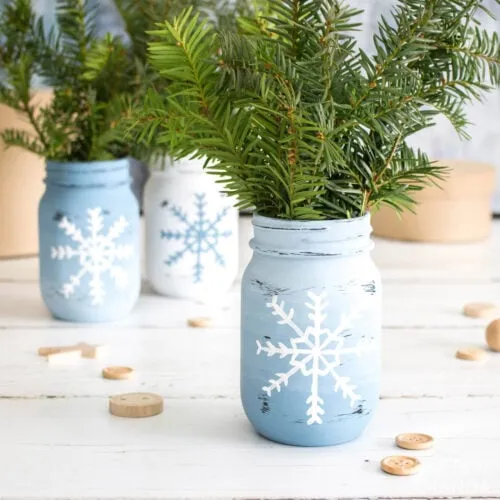
The ratio worth copying:
- 60% pale blue paint as the base
- 25% white snowflakes and dots
- 10% natural wood from the scattered buttons
- 5% fresh green pine
Turn one dial and the mood shifts. Charcoal instead of pale blue and the snowflakes become a night sky. Brass buttons instead of wood and it reads vintage hotel instead of cabin porch.
10. Snow-Lit Clamp Jar on a Rustic Console
It’s the clamp lid. That wire bail turns a plain jar into something that reads vintage canning, and it’s the reason this little corner looks collected rather than purchased. Take the clamp away and you’re back to a jar with lights in it — pretty, but anonymous. Everything else on the console — the pillar candle in its silver holder, the small gold deer, the frosted miniature tree — exists to keep the jar company.
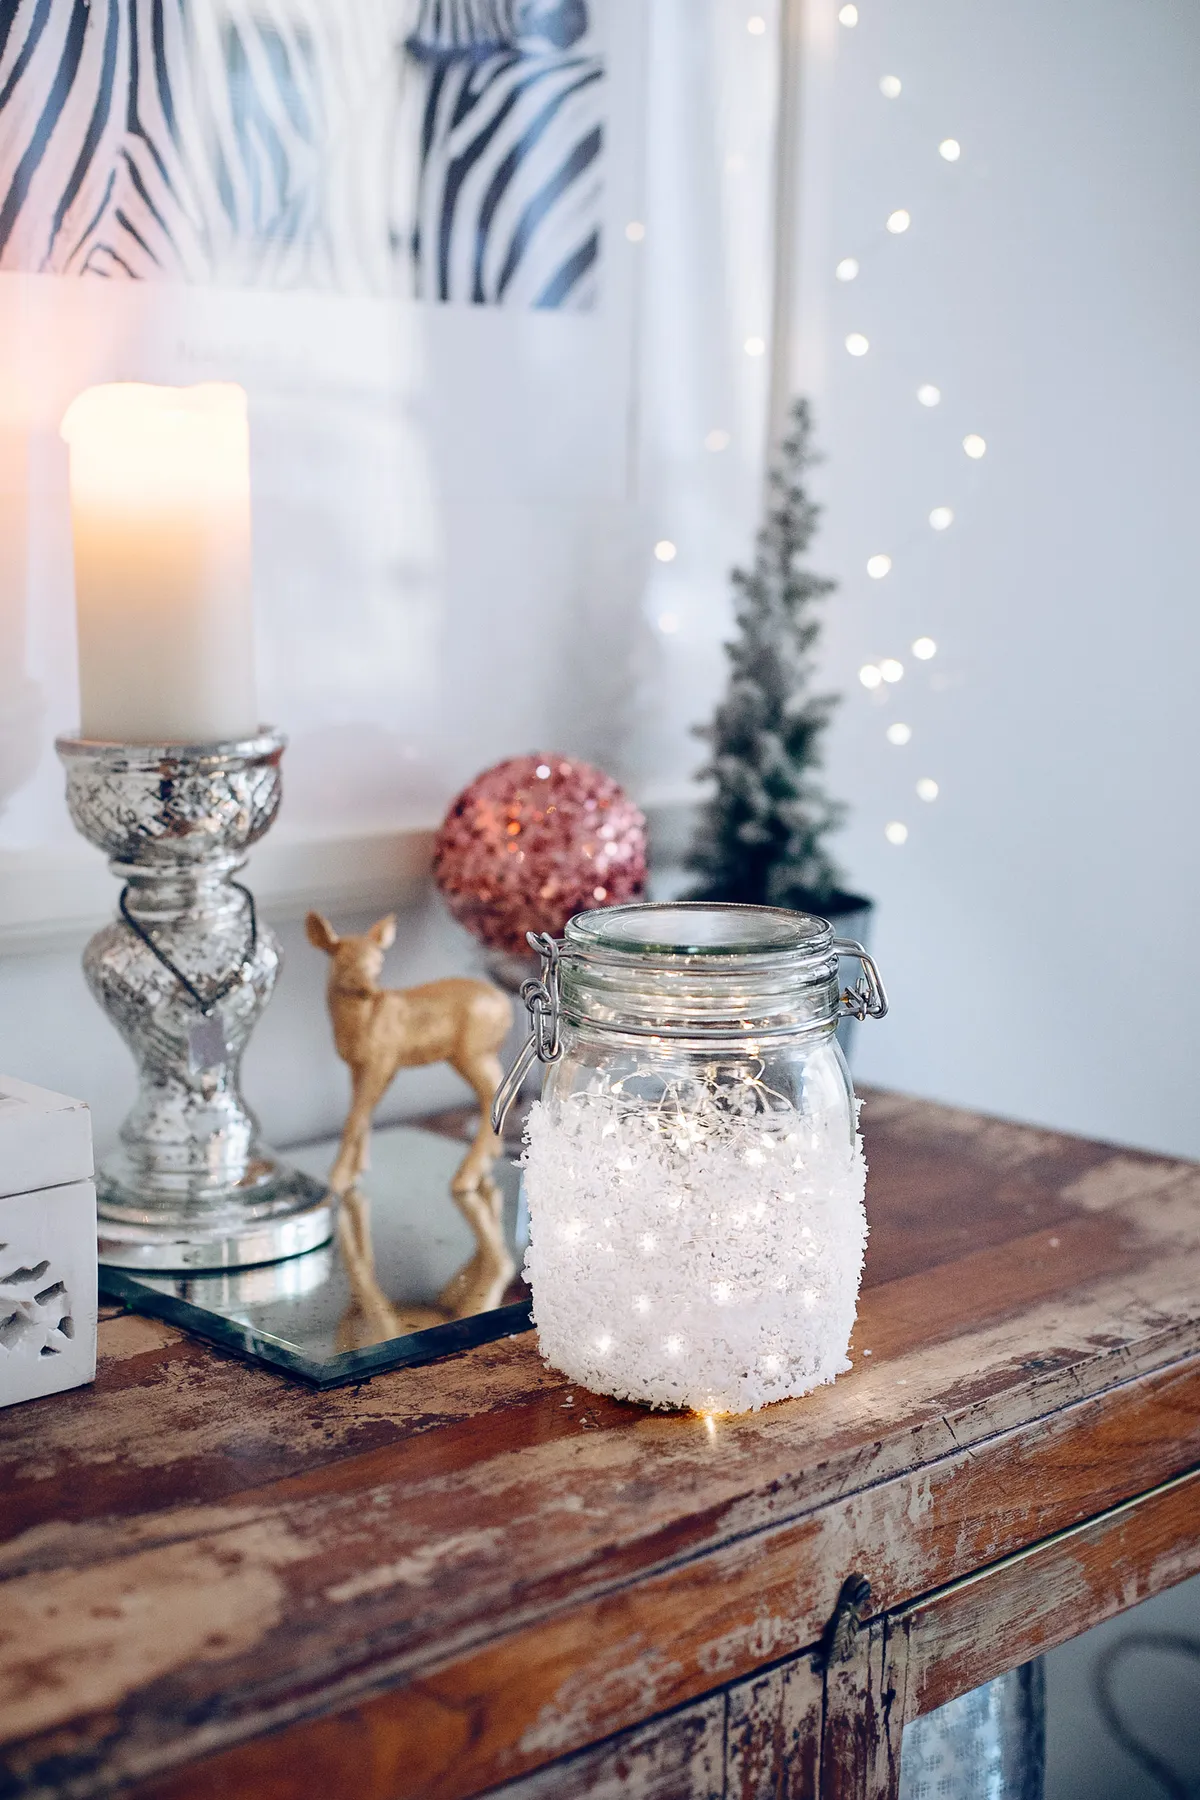
You can build the whole vignette for under $25. Dollar Tree has a small clamp-lid jar for $1.25 and fairy lights for $3, faux snow runs $2 a bag, and a frosted mini tree is about $4 at Target. The gold deer is the piece worth hunting: thrift stores and estate sales turn them up for $1 to $3, and a can of gold spray paint turns almost any small figurine into one. Compare with Idea #24, which is this same idea multiplied by three.
11. Heavily Frosted Jars with Berry Sprigs
Frosting spray is unforgiving. Hold the can 10 to 12 inches away and build the coat in four or five light passes, letting each one dry about 10 minutes. Get impatient and you’ll get drips, and a drip on frosted glass is permanent — it looks like a scar. Temperature matters too: below 50°F the coating dries chalky and rubs off on your hands, so spray on a mild day with good ventilation and let the jar cure indoors overnight.
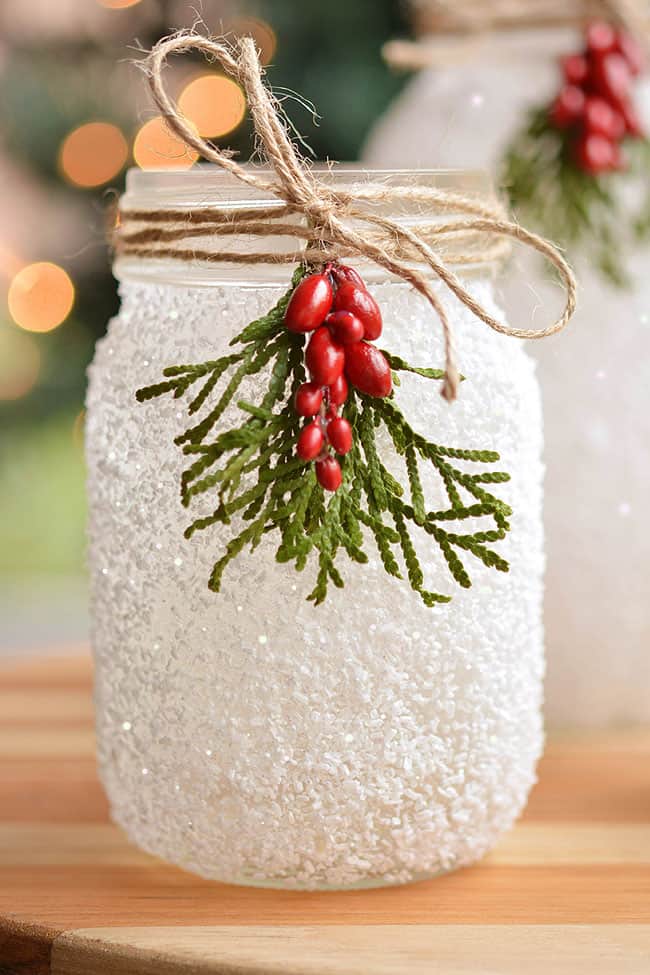
That texture that makes it look like snow is also a dust magnet, and dusty frost turns gray. Run a dry, soft paintbrush over it every week or so — never a damp cloth, which smears the coating into streaks. Plan on re-spraying every season or two at about $8 a can. If you’d rather skip the upkeep entirely, buy pre-frosted glass jars: more expensive up front, but you can wipe them down forever.
12. Mickey and Minnie Jar Ornaments on a Flocked Tree
Two jars, two pairs of paper ears, two polka dot bands — the charm is entirely in the pairing. Hanging them at roughly the same height gives your tree a small landmark, and the flocked branches do half the work by letting silver lids and clear glass read against white. The buffalo check bow on one of them is the detail that keeps it from looking like a matched set lifted straight off a store shelf.
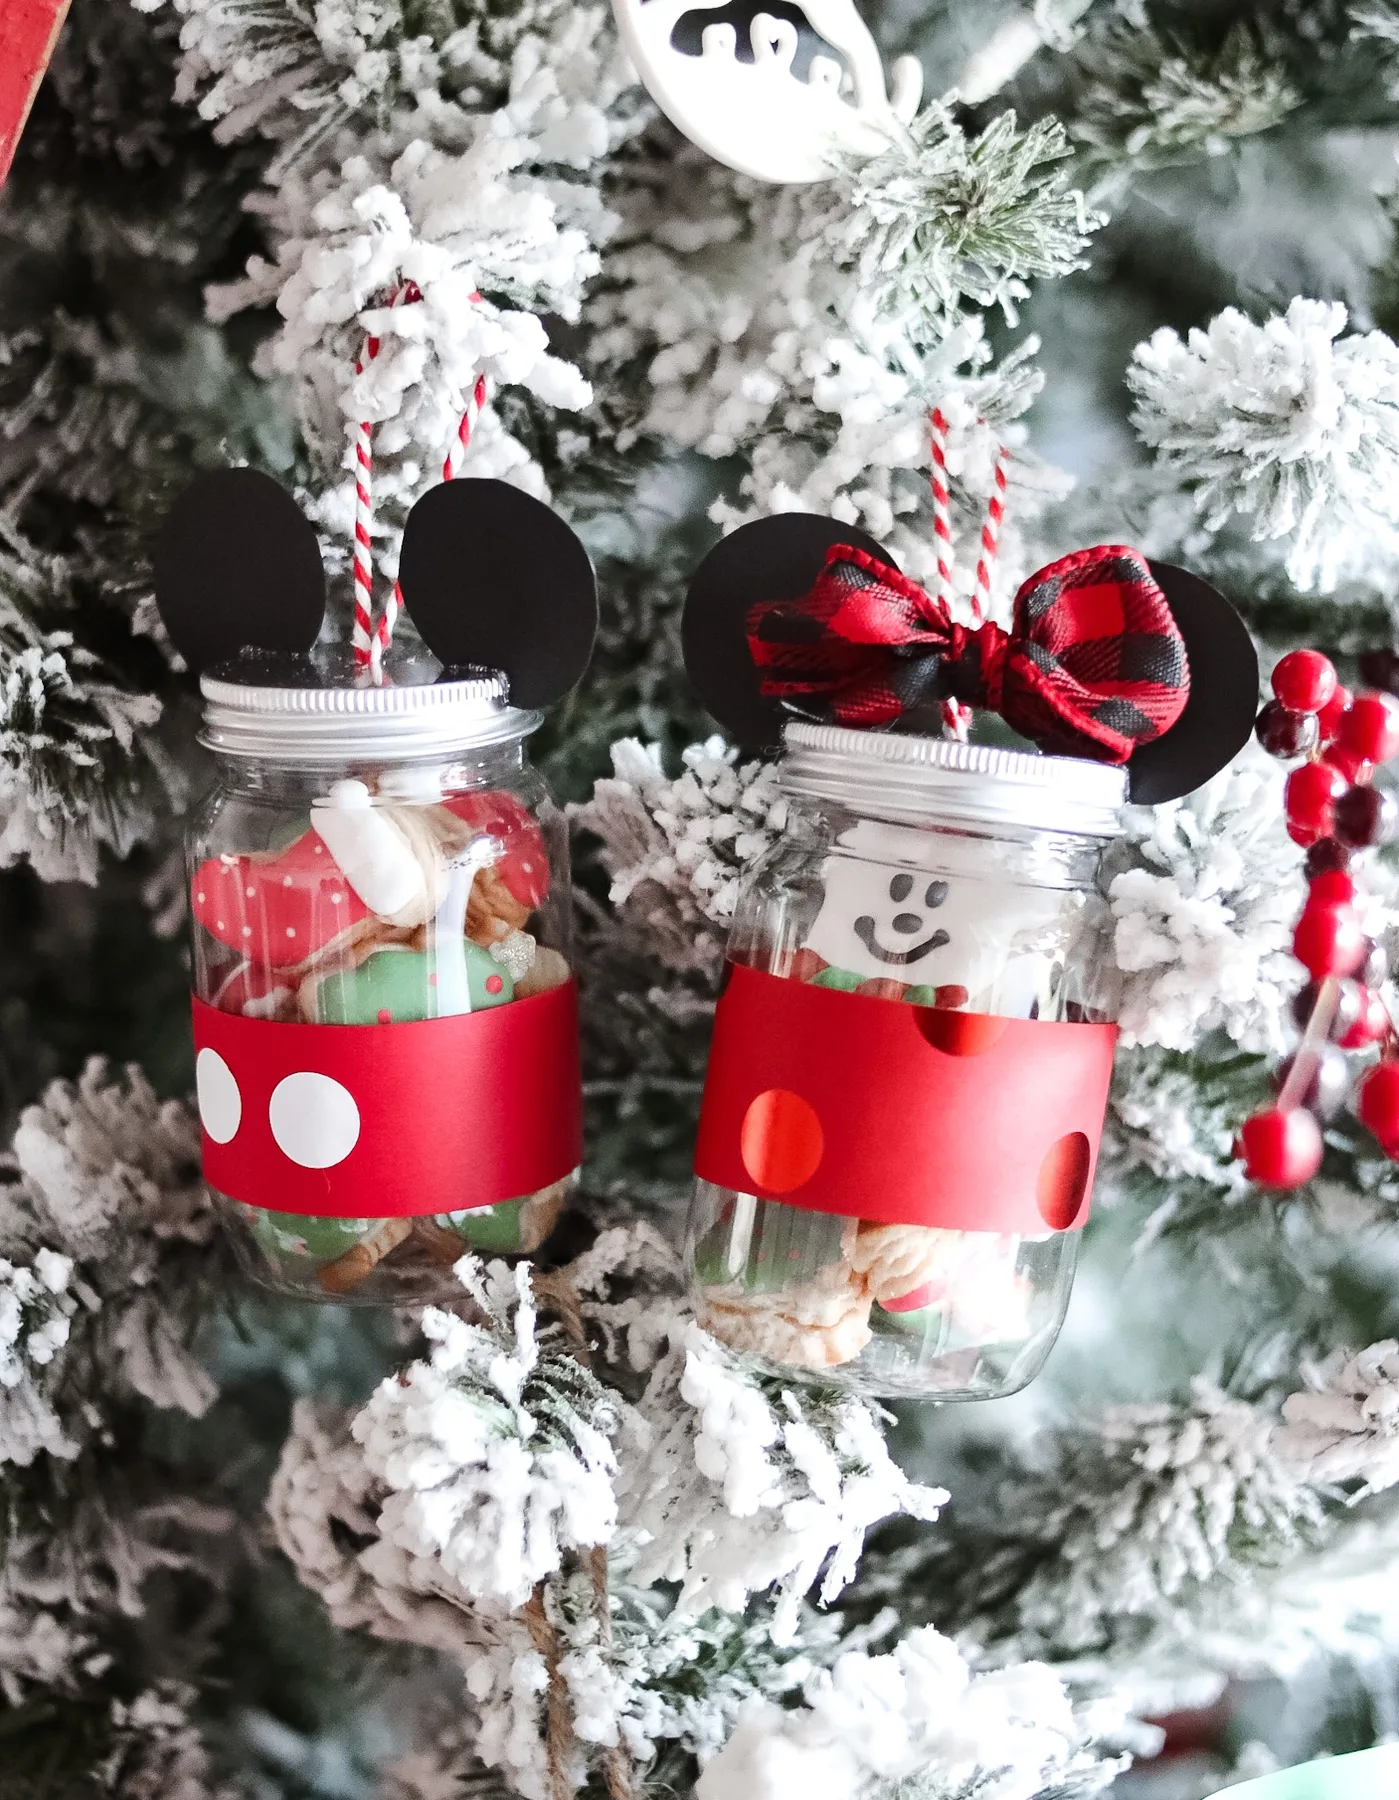
These are three-to-four-inch jars, so they want a tree at least six feet tall. In a room with standard eight-foot ceilings, a 6.5- or 7.5-foot flocked tree is the sweet spot — on anything bigger, the jars vanish. Keep them off the flimsiest branch tips, too: glass plus a metal lid carries real weight, and a bent branch in December is a sad thing to find in January.
13. Frosted Centerpiece Jar with Beaded Twigs
Wire twigs with clear bead tips. Pine and flocked branches alone would be pretty but flat — the beaded twigs catch light at eye level and hold it, so the arrangement still sparkles when nobody’s lit a candle. They’re also what makes this read as a centerpiece rather than filler. Everything else in the jar could be swapped for something else; those twigs couldn’t.
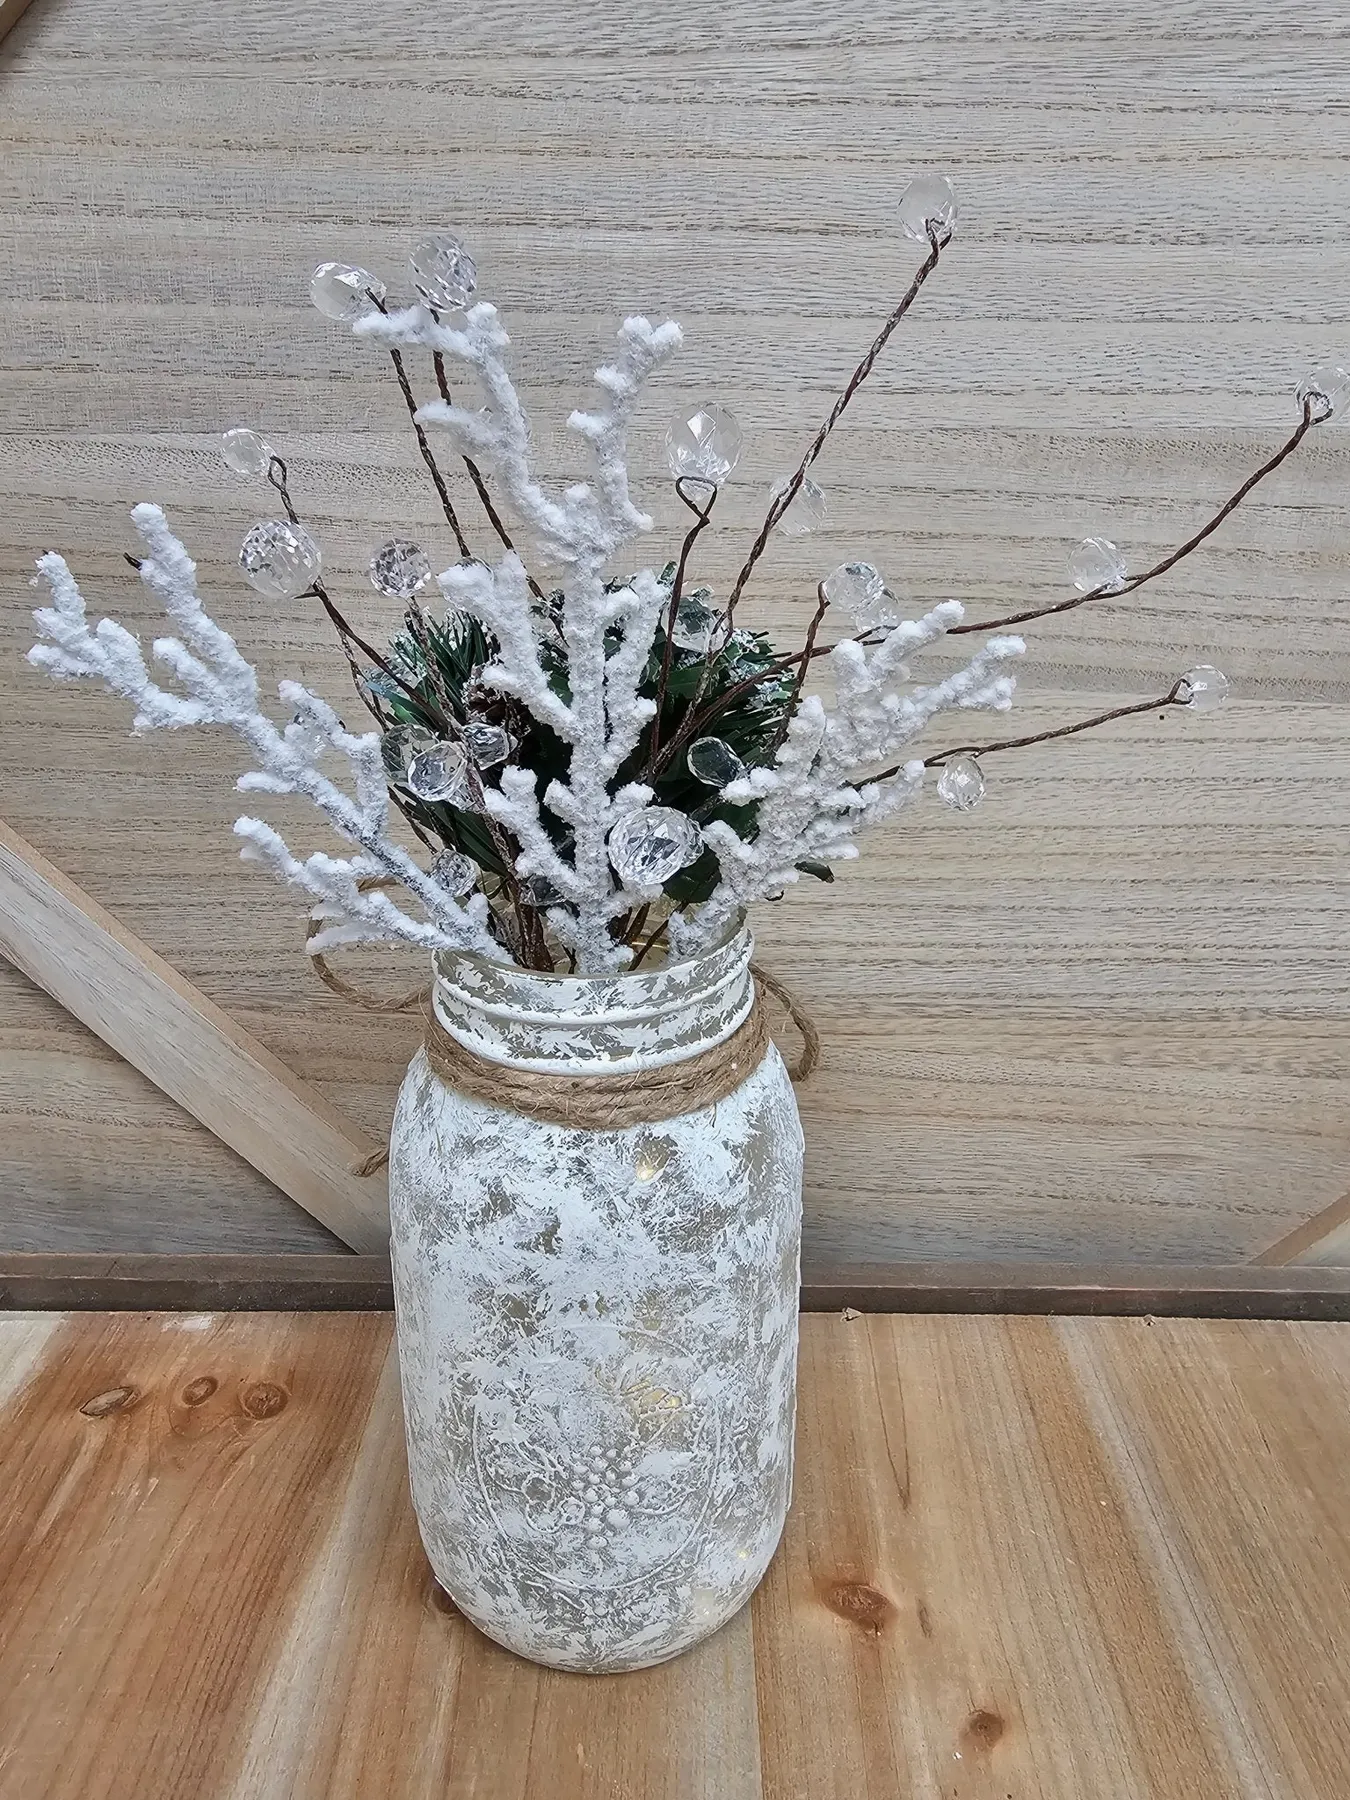
Aim for the tallest twig to land around 1.5 times the height of the jar. Bundle the stems in your hand and twist them together before you set them in — one bundle drops in without scratching frosted glass, and it comes out in a single motion when you want to change the contents. Fan the twigs slightly outward at the top so the beads don’t clump into one bright knot.
14. Green Candy Jars with Red Felt Collars
All of this comes from a dollar store for under $10. A bag of hard candy is $1.25, felt squares are four for $1.25, a bell is a quarter, and yarn is a dollar. The buttons are the only wildcard — snip them off a thrifted shirt or buy a mixed jar for $3 and use the leftovers on next year’s projects. Same red felt, completely different character in Idea #16.
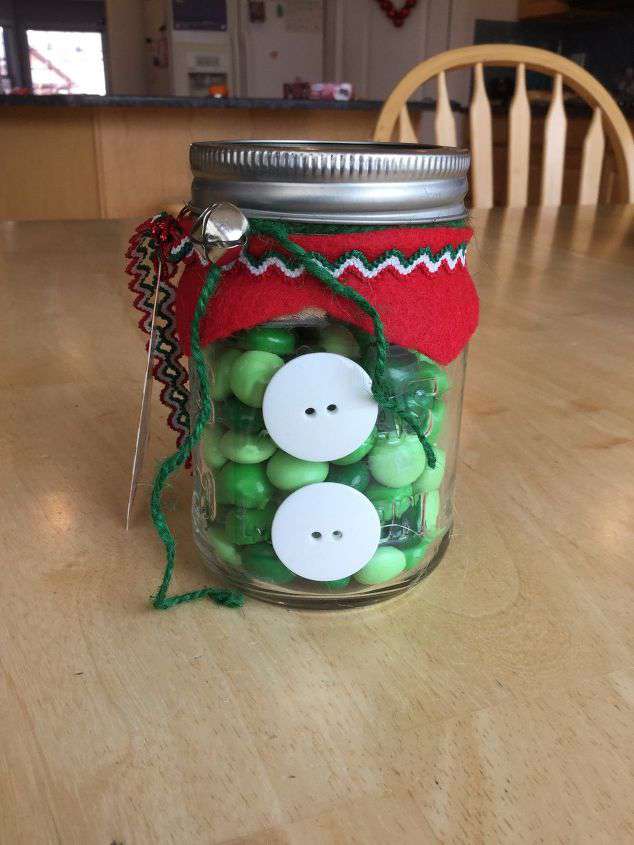
Read the whole thing as a formula: 65% green candy for volume, 20% red felt collar for personality, 10% white buttons for charm, 5% silver bell for a little noise. Change any dial and the jar changes character. Red candy with a white collar becomes peppermint; gold candy with a green collar turns suddenly elegant. The buttons stay either way — they’re what stops it from looking like a candy dish.
15. Faux Snow Figurine Jars: Snowman, Tree, Gift
- Three quart mason jars: $6–$12
- Silver screw lids, if you’re buying new: $4–$8
- Faux snow: $4–$7
- Figurines — snowman, frosted pine, wrapped gift: $9–$21 (thrifted, often $1–$3 each)
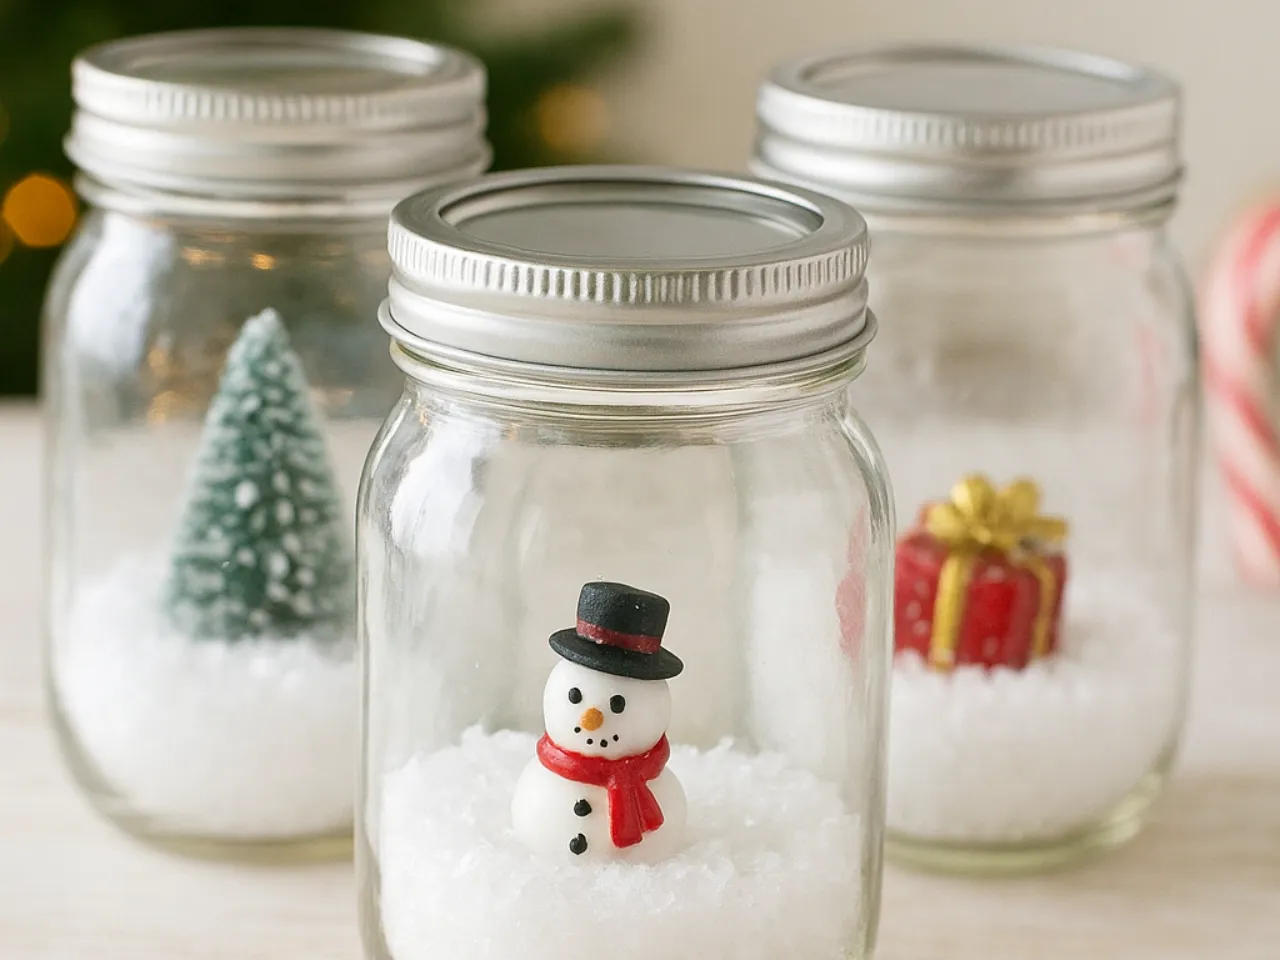
Total: $23–$48.
Budget alternative: one bag of dollar-store mini ornaments gives you three figurines for $1.25, and free jars from a neighbor’s canning stash drop the whole set to about $9.
- Measure the jar mouths first — a snowman that fits beats a snowman you love.
- Set the figurines together on the table; three pieces in one jar should differ in height by at least an inch.
- Rinse and dry the jars completely, since leftover moisture turns faux snow into paste.
- Decide on lids before you buy, because mismatched lids make a trio look accidental.
- Keep paper and fabric out of the jar — over a season they drink any moisture in the air.
16. Painted Snowman Jars with a Felt Cardinal
Mix a teaspoon of baking soda into a quarter cup of white acrylic and the paint dries matte and slightly chalky, which grips glass far better than straight acrylic. Two thin coats, 30 minutes apart, then let it cure a full 24 hours before you handle it. The three buttons go on with hot glue, never craft glue — craft glue lets go of glass the first time the house gets cold.
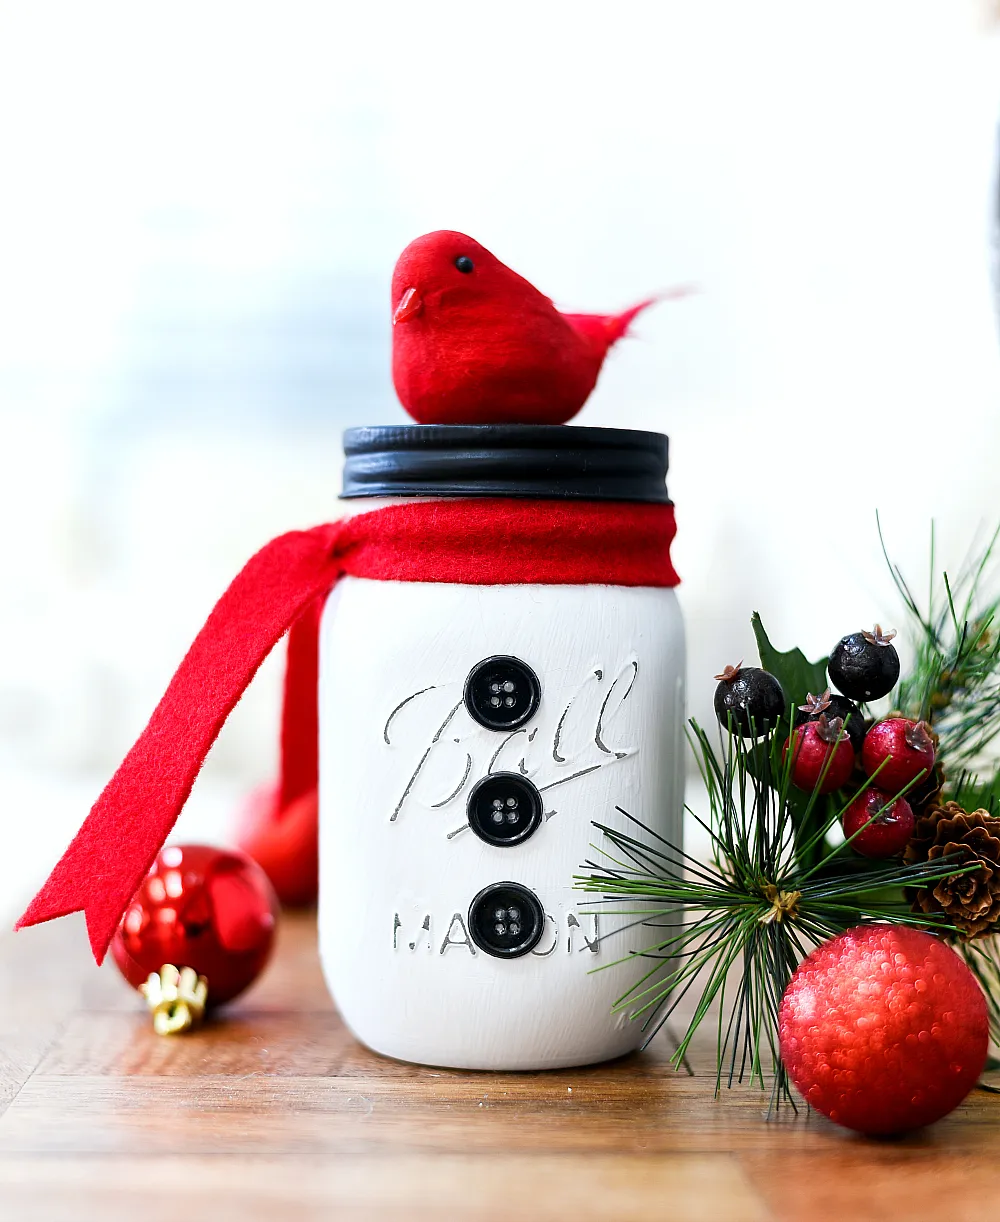
Hot glue on glass is essentially permanent, so decide now whether you ever want that jar back for canning. If you might, keep every bit of paint and glue on the outside and leave the sealing rim untouched. The cardinal perched on top also makes the jar top-heavy — a shelf is fine, a windowsill over a radiator is not. And red felt fades: keep it away from a south-facing window or your scarf turns pink by February.
17. Gingham-Ribbon Water Globes with Storybook Figurines
Two jars, two miniature stories, one glossy red surface underneath. That red tabletop does for these globes what a white wall does for framed art — it makes them the subject instead of an object in the room. The gingham bows matter more than they look: they tie the deer jar and the snowman jar together so you read one display instead of two separate projects.
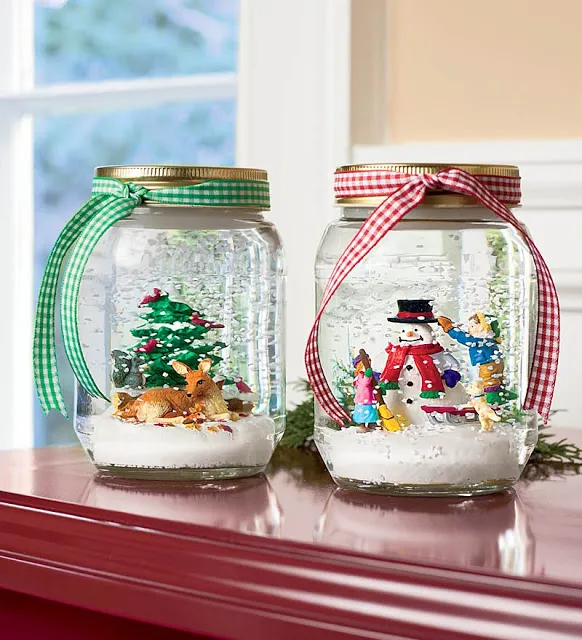
Water globes are the fussiest thing on this list. Use distilled water, not tap, or minerals cloud the glass within a few weeks. Add a single drop of glycerin so the faux snow drifts instead of dropping like sand, seal the lid threads with a thin ring of silicone, and test each jar on a paper towel before it ever touches wood. Budget a few minutes every season to top off the water as it slowly evaporates.
18. Grouping Mixed Mason Jar Crafts Without Clutter
The 2026 version of holiday decorating is about using what’s already in the kitchen. Pinterest boards have shifted from buy-the-kit projects to shop-your-pantry projects, and the mason jar is the perfect symbol of that: the container is free, so the only thing you’re really investing is taste. That’s why these crafts resurface every December instead of dying with the rest of the trend cycle.
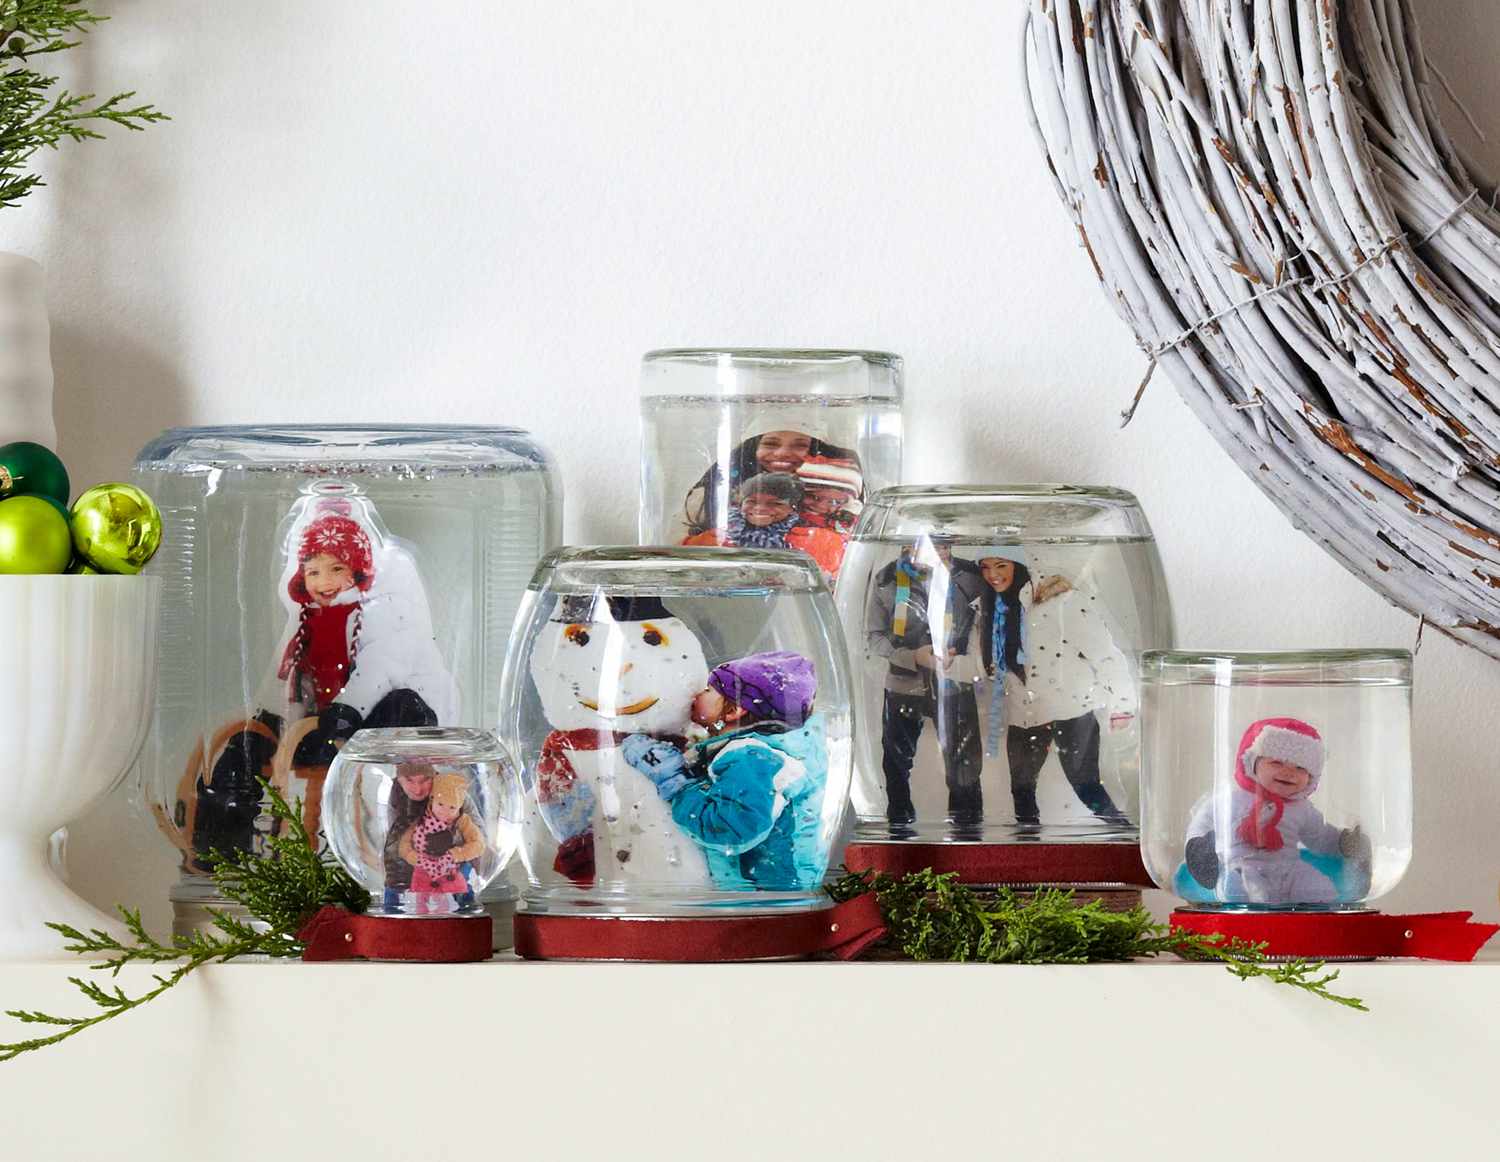
Once you’ve made a few, styling is where most people lose the plot. Group in odd numbers, vary the heights, and leave air between them:
- Three jars, with the tallest about 1.5 times the shortest
- One lit, one painted, one full of greenery — never three of the same
- At least two inches of empty space so each jar keeps its own outline
And keep a shelf to one row. Staggered and stacked jars start looking like storage.
19. Layered Hot Cocoa Gift Jars with Candy Canes
- Quart jar with lid: $2–$4
- Cocoa, sugar, milk powder, chips, and marshmallows: $9–$14 (enough for several jars)
- Fabric square and burlap band: $3–$6
- Candy canes and kraft tags: $3–$5
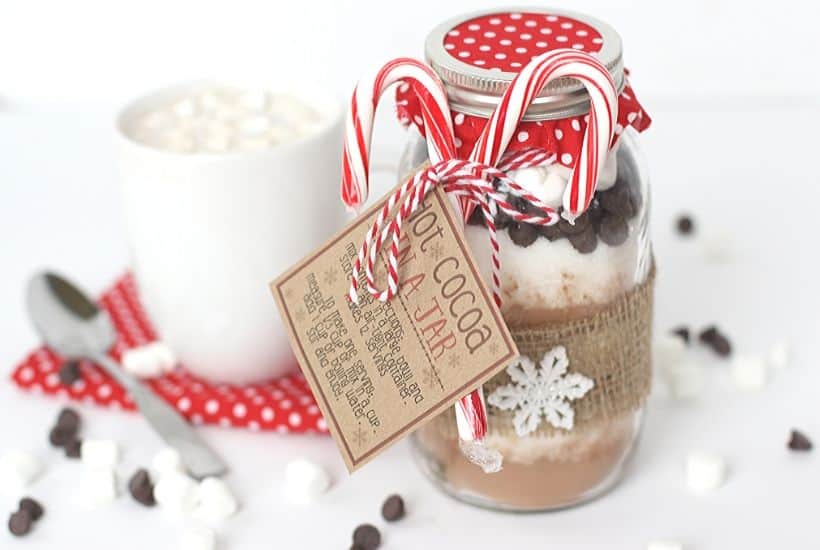
Total: $17–$29 for the first jar, less for every one after.
Budget alternative: skip the fabric entirely and set a paper doily under the band — about 10 cents a jar, and honestly just as charming.
- Layer cocoa, then sugar, then milk powder in a wide-mouth quart jar, tamping each layer flat with the back of a spoon.
- Add a thin layer of chocolate chips, then fill to the shoulder with marshmallows.
- Cut a six-inch square of fabric, center it over the lid, and screw the band down over it.
- Wrap a burlap band around the middle and glue it only at the back so it stays removable.
- Tie two candy canes to the neck with twine and add a kraft tag with the mixing instructions.
Time: 15 minutes a jar. If you’d rather gift something that lasts, Idea #15 turns the same jar into a keepsake.
20. Jars of Glowing Fairy Lights in the Dark
The picture breaks down to about 60% shadow, 30% warm gold light, and 10% glass. That ratio is the whole point. Flip on the overhead light and the jar becomes a plastic tub of batteries; switch to cool white lights and the glow turns clinical. Warm white — roughly 2700K to 3000K — is what makes the light inside the glass read as firelight instead of LEDs.
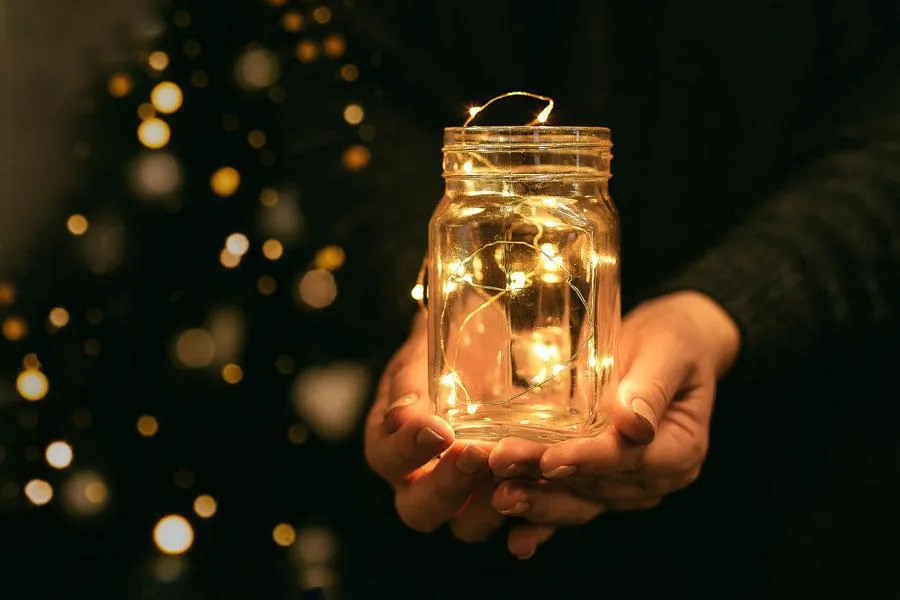
The dark is the one thing. Every good version of this scene has the room lights off, and that’s not a photography trick, it’s the design. A jar of lights on a bright afternoon is just a jar. At night, in a dim room, the glass disappears and the light becomes the object. If your living room stays bright in the evening, treat this as a bedside or hallway idea instead.
21. Two-Tree Snow Jars on Patterned Fabric
A jar like this wants a shelf or console at least 30 inches off the floor with 12 to 16 inches of open height above it. Any lower and the little trees sit below your knee line, where nobody notices them. Two trees is the right number, by the way — a third crowds the glass, the twine bow gets lost, and the snow base disappears behind the trunks.
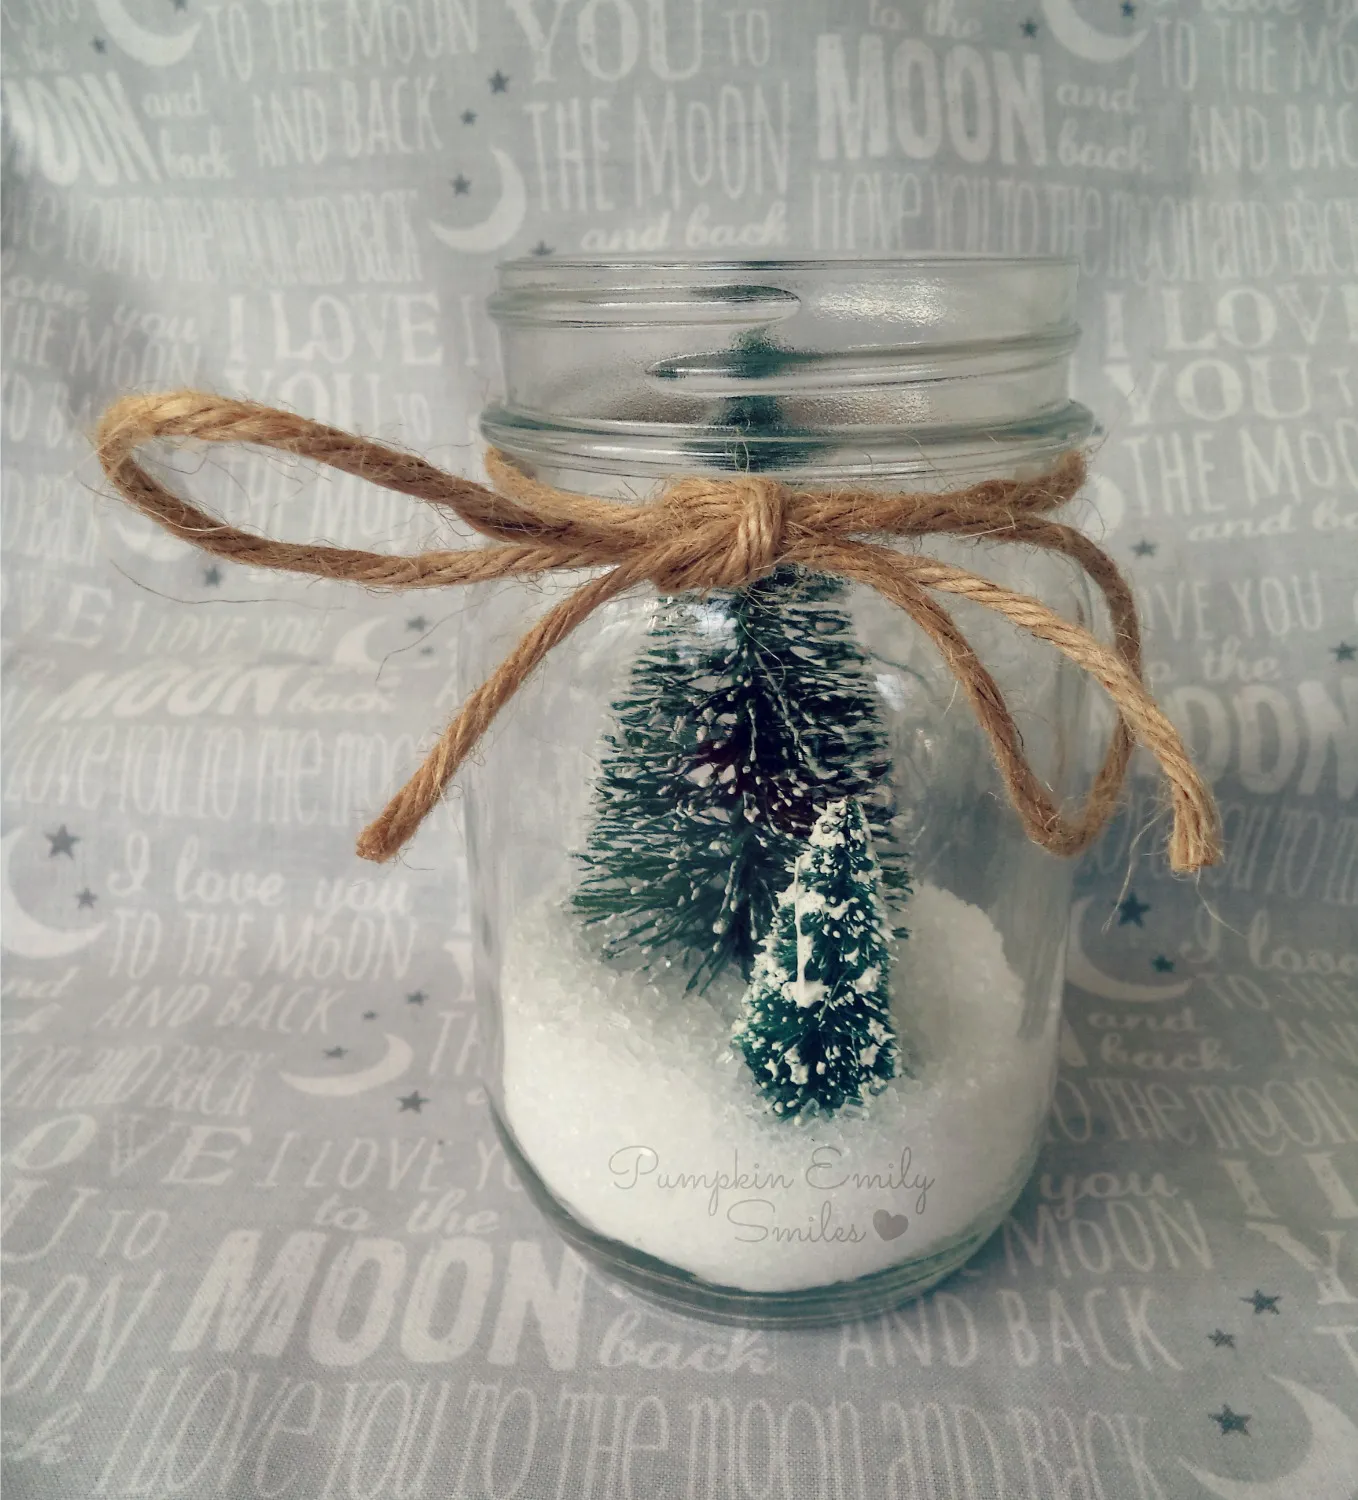
Dollar Tree’s mini bottle brush trees run two for $1.25, faux snow is $2 to $3 a bag, and twine is a dollar a roll. Add a thrifted jar at $1 to $2 and you’re under $7. For a step up, Michaels’ bottle brush trees run $3 to $6 each and have noticeably better tufted texture — worth it if the jar will sit somewhere you actually look. This is the simpler cousin of Idea #6: same tree, no wooden base, no gift tag.
22. Painting a Mixed-Blue Jar Set with White Dot Snowflakes
- Wash the jar with warm soapy water and wipe the outside with rubbing alcohol.
- Paint the base color in two thin coats, letting each dry completely — mixing two blues is what gives the set its depth.
- Load a thin round brush and paint each snowflake as a six-point star: one vertical line, then two diagonals crossing the center.
- Tap loose white dots around the flakes with the brush tip for falling snow.
- Cure 24 hours, then set the jars in a cold oven and bring it to 300°F for 30 minutes.
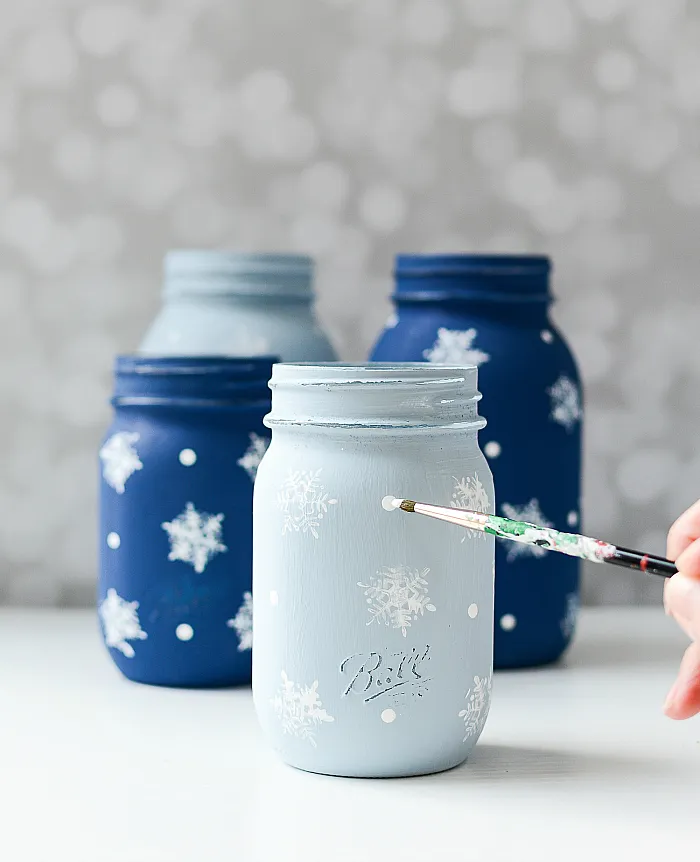
Time: about 45 minutes plus curing. Materials: $12–$18.
Hand wash only, and never soak them — water creeps under the paint at the rim and lifts it in sheets. Expect a ten-minute touch-up with a fine brush every season, and store them wrapped in tissue rather than stacked, because painted glass scratches painted glass. The oven step helps, but it does not make these dishwasher-safe no matter what a comment section tells you.
23. Floating Candle Jars with Wire Bail Hardware
Two clear jars, floating candles, wire handles, the same white twine looped around both, and a scatter of pine branches with white glitter snowflakes. Reflection is doing the heavy lifting here: a jar of water doubles the candle, and the dark metal hardware catches the flame and throws it back. Two identical jars rather than three is also a deliberate move — a pair feels calm, while a trio starts to feel like a display.
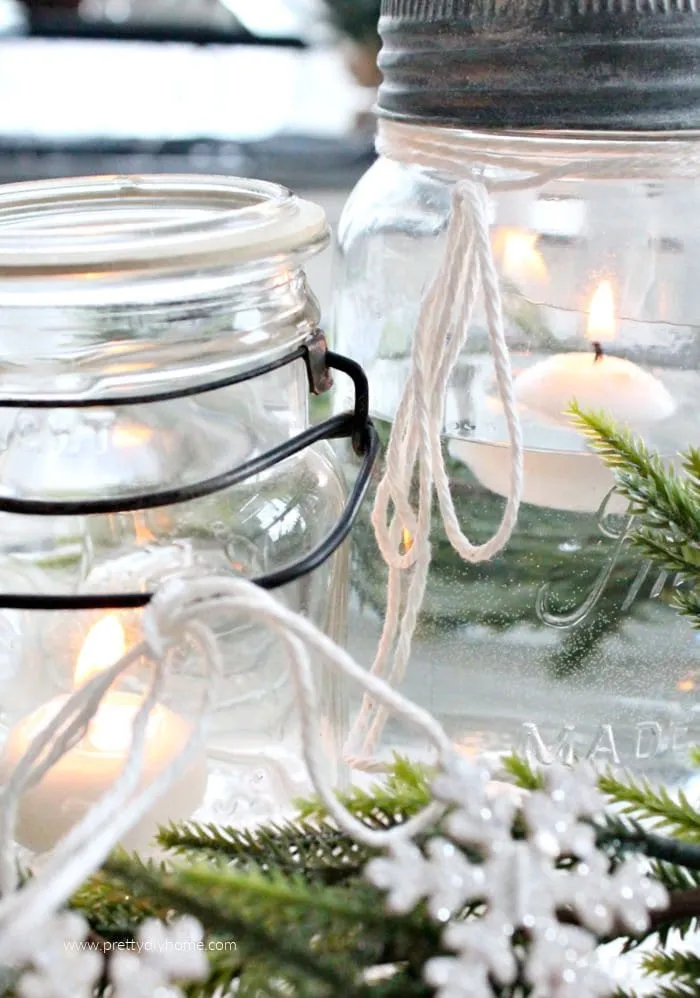
Check these before you light anything:
- Float-test the candles in a bowl first; a wick that won’t stay lit is a fire hazard, not a decoration.
- Fill each jar so there are at least two inches of glass above the water line.
- Keep every pine branch at least three inches from a flame, and never let greenery lean over the rim.
- Check the wire bail is tight — water, glass, and a loose handle is a bad combination.
- Set both jars on coasters; condensation rings show up on wood in a day.
24. Three-Jar Tray with a Red Painted Center
- Three Ball mason jars: $7–$15
- Dark wood rectangular tray: $14–$28 (thrifted: $4–$8)
- Red glass or enamel paint: $6–$9
- Two strands of battery fairy lights: $6–$12
- Berry and pinecone picks plus twine: $10–$18
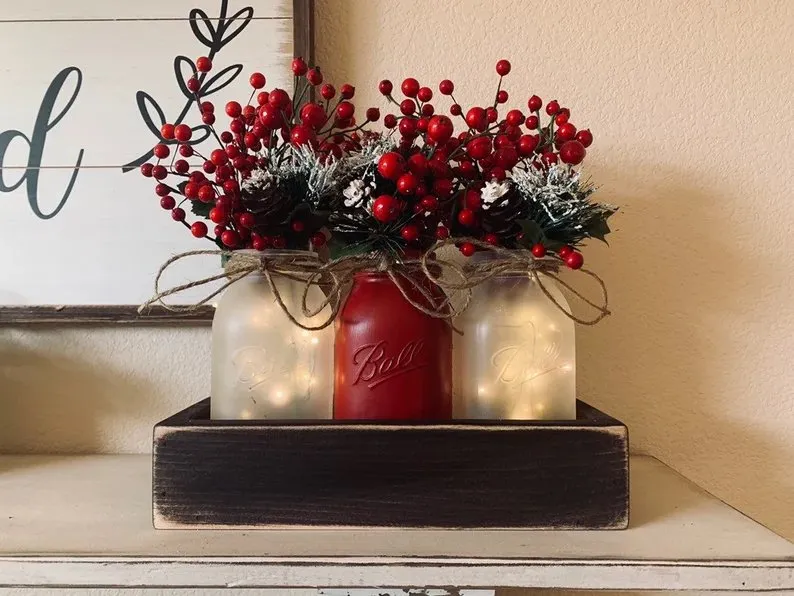
Total: $43–$82.
Budget alternative: thrift the tray, use dollar-store lights, and strip the berry stems off last year’s wreath before you toss it. That version lands around $18.
The middle jar is solid red — not frosted, not lit, not filled with anything. That single painted jar is what turns two glowing neighbors into a composition. Take it out and you have a matched pair with no story. The dark tray, the berry picks, and the twine bows all play supporting roles, but the red jar is the reason anyone stops and looks.
25. Beige Jar Bouquet with Fabric Flowers on a Woven Tray
Fabric flowers and a painted jar are a match made for low-effort decorating, with one catch: dust. Fabric blooms hold it, and a beige jar shows every smudge and fingerprint. Run a dry, soft brush over the bouquet every couple of weeks, or aim a hairdryer on cool at it from a foot away. Also worth knowing: a beige jar in beige light disappears at night, so keep the pillar candle in the lantern lit once the sun goes down.
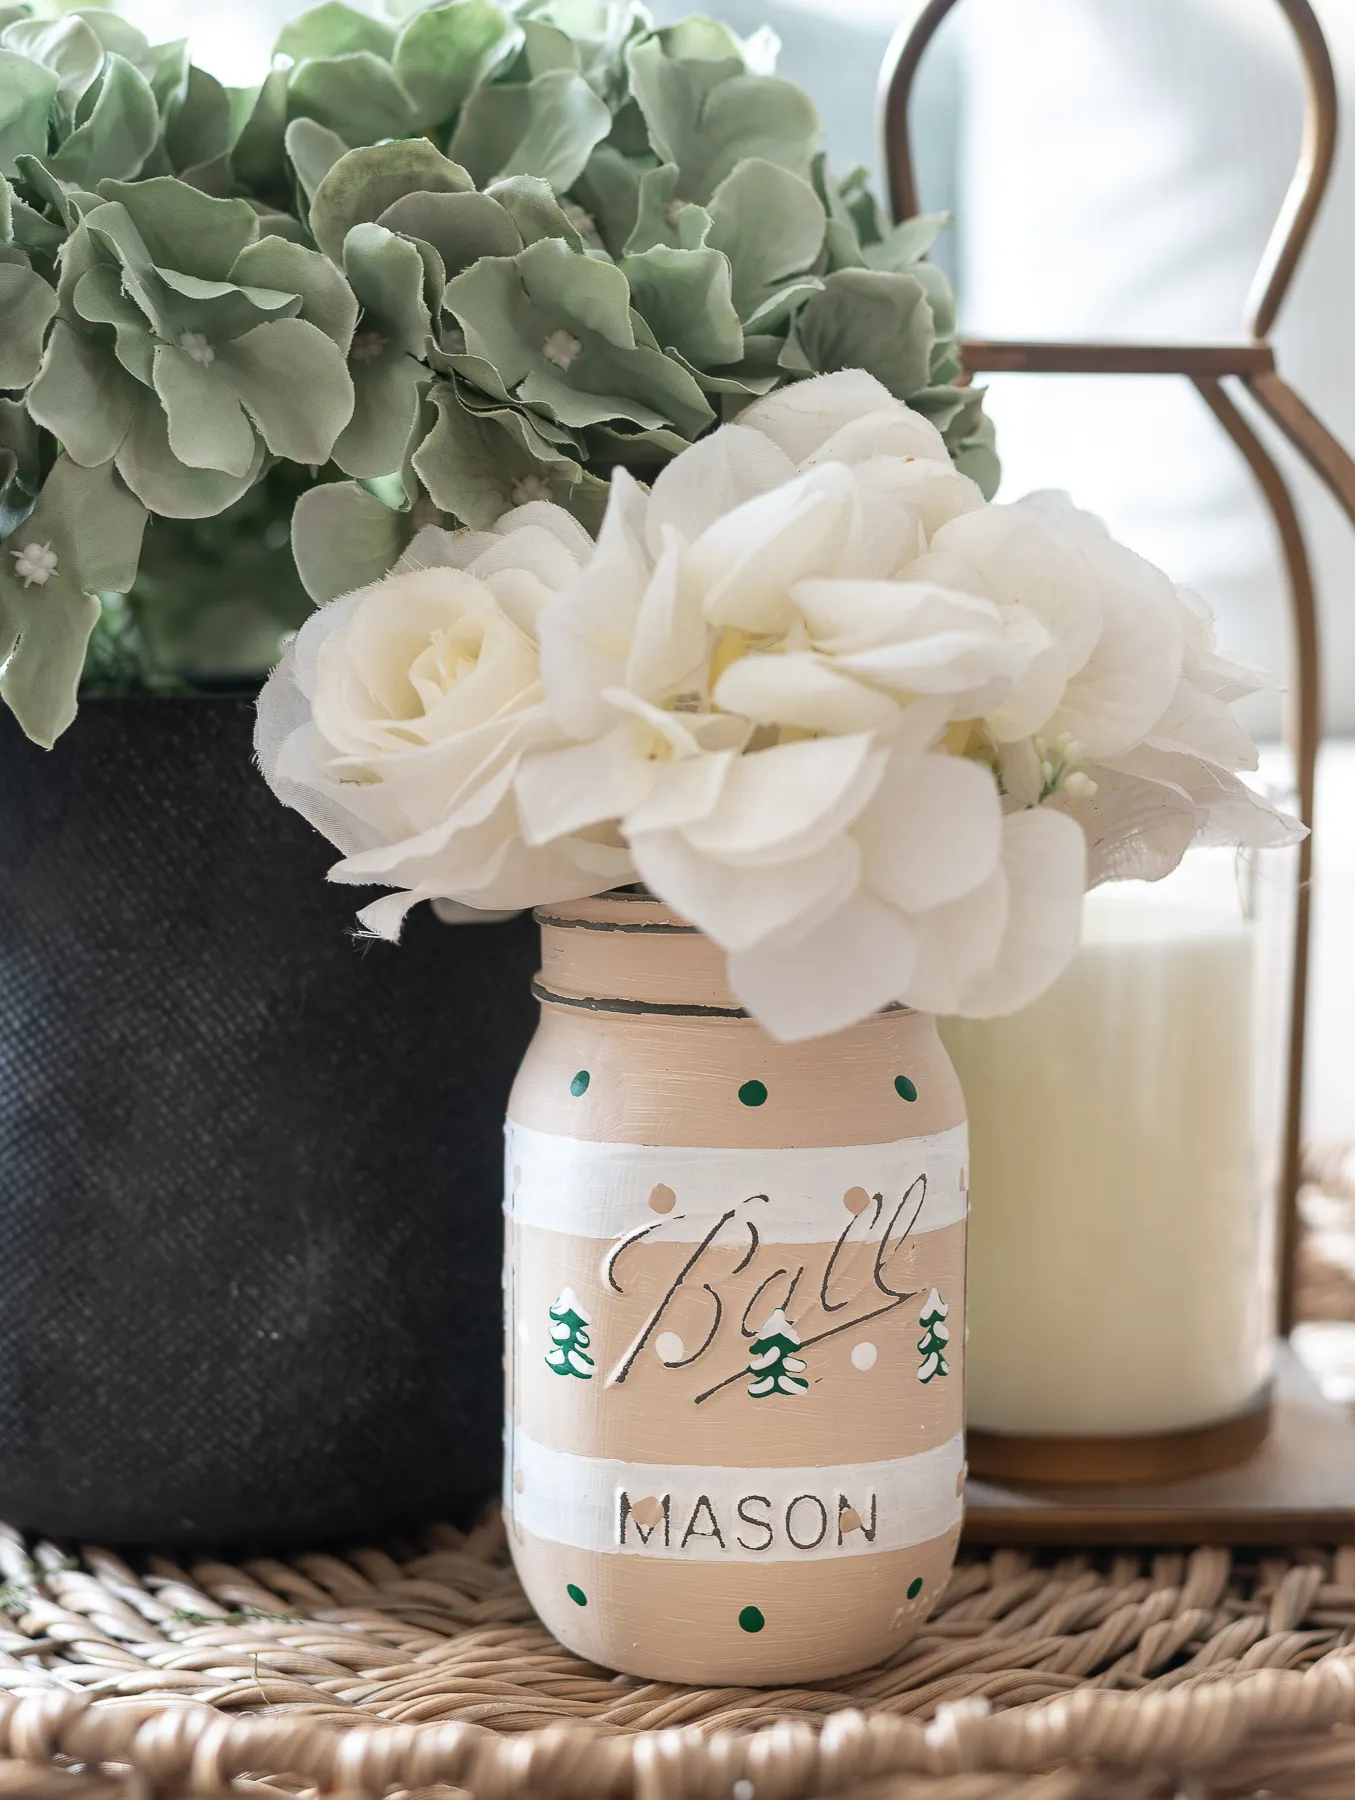
This vignette is a trio — jar, planter, lantern candle — and it needs room to breathe. Size the tray to the pieces:
- 12-inch round tray: one jar and one candle, nothing else
- 16-inch oval: the jar plus the planter, with the lantern alongside
- 20-inch rectangle: all three, with about two inches between them
Under 30 inches tall it works better on a dining table than a console, since this arrangement is meant to be looked at from above.
26. Glue-Gun Tree Bases with a Light Blue Ball Jar
- Let the glue gun heat a full five minutes — a warm gun strings less than a cold one.
- Run a thin bead of glue around the wooden base of the bottle brush tree.
- Press the base into the center of the lid insert and hold for 20 seconds.
- Add an inch of faux snow to the jar, lower the lid in, and screw the band down.
- Flip the jar upright and give it a gentle shake to settle the snow around the trunk.
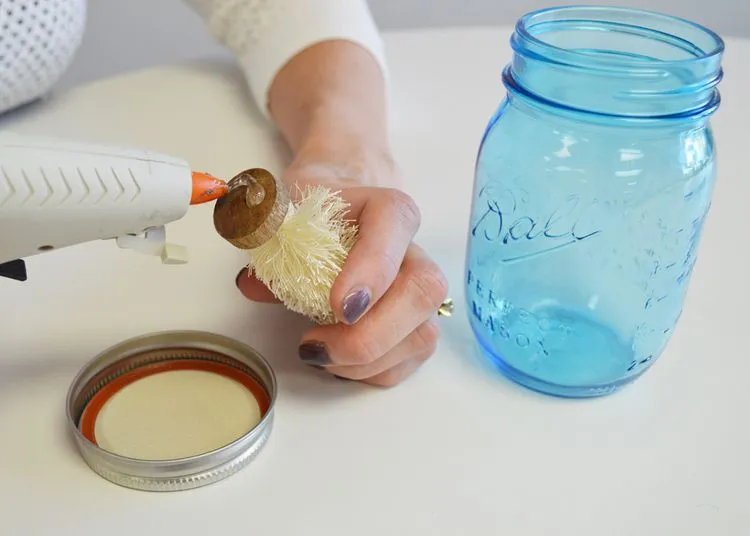
Time: 15 minutes a jar. Materials: $5–$8.
Dollar Tree’s cream bottle brush trees are $1.25, thrift store mason jars run $1 to $2, and a bag of faux snow is $2 to $3 and will fill a dozen of these. If you already own canning lids, you’re at about $4 a jar. If your jar isn’t already tinted and you want that soft blue, Idea #22 walks through painting one properly.
Your Jars Are Already in the Cabinet
Start with one — the cranberry candle jar, since it takes ten minutes and about six dollars — and let it sit on your table for a few days before you commit to a whole shelf. The best holiday decor is the kind you can remake next year with a different ribbon and a different handful of greenery.
📌 Pin this guide to your Christmas crafts board now, so it’s waiting for you the next time you’re standing in the kitchen holding a jar and an idea.