Marble is having a major moment on Pinterest right now—and for good reason. It’s timeless, adds a touch of luxury, and tells a story of the earth itself. But with so many options, turning that inspiration into reality can feel overwhelming. We’ve filtered through hundreds of designs from upscale showrooms to artisan marketplaces to bring you the styles that really deliver. From looks you can achieve for under $1,000 to full-scale renovations topping $25,000, we’ve got you covered.
Inside, you’ll find 27 curated ideas that navigate the biggest trends of 2026, from warm, veiny stones to bold, colorful marble statements. These looks prove that marble isn’t just for cold, minimalist spaces anymore; it’s becoming a key element in warm, personal, and livable homes. And stay until the end—we break down the most common mistakes that can ruin these looks.
📌 Save this to Pinterest for later—you’ll want to revisit these ideas.
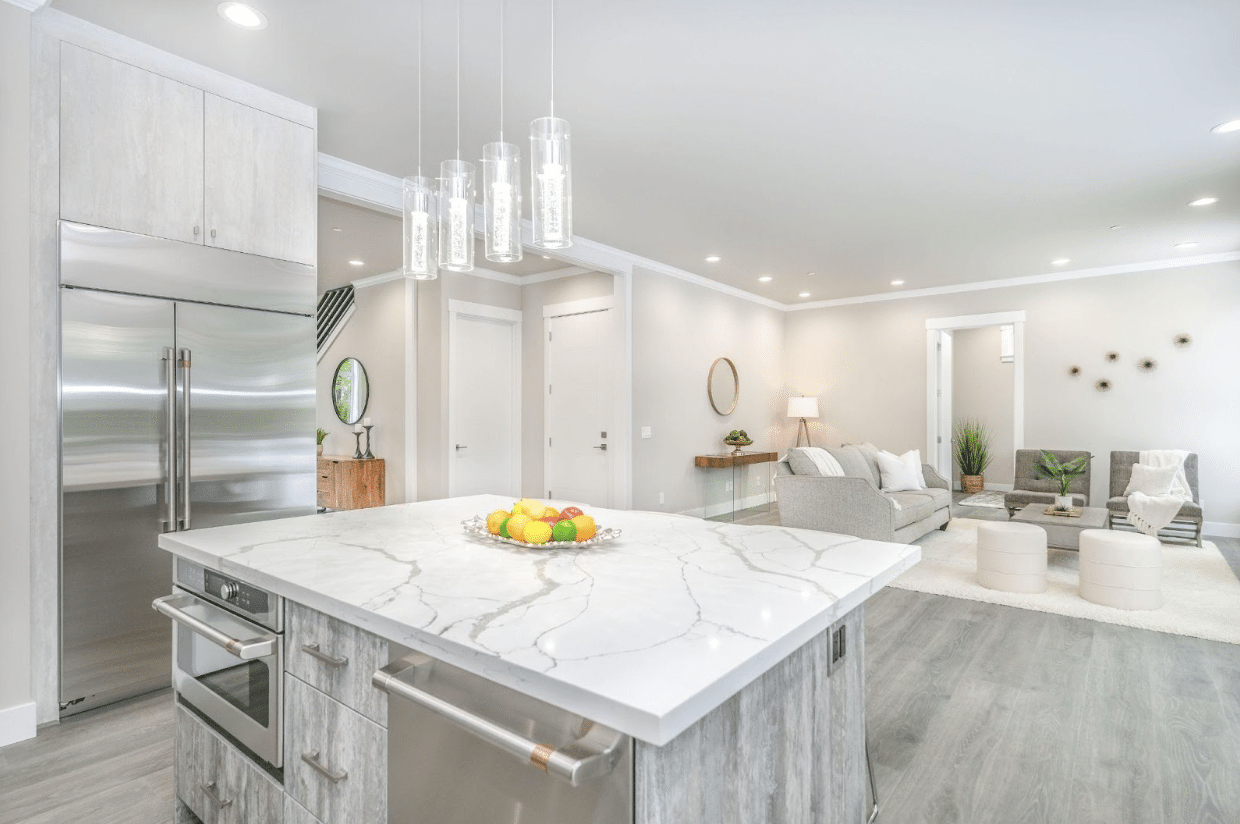
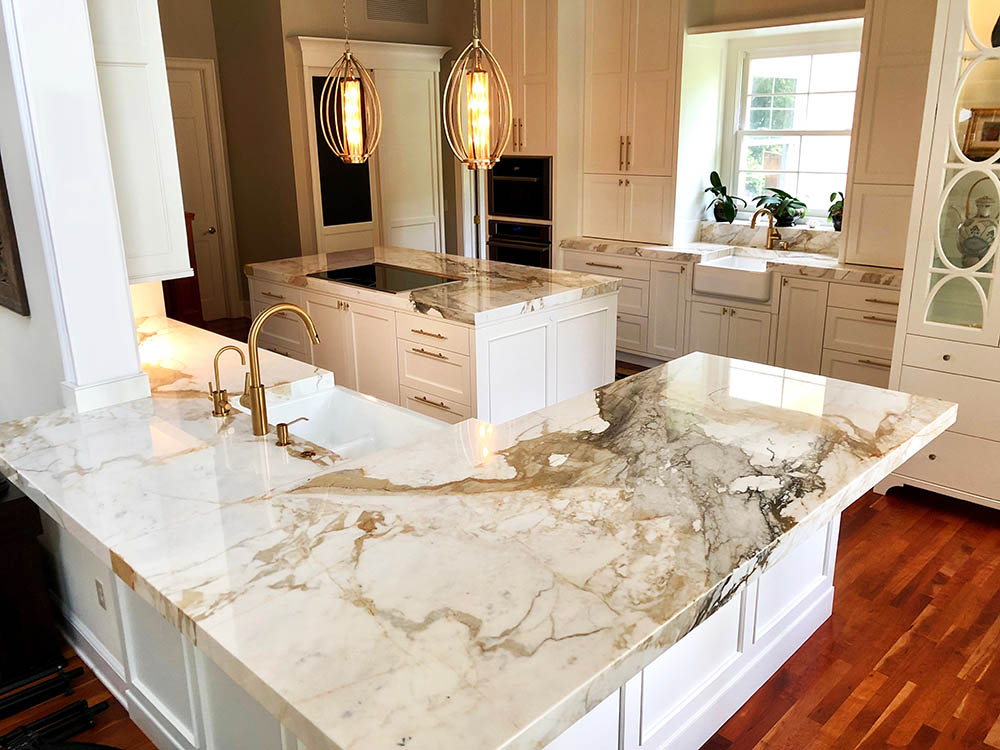
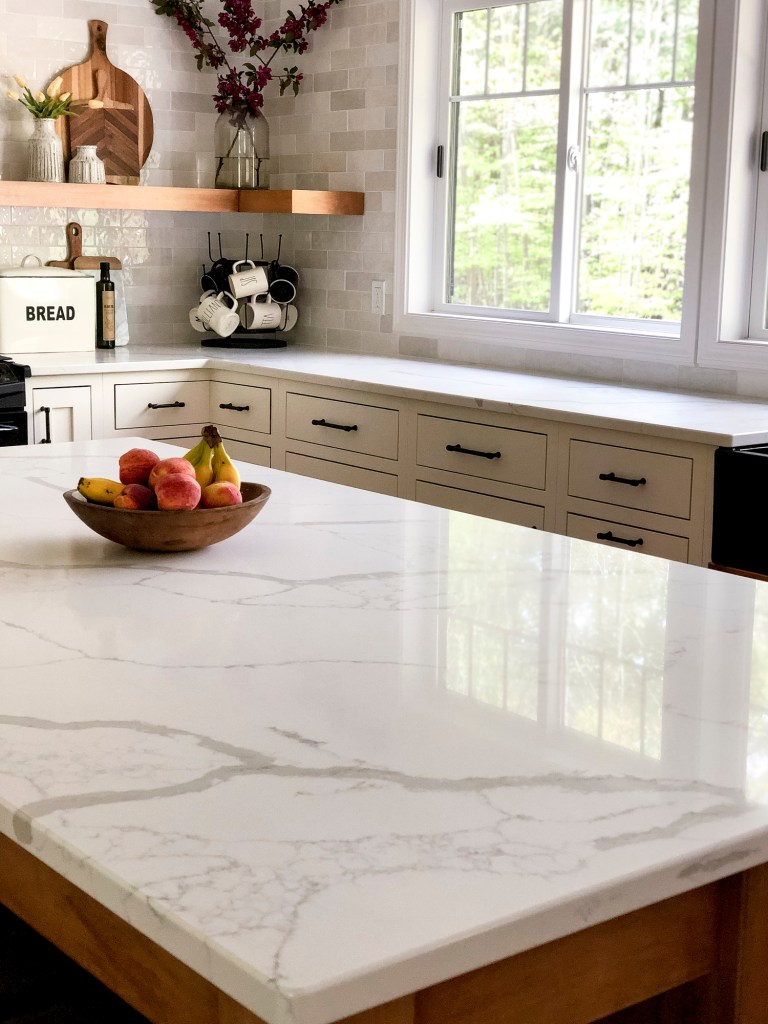
1. Open-Concept Living with a Statement White Marble Island
This space is all about the power of a focal point. The large white marble island with its sweeping grey veins acts as a stunning anchor, connecting the kitchen and living areas without a single wall. The rest of the palette is kept intentionally soft—light grey cabinets, beige seating, pale wood floors—which allows the island to command attention without overwhelming the serene, open atmosphere. It’s a masterclass in using one high-impact material to define an entire open-concept home.
⭐ The One Thing
An open-plan design like this thrives in a space that is at least 15-20 feet wide to allow for distinct ‘zones’ (kitchen, dining, living) without feeling cramped. For the island to be a true centerpiece, you need a minimum of 4 feet of clearance on all working sides for comfortable traffic flow. Ceilings of 9 feet or higher help maintain the airy, expansive feel, especially when incorporating pendant lighting like the clear cylindrical fixtures shown here.
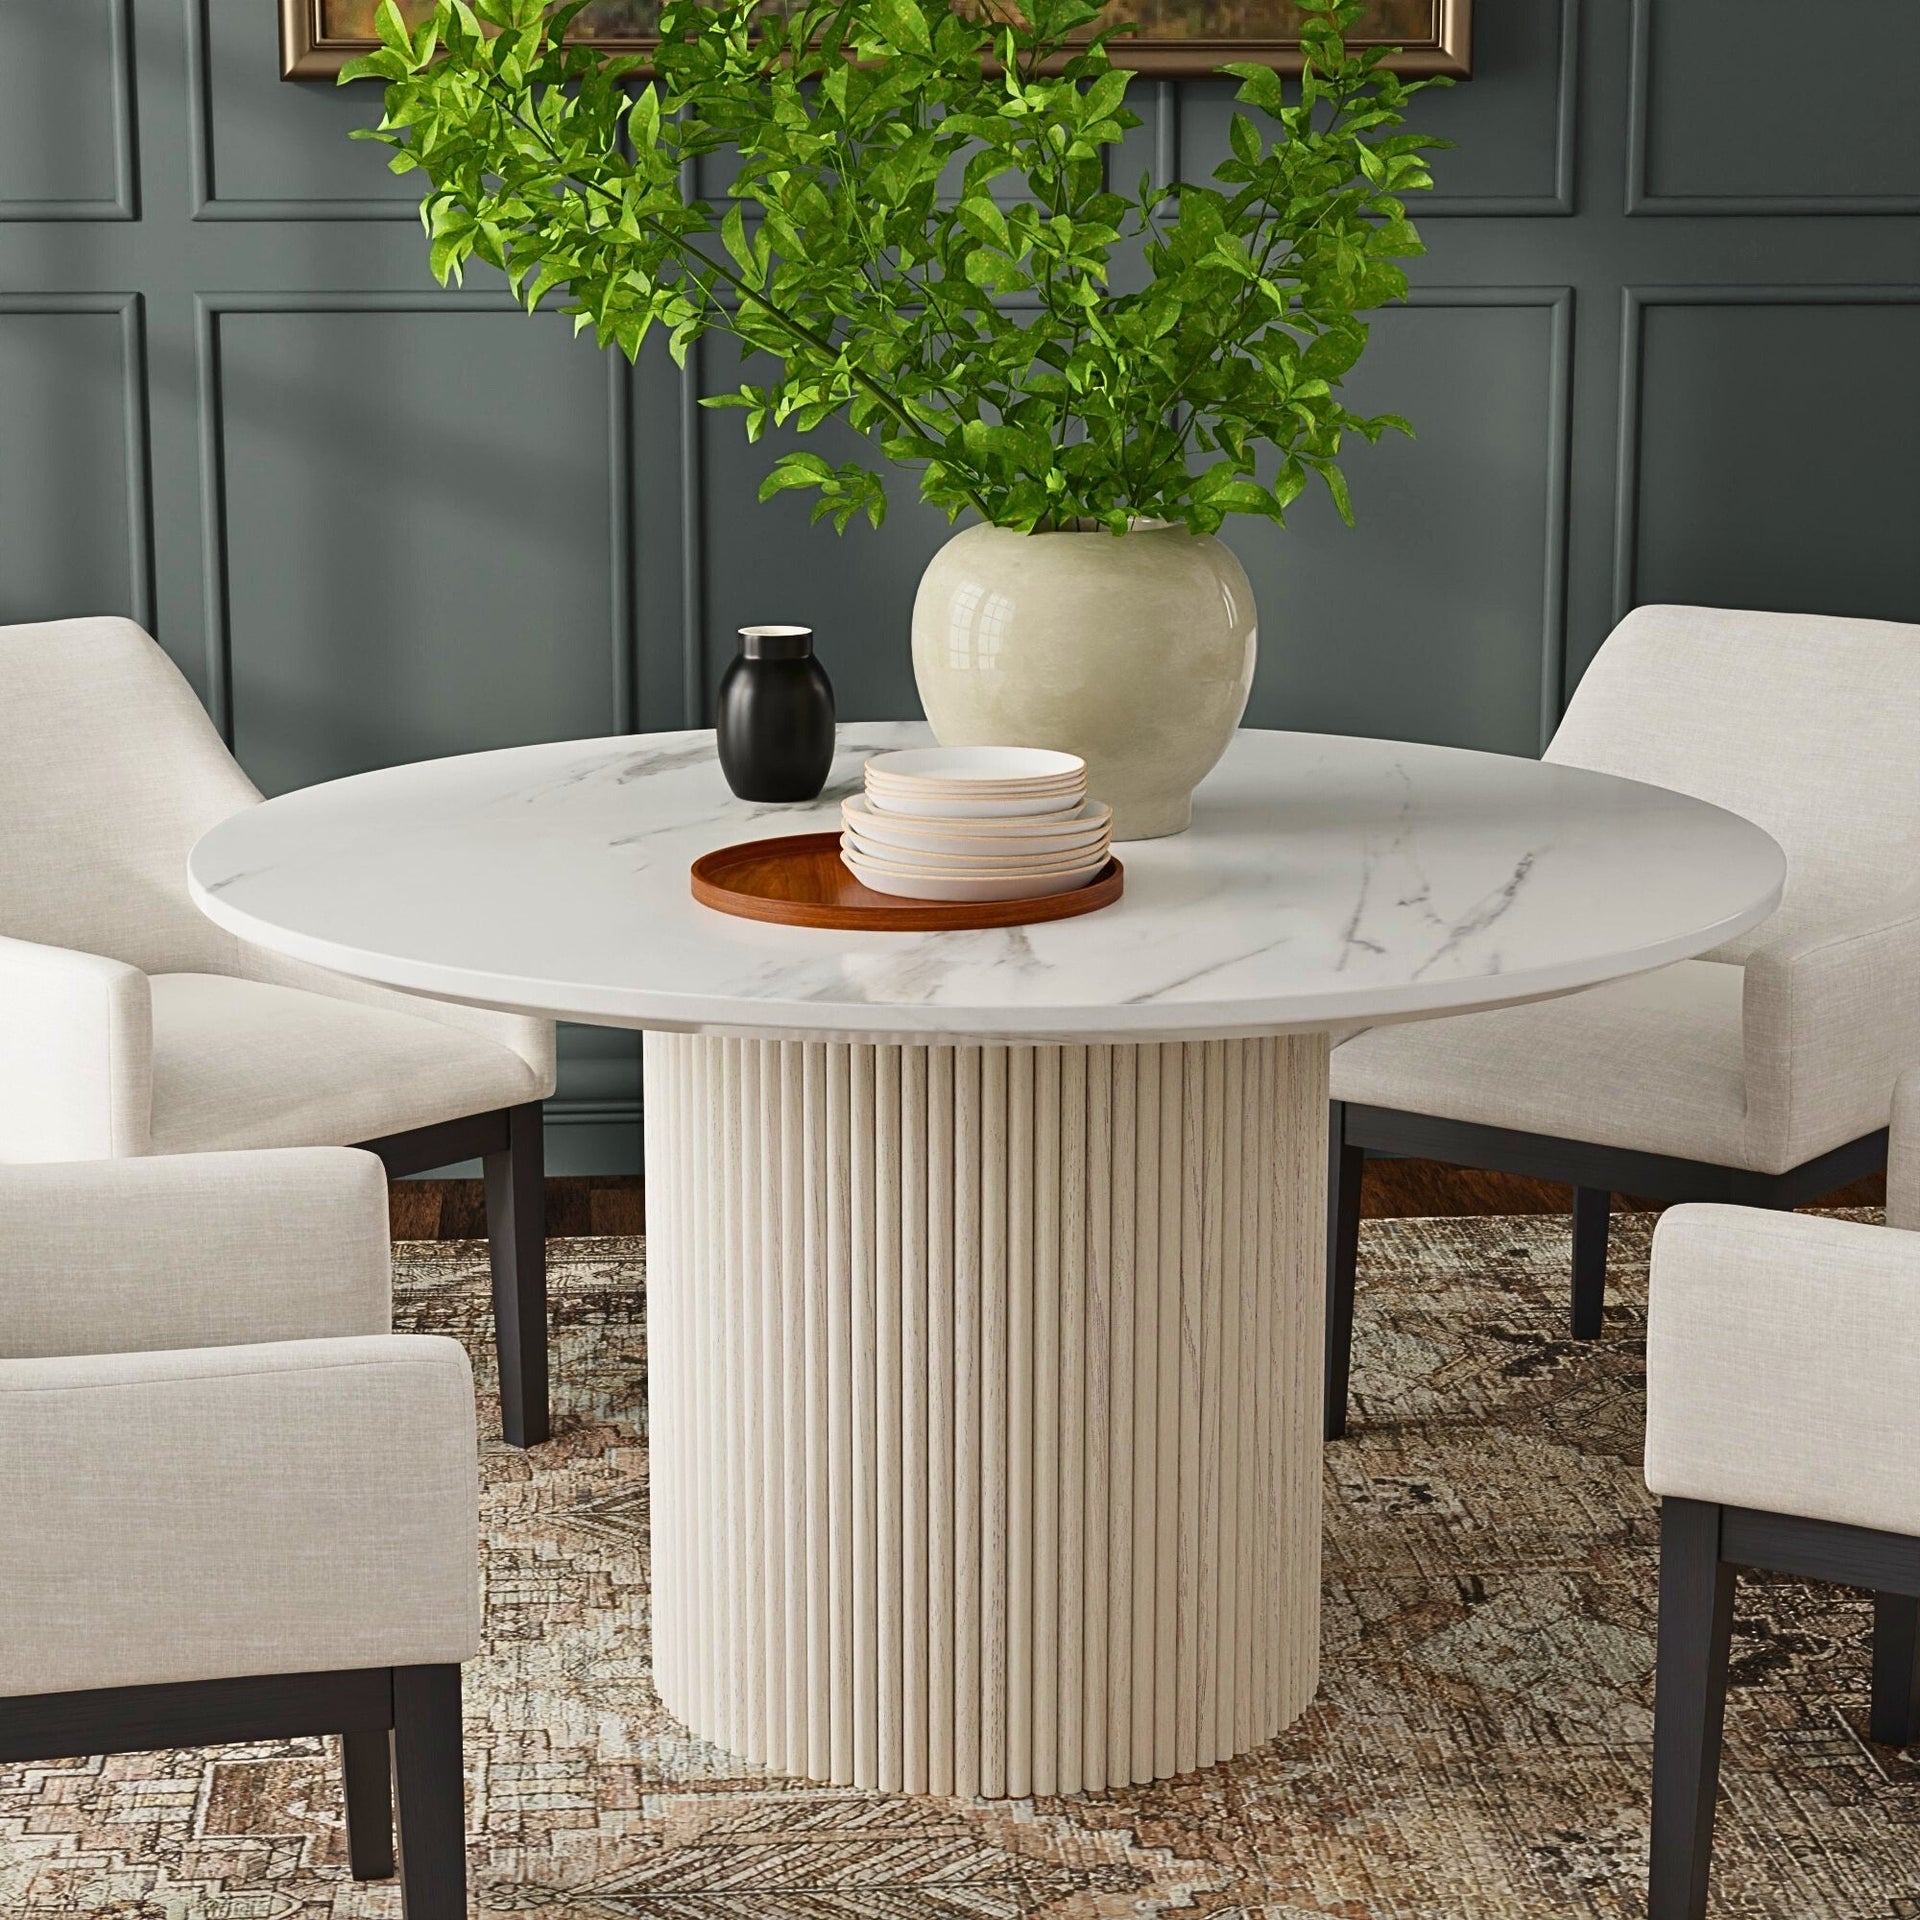
2. Pair a Round Marble Table with a Fluted Wood Base
The success of this dining area comes down to a simple formula: 50% hard and sleek + 50% soft and textural. The polished Carrara marble tabletop provides the ‘hard and sleek,’ while the fluted light wood base, upholstered chairs, and patterned rug deliver the ‘soft and textural.’ The dark teal wall acts as a bold backdrop, making the white and wood tones pop. You could swap the teal for a deep charcoal or warm terracotta and the entire formula would still hold, proving its versatility.
⚠️ Real Talk
While that fluted base is gorgeous, be honest about your cleaning habits. Dusting between each of those little grooves can be tedious. A round pedestal base is also less forgiving for larger gatherings than a rectangular table with four legs. If you regularly host more than four people, you might find a round table feels a bit intimate, and your guests might be playing footsie with that beautiful pedestal base whether they want to or not.
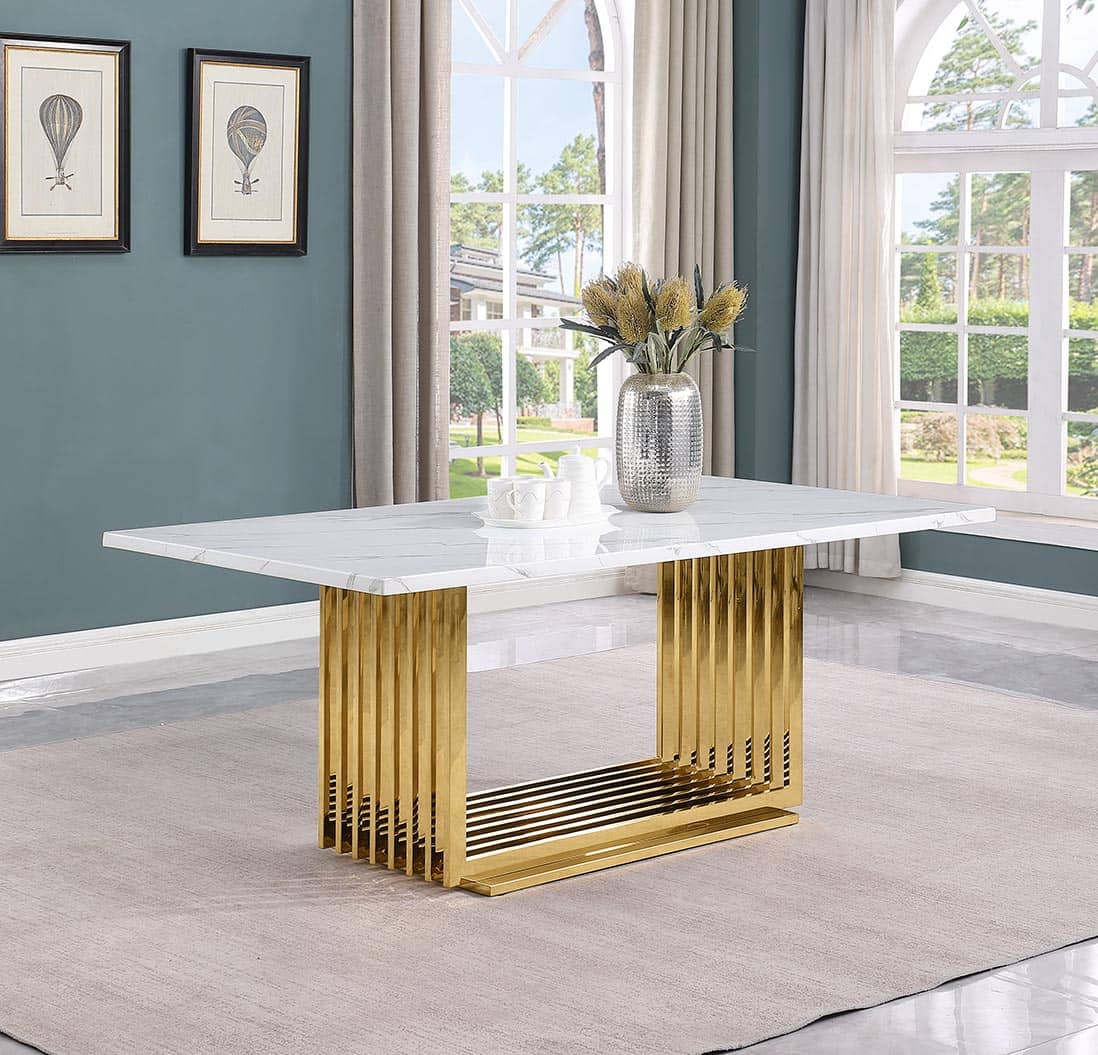
3. Contrast a Gilded Slat Base with a Simple Marble Top
The single element that makes this table unforgettable is the base. The top is a simple, elegant piece of white marble, but the slatted, mirrored gold base is what provides the drama and personality. It turns a standard console or dining table into a piece of sculpture. Remove it, and you have a perfectly nice table; with it, you have a conversation starter. It’s a lesson in prioritizing where you want to make a statement—sometimes, it’s what’s underneath that counts most.
✅ Before You Start
When pairing a visually complex base with a marble top, always opt for marble with subtle, delicate veining. If you chose a stone with loud, dramatic patterns, it would visually compete with the base, creating a chaotic look. The goal is for one element to be the star and the other to be the elegant supporting act. Here, the simple marble allows the gold base to truly shine.
4. Create a Seamless Look with a Full-Height Marble Backsplash
What makes this kitchen feel so luxurious and cohesive is the seamless transition from countertop to backsplash. Using the same slab of marble for both surfaces, including the waterfall edge on the island, eliminates visual breaks and makes the space feel bigger. The prominent grey veining flows up the wall, creating a continuous piece of natural art. This repetition of material is a classic design trick that signals high-end, custom work.
📐 Style Math
A full marble backsplash looks stunning, but remember that marble is porous. Acidic spills like lemon juice, vinegar, or wine can etch the surface if not wiped up immediately. You’ll need to be diligent about sealing it every 6-12 months to protect against stains. For a lower-maintenance alternative with a similar look, consider a large-format porcelain slab designed to mimic marble. You get the seamless effect without the constant worry. Compare this to the tile backsplash in Idea #13 for a more forgiving option.
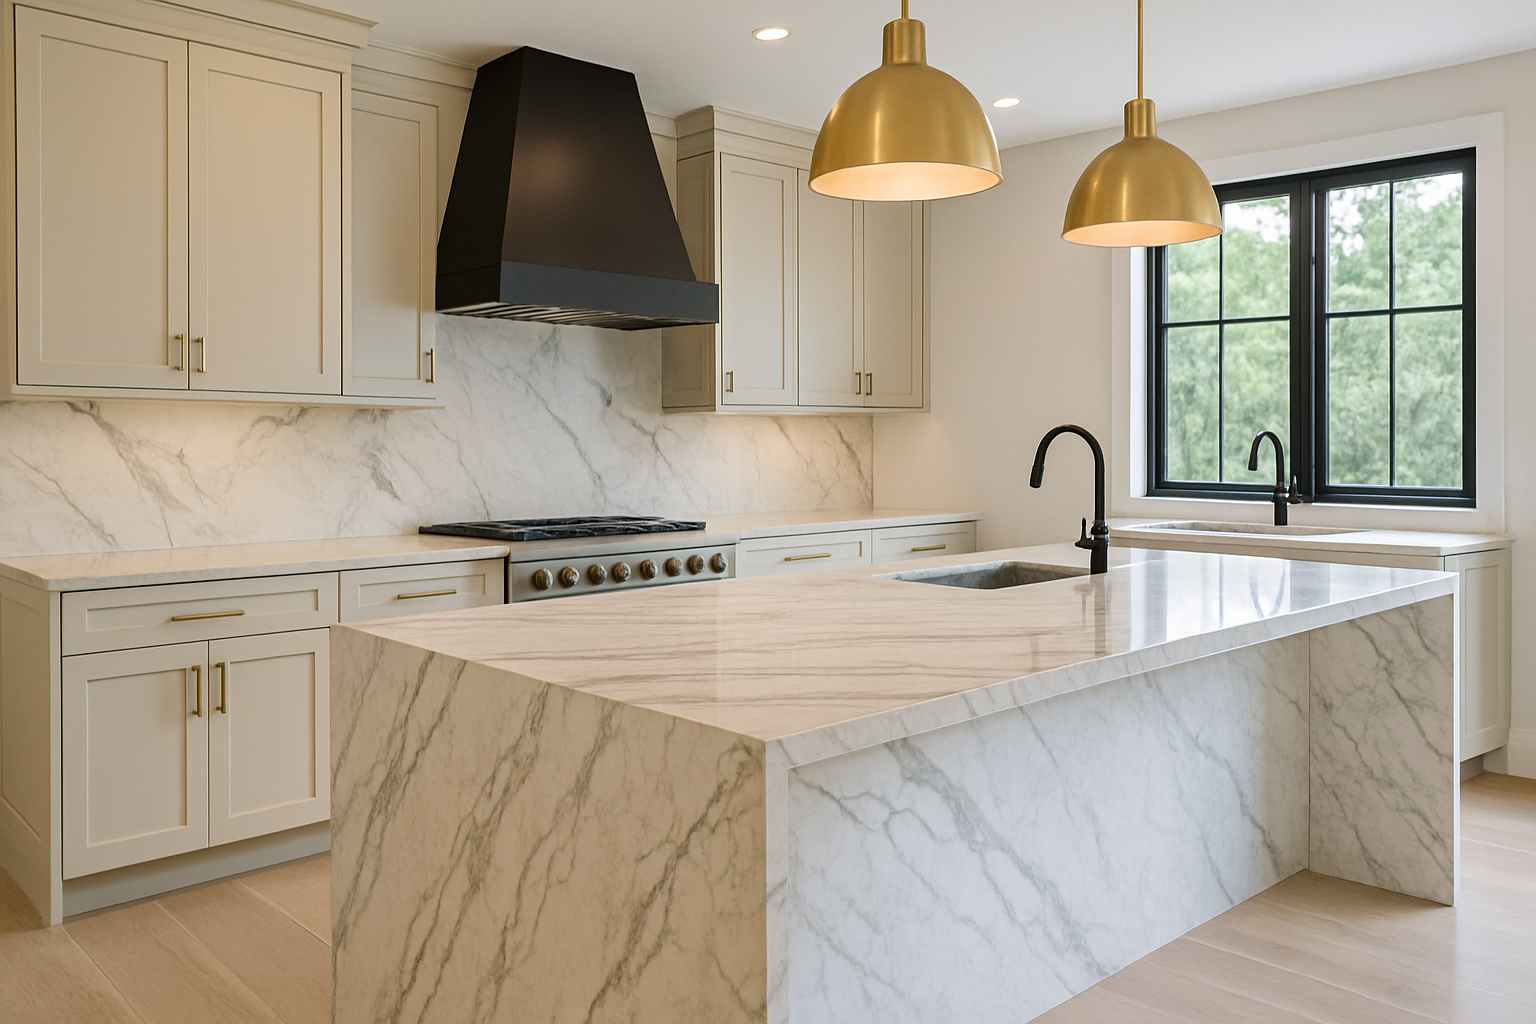
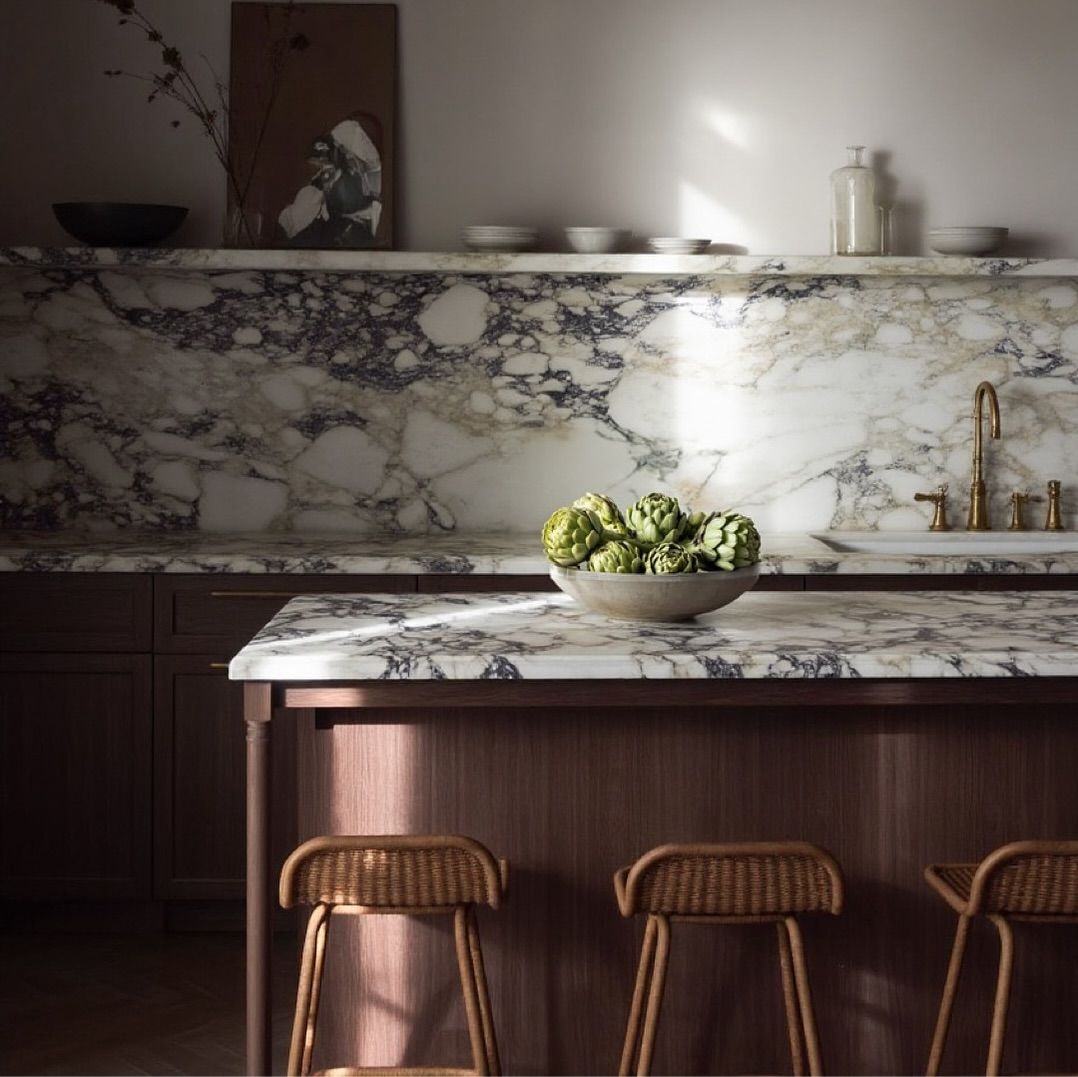
5. Warm Up a White Kitchen with Gold-Veined Marble
The secret ingredient here is the marble itself. While many white kitchens use cool, grey-veined Carrara, this design opts for a marble with dramatic gold and brown veining. This single choice infuses the entire room with warmth, which is then amplified by the gold-toned pendant lights and faucets. It’s the perfect bridge between the crisp white cabinetry and the warm hardwood floors, proving that a white kitchen doesn’t have to feel cold.
💡 Designer Tip
- Main Furniture (Islands & Cabinets): $15,000 – $35,000
- Lighting (Pendants & Recessed): $1,500 – $4,000
- Countertops (Highly Veined Marble): $8,000 – $20,000+
- Fixtures (Faucets, Sink): $1,000 – $2,500
- TOTAL: $25,500 – $61,500
- Budget alternative: Get a similar vibe by using a high-quality laminate or quartz with gold veining for countertops, focus on luxe-looking (but affordable) gold hardware, and find statement pendants from a big-box retailer. This could bring the total down by 40-60%.
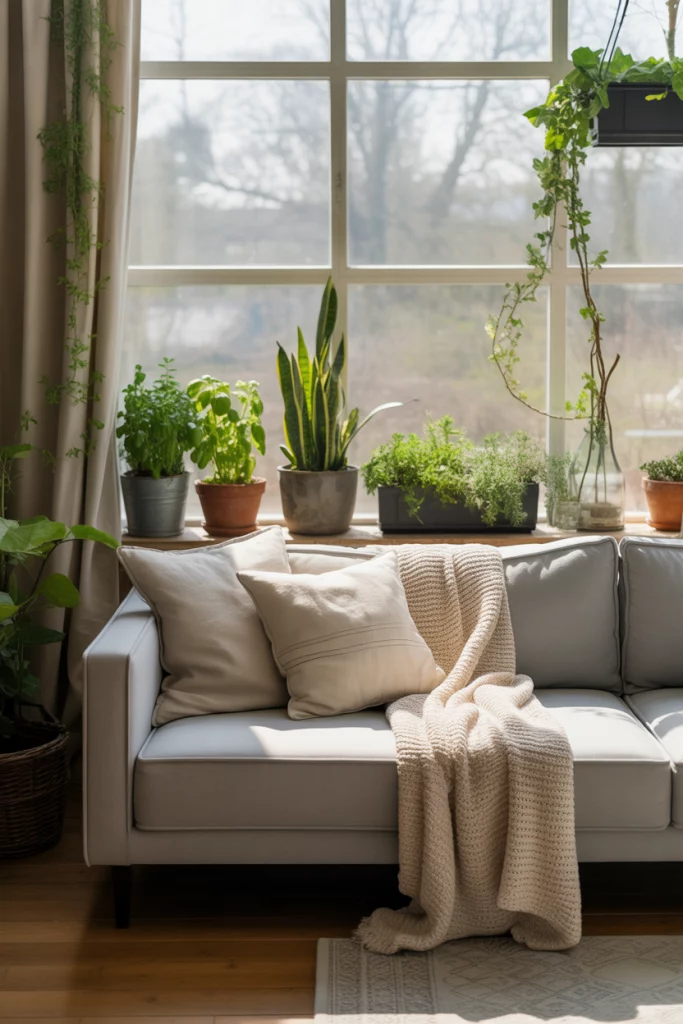
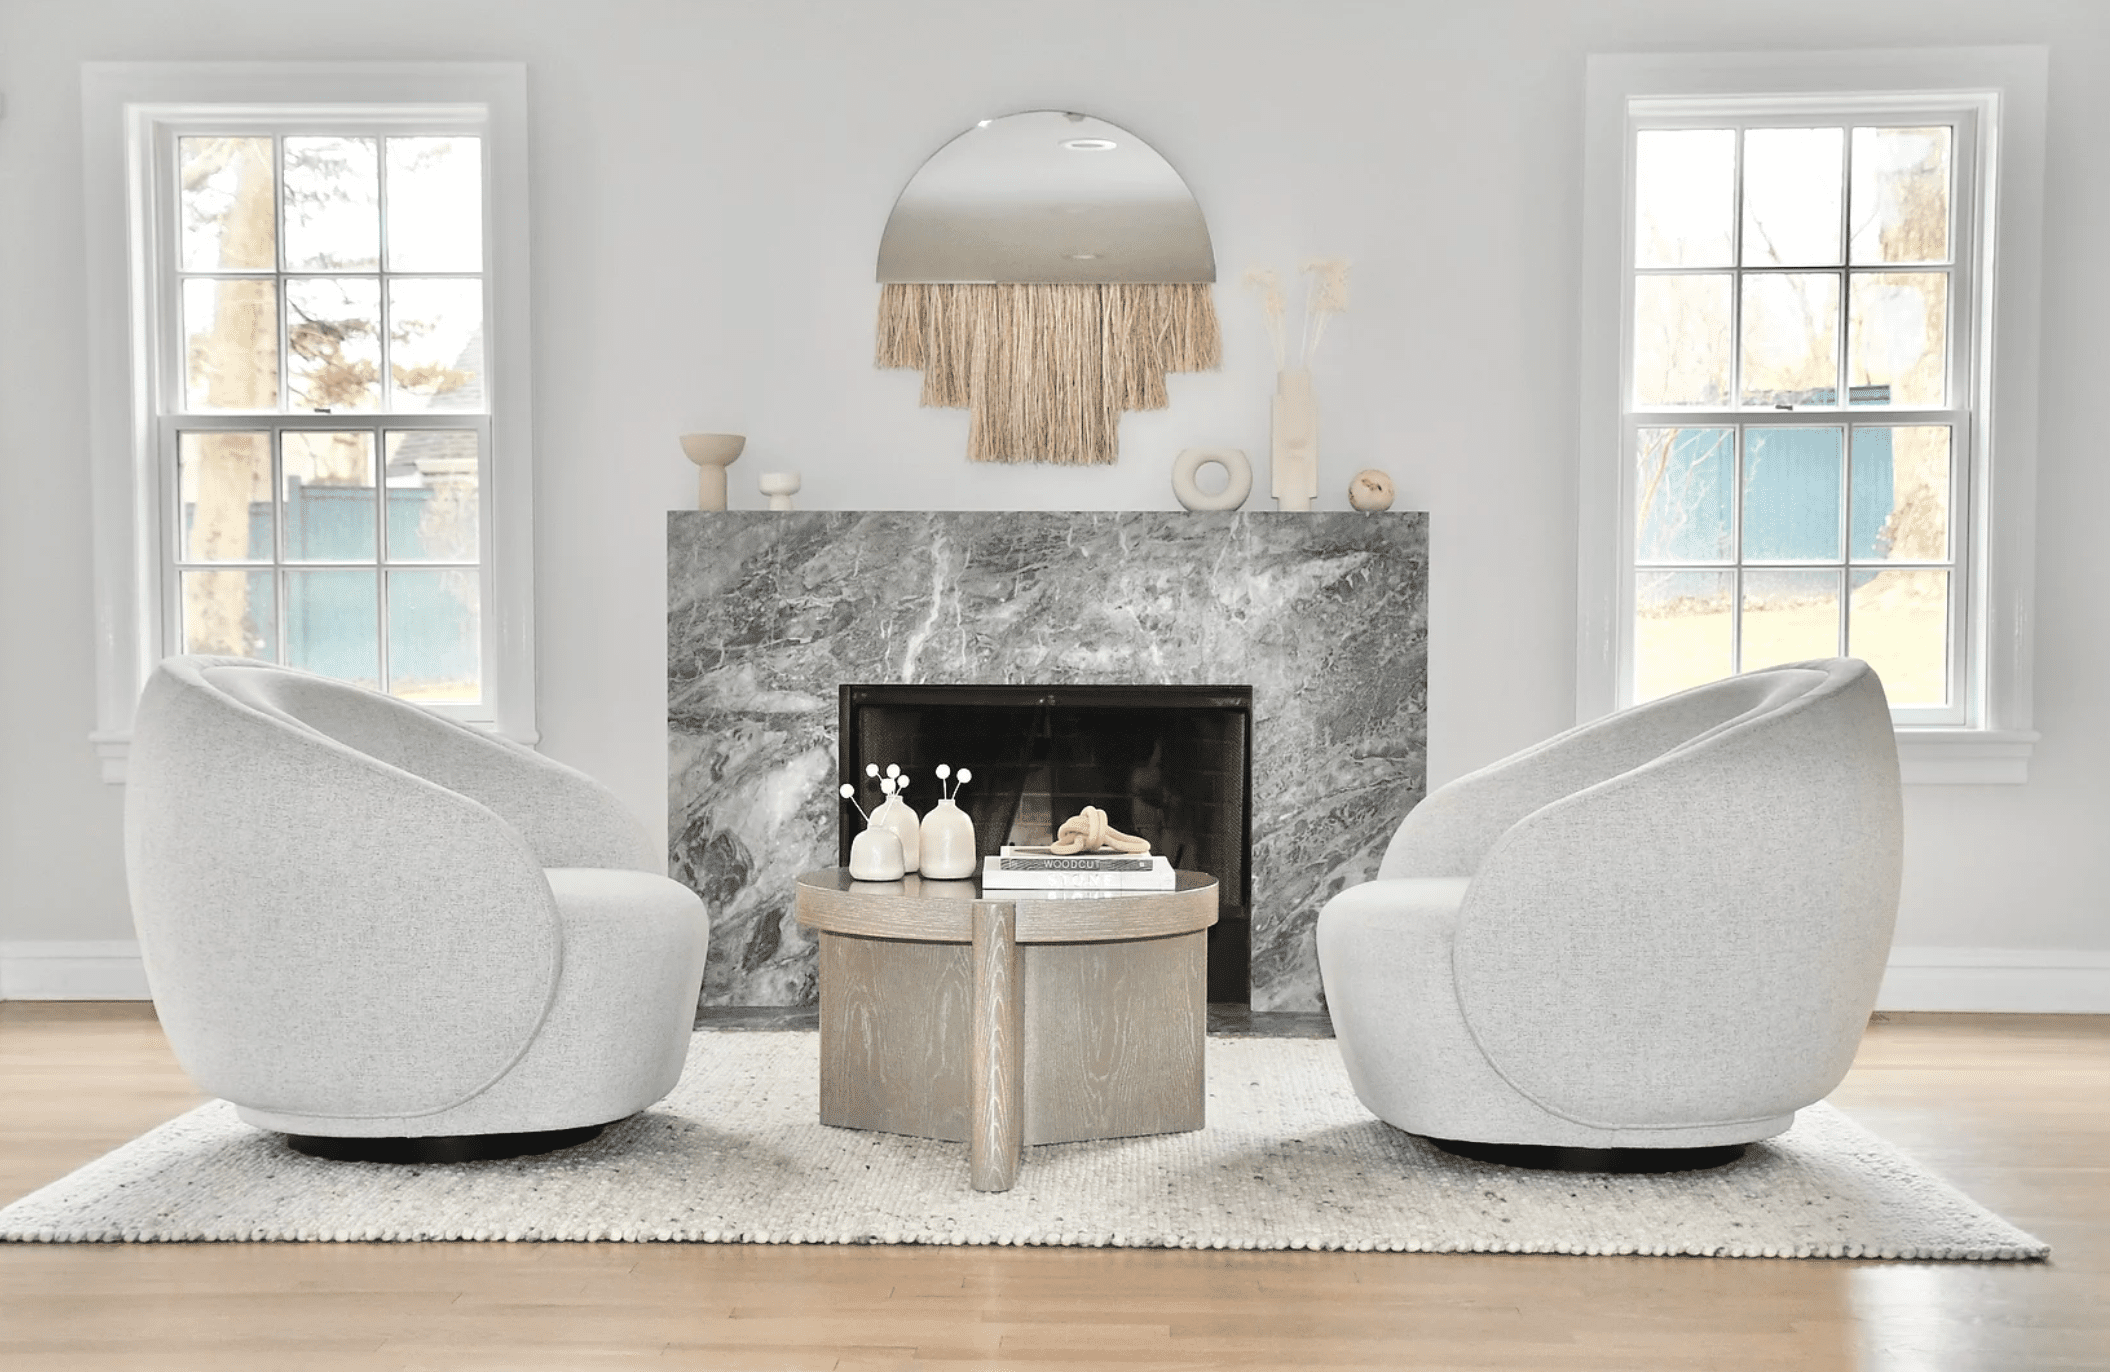
6. Anchor a Minimalist Room with a Dark Gray Marble Fireplace
This living room’s serene feel is a study in quiet balance. The formula is approximately 70% light and soft (white walls, light gray chairs, cream rug) + 20% dark and hard (the gray marble fireplace) + 10% natural and warm (the light wood coffee table and fiber mirror). The dark marble fireplace provides a necessary grounding point, preventing the light-on-light scheme from feeling washed out. It adds weight and sophistication without disrupting the minimalist calm.
💰 Budget Breakdown
To ensure a marble fireplace feels modern and not dated, pay attention to the surround. A simple, clean-lined slab application, as seen here, reads as contemporary. Avoid ornate mantels, corbels, or intricate profiles. The beauty of the stone should be the main feature. For maximum impact, run the slab from floor to ceiling if your budget allows. For a similar effect with a different material, check out the fireplace in Idea #7.
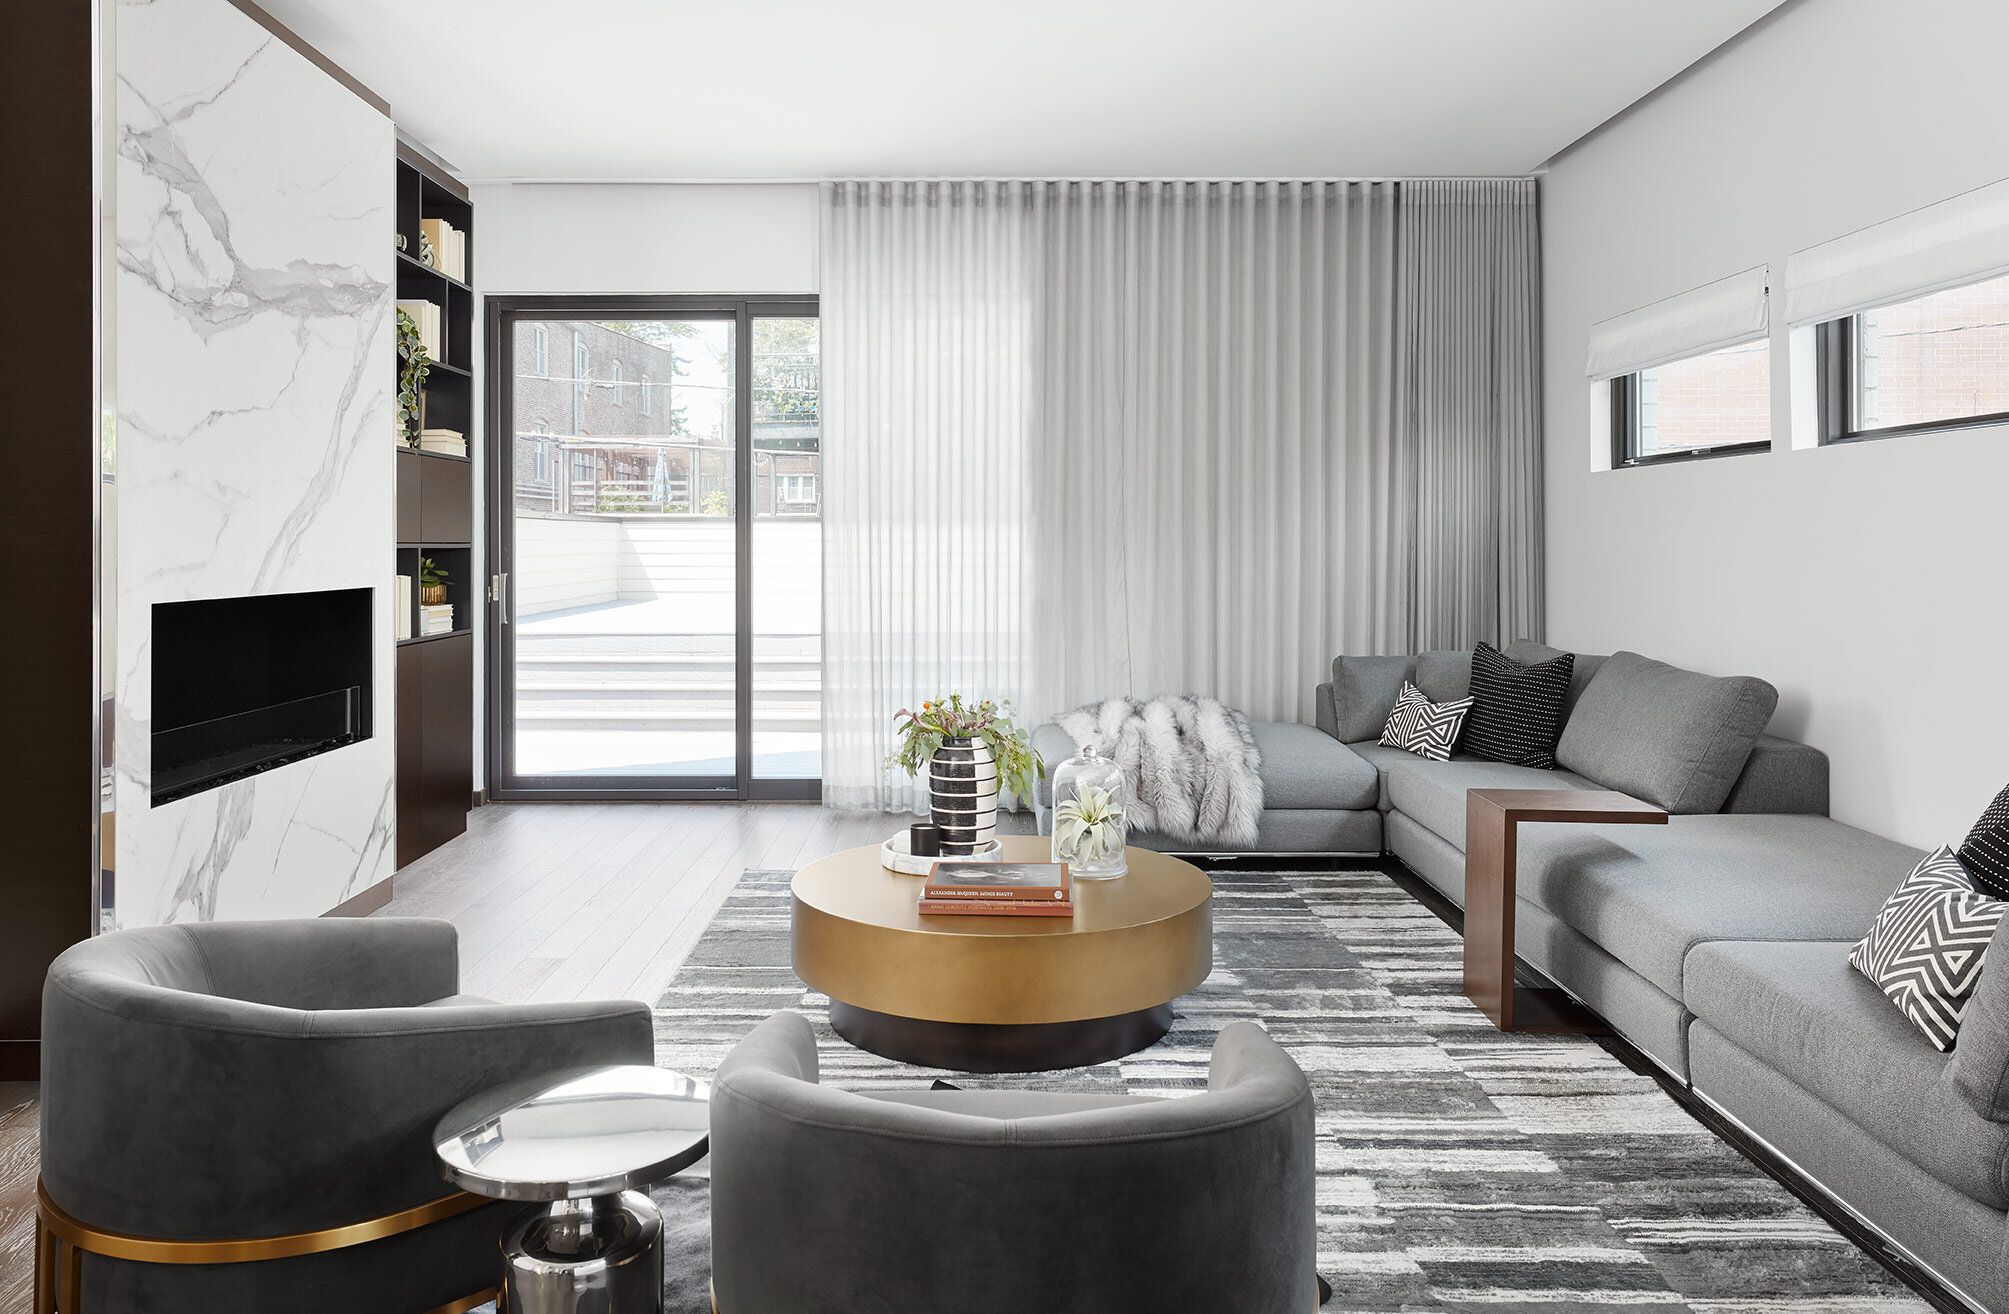
7. Frame a Marble Fireplace with Dark, Modern Built-ins
The visual success here lies in the powerful contrast. The bright, polished white marble fireplace acts as a column of light, made even more dramatic by the dark, matte-finish built-in shelving that flanks it. This high-contrast pairing creates a sophisticated, architectural focal point that is both bold and balanced. The grey sofa and rug mediate between the two extremes, while the round brass coffee table softens the room’s strong lines.
🔧 How-To Brief
A wall of dark built-ins can be a stunning feature, but it absorbs a lot of light. This look is best suited for a room that gets plenty of natural light, like this one with its large, sheer-curtained window. In a darker room, the same feature could feel heavy and oppressive. If your room is light-challenged, consider a lighter wood for the built-ins or add integrated LED strip lighting to the shelves to brighten things up.
8. Build a Sleek Media Wall with Grey Marble and Wood Panels
The defining feature of this media wall is its integration. Instead of a separate TV stand and shelving units, this design combines a grey marble slab, light wood panels, and dark-framed glass shelves into one cohesive architectural element. It feels intentional and custom-built. If you were to deconstruct it into separate pieces, the high-end, seamless look would be completely lost. It’s a prime example of how combining materials in a thoughtful way creates a sum greater than its parts.
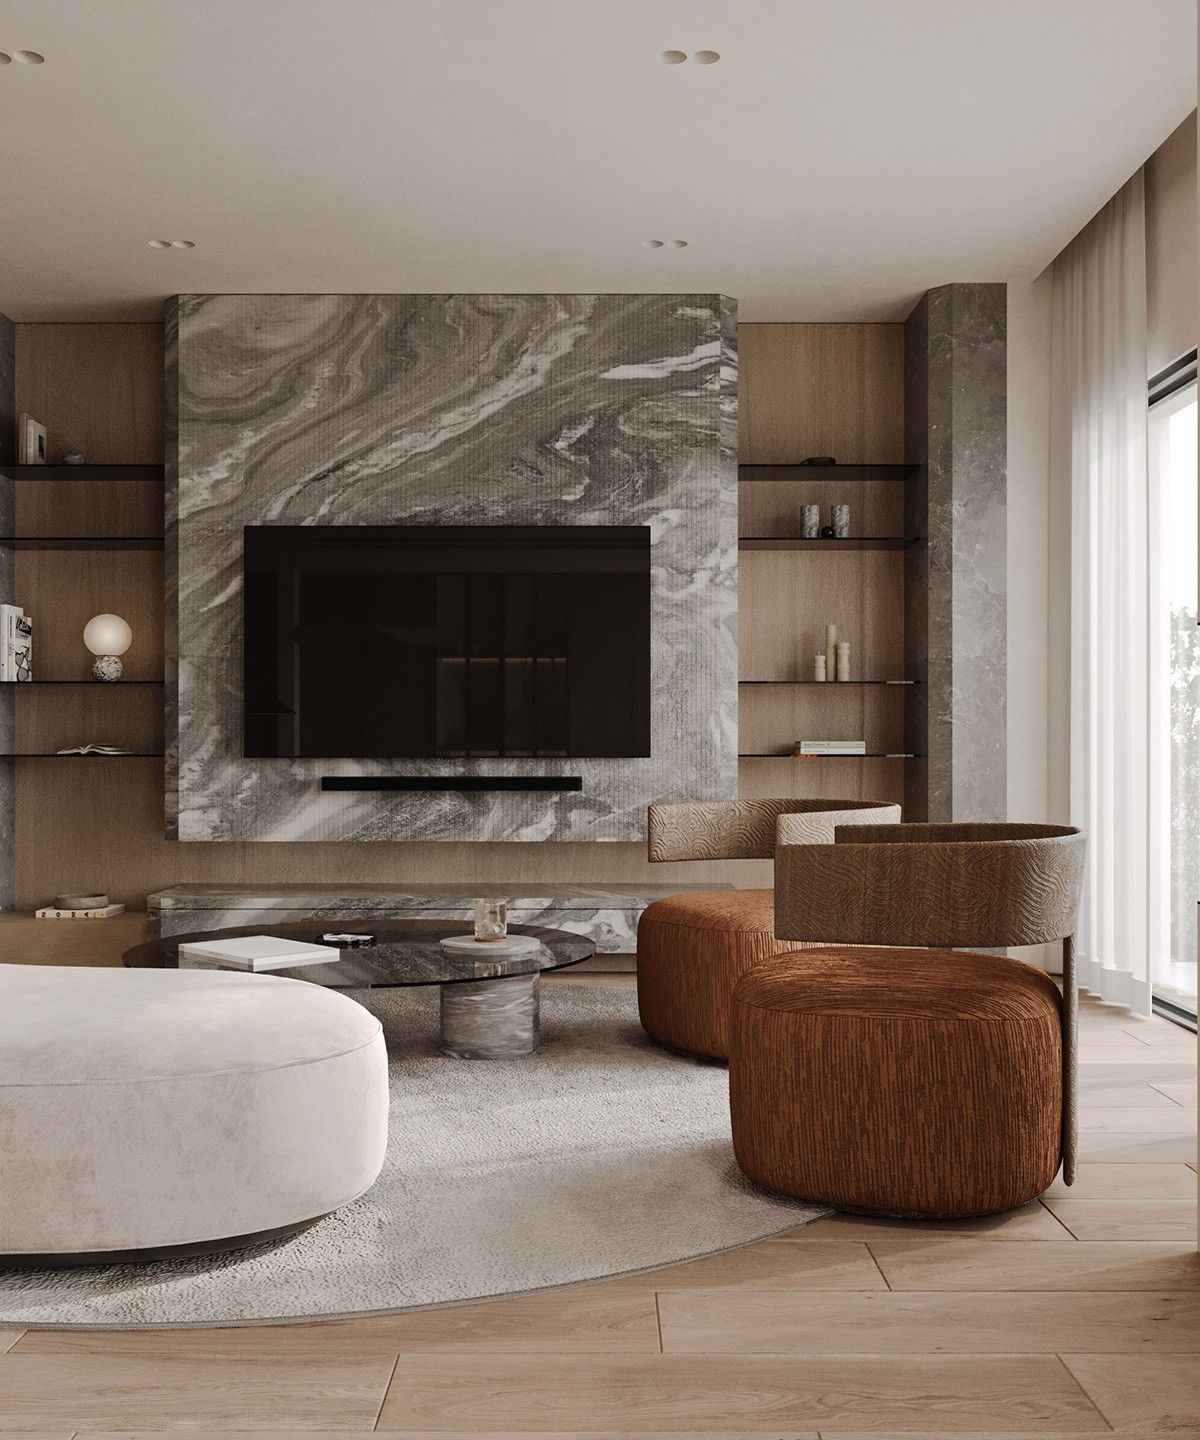
🎯 What Makes It Work
- Mount a wood panel (or a wood-look laminate panel for budget) to the wall, ensuring it’s perfectly plumb.
- Install your floating shelf brackets directly onto the panel, ensuring they are level.
- Cut a second identical wood panel, making precise cutouts where the shelf brackets are located.
- Slide the second panel over the brackets and secure it to the wall. This hides the hardware, making the shelves appear to emerge directly from the wood.
- Slide your glass or wood shelves onto the brackets.
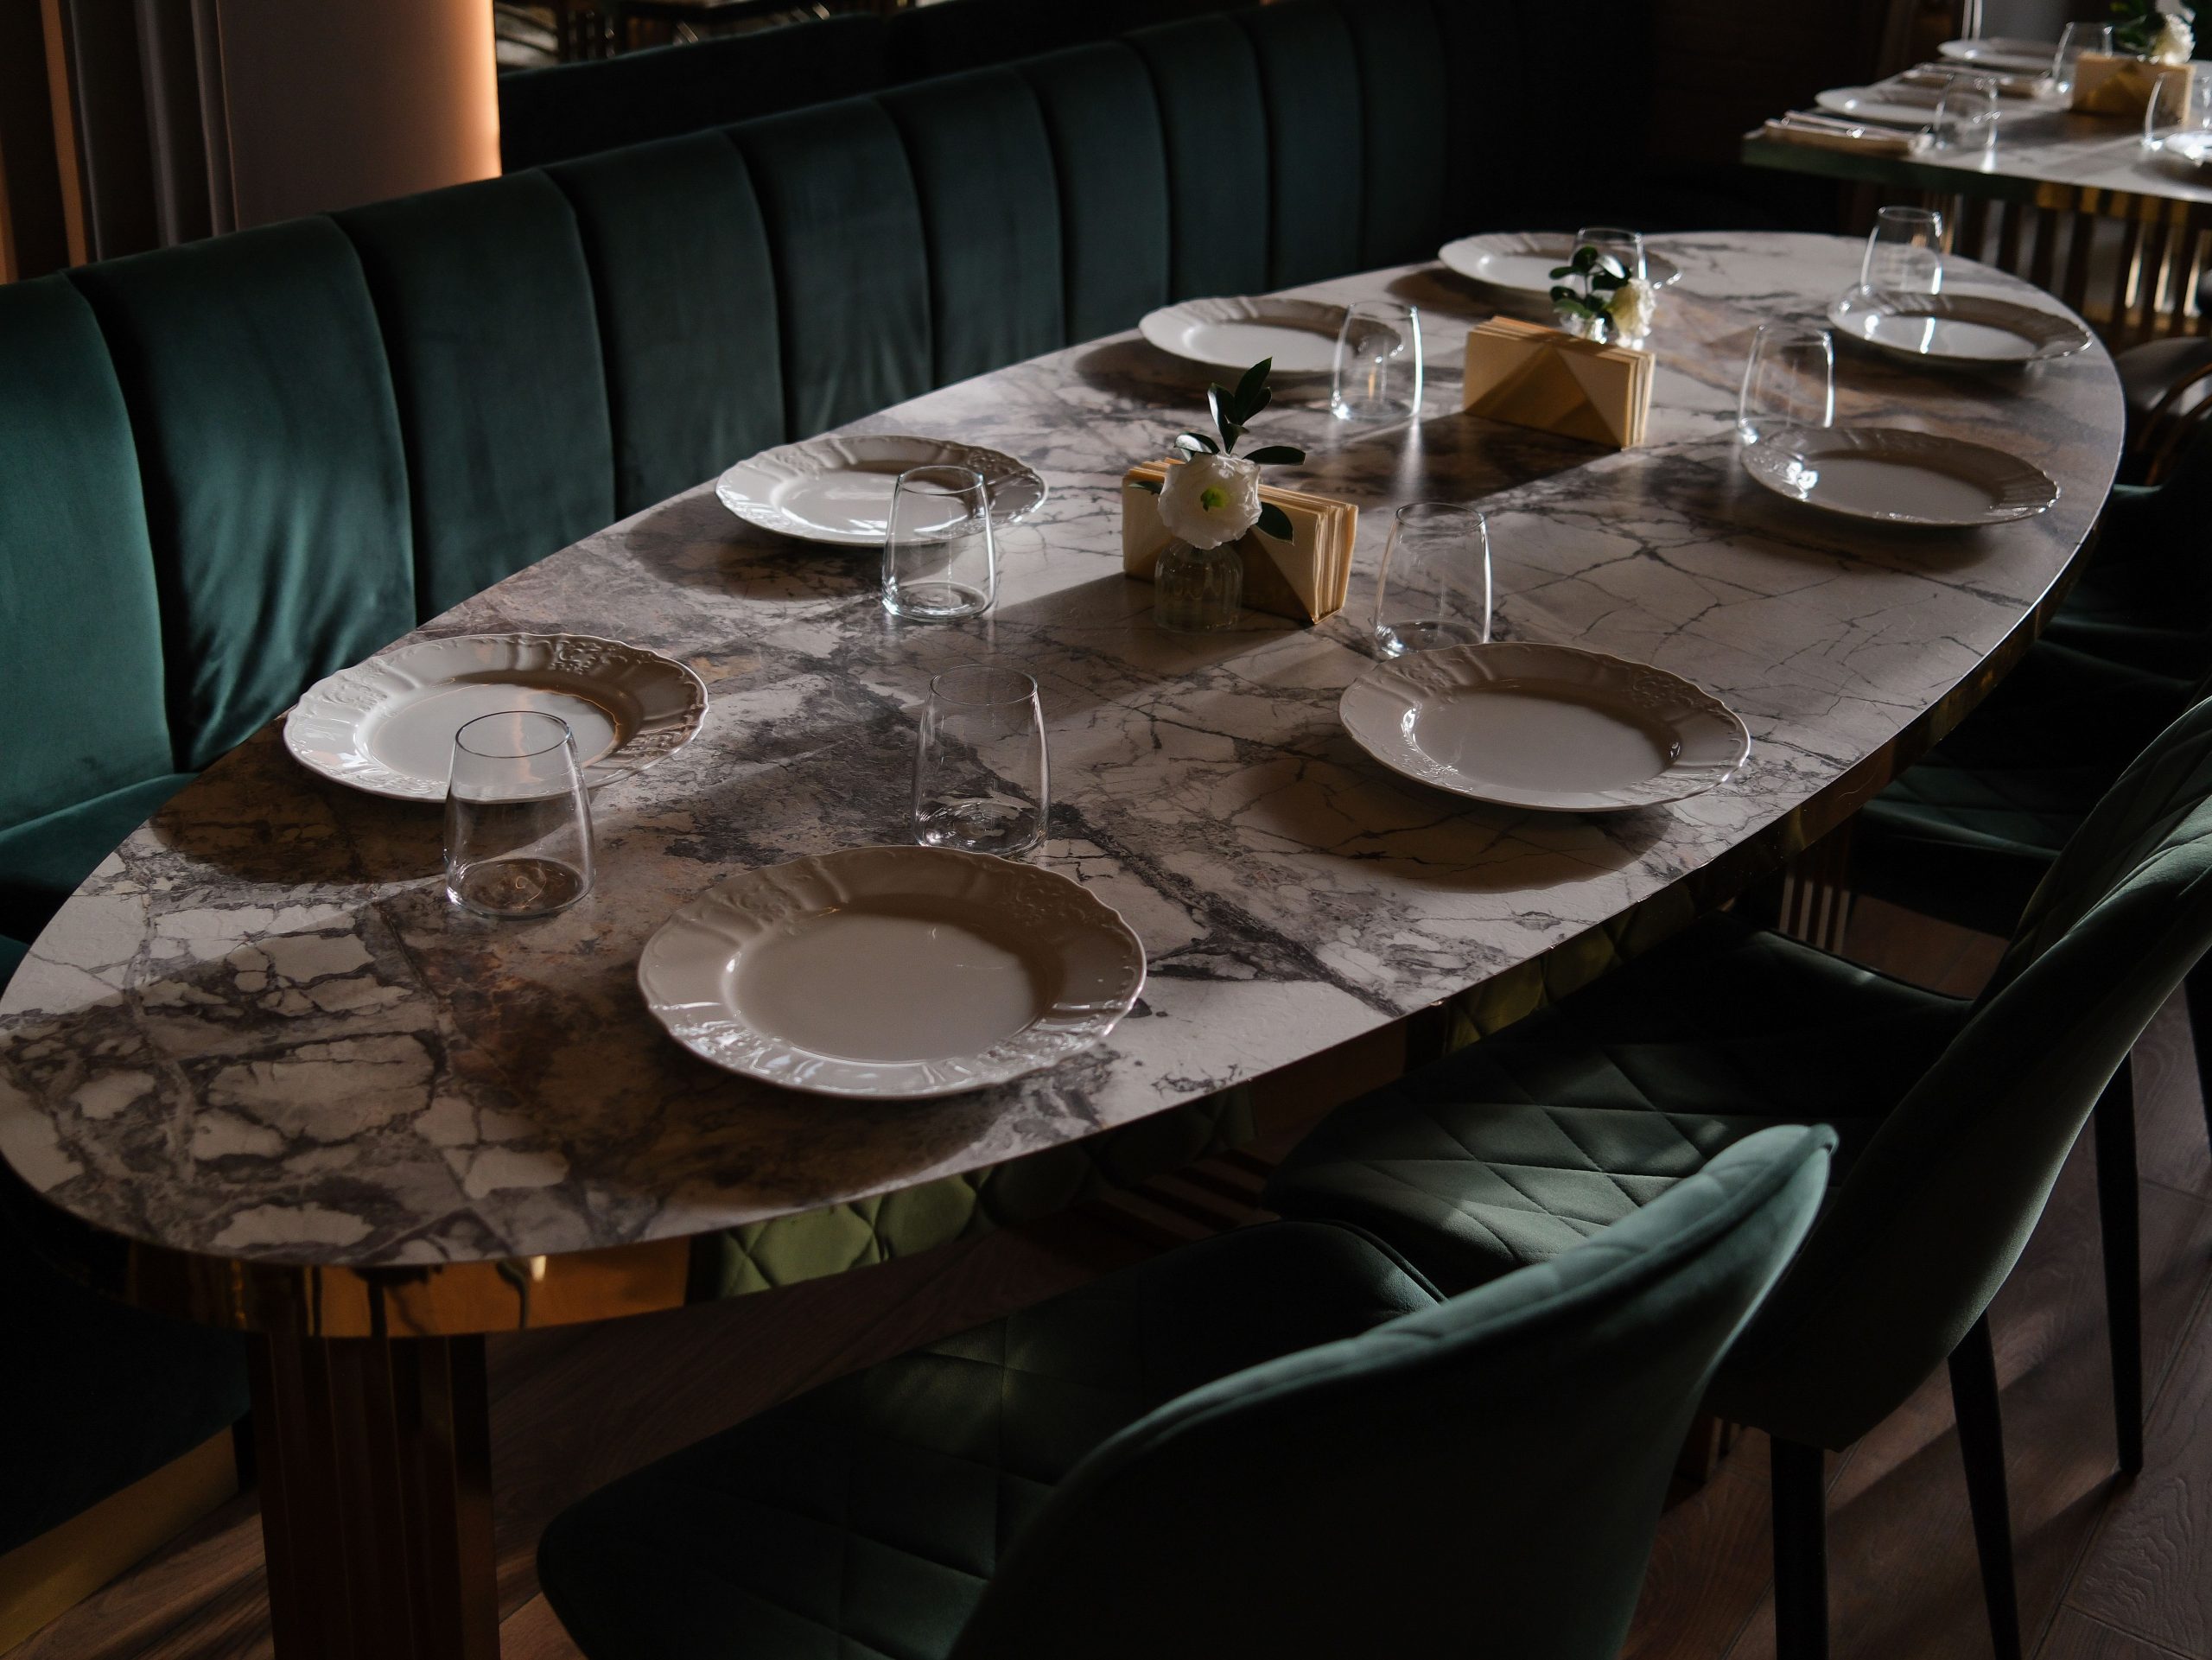
9. Go for Glamour with an Oval Marble Table and Emerald Green Velvet
This look taps directly into the ‘dopamine decor’ and ‘restaurant-chic’ trends that are huge right now. After years of minimalist, neutral-only dining spaces, people are craving color, texture, and a sense of occasion at home. The combination of rich emerald green velvet, gleaming marble, and gold accents feels like being in an exclusive, high-end cocktail bar. It’s dramatic, luxurious, and makes every meal feel like a special event. This is a move away from quiet dining and a step toward celebratory, maximalist joy. For another take on a glamorous gold and marble table, see Idea #3.
💸 Get This Look For Less
- Measure for clearance: An oval table with substantial booth seating requires significant space. Ensure you have at least 36 inches of walkway space around the entire setup.
- Check your lighting: This look leans on soft, focused, and often dimmable lighting to create its intimate, moody vibe. Bright, overhead general lighting can wash out the effect.
- Sample the velvet: Emerald green can vary wildly from a bright jewel tone to a deep, mossy shade. Always get a fabric swatch to see how it looks in your room’s specific lighting conditions before committing to upholstery.
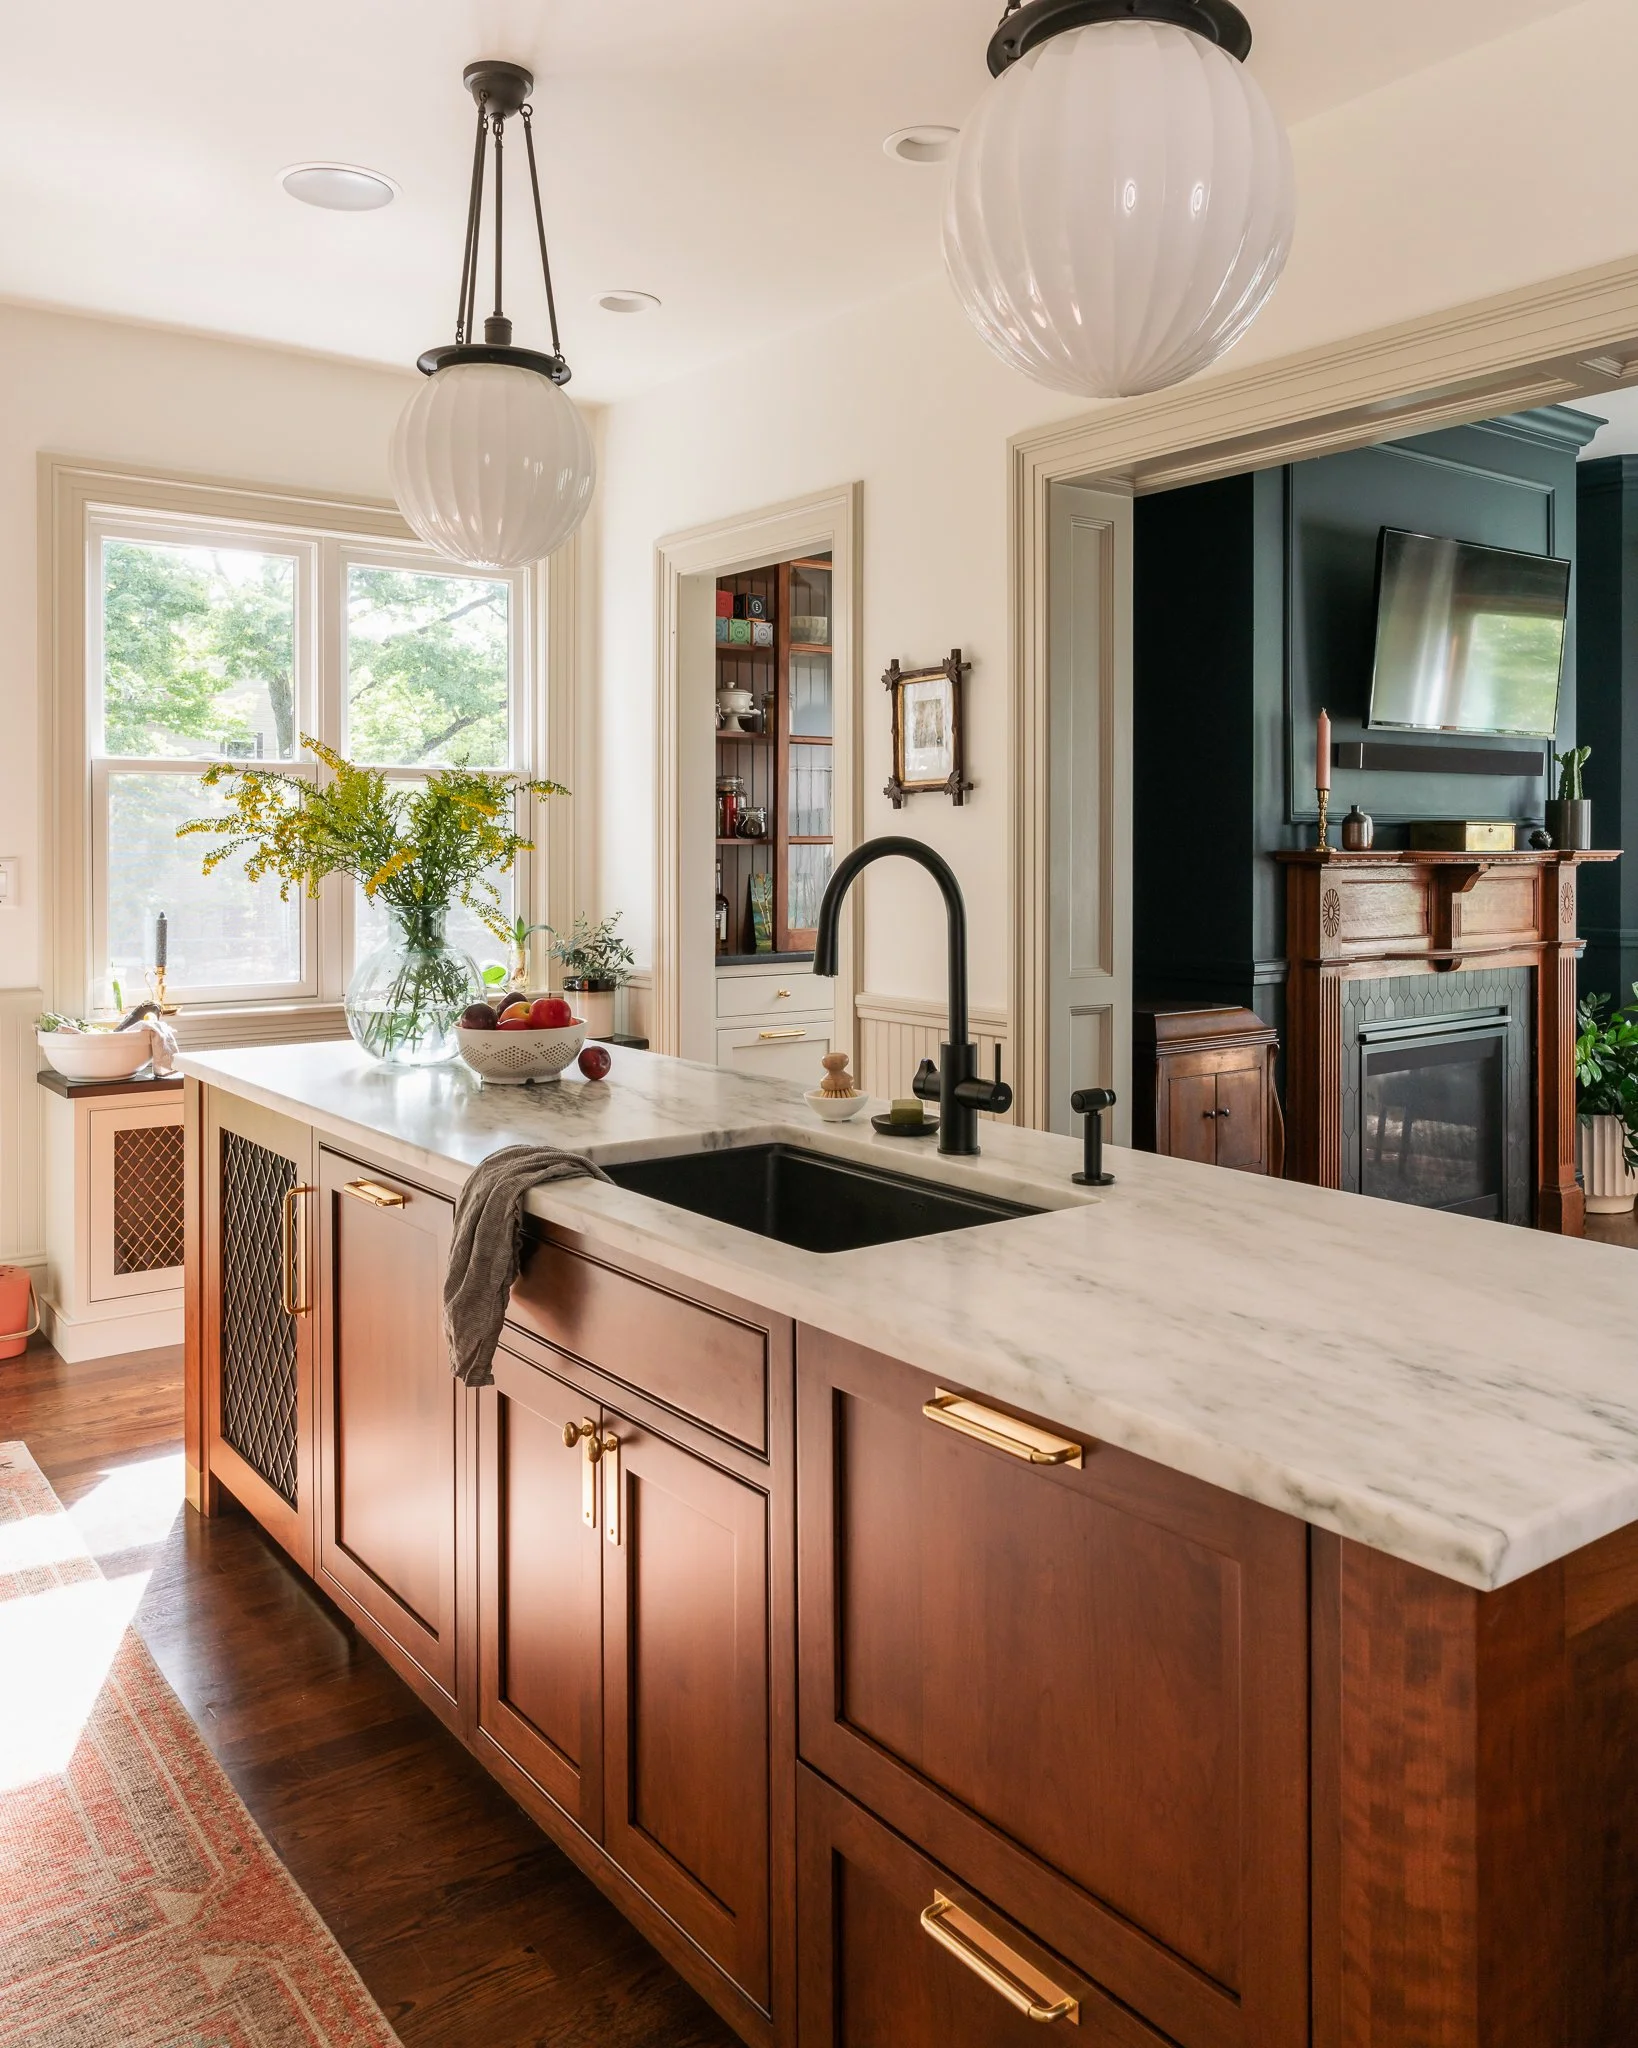
10. Combine a White Marble Island with Dark Wood Cabinets
This kitchen’s timeless appeal is built on a classic formula: 60% dark wood warmth + 30% white marble brightness + 10% brass metallic accent. The dark, reddish-brown cabinets provide a rich, grounding base, preventing the space from feeling sterile. The polished white marble island countertop bounces light around the room, adding a clean, modern surface. Finally, the brass hardware acts like jewelry, tying the warm and cool tones together. This balance ensures the kitchen feels both classic and current.
📏 Scale Guide
The design works because of the careful balance of color temperature. The dark wood and brass accents are ‘warm,’ while the white marble and off-white walls are ‘cool.’ Mixing temperatures creates a layered, sophisticated space that feels more dynamic and interesting than a room that is all one or the other. The large glass pendant lights add to this by providing a source of warm light that reflects beautifully off the cool marble.
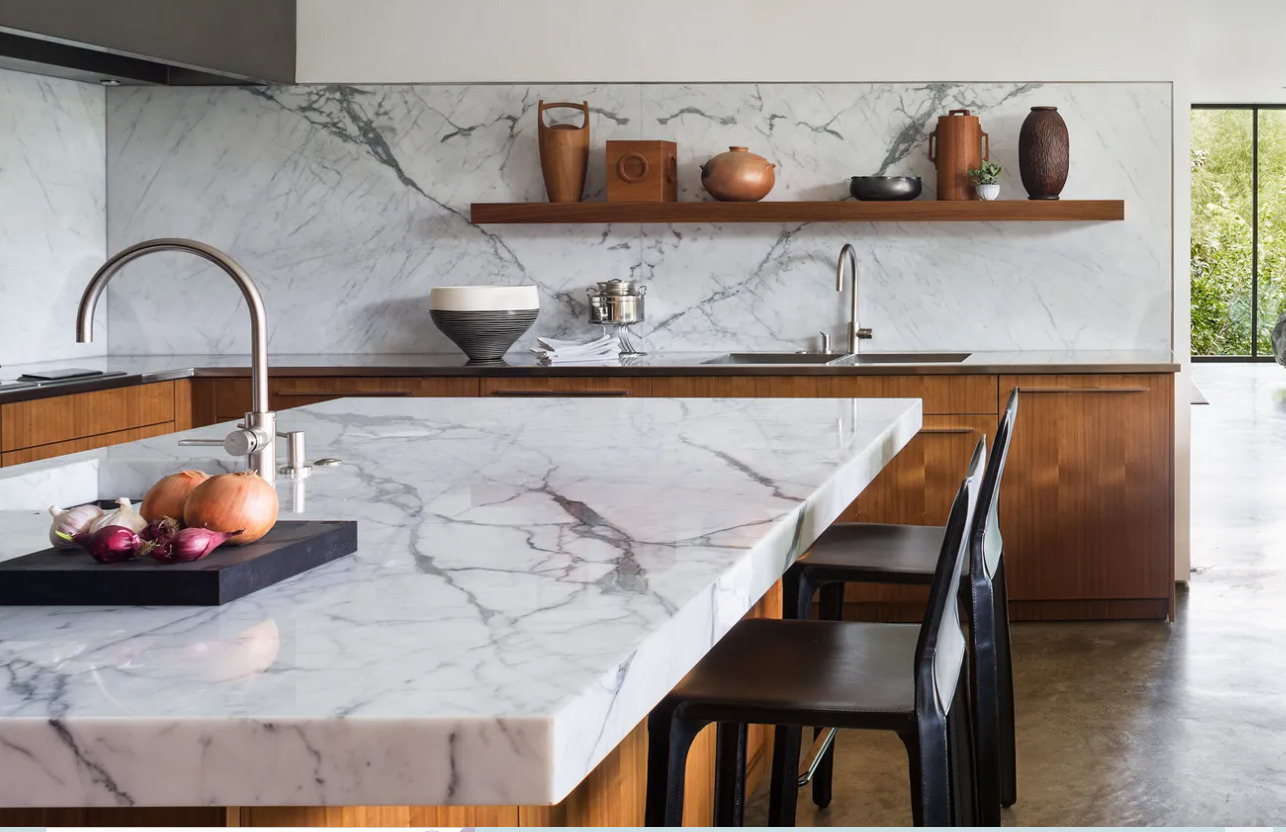
11. Soften a Marble Kitchen with Warm Wood Cabinetry and Shelving
Be mindful of wood tones. This look is successful because the light brown wooden cabinetry and the floating shelf share a similar warm, natural tone. If you were to mix a honey-oak floor, with cherry cabinets, and a walnut shelf, the effect would be chaotic rather than cohesive. When pairing marble with wood, try to keep the wood elements within the same color family to maintain a serene and intentional look.
🧹 Maintenance Reality
The single element that keeps this modern kitchen from feeling cold is the wood. Without the warm tones and natural grain of the wooden cabinetry and floating shelf, you’d be left with a sea of white marble, black, and stainless steel—a palette that can easily feel sterile and clinical. The wood injects life and nature into the space, making it feel like a home rather than a laboratory. It’s the essential ingredient for warmth.
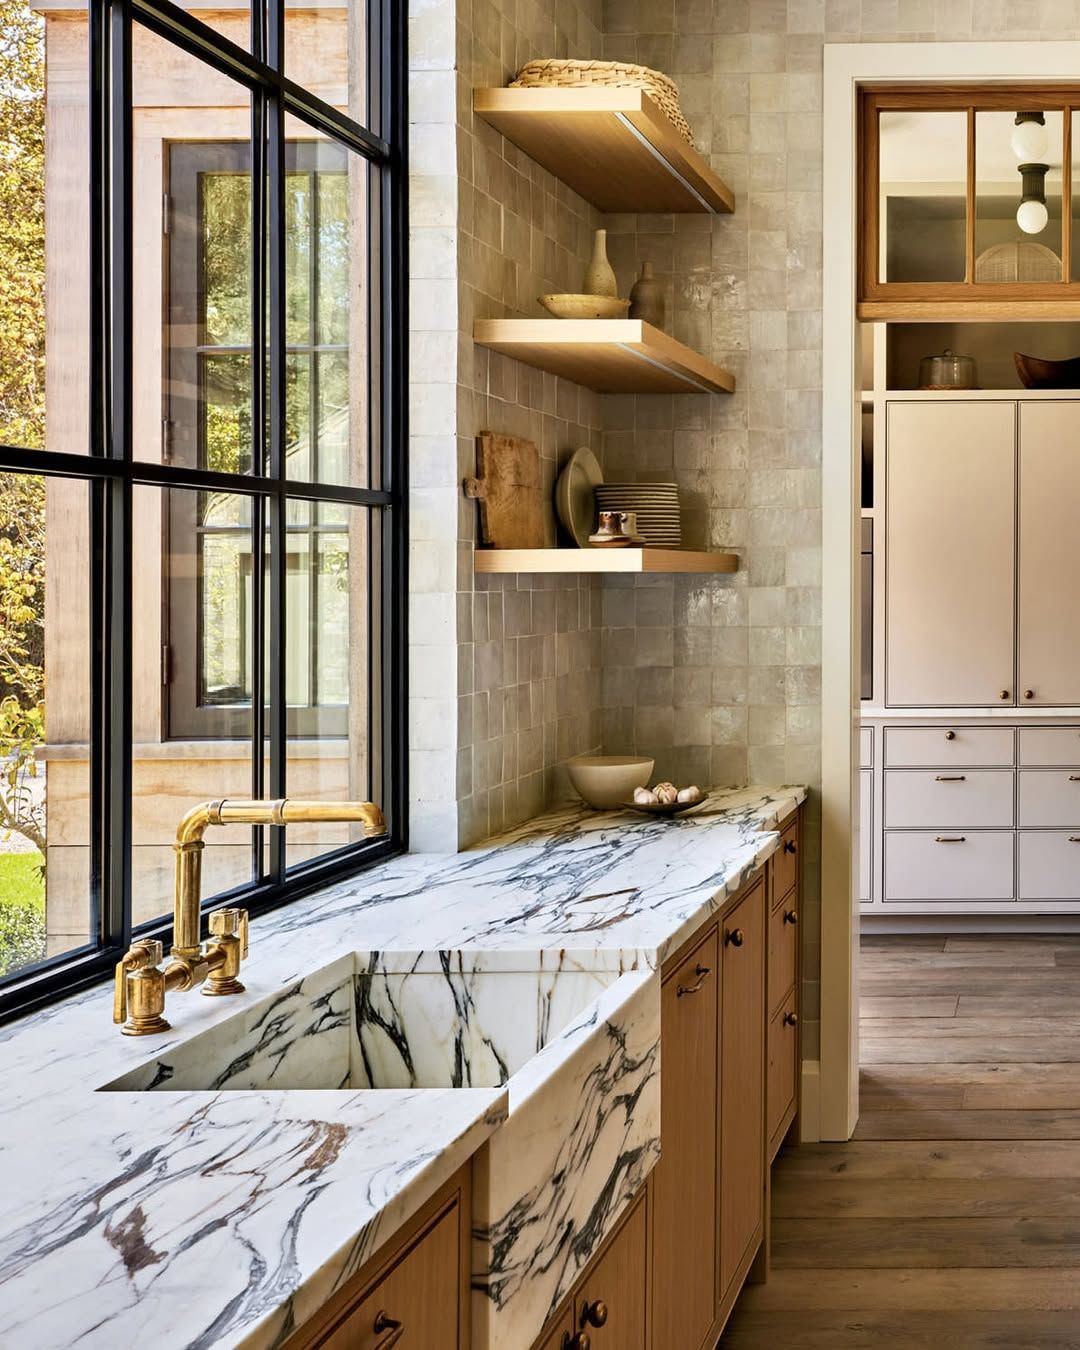
12. Pair a Marble Farmhouse Sink with Earthy Green Tiles
When you have one ‘hero’ element—like this incredible marble farmhouse sink with its dramatic veining—let it be the star. The designer wisely chose simple, earthy green square tiles for the backsplash. A busy, patterned tile would have competed with the marble’s natural artistry. By keeping the supporting elements (tiles, shelves) relatively simple in form and color, the eye is naturally drawn to the sink, which is the intended focal point of the design.
🔥 Trending Context
You can capture this sophisticated, natural vibe for less. A standard white fireclay farmhouse sink ($400-$800) beneath a marble-look laminate countertop ($20-$40/sq ft) can give you the same general shape and feel. Look for affordable sage or olive green ceramic tiles from stores like Home Depot or Floor & Decor (often $5-$10/sq ft). Finish with open shelving using reclaimed wood from Facebook Marketplace to get that organic, collected look without the hefty price tag.
13. Brighten a Kitchen with Light Grey Tiles and a Wood Floating Shelf
What makes this kitchen feel so inviting is the thoughtful layering of neutral textures. Instead of one solid block of color, you have the subtle veining of the marble-look countertops, the clean geometry of the light grey rectangular backsplash tiles, and the organic grain of the natural wood shelf. This textural play adds depth and interest, keeping the neutral palette from feeling flat or boring. The black hardware provides a crisp, graphic accent that defines the shapes.
⭐ The One Thing
A full wall of tile extending to the ceiling works best with ceilings that are 8 feet or higher. In a room with lower ceilings, this can sometimes have the unintended effect of making the ceiling feel lower. The floating shelf here is smartly placed about 18-22 inches above the countertop, which is the sweet spot for being reachable without getting in the way of countertop prep space. Any higher, and it becomes purely decorative; any lower, and you lose valuable workspace.
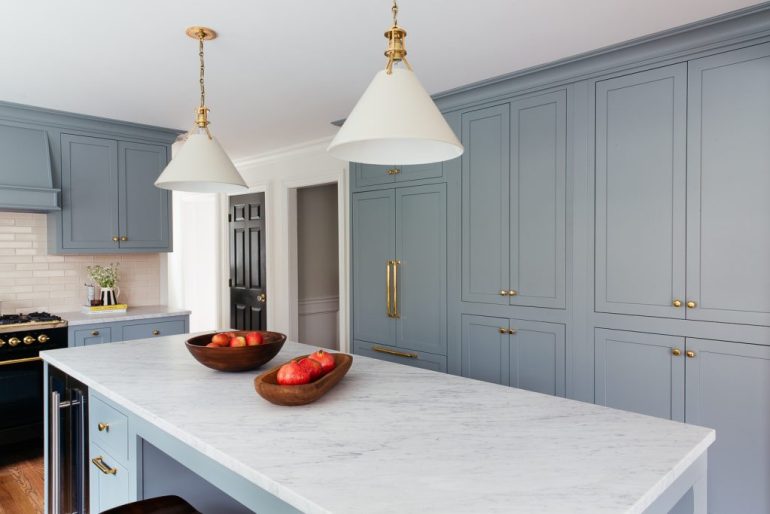
14. Use Blue-Gray Cabinetry as a Backdrop for a Marble Island
This kitchen is a perfect equation for modern classicism: 60% classic cabinet profile (inset panels) + 30% modern color (the sophisticated blue-gray) + 10% warm glamour (the brass hardware). The white marble island acts as the neutral centerpiece that allows the blue and brass to shine. You could swap the blue-gray for a deep green or charcoal and the brass for polished nickel, and the fundamental balance of the design would remain intact.
⚠️ Real Talk
We’re seeing a huge shift away from all-white kitchens toward more personalized, colorful spaces. This blue-gray is a perfect example of the ‘new neutral.’ It provides color and character without being shouty or overly trendy. It feels custom, thoughtful, and timeless. Paired with marble and brass, it hits a sweet spot between a classic English kitchen and a modern American one. Compare the calming effect of this blue with the warm beige in Idea #4.
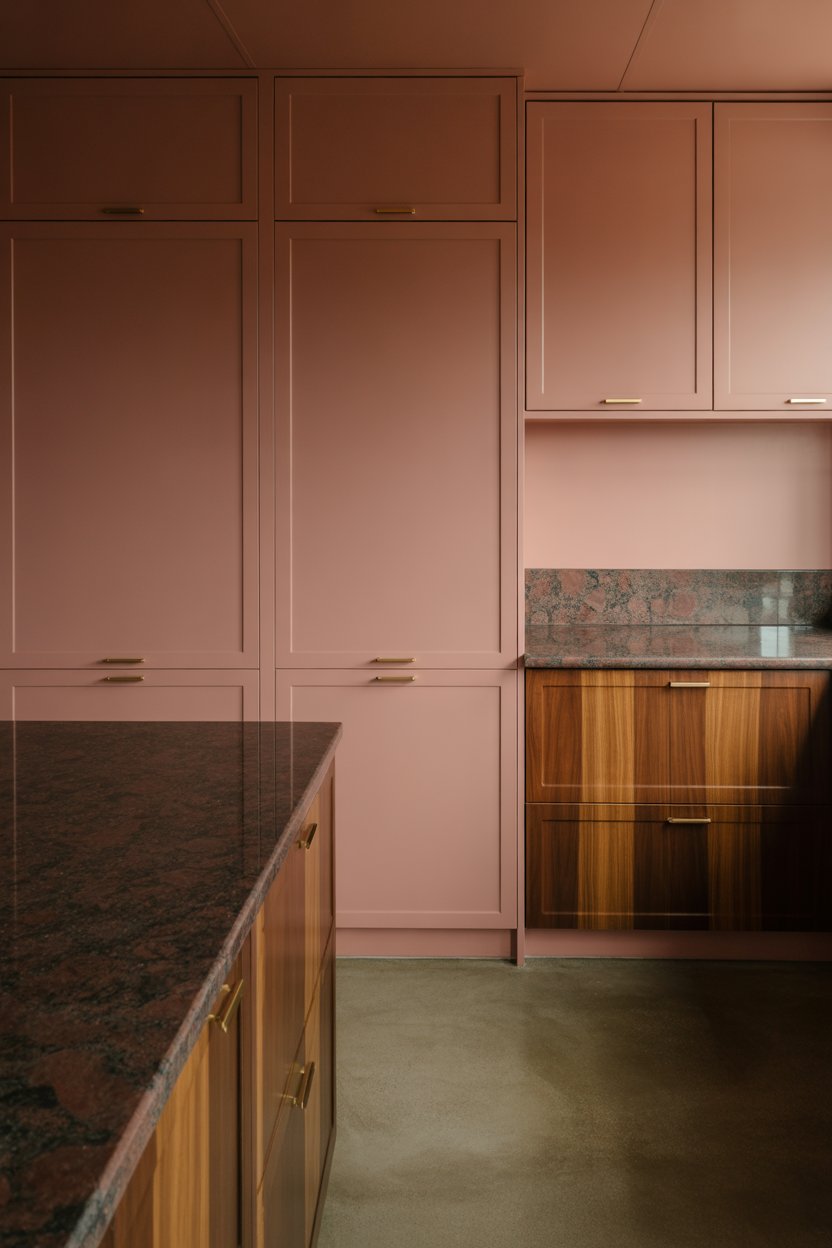
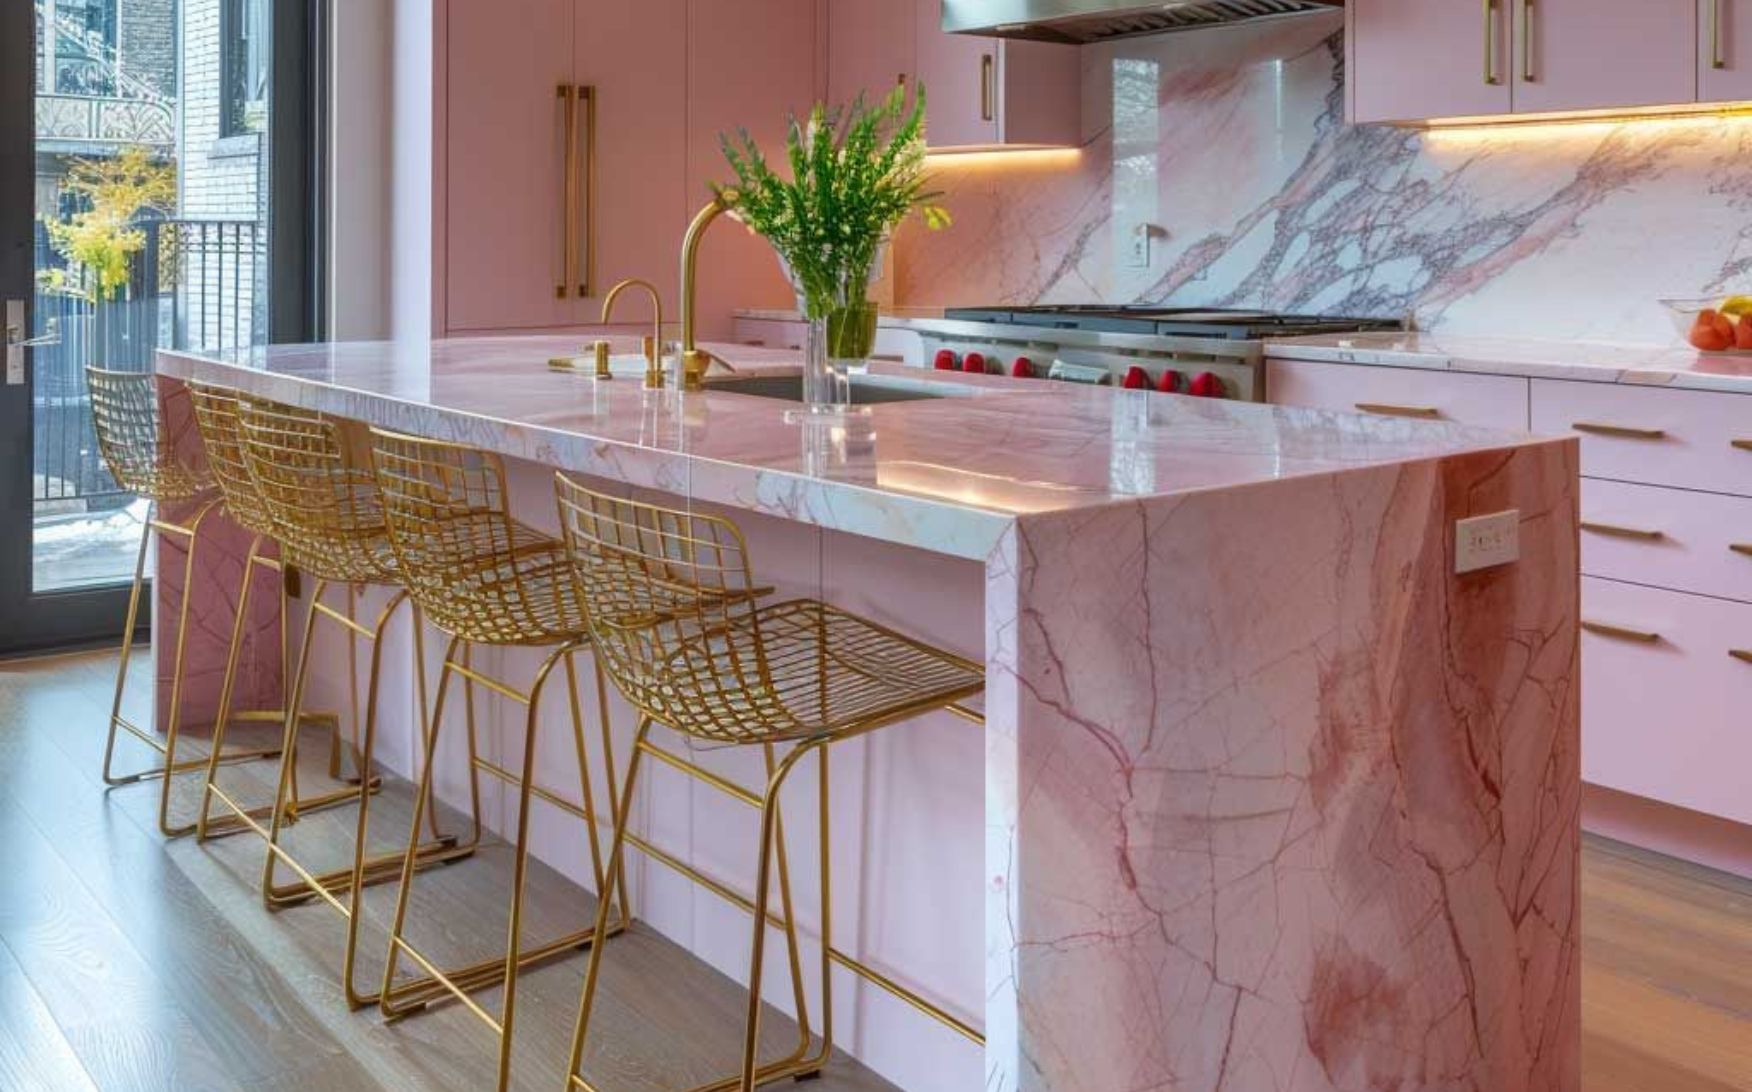
15. Embrace Playful Luxury with Pink Marble and Gold Accents
A full kitchen of pink marble is a bold commitment. While stunning, this is a very specific and trend-forward choice. Before you invest in slabs of pink marble, consider your home’s overall style and your personal taste five years from now. A less permanent way to get this feel would be to use pink marble on a smaller, movable island, or to incorporate it through accessories like a tray or cutting boards, while keeping the main countertops neutral.
✅ Before You Start
The element that elevates this from just a ‘pink kitchen’ to a truly glamorous space is the consistent use of gold. It’s in the cabinet pulls, the faucet, and, most importantly, the wire-frame bar stools. The gold adds a necessary touch of warmth and metallic sheen that complements the pink marble beautifully. If you were to use chrome or black fixtures, the look would feel less luxurious and more ’80s-inspired. The gold is the key to its modern, high-end appeal.
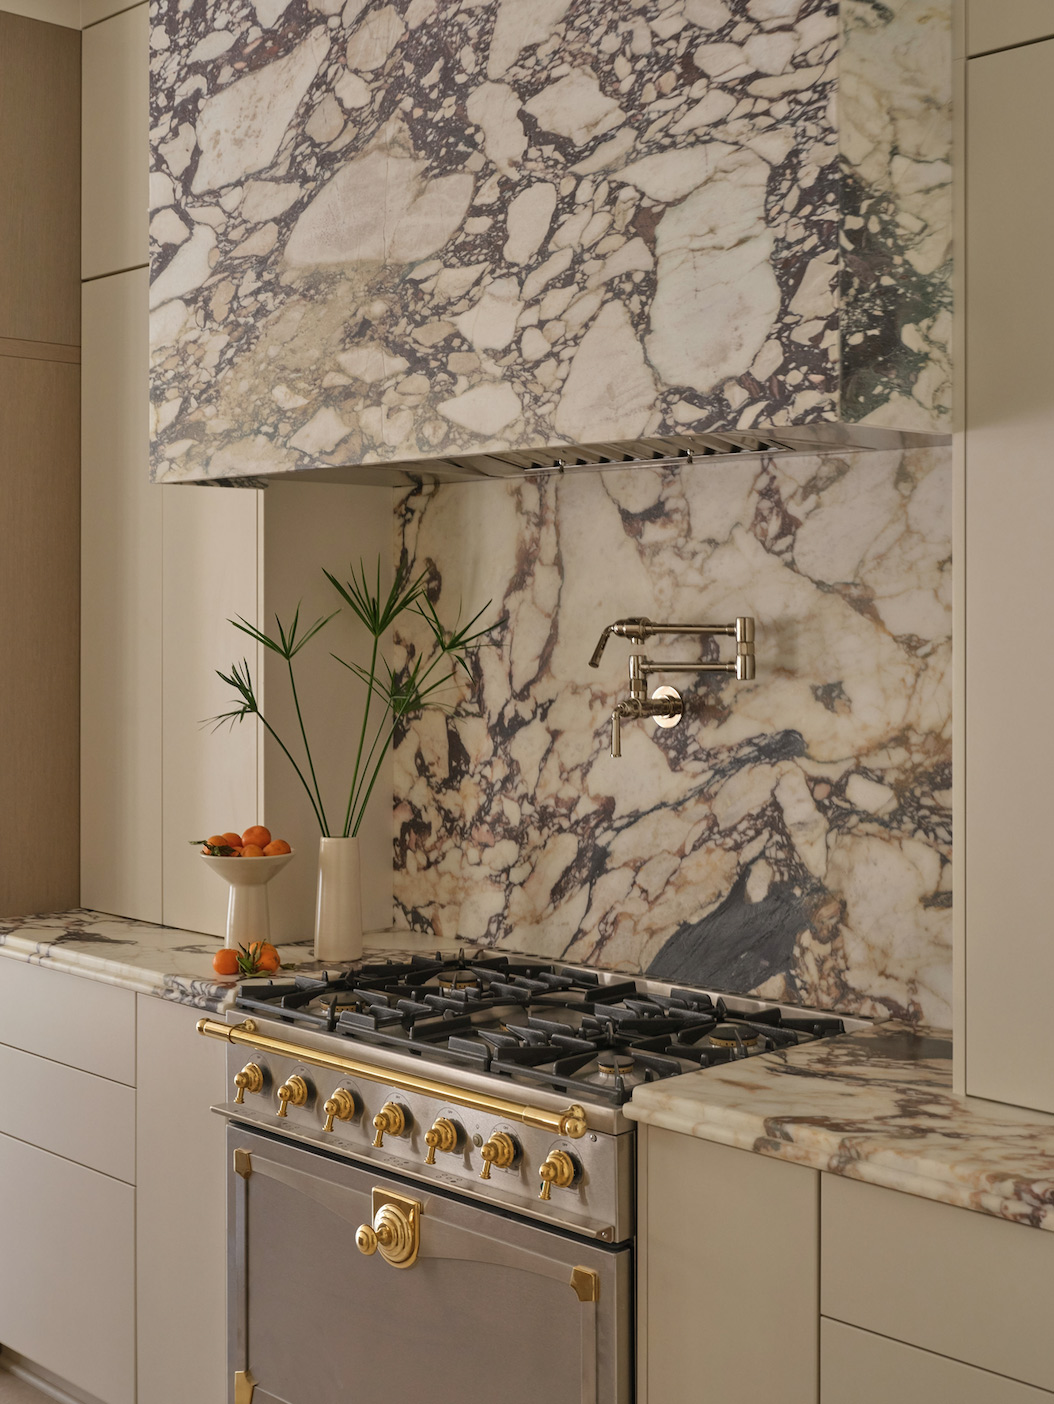
16. Make a Statement with a Burgundy-Veined Marble Backsplash and Hood
When you are using a marble with such dramatic, high-contrast veining, let it be the hero. The designer made a smart choice by wrapping the same slab from the countertop up the backsplash and over the range hood. This creates one powerful, uninterrupted focal point. Using a different material for the hood or even a different type of marble would have broken the visual flow and diluted the impact of this incredible stone.
📐 Style Math
This design is all about confident contrast. The deep, rich burgundy and black veins create a powerful graphic statement against the white background of the marble. This boldness is balanced by the clean, simple lines of the light taupe, flat-panel cabinetry. The cabinets don’t compete for attention; they frame the masterpiece. The gold details on the range add another layer of luxe, but the core success is the tension between the wild stone and the calm cabinetry.
17. Create an Earthy and Elegant Vibe with Purple-Veined Marble
The star of this kitchen is, without a doubt, the purple-veined marble. It’s unexpected, organic, and incredibly sophisticated. This single material choice elevates the entire design from a standard modern kitchen to something truly special and memorable. Paired with the dark walnut cabinetry, it feels earthy and grounded, while the unusual color of the veins provides a touch of the exotic. It proves that marble doesn’t have to be just white, black, or grey.
💡 Designer Tip
Authentic purple-veined marble like this can be rare and expensive. To get a similar feel on a budget, look for large-format porcelain slabs designed to mimic this type of stone. For an even more affordable approach, use a neutral quartz countertop and bring in that deep purple hue with a painted backsplash (protected by a sheet of glass) or through accessories. Pair it with walnut-veneer cabinetry from a store like IKEA to get the warm wood tone for less.
18. Achieve a Sleek Look with Two Marble Islands and Integrated Appliances
A double-island layout is a true luxury that requires significant square footage. To pull this off, your kitchen area should ideally be at least 16 feet wide and 20 feet long. You need to maintain a minimum of 42-48 inches of walkway space between the two islands and between the islands and the perimeter cabinets to avoid creating a bottleneck. This design is best for large, open-plan homes where the kitchen is the central hub of activity.
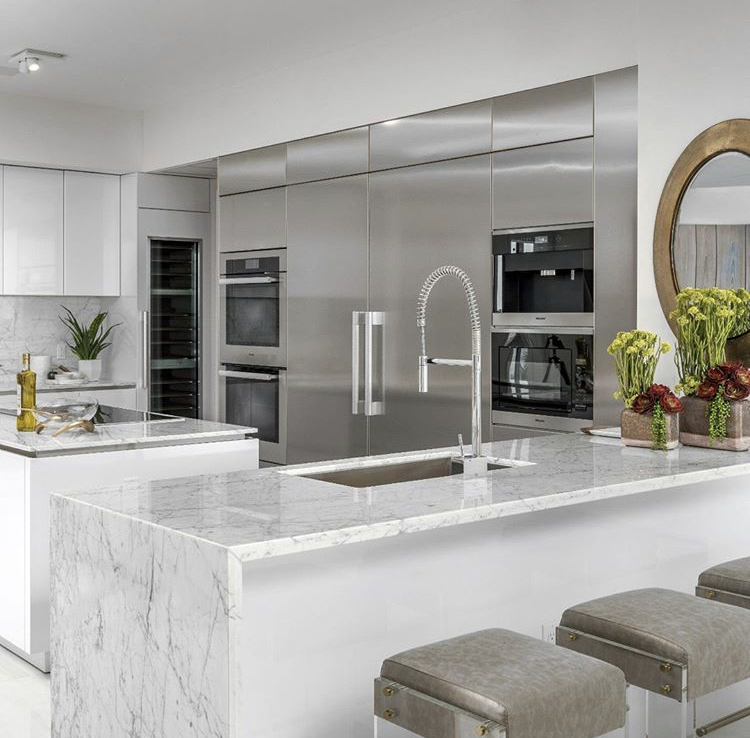
💰 Budget Breakdown
High-gloss white cabinets, like the ones featured here, create a stunningly sleek and reflective surface that bounces light around the room. However, they are a magnet for fingerprints, smudges, and smidgens of food. If you have kids or are not a fan of daily wipe-downs, you might prefer a satin or matte finish. While less reflective, a matte finish is far more forgiving when it comes to showing every little touch.
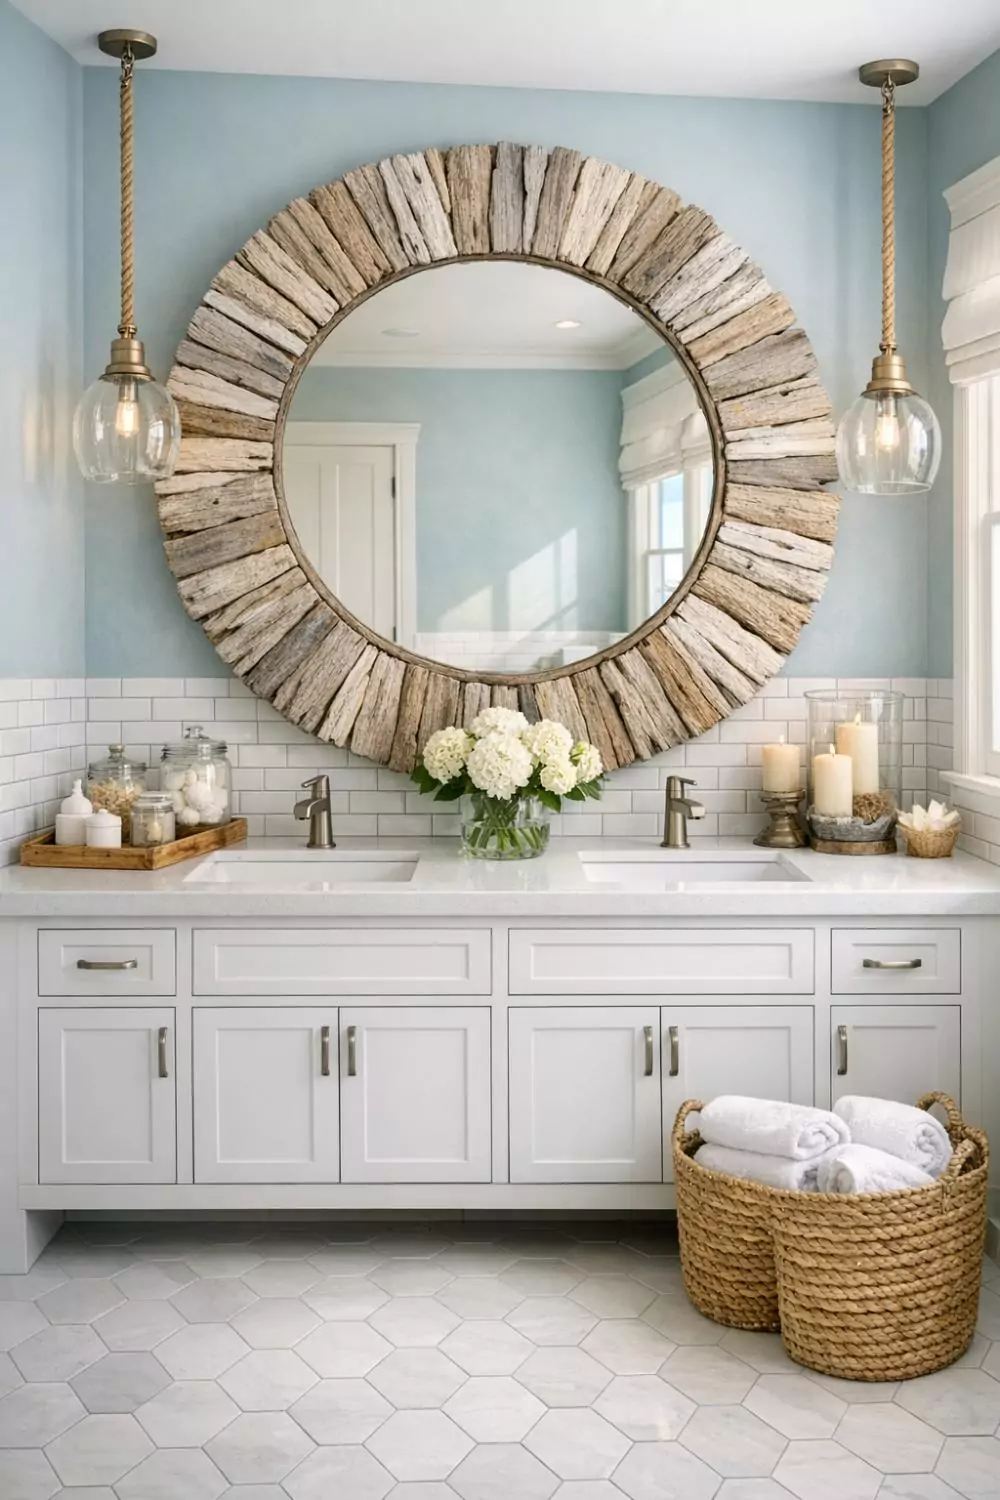
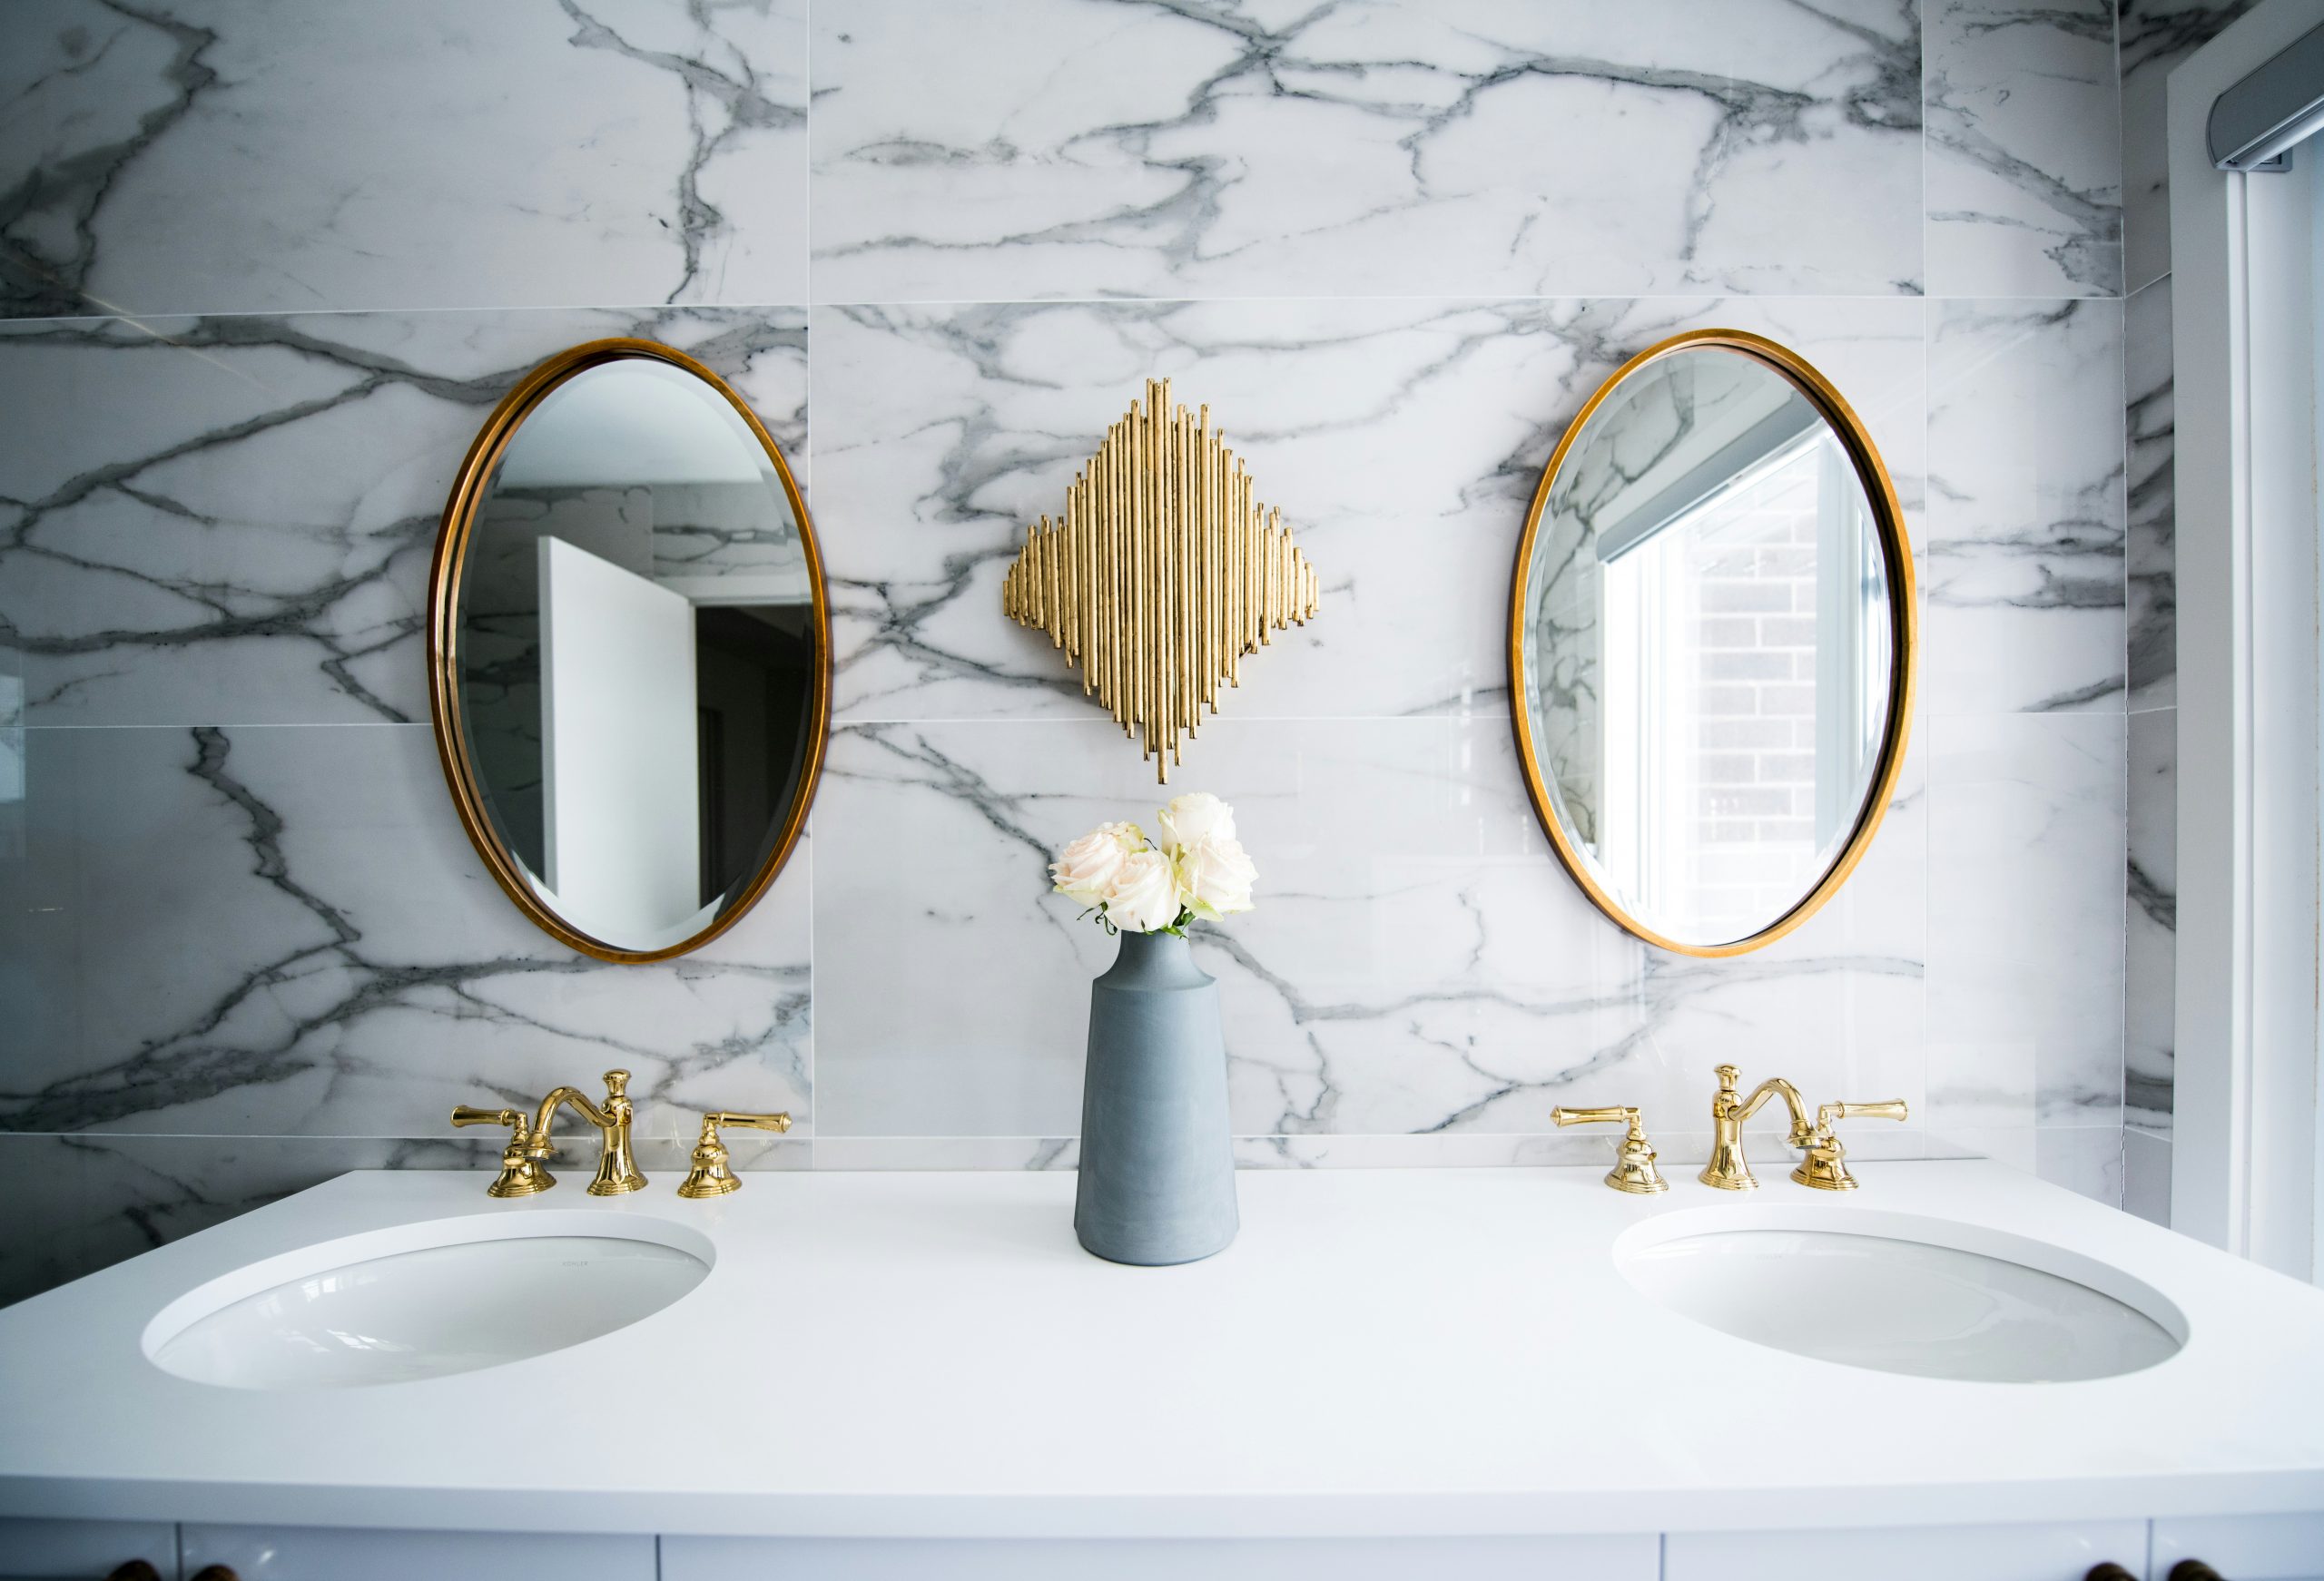
19. Elevate a Bathroom with a Marble Tiled Wall and Gold Accents
- Main Furniture (Vanity & Countertop): $1,500 – $4,000
- Lighting & Mirrors: $800 – $2,500
- Wall Treatment (Marble Tile): $2,000 – $6,000 (depending on square footage)
- Fixtures (Faucets): $500 – $1,500
- Decor: $200 – $600
- TOTAL: $5,000 – $14,600
- Budget alternative: Get the look for less by using a marble-look porcelain tile for the wall, sourcing gold-framed mirrors from Target or Overstock, and finding stylish gold faucets from an online retailer. This can bring the total cost down by 50-70%.
🔧 How-To Brief
- First, find the center of your sink basin. Mark it lightly with a pencil on the wall.
- Next, find the horizontal center of your mirror. Most mirrors have hanging hardware equidistant from the center.
- Hold the mirror up to the wall, aligning the center of the mirror with the center of the sink basin you marked.
- Use a level to ensure the mirror is straight.
- Lightly mark the wall at the top center of the mirror.
- Measure down from that mark to where the hanging hardware will sit, and that’s where your nail or anchor goes.
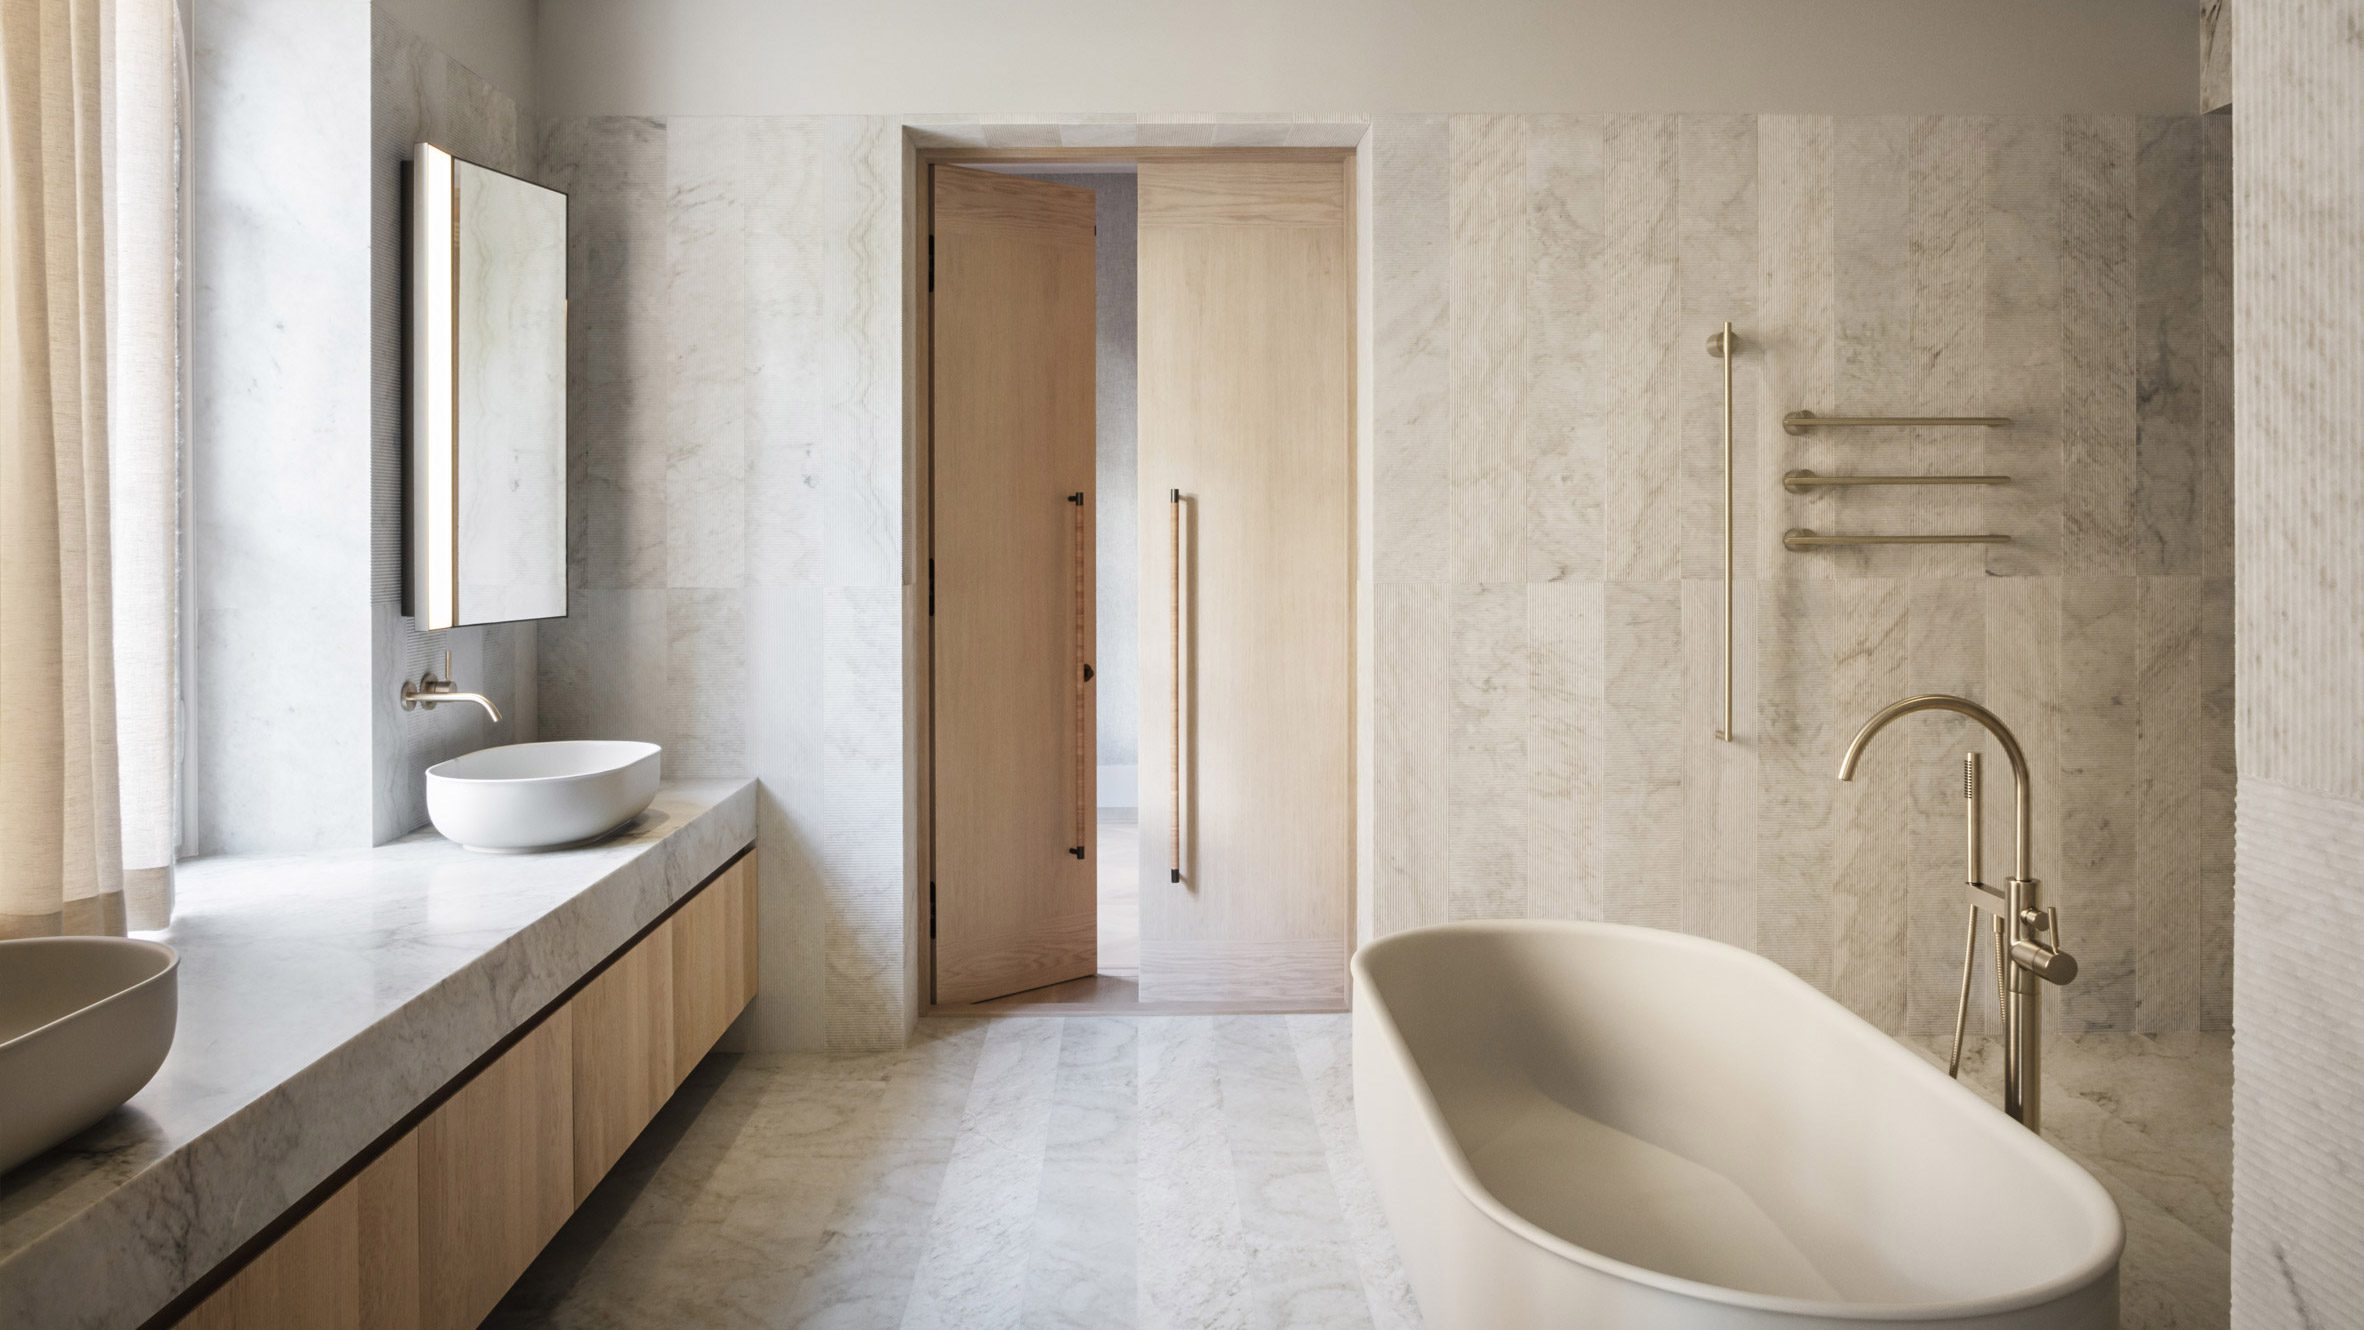
20. Encase a Freestanding Tub in Luxurious Green-Veined Marble
The single most impactful decision in this bathroom was to clad not just the walls but the entire bathtub surround in the same white and green veined marble. This continuous use of the material creates an immersive, monolithic look that feels incredibly opulent and custom. It transforms the bathtub from a simple fixture into an integrated, sculptural element of the room’s architecture. It is the absolute definition of a statement piece.
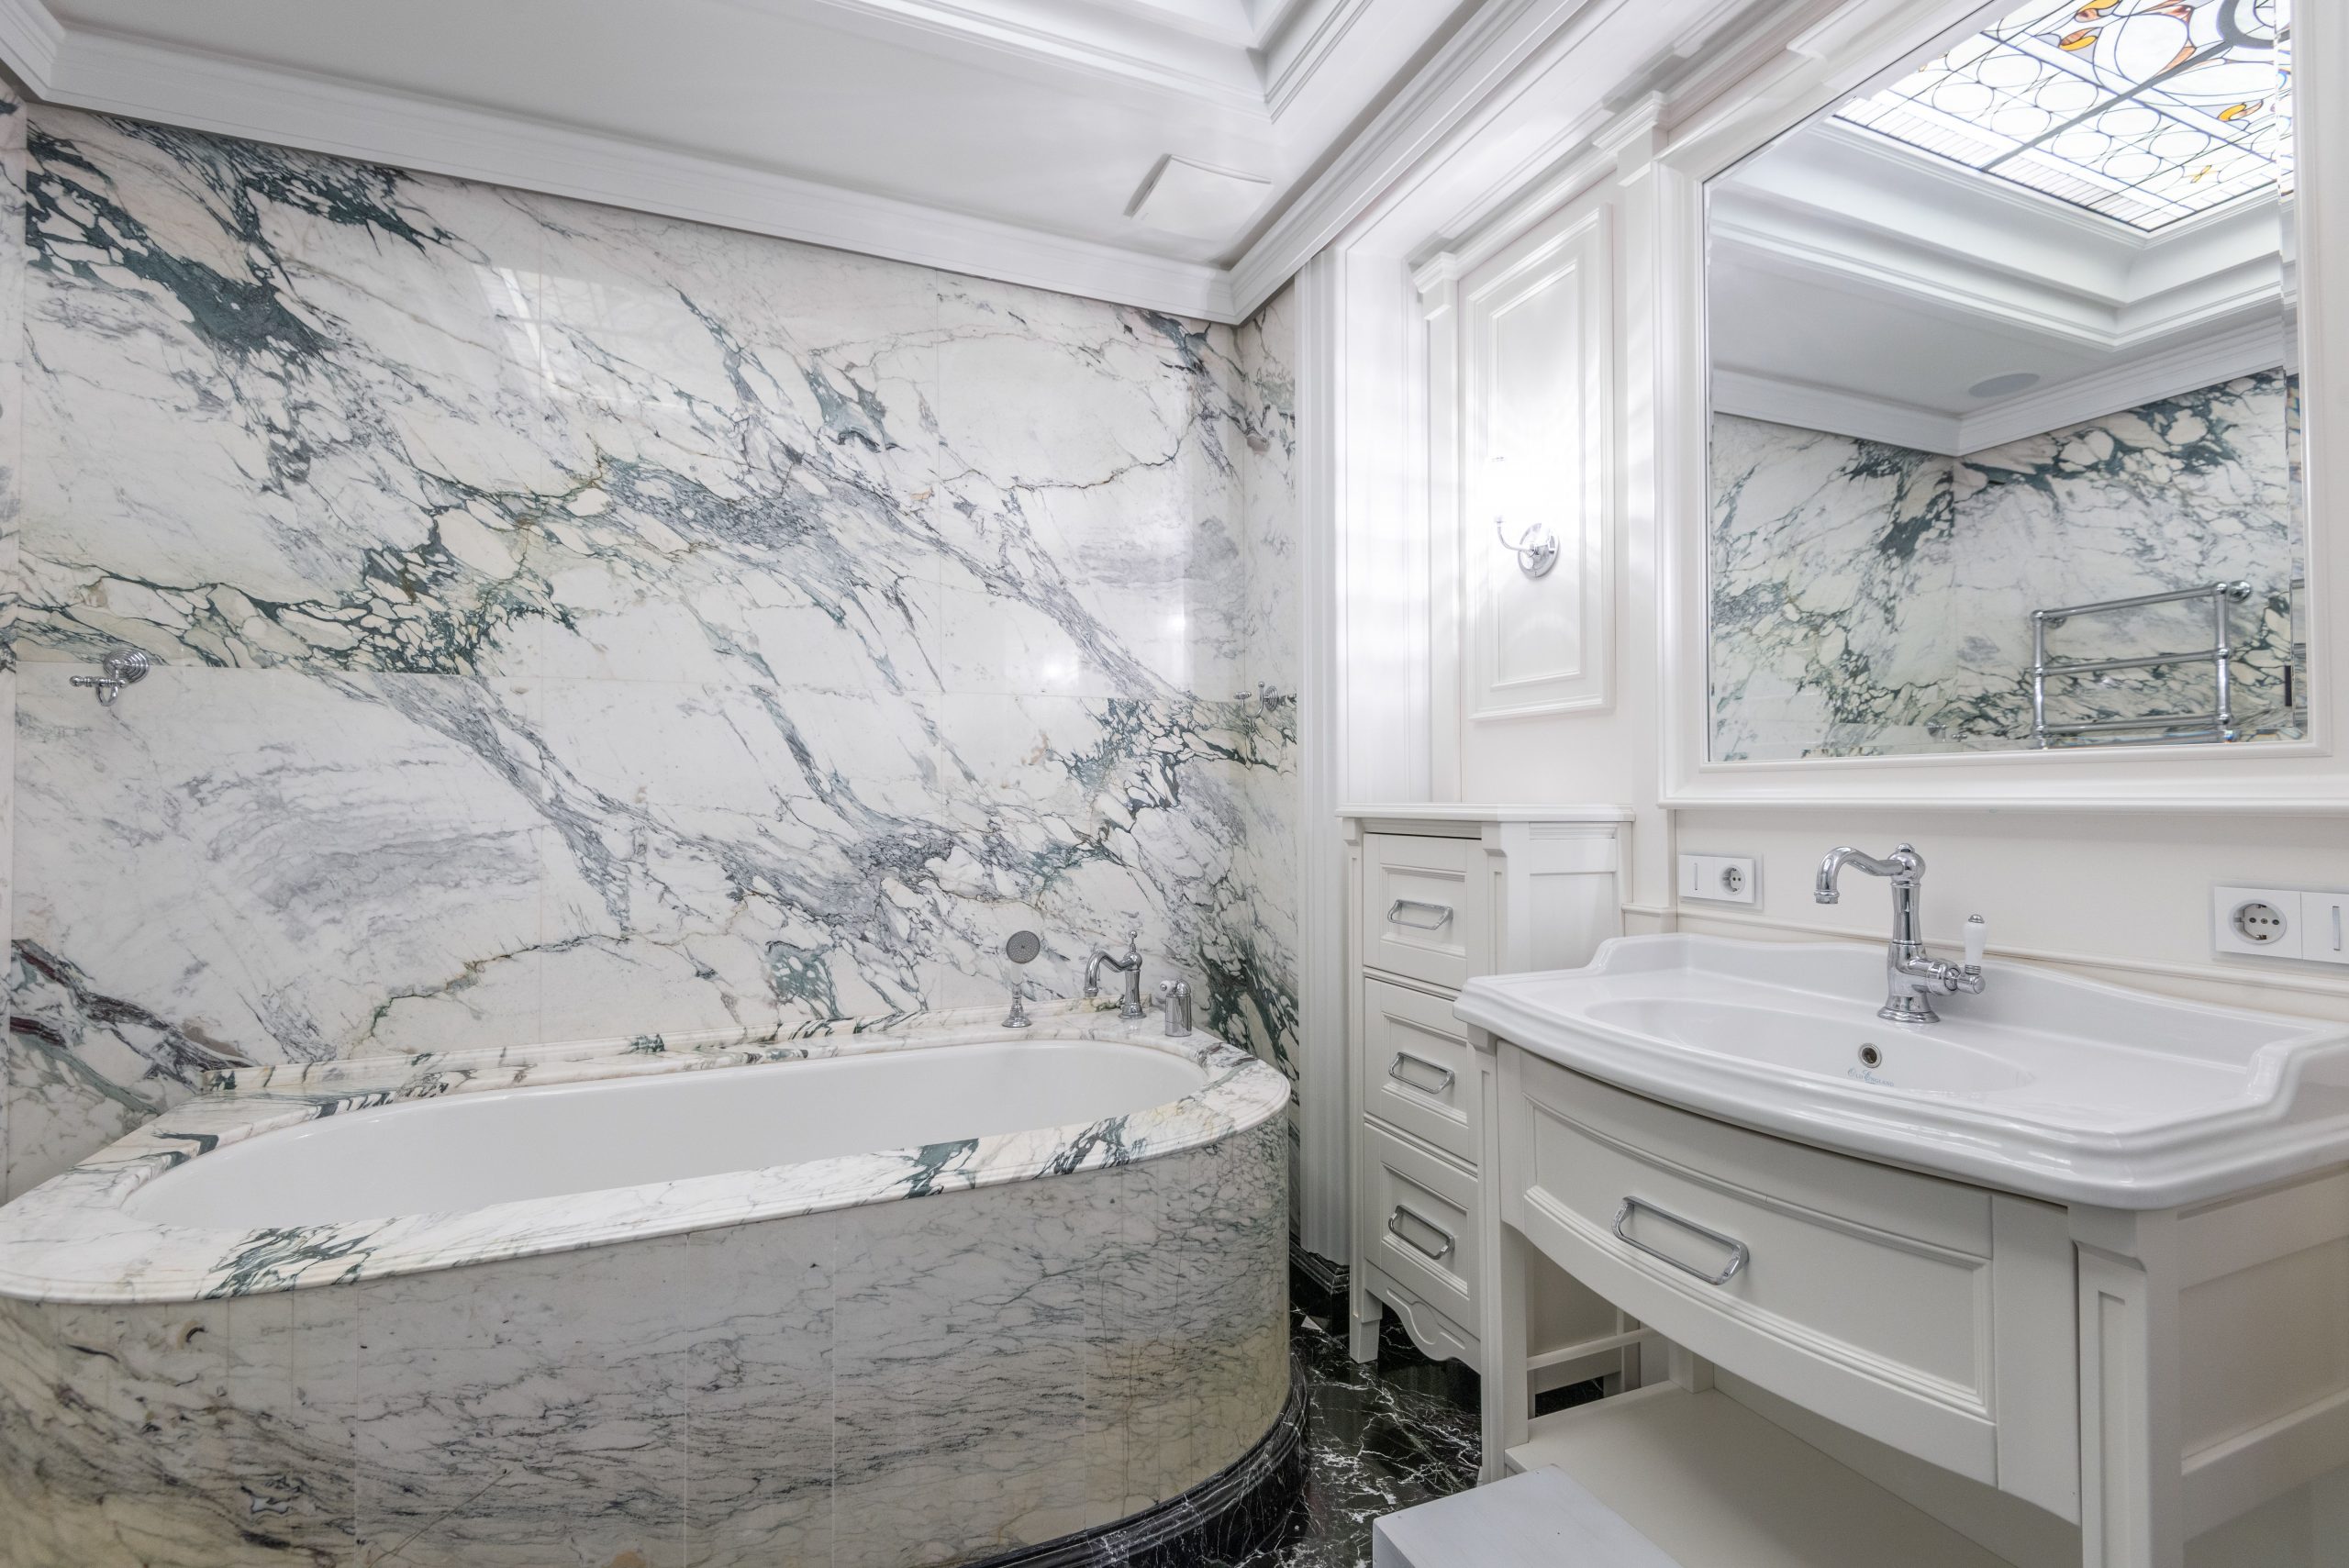
🎯 What Makes It Work
While a full marble-clad bathroom is the height of luxury, it comes with significant costs and practical considerations. The weight of this much stone may require reinforcing the floor joists, a hidden cost you must factor in. The installation is also highly specialized and expensive. Finally, as with all marble, the entire surface will require regular sealing to protect against etching and staining, which is a much larger task in a fully-clad room.
21. Create a Serene Oasis with Light Marble, Wood, and Brass
The serene, spa-like atmosphere in this bathroom is achieved by a very disciplined and minimal material palette. The designer stuck to three primary materials: light-colored marble, light wood, and warm brass. By repeating these same materials across every element—walls, floor, vanity, fixtures—they created a cohesive and calming visual rhythm. There are no competing colors or textures, which allows the mind to relax. The result is a space that feels clean, warm, and profoundly peaceful. For another quiet bathroom, see Idea #24.
💸 Get This Look For Less
You don’t need a five-figure budget to get this look. Start with an affordable light-marble-effect porcelain tile for the walls and floors. Pair it with an IKEA vanity in a light wood finish, like the GODMORGON series. Then, splurge just a little on the fixtures. High-quality brass faucets and hardware can make the entire space look much more expensive than it is. Check stores like Wayfair or Build.com for stylish brass options that won’t break the bank.
22. Showcase a Luminous, Translucent Marble Island Countertop
that sets this kitchen apart is the countertop material itself: it’s a translucent marble. This rare quality allows light to pass through it, giving the island an incredible ethereal glow, especially if backlit. The subtle beige and gray veining adds just enough pattern without detracting from its luminous quality. In a world of opaque granites and quartz, a translucent stone is a showstopper that turns a simple kitchen island into a work of art.
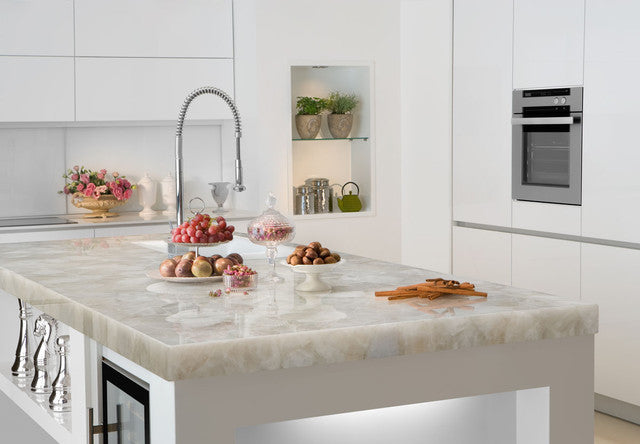
📏 Scale Guide
Translucent marbles, like certain types of Onyx or Cristallo quartzite which are often mistaken for marble, are breathtaking but require special care. They are often softer and more prone to scratching than denser marbles. Because they are translucent, any dark spill that manages to penetrate could be visible *inside* the stone. Sealing is not just recommended; it’s absolutely critical and should be done professionally. This is a material for a careful homeowner who values beauty over bulletproof functionality.
23. Contrast White Marble Countertops with Dark Wood Flooring
The success of this classic kitchen lies in its strong foundation of contrast. The dark brown wood flooring grounds the entire space, providing a rich, warm base. Against this dark floor, the white shaker cabinets and white marble countertops appear even brighter and cleaner. This simple, high-contrast palette of dark floors and white surfaces is a timeless choice that always looks crisp and polished. The stainless steel appliances add a modern, professional touch that completes the look.
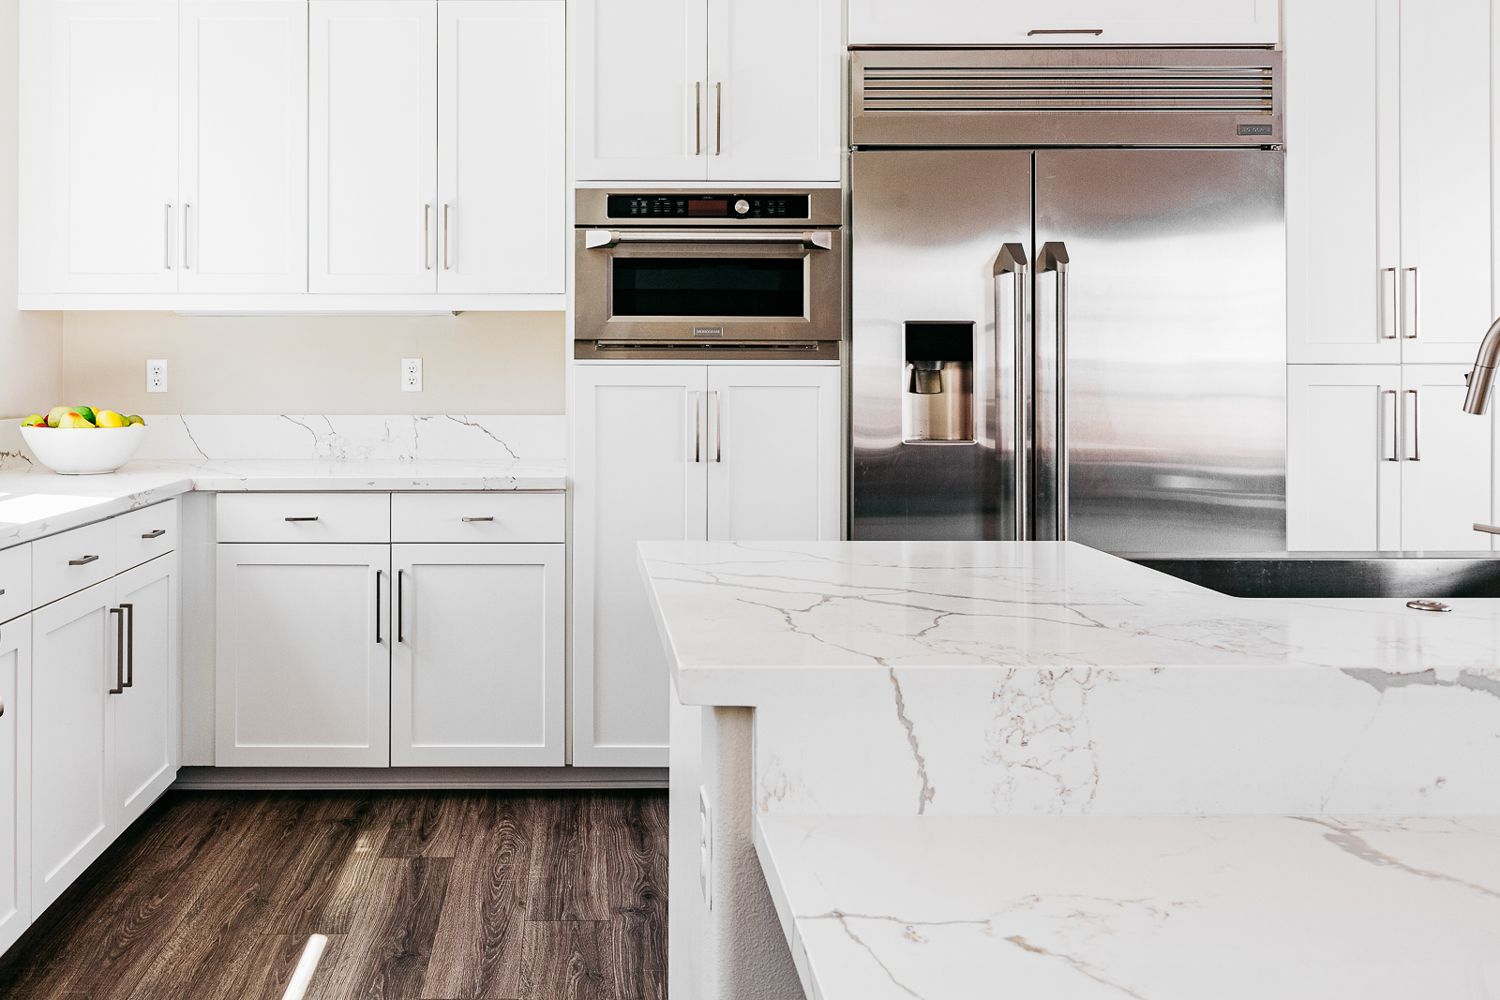
🧹 Maintenance Reality
- Check floor levelness: Before installing cabinets on an existing dark wood floor, ensure it’s perfectly level to avoid issues with cabinet and countertop alignment.
- Confirm your undertones: Not all white marbles are the same. Bring a sample of your chosen slab to your home to see it next to your flooring. A creamy marble might clash with a floor that has cool, ashy undertones.
- Plan your appliance layout: The ‘work triangle’ (the path between your fridge, stove, and sink) is crucial in a layout like this. Make sure the path is unobstructed for an efficient workflow.
24. Embrace Minimalism with Large Format Marble Tiles and a Floating Vanity
For a truly minimalist and expansive look, use the largest format tiles you can find. Using large tiles for both the walls and floor, as seen here, dramatically reduces the number of grout lines. Fewer grout lines mean less visual clutter, which makes a small or medium-sized bathroom feel much larger and more seamless. It creates a continuous surface of marble that feels both clean and luxurious.
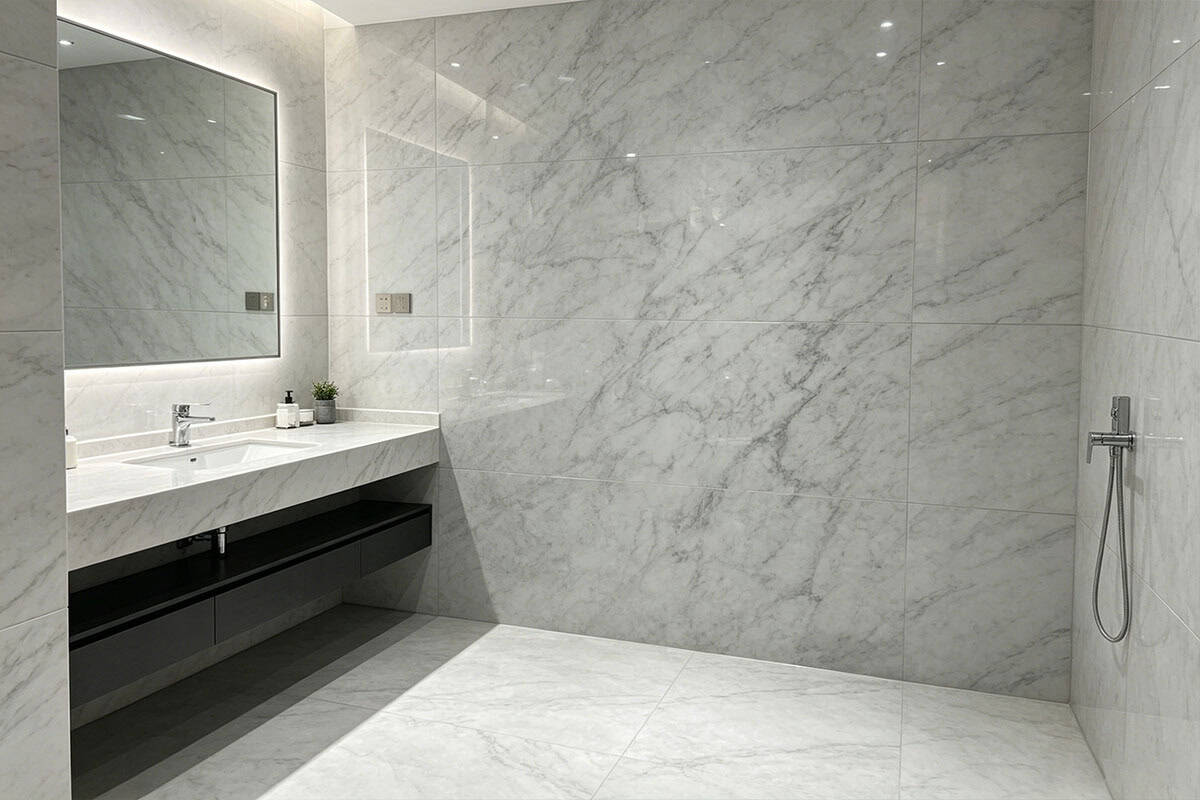
🔥 Trending Context
A floating vanity is a fantastic tool for making a bathroom feel bigger, as it exposes more floor area. This design works well in bathrooms of almost any size, from a small powder room to a large master bath. However, for a double vanity like the one shown, you’ll need a wall that is at least 60 inches wide to accommodate two sinks comfortably. The back-lit mirror is another great space-enhancing trick, as it provides ambient light without the bulk of traditional vanity sconces.
25. Design a Dramatic Focal Point with a Gold-Veined Marble Fireplace
This fireplace commands attention because it masterfully combines scale, material, and color. By running the gold-veined marble from floor to ceiling, it creates a sense of grandeur and height. The dramatic, almost painterly quality of the veining turns the wall into a piece of natural art. The dark built-ins and navy velvet chair serve as a framing device, their dark, solid colors making the white and gold of the marble appear even more vibrant and luxurious. This is a similar, but warmer, take on the fireplace in Idea #7.
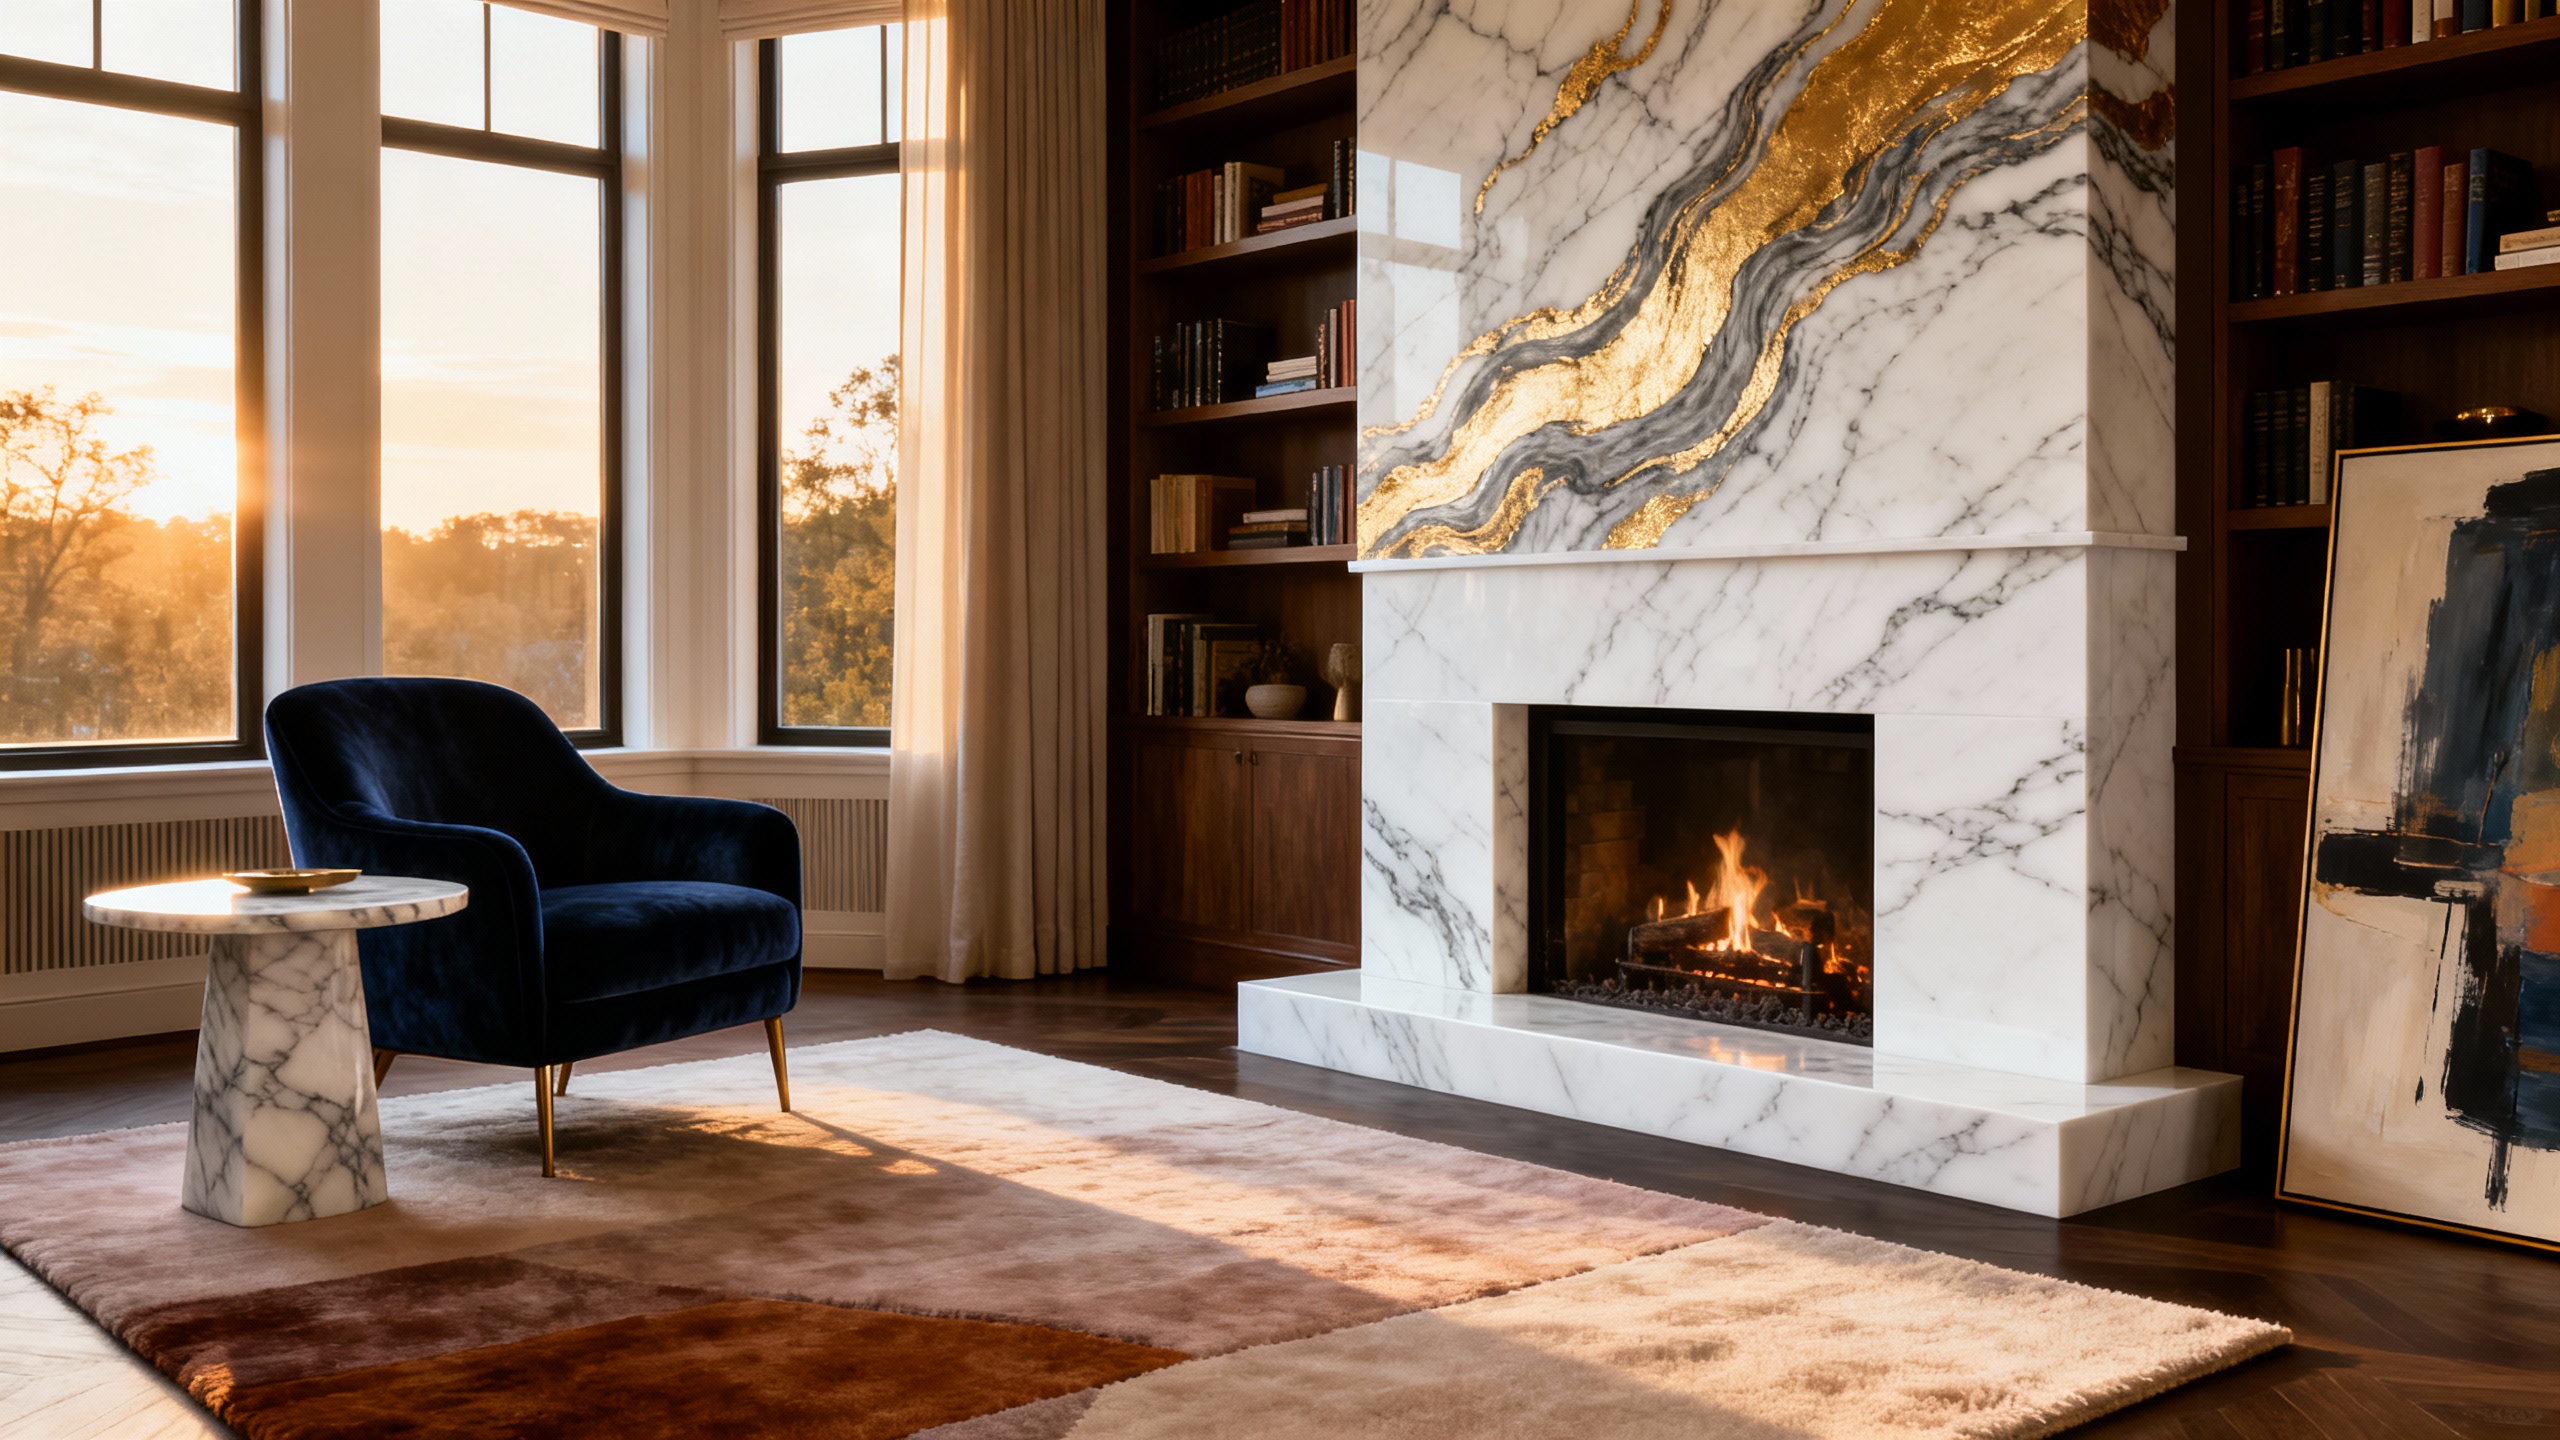
⭐ The One Thing
A floor-to-ceiling marble slab installation is a significant investment and a permanent architectural feature. Be absolutely certain you love the stone before committing. Veining patterns can be very personal; what one person sees as beautiful, another might see as too busy. Visit the stone yard and ‘claim’ your specific slab. Don’t just approve a sample; you need to see the entire piece of art you’re about to install on your wall.
26. Pair a Marble Tulip Table with Black Cane Chairs
This look is a perfect fusion of two major design trends: the resurgence of mid-century modern classics (the marble tulip table) and the rise of natural, textural materials (the black cane chairs). Pairing the sleek, space-age silhouette of the table with the organic, woven texture of cane feels fresh and very 2026. It’s a dialogue between minimalist form and natural craftsmanship, which is why it feels both timeless and completely current. Compare this sleek base to the more decorative one in Idea #2.
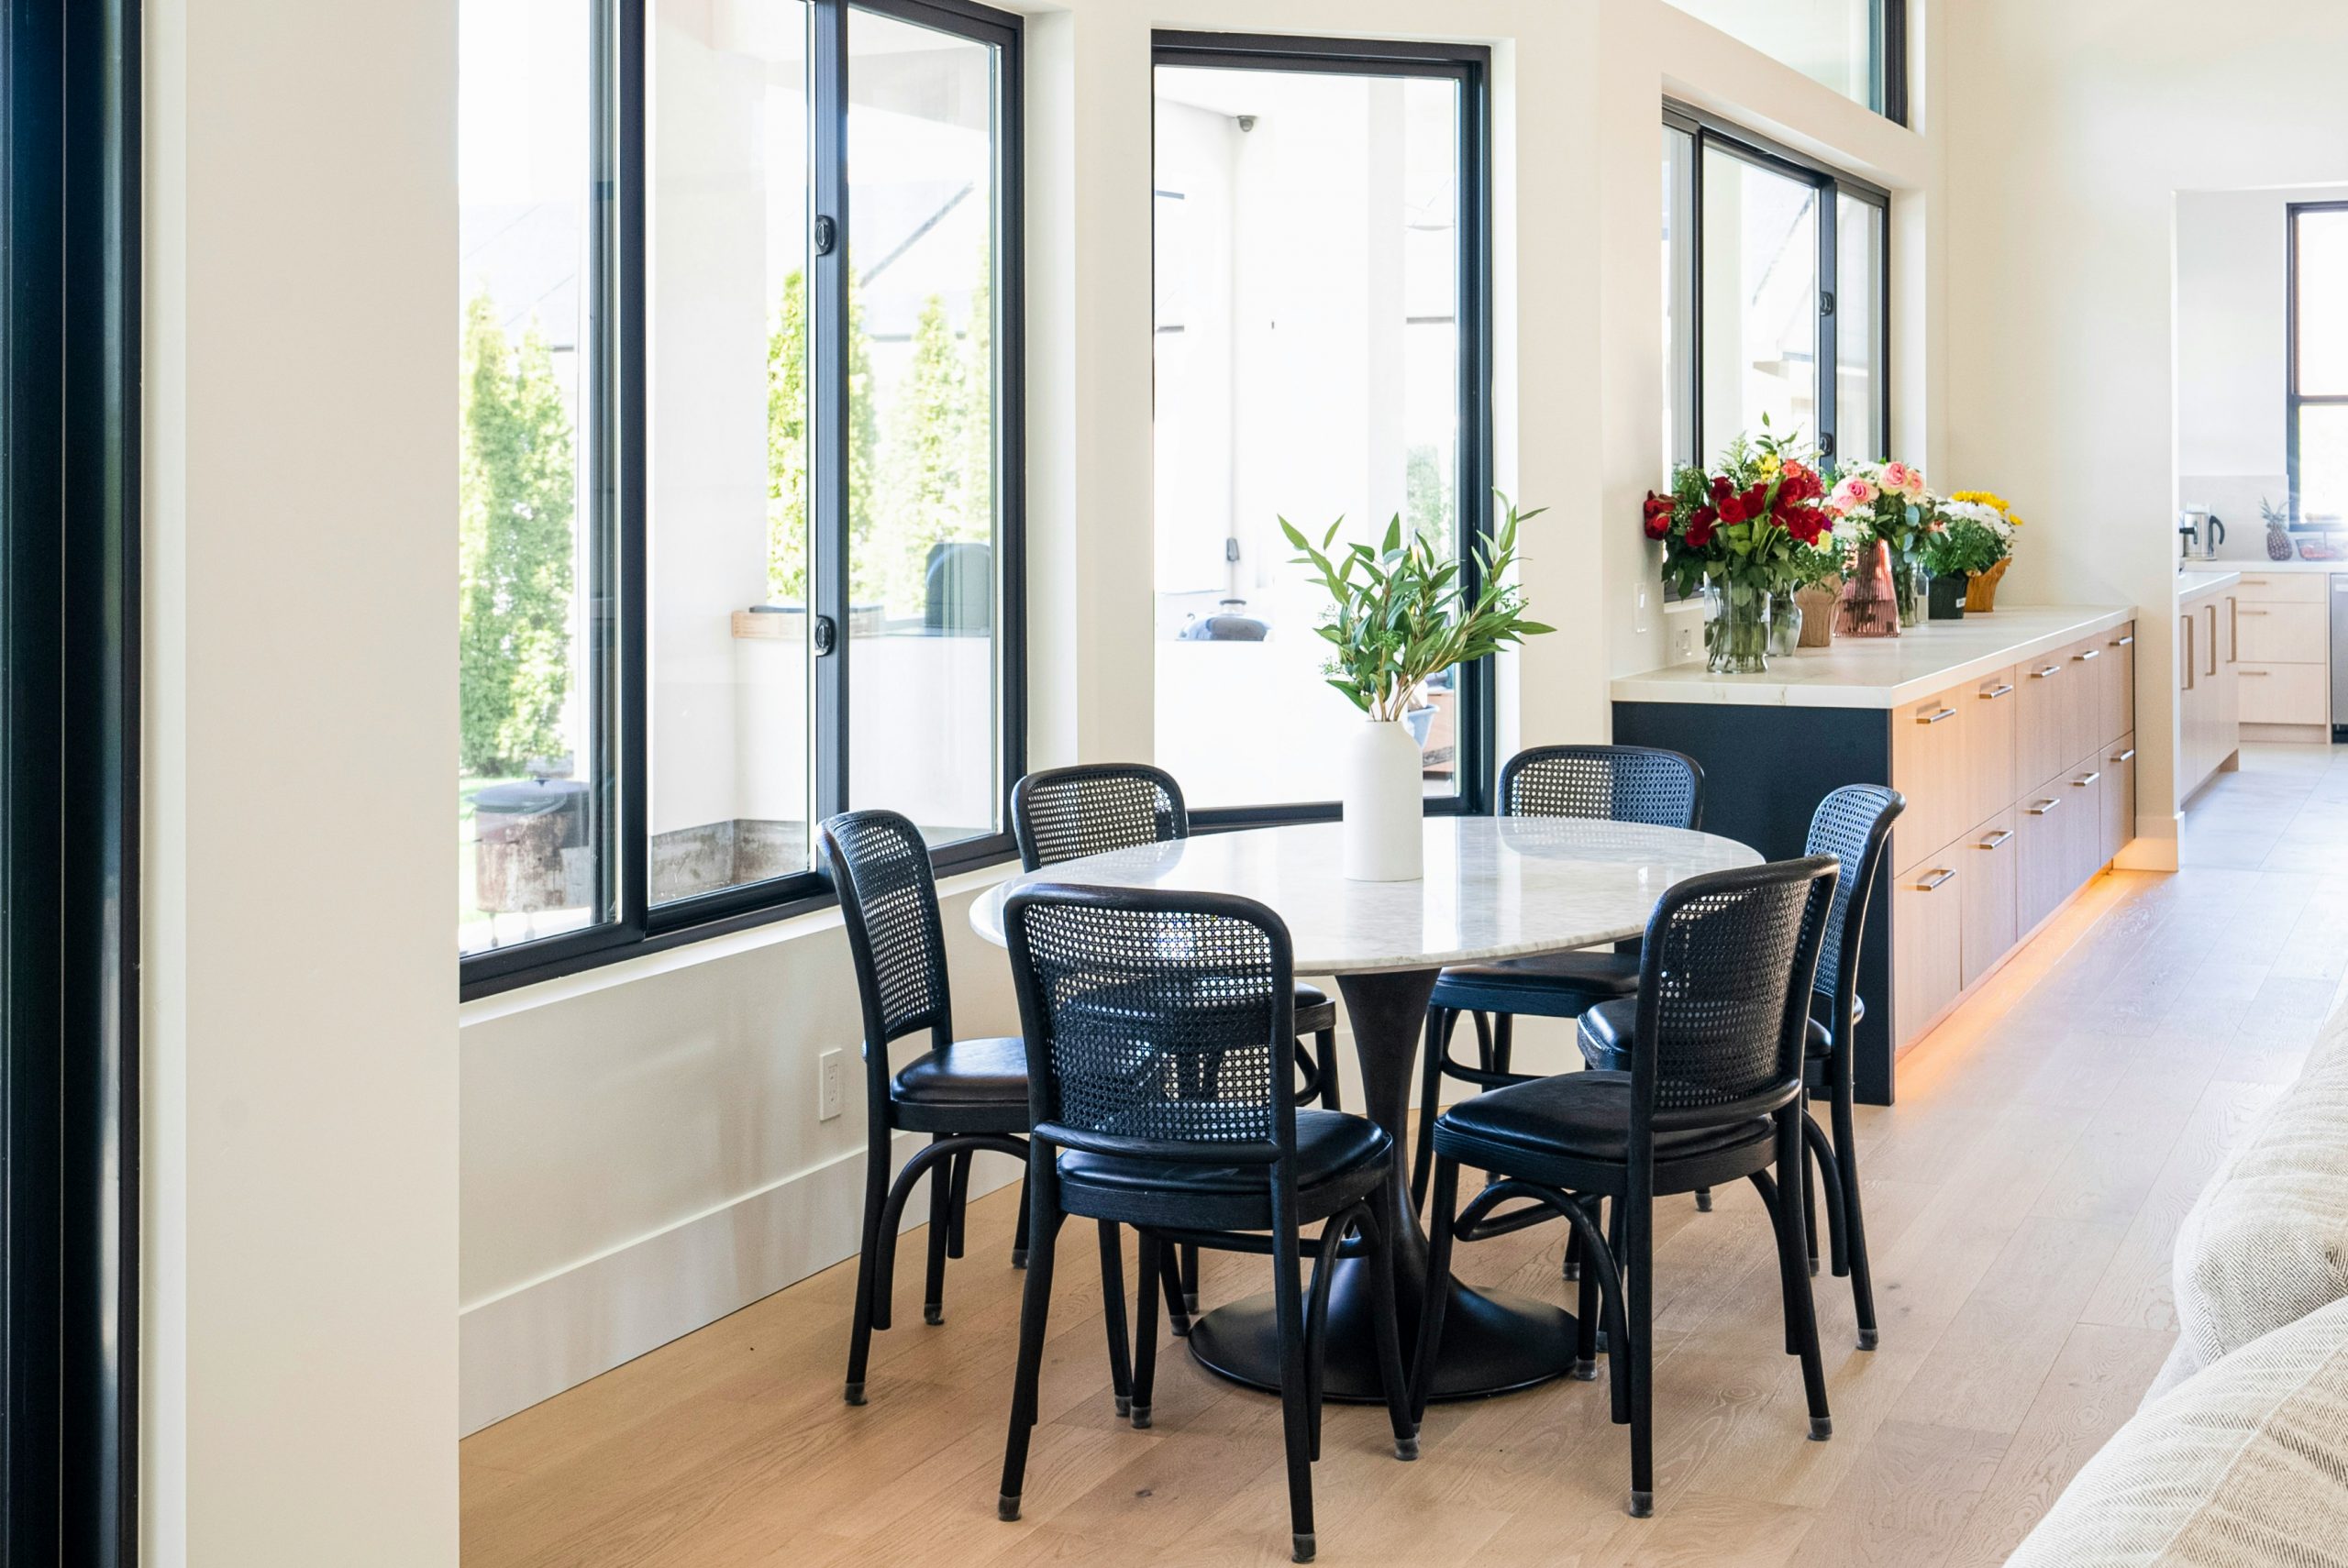
⚠️ Real Talk
The single element that prevents this dining set from feeling generic is the black cane chairs. A marble tulip table is a classic, but we’ve seen it a thousand times with simple molded plastic or upholstered chairs. The introduction of black-painted wood and natural cane adds a layer of texture, warmth, and graphic punch that makes the entire setup feel curated and stylish. They provide the perfect counterpoint to the cool, smooth marble.
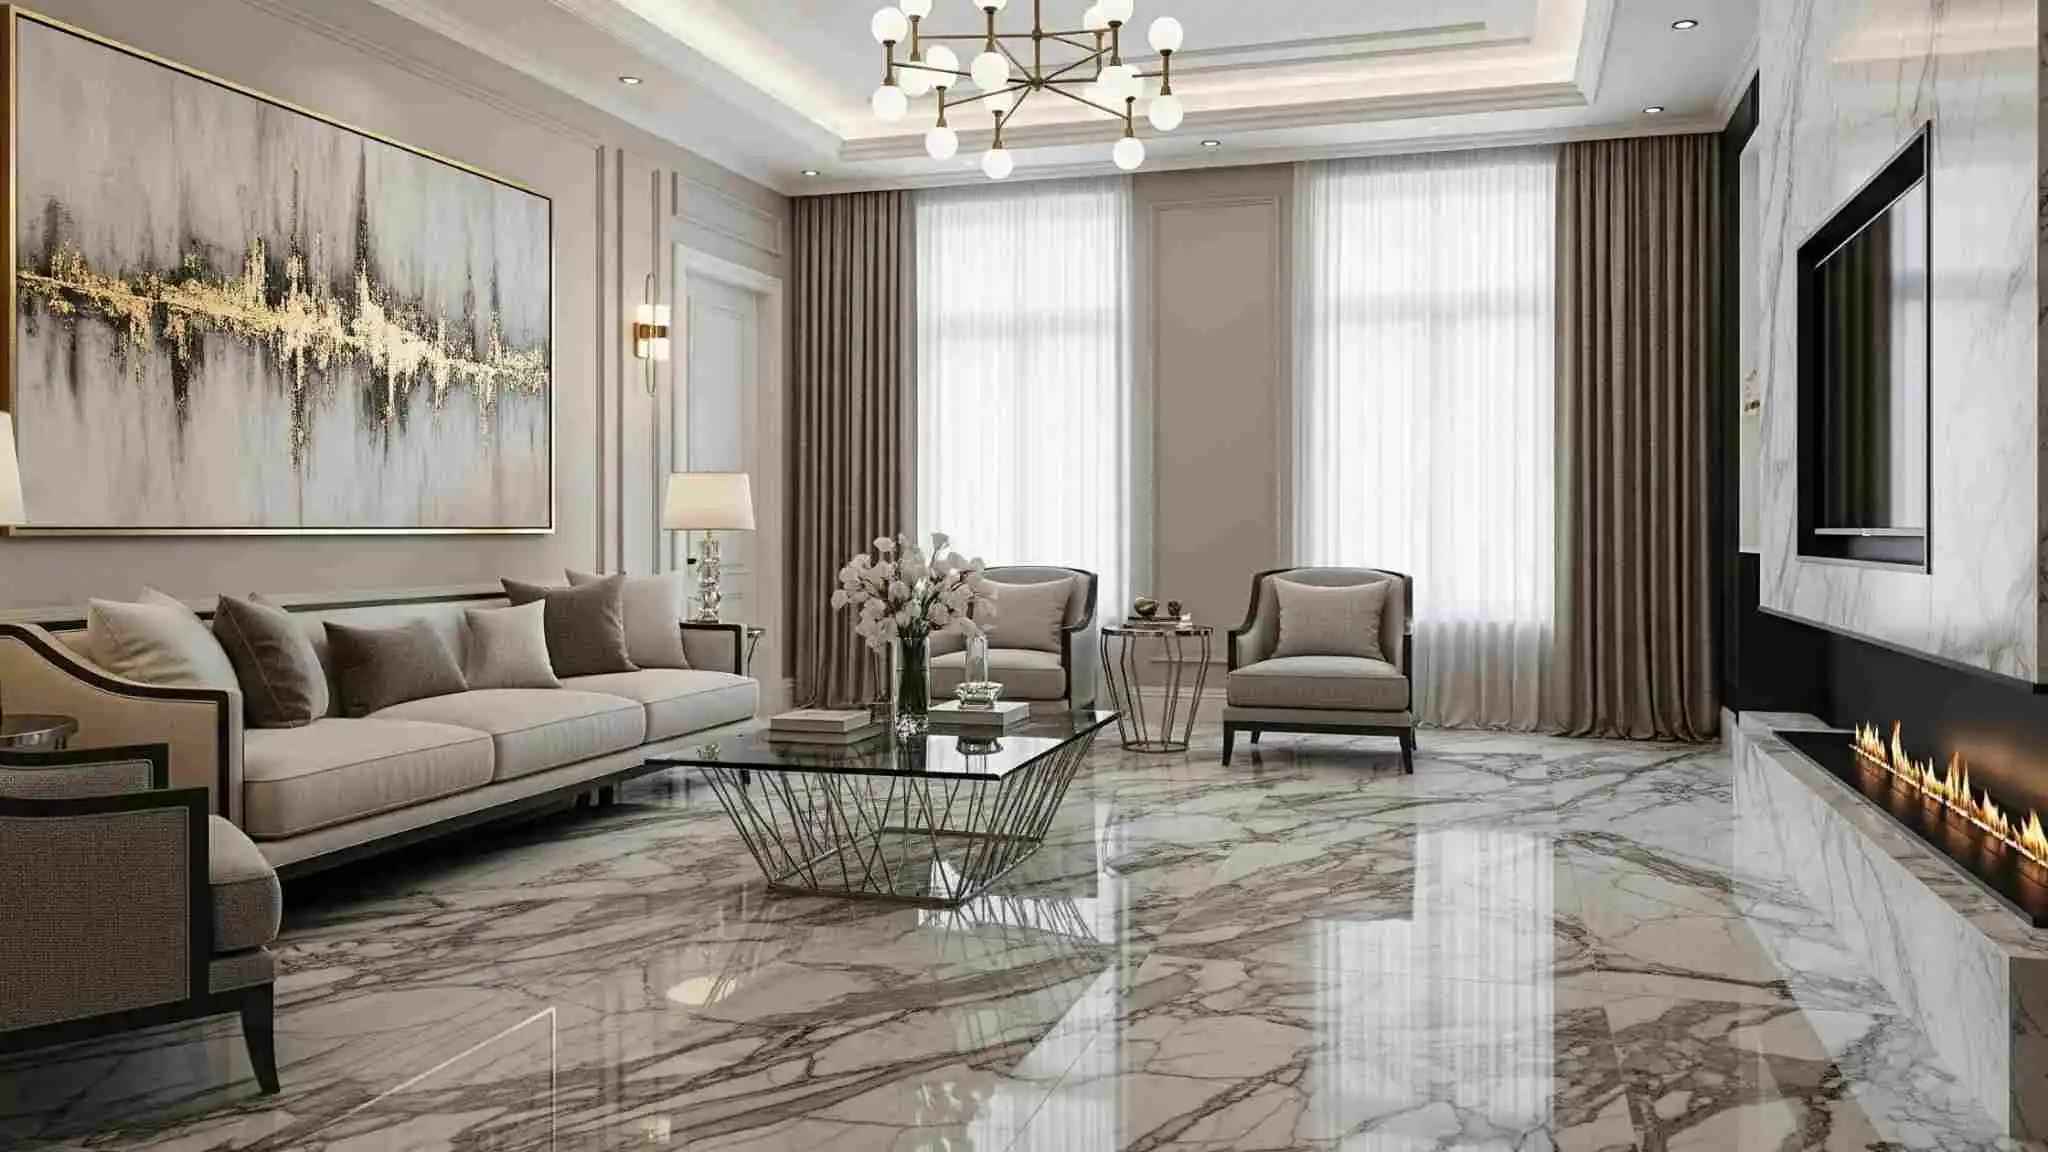
27. Embrace Ultimate Luxury with Polished Marble Floors
Polished marble flooring is the epitome of luxury, but it requires dedicated upkeep. The high-gloss finish will show every speck of dust and is susceptible to scratching from dirt, pet claws, or dragging furniture. It must be cleaned with a pH-neutral cleaner specifically for stone, as acidic or harsh chemicals can etch and dull the finish instantly. Expect to have the floors professionally re-polished every few years at a cost of $2-$5 per square foot to maintain that mirror-like shine.
✅ Before You Start
- Main Furniture (Sofa & Armchairs): $5,000 – $15,000
- Flooring (Polished Marble Tile): $15 – $40 per sq. ft. (plus installation)
- Lighting (Chandelier & Recessed): $2,000 – $7,000
- Fireplace/Media Wall: $8,000 – $25,000
- Artwork & Decor: $1,000 – $10,000+
- TOTAL (for a 400 sq ft room): $32,000 – $100,000+
- Budget alternative: Use a large-format polished porcelain tile with a marble look for a fraction of the cost and maintenance. Focus the budget on one statement piece, like a great sofa or a striking chandelier.
Your Home’s Next Chapter: Written in Stone
From a simple tray to a full-floor installation, marble offers a unique way to bring natural beauty and timeless elegance into your home. Each vein and swirl tells a story, and now you have 27 ideas to help you start yours. The perfect look is waiting for you to make it your own.
Feeling inspired? Head over to Pinterest and start creating a board for your favorite marble moments. Your dream space is closer than you think!