You know that feeling when you finally find the fairy garden idea that looks exactly right for your space? That little spark of magic you can actually build yourself. After filtering through hundreds of options across craft stores and garden centers, we narrowed it down to the 27 ideas that truly deliver for 2026. Inside, you’ll find curated scenes covering whimsical cottages, rustic repurposed planters, and sleek modern terrariums, with tips for every budget.
This year, it’s all about creating miniature, self-contained worlds that feel like a personal escape—a hands-on hobby that offers a break from the digital noise. And stay until the end — we break down the most common mistakes that can ruin these looks. 📌 Save this to Pinterest for later — you’ll want to revisit these ideas.
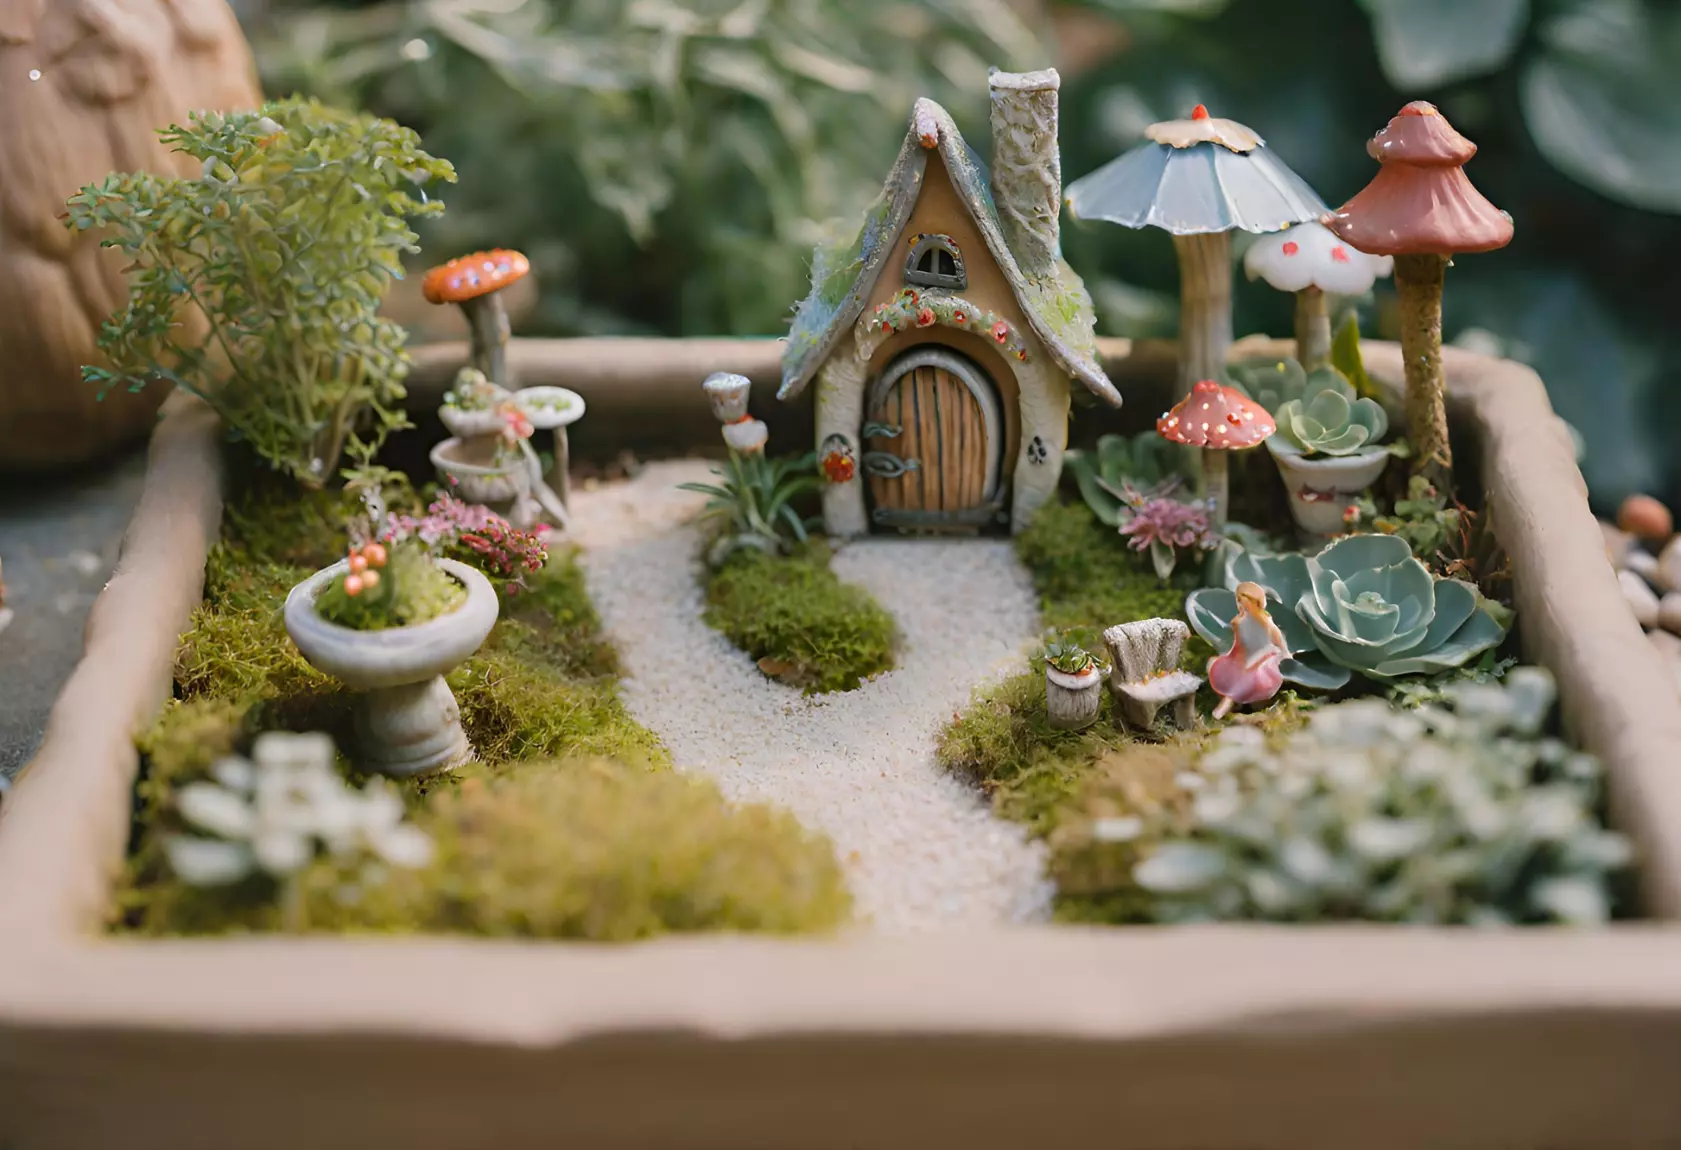
1. Whimsical Fairy Village with a Forest Sign
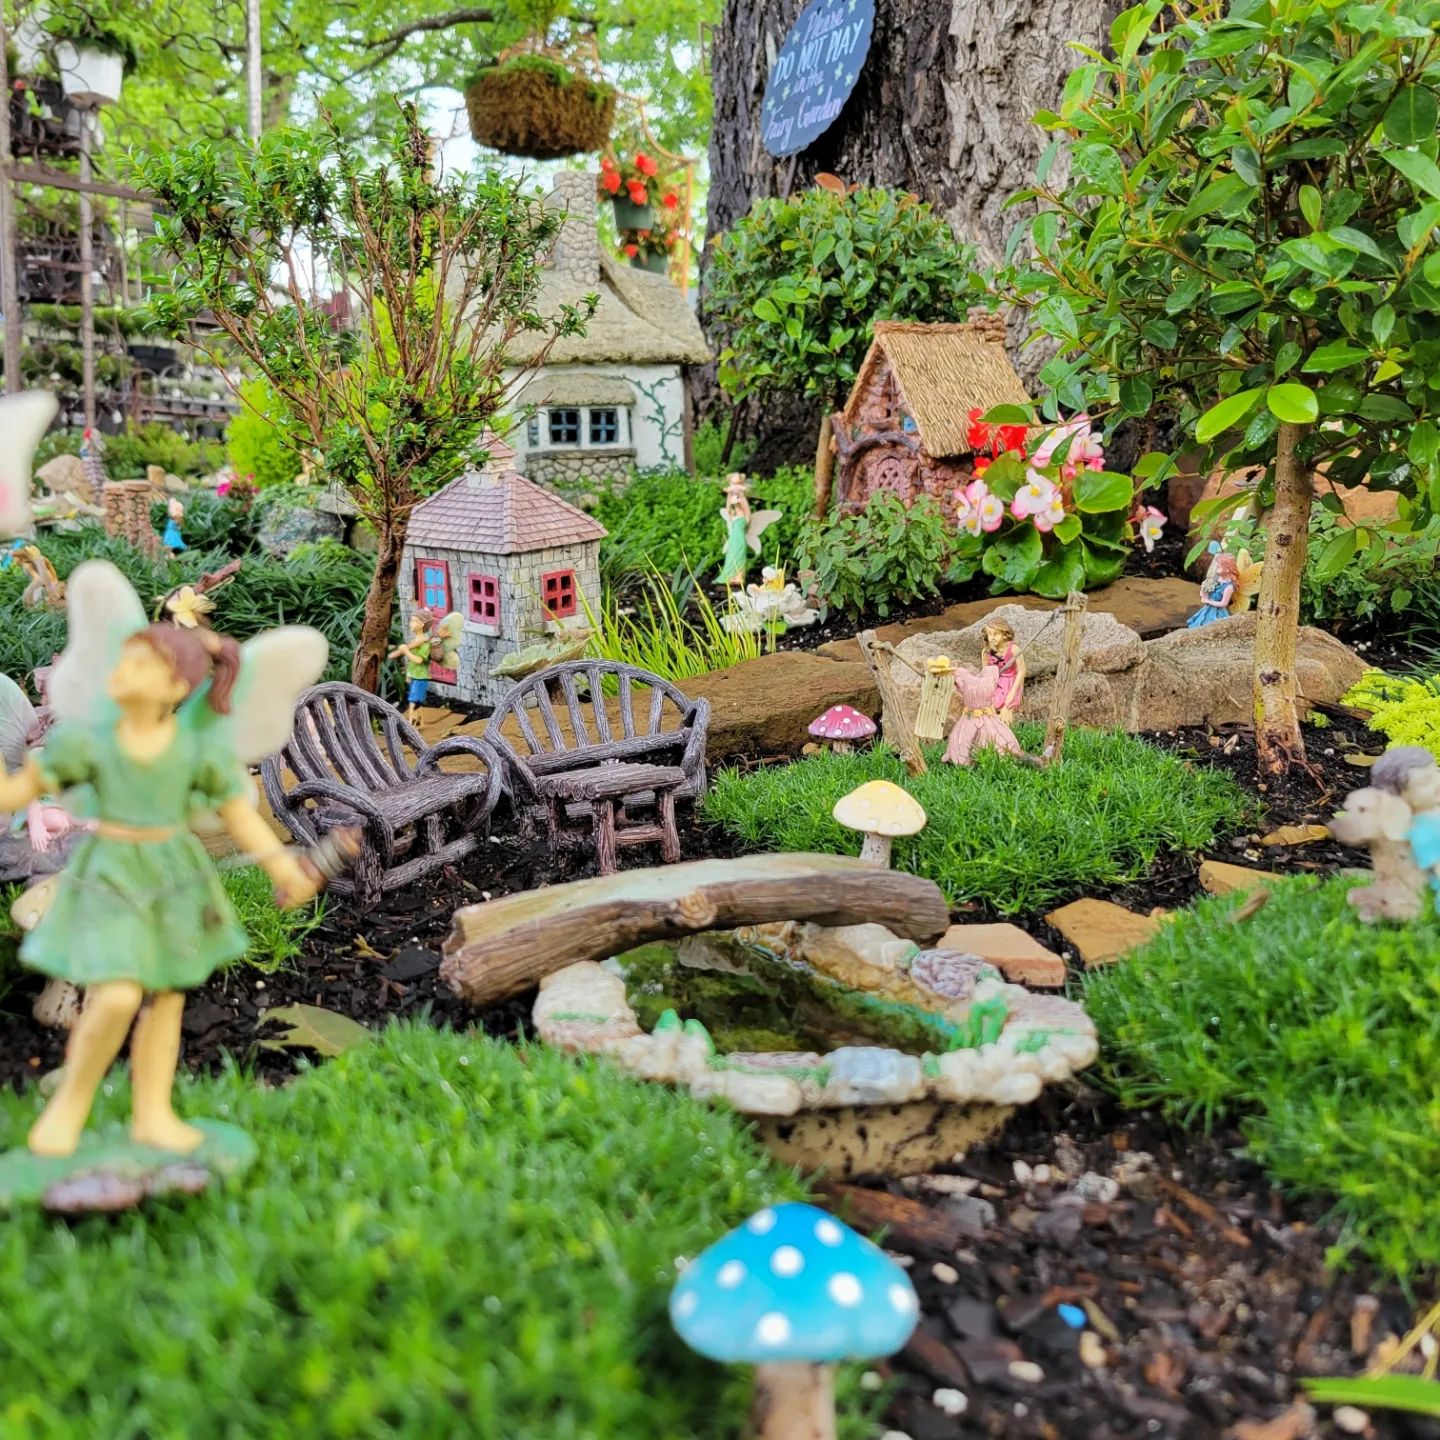
What makes this little world feel so complete is the clever use of scale and signage. The “Fairy Garden” sign isn’t just cute; it acts as a formal entrance, inviting you into the scene. It establishes a sense of place. The design works because of the contrast between the dark, crisp sign and the organic, varied textures of the foliage and yellow-roofed house. The tall, red-spotted mushroom adds a vertical element that draws the eye upward, balancing the low-lying home and ground cover.
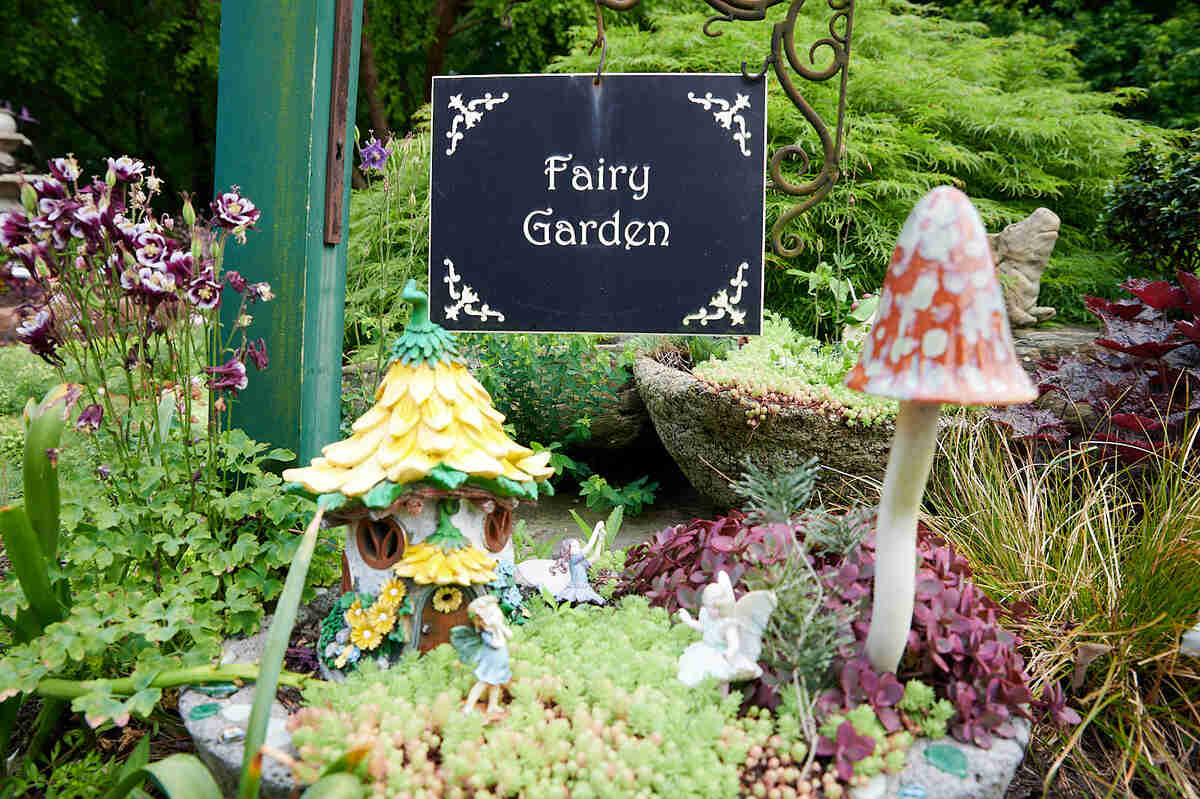
💡 Designer Tip
For a professional touch, always establish a clear focal point. Here, it’s the interaction between the sign and the house. To replicate this, position your main “statement” piece (like a house or large accessory) slightly off-center, then place a secondary guiding element (like this sign) to lead the eye toward it. Don’t just scatter items; create a visual journey. Use a primary path or signpost to guide viewers to the most interesting part of your miniature landscape.
2. Autumn Harvest Gnome Garden in a Terracotta Planter
This charming fall scene follows a simple but effective formula: 50% seasonal theme + 30% classic fairy elements + 20% natural greenery. The miniature farm stand, pumpkins, and gnomes clearly shout “autumn.” The red and white toadstools are timeless fairy tale icons, grounding the design in the genre. Finally, the moss and leafy plants provide a lush, living backdrop. You could swap the theme—try tiny beach chairs and blue glass for summer—while keeping the gnome and toadstool ratio for that essential touch of whimsy.
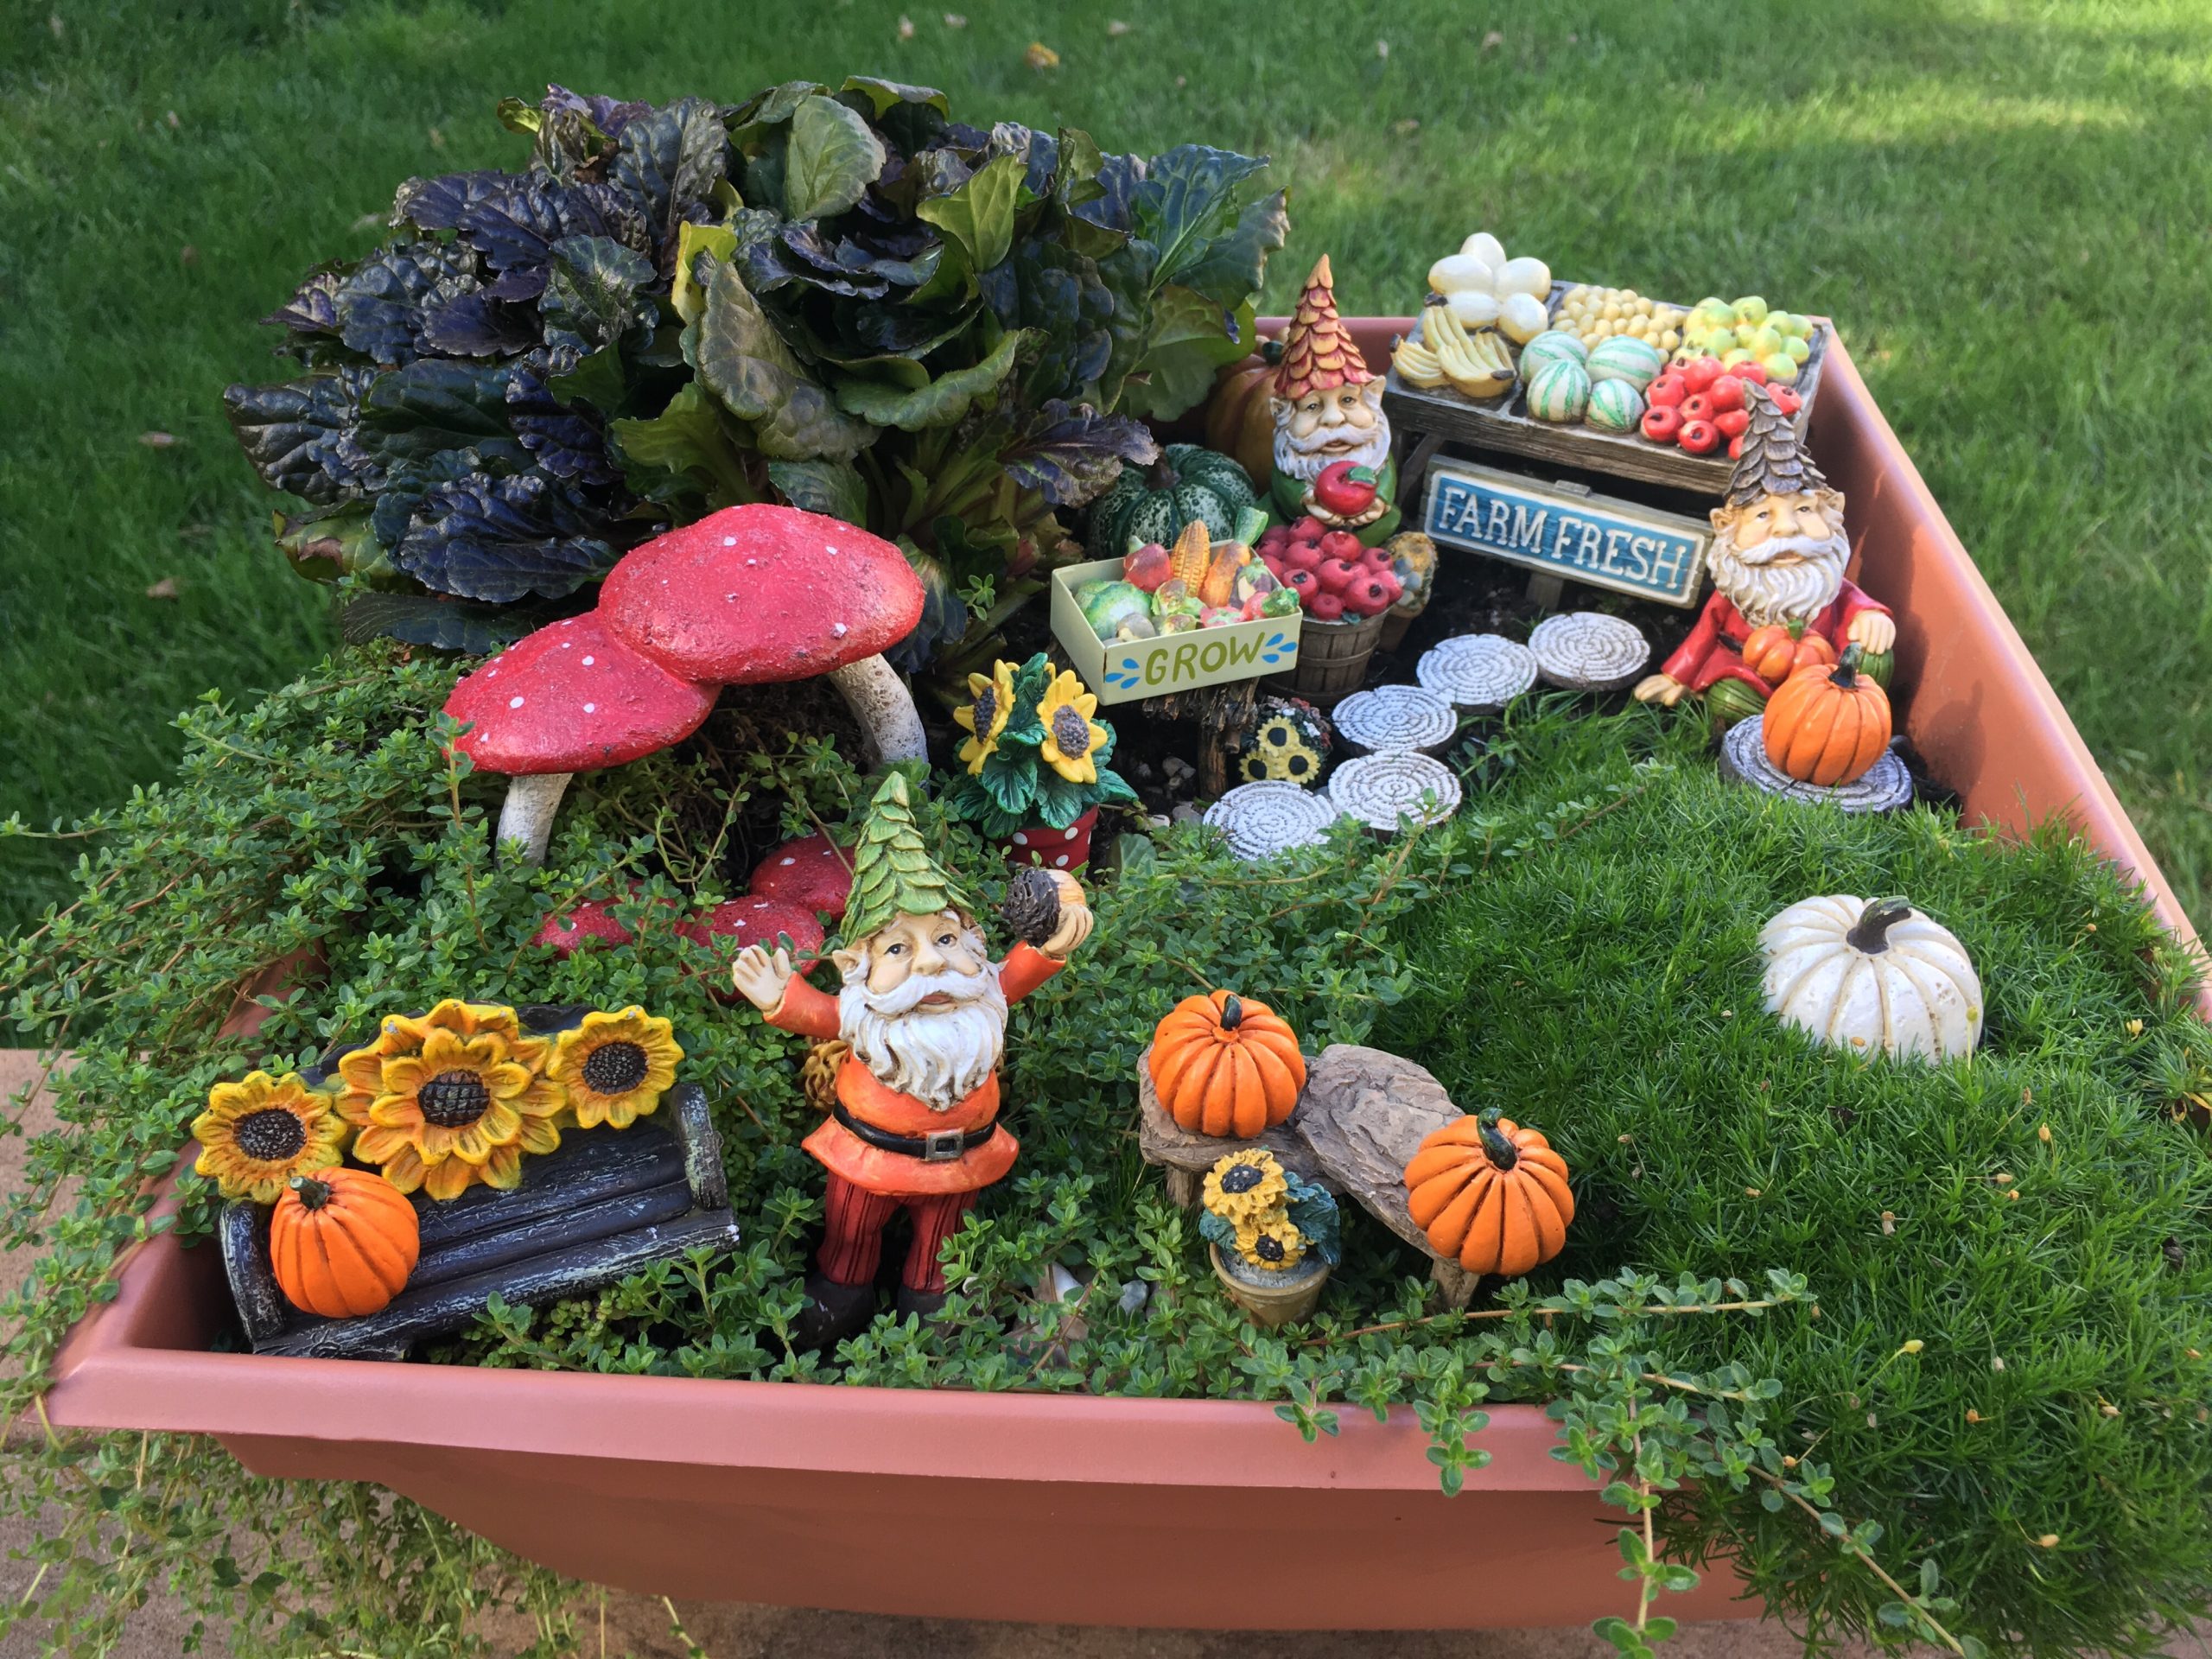
💰 Budget Breakdown
A word of caution: themed gardens like this one are delightful but have a short season. Be prepared to either love looking at a tiny pumpkin patch in May or have a plan to swap out the seasonal elements. The small pieces (gnomes, pumpkins, produce) can be delicate and are easily lost or broken, especially if the garden is accessible to kids or curious pets. I recommend having a small, labeled storage box ready for off-season decorations.
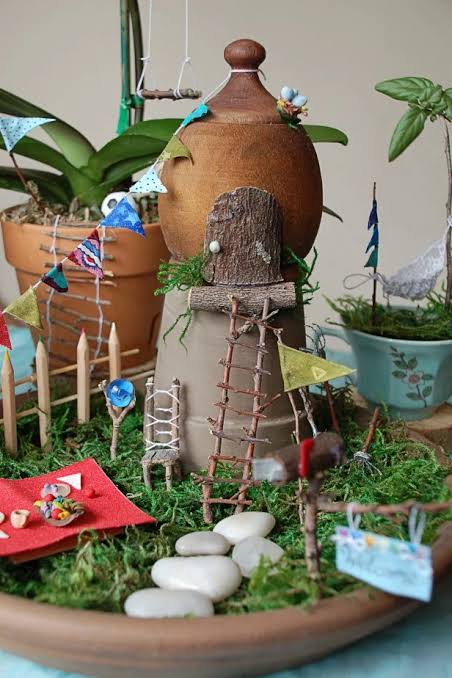
3. Miniature Thatched-Roof Cottage in a Terracotta Bowl
The single element holding this entire scene together is the terracotta bowl itself. It acts as a perfect, contained “world,” giving the garden defined boundaries and a warm, earthy frame. Without the bowl, the cottage and its surrounding gravel paths would just be a small arrangement on the ground, easily lost. The bowl elevates the scene—literally and figuratively—turning it from a temporary setup into a permanent, intentional miniature landscape that you can move and admire from all angles.
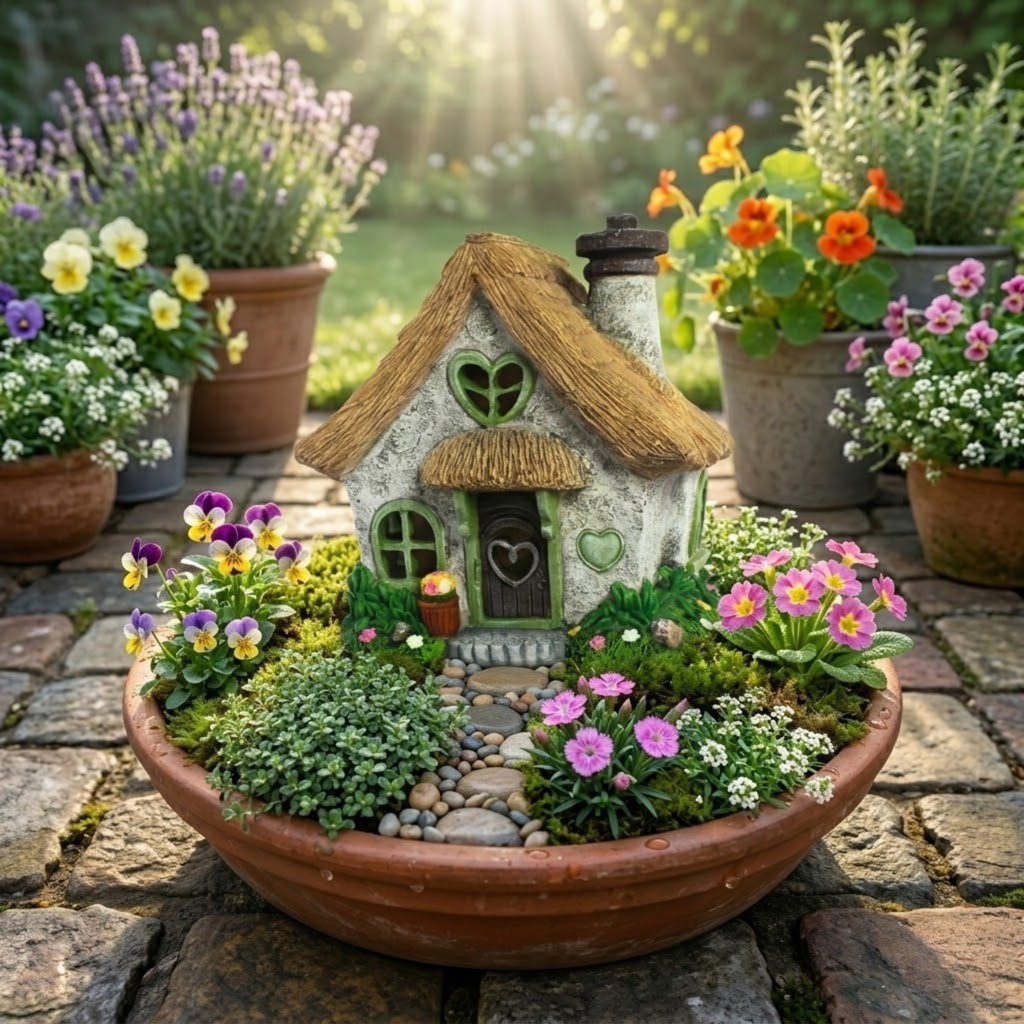
⭐ The One Thing
- Main Furniture (Cottage): $25 – $50
- Container (Large Terracotta Bowl): $30 – $60
- Textiles (Moss): $10 – $20
- Decor/Accessories (Plants, Gravel): $20 – $40
- TOTAL: $85 – $170
- Budget alternative: Use a broken terracotta pot (often free from garden centers) and thrifted miniatures to achieve this look for under $40.
4. Rustic Fairy Garden in a Repurposed Wooden Drawer
The magic here comes from the juxtaposition of rustic decay and vibrant life. The distressed, weathered drawer tells a story of age and use, while the lush, green plants growing within it are bursting with vitality. This contrast is what creates the charm. Furthermore, the use of a found object as a planter makes the entire piece feel clever and resourceful. The rusty metal details, like the birdhouse and wire chairs, perfectly complement the drawer’s dark handle and aged wood, creating a cohesive, rustic palette.
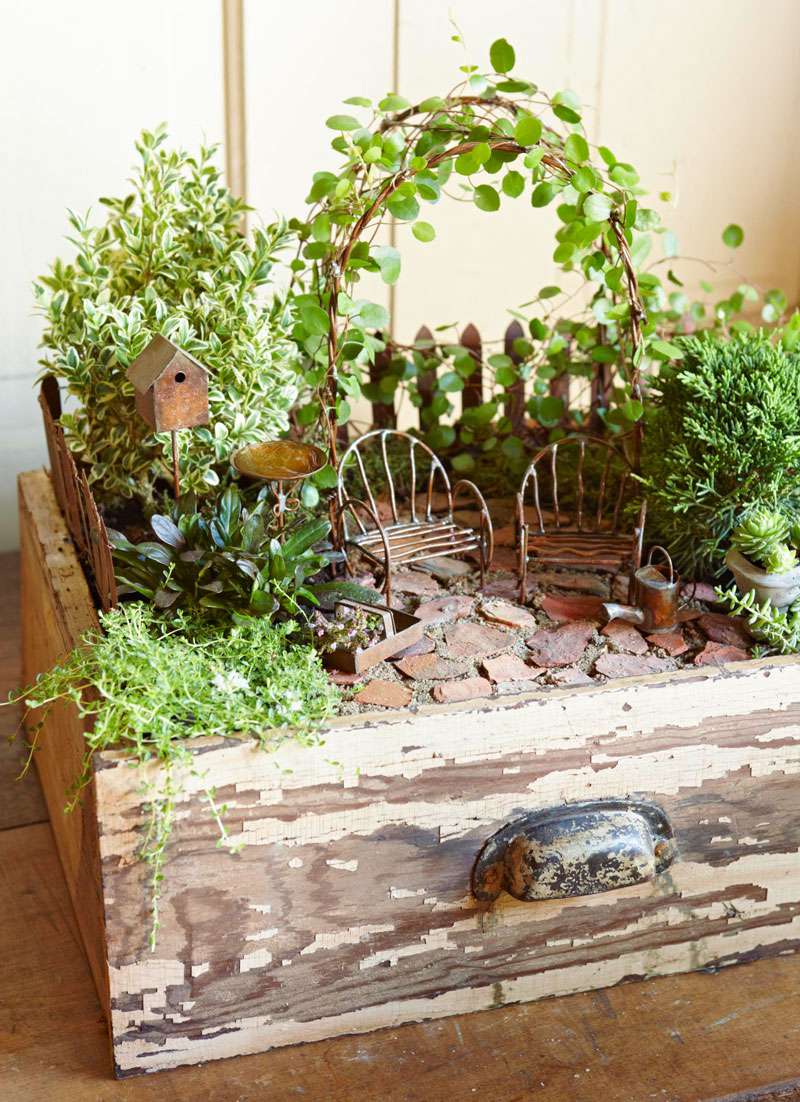
✅ Before You Start
Using an old wooden drawer as a planter is a fantastic look, but it requires some prep and care. Wood will rot with constant moisture. Before planting, you must drill several drainage holes in the bottom. It’s also wise to line the inside with a plastic sheet (with holes poked through for drainage) to protect the wood. Over time, the wood will continue to weather, especially outdoors. To preserve its look, you may need to apply a clear sealant every couple of years, but some people prefer the increasingly distressed appearance.
5. Watermelon House Garden with a Blue Glass Stream
When working with bold, whimsical elements like a watermelon house, the key is to create a visual “river” that connects the scene. The stream of blue glass pebbles does just that. It carves a path through the landscape, linking the picket fence, the stone path, and the house itself. Your eye naturally follows the flow of the “water,” making the small space feel more dynamic and expansive. For maximum impact, make your river serpentine (S-shaped) rather than straight—it feels more natural and interesting.
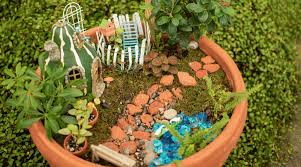
🎯 What Makes It Work
You don’t need to buy expensive kits to get this playful vibe. A simple terracotta pot is a great start, often under $15 at Target or Walmart. For the “stream,” check the floral or candle aisle at the dollar store for bags of blue glass beads for a dollar or two. A small bag of aquarium gravel can make the path. You can even fashion a little house out of a painted rock or polymer clay. A setup very similar to what’s shown here, which might be a budget-friendly version of the cottage in Idea #3, could be assembled for under $30 with a little savvy shopping.
6. Quaint Cottage Garden with a Pebble Pond and Bridge
The tiny pond is the star here, and it’s surprisingly easy to make. This mini-tutorial creates a non-functional, decorative water feature that always looks perfect.
Time: 20 minutes. Cost: $5-$10.
- Scoop out a shallow depression in the soil, about 3-4 inches in diameter.
- Line the depression with a small piece of blue plastic wrap or a shard of blue-painted plastic from a disposable container. This creates the illusion of water depth.
- Carefully arrange small, flattish pebbles around the perimeter to hide the plastic edge and form a natural-looking border.
- Optional: Scatter a few clear or blue glass beads on the plastic “water” surface to simulate sparkle and movement.
- Place your bridge over the top.
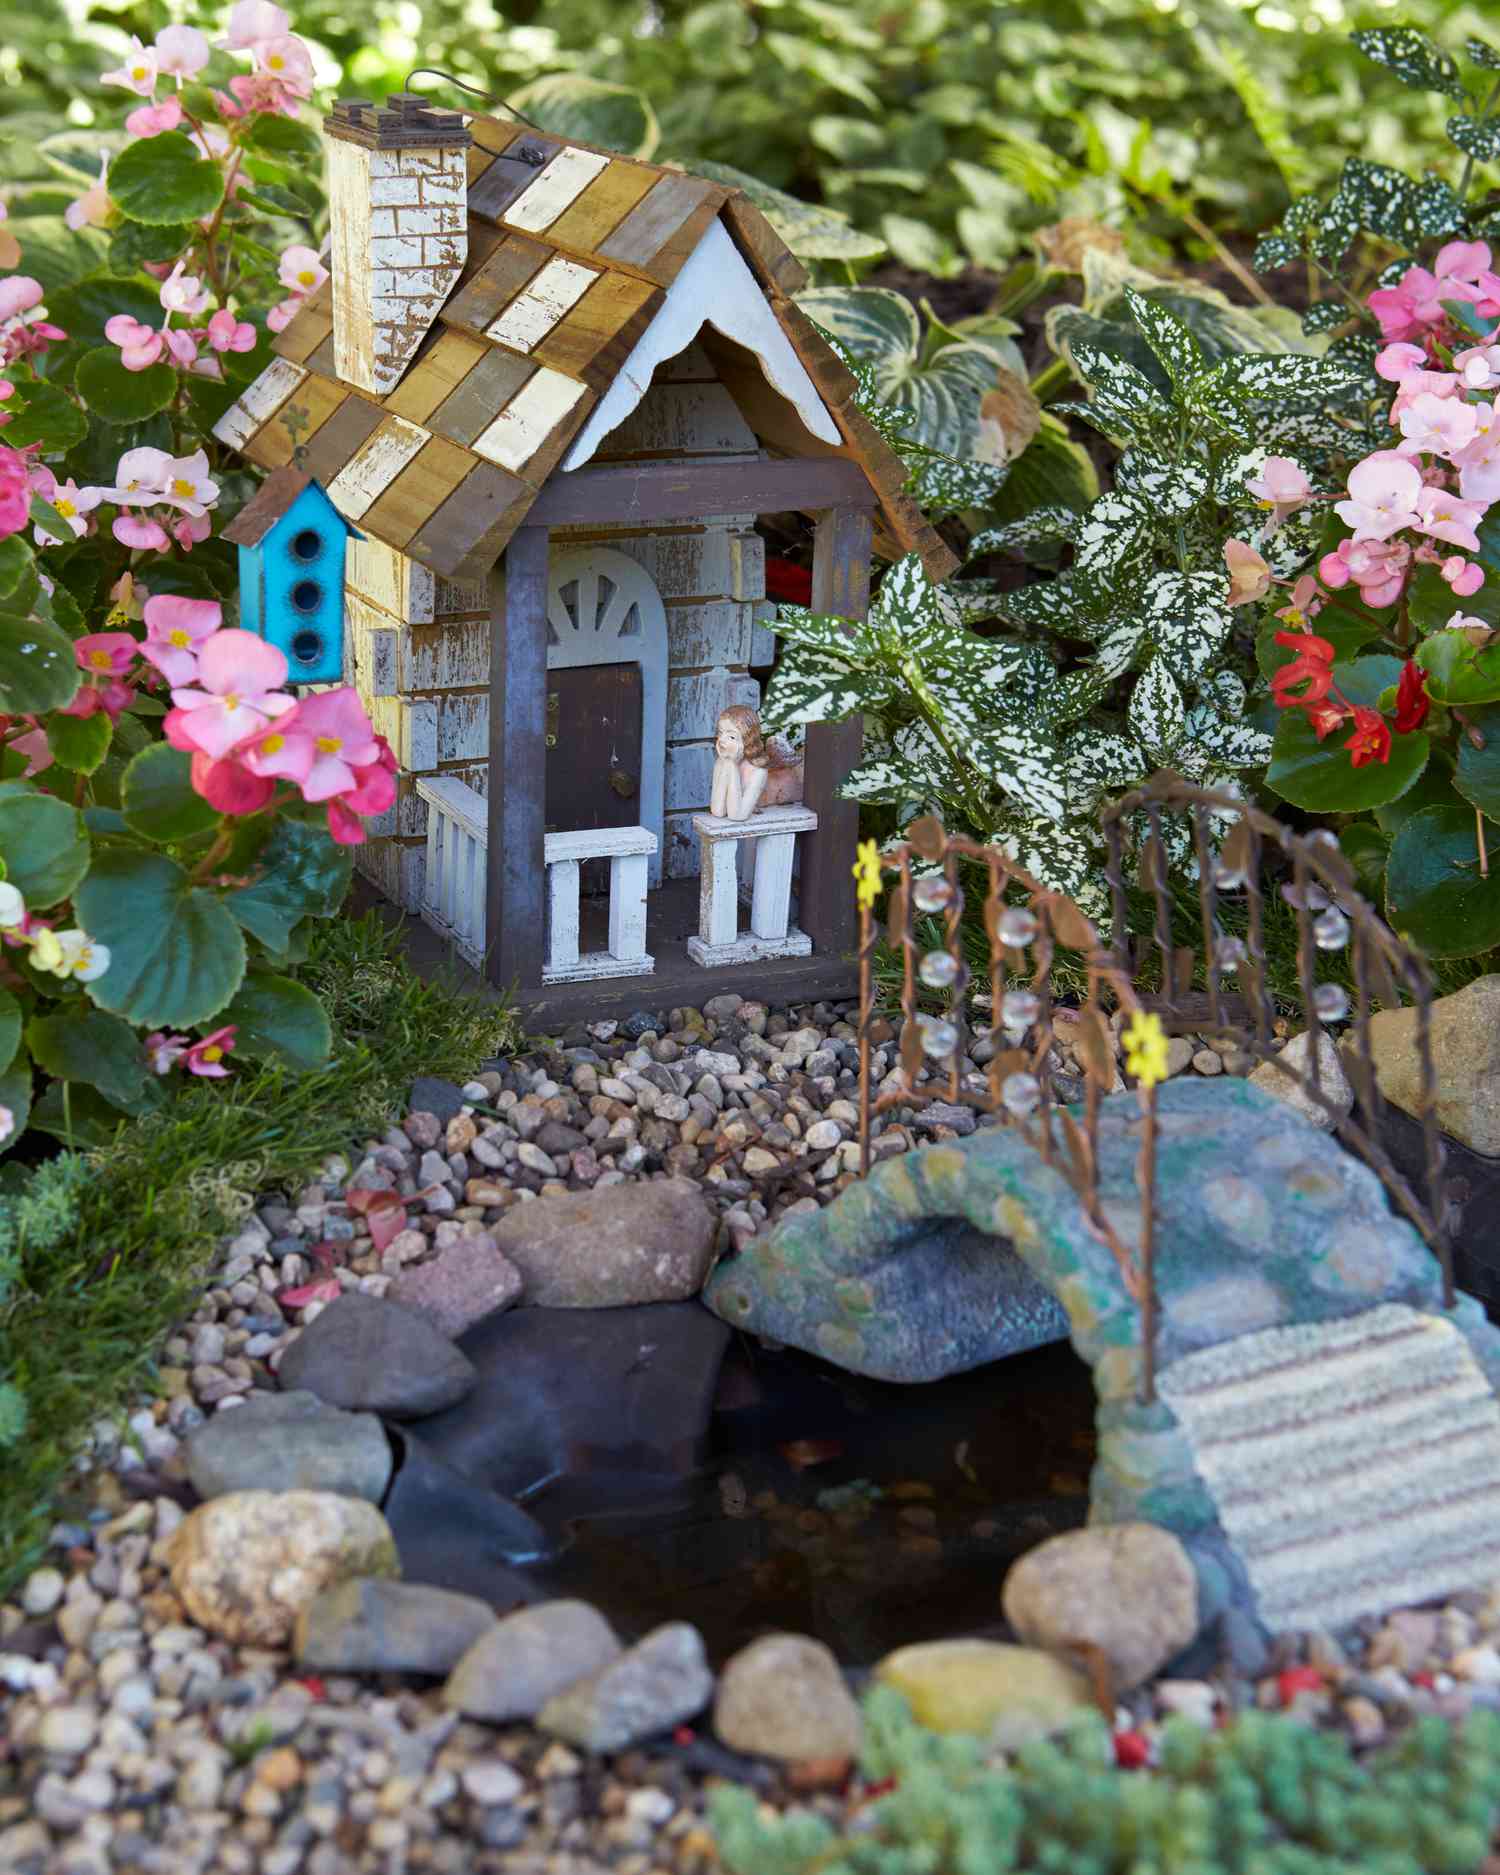
🔧 How-To Brief
This design is ideal for a contained planter or a small, dedicated patch in a garden bed, roughly 2×2 feet. The elements—cottage, pond, bridge—are relatively small, so they need a tight space to feel connected. If the area is too large, they will look lost and disconnected. This idea is perfect for a balcony, a patio corner, or nestled among larger plants in a flowerbed. For larger spaces, consider a more sprawling design like the village in Idea #21.
7. Enclosed Greenhouse Garden with Burgundy Foliage
The greenhouse itself is the undeniable centerpiece. It transforms a simple collection of miniature plants and accessories into a protected, curated exhibit. The glass walls create a world within a world, drawing you in and focusing your attention on the tiny details inside—the white archway, the stepping stones, the rich color of the foliage. It evokes the feeling of a prized collection, a precious and carefully controlled environment, which is the very essence of a terrarium’s magic.
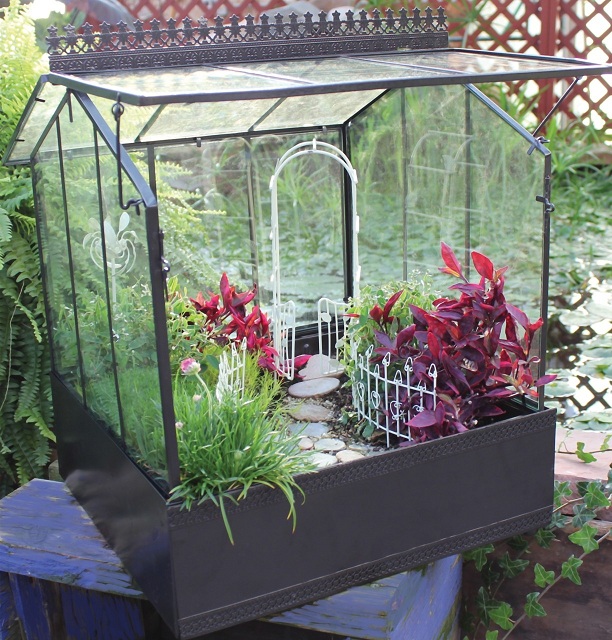
📏 Scale Guide
Glass terrariums look stunning but can be tricky. That enclosed space creates high humidity, which is great for some plants (like moss and ferns) but a death sentence for others (like succulents). The reddish-purple plant seen here is likely a Fittonia, or Nerve Plant, which loves humidity. Without proper ventilation—cracking the lid open regularly—you risk mold and root rot. Also, keep it out of direct sunlight, as the glass will act like a magnifying glass and scorch the delicate leaves inside.
8. Spooky & Sweet Halloween Fairy Garden Pot
The formula for a successful holiday-themed fairy garden is: 60% recognizable holiday icons + 30% live plants + 10% quirky details. Here, the pumpkin house and “Trick or Treat” banner are instantly recognizable. The succulents and grassy plants keep it grounded in the “garden” concept. But it’s the little details—the tiny witch figurine, the bats on sticks, the spider—that add personality and reward a closer look. You could apply this same math to any holiday: think tiny presents and fake snow for Christmas, or pastel eggs for Easter.
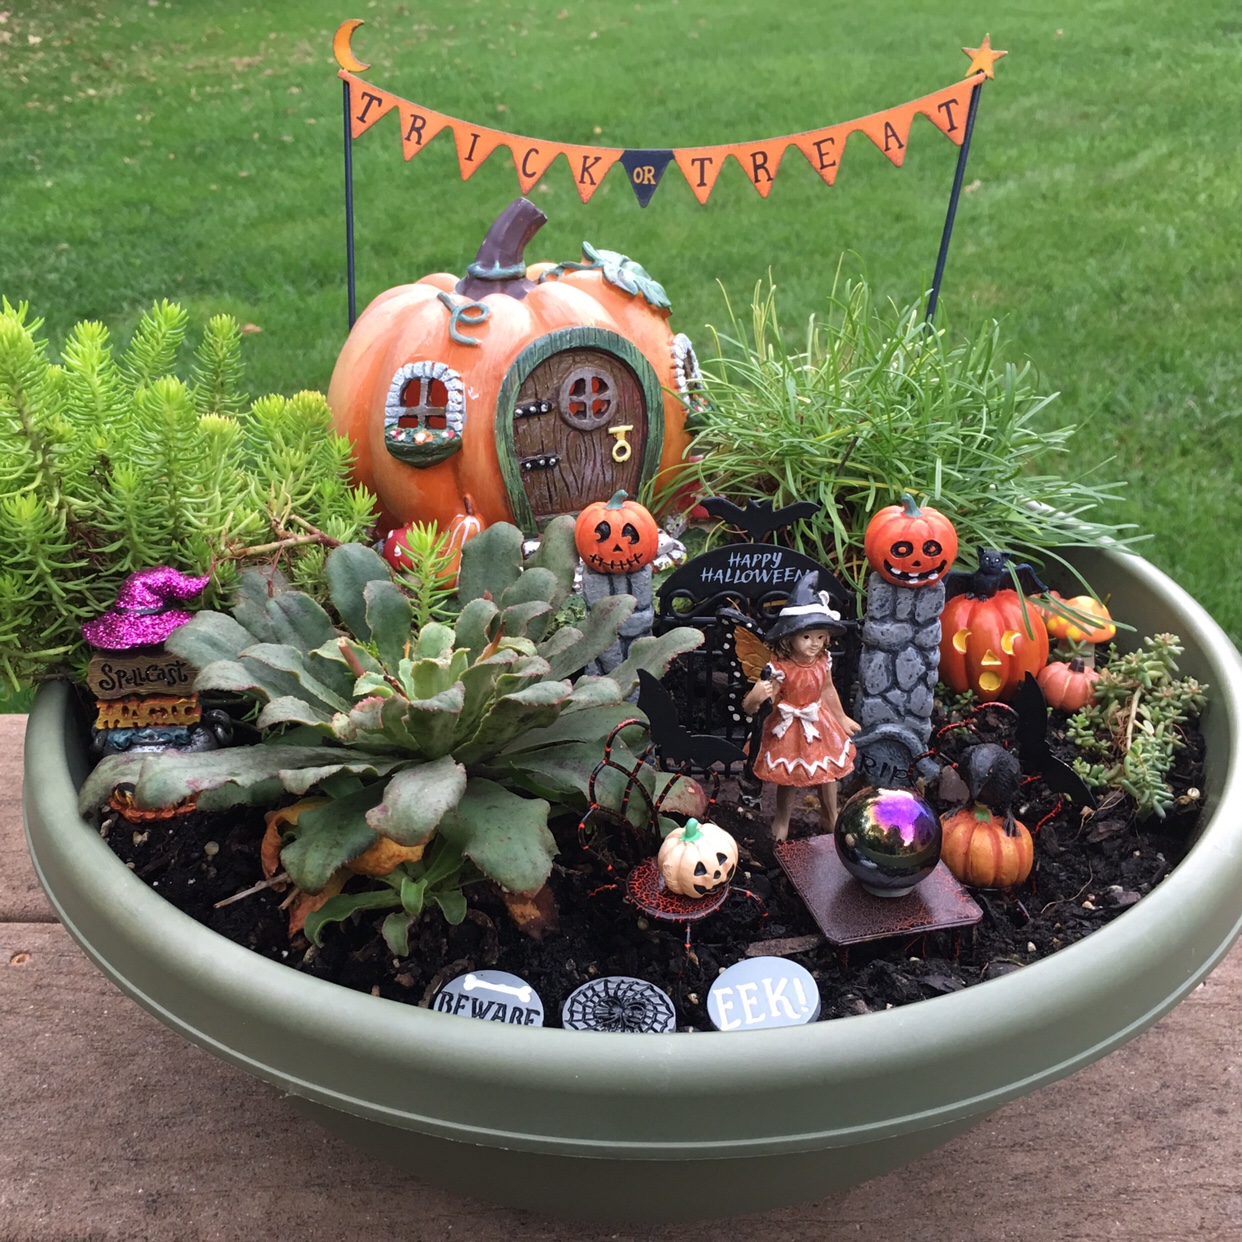
📐 Style Math
Seasonal fairy gardens, especially for Halloween, have exploded in popularity on Pinterest and Instagram. Why? It’s a low-commitment, high-impact way to decorate. Unlike covering your whole house in spooky decor, you can concentrate all that festive energy into one small, contained pot. It feels more manageable and allows for a higher level of detail and creativity. This trend has staying power because it combines the joy of holiday decorating with the satisfaction of gardening and miniature crafting.
9. Mossy Cottage Garden with Angel Figurines
This scene feels so lush and established due to the extensive use of green ground cover. The moss isn’t just an accent; it’s the foundation of the entire landscape, creating a soft, continuous carpet that unifies all the other elements. The pebble and wood chip paths are successful because they cut *through* this sea of green, creating clear lines and a sense of deliberate design. The clear glass marbles, nestled in the moss, catch the light and mimic dewdrops, adding a touch of subtle magic. Contrast this with the more open, soil-based design in Idea #1.
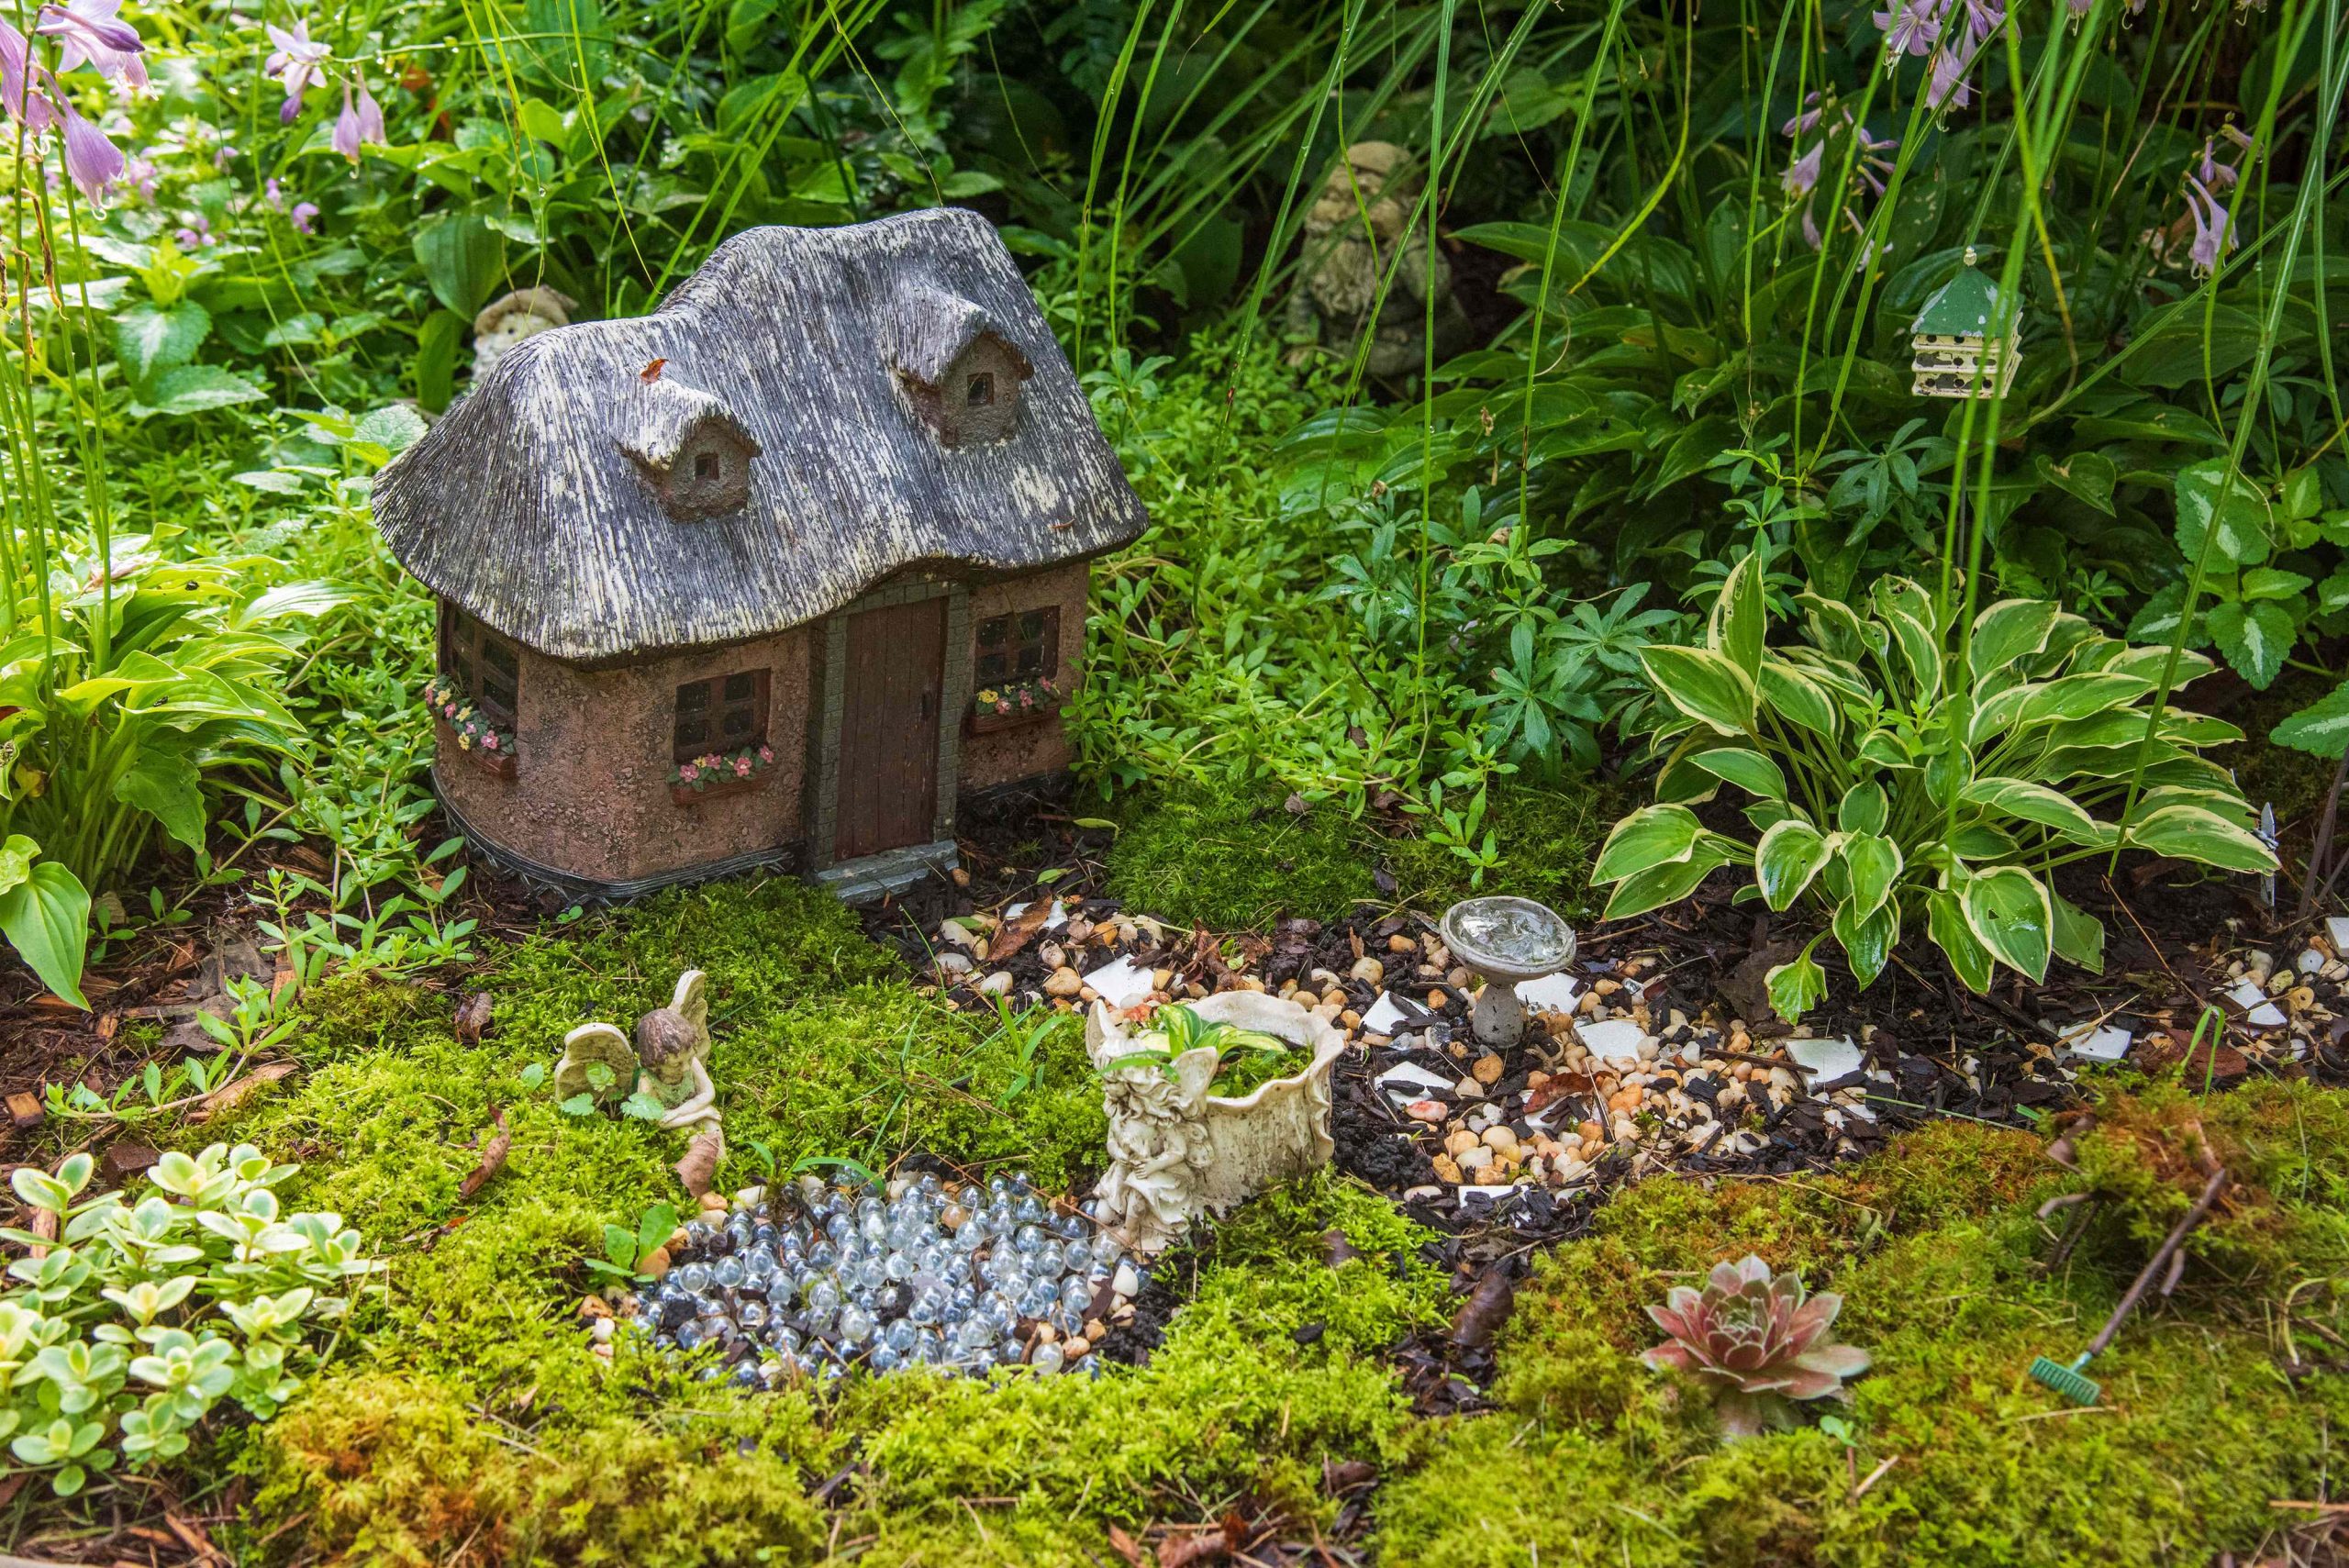
⚠️ Real Talk
To make your paths look more realistic, use a mix of materials and sizes. Don’t just pour down a uniform layer of pebbles. Start with a base of finer gravel or sand, then press in slightly larger, flatter “pavers” (like small, flat stones or bits of slate). Finally, use a soft brush to sweep the finer material back over the edges of the pavers. This variation in texture makes the path look worn and settled, as if it has been there for years.
10. Tiered Succulent Garden in a Shattered Terracotta Pot
Creating this “broken pot” look is a fun DIY project that recycles a common garden mishap. Time: 45 minutes. Cost: $15-$30 (plus plants).
- Start with a broken terracotta pot or carefully break one yourself (wear safety glasses and gloves!). You want one large piece to form the front wall.
- Fill the main pot with potting soil up to the level of the broken edge.
- Wedge the large broken shard into the soil to create a raised tier. Use other, smaller shards to build up little terraces and retaining walls inside.
- Backfill all the new levels with more soil.
- Plant your succulents and moss, starting from the top tier and working your way down.
- Add miniature furniture and pebbles last.
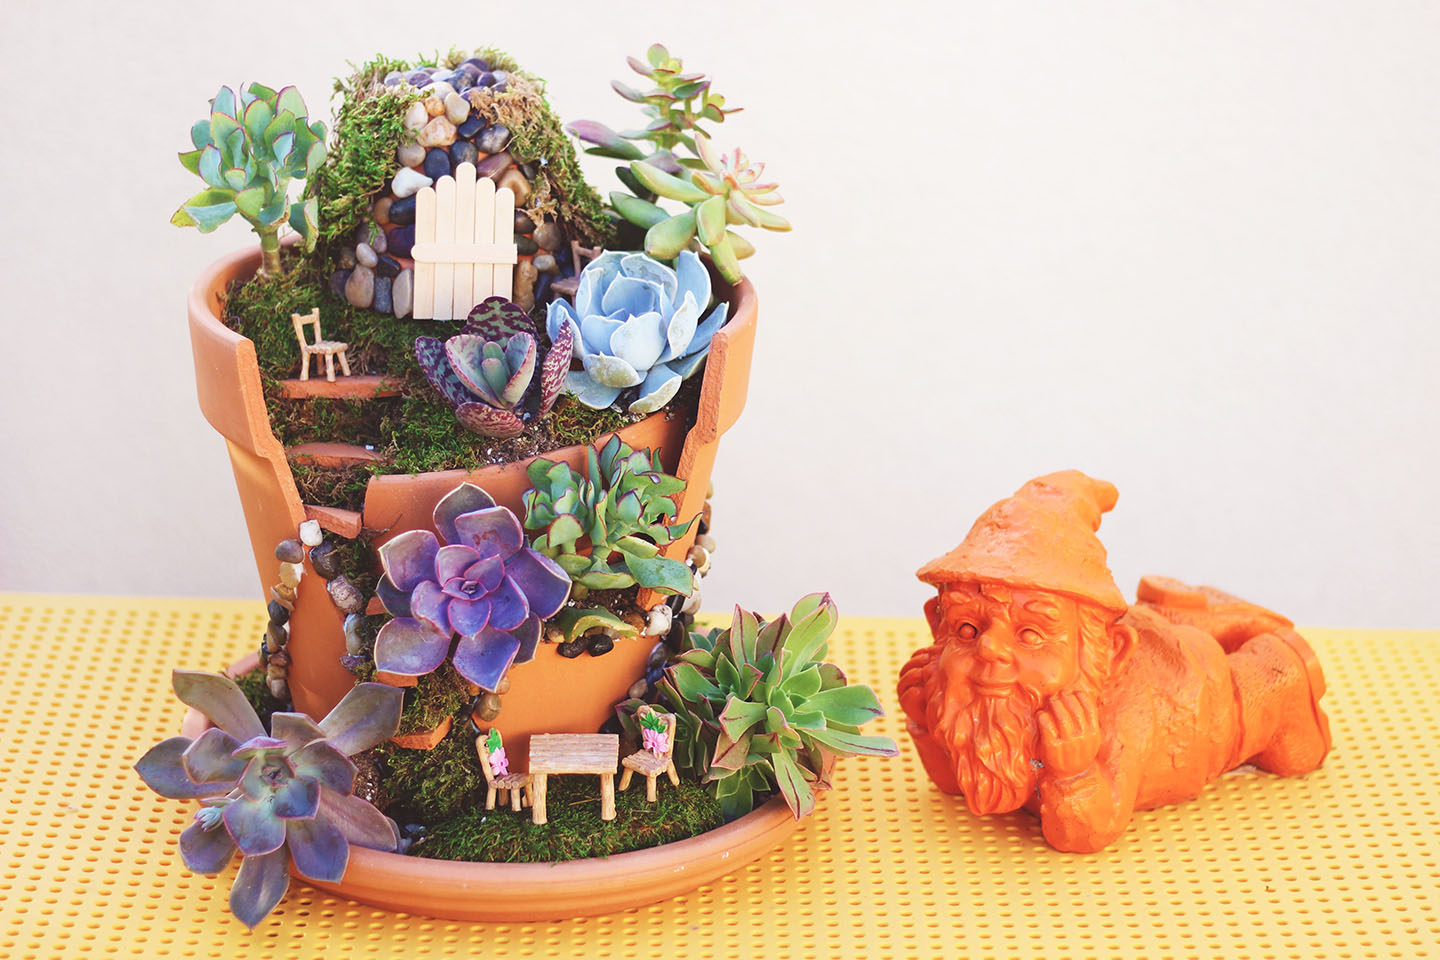
🔥 Trending Context
This is the ultimate budget fairy garden. A broken pot is essentially free—ask a local garden center if they have any damaged stock they’re tossing. Succulent cuttings can often be sourced for free from neighborhood plant-swap groups or from your own existing plants. Moss can be foraged (responsibly!). The only real cost might be the miniature furniture, but you can find incredibly cheap options on sites like Etsy or even attempt to make your own from twigs and hot glue.
11. Playful Fairy Scene in a Bright Green Bucket
A bucket-based garden like this is perfect for small spaces and beginners. The ideal container size is between 8 and 12 inches in diameter. Anything smaller and you won’t have enough room for the plants and furniture to breathe; the scene will look cramped. Anything larger and the miniature elements will start to feel lost in a vast green expanse. This size is just right for a small patio table, a balcony railing (with a secure hook), or a front stoop.
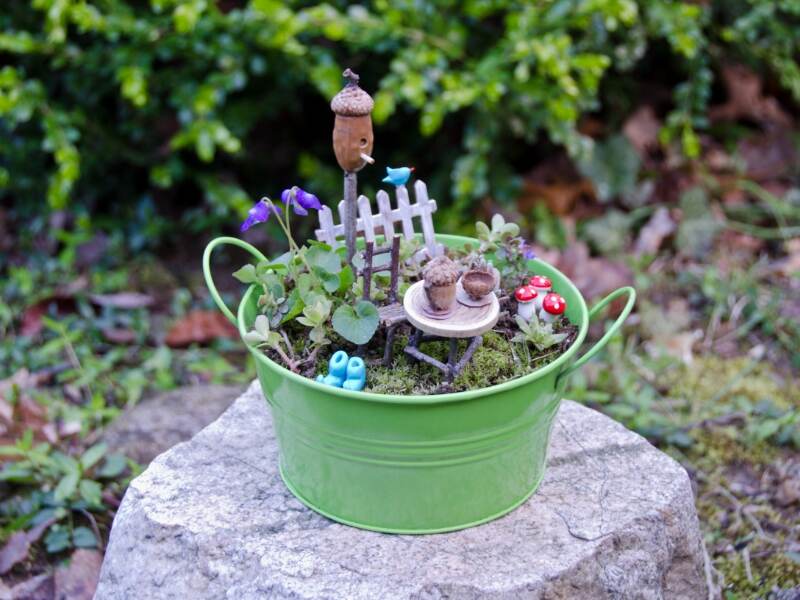
🧹 Maintenance Reality
that makes this design so cheerful and eye-catching is the bright green bucket itself. It’s an unexpected and playful choice. While terracotta or stone planters are beautiful and natural, this vibrant, enameled metal injects a huge dose of personality and fun before you’ve even added a single plant. It sets a lighthearted tone and makes the whole arrangement feel less serious and more like pure, joyful play. The color choice is bold and confident.
12. Earthy Tabletop Display with Moss and Driftwood
While this arrangement of moss, driftwood, and air plants looks effortlessly natural, it has specific care needs. Moss requires consistent moisture and indirect light; it will quickly turn brown and crispy in direct sun or if allowed to dry out completely. A daily misting is usually required. Air plants (Tillandsia) also need regular attention—soaking them in water for about 20-30 minutes once a week and allowing them to dry fully. The driftwood is low-maintenance, but be aware that it can occasionally grow harmless mold if the environment is too damp and stagnant.
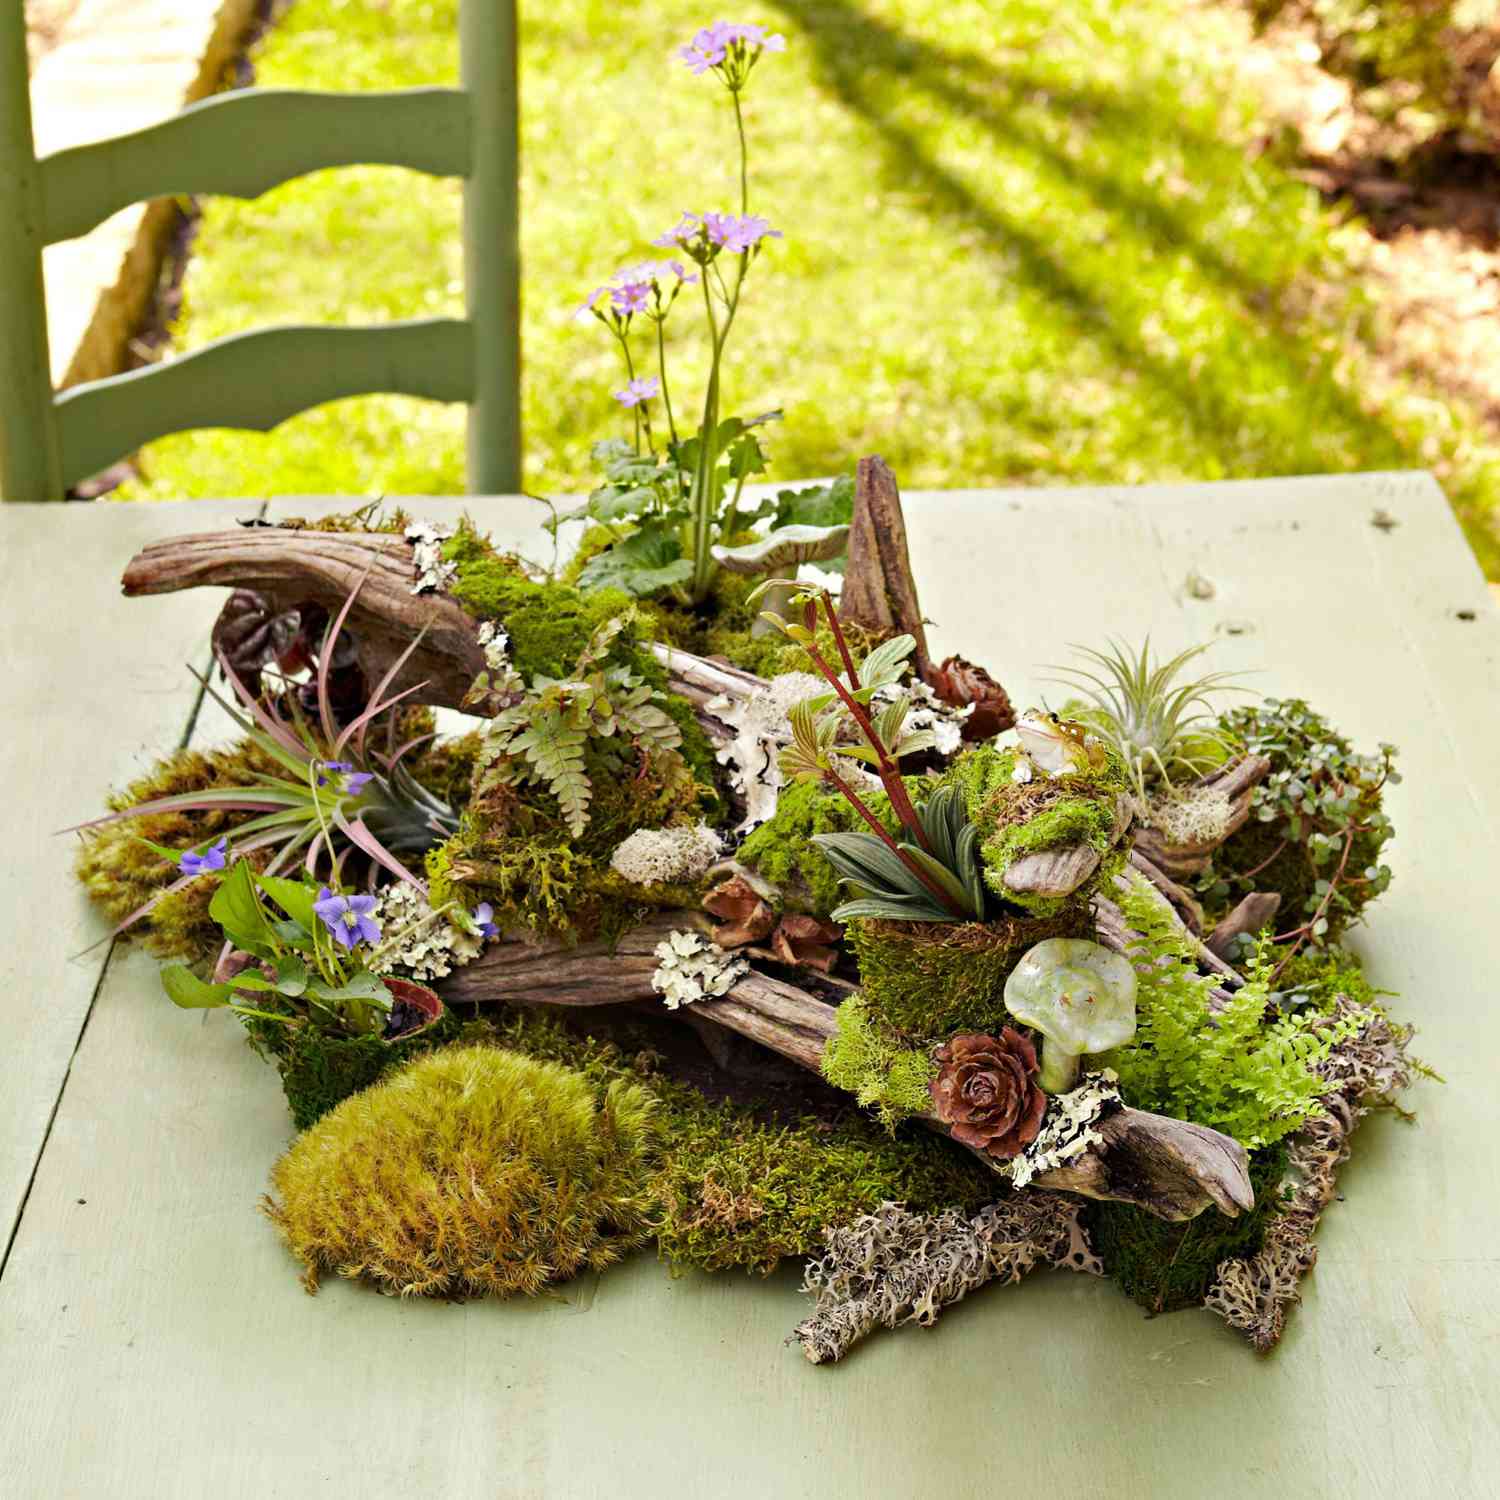
💸 Get This Look For Less
Before you commit to this beautiful, naturalistic style, run through this quick checklist to ensure your environment is a good fit:
- Light Check: Do you have a spot with bright, indirect light? Direct sun will scorch the delicate mosses and ferns.
- Water Source: Is a spray bottle or small watering can easily accessible? Daily misting is key for this look.
- Air Circulation: Is there some airflow in the room? Stagnant, damp conditions can lead to mold on the driftwood.
- Surface Safety: The tabletop underneath this display will get damp. Ensure it’s on a water-resistant surface or a protective tray.
13. Beginner’s DIY Potted Fairy Garden
Ready to build your very first fairy garden? This simple potted approach is the perfect starting point. Here’s a basic roadmap to get you going. Time: 1 hour. Cost: $25-$50.
- Select a pot (10-12 inches is great) with a drainage hole.
- Fill with potting mix, leaving about an inch of space at the top.
- Choose 3-4 small, slow-growing plants. Place the tallest one in the back and shorter ones in front.
- Decide on a focal point, like a small house or bench, and place it in the scene.
- Create a pathway using small pebbles, sand, or glass beads. This really ties the scene together.
- Add 1-2 final tiny accessories, like a miniature watering can or a sleeping fairy. Done!
💡 Designer Tip
The best way to start is by not starting at a specialty fairy garden store. Head to a craft store like Michaels or a big-box store’s garden section. You can find small, inexpensive terracotta pots, bags of decorative stones, and a wide variety of small plants. For accessories, look in the dollhouse section or even the scrapbook embellishment aisle for tiny items you can repurpose. This approach, similar to the DIY spirit of Idea #18, lets you experiment without a big investment.
14. Psychedelic Mushroom Lantern on a Sandy Path
This piece succeeds because it commits 100% to its wonderfully weird aesthetic. The success of the design lies in its fearless use of color and pattern. The wavy, organic lines painted on the mushroom cap are echoed in the surrounding plants, while the vibrant orange, blue, and yellow create an electrifying focal point against the neutral sand. The circular cutouts in the base add another layer of geometric interest and hint at its function as a lantern, promising a different kind of magic after dark. It’s a statement piece.
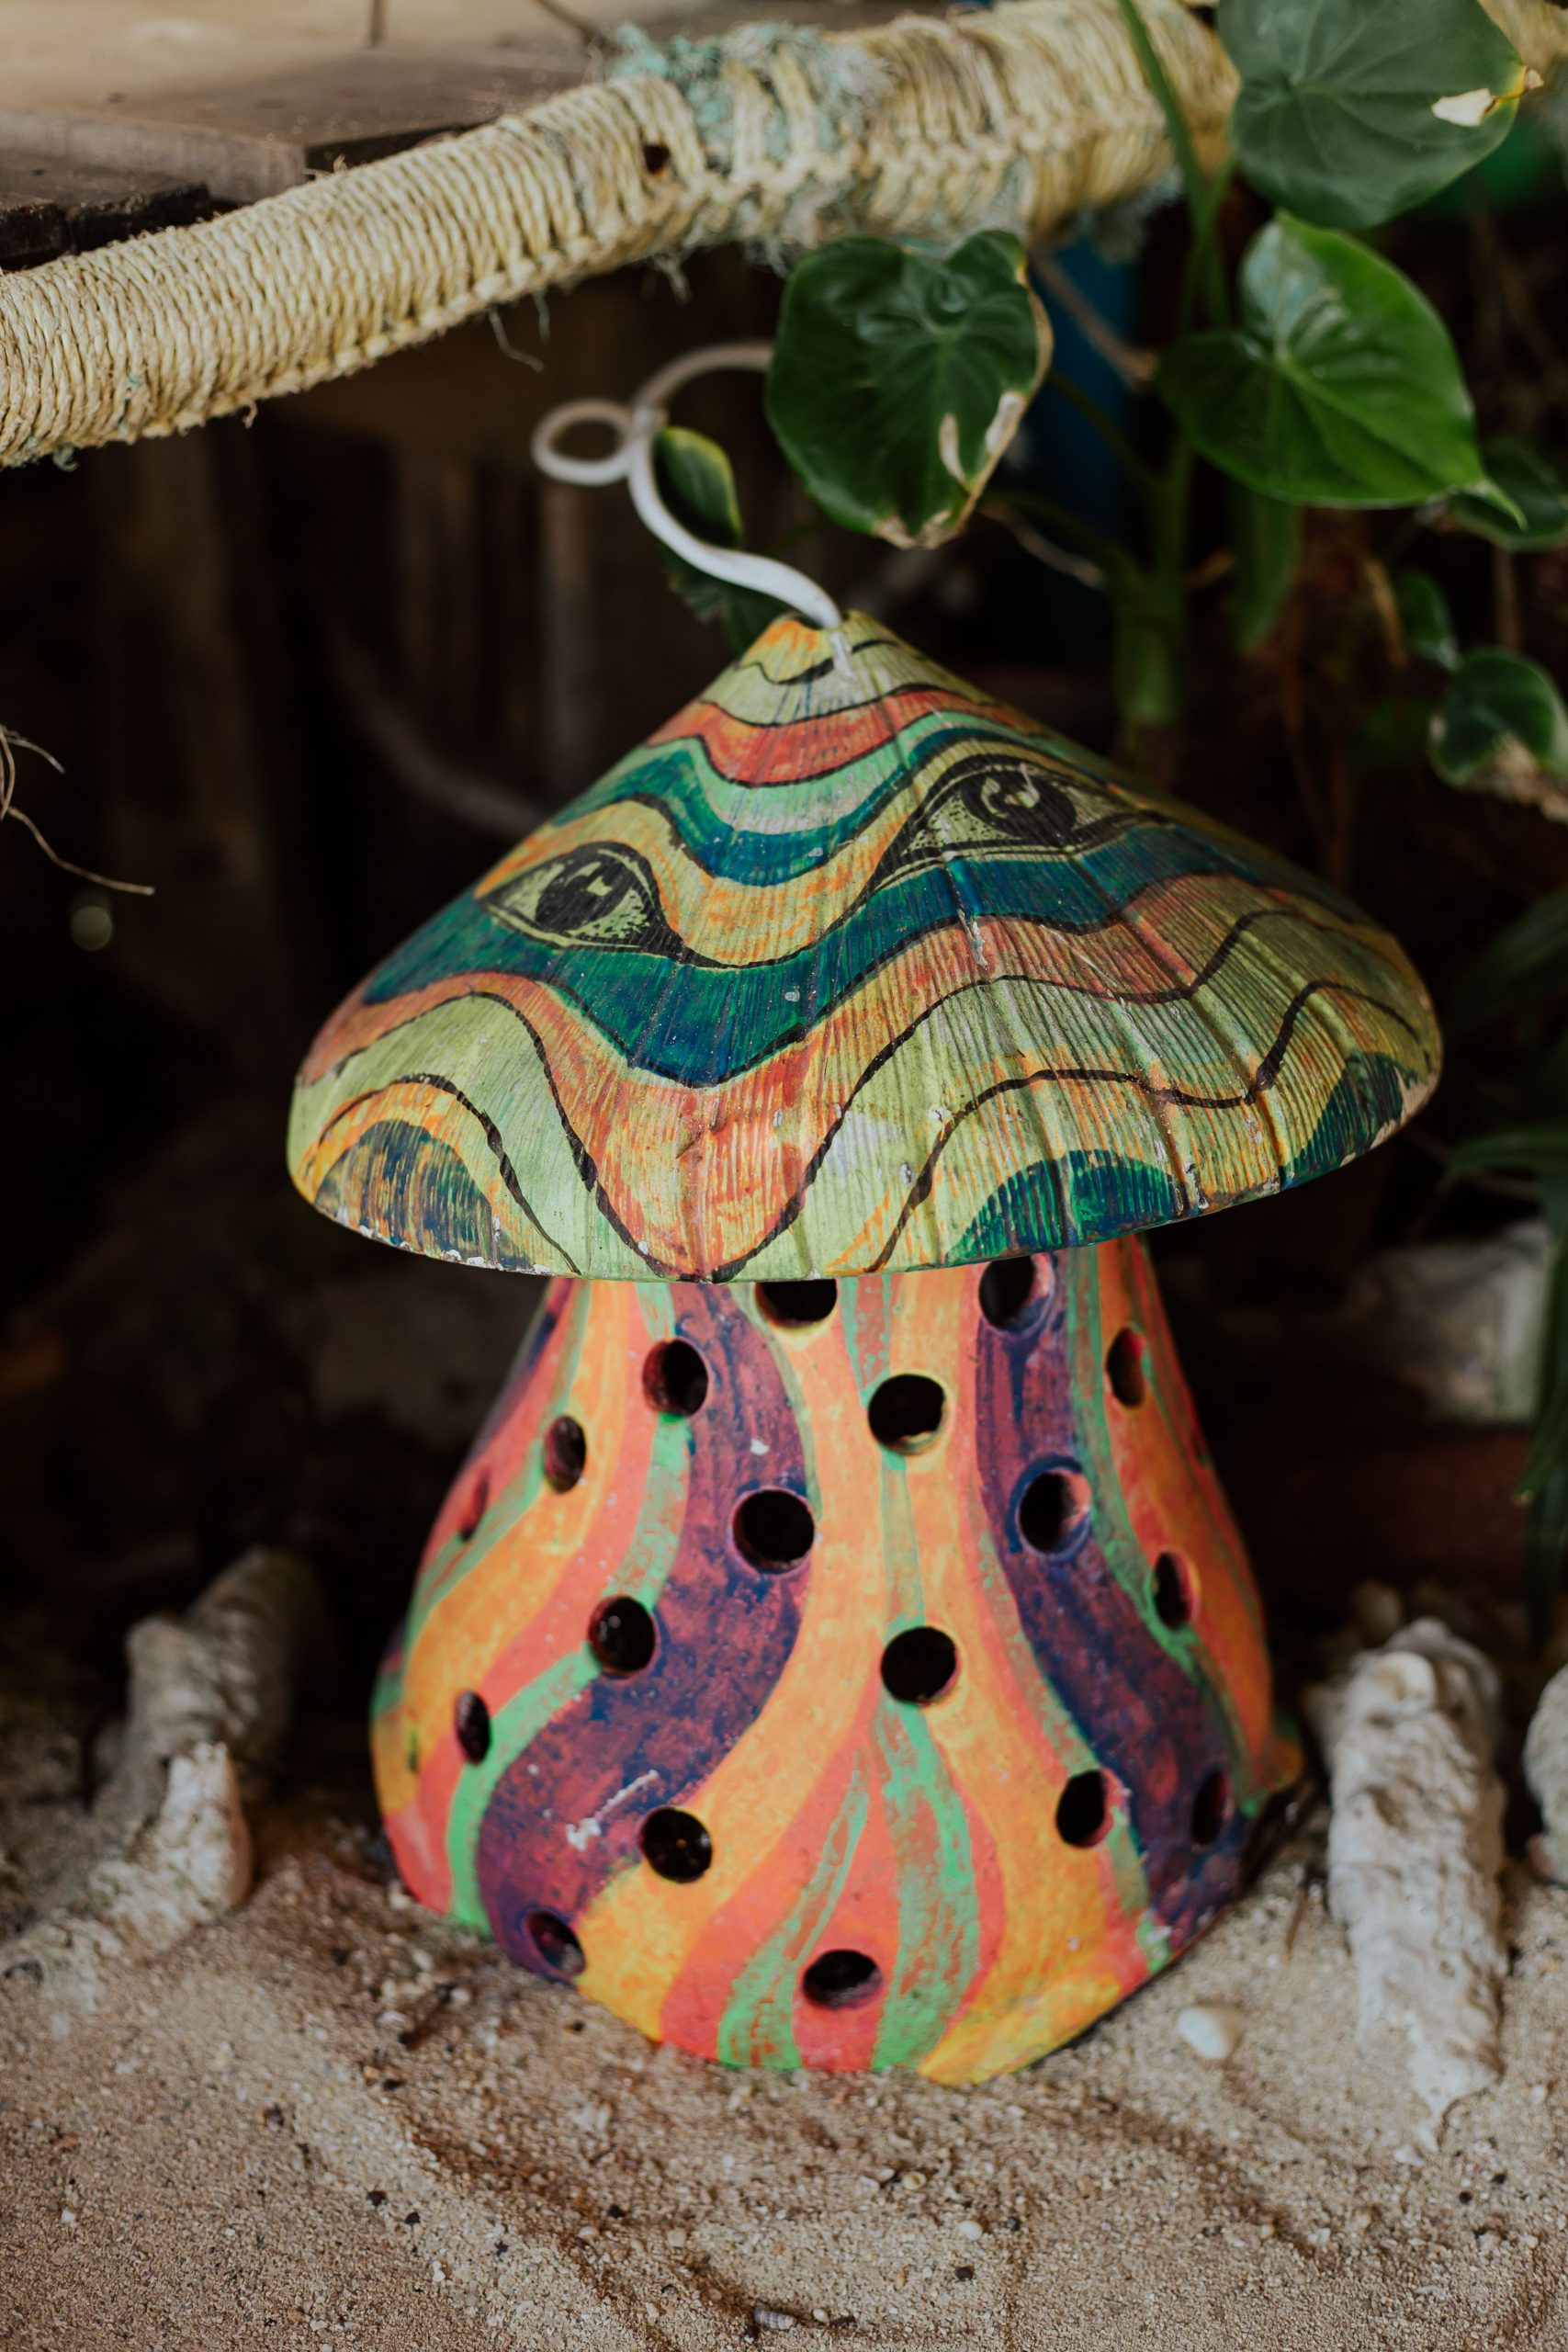
💰 Budget Breakdown
An item this bold and colorful can be a double-edged sword. It’s absolutely fantastic on its own or in a garden that embraces a bohemian, eclectic, or maximalist style. However, if you try to place this in a traditional, demure fairy garden filled with quaint cottages and delicate flowers, it’s going to stick out like a sore thumb. It will overpower everything else. Before buying a statement piece like this, be honest about your overall garden style. This mushroom wants to be the star, not a bit player.
15. Rustic “Fairy Garden” Sign with Perched Birds
The sign itself is the hero here. The faux wood grain, twisted posts, and slightly askew lettering all contribute to a feeling of rustic, handmade charm. It’s not just a marker; it’s an object with personality. It communicates the theme of the garden instantly and with a sense of playful authenticity. The tiny birds perched on top are the perfect finishing touch, adding a sense of life and suggesting that this little world is a friendly place for all creatures.
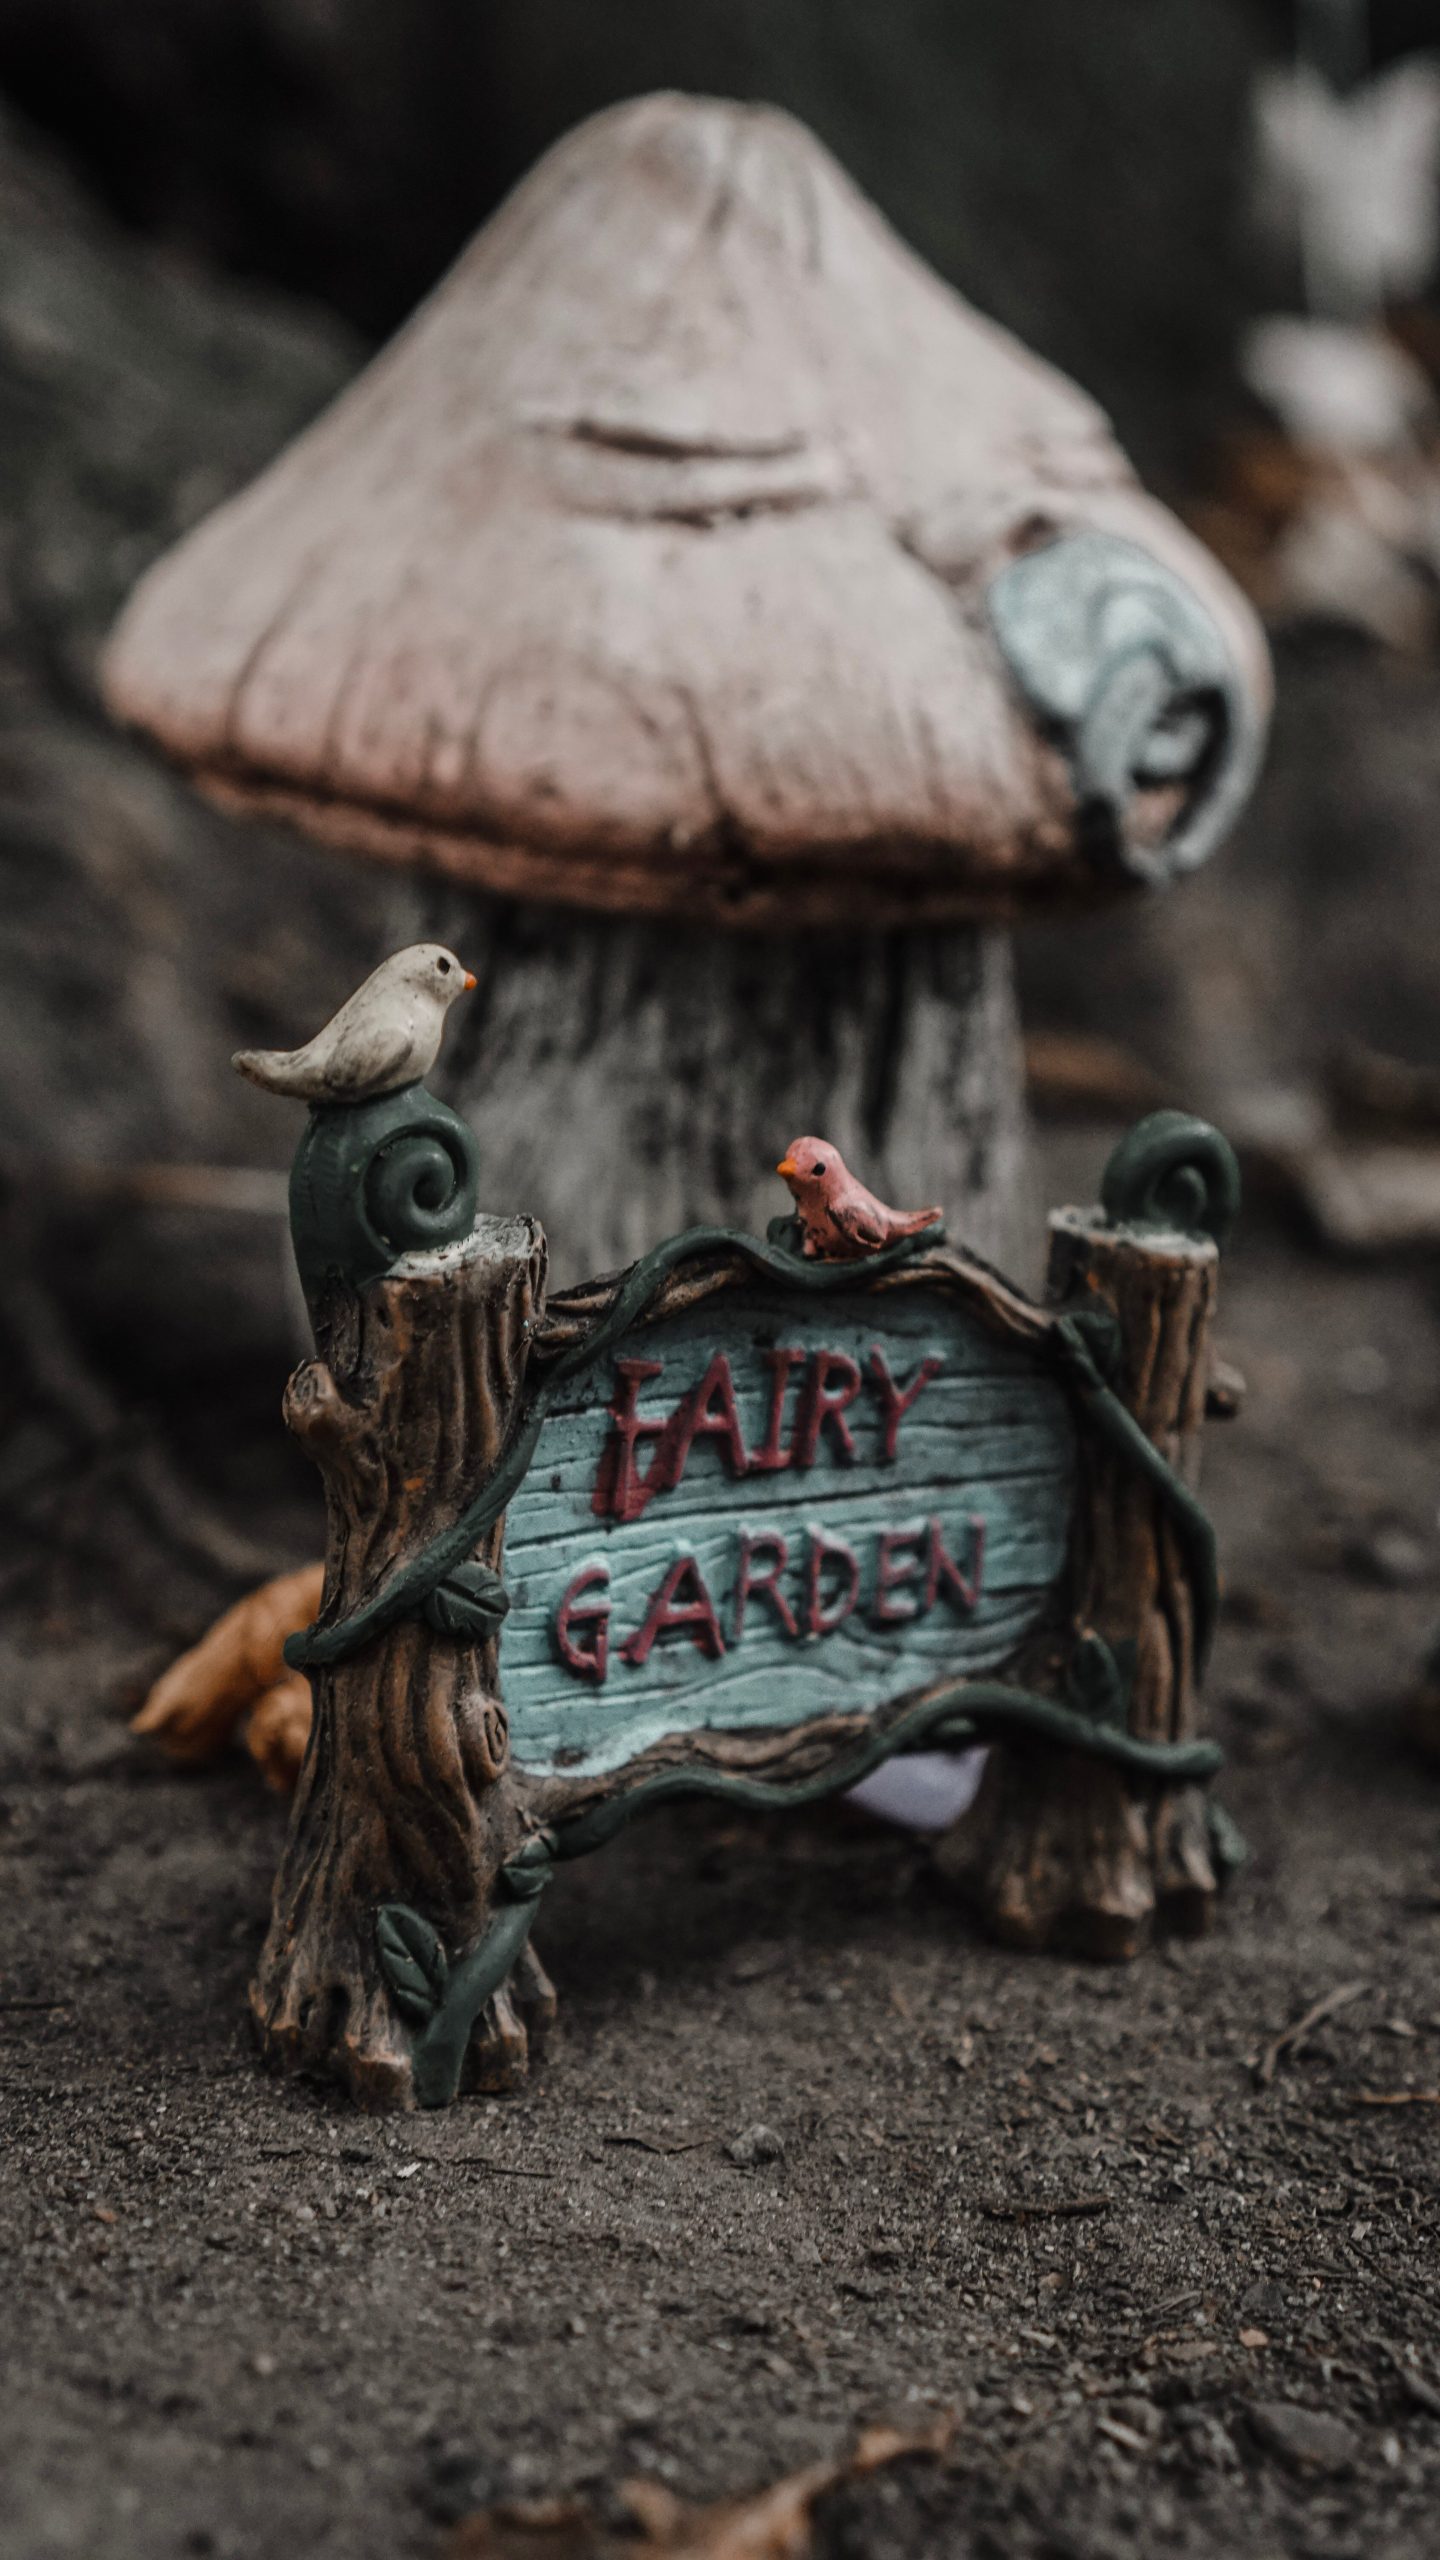
⭐ The One Thing
When placing signage, think like a tiny landscape photographer. Don’t just plop it in the middle. Tuck it slightly behind a small plant or next to a larger element like the mushroom seen in the background here. This creates depth and makes the sign feel discovered rather than just presented. By partially obscuring an object, you make the entire scene feel more complex and natural, inviting the viewer to look closer to see all the details.
16. Enclosed World: A Glass Globe Terrarium Garden
A globe-style terrarium like this works best for showcasing a very small, focused scene—one or two key elements at most. These globes are typically 6 to 10 inches in diameter. The limited space and the single front opening mean you’re creating a diorama, not a landscape. This is perfect for a single, beautiful figurine and a couple of complementary plants. It’s less suited for sprawling village scenes. Compare this contained approach to the open-top greenhouse in Idea #7, which allows for more complex arrangements.
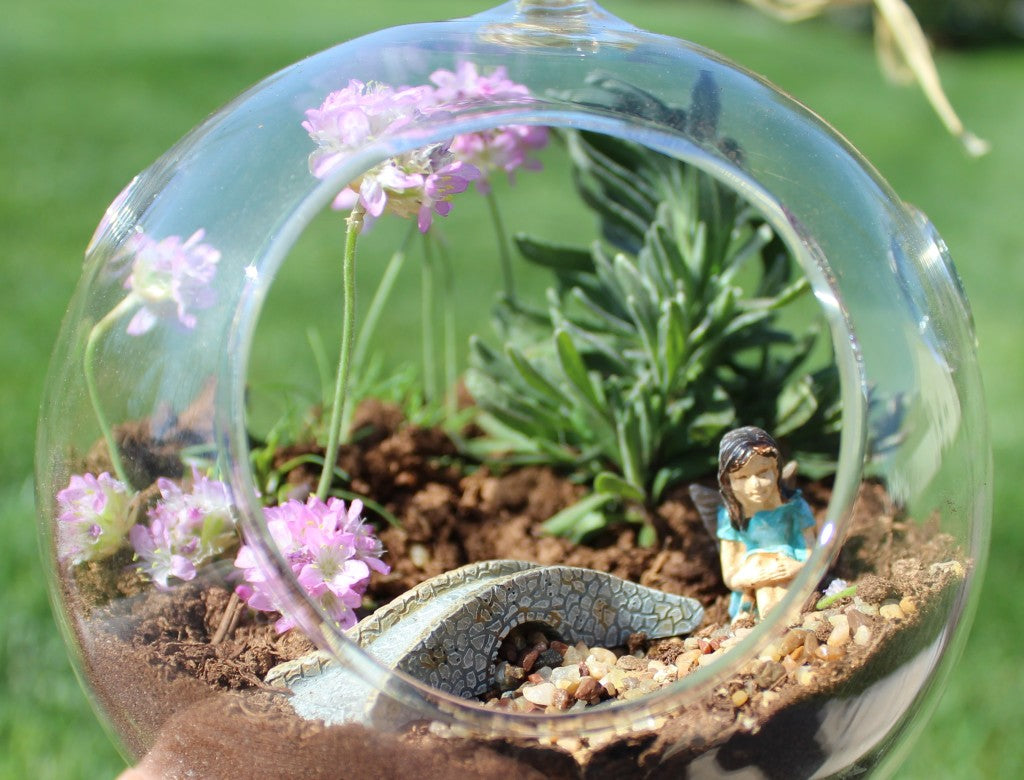
✅ Before You Start
That beautiful glass globe requires careful maintenance. Fingerprints and dust show up easily, so regular cleaning of the exterior with a glass cleaner is a must. The interior is trickier. The limited opening makes it hard to prune or adjust plants. The enclosed shape restricts airflow, so be very careful not to overwater—root rot is the #1 killer of terrarium plants. Water sparingly, perhaps with a dropper, and let the soil dry out slightly between waterings. Choose plants that love humidity and stay small, like tiny ferns or jewel orchids.
17. Crafting a Woodland Scene on a Wooden Base
The visual recipe for this woodland assembly is about layering textures: 40% soft ground cover (the faux moss) + 30% vertical height (the miniature trees) + 20% points of interest (the mushroom houses) + 10% hardscape details (the wooden steps). This creates a rich, tactile experience. The key is the moss base, which acts as the “glue” holding the scene together. The trees provide the necessary scale, while the brightly-colored houses draw the eye and create focal points within the little forest.
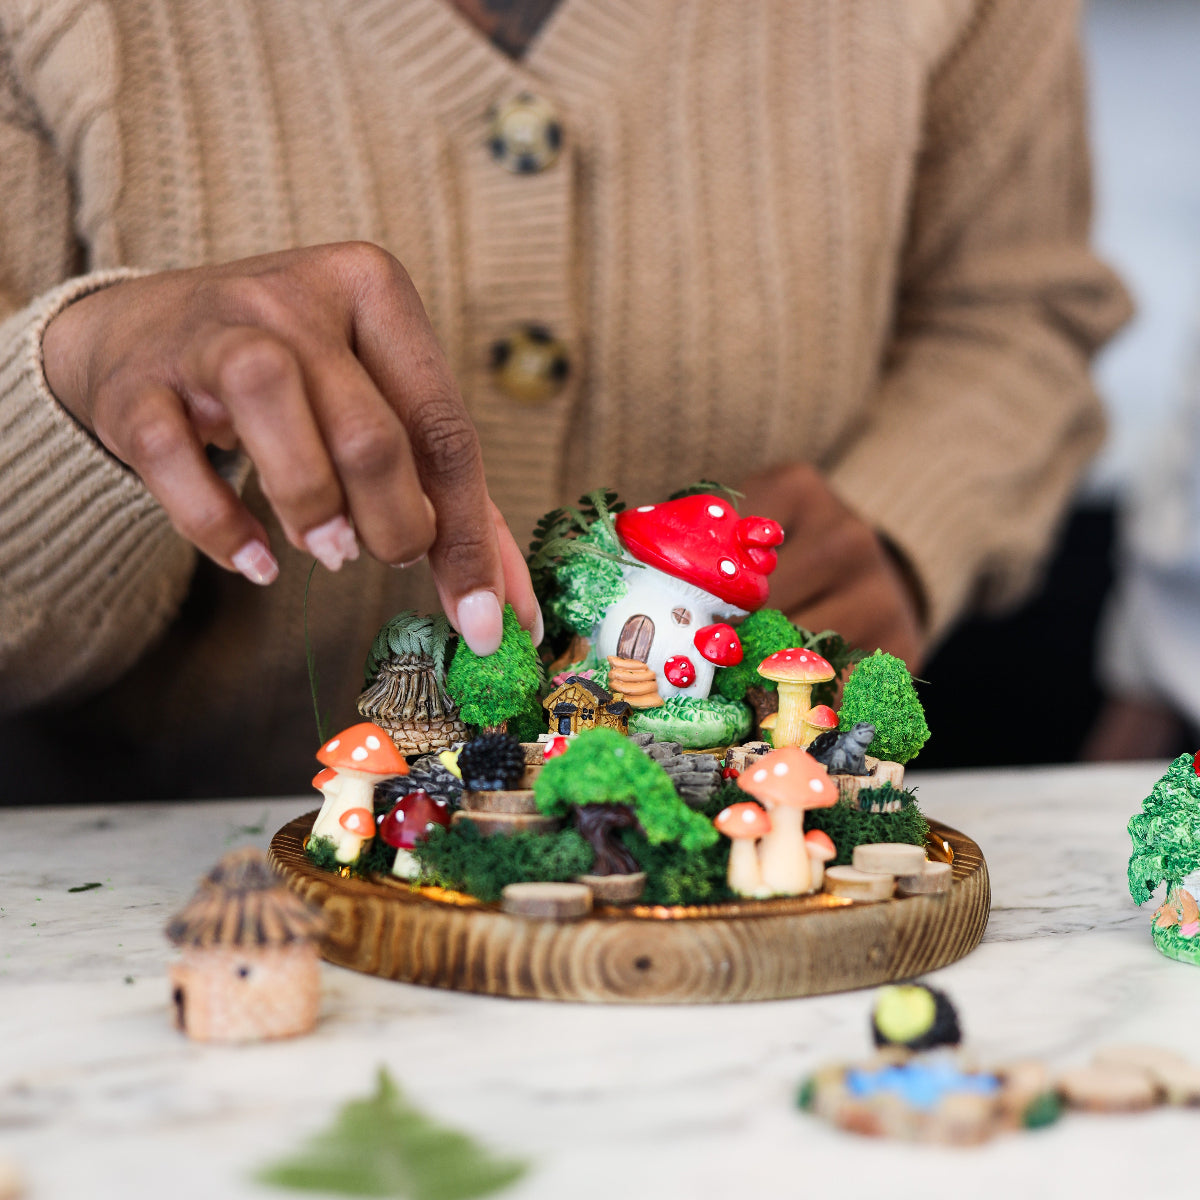
🎯 What Makes It Work
Creating realistic miniature trees is a key skill for this look. Time: 30 minutes. Cost: $10-$15 for materials.
- Start with a small, interesting twig for the trunk.
- Purchase a bag of “clump foliage” from a model railroad or craft store. It looks like a textured sponge.
- Using tweezers, pull off small pieces of the clump foliage.
- Apply a small dot of clear craft glue or hot glue to the “branches” of your twig.
- Press the clump foliage onto the glue dots.
- Vary the size and placement of the foliage clumps for a more natural, less uniform look.
18. Simple & Crafty Potted Fairy Display
You can create a charming fairy garden with items you might already have. Think of it as a treasure hunt. That souvenir thimble? It’s a perfect flower pot. A broken piece of a mirror can become a tiny pond. Popsicle sticks can be painted and glued together to make a fence or a bench. The key is to look at everyday objects with an eye for their miniature potential. This crafty approach, much like the one in Idea #13, is not about spending money, but about imagination and resourcefulness.
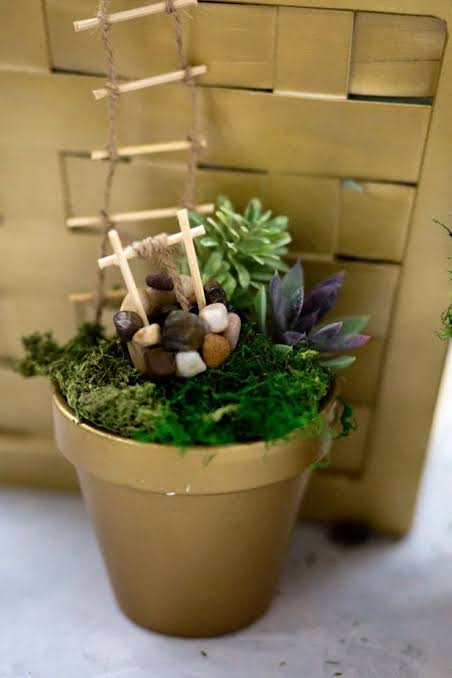
🔧 How-To Brief
When you’re working with a collection of DIY or found objects, the scene can get chaotic quickly. The secret to making it look cohesive is to stick to a strict color palette. Choose 2-3 main colors and paint your crafted items to match. For example, if your main plant has purple flowers, paint your popsicle-stick fence a pale lavender and find a purple bead to serve as a gazing ball. This color repetition will tie all the disparate elements together into a harmonious whole.
19. Serene Fairy Figurine Among Purple Flowers
In this composition, the one thing that brings the magic is the fairy figurine herself. The plants are beautiful, but they are just a garden. The mushroom is a nice accent, but it’s just a prop. It is the implied story of the fairy—her relaxed posture, the way she leans on the mushroom, the butterfly companion—that transforms the scene from a simple planting into an enchanted moment. Without her, the narrative is gone, and you’re left with a pretty pot of flowers.
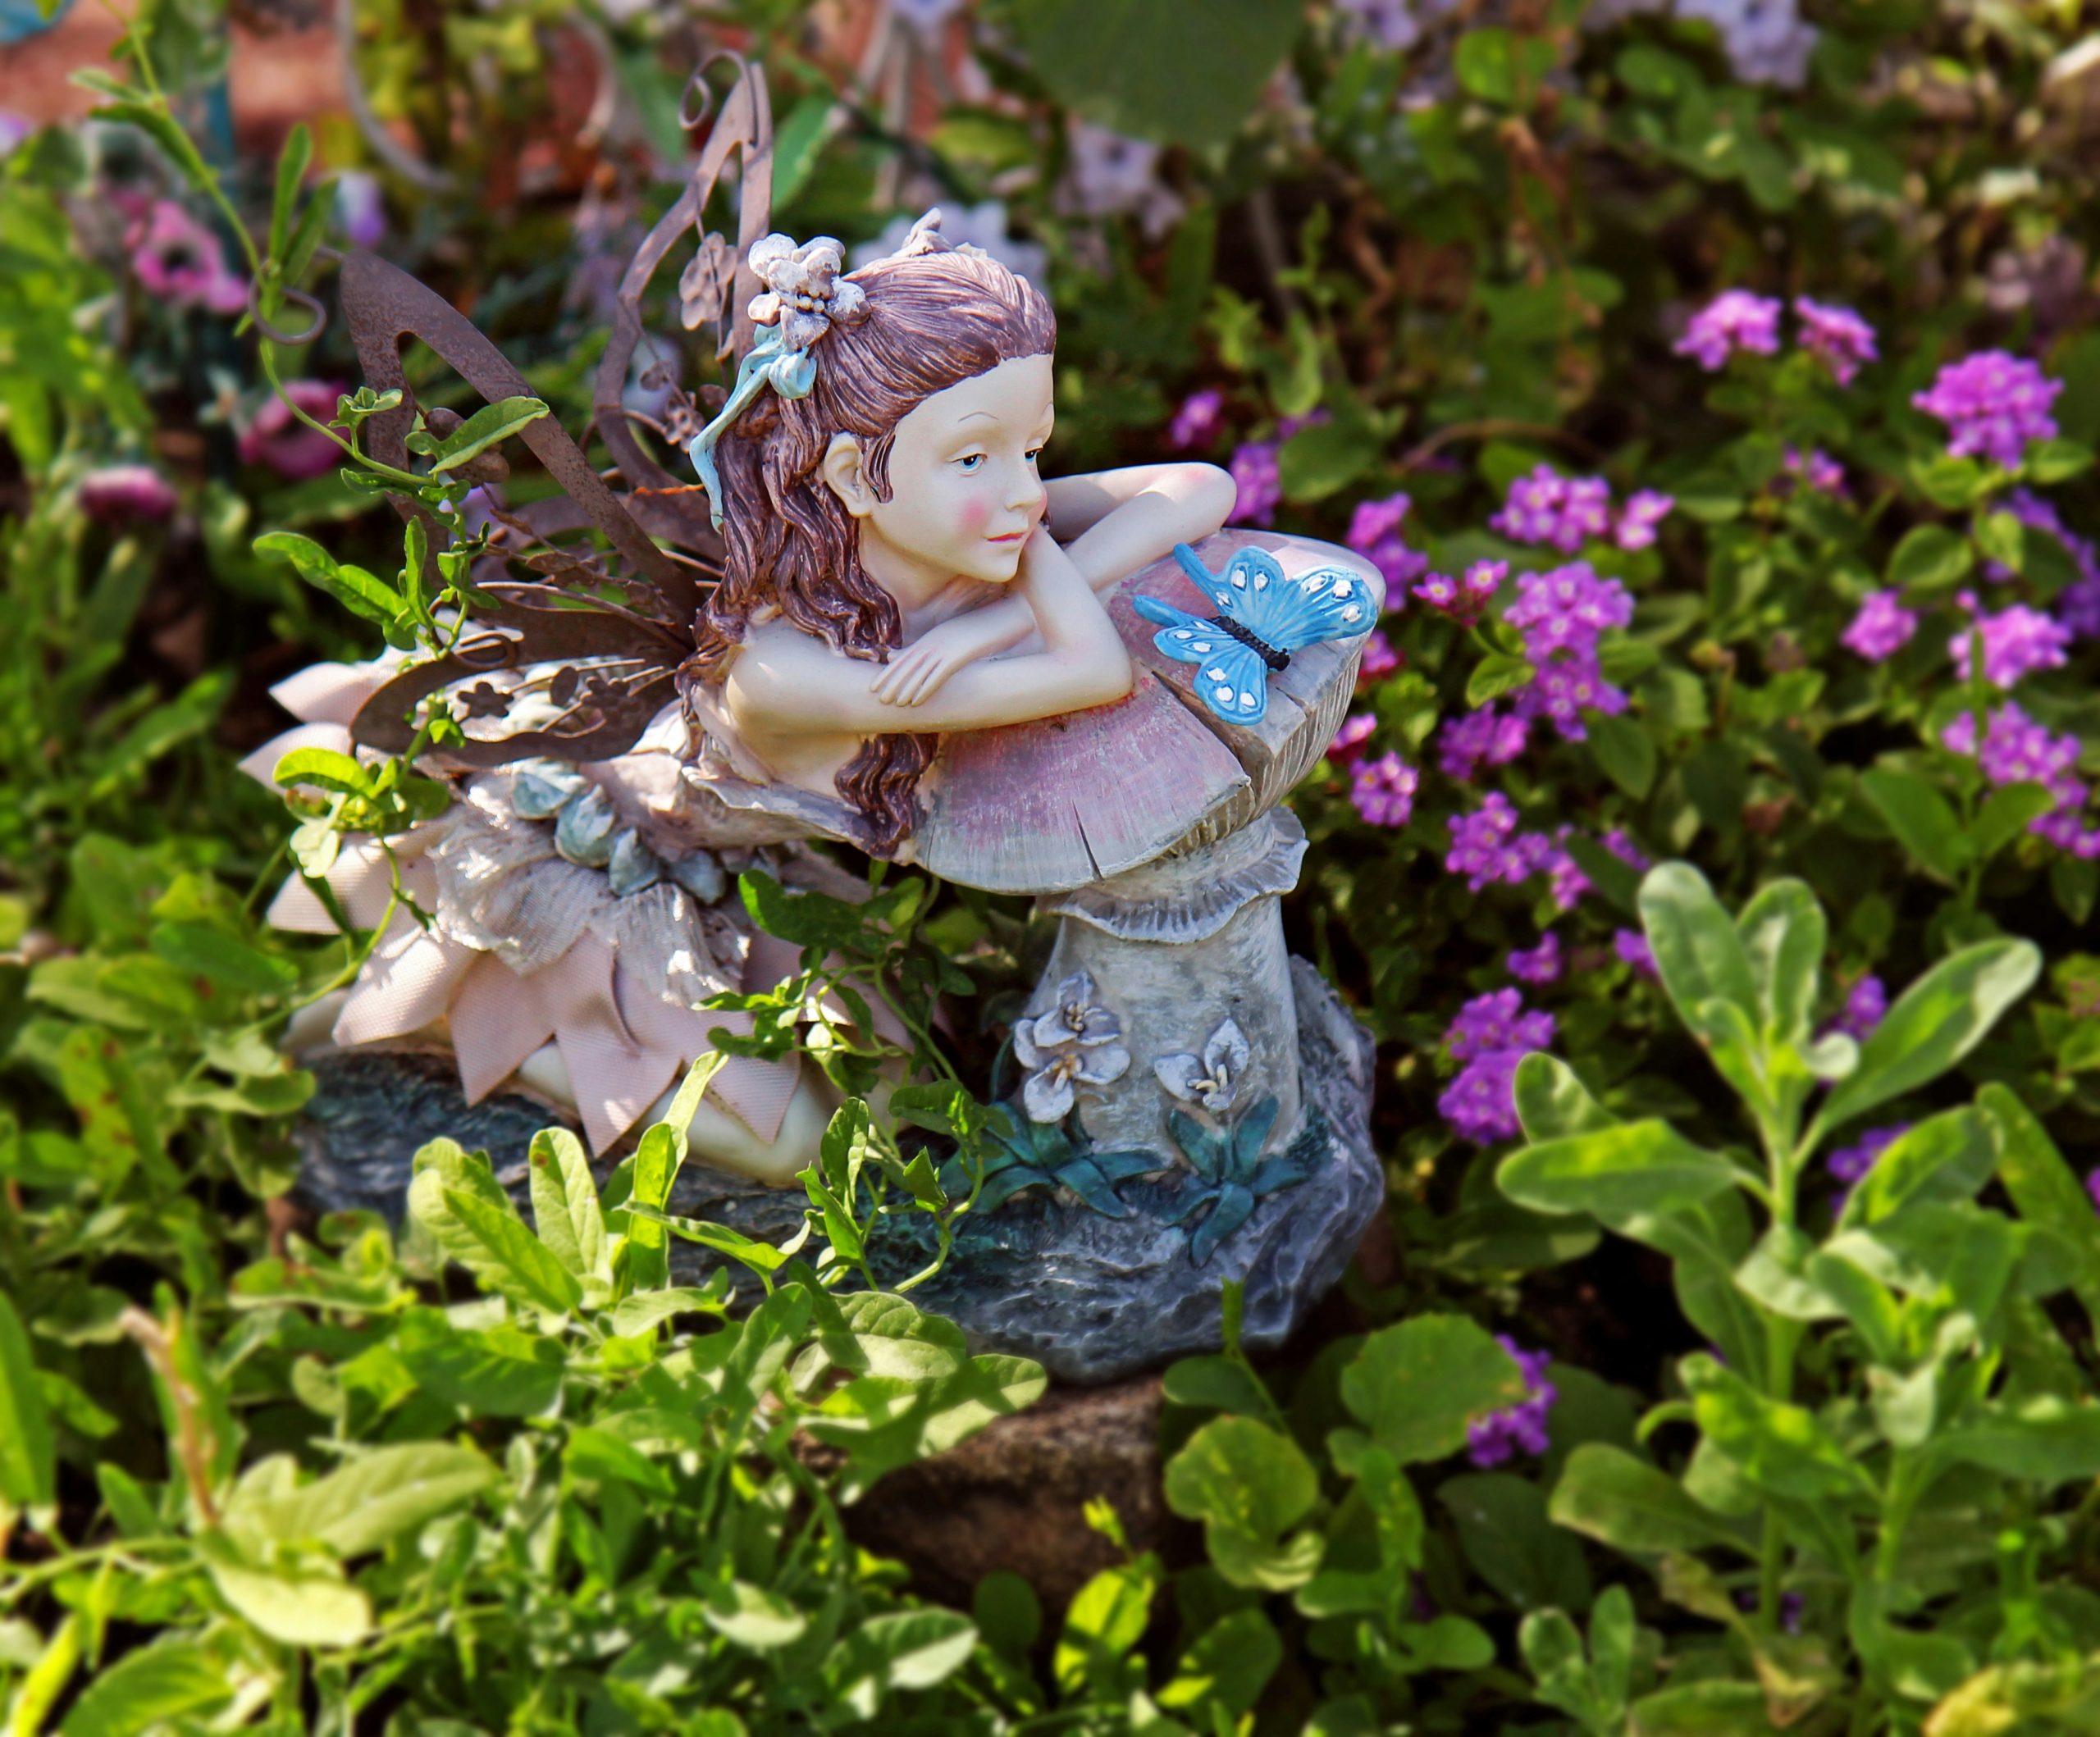
📏 Scale Guide
This scene is a masterclass in color harmony. The design uses an analogous color scheme, focusing on colors that sit next to each other on the color wheel. The purple of the flowers, the blue of the butterfly, and the lush green of the foliage all work together to create a feeling of calm and serenity. There are no jarring, high-contrast colors. This peaceful palette allows the gentle form of the fairy figurine to be the primary focus without visual distraction, creating a truly tranquil and enchanting vignette.
20. Ethereal Fairy Doll with a Rose Bouquet
This soft, dreamy aesthetic is part of a larger trend known as “cottagecore” or “fairycore” that has been huge on social media for several years. It romanticizes pastoral life and magical, natural themes. In 2026, we’re seeing it evolve from purely rustic settings to this more ethereal, polished look. It’s less about mud and moss, and more about soft focus, pastel colors, and delicate, doll-like figures. This isn’t for a garden in the dirt; it’s for an indoor, curated shelf display that captures a specific, dreamy mood.
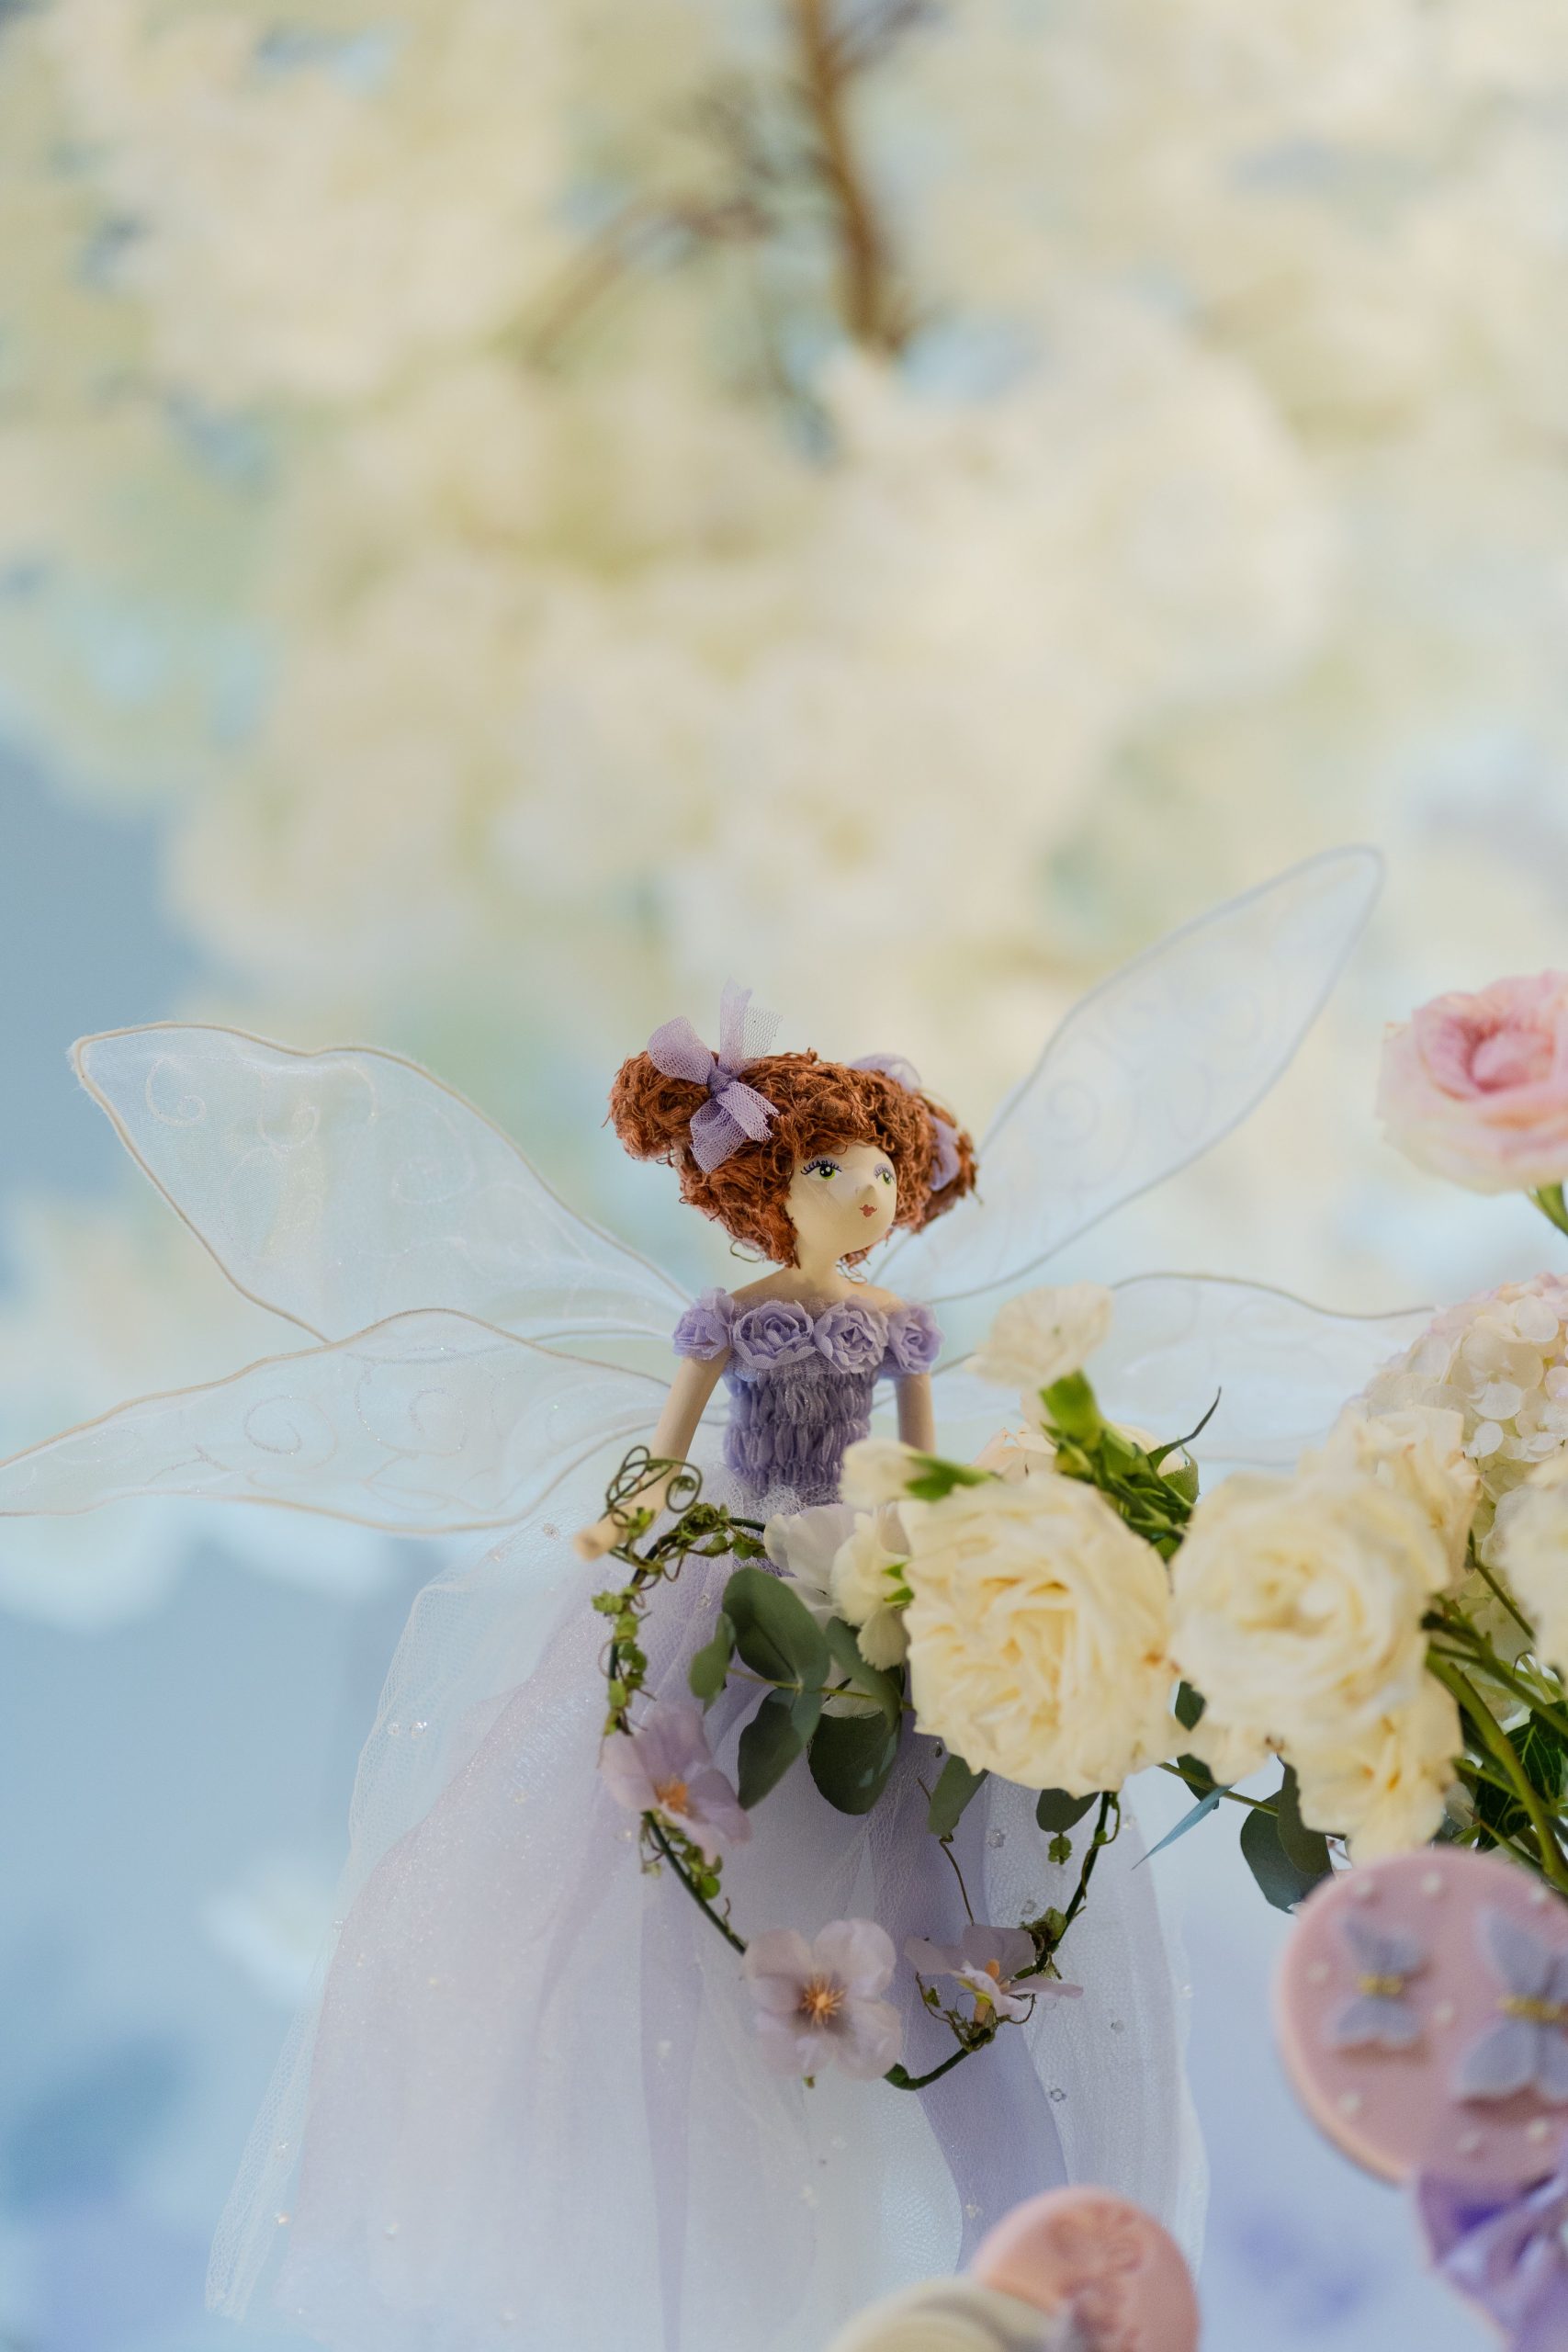
📐 Style Math
Be honest with yourself: this is a decorative vignette, not a garden. The fairy doll is the focus, and she is likely not weatherproof. Her delicate wings and fabric dress would be ruined by rain or direct sun. The roses are real, which means they are temporary. This is a beautiful setup for a photograph or a special occasion, but it is not a permanent “fairy garden.” To get a similar feel for an actual garden, you would need to source a weatherproof resin figurine and use permanent silk flowers instead of real ones.
21. Bustling Fairy Village with a Log Bridge
A village scene like this requires more space than a single-pot garden. To allow each house and accessory to have its own breathing room, you’ll need a minimum area of 3×3 feet. This layout is perfect for a dedicated corner of a garden bed, a child’s play area, or a large, low planter on a deck. The key is having enough ground to create distinct zones—a residential area with houses, a park with chairs, and a “wild” area with the water feature—all connected by paths, just like a real town.
⚠️ Real Talk
- Main Furniture (3+ Houses): $75 – $150
- Infrastructure (Bridge, Chairs): $20 – $40
- Landscaping (Moss, Plants): $30 – $50
- Decor/Accessories (Figurines, Toadstools): $25 – $45
- TOTAL: $150 – $285
- Budget alternative: Build your own houses from bark, twigs, and stones. Use a single interesting stick for a bridge. This more rustic version of the village can be built for under $50.
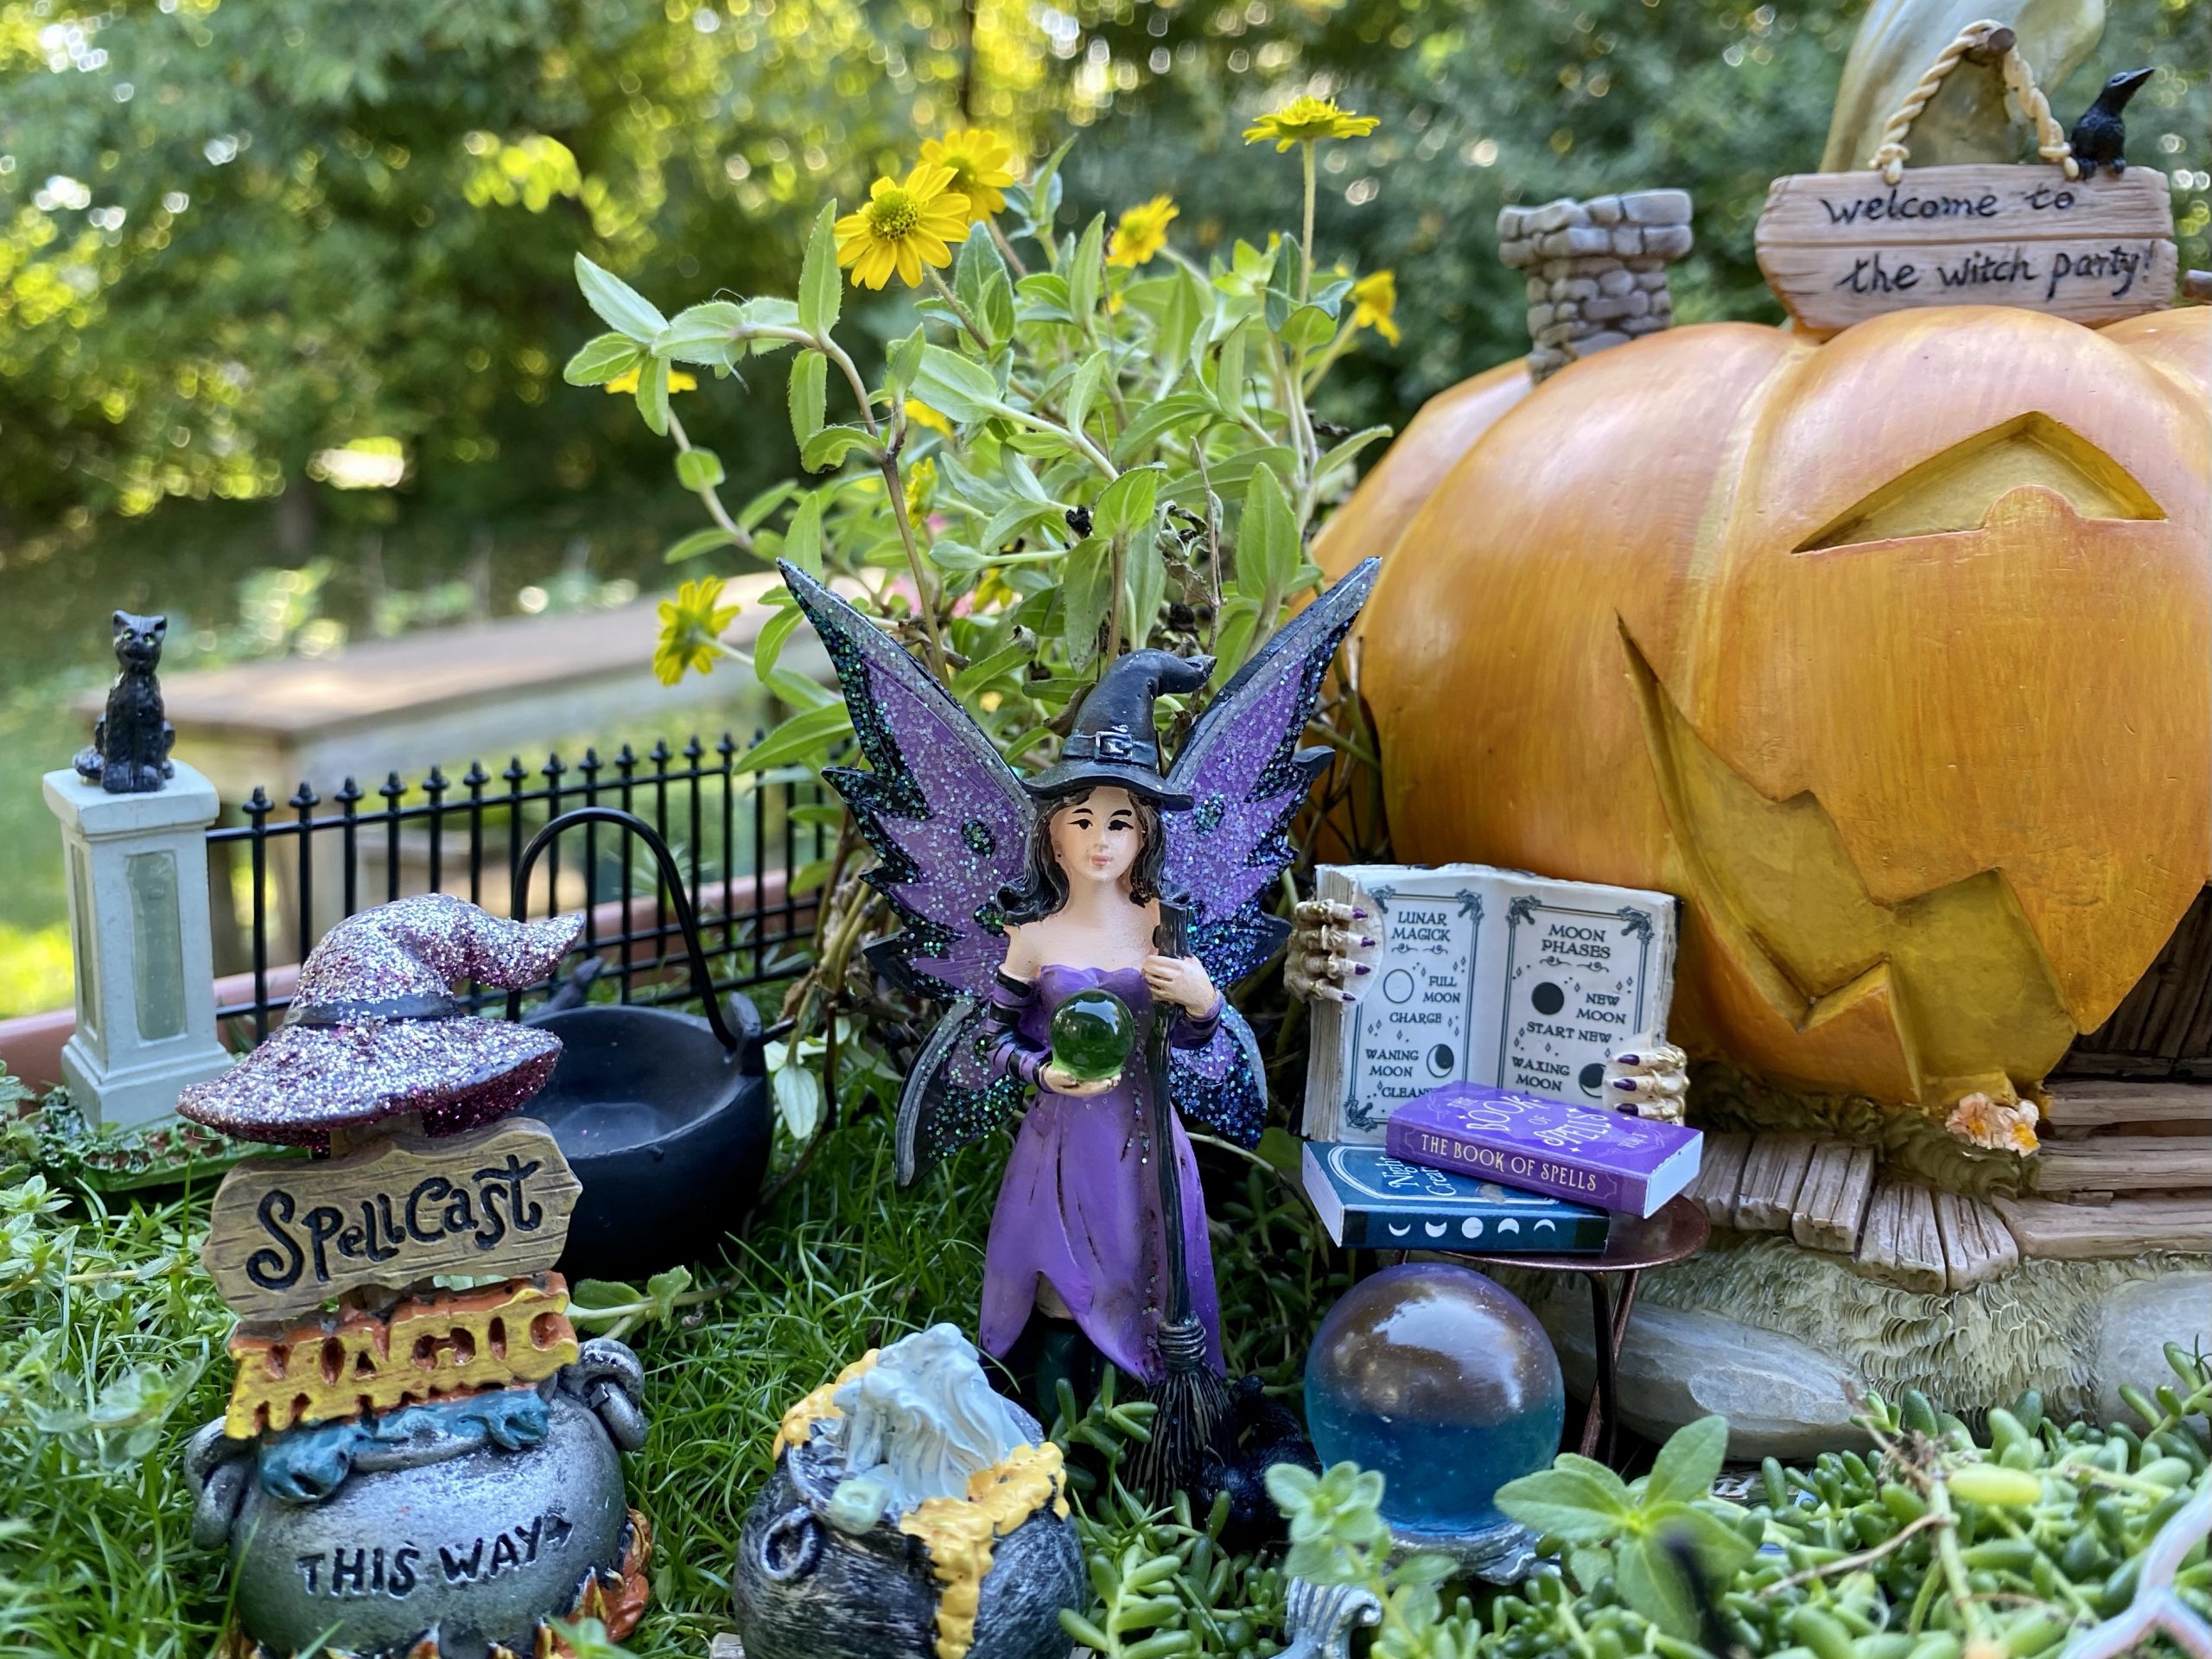
22. Mystical Witch’s Garden with a Pumpkin House
The formula for this magical theme is a careful balance: 50% spooky icons + 30% enchanting sparkles + 20% natural elements. The pumpkin house, black cat, and cauldrons are classic Halloween. The sparkle comes from the iridescent purple wings and the glittery witch hat, adding a layer of magic, not just horror. The live plants and mossy ground cover keep it rooted in the “garden” world. This balance is crucial—without the sparkle and plants, it could look like a cheap Halloween display.
🔥 Trending Context
When creating a dense, prop-heavy scene like this, layering is everything. Don’t place all your items on the same level. Position taller items in the back (the pumpkin house), medium-height items in the middle (the witch figurine), and your smallest, most detailed props (the spell books, the tiny cauldron) right up front where they can be appreciated. This creates a sense of depth and makes the small space feel much bigger and more immersive.
23. Charming Cottage Garden with Succulents and a Sand Path
This design is successful because of its brilliant material and texture combinations. The soft, fleshy leaves of the succulents contrast beautifully with the rough, mossy roof of the cottage. The fine, white sand of the path provides a clean, bright line that cuts through the earthy tones of the planter and soil, drawing the eye through the scene. Finally, the whimsical, painted mushrooms add pops of manufactured smoothness against the organic textures surrounding them. It’s a sensory feast in miniature.
🧹 Maintenance Reality
A white sand path looks incredibly crisp and clean, but it’s also high-maintenance. Every time you water, you risk displacing the sand or getting soil splashed on it. Outdoors, wind and rain will disturb it, and fallen leaves can be a nuisance to pick out. To keep it looking pristine, you may need to “rake” it with a small brush or fork and top it up with fresh sand periodically. Consider it the miniature equivalent of having to vacuum a white carpet.
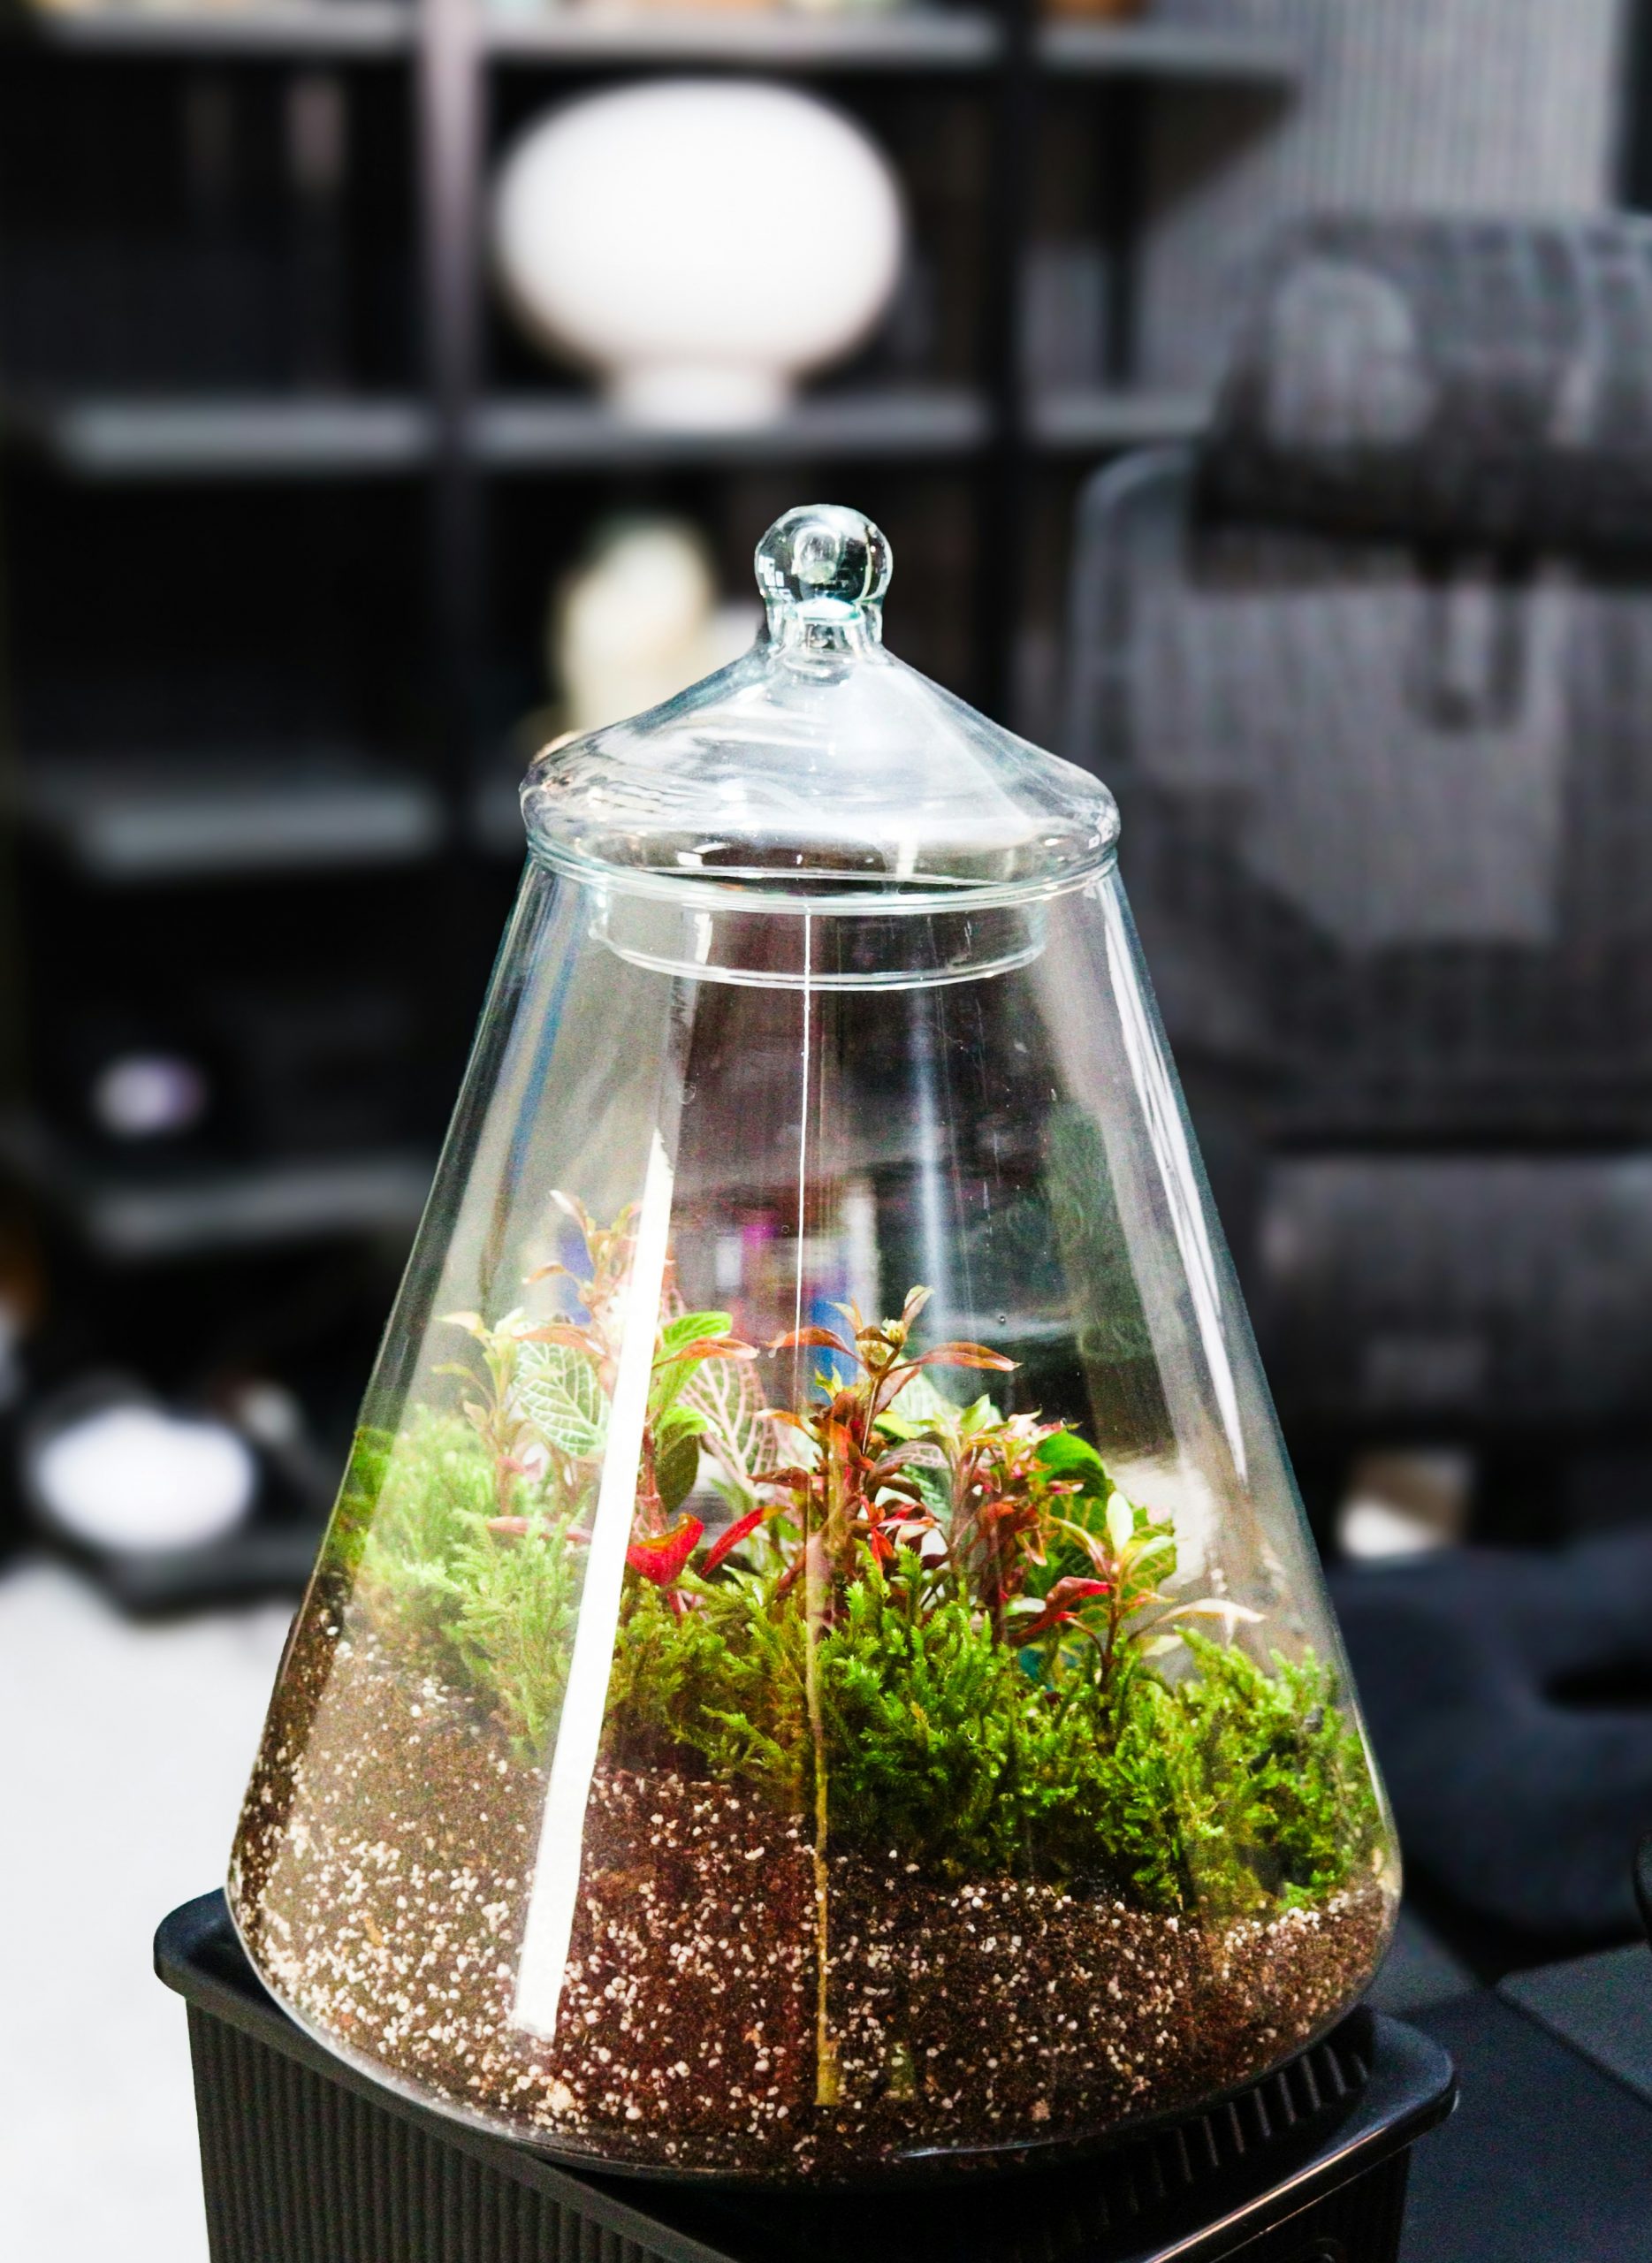
24. Lush Terrarium with Red and Green Plants Under a Glass Cloche
The absolute star of this show is the color contrast. The vibrant, almost electric green of the moss paired with the deep, rich red of the new plant growth is what makes this terrarium so mesmerizing. It’s a classic complementary color scheme (red and green) that is inherently dynamic and eye-catching. The glass cloche serves to frame and intensify this color story, turning a simple planting into a piece of living art. The similar enclosed garden in Idea #16 has a totally different, more playful feel due to its accessory choices.
💸 Get This Look For Less
A glass cloche is best for a very minimalist and focused display. This idea works best in cloches ranging from 8 to 15 inches tall. You need enough height to allow the plants room to grow, but if it’s too wide, the intimate, contained feeling is lost. This is not for building a “scene” with houses and furniture; this is for showcasing one or two spectacular plants, almost like a museum specimen. It’s an excellent choice for a desk, a bookshelf, or a bedside table where it can be appreciated up close.
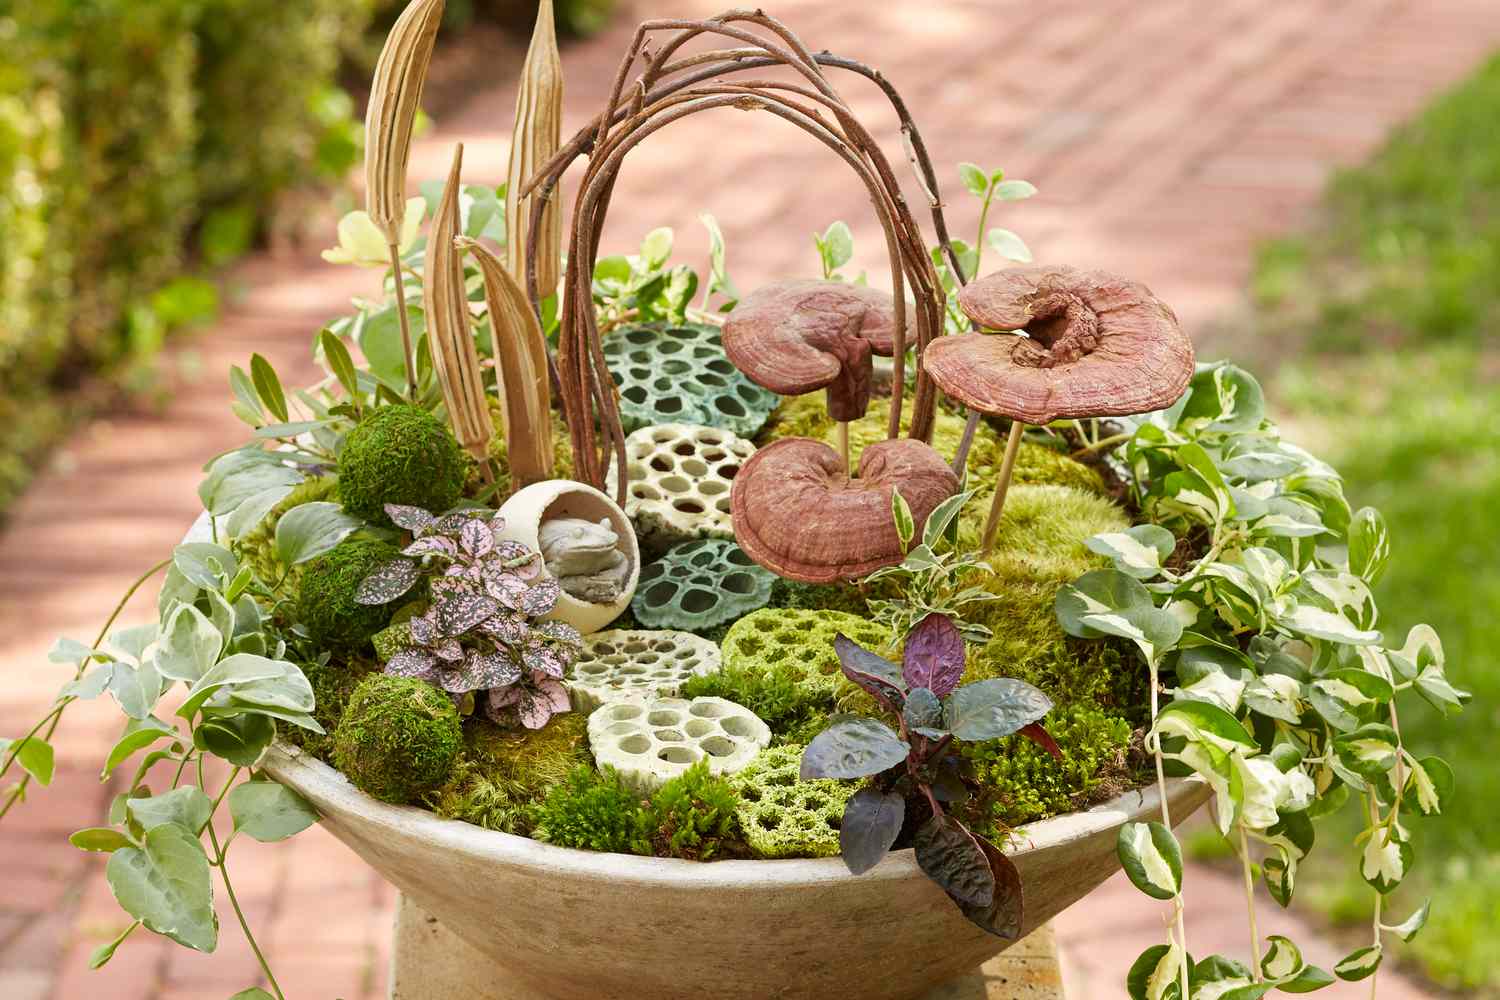
25. Enchanted Faux Garden in a Stone-like Planter
This artificial garden works so well because it masterfully mimics nature’s textures. The key is the variety. You have the soft, clumping moss, the waxy leaves of the trailing plant, the hard, ridged surface of the faux mushrooms, and the rough, porous texture of the dried pods. Even though many elements are faux, the rich textural tapestry makes the entire scene feel authentic and enchanting. The shallow, stone-like planter provides the perfect rustic, neutral base for all these competing textures to play on.
💡 Designer Tip
An all-faux or mostly-faux garden is a fantastic, low-cost alternative for those who lack a green thumb or the right lighting conditions. Craft stores like Michaels and Hobby Lobby are your best friends here. Look for bags of different types of artificial moss, small faux succulents, and decorative mushrooms in the floral section. A bag of rocks from the dollar store and a stick from your yard for the archway complete the look. You get all the whimsical charm with zero watering required. This is a zero-maintenance version of the living moss display in Idea #12.
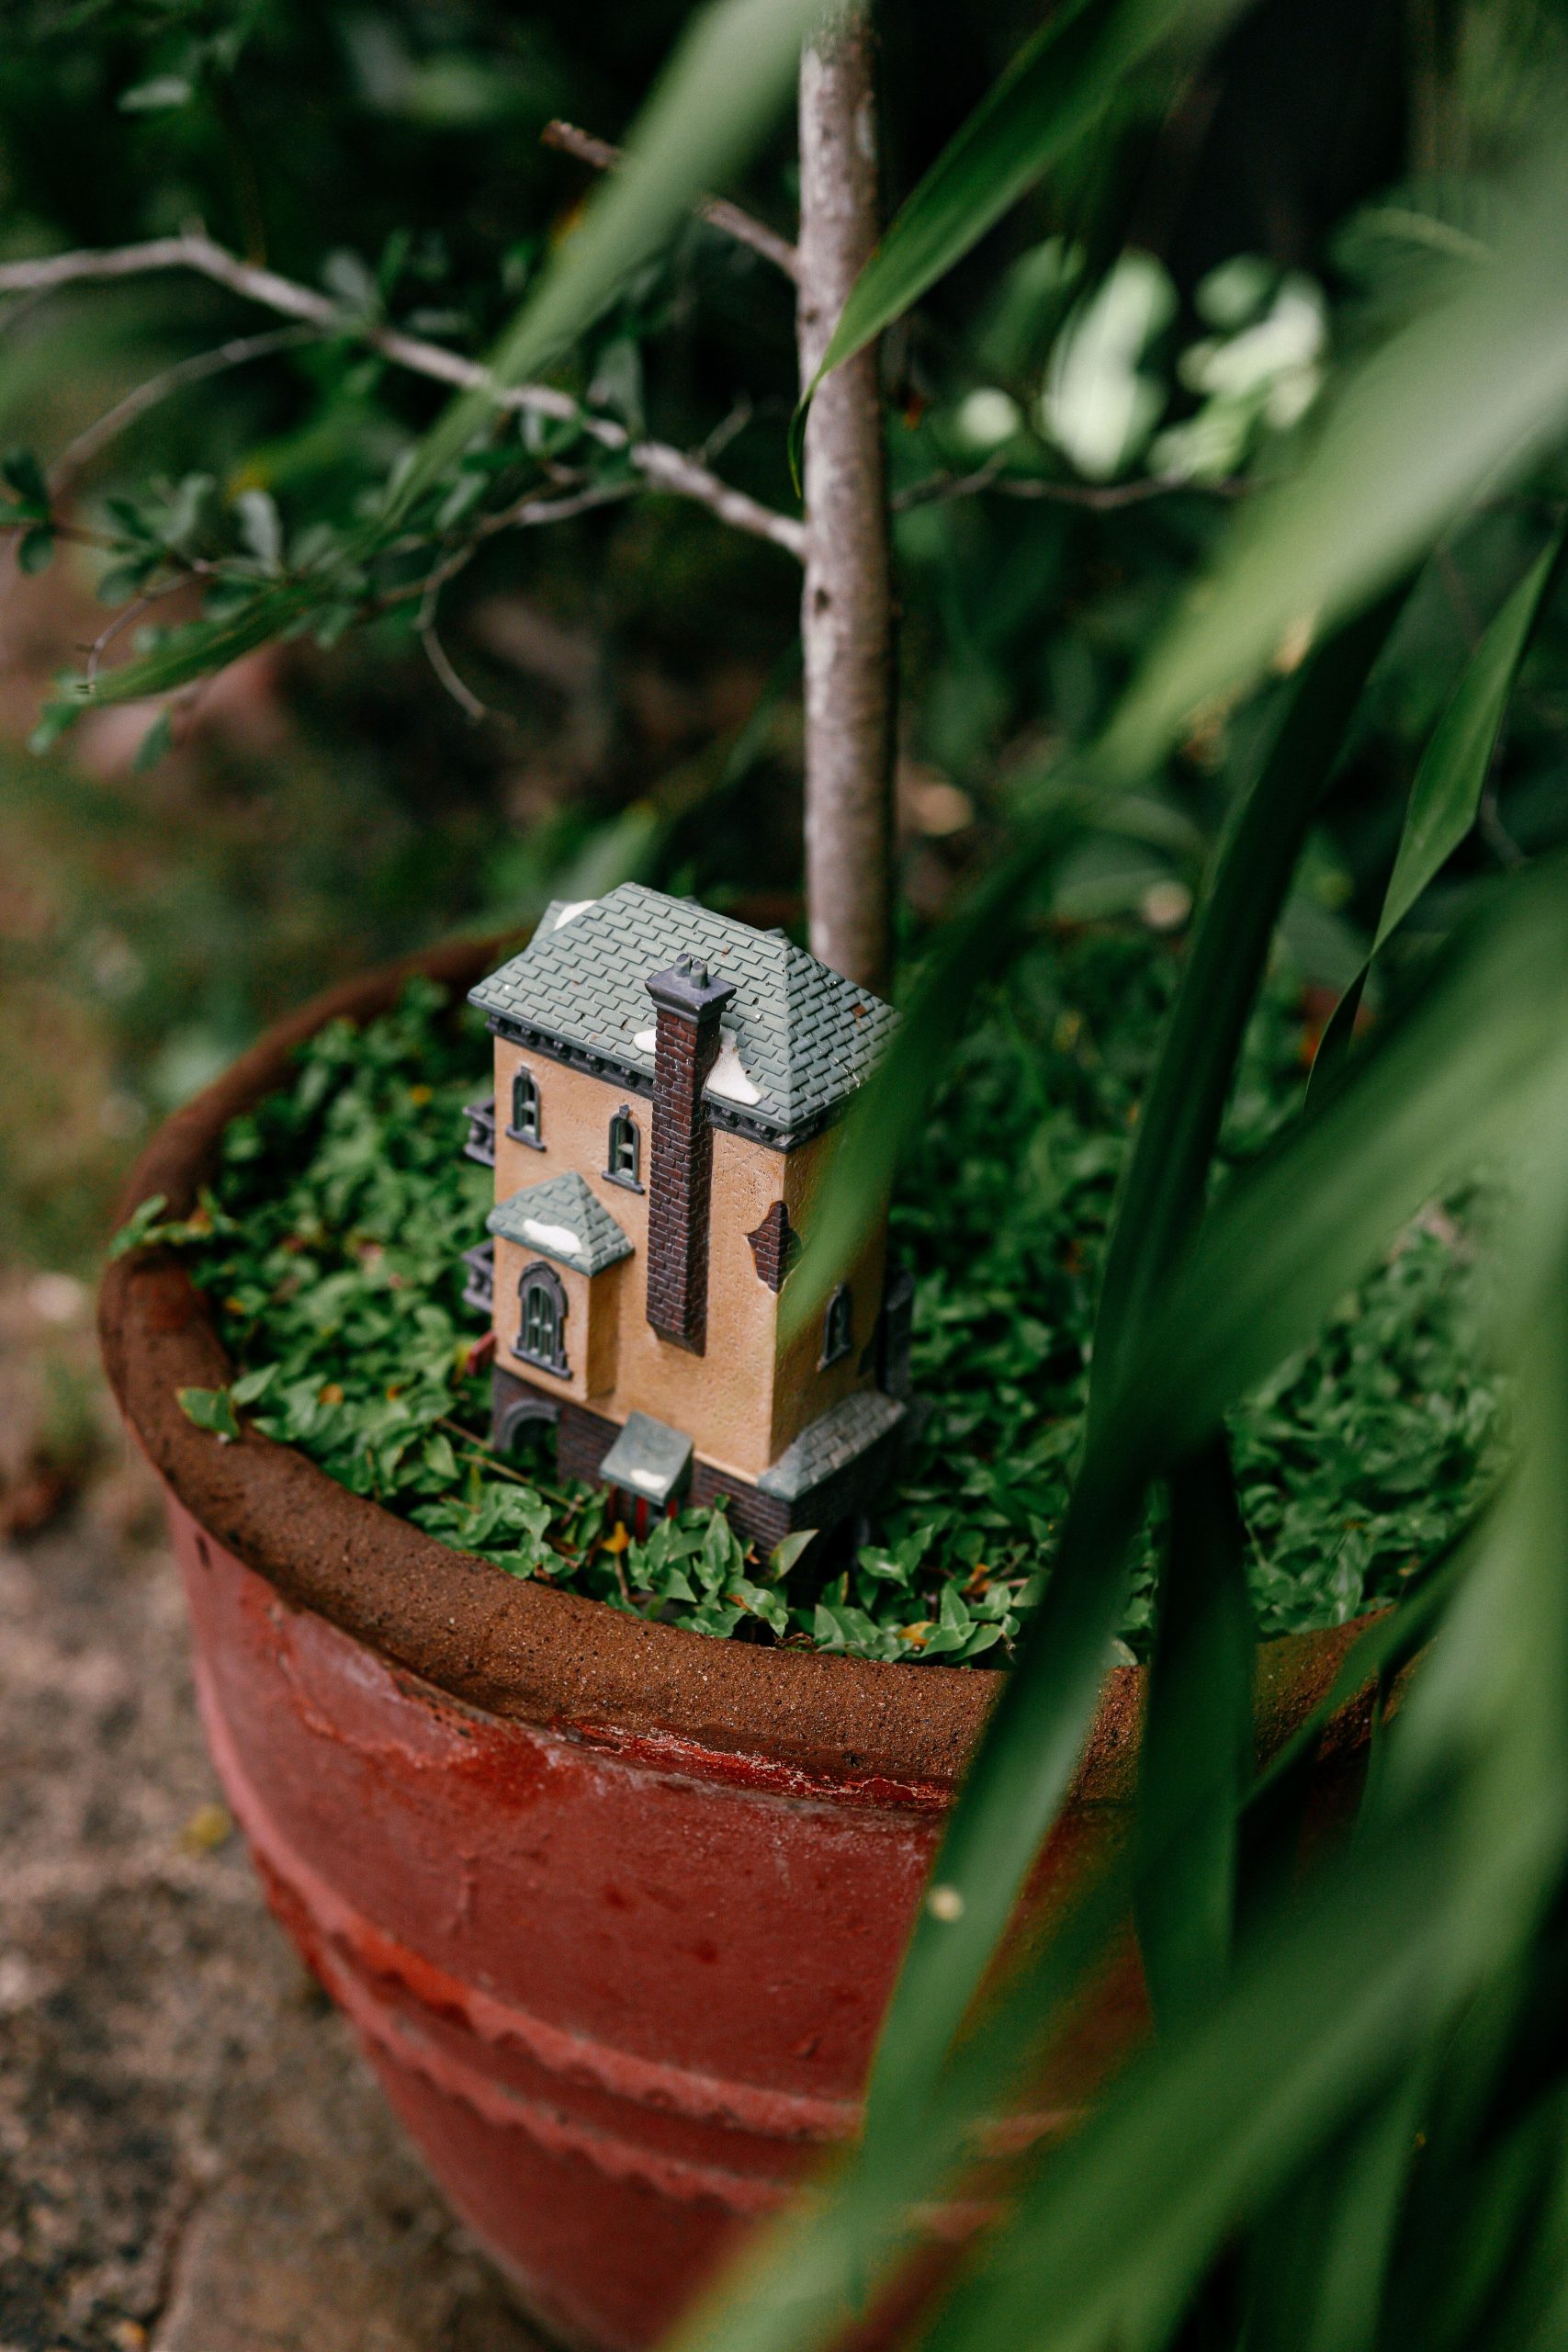
26. Miniature Brick House Nestled in a Potted Jungle
To achieve this “nestled” look, the secret is to plant your foliage first and add the house last. Fill the pot with your leafy green plants, especially ones that will trail or drape, and let them grow in for a few weeks if you can. Then, gently part the foliage and create a small clearing for your miniature house. Tuck it in so that the leaves overhang the roof and brush against the walls. This makes it feel like the house was discovered within the jungle, rather than just placed on top of it.
💰 Budget Breakdown
A potential issue with this overgrown, leafy look is that the house can get… well, overgrown. Fast-growing plants can quickly swallow a miniature house, obscuring it from view entirely. You’ll need to commit to regular, careful pruning with small scissors to keep the foliage in check and maintain the charming, nestled look without losing the house completely. Also, be aware that the dense foliage can trap moisture against the house, which may cause paint to peel or wood to degrade over time on lower-quality miniatures.
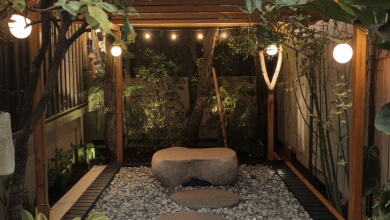
27. Sunlit Garden Path with a Mossy Log and Fairy Statue
This serene corner follows a recipe for natural magic: 70% authentic natural materials + 20% curated hardscape + 10% whimsical accent. The moss-covered log and lush background foliage provide a powerful, authentic base. The white and grey pebble path is clearly man-made, showing intention and care. Finally, the small fairy figurine is the single touch of overt whimsy that re-frames the entire scene as an enchanted space. With a different figurine, you could change the whole mood. Compare its simplicity to the busy village in Idea #21.
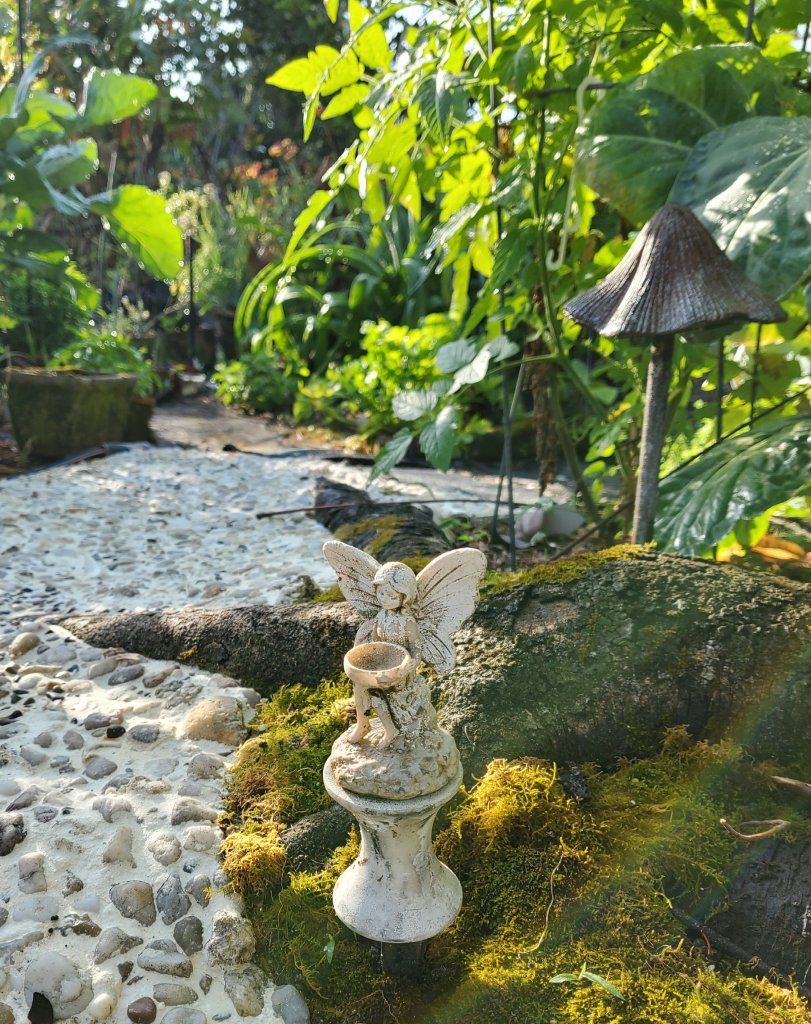
⭐ The One Thing
that elevates this from a simple path to a magical scene is the sunlight. The way the light dapples through the leaves in the background and catches the edge of the fairy figurine creates a sense of life, movement, and ephemeral beauty. It’s a reminder that the best decorating tool is often natural light. When you site your fairy garden, pay attention to how the sun hits it at different times of day. A little bit of morning or late-afternoon sun can bring the whole world to life.
Your Miniature World Is Waiting
Remember, the perfect fairy garden isn’t about following rules—it’s about creating a tiny space that brings you joy. Whether you build a bustling village or a single, serene scene in a teacup, the goal is to play, imagine, and make a little magic of your own. Now go get your hands dirty!
Found your inspiration? Pin this article to your board so you can find it again when you’re ready to start building.