You know that feeling when you finally find the fall wreath that looks exactly right for your door? That’s what this guide is all about. After sifting through hundreds of DIY ideas and checking out the craft aisles at Dollar Tree and Michaels, we’ve pulled together 27 of the most inspiring, doable projects for 2026. Inside, you’ll find everything from simple, natural grapevine wreaths to chunky yarn creations, covering styles from rustic to whimsical. In 2026, it’s all about making decor that feels personal and real, which is why homemade wreaths are absolutely everywhere. And stay until the end — we break down the most common mistakes that can ruin these looks.
📌 Save this to Pinterest for later — you’ll want to revisit these ideas.
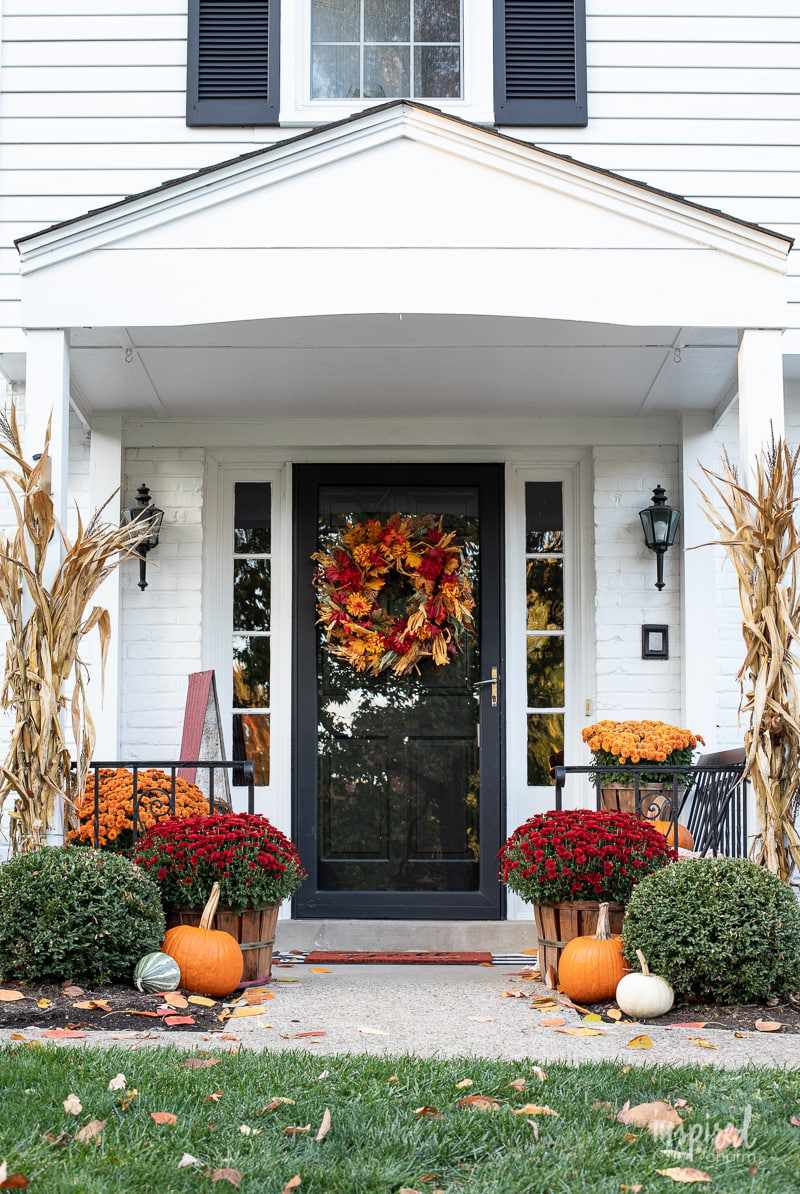
1. Classic Autumn Porch with a Wreath and Potted Mums
There’s a reason this look is a classic. The key is the powerful color contrast and confident symmetry. The deep reds and oranges of the wreath and mums pop beautifully against the clean white brick and the grounding black of the screen door and lanterns. By placing matching arrangements on either side of the door, you create an intentional, balanced composition that feels instantly welcoming and thoughtfully designed. It’s a timeless formula that says “autumn has arrived” without being over the top.
💰 Budget Breakdown
Here’s a realistic look at what it takes to bring this classic porch to life. Remember that prices vary wildly by region and quality.
- Large, pre-made wreath: $60 – $150
- Potted Mums (4): $40 – $80
- Decorative Baskets (4): $50 – $120
- Pumpkins & Gourds (assorted): $30 – $70
- Corn Stalks (2 bundles): $20 – $40
- TOTAL: $200 – $460
Budget alternative: Make your own wreath using a grapevine base and faux florals from a craft store, and purchase fewer, larger pumpkins for impact.
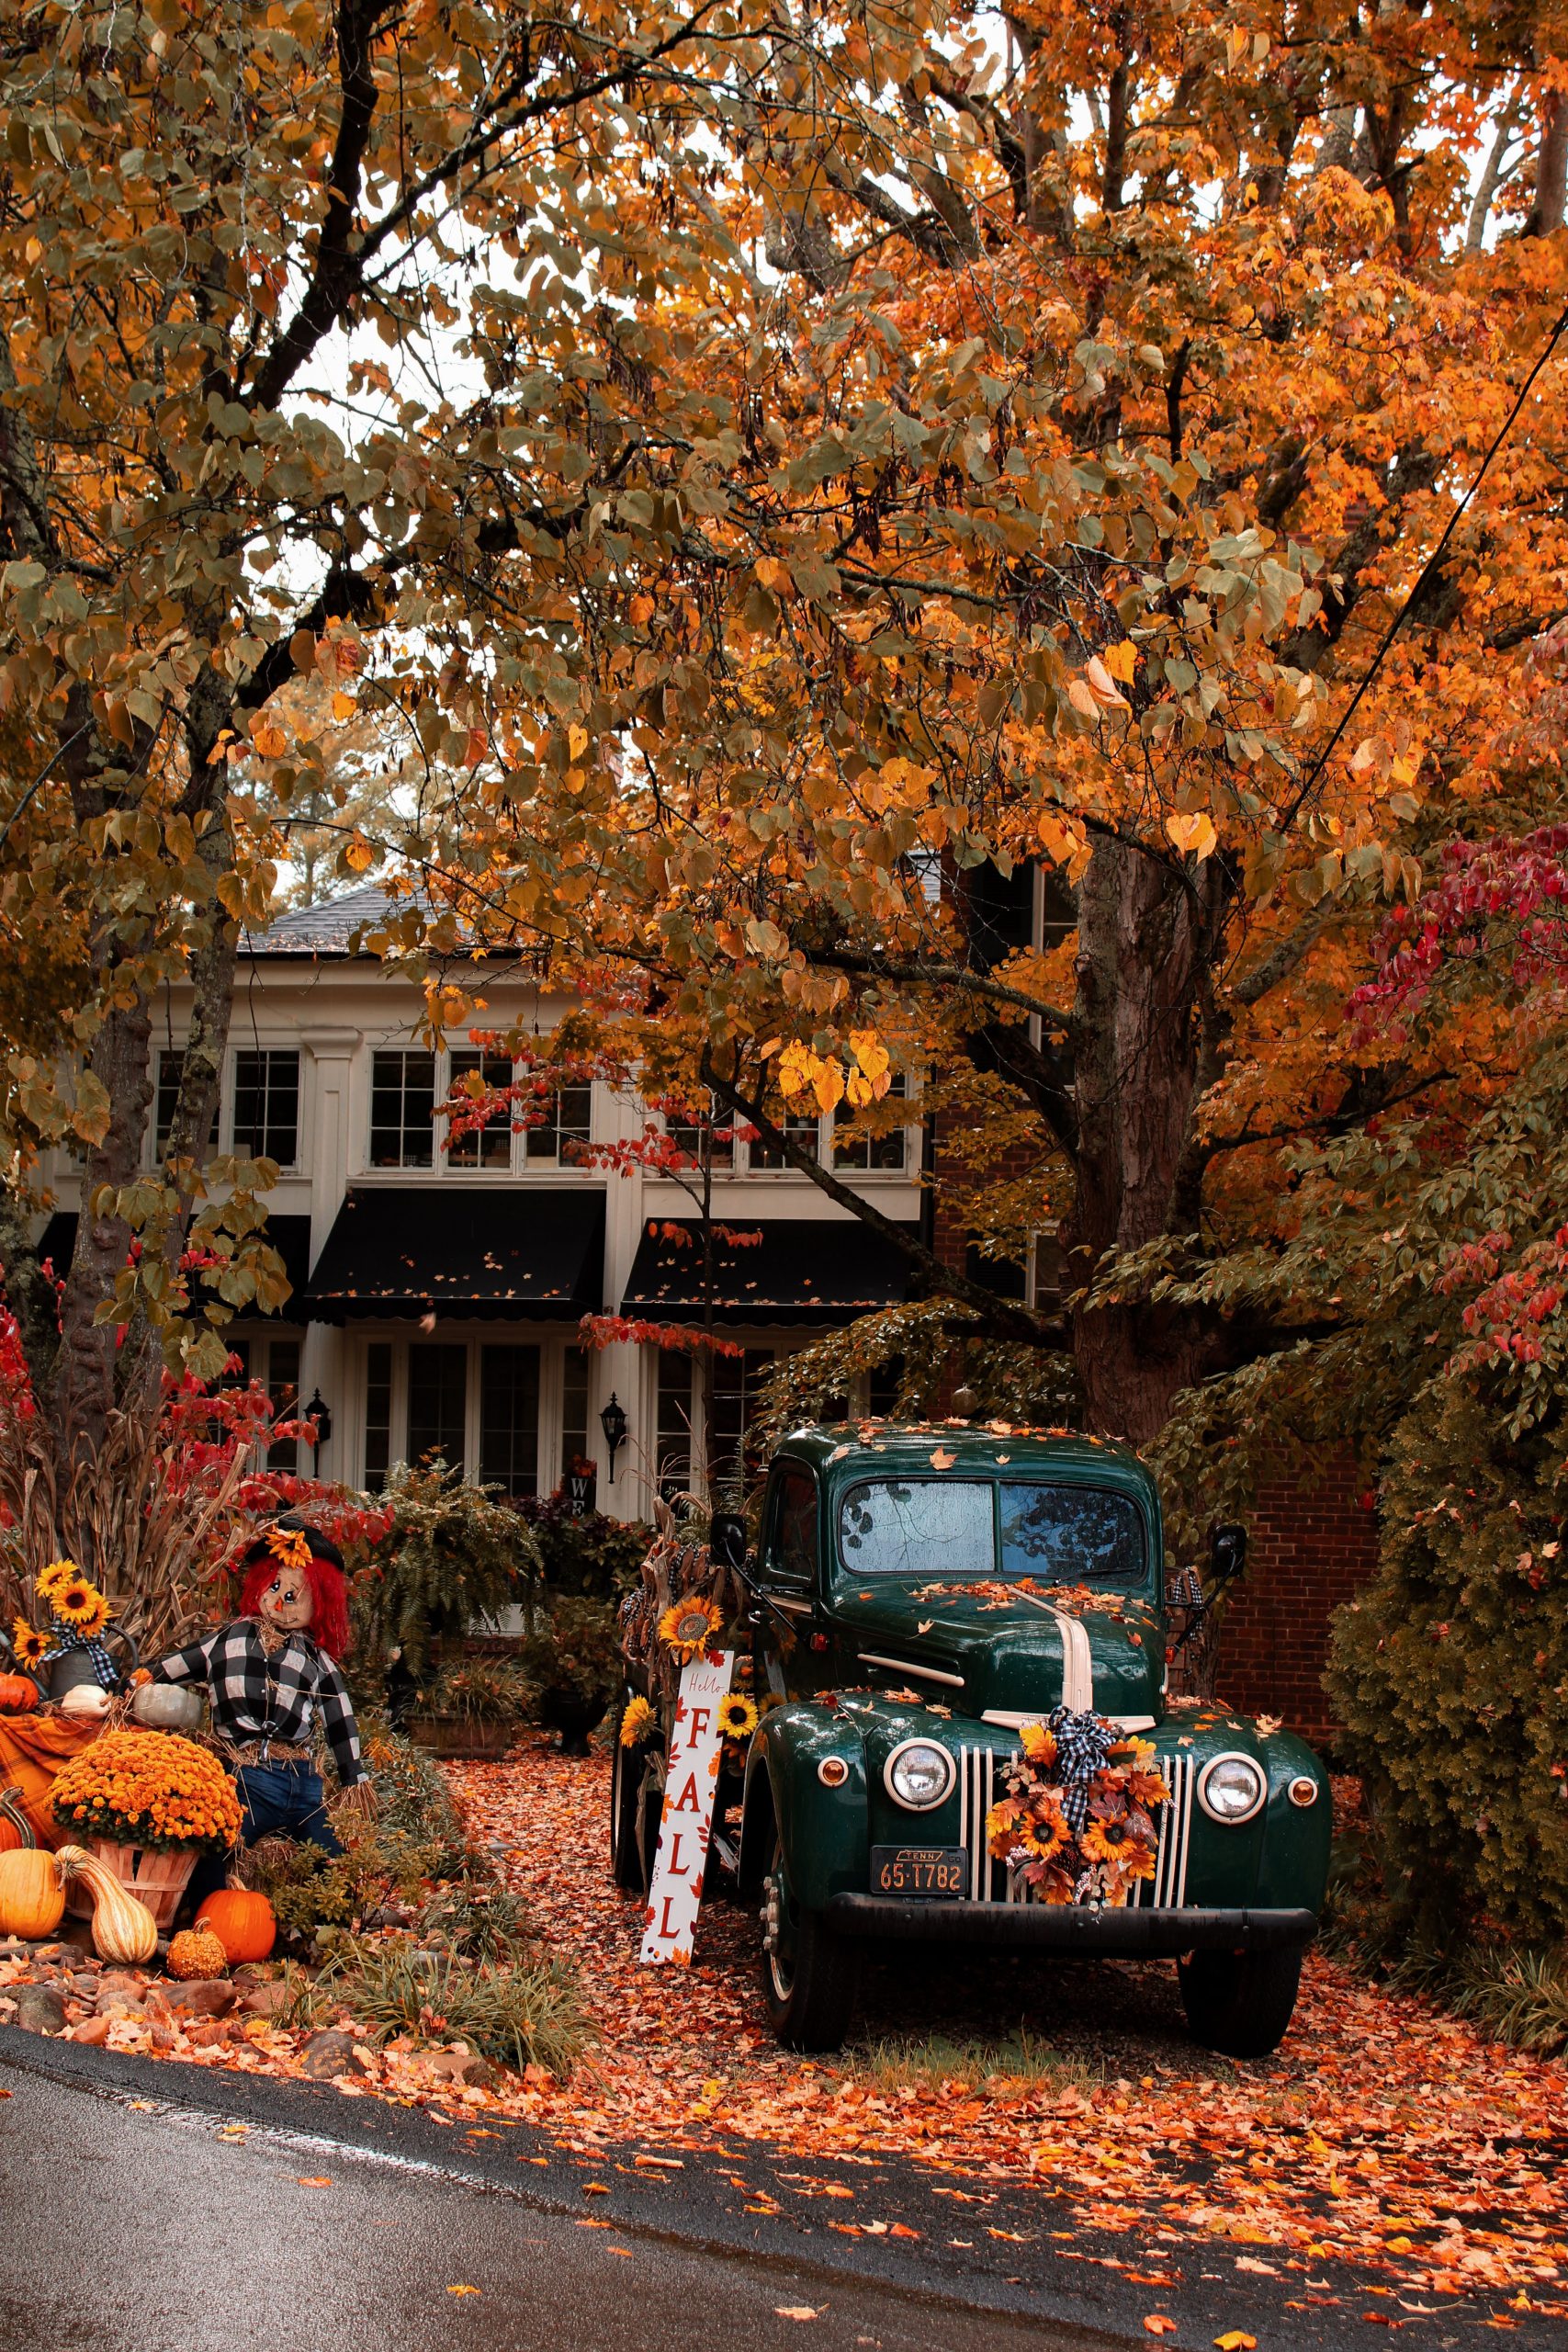
2. Abundant Harvest Display Featuring a Vintage Truck
The single element that makes this entire scene work is, without a doubt, the vintage green truck. Remove it, and you just have a lovely, but standard, pile of pumpkins and fall decor on the lawn. The truck provides a unique foundation, adds a strong narrative element, and serves as a large-scale planter and stage. It introduces a sense of history and character that you just can’t get from mums and gourds alone. It’s the anchor that elevates the entire display from seasonal decoration to a full-blown autumnal story.
💡 Designer Tip
Let’s be honest: this is a magazine-level setup. While it’s absolutely stunning for inspiration, it’s not practical for most homes. Sourcing a vintage truck is a major undertaking, and the sheer volume of pumpkins, sunflowers, and scarecrows represents a significant investment in both time and money. This is more of a “fall festival” or “pumpkin patch” vibe than a simple weekend DIY project for your front porch. Use it as inspiration for color and texture, but don’t feel pressured to replicate it at this scale.
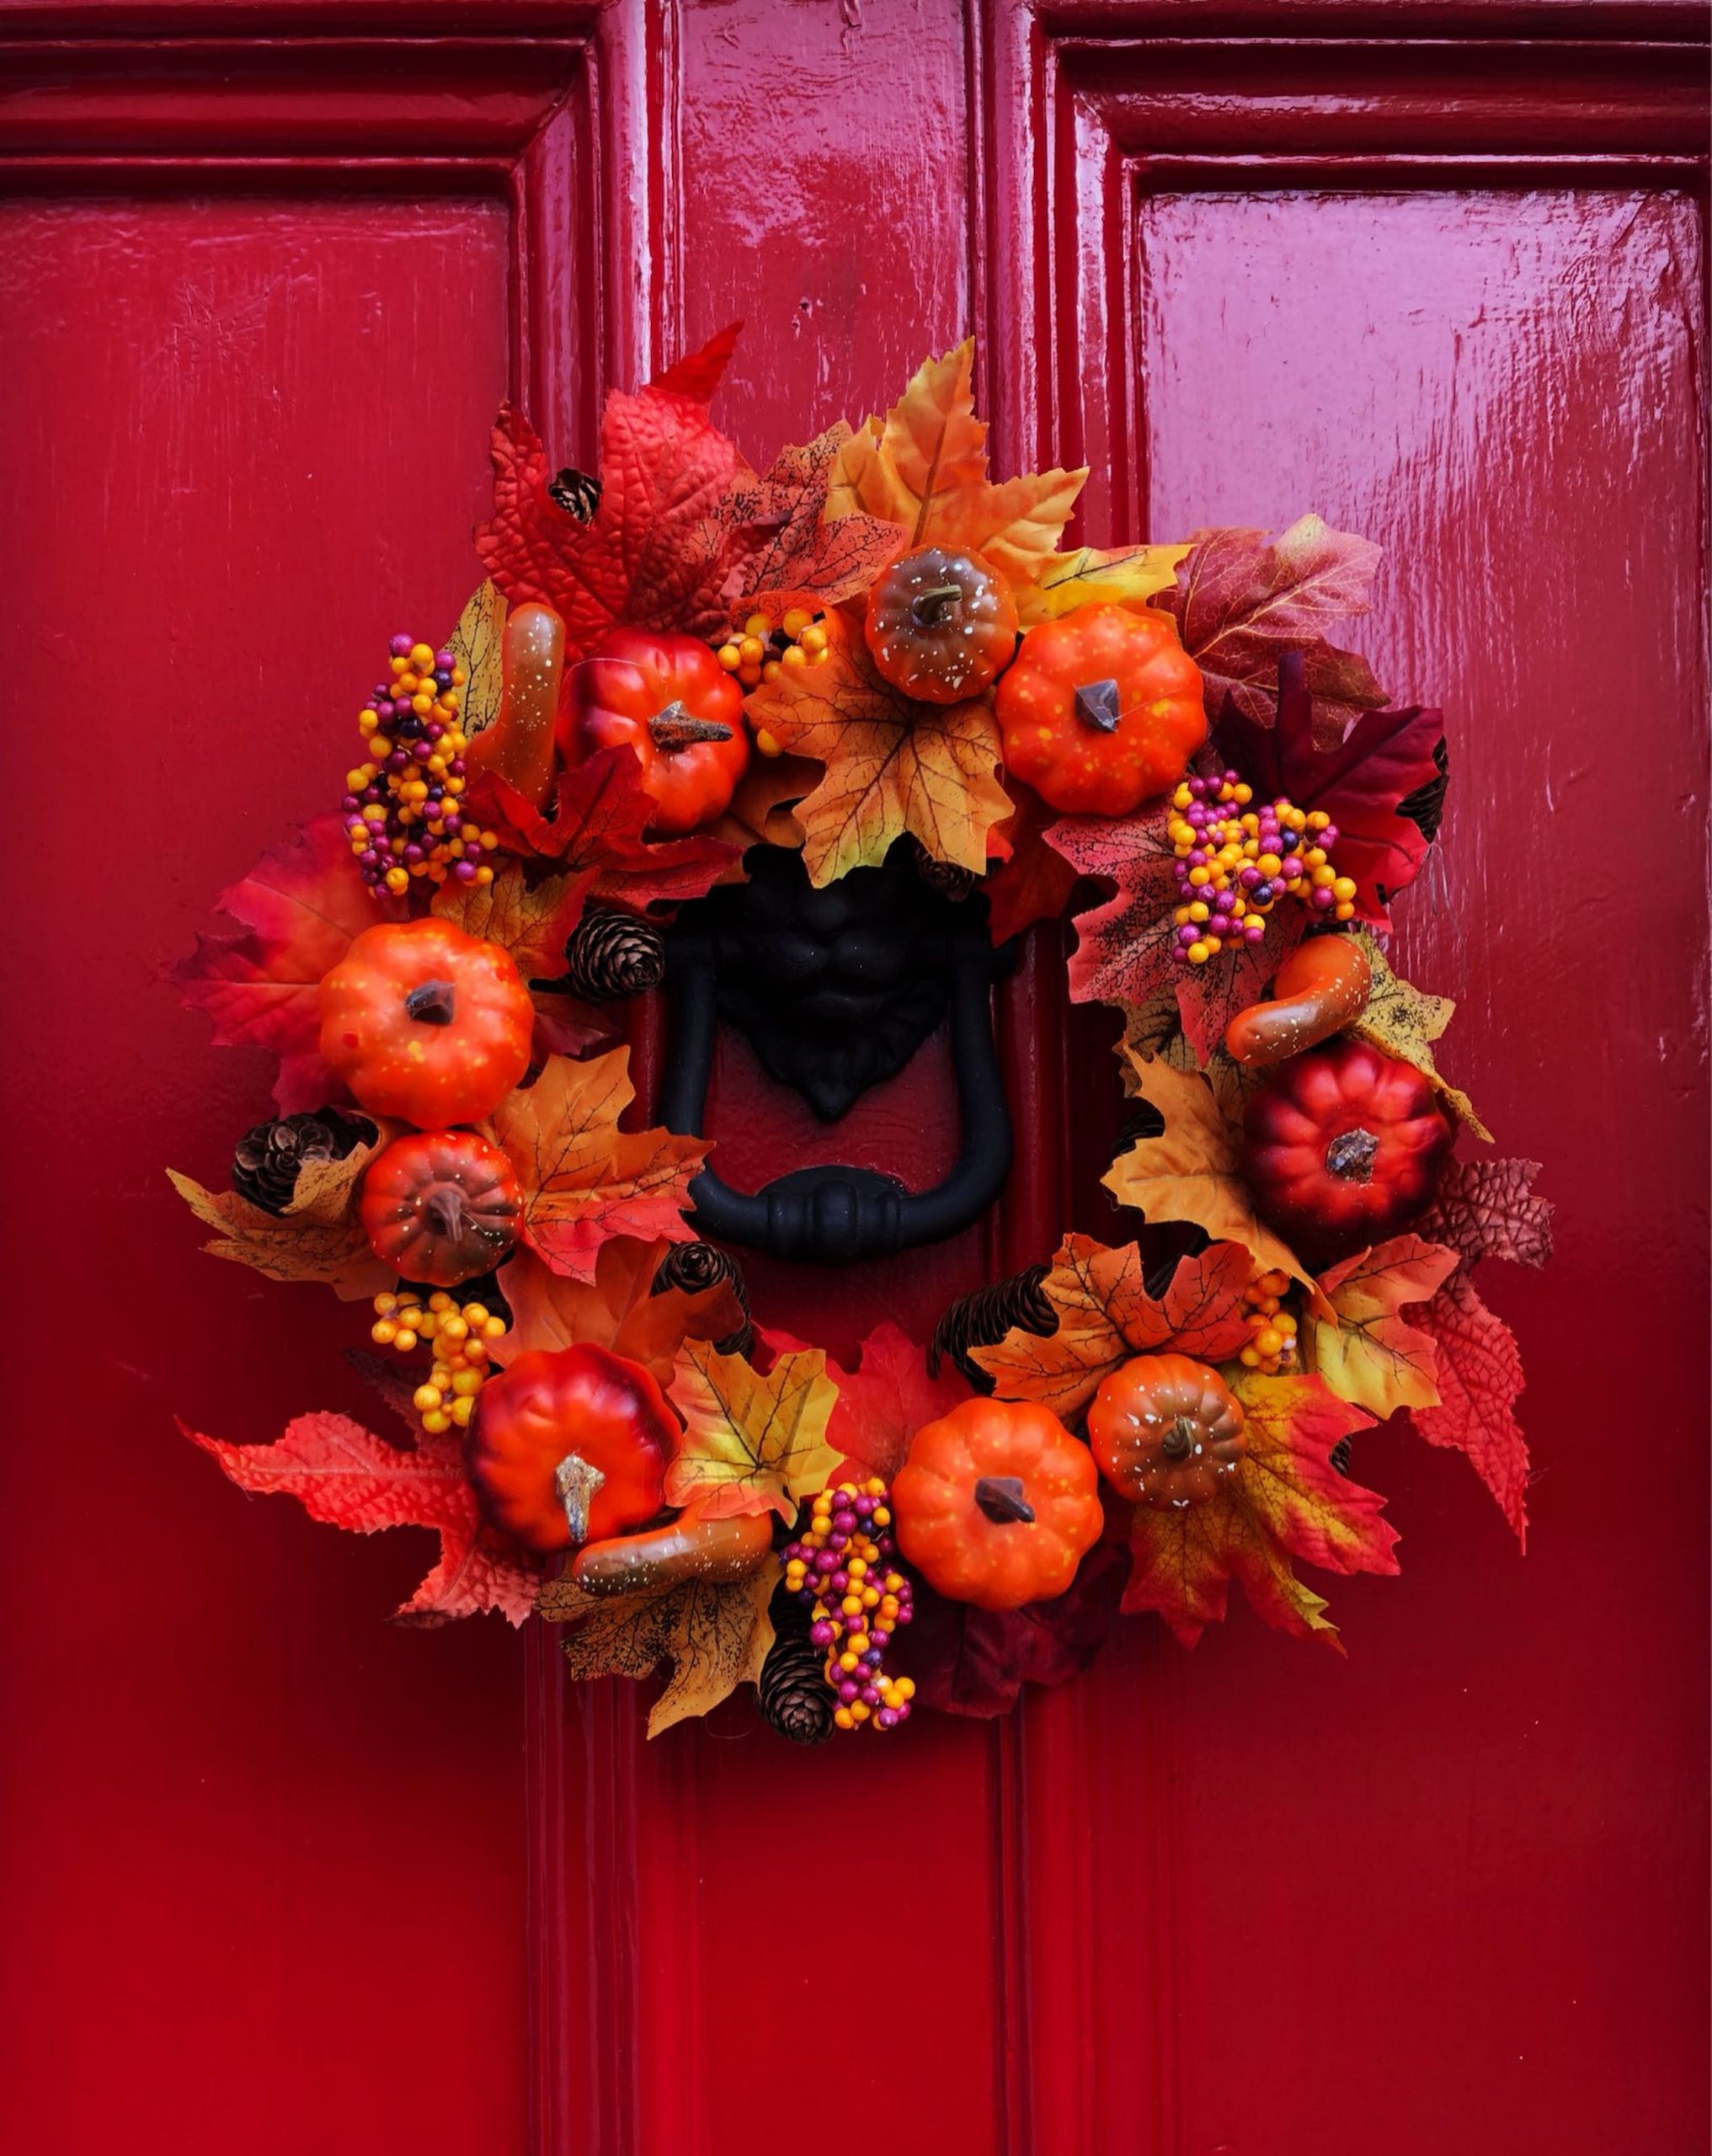
3. A Cheerful Pumpkin and Berry Wreath for a Bold Red Door
When you have a door that’s already a statement color, like this glossy red, your wreath needs to complement it, not compete with it. A common mistake is putting a wreath with clashing red tones on a red door. Instead, pull out the warmer, secondary colors of fall. Here, the oranges and yellows of the pumpkins and leaves create a harmonious, layered look. The small pops of deep purple berries add just enough contrast without being distracting. Always hold your wreath materials up to your door before you start assembling.
⭐ The One Thing
The visual balance here comes down to a simple recipe that you can easily adapt. Think of it as 50% colorful leaves (the main texture), 30% shapely objects (the mini pumpkins and gourds that add dimension), and 20% small-scale accents (the berry clusters and pinecones that fill in the gaps). You could swap the pumpkins for small apples or the berries for dried pods, and as long as you keep the proportions similar, the wreath will still feel lush and well-balanced.
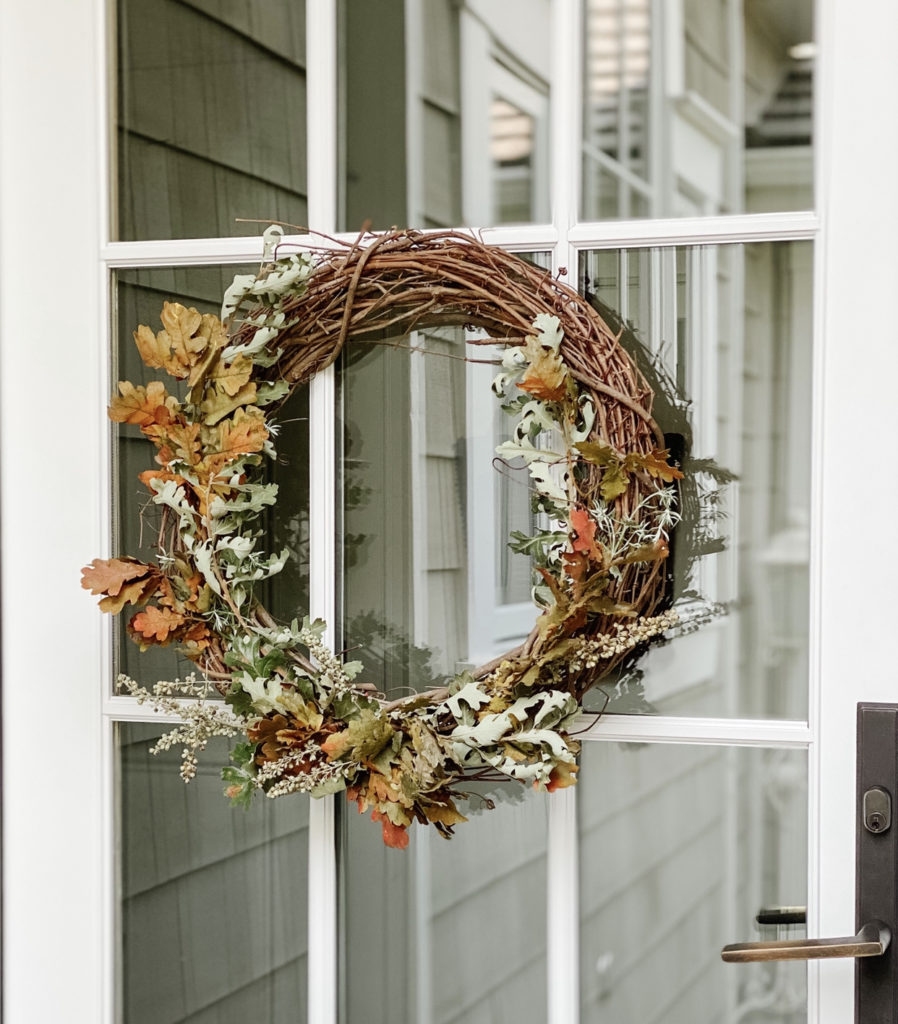
4. Rustic Grapevine Wreath with Muted Greenery and White Berries
This elegant, natural look feels expensive, but it’s one of the most budget-friendly styles you can create. A plain grapevine wreath base costs less than $10 at any craft store. The real savings come from the faux foliage. Look for dusty miller stems and small white berry clusters at stores like Dollar Tree or Walmart’s craft section—you can often get a whole spray for a few dollars. With a glue gun and some wire cutters, you can easily replicate this entire wreath for under $25. It’s proof you don’t need a huge budget for a sophisticated result.
📏 Scale Guide
While a wreath made of faux materials is incredibly low-maintenance, its biggest enemy is direct sunlight. The dusty green and warm orange tones are particularly susceptible to fading over time. If your door gets hit with strong afternoon sun, you might find the colors look washed out by the end of the season. To prolong its life, consider spraying it with a UV-protectant craft spray before hanging it. Store it in a cool, dark place after the season to keep it looking fresh for next year.
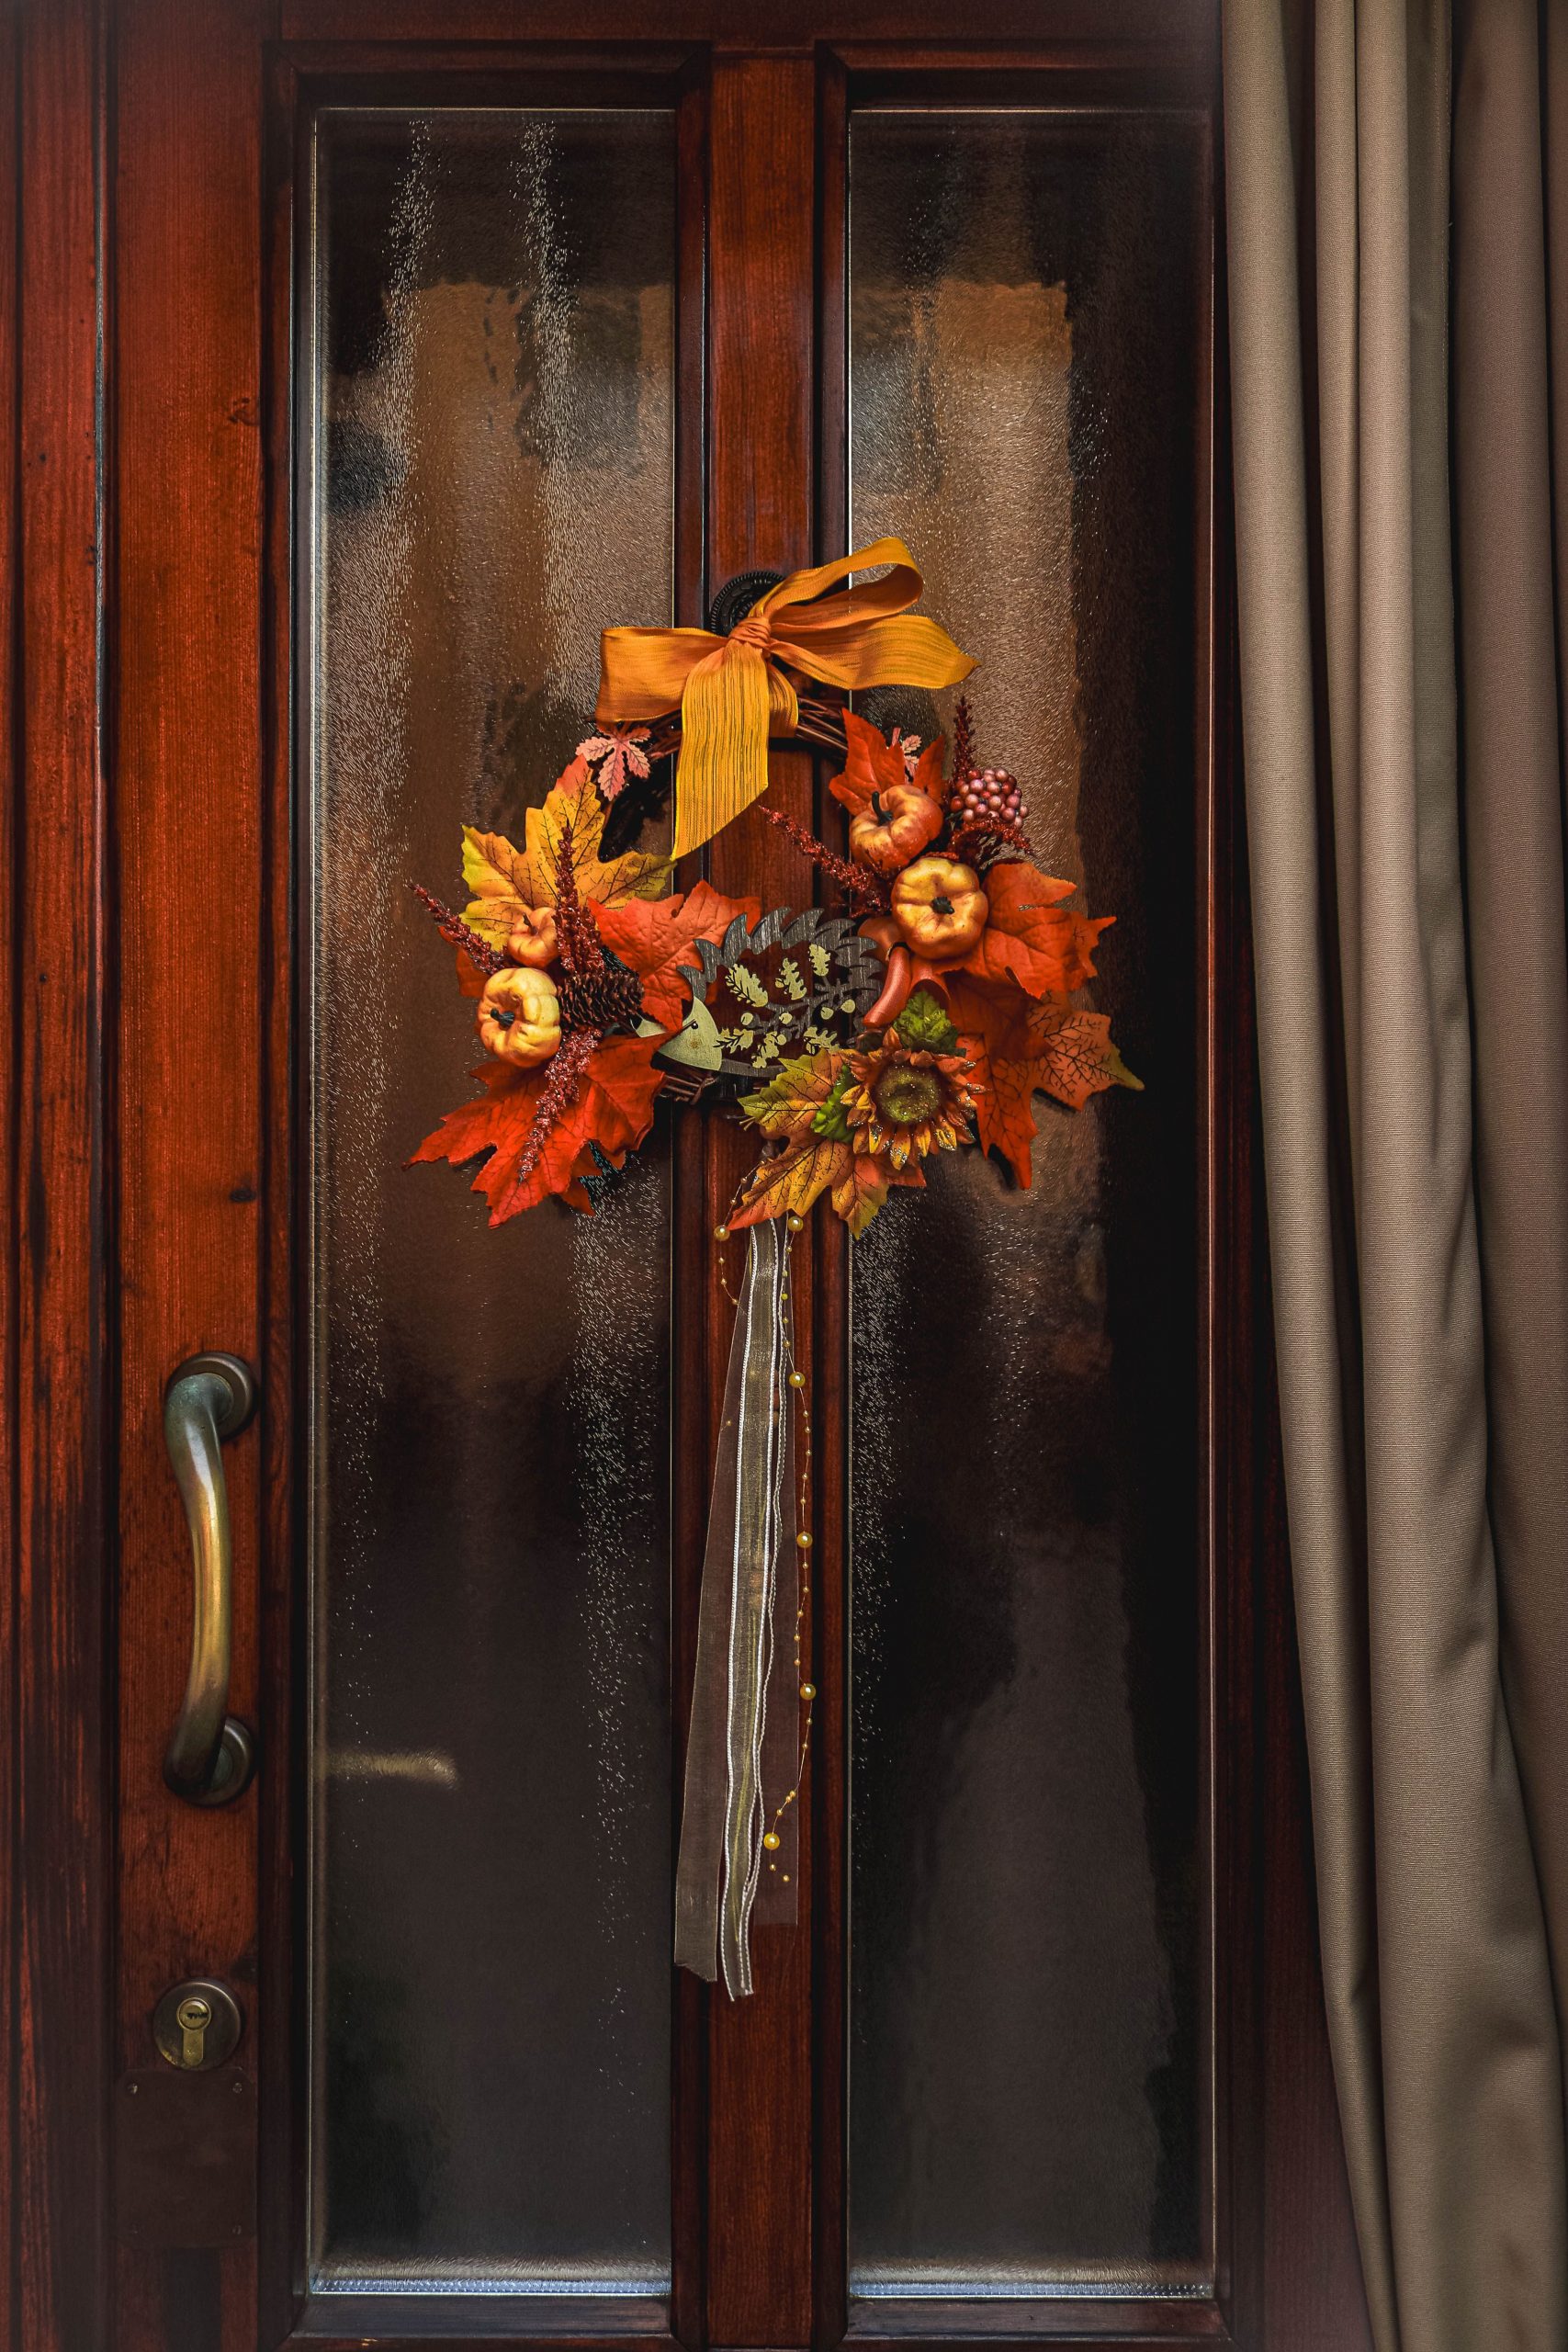
5. A Whimsical Autumn Wreath with a Friendly Hedgehog Accent
It’s the hedgehog. That little rustic creature is the single detail that elevates this wreath from merely pretty to utterly charming. Without it, you have a lovely but standard collection of fall foliage. The hedgehog adds a touch of whimsy and personality, turning the wreath into a small, delightful scene. It invites you to look closer and rewards you with a sweet surprise. This is a brilliant reminder that a single, unexpected element can define the entire mood of your creation.
📐 Style Math
This design works so well because it expertly balances color and texture against the dark wood door. The vibrant oranges and reds of the leaves provide a necessary pop of brightness, preventing the wreath from getting lost visually. Meanwhile, the variety of textures—the smooth pumpkins, rough pinecones, silky ribbon, and prickly hedgehog—creates a rich, tactile quality. It feels abundant and interesting. Compare this to the more subdued look of Idea #4, which uses a similar base but a completely different color and texture strategy.
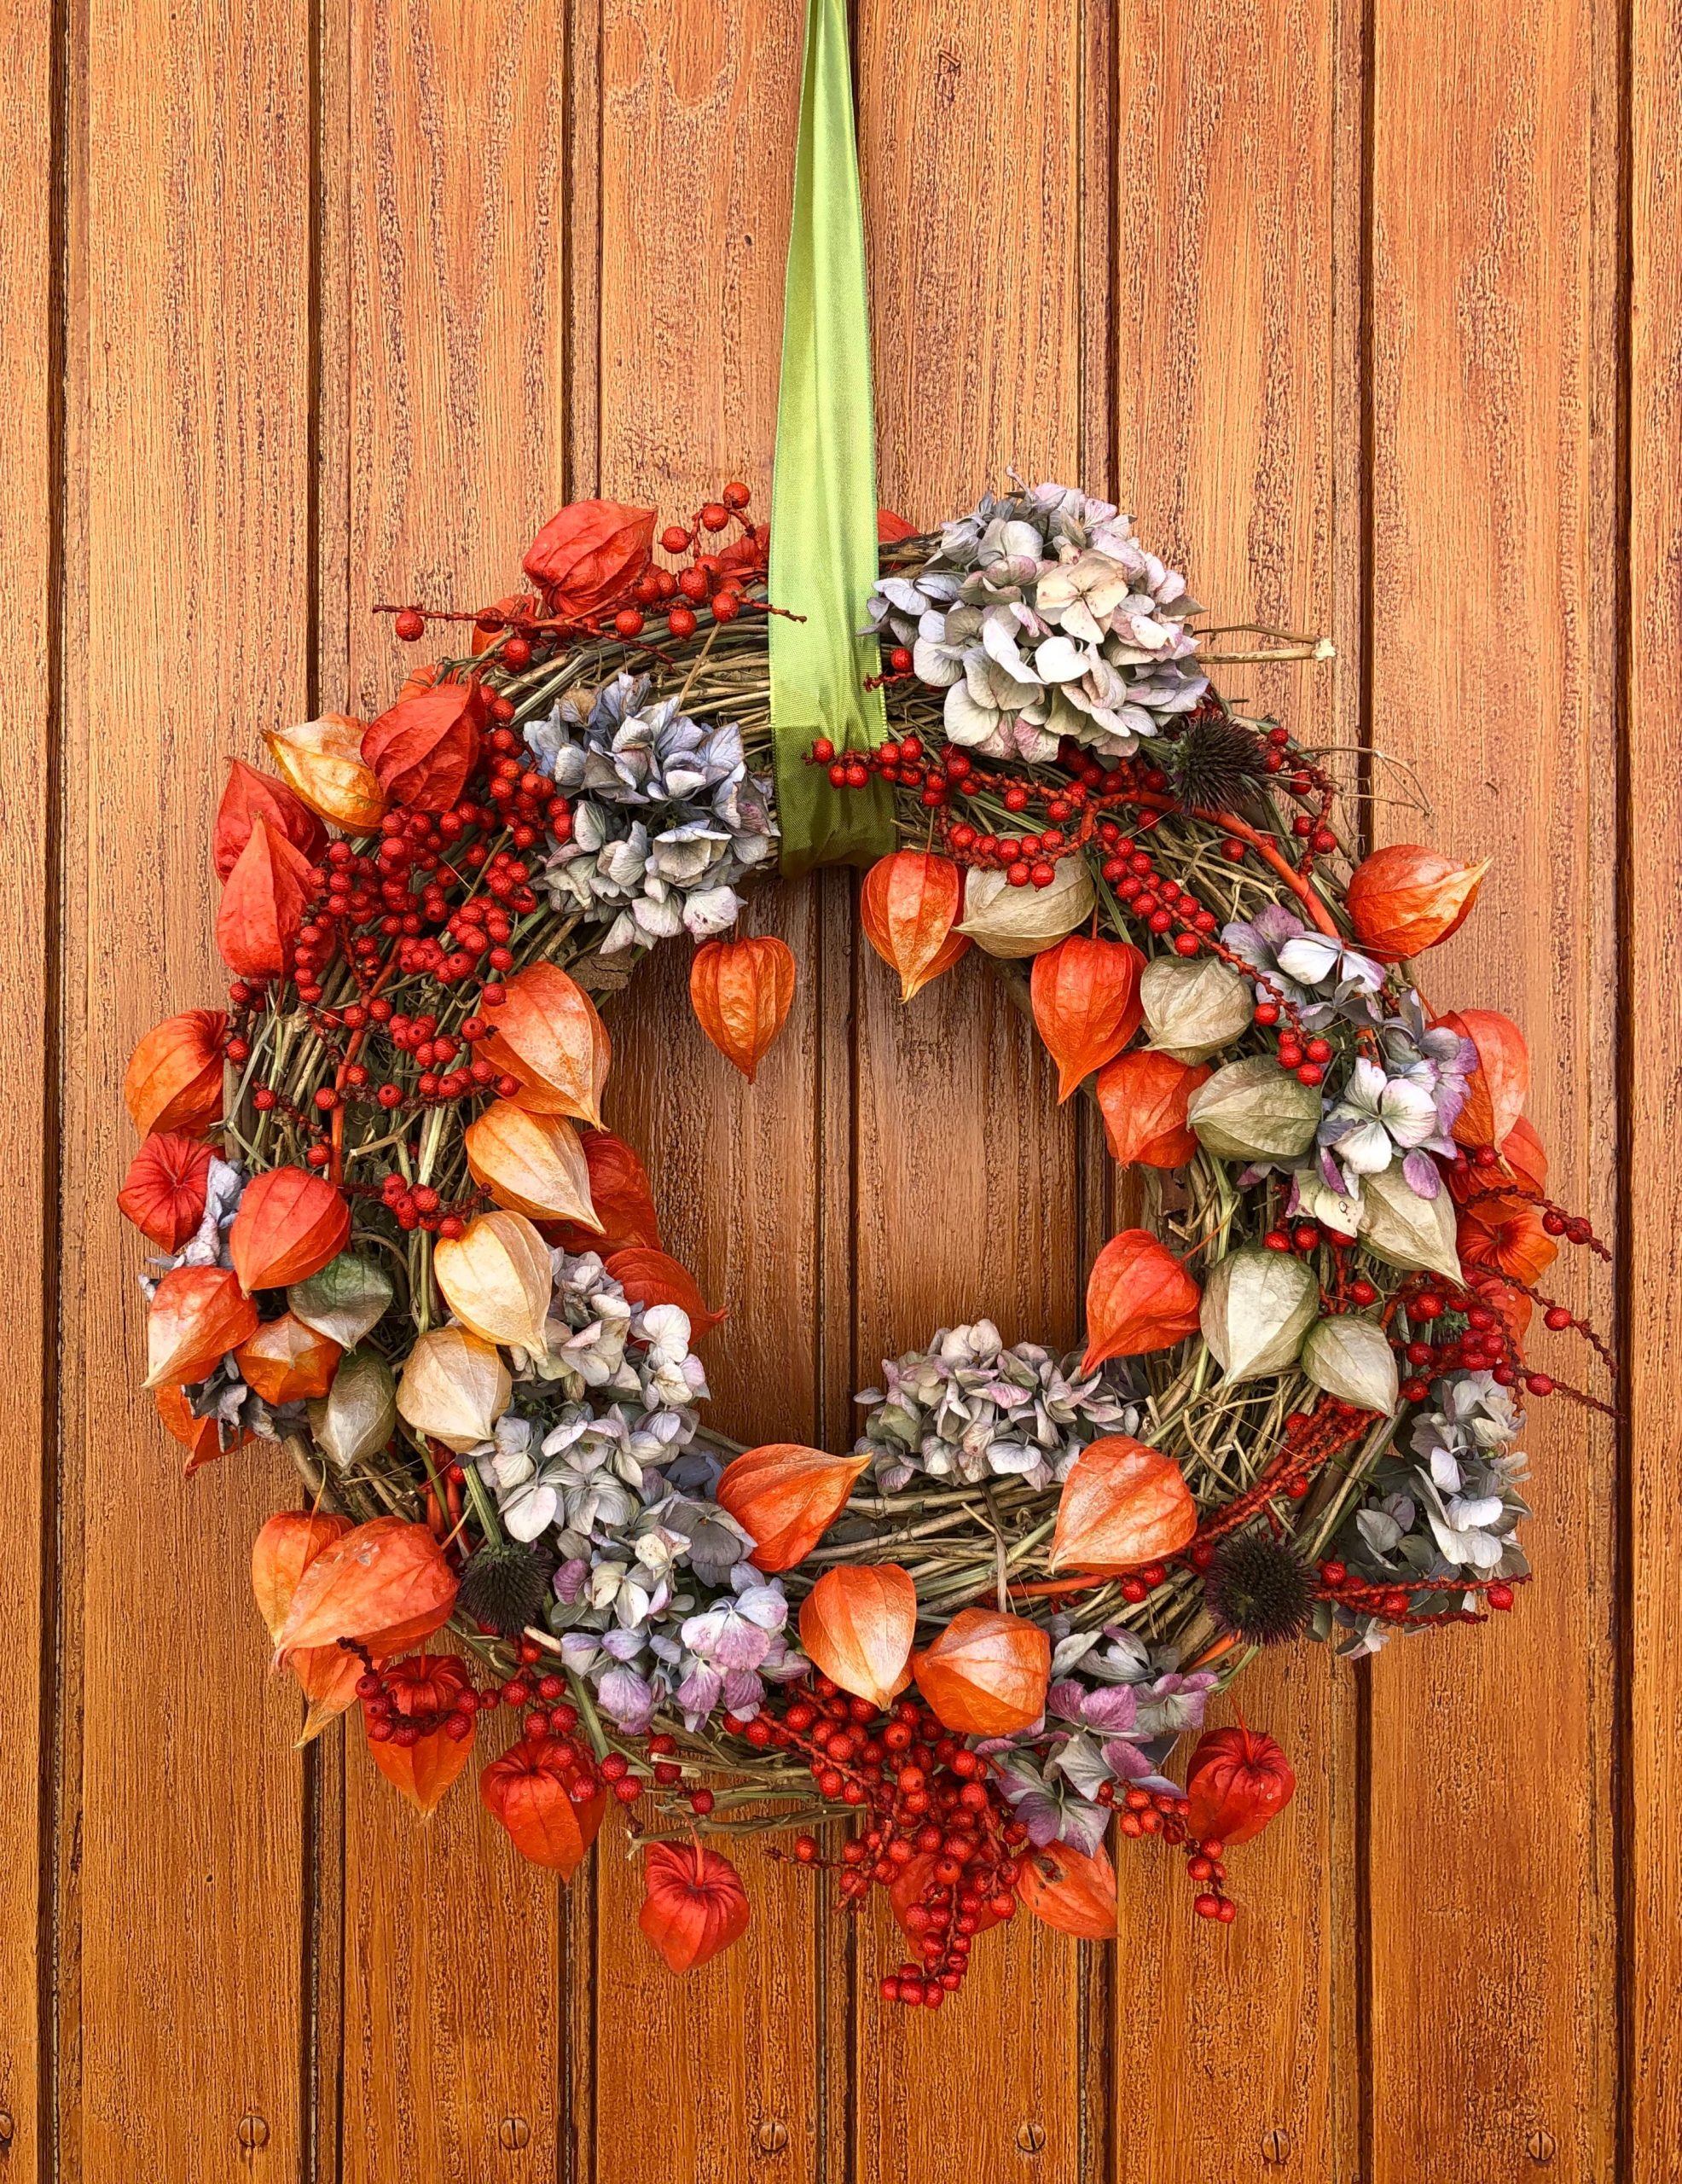
6. Earthy Twig Wreath with Chinese Lanterns and Dried Hydrangeas
We’re seeing a huge move towards using more unusual, natural botanicals in home decor for 2026, and this wreath is a perfect example. People are tired of the standard faux maple leaves and are seeking out more interesting textures and shapes. Chinese lantern pods, with their vibrant orange color and delicate, papery structure, are having a major moment. Paired with the muted, moody tones of dried hydrangeas, it creates a look that feels both earthy and elevated, hitting that perfect note of curated-from-the-garden style.
🔧 How-To Brief
When working with delicate dried elements like Chinese lanterns and hydrangeas, you can’t just shove them into a twig base. The key is to create small, individual bundles first. Use thin, flexible floral wire to group a lantern pod, a few berry stems, and a small hydrangea floret together. Wrap the wire tightly around the stems. Then, use that same wire to attach the entire bundle to the wreath. This method gives you more control and prevents the delicate items from breaking.
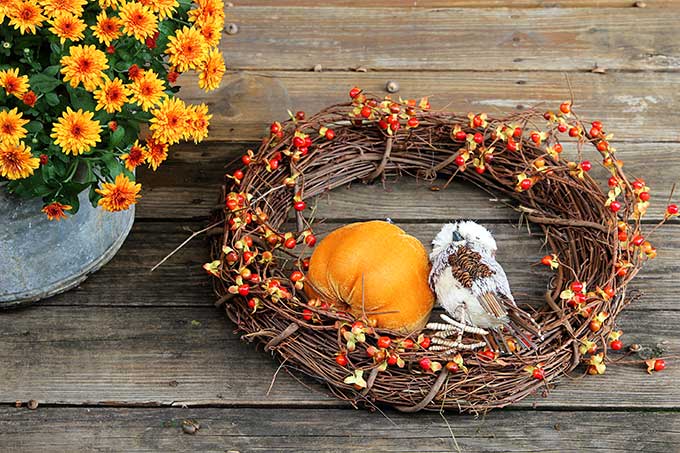
7. Rustic Still Life: A Grapevine Wreath with a Velvet Pumpkin
This composition is a masterclass in rustic texture. The formula is simple: 70% raw natural elements (the grapevine wreath, weathered wood backdrop) + 20% pops of intense color (the orange berries and chrysanthemums) + 10% a single touch of softness (the velvet pumpkin). This math ensures the overall feeling remains rustic and grounded, while the color and soft texture add just enough visual interest to draw the eye in. The small white bird acts as a quiet focal point, its smooth texture contrasting with everything around it.
🔥 Trending Context
This isn’t a front door wreath. This is a styled, decorative accent for a covered porch, entryway, or interior wall. A velvet pumpkin would be ruined by a single rainstorm, and the bird figurine is too delicate for a high-traffic area. Think of this less as a functional door wreath and more as a piece of seasonal art. It’s perfect for creating a cozy autumn vignette on a console table or a protected porch wall where it will be shielded from the elements.
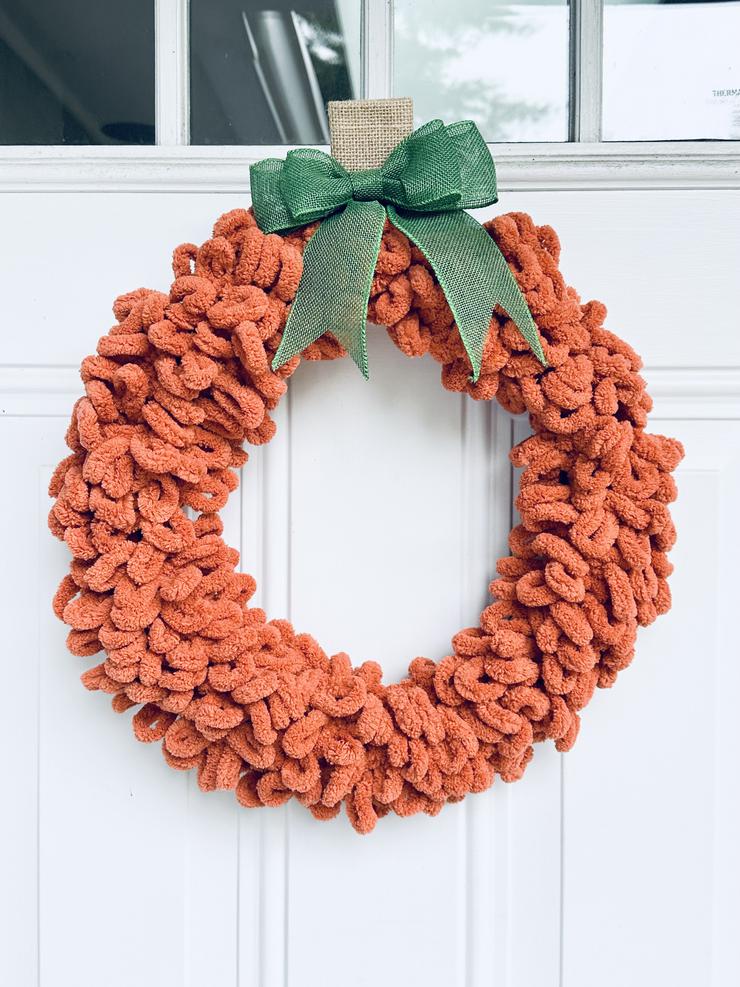
8. Handmade Pumpkin-Shaped Wreath from Chunky Orange Yarn
You can create this cozy pumpkin shape using a surprisingly simple wire frame technique. Here’s a quick guide for the base:
💸 Get This Look For Less
- Time: 1 hour | Cost: $15-$25
- Get two wire wreath frames from a craft store (one 14-inch, one 10-inch).
- Overlap the frames, with the smaller one higher than the larger one, to create a pumpkin-and-stem silhouette. Secure them together tightly with floral wire.
- Starting at one connection point, begin wrapping the chunky yarn around both frames, looping it through the center. Keep the loops loose and fluffy.
- Continue wrapping until the entire wire form is covered in plush yarn loops.
- Create the bow and a small burlap hanger to finish the look.
While specialty chunky chenille yarn can be pricey, you don’t need it to get this effect. Check the clearance section at craft stores for off-brand bulky yarns. You can also use multiple strands of cheaper, standard orange yarn held together to create a similar chunky texture. Another great option is to buy a cheap, ugly orange blanket from a thrift store or Walmart for under $10 and cut it into strips. The looped, slightly frayed texture can look amazing and very rustic.
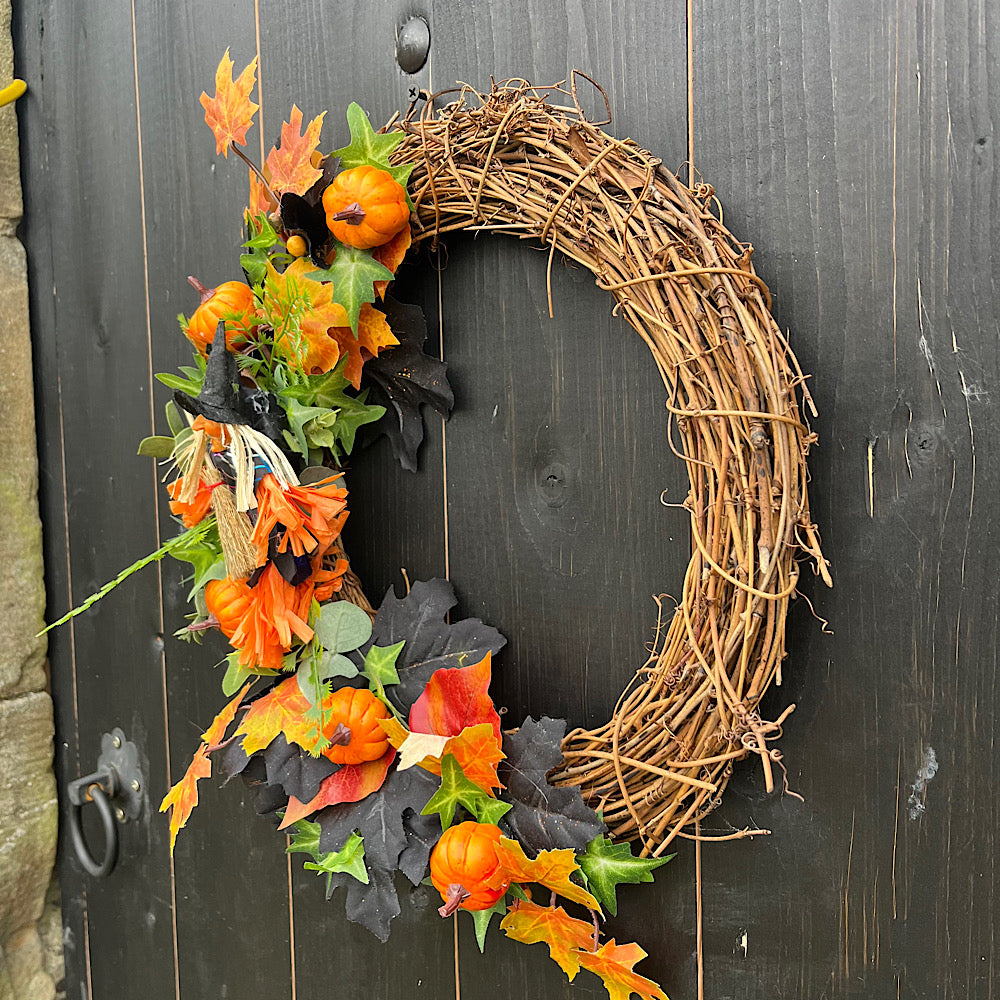
9. Spooky-Chic Halloween Wreath with a Witch Accent
The trick to a successful Halloween wreath that doesn’t look like it came from a party store is to exercise restraint. Notice how the decorative elements—the witch, pumpkins, and leaves—are clustered together on one side. This asymmetrical design allows the natural, rustic texture of the grapevine base to show through. If the entire wreath were covered, it would lose its shape and sophistication. By grouping your accents, you create a clear focal point and maintain a more organic, less-is-more feel.
✅ Before You Start
This style of wreath, with its concentrated cluster of details, works best on a standard 32-inch to 36-inch wide door. A wreath around 24 inches in diameter is ideal. If your door is much wider, the wreath might appear a bit lost. If you have double doors, consider making two of these and having them mirror each other, with the decorative clusters facing inwards. This creates a really strong, intentional design statement that feels custom to your entryway.
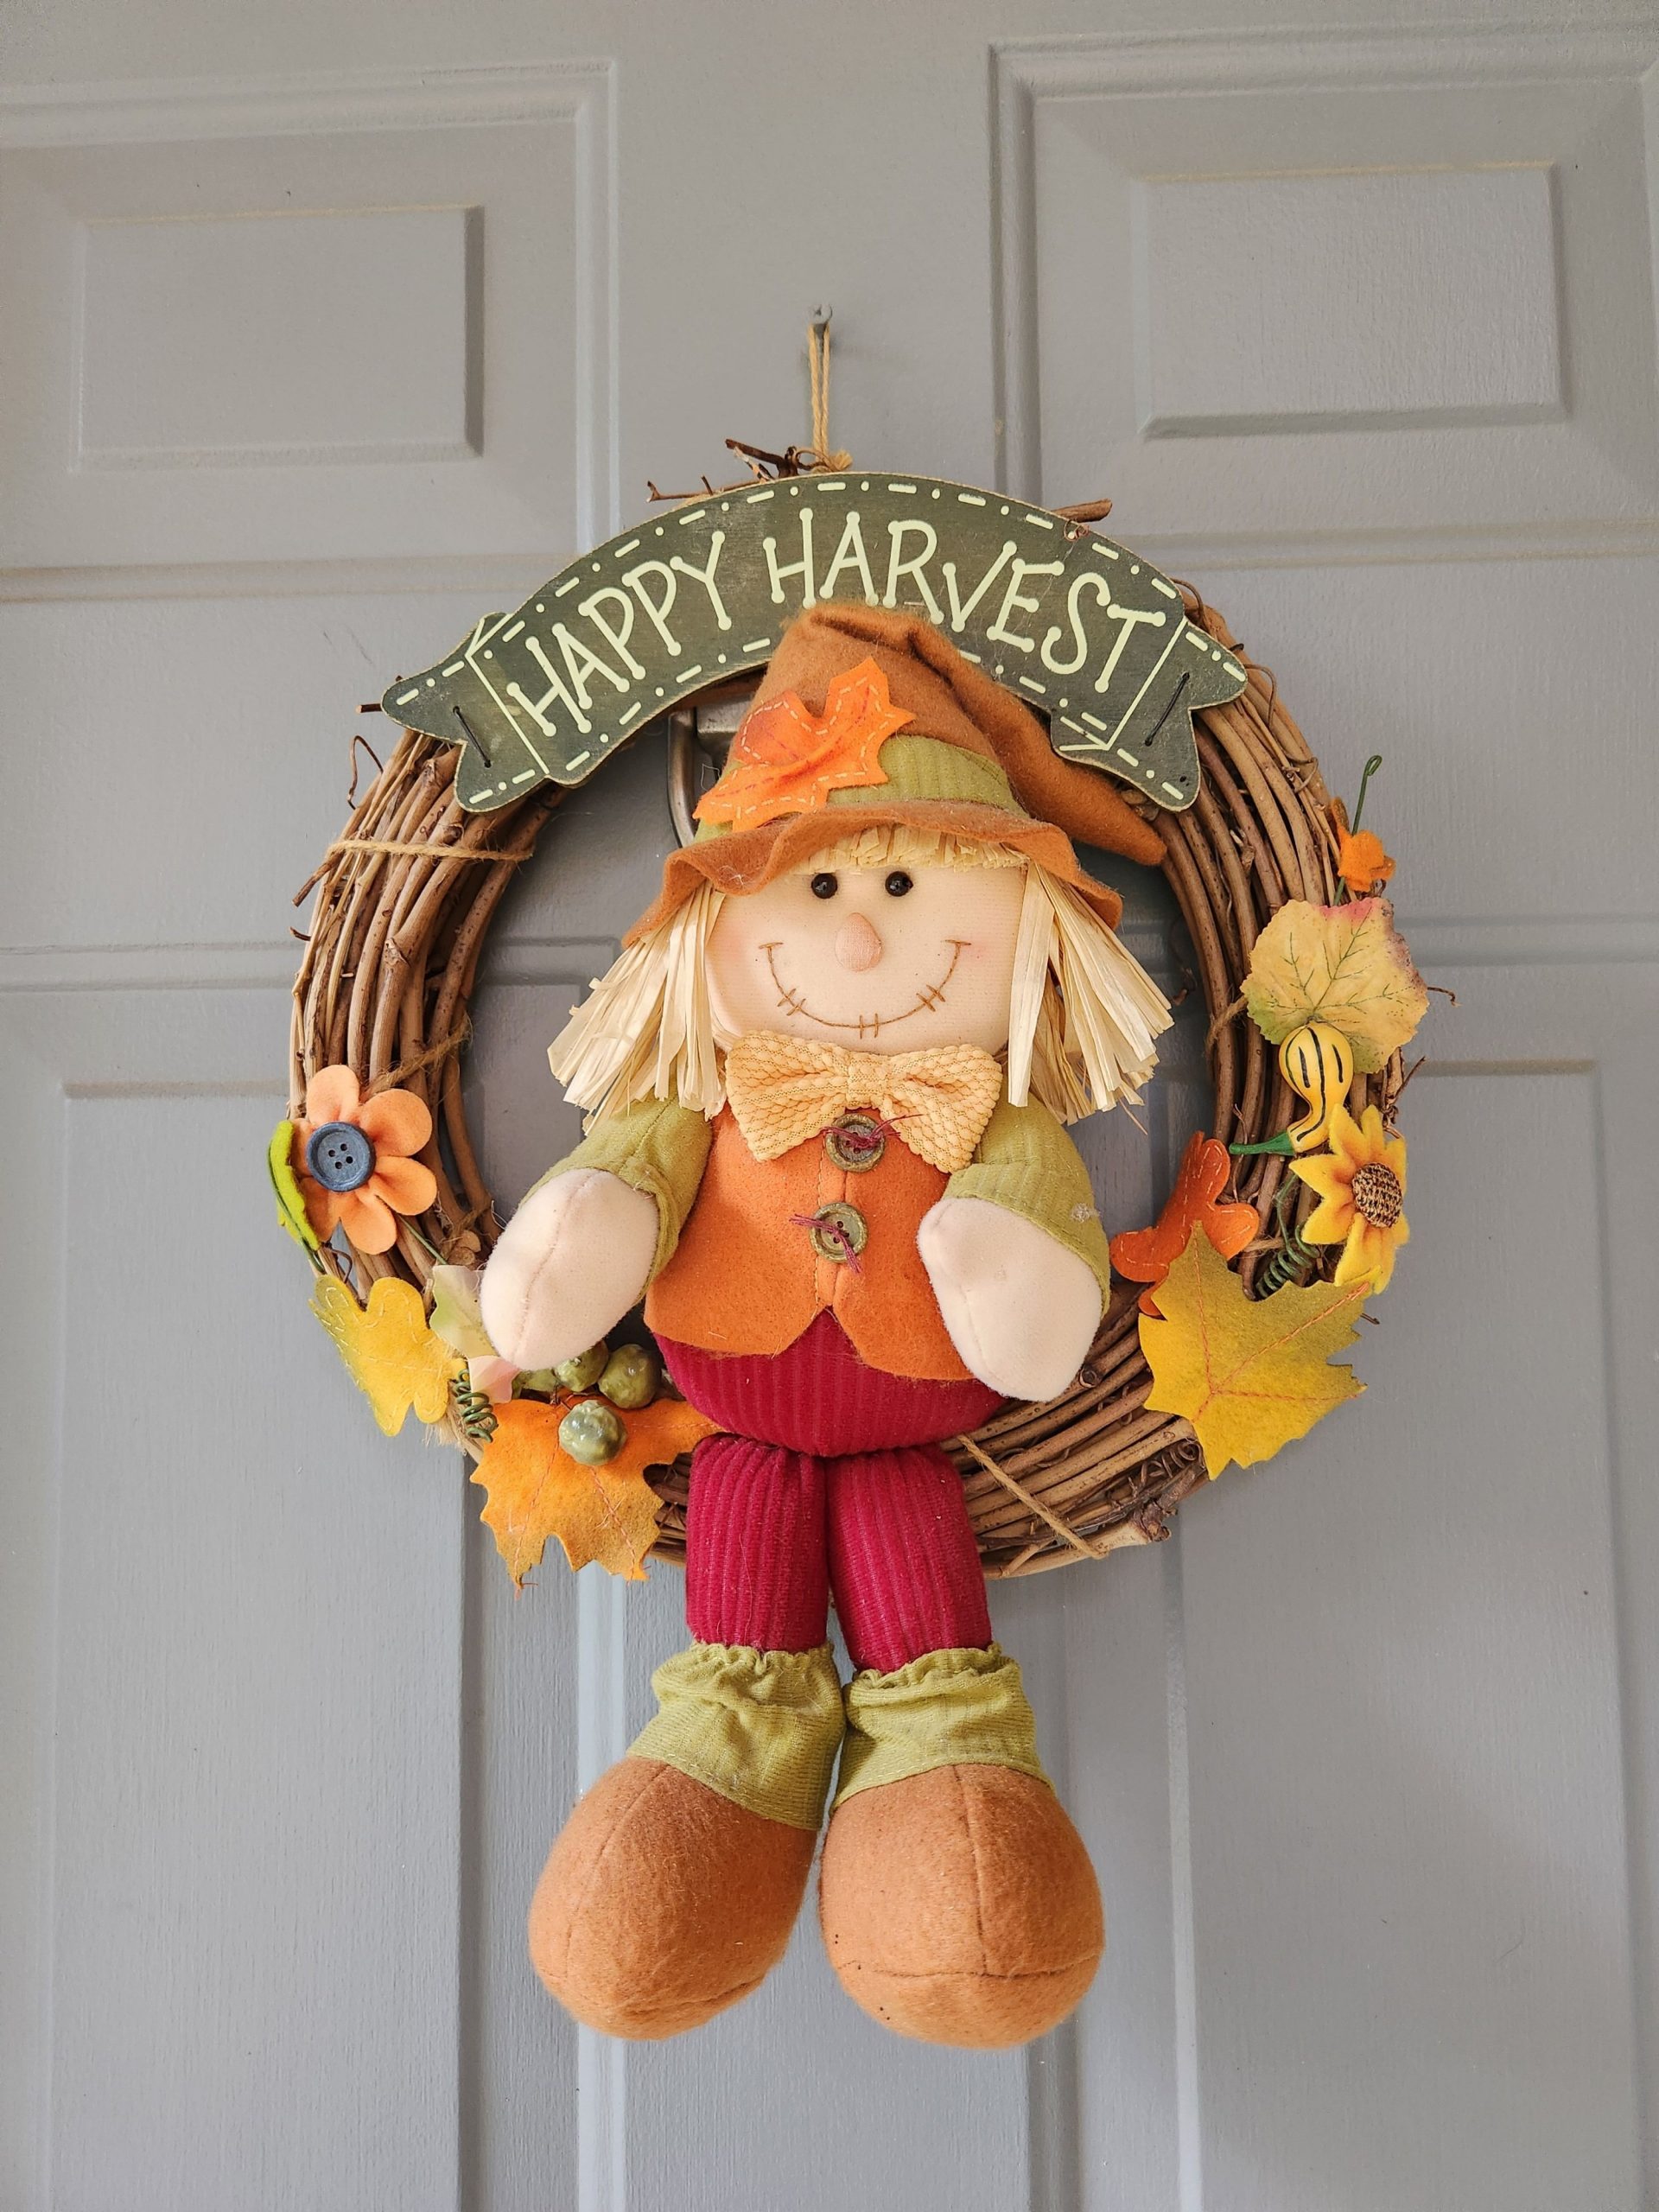
10. Whimsical Harvest Wreath with a Scarecrow and Felt Banner
This design is pure charm, and it works because it leans into a playful, handcrafted aesthetic. The mix of materials—plush scarecrow, felt banner, fabric leaves, and a twig base—gives it a delightful, scrapbook-like quality. The colors are classic autumn, but the whimsical character and a ‘Happy Harvest’ message keep it from feeling too formal or stuffy. It’s approachable and fun, signaling a home that doesn’t take itself too seriously. This is a great contrast to the more elegant and spooky feel of Idea #9.
🎯 What Makes It Work
A wreath with this many fabric and felt components is not built to withstand the elements. Rain will saturate the plush scarecrow and felt banner, potentially leading to mildew and color bleeding. Even heavy morning dew can cause the fabric leaves to droop and lose their shape. This is an ideal wreath for a door that is completely protected by a deep, covered porch or, even better, for indoor use. Hang it on a pantry door or an entryway wall to get the cheerful vibe without the weather-related worries.
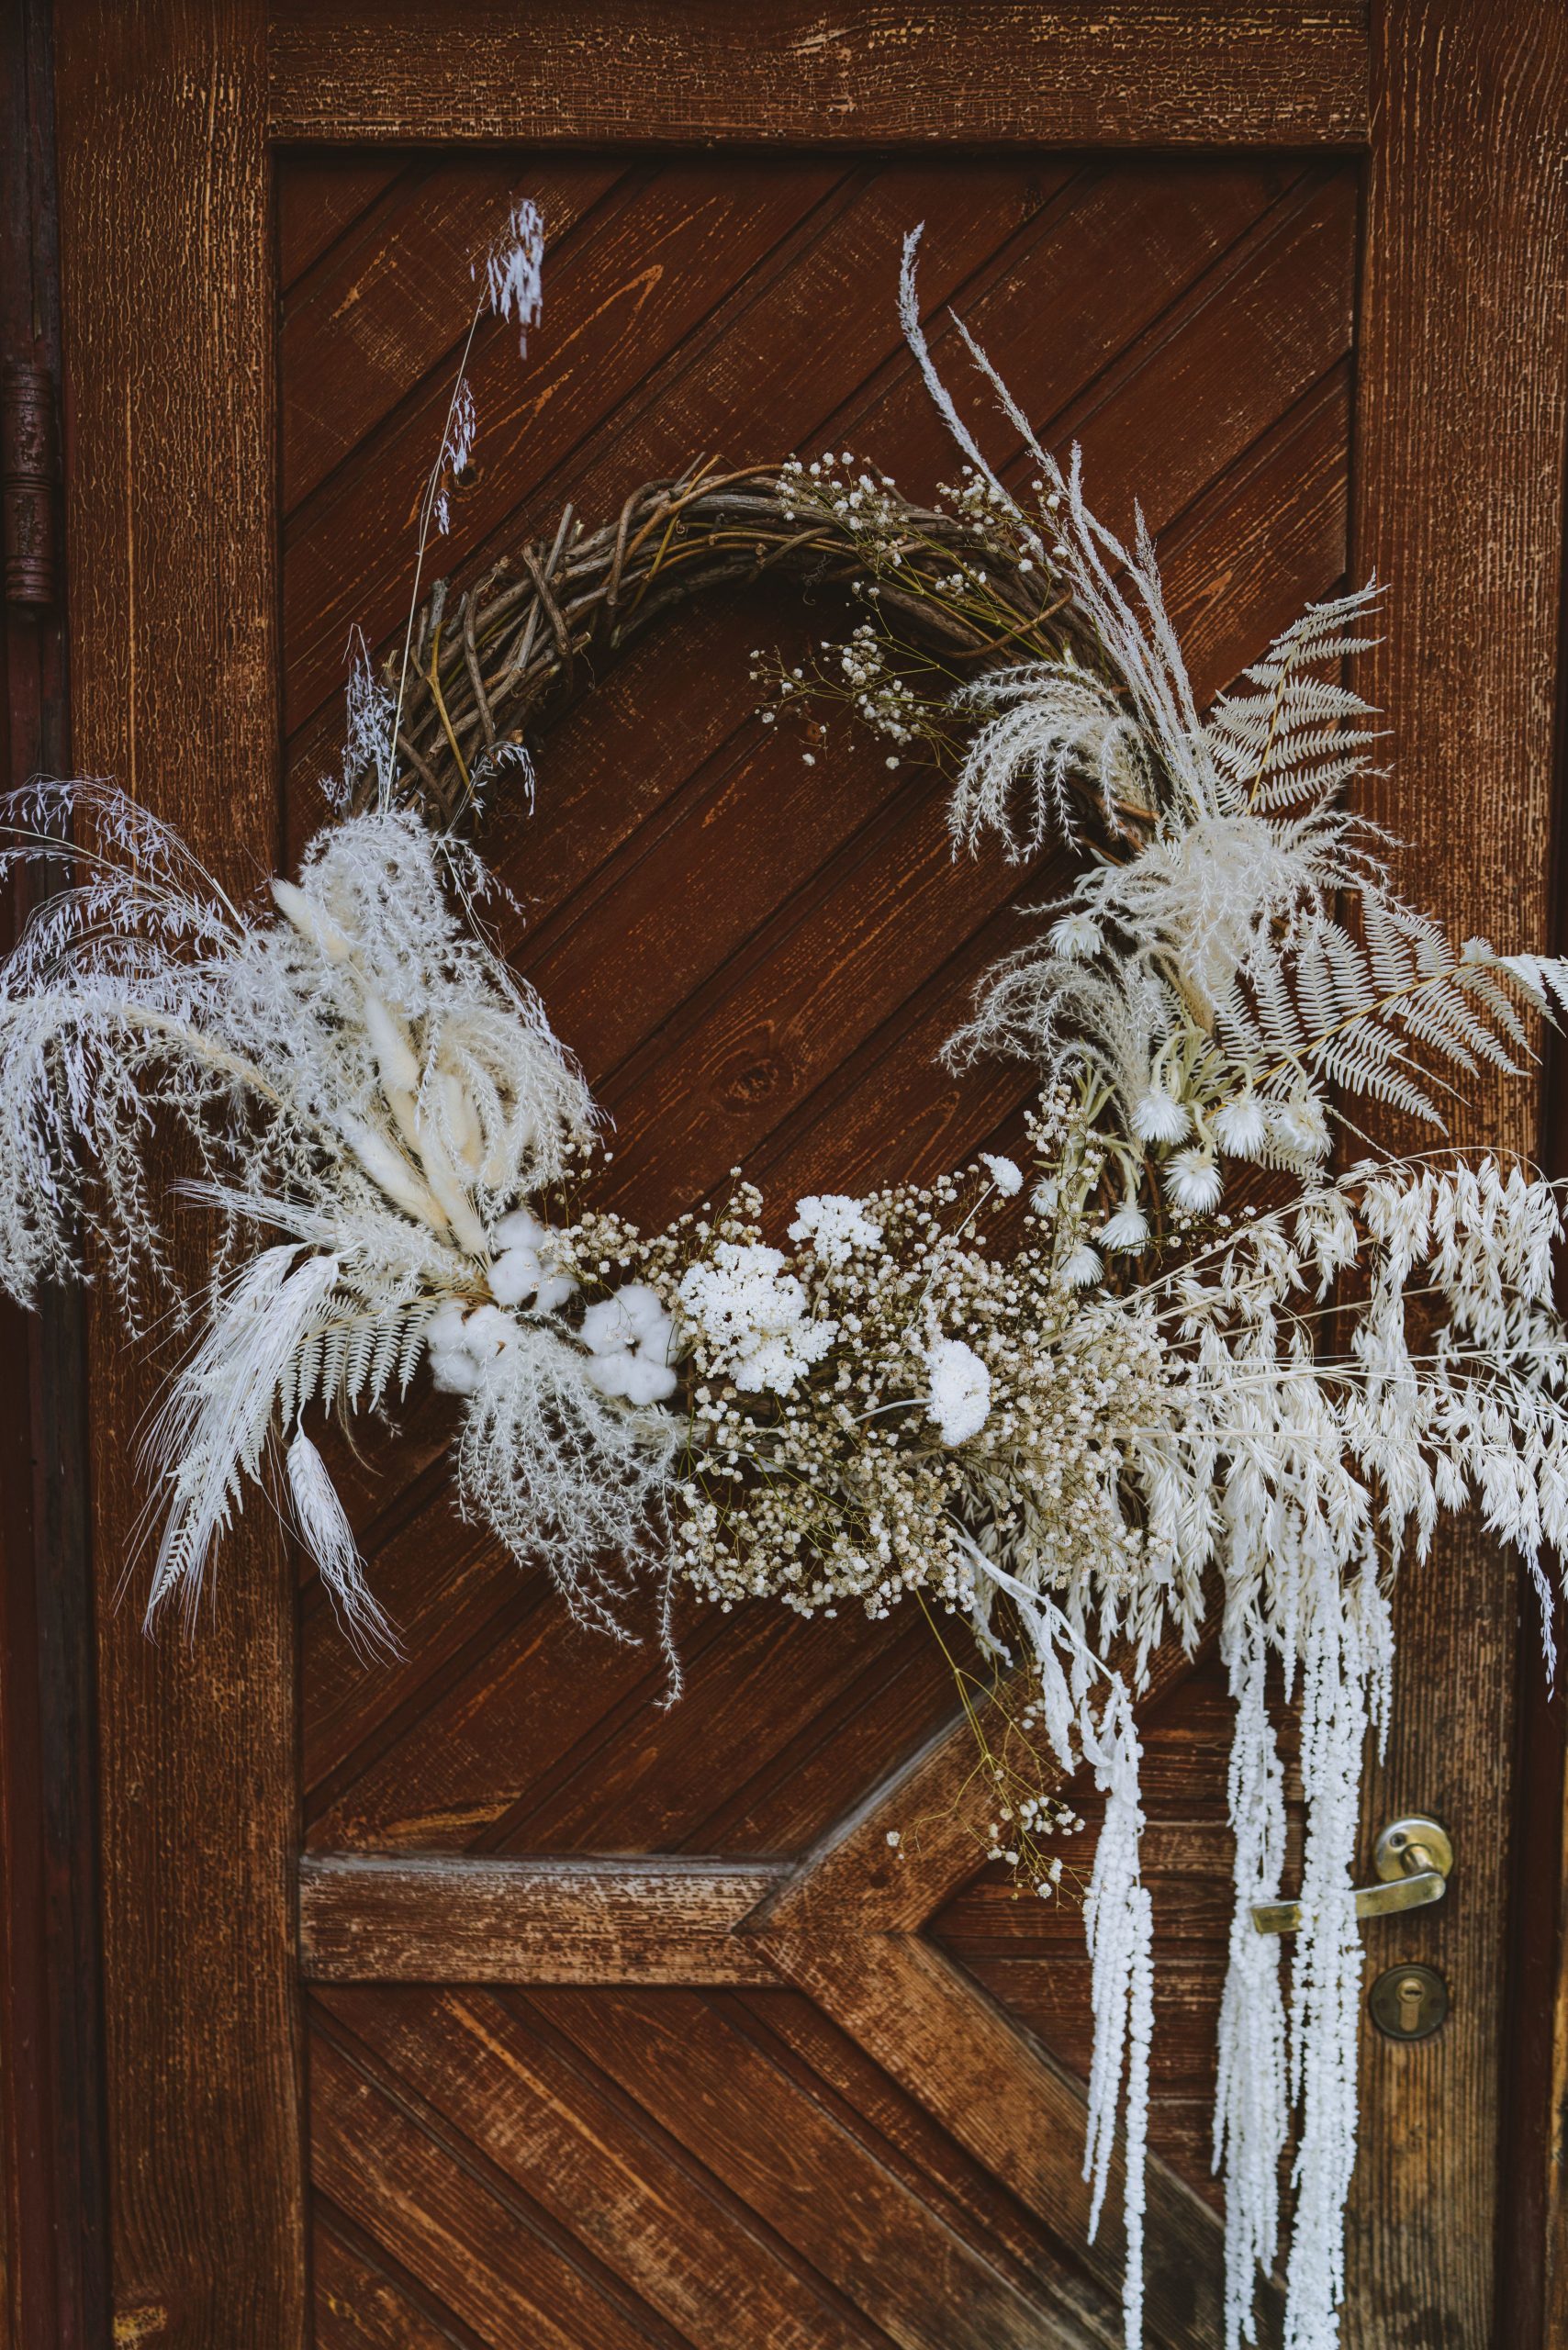
11. A Serene Winter-White Wreath on a Rustic Wood Door
The all-white color palette is the single most important element of this design. By stripping away the typical fall colors, the focus shifts entirely to texture. You notice the feathery plumes, the intricate fern shapes, the soft cotton bolls, and the rough twig base in a way you wouldn’t if they were all different colors. This monochromatic choice is what transforms it from a simple botanical wreath into a sophisticated, almost sculptural piece of art. It feels serene, modern, and unexpectedly cozy against the dark wood.
🧹 Maintenance Reality
For a while, fall decor was all about a blast of orange and red. But now, especially on Pinterest, we’re seeing a huge trend towards more transitional, season-blurring decor. This wreath is a prime example. It’s not strictly “fall” or “winter”; it could comfortably hang on a door from October through February. People want decor with a longer lifespan, and this neutral, nature-inspired palette feels chic and relevant for months, making it a more sustainable and versatile choice.
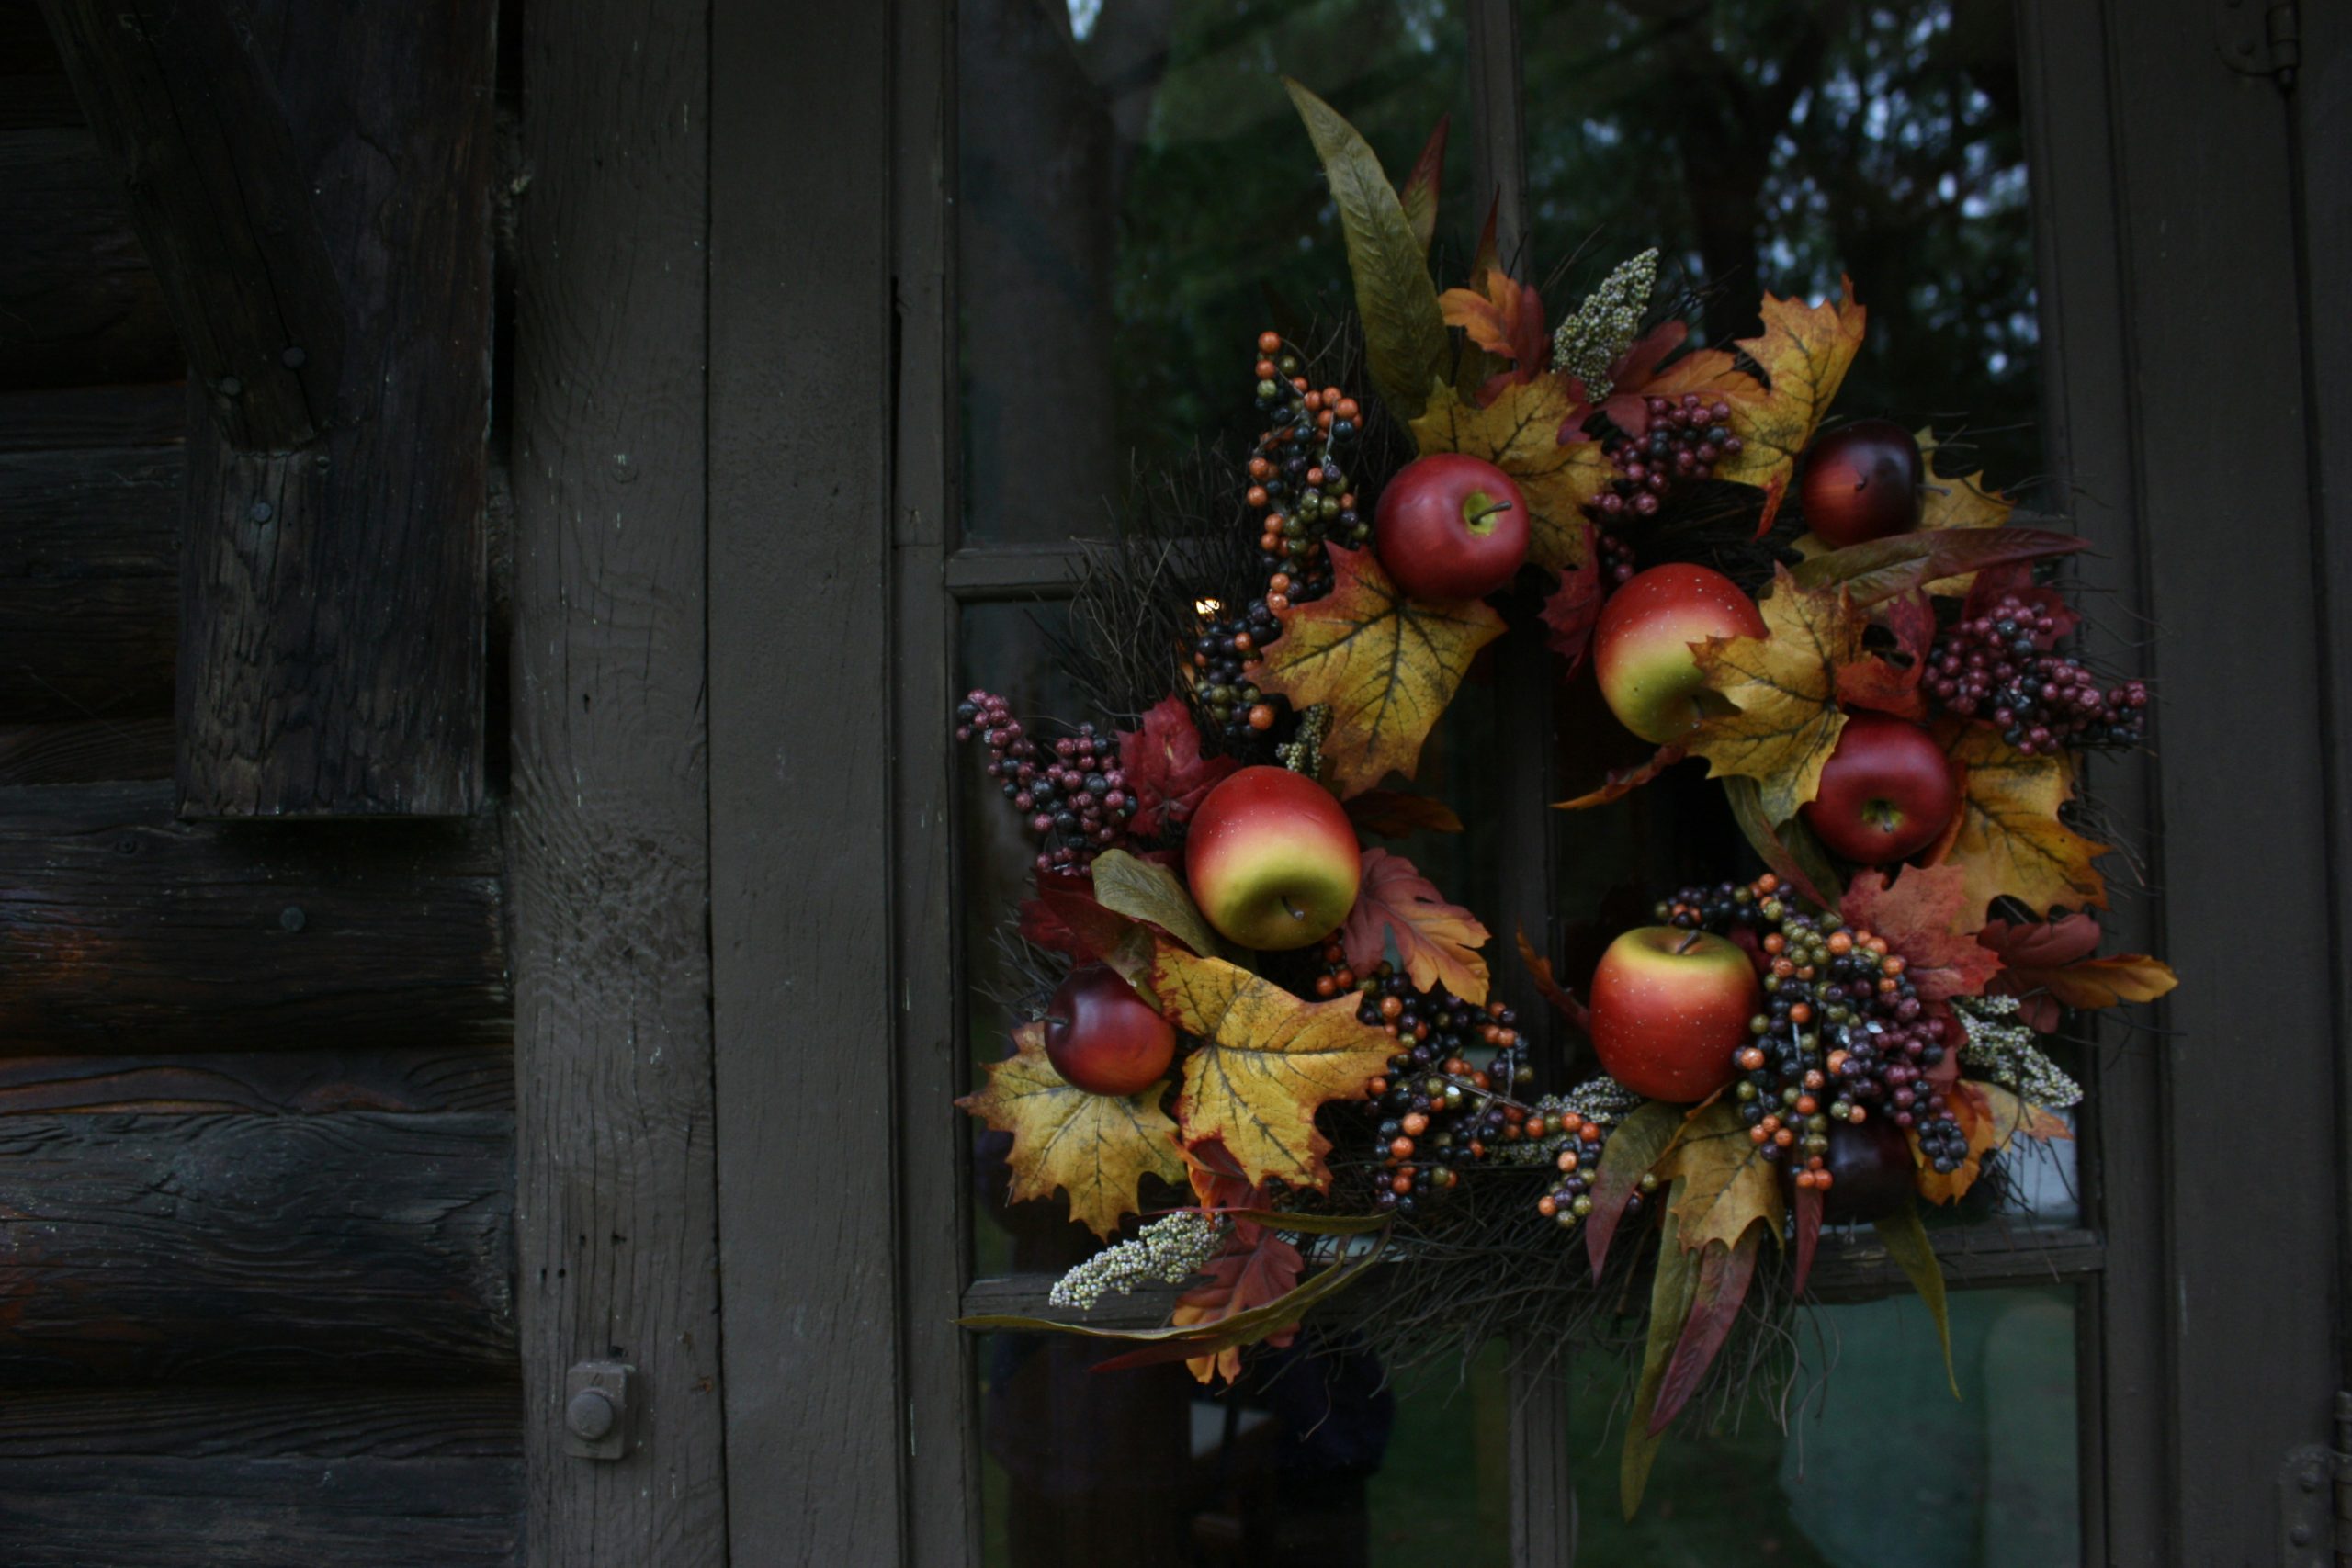
12. A Moody, Rustic Wreath on a Dark Log Cabin Wall
This wreath works because it fully commits to a dark, rustic aesthetic instead of fighting against it. Placing a bright, cheerful wreath here would feel jarring. Instead, the designer chose a wreath with a dark foliage base that echoes the deep tones of the wood. The pops of red from the apples and yellow from the leaves provide just enough color to register without overwhelming the moody atmosphere. It’s a lesson in respecting your home’s existing architecture and color palette.
⚠️ Real Talk
A dark wreath on a dark surface can easily get lost, especially in low light or from a distance. The key elements that prevent this one from disappearing are the bright red apples. They act as points of light and color that catch the eye. If you’re attempting a similar look, you must include a few elements that are significantly lighter or more vibrant than the base. Without that contrast, your beautiful wreath might just look like a dark, unidentifiable circle from the street.
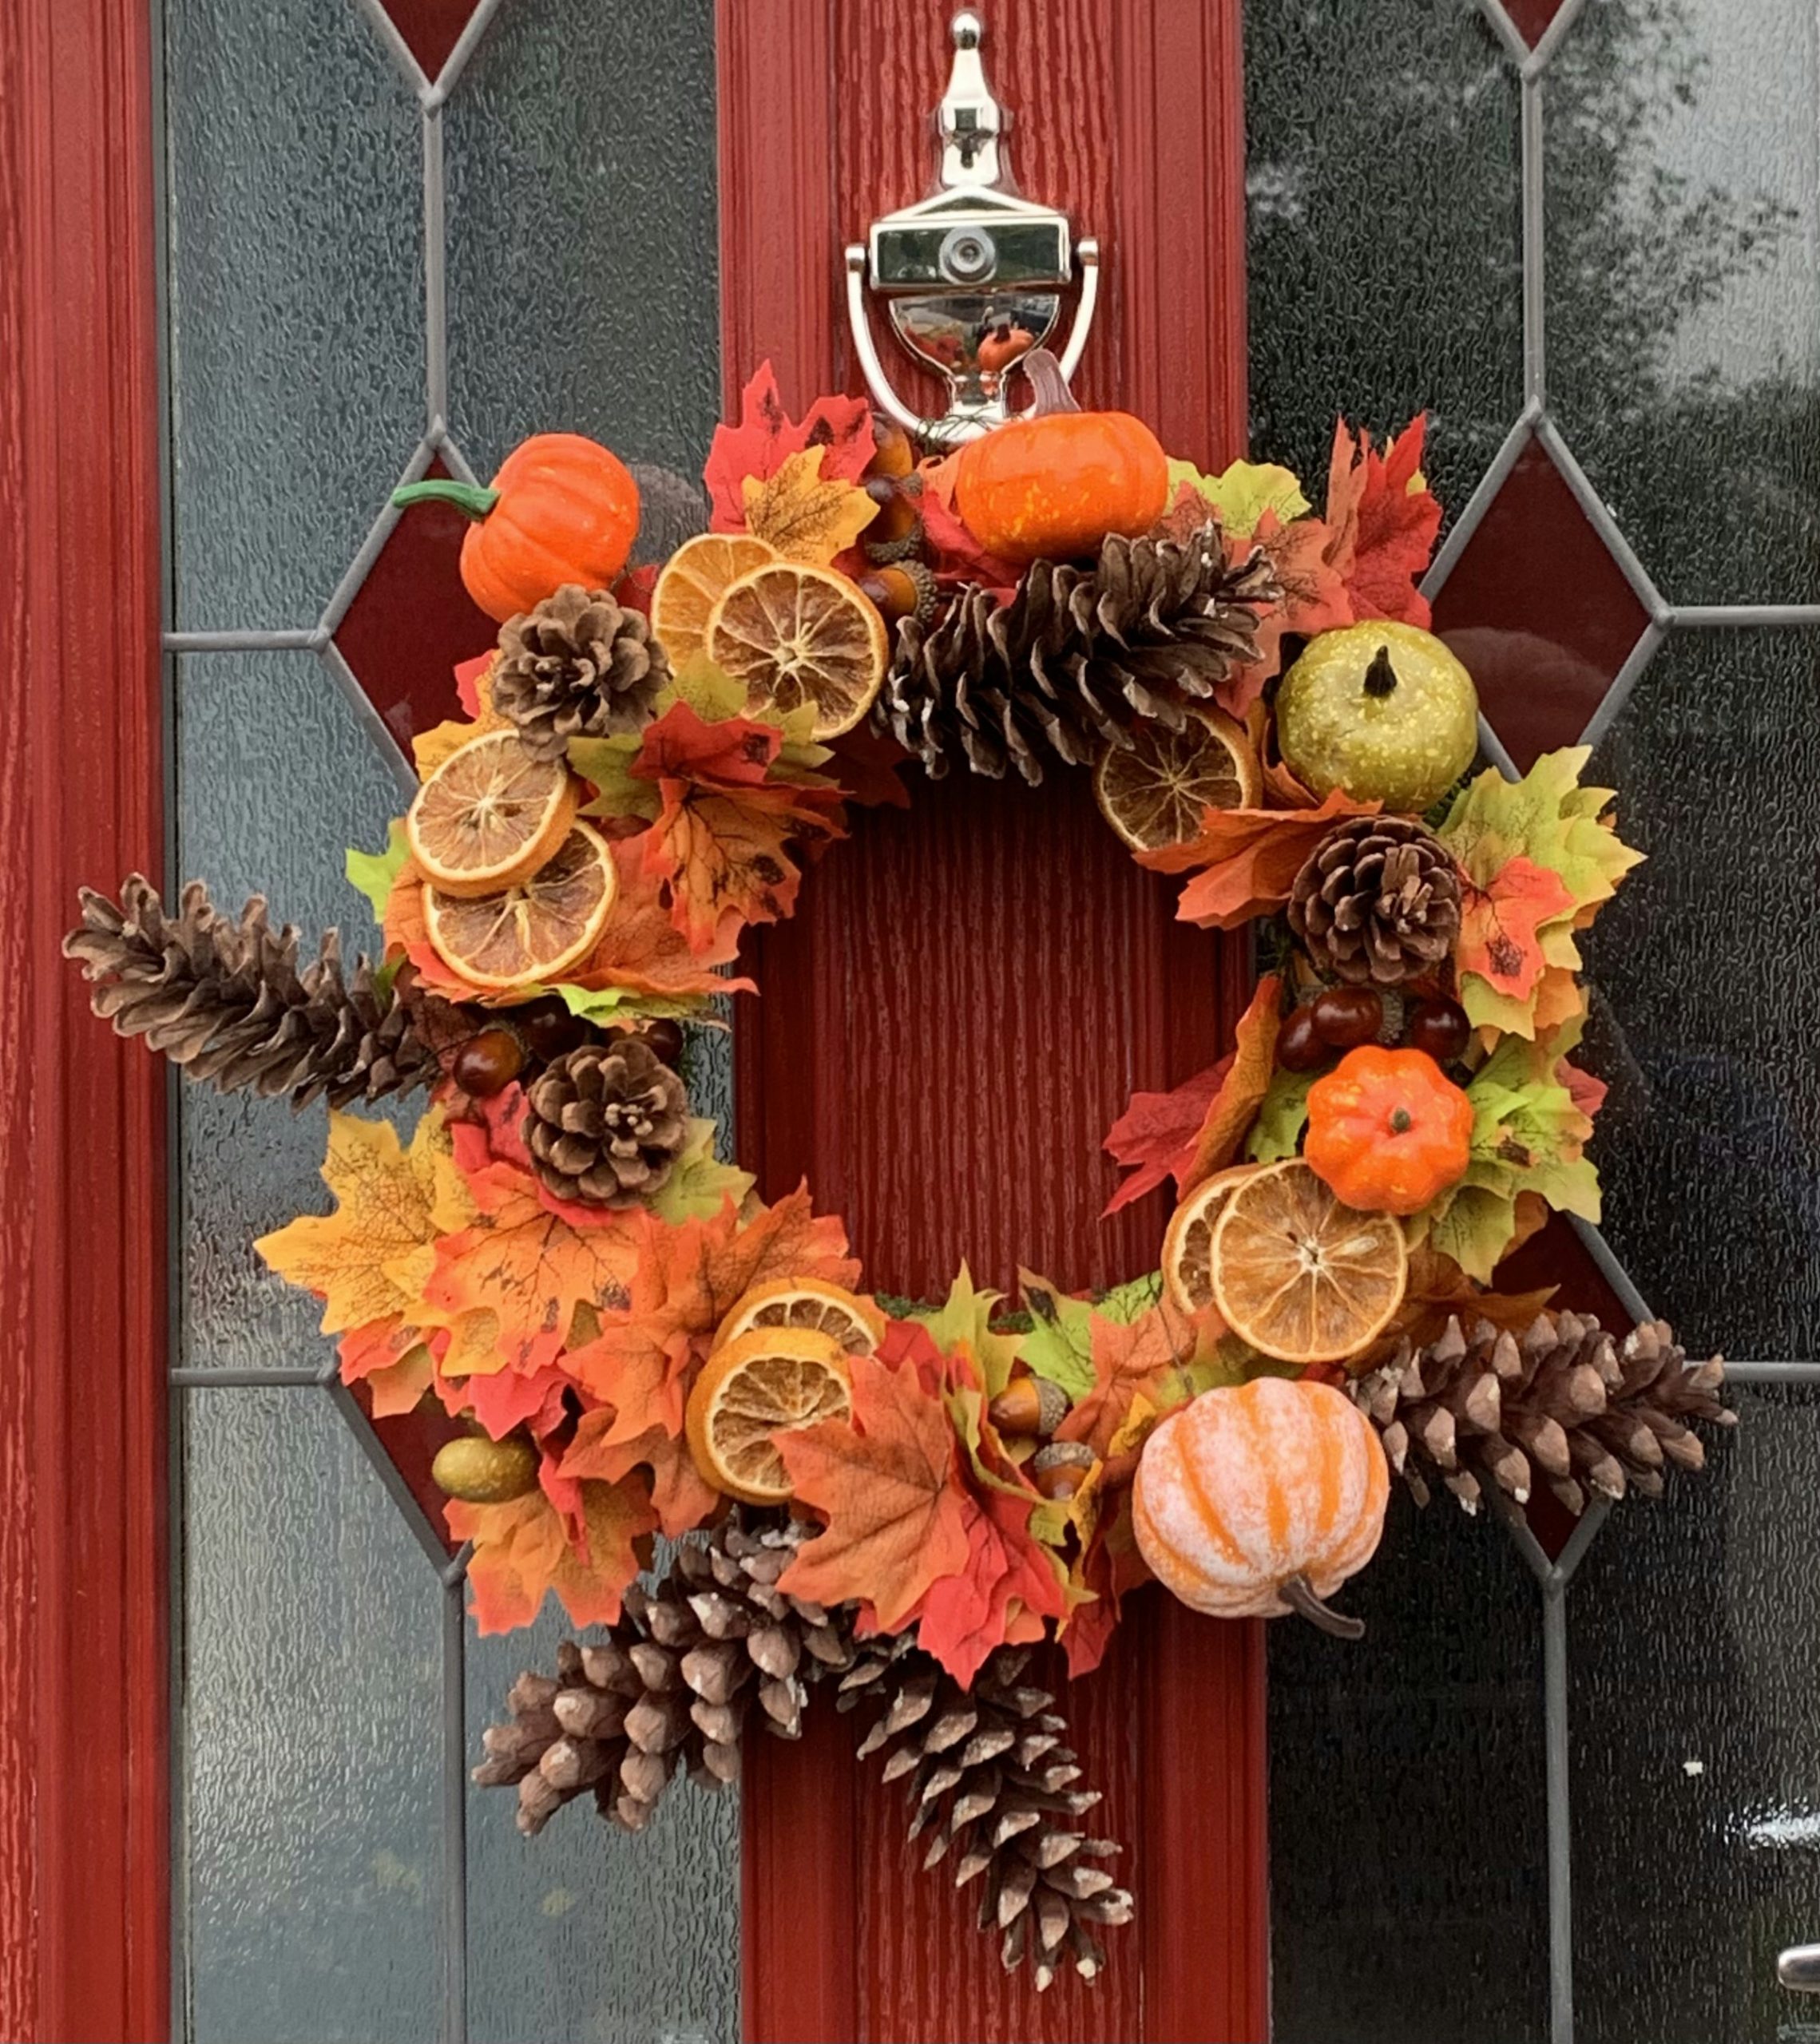
13. Festive Harvest Wreath with Dried Oranges on a Red Door
When you have a busy, textured glass on your door like this, your wreath needs to have bold, clearly defined elements to avoid looking messy. This design is smart because it uses distinct shapes: the round orange slices, the clear forms of the mini pumpkins, and the spiky pinecones. These simple, strong shapes stand out against the patterned glass, whereas a wreath made of fine, feathery foliage might have blended in and looked cluttered. Always consider the texture of the surface behind your wreath.
💰 Budget Breakdown
Dried orange slices look absolutely beautiful and smell amazing, but they are very attractive to moisture and small critters. In a damp or humid climate, they can rehydrate, become sticky, or even grow mold. They can also attract insects. This type of wreath is best used on a well-covered porch or for a shorter duration. To extend its life, make sure your orange slices are completely dehydrated and consider sealing them with a clear matte craft sealant before adding them to your wreath.
14. A Rich, Jewel-Toned Wreath of Figs, Pumpkins, and Berries
The deep purple figs are the game-changer in this arrangement. Fall decor is so often dominated by orange, red, and brown that the inclusion of this rich, unexpected color is what makes the whole design feel fresh and luxurious. It provides a cool, deep counterpoint to the warm orange pumpkins and vibrant red berries, creating a much more complex and sophisticated color story. Take away the figs, and it’s a pretty wreath; with them, it’s a masterpiece.

💡 Designer Tip
This stunning, abundant look is all about a rich, saturated color formula. Think of it as 40% deep, cool tones (the purple figs and dark background leaves) + 40% classic warm tones (the orange pumpkins and red berries) + 20% calming greens (the eucalyptus leaves). This balance of warm and cool colors is what gives the wreath its depth and prevents it from feeling like a one-note explosion of orange. You could swap the figs for small plums or deep purple foliage to achieve a similar effect.
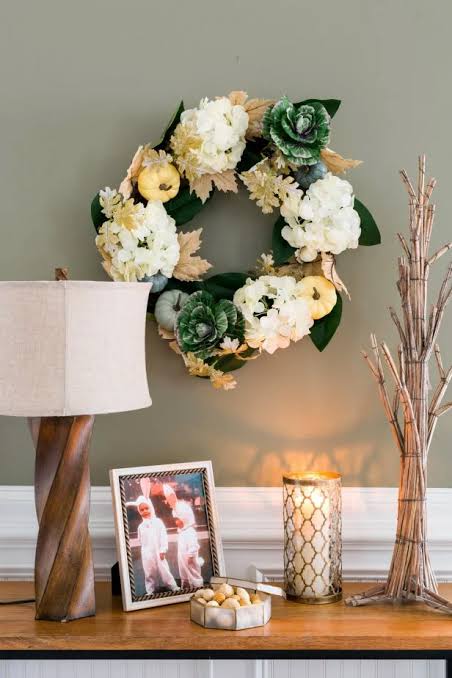
15. The Quintessential Rustic Homemade Fall Wreath
Creating a classic rustic wreath is all about embracing natural imperfections. You can easily make your own base from foraged branches.
⭐ The One Thing
- Time: 2 hours | Cost: $0-$15
- Gather flexible, freshly cut branches (like willow or grapevine) about 2-3 feet long.
- Take one long branch and form it into a circle, overlapping the ends.
- Weave a second branch around the first, tucking the ends in to secure it.
- Continue weaving more branches onto the base, building up the thickness and shape. Don’t worry about it being perfectly round.
- Use thin floral wire to attach small bundles of fall leaves, pinecones, or dried berries.
- Finish with a simple loop of twine for hanging.
Before you head out to forage materials for a rustic wreath, run through this quick checklist to make sure you’re prepared. A little planning goes a long way!
- Have I checked if foraging is allowed in the area I’m planning to go? (Public parks often have rules).
- Do I have a sturdy pair of gardening gloves and pruning shears?
- Have I brought a bag or basket to carry my findings without crushing them?
- Do I have a plan for dealing with potential insects on the branches and leaves I bring home?
- Do I have floral wire and/or a hot glue gun ready for assembly?
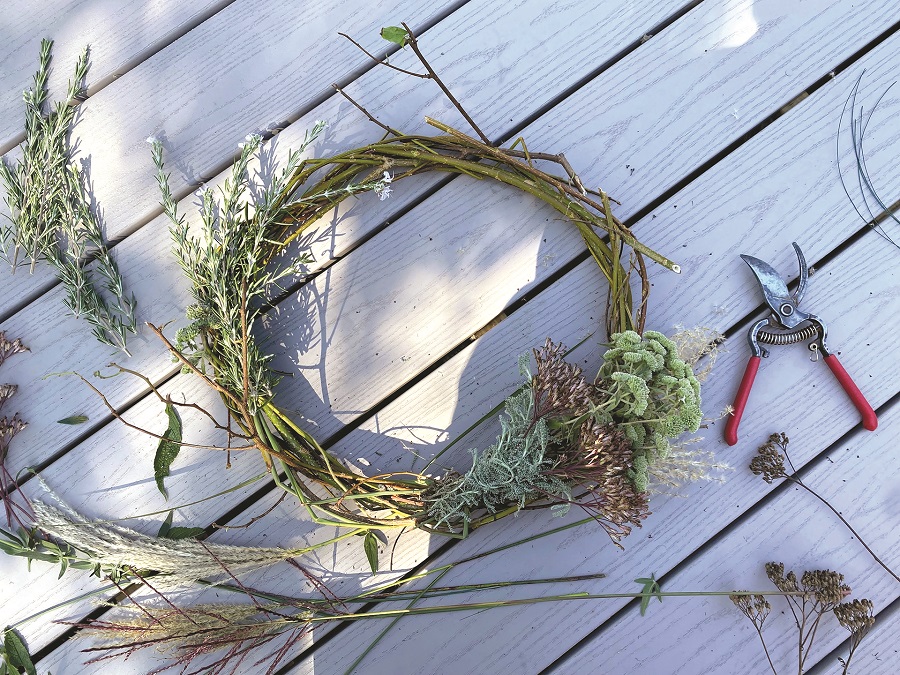
16. A ‘Work in Progress’ Wreath with Fresh Garden Trimmings
The most important element here isn’t on the wreath itself—it’s the scattered tools and trimmings around it. Showing the pruning shears, the loose wire, and the extra botanicals tells a story. It transforms the image from a simple product shot into a relatable, behind-the-scenes moment. It captures the joy of the creative process itself. This makes the wreath feel more authentic and inspiring, reminding us that beauty is often found in the making, not just the finished product.
📏 Scale Guide
This image is so effective because it feels real and achievable. The natural, slightly messy composition on the deck boards creates a sense of immediacy, as if the creator just stepped away for a moment. The use of fresh, just-cut greenery alongside dried elements provides a beautiful textural contrast. It’s a perfect snapshot of a slow, satisfying afternoon spent creating something by hand, which is a feeling many people are craving in our fast-paced world.
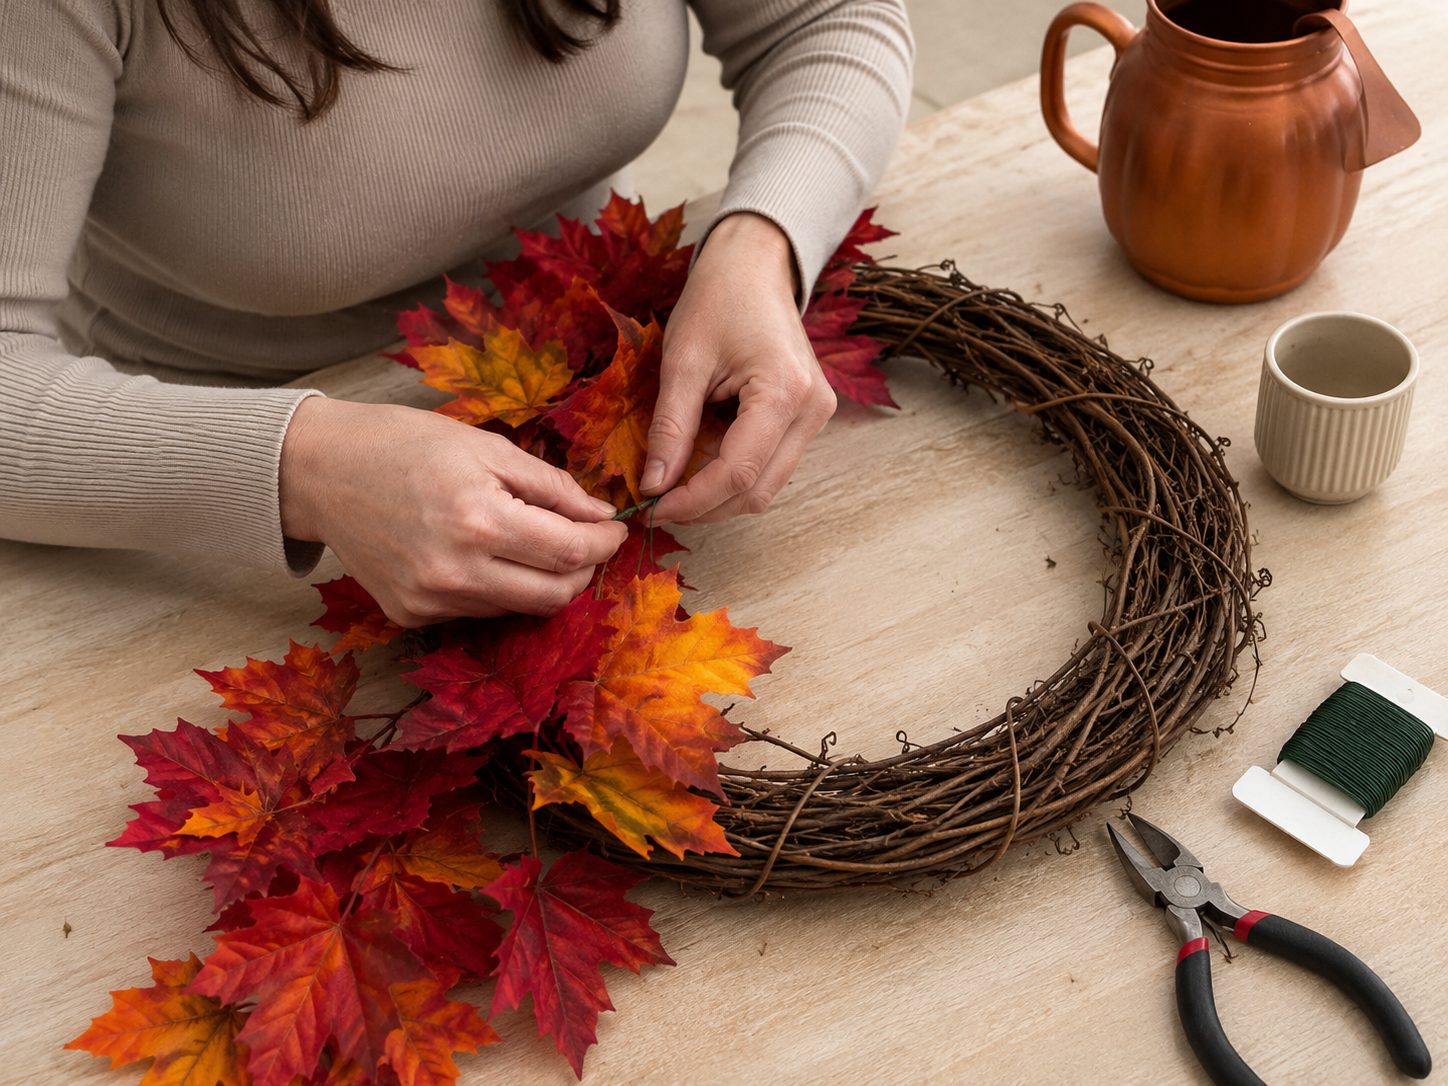
17. Crafting a DIY Wreath with Vibrant Maple Leaves
Securing faux leaves to a grapevine base so they look natural is an art. Here’s the professional way to do it for a lush, layered look.
📐 Style Math
- Time: 1.5 hours | Cost: $20-$35
- Start with a bare grapevine wreath and a few large sprays of faux maple leaves.
- Using pliers, snip the large sprays into smaller, more manageable clusters of 2-3 leaves.
- Arrange the first layer of leaves, all pointing in the same direction (e.g., clockwise), tucking their stems into the grapevine base.
- Use small pieces of green floral wire to discreetly secure the stems to the base.
- Add a second layer of leaves on top, filling in any gaps. Angle them slightly differently to create depth.
- Bend and fluff the leaves to give them a more natural, less flat appearance.
When working with faux leaves, the biggest giveaway that they’re not real is a uniform, flat appearance. Before you even start attaching them to the wreath, take a few minutes to manipulate them. Gently bend the plastic stems to create natural curves. Crumple the leaves slightly in your hand and then smooth them out. This small step breaks up the perfect, factory-made look and introduces subtle variations that mimic how real leaves would behave. It adds a layer of realism that makes a huge difference in the final product.
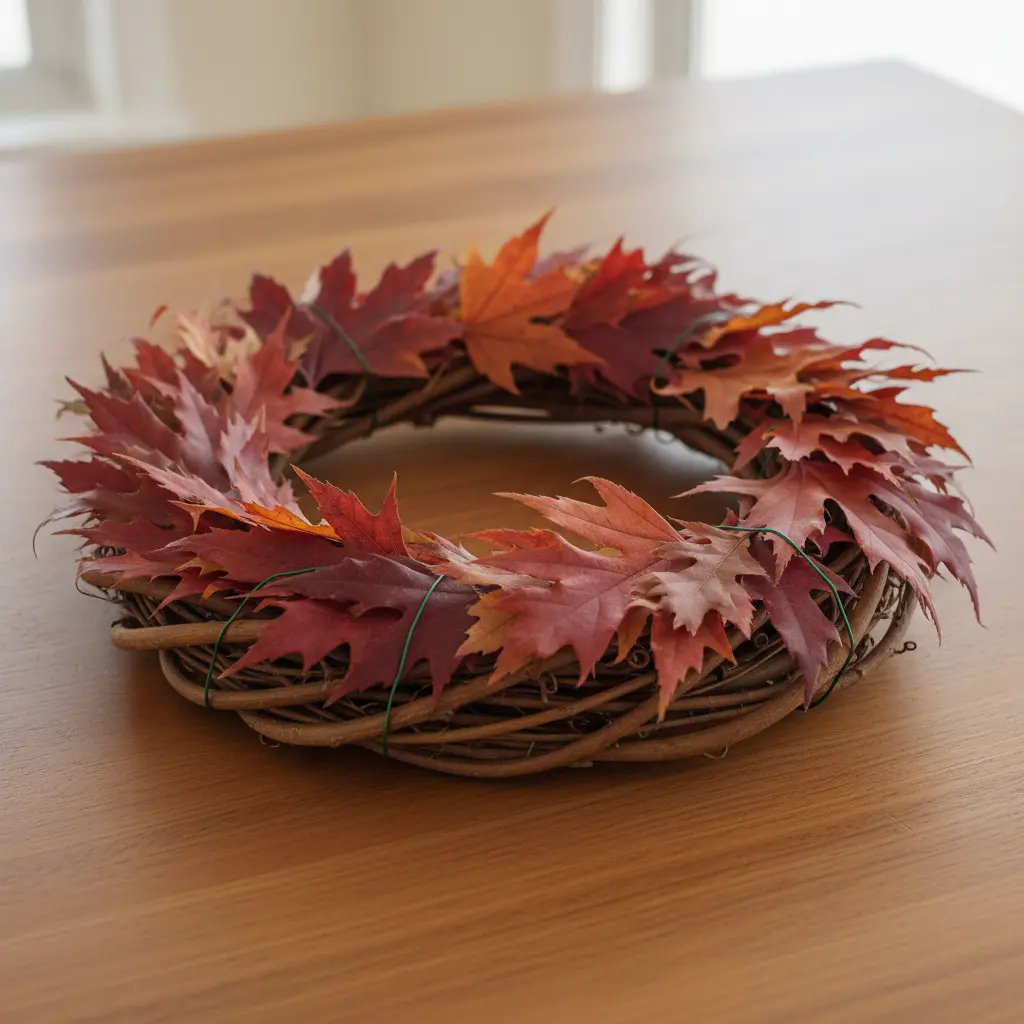
18. Simple Grapevine Wreath Layered with Real Autumn Leaves
It doesn’t get more budget-friendly than this. A grapevine base is one of the cheapest wreath forms you can buy (often under $10), and the main decoration—real autumn leaves—is completely free. All you need is a roll of floral wire. This is a fantastic project to do with kids. Send them on a mission to find the most beautiful and colorful leaves in the yard. The result is a truly authentic, natural piece of decor that costs next to nothing and captures a specific moment in the season.
🔧 How-To Brief
The beauty of using real leaves is also its biggest challenge: they don’t last. As they dry out, they will become brittle, lose their vibrant color, and eventually crumble. This is not a wreath you can store and reuse next year. Think of it as a temporary, ephemeral piece of seasonal art. To prolong its life for a few weeks, you can try pressing the leaves in a heavy book for a few days before attaching them, or dipping them in a mixture of melted beeswax and paraffin wax.
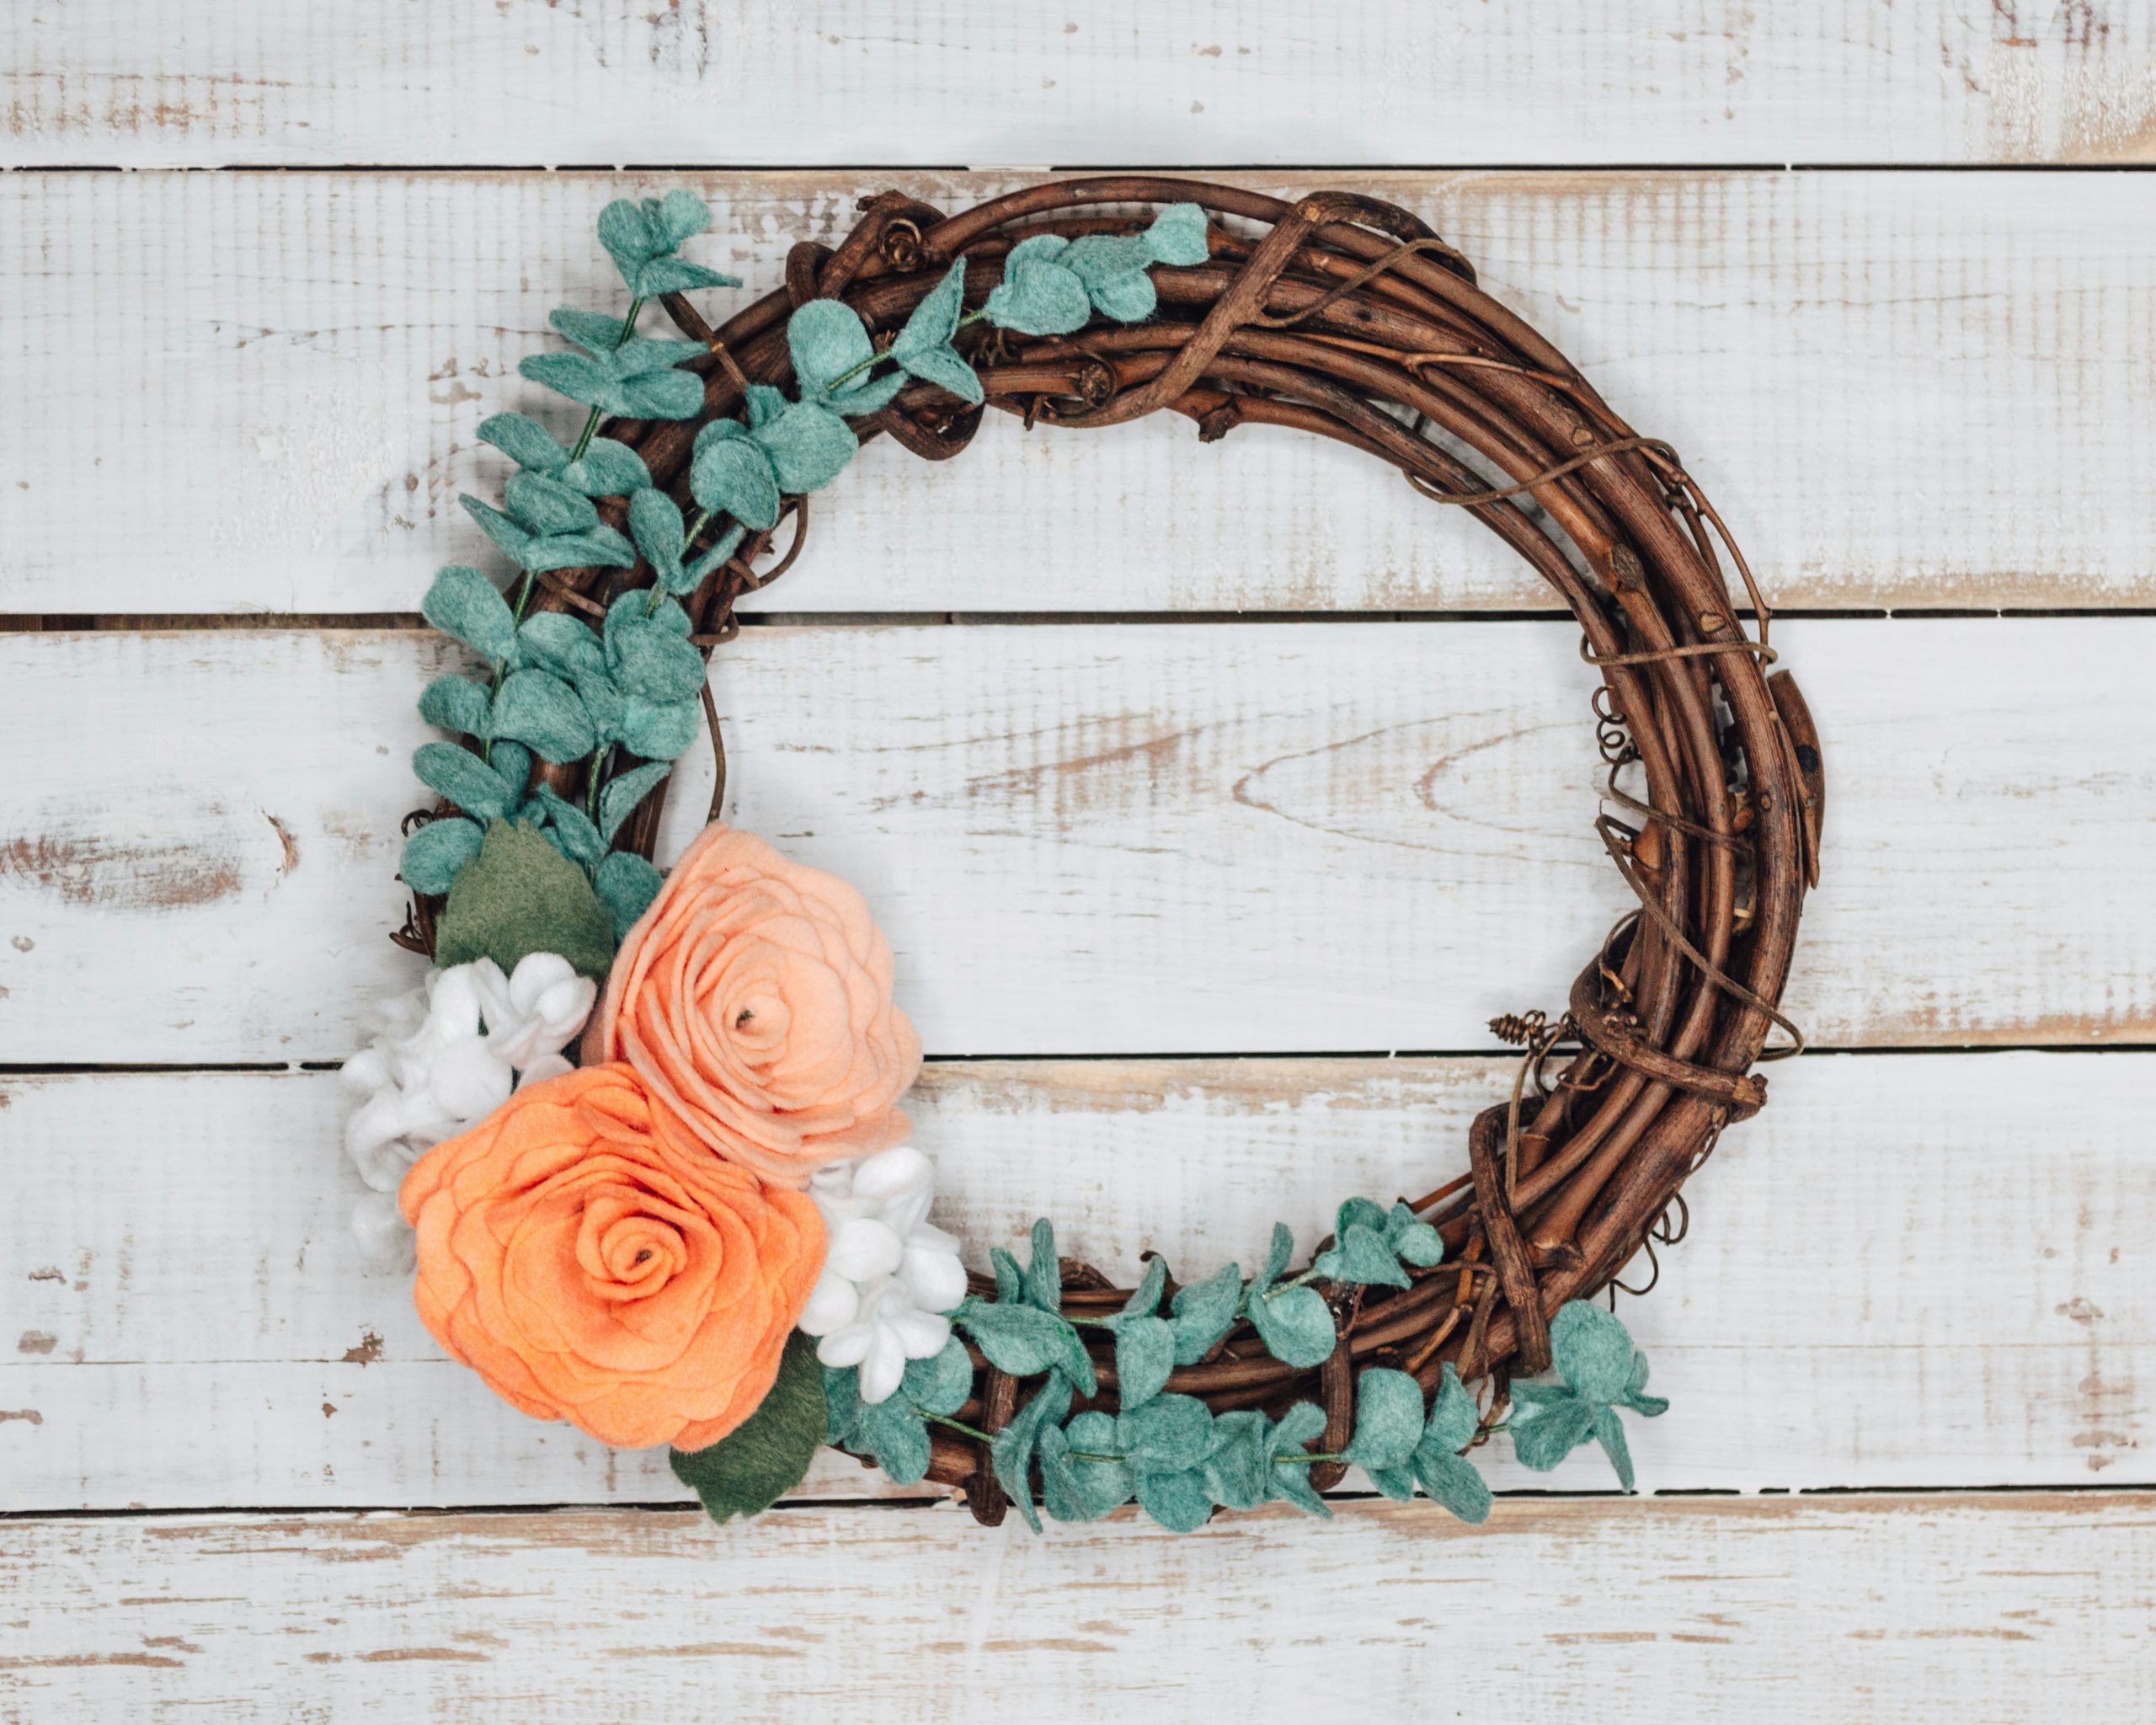
19. Handmade Felt Eucalyptus Wreath on a Whitewashed Wall
Felt crafts are experiencing a huge resurgence, especially on platforms like Pinterest and Etsy. This wreath is a perfect example of why. It blends the rustic charm of a grapevine base with the soft, modern, and slightly whimsical feel of felt. The muted teal of the eucalyptus and the soft peach of the roses are colors you don’t find in nature, which gives the wreath a unique, stylized look. It’s part of a broader trend of elevating ‘kitsch’ craft materials into sophisticated home decor.
🔥 Trending Context
The formula for this charmingly modern-rustic look is about balancing the hard and soft textures. It’s approximately 60% rustic base (the dark, rough grapevine) + 40% soft, handmade elements (the felt leaves and flowers). The asymmetrical placement is also key—by clustering the felt decorations on one side, you allow the natural beauty of the grapevine to have its own moment. This creates a more dynamic and visually interesting composition than if the decorations were evenly spaced all the way around.
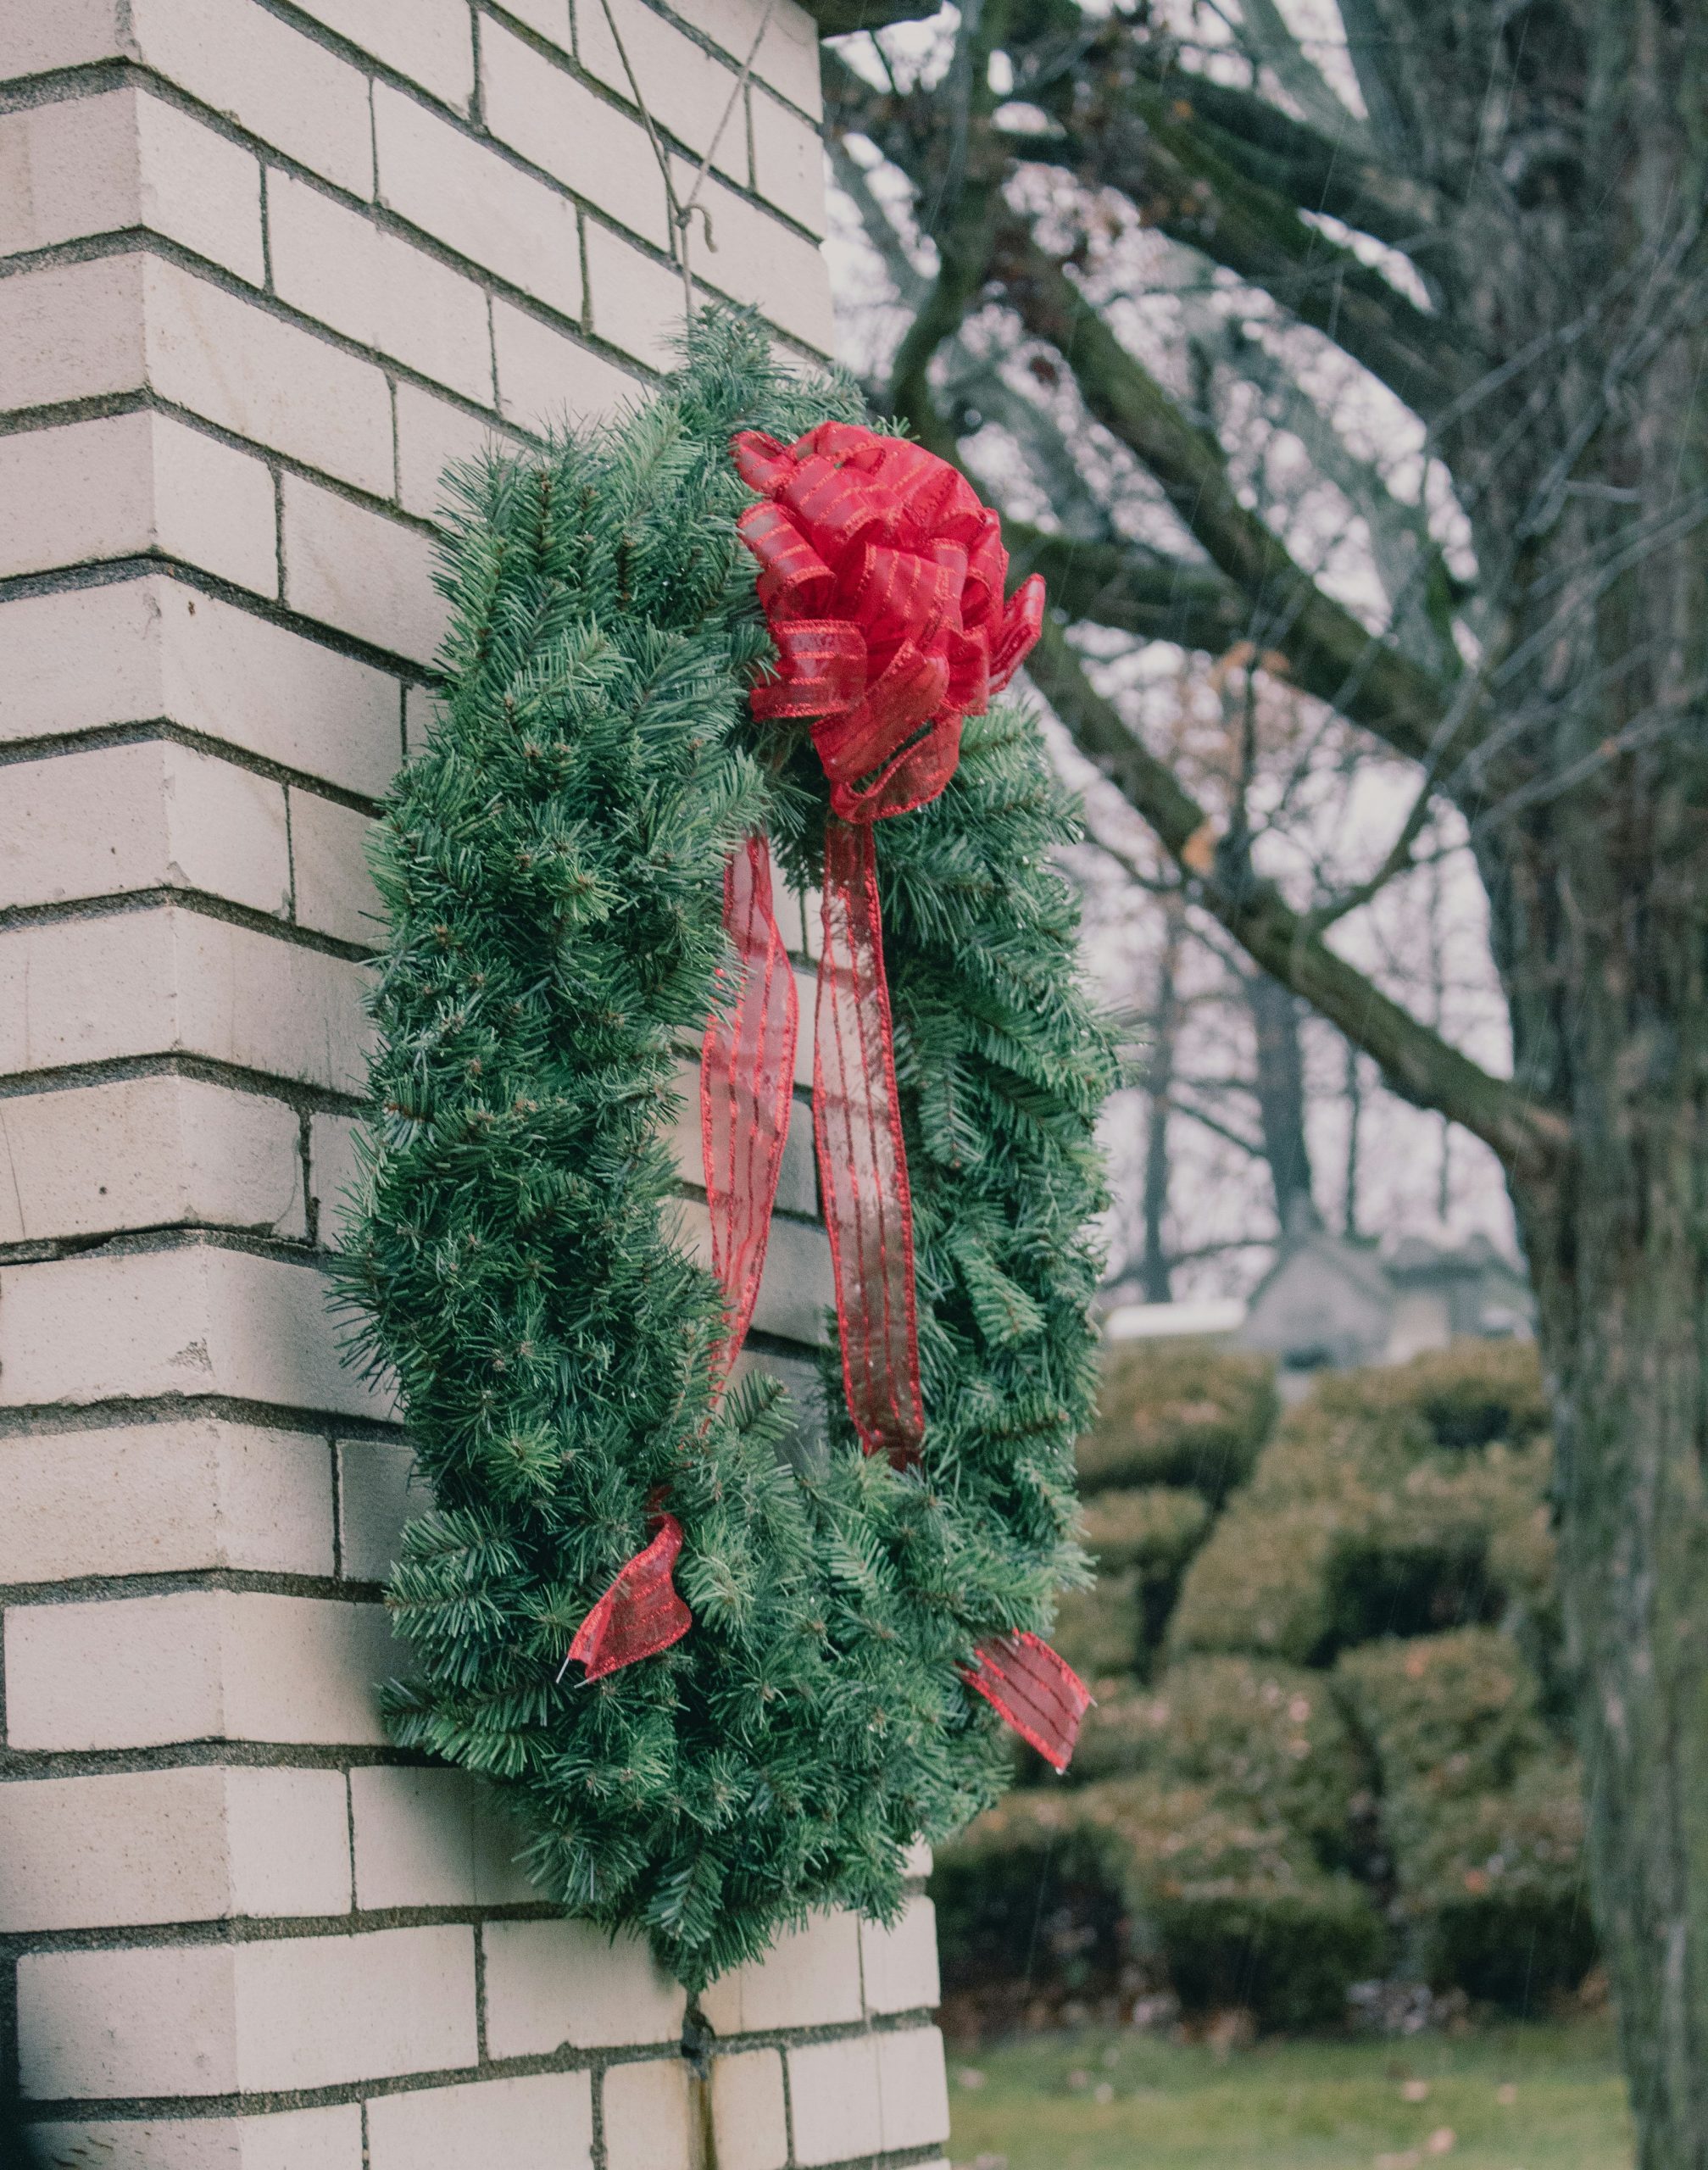
20. Classic Evergreen Wreath with a Festive Red Bow
While this is a timeless holiday look, the visual notes—bare tree branches, green grass—suggest this photo might be more early winter than deep fall. For a truly autumnal feel, you’d want to swap the evergreen for a base of fall leaves or twigs. However, if you live in a climate where the leaves drop early, an evergreen wreath can be a great transitional piece to take you from late autumn right into the Christmas season. Just be aware that it might read more ‘Christmas’ than ‘Thanksgiving’ to some.
💸 Get This Look For Less
The simplicity of this design is its strength. You have two primary colors: the deep green of the wreath and the vibrant red of the bow. You have two primary textures: the fine needles of the evergreen and the smooth fabric of the ribbon. This limited palette allows the wreath to make a strong statement without feeling cluttered. The pop of red against the white brick pillar is a classic color combination that provides excellent visibility from the street, which is exactly what you want in an outdoor wreath.
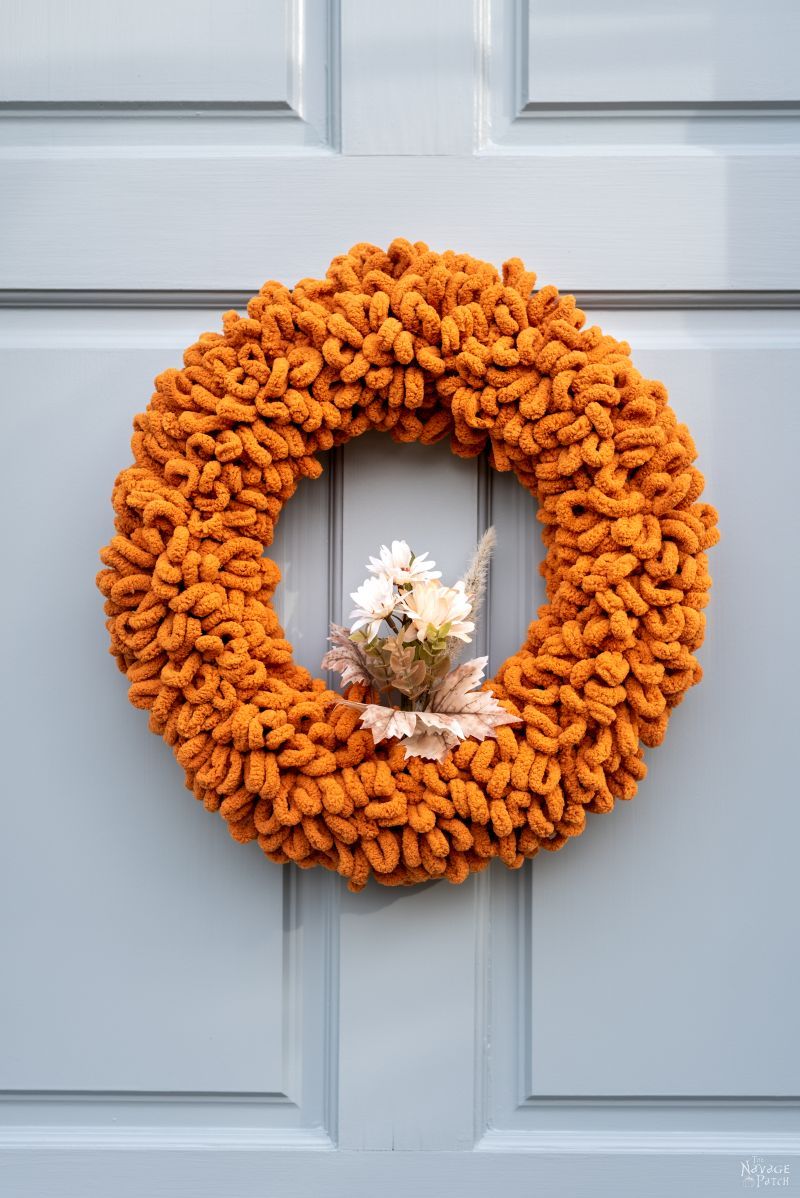
21. Cozy Chunky Knit Wreath in Bright Orange
The texture is everything here. You could have an orange wreath made of leaves or mesh, but the chunky, plush, oversized knit is what makes this piece so special and inviting. It taps into our love for cozy sweaters and warm blankets, translating that feeling into a piece of door decor. The texture is so dominant and appealing that the wreath needs very little else to make an impact. The small floral accent is just enough to add a finishing touch without distracting from the main event: that wonderful, huggable yarn. Compare its cozy vibe with the similar but more craft-focused Idea #8.
✅ Before You Start
A bright, bold color like this orange yarn looks incredible against a cool-toned door. The light blue here provides a perfect complementary contrast, making the orange appear even more vibrant. If your door is a warm color (like red, yellow, or wood-toned), this much orange might create a less impactful, more muddled look. If you have a warm-toned door, consider making this same wreath in a cream, navy, or even olive green yarn to create that essential color pop.
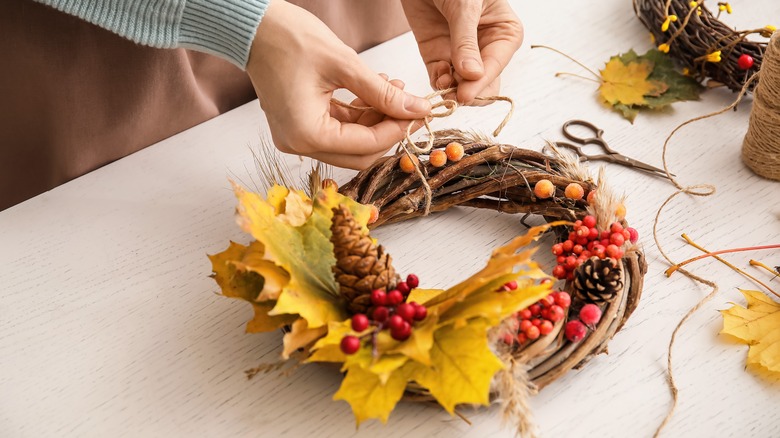
22. Hand-Tying a Natural Wreath with Twine and Foraged Finds
This image captures the essence of homemade charm. The power of this design lies in its honest, natural materials. The simple twig base, the crisp yellow maple leaves, the rough little pinecones, and the fibrous twine all work together to create a cohesive, earthy texture. The act of tying the bow by hand is central to this feeling. It’s not a perfect, pre-made bow; it’s rustic and real. This wreath isn’t trying to look like it came from a store, and that’s precisely its appeal.
🎯 What Makes It Work
This is the ultimate look for less because it’s a look for (almost) free. All you need is a roll of twine, which costs a couple of dollars. The rest of the materials—twigs, leaves, berries, pinecones—can be gathered from your own backyard or a nearby park (where foraging is permitted, of course). It’s a wonderful way to create something beautiful and seasonal without a trip to the craft store. It’s a more minimalist version of the craft-in-progress scene in Idea #17, focusing purely on found objects.
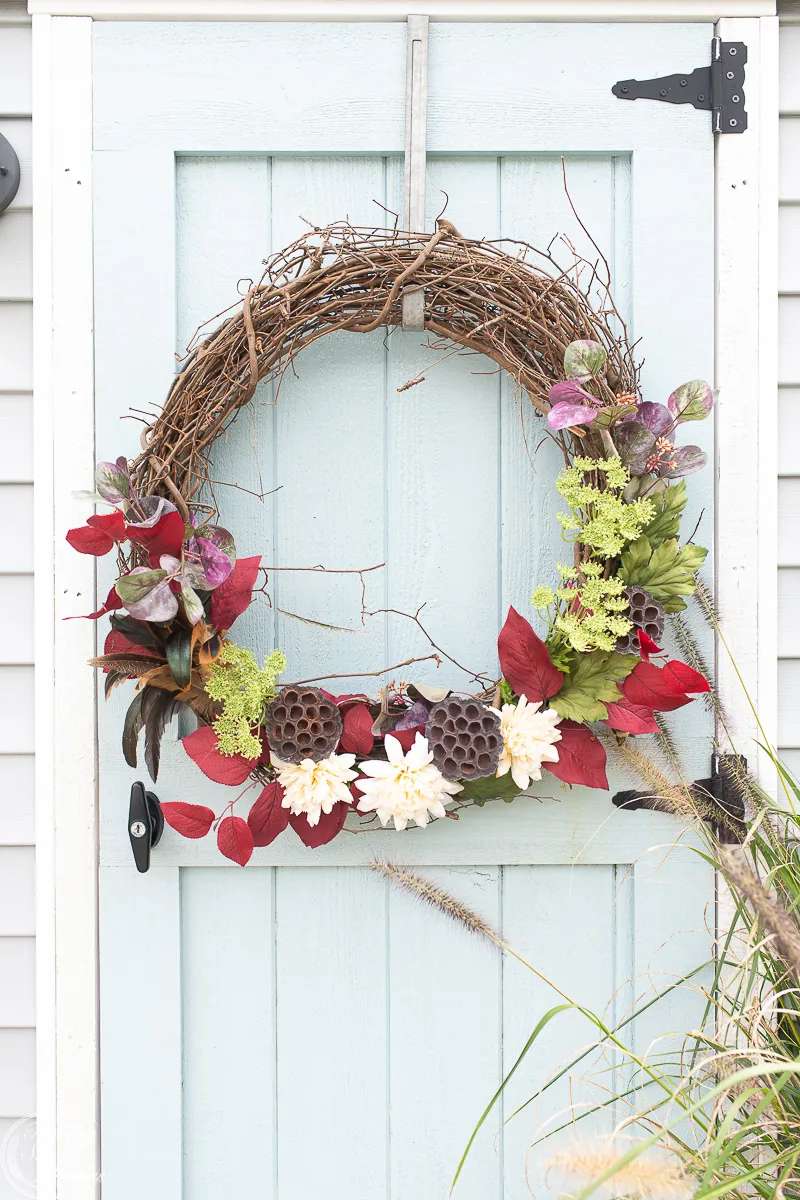
23. A Lush Grapevine Wreath with Dahlias and Lotus Pods
The sophisticated color and texture palette here follows a clear formula: 50% rustic base (the exposed grapevine), 30% deep, moody color (the red and purple leaves), and 20% light, contrasting accents (the white dahlias and pale green florals). The dried lotus pods fit into the rustic category, adding texture and interest without competing for color dominance. This recipe ensures the wreath feels full and lush but also balanced and artistic, not just a random collection of fall florals.
🧹 Maintenance Reality
A large, dramatic wreath like this one, which looks to be about 28-30 inches in diameter, requires a standard to large-sized door to look properly scaled. It would be perfectly at home on a 36-inch wide front door. However, if you have a smaller apartment door (typically 30-32 inches wide), this wreath could be overwhelming. For a smaller door, you’d want to scale down to a 20 or 22-inch wreath, using the same gorgeous elements but in a more compact arrangement.
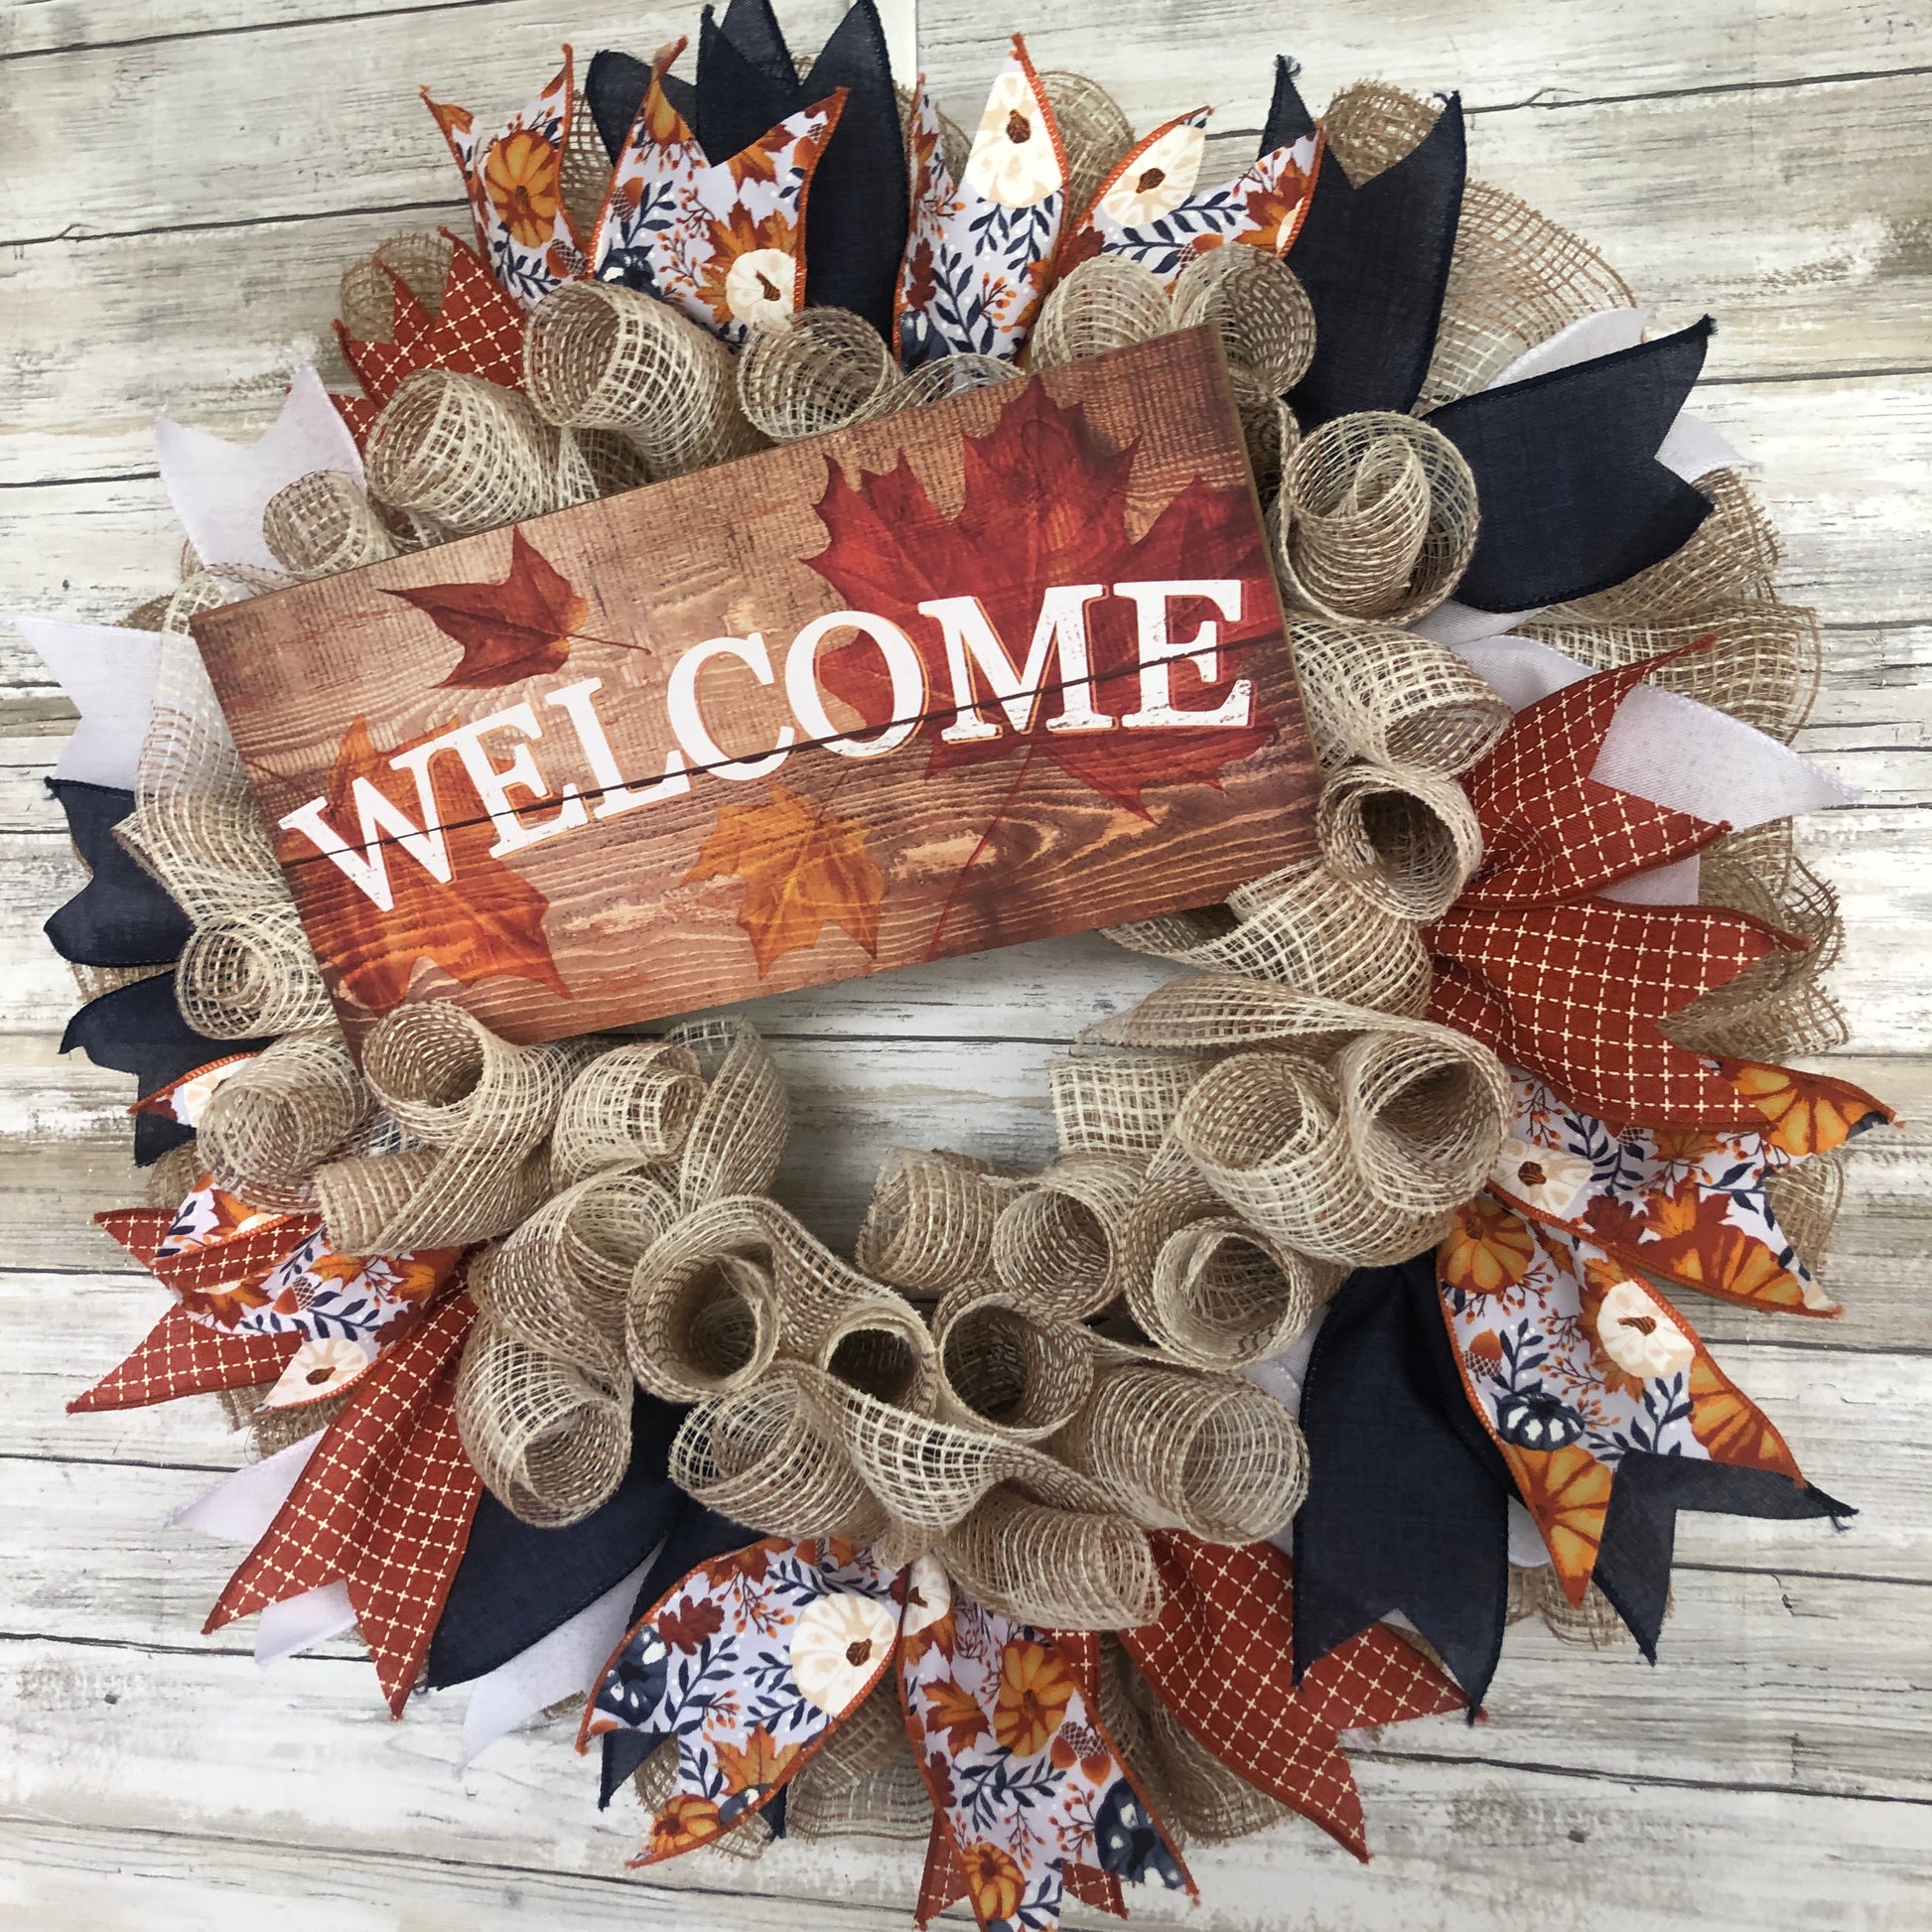
24. Rustic Burlap Wreath with a ‘WELCOME’ Sign
Creating that full, loopy burlap base is easier than it looks. It’s often called the ‘poof’ method and requires a wire wreath frame and a roll of burlap mesh.
⚠️ Real Talk
- Time: 45 mins | Cost: $20-$30
- Secure the end of your burlap roll to the inner ring of the wire frame with a zip tie or floral wire.
- About 8-10 inches down the burlap, bunch it together and attach it to the next ring on the frame. This creates your first ‘poof’.
- Continue this process, working your way around the frame, alternating between the inner and outer rings to create a full, even look.
- Once the frame is covered, fluff the loops and then add your ribbons and sign using a hot glue gun or more wire.
Before you commit to a burlap wreath, there are a few practical things to consider. Run through this list to make sure it’s the right choice for your home.
- Is my front door protected from rain? Burlap can absorb water, become heavy, and even develop mildew if it gets repeatedly soaked.
- Do I have a way to protect my door from scratches? The wire frame on the back of these wreaths can easily scratch paint or wood. Consider adding felt pads to the back.
- Do I have a variety of wired ribbons? Wired ribbon is essential for creating bows and accents that hold their shape.
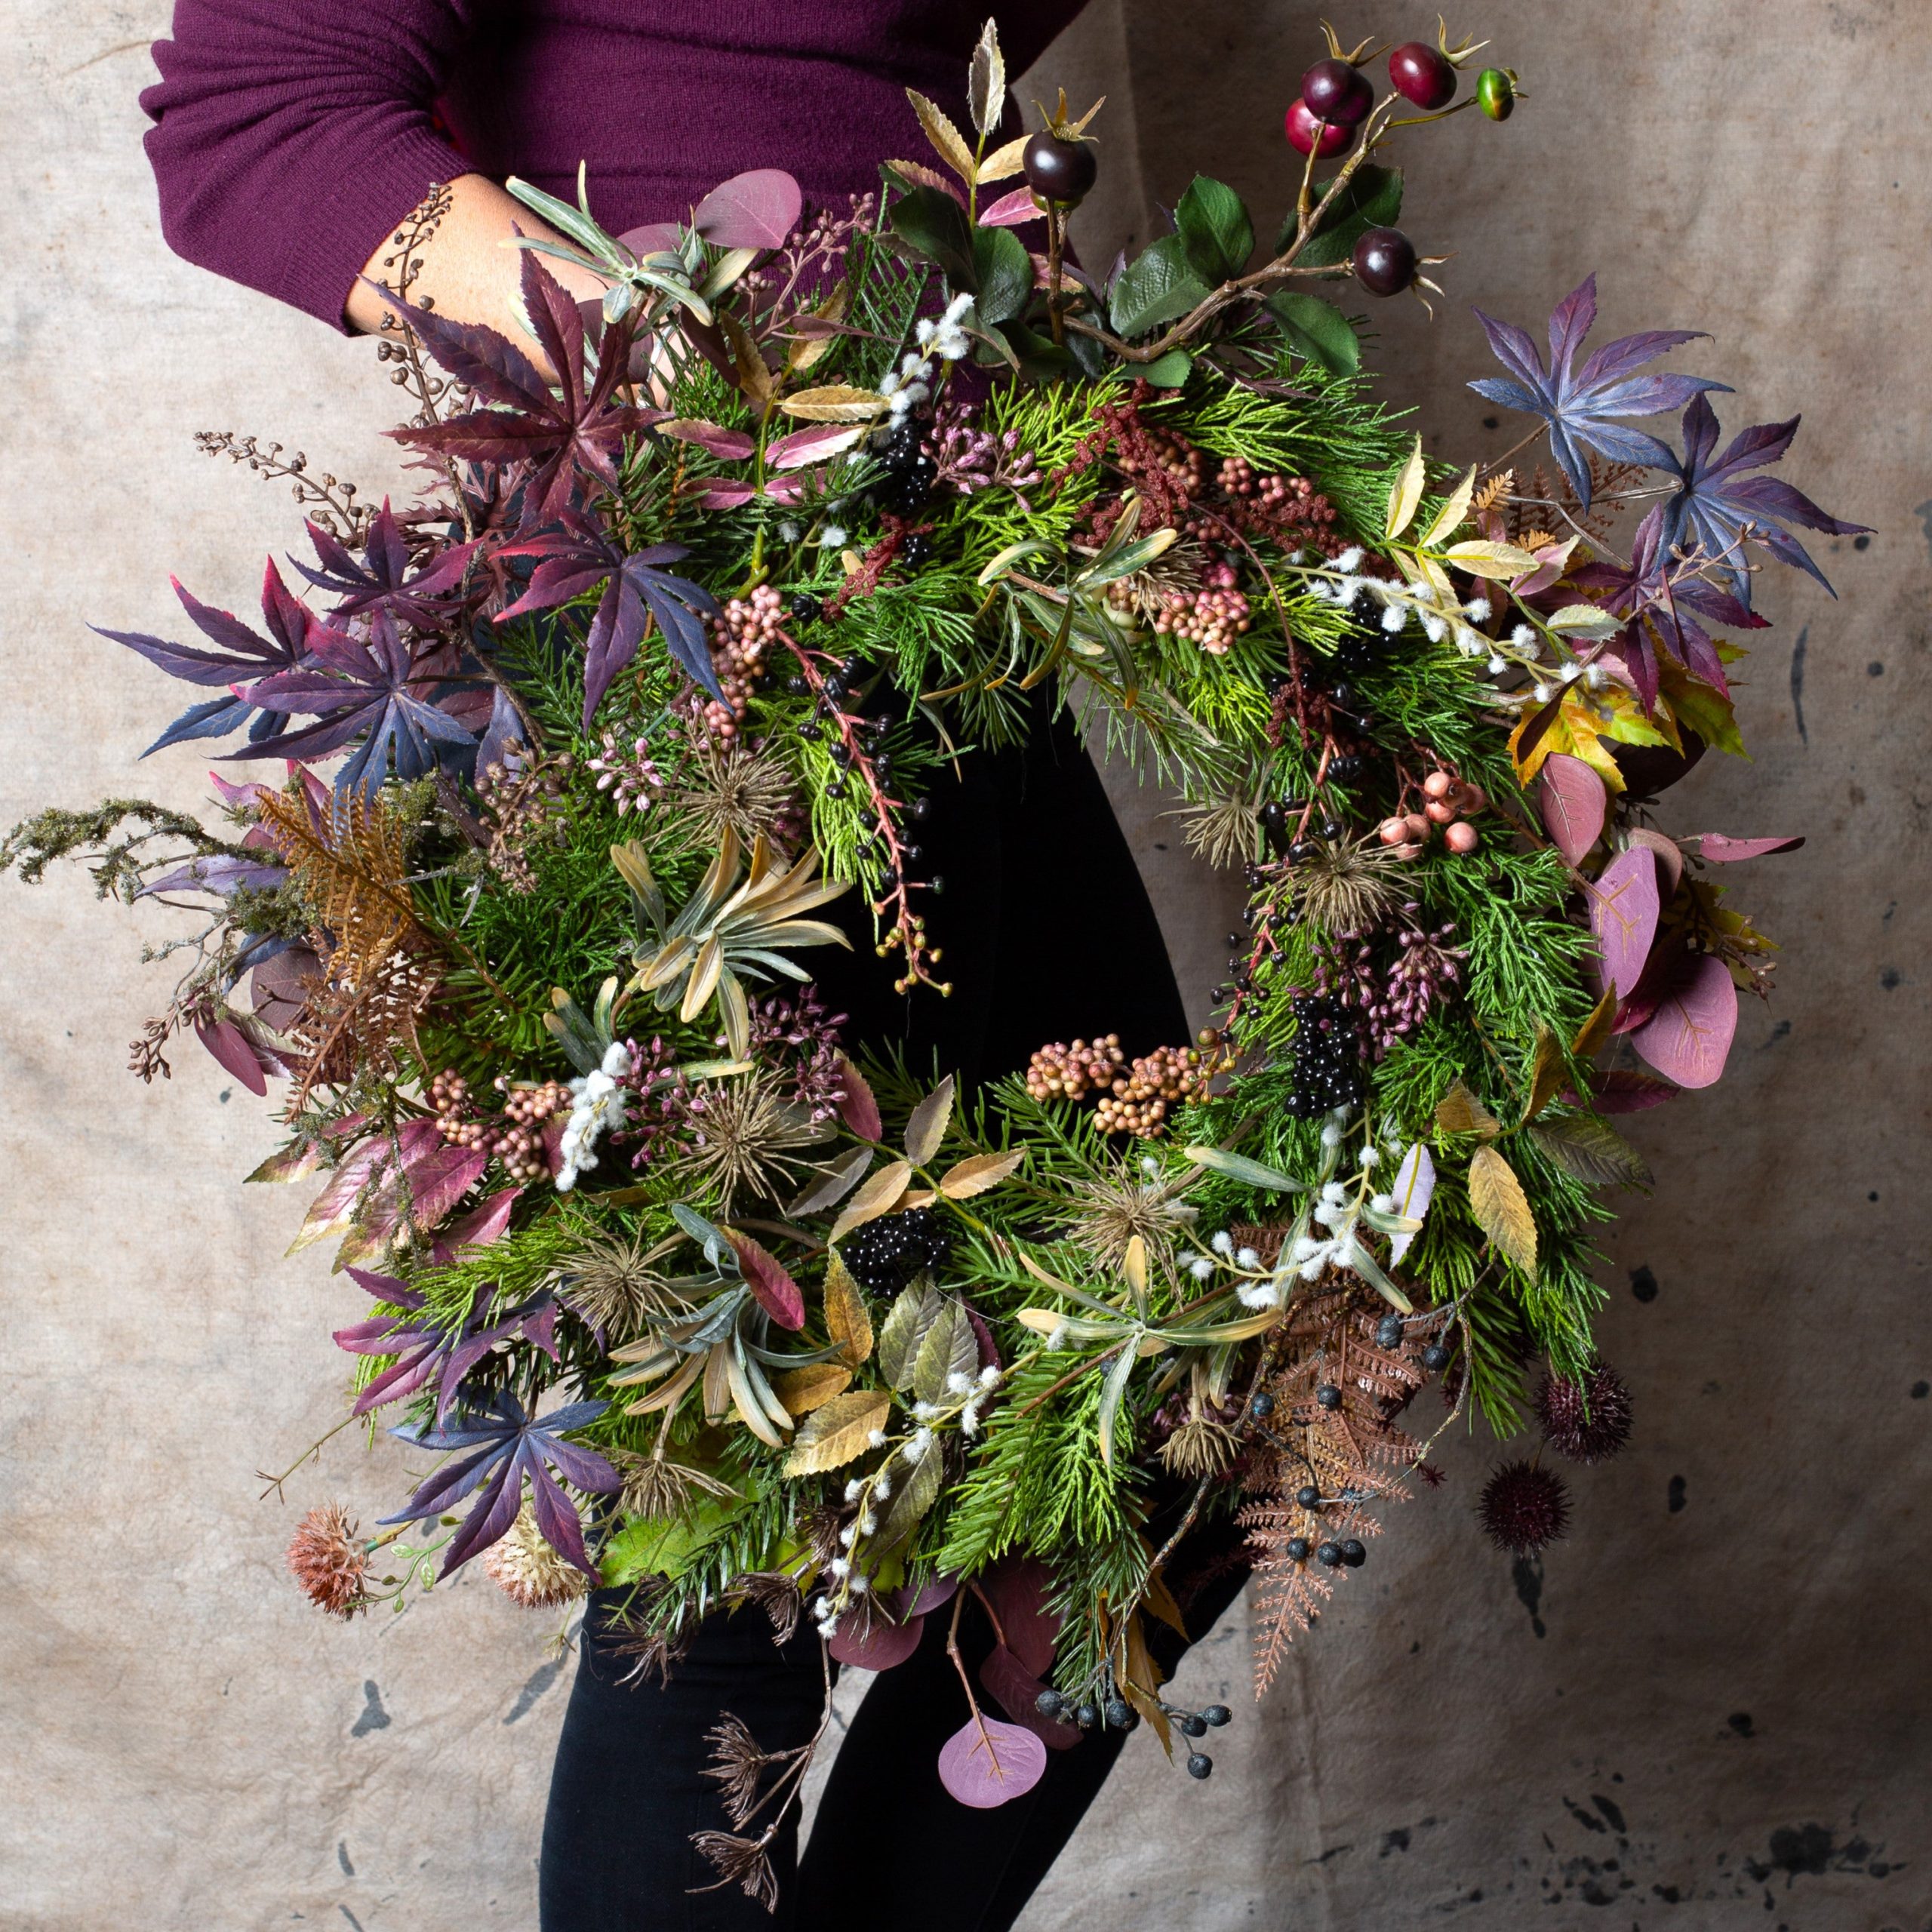
25. A Moody Wreath with Deep Jewel-Toned Foliage
This wreath is stunning because it rejects the traditional bright orange and yellow fall palette in favor of something much more dramatic and sophisticated. The deep forest greens, plum purples, and rich burgundies create a moody, romantic feel. The design works by layering various textures within this tight color family—from the soft evergreen needles to the waxy broadleaves and spiky pods. It’s a testament to the power of a non-traditional color scheme to create something truly memorable.
💰 Budget Breakdown
A wreath this dark and dense can be visually heavy. It works beautifully here against a light, neutral background where it can really stand out. However, if you were to hang this wreath on a dark-colored door (like black, dark brown, or navy), it could completely disappear and lose all its beautiful detail. For a dark door, you would need to incorporate more of the light elements, like the white fluffy seed heads, to create enough contrast to be seen from a distance.
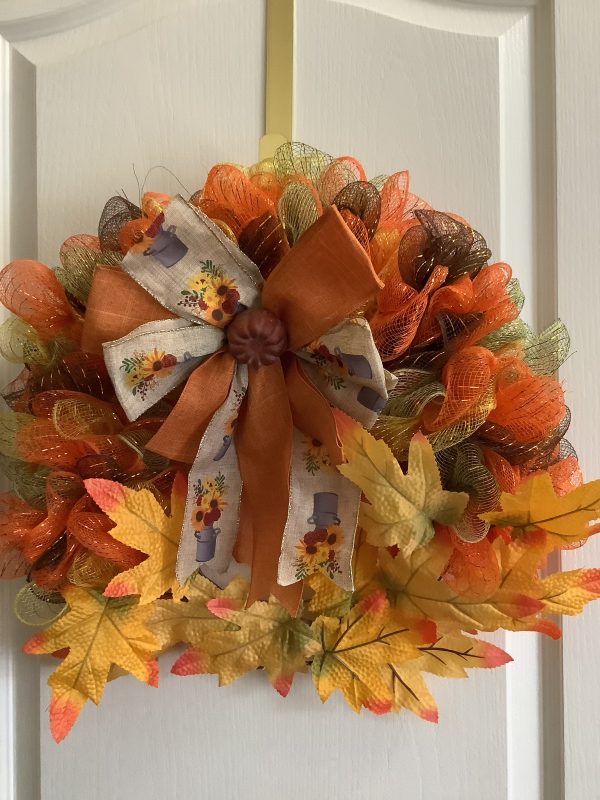
26. Festive Deco Mesh Wreath with a Pumpkin Ribbon Bow
The key to a polished-looking deco mesh wreath is layering and a clear focal point. Notice how this design uses three different colors of mesh (orange, brown, and gold) to create depth and texture. The real star, however, is the bow. By using two different—but coordinating—wired ribbons, you create a much more luxurious and custom look. The small pumpkin in the center of the bow acts as a perfect anchor point, drawing the eye and tying the whole theme together. Never underestimate the power of a great bow.
💡 Designer Tip
Deco mesh wreaths are a fantastic, budget-friendly DIY project, popular at stores like Dollar Tree. Here’s what it might cost to make this yourself:
- Wire Wreath Frame: $2 – $5
- Deco Mesh (3 rolls): $9 – $18
- Wired Ribbon (2 rolls): $6 – $12
- Faux Leaves & Pumpkin Accent: $3 – $7
- TOTAL: $20 – $42
Budget alternative: This is already a budget project! To save even more, look for mesh and ribbon bundles after seasonal holidays go on clearance. Stock up for next year.
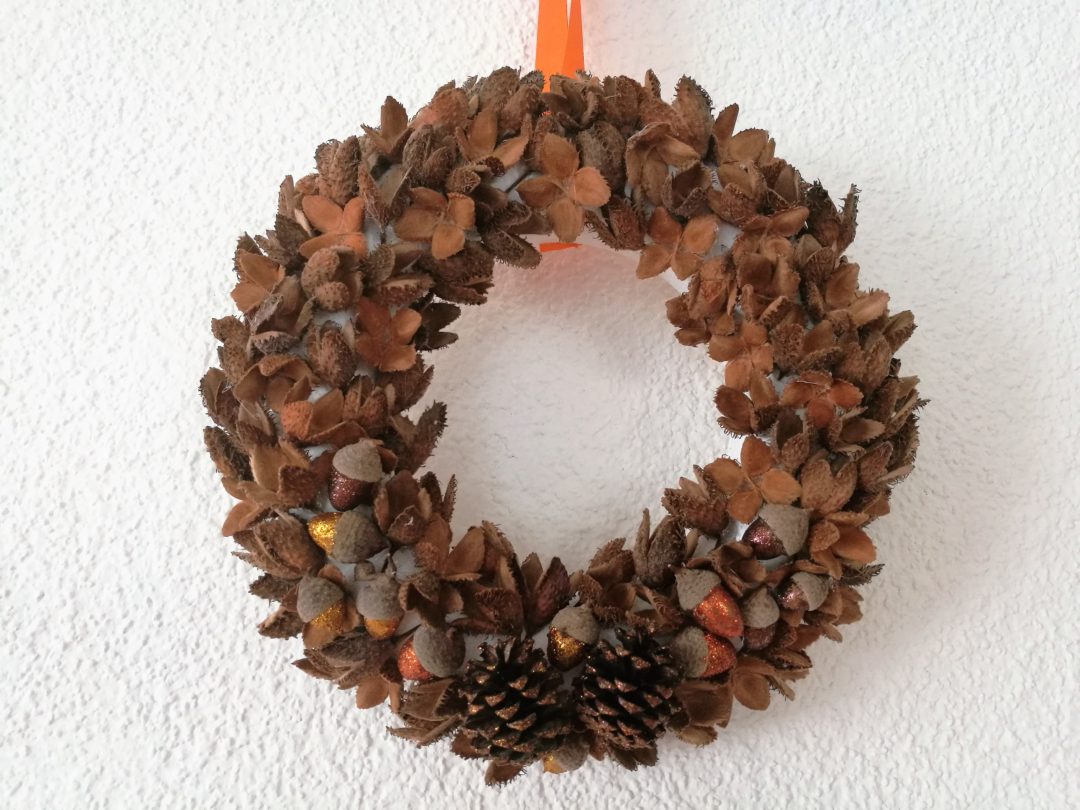
27. A Natural, Rustic Wreath of Pinecones and Glittered Acorns
This wreath works because of its incredible textural density and its strict, earthy color palette. It’s made almost entirely of small, similar-toned natural elements. This repetition of form and color creates a cohesive, unified look that is very calming to the eye. The magic is in the details—the central cluster of larger pinecones that provides a focal point, and the subtle hint of glitter on some acorns that catches the light and adds a tiny, unexpected touch of glam without disrupting the rustic feel.
⭐ The One Thing
Because this wreath is so texturally intricate but visually quiet, it’s best suited for an eye-level placement where its details can be appreciated. This would be a perfect wreath for an apartment door, an interior door, or hung on a wall above a console table. From 30 feet away on a large front door, it might just read as a simple brown circle. This is a piece that rewards close inspection. For a bigger impact from the street, consider the bolder colors in Idea #14.
Your Front Door’s Autumn Chapter
Hopefully, these 27 ideas have sparked some serious inspiration for your own front door this season. Don’t be afraid to mix and match concepts, pull a color from one idea and a texture from another, to create something that’s uniquely you. Now, get crafting, and don’t forget to show off your beautiful creation on Pinterest!