Kitchen makeovers top the list in 2026 as homeowners seek to be tasteful and cost-efficient and avoid full-scale remodeling of the beating heart of their homes. Whether you rent and are looking for renter-friendly solutions, live with standard builder-grade basics, or just want to refresh a tired dining layout, there’s never been a better time to dream up your cooking space. From galley reimagining to farmhouse flair and even mini play kitchen upgrades for the little ones, these are ideas that marry style with function. As they did, Americans flocked to Pinterest in search of visual inspiration that resonated with real life, budget-strapped and DIY-friendly, but also full of personality. Here are some clever ways to give your kitchen a little facelift in 2026.
1. Renter-Friendly Peel-and-Stick Backsplash Upgrade
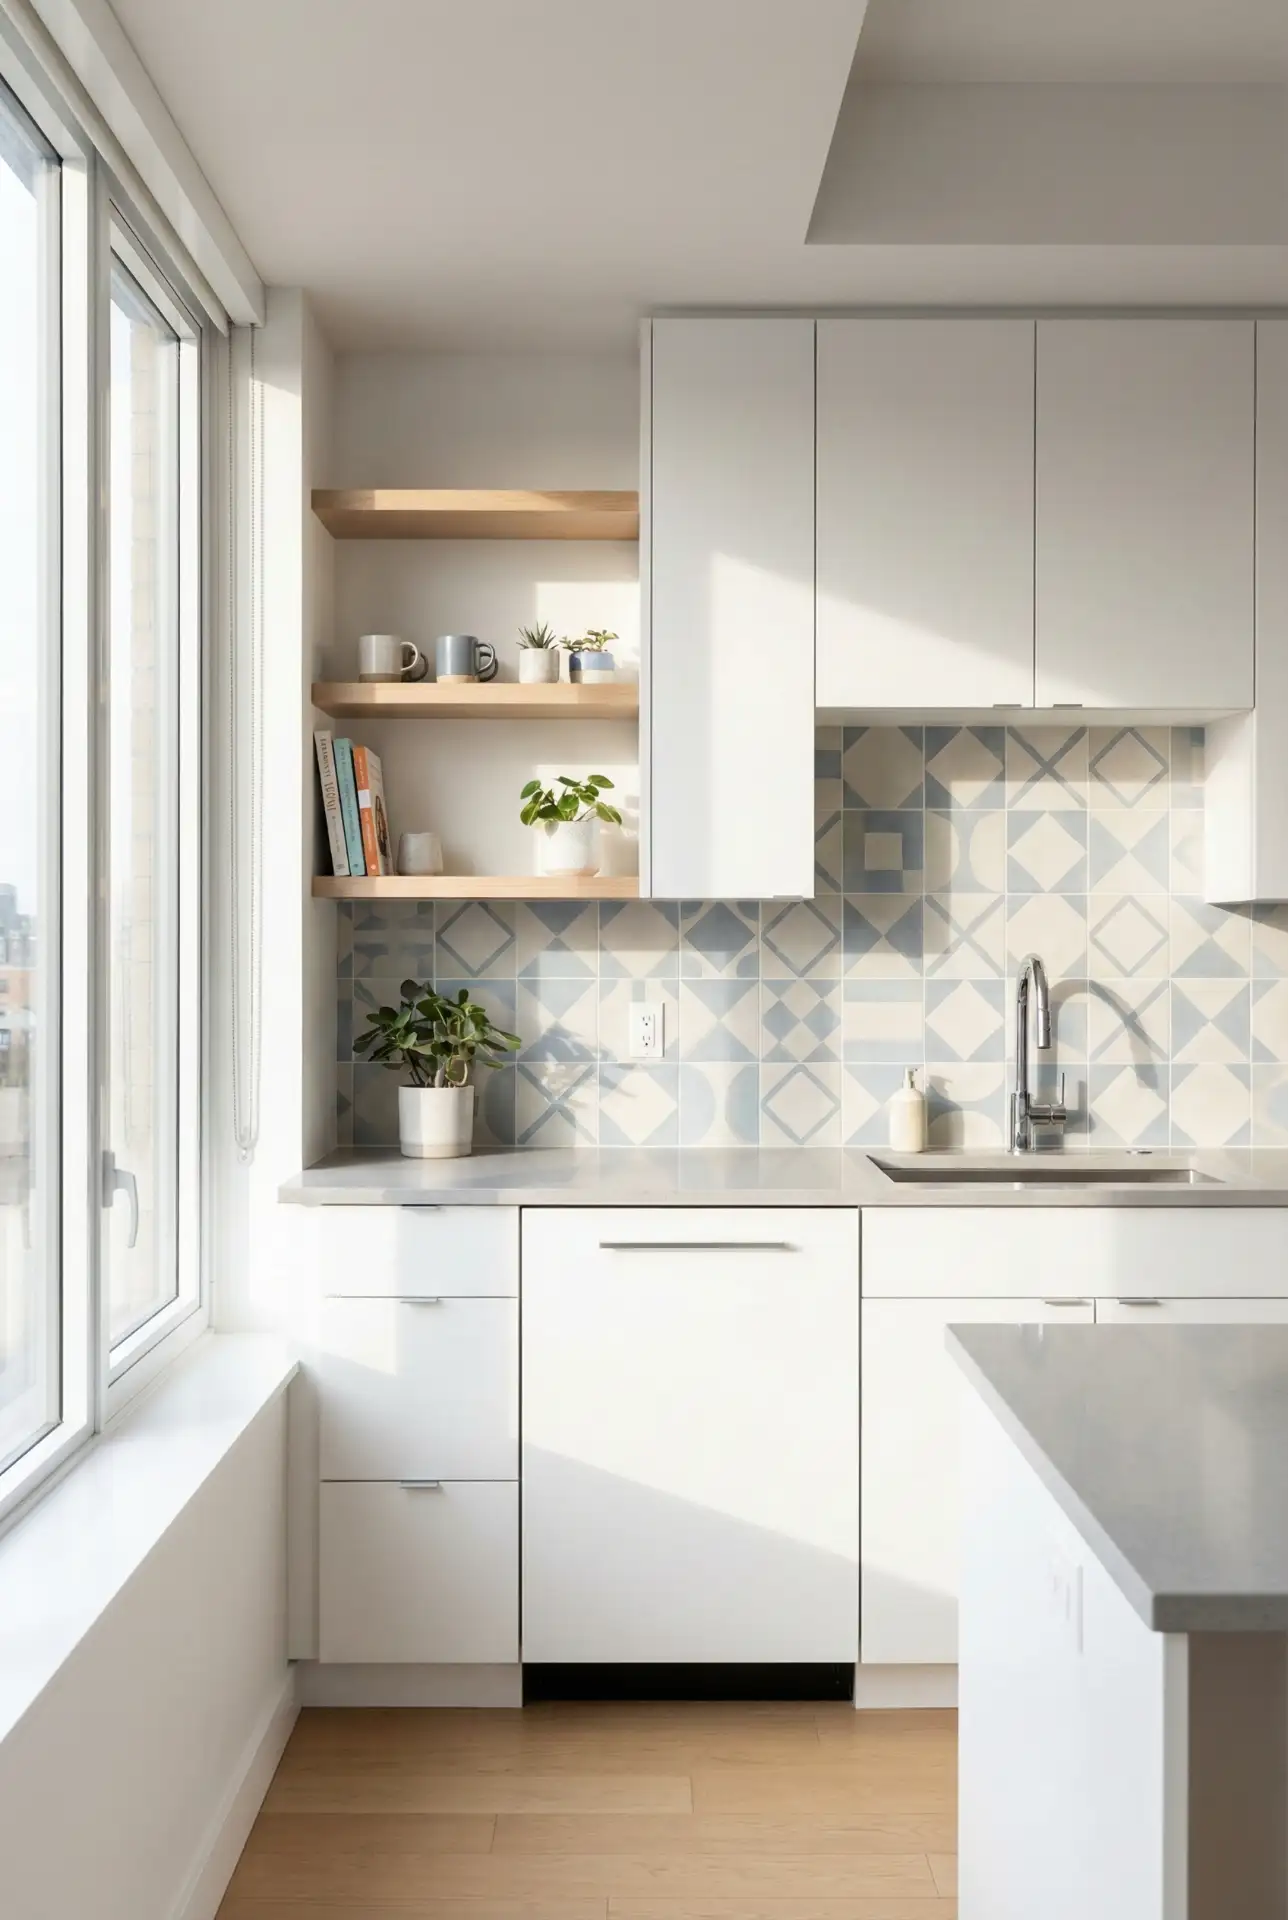
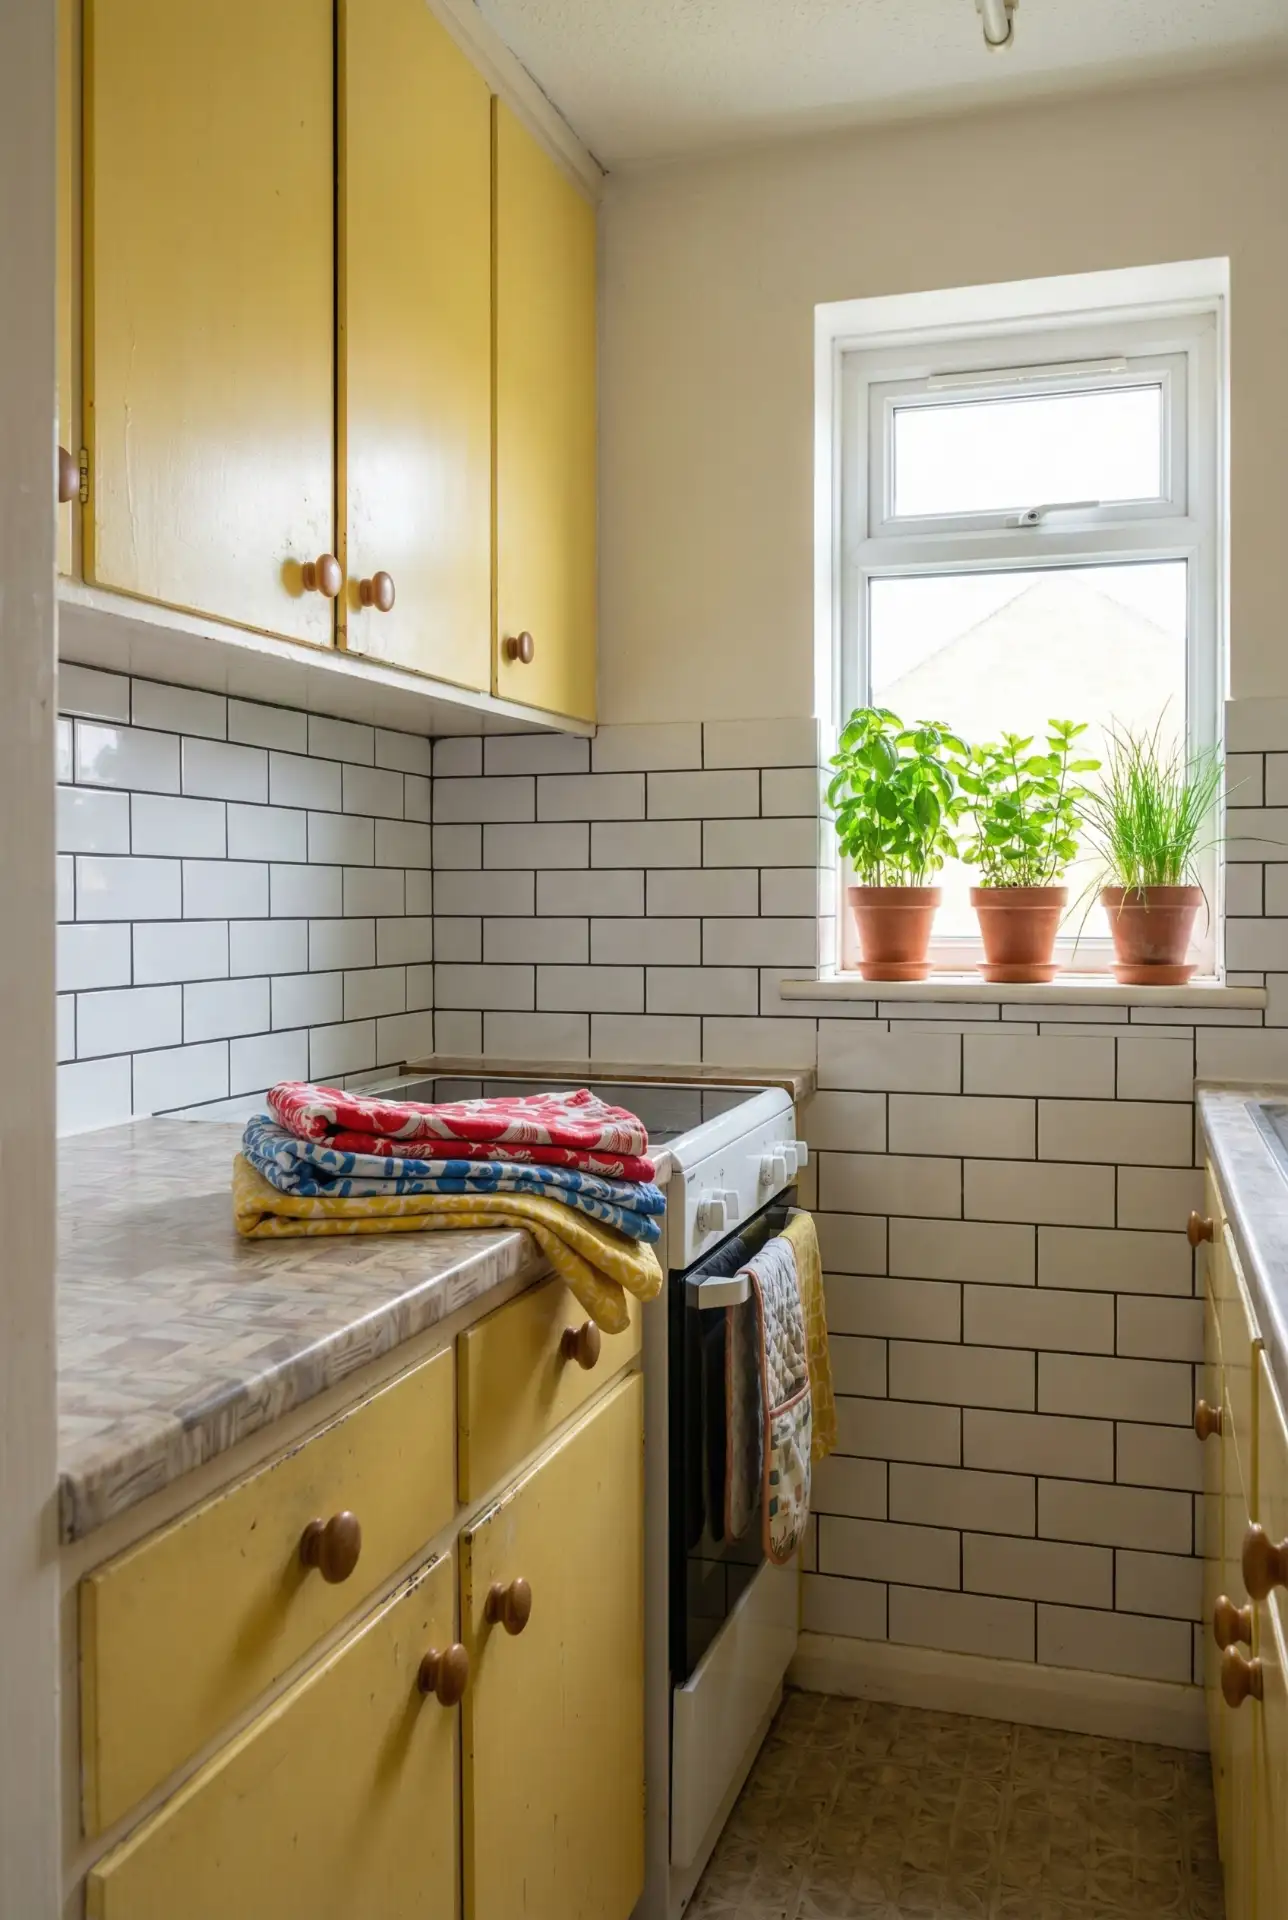
Rent Diane Riga Transform your apartment kitchen without losing your security deposit by installing a renter-friendly peel-and-stick backsplash. With dozens of patterns—from classic subway to Moroccan zellige—these adhesive tiles are easy A’s, needing only a clean surface and steady hands. Ideal for masking builder-grade beige or outdated dust-brown tile, they also peel off cleanly when you move out! The installation is done in one afternoon, and the effect is immediate, transforming a faceless rental into a room that feels custom and curated. 
This is best for galley kitchens or tight apartments with a bold backsplash that brings your eyes up, creating the illusion of more space. Pick a pattern that works with your countertops—if you have stuck with laminate, a neutral tile adds to the cohesive look. But the beauty of peel-and-stick is that there’s virtually no commitment; if you don’t love it after a week or two, just swap it out. Renters in cities like New York and San Francisco have latched onto this trick to make cookie-cutter units their own, and the trend was showing no signs of slowing down in 2026.
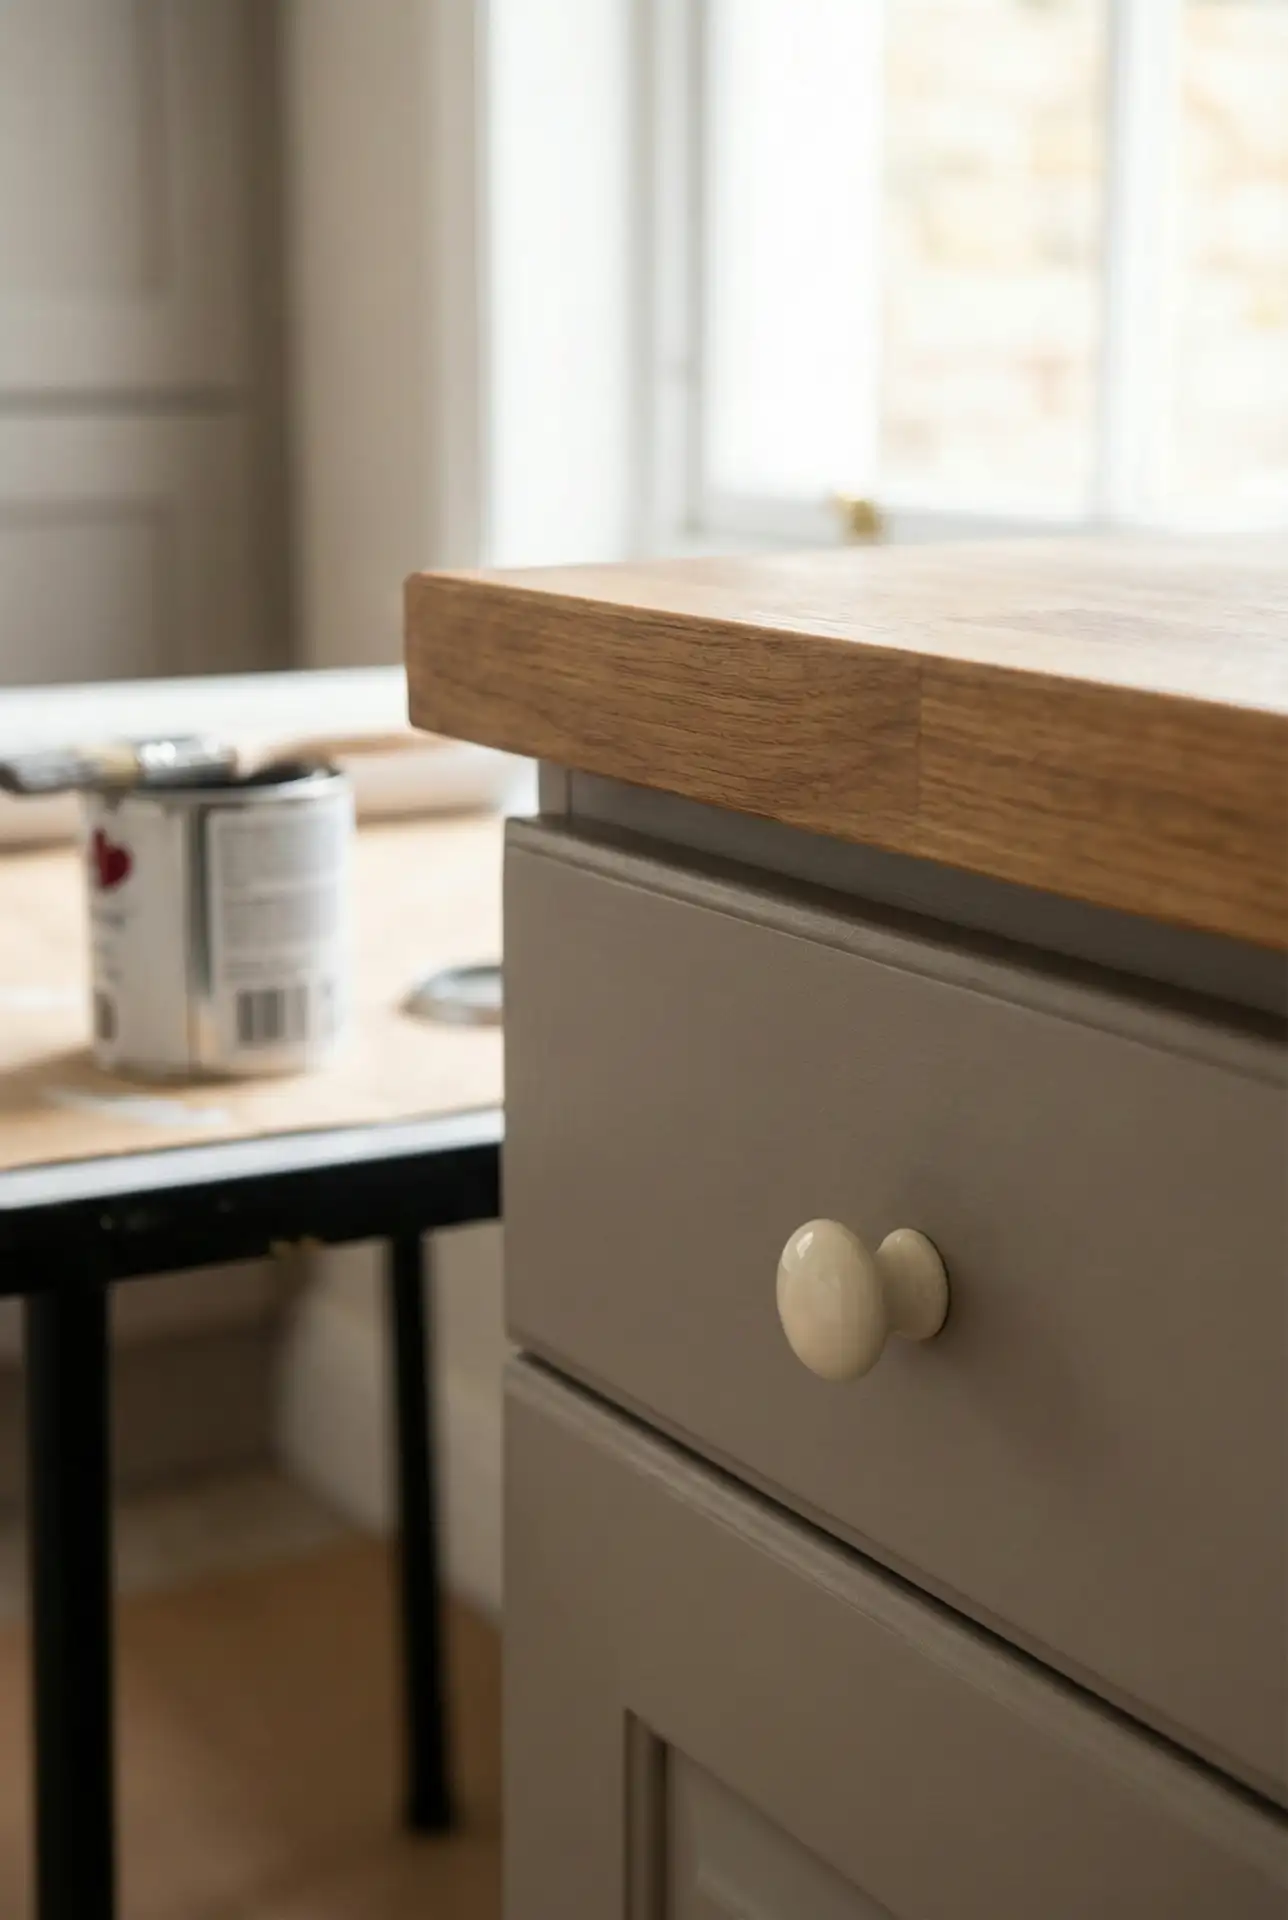
2. Budget-Friendly Cabinet Paint Transformation
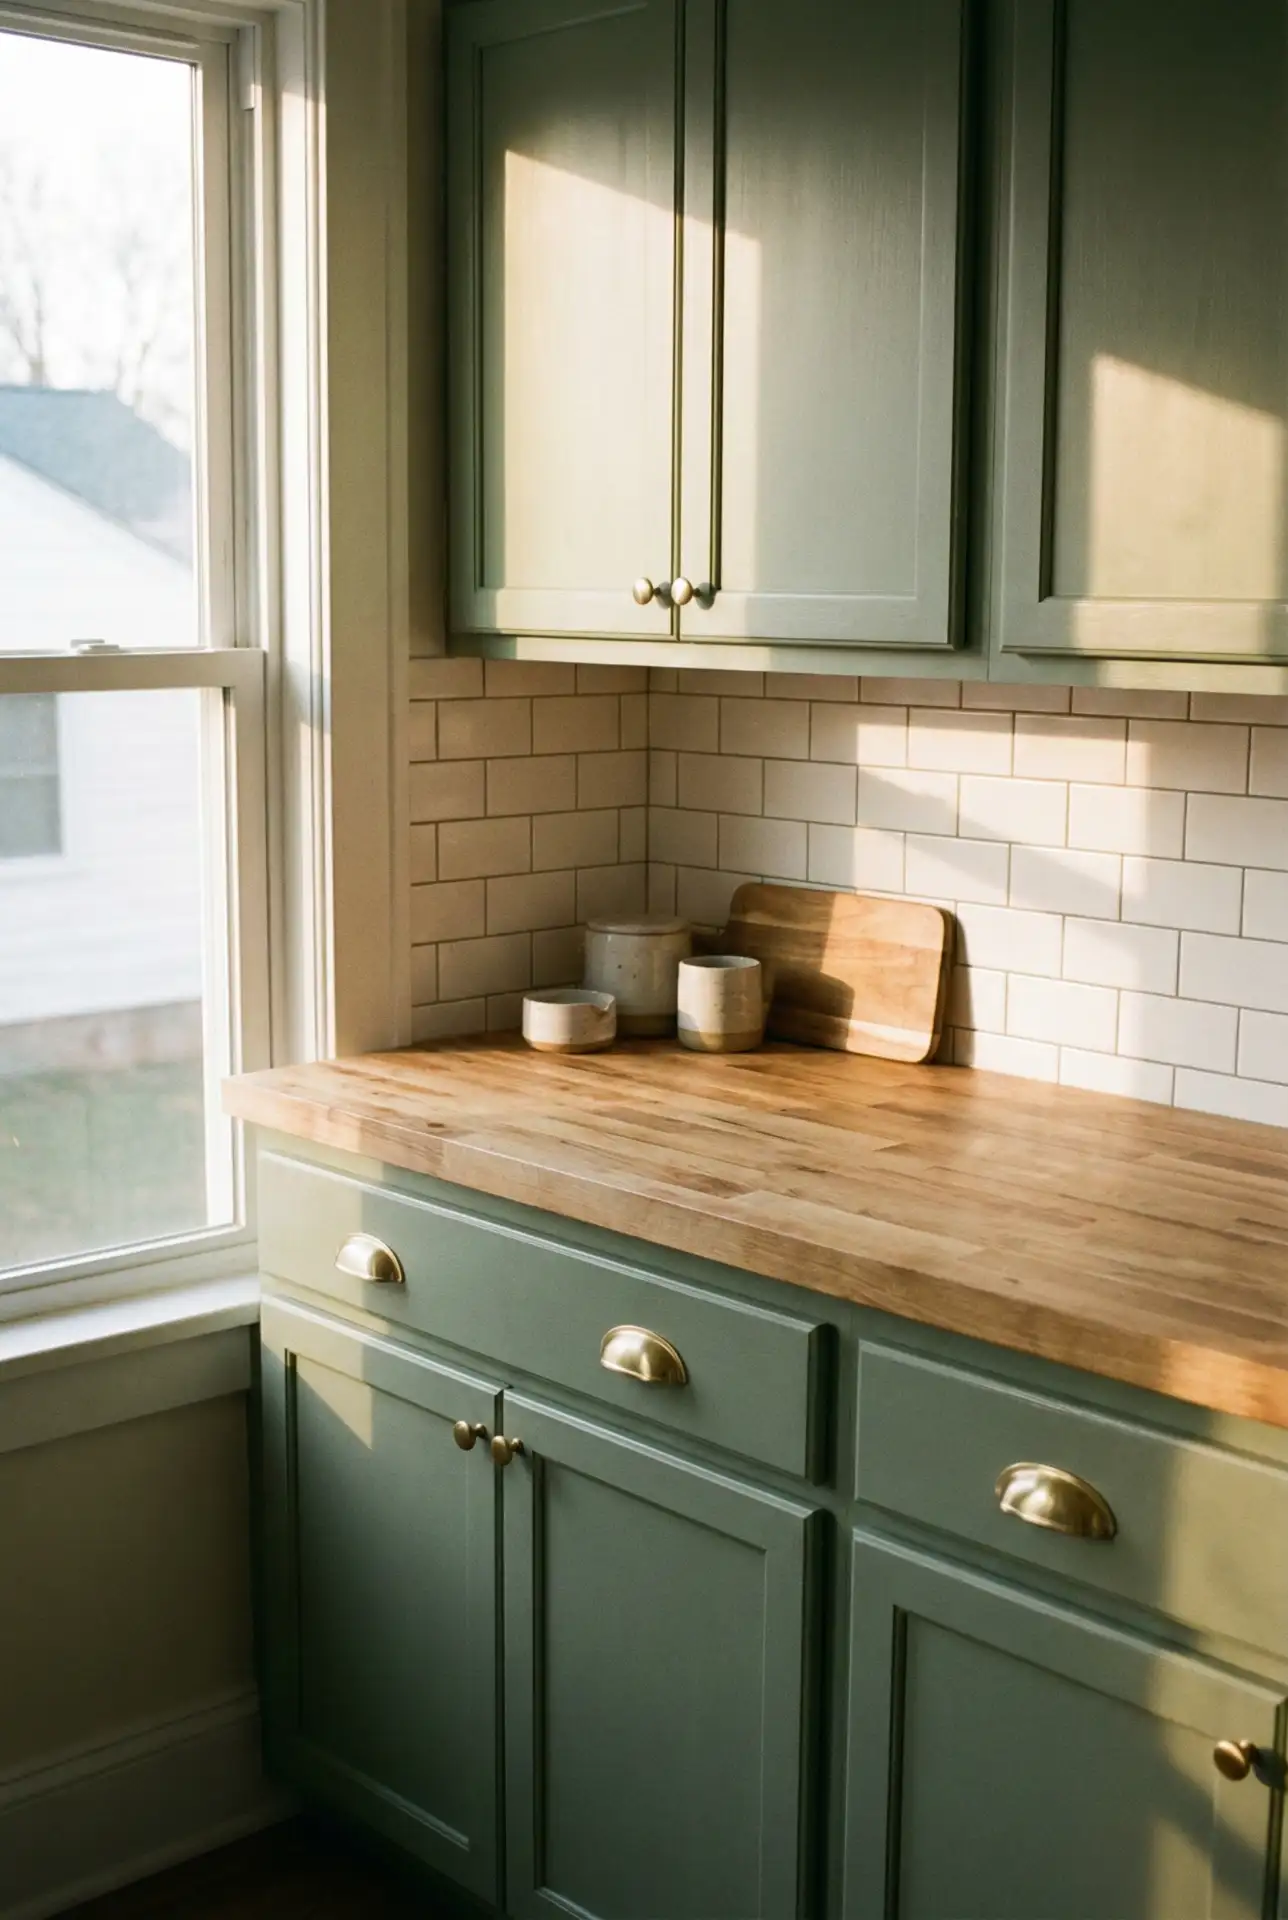
Give your kitchen a complete facelift on a budget by painting existing cabinets instead of replacing them. Whether you’re working with dated honey oak or generic builder-grade wood, a fresh coat of paint in soft sage, crisp white, or moody charcoal can modernize the entire room. The process requires degreasing, light sanding, priming, and two coats of durable paint, but the cost is a fraction of new cabinetry. Pair your newly painted doors with updated hardware—brushed brass or matte black pulls—for a designer look that belies the DIY price tag. 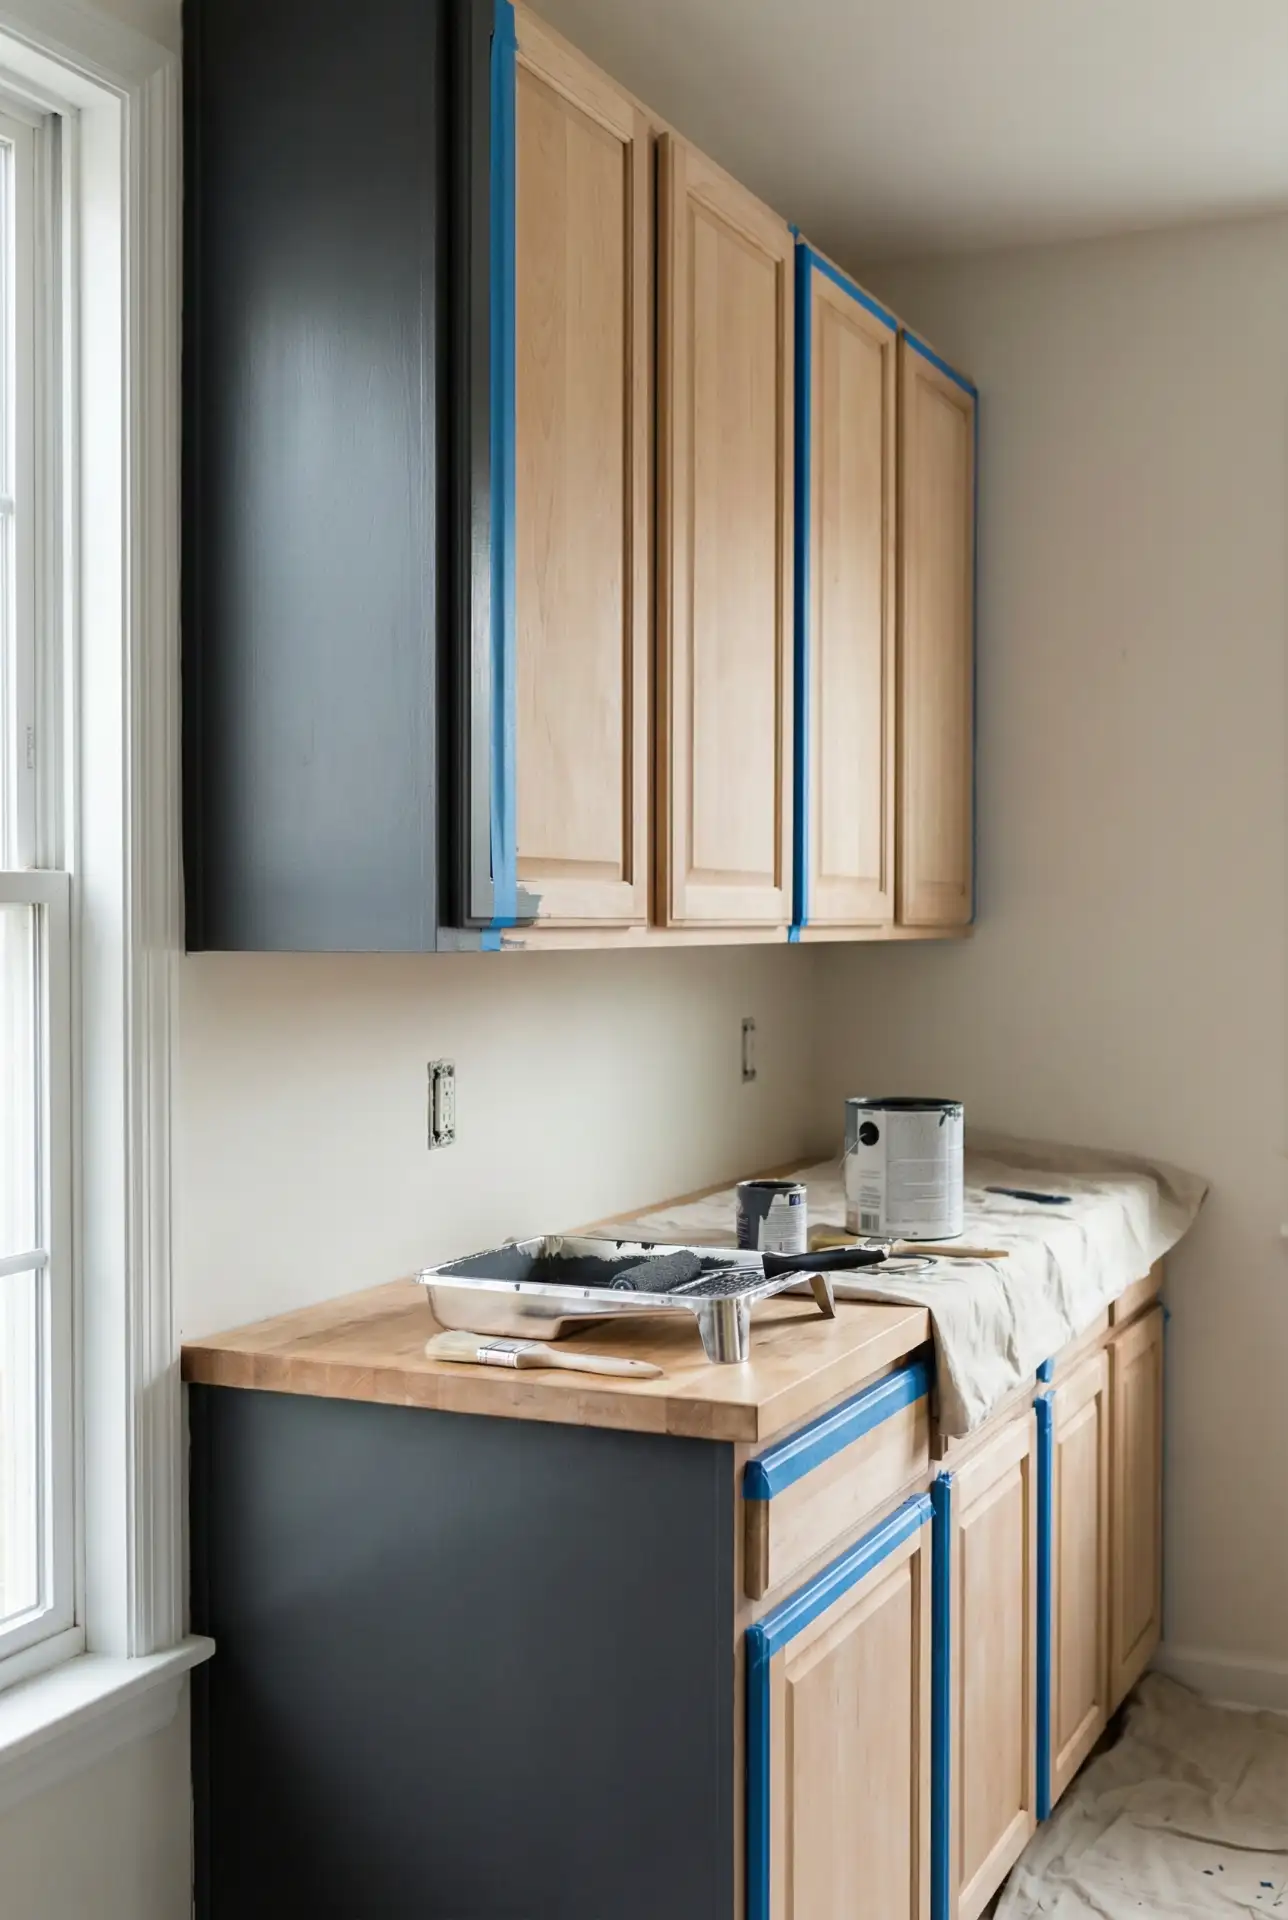
Making the common error of omitting the degreaser step—kitchens build up oils and grime that keep paint from adhering as it should. Clean with TSP substitute or strong degreaser, then lightly sand with 220-grit paper to create tooth for the primer. Take your time between paint coats; fully curing each layer prevents chipping for a polished result. If you’re painting over dark stain, apply a stain-blocking primer to keep the dark color from showing through, and consider using a paint sprayer for smooth surfaces—flat-panel doors in particular look the best this way.
3. Open Shelving for Airy Minimalism
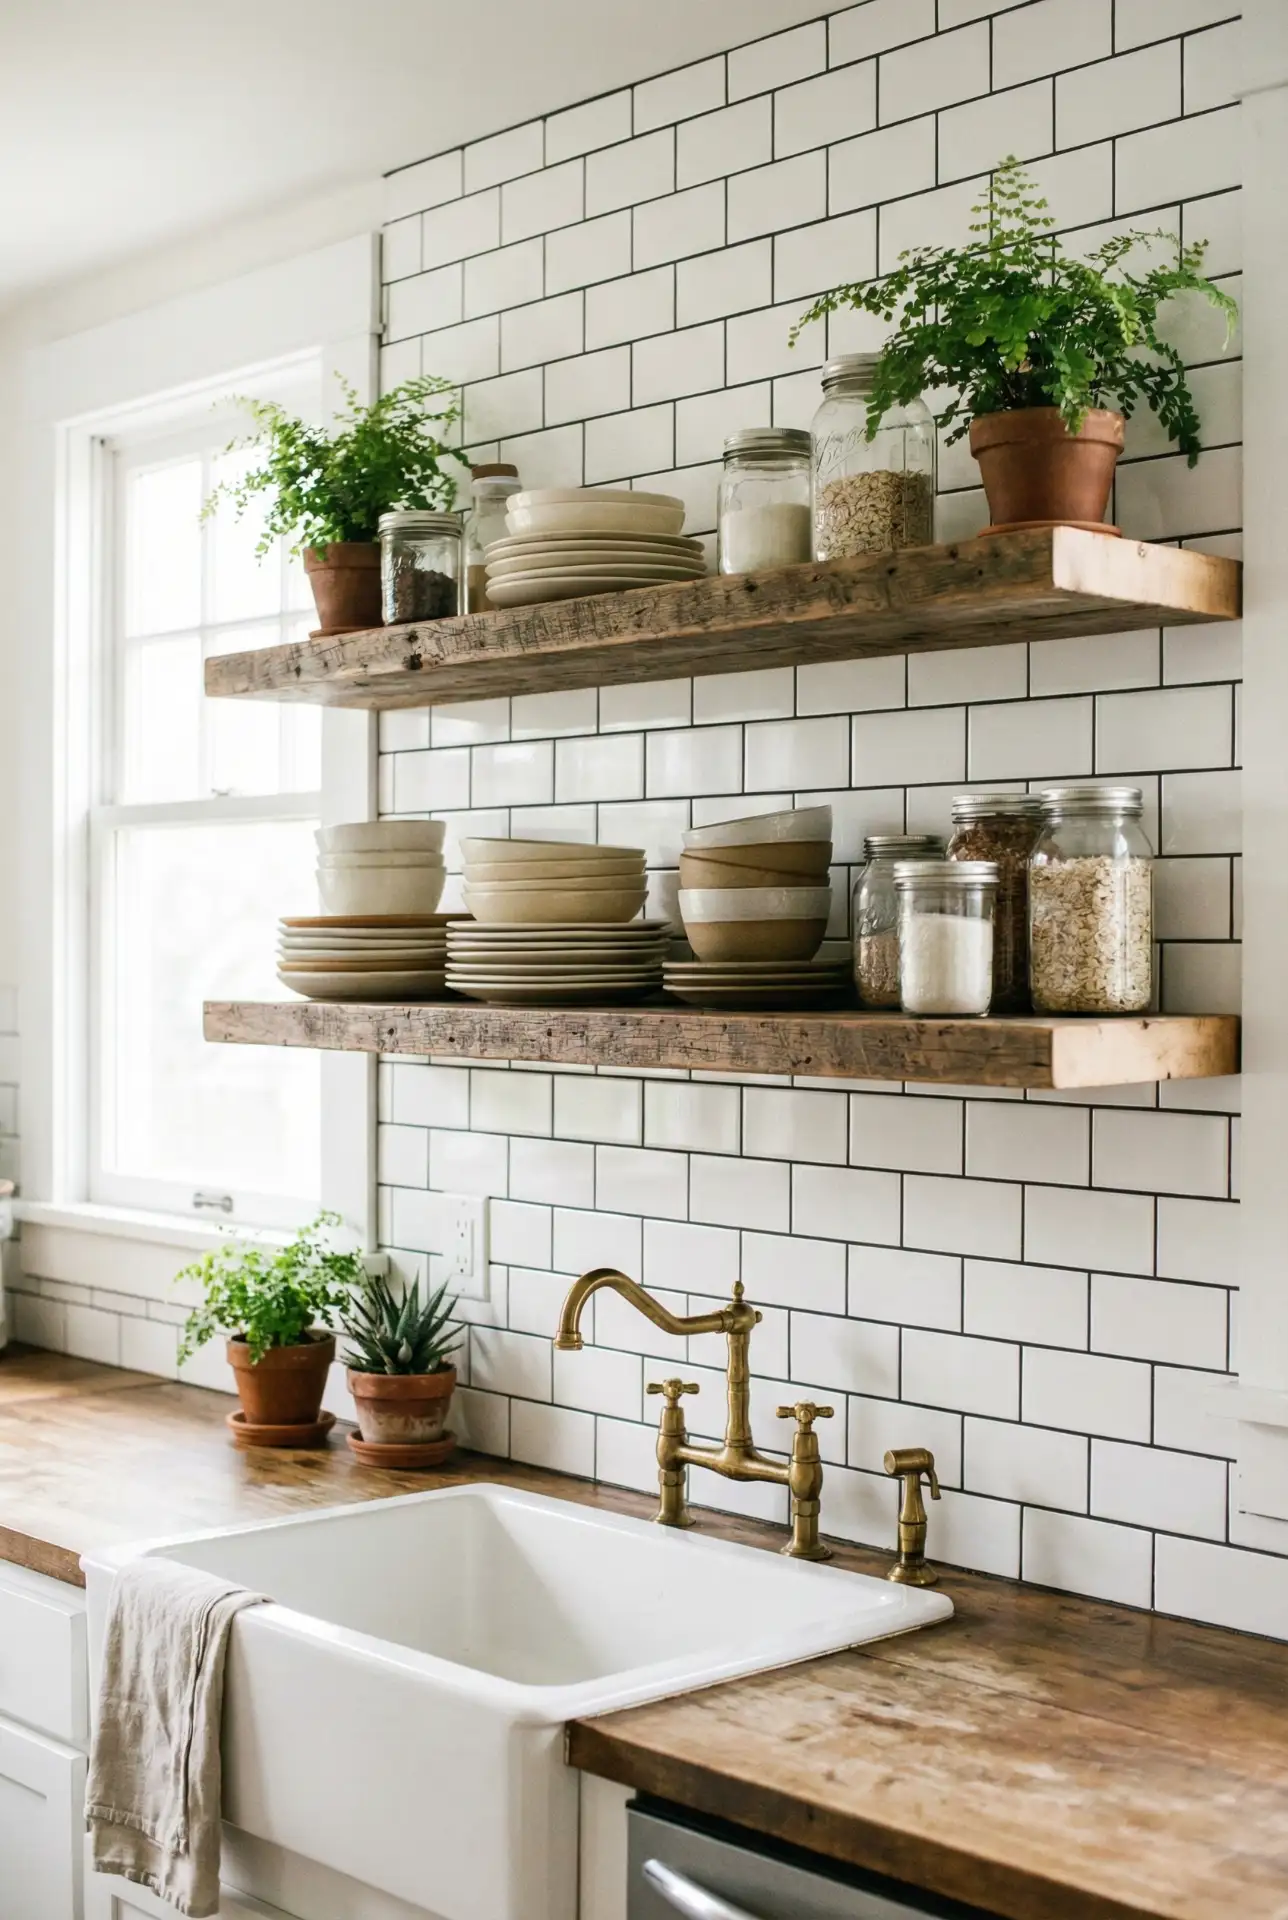
Swap some of the upper cabinets with open shelving to achieve a modern, airy atmosphere that looks especially great in white or cottage-style kitchens. Floating wood shelves or metal brackets to which you attach reclaimed planks display your favorite plates, glassware, and cookbooks, while keeping the space from feeling so boxy. This method works wonderfully in moderation because, you know, close cabinets can feel oppressive, and it encourages a curated, intentional display. The key is editing: Display only things you love and use on a regular basis, while keeping to a color palette so the display doesn’t look cloying. 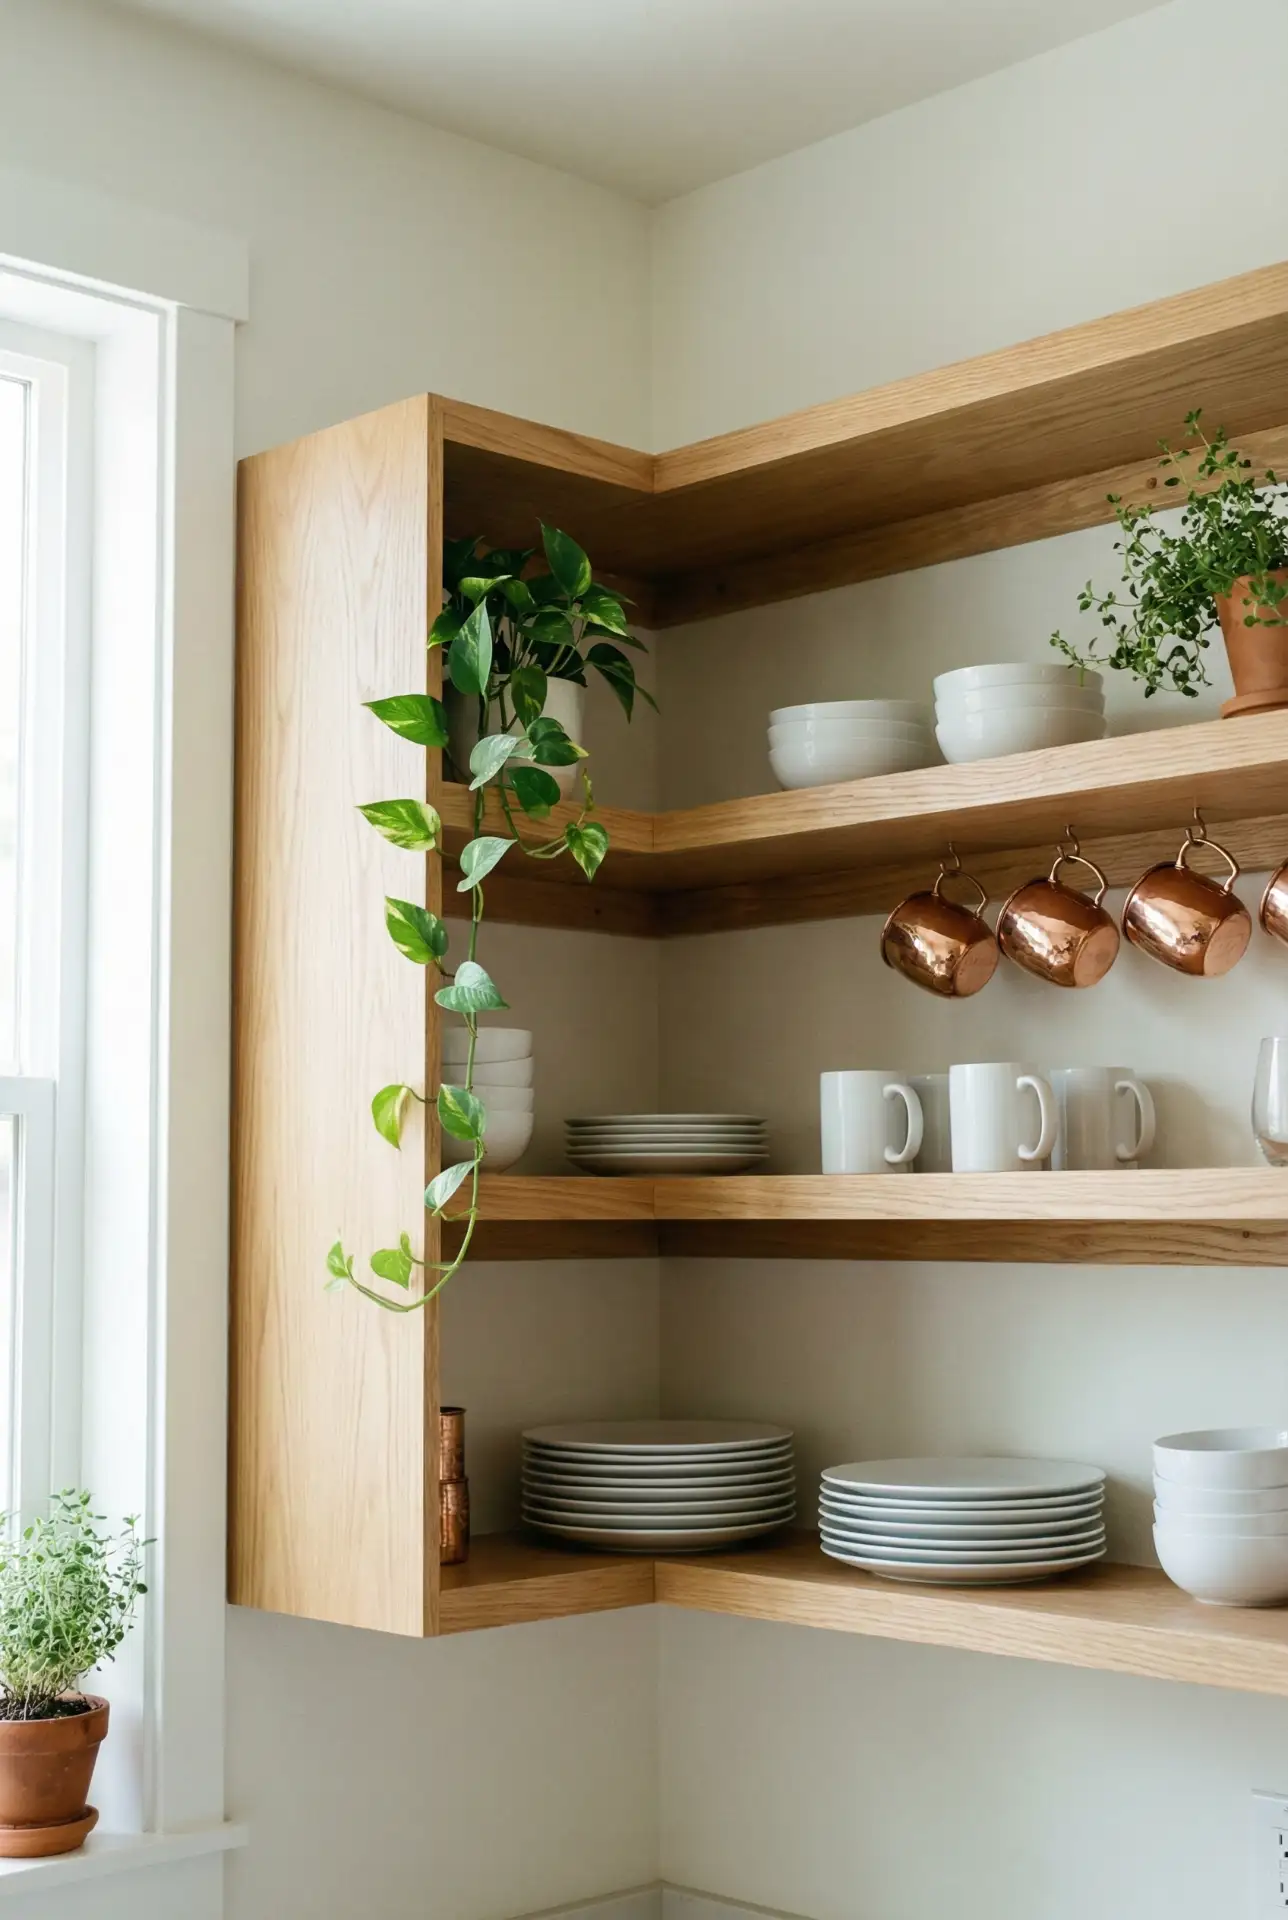
Insider’s tip: open shelving is a pain to maintain because it all gets exposed to kitchen grease and dust. Wipe down shelves and the stuff you display weekly, and keep them for articles that you don’t mind dusting off on a regular basis. In houses close to the coast or in humid areas, remember that open shelving may require more frequent dusting. But for the visual return—especially in a tight galley or apartment kitchen—the trade-off is often an appealing one, conferring an artisanal, lived-in charm that screams effortlessly curated.
4. Vintage 70s Revival with Earthy Tones
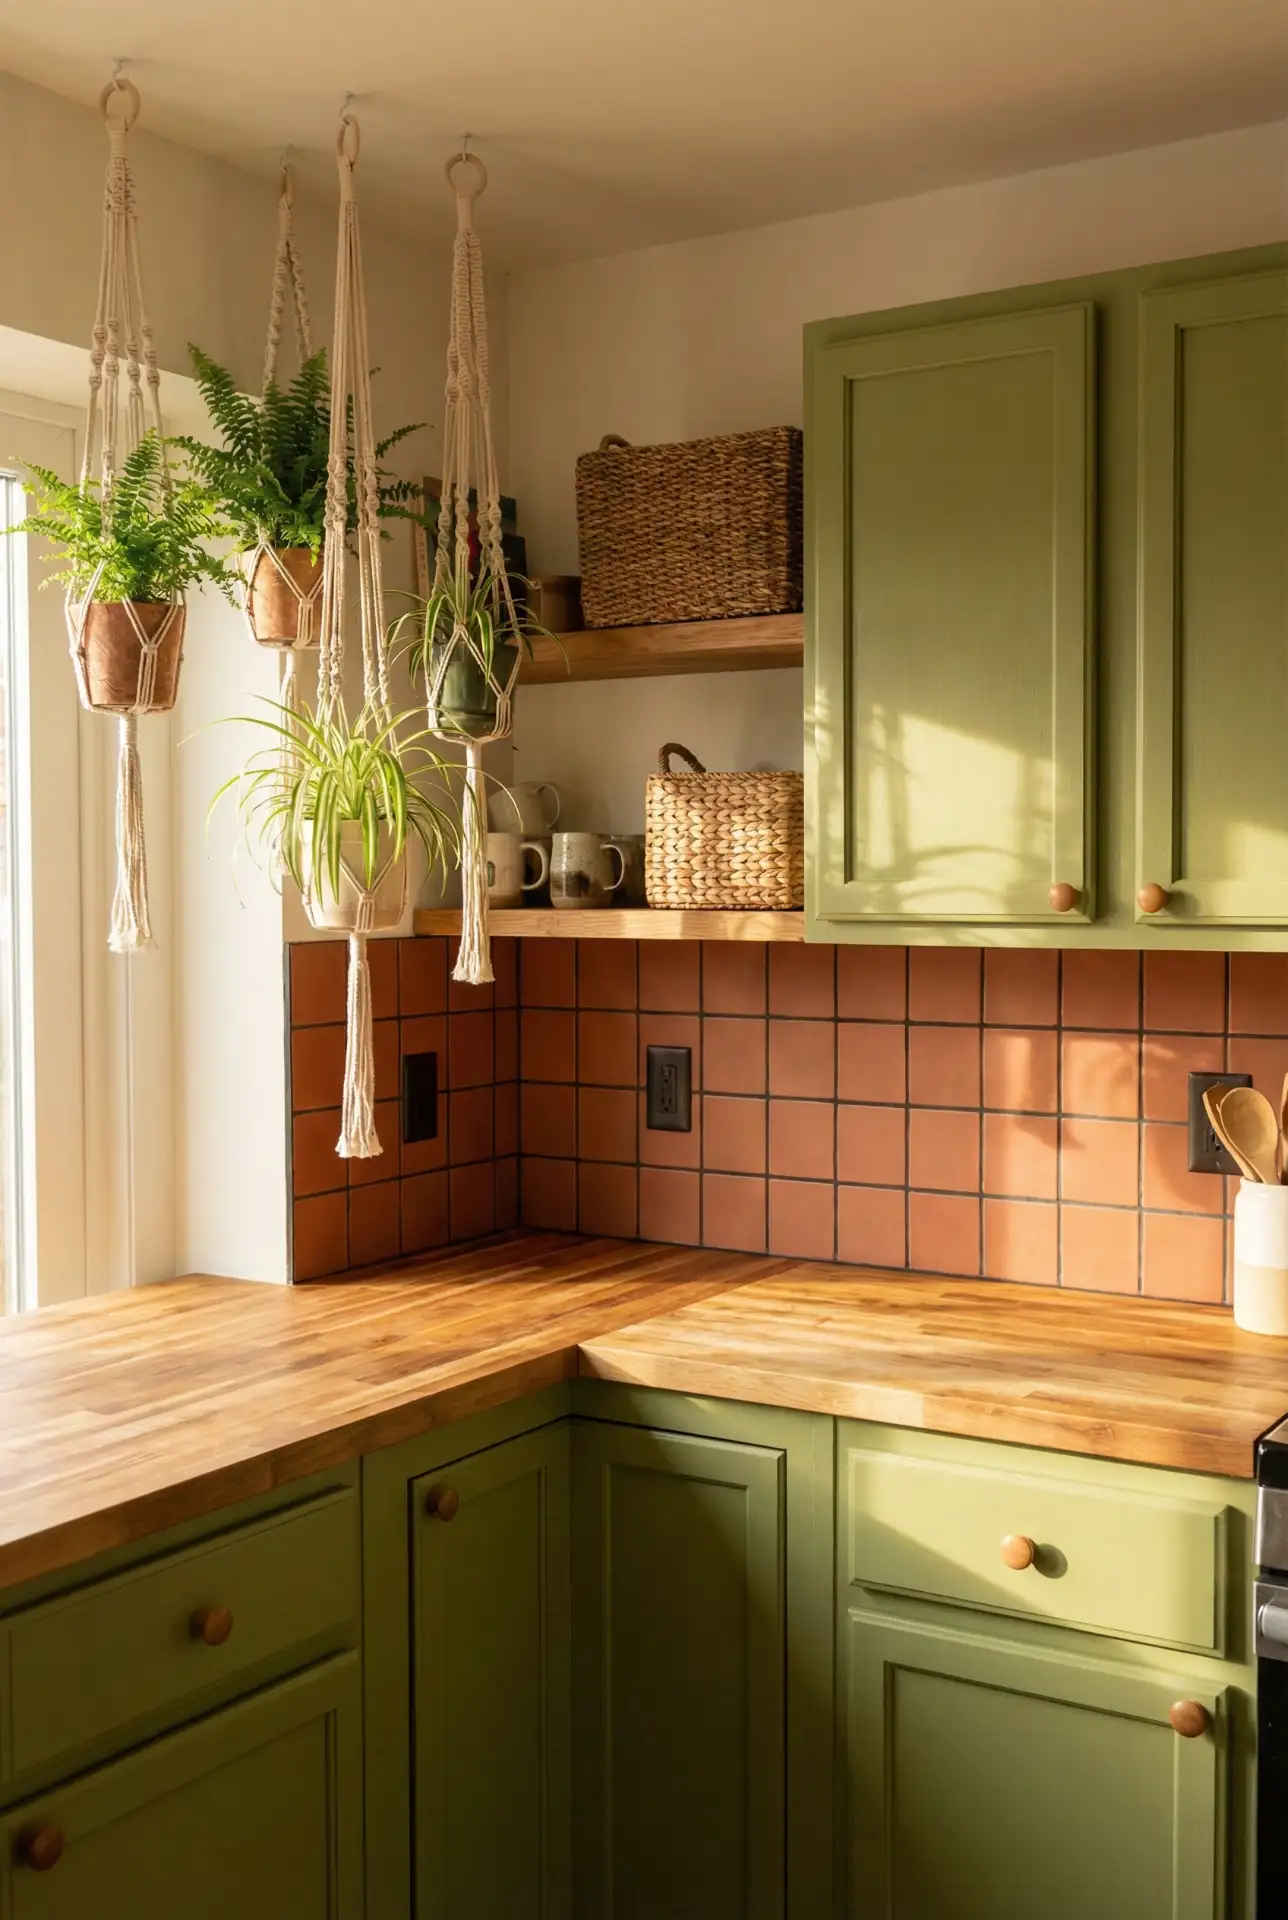
Get down with warm hues and earthy tones Give a nod to the pops of color we saw throughout the 70s—work in terracotta tile backsplashes, avocado-green accents, and natural wood cabinetry that feels both throwback and refreshingly current. This design style looks great with cottage or farmhouse accents—add textures such as woven baskets, ceramic canisters, and macramé plant hangers. Instead of battling the era in which your home was built, embrace it: if you’ve ended up with harvest gold appliances or burnt orange tile that survive from another era, work with the tones rather than against them. Add some open shelving, brass fixtures, and lots of greenery to polish off the look. 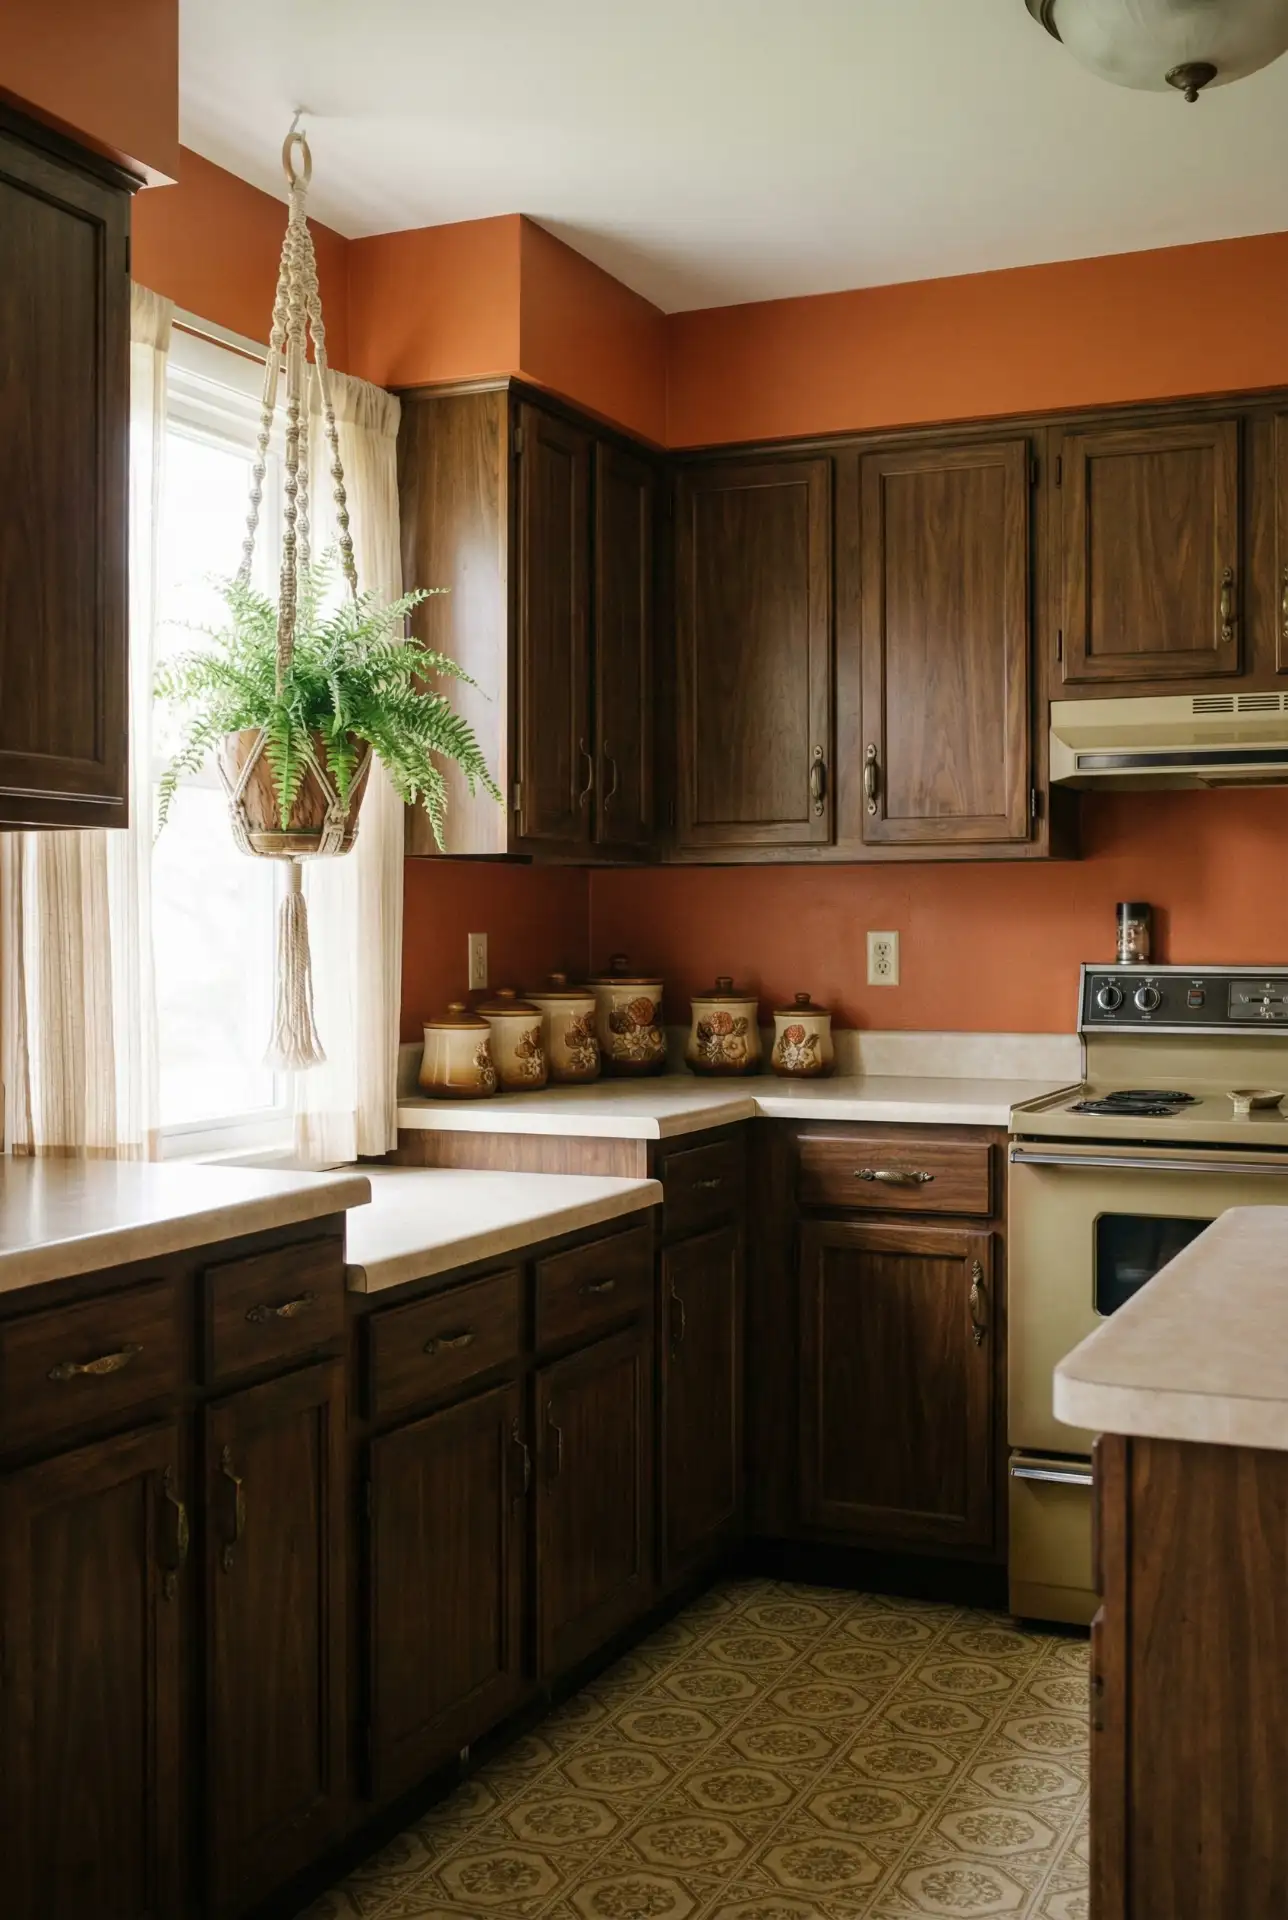
Homeowners in the Pacific Northwest and parts of California are opting to restore rather than rip out original 70s kitchens, finding charm in details that belong to the era. The original avocado tile in a neighbor’s Portland bathroom (with updated grout, modern lighting, and walls painted pale cream) looks intentional and special. This strategy saves money and pays tribute to the home’s history, making a statement that looks good not only on Pinterest but also in real life.
5. IKEA Kitchen Hack with Custom Touches
An IKEA kitchen doesn’t have to look like everyone else’s when you add custom fronts, unique hardware, and thoughtful styling. Start with IKEA’s affordable cabinet frames and pair them with fronts from companies like Semihandmade, or DIY your own with Baltic birch plywood. Swap standard handles for leather pulls, vintage knobs, or sleek brass bars to instantly elevate the look. This hybrid approach delivers a high-end aesthetic at a fraction of custom cabinetry costs, and it’s especially popular among younger homeowners who want style without the designer price tag. 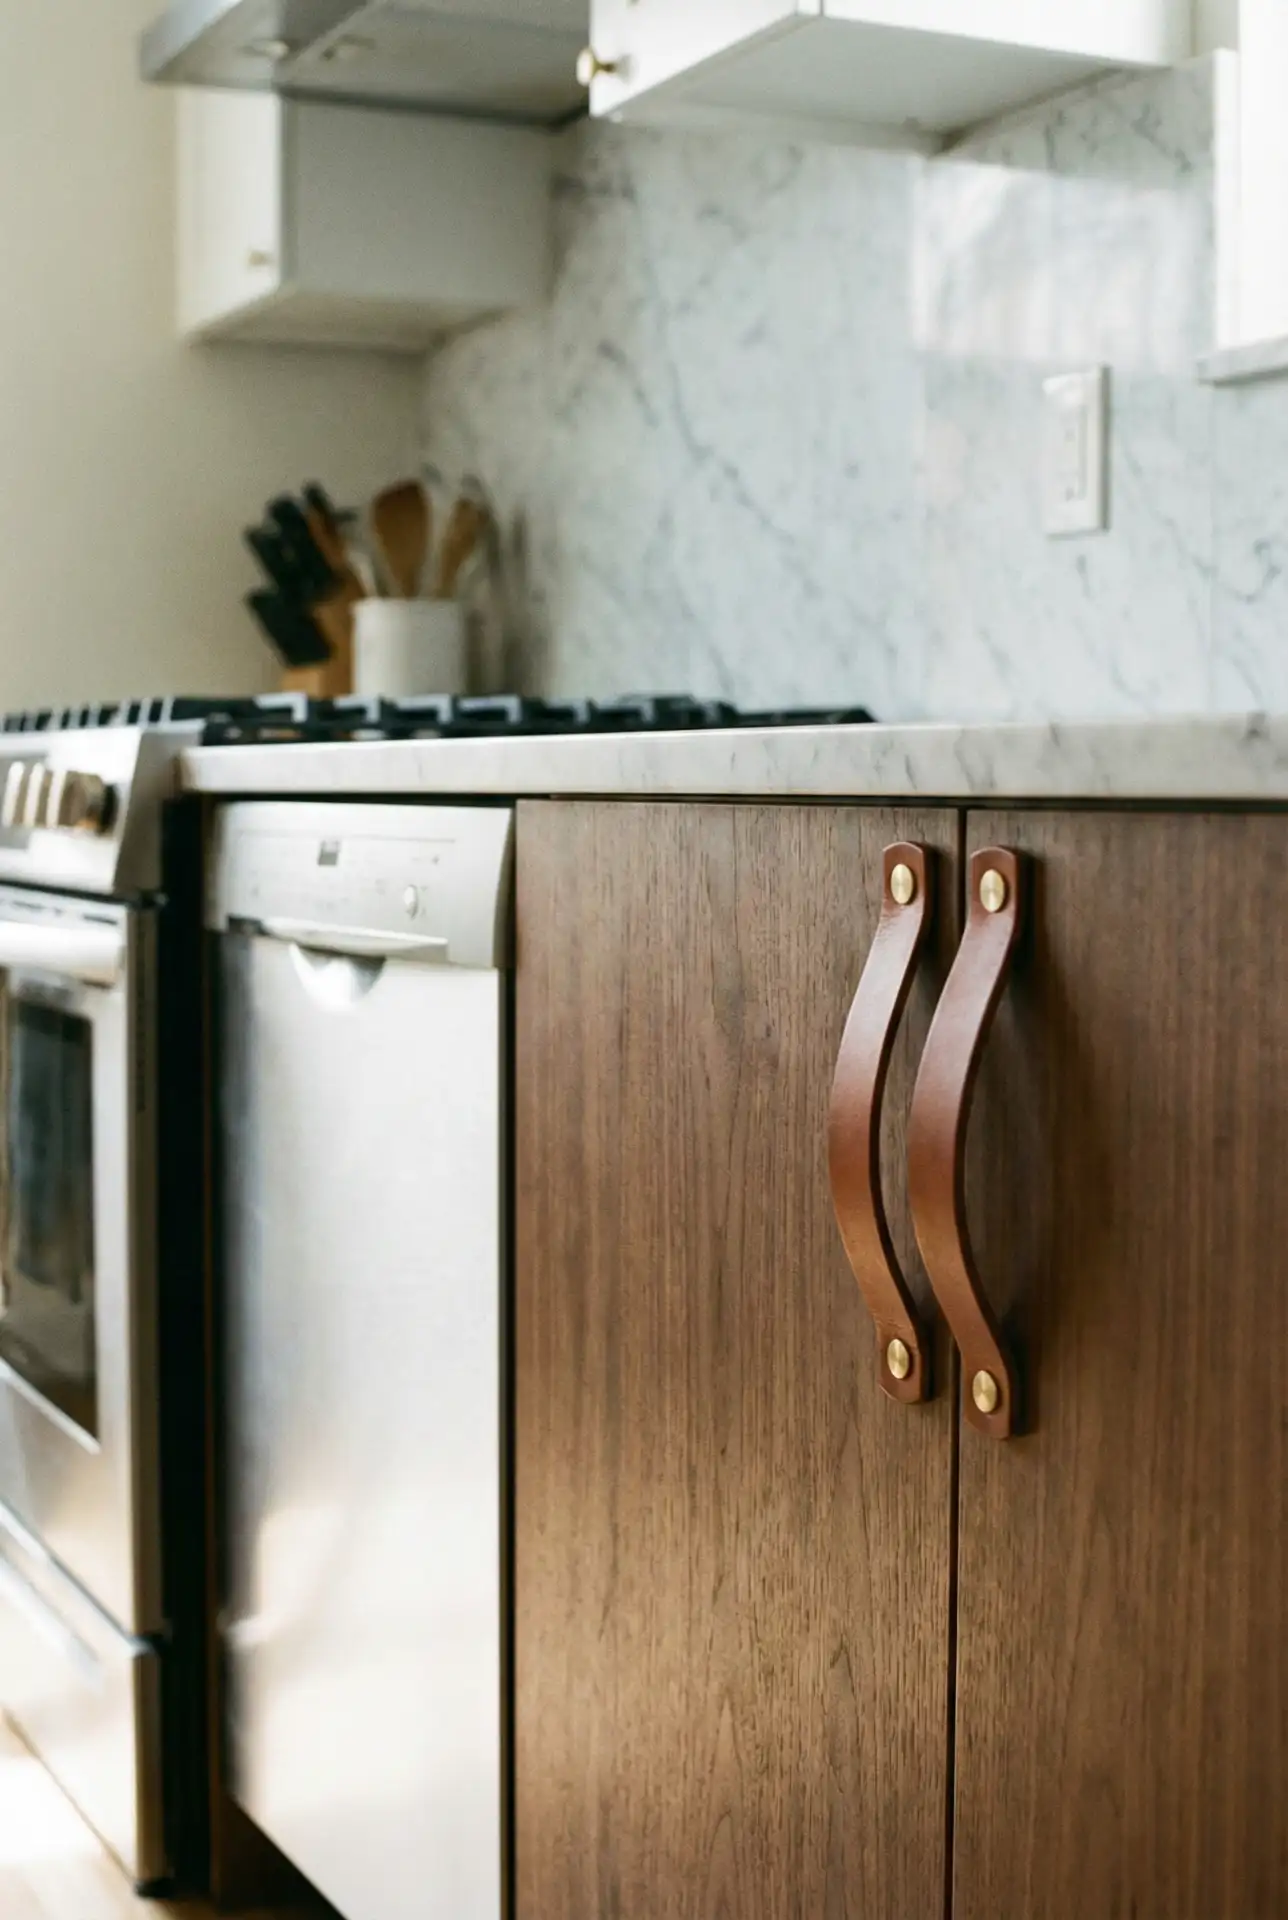
Budget angle: You can probably get a small to medium IKEA kitchen with basic fronts for about $5,000–$8,000; upgrading to custom fronts and nice hardware will generally cost an additional $2,000–$4,000. Even on the high end, you’re way south of that $15,000-$30,000 for custom cabinets. Plan well, measure twice, and use IKEA’s planning tools to see your design before you buy. The modularity makes it possible to start with basics and add specialty cabinets or islands later on, as your budget permits.
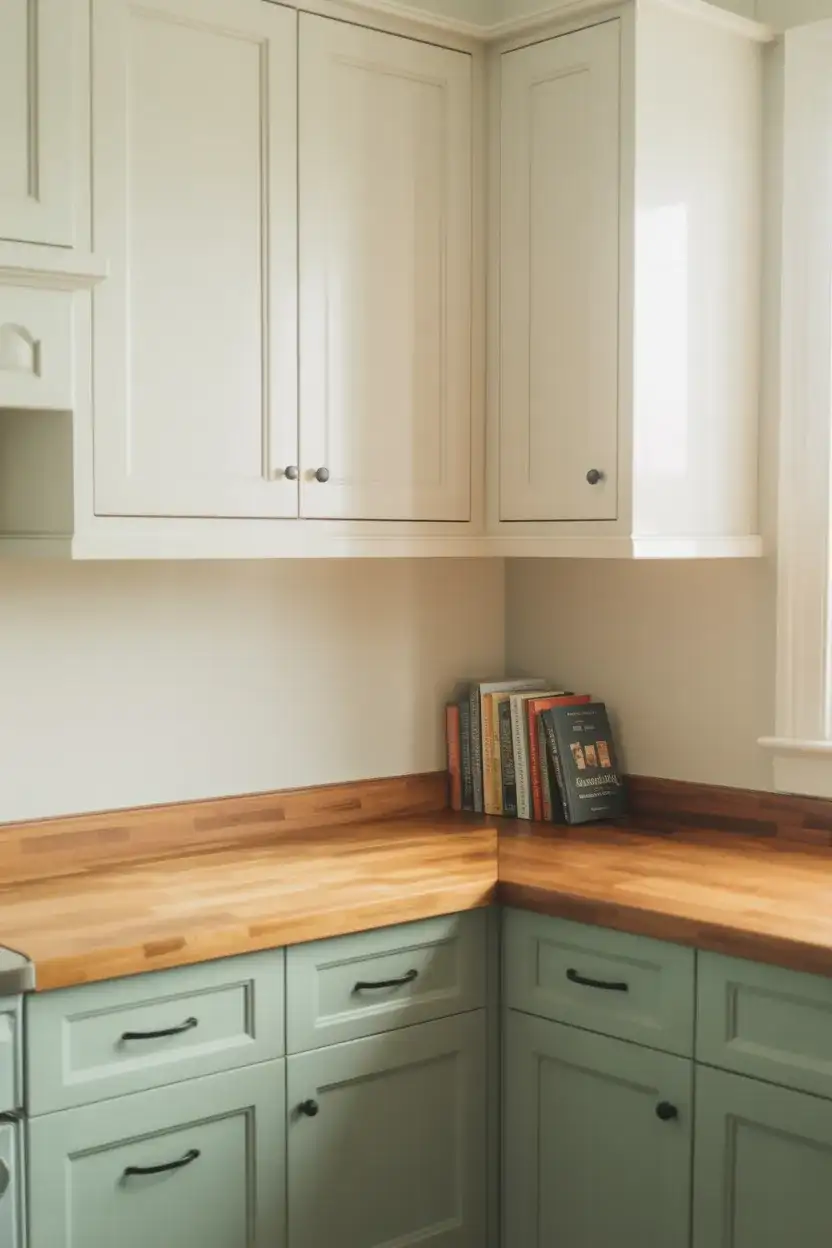
6. Painted Oak Cabinets for a Fresh Start
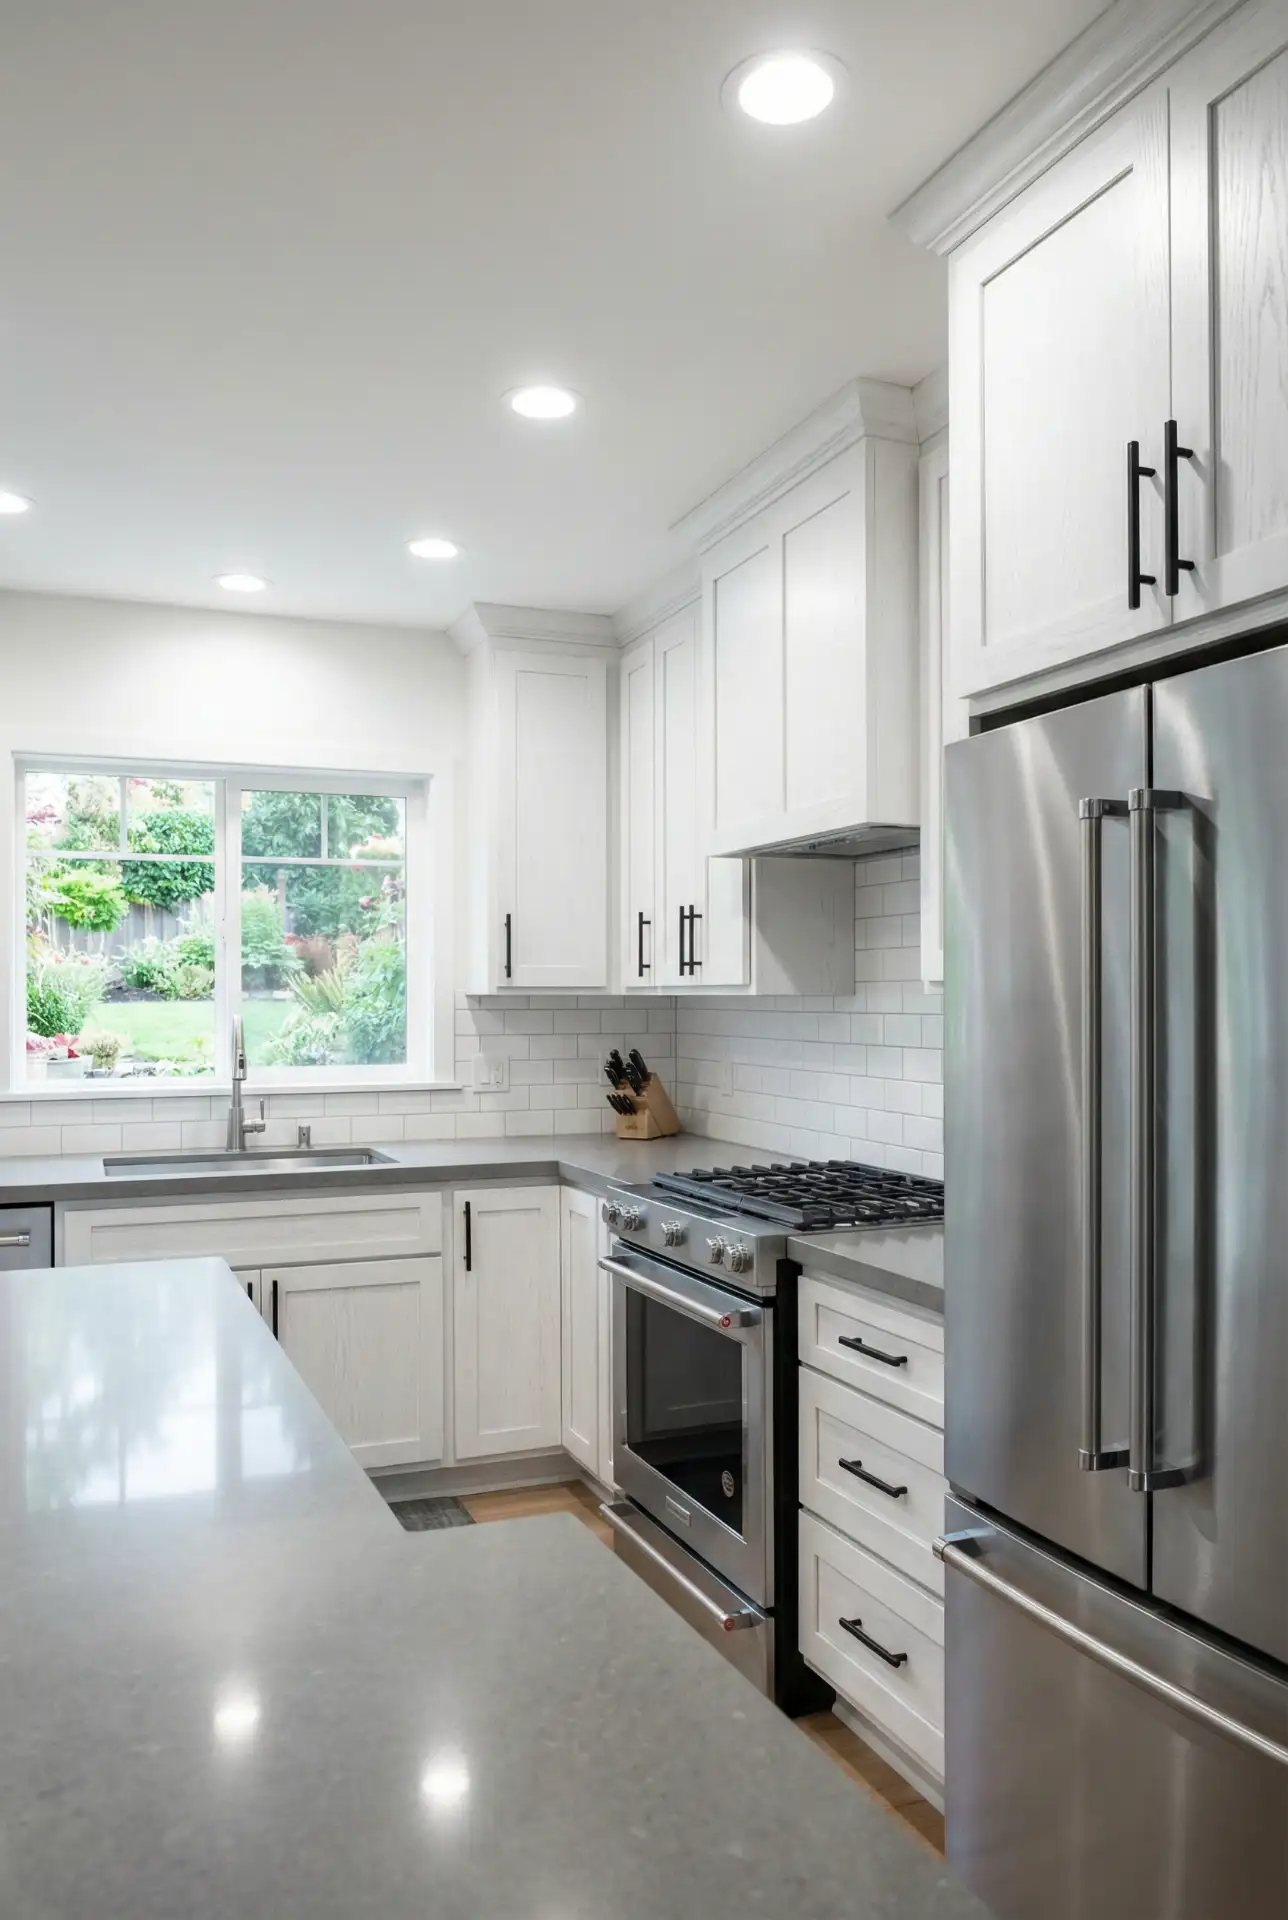
They don’t make those solid wood oak cabinet doors like they used to in the 90s—popping a little bit of paint on them brings them straight to the present. Opt for a soft white, warm greige, or even dramatic navy to bring the space up-to-date and embrace the grain instead of working against it. The strong texture on the oak shows even after it is painted, and that can be a plus if you are for a relaxed, lived-in look rather than ultra-slick minimalism. Combine refinished oak with new countertops and a backsplash for an overhaul that costs just pennies in comparison to a total tear-out. 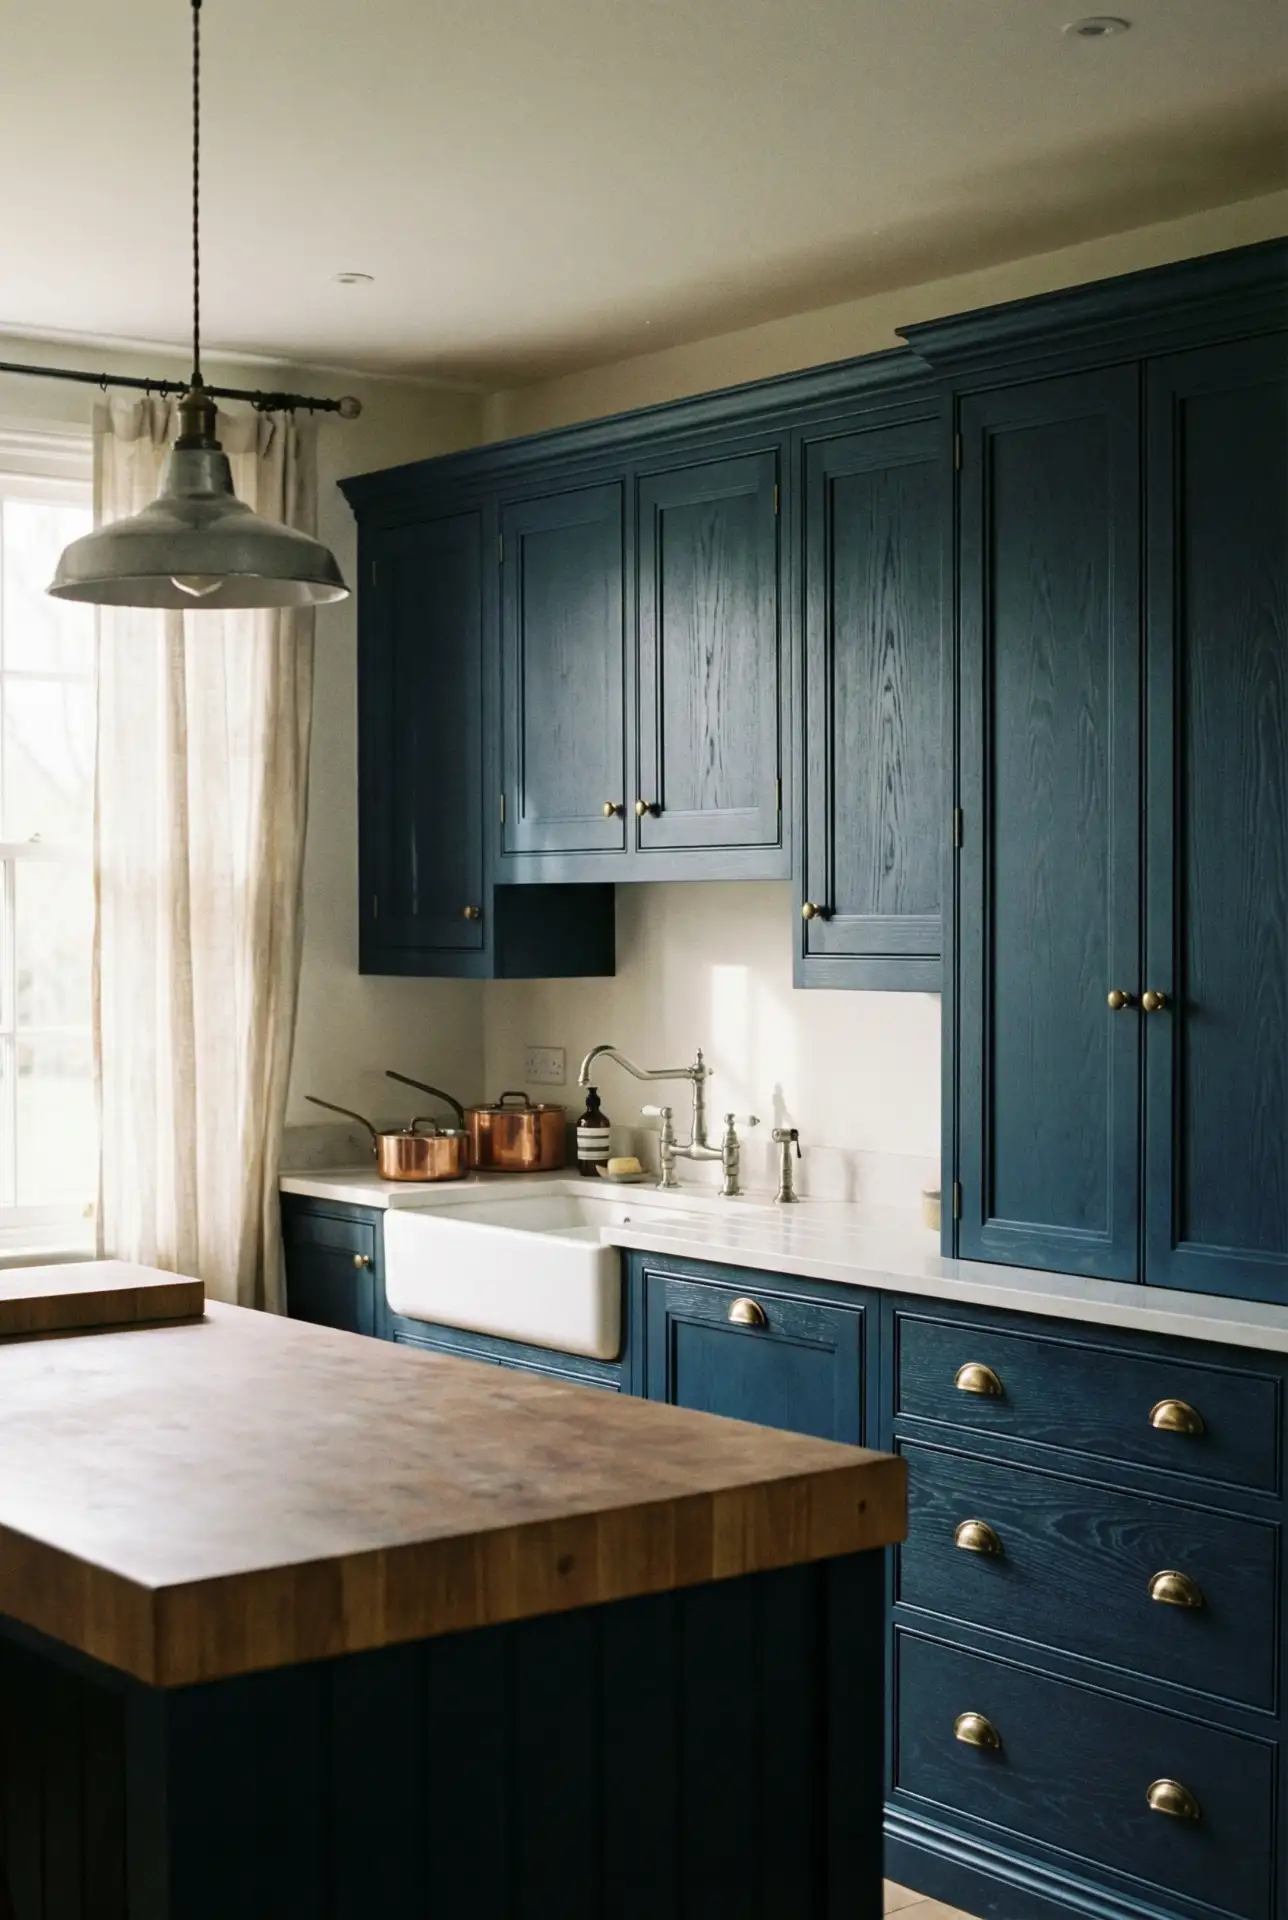
Where it works best: suburban homes built in the 80s and 90s often feature golden oak throughout, and painting the kitchen can be the first step in a whole-home color update. Use a high-quality primer designed for wood, especially if you’re going from dark stain to light paint, and don’t skip the deglosser or sanding step—oak’s tight grain needs proper prep to hold paint long-term. Consider keeping the island or lower cabinets in natural wood for a two-tone look that honors the original material while still feeling fresh.
7. Farmhouse Sink and Shiplap Charm
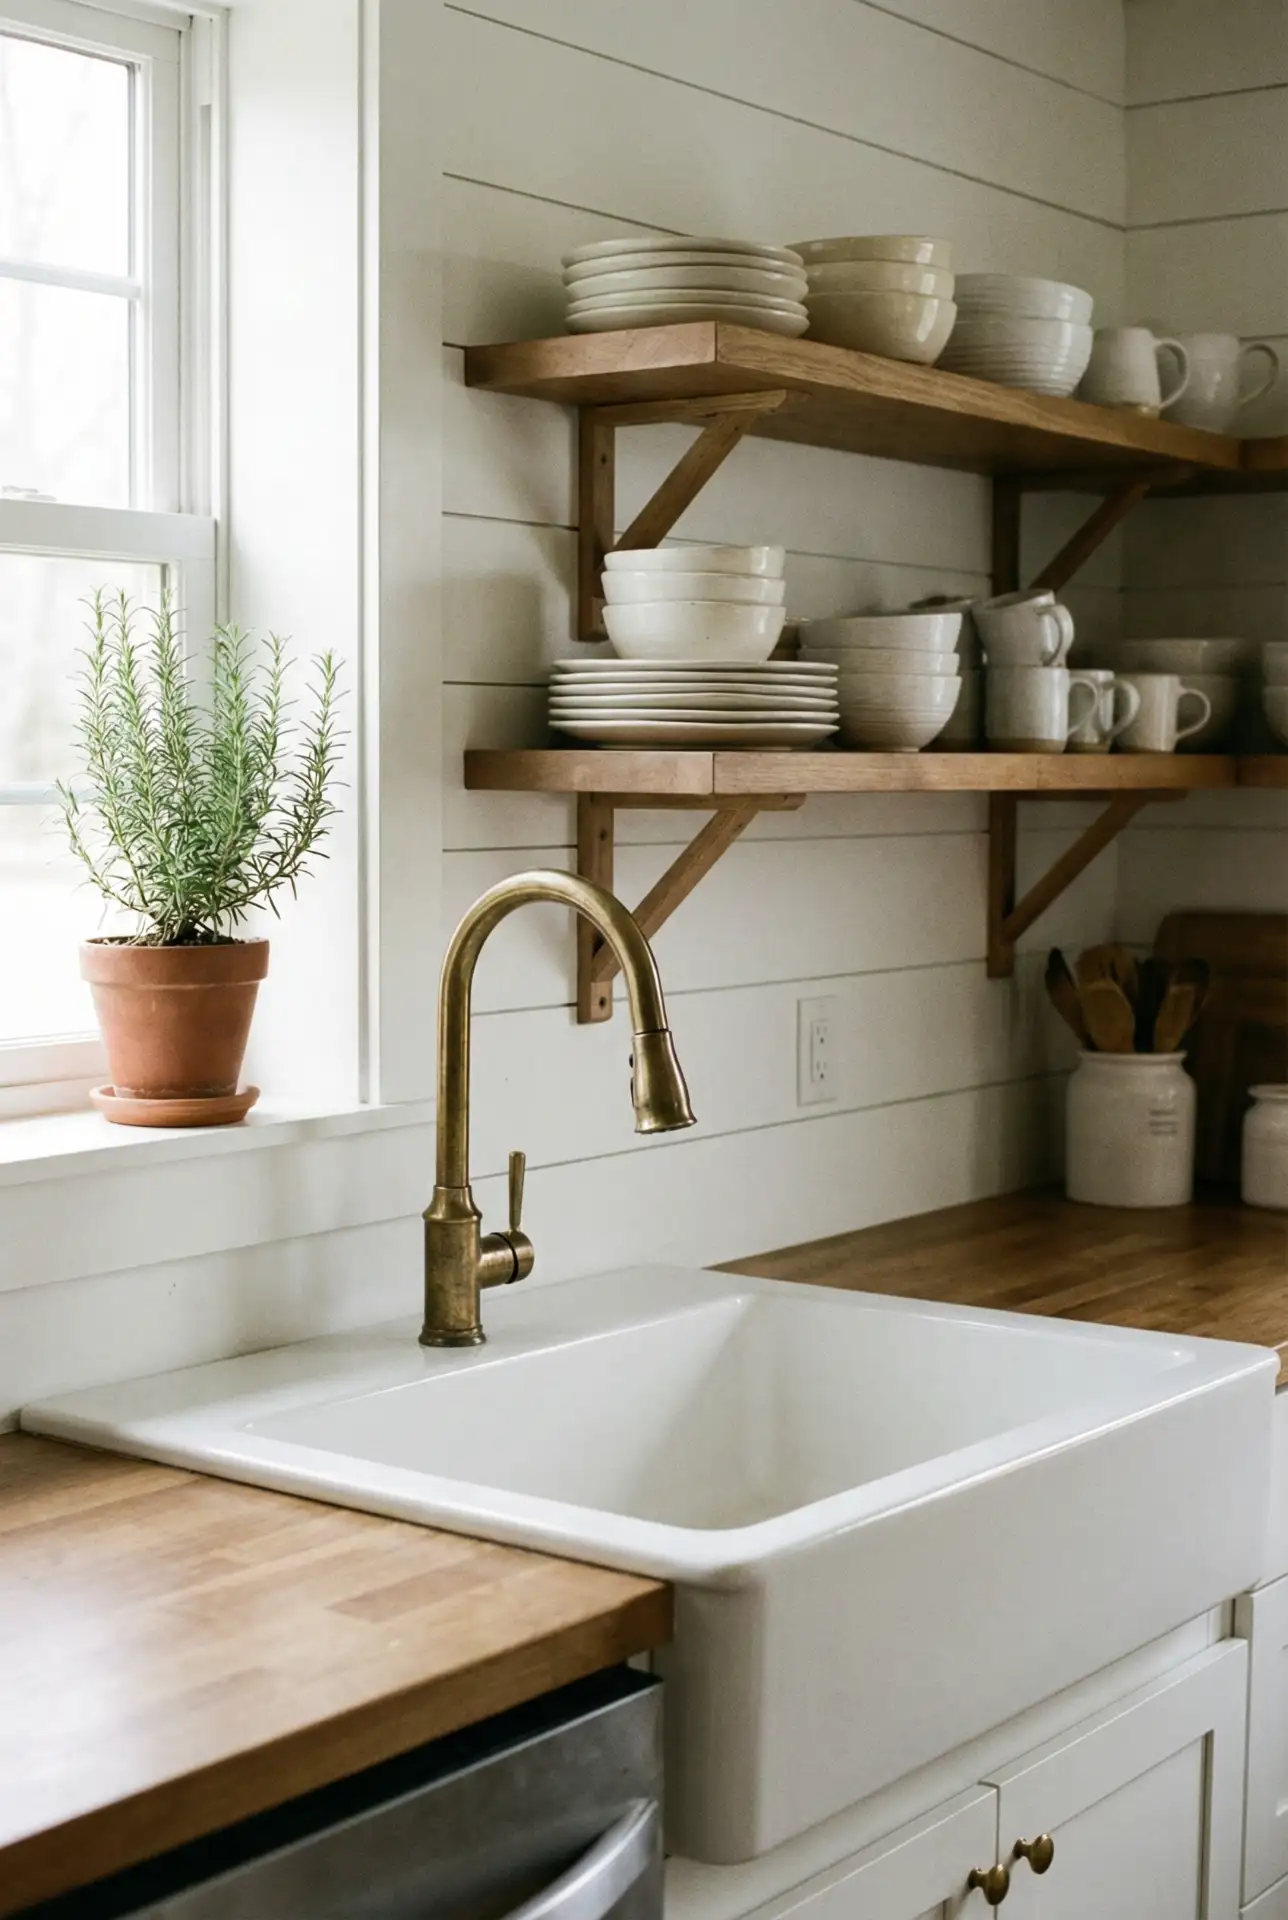
Nothing says farmhouse like a deep apron-front sink paired with horizontal shiplap walls painted in crisp white or soft cream. This combination delivers timeless appeal and works beautifully in both rural homes and urban apartments seeking a cozy, pastoral feel. Install the shiplap as a backsplash or extend it to cover an accent wall, and choose a fireclay or cast-iron farmhouse sink for durability and classic good looks. Add open shelving, vintage-inspired faucets, and rustic wood accents to complete the aesthetic that dominates Pinterest boards and home magazines alike. 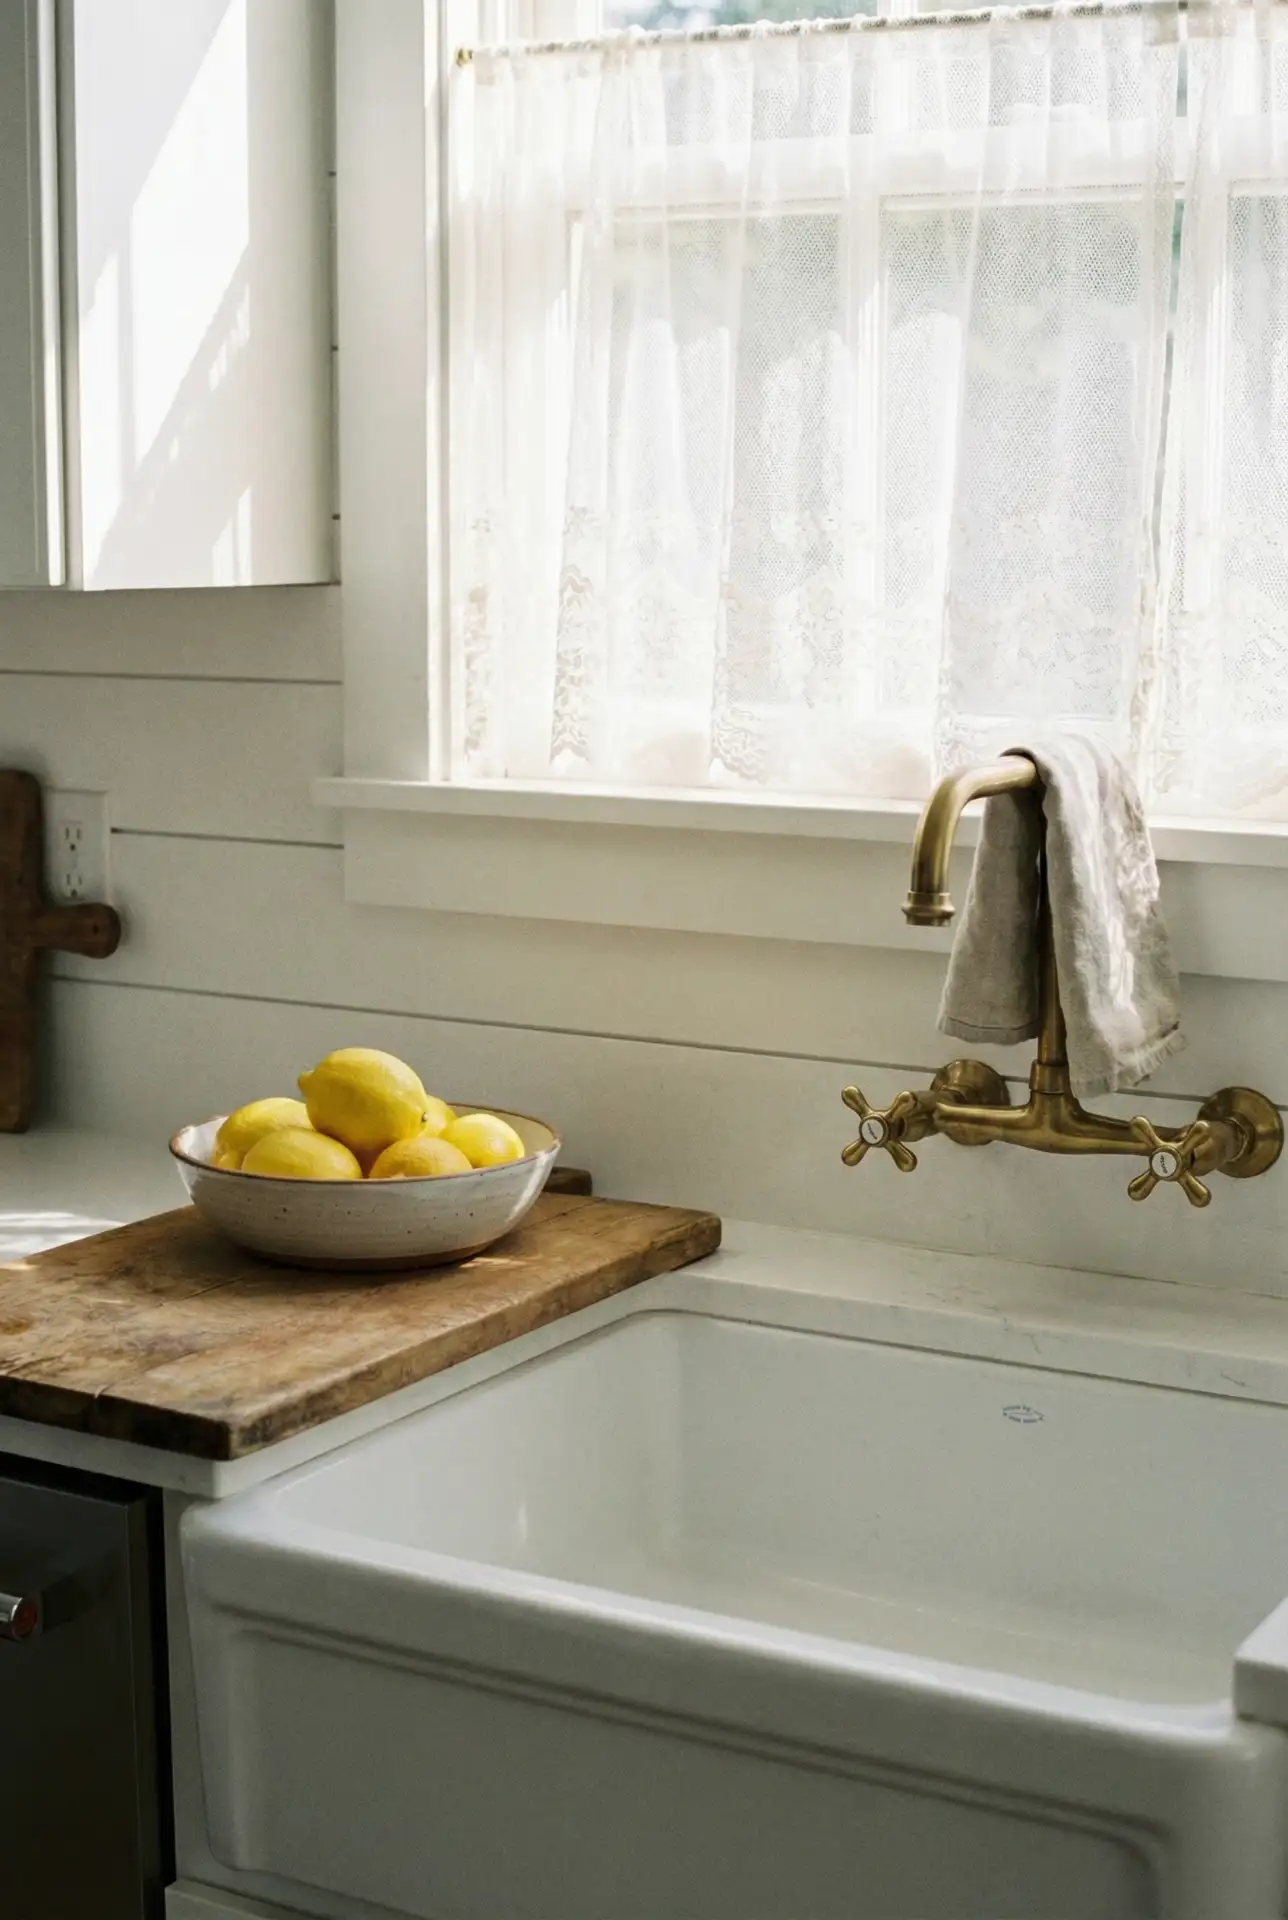
Expert-style commentary: while farmhouse sinks are undeniably beautiful, they require a specialized cabinet base and proper installation to support their weight—especially the cast-iron versions that can exceed 100 pounds. Plan for this expense when budgeting, and consider whether you’re prepared for the deep basin that can splash water more than standard sinks. Shiplap is relatively DIY-friendly, but take time to ensure boards are level and evenly spaced; even slight inconsistencies become obvious once painted. The payoff is a kitchen that feels warm, welcoming, and distinctly American.
8. IKEA Duktig Play Kitchen Makeover
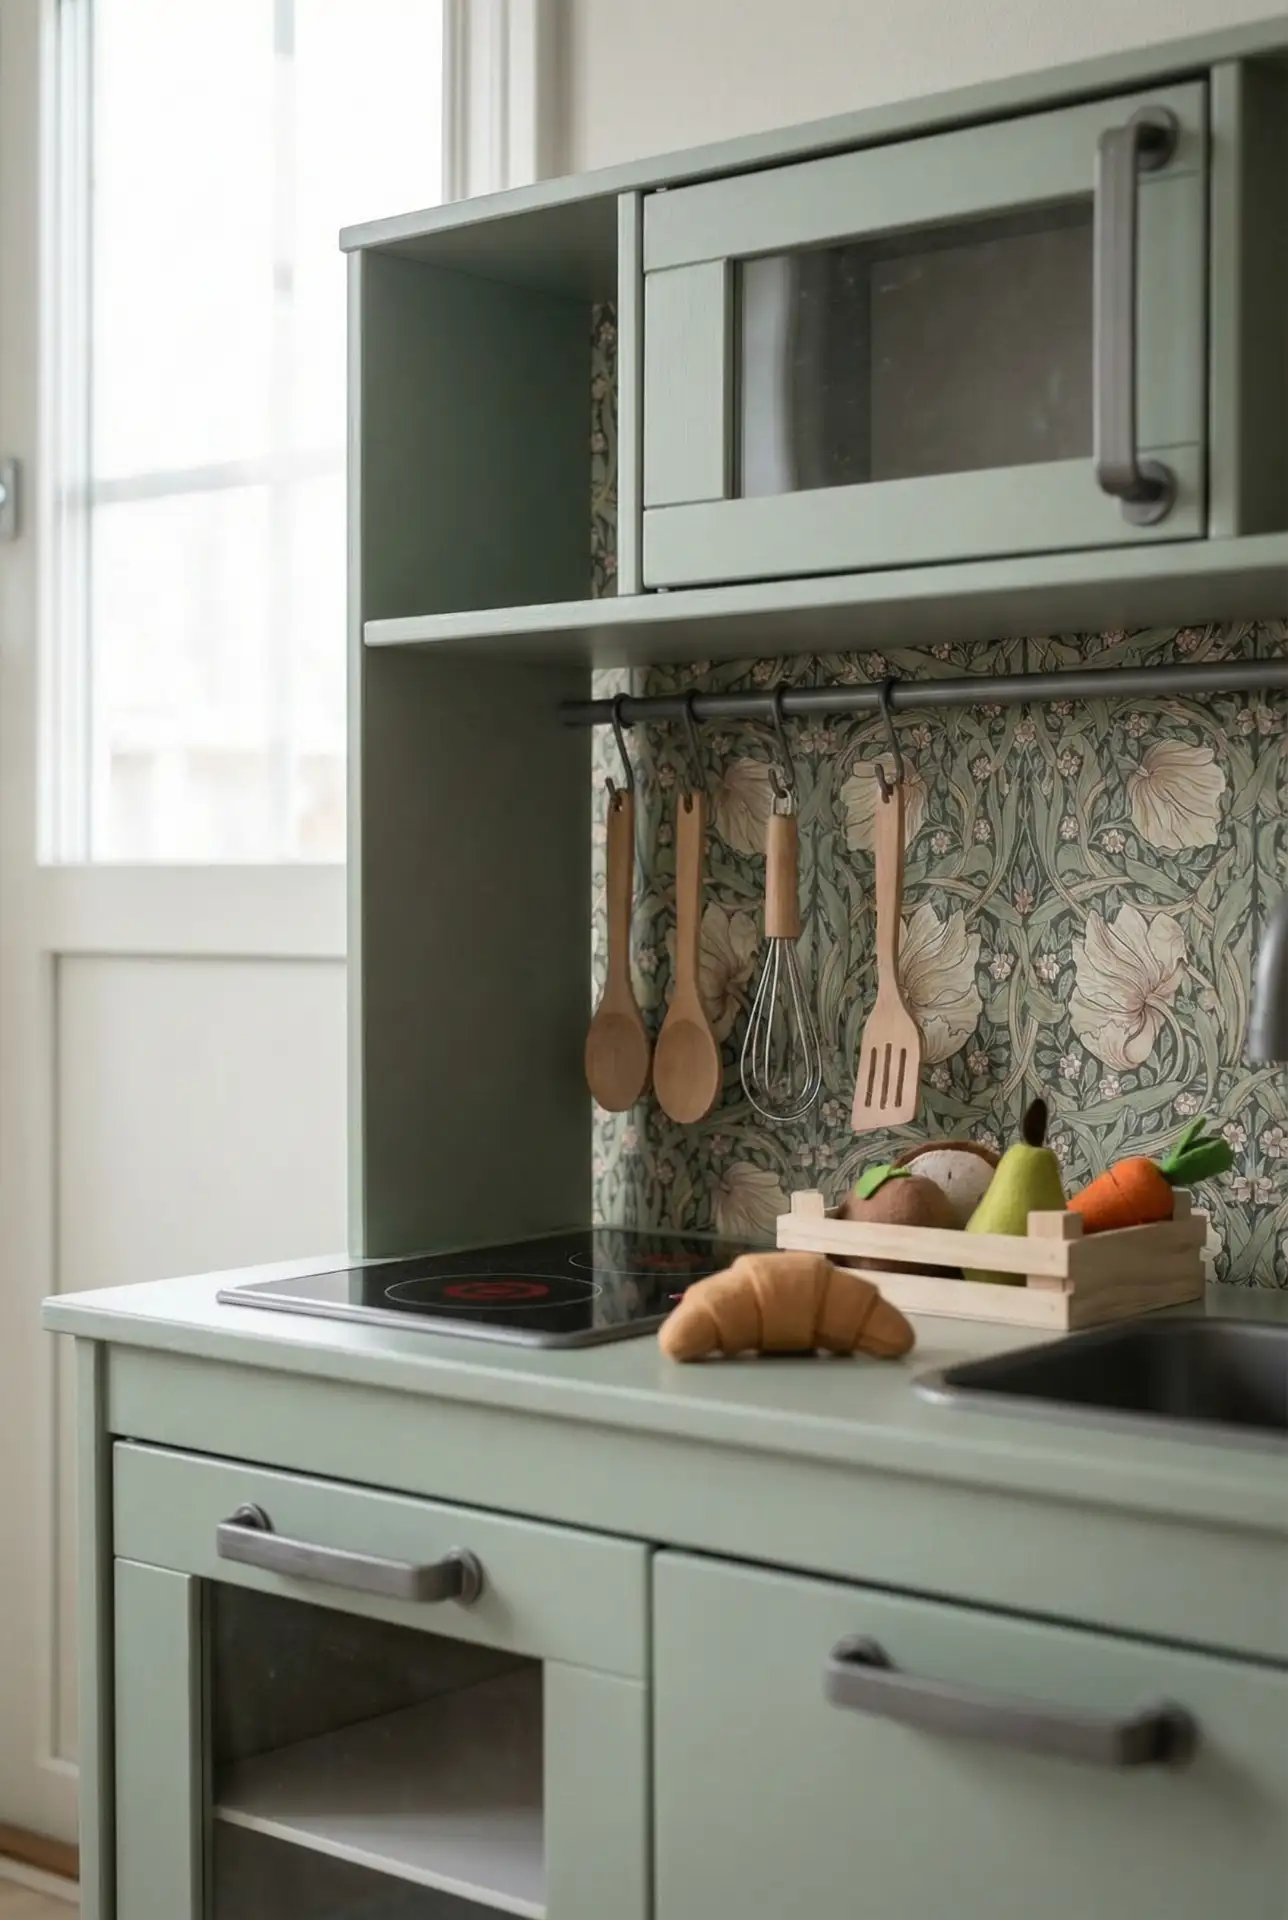
Turn the standard IKEA Duktig play kitchen into a mini design statement with paint, wallpaper, and custom hardware. Parents are installing stick-on tiles on the backsplash, painting cabinets trendy colors such as dusty pink or sage green, and attaching miniscule brass knobs for verité. This frugal kids’ play project takes an afternoon and can be completed for less than $50, beyond the initial Duktig purchase, but puts custom wooden play kitchens that run hundreds of dollars to shame. This is a fun way to bring design concepts to your littles, and you also get an Instagram-worthy corner of the playroom. 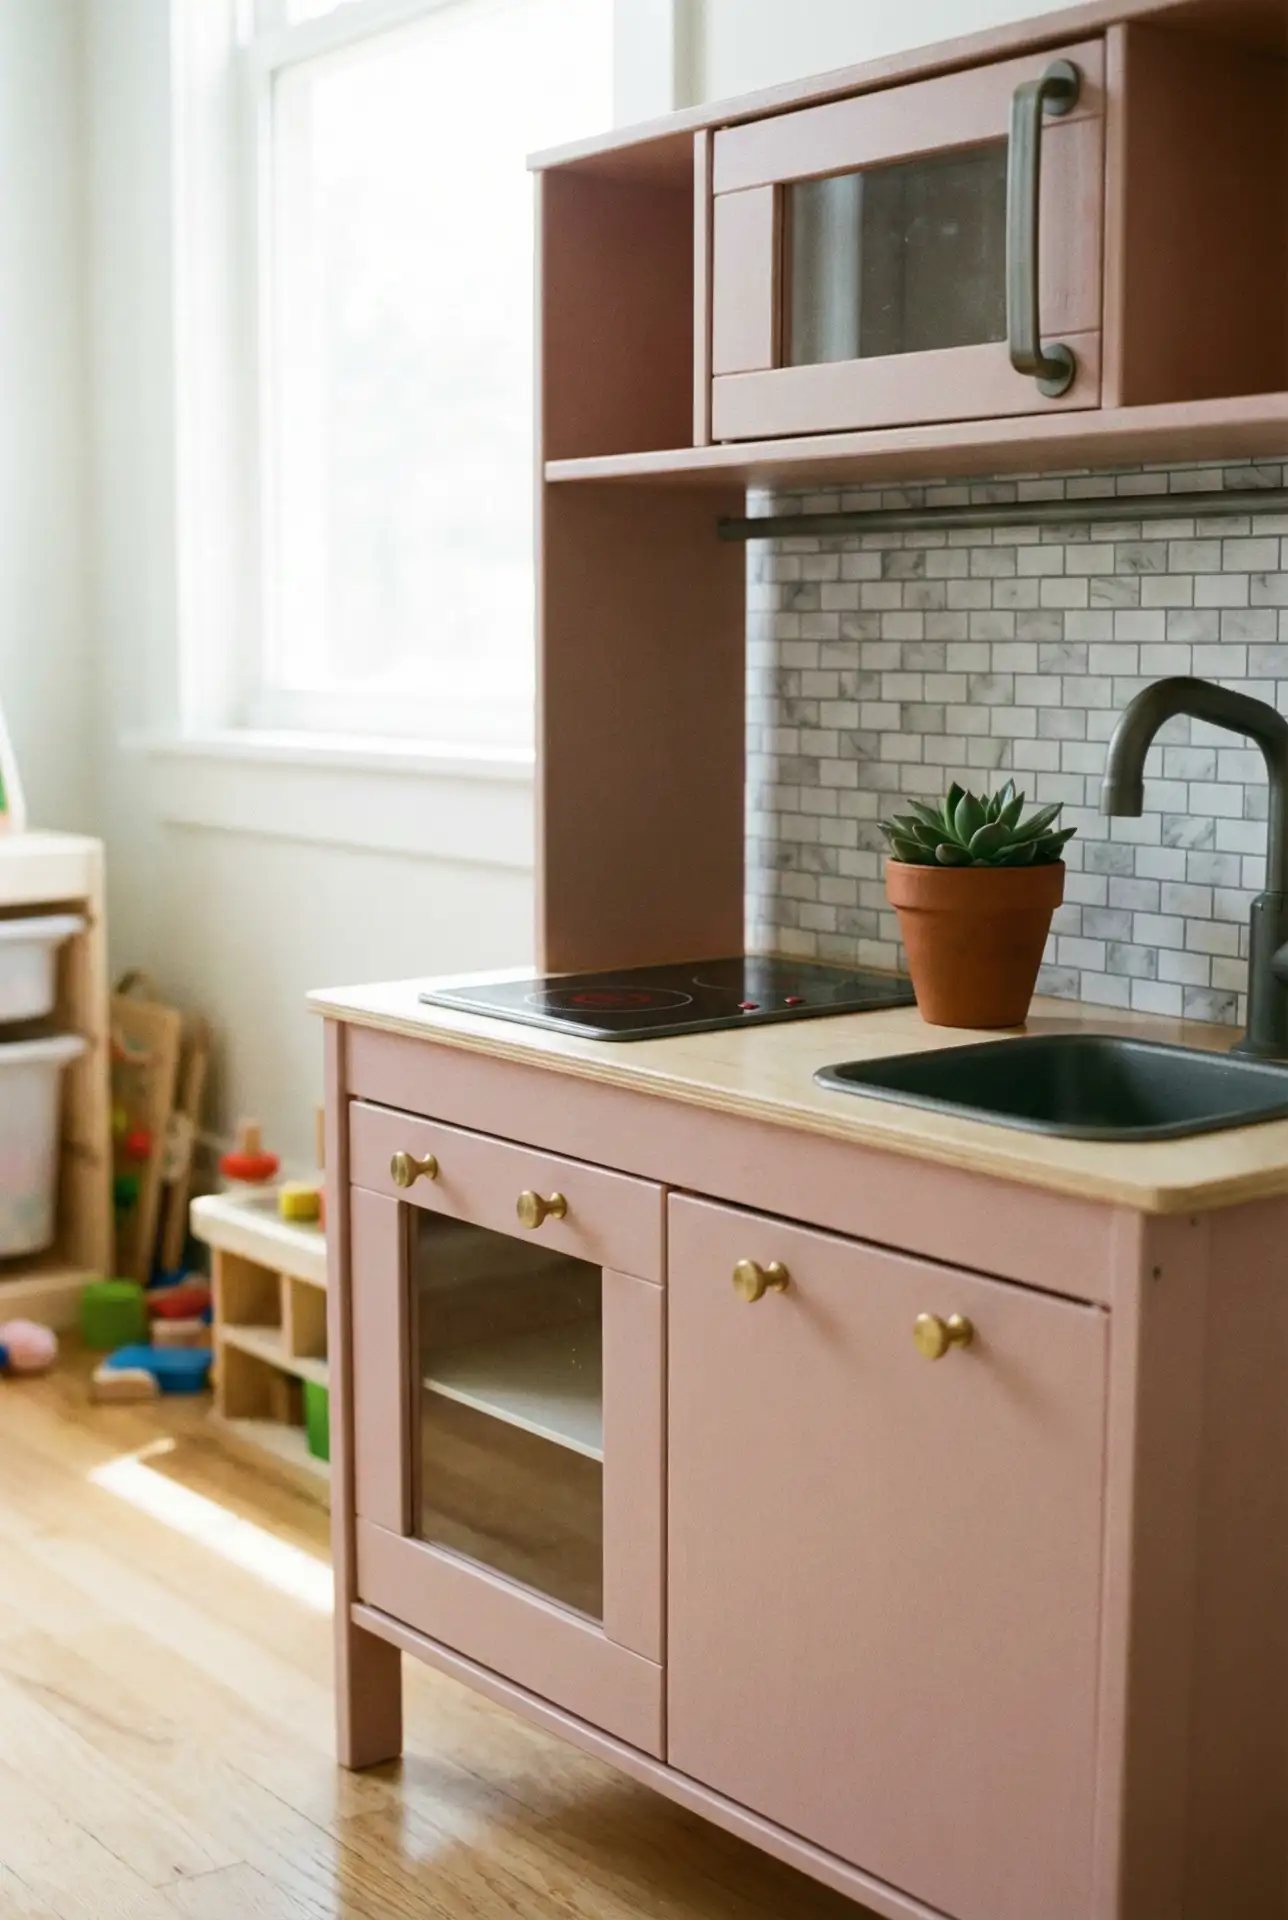
Real homeowner behavior: Cunning parents are proudly sharing their Duktig hacks all over Pinterest and parenting blogs, causing a burgeoning play kitchen customization subculture. Some install battery-powered LED strip lights under the upper cabinet, and others sew tiny curtains for the window cutout or make fancy-pants miniature subway tiles from foam board. For adults, the project is a creative outlet; for kids, it’s often a beloved toy they share with their siblings or friends. Select a non-toxic paint and make sure any add-ons are mounted securely, because your toddler is way less gentle than the designers at IKEA seemed to think.
9. Galley Kitchen Maximized with Smart Storage

A galley kitchen is transformed when you make the most of a place to store stuff. \n\n View Gallery: 10 images discuss this story Choose floor-to-ceiling cabinets, magnetic knife strips and hanging pot racks, and pull-out pantries that use every inch. Light colors, including on the walls and cabinets, make the corridor feel less constricted; strategic lighting—under-cabinet LEDs and pendant lights—brightens the workspace. This design is often found in older apartments and condos, and with the right planning it can be as functional as an expansive L-shaped kitchen—only it takes up much less of a footprint. 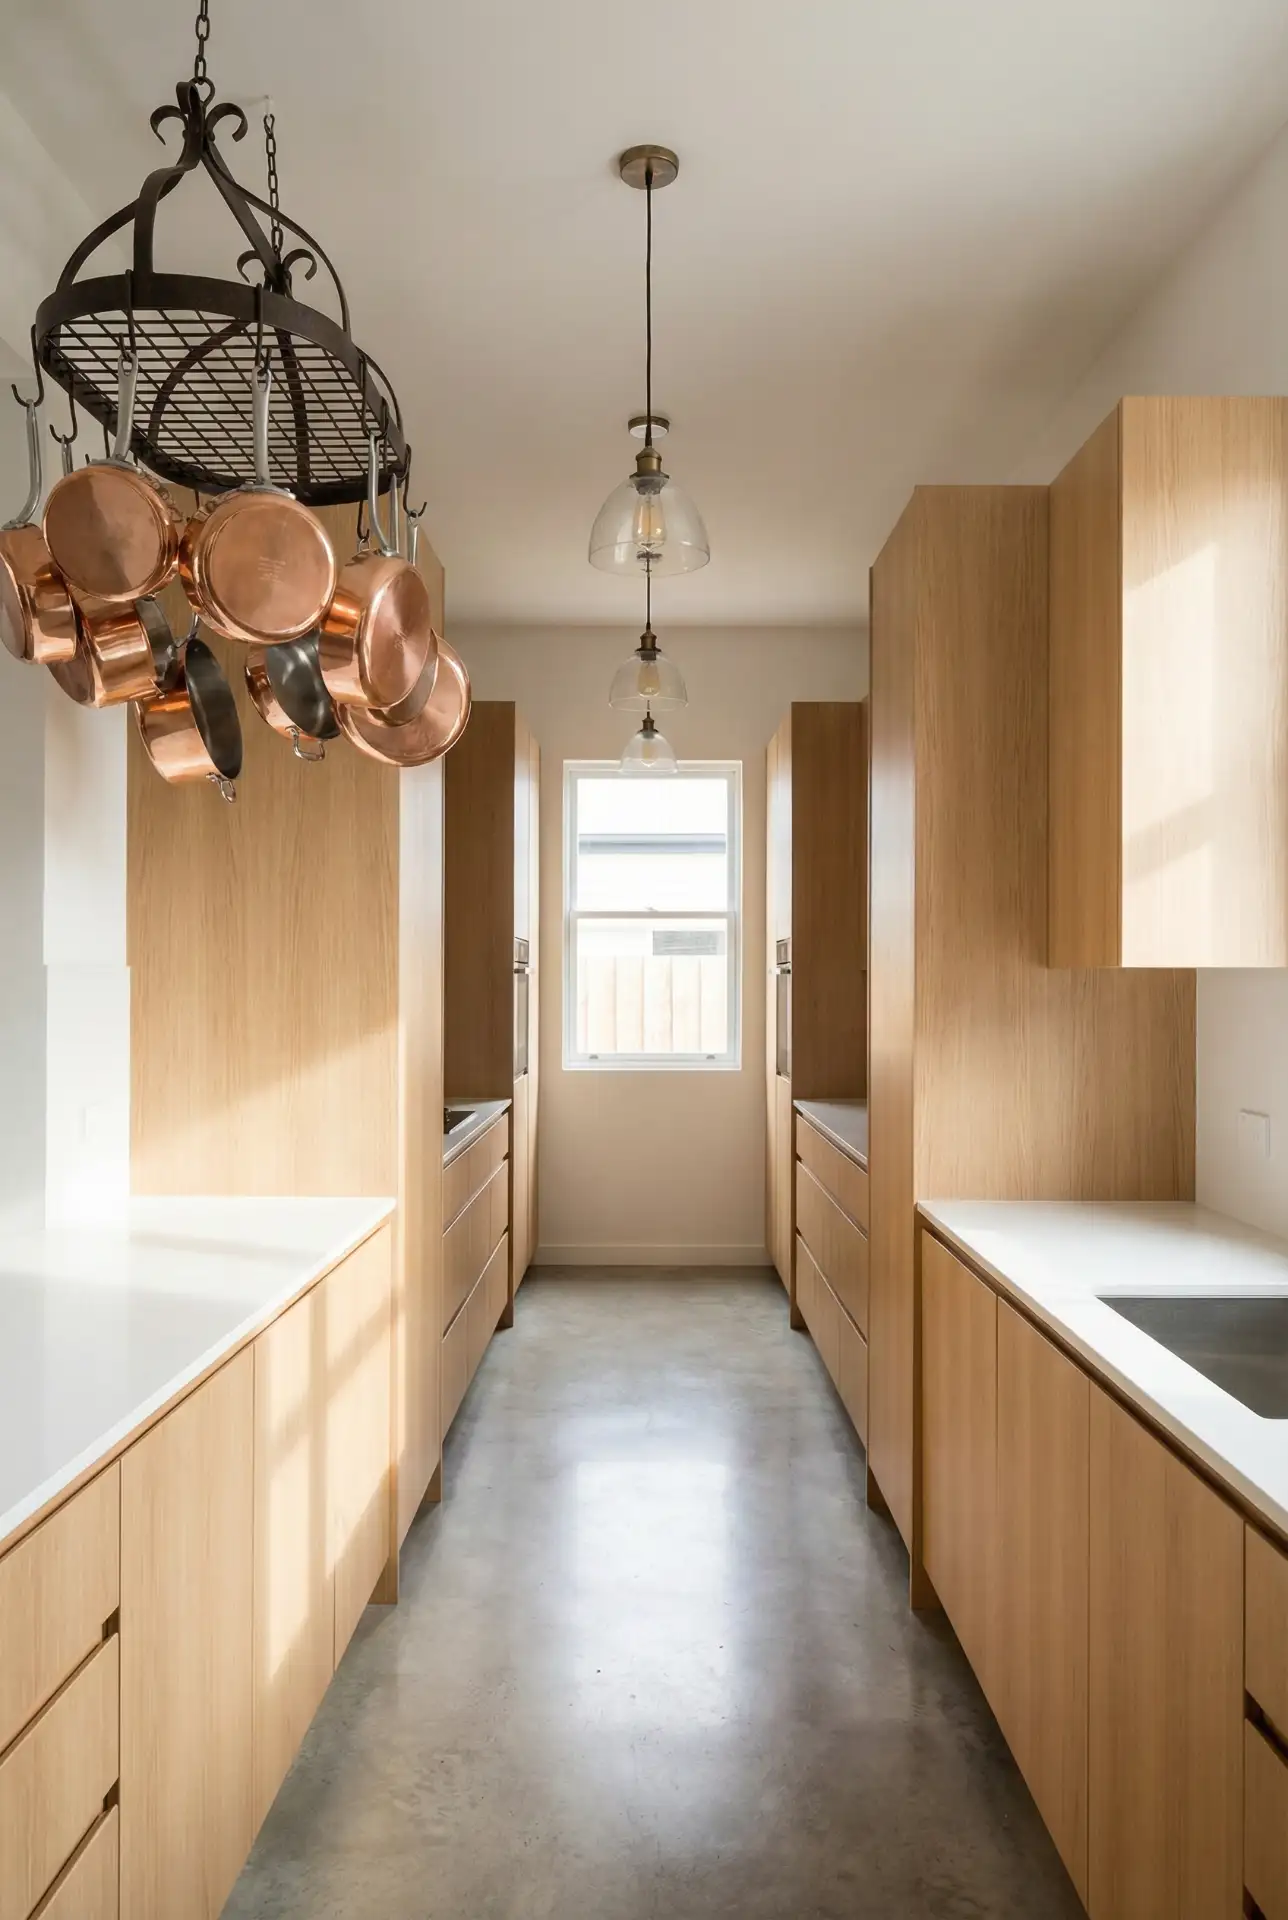
Mistakes to avoid: Overloading a galley with too many decorating accents or selecting dark finishes, making it feel like a tunnel. Keep to a simplified color scheme, restrict open shelving to one wall so as not to overload the space visually—and don’t be tempted “to throw in a kitchen island” if you feel obliged because everyone else seems to have one: Go for quality over quantity when it comes to cabinetry and appliances. Instead, think of a slim rolling cart that you can push under the bed when not in use. Mirrors or high-gloss backsplash tiles can reflect light and lend the appearance of width, a trick lifted from tiny apartment living in cities like Manhattan as well as Chicago.
10. Council House Kitchen on a Tight Budget
Getting the most out of a basic council-style kitchen will involve either laminate counters, builder-grade cabinets, or, in some cases, limited square footage—but that doesn’t mean sacrificing style. Mass-market a few of the largest items that you’ll never see no matter what (Movie: there should be something); paint cabinets a fun color; put down peel-and-stick tiles for an easy backsplash. A Fraida pull-chain light can’t get here quick enough. Thrift stores and discount stores can provide small, cheap accessories such as canisters, dish towels, and small rugs that add personality without costing a fortune. Even the tightest budget will benefit from strategic updates, leaving a space that feels cared for and intentional rather than ignored. 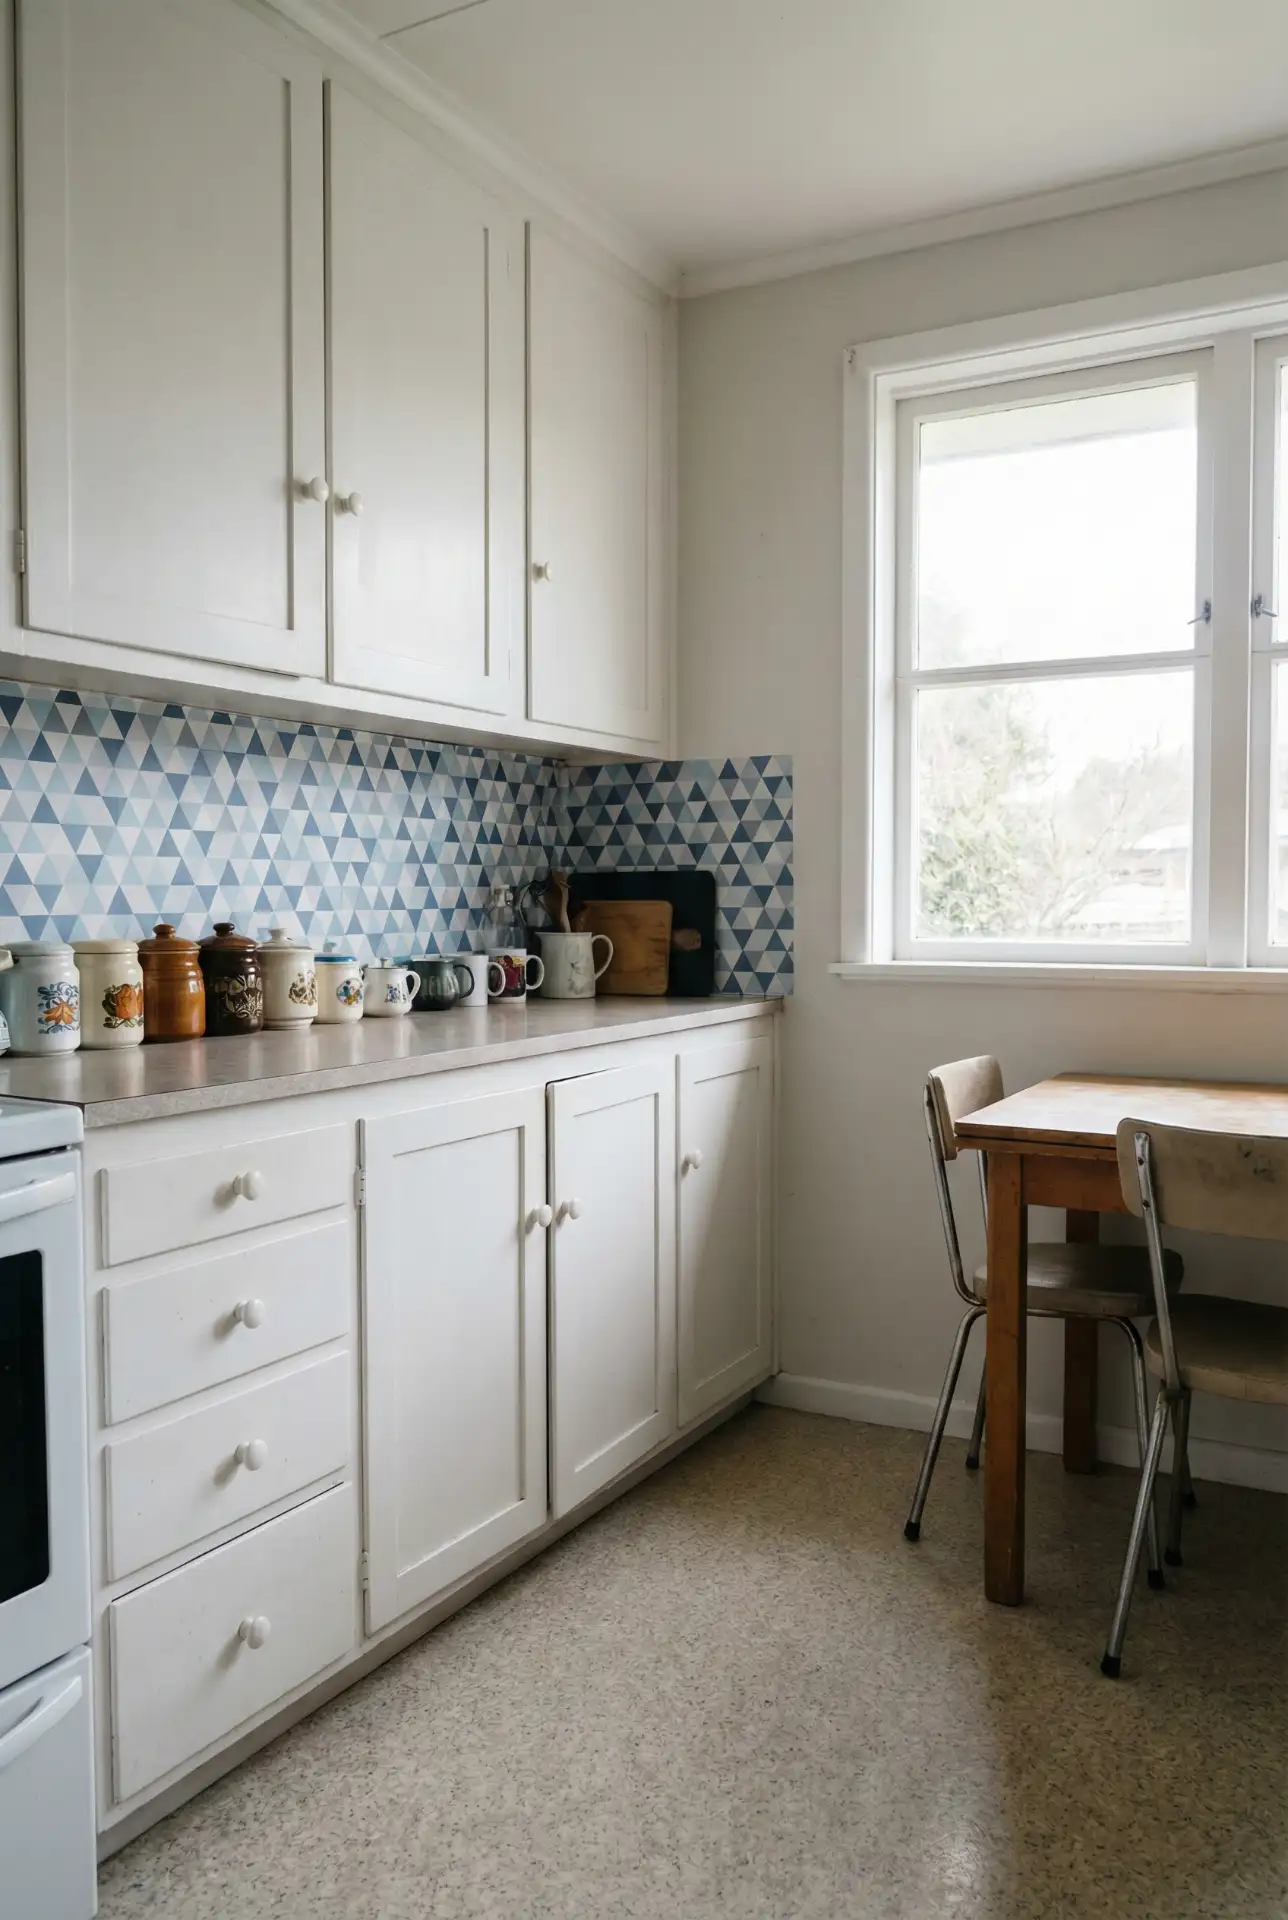
Budget Angle: anticipate spending between $200 and $400 for a full refresh with paint and peel-and-stick materials, plus some secondhand accessories. Focus on anything that is the most prominent—if the cabinets are rough and worn, paint those first; if it’s an aged backsplash as well as countertop situation that is the beloved eyesore, go there. DIY everything you can, and do not underestimate the power of a deep clean: Degreasing cabinets, scrubbing grout, and shining fixtures can make even the grimiest kitchen feel revitalized. This technique is particularly apropos for UK and Australian renters or owners of council houses, where the stock kitchen is often a purely functional room.
11 Kidkraft Play Kitchen Customization
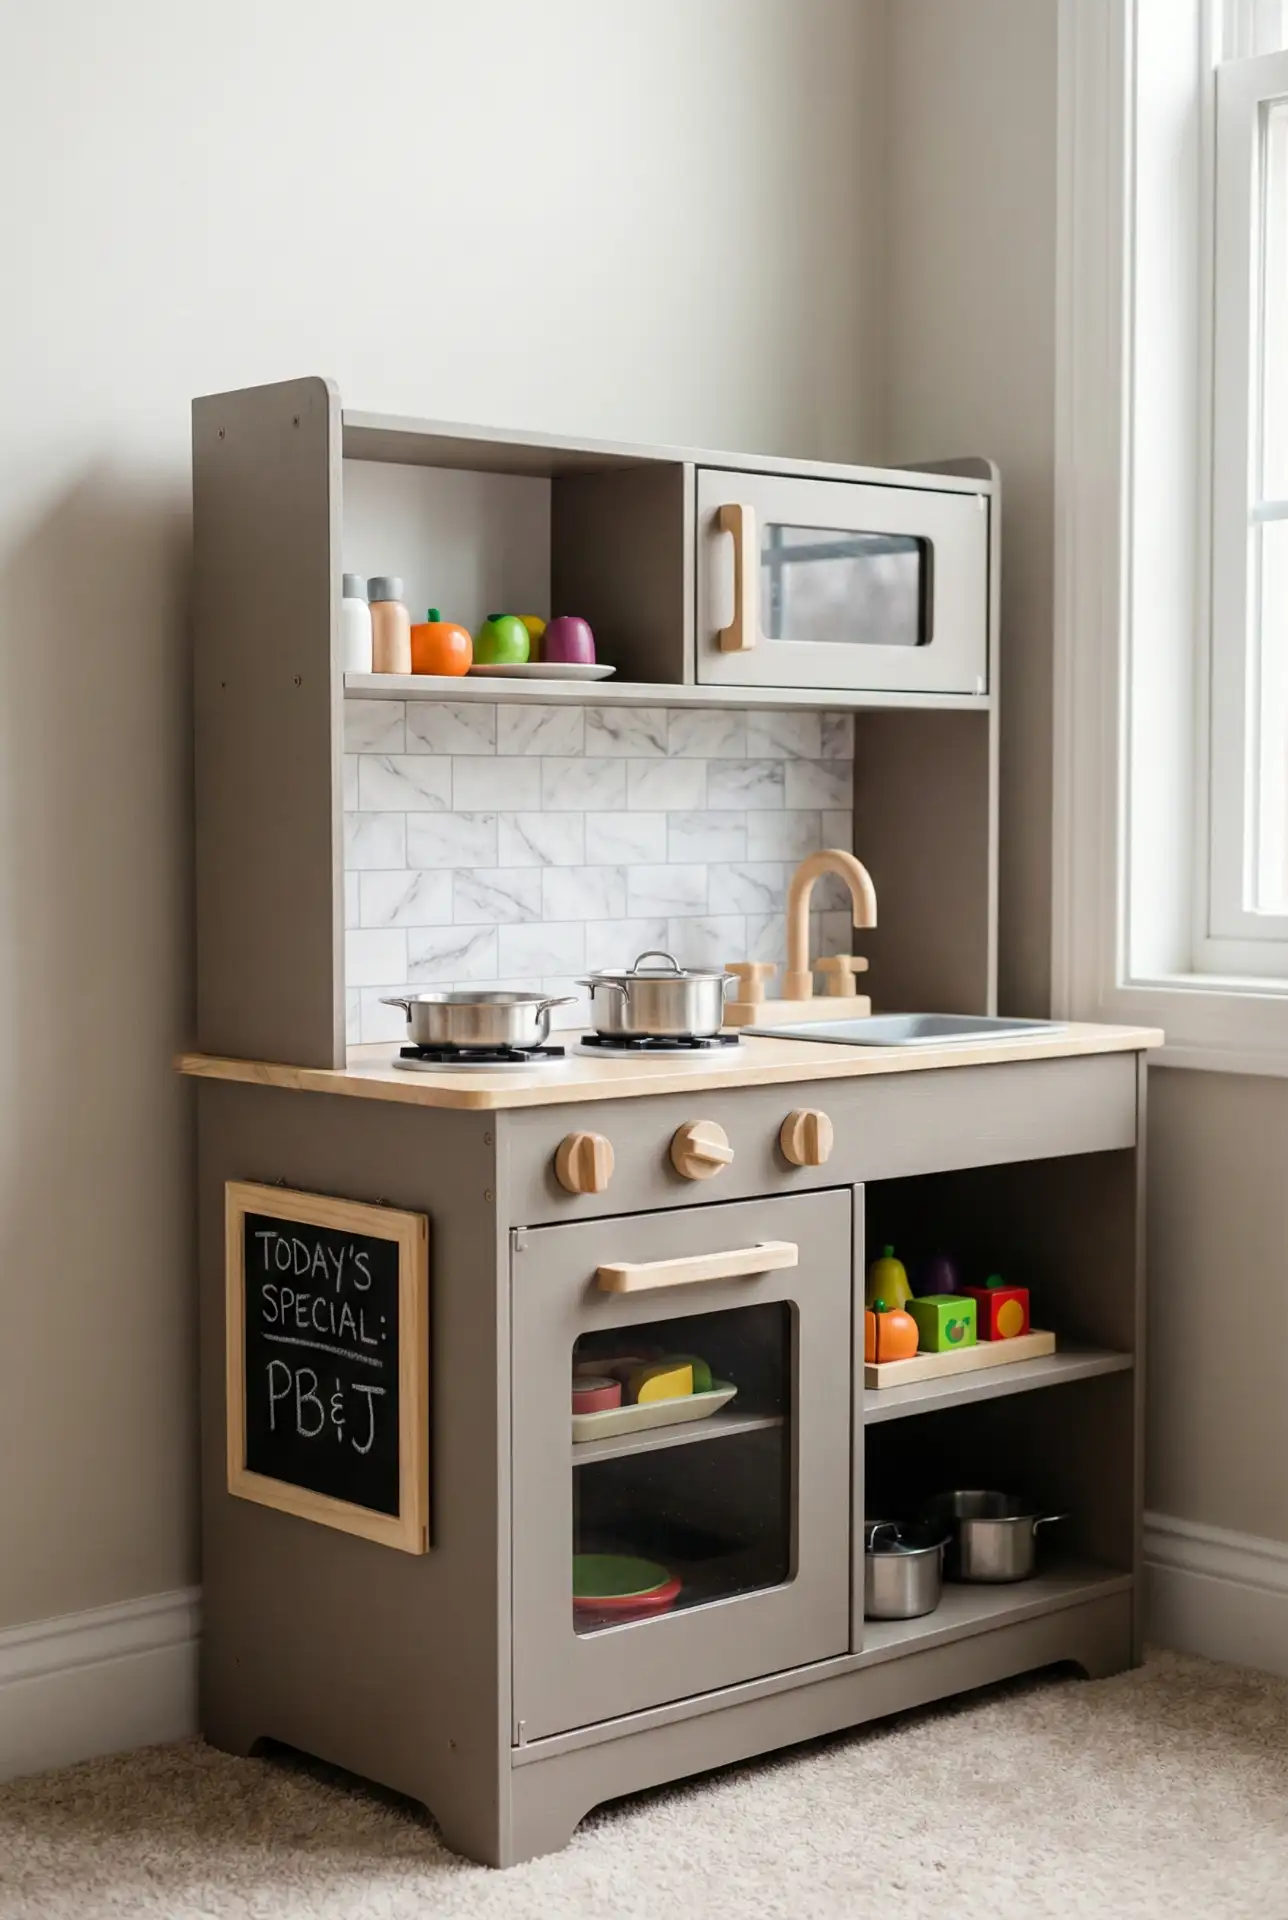
Take a simple KidKraft play kitchen from out of the box to custom with paint and extras. Sand lightly, and add a coat of chalk paint in contemporary neutrals or dramatic jewel tones, sealing with water-based polyurethane to endure abuse at the hands of toddlers. Throw up peel-and-stick tile as a backsplash, swap plastic knobs for wooden ones, and hang a tiny chalkboard to showcase menus. These hacks elevate a generic plastic play kitchen to a custom piece that will perfectly match your home’s decor but also hold up well to everyday playing. 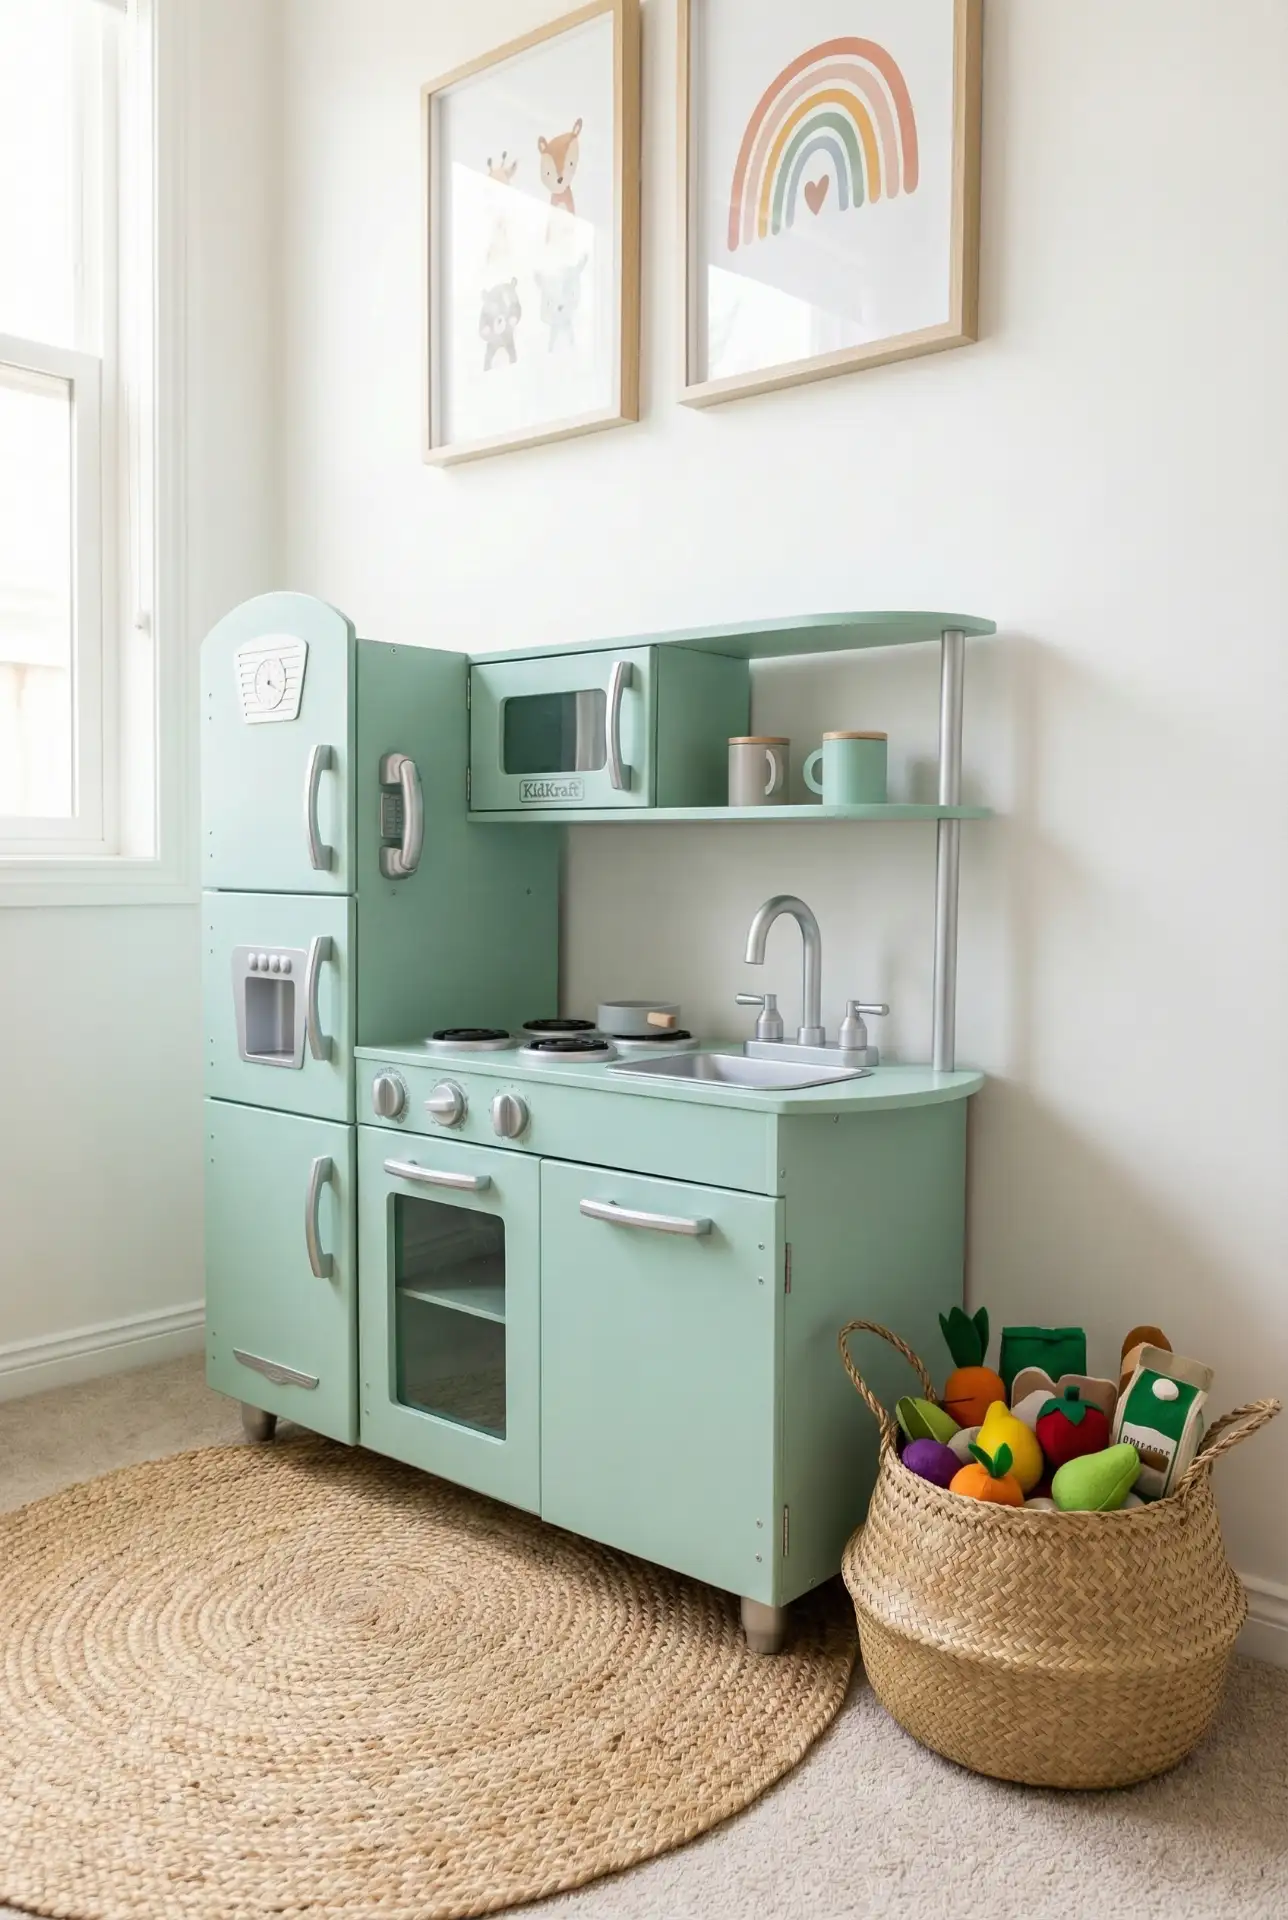
Tip: even though Kidkraft kitchens are made of wood composite and not plastic, you will still want to lightly sand before painting to make sure the paint sticks nicely. Prime with a primer specifically formulated for laminate surfaces, and be sure to allow each coat to dry completely before applying the next. It’s guaranteed that kids will bang pots and pans against them, so a hard-wearing topcoat is a must. This project costs less than $30 for materials but turns a $100 play kitchen into something that seems twice as expensive, and it has emerged as a favorite rainy-day project for parents desperate to channel their creativity during nap time.
12. Frenchic Paint for a Vintage Finish
British favorite Frenchic paint has come to America, with fans here loving its low-VOC formula and that you don’t have to sand or strip old finishes before painting new ones. Use it to makeover kitchen cabinets, furniture, and yes, even appliances in colors such as Posh Nelly (soft pink), Wolf Whistle (a warm gray), or Whitby (creamy white). The chalk-type formula goes on easy, dries to a beautiful matte finish, and has less than 1 g of VOC per liter; no sanding or priming is required. Seal with Frenchic’s finishing coat and love a paint that’s simple to use yet so very beautiful. 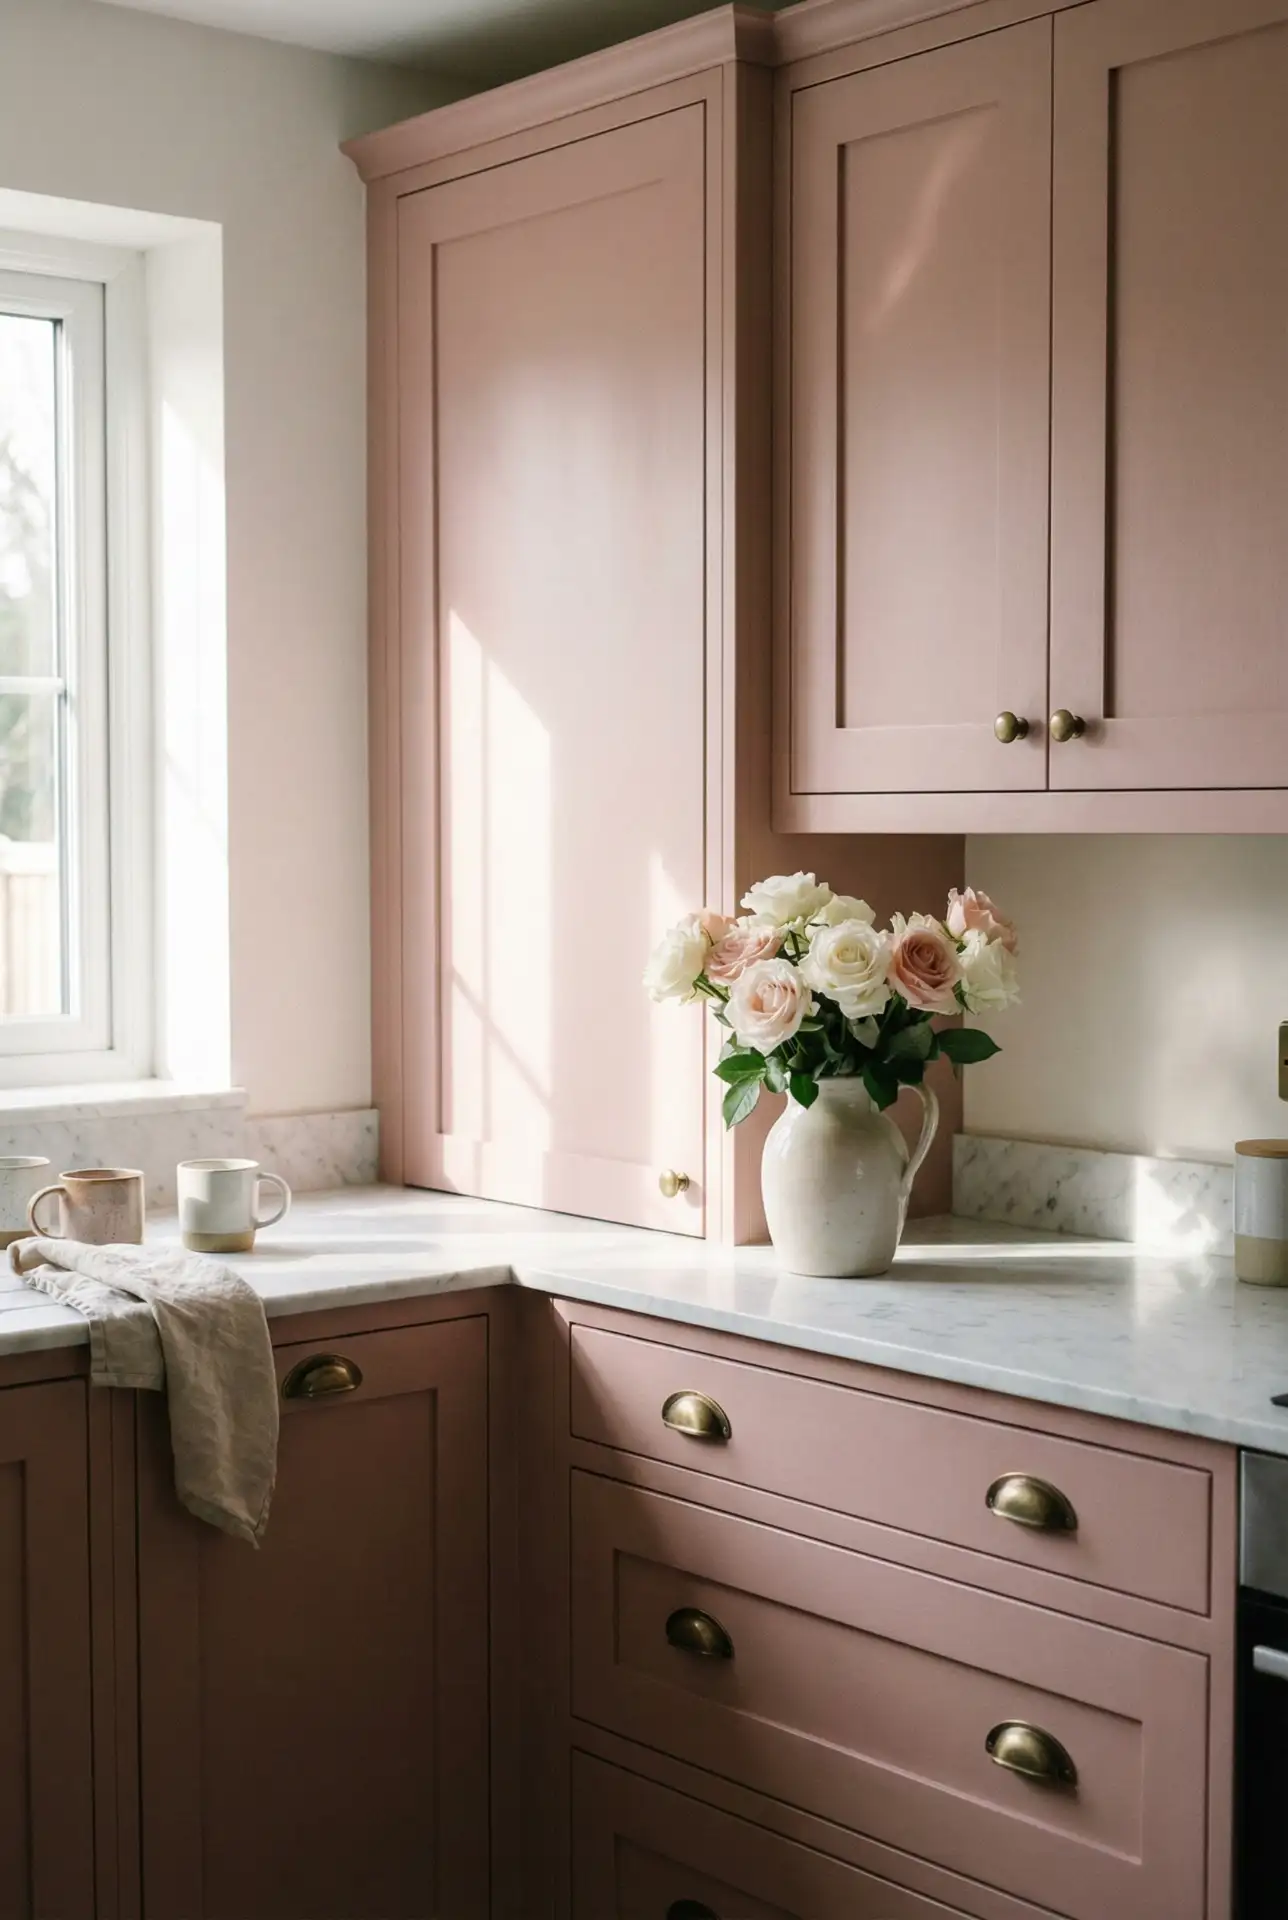
Where it works best: Cottages, farmhouse kitchens, and vintage-inspired spaces where the slightly lumpy hand-painted look either adds to—or doesn’t distract from—the charm. Frenchic has great coverage, for which one or two coats are usually enough, even if being painted over dark wood. The paint has inspired a cult following among furniture flippers and DIY fans who love that you don’t have to strip old finishes off first. It’s more expensive than big box brands, but for those who want a specific look without paying for professional application and don’t mind some trial and error getting there—it can be worthwhile.
13. Miniverse Kitchen Collection Display
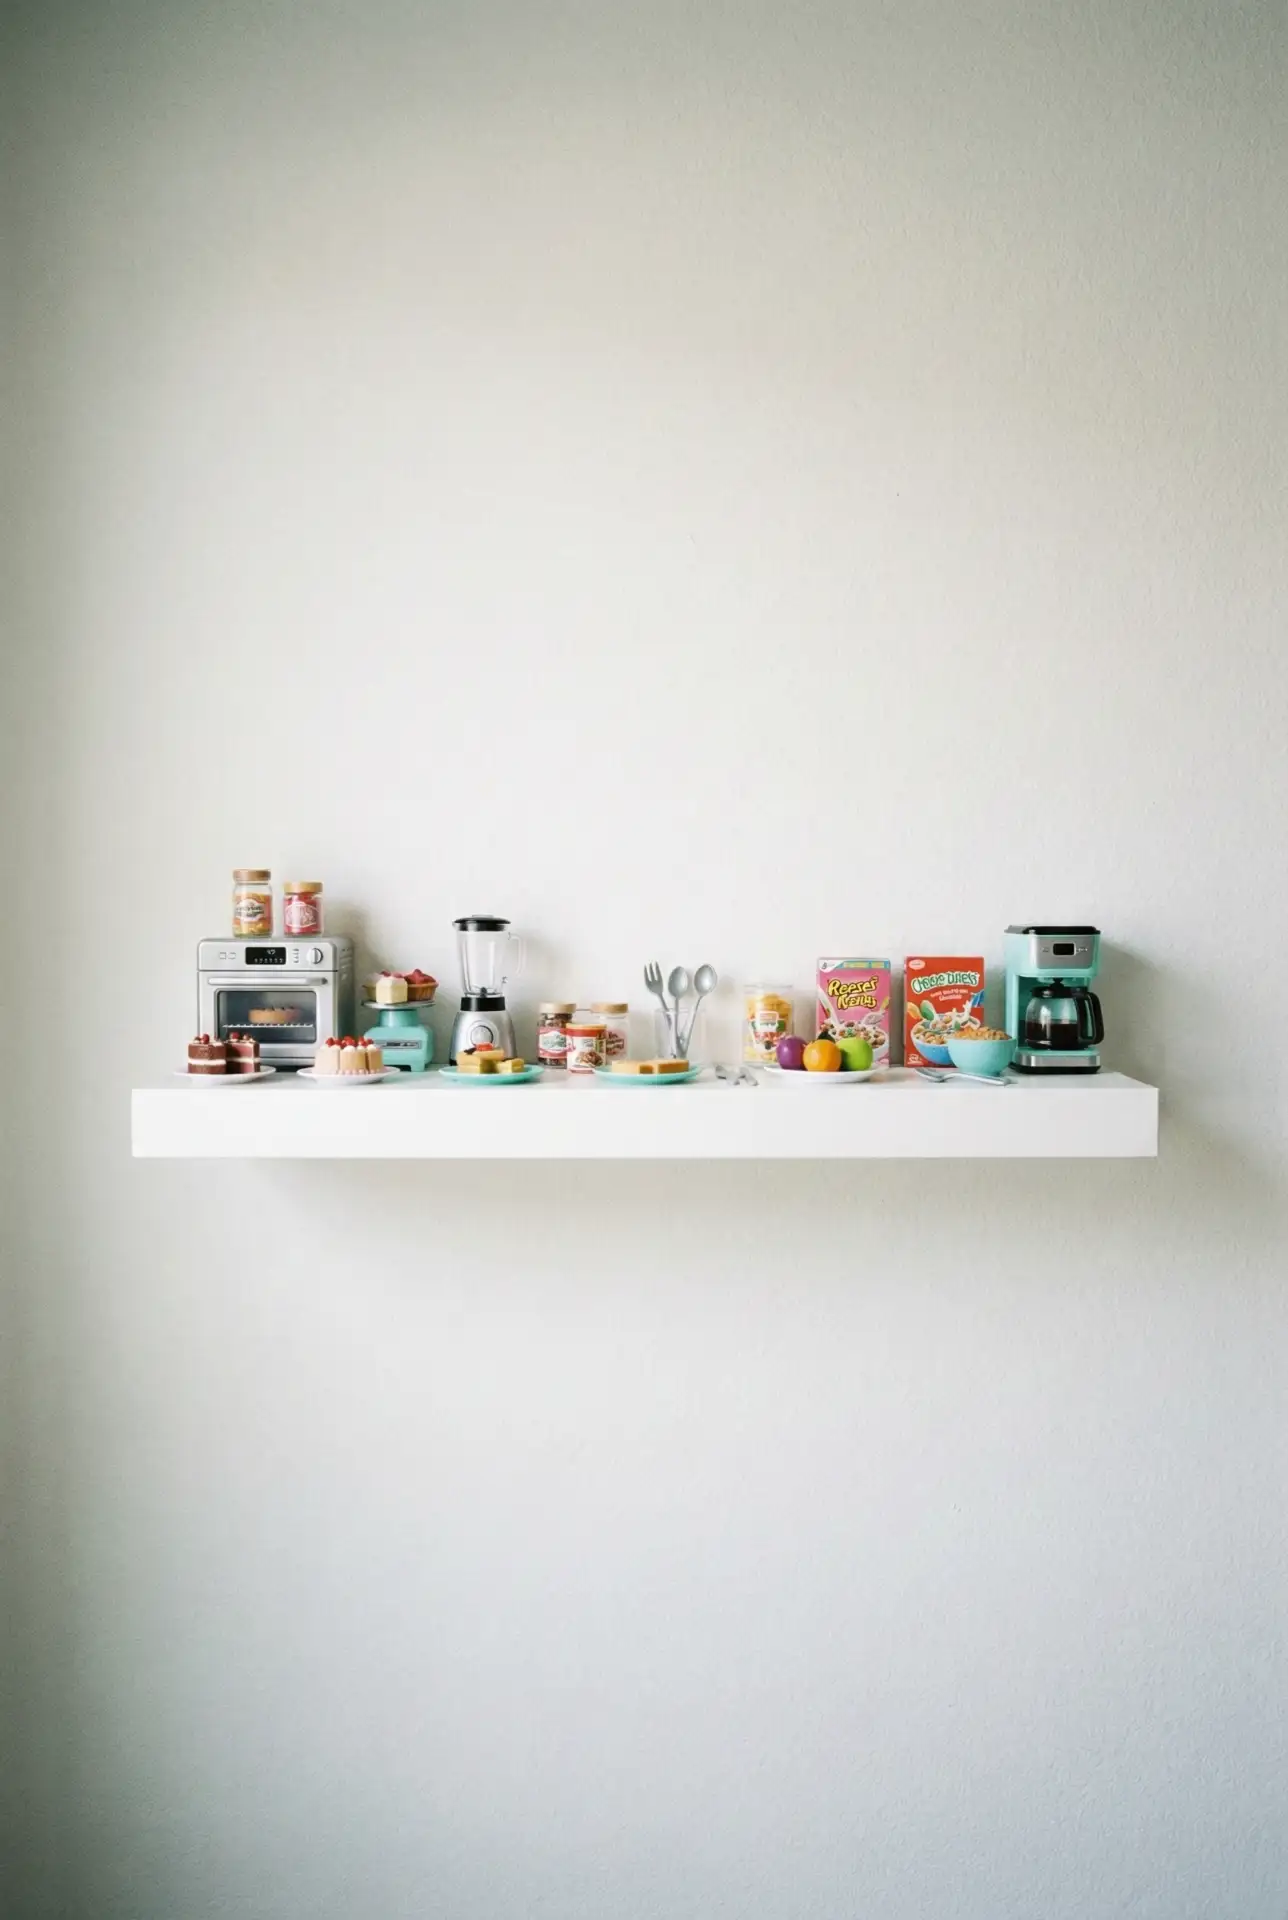
The collectible-driven Miniverse trend has adult fans carving out shrine-like kitchen displays for tiny, hyper-realistic food and appliances. Construct a low shelf or opt for a glass-fronted cabinet to display your mini collection, arranging the pieces as if it were a curated still life. This may not be a classic makeover, but it will bring a surprising new focal point to kitchen decor that nobody expects and anything that starts a conversation or reflects your personality. Miniverse pieces are so small and so detailed that, when grouped together, they wind up being rather beautiful—to the point where the line between toy and art object becomes blurred. 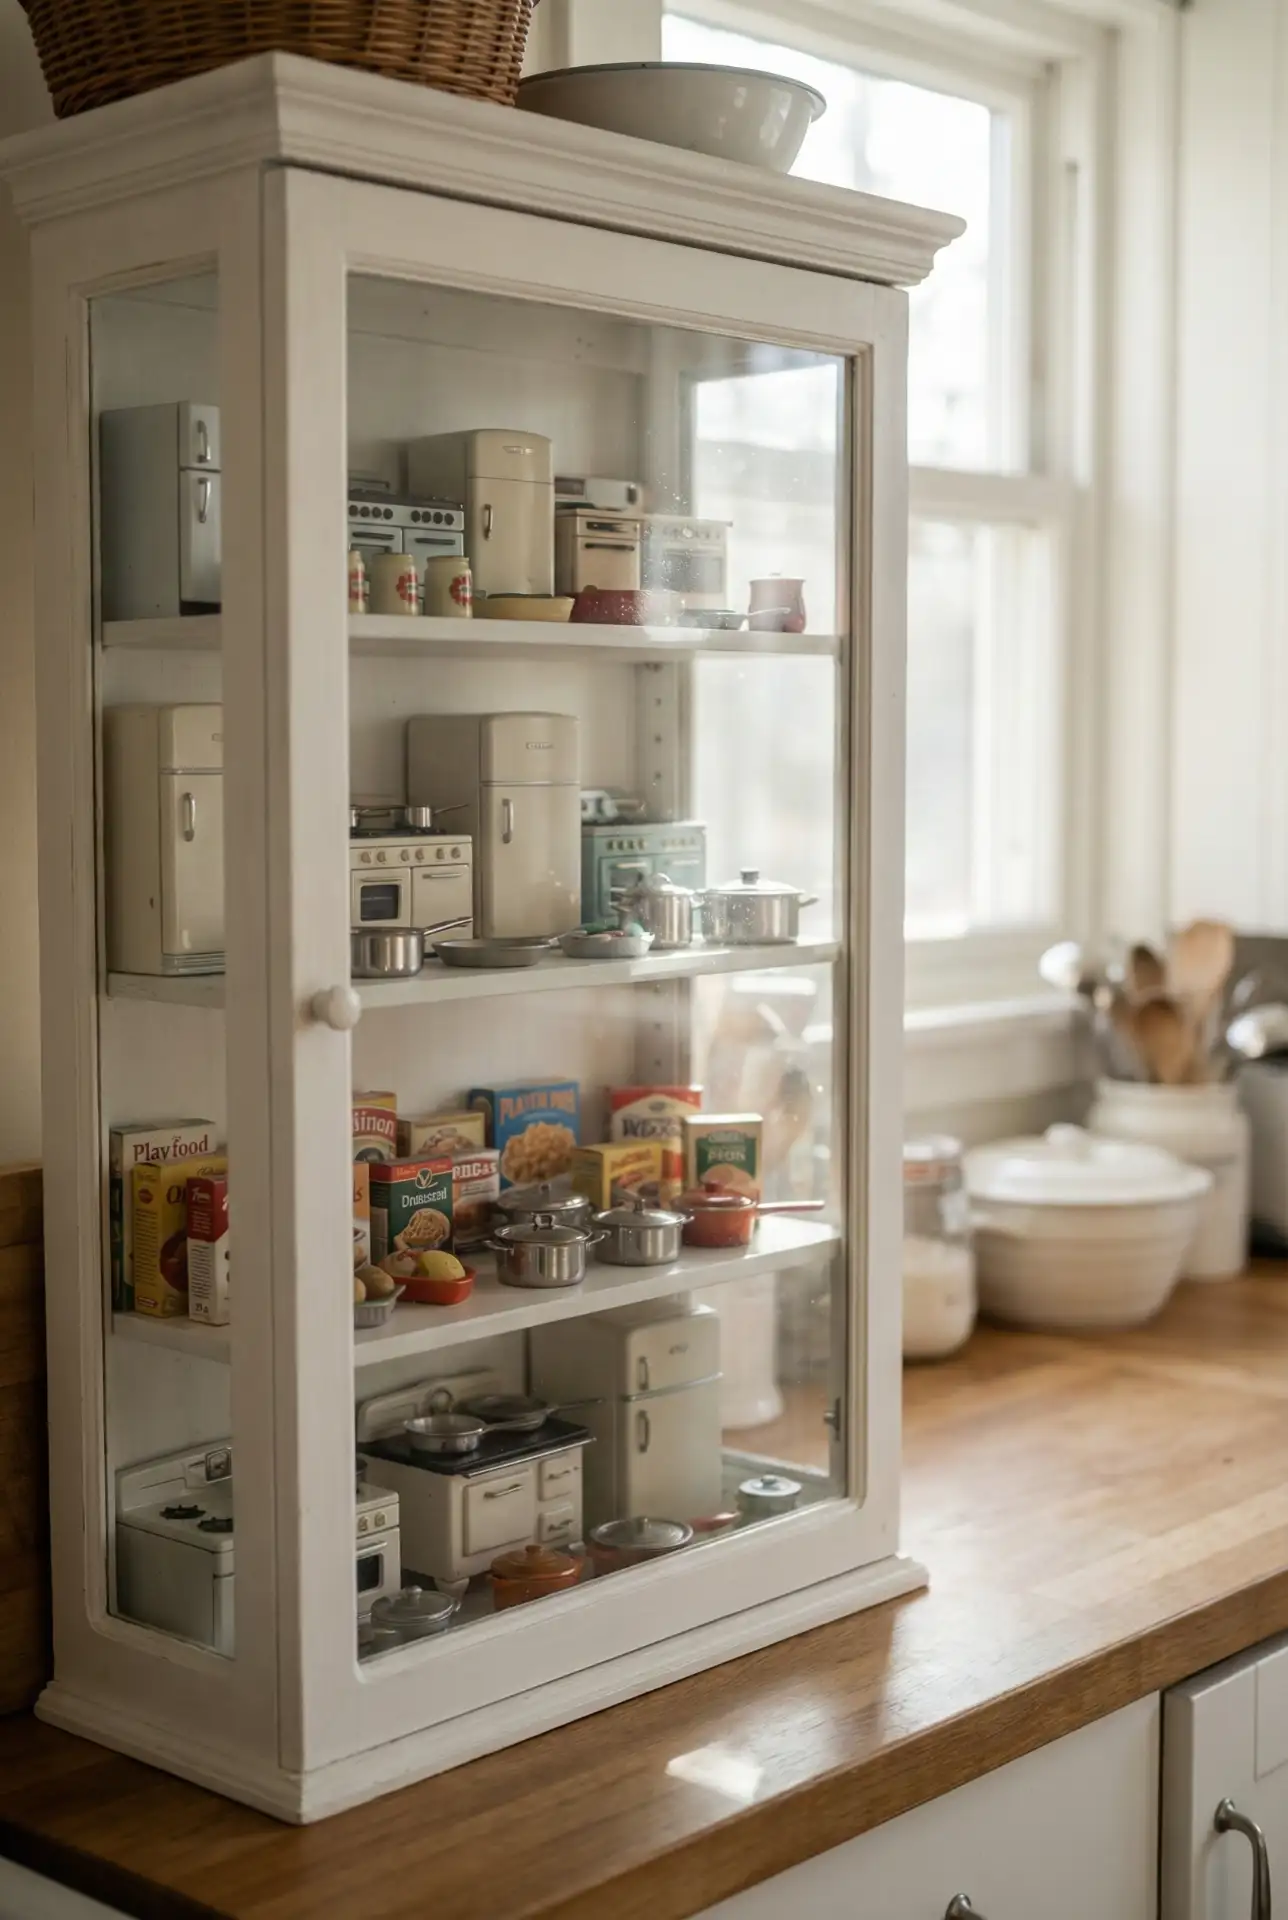
Real homeowner behavior: collectors are incorporating Miniverse pieces into kitchen design—rather than relegating them to kids’ spaces—and using the miniatures as decor. In Austin, one collector put in a slim picture ledge above her sink just for her güiro collection, which she likes to rotate seasonally. It’s a conversation piece when you throw dinner parties, and it injects a bit of humor into an otherwise minimalist modern kitchen. If you are already investing in these collectibles, displaying them raises both the bar for your collection and the personality of your kitchen.
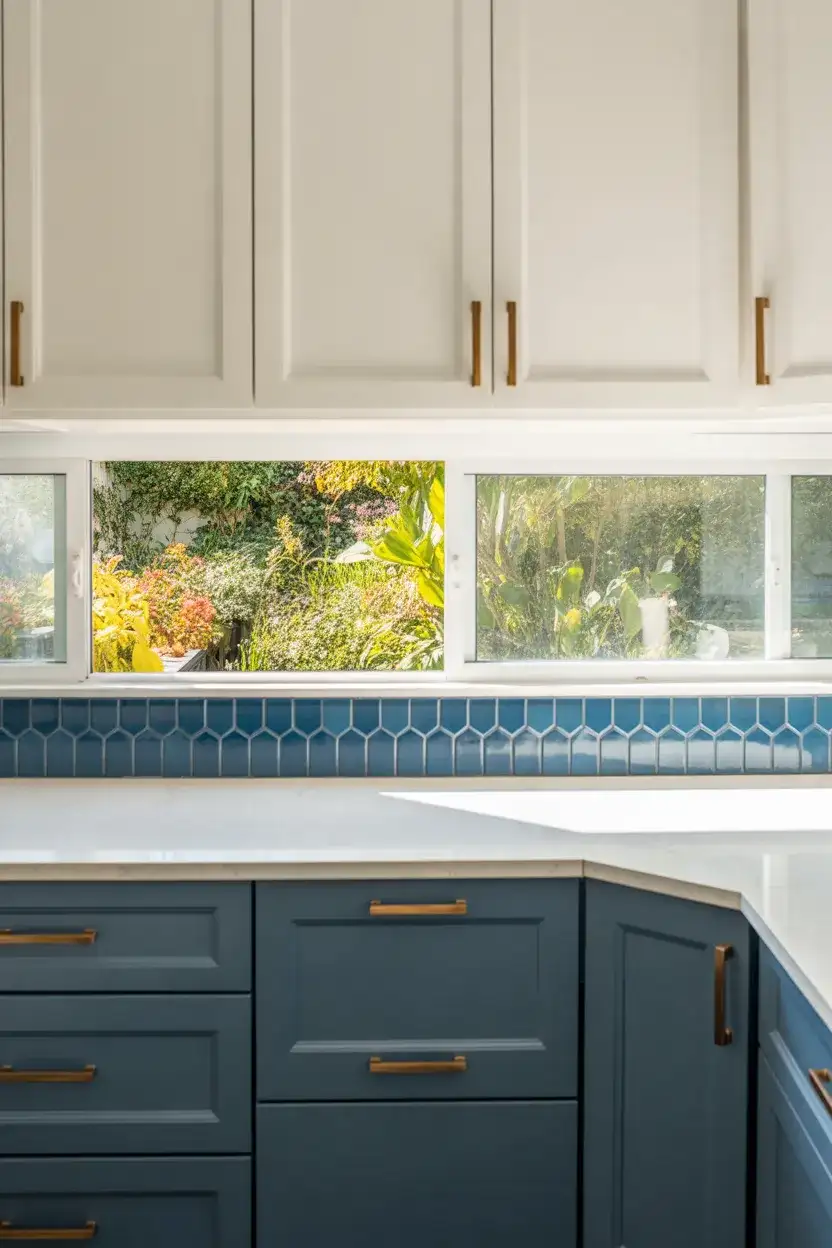
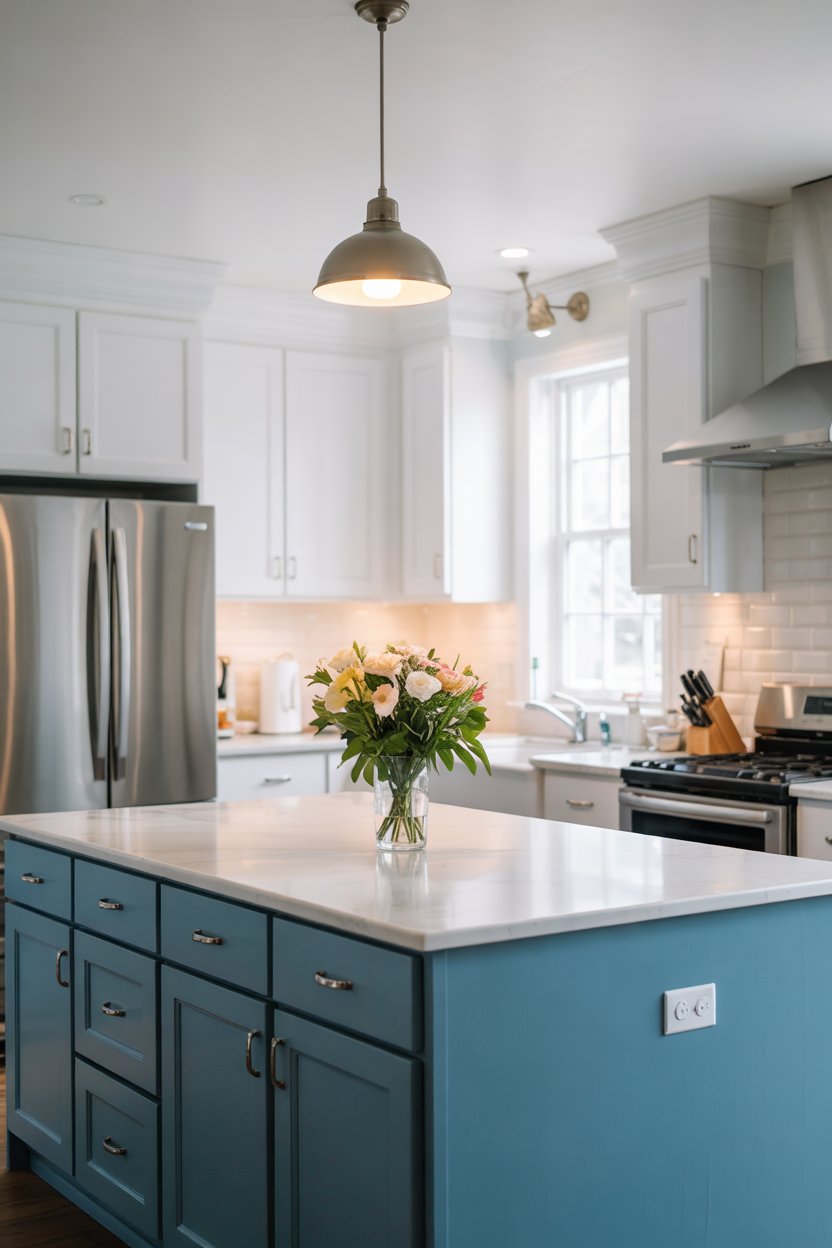
14. Two-Tone Cabinet Drama
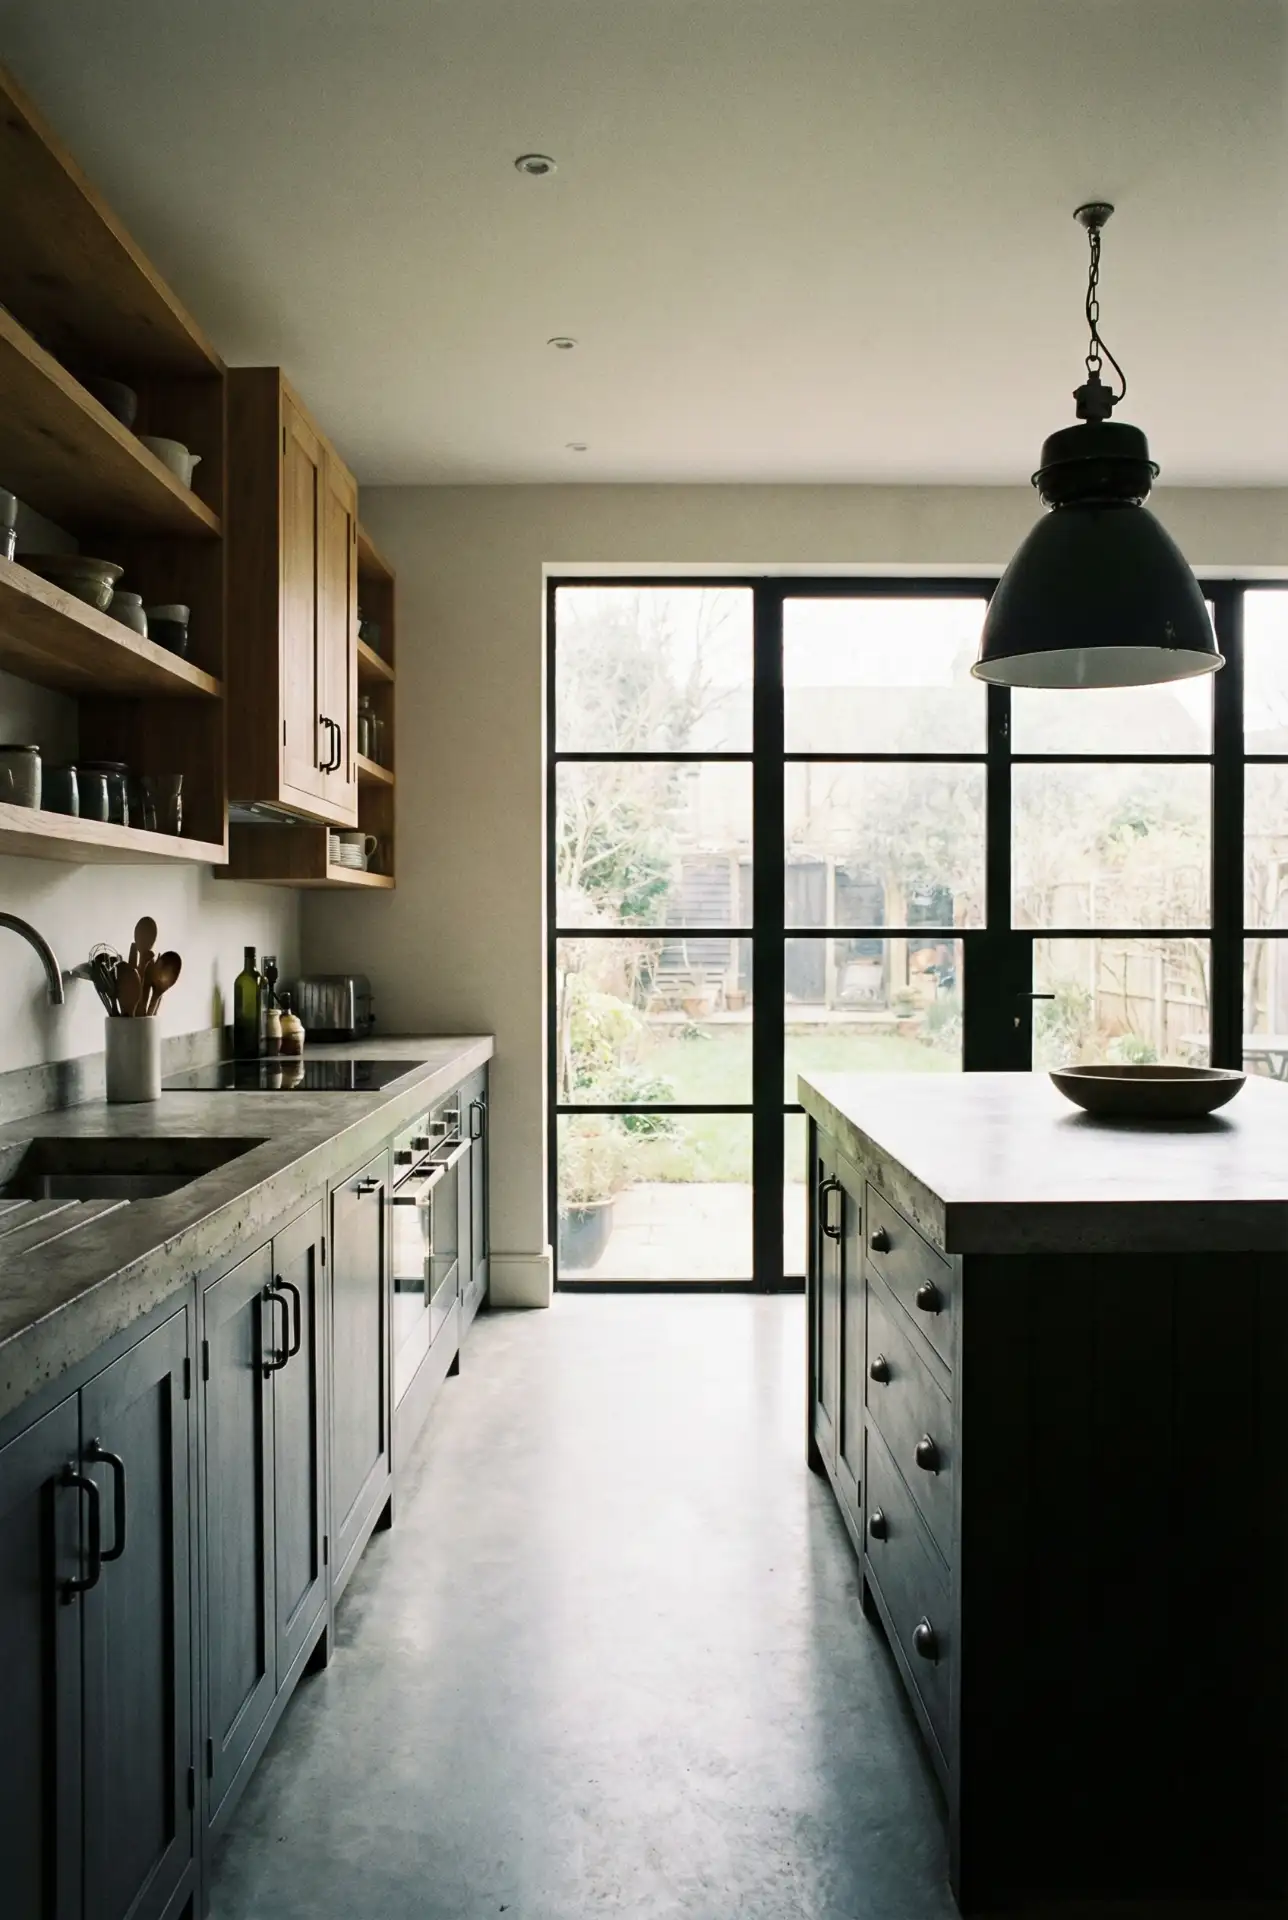
Paint your upper and lower cabinets different colors—try navy and white, sage and cream, or charcoal and natural wood—for drama. This is purely a technique for grounding the space without creating too much heaviness or enclosure, and it’s particularly useful to break up a long run of cabinetry in galley kitchens or open-plan spaces. For bottom cabinets, opt for the darker color to ground things, and keep upper cabinets light to maintain the sense of air. It’s a contrast that accentuates architectural elements and elevates even the most basic builder-grade boxes to something custom and considered. 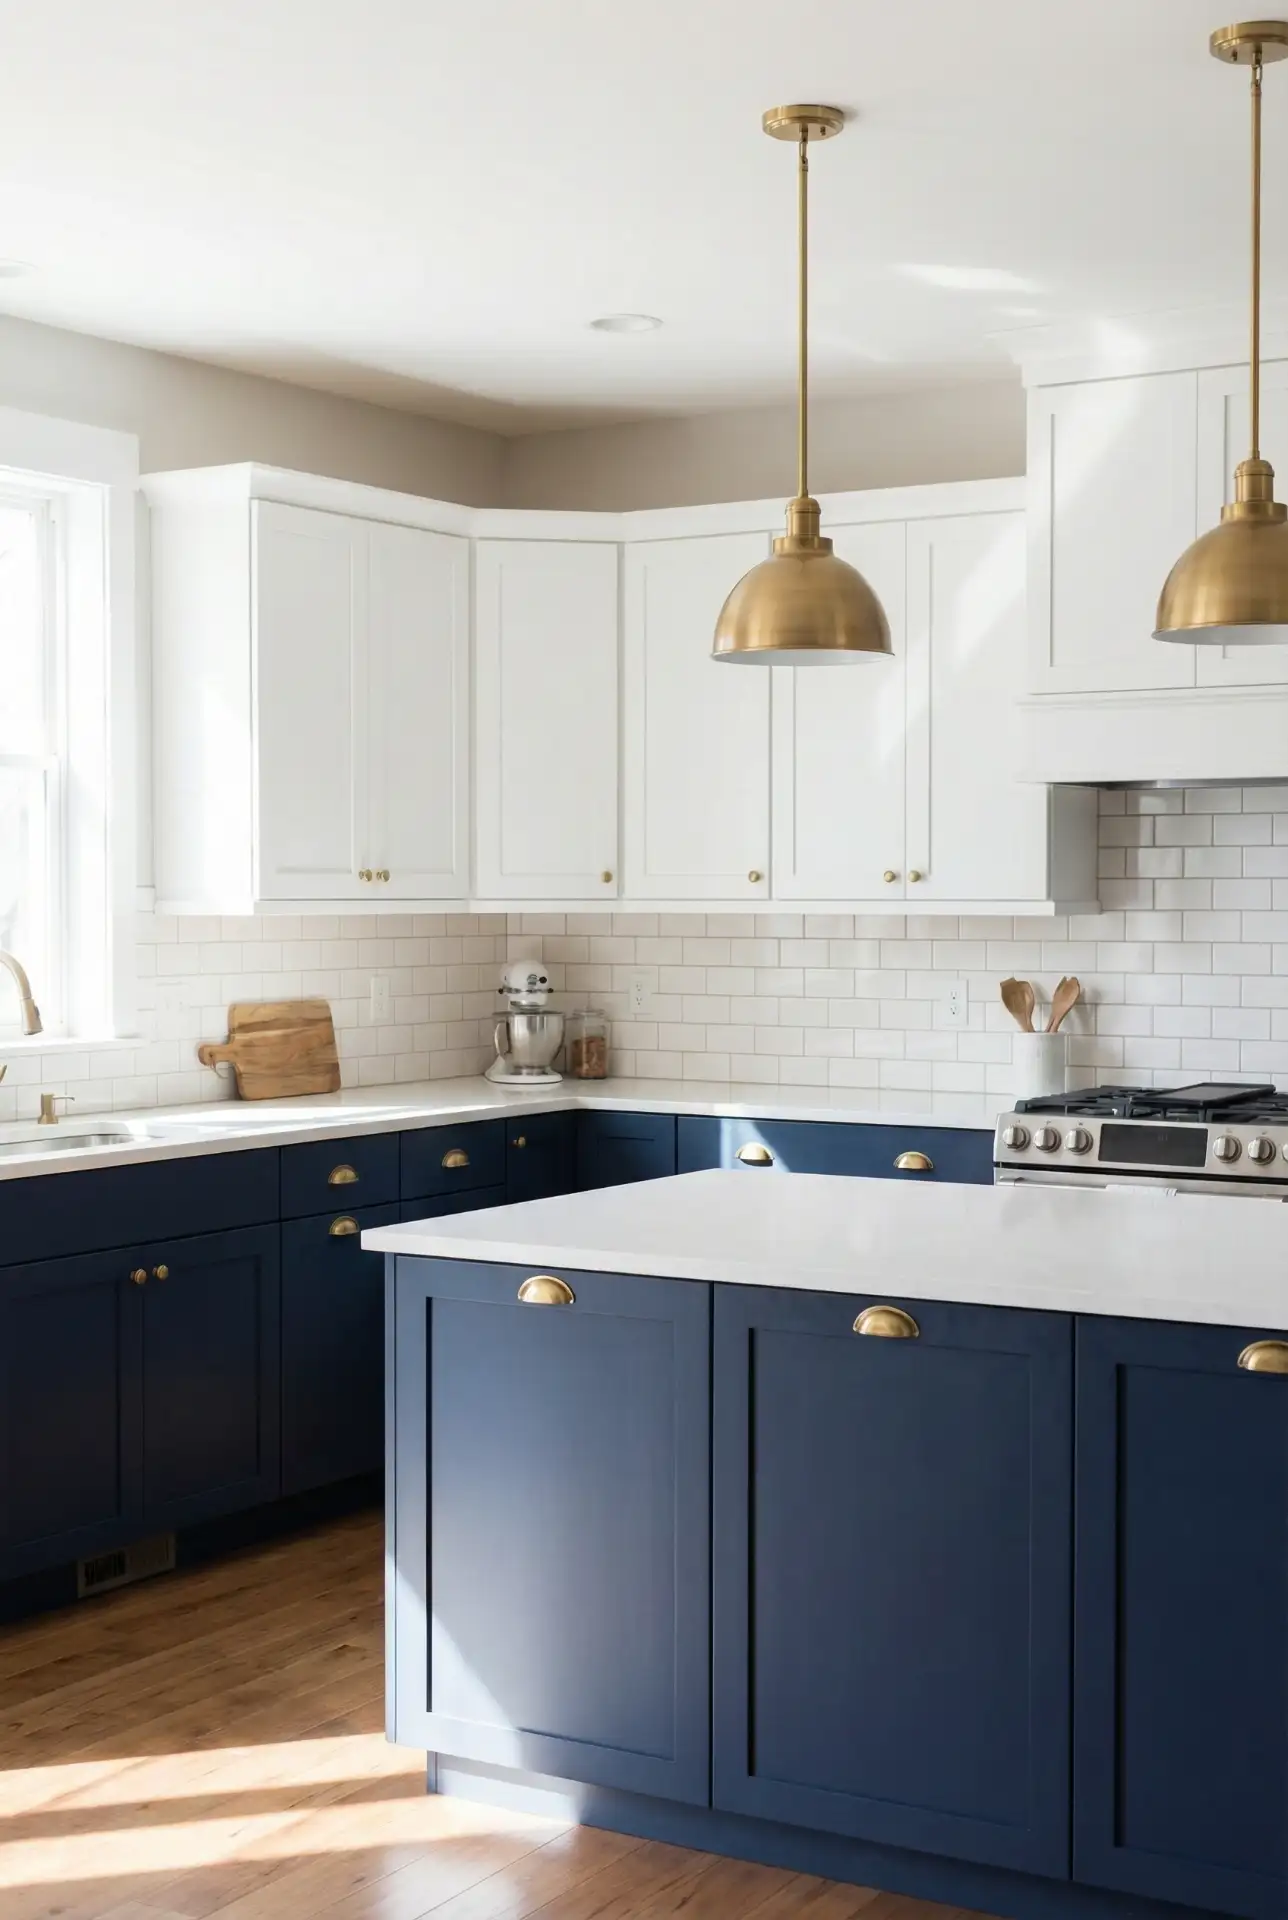
This is well-suited to open-plan homes where the kitchen integrates with living spaces and the two-tone scheme separates the work area without using walls or screens. In Southern California and Texas, which have open floor plan-heavy new construction, this trend has caught on as a way to bring personality to cookie-cutter layouts. If you have one, consider taking the darker color all over a kitchen island and treating it like a piece of furniture that grounds the room. The trick is to pick colors with compatible undertones—both warm ones or both cool ones—so that they flatter instead of compete.
15. Photos-1-IKEA Toy Kitchen Into Mud Room Station
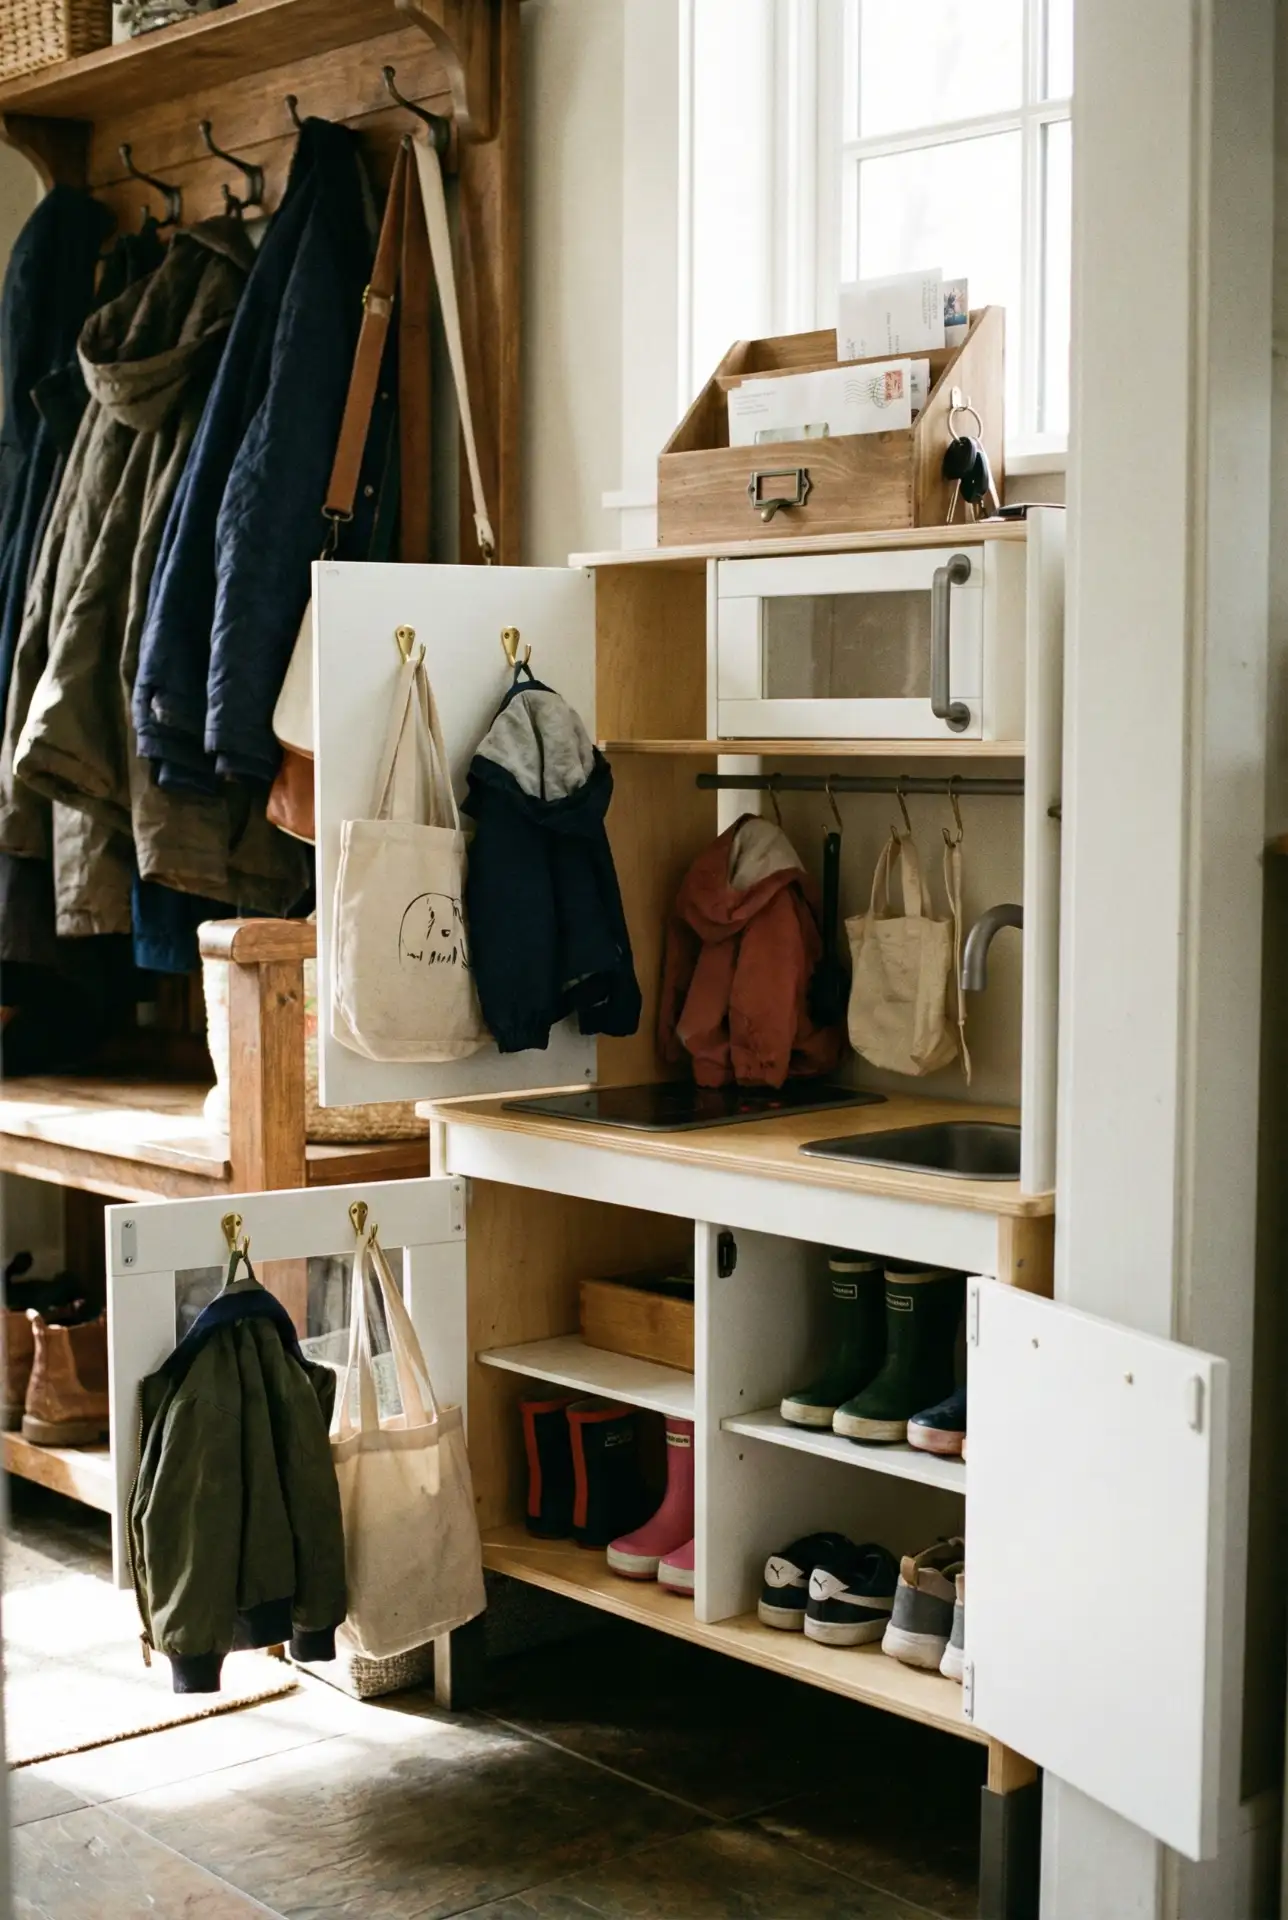
Turn an overgrown IKEA toy kitchen into a functional mudroom station for kids. Take out the play stove elements, install hooks inside the cabinet doors for jackets, and repurpose counter space to hold a tray for keys and mail. Built-in shelves make perfect cubbies for shoes, hats, and backpacks—all at kid height for independence to thrive. Paint it to go with your entryway, and a $50 thrift-store piece becomes custom furniture that serves real organizational needs—and cheapens down what we buy. 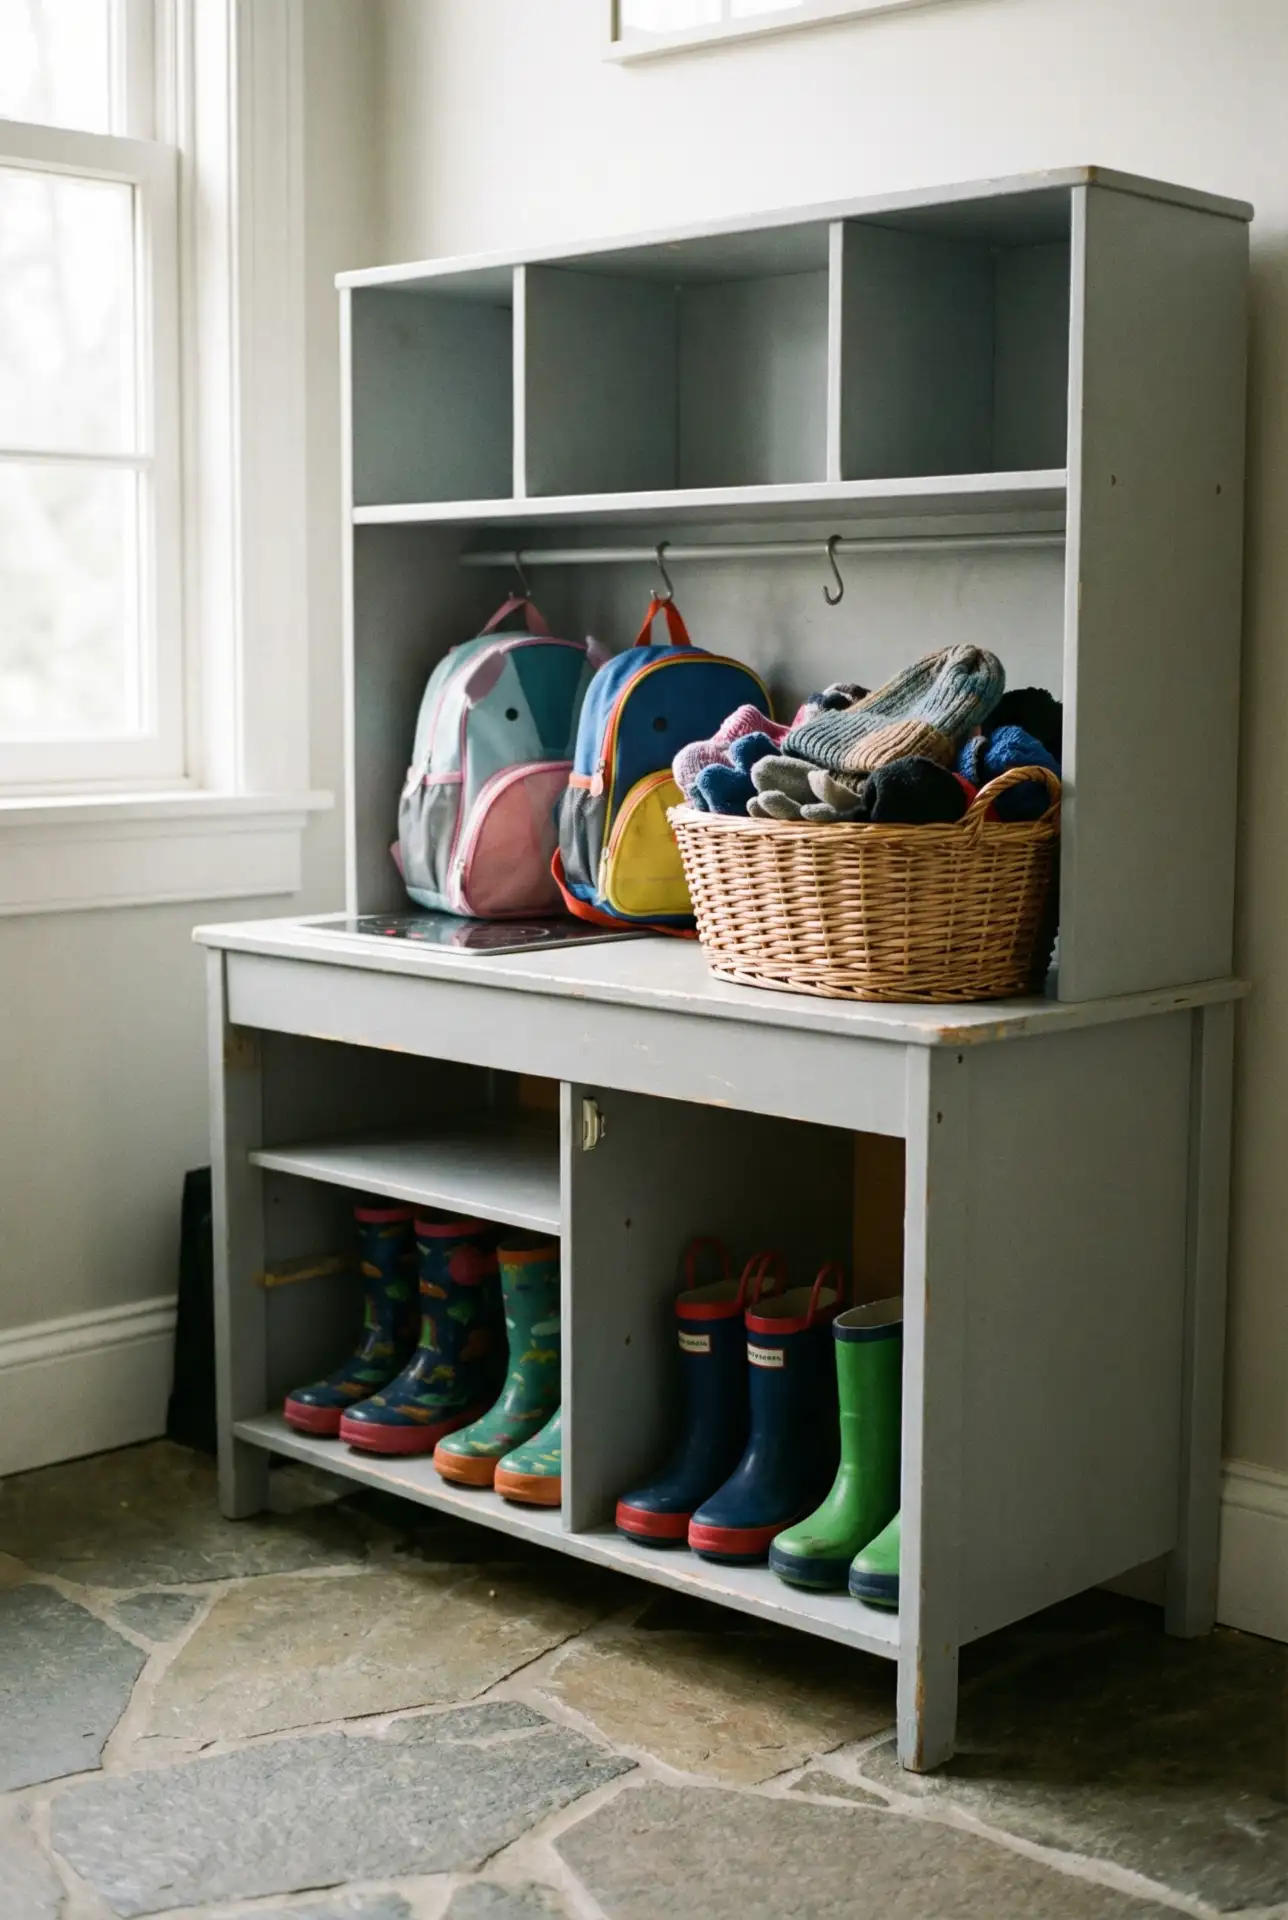
Micro anecdote: A family in Minnesota shared online how their Duktig kitchen transitioned from playroom to mudroom when their youngest started kindergarten. They removed the sink and stove decals, painted it navy, and installed adhesive hooks—total cost under $20. Now it’s the command center for three kids’ school gear, and visitors never guess it started life as a toy. This kind of creative repurposing extends the life of children’s furniture and saves money while creating truly custom solutions for family life.
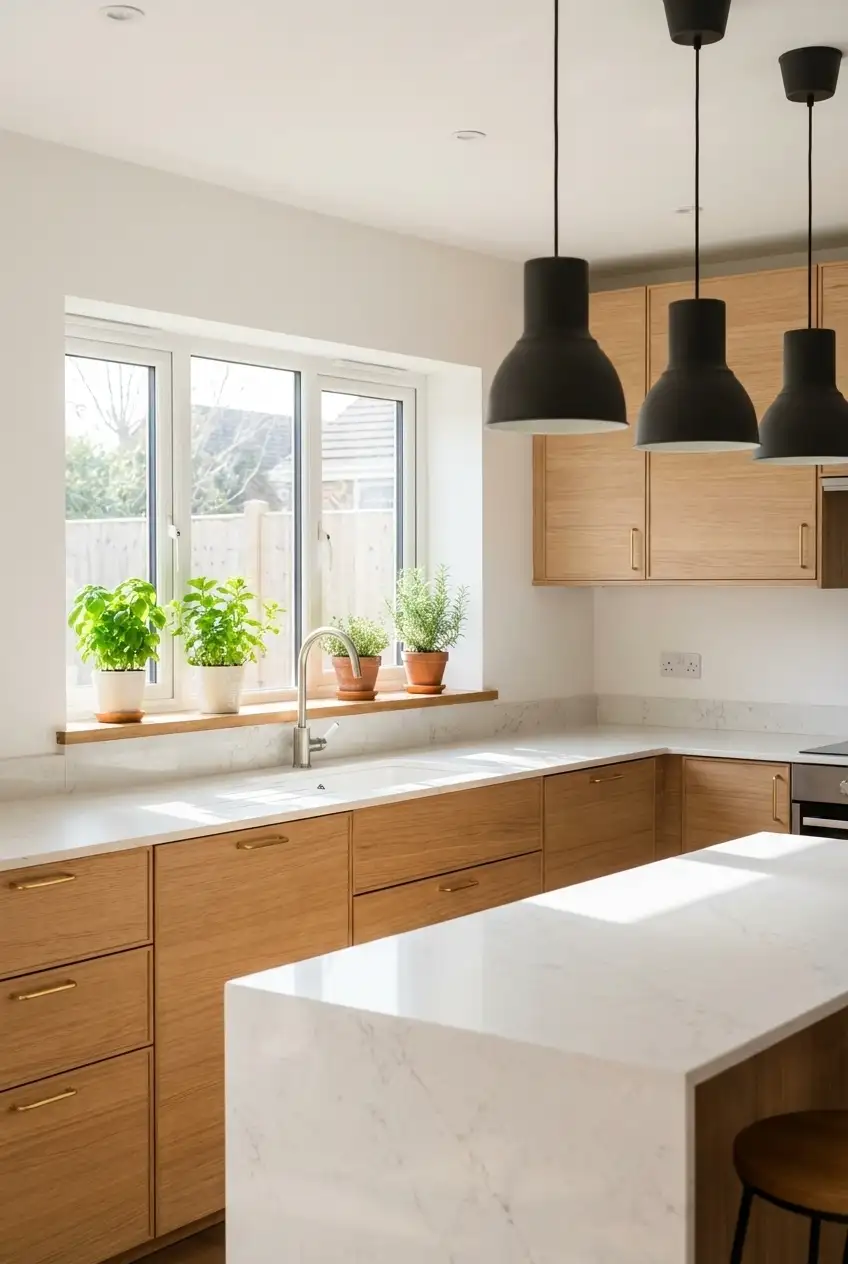
16. Warm Wood Tones and Brass Accents
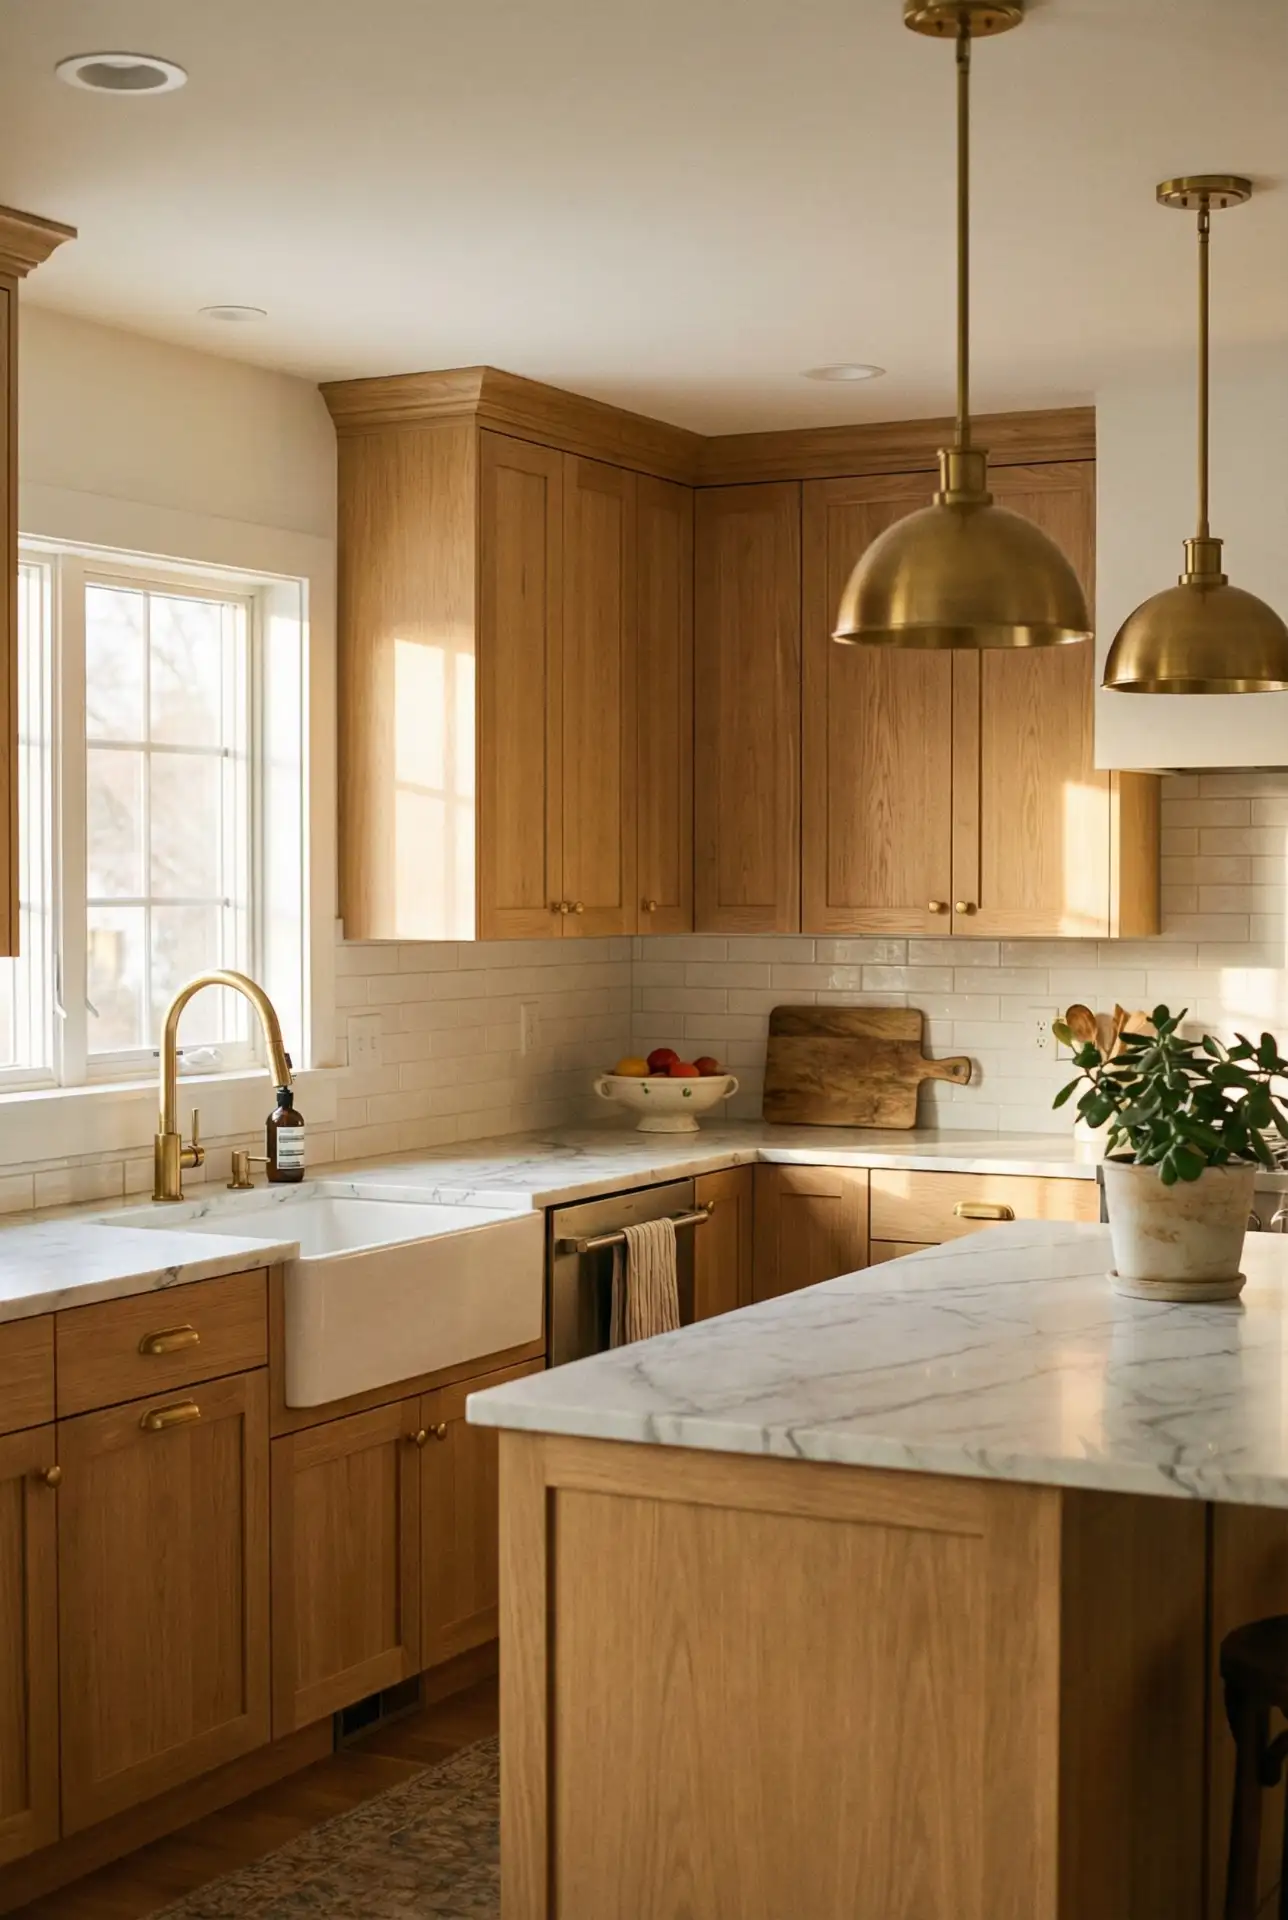
Embrace natural wood cabinetry paired with warm brass or gold hardware for a look that feels both modern and timeless. This combination works especially well in cottage- and mid-century-inspired spaces, where the warmth of wood contrasts beautifully with cool stone counters and white walls. Choose lighter woods like white oak or maple to keep the space feeling open, or go darker with walnut for a moodier aesthetic. Brass faucets, cabinet pulls, and light fixtures tie the look together, creating a cohesive palette that’s sophisticated without being cold. 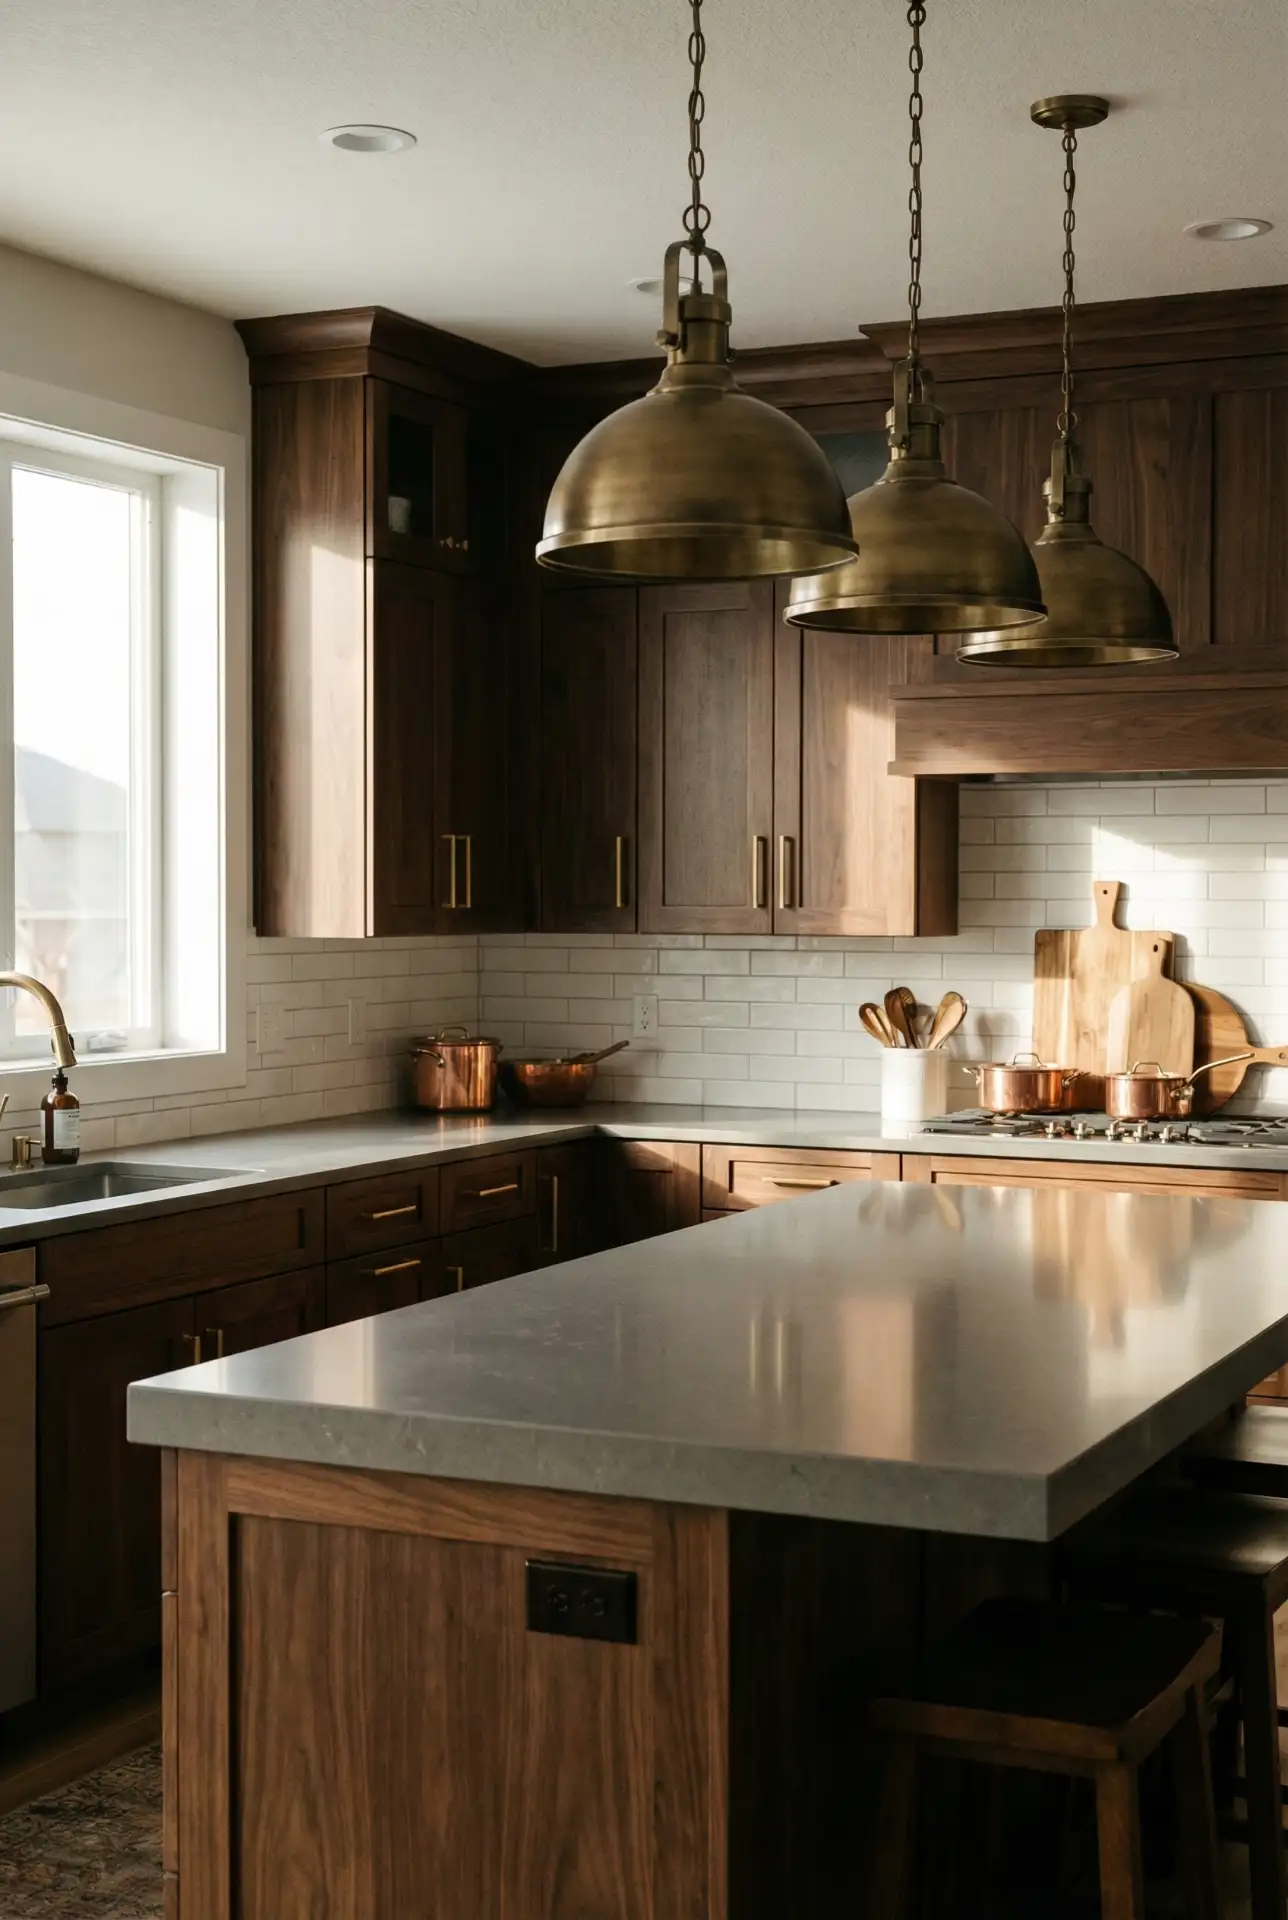
American lifestyle narrative: the aesthetic is taking root in Portland, Seattle, and the Northeast, where it fits with a love for natural materials and craftsmanship. Homeowners are straying away from the all-white, sterile kitchens of the 2010s to something warmer and more lived-in—kitchens that feel inviting rather than showroom perfect. The brass adds a subtle glimmer that’s not as sterile as chrome or nearly as urban-looking as matte black. To keep brass in good condition, simply wipe it down regularly with a soft cloth and let the patina develop over time, an integral aspect of its charm for many people.
17. Compact 50s Retro Revival
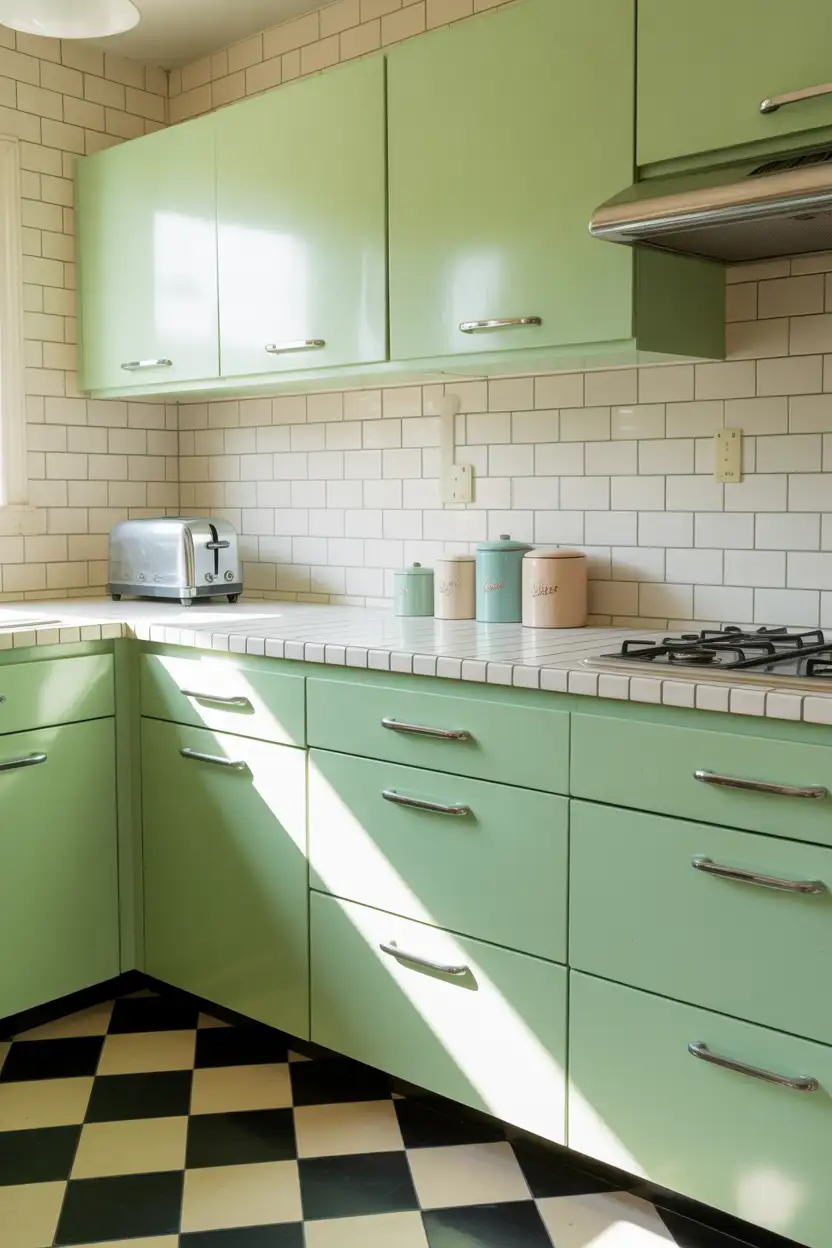
Embrace the happy-go-lucky vibes of the 50s with mint green cabinetry, chrome accents, and checkerboard floor tiles. This look is great for tiny kitchens that need a big personality to feel intentional instead of cramped. Accessories: Period-appropriate accessories, a vintage-style toaster, enamelware canisters, and that retro clock will nail the look. The kitchen of the 50s was built around convenience: everything you needed was a short arm’s reach away, making this look not only adorable but also truly convenient for modern life. 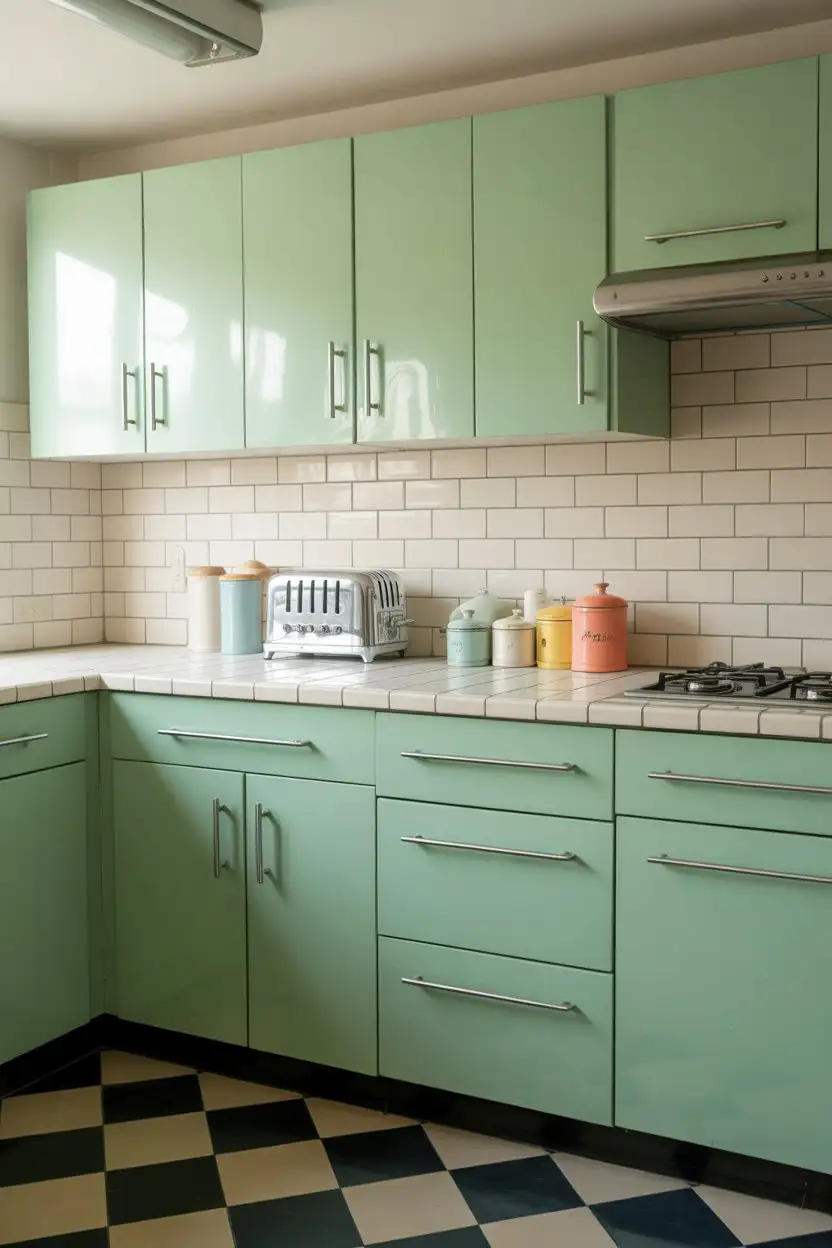
What to avoid: taking the retro thing too literally can result in a kitchen that feels like it belongs in a theme park and not in your home. Select one or two signature features—whether it’s the checkered floor or the mint cabinets—and let everything else read a bit more neutral. And sleek, stainless steel or black could also totally blend with retro vibes if you styled it right (and the updated performance on your refrigerator will be more than enough to make up for any lost authenticity). This is a favorite method for owners of remodeled Airstreams and vintage homes who want to pay homage to the era while still enjoying modern comfort.
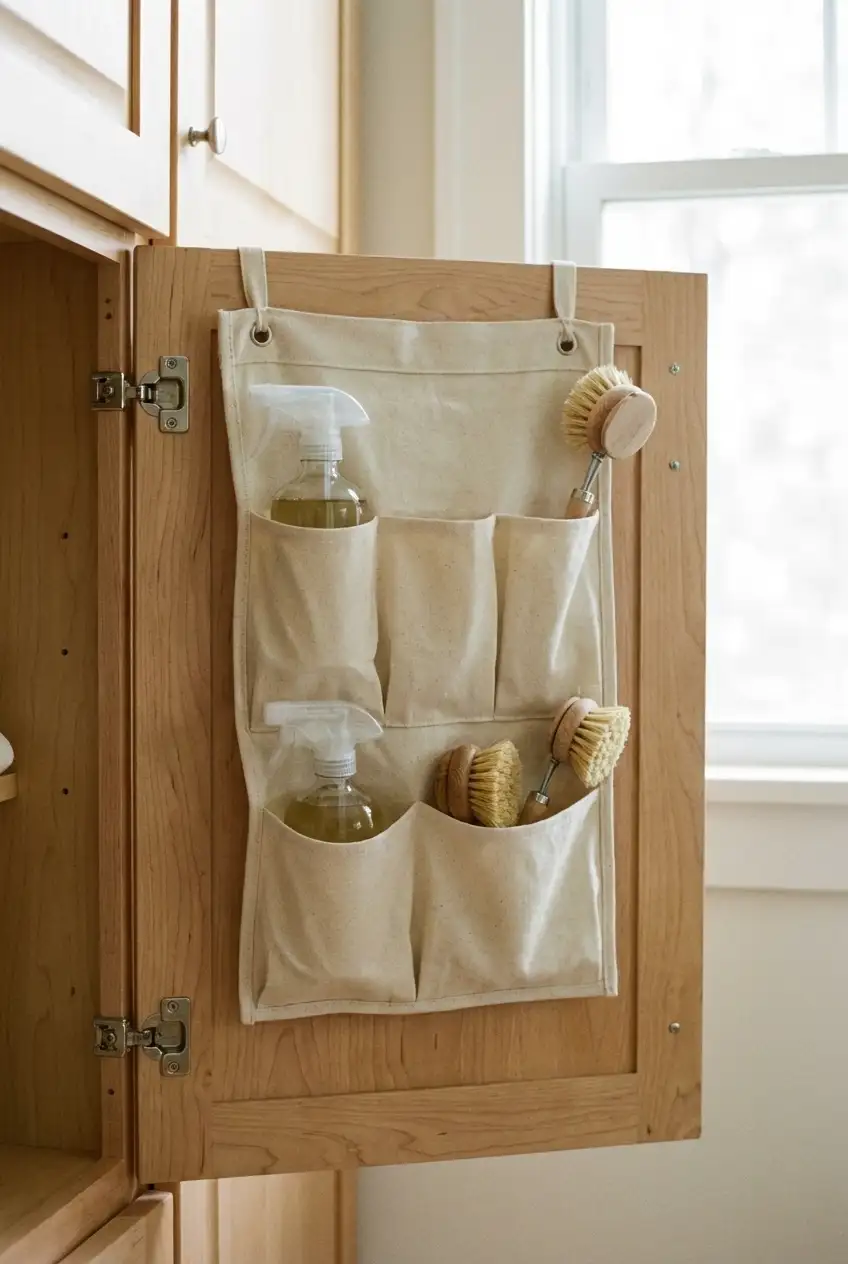
18. Rent-Friendly Command Center
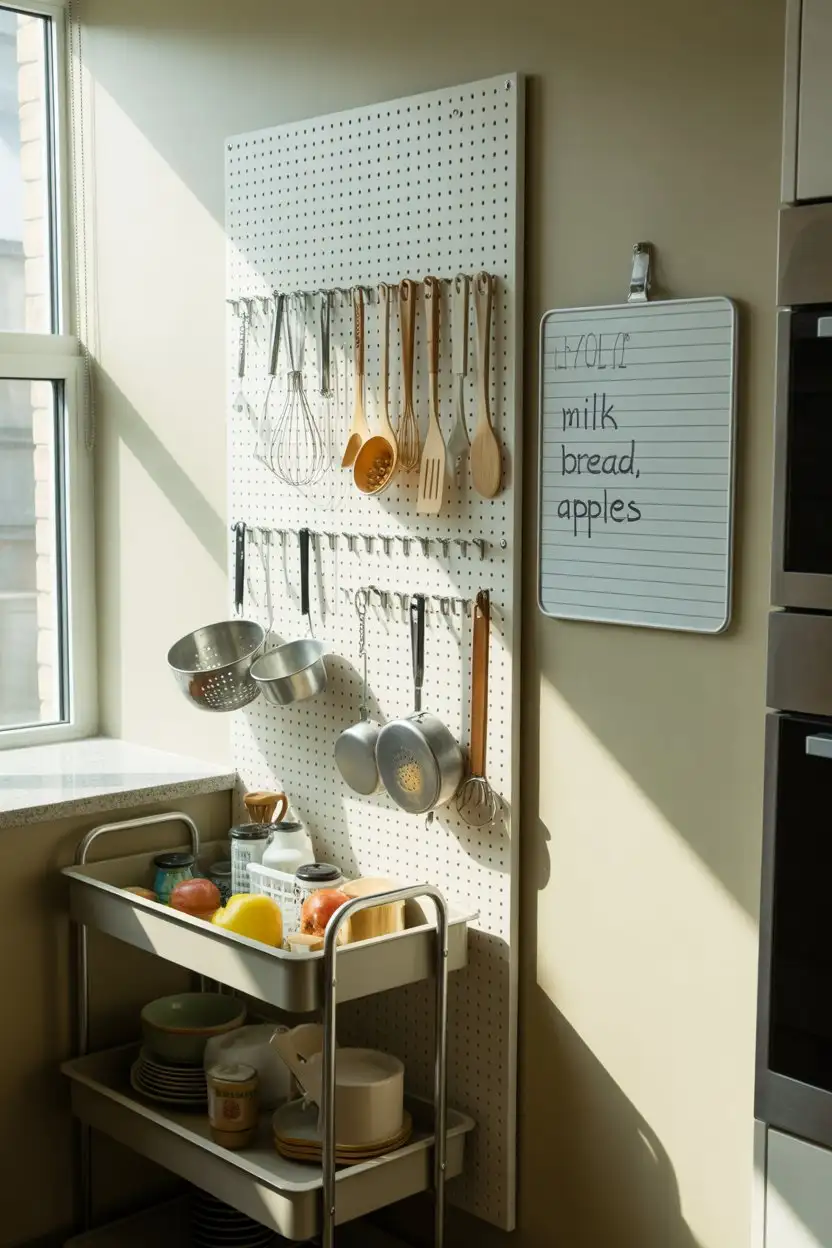
Make a command center in your kitchen with renter-friendly options like removable hooks, magnetic boards, and freestanding organizers. Put in a pegboard with Command strips, add a small magnetic whiteboard for meal planning, and wheel in a rolling cart to add extra storage. With these renter-friendly solutions, you can personalize and organize without drilling holes or marking up your walls. The setup is transferable when your lease ends, and it costs a fraction of that of a built-in with the same capabilities. 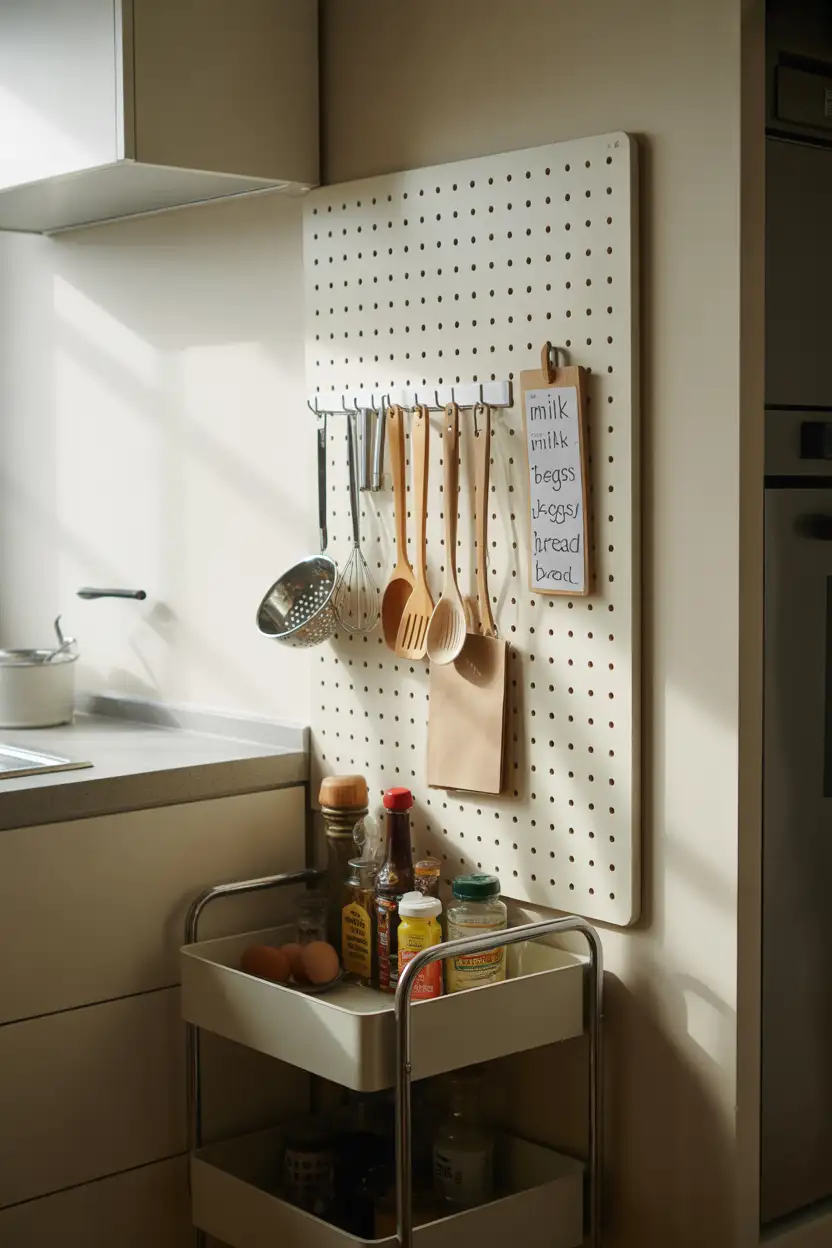
Expert-style commentary: renters often feel stuck with whatever organizational systems their landlords installed, but removable solutions have come a long way in recent years. Heavy-duty Command strips can hold surprising weight when installed on clean, smooth surfaces, and companies like The Container Store now offer entire lines designed specifically for renters. Just follow weight limits carefully, clean surfaces with rubbing alcohol before applying, and press firmly for the full recommended time. A well-organized command center can transform kitchen functionality in an apartment, making it feel custom even when you can’t alter the bones of the space.
19. Statement Lighting Transformation
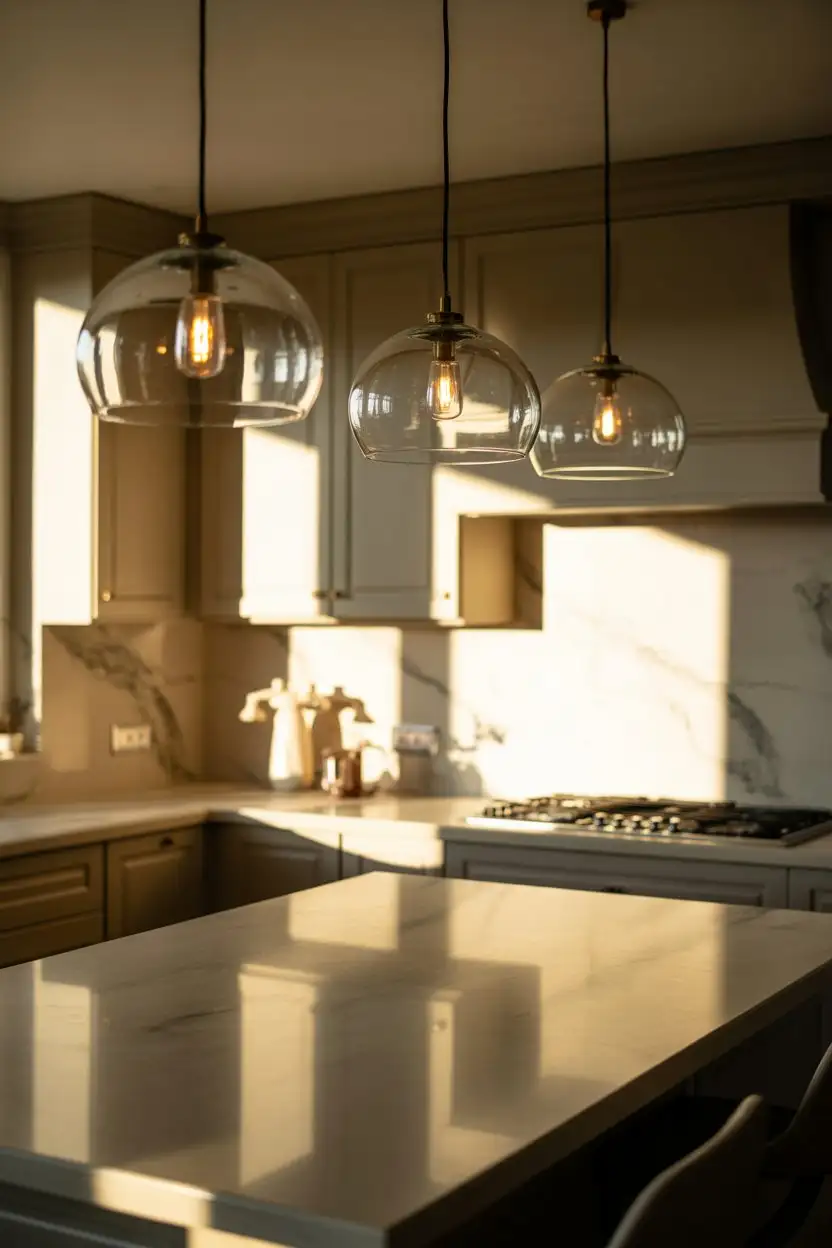
Swap out your standard-fit builder-grade light fittings for statement pendant lighting or a dramatic chandelier to quickly level up the look of your kitchen. Even if the cabinets and counters stay, new lighting changes the feel of an entire room and becomes its focus. Opt for oversized dome pendants over an island, a brass chandelier above the table, or industrial cage lights for something a bit edgier. This is one of the most transformative things you can do with a modest budget (assuming we’re working here with the kind of builder-grade finishes where the bones are basic but serviceable). 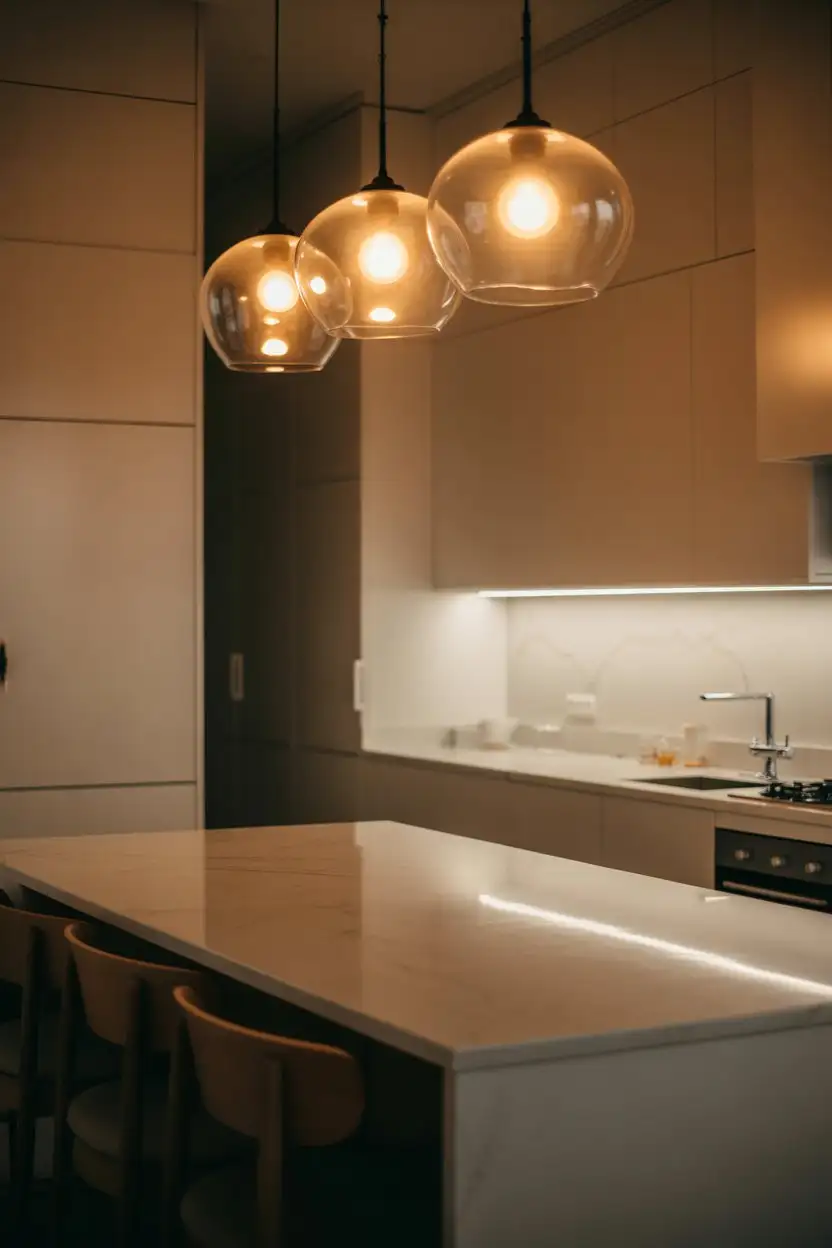
Budget angle: quality lighting ranges from $100 to $500 per fixture, with installation running another $100–$200 if you hire an electrician. However, many pendants and chandeliers are DIY-friendly if you’re comfortable working with electrical boxes—just turn off the circuit breaker and follow instructions carefully. The return on investment is high: good lighting improves functionality, sets mood, and becomes a design statement that draws the eye upward, making ceilings feel higher and spaces more intentional. Even rental-friendly plugin pendant lights exist for those who can’t alter wiring.
20. Industrial Pipe Shelving
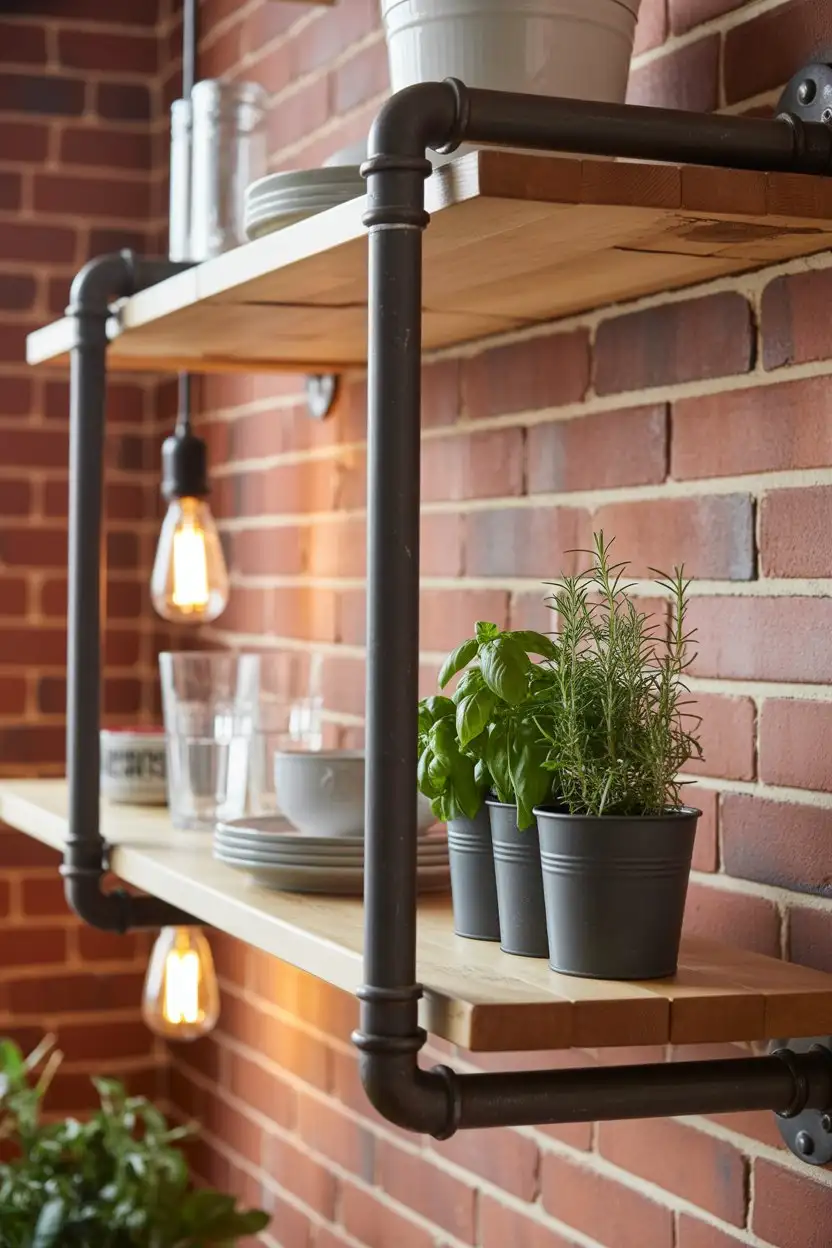
Replace upper cabinets with DIY pipe shelving for an industrial-modern look that’s surprisingly affordable. Black iron or brass pipes serve as brackets, supporting reclaimed wood or live-edge boards for a custom appearance that costs a fraction of traditional cabinetry. This open approach suits loft apartments, urban kitchens, and anyone comfortable with visible storage. The pipes develop character over time, and the shelves can be adjusted or reconfigured as needs change—flexibility that fixed cabinets can’t offer. 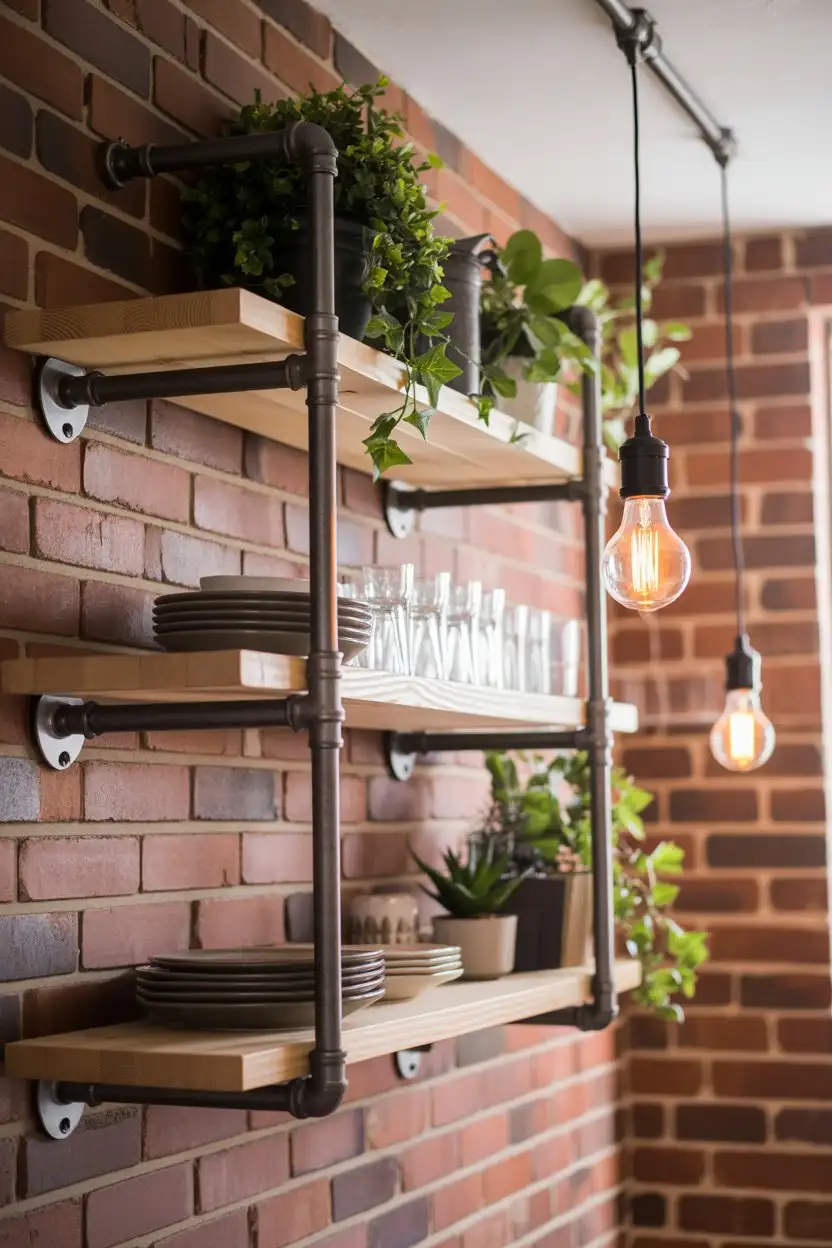
Practical insight: For pipe shelving, you have to find wall studs or use heavy-duty anchors because the weight of your dishes and cookware adds up quickly. Measure carefully and check that pipes are level—even slight angles show up when the shelves rest on them. Dry-fit sections on the floor before assembling and mounting, and if using wood shelves, seal them with polyurethane to prevent moisture or stains. The project is best for those who are confident in their DIY abilities and don’t mind devoting a weekend toward the cause (the result is a kitchen that feels architecturally interesting and deeply personal as opposed to catalog-perfect).
21. Bold Color on One Wall
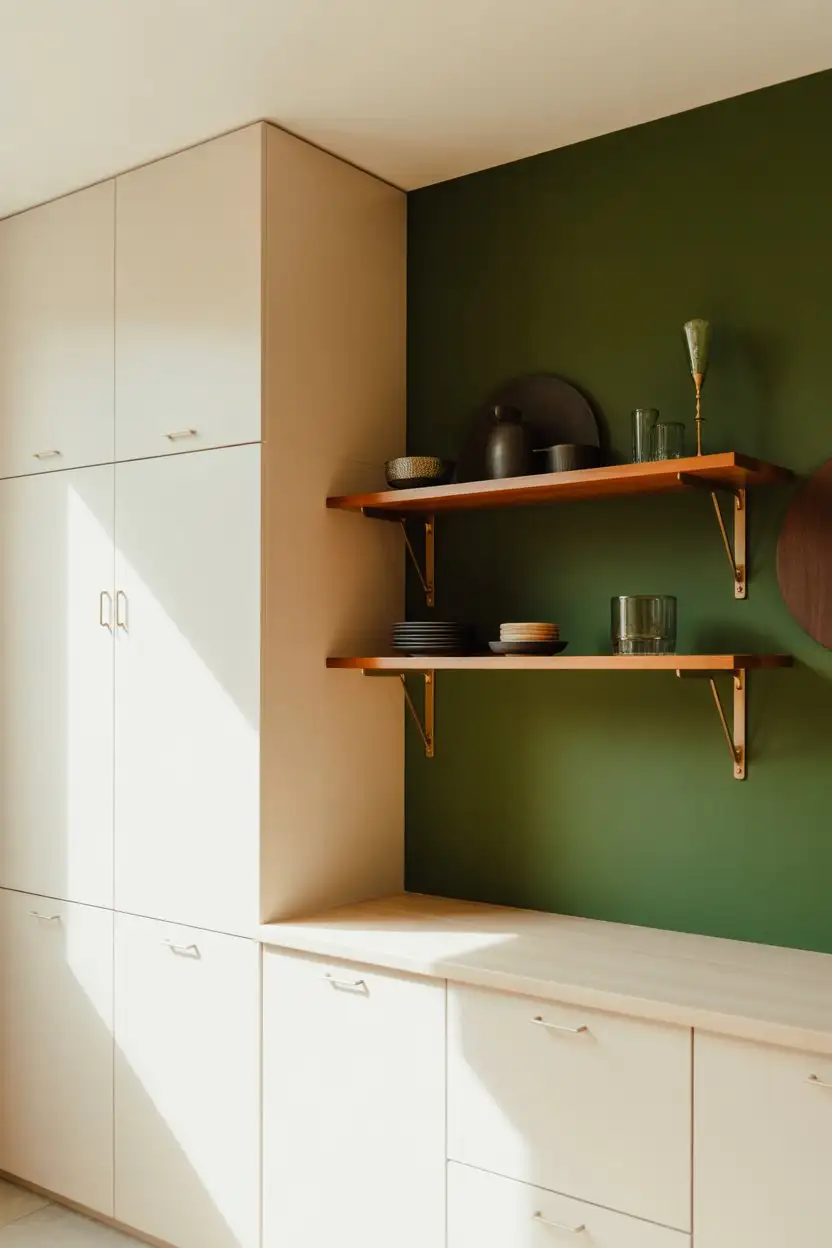
Paint a single accent wall in a bold color—deep green, terracotta, navy, or even black—to add drama without overwhelming the space. This works especially well behind open shelving or as a backdrop for white cabinets, creating contrast that makes both elements pop. The technique is budget-friendly and easily reversible, perfect for renters or anyone testing a color before committing fully. It’s a design trick borrowed from European interiors that’s gaining traction in American homes seeking personality without complete renovations. 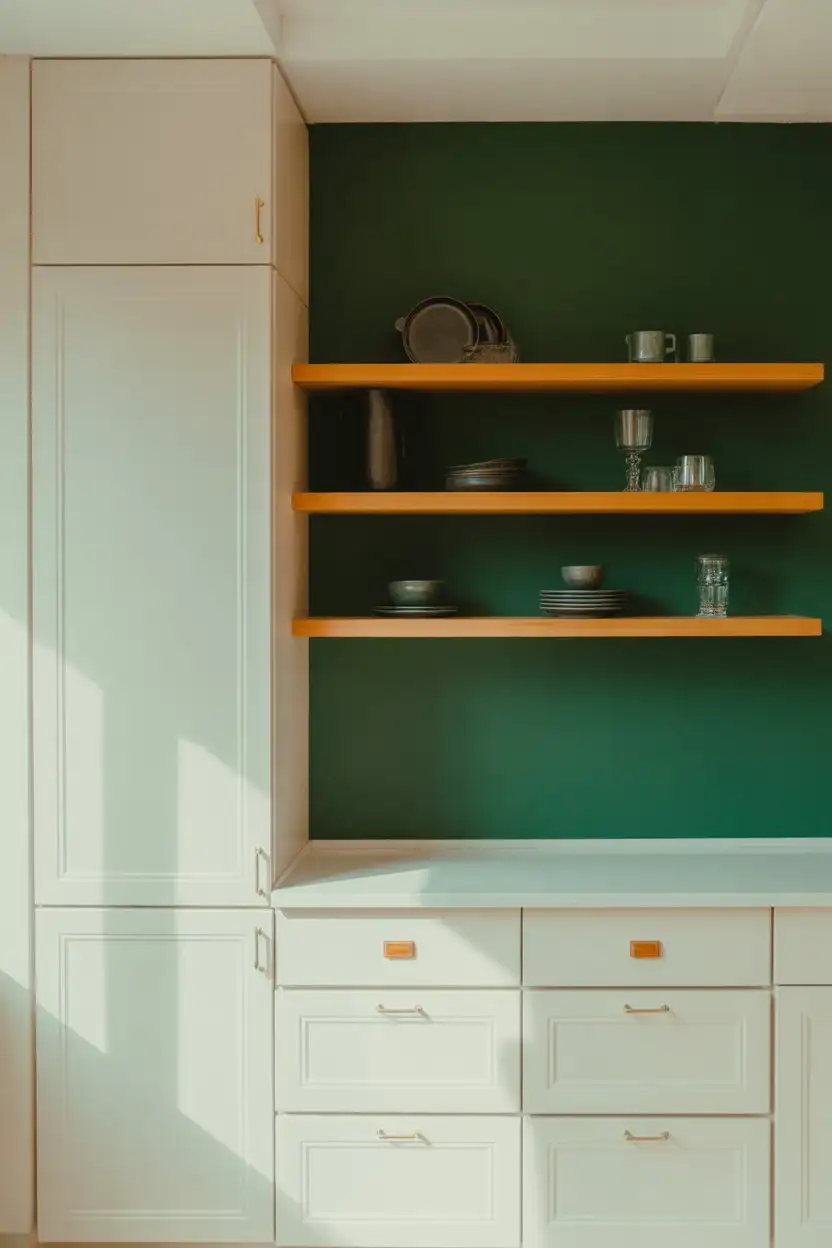
Best for: Kitchens with good natural light (so the wall doesn’t darken the space) or open-plan spaces, where the colored wall helps define different zones. Opt for the wall behind your stove or sink for maximum impact—and you don’t want to take away from natural focal points. Paint test swatches in large patches on the wall and see how they look at different times of day—colors take on entirely different tones depending on natural and artificial light. This technique allows you to go wild with color while maintaining bright, efficient kitchen spaces overall.
22. Vintage Appliance Statement Pieces
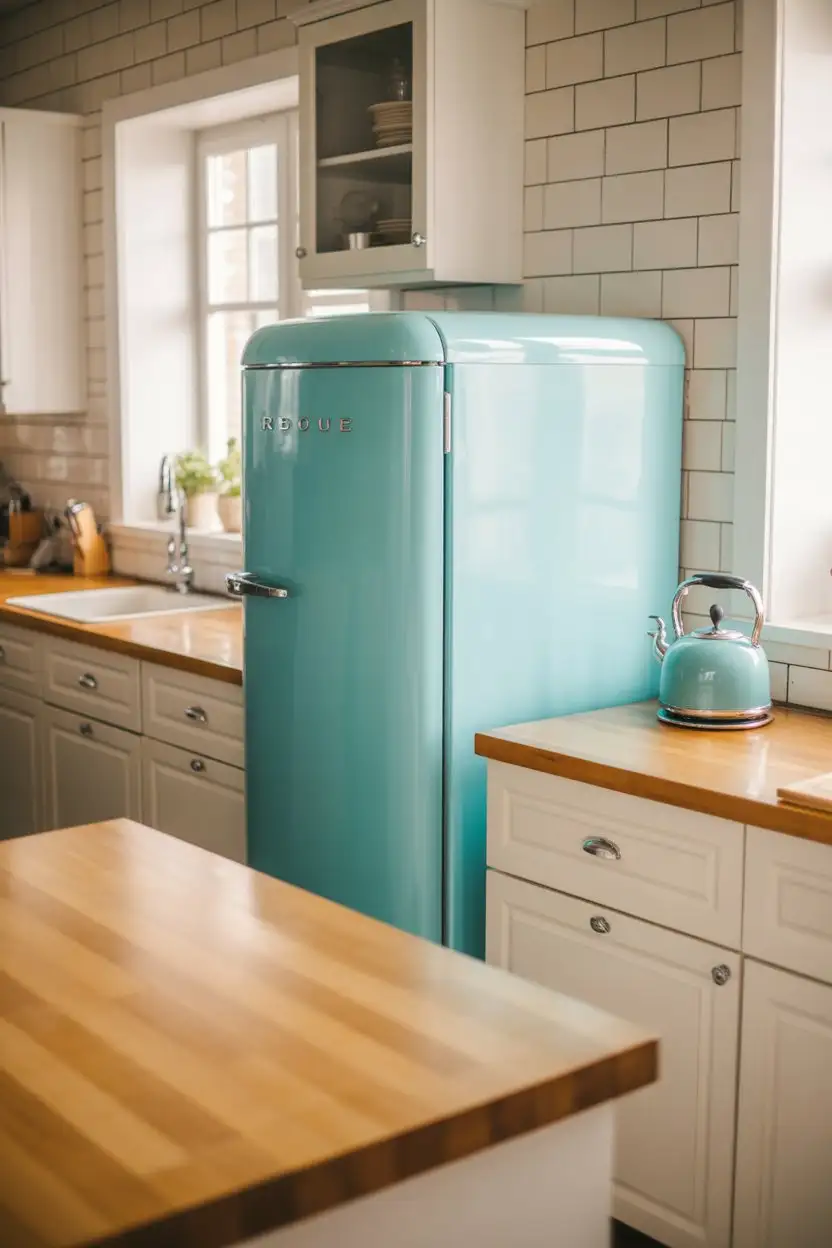
Bring an old-school fridge or a hot-blooded range as the kitchen’s anchor placement. Alongside other retro brands like Big Chill and Smeg, they make modern appliances with vintage silhouettes in hues like cherry red, turquoise, and butter yellow. These cost more than basic appliances, but they obviate the need for other big-box updates—a colorful fridge can be the rock star of even the most utilitarian apartment kitchen. Pair with plain white or light wood cabinets to make the appliance stand out, and include coordinating accents in the same color family for structure. 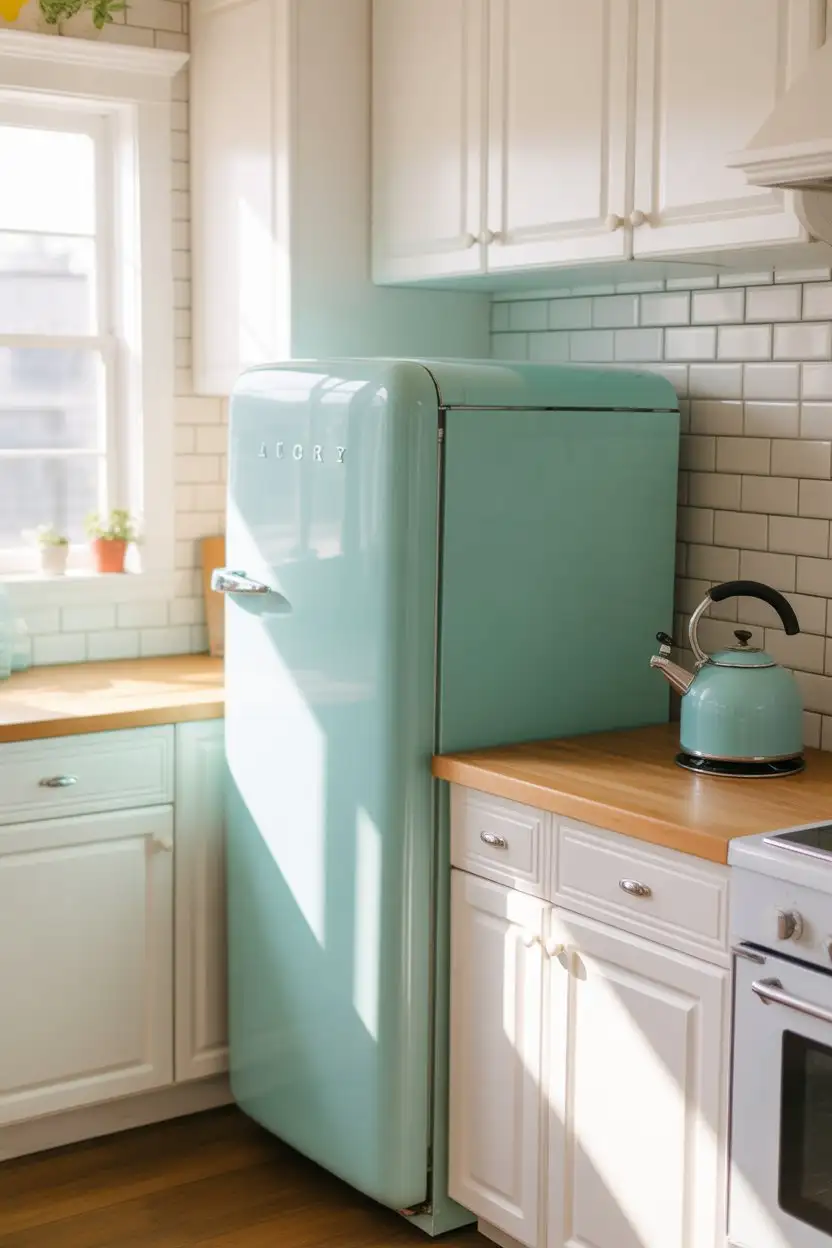
Local context: The trend has lots of fans in the Southwest and Southern California, where mid-century modern homes are perfect for retro appliances. A pink Smeg fridge in a Palm Springs bungalow, or a mint Big Chill range in a Phoenix ranch home, reads real rather than kitschy. And that last one will be enjoyed by all riders, new and old; you benefit from modern internals giving out contemporary efficiency and features dressed in nostalgia styling, which is perfect for the best of both worlds ‘cafe racers.’ Think about it if you plan to be in your home for a long time and want a kitchen that is joyful-looking and feels special, rather than neutral and forgettable.
Conclusion
2026 kitchen makeovers are all about coming up with creative solutions to fit your budget, lifestyle, and space—whether it’s a large country farmhouse or a small apartment galley. The finest makeovers add intelligence to the spirit of the work, and you leave spaces thinking they are at once more practical and more energizing. Which of these kitchen makeover ideas is your favorite? Leave your thoughts, questions, and before-and-after stories in the comments—we’d love to hear how you’re refreshing your space this year!